king derelict
-
Posts
3,295 -
Joined
-
Last visited
Content Type
Profiles
Forums
Gallery
Events
Everything posted by king derelict
-
Egilman, many thanks for the great photos and extensive research. The camouflage patterns are very varied and this may be expected given the huge size of the country. Sudan ranges from very arid desert in the north passing through the scrub of the Sahal into the grasslands and forest of the south where possibly your third photograph was taken.. It looks quite green there. I spent most of Sunday working through my material and found a lot of information suggesting where the SDF cars were NOT. Many Thanks again Alan
-
Many Thanks Patrick and for the great reference material. I may be verging on fantasy now but I think I'm going to stick with the SDF plan - just because I thought it sounded fascinating to have been a young officer patrolling out in the vast open deserts (assuming you didn't get posted to the southern part of the country Alan
-
Kevin The spool holder is very nice; looks like a big improvement over hanging the spool off the printer. Yes I think resin looks like the way to get the best detail but with my natural clumsiness and two inquisitive long haired cats I'm not sure I should be handling resin.😄 I need to try different nozzle sizes; so far I have stuck with 0.4 mm. I feel a bit better about the whole printing business now that I seem to have the levelling and feed under better control. I am using the Creality coated glass bed top and so far haven't used glue sticks or hairspray. As I said earlier repeat prints still occasionally fail for no obvious reason. I guess it keeps me humble. Alan
- 460 replies
-
- 4
-

-
- Finished
- Flower-class
- (and 1 more)
-
Beautiful PE work. Looks very tidy Alan
-
OC. That looks great with the dramatic lighting. My favourite log too Alan
-
Many Thanks Gregg I put an order in for those two filters and a few other items from Mig and AK (no sense in wasting postage). I look forward to trying them. I have another Hunt class destroyer and another simple tank that will make good practice pieces to try them out. Not much investment in build time to get to the painting. Thanks again for the technique. Have a great weekend Alan
-
Moving along; now the four main assemblies are complete leaving a few parts that are better painted separately and also three pieces that complete the rear section that need to wait until everything is together to get a good fit - at least that is my thinking. I dry fitted the forward and rear sections onto the chassis which saved me from a mistake in waiting. There is a board that goes across the lower section of the rear compartment (at left)'fitting onto the two lower vertical pieces. However, the board needs to be fitted low enough to allow the rear of the chassis to pass over the top and allow the rear section to sit up against the rear of the turret. That board is one of the three pieces that will be fitted after the major parts are installed I am deferring doing anything about the rear wheels until it rear is built up. First look suggests that the wheels need to sit on the outer edge of the hub to be the correct width under the body. Everything got a coat of Vallejo black primer ready for the sand colour as the first part of the paint scheme. I am assuming the darker colour in the photos is the British Army green. Thanks for looking in Have a great weekend all Alan
.jpg.d5cb0dc8b4fa3864b80c2eaee2e29d03.jpg)
.jpg.40df006b297277fedac66aa9e9486542.jpg)
.jpg.b4a1dea3949d37b7ecf7c579a094cb8b.jpg)
- 92 replies
-
- 13
-
-
Glad to see you Patrick Alan
-
Hi Kevin Thank you for the very informative comments. Very helpful and some useful new tip and ideas to try In response to your note. 1 - I calibrated the filament feed by just measuring the length consumed versus the amount commanded. That found the worn gear and the estep needed changing for the new gear. I just looked at pronterface. Thank you very much for that; I have made a note to use it for printer checks in the future. 2 -I have the coated Creality glass bed and it seems a little higher in the middle sloping to the edges 3 - I just received a length of Capricorn tubing so; after your comments I am very interested to see the improvement when its fitted. The OEM Bowden tube may be a big contributor to the under extrusion and gear damage 4 - Filament. I think there is quite a difference between PLA brands. I have used Overture brand mainly so far (As does Yves I believe) but the Creality sample that came with the printer seems much softer. I have just received a spool of their PLA to see if that is true of their filament in general. So far I have only used PLA 5 - Yes I think the drying helps with print quality. If I had more room I would like to try feeding directly from the dryer to the printer. 6 - I would like to see a better spool holder. There is quite high drag on the original set up sometimes and may explain a filament break I had. Many Thanks 7 - For levelling I tend to use the paper check as a rough start and then I run a print file that runs a series of layers around the edges of the bed and generates the square pads at corners and centre. While its running it is easy to see whether the nozzle is too near or too far from teh bed and adjust accordingly. It can actually be done while its running with care. I will try a new nozzle too. I bought a pack of ten recently. The wisp removal with a heat gun sounds good. I have been using a slow speed for the initial layer along with a hotter bed temperature and nozzle temperature. The speed is increased and the temperatures are reduced for subsequent layers. I think it helps bed adhesion and quality but it may just be my voodoo I routinely use a brim to prevent corners lifting and other warping. The change in temperature is also supposed to help there too. The mouse ear brims are a bit hit and miss. I tend to use them when its a big print and its going to use a lot of time and filament to run a full brim. Every now and then the mouse ear won't stick and the nozzle will push it around and ruin the print. The variability is a constant frustration. It irritates me to make a print and need a second, identical piece. Same file, same starting temperatures and same filament. The first print was perfect so start the second one. return an hour later to find the nozzle pushing a ball of filament around the bed. Arrgh. I think I am going to try new rollers. I feel a slight hesitation when I move the x axis by hand and I notice some bearing material furring up in the roller. Th etension seemed good but maybe I have too high. I just need to sort out a decent set of rollers. There are a lot out there with very mixed reviews. Any experience there? Thank you again for the very helpful comments. You have given me more solutions for the road to good prints. Have a great weekend Alan
.jpg.0e1e5b5db6f36917bdbecacfc040deb1.jpg)
- 460 replies
-
- 3
-
-
- Finished
- Flower-class
- (and 1 more)
-
Thanks for the nice comments Gregg. Thank you also for the filter suggestion. I need to get my photography brought up a level. What type of filter would you recommend Thanks again Alan
-
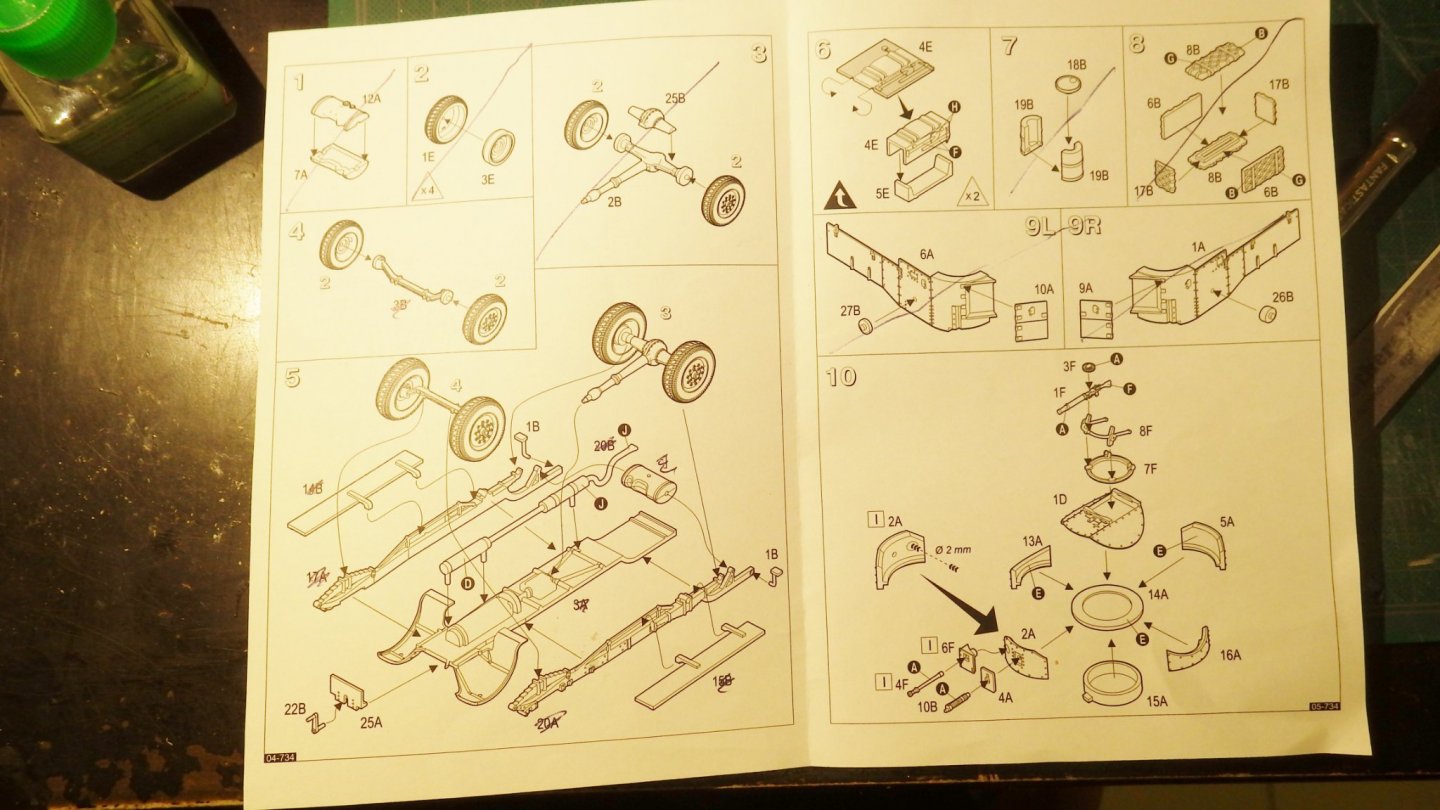
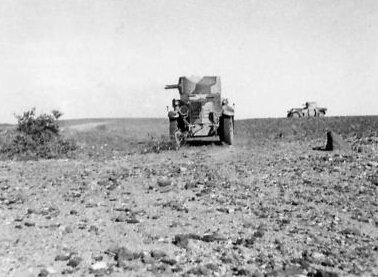
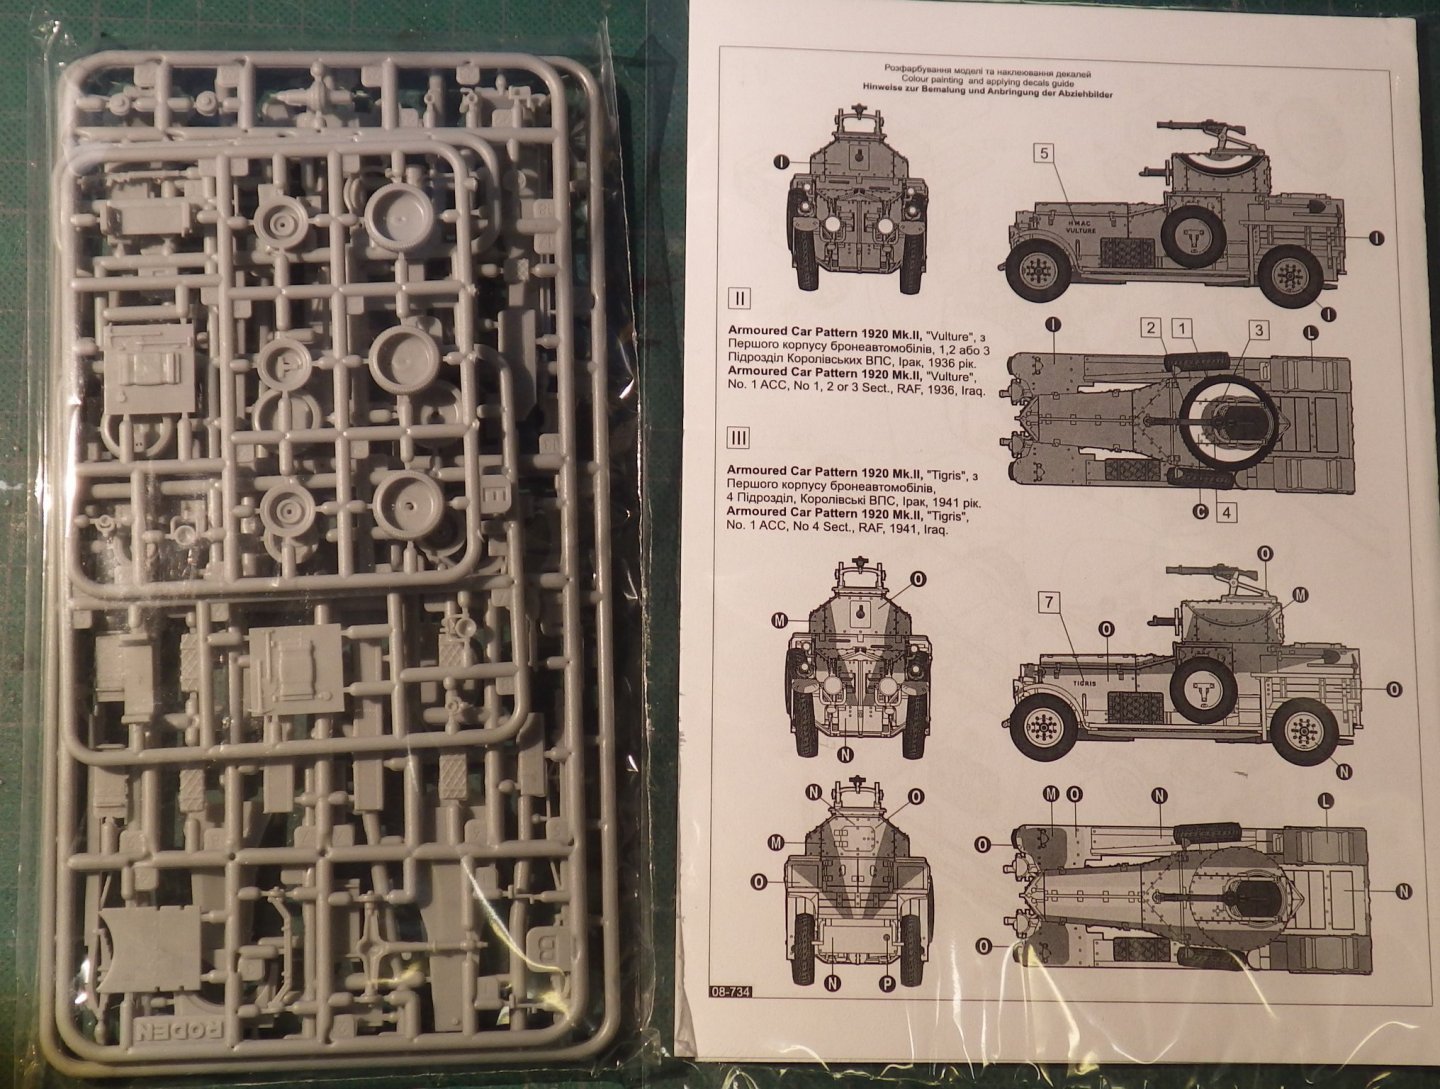
I didn't make as much progress as i hoped. I had to deal with the pre Christmas tradition of plugging in the tree lights and finding two strings didn't work. After trying to remember where the spare bulbs and mini-fuses were and it just seemed easier to go to Walmart. I started building up the assemblies that I plan to paint before putting them together. The wheels are a two part assembly which I was initially going to keep apart to paint but the inner includes some of the tyre so I put them together. The kit has six wheels, two spares which have different inners to mount on the car. The instructions need a little thought in places, the part numbering is off in several places but the shapes are hard to confuse. The underside is quite nice and went together well although cleaning up of most pieces is necessary. The fit is then good. The building of the rear lockers is interesting. The flat square, lower centre is scored underneath and then folded over the U shape piece to create a box as seen lowest centre. I've not seen that before. I have come across two curiosities so far. The running boards (the rectangles with brackets) if fitted where the instructions indicate will foul the rear wheels. They need to be installed to overlap the back of the front wheel arch and then they match the box art and old photos. The four wheels are all the same but if you look at the rear hubs they are bigger than the front ones and the wheels do not fit. I haven't thought my way through a solution yet. If I had discovered the issue before installing the rear axle, I could have got a bit rough with a file around the hub diameter. I may see if I can remove it again without too much distress. The SDF MMGB were at Kharkur Murr in 1934 as part of a British presence to stop the Italians from getting any ideas about encroaching into British controlled Egypt from Libya. Further down the wadi from the rock memorial are the remains of stone huts used by the troops. The MMGB were part of the force present during this period but mostly used Thorneycrofts The SDF were responsible for a huge but largely unknown logistics operation supplying Khufra oasis after the Free French captured it from the Italians. The Khufra convoys drove 1200 kms from Wadi Halfa on the Nile across the desert to Khufra. The convoy tracks are still visible in the sand today and a few abandoned trucks are still there too. This is the background I will be modelling my car to. The Rolls and Ford patrol cars were used as escorts to the trucks The single round petrol can provided by the kit will be discarded in favour of some home made square tins (flimsies) that were used extensively at that time and are still widely found in the area Thanks for looking in Alan
.jpg.f8fc072b113526d9bff0129fea4d2bff.jpg)
.jpg.fa6c4fd1b17ef28aa28f0e3acdea00bd.jpg)
.thumb.jpg.77236e64315a02adaa6013fb1d232579.jpg)
.jpg.d0013454cbdee9299c54ea800d2ac0fe.jpg)
.jpg.331df7769d40748c28d7e83fedb45ef8.jpg)
- 92 replies
-
- 16
-
-
Thanks Popeye, I have some of their WW1 aircraft in the pile. Alan
-
Thank you Edward. I hope you find this one interesting. Alan
-
Welcome Ken
-
Thanks Egilman - I'll probably be leaning on your research skills Alan
-
Thanks OC. I hope you enjoy it Alan
-
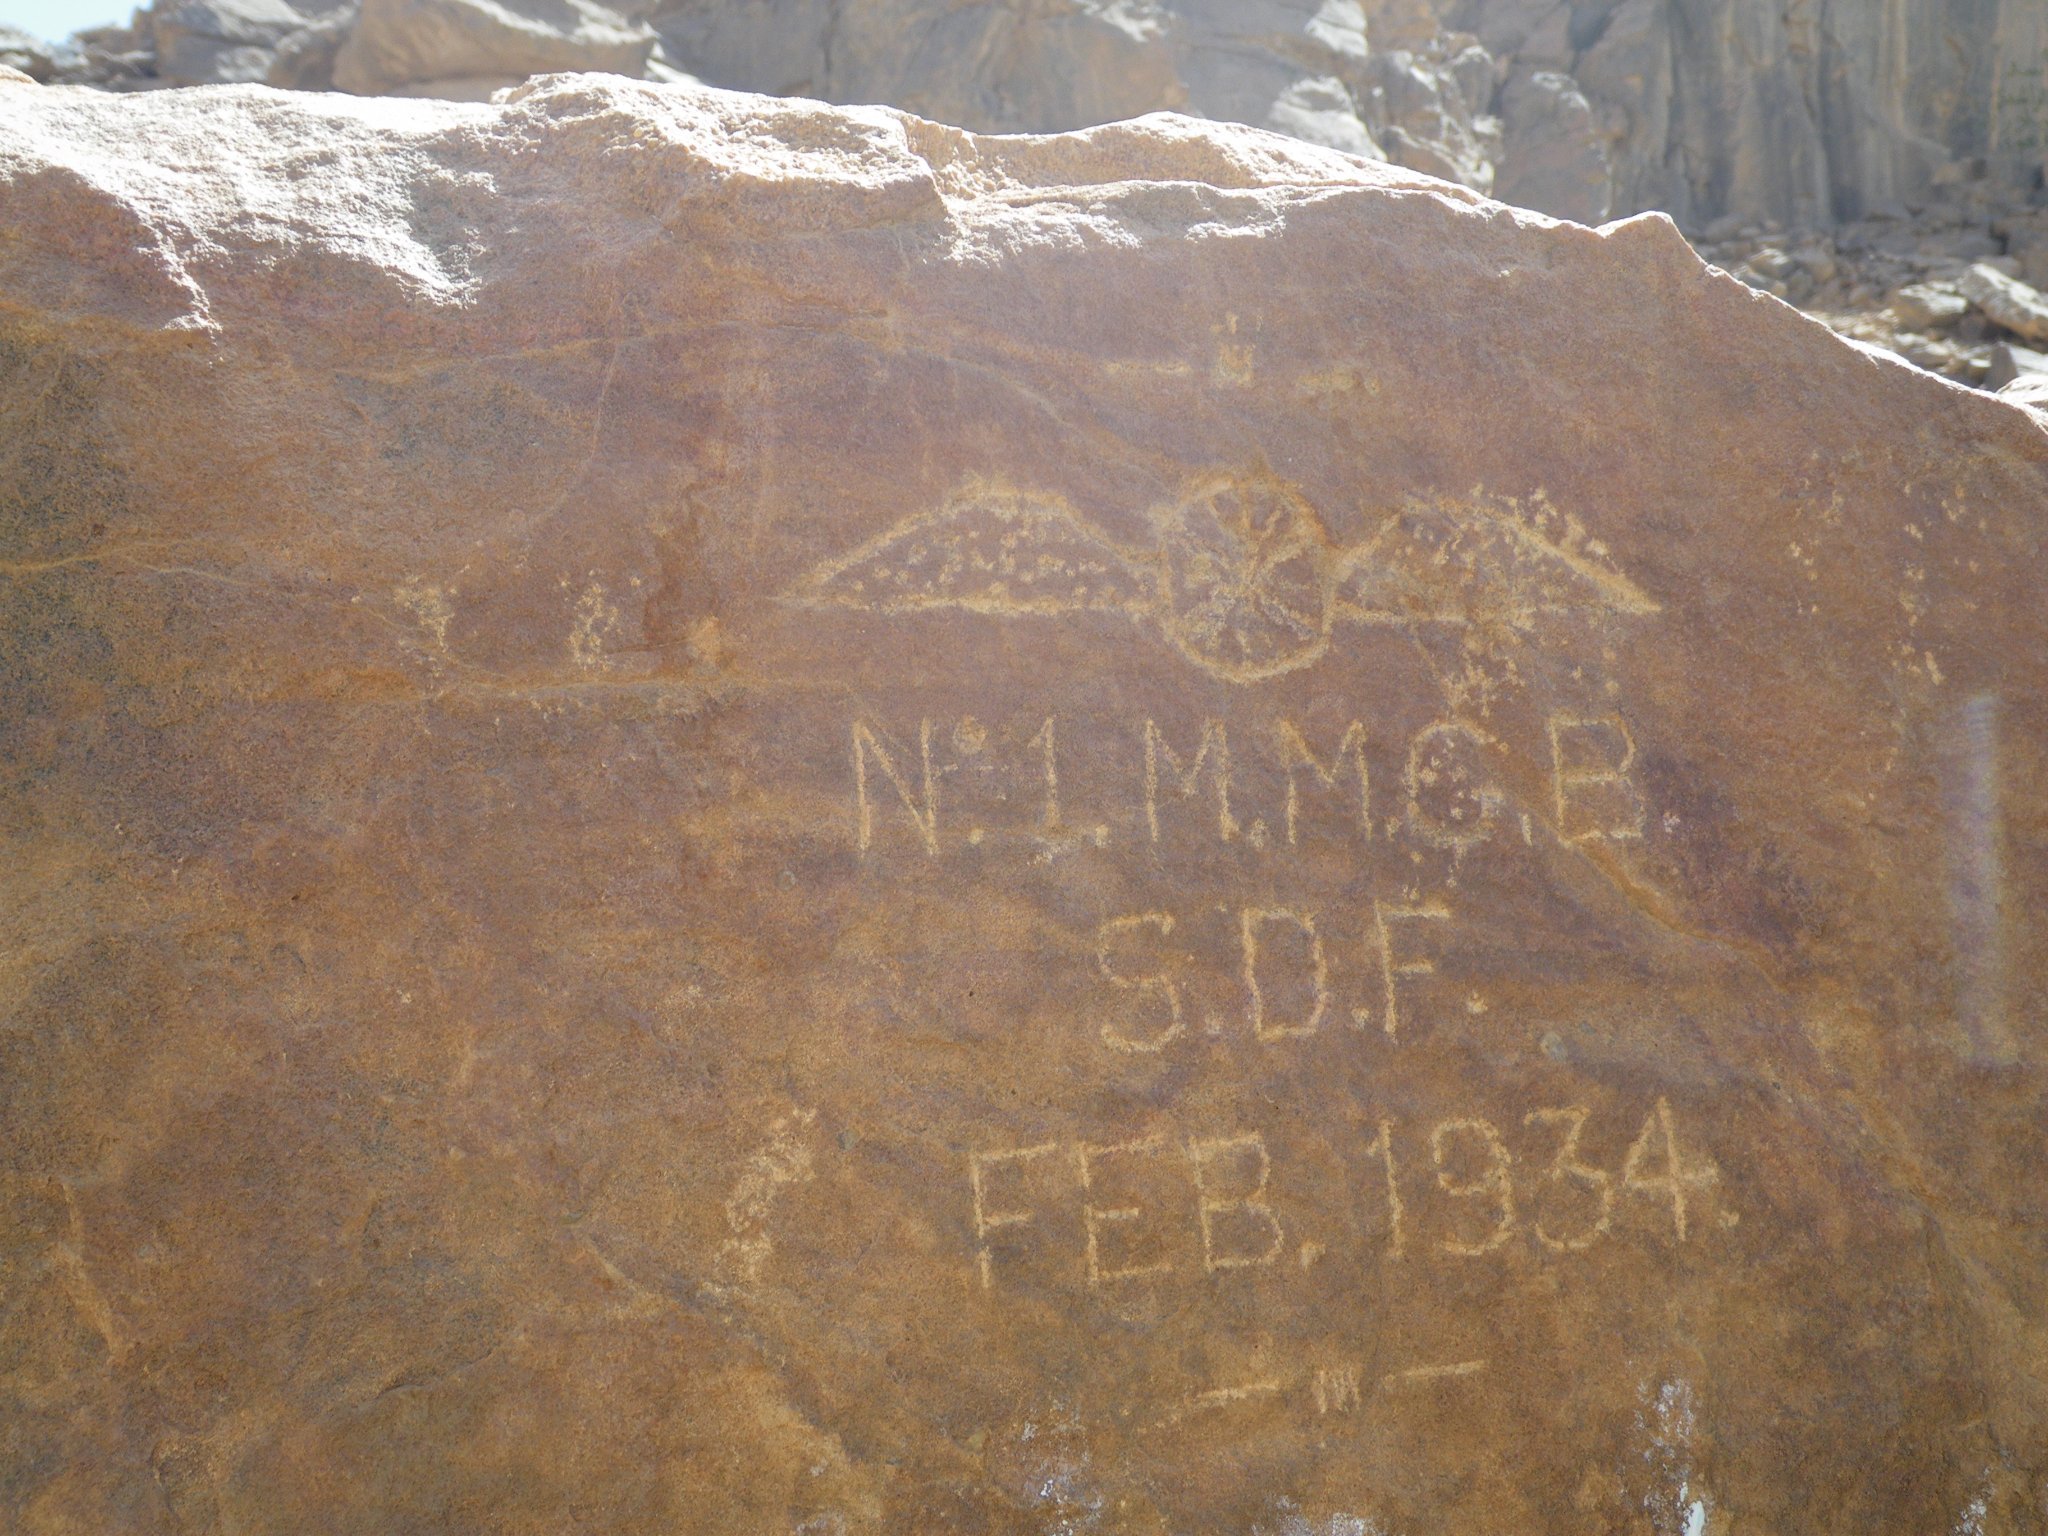
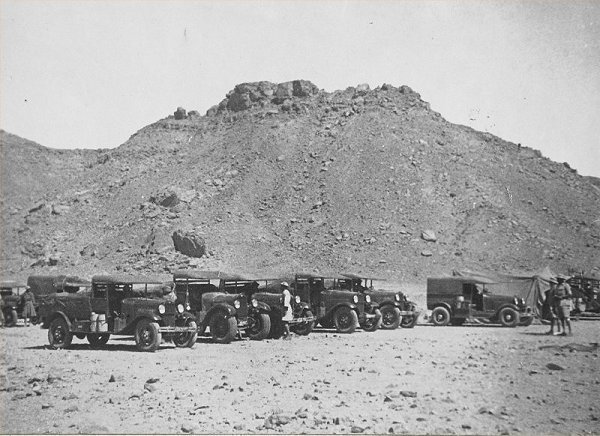
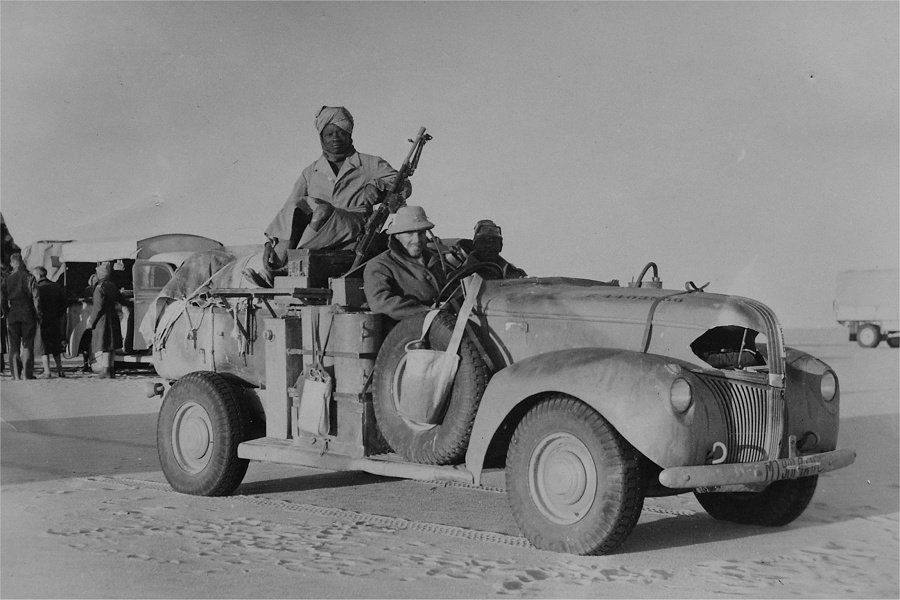
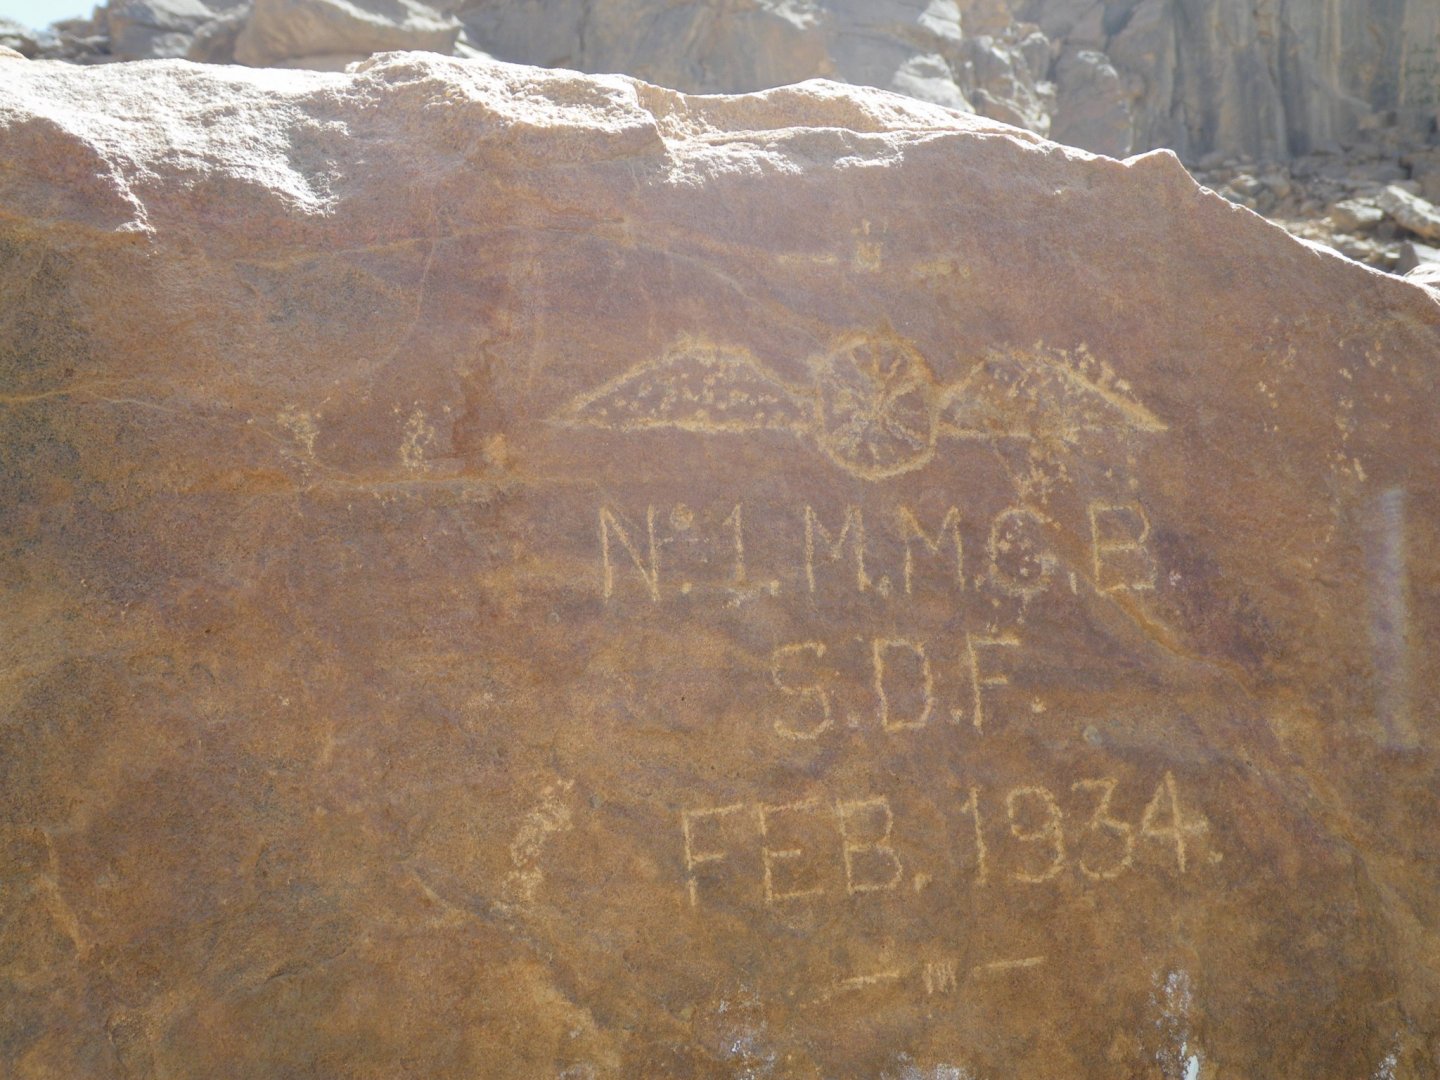
This is the first Roden kit I have attempted. I have read a lot of positive reviews and they have some wonderful subjects both armour and aircraft - especially aircraft. There is a respectable part count for a small model. The detail is quite nice. There is also a lot of flash on some parts and it looks like a file will be needed close to hand for this build. Limited decals and paint scheme for three different cars are provided. I don't plan to use the kit suggestions for teh subject car. I have a little personal interest in this model after finding this engraved on a rock in Birr Murr in northern Sudan a few years ago. Therefore the car will be a Sudan Defence Force vehicle of the Mobile Machine Gun Batteries of the 1930s and 1940s The Imperial War Museum has a photo of them on patrol It looks like a two colour paint scheme, from @Egilman research I am thinking it will be British Army Green and Sand The build is underway Thanks for looking in Alan
.jpg.2a42812096c34383ec0c99a89fd88c2e.jpg)
- 92 replies
-
- 15
-
-
That looks very interesting Craig. Are you going to try it. I have a friend in Maryland building a huge A10 RC plane with 3D printed parts. This aspect of modelling is a huge adventure - its also a huge rabbit hole. Alan
- 460 replies
-
- 4
-
-
- Finished
- Flower-class
- (and 1 more)
-
Thanks Roger - its now in build - then back to 1/700 world and PE. You and OC are making me jealous Alan
-
Thank you Egilman for the great research - as always. Its very helpful. I'm planning to build it as a Sudan Defence Force vehicle from the 1930s. It looks like a two tone scheme. Alan
-
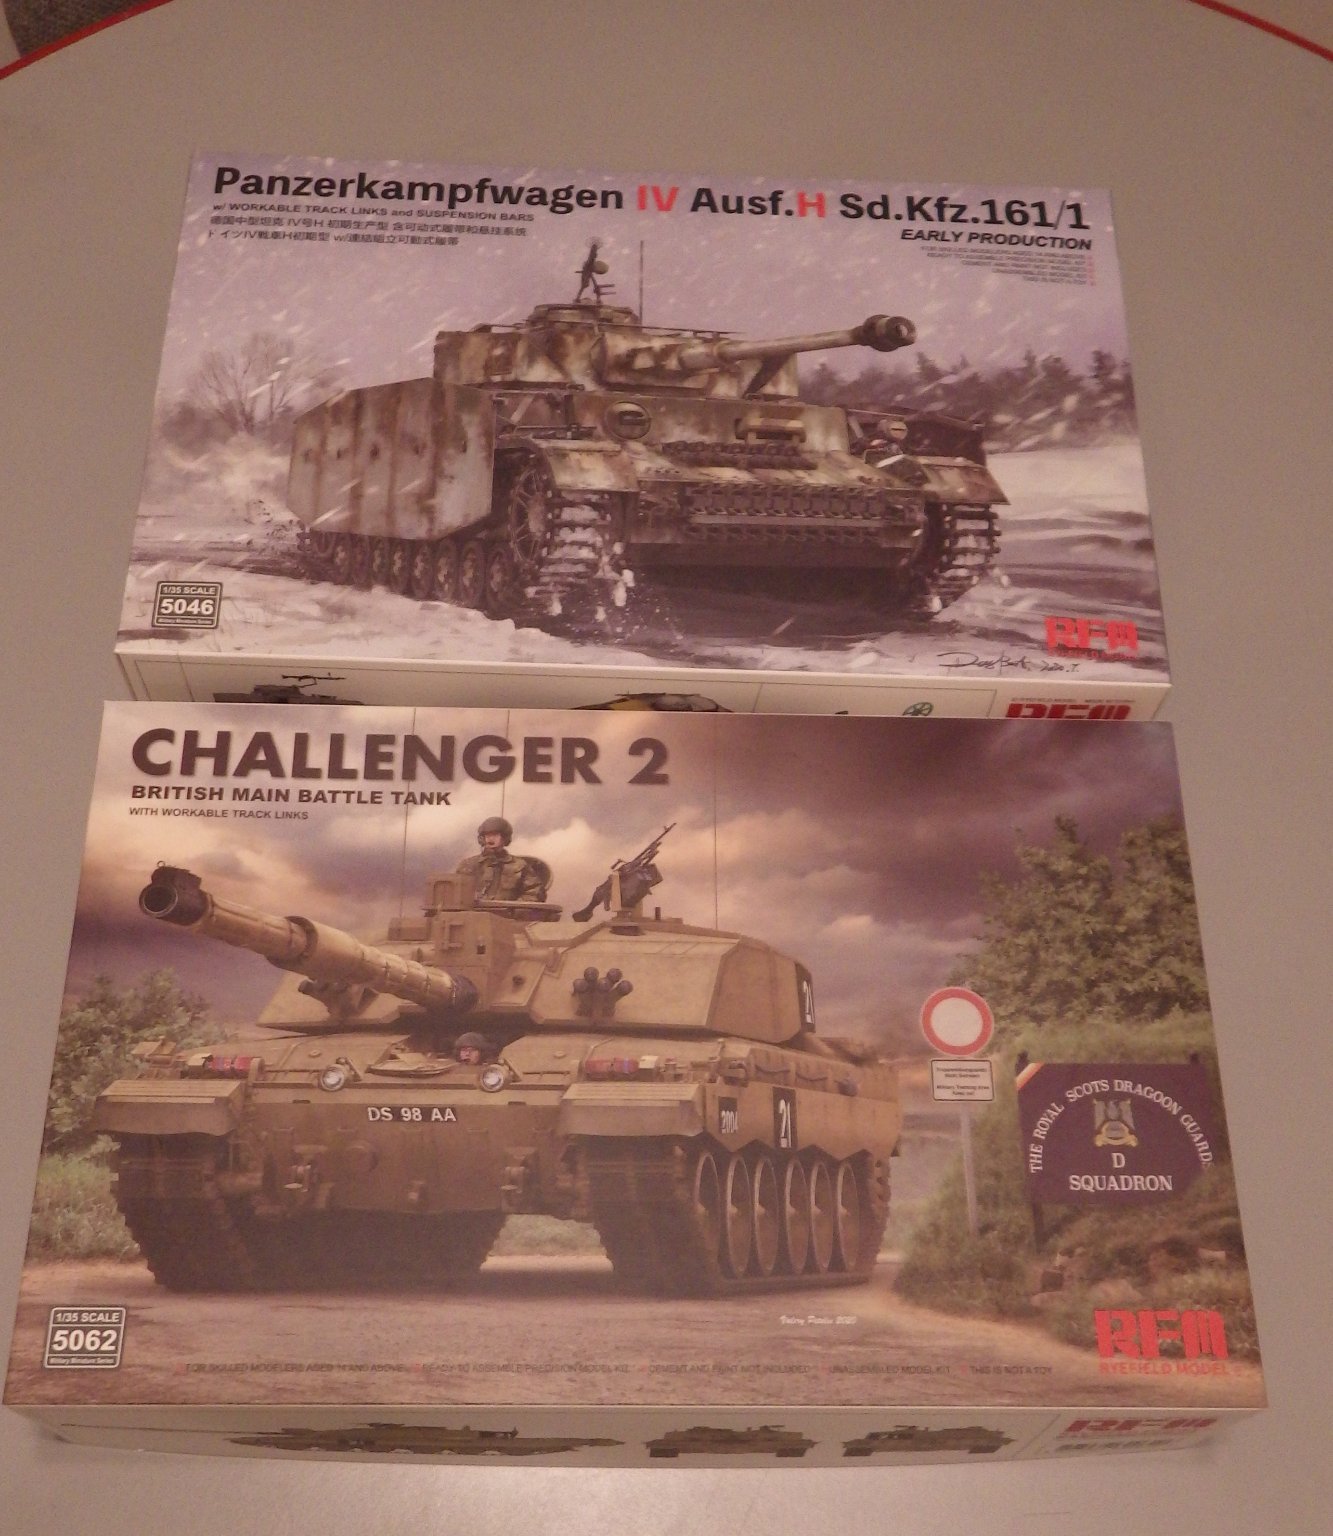
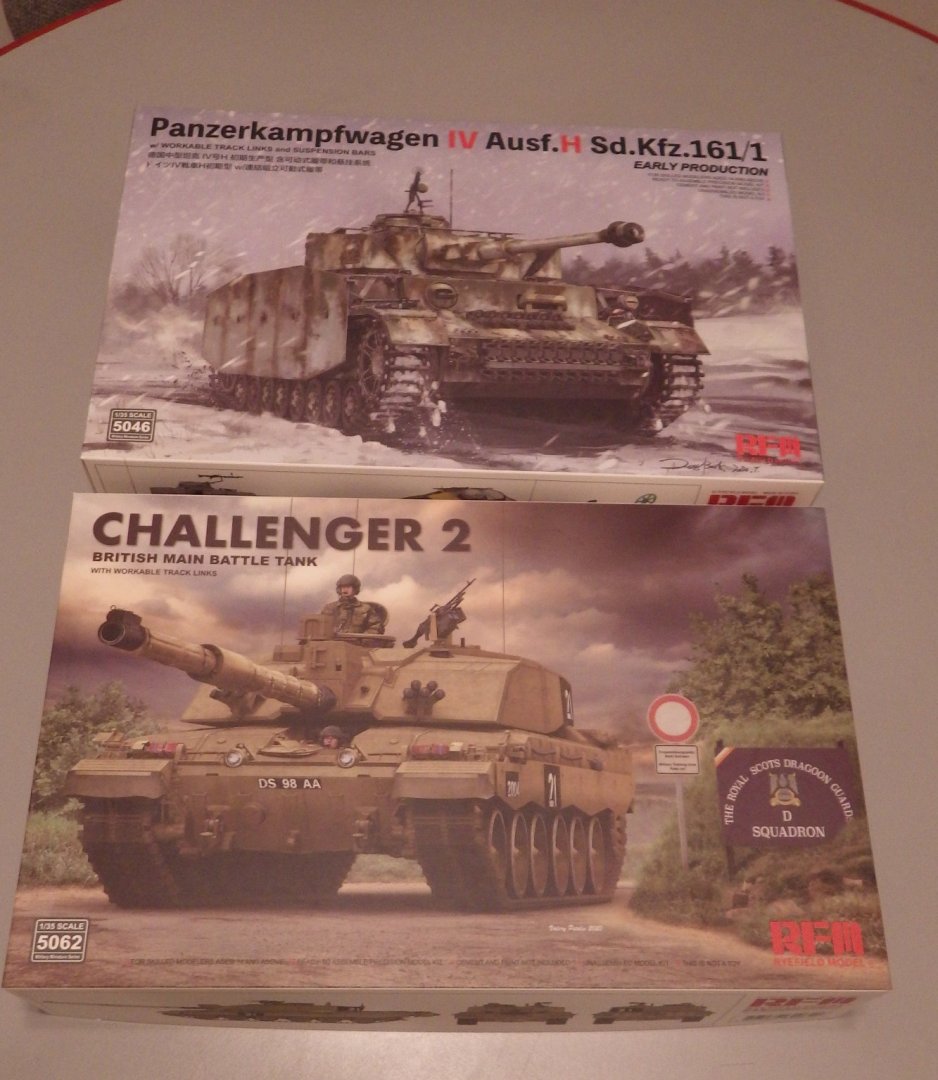
Thank you for the very kind comments OC. The twin turrets seem made for confusion and they went to a single turret in the later models I think. Then the crew would just have to resort to fisticuffs. I took advantage of a sale and thought I would try some bigger stuff at some point Your Challenger made me want to try one so I'll be going back over yout log and hoping I can do half as well. I want to try to develop my weathering techniques and I thought a Panzer IV on campaign might be a good subject Alan
-
Thank you Mike, I enjoyed the painting a lot. The torpedo nets are the thing that has put me off the Lutzow. It looks fearsome in 1/350 so I dread what it will be like in 1/700. Maybe stow the booms and leave it at that. Its next up after the armoured car. Alan
-
Thank You Mark. The twin turret design was new to me. They are nice little kits - I see some more in my future, First To Fight have quite a range Alan
-
You need lots of fine filament to print that one 😄. That is Gracie my Maine Coon mix adopted from the local shelter when she was four months old.
- 460 replies
-
- 5
-
-
- Finished
- Flower-class
- (and 1 more)
-
Thank you for the support Lou. I have found the process to be harder than I expected but I have learnt a lot as it progressed. Overall it is still enjoyable but there have been some frustrating moments with teh printer and working around the generic nature of the model. The next phase should be less fraught and thus more enjoyable as teh detail builds up. Alan
- 460 replies
-
- 5
-
-

-
- Finished
- Flower-class
- (and 1 more)
.jpg.3cd59e0bbc34556d448a195a3b68a49a.jpg)