king derelict
-
Posts
3,292 -
Joined
-
Last visited
Content Type
Profiles
Forums
Gallery
Events
Everything posted by king derelict
-
Hi Mike Thats a great idea. Mutual support may be the deciding factor for the Felixtowe kits and I could use the push to make the commitment. I've liked the Roden vehicle kits but the Condor was not one of their best. It was also my first attempt at 1/144 scale which probably didn't help. Thank you so much for the detail about filling gaps. I appreciate the time it must have taken to compile the information. I have ordered some thin plastic card to try next time. The Mr Dissolved Putty shrank considerably and needed several applications. It did sand down nicely though. I think I would have been better off with shaved down plastic card. I am a bit cautious about CA; the fumes tend to bother me if I use it a lot but I have now got some Bob Smith Gold odourless CA and that does seem to be something I can use. I will try it on the next gap. Thank you also for the advice on metallic paints. I really liked the ease of using the Vallejo Metallics and they look quite good. I need to really improve my game with the priming to ensure I get a really smooth surface to work from. It is amazing how much there is to learn in this hobby. So many techniques and I am very grateful that people are so happy to share. Alan
-
Thanks OC. The figure sculpts make the work a lot easier and they do look great. I really enjoy watching the figure develop as I paint it. Alan
-
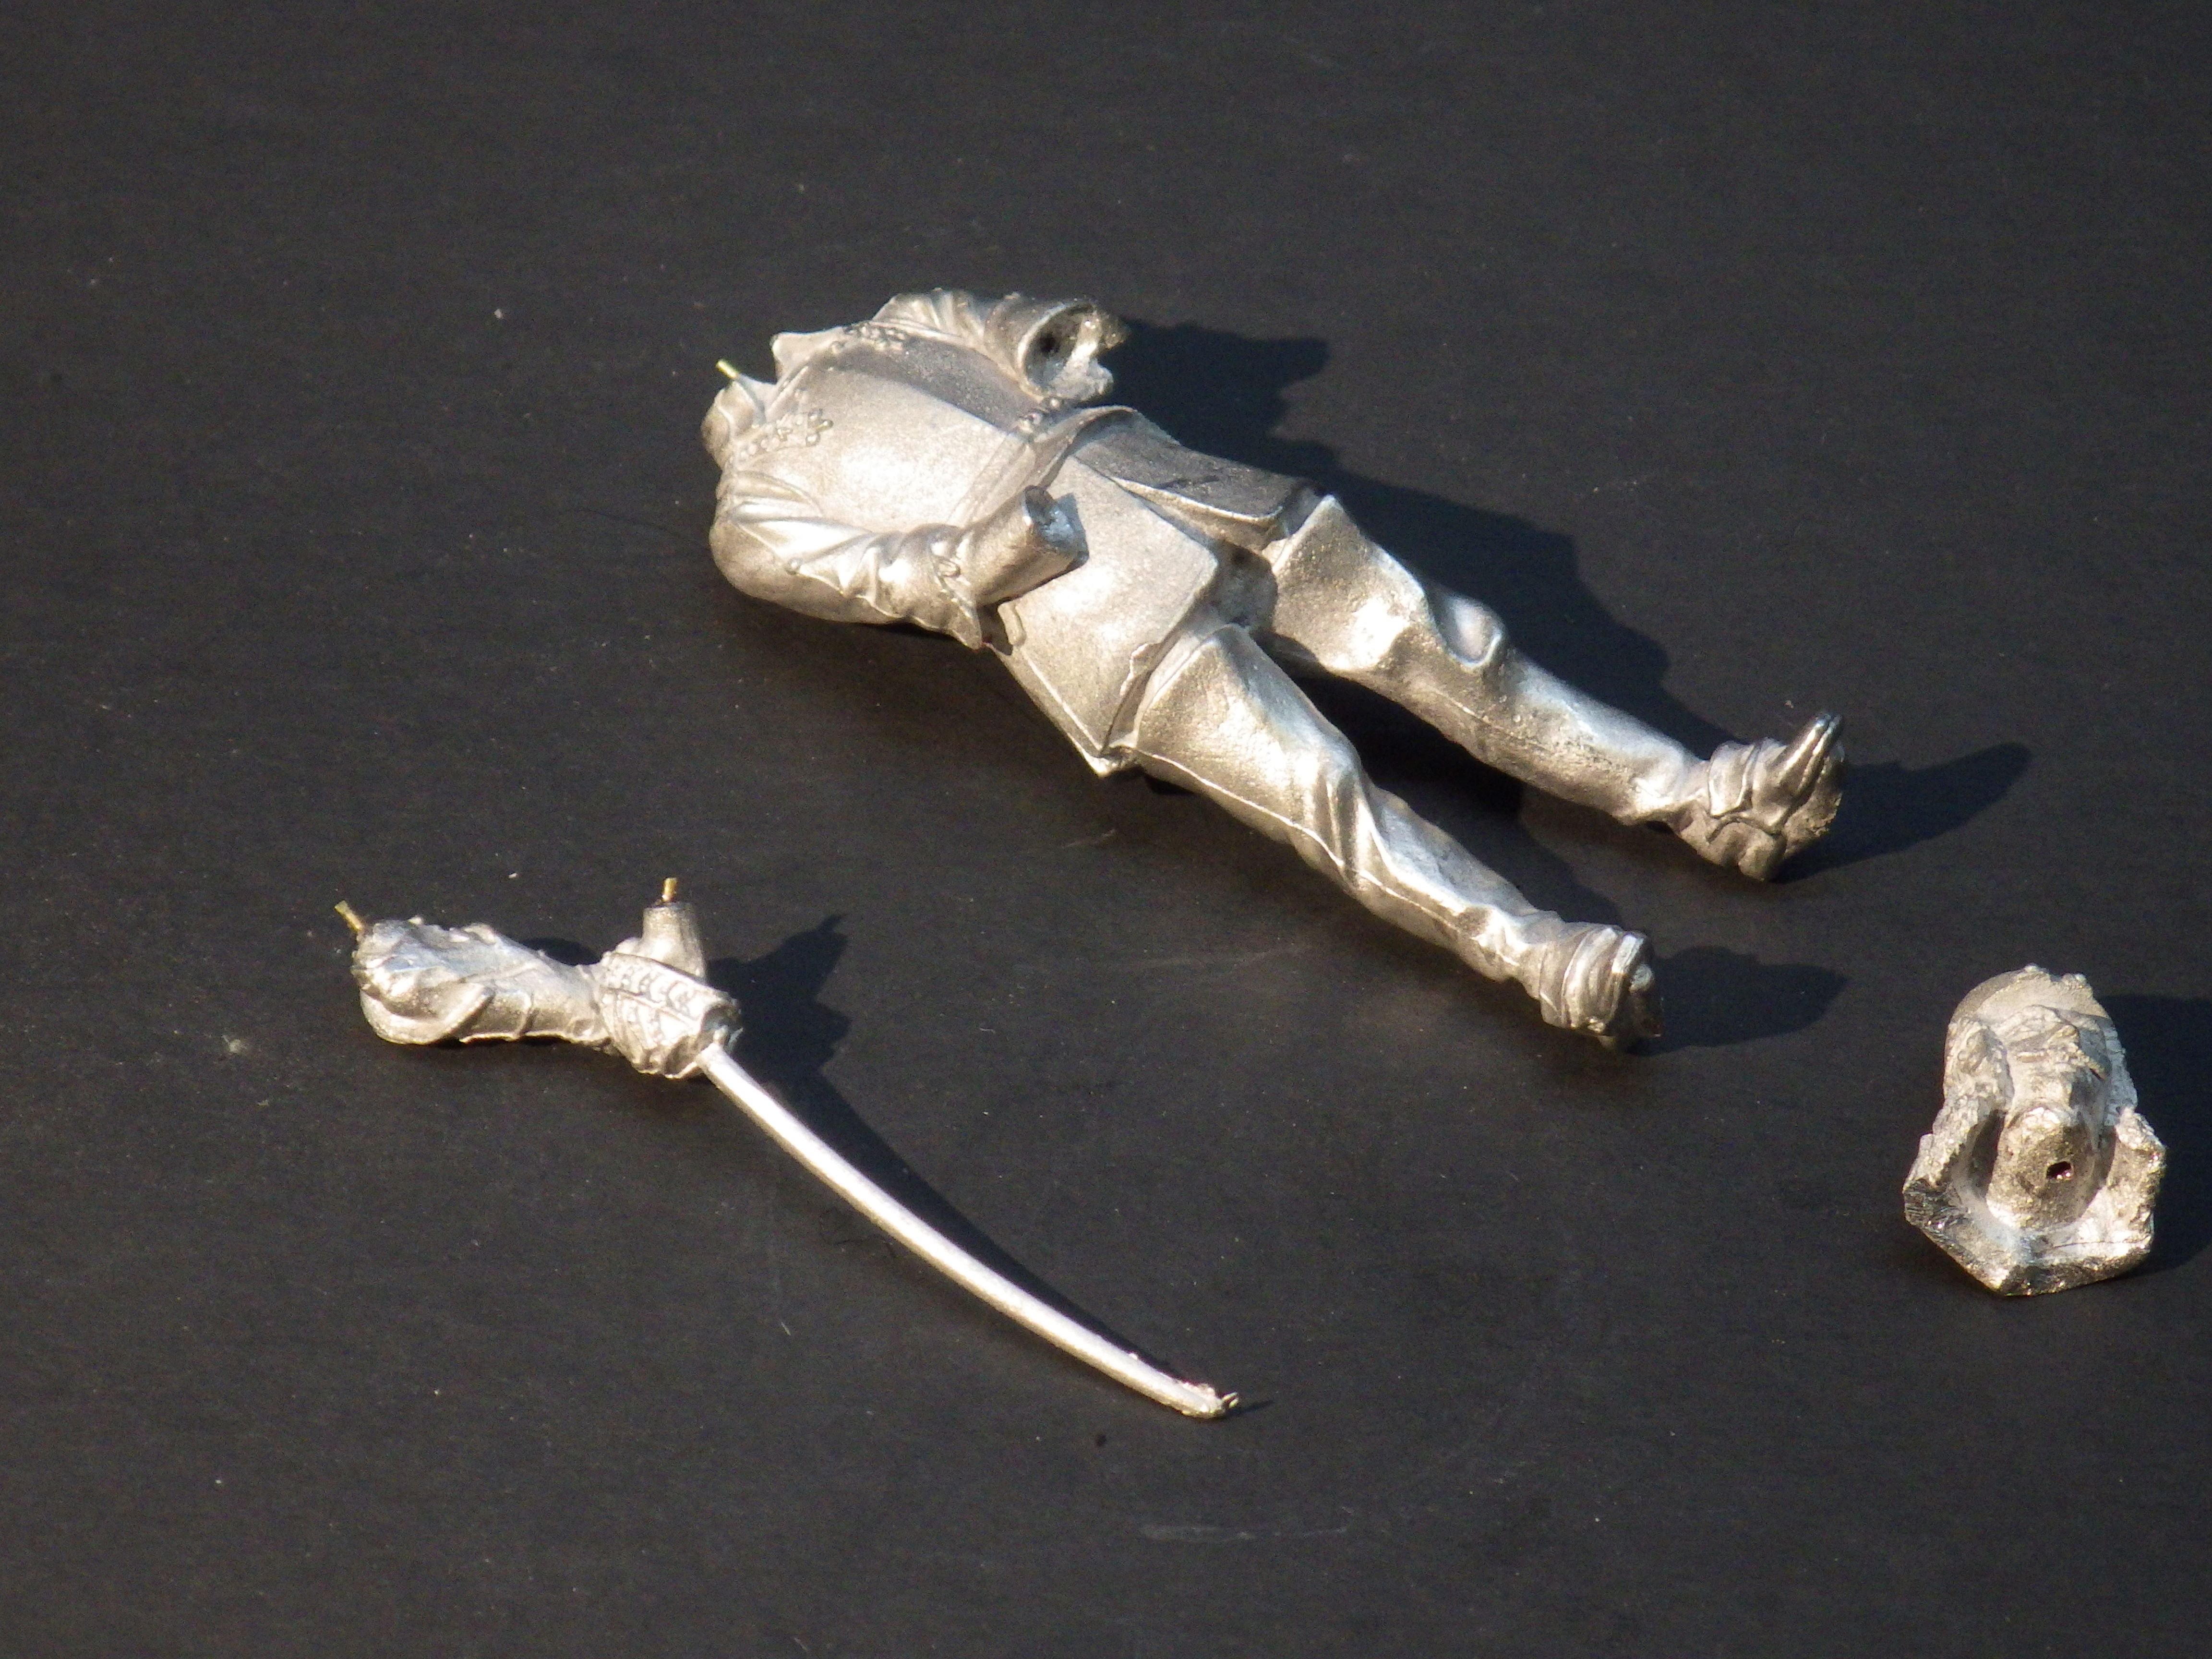
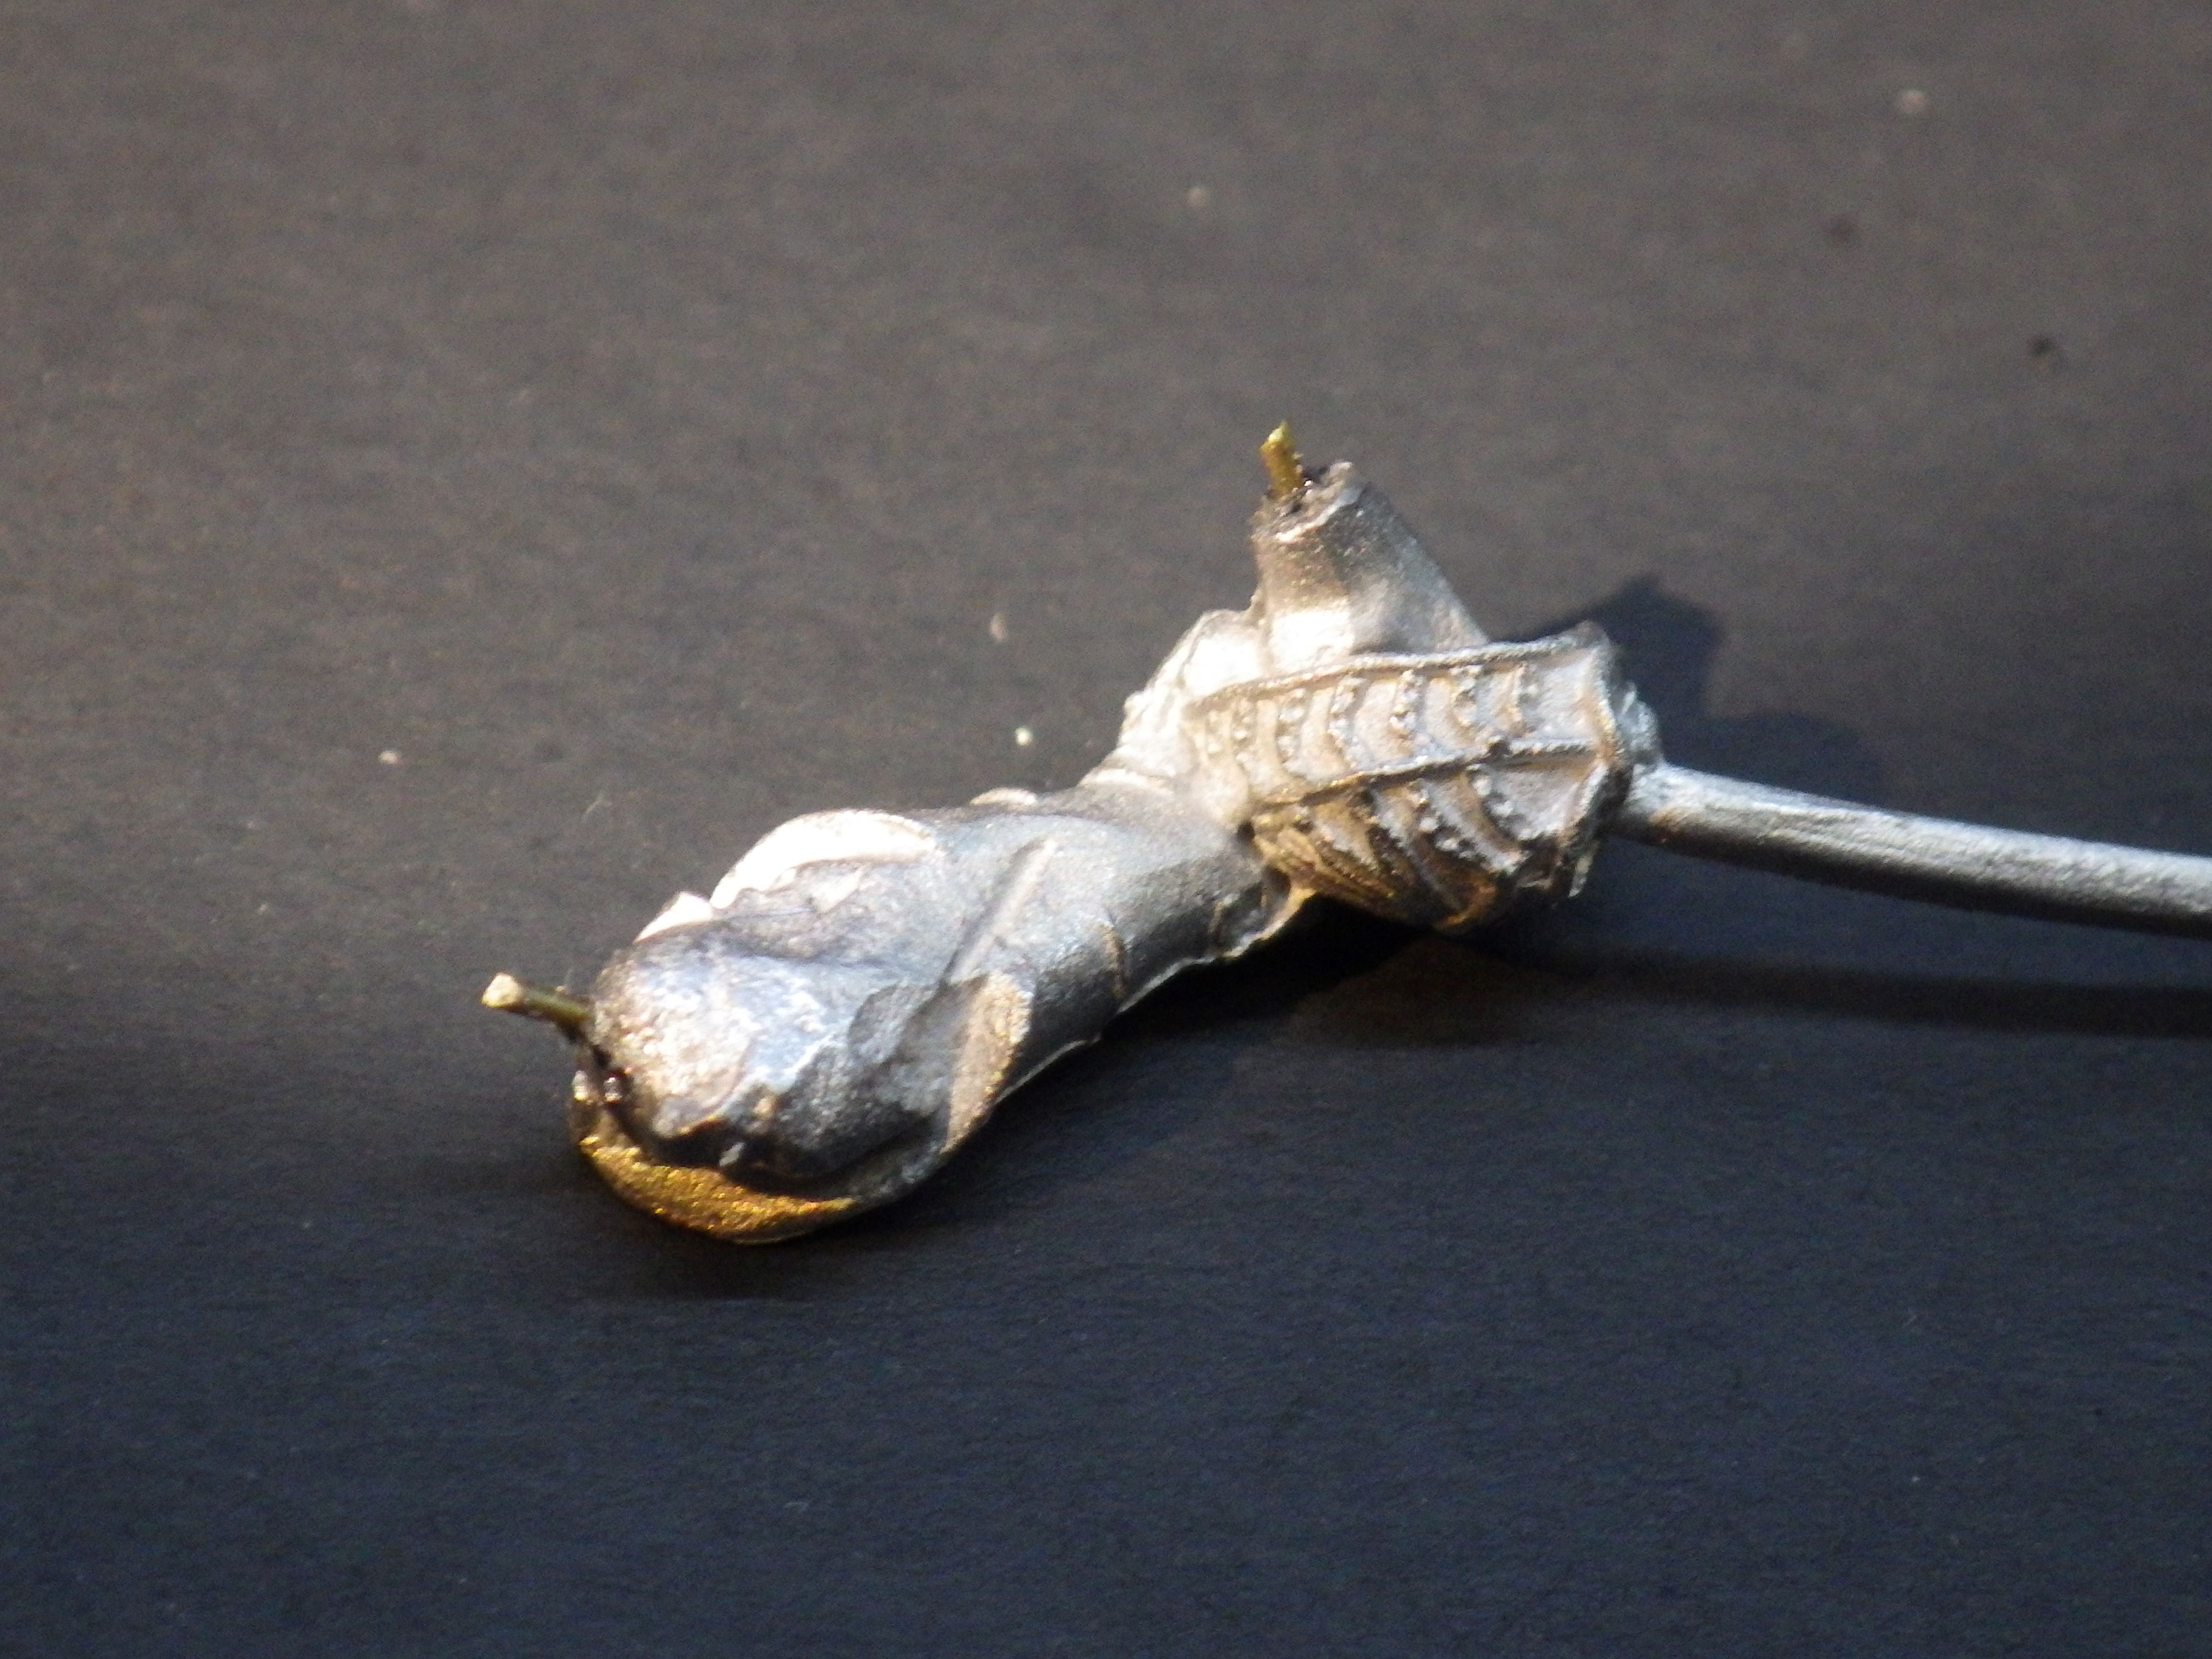
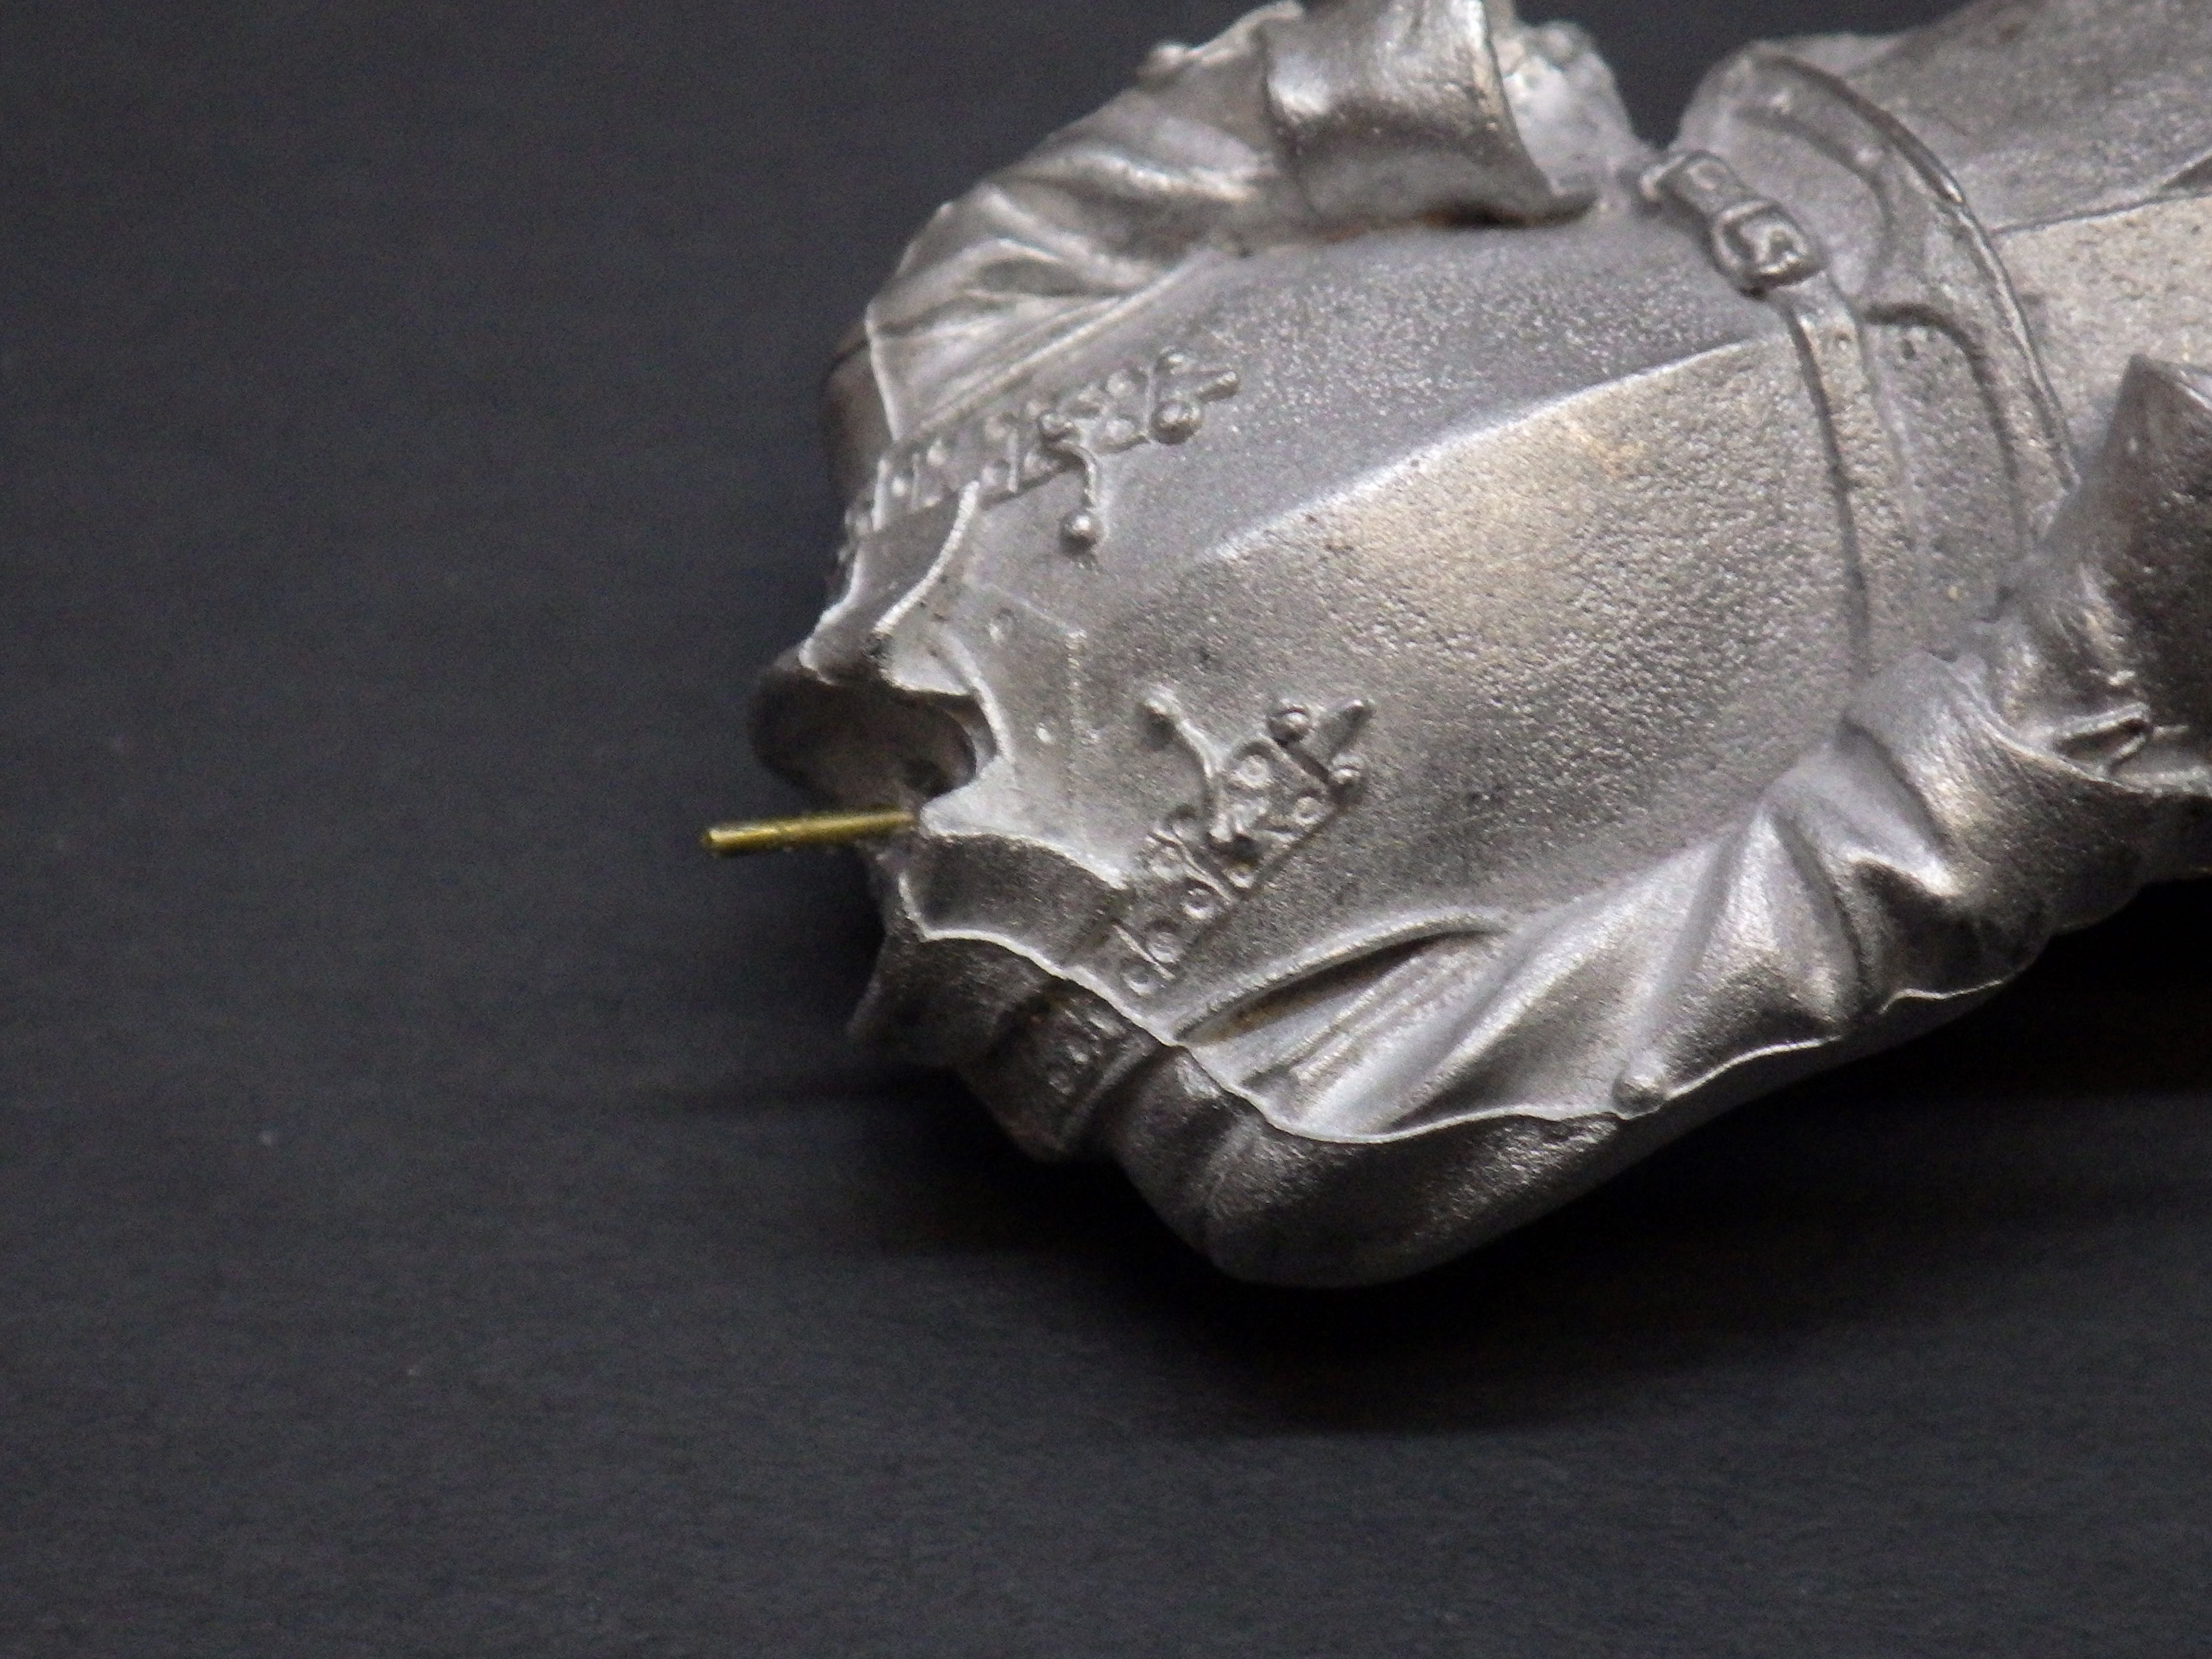
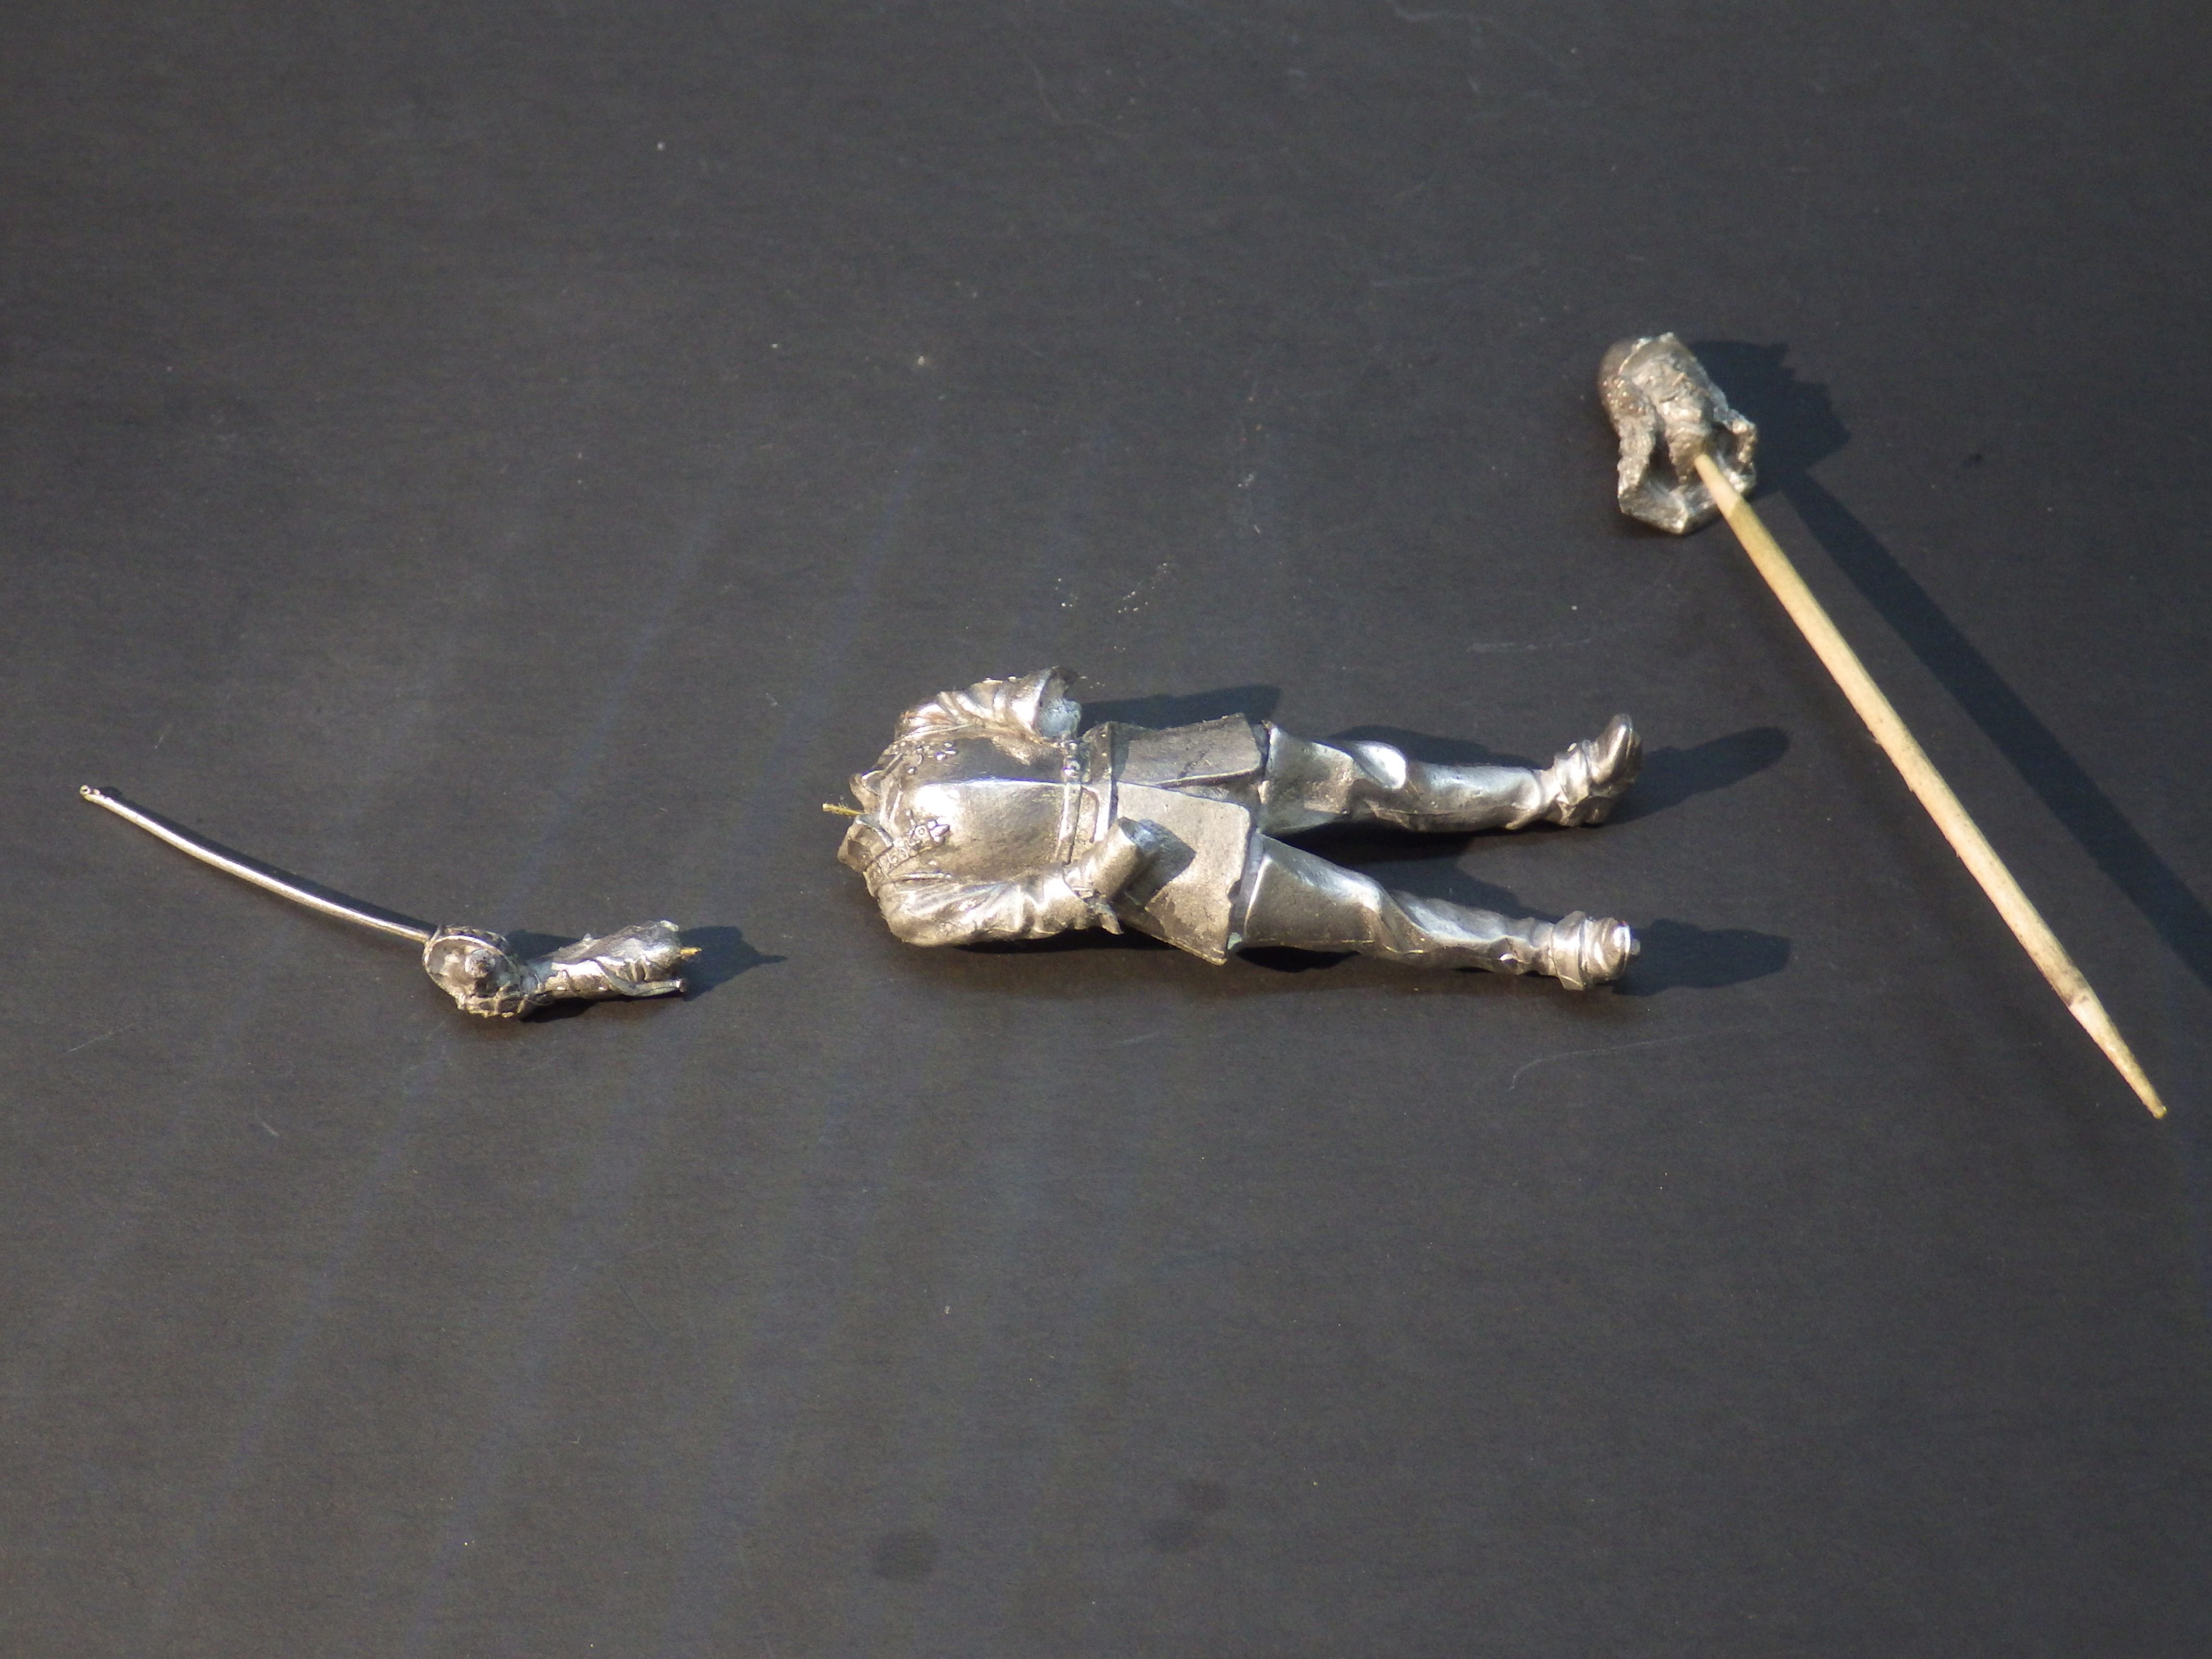
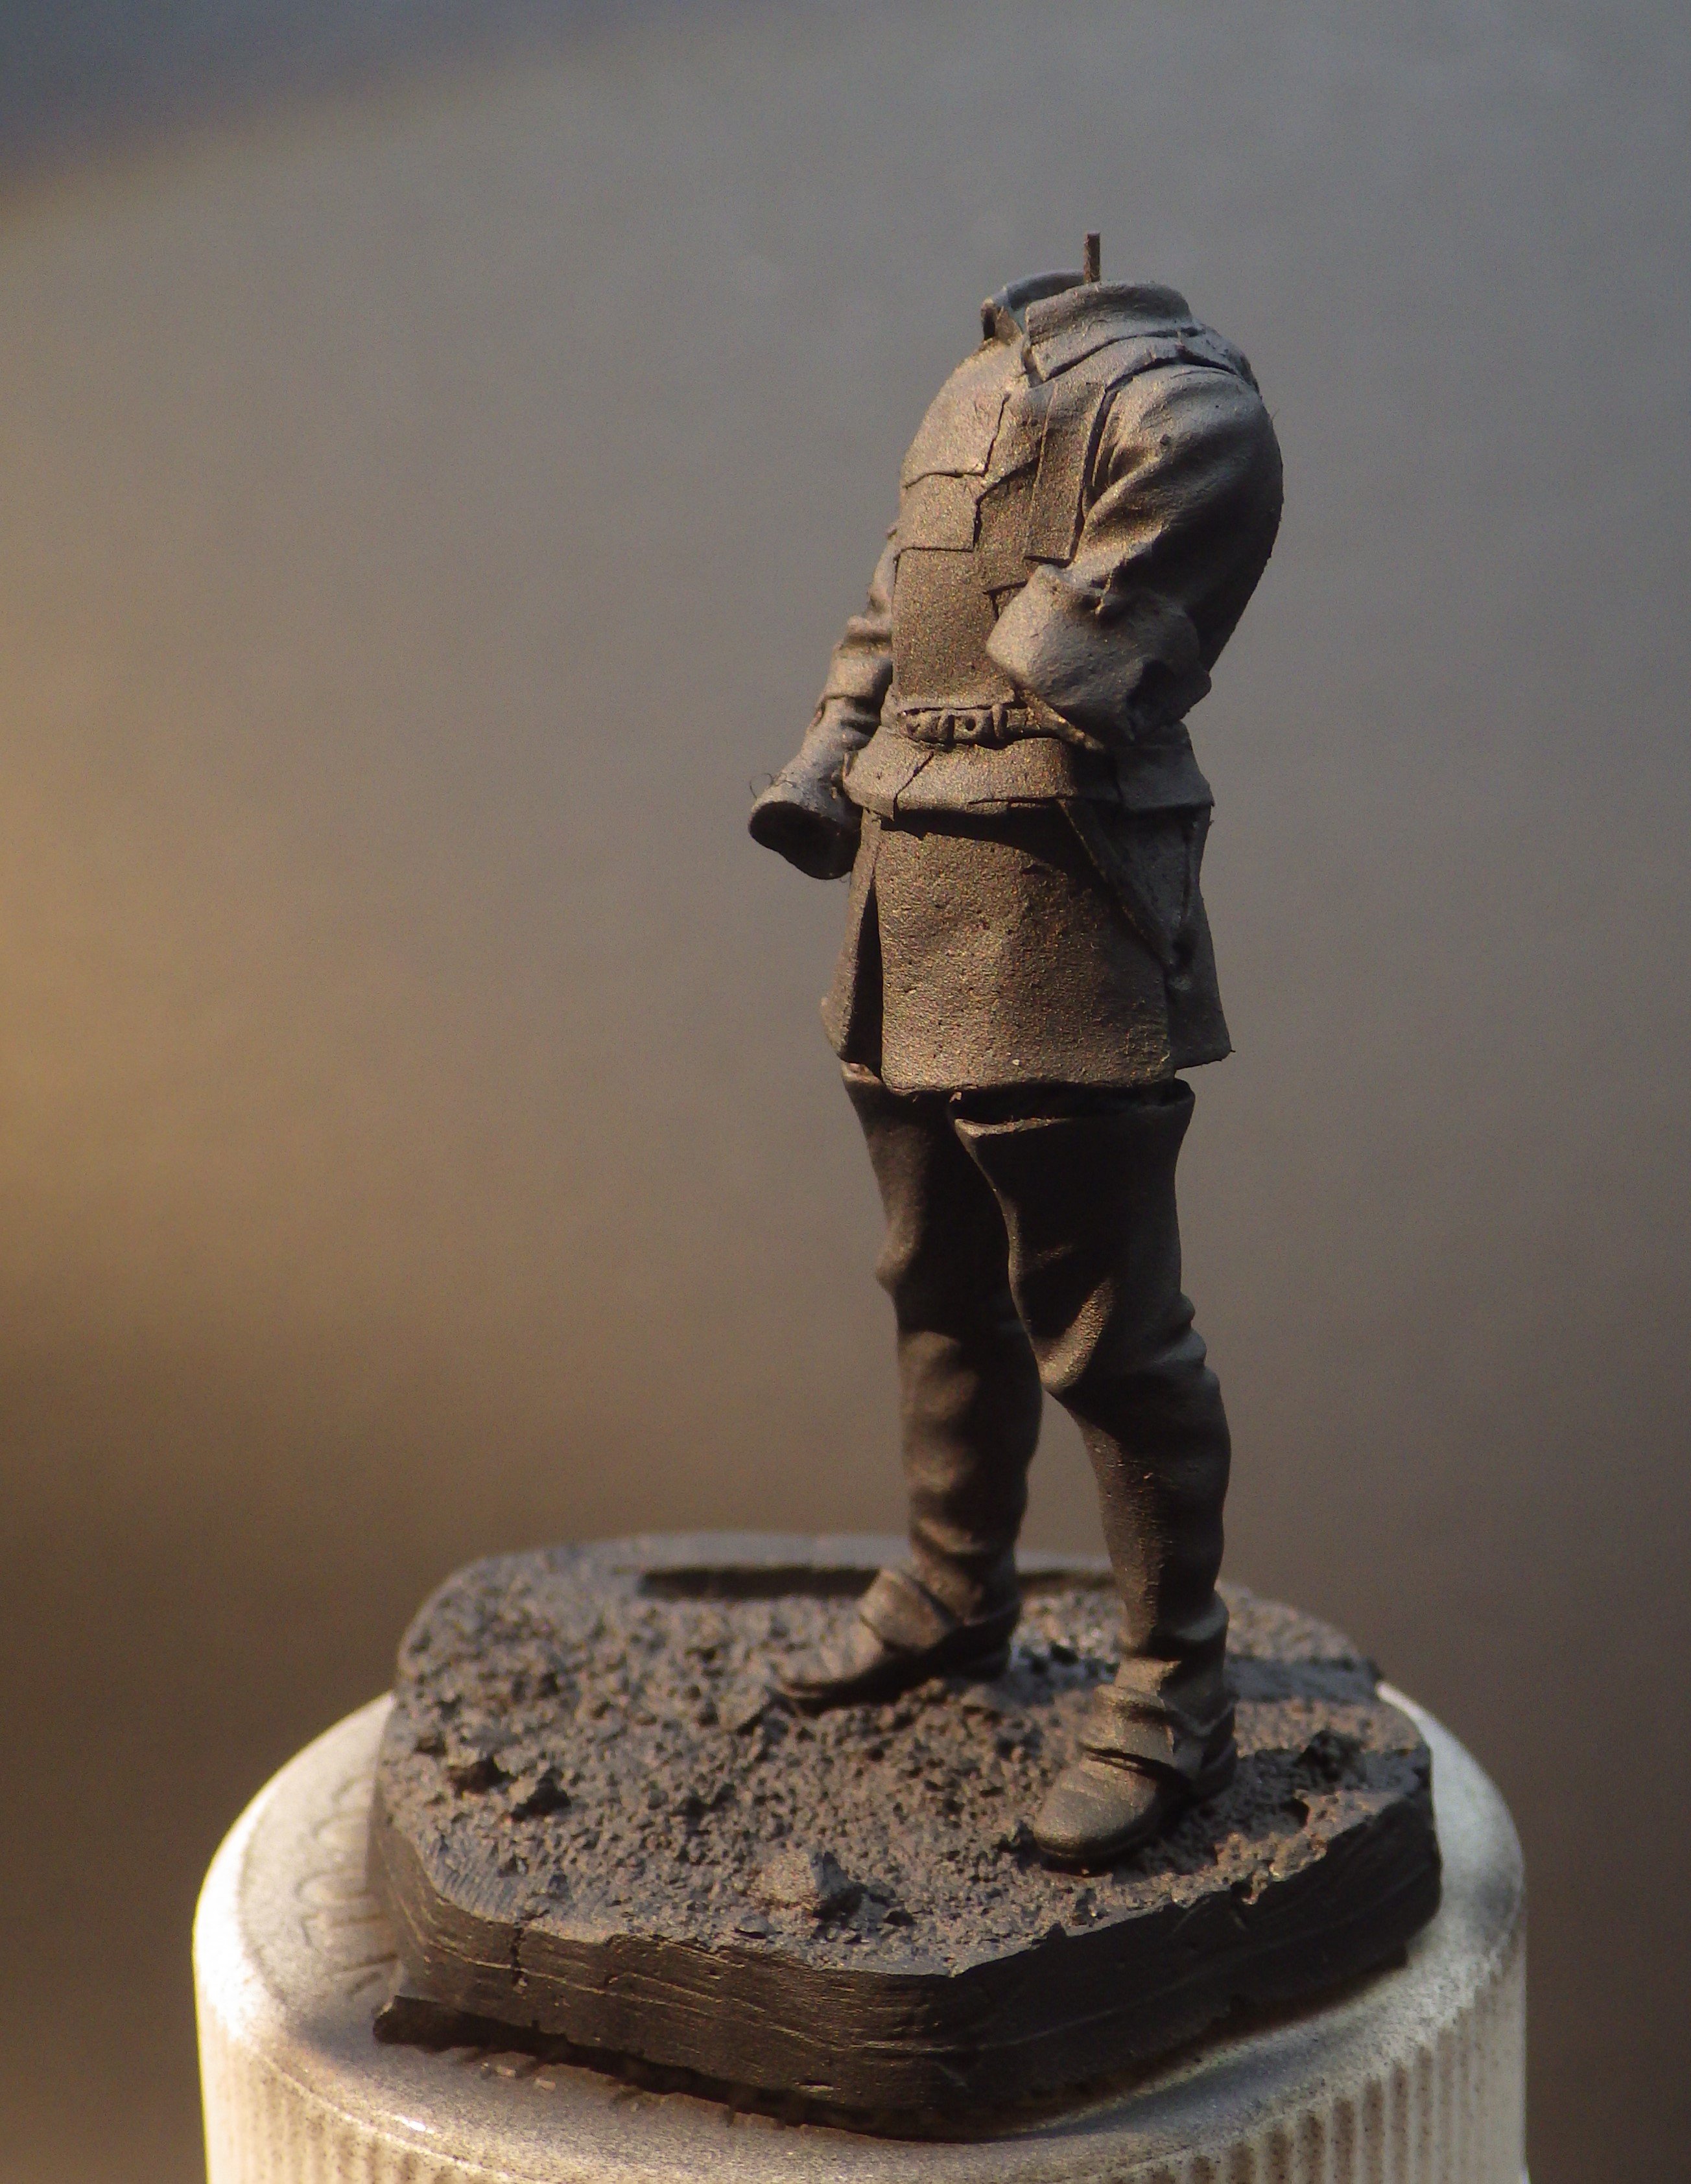
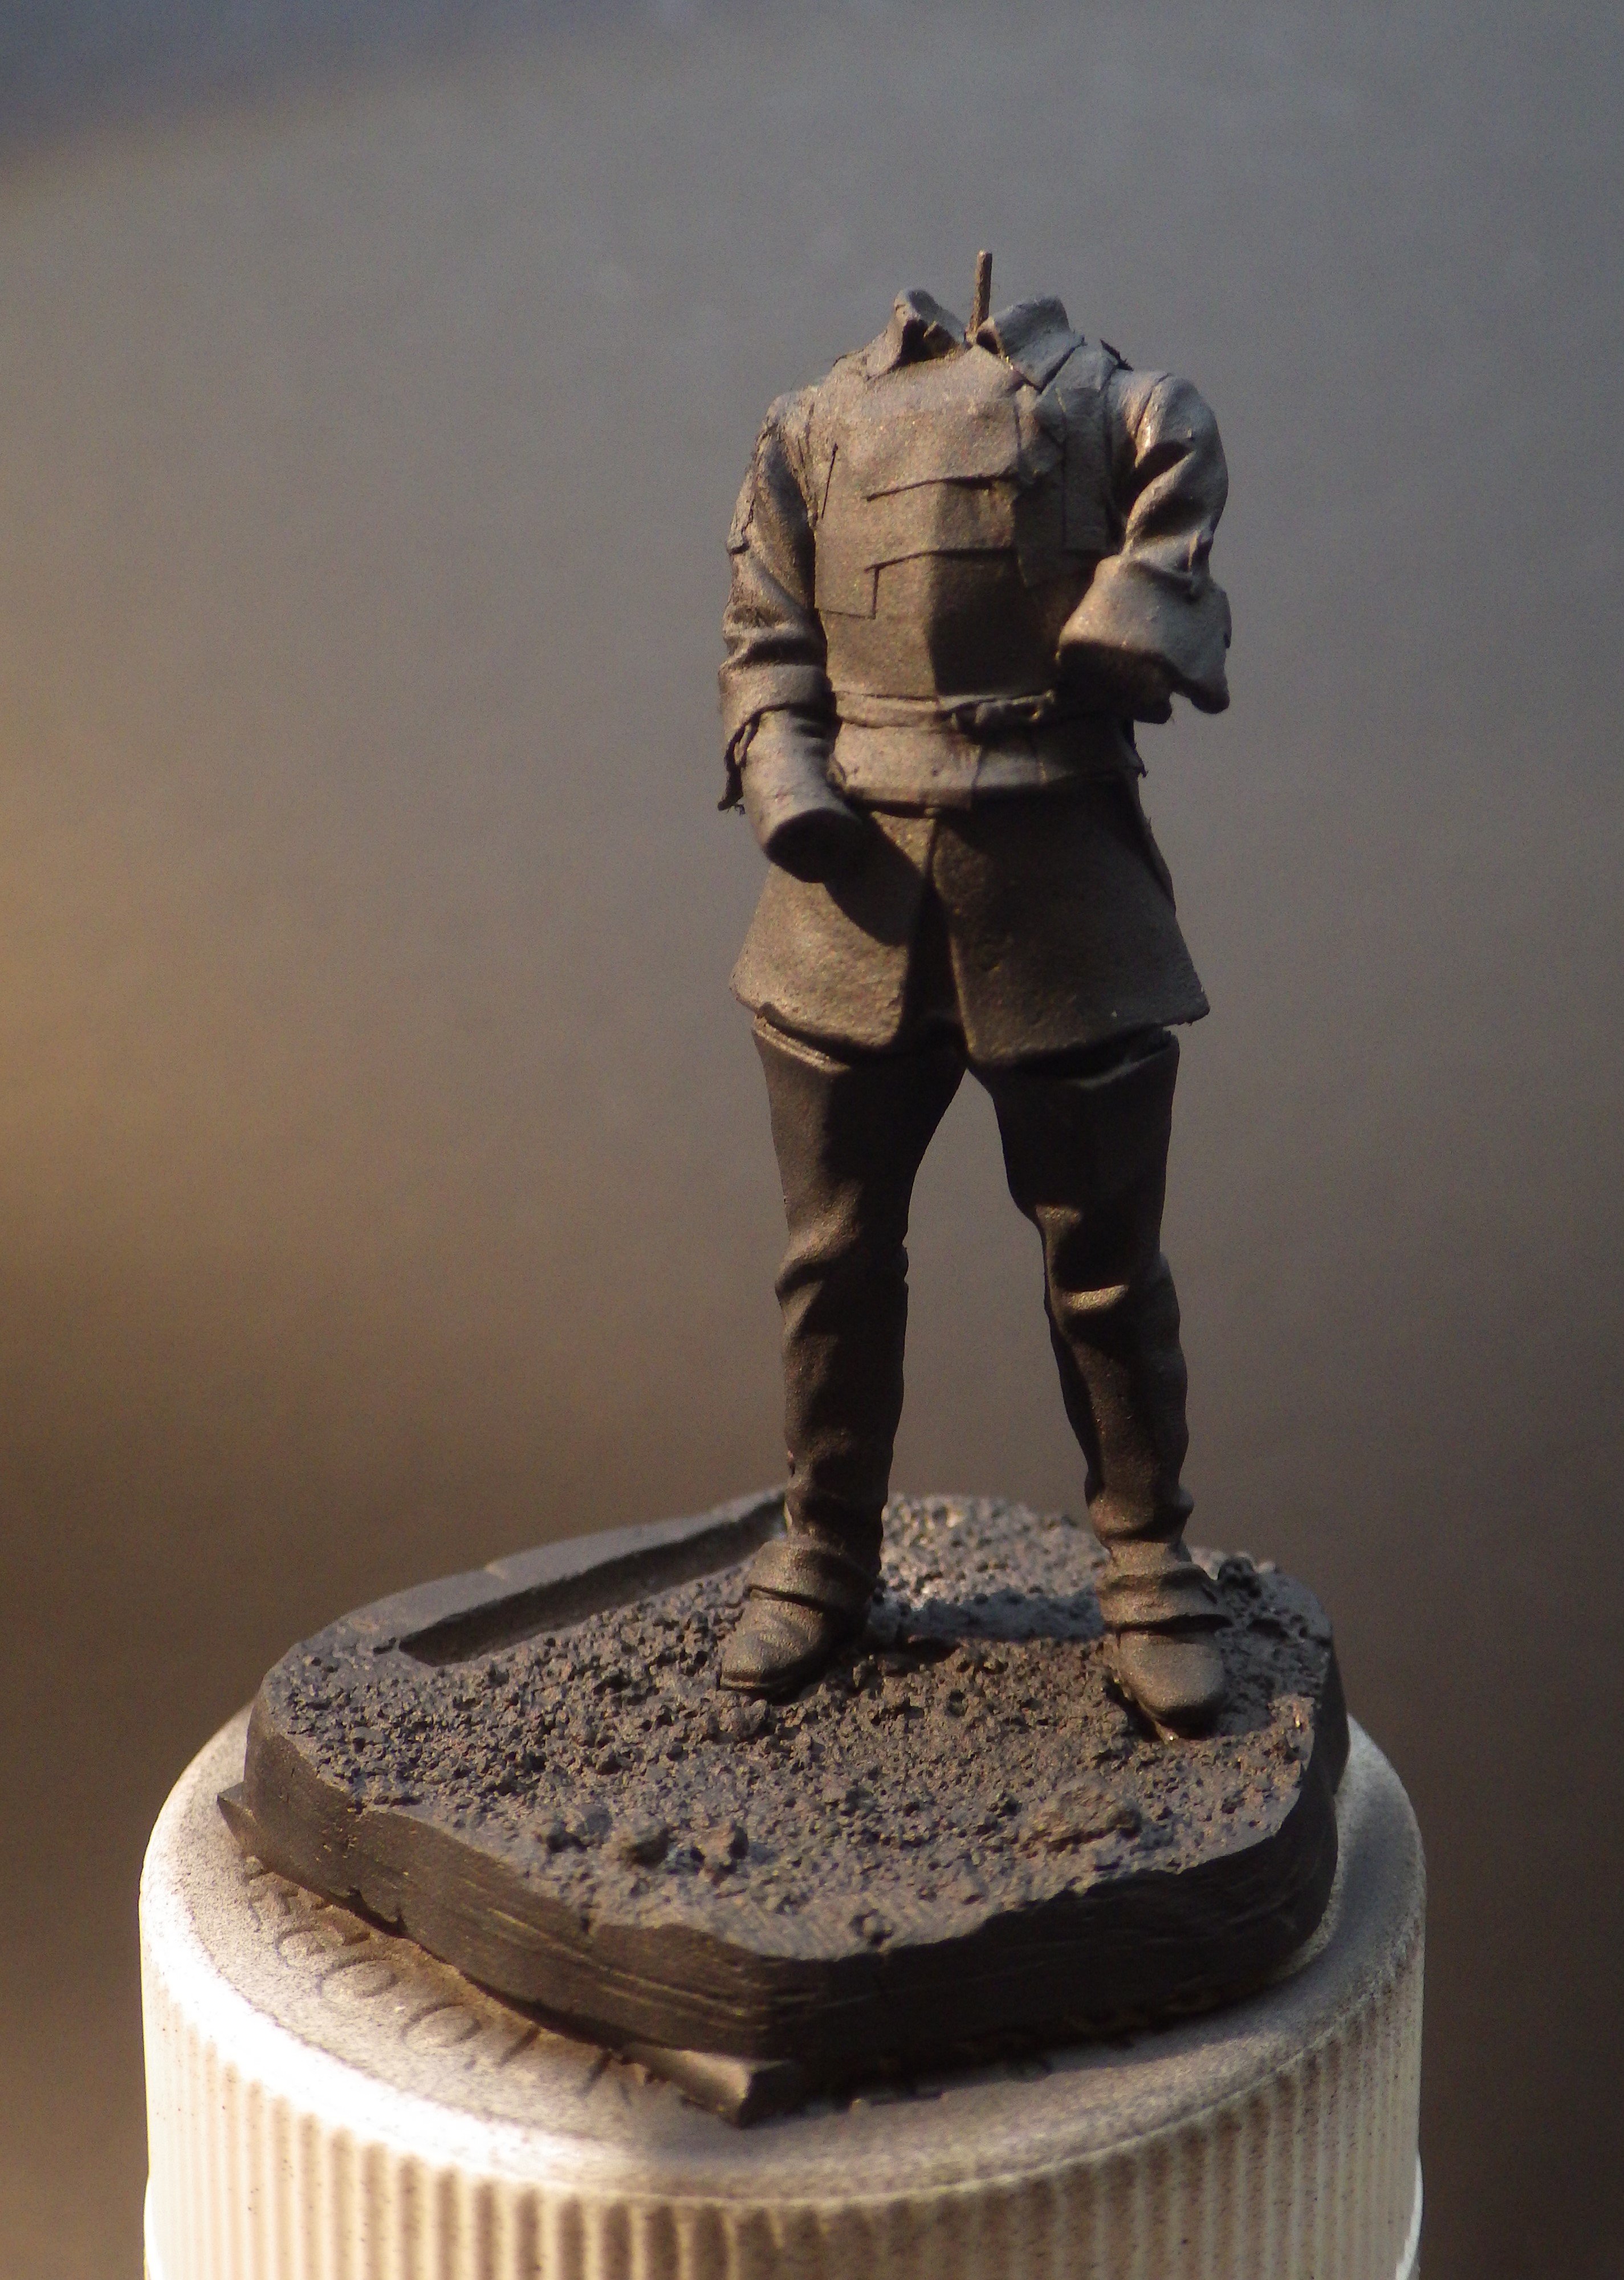
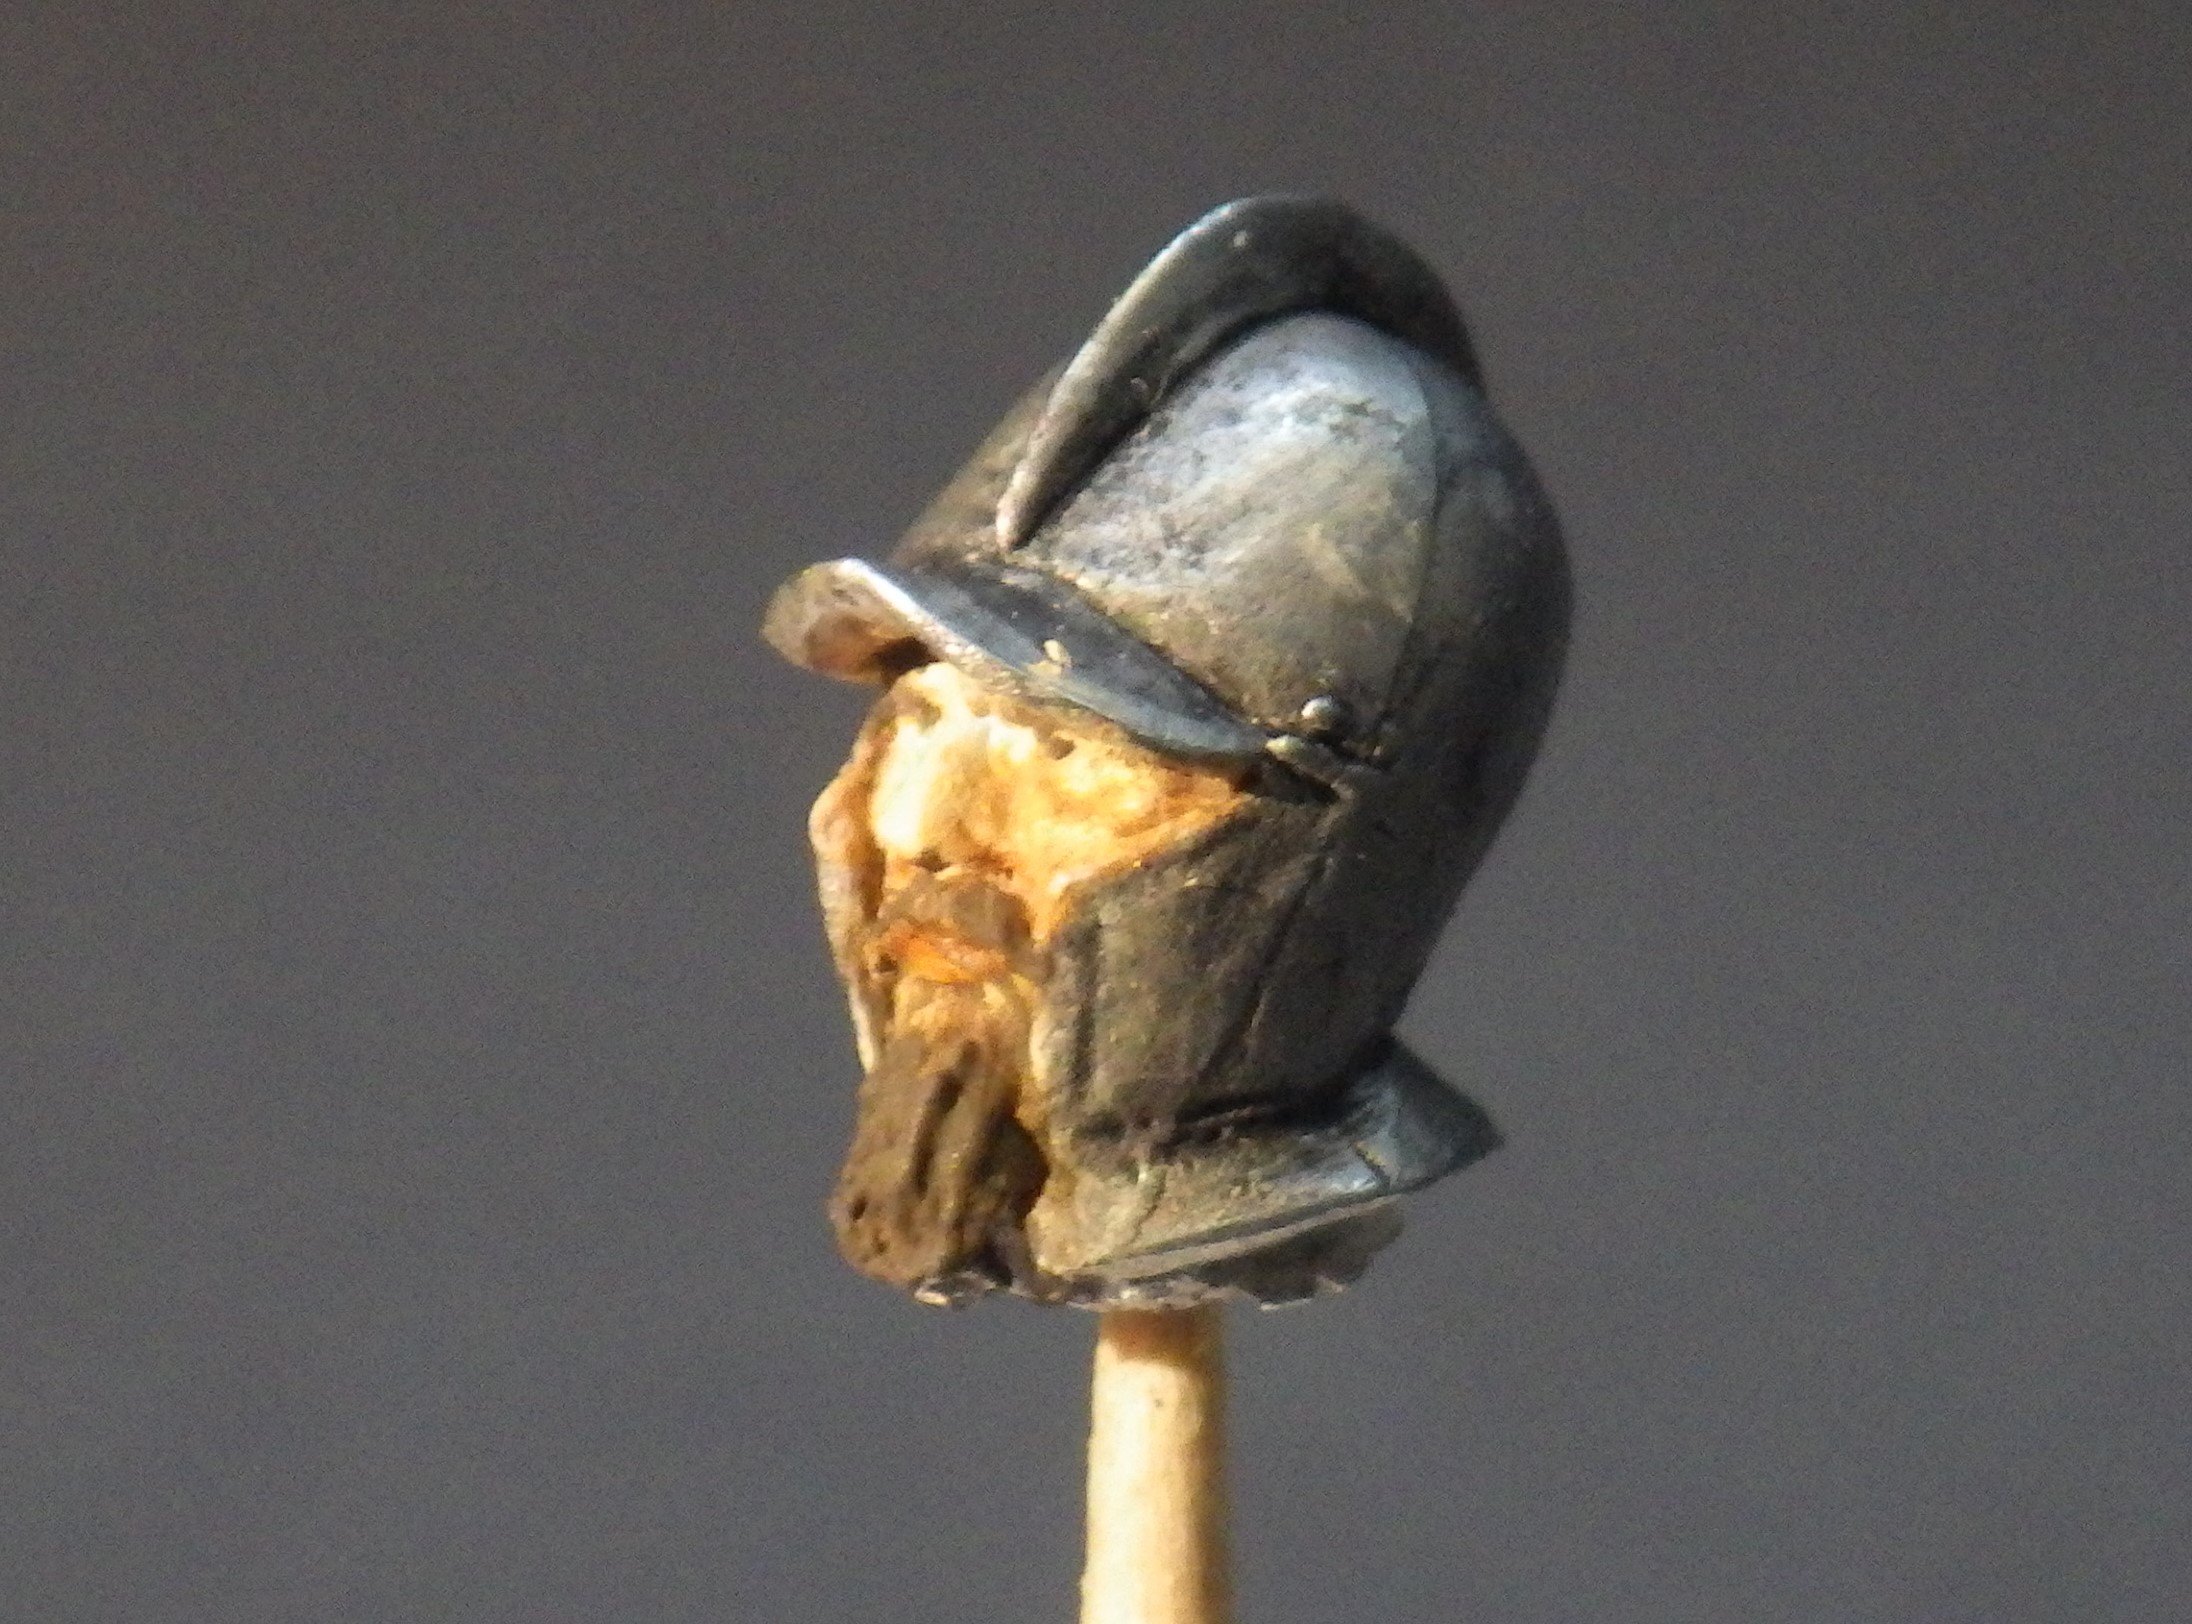
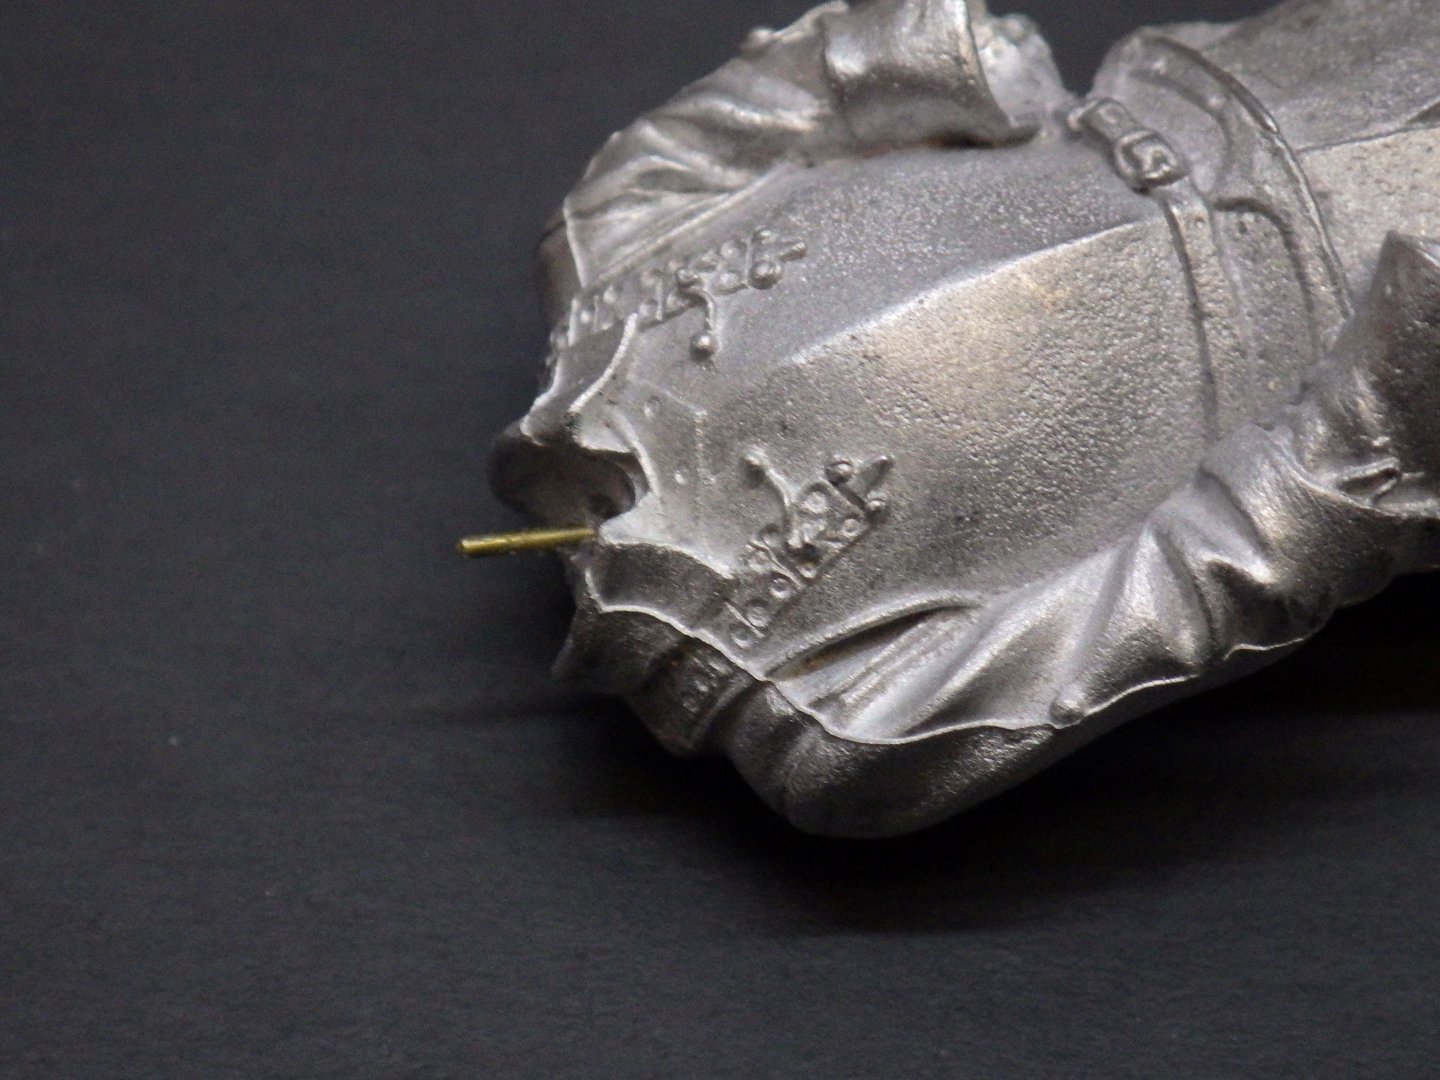
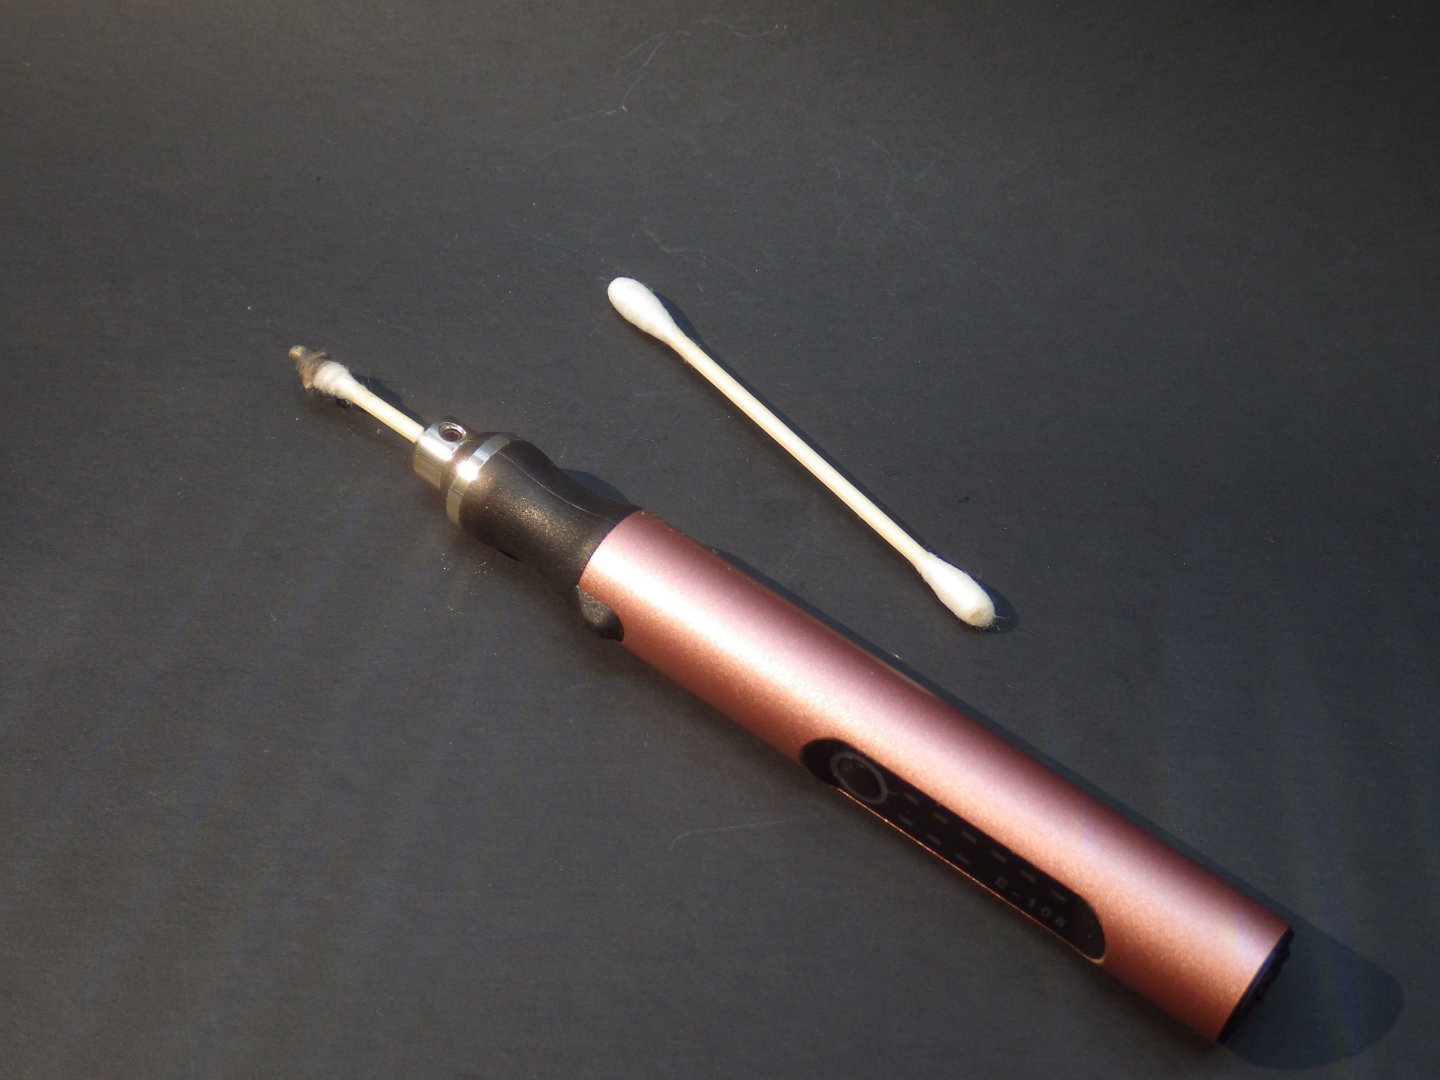
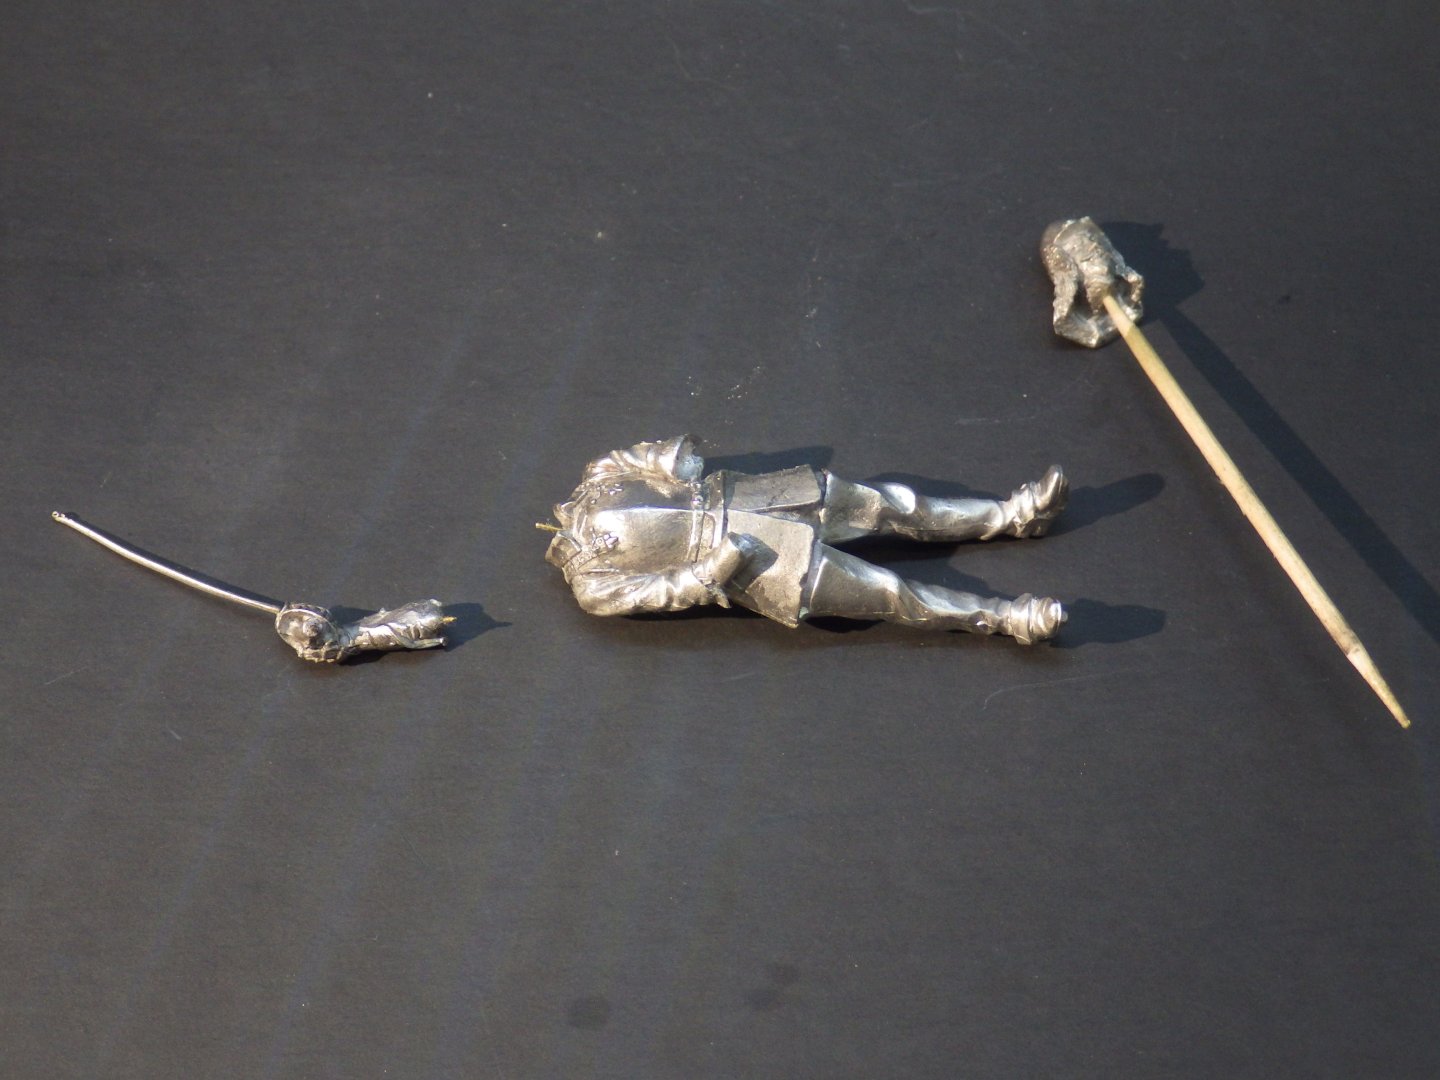
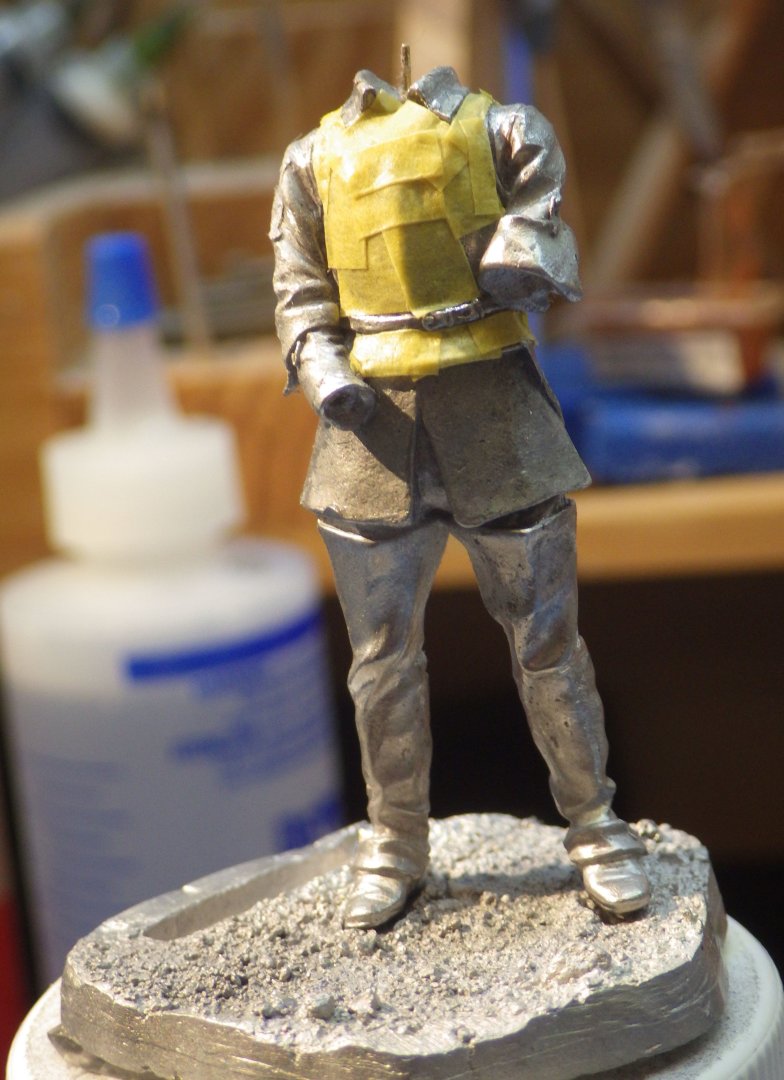
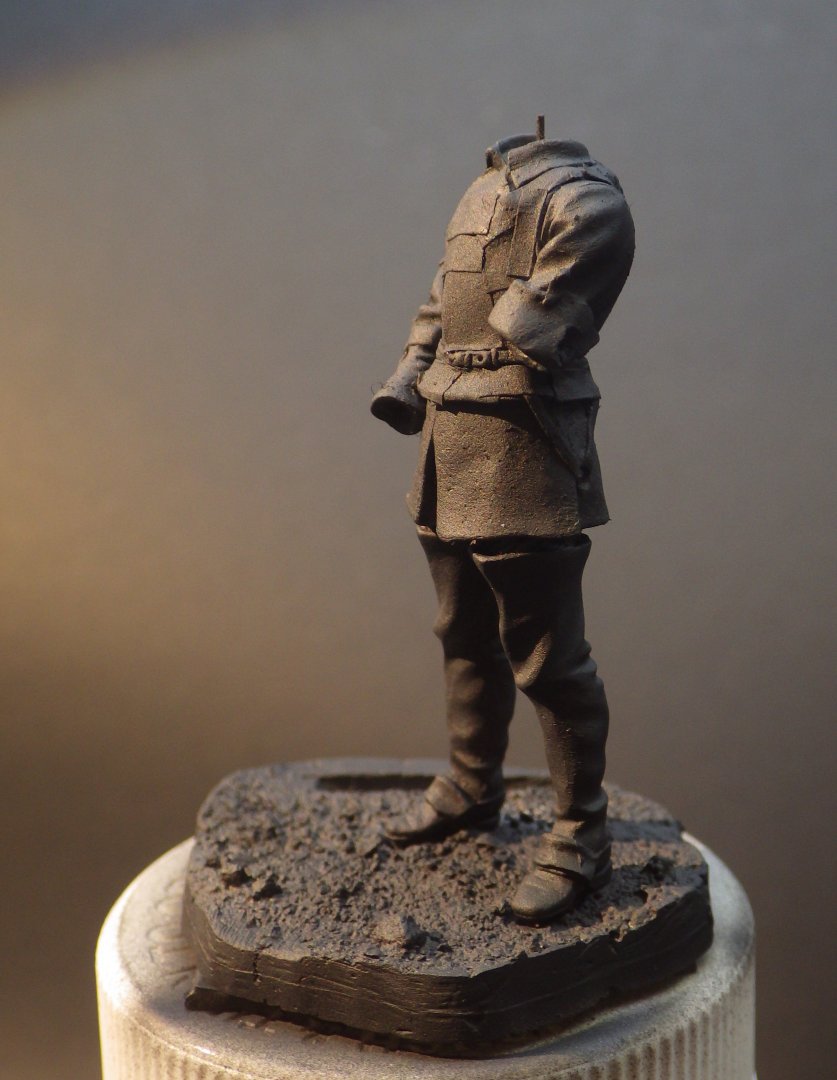
I opened the box while I was waiting for some glue to set on the Argosy and somehow I started to fiddle with the bits - and here we are off again. I'm trying a few ideas to see if I can make life easier. The weight of the parts makes it hard to get the components to adhere even if you leave the glue to almost set. If I paint the components separately and I'm gluing up the painted parts its really easy to spoil the paintwork; especially with epoxy glue. so I have drilled the neck and hands and added 0.5 mm brass rod which has been epoxied into place in one half of the joint and the fit and position checked satisfactorily for later. A few more cast lines to remove on this one but nothing too bad. A lot more polished metal too and again I would rather polish the kit metal instead of painting it. Based on a suggestion by @Jack12477 I decided to try a mini engraver / polisher and a few wooden shafted cotton buds. With jewellers rouge they made quick work of it and got into the corners well. Everything not polished then got a coat of Mr Metal primer hand painted on The polished parts of the body were masked and a coat of Mig One Shot black primer was air brushed on Next will be the directional white primer to provide a base for the glazes. Thanks for looking in and I hope you enjoy another metal figure. Alan


- 27 replies
-
- 12
-

-

-
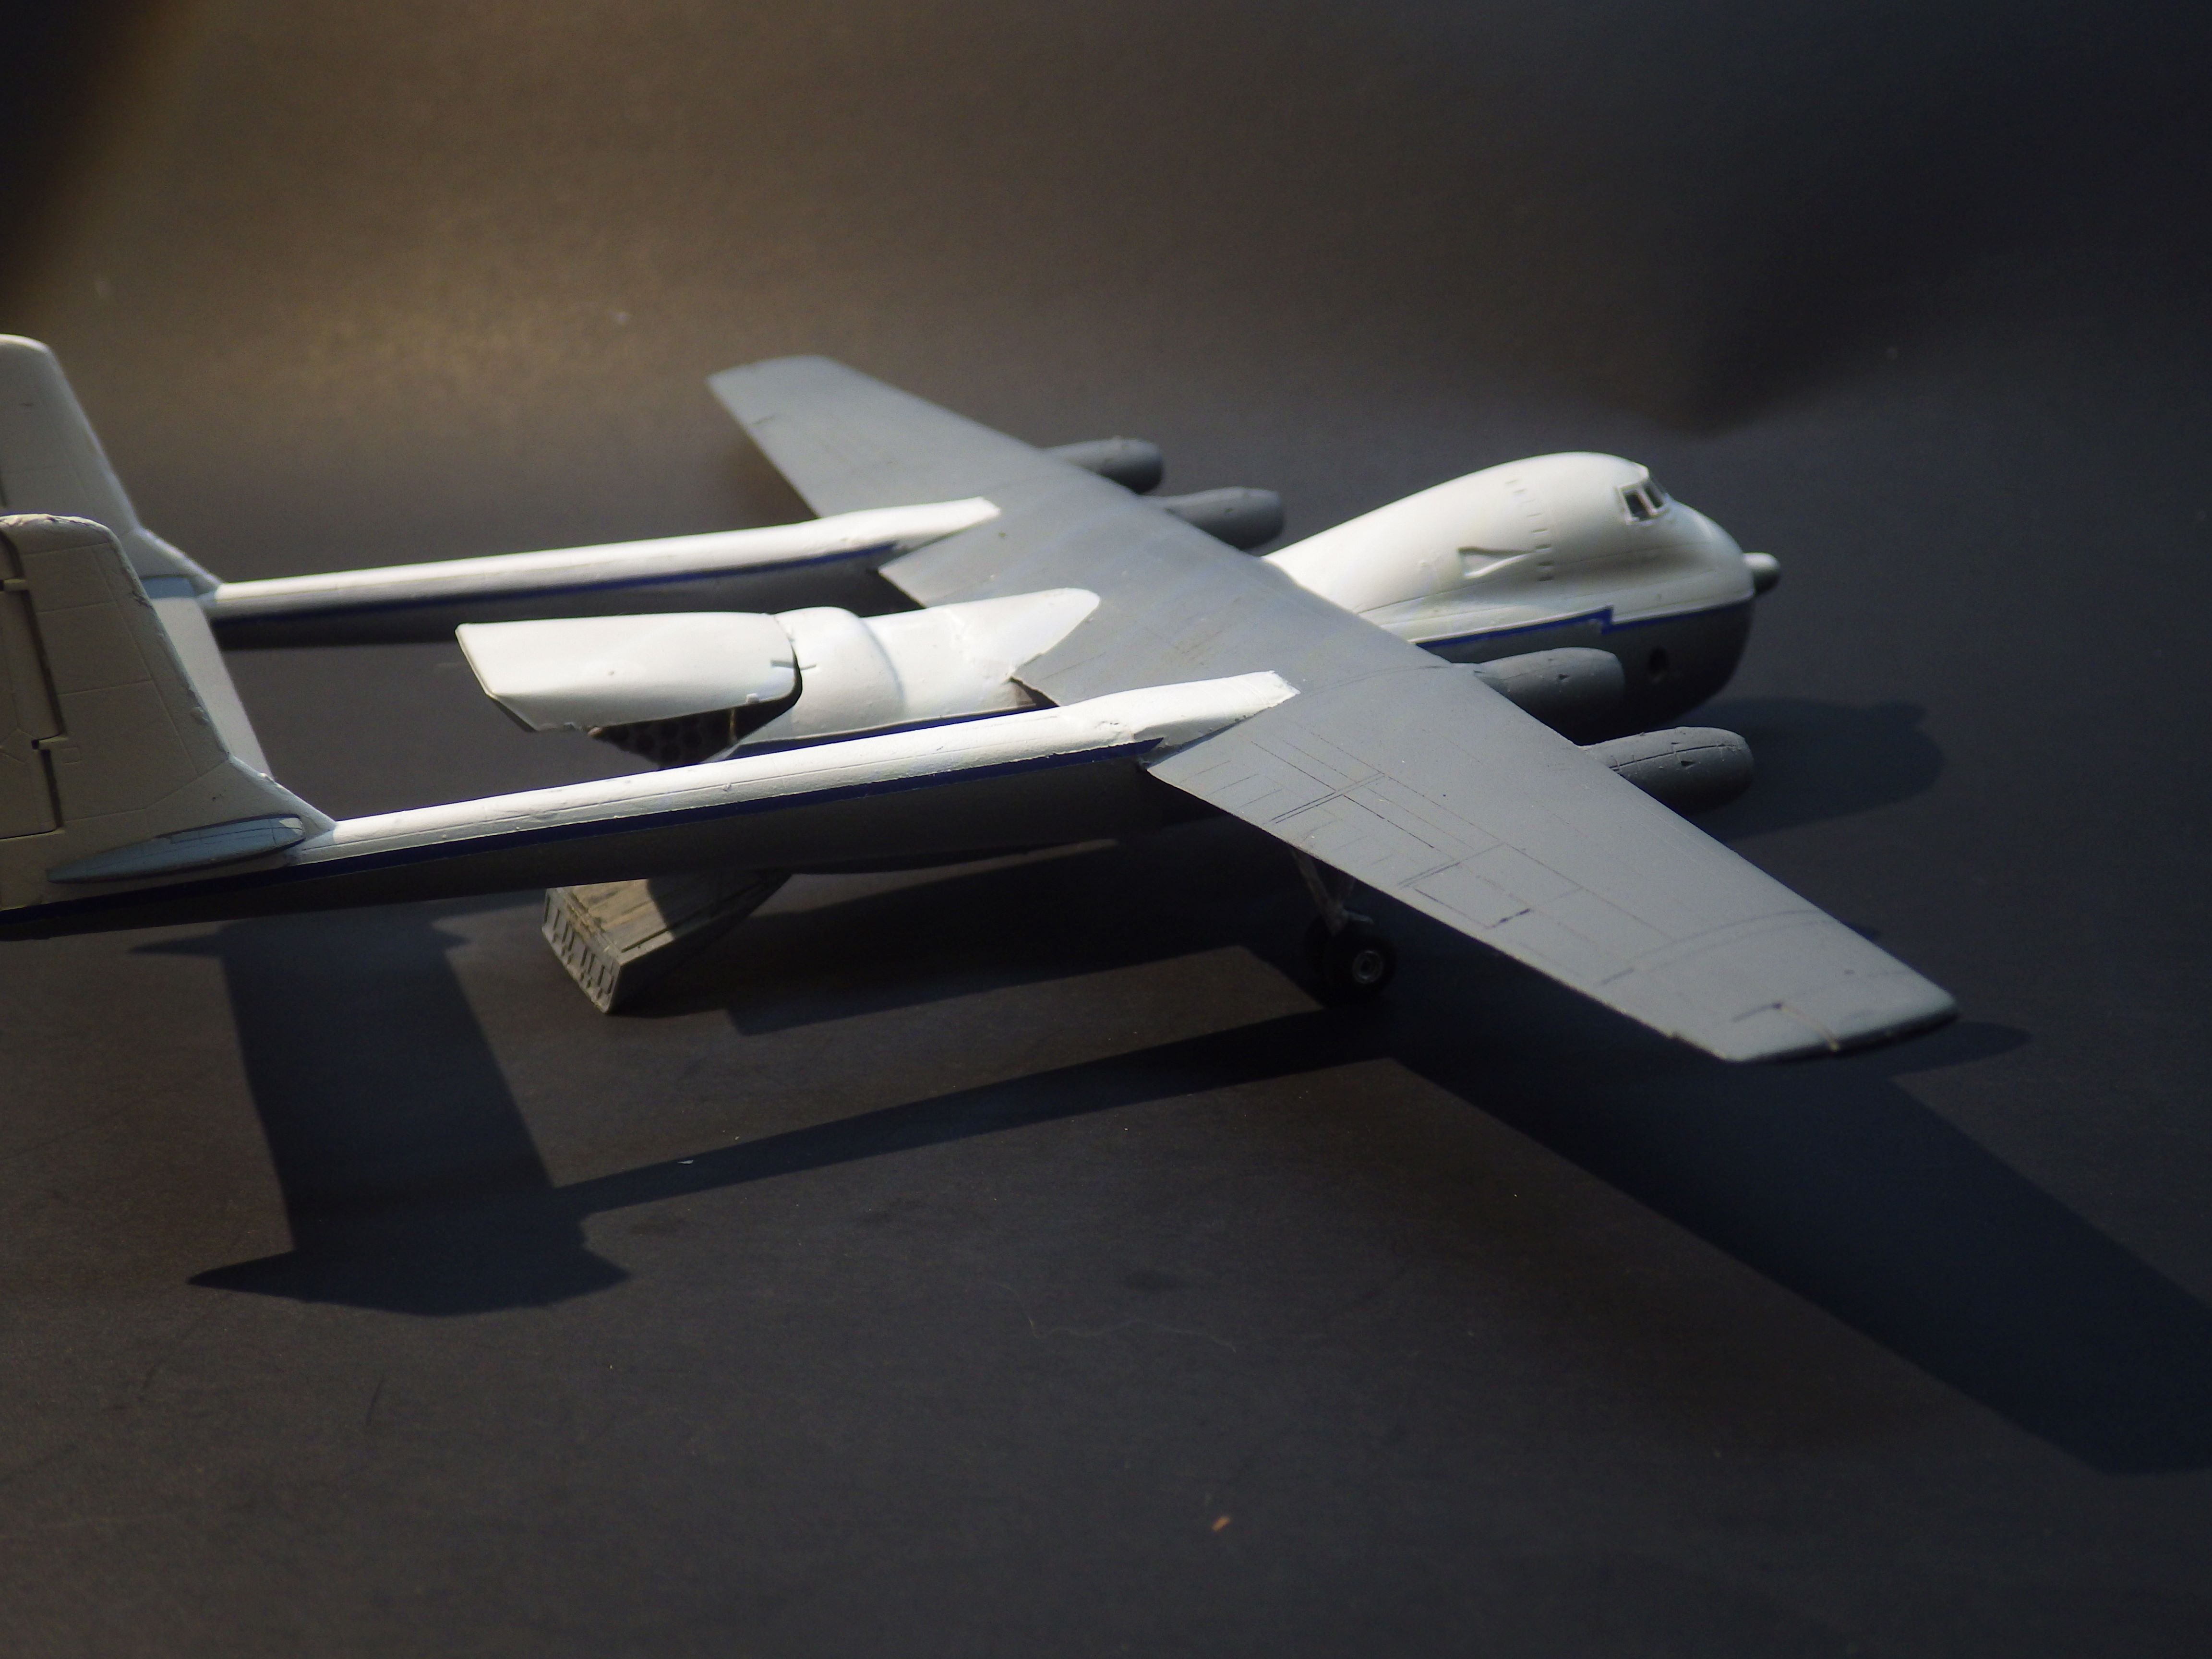
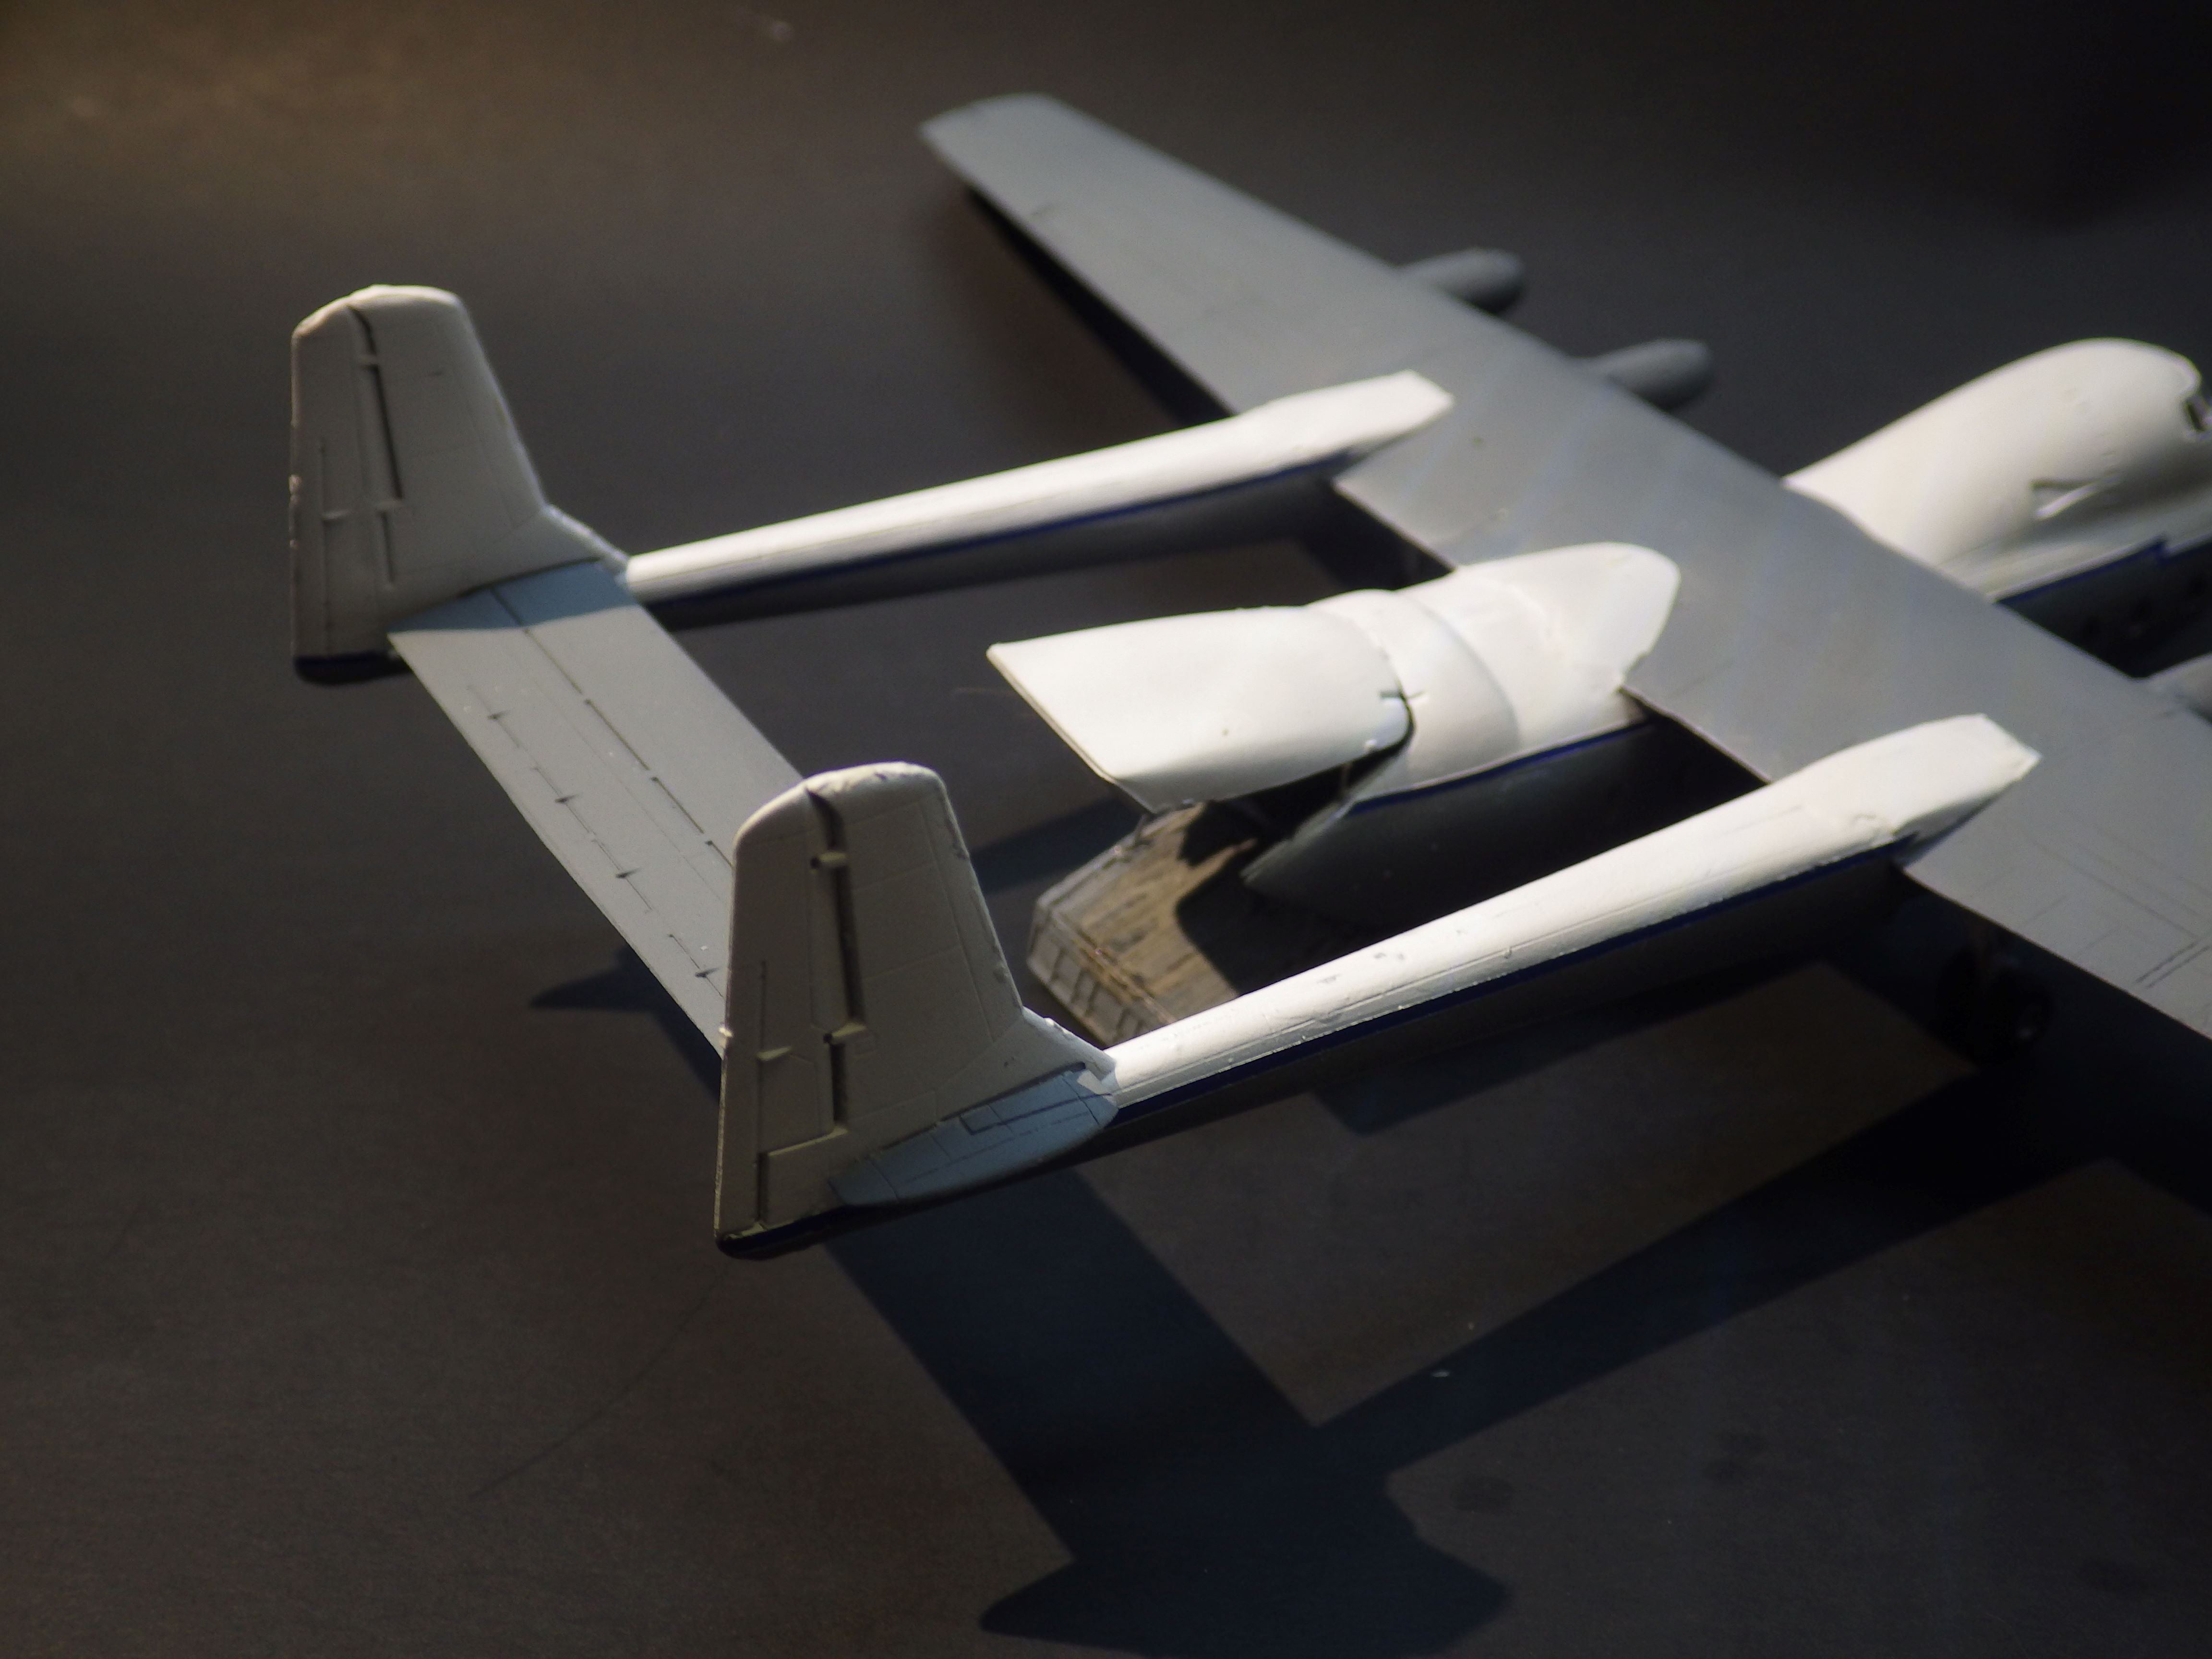
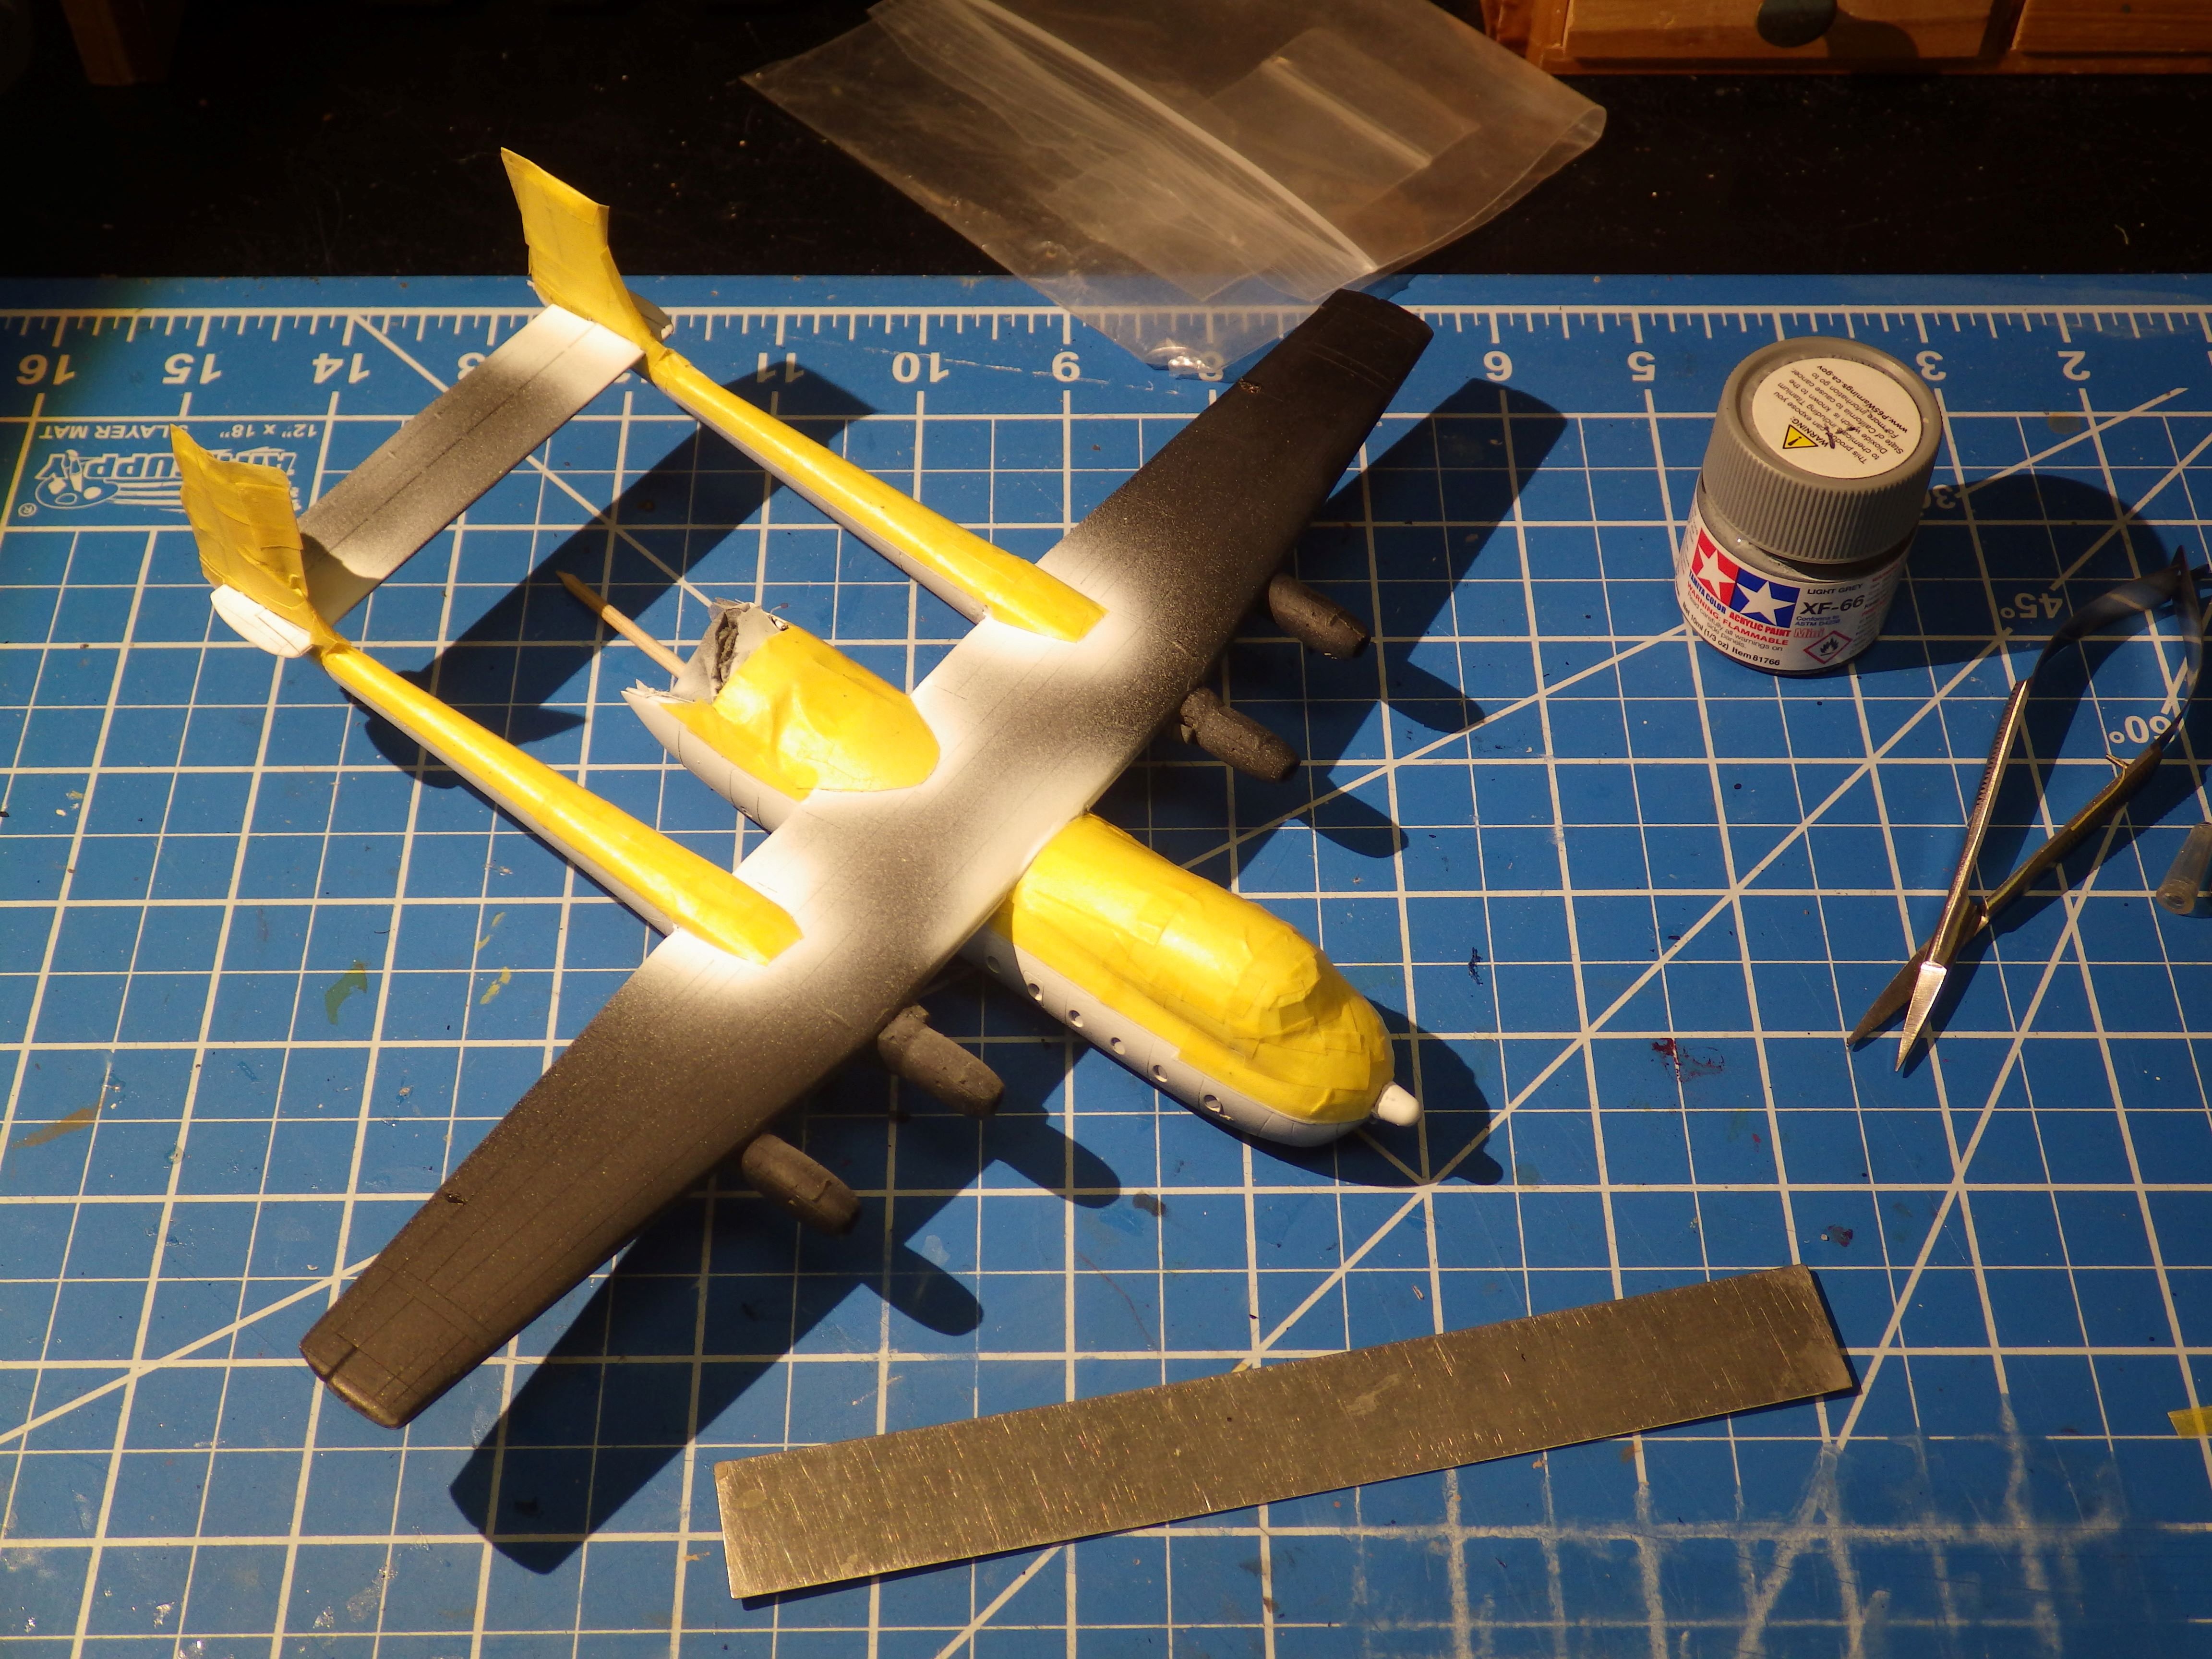
The last few days have been spent in a serious tussle with this one. Two related issues really. 1 - She is a serious tail sitter and needs a lot of weight up front. 2 - How to pose the clamshell door open in a reasonably robust fashion. I decided the weight issue could be resolved if I could get the ramp strong enough; then the aircraft would be held up at teh back by the open door. I tried drilling the doors and inserted brass rods to hold them open and was unsuccessful although I did break several of my nice new DSPIEA drill bits. I think they were the same as the ones originally used to drill circuit boards. After a lot of puzzling it occurred to me to replace the very thin plastic struts / actuators in the kit with brass rod and that worked a treat. I drilled into the back of the fuselage a fair way so I could adjust the rods to make sure the ramp pushed the nosewheel back onto the ground. It seems to have succeeded. The doors were a horrible fit as well but that was a relatively minor annoyance Doesn't really show the rods I'll try again. The next task is a gloss coat and the decals. I think I need to add them before the PE makes it very difficult to handle the model. Ooops - after the gear doors and the door hinges. I'm hoping this is the last major structural fight. Thanks for looking in and the likes and comments. Alan


- 52 replies
-
- 11
-
-
I have the Felixstowe by Roden along with a Gotha. I have no idea what I was thinking. They look like being a serious challenge. Especially as I have trouble with rigging a ship Alan
-
This should be a spectacular build.im looking forward to it. alan
-
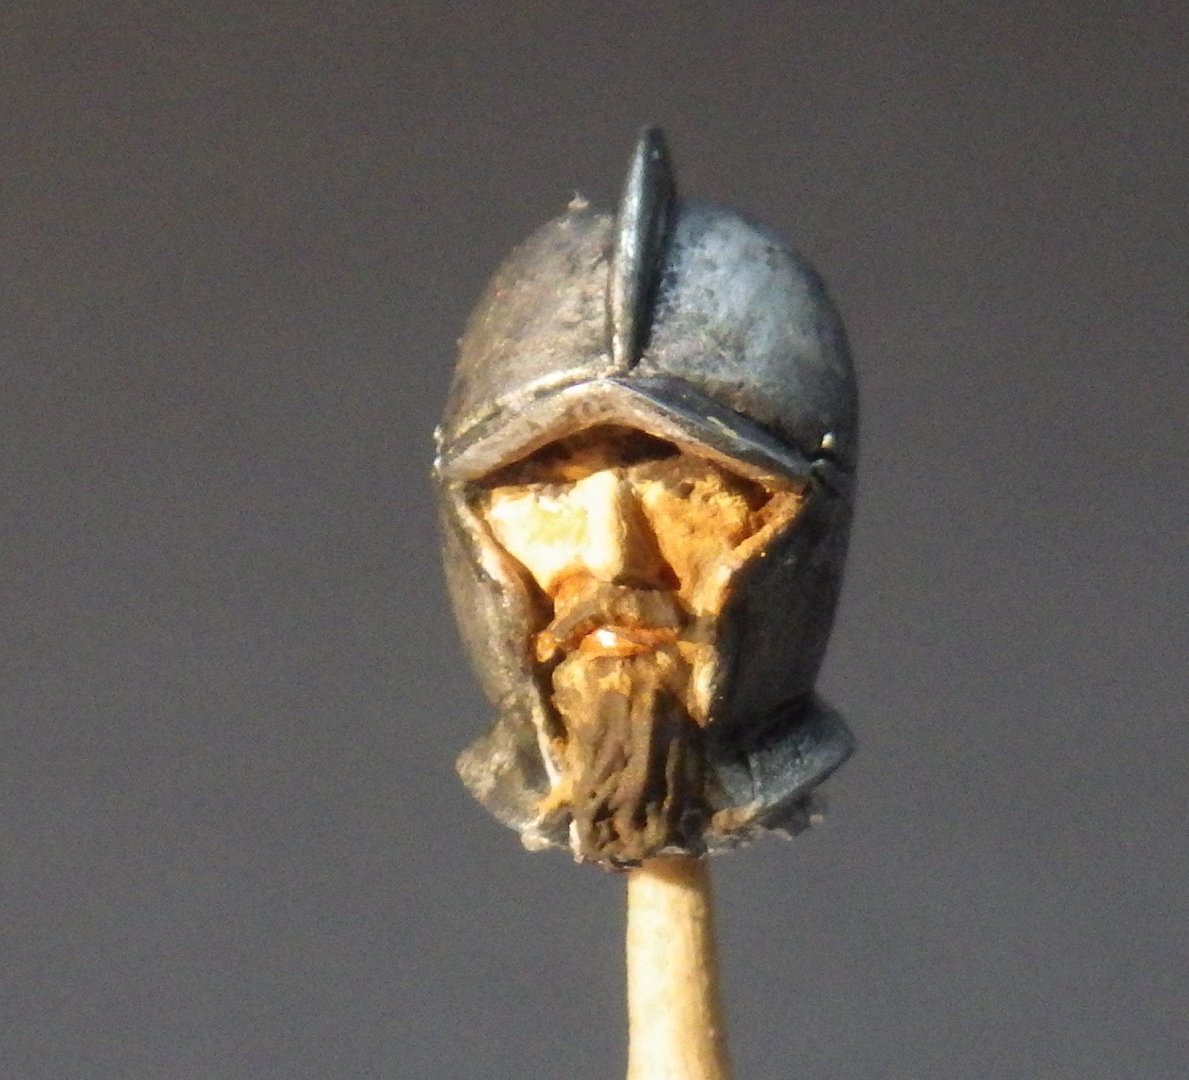
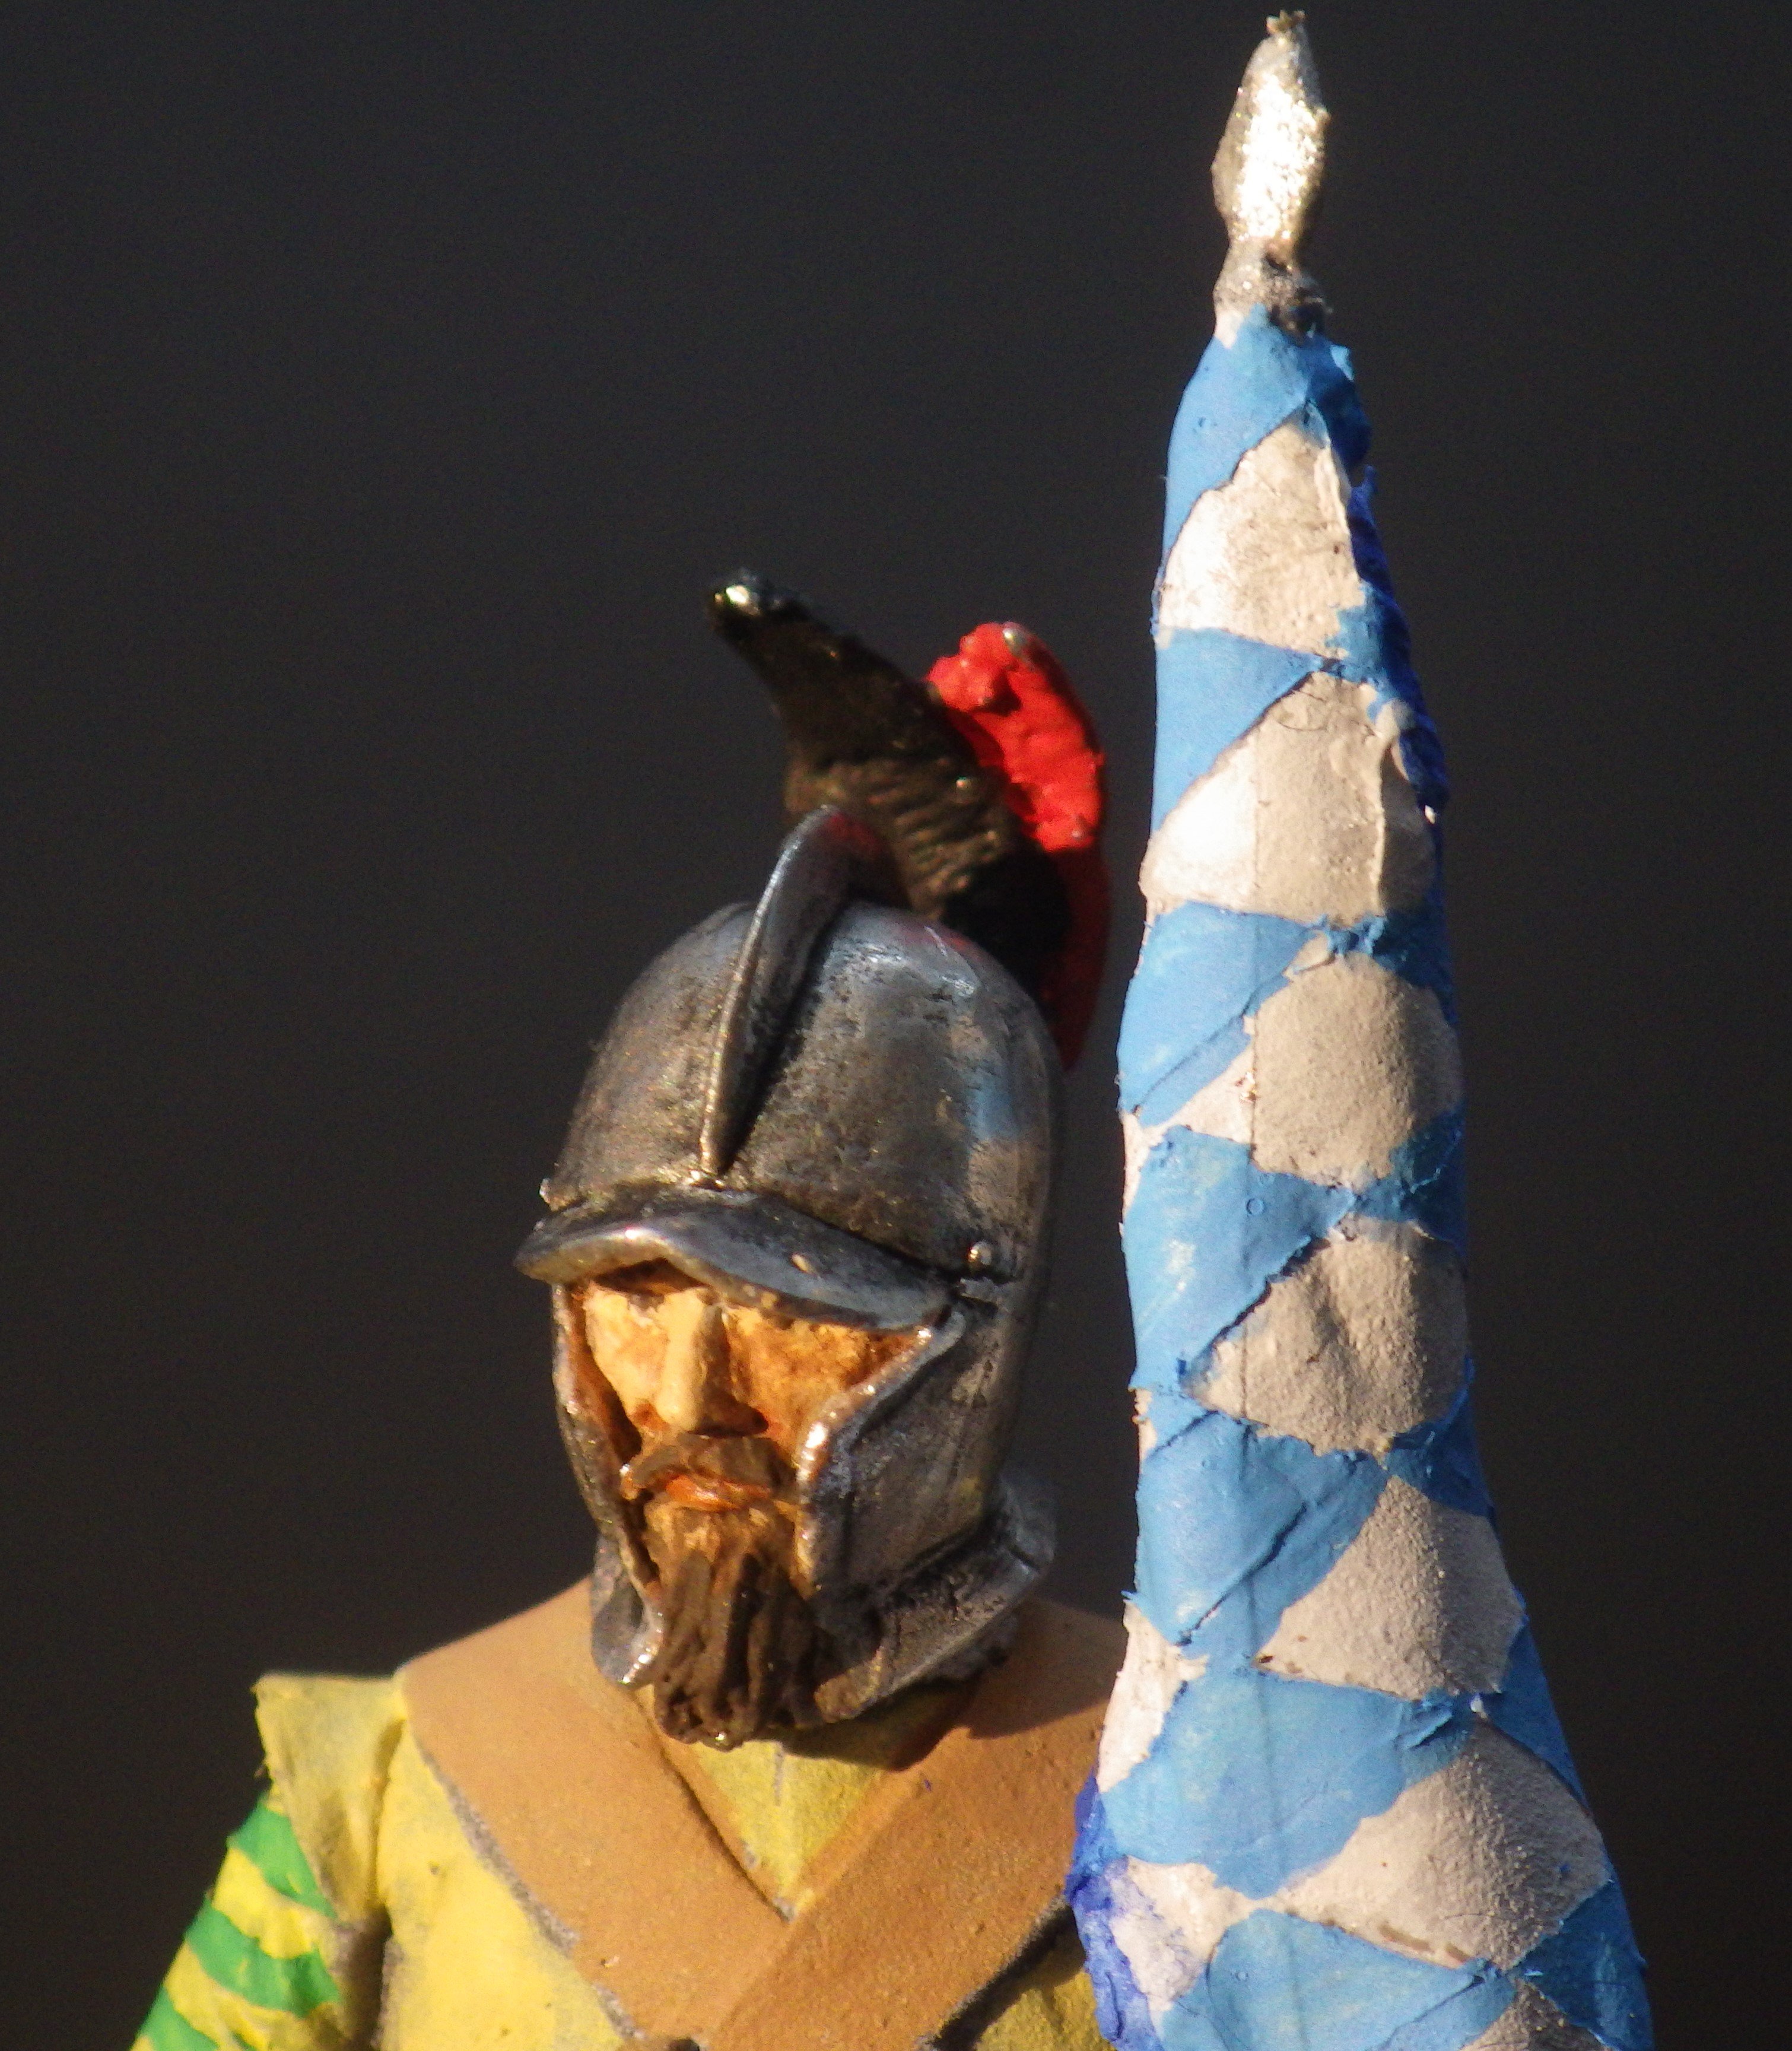
Thank you very much Jack. Somehow the face face has come out reminding me of someone I knew many years ago. Funny. Anyway. I think I’m getting used to the dimensions. The face isn’t impossibly small anymore. But my fingers are still impossibly big 😃 Alan
-
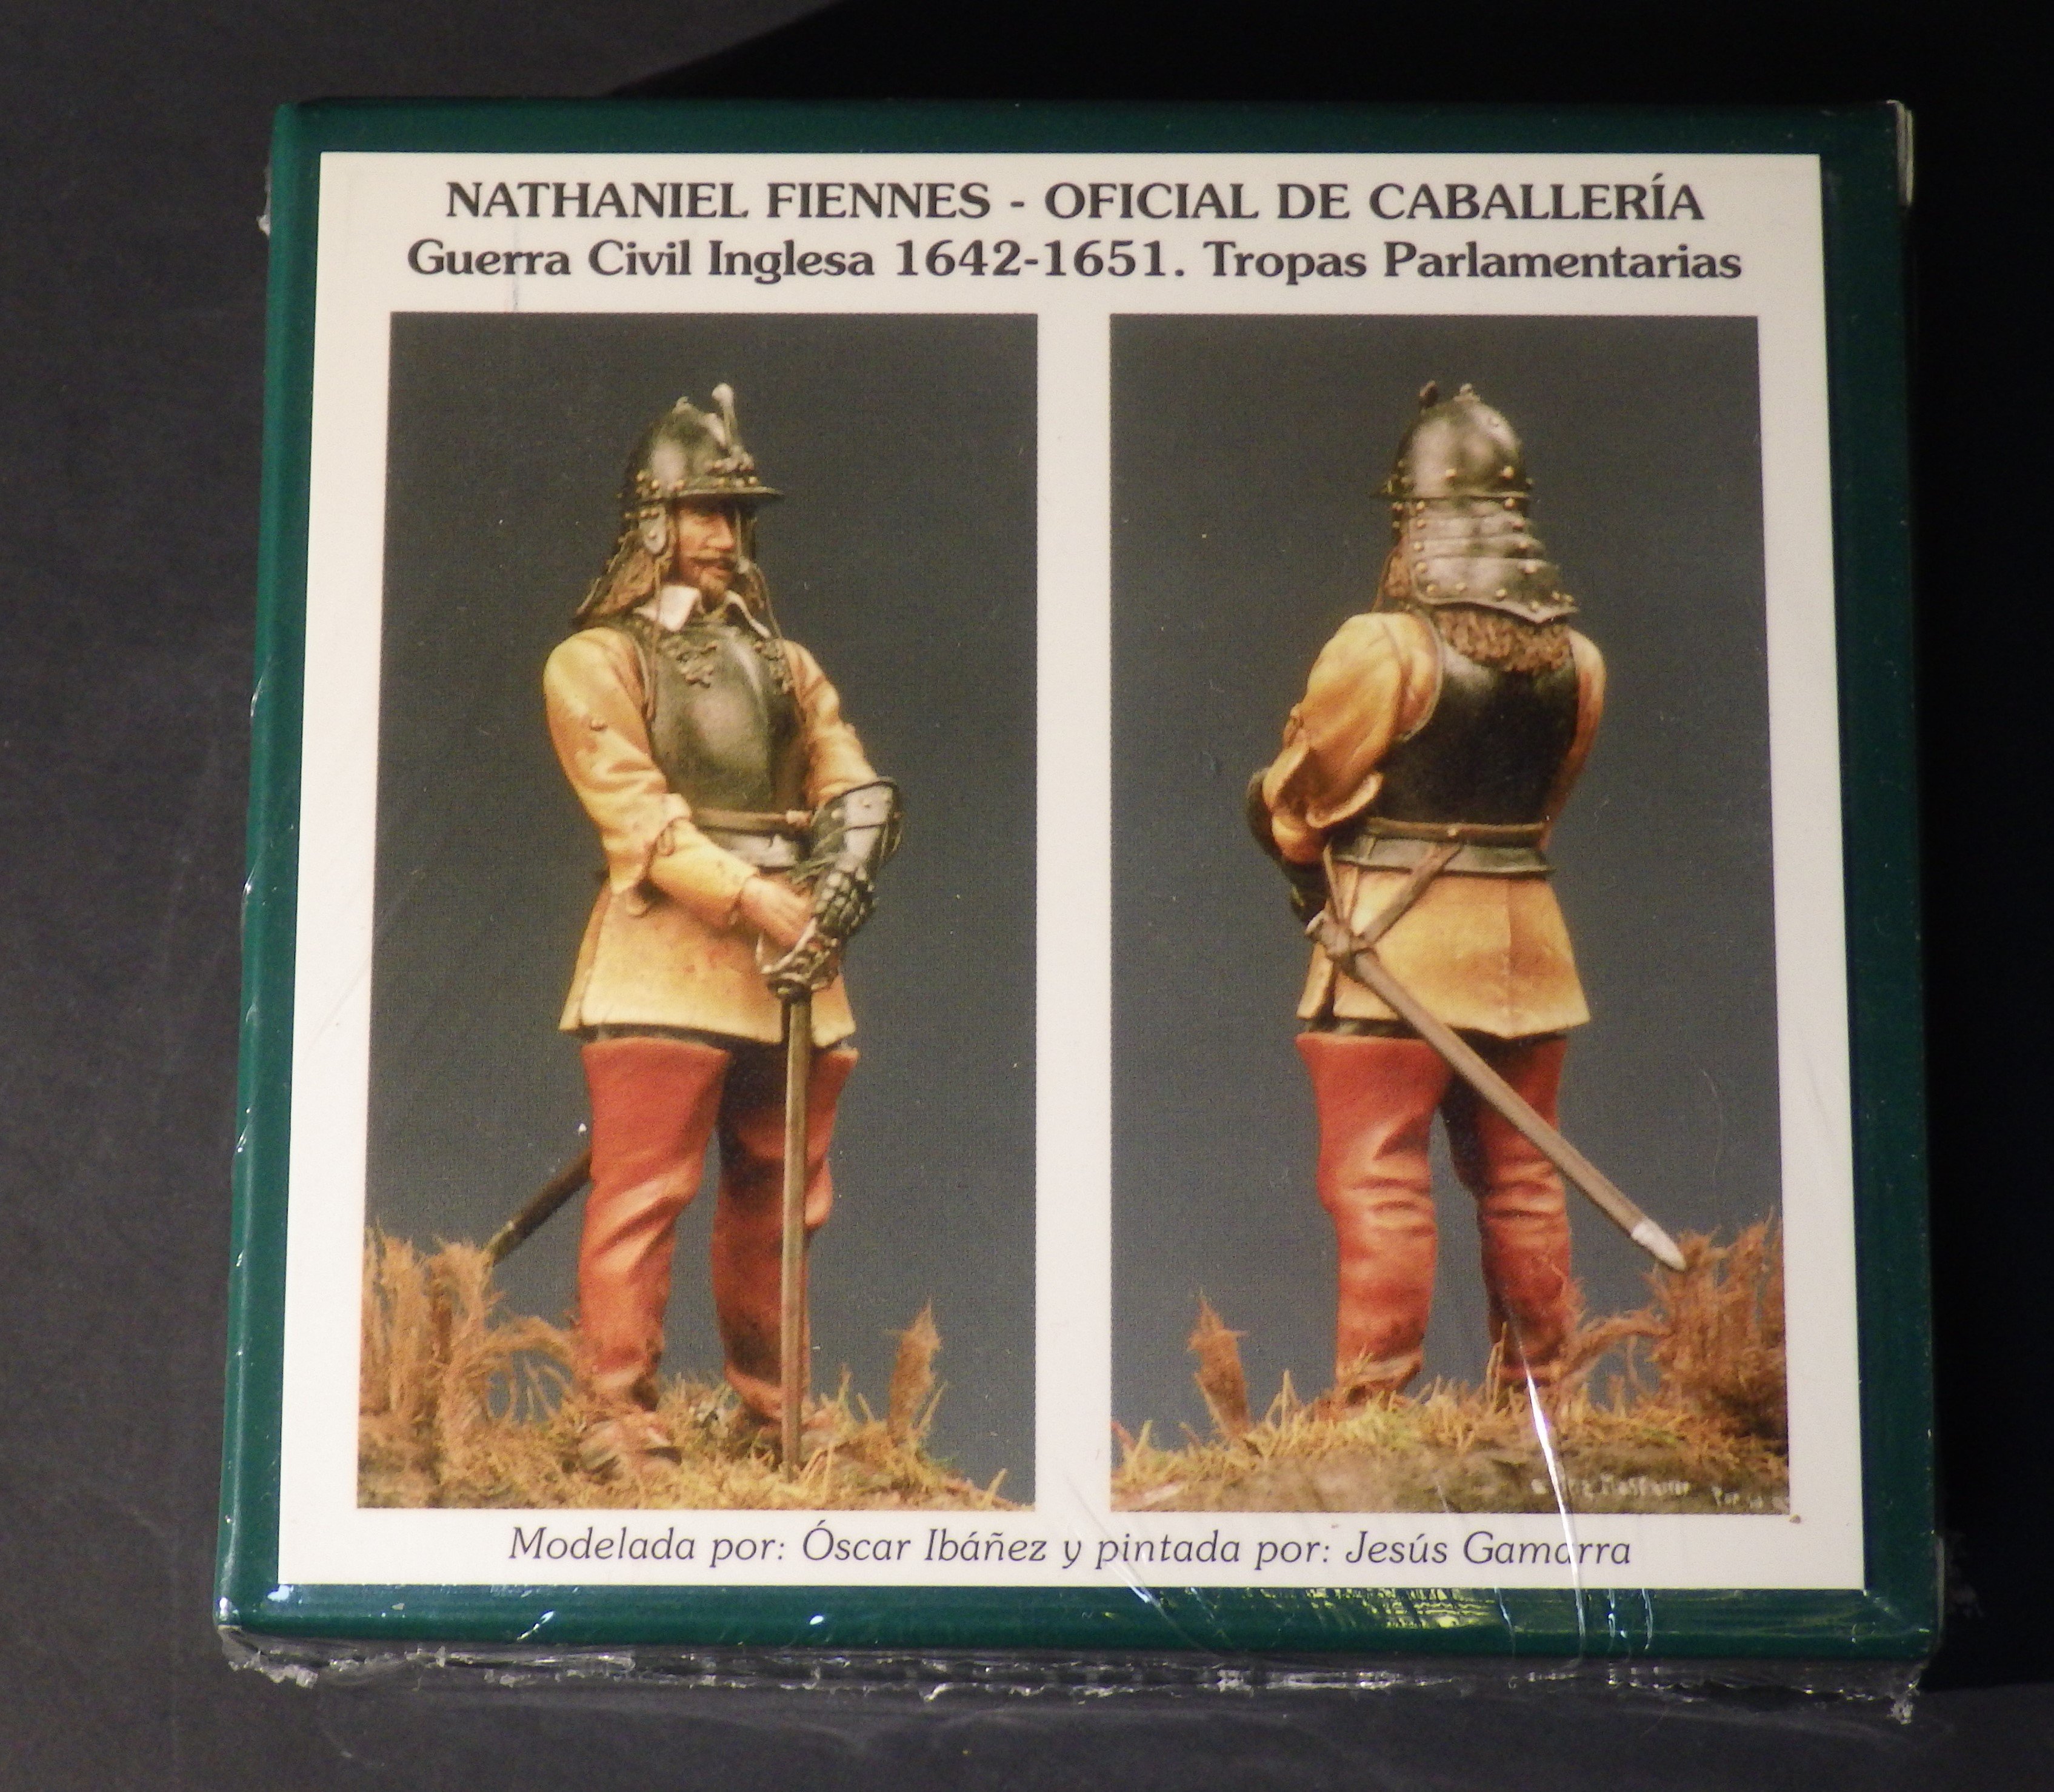
Thanks very much OC. Now to try Nathaniel and all his armour. alan
-
Congratulations Mike. You have made a beautiful model. The details are amazing and the paintwork is excellent. Great job on a difficult kit. That’s a result to aim for. alan
- 112 replies
-
- 10
-
-

-
A wonderful rendition of a beautiful aircraft. You did a great job of a terrific kit. Congratulations alan
-
Thank you very much Andrew. I remember the Argosies in service. Don’t recall the Beverley though but I do plan one of them too. It’s worth the struggle with the kits to get the less known subjects. alan
-
Lovely story EJ. Thanks. The RAF of the fifties and sixties was a special place. I just read Vampire Boys about the pilots who flew the RAFs first frontline single engine jet. The number of crashes is amazing. One pilot describes losing his brakes on landing, going off the runway and through the perimeter fence, crossing a road and ending up on a traffic island. There was an AA motor cyclist ( remember them!) standing there who walked over to what was left of the cockpit and asked “ Are you a member sir” some great stories in that book, highly recommended. alan
-
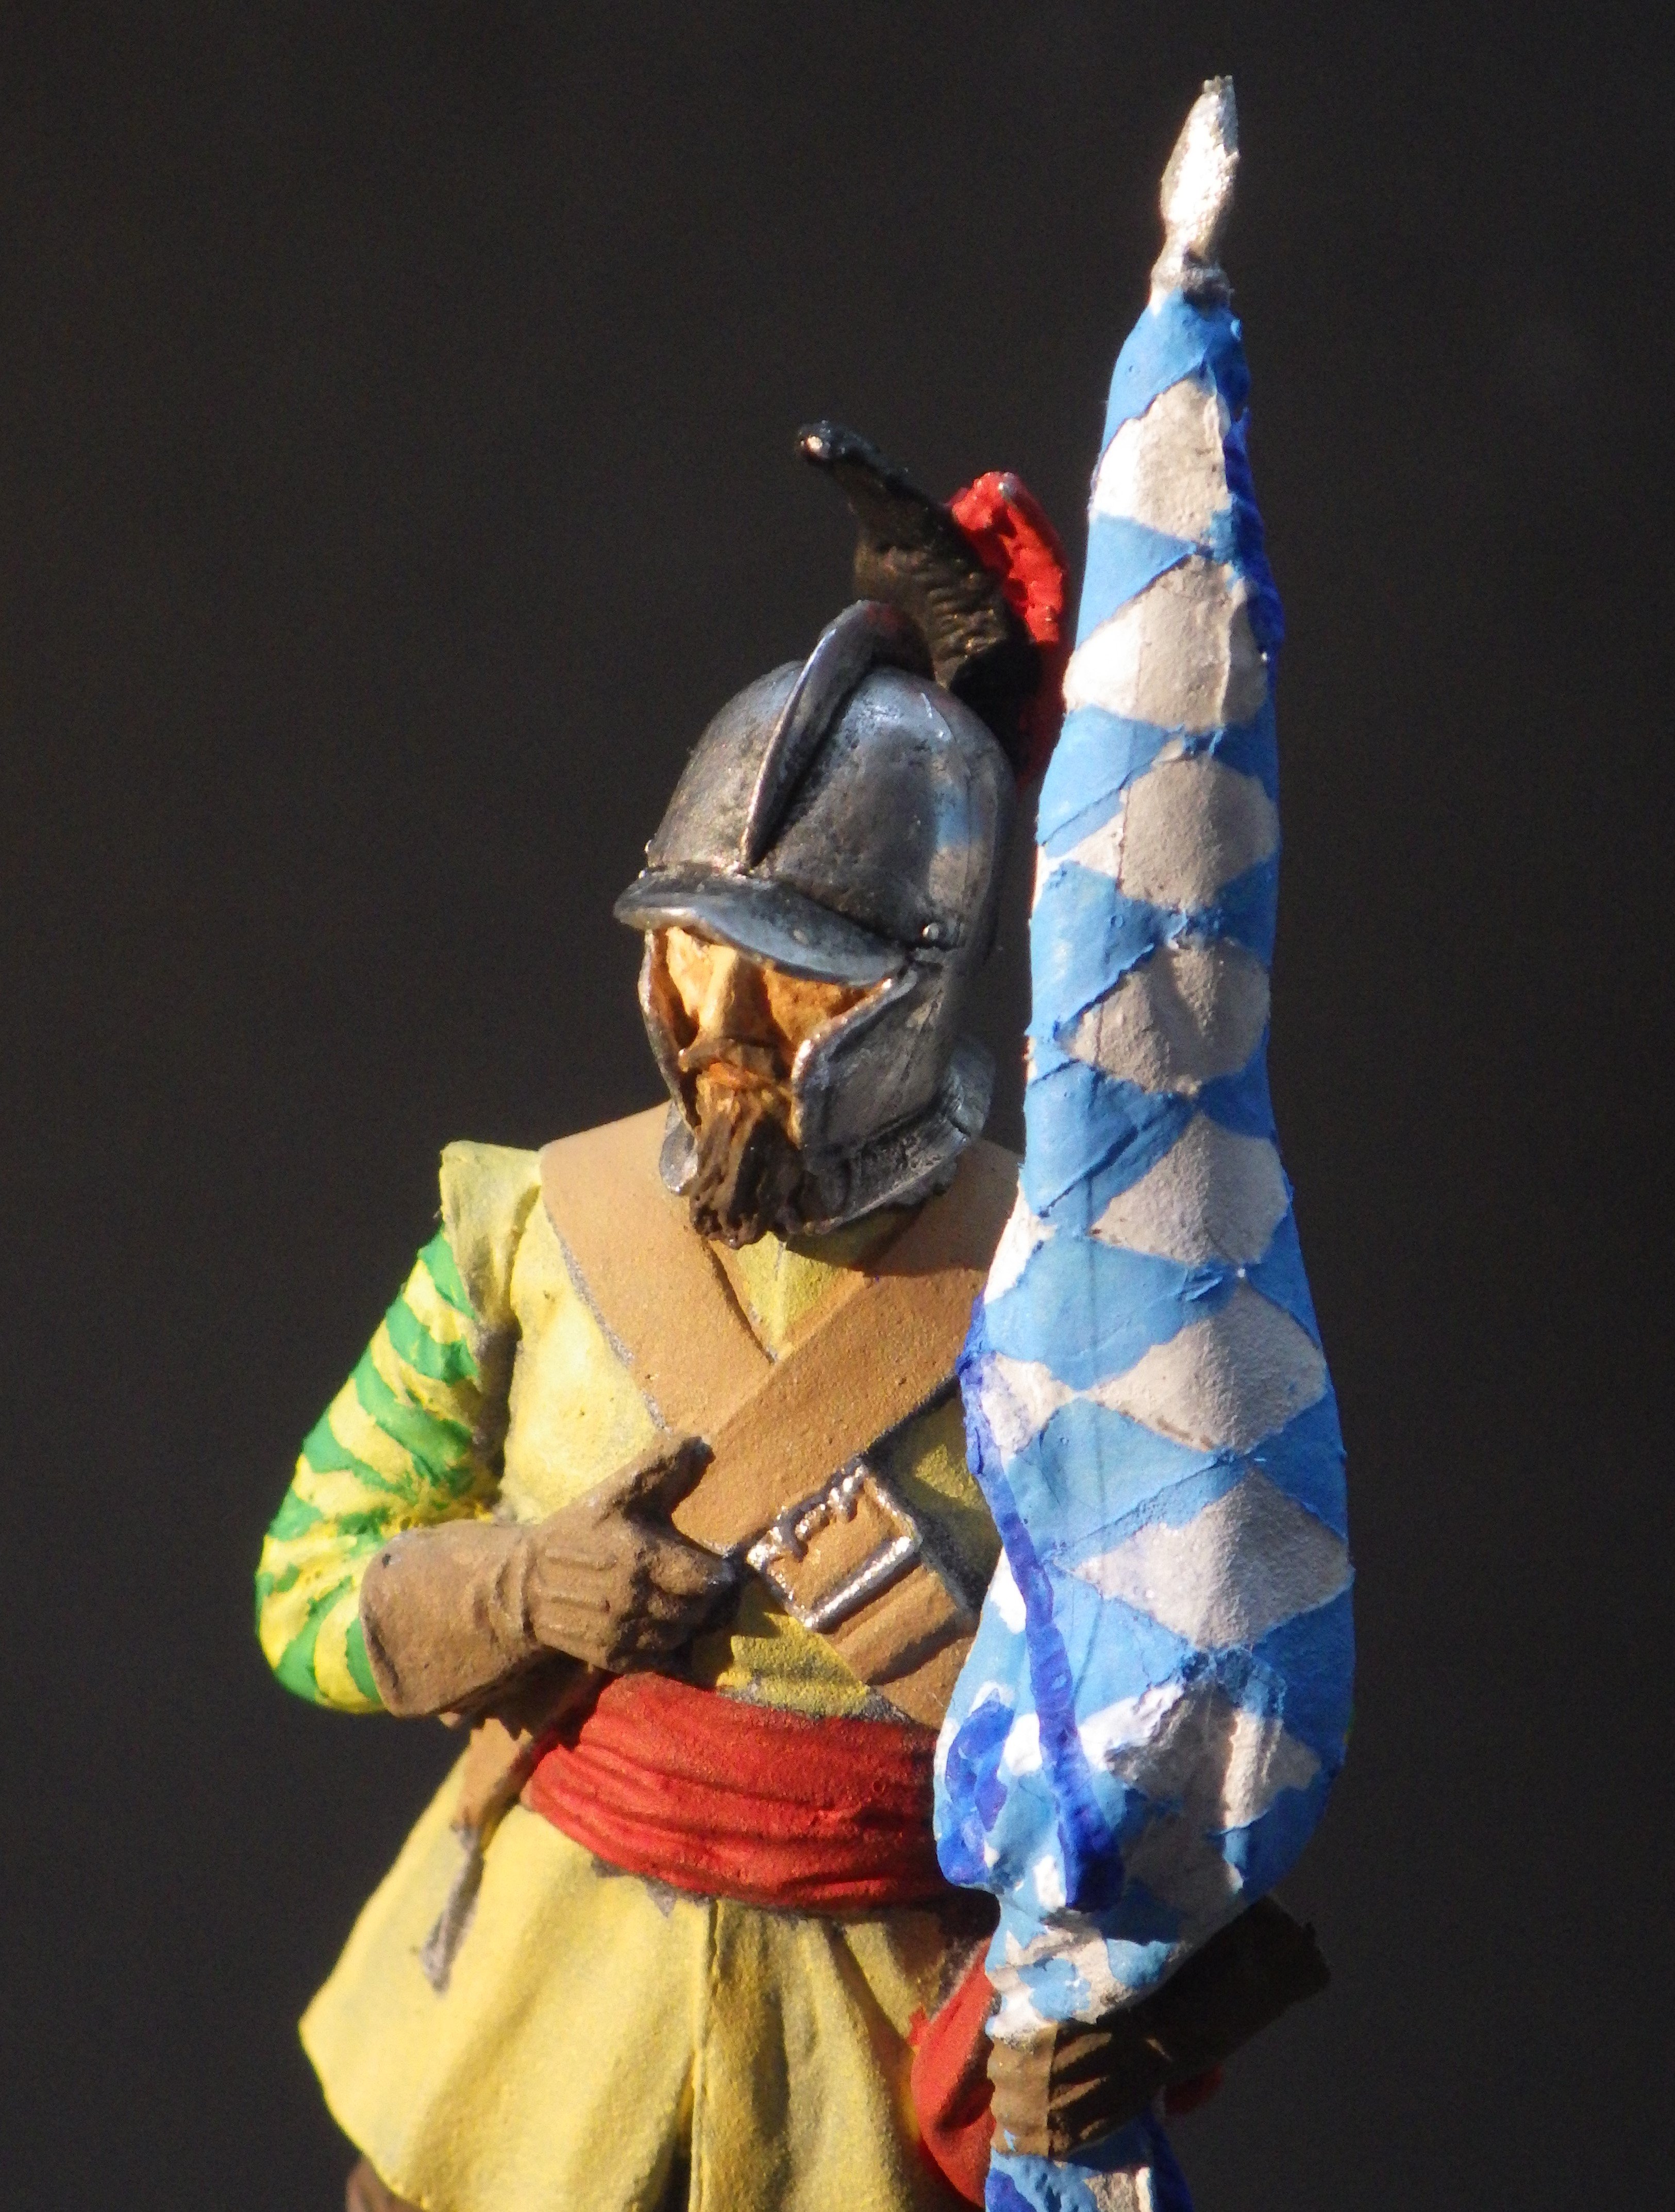
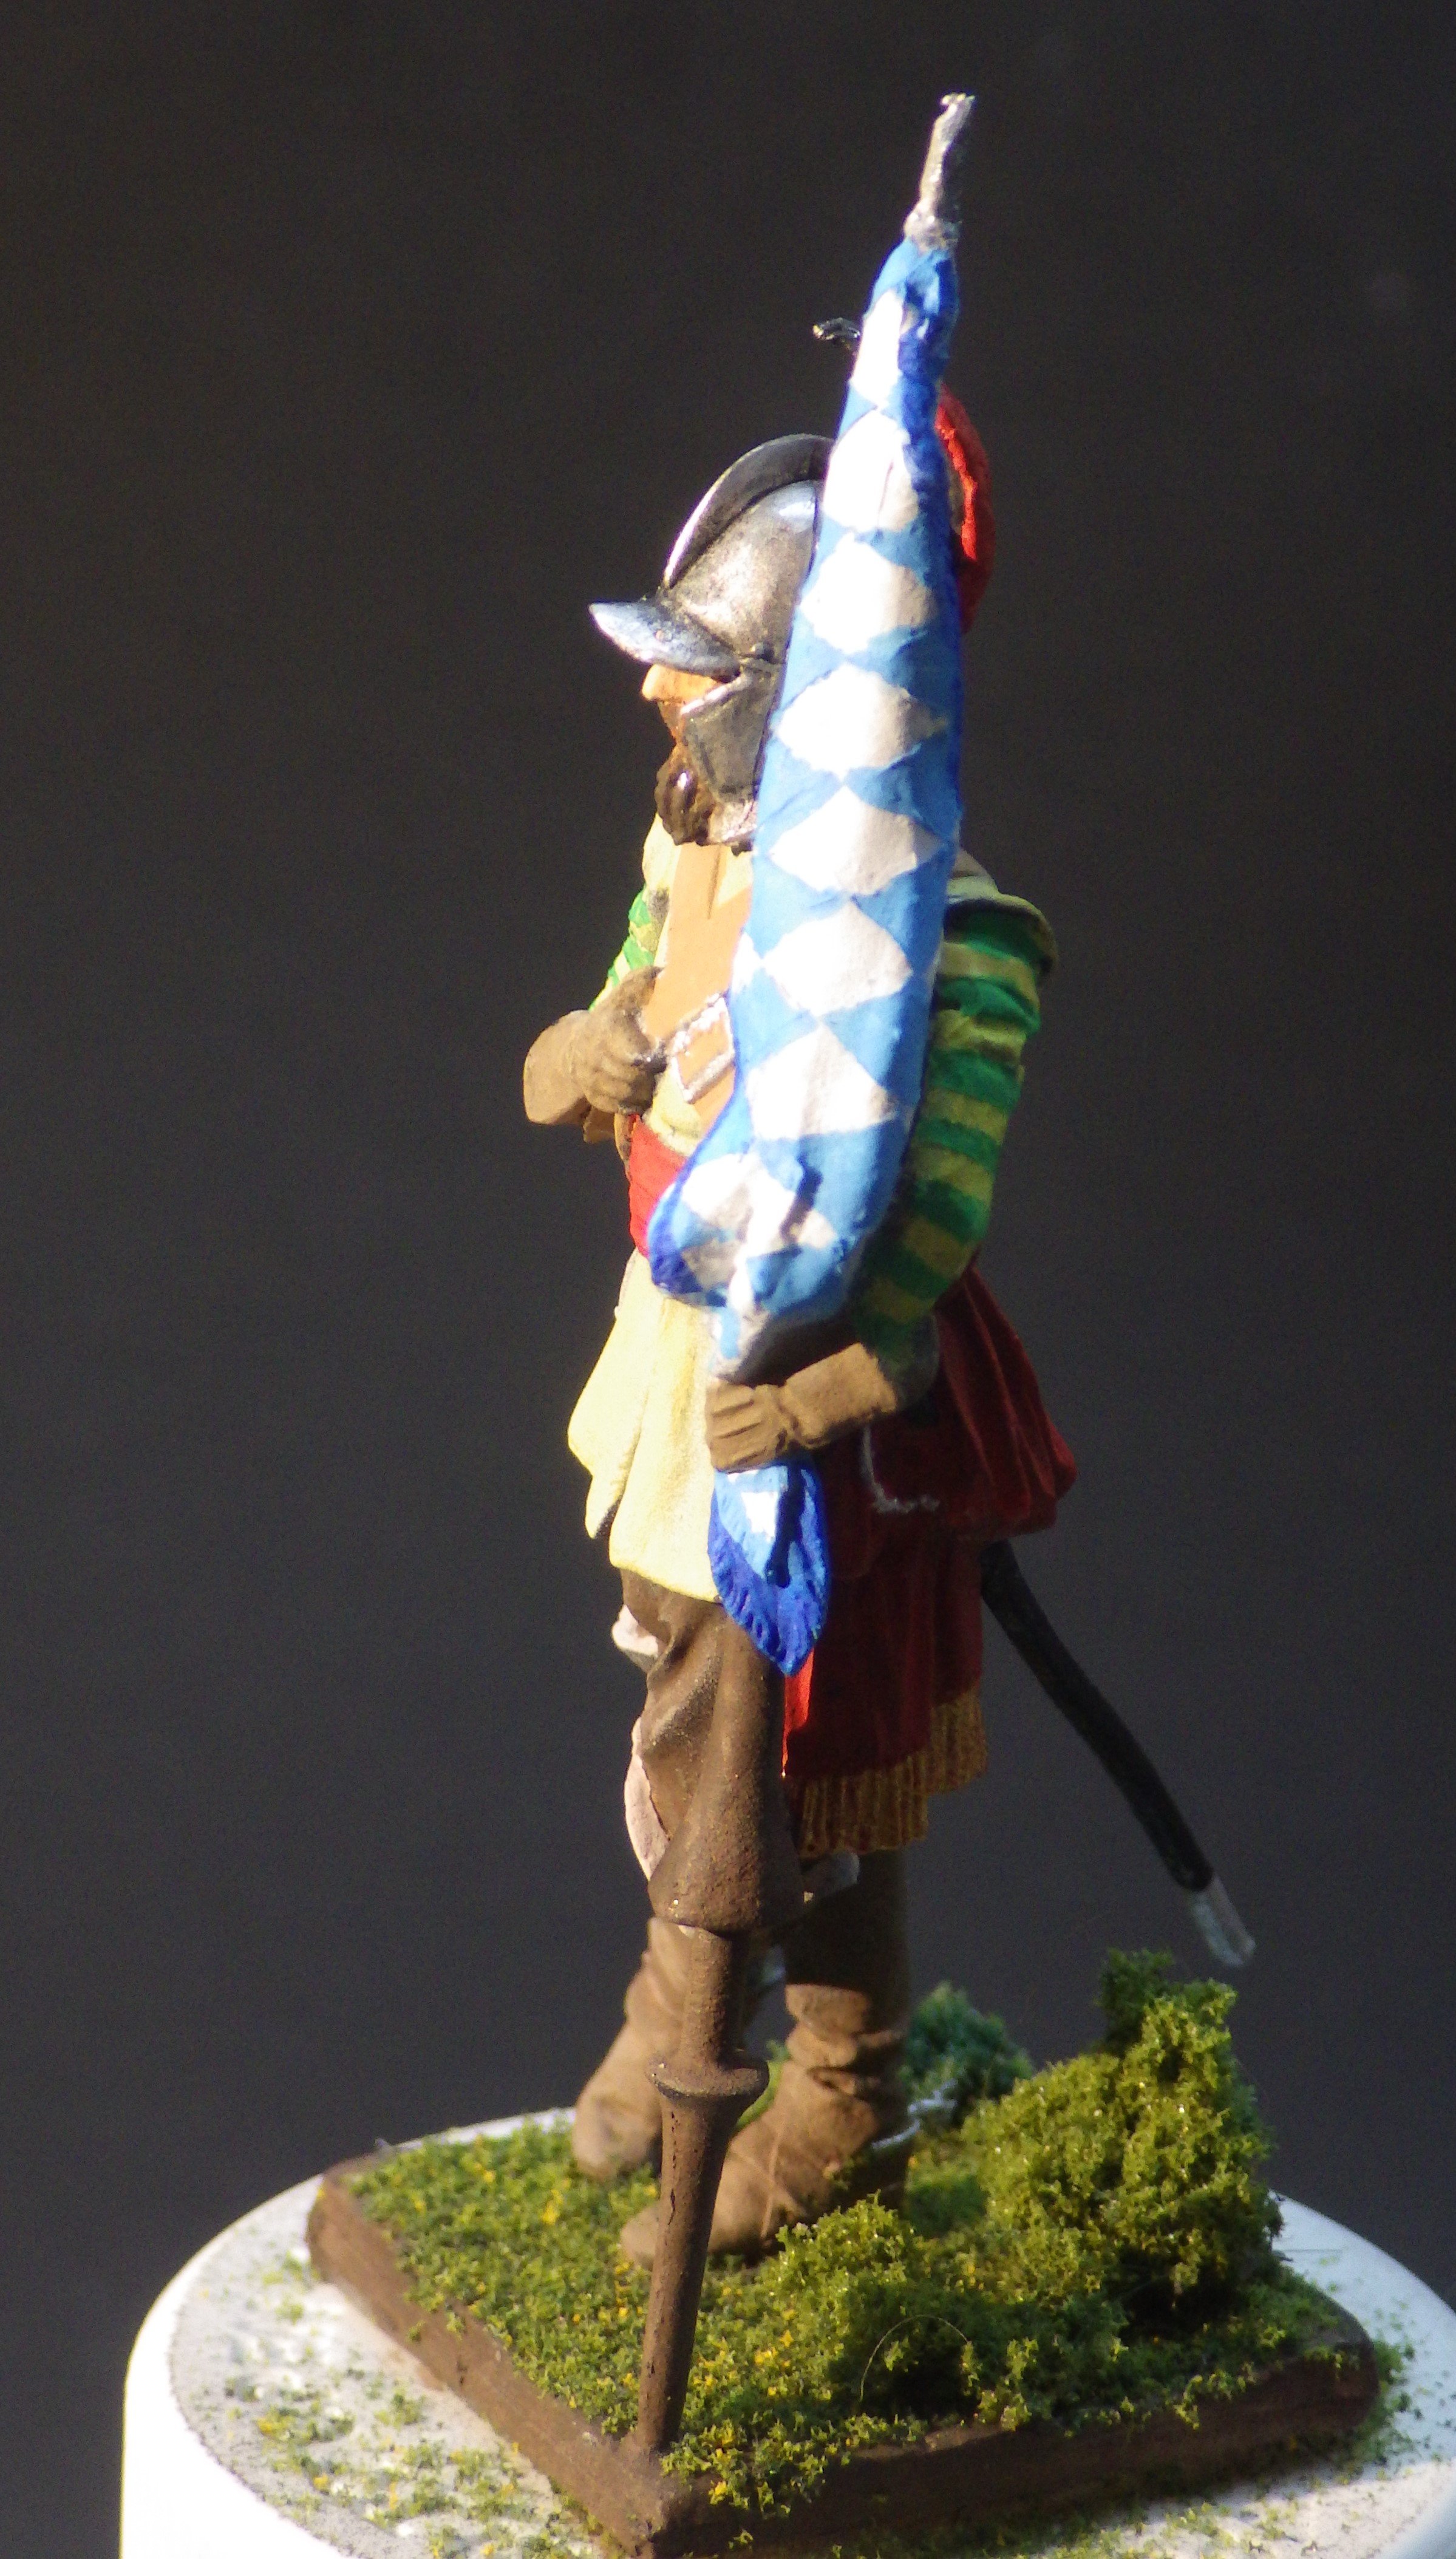
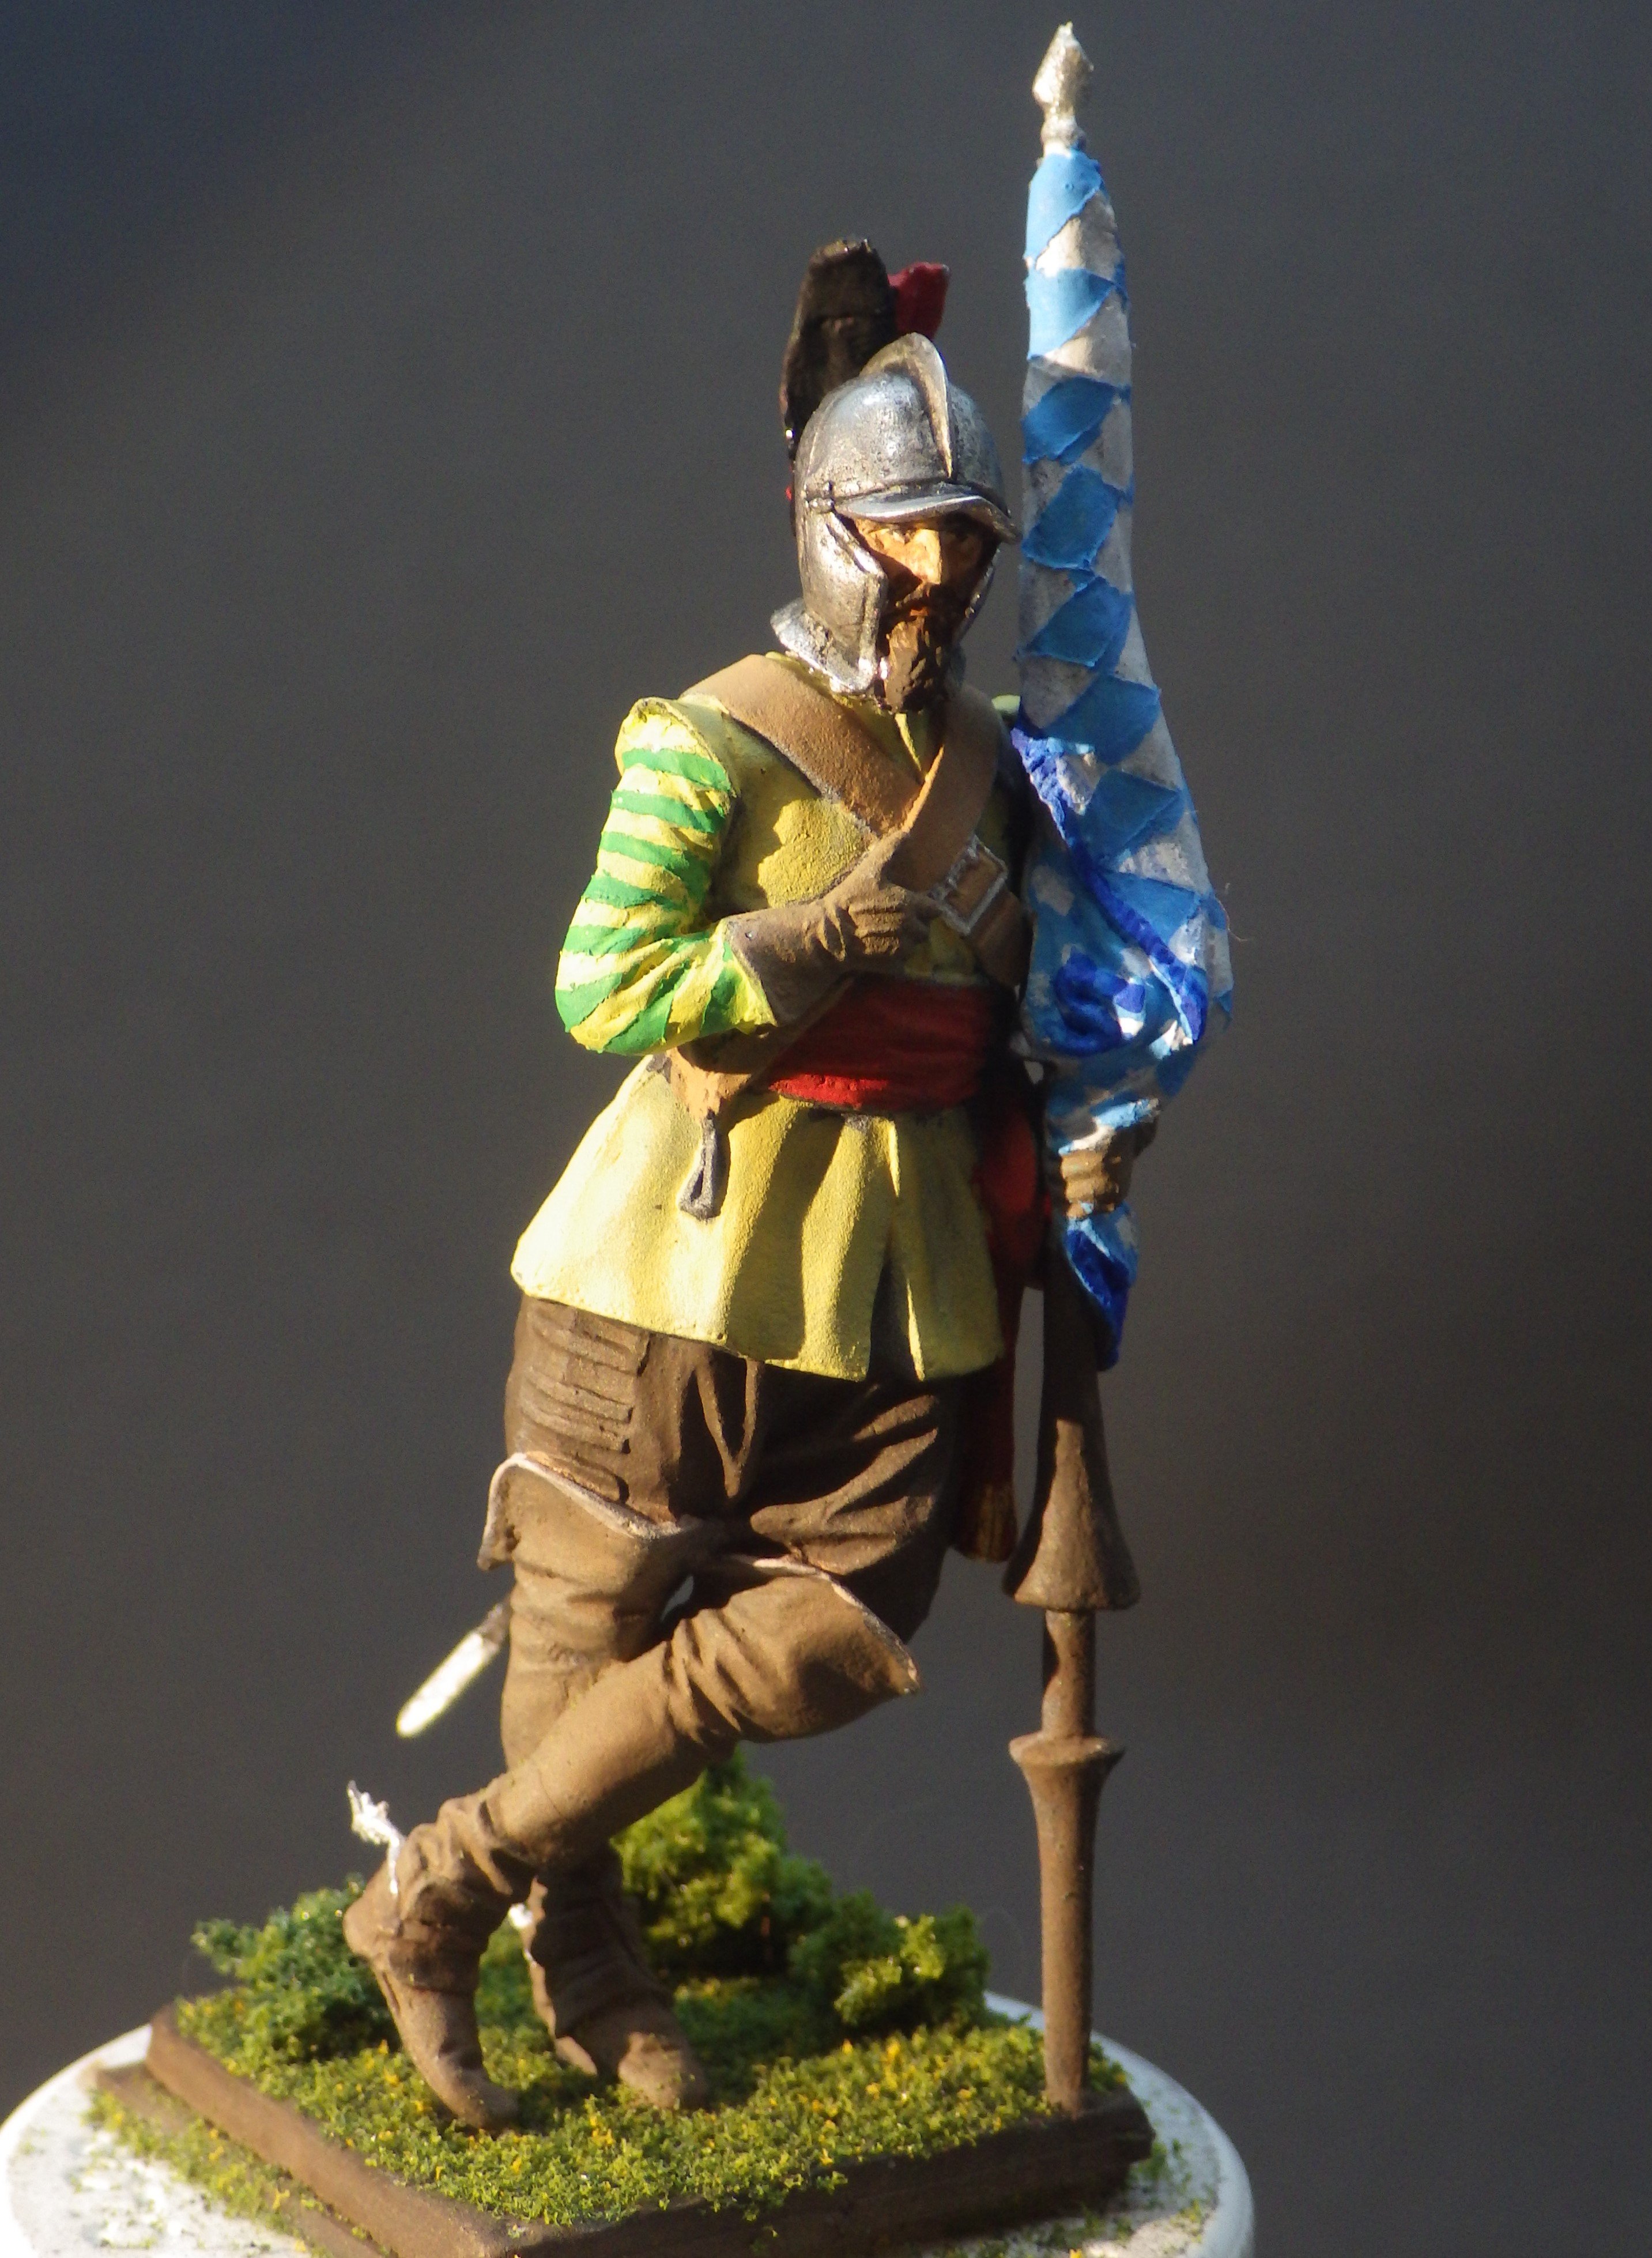
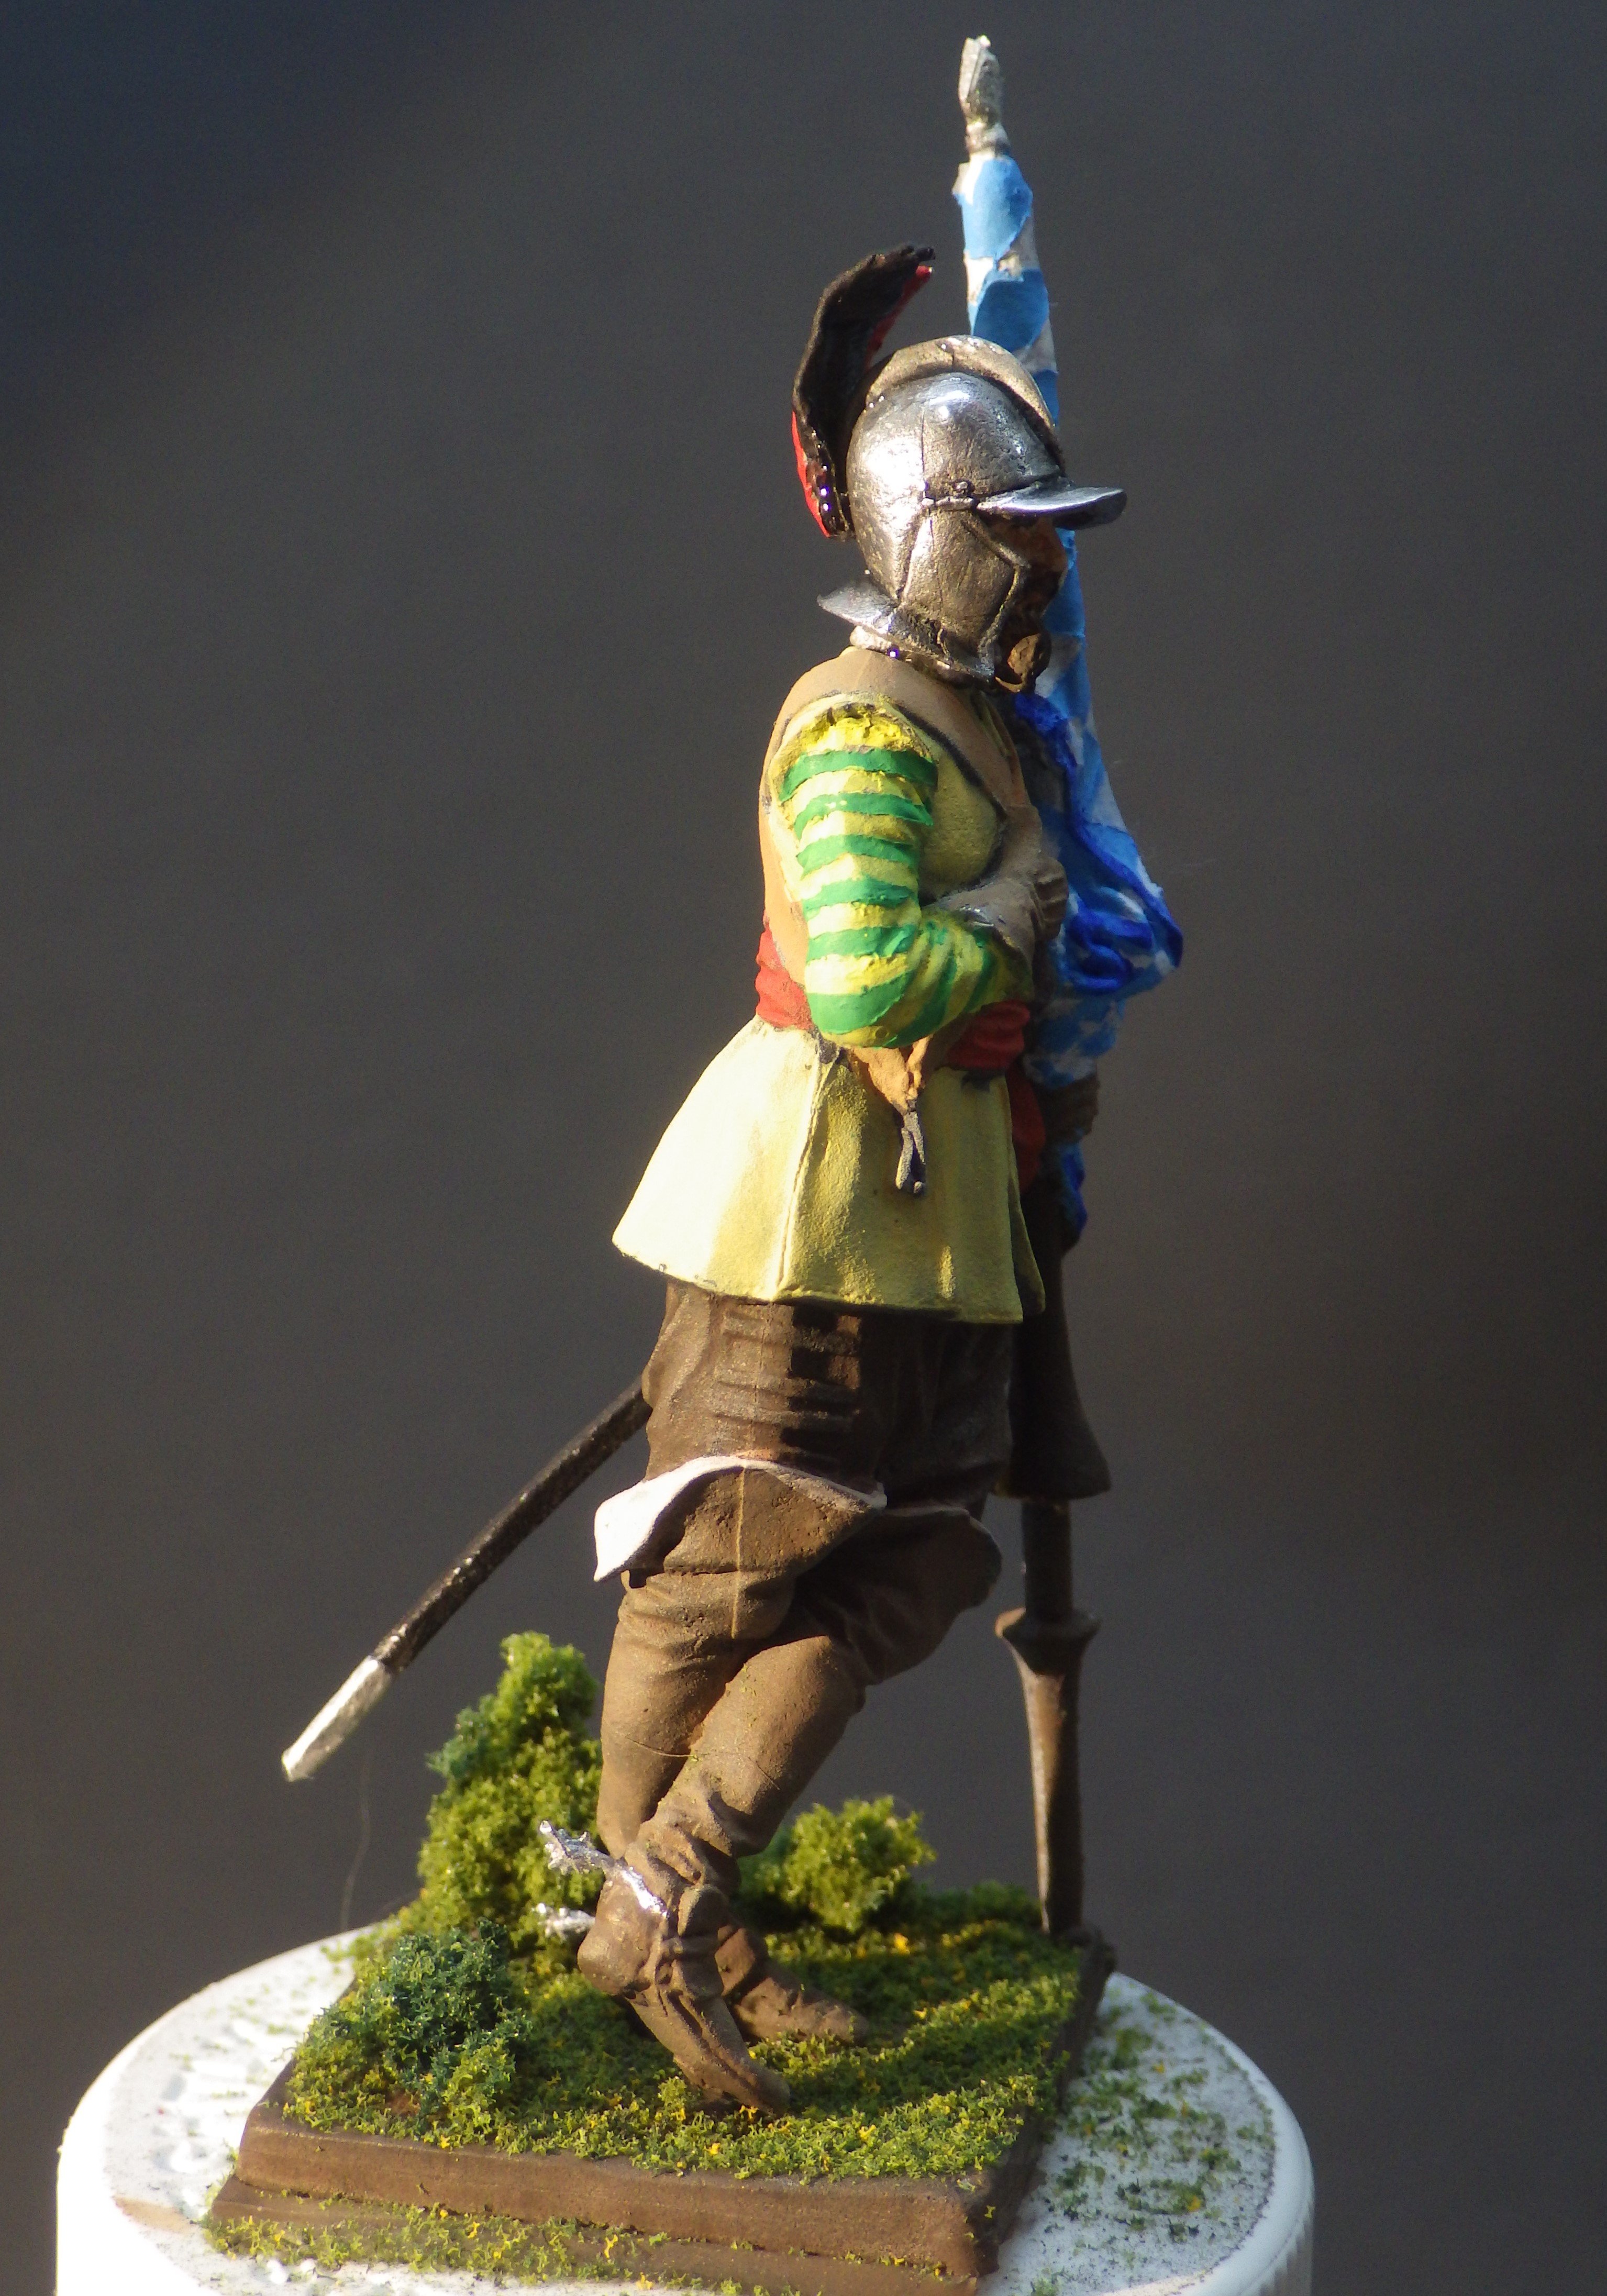
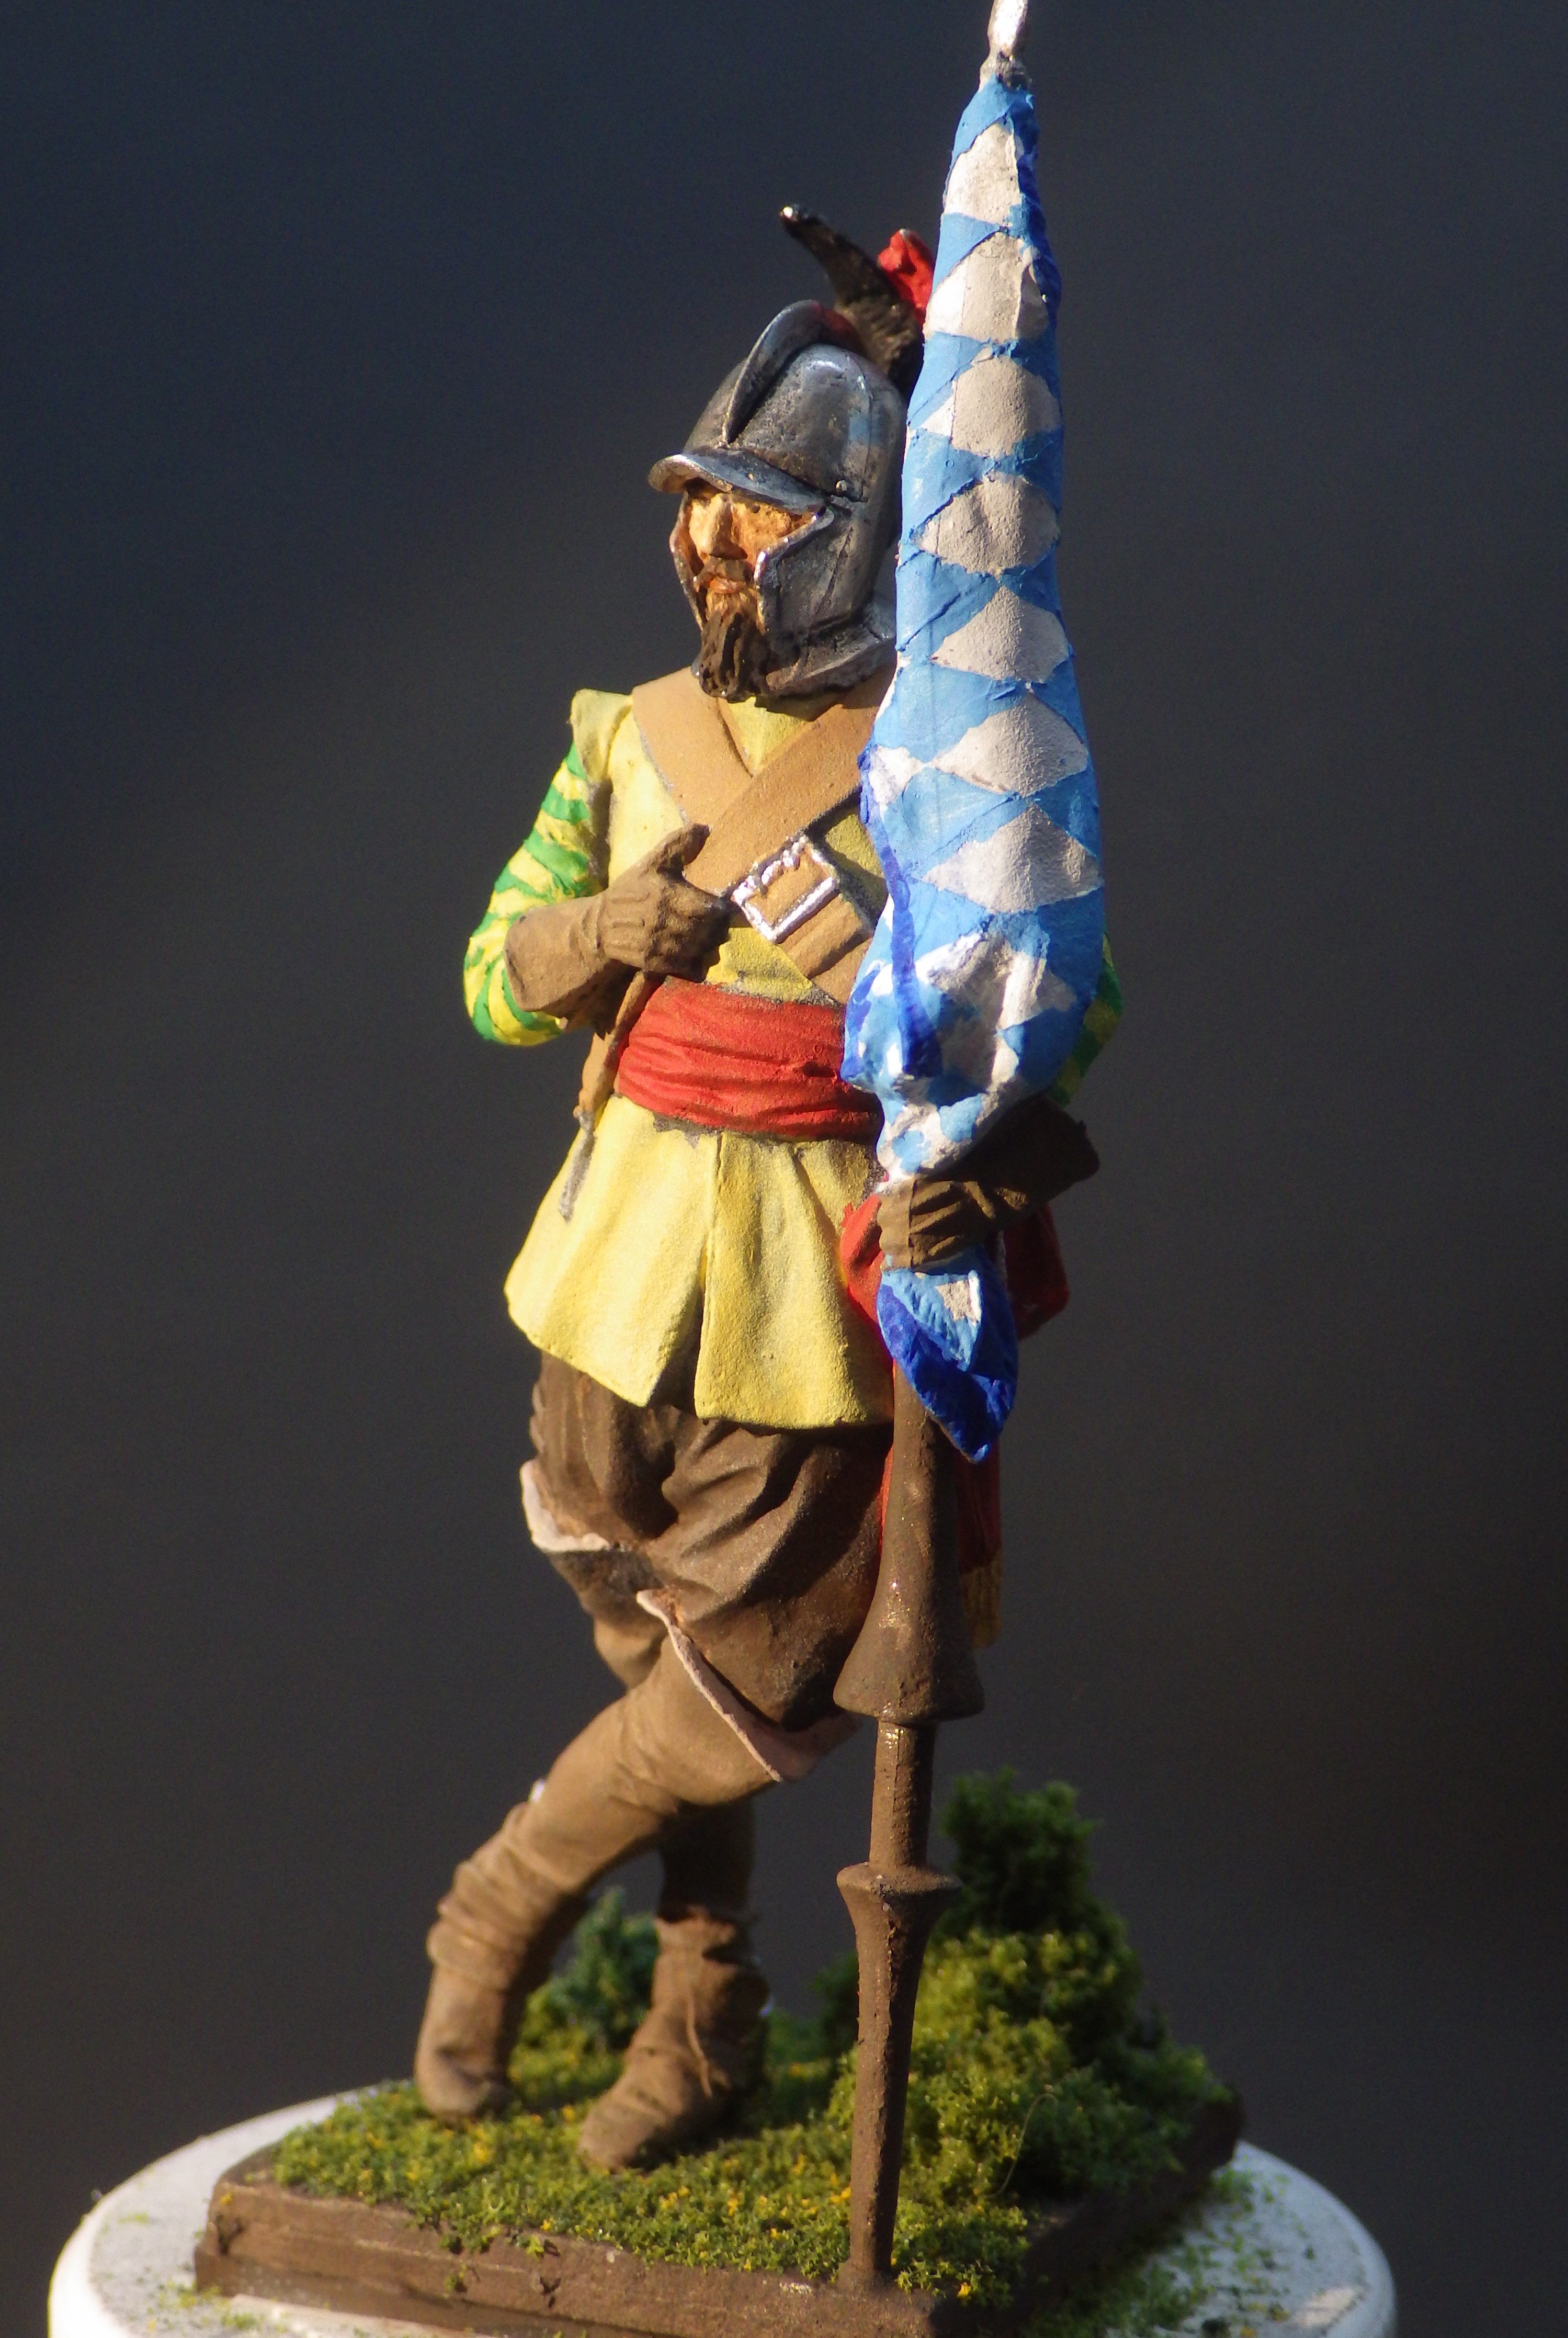
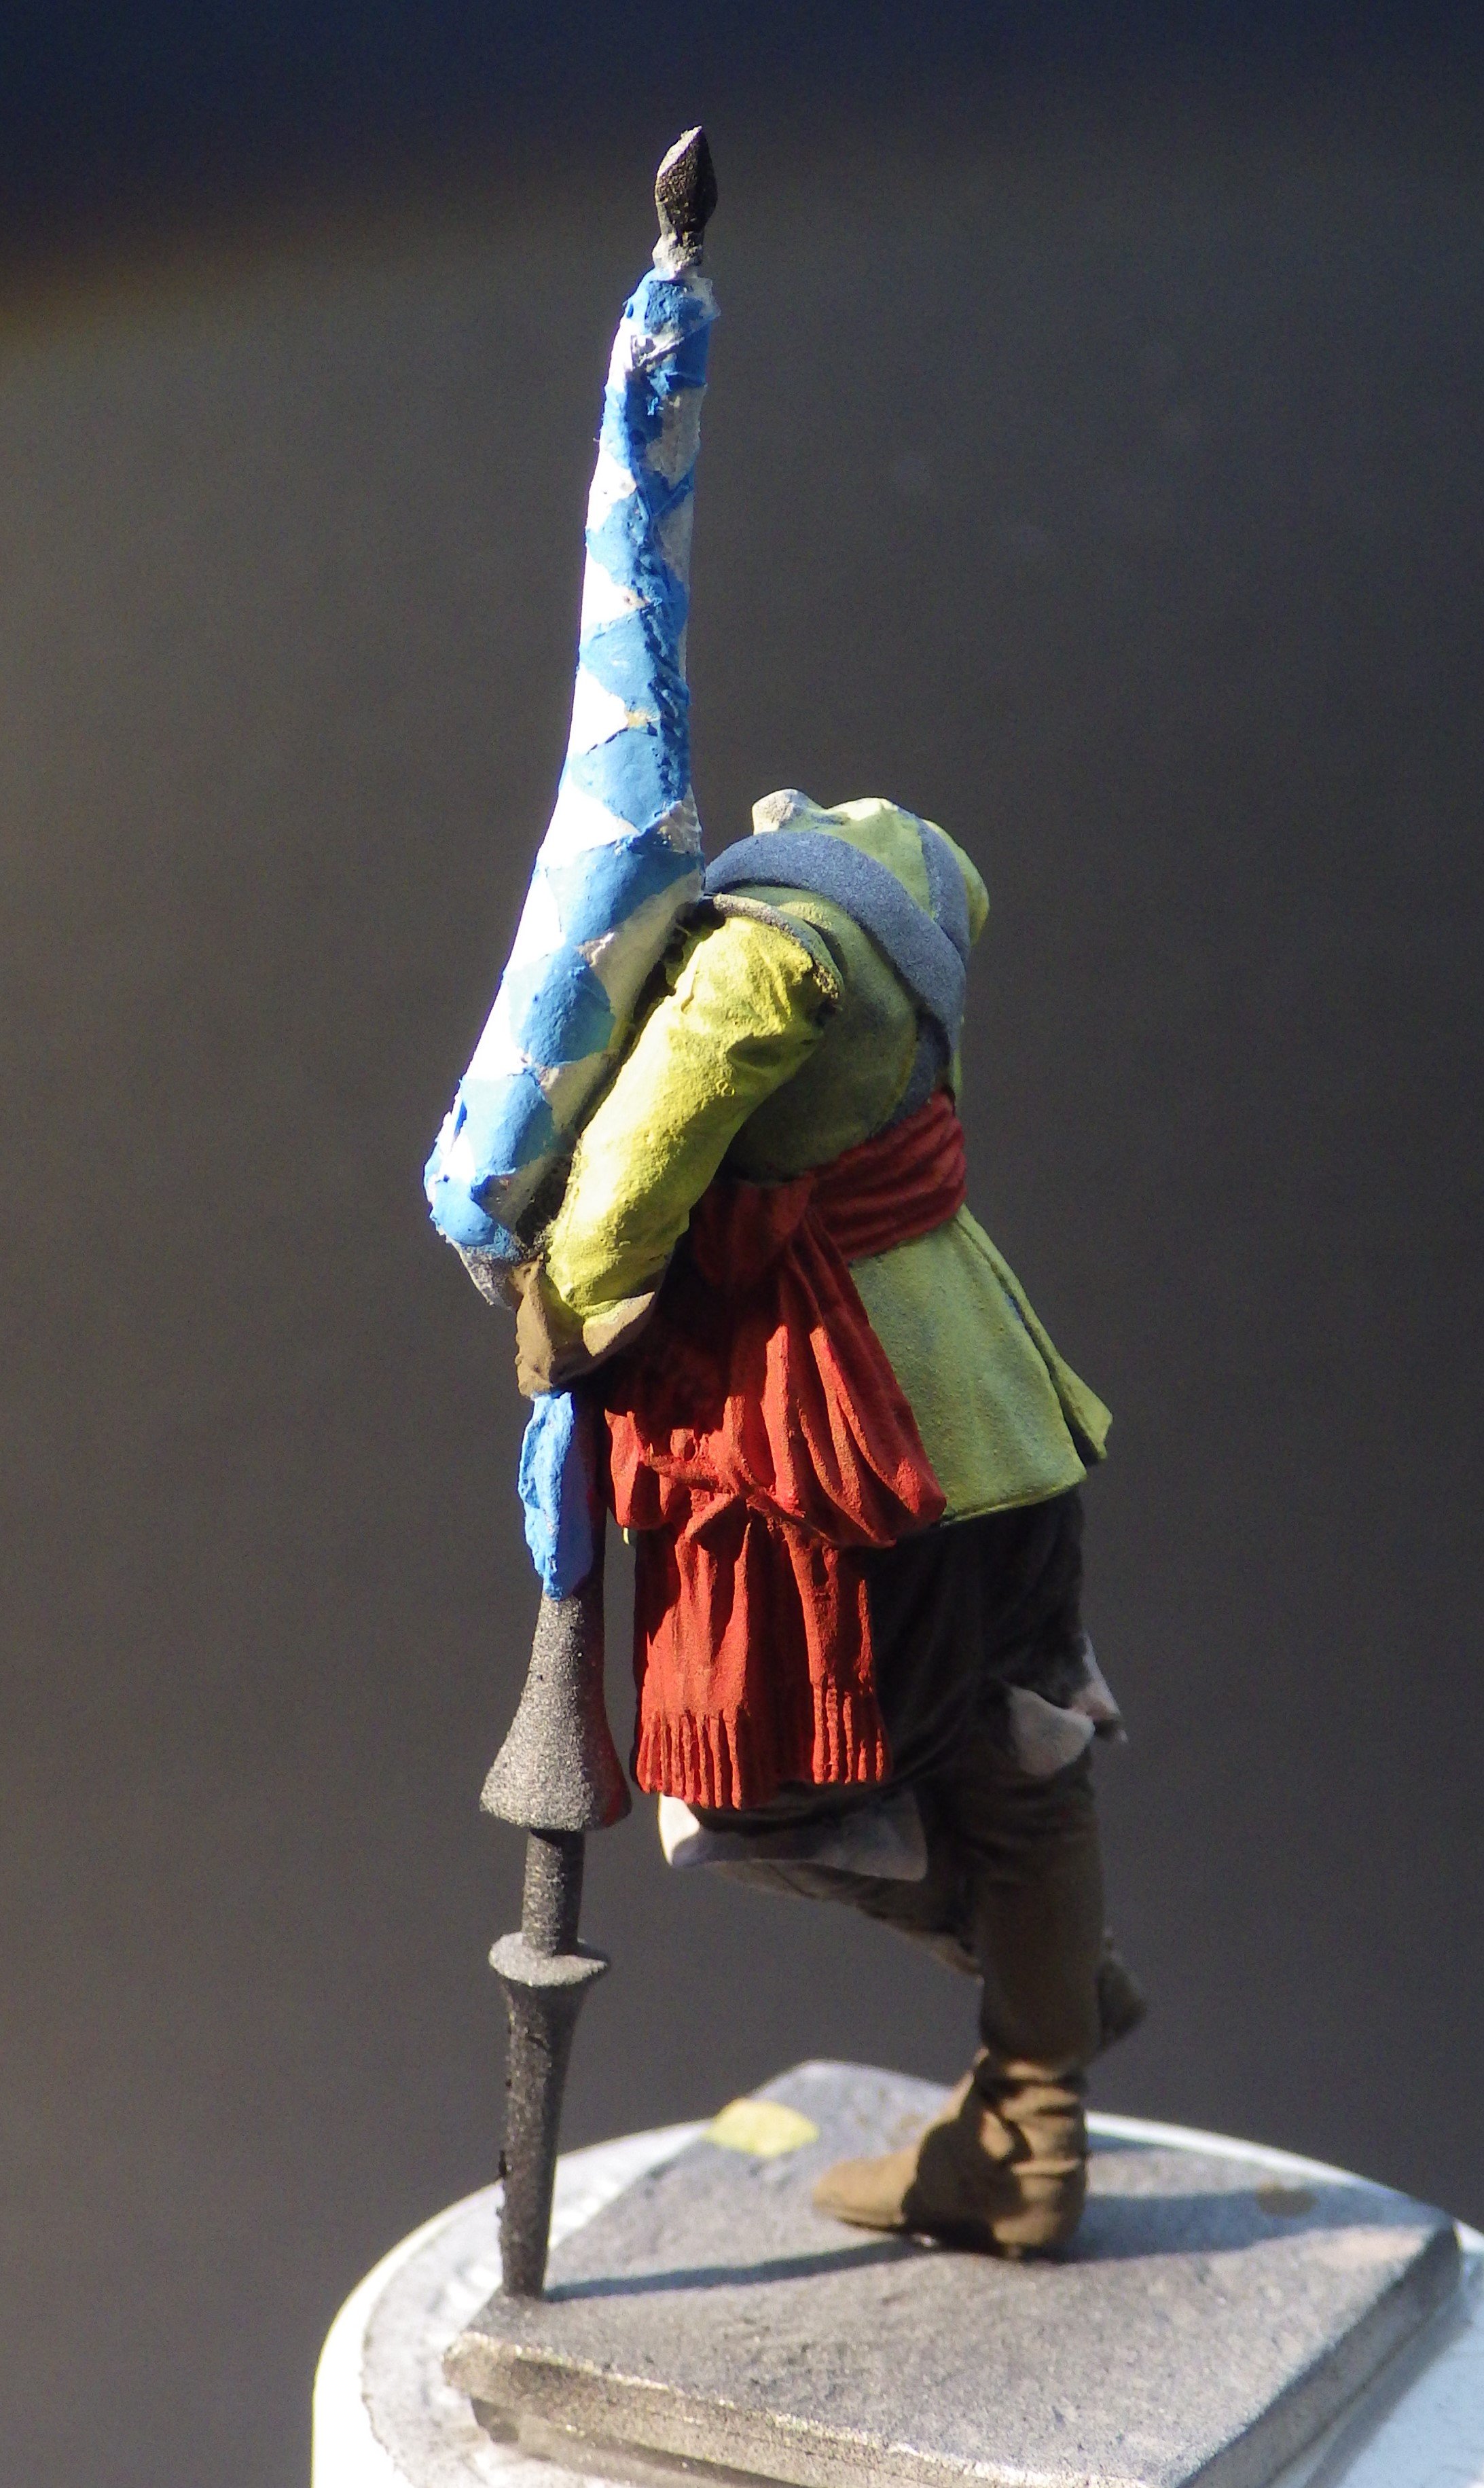
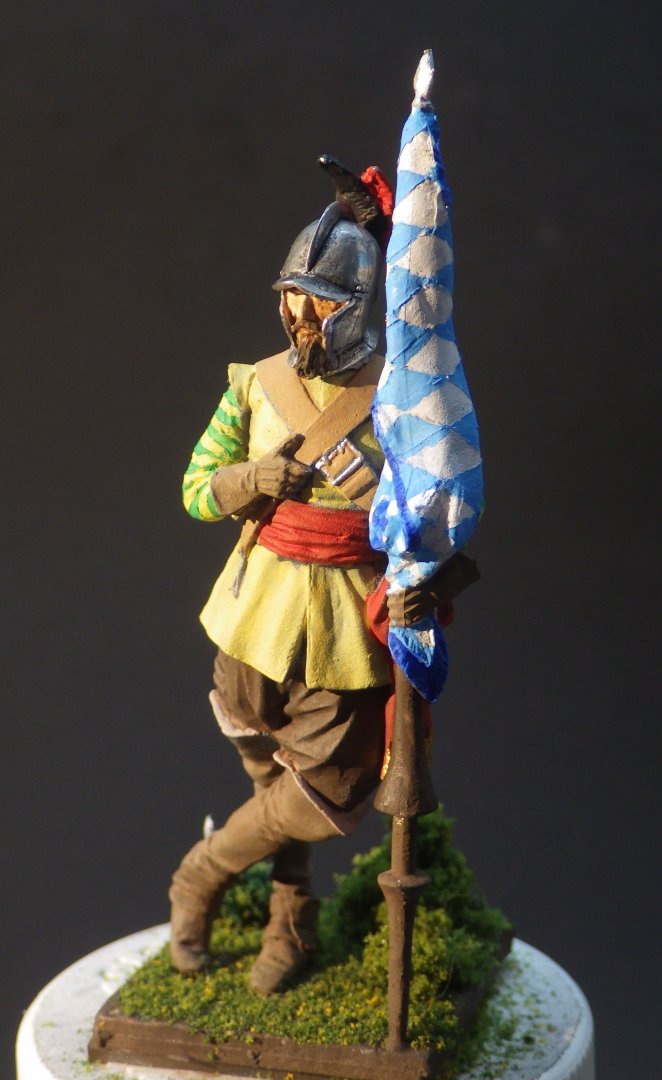
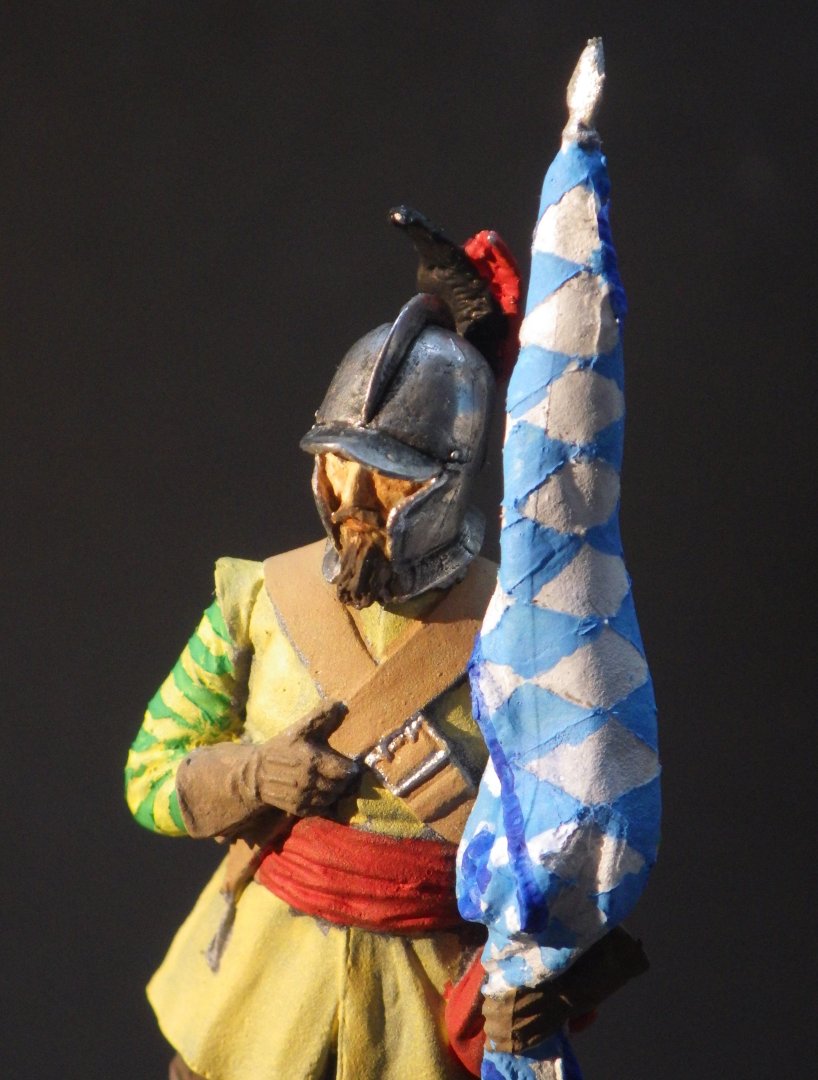
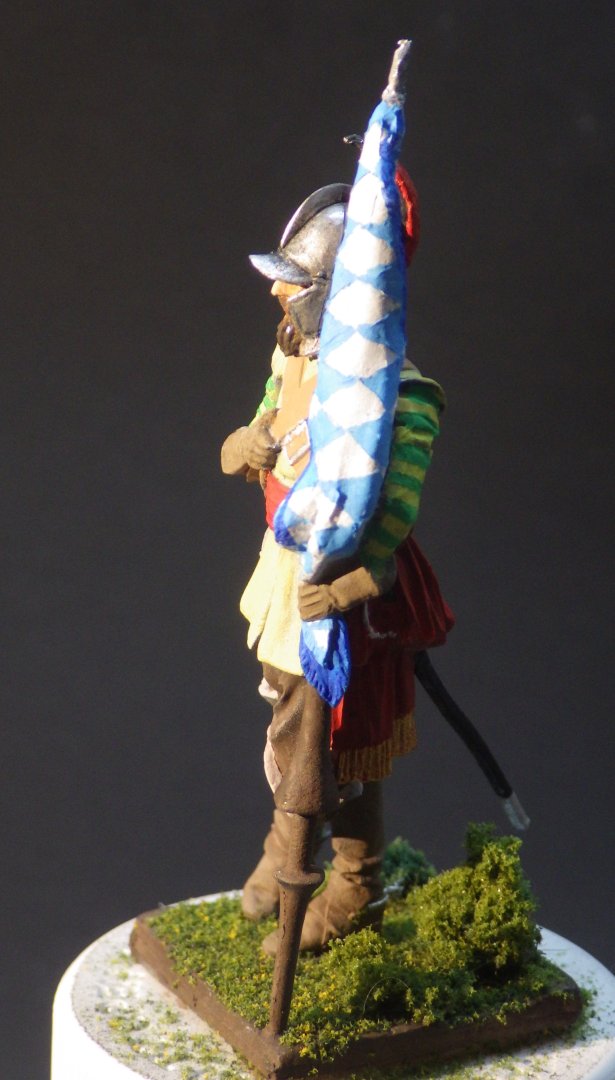
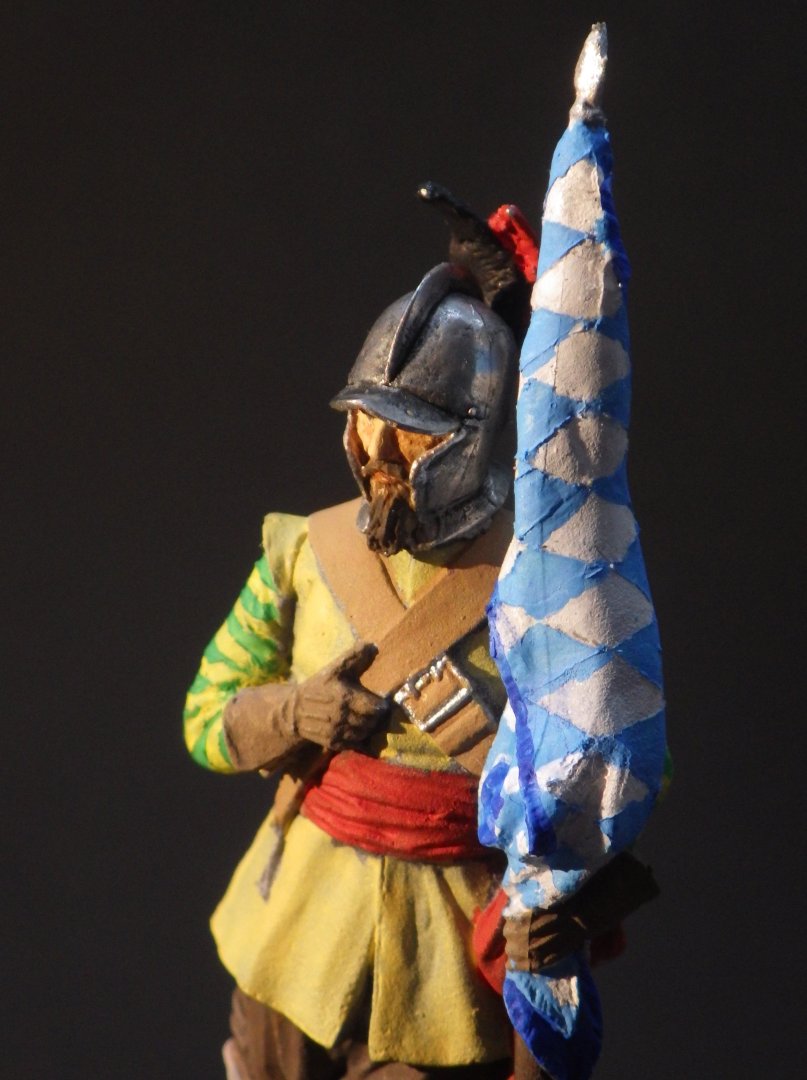
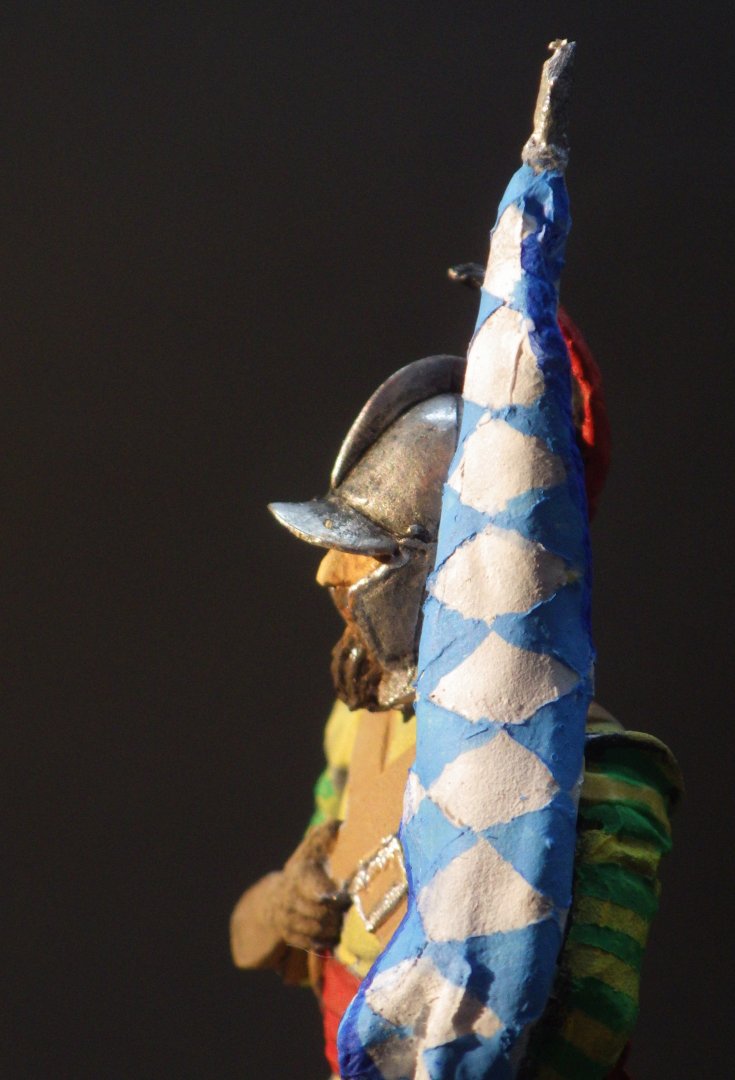
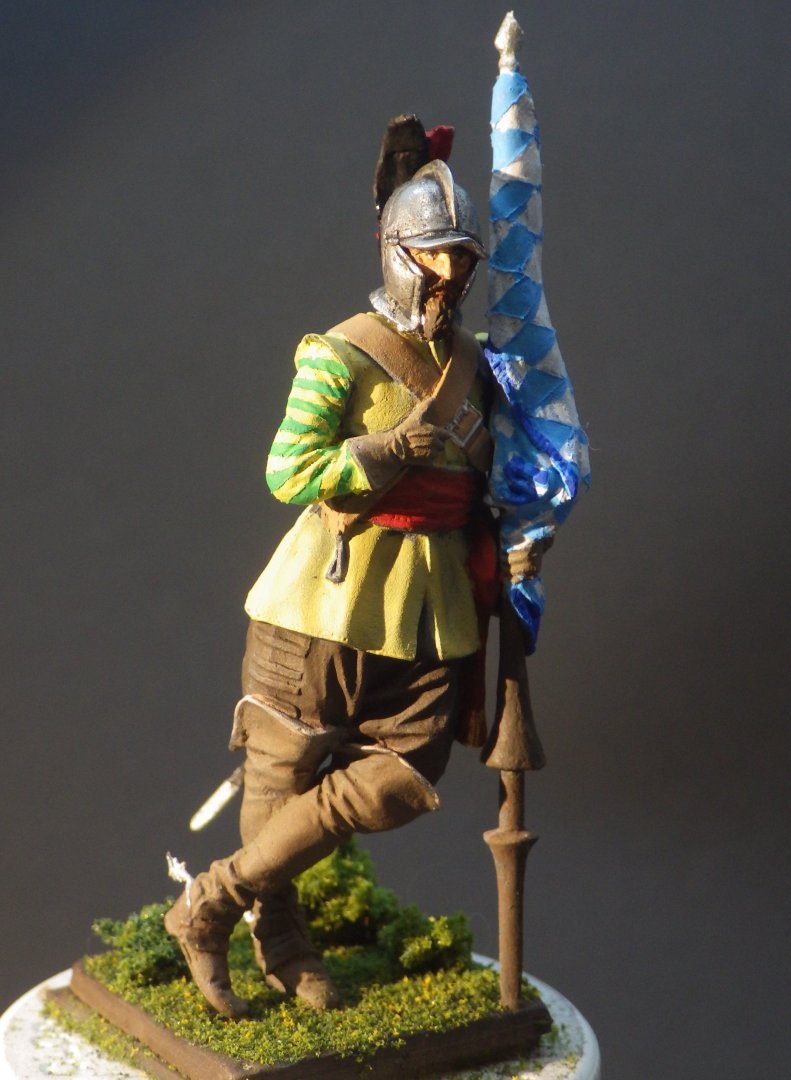
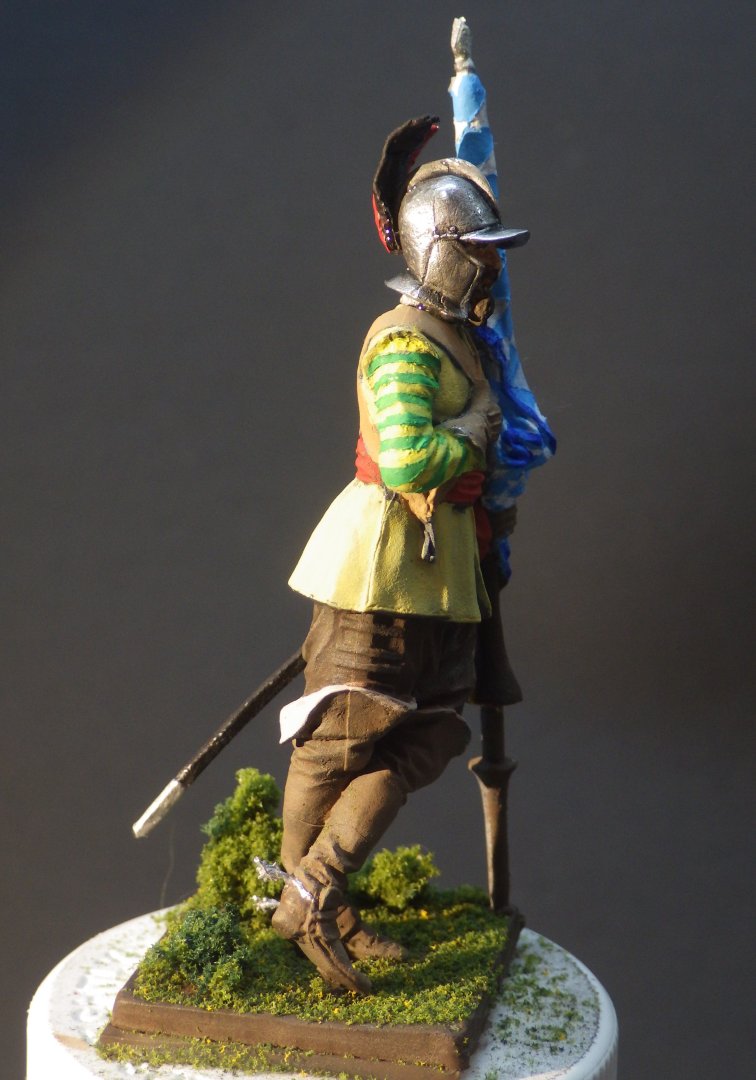
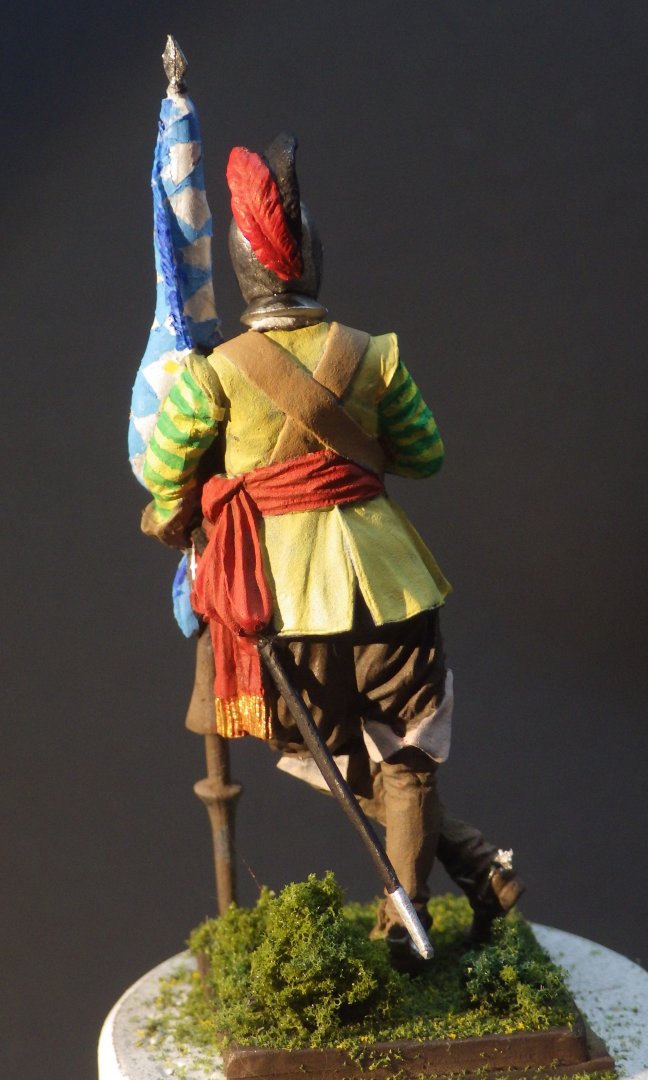
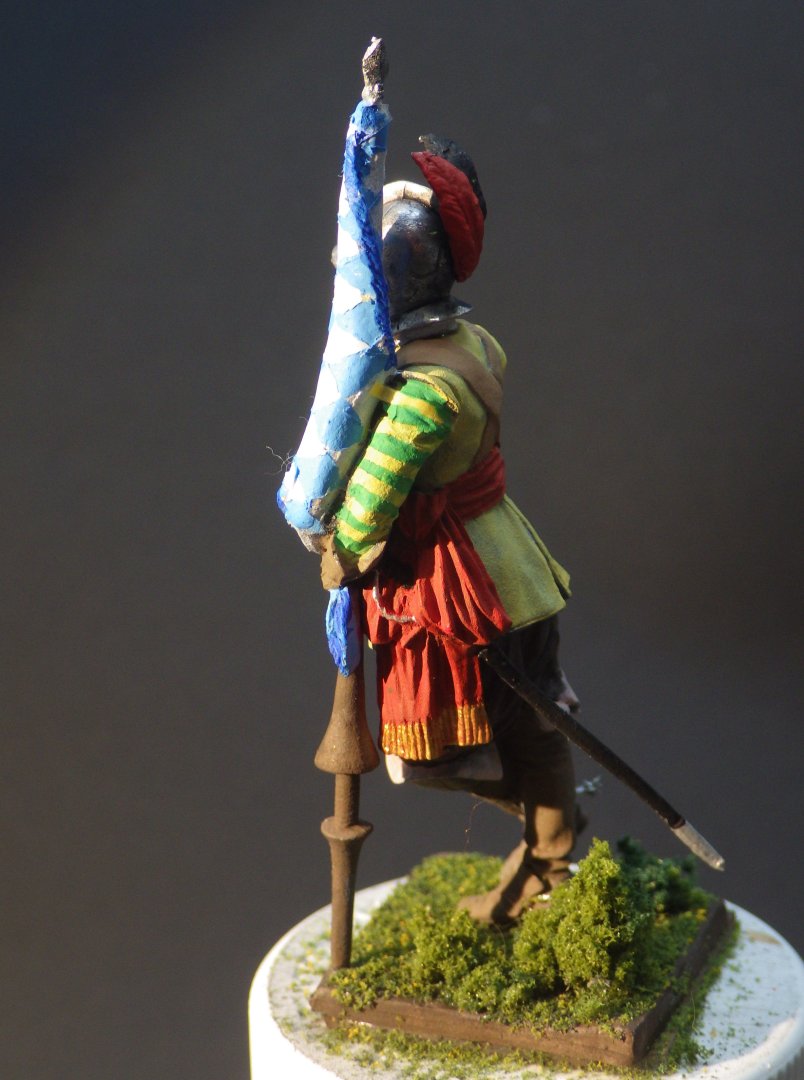
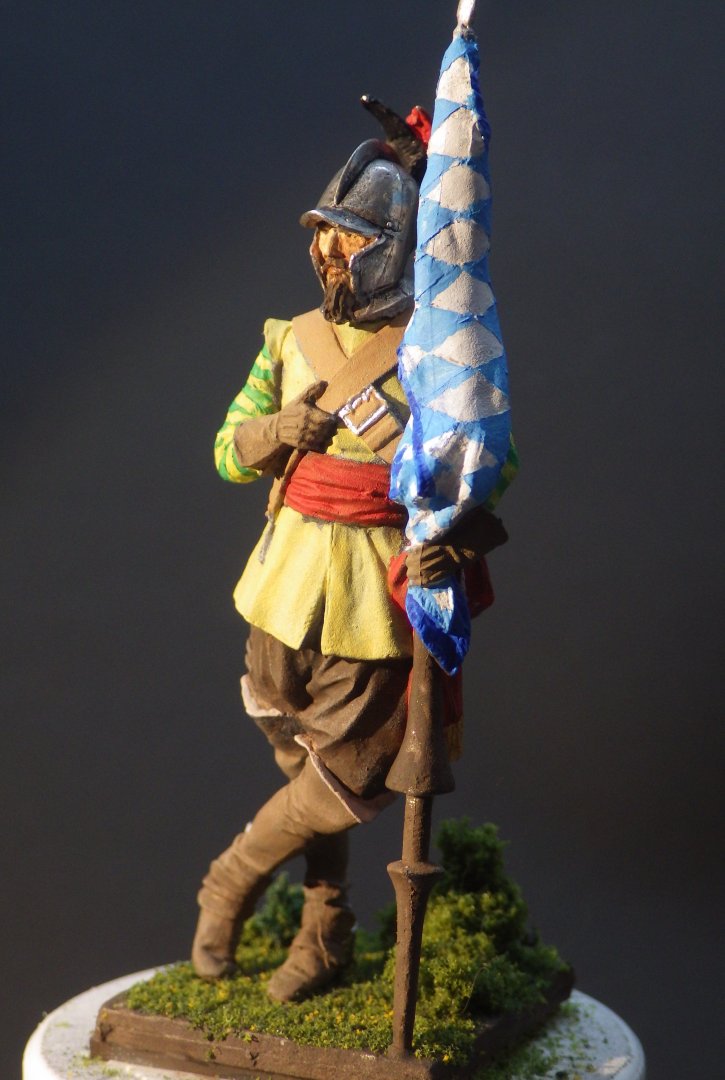
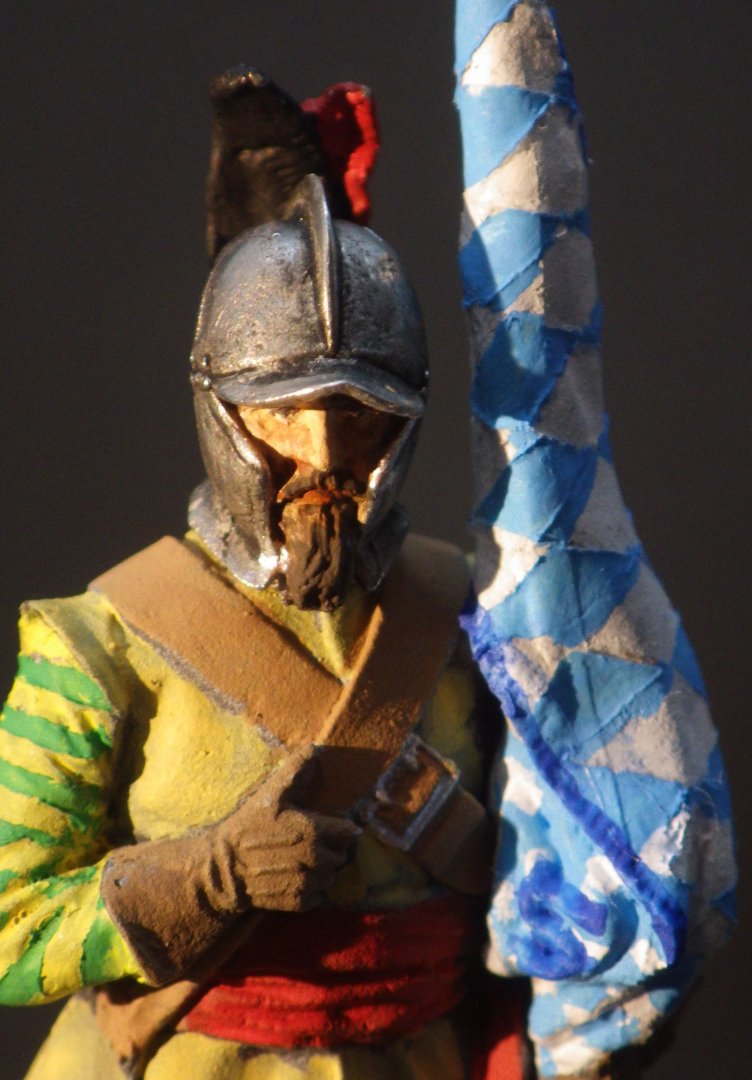
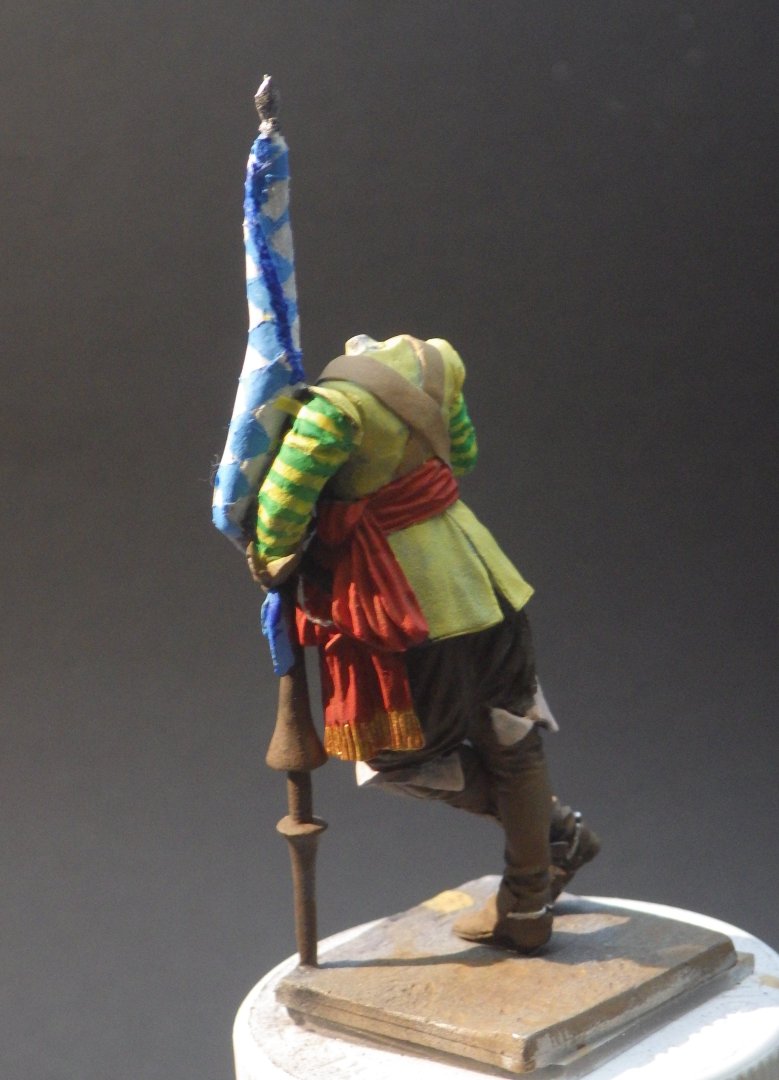
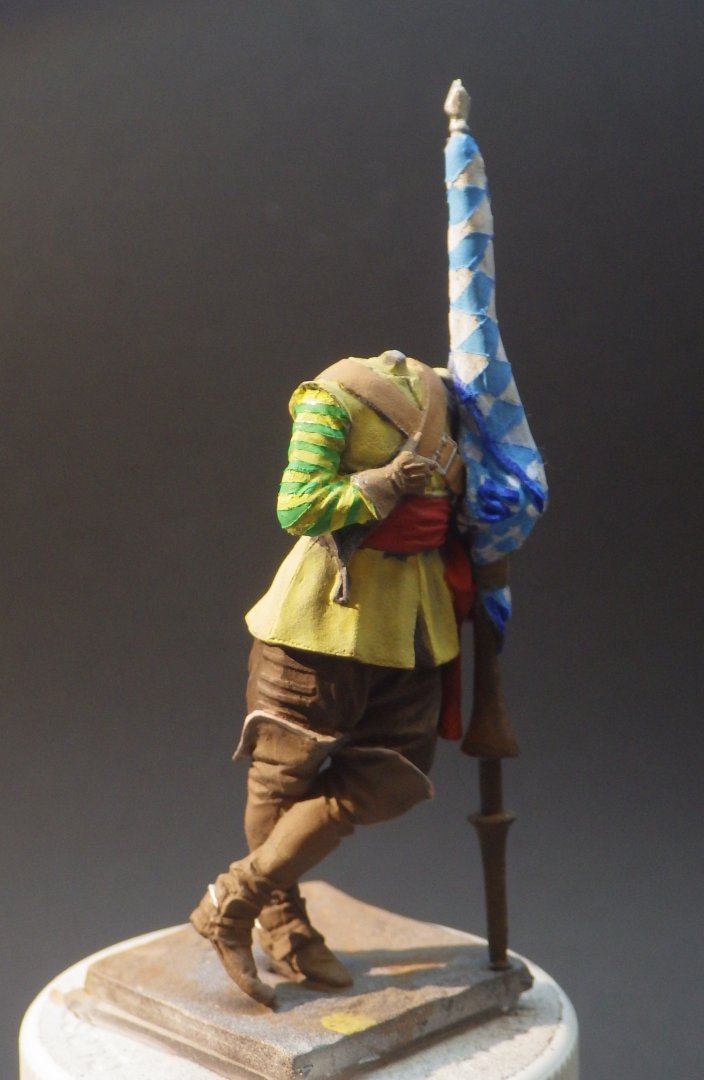
I added the spurs, the sword and the head. Tidied up a few little bits and did the Woodland Scenics thing with the base. I think this one is now done. After overcoming the flag this was really very nice and fun to do. Thanks for looking in, the likes and kind and helpful comments. Alan

- 49 replies
-
- 11
-
-
-
Thank you OC. I've had a lot of useful tips from this forum which has helped me immensely. Alan
-
The details and the finish are absolutely stunning alan
-
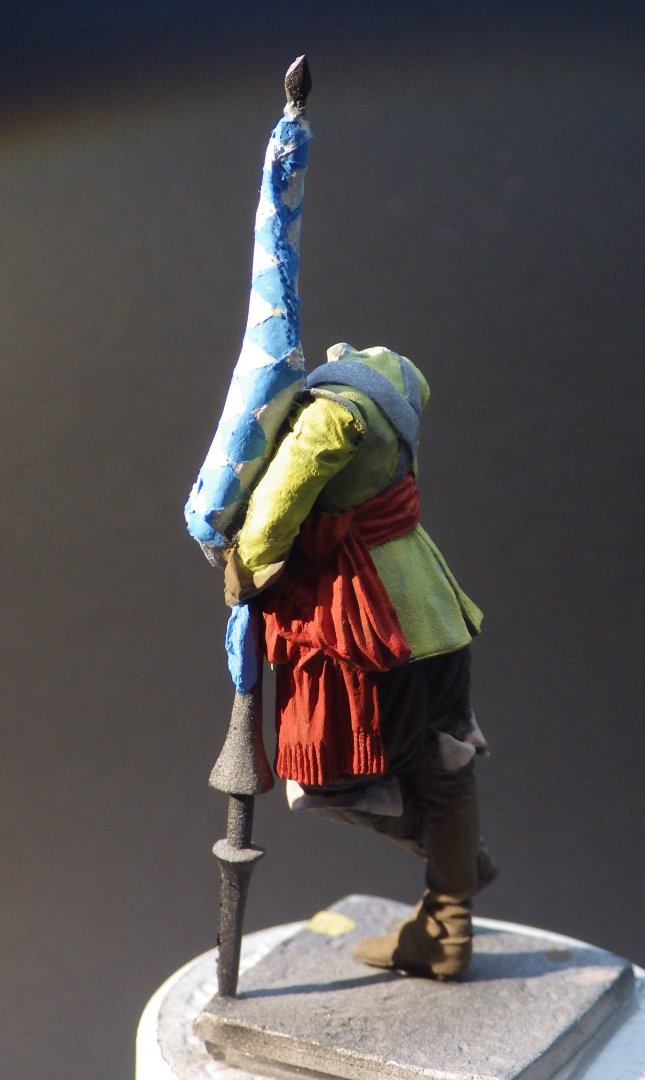
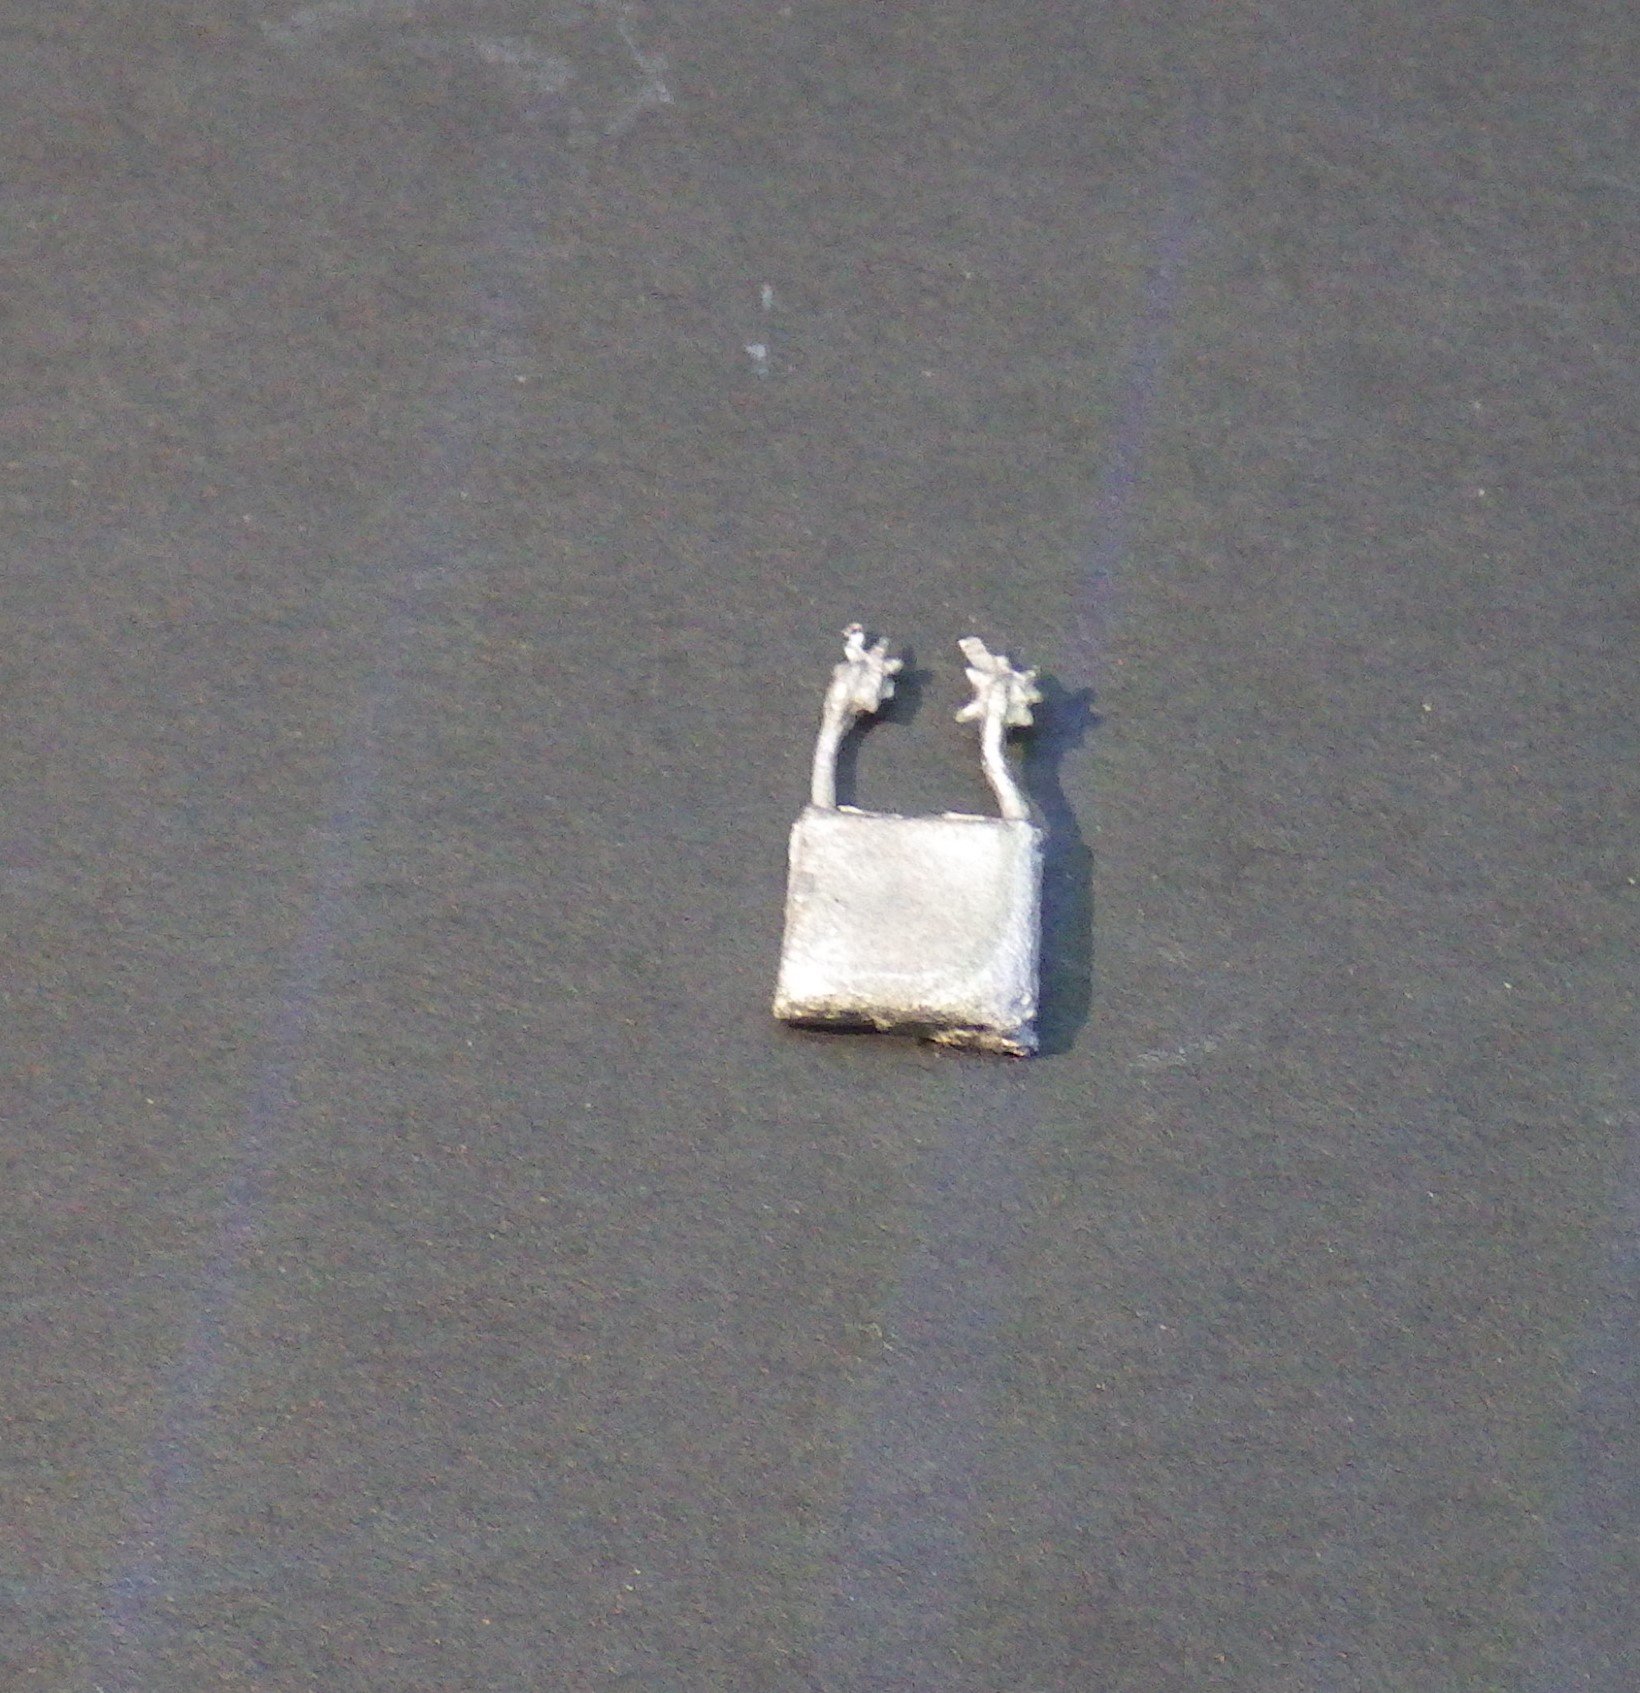
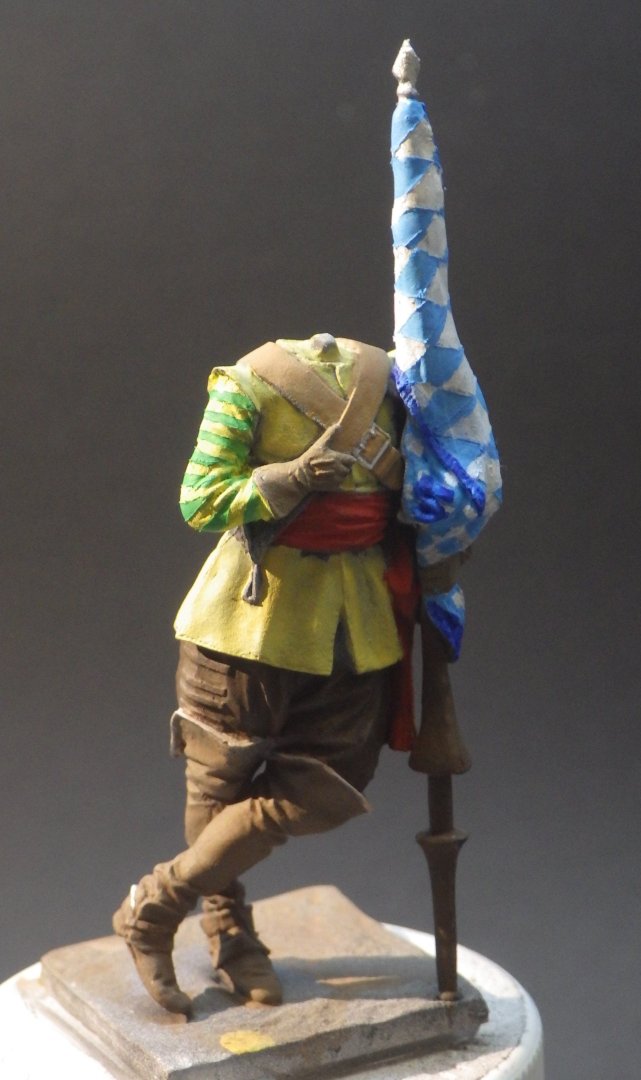
Well today was supposed to see some progress on the Argosy but first I thought "I'll just touch in the sword handle on this chap" One thing led to another and I spent most of the day playing with the figure. I added the fringes to the flag and the sash. The fringe on the sash is a base of orange red and then gold dry brushed on top. Spurs and belt buckle added and the green stripes on his shirt. I used thin strips of masking tape to get the separation reasonably consistent. This piece was in the bag of bits. I thought it was a bag or pouch of some sort, maybe like a sabretache but on closer examination its actually his spurs on a piece of moulding. I also found a use for these in my Bumper Bag of Brushes Its great for burnishing masking tape down in tight places. I think, touched with beeswax it might also work to move PE bits around. Thanks for looking in and the likes and comments Alan

-
Thanks for the story. I have the 1/144 Beverley to start when I'm feeling strong. I gather it is as much a struggle in places as the Argosy but it will be a great compliment to the Argosy. Doing a bit of preliminary reading I gather the whole rear door assemblies could be removed from the Beverley for heavyweight drops; so flying with teh back end completely open. I think I also read that an initial concept had the entire cargo pod detach as the aircraft overflew the destination at about ten feet and it landed on its own wheels. Fun days Alan
-
Thank you OC. Now to start the fiddly stuff. Alan
-
Thank you very much EG. I need to work on my primer I think to get a better finish. I have a couple of 1/72 aircraft that I hope to improve for. Possiby a larger scale map of the Reichstag area might have been better. Uh oh - I can smell burning.😄 Alan
-
Coming on beautifully Mike. The aluminum finish looks great. I will look for the Mr Color paint. I found the Vallejo metal to go on well but not as metallic as I would have liked. alan
-
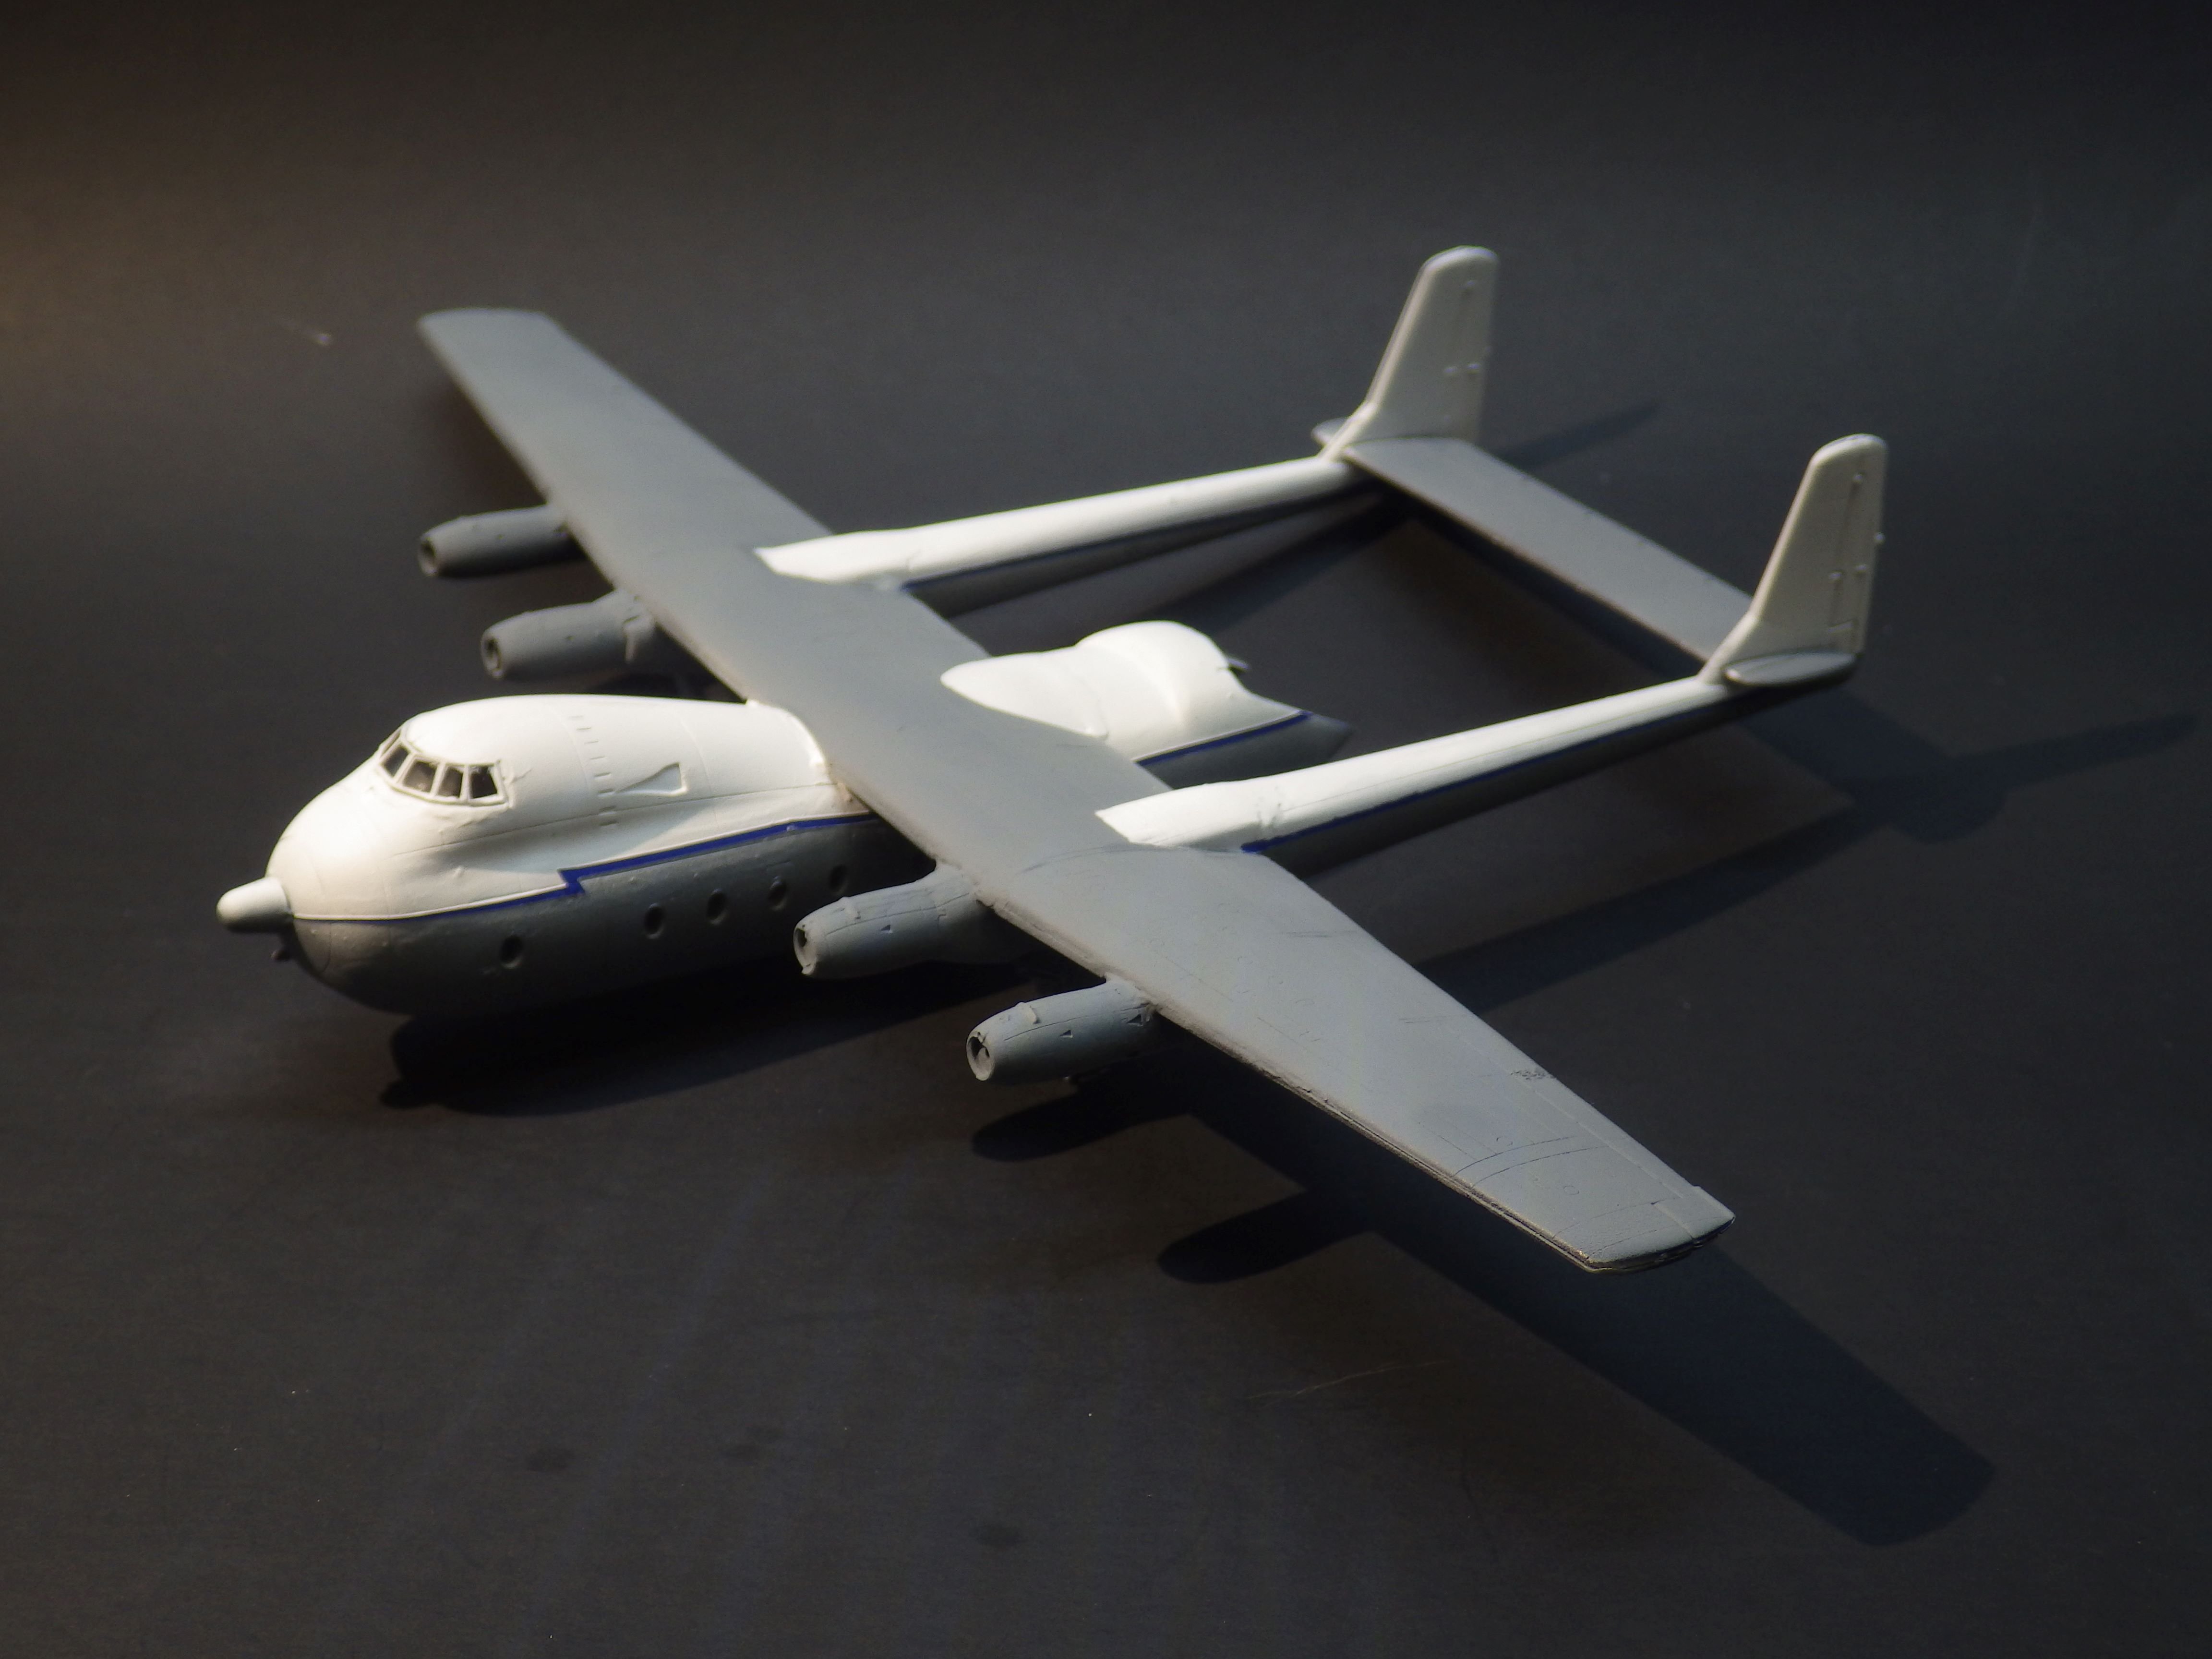
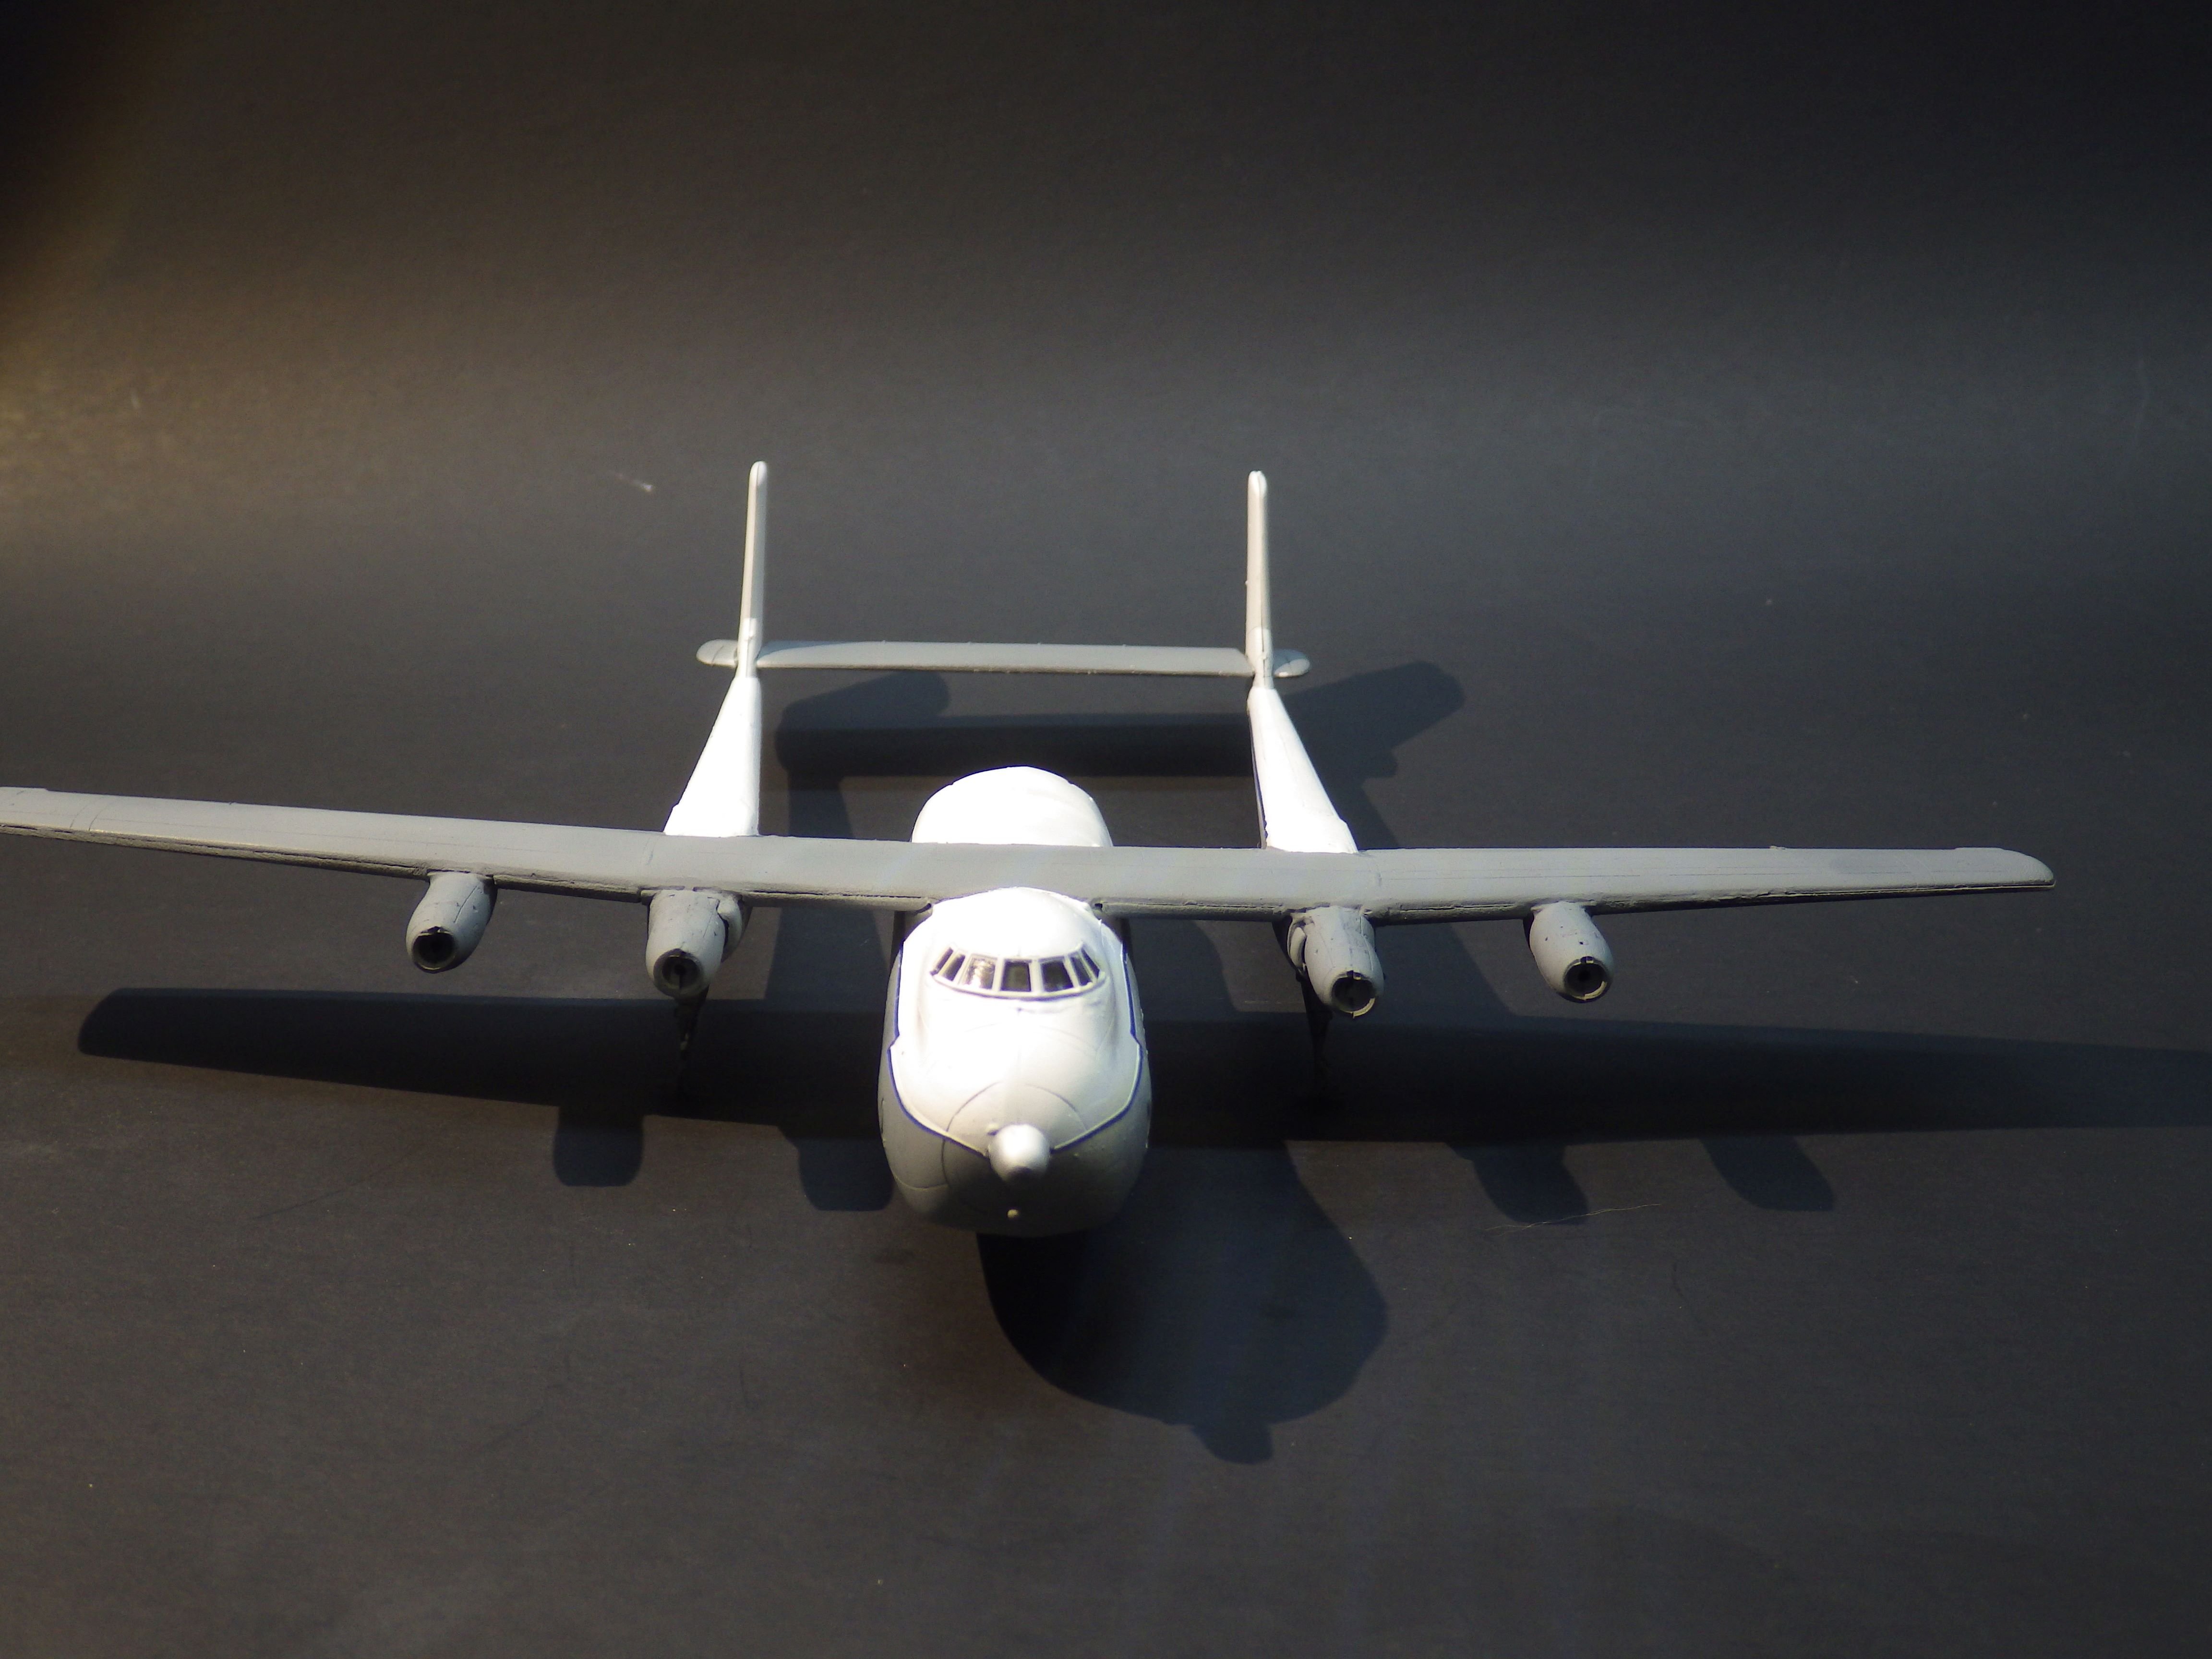
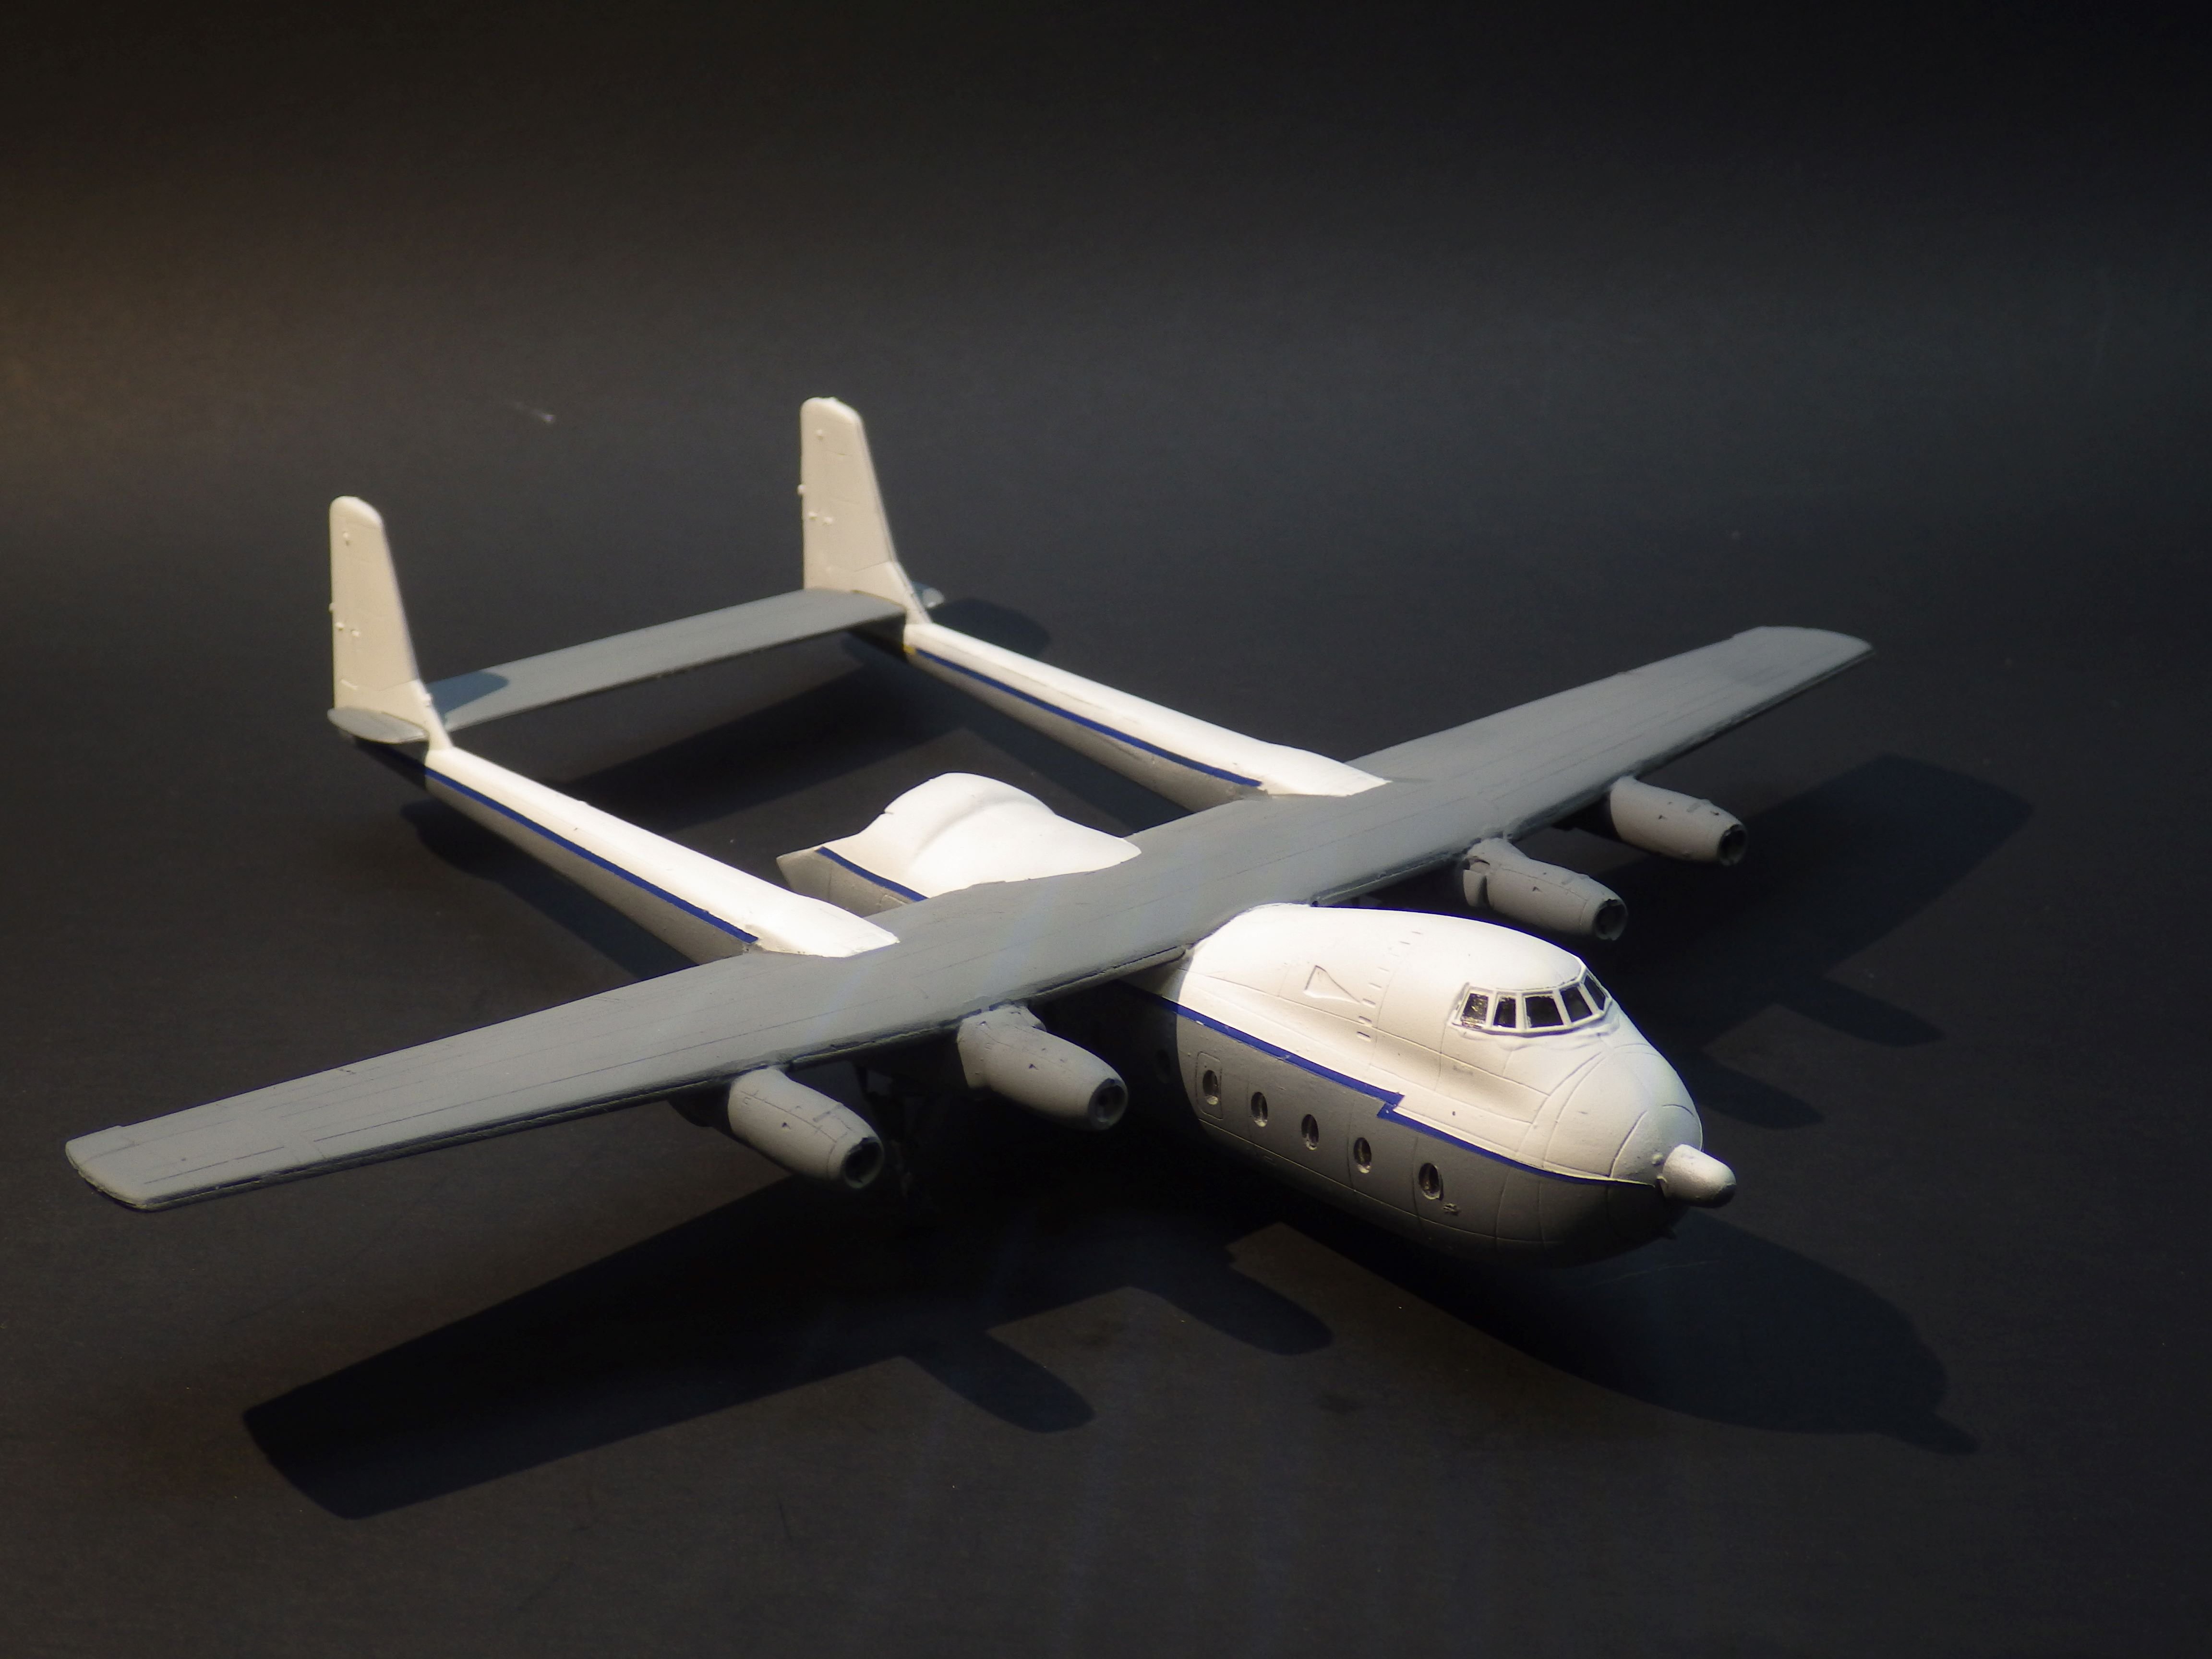
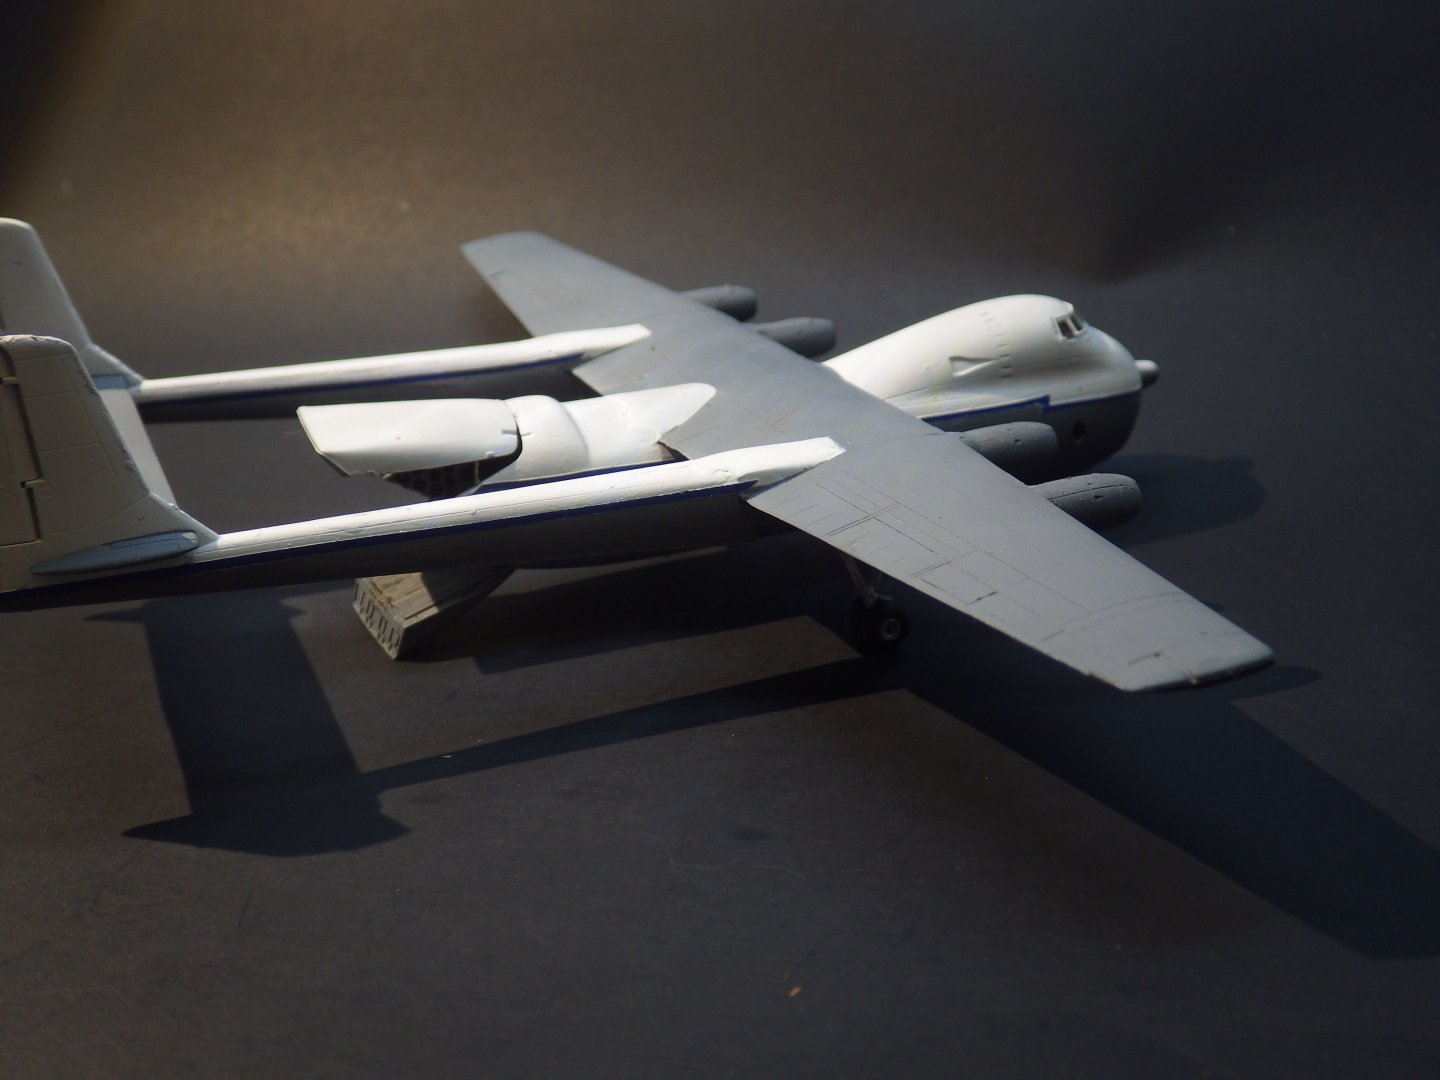
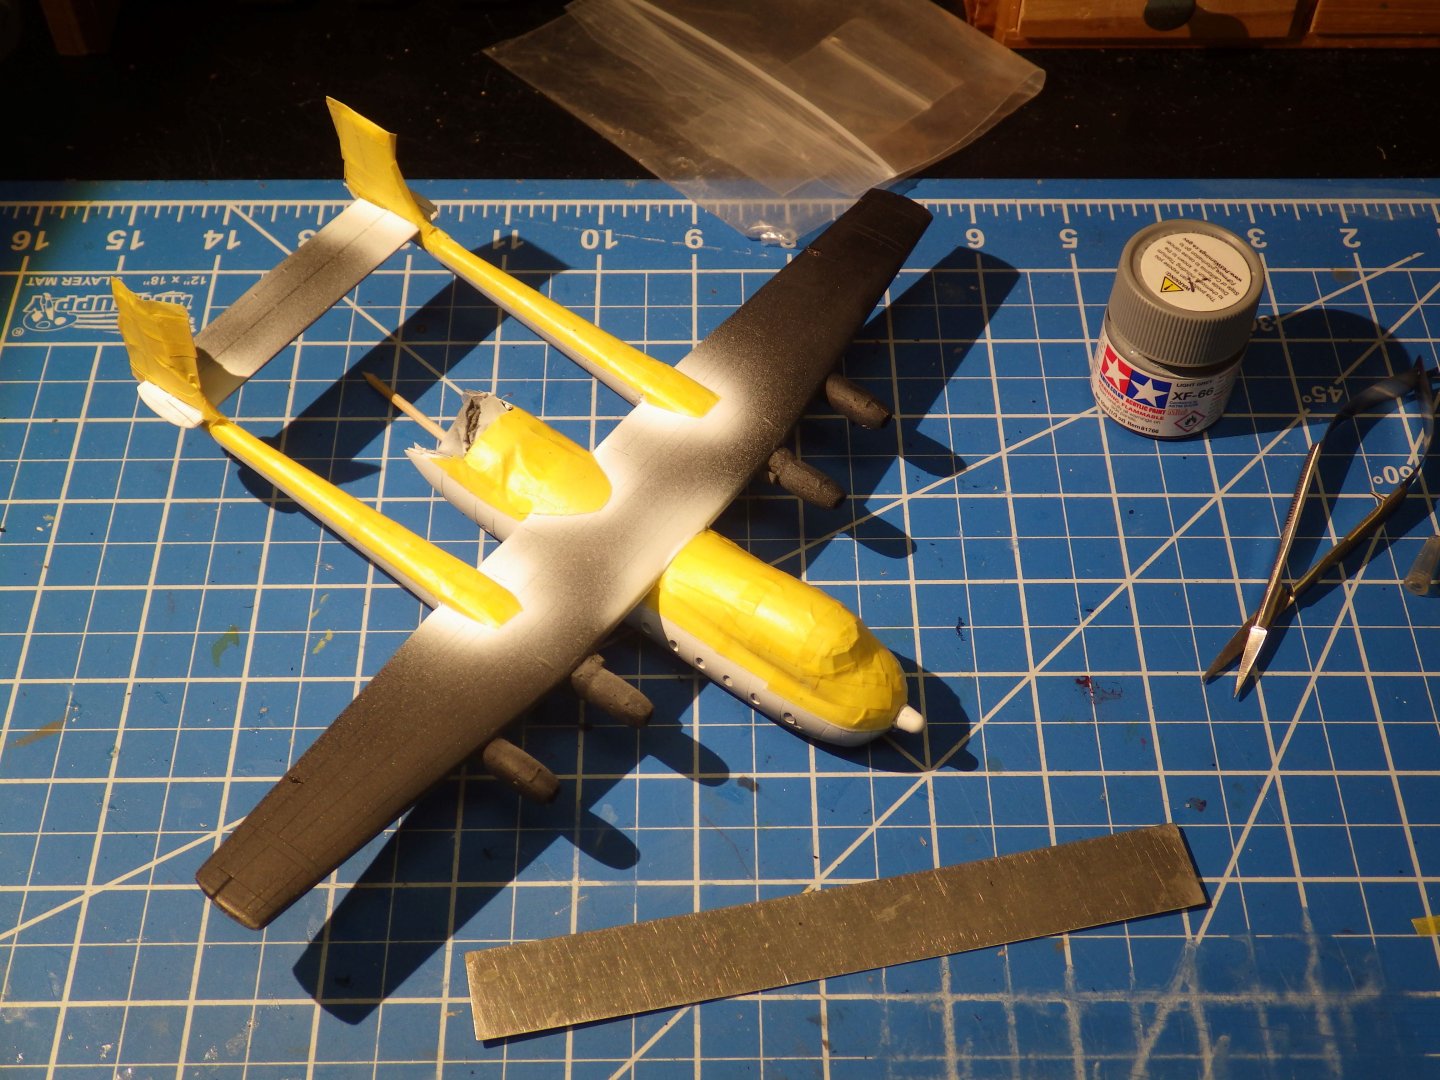
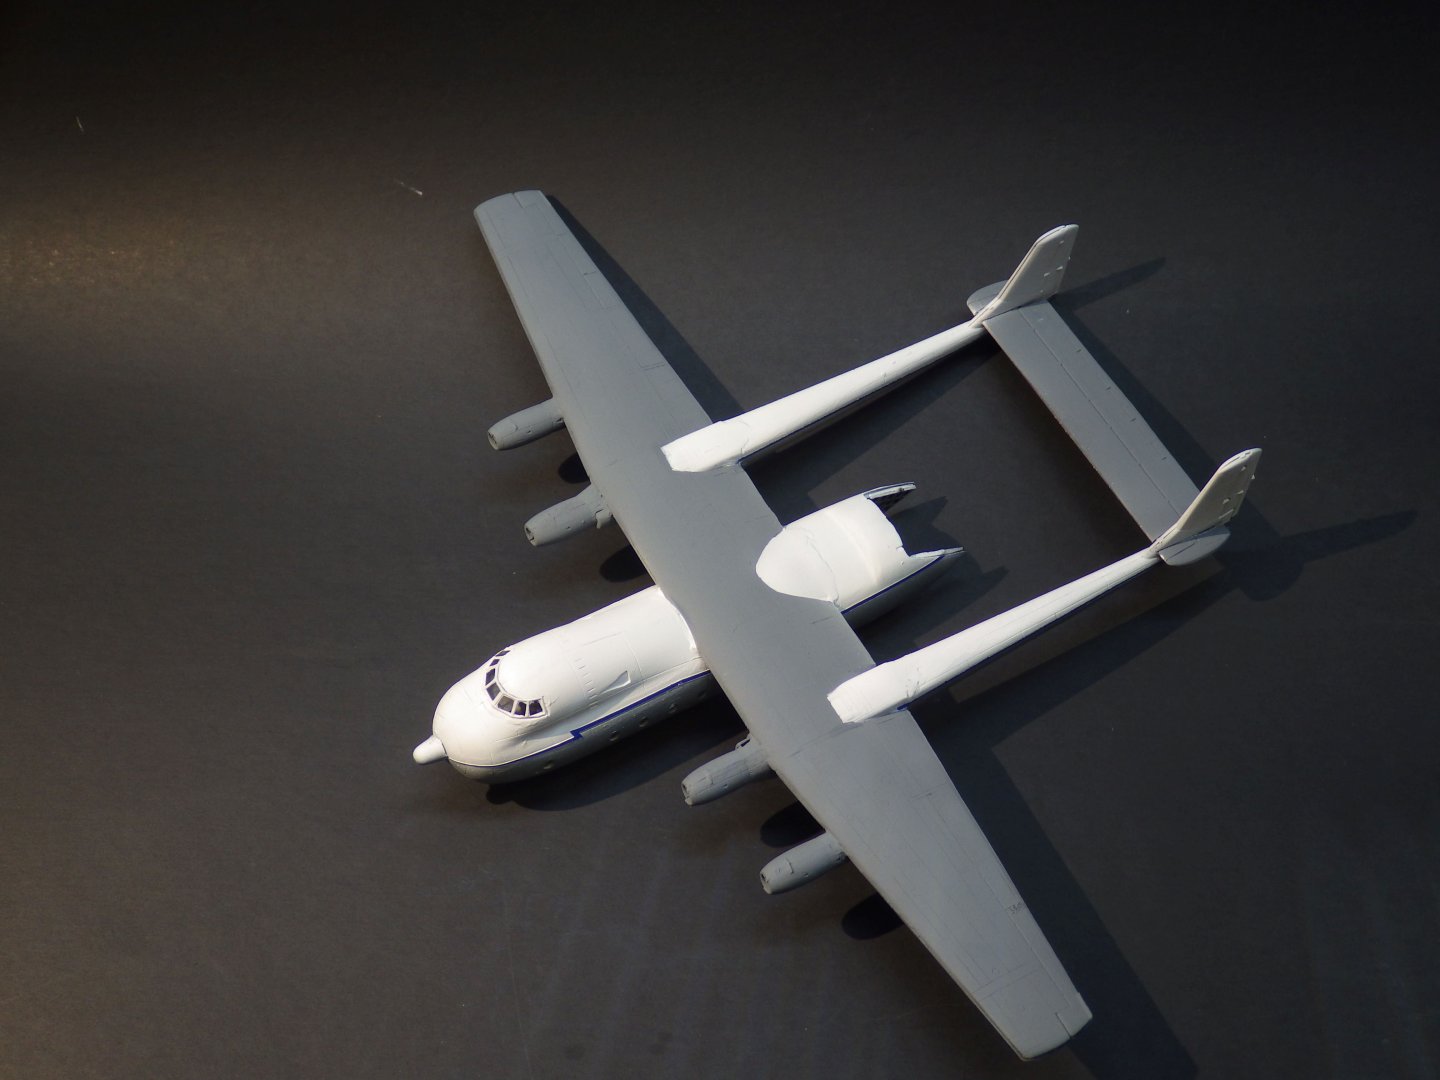
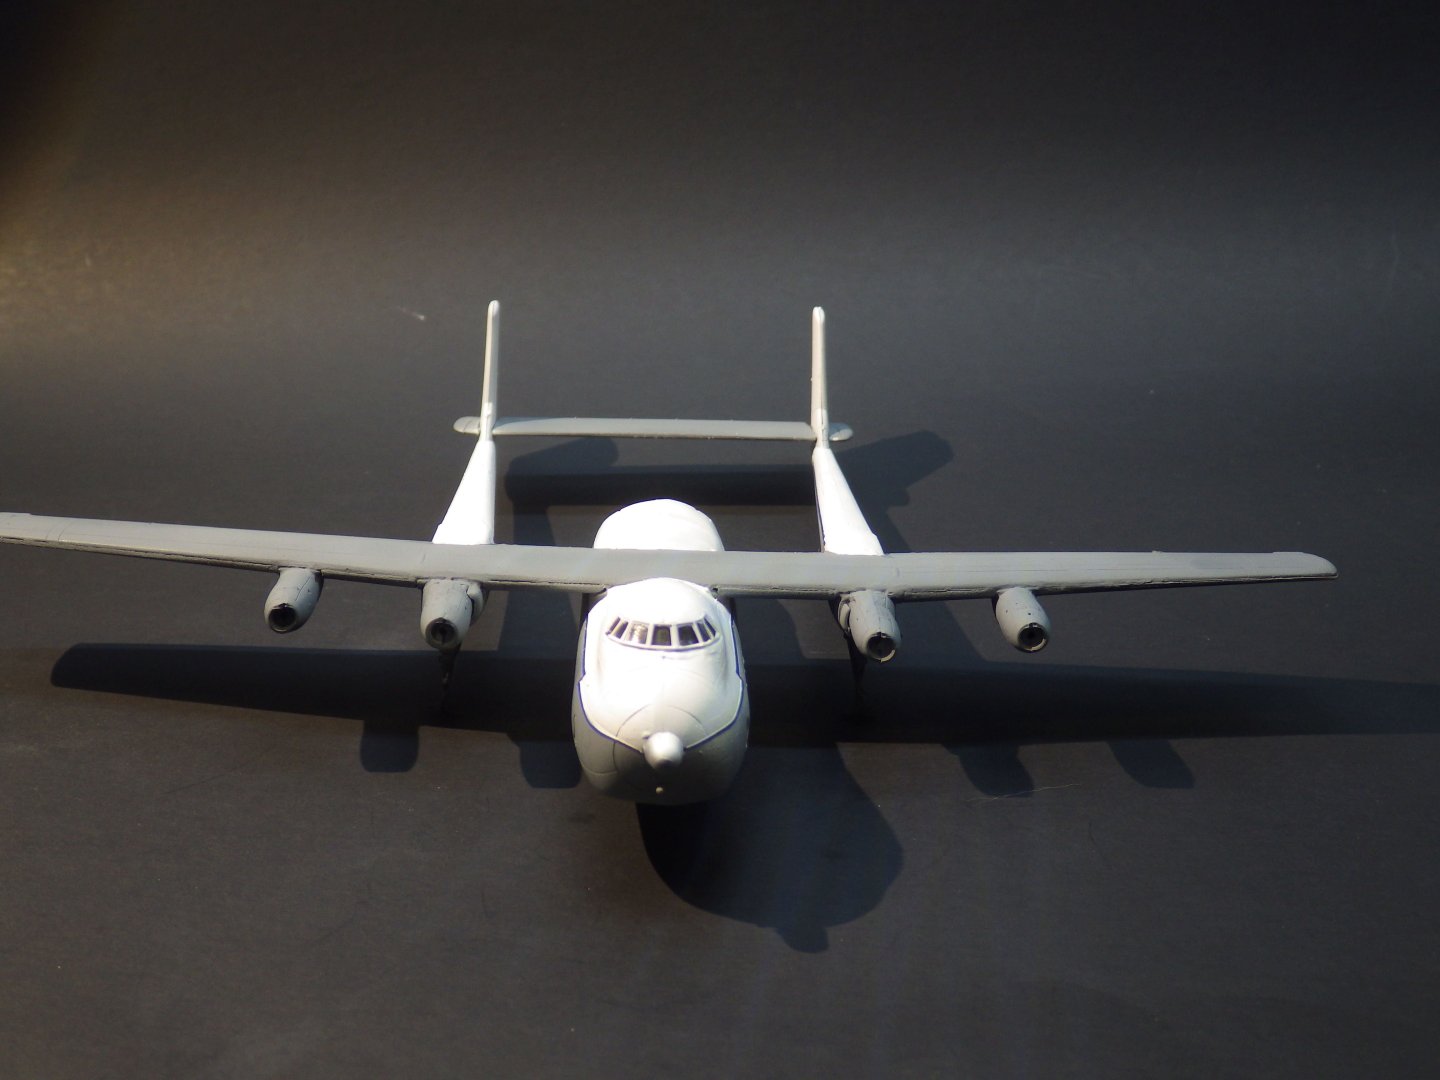
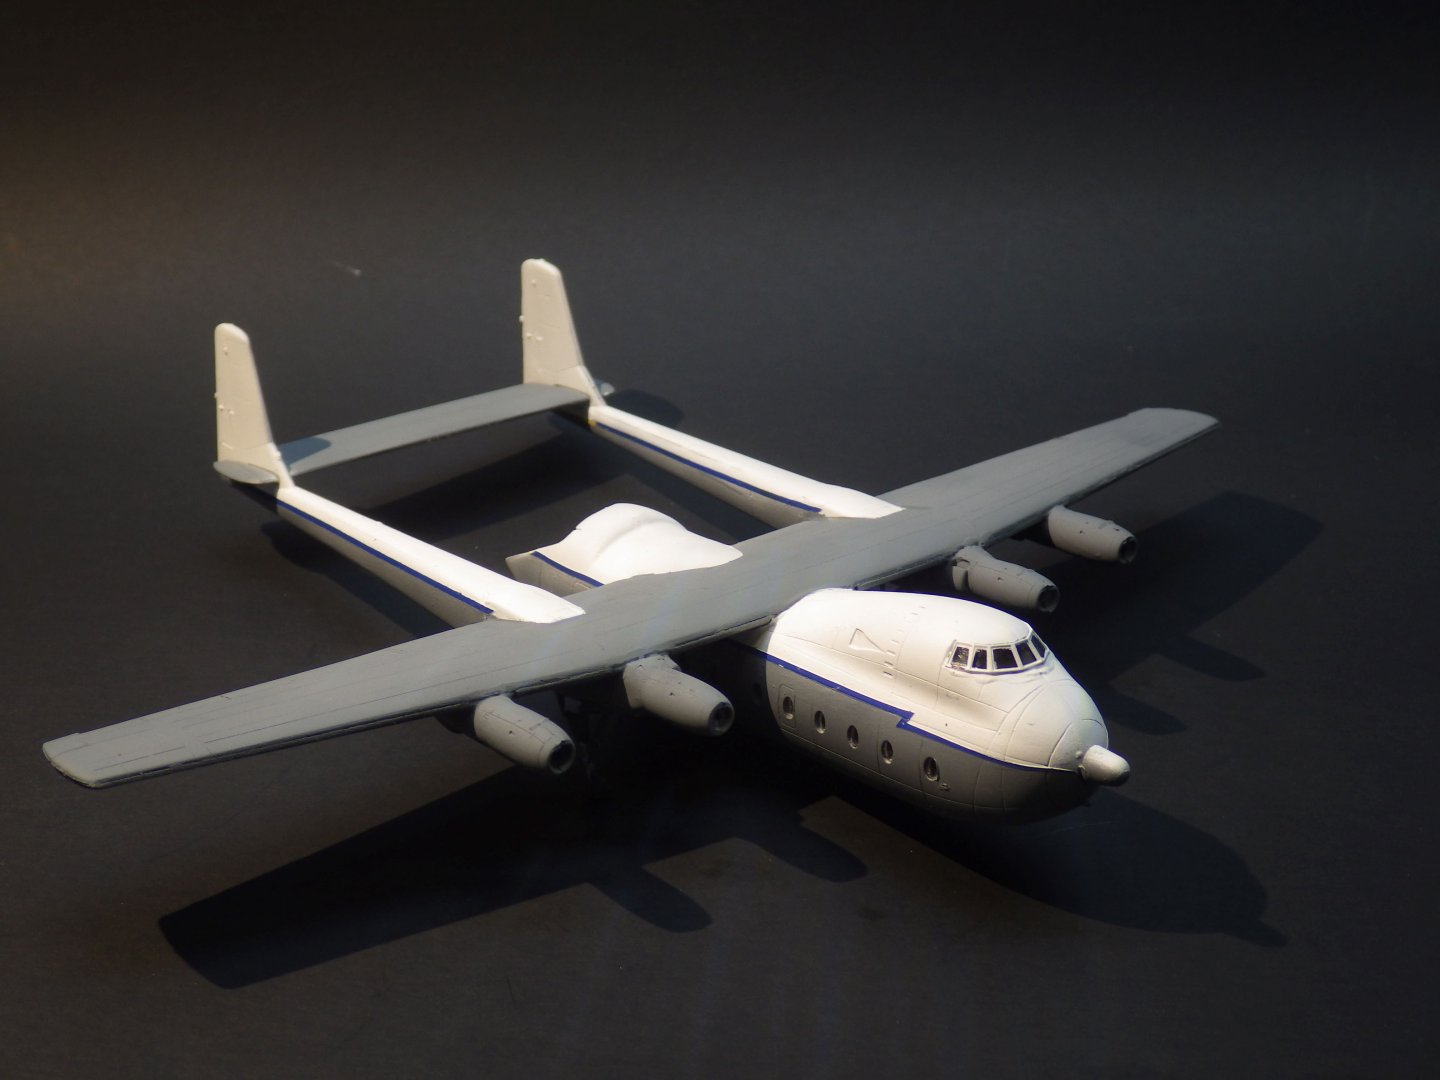
A bit more of an inspiring day. I masked up for the grey section. The yellow and black almost looks like a paint scheme in its own right! After airbrushing the light grey it was time to see the results - and the masking behaved very well. I had resigned myself to the blue stripe being a mess but it came out nicely and so did the windows and cockpit glass. Its starting to feel like I might make something out of this one. Now the attention turns to the details. Wheels, props and some delicate PE along with posing the cargo doors open. Thanks for looking in and the likes and comments Alan

- 52 replies
-
- 11
-
-
-
I look forward to lovely nails
-
Looks very good. Great work shaping the end blocks alan
- 33 replies
-
- 1
-
-
- midwest products
- kayak
- (and 1 more)
-
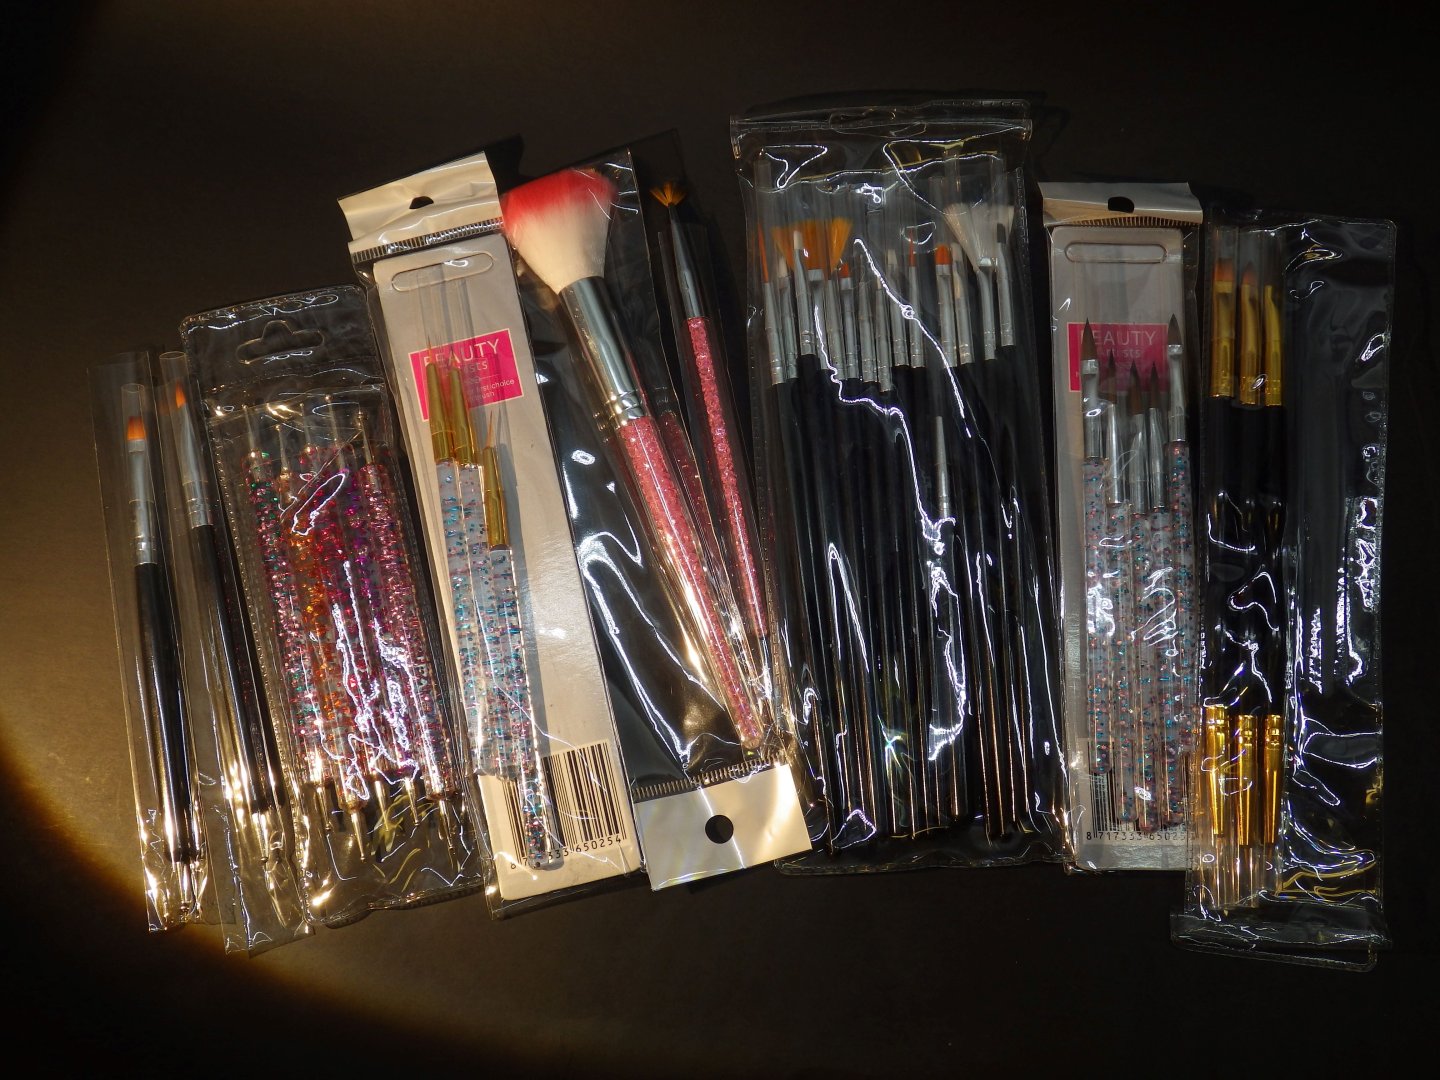
I added the sash and other details to the body. The cross belt and the flag fringes and a few small details remain - and the dreaded green stripes on the arms. I think I will try 1mm strips of masking tape and see how it goes. I reworked the eyes and balanced his moustache a bit better. I got this from Amazon this afternoon. I've been finding the nail painting brushes to be very helpful for the small details and they seem to be holding up quite well; the ones I use the most are holding their shape and they don't shed bristles so I indulged $6:99 in this set of 35 brushes They look like they should cover every brush related arising 😄 At this price they can be used a few times and discarded and they are cheap enough to modify with teh scissors. Thanks for looking in and the likes and comments Alan