king derelict
-
Posts
3,292 -
Joined
-
Last visited
Content Type
Profiles
Forums
Gallery
Events
Everything posted by king derelict
-
Thank you very much OC. I gather he survived Edgehill and the round ups after the Restoration eventually died peacefully in old age. alan
-
I really enjoy the weathering but there is so much to learn and so many products to play around with. You did a great job here and avoided it looking excessive. alan
-
Thank you kindly OC, those prop tips are driving me dippy alan
-
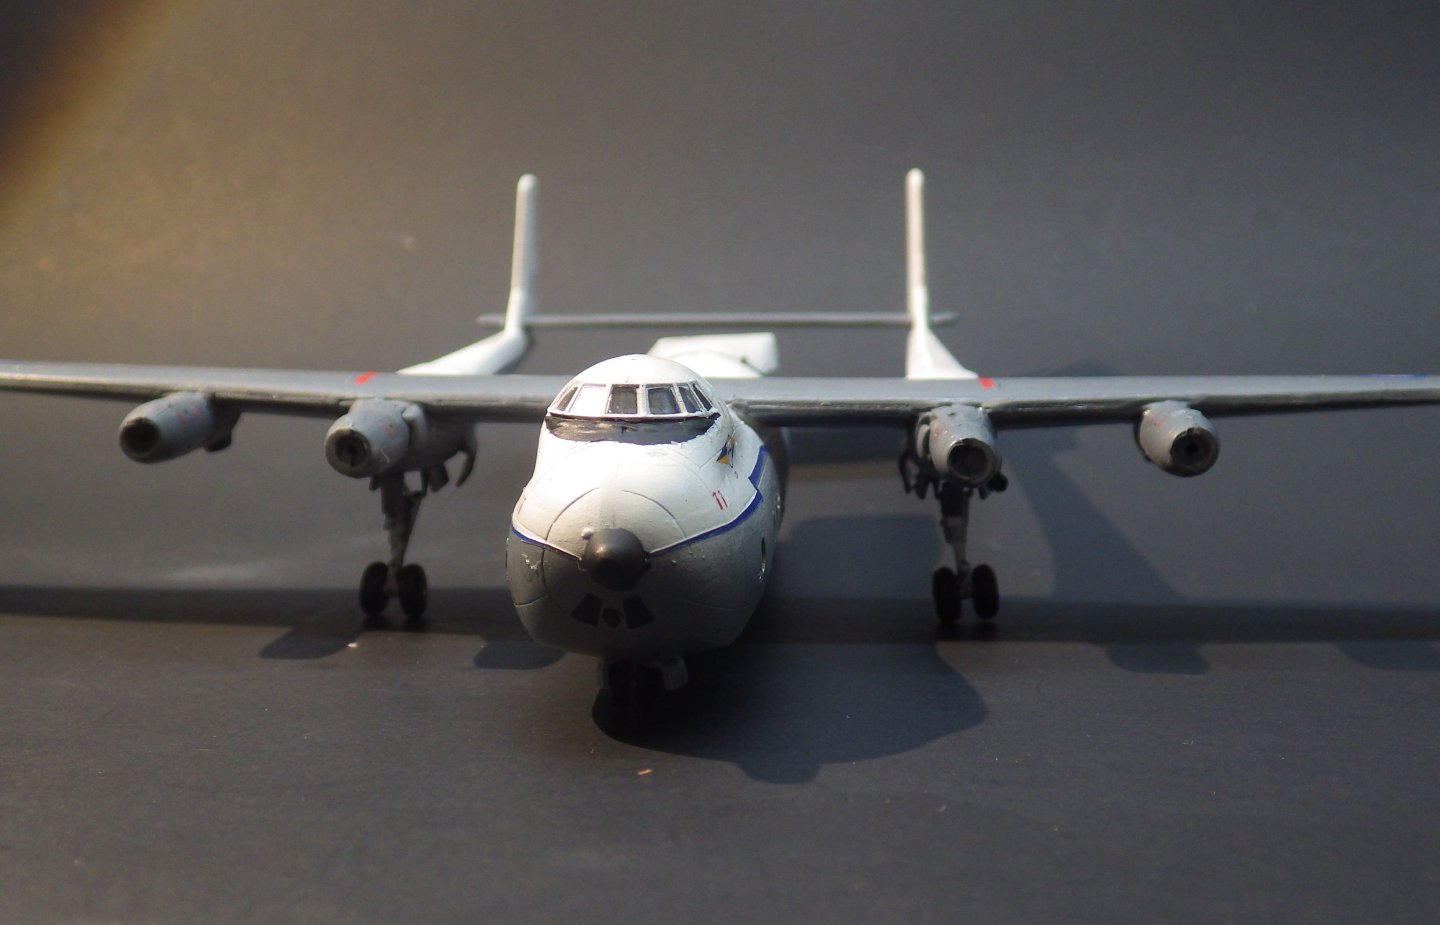
Thank you very much Mike. It’s been a bit of a struggle but I’m pleased to see an Argosy taking shape. The Beverley might have to wait for a while though. I feel the need to start something Flyhawk alan
-
Beautiful finish Craig. You need some cat hairs 😃 Alan
-
Thank you very much Phil. alan
-
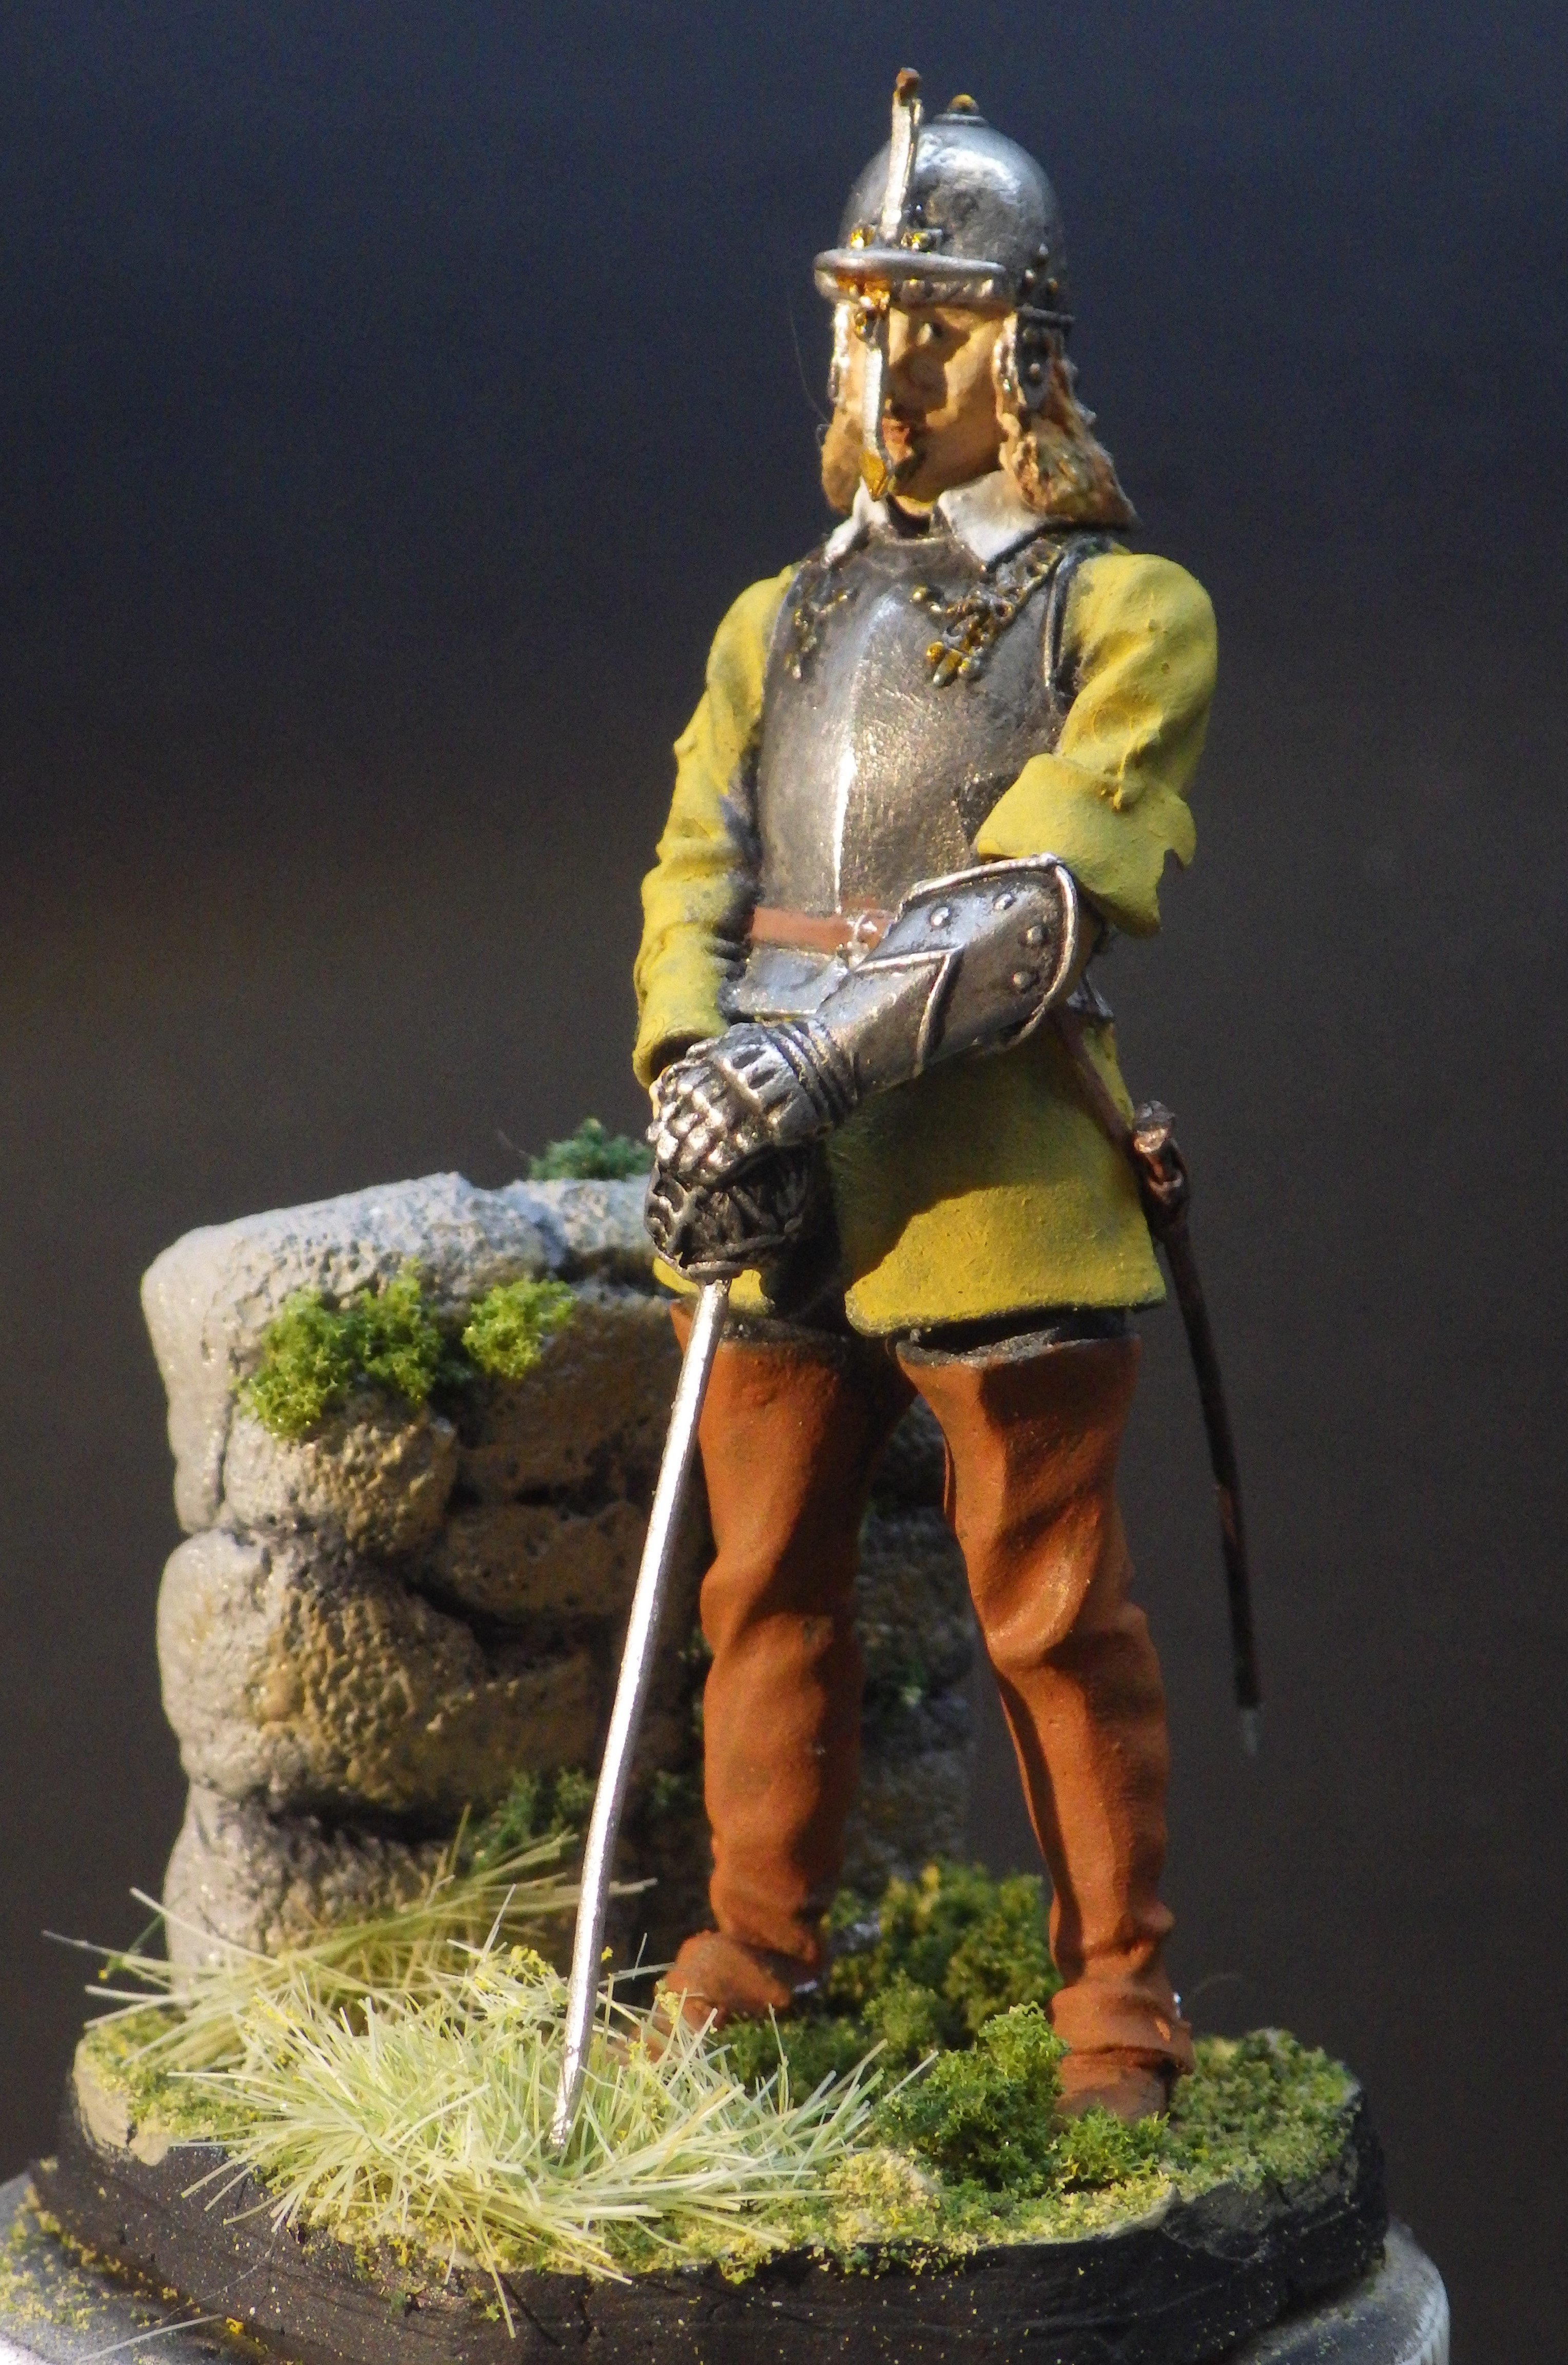
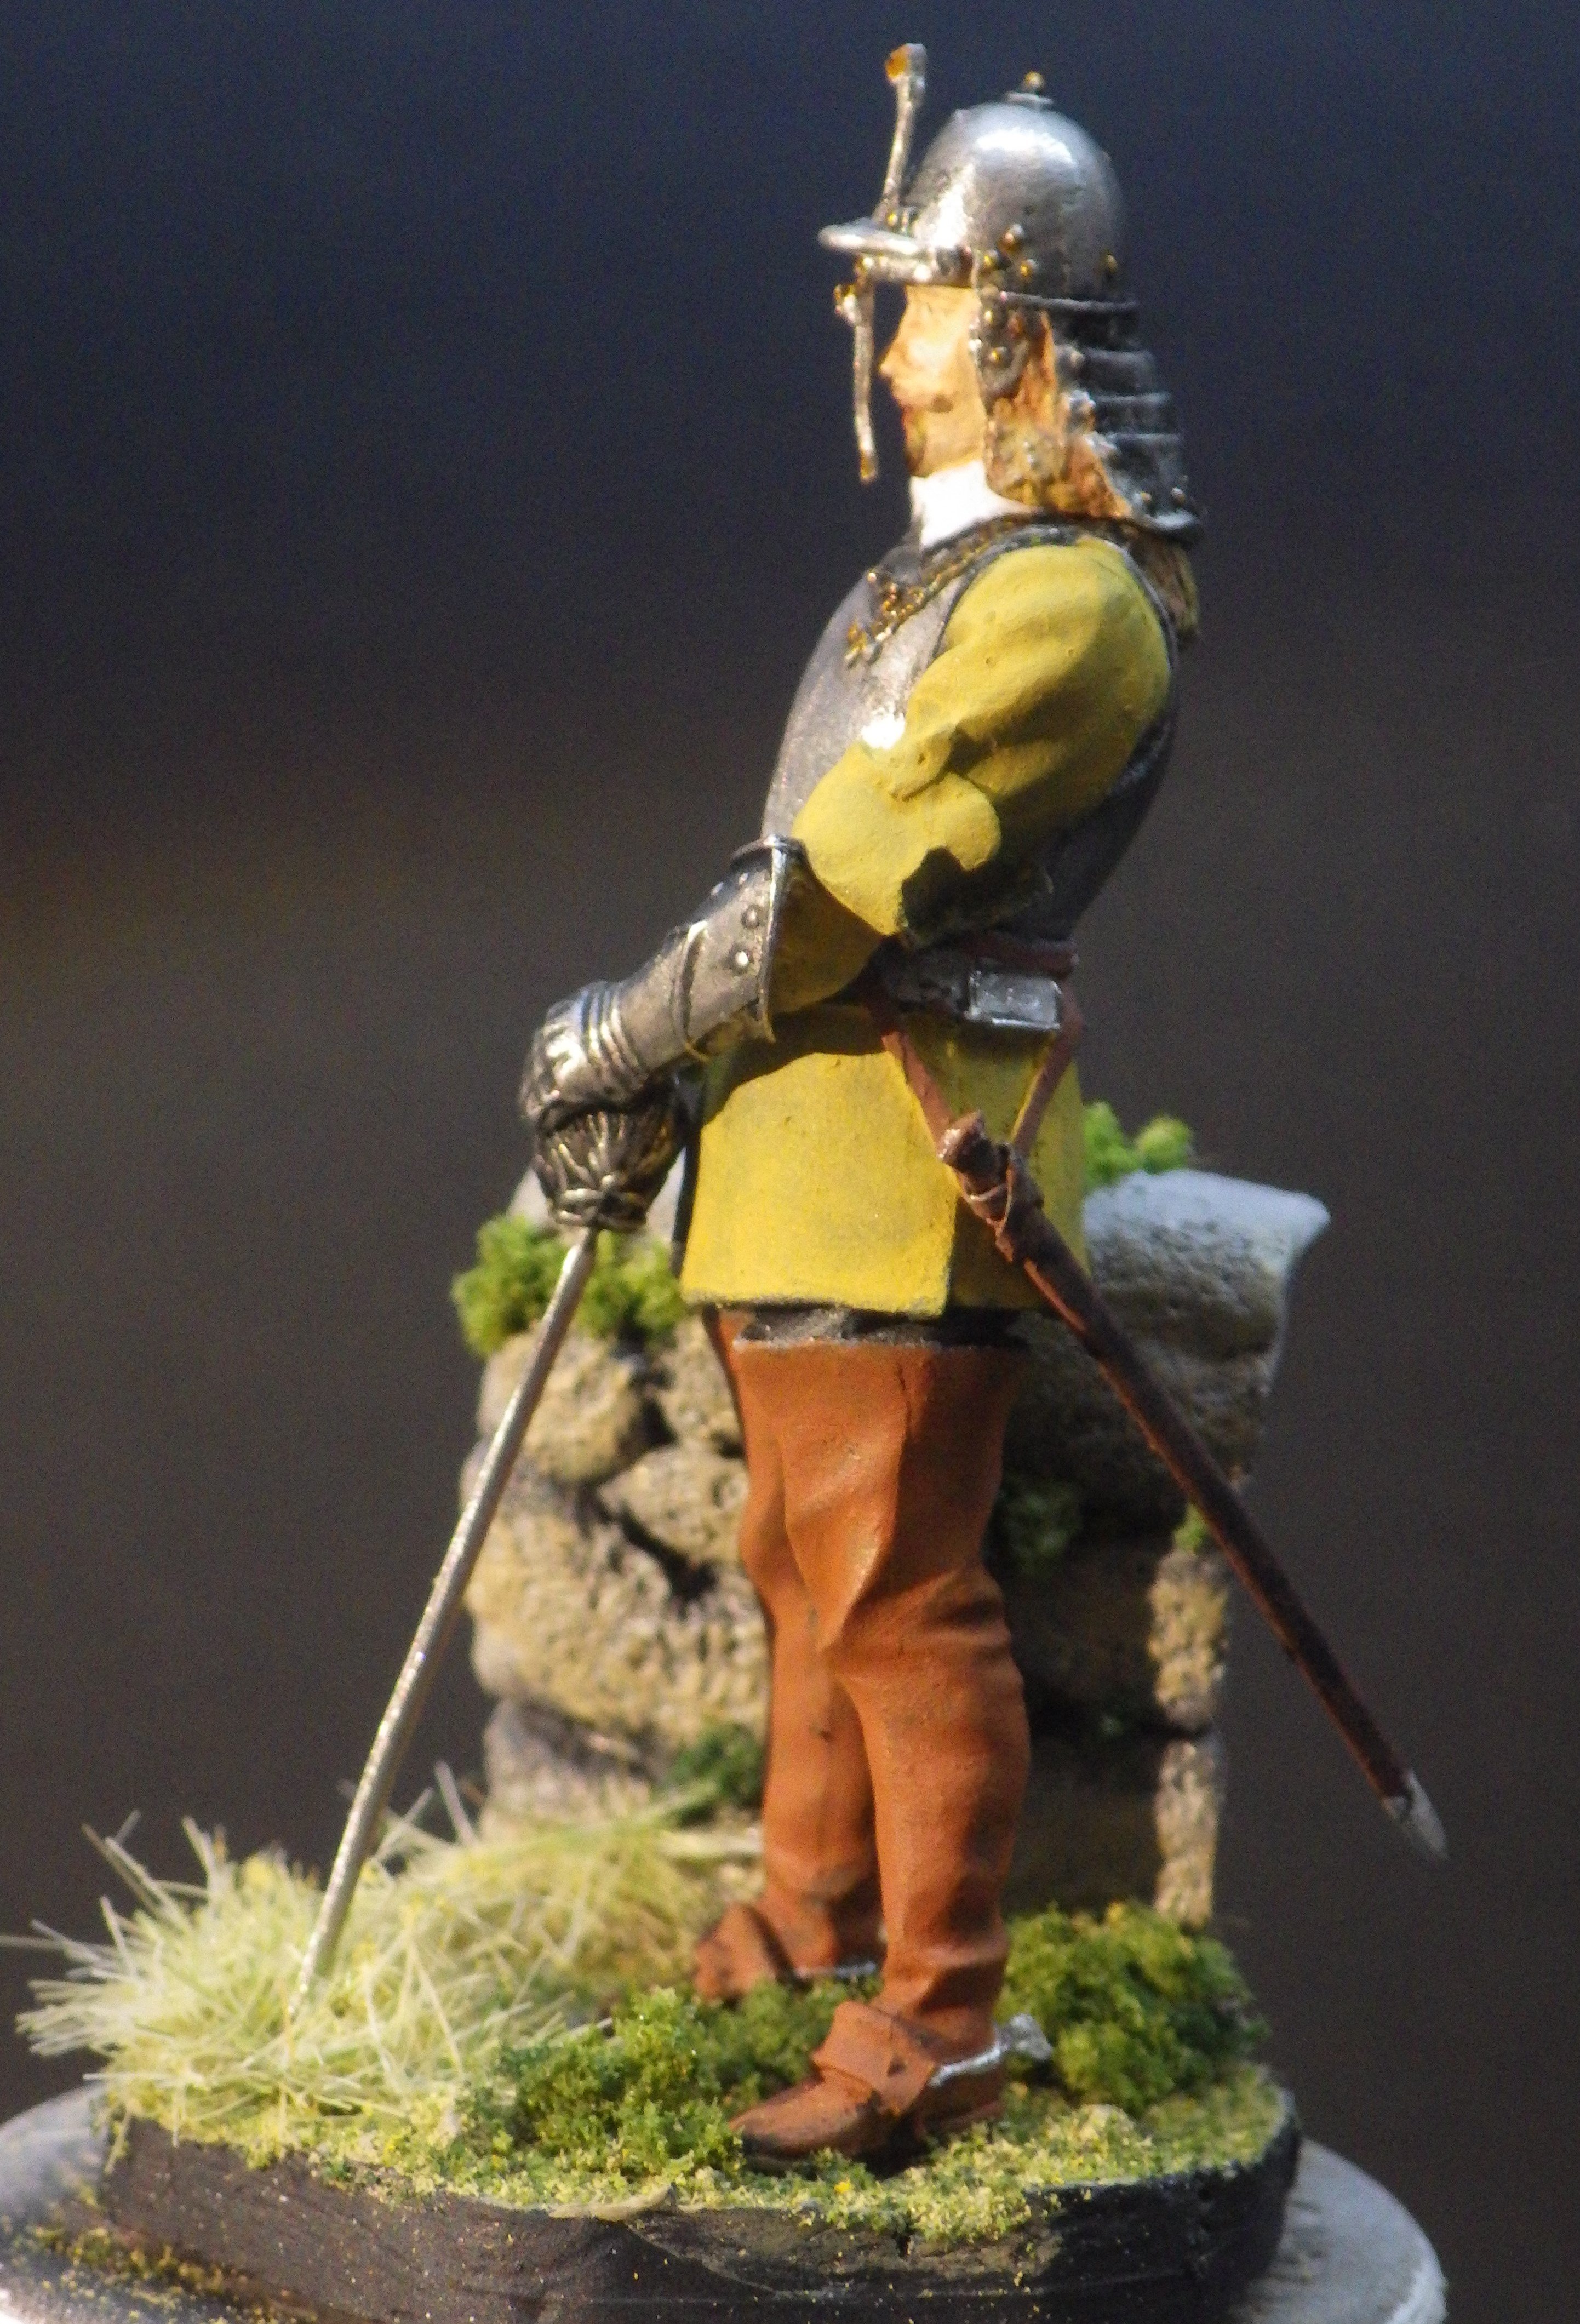
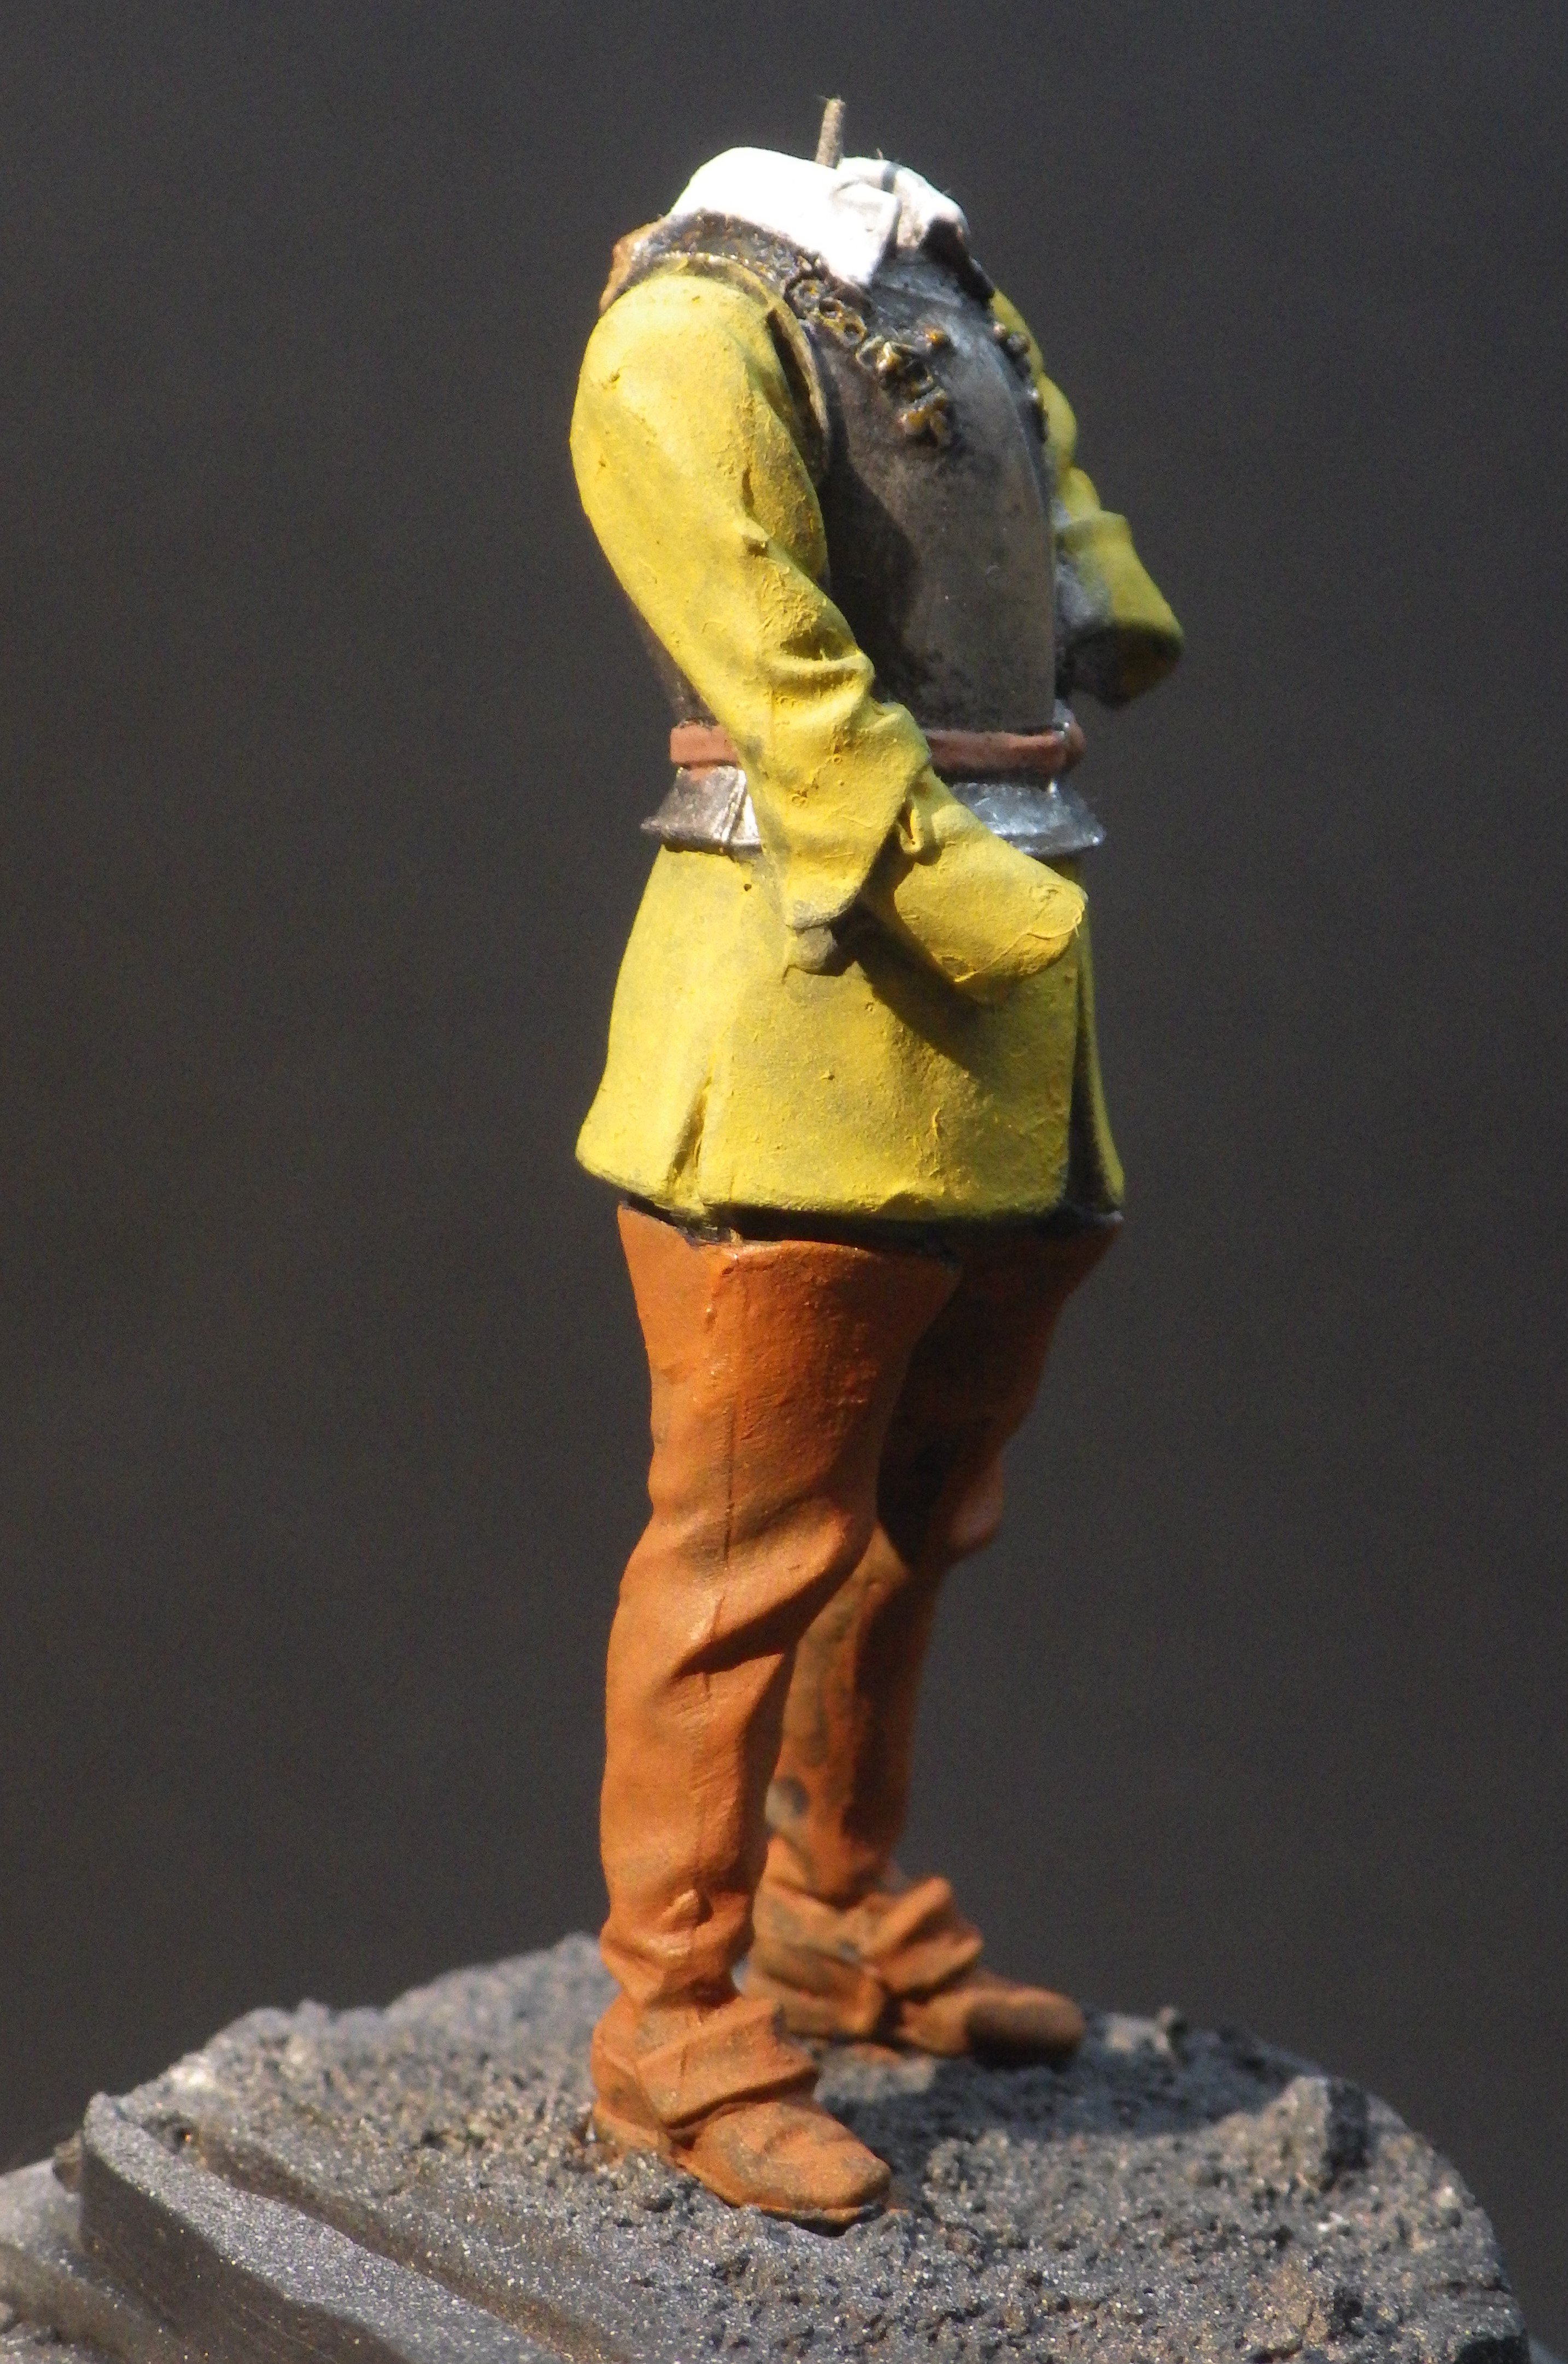
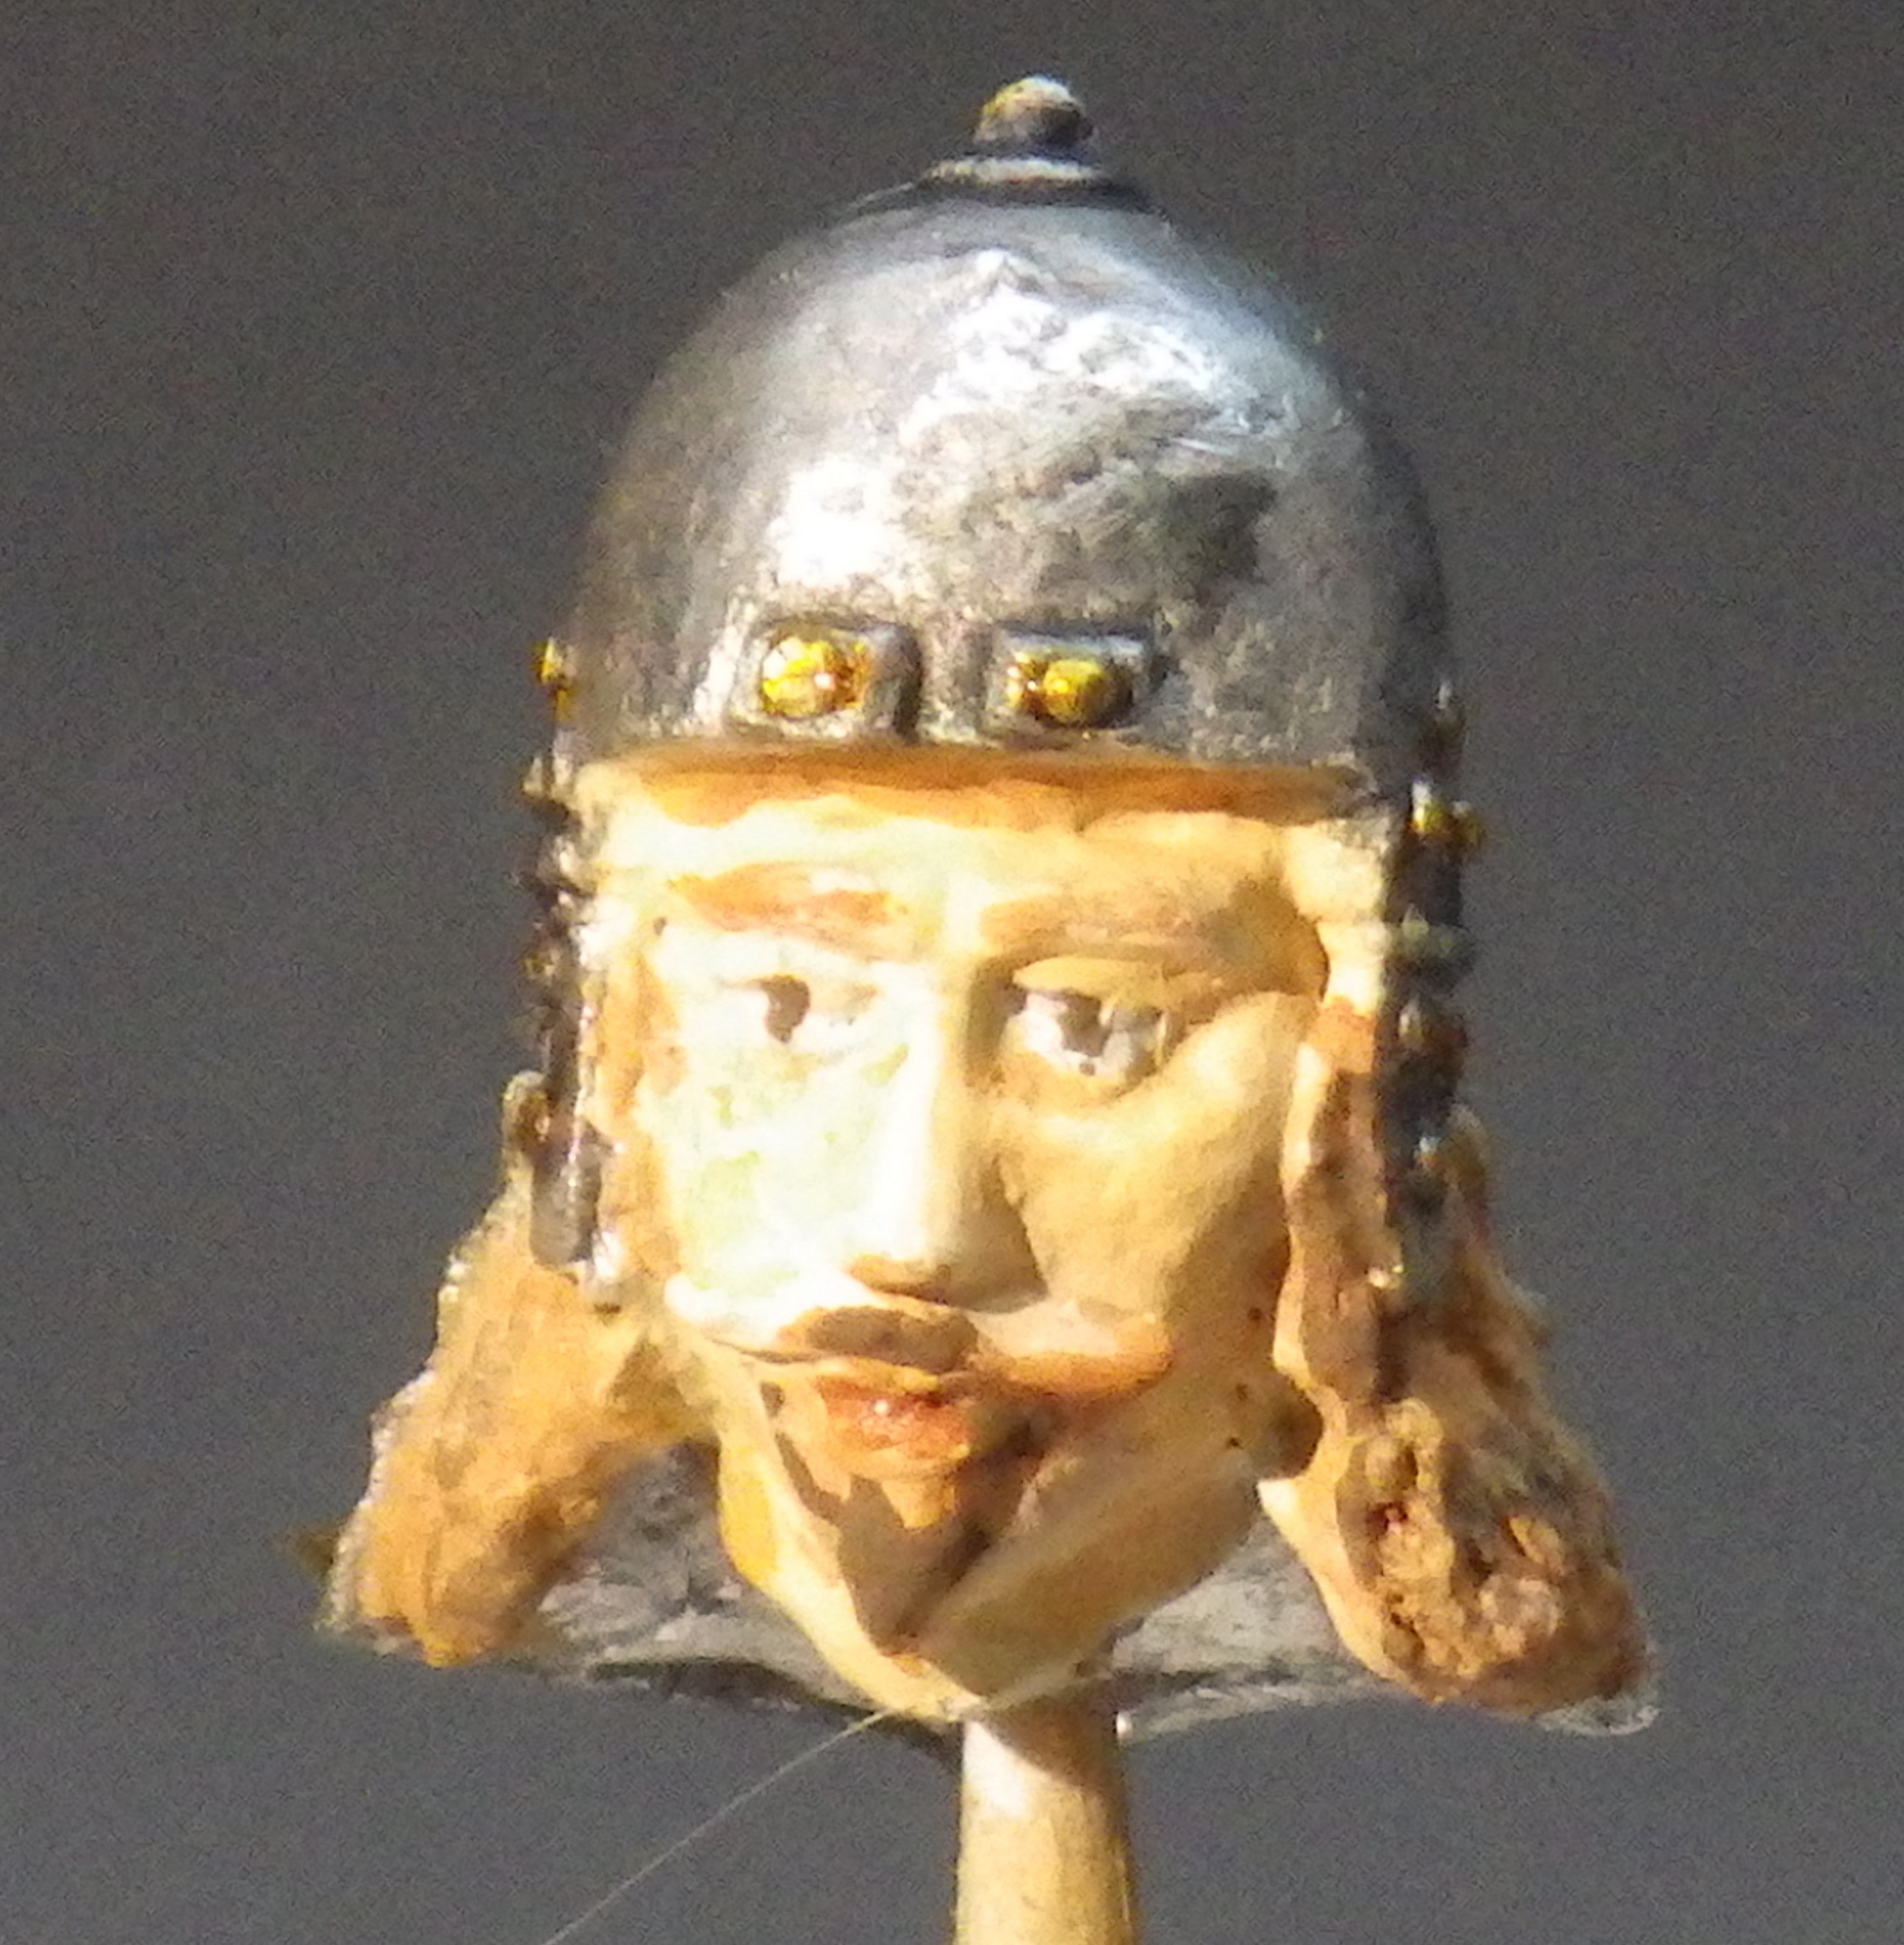
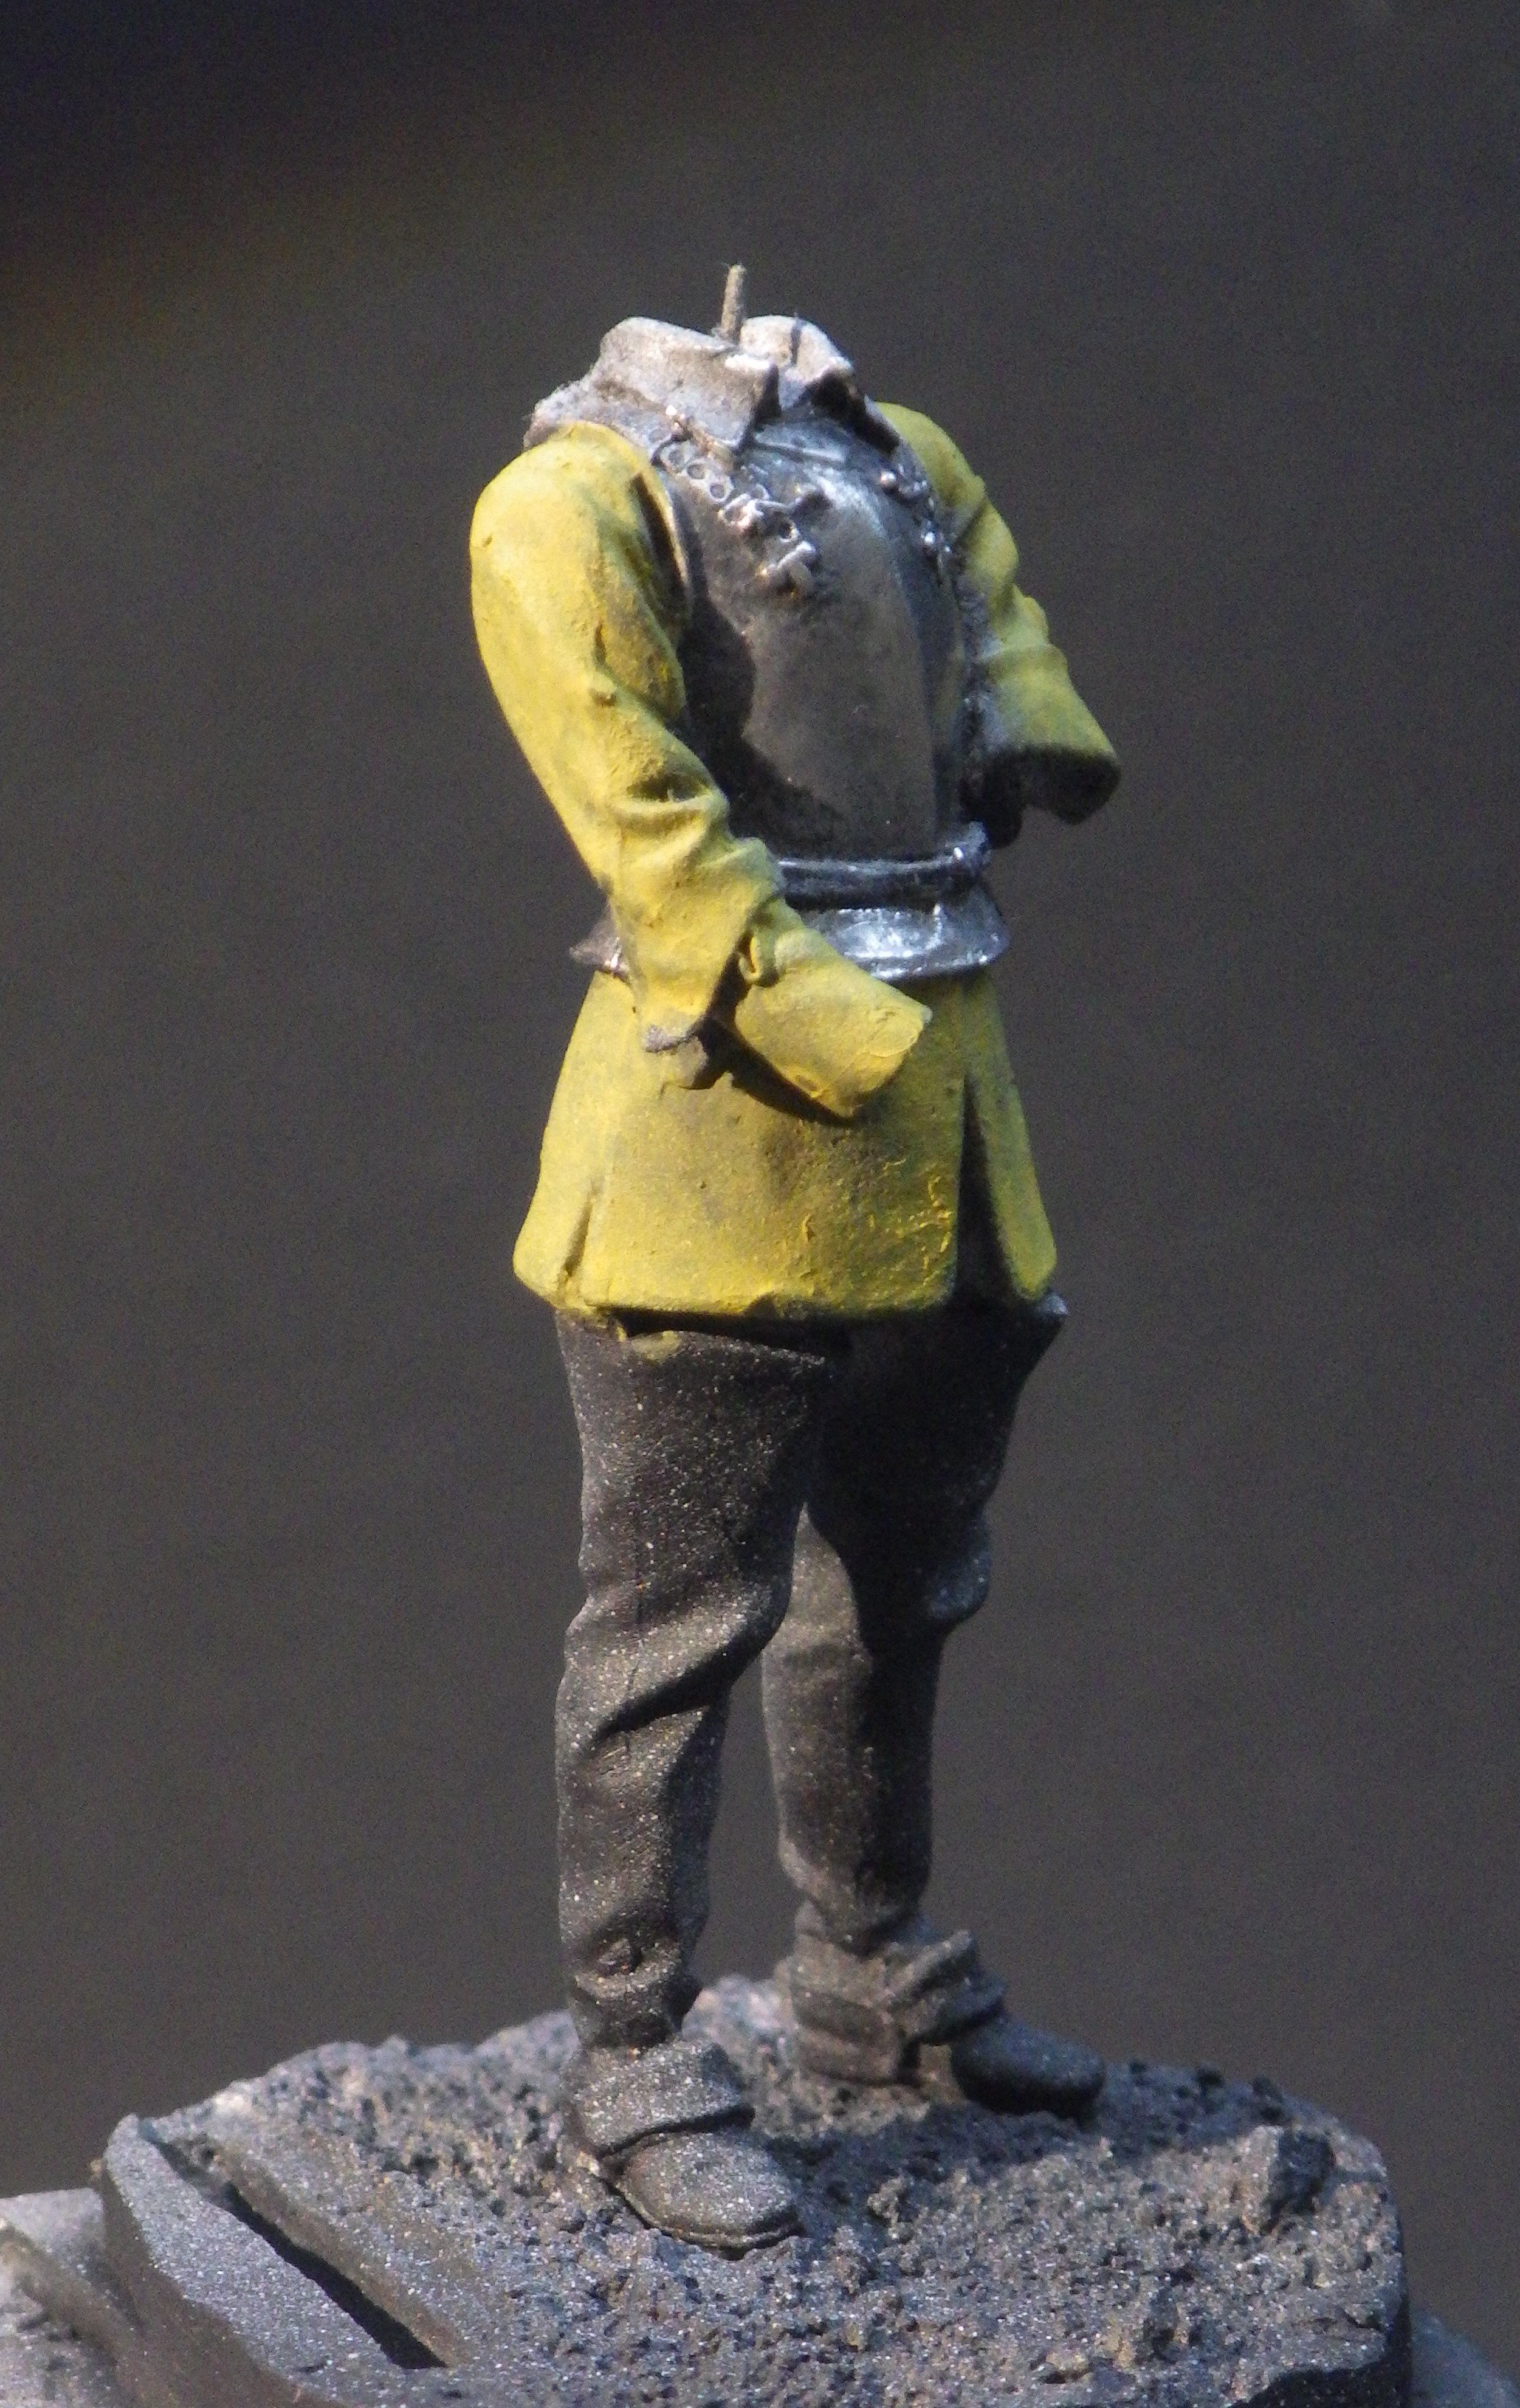
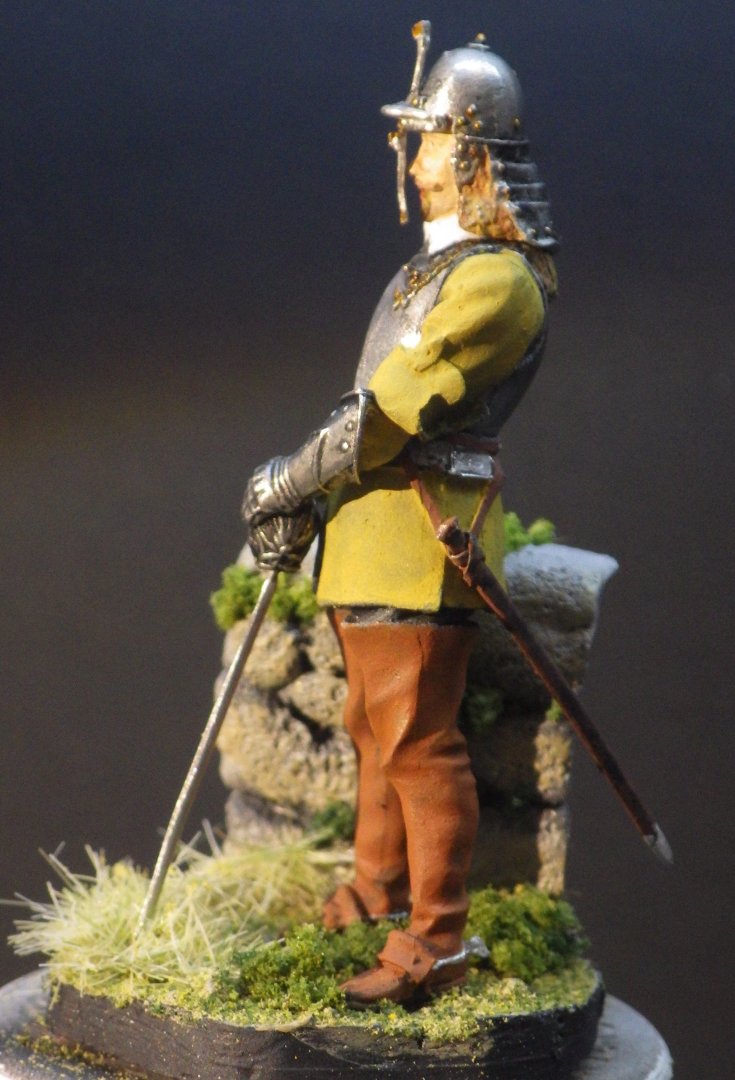
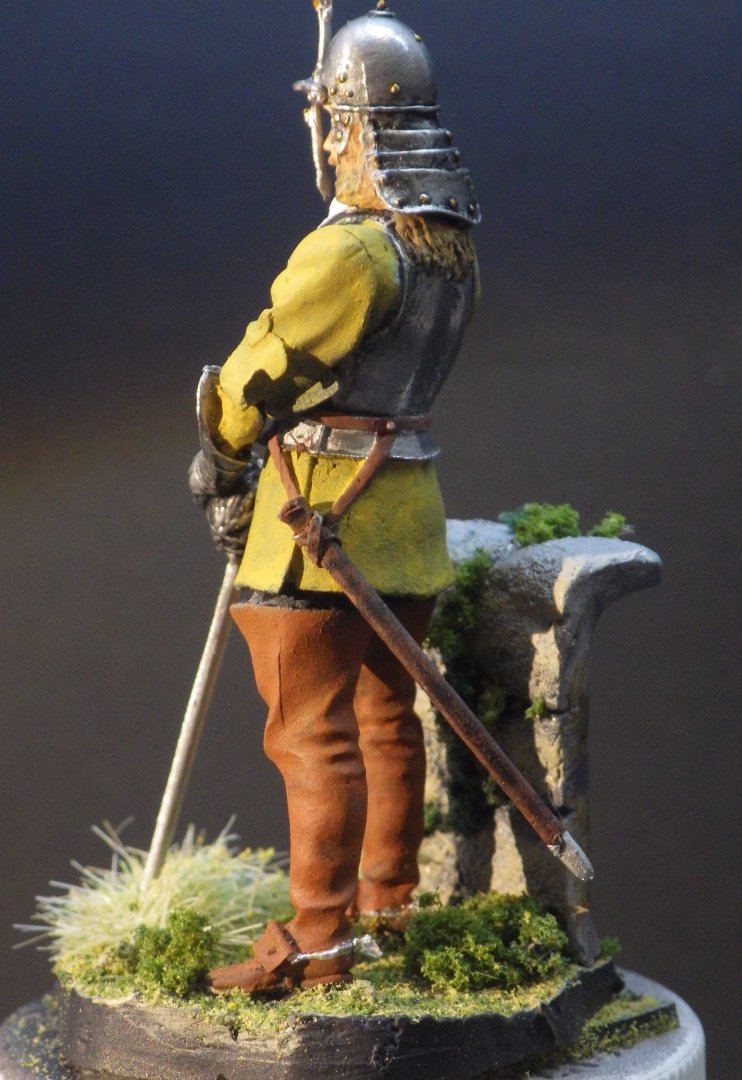
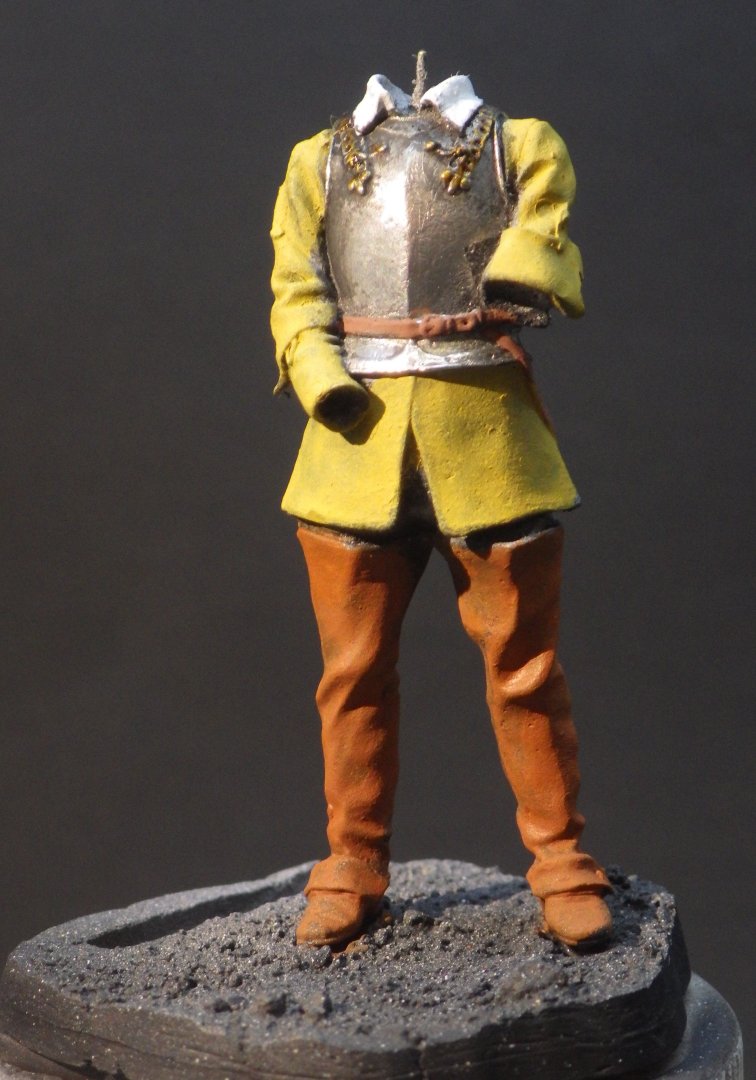
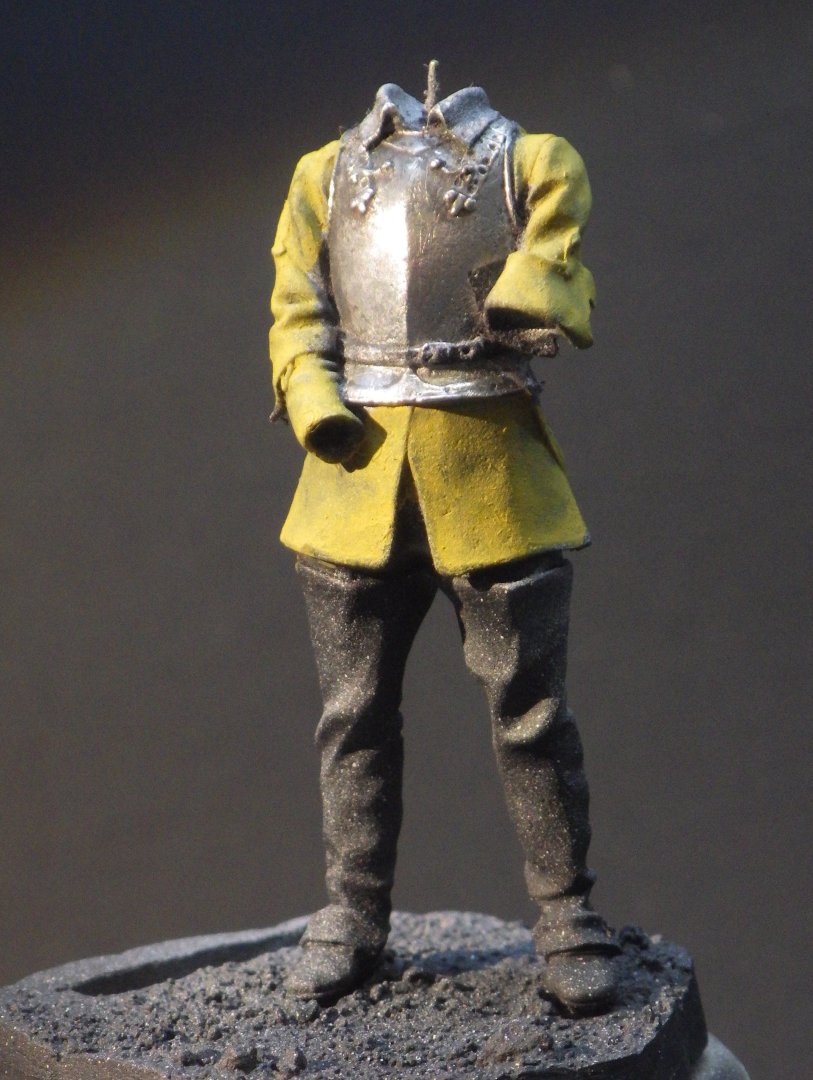
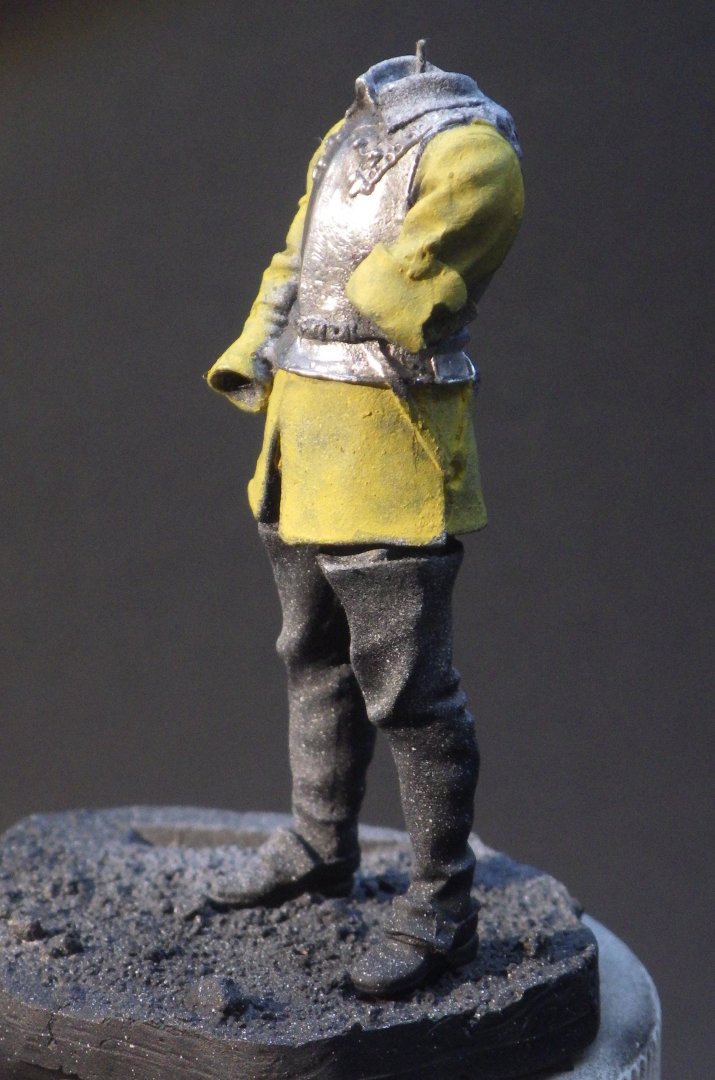
Suddenly I seem to have reached the end of the Nate build. Taking the time to pin the head, arm and sword scabbard made all the difference. No more trying to hold everything in place and then watching it slowly fall out of place leaving a trail of half cured epoxy behind. This time things popped into place and stayed. I've added the spurs, and scabbard. The face piece for the helmet was a bad fit and needed a lot of filing to get it to slot into place the nose guard and helmet piece are very delicate but they stayed intact. The base was gussied up with Woodland Scenics grass and foliage. If he is supposed to be at Edgehill that was in October so the grass is starting to die and lose its green. I reworked the hair with Vallejo Cork Brown and didn't like the uniform colour so I dry brushed it with Yellow Ochre and I think its better. I think I have read that blonde hair is even worse to paint. I still have a few more A-G figures on the shelf and the interest is still strong so I think I will try another one to distract me from the Argosy when it gets annoying. Thanks for looking in, for the likes and the helpful comments. Alan


- 27 replies
-
- 10
-

-

-
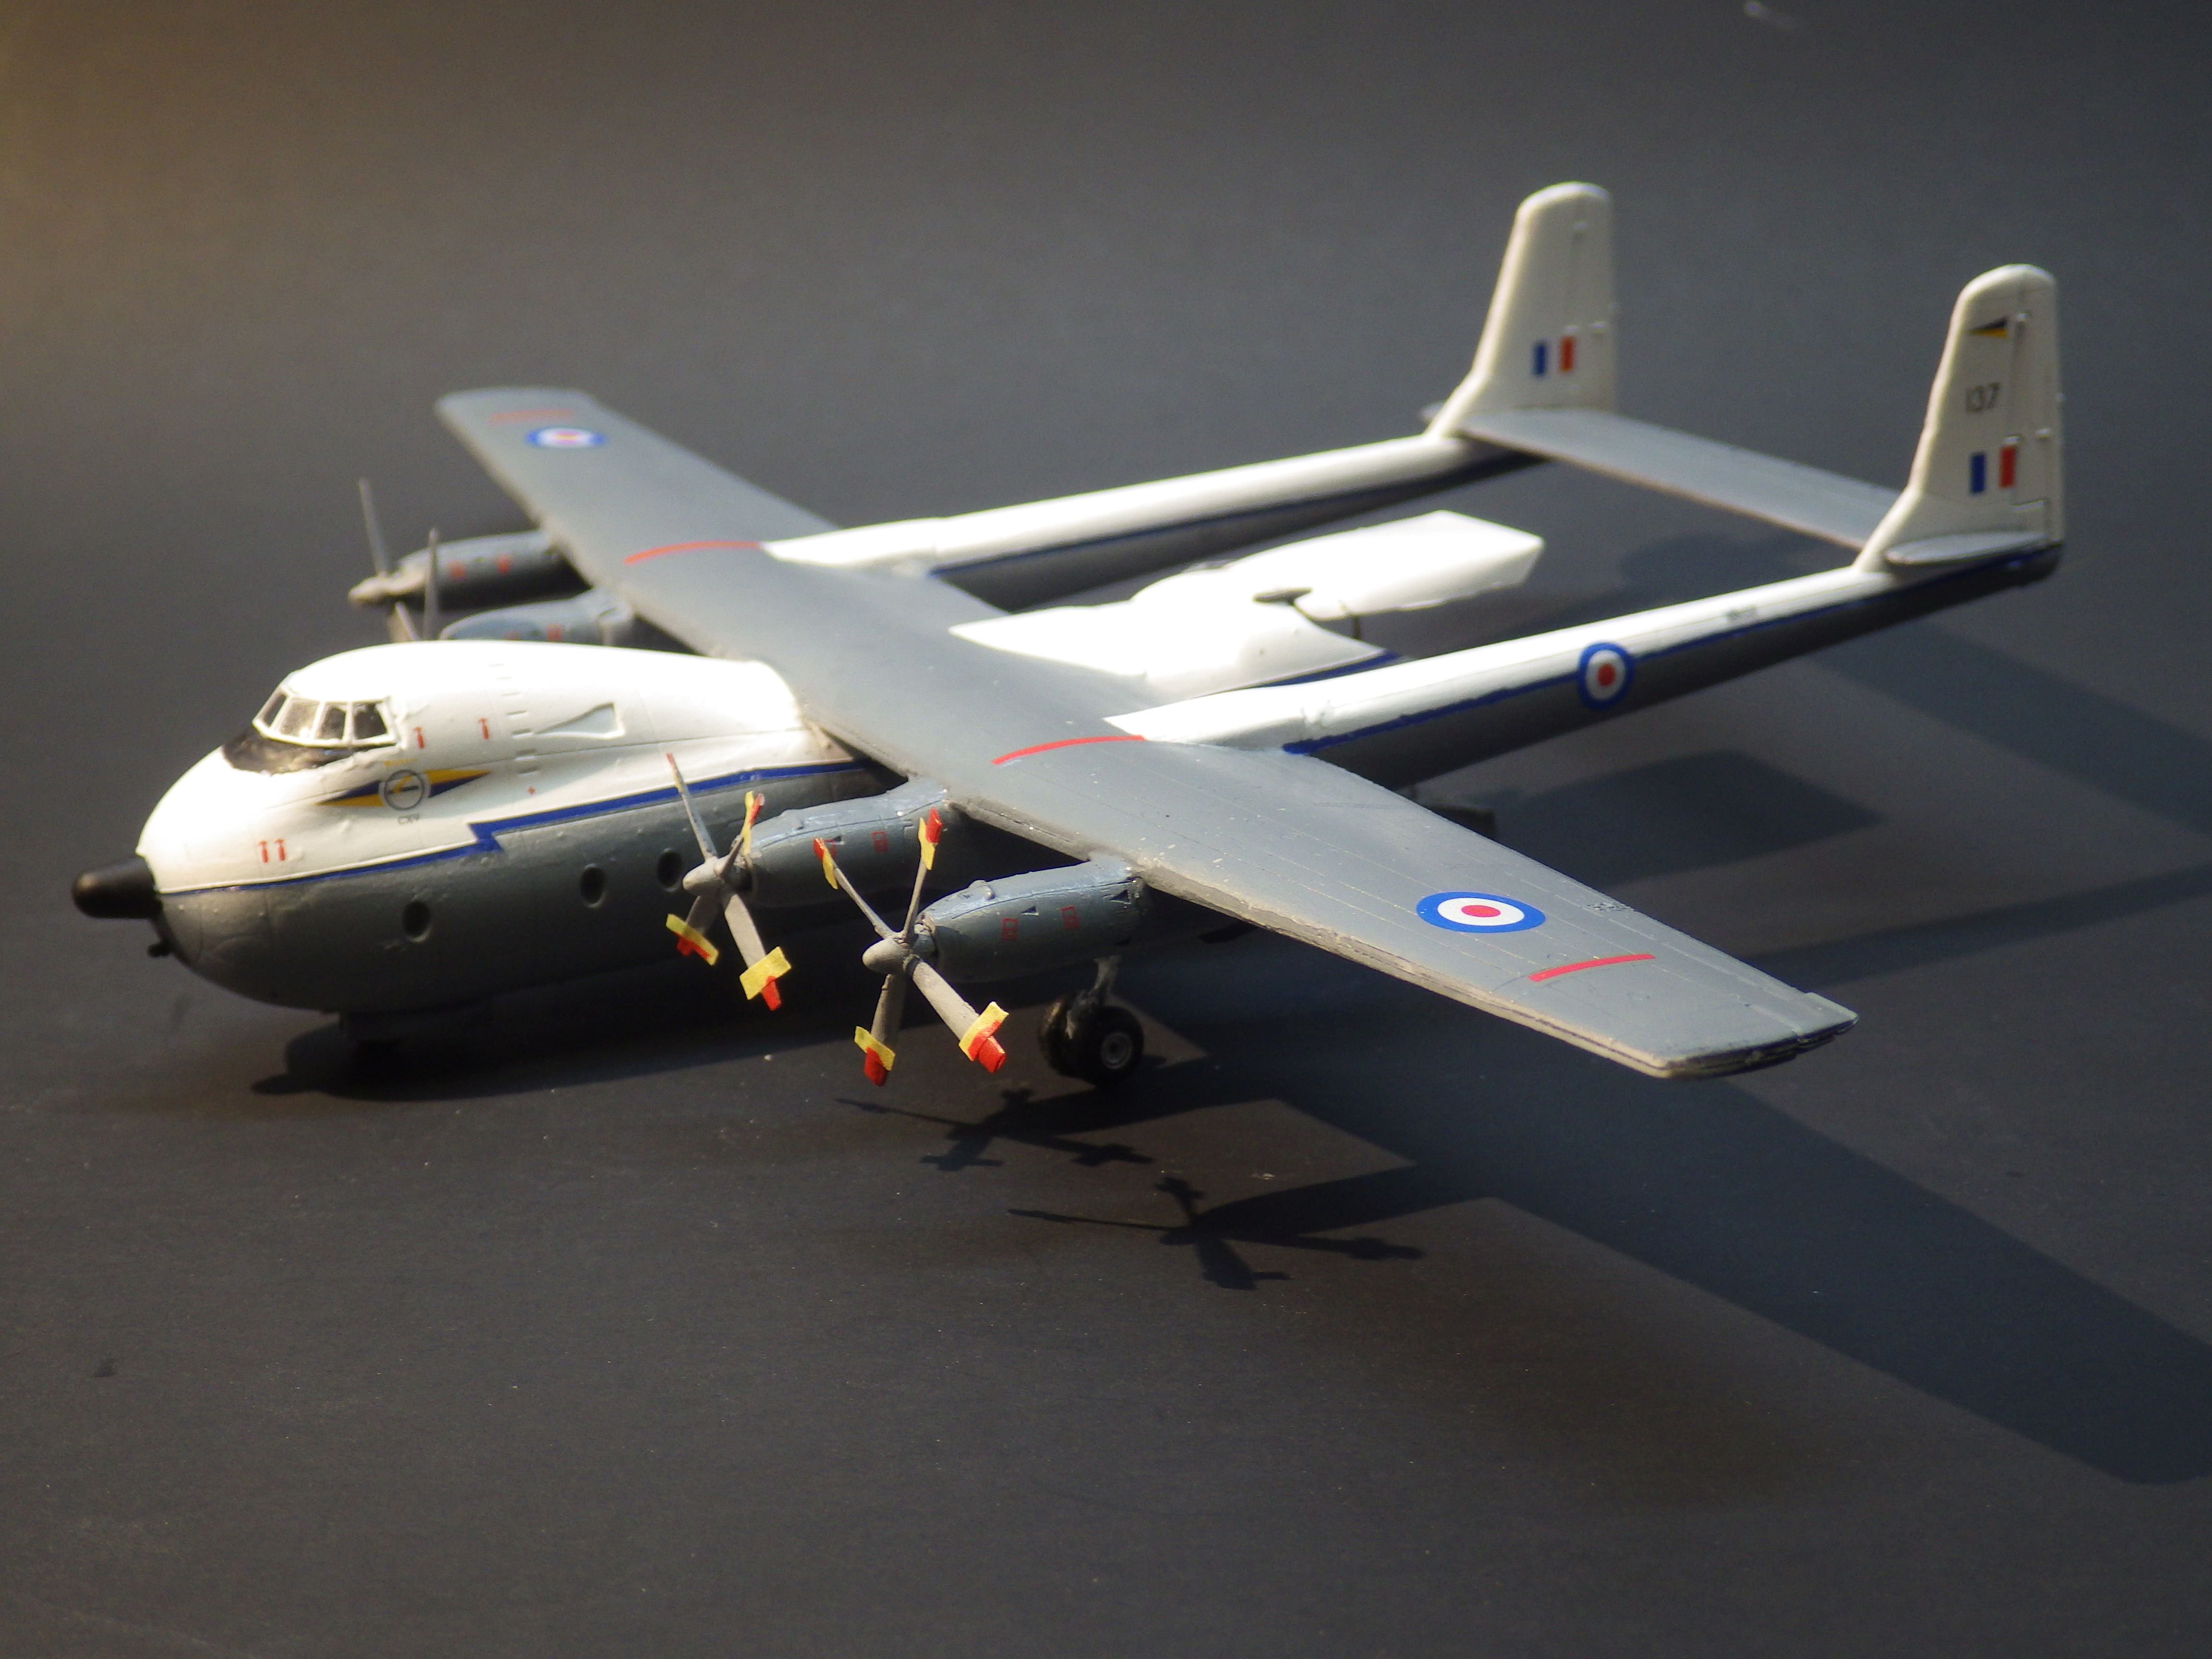
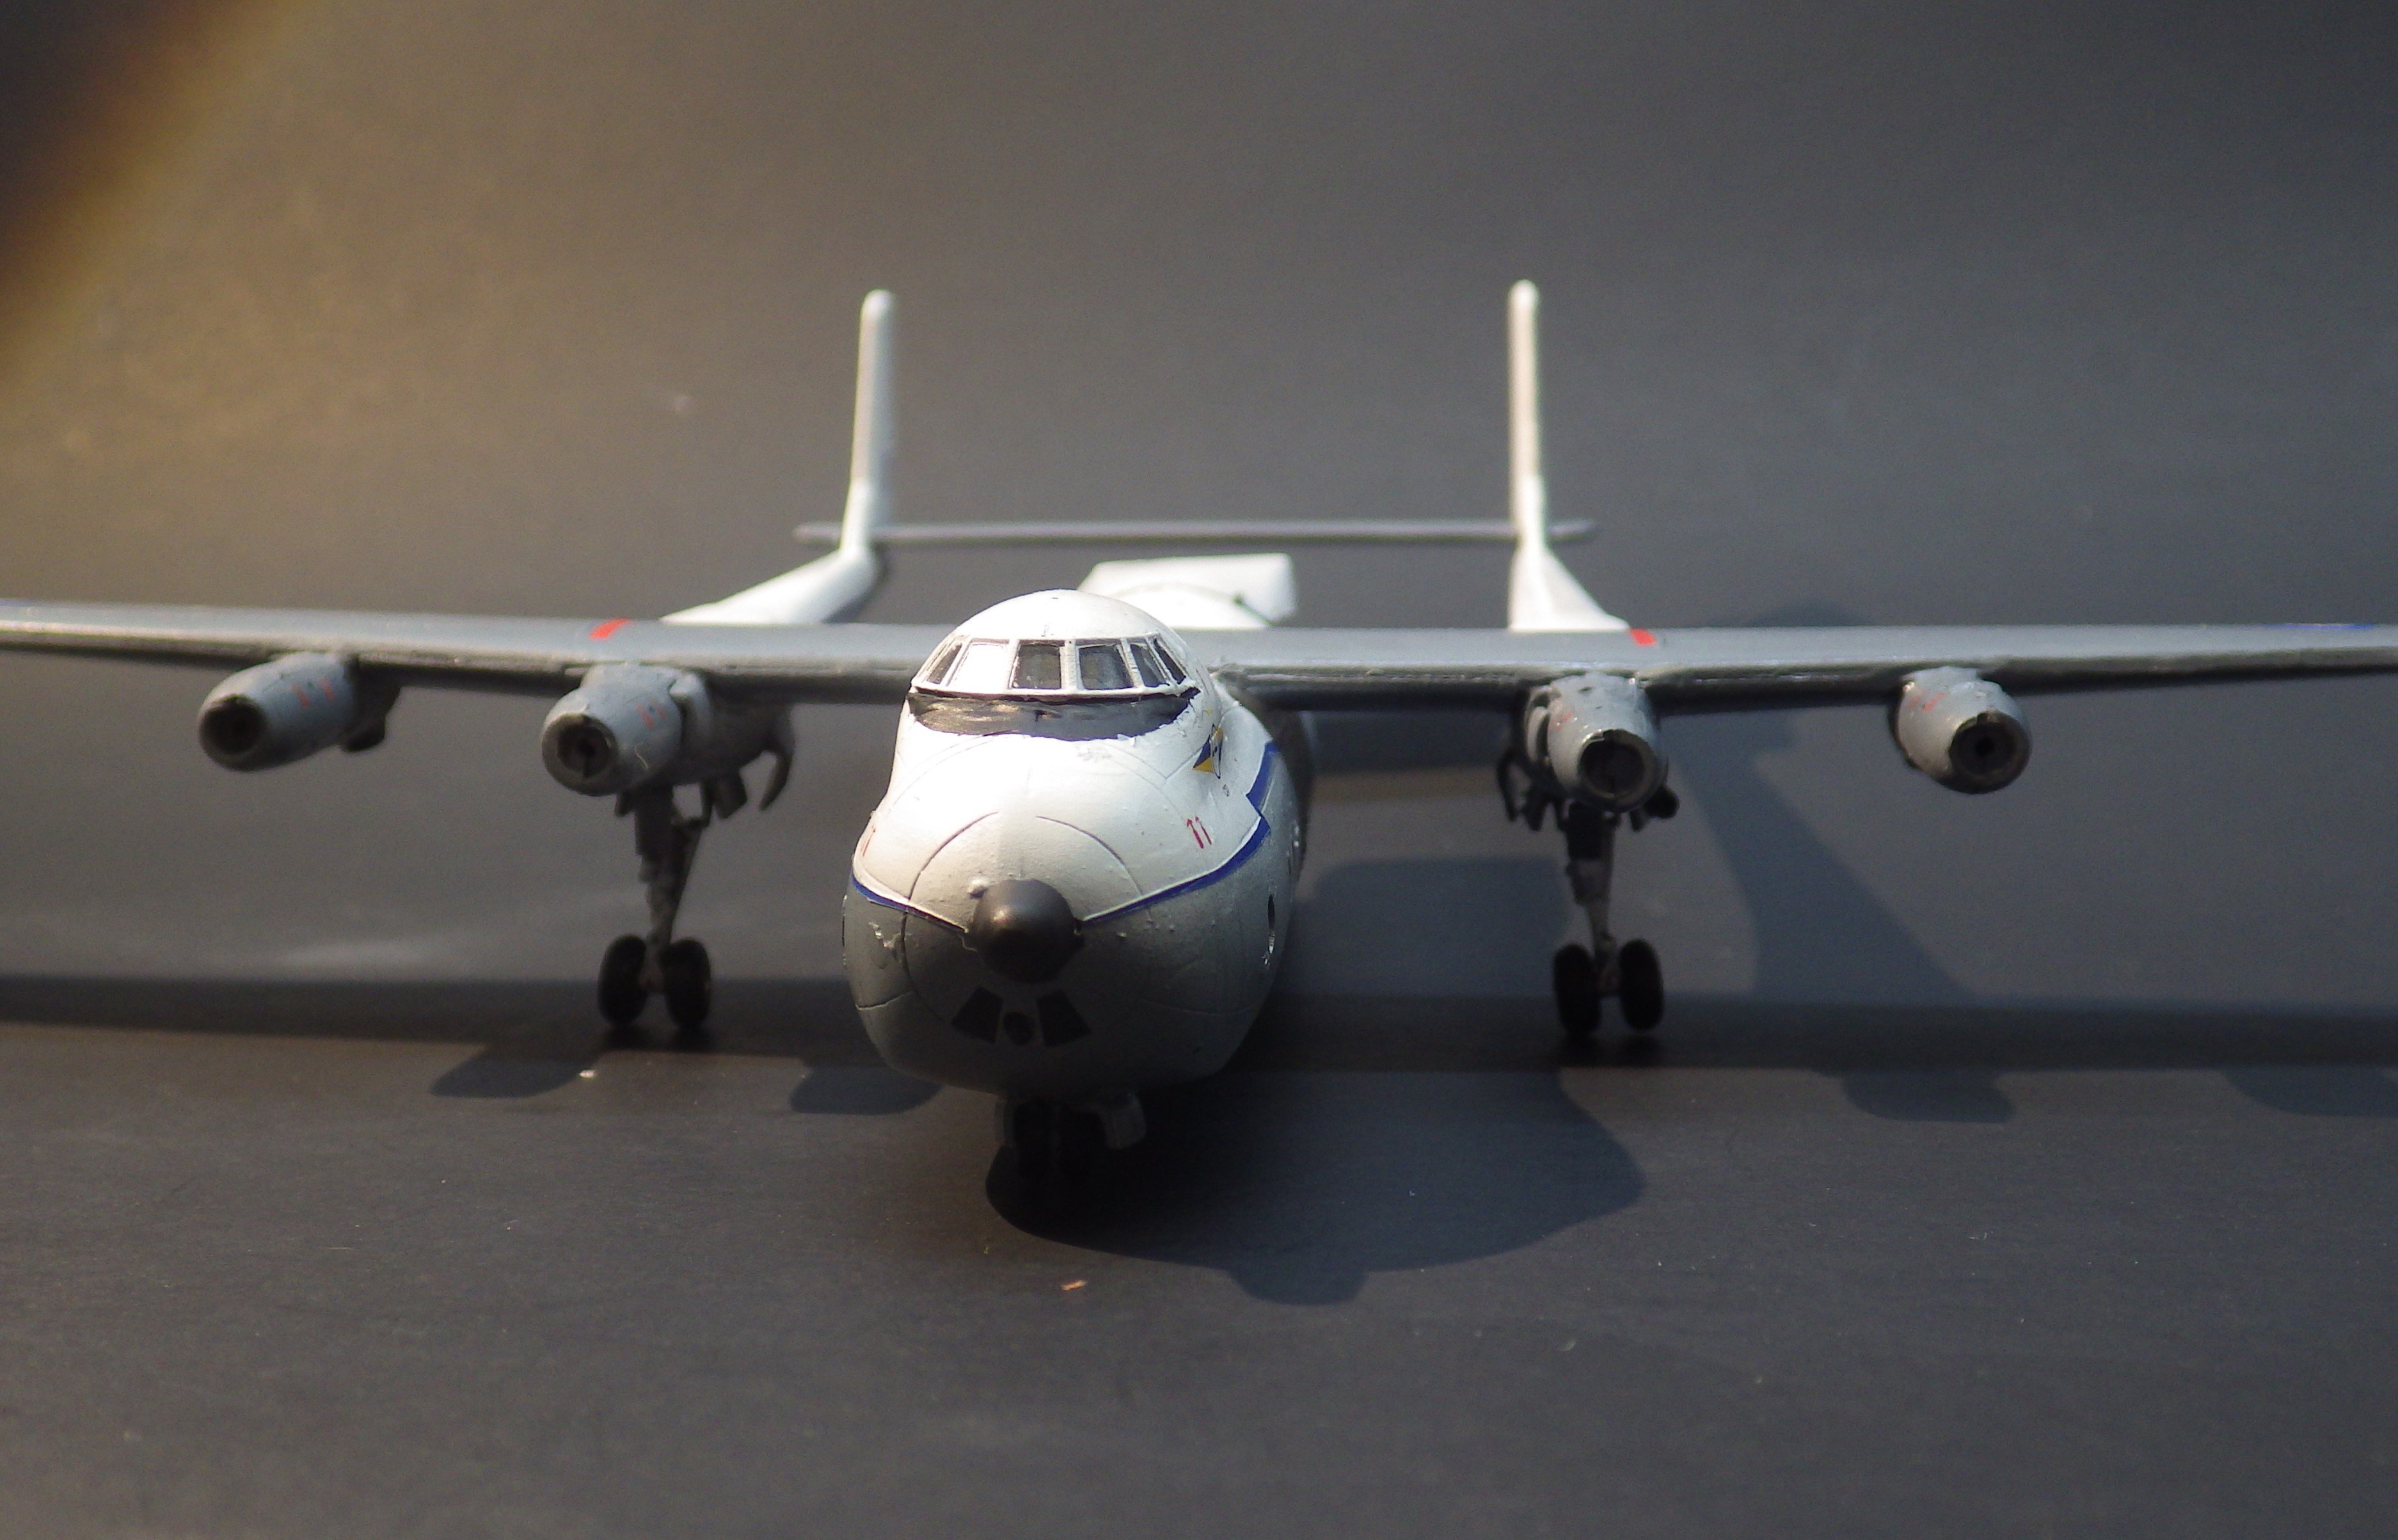
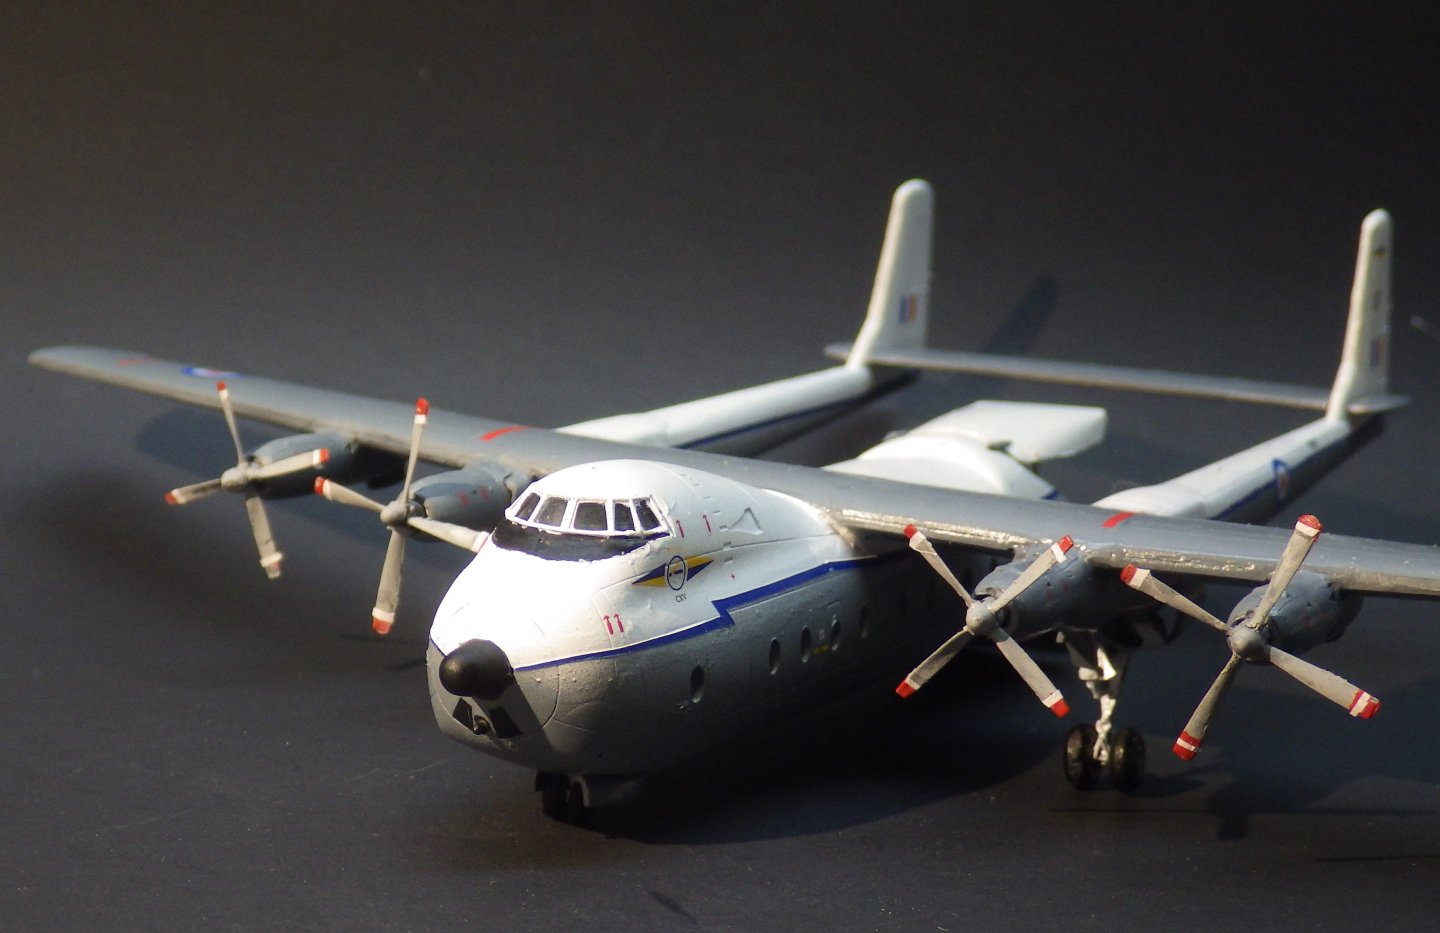
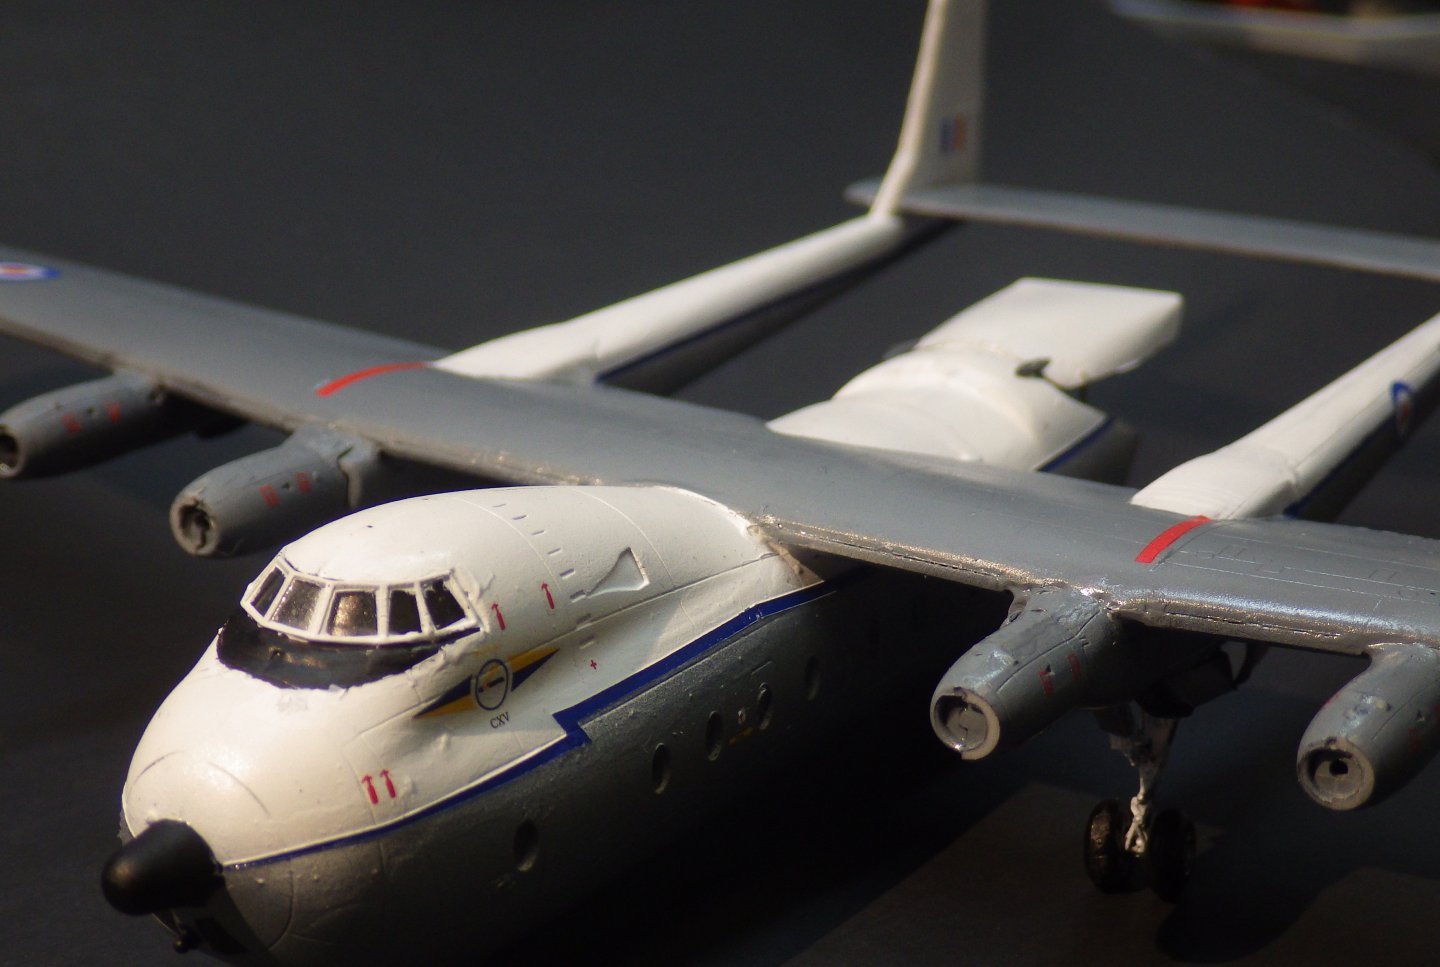
I can't believe how much time I have spent fiddling with the prop tips. It hasn't helped that the Ammo acrylic red seems to be flaking off. I'm try the Tamiya version next. I had a thought for the white stripe. One of the paint schemes that Mikro Mir provided decals for involved fairly large white lettering. I started butchering the X, P, $ and ) to get small straight bits and tried them on the blade tips. It looks promising although I will have to touch up the red. Its just occurred to me - I am going to have to repeat the same exercise on the back side of teh props. Oh well. Thanks for looking in, the likes and the comments Alan

- 52 replies
-
- 11
-
-
Thank you very much OC. I'm starting to get an itch to do a figure in full armour. I will have to look back at the Art Girona catalogue Alan
-
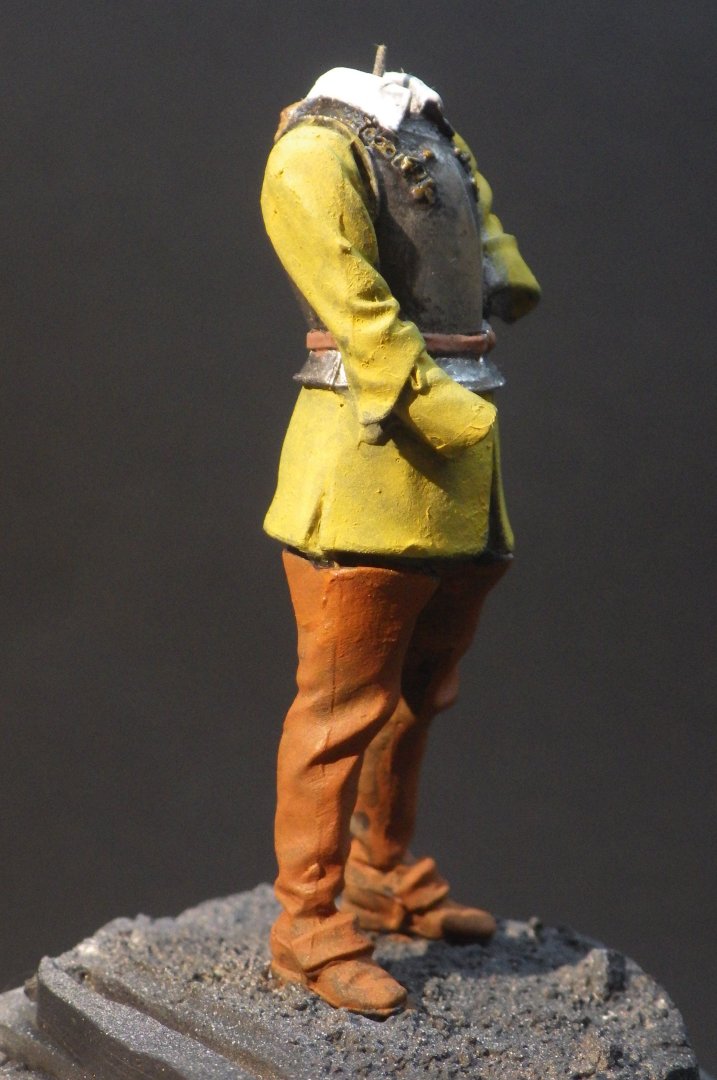
Hi Craig From what I have read Fiennes command a troop of cavalry at the Battle of Edgehill so I'm guessing this figure is representative of that time. He certainly isn't marching far in those boots. It sounds like plate armour was still pretty effective in the 17th century and infantry still wore a breastplate but it must have been a hot and heavy thing to put up with. The paint is Ammo Acrylic F-552 Red Leather. It is part of a six colour pack intended for face painting. I use it for the lips mostly but it was perfect for those boots. Alan
-
It was another opportunity to revisit one of your great works OC. There is so much going on in this diorama and every detail is superb. Figures, vehicles and the planes its all great. Alan
-
A lot great, tidy work there Yves alan
-
Thank you Mike They seem to be quite short projects and work well around other work Alan
-
Thank you very much Ken Each figure has its new challenges but its greatly enjoyable Alan
-
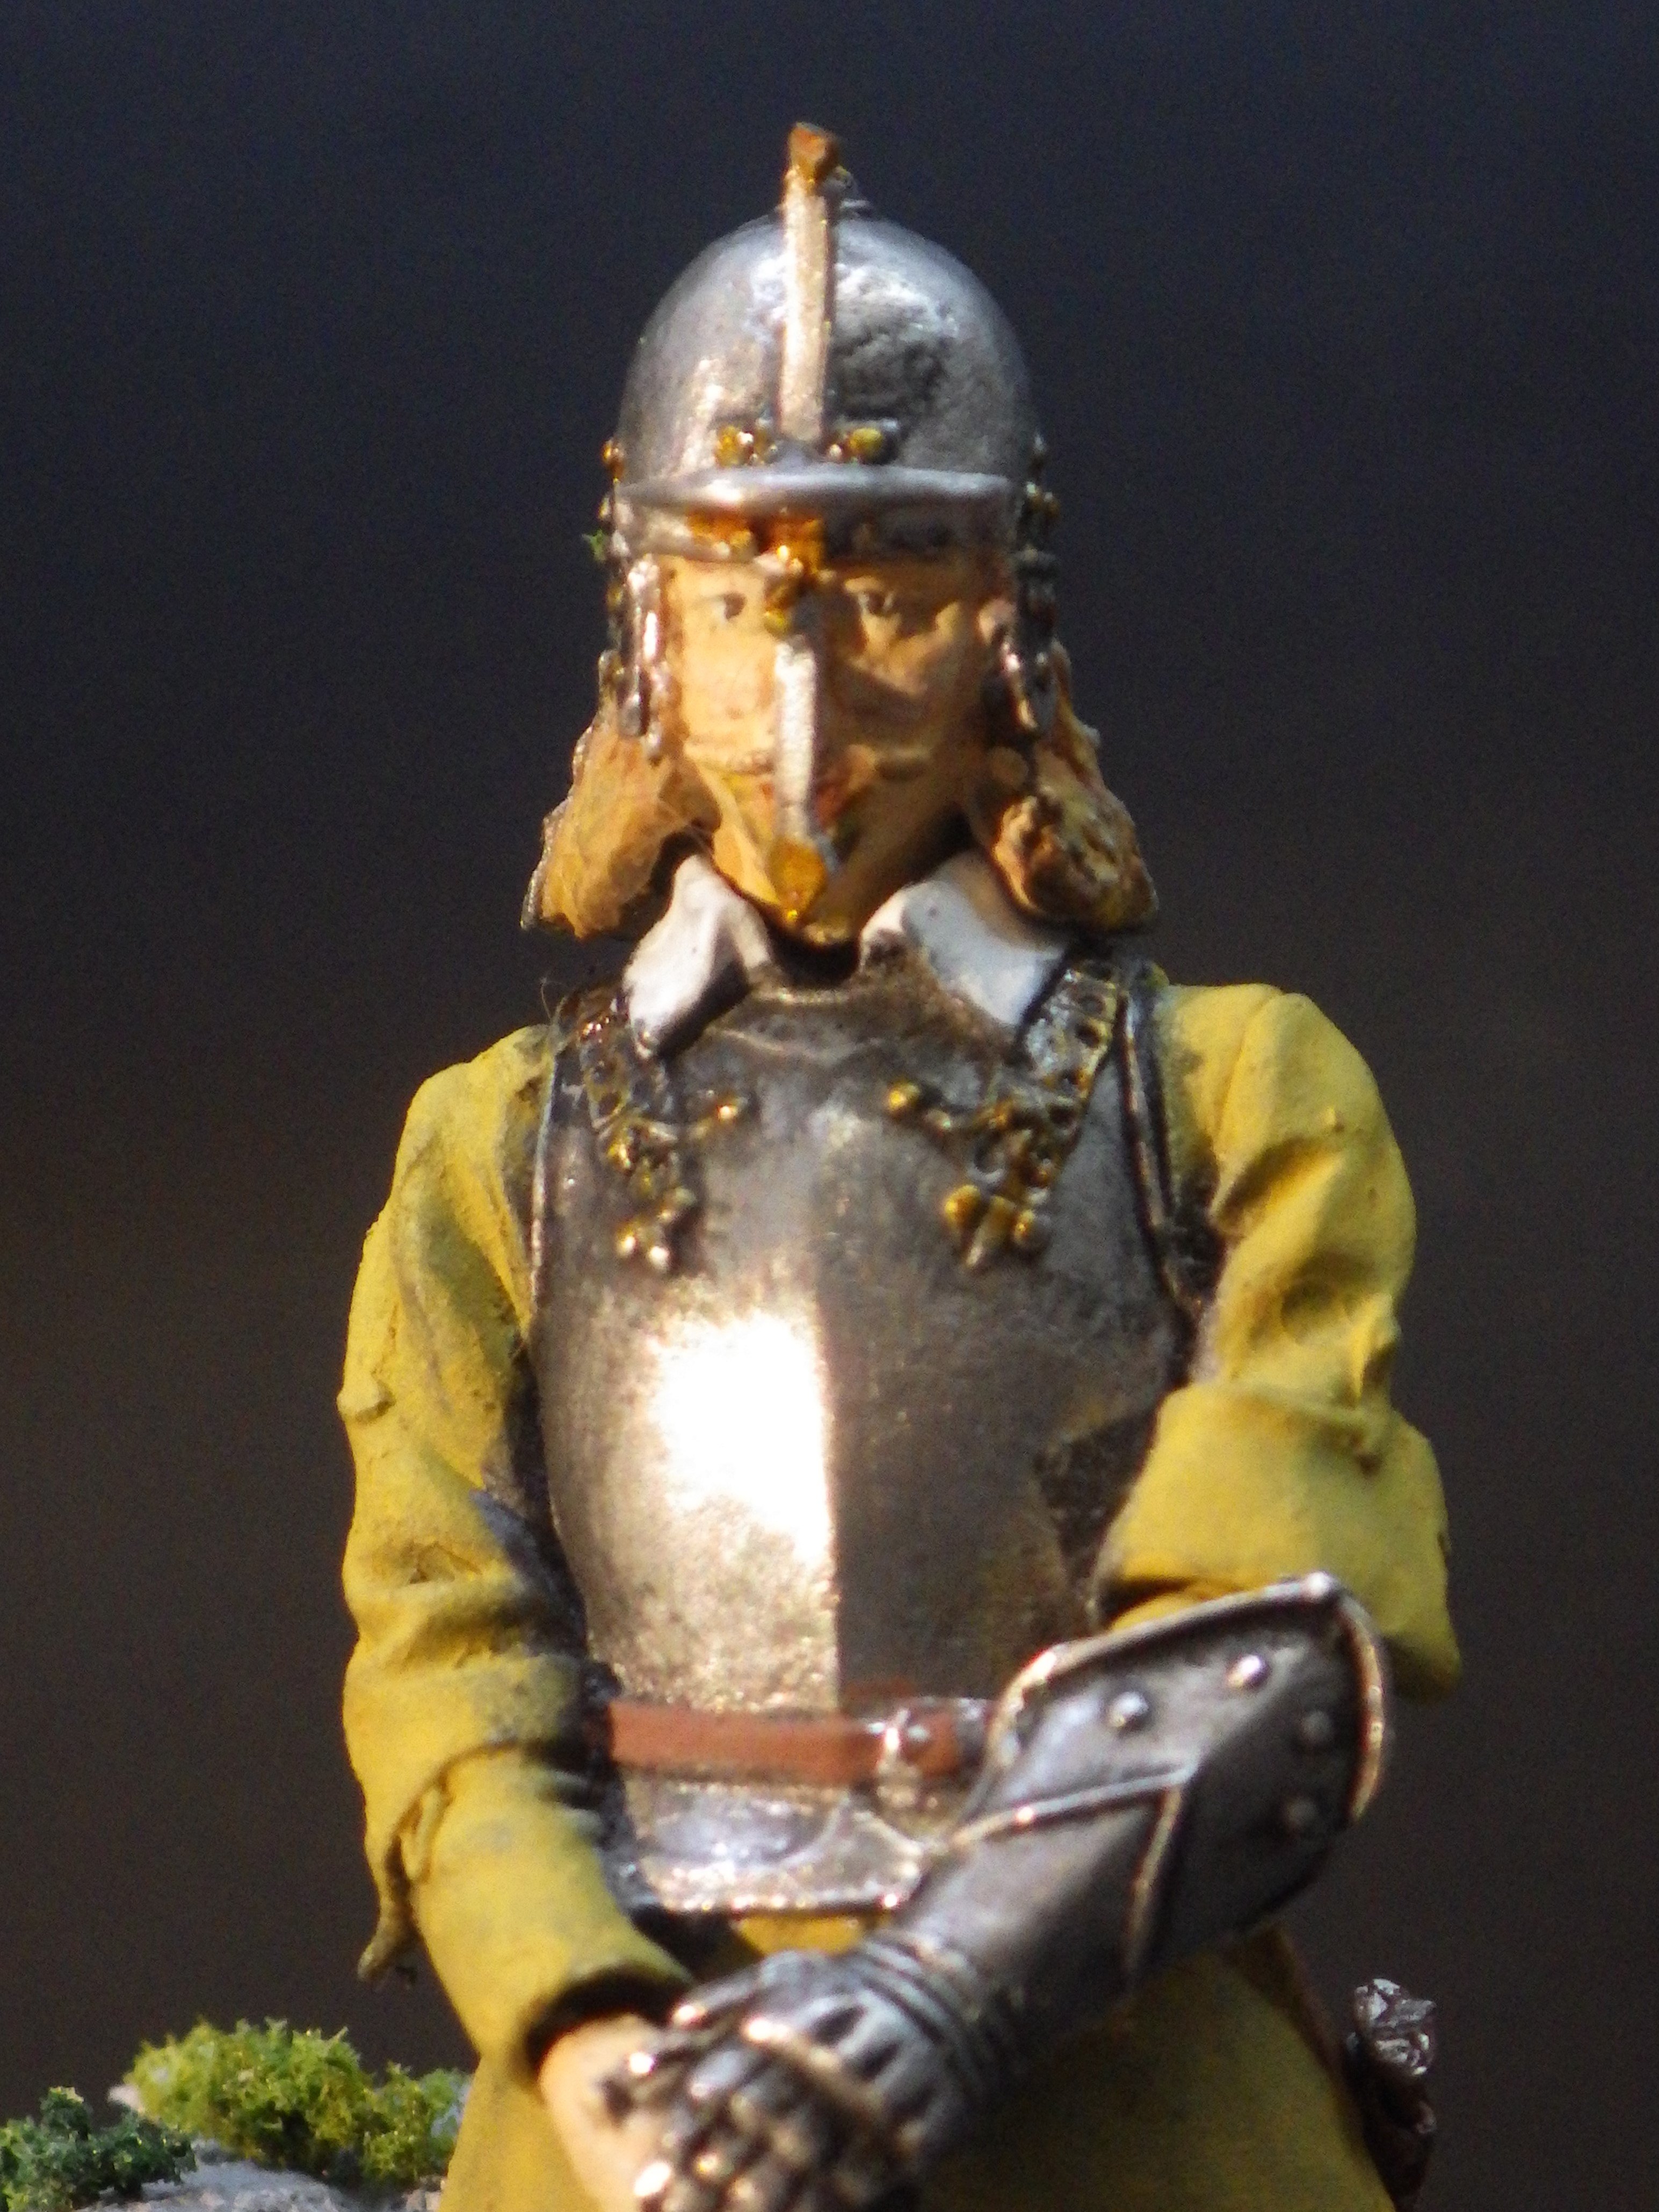
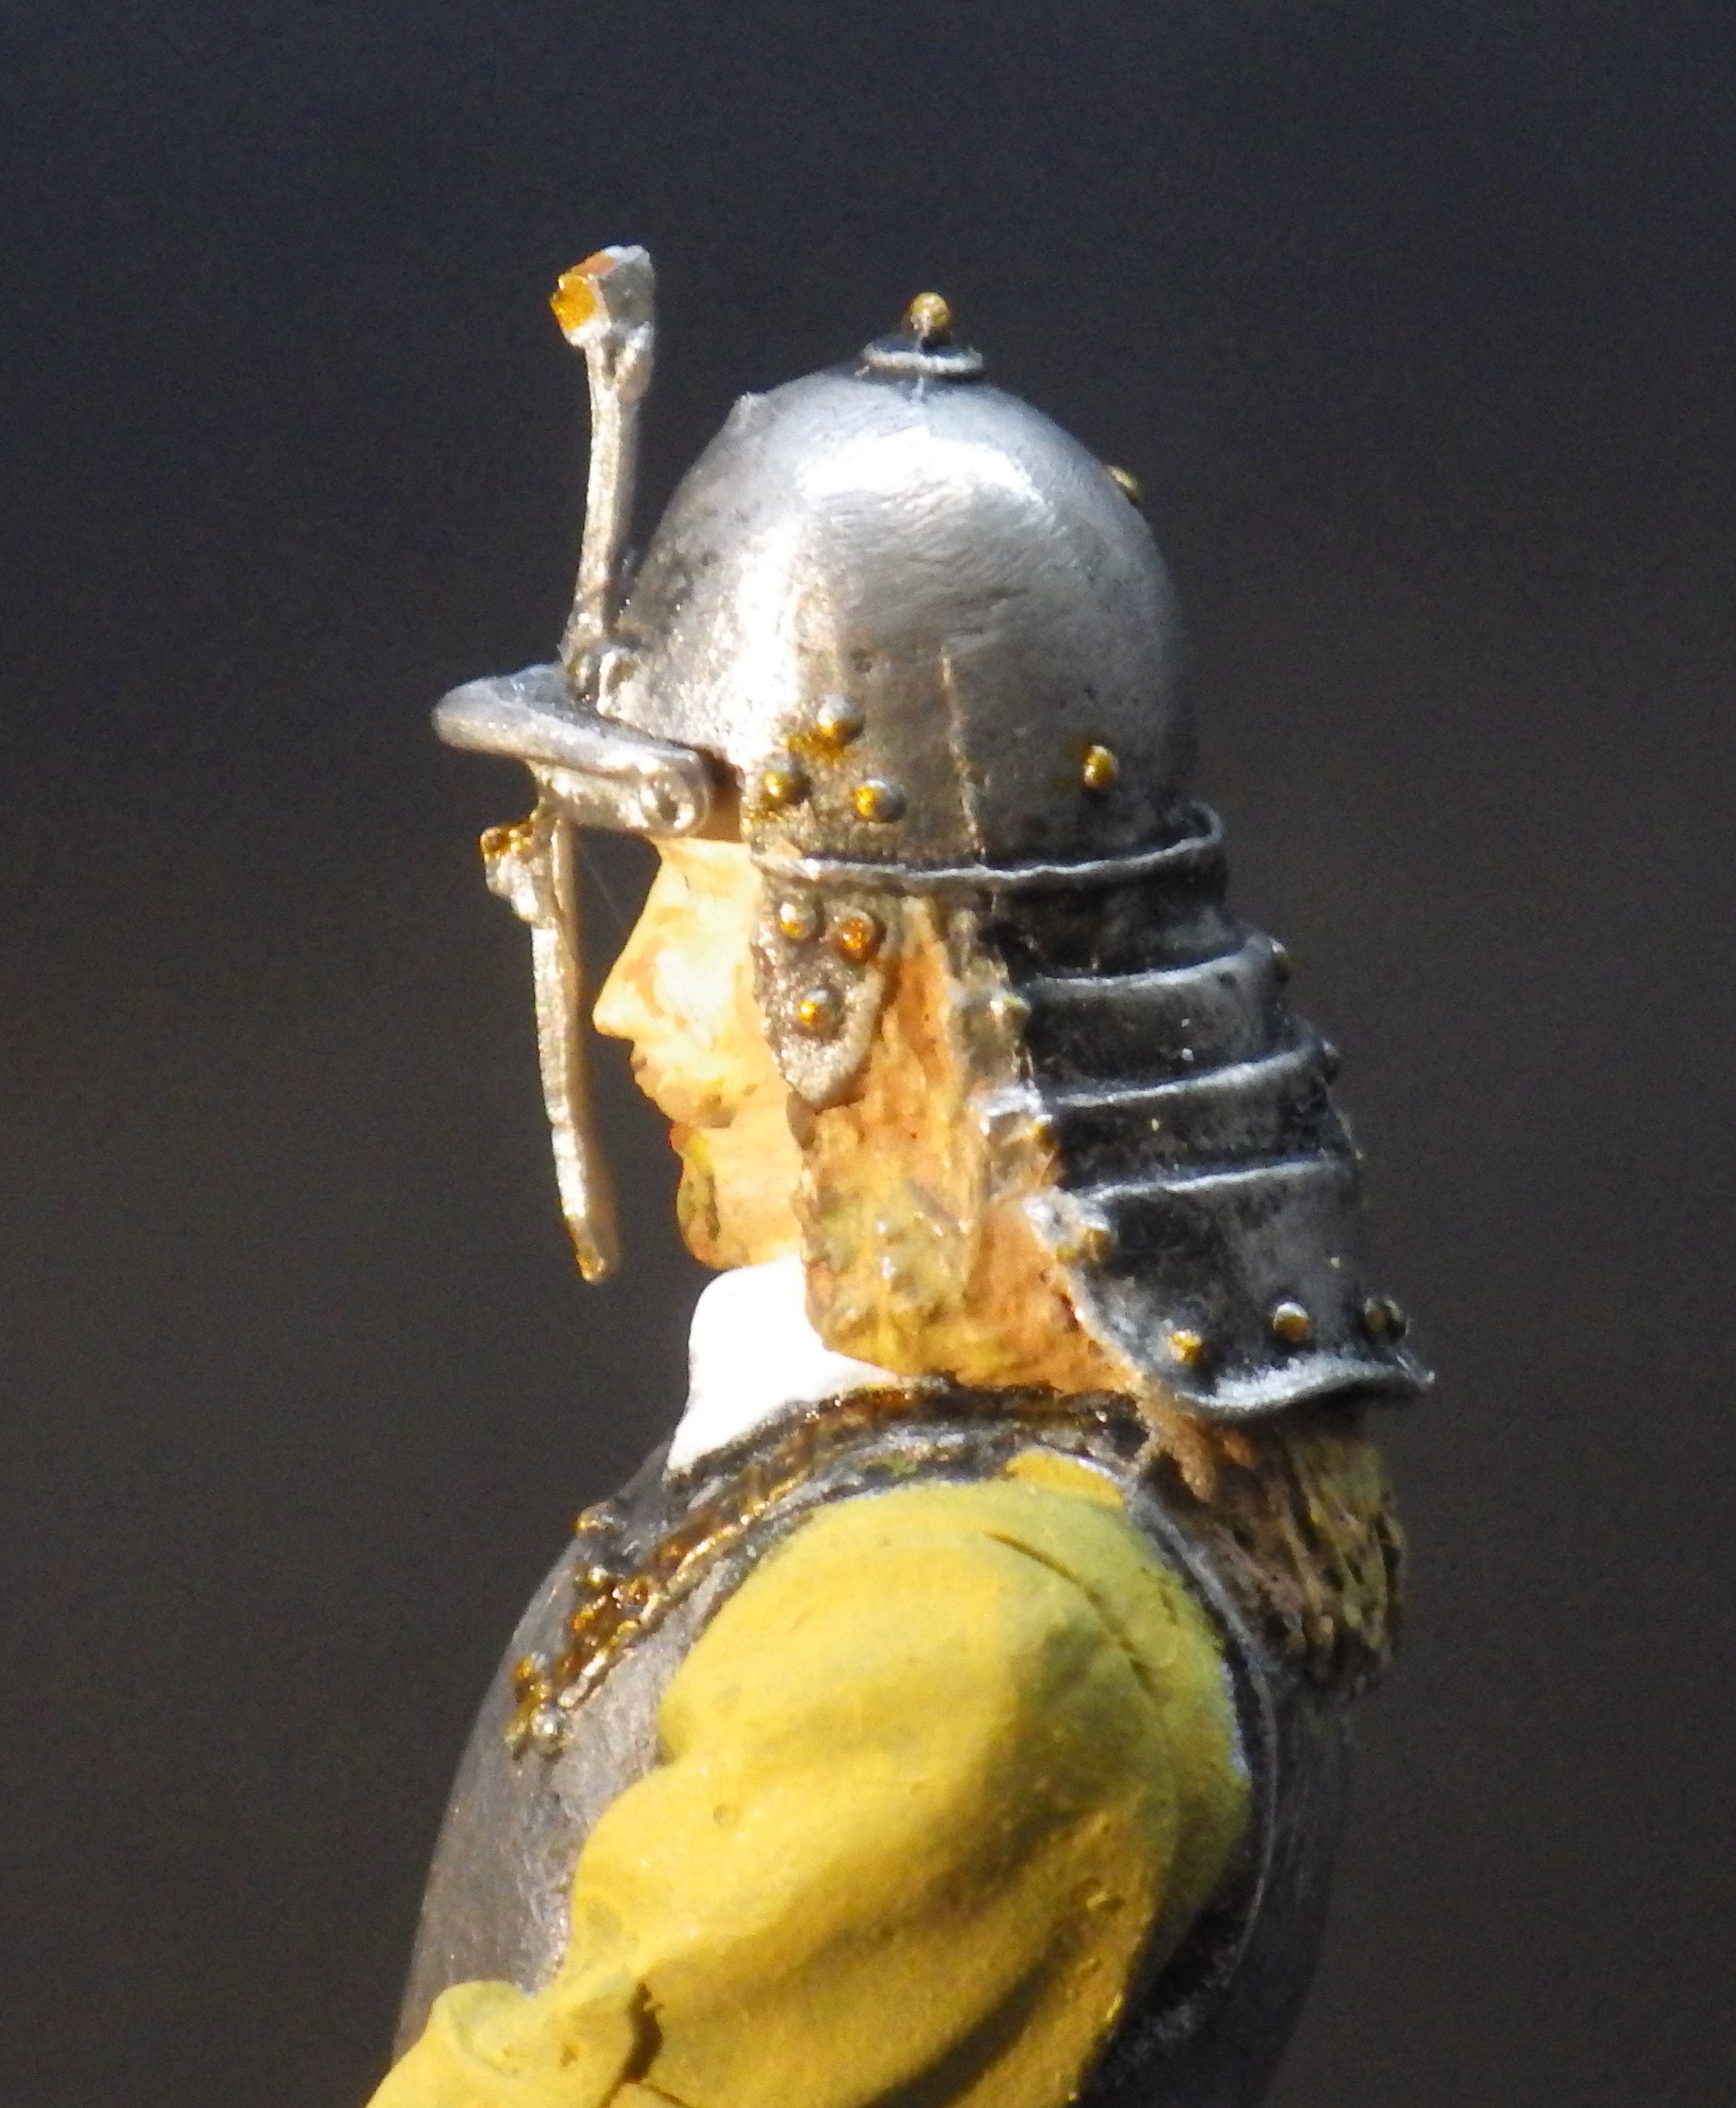
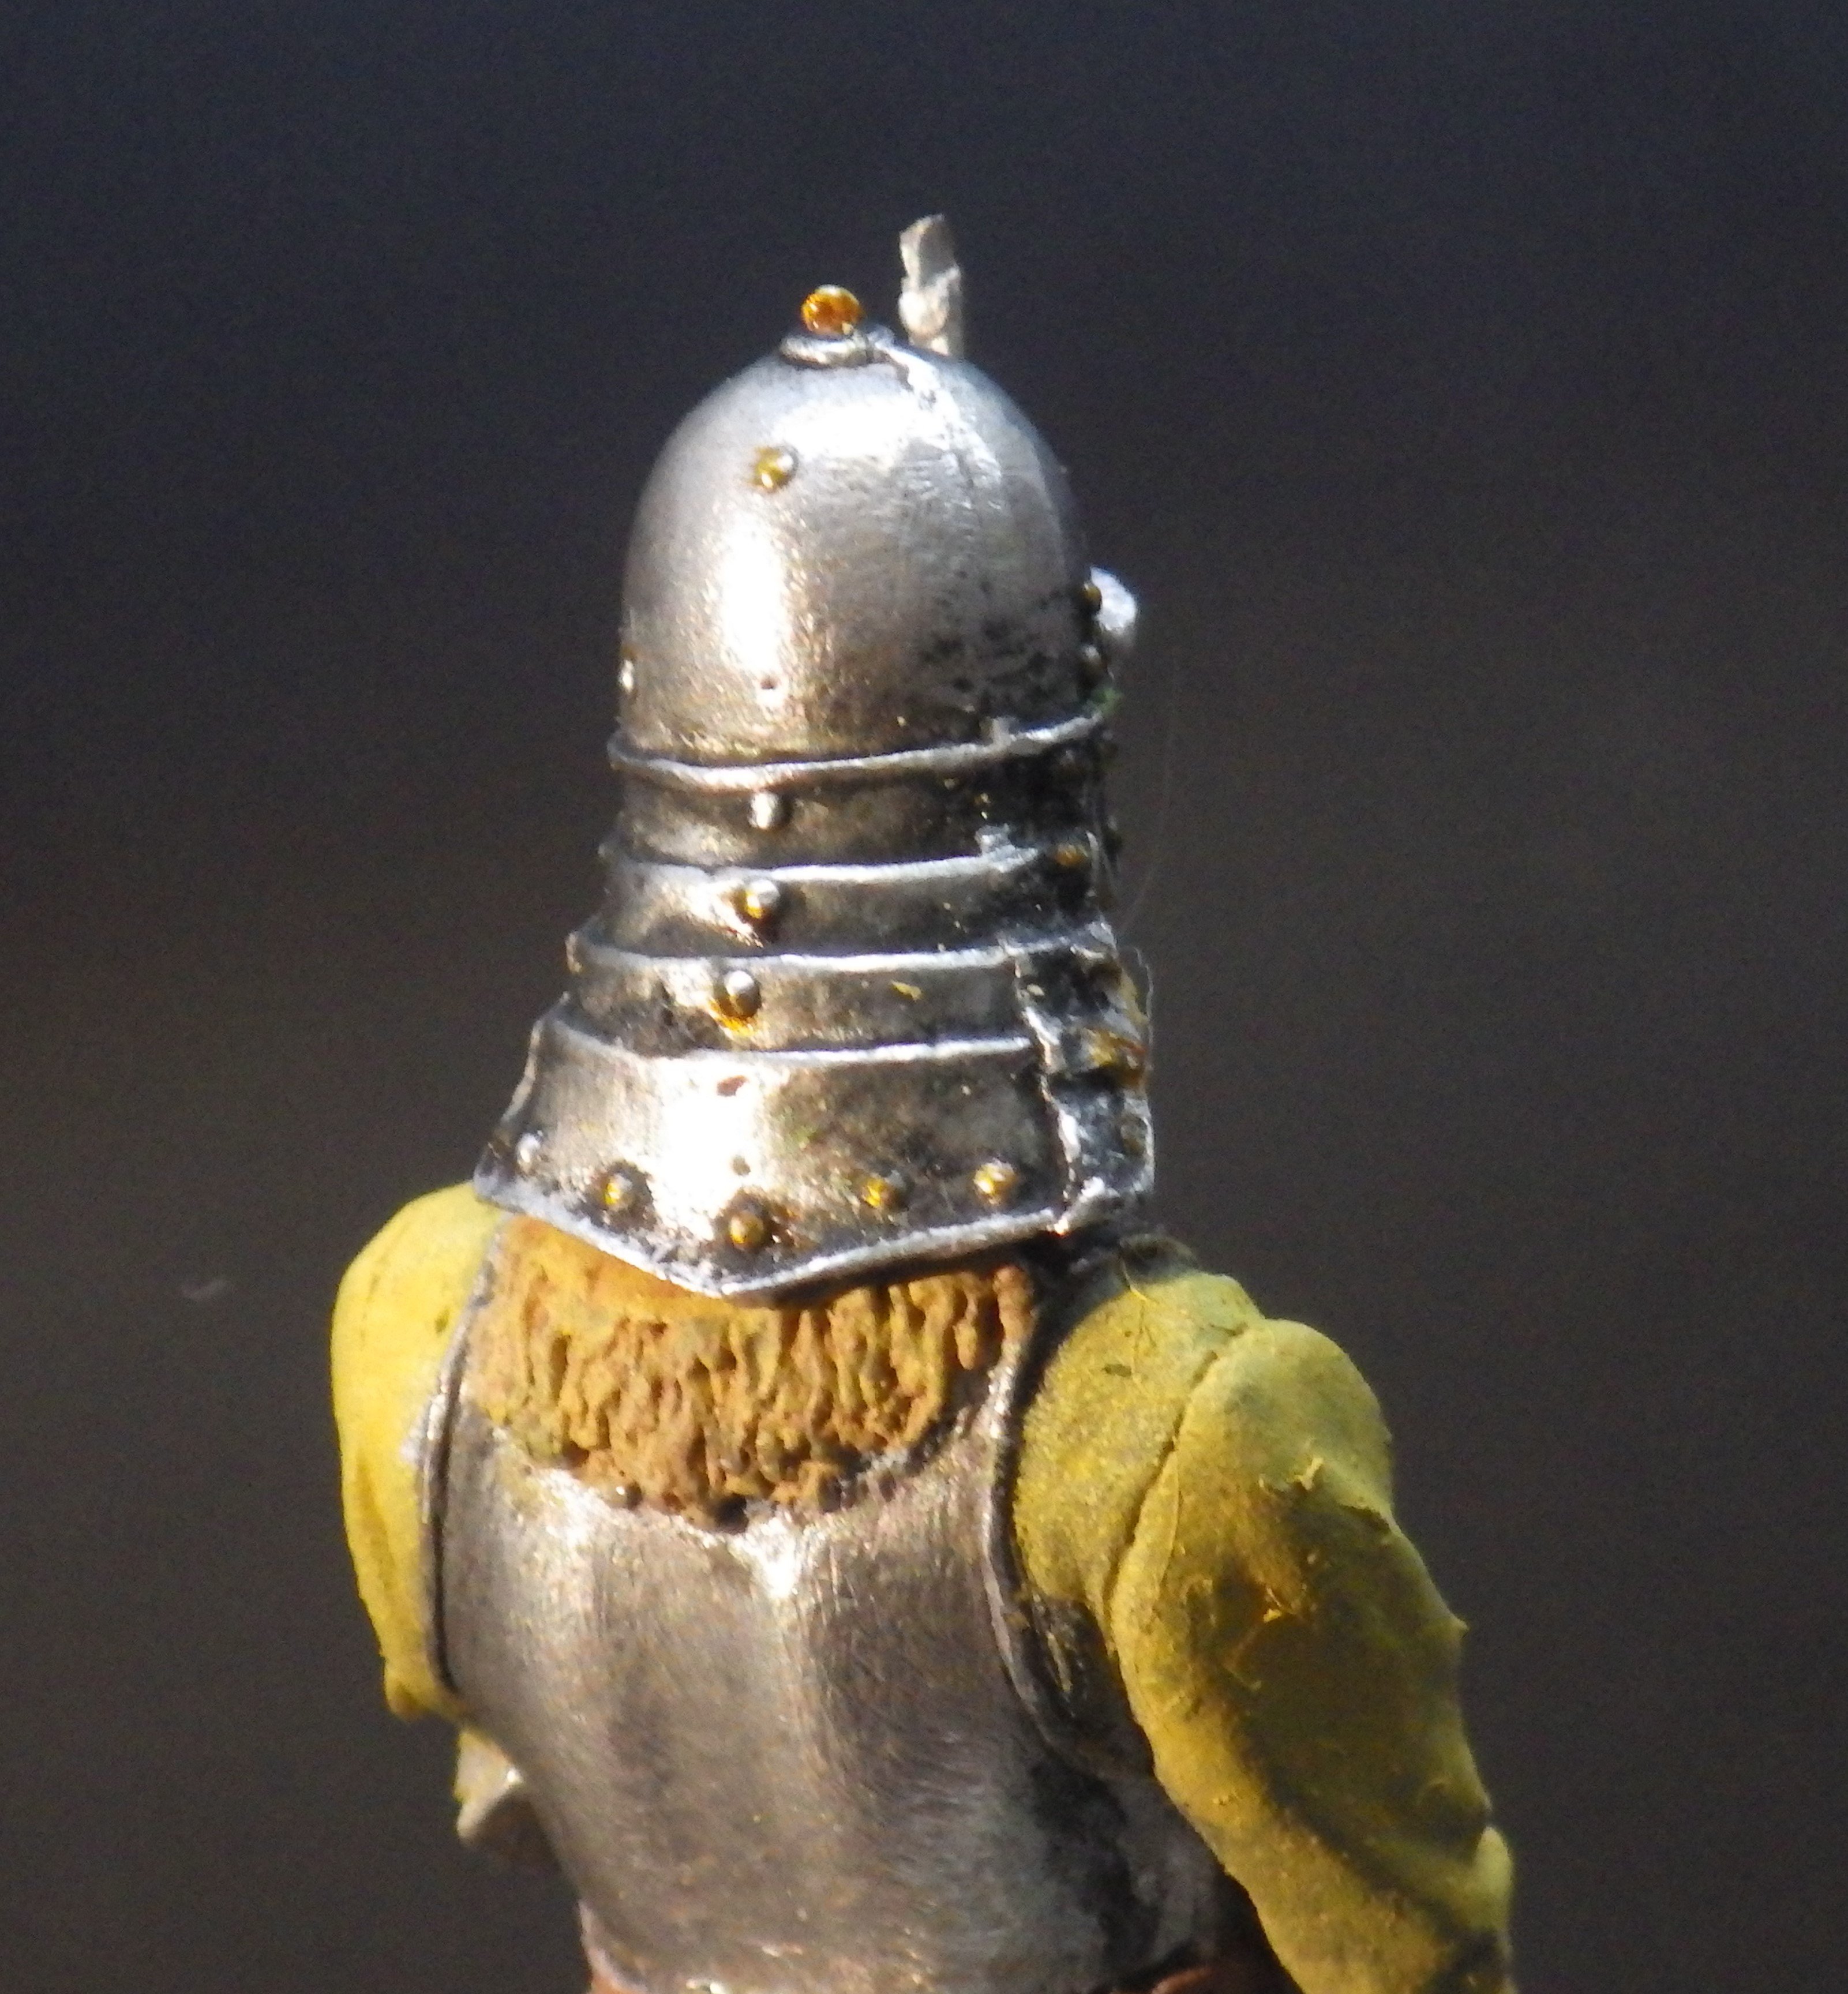
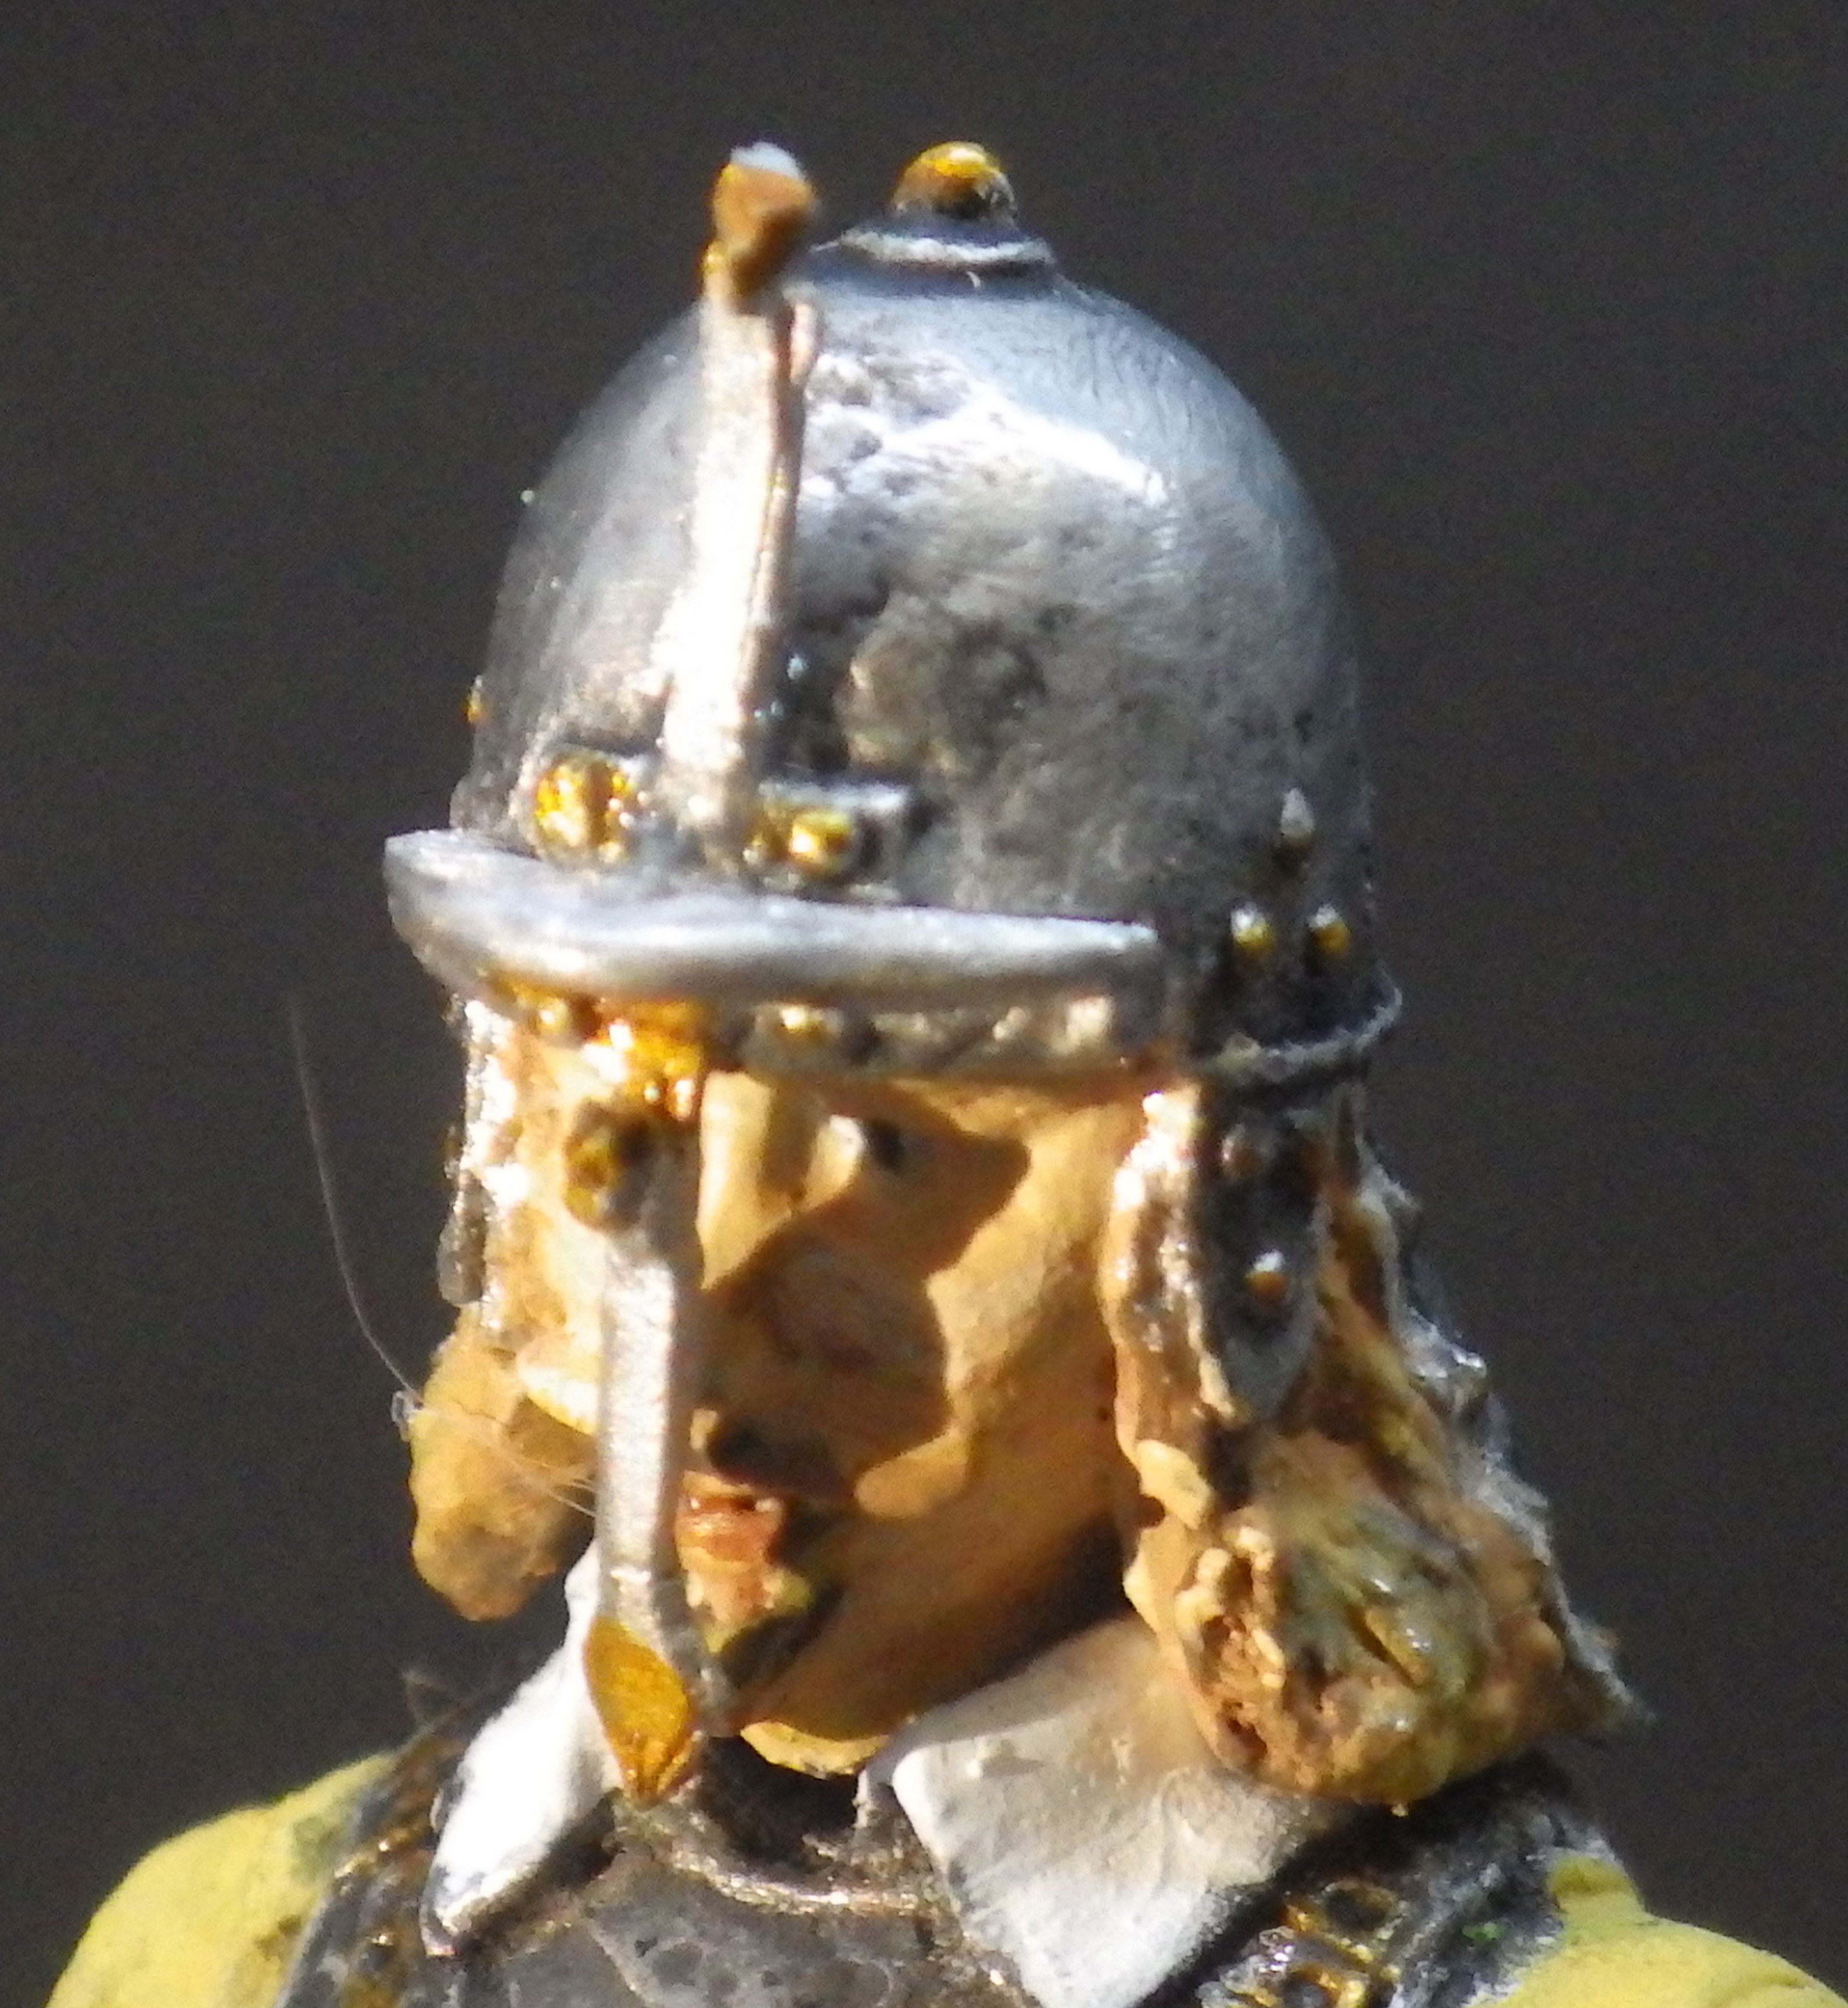
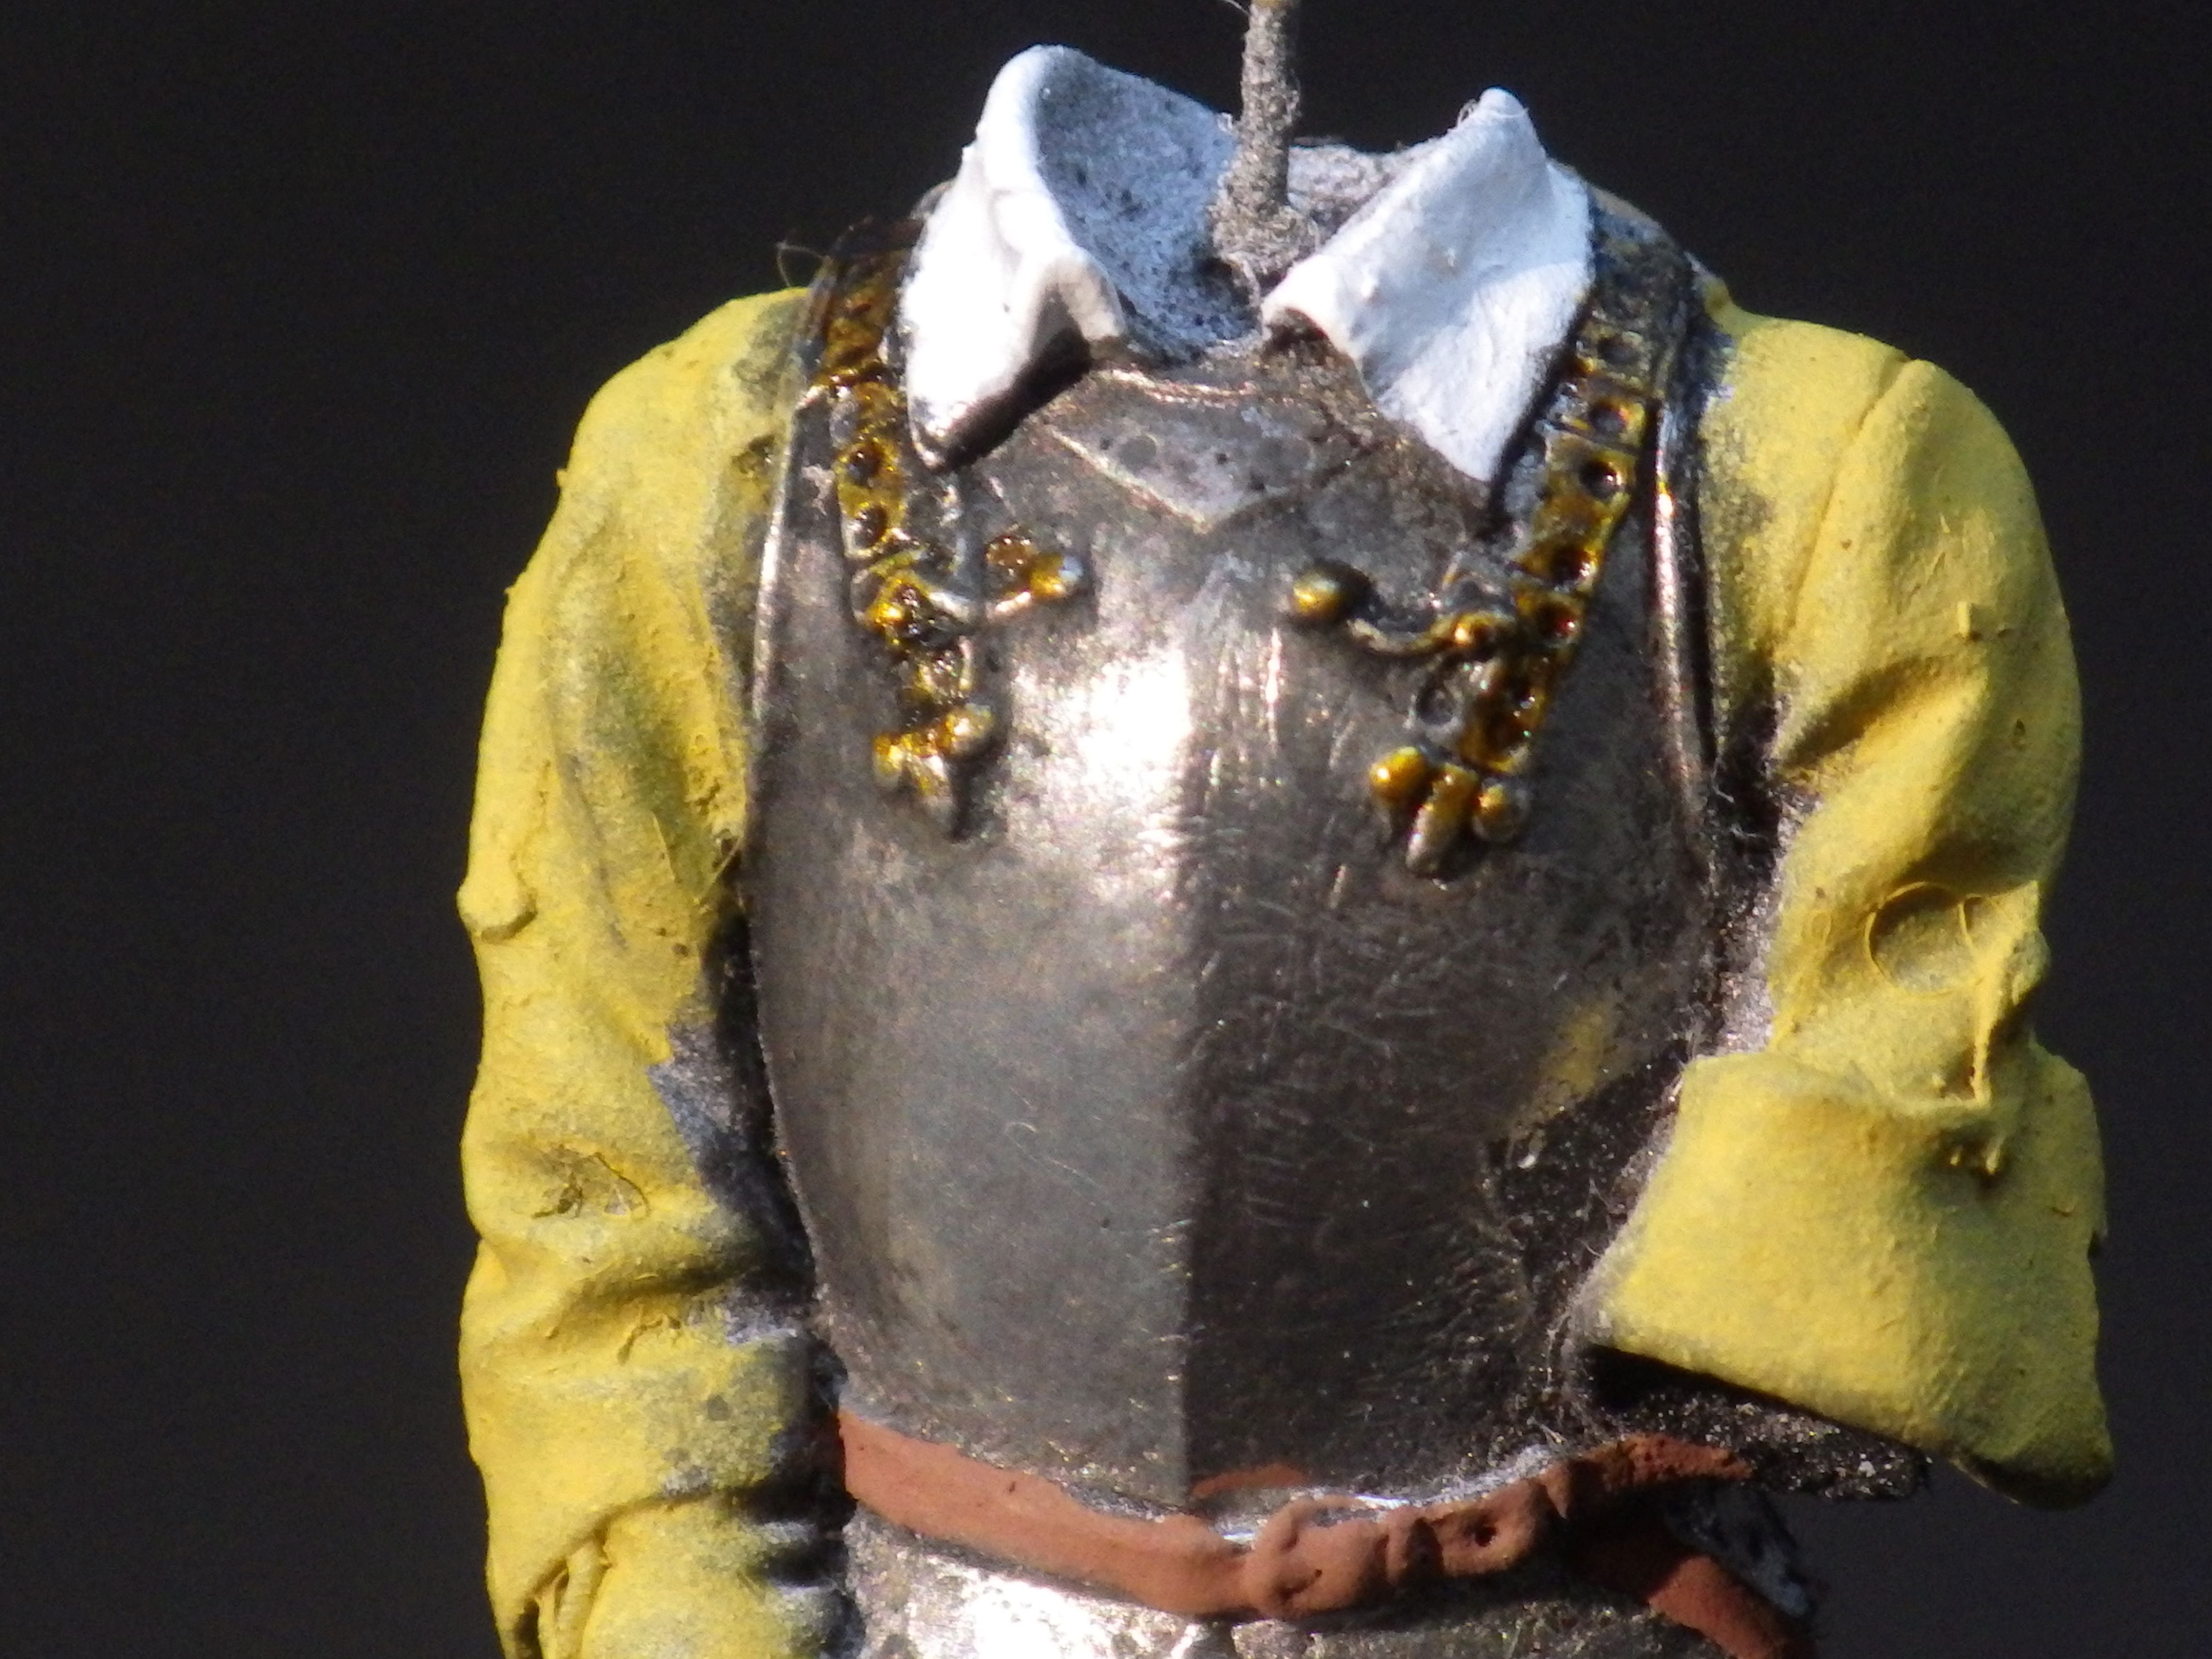
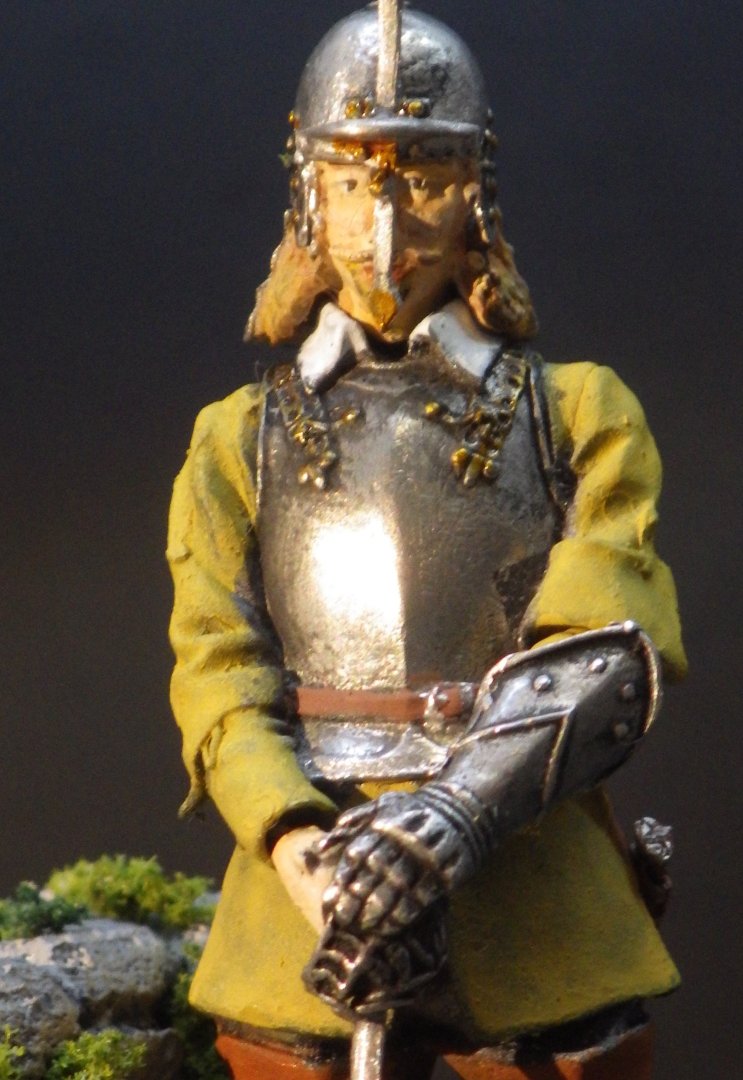
More glazes and detail painting added and we seem to be moving right along here. According to the notes the breastplate and helmet rivets and decoration is gilded. I had read somewhere that Tamiya transparent orange acrylic looks like gold when painted over polished metal so I thought I would try that. I really like how it came out, in this instance probably better than opaque gold paint. It is also easier to get the light touch needed for the rivet heads. The face is a work in progress. I am trying for lighter skin tones and hair colour and its harder than painting dark hair. For some reasons the moustache is being awkward even though it is well sculpted. The traditional cat hair seems to have arrived too. The beard is definitely going to get reworked. Thanks for looking in and the likes and comments Alan


-
Thank you OC. Its interesting history. Near where I used to live in Derbyshire there is an old manor house that still has a Civil War cannonball embedded in one of teh outer walls. Alan
-
Thank you very much Craig. Each one is a learning experience and I am starting to build up some of the tricks that make it easier. They really are a lot of fun to paint. Alan
-
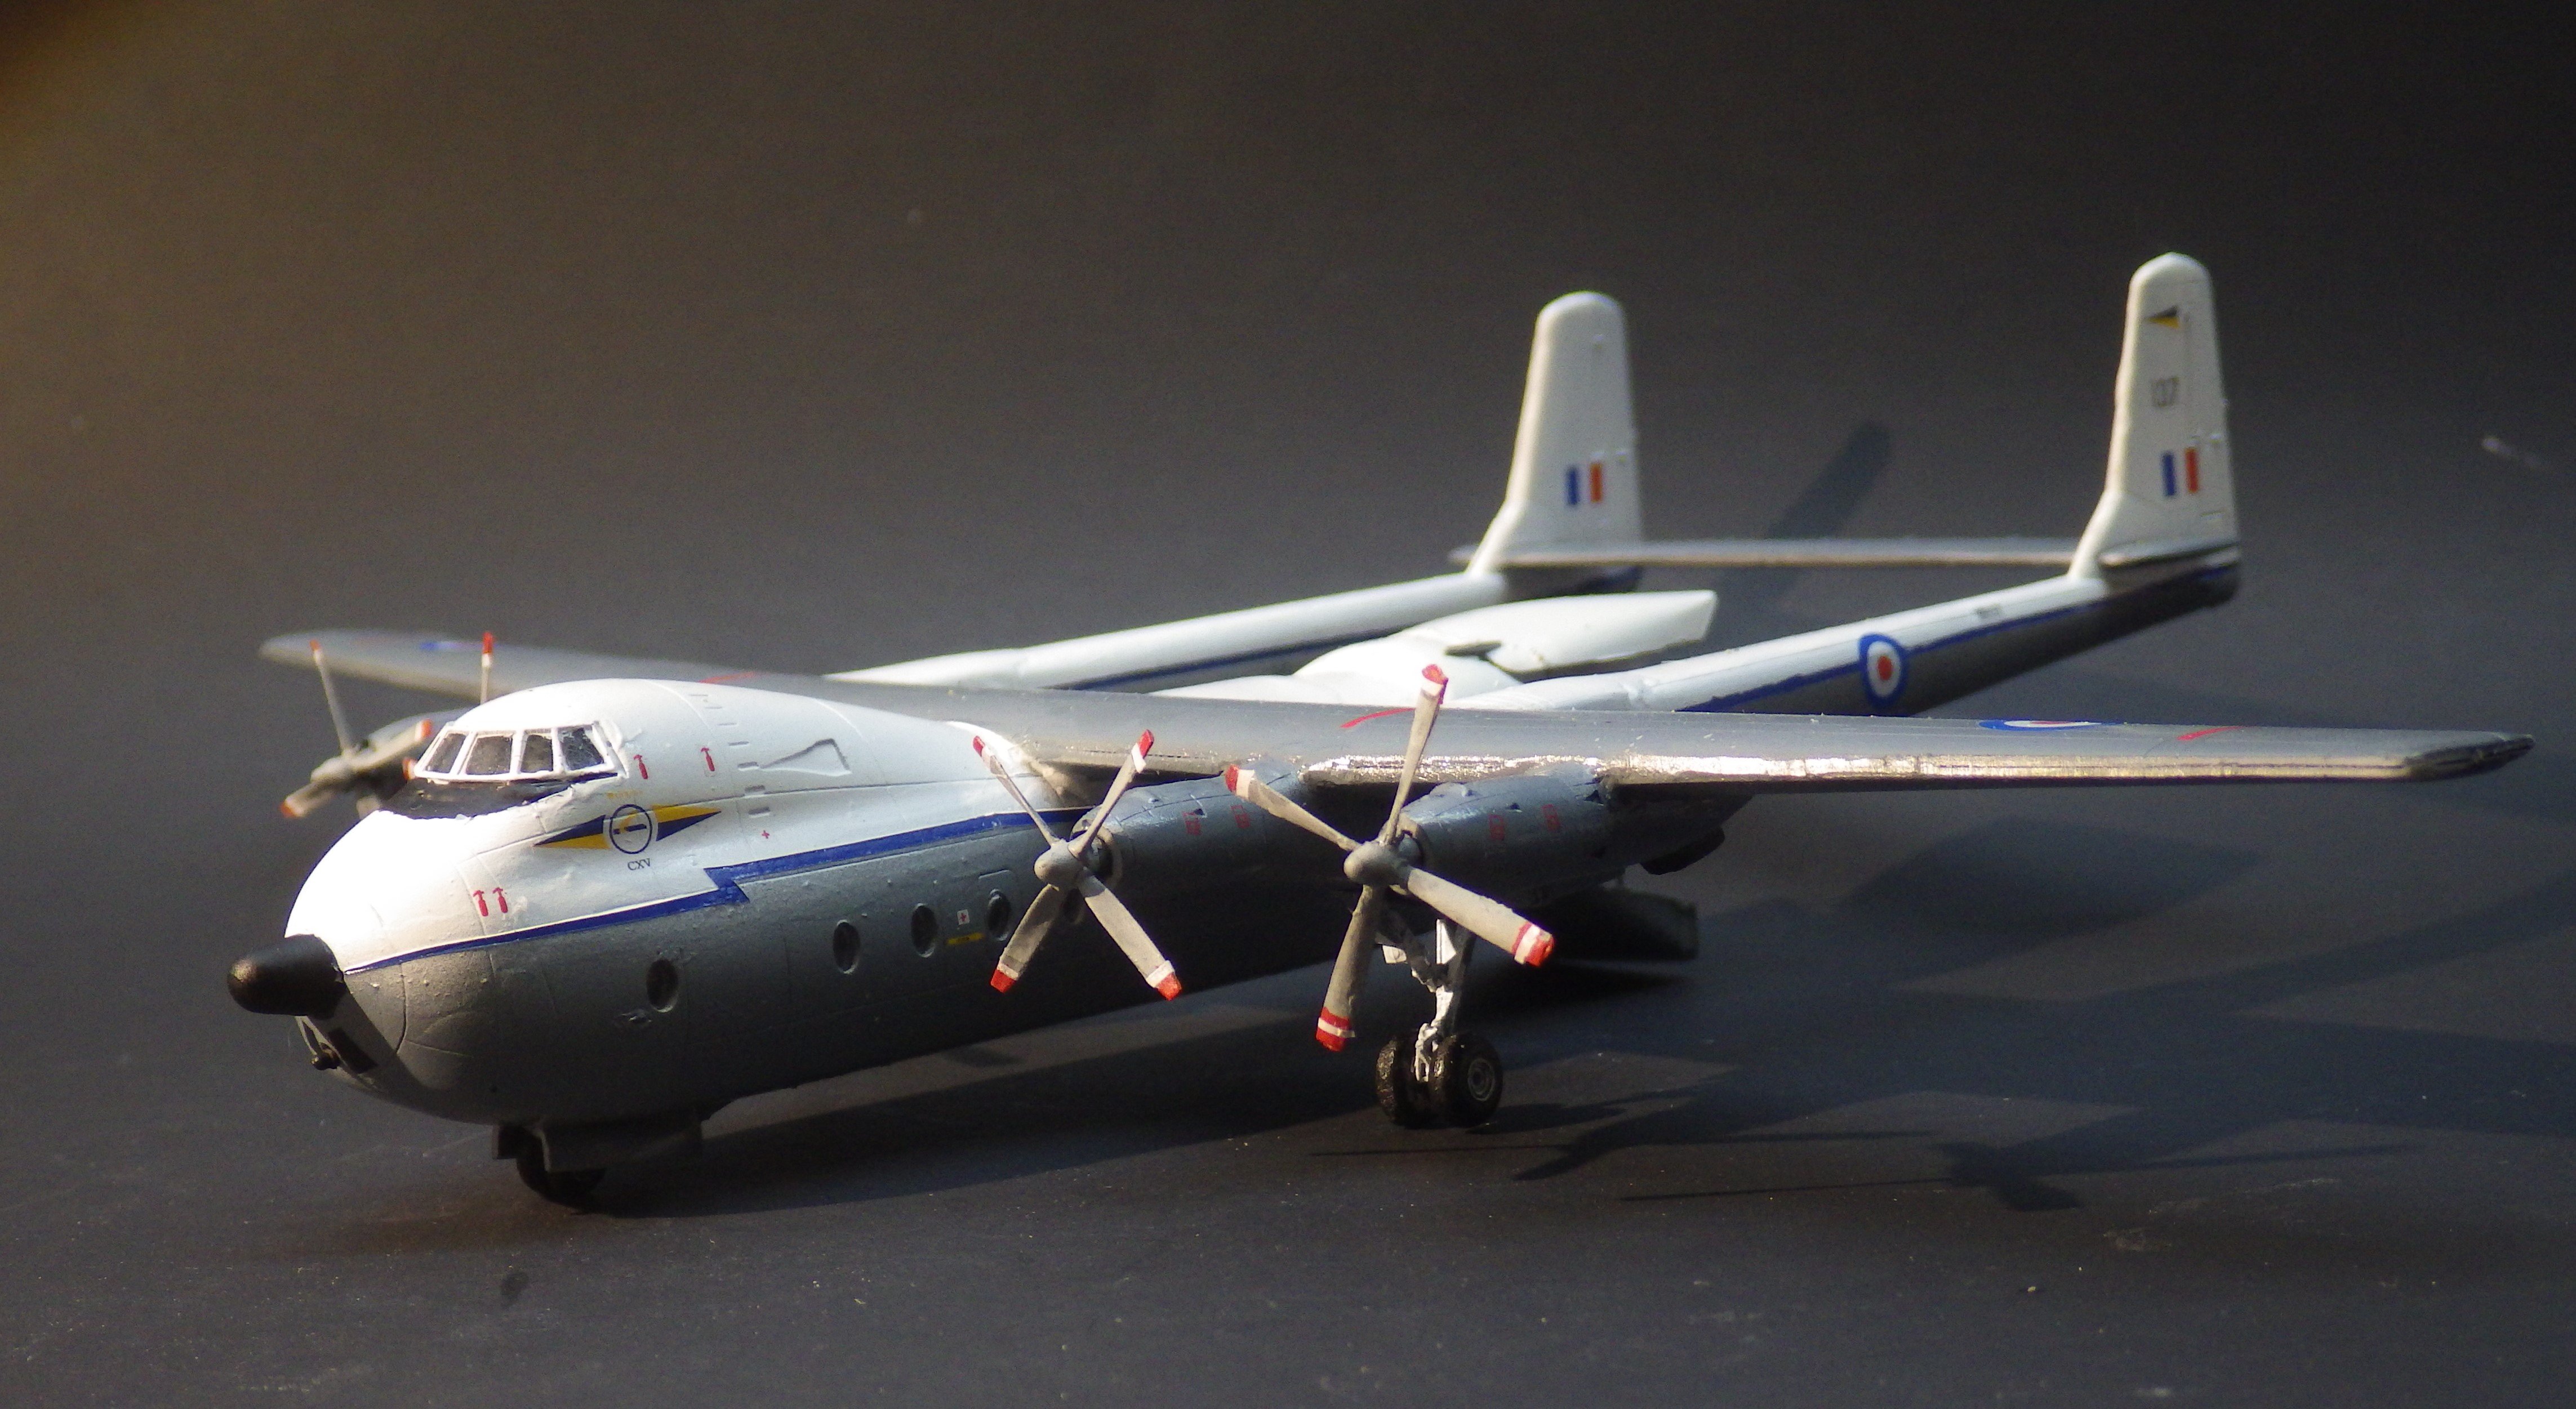
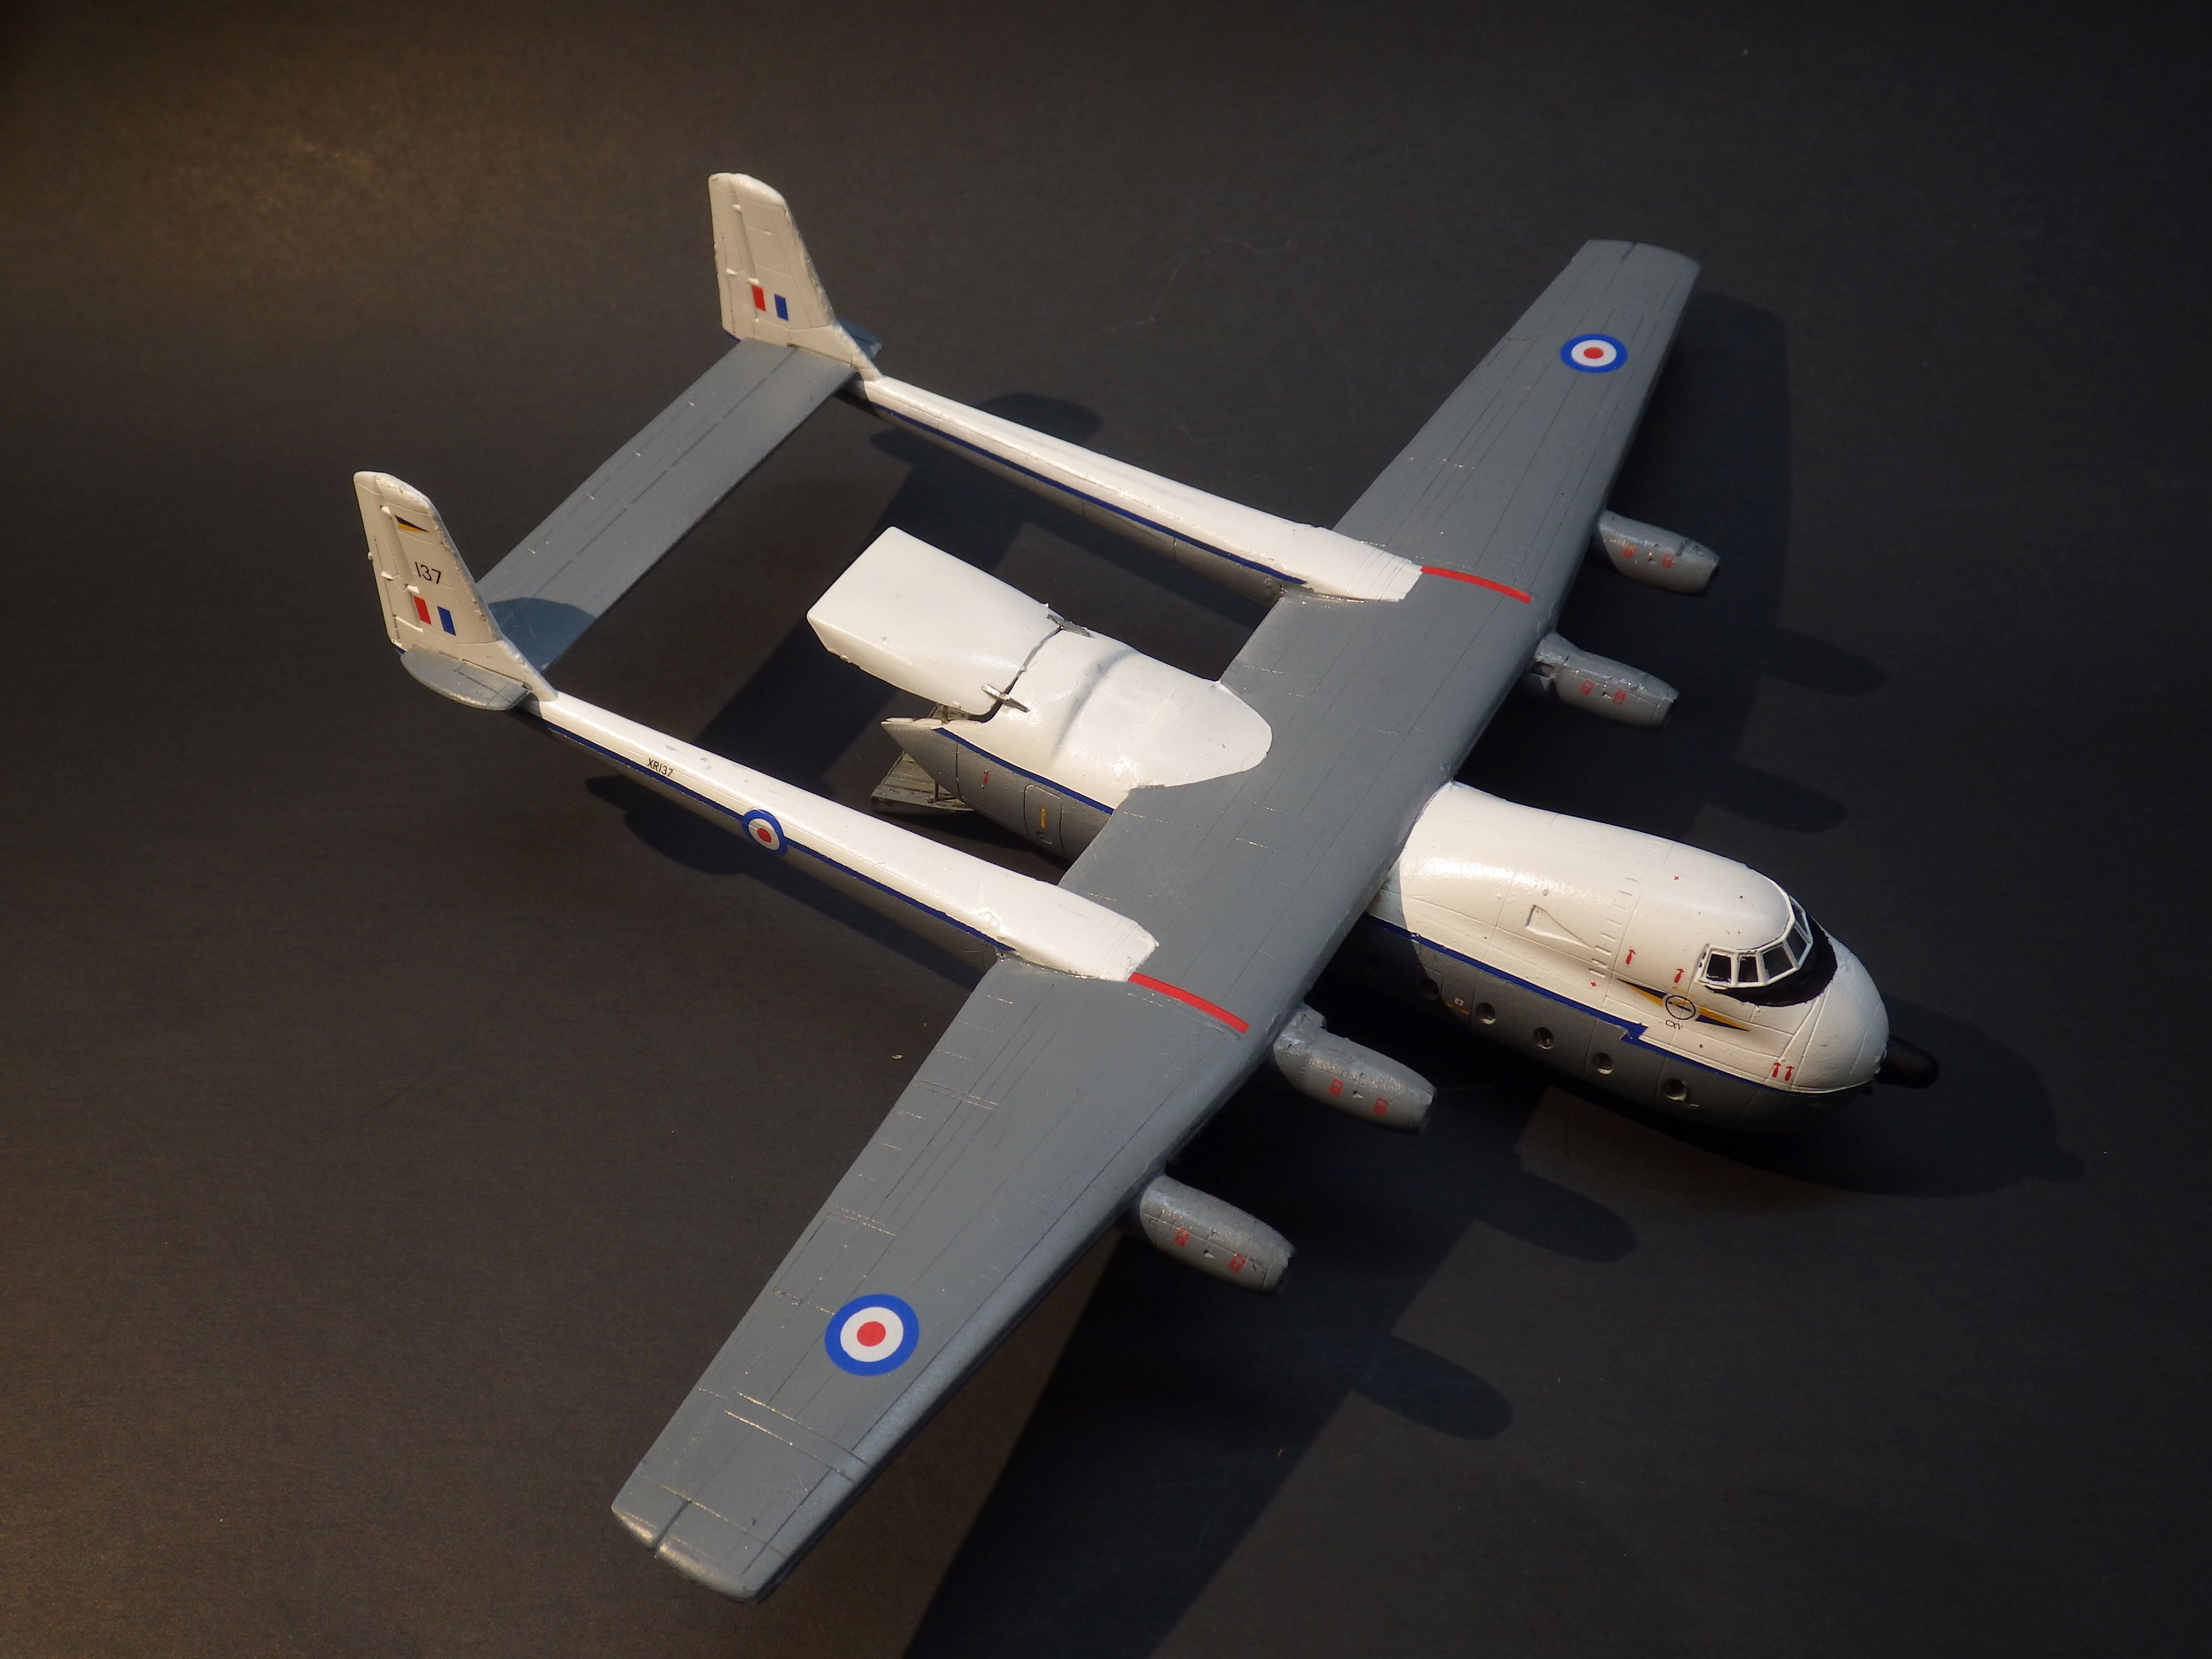
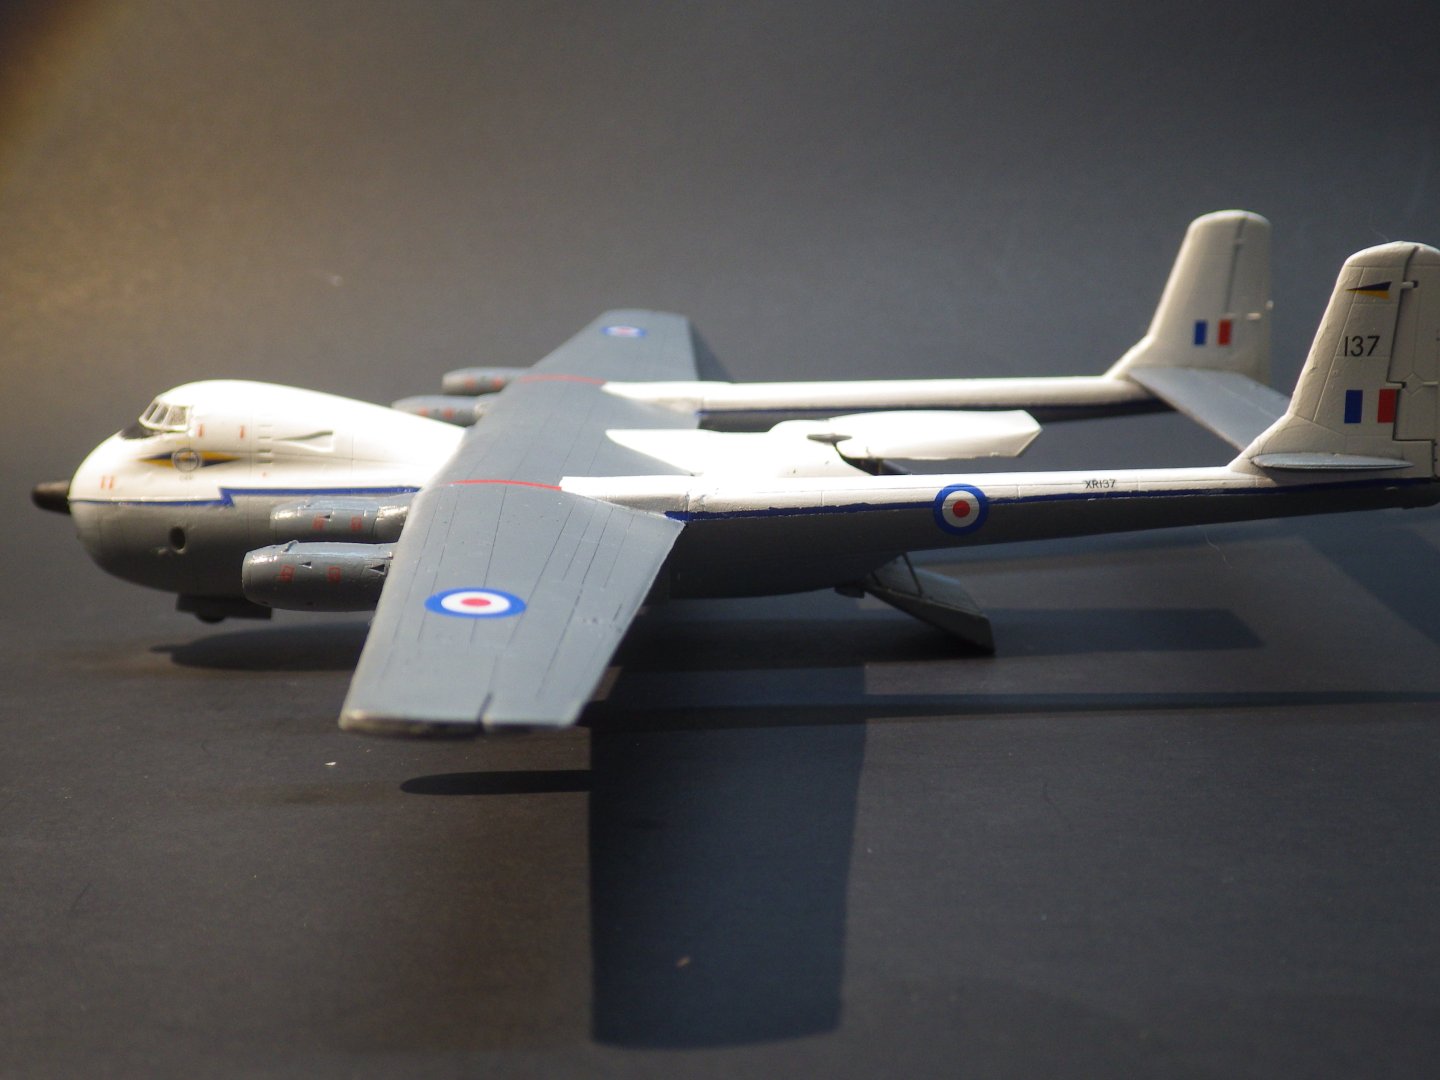
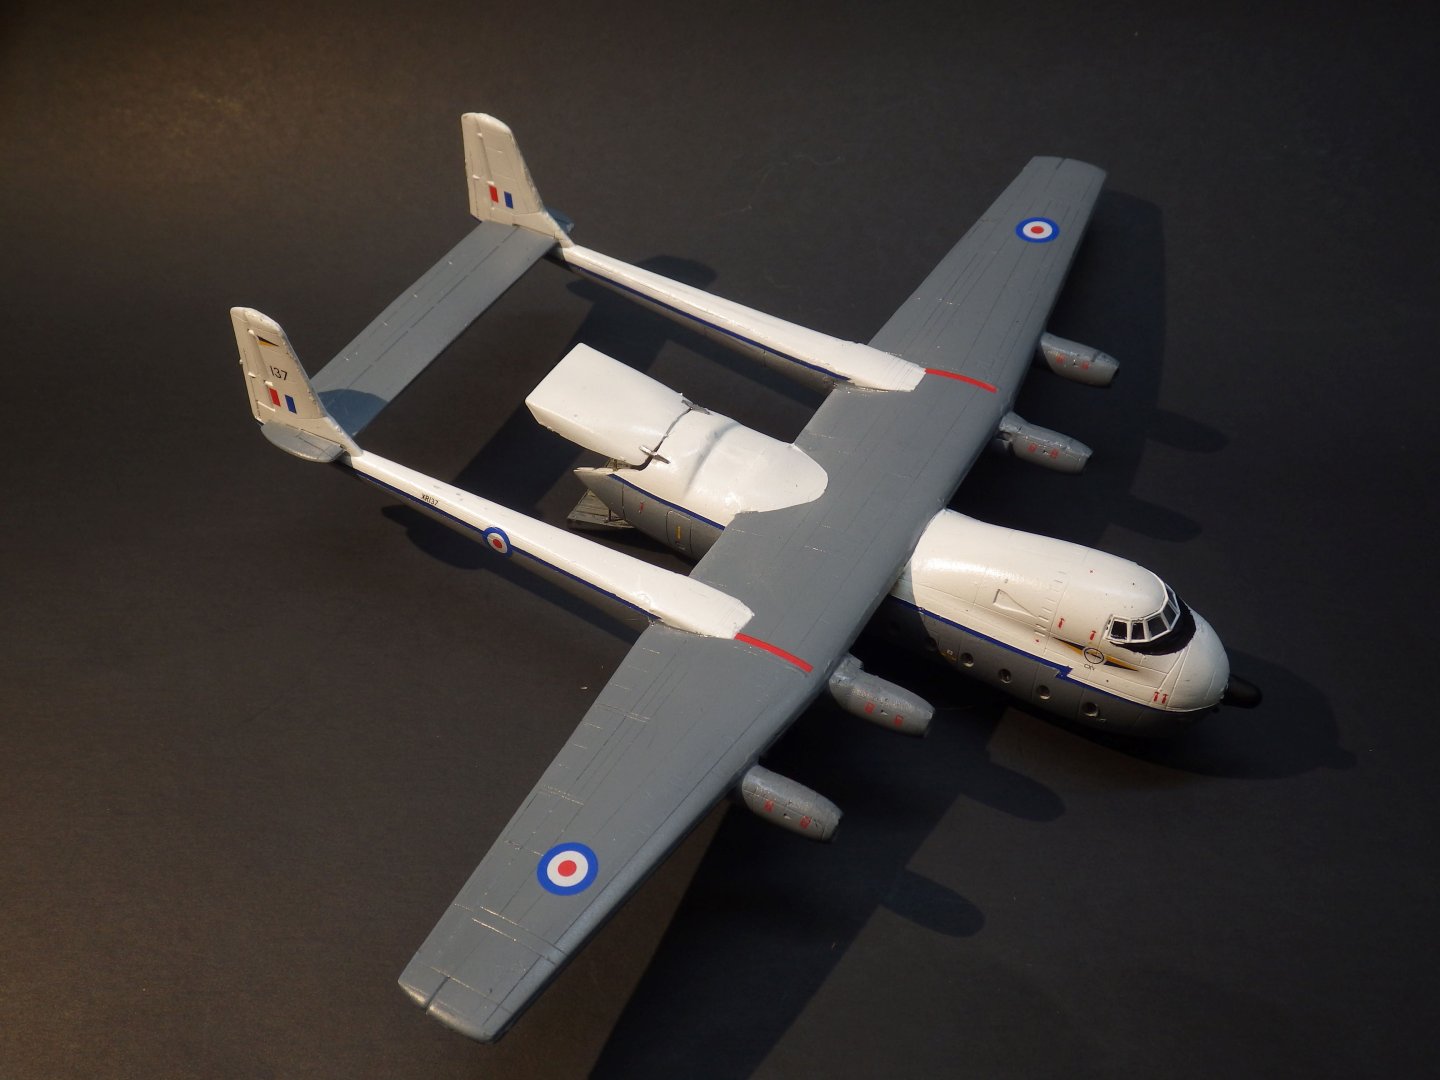
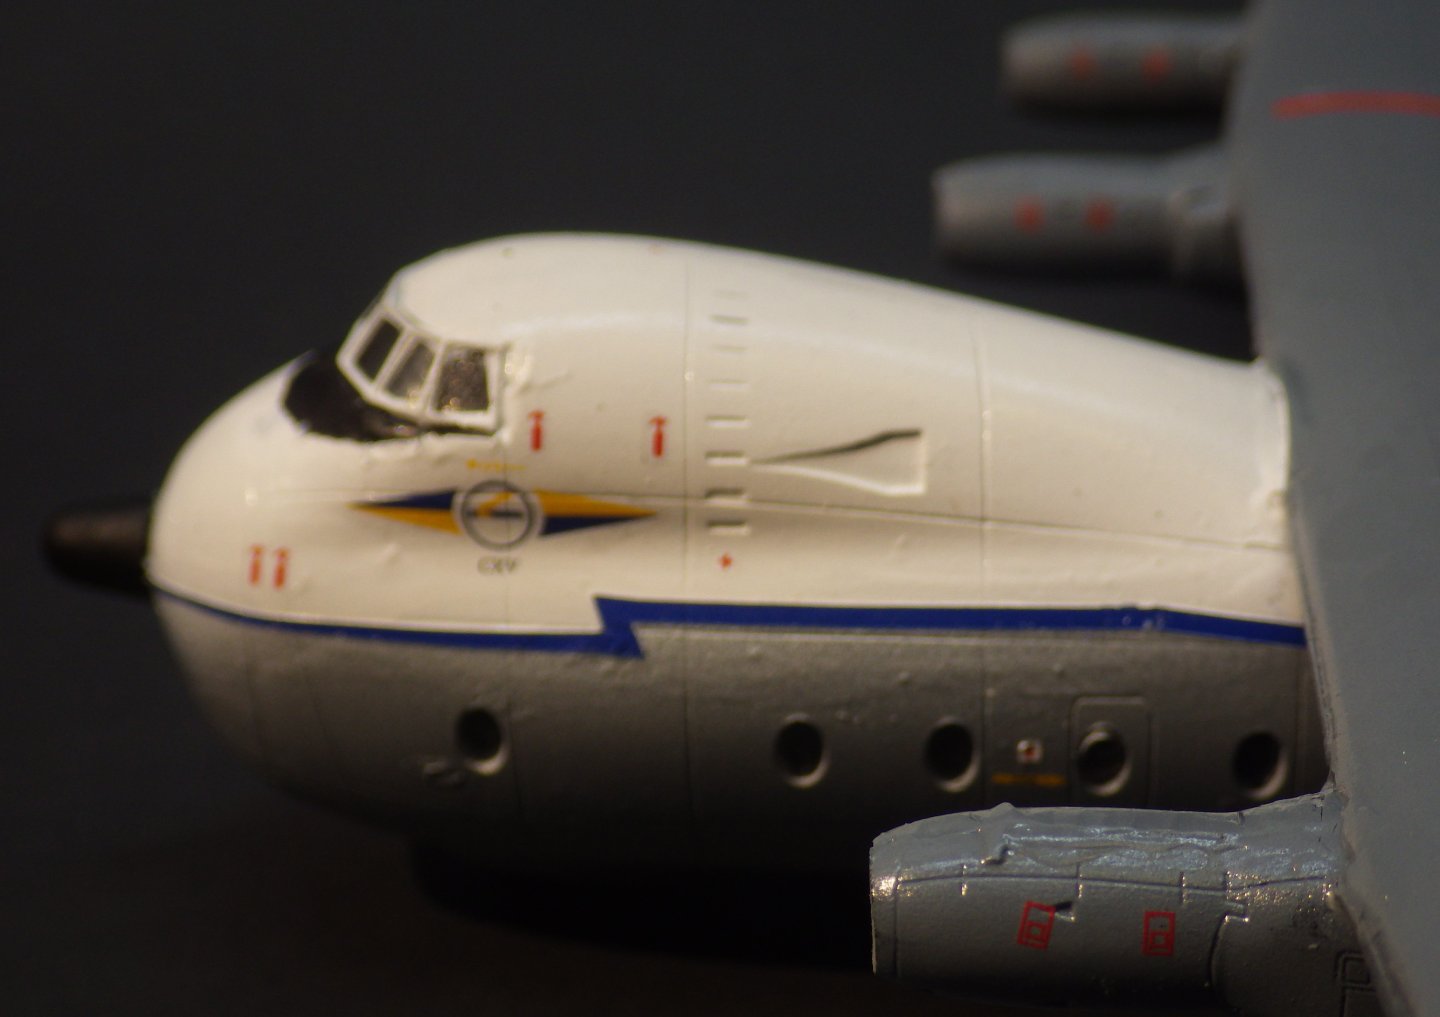
Some minor progress tidying up a few details and adding the red stripe decals after finding them documented in a couple of photos.. I added the props and started painting the red tips. I think there is supposed to be a white stripe in the middle of the red but that may be a little tricky. The props were a source of frustration. They were heavily covered with flash and are very delicate at the inboard end where the blade meets the hub. In spite of best intents I boke a blade off two of them and its far to small an area to effect a reasonable repair. The kit provides a second set of props for (I think) an earlier standard with thinner rounded blades. I clipped the tips slightly to square them off so they are a touch thinner than the real deal but I can't think of a better solution. Thanks for looking in and the likes and comments Alan


- 52 replies
-
- 11
-
-
-
Thank you very much Mike. Its easier with the 1/700 ships that you can mount on a pill container or similar to have a solid place to hold. I get focussed on exactly positioning something and fingers wander and always seem find something to damage. THe front part of the booms are going to be the safest place I think. Alan
-
Super nice wall mount. Great imagination and beautifully executed alan
- 33 replies
-
- 1
-

-
- midwest products
- kayak
- (and 1 more)
-
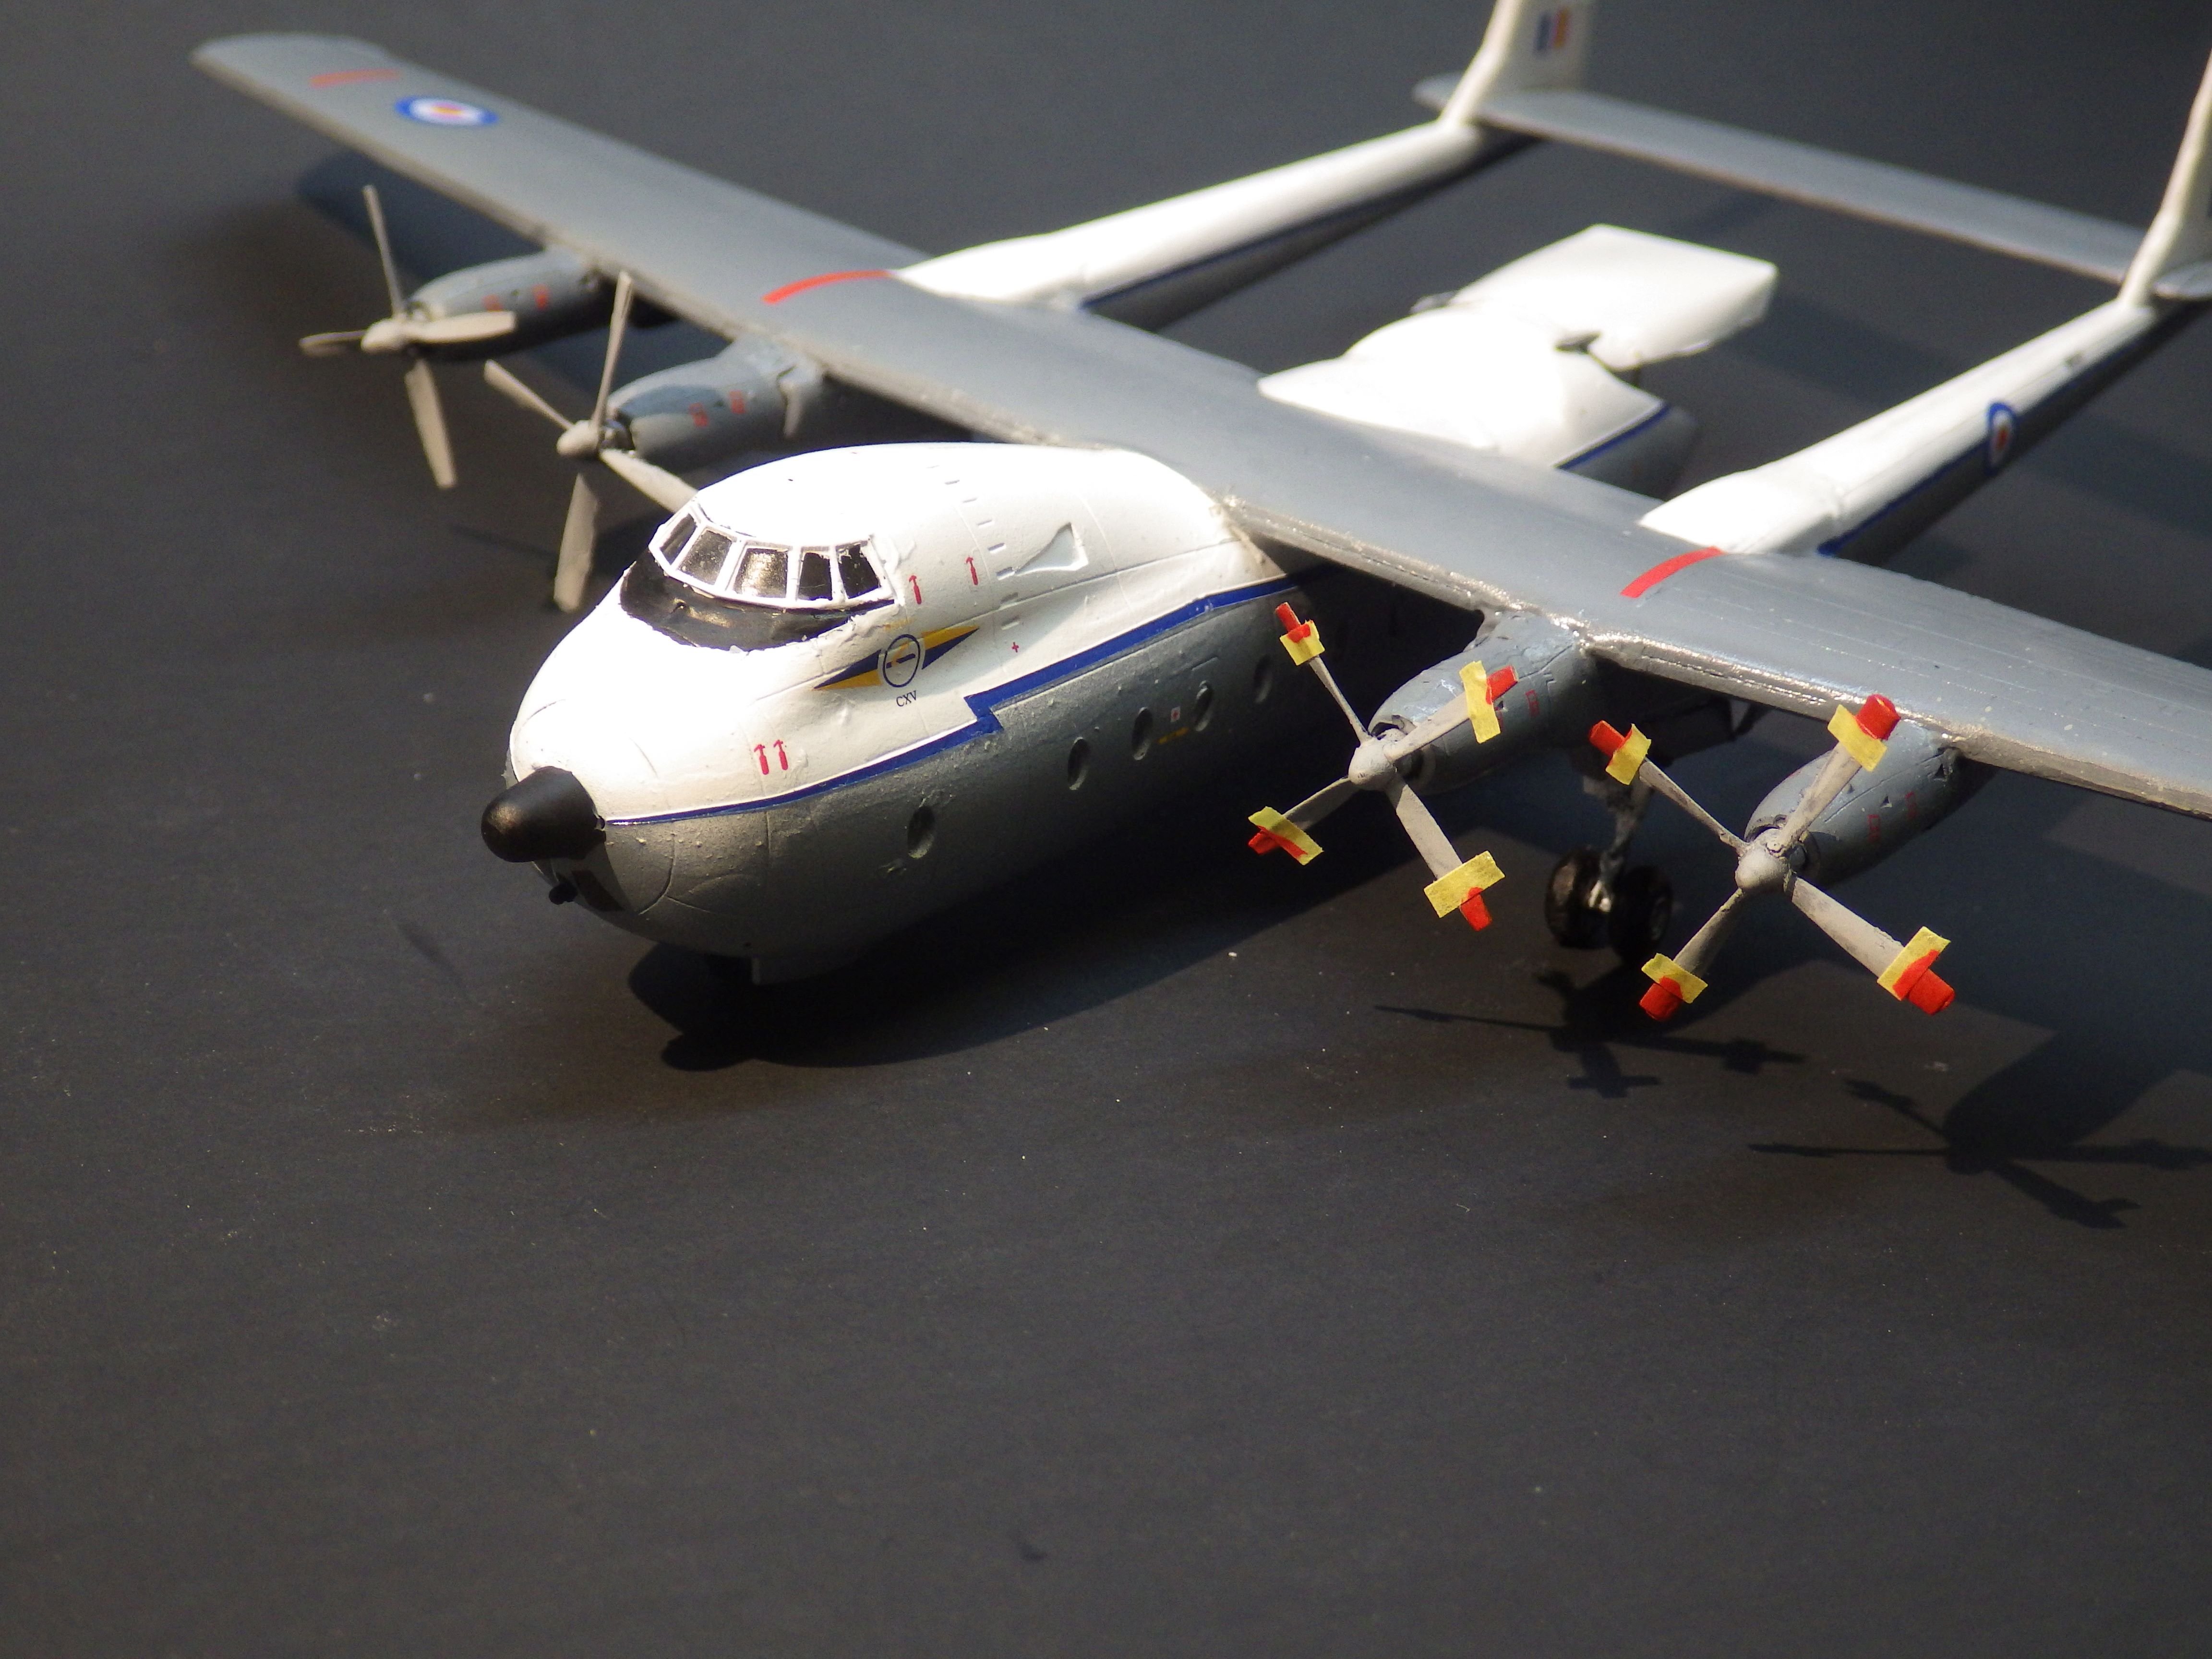
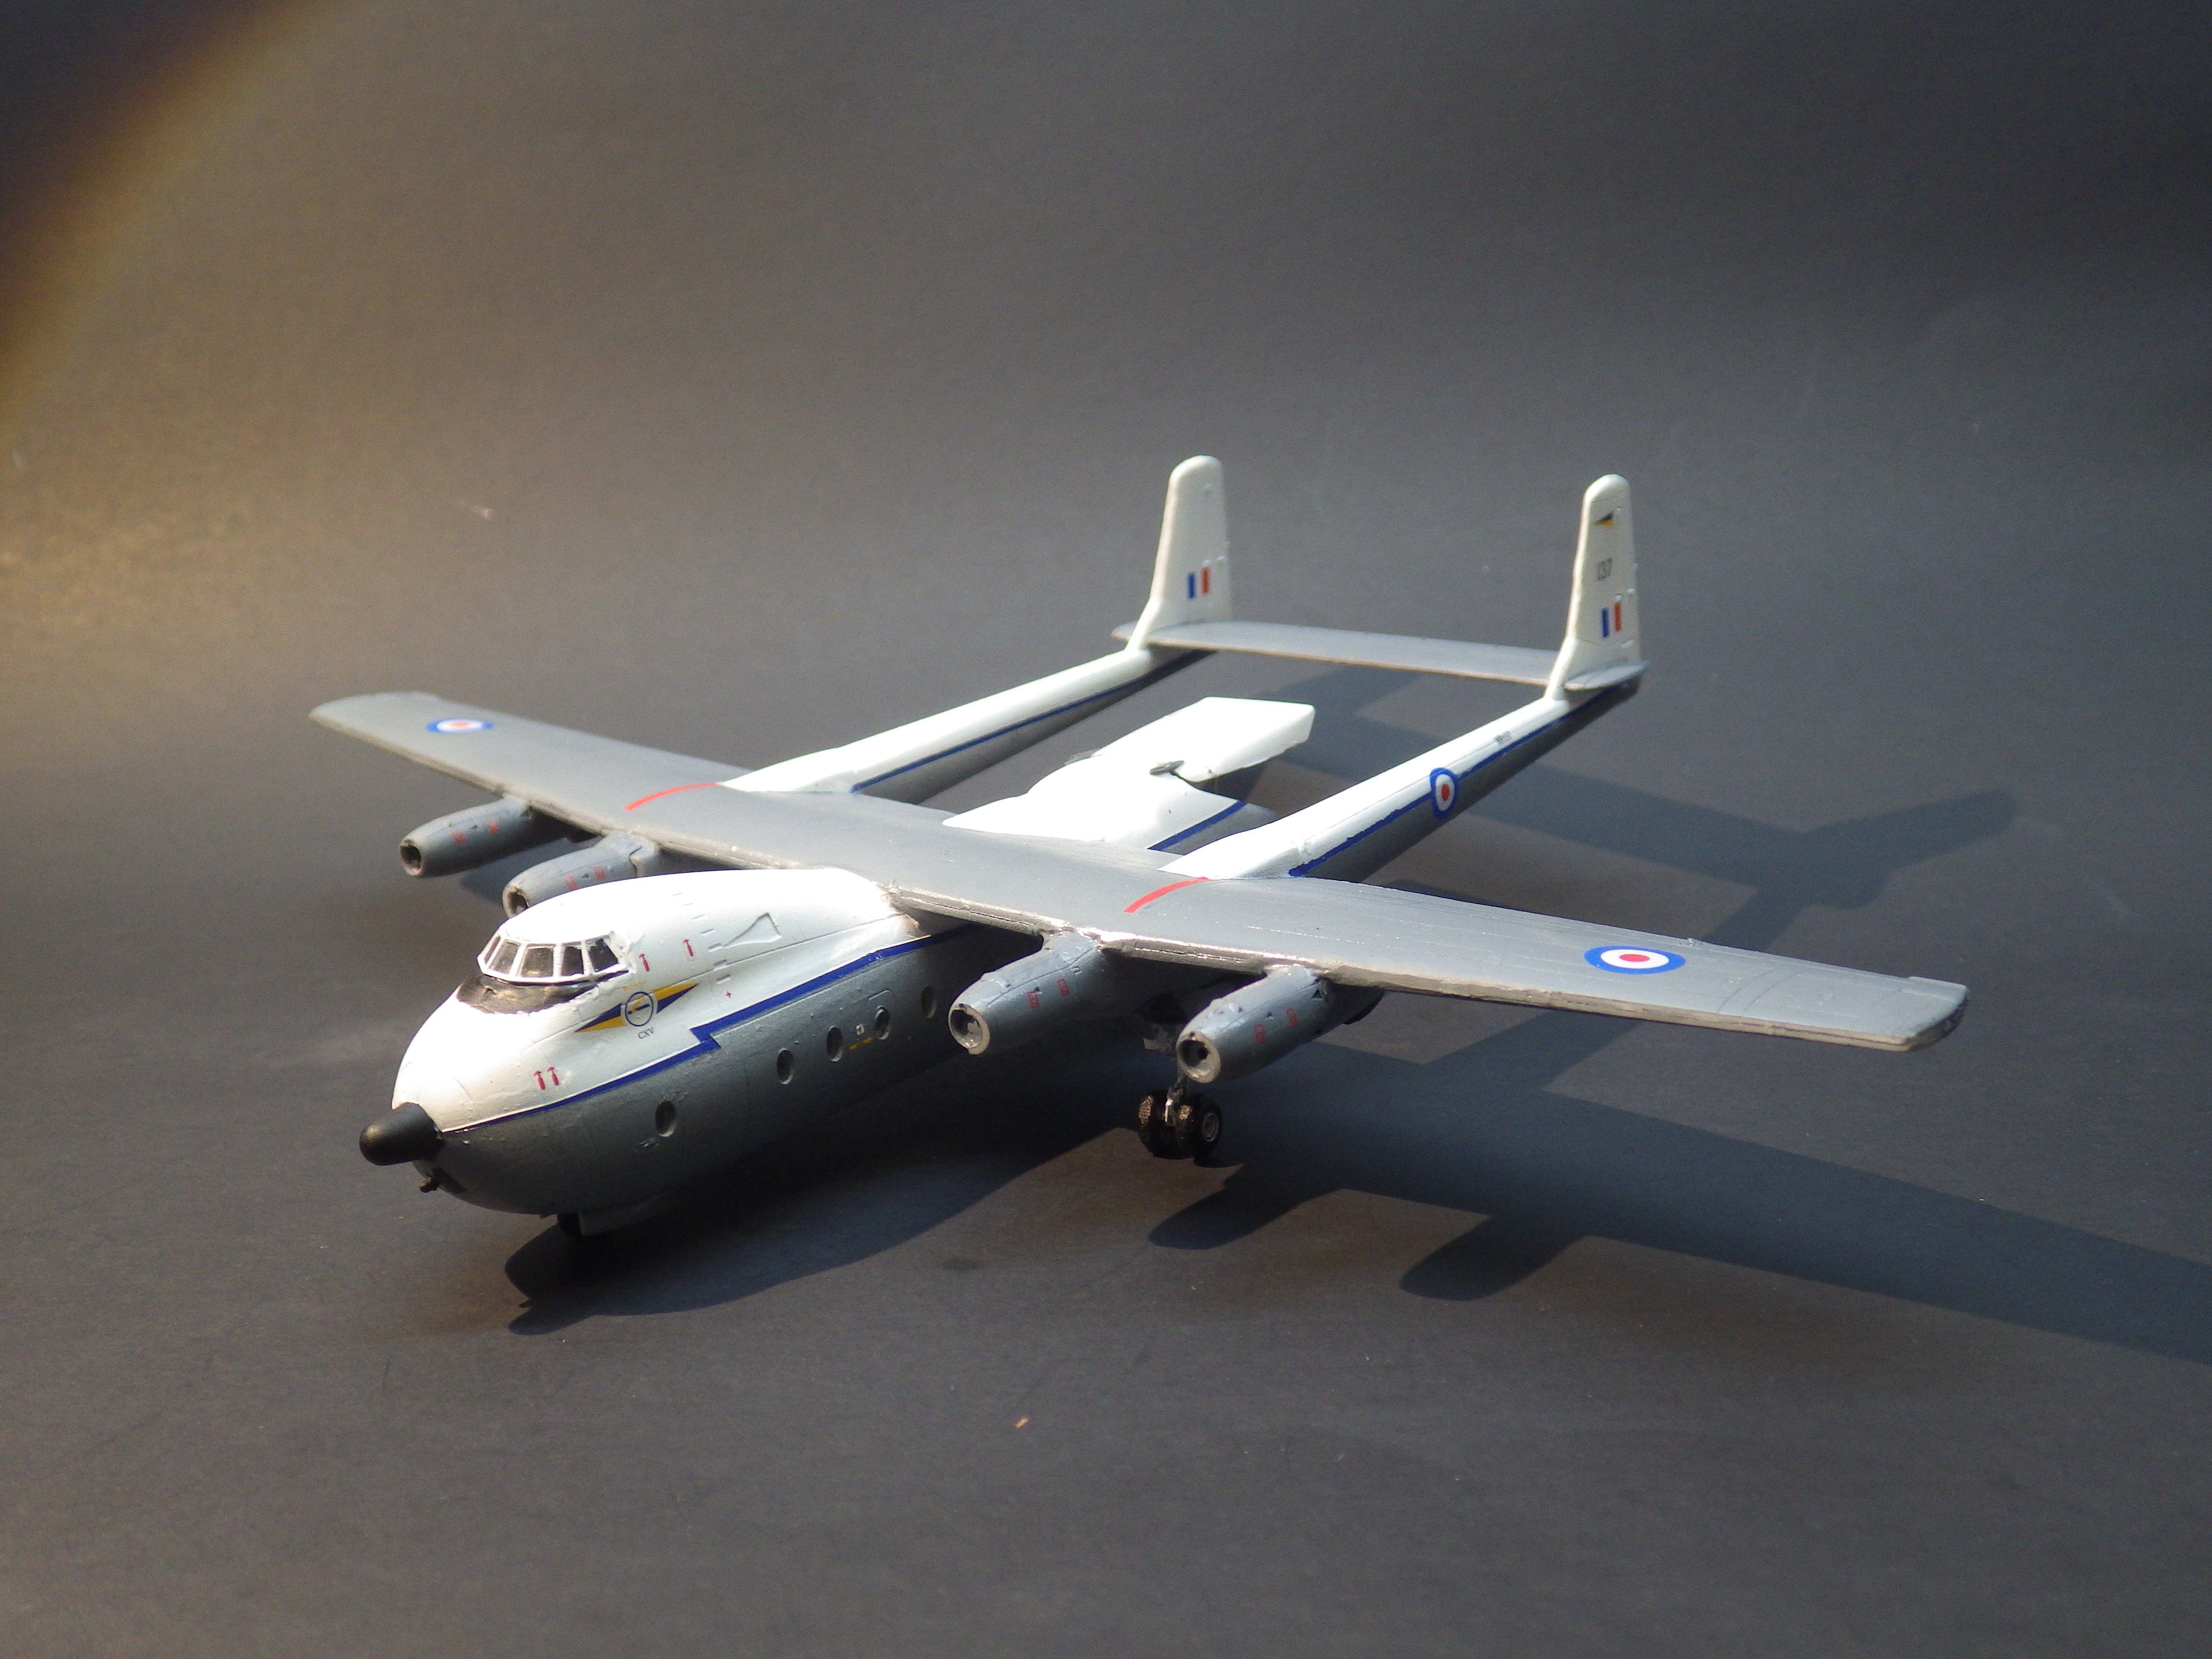
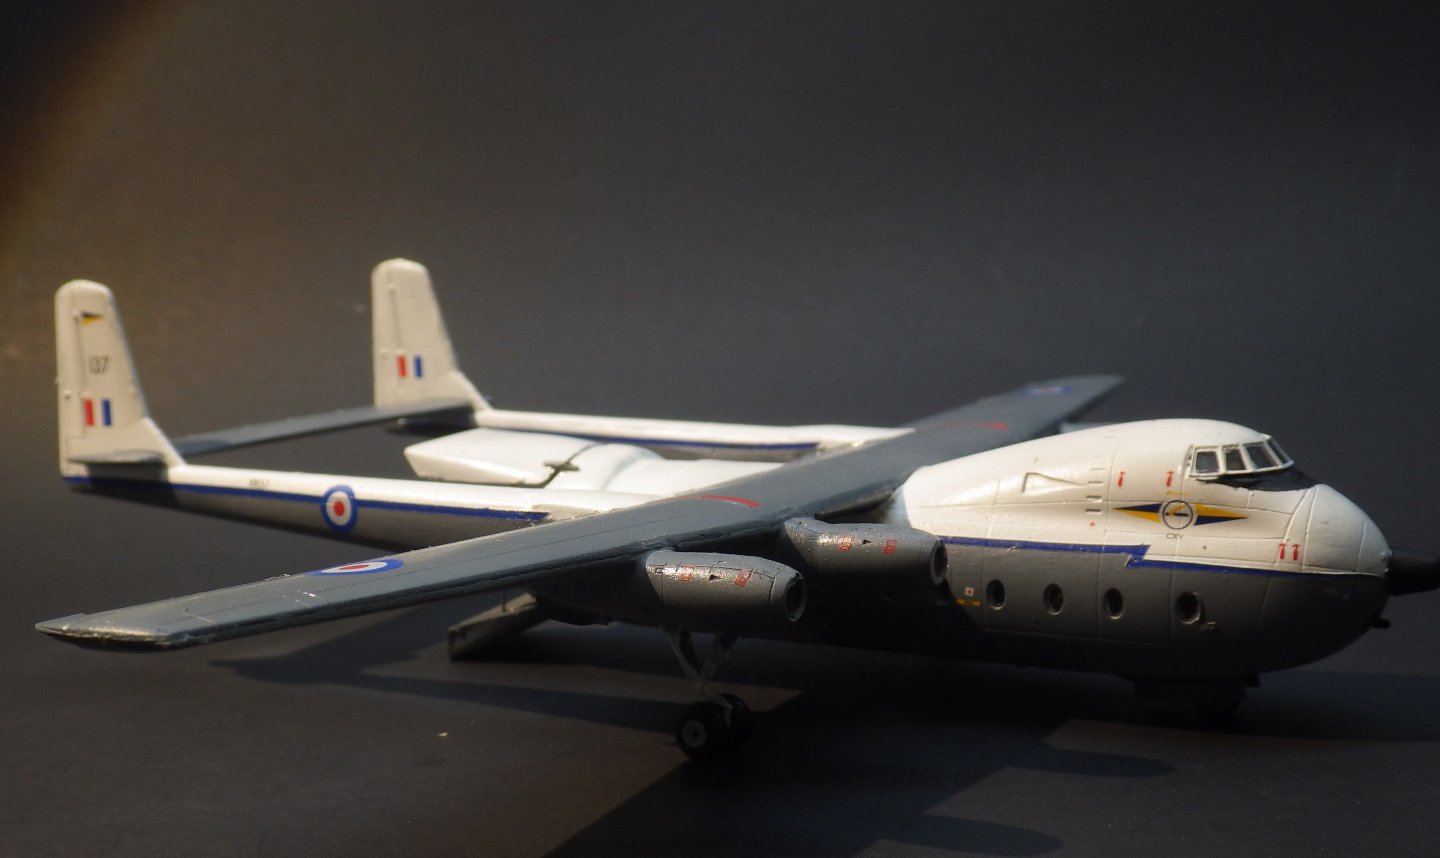
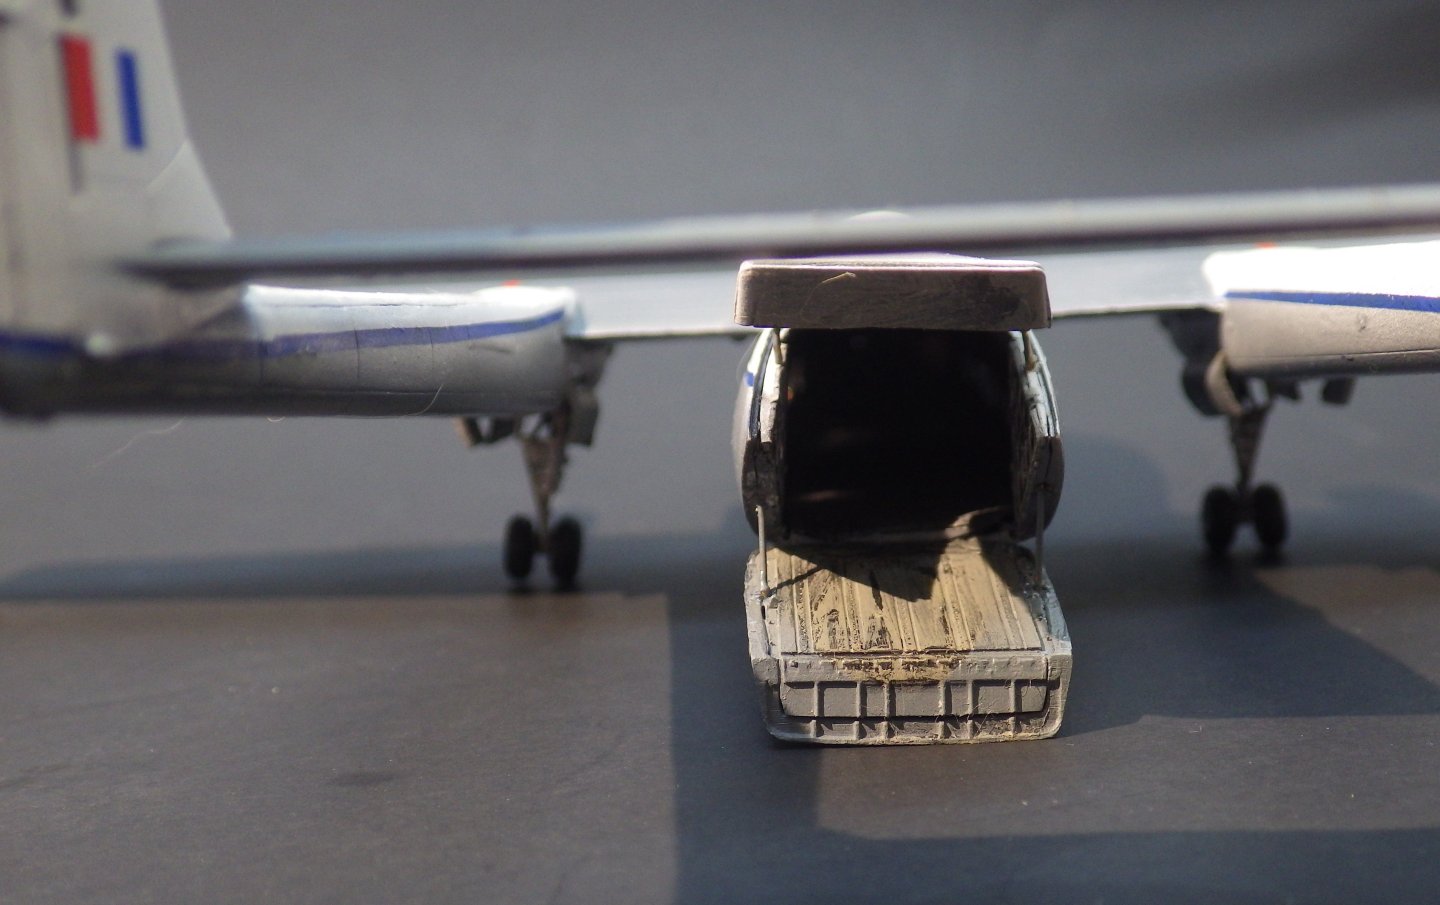
The last two days have been spent decalling the model. A lot of small decals widely spread across the plane. I thought it was best to do them before the PE because holding the model after the PE is going to be delicate. Actually I had to do the decals in several sessions for the same reason. The Mikro Mir decals are very nice. They don't have a lot of extra carrier film, they slide off the backing nicely and seem well registered. I had to go back to photos of the real thing several times because the kit instructions for placing the decals didn't always seem sensible and are probably wrong in places. I went with the photos I need to tidy up the anti-glare black below the cockpit windows, then another satin coat to seal everything followed by the props and onto the PE. I plan to try to weather it quite heavily after the PE is on. A better shot to show the struts holding the ramp Thanks for looking in, the likes and comments. Alan

- 52 replies
-
- 10
-
-
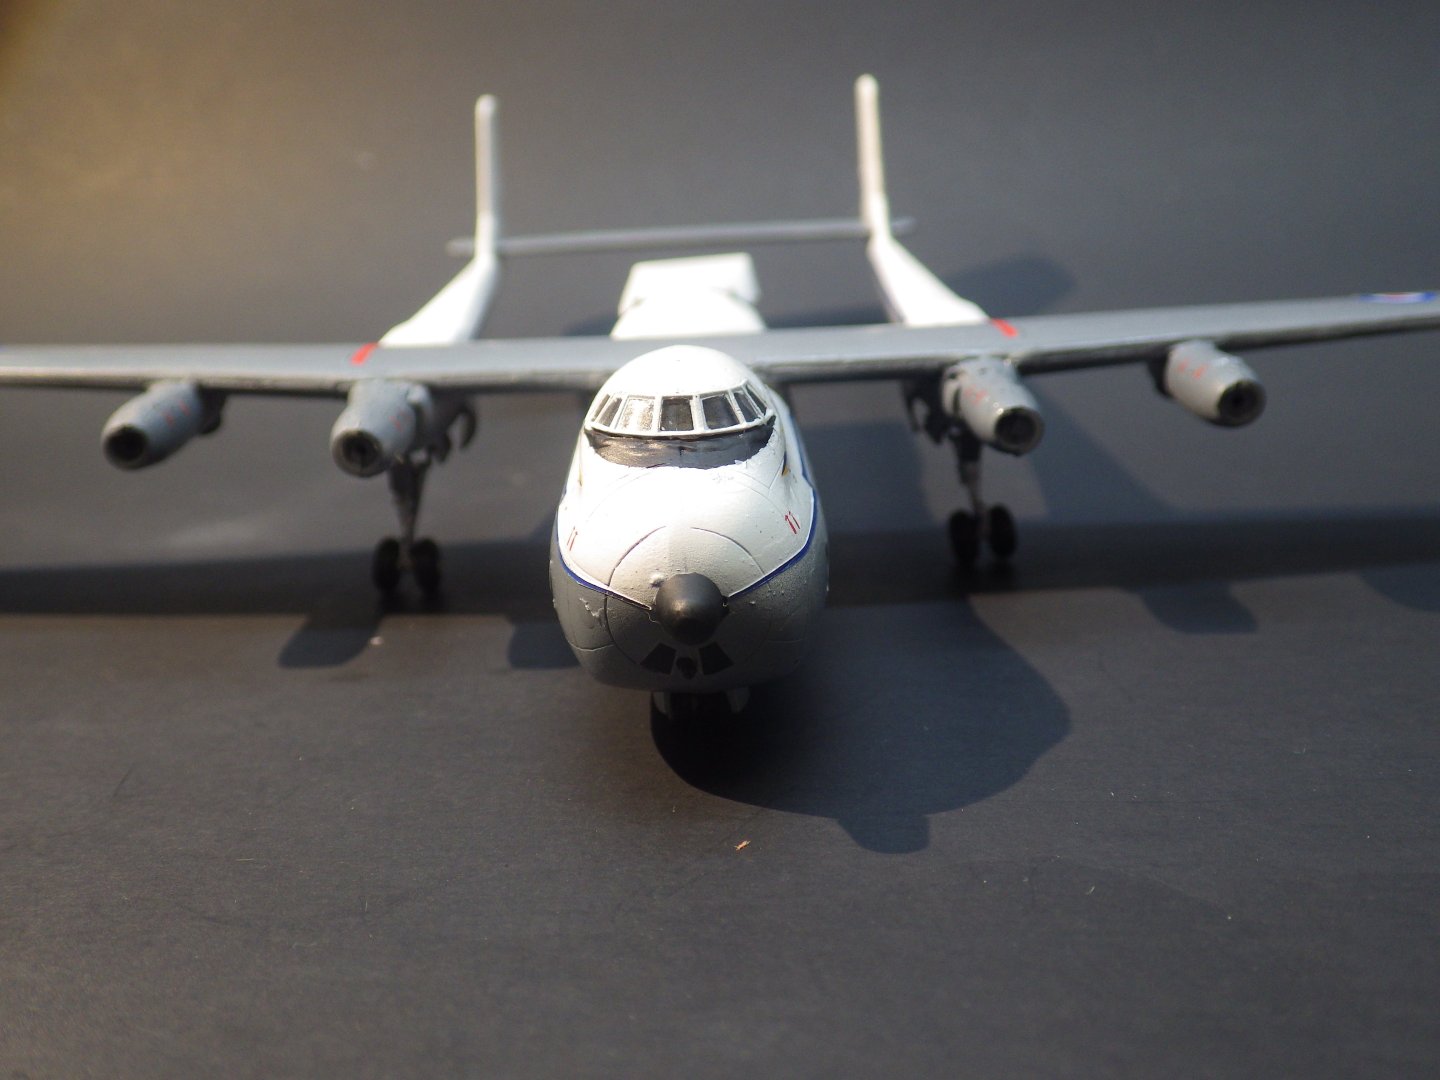
Thanks Mike The instructions didn't mention being a tail sitter or adding weight. I tried some weight in the cargo pod (there is nowhere else to put it) before adding the doors and I needed about 15 grammes. Which took up a lot of room. I was toying with making it look like cargo but decided I could probably strengthen the ramp and use that to keep the tail up. Its a complete contrast between the two builds. Lots of struggling and bad language with teh Argosy (but its starting to look quite nice now) and the figure painting is all calm and reflective. Very soothing and enjoyable. Alan
-
The directional shading with white over the black primer is done and the first glaze coat has been applied. The Argosy has been occupying most of the recent days. Thanks for looking in, the likes and comments Alan

- 27 replies
-
- 10
-
-
Thank you very much Mike. The excellent sculpting by Art Girona helps a lot along with the glazing technique demonstrated by the Nightshift YouTube. The sculpts have excellent folds in clothing and the glazing really brings it out. Alan
-
The fire extinguisher is exquisite. Alan