
Zarkon
-
Posts
295 -
Joined
-
Last visited
Content Type
Profiles
Forums
Gallery
Events
Everything posted by Zarkon
-
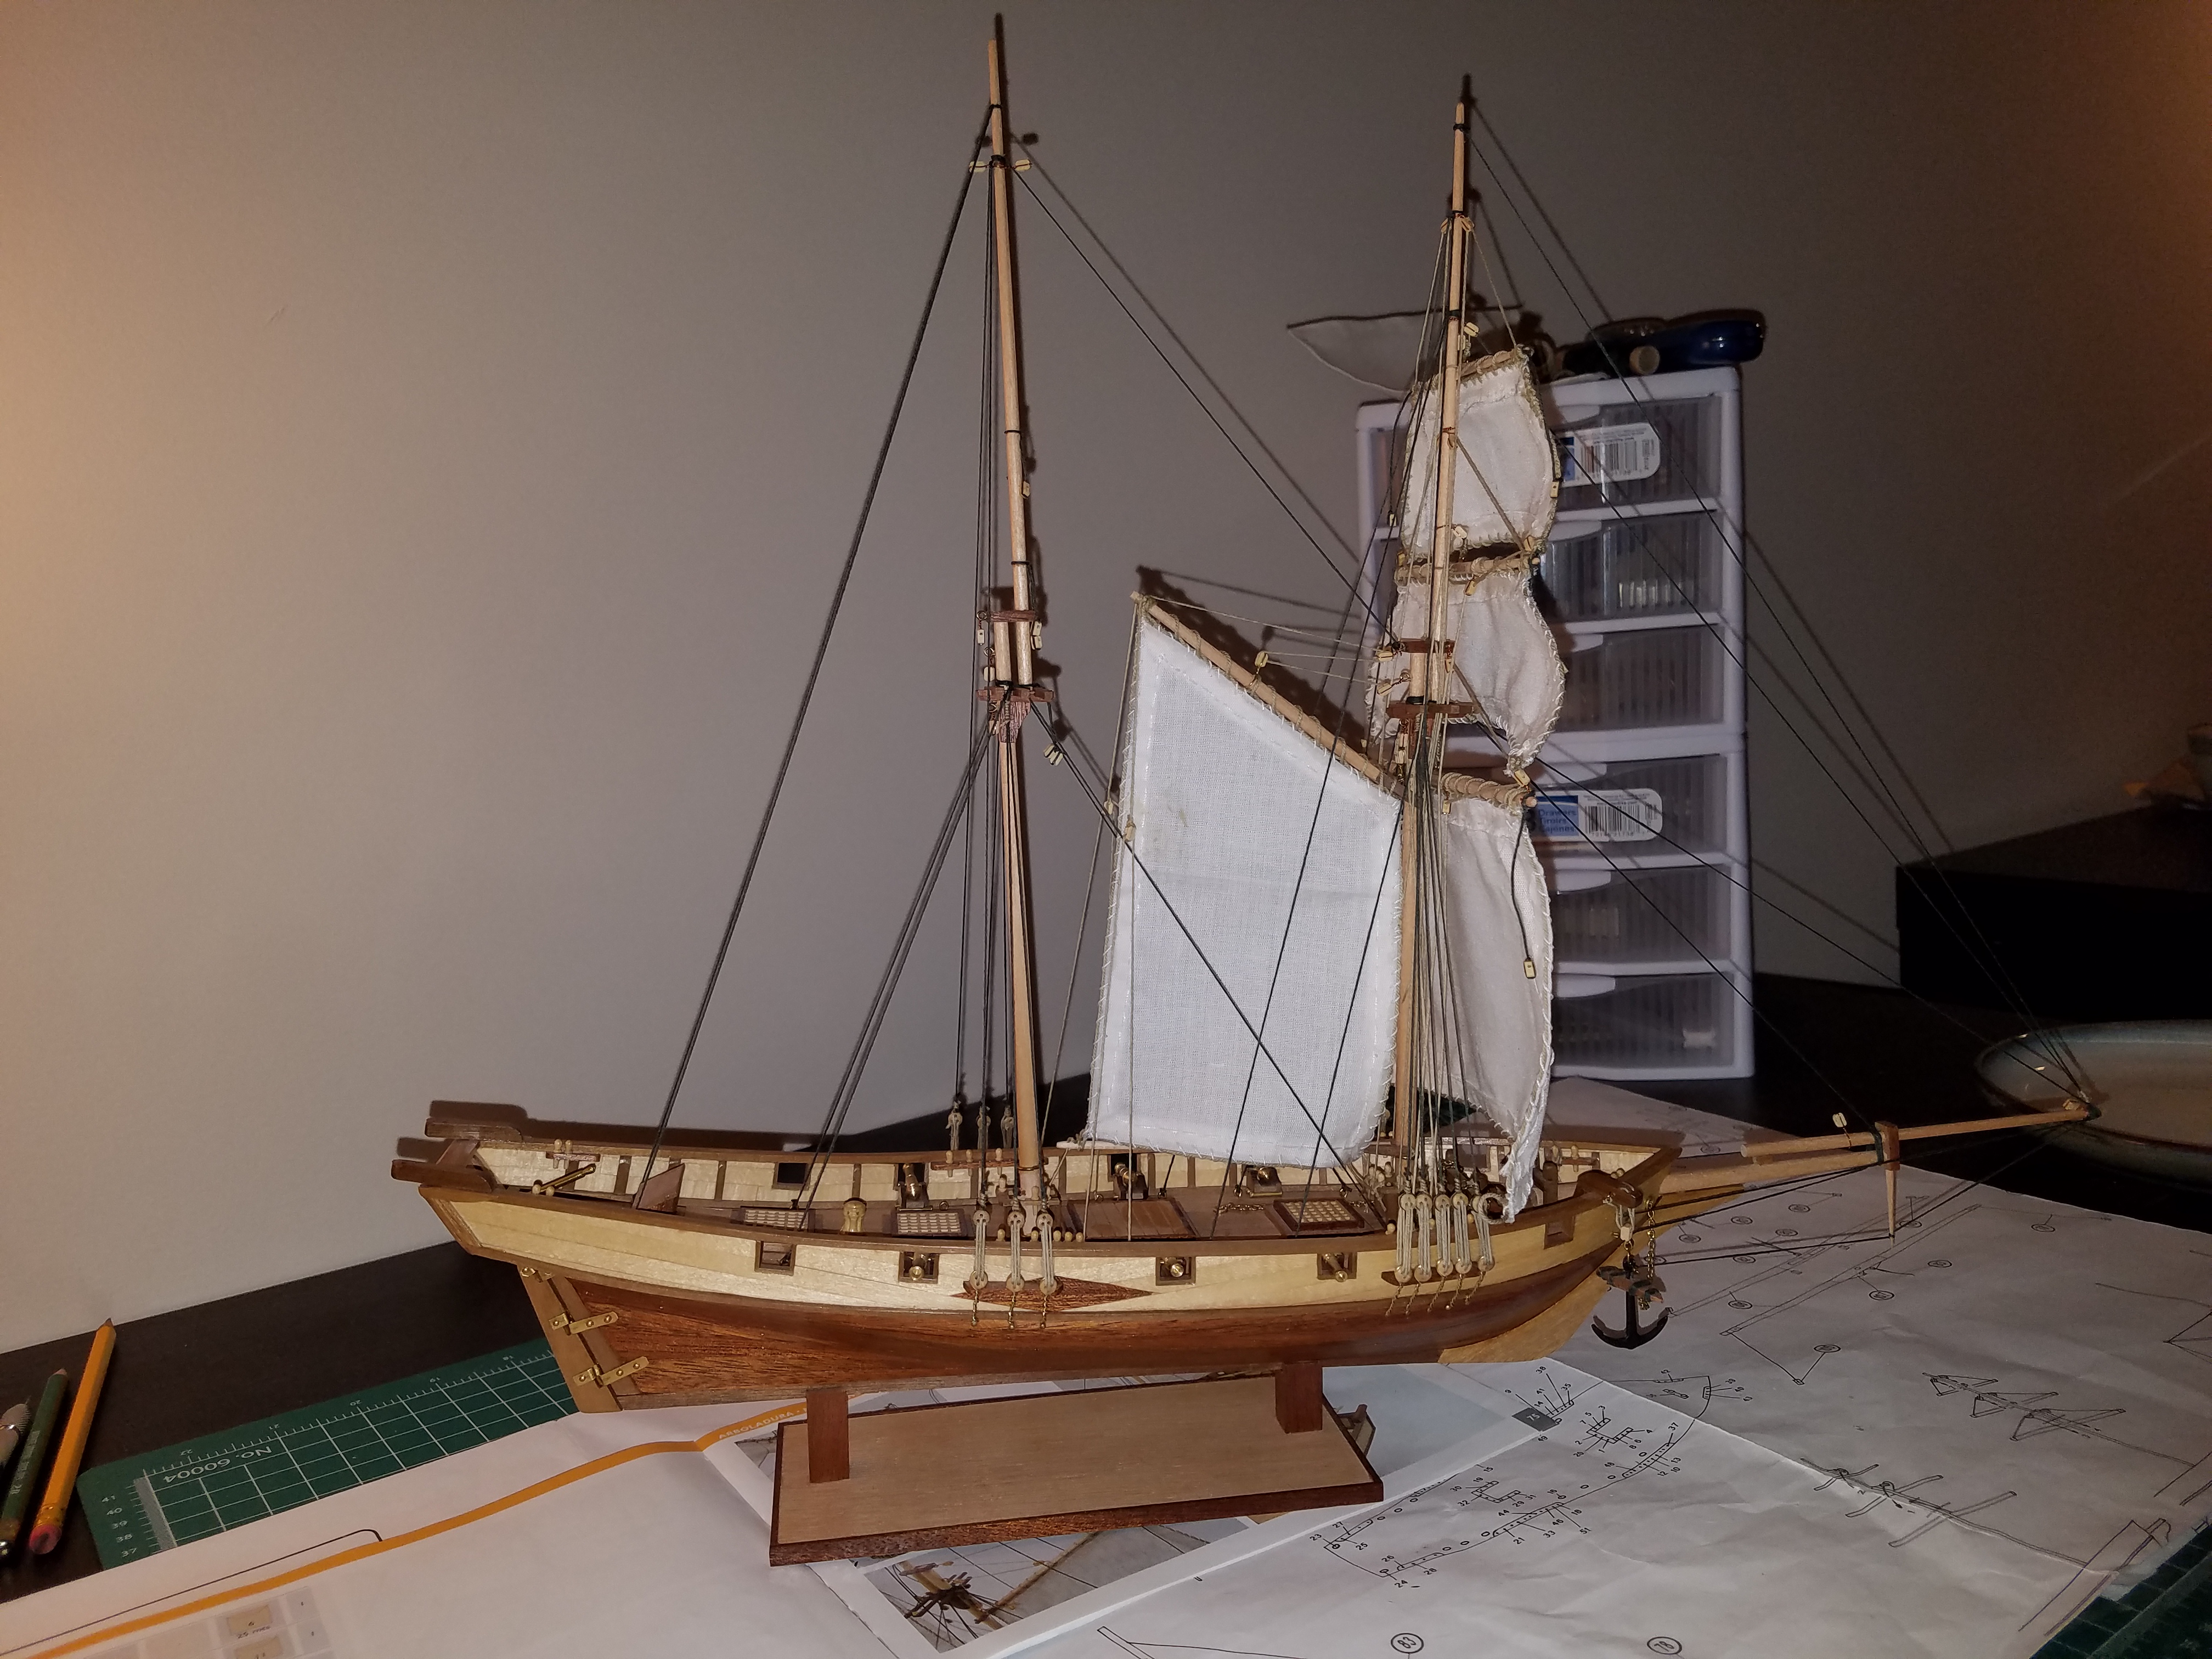
You have done a fantastic job!! Looks great!! Jeff
- 51 replies
-
- 1
-

-
- bounty jolly boat
- Artesania Latina
- (and 2 more)
-
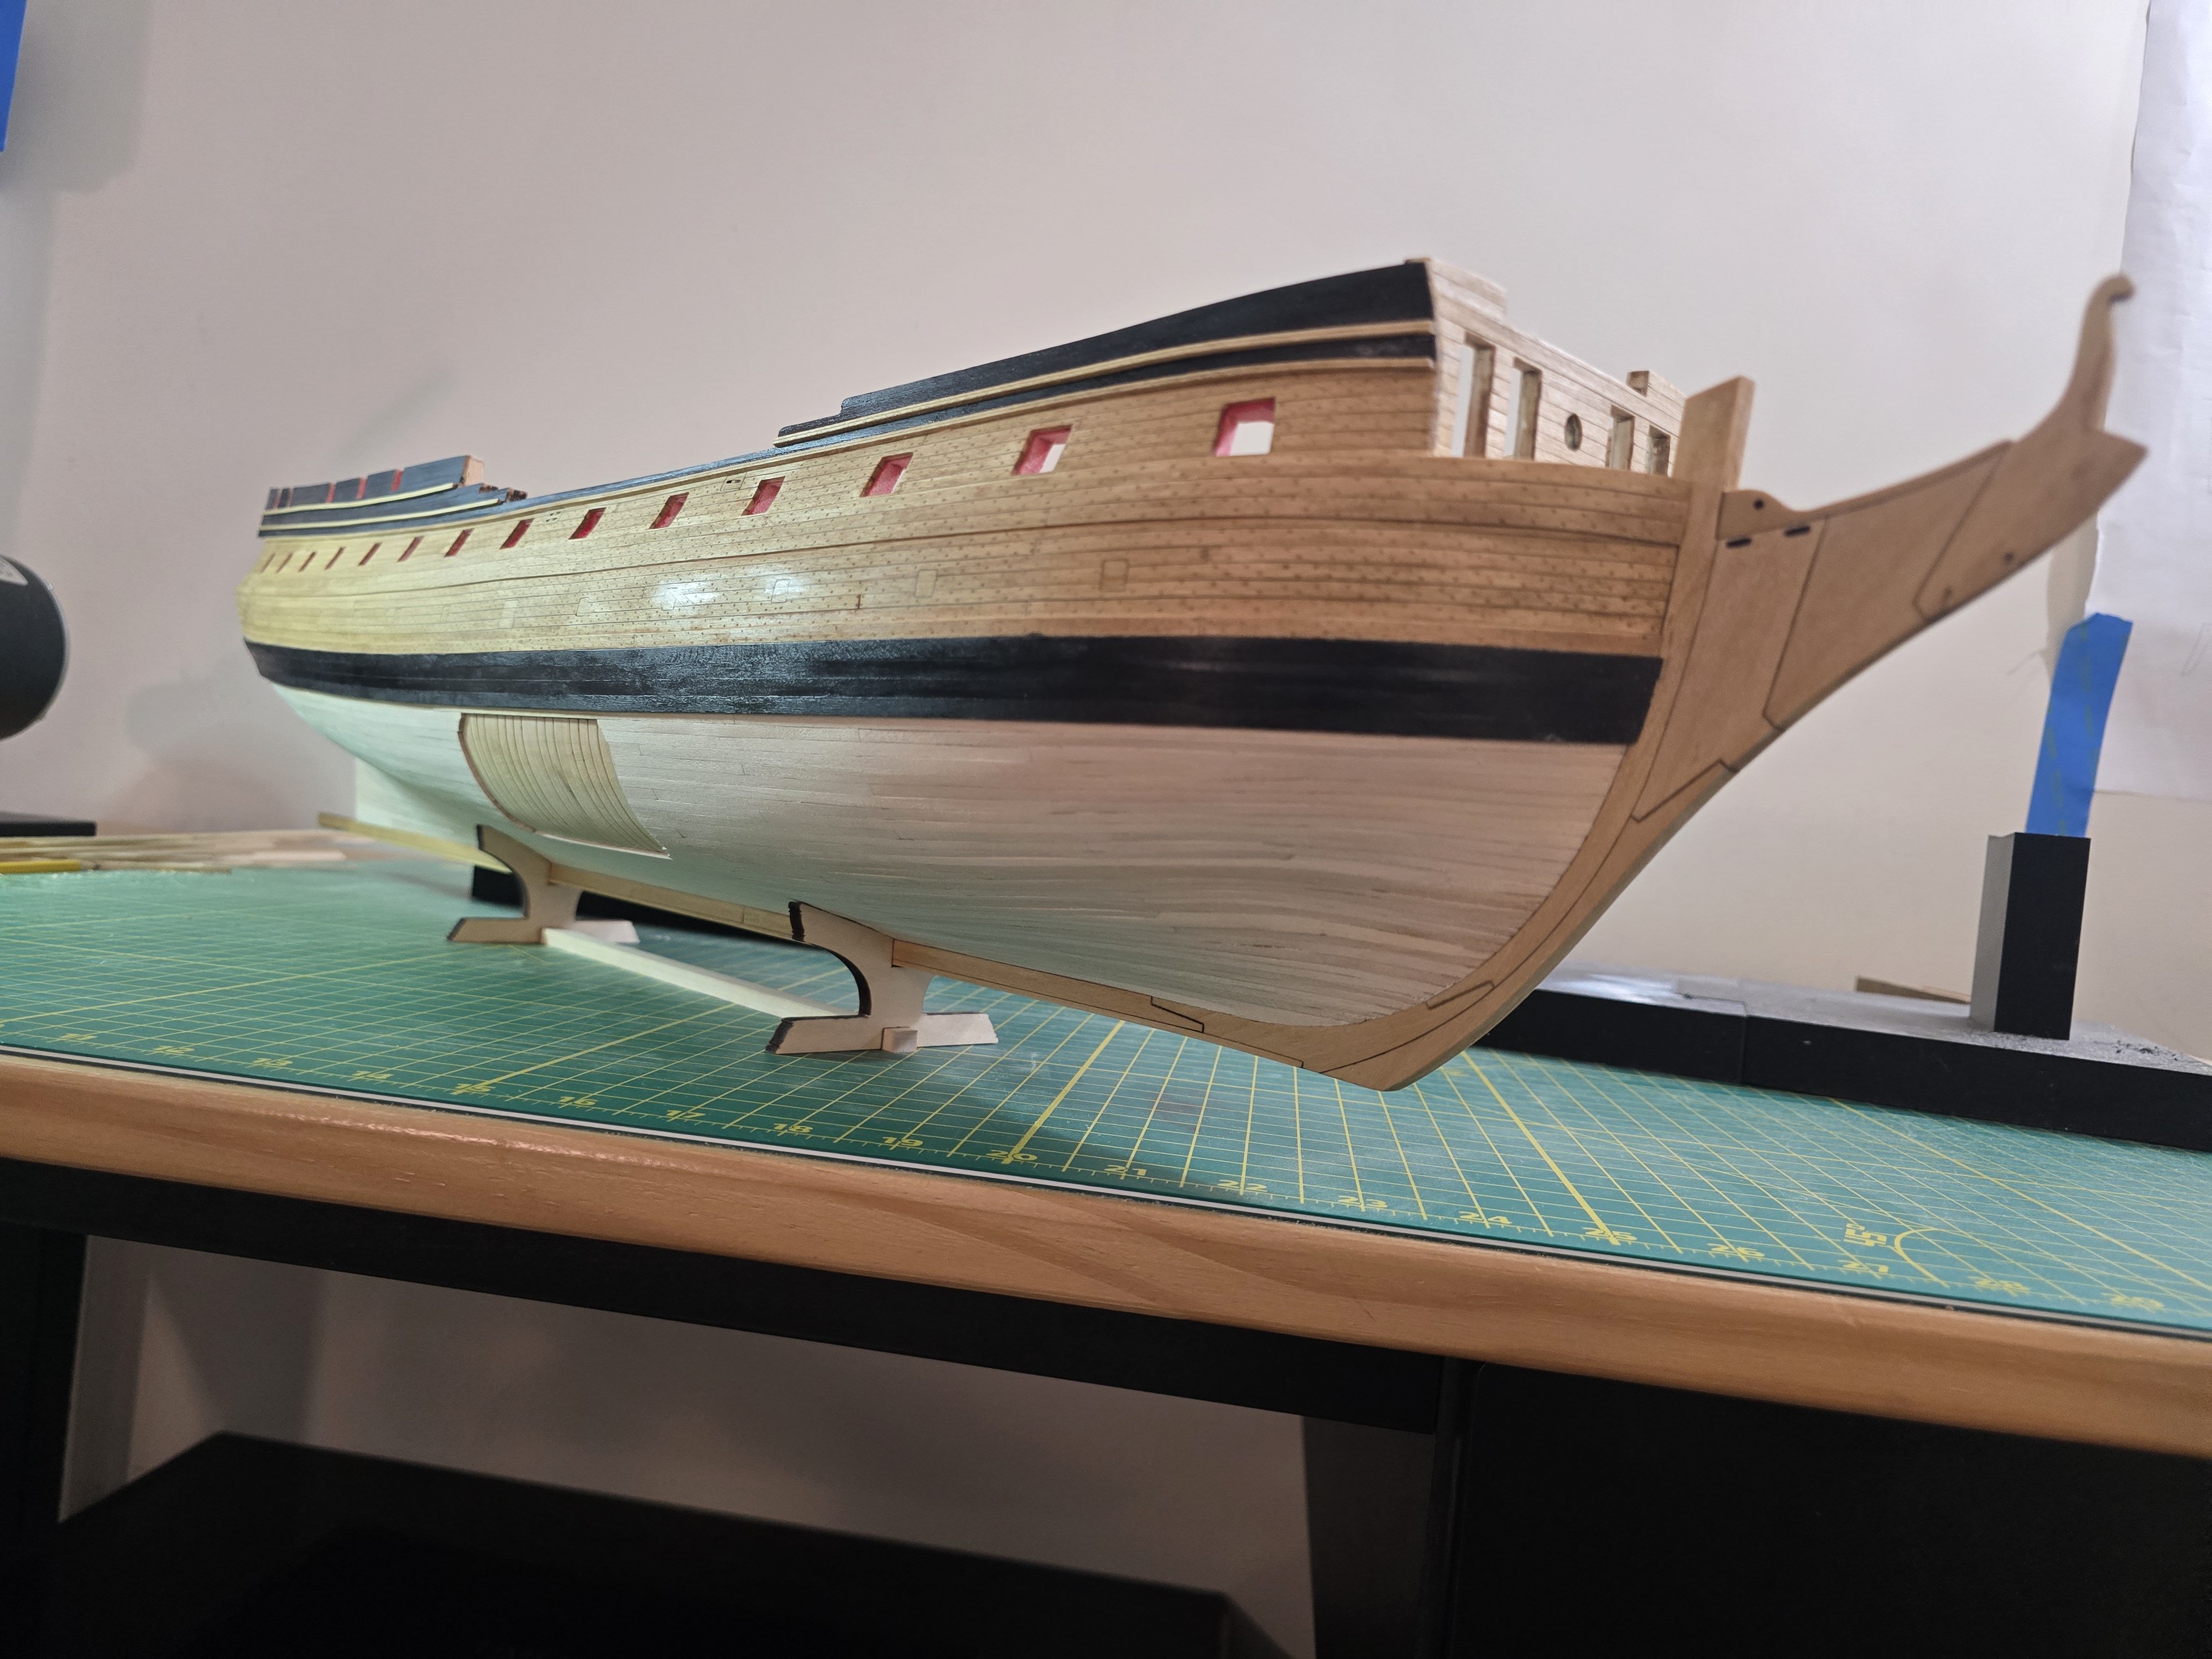
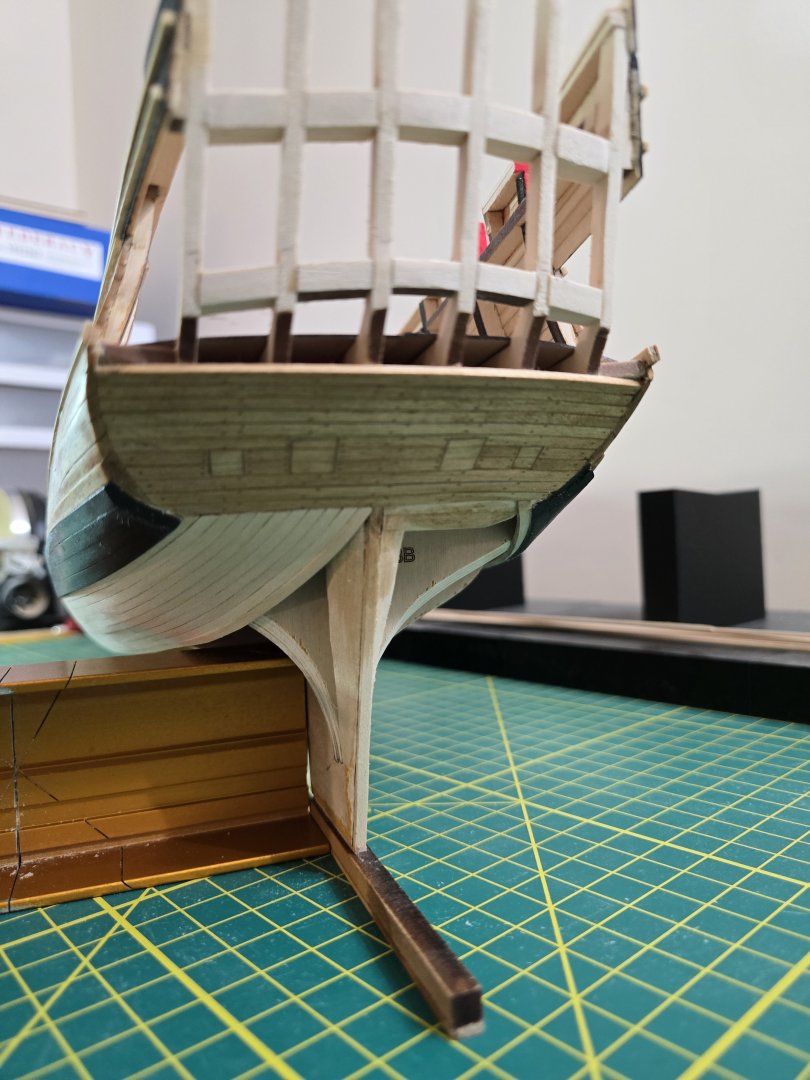
Hey all! Sorry for the long delay. Time has been short for me in the evenings with visiting family, summer, and other things. But today, I finally finished planking one of her sides! I also constructed the display stand for her and finally placed her right side up for the first time with one side planked. I have some sanding I need to do to even out some parts of the planking though. This side is definitely not perfect. No where close. This was the first time I tried this method of planking the hull and now realized how to do it better for the next model I have to plank (Hint: The Cheerful!) What a long planking process! I do have 1 belt left on the other side. Then finally some sanding and varnish. Wish me luck it takes me less time to do the other side! Haha! To be honest, I'm getting planked out! This process, especially on the USF Confederacy, is a lot to plank. This isnt a complaint about the model at all. I think the width of these planks fit perfectly with the model and really do the ship justice. Other kits use wider strips so less rows to plank. But I think these thinner strips give it a more authentic look. Thanks everyone for checking in! Onto the last belt section! Jeff


-
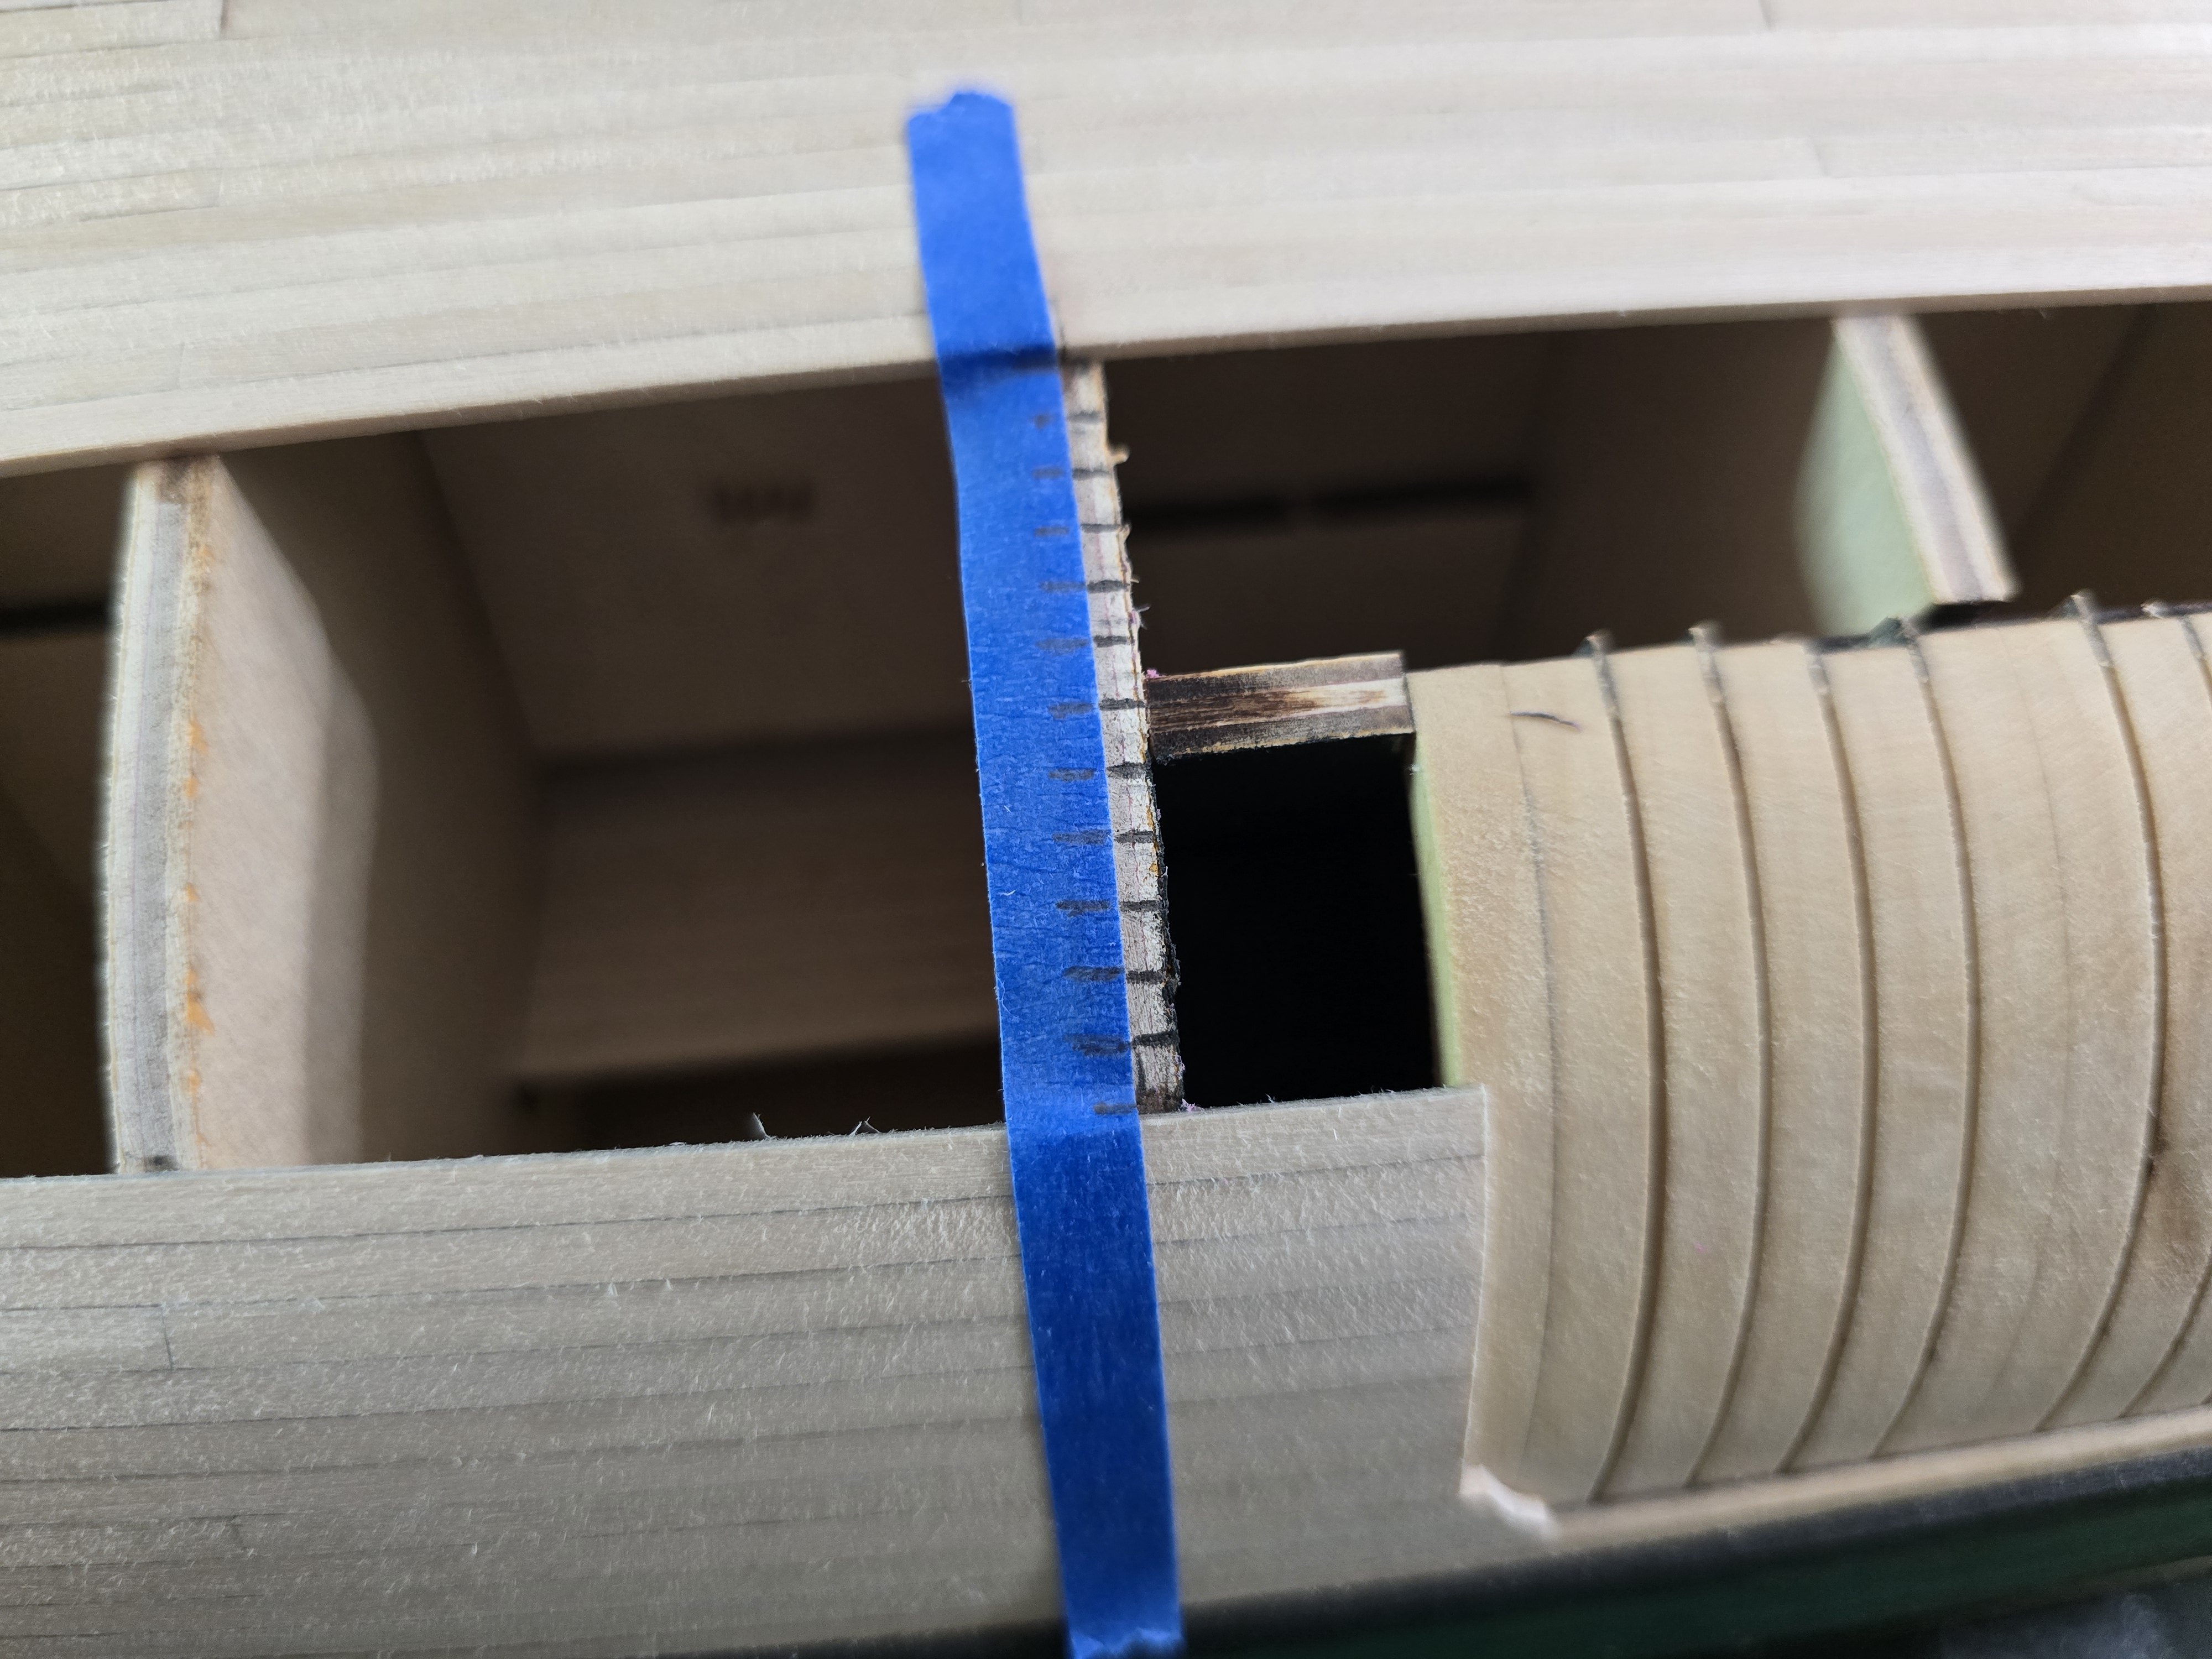
Forgot to mention, you could Place some weak sticky painters tape around the top and bottom where the wales will be placed. This can help you figure out where to sand and helps give a run of the wales. Jeff
- 51 replies
-
- 2
-
-
- bounty jolly boat
- Artesania Latina
- (and 2 more)
-
Hey Peter! What i would try, would be to sand off the varnish where you want you want to glue the wale strips on. Try not to sand too much, just enough to get the varnish off. You can always restain/revarnish after placing the wales on, or also over and parts where you might sand thats not where the wales are. I hope this helps! Jeff
- 51 replies
-
- 1
-
-
- bounty jolly boat
- Artesania Latina
- (and 2 more)
-
Congratulations! Beautiful work! You did an amazing job on this build at it looks fantastic! Jeff
- 310 replies
-
- 1
-
-
- Diana
- Caldercraft
- (and 1 more)
-
I am always amazed by your work! Fantastic! Jeff
-
I CANT believe how great this looks! 🤣 You are doing a fabulous job and I am enjoying watching your build! I haven't heard of Portland Scale Ship Co. Are they a newer company or have they been around for a while? This kit looks like a fun build! Jeff
-
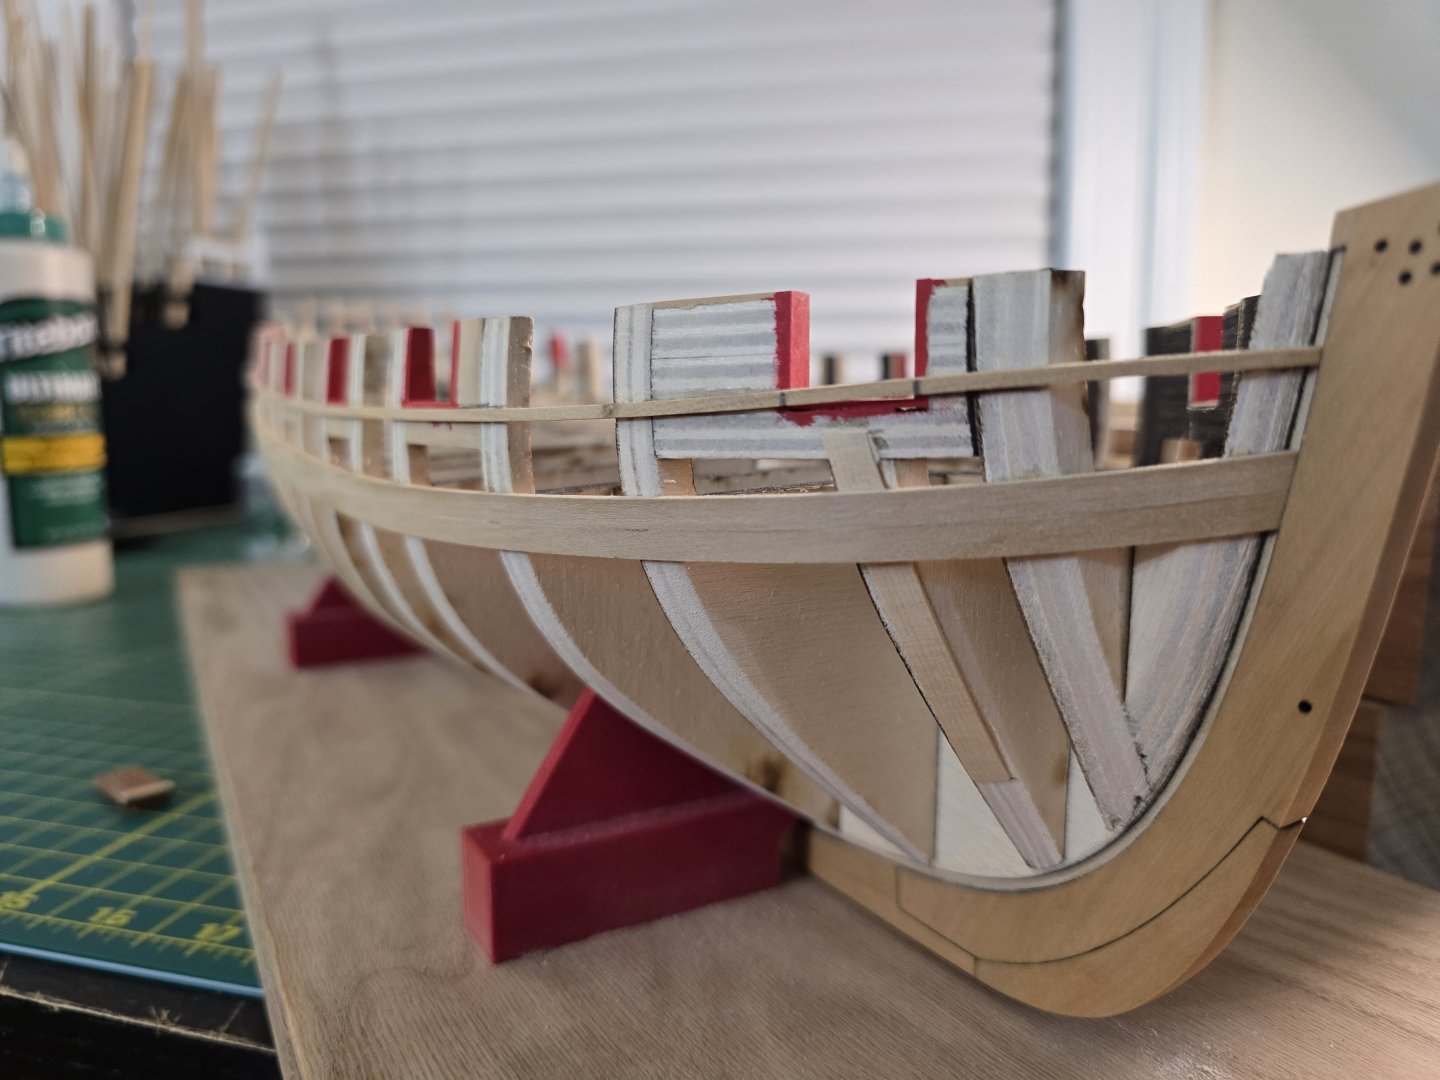
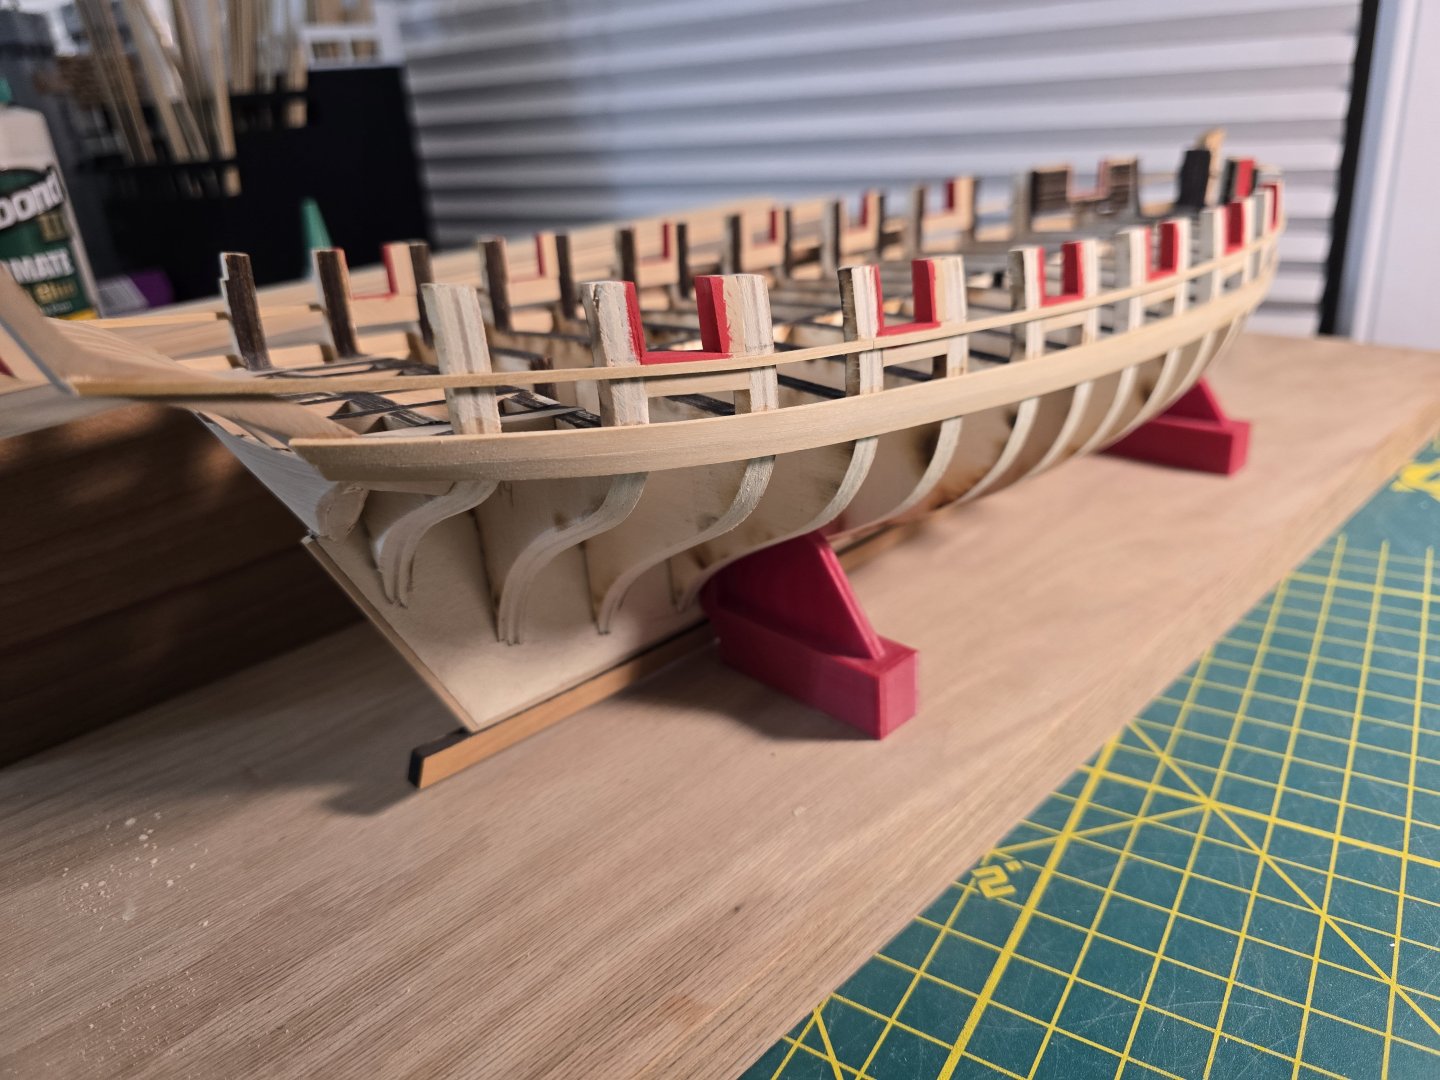
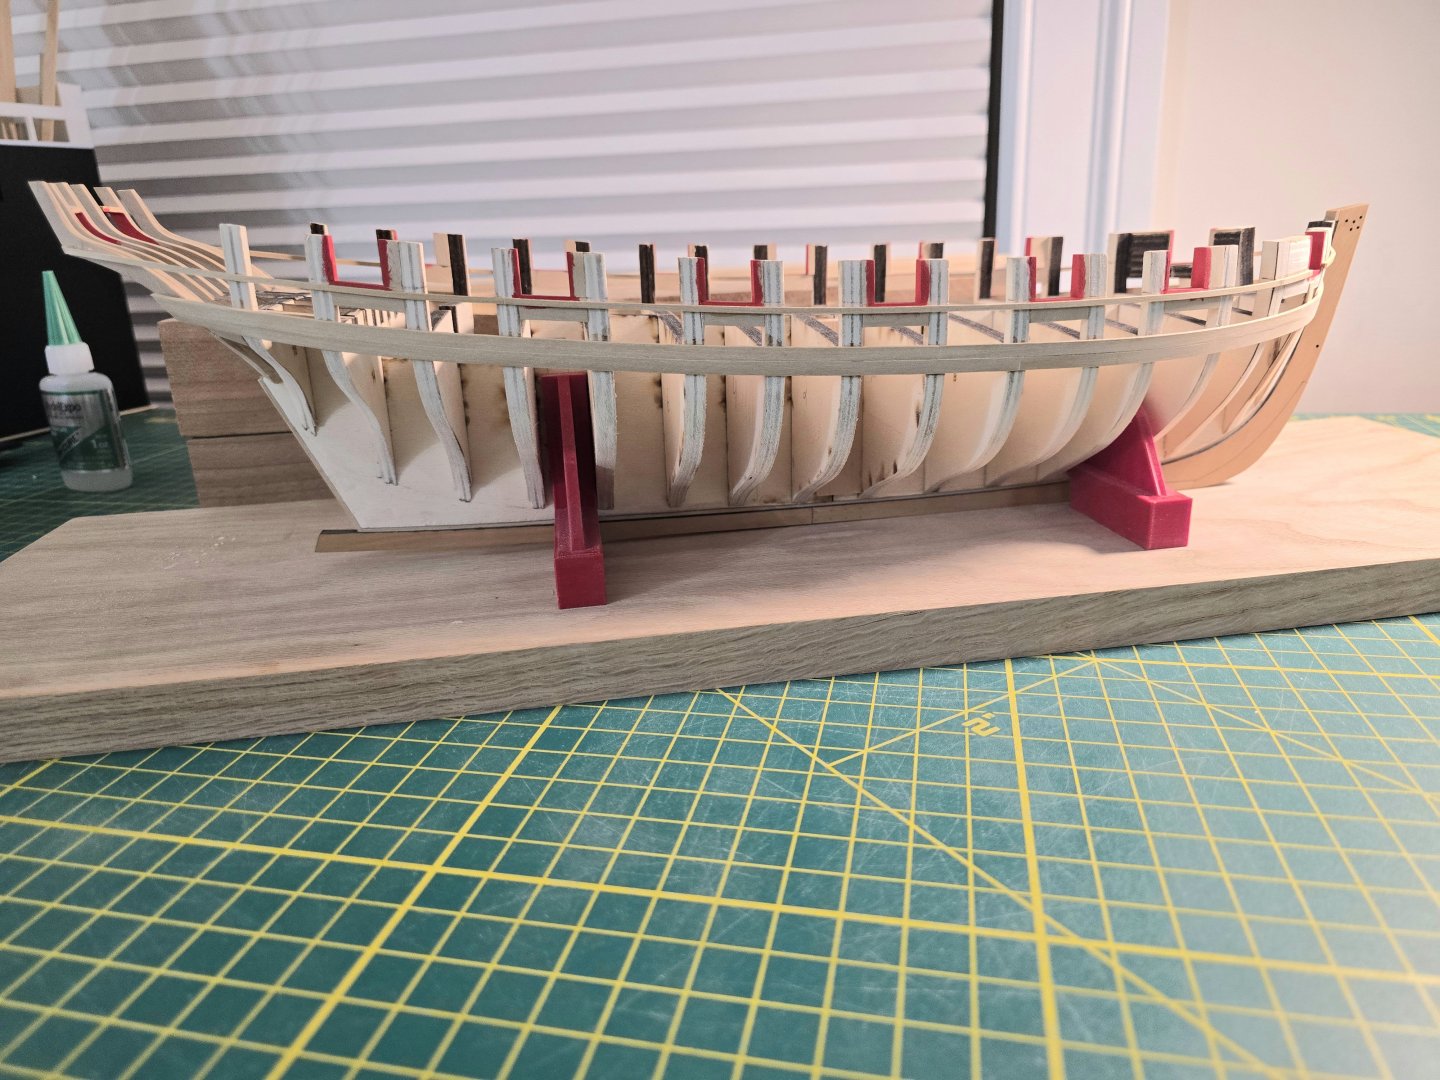
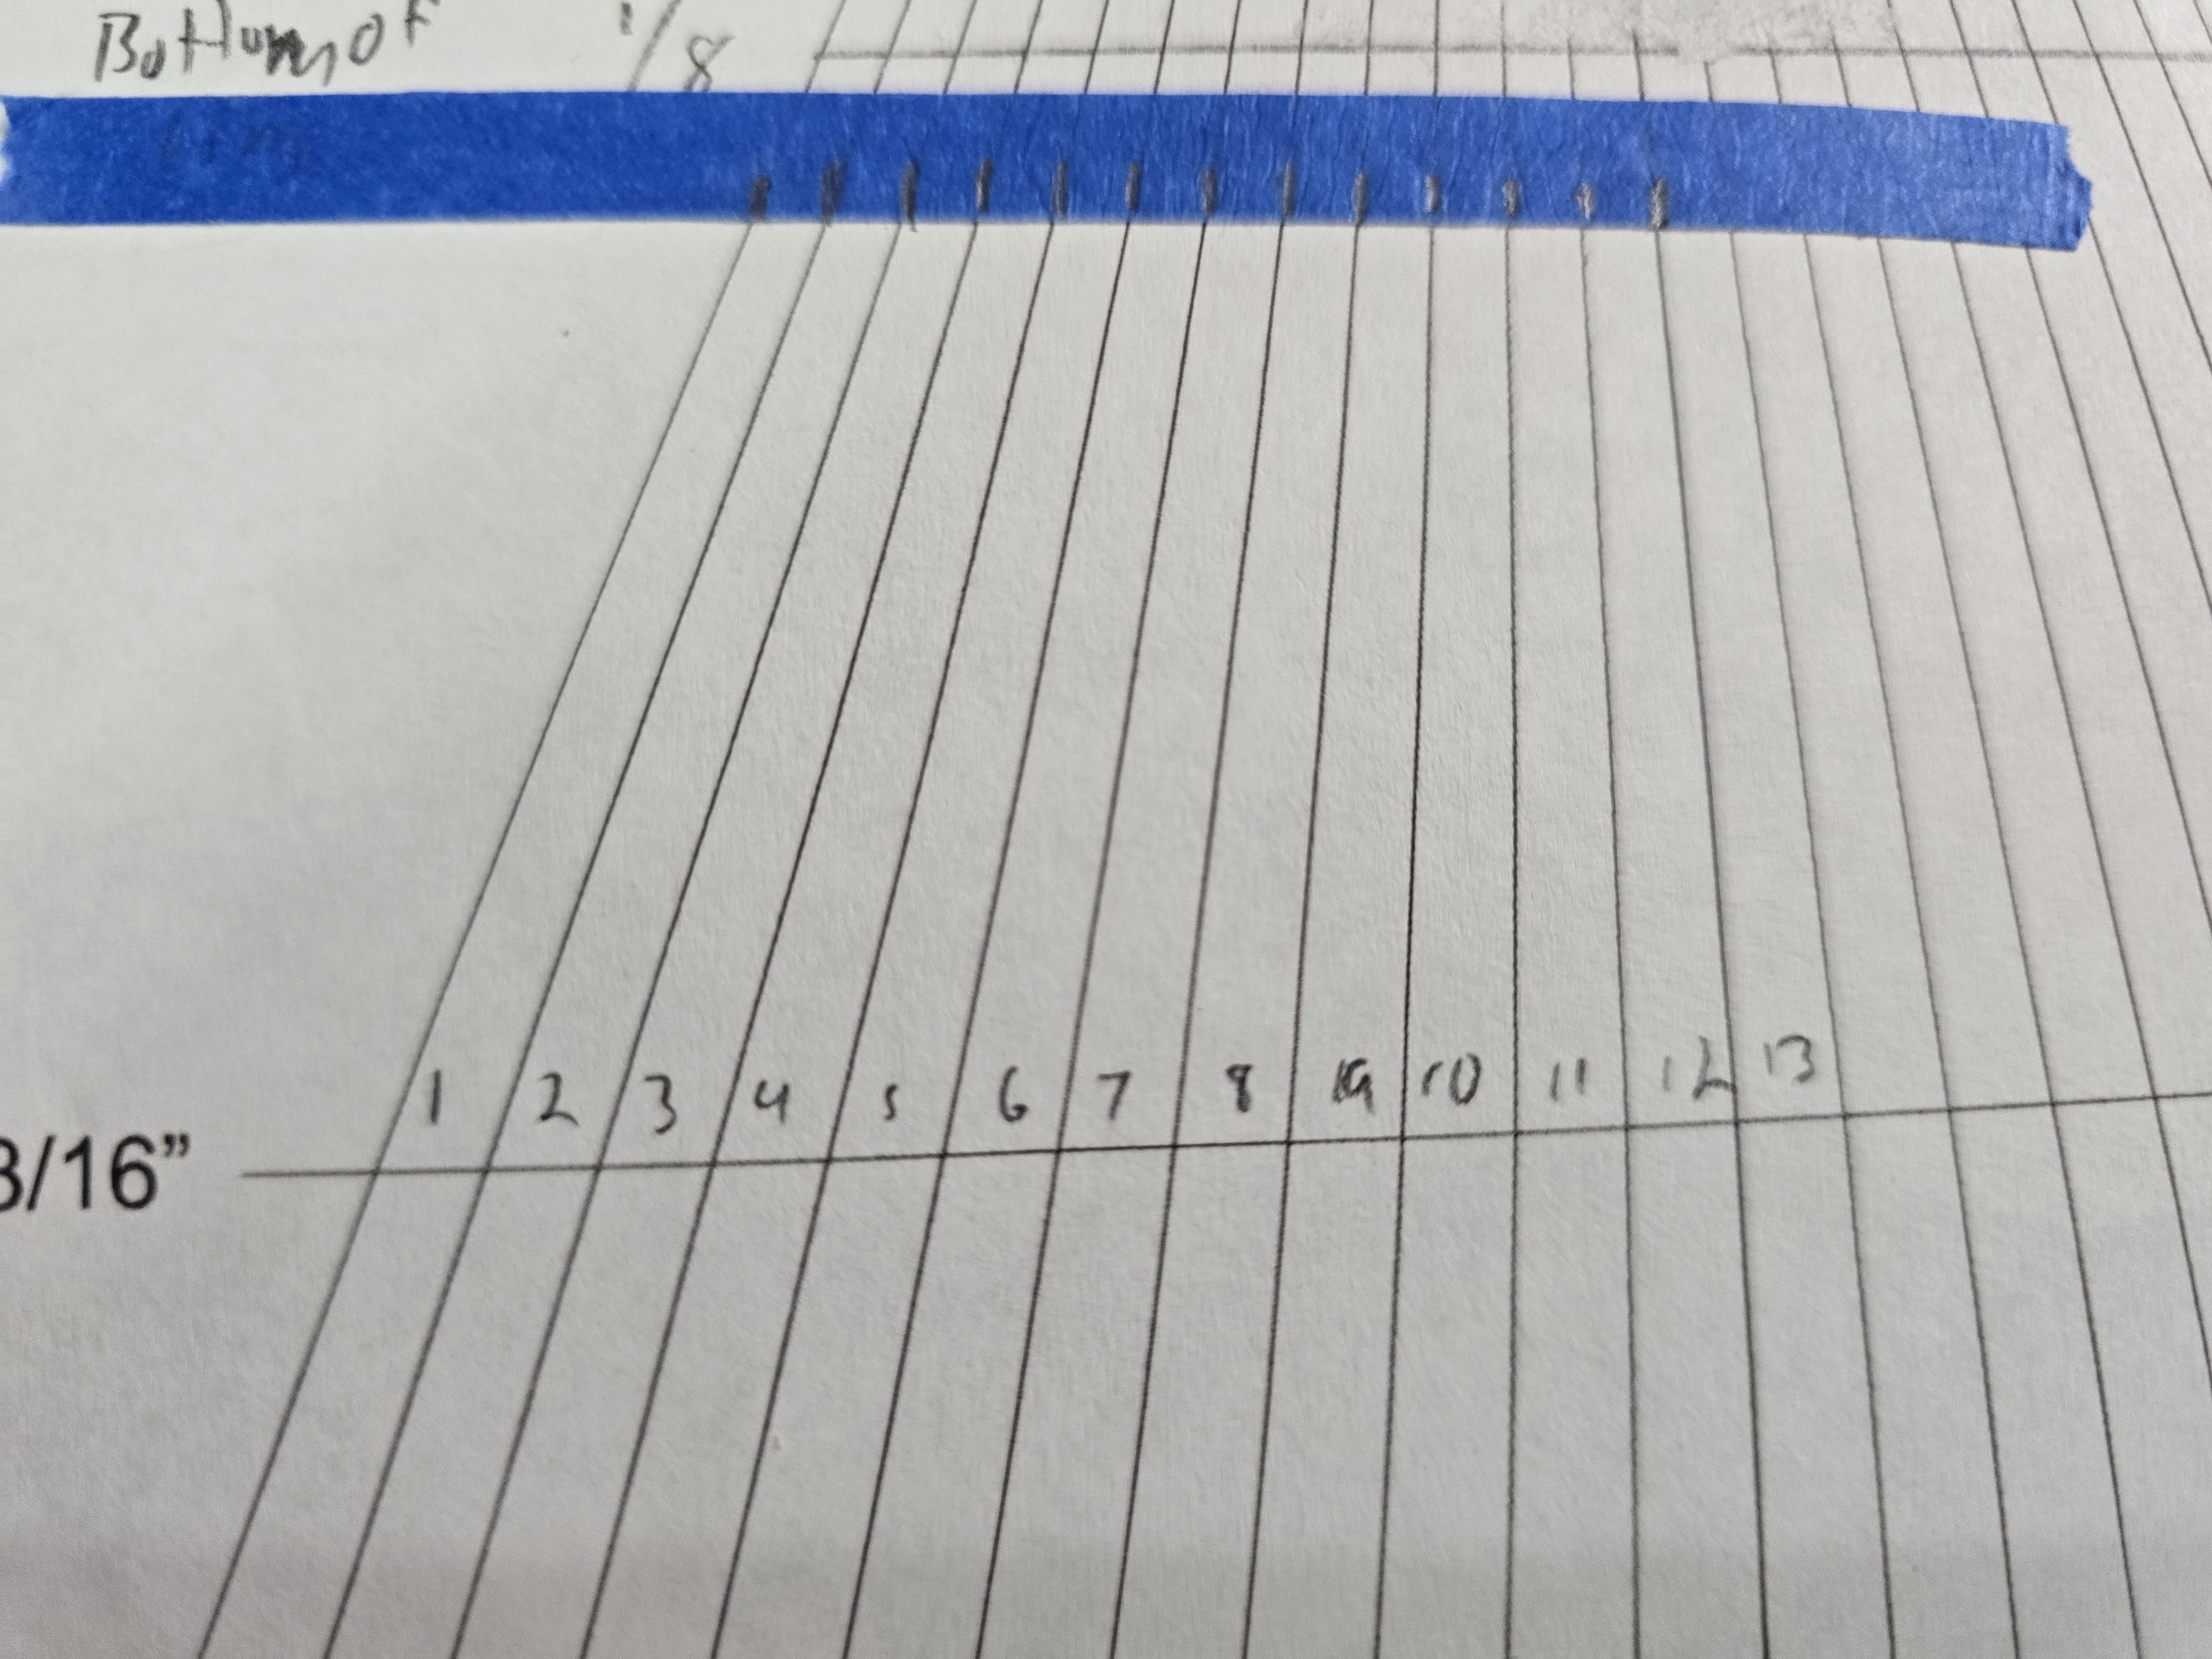
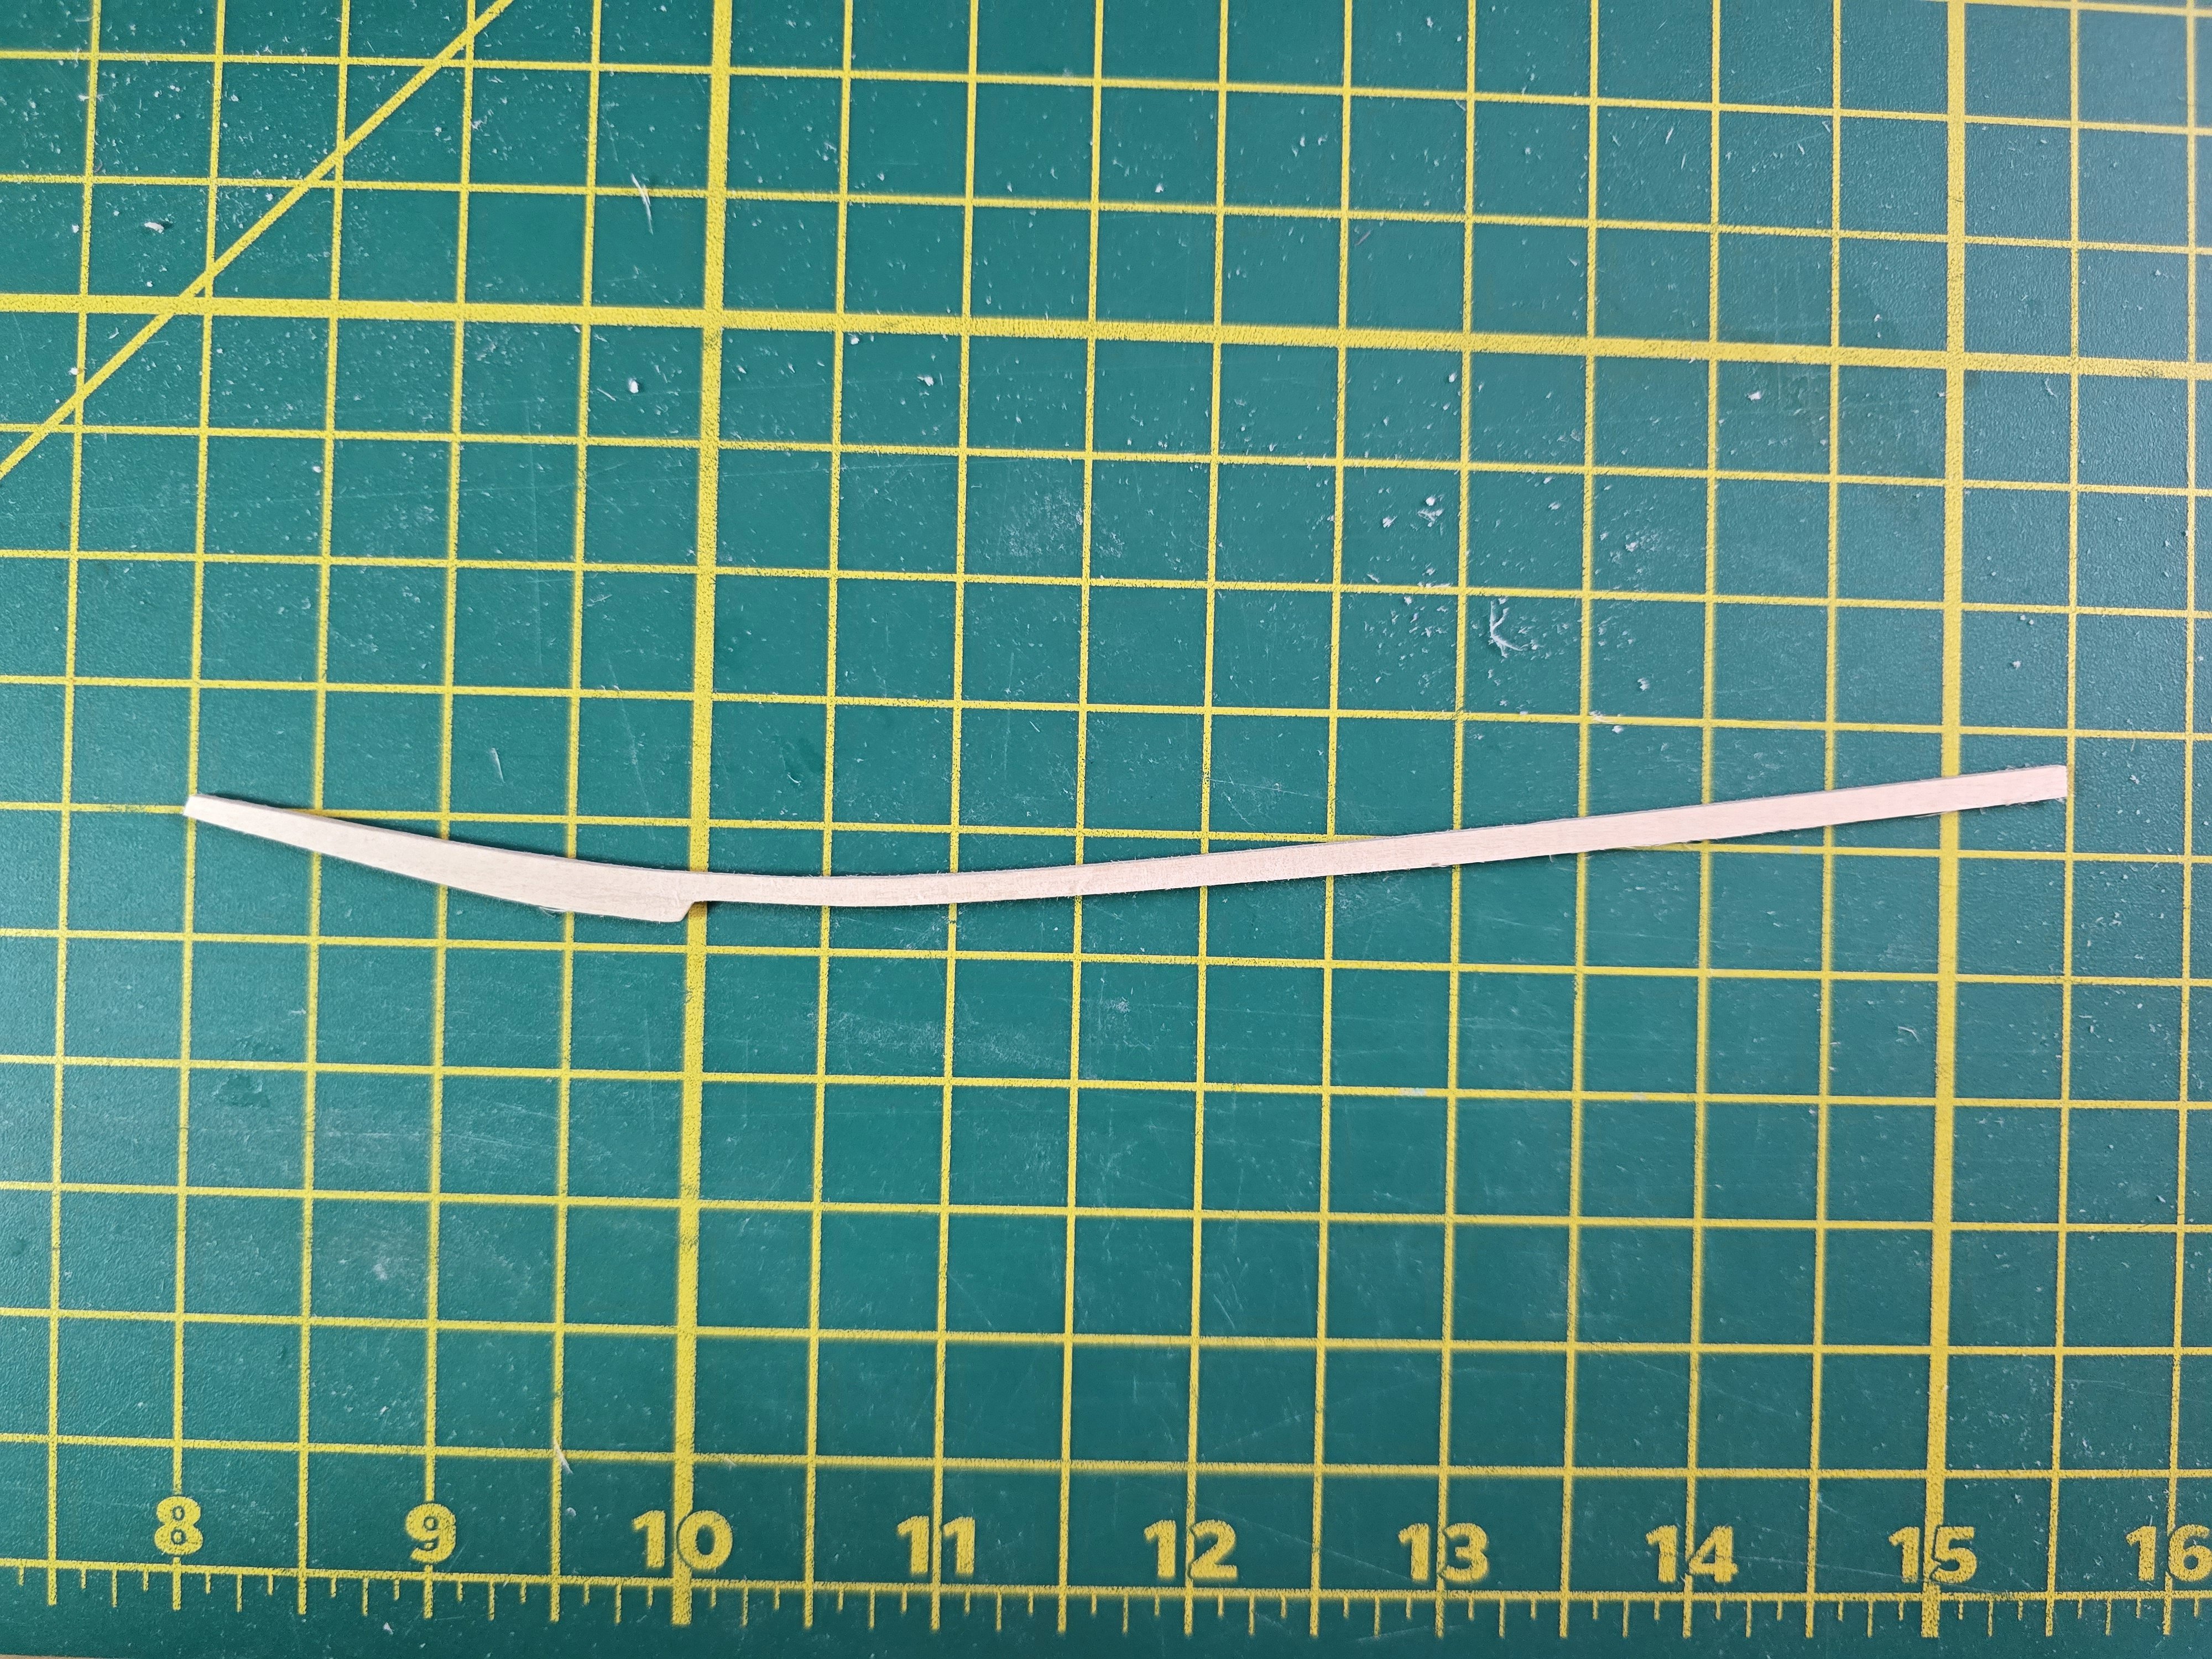
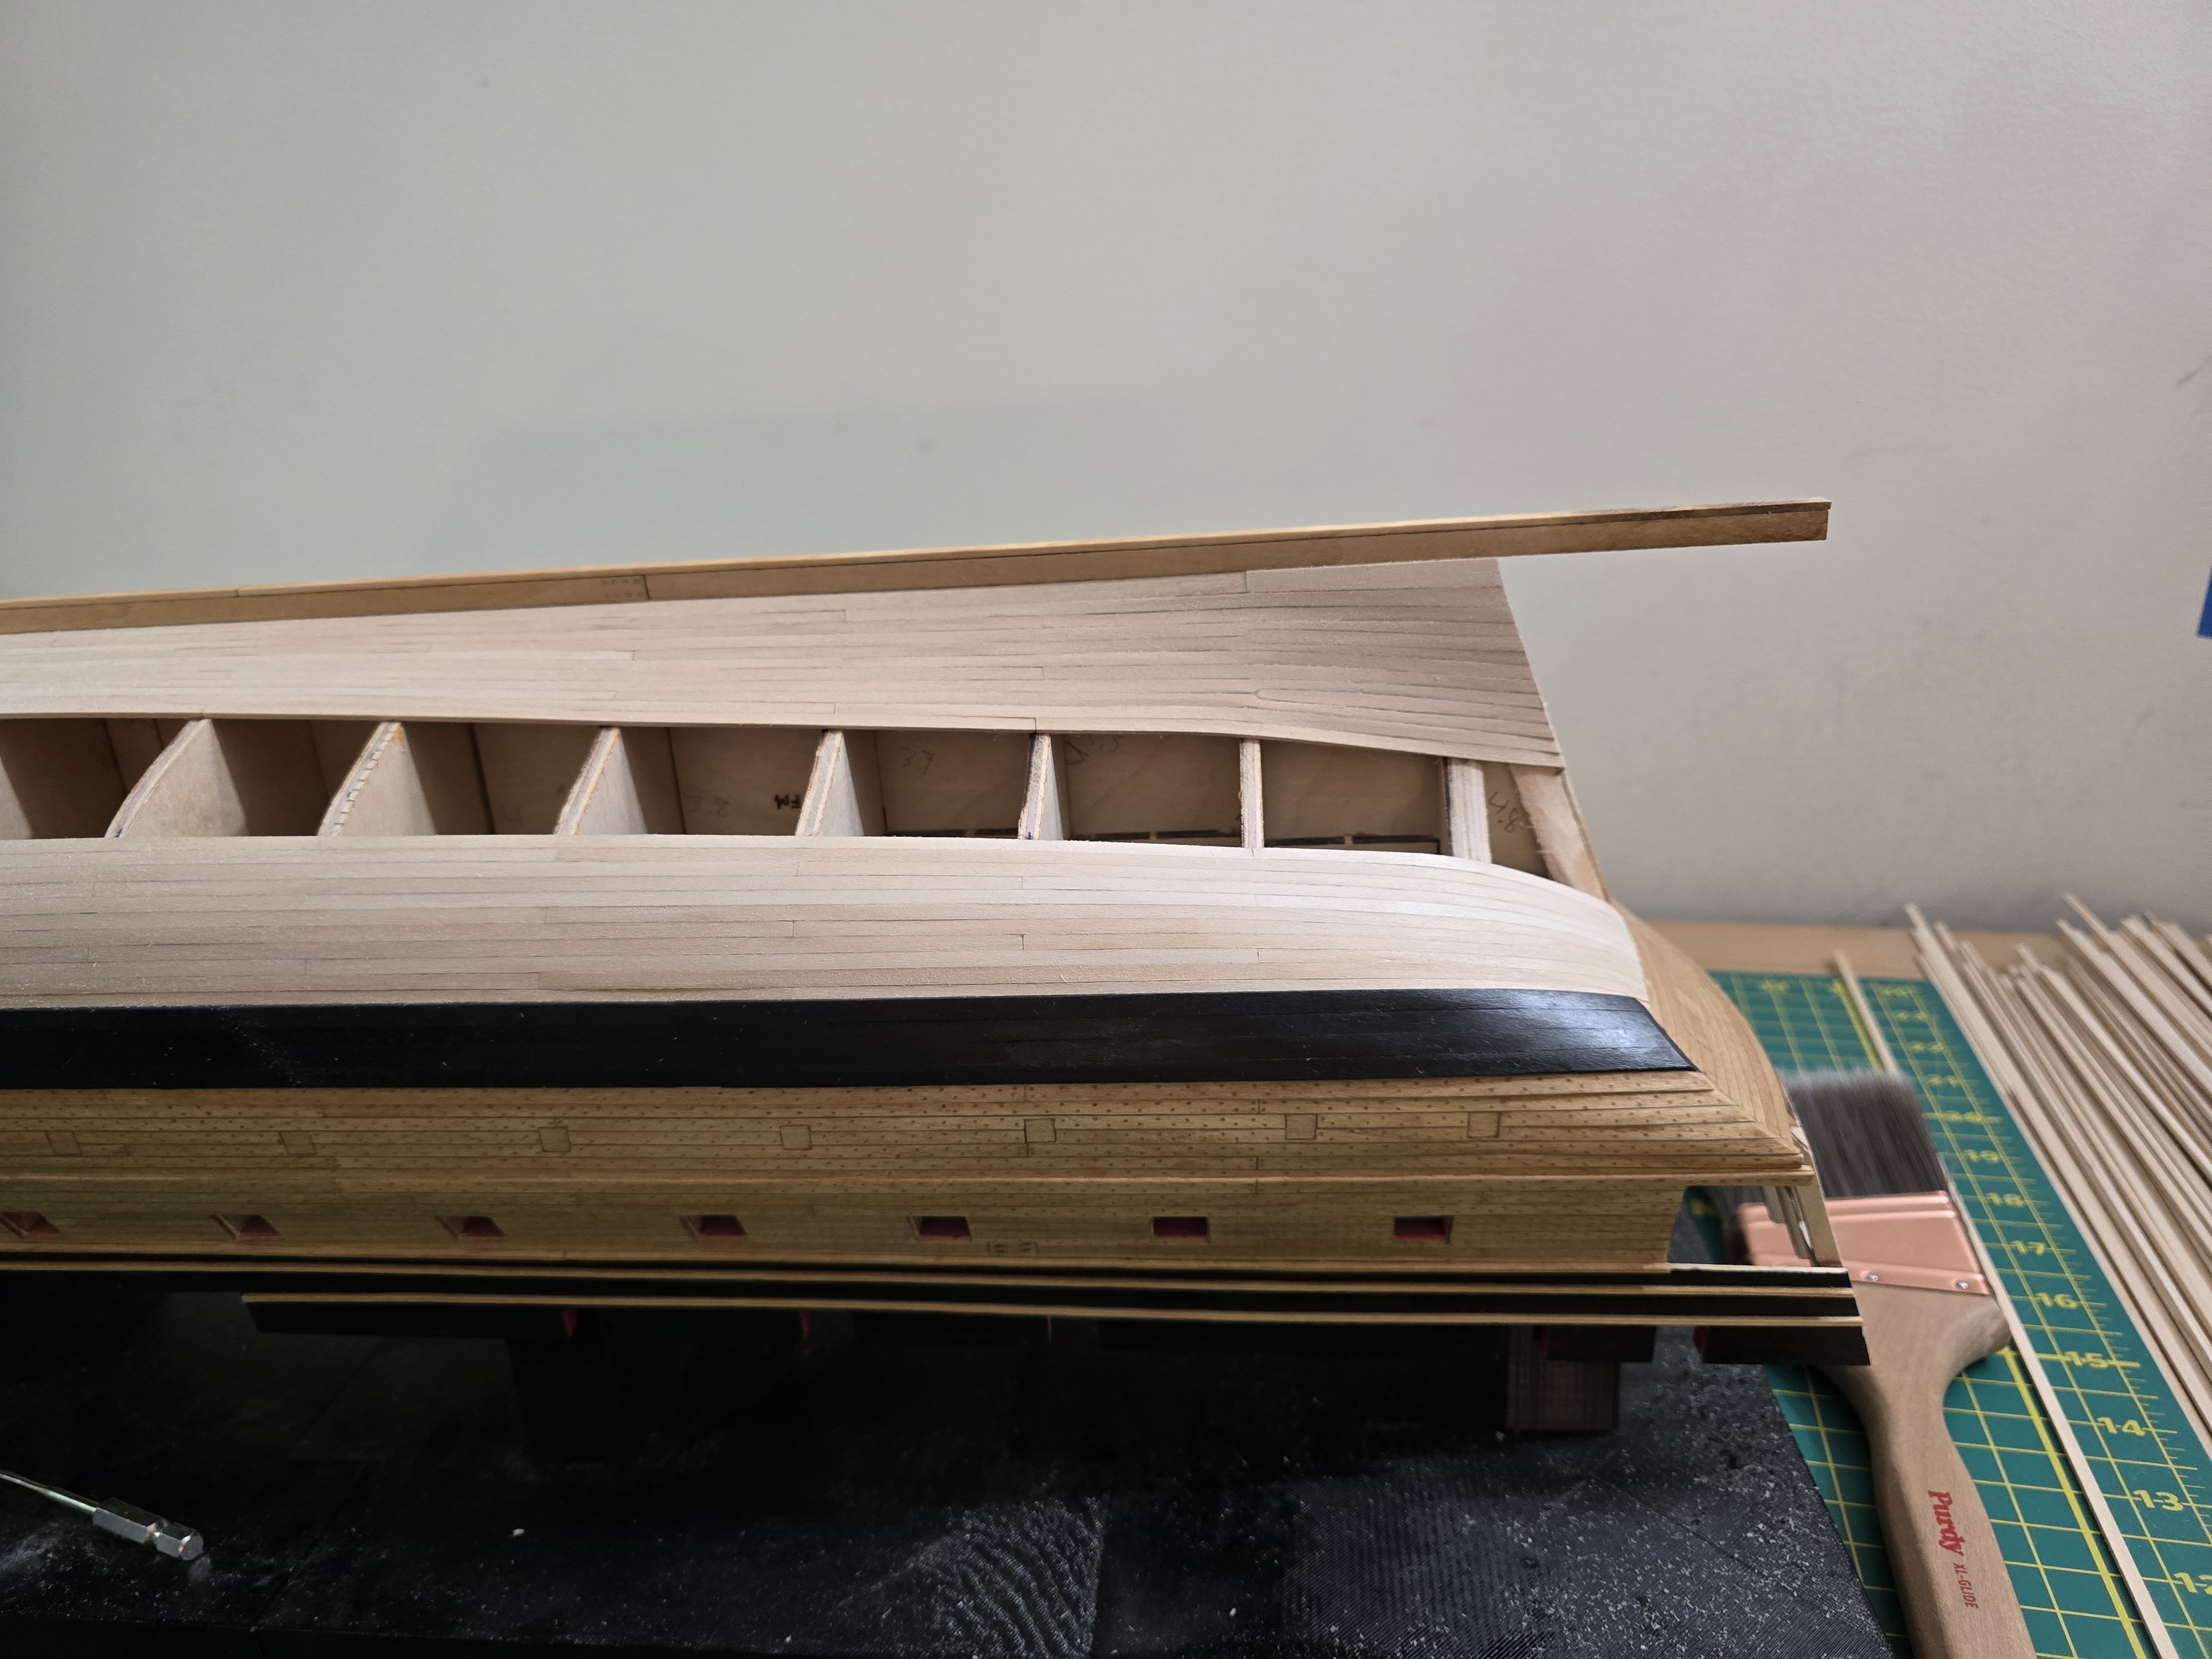
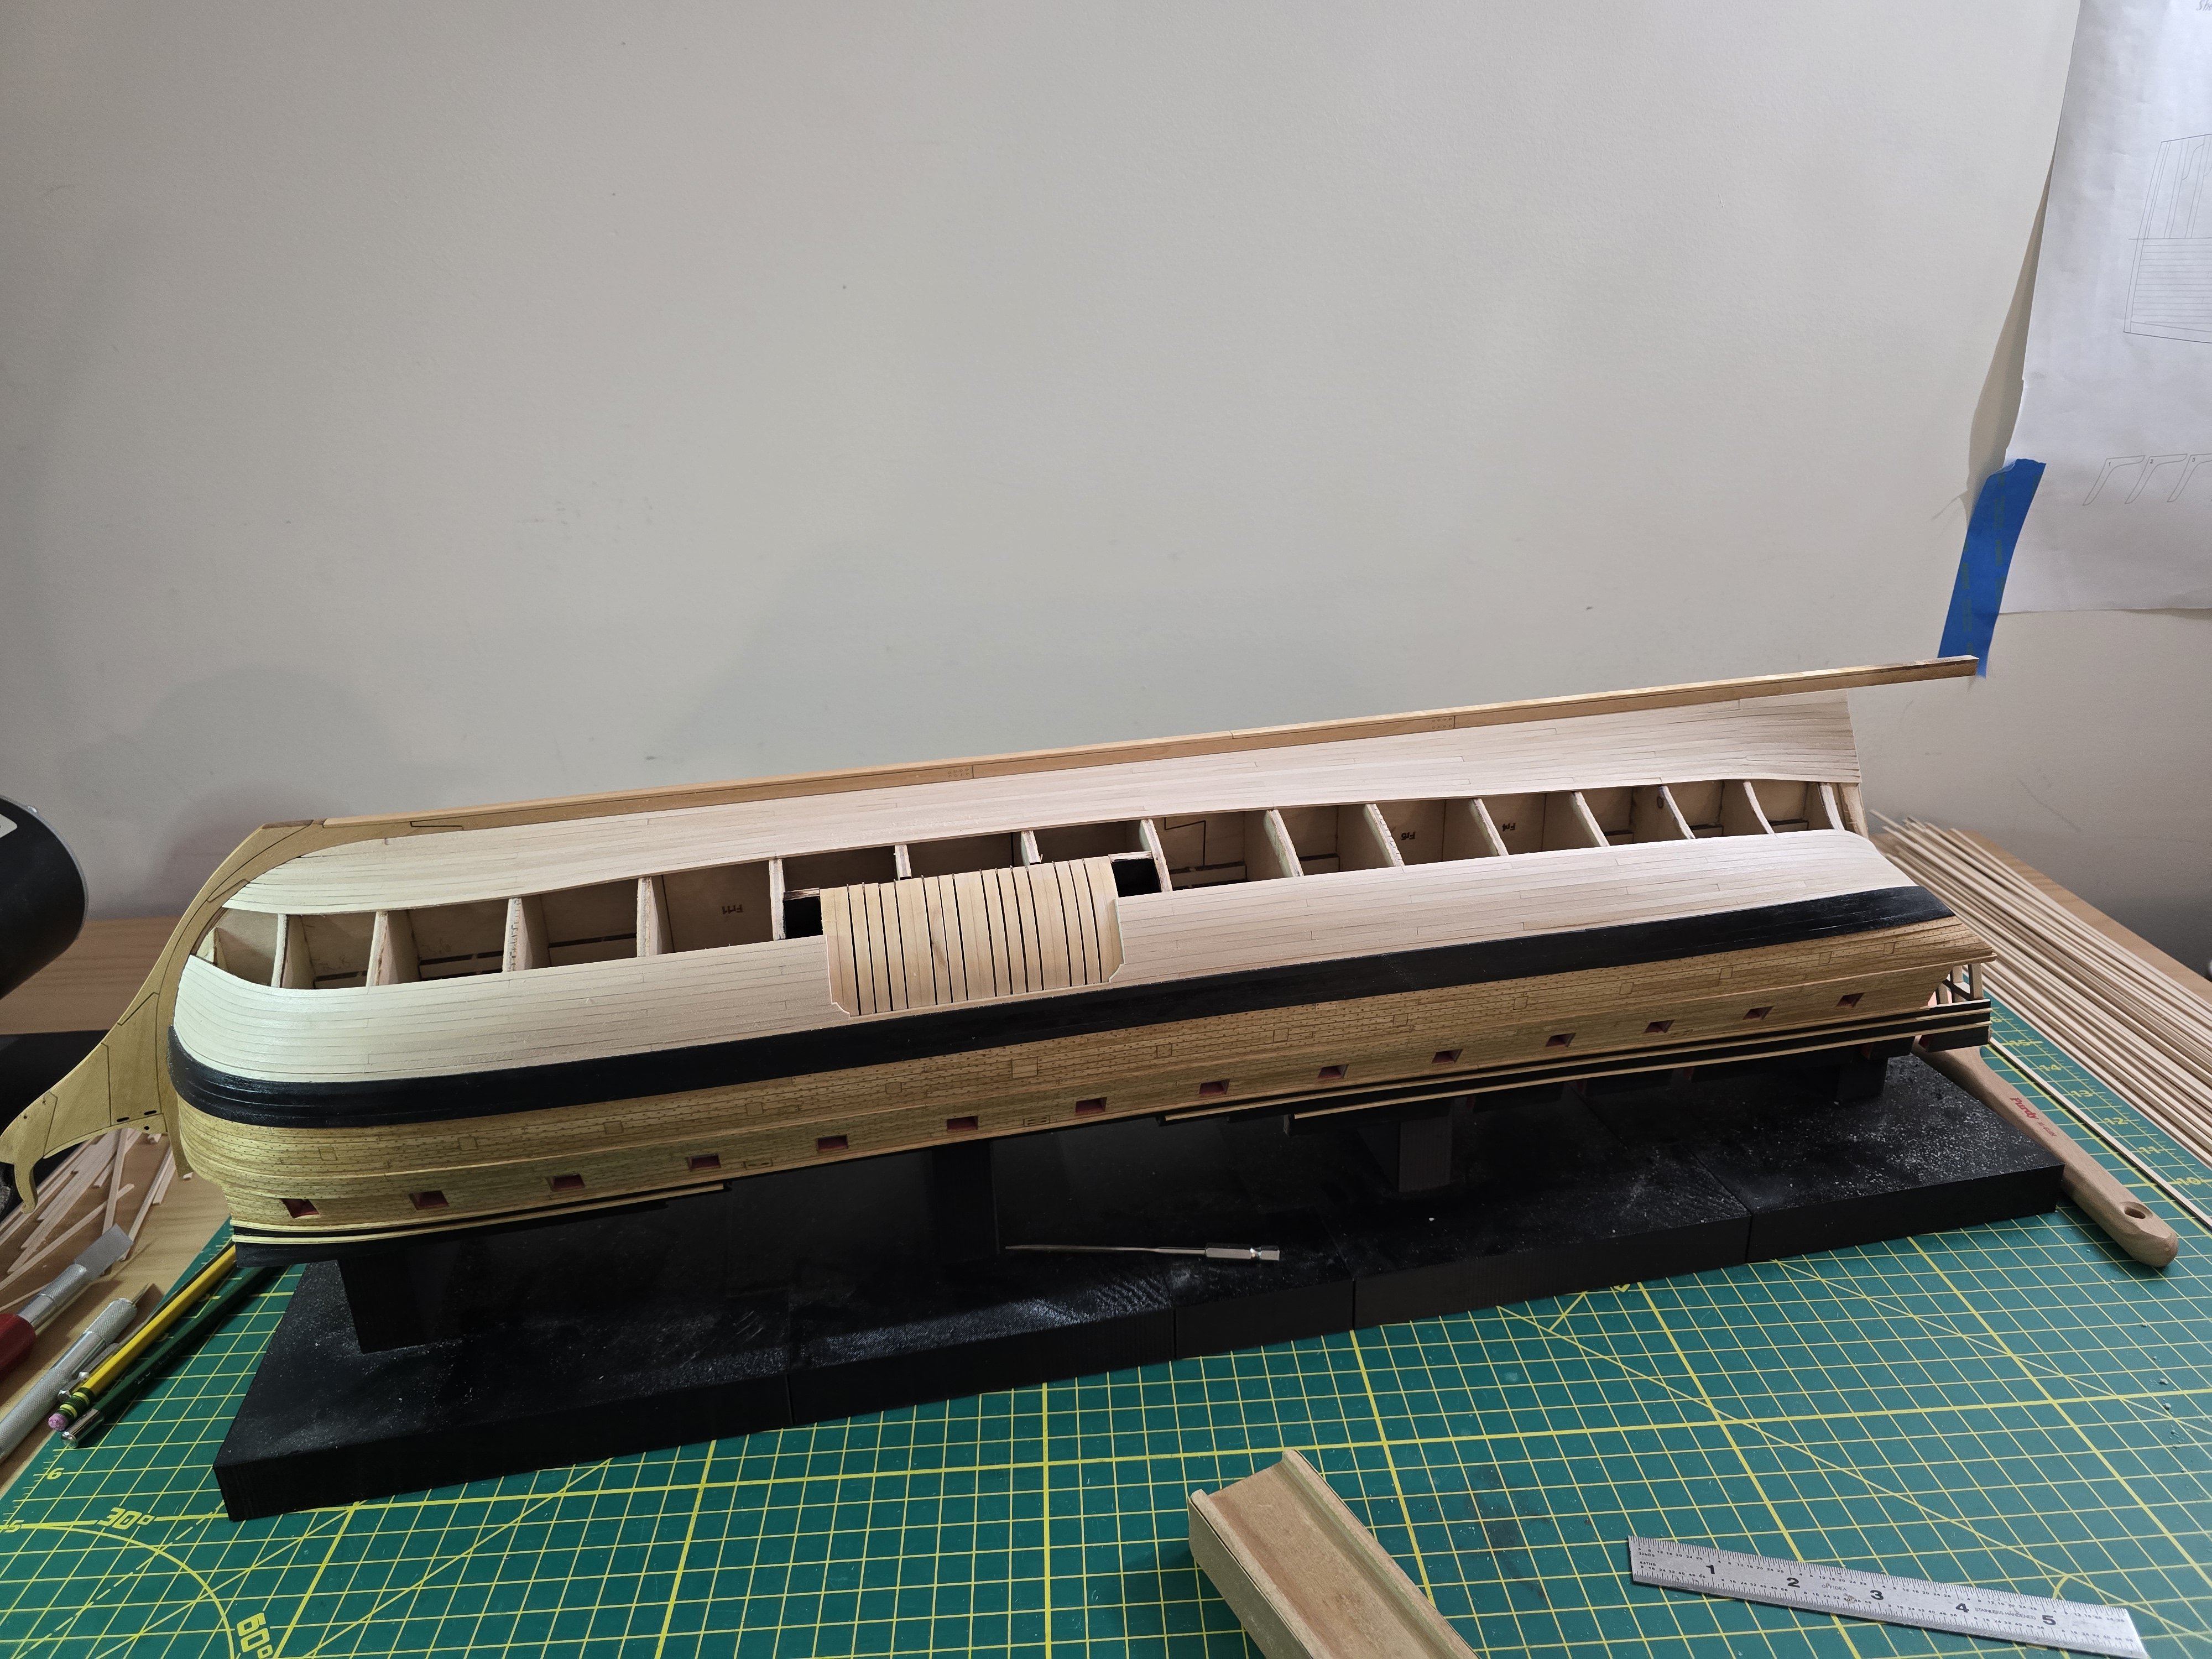
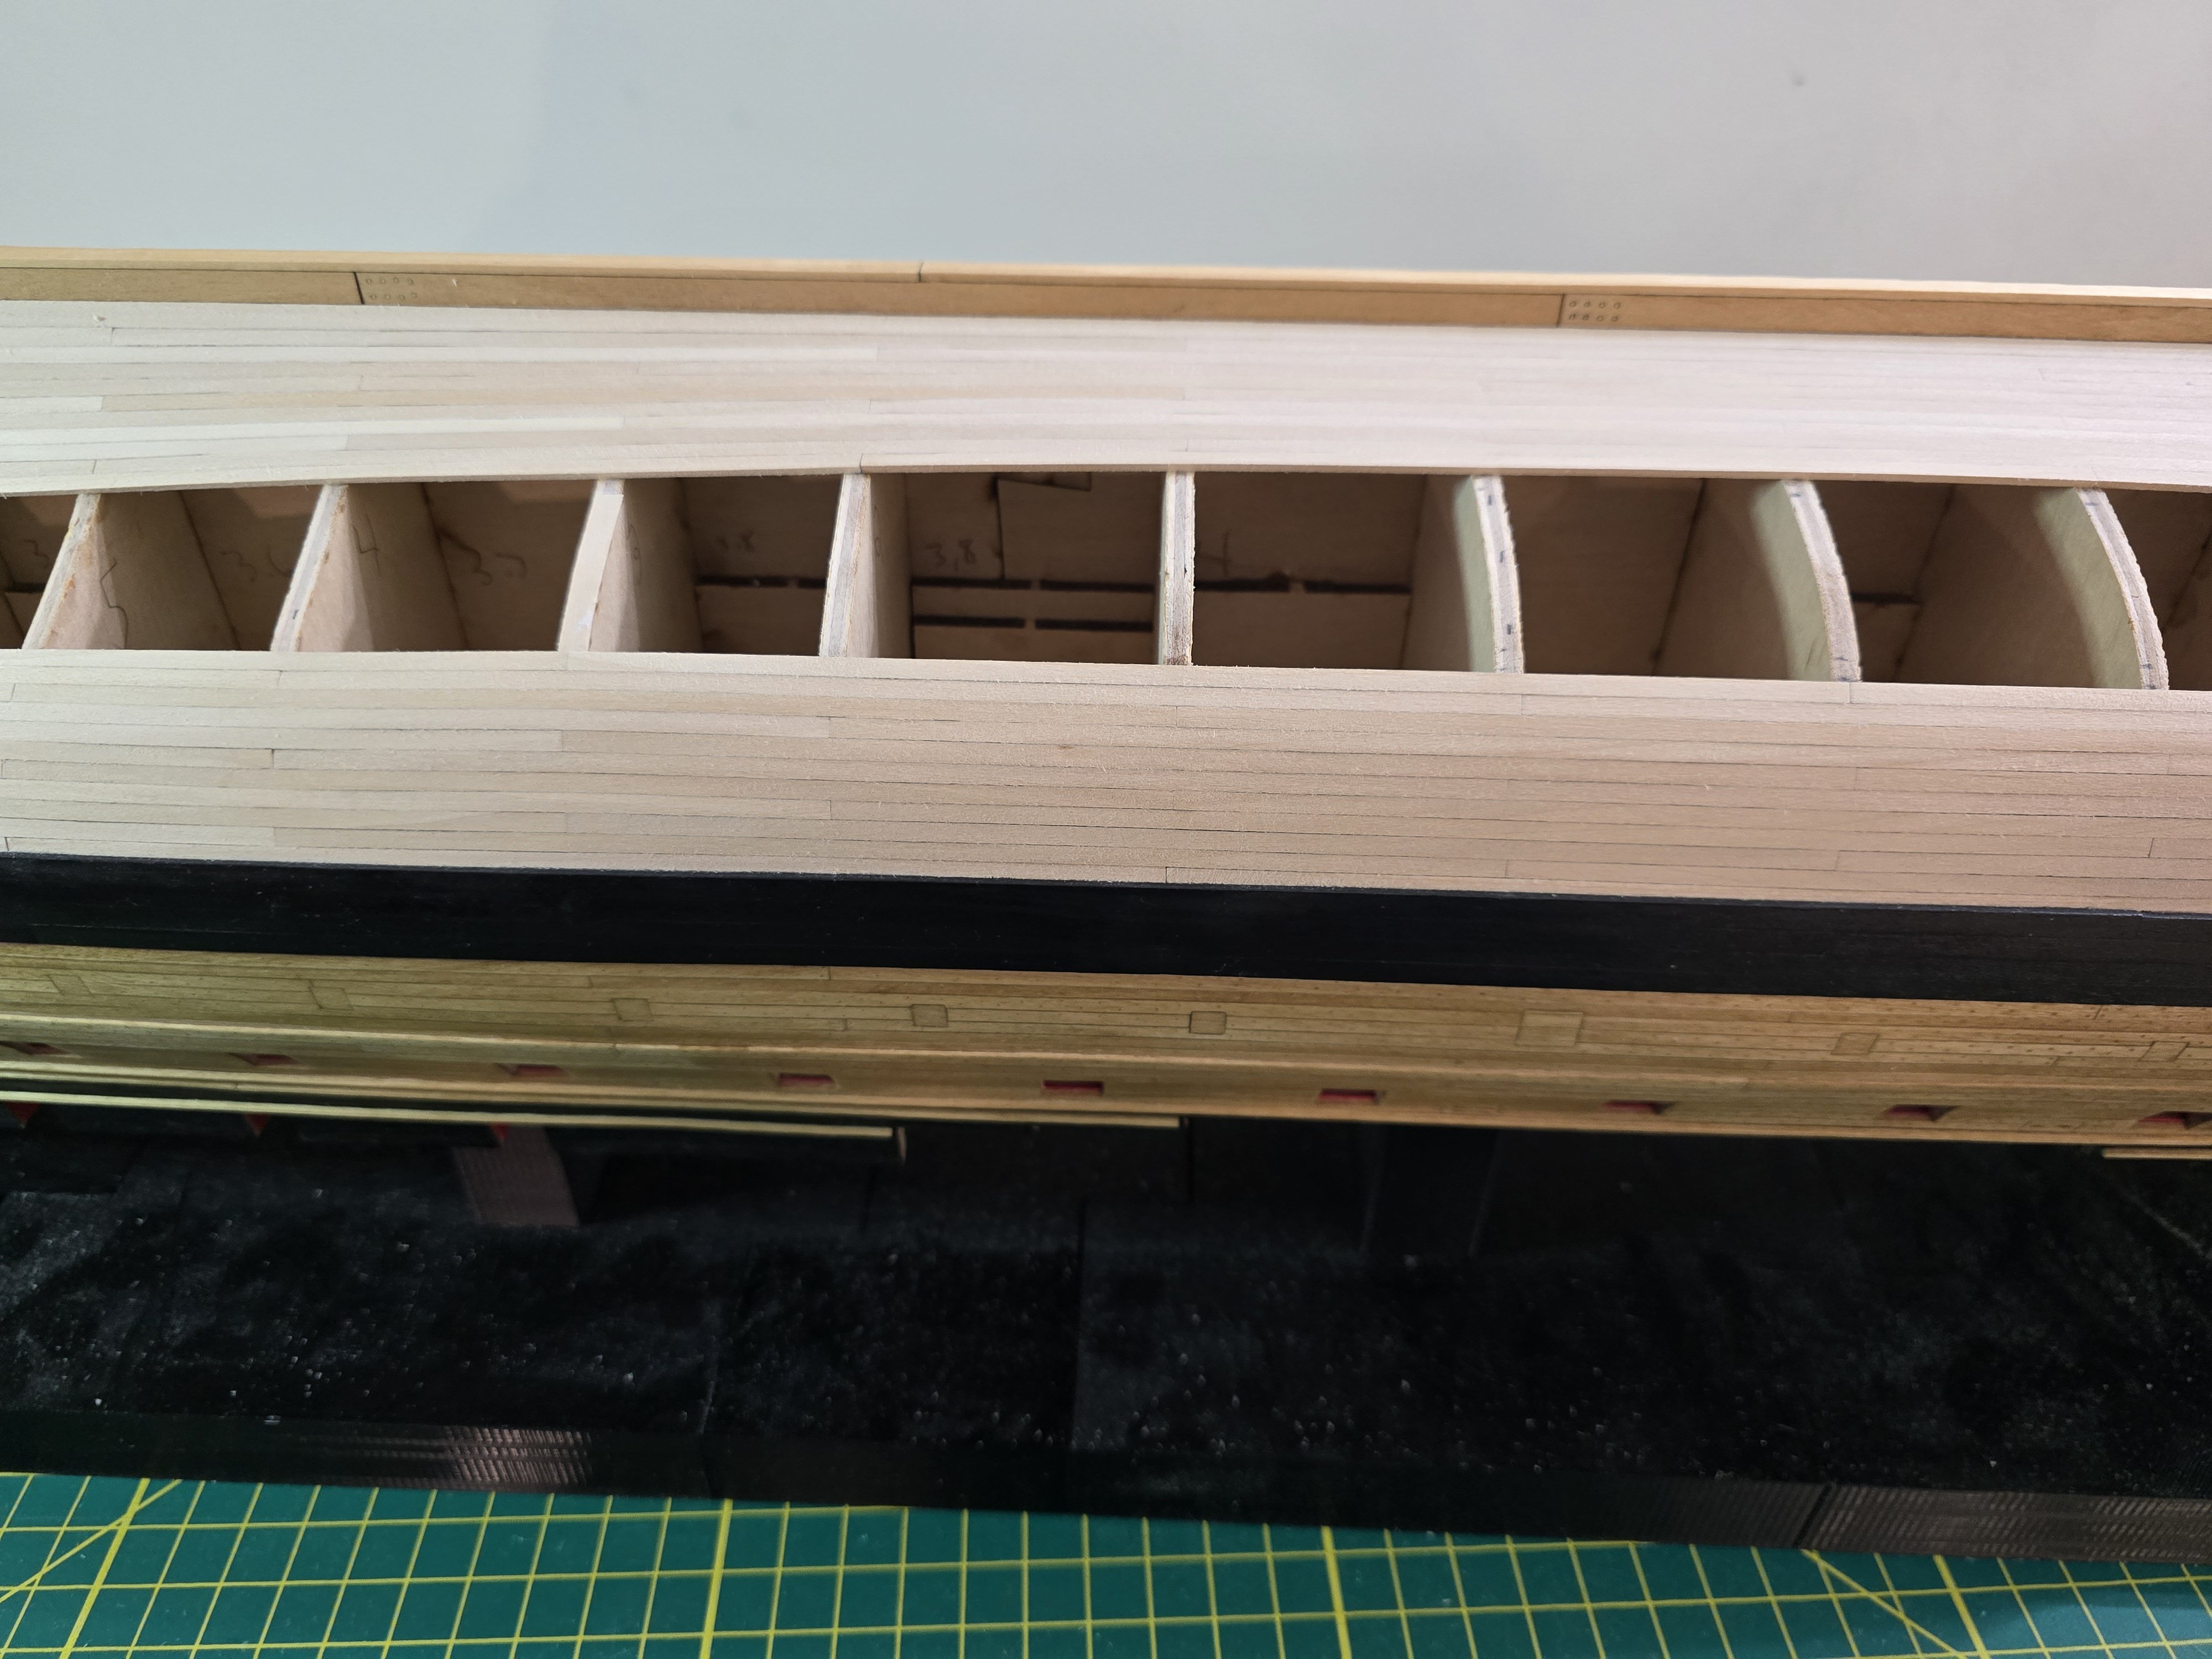
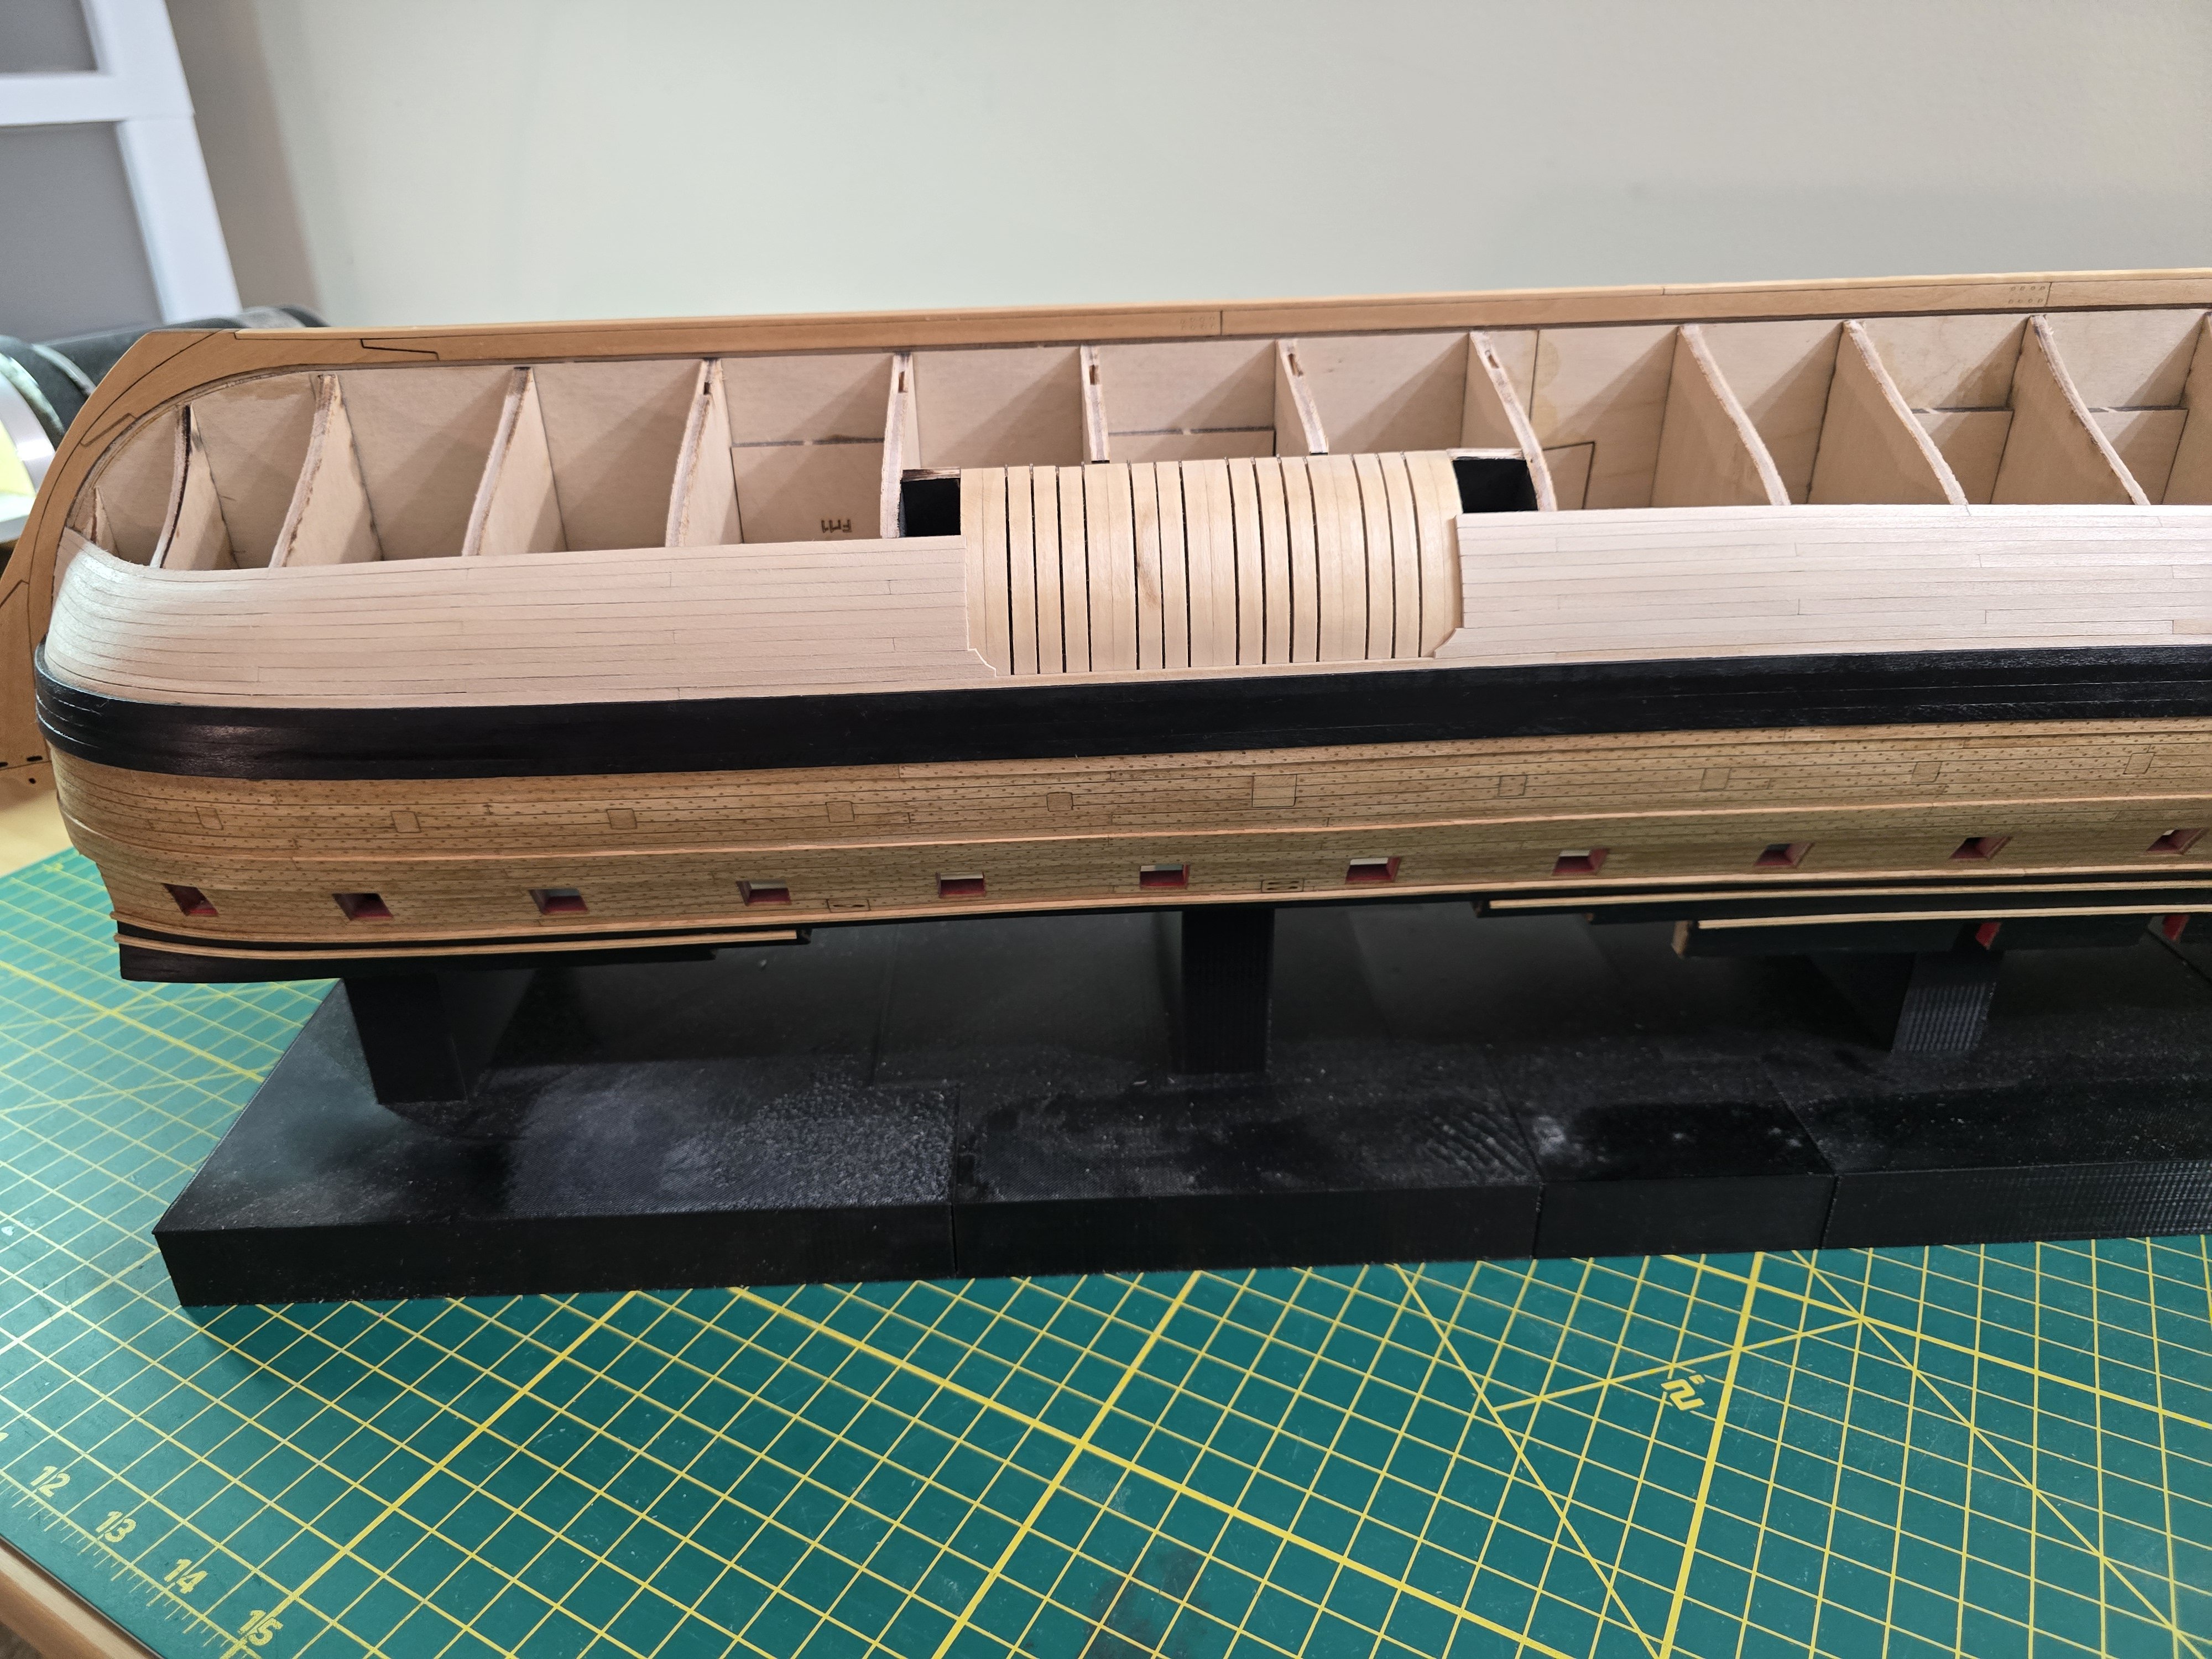
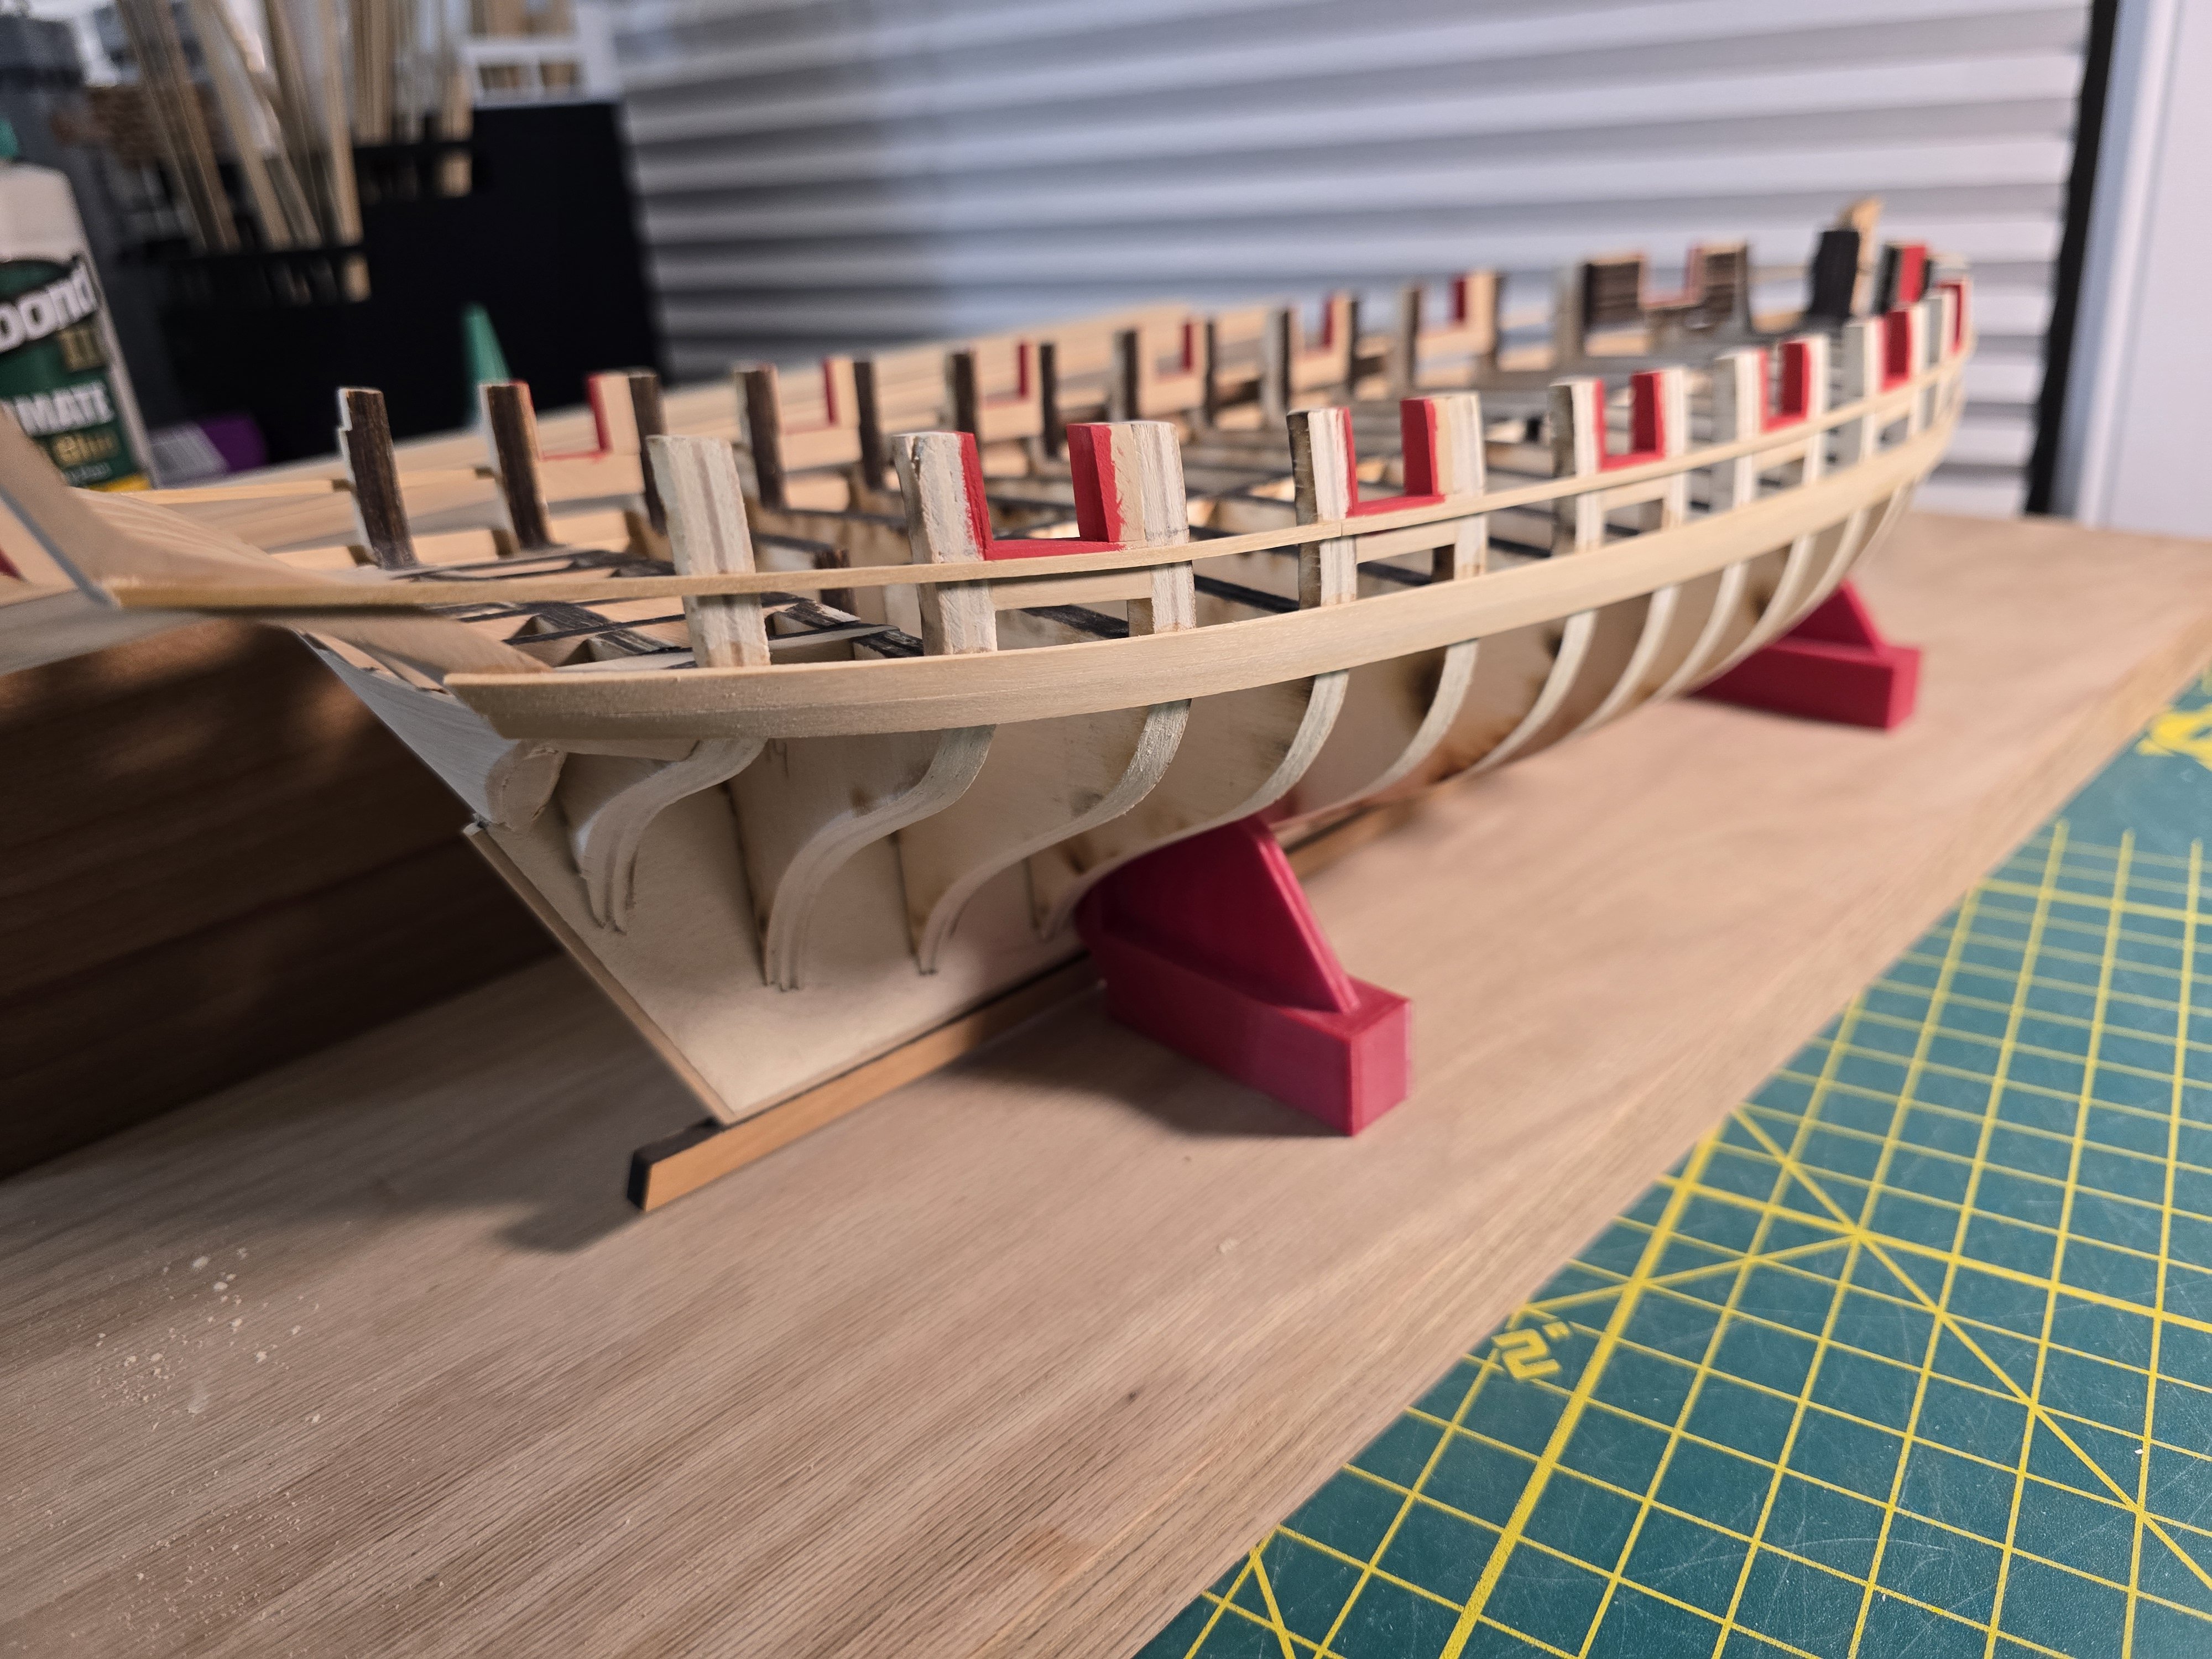
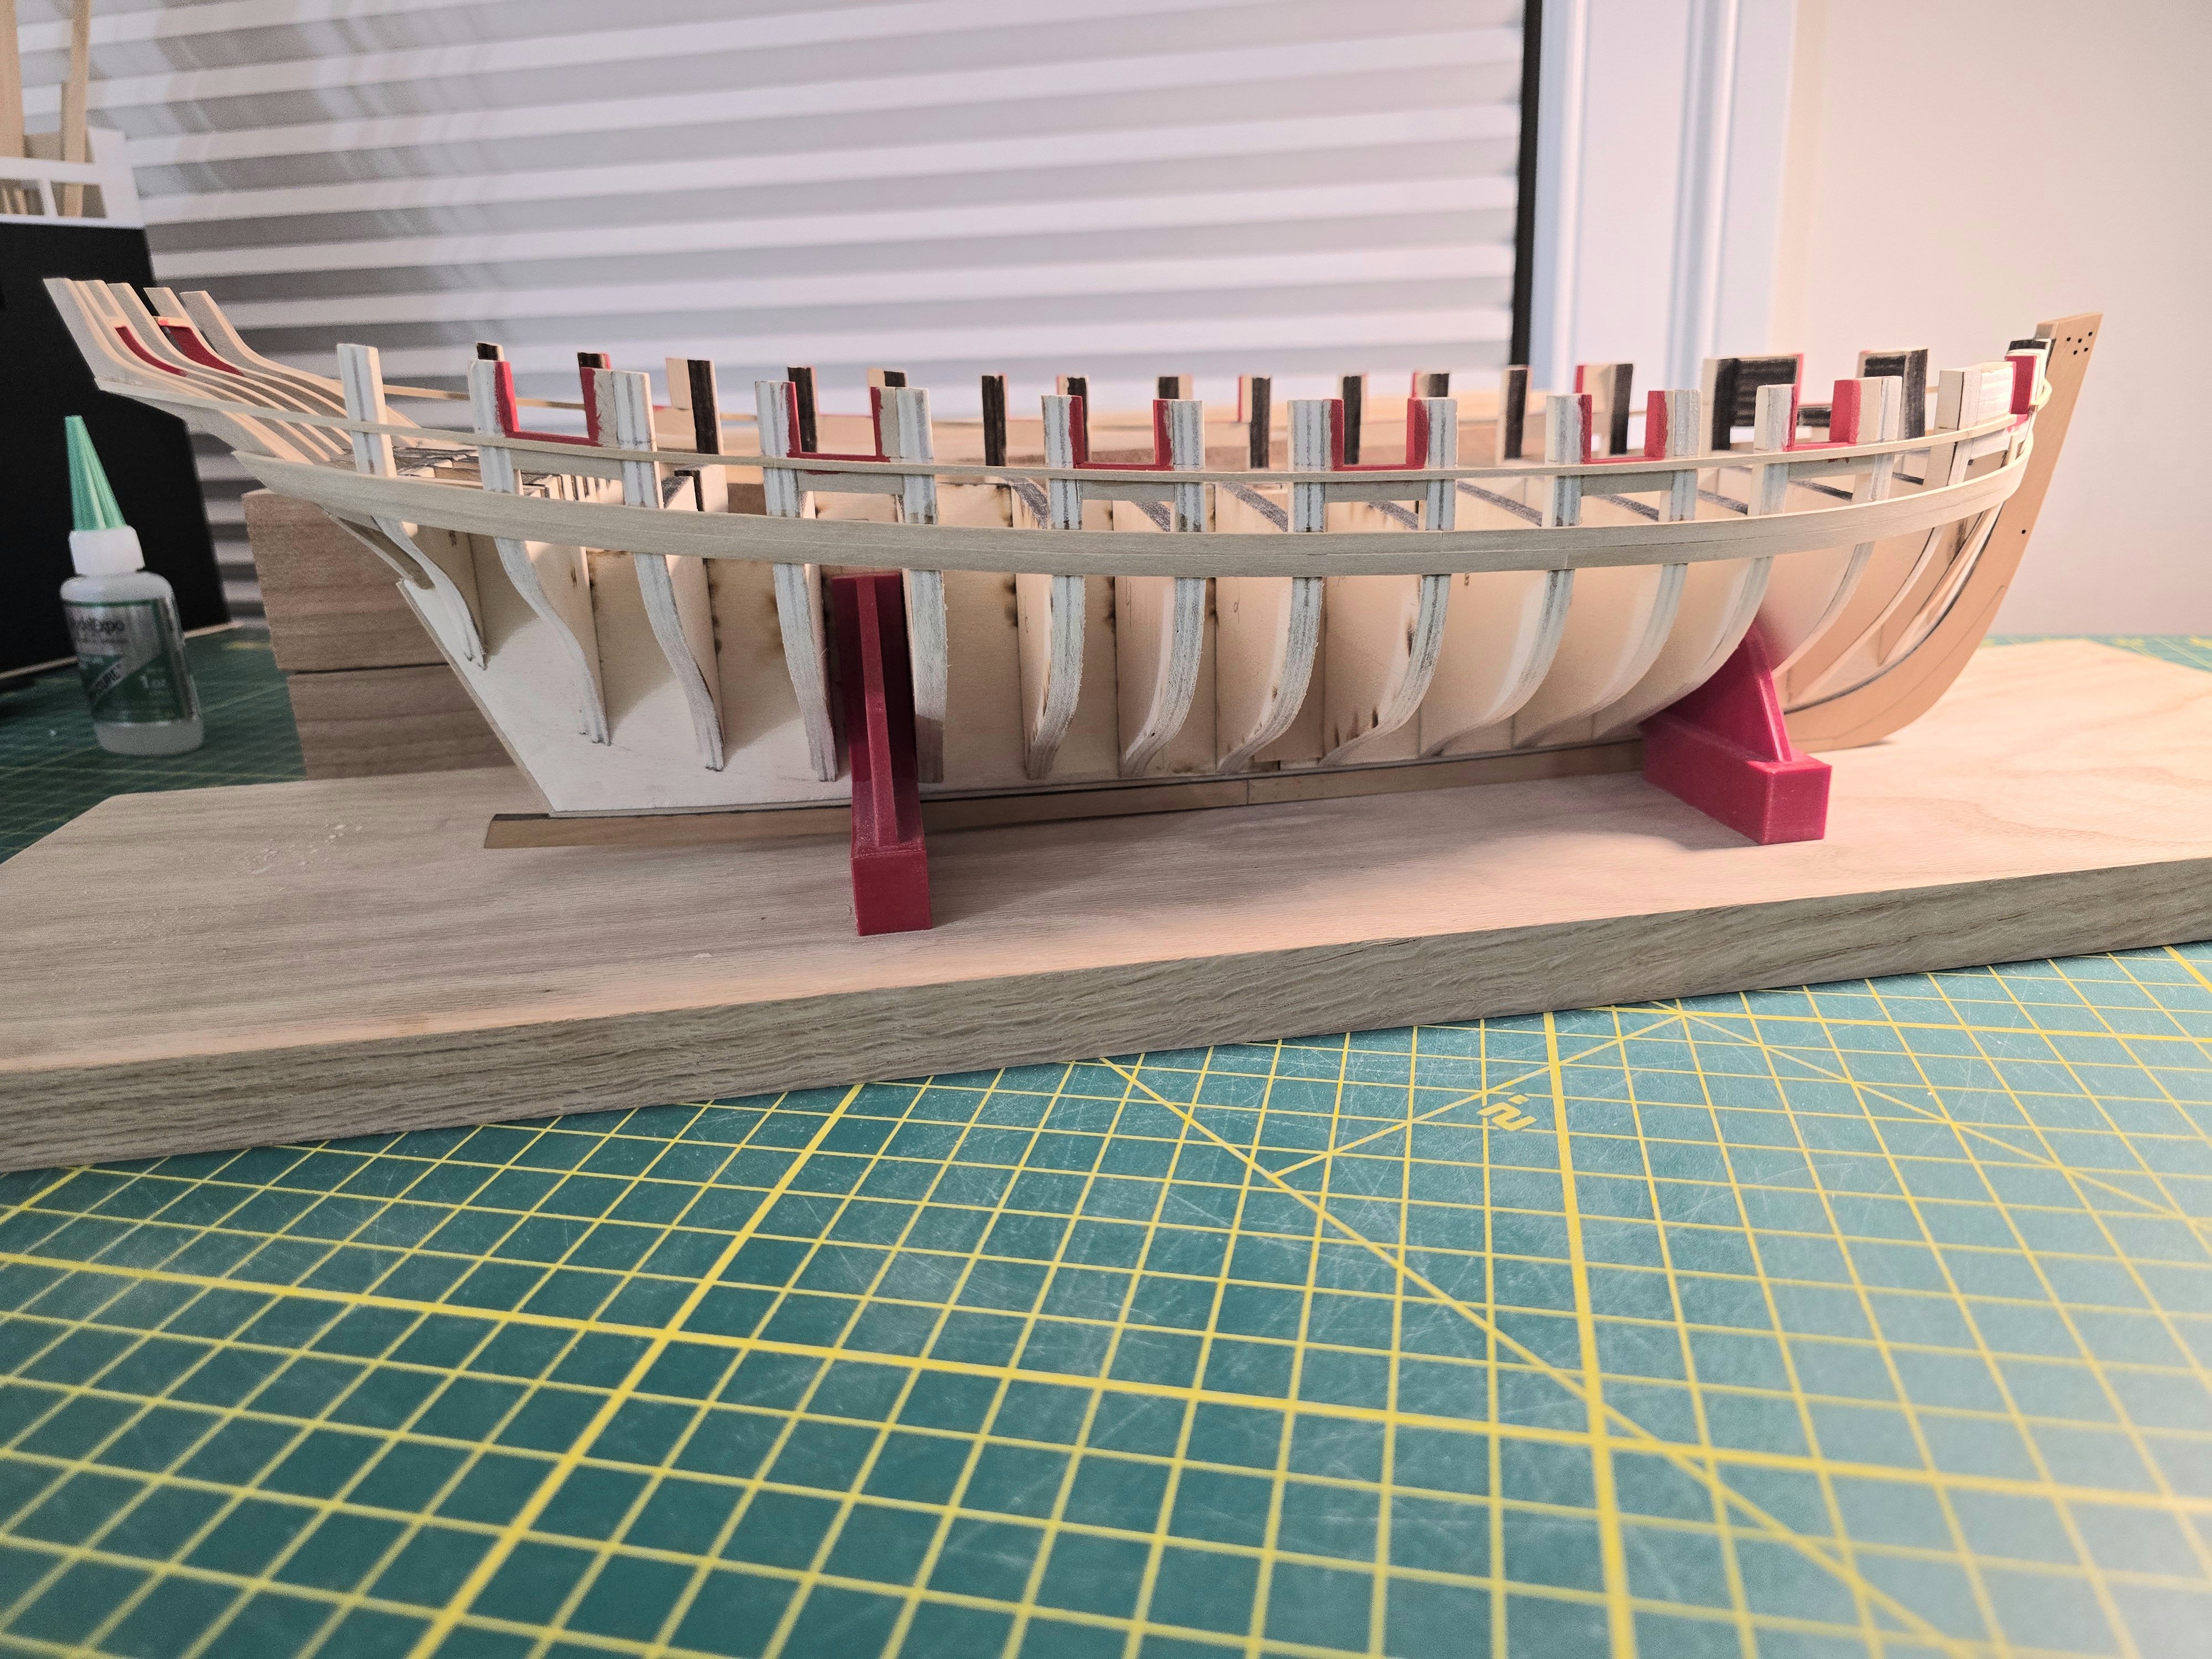
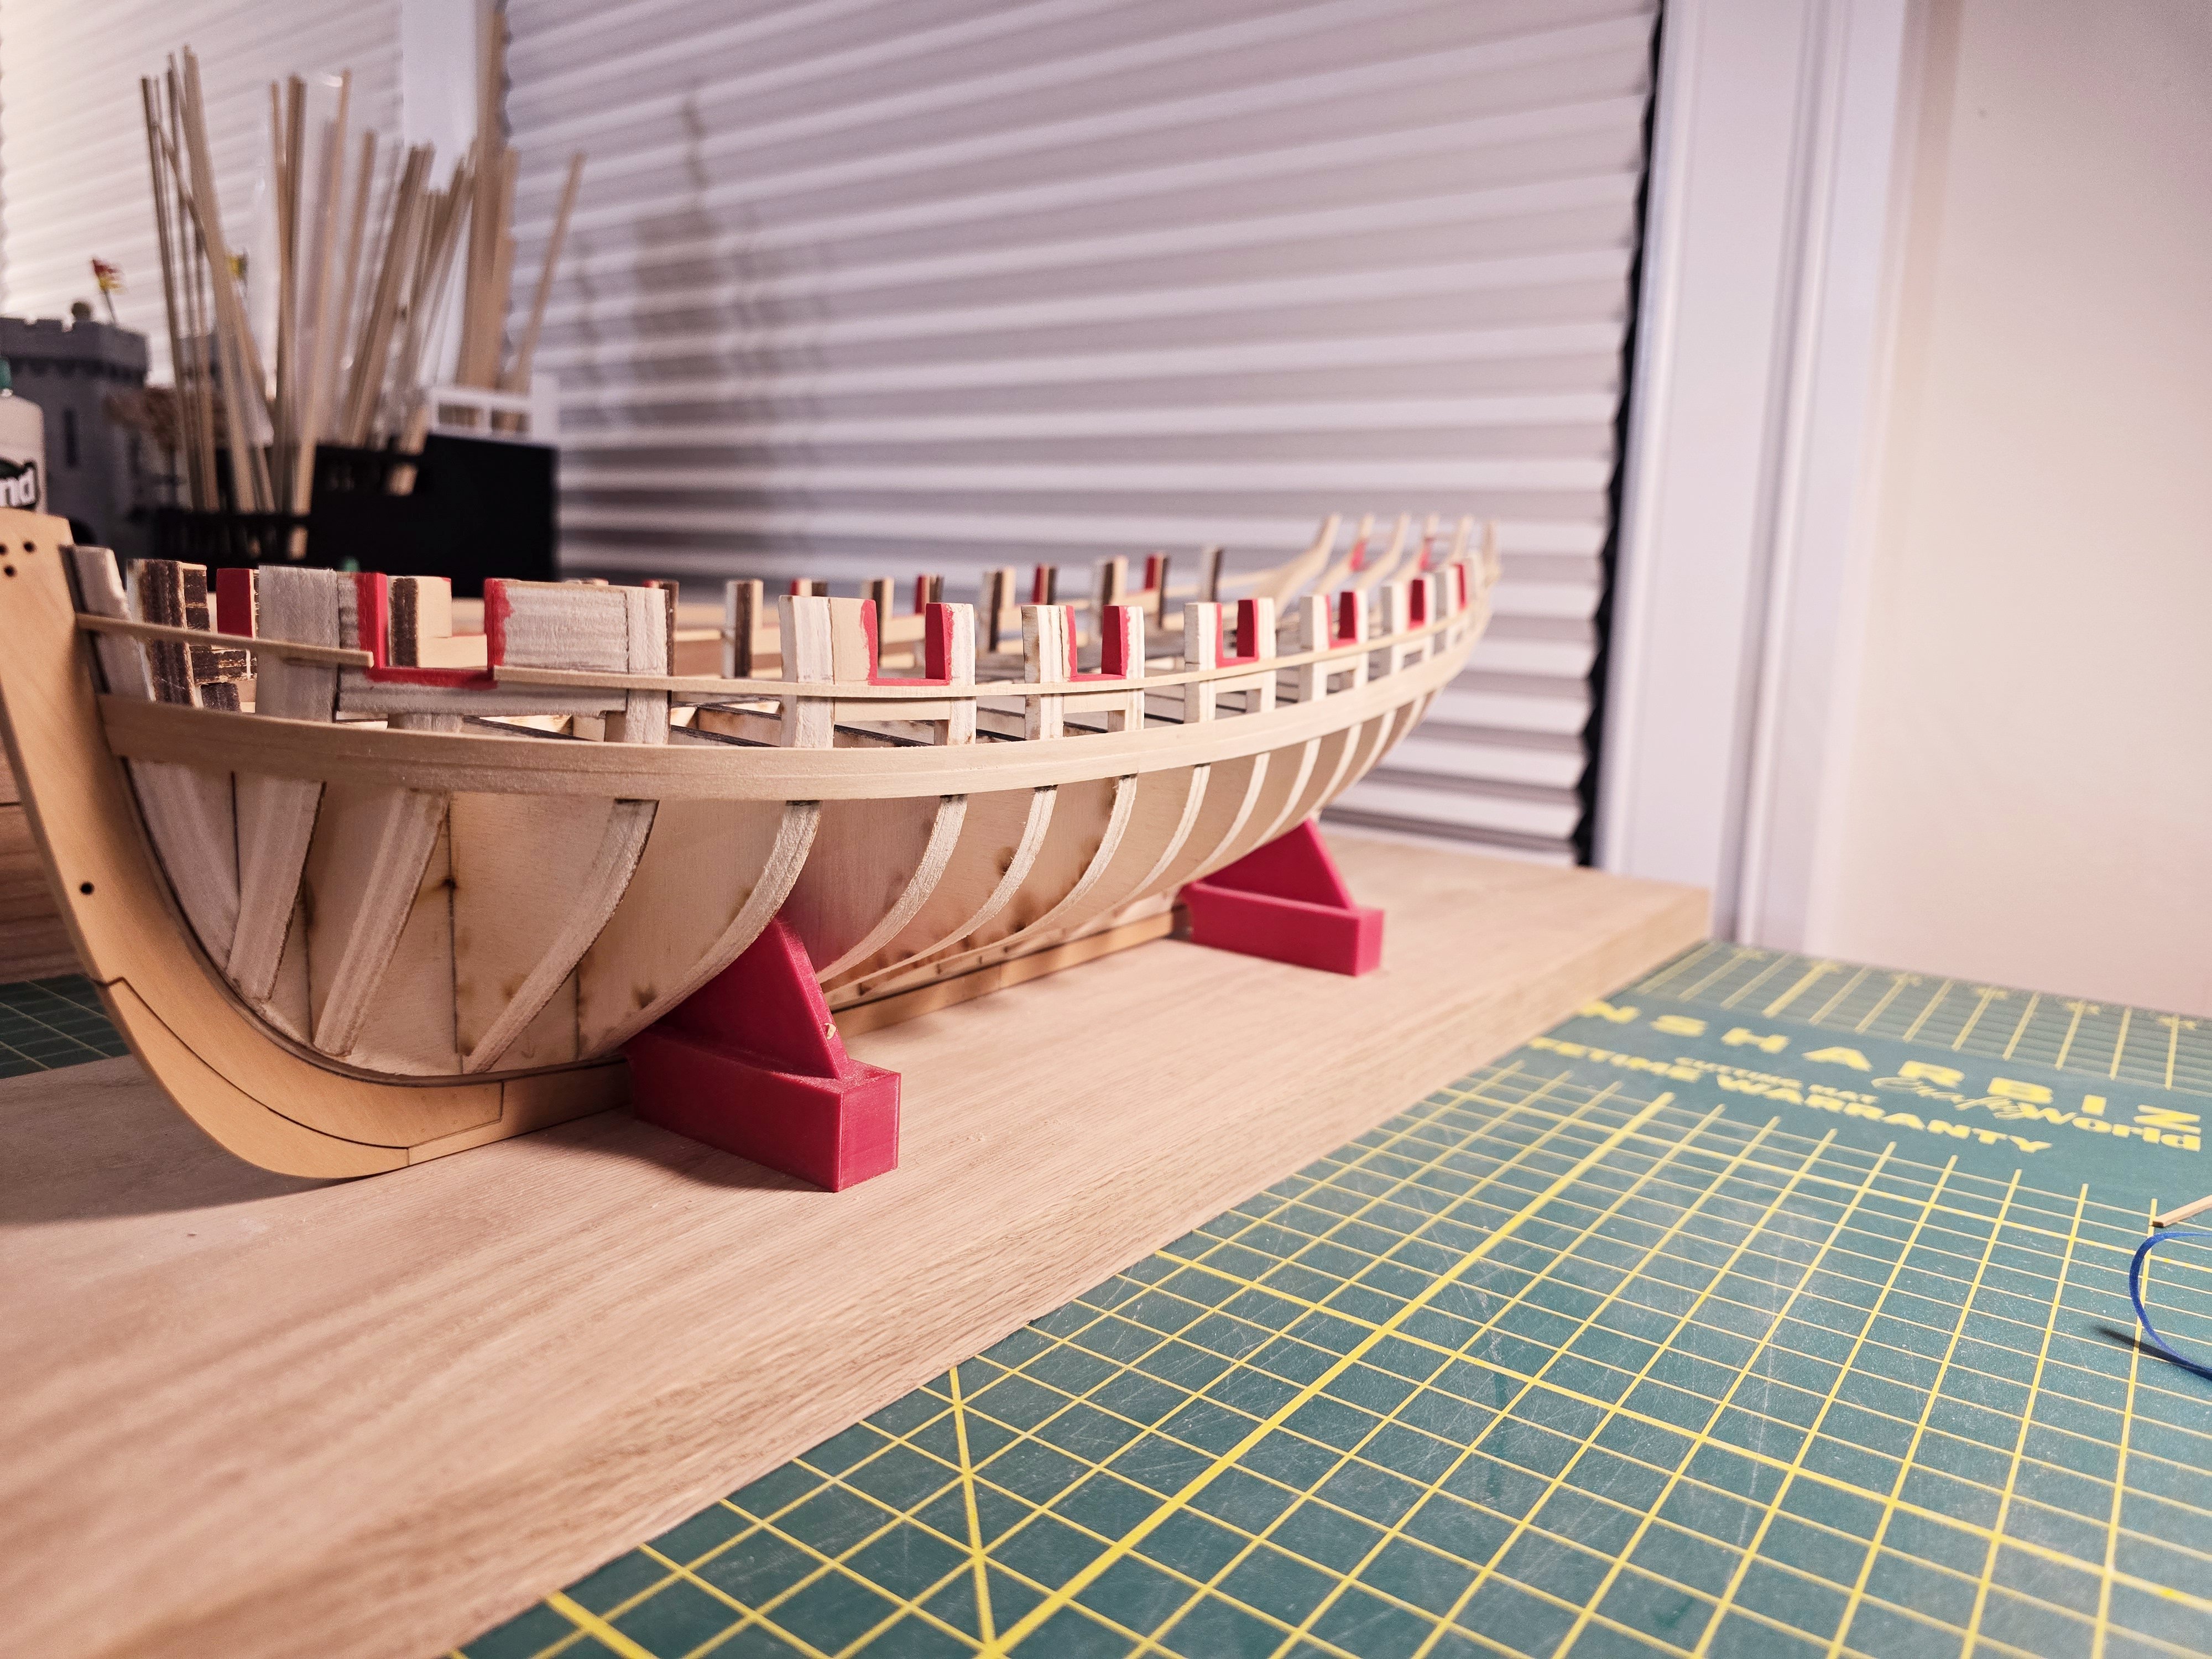
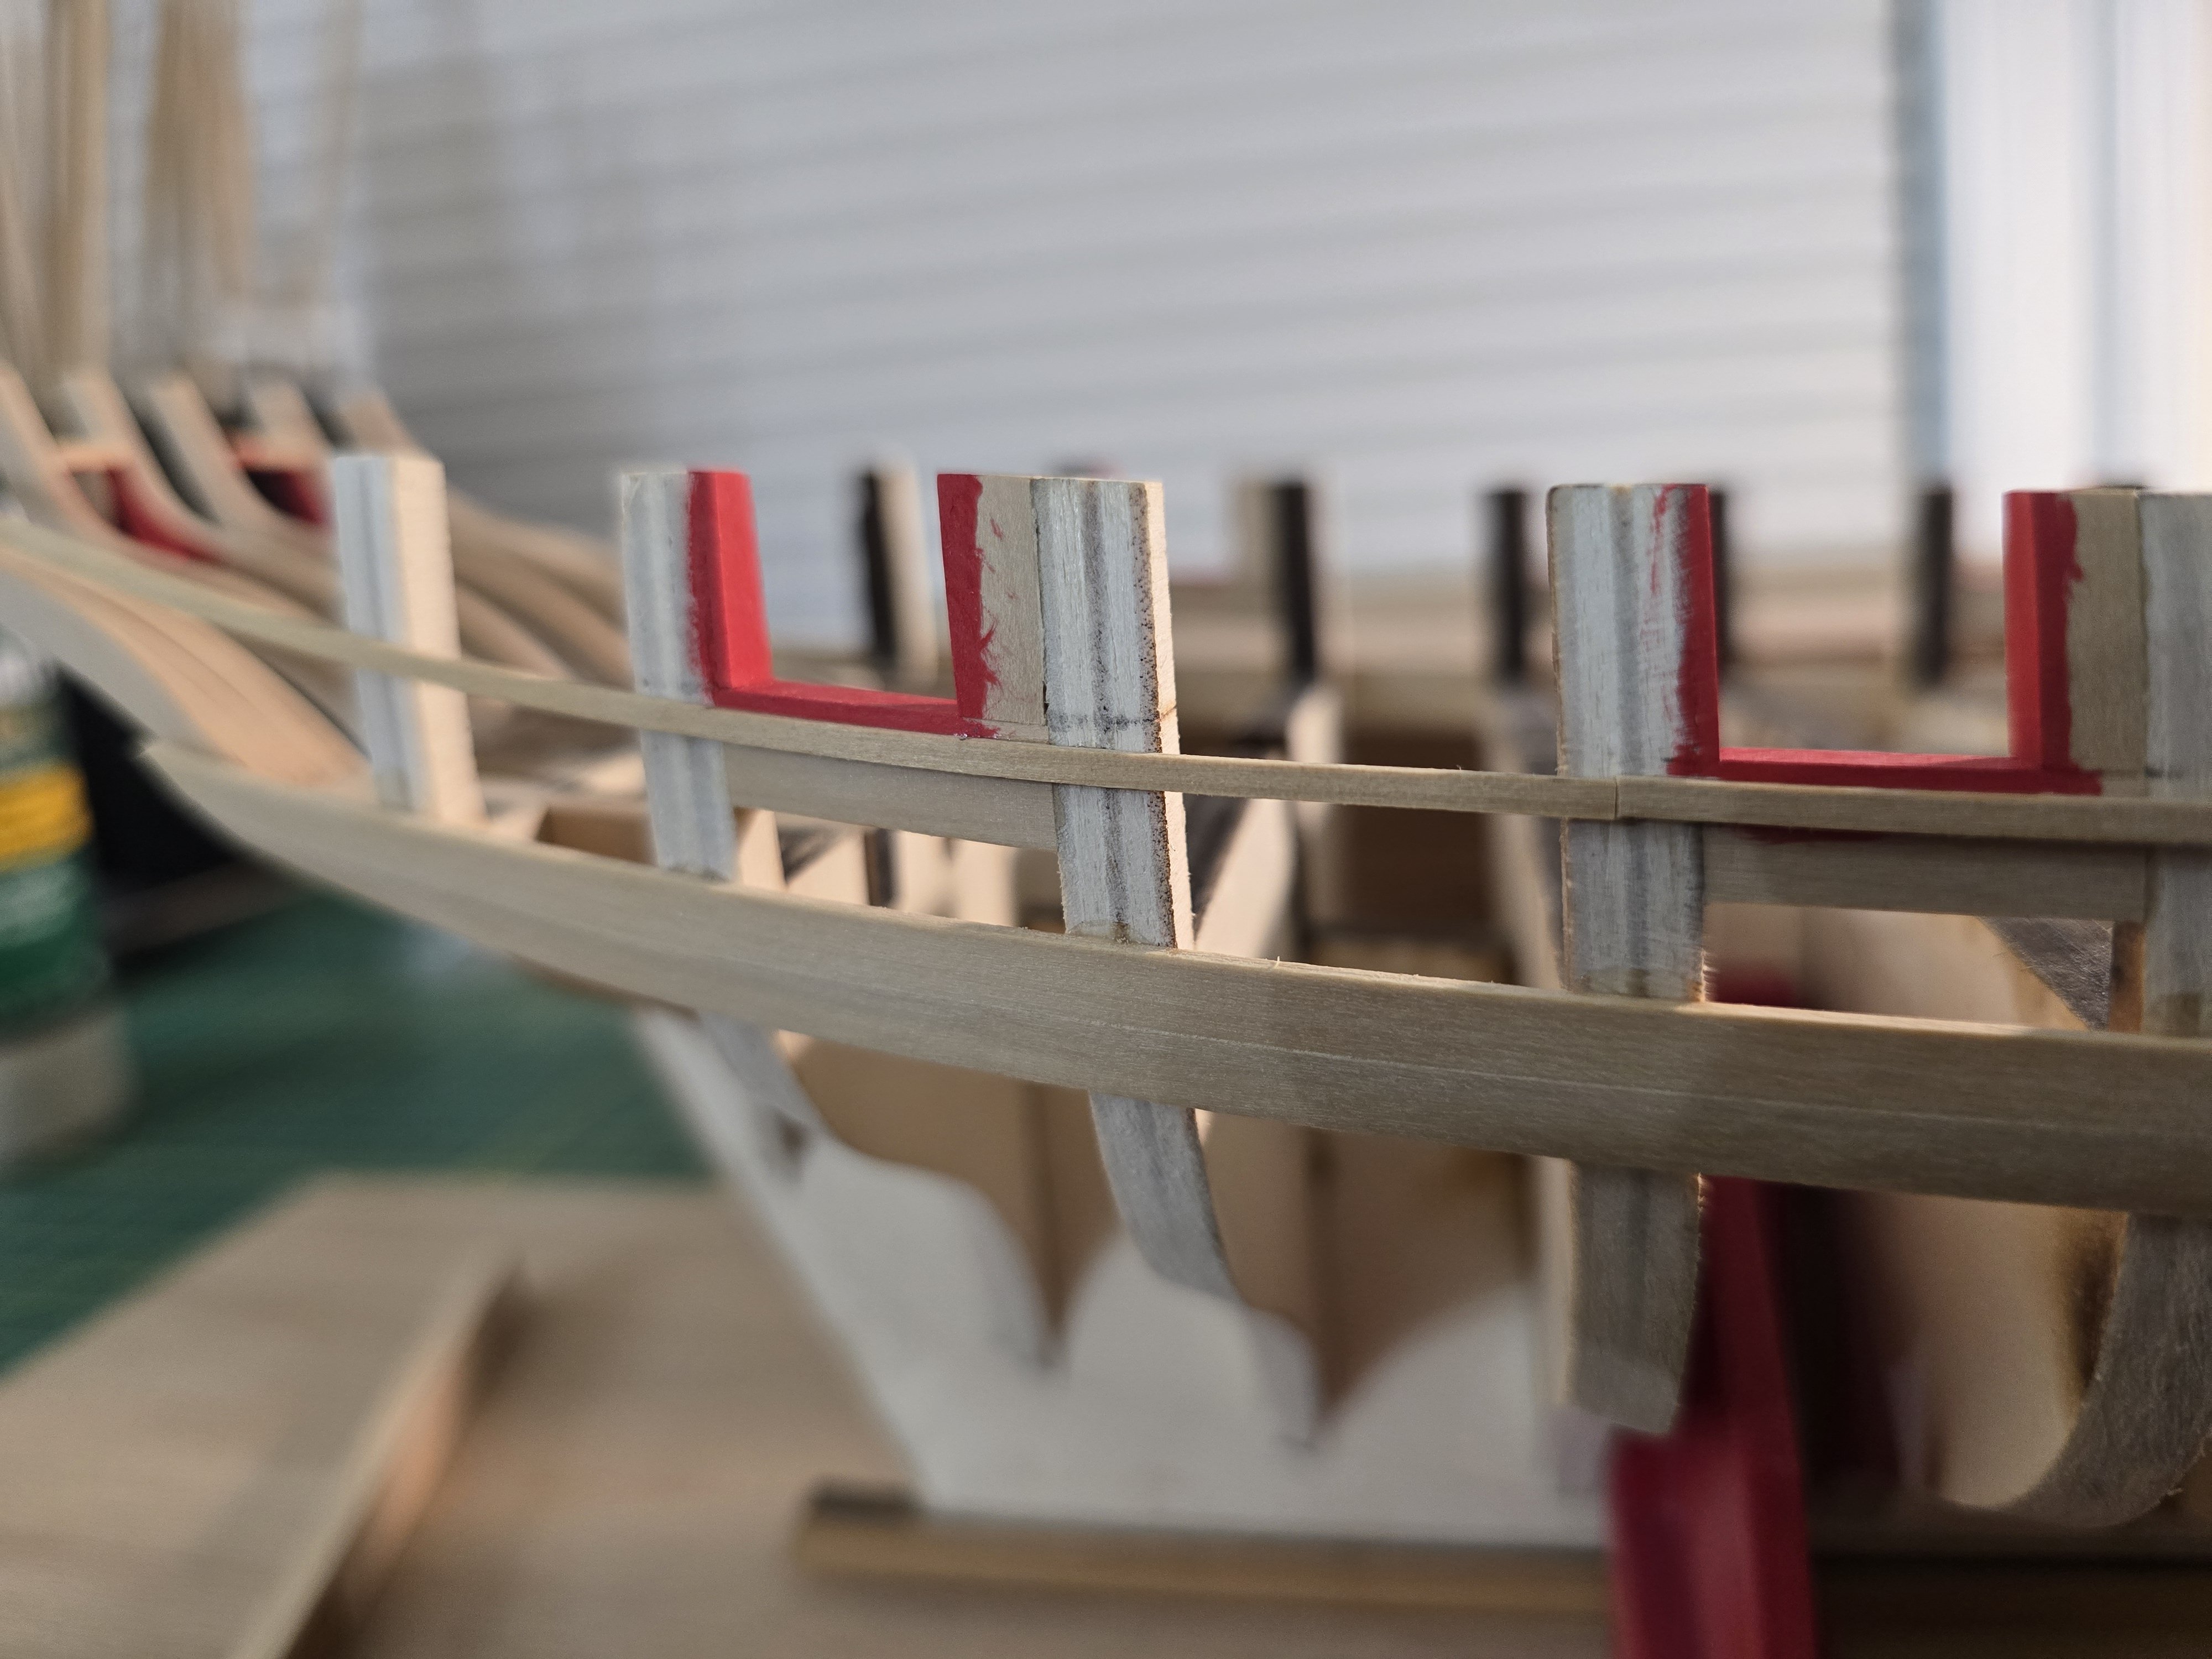
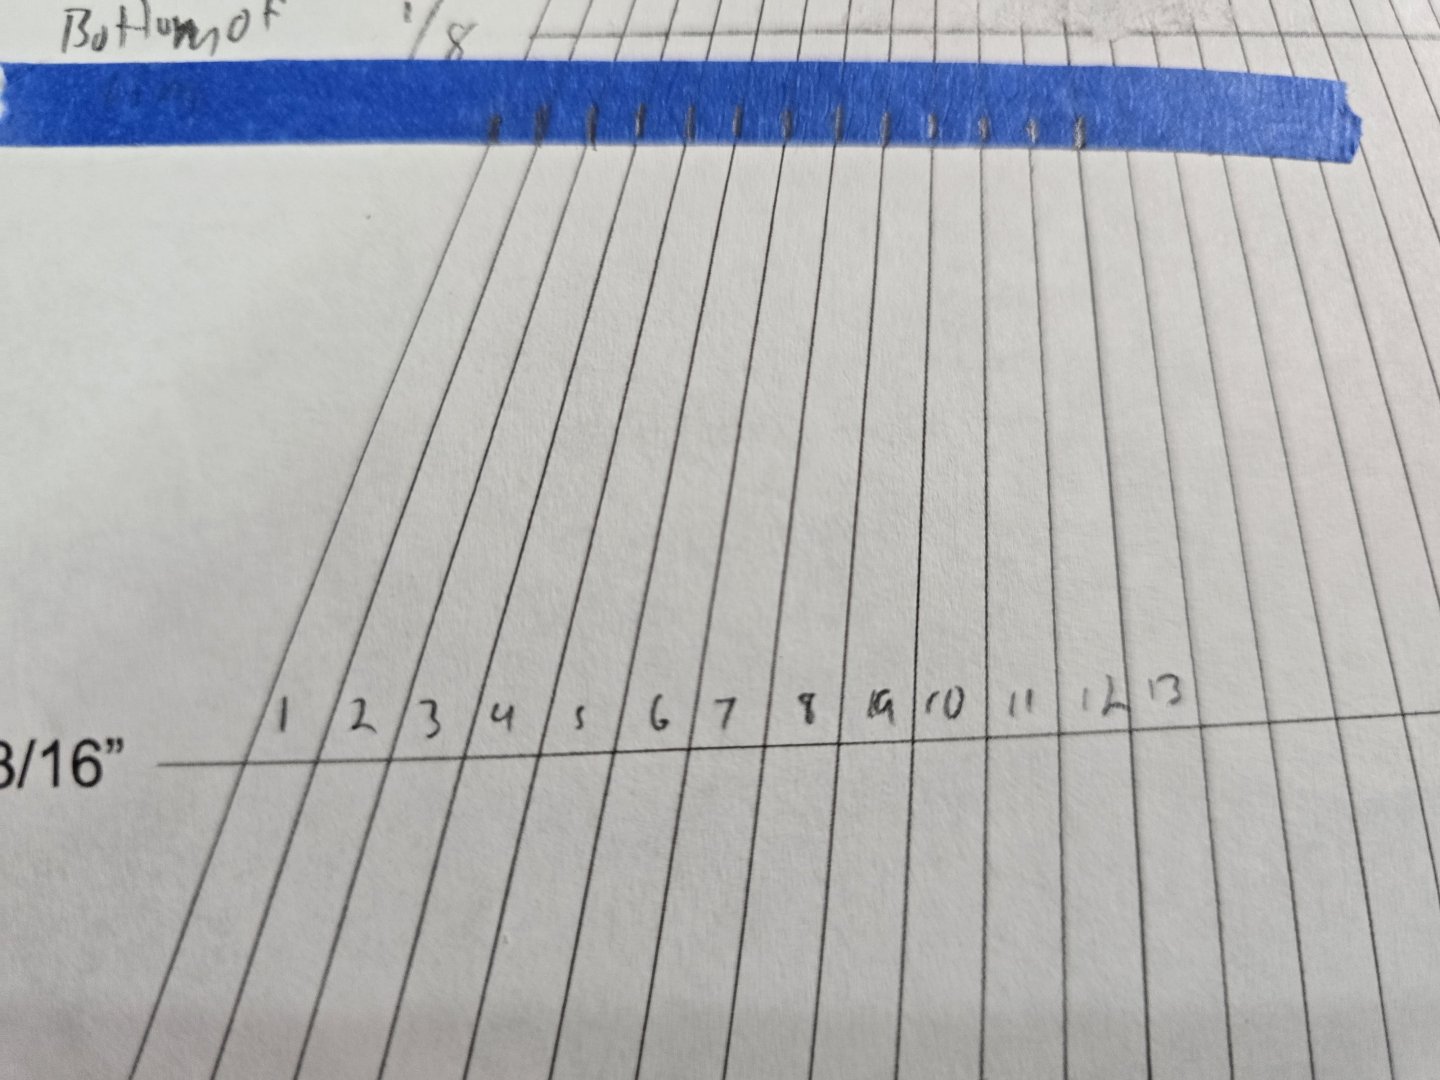
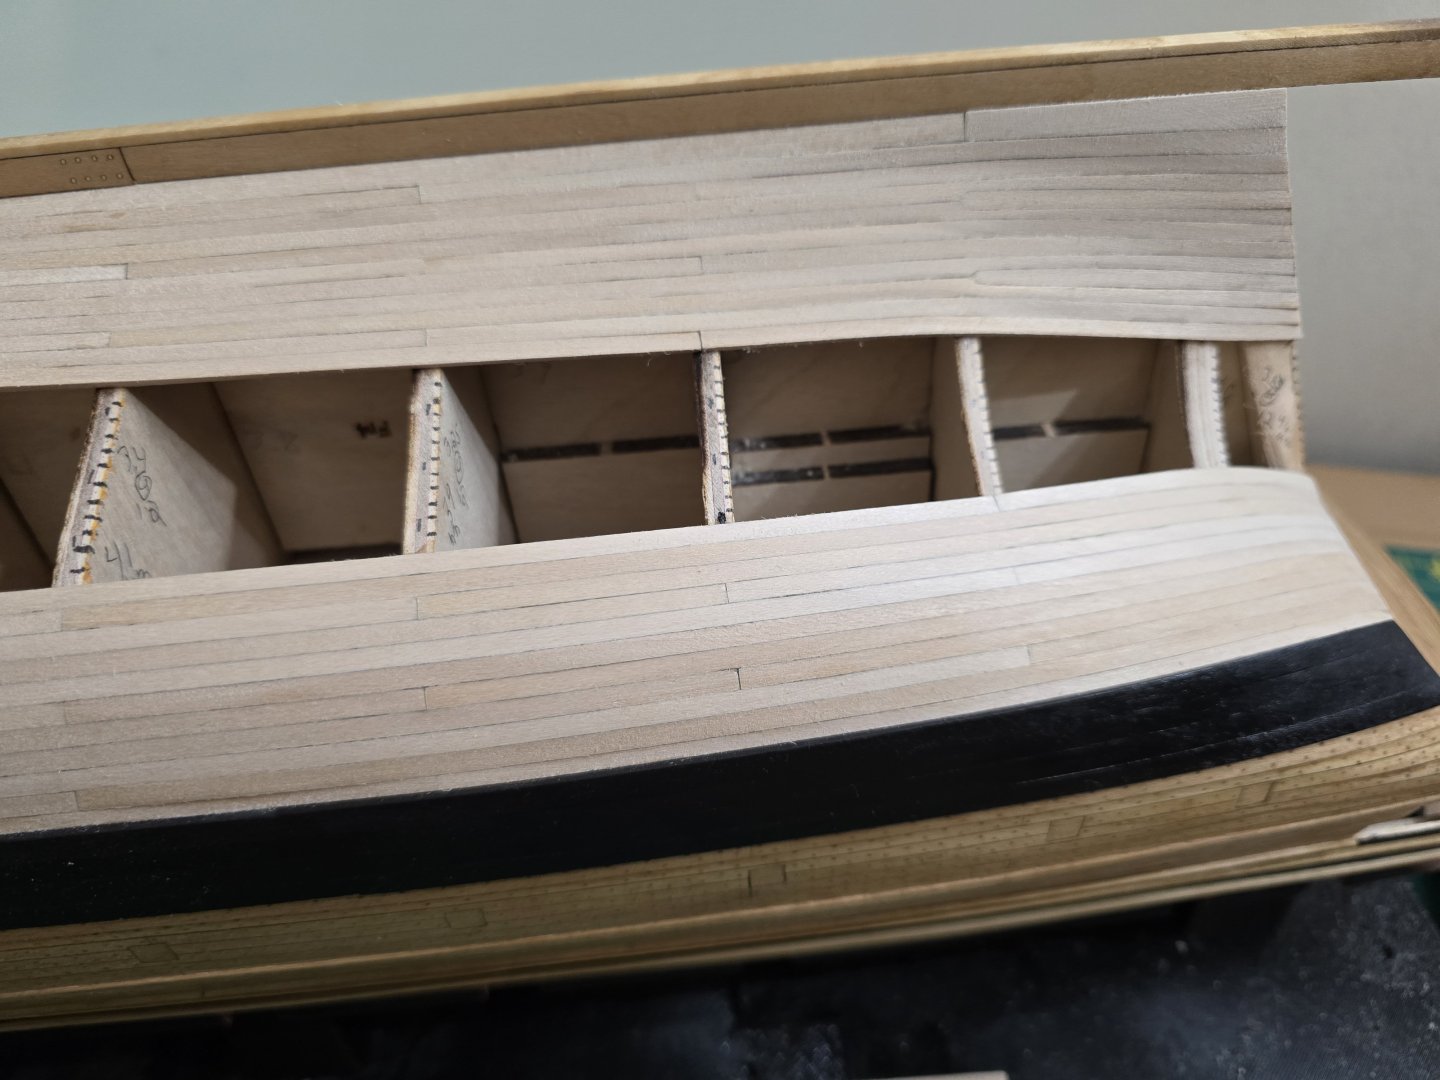
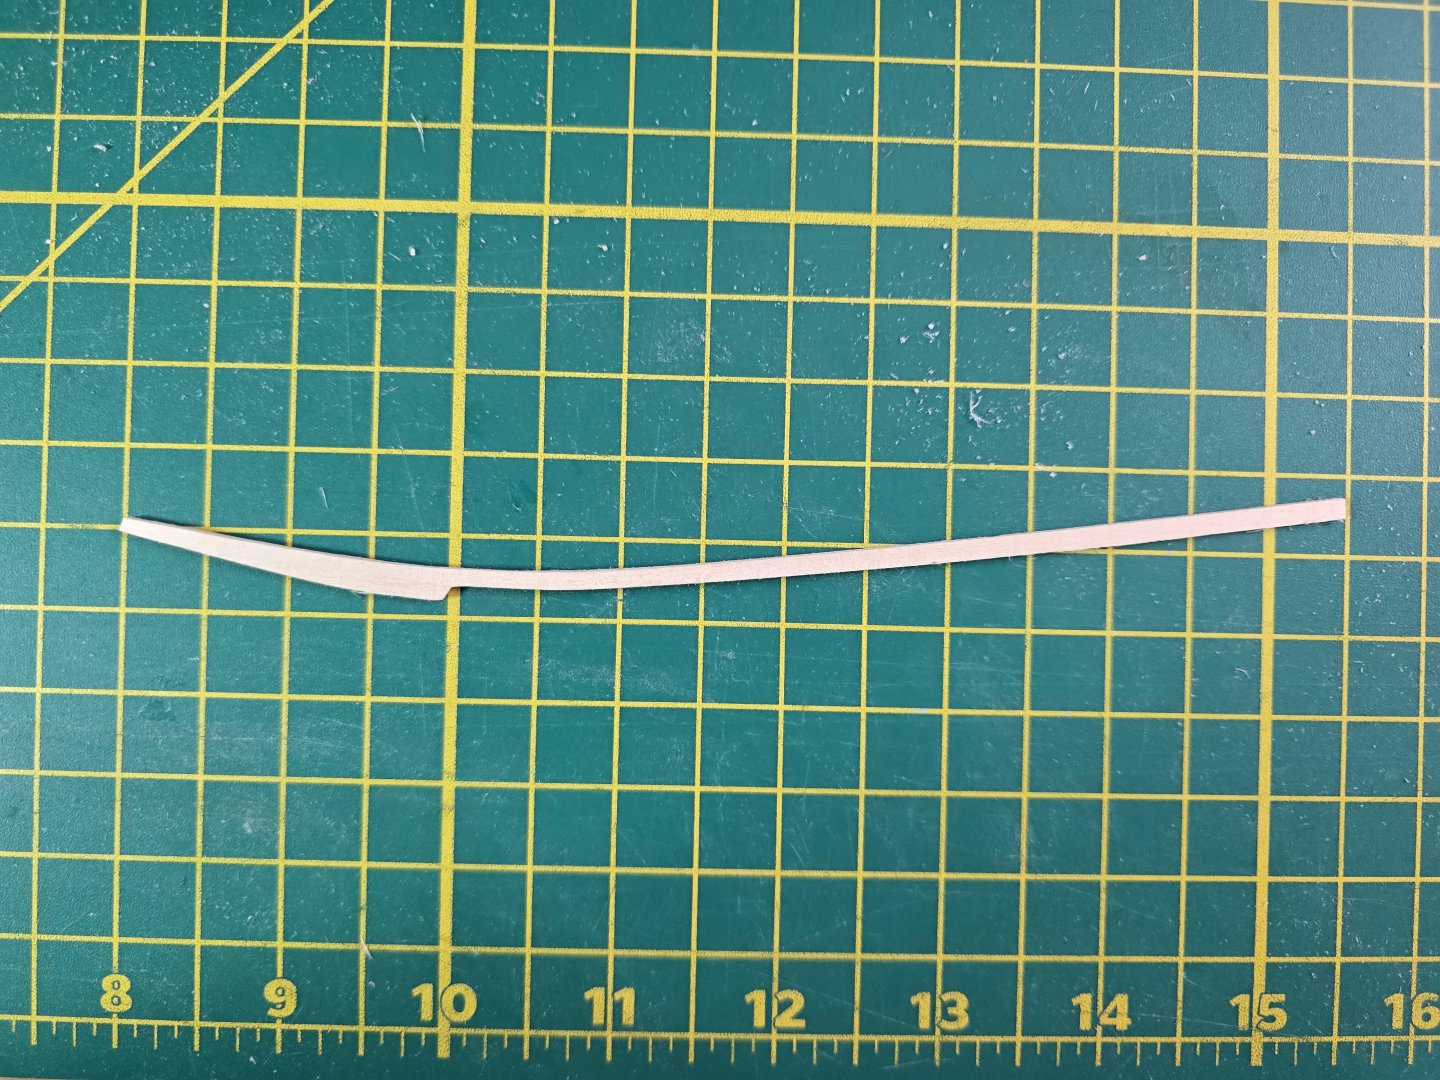
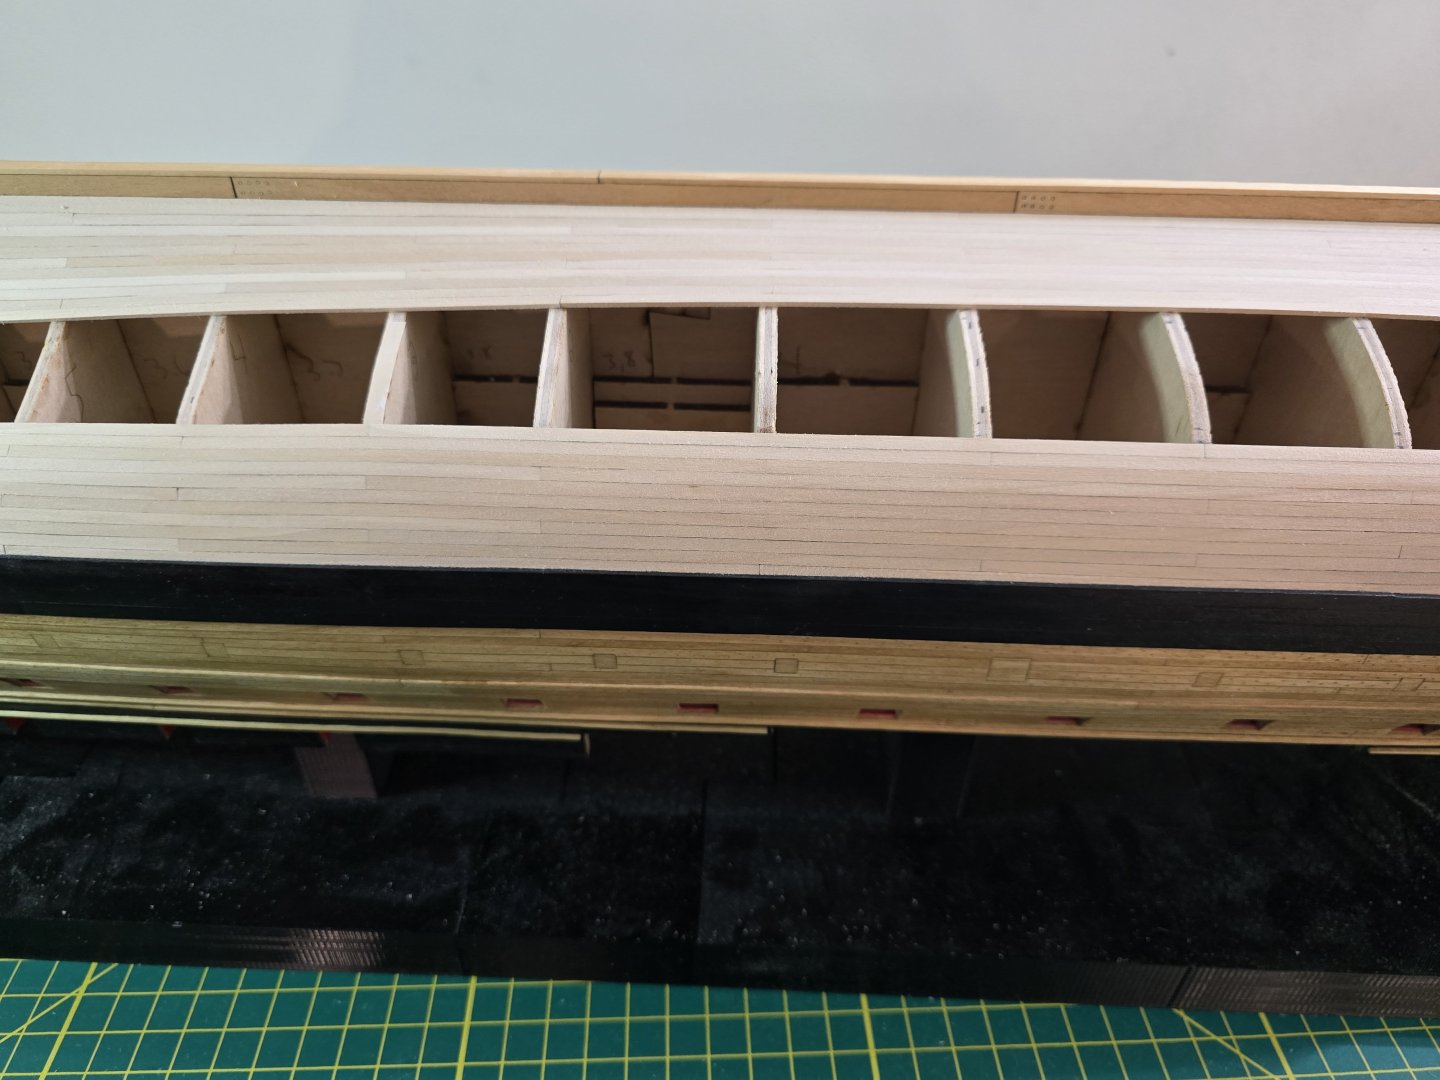
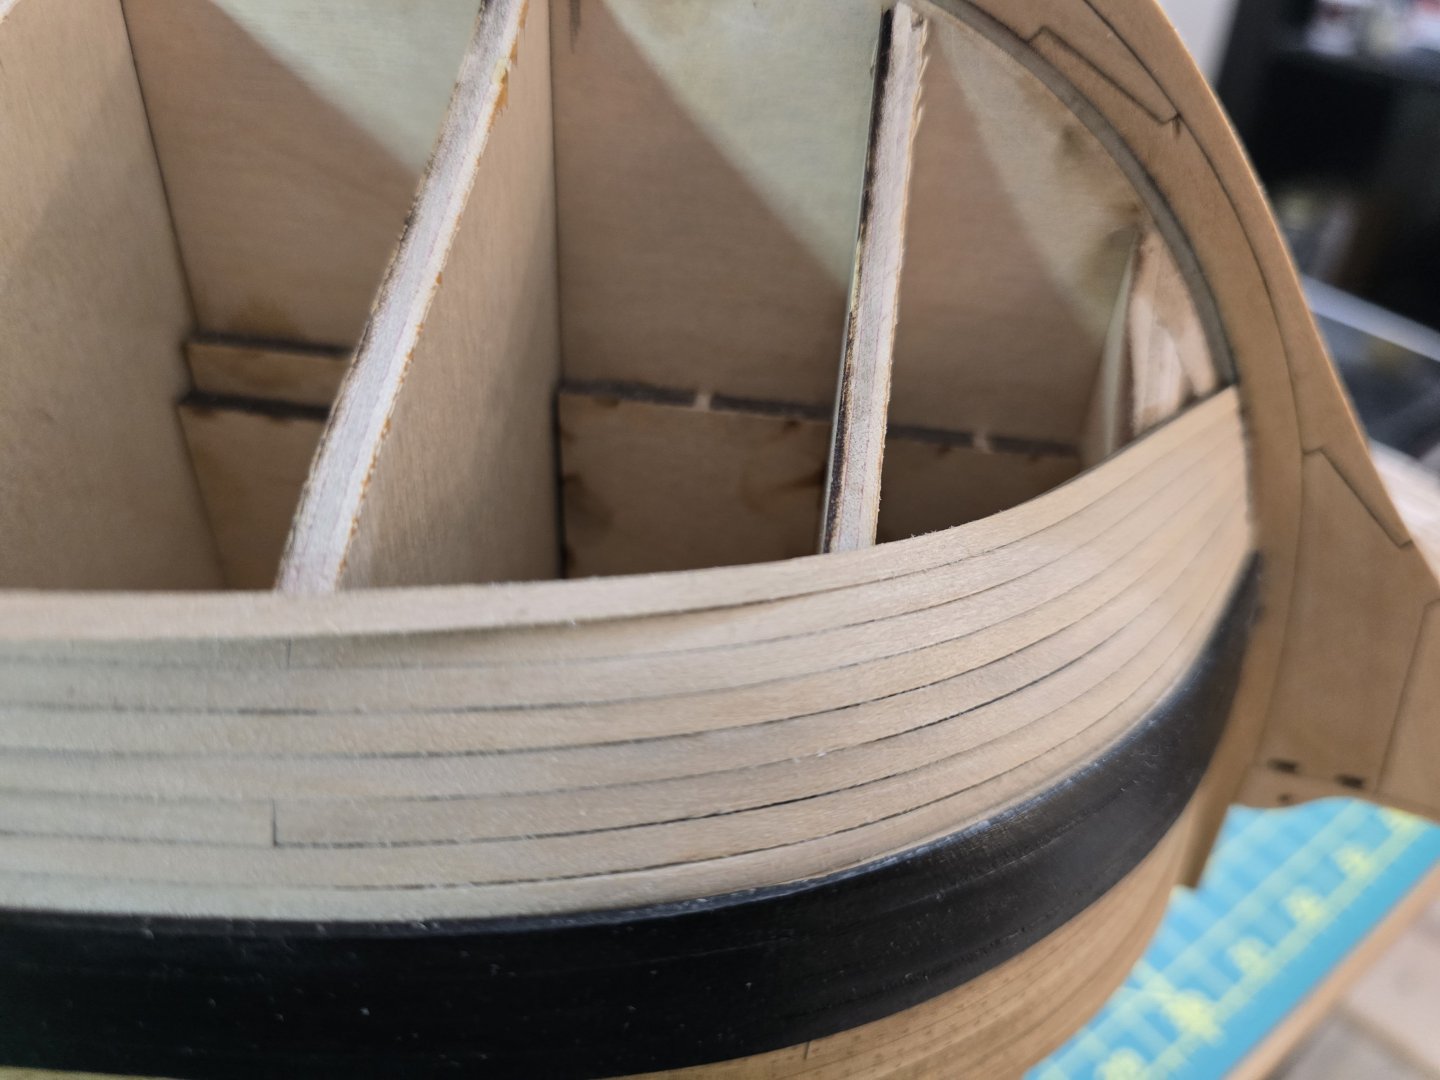
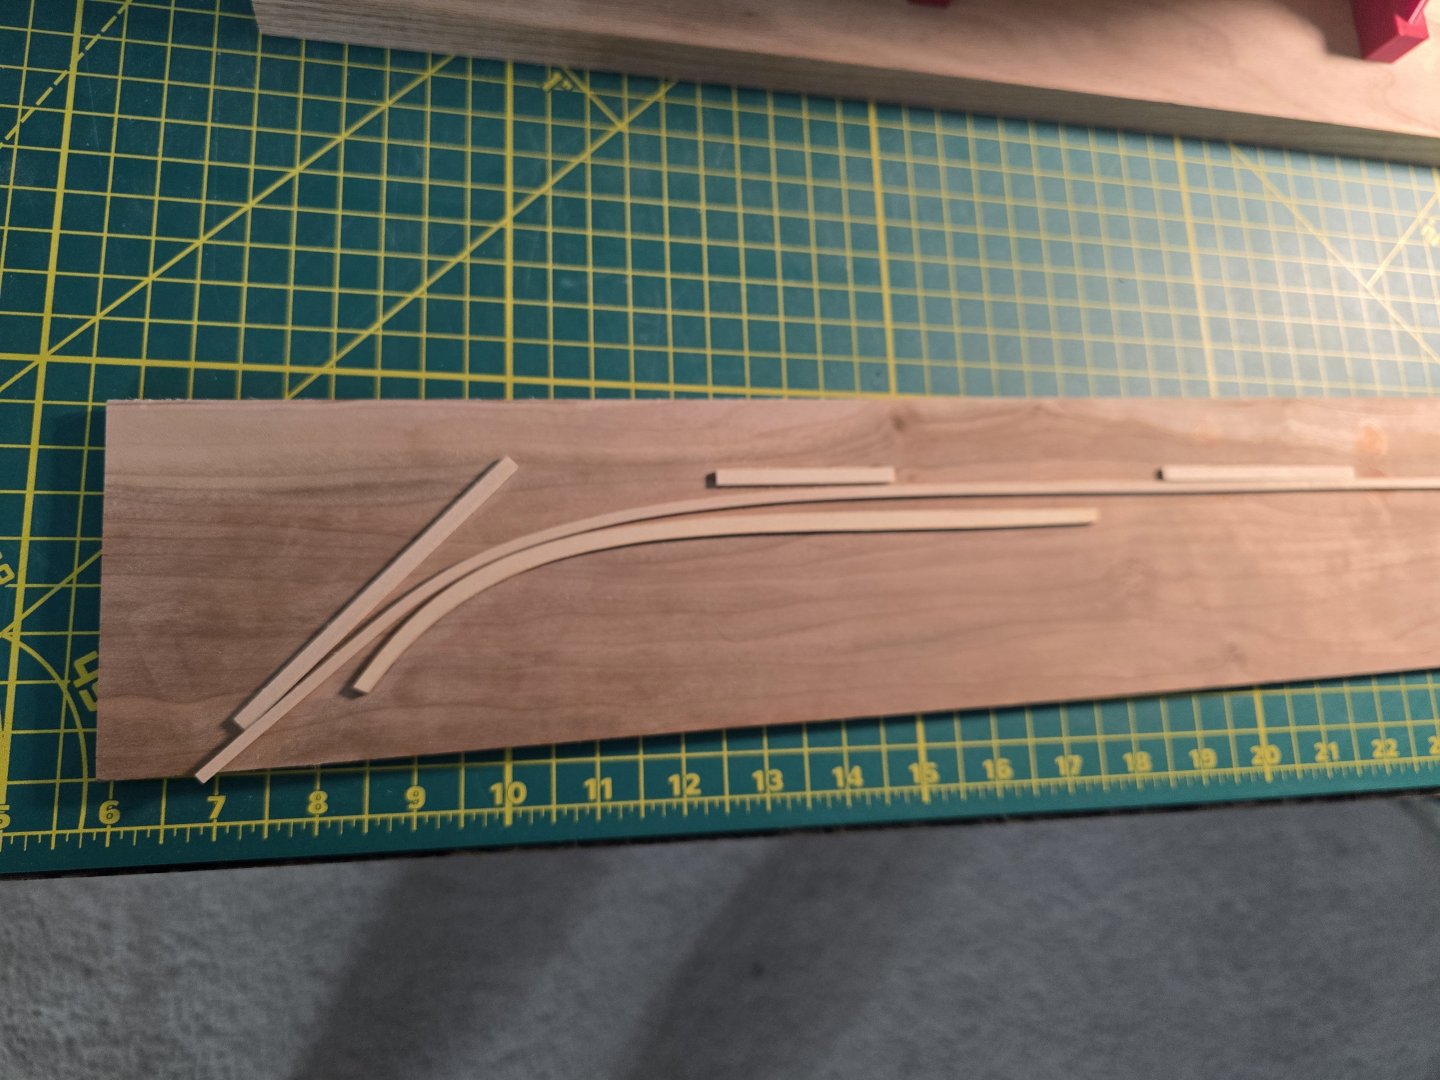
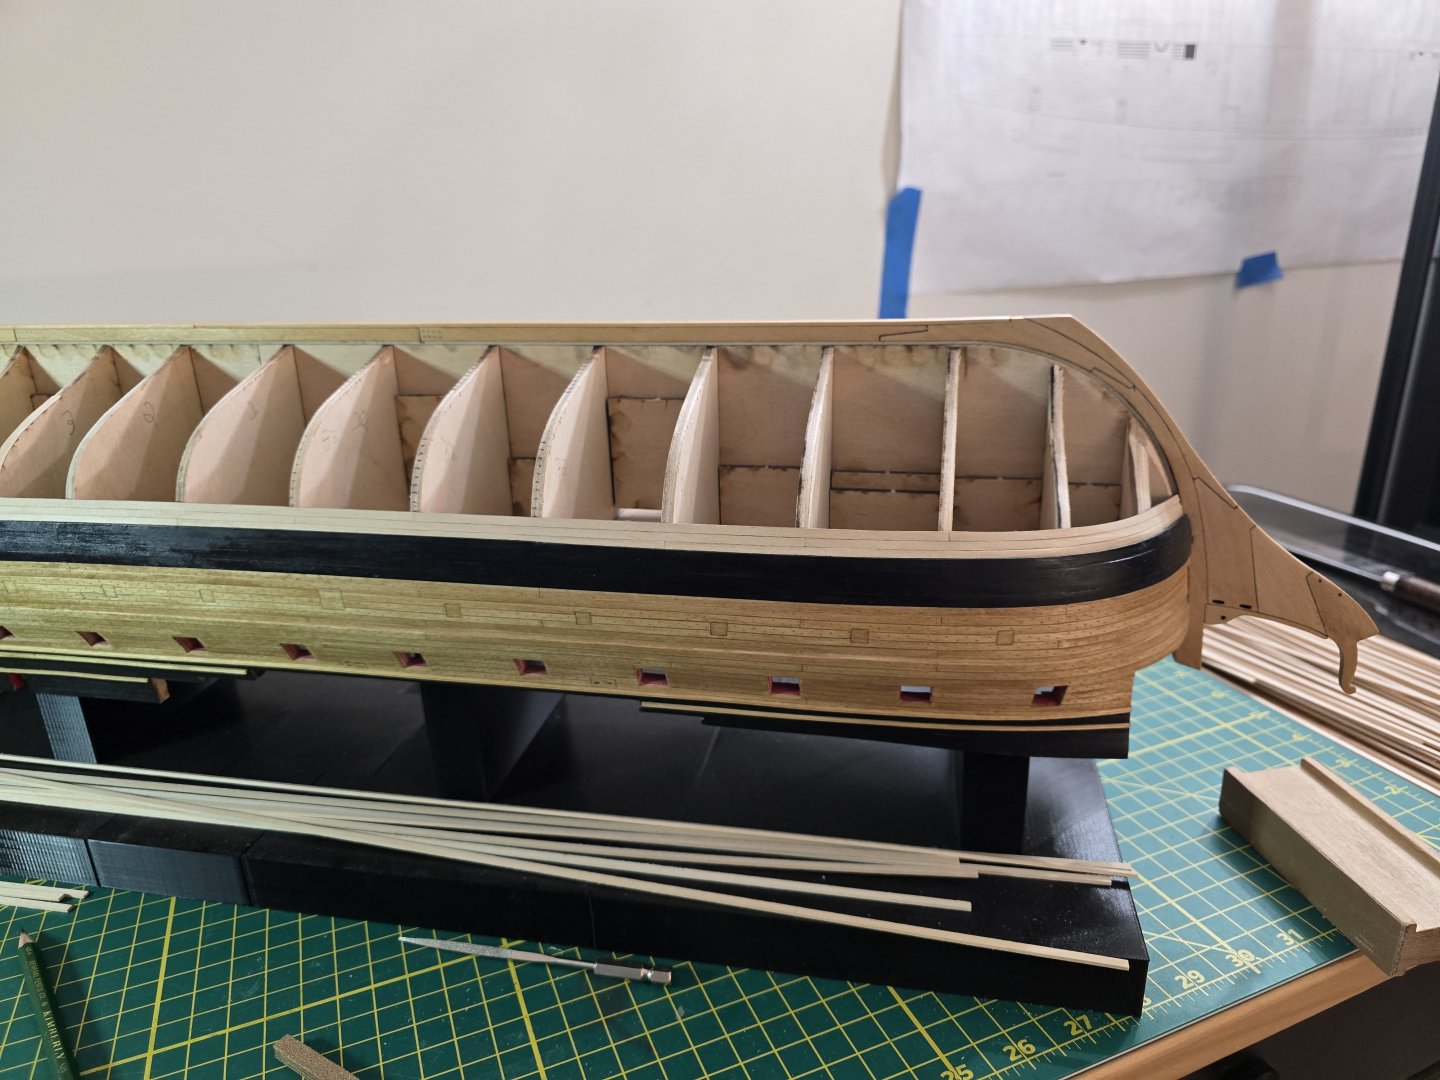
Hey all! I started on the 3rd belt finally. I'm starting this belt differently than the last two. First off, I measured the area of planking at each bulkhead. I then took the biggest and smallest bulkead areas and figured out how many planks I would need to fill both. I figured out that I can use 12 rows of planks at the center, but at the bow, I would need 11 instead to not make the planks too thin. I then made tack strips with painters tape for each bulkhead area and marked the hight of each plank. As you can see, I wrote down the dimensions on each bulkhead. This took a while for me as there are quite a lot of bulkheads which is good. I then, at the bow, had to transition from 12 rows to 11. So I followed the instructions on how to do that. I first placed the first batten down as such. Notice how it stops at the first real bulkhead. I then had to make this piece. This piece took quite a number of tries to make over quite a number of days. Here is how it sits on the ship. This was sure tough for me. The hardest batten to shape yet! I might be doing some sanding on the top of this batten when I start the next row. I'll update as more of this belt gets planked! Thanks! Jeff


-
Hi Peter! I think you are doing a fantastic job! Especially for your first model. Your picturs look great and I believe you have done a grear job planking your first hull. I think you have gotten some excellent advice from othet members here. For me, the real trick about planking a hull is making sure the bulkheads are faired properly. This took me a while to figure out. The only thing I wish some of these kits had, were more bulkheads to help with understanding the curve of the hull. Anyway, keep up the great work and I'm going to follow along! Jeff
- 51 replies
-
- 1
-
-
- bounty jolly boat
- Artesania Latina
- (and 2 more)
-
Hey all! Finally finished the second belt! That sure took a while. I'll share some pics. I realized after working on the keel, that getting the correct angle is difficult. I haven't measured for the 3rd belt yet to figure out the widths of the planks, but I hope I did a good enough job on the first 2 belts so the 3rd goes on alright. I haven't finished sanding and filling some small areas yet, but I will do that after the third belt is complete. Thanks all! Jeff


-
Great work! You have done a fantastic job! Jeff
-
Look great Ben! This looks like a very fun build! Jeff
-
Thanks all for the positive comments! I really do appreciate it. I wanted to take a small break from it before starting this belt over again since I've been at it almost daily for a year now! I did take about a week off, instead building some Lego sets and playing Satisfactory on the PC. I have put the garboard strake on and placed the next 2 rows. I did take my time and it does look better. I'll show some pics after I get a few more rows on. Thanks all! Jeff
-
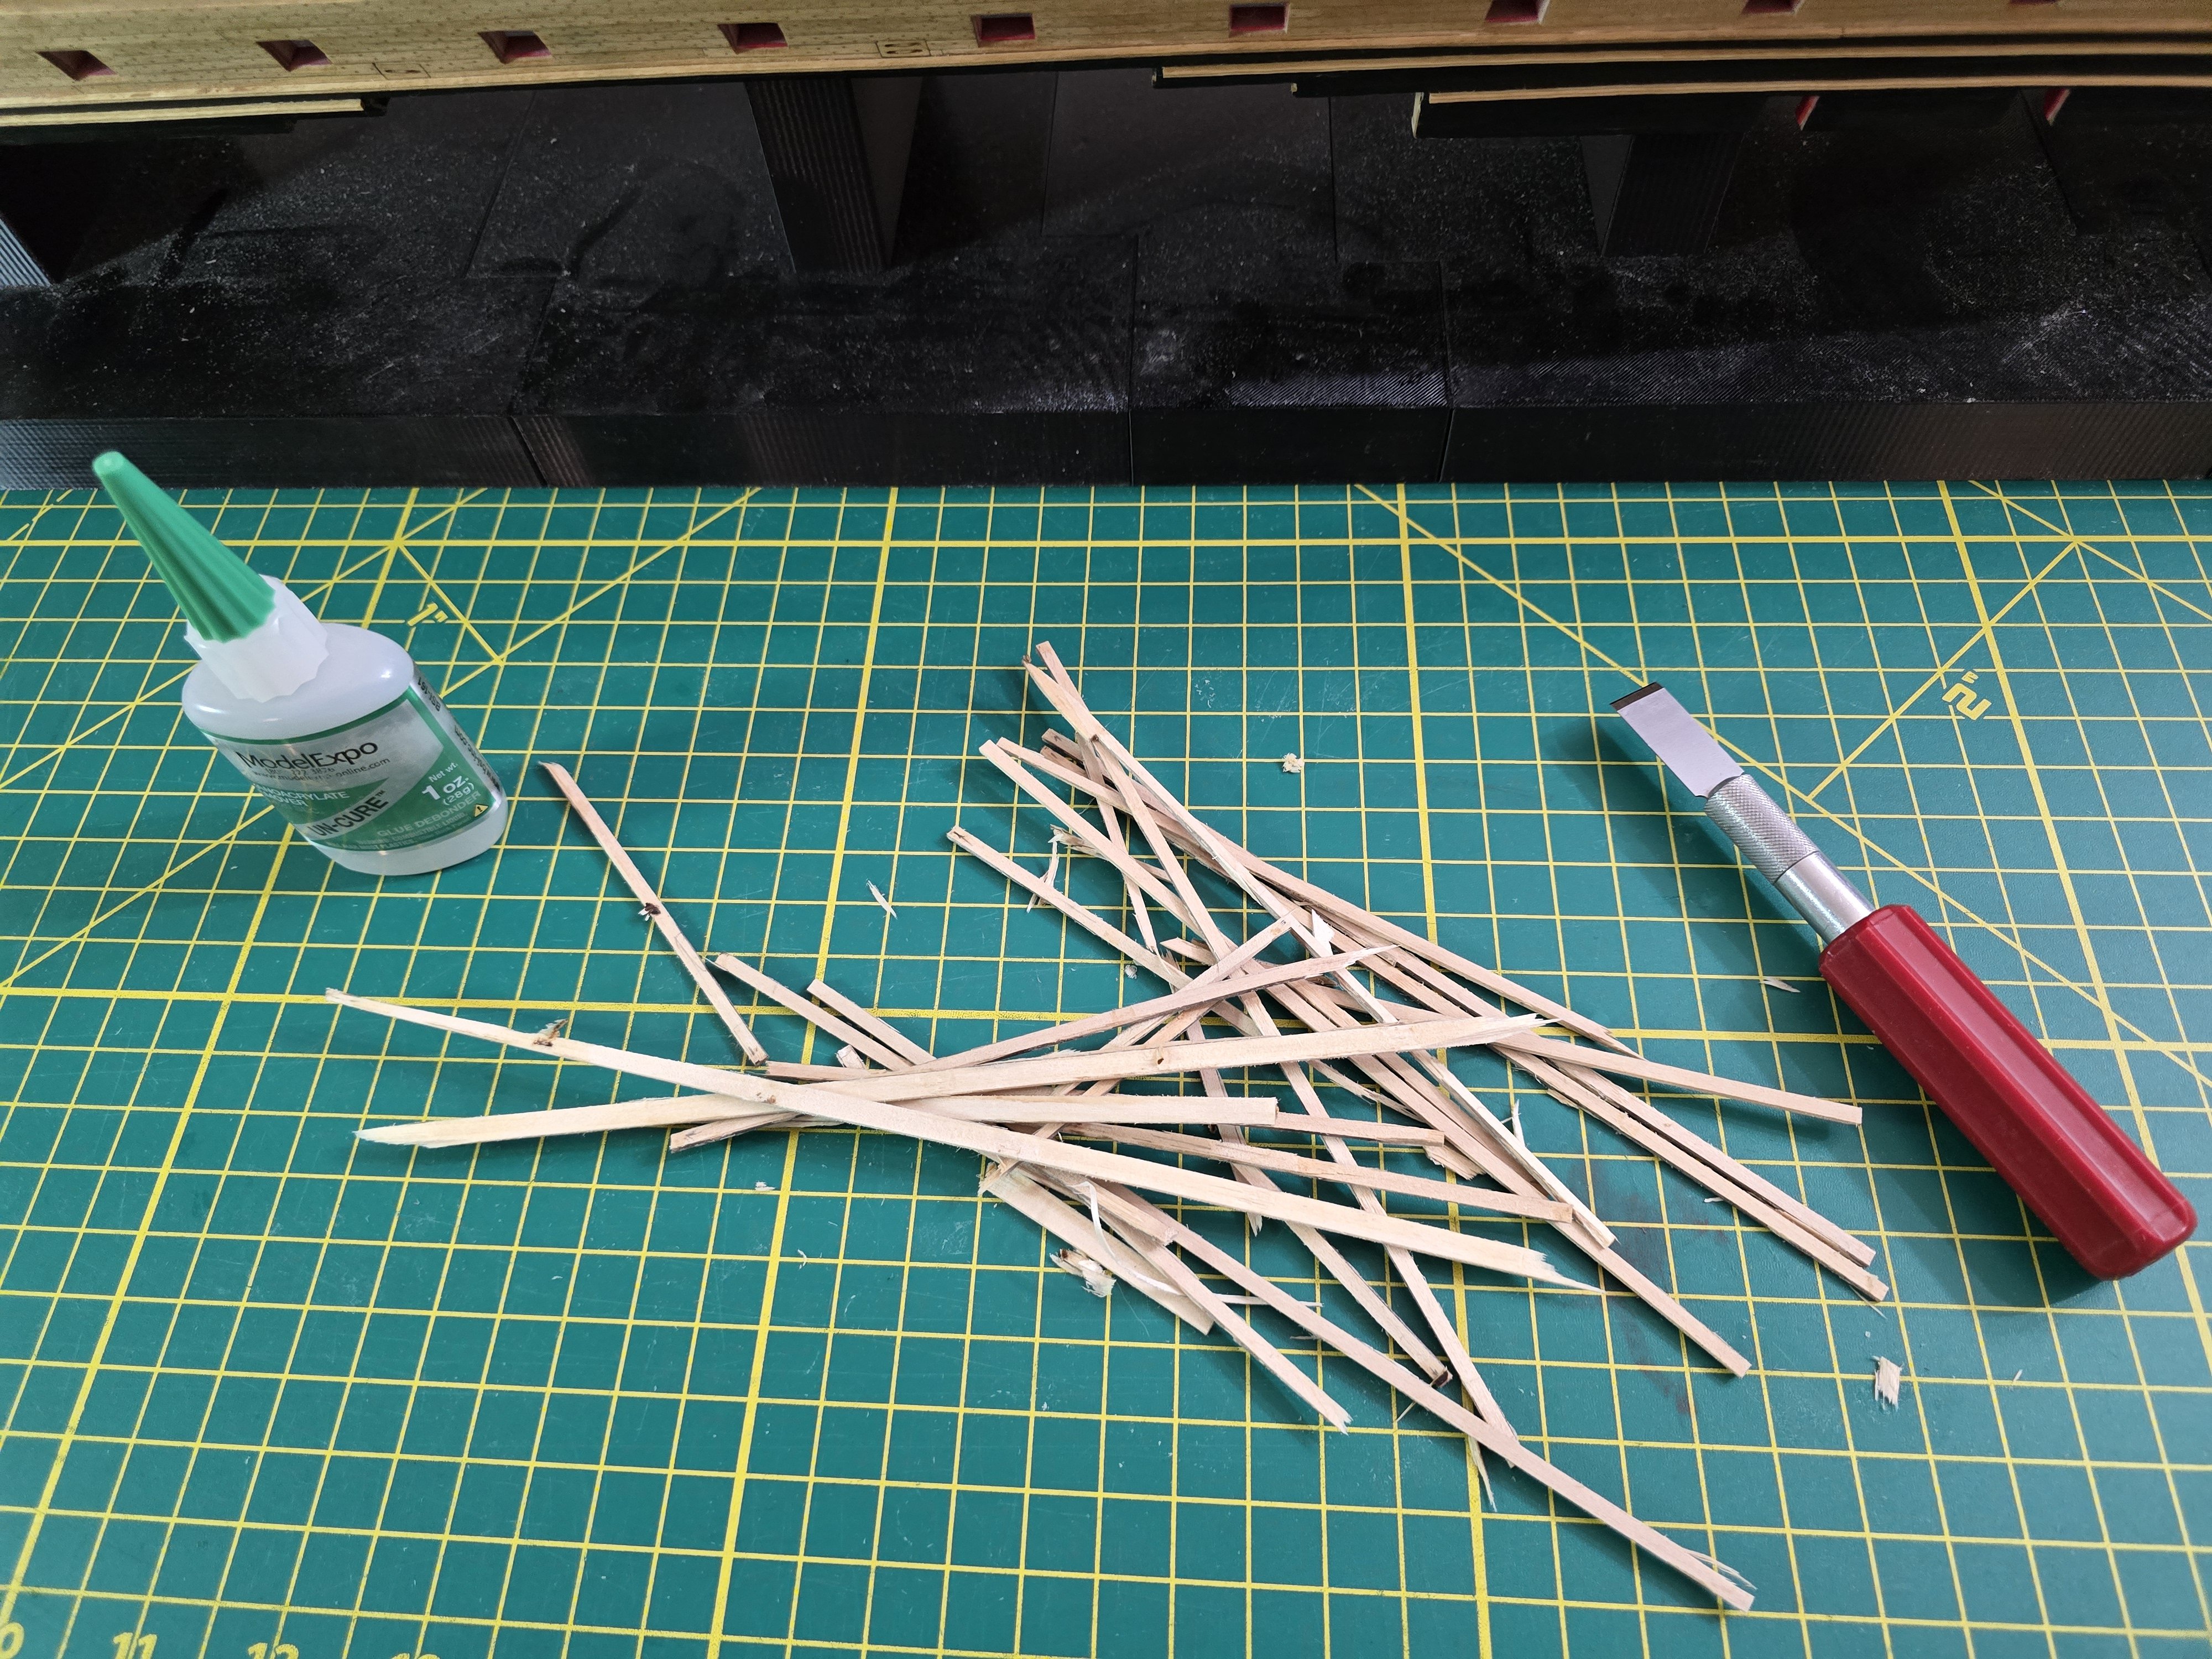
Thanks everyone for your comments! You guys are right that varying color does give it a more distinctive look! So I have some bad news. I was half way done with the second belt on the starboard side and I wasn't satisfied with it at all. At the bow, my second plank after the garboard was way too thin. This caused a bigger curve than what it needed for subsequent planks. After 4-5 plank rows, it curved up way too high at the bow. Im sorry I forgot to take pics of what I mean. So I tried to remove some of the strakes at the bow. Because they were all connected together, this was the outcome. I ended up having to remove all the planks on the second belt for the starboard side. This also includes the garboard as well. Thats a lot of work lost that I have to redo. It's very upsetting to have to do this, but I really didn't have much of a choice. Because of this, I might have to order more wood strips from Model Expo. Im waiting for the de-glue to dry before sanding off all the excess wood still attached to the bulkead formers. I'll give an update once I start the stsrboard side again. Jeff

-
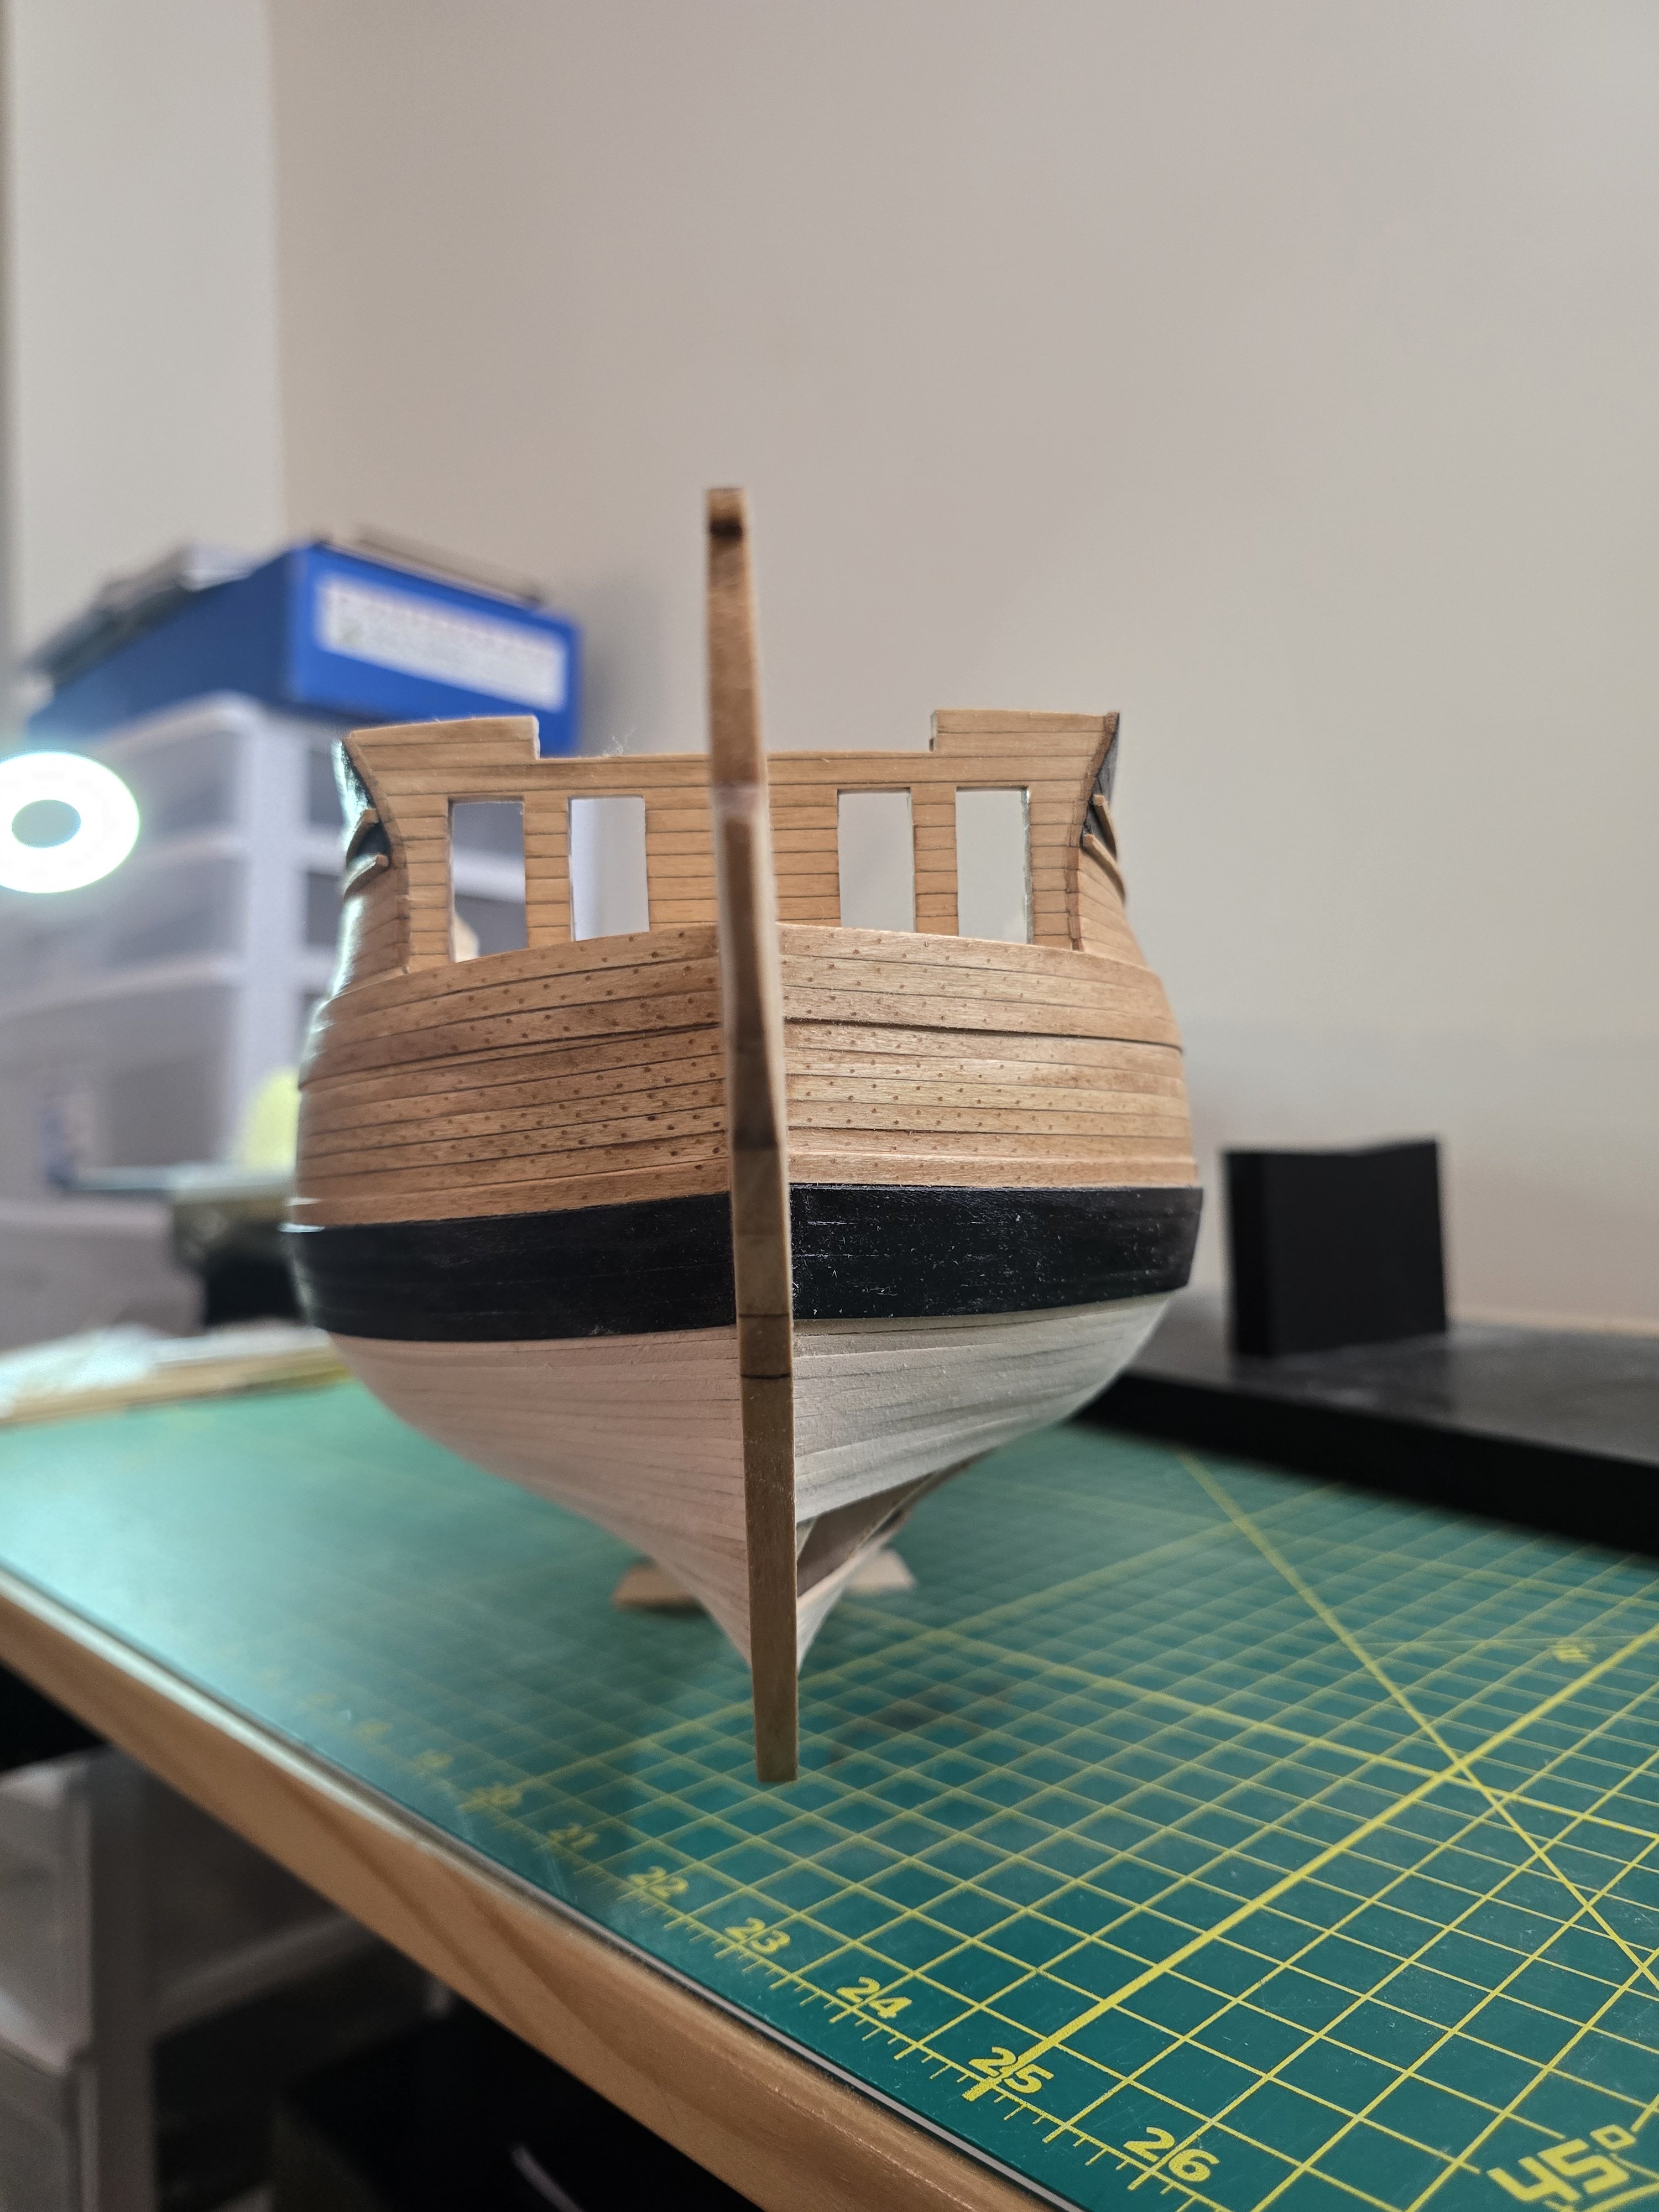
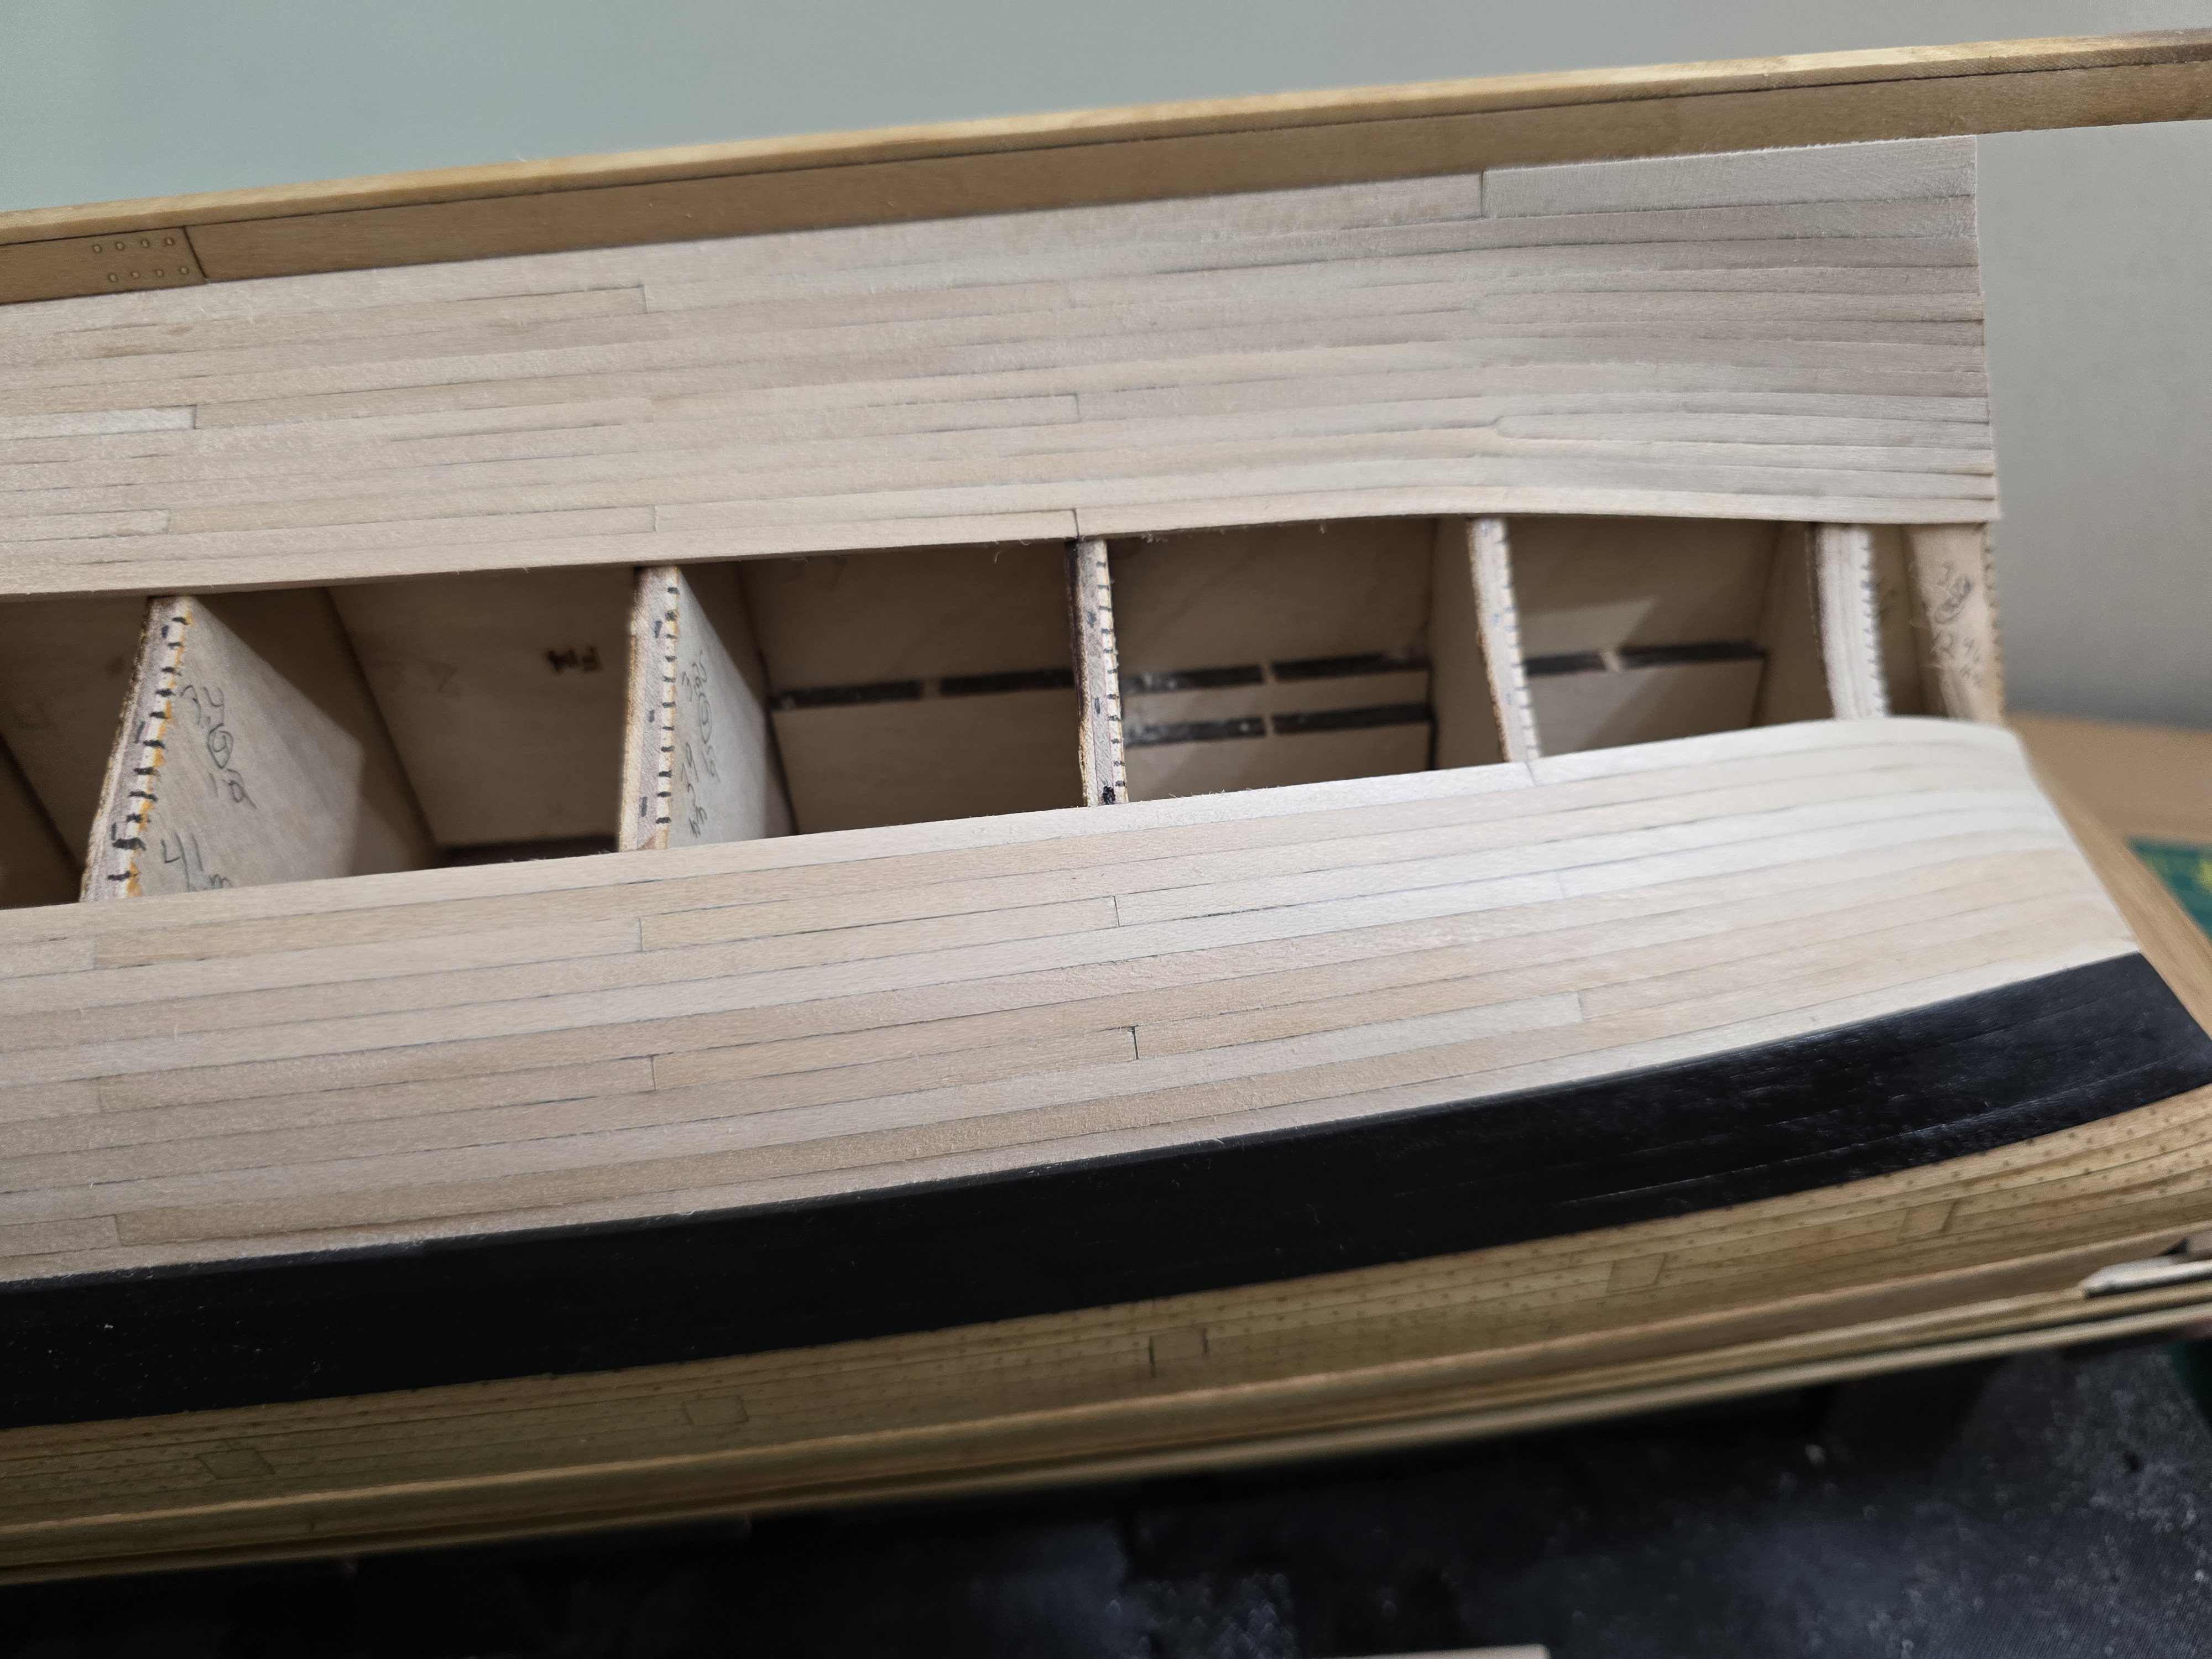
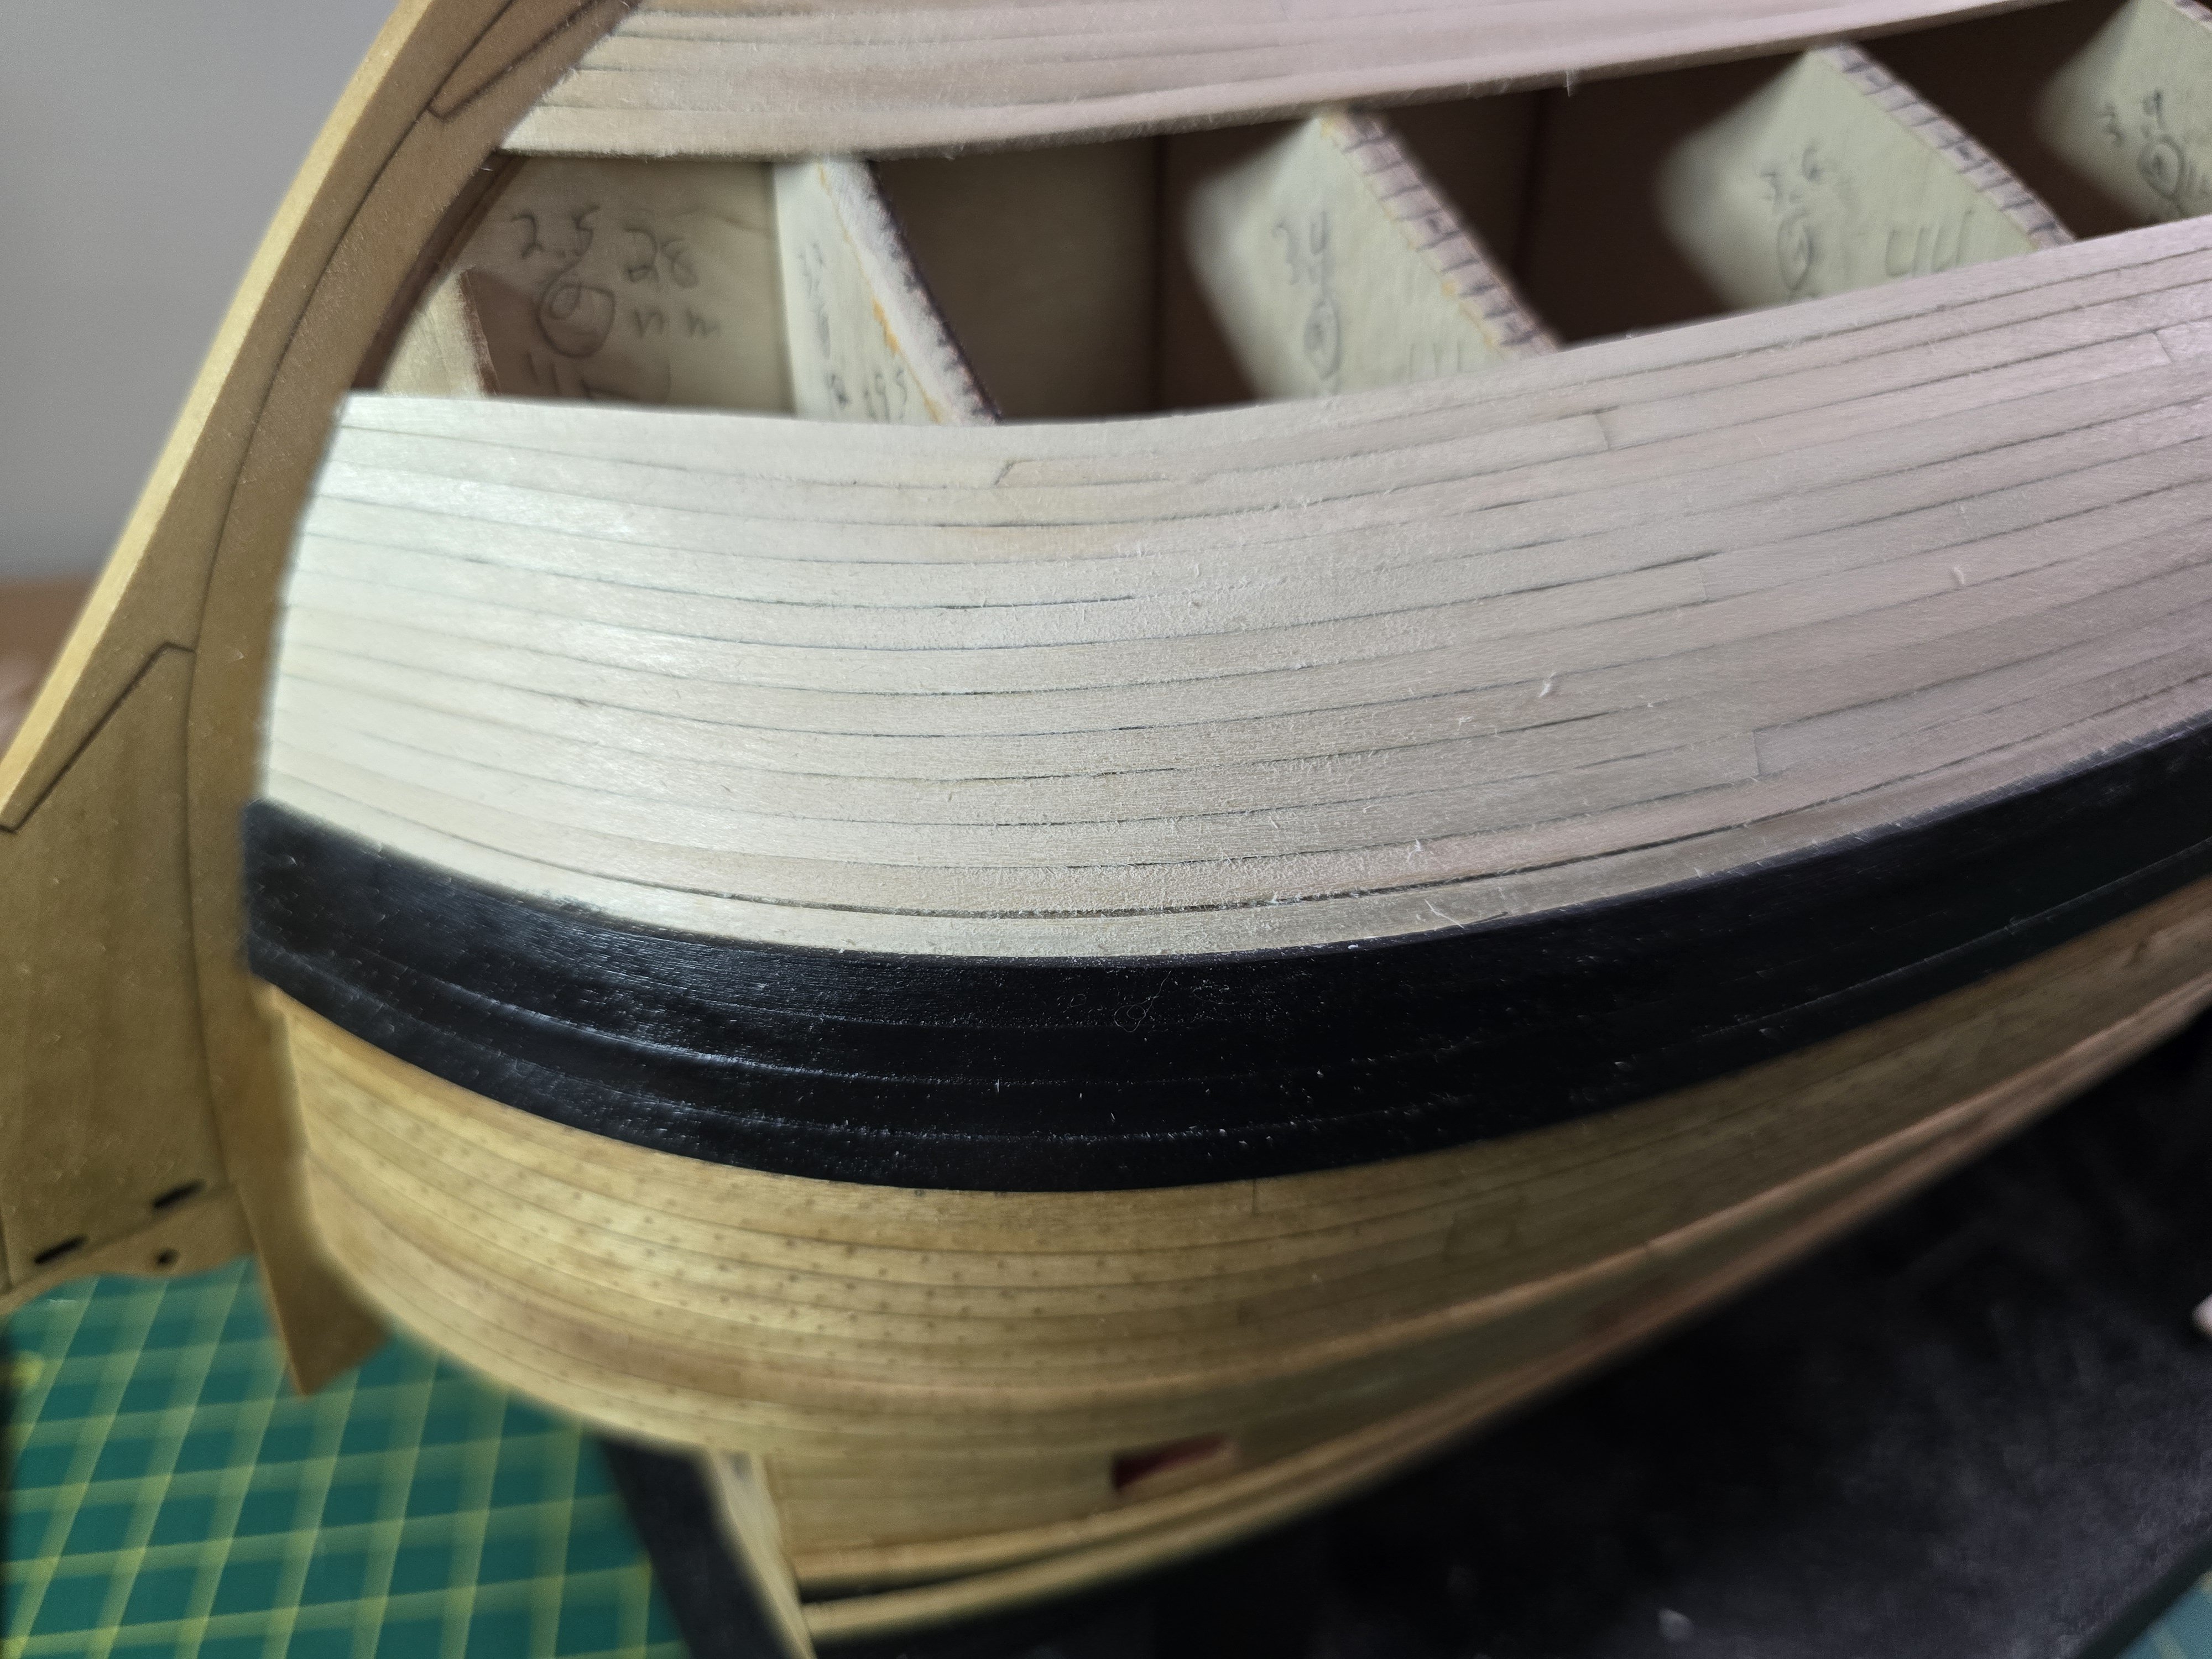
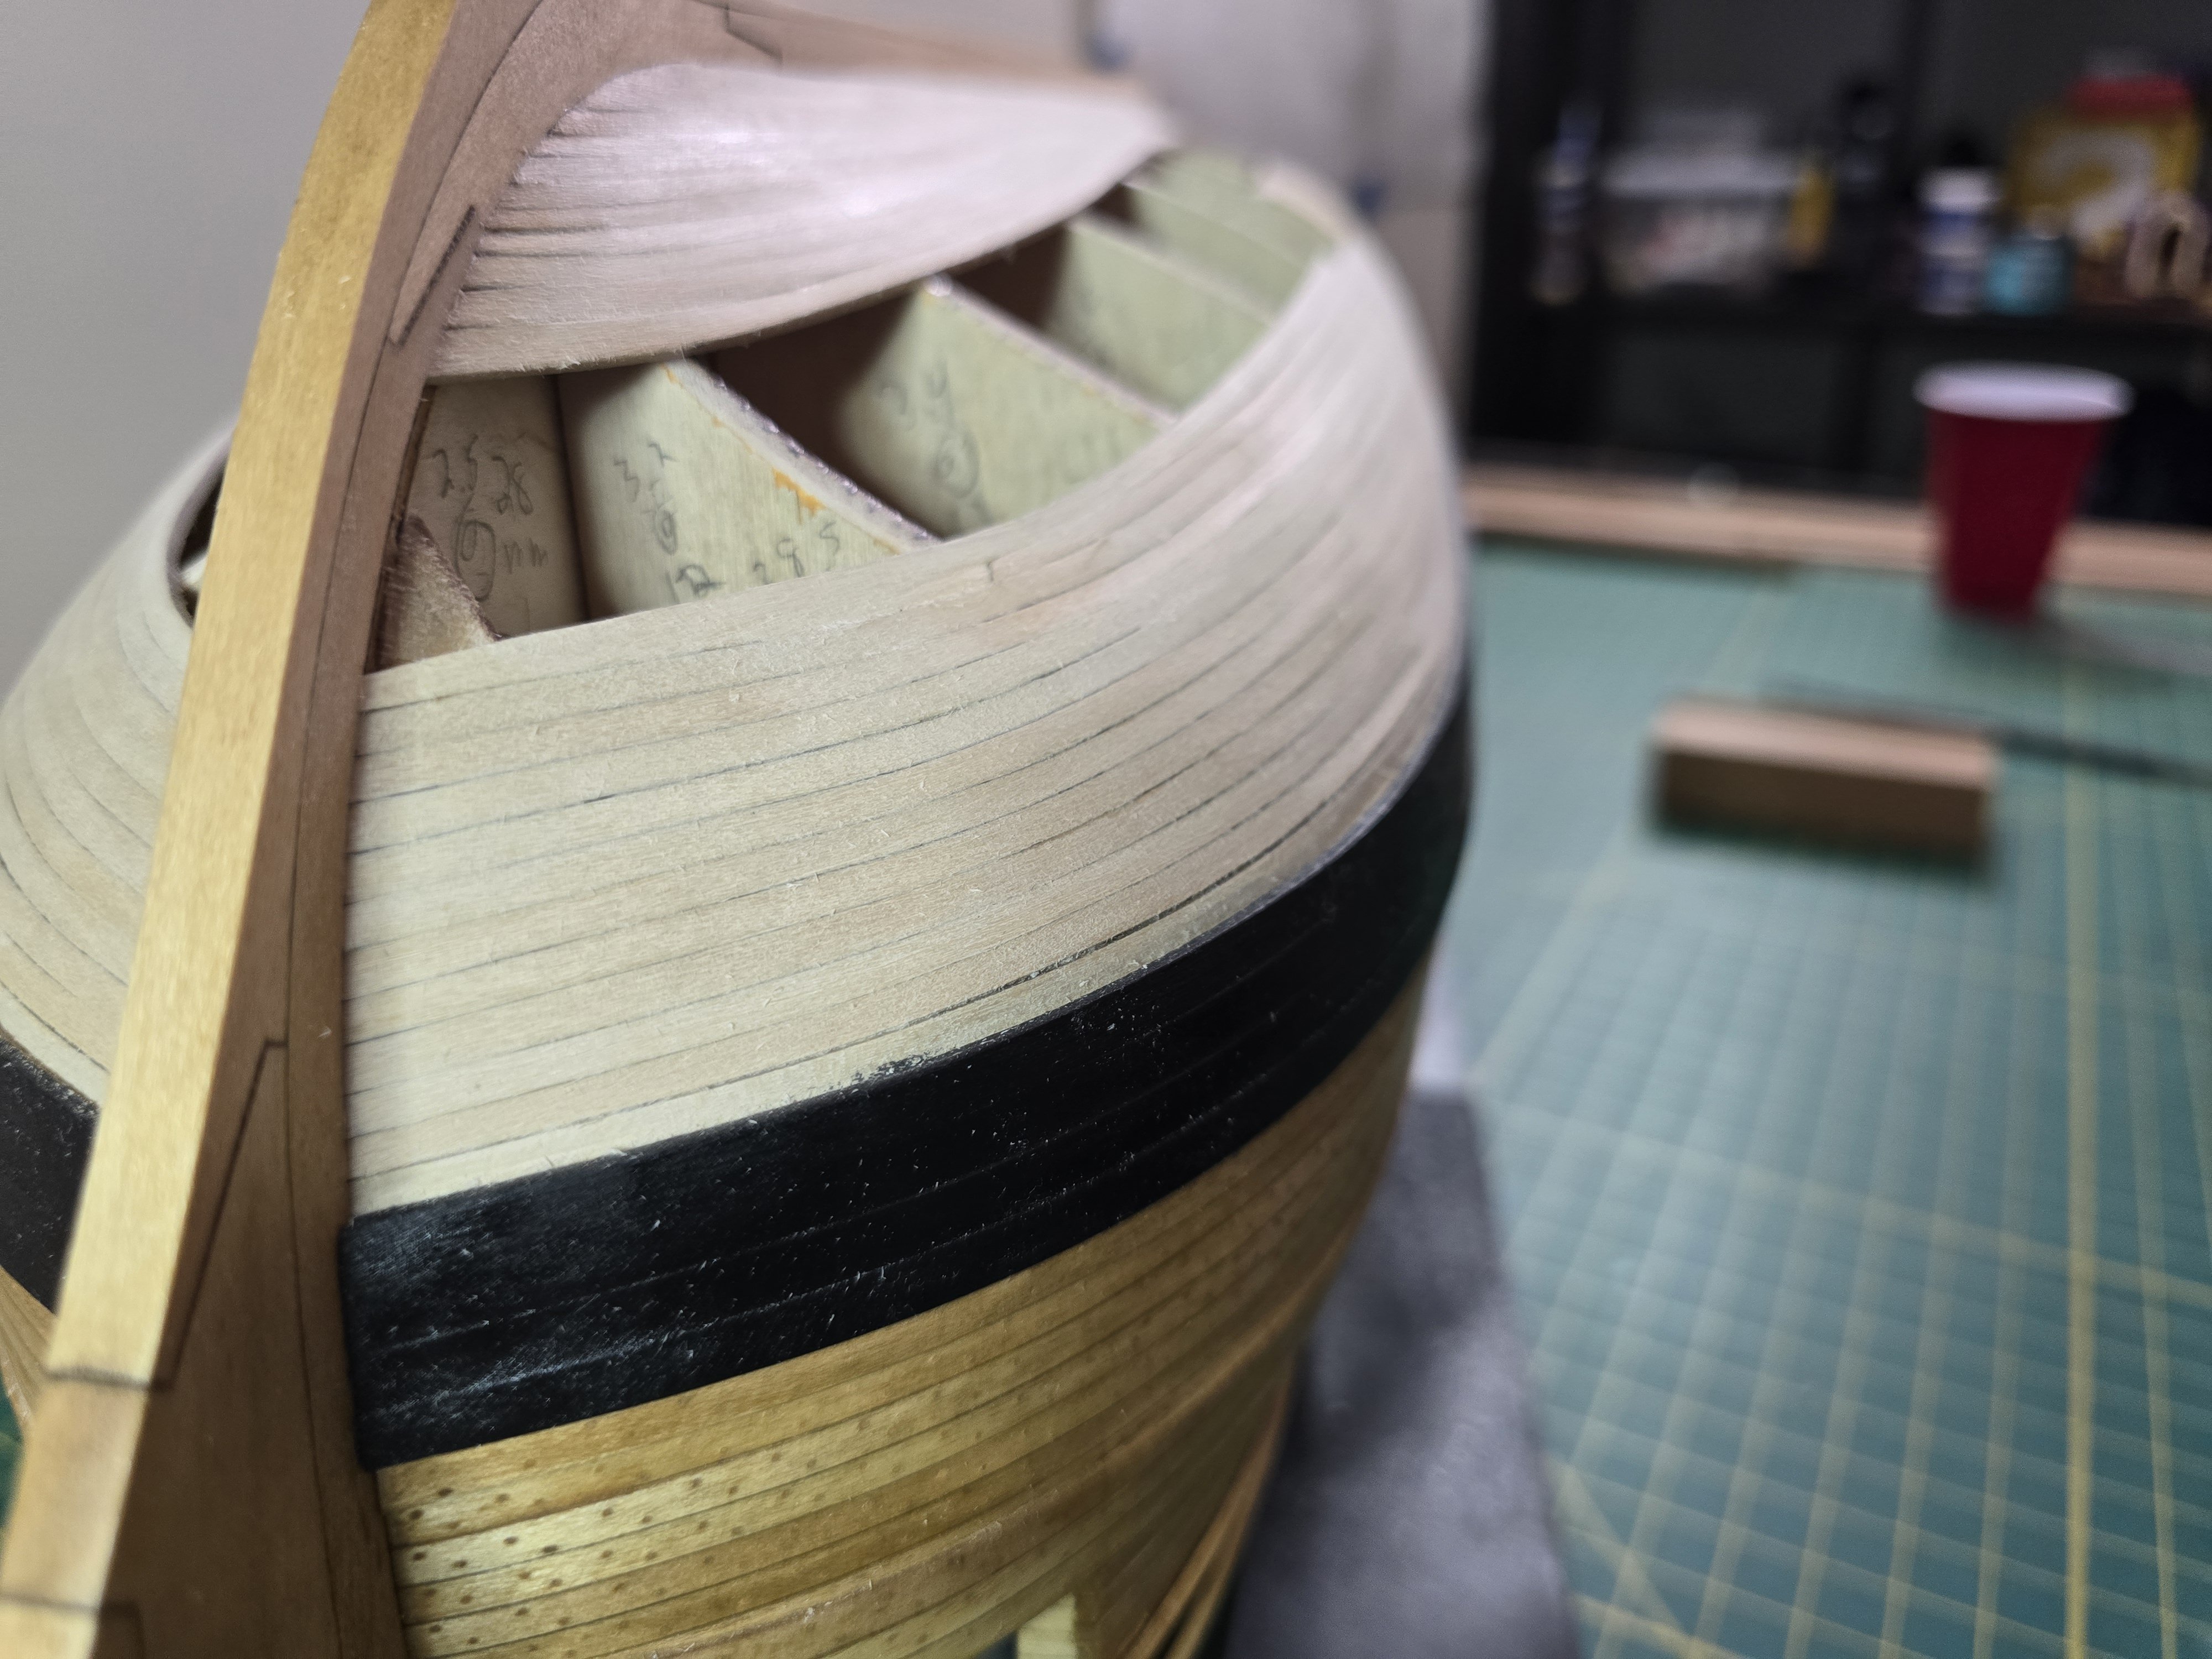
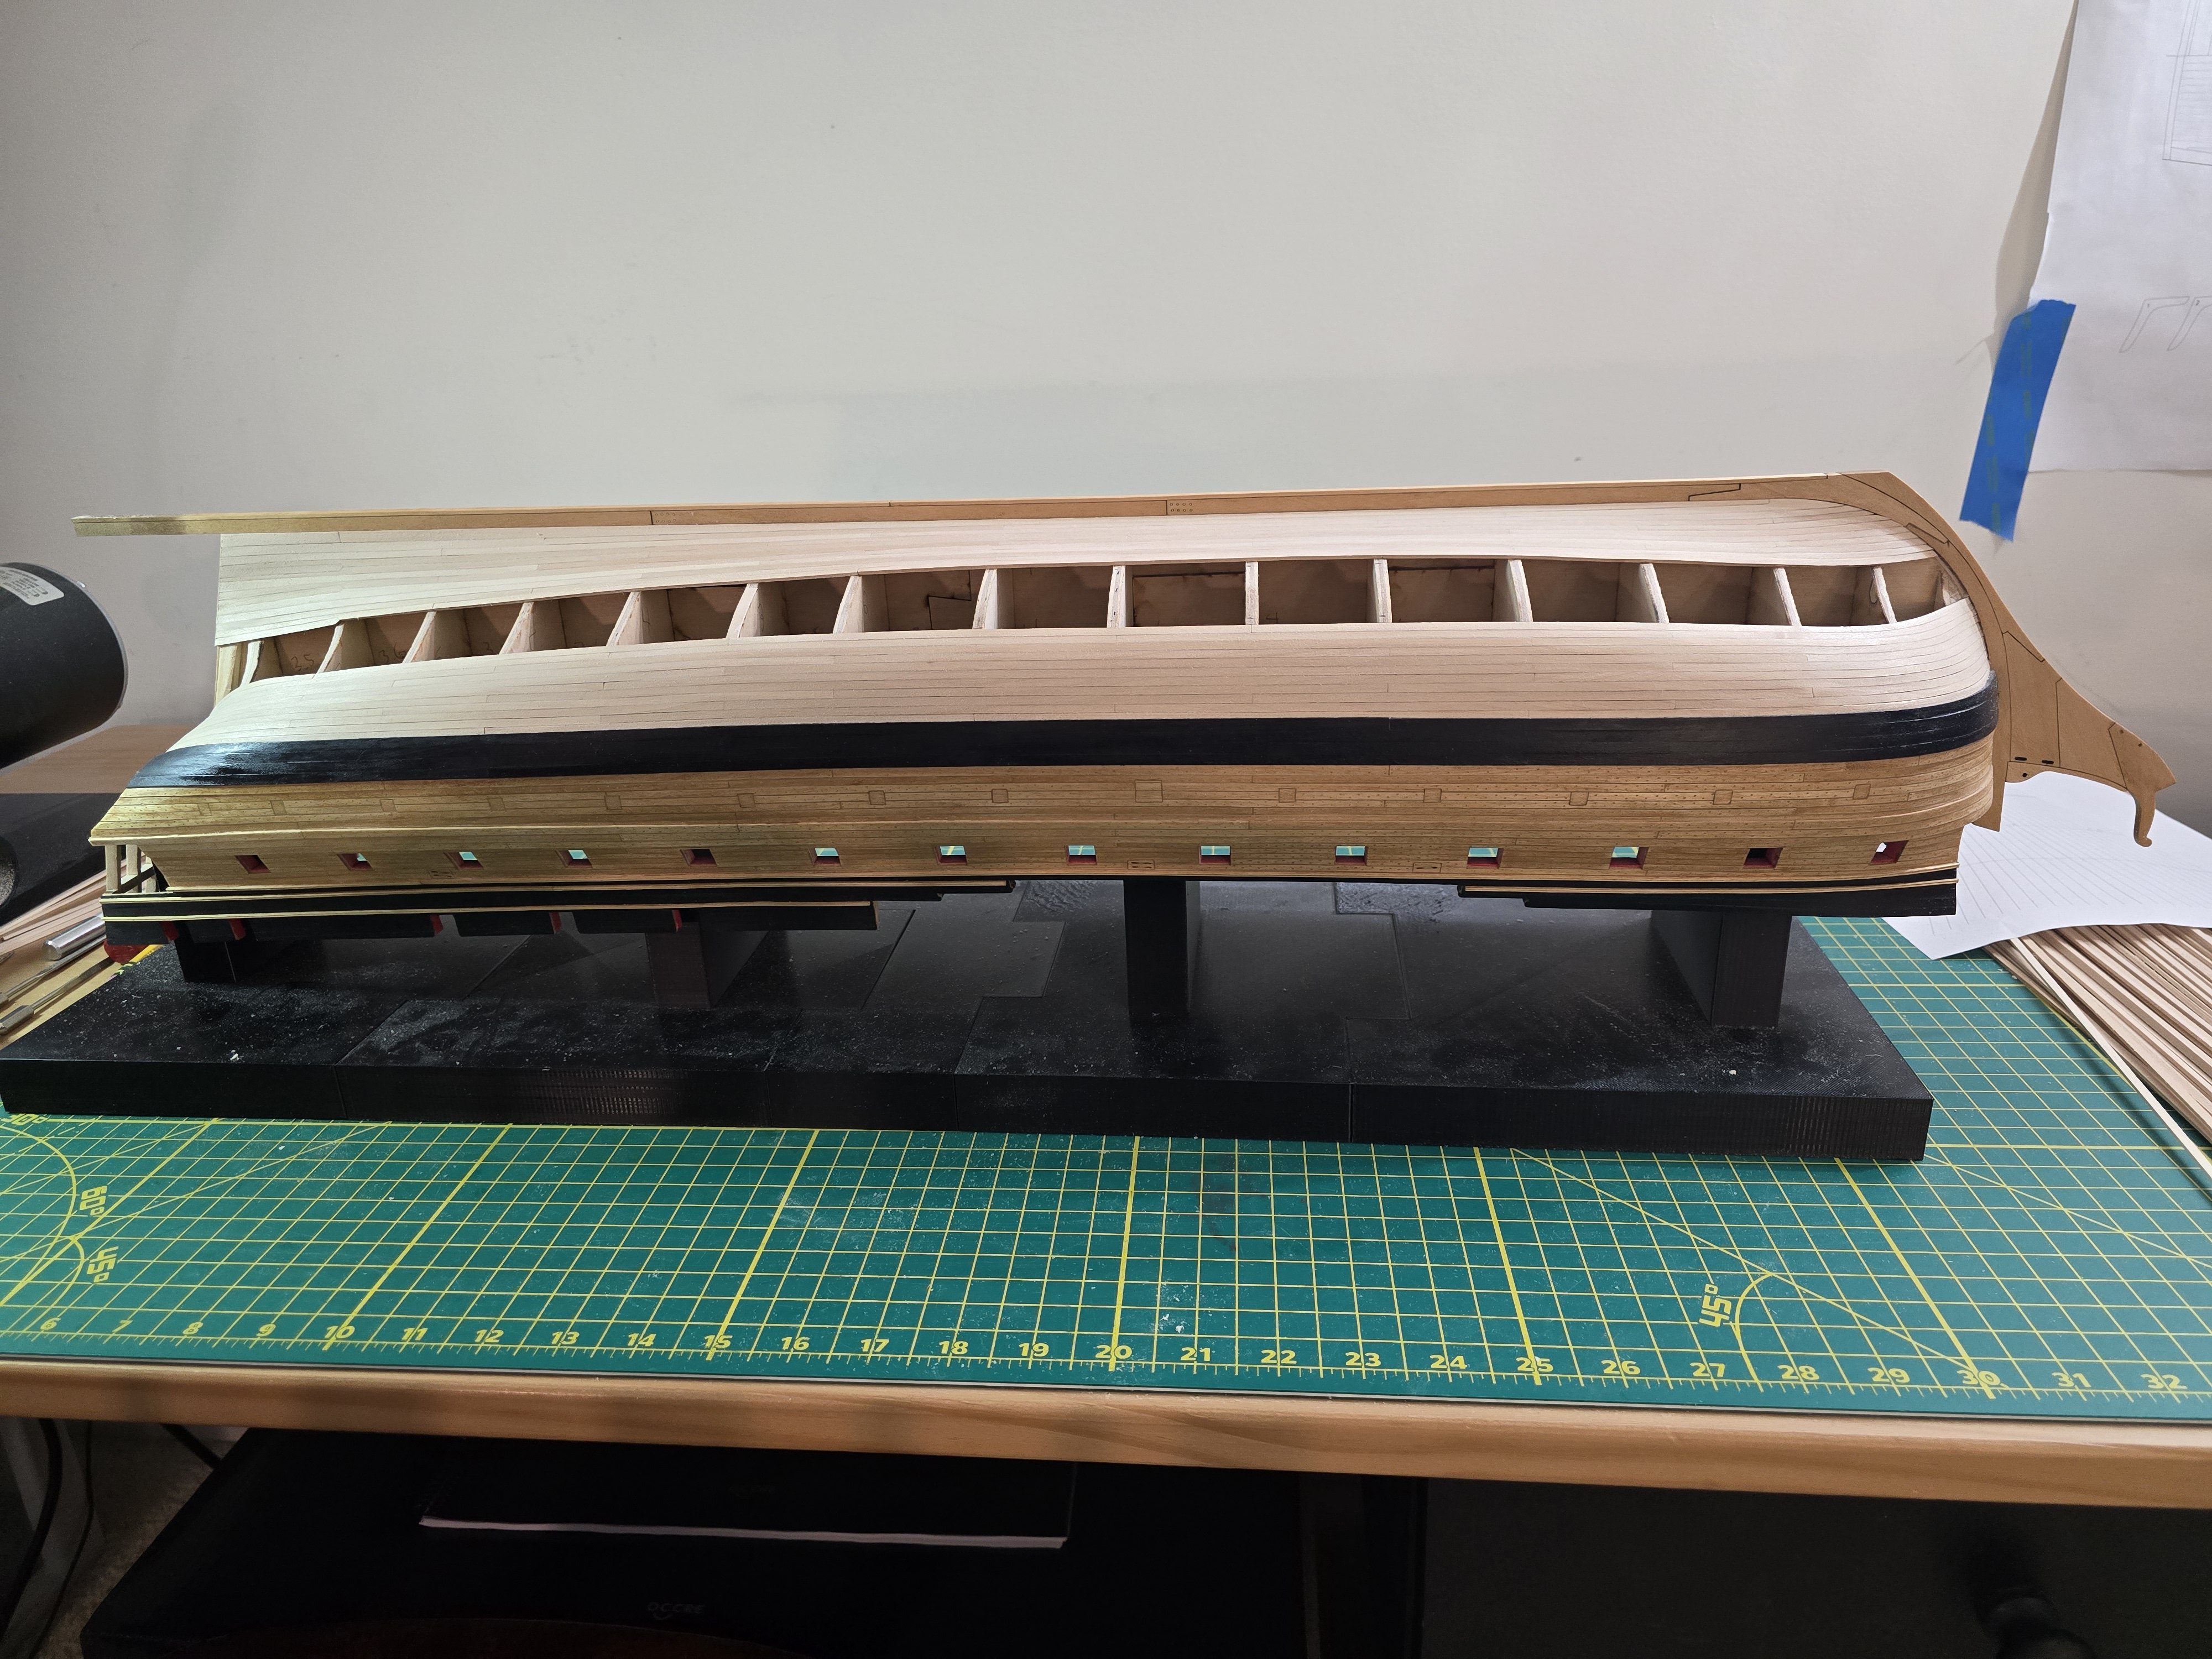
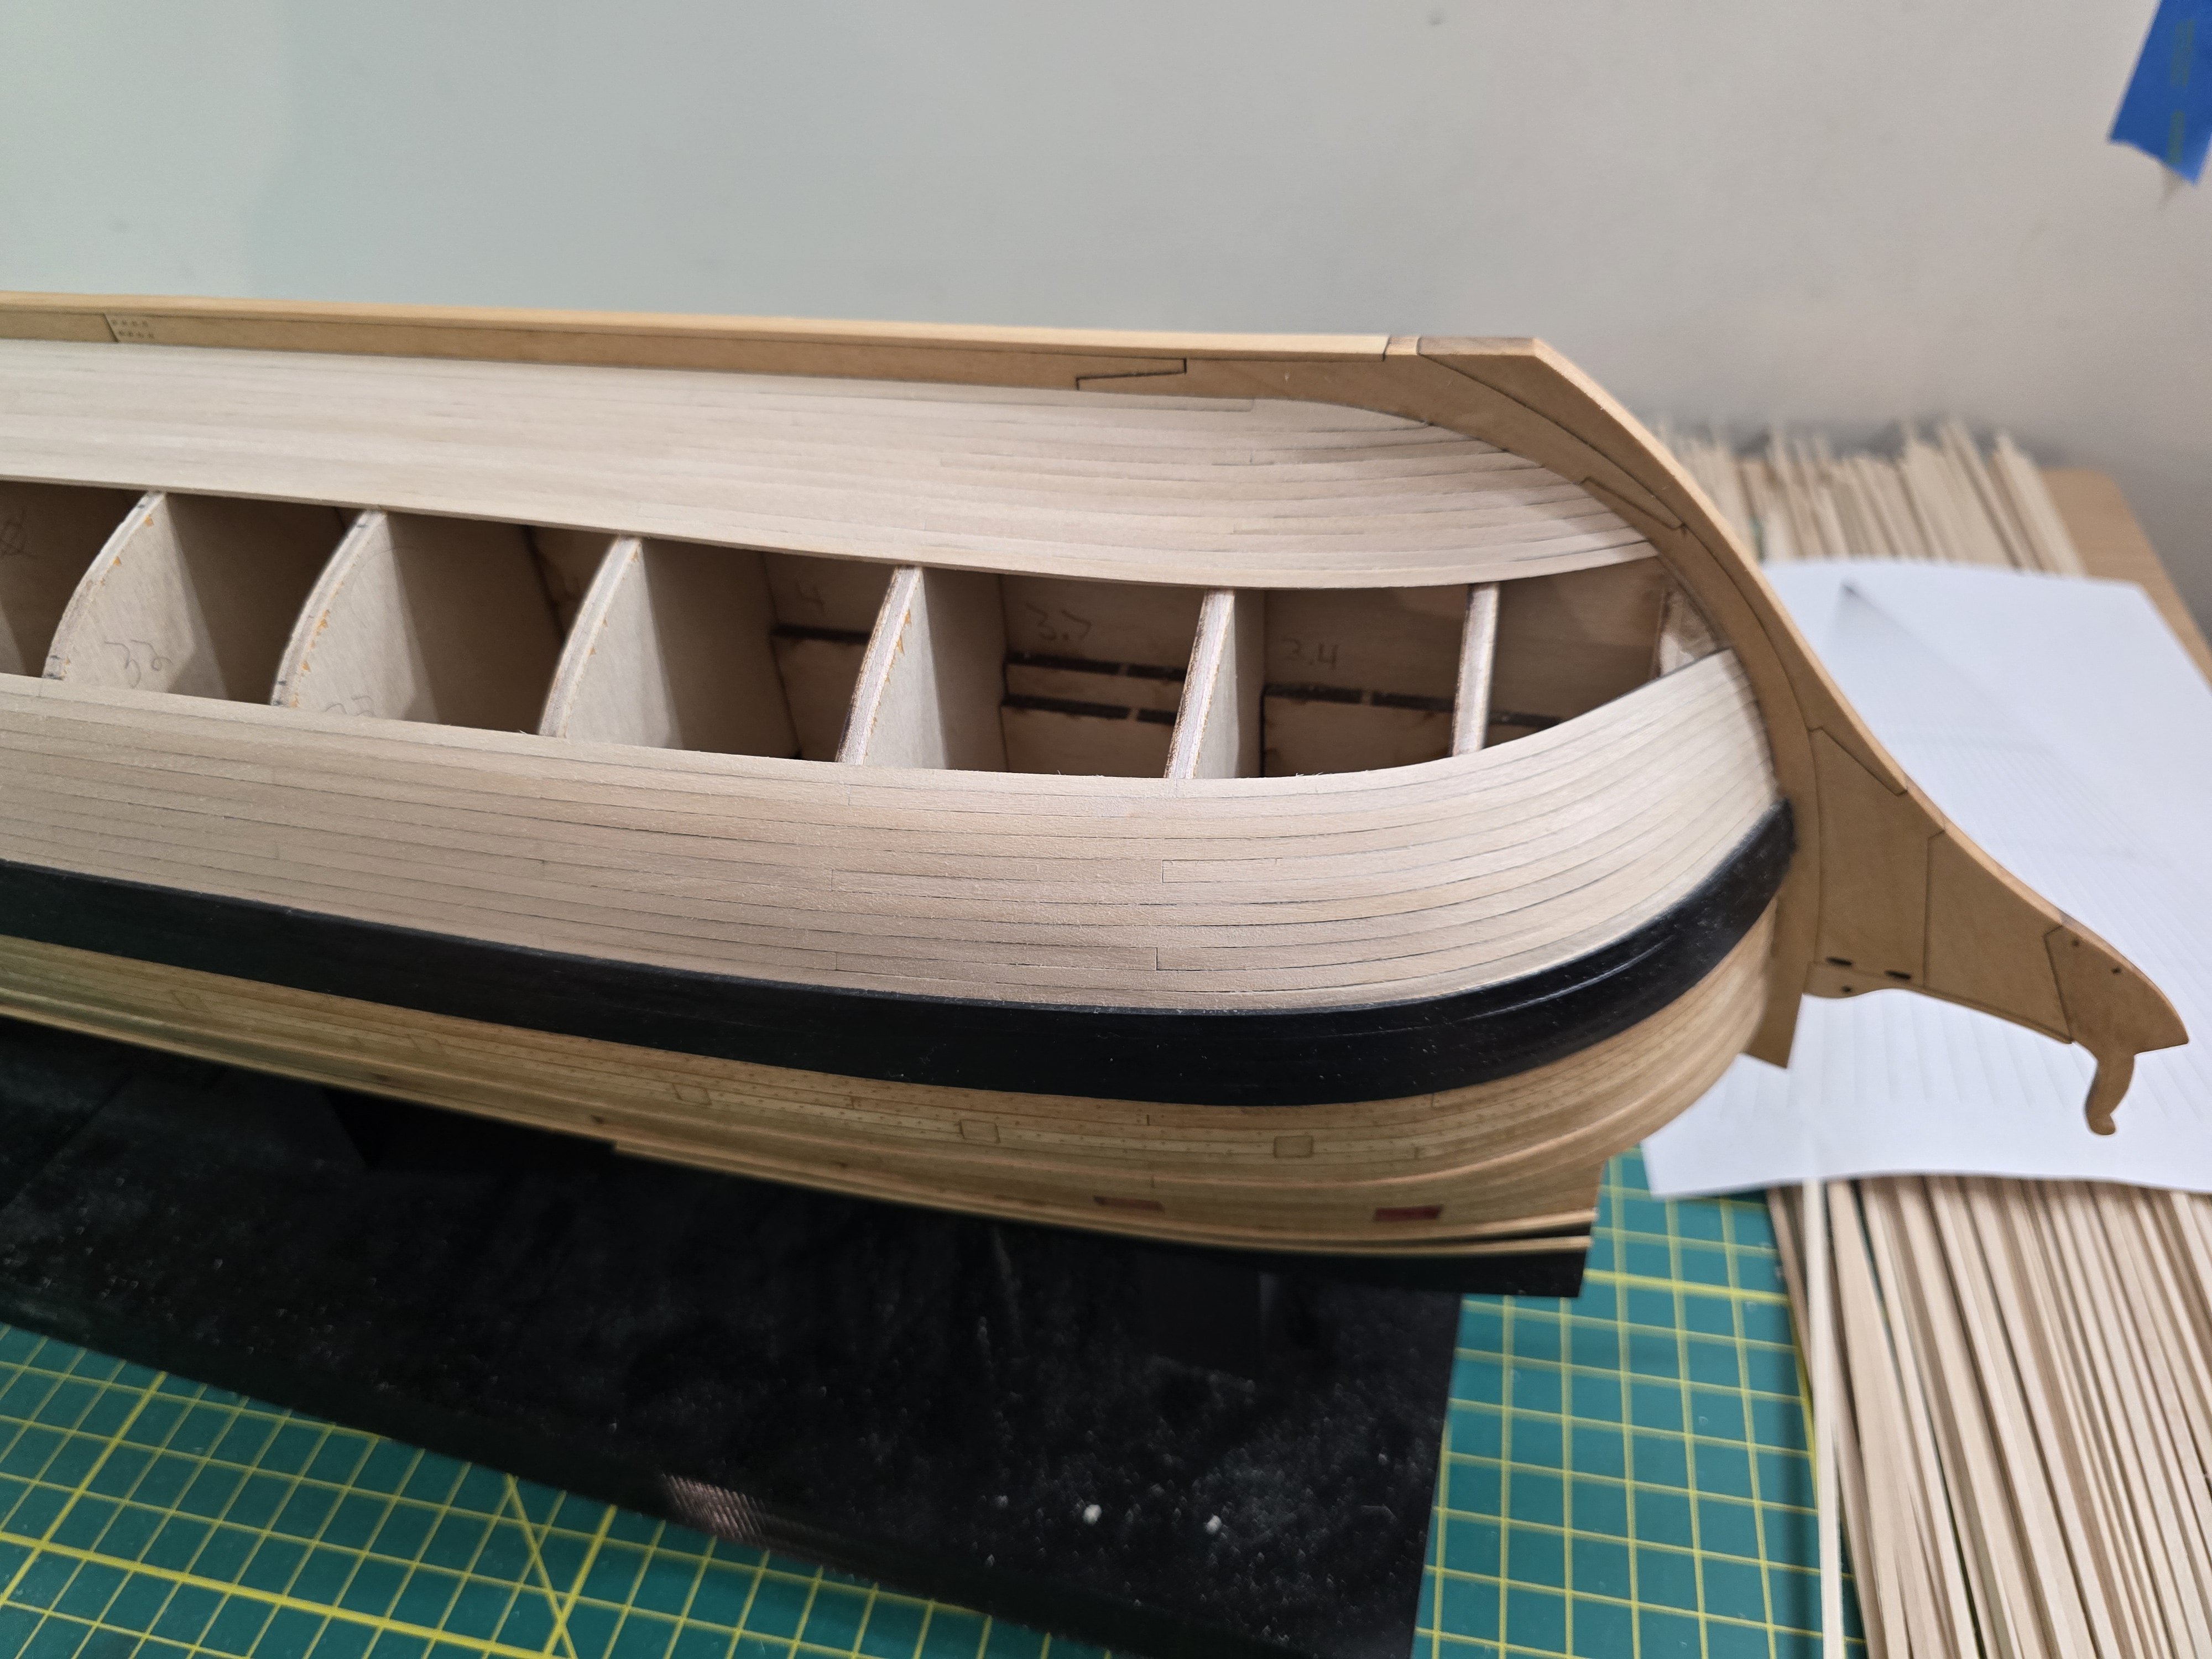
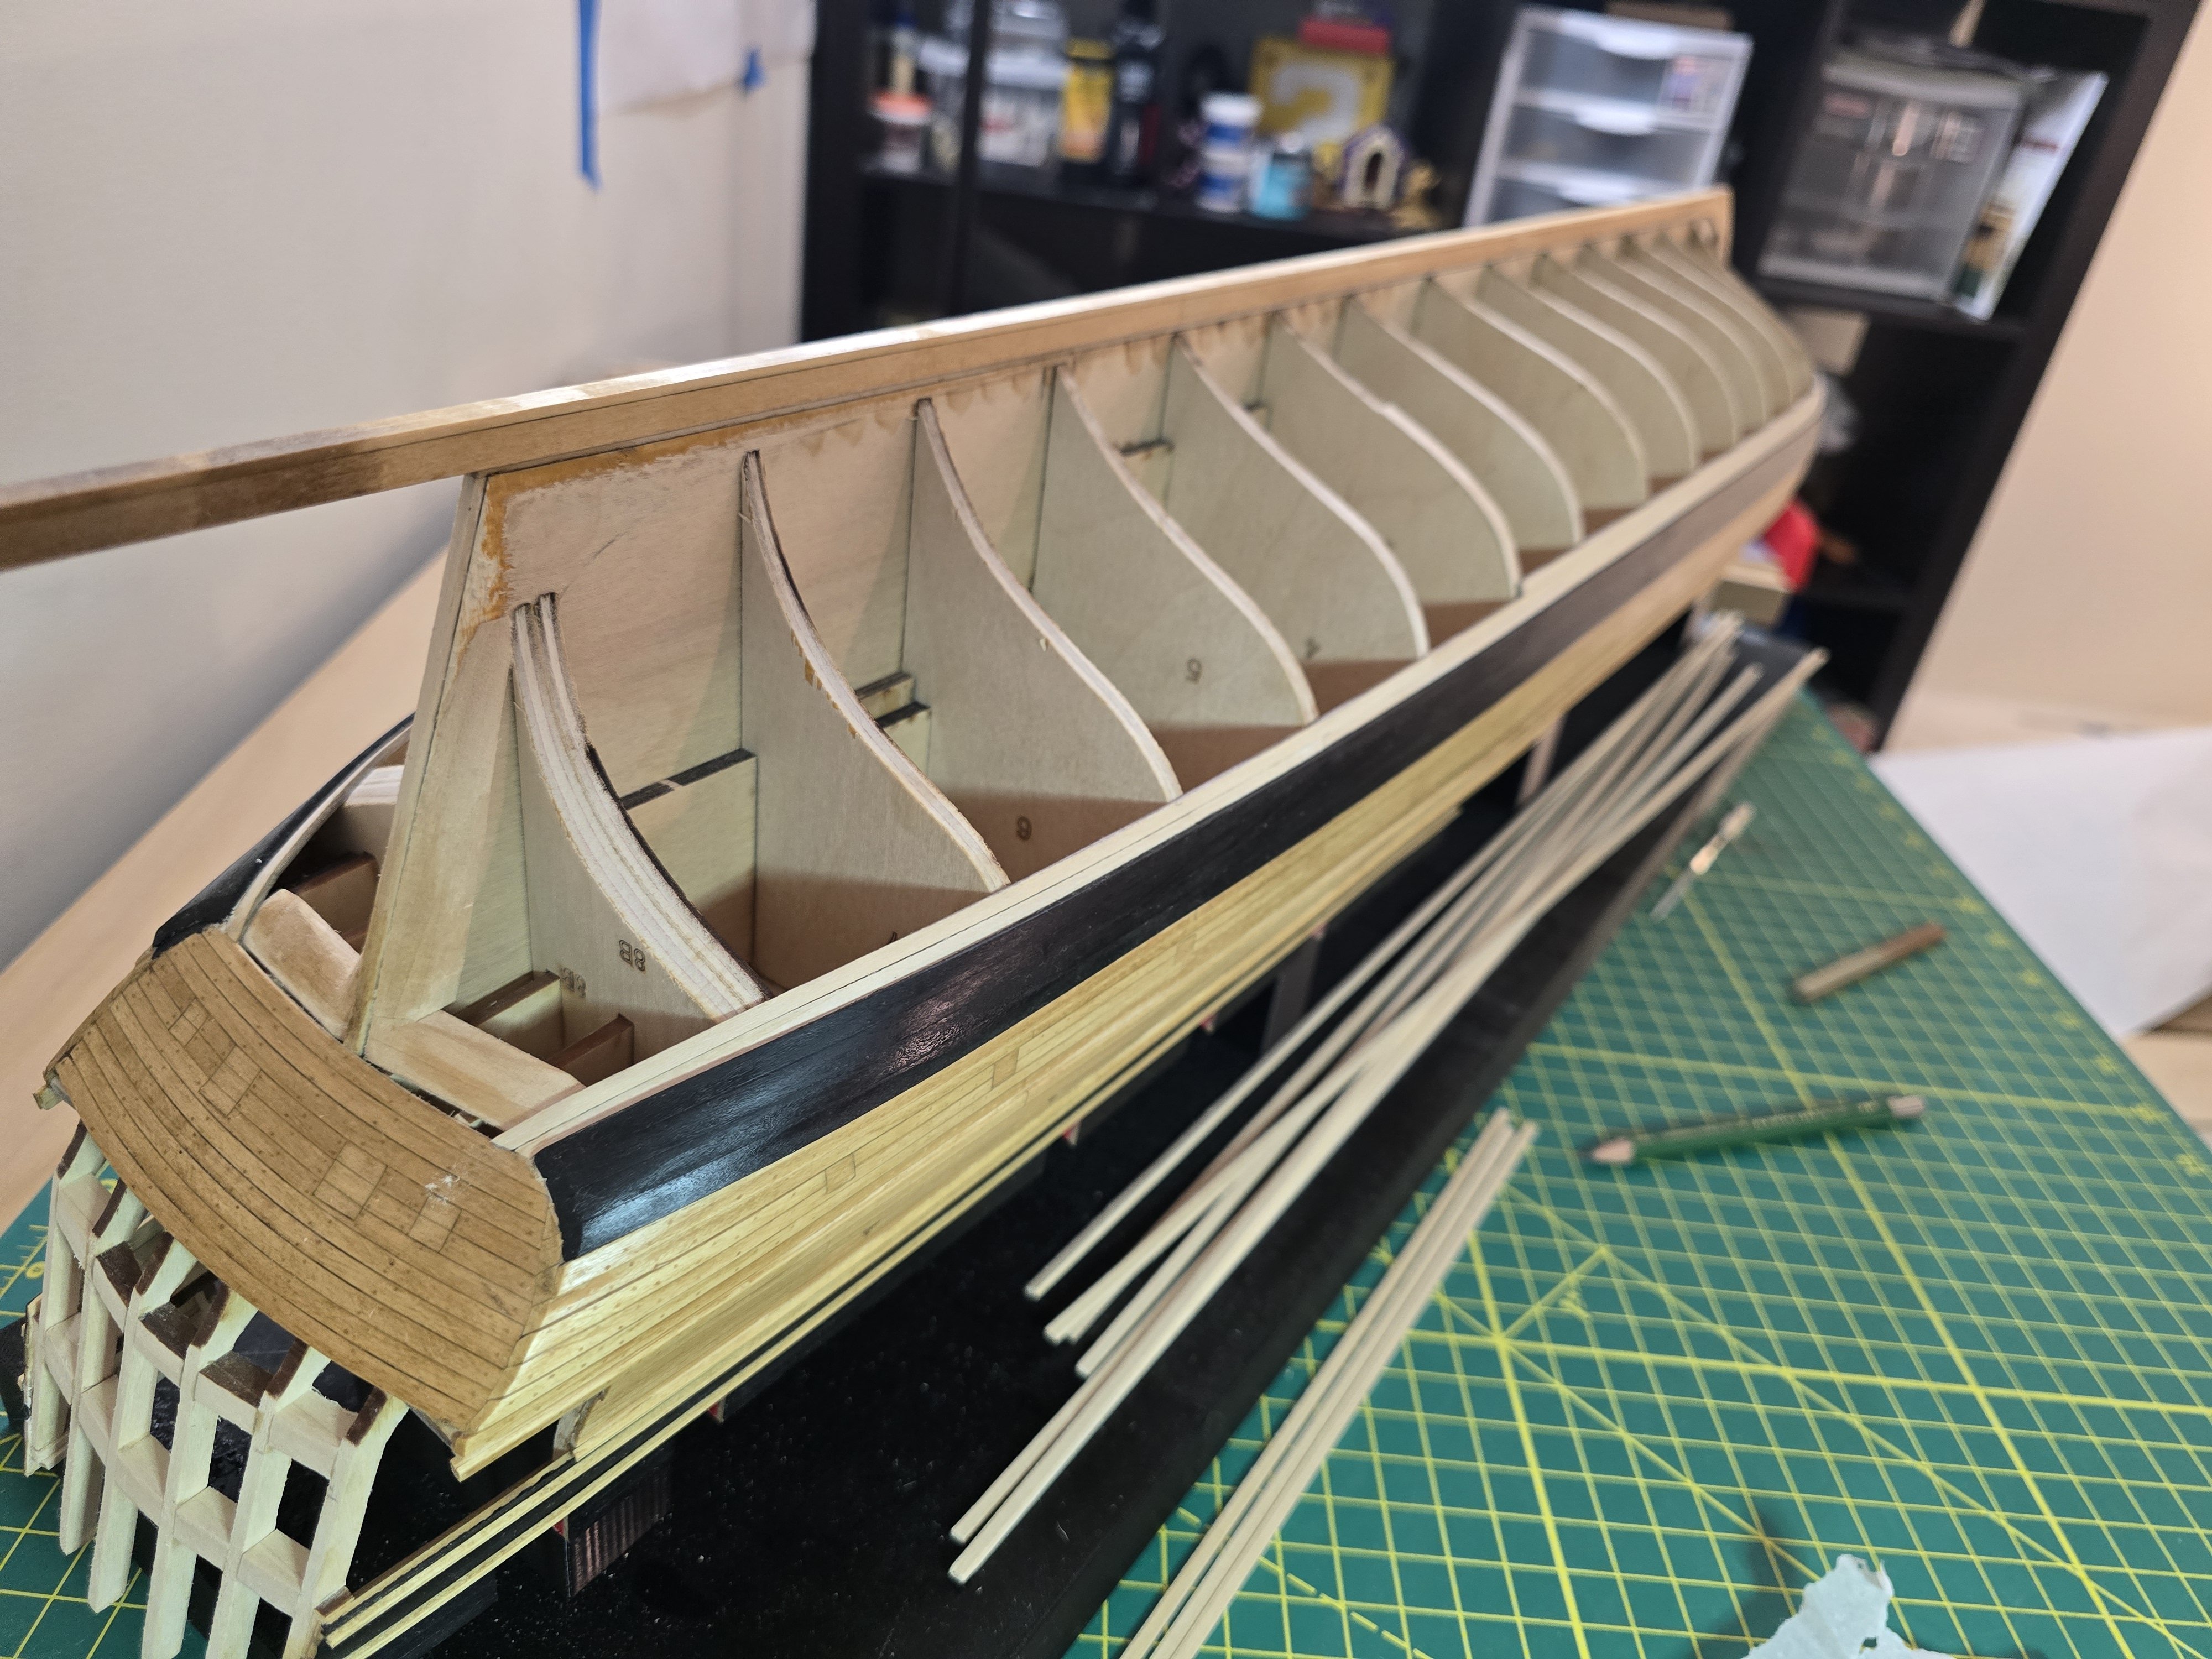
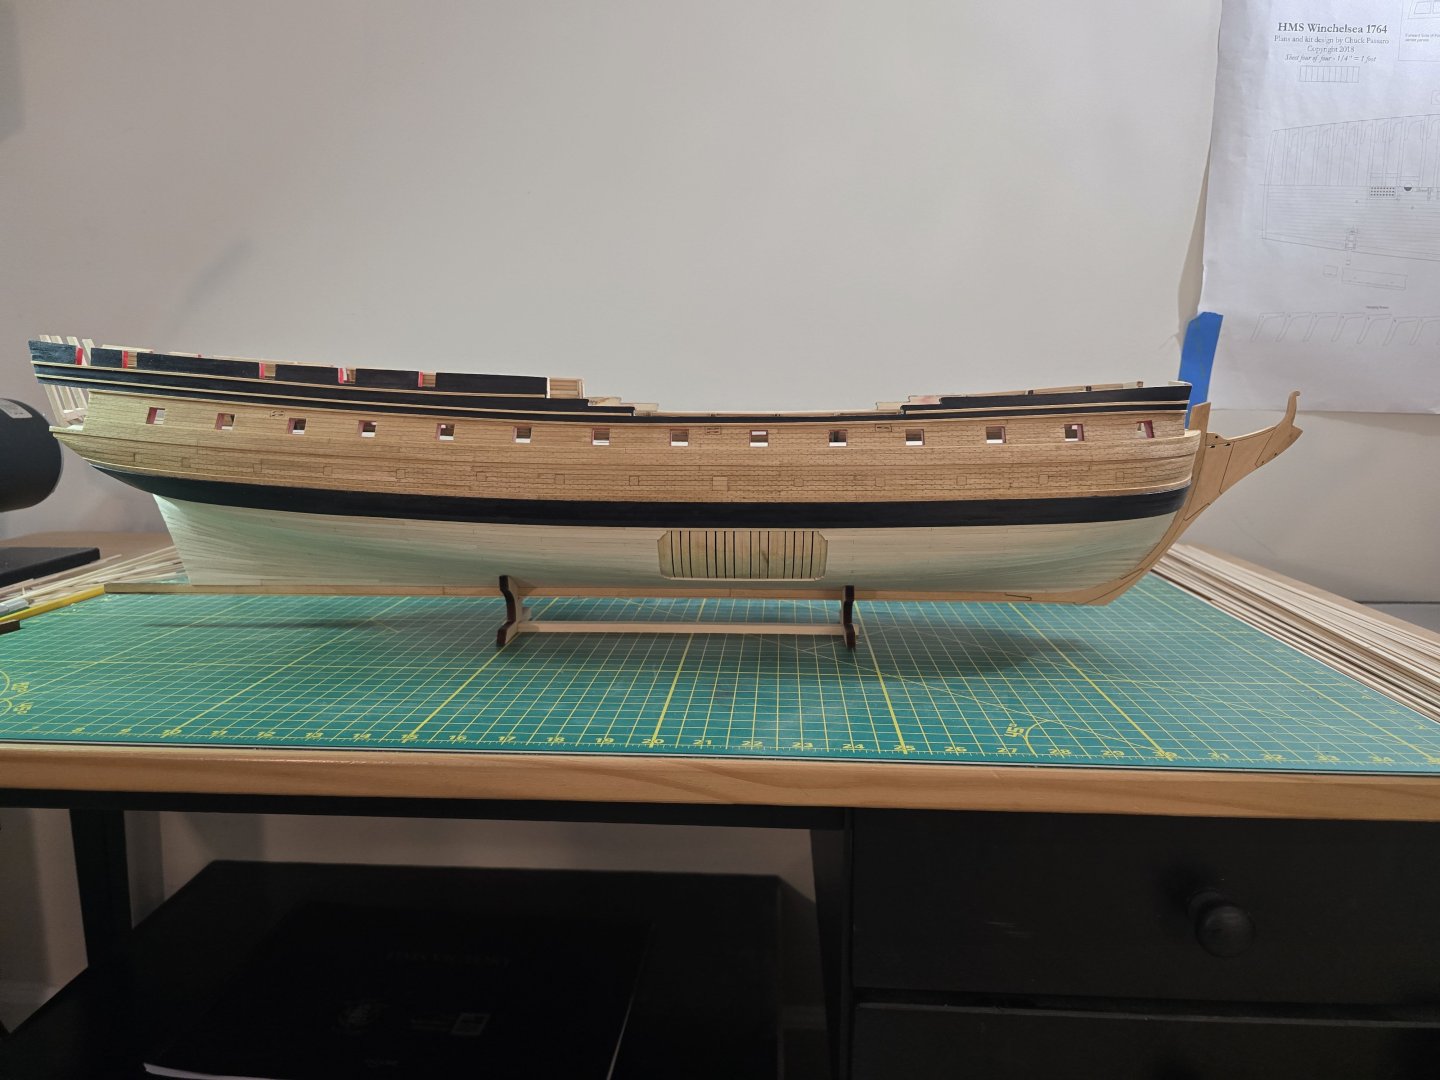
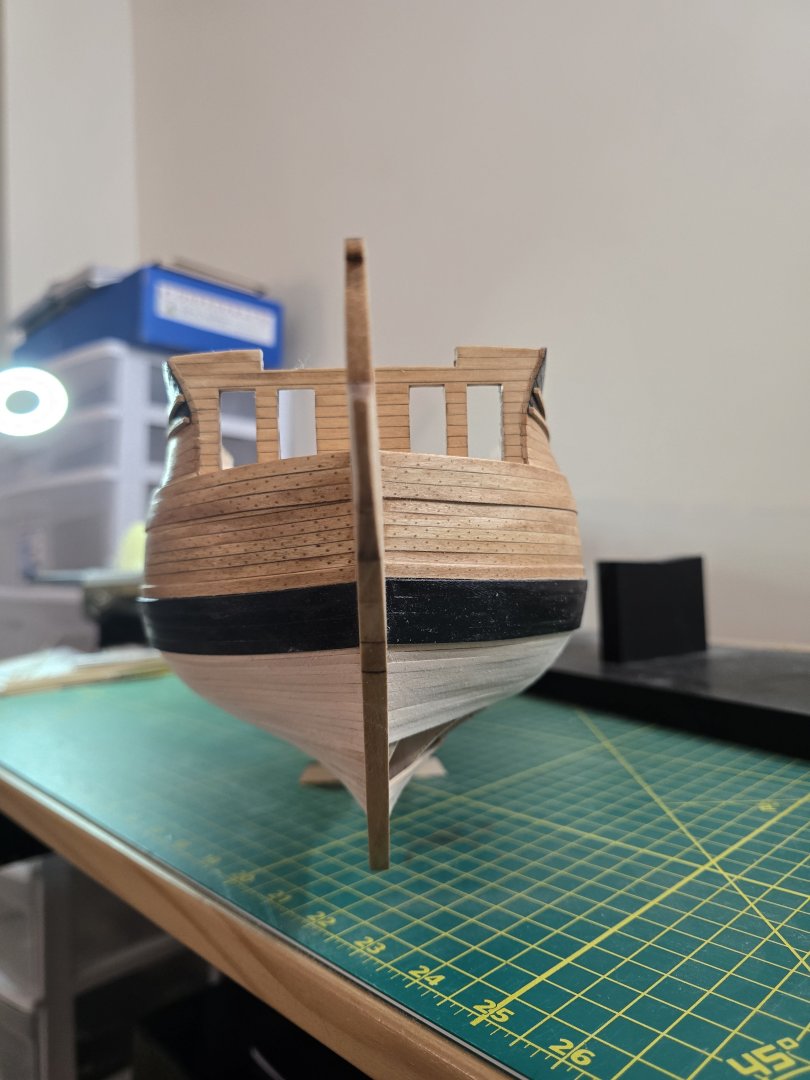
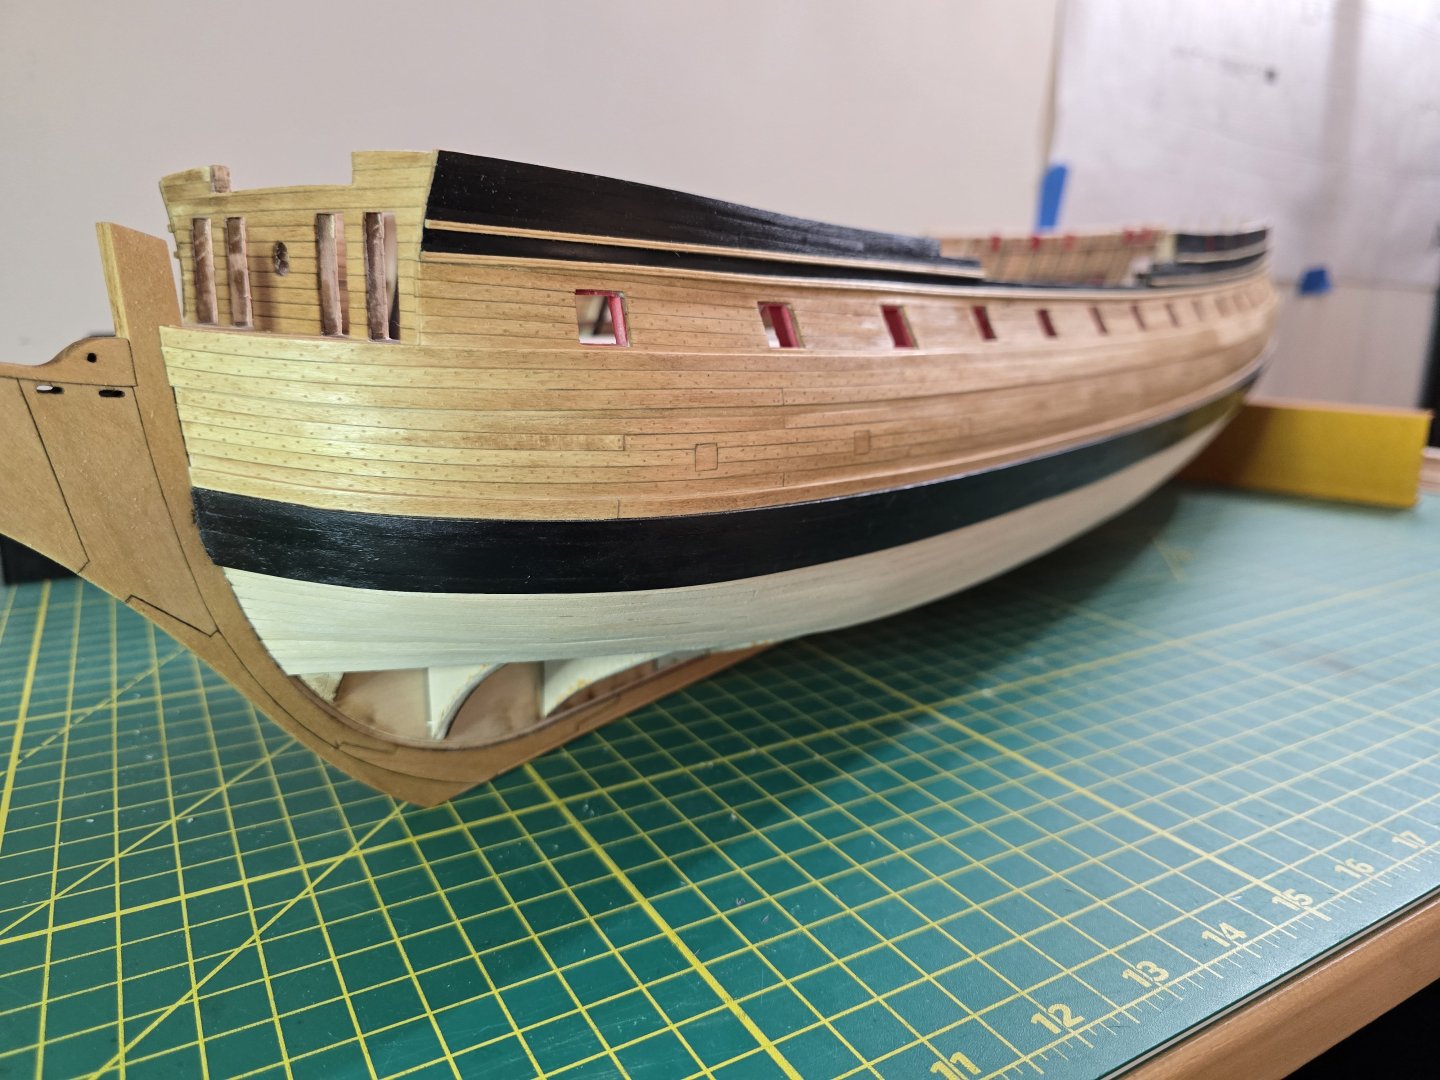
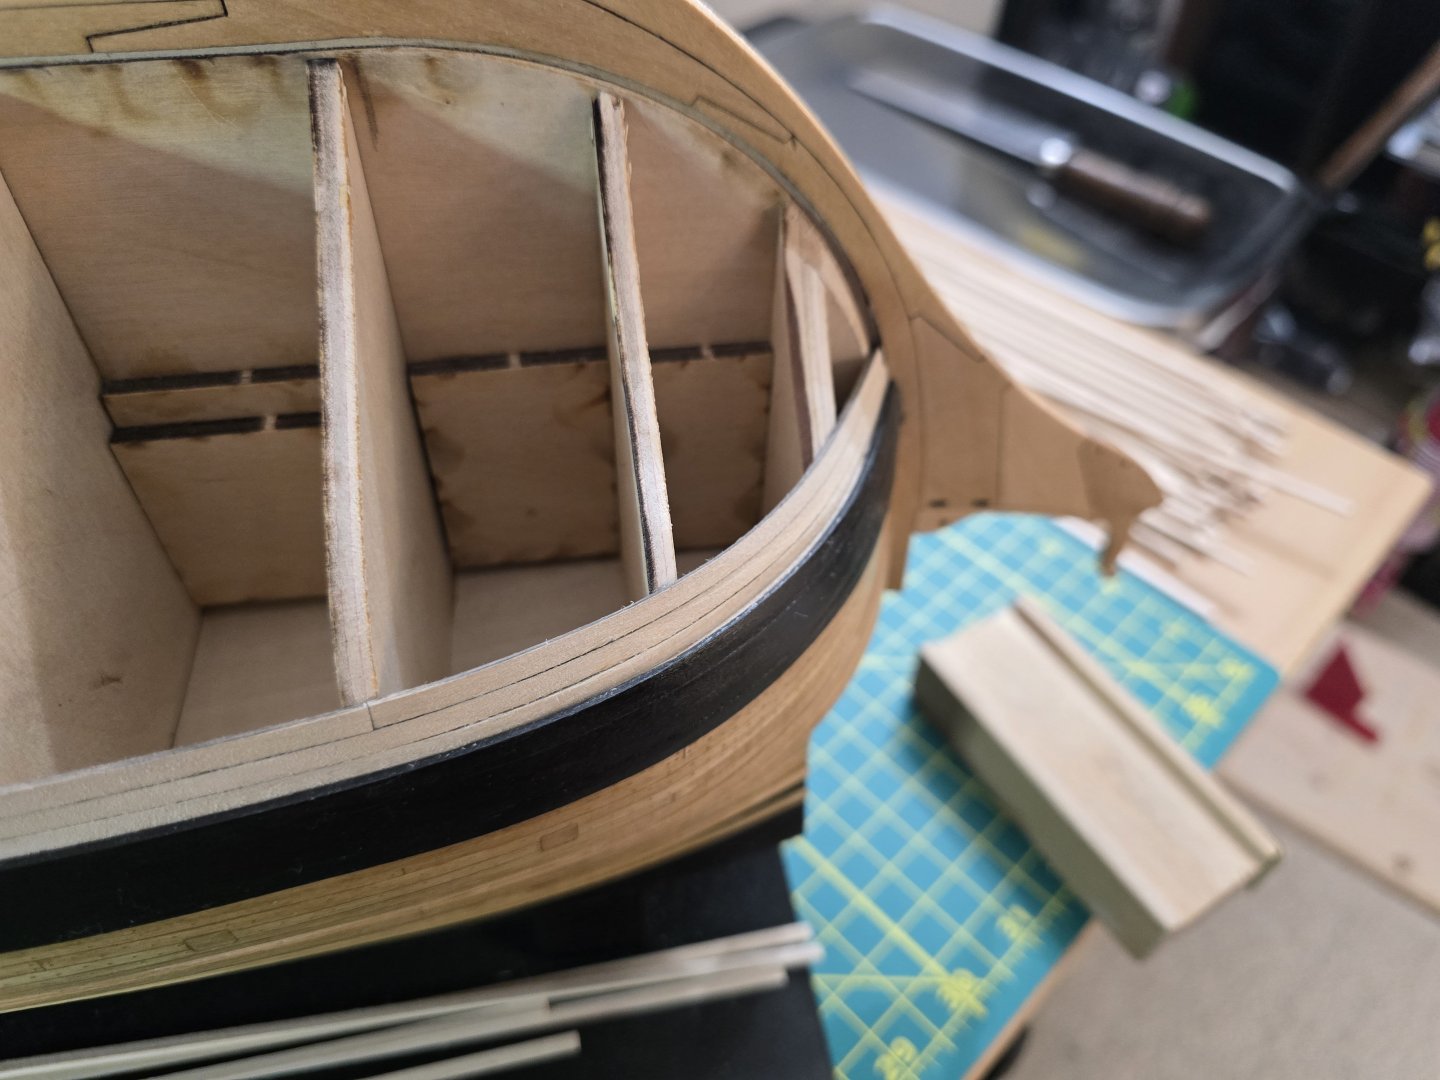
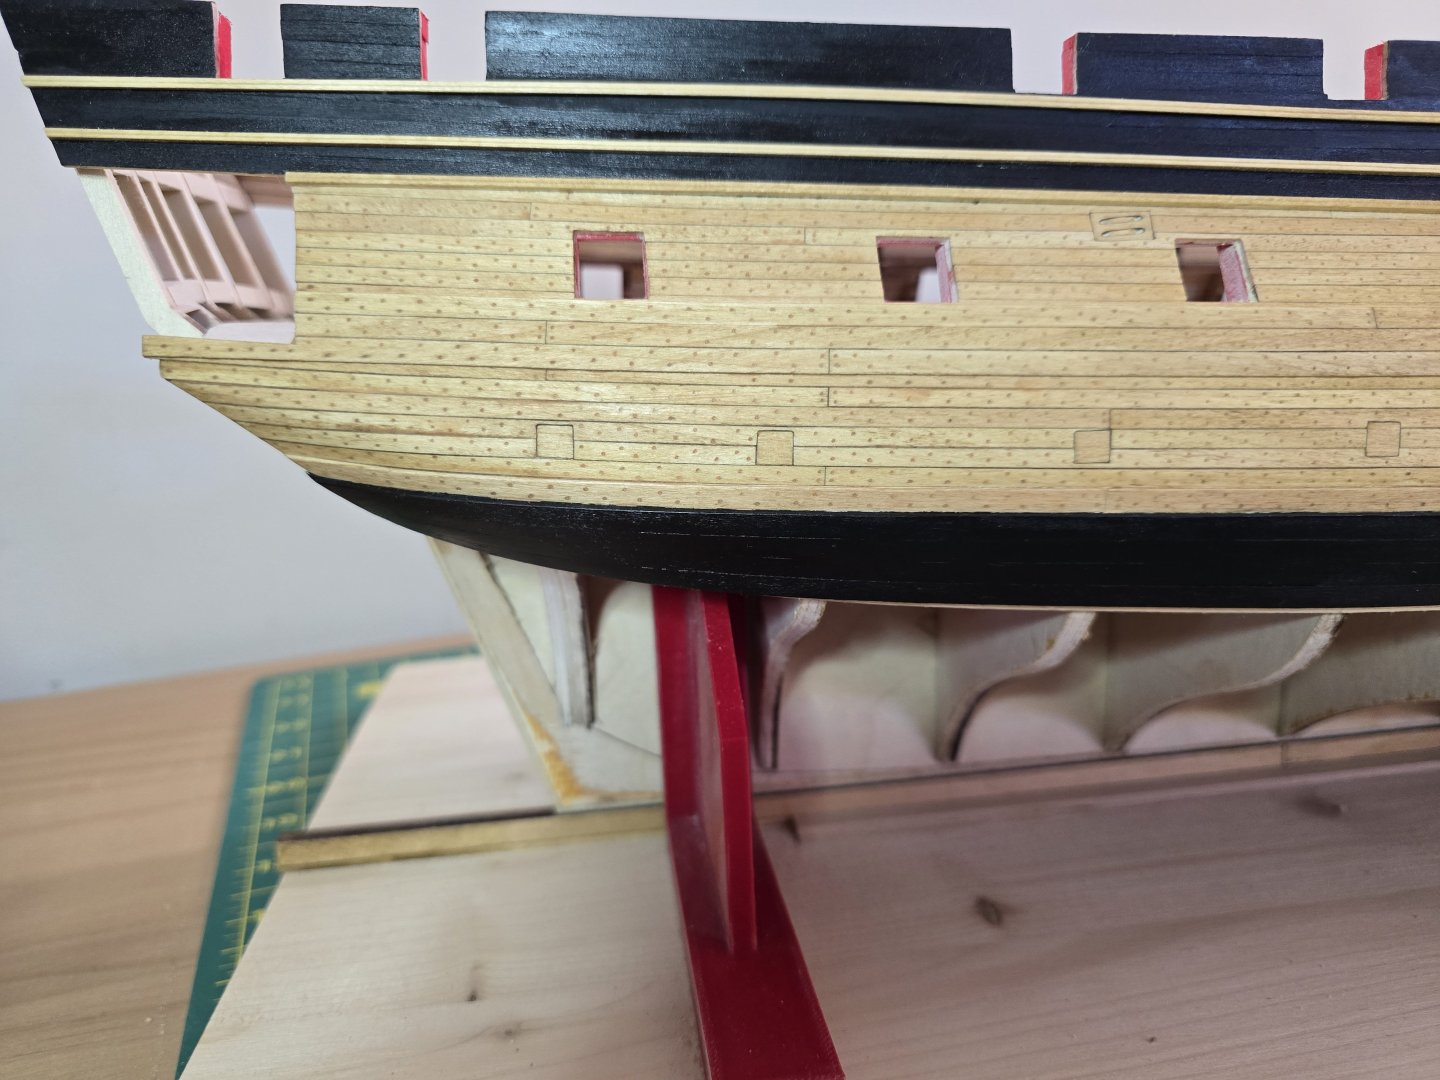
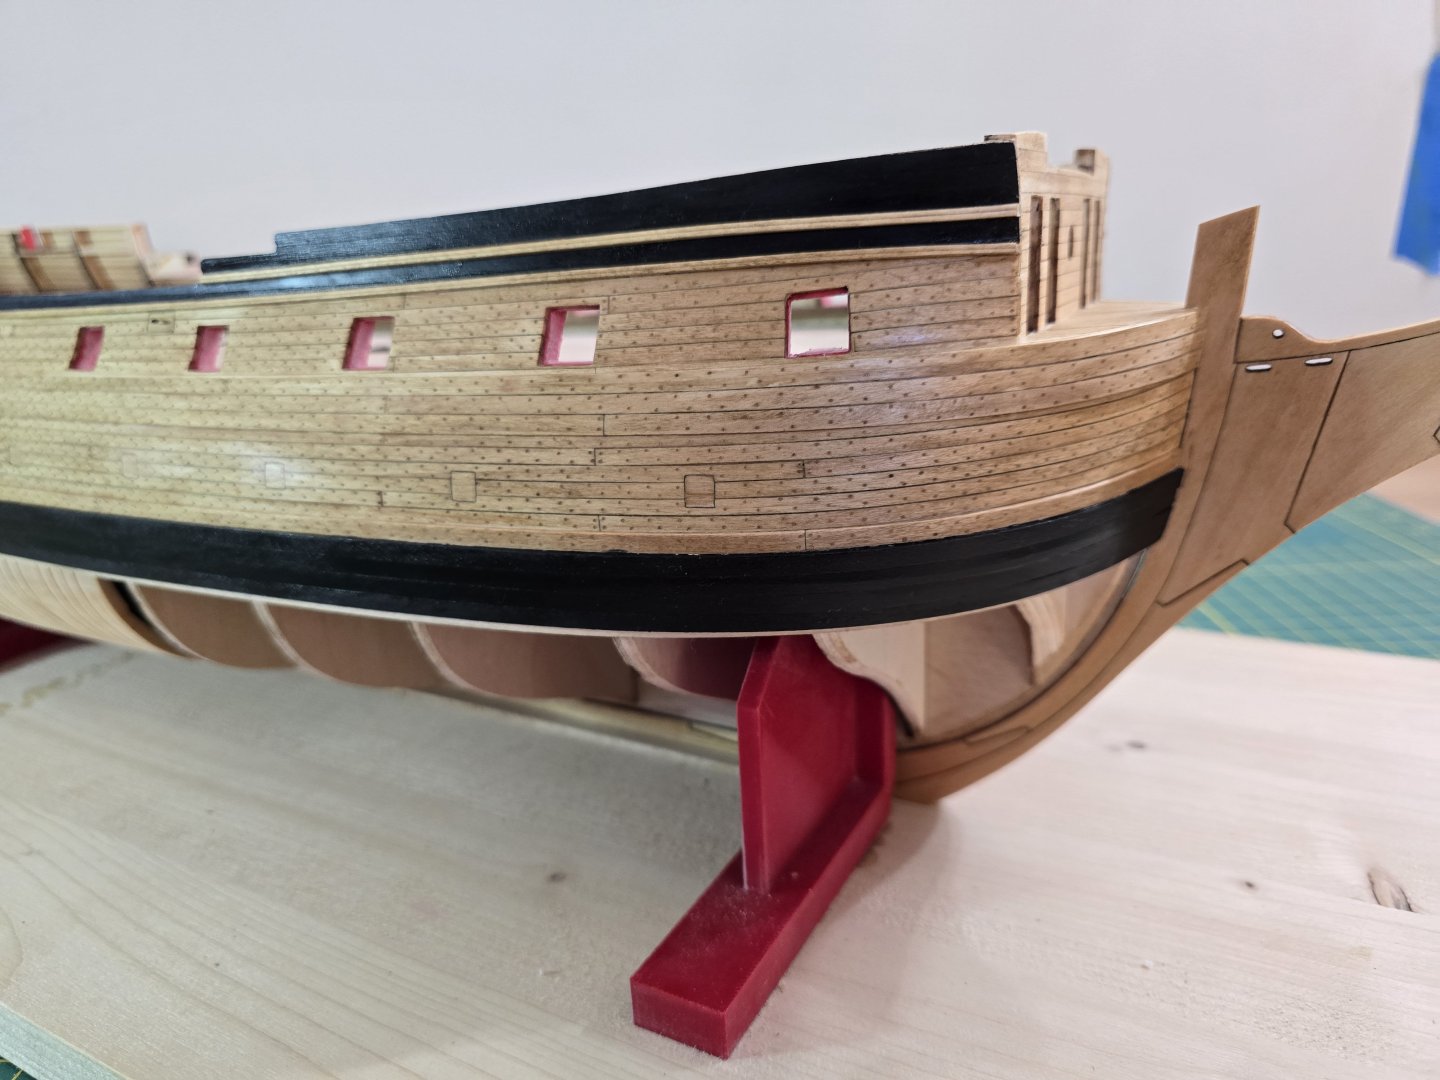
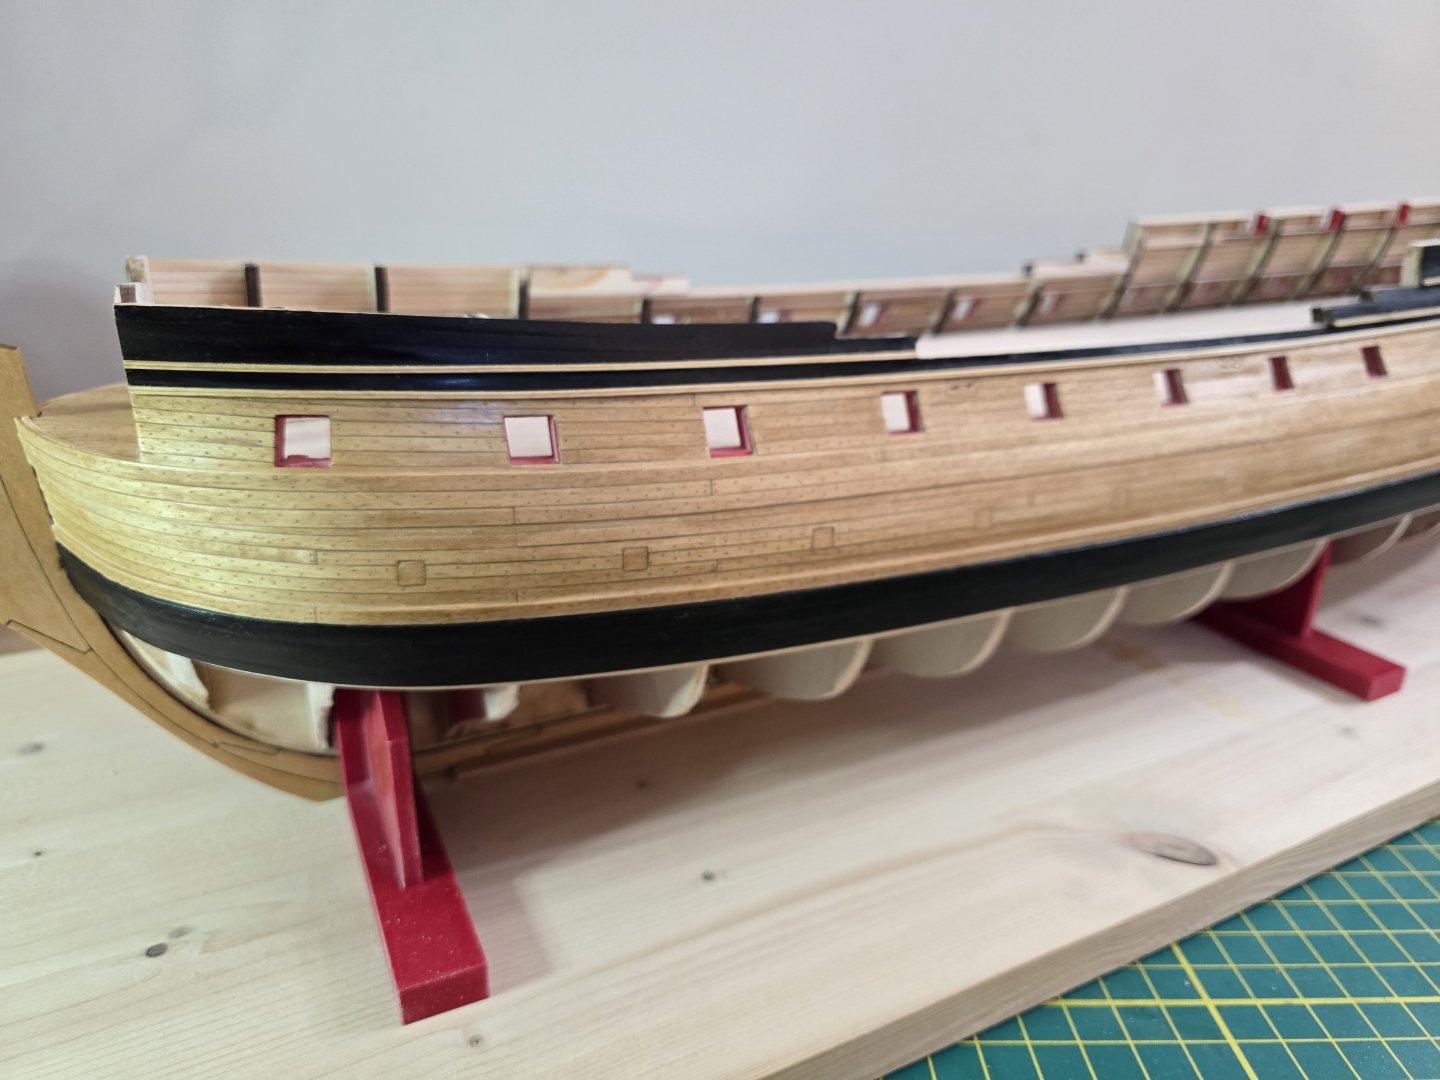
@wernerweiss After looking at it again, i do accidentally have the molding strip slightly lower than it should be at the bow from the foremost gunport forward. Thanks for noticing. I'll see if I can fix it later! I have finally finished the port side second planking belt. This sure took me a while! This was the first time I have ever created stealers (all at the stern). Please let me know what you think! I think i did ok, but I did learn a lot doing this side, so the starboard side should be even better! I do need to complete some more sanding on these planks, and see if I need to make some filler with some sawdust, but I'll do this once the final belt is planked. Its fun seeing how the curve starting at the bow/keel evolves as it move up the ship. The same with the stern. The only thing I'm not super happy with, is the different shades of the strips. I tried to separate them by shade, but there was quite a range of shades unfortunately. The wider strips I used for the garboard plank is a lot lighter in color than the normal planking strips. All of the wider 3/16" planks were a lot lighter in color. Because of this, I tended to have quite the color contrast between some planks. I wonder if lightly staining the planks (a lighter color than the planking above the wales) would help? Or should I just varnish the lower hull? I don't know yet. What I do know, is I don't want to paint the hull planking. I just like the natrual unpainted wood look better. Thanks all for reading! Jeff

-
Wow great job! This build looks like a lot of fun! Jeff
-
Hey all, I have finished the first belt of hull planking. I'll leave some pics and will start re-reading the instructions about the second belt! I'm 1/3rd done with the outsidr hull planking! Thanks all! Jeff


-
@Ronald-V Thank you very much for the compliment! You're right about it being harder to have one layer of planking instead of 2. But I have to admit, I do like to do it this way a little better because I only have to plank the hull once haha! I wanted to give an update. I finally finished the 1st belt on the port side. As I was almost done, I realized the planks attached to the bow were not beveled enough edge wise. It's not by much, but I noticed it. I also completed a light sanding too so I will have to come back later and finish the sanding. Thanks all for following and for the likes! Next up is completing the 1st belt on the starboard side. Thanks all! Jeff

-
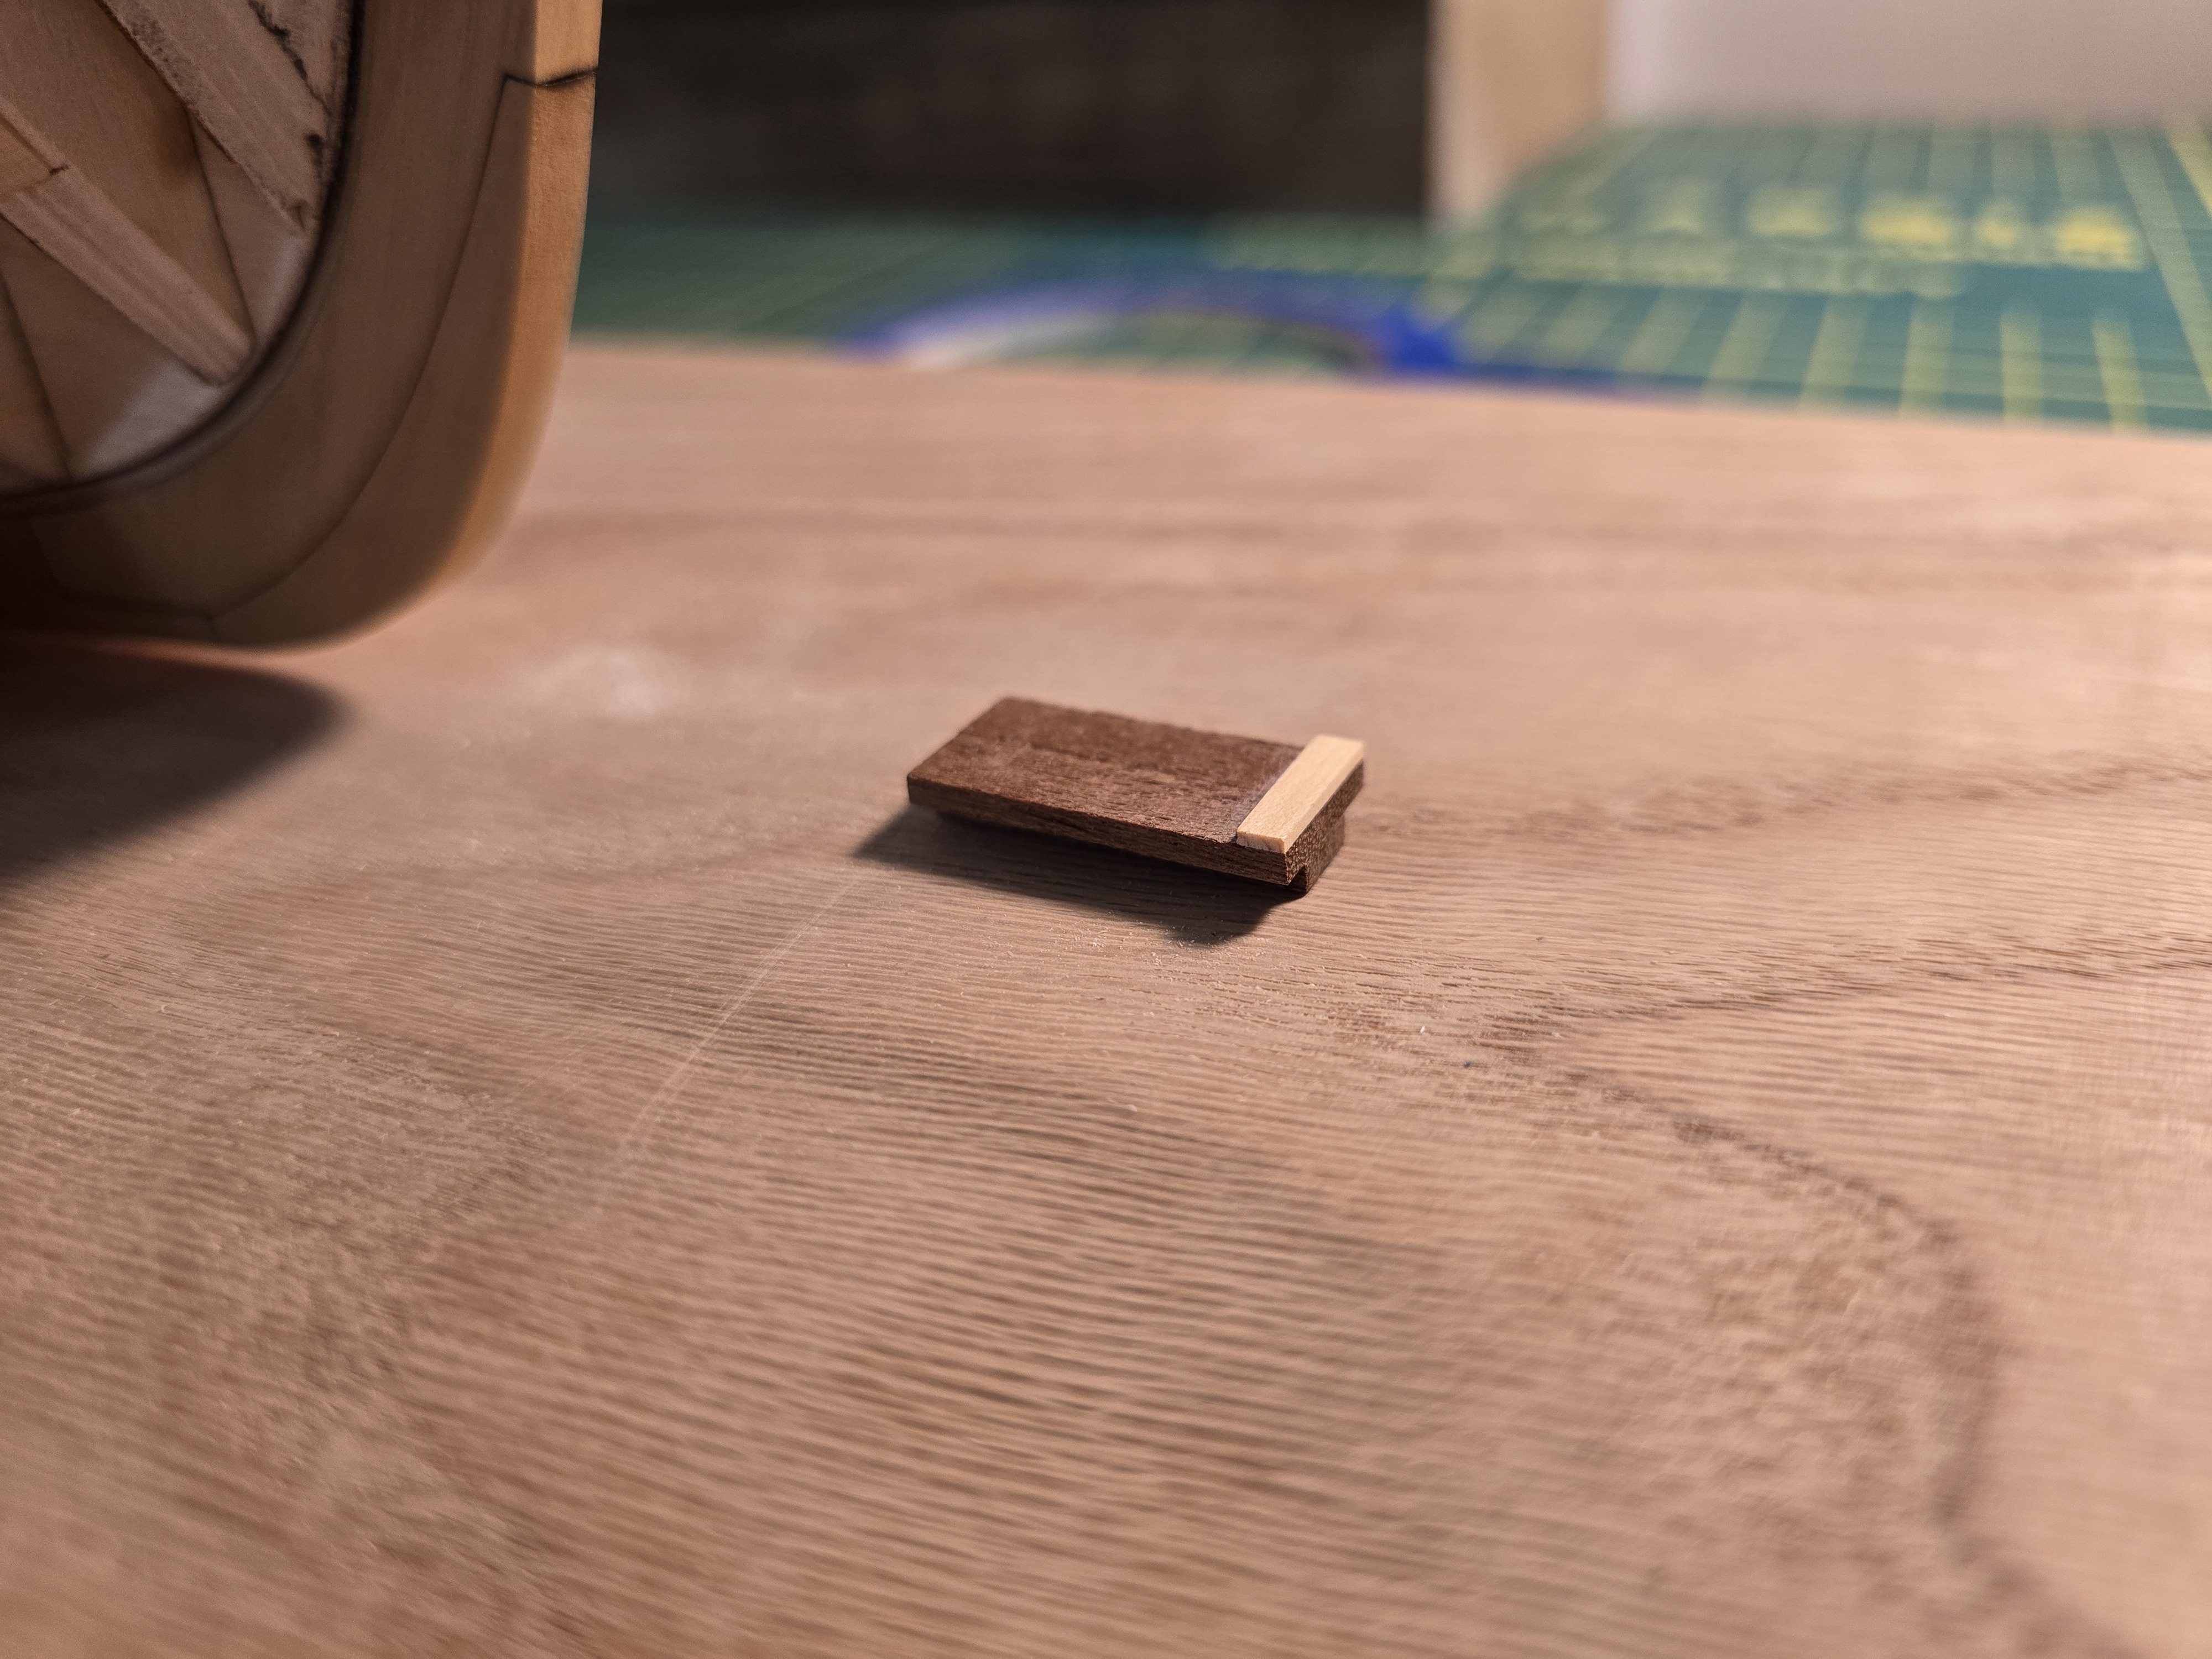
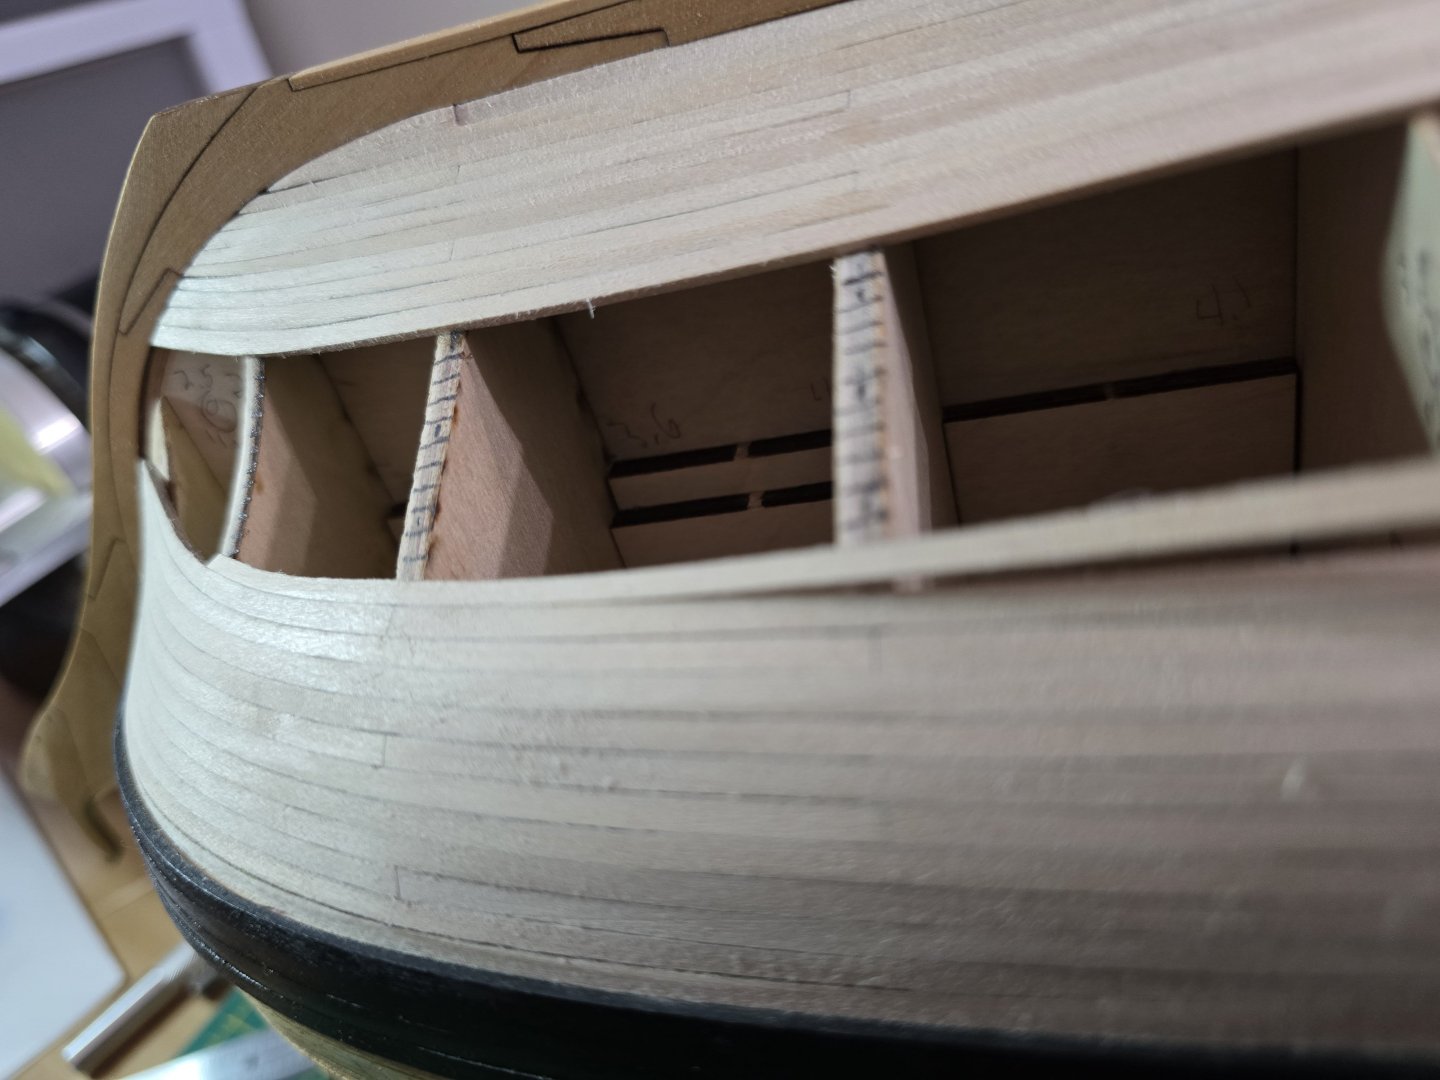
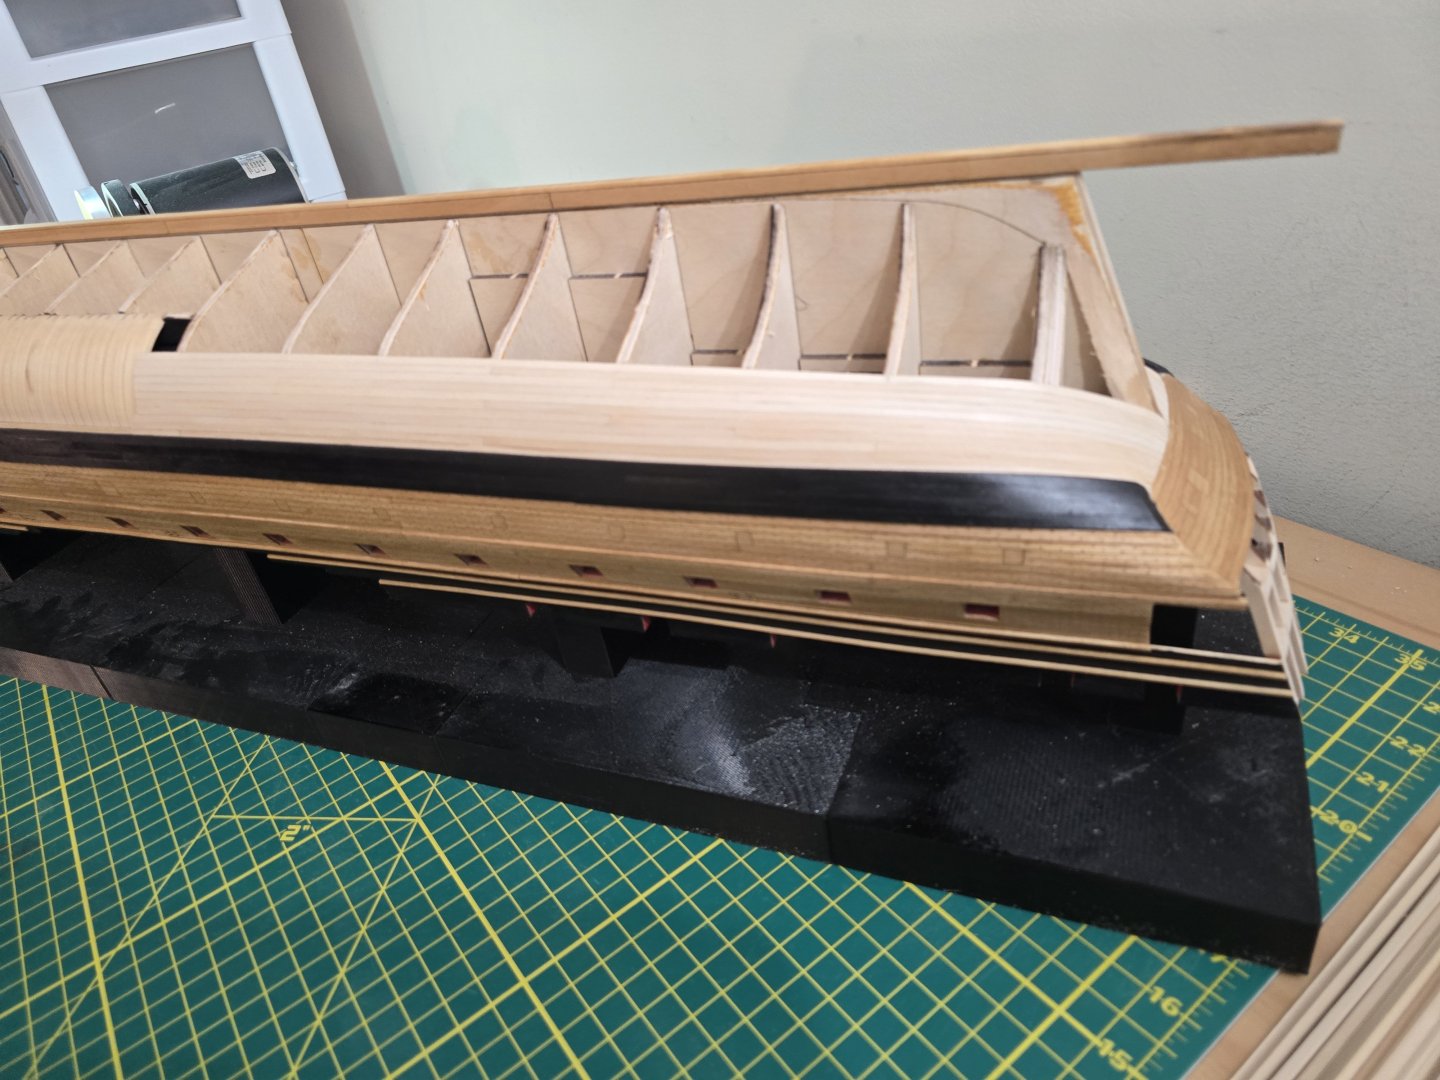
Hey all, I've been able to get more planking done. I am almost done with the first belt on the port side. I believe it's looking pretty good so far. This is how I place the plank on the bow. First, after I use the jig to pre-edge bend the planks, I test fit it on the bow. I have noticed with the basswood strips, I don't really need to pre bend the planks in any another direction other than on the edge. When I test fit the plano, I do bottome edge bevel so that it sits as flush as I can get it to the previous plank. After test fitting, I darken one side edge and the end of the plank where it will butt against the next plank. I make sure to not have both edges darkened. There are 2 reasons for that. I don't want to make the edges too dark, and if there is a small gap between it and the previous plank after gluing, if you fill the small hole, it will look odd having the filler used surrounded by the black pencile lines. If you only darken one edge, the filling looks like it's attached to the plank that does not have the darkened edge. It looks a lot better. I hope that makes sense. When ready to glue, I first only glue the very tip of the plank. I don't glue the plank to the thicker bulkhead yet. After the glue dries (I use thin CA glue), I then glue the plank to the first bulkhead former. I then added some glue to the next bulkhead but a super small amount to the previous plank edge (only add glue to the space between bulkheads. This helps me make sure that I can get the planks to stick to the previously place plank below it. I then continue in this fashion, only gluing the plank to 1 bulkhead former at a time until it's all glued on. The pic above shows I have a problem. I wasn't able to glue the plank totally against the previous plank. That was my fault. To fix it, I mixed wood glue, some basswood shavings I sanded off the basswood strip I was using, and a few drops of water to make my own wood filler. Here is the wood shavings next to the glue. I mixed in a few drops of water to the wood and added a very little amount of the wood glue. I then filled the small gap between the 2 planks. After it dried, I lightly sand it with 220 grit sandpaper to even it out. I continue in this fading to the stern. For the stern, I overlap the stern plank with the plank next to it to give me room when I'm adjustmenting the stern edge of the plank. I then marked the stern edge as well. I then bent the plank to shape, especially at the stern edge as that has the most curve to it. I then use a sharp hobby knife to cut along the diagonal line I marked. I then test fit and modify the stern most edge of the plank to fit nicely against the lower counter. Once satisfied, it cut and used my disk sander to slowly shorten the plank so it butts against the previous plank with a nice fit. Once i am satisfied with the fit, I bevel the bottom edge to sit better against the plank under it, and darken one edge. Like the bow plank, I glued it onto one bulkhead at all time until it's fully glued onto the hull. This pic (above) shows how much CA glue I use when gluing to the lower counter. It's not much honestly. I then contiue the plank per bulkhead So here are some pics as to how far along I am on planking so far. Thank you for following along with me! Jeff


-
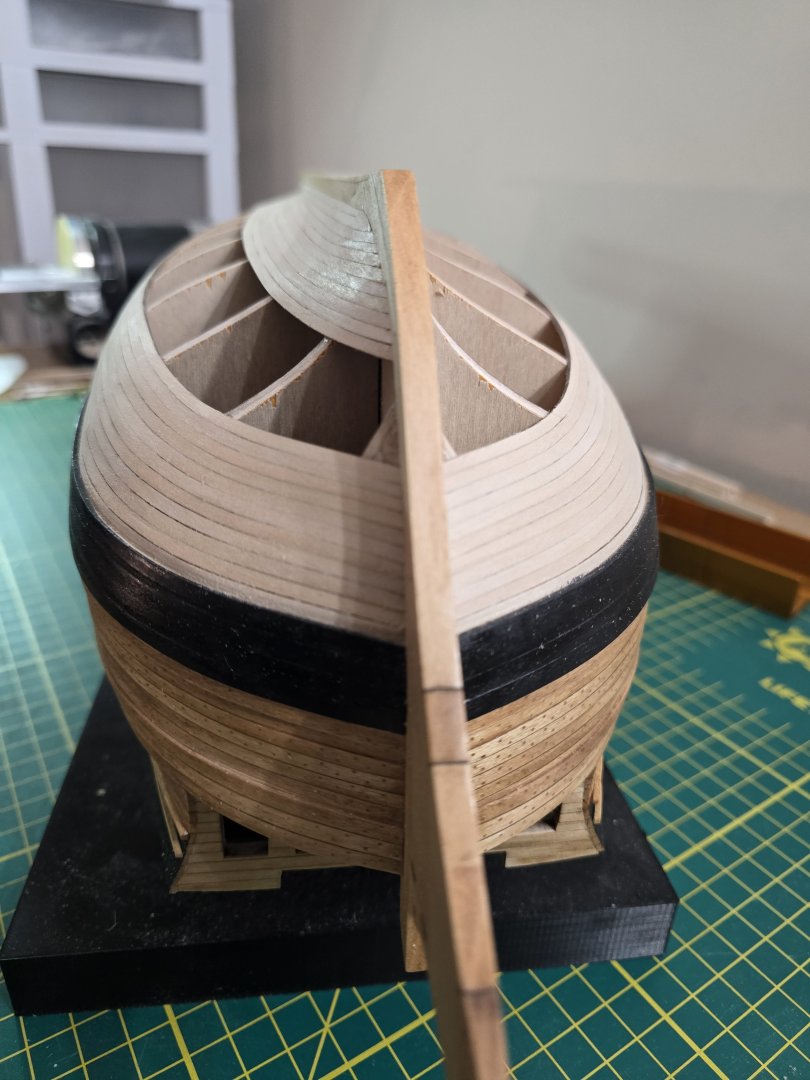
Hey all! Thank you for the likes! Just a quick update. My entire family has been sick and we had to deal with a leak in our shower that was coming down upon our kitchen ceiling. Yuck. So not too much time for modeling unfortunately. But I have a small update today. I have started planking the hull below the wales. Before I started, I read the instructions quite a few times. It's a lot to take in at once. @Chuck recommended in his instructions to read the book "Planking the Build-Up Ship Model" by Jim Roberts. I ordered this book from Model Shipways and it didn't take too long to arrive. This book, like what Chuck said, is highly detailed and is a great resource for planking. I read through a few chapters and noticed that some pics in this book, are also in the instructions of the USF Confederacy! Chuck's instructions does a good job summarizing what is in this book. Which is a lot of information. I did create the jig written in the instructions with the supplied laser cut curved batten. Here is a pic of it after i bent 3 wood strips. (Though I have already used 2 of then hah!) It's definitely helpful for edge bending 3 strips at a time. I was able to finish 1 row and started the next. Here are some pics of my progress. As you can see, it's just the beginning of the process. I will start to make steady progress soon. Once I complete 10 rows, I will then start the other side's planking. Thanks all! Jeff


-
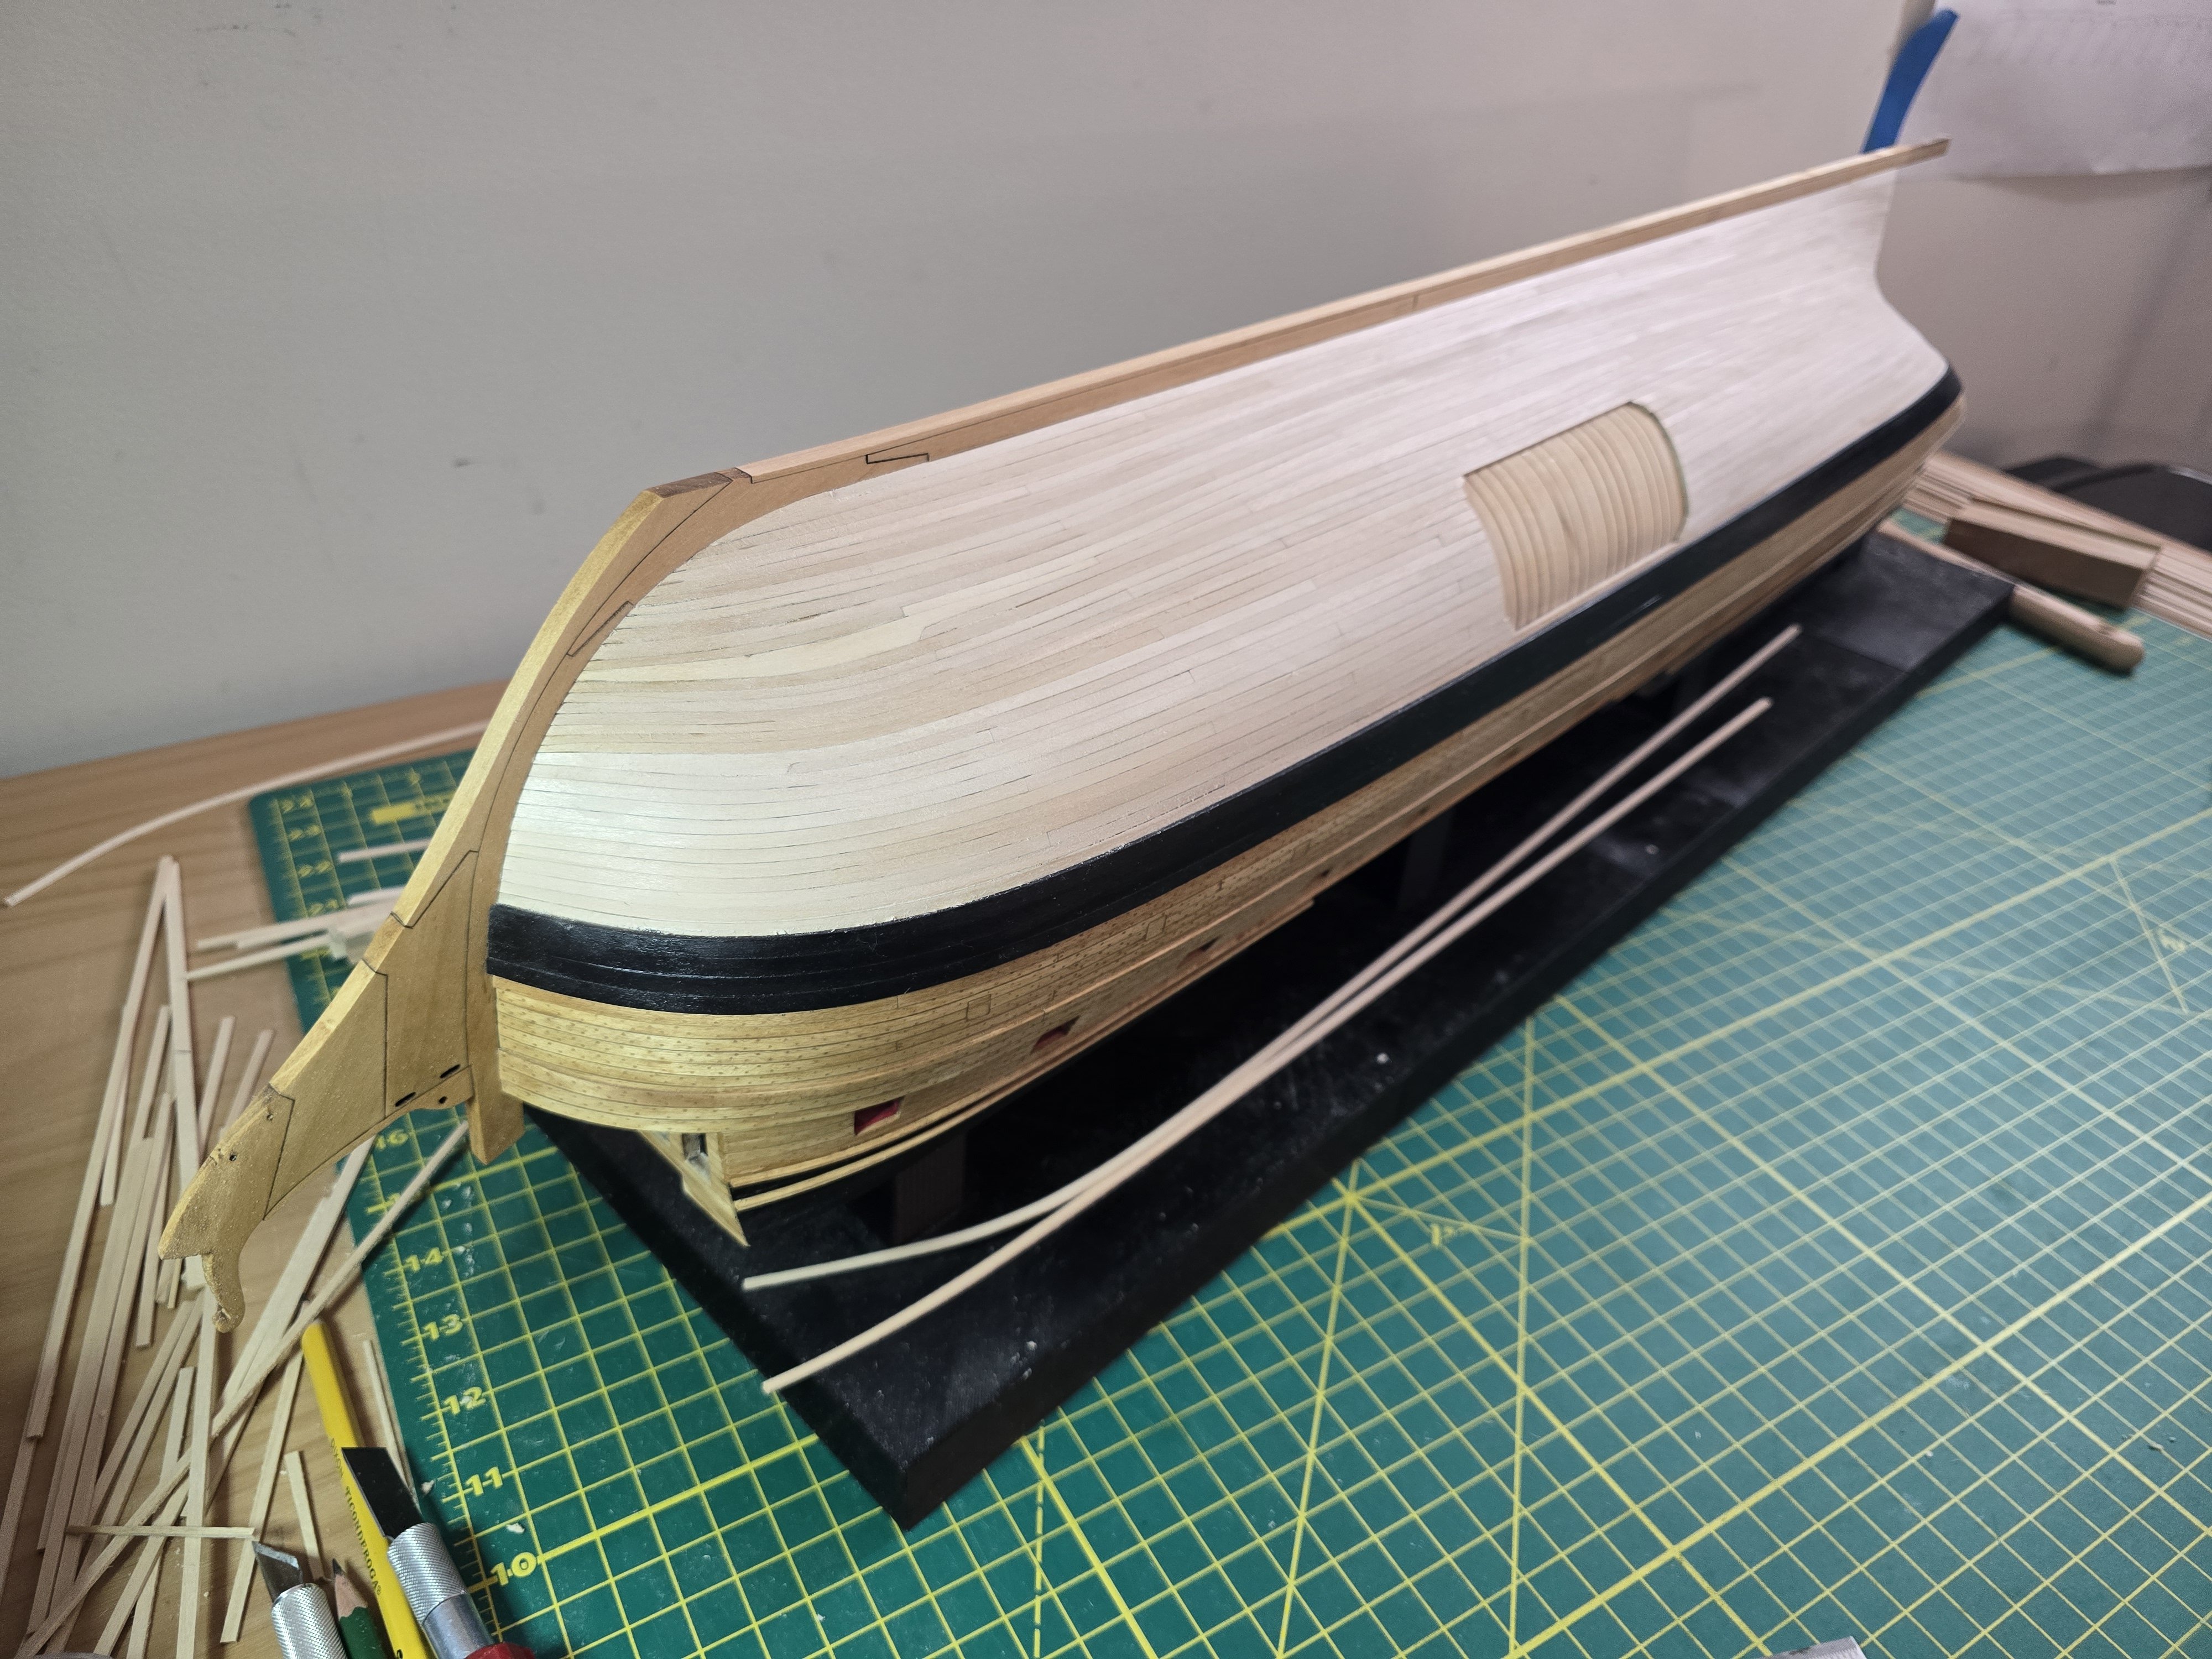
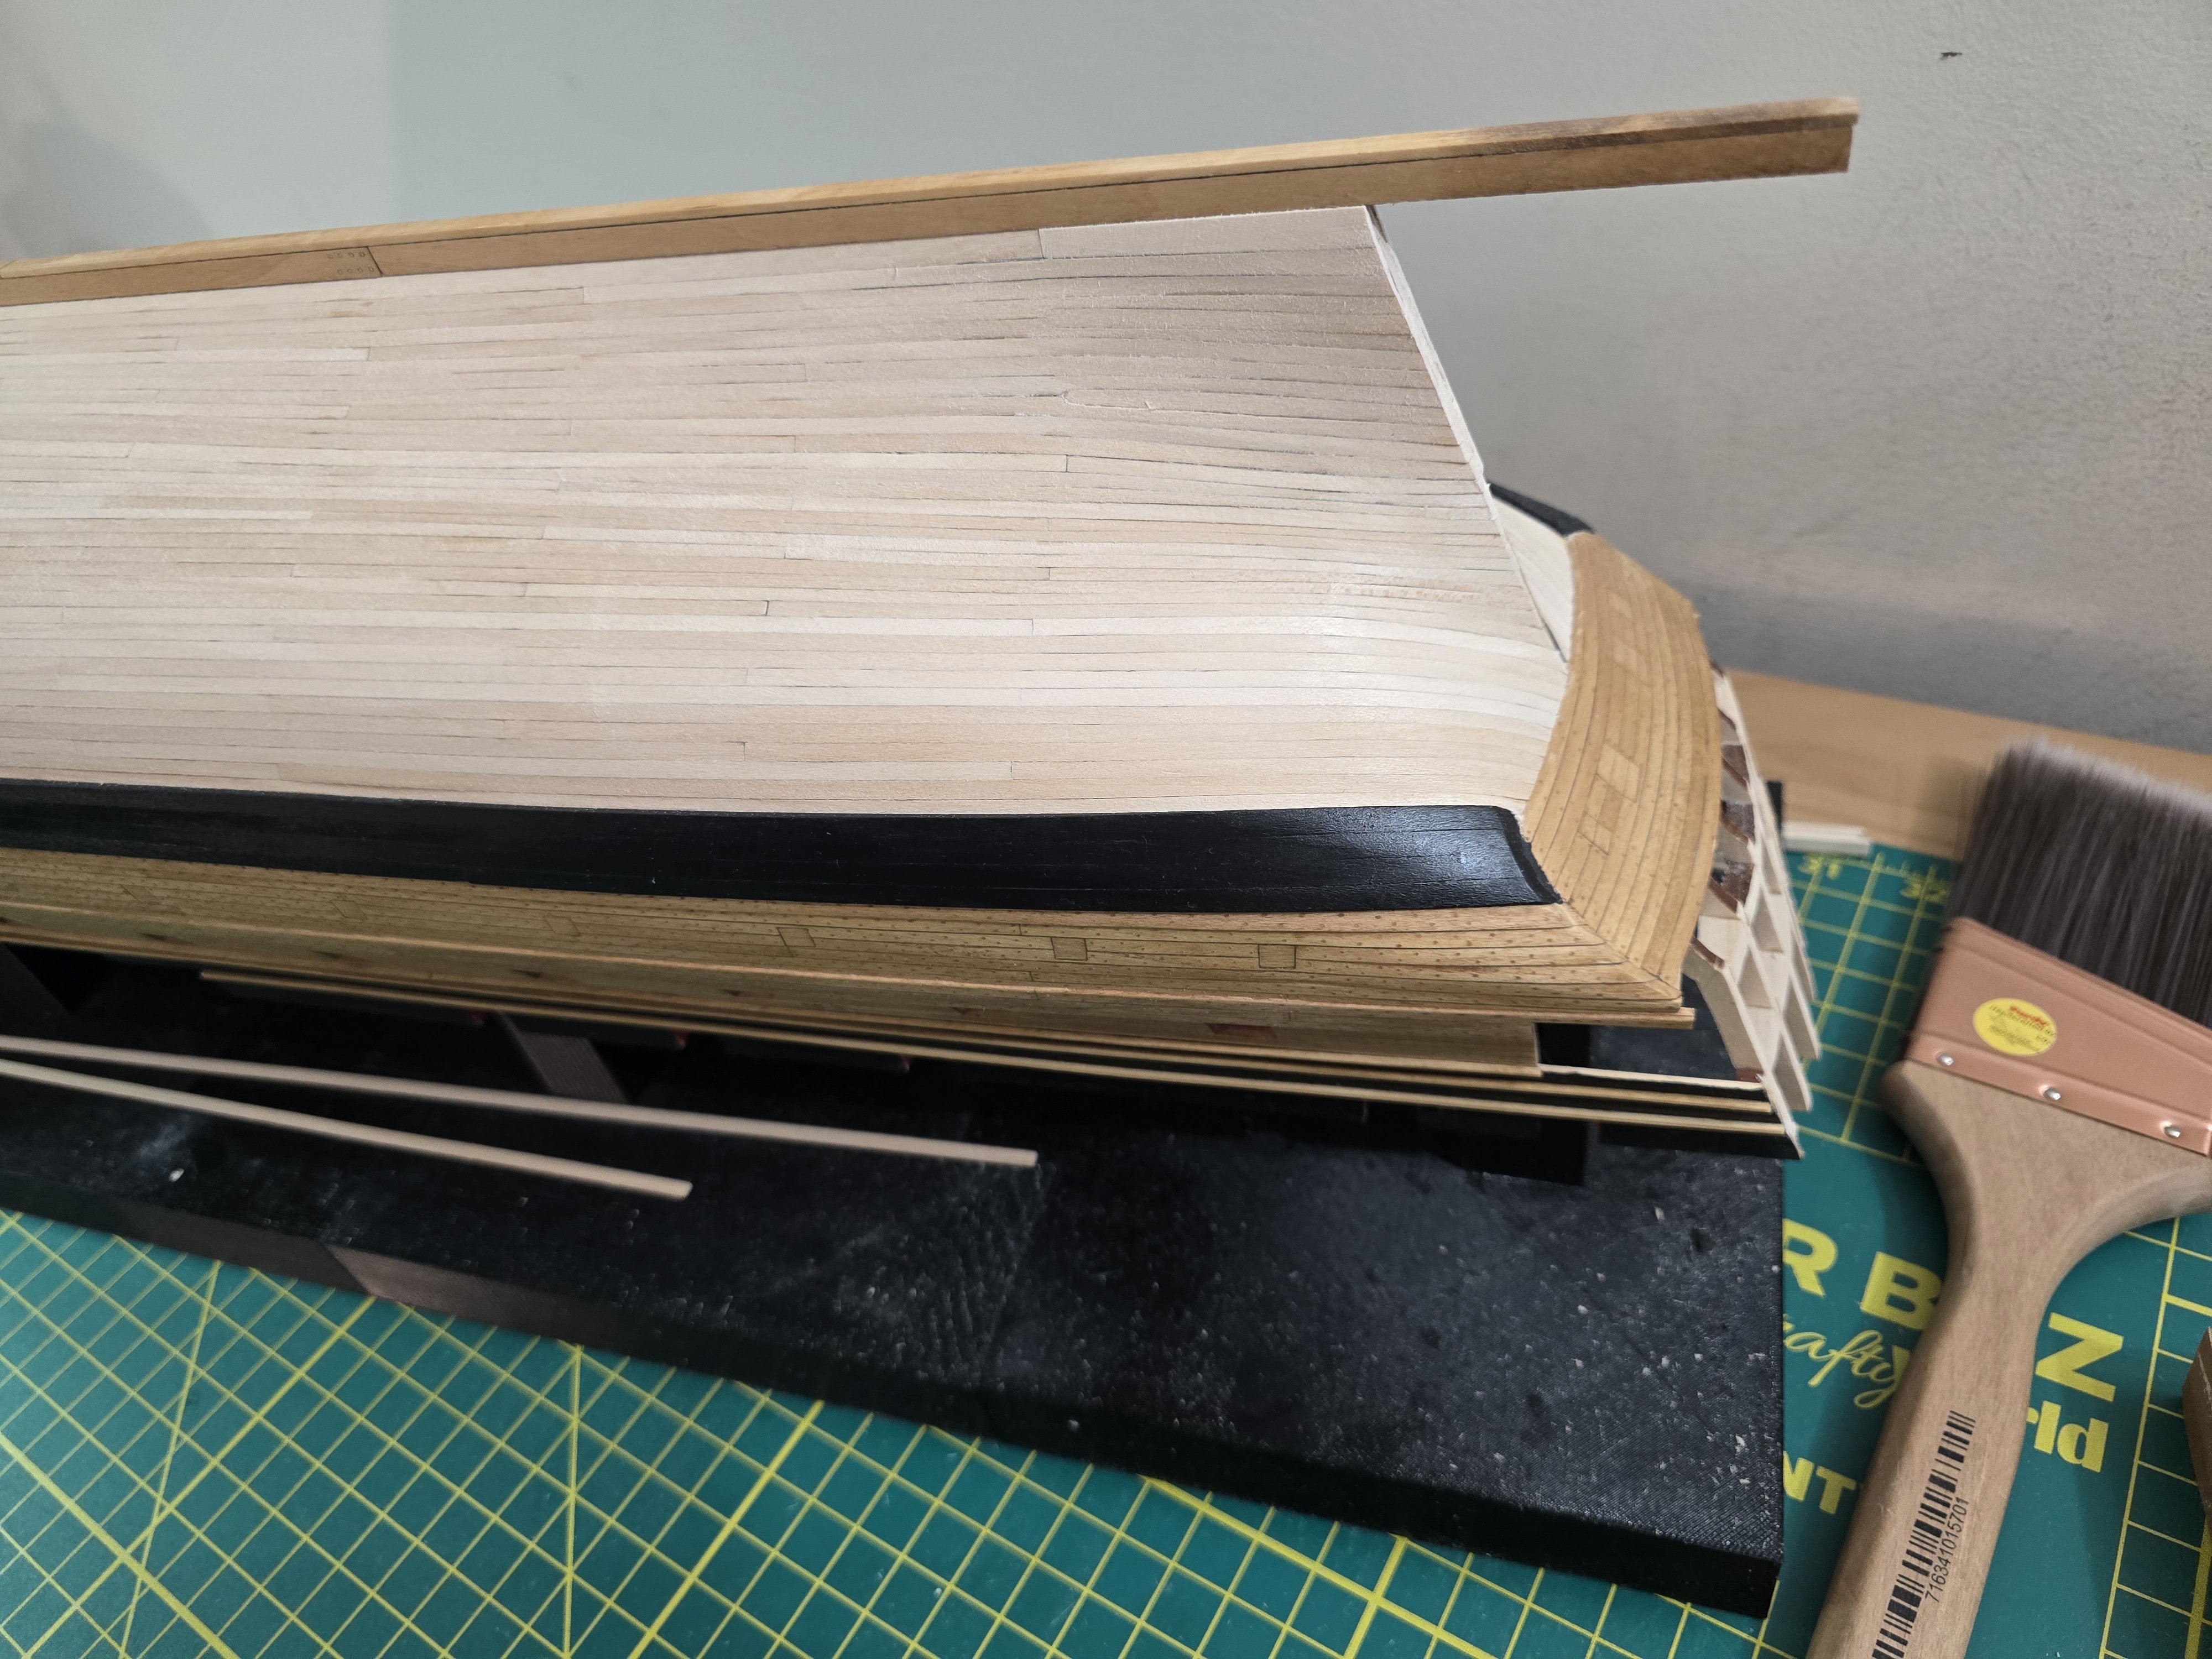
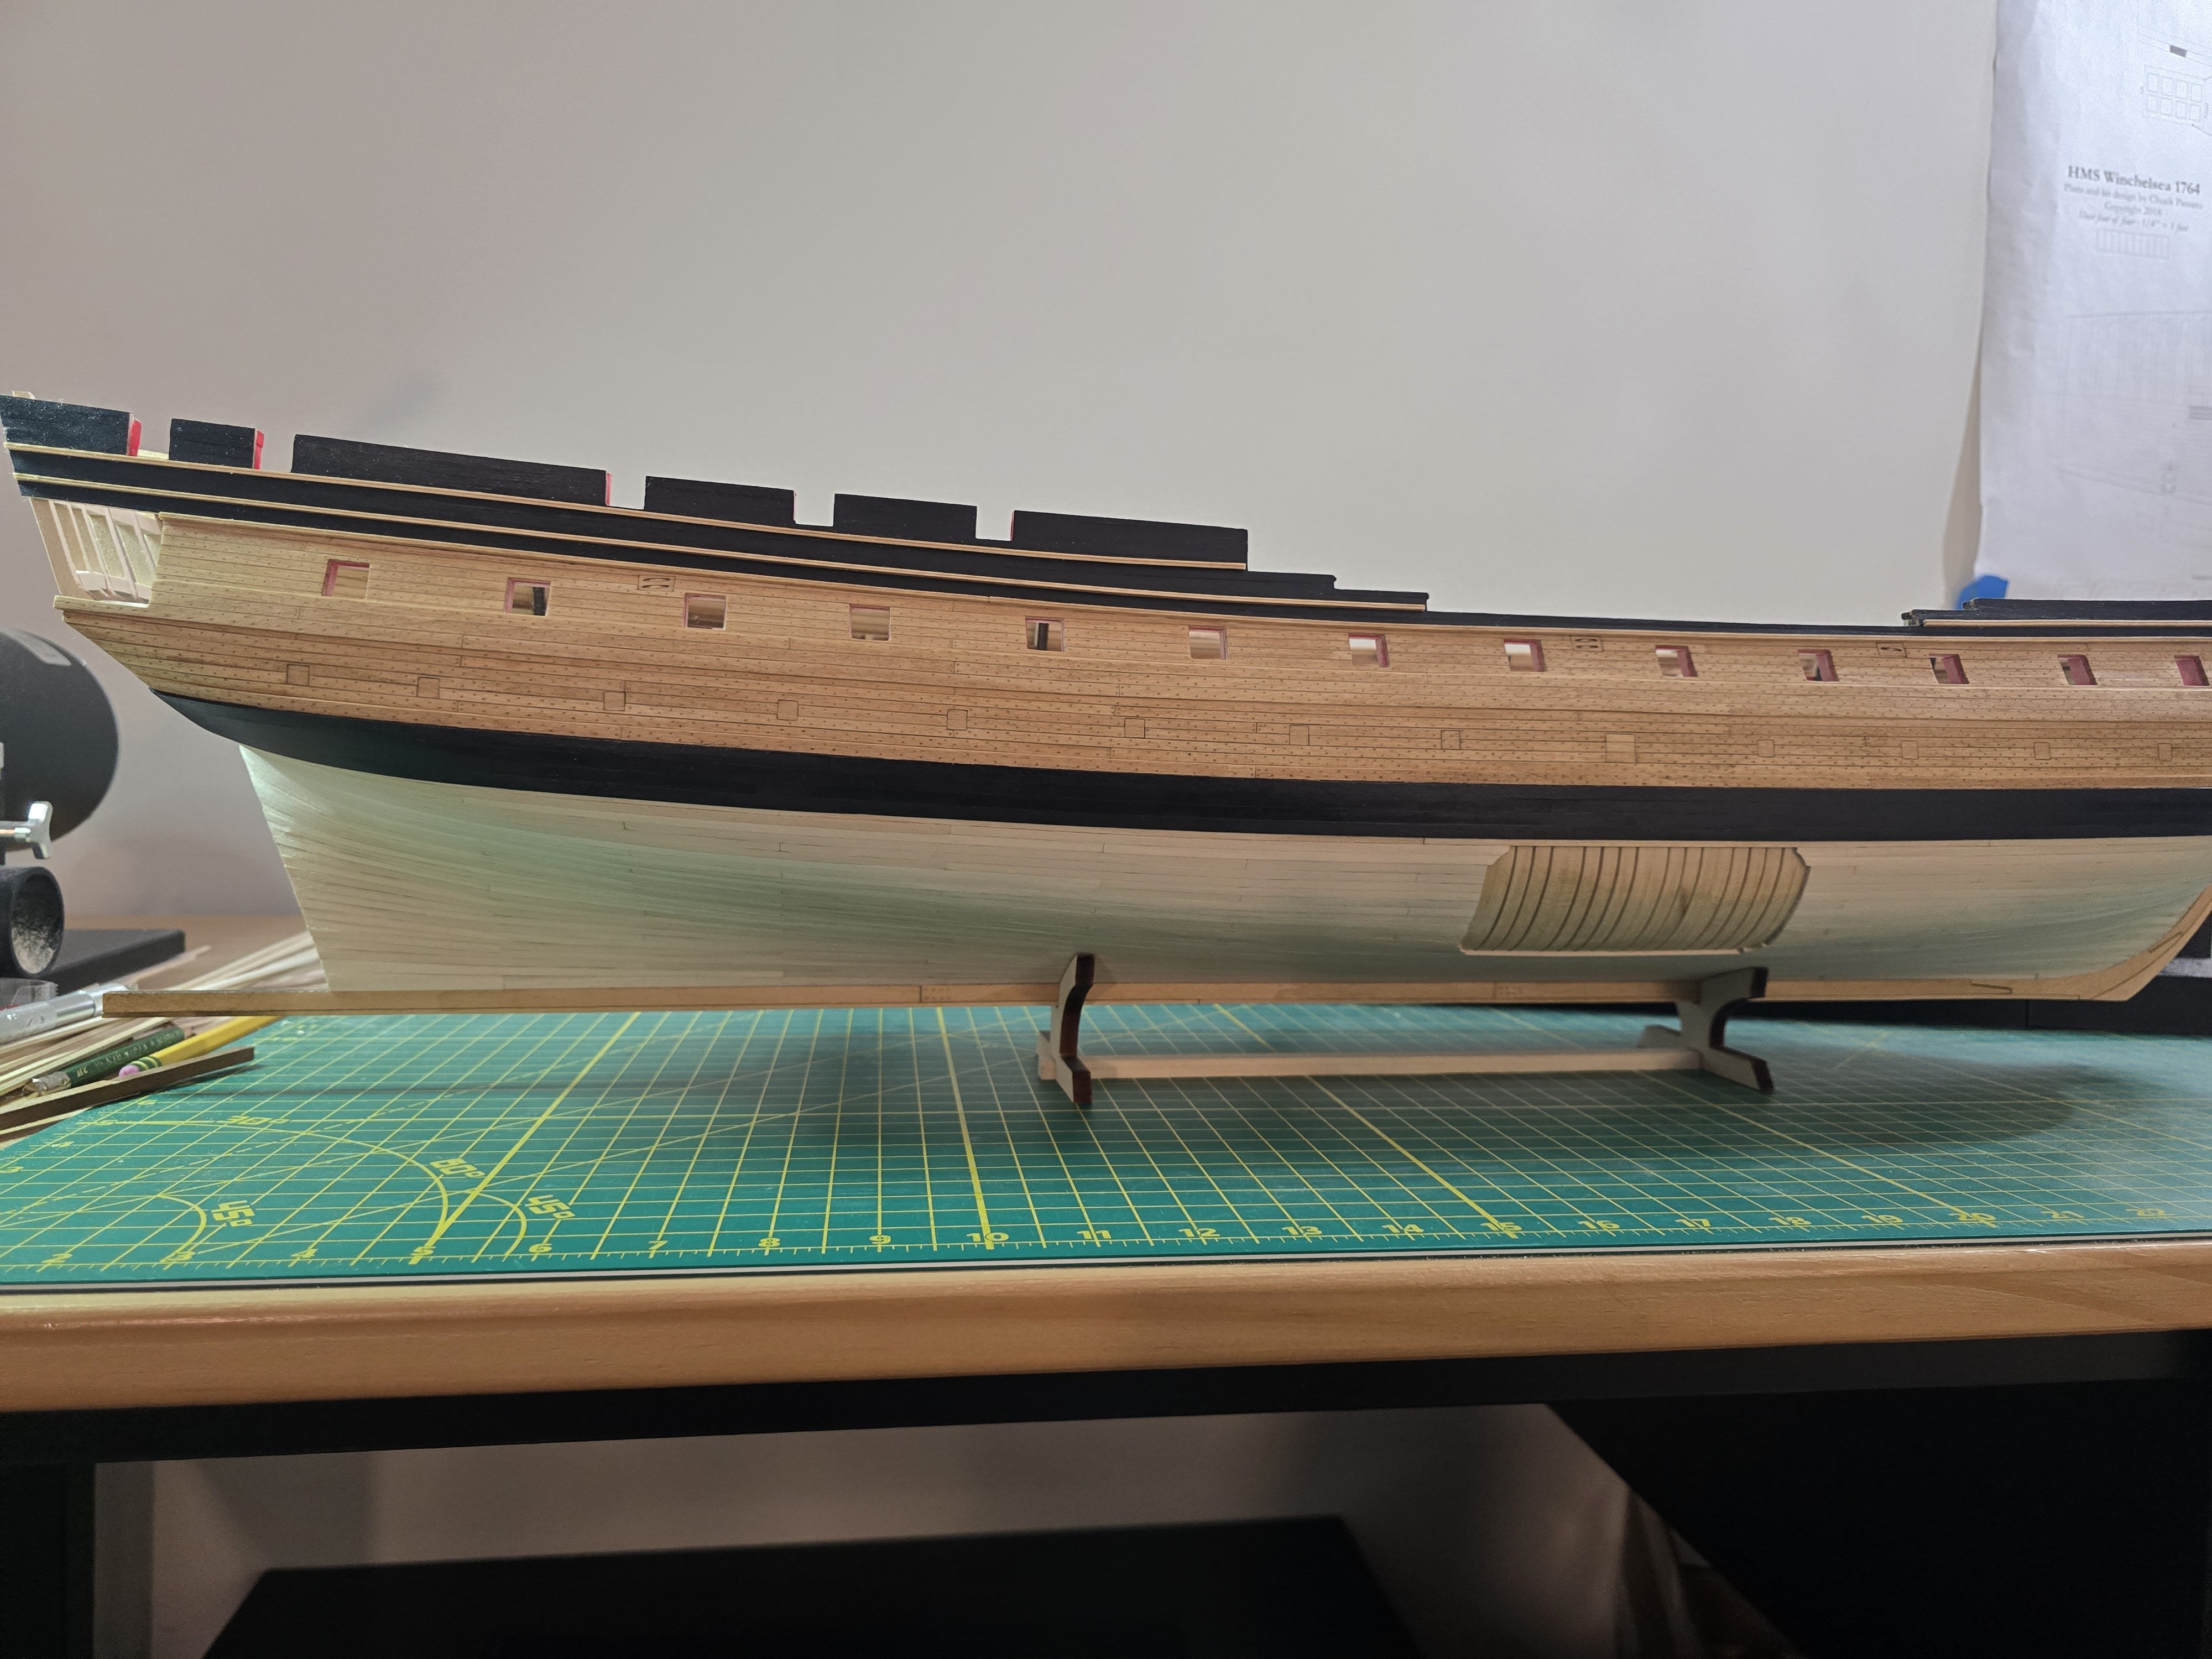
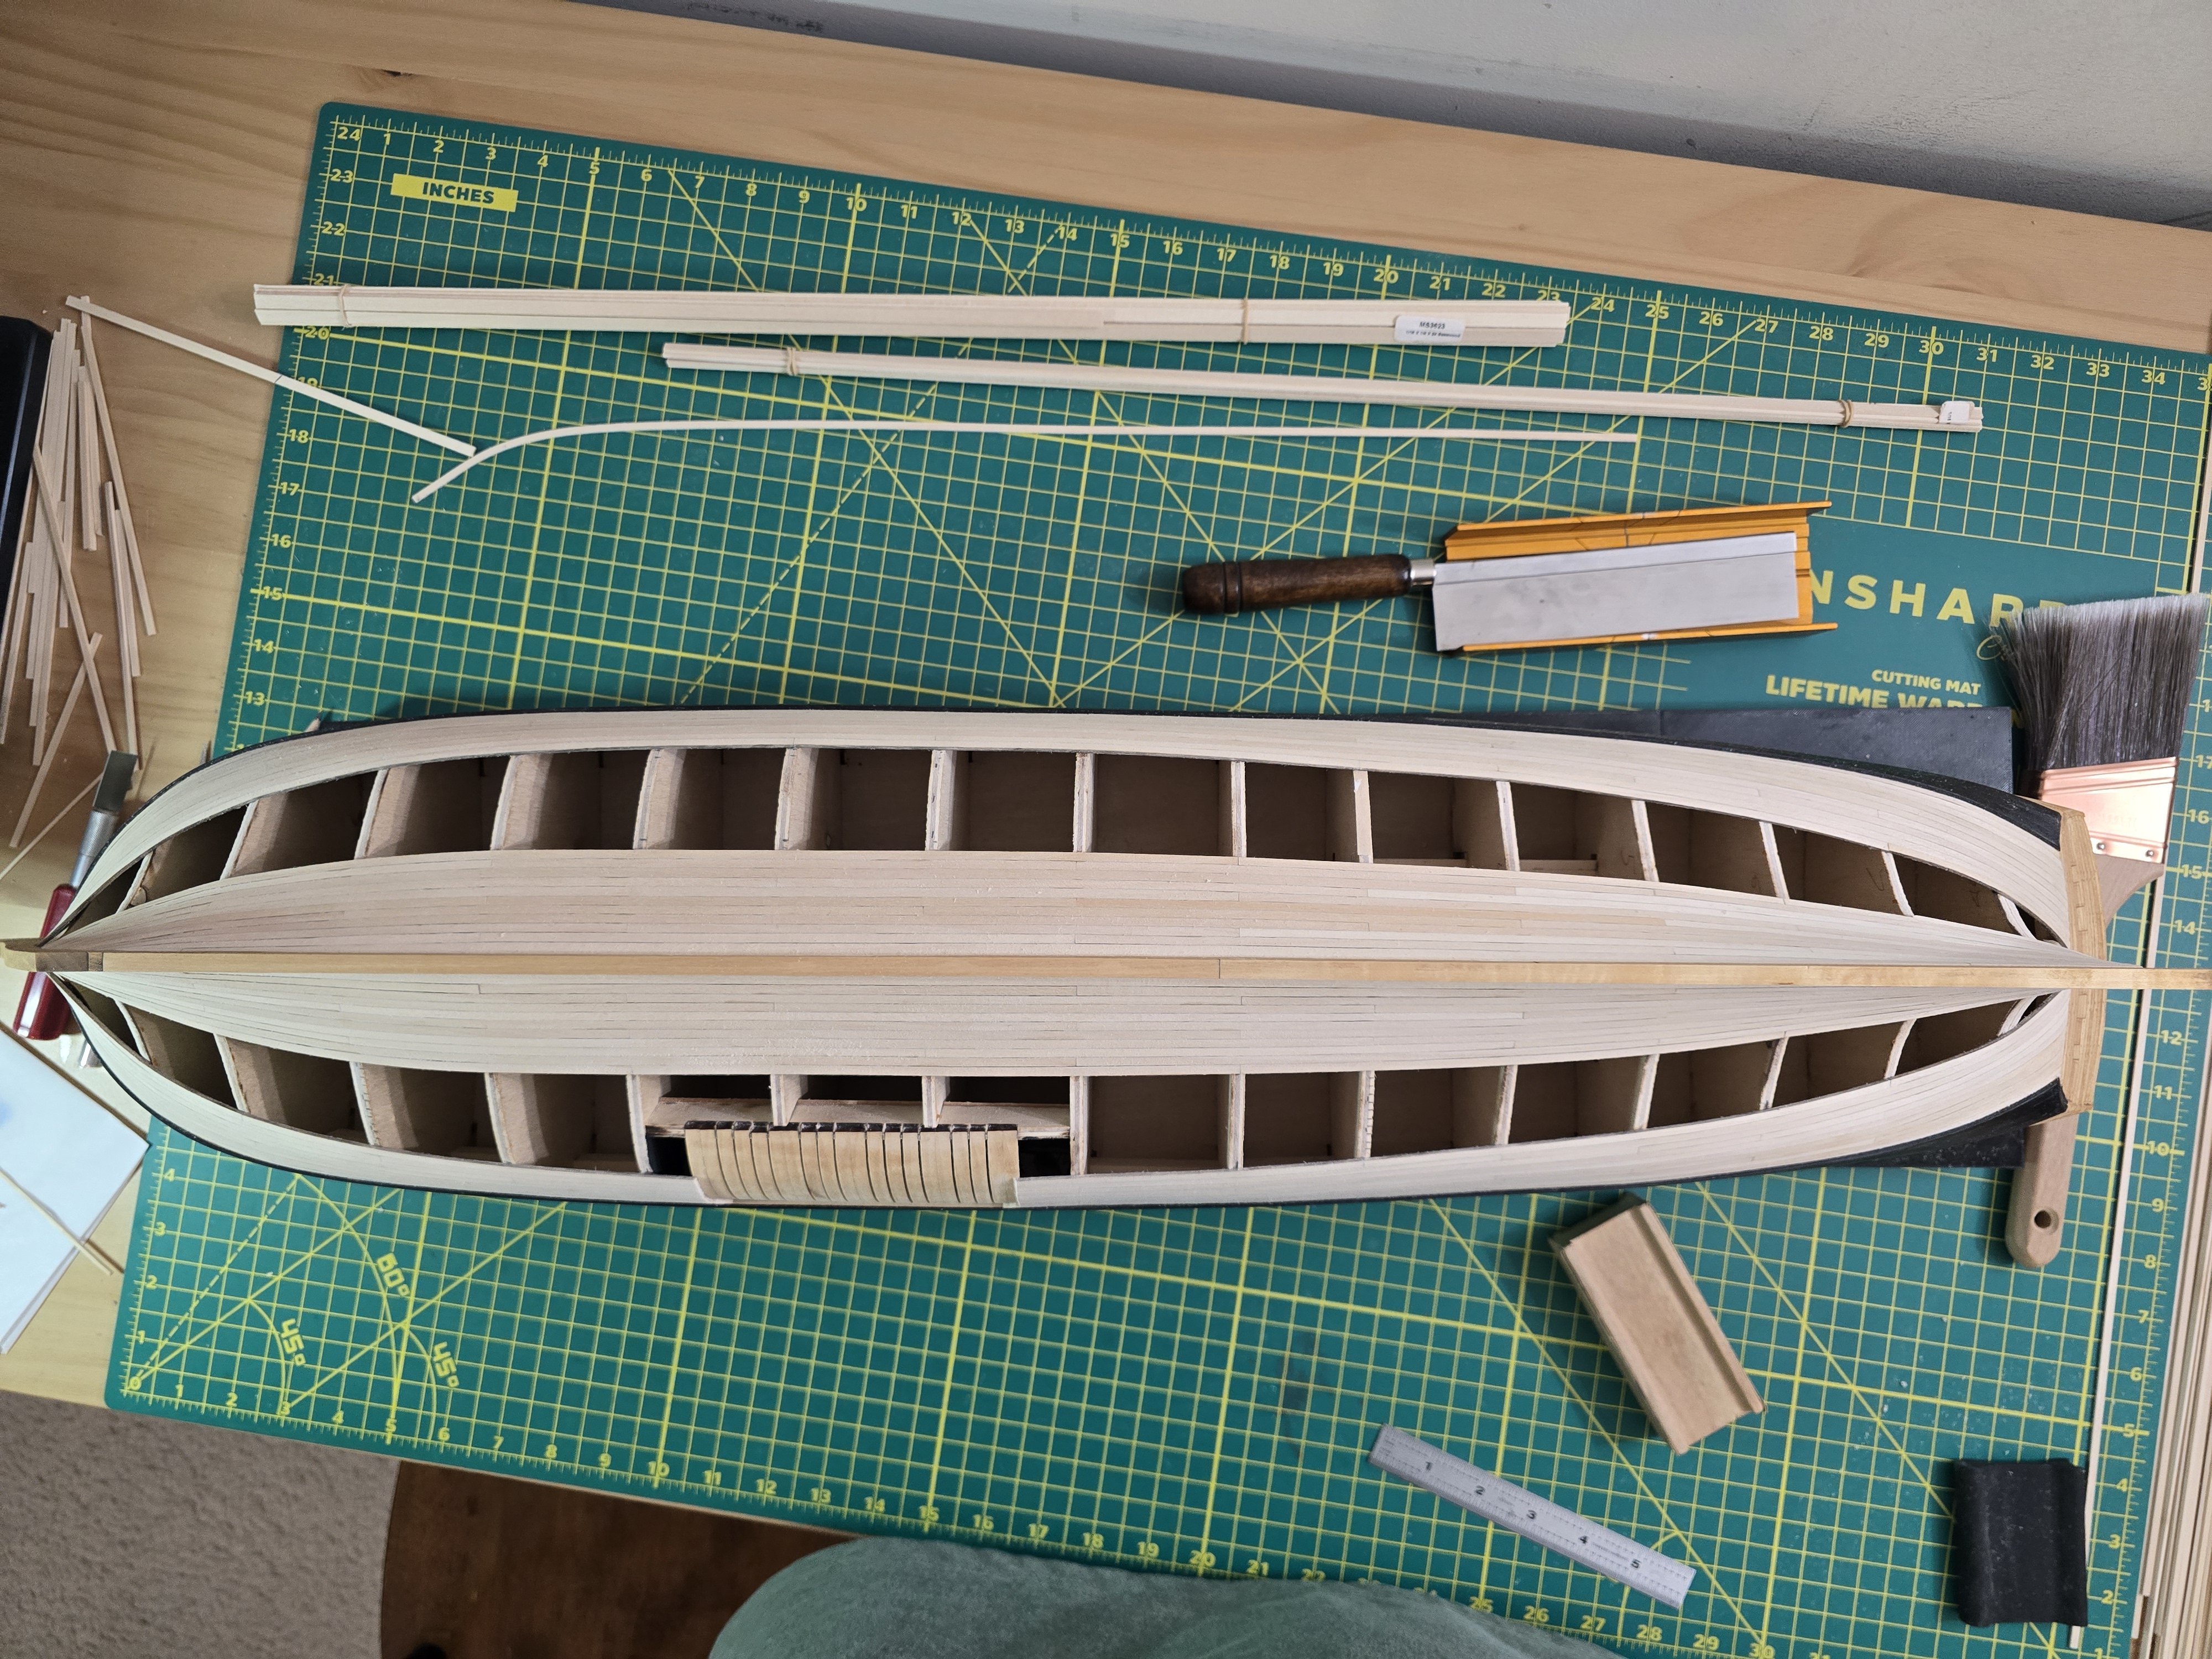
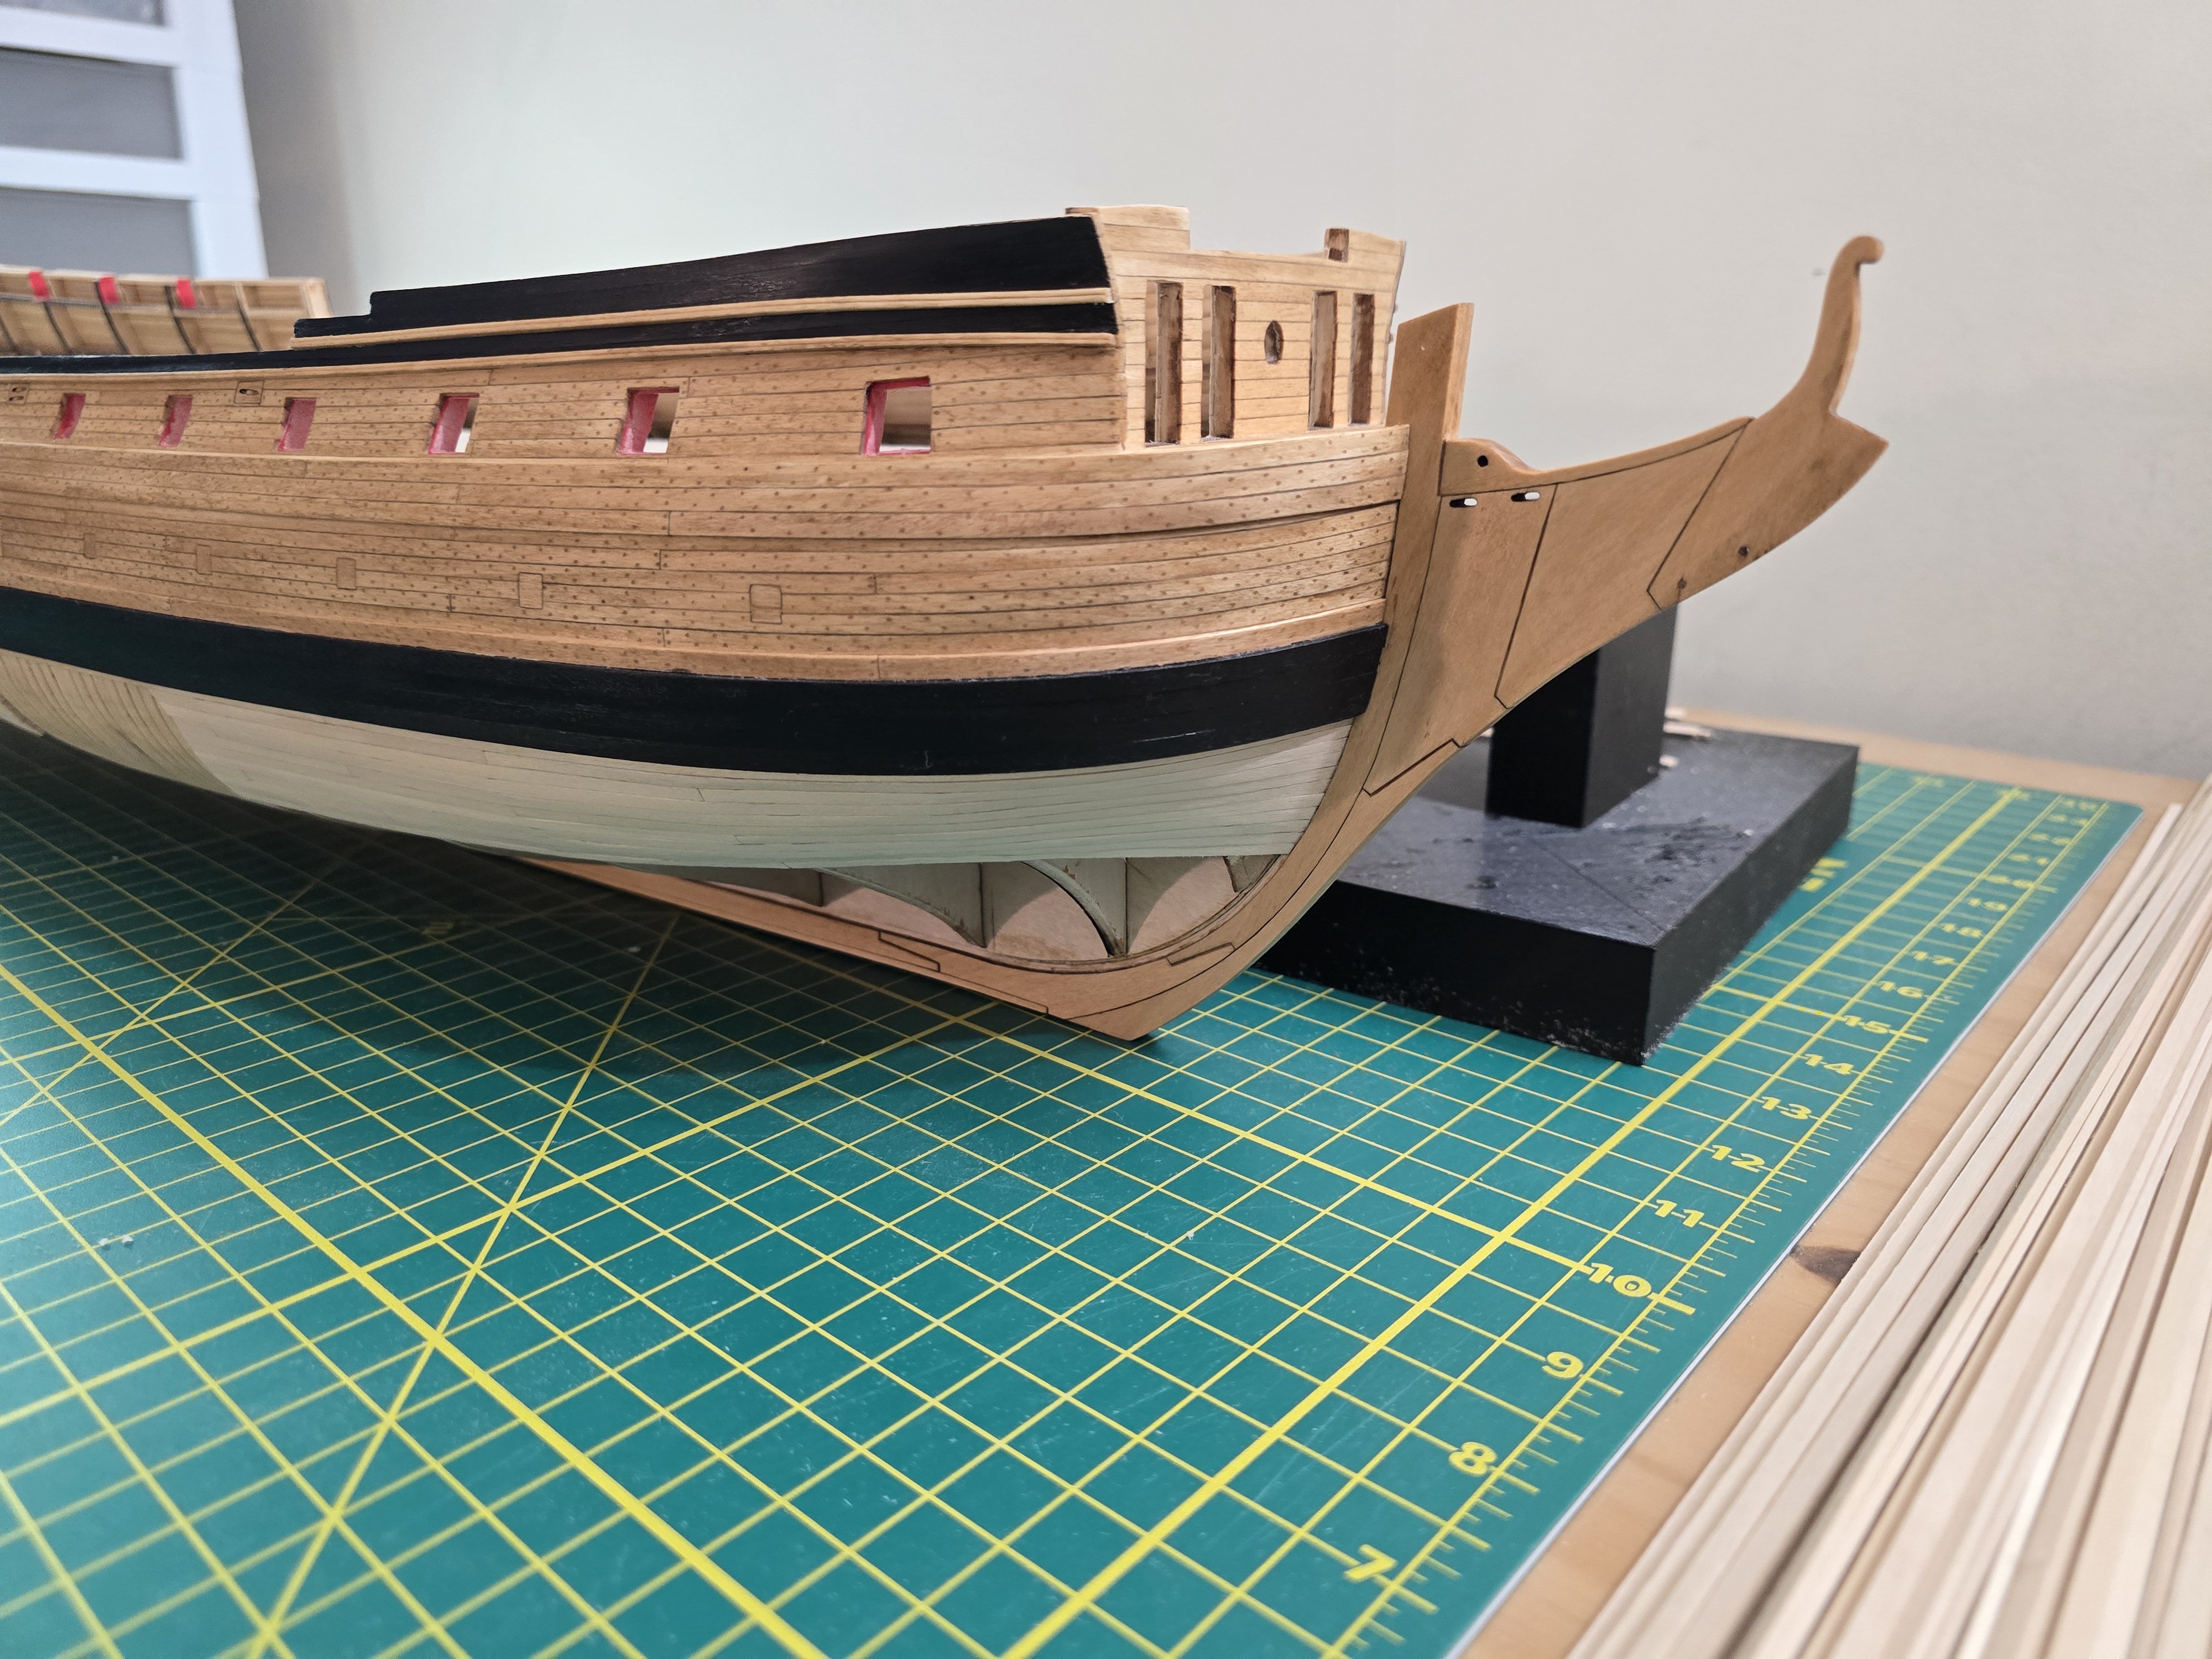
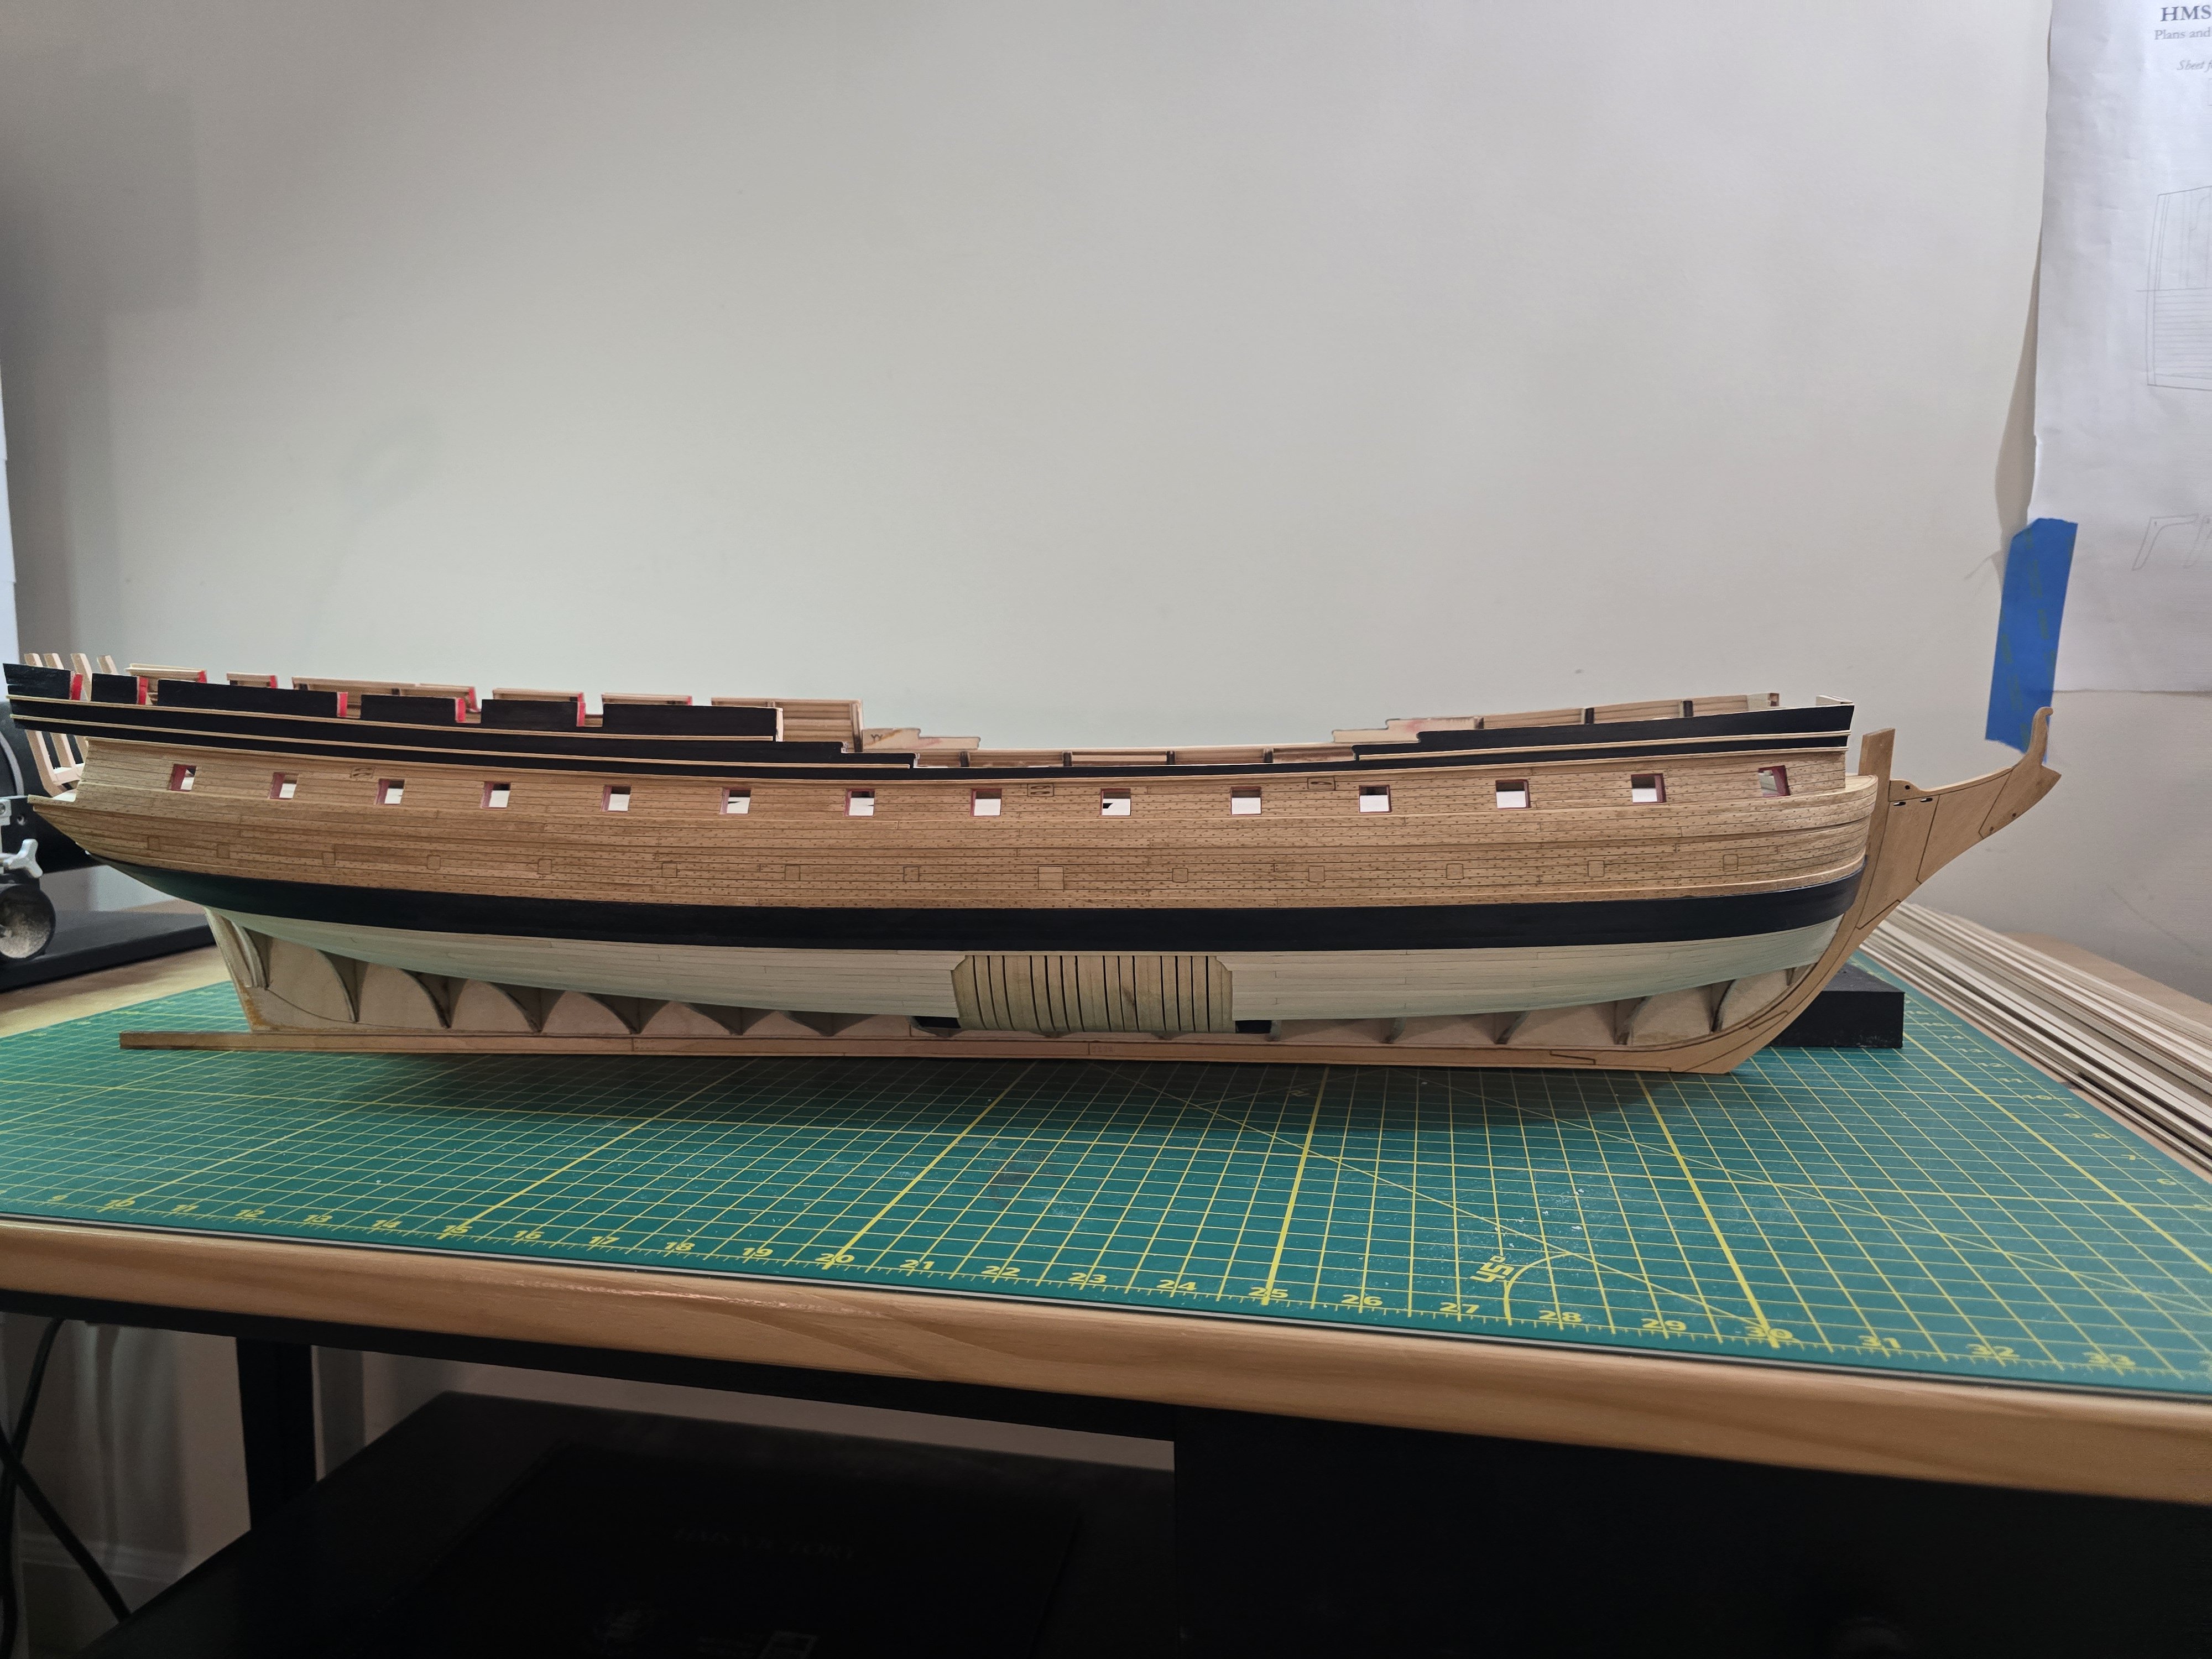
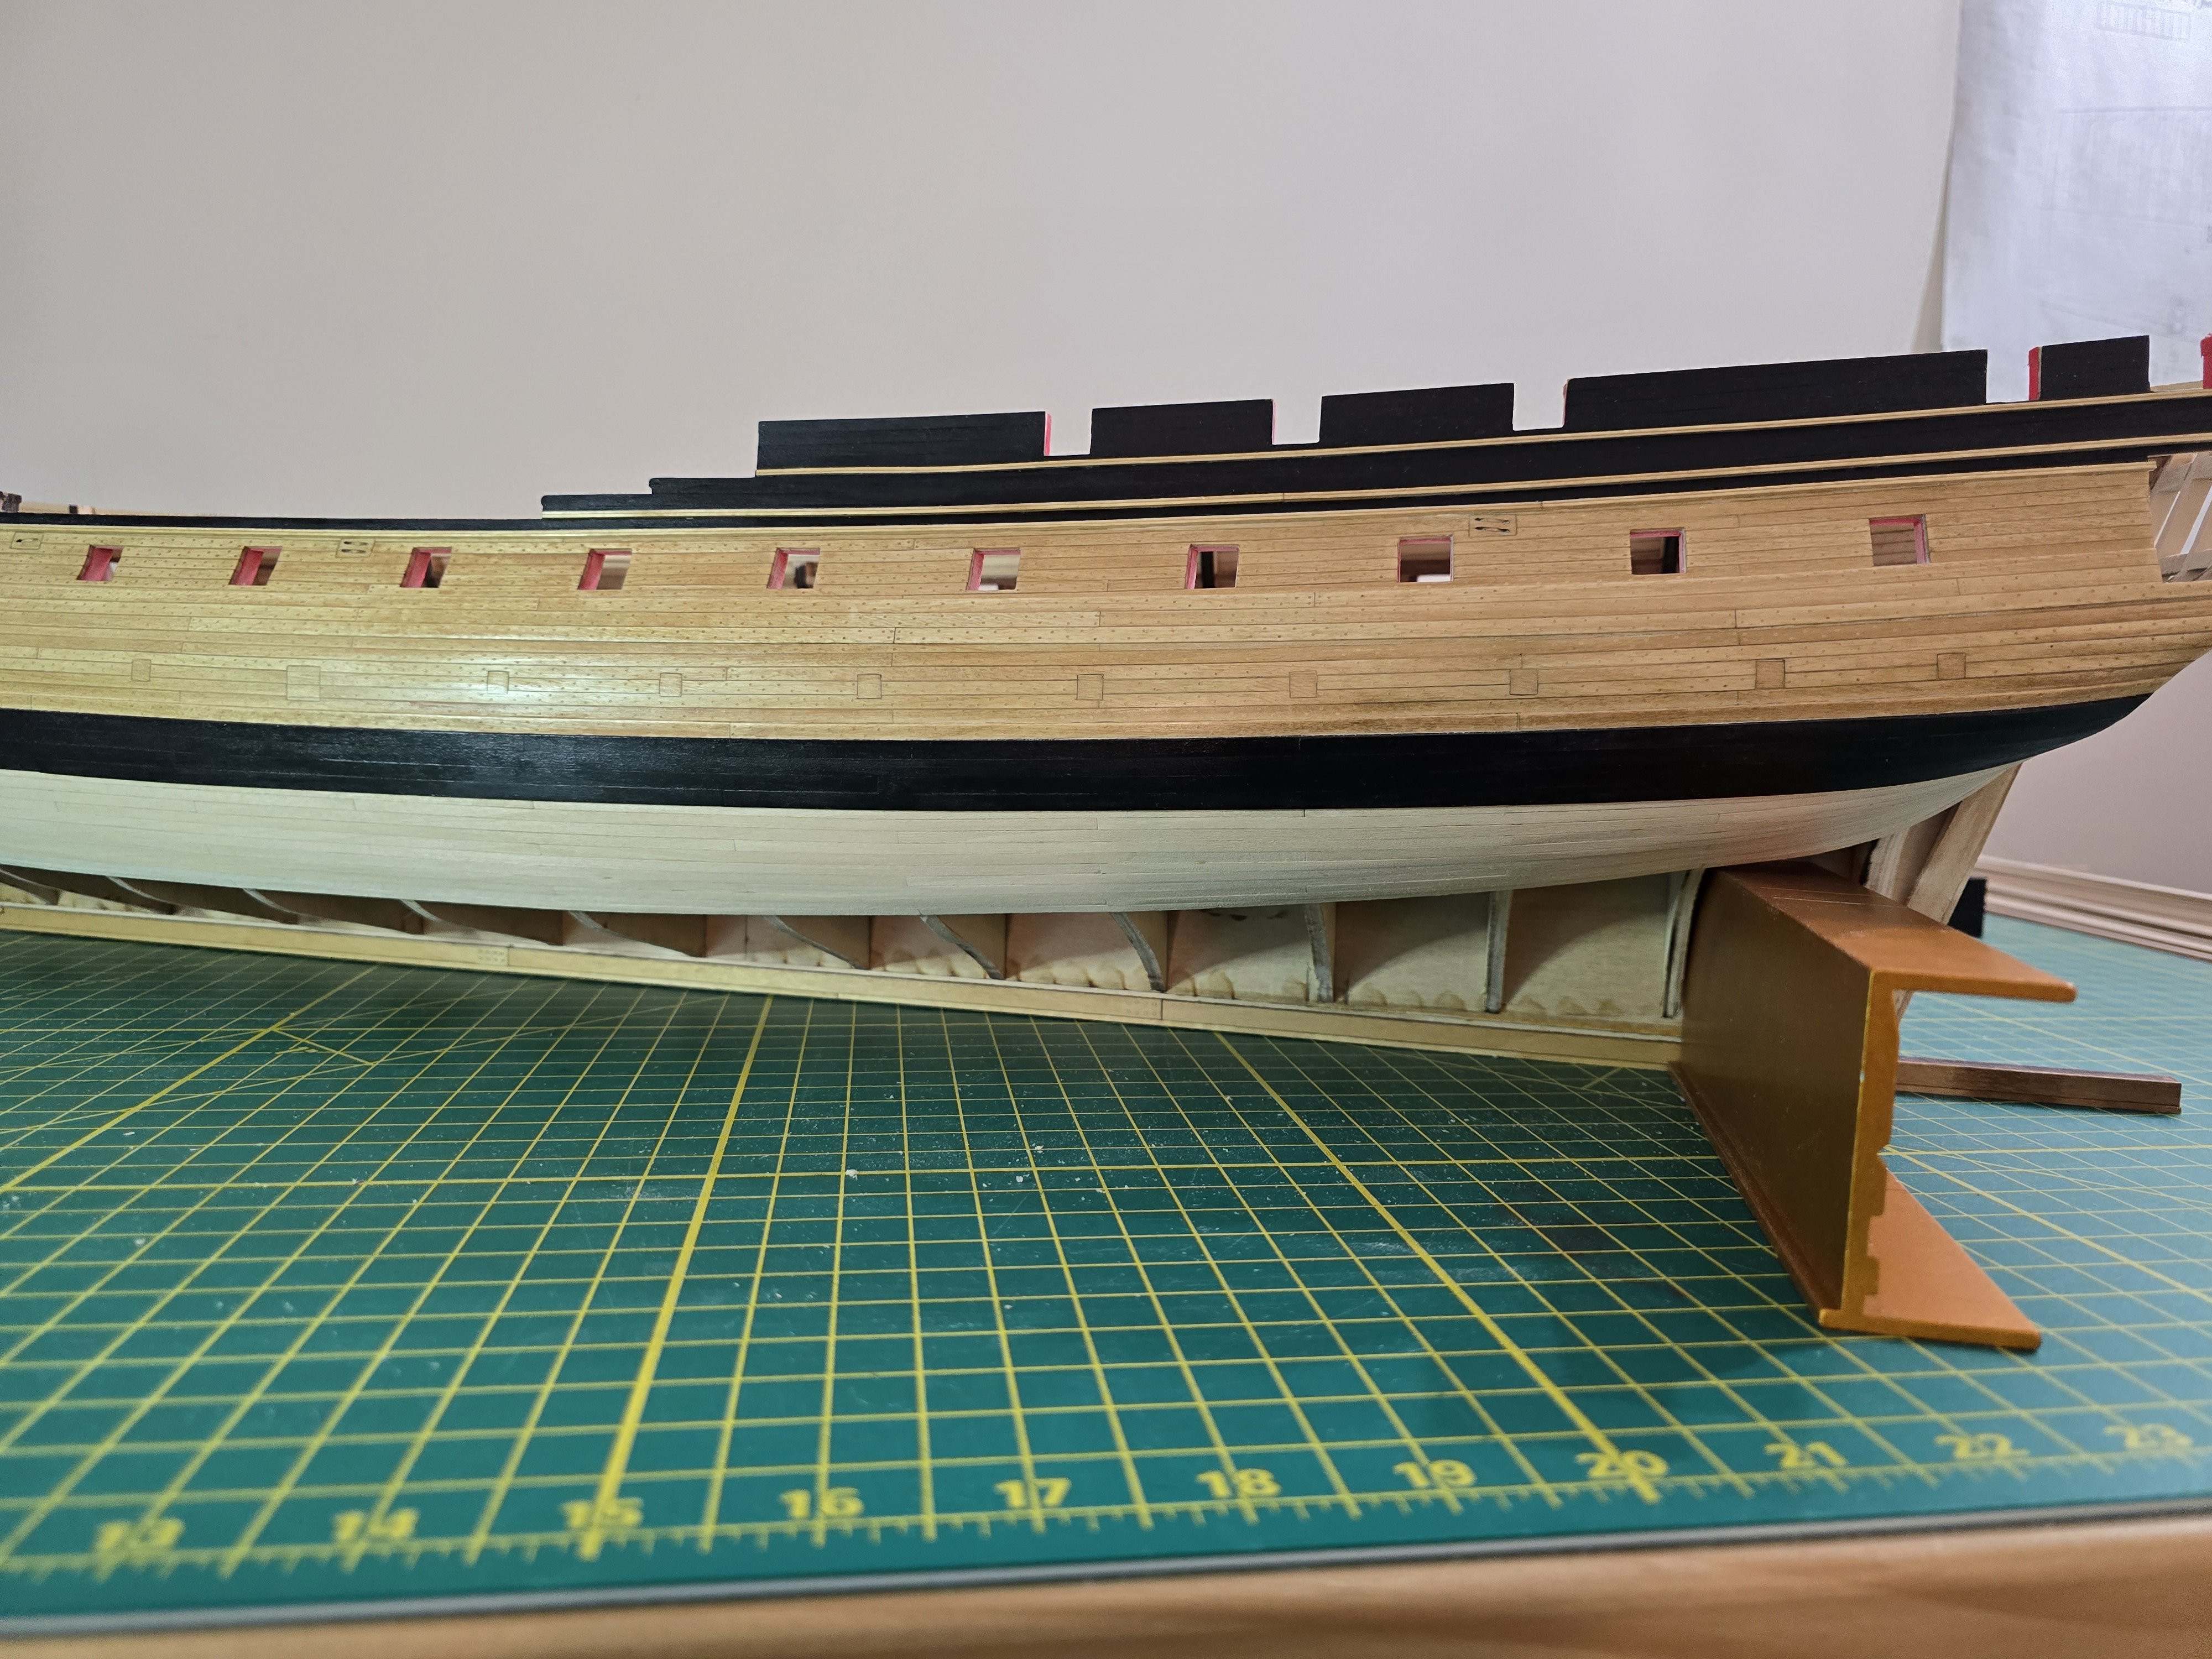
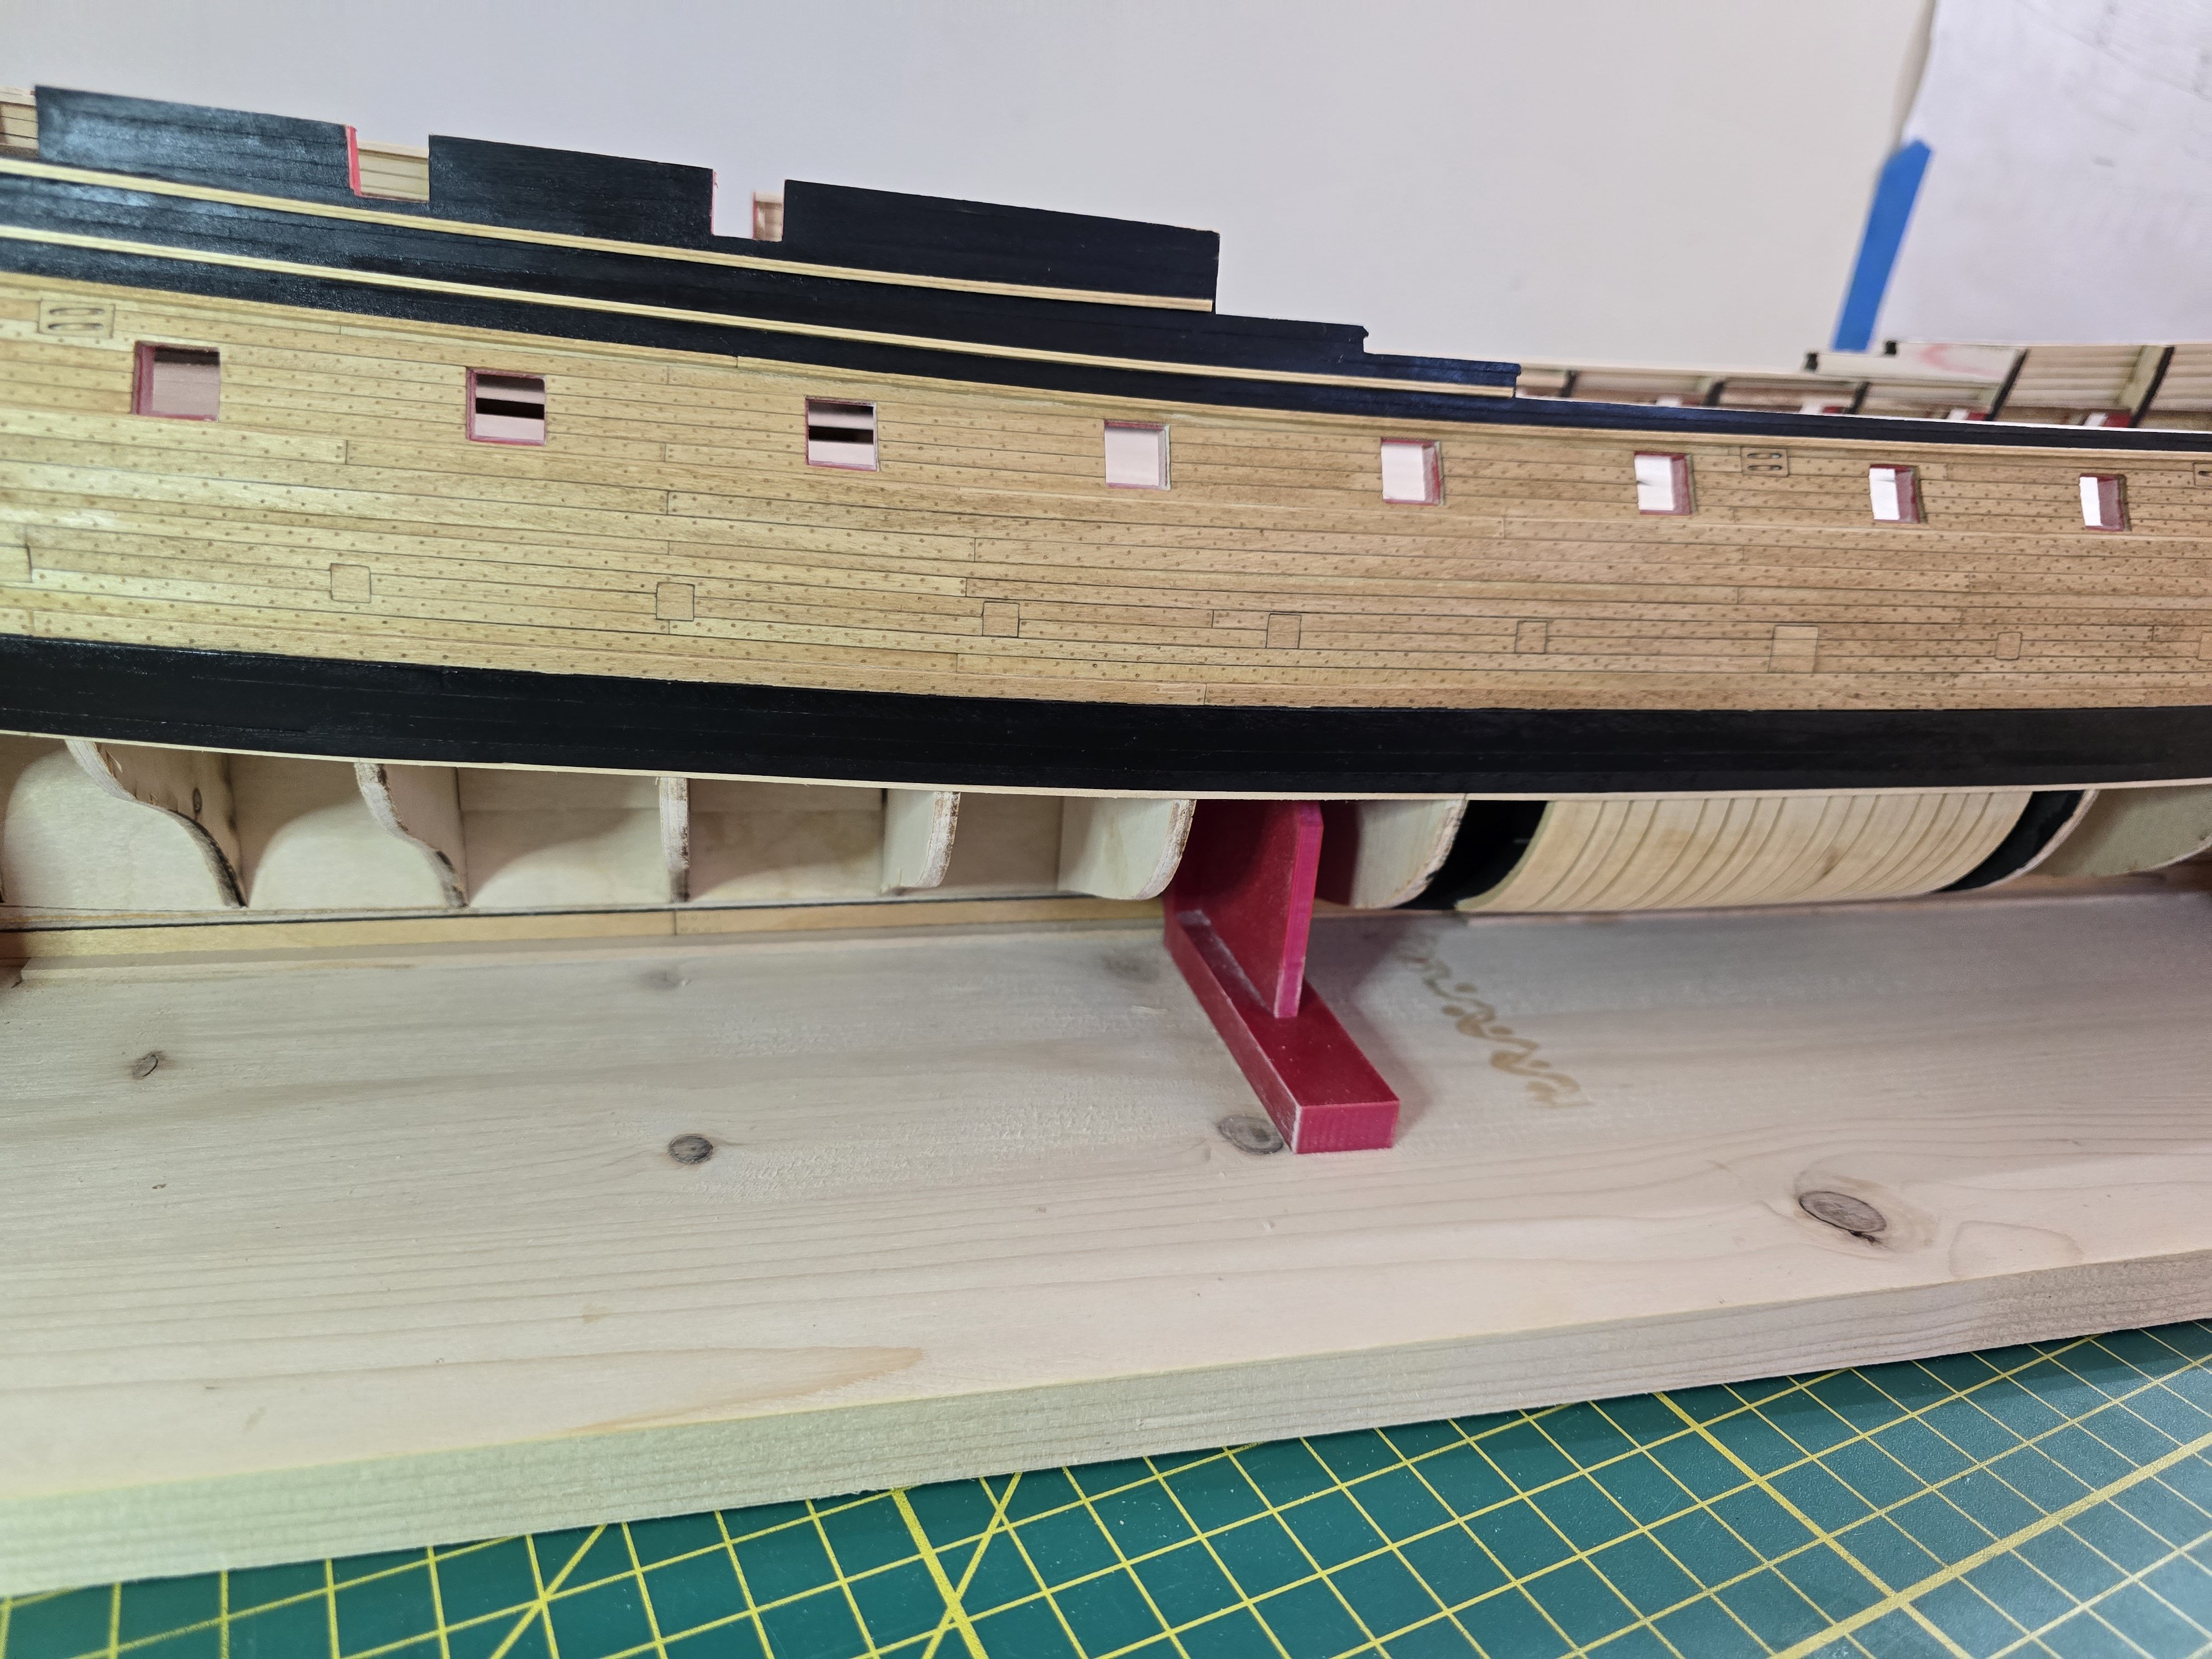
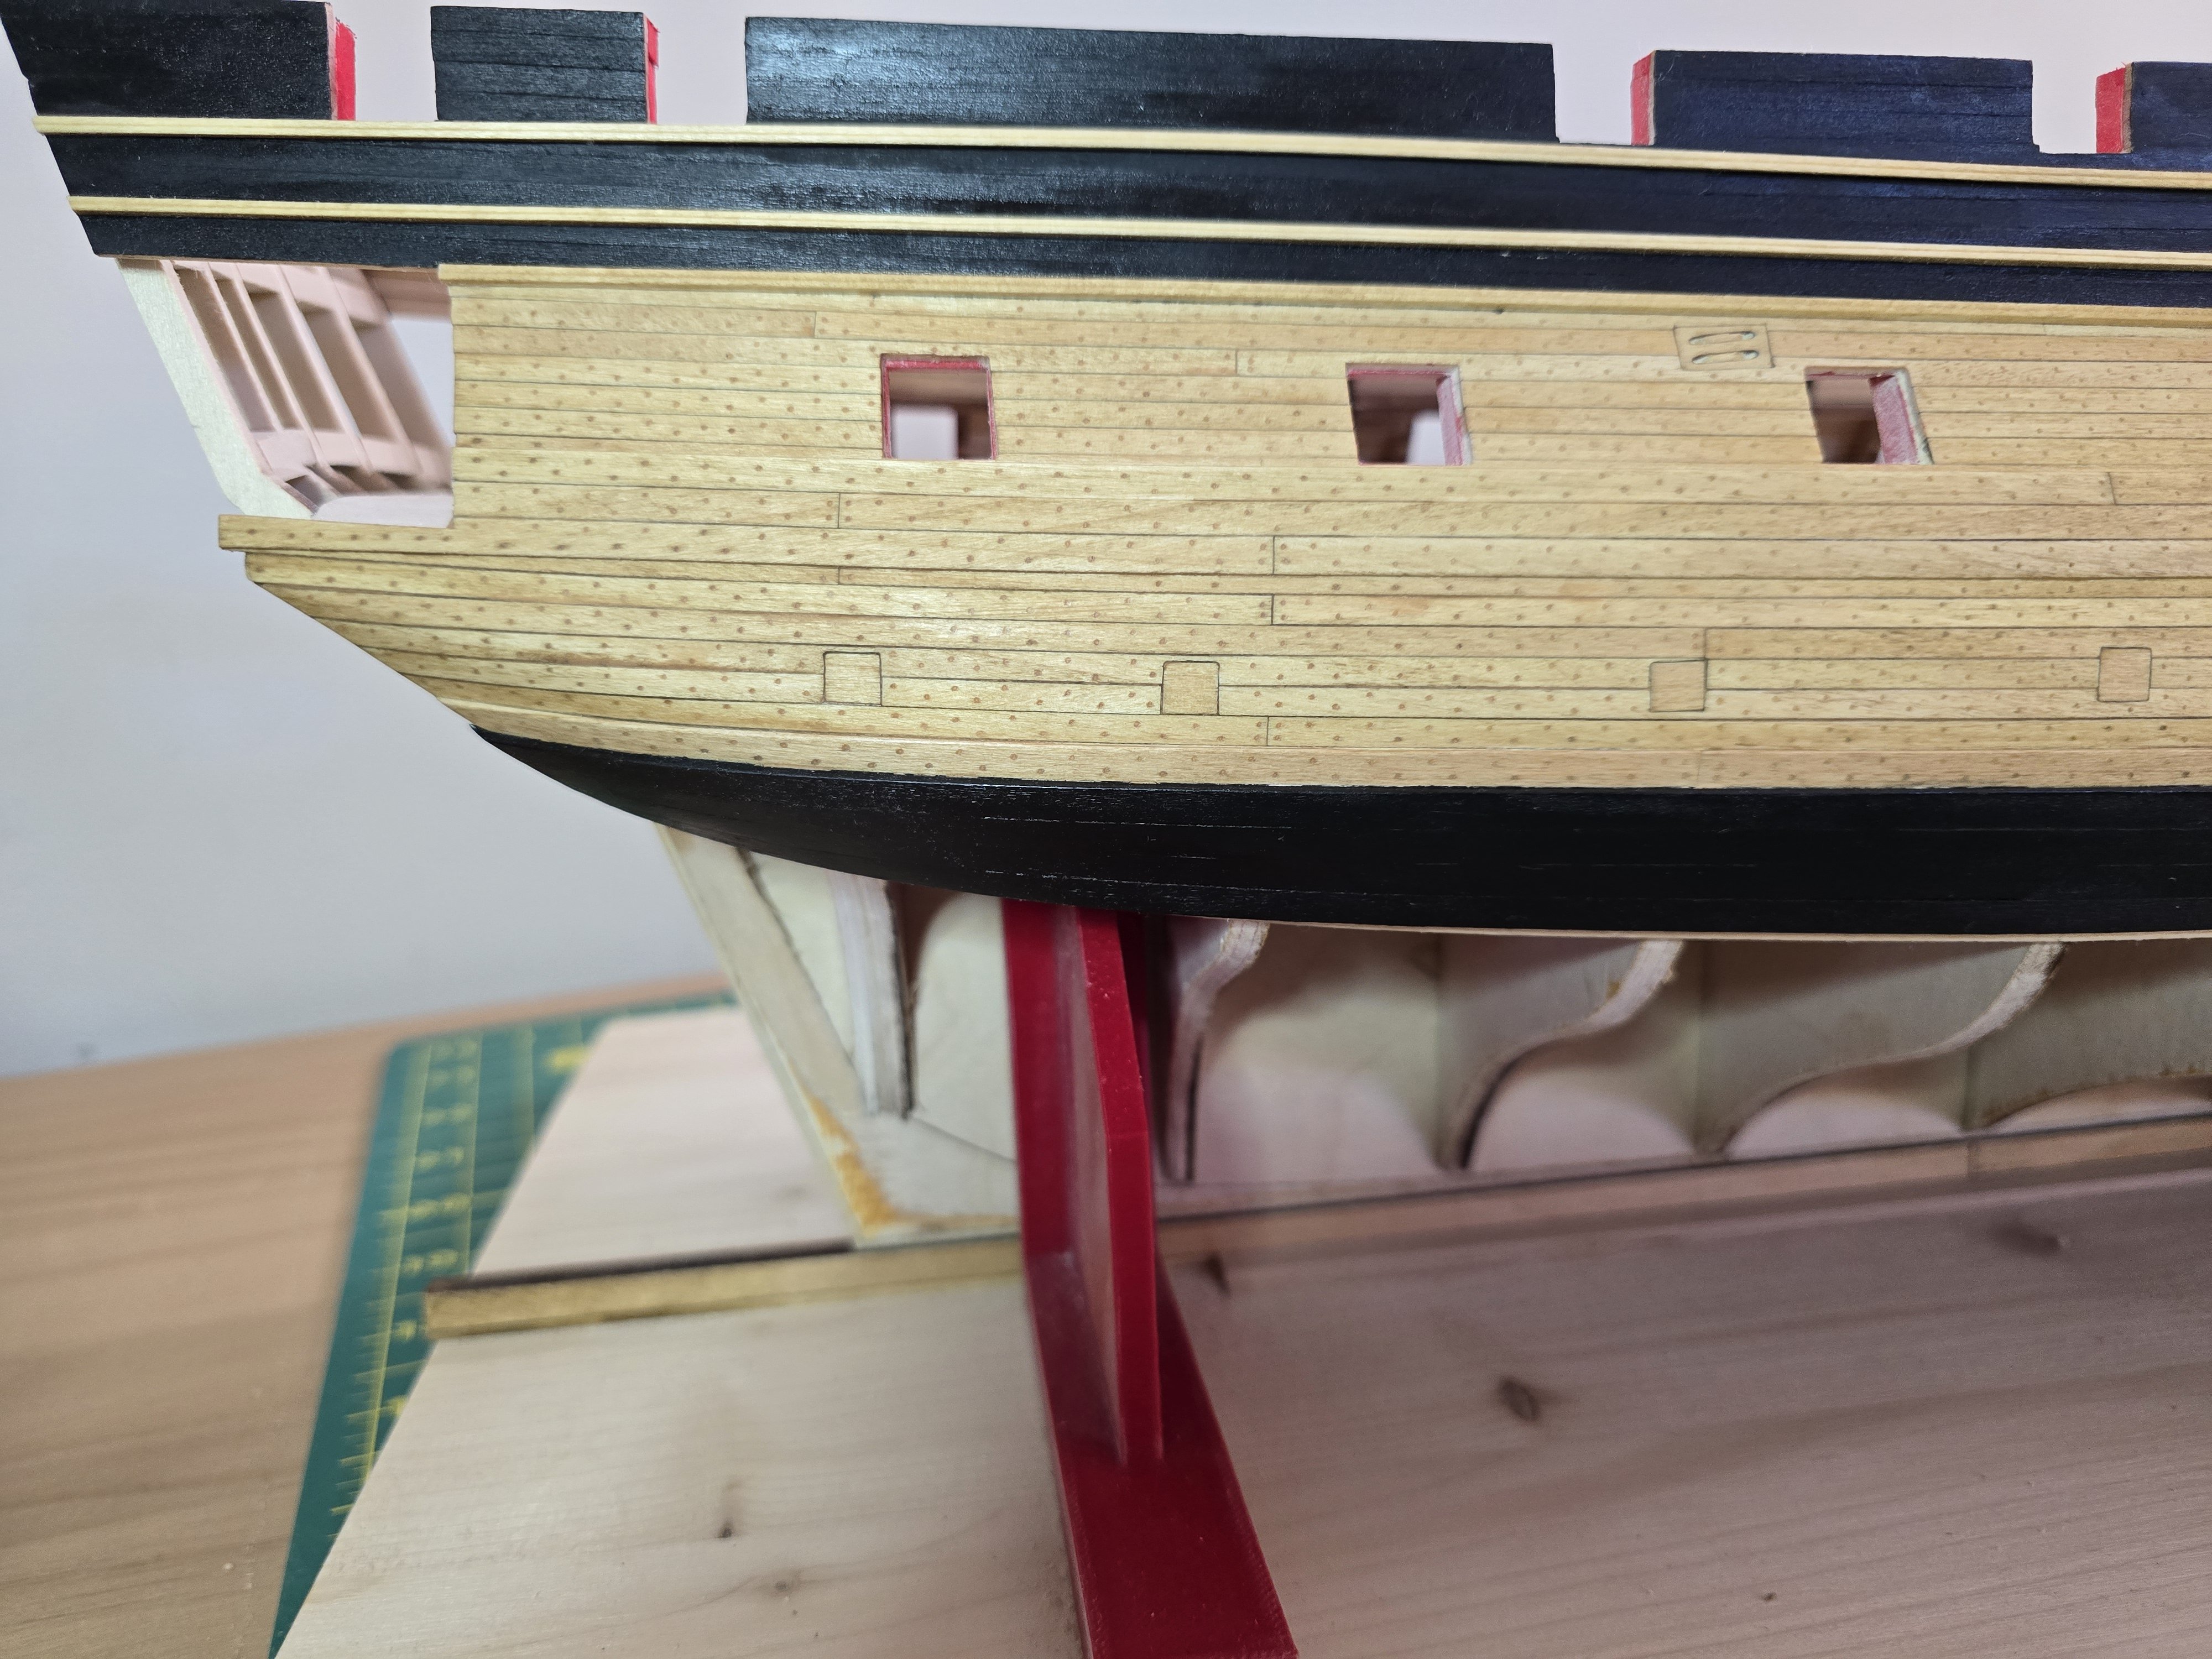
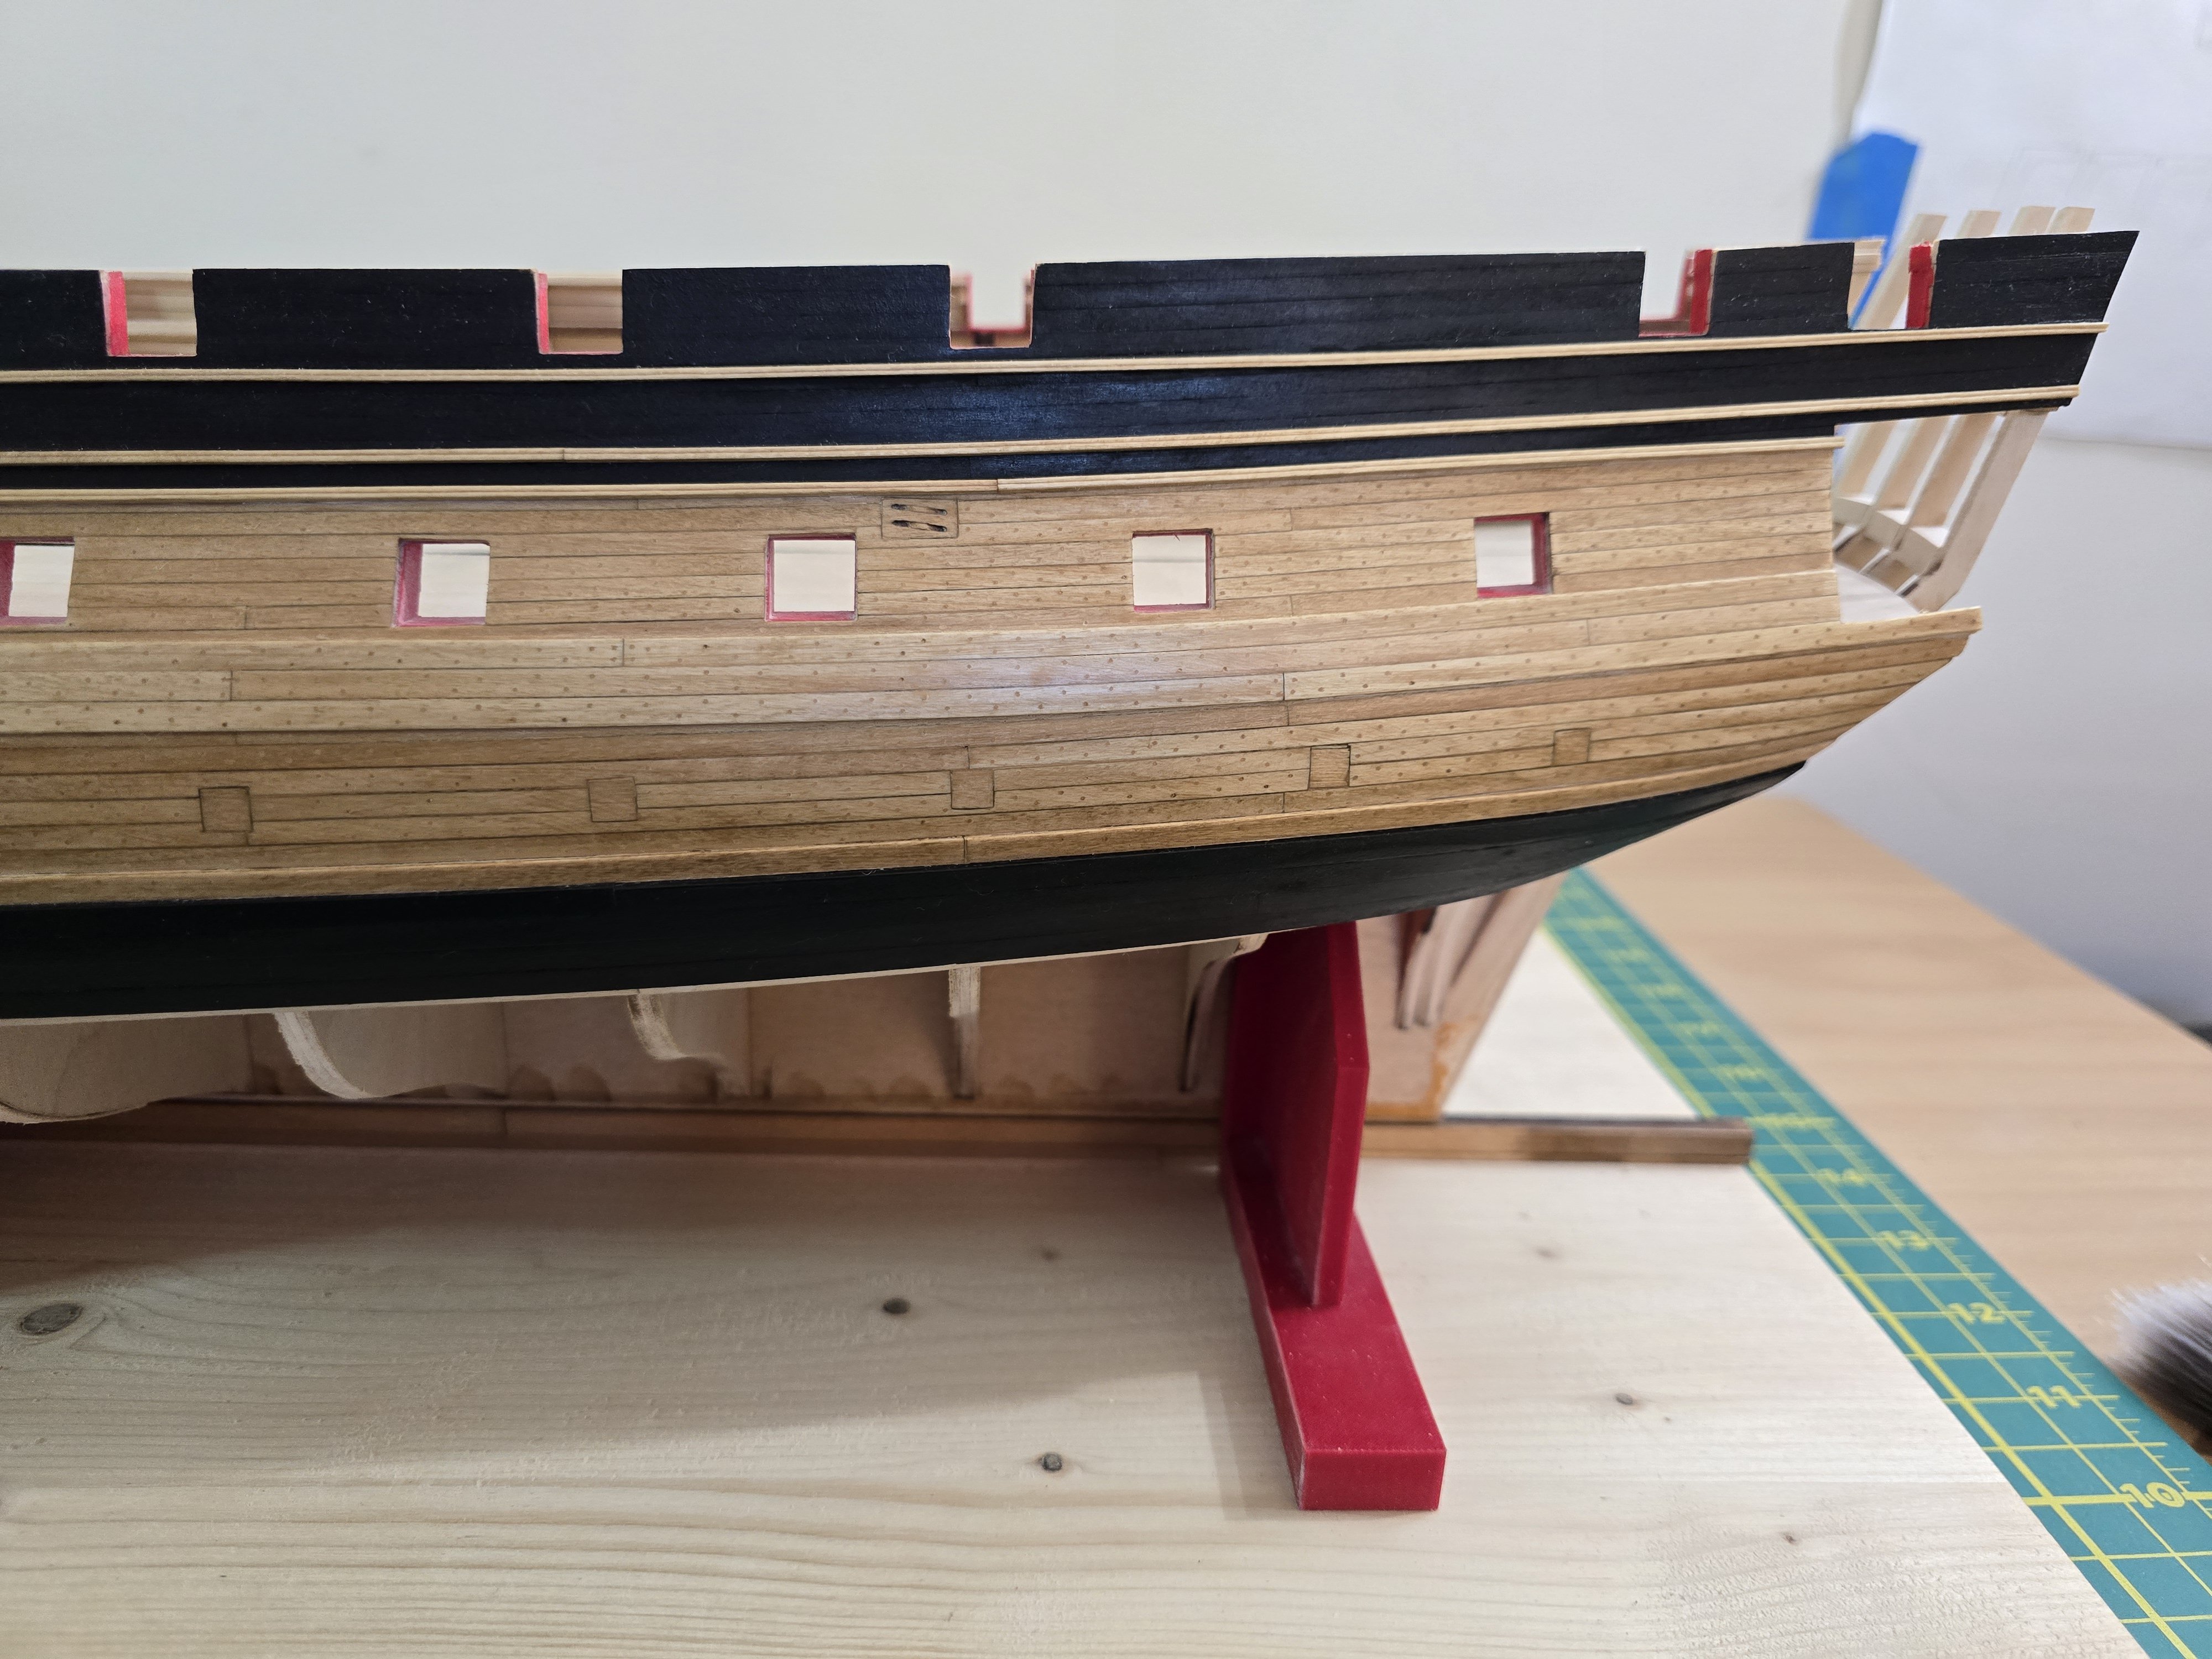
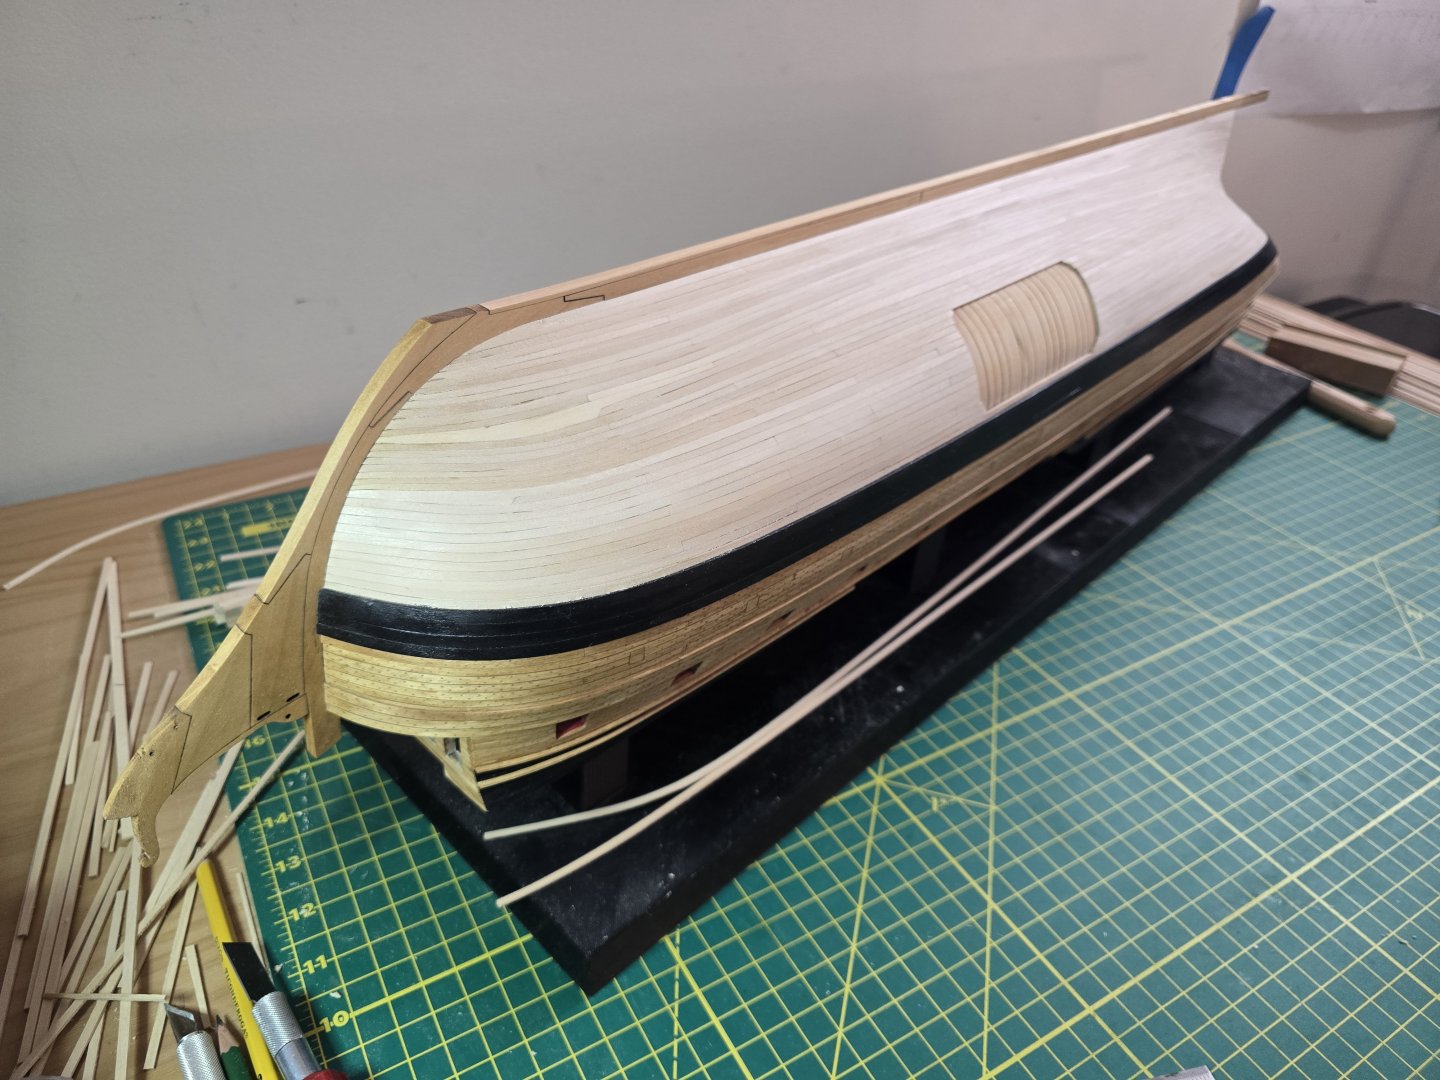
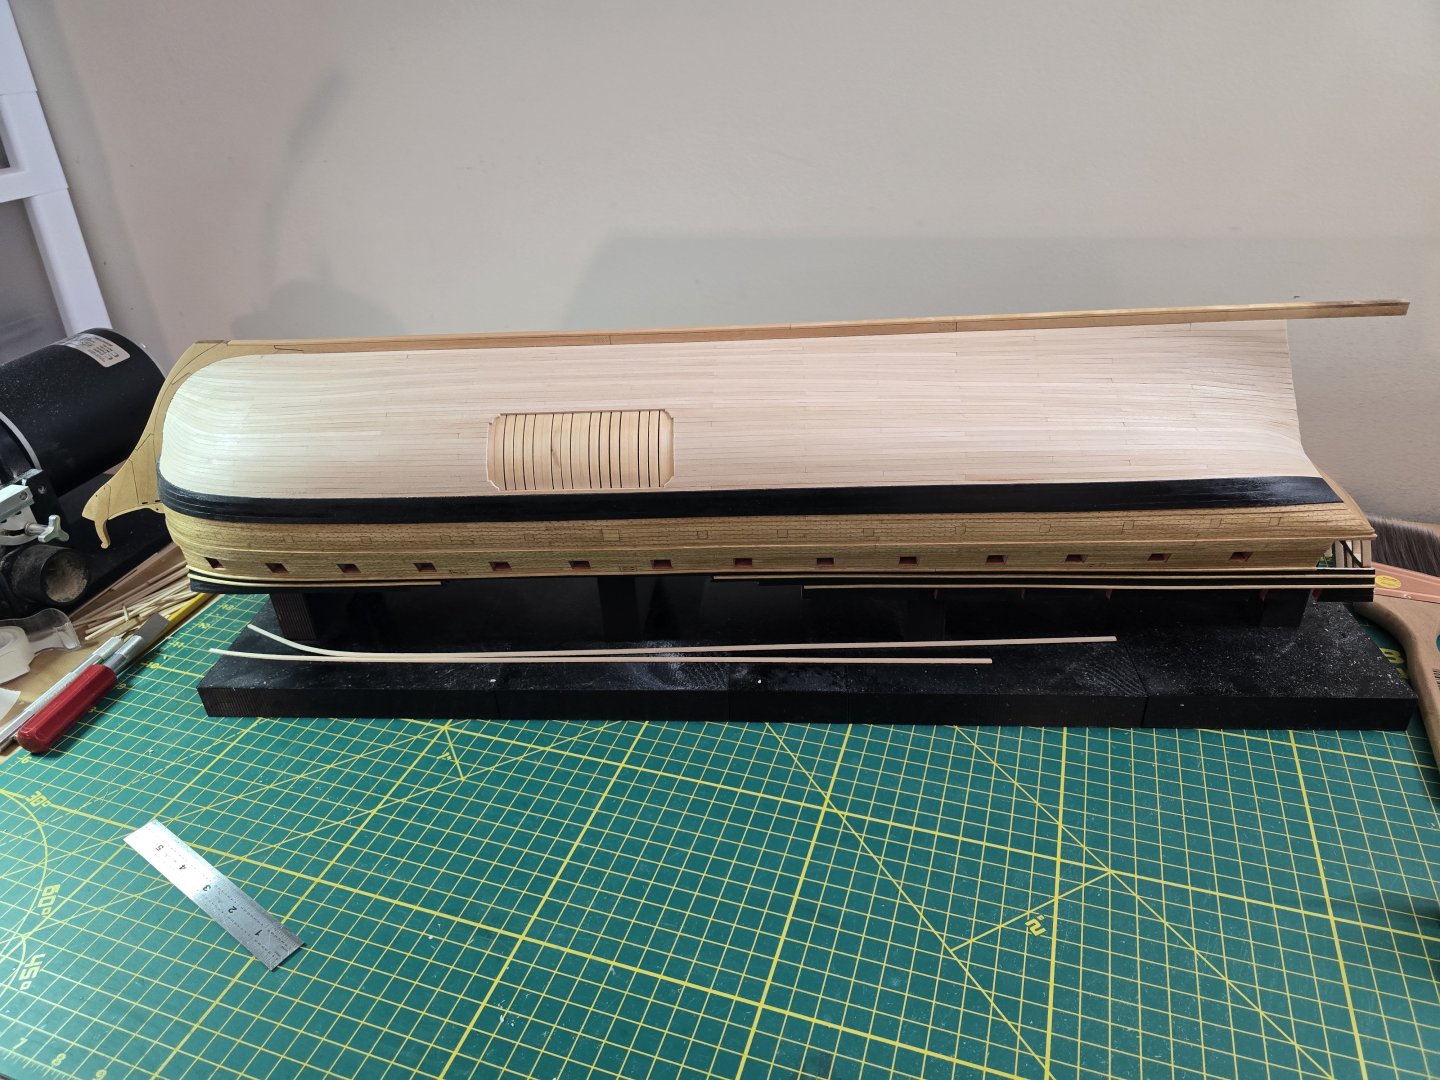
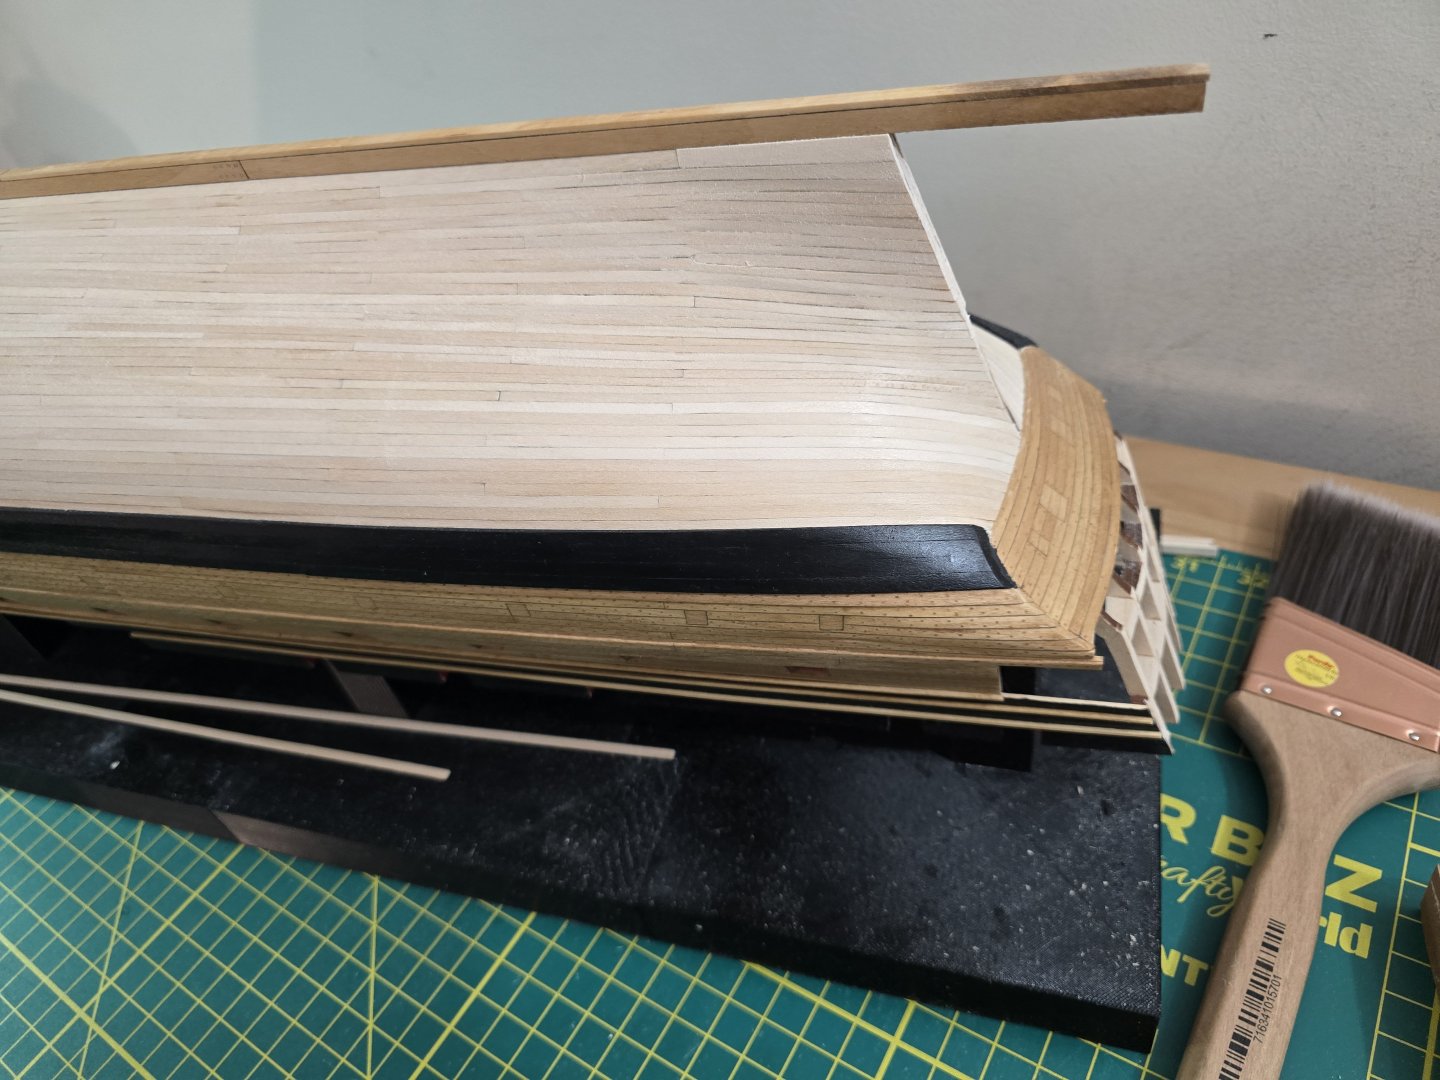
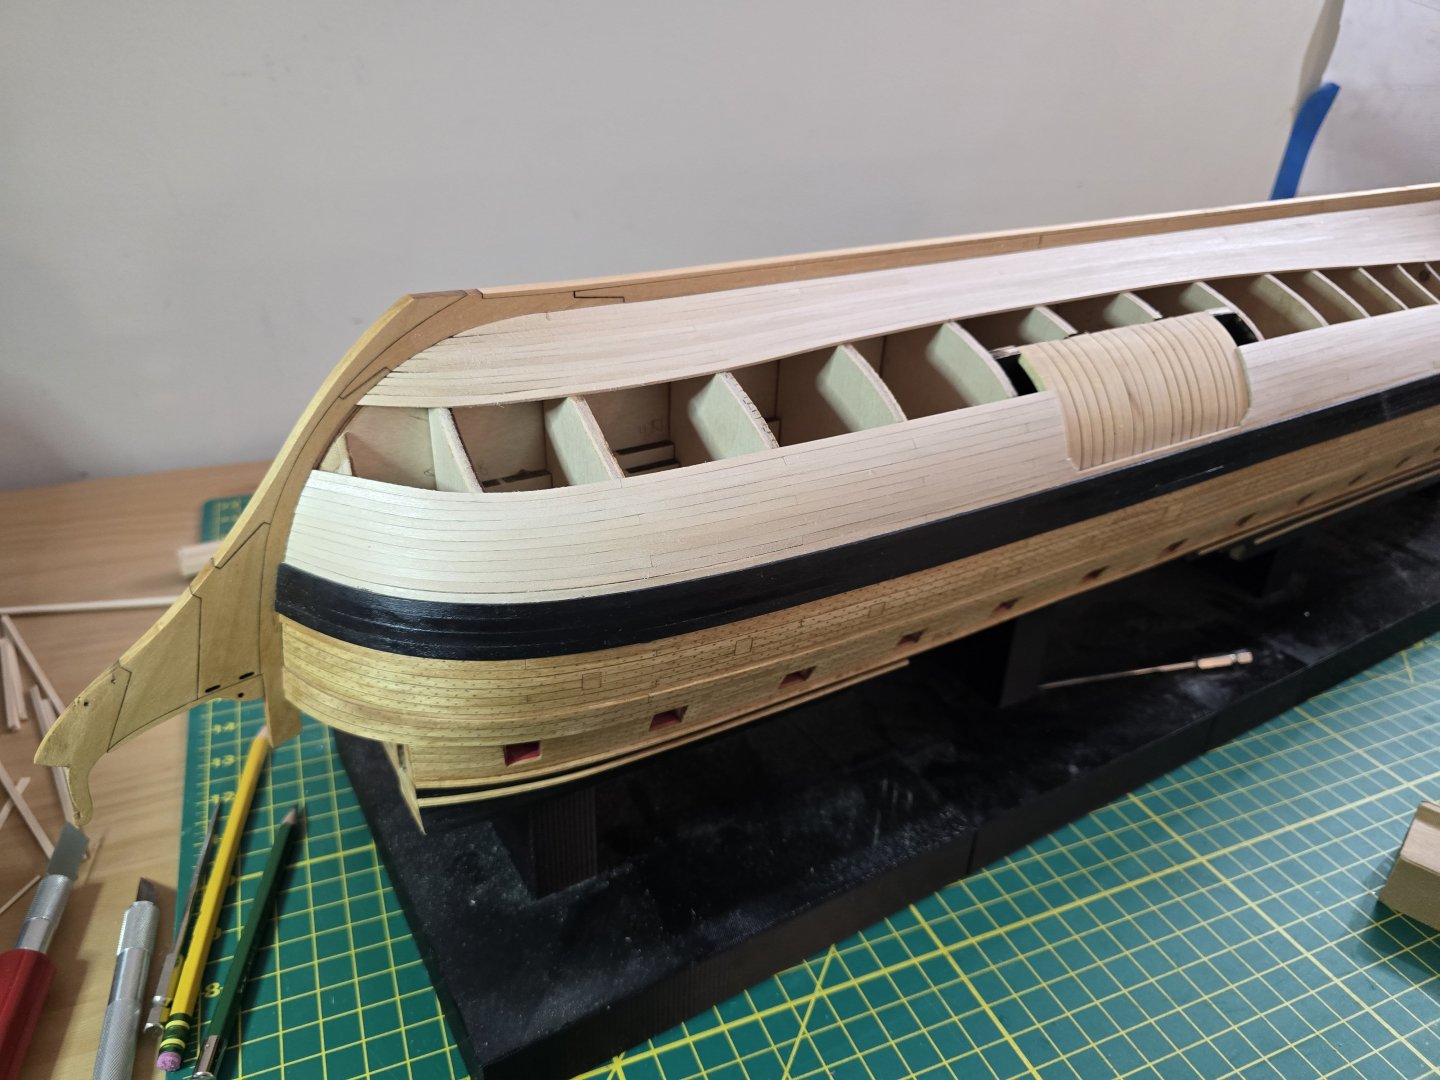
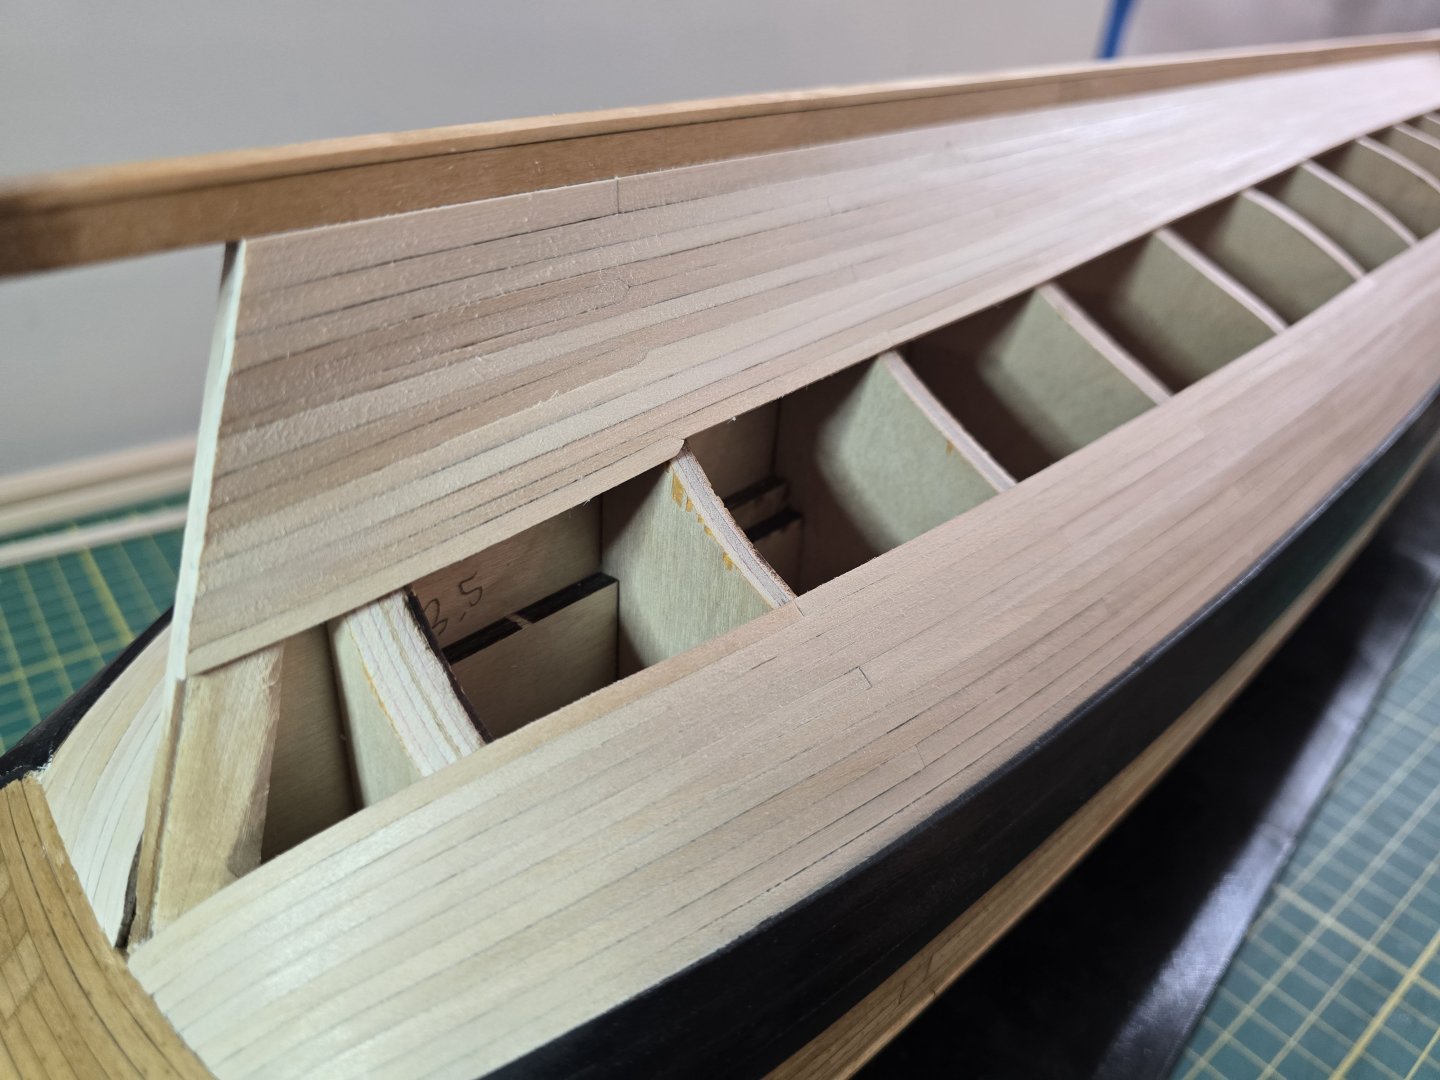
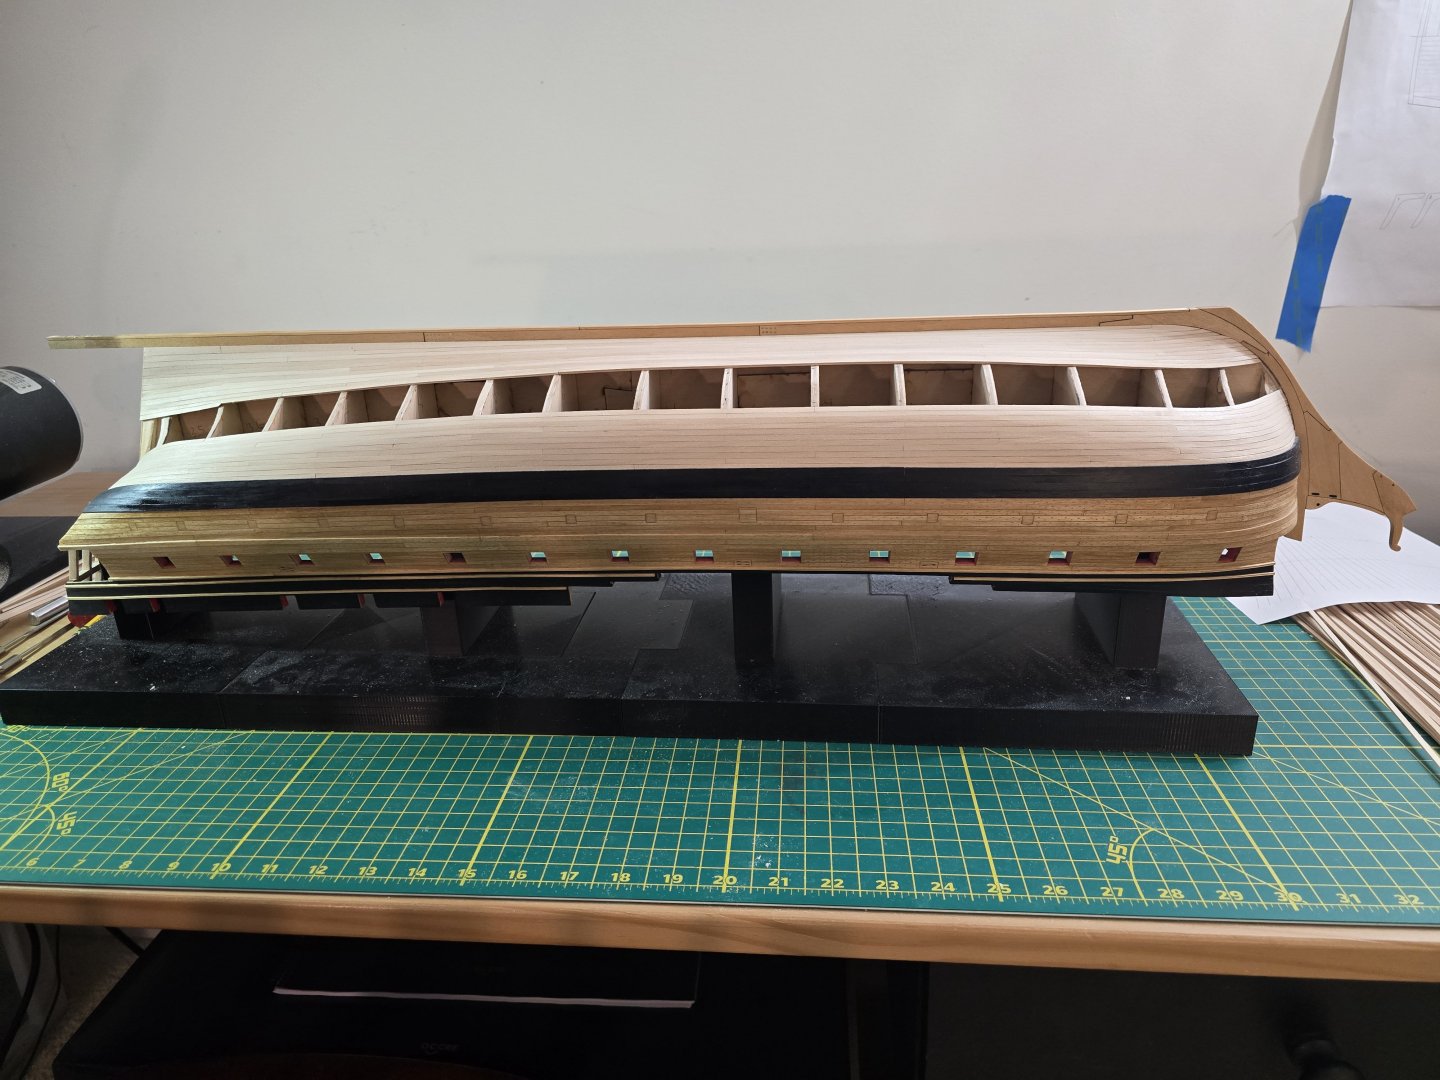
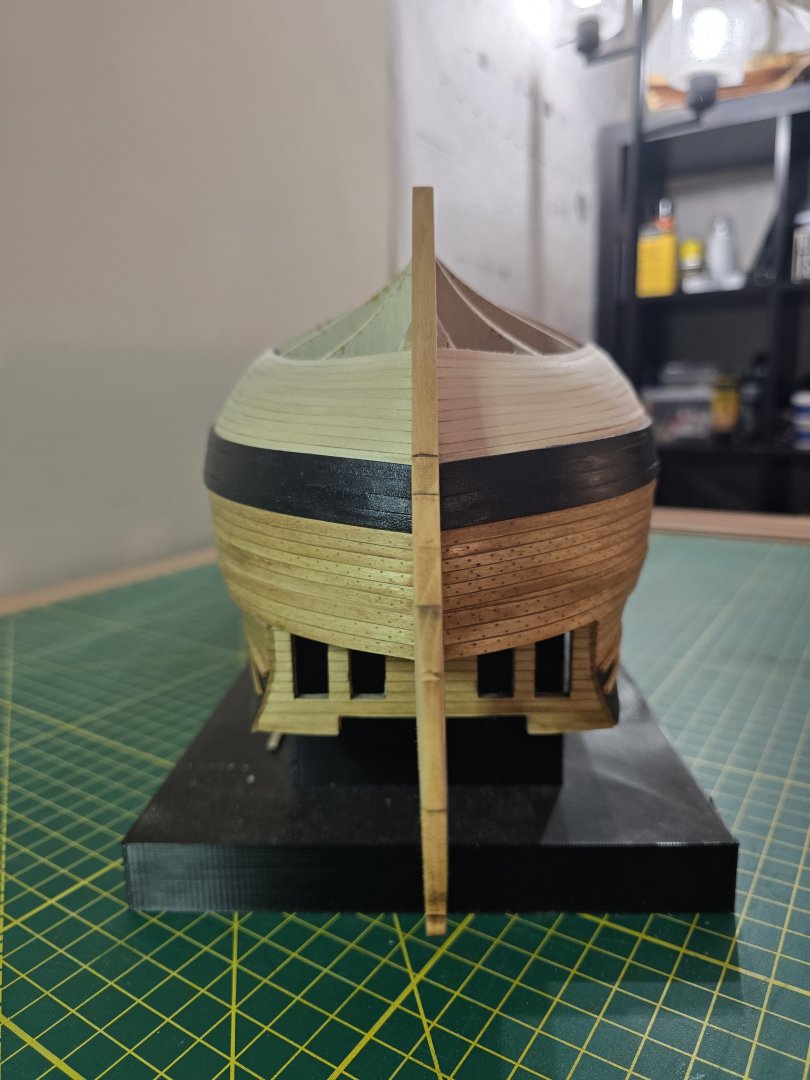
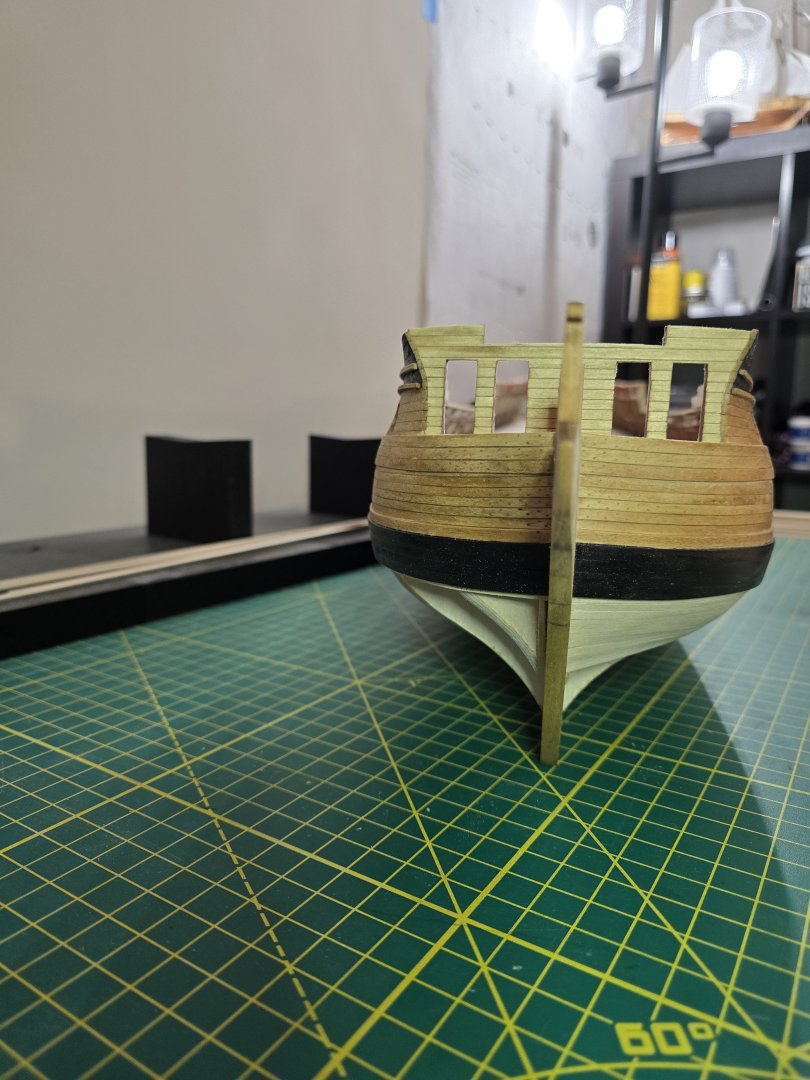
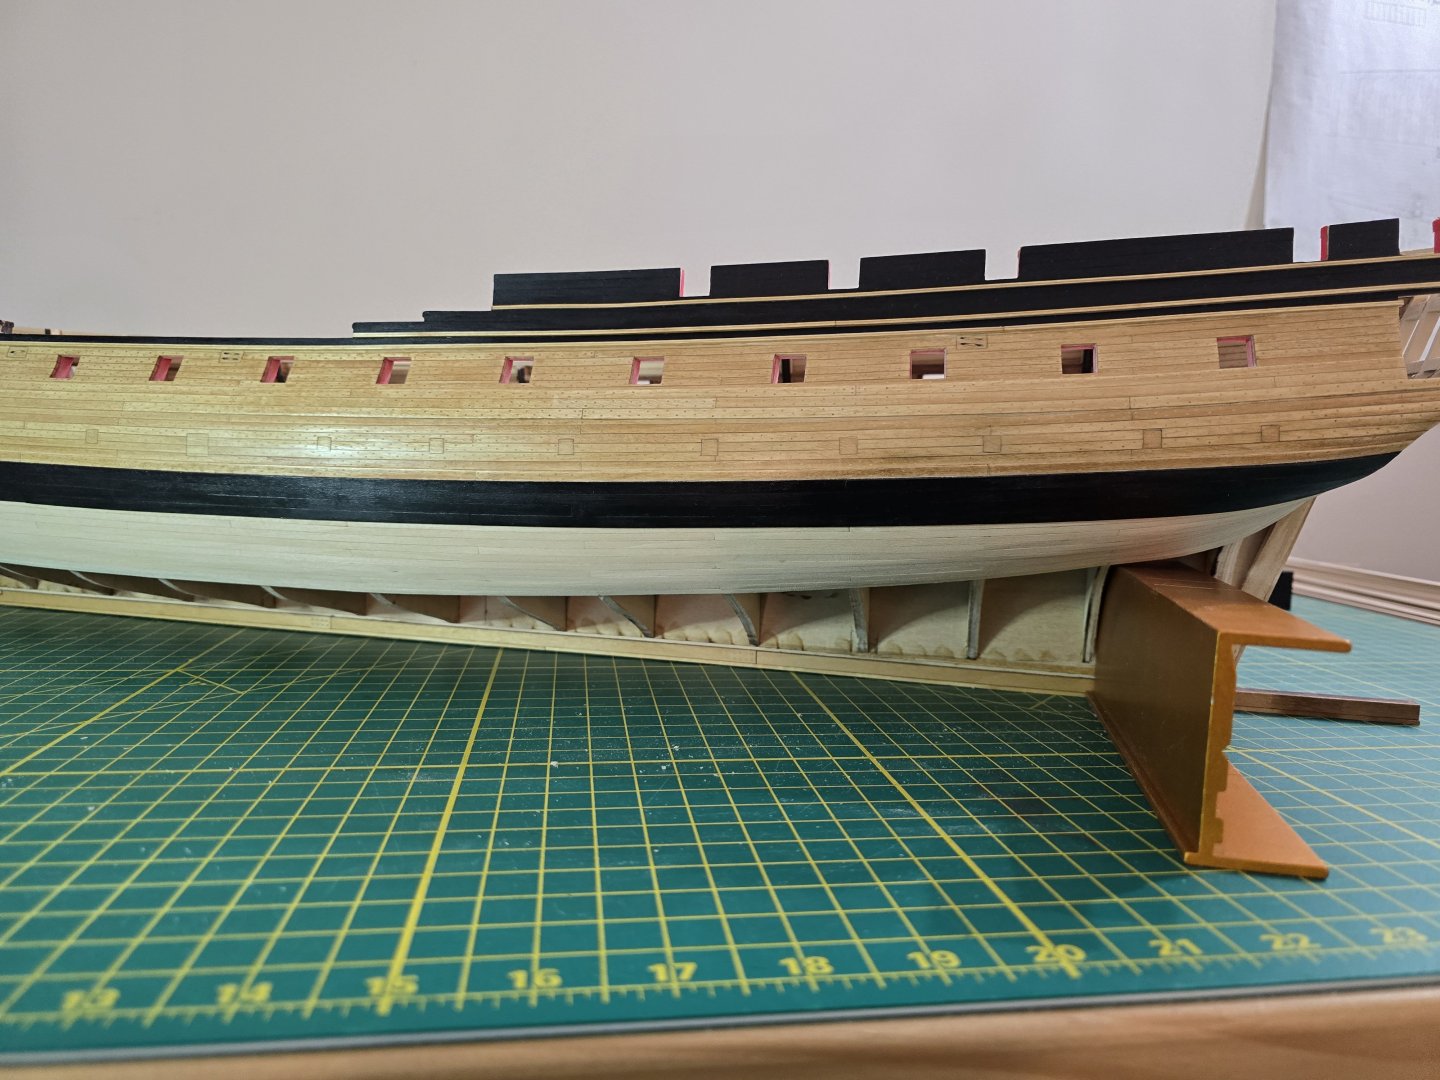
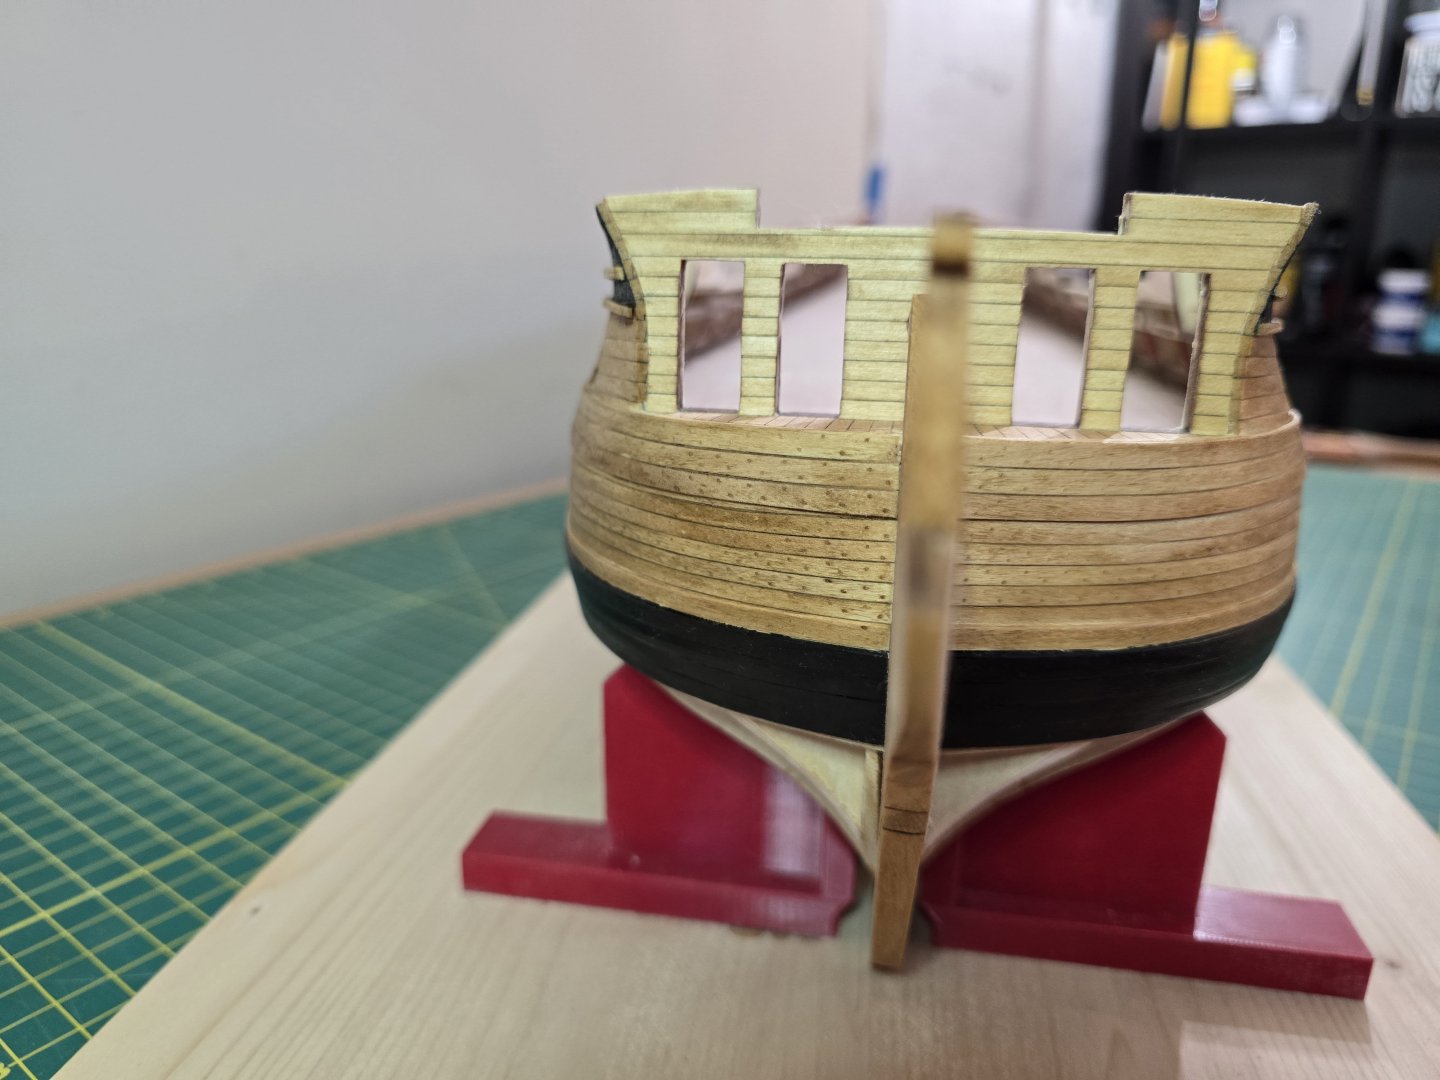
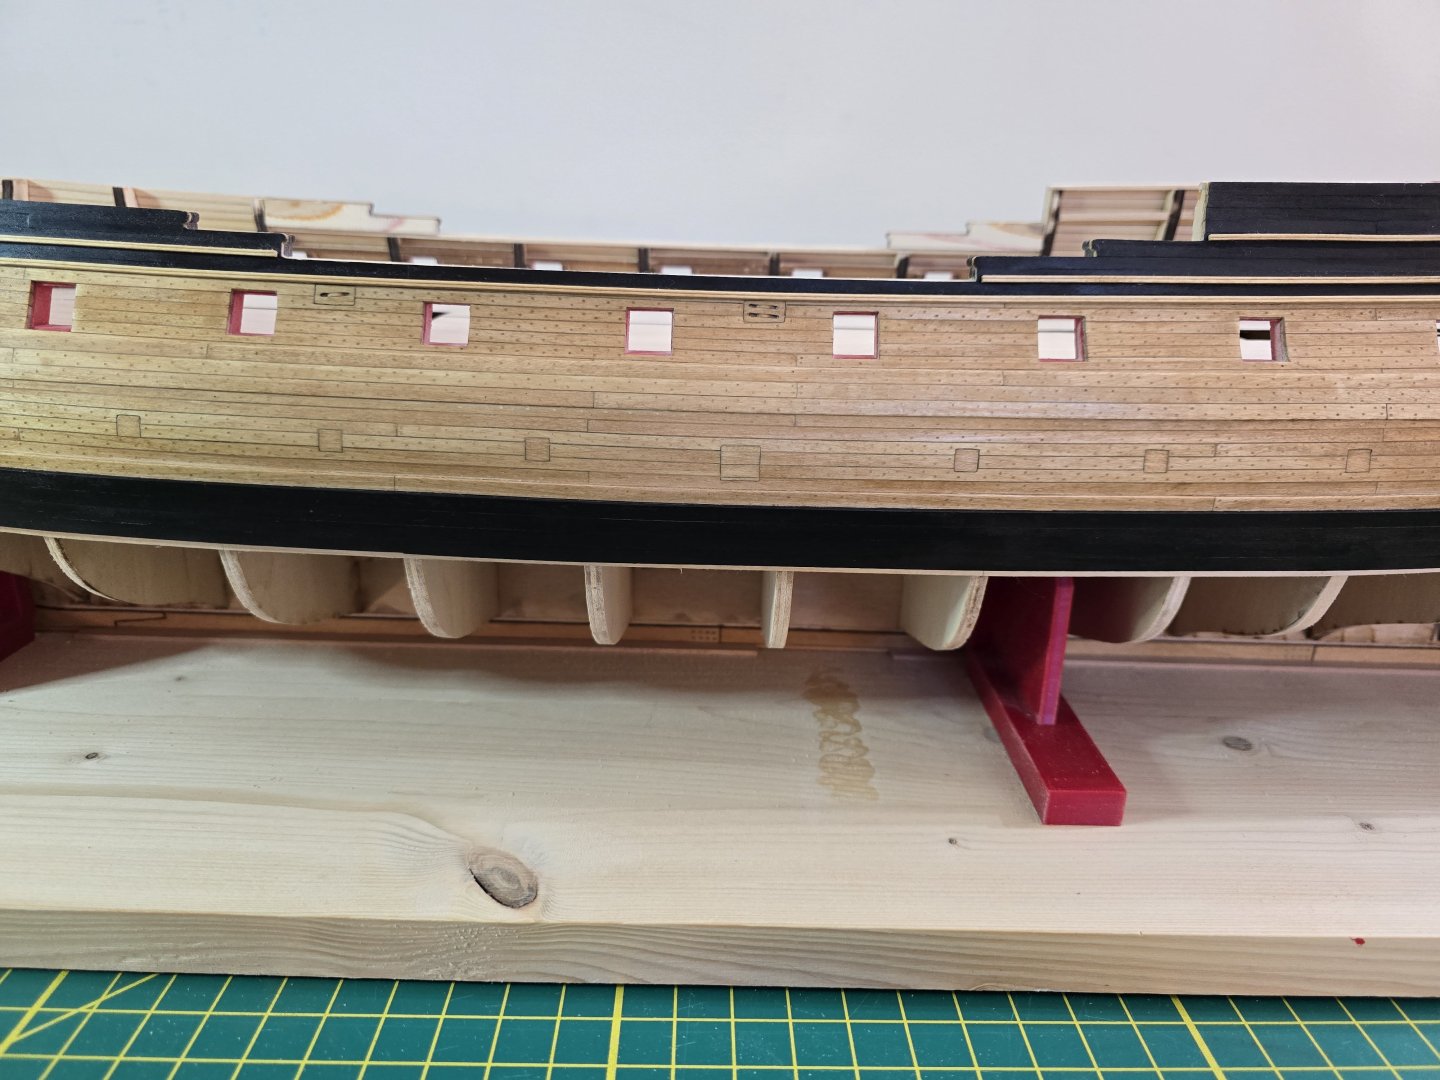
Hey all! Finally finished tree nailing the hull! That sure took a while to do. It took a total of 6327 tree nails. Whew! I completed this step by re-staining and varnishing the hull. Now, this is the first time I've tried to both tree nail and varnish a hull. I can see spots where I can clean it up and bit; but I learned quite a lot doing this. Doing 3 inches at a time was key to not get overloaded with this step. Here are the pics of the hull as she stands now. You might have to zoom in to really see the tree nails. I won't be tree nailing below the wales. I might take a day or two off before starting to plank the hull. Thanks all! Jeff


-
Congratulations! You have done an excellent job! I think it looks cool that you stopped at the main mast cap. It gives a unique look since not many modelers stop there. Here is looking forward to your next build! Cheers! Jeff
- 21 replies
-
- 1
-

-
- Santisima Trinidad
- OcCre
- (and 2 more)
-
Thanks Bug! Like the instructions say, focusing on 3" segments really helps me get through this process. I hope she will look better with these tree nails! I also can see why this is one of your favorite kits. It has been very fun so far and the instructions are excellent. Ill check out your joint build log! Also, if you decide to make a build log of her later this year, I would be interested in following along! Jeff
-
Hey all! I know it's been quite a while between my last post, but I've been super busy with my Confederacy build and currently in the middle of tree nailing her. But I finally was able to give my Cheerful the quality time she deserves. First, I have to admit, I measured twice and cut once with making my strips, but I guess my eyes were tricking me! I thought i was milling 3/32" strips, but instead, I was making slightly thinner than 1/16". This was too thin. I had to create a new jig to measure out 3/32" and mill more strips at the correct width. It always hurts knowing I milled the wrong sized strips. I then had to remove all the strips I had glued on her. Believe me, that wasnt a.... Cheerful activity. Yes. Bad dad joke. To remove the strips, I used Bob's CA unglue and that worked remarkably well. Though I had to still be very careful removing the whale strips. This was disheartening, but it's best to fix things now than being in a much worse place later. I have since glued on both rows of the first layer of the wales. I then glued on the molding strip right below most gunports. This molding strip needs to be 1/64" below each gunport except for the first port. The best way to figure out where to place the molding at the bow is studying the plans. To make the 1/64" between the gunport and strip, I created a small jig to measure out that width. I would hook this over the gunport and push the molding strip up against it. At least this way, it will help to keep a more even and consistent width between the molding strip and the gunports. Soon, I will continue planking the gap between the molding strip and the wales. Thanks all! Jeff