RiverRat
-
Posts
206 -
Joined
-
Last visited
Content Type
Profiles
Forums
Gallery
Events
Everything posted by RiverRat
-
 Alexander, I had not run across your work before. What a treat to see such exquisite craftmanship. Bravo!! Many thanks. Regards, Brian
 -
Blockade Runners - Paddle Steamers
RiverRat replied to the learner's topic in Nautical/Naval History
John Fryant has model plans for various steamboats: http://modelplans.steamboats.org/ This one, perhaps, relating to your topic: USS Choctaw, Union navy sidewheel ram gunboat http://modelplans.steamboats.org/p2-choctaw.html These books by Alan Bates are great resources for steamboat model builders, though geared to riverboats (sometimes used as transports in the War of Northern Agression, mis-named the Civil War): The Western Rivers Steamboat Cyclopedium The Western Rivers Engineroom Cyclopoedium I believe these are out-of-print, but might be found used at Amazon or eBay. Brian -
Hmmm. I hope your pharmacist doesn't get into trouble for being a reasonable rational human being!
-
Can anyone recommend a miniature hand plane?
RiverRat replied to Bettina's topic in Modeling tools and Workshop Equipment
Stanley has this inexpensive plane I've always been happy with for small work.... http://www.stanleytools.com/default.asp?CATEGORY=PLANES&TYPE=PRODUCT&PARTNUMBER=12-101&SDesc=Small+Trimming+Plane I've used it for such as turning 1/16" diam. round sticks into square stock. Brian -
Hi Jared, Yes, as Russ said, a steamboat would be carvel planked. But absatively, posilutely, don't bother trying to plank this one. I have one of these waiting in the wings and dug it out to look at the scale. It's 1:139. If it had, say, 12" planks, that would be about 5/64" on the model. Just paint the dang thang. Brian
-
Hi JPett. I've enjoyed looking through your build! It's good you're keeping your cheerfulness in getting through your ouches. I thought I'd collected most of the descriptions-of-Rattlesnake stuff and saw this in post #9: "The Rattlesnake had an enlarged transom and dummy window to confuse enemy ships as to her true size." Where might this be from? Regards, Brian
-
Huzzah! Another Rattlesnake! I was hoping you'd post pictures of your build someday. Thanks.......... Brian
-
What is your favorite hand tool(s)??
RiverRat replied to Modeler12's topic in Modeling tools and Workshop Equipment
Boom-box radio/CD player. Gotta have some appropriate tunes in the background for relaxation, working with some of this nick-picky piddely little stuff. Bach on classical guitar or Rossini overtures keep me centered. Brian -
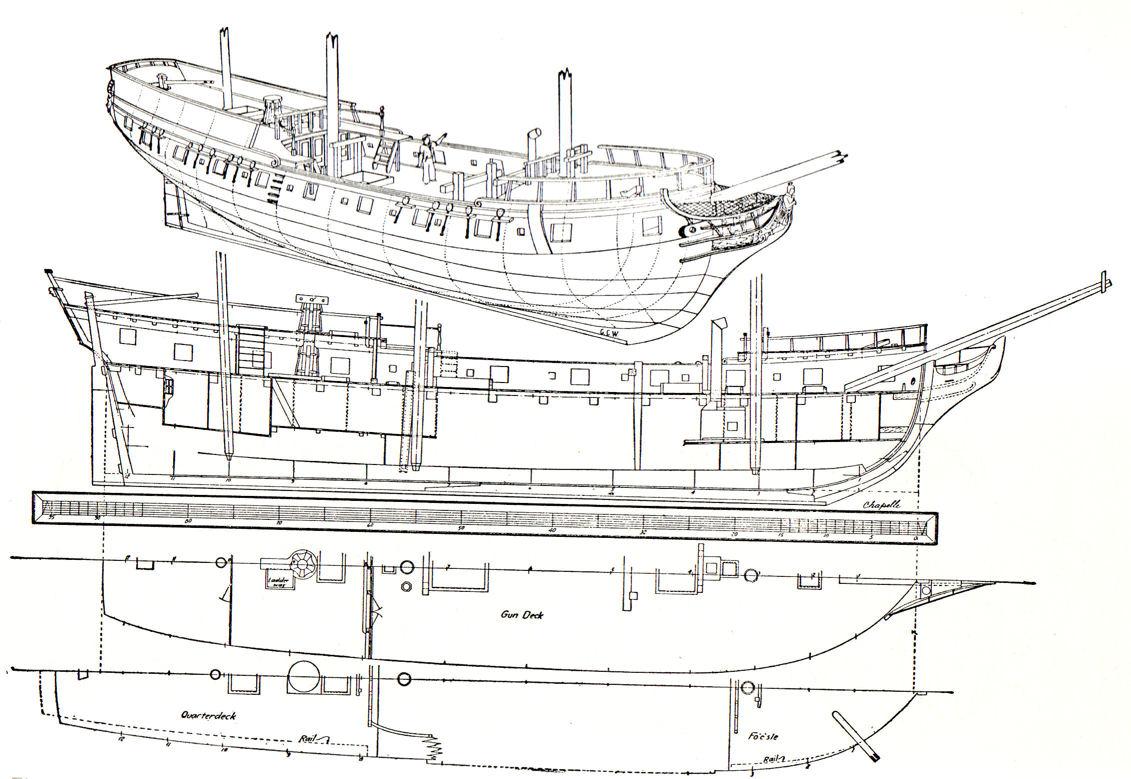
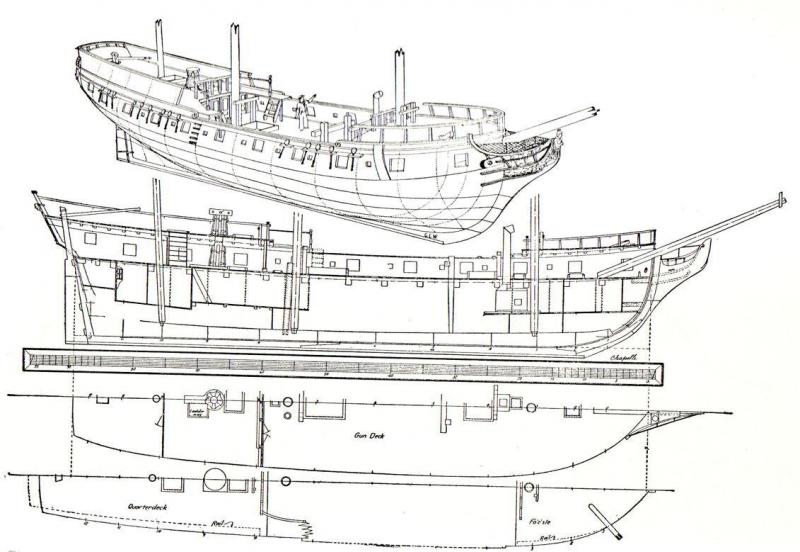
I have copies of Chappelle's drawings, looking too good for me to have scanned from the book. I found where I got them: http://www.awiatsea.com/Privateers/R/Rattlesnake%20Massachusetts%20Ship%20%5BClark%5D.html Right click the pic, "save as" where you want it. Here's one, for example: This also shows the cabin wall mentioned earlier. Brian
-
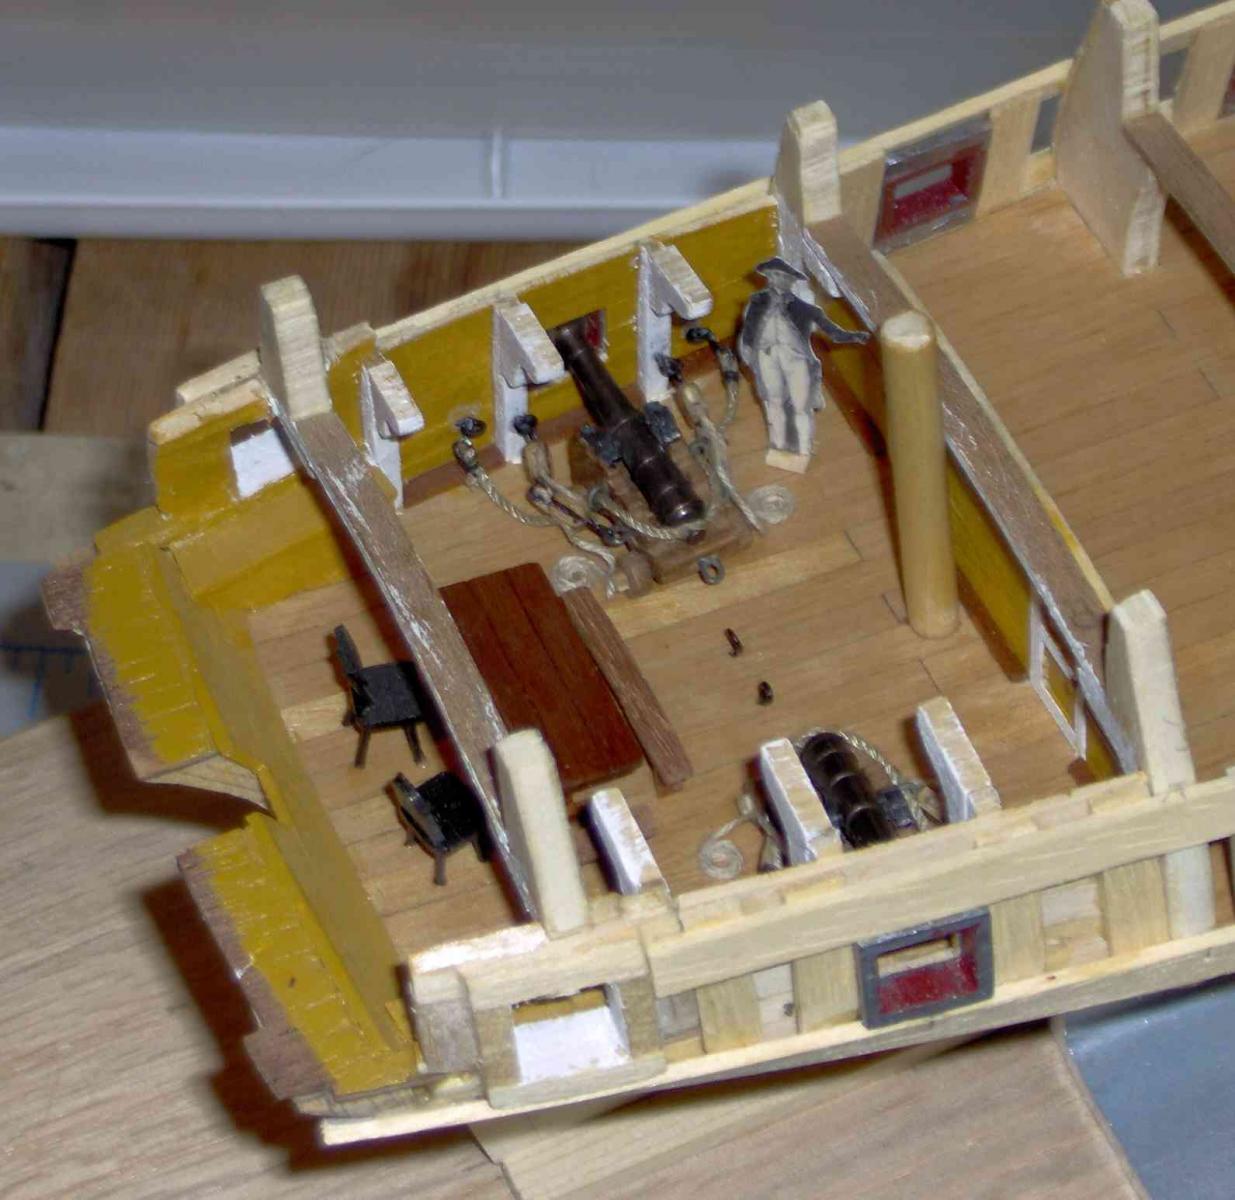
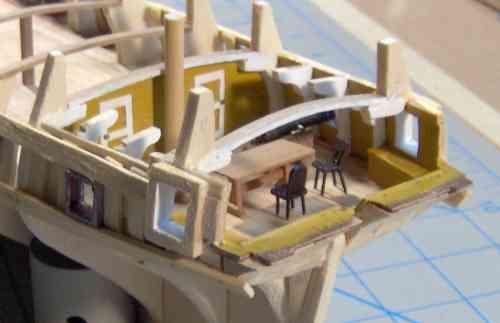
Hi RiverRat, .... And I just realized that the cabin is indeed small; did you make yours extra small as the instructions show that the cabin should hold at least six cannons... Dominik ............................................ The wall I put in with the doors (I assume would actually be a removable bulkhead) splits the area under the quarterdeck in two just ahead of the mizzenmast (the dowel stub in the picture). This is shown in Hahn's drawings so I opted to put it in. Two cannons behind in this captains cabin, and four in front of it (the 'officers mess' maybe?). I had taken out a chunk of the kit's stern area to make the interior space closer to what it should be. If the sequence of the bashing in my first post isn't clear, I can try to explain better. Where the black chairs are in my cabin, the kit has a solid bulkhead which I removed. I'd guess this cabin is actually roomy (except for height) for a ship of this size.
-
A little update. Finished all I'll be doing as far as furnishing the cabin. Benches for the table, some rigging for the cannons. Learned some lessons on the rigging to be incorporated on the more viewable deck cannons later. I'd originally intended the cannons to be in the housed position, with all the lashings and such, but left them a little simplified. The supplied carriages had a thick bottom and the barrel couldn't be elevated much for housing. I carved out a bit, but it could have used more. The Mamoli instructions don't address rigging them and doesn't even provide enough extra blocks for doing so. I bought some 3mm single blocks at the local hobby shop (the smallest in the kit are also 3mm) and made a reasonable facsimile of cannon tackle. They still look too huge. I would want smaller in the future. I've think I've seen 2mm for sale a couple places. I added hooks (half also with eyebolts) to the blocks. The strops(?) around these blocks are from a fine-point Sharpie. The provided straps for the trunions are too long for the wood they are to sit on (I shortened them) and are much too thick. I may make the rest from brass sheet stock when I get to that stage. Probably can't tell from the picture, but the cannons are a dark antique bronze finish. Good looking, actually, but I might try blackening some to see if I'll go that route. All 20 won't be used/visible. Now on to adding the quarter- and fore- sub-decks and transom, perhaps some minor detail corrections, and then hull planking. Martin - I remember before thinking I might want the carving book. Thanks for the reminder. Your link doesn't work for me, but it happens to be one of the ads on MSWs home page.

-
I may have asked this in MSW 1.0. I don't remember and perhaps didn't record the info thinking I could always go back and look at it...... Where were the necessary cannon operating tools, such as sponge, rammer, worm, handspike, etc., stowed when not being ready-for-use? On the bulwarks at each station, or elsewhere to be fetched for battle stations? See this page, about halfway down, for examples: http://www.history.navy.mil/library/online/consitutiongundeck.htm I don't recall ever seeing these included in a model. I can certainly understand not adding all this detail if they were out in the open! Brian
-
Naturlich! Please do. More reconstructed logs (especially pictures) are always good.
- 487 replies
-
- 1
-

-
- ship of the line
- 80 guns
- (and 1 more)
-
Dust collecting on Byrnes Machines
RiverRat replied to stantona's topic in Modeling tools and Workshop Equipment
And here I was thinking you had some machines to sell that were just collecting dust............ Brian -
Solder brass rod for deadeye
RiverRat replied to cog's topic in Metal Work, Soldering and Metal Fittings
Here's an example of three different melting points: http://www.contenti.com/products/soldering/420-840.html My soldering stuff is being shipped as I type; haven't done this work yet. But if you have two joints close together to solder, I believe you would solder one joint with the higher temp, and the second with the lower, so as not to undo the first. Someone chime in if I have this incorrect, please! Brian -
Thanks for the tips. I had found some drawings from the 'net for guidelines, but they're someone's drawings and not necessarily correct. Brian
-
i am about to rig a pair of cannons in the cabin before I close it up, and want to know how much breeching rope to provide. That is, how far back do the breechings allow the cannon/truck to recoil backwards? How much space is typically left between the muzzle and the port opening to allow cleaning/re-loading? Thanks! Brian
-
Karl, I'm so gladdened that you brought your build back to MSW after the crash. I've been simply awed at the craftmanship and artistry, you especially, and others, display in these types of models . Thanks for sharing your work. Regards, Brian
- 662 replies
-
- 1
-
-
- bonhomme richard
- frigate
- (and 1 more)
-
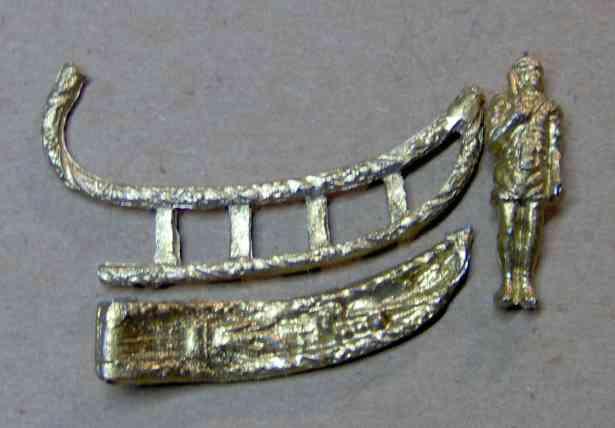
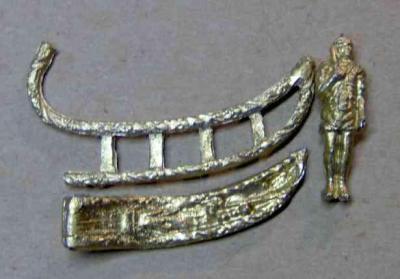
While contemplating/planning after having been away from this so long, and wanting to try silver-soldering to make better rings, etc (encouraged by the tutorial here at MSW), I had ordered a book that I knew contained Rattlesnake's figurehead from the Admiralty drawings. It's "Shipcarvers of North America", Brewington. I had seen a poor copy of it online somewhere on someones research paper, and hoped to find a better image in the book. What the heck, it was 10-cents plus shipping at Amazon! Here are the pieces from the kit. The figurehead looks like a Roman soldier with a short sword, not the described Indian. And here's the drawing scanned from the book: I hope I can manage to carve resembling the drawing when the time comes. That's further down the road.... Some of my research: I had ordered a Nautical Research Guild reprint of Harold M. Hahn's article "Rattlesnake, a 20-gun Privateer" text, photographs and drawings. Vol 39 No.1, Mar 1994. I'm not doing a POF of course, but the article has a lot of interesting information. The manual for the Model Shipways Rattlesnake is available online. Has some details that Mamoli's ignores. Free. Worth looking at. http://naturecoast.com/hobby/ms2028.pdf Besides some of the great scratch and kit builds that were here, here are some other completed Rattlesnakes, Mamoli and Model Shipways, worth looking at for ideas.... http://www.modelshipgallery.com/gallery/misc/sail/privateer-pb/rattlesnake-index.html And http://www.bishophobbies.com/2009/05/18/privateer-rattlesnake-211-model-shipways-1-64/ http://www.modelexpo-online.com/album.asp?a=HarryBelflower http://www.shipmodel.com/models/rattlesnake-privateer http://shipsofscale.com/gallery/mmacdonald/rattlesnake/index.html http://homepage3.nifty.com/modelshipbuilder/rattlesnake2.htm http://homepage3.nifty.com/modelshipbuilder/rattlesnake.htm http://www.guzmanshipmodels.com/ Brian Ooops! Forgot about: Howard I. Chapelle's The History of American Sailing Ships, with Rattlesnake lines, profile, and sail plan. Good stuff. It's lines are also in his The Search for Speed Under Sail 1700-1855.

-
Thanks all. I edited the log title to fit the forum's conventions/guidelines; saves the admin a little work. @hamilton --- I started as "RiverRat" when I originally signed up here thinking of building a riverboat (still in my mind). Kept the name in re-signing up, after the crash, for continuity. I usually sign off....... Brian
-
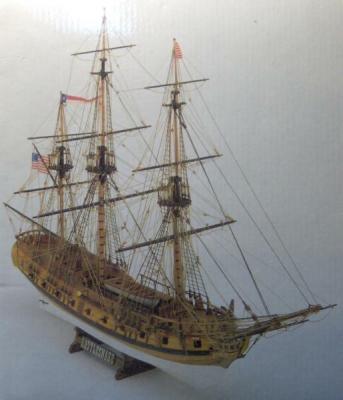
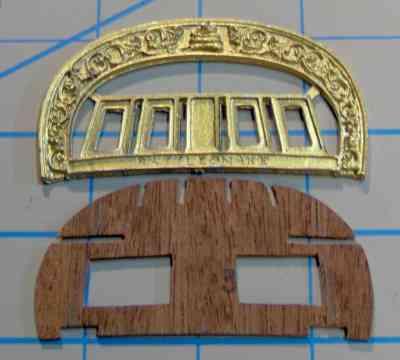
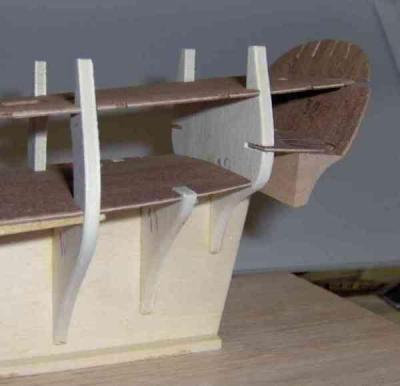
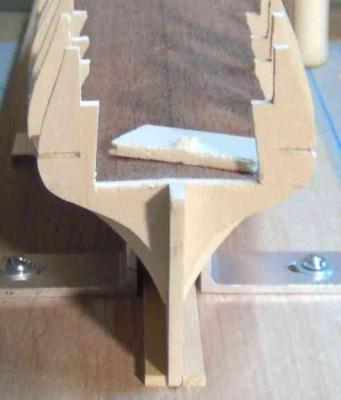
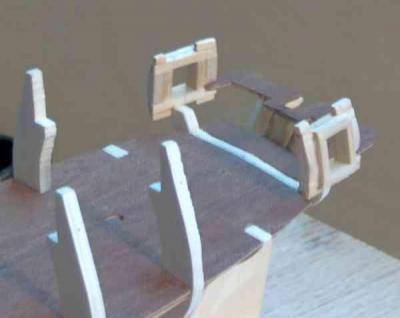
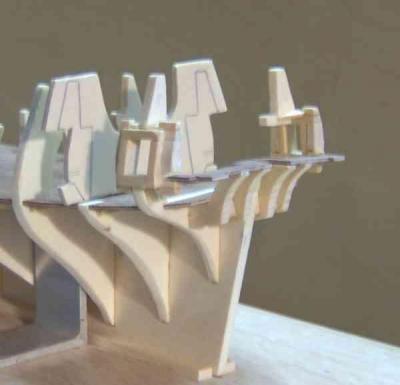
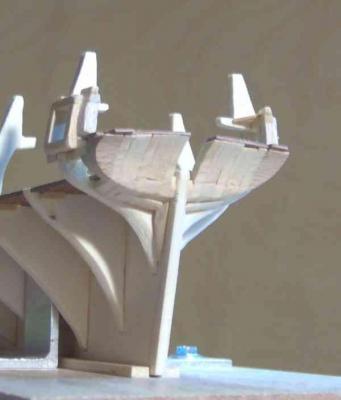
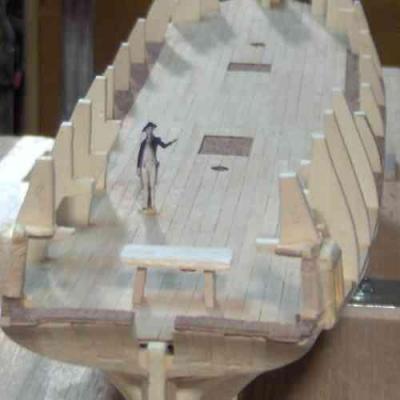
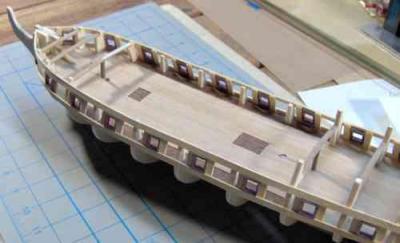
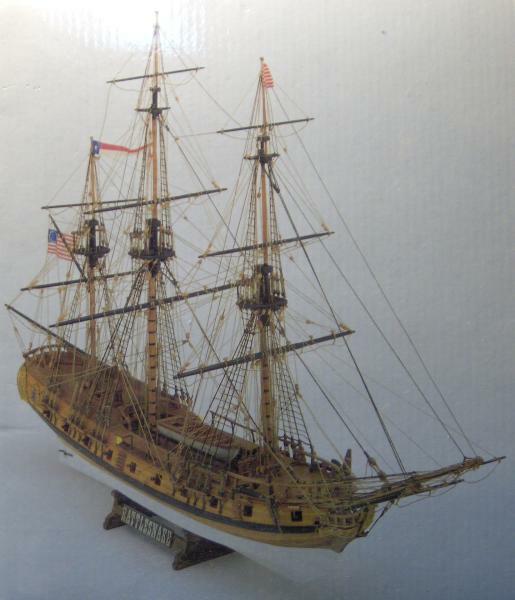
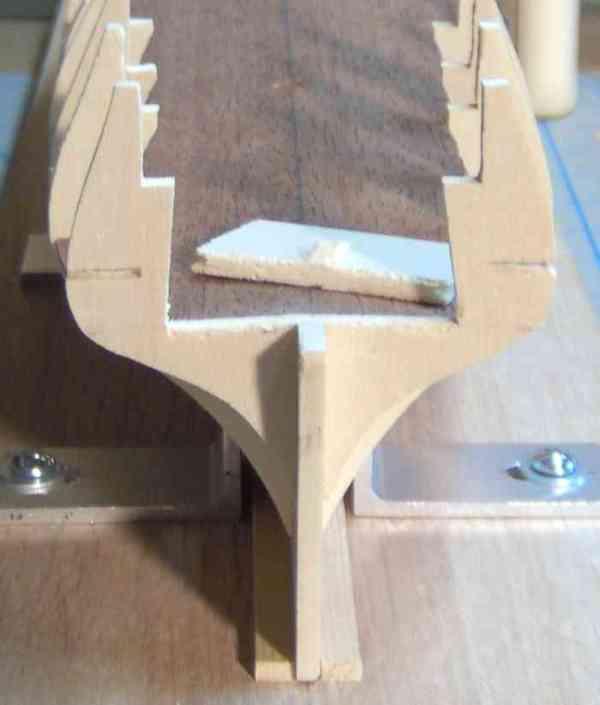
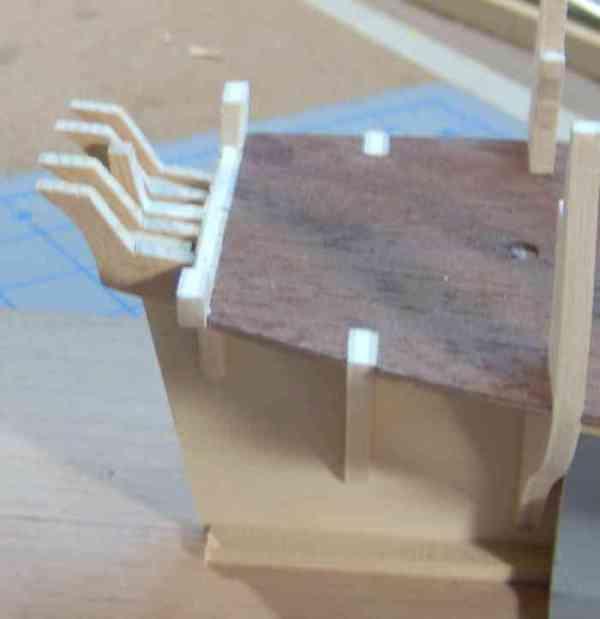
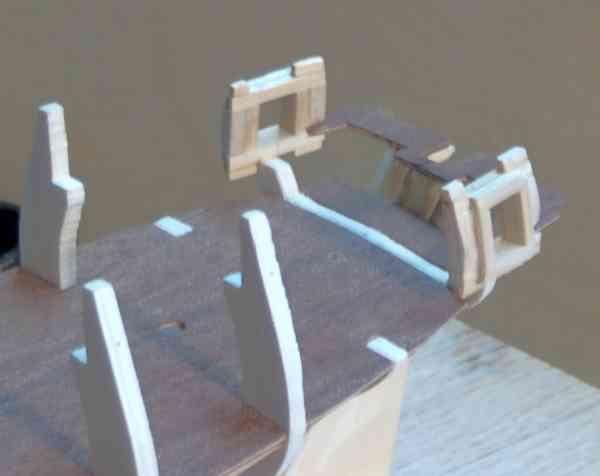
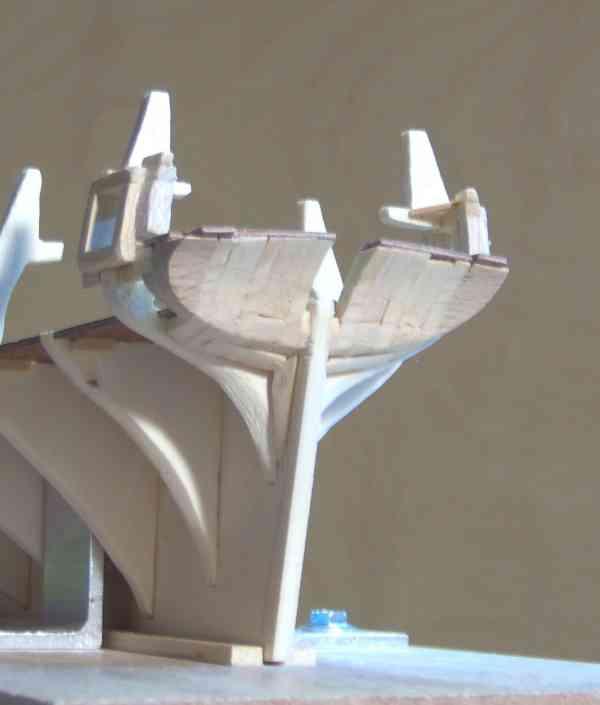
Ha! The midshipman has lost the log and reel in the stormy digital sea! After a long hiatus due to "personal issues", I was about to get back to working on the Rattlesnake and then I find much has been lost in the software change. I thought I'd go ahead and repost some info/pictures before I actually got into it in earnest. I had been wanting to build a replica of an 1870s Ohio River steamboat my ancestors owned and operated, found this site looking for tips, fell in love with some of the builds here, found a great deal on a Rattlesnake kit on eBay, and picked up this infernal shipmodelling disease. I had kept my MSW Rattlesnake log photos in a separate folder on my computer so they're all set to be reproduced. Here's the box picture of the Rattlesnake... Handsome ain't she? The metal parts provided for the transom, quarter lights ( I used to call these windows until I got a little nawdikal ejukashun), and other areas made me cringe, so I thought I'd replace them with wood or other appropriate medium. Here is the supplied transom decoration and window frames and the supplied transom base with the window area excised... Here are the original pieces dry-fitted/taped. The #12 bulkhead is located at the position of the quarter lights, and the horizontal piece, #22, cuts into the cabin space, so I will modify that area to add the quarter lights and open up the cabin to approximate its fullness, as I will be making the lights (windows) clear instead of the blue paper simulated glass. Part of #12 cut away. Pseudo-framing of transom.... Quarter light frames (very fragile at this point!) made and stern "bench" from #22 piece.... I think this shows the template for adding the structure/frame above the light frames (hey, forgive me, it's been a while....) Here's the rough-shaped transom, balsa filler and the supplied beechwood pieces at the outer ends. The beech was surprisingly easy to shape; could have used it for the whole thing , as designed, without much heartache. Most of the main deck planking done, with a scale Captain Clarke (hey! looks like John Paul Jones....) Gunports and framing, fore- and quarterdeck supports, and fake bowsprit root in case that area is visible.... I had grandiose visions of outfitting the captains quarters, adding quite a bit of fine detail, but I've decided it would not likely be too visible anyway, so I'll keep it simple and move on. With what I have, I'll add rings, rig/secure these cabin cannons for sea, add a couple benches, and move on to finish the stern pieces, decks, and then the dreaded planking........ I may not get to this right away, but the intention is there....stay tuned.