RiverRat
-
Posts
206 -
Joined
-
Last visited
Content Type
Profiles
Forums
Gallery
Events
Everything posted by RiverRat
-
 I'd recently aquired a copy of Seamanship in the Age of Sail by John Harland. Haven't had time to get deep into it yet, but thumbing through, I just happened to find this method of using the chains for steering. I'm sure there are other riggings possible. With my Rattlesnake not using a wheel that might have its rigging damaged, I wonder if it might just be chocked, rather than having chains available. Cheers, Brian
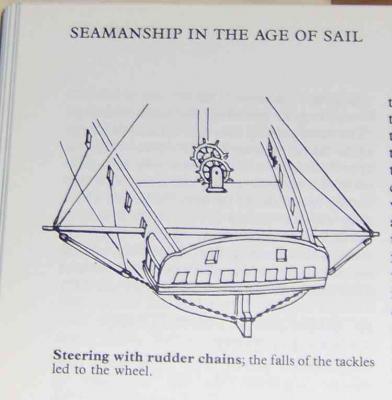
-
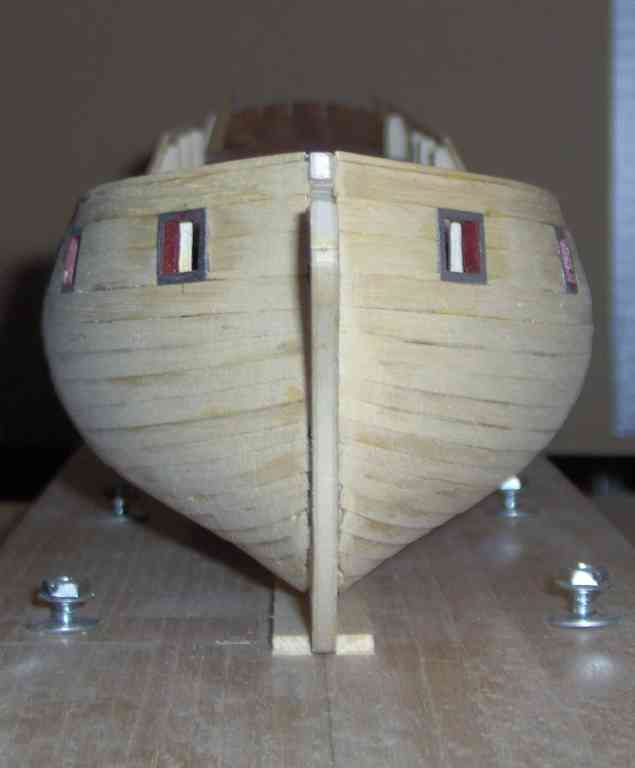
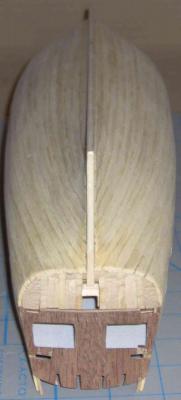
I'm near to starting the second planking of my Rattlesnake and am not sure which plank ends are left exposed; the ends of the hull planking, facing aft, or of the transverse planking of the transom counter. Here's my RS stern after the first planking, with the plank ends facing aft at the (unplanked) counter, for example; I've browsed the Galleries, couldn't see a definitive answer. Many had trim at those joints; mine won't. I'm thinking do the stern planking first, and have the hull planking ends end exposed there, rather than stern planking covering the ends of the hull planks. Is there a "correct" way? Sure I can do as I please, but I'd hope to show what might have actually been done. (Please, I hope they woudn't be mitered!) Brian
-
Hi Dan, I had long been curious how these bulkheads were secured and removed. Have any pictures of these "Cants"? Or if your log shows them later, I'd be happy to wait! Brian
-
Daniel, Thanks for the lovely presentation! But it's given me a brain overload and will have to digest it fully later. The Rattlesnake is but a wee frigate, if that, and I would guess its operations were a bit scaled down from those of Victory. Brian
-
Just ran across this in dafi's Victory build. See post #129 http://modelshipworld.com/index.php?/topic/76-hms-victory-by-dafi-to-victory-and-beyond/page-9
-
Good job on the planking! When I read this, I thought about this topic you may want to consider: http://modelshipworld.com/index.php?/topic/1834-wipe-on-polytung-oil-effect-on-glue-strength/ Cheers, Brian
-
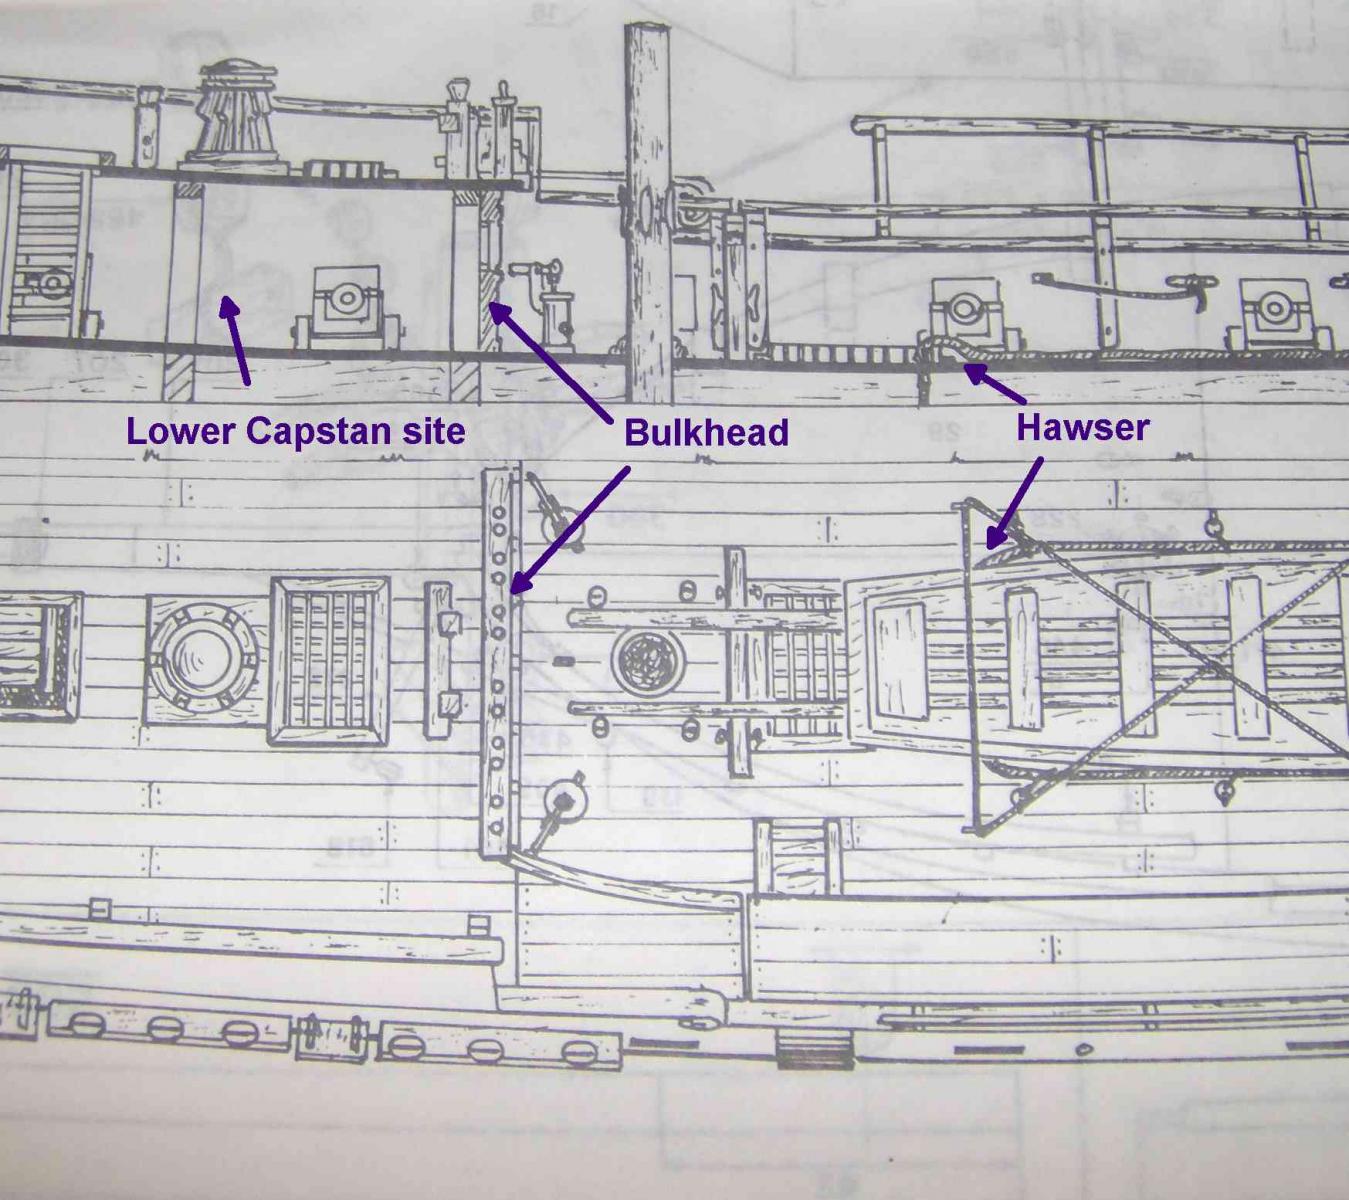
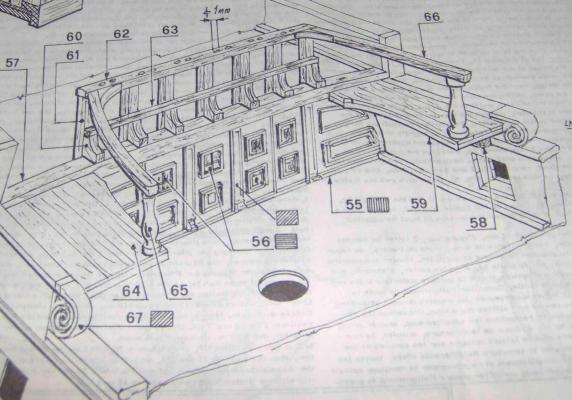
In my Rattlesnake build, I had been puzzled, as a rookie, by the plans showing the hawsers running down into the main hatch. Gee, I thought, shouldn't they be routed to the capstan?? I've been reading through Patrick O'Brian's Aubry/Maturin series of books and ran across the solution! A "messenger" cable, smaller than the hawser, is attached to the hawser by "nippers" and the wet smelly hawser is sent below. Ah-HA! In the Rattlesnake, I guess this messenger would go through this bulkhead to the lower capstan (not modelled in this kit): I'm wondering what accomodation might there be to run the messenger through it. Would whole panels be unshipped, or could there be a smaller opening in a panel for that purpose? Thanks! Brian

-
Ha! Found it. (Naiad - EdT) 6th photo http://modelshipworld.com/index.php?/topic/232-hms-naiad-by-edt-160-frigate-38-1797/page-14
-
Some of the kit wood, supposedly boxwood, for the planking/trim above the wales is pretty much garbage for that task (see my previous post/link), so I'm ordering some strips to replace it. Will have to wait for the delivery to do the second planking. Meanwhile, I'll probably complete planking the decks. The instructions have that done after the hull planking, perhaps to have them more stiff while removing the ply bulkhead supports at the bulwarks, but I'm sure it's safe to carry on. Also need to design and build the bulkhead wall under the fore of the quarterdeck (to replace the metal part provided) and and the same for the lights/windows at the stern. Brian
-
Yes, I think I saw one in one of the scratch builds. Don't recall which.
-
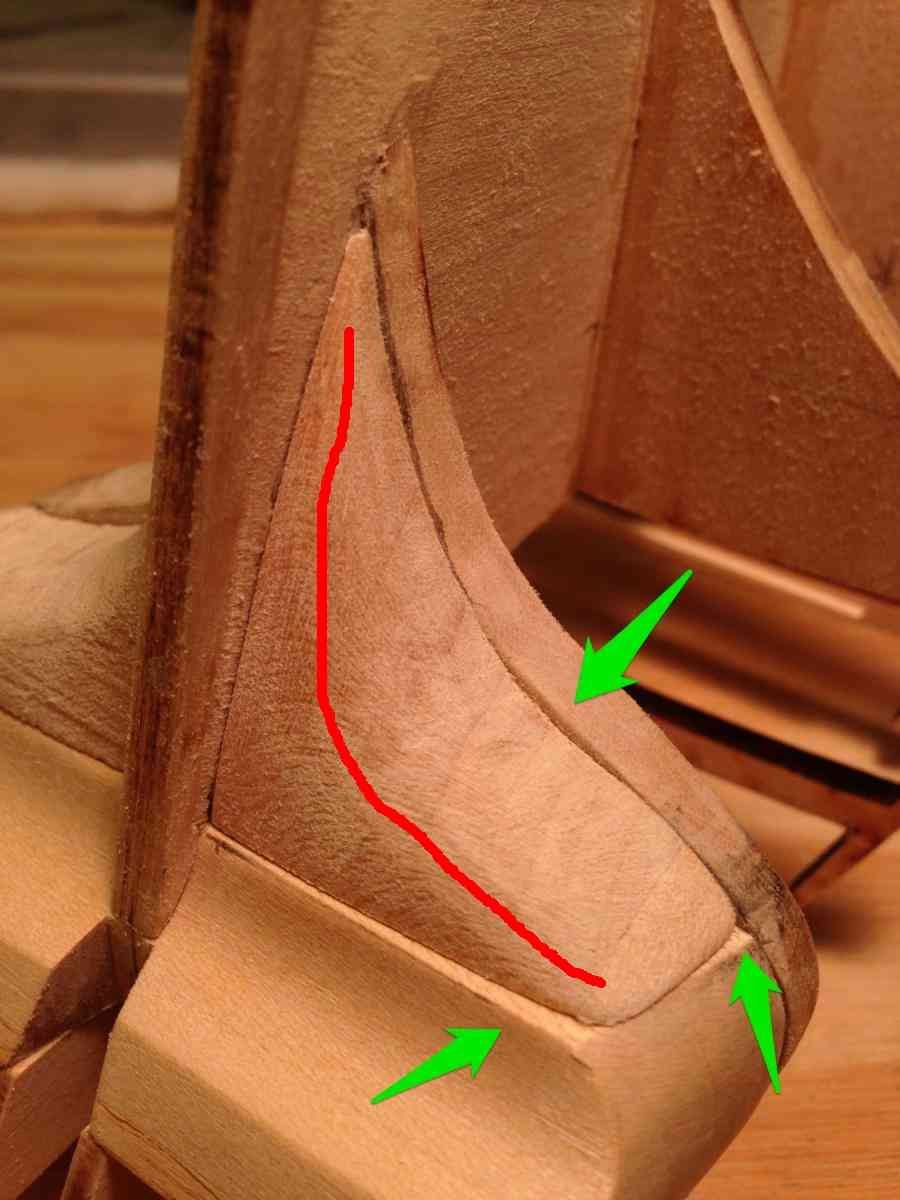
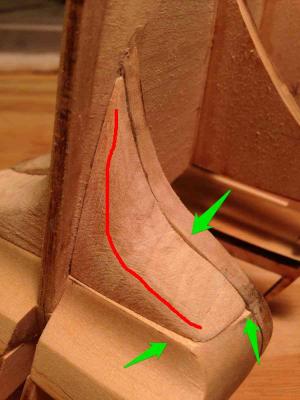
Hi Zev, Let me preface this by saying I'm a novice at this wooden ship building, I've done one of the two-layer planking of a (Mamoli) Rattlesnake and absolutely no others before, so you may easily ignore my advice. But, looking at your filler as-is, I feel that it would induce some radical plank bending near the ends, rather than forming a smooth transition from the previous bulkheads to the termination. I've marked a red line where it looks like severe bending might occur, where I would lessen the bend a bunch. I've have seen some builds with such severe bends into the keel or counter, but it just doesn't seem ship-shape to me. Look at some of the sterns, at the horizontal transom pieces below the counter (which these filler blocks emulate), in some of the plank-on-frame scratch builds, how there is a smooth gentle curve into the keel. And I wouldn't worry about those little gaps/spaces unless there needs to be a strong glue bond there, such as the very end of a plank.
-
Georgeous planking! HUZZAY!!! HUZZAY!!! HUZZAY!!! A shame though you built the dang thang upside down ! Brian
-
Do you have the Mamoli Rattesnake kit, or have built it? I have a question about some of the wood. Please see my post at the Wood Discussion forum: http://modelshipworld.com/index.php?/topic/2095-is-this-boxwood/ Brian
-
I like the second; more elegant and finished. ( As long as it doesn't attract attention from your fine craftmanship ) Brian
-
I had printed out some cannon rigging pages from the internet. How I found them back then, I don't recall. One is at: http://www.fototime.com/25E4D7A80B8938C/standard.jpg Another was posted at the old MSW. A page from "Ship Modelling from Stem to Stern" Milton Roth. Fig 36-15 on page 223 or 233 (hard to read) Hope this helps. Brian (edit) I realize these aren't parallel to the bulwarks, but it might give you some insight.
-
Hi Ferit, Something I apprciate seeing is the rope pulls for the port lids. It seems not many include this detail. I've enjoyed your build since I found it and it's one I always look for for updates. Regards, Brian
-
Hi Martin, thanks for the encouragement. My main goal of the planking was to try to keep it symmetrical side-to-side. Did OK there. Some of the ends aren't too neat, but this being the first layer, (filler!), I didn't worry much about them. Will certainly be more meticulous with the second. Filler blocks. No, this was just the usual fillers (balsa) most modellers seem to use on POBs at the bow and stern where the bending is more severe; more glue area and definition of the shape. In my naivete long ago, I had thought I could do it with correct bending, and it certainly could be done, but I chose to do the usual filling. Nuttin' special. As it was, some of the earlier planks at the bow were a little clinkered from insufficient bending, but I got better as I continued. Learned a bunch from this first layer, as I had hoped to do, to apply to the second. Brian
-
Yes! I've seen it and others from searching around. You should be pleased; it looks great. Brian
-
Rebates for pintles? Holycow, I've not seen this before! Is this usually done on the real thang? I can't recall seeing modellers doing this. Seems like a reasonable real-world thing to do though. Brian
-
I've seen a number of models incorporating rudder chains, meant, I suppose, to retain the rudder if it becomes unshipped. Is (was) this a common, even universal practice? Few models I've seen actually DO have them. What is or was the actual practice historically, geographically, in their use? What wold be a reasonable size for these and how were they attached? Brian go BLUES!!!!!
-
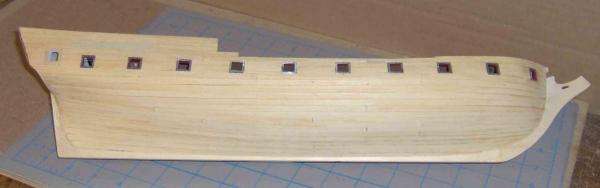
Thanks all! I replaced the last two photos with a bit higher resolution; more rattiness to see than before! @ J. Pett --- do you mean amazing I've actually got this far Adequate and acceptable maybe! Forgot to add this before....At the stern, I've seen some builds where the filler (or framing in POF models) is a bit more full than what I ended up with, with the planking sweeping up more. Or maybe it's just my imagination (running away with me). Anyway, whether its correct or not, I'm happy with it so far and I think she'll have a nice shapely bum in the end (or stern)! Brian
-
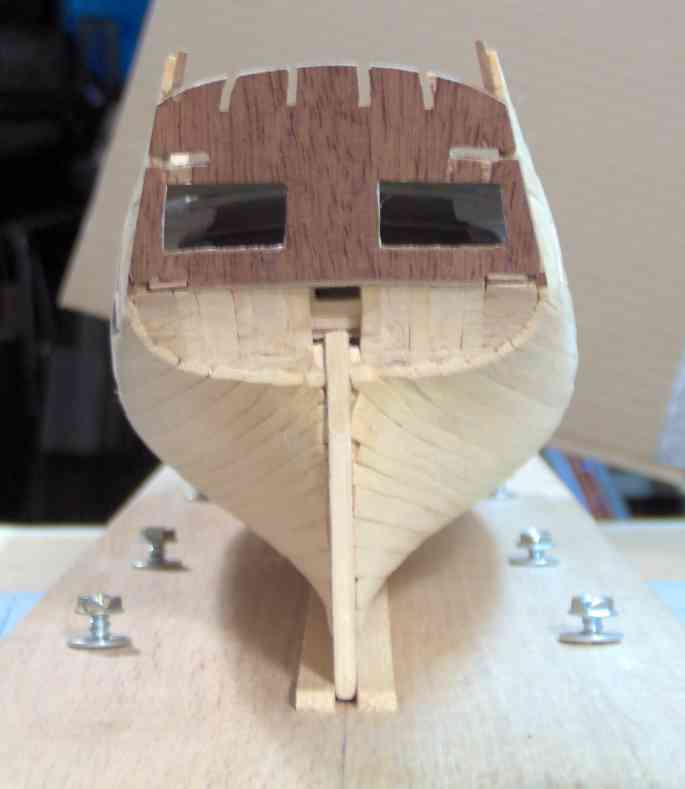
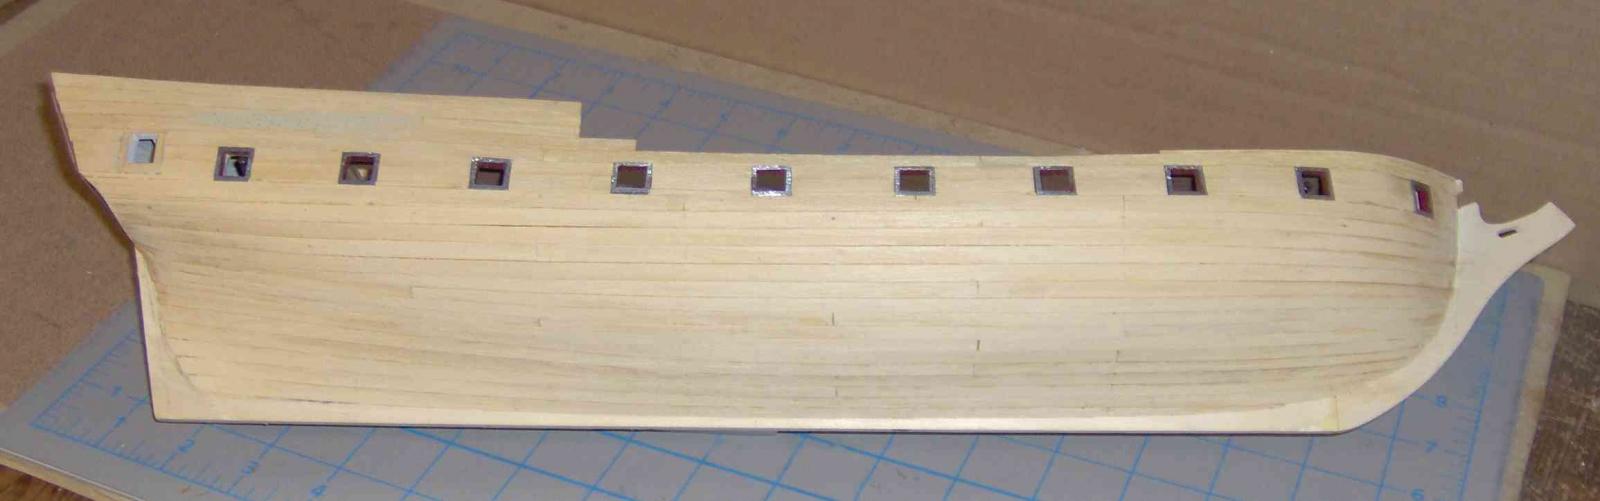
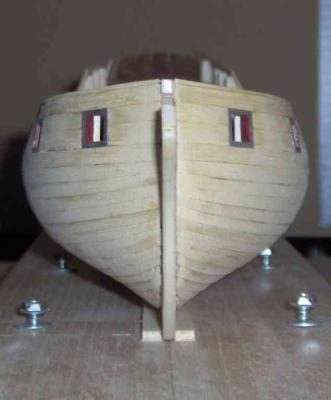
A MAJOR milestone! I told meself that I'd post an update when I got the first planking installed. Soooooooo.................. I originally thought I'd do this first layer without filling the bows with balsa, but I wised up and did the filler and a little bit on the lower part of the next space between bulkheads. The Mamoli drawings of the stern are cartoonish and vague and I had originally had the bottom of the counter (the undercut part under the transom proper) fairly rounded like their drawing, but after seeing better drawings, I reshaped the bottom so that it was mostly horizontal as is more correct. The first-planking strips are 1.5 x 5 mm basswood/lime (I assume), though the instructions call for "LG", the abbreviation for tanganyika in their key, same as the deck planking. These should be indicated as "LT", their abbreviation for lime. The lime is whitish, coarse-grained, easily split, and some of the fibers tend to buckle or separate when bending, even when minimally soaked. Difficult to bring to a nice point, as with the fore of the garboard plank. Quite irritating to deal with, but........... A poetic interlude ............. "Hey! It's the first planking, What the hell. Fill it, fair it, All is well!" I measured each bulkhead length from keel to the already-applied plank below the gunports. The maximum length allowed slightly less than fifteen of the 5mm planks. I then divided each bulkhead into three equal bands, which would have five planks (theoretically!) each. "Good" planking set up would be a bit different, with likely 4 bands marked by battens, but I figured this would do in a pinch. I used these numbers to figure out how much to taper at the bows. I left them full at the stern, but should have put some taper in the area just before the stern on all or most of the planks and with about a third to go, I had to put in some severe tapers. I had intended to try a stealer, but decided to stay with the tapering: they didn't get below half the original plank width. While trimming off a loose shaving, it fell into the void. Turning it over and trying to shake it out, I heard this annoying clunking. One of the cannon carriages in the cabin had come loose! Not enough diluted glue, I guess. I levered it in place with a plank and a tensioning device (tape to a dowel in the tiller hole), practiced my entry with a dry toothpick, and then applied some medium CA glue to the two wheels I could reach. OK. Before this, I had decided to do another alteration. WHEREAS, the provided metal stern decoration is an abomination to Us, and WHEREAS, We intend to produce Our own ornamentation and associated support, and THEREFORE, the ears of the transom becoming superfluous, RESOLVED, that We smite off the offending ears and send them to the Deep (or that container of little scrap bits that might be useful someday....) I made a leap of faith that I could learn to do some proper carving! I kinda like the looks of the earless stern (no I won't leave it like that) and it'll make the planking ends easier to do neatly. Here 'tis, some rough sanding done to knock off the fuzzies and such. The kit doesn't use a bearding line and rabbet. I didn't even know of such things on a ship when I began the build. The bare plywood stem, keel, and stern are to be "sheathed" with strips. I suppose if their edges abutting the hull planking are beveled and fit close, they form a pretend rabbet . Besides fillin' and fairin' prior to the actual planking, I need to check plans/drawings to see that the quarterdeck bulwark is the right height. Looks OK, but per the instructions... "...sheath the upper part, setting some millimetres over the end of the frames." Regards, Brian (edit: last 2 photos higher resolution)

-
Absolutely beautiful!!! Great workmanship and impressive detail for such a small scale. Needs a place of honor for display. Brian
-
Doin' great. I bet you'll end up with no regrets! Say.... in that last pic, are those spring-loaded outward tensioning fixtures? Cheers, Brian