Tim Moore
-
Posts
357 -
Joined
-
Last visited
Content Type
Profiles
Forums
Gallery
Events
Everything posted by Tim Moore
-
Mighty impressive result Mike, I particularly like the dynamic presentation. Great impression of movement.
- 179 replies
-
- 5
-

-

-
- hatsuzakura
- pit road
- (and 2 more)
-
Fabulous! I’m gonna have to do this at some point. Definitely Mark is quite right - seems to be burning a little oil.
-
Thanks Dan, Druxy and Lou - yes I’m pleased with how this turned out - going back to shipbuilding next but plan on doing another car after that.
-
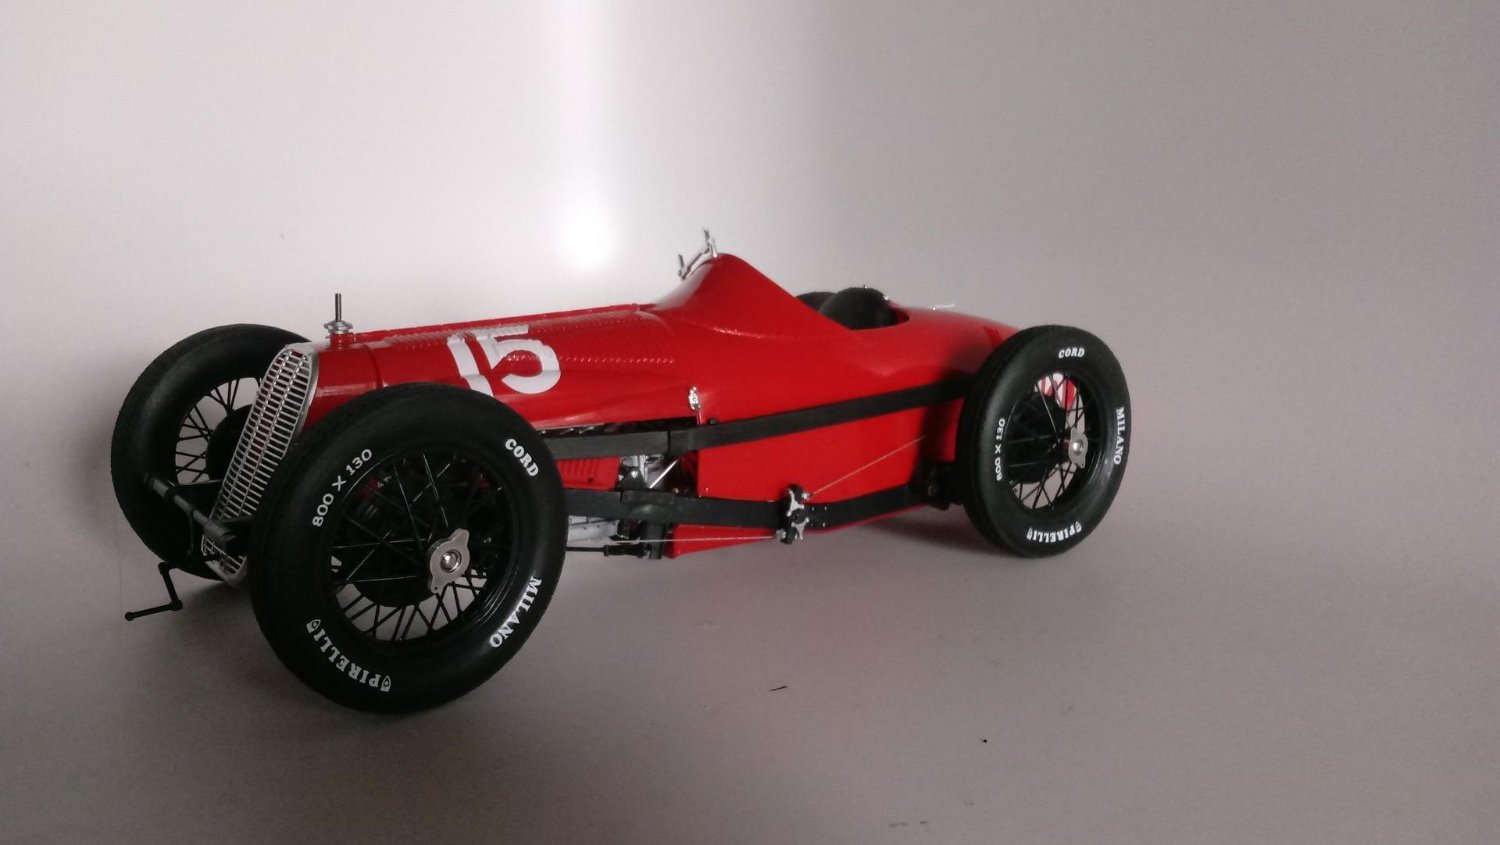
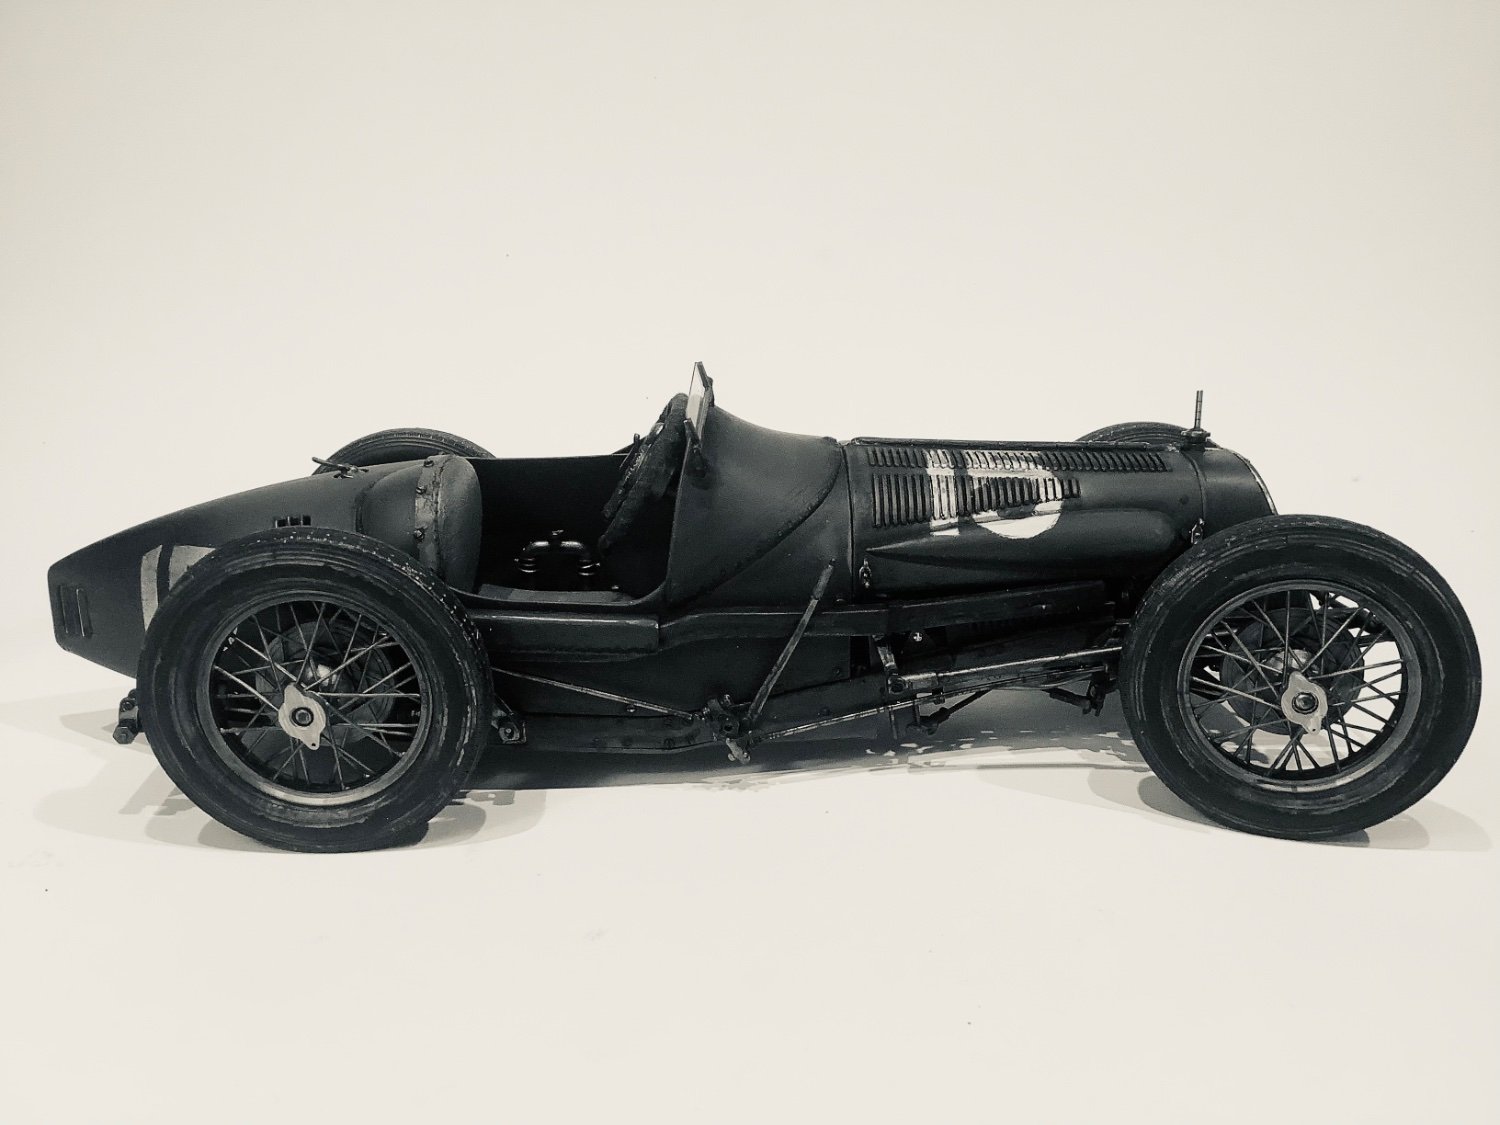
Thanks Bill, Egilman & Dan! Yves, Mike: The Mefistofele engine looks incredible, just looked it up. Kind of an interesting story too. I showed the admiral pics of it and the Bugatti; she decreed the big M as interesting, but fundamentally an ugly car and voted enthusiastically for the Bugatti so I’ll have to take that into consideration. Heres a shot of what the 806 kit looks like, out of the box more or less as opposed to my grubby edition, so you can see the range of end products you can produce with this kit. Here is mine rendered in b&w as per Dan’s comment. Cheers all. Tim


- 61 replies
-
- 17
-
-
Hey thanks Yves, Bob, OC, Druxey, Mark, Mike and Lou, and all the likes I appreciate the comments, very much. Still doing a bit of finishing then will post one final calendar pic. Ok Yves challenge accepted I will do another in due course, like the look of that Mefistofele and Bugatti, maybe also look around to see if any other 1:12s from other manufacturers look interesting. I’m from the polymath sect when it comes to modeling I now realize; the car world was a really nice break I want to get back to, but think I need to find another ship for my next major victim. A good old dreadnaught type vessel maybe if there’s something substantial available?
-
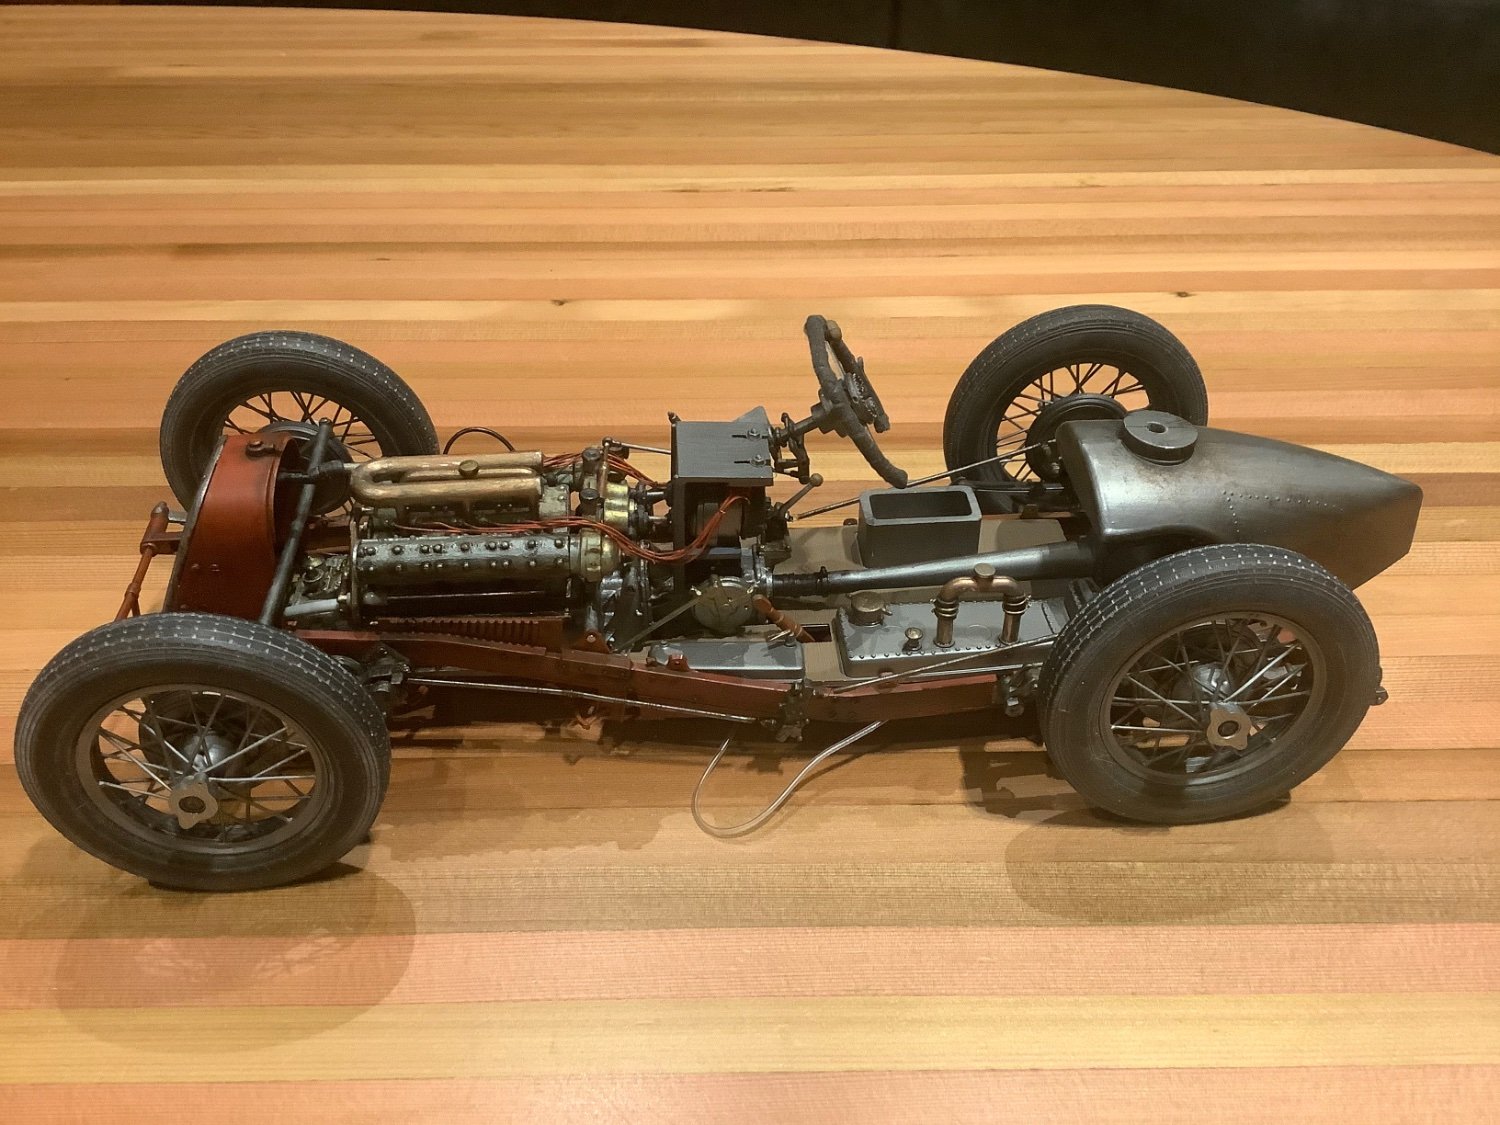
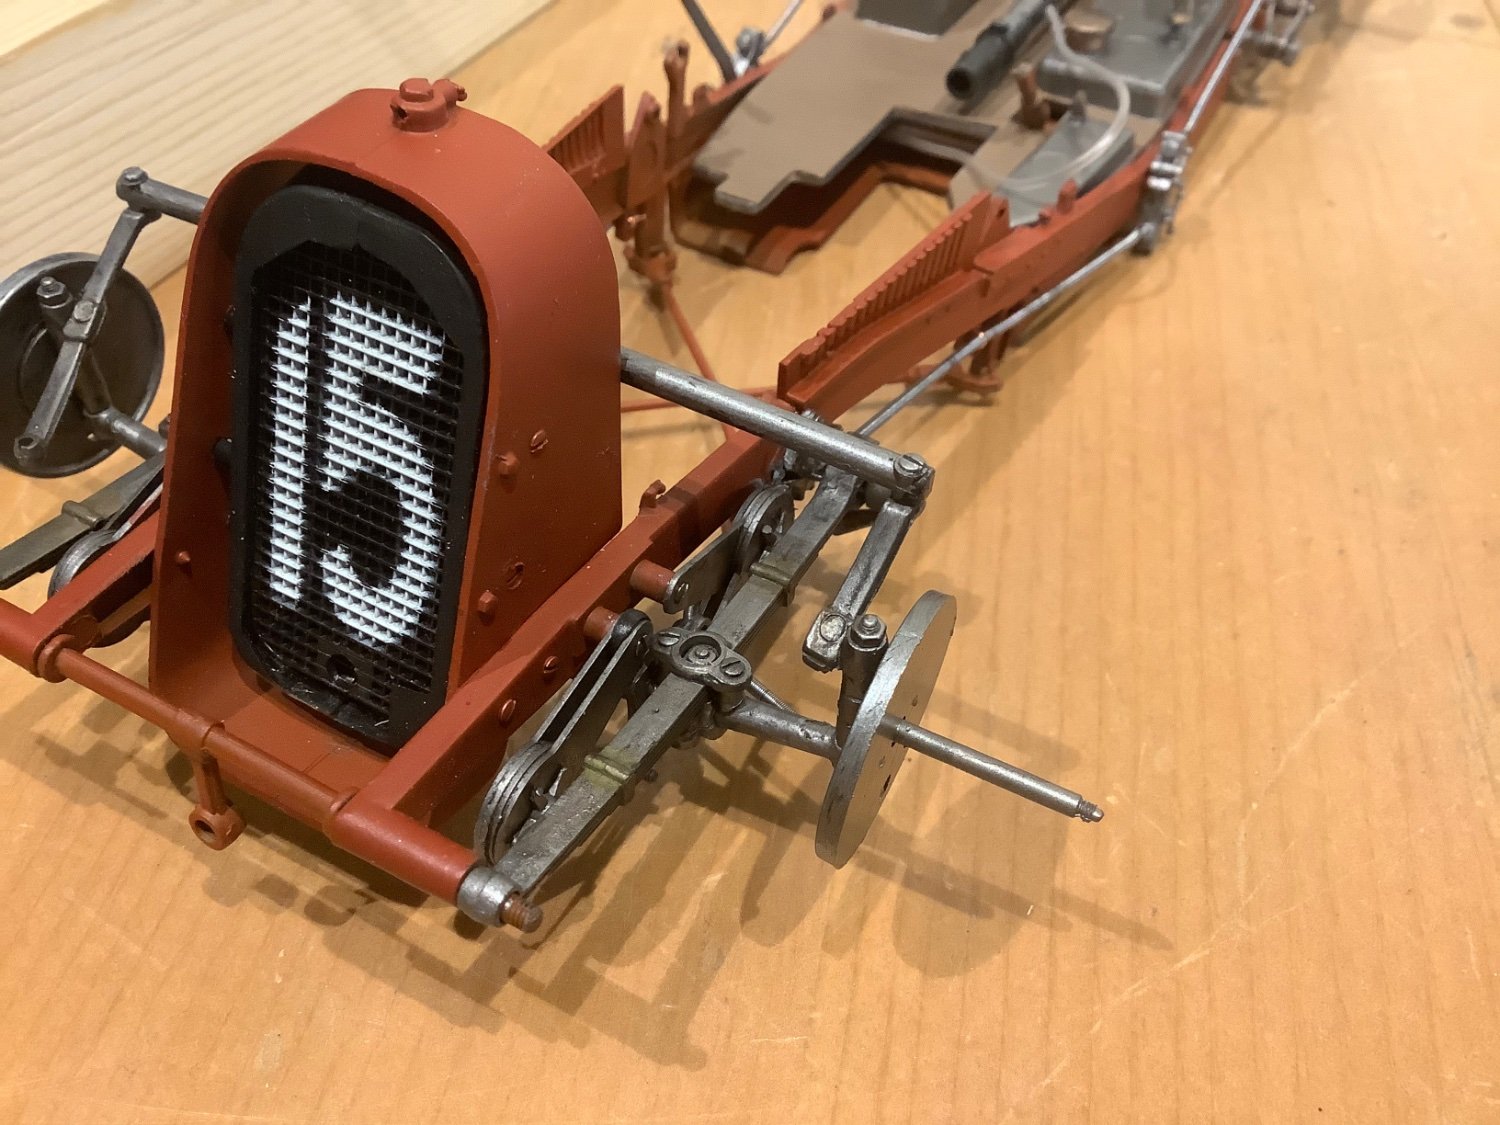
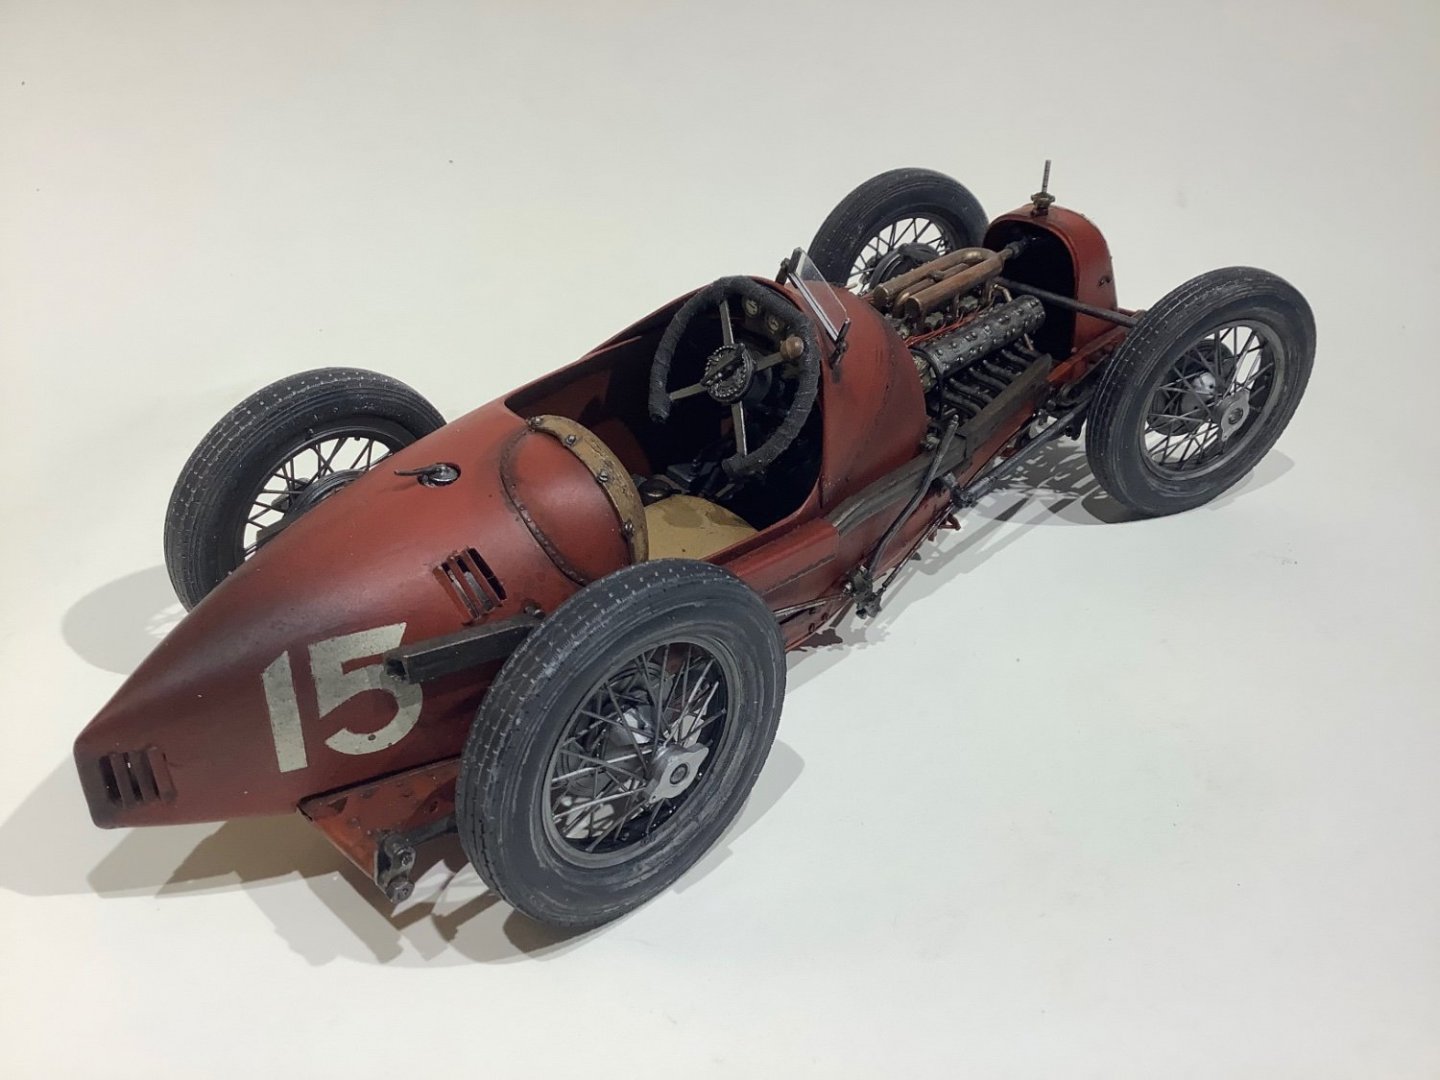
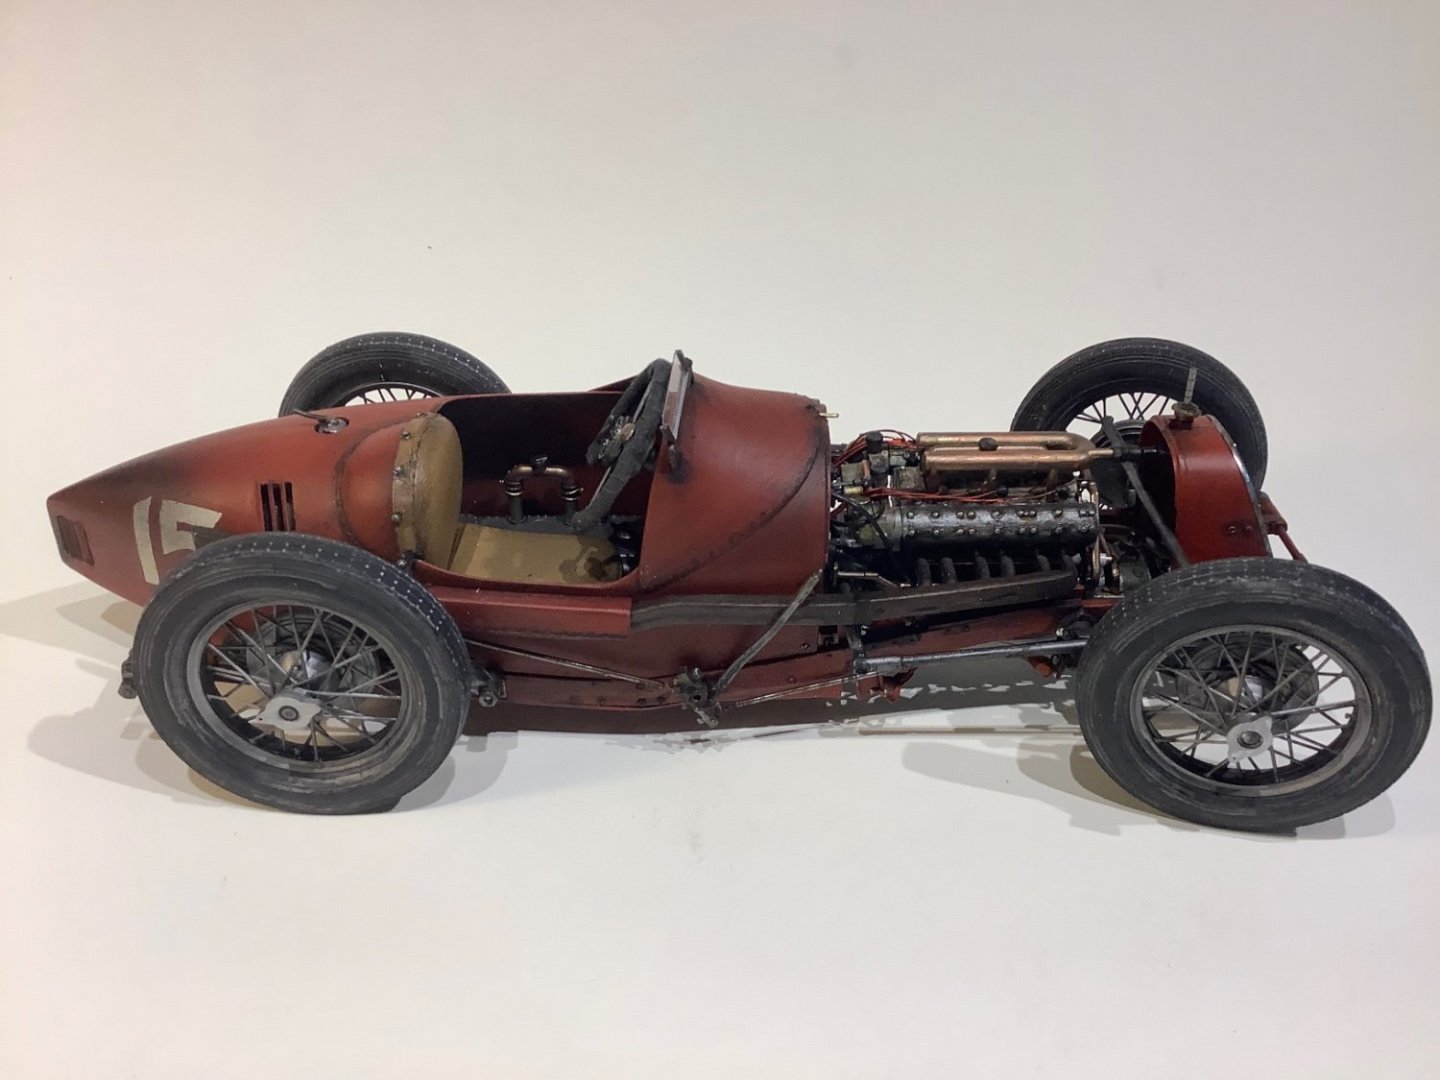
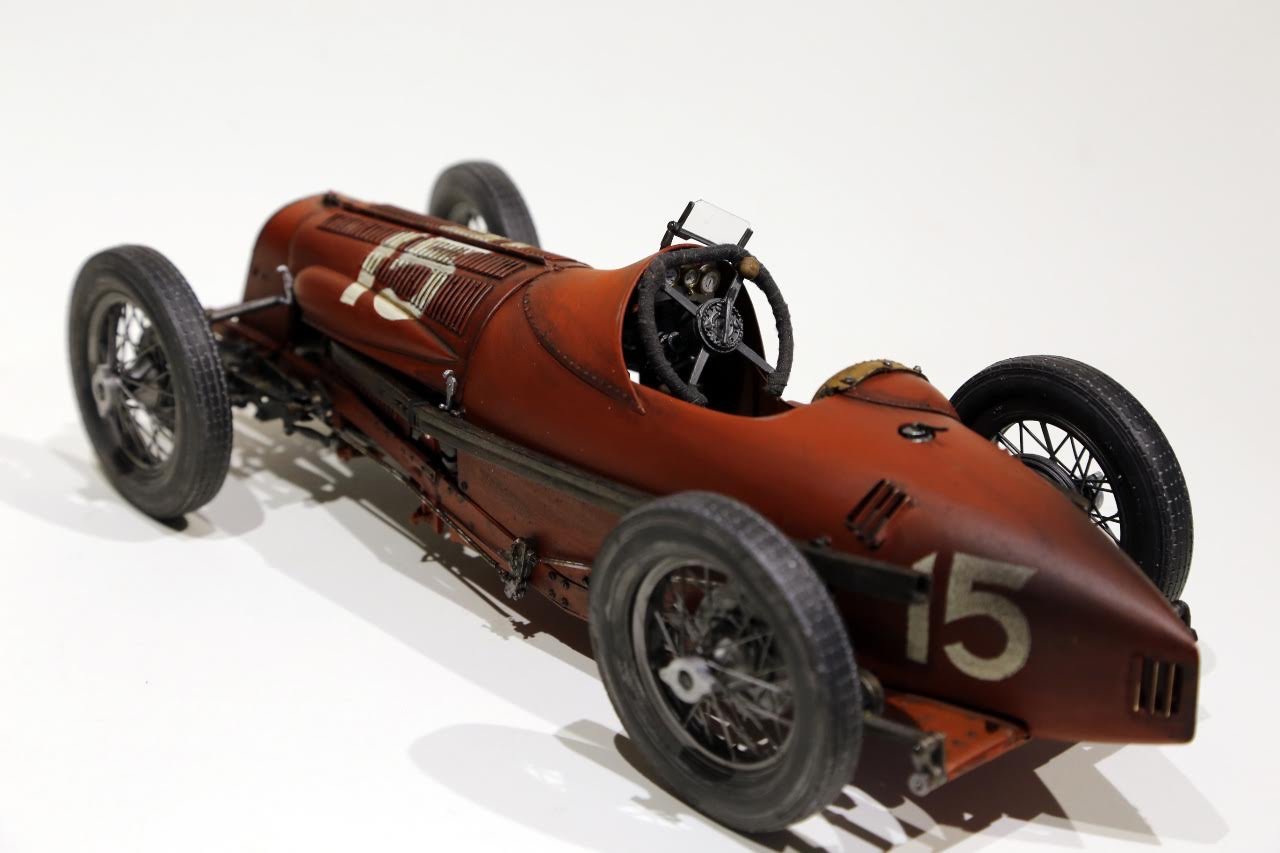
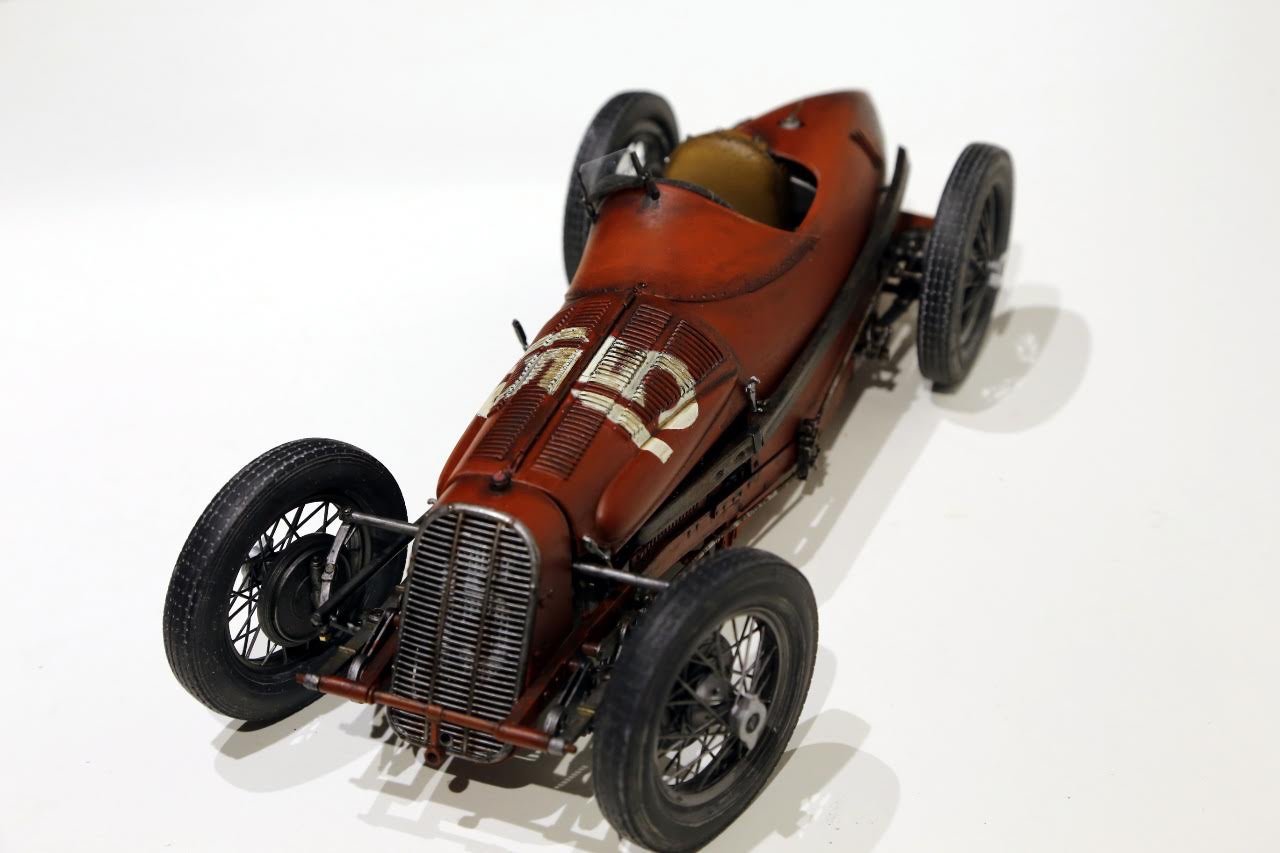
Thanks Bob. A bit of aging and colour variation really does give life to a model. The basics I used here were: 1. I used an airbrush for most of the base colour on major elements. Brush for bits and pieces. 2. I applied a black wash over the base colour using a brush. I varied the amount of paint to water to give more black density to some edges, bolts etc. I also dabbed a bit of rust colour on some mechanicals and springs. It’s a bit of an organic process. 3. For the numbers, I sprayed them on (before the back wash) using a sticker mask provided in the kit. I added a bit of yellow to white in the airbrush cup to give a more aged appearance. I actually cocked this up badly as the mask leaked at the edges horribly, so I had to go back and hand paint them, which surprisingly ended up looking better and more vintage anyway. 4. to give depth on body panels before weathering in this case, I airbrushed a grey primer, then a light orange red, then the final brick red colour. That allowed me to burnish some areas using 400 paper as a final step after the black wash, providing some highlights by exposing the undercoat where paint might have been lightened by the sun, or abraded away from use. I’m still working on this. I was doing a bit of experimenting with this model, thinking I might want to tackle something more substantial in plastic like an old battleship or something similar.
-
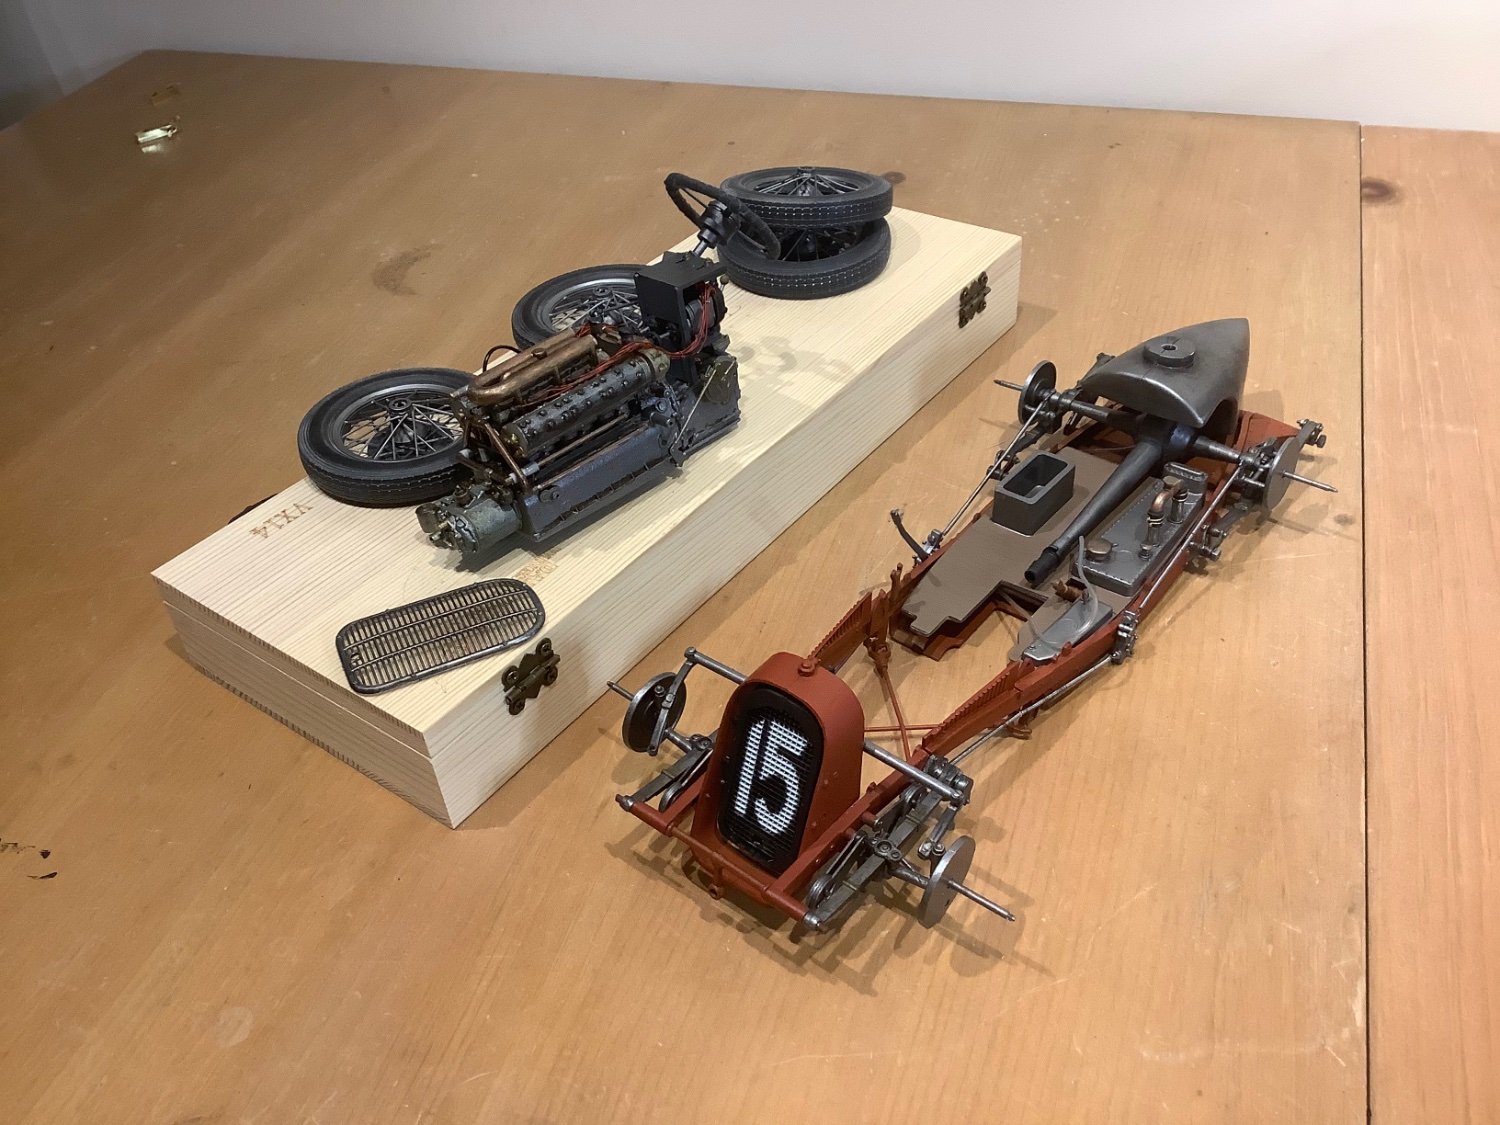
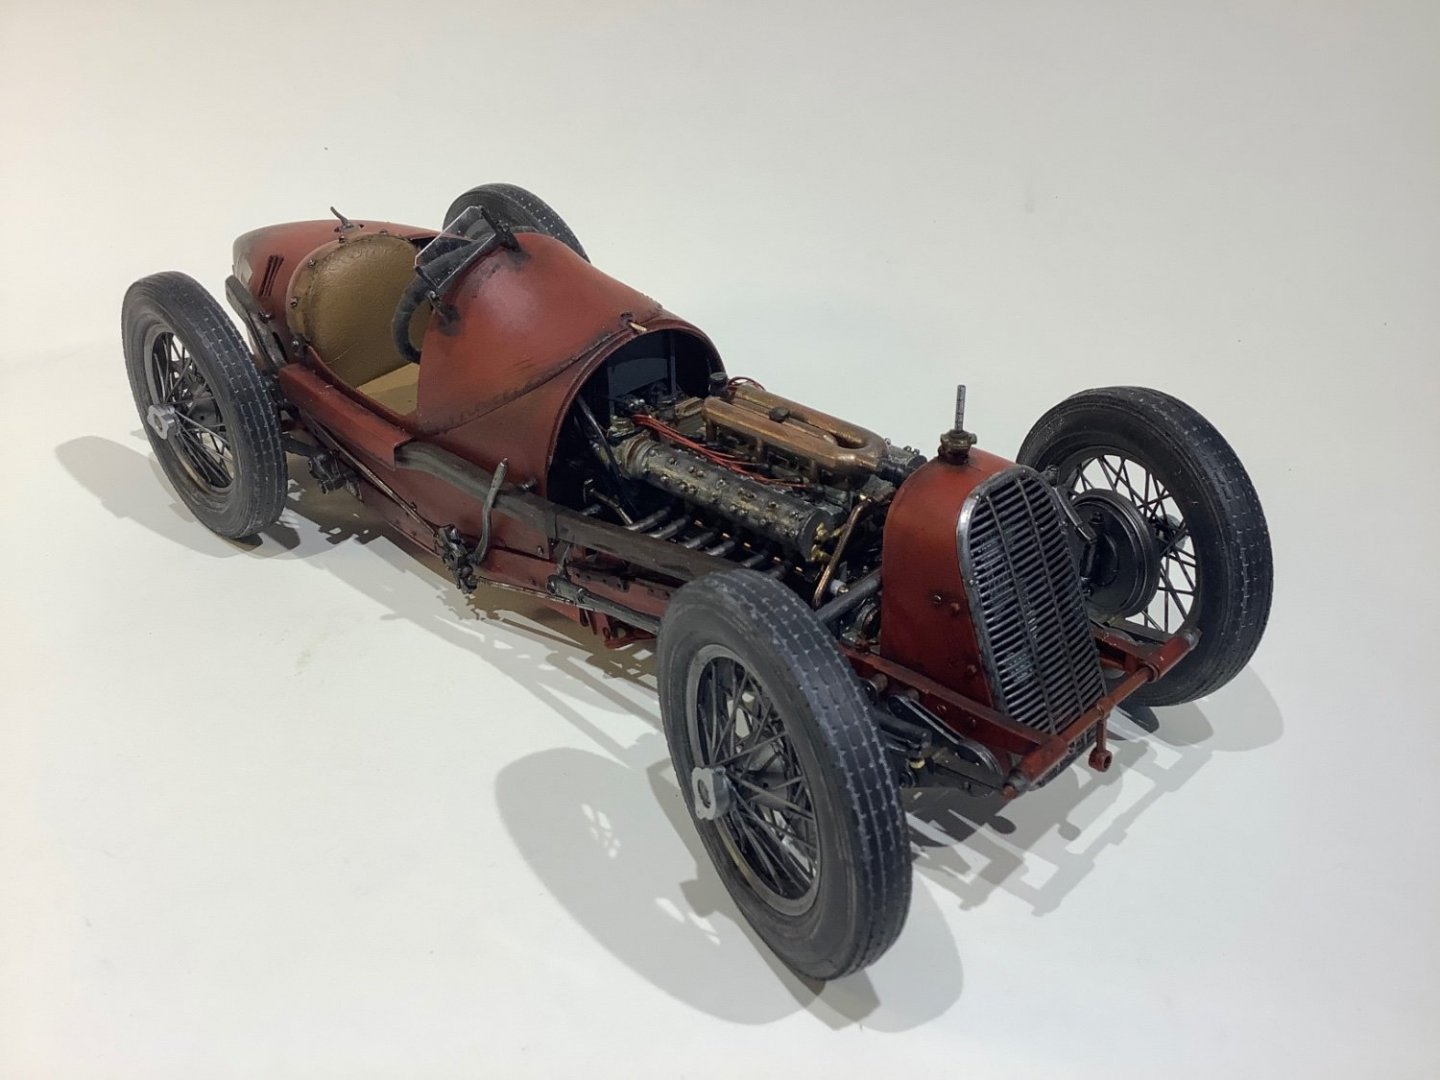
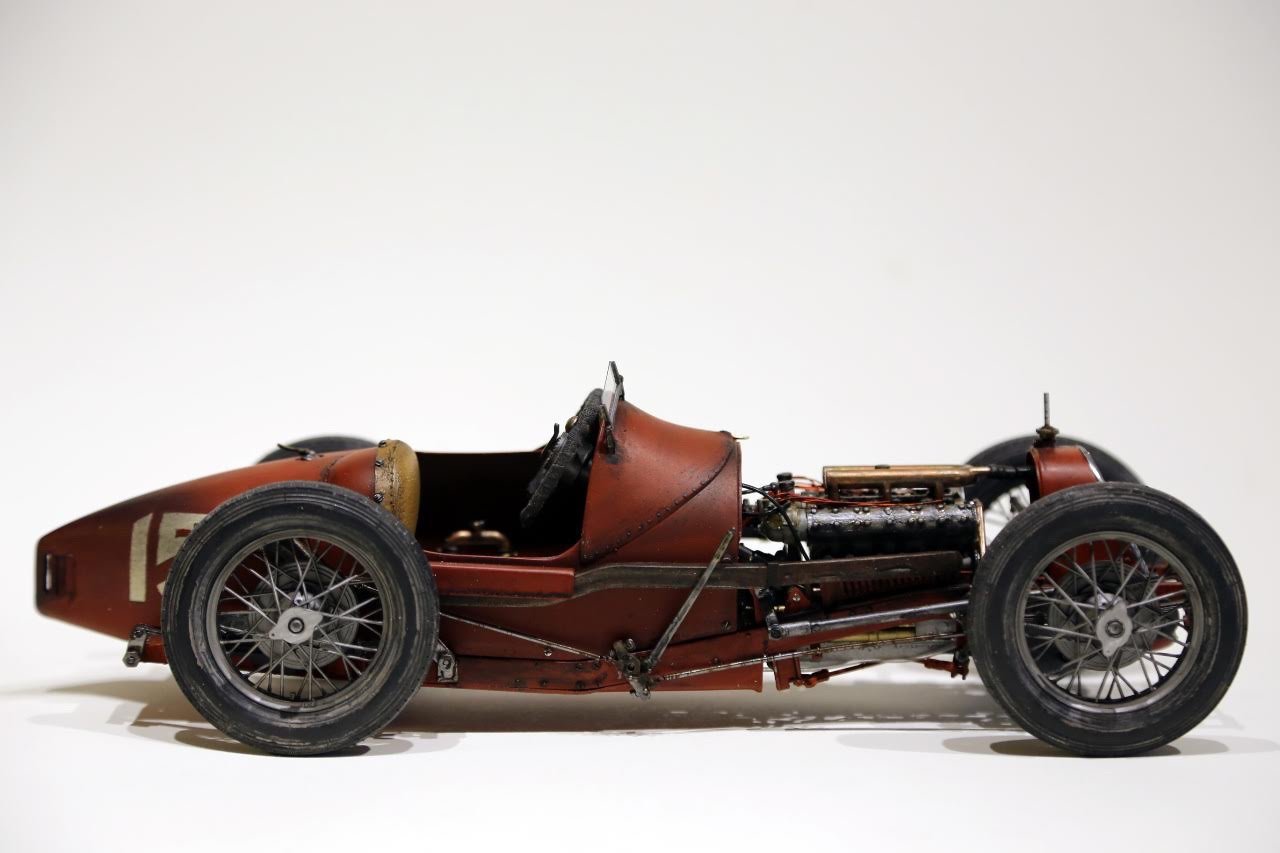
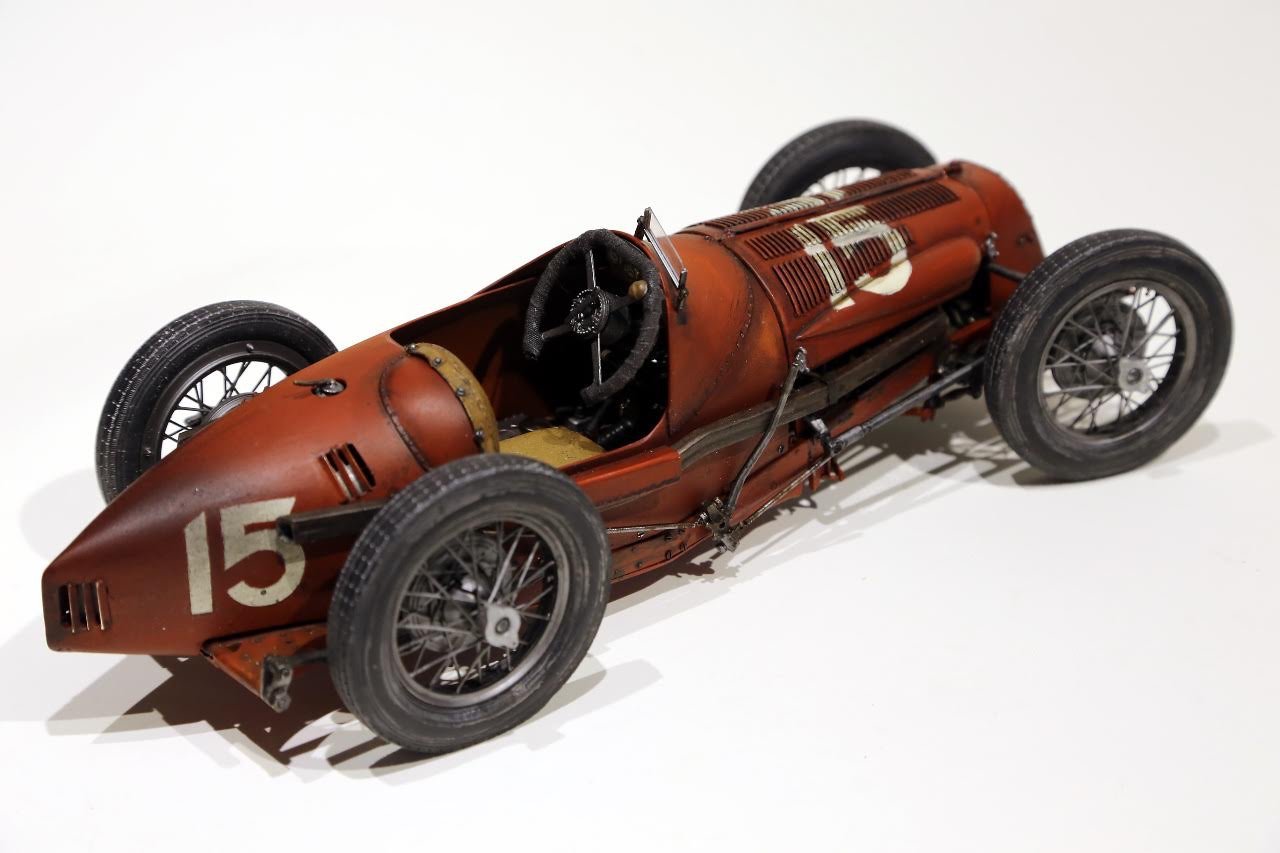
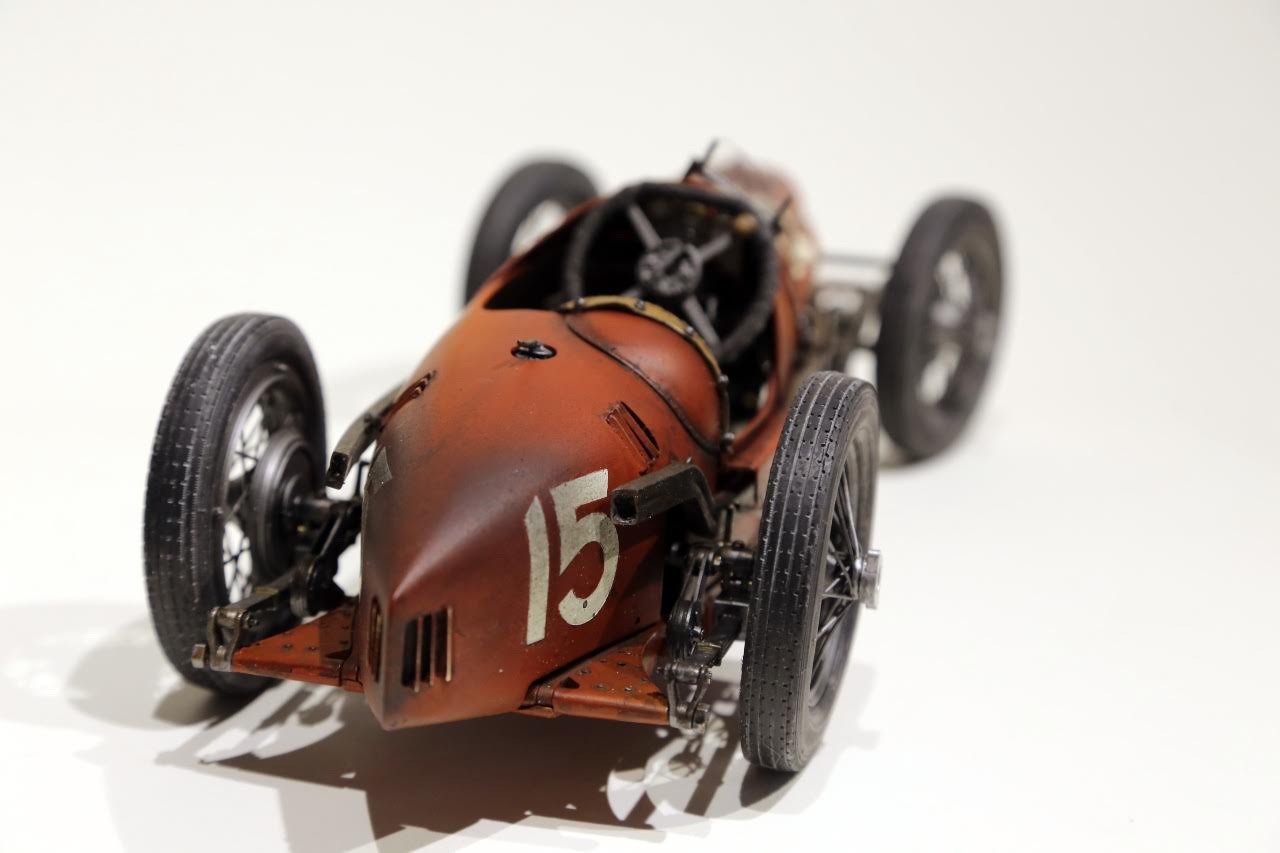
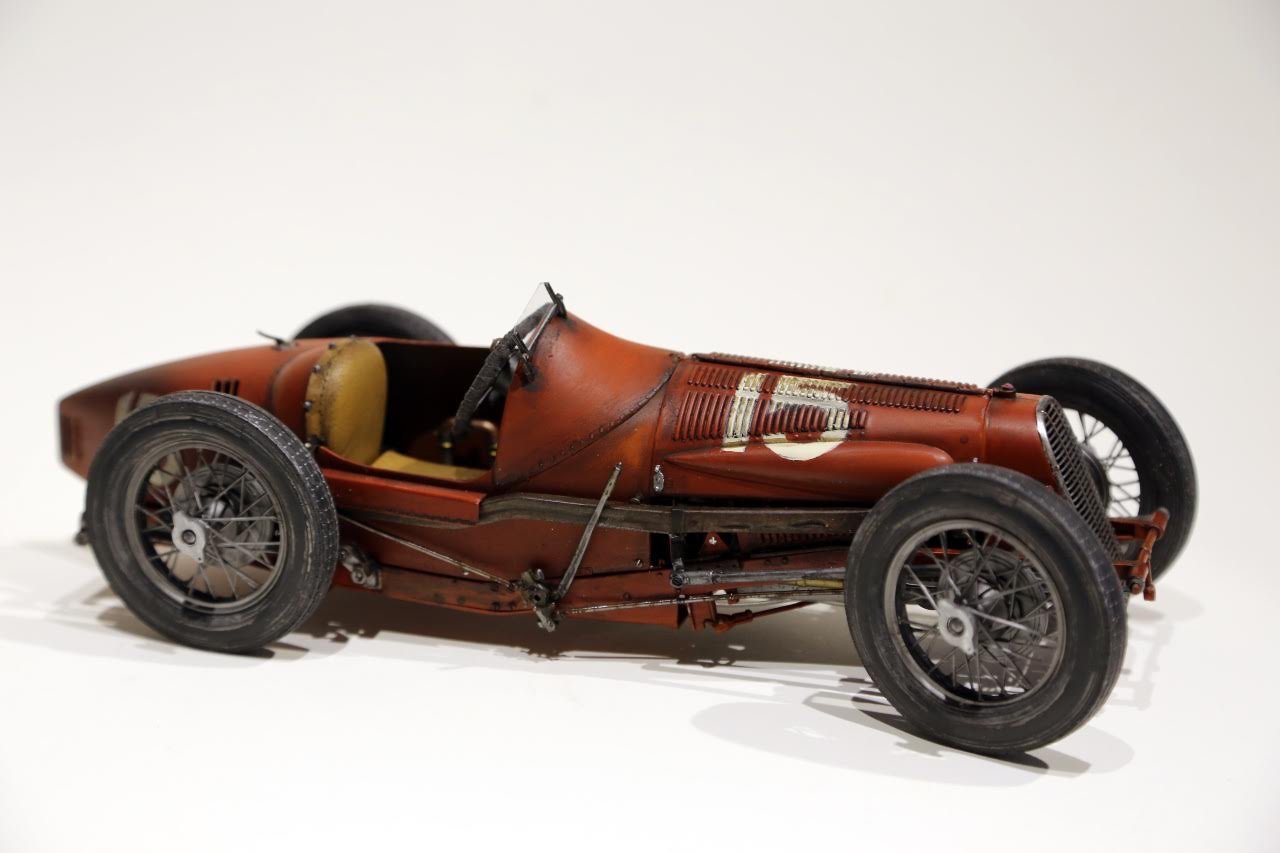
A few shots of this more or less finished rendition of the Italeri Fiat 806 Grand Prix, which is approaching the chequered flag. Bit of a change from wooden ship-building. First car model I’ve ever done now I think of it. Pretty satisfied with the result - the look I was going for was something 100 years old with some long gritty racing under its belt, with lots of oil and petrol flying about. It all went together pretty well. The only kit related issues were some body panel struggles at the front end - the engine cover plastic was pretty bad and hinging apparatus is dodgy, needs to be re engineered. I may redo so it opens to see the engine more easily.

- 61 replies
-
- 28
-
-

-
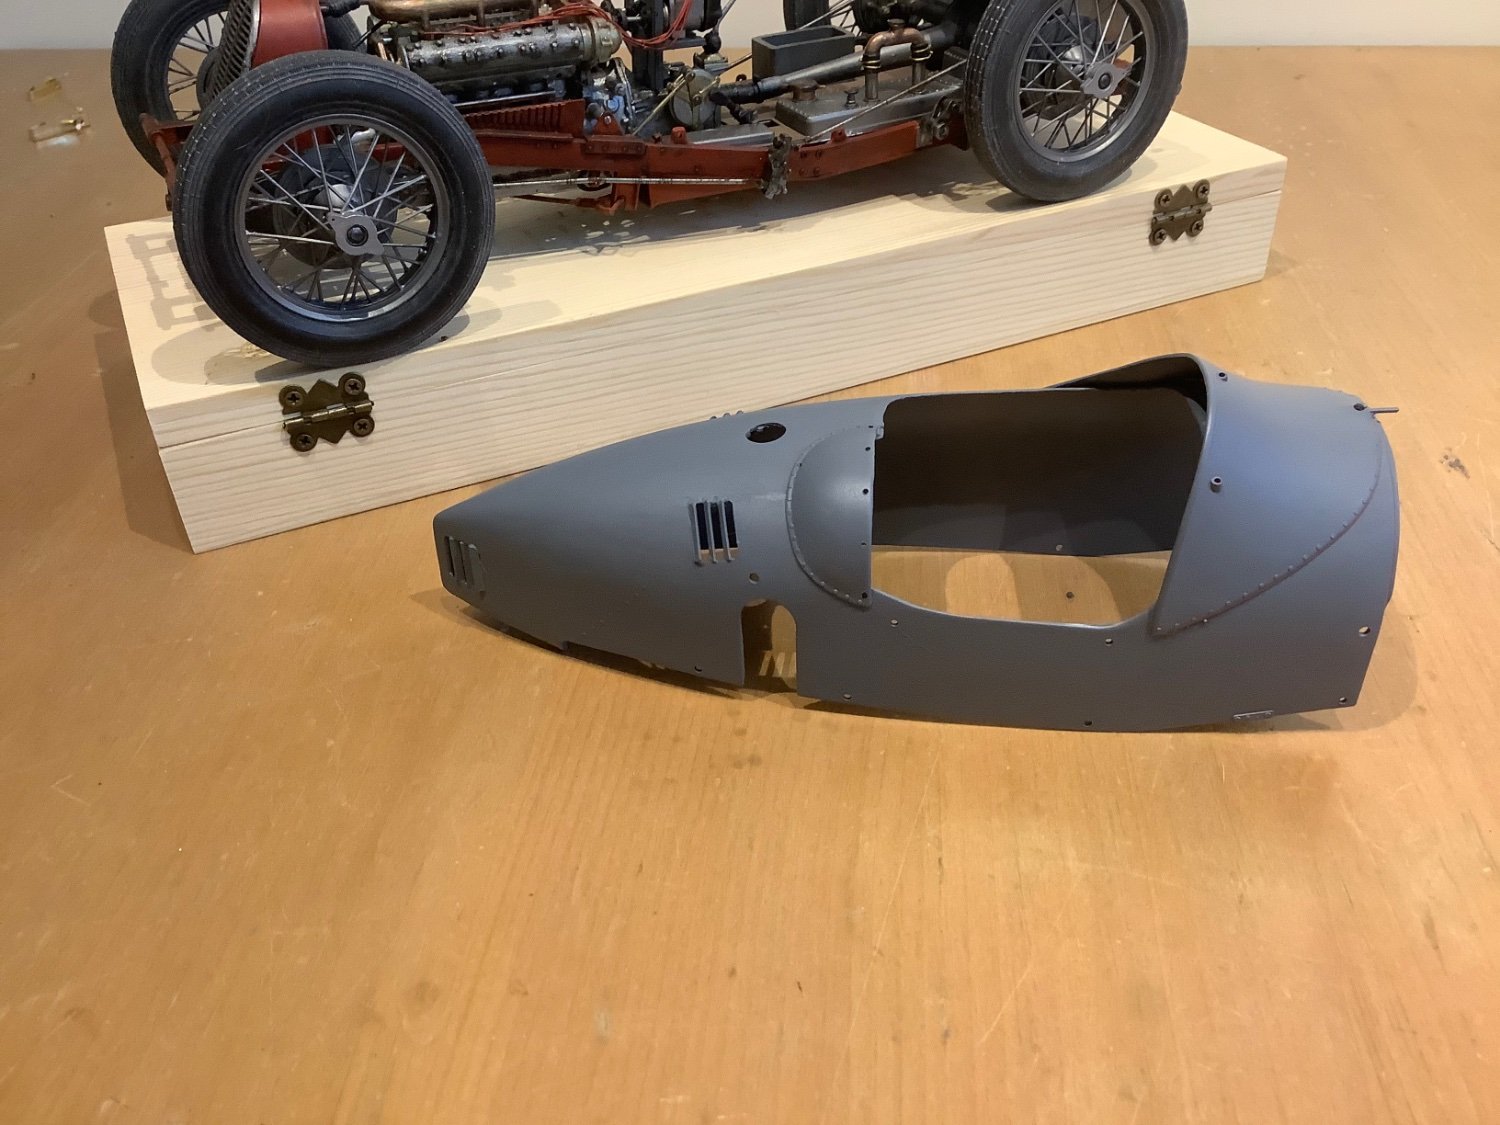
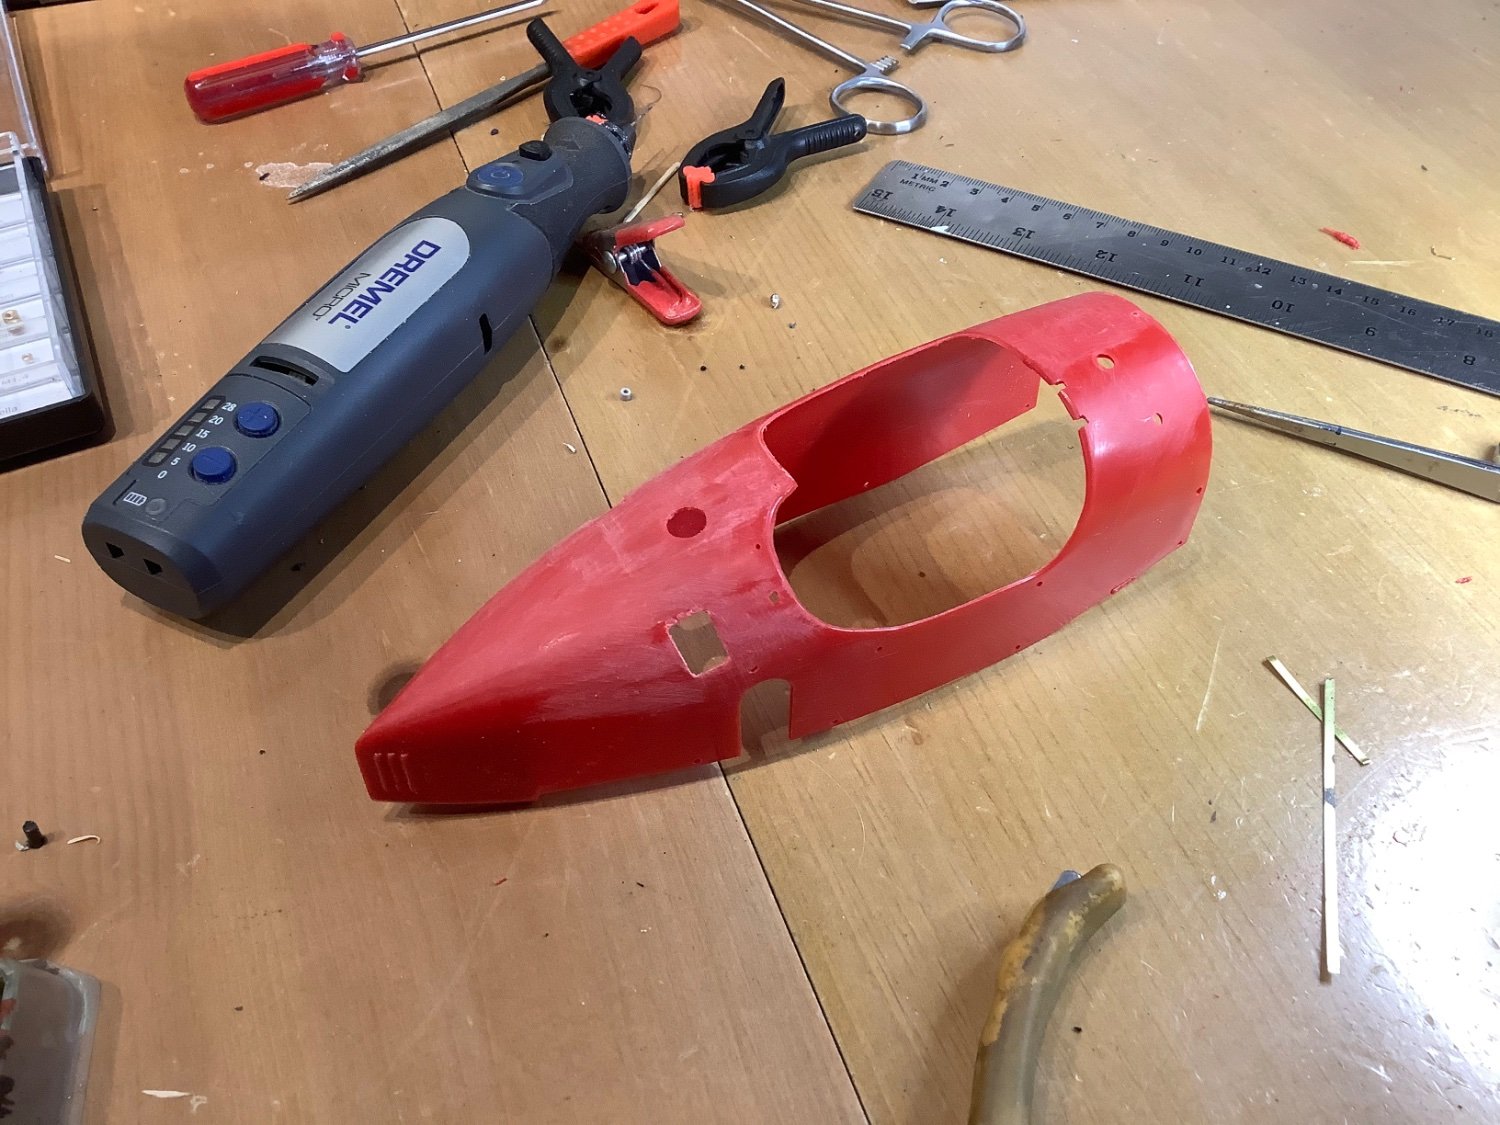
Thanks Mike! Finished hacking away at the vent openings, assembled the three main pieces of the body and gave it all a coat of primer. Looks fine I think, I can deal with a few imperfections.

- 61 replies
-
- 12
-
-
Looking outstanding! Just a sweet planking job, so well crafted.
-
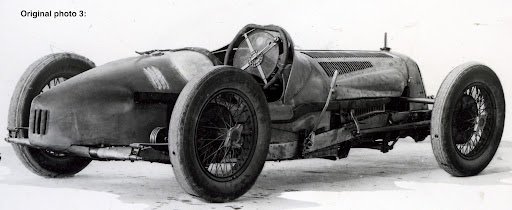
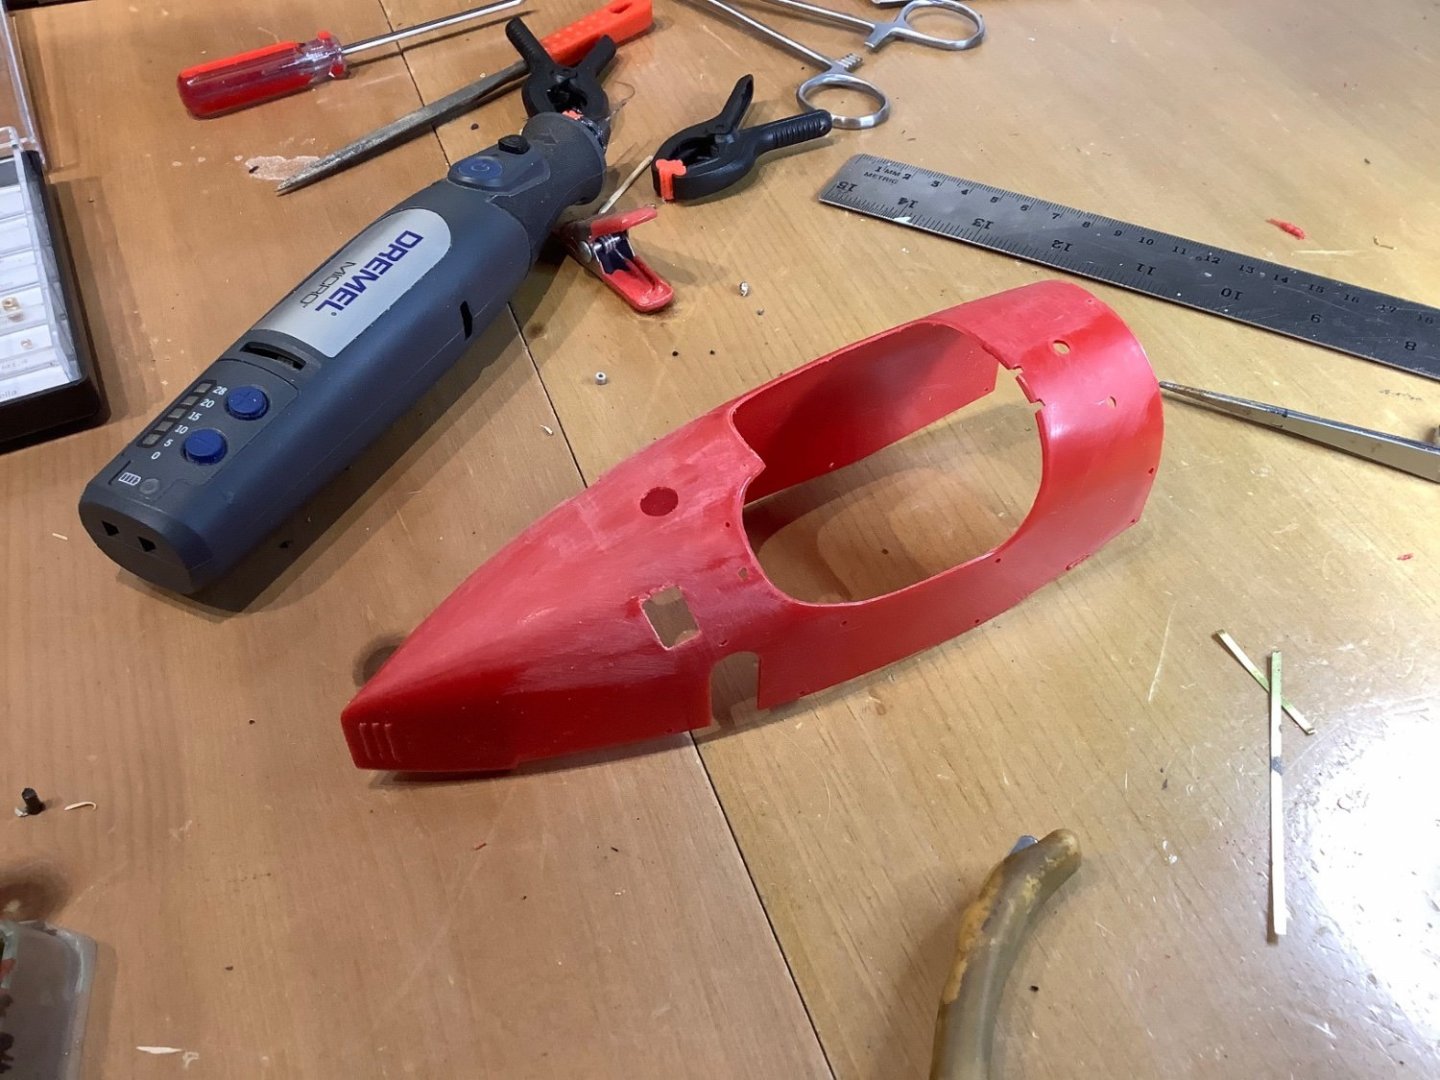
Thanks Gary and Egilman. I’ve set aside the chassis assembly for now and am tackling the body for something different. The body sprues are a bit rough with this kit, pretty crappy actually so a bit of work to knock them into shape. Could just do a painting exercise now but I can see from the original picture I have that the vents on the back were prominent, while the plastic piece just has a few insignificant closed bumps, so thought I’d open them up a bit for a more authentic look, which I know some other builders have done. Spent a good part of the niners packers game doing that with a blade and micro drill, to an unexpectedly good result. Then I went to the other side and made a complete shambles of that side. So now I’ve just cut them both out completely and have to start again with something from scratch. Guess I’ll now do this for the two at the very back as well.
- 61 replies
-
- 10
-
-
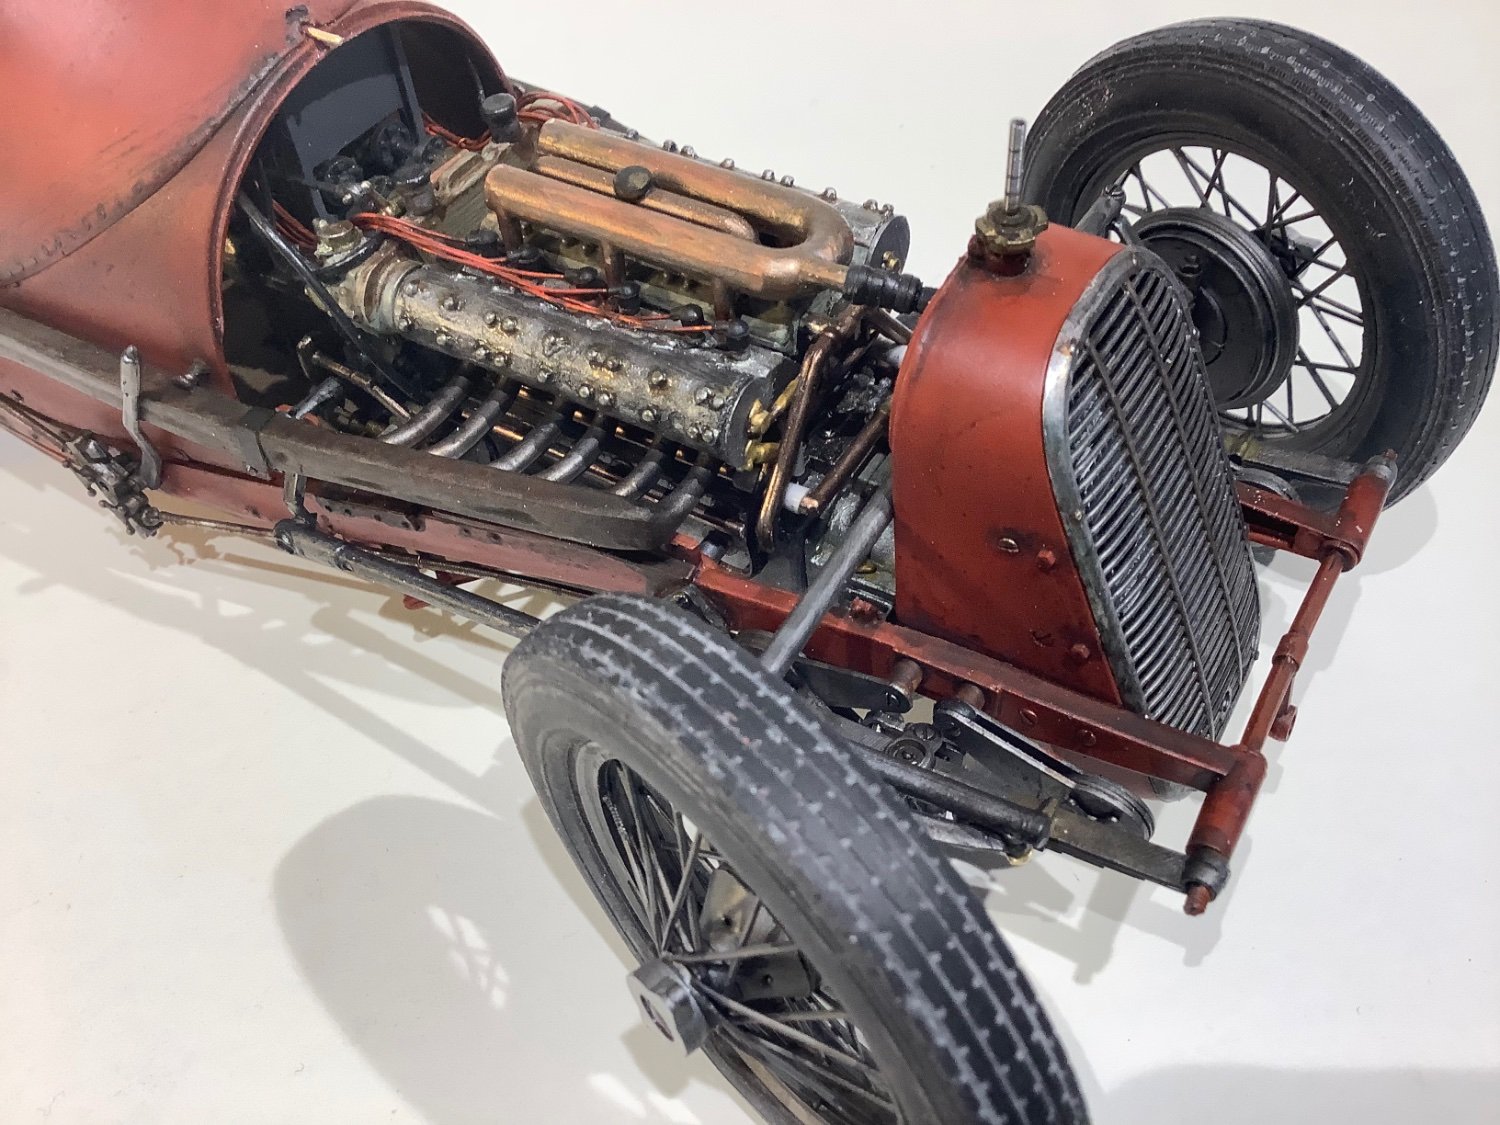
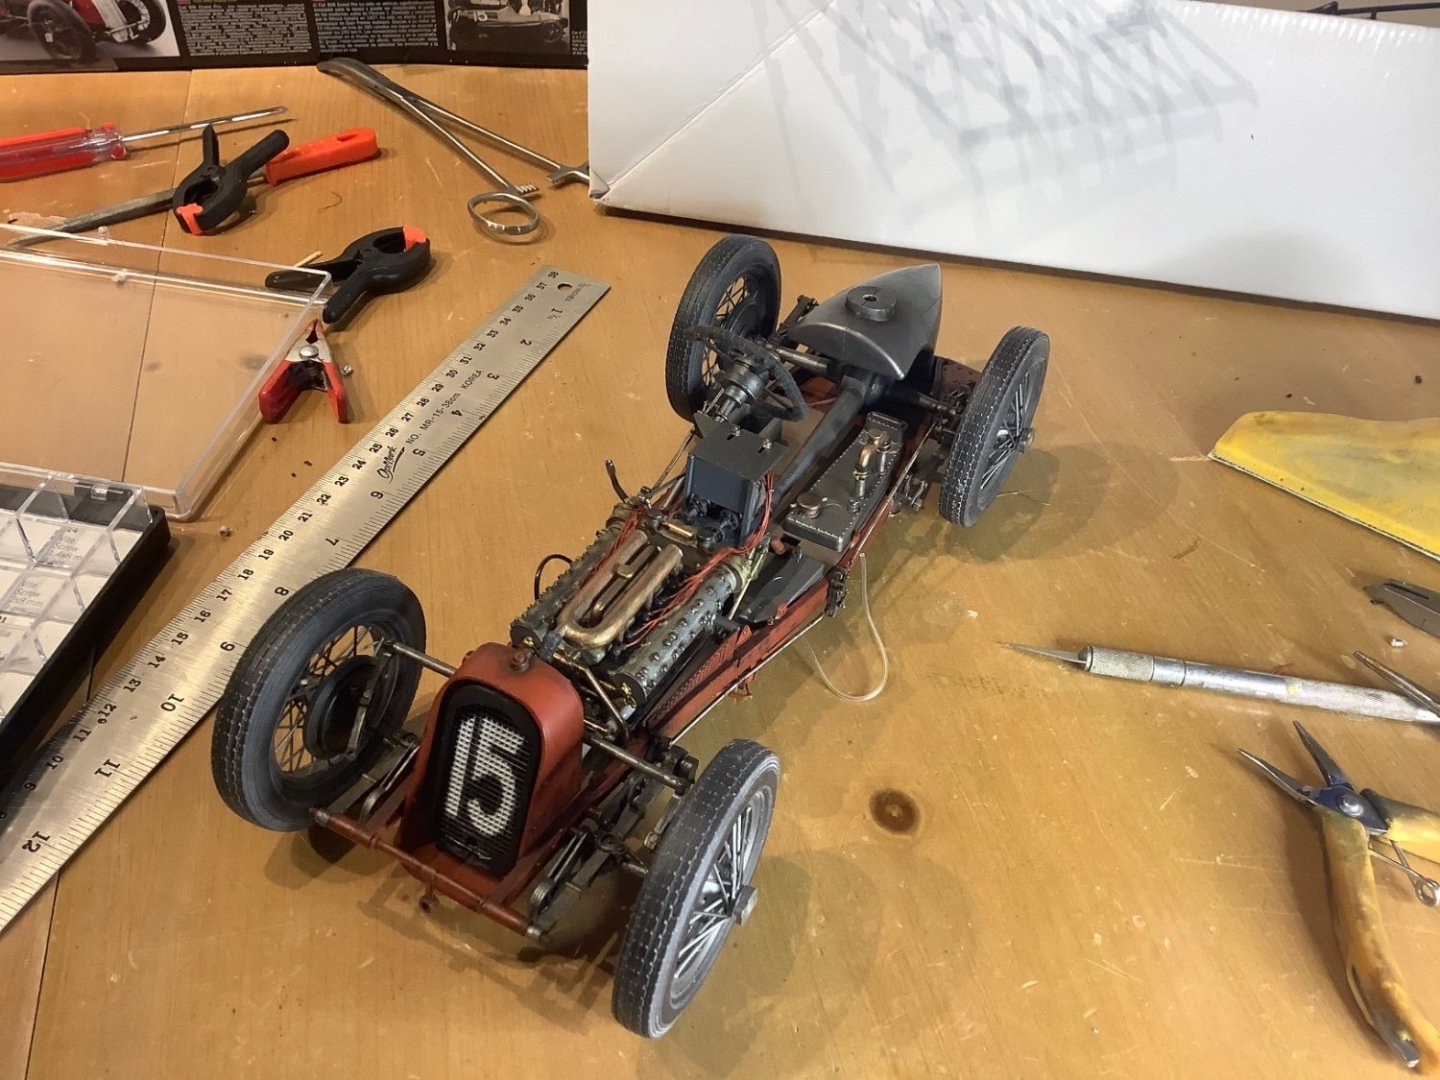
Thanks Egilman. Here’s a few closeups so you can see all the warts in its current state, still a ways to go. What I’ve been doing to get the patina is as follows: For the red bits I first started with a grey primer, then airbrushed the final red colour, seems to have more depth and truer final colour that way. I bought three different reds, a lighter red, Ferrari red and Fire red, and after testing liked the latter for an old car like this for some reason. After the red I used a bit of black and water and brushed it on here and there, letting it pool or added more pigment in certain places to give an impression of grime. For the metal bits I started with a dark steel colour then messed about with a brush on top with the thinned out black wash. I also have a bottle of something called Matt rust which I dabbed on in certain spots. Really it’s just brown paint. Most of the contrasting metallic bits are mixes of copper, bronze and black. A 1:1 mix of copper and black gives you a pretty good rendition of an oxidized old copper pipe. For the tires which tend to look plastic and too black, I just rubbed them with a bit of talcum powder to make them less new, and the powder settles into the tread so you get to see that texture. I’m really just making this up as I go along, there are real wizards at this that could probably explain how to create perfect results with proper technique.


- 61 replies
-
- 13
-
-
-
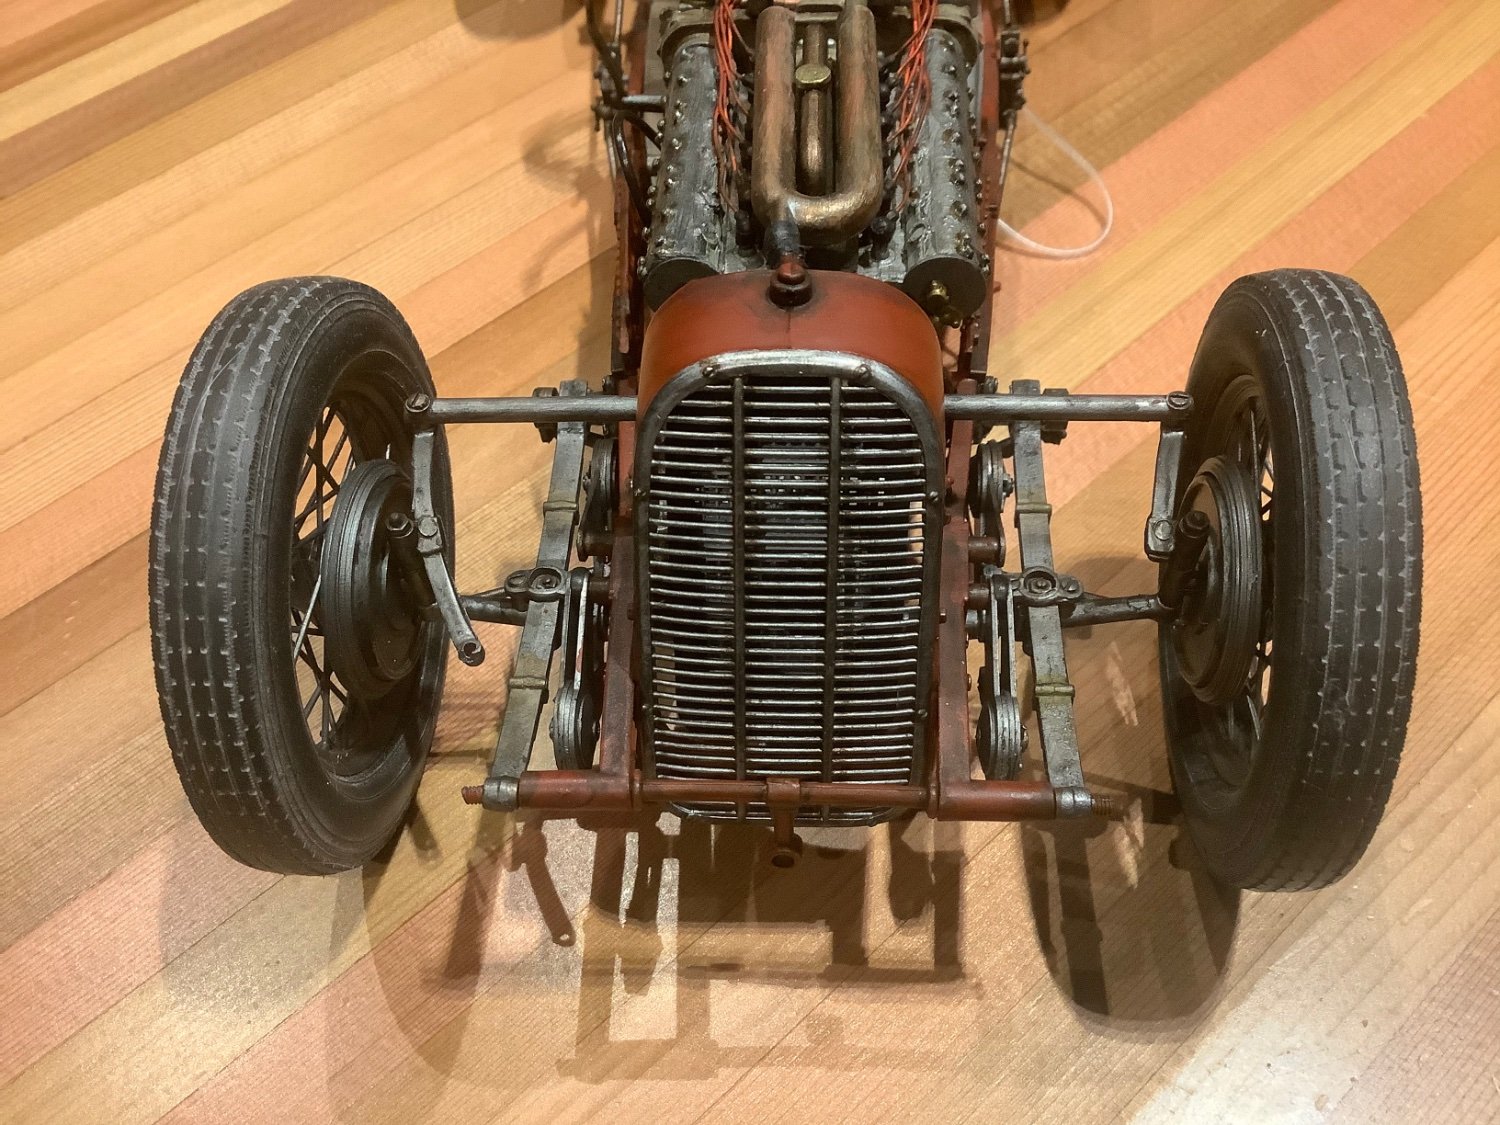
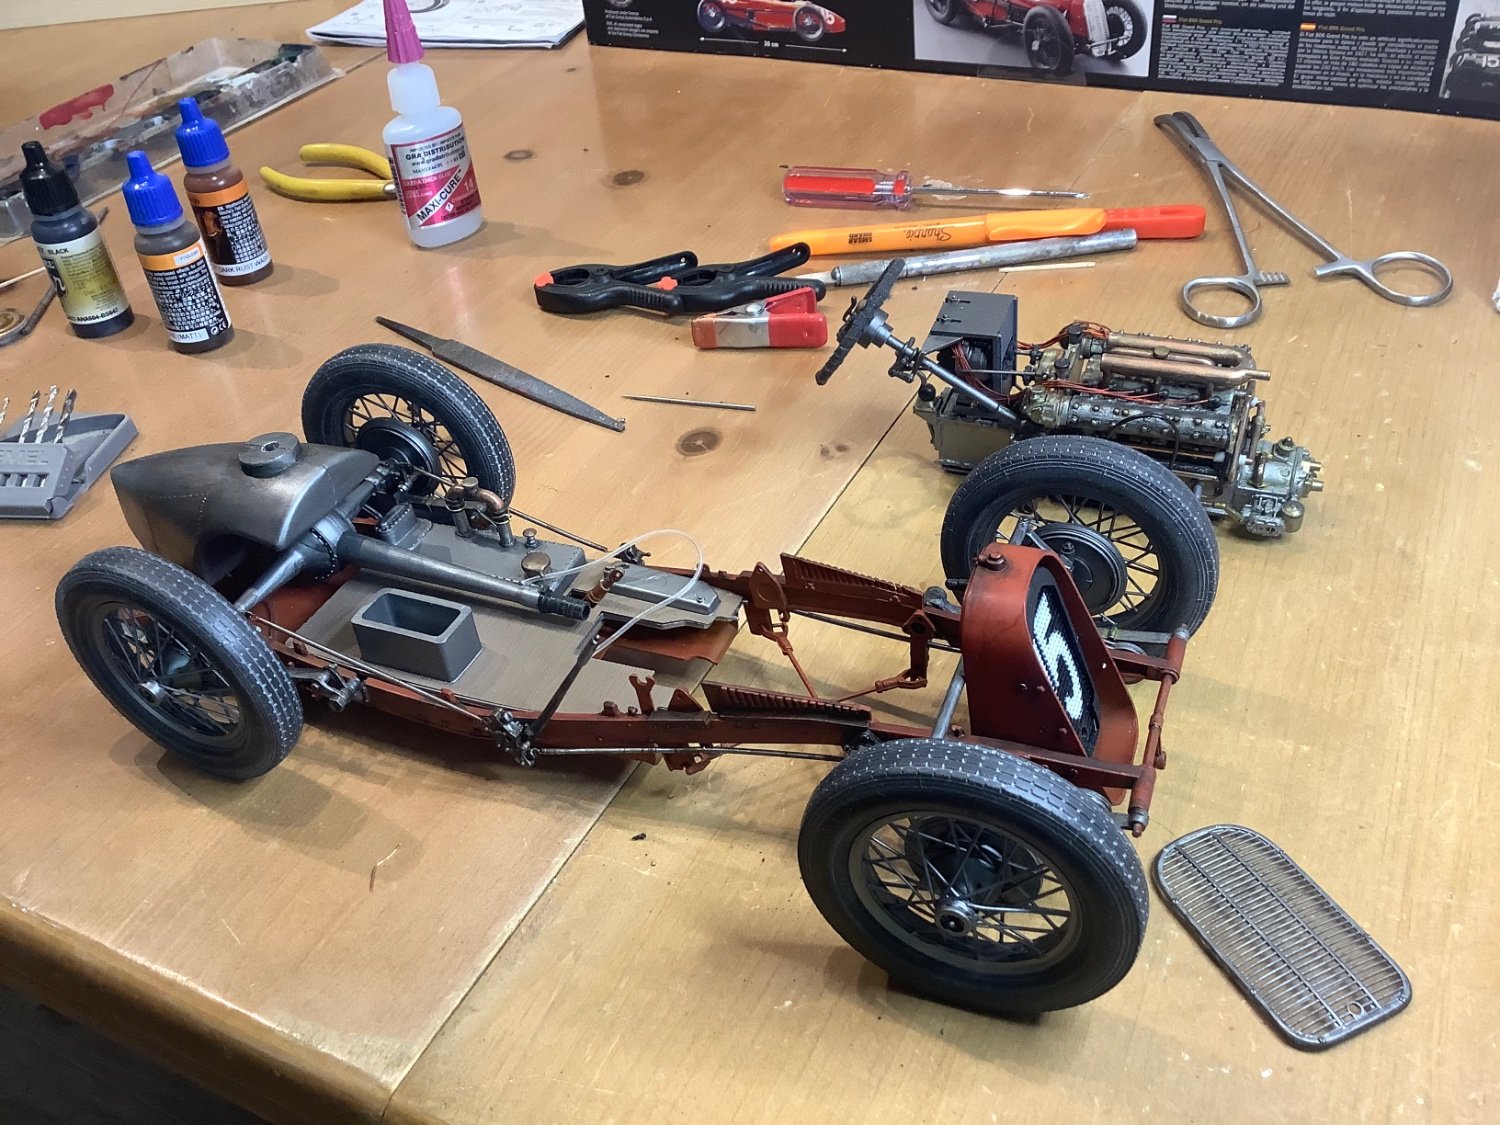
Wheels on…mounting the engine assembly and attaching the fuel line and all the tubes and hoses will be next.

- 61 replies
-
- 14
-
-
-
Thanks Yves - yes I’ve seen that one, and actually might do that - I’m quite enjoying the scale of this and messing around with paint. Haven’t seen the Bugatti. Wish there were more at 1:12.
-
Thanks Yves…bit of a hiatus as a couple of my design projects needed attention, but should be able to be back on the Fiat tomorrow. I’ve got most of the wonderfully complicated suspension parts in place and should be able to get the wheels on this thing next. I used the sticker provided in the kit as a mask and sprayed on the number rather than use the decal. Have started a bit of tentative weathering on some parts to give them a more vintage metallic feel, will be doing more.


- 61 replies
-
- 17
-
-
-
I need help repairing an Artesania Latina Dallas 1:50 model
Tim Moore replied to Zeus-cat's topic in Wood ship model kits
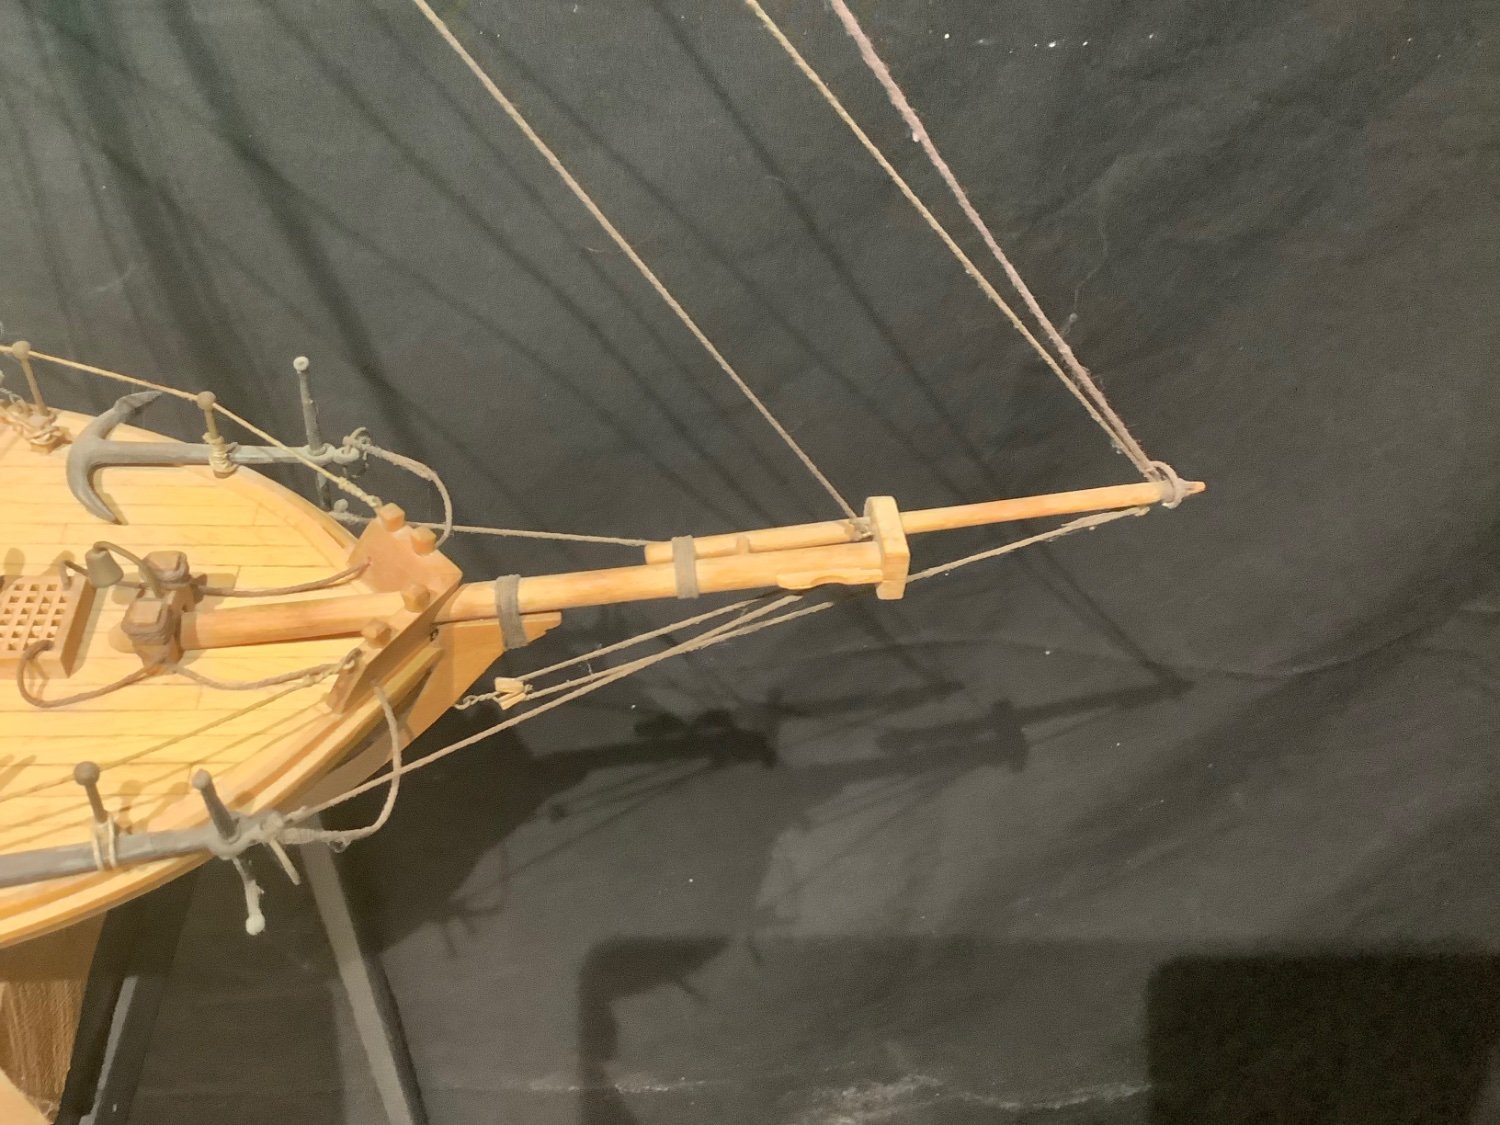
Hi Carter. On my Dallas the main bowsprit is 12.5cm long, 6mm dowel. The additional bowsprit section is 9cm long and 4mm dowel. The rigging is 0.75mm dark brown thread. Tim
-
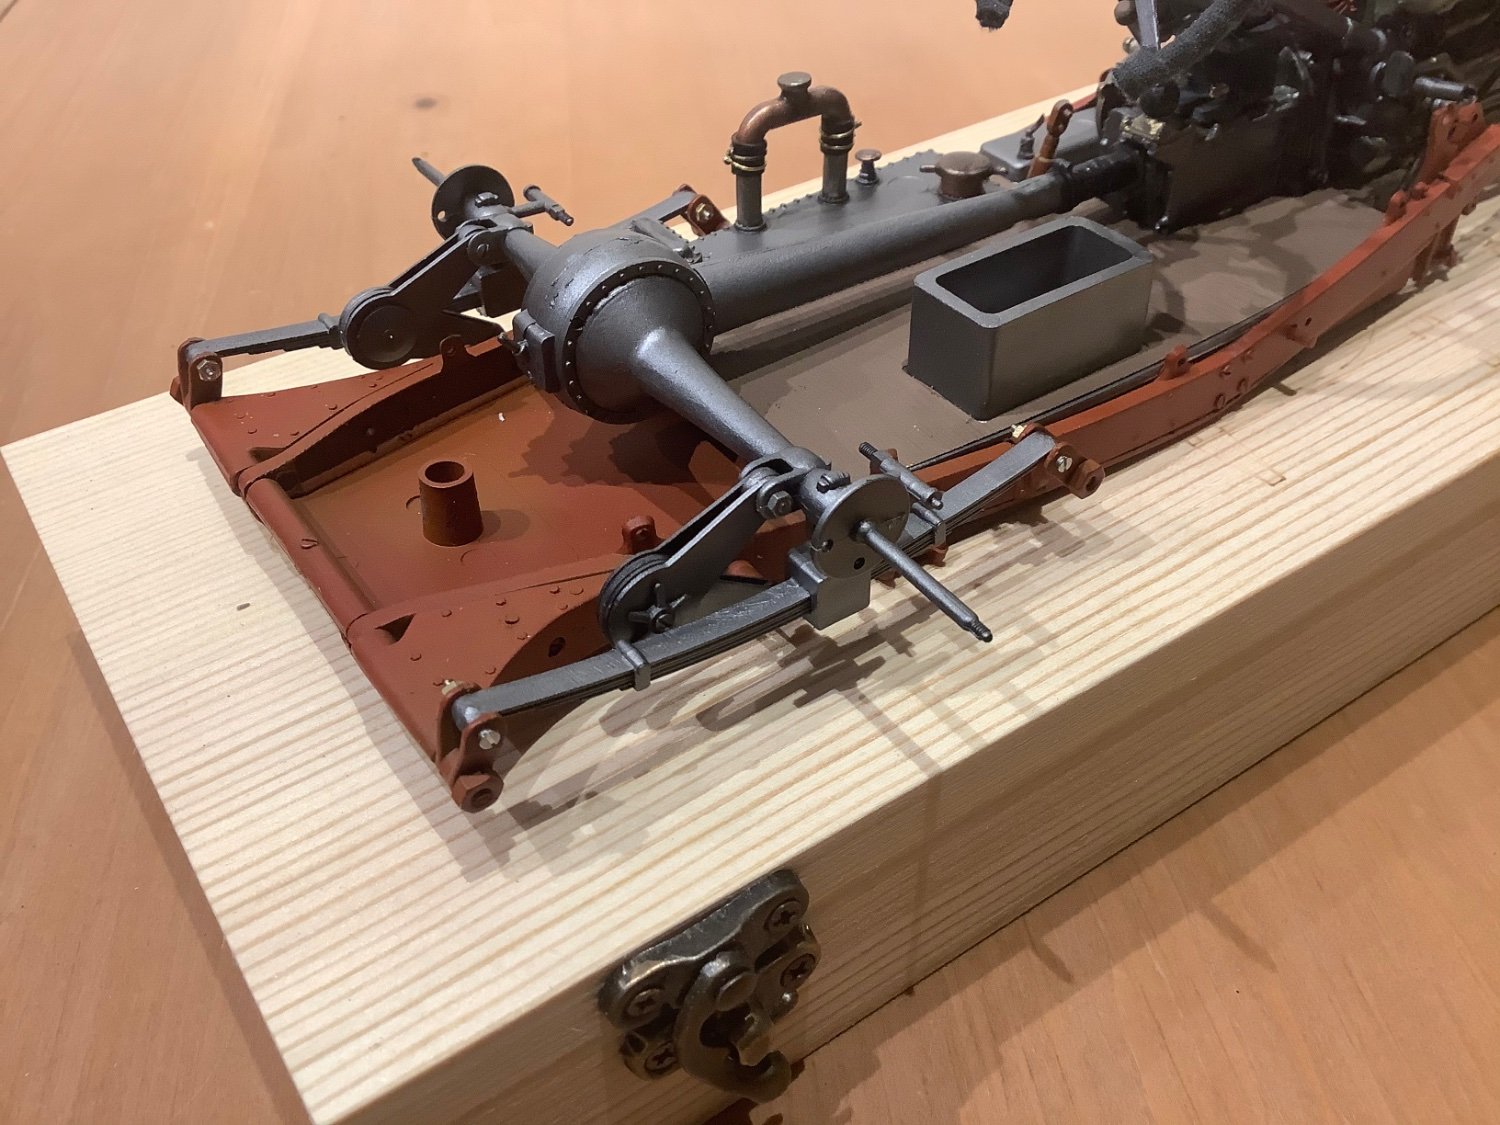
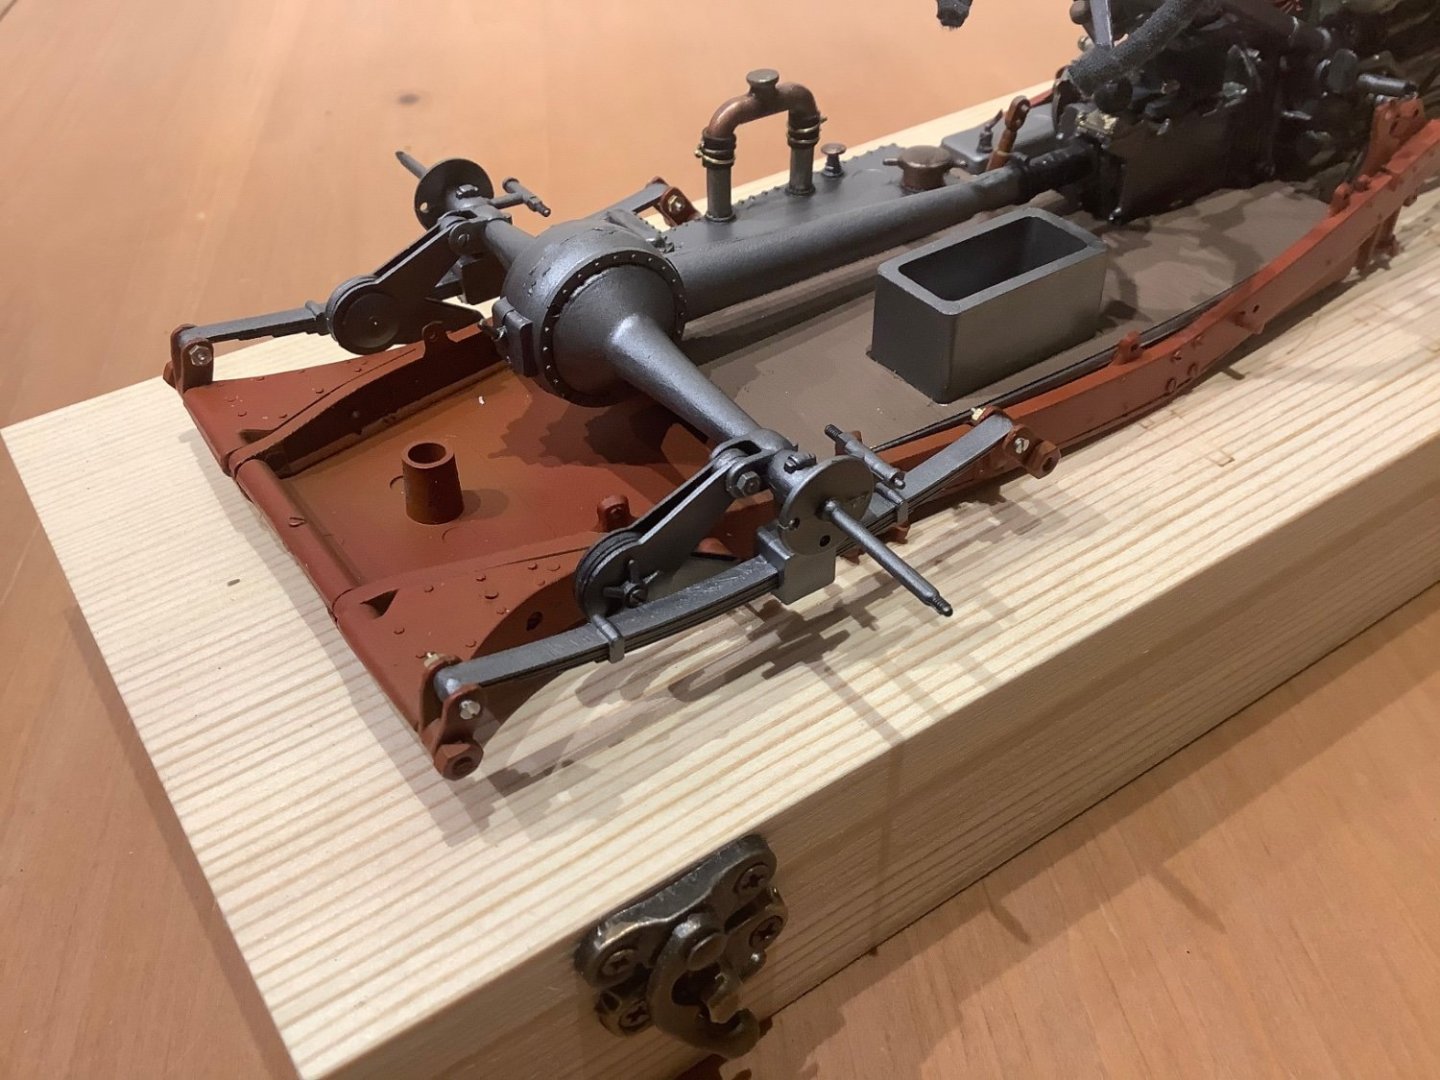
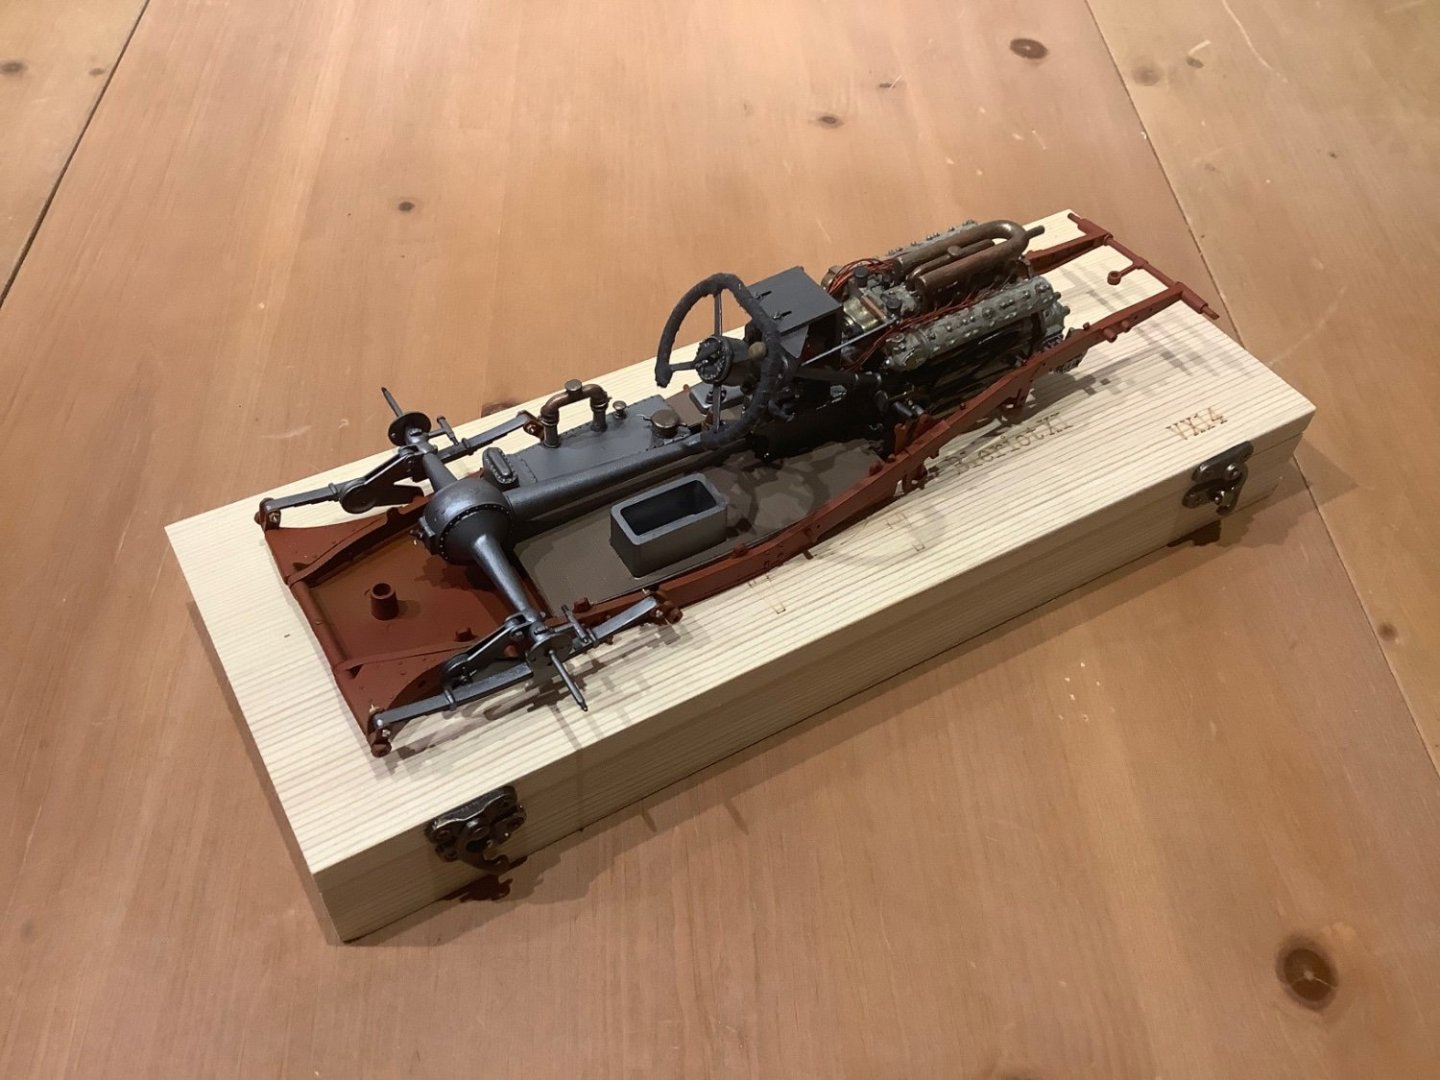
Thanks for looking in Diver and Egilman… Apart from a couple of glued components the rear axle and spring assembly is put together with nuts and bolts and some fine screws. Everything has fitted pretty well for me so far. I’ve airbrushed on a base coat of dark steel on these mechanicals to begin with. As nice as these bits are, it’s mostly hidden and really it’s the finish bodywork that’s going to make or break this model. That will take a little time I think. There are 33 steps to this model in the assembly guide, and this takes me to the end of #18.

- 61 replies
-
- 16
-
-
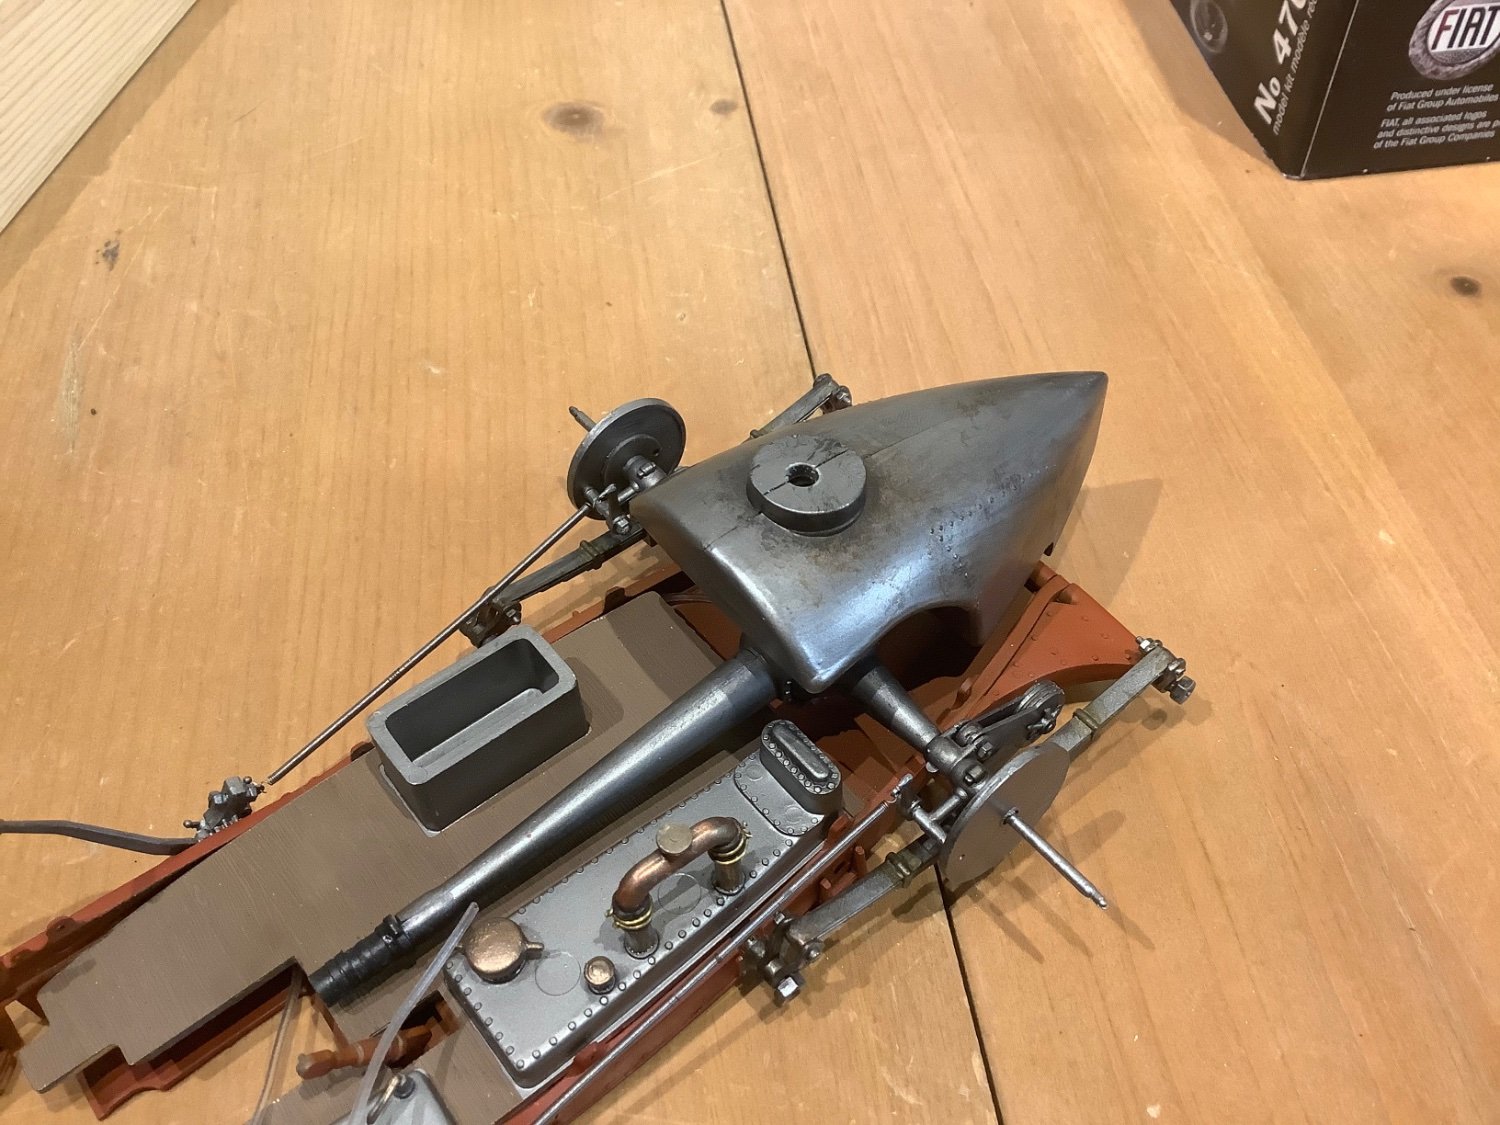
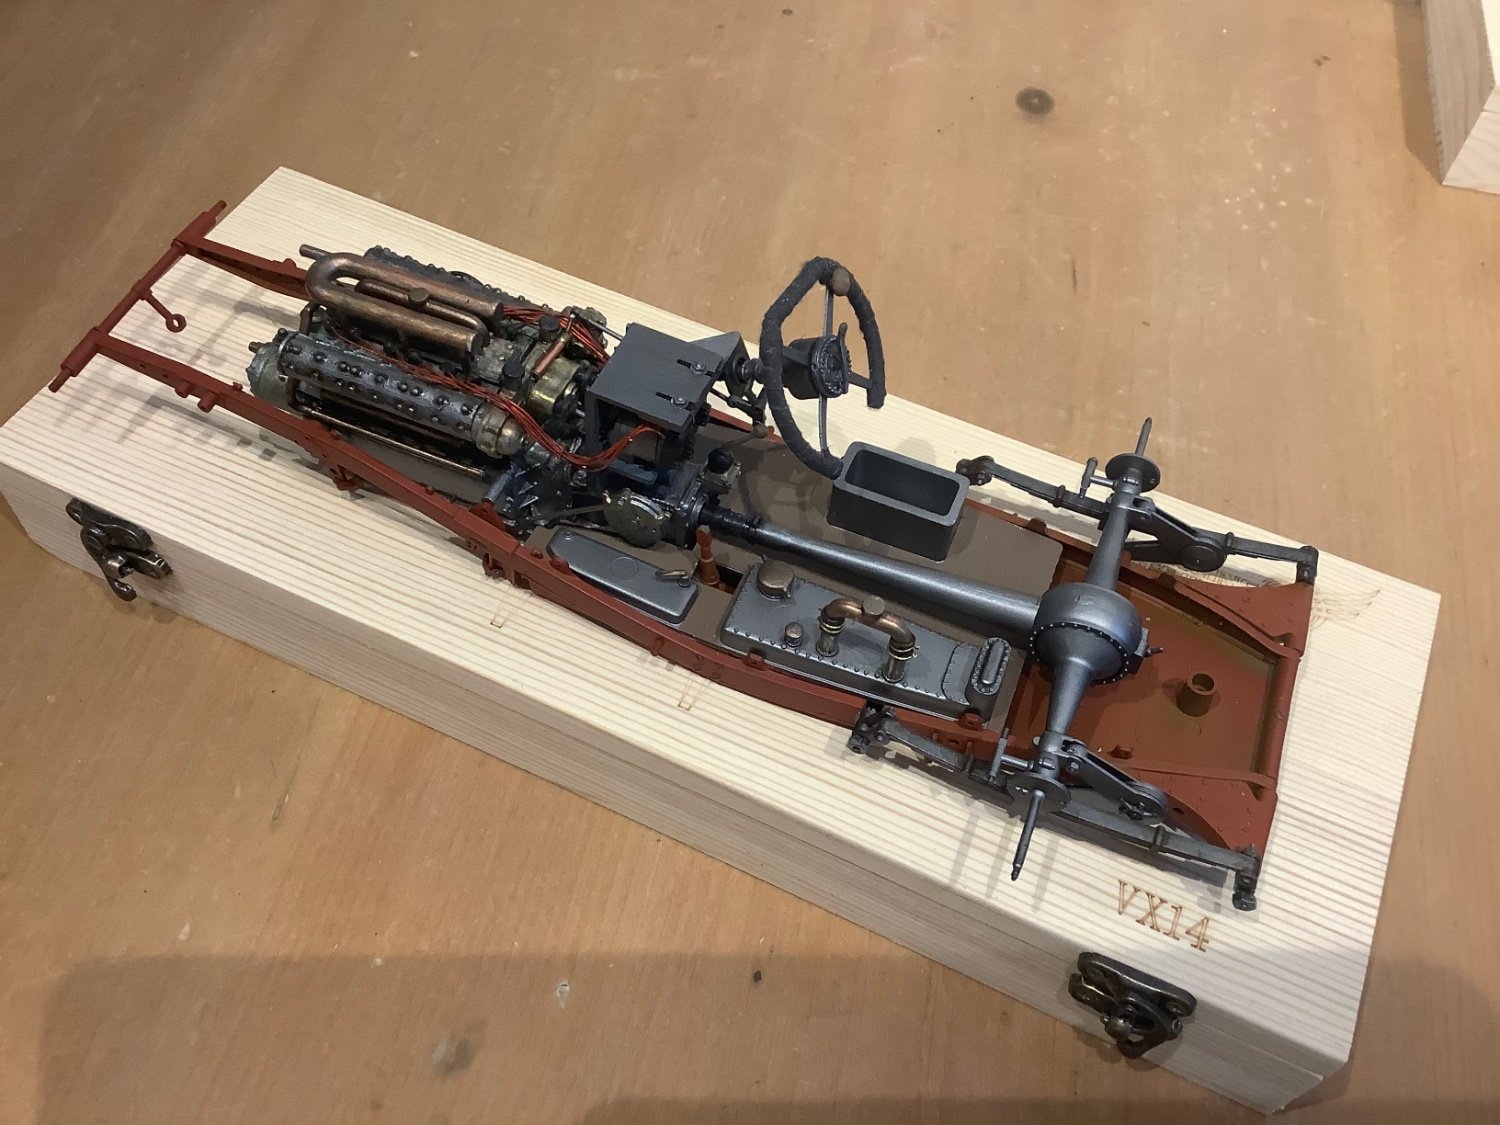
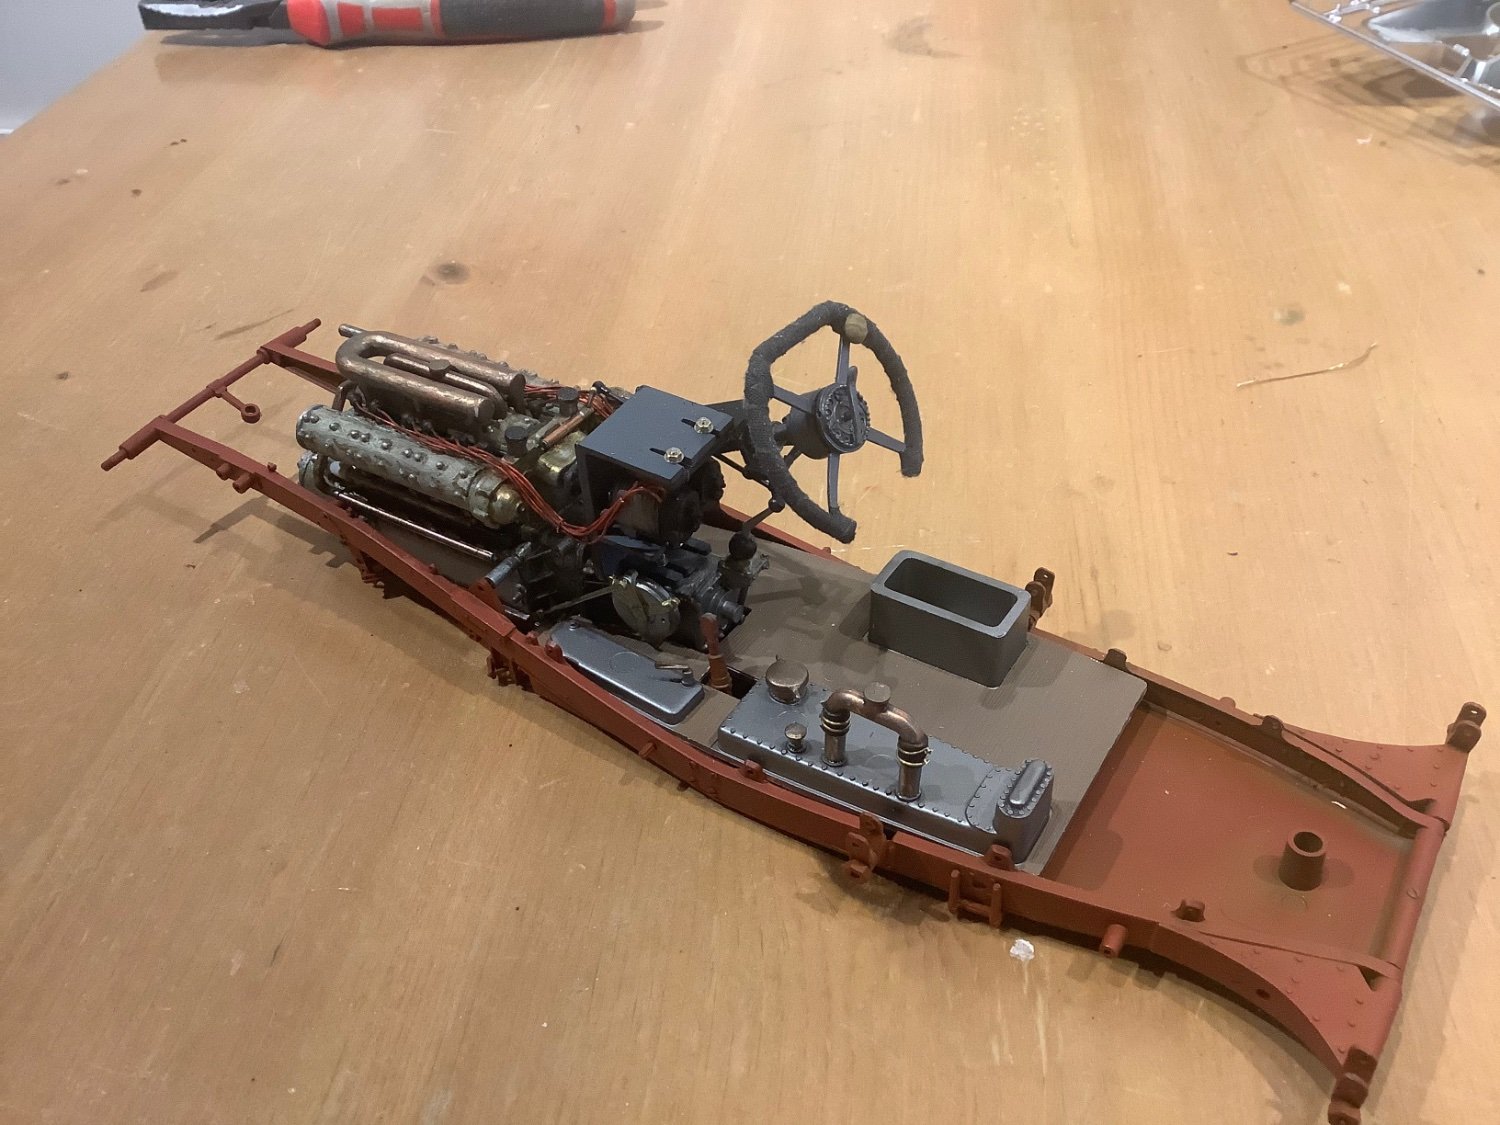
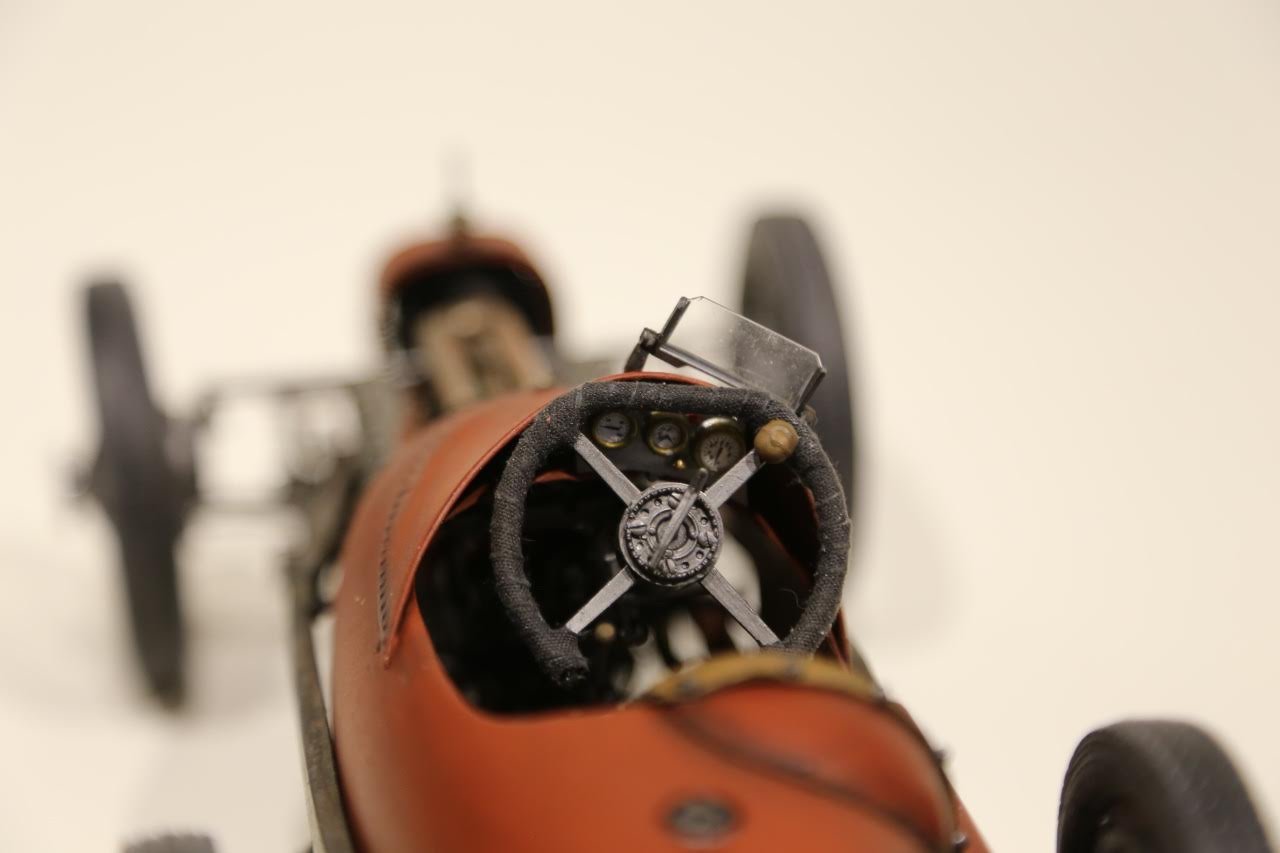
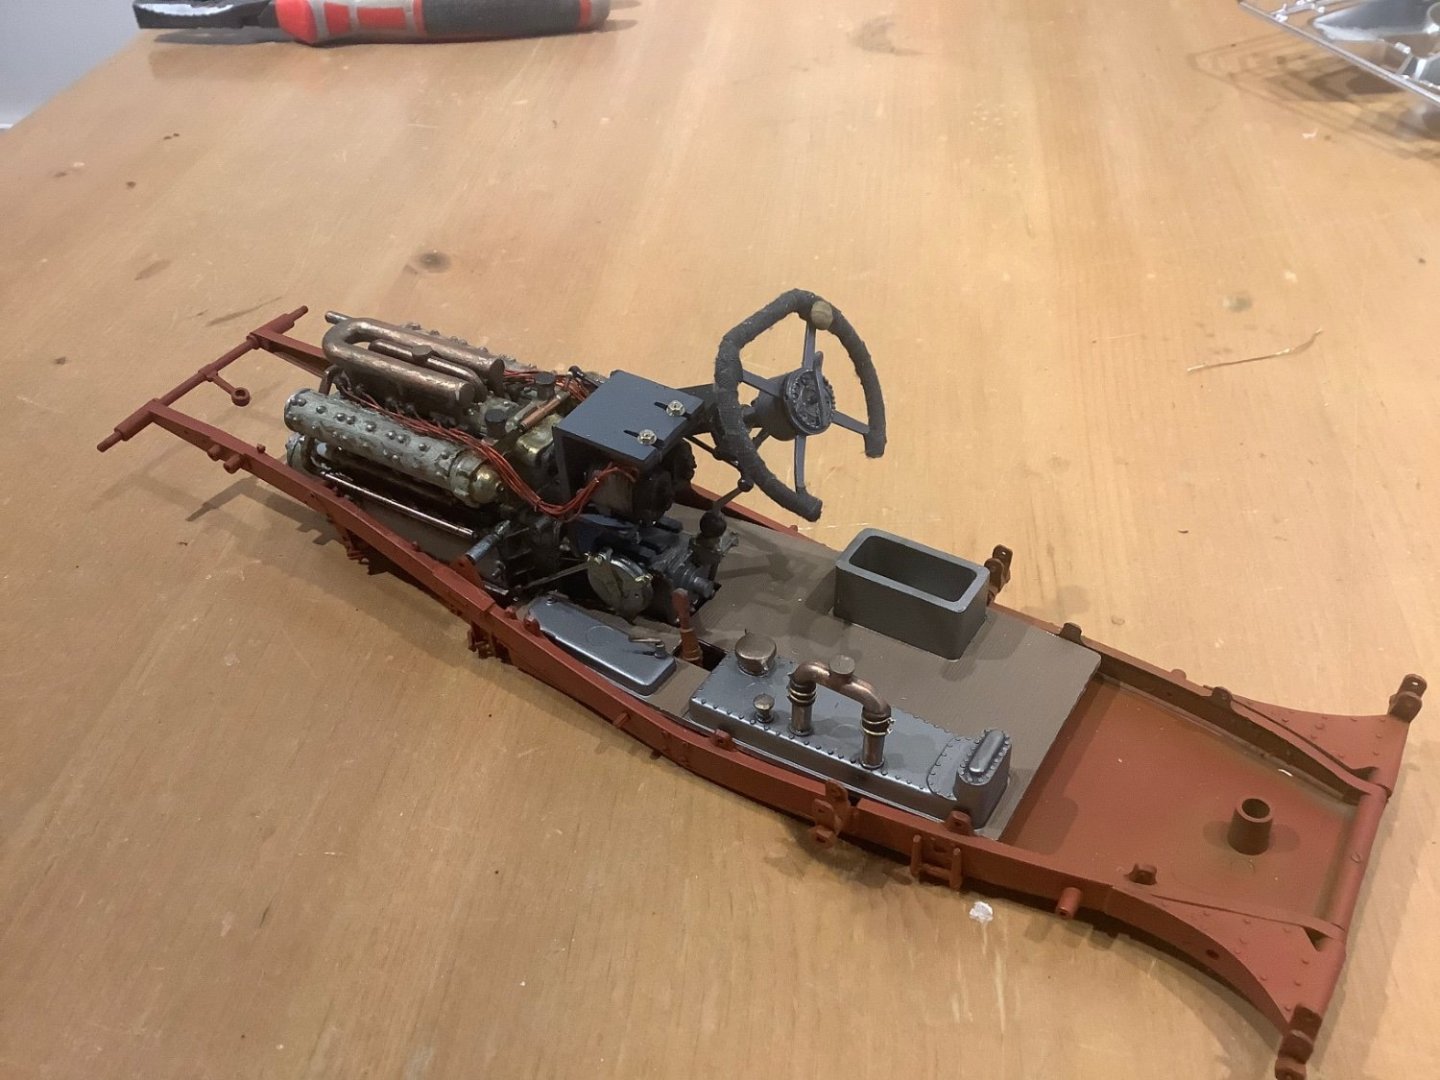
Thanks Lou & Ken… We are moving along here, Now that the steering assembly is done & married up with the engine block, I can tackle the axle and wheel assemblies and add them to the chassis. I’m still going to spend a little time detailing the engine/steering assembly but component wise it’s pretty much all there. The steering wheel is wrapped in some strips of cloth to simulate leather. The kit had a couple of other steering wheel bits - an inner ring and a clear panel, but I didn’t like the look so will leave them out. Ok that’s not exactly the gospel truth. I actually busted the inner ring and got fed up with the fragile piece of crap it was, so said to hell with it and chucked it in the bin.
- 61 replies
-
- 15
-
-
Hi Yves Yes the Italeri kit is apparently a reproduction of a diecast model by Protar. I’m pretty sure you could do this thing justice. I have to say I’m finding it a lot of fun to build, and I’m particularly liking the guide booklet which parcels out the component assemblies pretty well in digestible chunks.
-
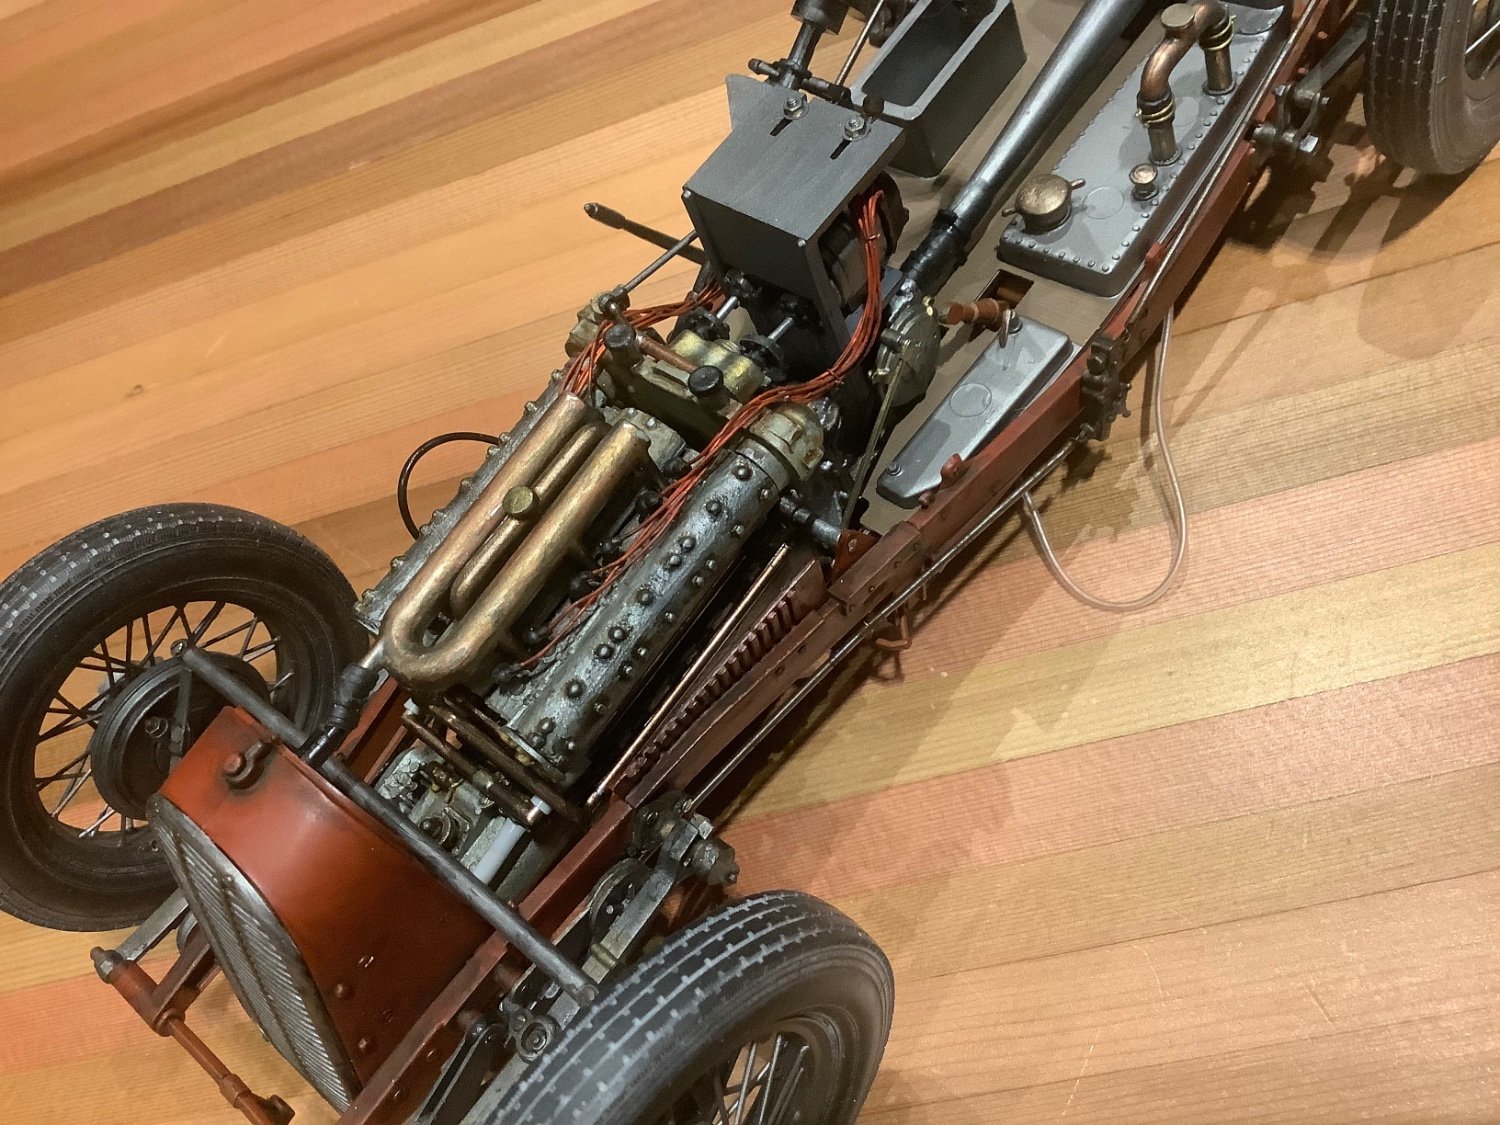
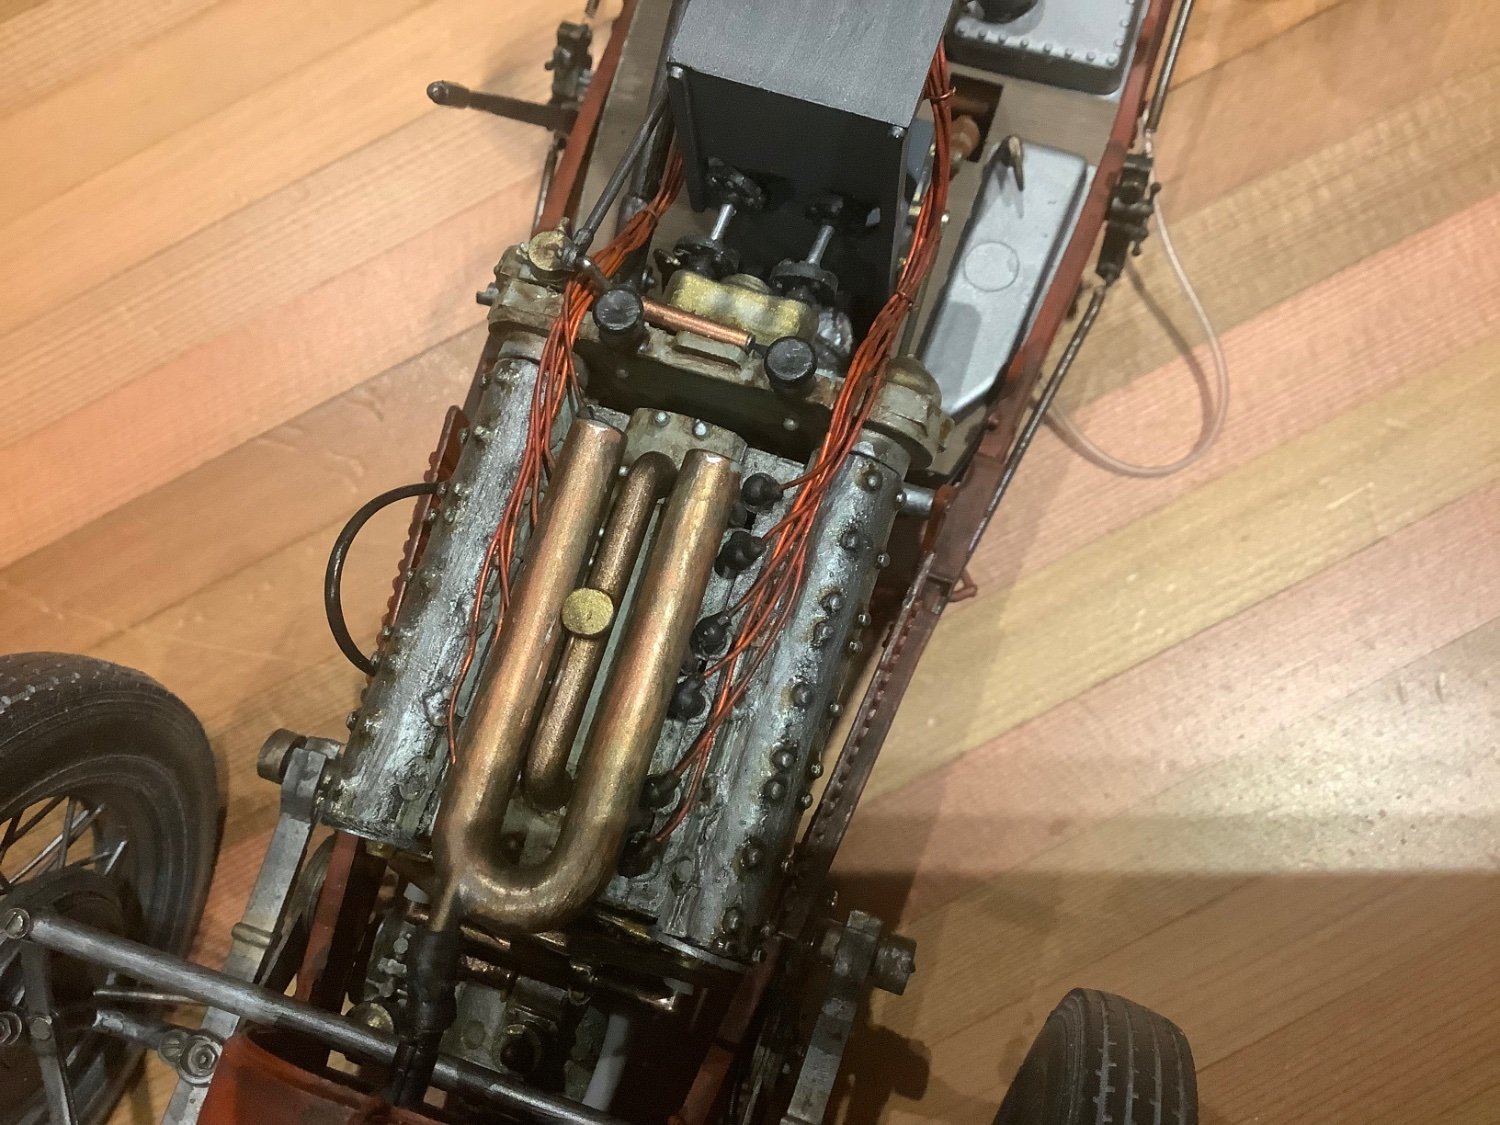
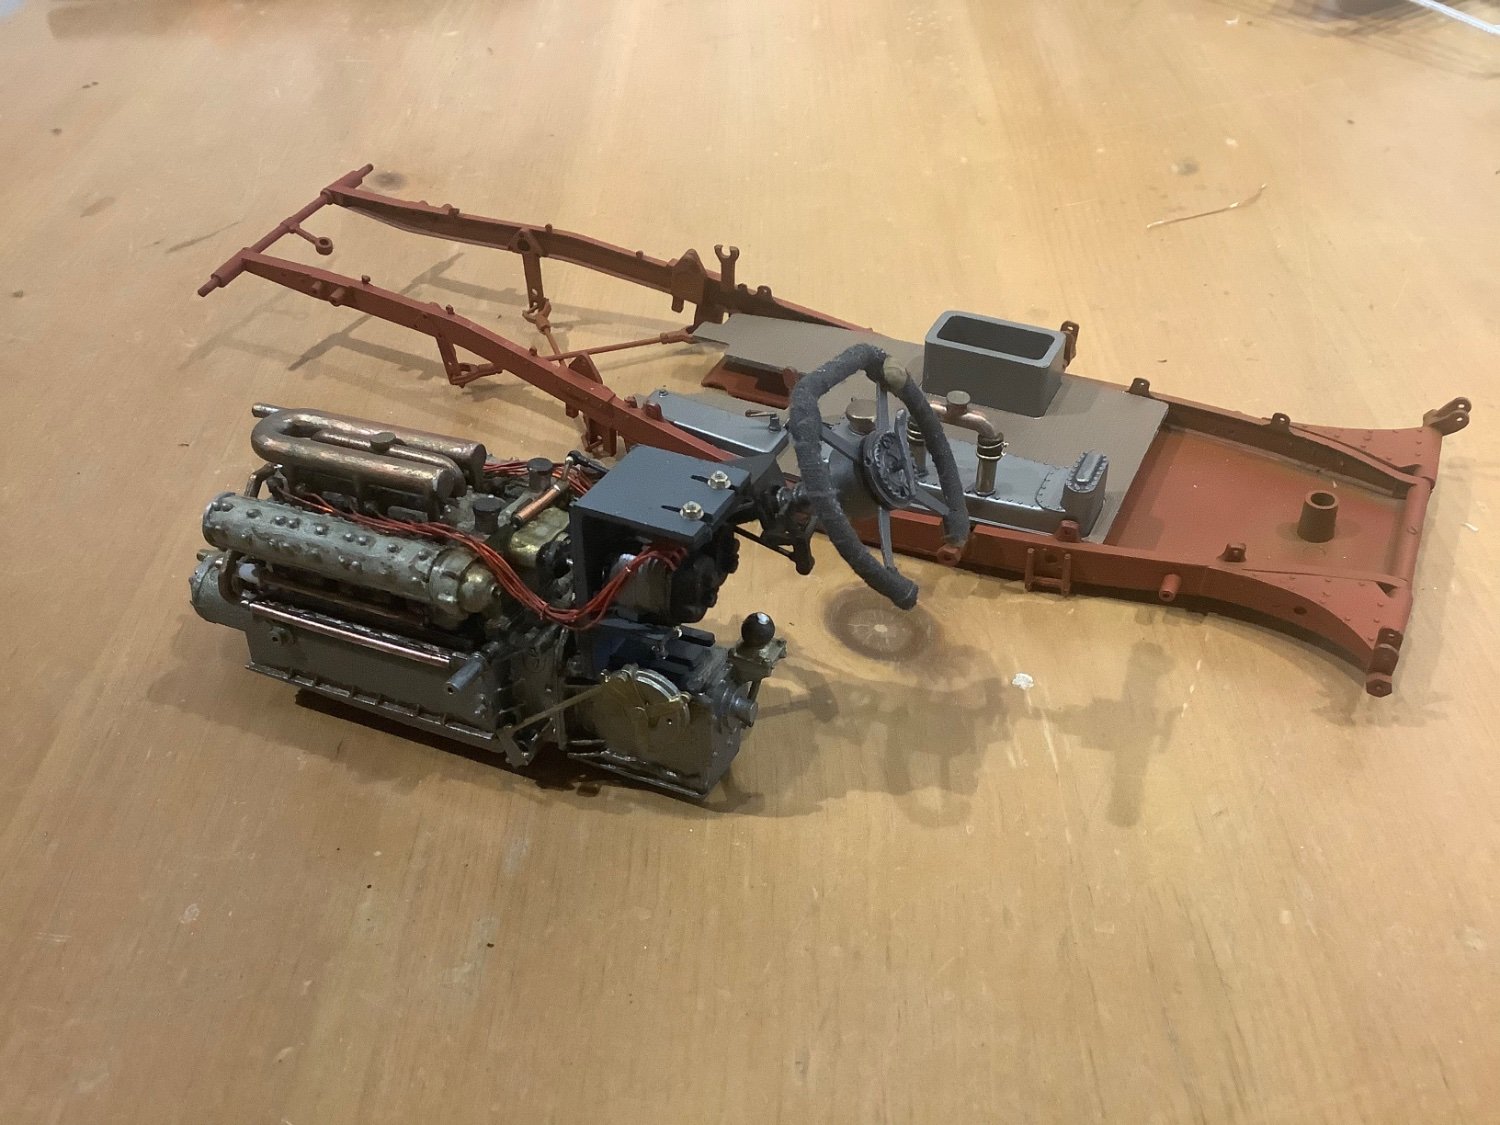
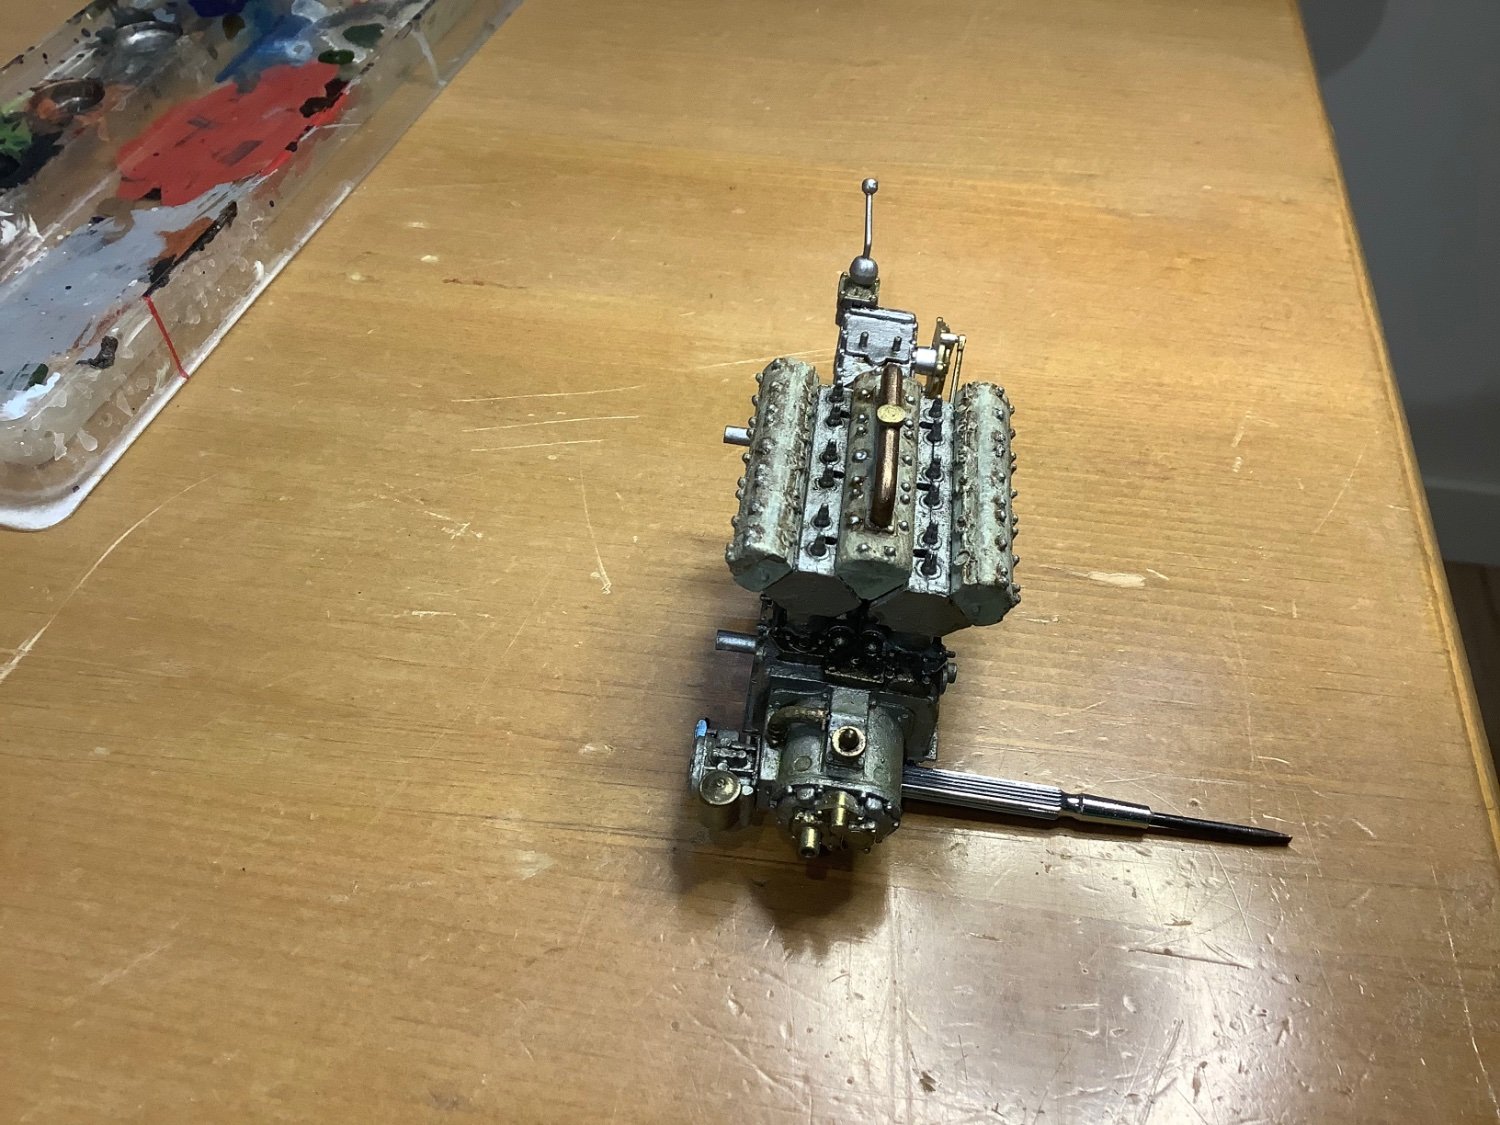
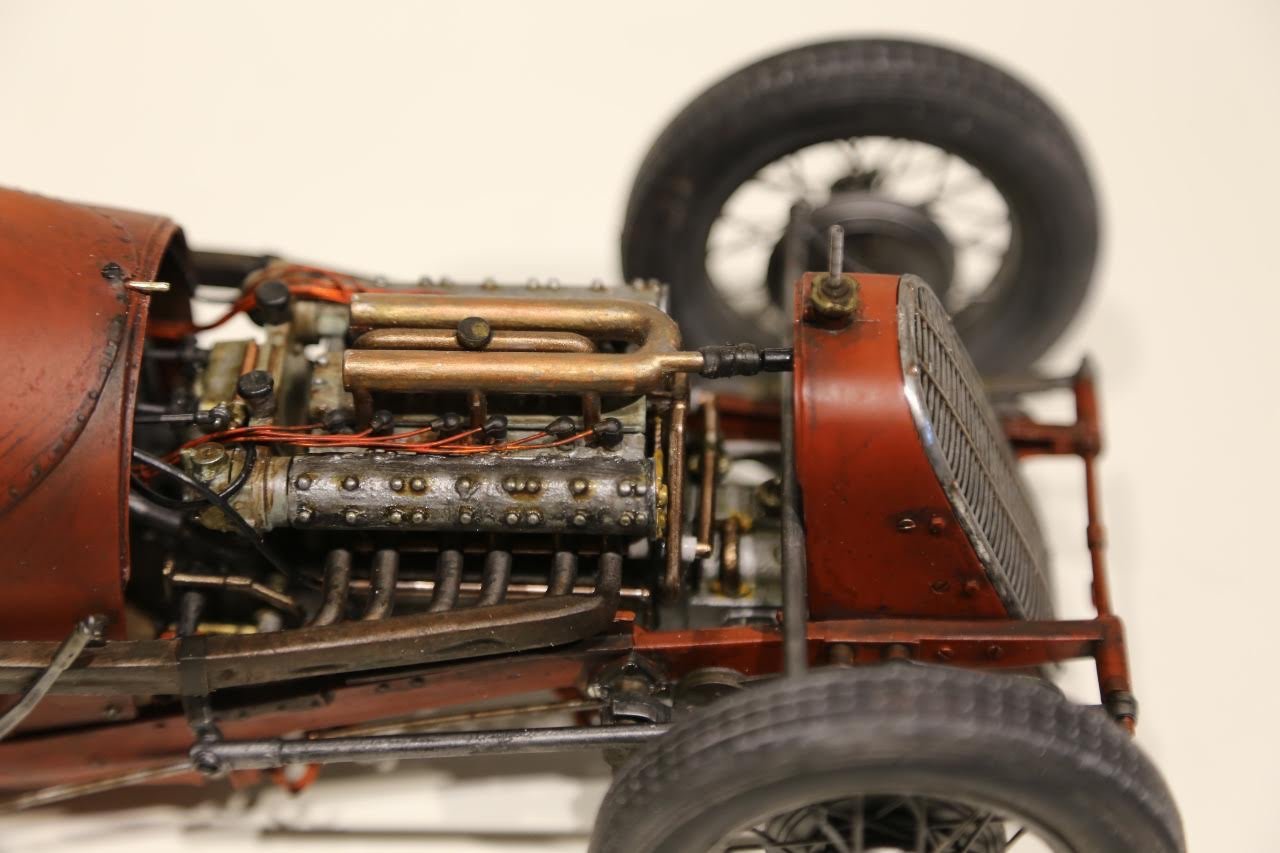
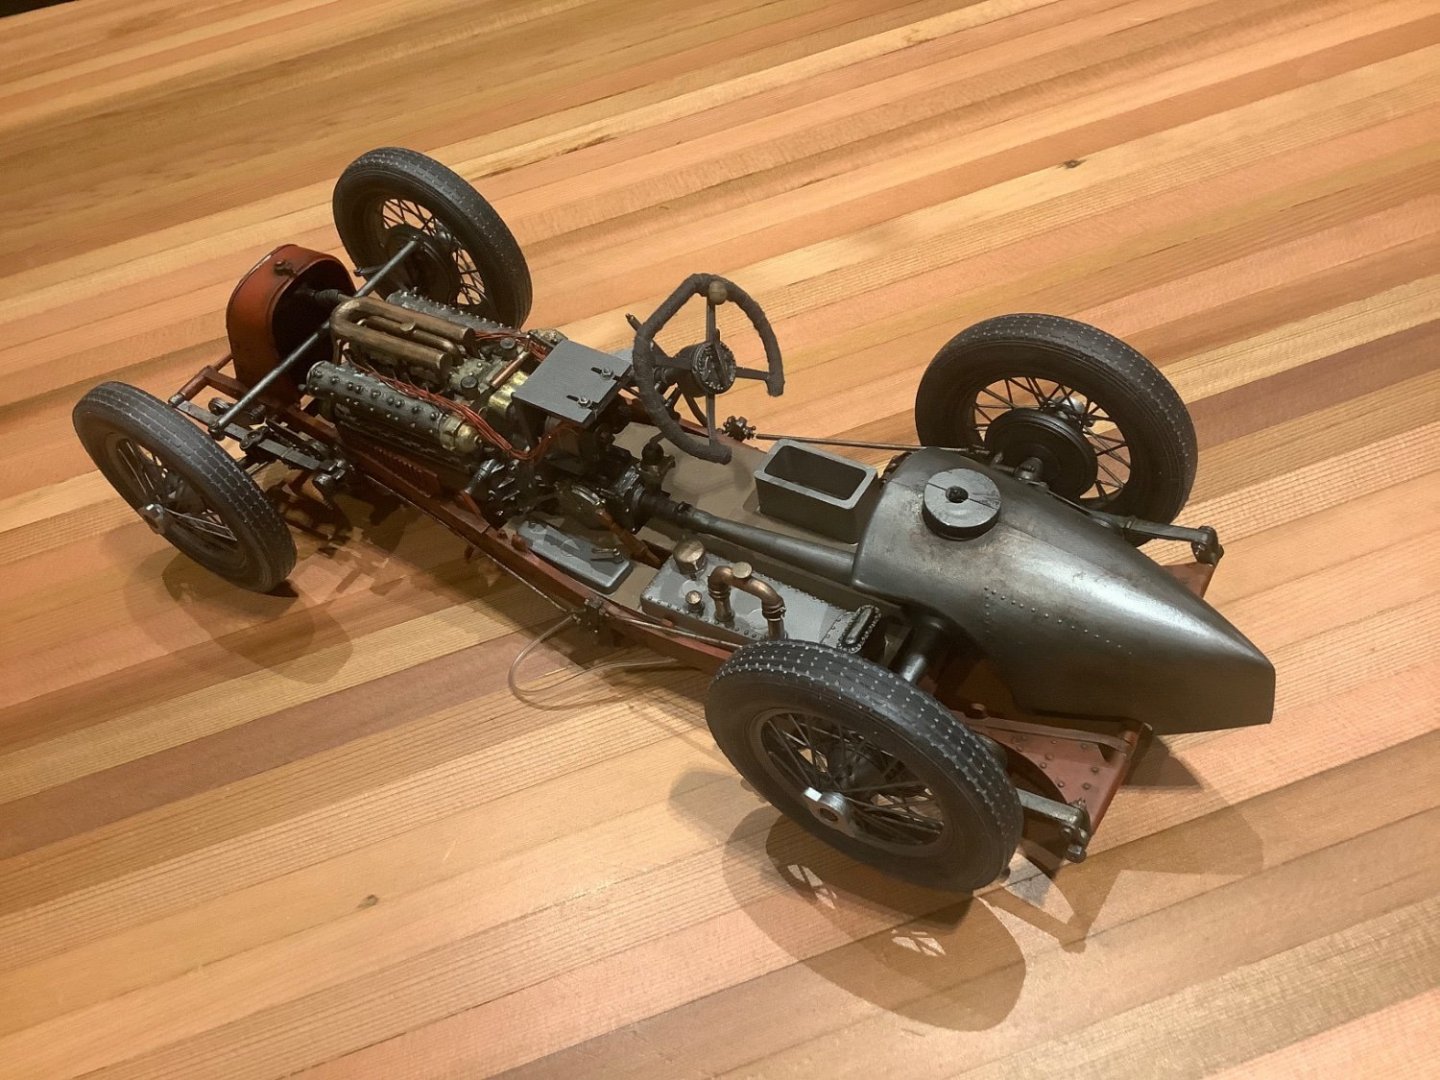
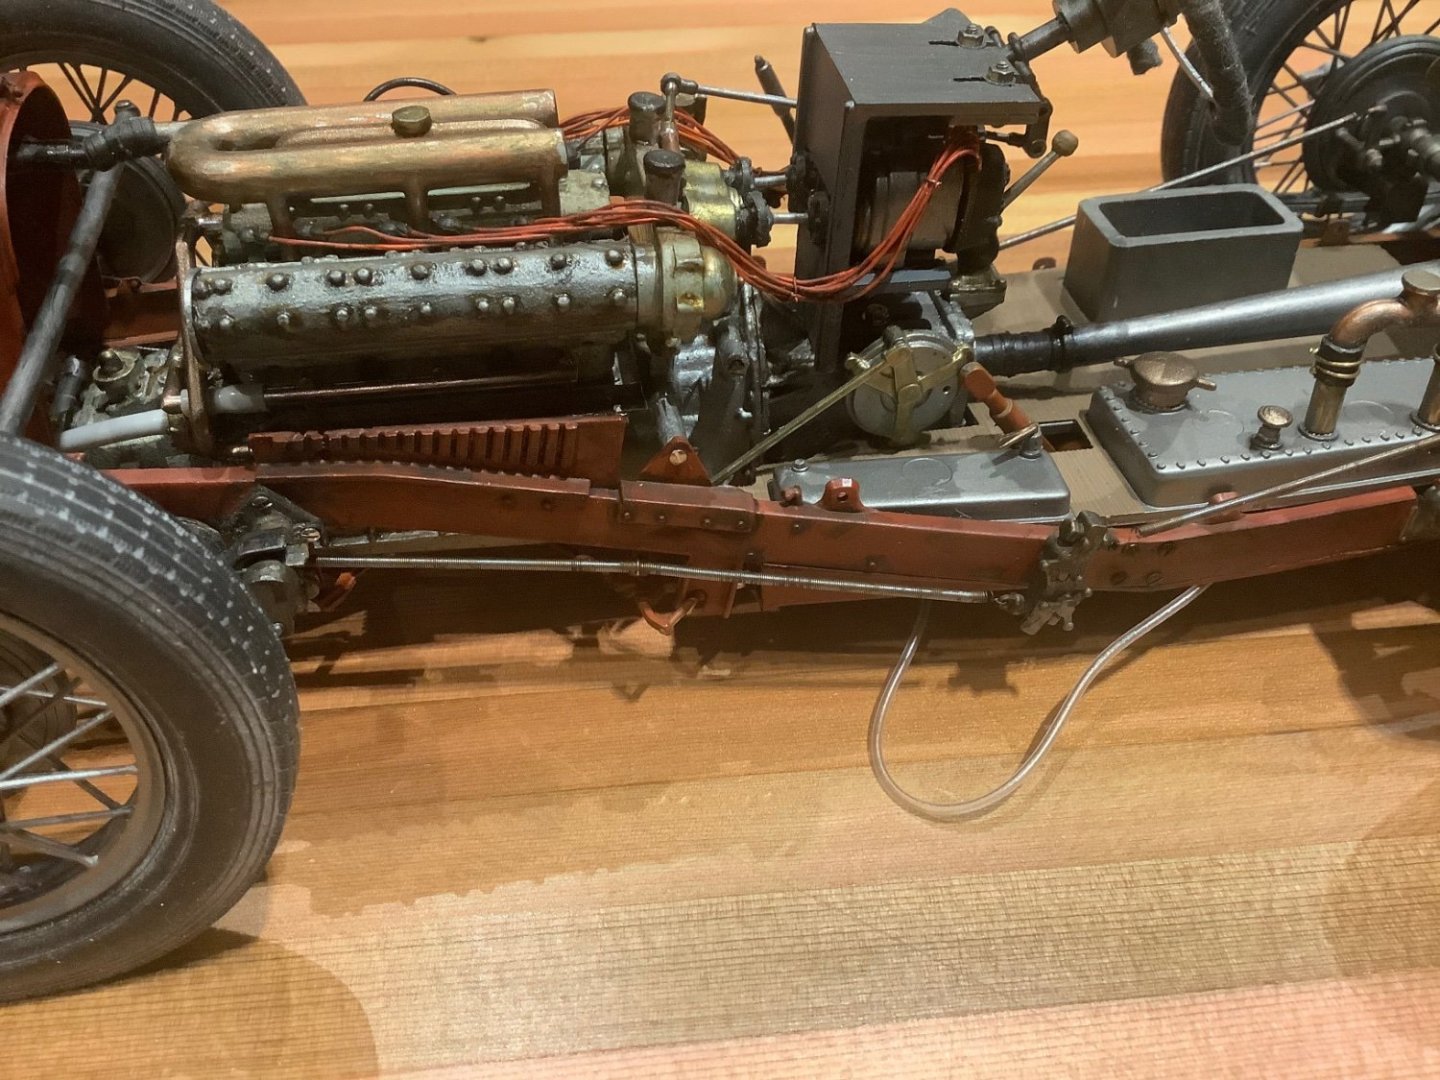
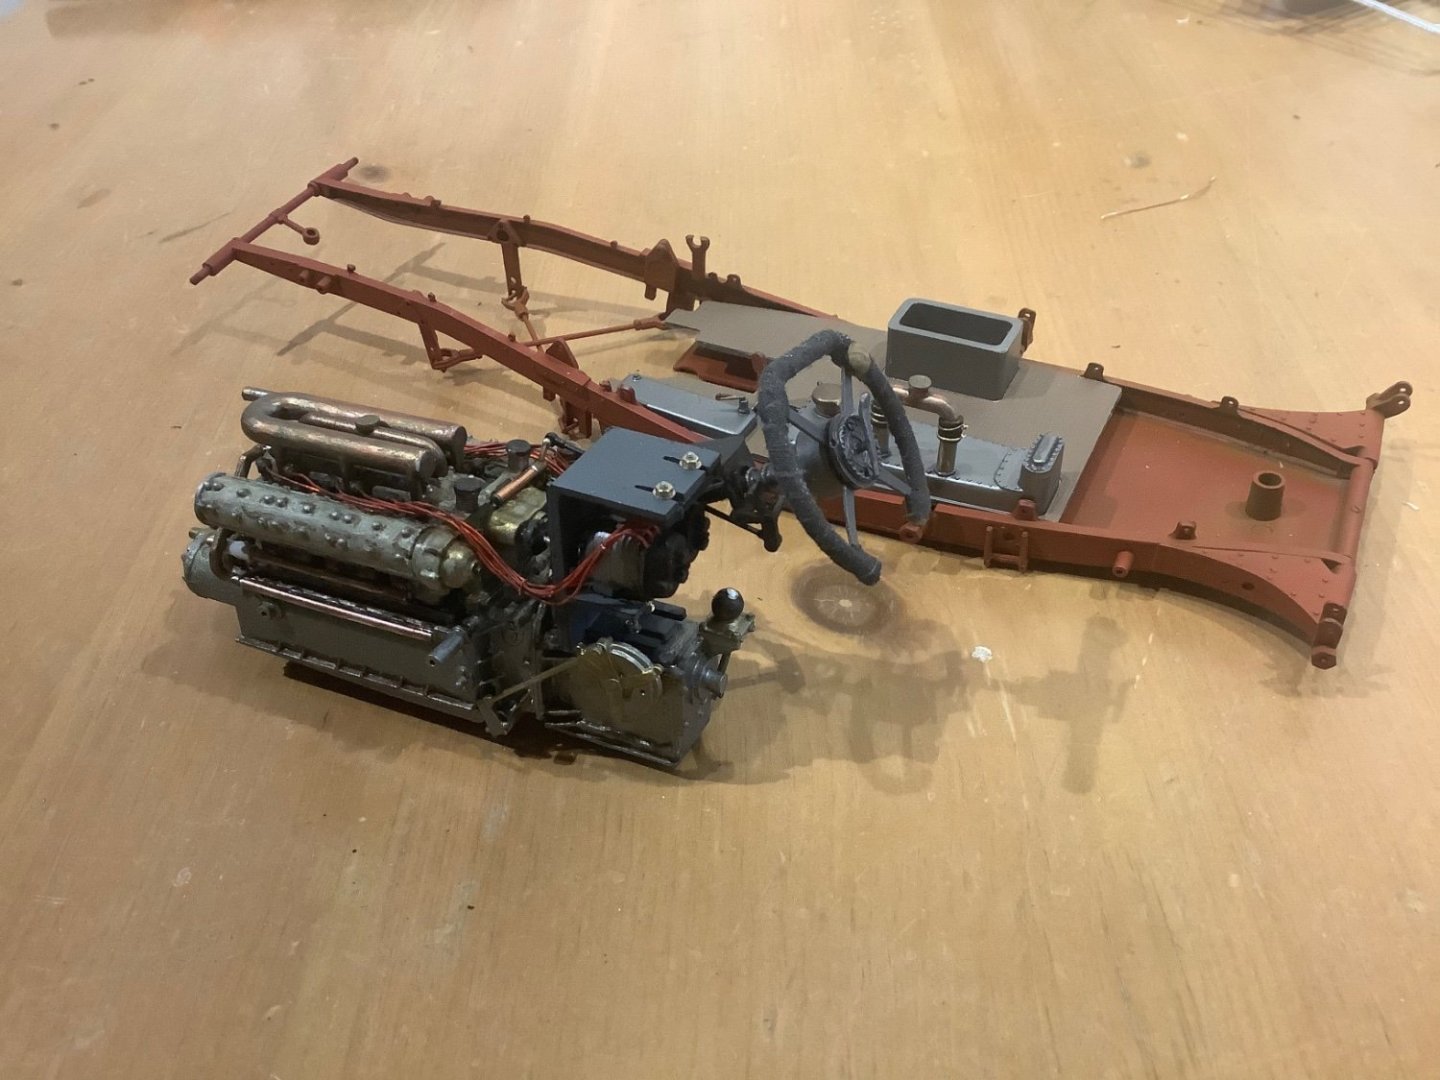
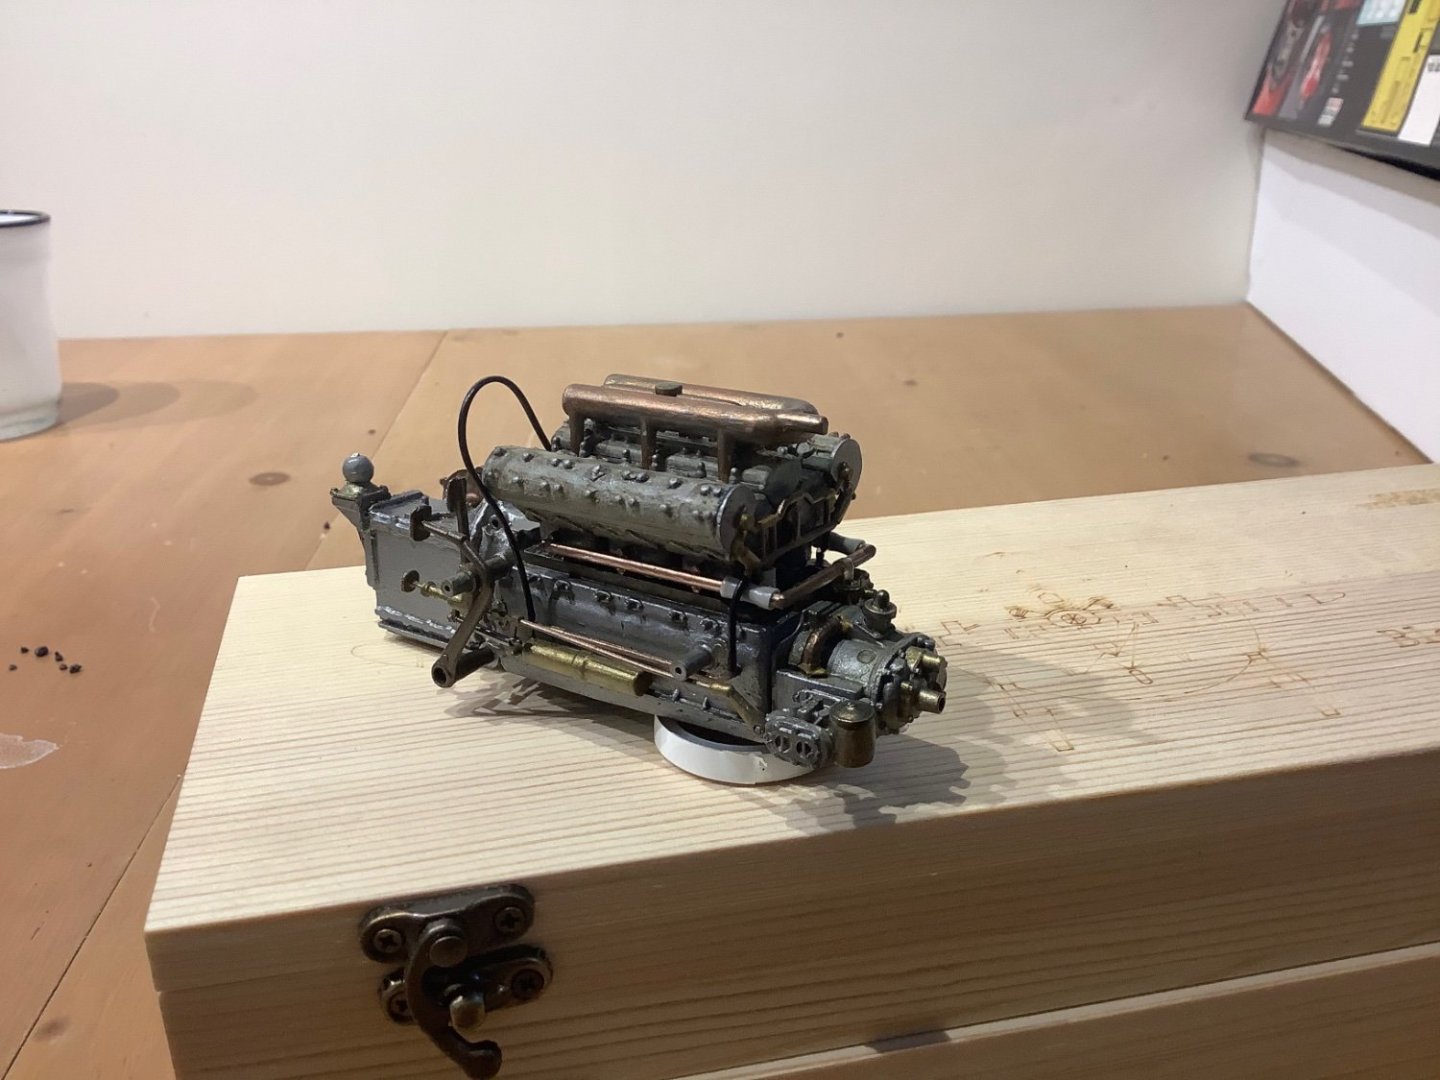
The engine completed, except for some final finishing etc.. The replacement ignition wiring worked better than expected. I cut out the oversized rubber strands, poked a hole in the alternator or whatever that is and inserted a thin copper wire which I had painted a light red. On the engine block end I attached the rubber spark plug caps I had trimmed off back on to the end of the wire using basic neurosurgery practice. Looks reasonable I think and more to scale. The big frame piece in front of the engine looks ridiculous to me but I’m assuming it is for attaching the body and won’t be visible on completion. I hope.

- 61 replies
-
- 17
-
-
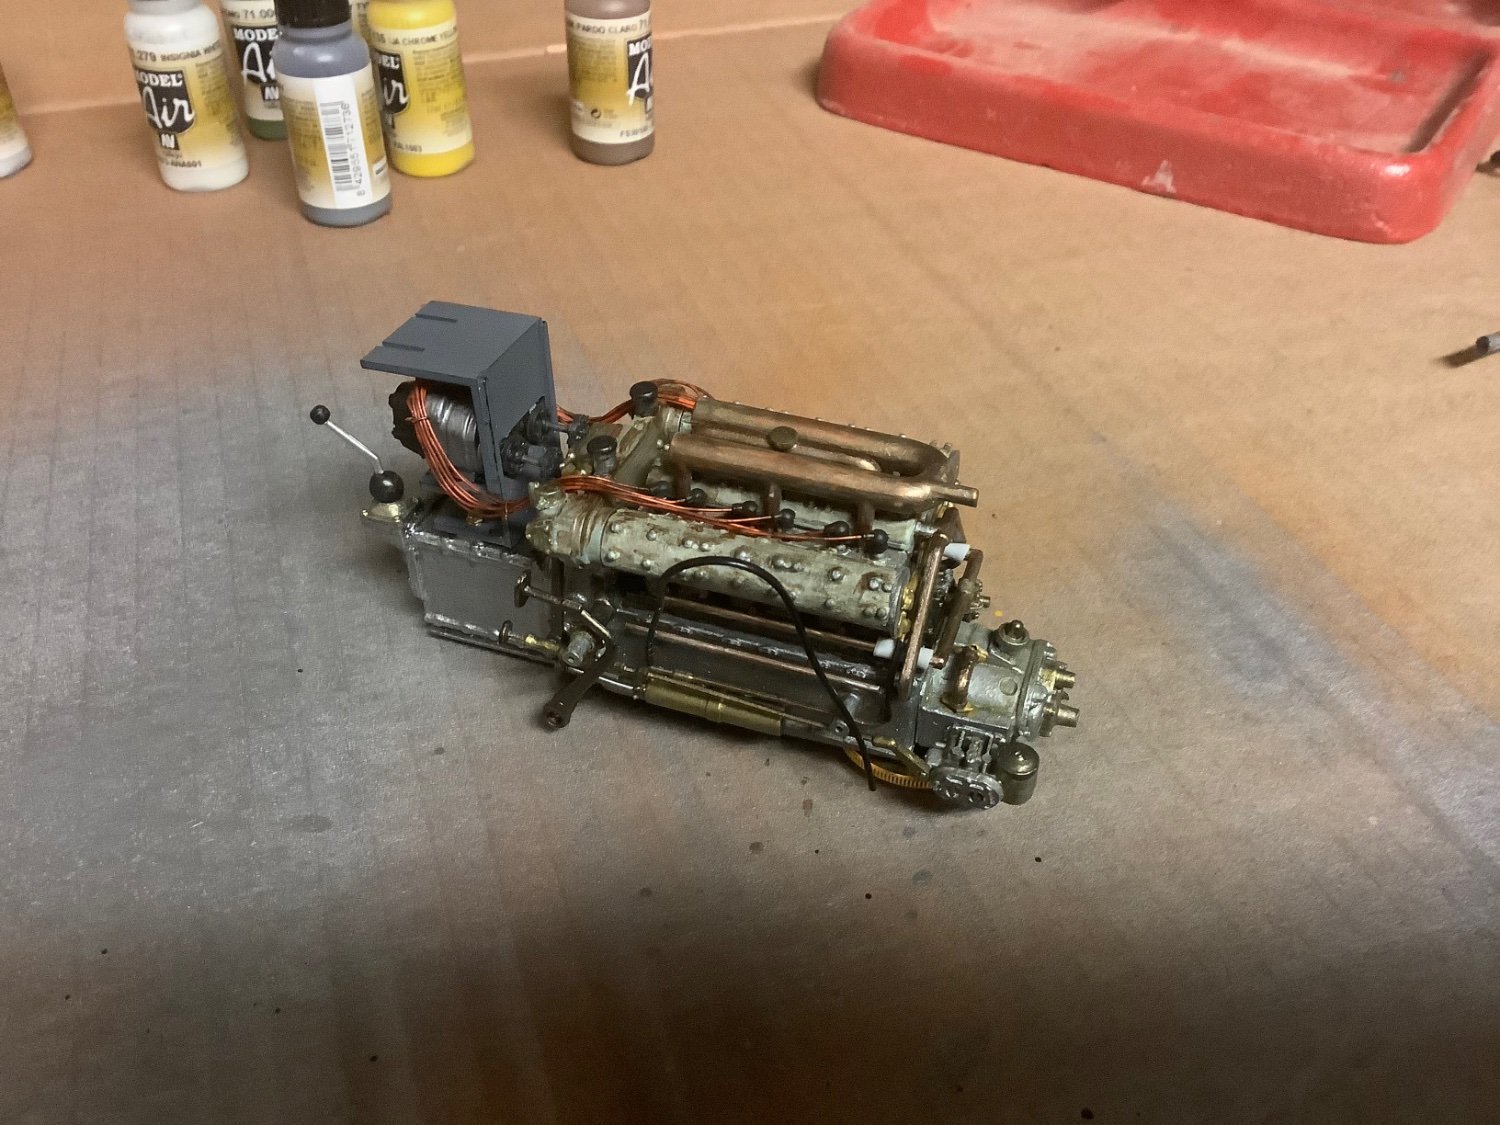
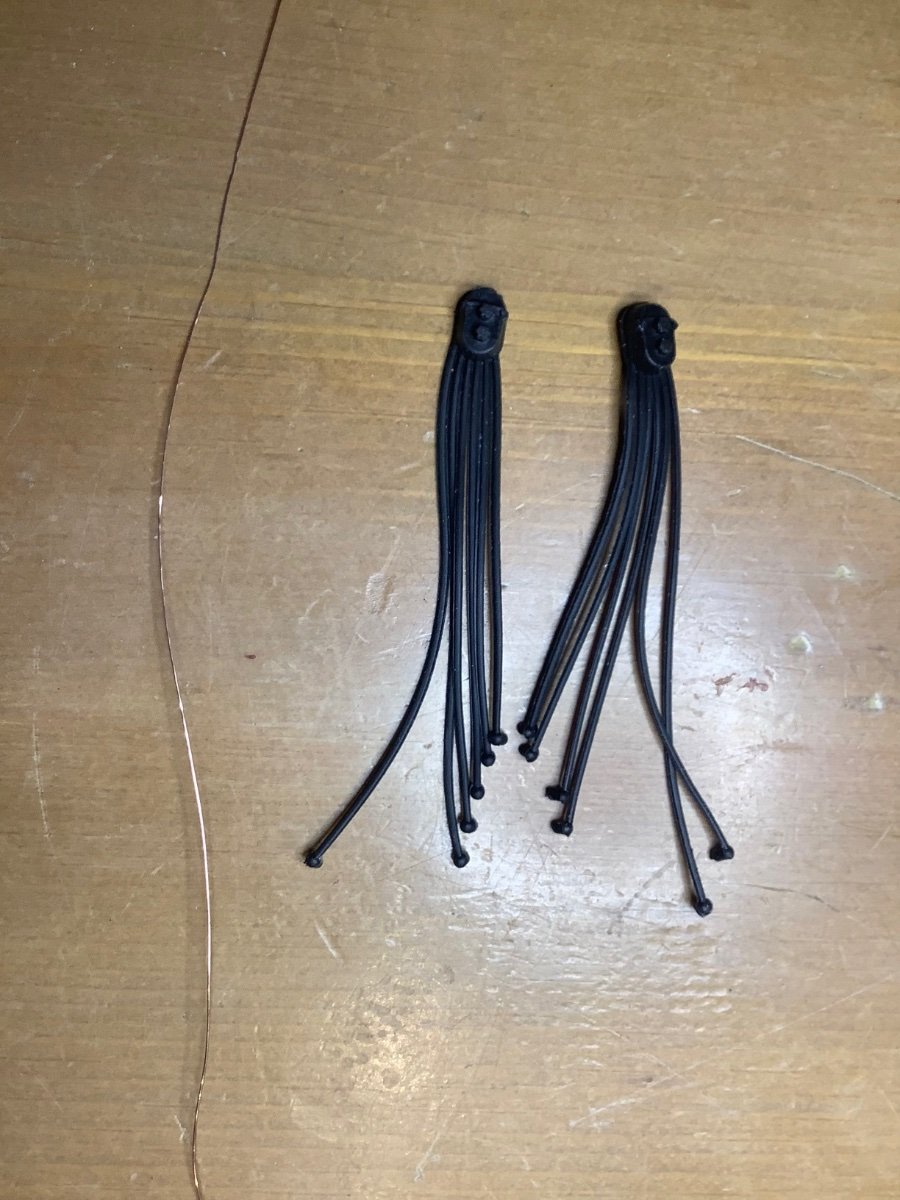
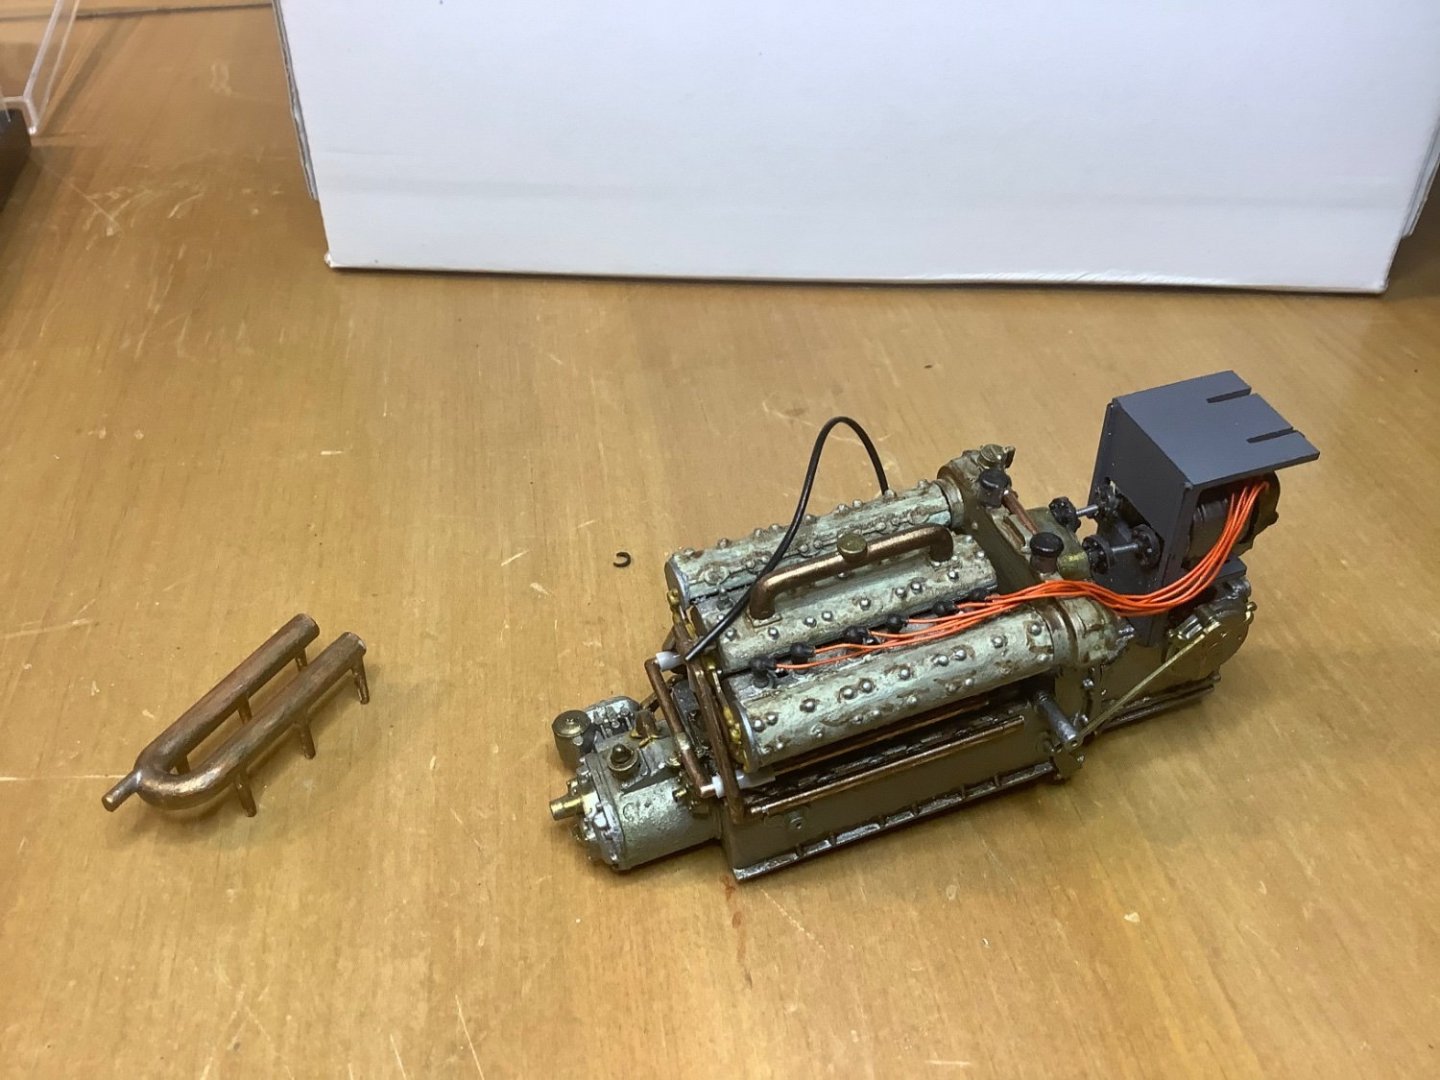
Thanks for comment Mark & Popeye! Continuing with making the engine, trying to make it look cool and non plastic like, but also like a 100 year old. Next steps will include the ignition wiring. The kit includes some tiny rubber caps, wires and whatever the apparatus at the other end, all in one octopus. This makes this fussy bit of work a deuced easy install, but there’s a snag. At 1:12 scale, the rubber wire provided is at least 1” in diameter, which looks way too big. My plan is to snip off the two business ends, reuse them and replace the rubber with smaller gauge copper wire, attached to both rubber ends somehow. We will see how that goes.

- 61 replies
-
- 14
-
-
A masterclass in decking…really well documented too. Terrific work.
-
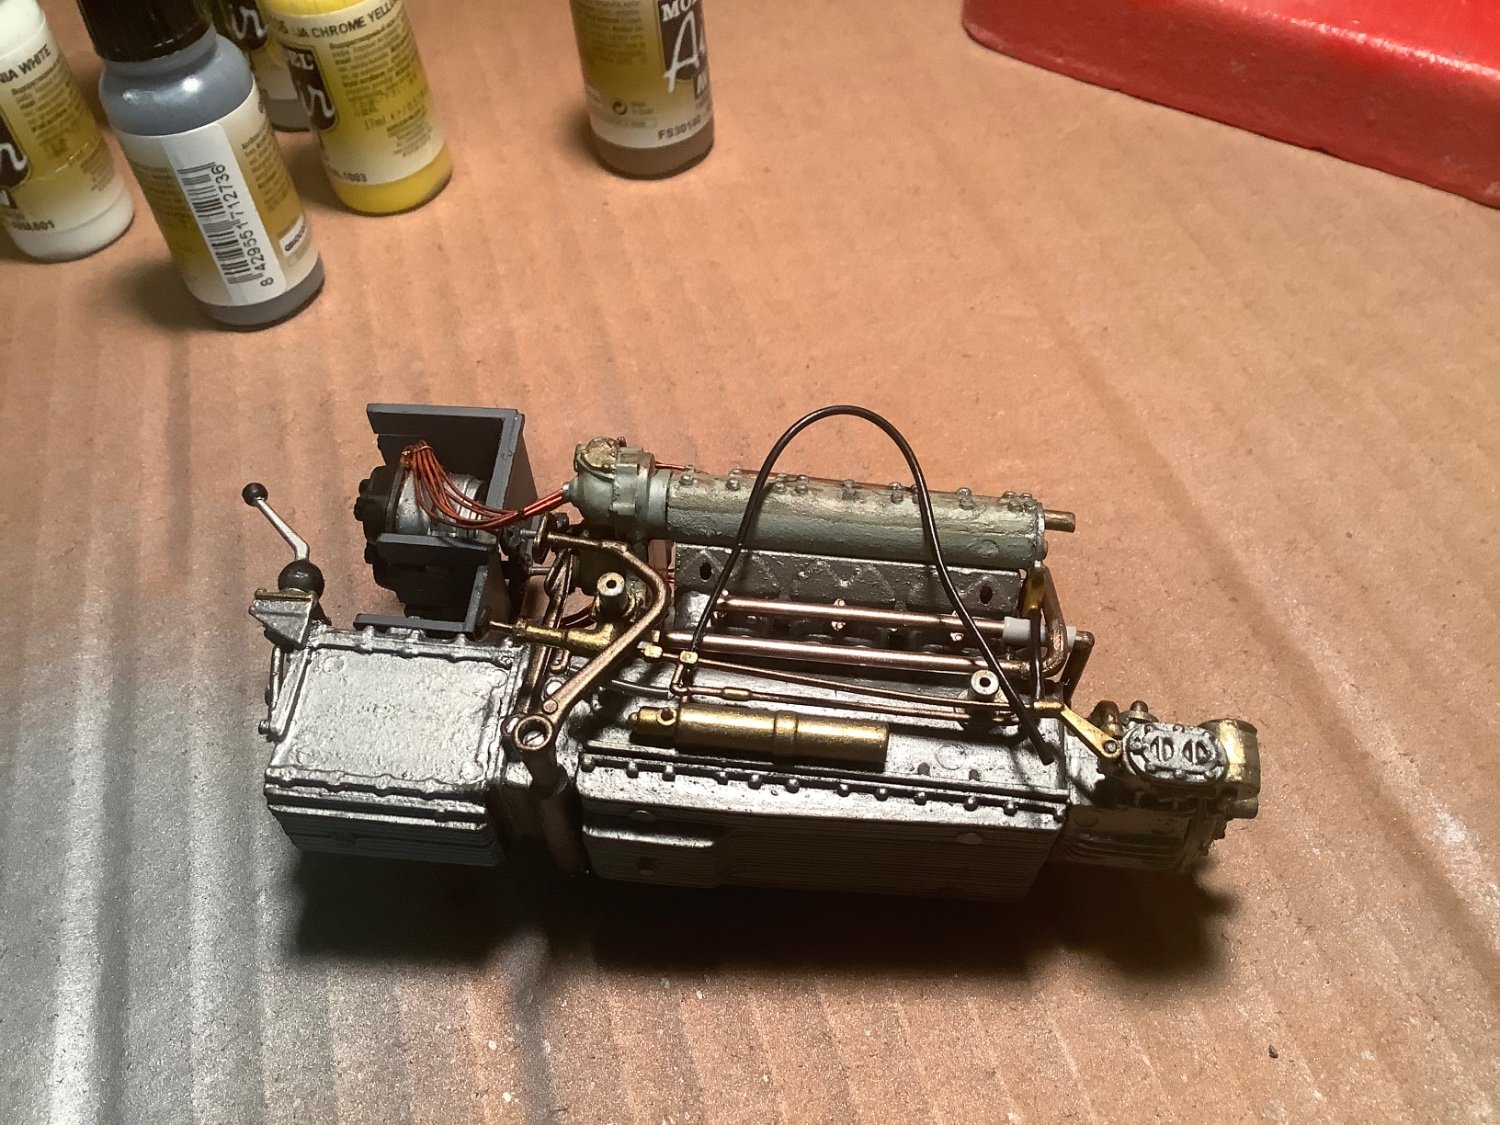
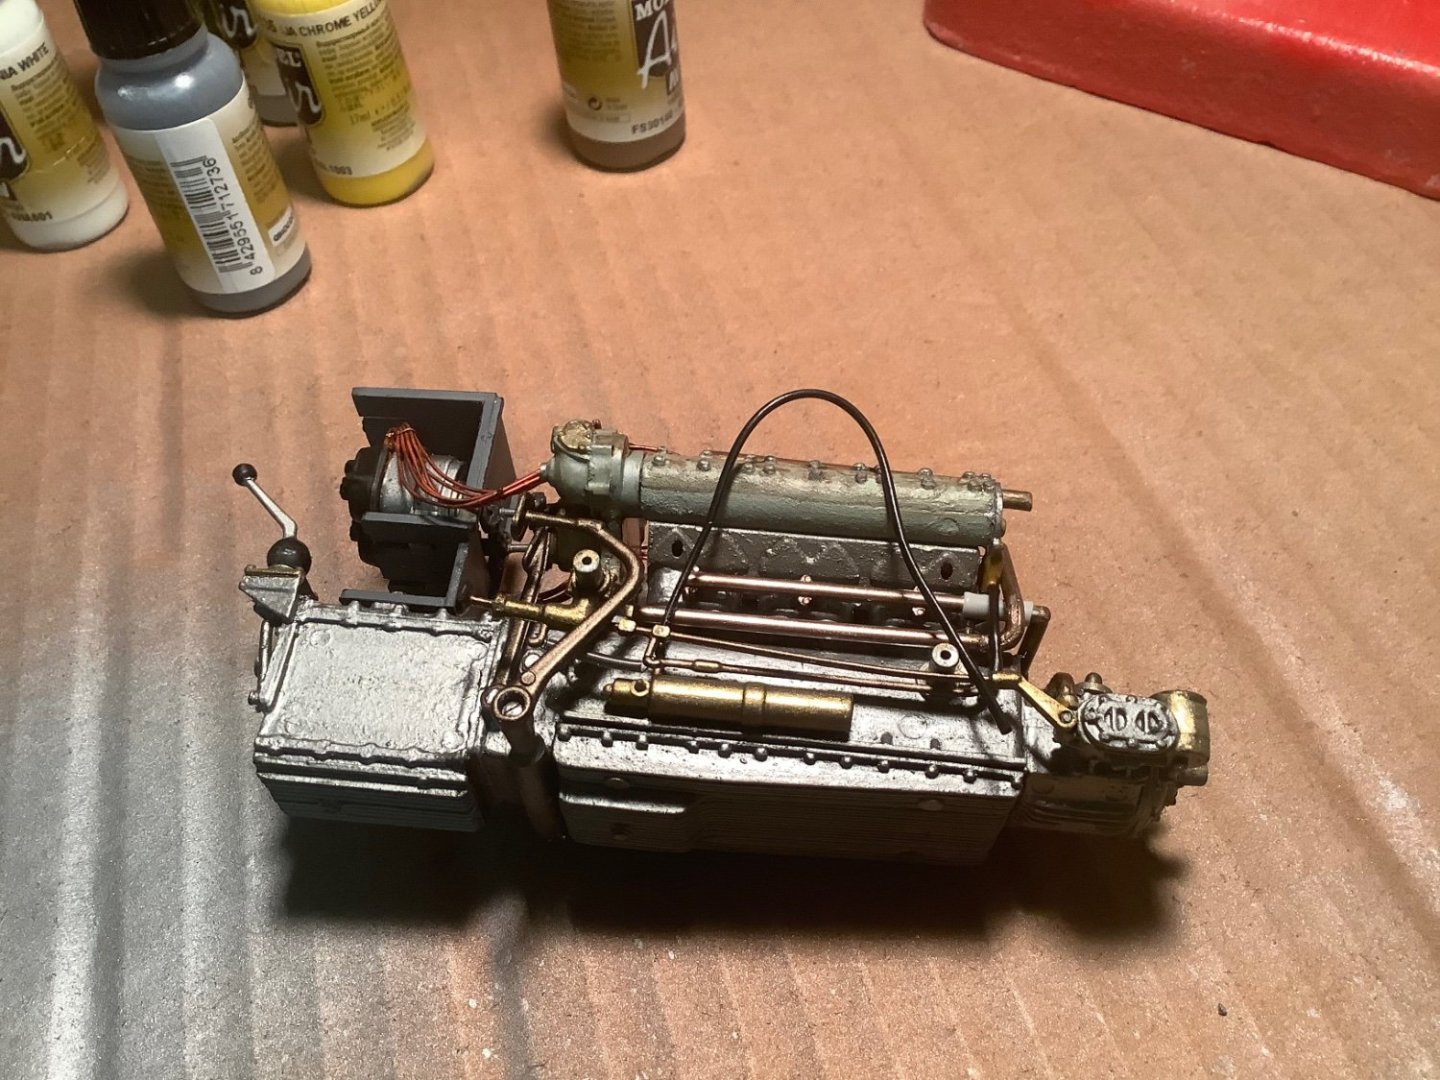
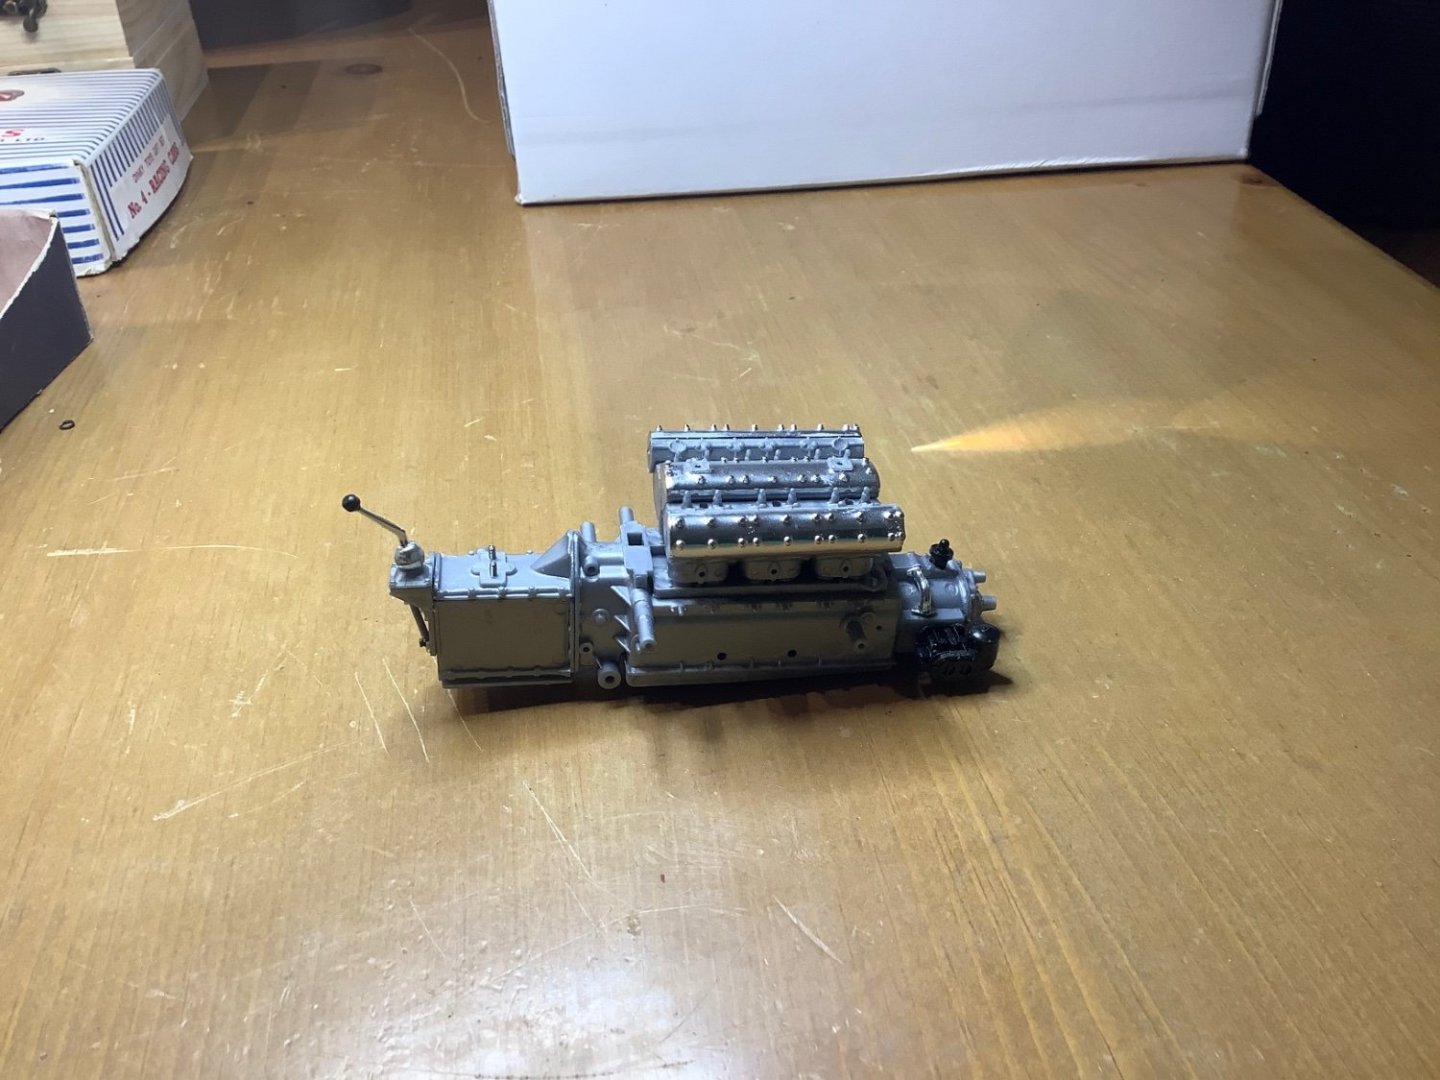
Starting on the engine. Assembly’s a cinch after being used to a lot of wooden ship destructions. To make it look more engine like I brushed on some steel colour paint and then quickly dabbed it with a bit of talcum powder on the brush while still wet, to add a suggestion of texture. Seems like it will work pretty well to give a cast iron look. Long way to go with this but it’s looking like I’m heading for a bit of a grubby used look on this racer. I’m experimenting with some paint techniques, eventually I may do a warship of some kind.

- 61 replies
-
- 15
-
-
Hi Mark - I wish! It is mostly plastic, and rubber, tubing etc. for some components, but some of the assembly is with fine screws, nuts and bolts. The chassis was basically put together with about 8 screws rather than any glue. It’s a big kit so lots of parts.