Tim Moore
-
Posts
357 -
Joined
-
Last visited
Content Type
Profiles
Forums
Gallery
Events
Everything posted by Tim Moore
-
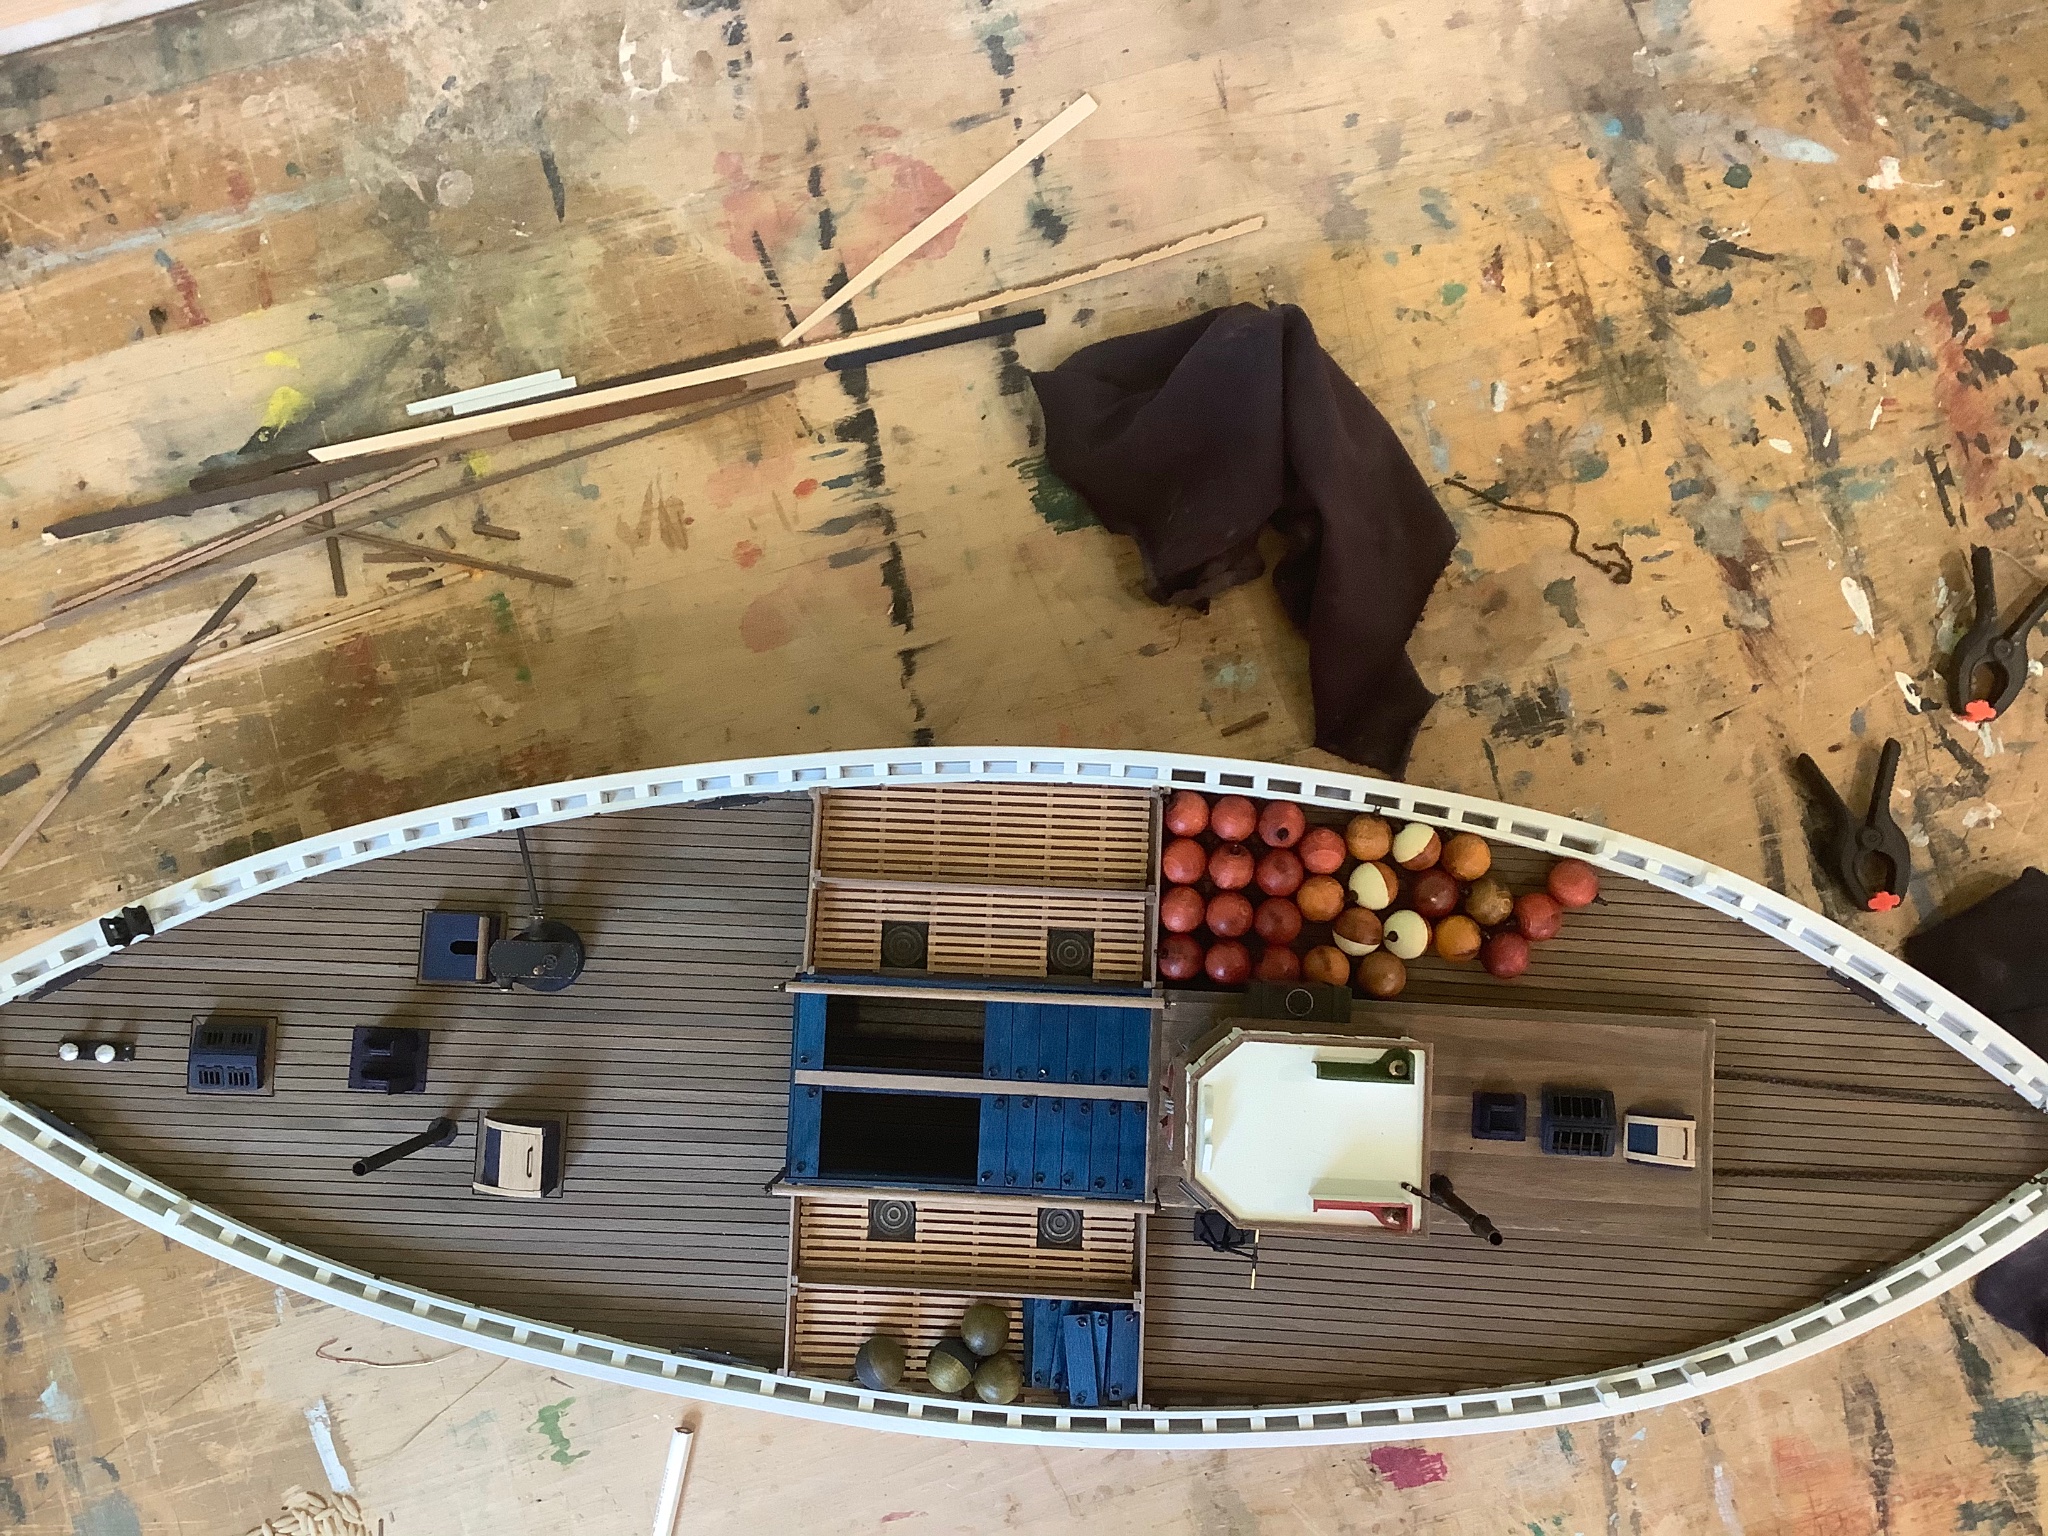
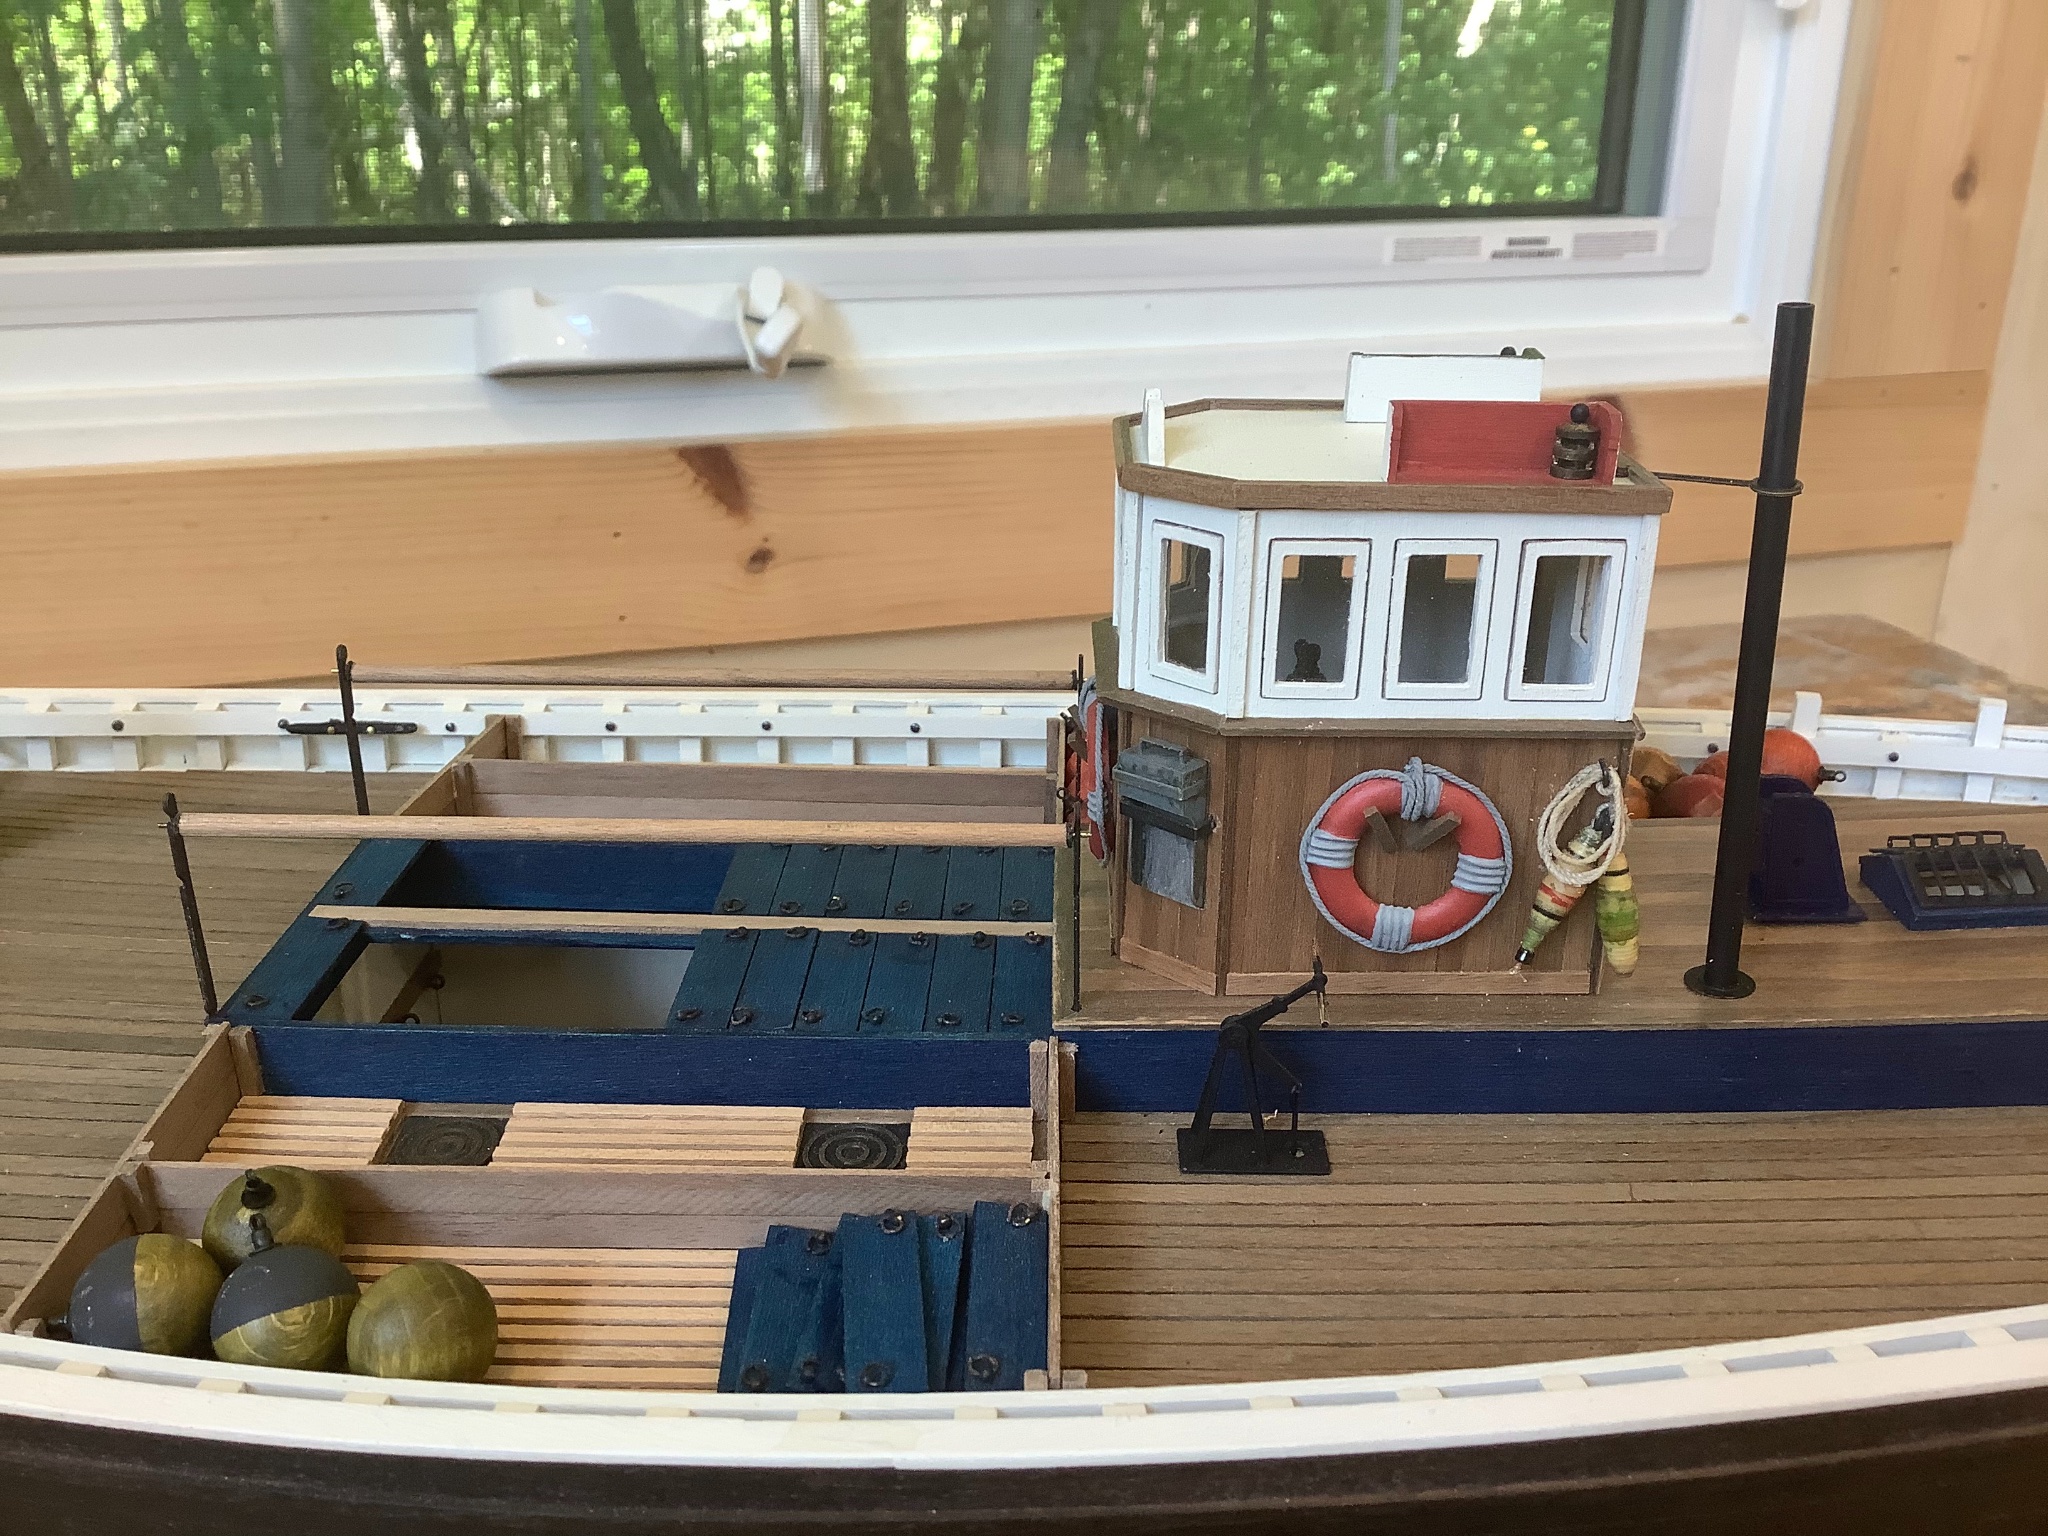
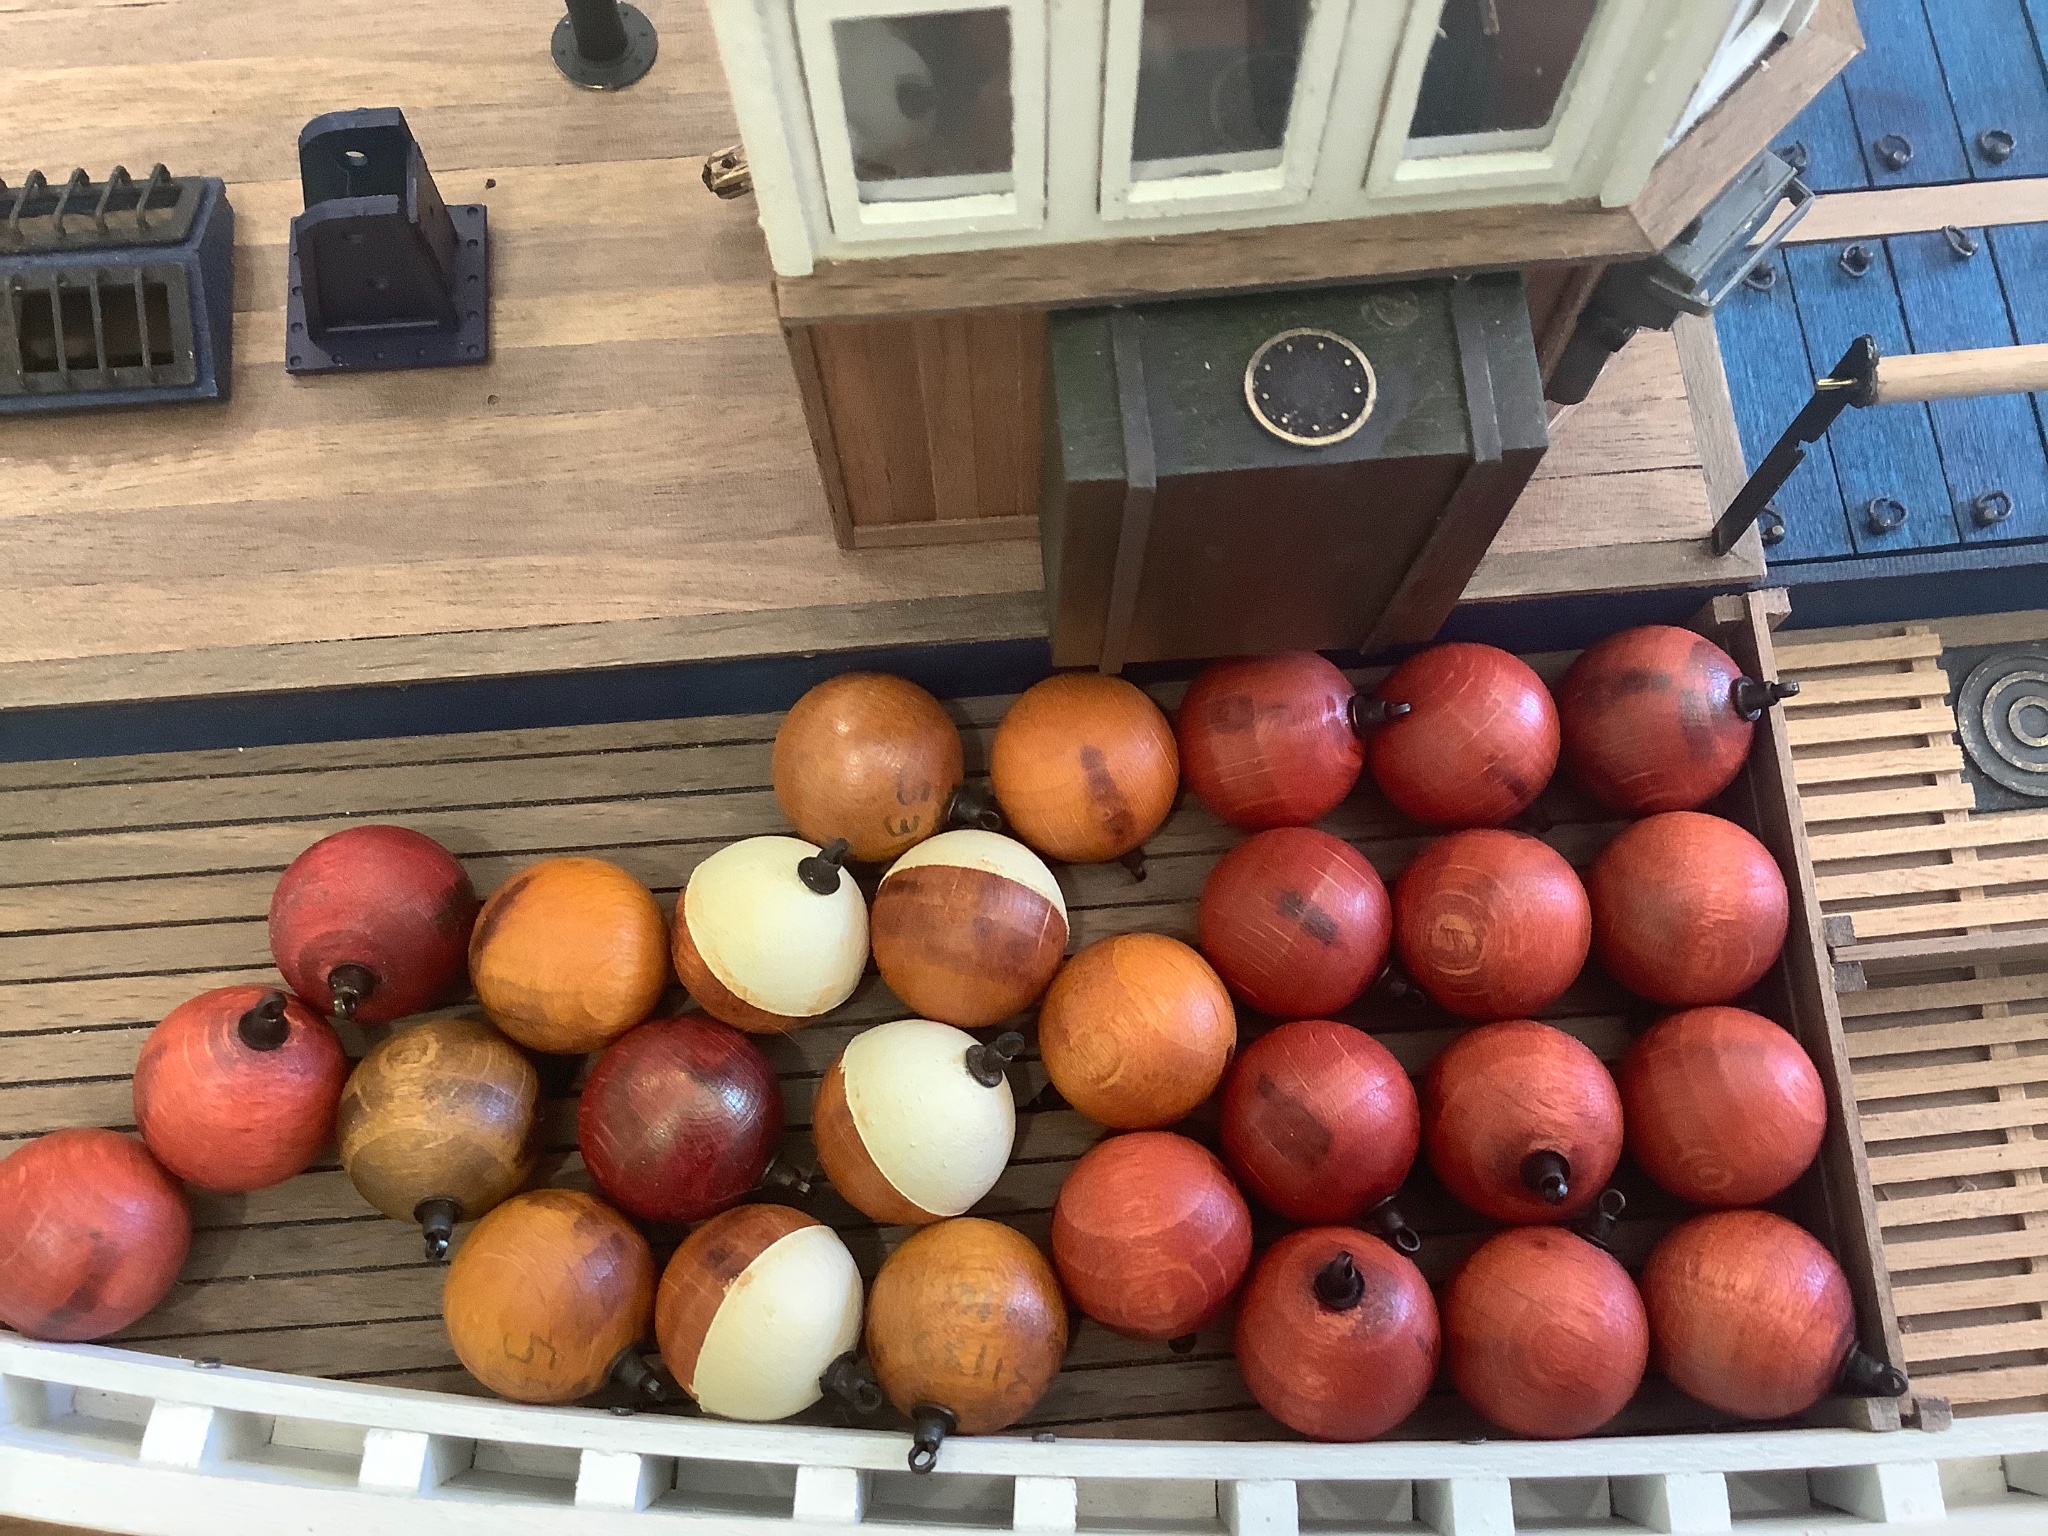
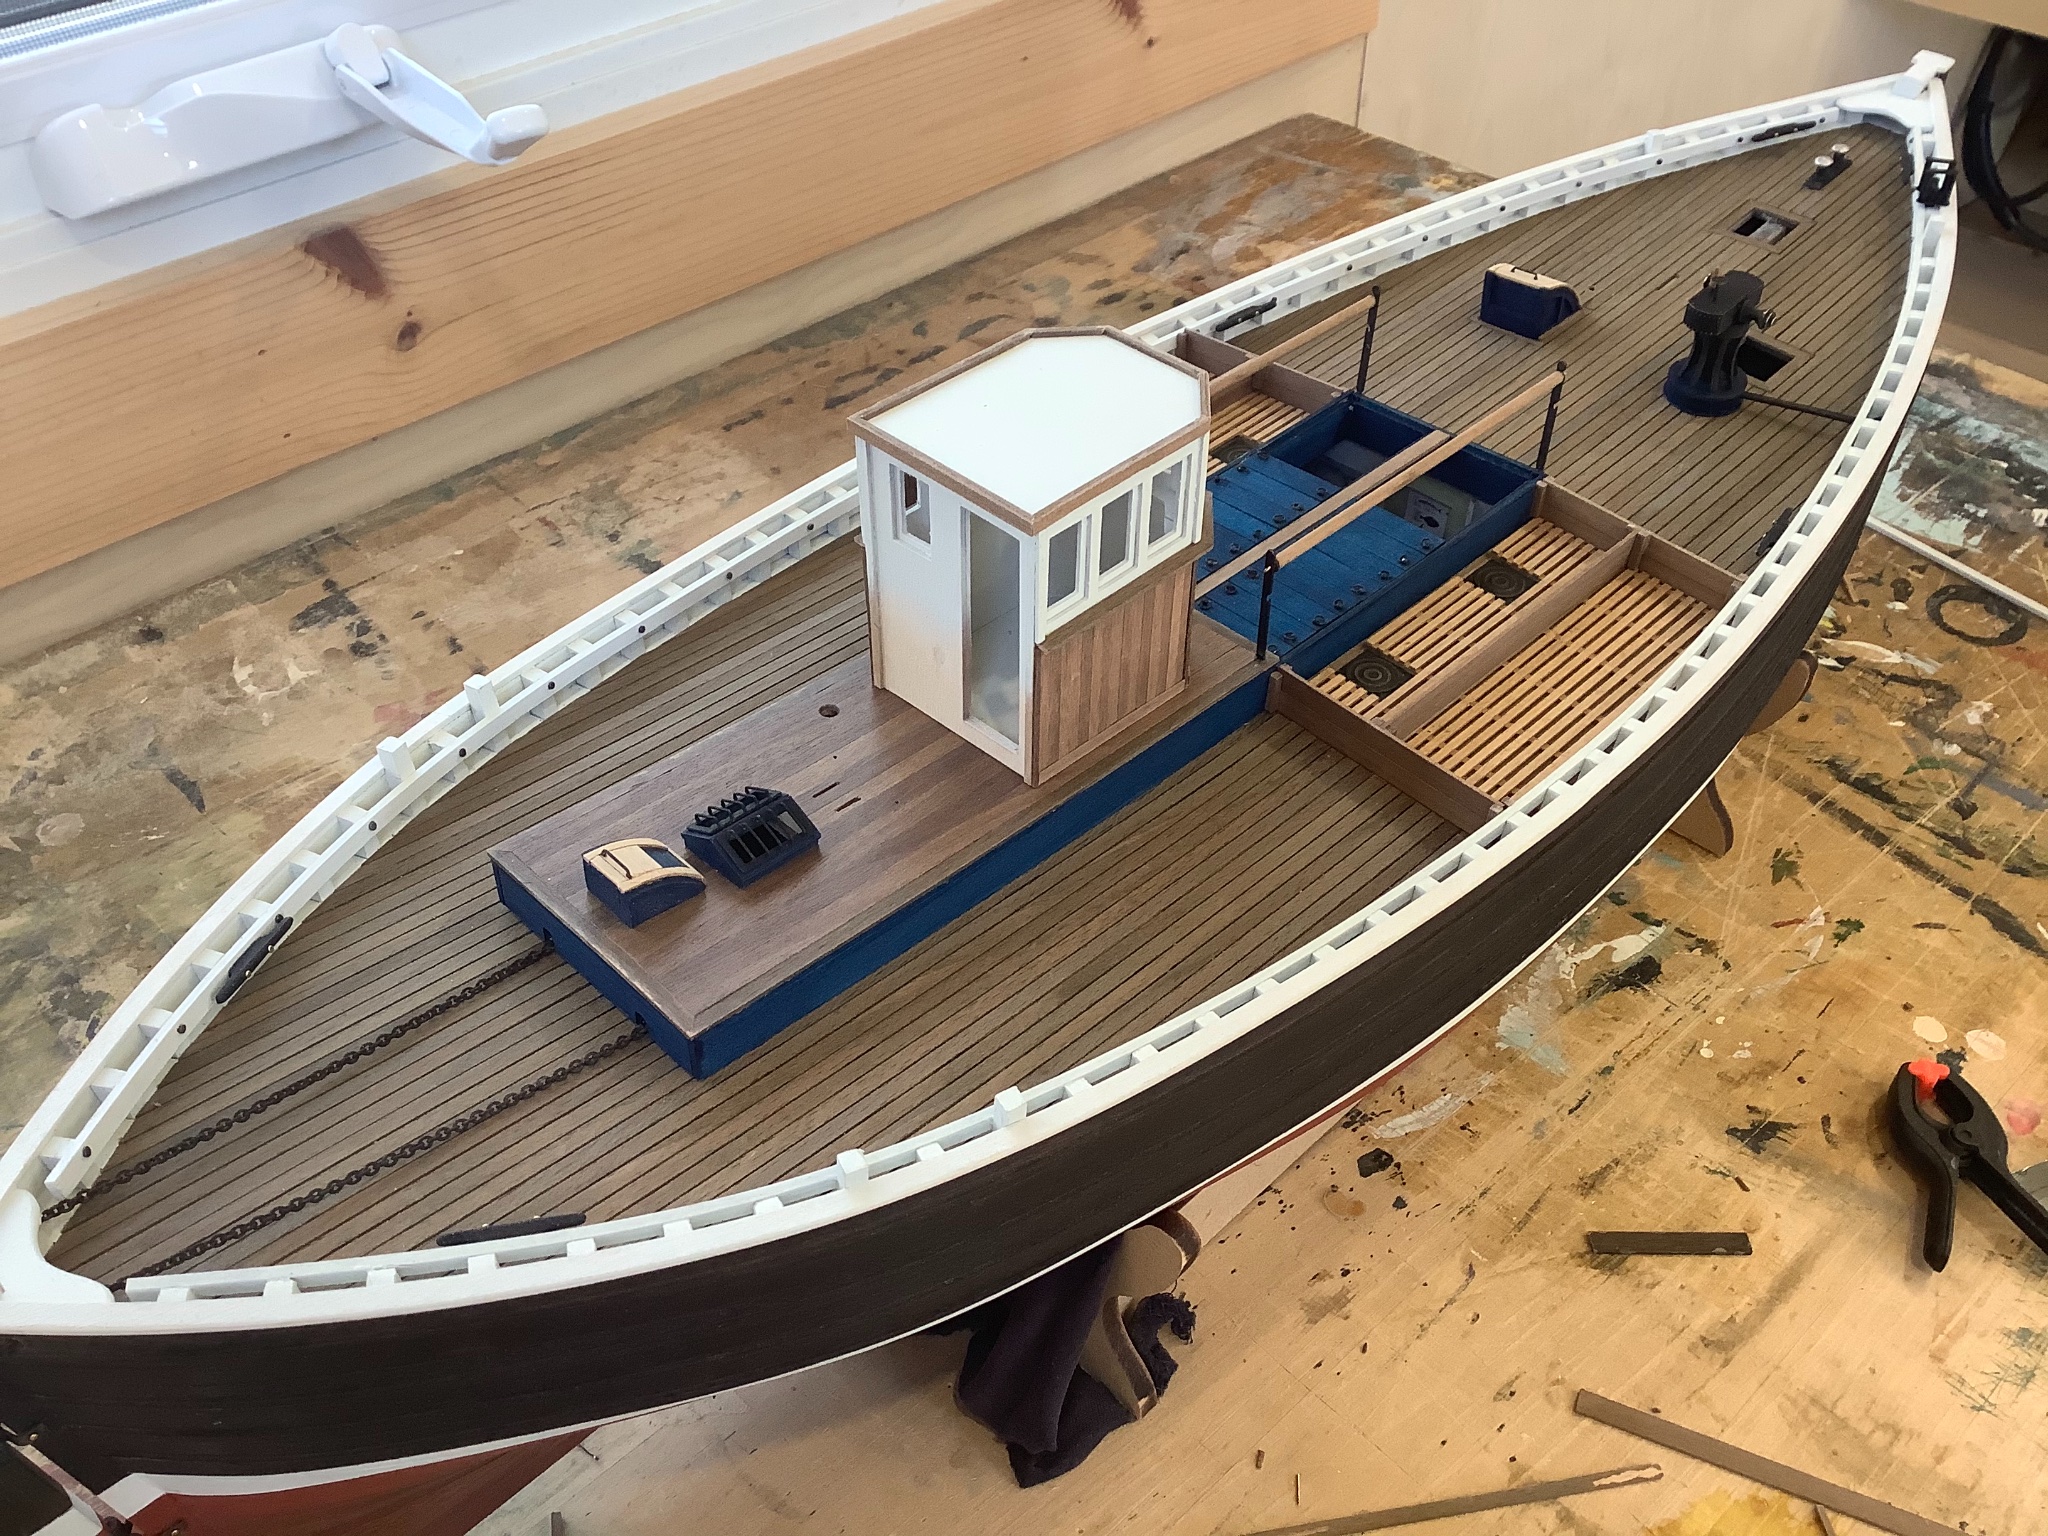
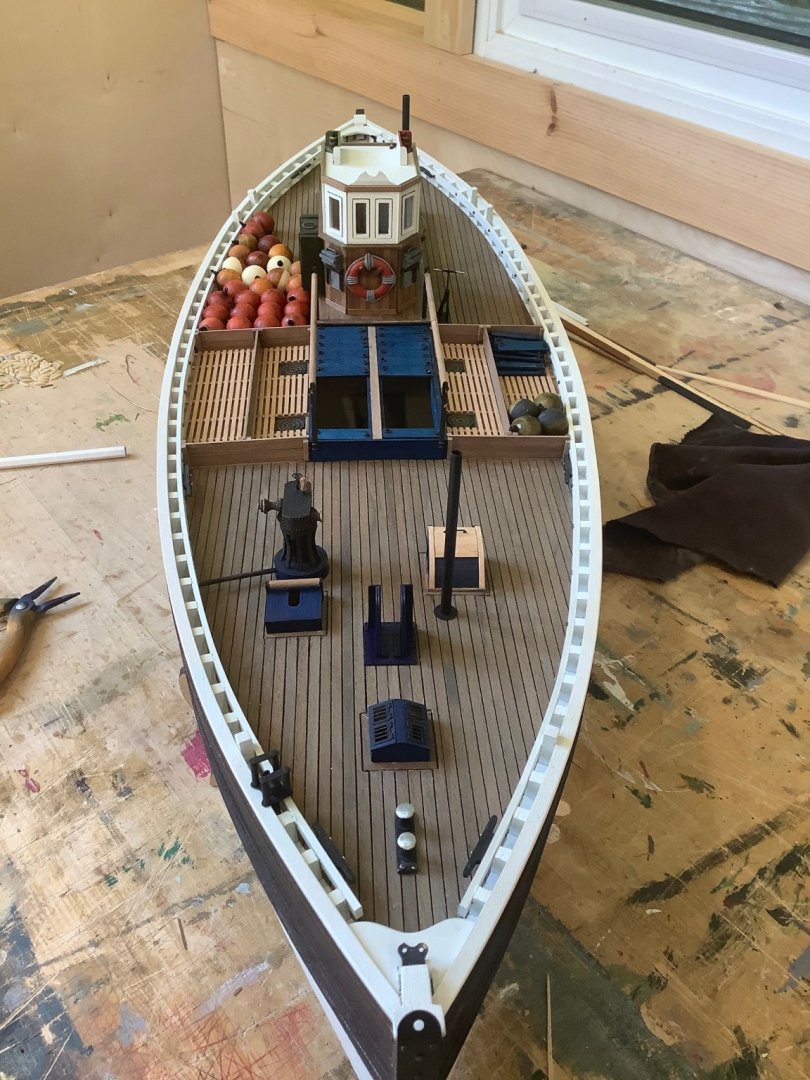
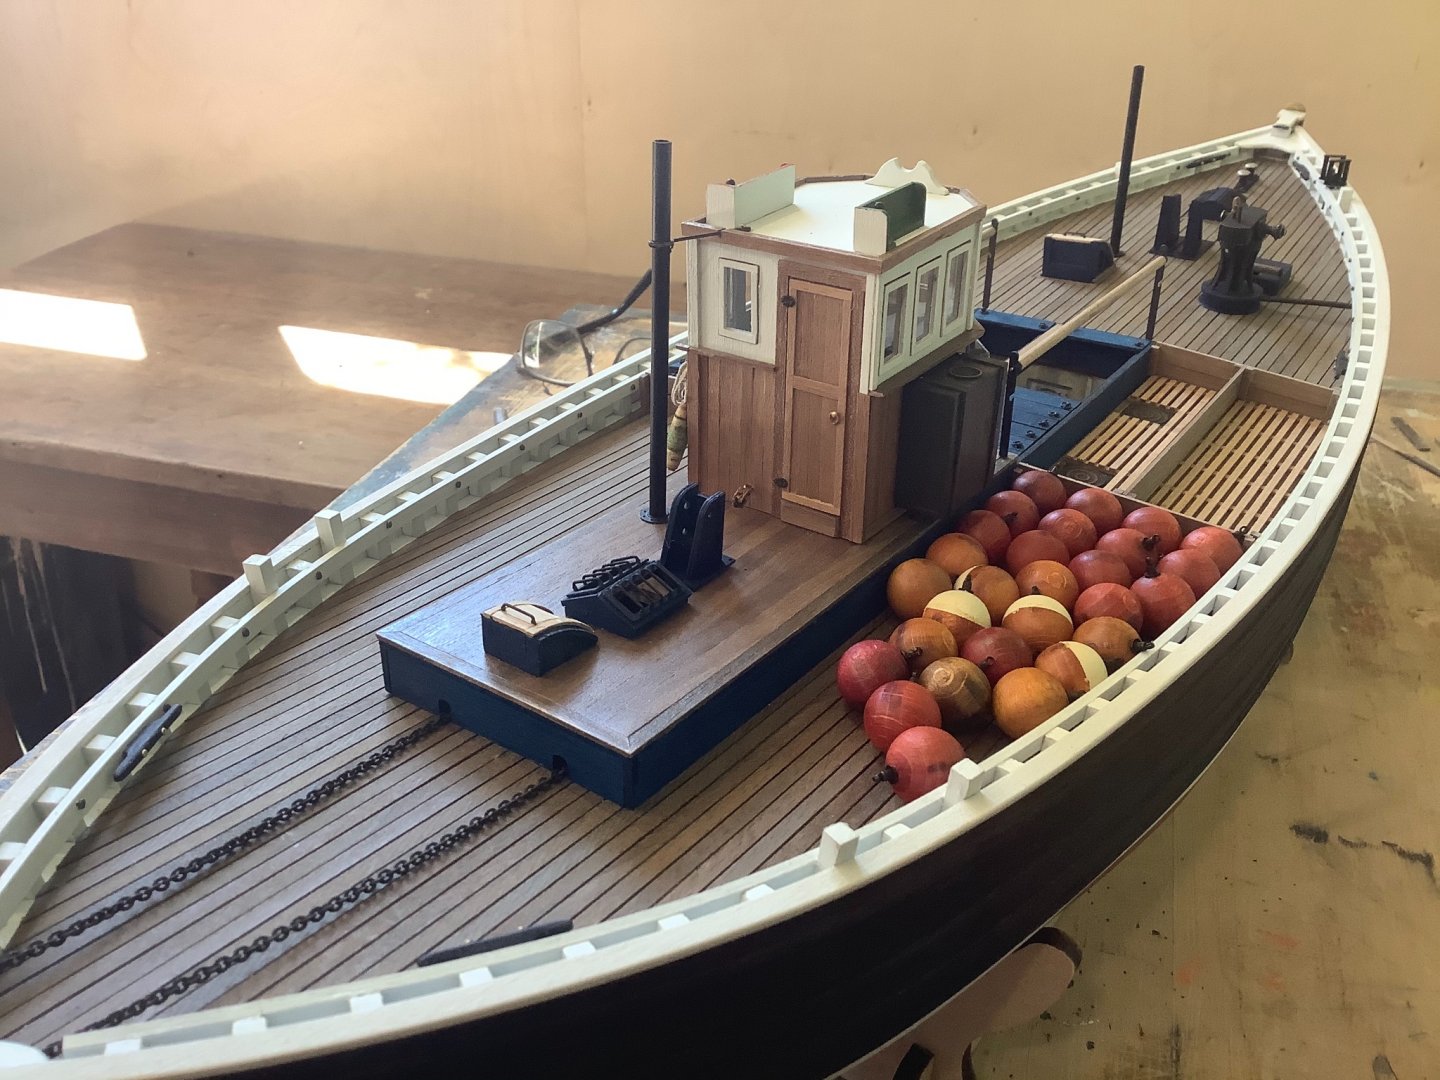
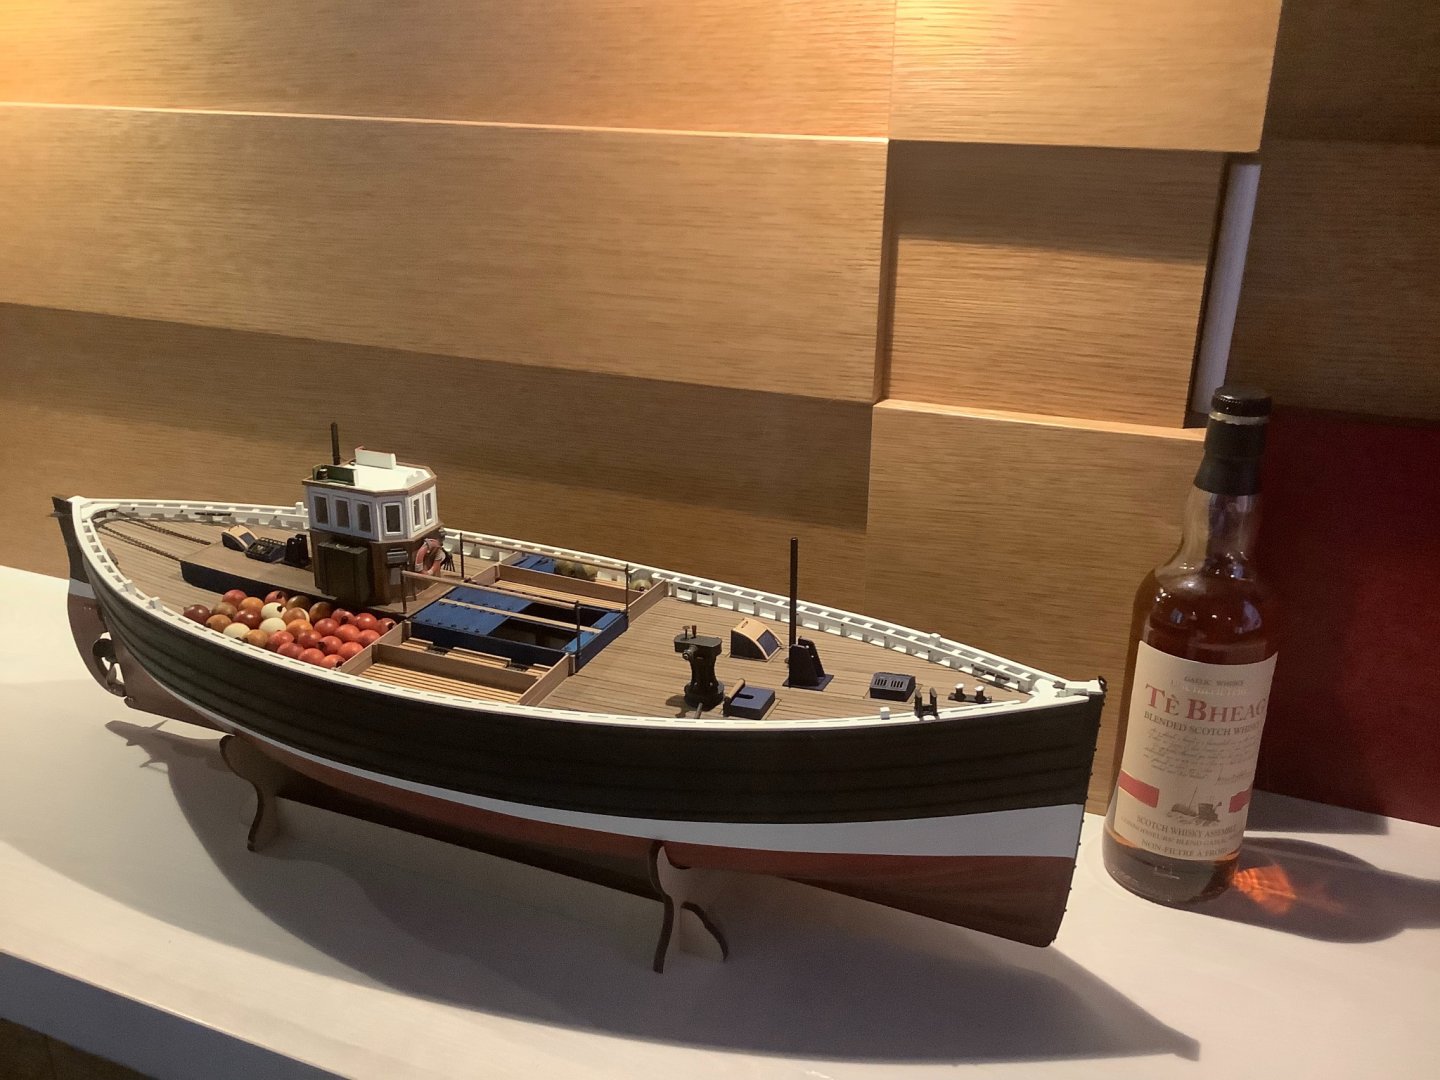
Just finishing up some colourful deck paraphernalia on what has been a creative and enjoyable build. Really just the lifeboat to do and then the masts and rigging. Not a lot of time working in the cabin lately, but really I’m happy to stretch out this build over summer since I don’t plan on starting my next one until late fall. Not sure what area of the model kingdom I’ll tackle after Fifie yet.


- 79 replies
-
- 12
-

-

-
- Fifie
- Victory Models
- (and 1 more)
-
Thanks Popeye! Work has kept me away for the last couple of weeks so haven’t been able to spend much time in the cabin...just started on some of the various deck fittings and pilot house.


- 79 replies
-
- 9
-
-
-
- Fifie
- Victory Models
- (and 1 more)
-
Your America is a really fine piece of work Gary. I particularly love the rich treatment on the hull. Looks like it should be on display in a historical museum somewhere. Really well done!
- 162 replies
-
- 1
-
-
- america
- BlueJacket Shipcrafters
- (and 1 more)
-
Hi Trond & Lyle: when doing the single planking on my Bounty, my basic process was: 1. back sand the edge of the plank I am fitting slightly along the length so the face fits tightly against the existing plank 2. working at about three frames at a time, glue the plank to both the frame and the plank above with tiny intermittent drops of CA, and pin in place. 3. move along to the next 3 frames 4. fill any unavoidable small gaps with dark walnut or ebony coloured wood filler.
-
Hi Diver. I faced the same situation last year. Wanted to get a good general purpose airbrush for ship models and too much granular information probably more useful for graphic specialists. I ended up getting a Paasche Talon TG-3F, the kit with all three (size 1, 2 and 3) heads. Decision was based on apparent quality, and cost and availability here. The only extra I purchased was their 10’ hose with a water stop. I attach to the pancake compressor I use for my nail guns. I usually use Vallejo model air paint and a drop or two of their airbrush flow improver each time. I don’t plan on using any solvent based paints because I have no interest in a messy cleaning routine. My studio has a slop sink which is perfect for running lots of water through immediately after which is all I do for cleanup most of the time. Results have been very good, really fine finish once you get the hang of it, which isn’t too difficult. There are no doubt many other good options, just wanted to pass on my own hands on experience.
-
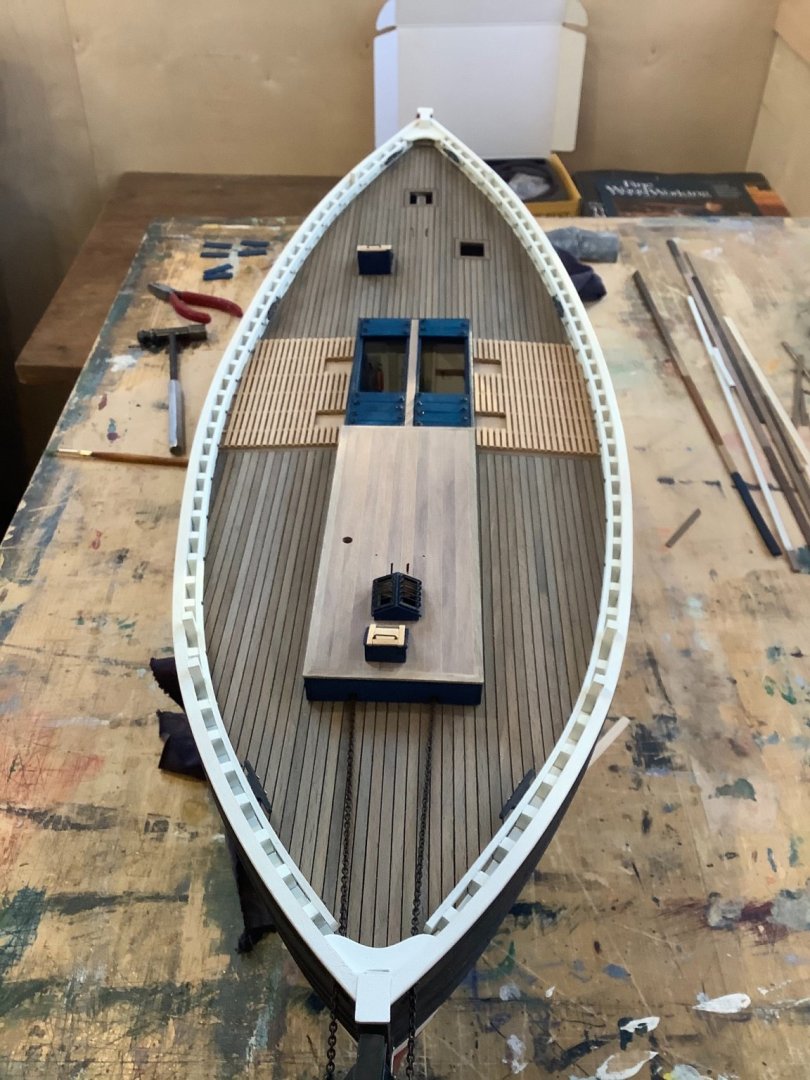
Thanks Jean-Paul, Bob and Clive! This pandemic is really helping with my productivity model ship wise, although I am very soon going to have to get into some construction jobs. Meantime I’m pressing on with the companionways and other deck installations. These are fun bits and pieces, each a small project. The hatch coverings’ ring and post assemblies don’t go together that easily. Should really have drilled out all the posts to make assembly easier. Having said that, I’m finding pretty much everything on this model to be a satisfying undertaking. Nice change from HMS Bounty which I have to admit was a bit of a slog at times.


- 79 replies
-
- 9
-
-
- Fifie
- Victory Models
- (and 1 more)
-
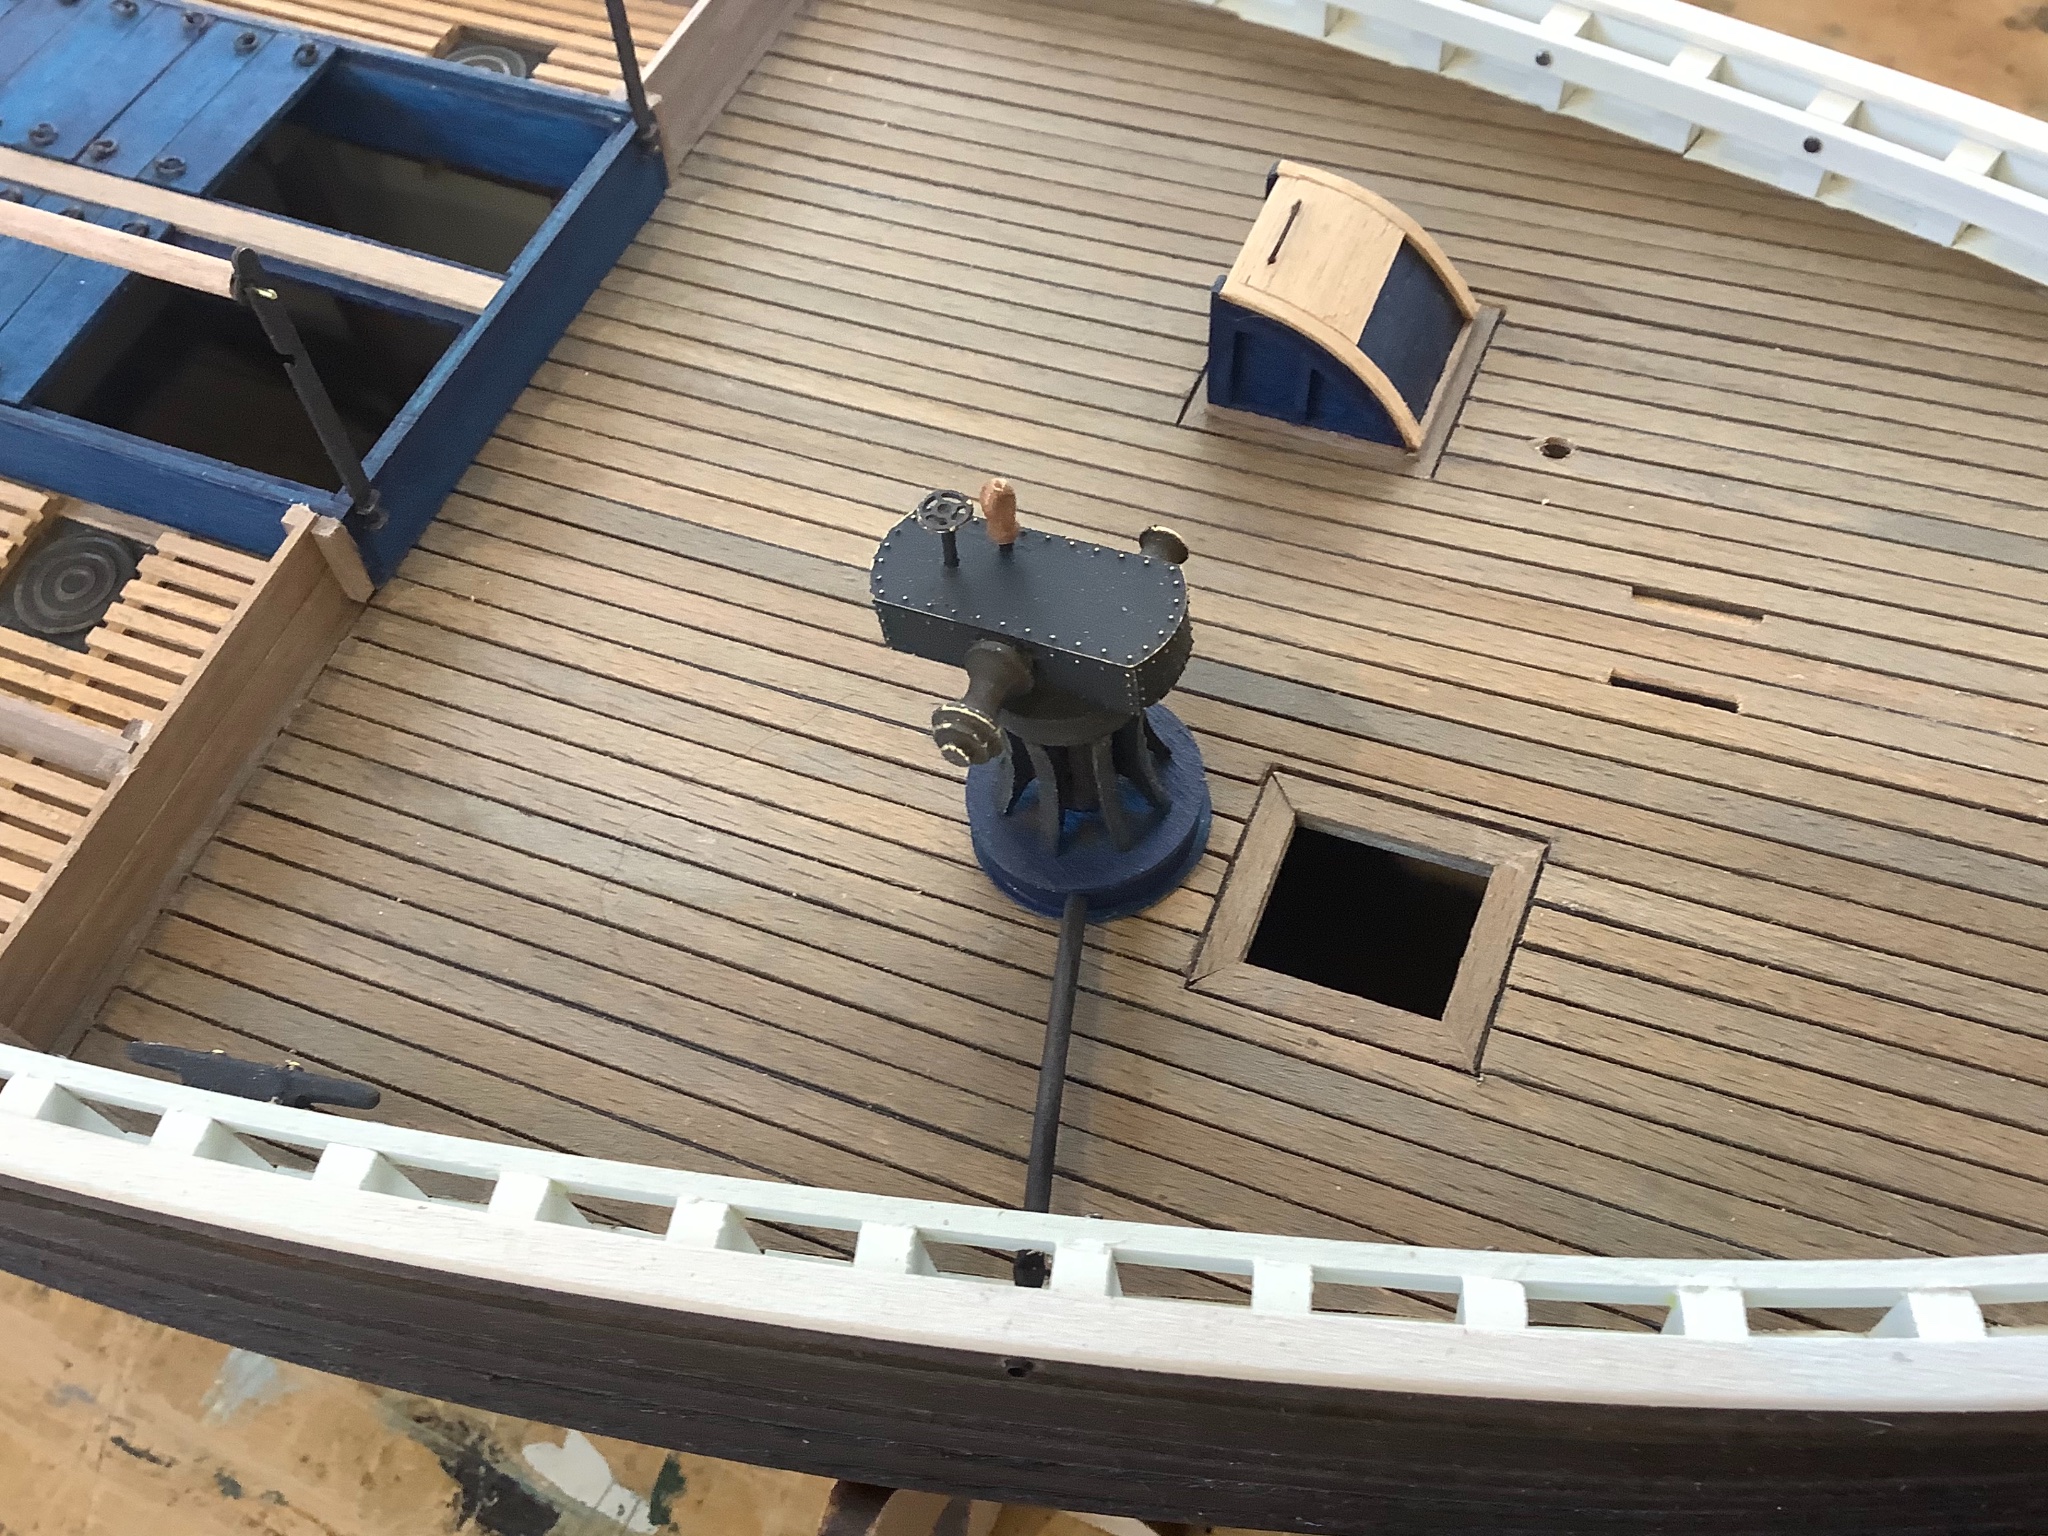
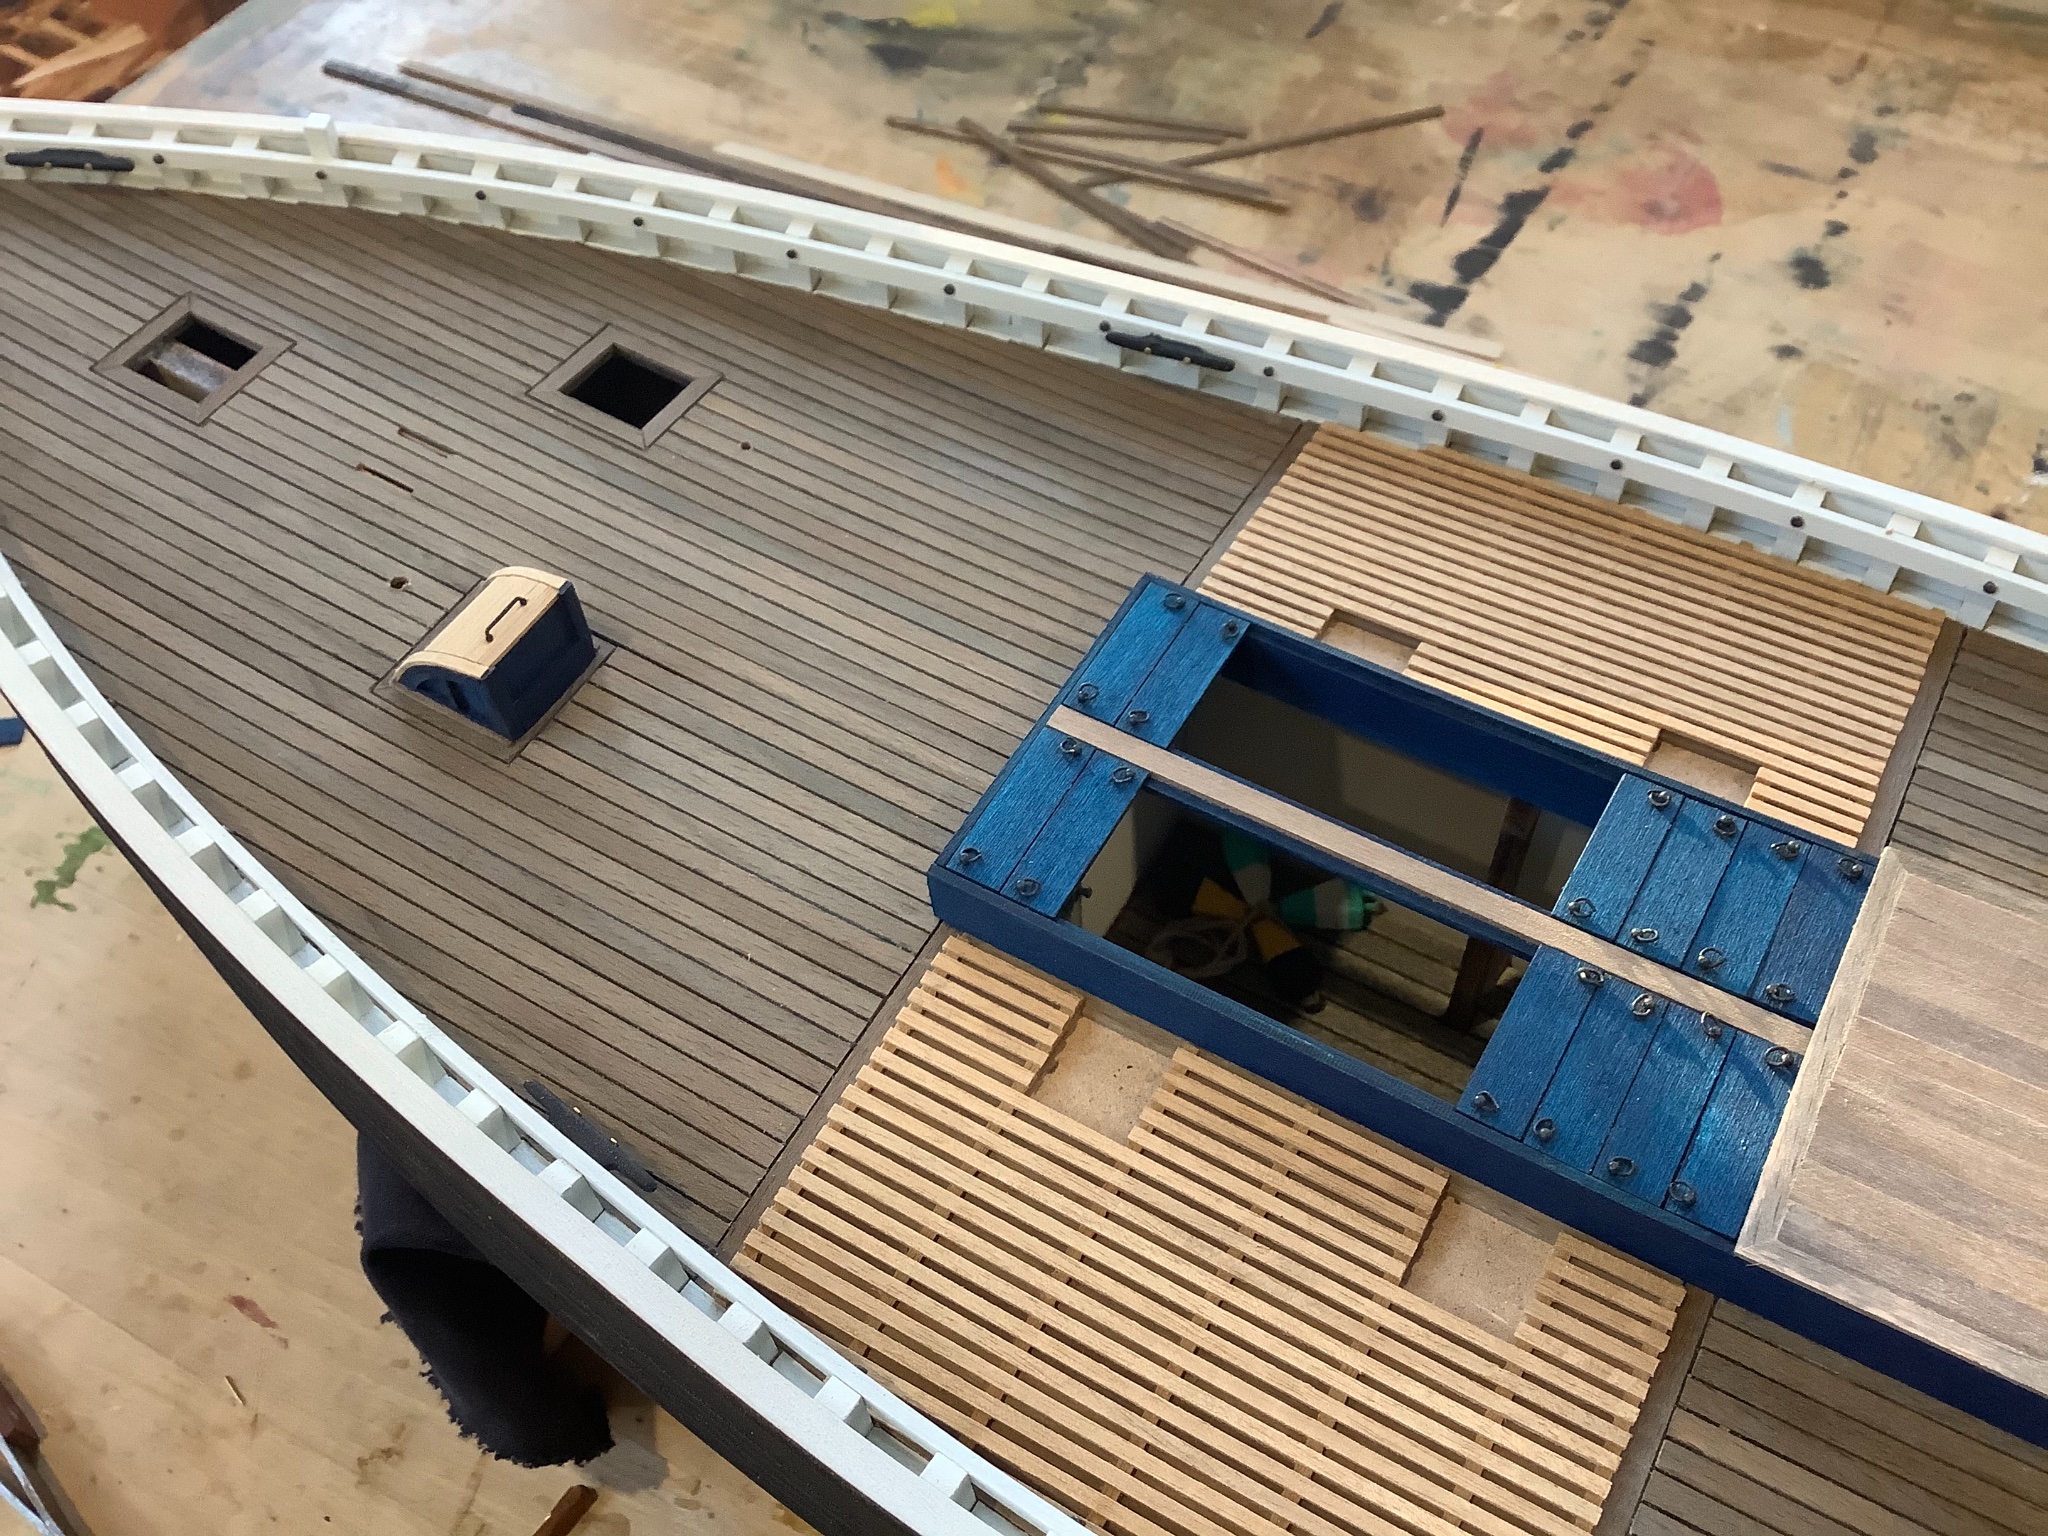
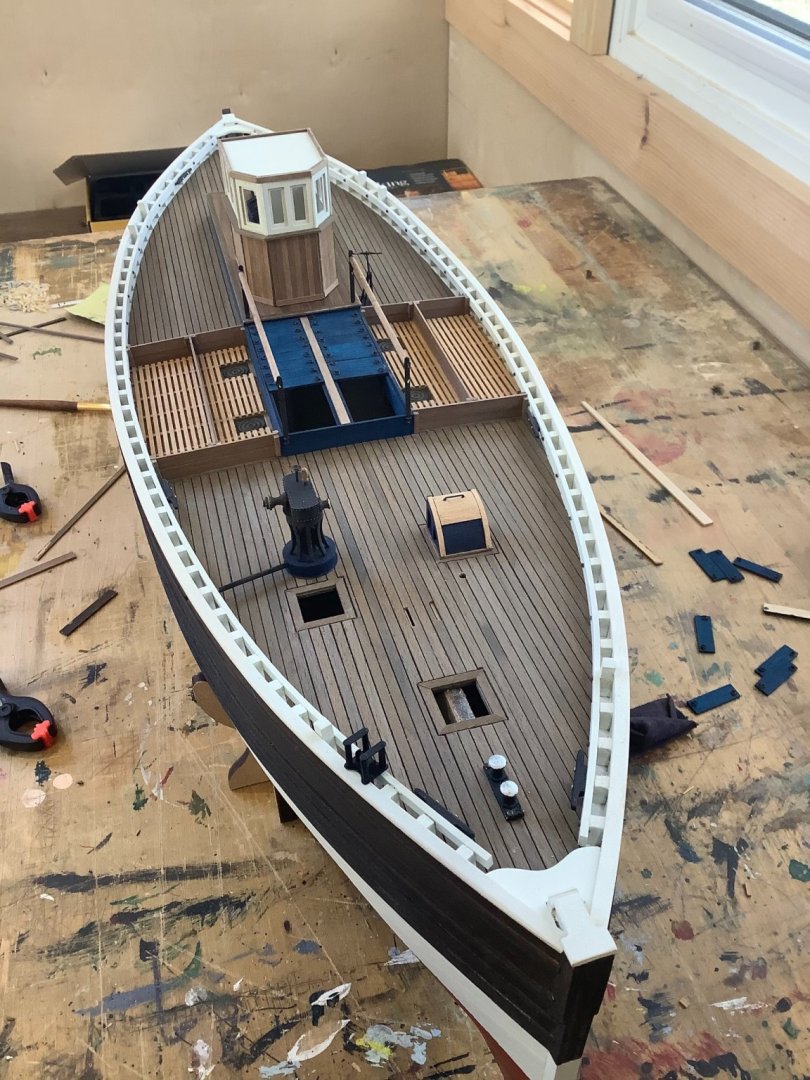
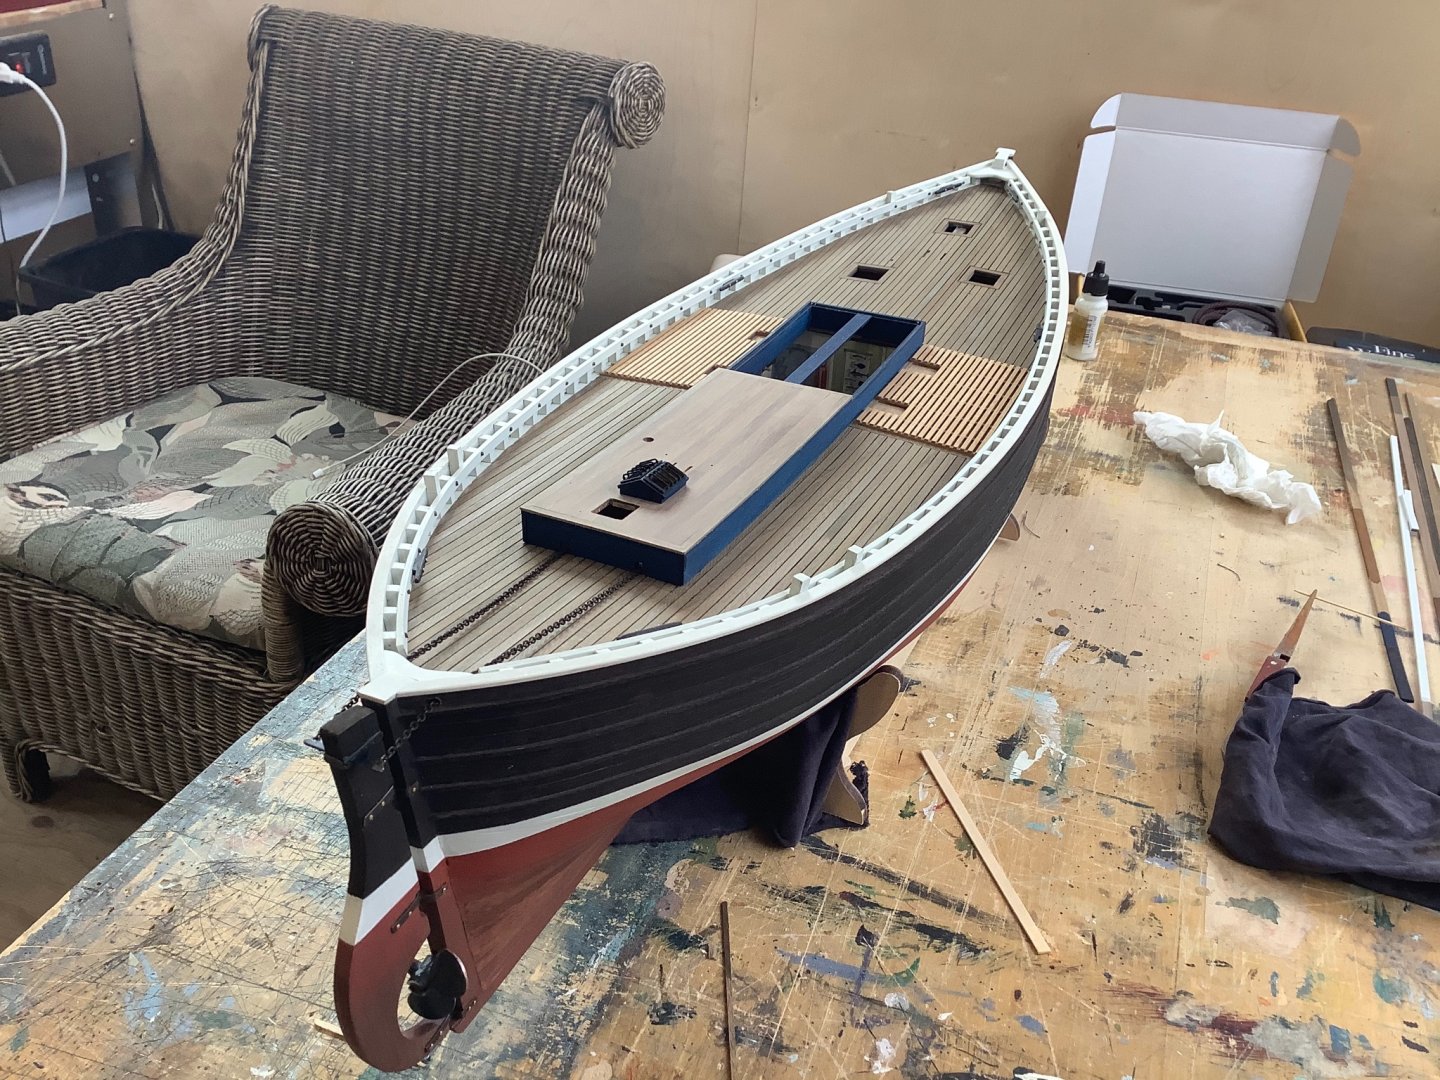
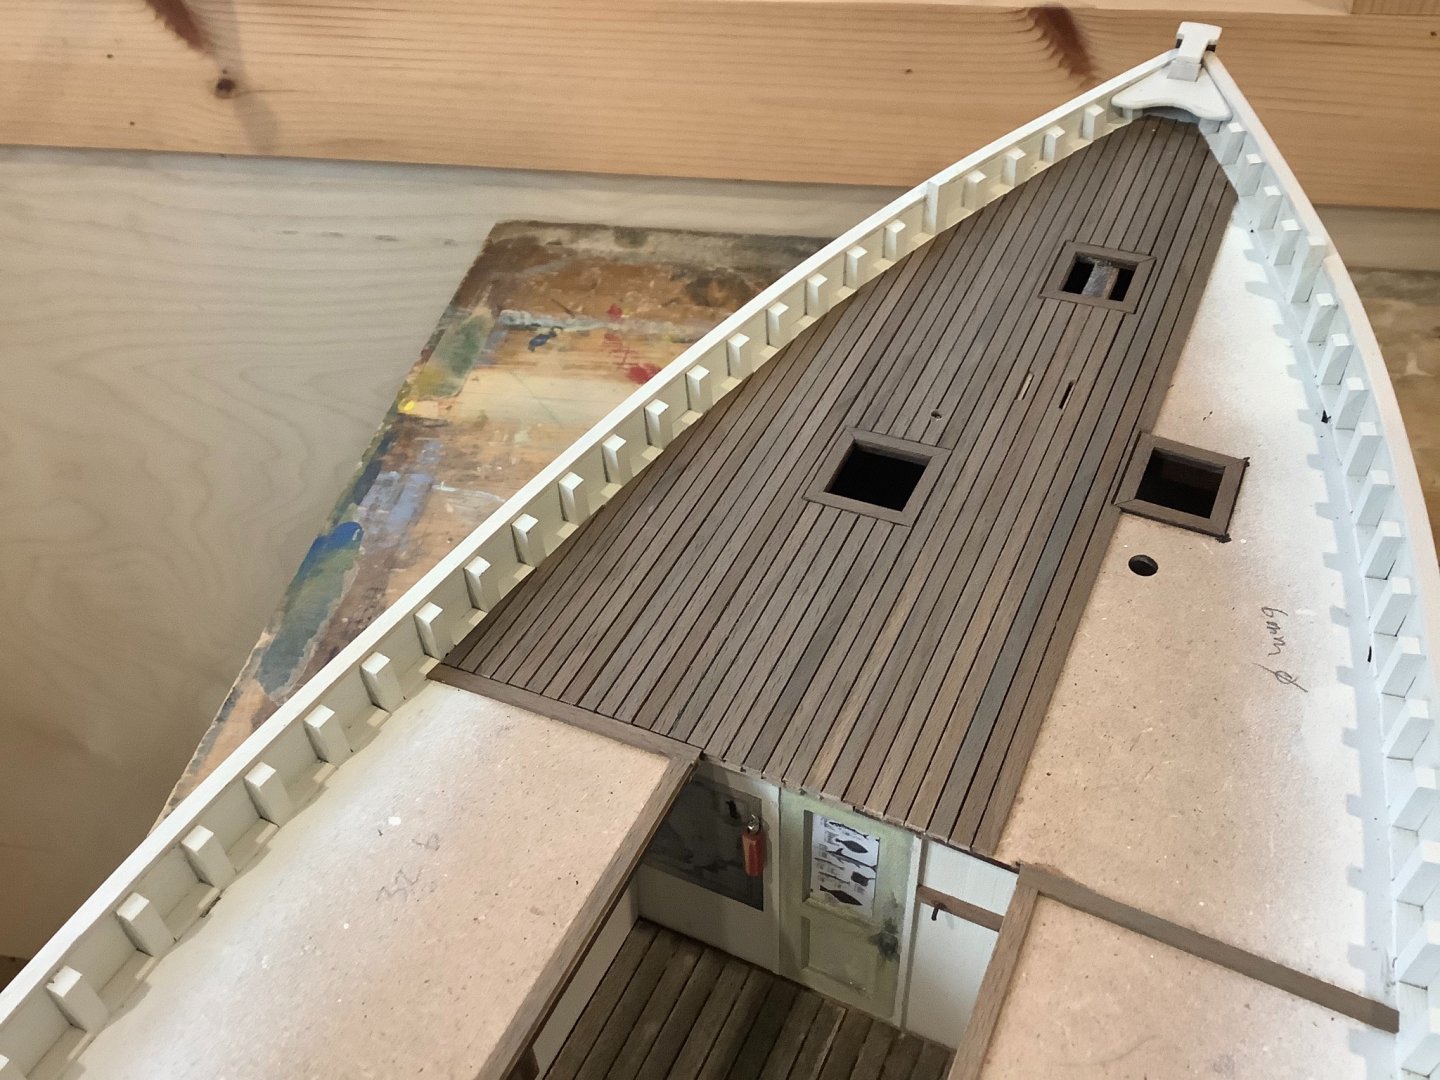
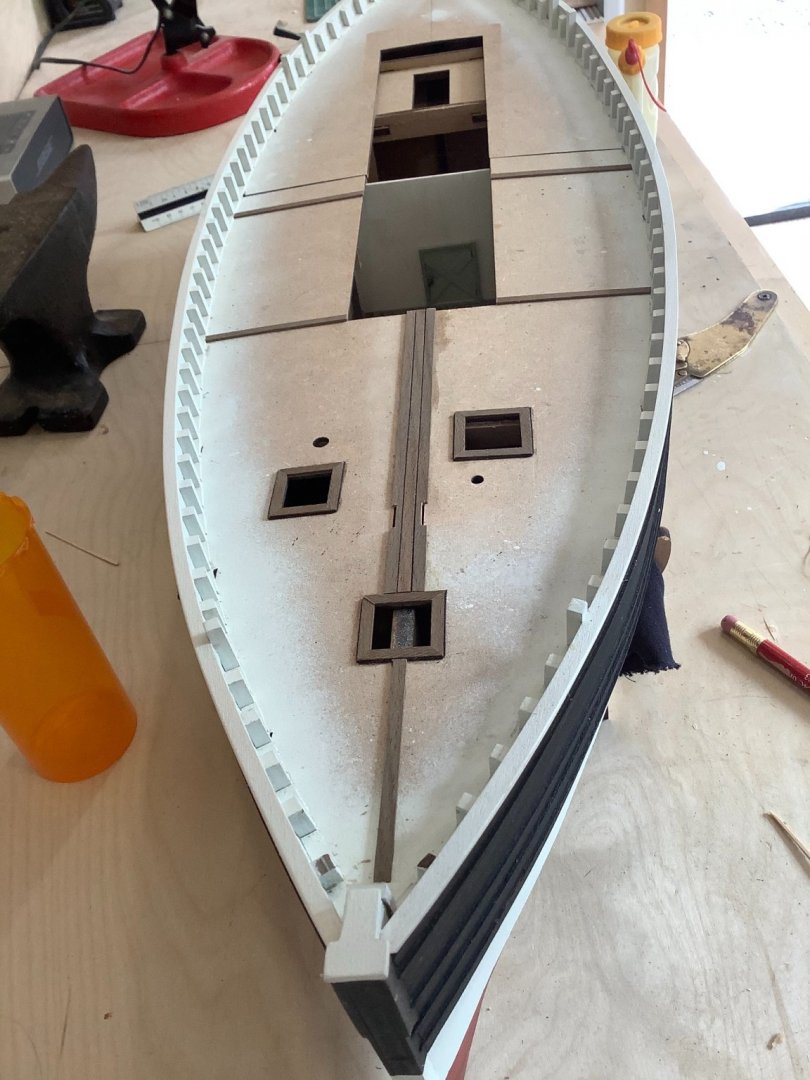
Thanks guys...really appreciate the comments and you checking in. Bit of a hiccup after deck was done as my kit was missing rudder hinges. They had only put one set in my kit instead of 3, so had to mess about fabricating something similar from what I had lying around. Not perfect but good enough. Used some leftover walnut as decking on the platform for the cabin. I relocated the scuttles on the fish deck somewhat so they connect with the space I created below decks. Not sure I’m going to try to drill through the sub deck for the holes since it’s mdf and could get messy.
- 79 replies
-
- 8
-
-
- Fifie
- Victory Models
- (and 1 more)
-
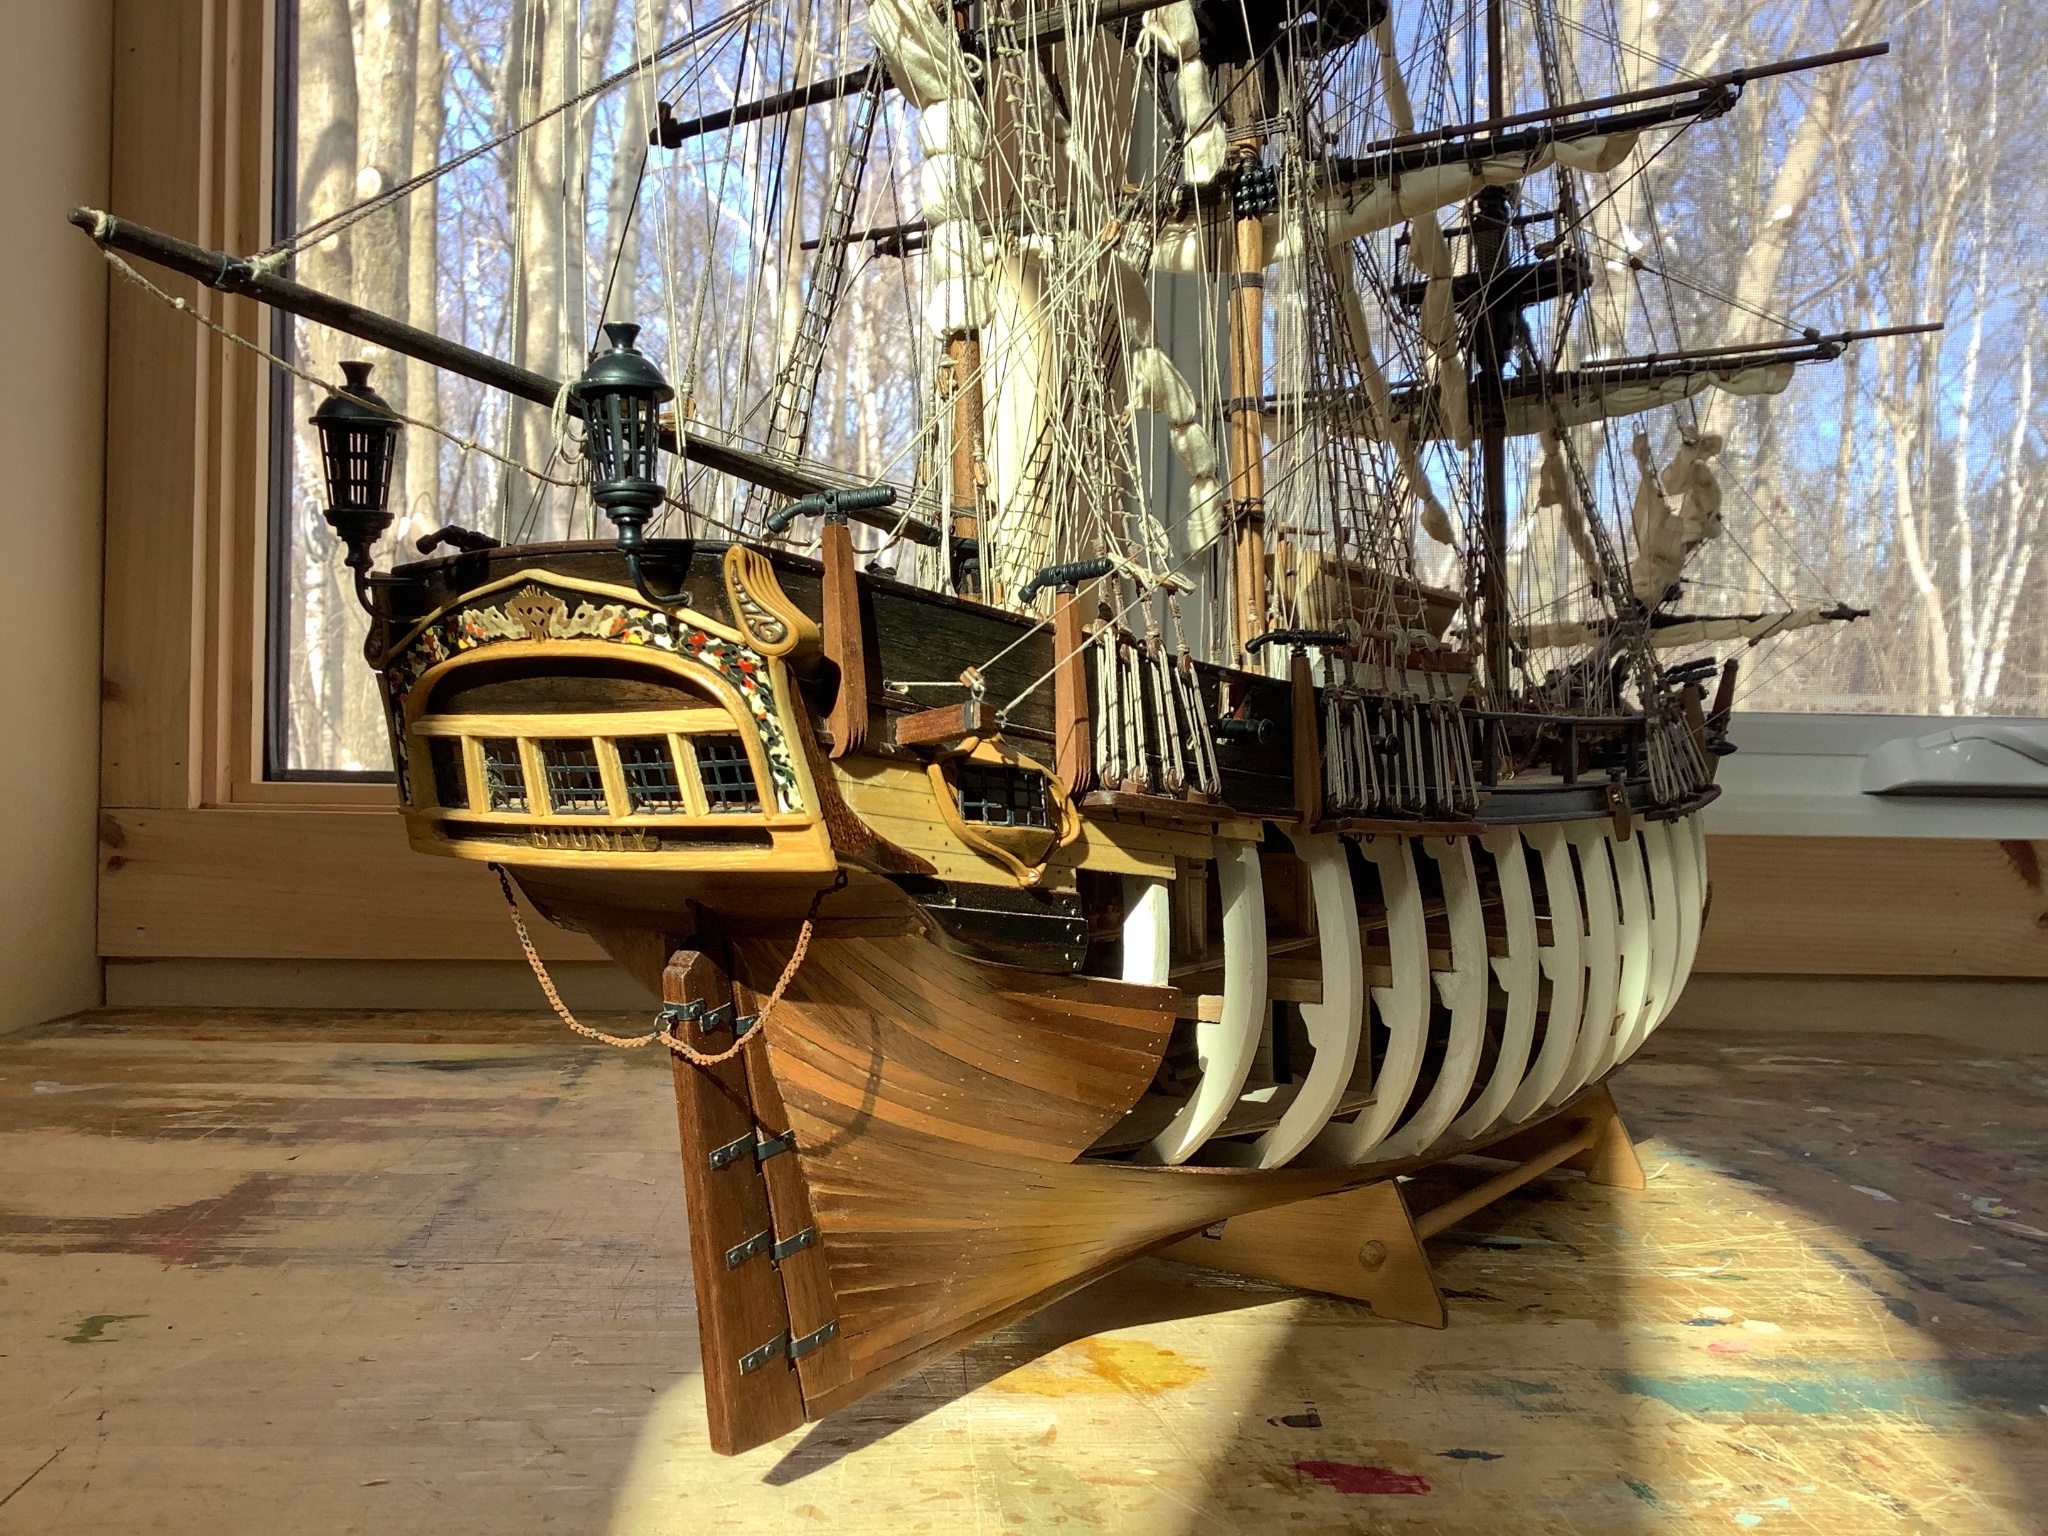
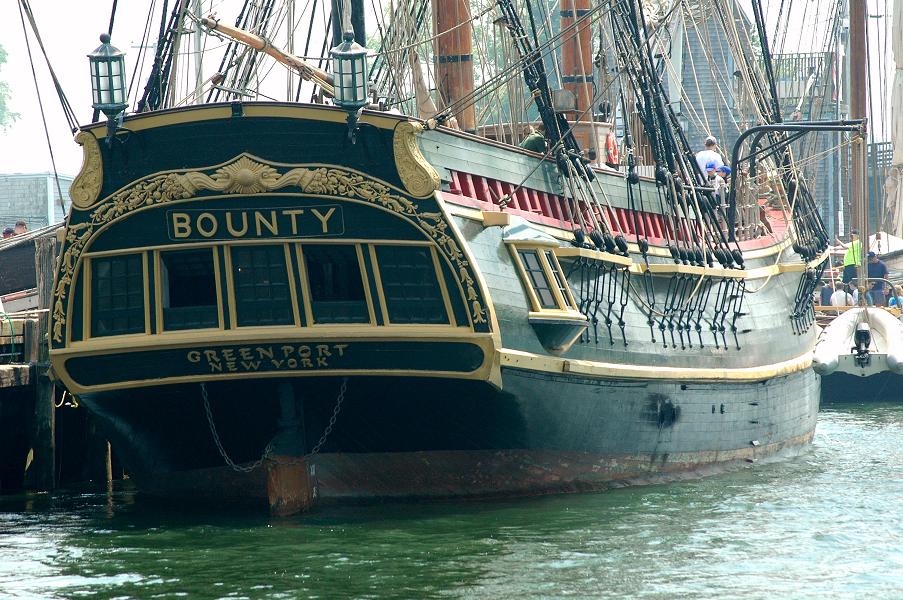
The first picture is the replica Bounty. The name usually goes under the windows as per the illustration with the flag.


-
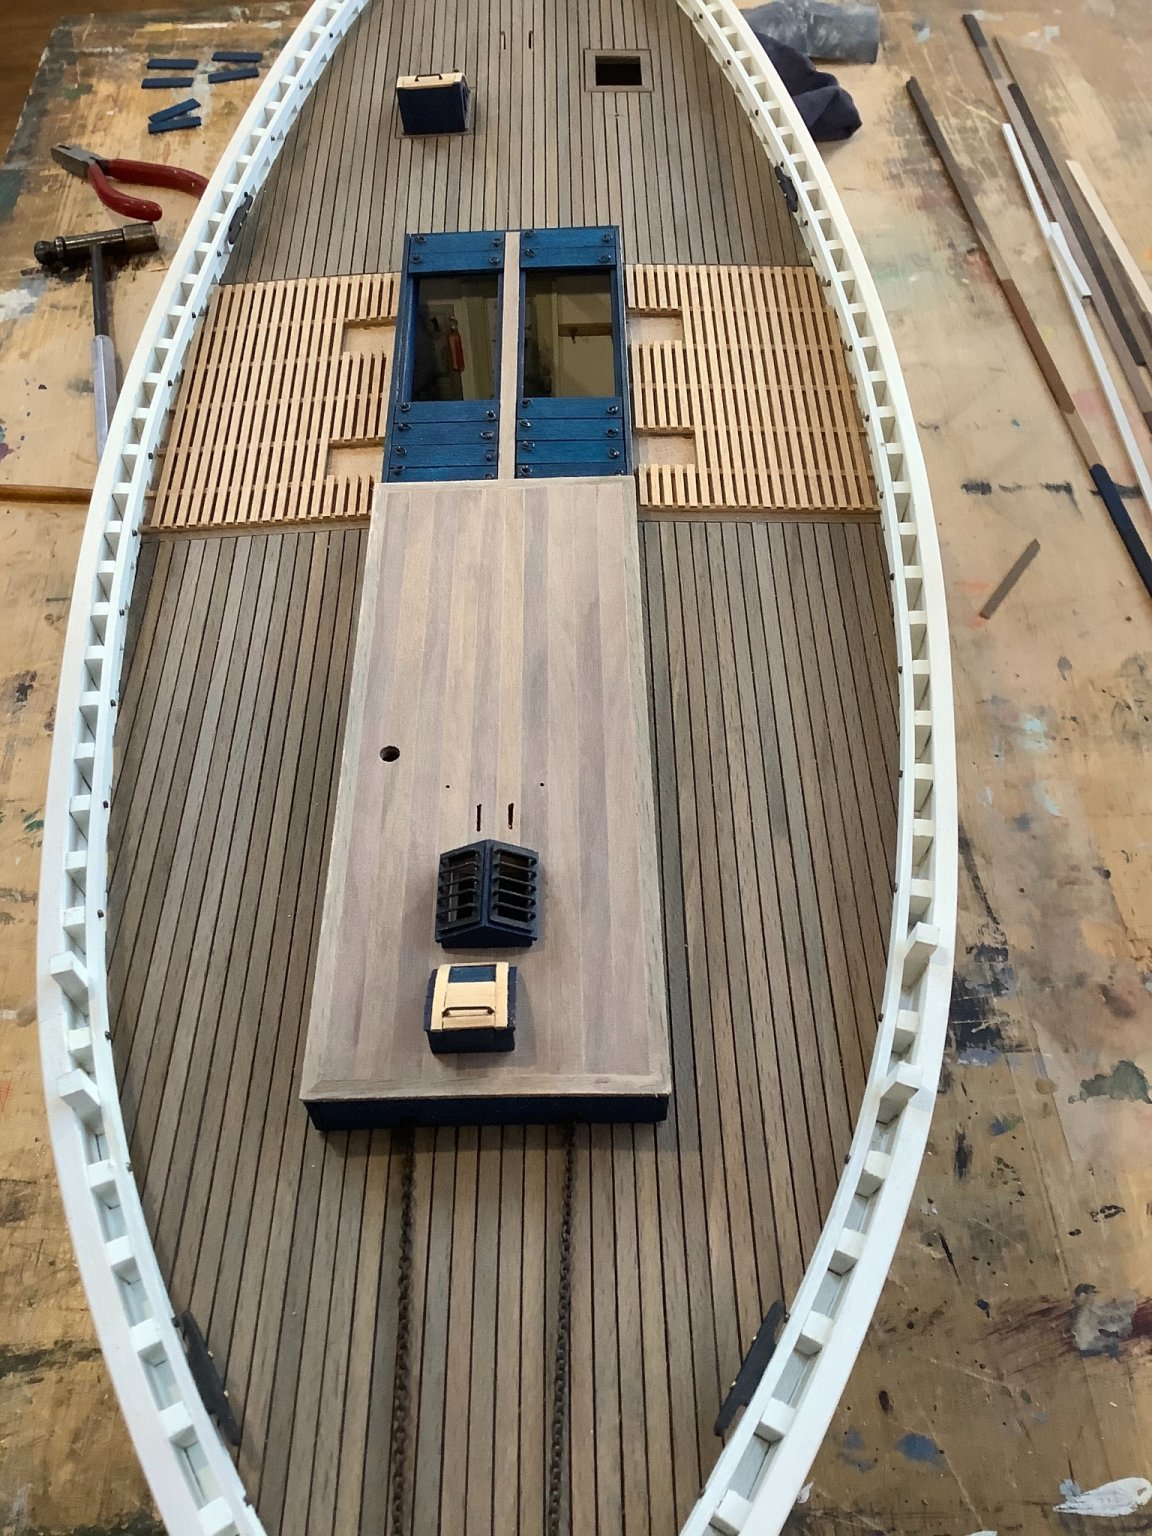
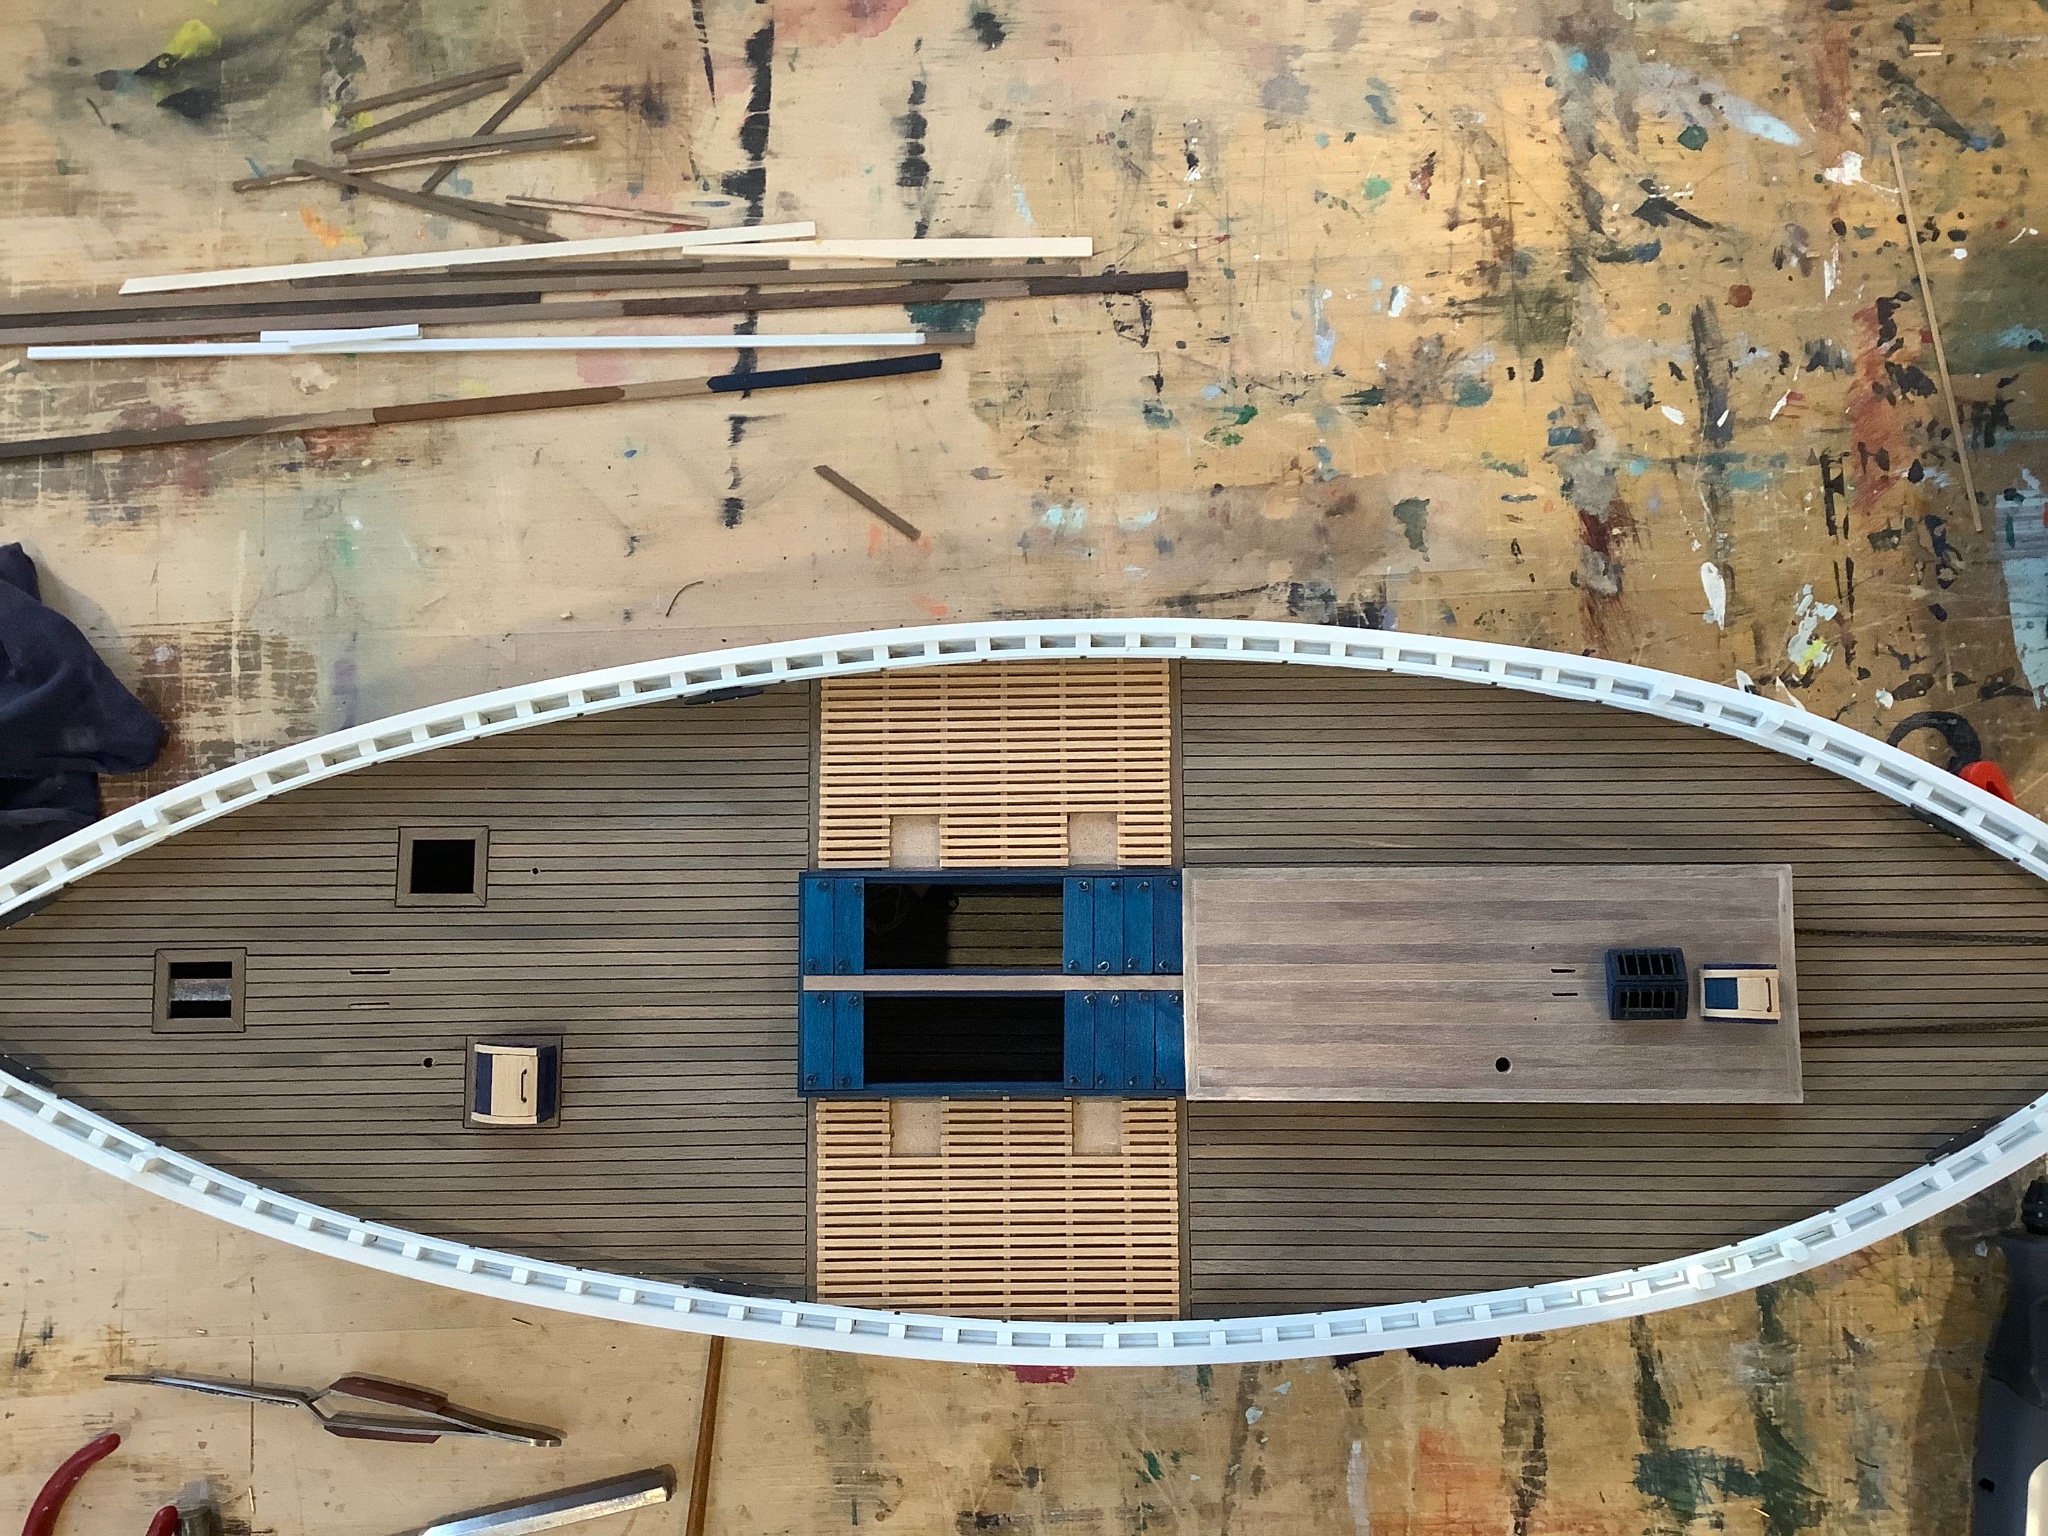
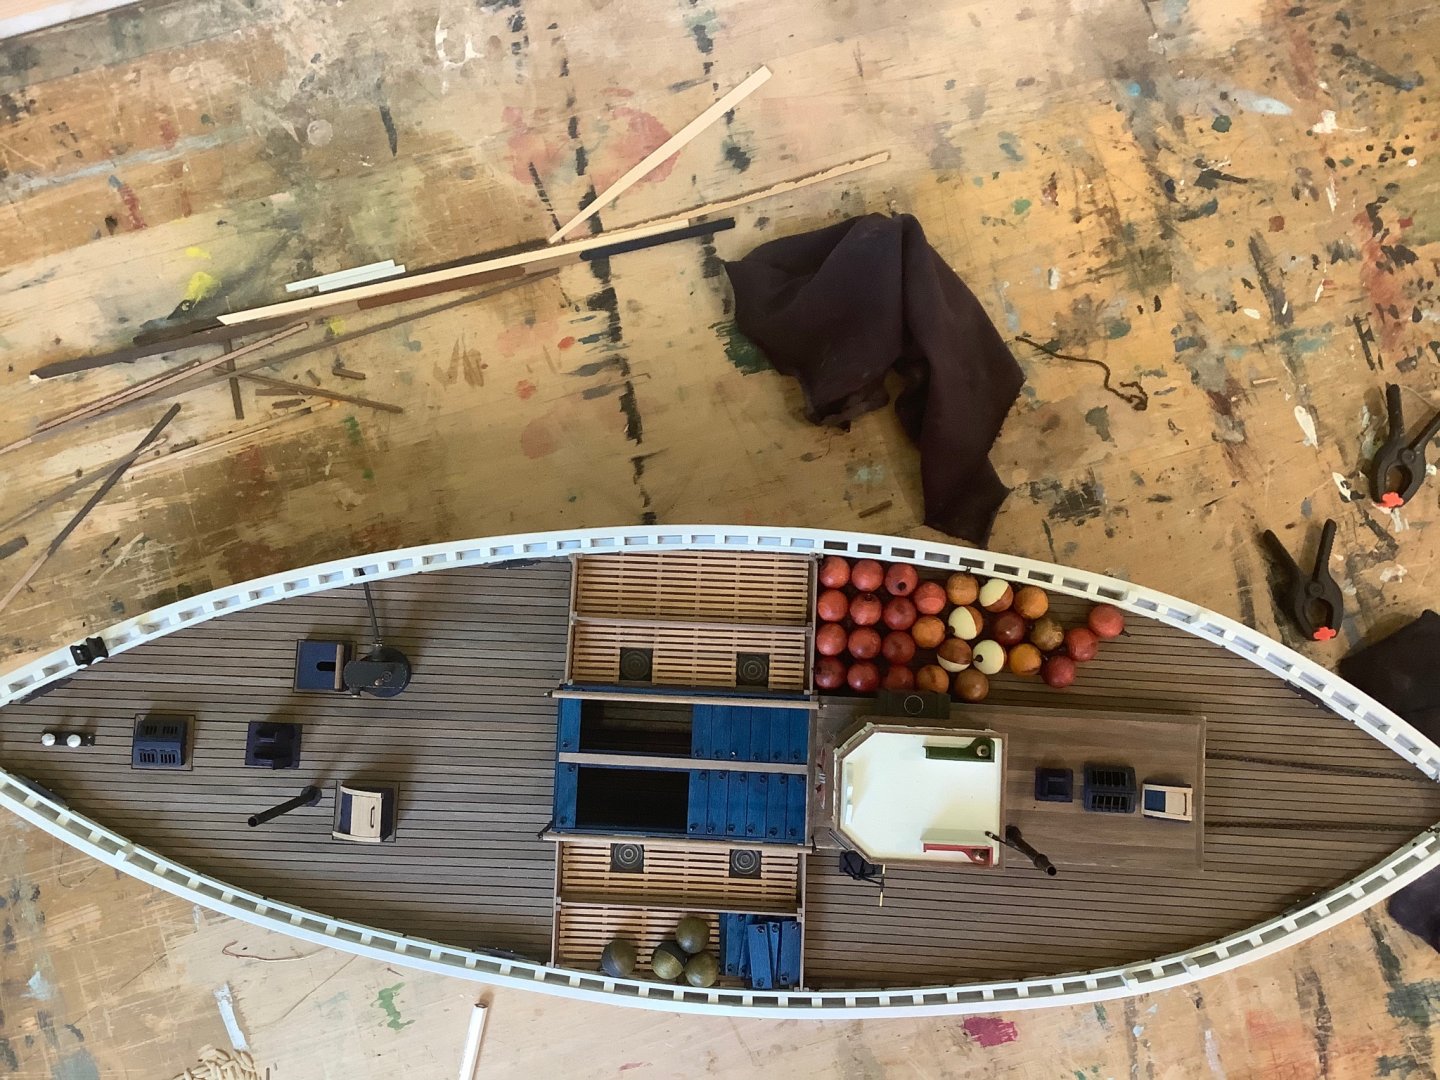
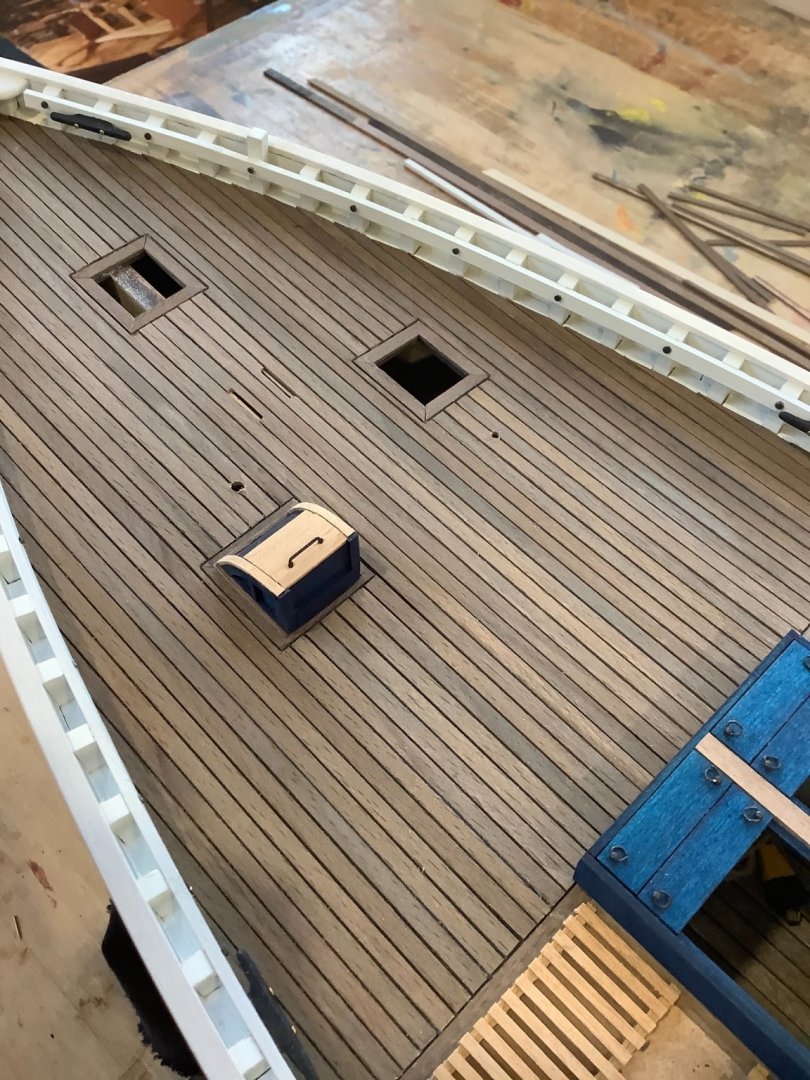
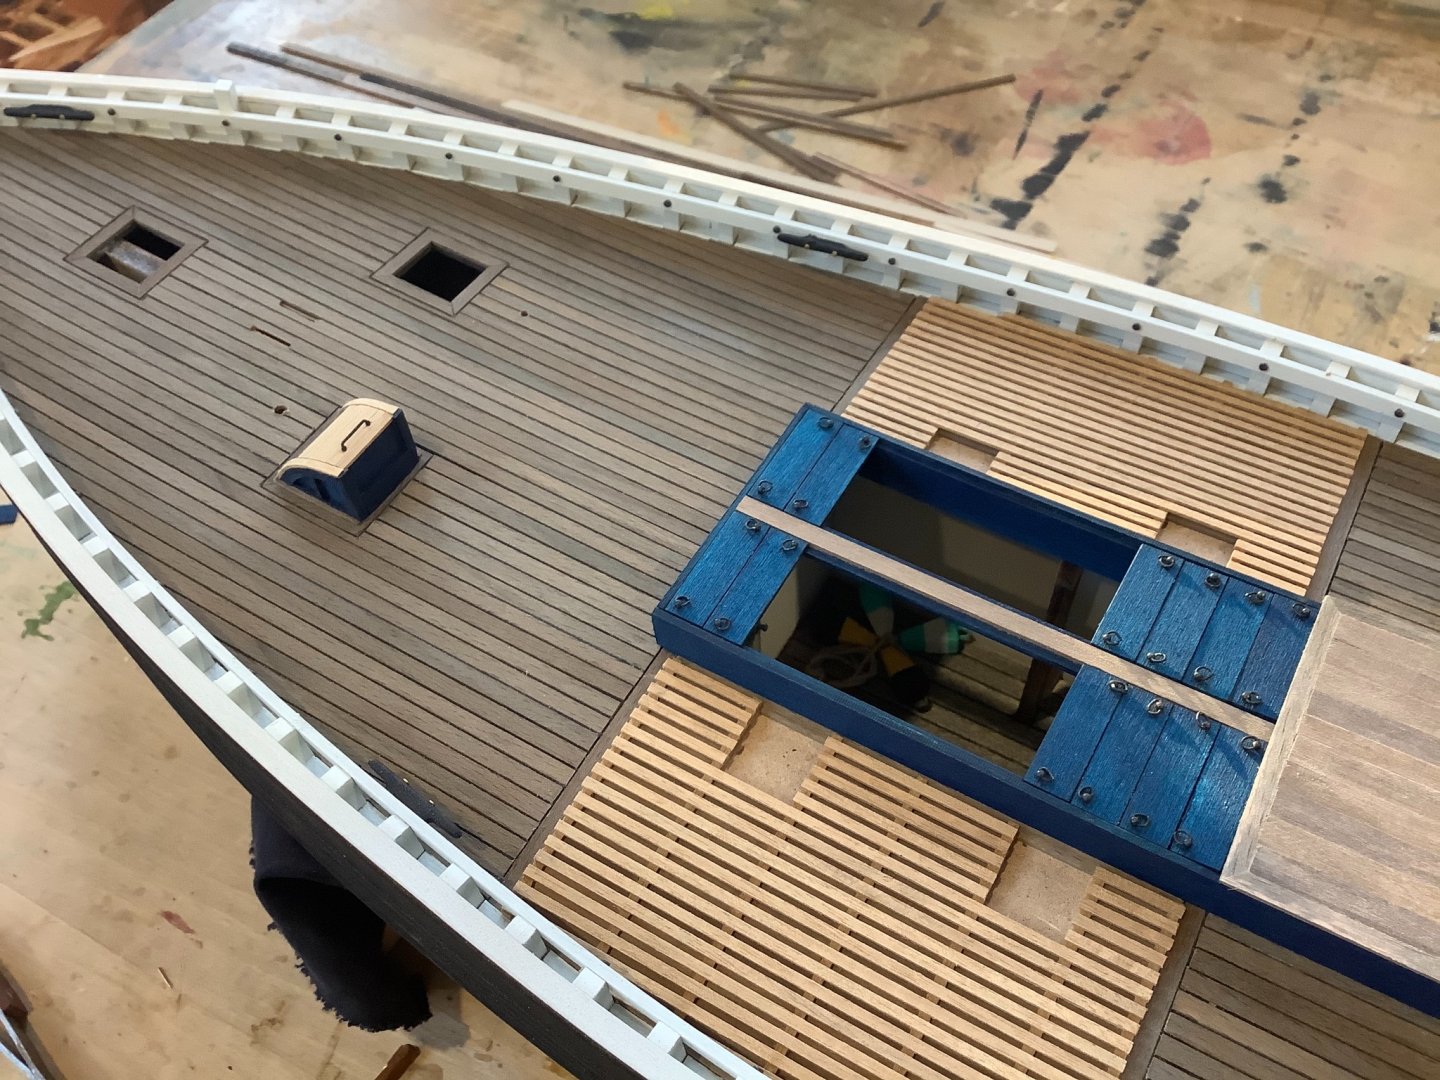
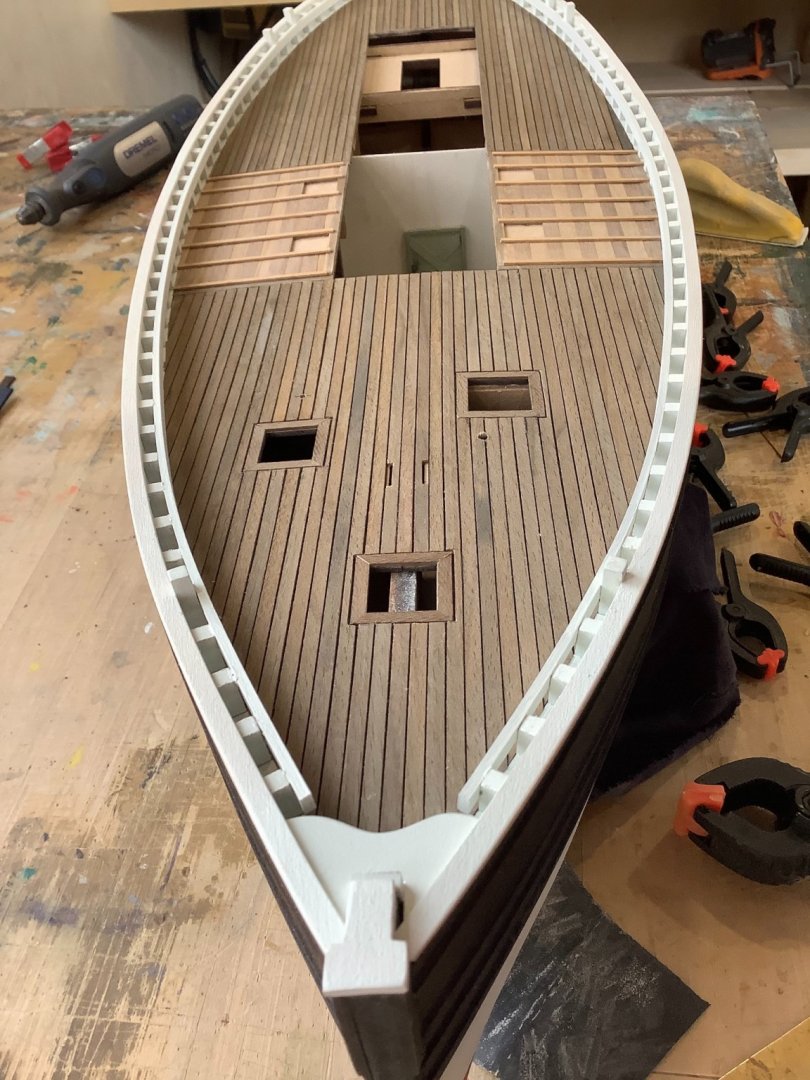
Main decking on Fifie completed. I know, it perhaps looks a little too posh for a fishing boat. Not sure I have the heart to scuff it all up with a little sandpaper. The deck was accomplished by prefinishing the planks with a weak concentration of iron acetate, tacking down 0.15mm black thread using CA and then setting the planks with wood glue.

- 79 replies
-
- 13
-
-
- Fifie
- Victory Models
- (and 1 more)
-
Hi Ras - yes I agree with Eamonn...you’ve got the right coloration there and it should give you the right sort of look in the aggregate...just a little more form to the fish on top and that should work pretty well.
-
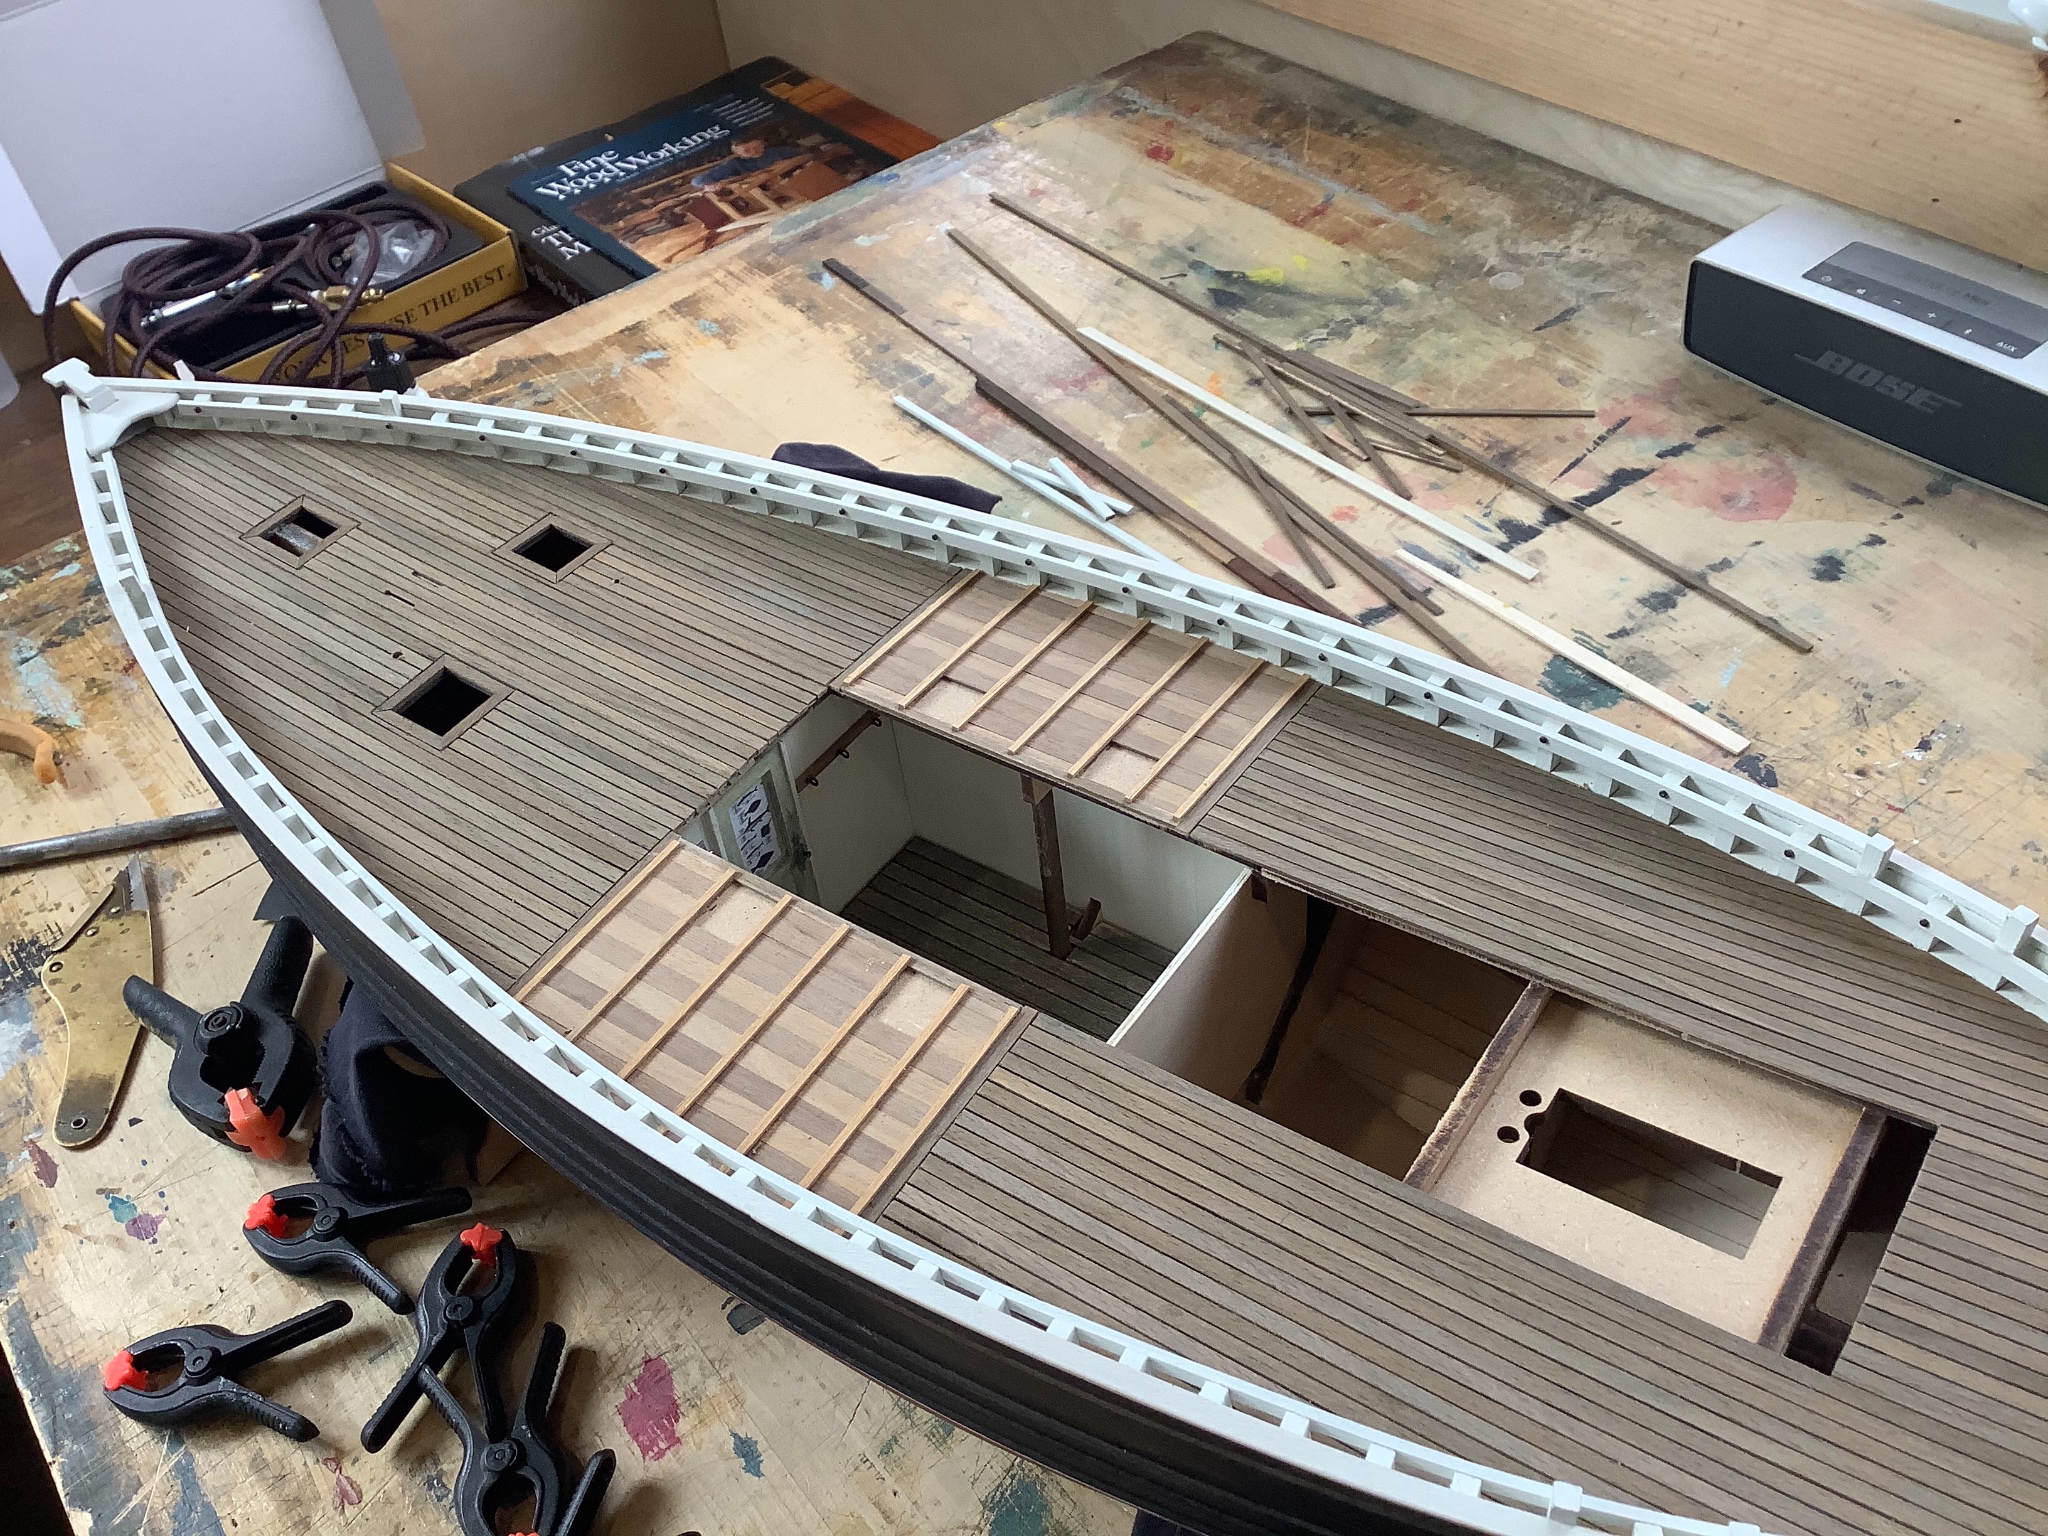
Planking the deck requires a bit more precision than usual because the white border at bulwark isn’t very forgiving, visually speaking.
- 79 replies
-
- 7
-
-
- Fifie
- Victory Models
- (and 1 more)
-
Thanks Bob and Jean-Paul! Just starting the deck. The deck wood is an odd sort of beige, so I brushed it with some of the iron acetate solution which I only let steep for 24 hours. It gives the wood a warm grey patina which I think should be right for a fishing boat. I’m in agreement with PJG and using thread to separate the planks slightly, rather than the wood strips provided in the kit.
- 79 replies
-
- 5
-
-
- Fifie
- Victory Models
- (and 1 more)
-
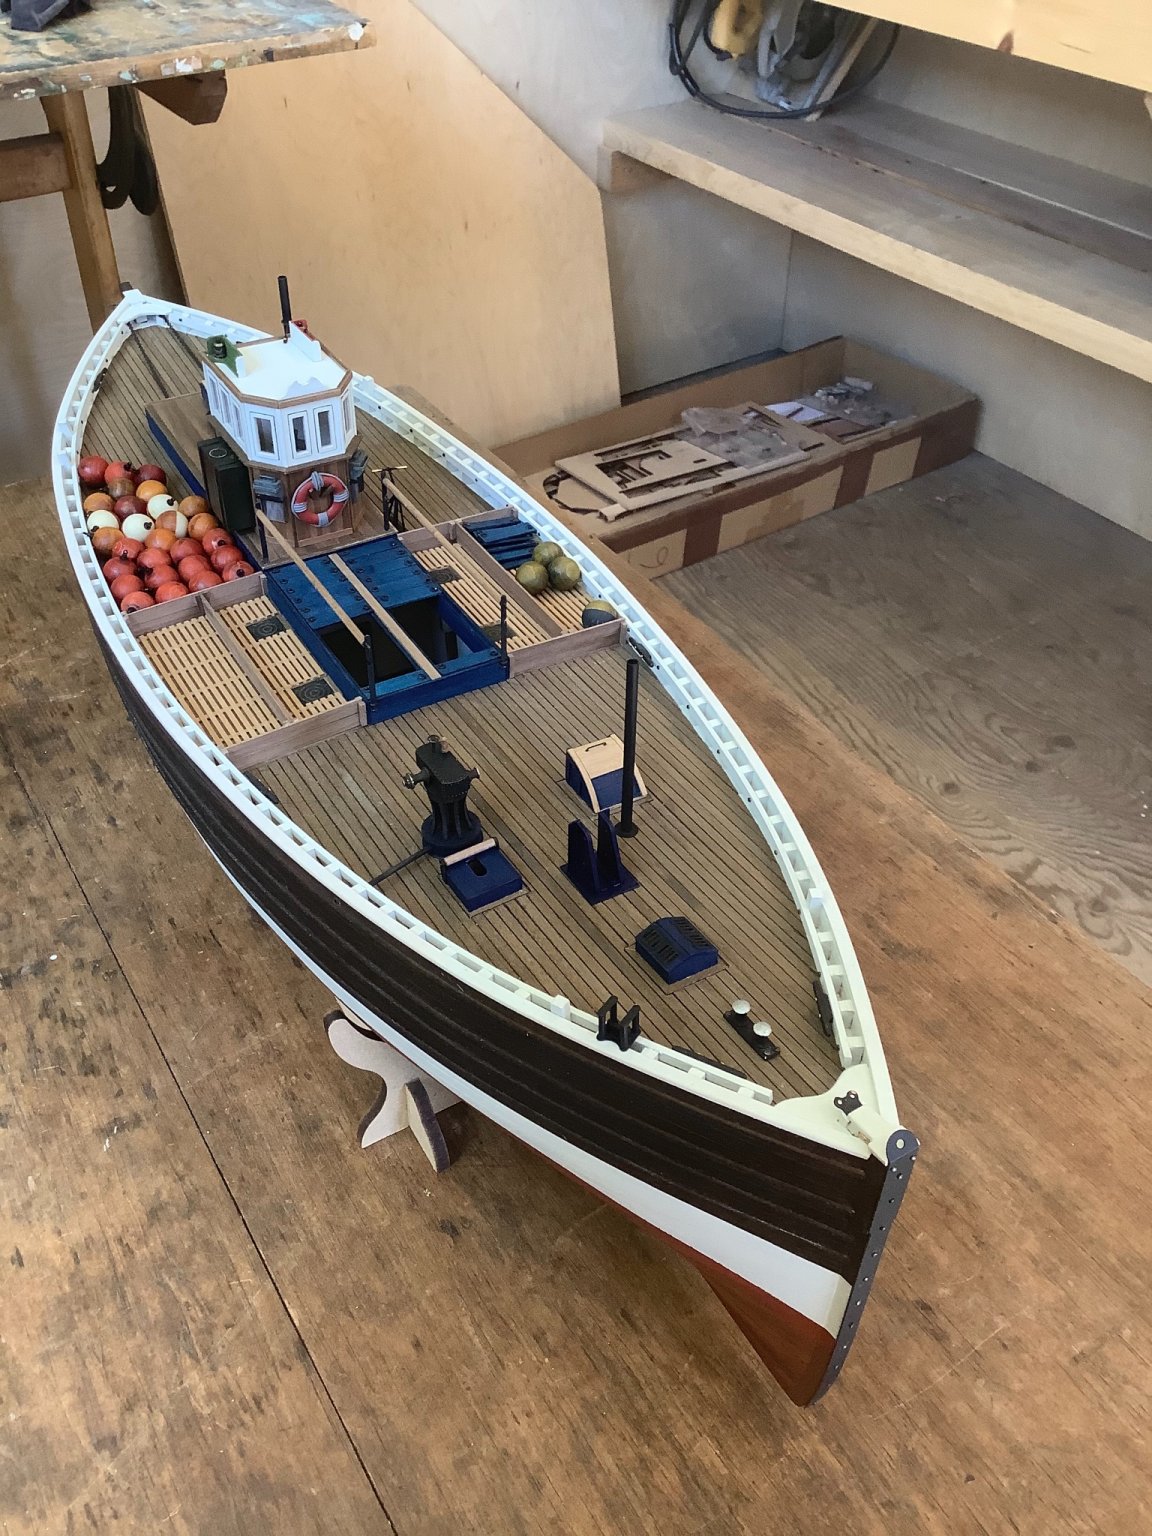
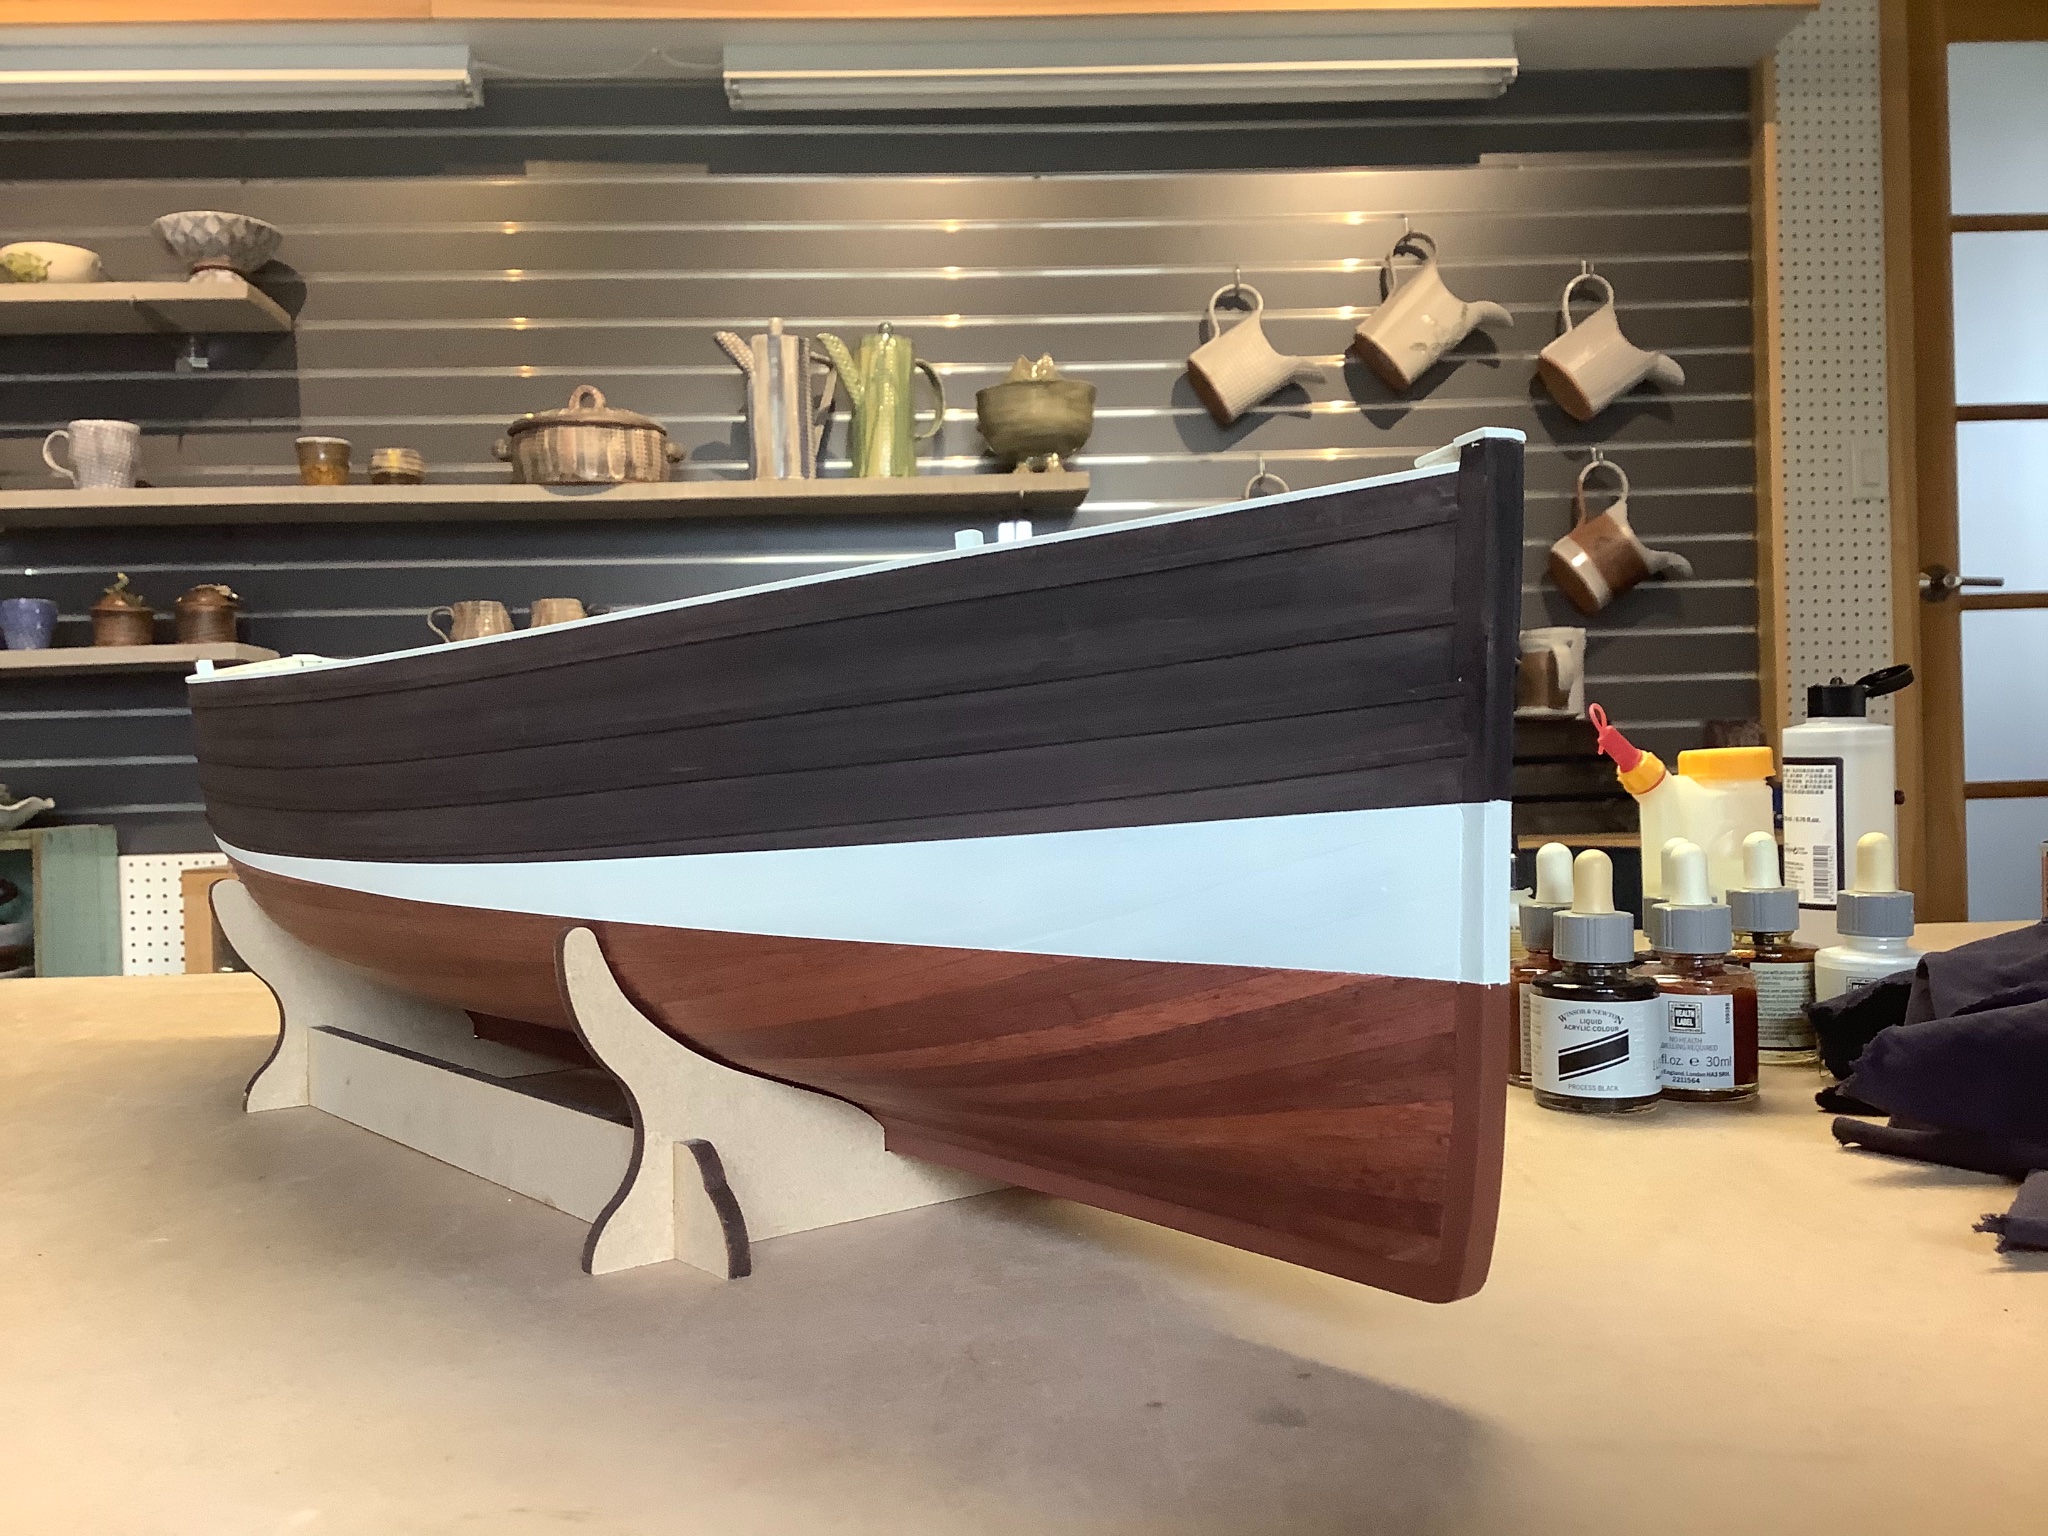
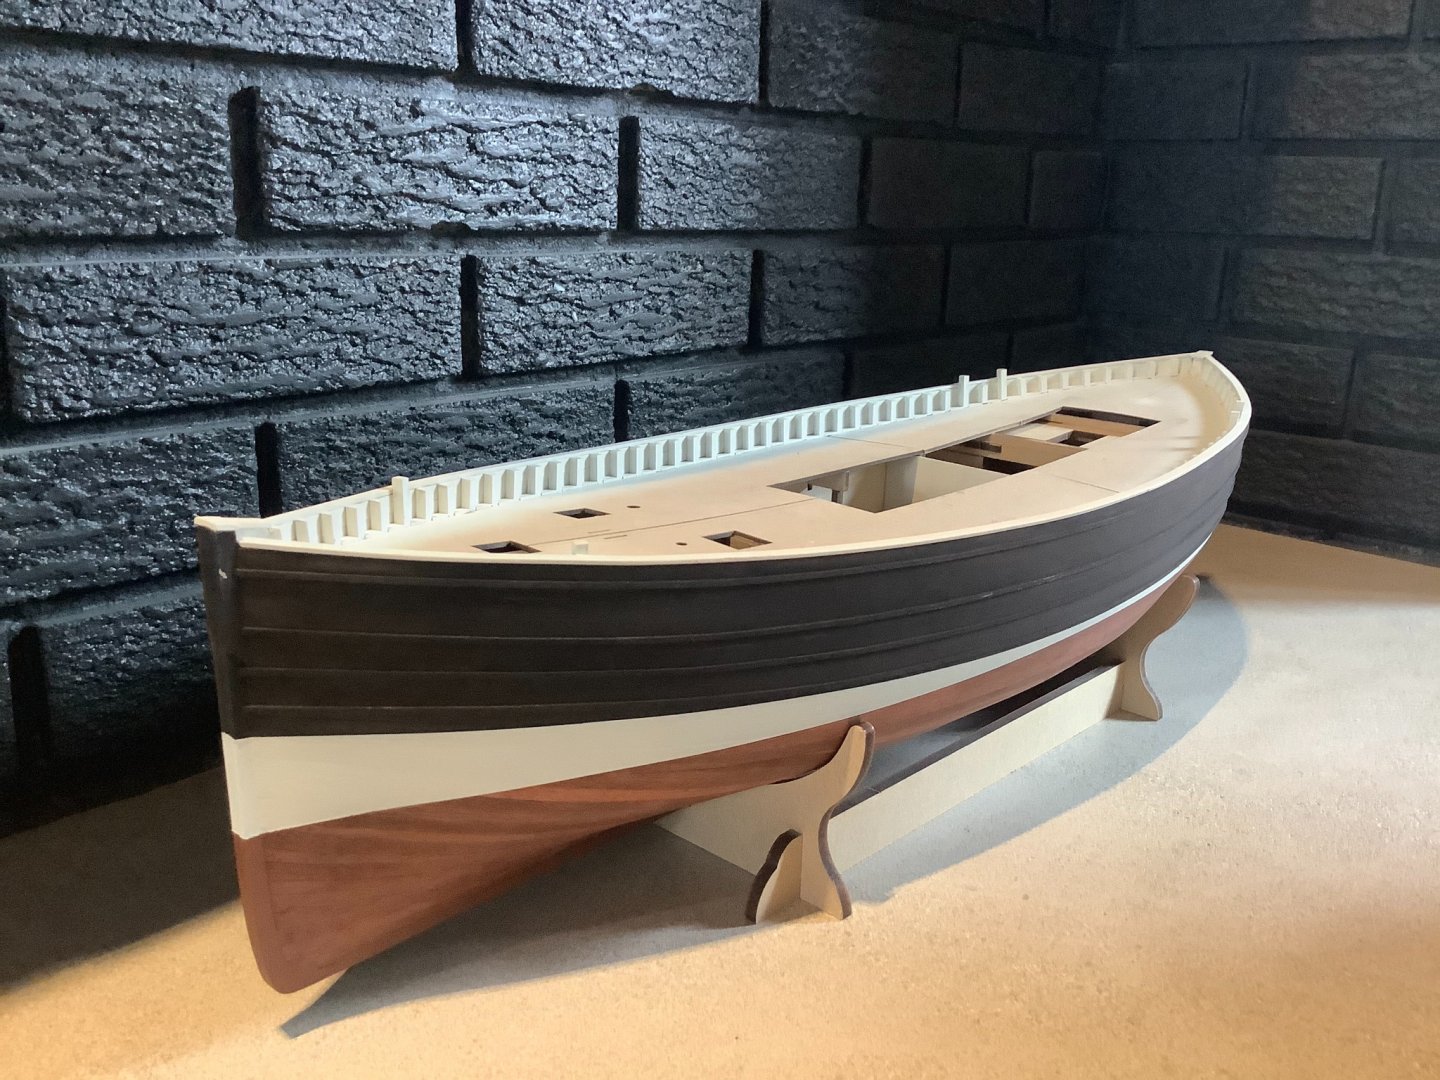
Airbrushed a shadow line in a rust colour just below the white band to suggest that part of the hull that would often sit above the waterline and be less weathered by the sea. Satin spray finish on the hull to protect it. Now I can get going on the deck.

- 79 replies
-
- 10
-
-
- Fifie
- Victory Models
- (and 1 more)
-
Thanks PJ...my wife is the potter....I use her studio here for painting because it is heated and attached to house and has a sink etc for cleanup. Your Fifie diorama is a museum piece. I’m pulling for the fish to show up in the final product.
- 79 replies
-
- 2
-
-
- Fifie
- Victory Models
- (and 1 more)
-
It seems to chemically change the wood so there really isn’t anything to rub off I don’t think. But I will definitely put a clear coat on the whole thing, it will give it more depth and look more finished. Another option is just to buff it which usually gives a very soft sheen.
- 79 replies
-
- 3
-
-
- Fifie
- Victory Models
- (and 1 more)
-
Thanks Jean-Paul and G.L...Ebonizing is a piece of cake once you’ve prepared the two necessary solutions. It is accomplished by the reaction between iron acetate and tannin. For the acetate I submerge a clump of fine raw prewashed steel wool in a plastic container containing 10% (double strength) cleaning vinegar. Put holes in lid for offgassing and leave for a week and then filter using a coffee filter. For the tannin I steeped a dozen tea bags in a cup or so of water to make ridiculously strong tea. The tannin solution is the key to the process. When you’ve concocted these two witches’ brews paint the wood with the tannin solution first, let soak in for a few minutes, then paint on the acetate. Let that dry, and then apply the tannin solution again and your wood will magically be dead black and ready for any finish.
- 79 replies
-
- 7
-
-
- Fifie
- Victory Models
- (and 1 more)
-
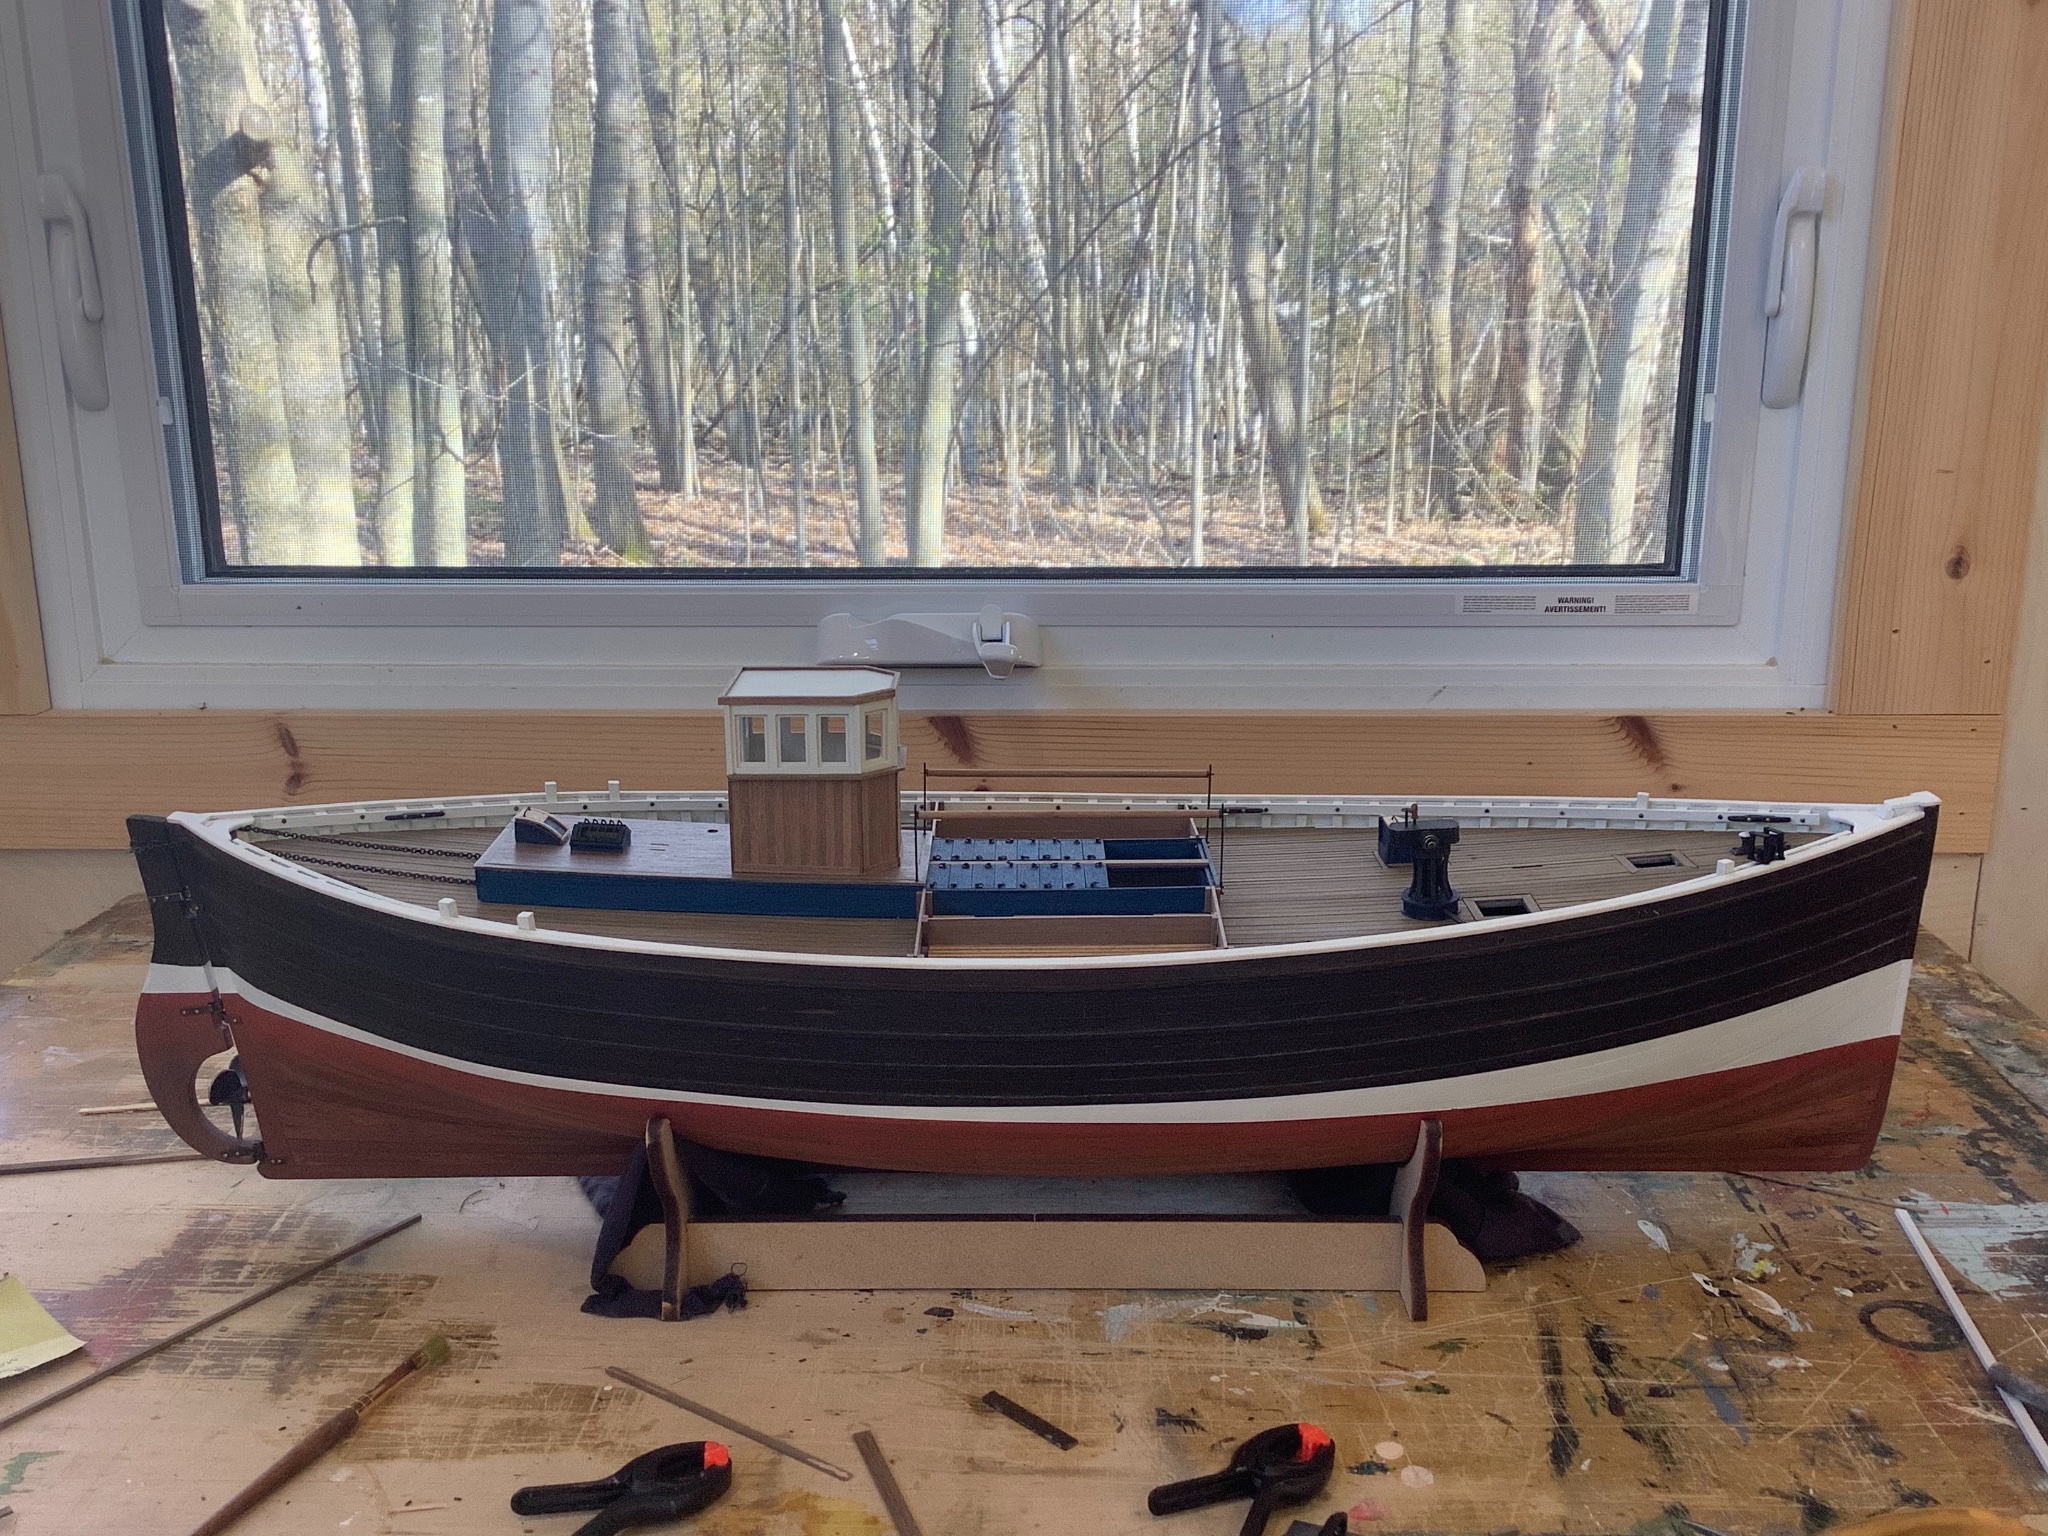
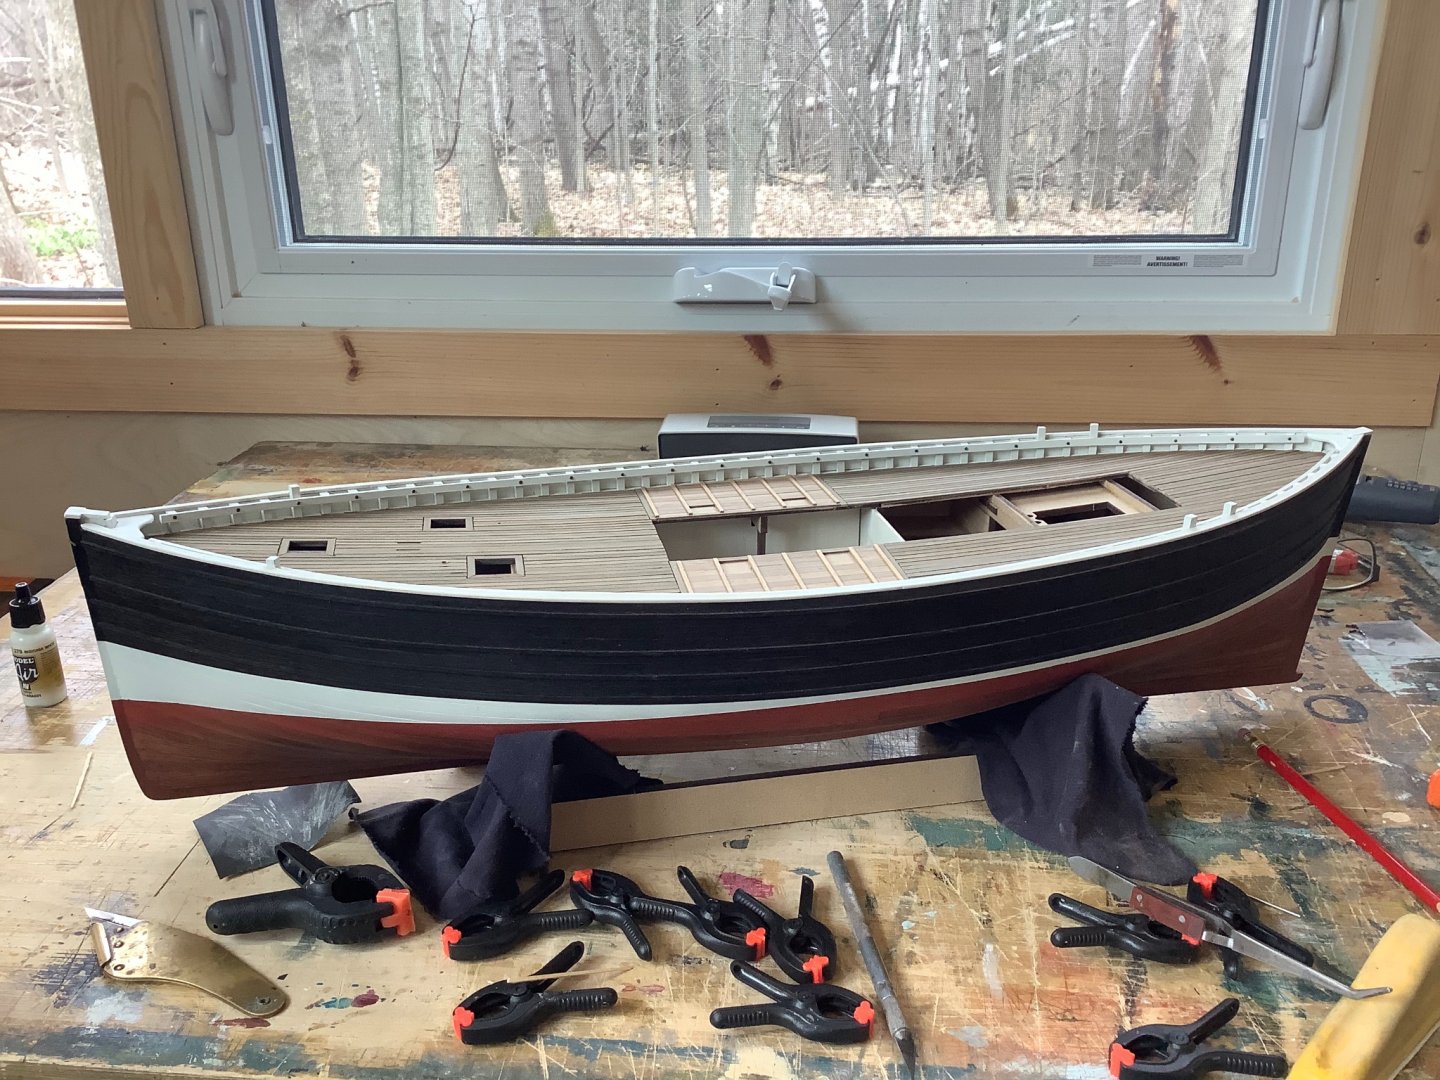
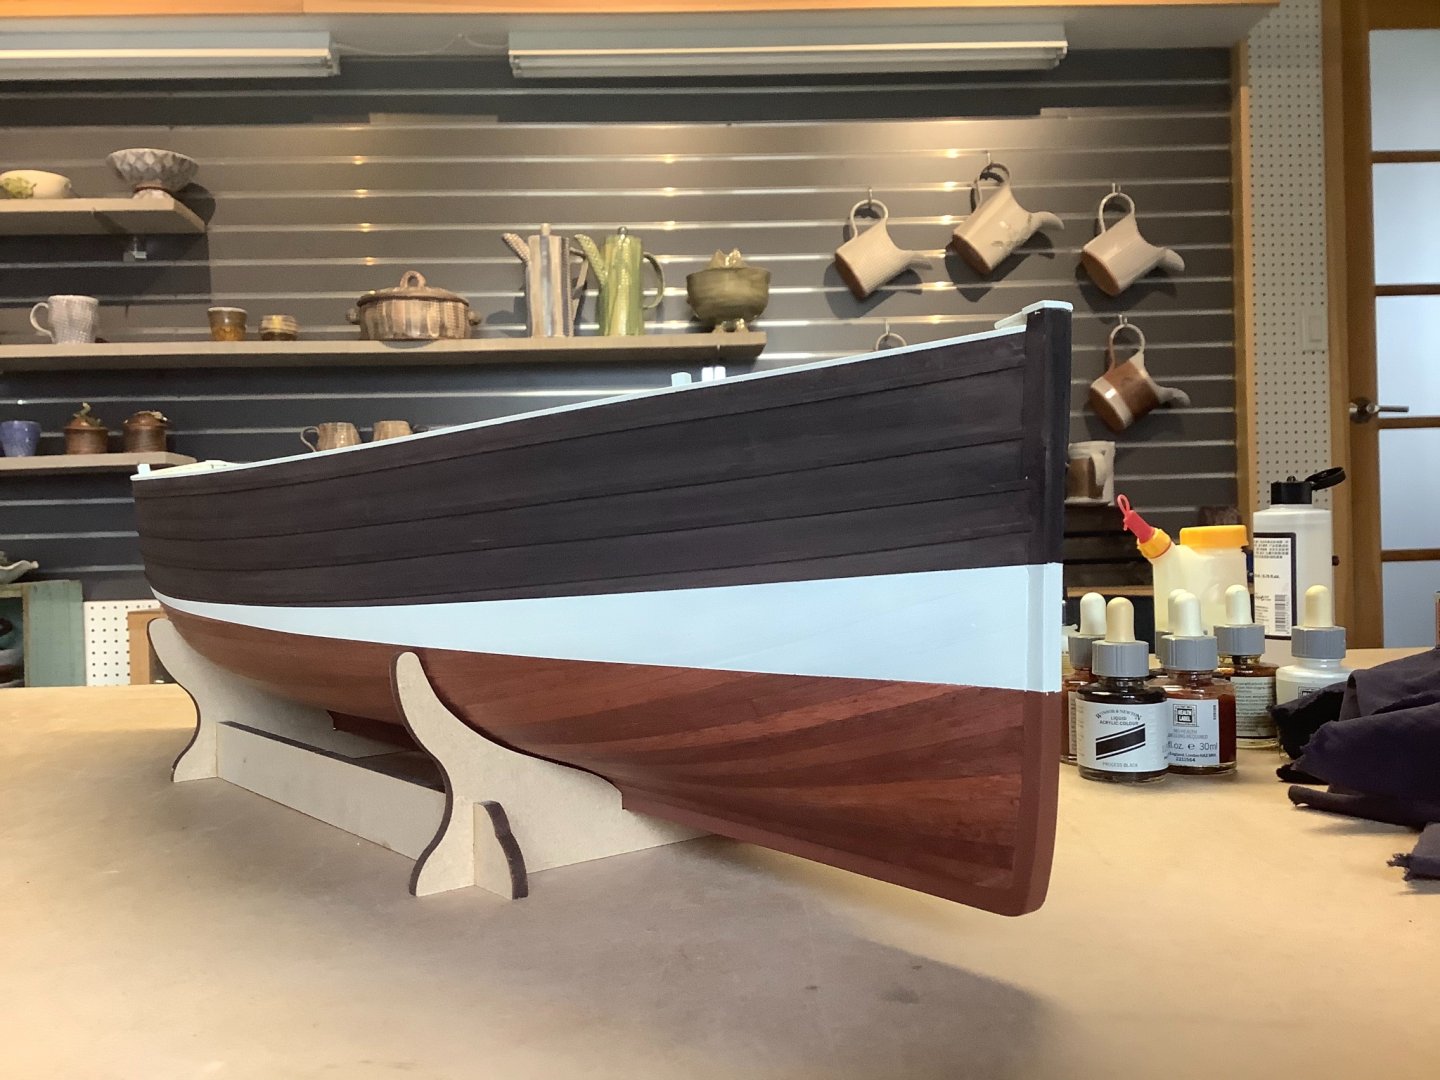
Installed all the timber heads and gunwale. Decided on painting the bulwarks white just because that’s what I usually see on fishing boats. A little harder to do well since white shows up every defect on an assembly. Laid on the basic hull colours, and may do some weathering with the airbrush before applying a final finish. The walnut hull seemed too nice to completely paint over so I’ve used a rust coloured stain for the underwater, which lets the grain and planking come through, and for the upper I used an ebonizing technique which transforms wood to a really deep black without hiding the texture of the planks. Not sure it really comes through in the pictures but i think it has been pretty successful. If anyone wants particulars on how this is done I can provide details on the technique I use, after some trial and error in the past.
- 79 replies
-
- 9
-
-
- Fifie
- Victory Models
- (and 1 more)
-
Unbelievable. Every aspect so well done. A treat to see your creative approach and masterful execution.
-
Thanks Ras - I appreciate the comments; you are a real gentleman for saying them. Nice to hear from a fellow builder also working on the Fifie - yours is really coming along as well. I scratch built the door and detailed it with a bit of paint and graphite pencil. The North Sea fish chart and the map are paper prints I tacked on. I’m planning on putting a few more things down there but for now I’m concentrating on finishing the hull.
- 79 replies
-
- 1
-
-
- Fifie
- Victory Models
- (and 1 more)
-
With the rubbing strakes on, Fifie’s basic hull is finished and ready for painting. Think I’ll fashion the rudder next so that I can paint everything in one go, before I start on the deck.

- 79 replies
-
- 9
-
-
- Fifie
- Victory Models
- (and 1 more)
-
The rope I used was 0.15mm for most of the running rigging, halyards etc., 0.25mm for ratlines, 0.5mm for shrouds and the major standing rigging. Most of the blocks are 4mm. There are a few larger 5mm blocks attached to the masts. I darkened the blocks and deadeyes with a chestnut stain.
- 171 replies
-
- 1
-
-
- artesania latina
- bounty
- (and 1 more)
-
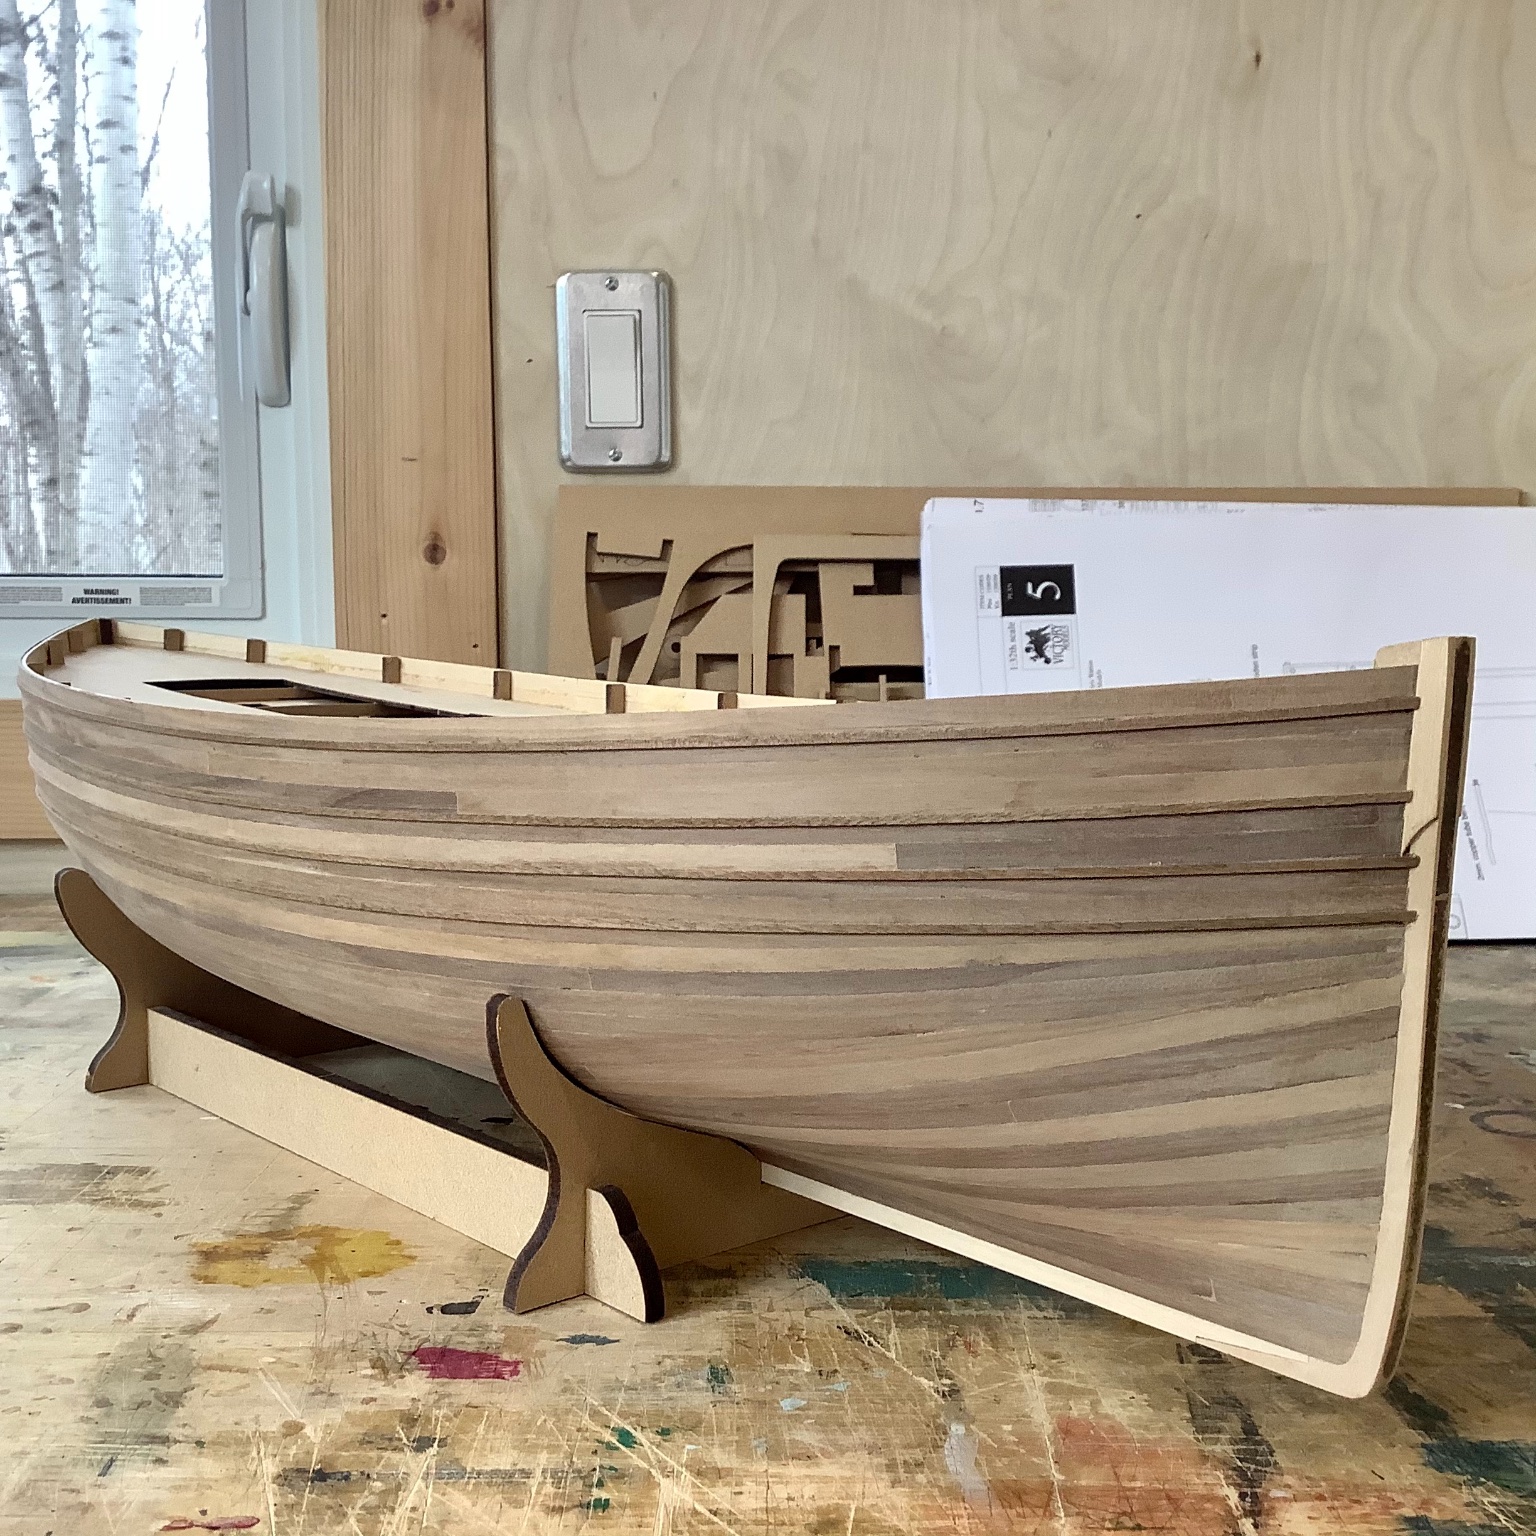
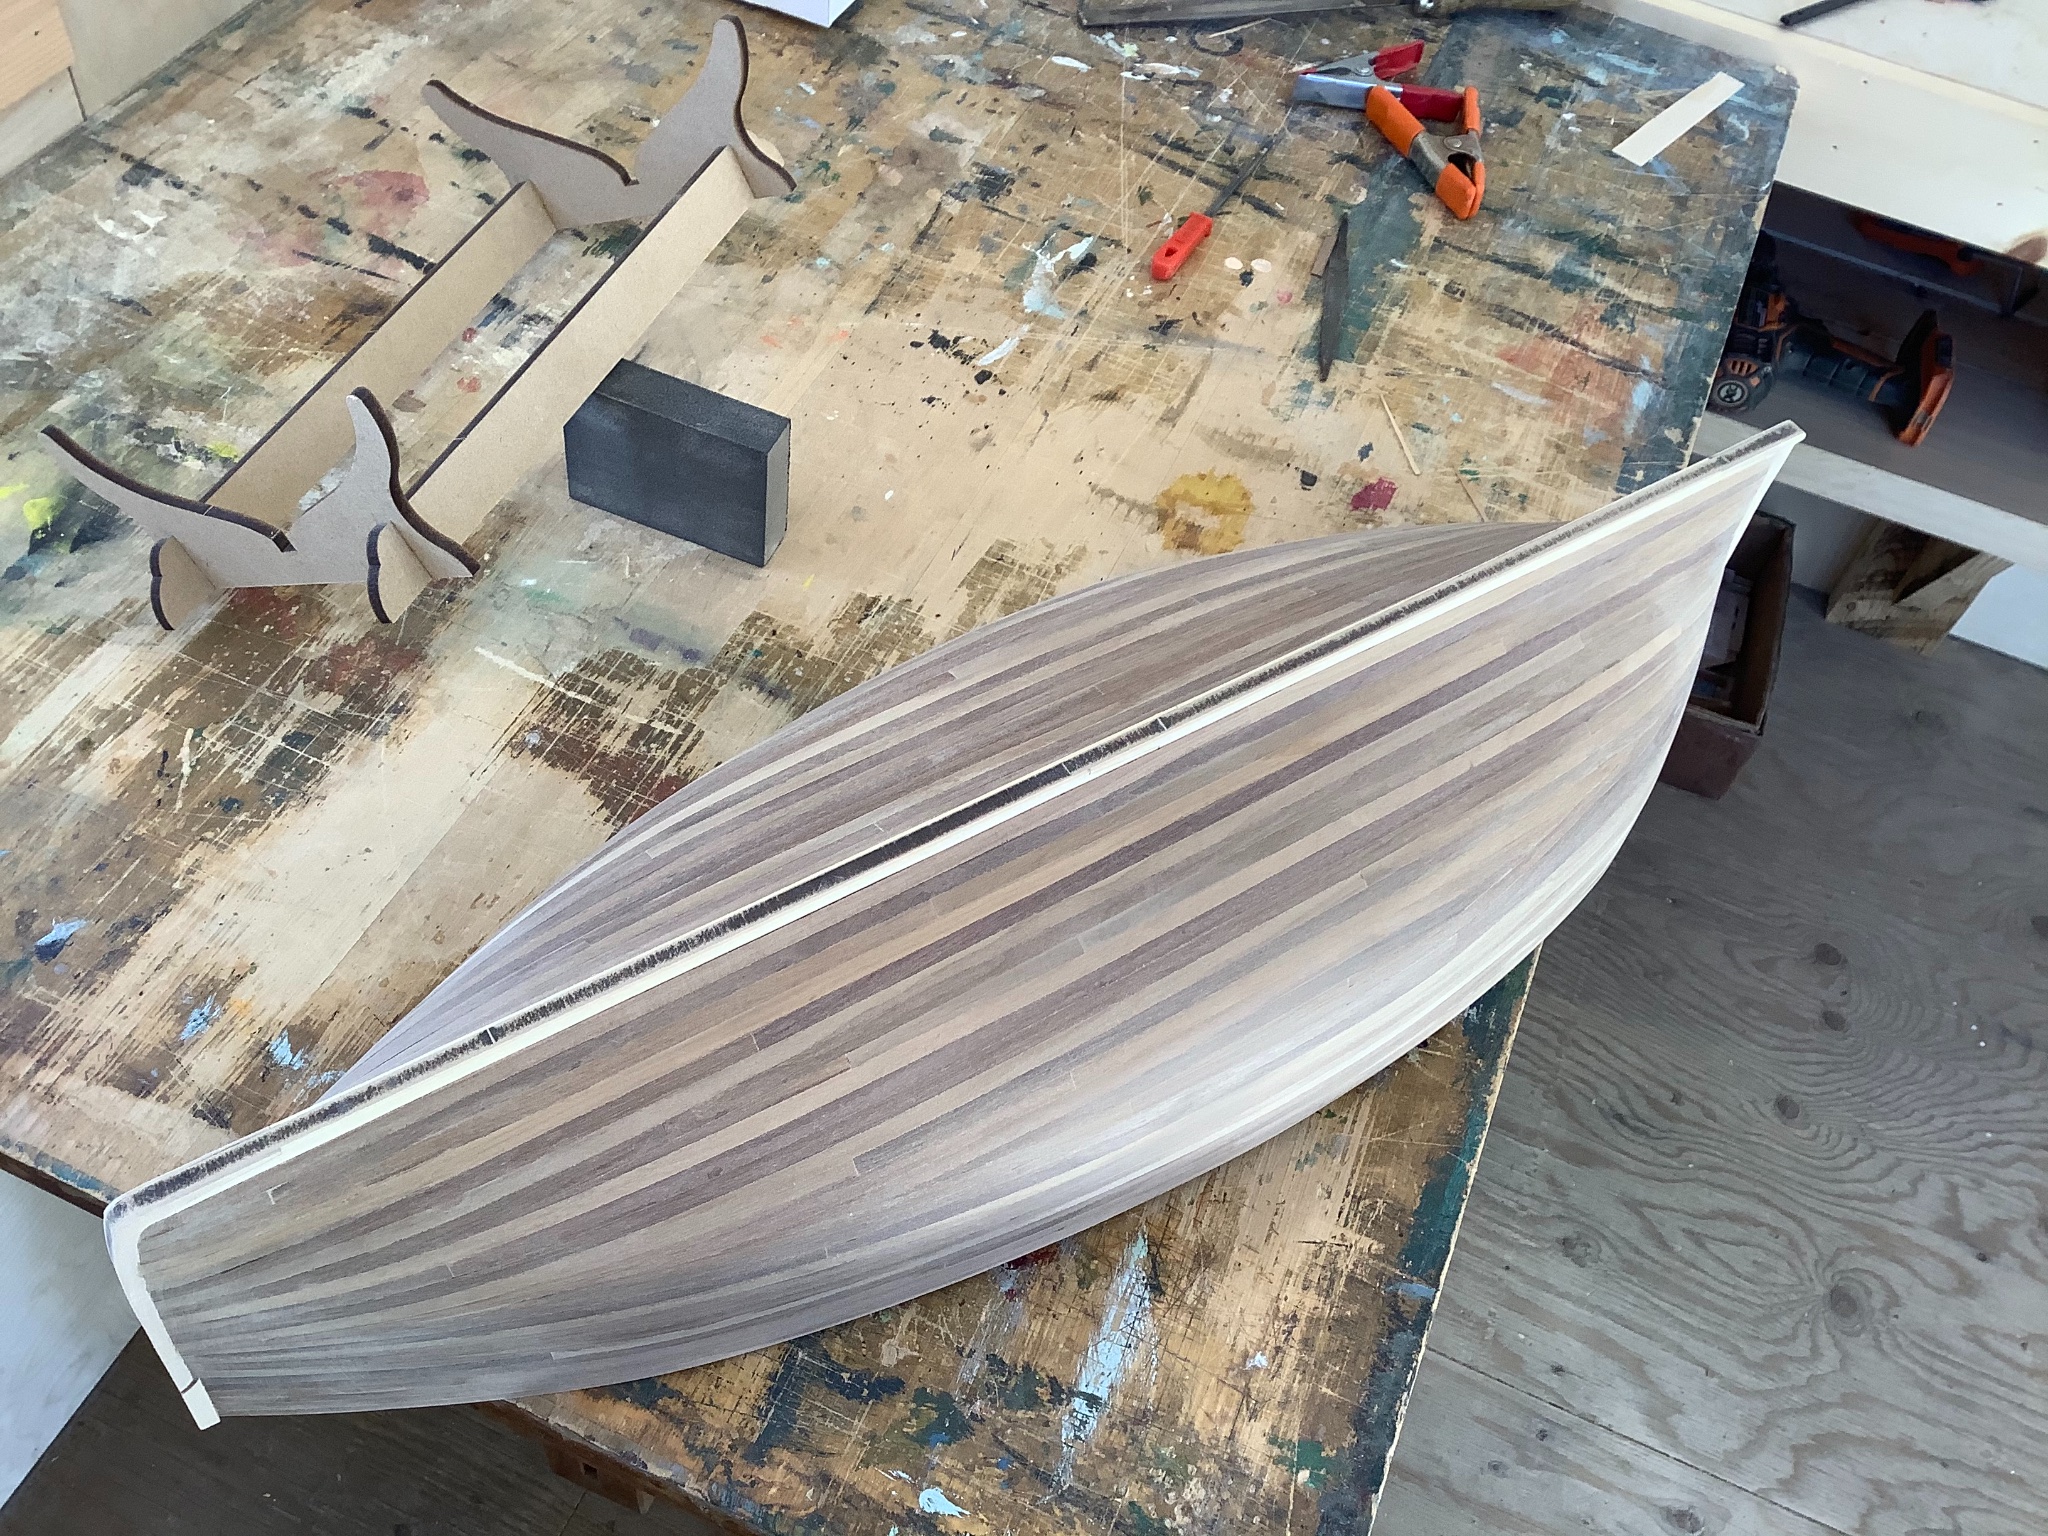
And the planking is done. The frame is nice and sturdy to work on, no real issues with second layer just a little finish sanding and then on to some more interesting bits. The walnut is pretty nice seems a shame to cover it all with paint so I’m thinking about my finishing strategy. Kind of looks like a stubby fat cedar strip canoe at the moment.

- 79 replies
-
- 9
-
-
- Fifie
- Victory Models
- (and 1 more)
-
I used aluminium because the right sizes were available. it is also really easy to slice with a Dremel and file into decent rings, and drill holes into for the brass posts.