Tim Moore
-
Posts
353 -
Joined
-
Last visited
Content Type
Profiles
Forums
Gallery
Events
Everything posted by Tim Moore
-
Hi Gary glad to see you doing this beauty - looks like a pretty sweet project. I actually had this pegged as my next build but inexplicably careened off track and decided to try an italeri kit of a Grand Prix car for something different. I’ll be watching with interest to see how you make out, Diorama sounds like a cool idea.
-
Looking very good Lyle! Congrats on your retirement and wishing you a happy new year.
-
Thanks for looking in and comments Don!
-
Thanks Lyle and Merry Christmas to you and yoursI have 10 proper finished builds from my adult years, and I probably need to rethink display. Right now they are scattered in my model cabin and the house. A few years ago at Cathy’s suggestion I installed a bunch of cantilevered glass shelves on a wall in our downstairs rec room. They work well but not nearly enough space. The Bounty is a beast and could really use a proper display in a case. I’d actually like to donate it if I knew an organization that would appreciate and display decently. God knows what I’ll do if we move out west!
-
Thanks Chris - I’m enjoying checking out your Spitfire work, your card models are jewels.
- 79 replies
-
- 1
-

-
- Fifie
- Victory Models
- (and 1 more)
-
Thanks Jean-Paul! I like to switch things up so for the winter I’m going to the dark side for a bit and will be doing a 1:12 Fiat 806, a vintage Grand Prix car from Italeri. Allows me to stay inside the warm house as it’s a plastic and airbrushing project as opposed to woodworking. After that I have a few boats in mind, inspired by some work I’ve seen on MSW, naturally. Tim
- 79 replies
-
- 2
-
-
- Fifie
- Victory Models
- (and 1 more)
-
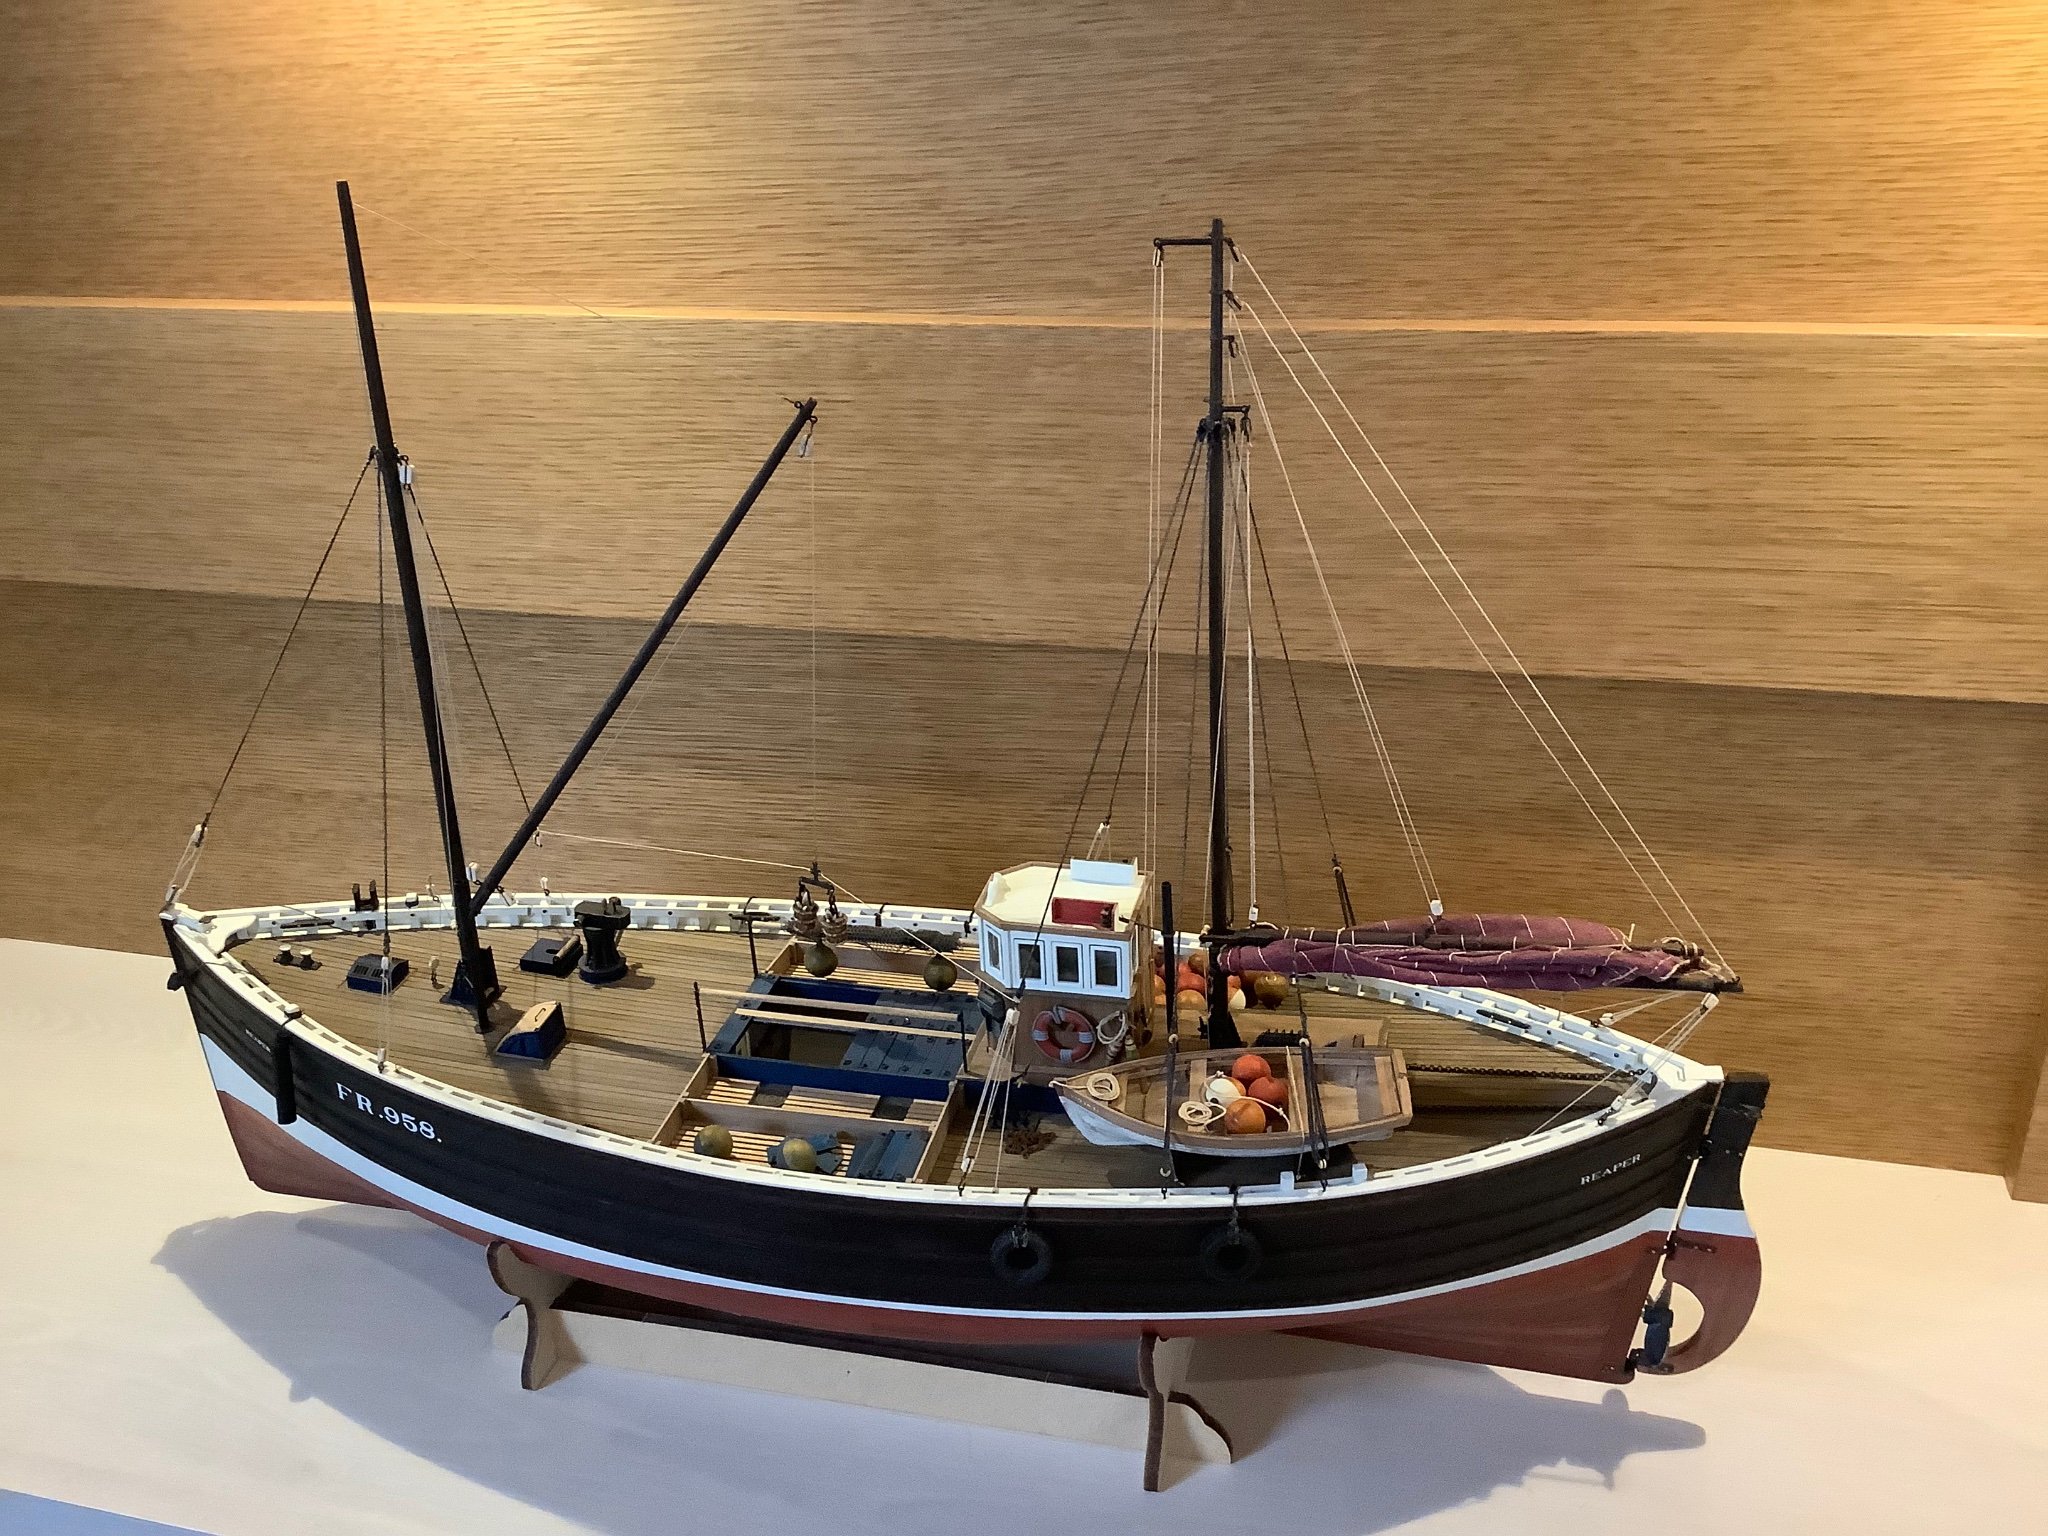
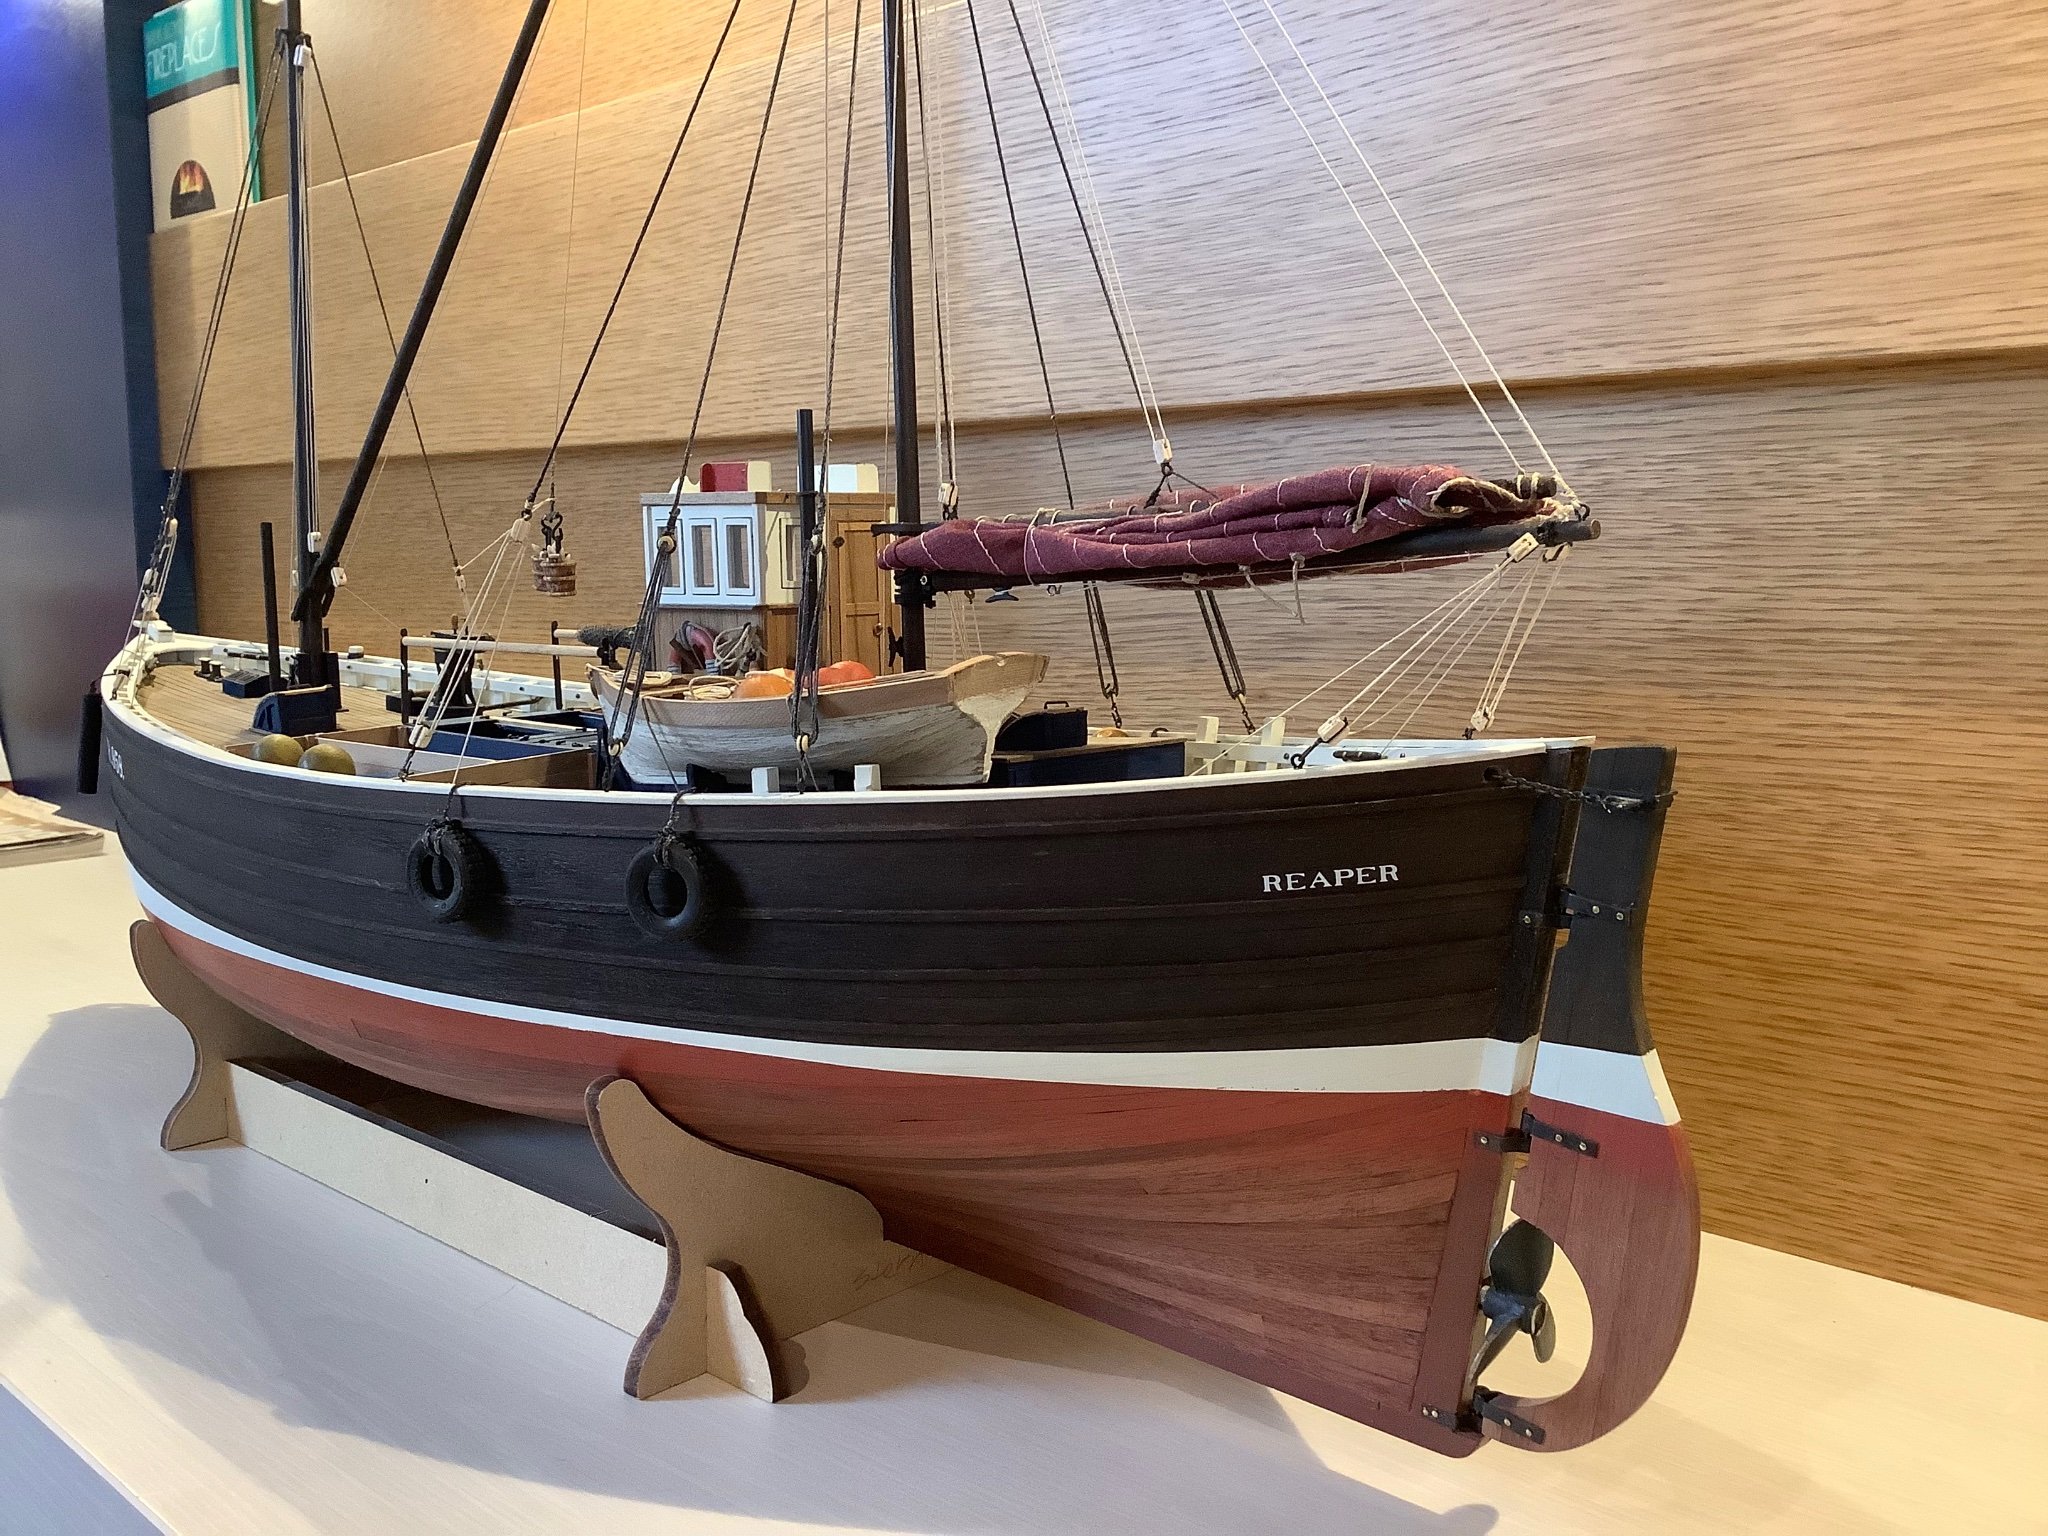
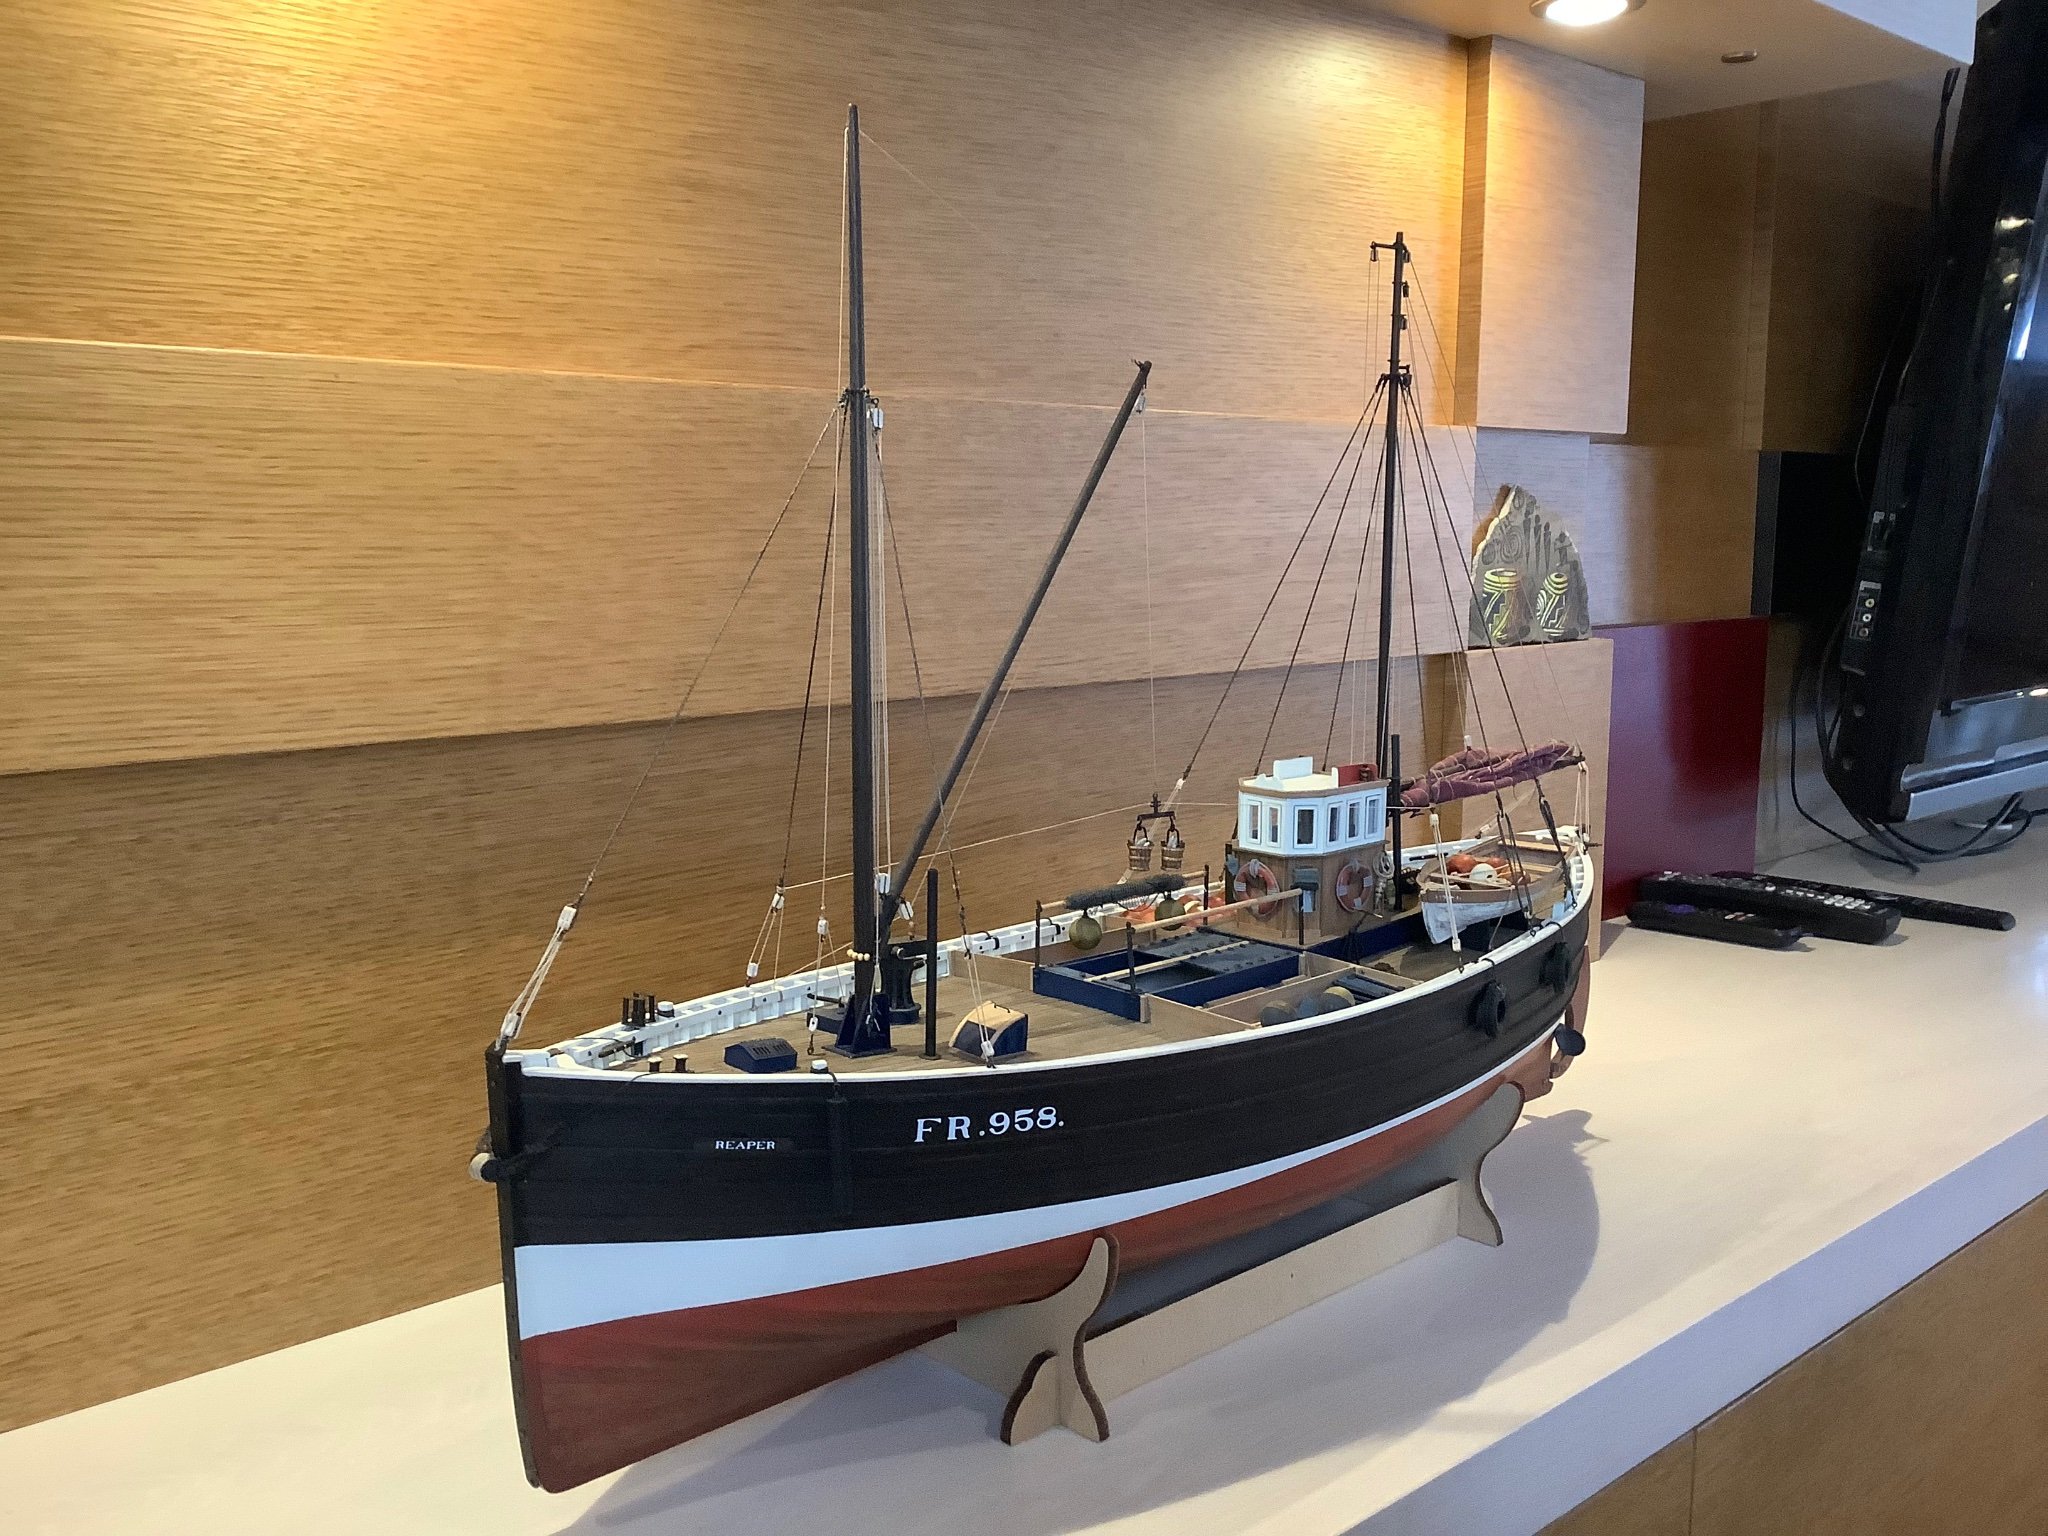
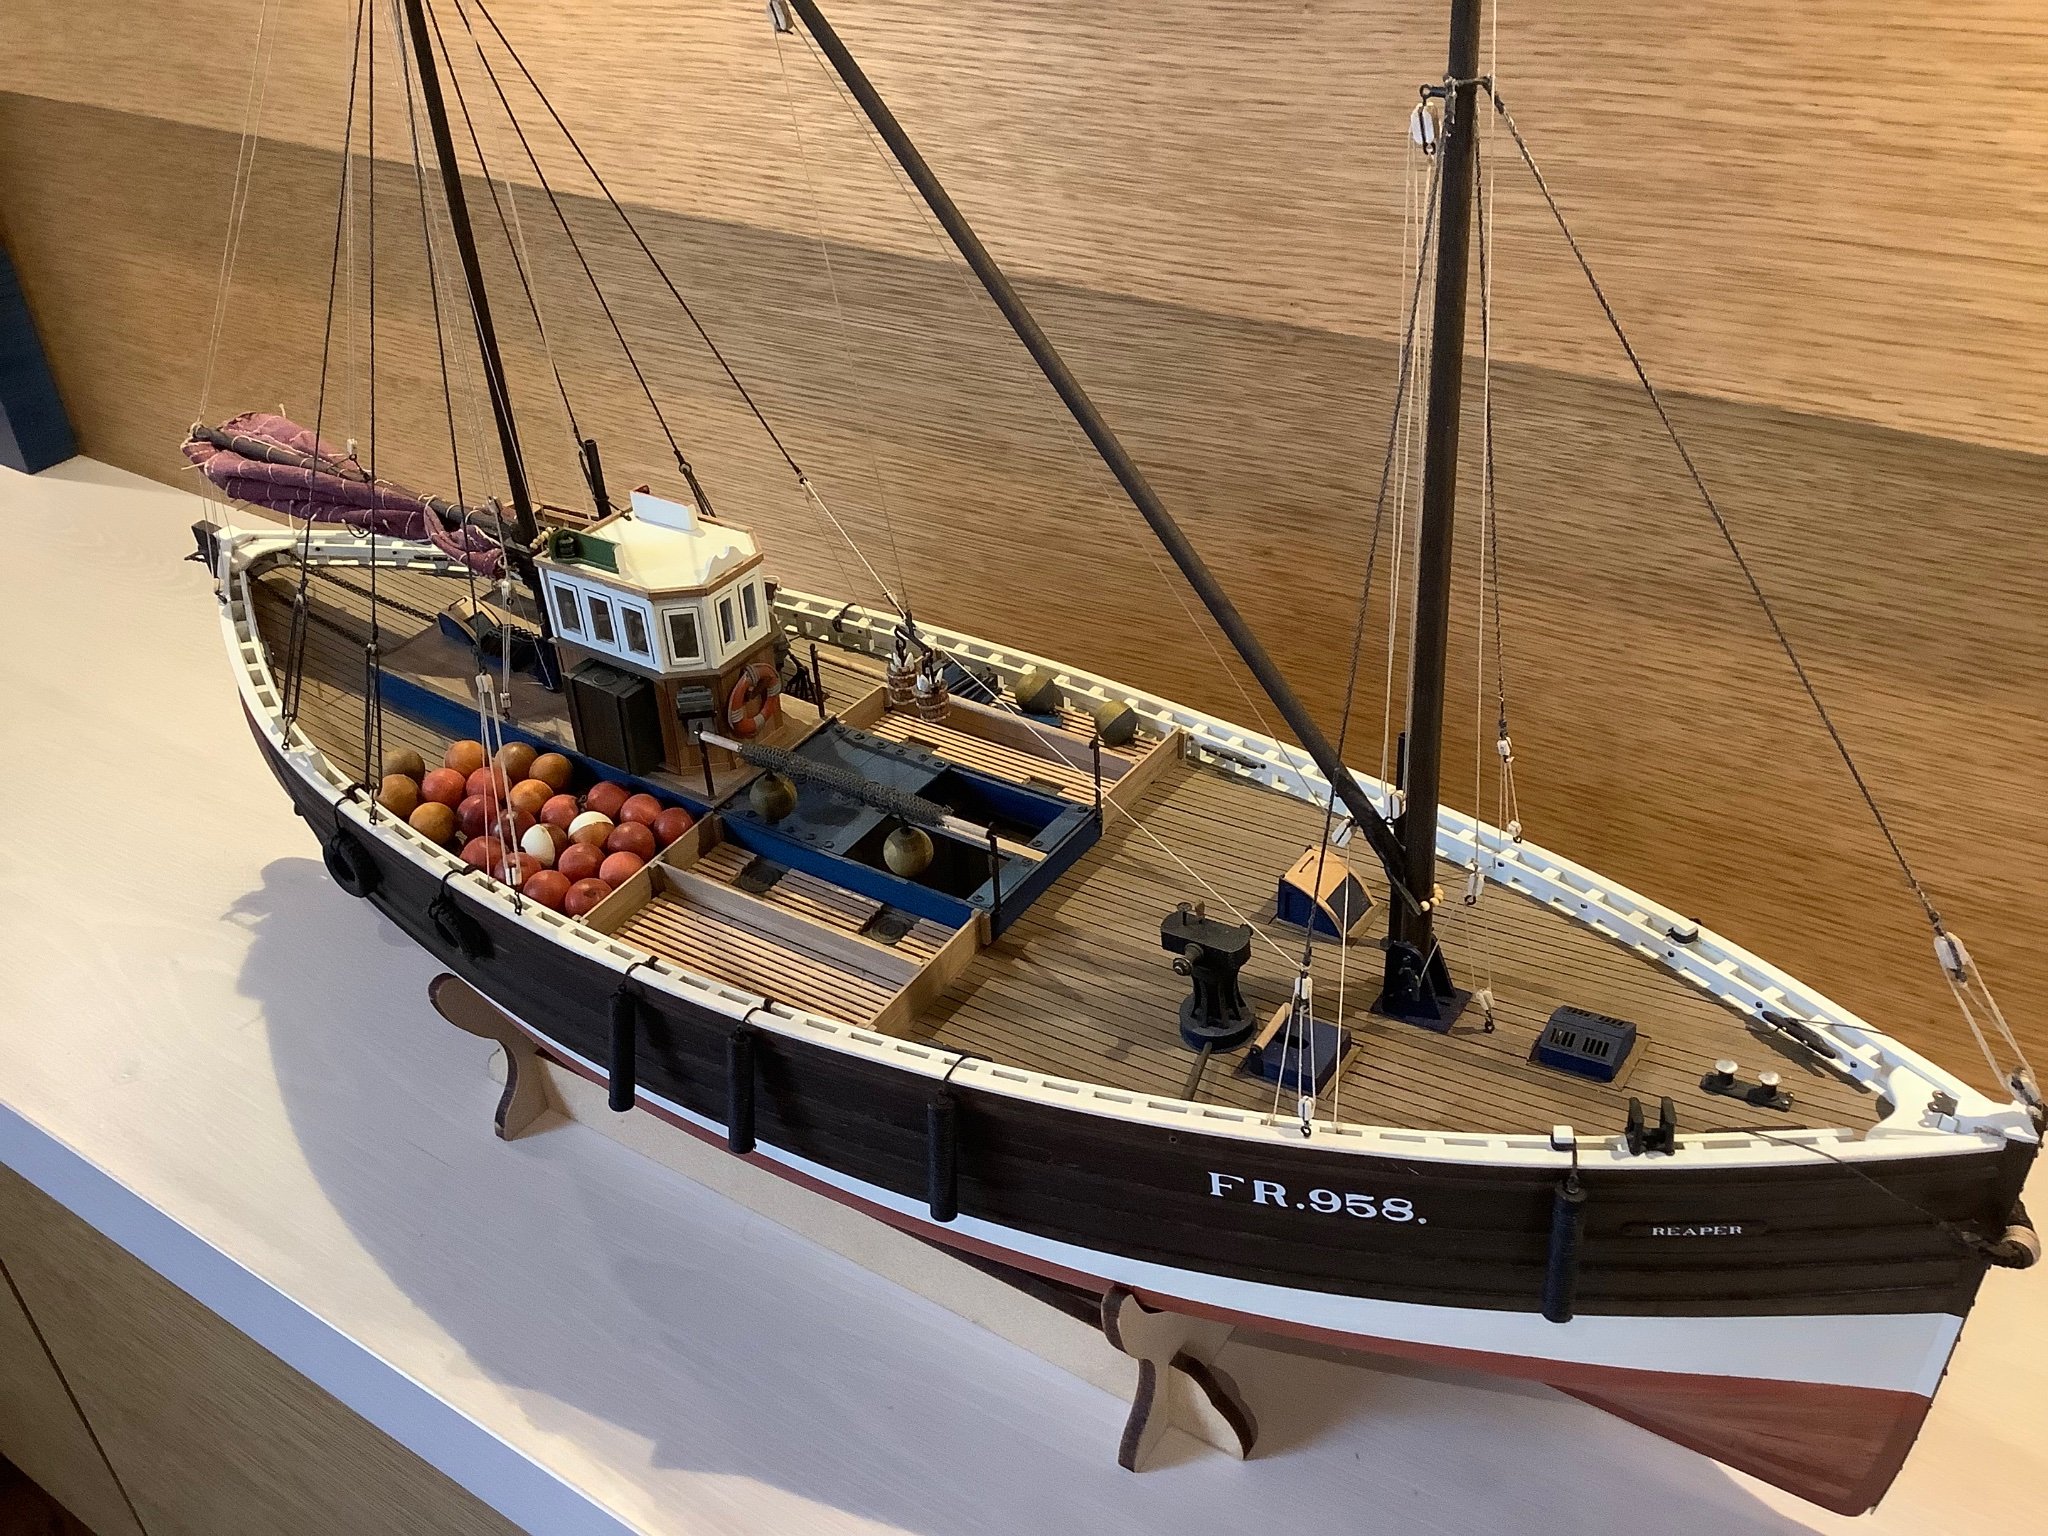
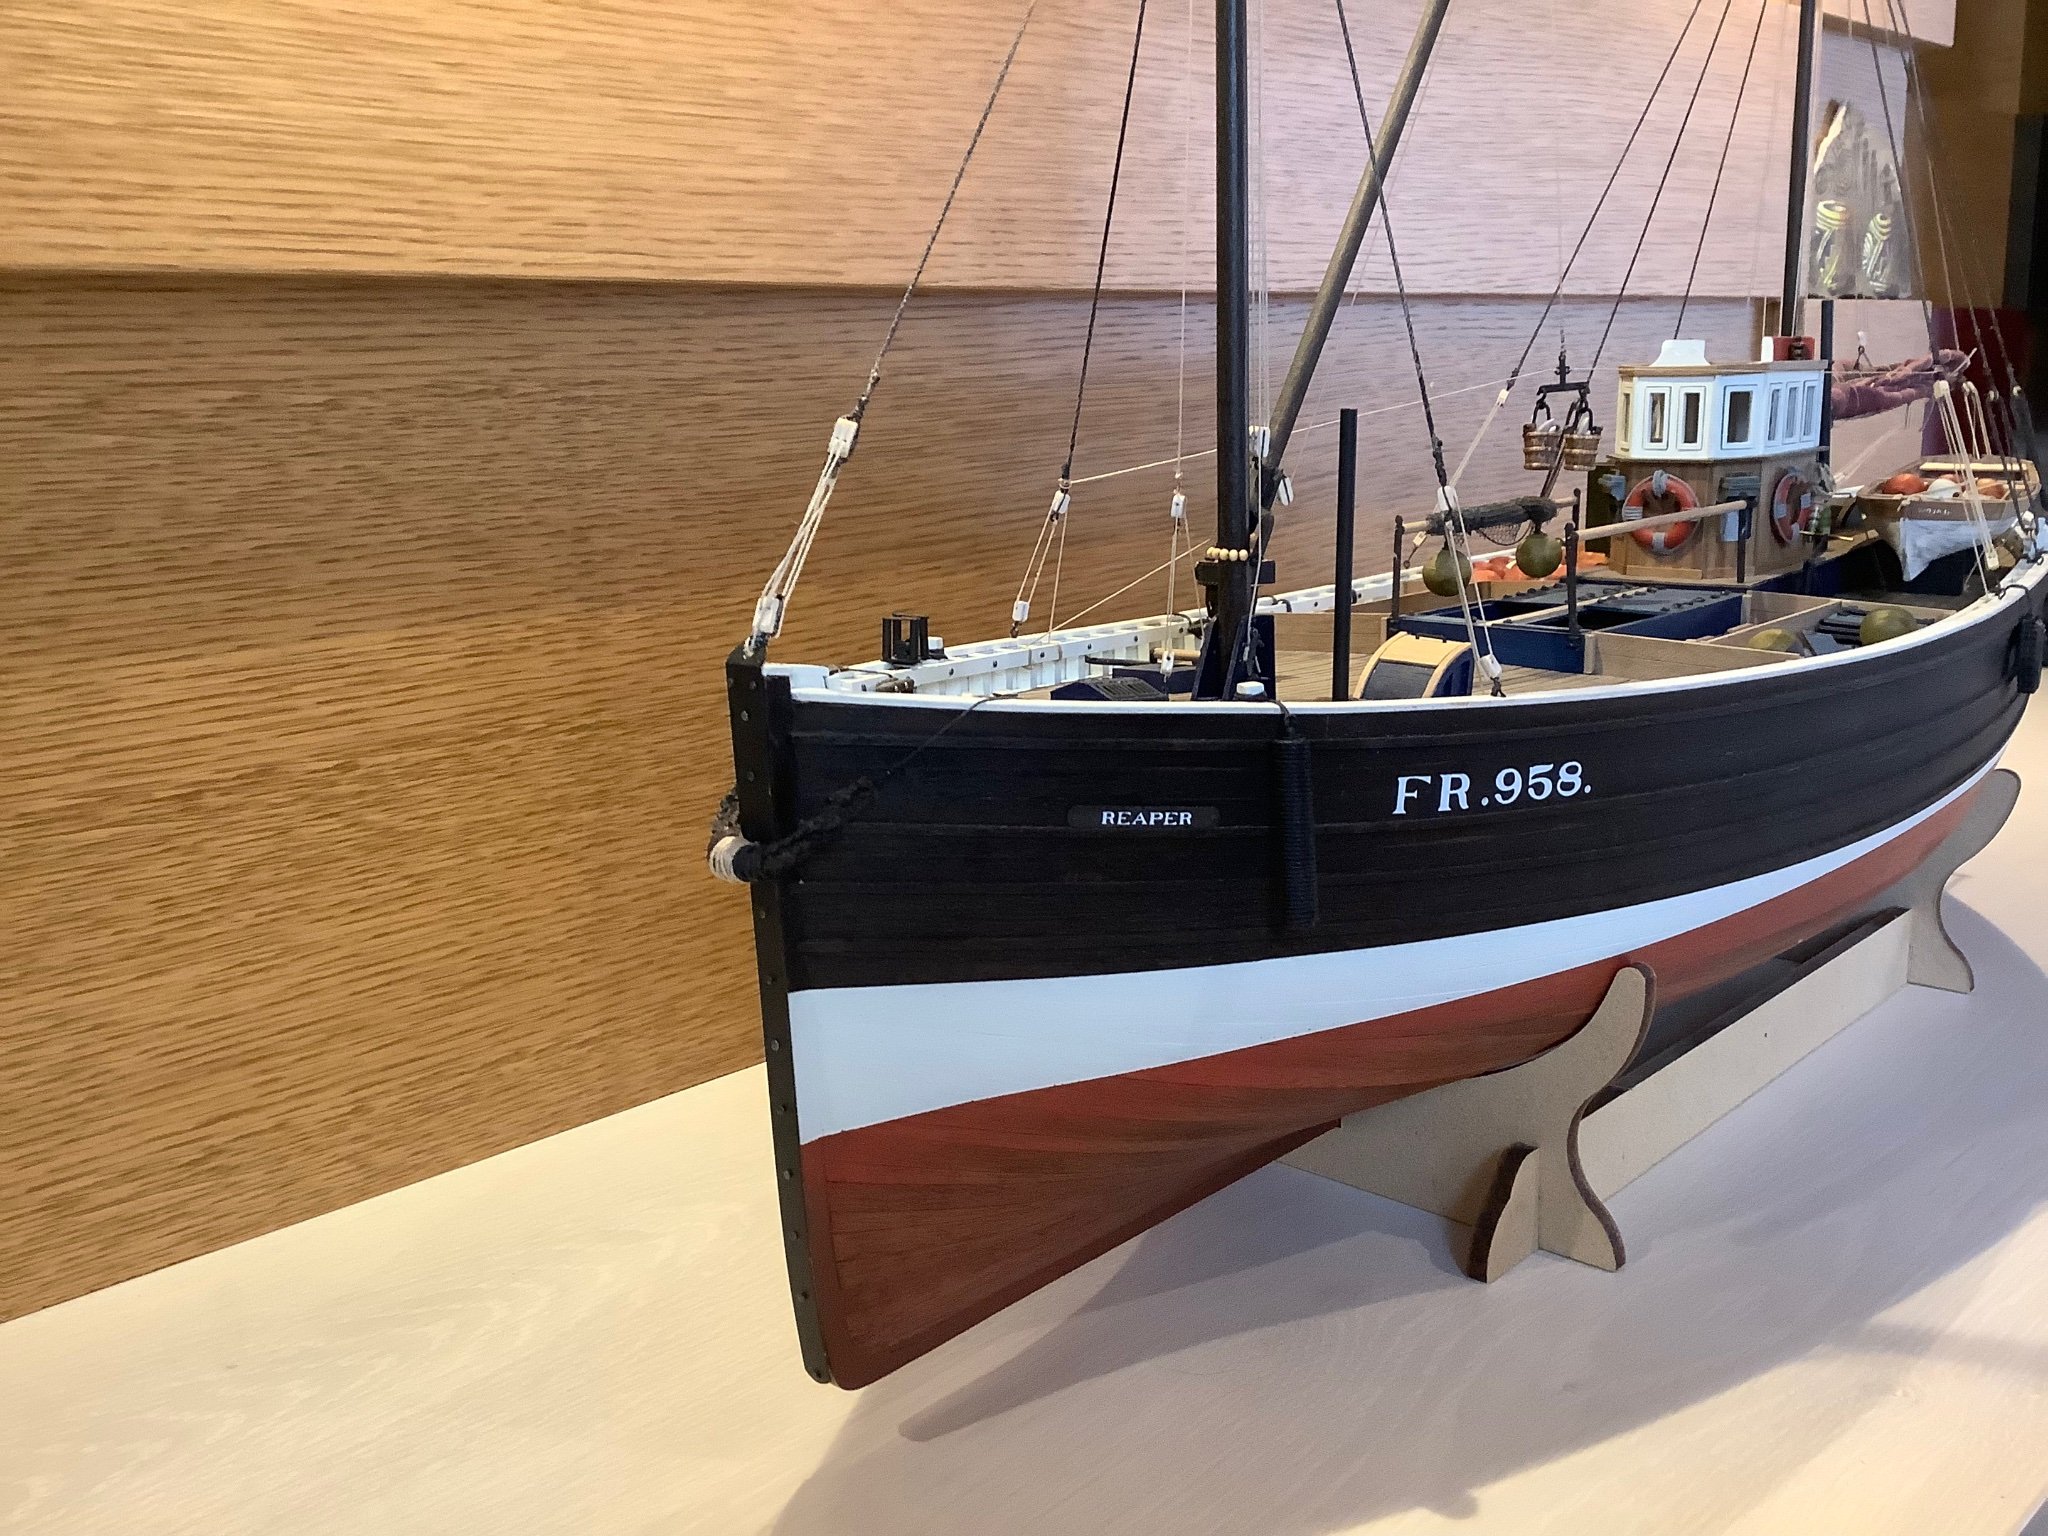
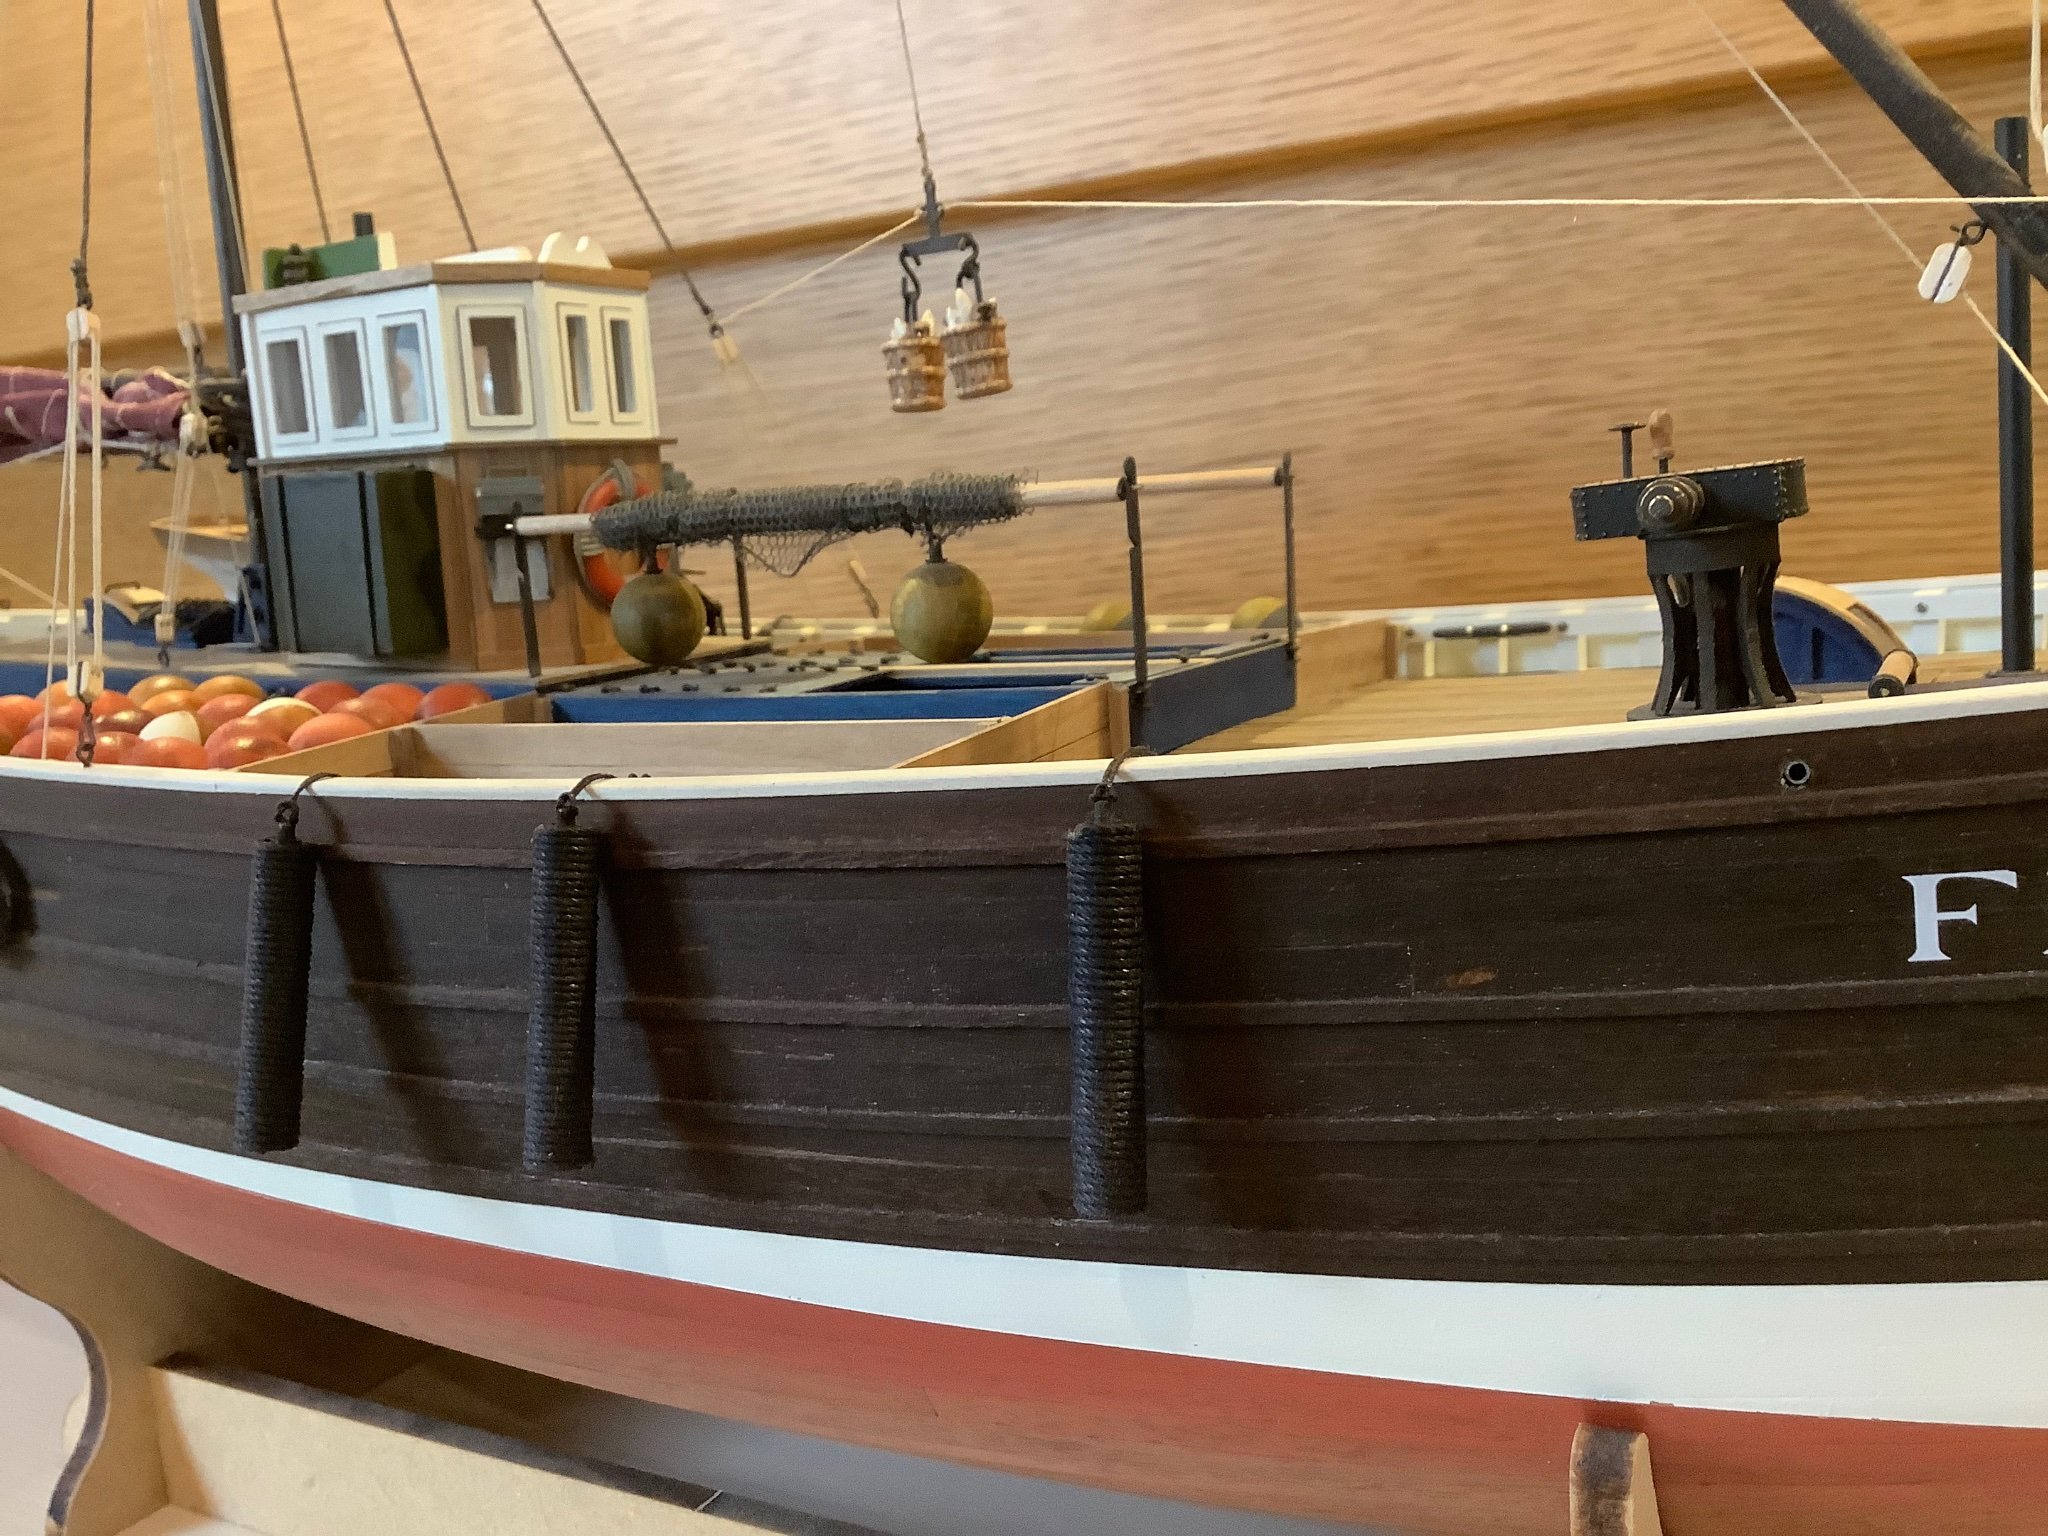
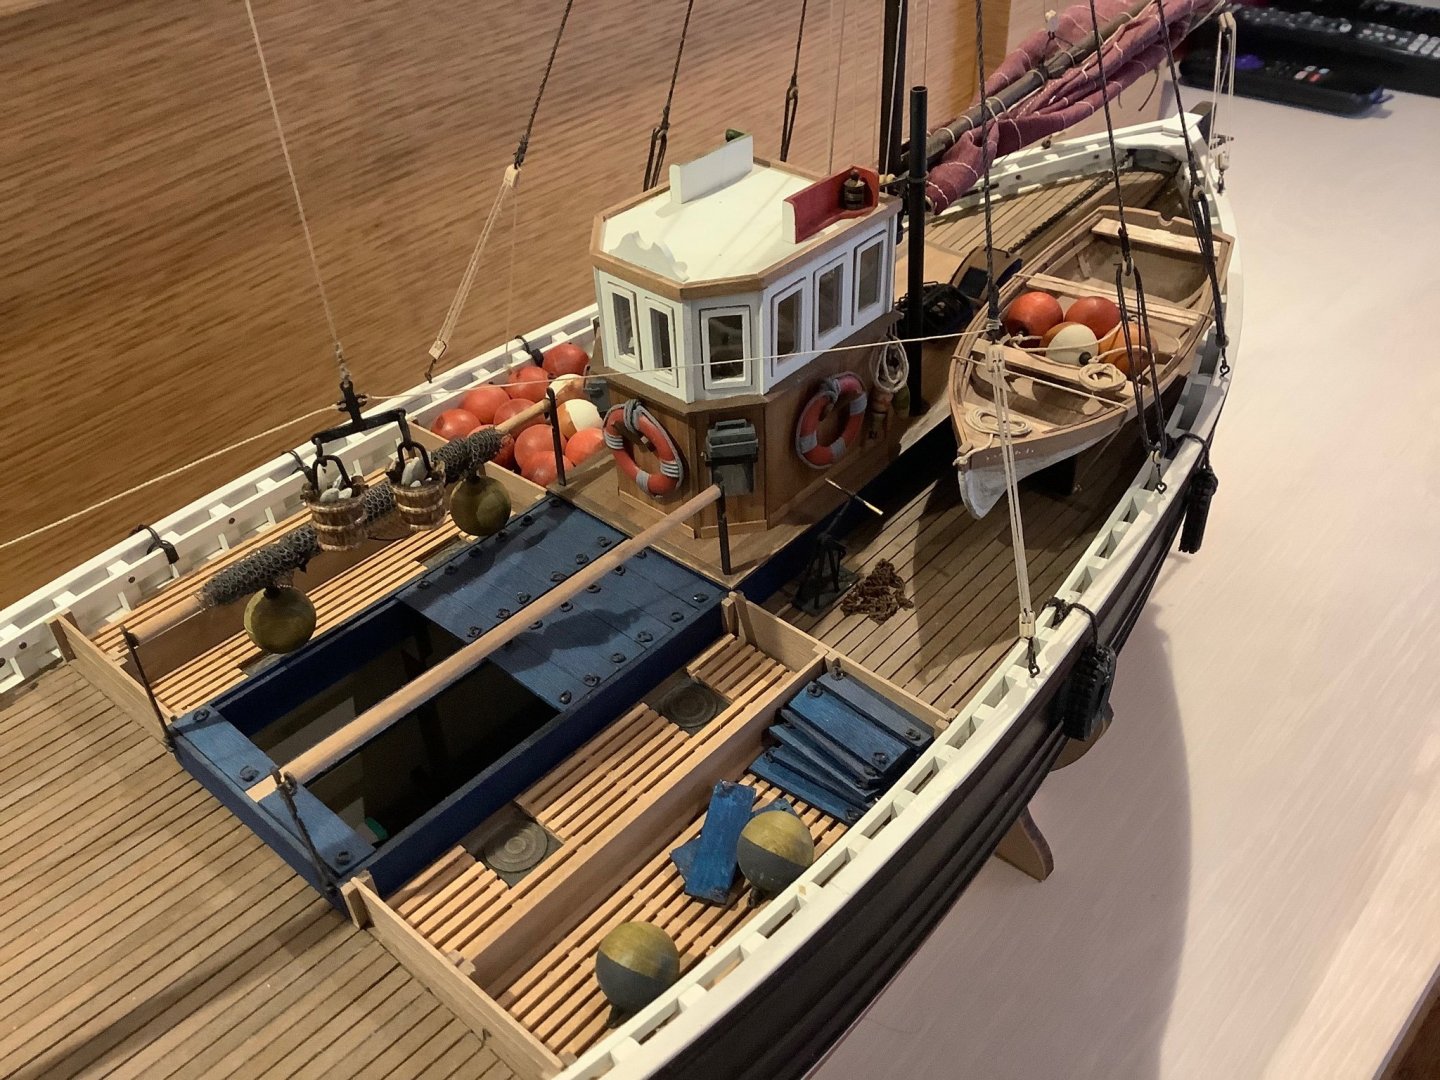
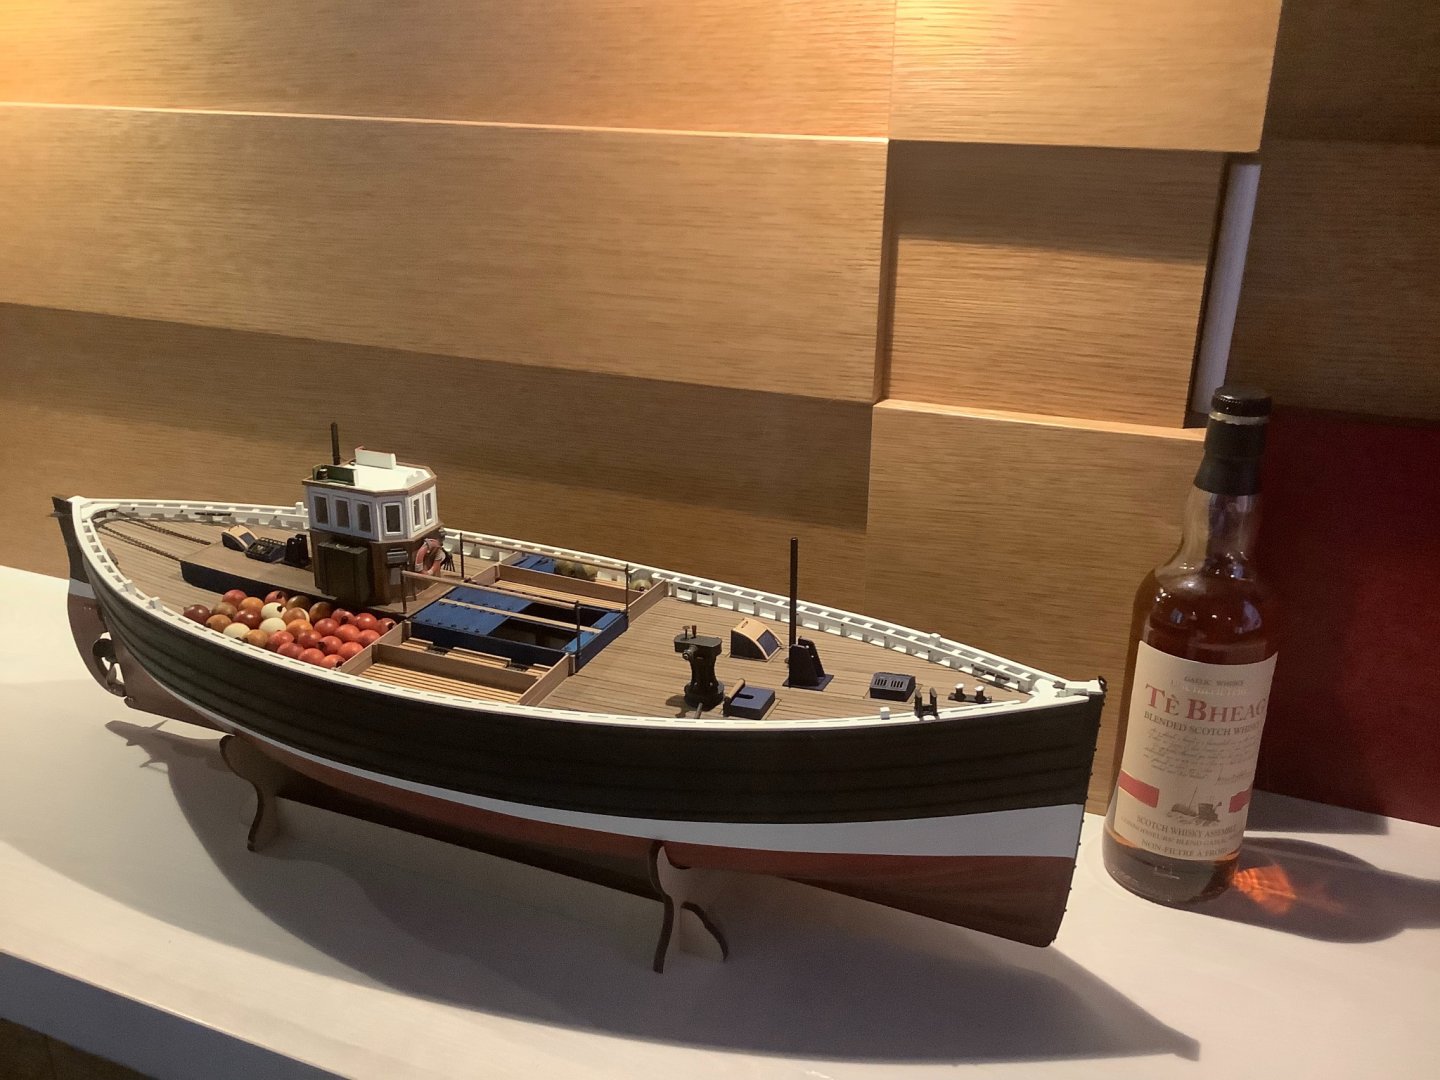
My rendition of Fifie ….finished! And on my birthday. A colourful and happy fisher boat as I’ve done her, with lots of detail. This is a faultless kit that results in a substantial model, bigger than it looks. Lots of scope for adding your own custom bits. Don’t really like sails up on my models for some reason so set mine down, despite doing all the detail on it. At least I know it’s there I suppose. It’s rigged properly so can be pulled up. Those in the know history wise on this craft may recognize the name and number. Best wishes of the season to everyone!


- 79 replies
-
- 18
-
-

-

-
- Fifie
- Victory Models
- (and 1 more)
-
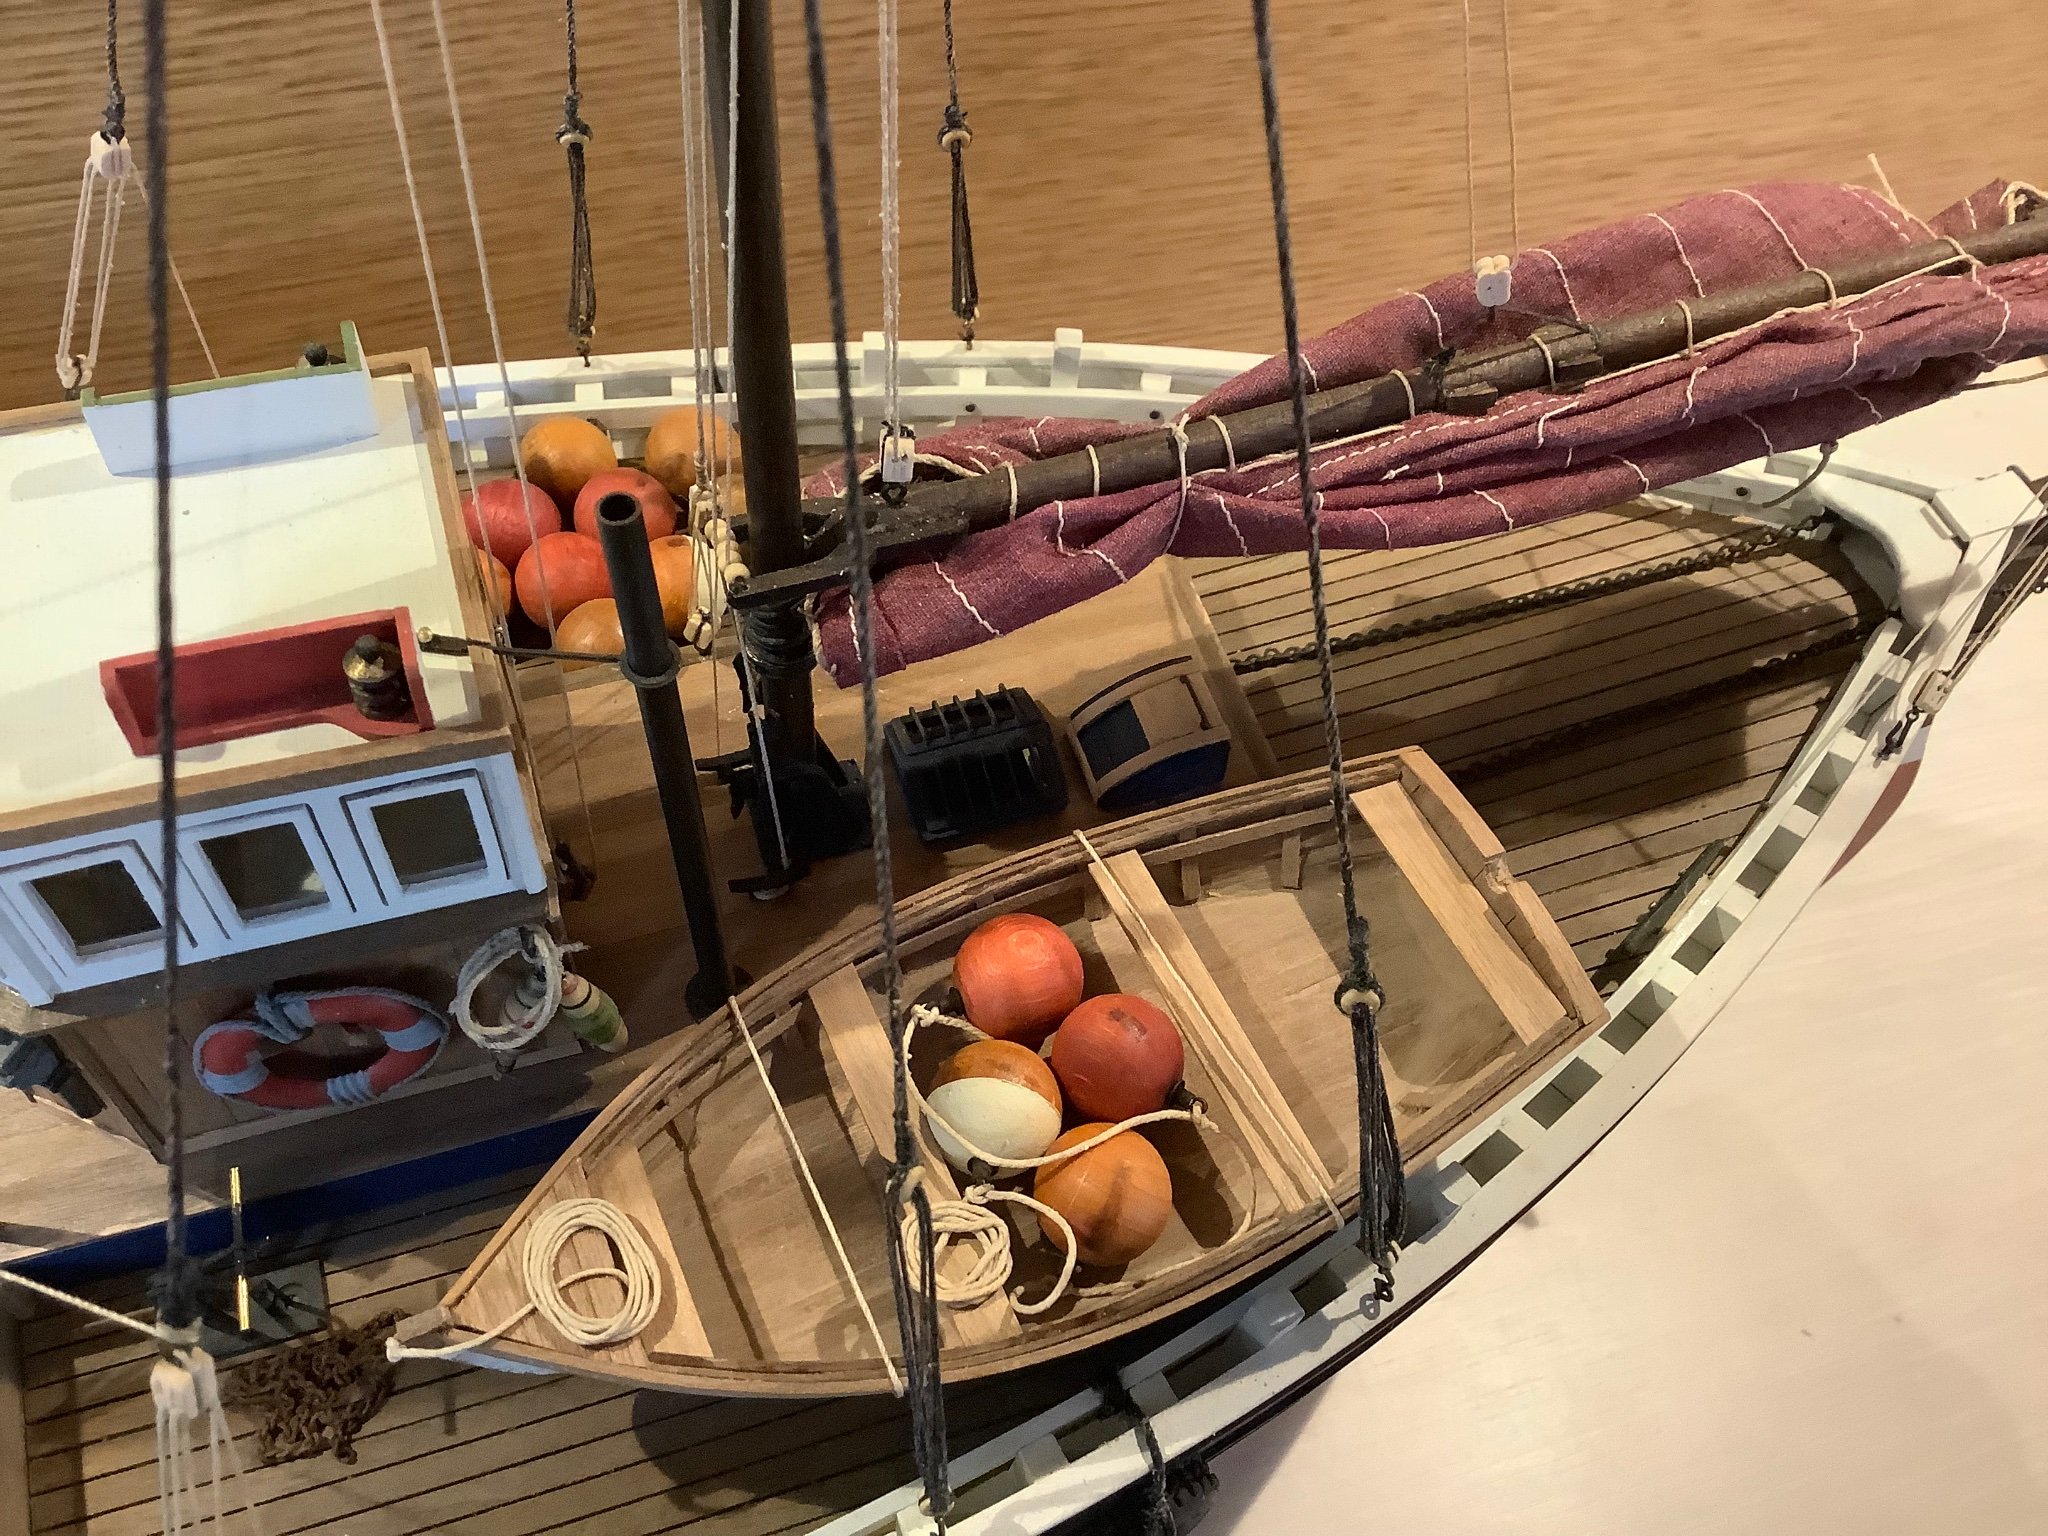
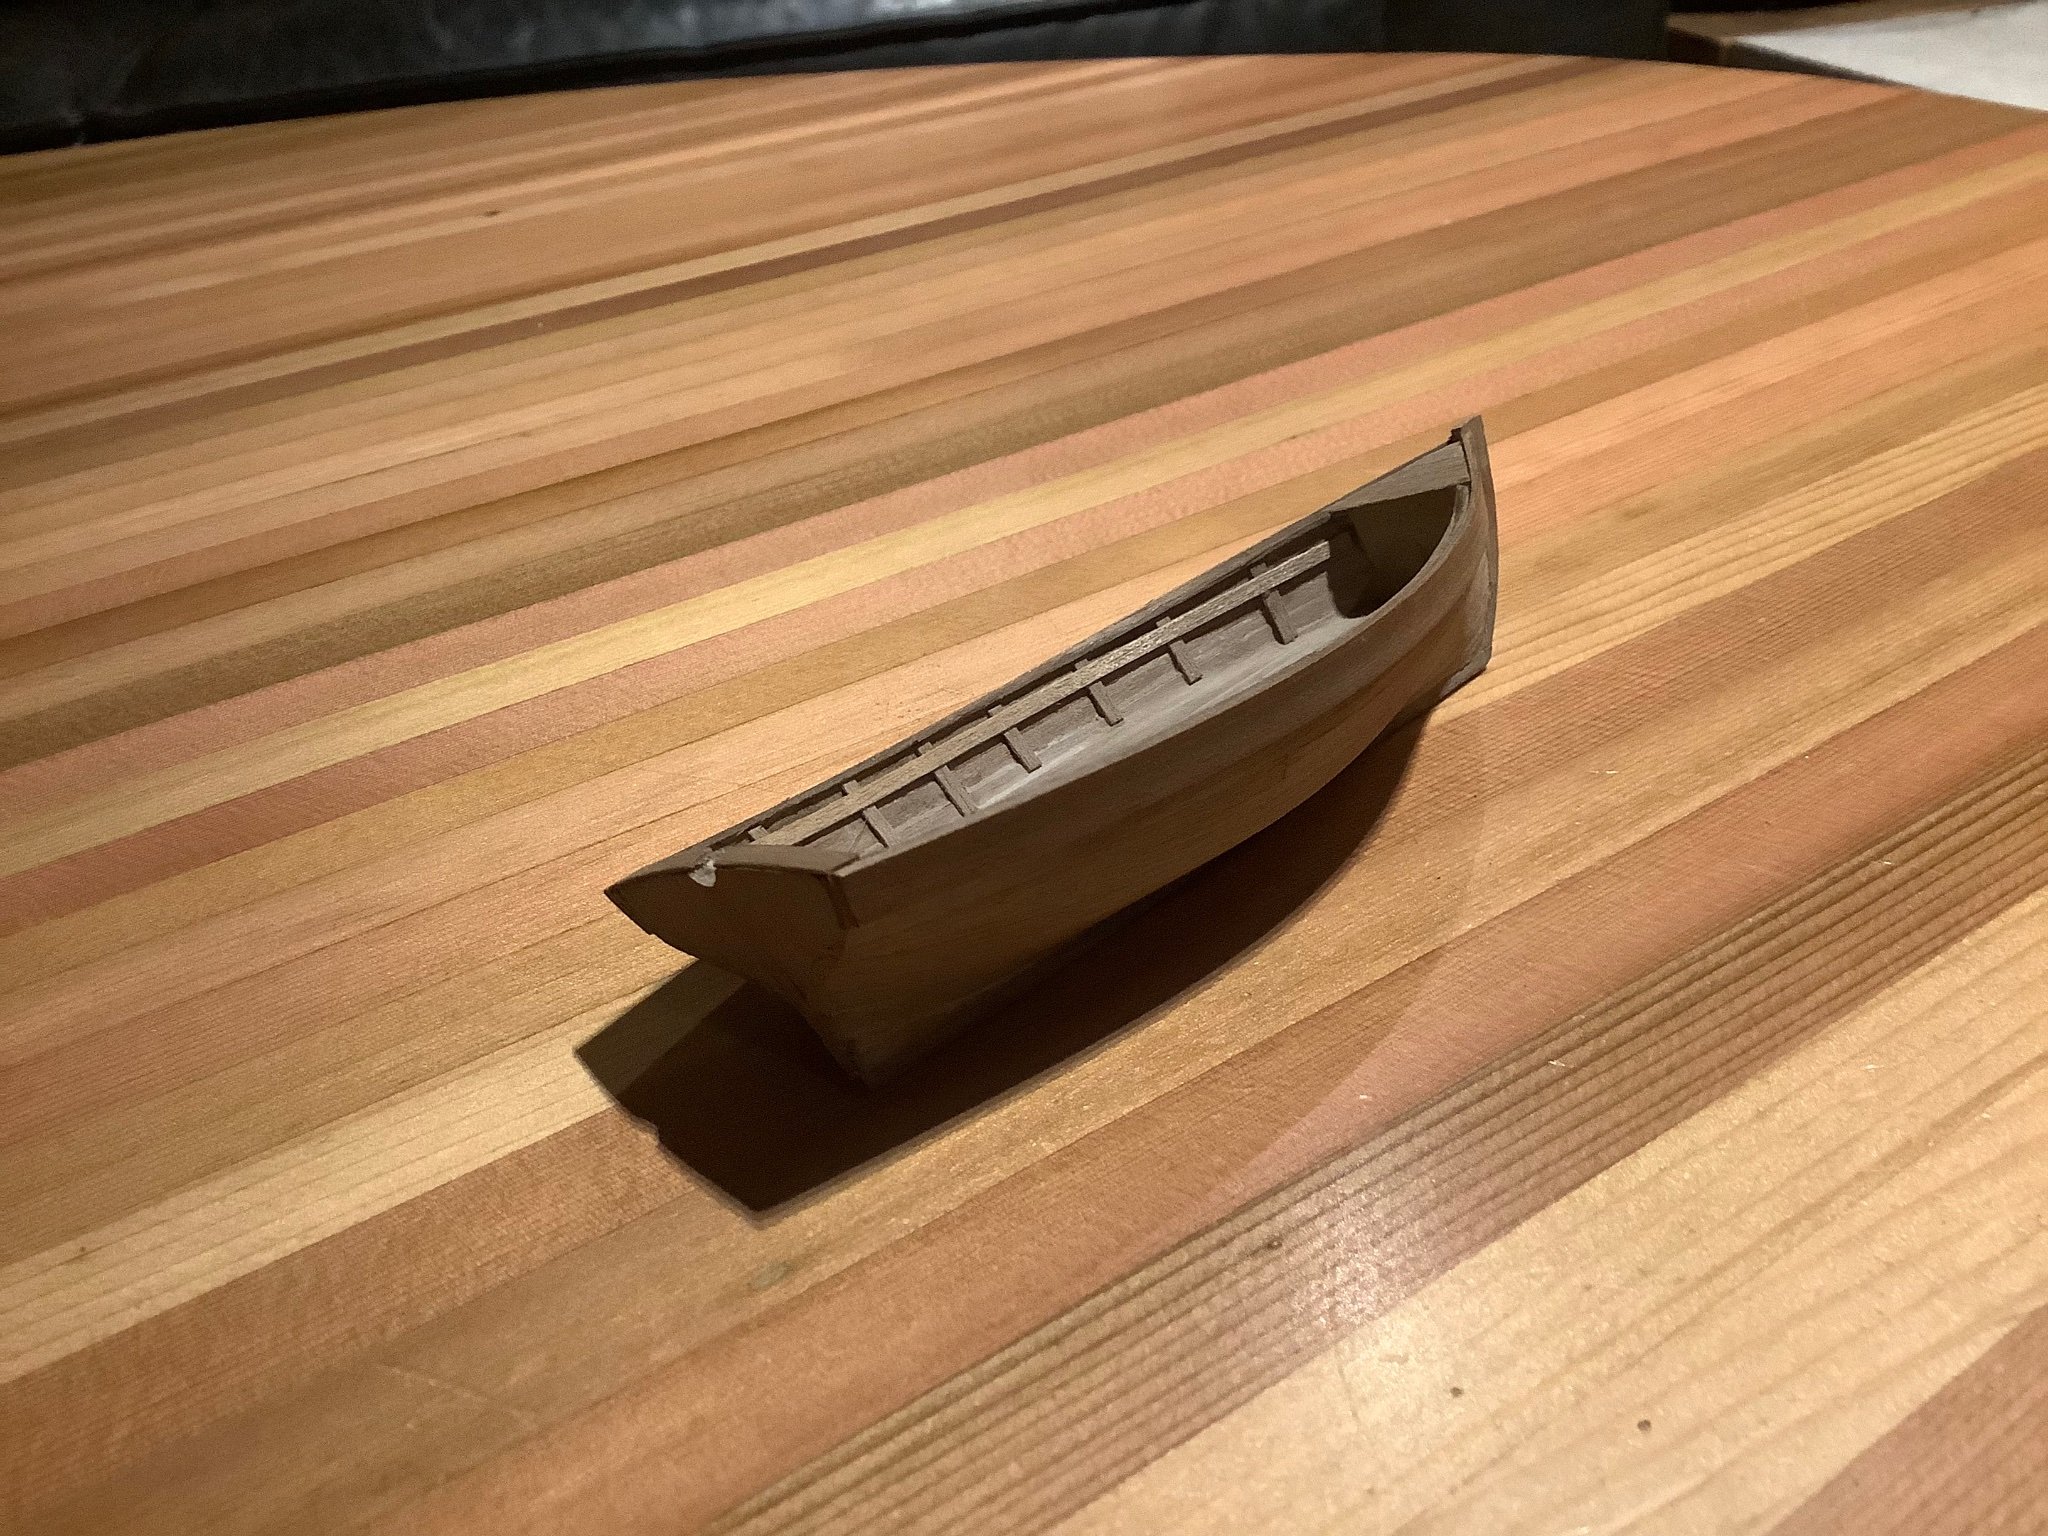
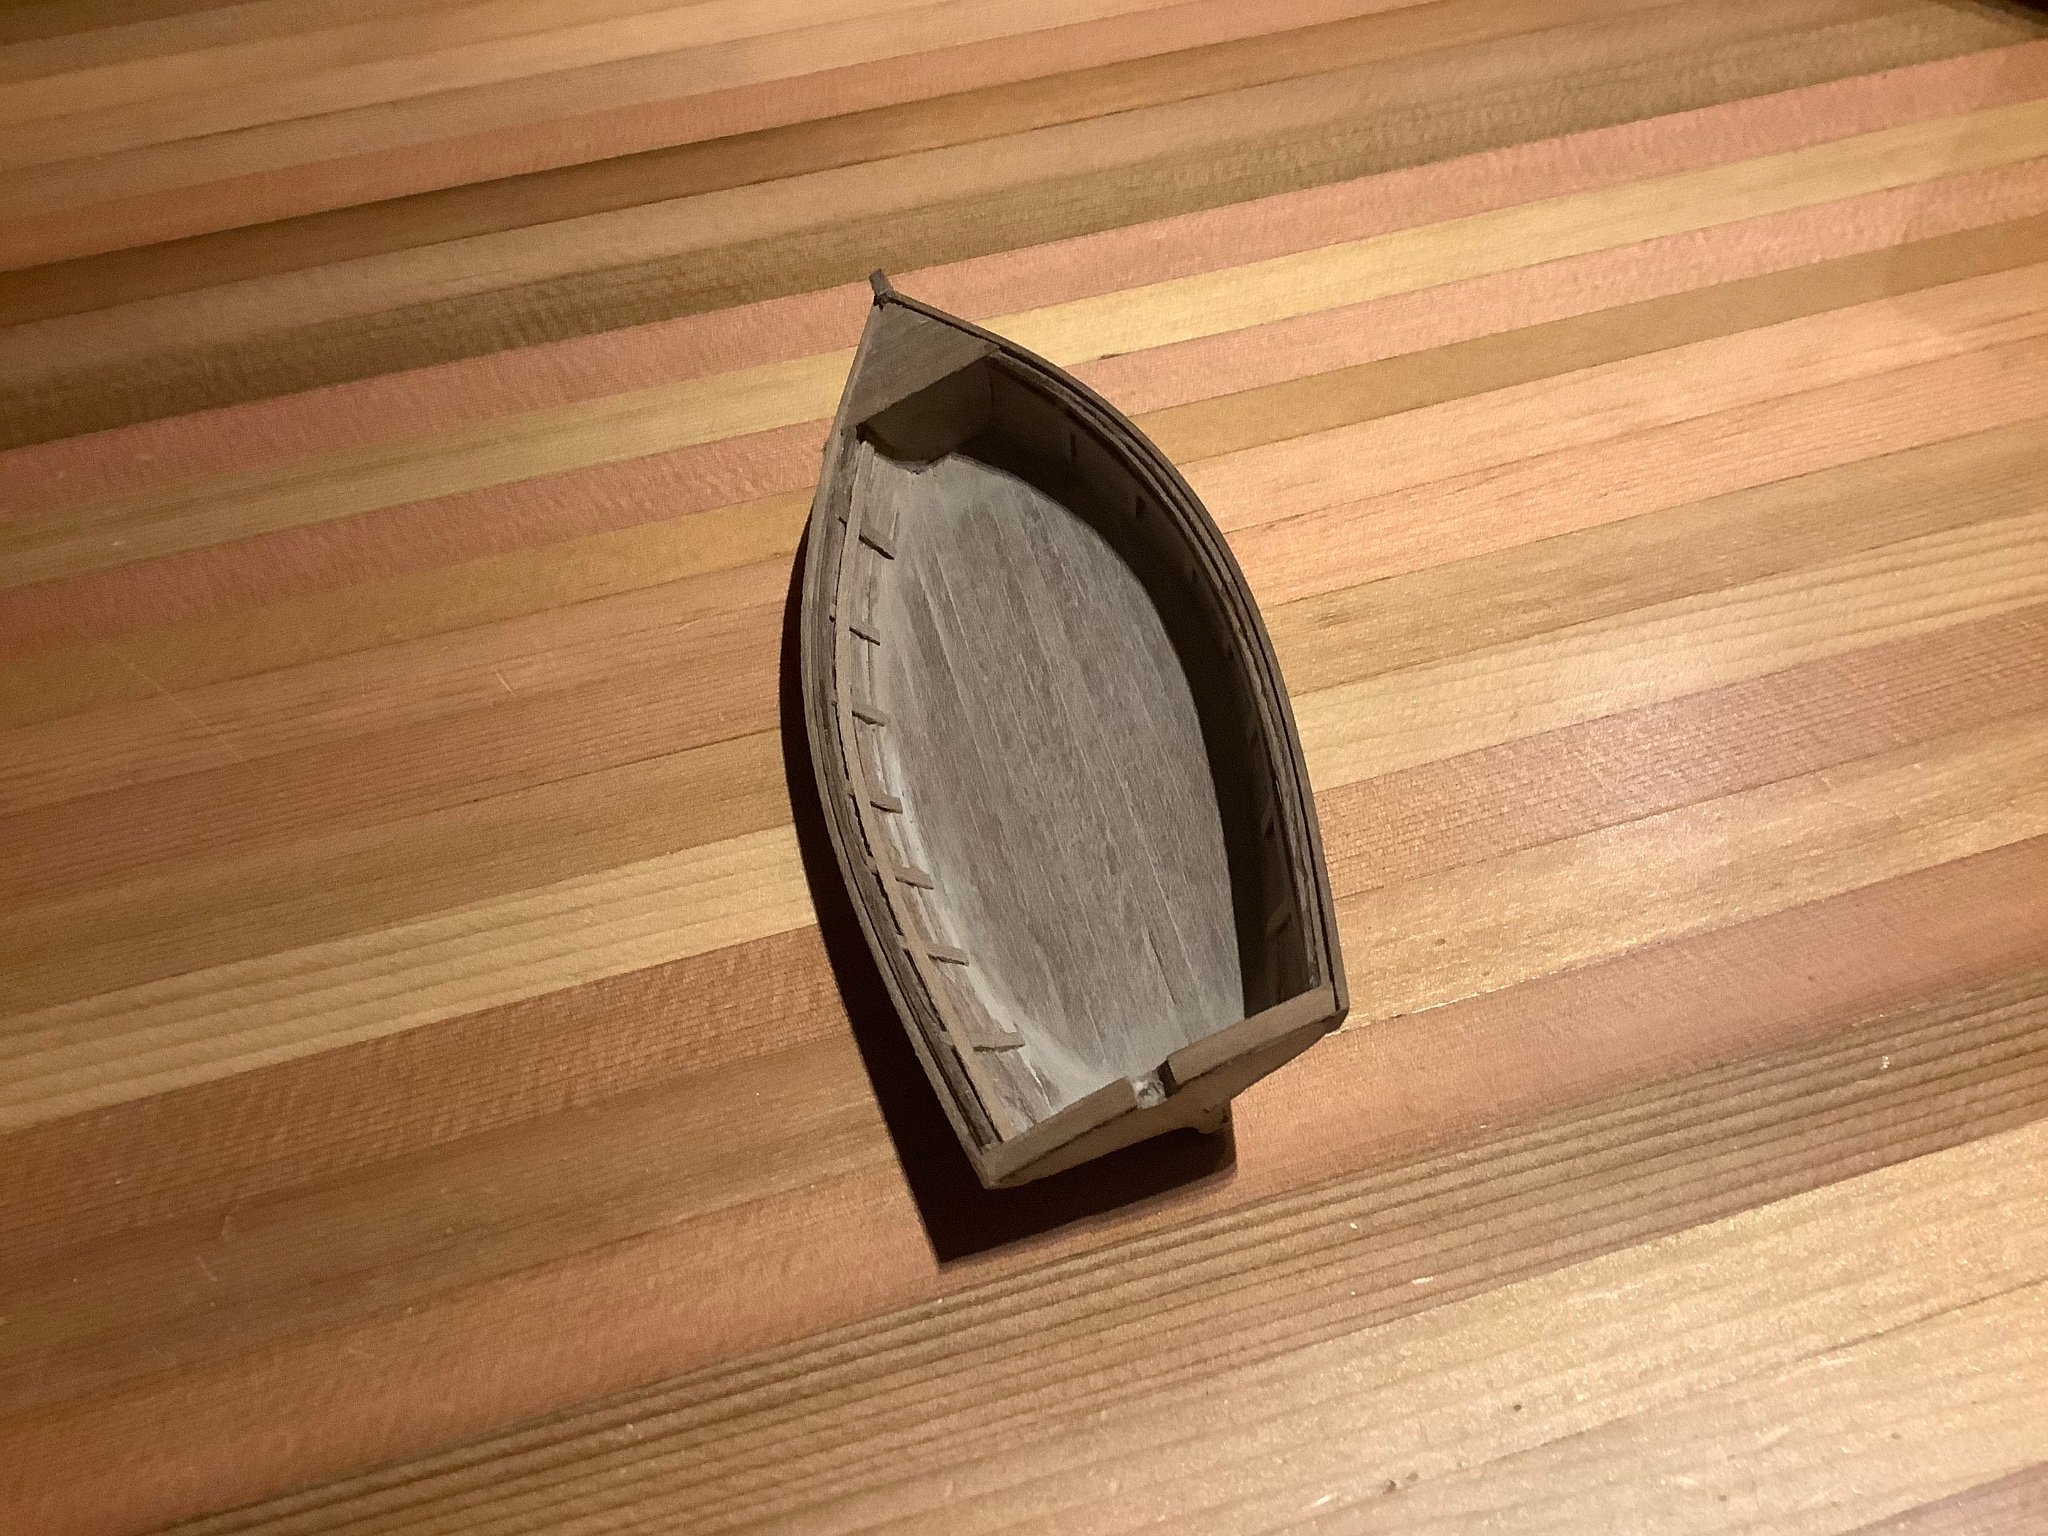
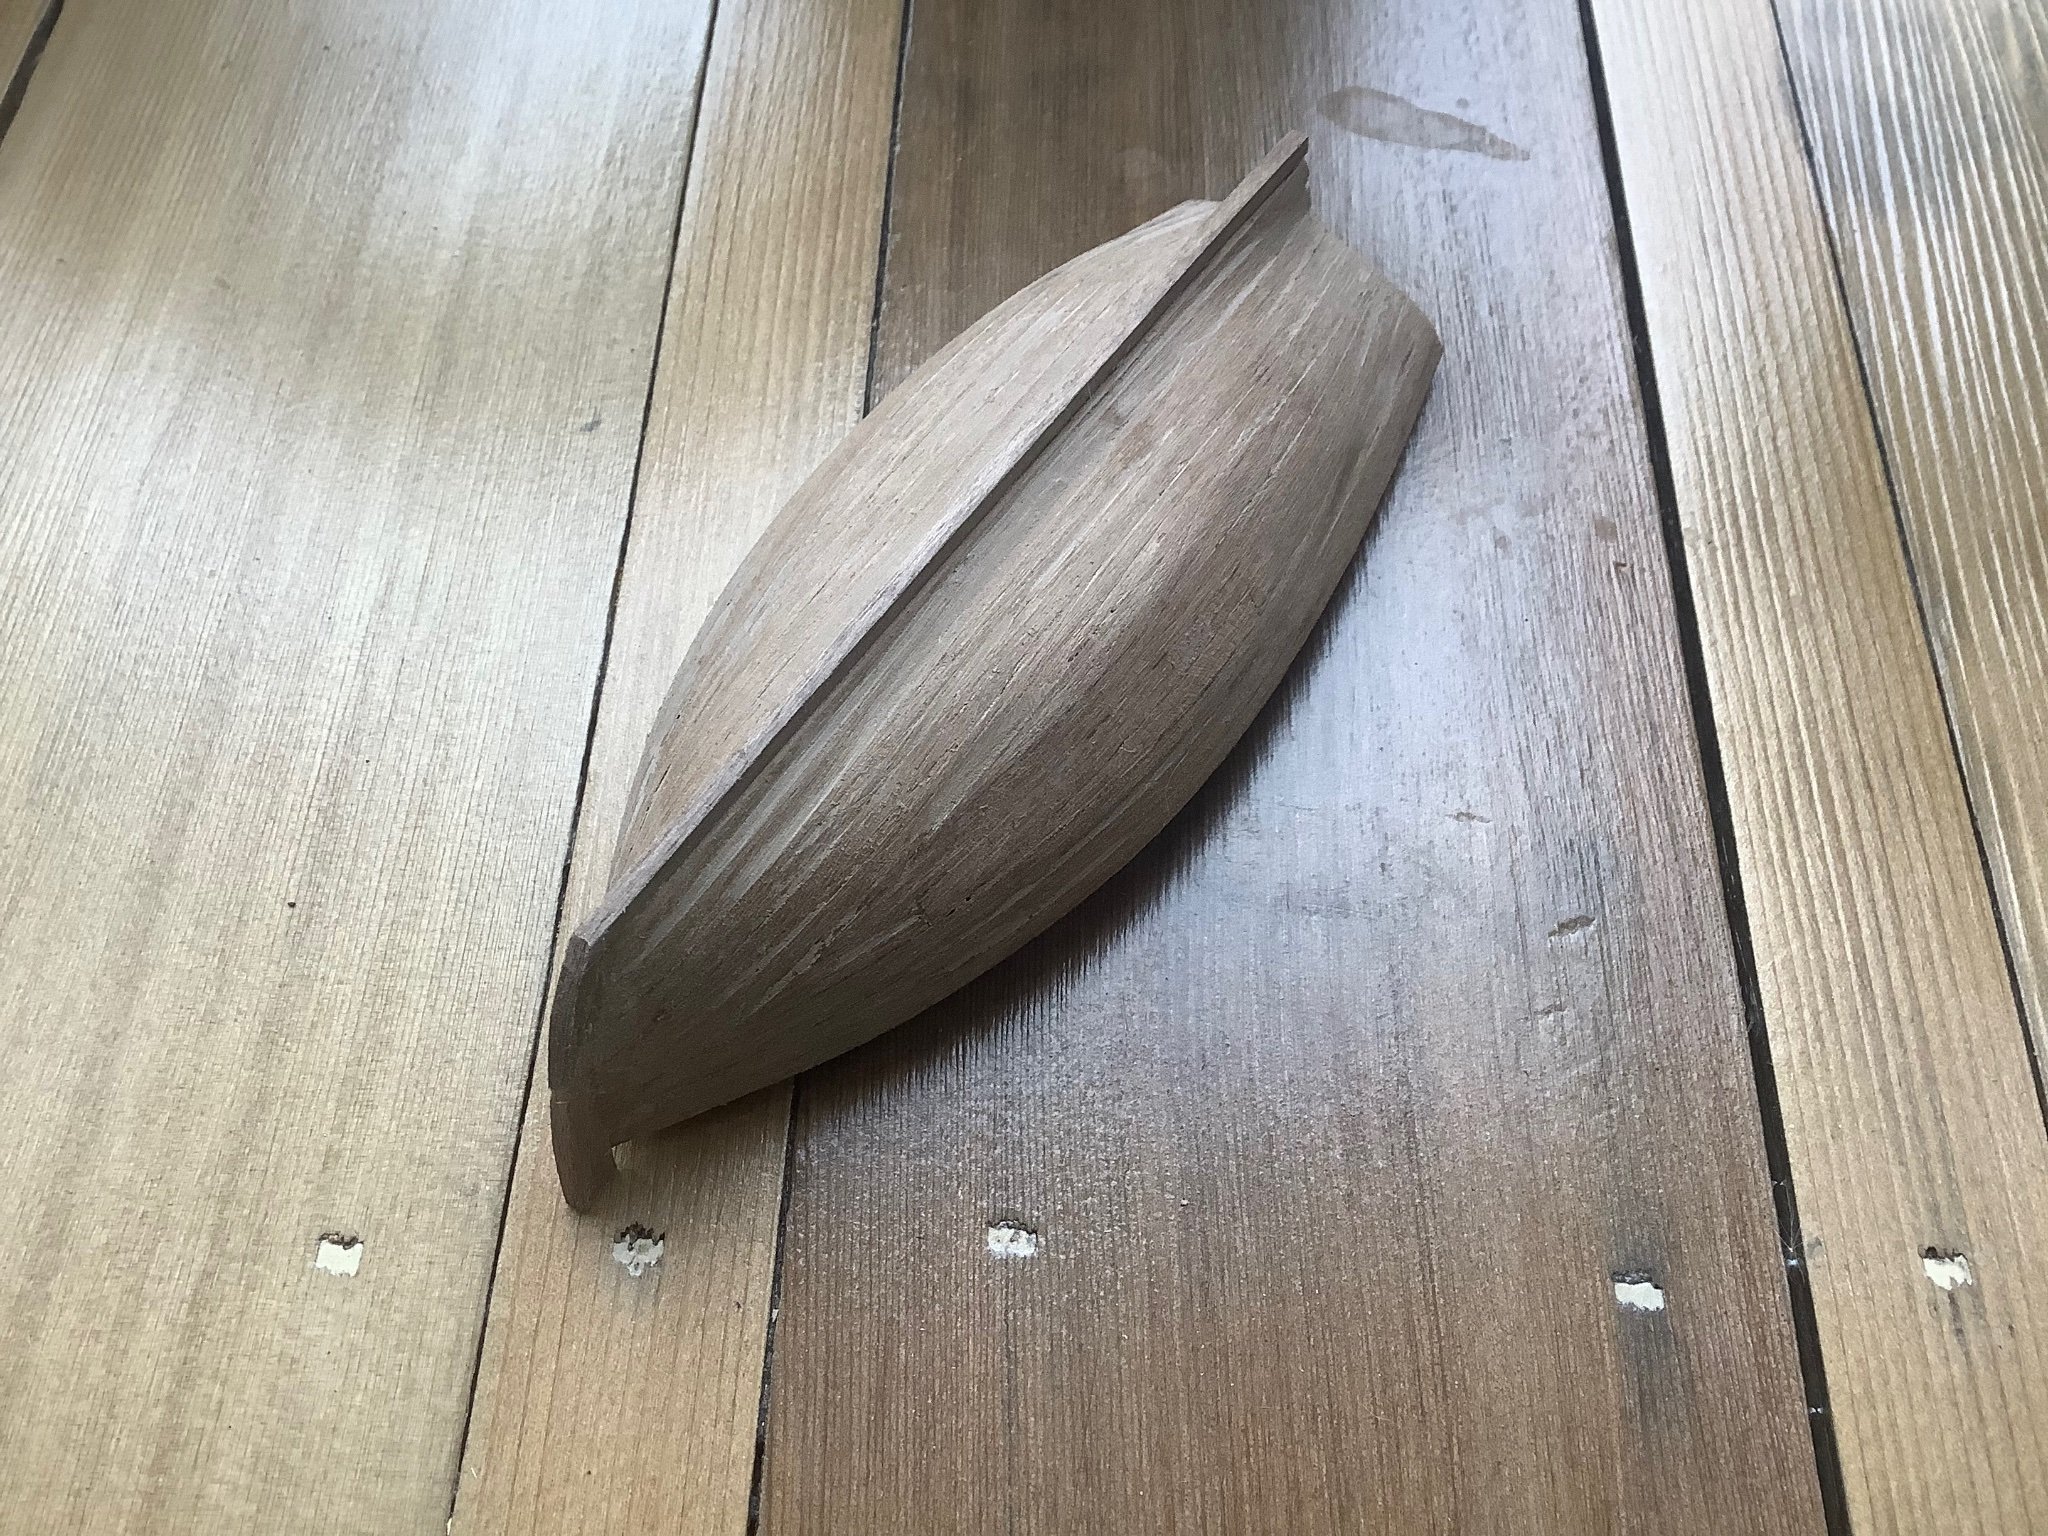
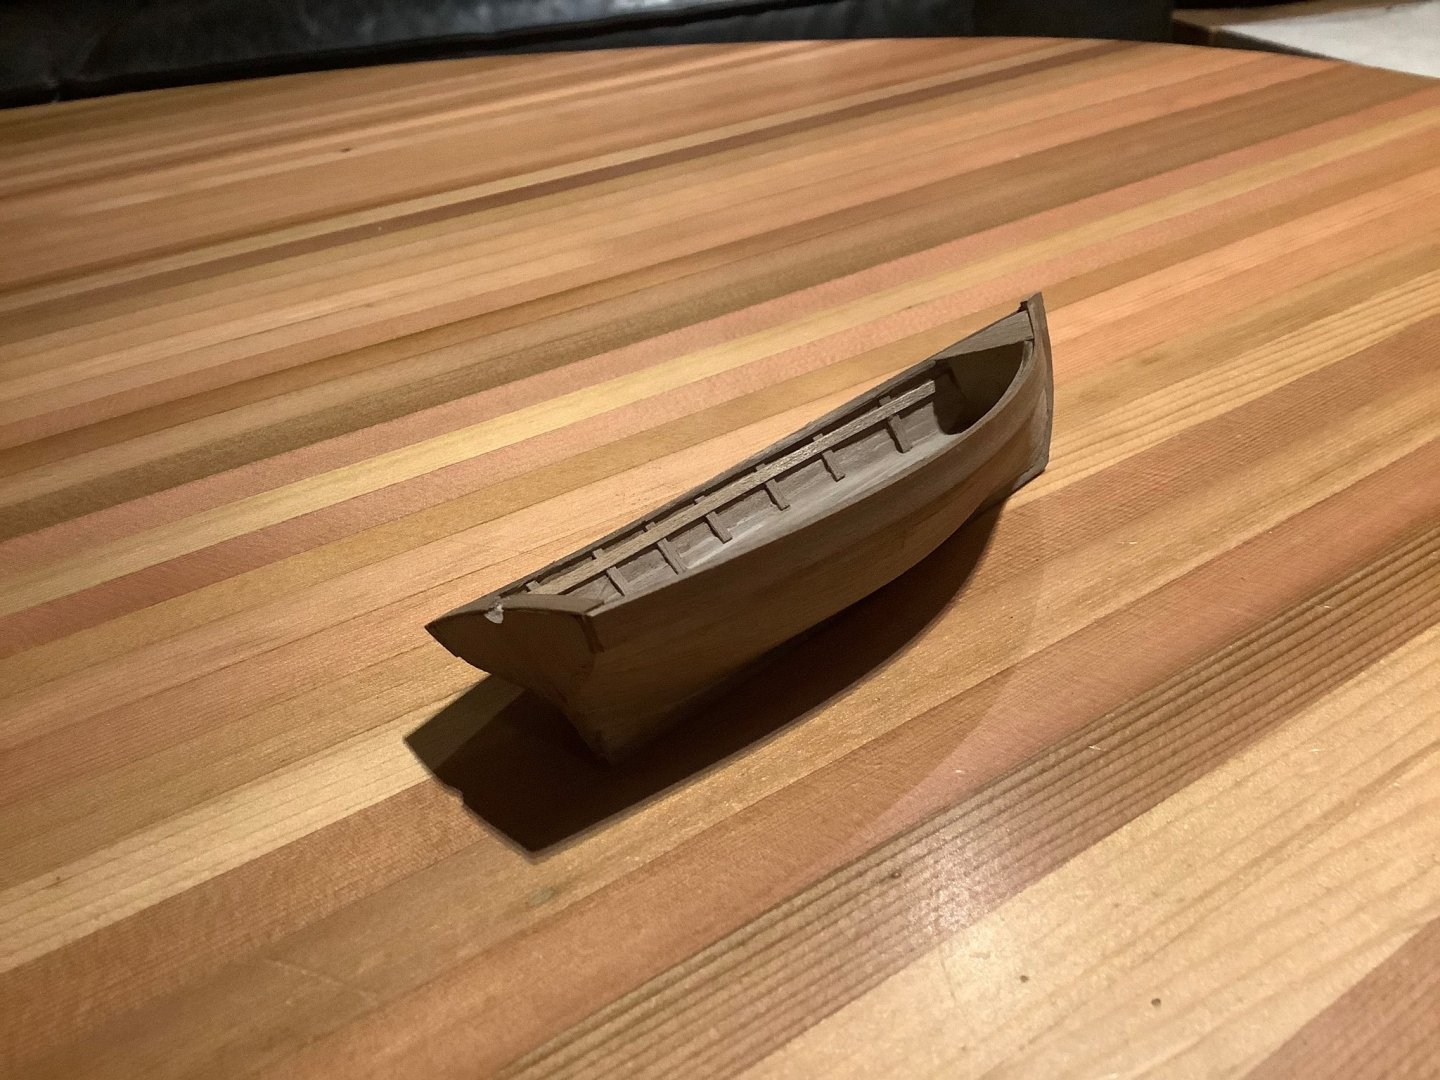
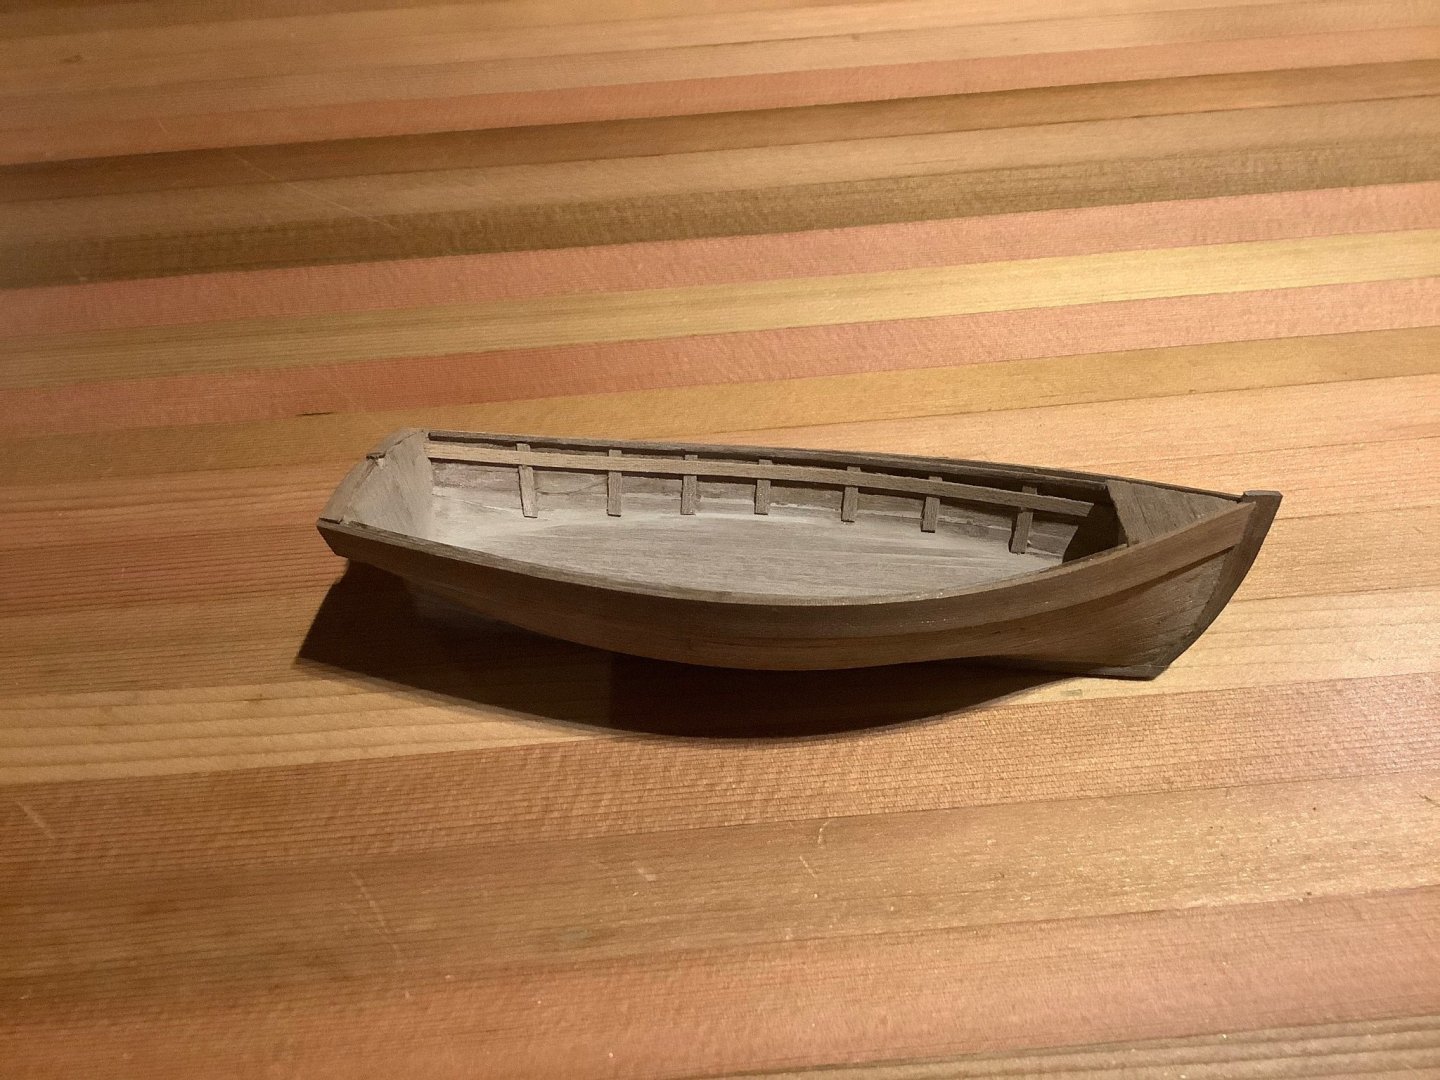
Ha thanks Lyle. I’m really just putzing around now micro-modeling this little rowboat, haven’t had much sustained time in the cabin and don’t want to start my next model victim until the new year anyway. Egads! Shortly after I took these pics my collie Trixie nabbed it off the coffee table but thankfully I extracted it before any major damage.

- 79 replies
-
- 7
-
-
-
- Fifie
- Victory Models
- (and 1 more)
-
All done except for the rowboat which I almost forgot about. I’ve edge glued the 1mm material along the temporary bulkheads and then pinched out the mdf formwork.


- 79 replies
-
- 7
-
-
- Fifie
- Victory Models
- (and 1 more)
-
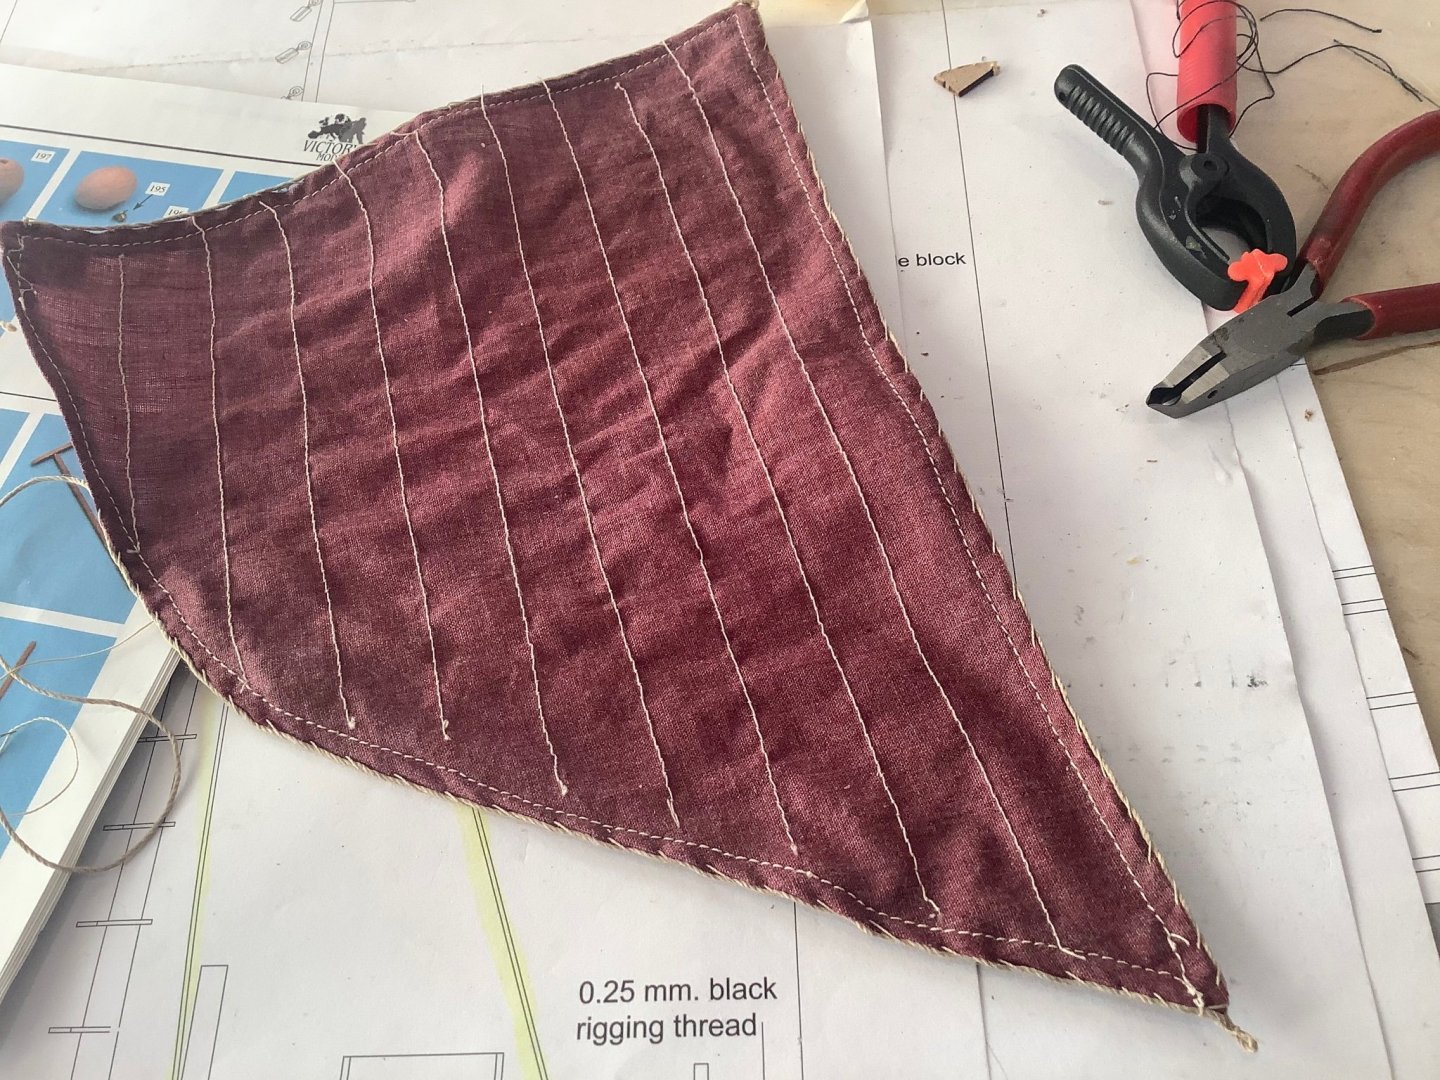
Yes, I am still working on the Fifie finish…rigging is in place and I’m just fashioning a sail. Always a new skill to master or in my case butcher in ship modeling.
- 79 replies
-
- 5
-
-
- Fifie
- Victory Models
- (and 1 more)
-
A great rendition of Endeavour, Rock, congratulations! The Corel Endeavour was the first complex build I undertook many, many years ago and still has pride of place in my home. You have taken it to another level in your excellent build. Good luck on your next one. Tim
-
Wow substantial build Yves, excellent work as usual! I love the way you go big. Nothing wrong with that planking. How is the house addition coming to house your models.
-
Thanks for the gluing advice Gary, I actually saw that really thin stuff in our local supply shop last time I was there so will try that.
-
Thanks Bruce, Gary and Richard….I will get my backside in gear to finish her and take a few decent pics. Appreciate you looking in and the kind comments. Kind of like the structure these build logs give to a project so may well sneak one about the Fiat in the unauthorized non ship section.
- 79 replies
-
- 1
-
-
- Fifie
- Victory Models
- (and 1 more)
-
Hello all finally just getting back into the model cabin now that a busy construction season is almost over. The Fifie is pretty much done, I will post the finished product shortly after I finish off the lifeboat and the minor amount of rigging. Been thinking about my next victim for winter production. On the marine front I am pondering possibly the Endurance now that occre has that model, which I’ve always wanted to do. The Amati Grand Banks and their large scale Endeavour americas cup contender also appeal, although the former seems not to be available at present. I usually like to switch things up so as not to do two similar subjects in a row, so to start off I’ve got something completely different coming next week - a 1/12 italeri kit of the fiat 806 Grand Prix racer. Always been an F1 fan so looking forward to what I can do on a vintage racer with my new airbrush. I enjoyed scratchbuilding an engine in my mahogany runabout some years ago so should be interesting. Been ages since I worked in plastic, forgotten what adhesive strategy is best. Tim
- 79 replies
-
- 4
-
-
- Fifie
- Victory Models
- (and 1 more)
-
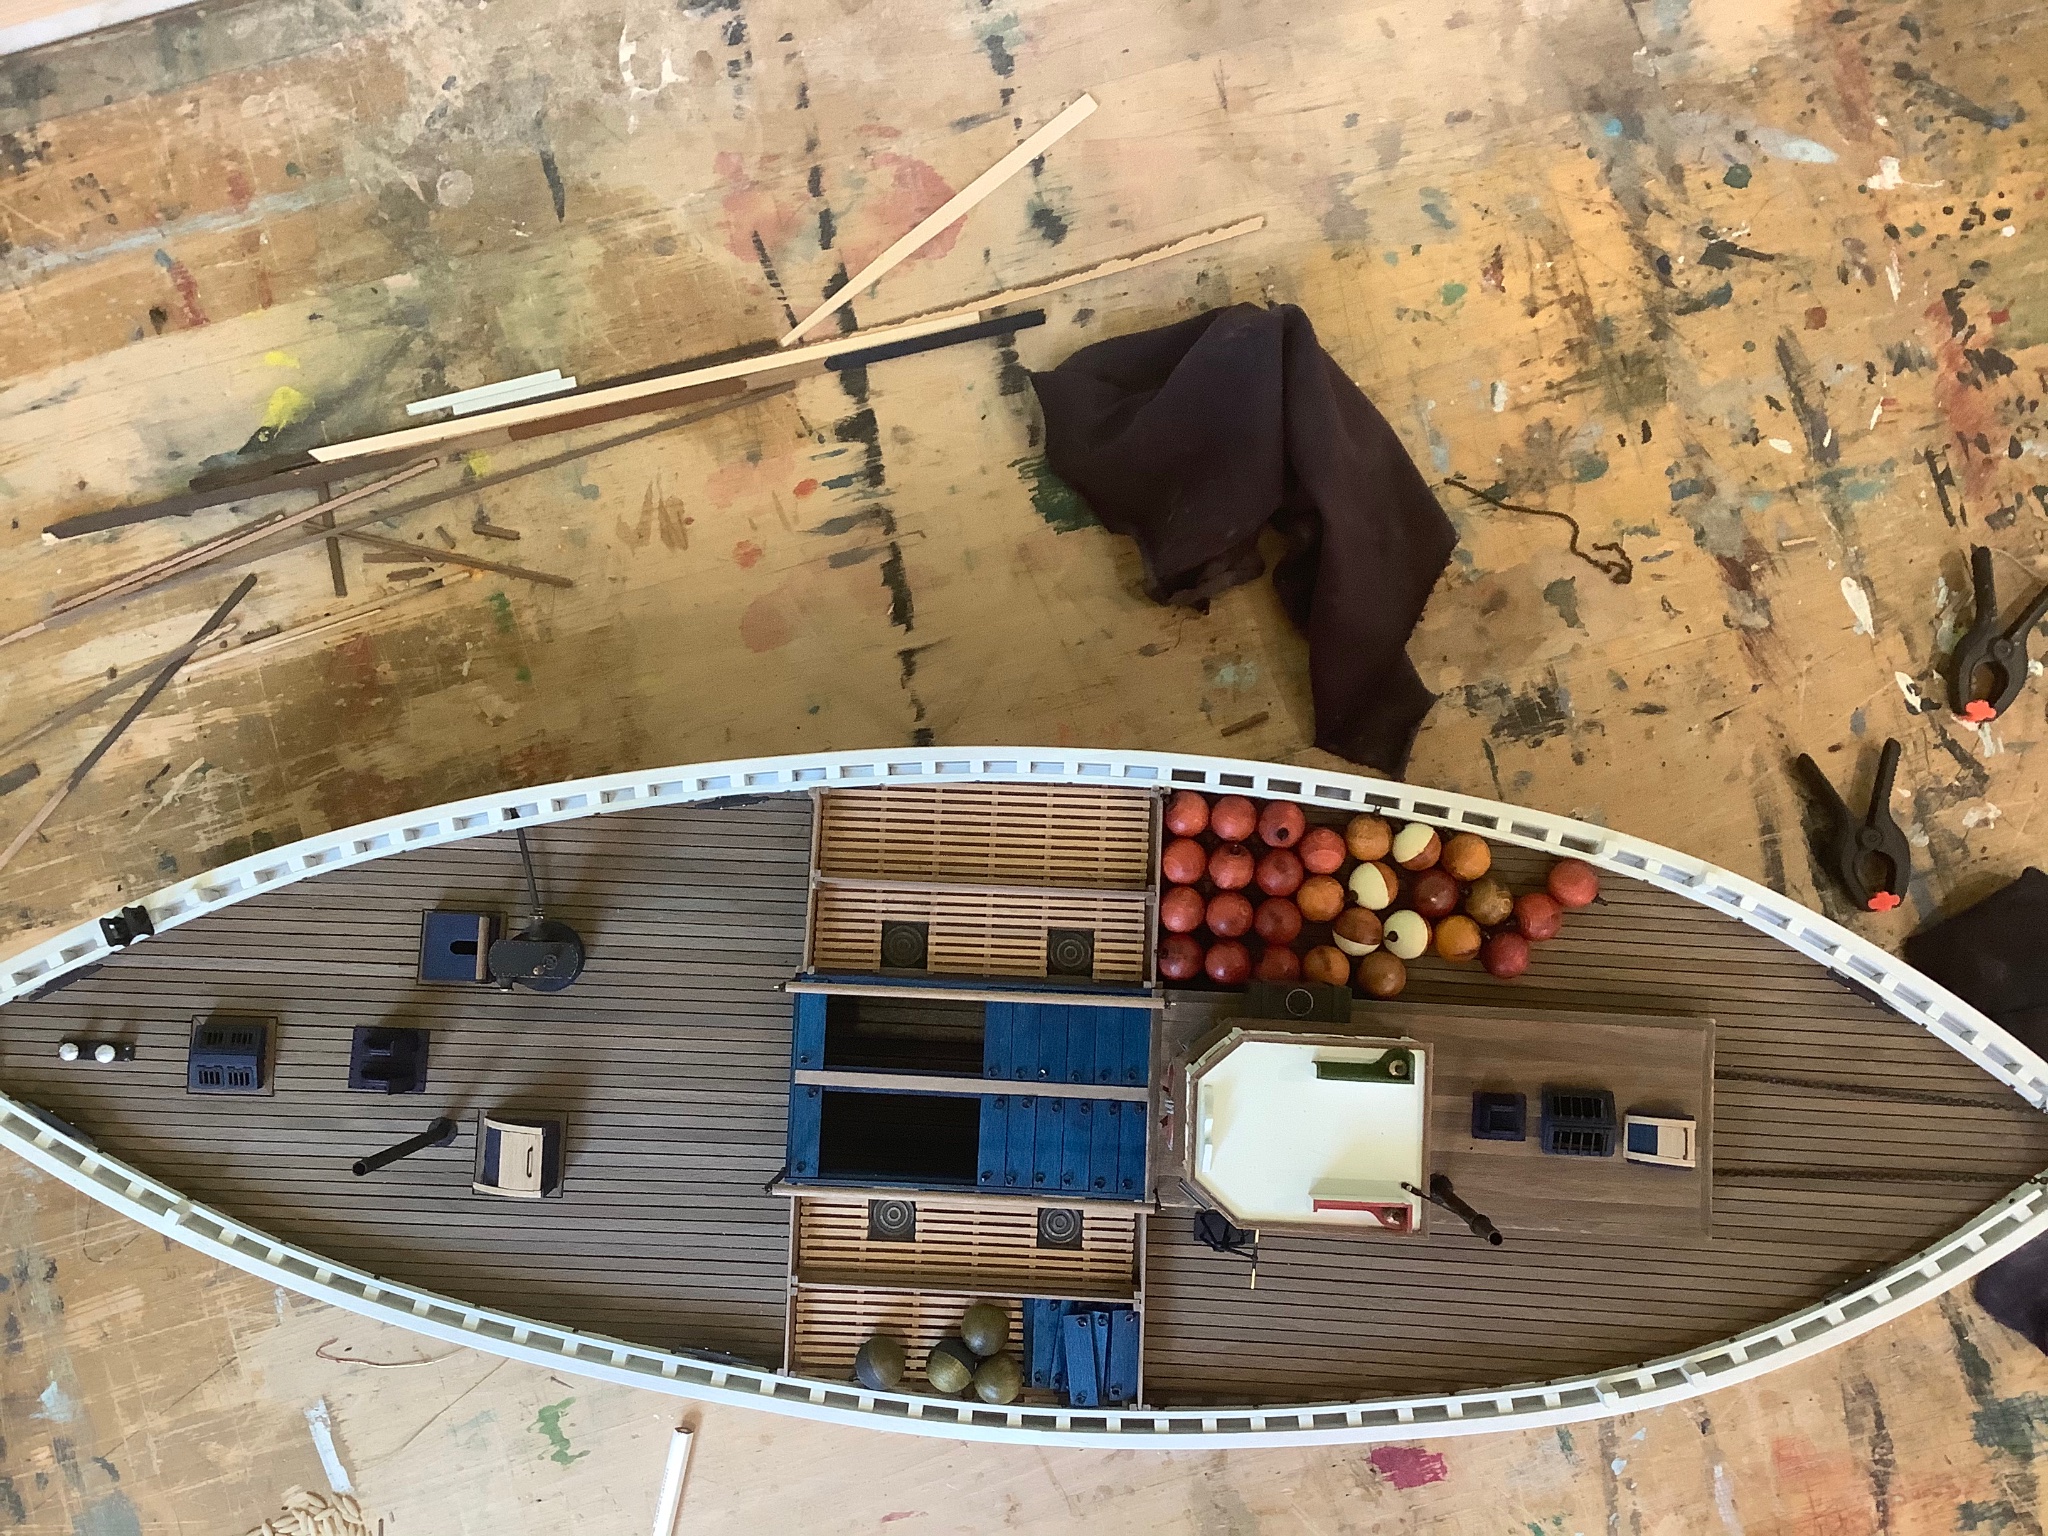
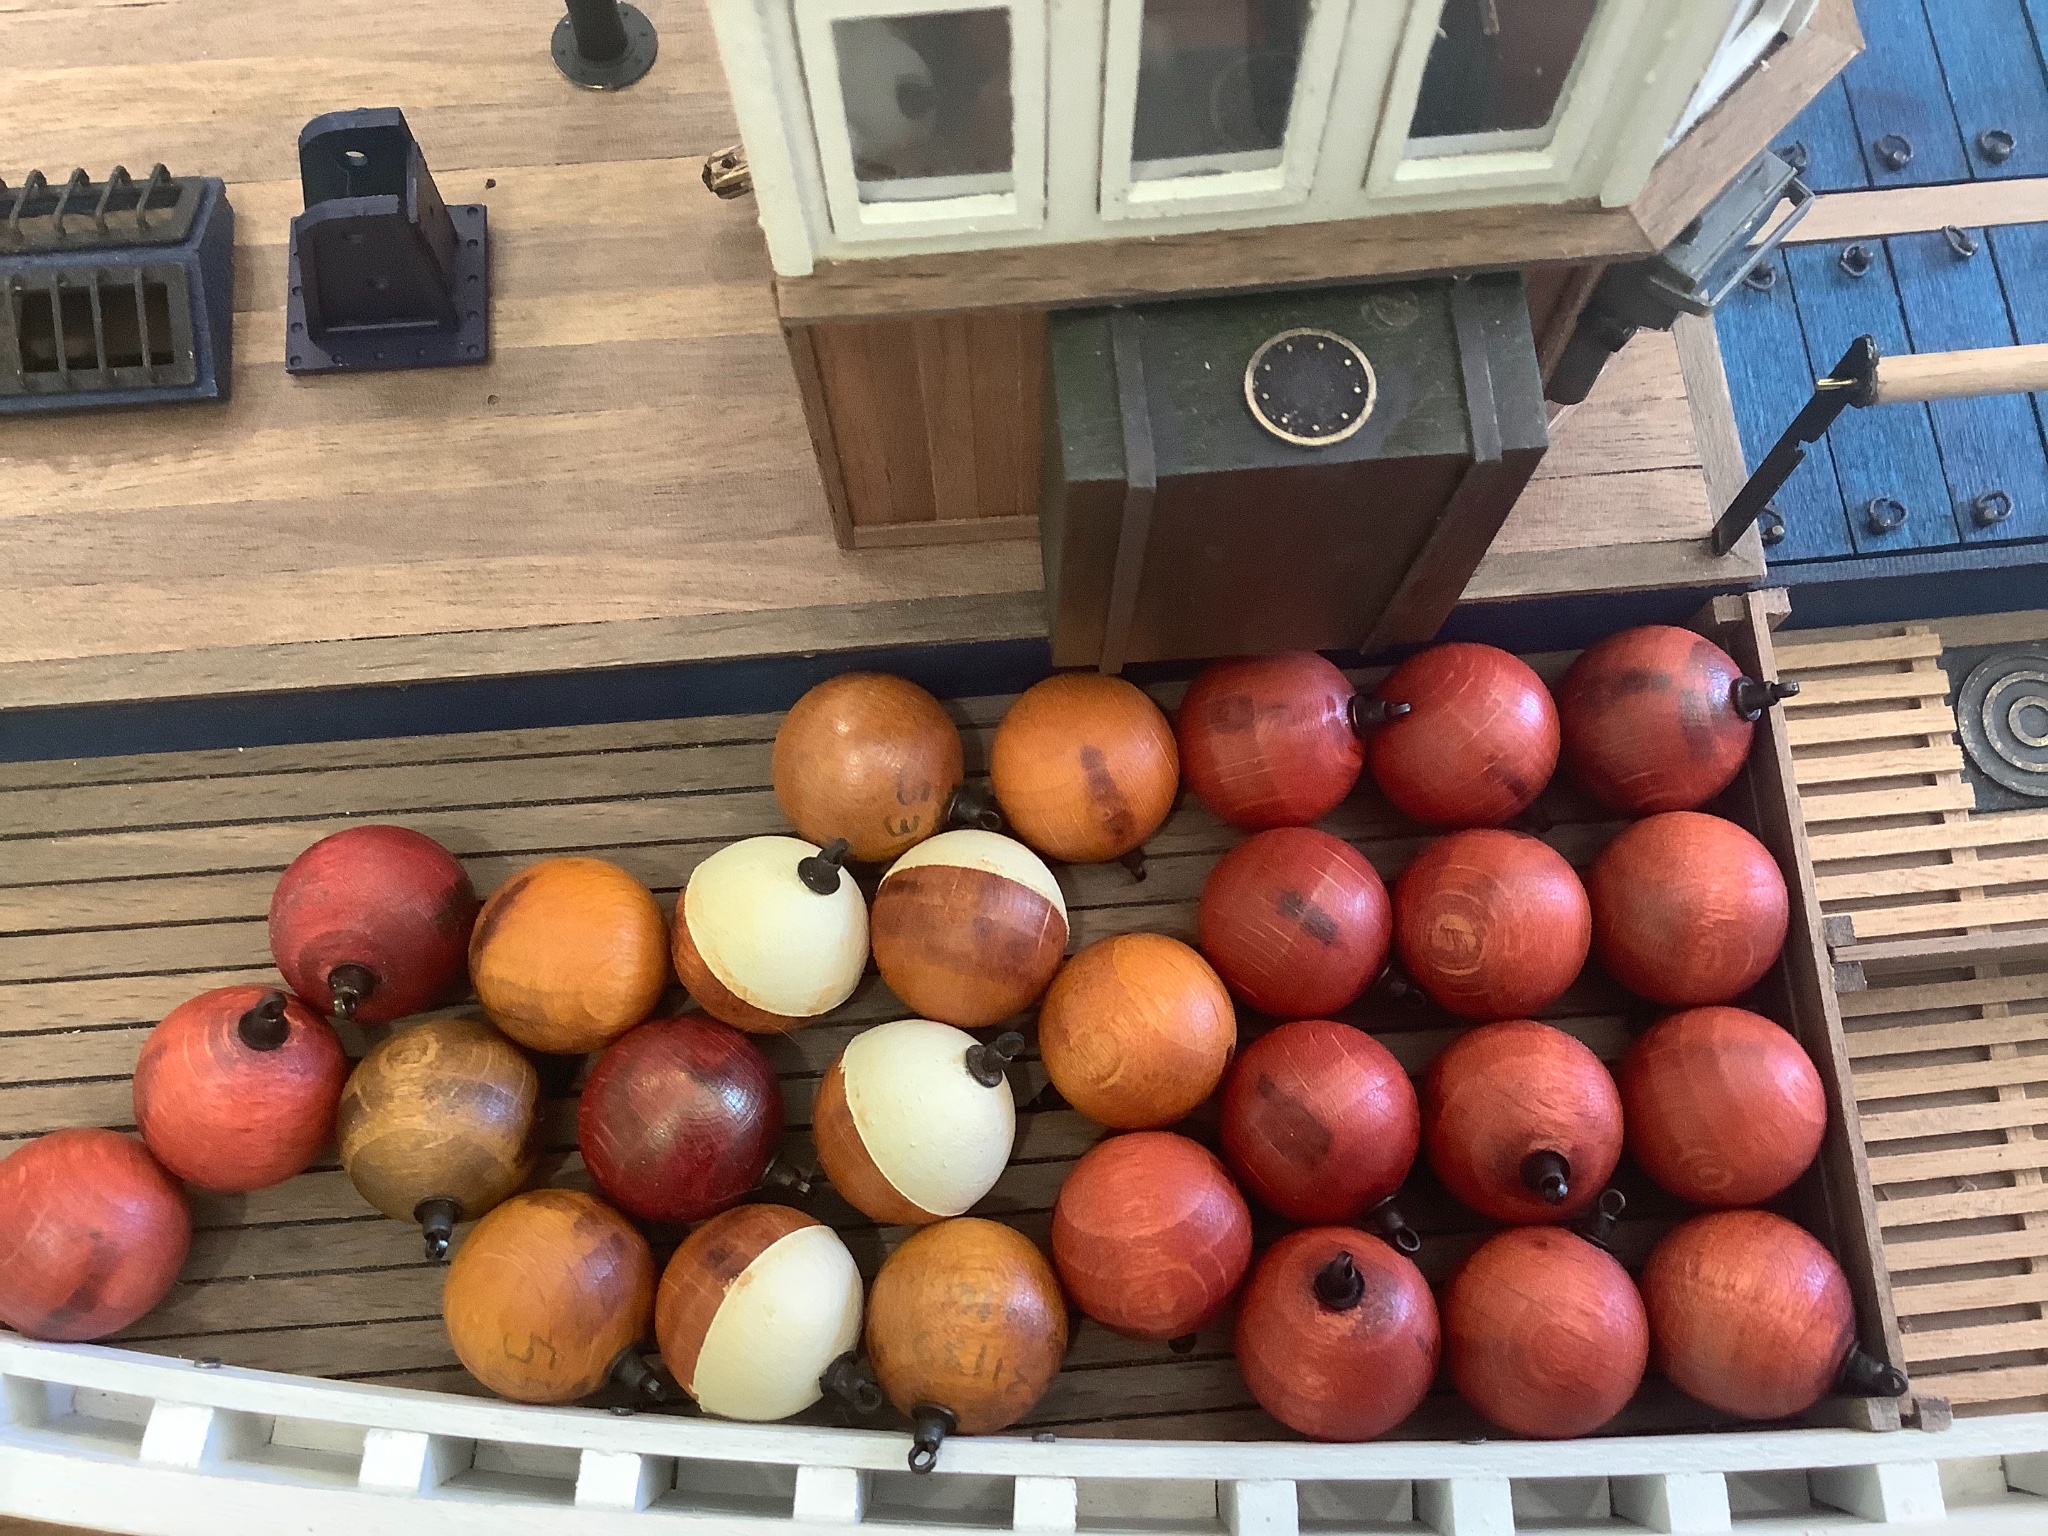
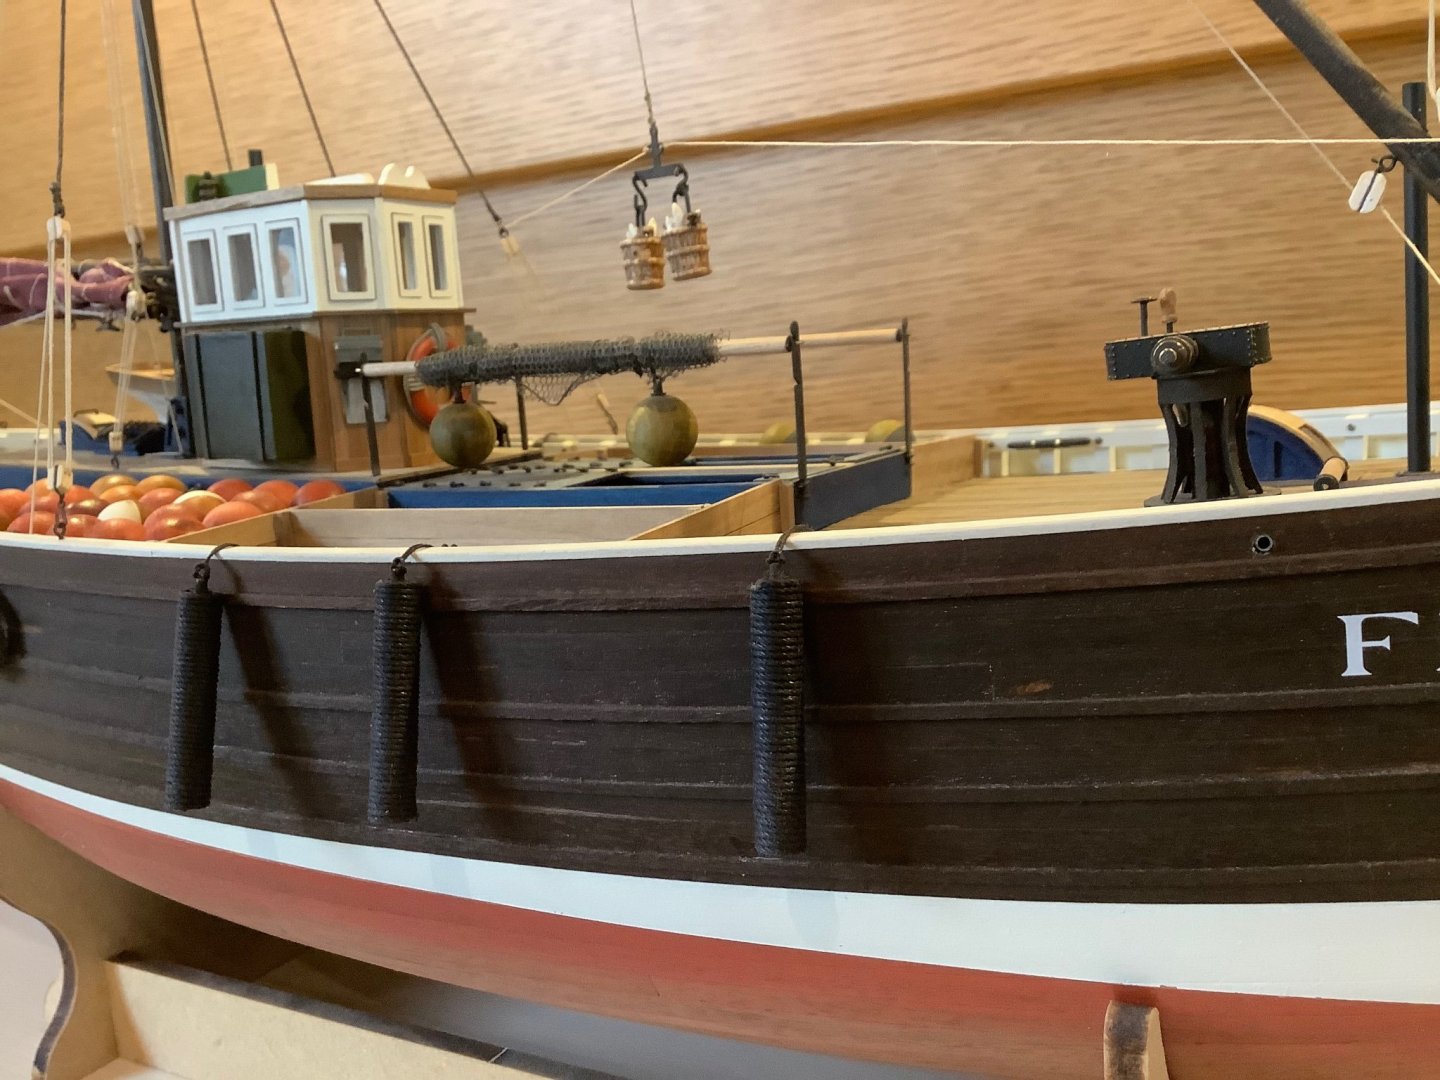
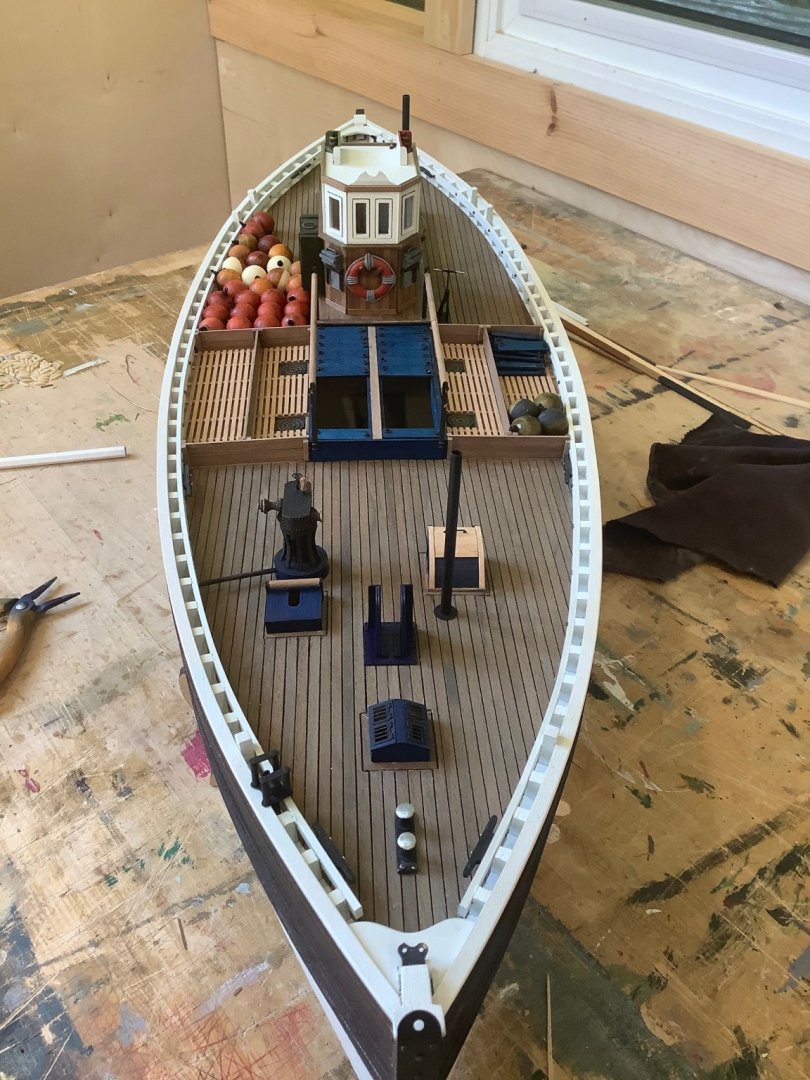
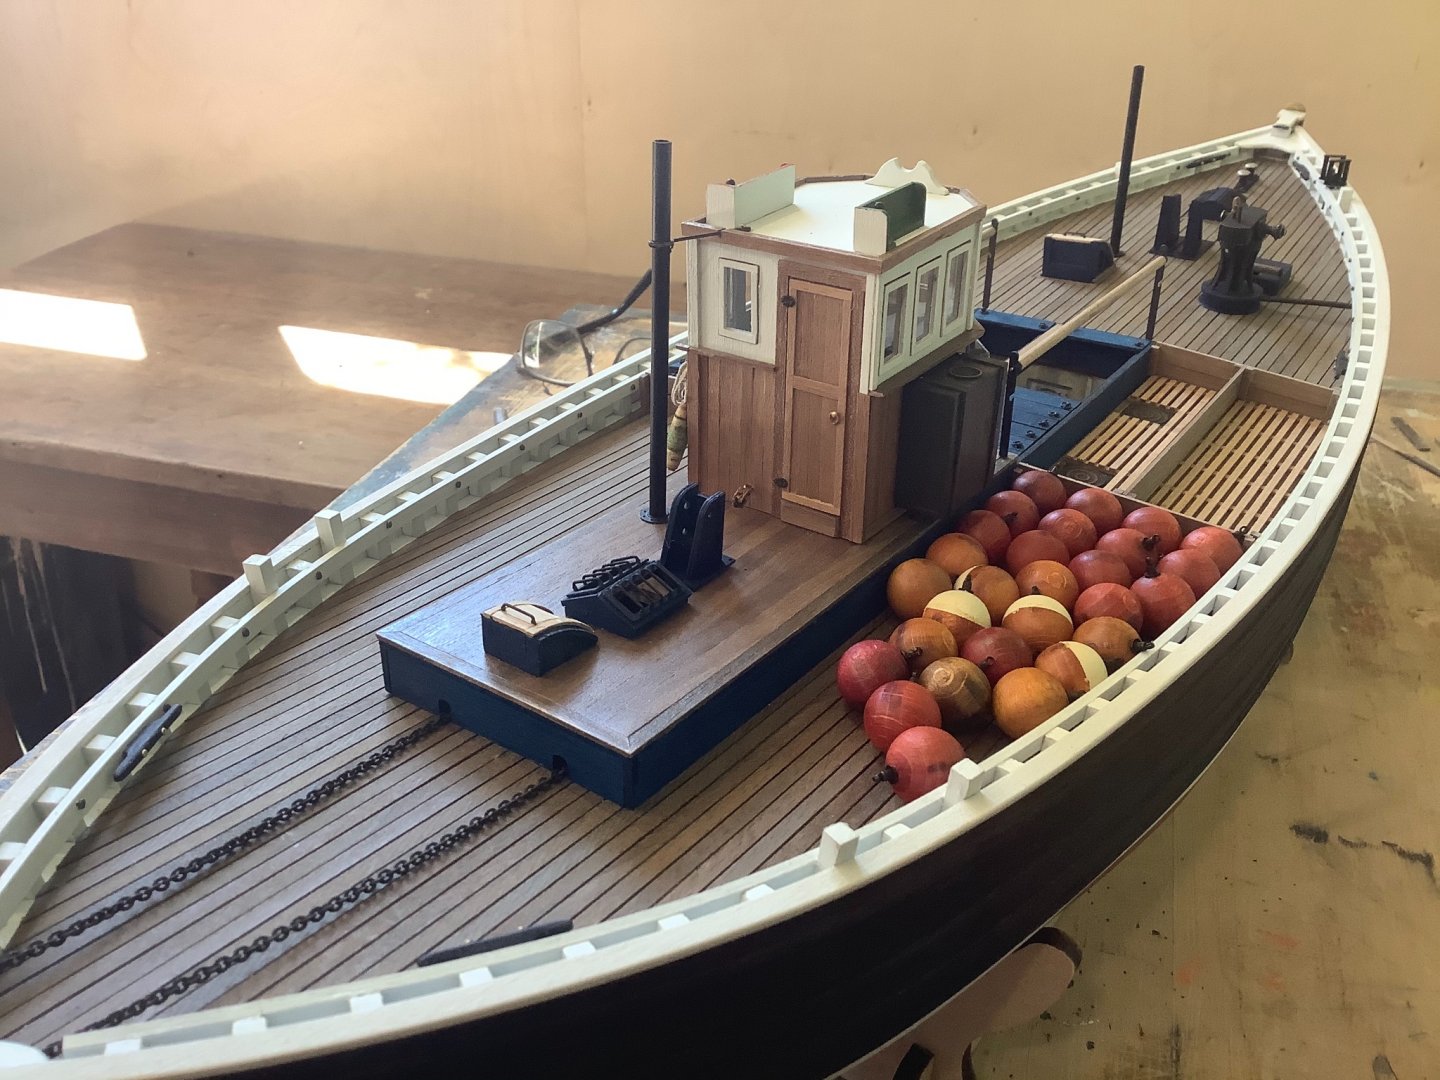
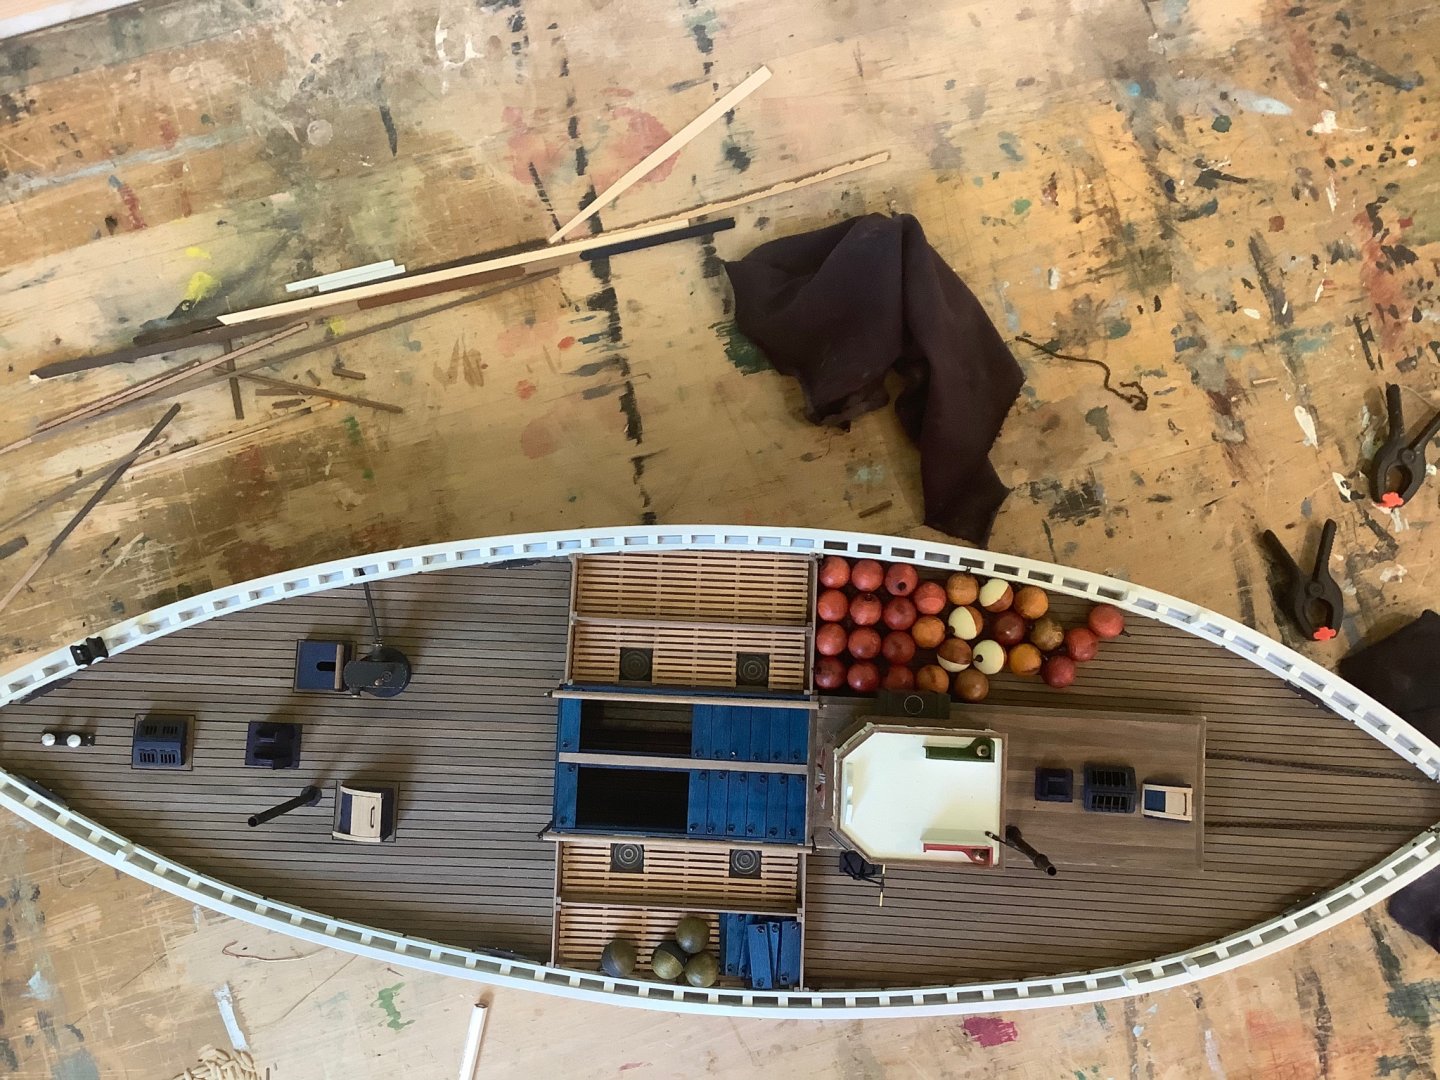
Hi thanks and sorry for not seeing this message earlier…the buoy materials are provided in the kit and fashioned from wooden balls which are drilled to accept an eyebolt and collar. I blacked the fittings and stained them an assortment of colours, some I painted.
- 79 replies
-
- 1
-
-
- Fifie
- Victory Models
- (and 1 more)
-
Hi Lyle! Yes looks like you are doing the stem and keel black; I wish I had done that, in my case in the ebony stain like I did for the wales. The black will be a good contrast with your weathered oak.
-
Really nice work on that walnut Lyle, and a great idea to veneer the ribs. Looks perfect. Going to be a great model of Bounty.
-
HMS Bounty by Gct86 - Amati
Tim Moore replied to Gct86's topic in - Kit build logs for subjects built from 1751 - 1800
Really nice work…particularly impressed with the deck and of course your accomplishment on that coppering is fantastic. Tim -
No actually I’m just finishing up a Scottish Fifie fishing boat by Victory models…not sure what my next project will be this fall, still mulling that over.
-
Impressive job on the Bounty planking Lyle - really meticulous work, you’re going to have a fantastic result.
-
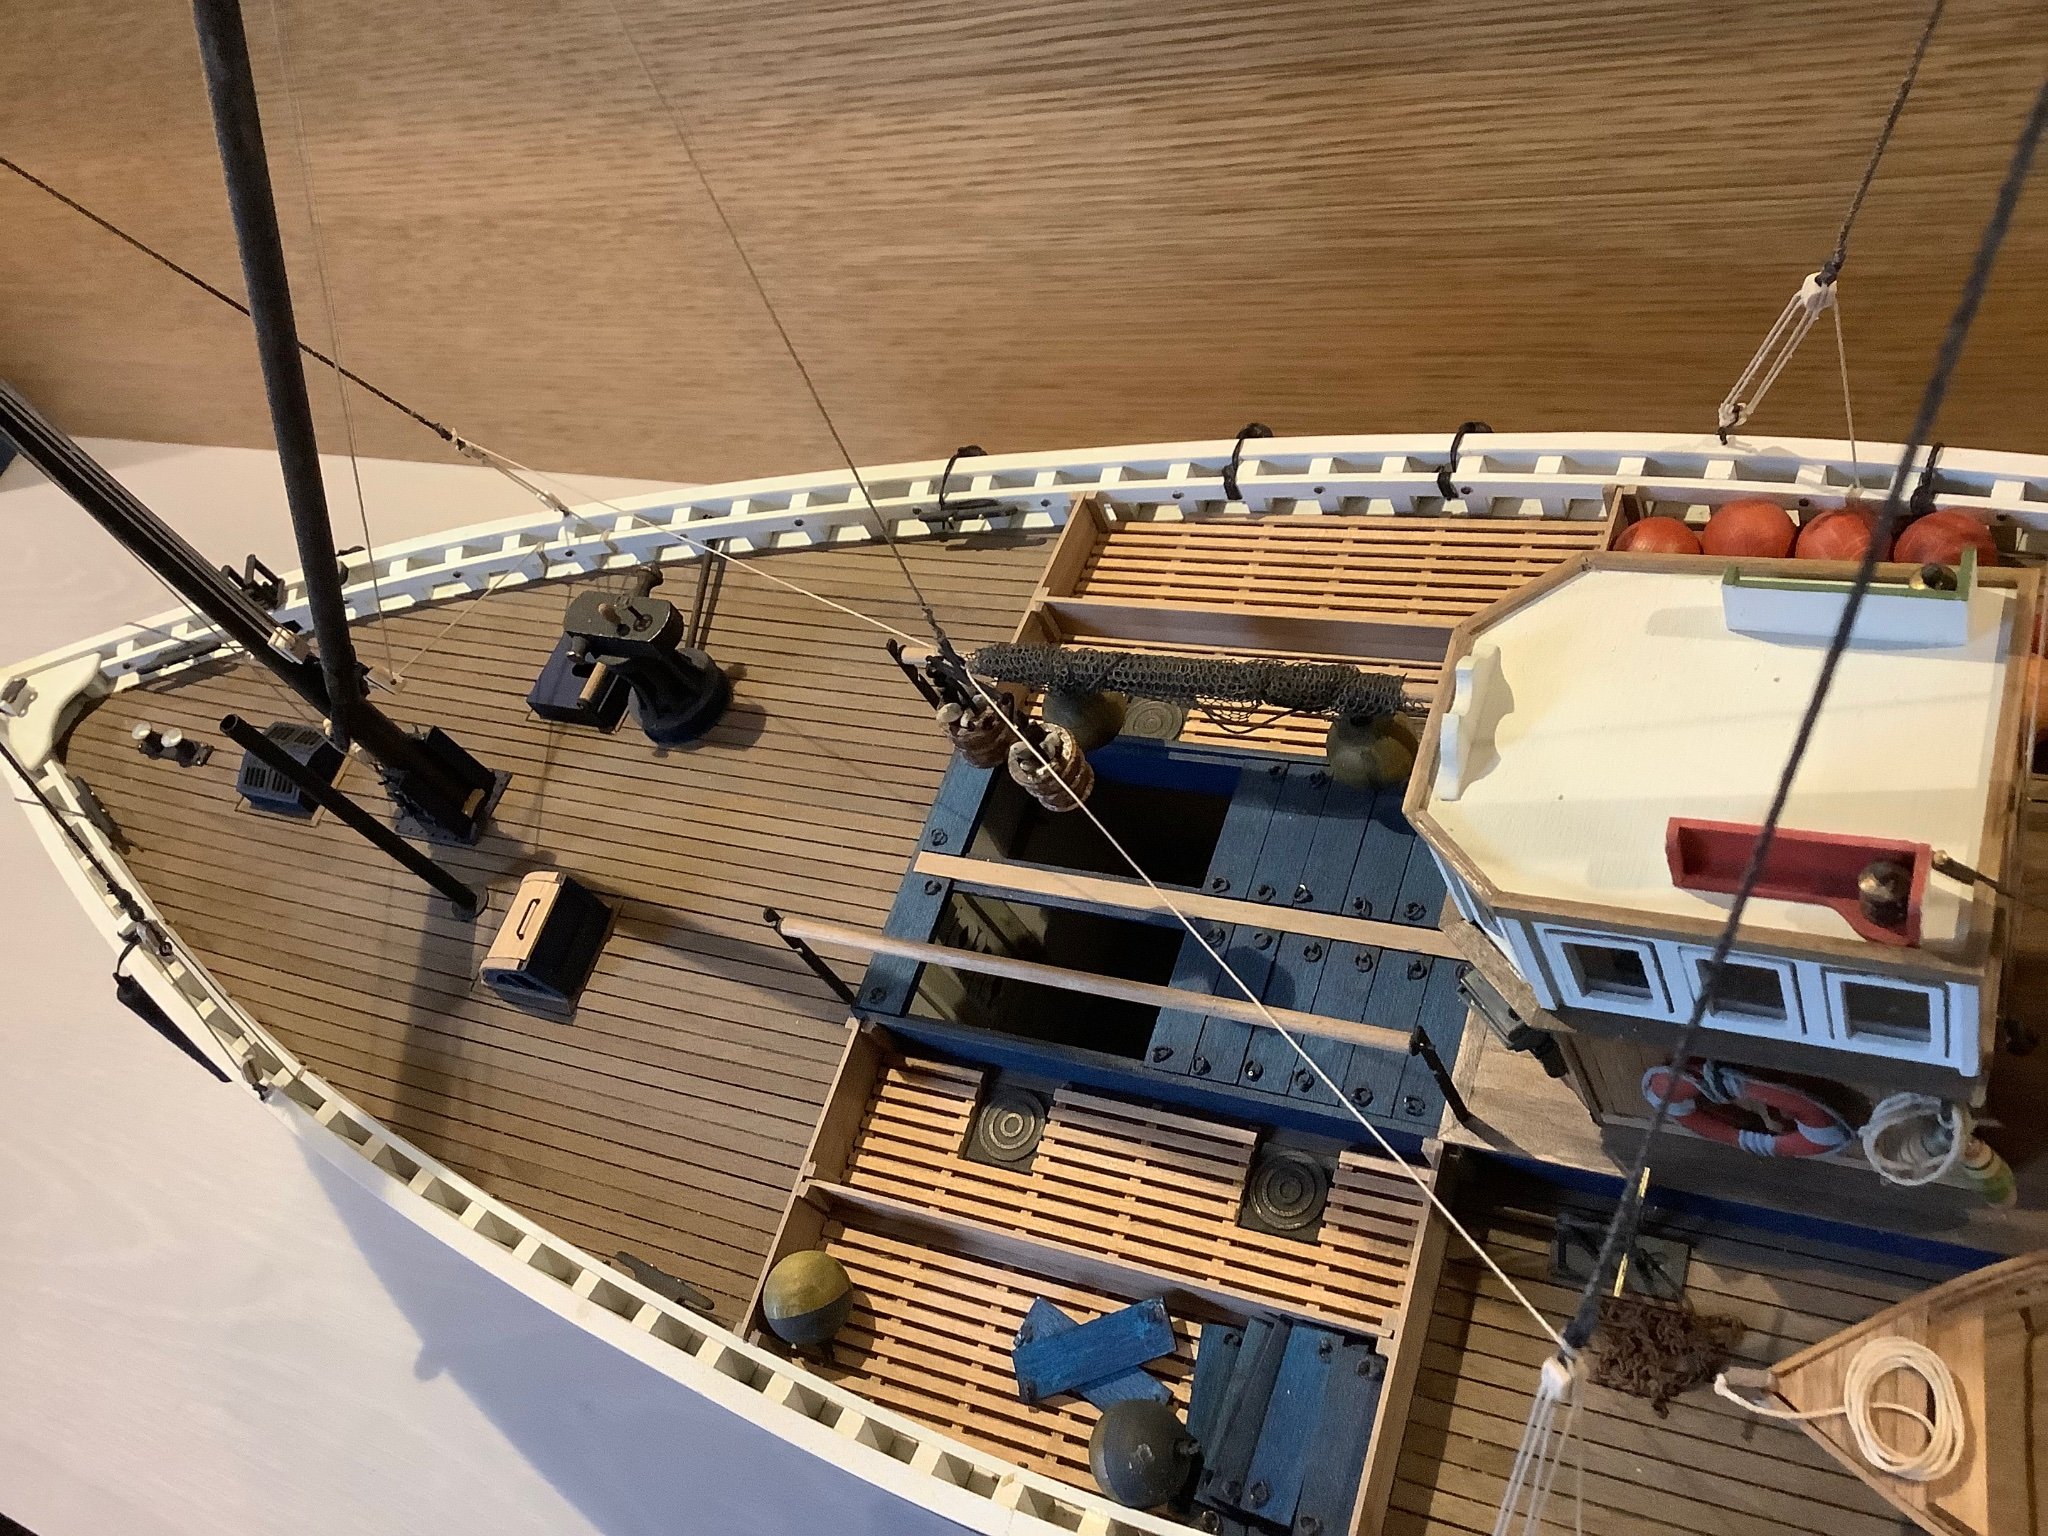
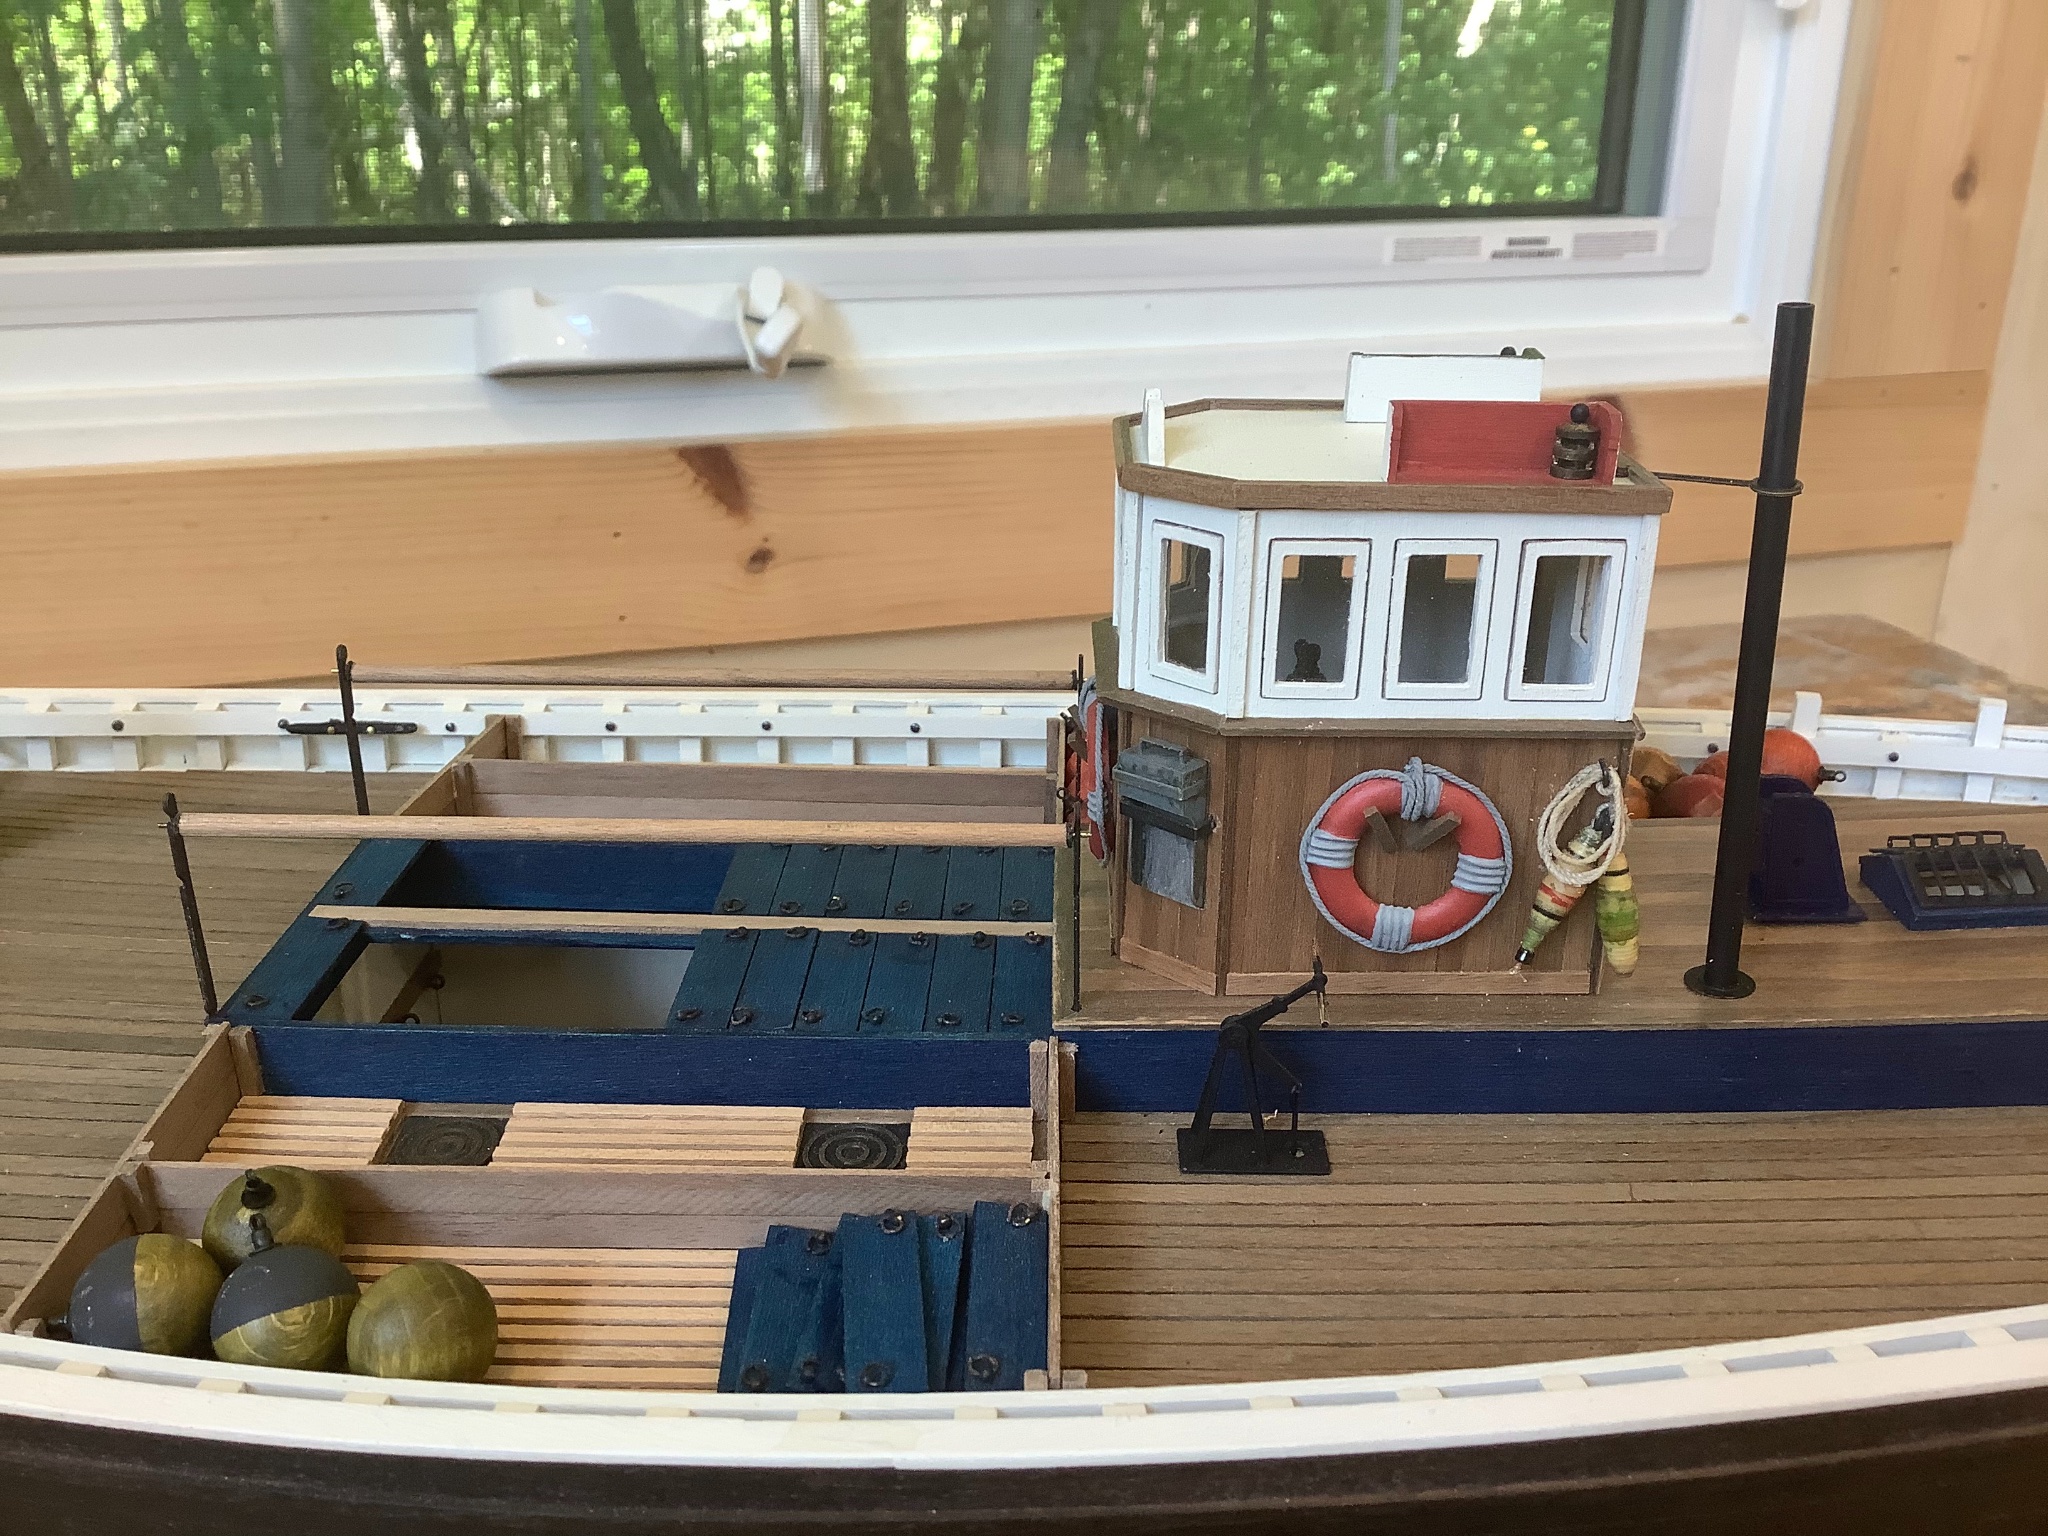
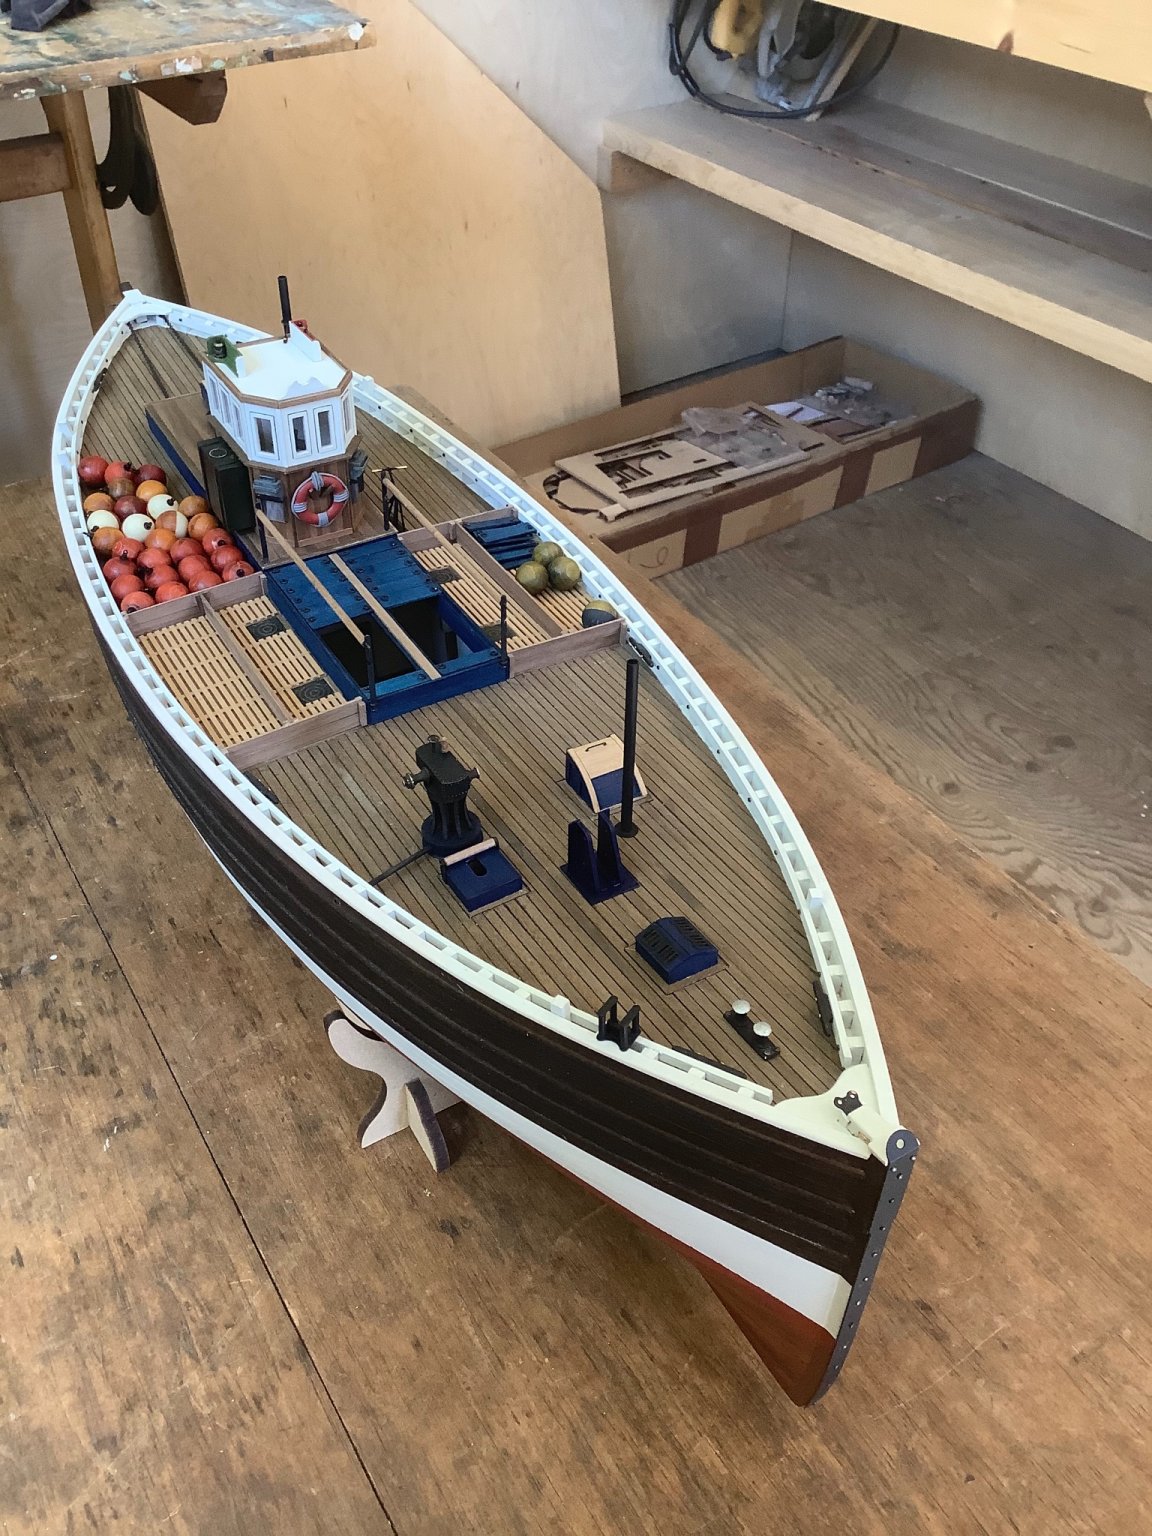
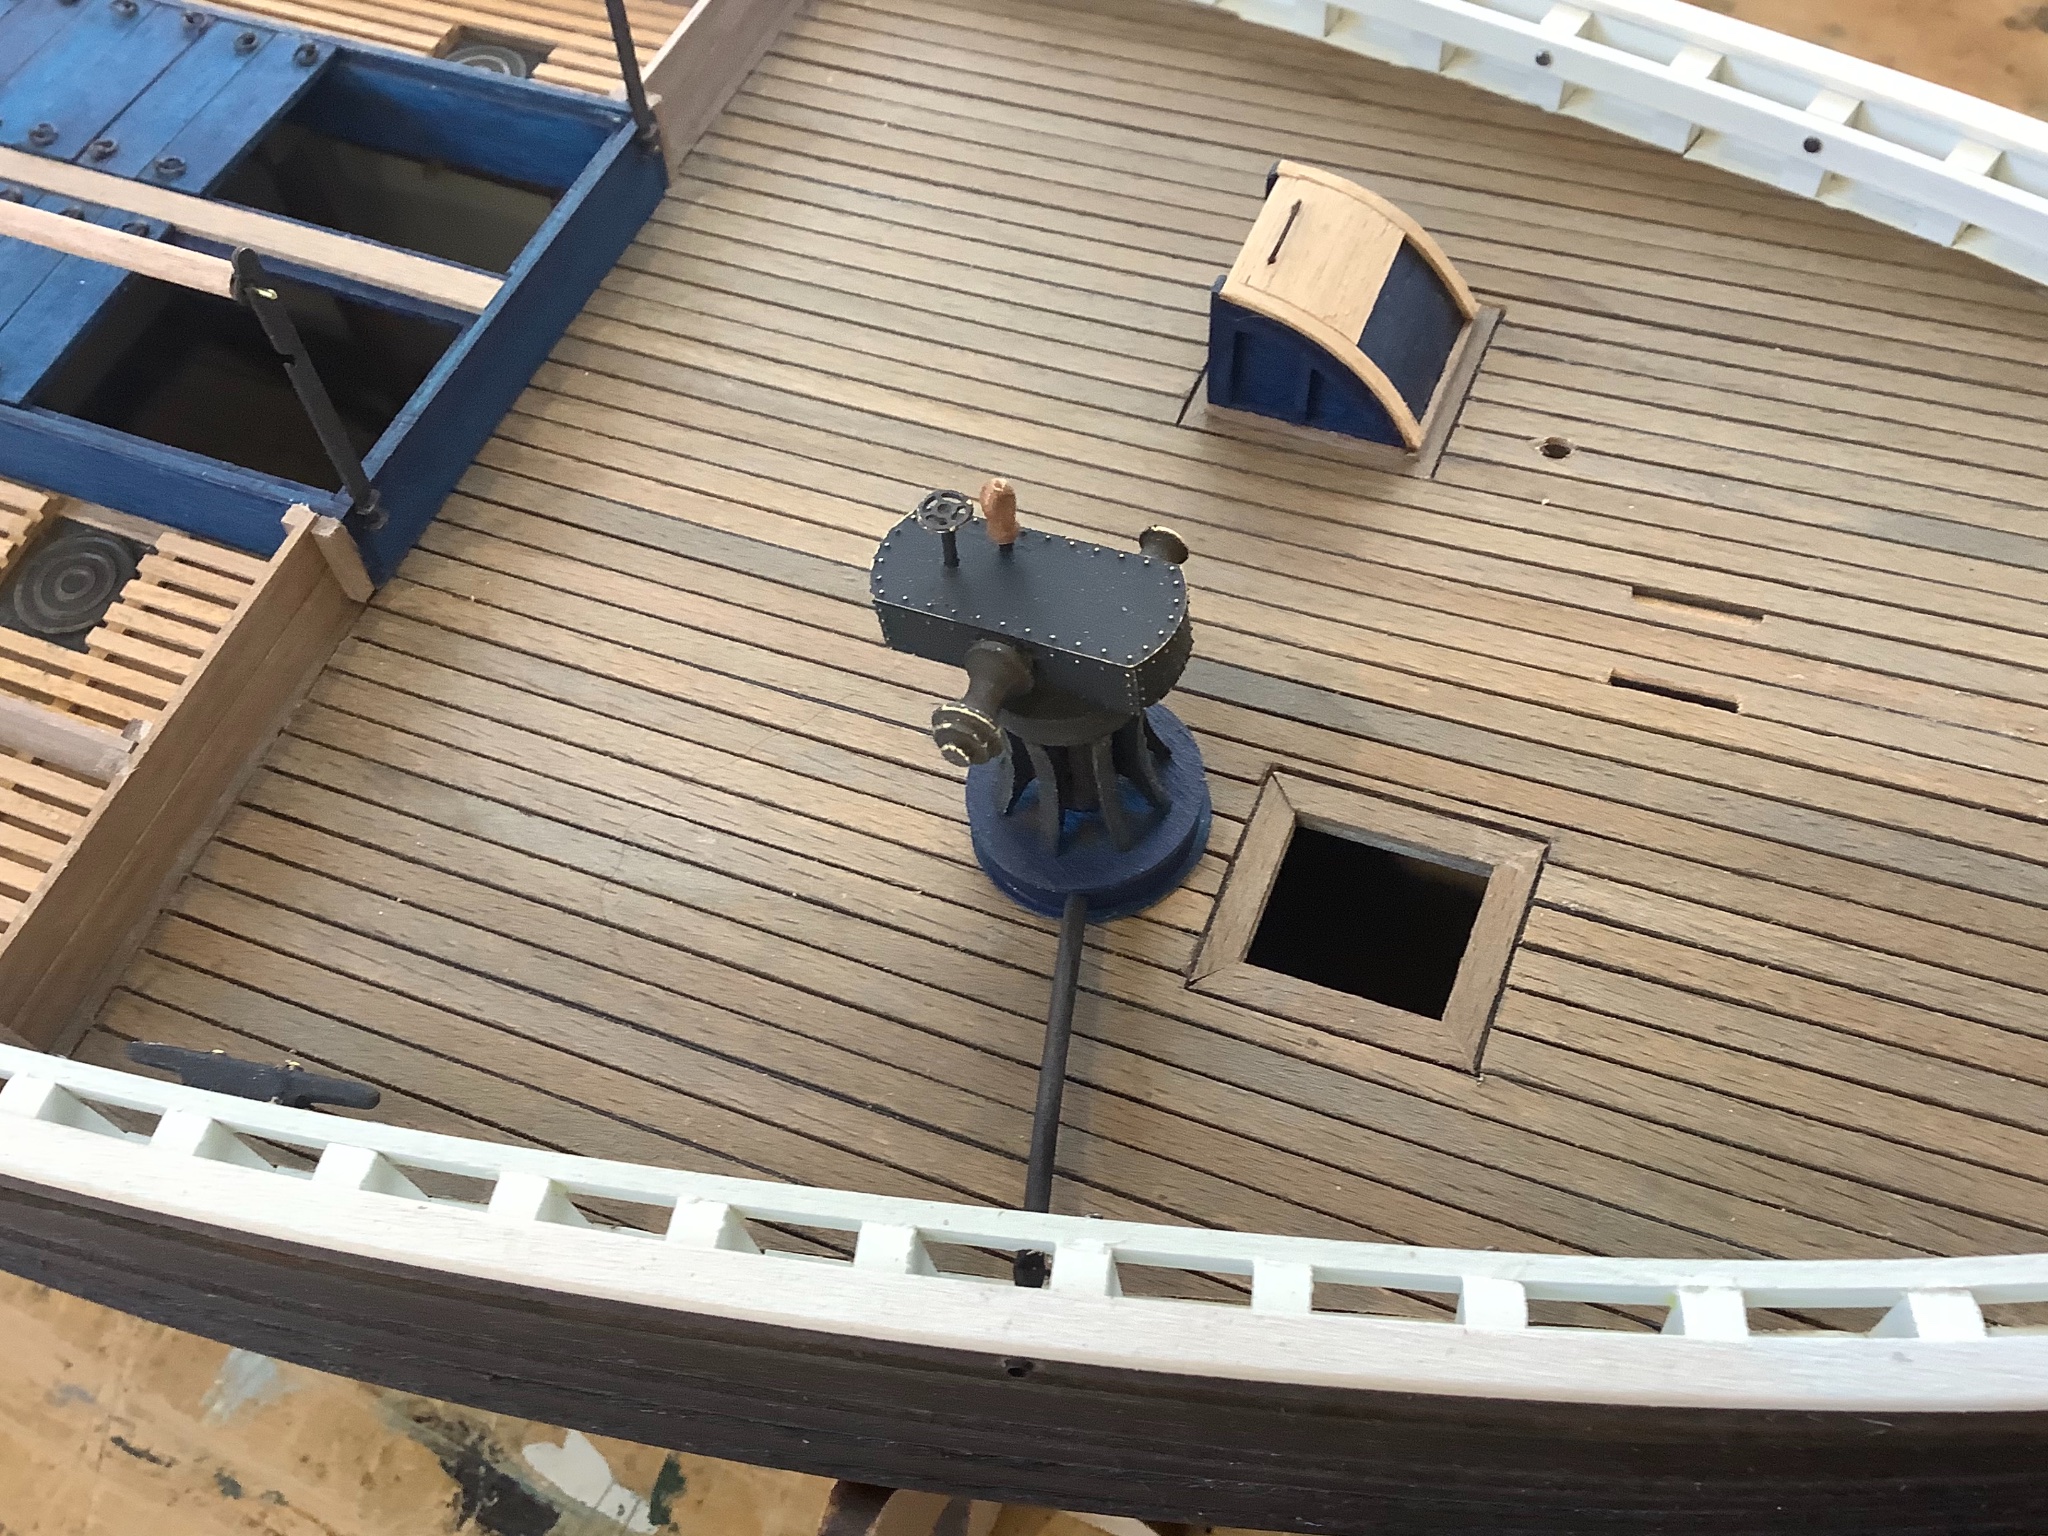
Just finishing up some colourful deck paraphernalia on what has been a creative and enjoyable build. Really just the lifeboat to do and then the masts and rigging. Not a lot of time working in the cabin lately, but really I’m happy to stretch out this build over summer since I don’t plan on starting my next one until late fall. Not sure what area of the model kingdom I’ll tackle after Fifie yet.


- 79 replies
-
- 12
-
-
-
- Fifie
- Victory Models
- (and 1 more)
-
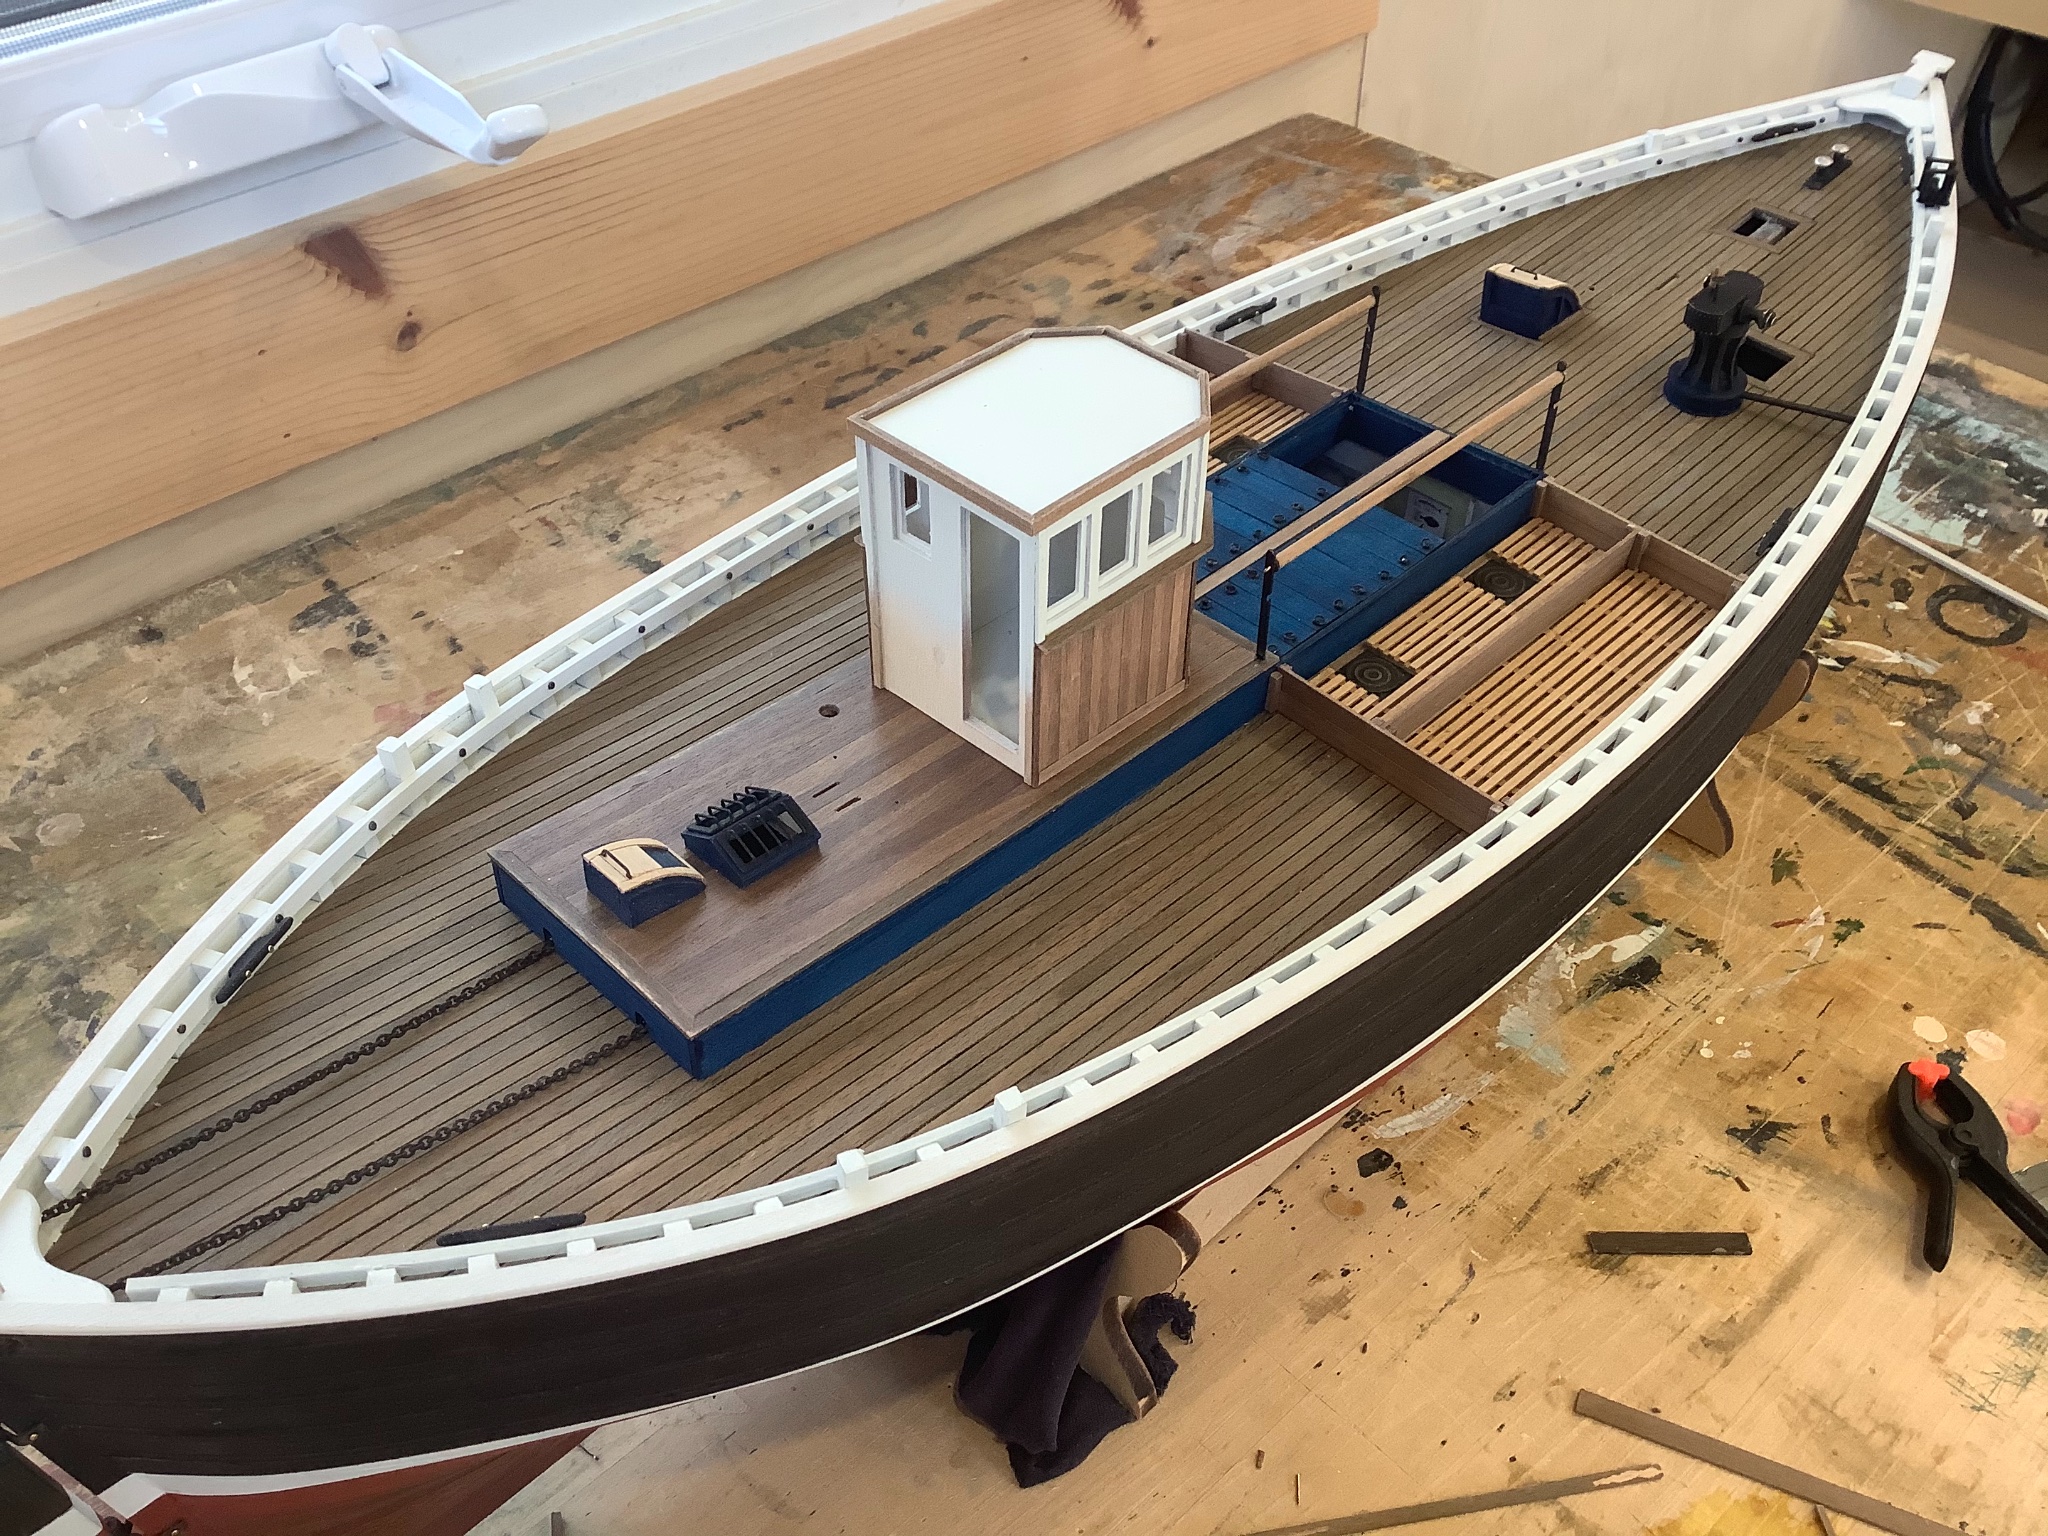
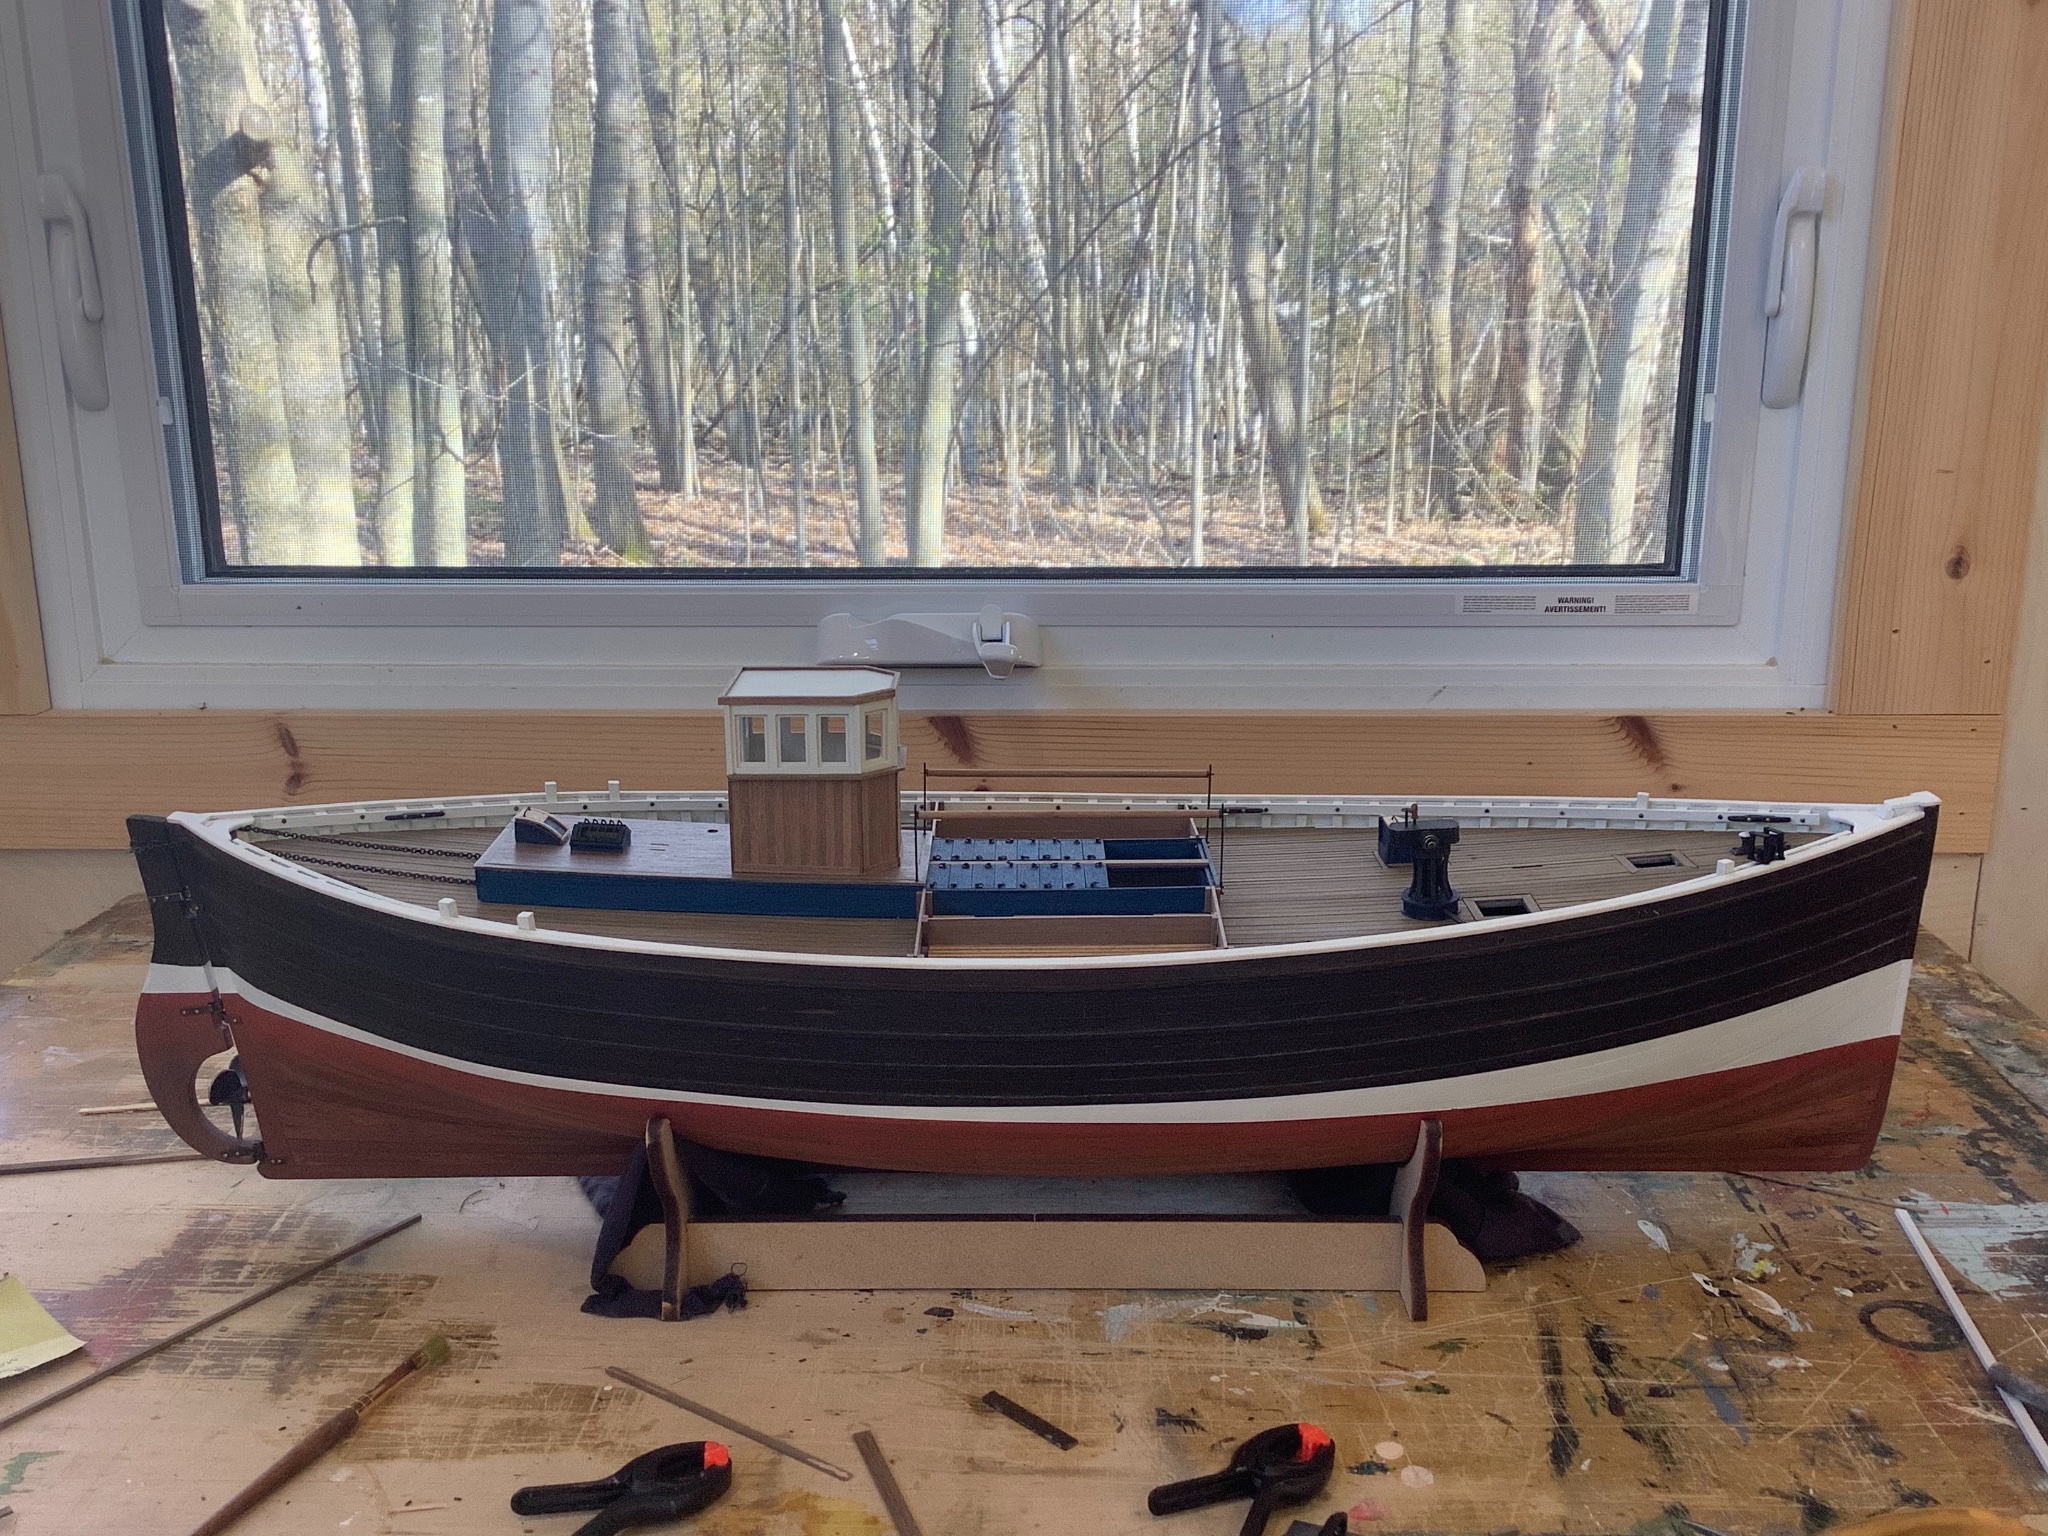
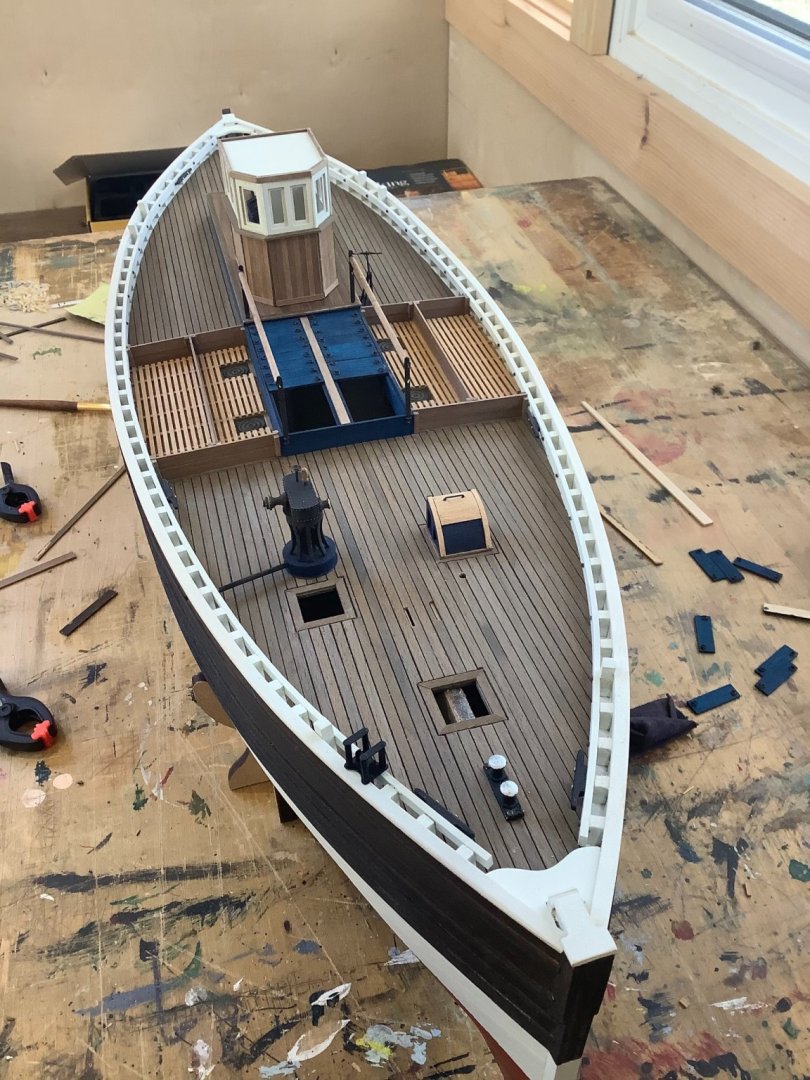
Thanks Popeye! Work has kept me away for the last couple of weeks so haven’t been able to spend much time in the cabin...just started on some of the various deck fittings and pilot house.


- 79 replies
-
- 9
-
-
-
- Fifie
- Victory Models
- (and 1 more)