


DenPink
-
Posts
818 -
Joined
-
Last visited
Content Type
Profiles
Forums
Gallery
Events
Posts posted by DenPink
-
-
Hi all
Sorry not much work has been done on the Revenge.
I have done the first planking, I have to say it is not my favorite job to do on any build, I seem to have a mental block when it comes to first planking ??.
Any way on to the next job.
Denis.
- BLACK VIKING, edmay, kiwiron and 8 others
-
 11
11
-
-
-
Hi Nenad
For the rope on your buckets have you thought about some fine electrical copper wire.
Denis.
- Omega1234, CaptainSteve, Piet and 3 others
-
6
-
gee Den........been wondering where your at........find anything good so far? I'll have to check on your revenge build.......I assume you have a build log

Hi Den
Long time no talk my friend.
Yes I have a log for the Revenge just click on the link.
Denis.
- mtaylor, popeye the sailor and edmay
-
3
-
Naah Sydney and it's surrounding towns has more modelshipwright talent than Melbourne Kevin, not including you of course!
Greg
Hi Greg
I am sure the both city's have good ship builders so why should I up set the apple cart
 :(
:(  .
.Denis
-
-
G'day Denis
Been waiting for more post from you, but nonthing happened. Are you okay mate?
Greg
Hi Greg
I have been busy with my Revenge build also some time out with house hunting in NZ and Australia.
Denis.
- edmay, CaptainSteve and mtaylor
-
3
-
Hi Ron
Don't understand why you cannot get your ropes to hang down.
What sort of wax are you using, and what glue for the knots.
Send me a PM and I will take you through it if you wish.
Your build is looking fantastic.
Denis
I will send you some wax that I use, but you may have the same one please let me know.
-
-
Hi Ron
To get them to lay down, you should have waxed them like Mark said.
After waxing them, tie a knot at the back of the sail put a spot of glue on.
Turn it over to the front of the sail and do another knot, then another spot of glue but at the same time hold the tail of the rope down wards let it dry.
The glue will hold it straight down.
You will have to pass the rope through some wax about 3-4 times on each side.
Hope this helps you.
Denis
-
Hi Nenad
I am so pleased you are not going to put your new friend in a cage, they love people around them.
We never had the three Old English Sheepdogs out side the house they were always inside apart from walking them and showing them at shows.
I think by looking at your photo that your dog will have a tail.
That is a shame as in this PC world we live in they are not allowed to doc the tail off.
That is how they got the nickname Bobtail.
Why they cut the tail off was because a dog uses the tail as a rudder (just like a ship) .
They used OES dogs to herd sheep and cattle from Wales and Cornwall to London, a dog with a tail split the sheep and cattle up so you had sheep and cattle going every were, so they cut the tail off the OES dogs so they could not turn so quickly this kept the sheep and cattle in one herd and not scattered all over the land.
I hope I have explained how they got the name Bobtail.
If you look after him or she they will reward you an 100 times more.
Denis.
-
Denis,
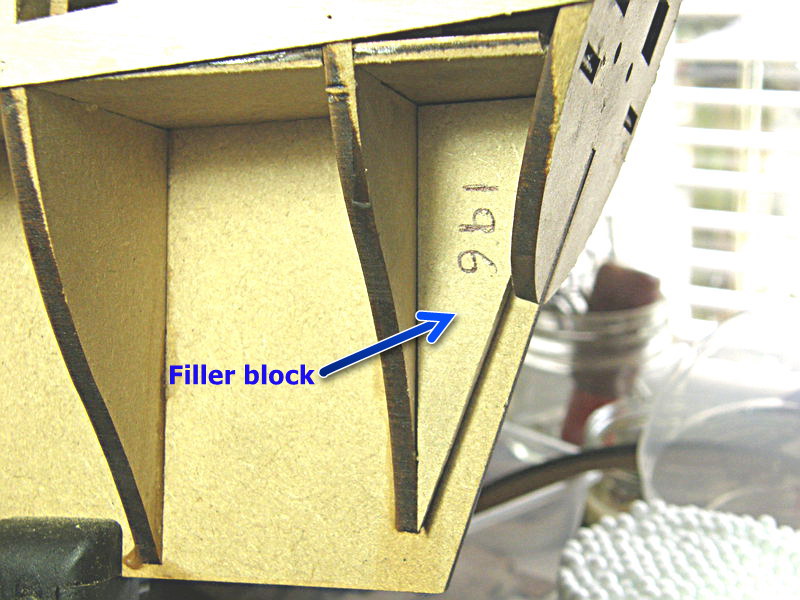
I just looked at the photo you show a few posts above this one of the filler block 196. To be redundant, as an amateur I would like to respectfully ask if you might be willing to show in excruciating detail how you fair and how you plank at the junction between the rudder post and where the planks transition from the post into the curve of the transom. Have I described that clearly? It is hard to turn my visualization into words . . . .
I am loving your descriptions. Thank you for being so explicit.
Respectfully,
John
Hi John
Like I said I am not working on the Revenge for another day or two.
I sent you a drawing on how to use a half round file on parts like this.
You glue part 196 in place, then you start with the flat part of the file from one frame to the next one in front , when you get to the concave part turn the file over to the half round part, as you push the file down twist your wrist, so you are using all of the half round part of the file.
You will be taking part of the false keel off, this is what you want ( warning keep an eye on how much you take of the false keel you have two sides to file ).
Then you start again with frame two and three from the stern area till they blend together.
Put a thin plank across the frames to see how it fits across the frames.
Like I said when I get to that stage I will send you an email.
Denis.
- mtaylor and CaptainSteve
-
2
-
Hi Nenad
Yes it is an Old English Sheepdog.
My wife and I had three of them, they are fantastic dogs.
Lots of exercise and grooming ahead of you my friend.
Denis
- GLakie, CaptainSteve, jud and 5 others
-
8
-
Model ships, now model trees as well. I would guess you definitely like miniatures, don't you? Any chance you also have a chihuahua dog?

Good job on your Revenge, by the way (OK, it's only a mini-compliment, but well meant!...)
Hi Jean
Very good,
But how did you know I had dogs ???, but I am sorry to say I had three Old English Sheepdogs
 :D
:D  .
.Denis
-
Looking great, Denis. Please take extra photos of your stern area fairing. I'd also like to see details of how your planking transitions between the lower vertical part of the stern post then transitions into the curve of the transom. The couple of planks at that transition area are of interest to me.
Respectfully,
John
Hi John
I have not finished the fairing yet, I am taking a day or two off from my build .
I am busy doing my Bonsai tree, plus going to cut off part of a Totara tree and with a bit of luck turn it into a Bonsai tree.
I will send you an email with photos when I have finished the fairing etc.
Denis
-
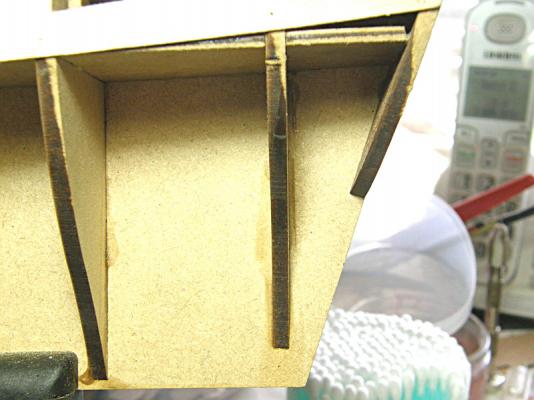
Hi Frank
Thank you my friend.
To tell you the truth I nearly missed it, I was looking for the size of the wheels for the stern cannons and the filler blocks 196 was at the bottom of the cannons.
Denis.
- edmay, CaptainSteve, riverboat and 1 other
-
4
-
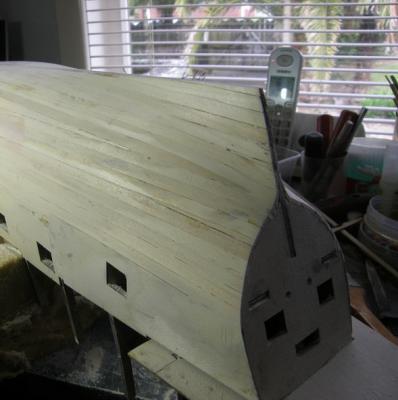
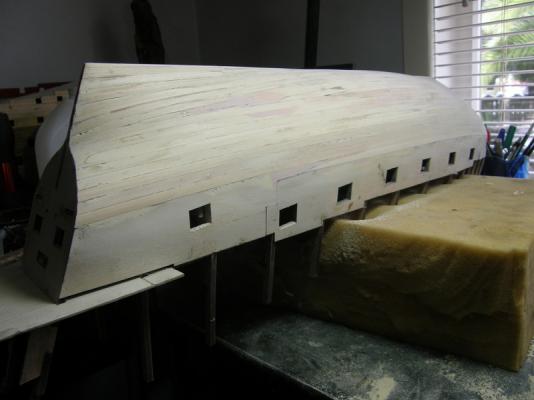
Hi all
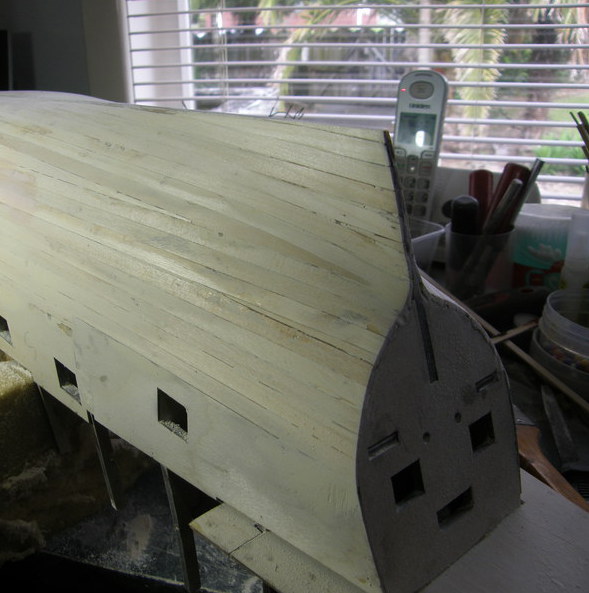
Done a little bit of work, side panels have been glued on, so now time to start the fairing of the stern area.
WARNING to the builders who have not got this far, or are about to start this Revenge kit build.
The instruction book doesn't mention the filler block at the stern.
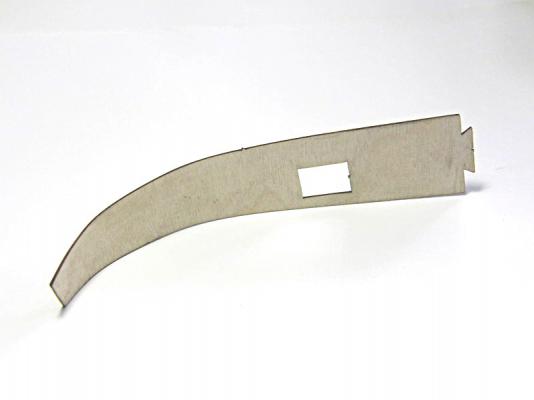
Please look at plan sheet 4 you will see part 196 ( filler block ) has to be fitted before you start fairing the bulkhead frames.
Denis.

- CaptainSteve, mtaylor, UpstateNY and 4 others
-
7
-
-
-
-
-
-
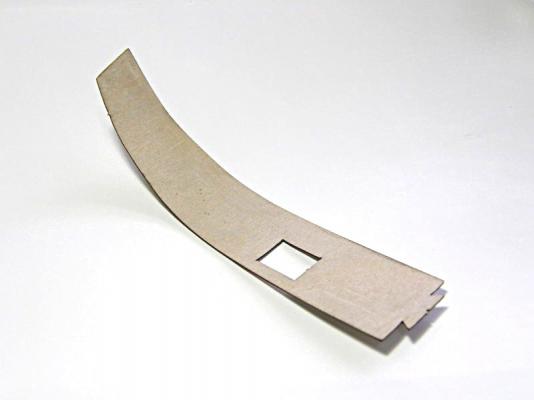
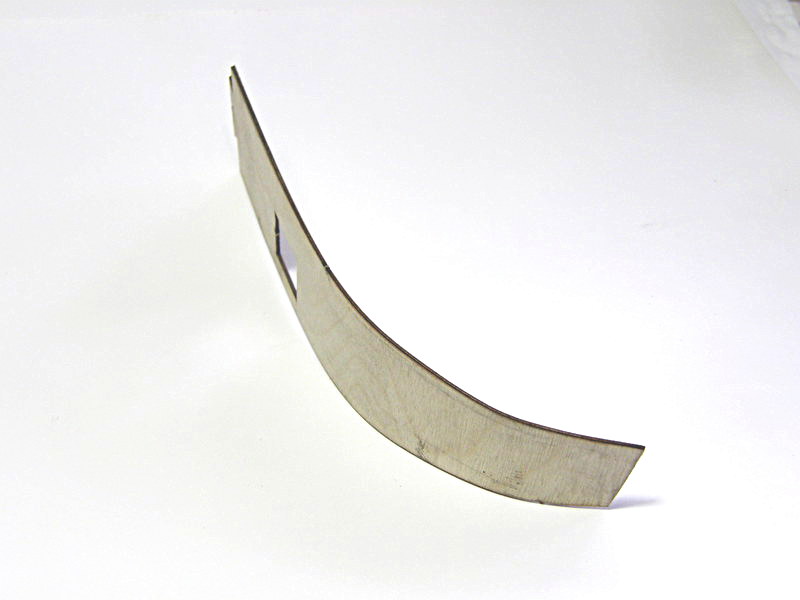
Hi All
Sorry not a lot has been done this week.
Part 53 that wraps round the bow is very springy, so to take out some of the spring out of this part ready for gluing I decided to get my electric plank bender out.
I soaked the part in water for only one minute, just to dampen the wood ( never over soak ply wood ).
Then used my plank bender to get a curved shape for the bow.
Denis.


HMS Revenge by Denis R - Victory Models (Amati) - Scale 1:64
in - Kit build logs for subjects built from 1501 - 1750
Posted
Hi Edwin
Thank you my friend, it can be better, just a bit more sanding to do.
Denis.