hamilton
-
Posts
1,933 -
Joined
-
Last visited
Content Type
Profiles
Forums
Gallery
Events
Everything posted by hamilton
-
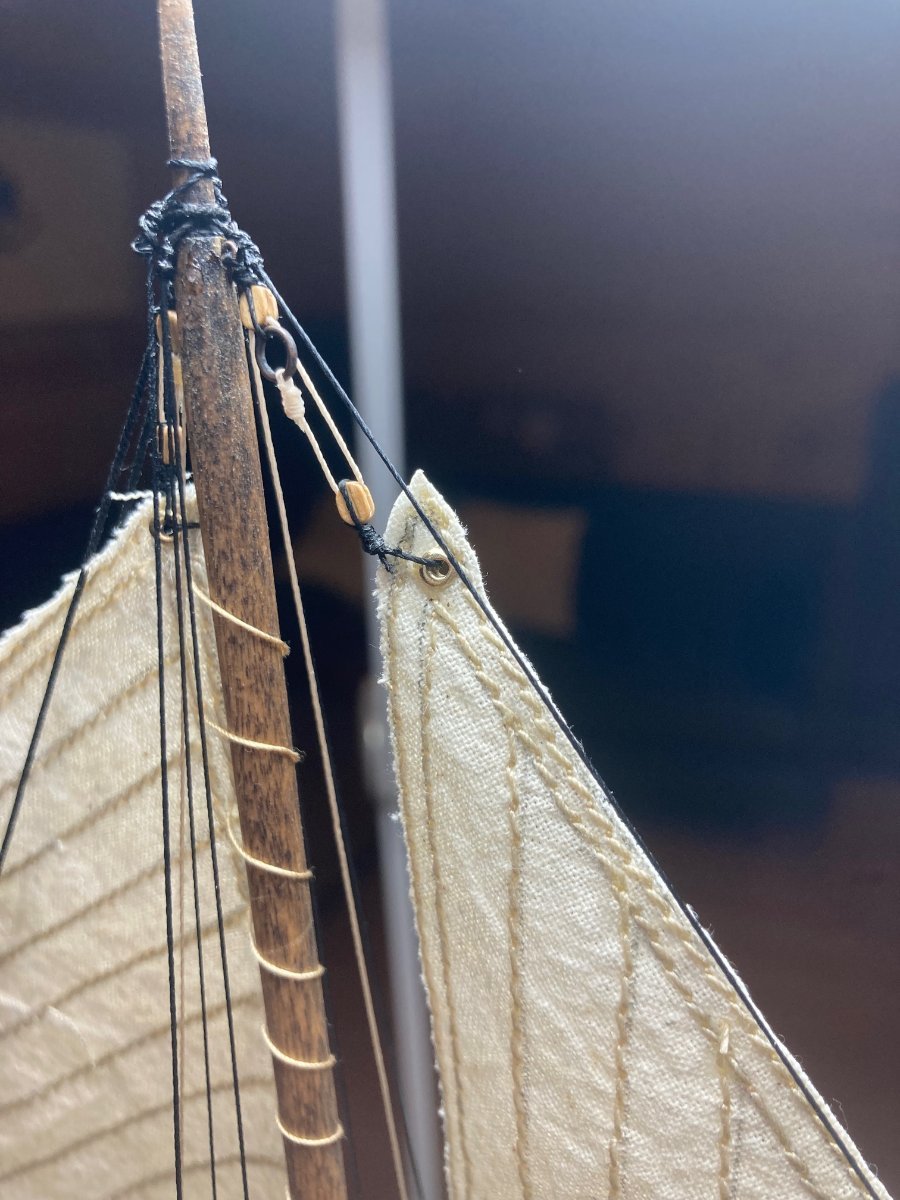
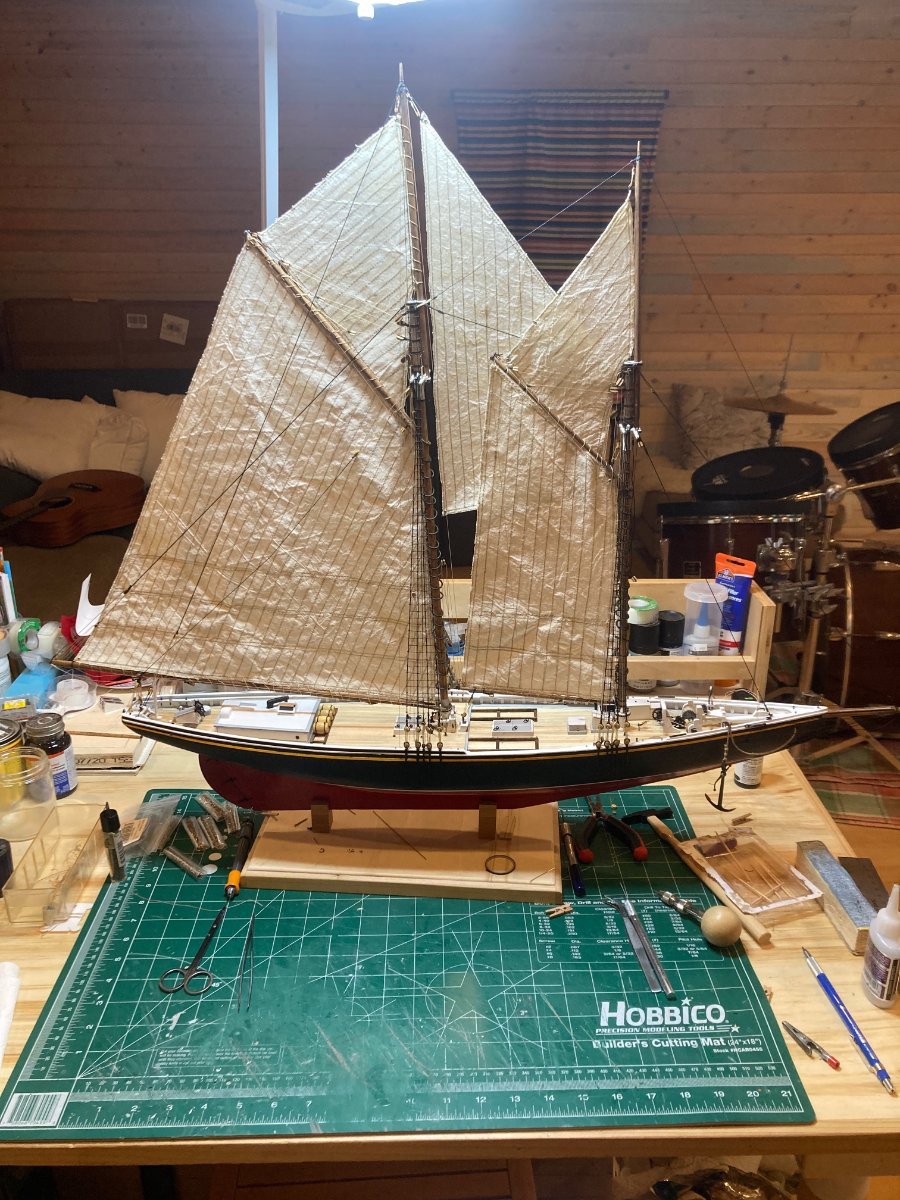
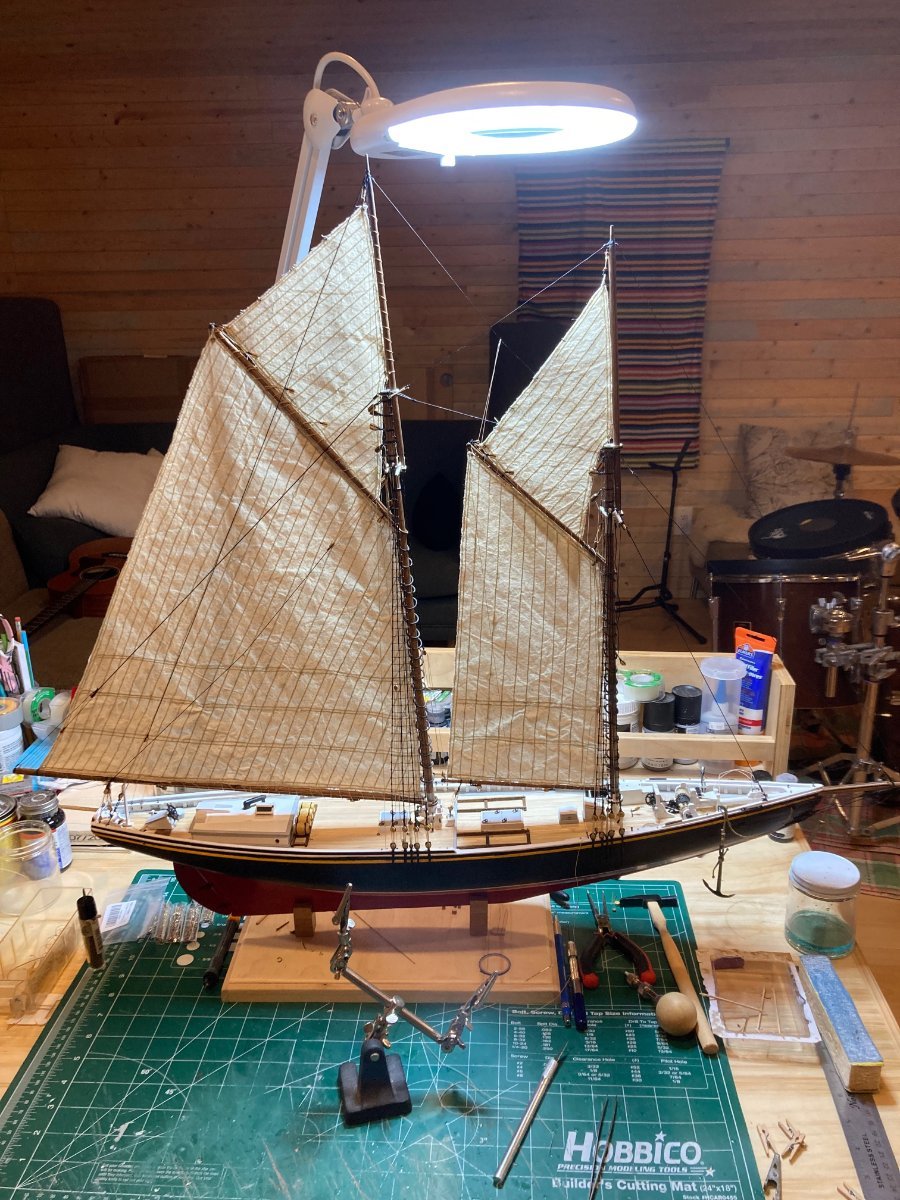
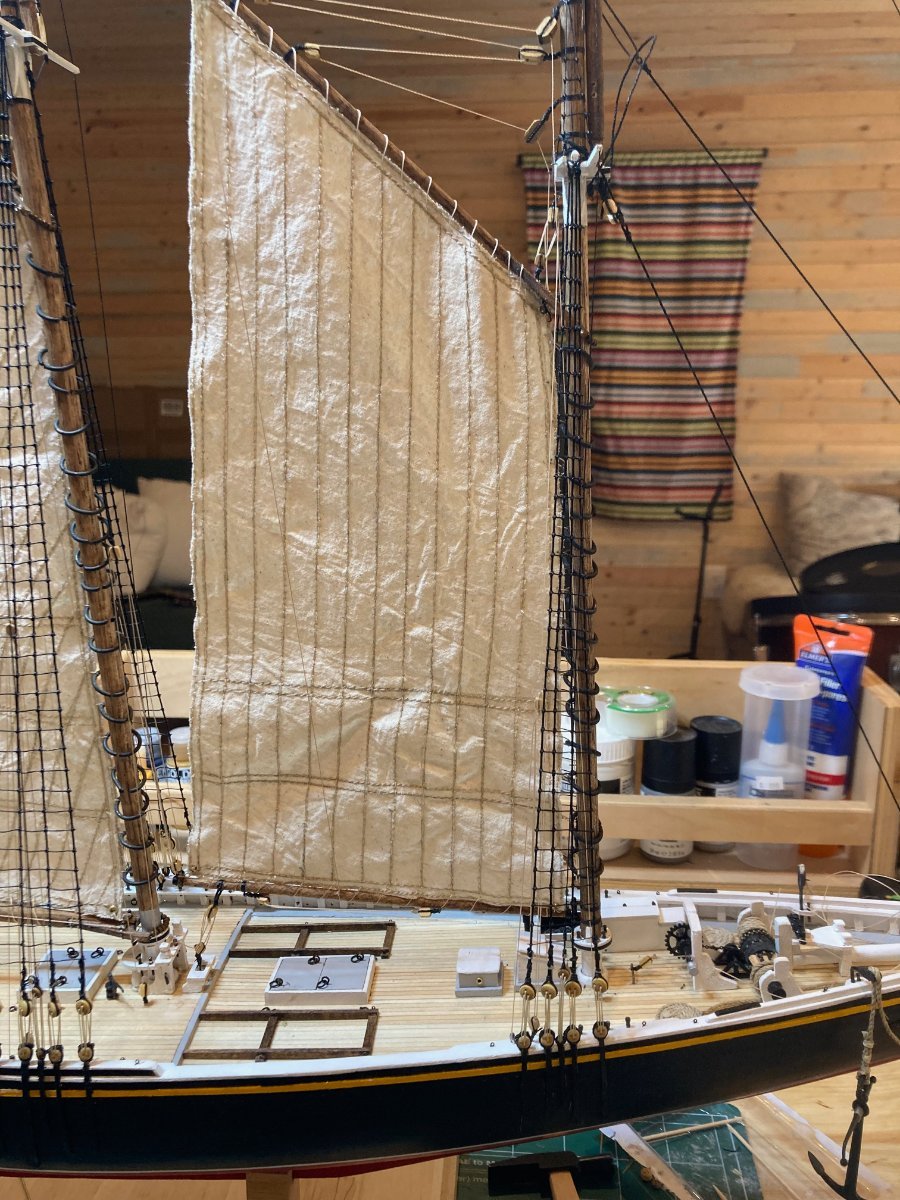
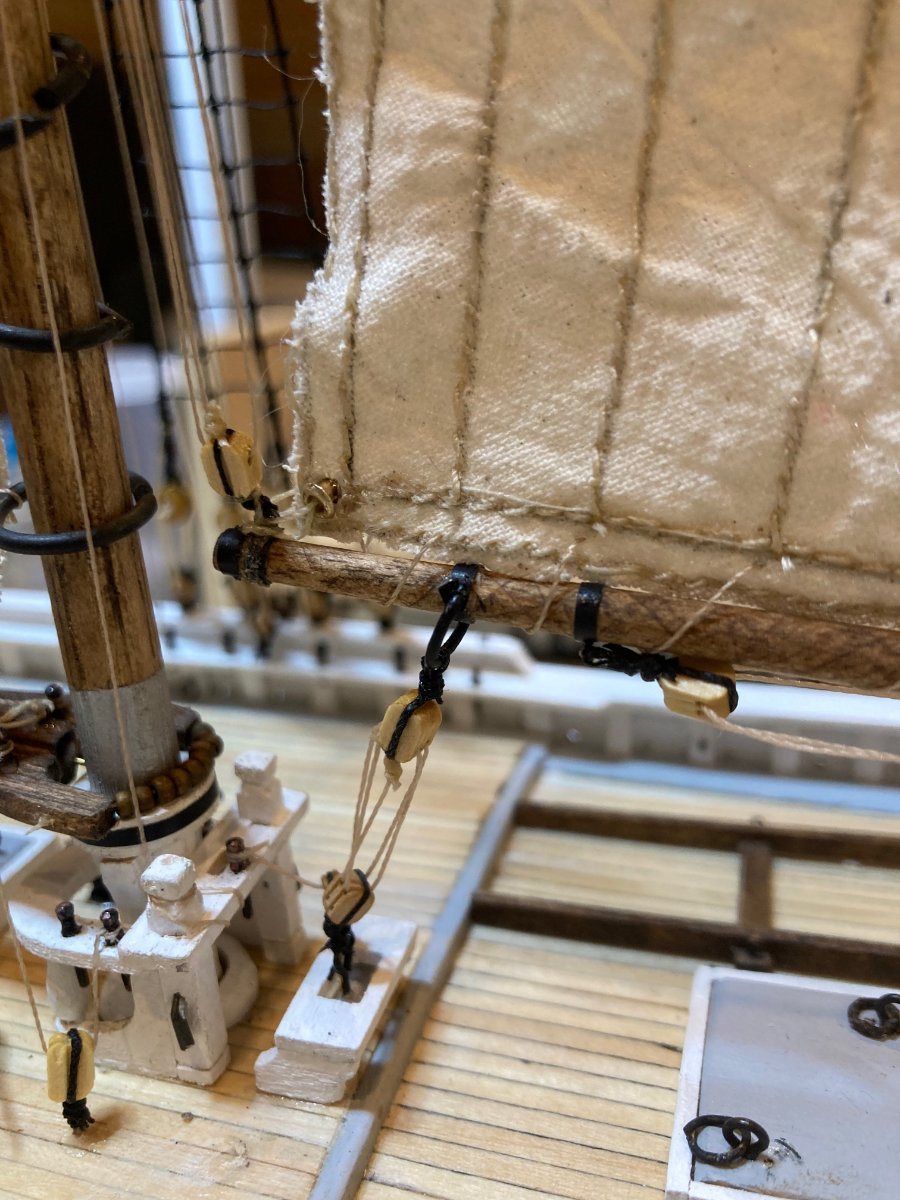
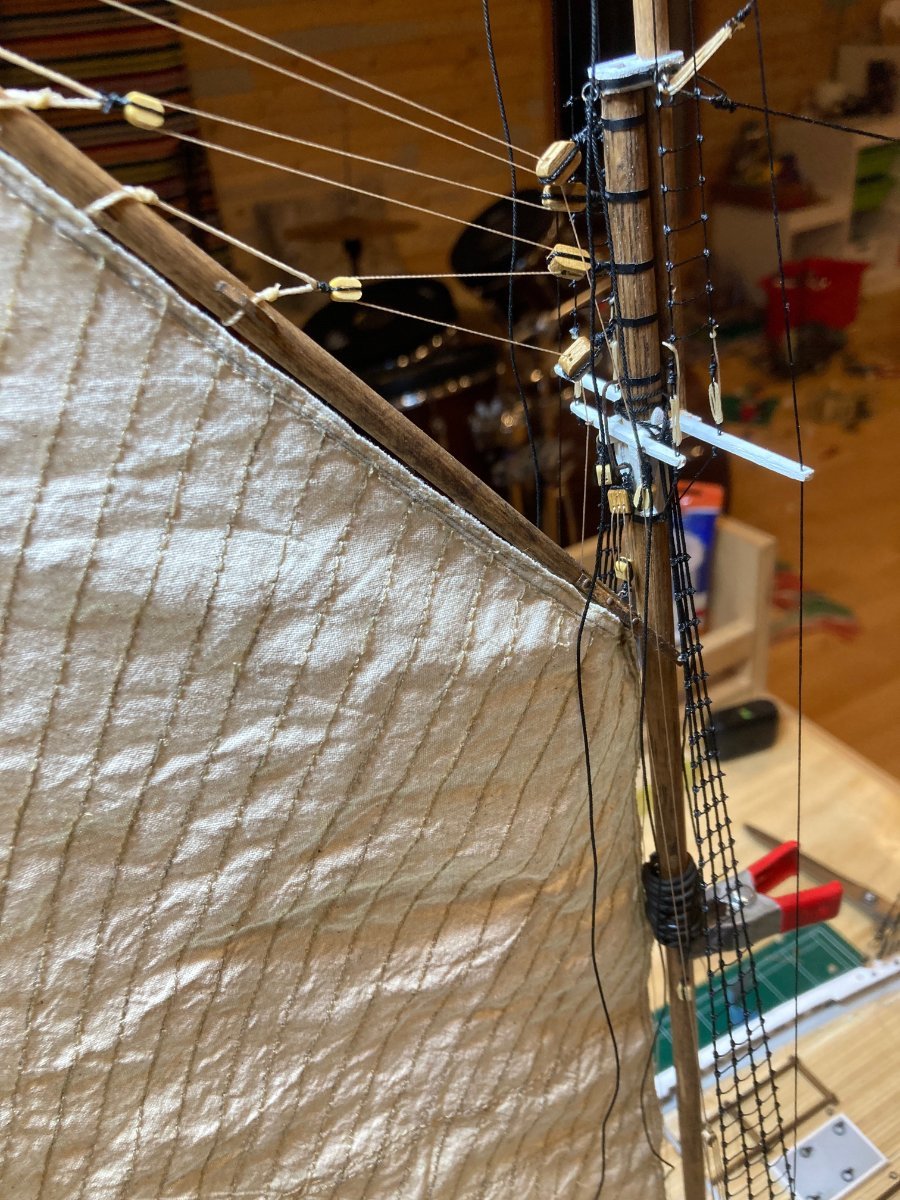
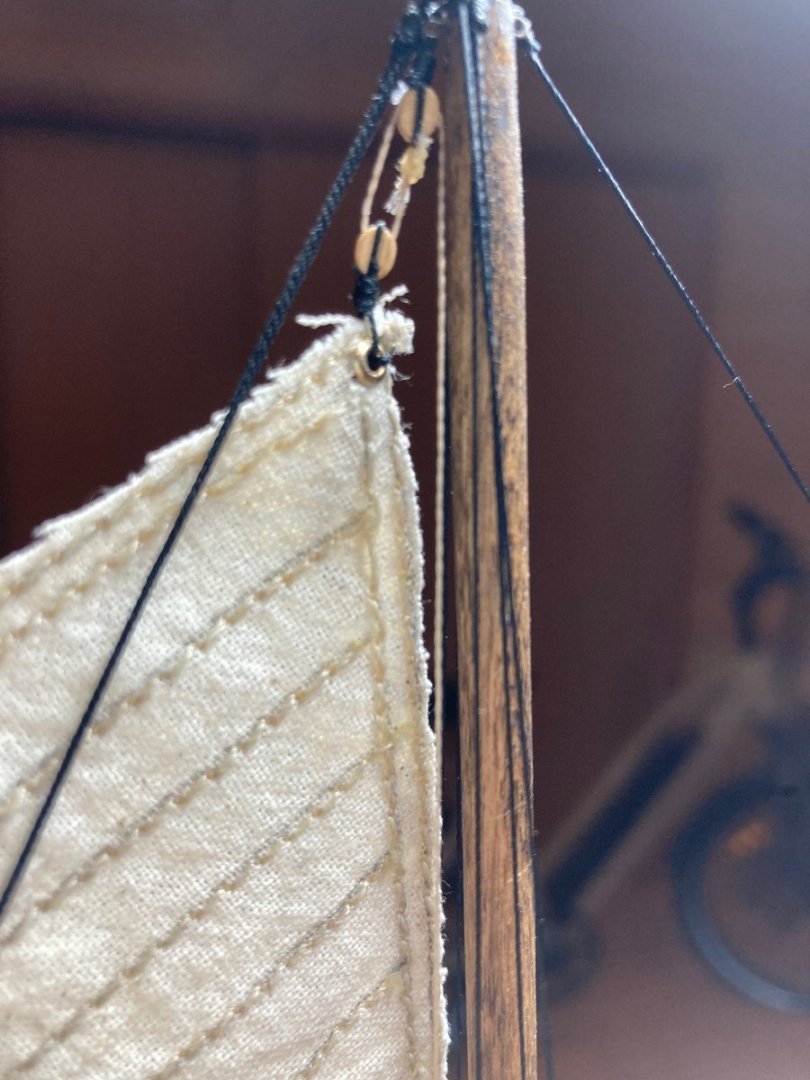
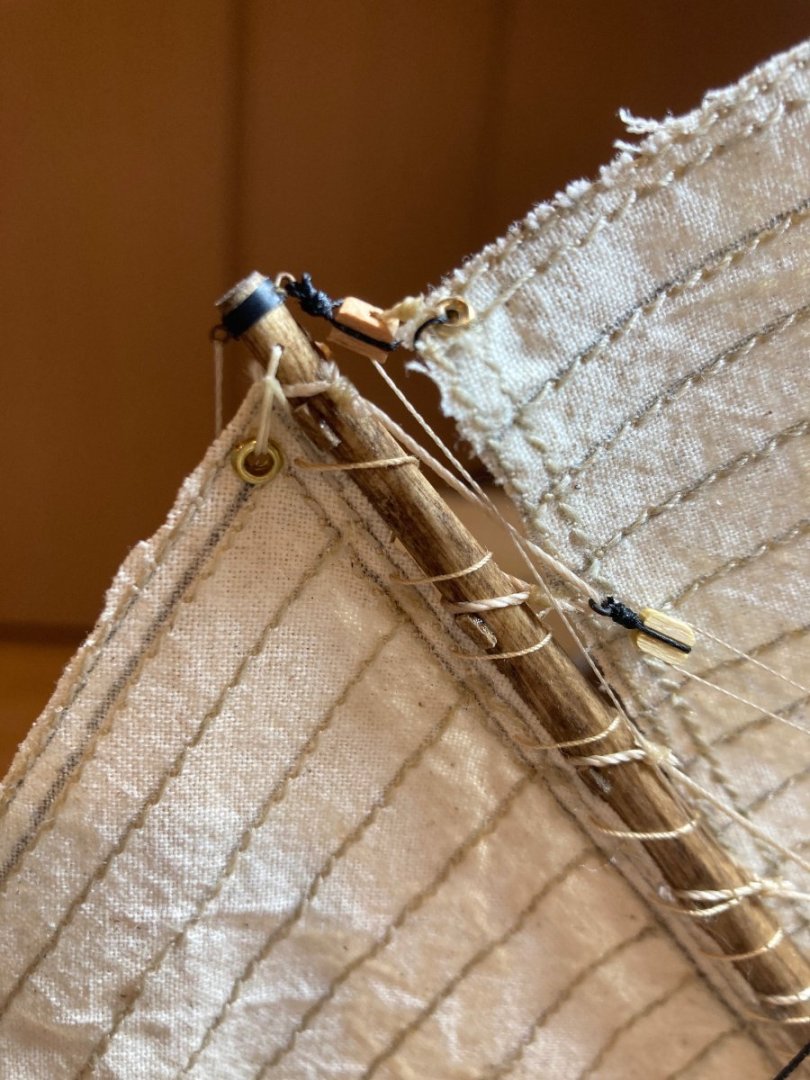
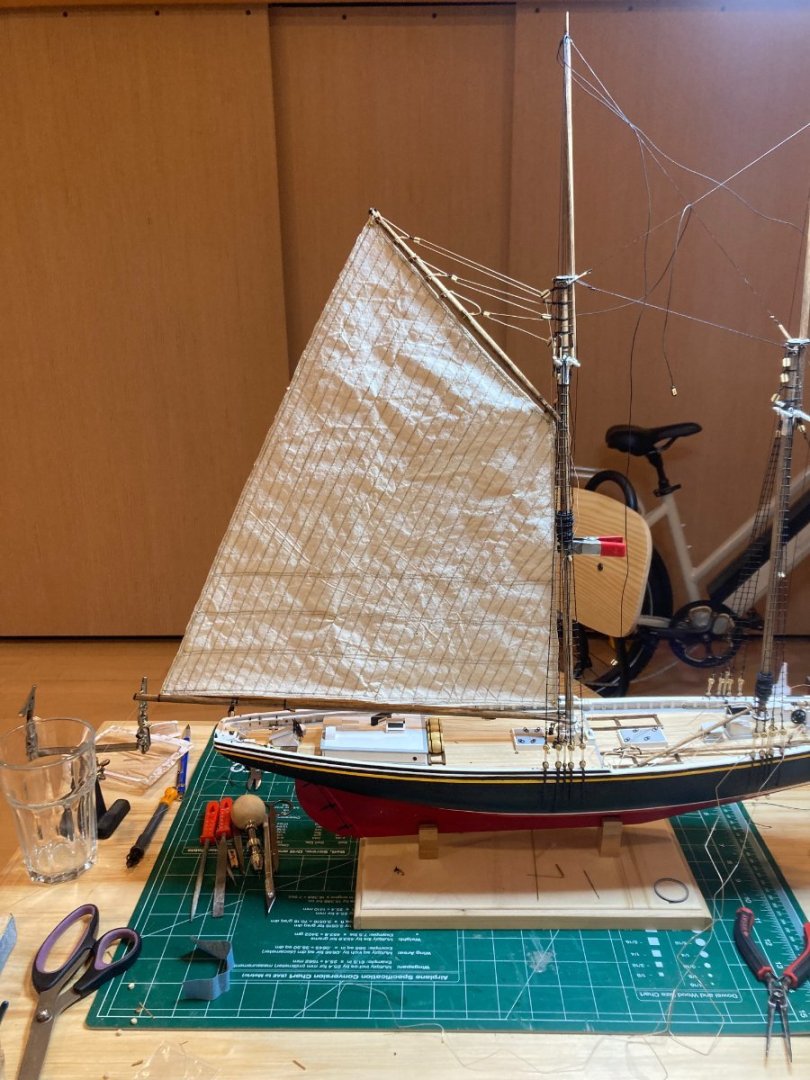
 Very quick update - with minimal time to spend on modelling each day, I managed to fabricate and rig the jib sail - there was nothing trickier about this than the other sails, though I did work out a better way to add the brass rings that lace the sail onto the jibstay - with the jumbo jib, I rigged the sail on the model first and then added the rings - a big mistake as this ended up putting a lot of pressure on the rig and I accidentally pulled a couple of things out of alignment and had to re-do them, which (as many of you will know) gets harder to do the more the model gets built up and the more you have to navigate the spider's web....this time, I opened the rings, added them off the model, and made temporary lines at the halliard and the tack to steady the sail in place. I could then easily pry the rings closed one-by-one, then add the rigging features. This proved to be much easier to accomplish without risking damage to the model. In any case, here is a photo - I posted this already in the "state of the build" thread elsewhere on MSW, so if it looks familiar, that's why! Enjoy and bye for now hamilton
-
Is this the model shipways Flying Fish (tea clipper of 1851) or the Corel Flying Fish (schooner of 1860) - mast lengths will be different for each of these models, so letting us know which you're working on will net a useful answer - I can't speak to the Corel model, but I have the MS one and can certainly help with mast lengths if that's the model you're working on hamilton
-
Hello John It's taken me way too long (shamefully long) to look through your build log - just did that this evening and WOW - no short cuts for you, huh? Some incredible work here - the bow works (windlass, etc.) look great and the finish on the deck superstructures is really nice. Those dory jigs have confounded me for months now...I had a go at making one, but lacked the patience to work with that thing - seeing you go through it has now inspired me to have another go....wonderful work! hamilton
- 282 replies
-
- 2
-

-

-
- Bluenose
- Model Shipways
- (and 1 more)
-
Bluenose staysail halliard - confusion
hamilton replied to hamilton's topic in Masting, rigging and sails
thanks Wefalck - that is helpful! hamilton -
Your Bluenose is shaping up beautifully, Gregg - I love the idea of the furled sails - I feel like I read a tutorial on fabricating furled sails somewhere - either on here or in the article database of the Nautical Research Guild home page - I'll see if I can't locate this or something and pass it on. hamilton
- 184 replies
-
- 2
-
-
-
- Bluenose
- Model Shipways
- (and 1 more)
-
Furled sails seem a challenge - I know that they are fabricated differently than when they are displayed set, but I've never tried doing furled sails myself....I've always admired the way they look, and I think that as a display option they probably read as more authentic in the context of a static model ship - looking forward to seeing your experiments! hamilton
-
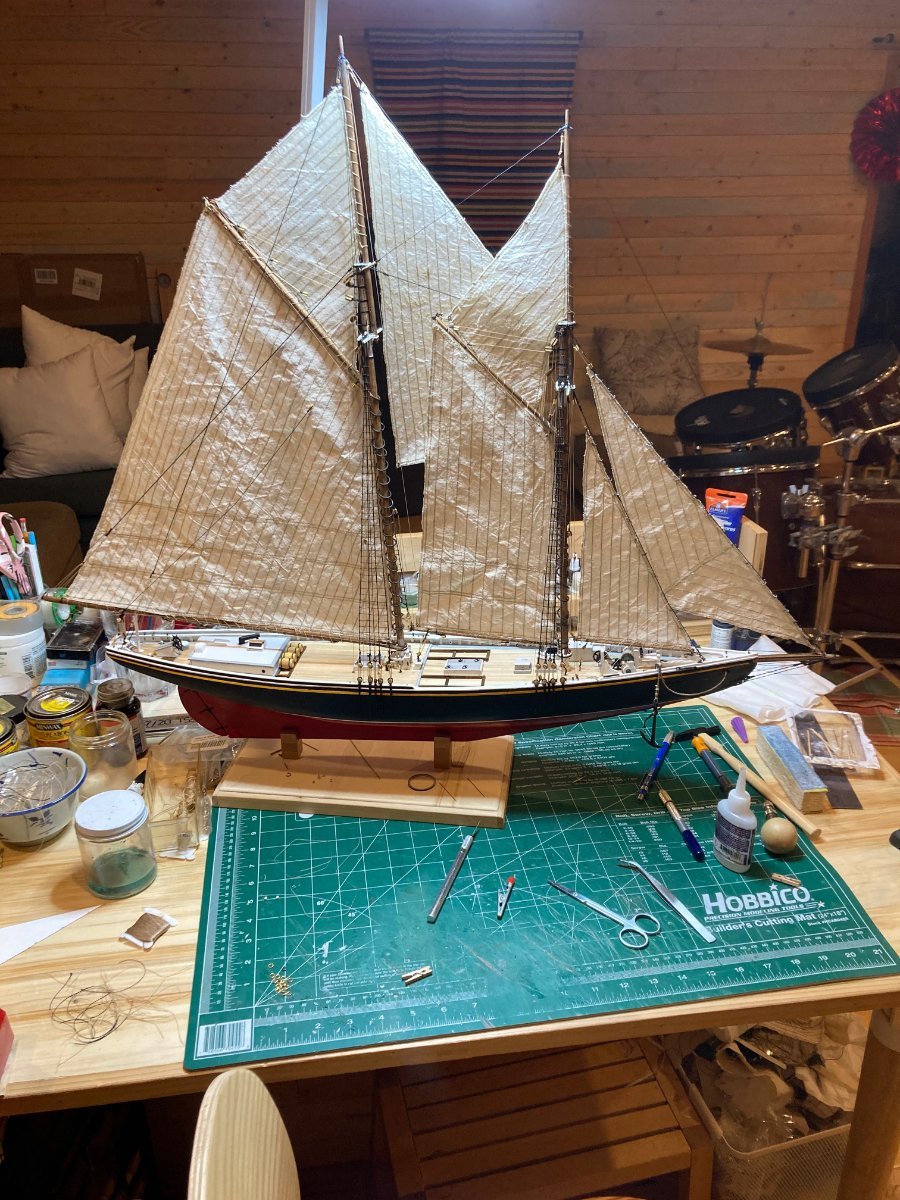
Thanks Gregg - it's pretty incredible how the sails transform the model and give it what the marketers of shampoo call "body". I was considering this as a gift for a close colleague who is retiring at the end of the year, but now I worry that it's so big it'll be seen more as an imposition than a gift! But maybe I'm just looking for excuses to keep it for myself....... hamilton
-
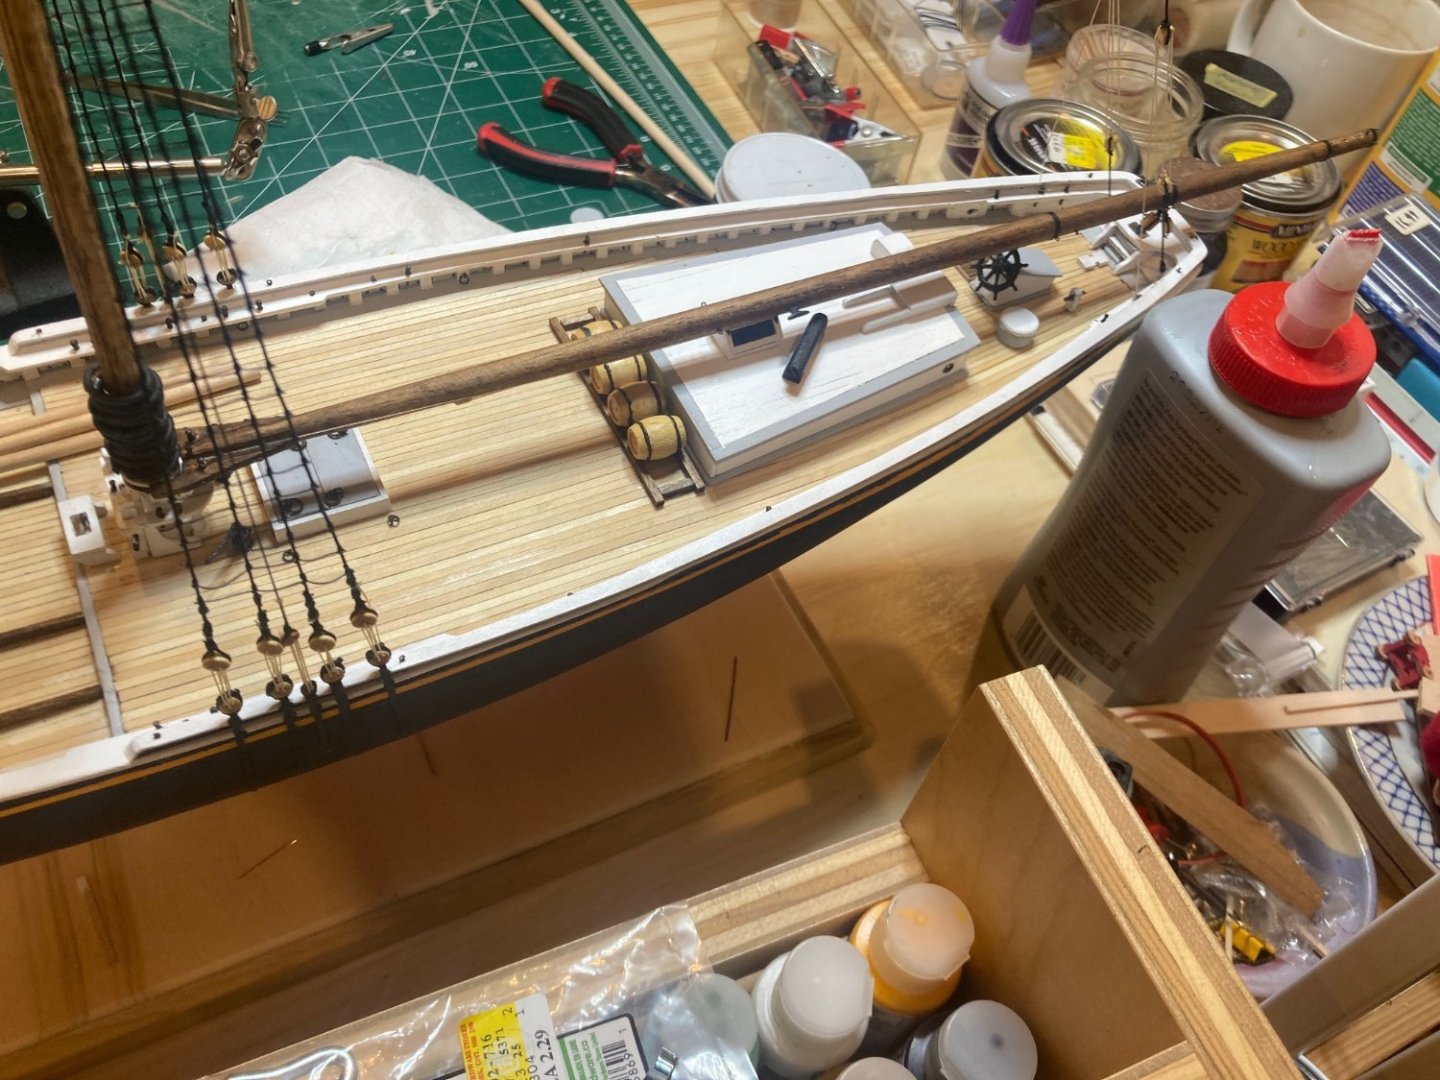
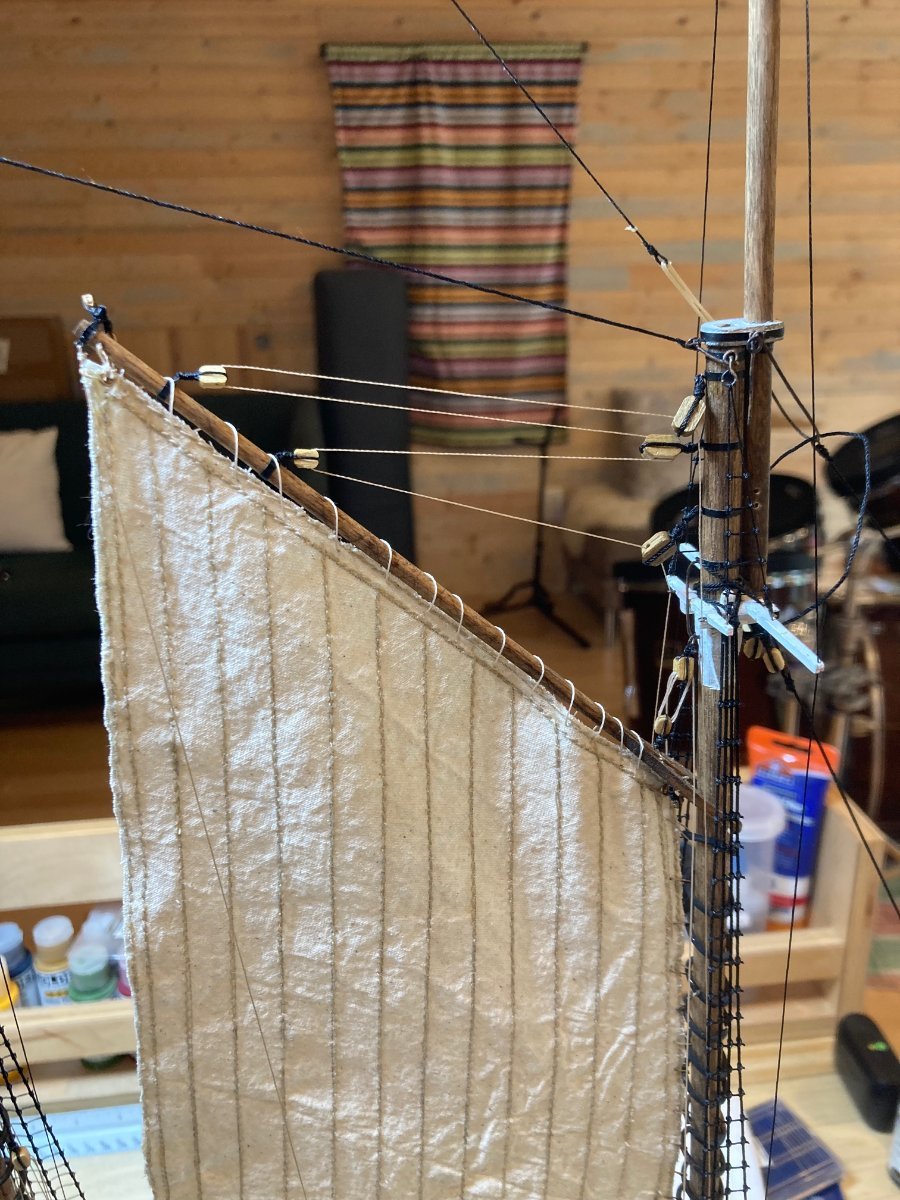
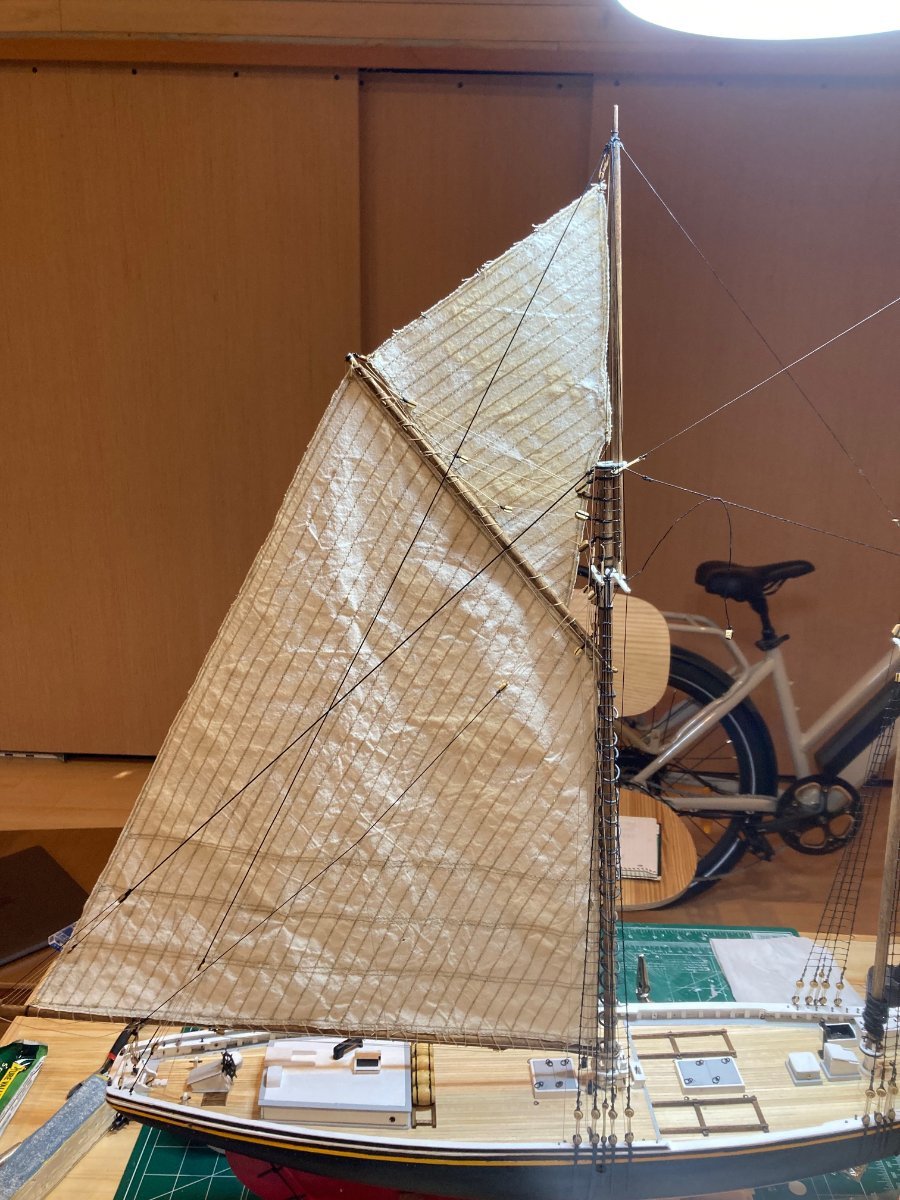
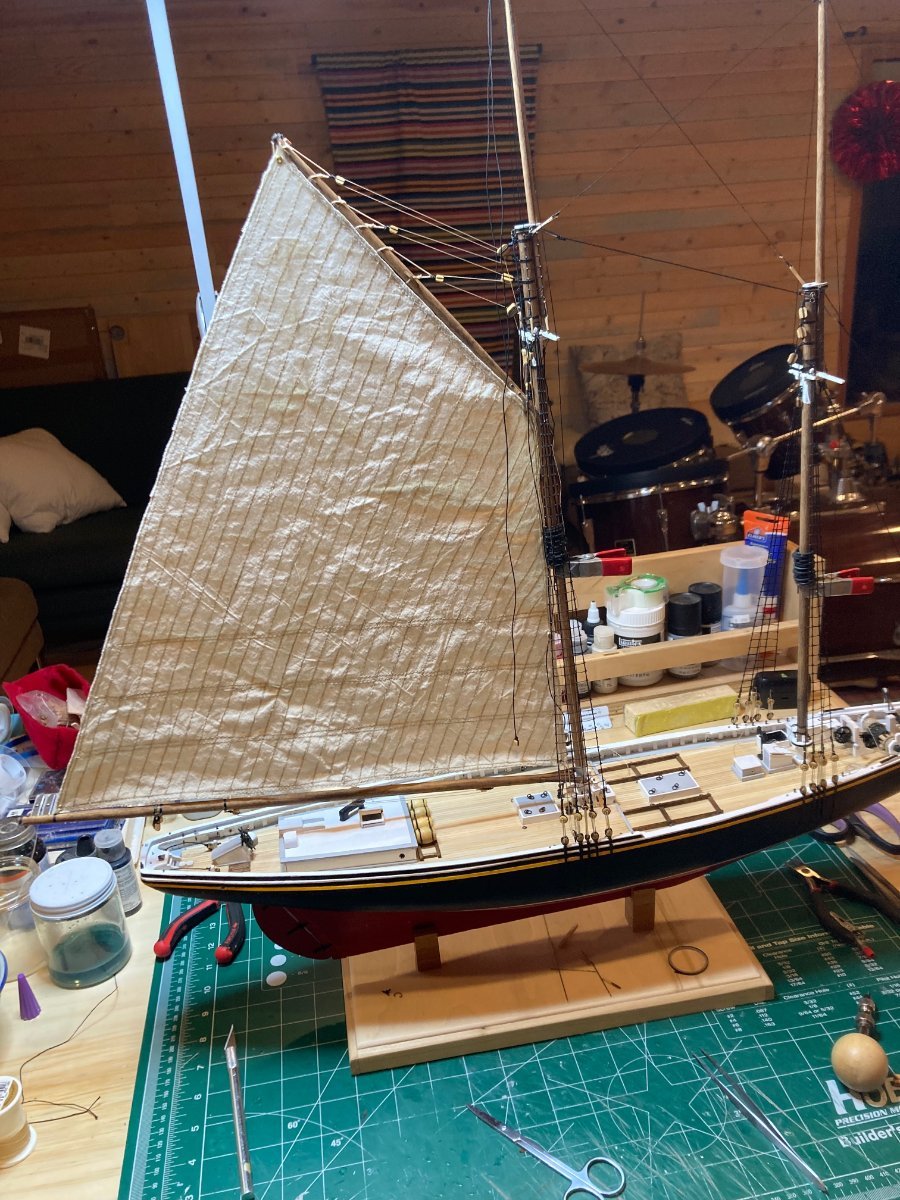
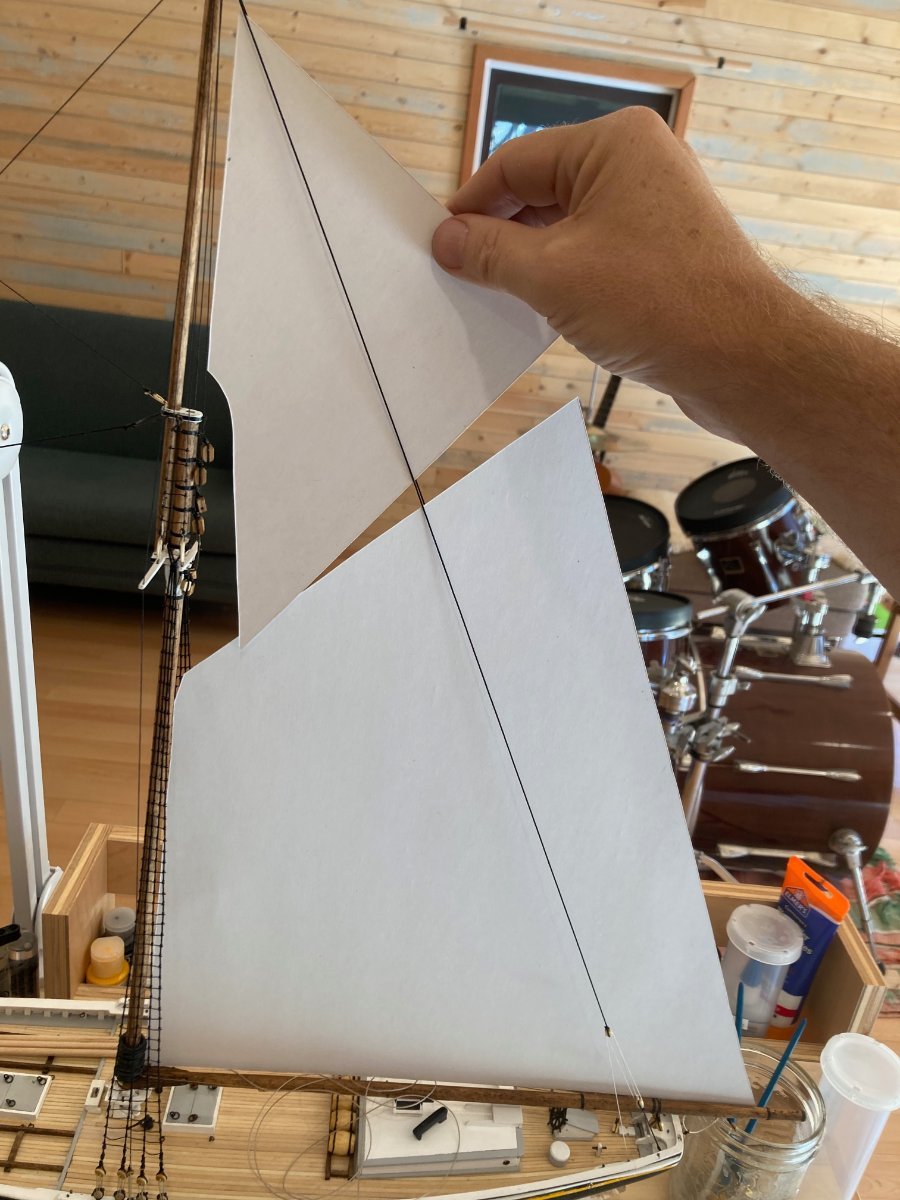
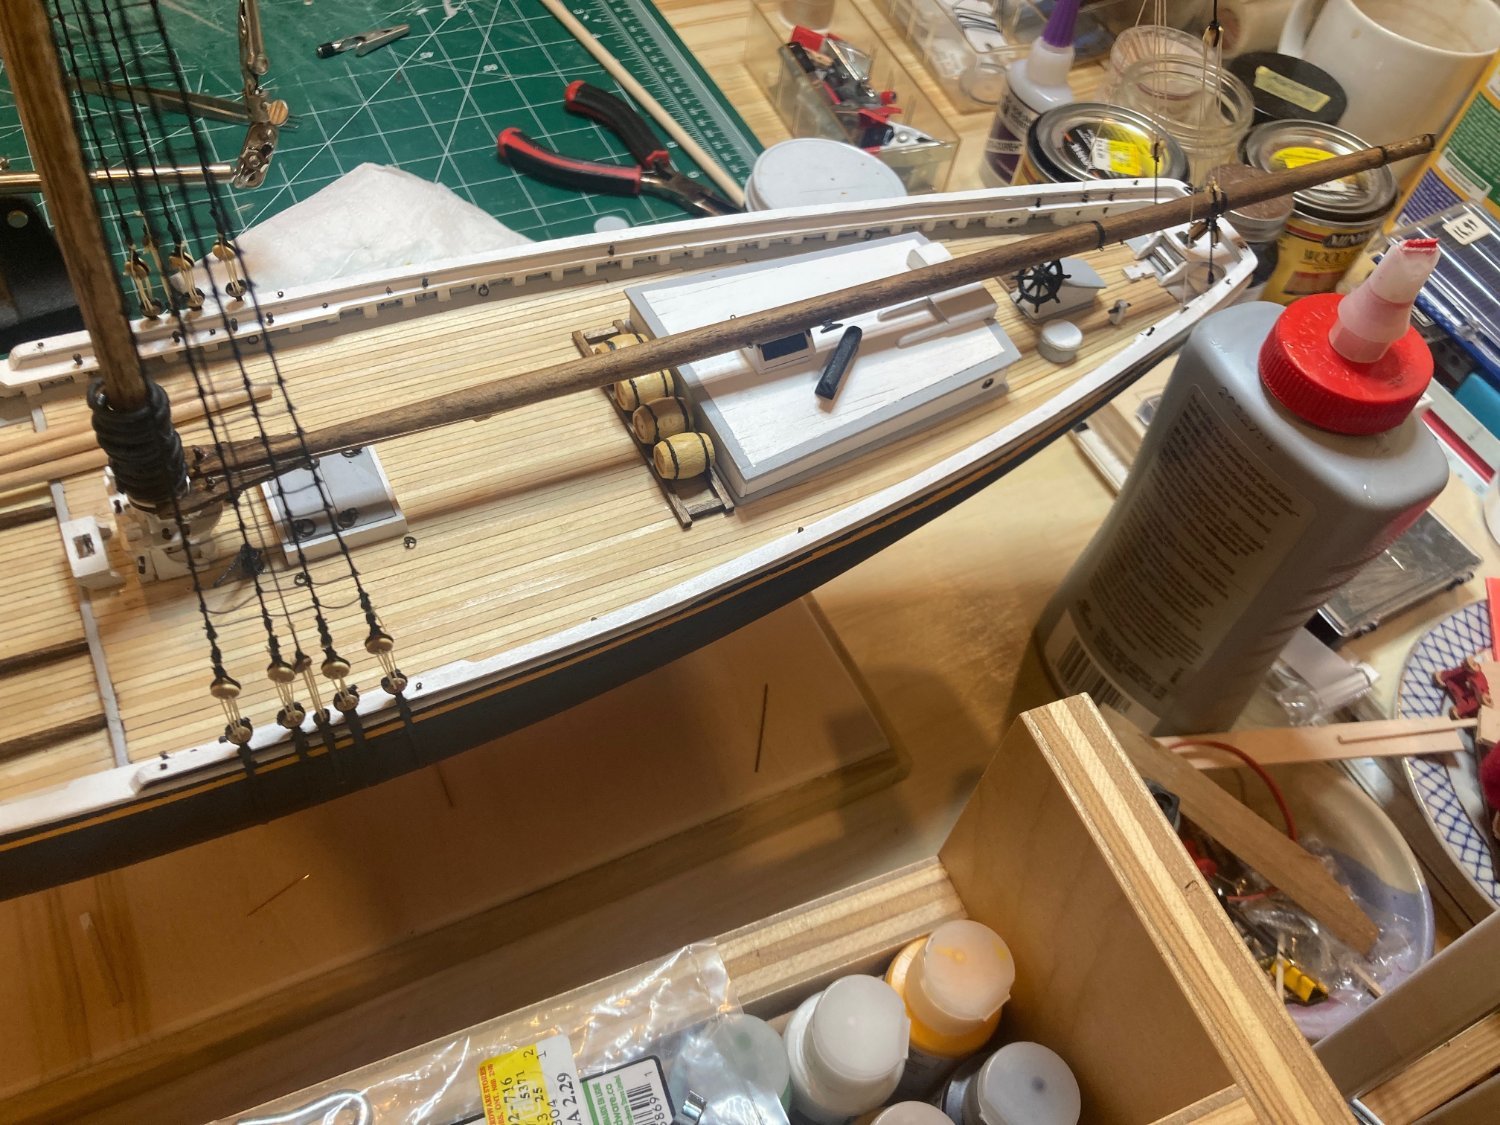
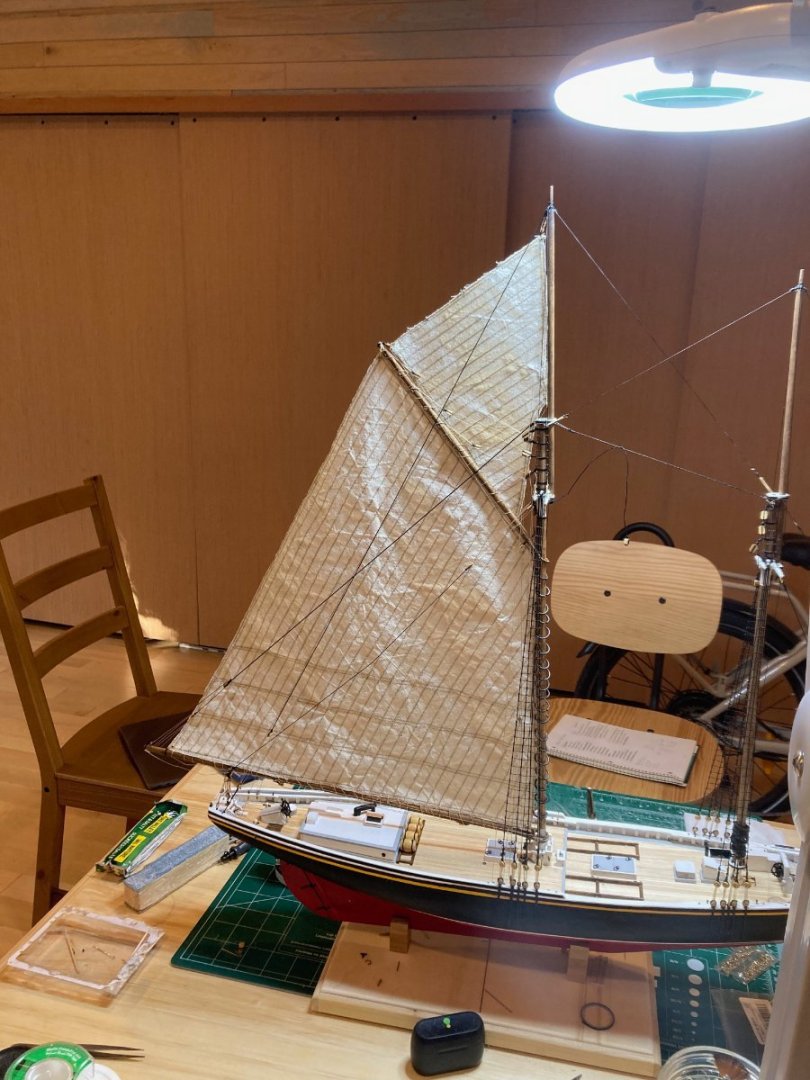
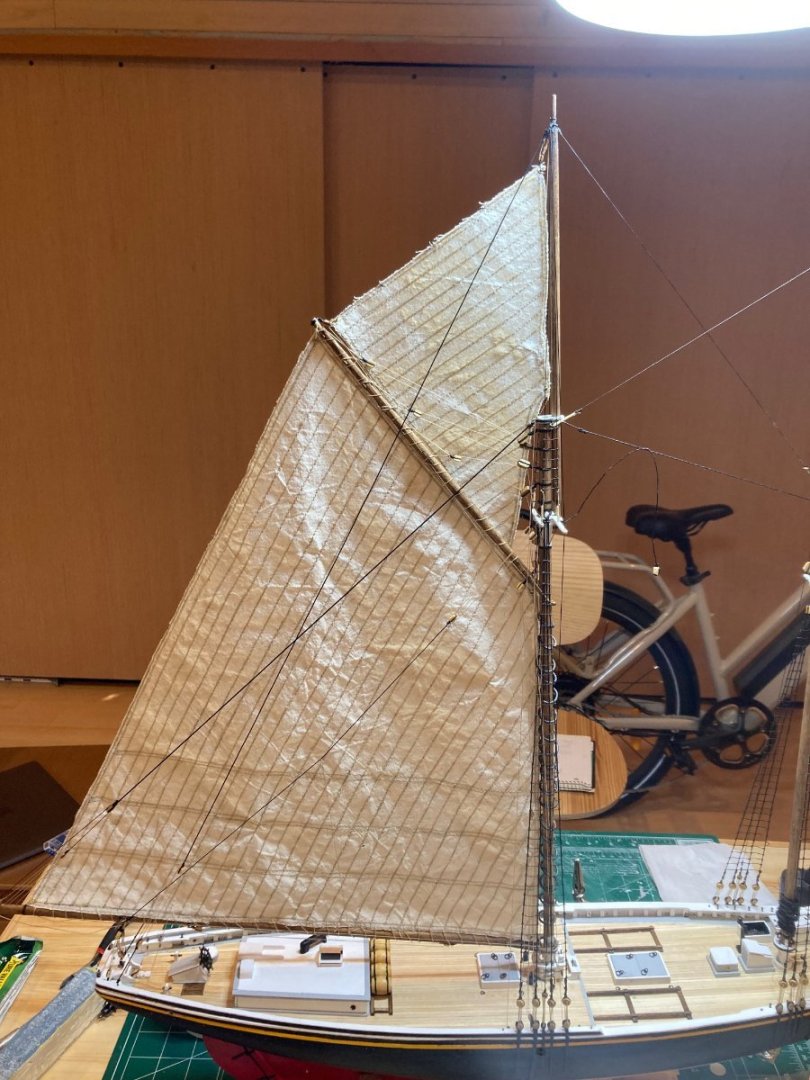
OK - I promise I actually do have a job and it is about to get very busy...but once again I seem to have found some time today to fabricate and rig the stay sail....I won't belabour things with long explanations - things went pretty smoothly - I did simplify the halliard rig, as this is one area where the plans (otherwise very clear and readable) are a bit confounding.....anyways, here are the pictures - I actually also fabricated the jumbo jib sail, but I think I need to adjust the pattern for the model as built - the one I've made is a smidge too big.....bye for now hamilton


-
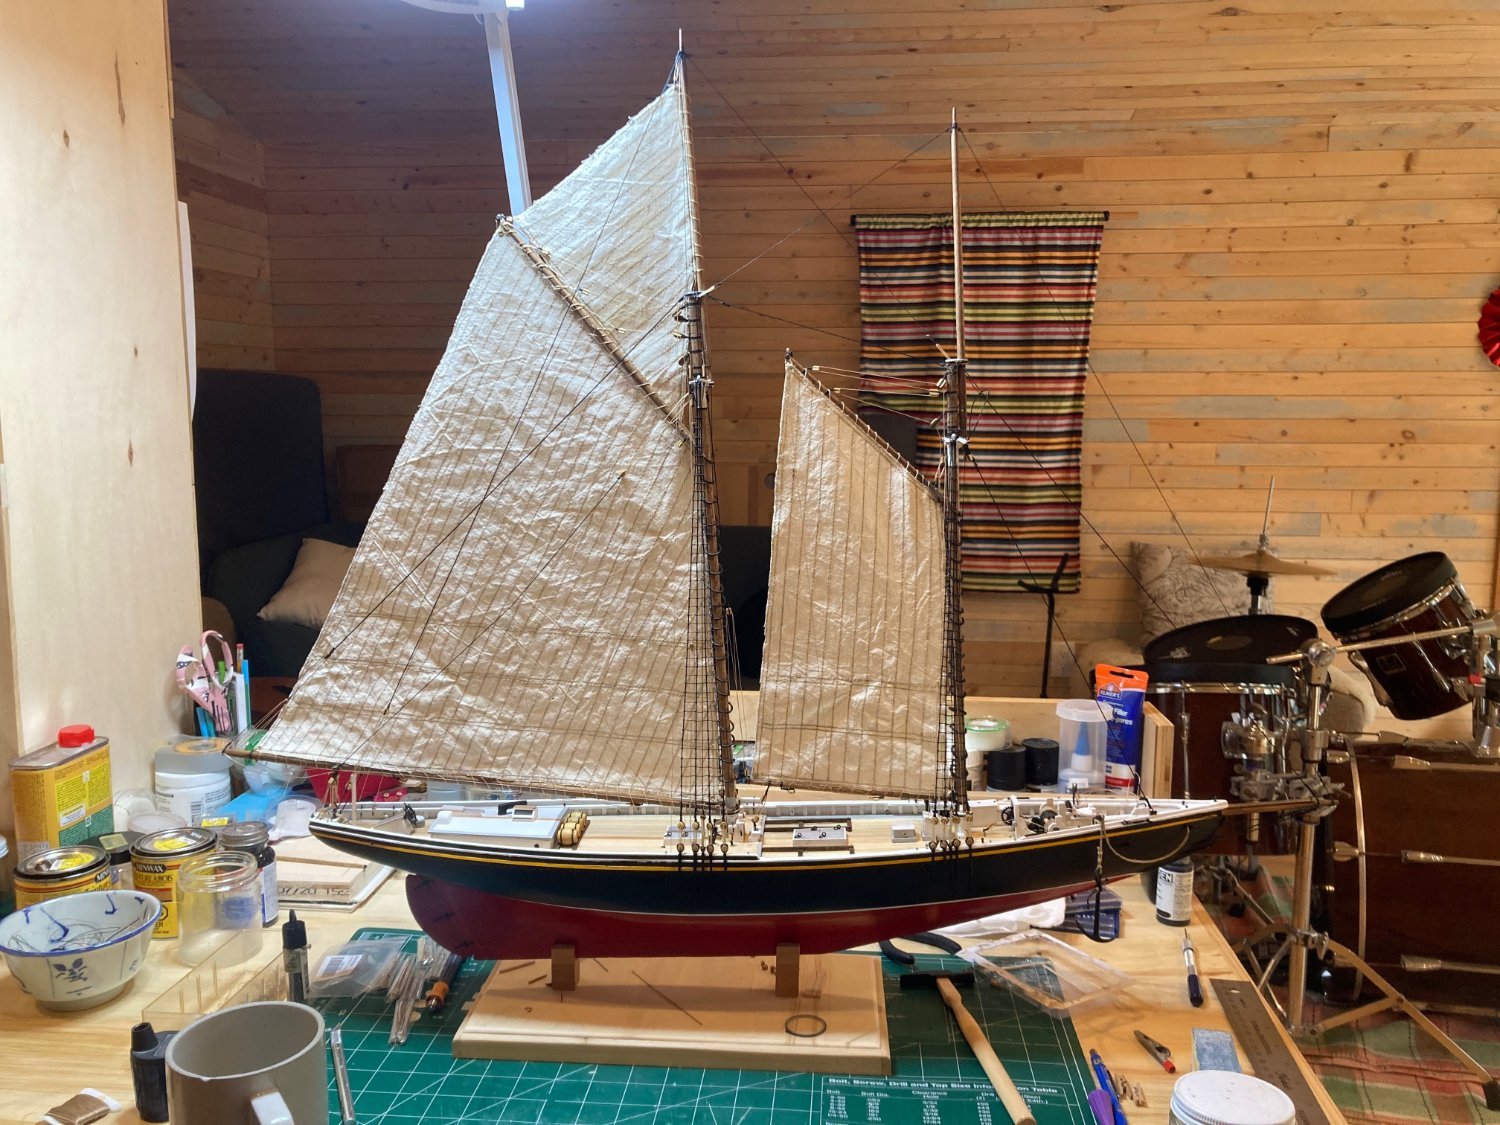
One more photo - in a burst of activity, knowing work's going to kick in seriously for a bit, I managed to fabricate and rig the fore topsail! Here's a last pick for the day. hamilton

-
True, Gregg! But as I crest the middle of middle age the remembering is taking longer and longer! hamilton
-
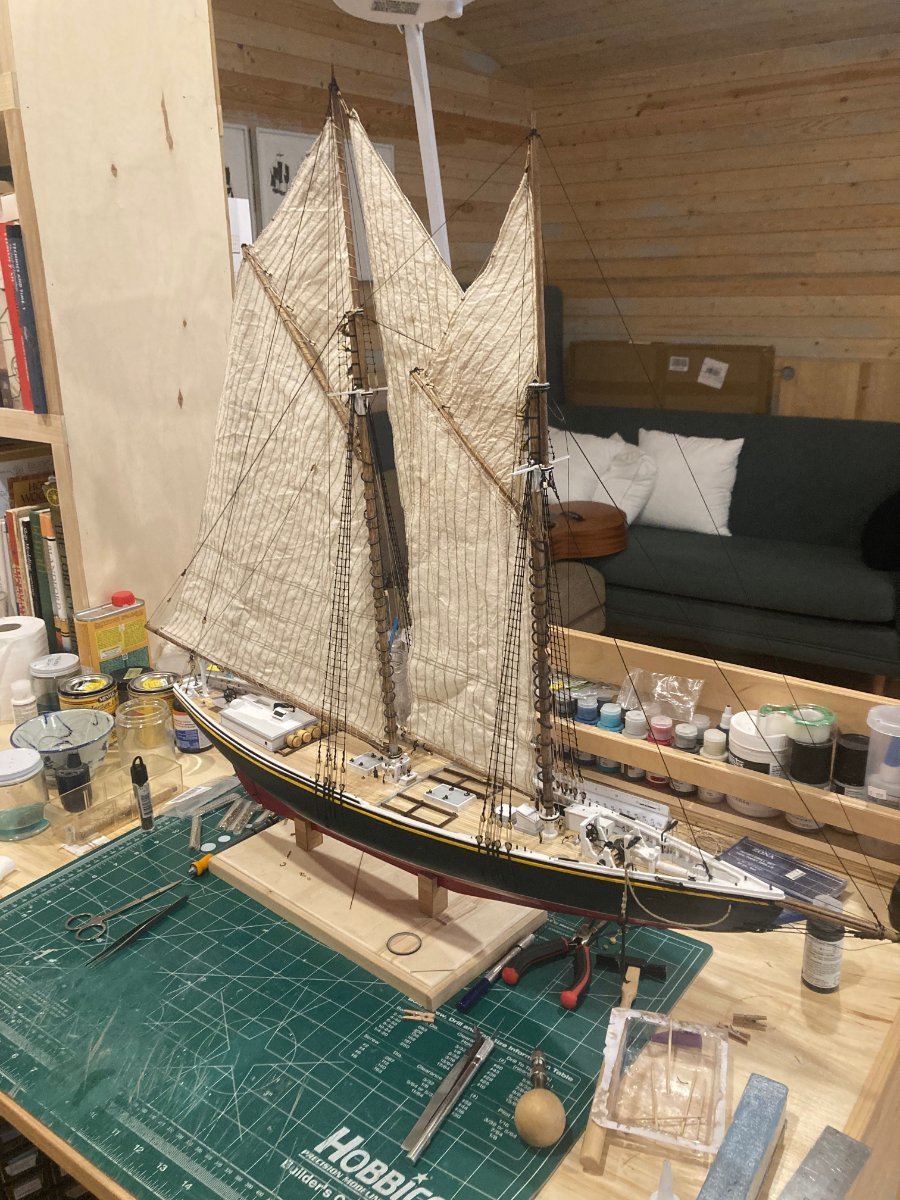
Hello there: Another quick update on Bluenose - the foresail is now rigged onto the model. This was a more or less straightforward process, and I learned from my rigging of the mainsail to fasten lines with relative tension rather than one at a time! It's been so long (2016) since I rigged any model that I feel like I'm learning things all over again.....anyway, here are the photos. Next it's on to the fore topsail.....but since I'm heading into a few weeks of very intense work I may not get to this for a bit.....enjoy the photos hamilton


-
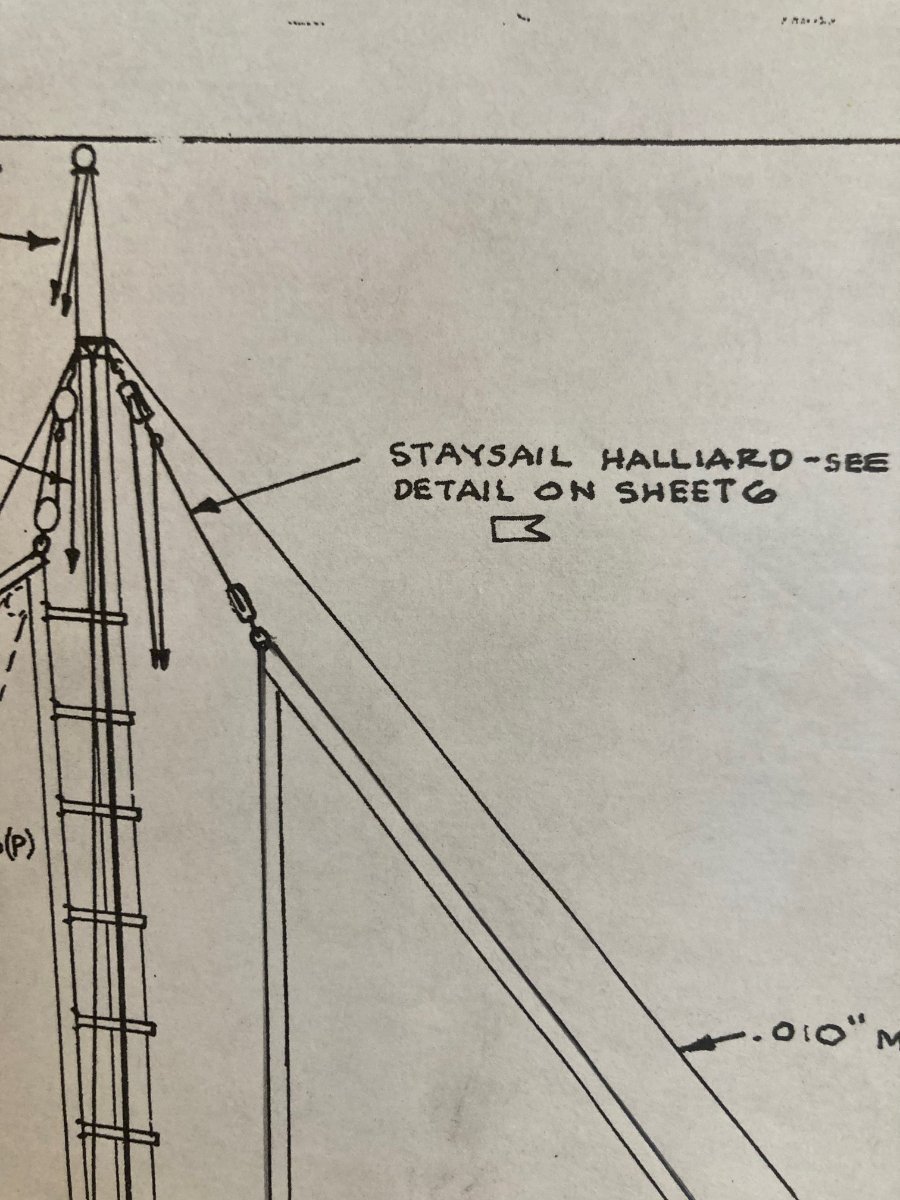
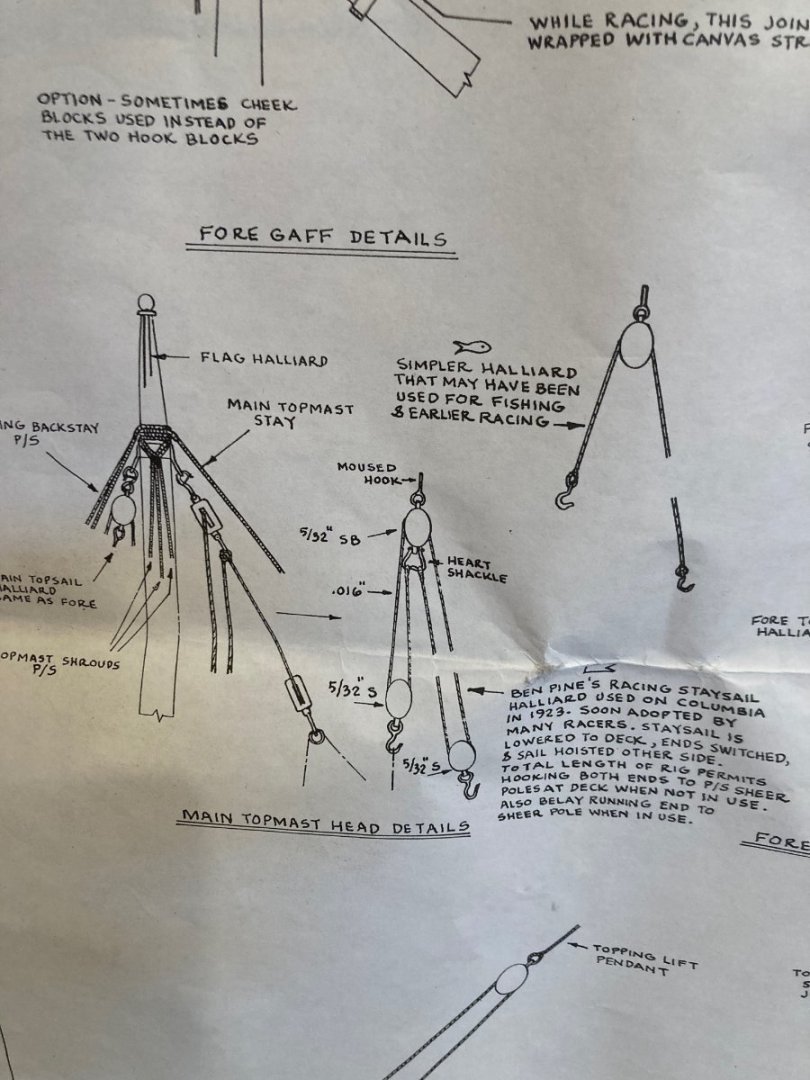
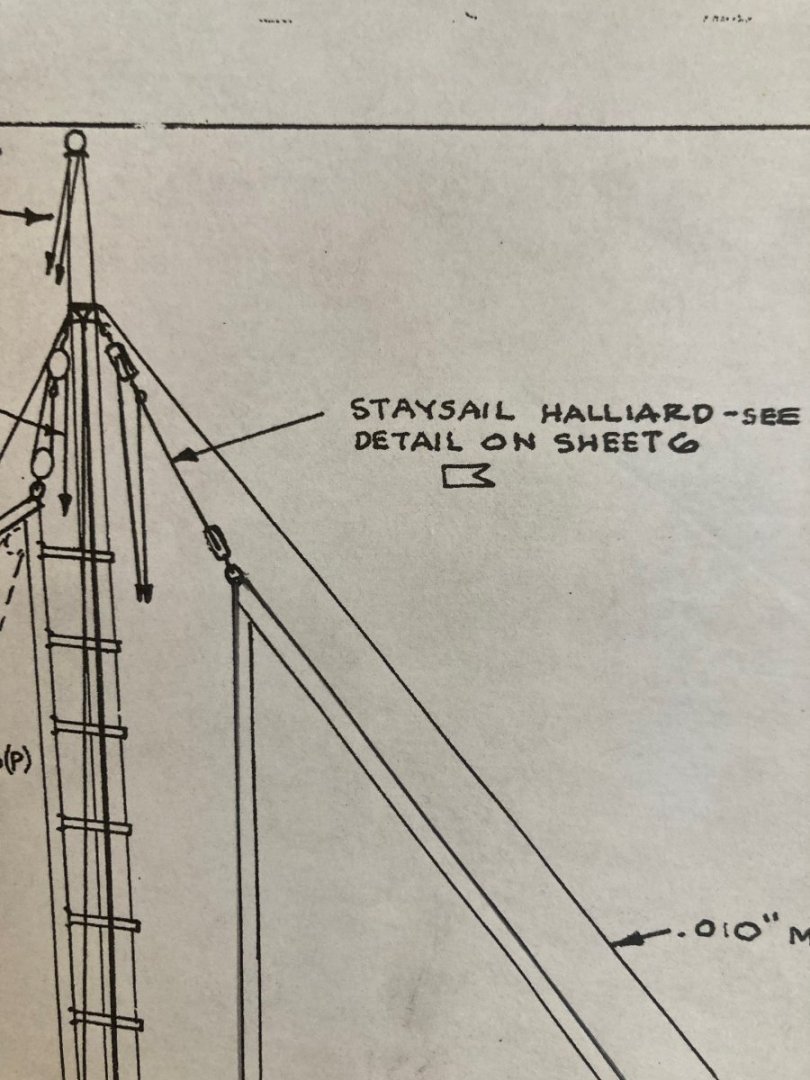
Hi there: I have some confusion about how the staysail halliard on the Bluenose would have been rigged. The plans provide two views of the halliard (see below) The upper and lower blocks seem obvious - one seized to the peak of the sail, the other seized to an eye on the main topmast. But in the image with the three blocks, the line just seems to circle between a standing end on a ring, through the block on the sail, up to the block on the mast, down to a third, hooked block - but where does this third block go? There is talk in the explanation to the right in the image of it being hooked to the sheer pole - ok....but then there is talk of the "running end" of the line, which doesn't seem to exist in that drawing.....has anyone come up with an interpretation of this element who can share it with me? Thanks a lot hamilton
-
Looks great! hamilton
-
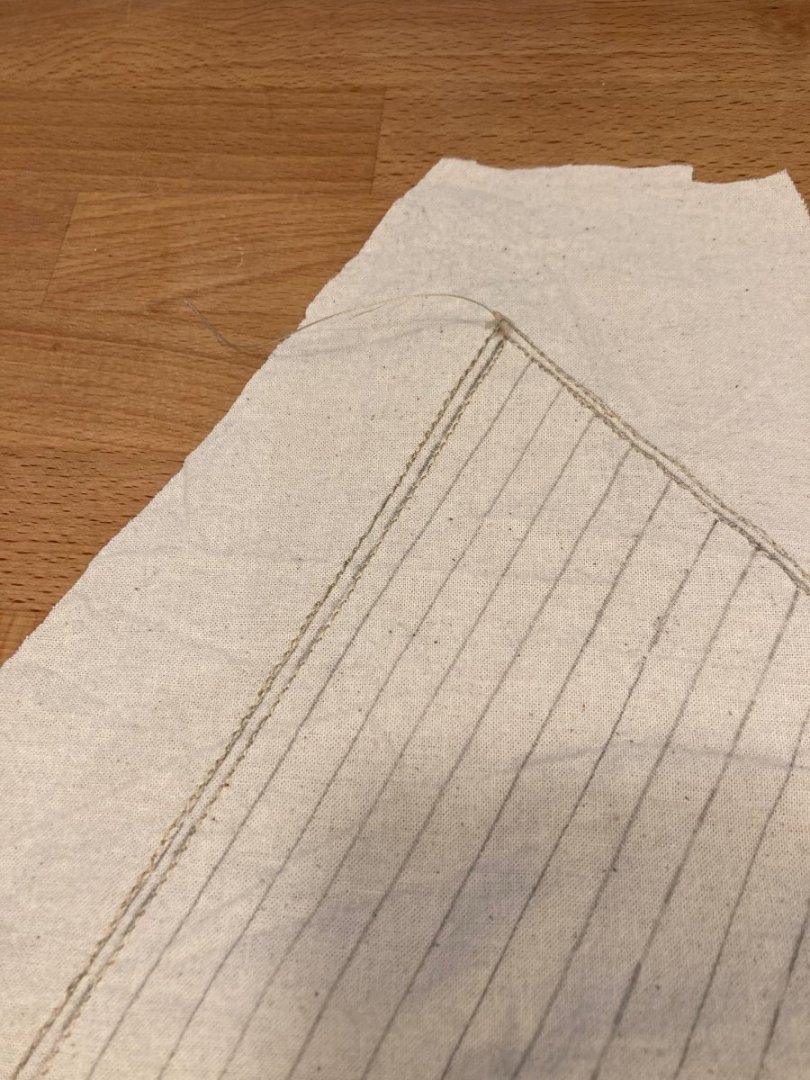
Hello all: I found an opportunity yesterday to spend almost the entire day at the work bench - what could be finer or more relaxing than throwing on an audiobook and doing some rigging and sail making? I had a couple of small tasks to complete for rigging the mainsail - lacing the sail to the boom & gaff and tying on the mast hoops. This got done fairly quickly, so I decided to move on to the main topsail. I stitched the sail, and added eyelets and rigging elements, which is about as much as I could accomplish yesterday. This morning, I rigged the sail onto the model and then, in a fit of ambition, decided to start on the foresail. I traced the sail form onto the cloth and marked out the seams and reef bands and then stitched the entire sail before I realised I had done the whole thing backwards - I stiched on the port side of the sail, but the model is built for a starboard side display!! I managed to retrace it before my modelling time ran out, but completion will have to wait for another day - going to go play some mini golf with the family. To all the Canucks, happy Thanksgiving!! Enjoy the long weekend and the photos hamilton
-
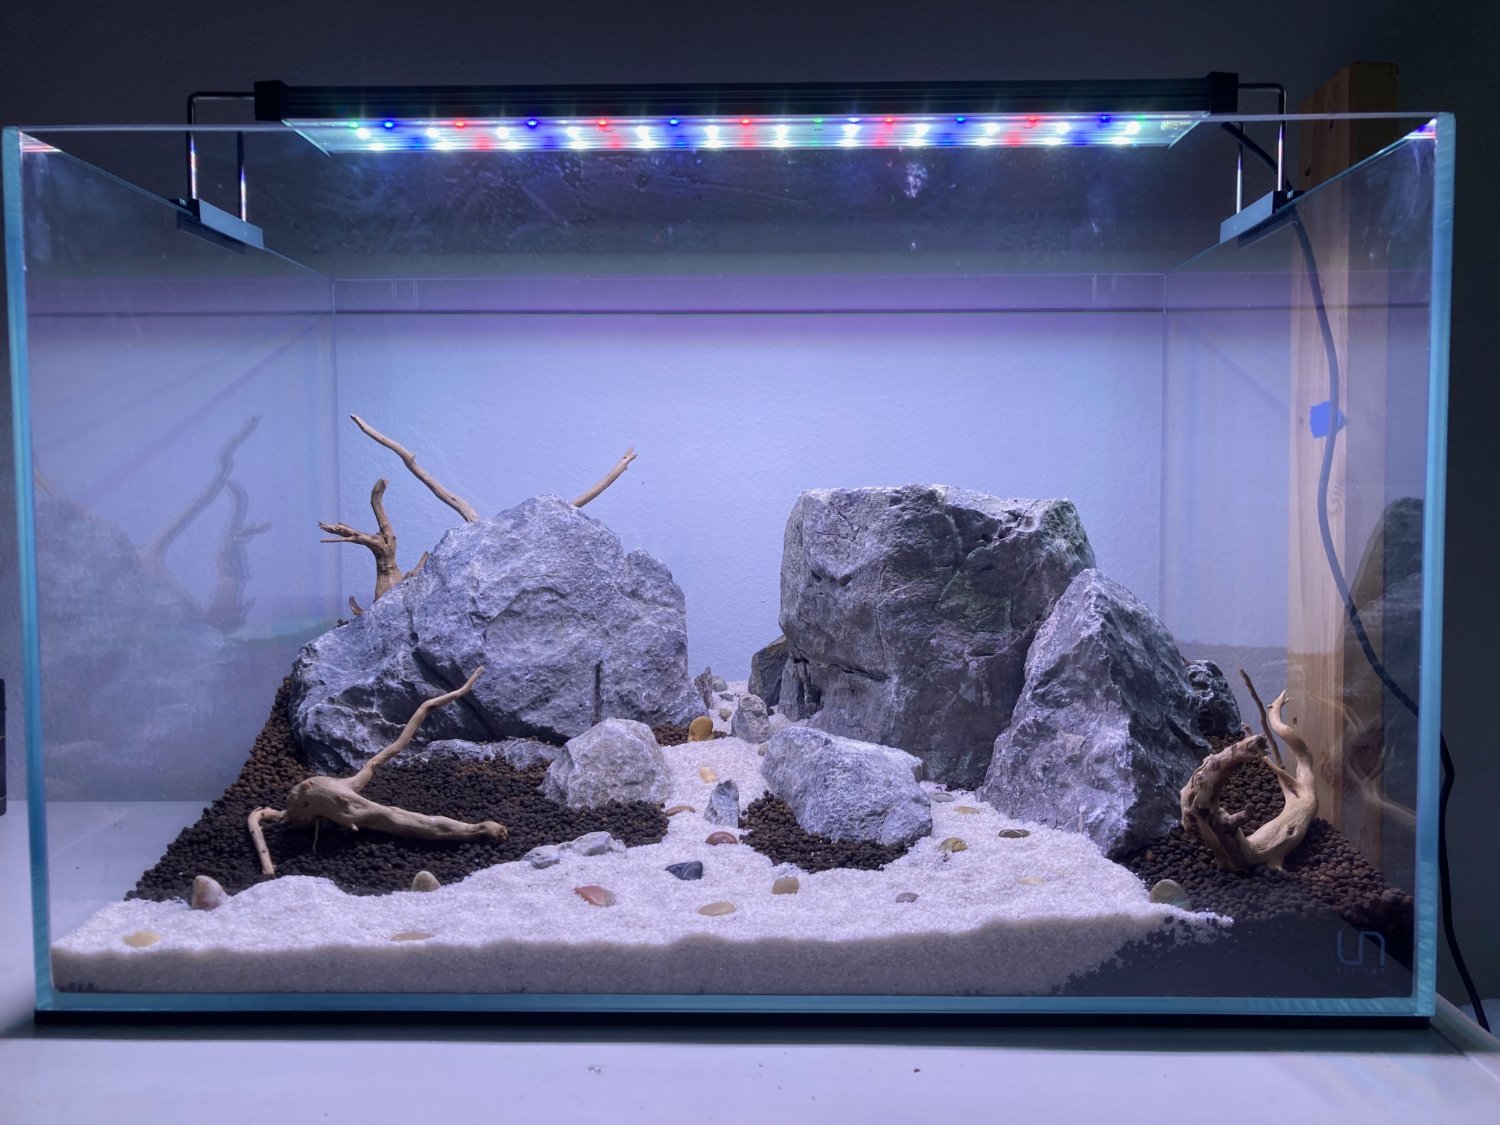
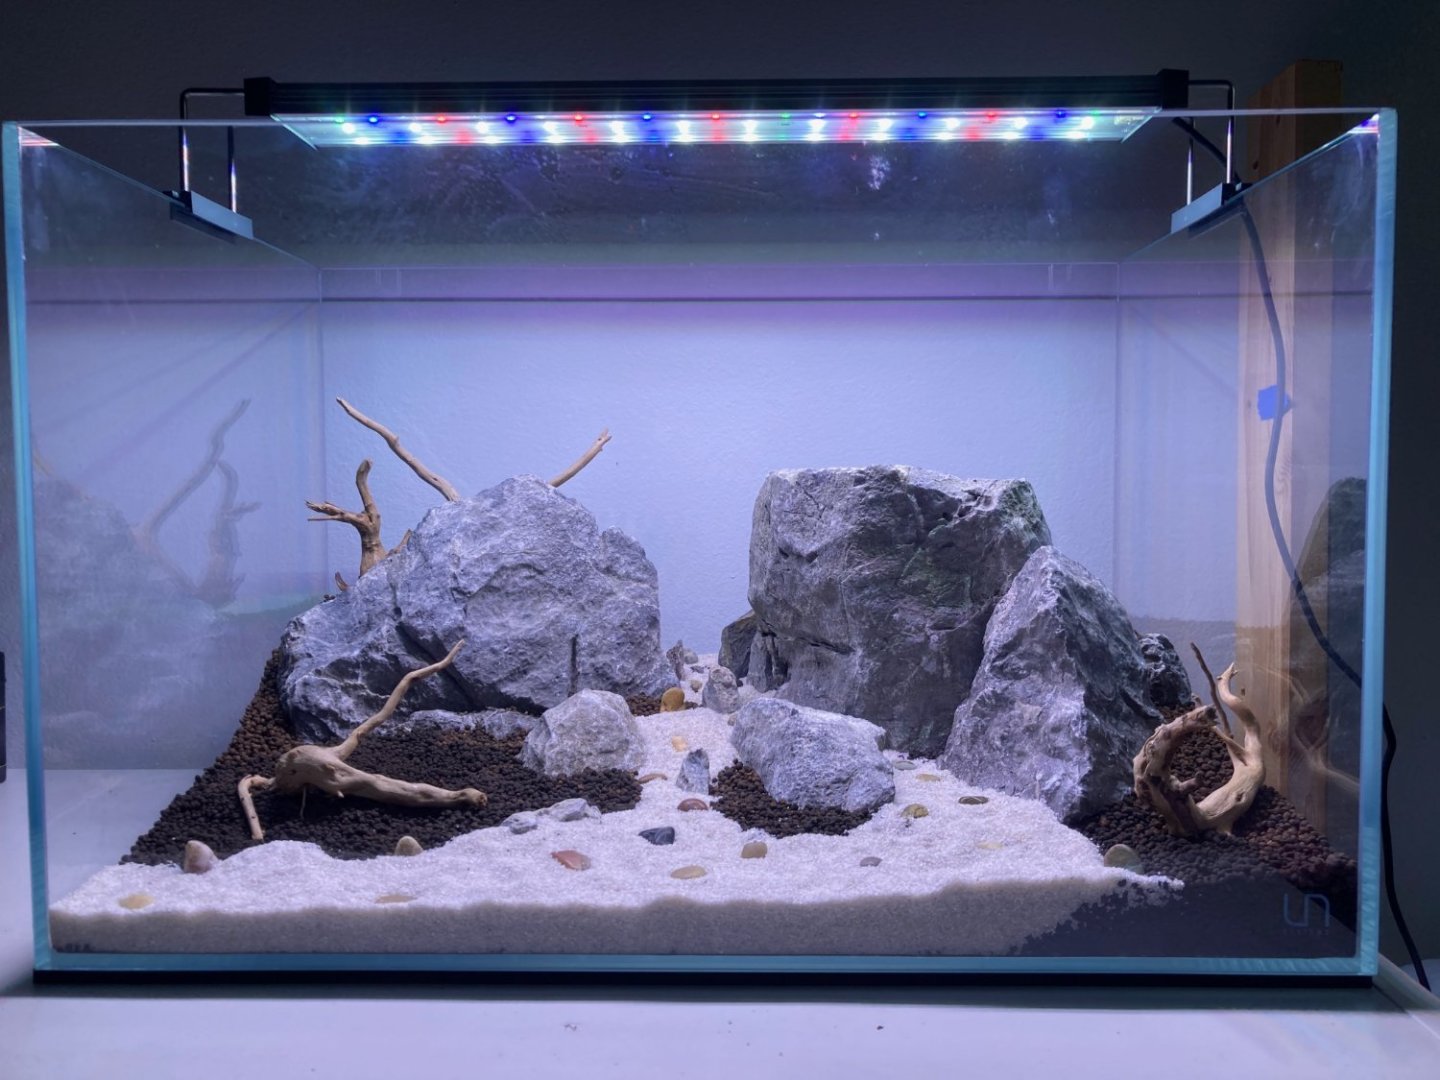
some one suggested this already, but an adjustable open top aquarium lamp might work - except they're designed to sit on the top edges of the aquarium sides - you can get ones that are dimmable and that (while quite bright) would not be so intrusive or offensive. They are, however, not cheap...and an enclosed case would require the addition on the top side edges of thin extensions on which the light could rest - here is an image of an aquarium I designed a couple of years ago that shows this. The broad spectrum REBs are high quality, but really designed for plant growth - so bright! But this photo is just to show how the lights fit on the aquarium...and to illustrate what you might need to do do fit something securely on your model case.... I'm on another forum for my aquarium/aquascaping hobby and one time someone there asked about putting a wooden ship model as a decorative element inside the aquarium! It's fun when there's crossover between these two worlds....good luck! hamilton
-
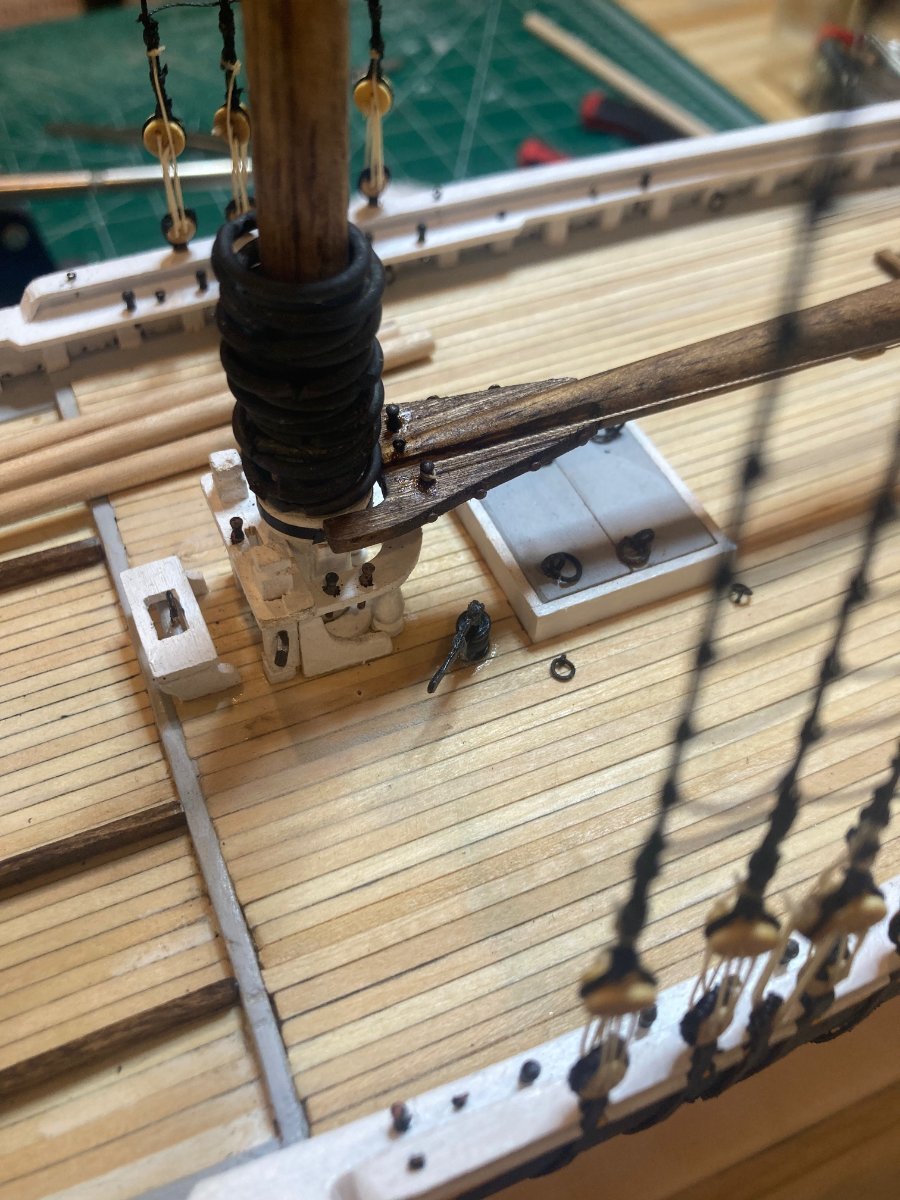
Hello there: I've now started rigging the main sail - a lot of elements to juggle here! The first step was to lash the sail to the boom and gaff and the clew, toe, throat and peak - the eyelets I added to the mainsail helped here, though I wish I had blackened them first....an oversight (or overeagerness) on my part. Regardless, After trying to rig the throat and peak halliards with the boom and gaff "loose", I added small brass nails to the ends of these parts and drilled holes on the main mast so the spars could be anchored in place to ease the rigging. I also had to undo the tackles on the flying backstays since these were really getting in the way - I'll re-do these once the main sail and main topsail are finished. In any case, at this point I've put in the parrell ropes (but not added parrells or tied them off) and rigged the peak and throat halliards and tackles. There is still a lot to do here - including lacing the sails onto the gaff and boom, the sheets and boom crutch tackles, the topping lift and quarterlifts and the lazy jacks - I installed the flag halliard today, so that's taken care of at least - and of course I'll need to tie on the mast hoops and parrells.....sheesh! Then onto the topsail..... Bye for now and happy modelling hamilton


-
Hi Gregg - go for it! It's "fun" to learn a new skill, though as soon as people start coming to me for drapes I might have to feign ignorance....Fortunately I have a couple of sewing wizzes in my life, so I got some decent tutorials, but unfortunately they were not willing to do this work for me! hamilton
-
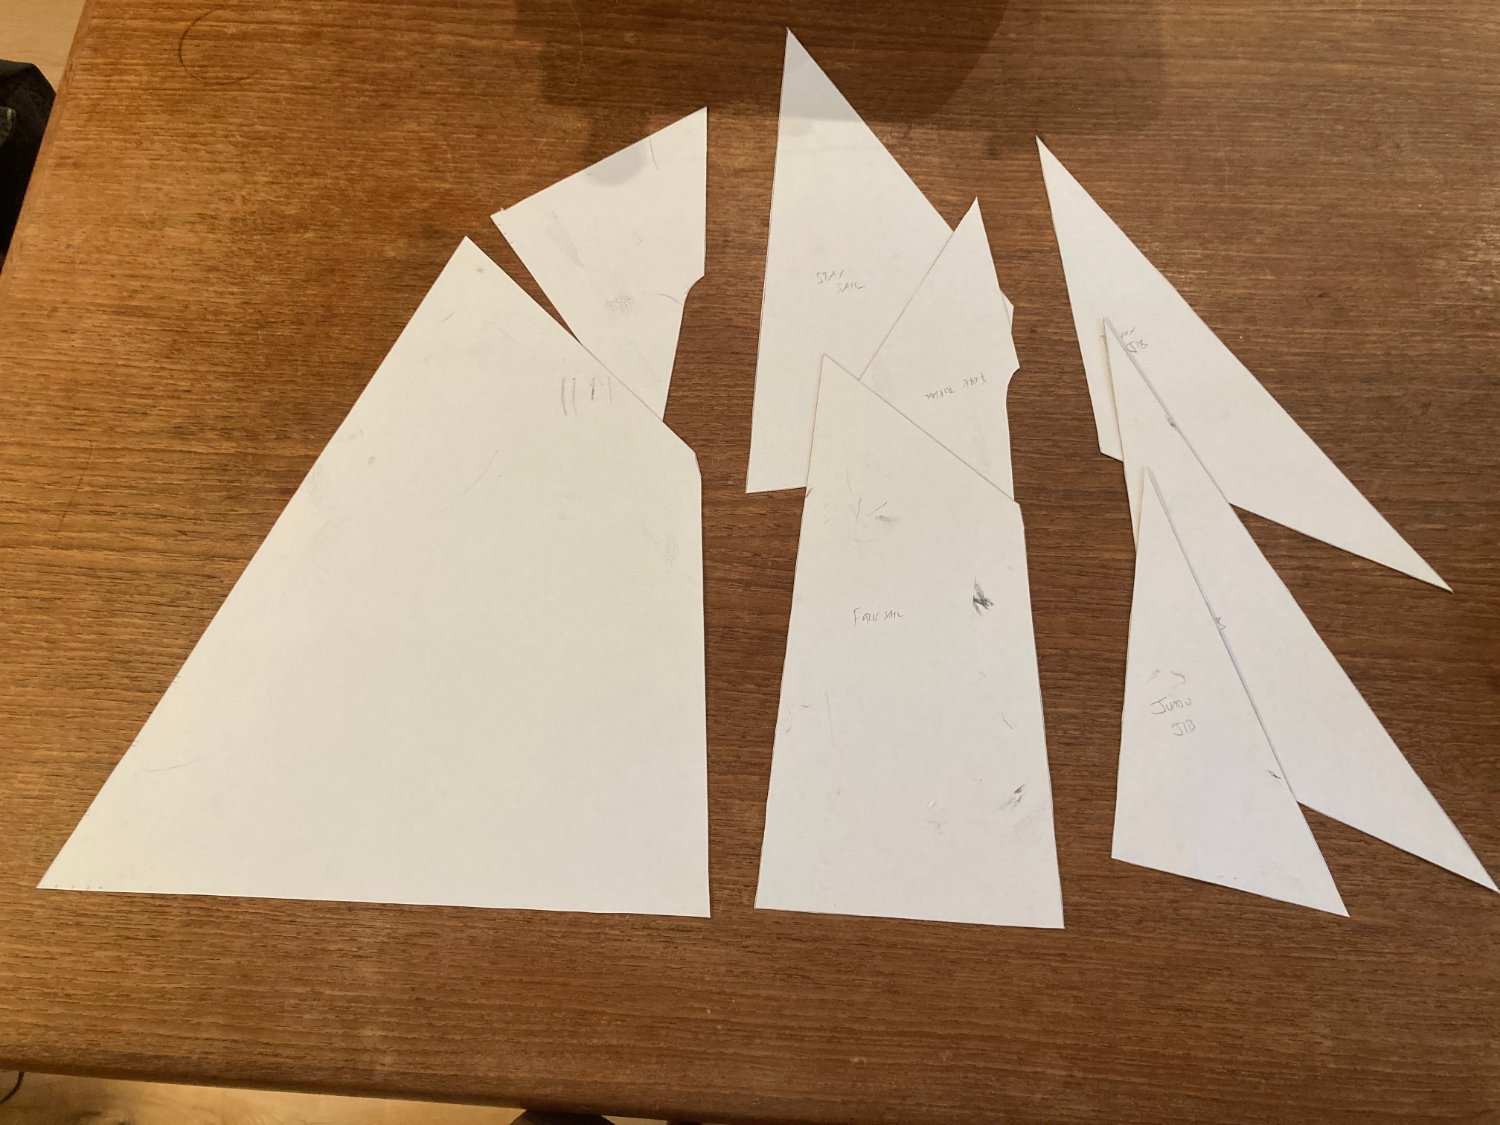
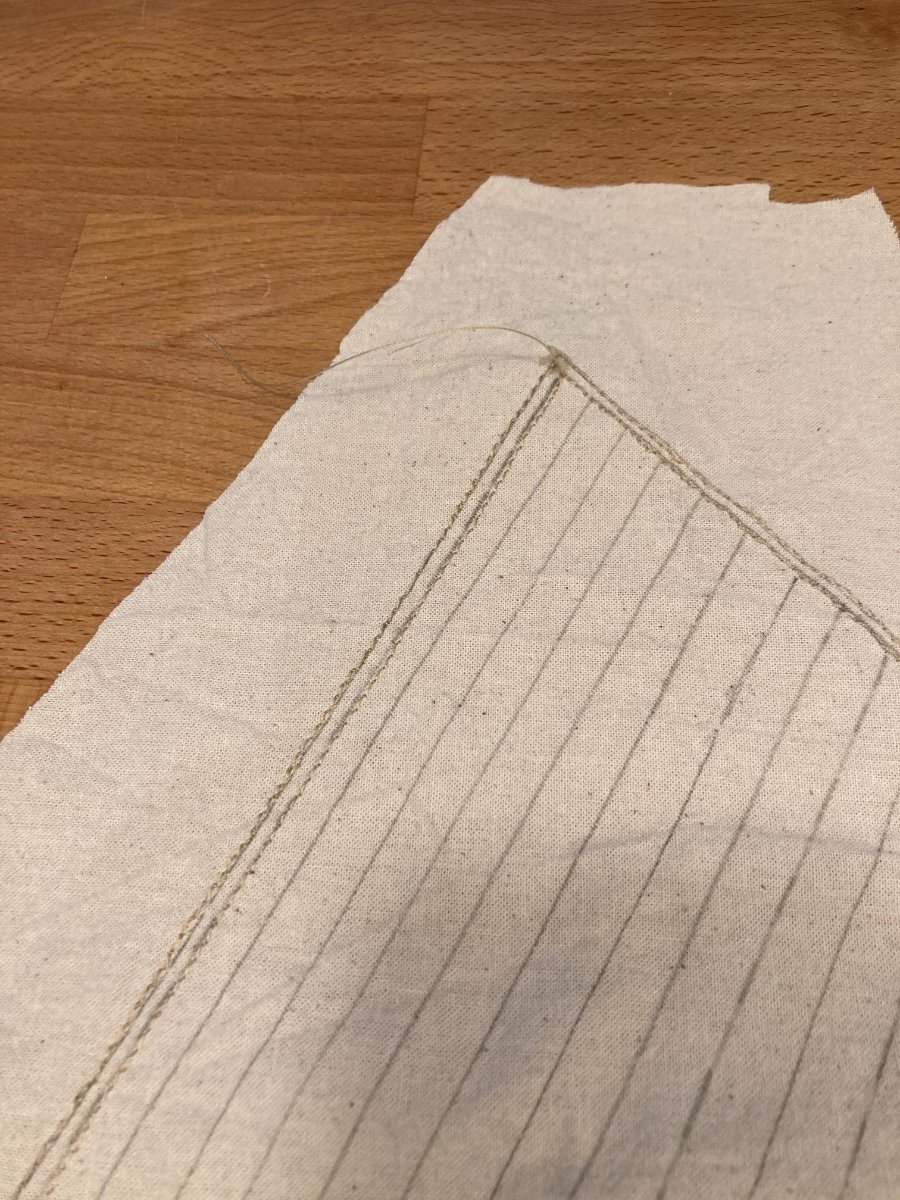
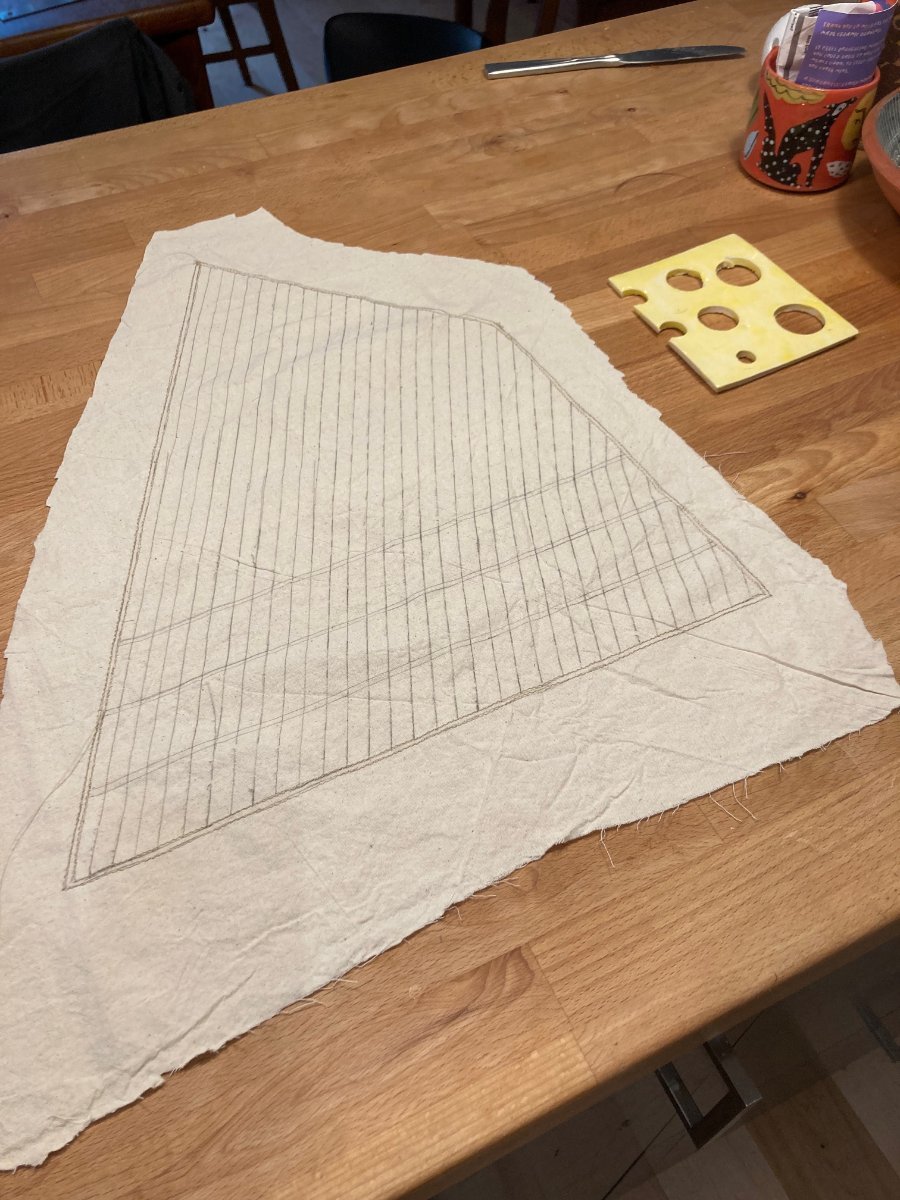
Managed to get in a couple of hours at the bench today and can report some progress on the sails. I made patterns a little while back for all the sails - you can see these arrayed in the first photo below - and transferred the pattern for the fore sail to some thin fabric I had lying around (nothing like ship modelling if you want to end up with a lot of random stuff just lying around...or maybe that's just life...) for experiments with the sewing machine. After a lot of work wrestling with that demonic device, I finally got into a rhythm where the threads weren't seizing up and doing all kinds of annoying things. Feeling daring, I transferred the patterns for the main sail and main topmast sail to the cloth and started stitching the main sail - just the reef bands and outside "hems" - not sure how generally to refer to these....I forgot how time consuming making sails is!! I imagine I'll be at this for a couple of weeks given the limited time I have these days....Anyways, here are some photos - the sail patterns and some shots of the main sale with a piece of ceramic Swiss cheese for scale comparison. Happy modelling and bye for now hamilton


-
A small update - no photos, sorry!! I've now finished the standing rigging, including ratlines, and fabricated and outfitted all the spars. I realised as I was doing this that I forgot to make and install the jumbo jib sheet horse in front of the fore mast, so did that quickly, and also forgot until now all about the boom crutches, which I'll need to make as part of the process of adding the sails, spars and standing rigging...not a huge deal. Man there's a lot to hold in your head with this hobby!! I'll be moving onto the sails now, as noted before. I have made sails before (kind of poorly, but satisfactorily enough for my own purposes) but it's been a long time and so I'll need to do some practice. I made templates for all the sails and have a decent quantity of thin cotton fabric in a kind of canvass-y tone, so I'll first do some experiments just reminding myself how to use the sewing machine till I get to the point where I feel confident enough to make the sails. I also invested in some tools to add grommets and eyelets, so I'm hoping this can up my sail modelling game a bit - I'll be doing some trials with those tools as well to see if I can get a hang of the process - if so and if the eyelets look decent and to scale I'll add these at the luff and foot of the main and foresails (1/16") and at the corners for lashings, etc. Though work is now picking up again for the next couple of months and I won't have a huge amount of time to work on BN, I hope to have her before Christmas. This is exciting as I've not finished a model since I completed the Mamoli America in October, 2016!!! For reference, I had already begun the planning process for Bluenose at that point! So ultimately, this project - as long as it has taken - has finally brought me bak to ship modelling as an earnest pursuit (rather than an occasional pastime as it has been these past 7 years), which I am very happy about....can't wait to return to Bellona once this one's done! I'll post an update with some photos once I get into the sail making process. In the meantime happy modelling hamilton
-
Very quick update - made some patterns for the mainsail and main topmast sail. Took a tracing from the plans, transferred this to bristol board using carbon paper and then trimmed up the bristol board patterns until the seemed to fit reasonably on the model as-built. It's been a long time since I made sails for any model - and I was never as expert a hand at it as some on the forum. But this weekend, I'm going to haul the sewing machine out and see if my wife will be willing to show me (again) how to thread the damnable thing...I'm sure that a bit of casual experimentation over the weekend will refresh my memory, right? HAHAHA!! I think I'm going to invest in a little eyelet tool so I can add grommets to the sails, but I have to see if I can find something for this purpose - what do other people do/use for this? Bye for now and hope you all have a great weekend hamilton

-
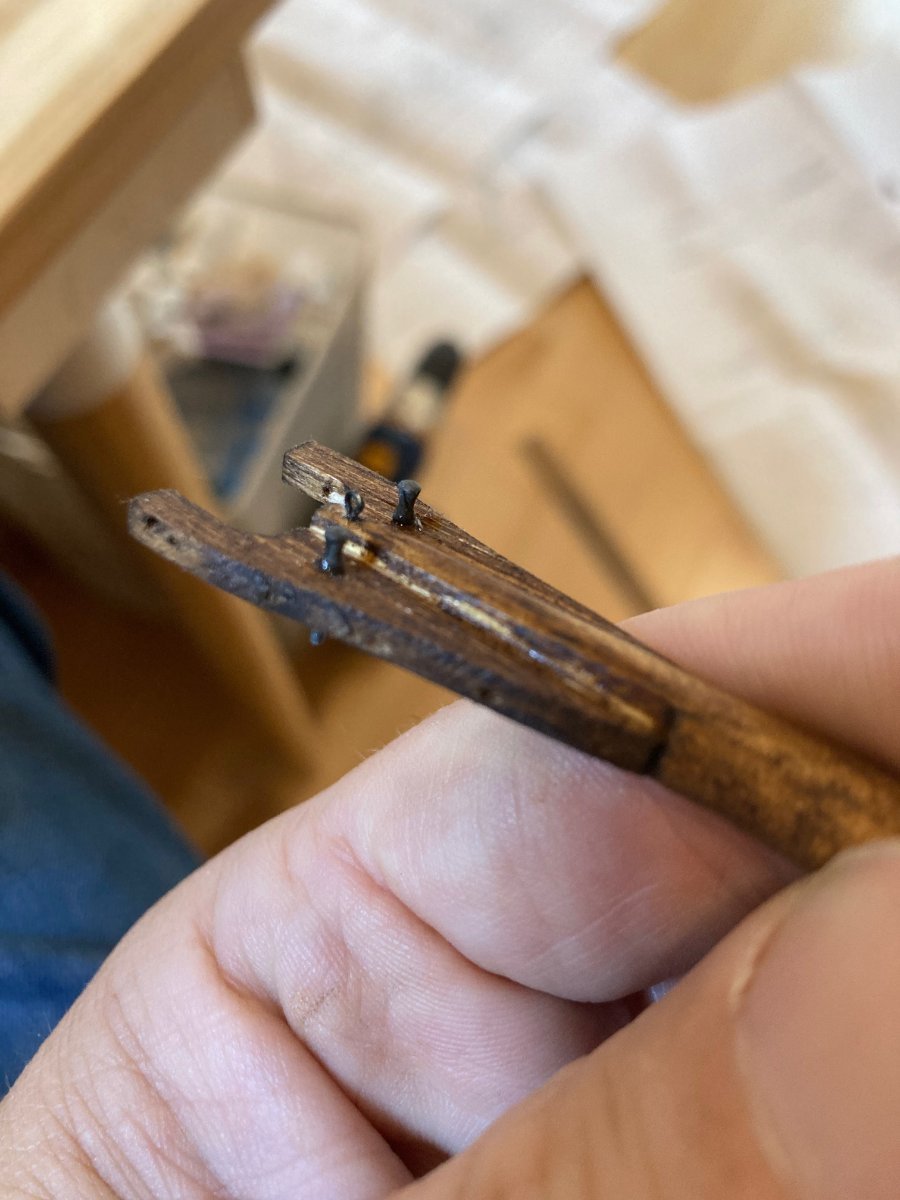
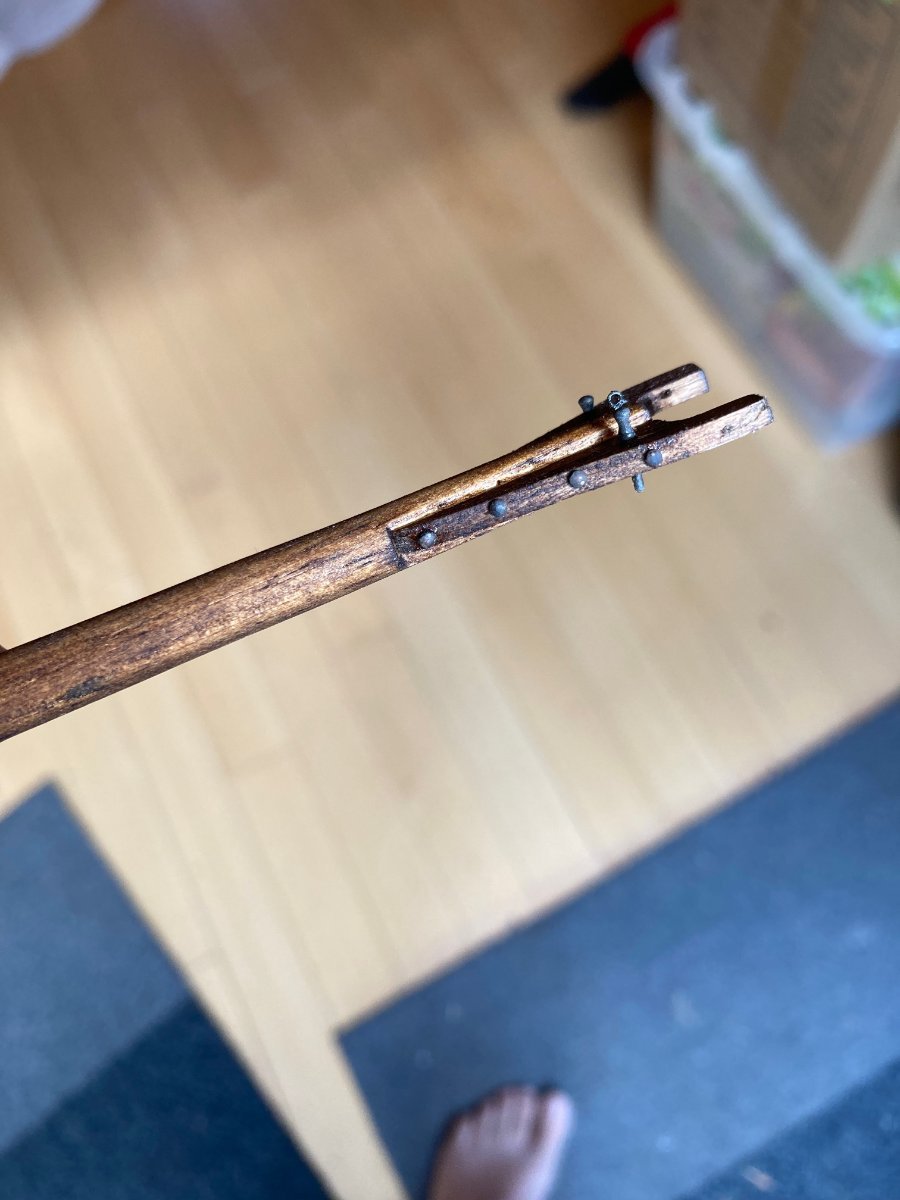
Looking at the photos I realise I'm not finished outfitting the boom - still have to add the clapper! And the parrell ropes and parrells, but those are for later..... hamilton
-
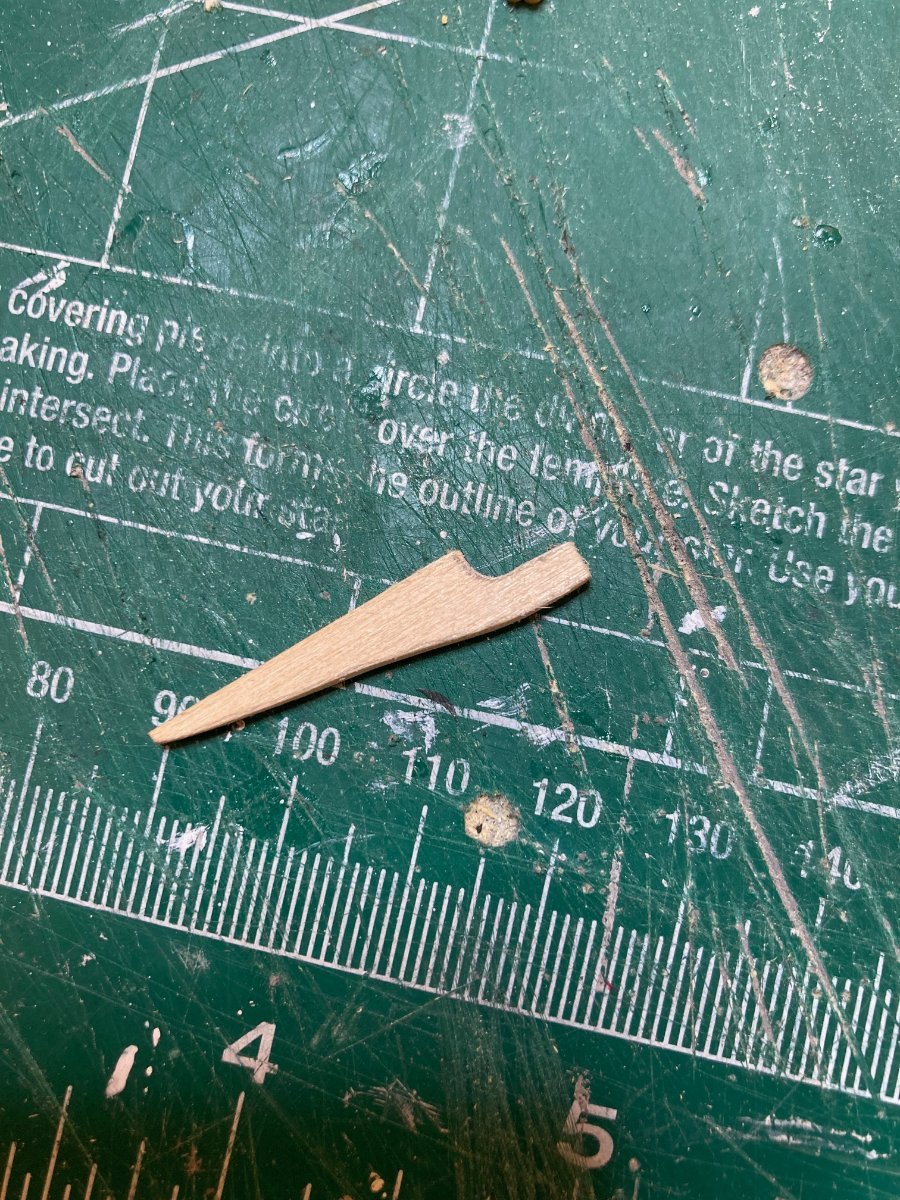
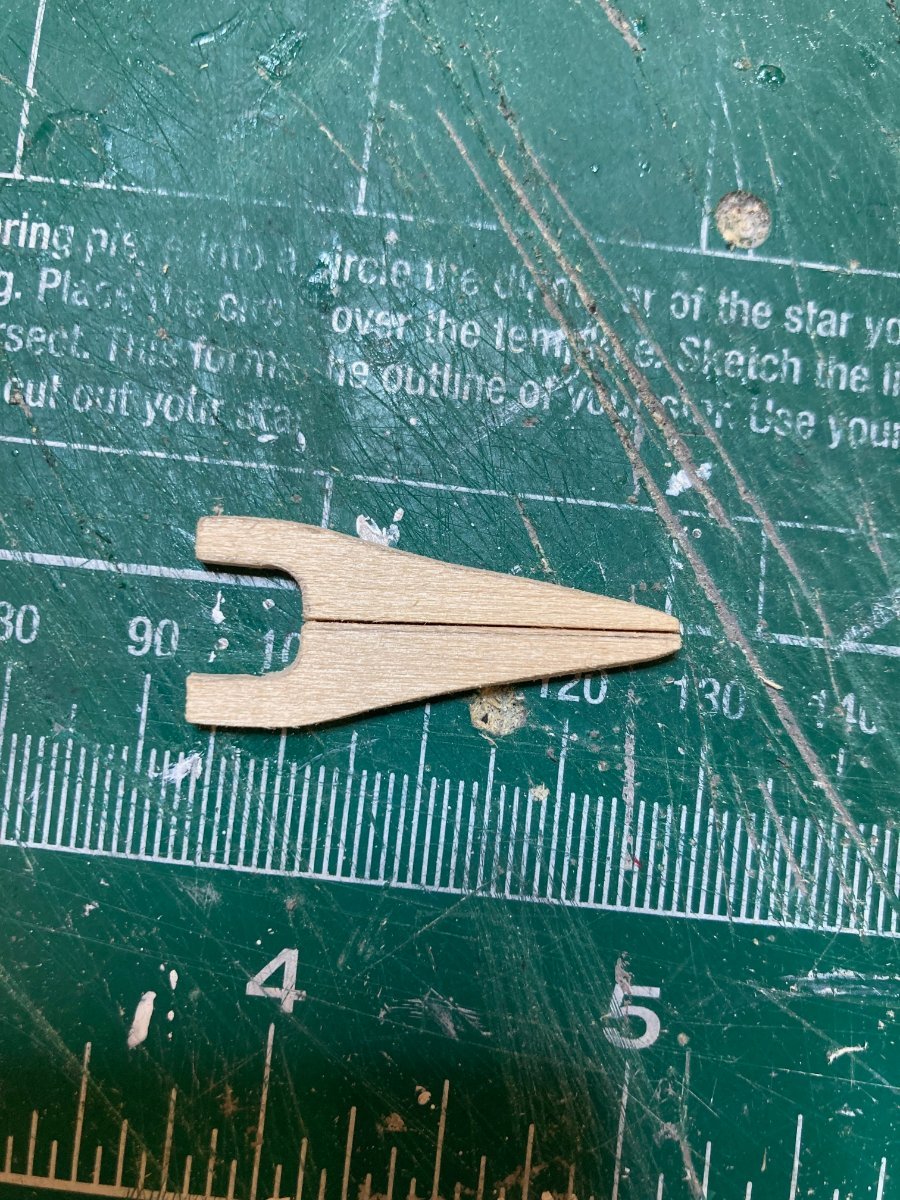
Thanks for the comments Nearshore and Gregg! Another quick update - I spent the last couple of days fabricating and outfitting the main boom - a relatively straightforward process. I'll complete the main gaff and then make the mainsail and main topmast sail before adding all these elements to the model and moving forward. Here are some photos - hope all are well! hamilton