


hamilton
-
Posts
1,933 -
Joined
-
Last visited
Content Type
Profiles
Forums
Gallery
Events
Everything posted by hamilton
-
 I found a lot of help and support for my Greyhound/Blandford build and I am forever grateful to the MSW pros who lent their time and expertise there - couldn't have done it otherwise - I know you'll find the same as you go through - just don't be shy to ask!! hamilton
 -
Happy to act as a support for this build - as we've chatted about already, it's a tricky one, but it can make a very nice model with a bit of extra effort - and lot of extra patience! Post pics of any issues you encounter - my build was greatly assisted by @harlequin who also has a nice build of this kit, and @oldcollingwood, who has built this one as well. Try not to judge Corel too badly based on this kit! I've built a few Corel models and with the exception of this one they have all been of very good quality. And with this one, once you're past the framework things go smoothly - at least til it comes to the masting and rigging, which are woefully undersupported by the plans and instructions provided with the kit..... hamilton
-
Planking looks excellent! hamilton
-
Historical accuracy in this case might also be a creature of the restoration of the St Roch for display in the VMM - don't know much about the history of the restoration or how much photo documentation of the original vessel exists that might highlight this feature. From an architectural perspective, I can't see the overlap of the rubbing strakes and portholes making a lot of sense....at the same time, I've worked with enough contractors to know that sense often gets sacrificed for convenience in the real world as in the world of modelling - though usually with much greater consequences. In a situation like this I would always choose aesthetic effects over accuracy of representation - it bugs me to look at the photos of St Roch and see this feature - I imagine some poor person trying to rout out the back sides of the rubbing strakes to fit snugly around the portholes and cursing whoever put them in that position in the first place. And then I imagine someone working at scale trying to do the same thing...sheesh! It's one thing to cut wales or bulwarks planking around gunports, and quite another to try to achieve this kind of effect. But that's just me! hamilton
-
This looks like a really nicely detailed kit! Been watching a few of the Titanic logs and getting tempted....I'll follow here with interest. I notice from your user ID that you're in SASK, but the background of your photos suggest some BC roots! My mother-in-law lives in Regina and if she saw your BC Lions memorabilia she would probably be on your lawn wearing a watermelon on her head and waving a pitchfork. How do Lions fans fare in the middle of all that Rider pride? hamilton
-
Looking good! hamilton
-
I think it looks good so far - curious how you'll approach the stern framing - from my son's collection, I know there are pieces that feature compound arches that might work for this purpose - interesting build to be sure! hamilton
-
Really beautifully done, Adam! hamilton
-
My 10-year old loves this! As do I - seems to me that there is a serious challenge in knocking a lego period ship together - will you supply build instructions for those of us who might want to follow in your footsteps? I know that's a tall order so please don't take me seriously (though I am a little bit serious)....Lego released a Titanic recently that apart from being as costly as a high end wooden ship kit also looks very cool - would love to see someone document a build of that.... hamilton
-
It will take some finessing, for sure - but if you use a scalpul blade to shave off any ridges between planking strakes and then sand the planks manually (and carefully following the wood grain) along the bulwarks you should be ok - looks good so far to me hamilton
-
Ahh - that makes sense to me! Thanks for clarifying Chuck! hamilton
-
Hi there: A question for the moderators. I just packaged a bunch of photos that I took of the St. Roch here in the Vancouver Maritime Museum to send off to someone working on the Billings model and wondered if there was a thread or gallery where these could be broadly shared...I often see pictures of real ships on build logs and elsewhere for reference, but a single landing place for these would, I think, be useful for the community - perhaps it already exists and I didn't work hard enough to find it! If not, though, could a new area of the forum be created? hamilton
-
nice work on the bowsprit rigging! She's looking really nice. hamilton
-
I always use medium thickness CA for hull planking - and I also get glue on my fingertips. It's a pain! But if you invest in some isopropyl alcohol (nail polish remover) you can remove it once it's dried and crusty - it peels off like a scab once softened by the alcohol - as my skin gets thinner I worry it might take some skin with it when it does, but I prefer to use CA for this purpose as it allows speedier progress on a process I don't always get much enjoyment out of.....I have read of others who use PVA (wood glue), but my impression is that because of the slow setting and curing time it makes for very slow work....I'm willing to sacrifice my fingers for a little bit to get through it! hamilton
-
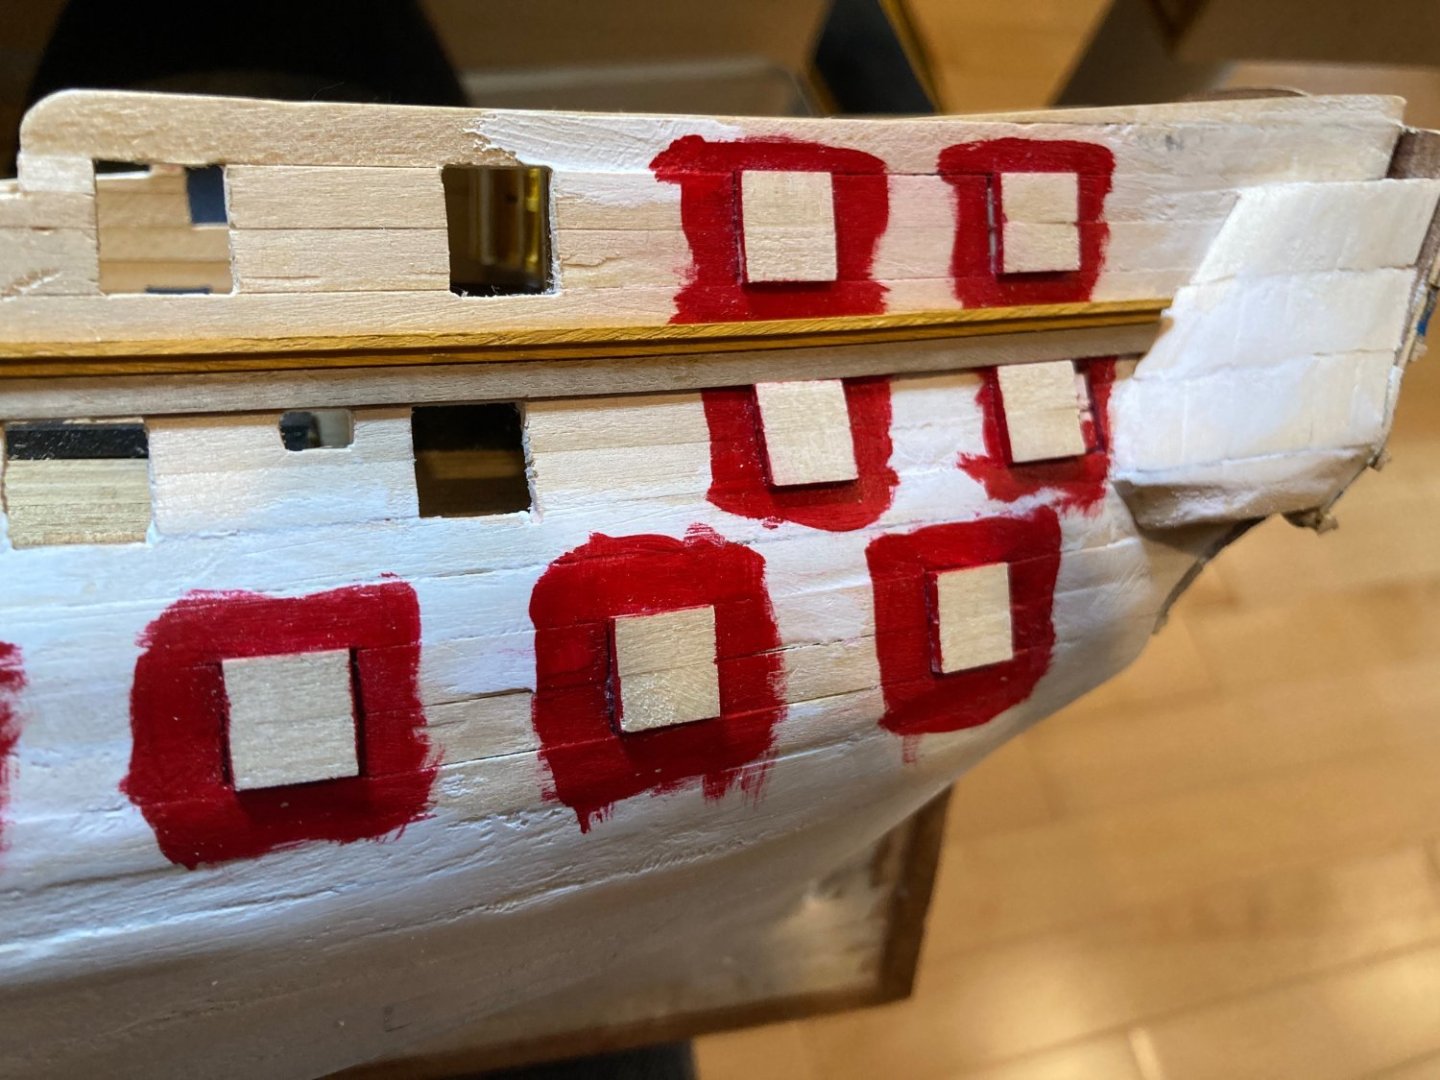
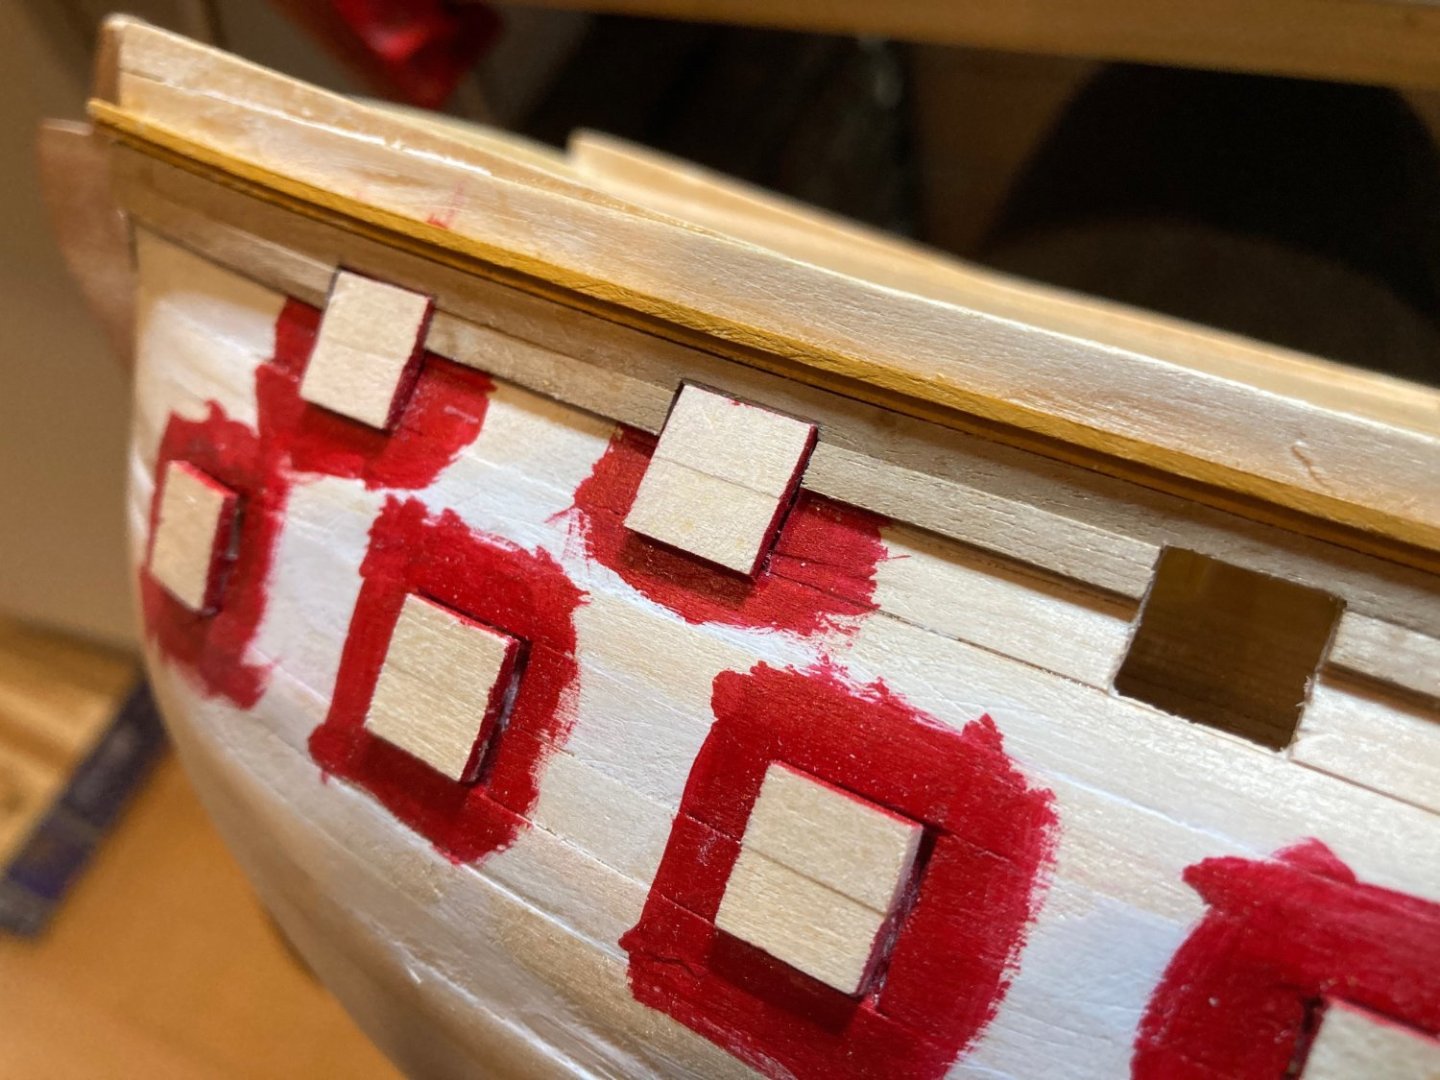
I see it's been quite a while since I've updated here.....not that I'm on a schedule or anything! In any case, I didn't get as much done on Bellona over the holidays as I hoped. But since the new year, I've managed to get a start on the second planking - starting with the outboard bulwarks. The first element laid here was a strip of molding that runs flush with the top of bulwarks mid-ships and follows the sheer to the beakhead forward and quartergalleries aft. This was a more or less straightforward operation, though it was eased by adding this strip in 3 sections and then blending these with acrylic modelling paste. The first section ran in line with the ship's waist, the second ran forward to the beakhead and the third aft to the quartergalleries. I finished this in Golden acrylic yellow ochre. I've now also completed the first strakes of outboard bulwark planking in 1mm x 3mm walnut - 2 strakes laid below the first molding strip and cut around the main deck gun ports. This posed few difficulties. All of these elements will be finished in yellow ochre eventually, so the contrast between the limewood gunport lids and the walnut planking will be masked. One thing I noticed on installation of these first planking strakes is that the gunport lids already installed on the model will in some cases stand a little proud of the hull planking. Once these strakes were installed, I had to commit quite a bit of elbow grease to sanding the lids down to be more or less flush with the surface of the planking. Here are a couple of photos - not great or very interesting ones, but....you get the impression. Bye for now and happy modelling hamilton
-
Roter Löwe 1597 by Ondras71
hamilton replied to Ondras71's topic in - Build logs for subjects built 1501 - 1750
Beautiful work! hamilton -
Looks good so far - I'm not sure where you're located, but I'm in Vancouver and have visited the St. Roch many times. I have a tonne of photos of the reconstructed vessel as she sits in the Vancouver Maritime Museum and I'd be happy to share these with you if you like - not sure how detailed you want to get, but they might be helpful.....PM me if it's something you're interested in. hamilton
-
Nice detailing on the rudder! hamilton
-
Great start on the rigging John! And Happy New Year to you! hamilton
- 282 replies
-
- 1
-

-
- Bluenose
- Model Shipways
- (and 1 more)
-
That person is me!!! Planking drives me crazy!!! But I love building deck structures and absolutely love rigging.....The hard part is - who gets the finished product!! It's easier to ship a hull than a fully rigged model, after all......but I've always wanted to visit Tennessee!! hamilton
-
Nice work on the repair Cisco! hamilton
-
Looks great - I had a lot of fun building this model way back - the finished product is still in my office! Hope you're enjoying this one hamilton
-
Great work on the topmasts! hamilton
-
Thanks for the suggestion, Thunder. The fairing down option does seem ruled out at this point.....But I'm not sure I'm daring enough to go for any major surgery.......the problem is that once I start on any solution I won't be able to stop and the chances of really messing things up after that is pretty high.....On my Bluenose log I spent a bit of time explaining that, as someone who models for pleasure only, I'm not too worried often about historical accuracy and am perfectly happy if things look more or less tidy. I did want to hold myselkf to a higher standard on this one, so I'm feeling torn - my "natural attitude" is to just press on with an anachronistic transom, but then there's part of me that wants to intervene.....I've been working on other parts of the model to avoid making this decision, but it's gotta happen at some point!! But first.....coffee! hamilton


