DONATION DRIVE - SUPPORT MSW - DO YOUR PART TO KEEP THIS GREAT FORUM GOING!
×


hamilton
-
Posts
1,933 -
Joined
-
Last visited
Content Type
Profiles
Forums
Gallery
Events
Everything posted by hamilton
-
 Even if it doesn't come out exactly symmetrical, this approach should produce good results - great work so far - very precise and clean looking! hamilton
 -
Looks really good so far! hamilton
-
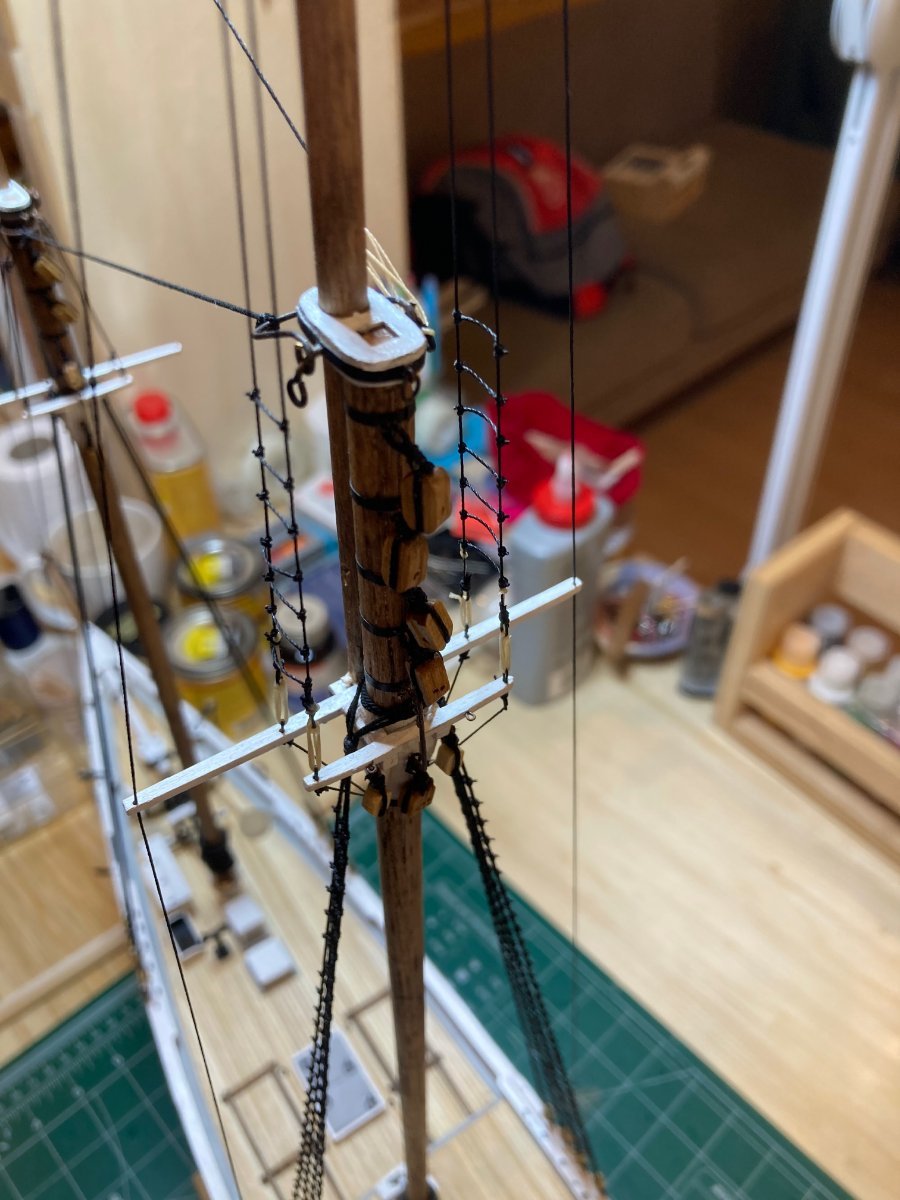
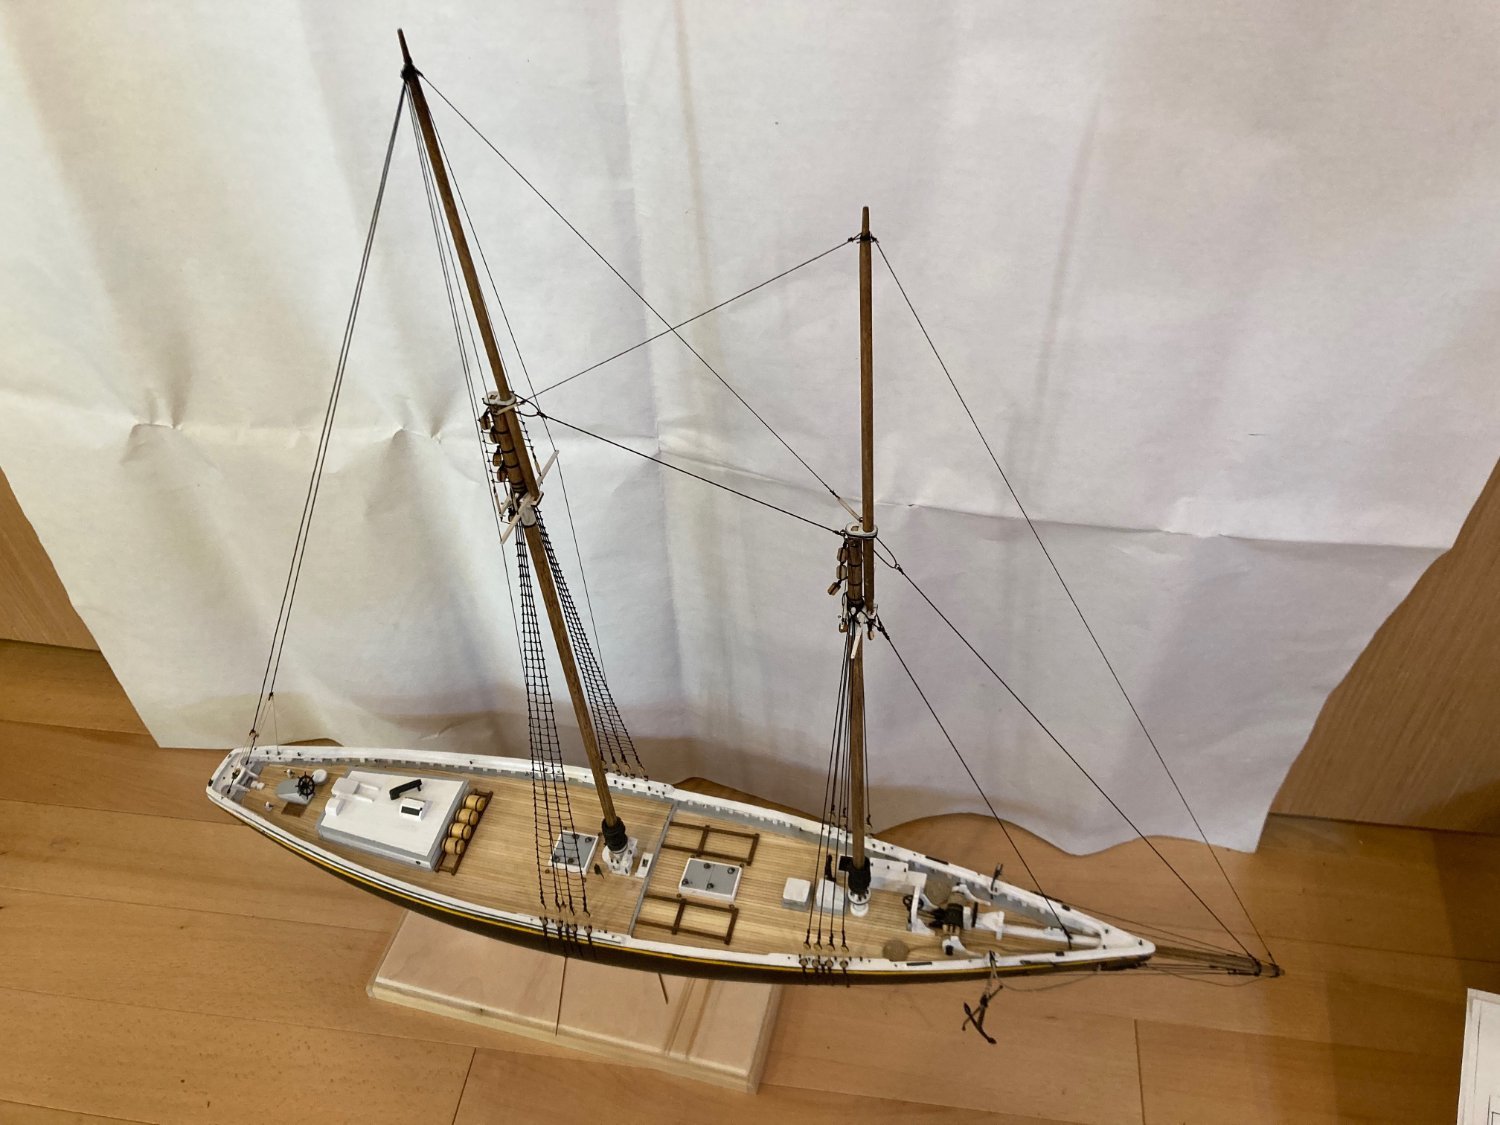
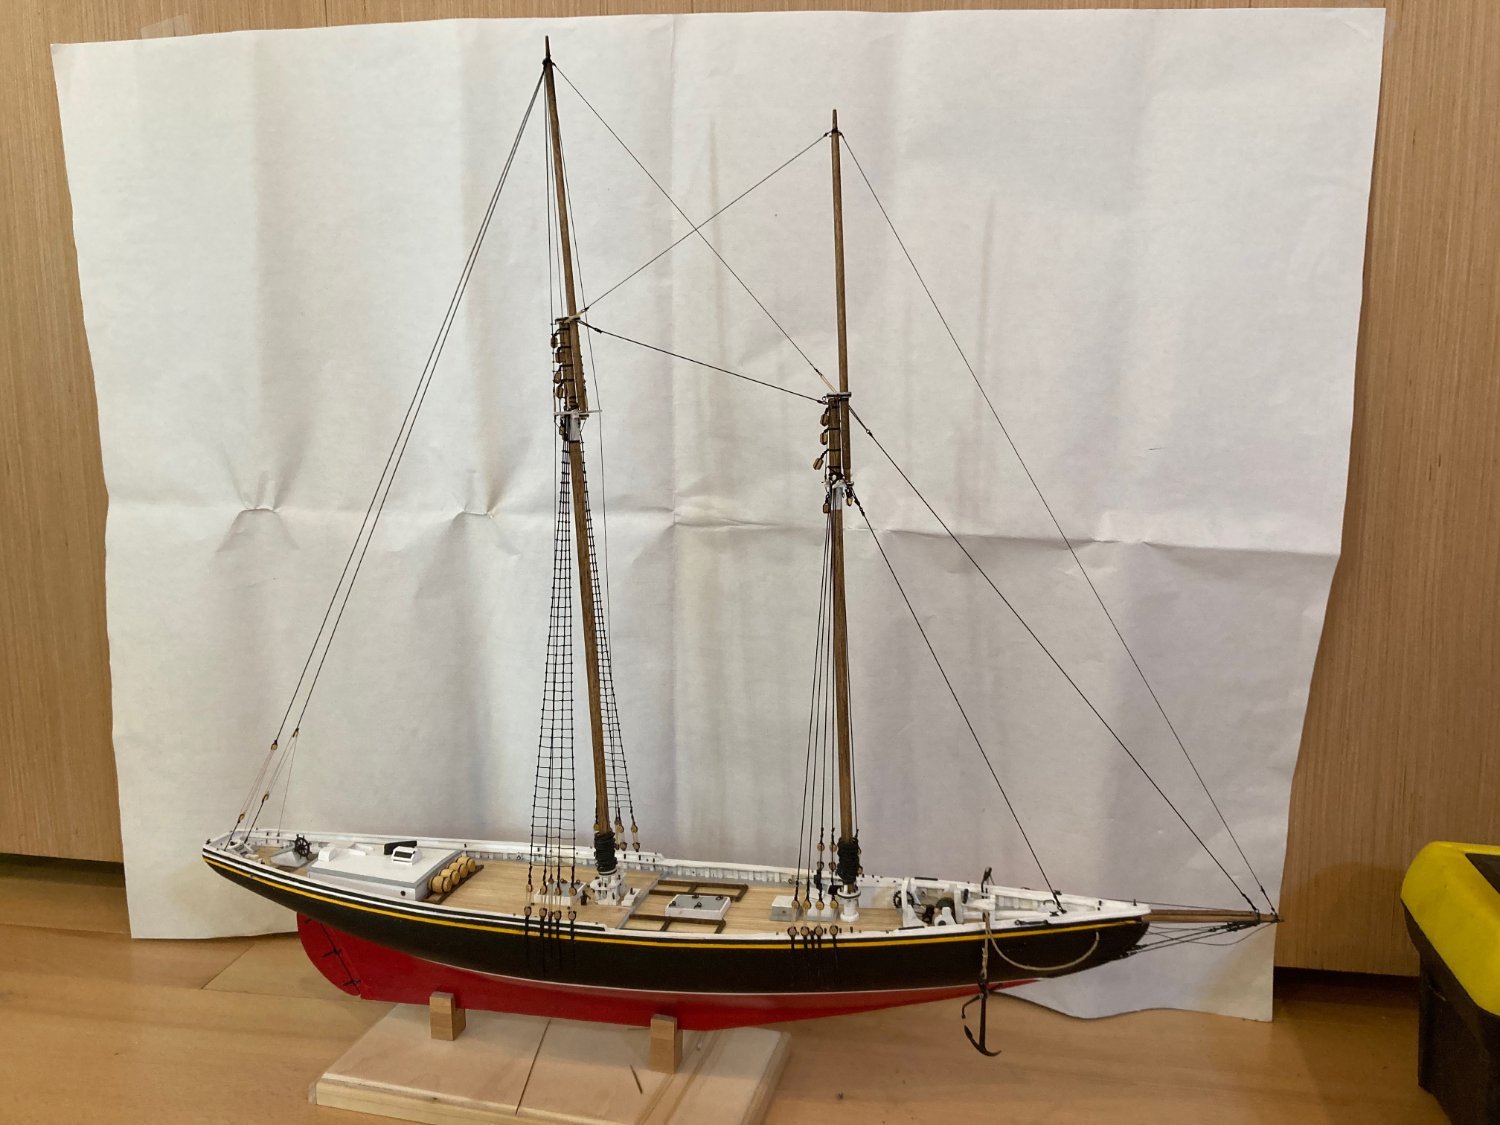
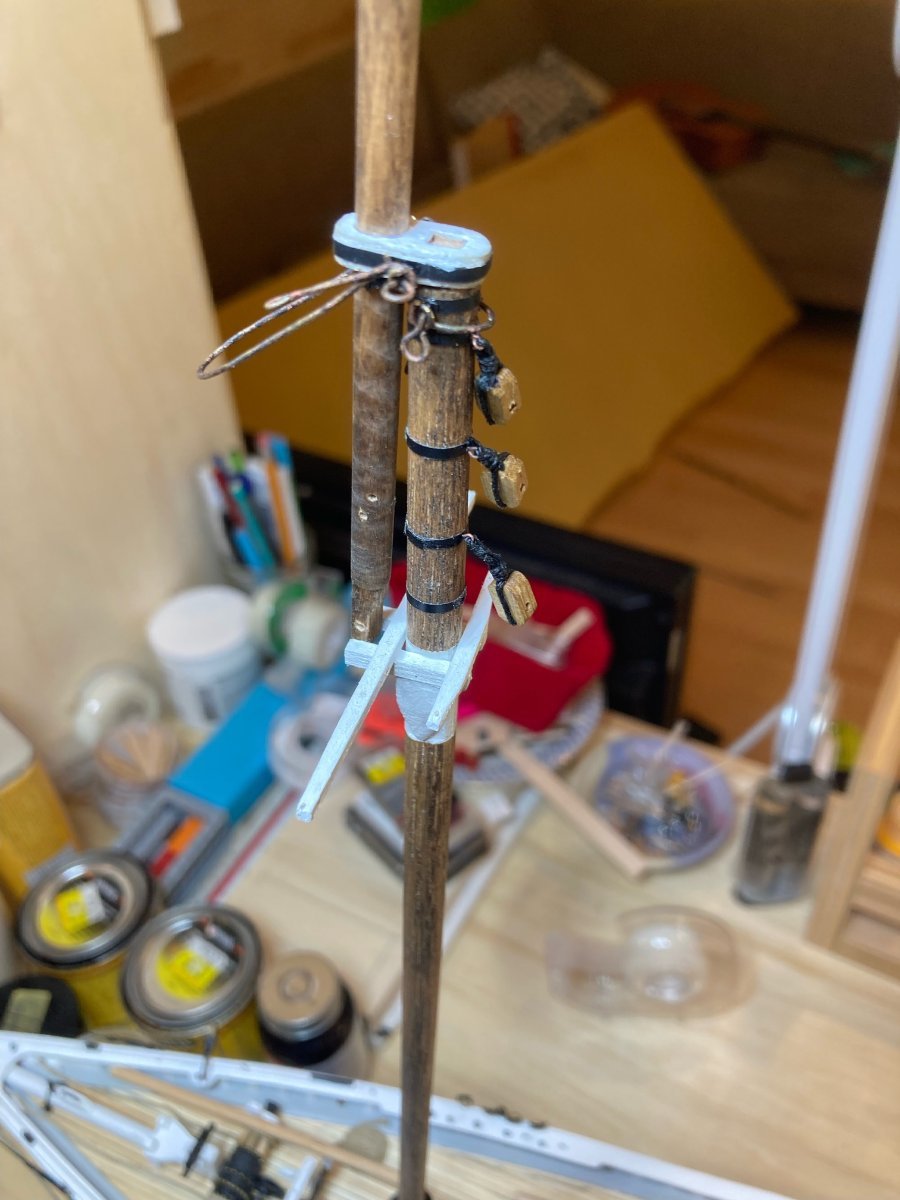
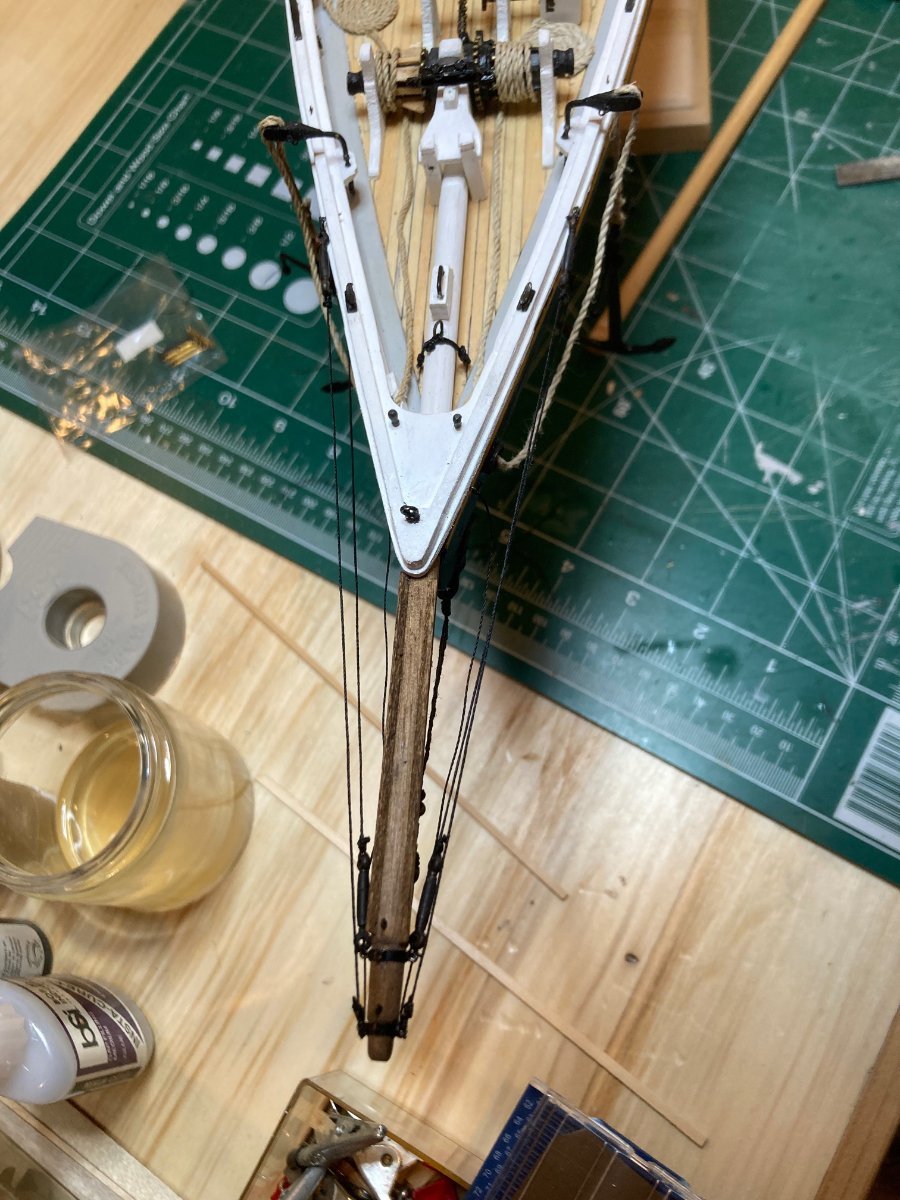
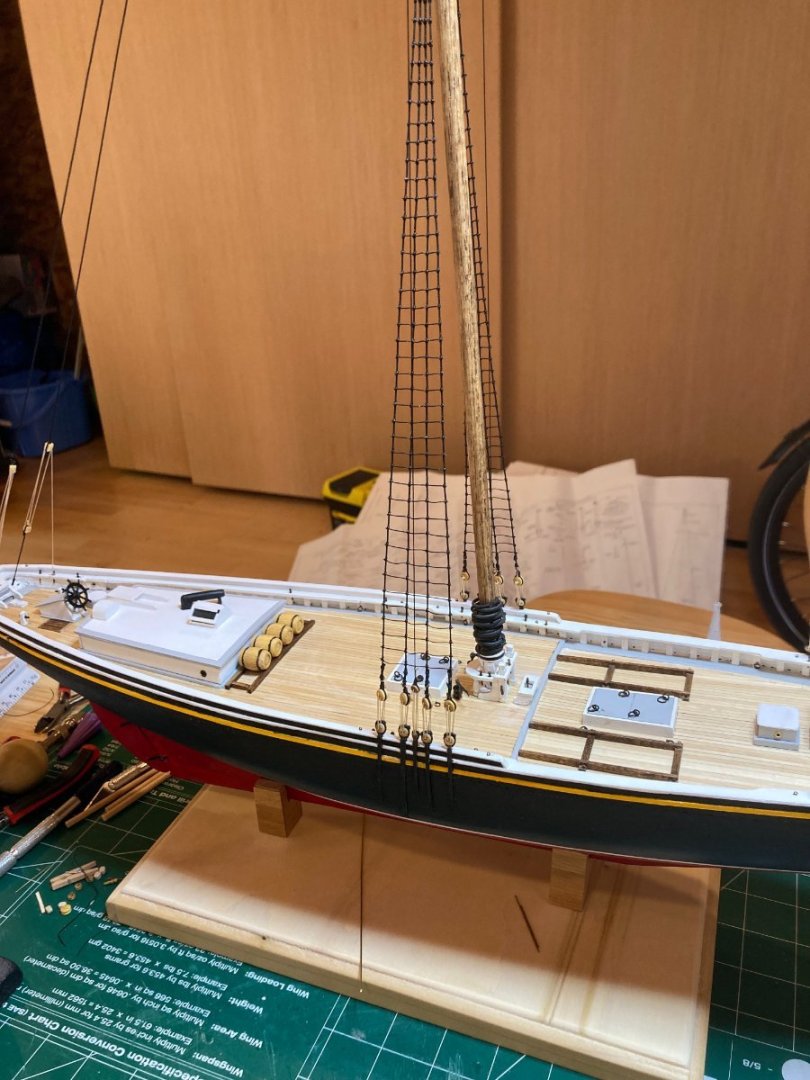
Well - it's finally time for a real update on the build. I've been working on the standing rigging and this is something I always have trouble documenting because of my poor camera skills and equipment (iPhone).....but now that the standing rigging is almost done (only the fore lower shroud ratlines and fore spreader lift ratlines plus the fore topmast shrouds to complete) I can share the progress. I won't spend too much time with descriptions here other than to say that I did not pay enough attention to the plans and ended up tying the ratlines across all four lower main shrouds instead of the first three with an occasional extension to the fourth.....I know I talked about historical accuracy above as something I'm not too concerned about, but this one sticks in the craw a bit - though I'm sure eventually I'll reconcile myself to it.... In any case, I really enjoy the rigging process - probably my favourite part of any build - as it really brings the model to life in such a big way. Even ratlines aren't too bad with a good podcast or audiobook! Next to give myself a bit of a break, I'm going to fabricate the main boom and gaff and the main sail and main topmast sail and rig those up before moving on to completing standing rigging on the foremast. Enjoy the photos all and bye for now hamilton


-
Thanks a lot Johnny - I agree wholeheartedly - if I could afford it, I would always go with Syren blocks. As it is, I have to save those kinds of expenses for builds where I have more of an eye to accuracy. The Bluenose is what I consider a kind of "recovery model" - a project that - along with a 1.5" = 1' rowing skiff I built last summer - I'm working on primarily to get back into modelling. When I first got into this hobby in 2009, I built 15 models in succession over an 8 year period. Then I injured my hand back in 2017 and have only worked sporadically on models from that time until the beginning of last summer, when I built the skiff, picked up Bluenose again and started working on HMS Bellona (Corel), which I am going to try to build to at least something of a level of historical accuracy (though there are Bellona and other 74 builds on here that outstrip my capacities in all ways!!!). Like you my questions are the same - what do I want to achieve with this build? Where are my interests going with this or that model - most importantly what is available to me for resources! Bluenose is obviously well documented, but the aim of building it really is to get a modelling rhythm back in my life...... Thanks for dropping by! hamilton
-
Thanks for the recommendation, Alan - my son is a budding filmmaker (hard to believe given what's happening in Hollywood these days) and we have a weekly film club where we watch classic cinema - the farthest back we've gone so far is Night of the Hunter (1955), which he really enjoyed (as do I) but I'll add Captains Courageous to the list! hamilton
-
Looking good cisco! hamilton
-
Thanks for the helpful suggestions guys, but I do this for fun, and will go my own way on this one. I appreciate and admire those with the technical skill, money and time to achieve at the high level you guys do, but this is my hobby and I seek relaxation and quiet enjoyment in it. And since I'm under no obligation either to keep anyone on board this boat safe or pass a bar of historical or technical accuracy, I'll leave these as they are and move along. I do appreciate the comments, and if I ever come to build a model with an eye to technical and historical accuracy, I will definitely make sure to rig my blocks correctly. Thanks again! hamilton
-
Hello again: In a burst of activity today I managed to outfit the fore mast and fore topmast - they are now assembled as a single structure, but not yet installed on the model. I'll wait to do this until I've finished outfitting the main mast and topmast and I'm ready to begin the rigging, though some rigging elements (the spreader lifts and ratlines) will be installed first. The process was mostly trouble free, though the results are a little wonky....I've been trying a new blackening agent that is not very good - so the pieces look...well more rusted than anything...I may try to dab some black paint on them to tone them down a bit but we'll see....I don't know why the new blackening agent I was using today ended up flaking so badly - I bathed the brass in acetone and rinsed with water before blackening and then tried just putting them straight in the blackening solution, but in both cases the results were equally poor....I may try diluting the blackening liquid more to see if that helps, but honestly I'm at a loss....the old Blacken-It (no longer available in Canada) is sorely missed!!! Any tips from pros out there would be appreciated. Enjoy the photos and bye for now hamilton


-
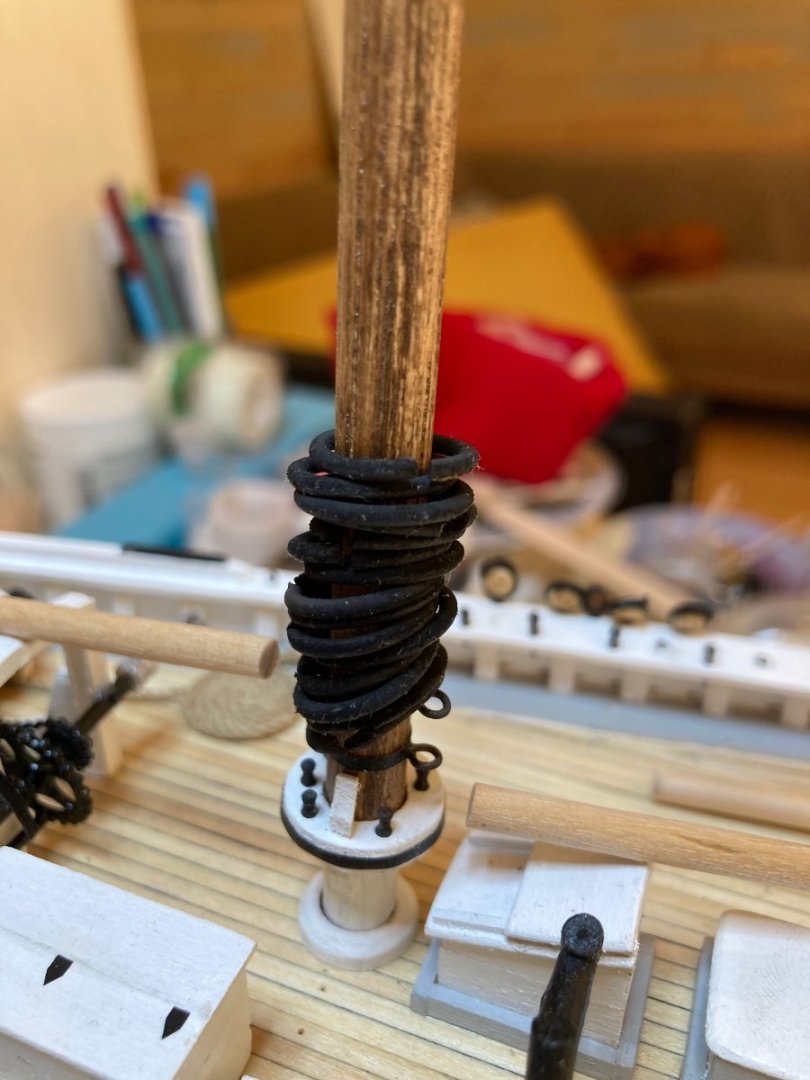
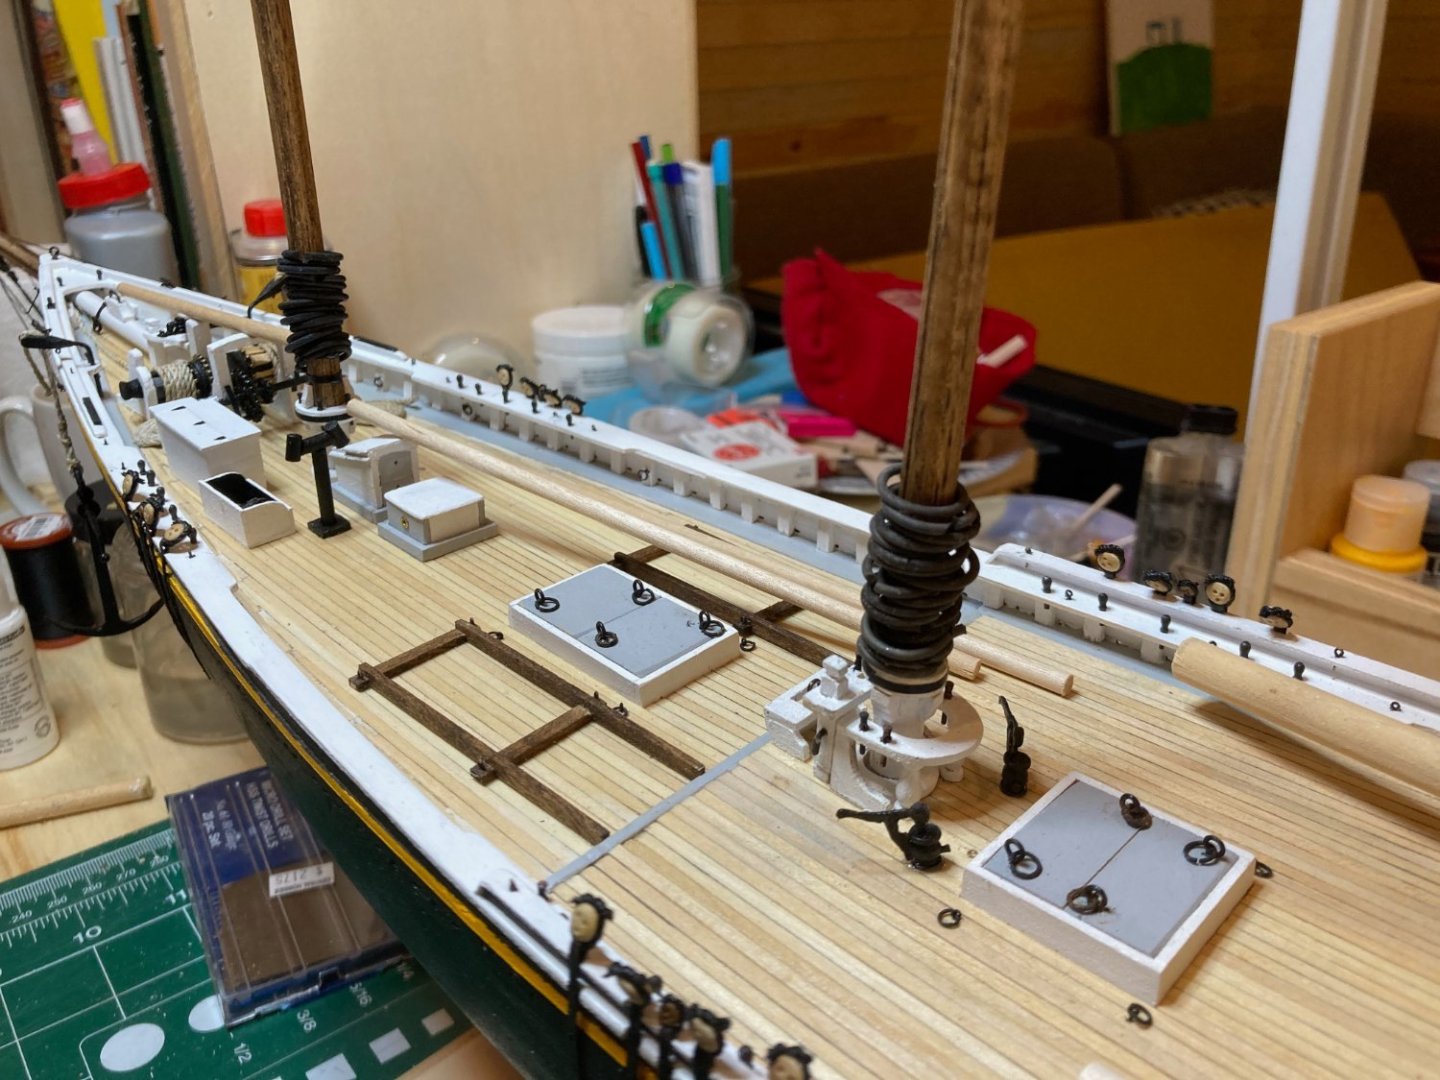
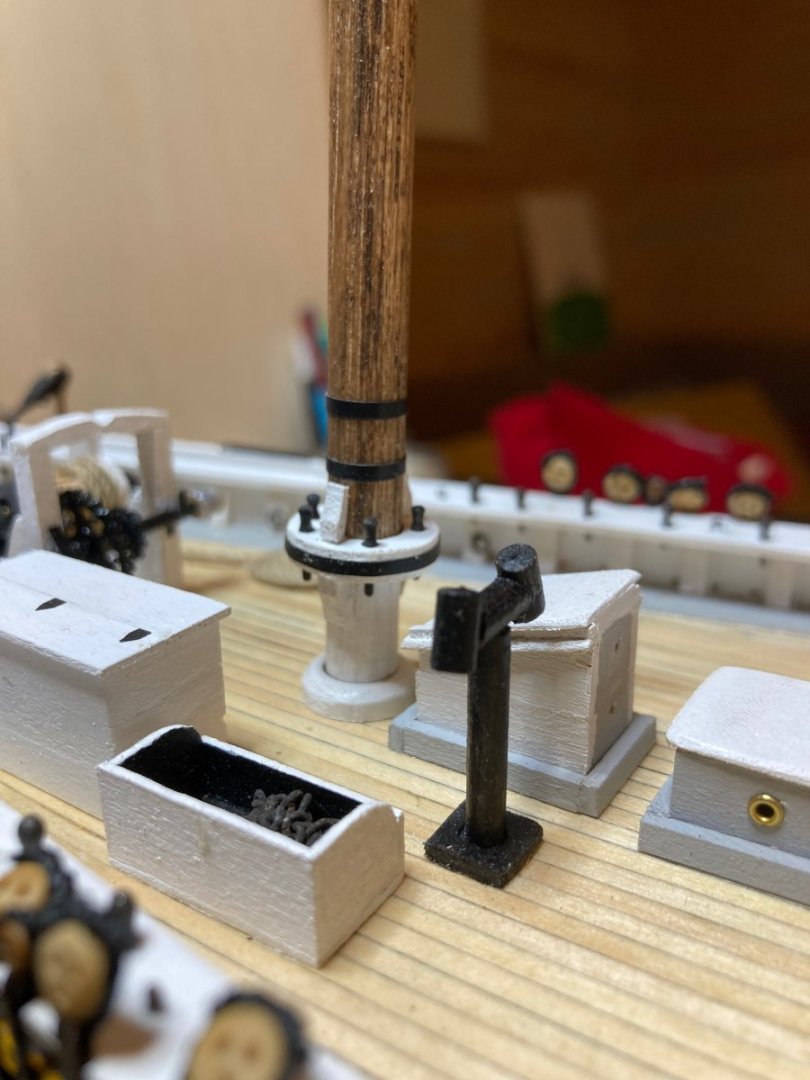
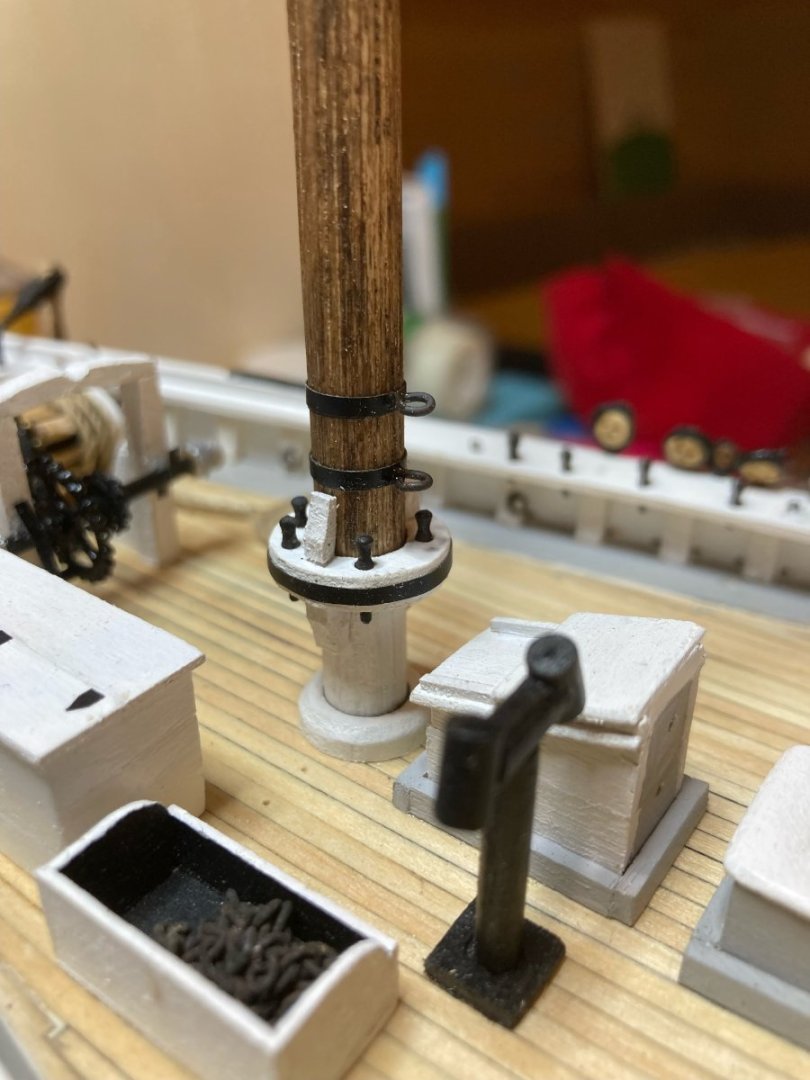
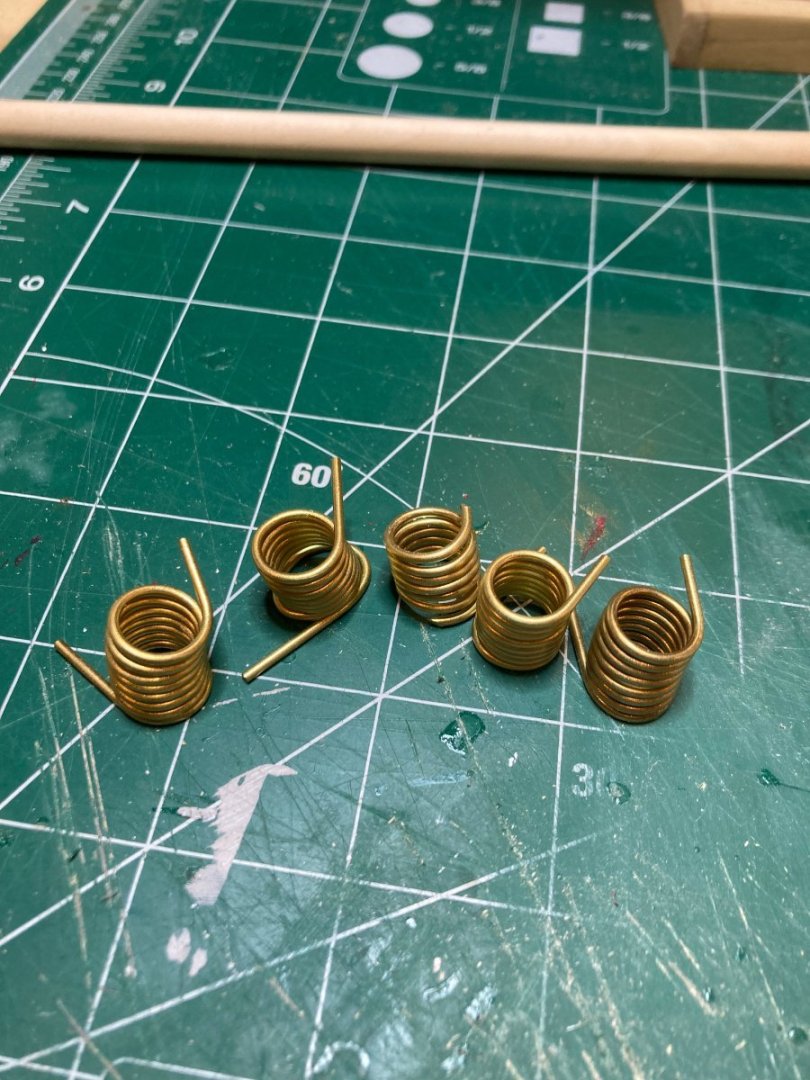
And here are the finished results with the mast hoops - now just need to detail the masts before mounting and adding standing rigging...things seem to be progressing.... hamilton
-
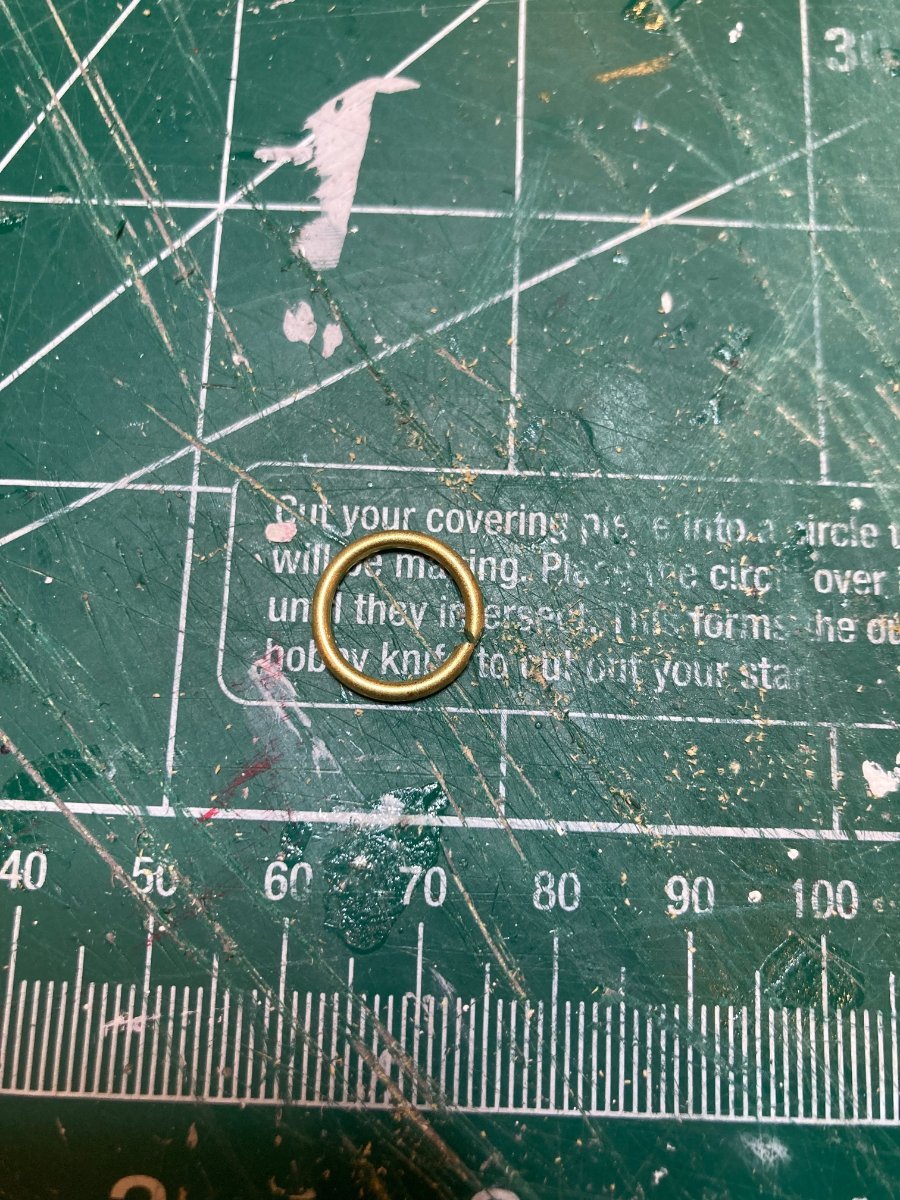
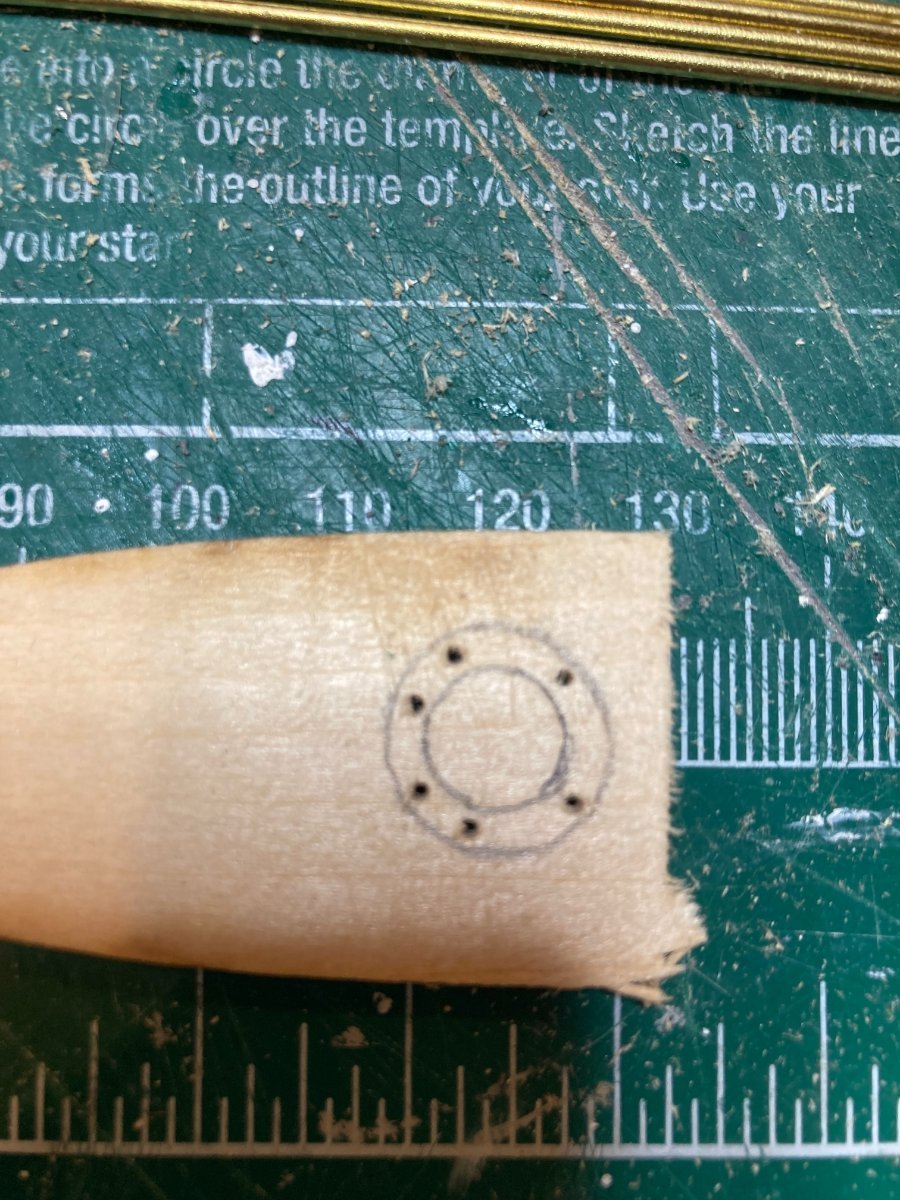
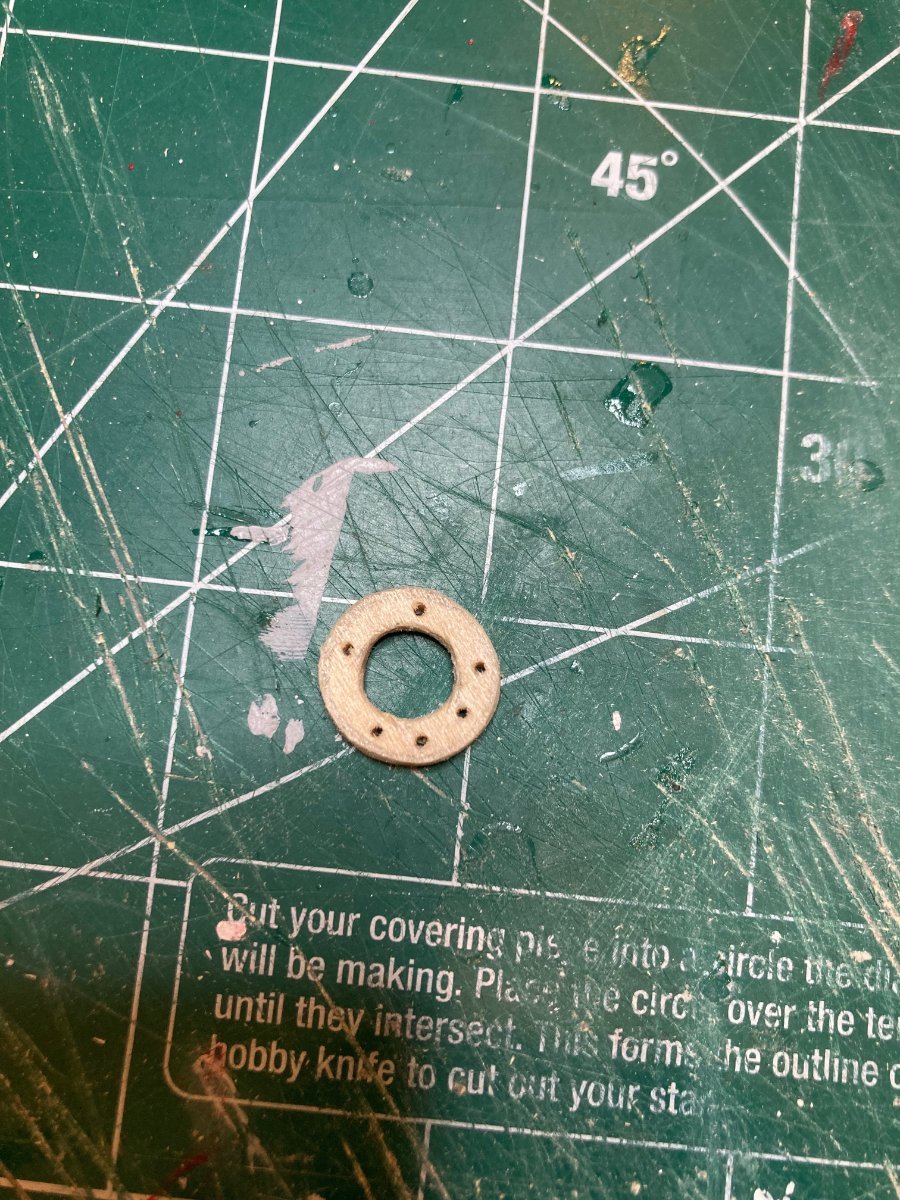
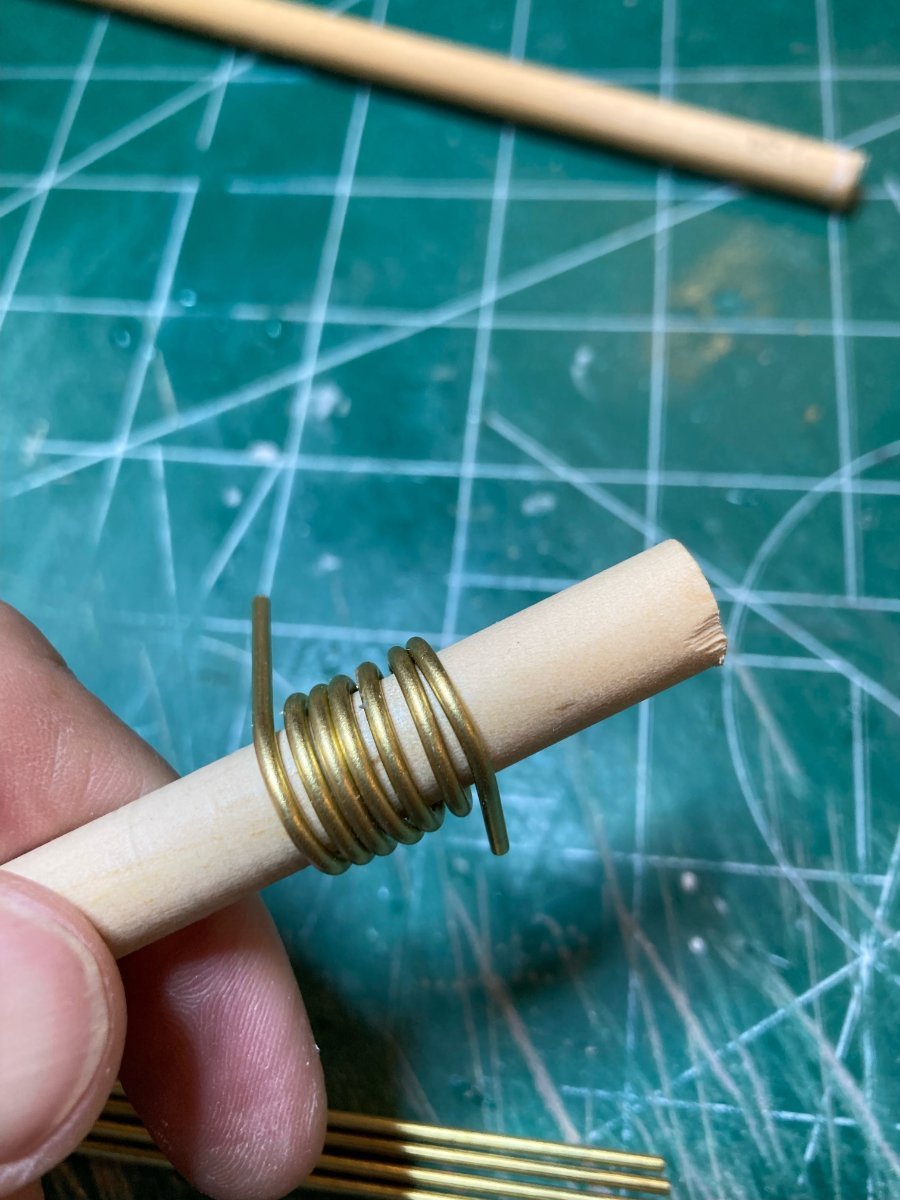
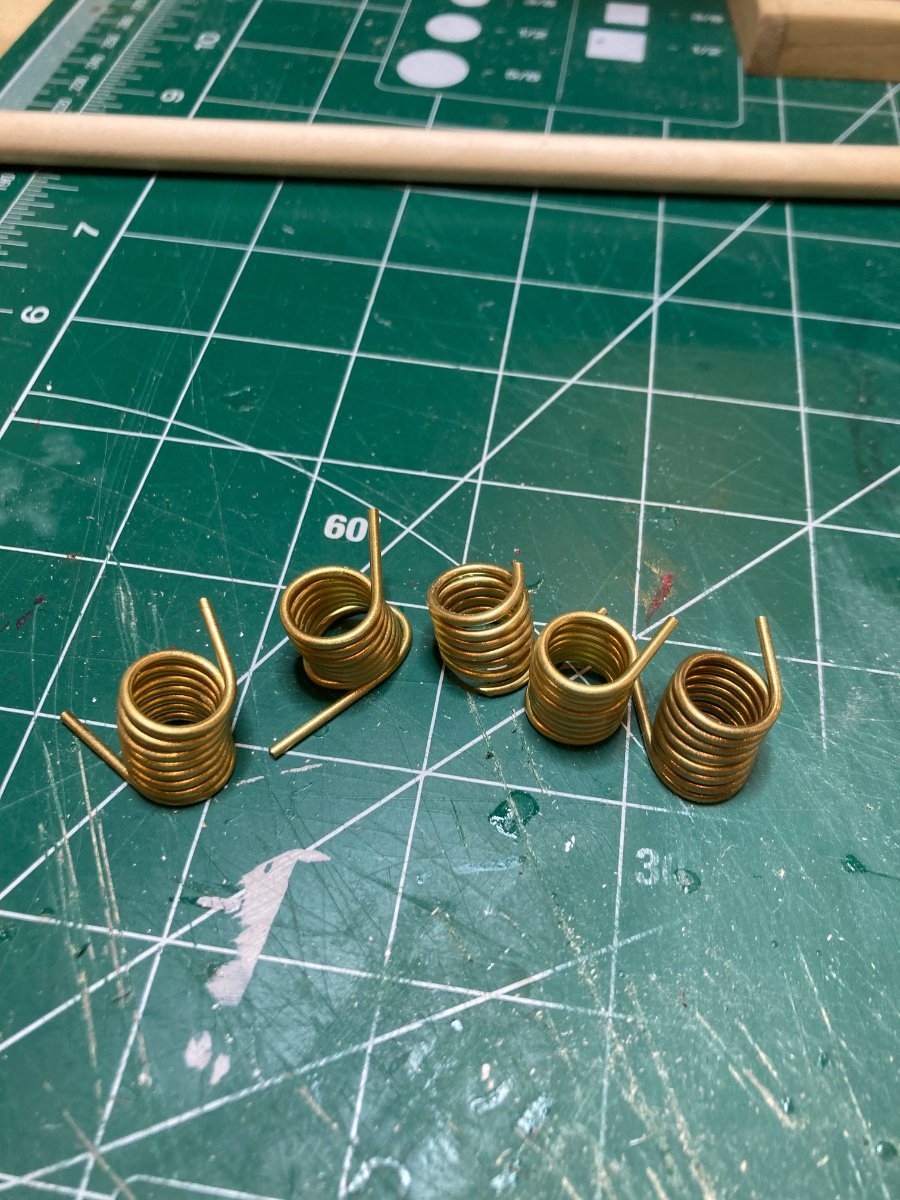
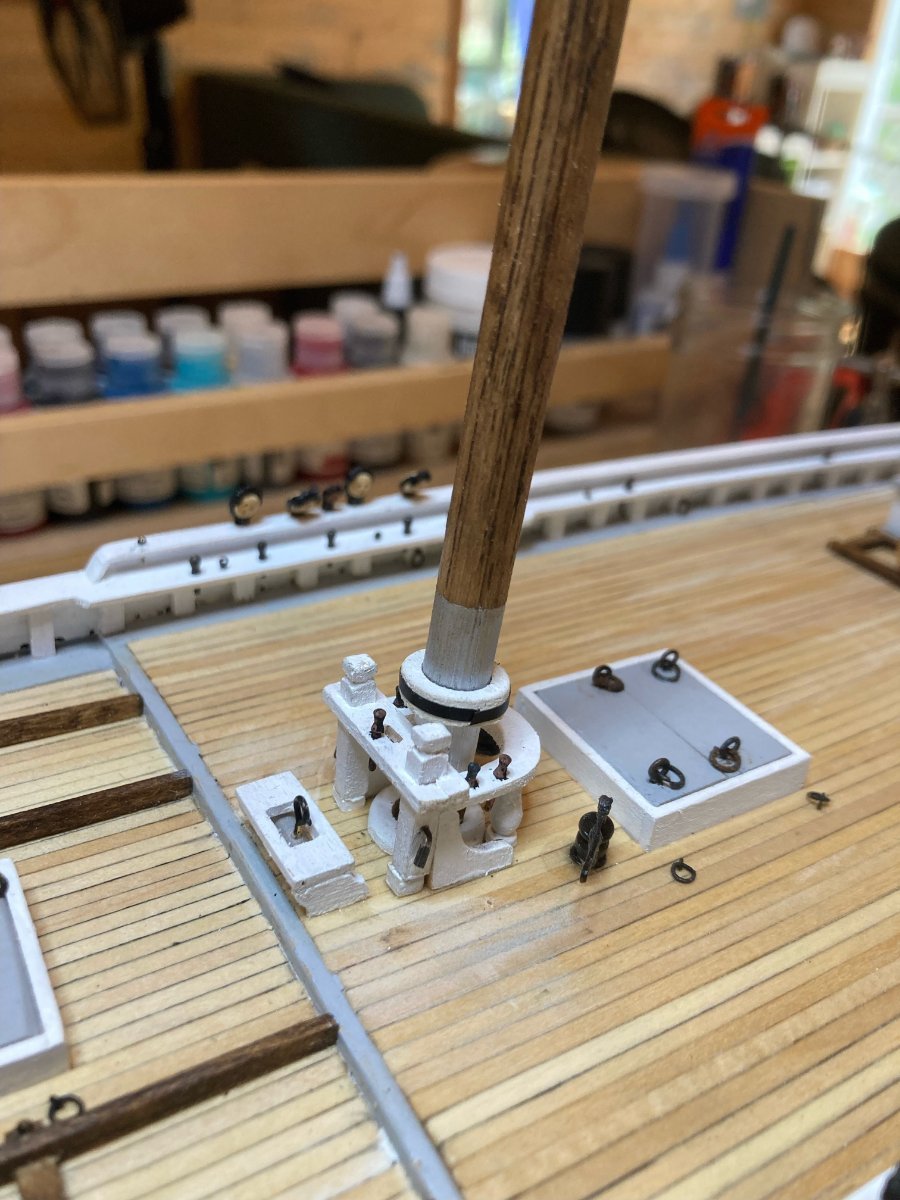
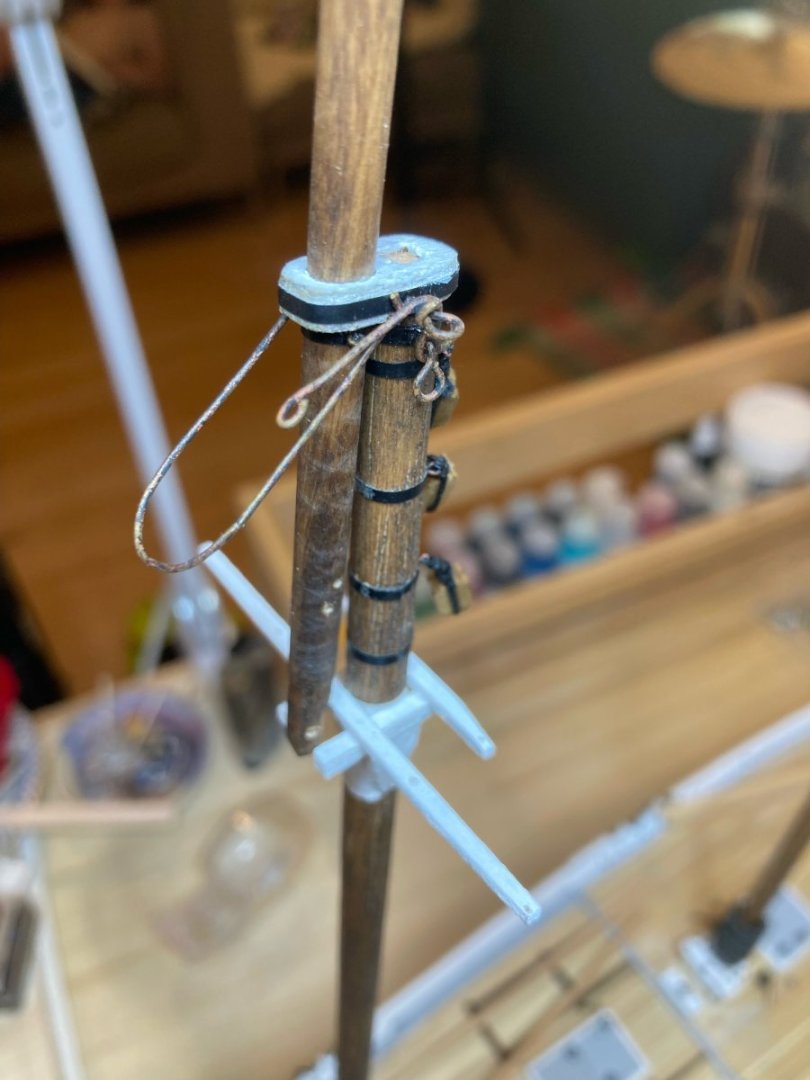
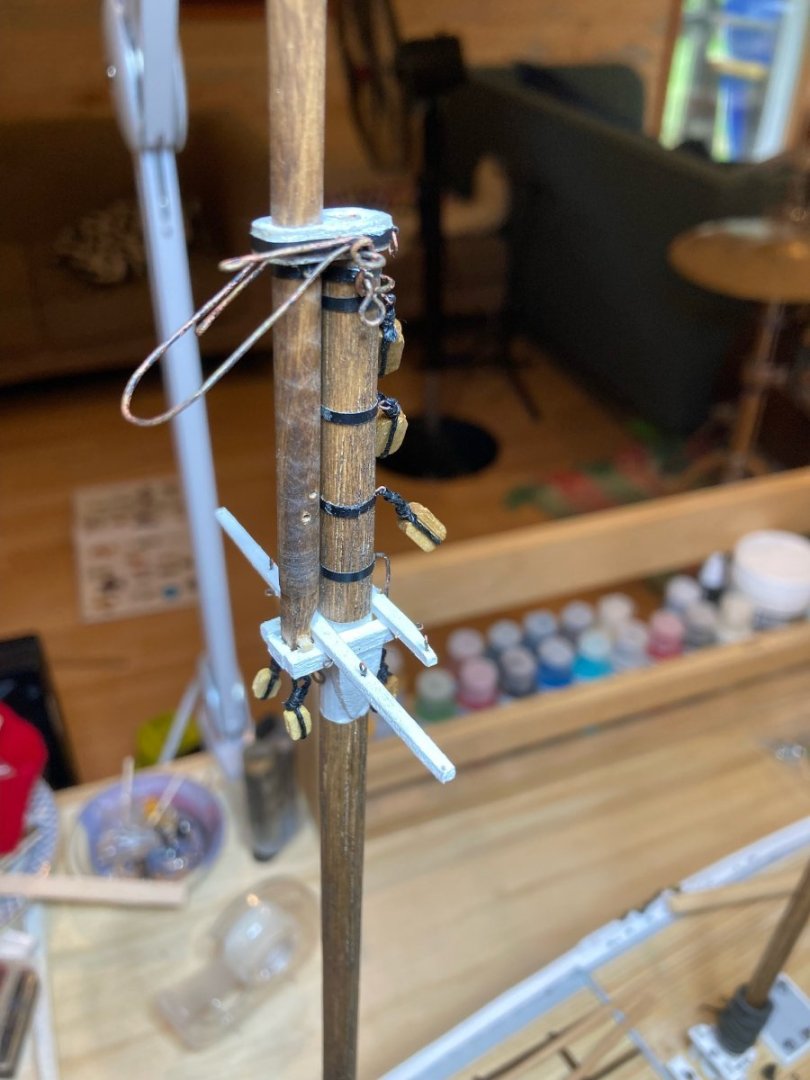
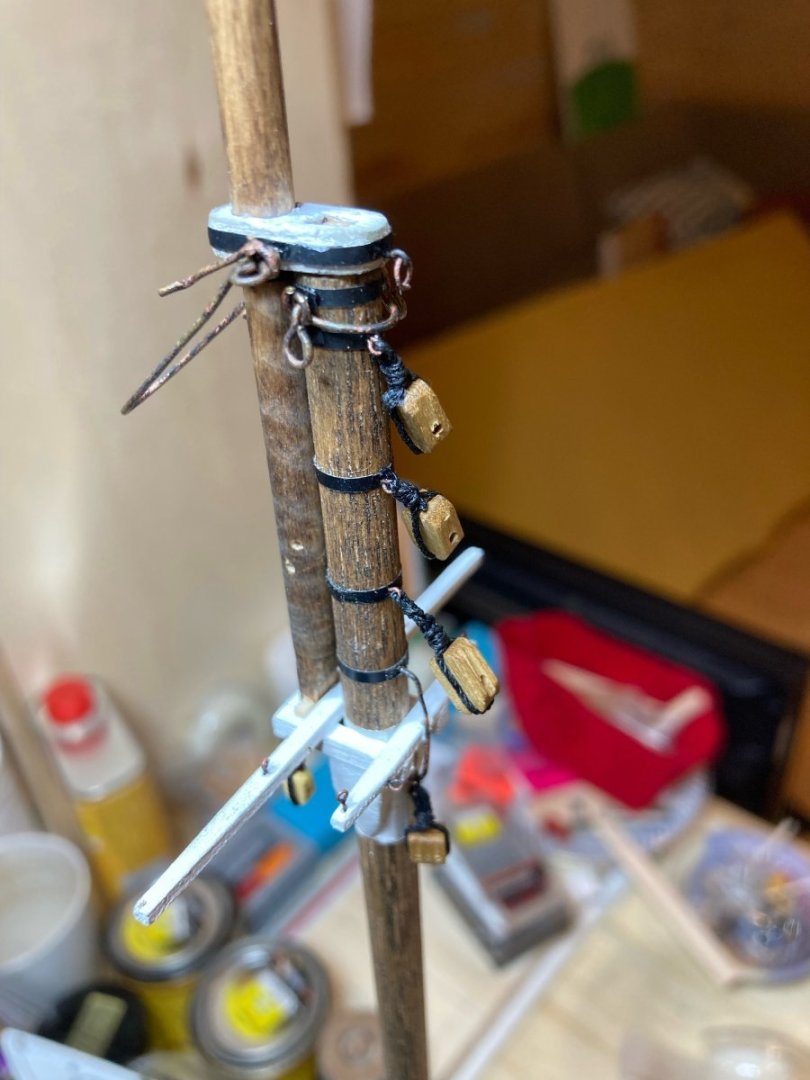
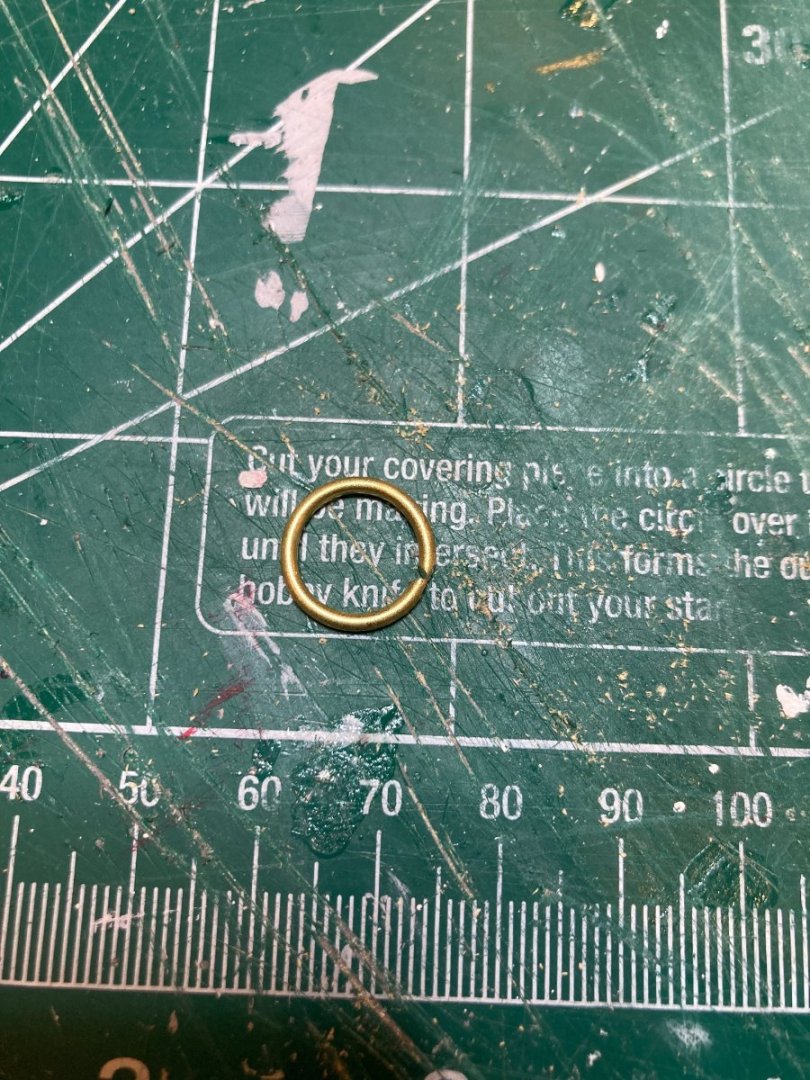
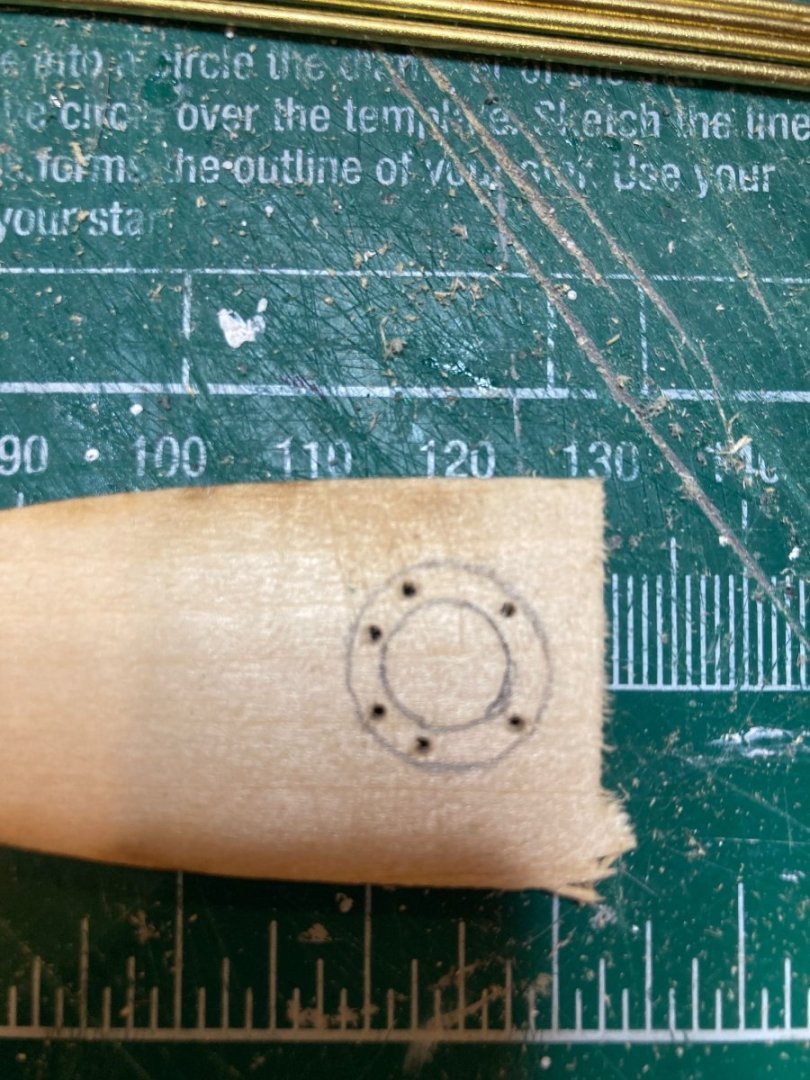
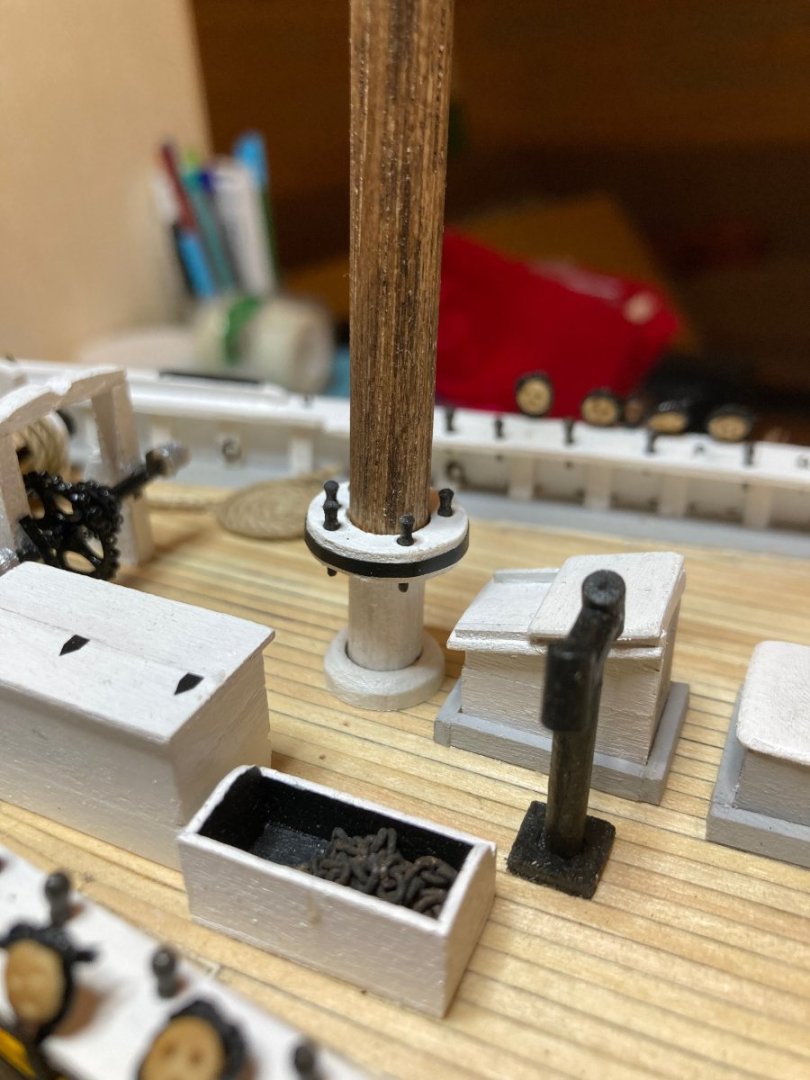
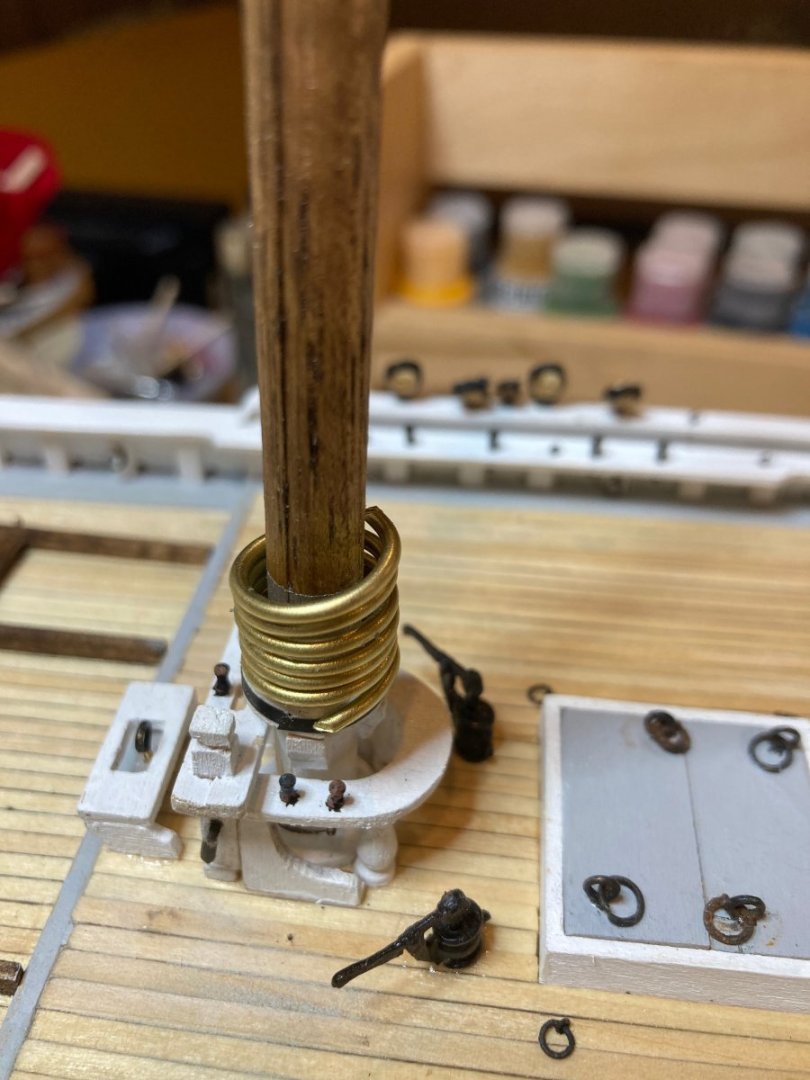
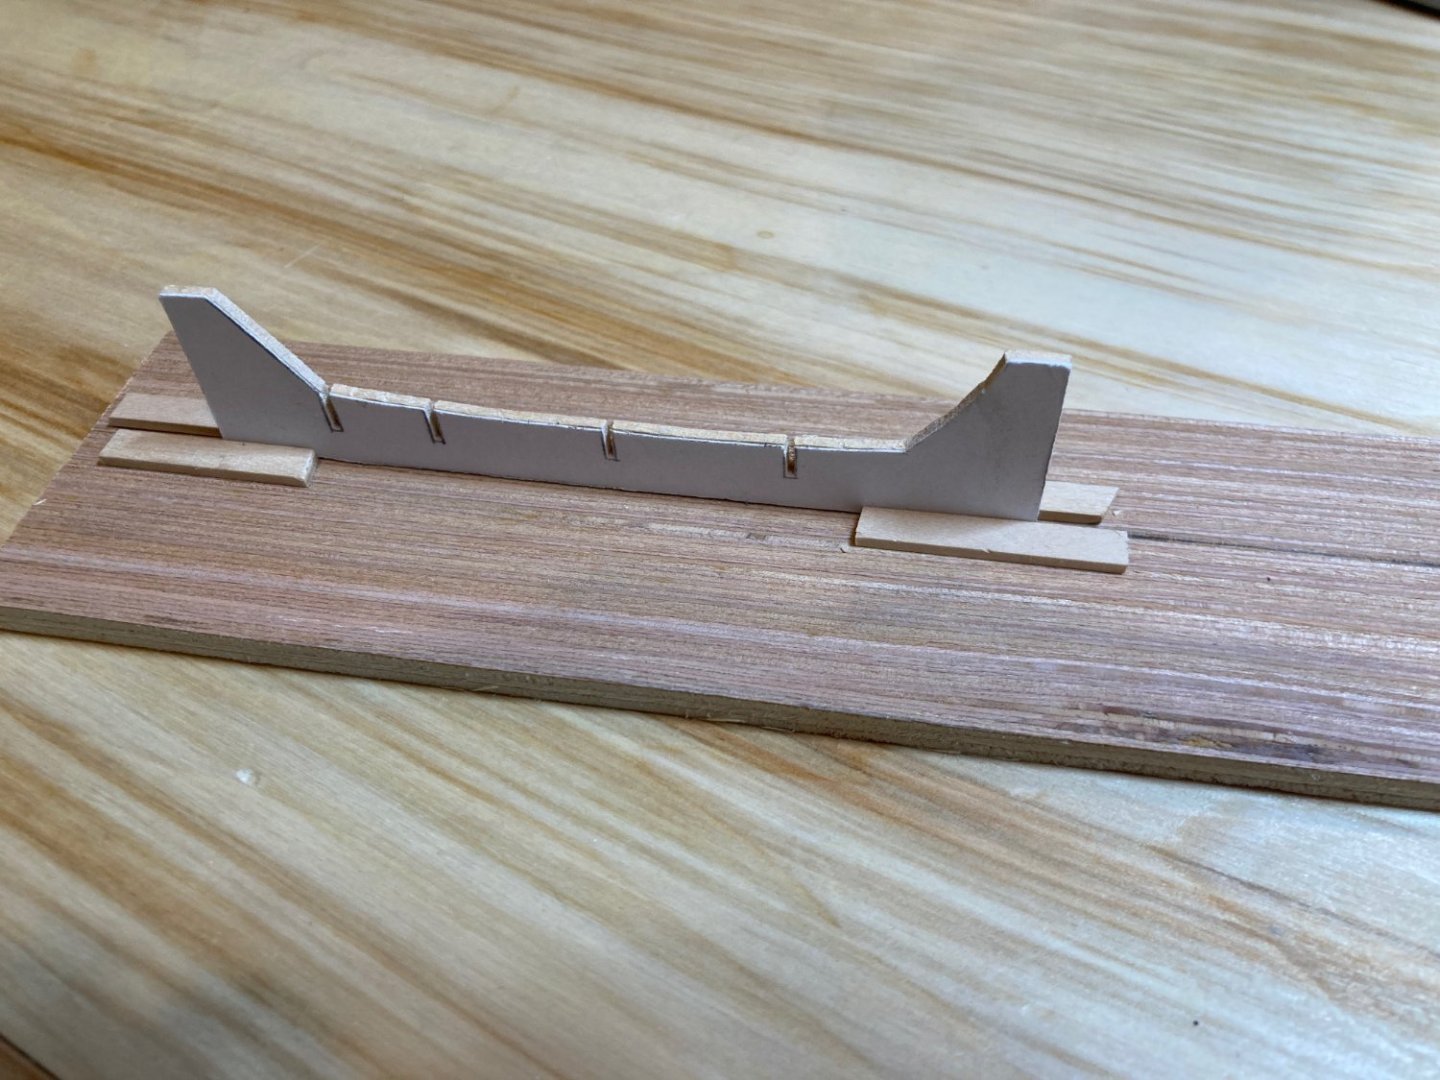
Well - looks like page 7 is even more insane than page 6 was.....hopefully we can get to page 8 and lighten the scrolling a bit.... In any case this is just a small progress report - I've made the fore boom saddle and started to fabricate mast hoops - these are supposed to be wooden, but since I've already jumped the shark with the anchors I feel more justified in deviating here, as well, for the sake of "modeller's convenience"....ample quantities of 1/16" brass rod make the approach shown below a little more reasonable for me - though I will need to get some new nippers to cut through these!! The boom saddles (main and fore) were constructed using 3/32" material from old model shipways laser cut billets. I traced the end of a 5/16" dowel on the material and then marked its centre with a compass point. I then drilled out the centre using progressively larger drill bitts and did the final bit of interior sizing using some needle files. I then drew a concentric circle about 3/32" out from the inside opening, marked out the belaying pin locations, drilled those and the rough cut out the piece, doing some final shaping with a sanding block. I lined the outside with some 1/16" pinstripe tape, added some blackened belaying pins and installed it on the mast with some small chocks as noted on the plans. I used pinstripe tape and some slightly modified eyebolts for where the foreboom attaches to the mast - I'm sorry but I'm away from the plans and cannot remember the official name for this!! In any case, here are the photos - enjoy and bye for now hamilton


-
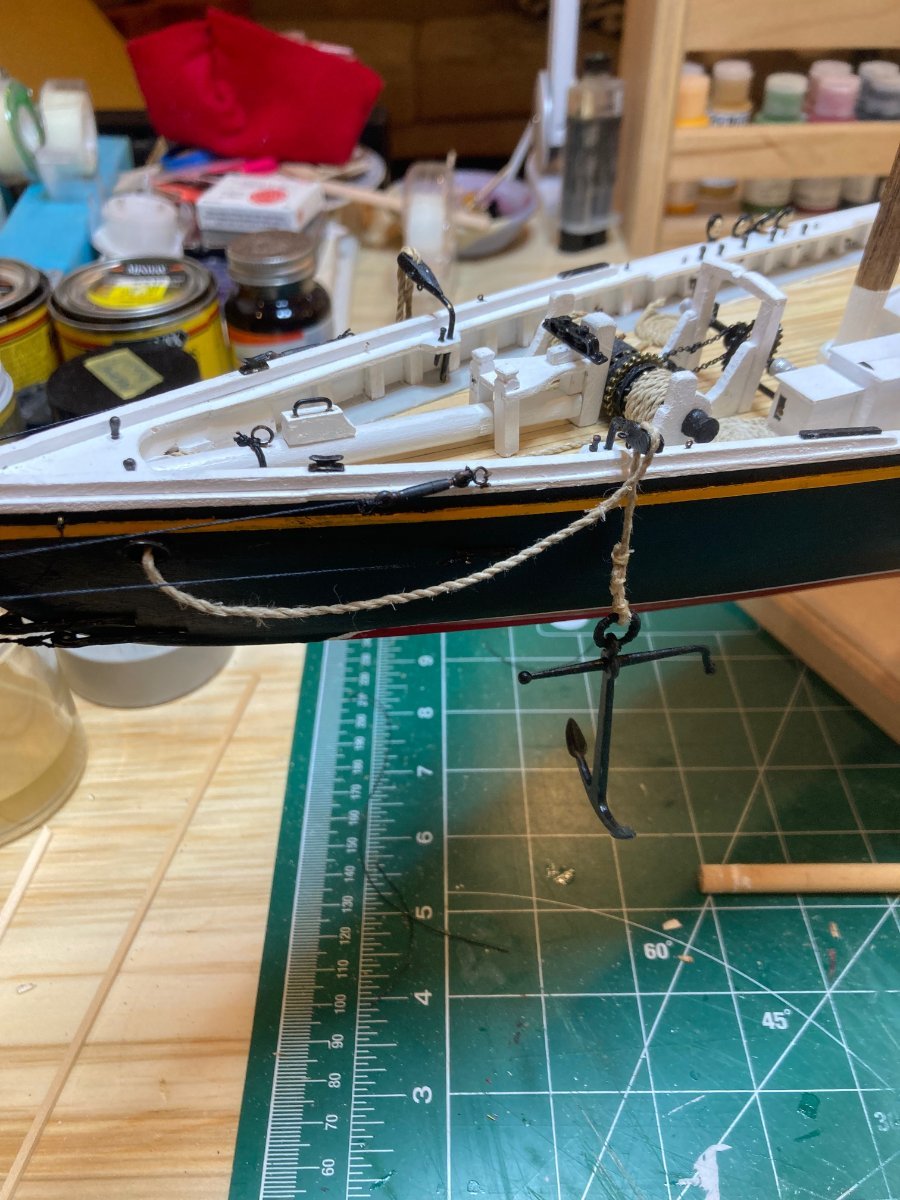
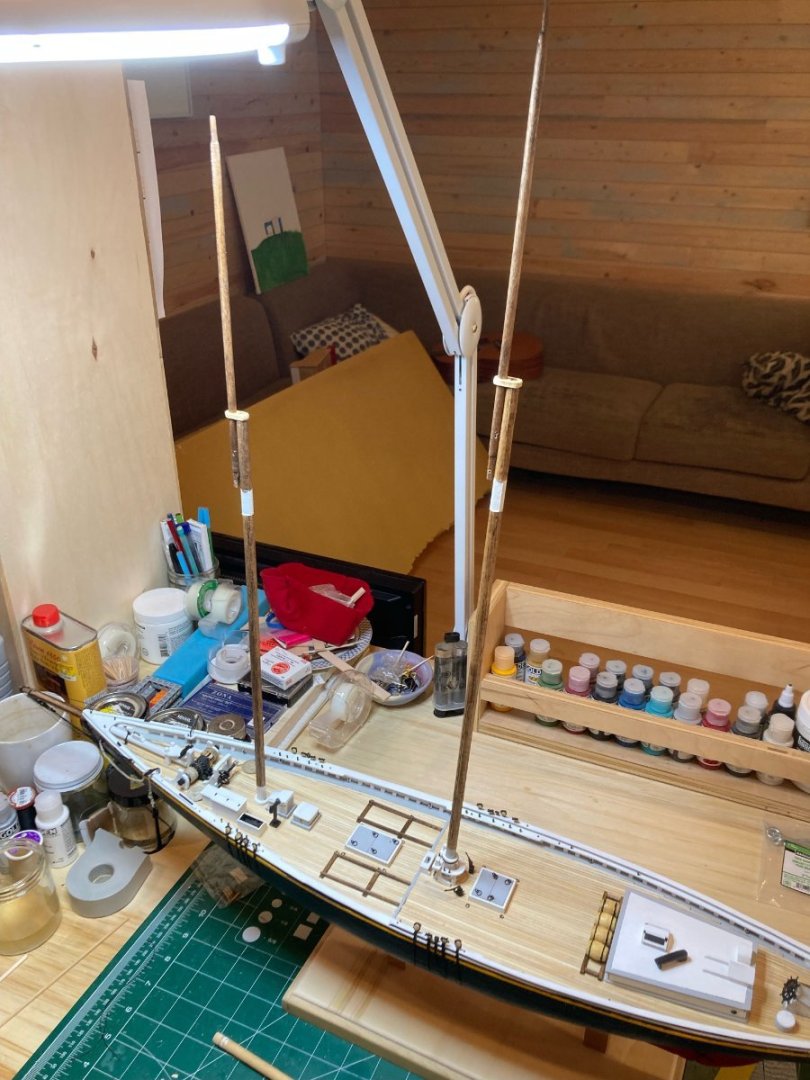
Hello again: It's been a while since I updated here, but work has progressed on the Bluenose - albeit somewhat more slowly....since the last post, I've more or less finished the hull - with the dorys and nameplates/scrollwork still to be figured out....to be honest I'm delaying these.... I added some barrels on a rack forward of the cabin, completed the bowsprit rigging installed the lower shroud chainplates & deadeyes & started on the lower masts and topmasts (they are dry fit in the photos below). I also set up the anchors - though I know these are not really accurate! I had to make do with what I had to hand or what was available locally - no scale chain that I could find so I substituted some hemp rope, and the anchors I sourced at my local hobby store are both slightly out of scale (on the large side) and not proper to what was carried on Bluenose....but, I'm going to forgive myself for these lapses and hope you will do the same! Work is kicking in again pretty quick and we're heading off to our country retreat on the 17th, but I hope to make more progress on the masts and spars before we go - after studying the rigging a bit it is definitely going to be more complicated than I initially thought - many elements to keep in mind and plan for as the masts and spars come together - but this is actually part of the modelling process that I really enjoy, so I'm looking forward to getting into it. Enjoy the photos and bye for now hamilton


-
Thanks Gregory! Much appreciated! hamilton
-
Hi there: I recently had to have my computer refurbished and in the process lost the direct links to these videos - the ones that Mark posted to start this thread are now marked "private" - is there any way to access them? Thanks! hamilton
-
I have Part 1 of the CAF Granado, but I'm in Canada, so too bad!! Hope someone picks this up - your offer is a definitely a good deal hamilton
-
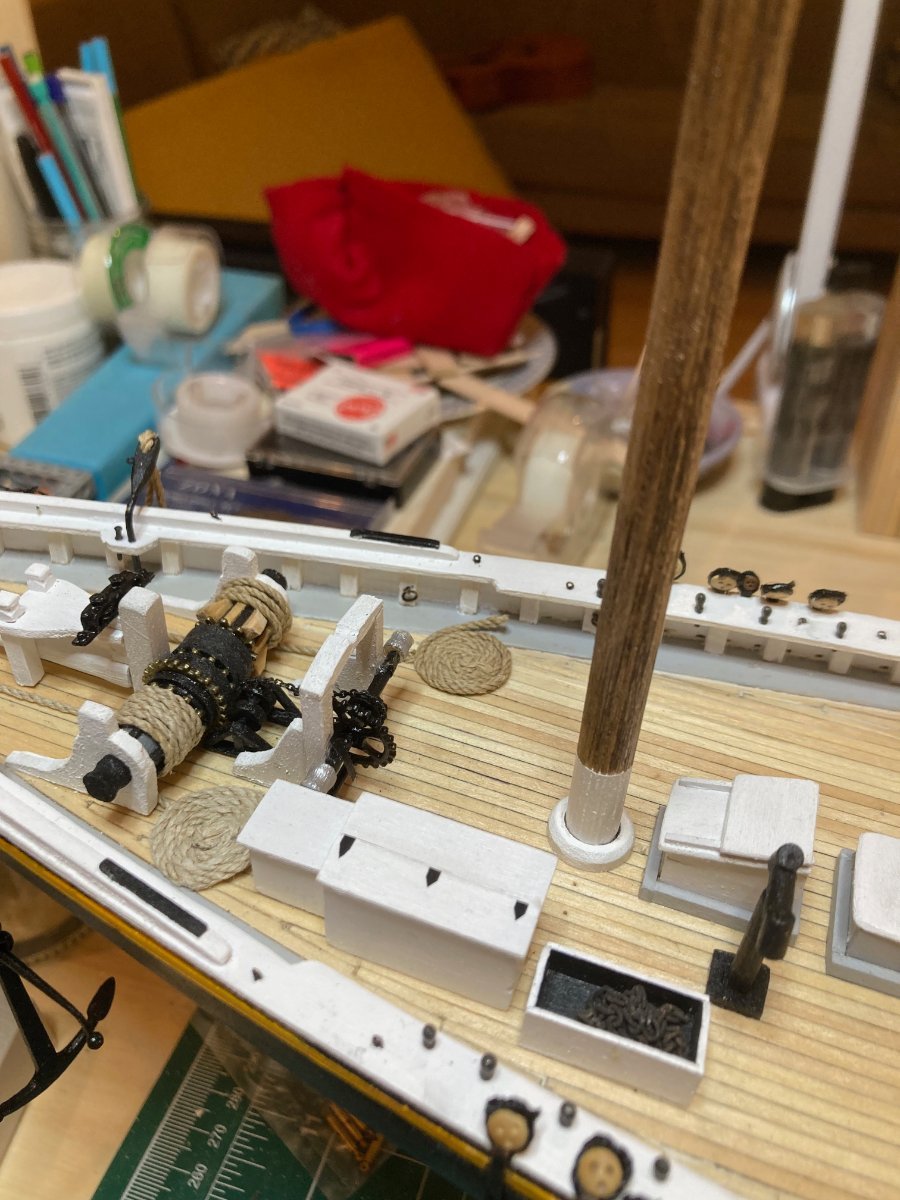
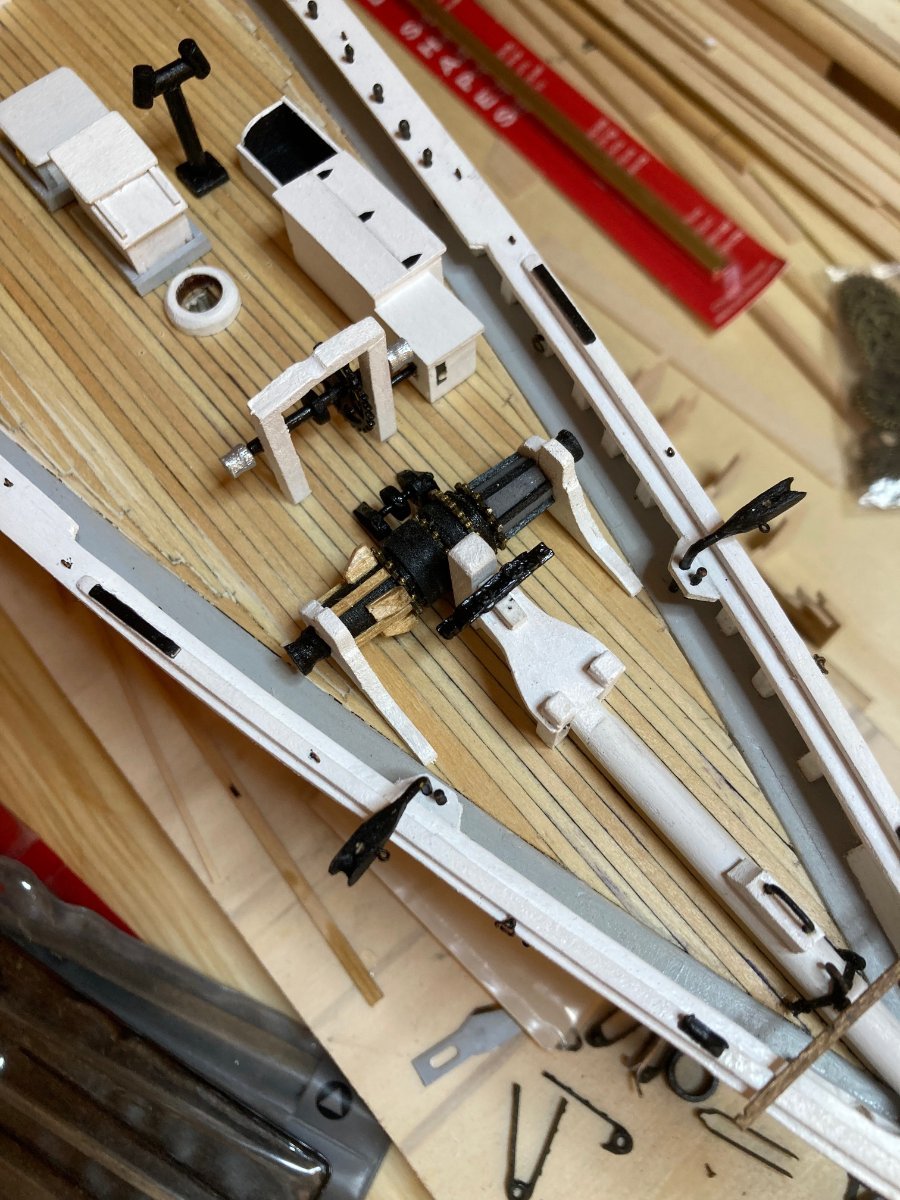
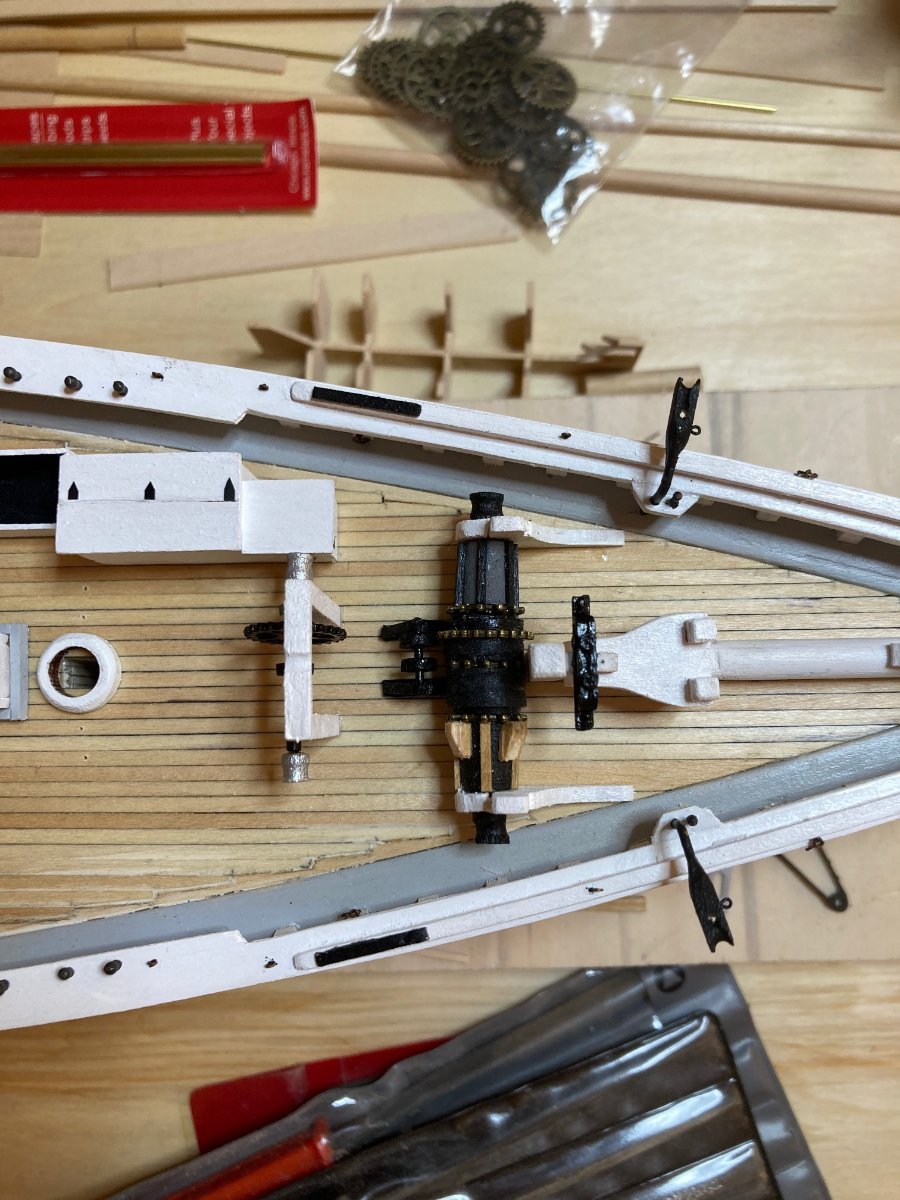
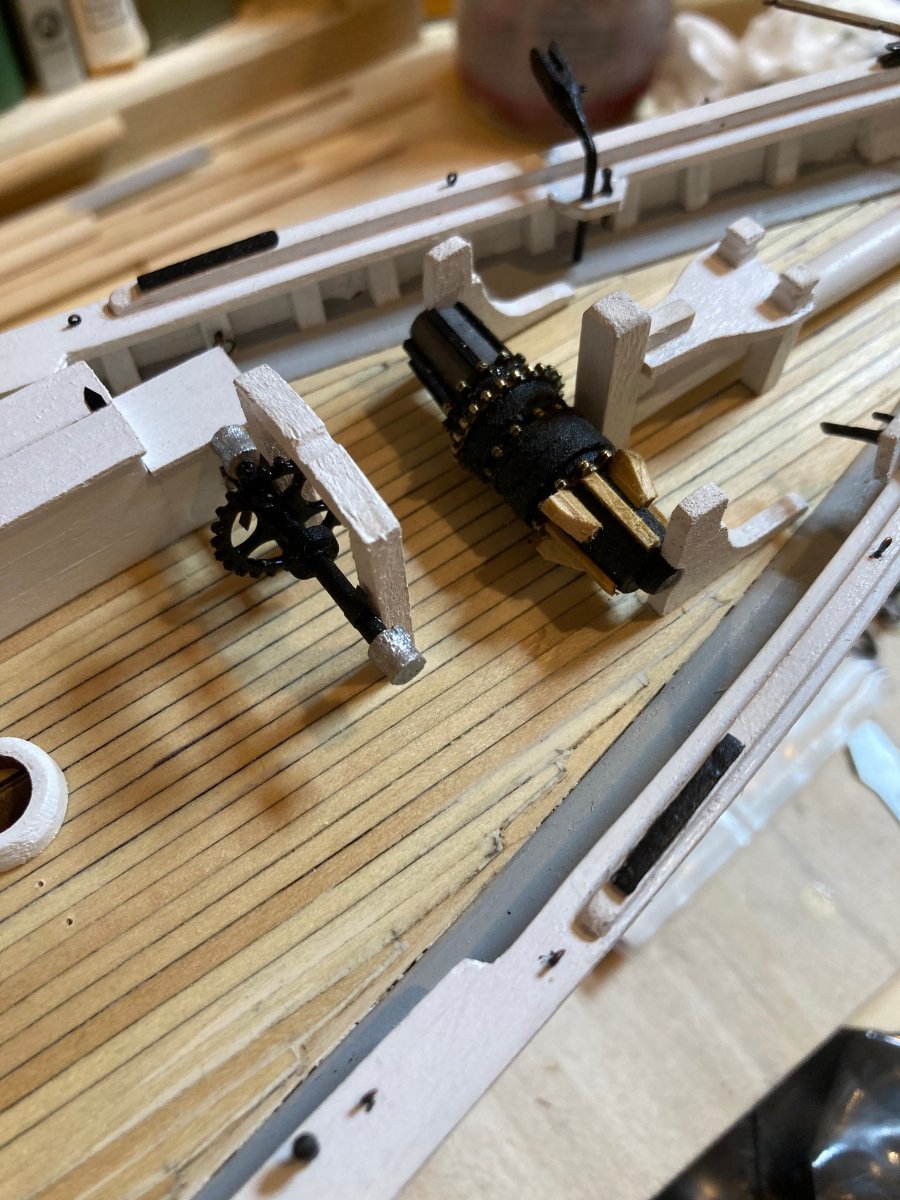
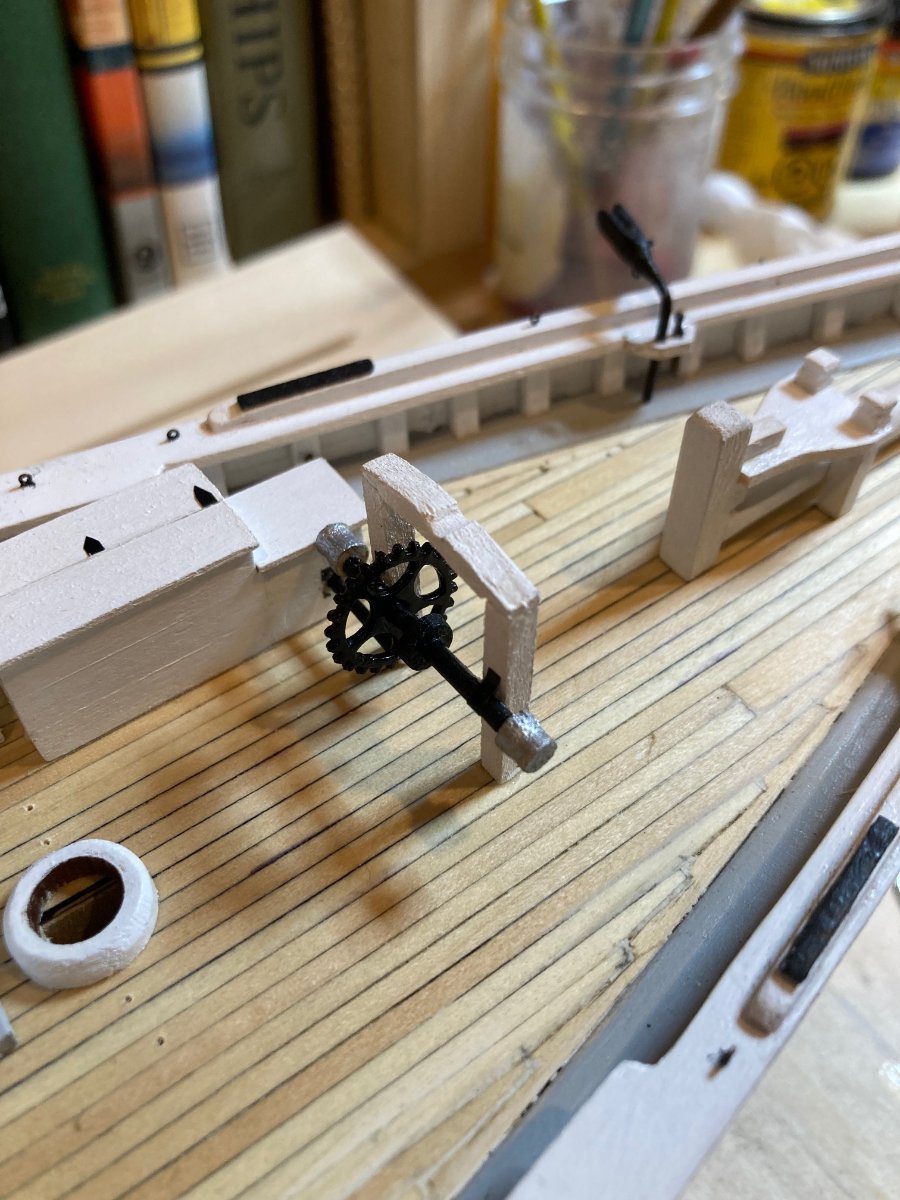
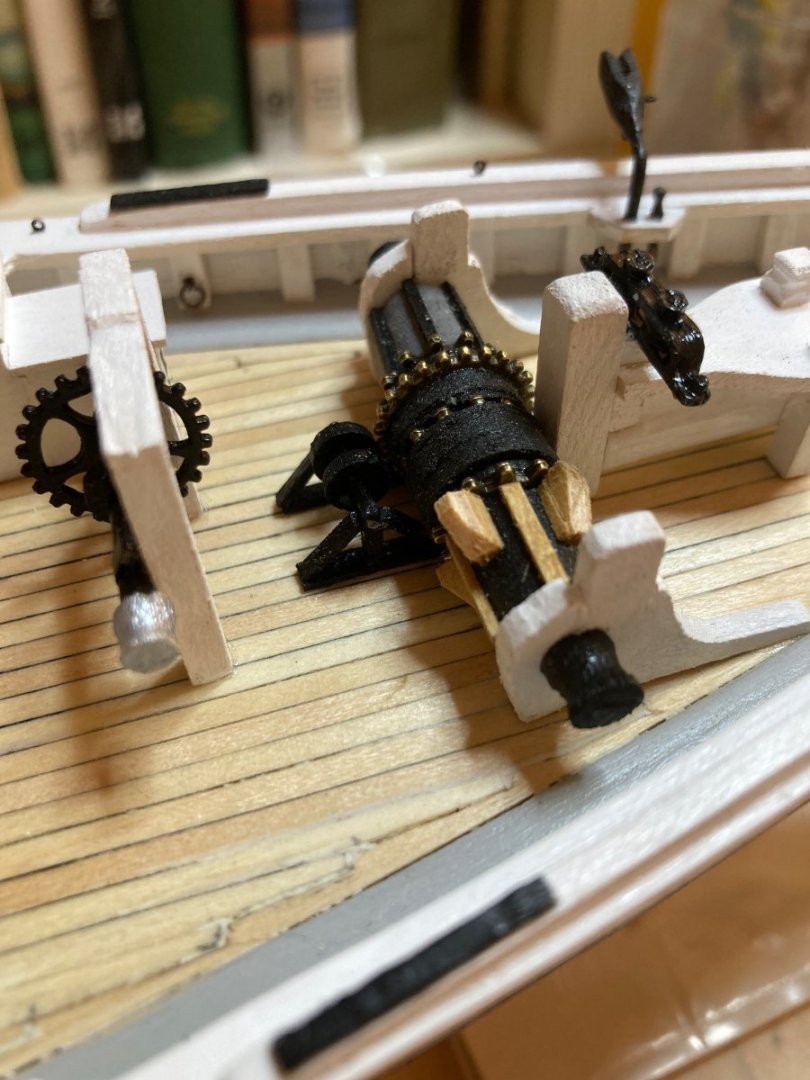
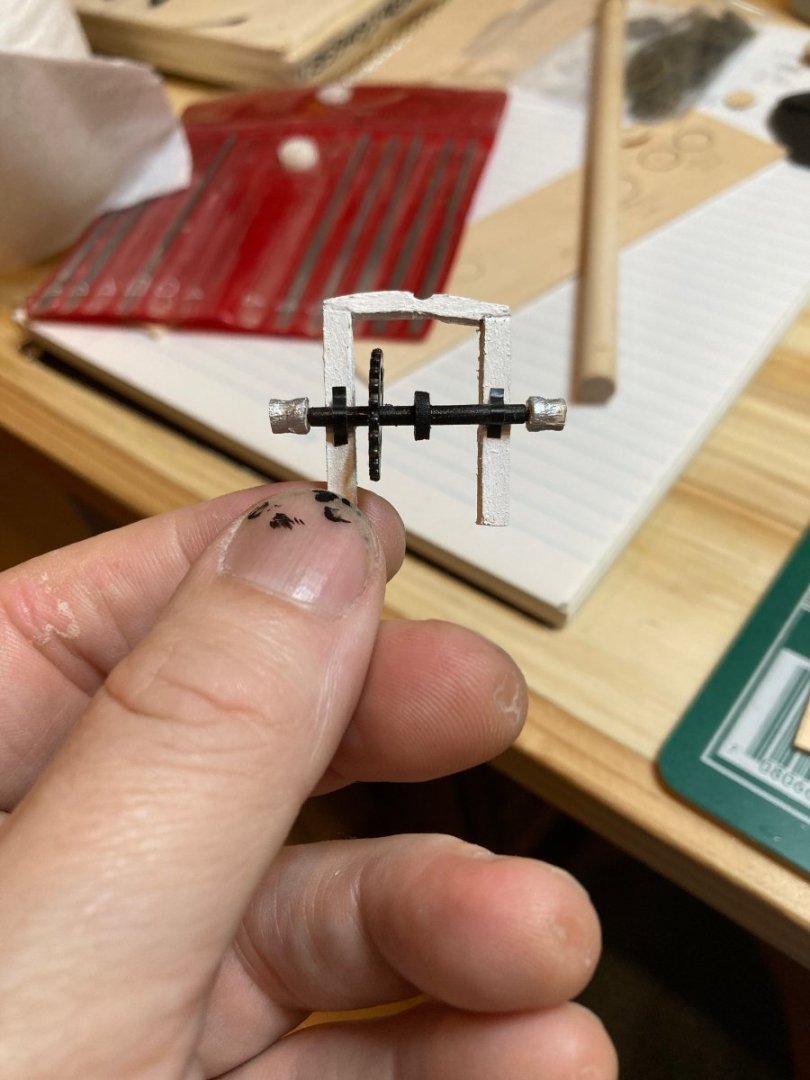
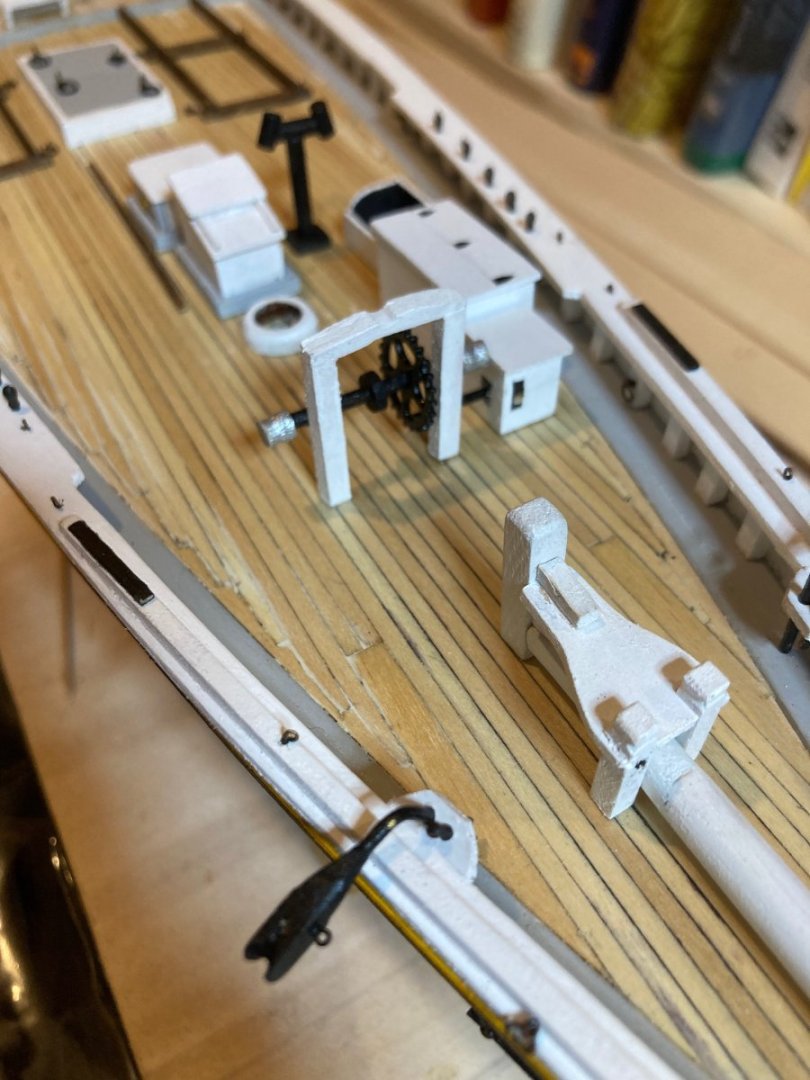
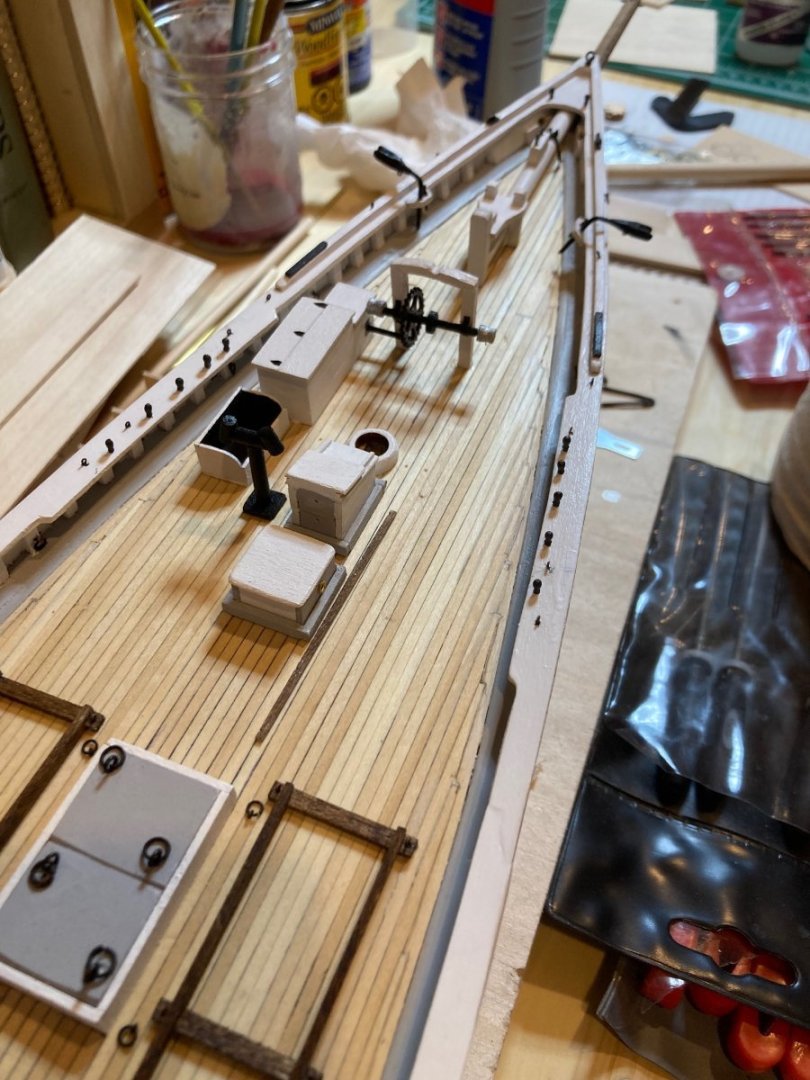
Just a quick post to show the completion of the windlass, anchor winch, etc. - I still have to fabricate and install the knees on the jumbo jib crutch and add some other minor details, but it's nice to have the bulk of this work done! The hull will be complete soon, which means I'll be taking a break from Bluenose and returning to the HMS Bellona.....in the meantime, enjoy the photos. hamilton


-
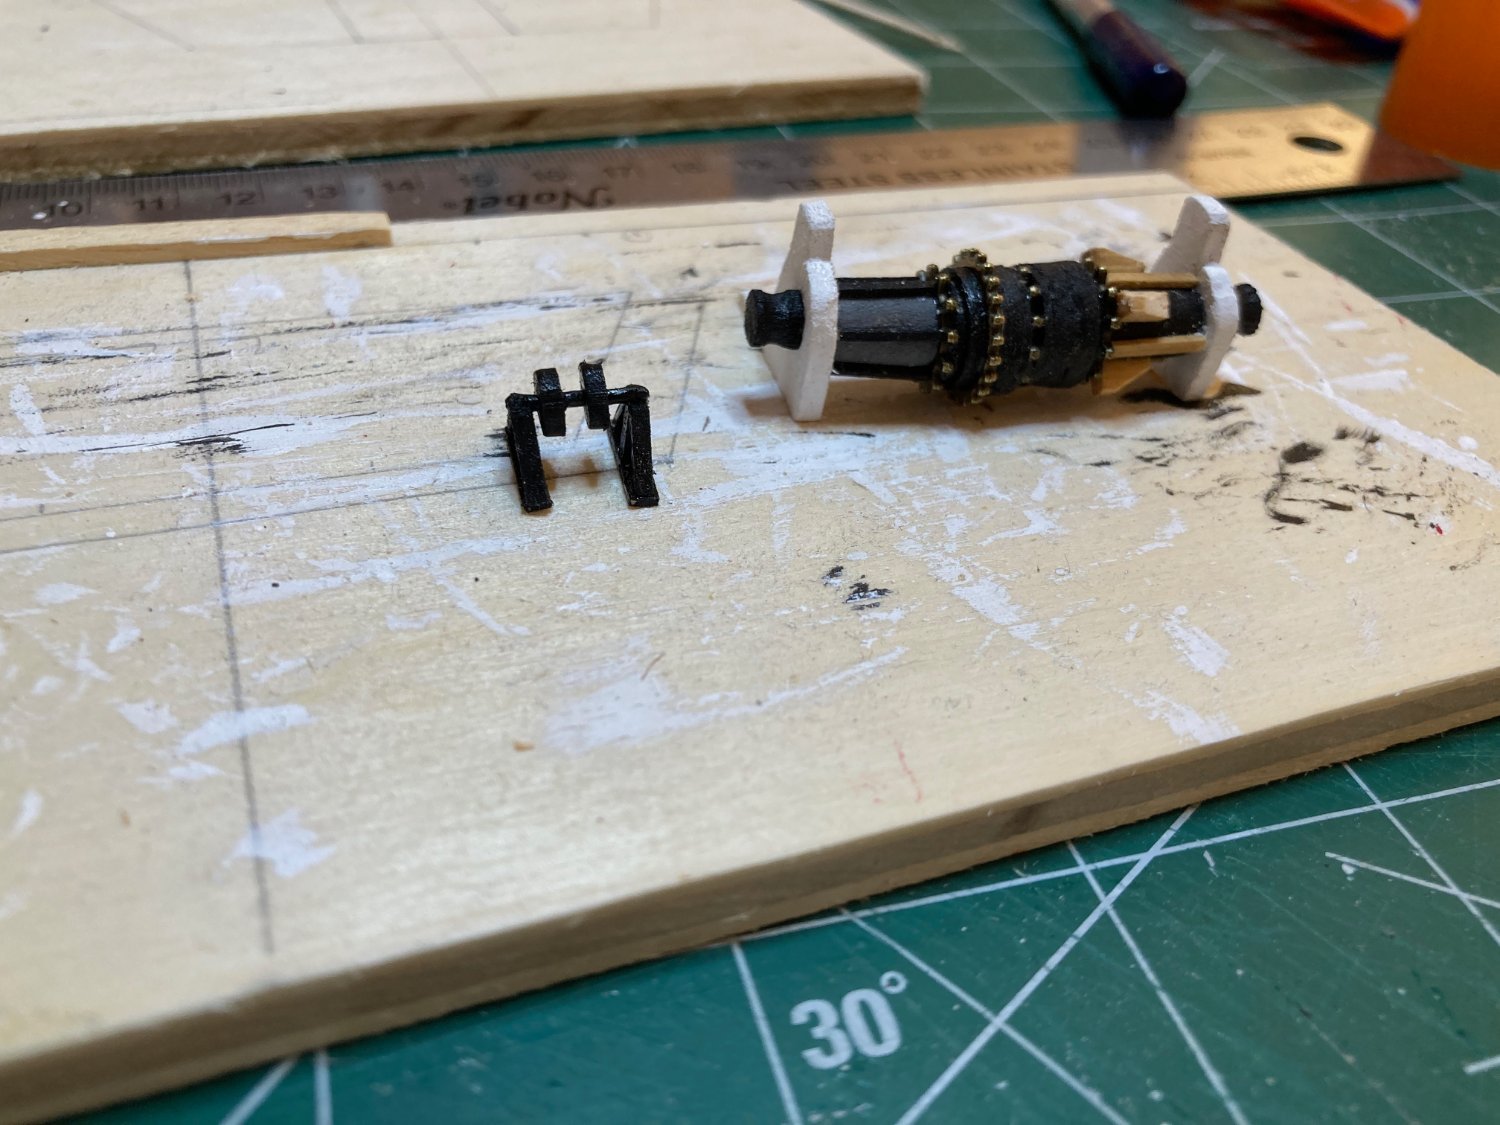
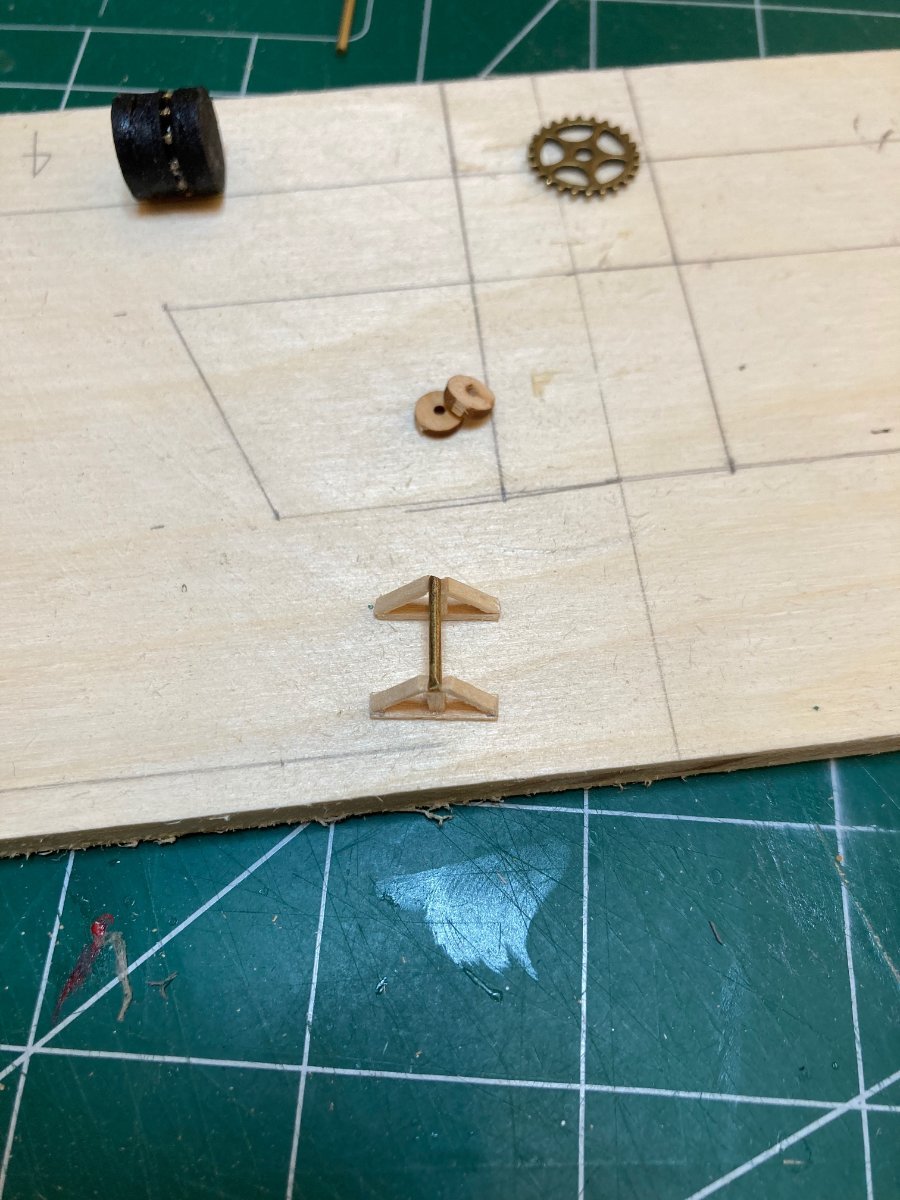
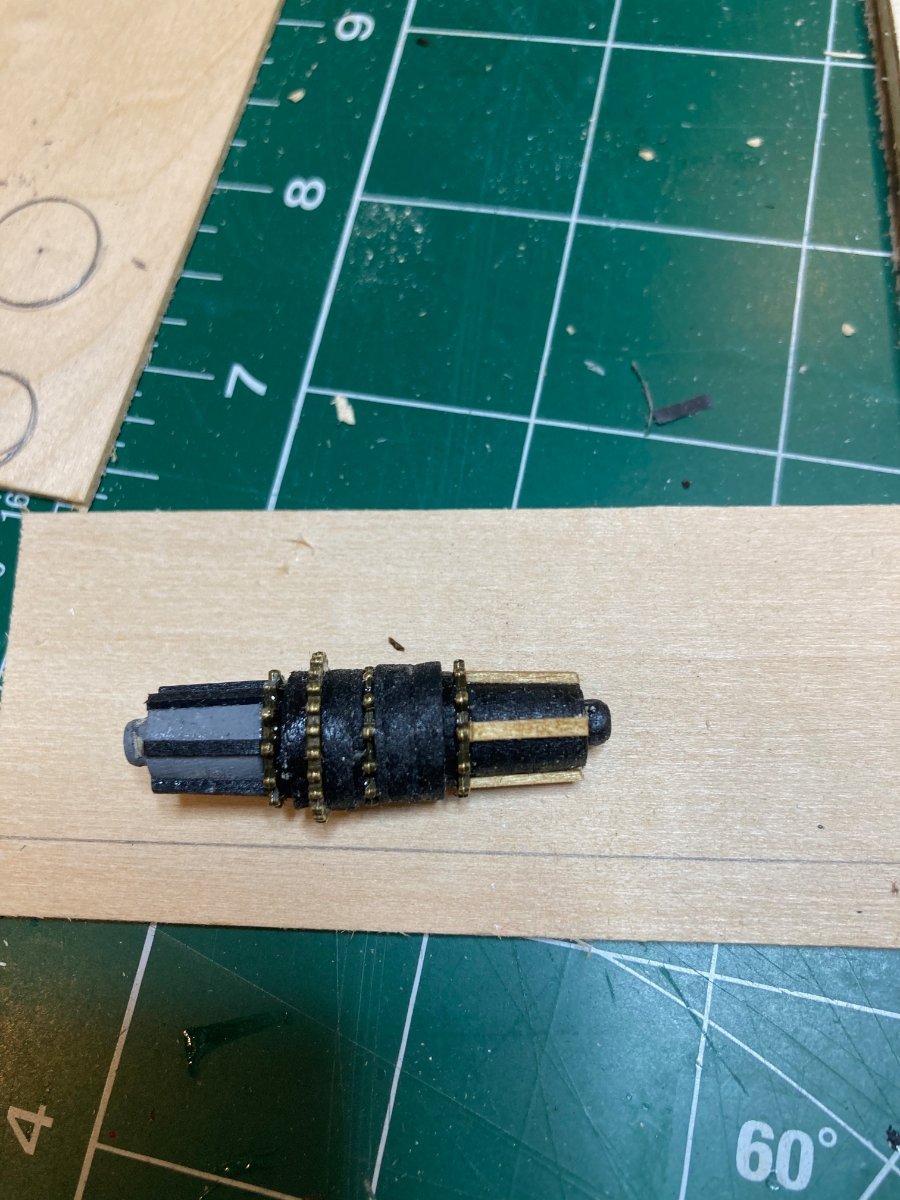
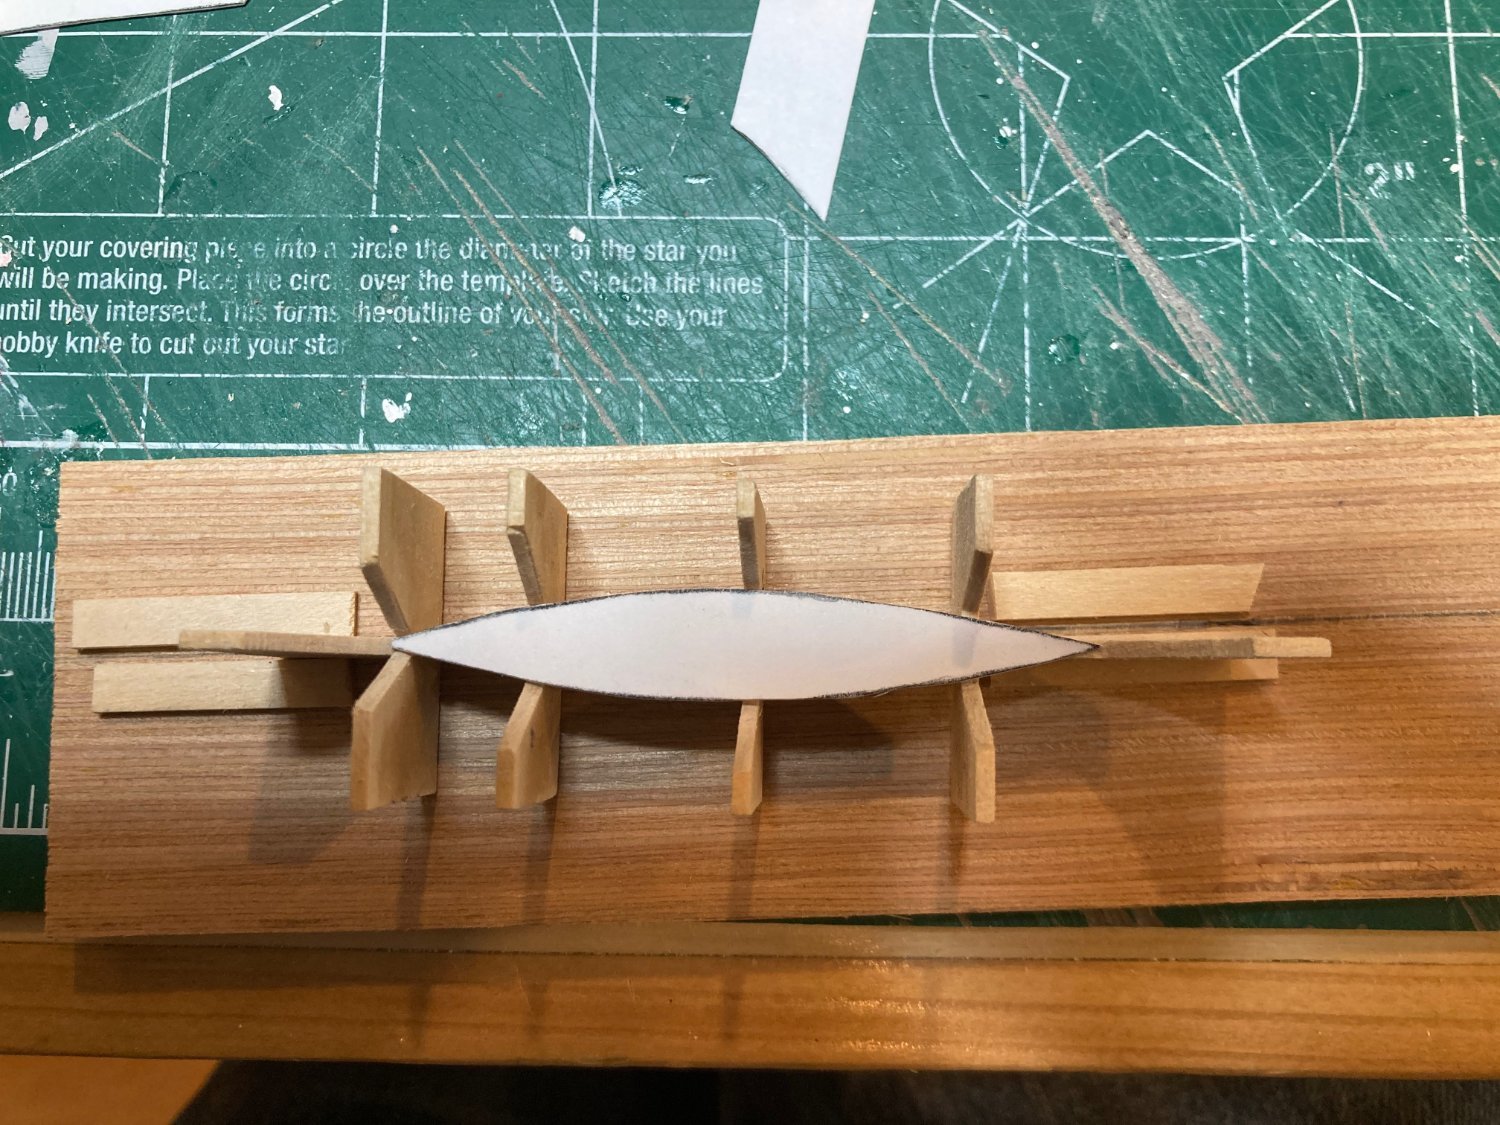
Hello again I should have mentioned that after starting on the dory's I have taken a pause - I built a jig following the drawings on the plans, but this contraption seems very difficult to actually use and I'm contemplating another type of building jig for an upside-down construction that I think (or hope!) will work better.... In any case today I managed to put in a nice session at the bench working on the windlass. I've been using a bread-and-butter method of building it up in sections using both 3/32" and 1/32" basswood sheeting to cut rounds of 11mm and 9mm - these are then veneered together along with the gears interspersed between them to form the central element. I used PVA for gluing up the wood elements and epoxy for attaching the gears to the wood. The two drums were made from 1/4" dowel, tapered as well as possible in the drill chuck. These were 3/8" long each with a 3/32" extension for fitting into the knees, which I also took a stab at. I got the main parts of the knees completed easily enough, but the smaller front part that clamps over the windlass onto the other part I was having trouble with. I will give this another go tomorrow. As it stands, the main part of the windlass is done. The photos below show it in its current state, with the main portion of knees attached already and dry fit on the deck. It's a little big, but I can live with that - It's also a little janky looking, but I can live with that too! Enjoy the photos and happy modelling to all. hamilton


-
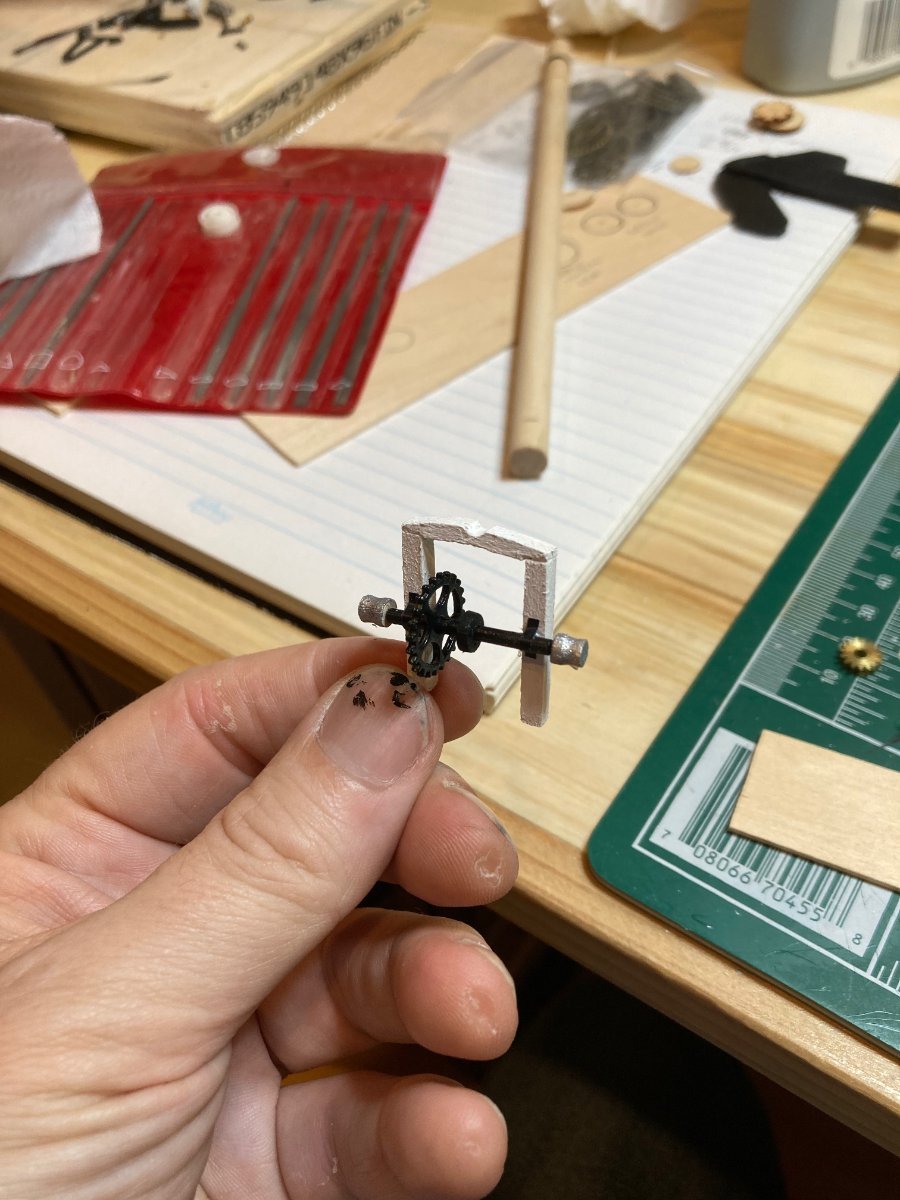
Hello again: It has been a very busy month of May at work, and I have had very little time at the bench until quite recently. Over the last several days I've made a bit more progress on the works at the bow of Bluenose. I think I've figured out a process for the windlass - a kind of bread & butter approach that I've seen other modellers try - I'll give it a go in any case. I purchased some small brass gears for this purpose and even though they're not precisely to proper shape and a little bit off scale, I will make do. I've used one for the jumbo job boom crutch gears and you can judge for yourself how it looks. So far the jumbo jib crutch is the only part of these bow works that is complete - I have start on making up the bread and butter parts for the windlass and also for the little gear mechanism that sits between the jumbo jib crutch and the windlass - sorry I don't have the proper names of these things at hand! And it's been an exhausting week if I'm being honest....feel like a vacation of some kind is in order but I can't see one on the horizon yet....not until late July! Arghh...till then I'll have to catch as catch can.....hope you are all having a restful time and a peaceful life! I'll join you there someday!! hamilton


-
Haha! Ship modelling has made me rethink all my criticisms of the "slippery slope" argument.....
-
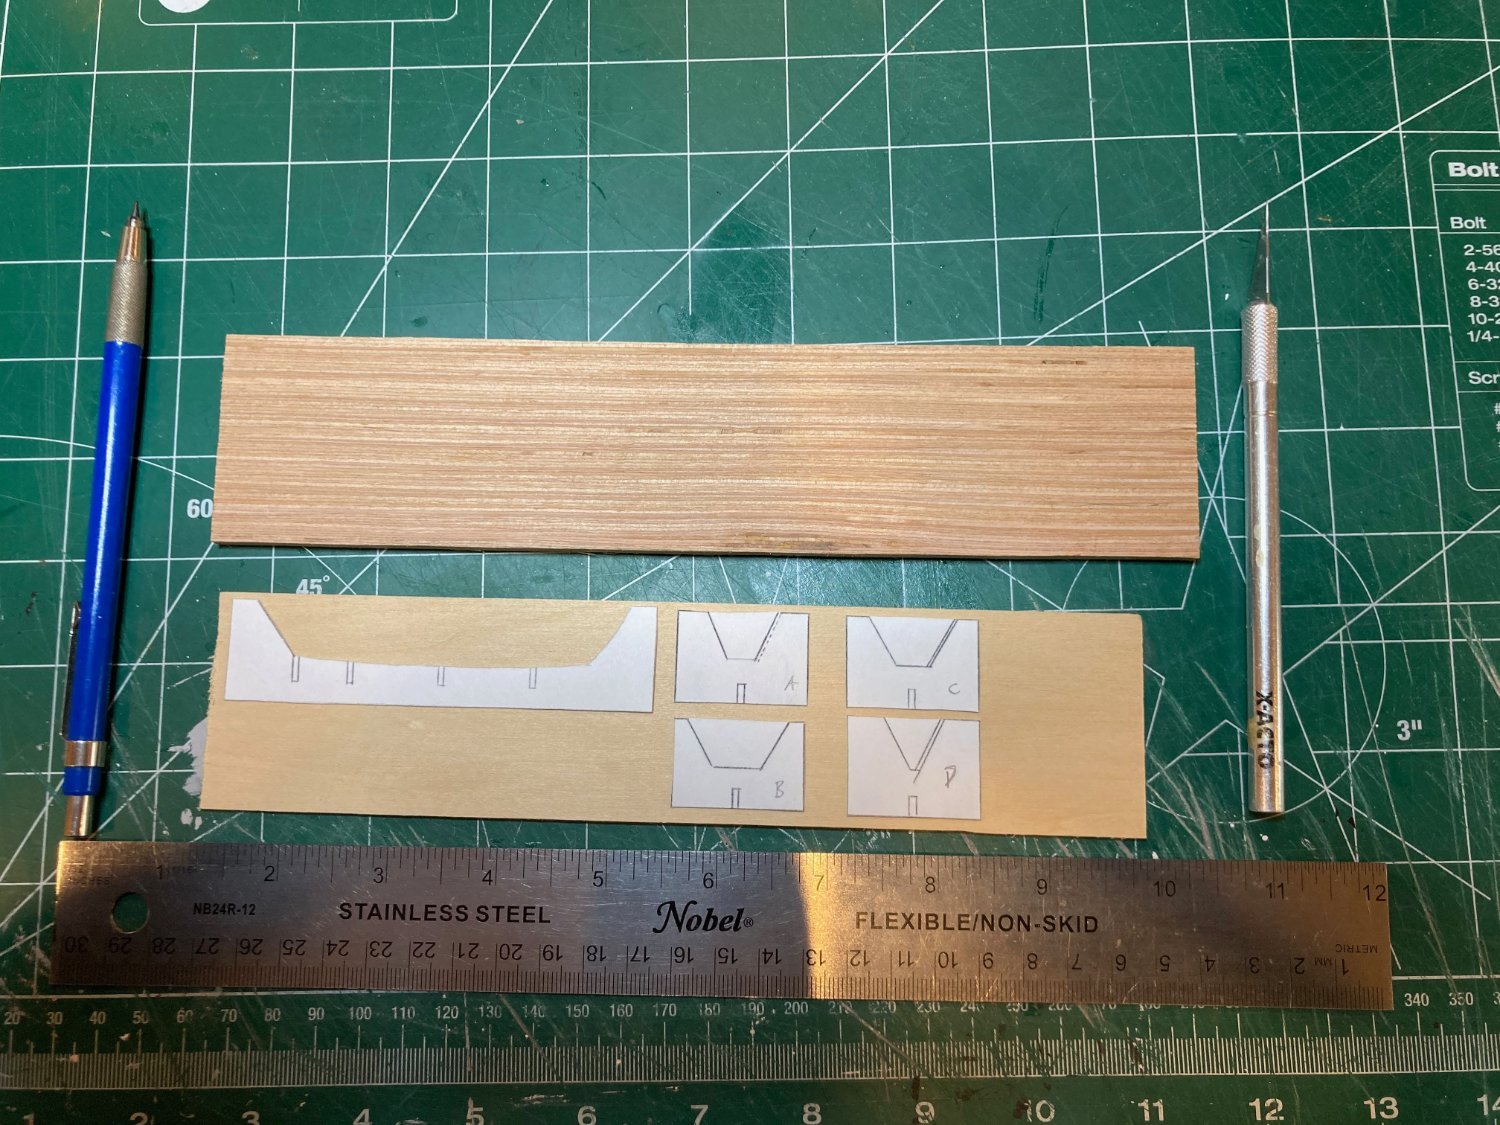
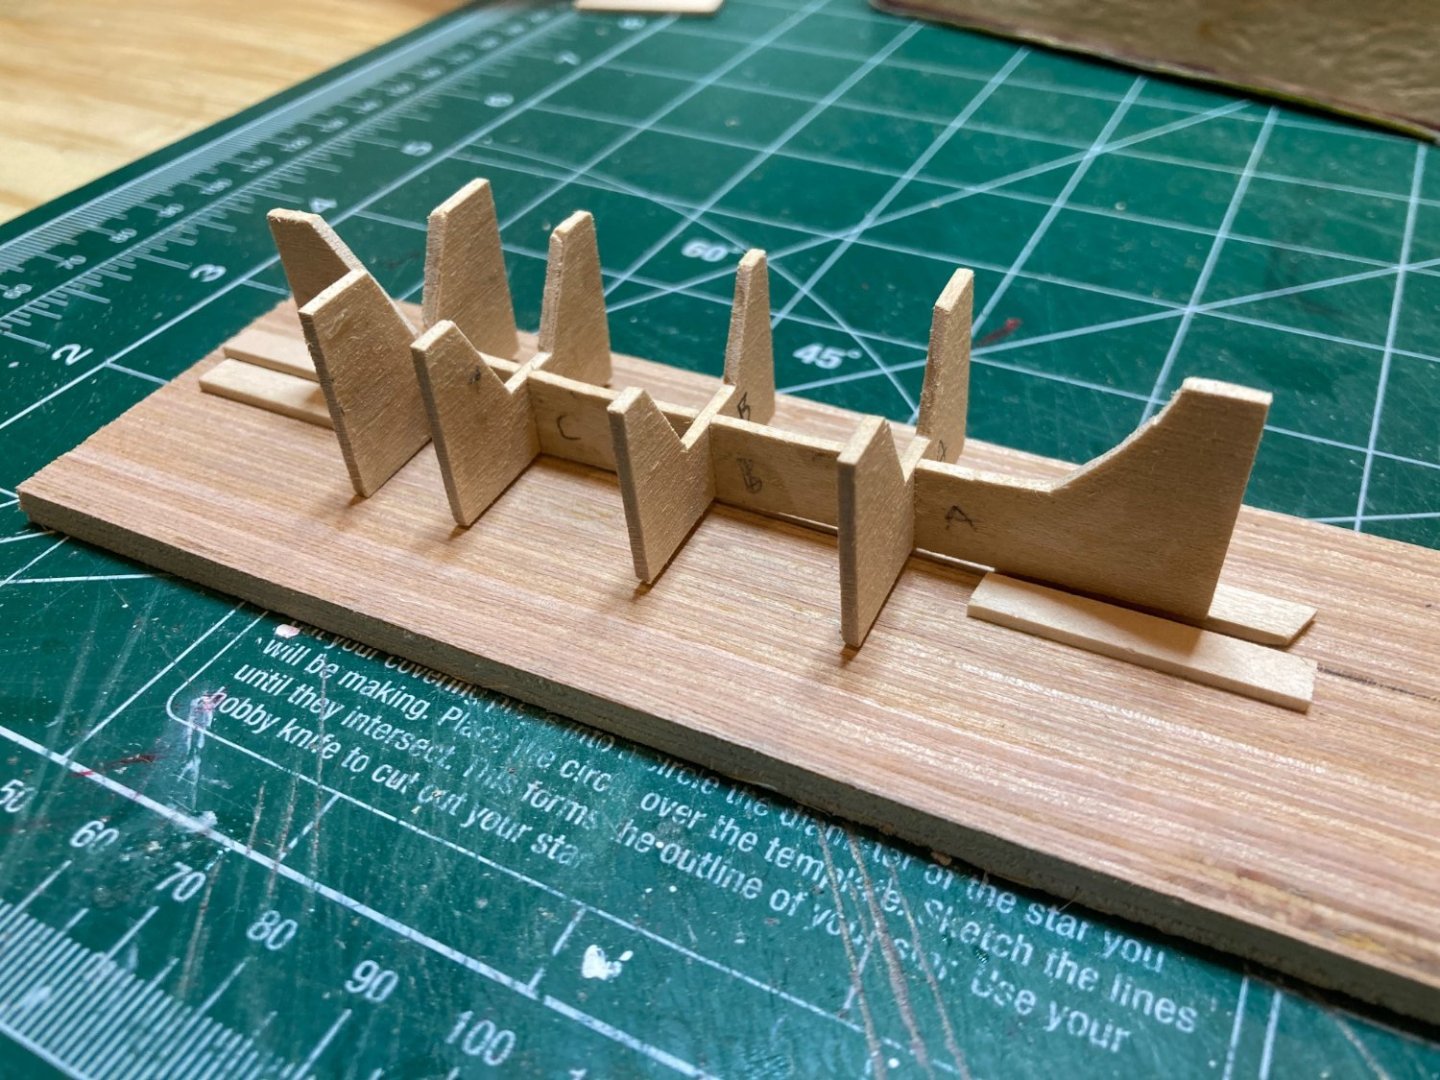
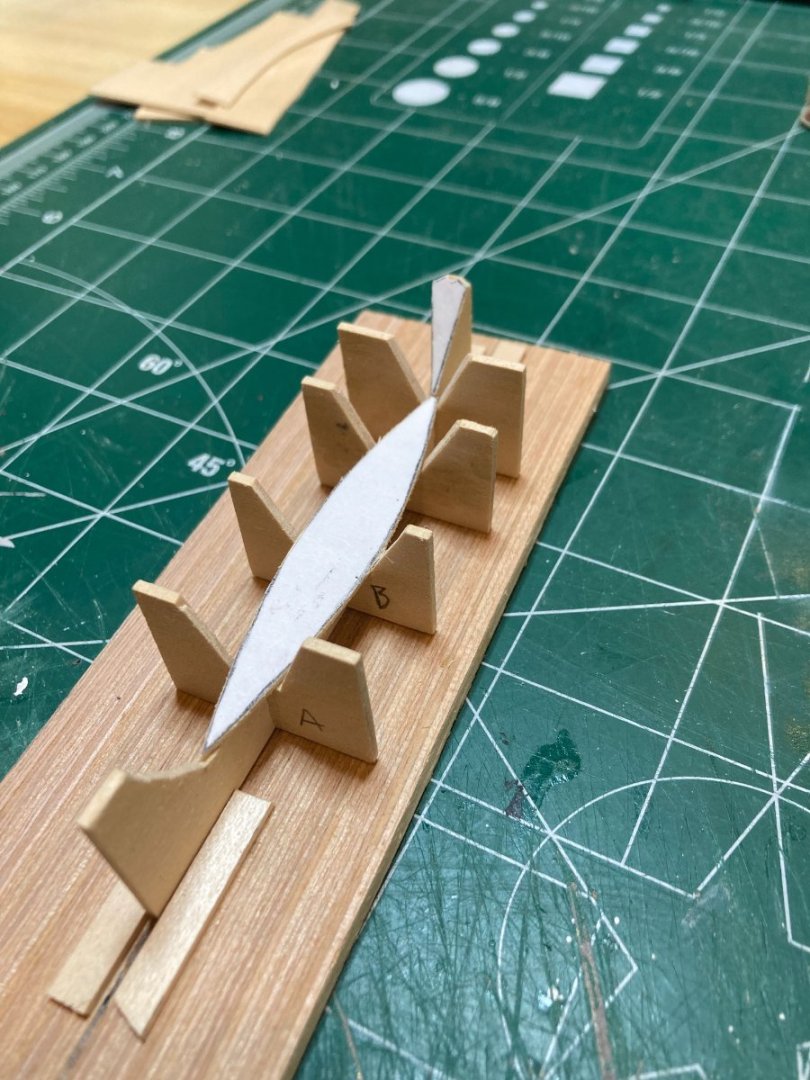
So there are a couple of things to update on here. First is that I've started on the dorys, in a deviation from work on the windlass and other fore deck features. This is because, second, I've bought a Proxxon wood lathe and am waiting for its delivery to continue on the windlass, etc. I have had my eye on the miniature wood lathe for a while as an entry-level tool to practice on - I should have it in hand within the next ten days or so (I hope). In the meantime, I used the plans to make the dory-building jig and the elements of one dory hull. This is as far as I was able to get today, unfortunately and things have picked up now at work as well for the next few weeks, so I'm thinking that progress will return to its more typical snail's pace for a while. I'm happy, though, to have the modelling bitt between my teeth again - it feels great after a long period of irregular work at the bench since summer 2017! There is something to be said for a lengthy break to re-awaken the zest for even the more tedious of jobs! In any case, happy modelling all and enjoy the photos hamilton


-
Nice work on the planking so far! hamilton
-
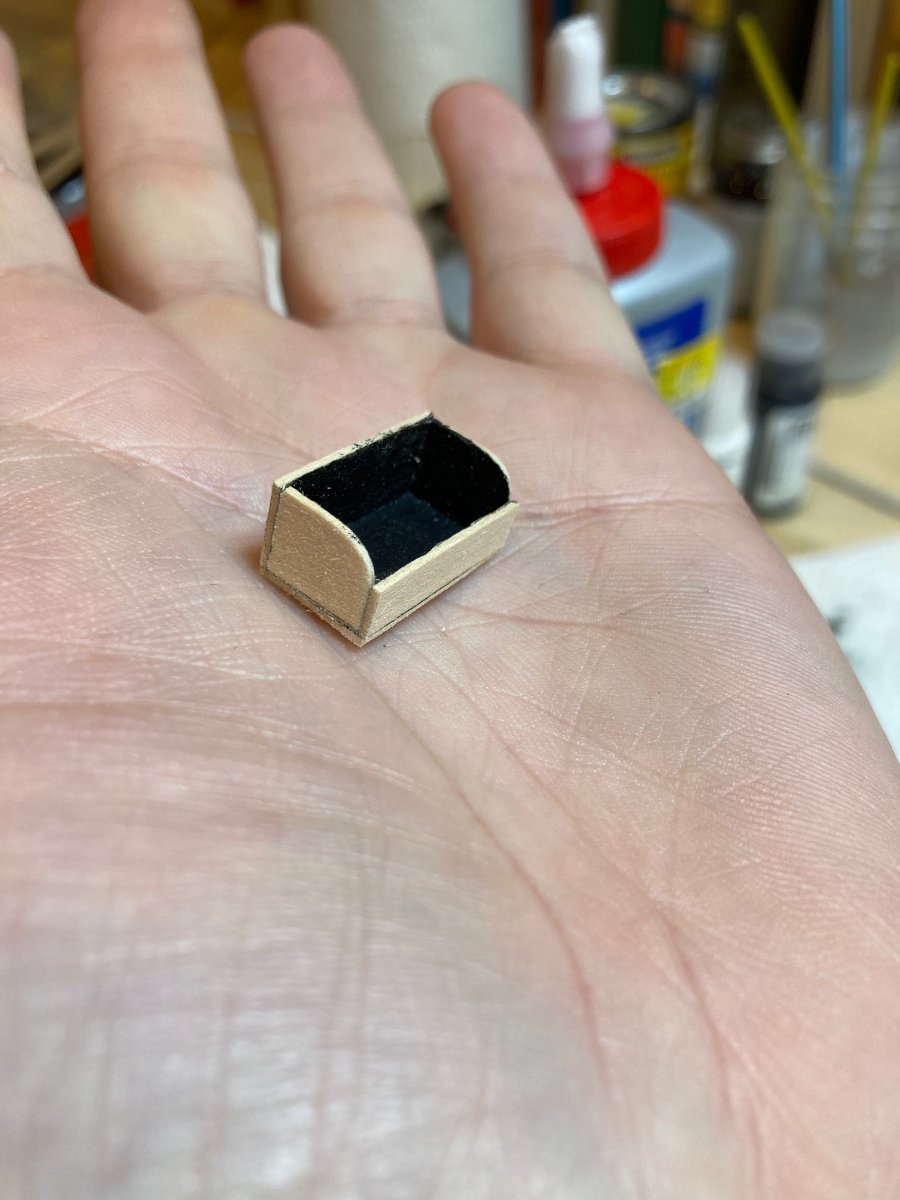
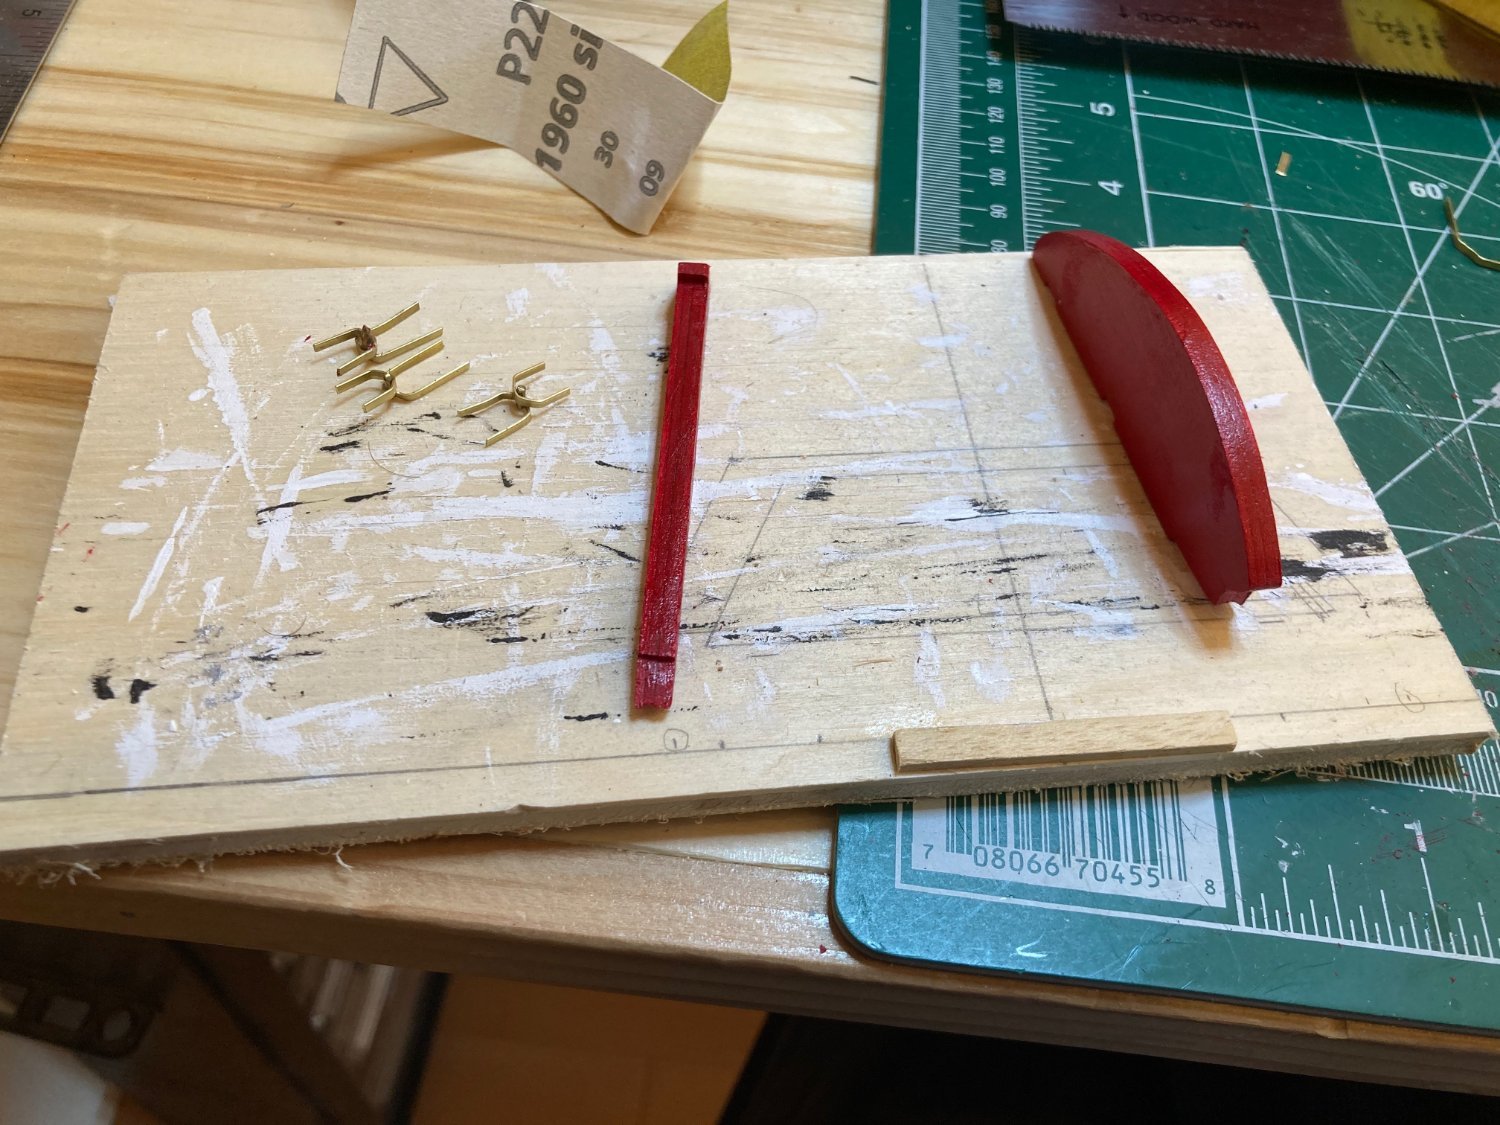
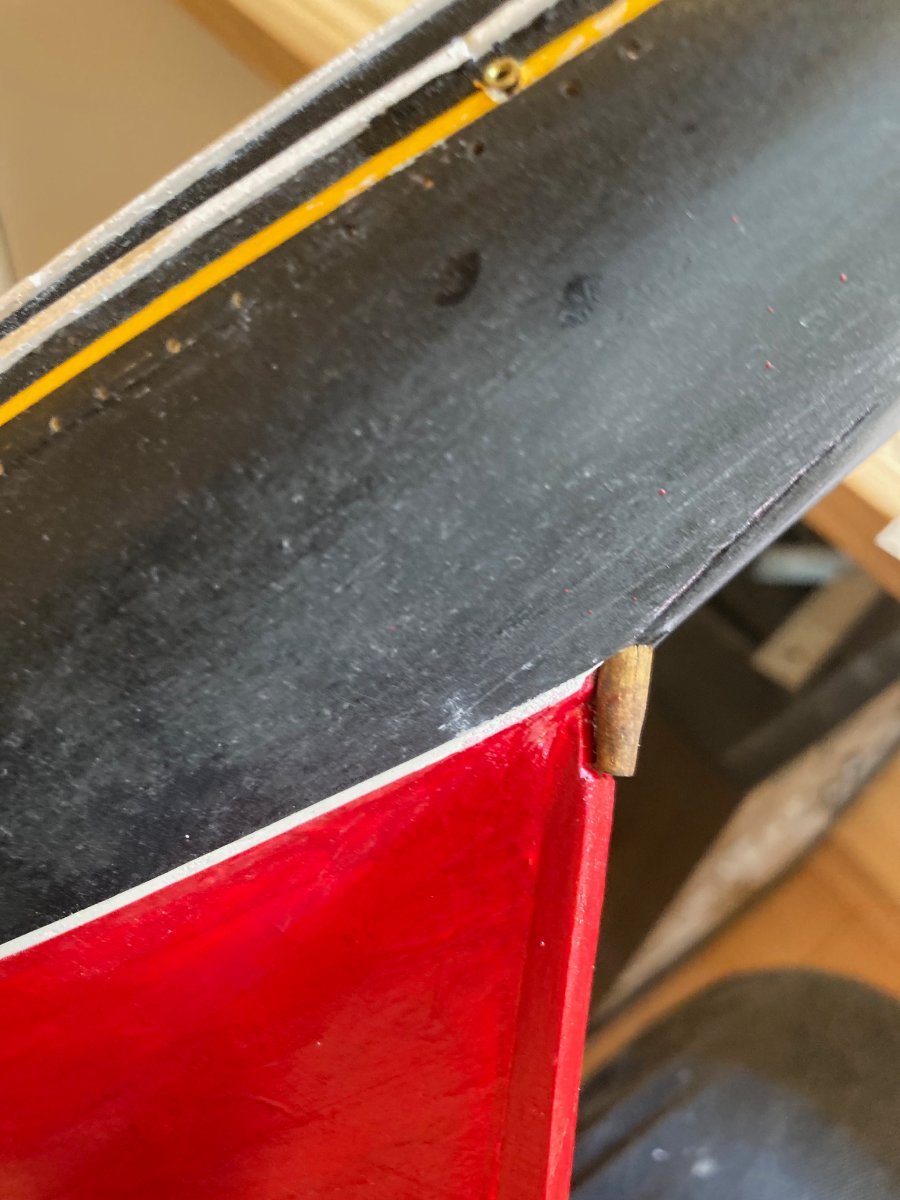
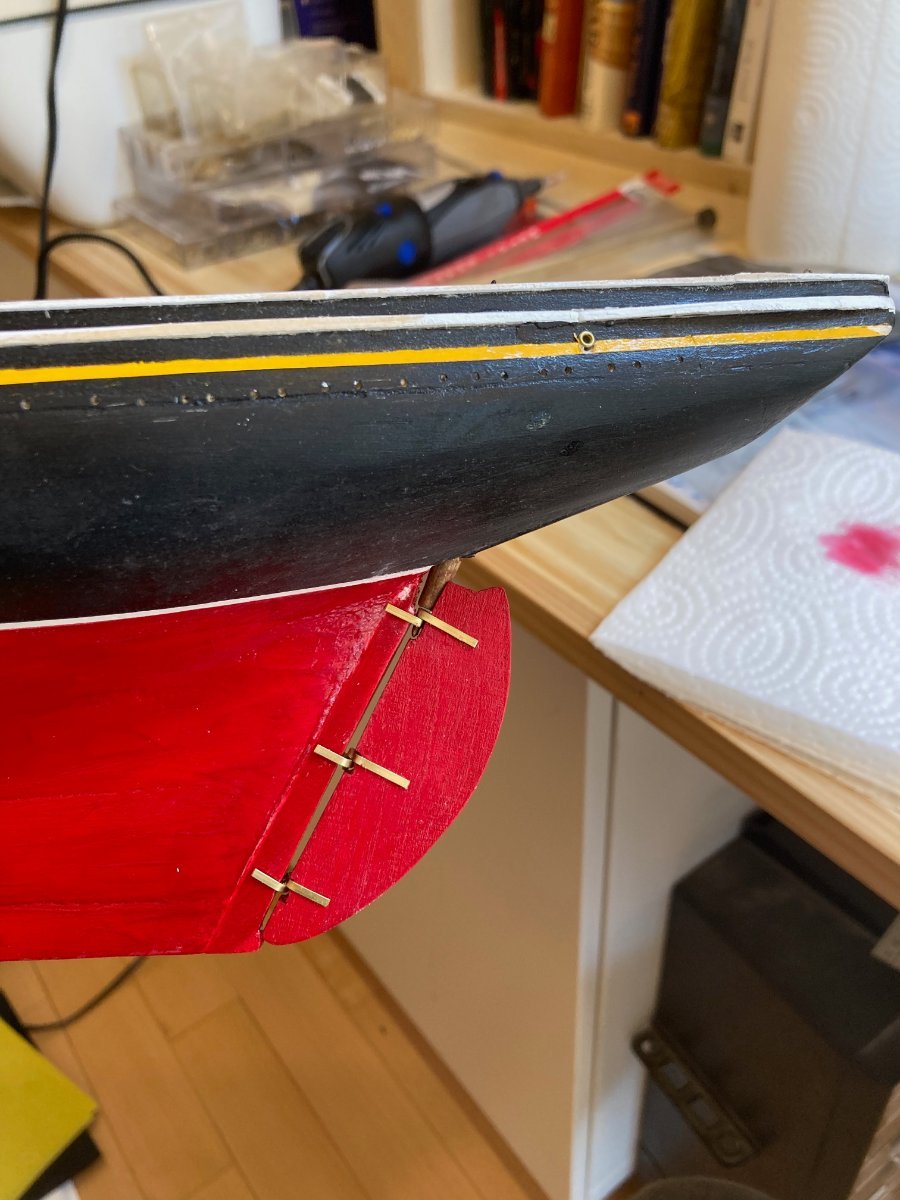
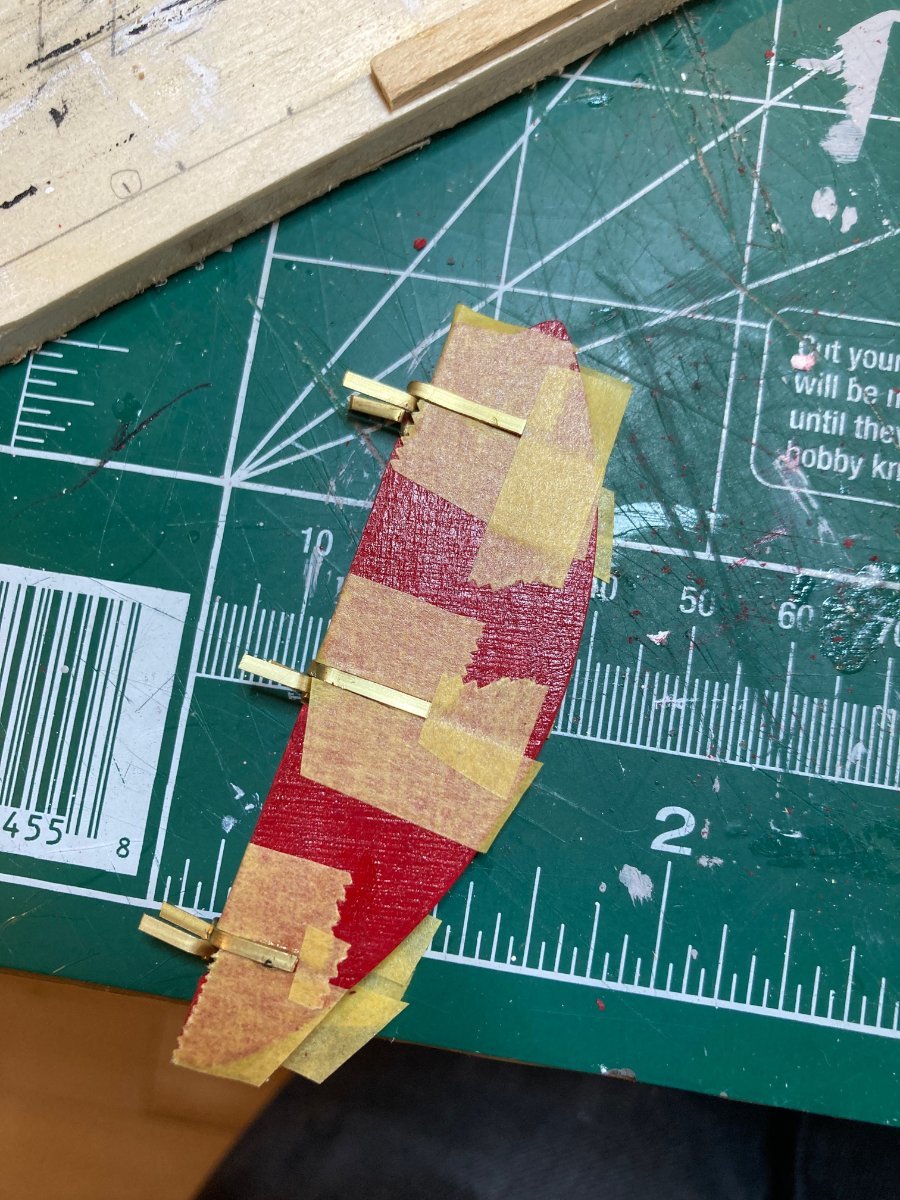
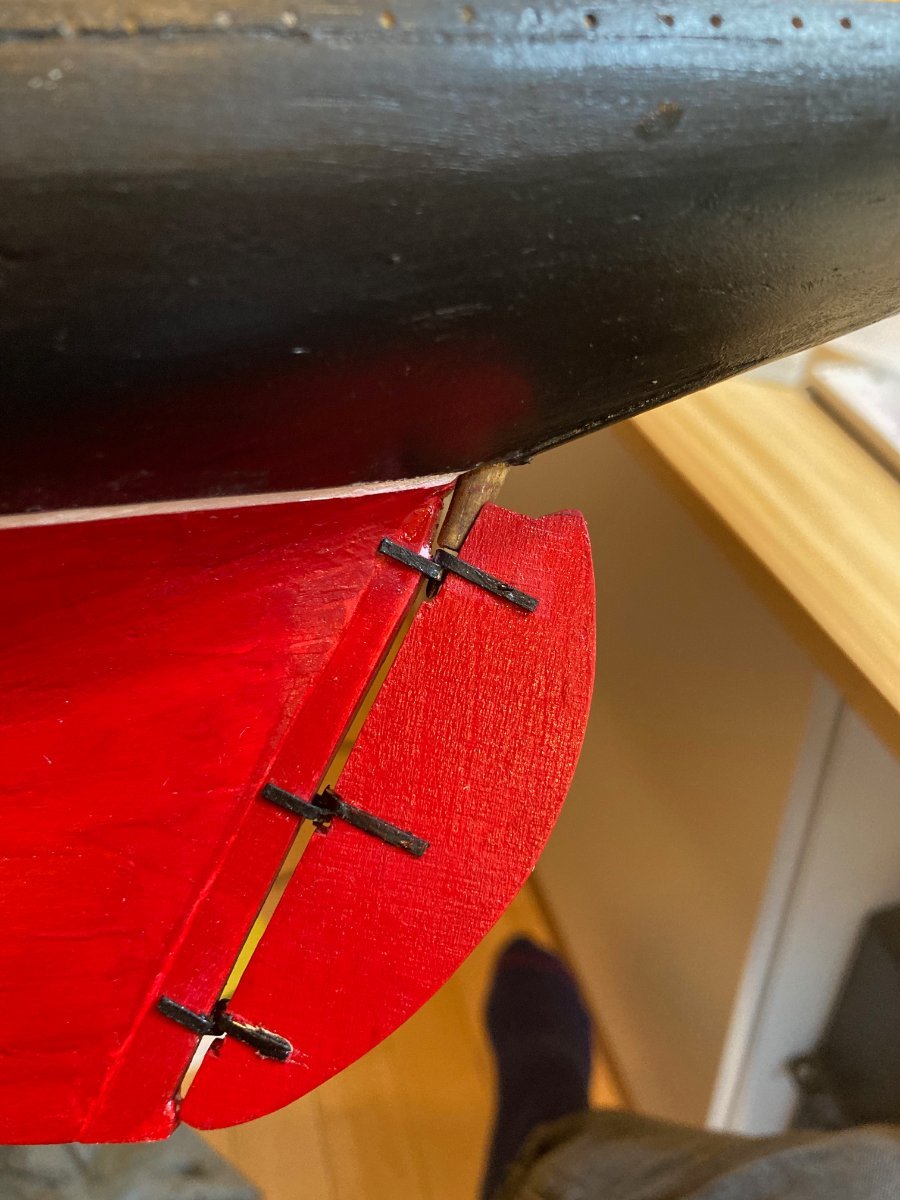
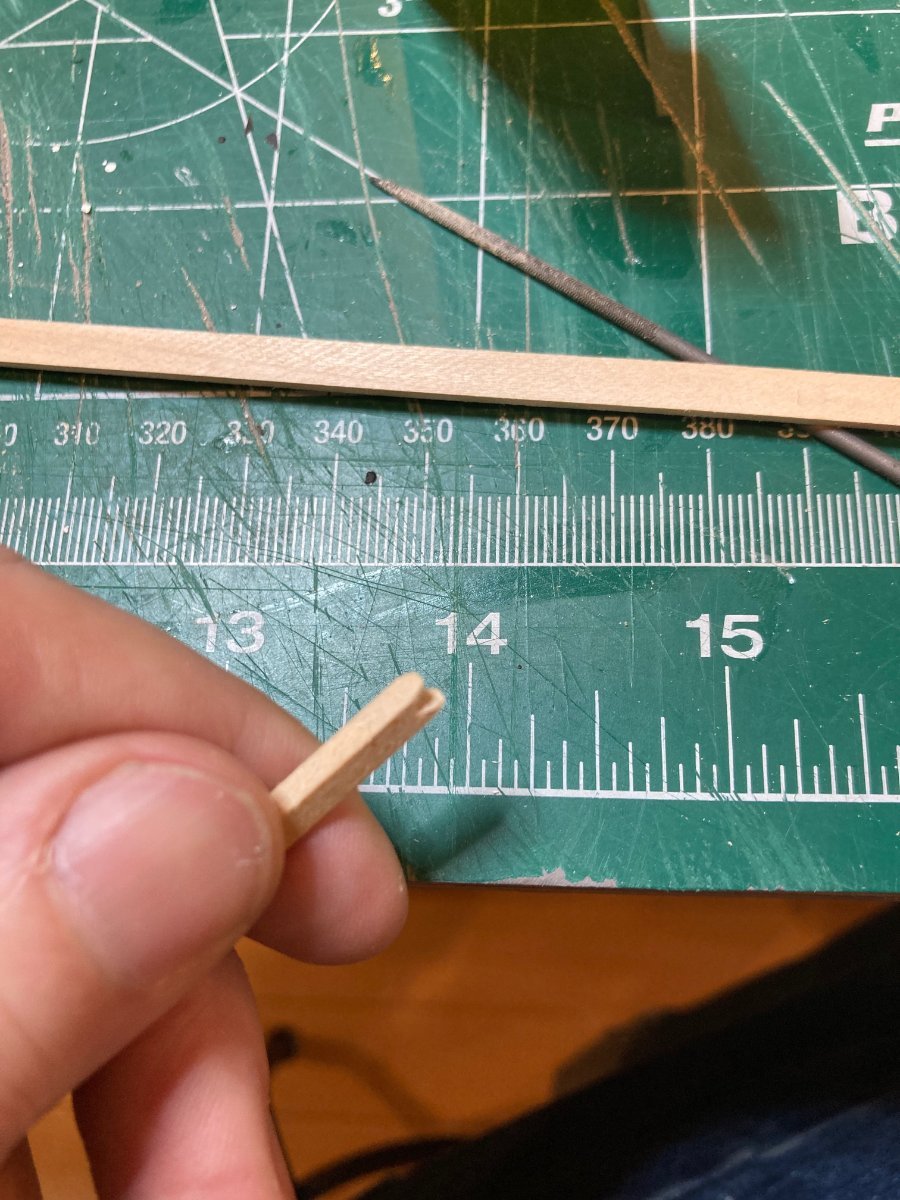
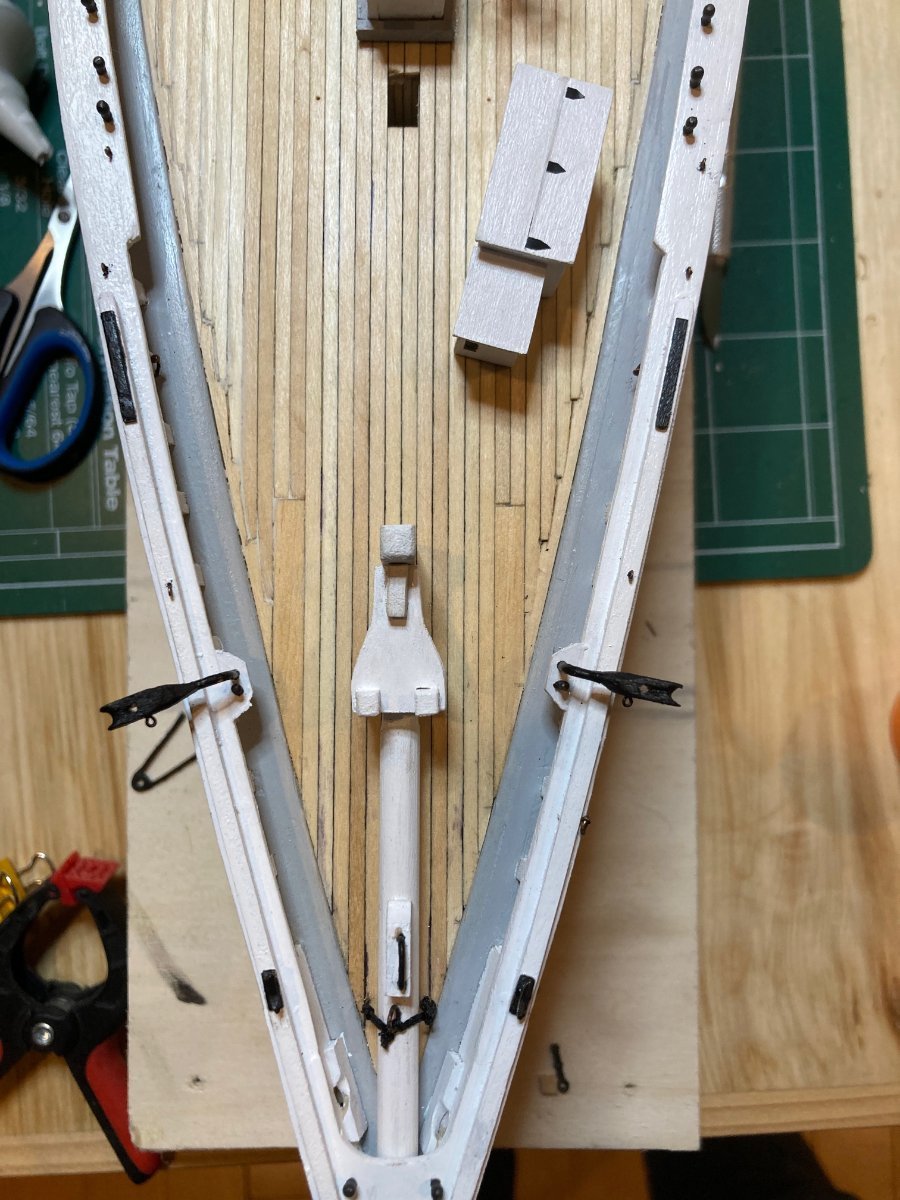
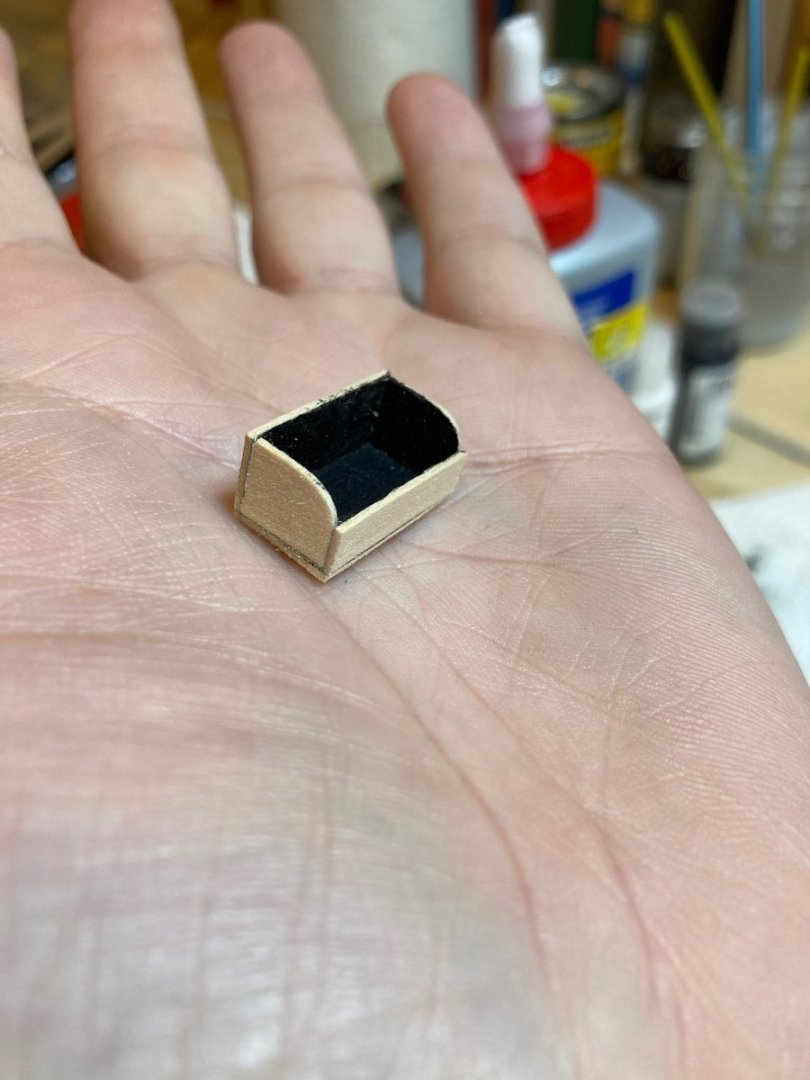
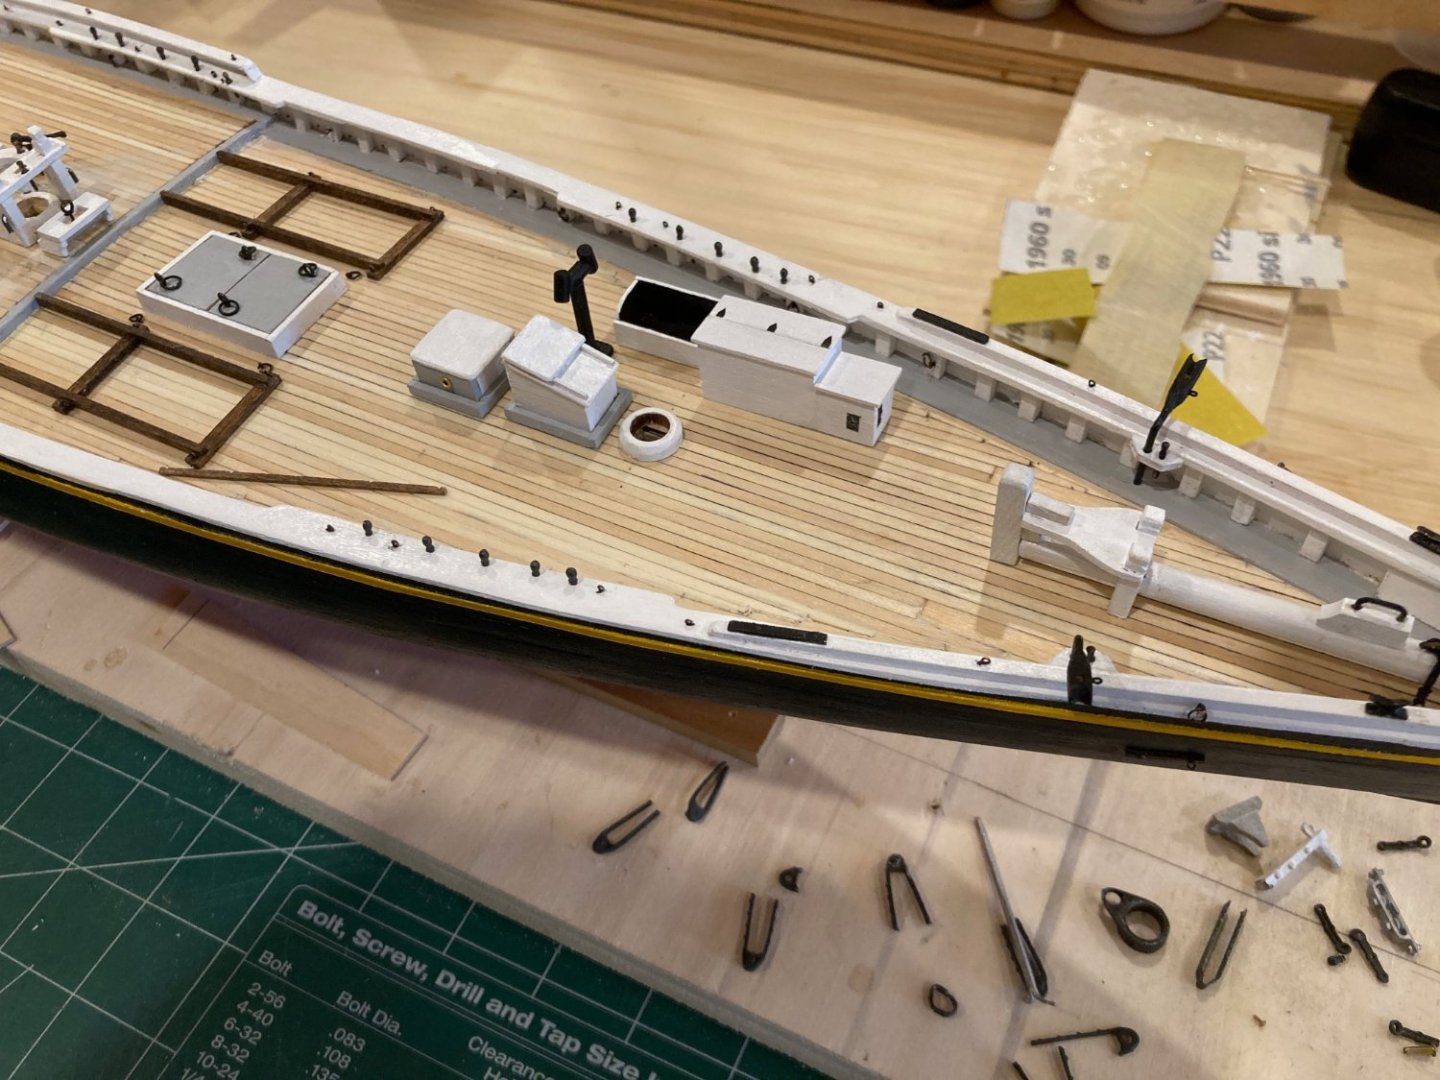
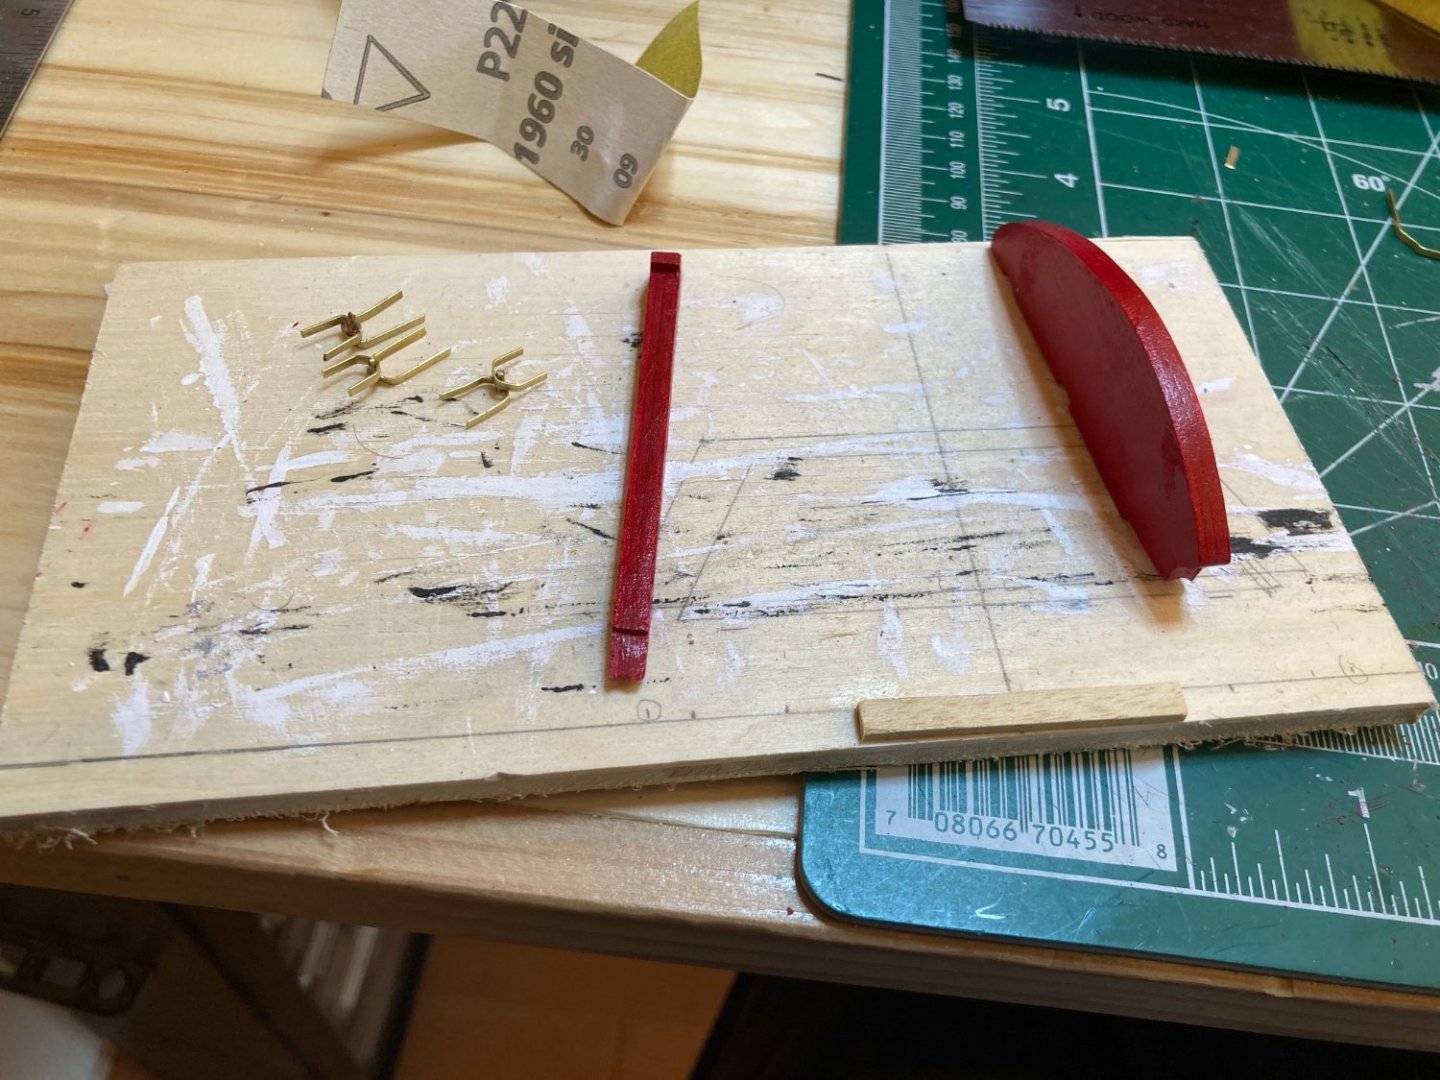
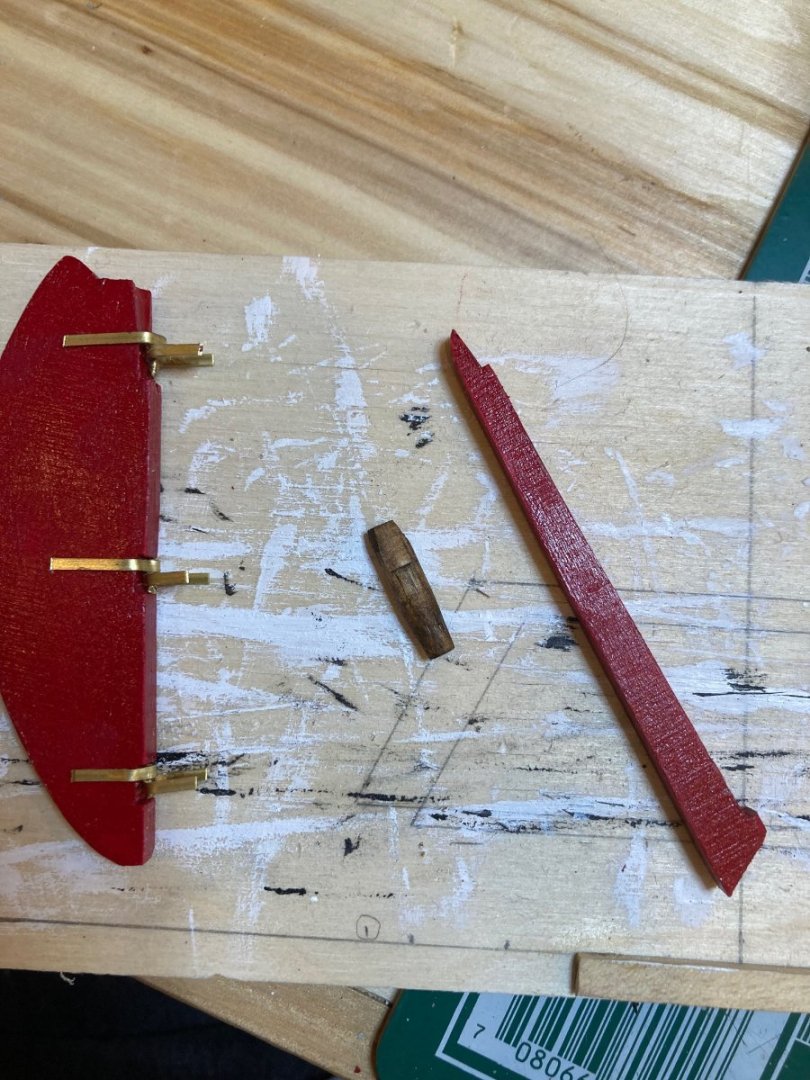
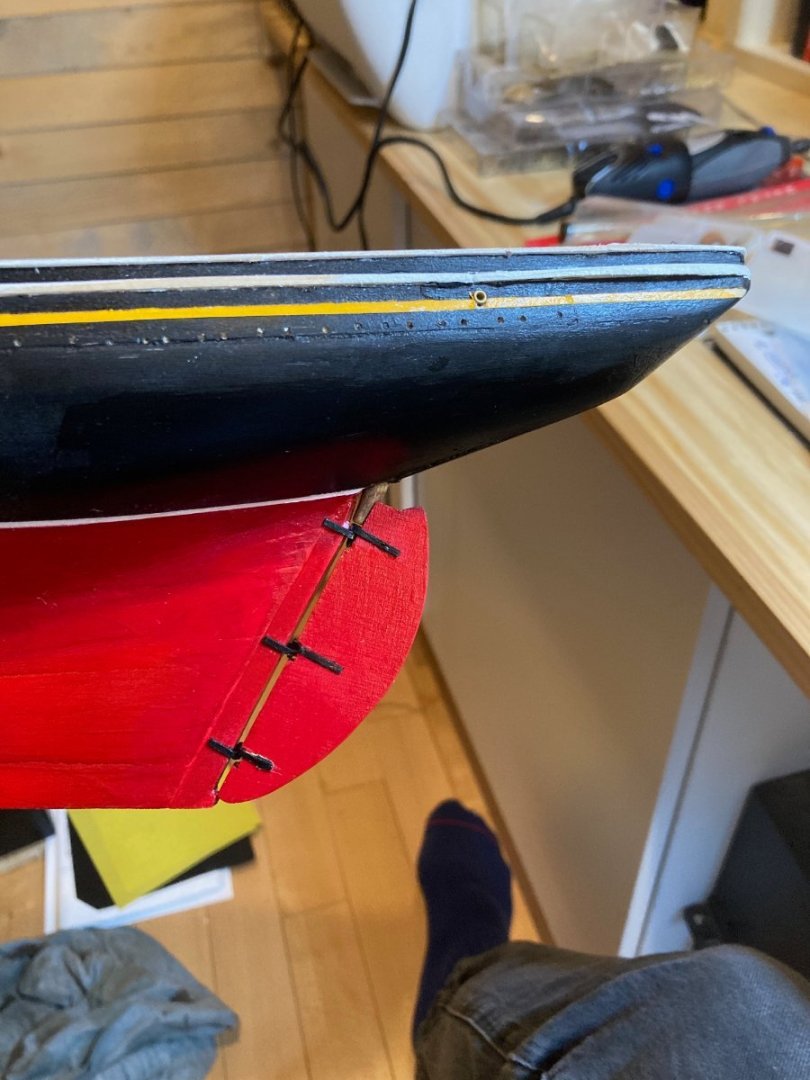
Hello there: Over the last couple of evenings I've managed to complete another couple of small things on Bluenose - the chain box and the rudder. The chain box is not featured on the deck plans, but included in a lower corner of a plan sheet that documents the deck fixtures, dorys and mast/spar construction - it could easily be overlooked. What isn't clear is if there was one such box on either side - the plans say to locate the chain box just aft of the engine box, which is located on the port side. I included two boxes on my 1:100 scale Bluenose, since it made sense to have one on each side for each anchor....but what is the consensus on this? Anyway, this feature was constructed out of 5 pieces of 1/32" thick basswood cut to measure. The front and back of the box were installed on top of the base and then the sides added after - the inside faces of each strip were painted black prior to assembly and then the outside and edges finished white after. The rudder was pretty easy - especially since I had already made them man years ago when I cut out the final versions of the keel pieces and bulkheads - this much have been back in 2016 or 2017!! Sheesh!! I was reading another modeller's log today and he was calling himself "lazy" for not treenailing his deck - but I bet he never waited 7 years to install a rudder!! Anyway, the rudder and stern post were made from 3/16" ply and needed only some minor adjustments to fit properly. The pintles and gudgeons were made using 1/64" x 3/64" bras strip gently bent first around a 1/16" brass rod and then again around a scrap 3/16" piece of ply to get the rough shape. The short sections of 1/16" brass rod were glued to the pintles and gudgeons with CA and then attached to the rudder first. I installed the stern post onto the model and then the tiller extension was added - made from a 3/16" dowel and shaped accordingly. I masked off the rudder and painted the pintles and gudgeons before installing the rudder on the model - I felt that this would be far less messy than using the blackening agent I have or trying to paint them on the model. Next I'll probably mount the model on a stand I made about a year and a half ago and then finally move onto the windlass and other works at the bow....this, along with the scrollwork and name plates as well as the chainplates & shroud deadeyes will see the hull more or less complete! Then I think I will return to my Bellona build for a while and let Bluenose rest before moving onto the masting.... In the meanwhile, enjoy the photos and happy modelling hamilton


-
Wow, Yves! It's been a while since I came by here and you have not been idle! Somewhere above you mentioned that you weren't doing treenails on deck because you're lazy - no offence, but given the results here I have to doubt that self-assessment!! hamilton
-
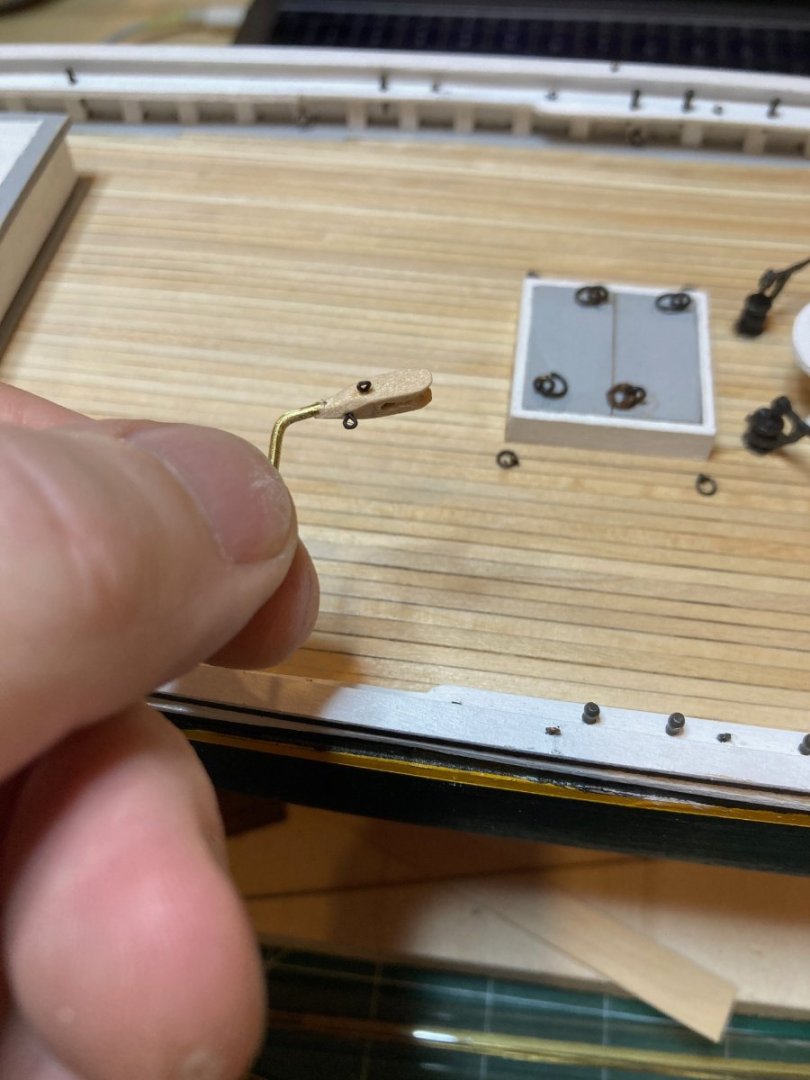
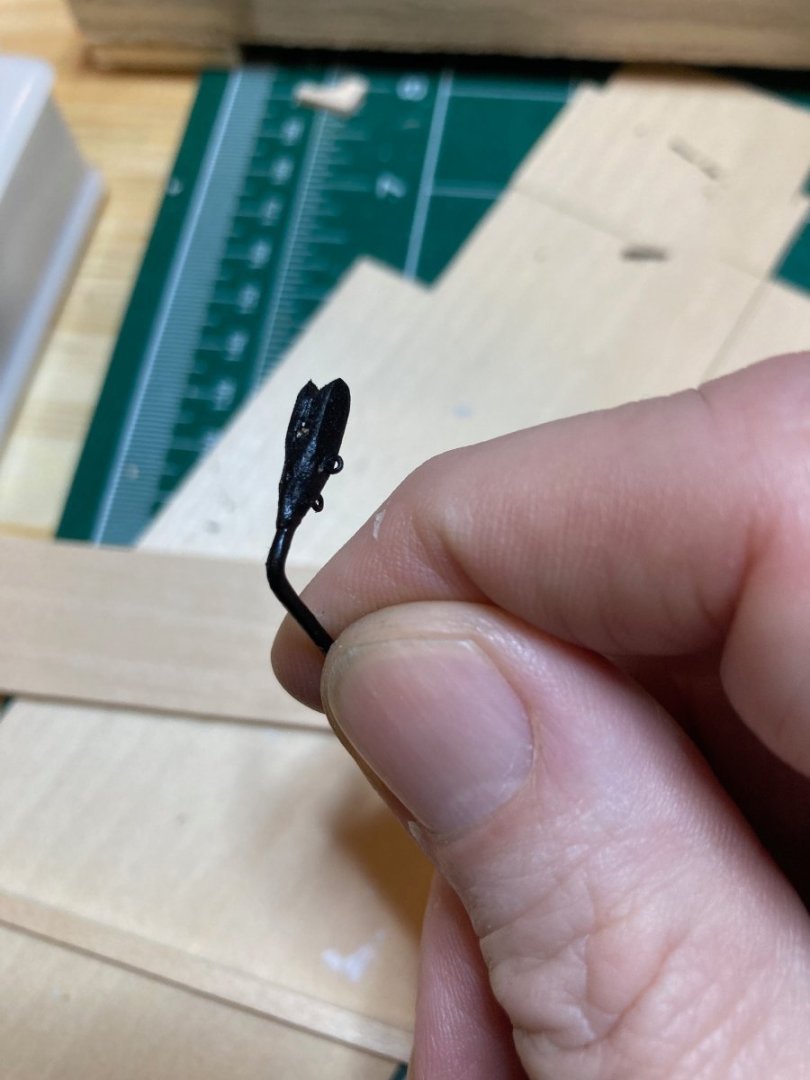
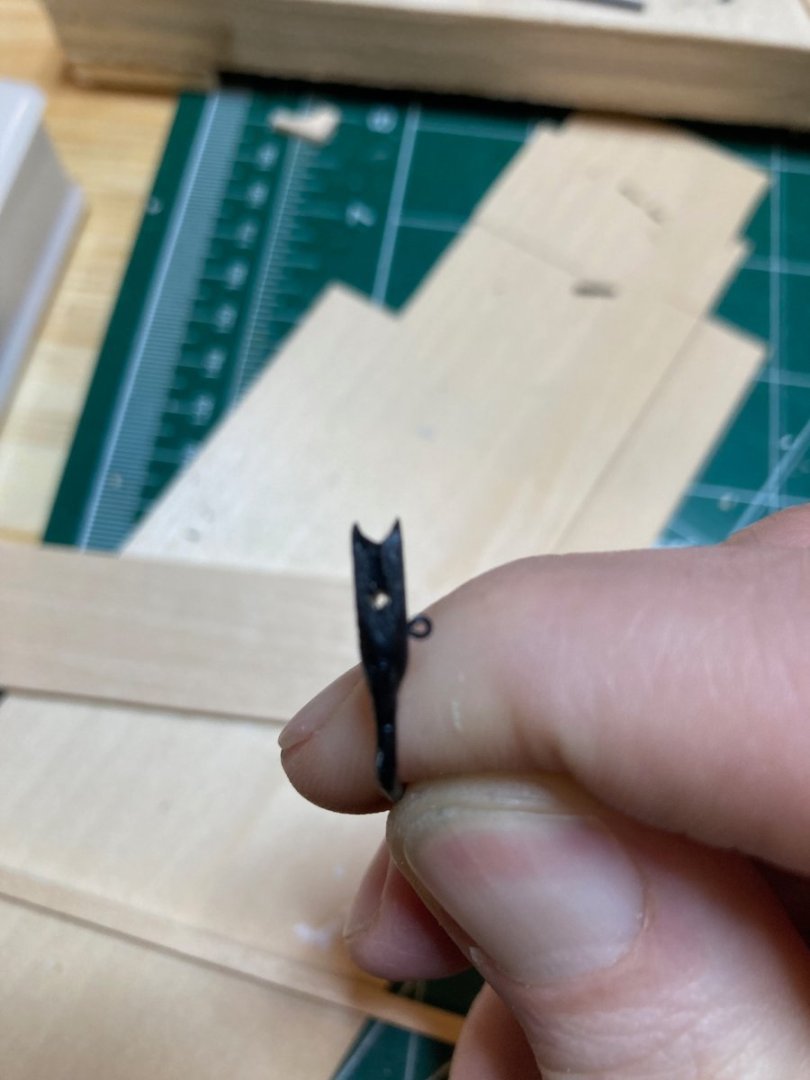
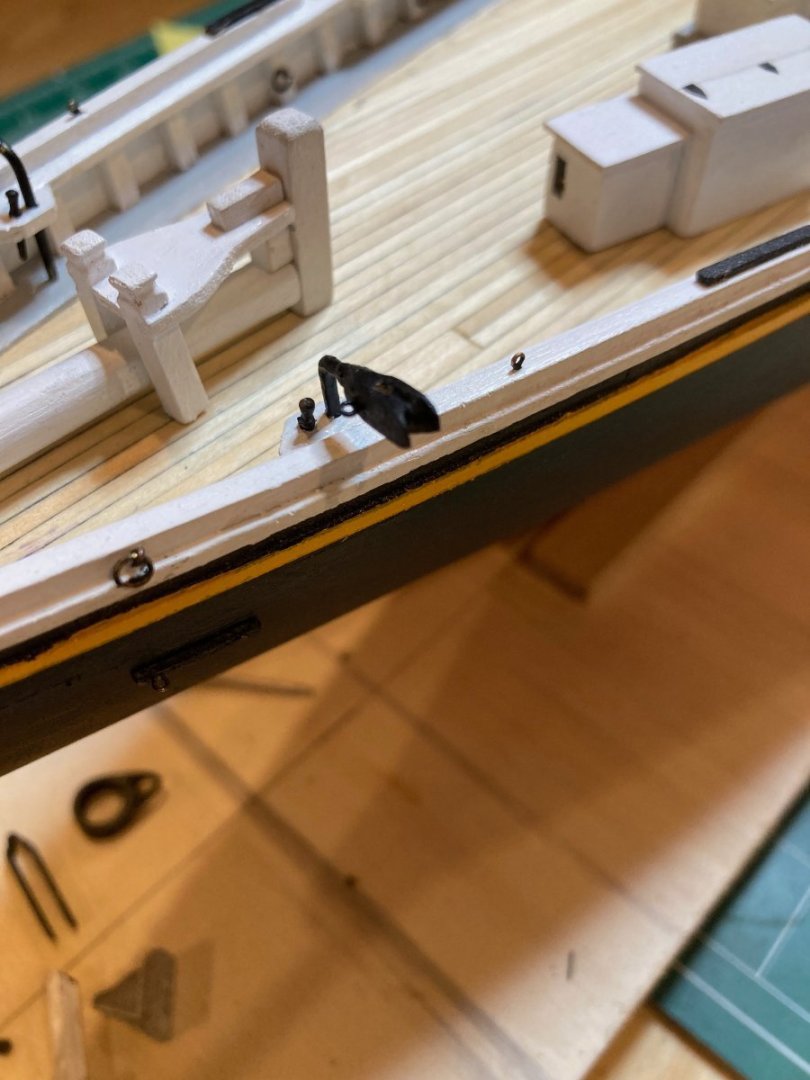
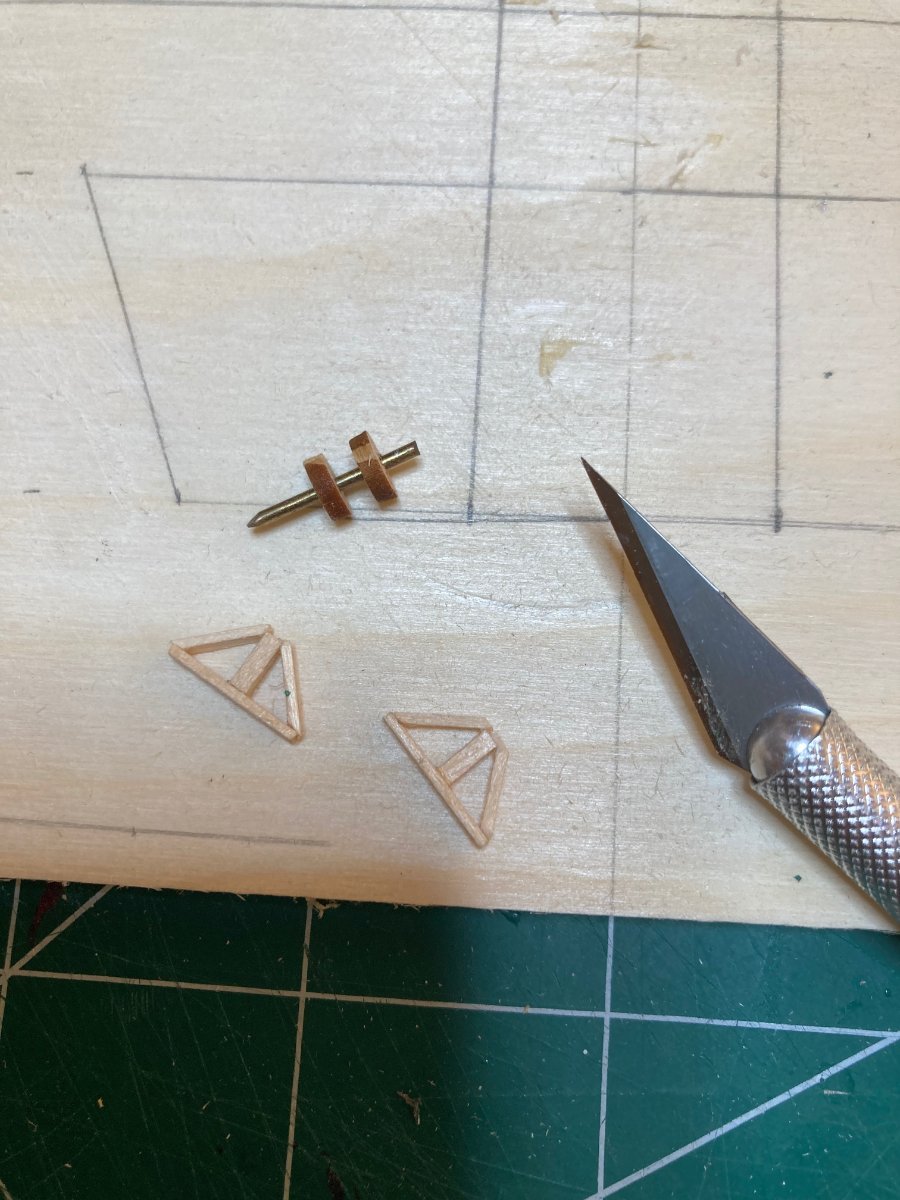
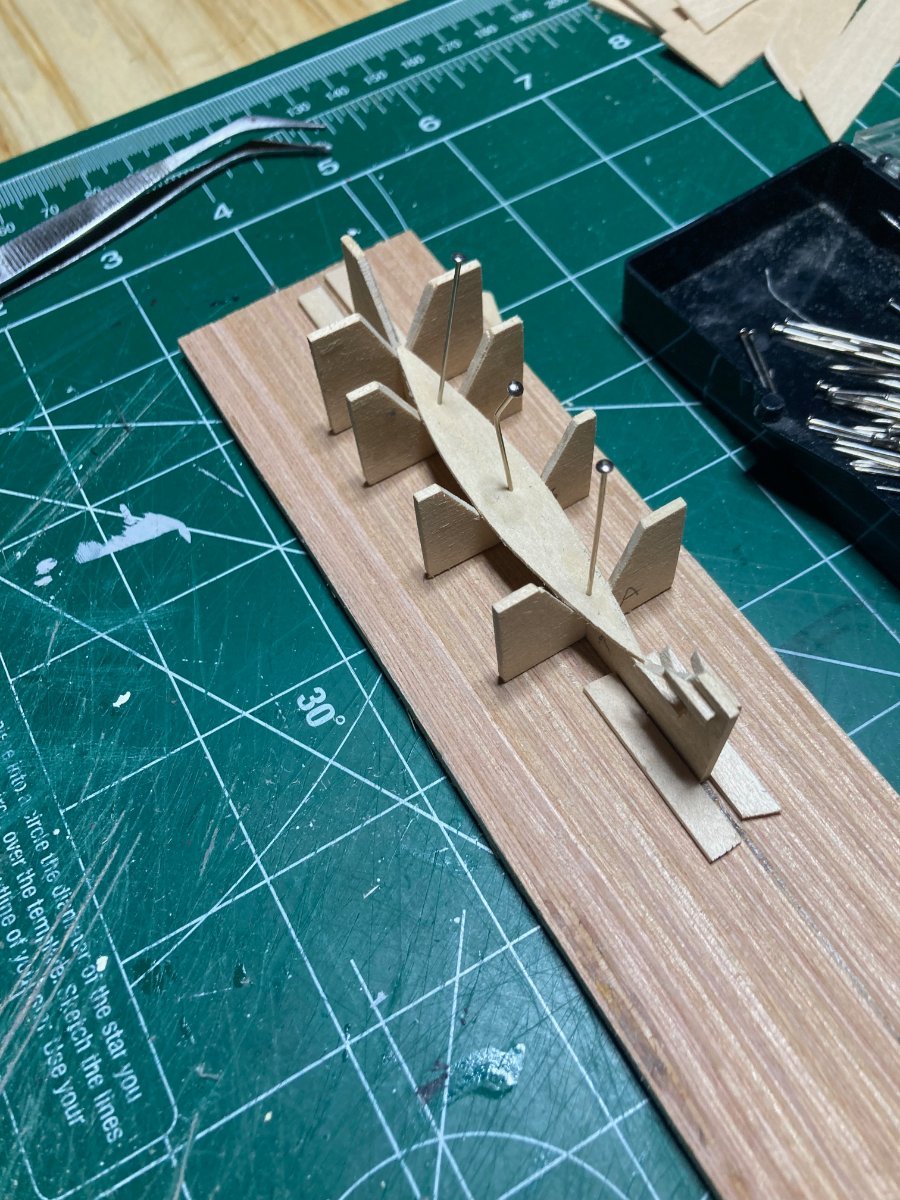
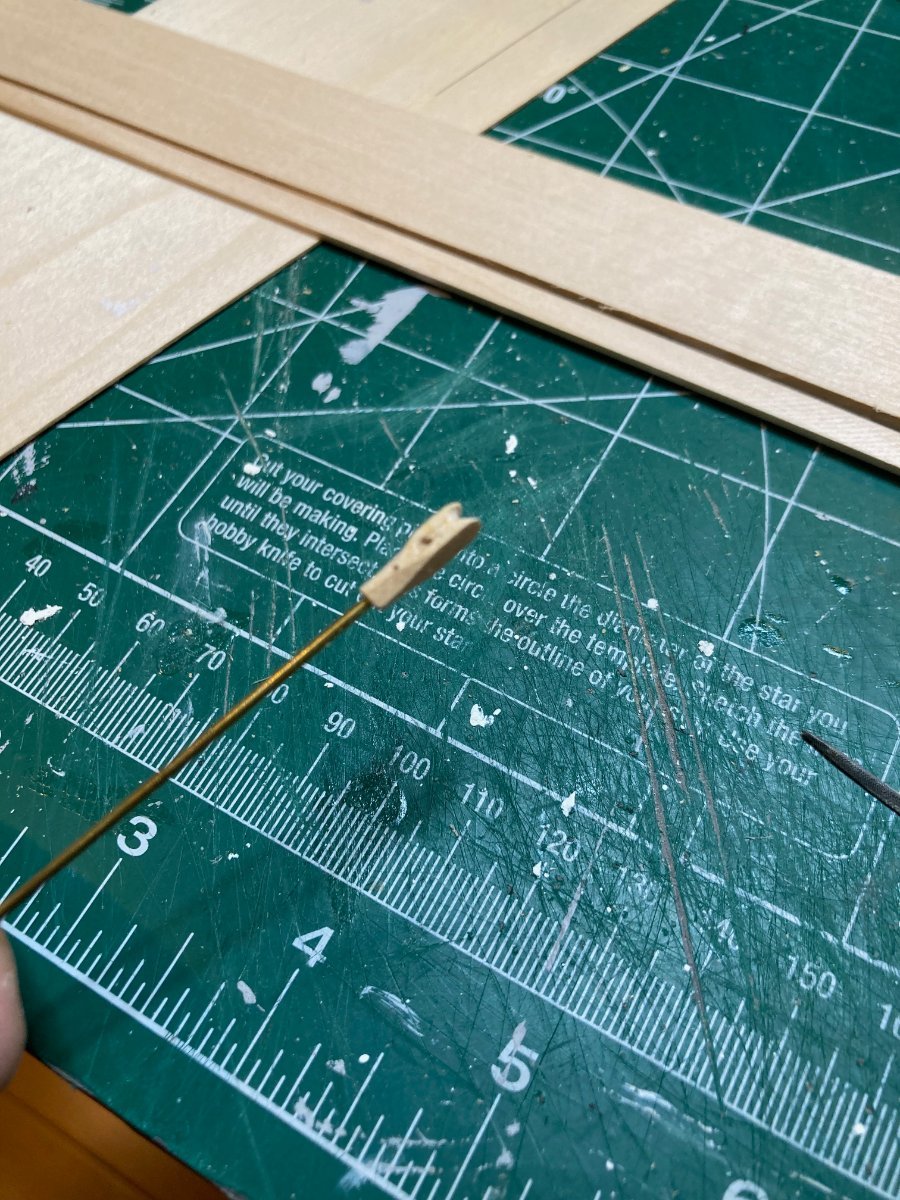
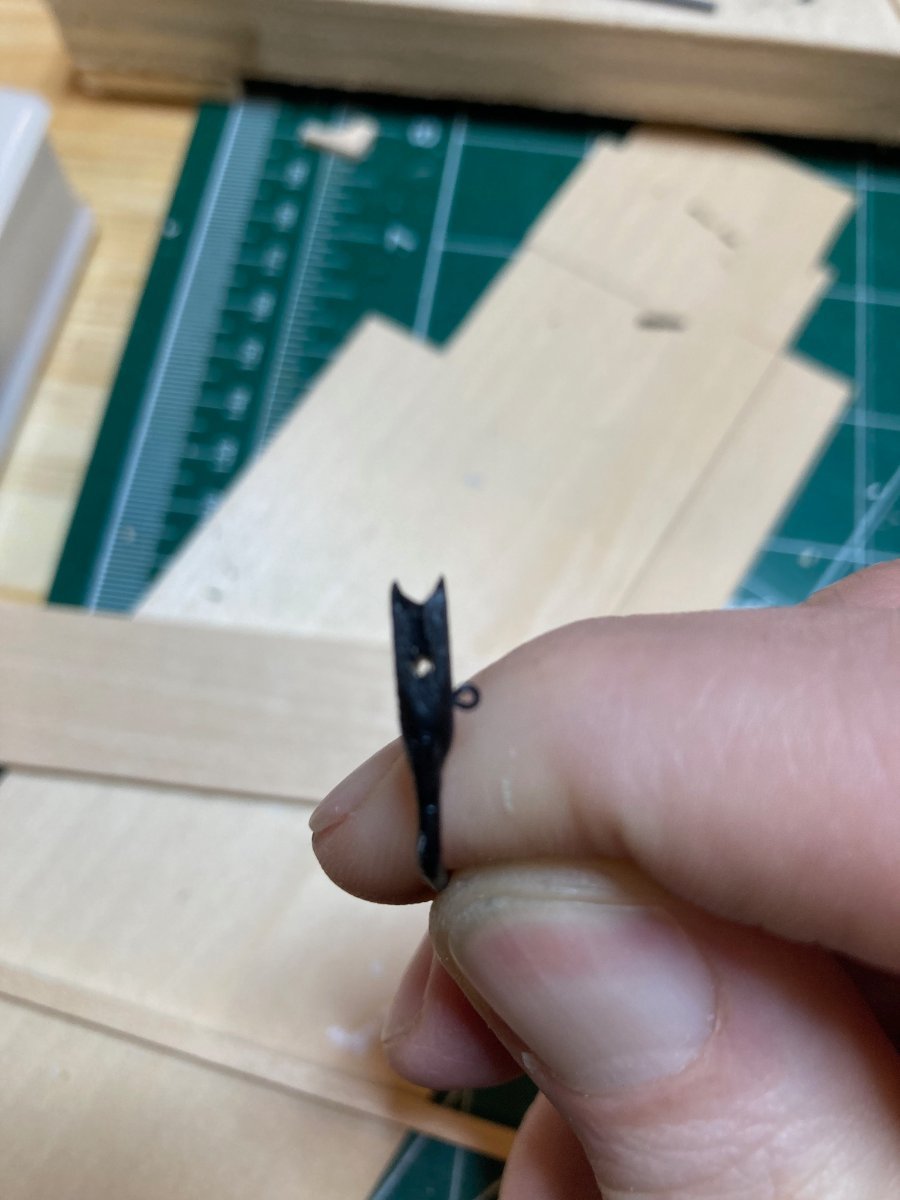
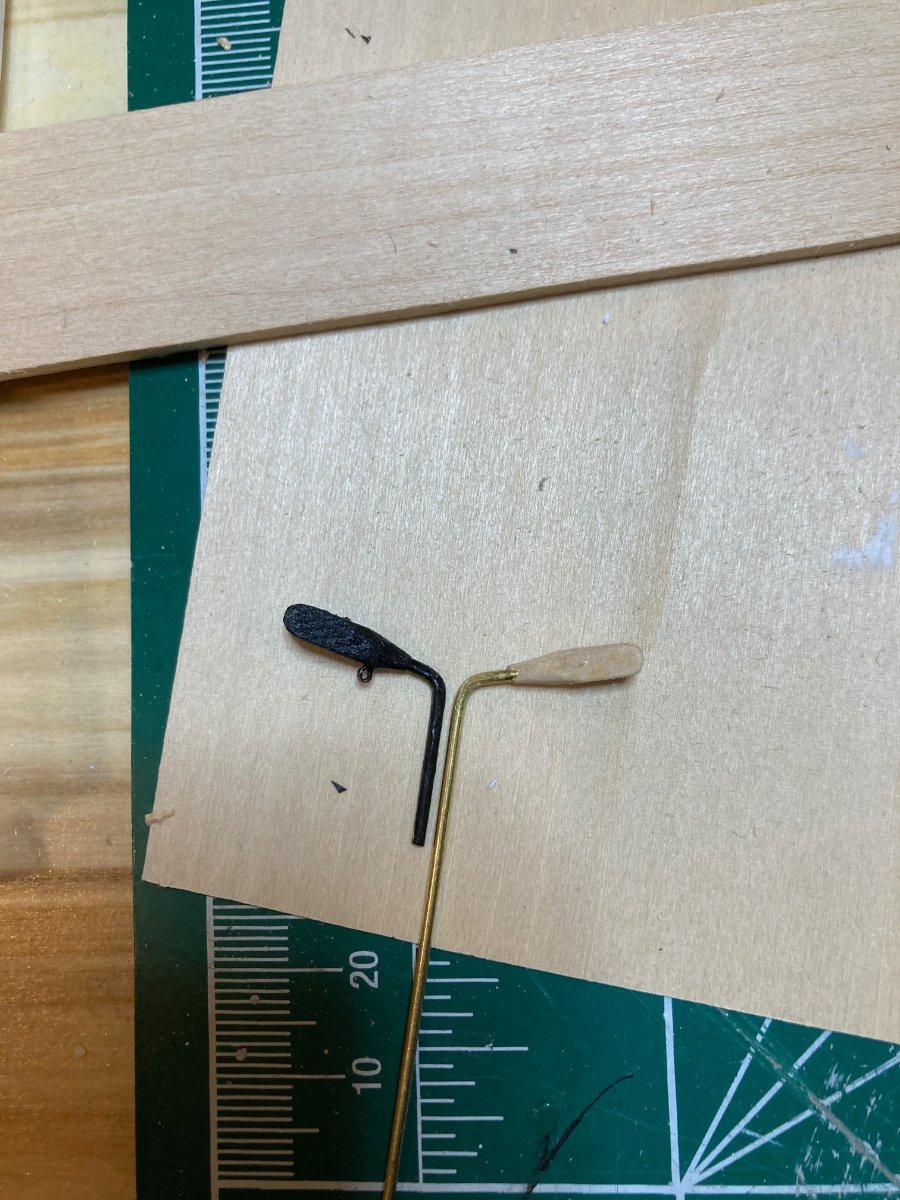
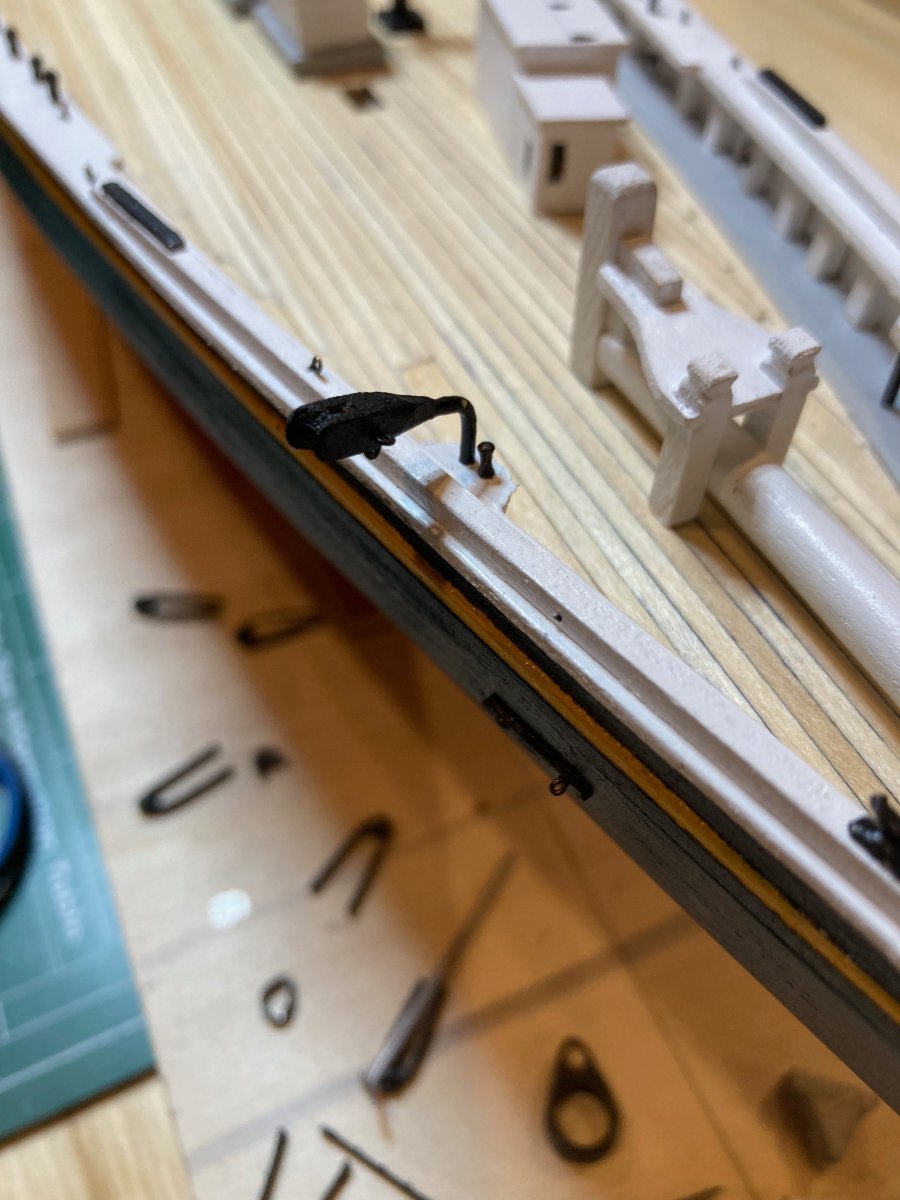
Yesterday I had a go at the catheads, which were one of those elements that I was kind of puzzling over. In the end, I decided that my metal working skills and the resources at my current disposal for achieving good results were pretty limited, so I took another route. I used 3/32" square basswood stock for the the "head" and 3/64" brass rod for the shaft. I marked off the basswood to the length of the out portion of the cathead and filed out a notch in the end, first making a gentle cut along the centre of one end of the strip and then using first a triangular and then a round needle file to widen out the end to simulate the sheave. I then drilled a hole behind that and widened/filed it out with files to complete the sheave. I then drilled small holes to receive eyebolts in the bottom and side. Only after that did I cut off the portion of the basswood stock, drill a hole in the square end of it and attach a length of brass rod for the cathead "shaft". I then whittled and sanded down the end of the wooden "head" portion to blend it in with the brass, painting the whole assembly black. They're definitely out of scale (the head portion anyway) but I'm hoping that they won't look so bad once all the other elements are built up around them..... I did have to make some 1/16" thick cap rail extensions, since I forgot to mark out those when I was making the caprails a while back...this was very straightforward. Here are the photos - enjoy and happy modelling hamilton