HOLIDAY DONATION DRIVE - SUPPORT MSW - DO YOUR PART TO KEEP THIS GREAT FORUM GOING! (89 donations so far out of 49,000 members - C'mon guys!)
×


niwotwill
-
Posts
596 -
Joined
-
Last visited
Content Type
Profiles
Forums
Gallery
Events
Everything posted by niwotwill
-
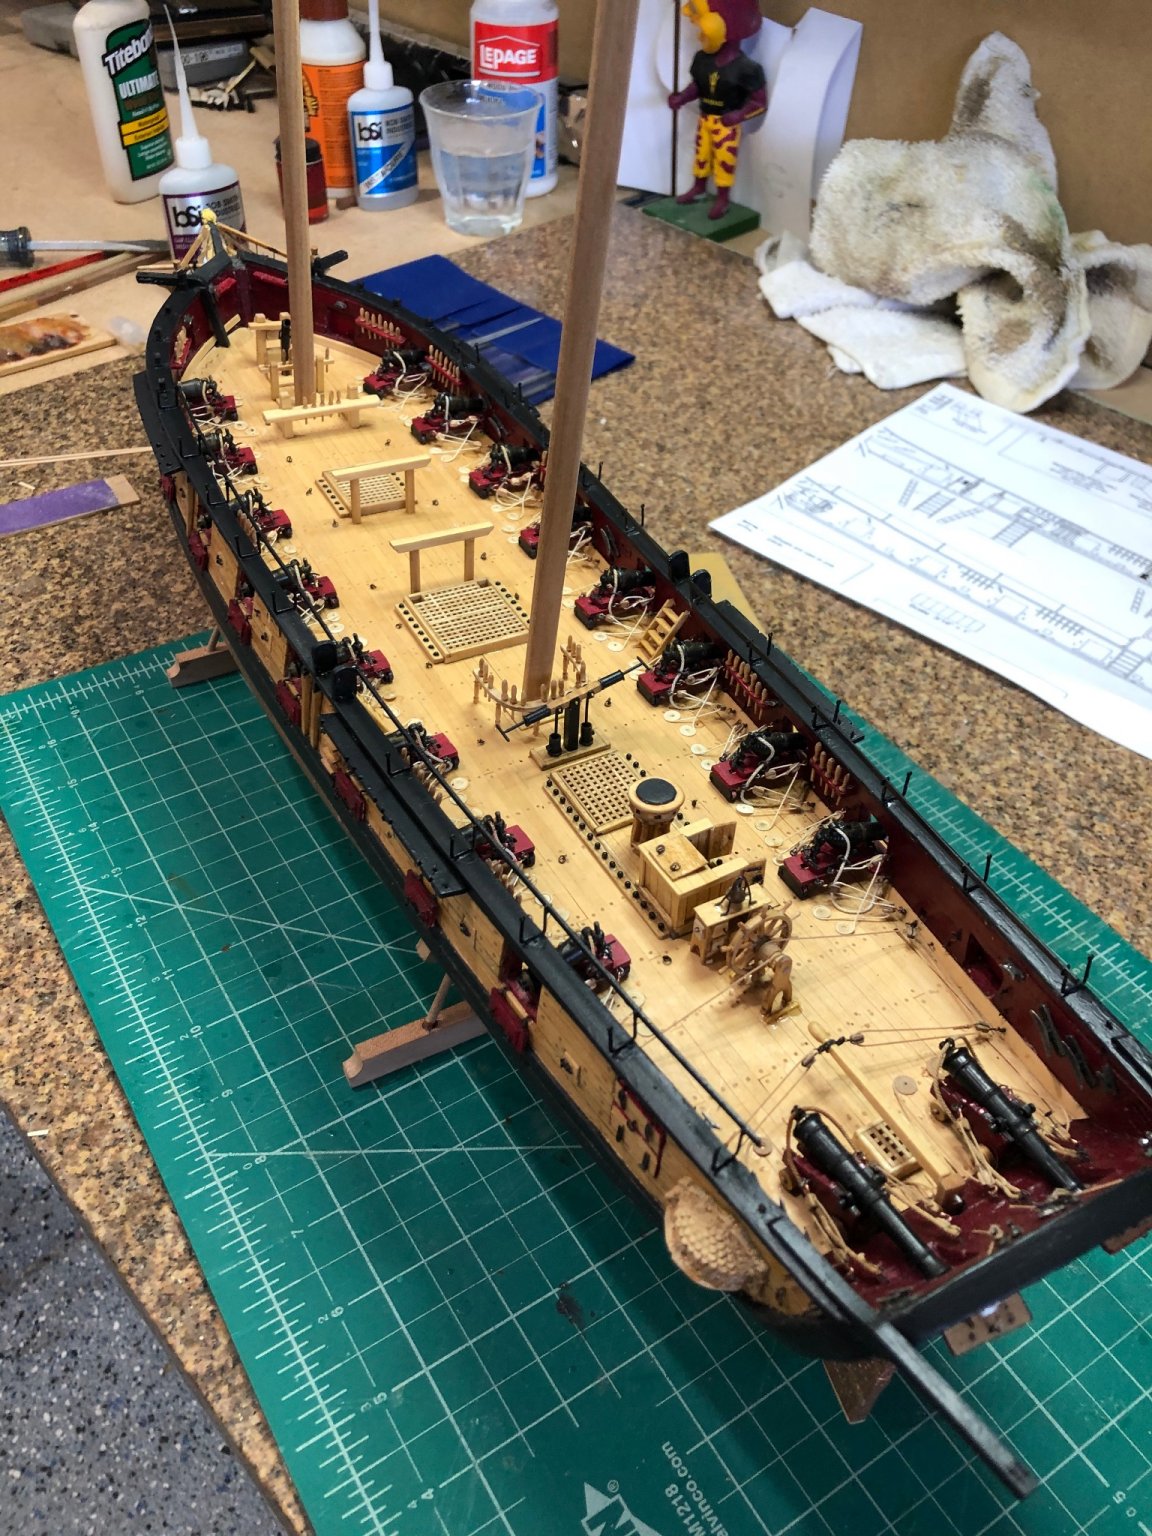
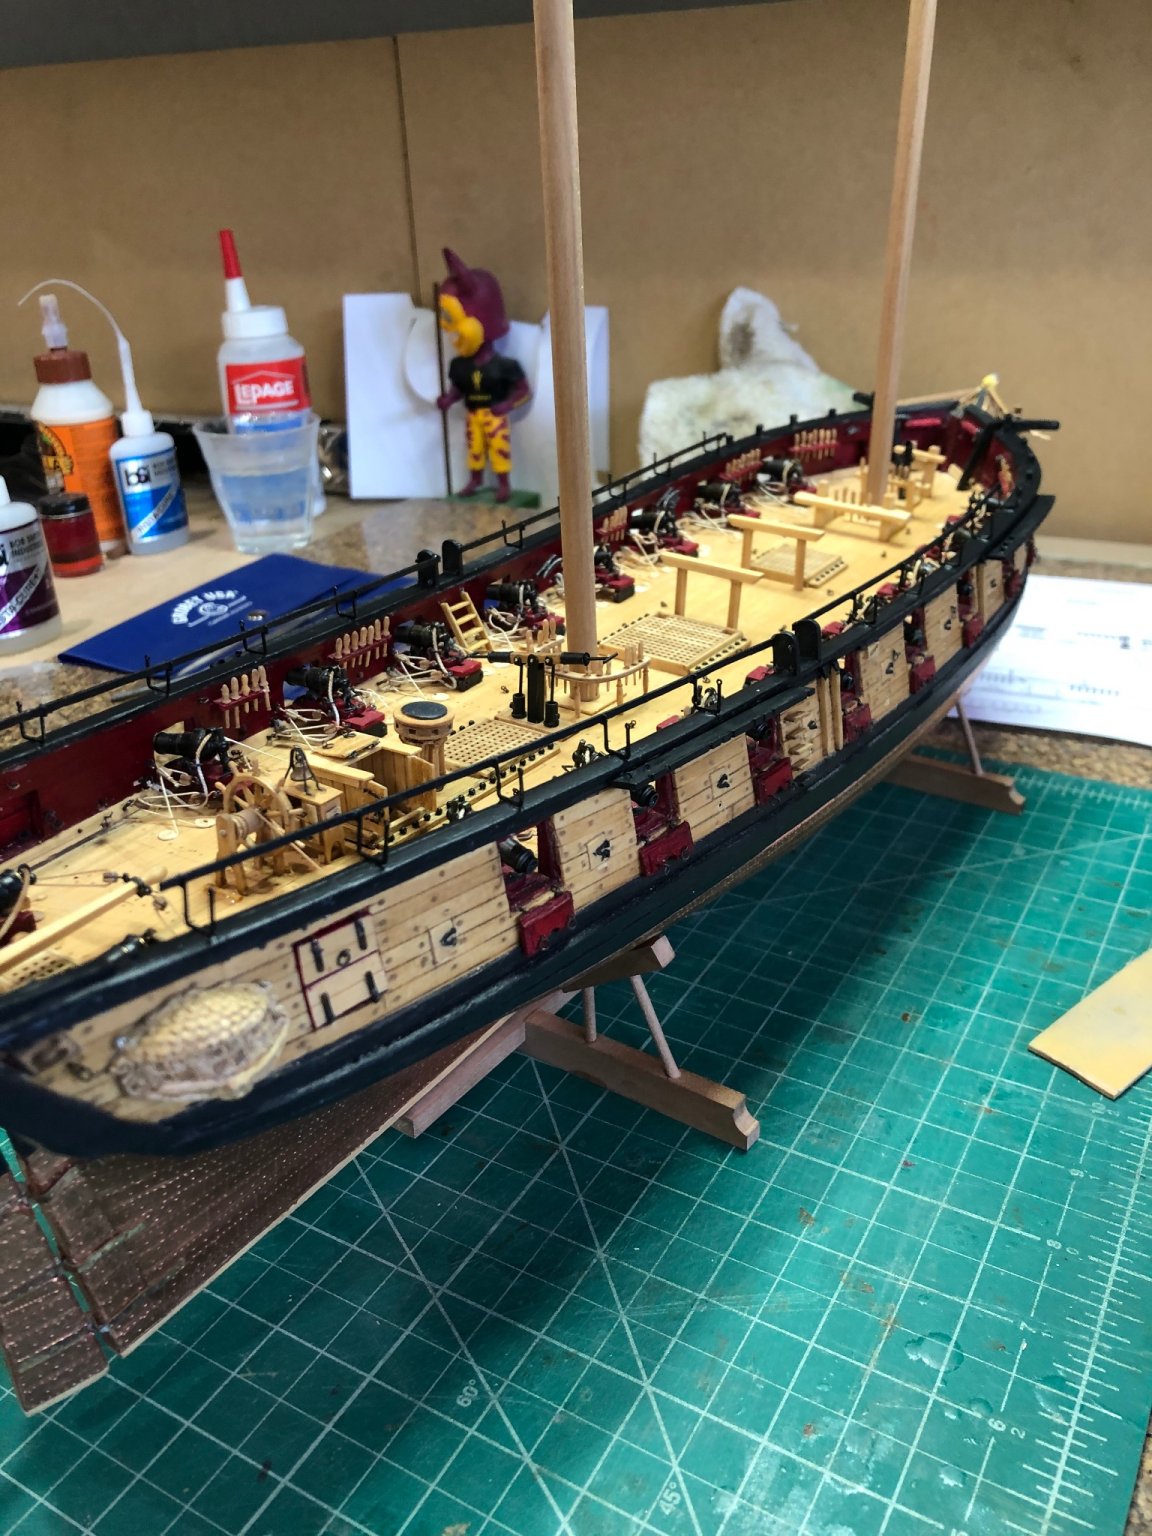
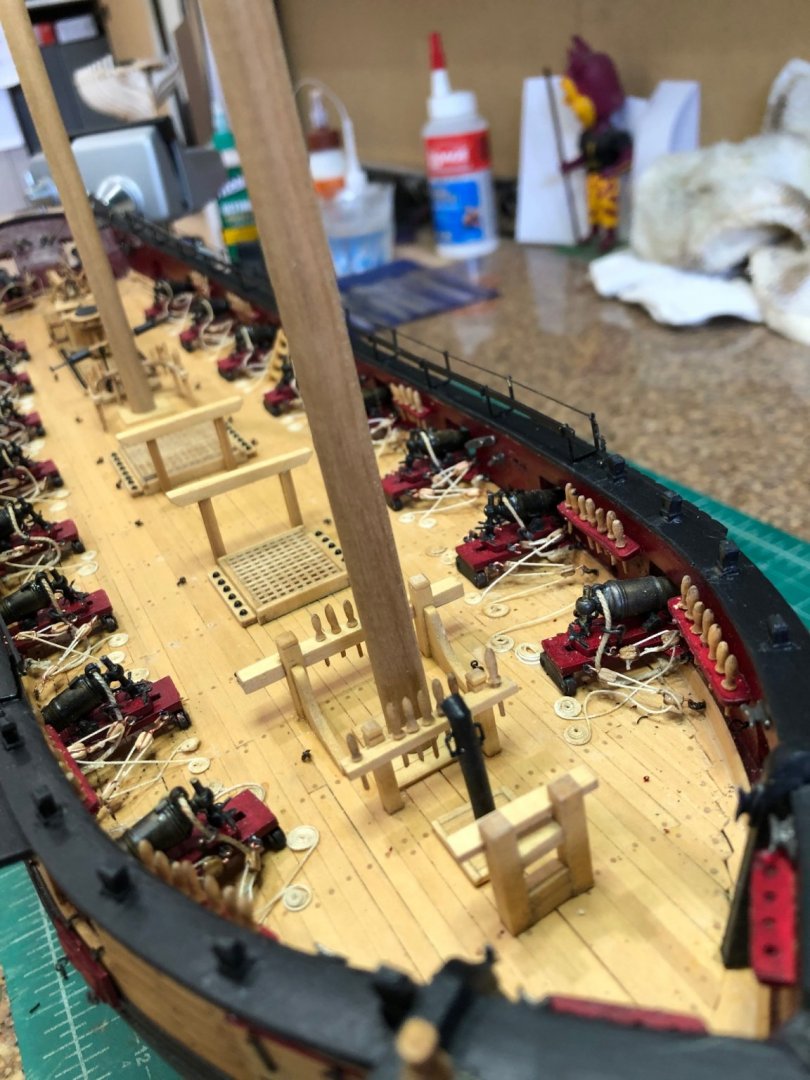
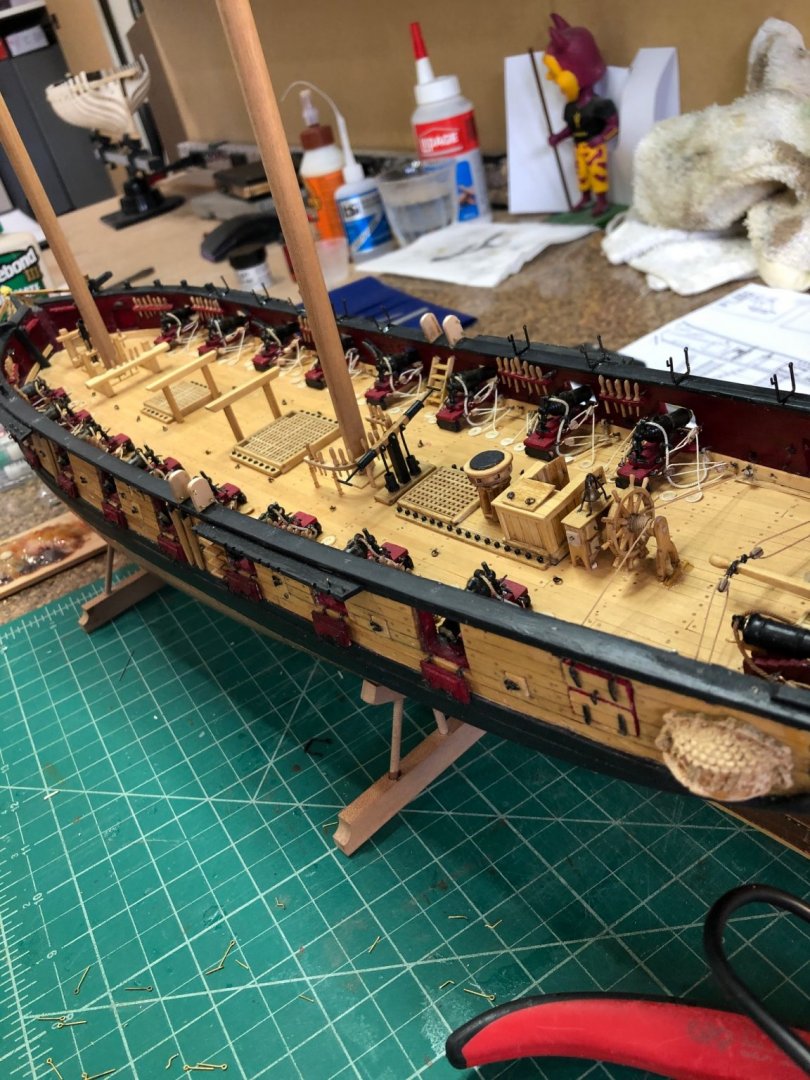
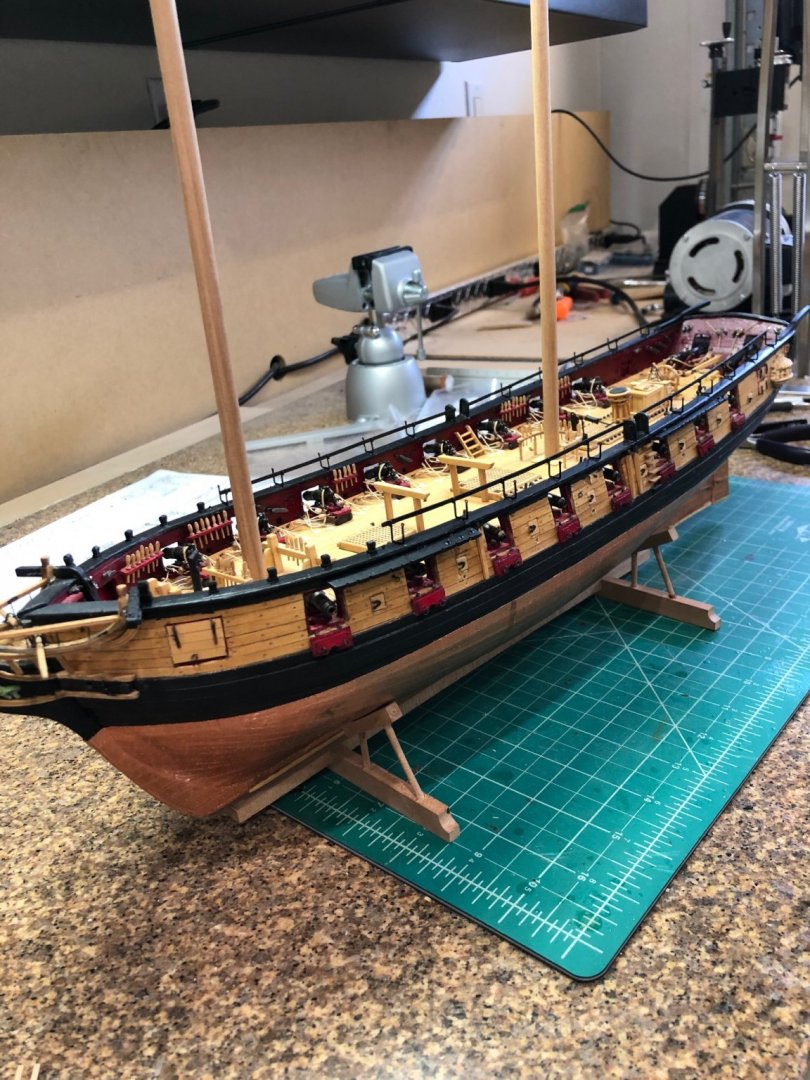
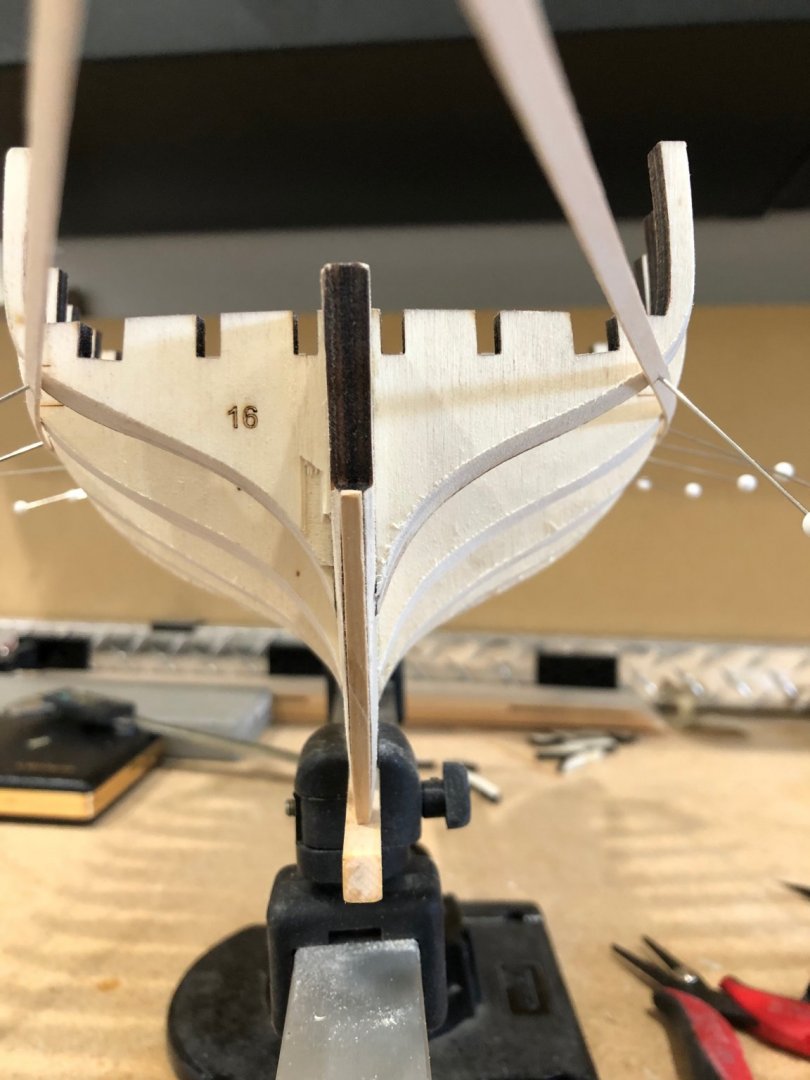
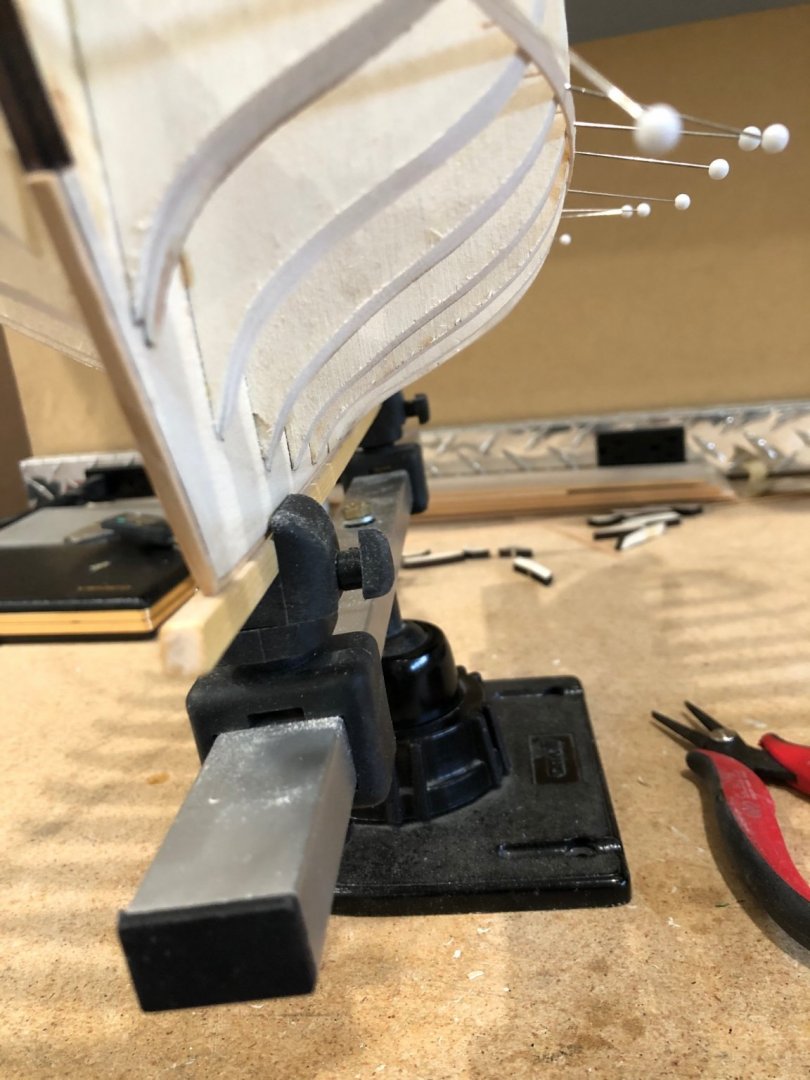
 Finished the hammock cranes rigged the black line and touched up the paint and now ready for netting. Added rudder pendents and I'll add the coiled lines when I add them for the rigging. Ruddert pendents Netting tomorrow Make it a good day Will
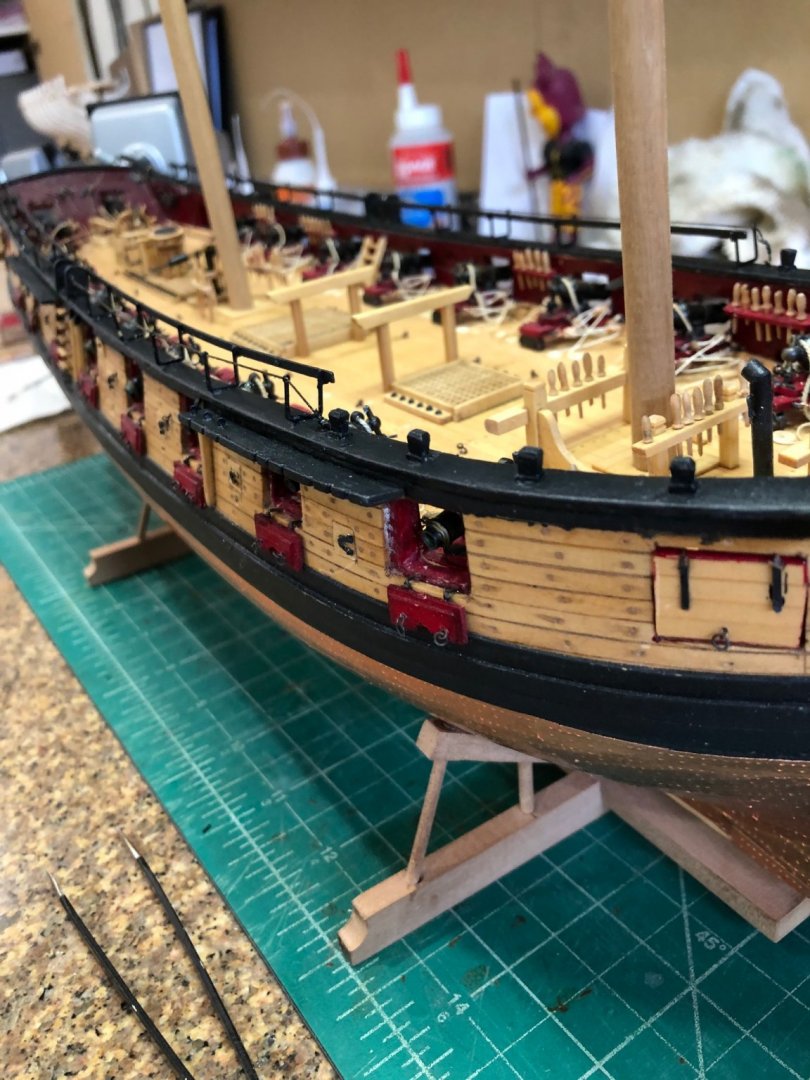
-
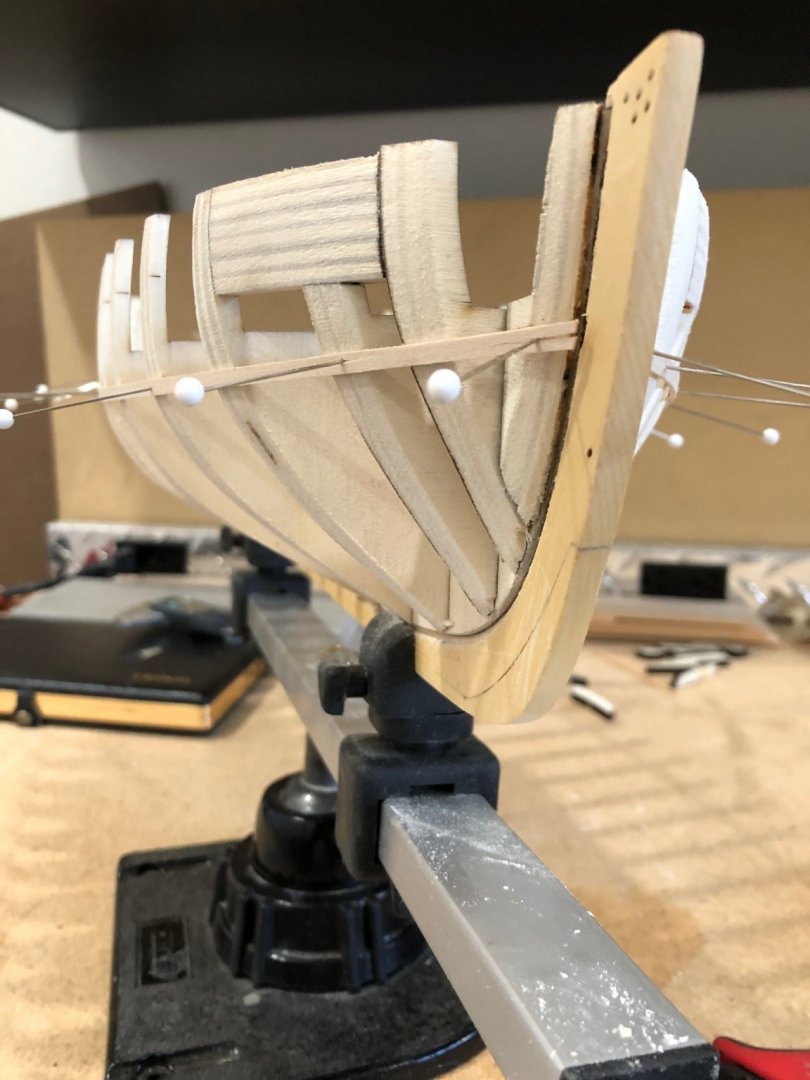
Had a good catch while measuring for the boarding panels that was no inboard boarding ladders. Made up a set of ladders using the plans as the pattern. Filed slots in the sides for the steps as before keeping the steps perpendicular to sides. Glued together and when dry stained them golden oak. Now on to hammock cranes and boarding panels. Using the laser panels I carved a recess feature as in the monograph. Sanded the cranes to thin them up slightly and burnish them for better paint adhesion. Spray painted the cranes to get complete coverage before mounting and then just a touchup after assembling. Putting the cranes into the pre-drilled holes was a fiddly process. Just the slightest friction between the cranes pin to the hole walls caused them to bend. Got them in and after letting everything set overnight the wood strip was installed without any problems. Everything made and glued now on to paint. and then the netting. I still am trying to decide if I want to install hammock rolls but I have time to make up my mind. I placed the mast rods in to get an idea of how its going to look and when I saw the photos I noticed the masts not being perpendicular and appearing to point away from each other. I use my Apple phone for photos and you can really see the wide angle lens making a bubble lens effect. The masts are correct. Make it a good day Will


-
You just keep amazing me. Make it a good day Will
- 778 replies
-
- 1
-

-
- cheerful
- Syren Ship Model Company
- (and 1 more)
-
Maury I used Lepages white glue and water loosened a dry joint after soaking with paper towel wrapped joint. Have a good day Will
-
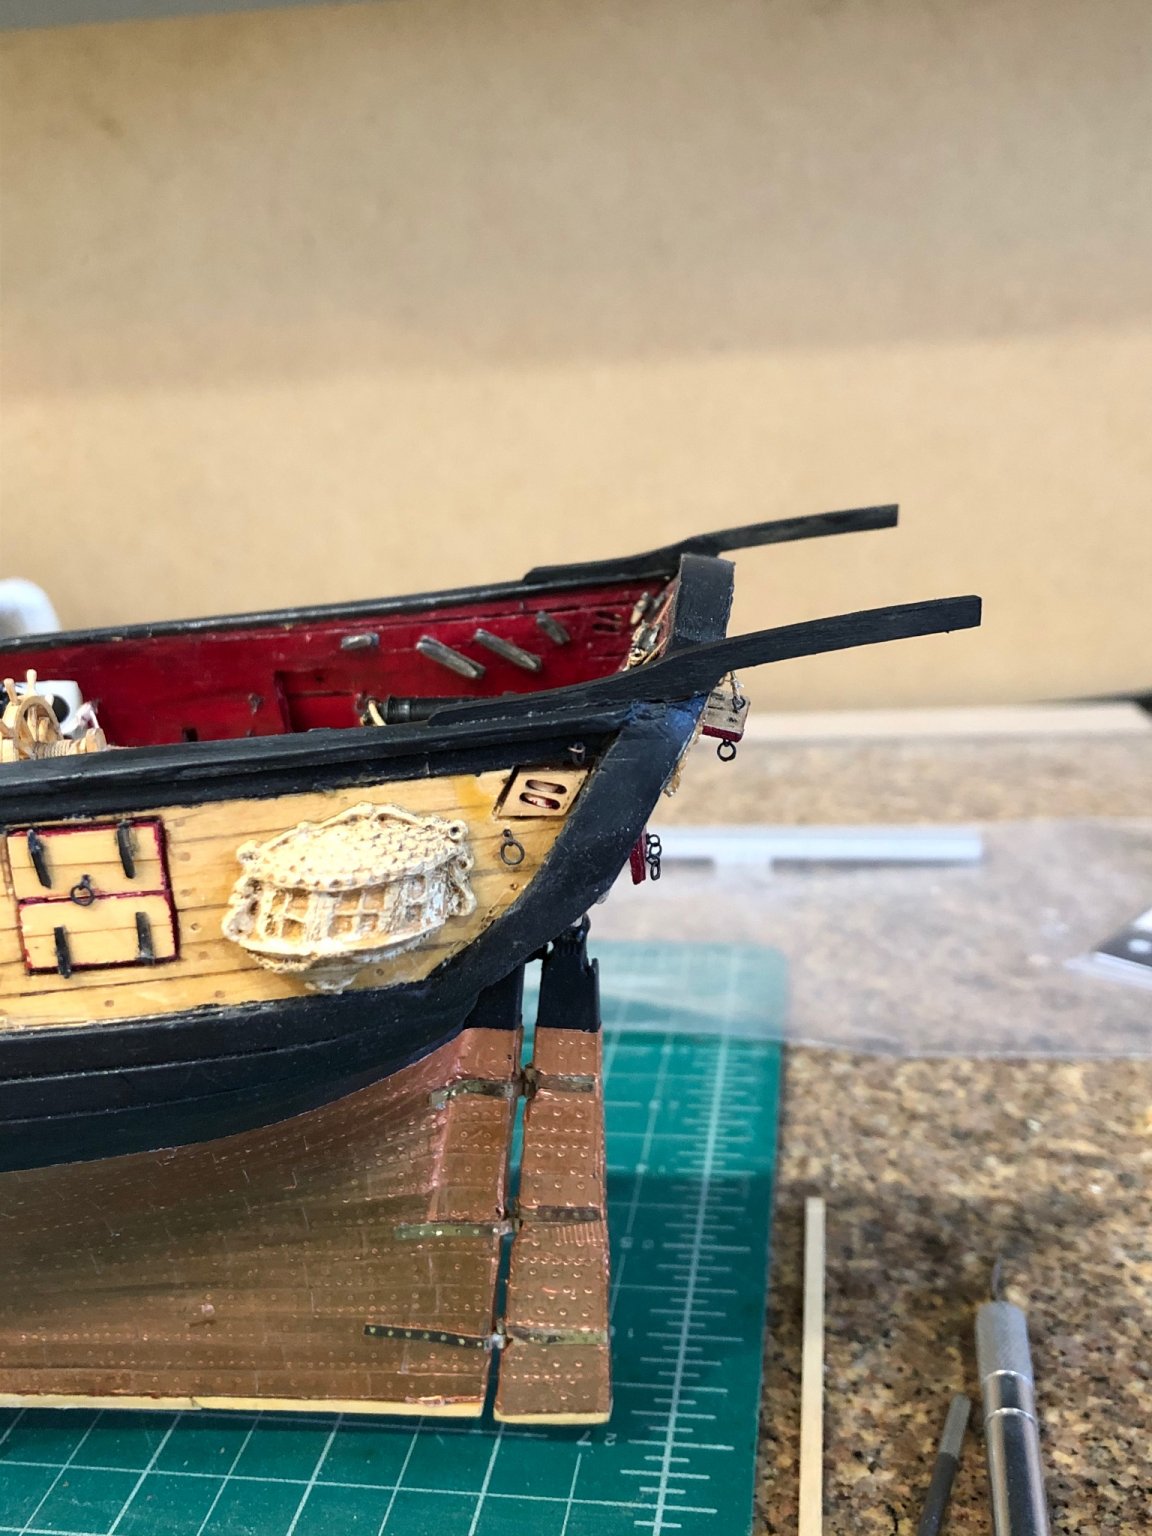
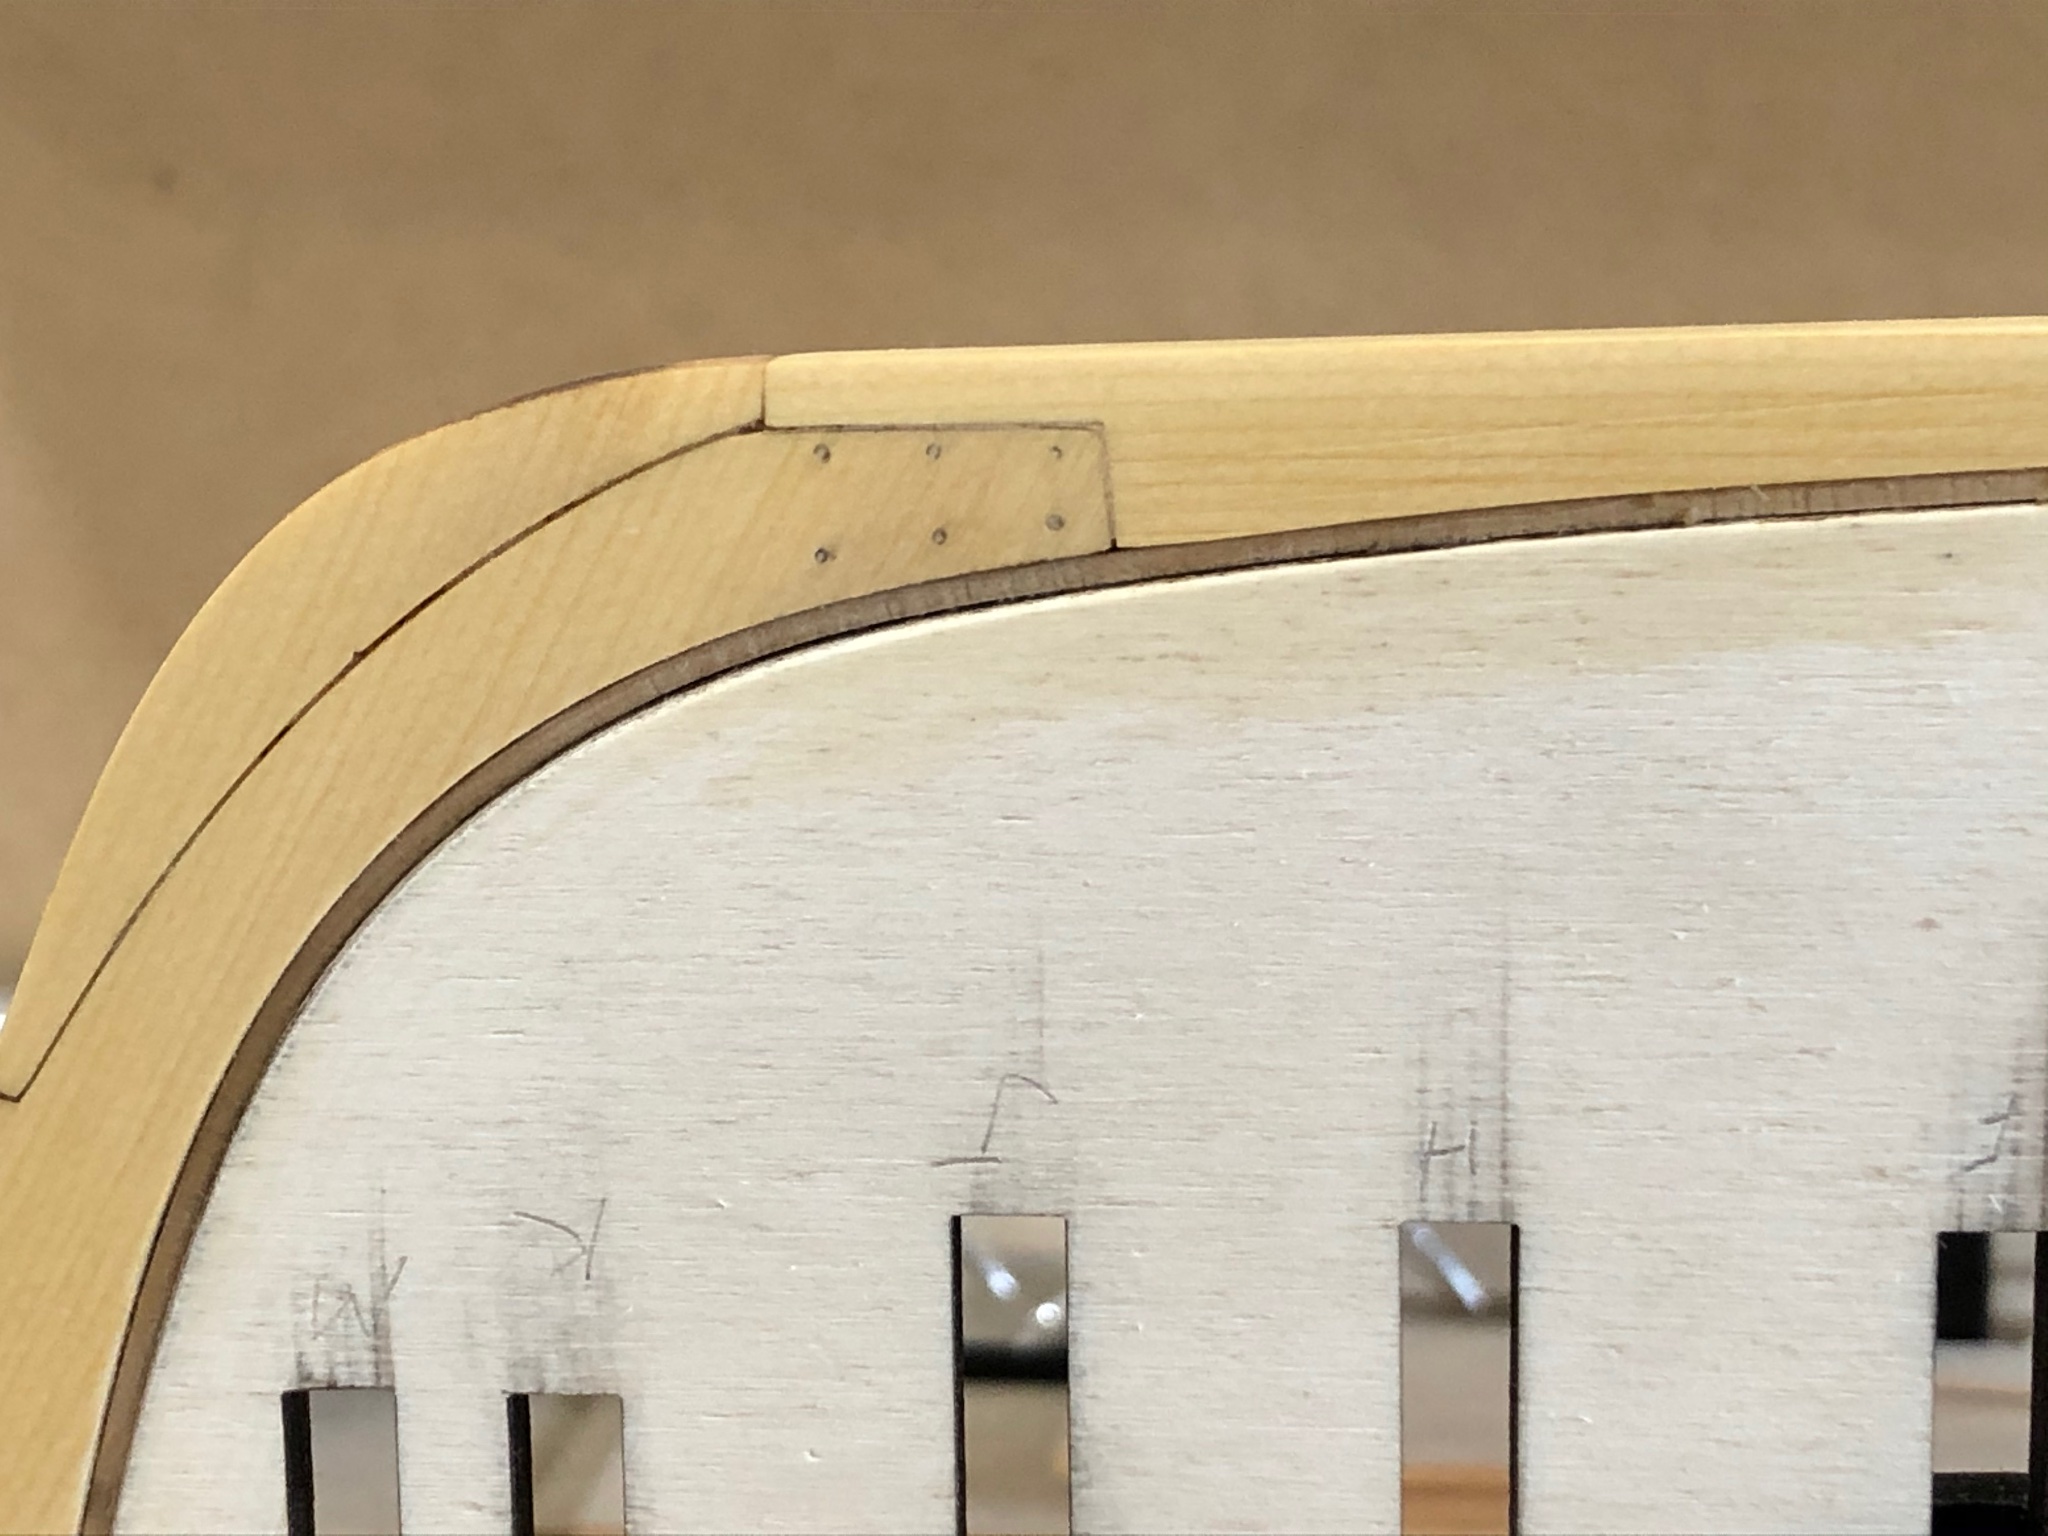
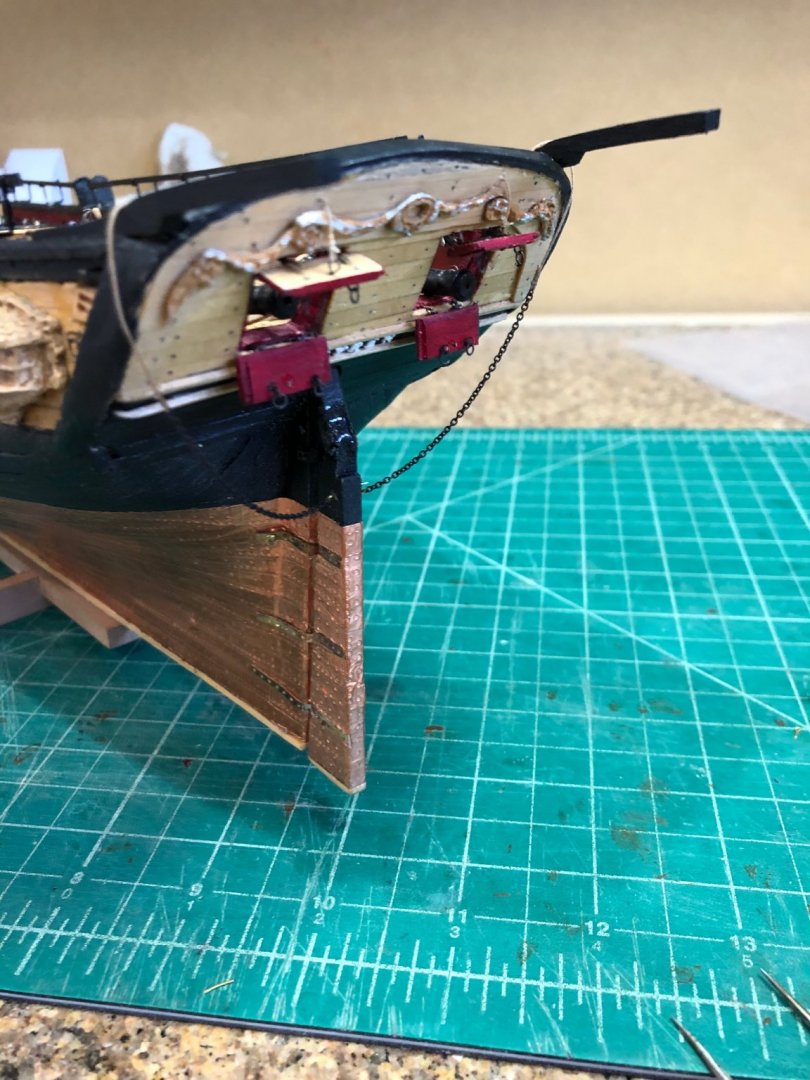
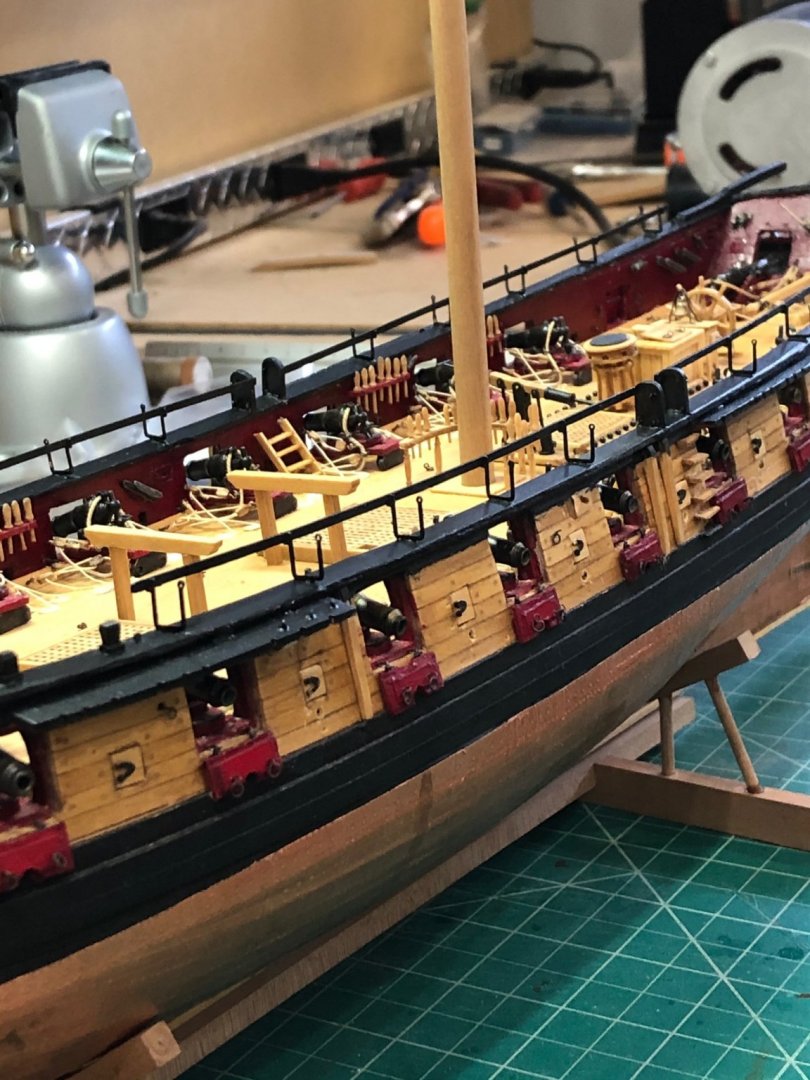
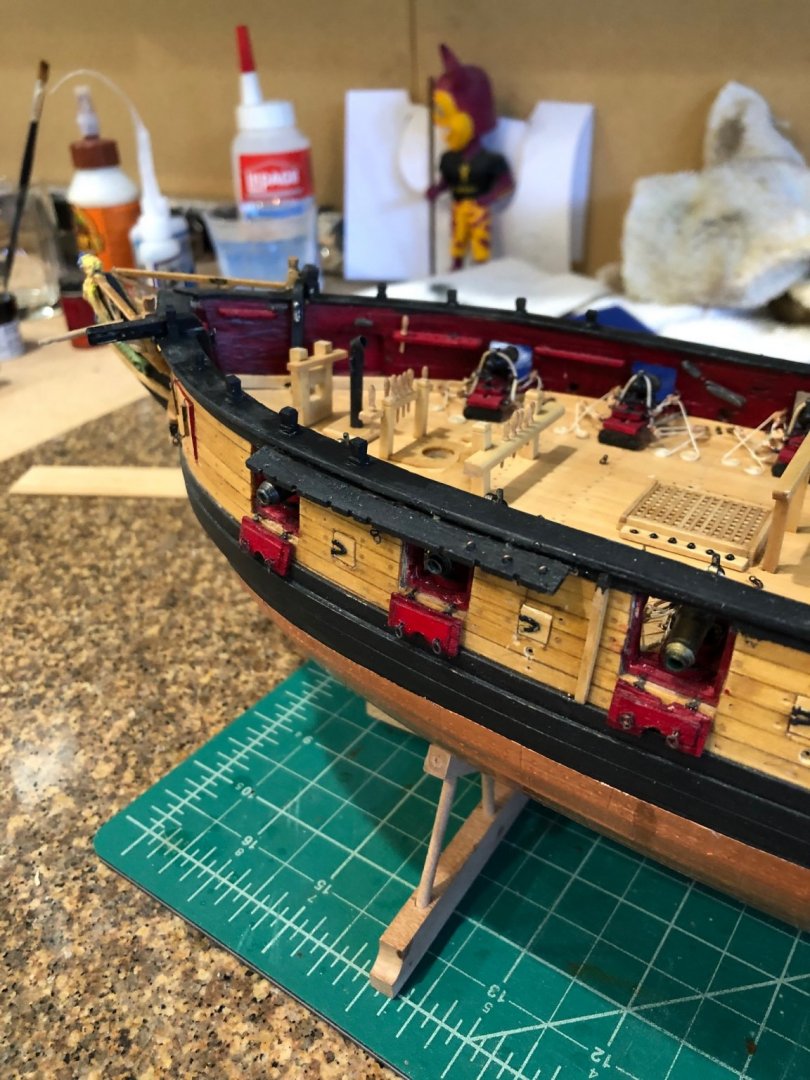
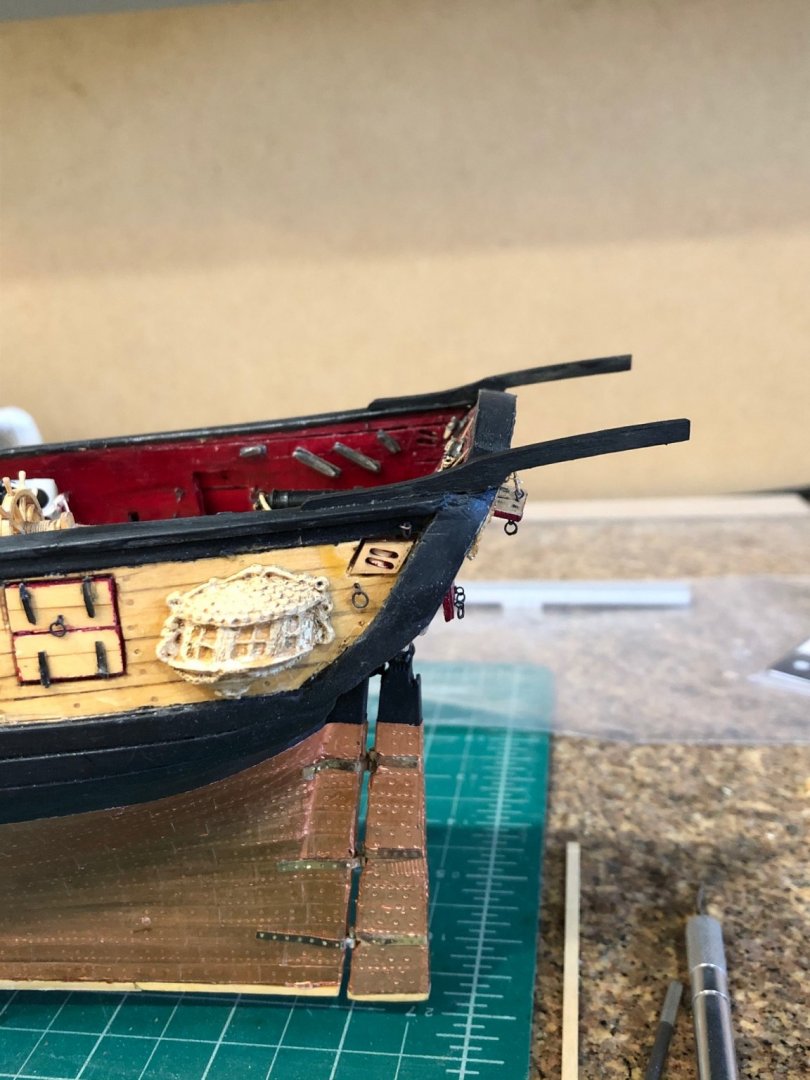
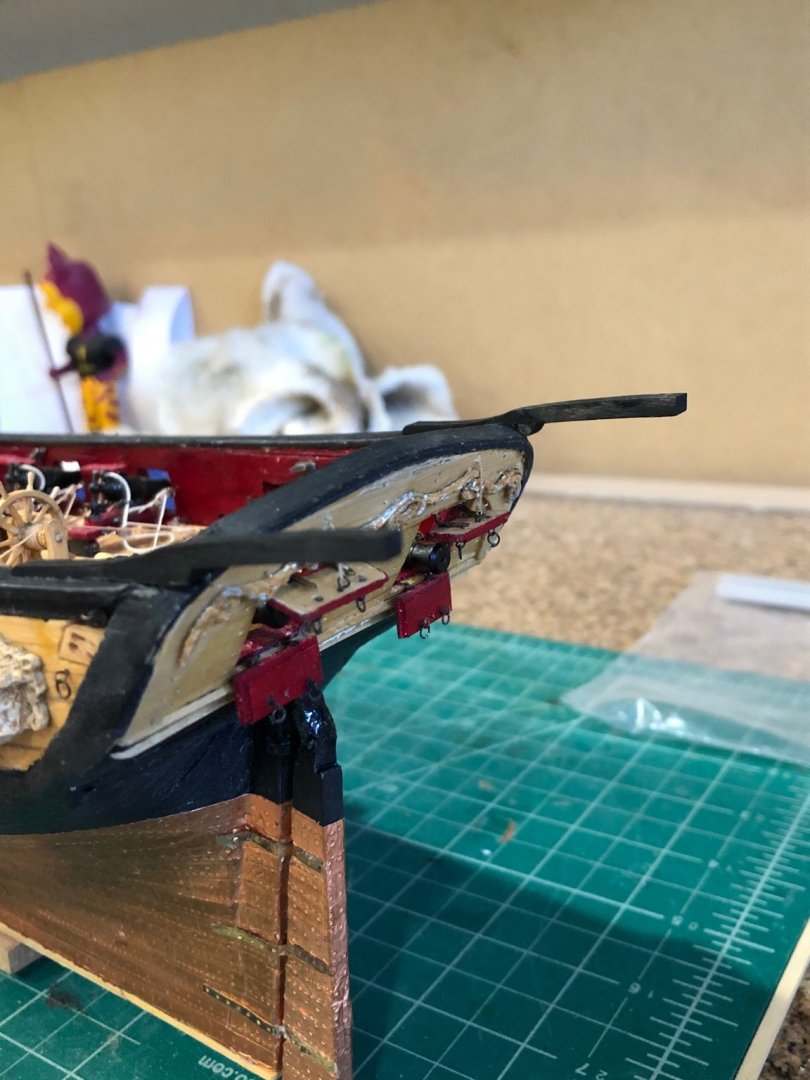
Deck is complete after the eyebolts and rings. Using the kit eyebolts and making split rings out of 26AWG copper wire. I tested the rings for strength against the pull that rigging will exert and they seemed to be strong enough so I didn't solder the rings. Moved on the timber heads using the plans for a pattern. Timber heads made from AYC which is easier to carve that basswood keeping sharp edges and smooth surfaces. While placing testing how to cut the transom I discovered an old problem surfaced it ugly head again. Way back in fairing I over cut the rear frame causing problems with fitting wales, upper planking, fashion pieces and transom. Spending a lot of time making the stern overcome the problems while still look correct. These modifications caused to top rail to be to high in relation to the transom so when the davits were fit the were also to high above the transom. The fix I came up with was to flatten the top rail, make small notches in transom, and move the davits rearward. So instead of the davits being against to forward edge of the transom the davit angle is now an extension of the rear of the transom. Its not right but it looks ok. Now on to the hammock panels when suddenly I realized I had not made the interior boarding ladders so on to ladders then hammock panels. Make it a good day Will
-
Glad to you see you're back at it. Hope life wasn't too bad for you. Mounts look good being made out of wood be sure to post the painted ones. Make it a good day Will
-
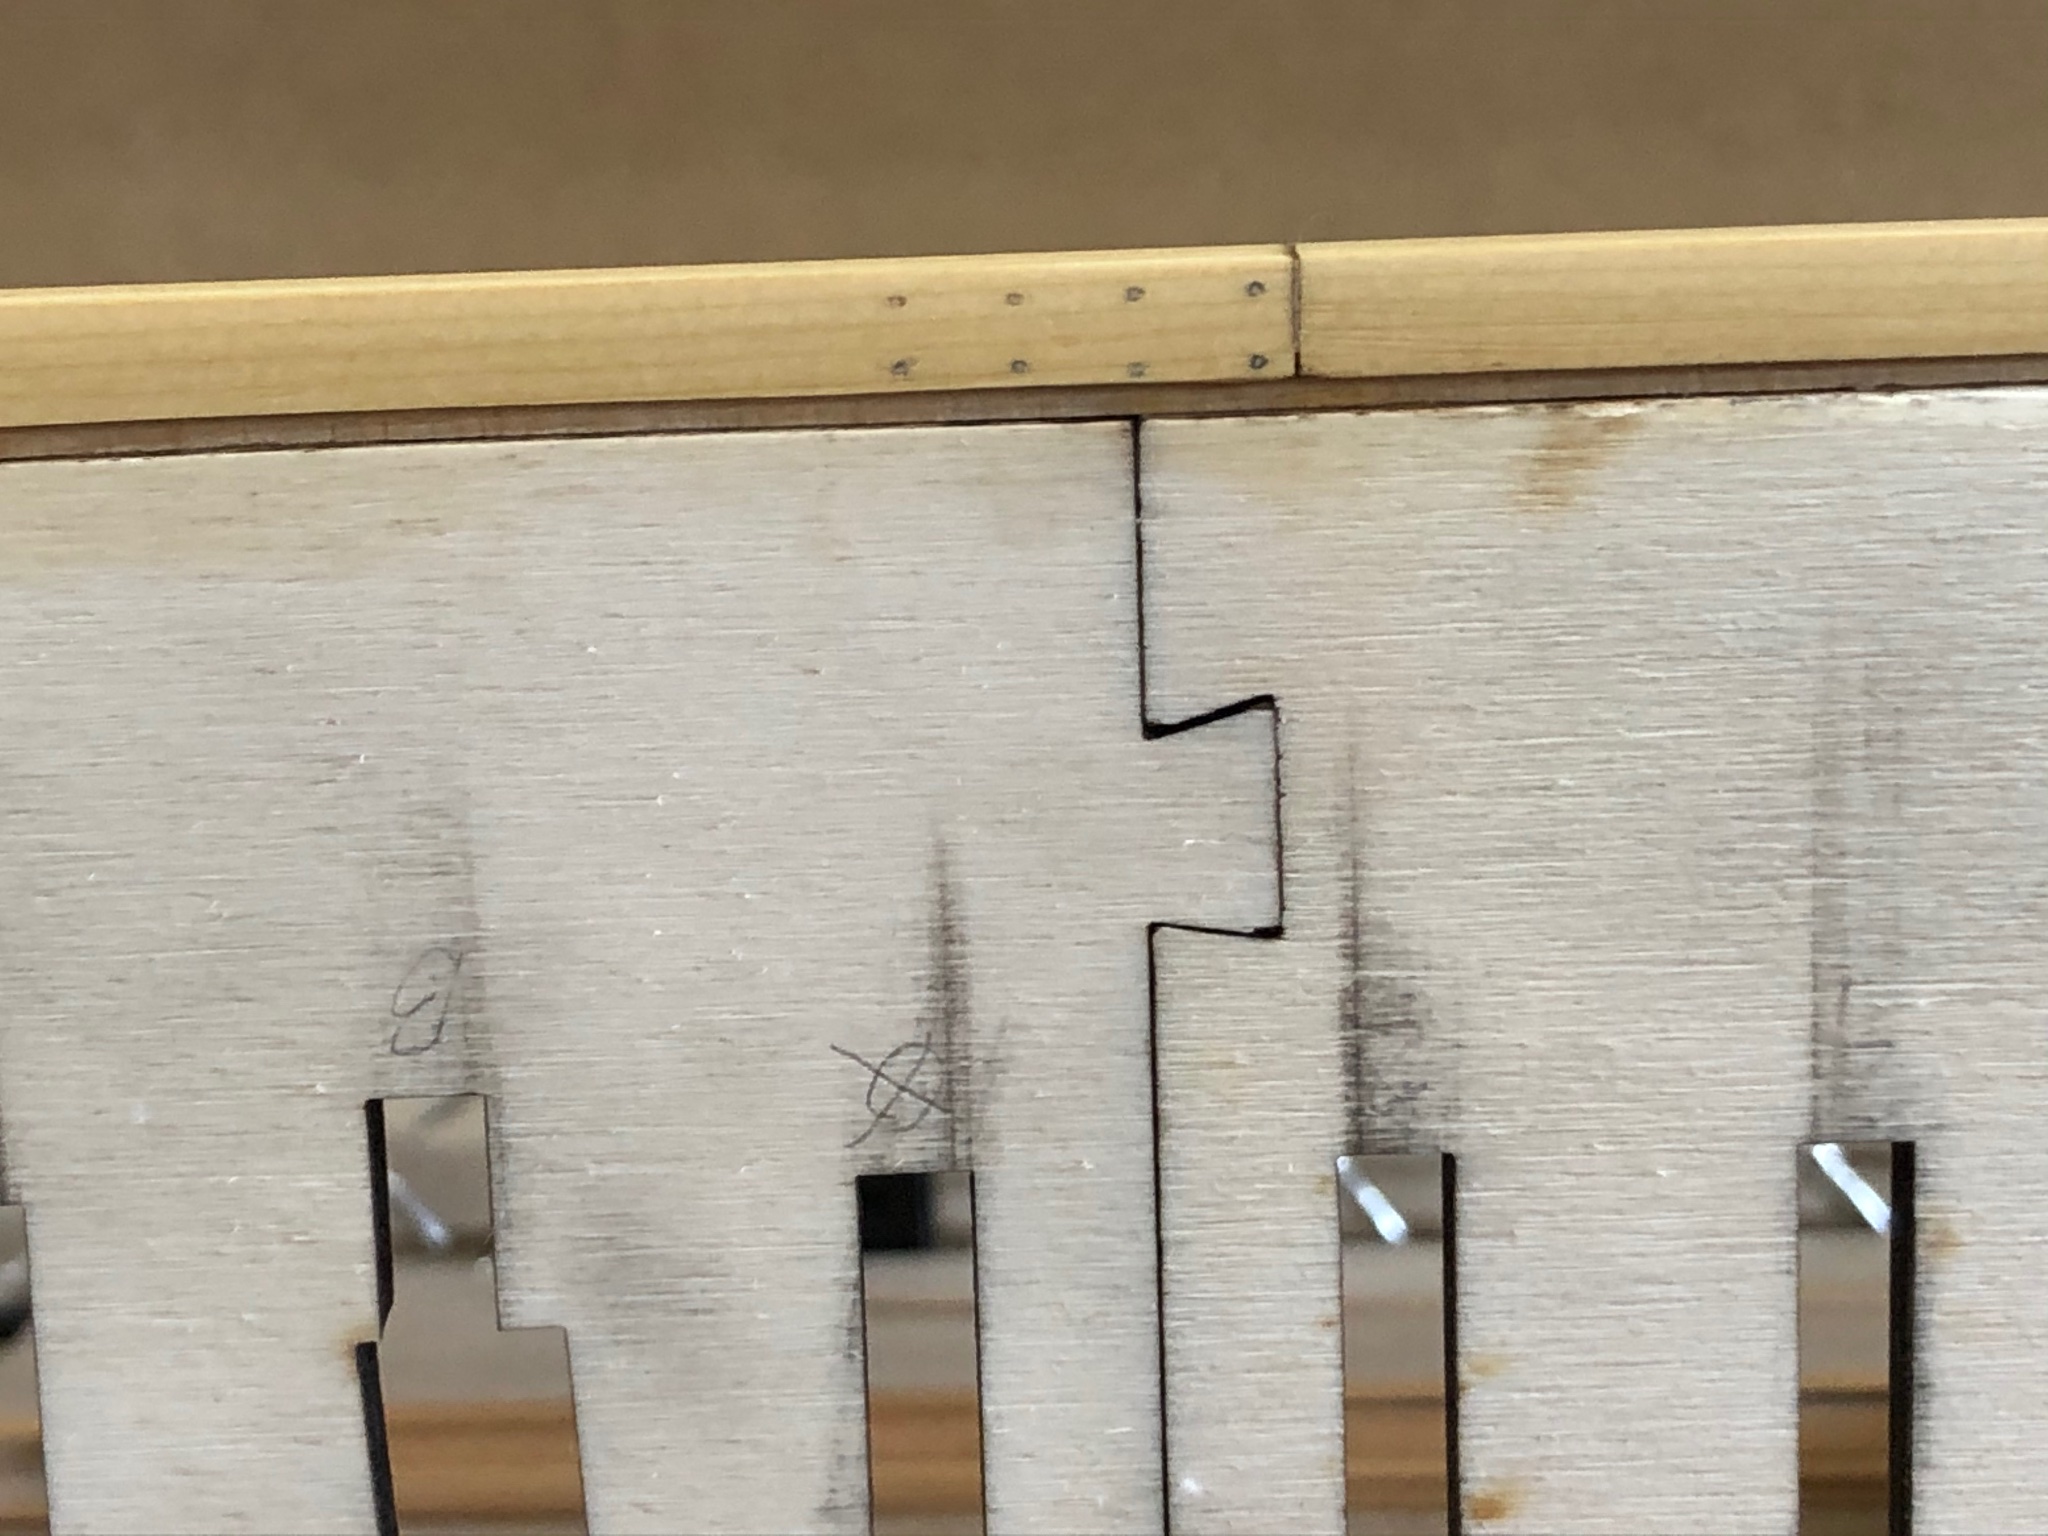
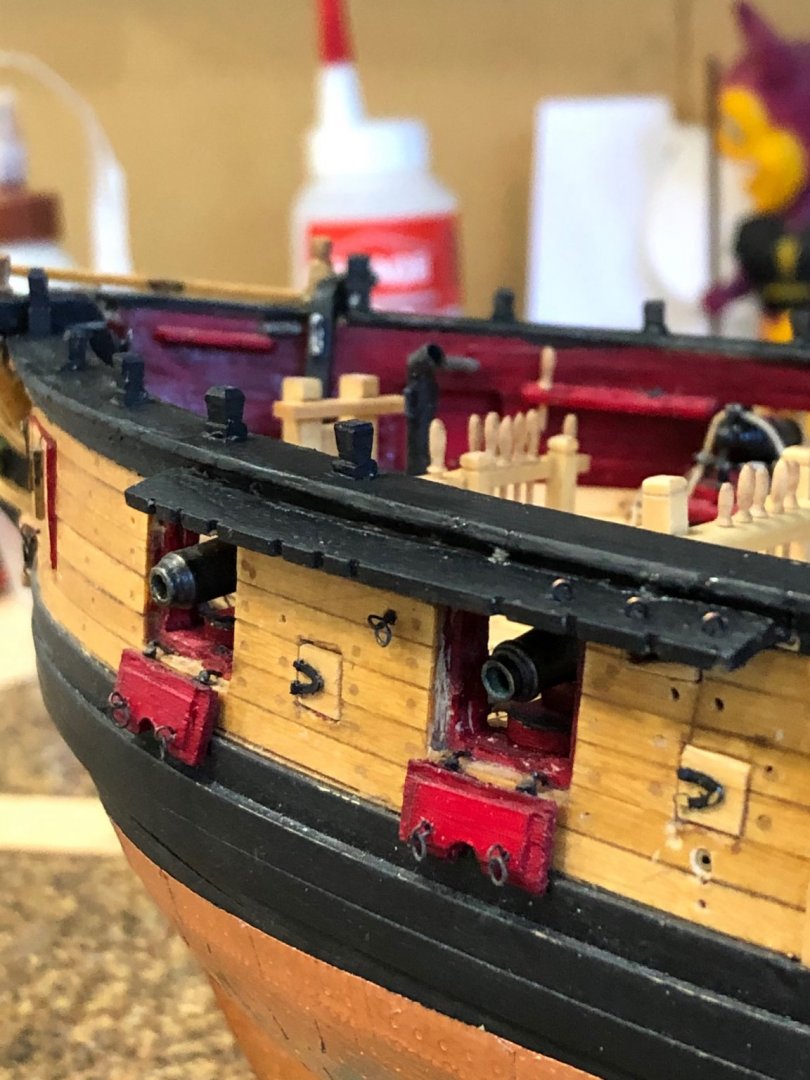
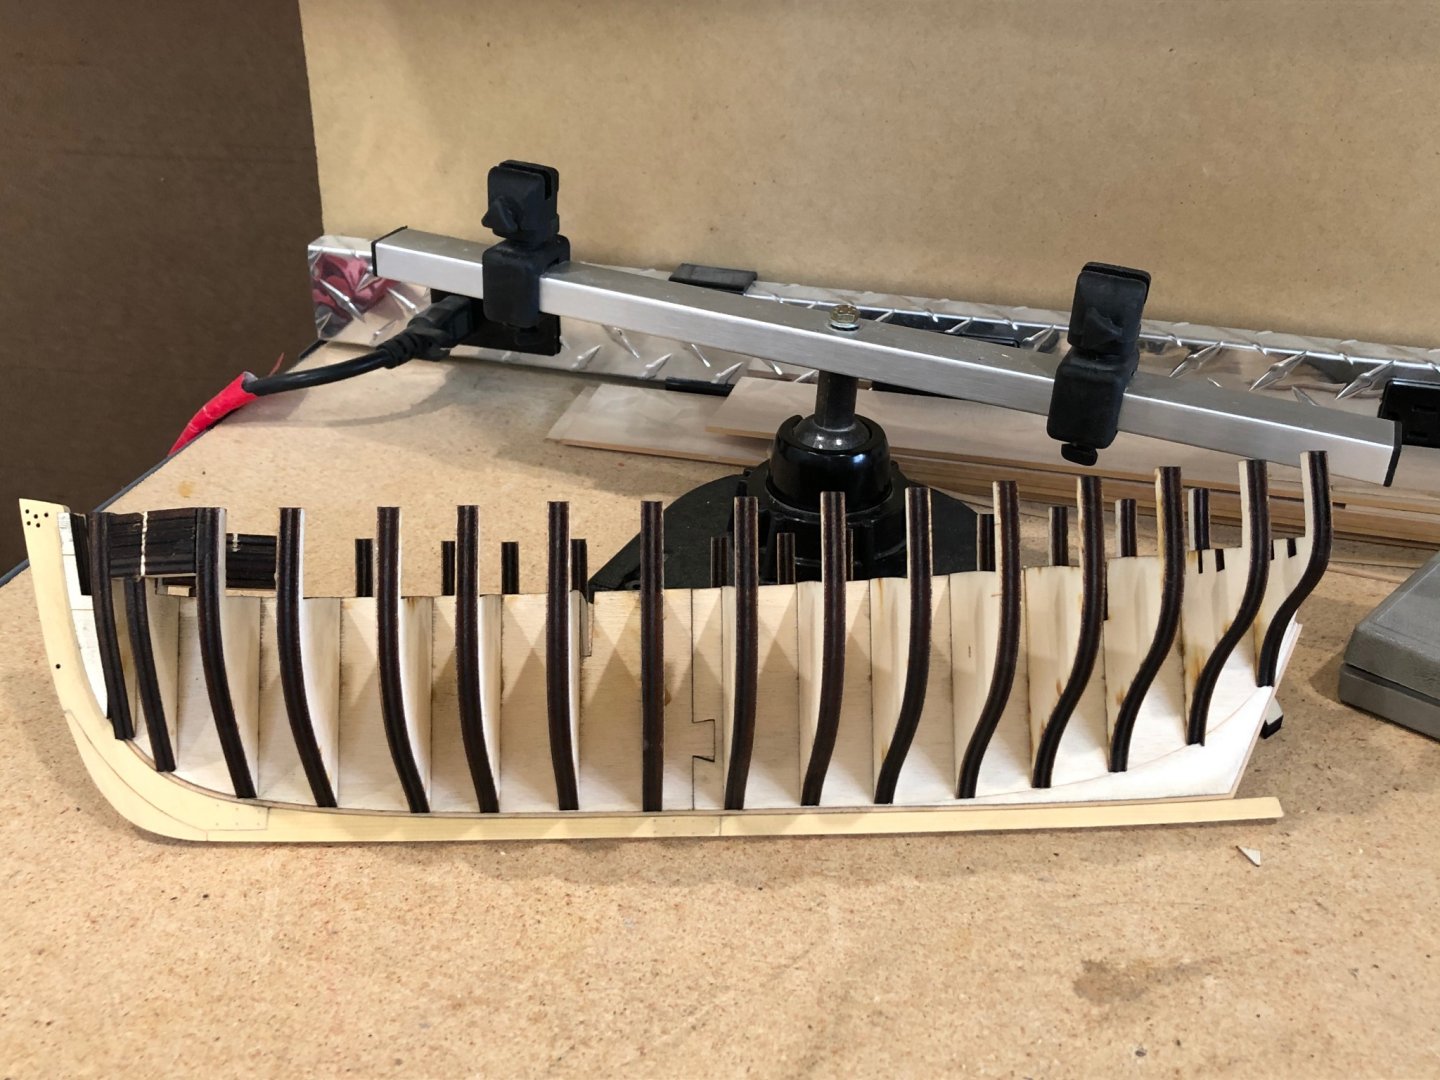
Finished the port sills and will do the gunport framing when the sills to bulwark dry to a hard cure. My comment on the first sill has since proved me wrong so its back to measuring and markings. My first method works fine if the sill stays at the level evaluation but when they start to sweep with the line they present two angles for each cut. Fiddly little buggers. Cutting the top and bottom angle and the the side upsweep angle required many oops. Got to feed the scrape barrel mouth. Got all the port sills in now on to the framing and starboard side. The process I finally settled on was to cut the bulwark angle first then making minor amounts of sanding until the sill rested against the bulwark. Hardest part was to make them so the slide between the bulwarks without forcing the geometry. Just enough of a slide fit to hold in place while the glue sets. Oops, feed the scrap barrel again. First sill done Feeling good about myself and then OOPS I saw the upsweep missing between 0 and 2. Breakout the alcohol and start soaking. Wasn't bad though as the glue was still fairly soft. Fixed the placement and continued on to adding sills. All sills placed waiting for glue to set. Looking good I think for my first scratch build. Make it a good day Will


-
Thank you Chuck and Glenn for the nice comments and everyone for the likes. Glenn I've been following your log from almost the beginning and I must tell you it is amazing. I use your log daily as a reference to see how you've done things and as I said I now read the last page of the book as you add them. I ripped a 1/4" square strip for the gunport sills and started with the first sill on the port side. Fitting the sills with the angles is going to be a challenge. I measured, measured again, remeasured and cut the first piece. Wrong angles. My woodworking buddy gave me a marking knife for my birthday and all of a sudden it hit me to lay the strip on top of the bulkheads and use the knife from below. Cut close to line and used disk sander to get to the line but I came to the line making the part about a hair short. No worries I know how to do it and leave the line. Tomorrow is a new day. Make it a good day Will
-
I've been following this build from the beginning and have watched your work in wonder. Photography is amazing I use your log almost daily to see how you've done things and learned a lot. Make it a good day Will
- 950 replies
-
- 1
-

-
- syren
- model shipways
- (and 1 more)
-
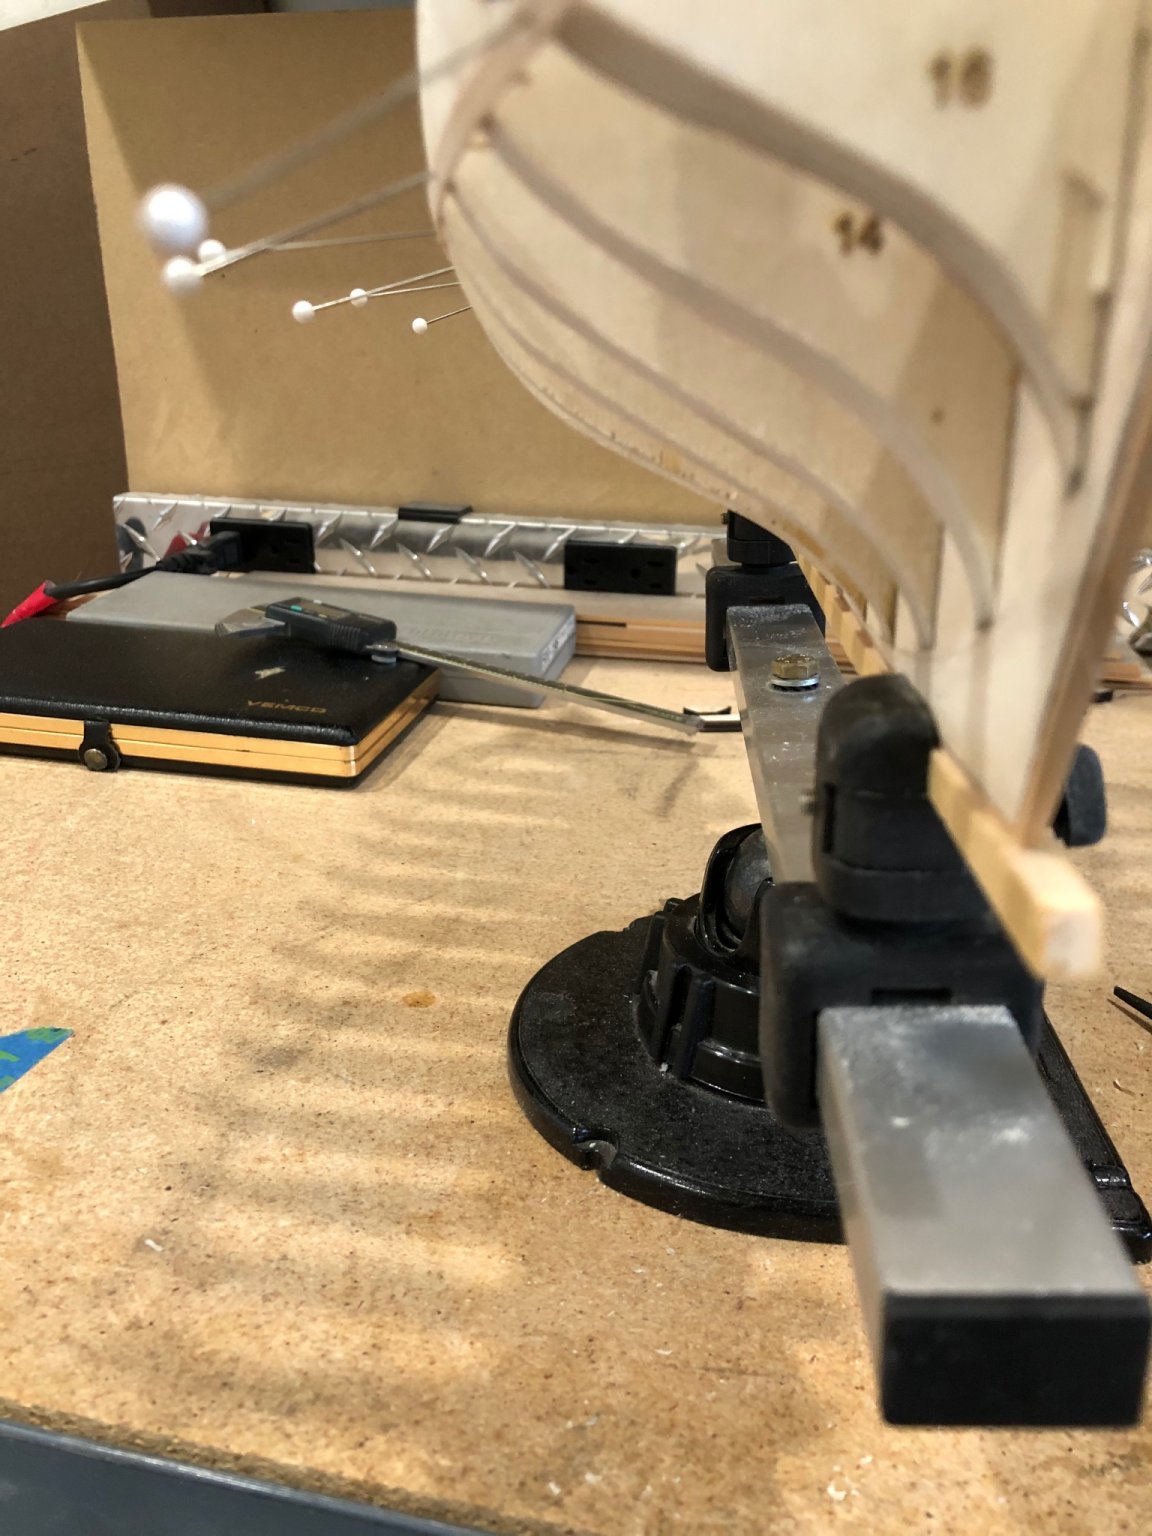
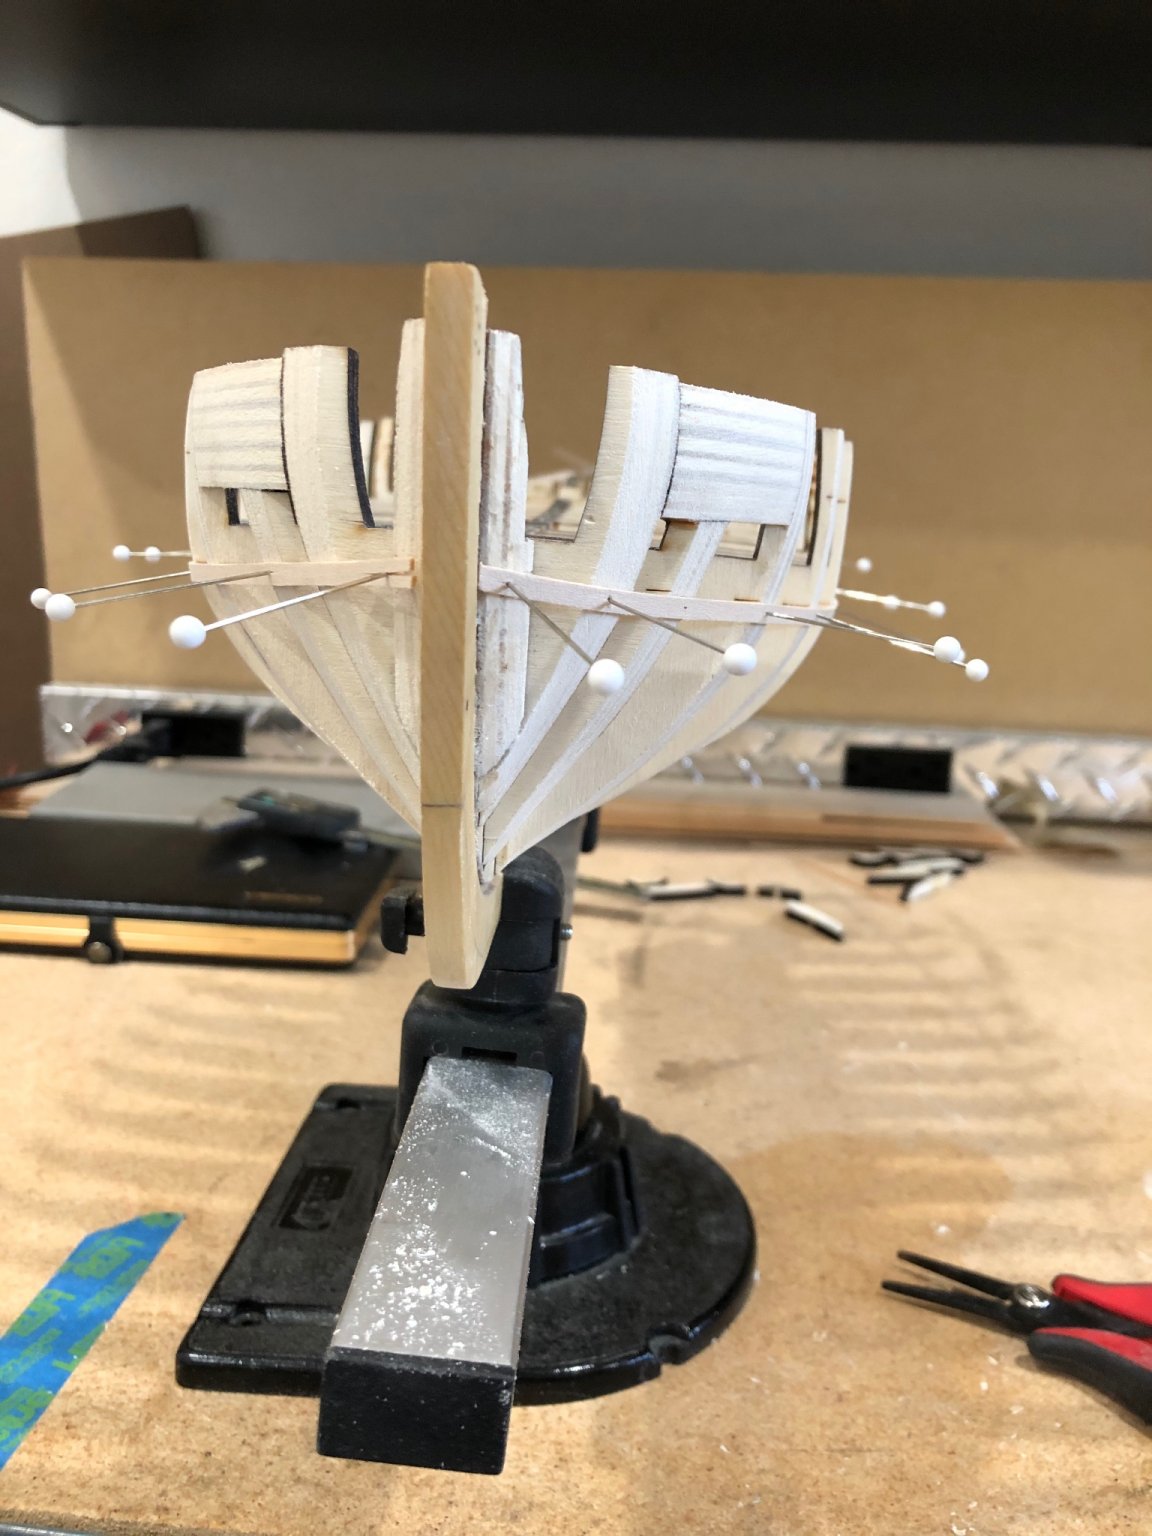
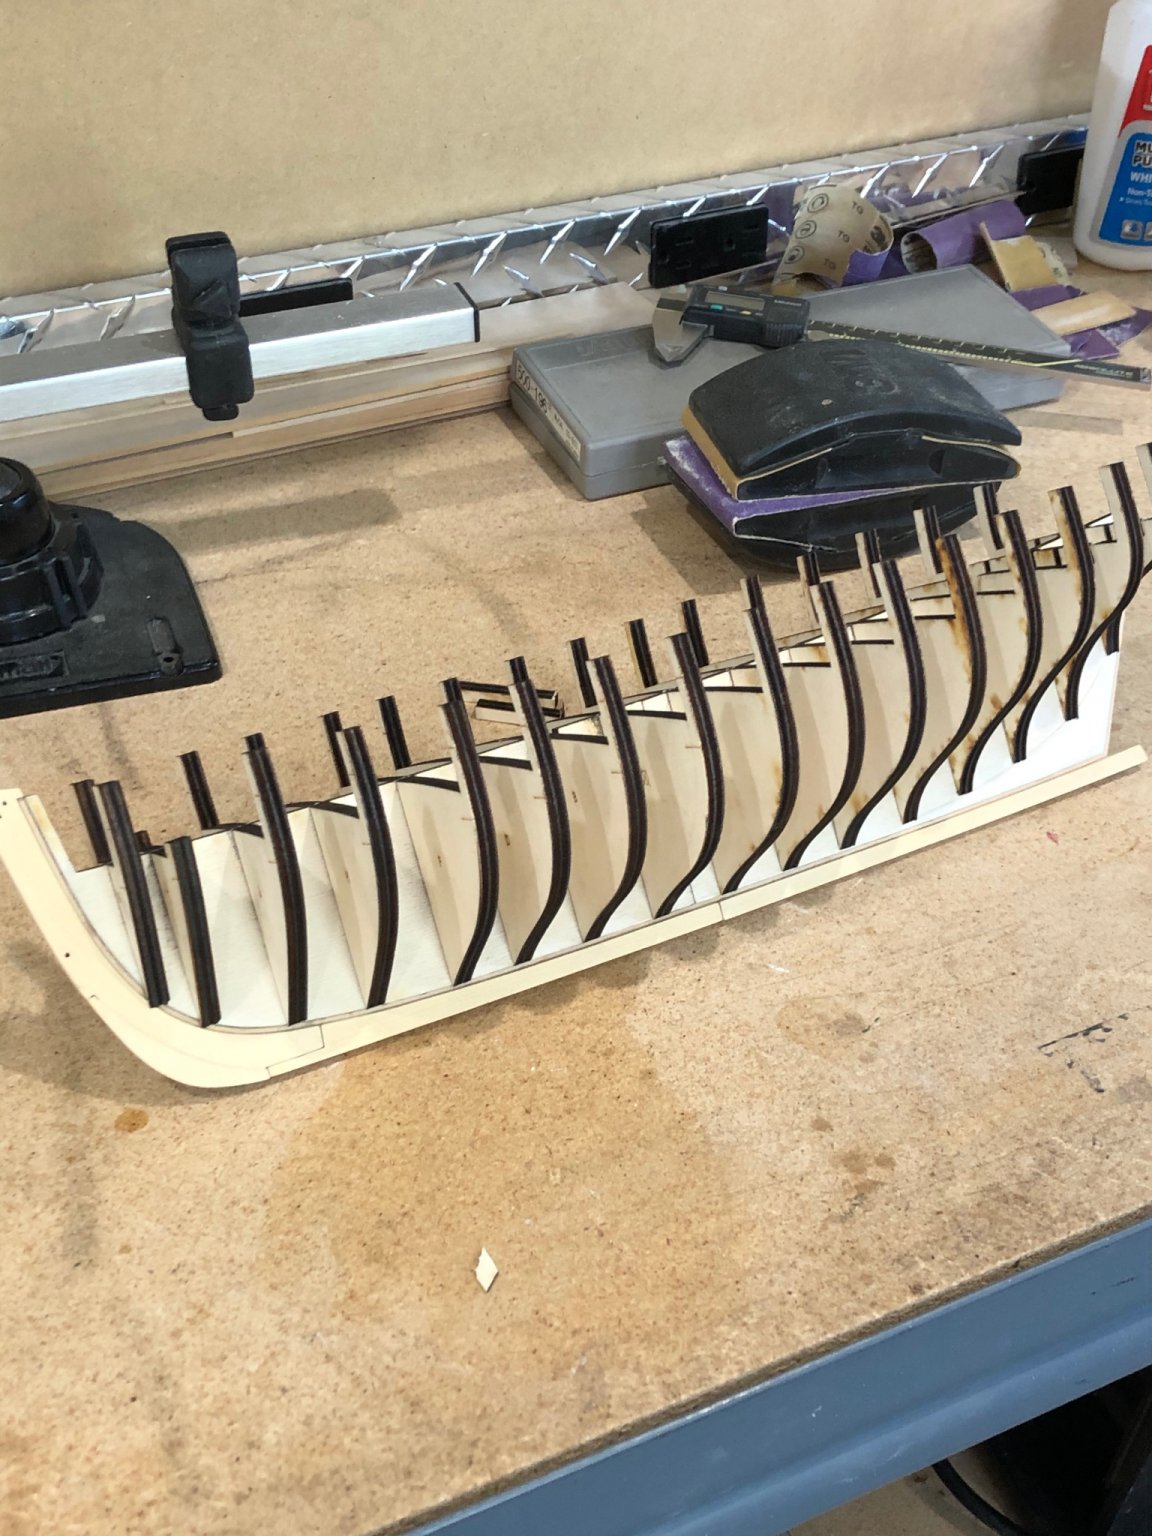
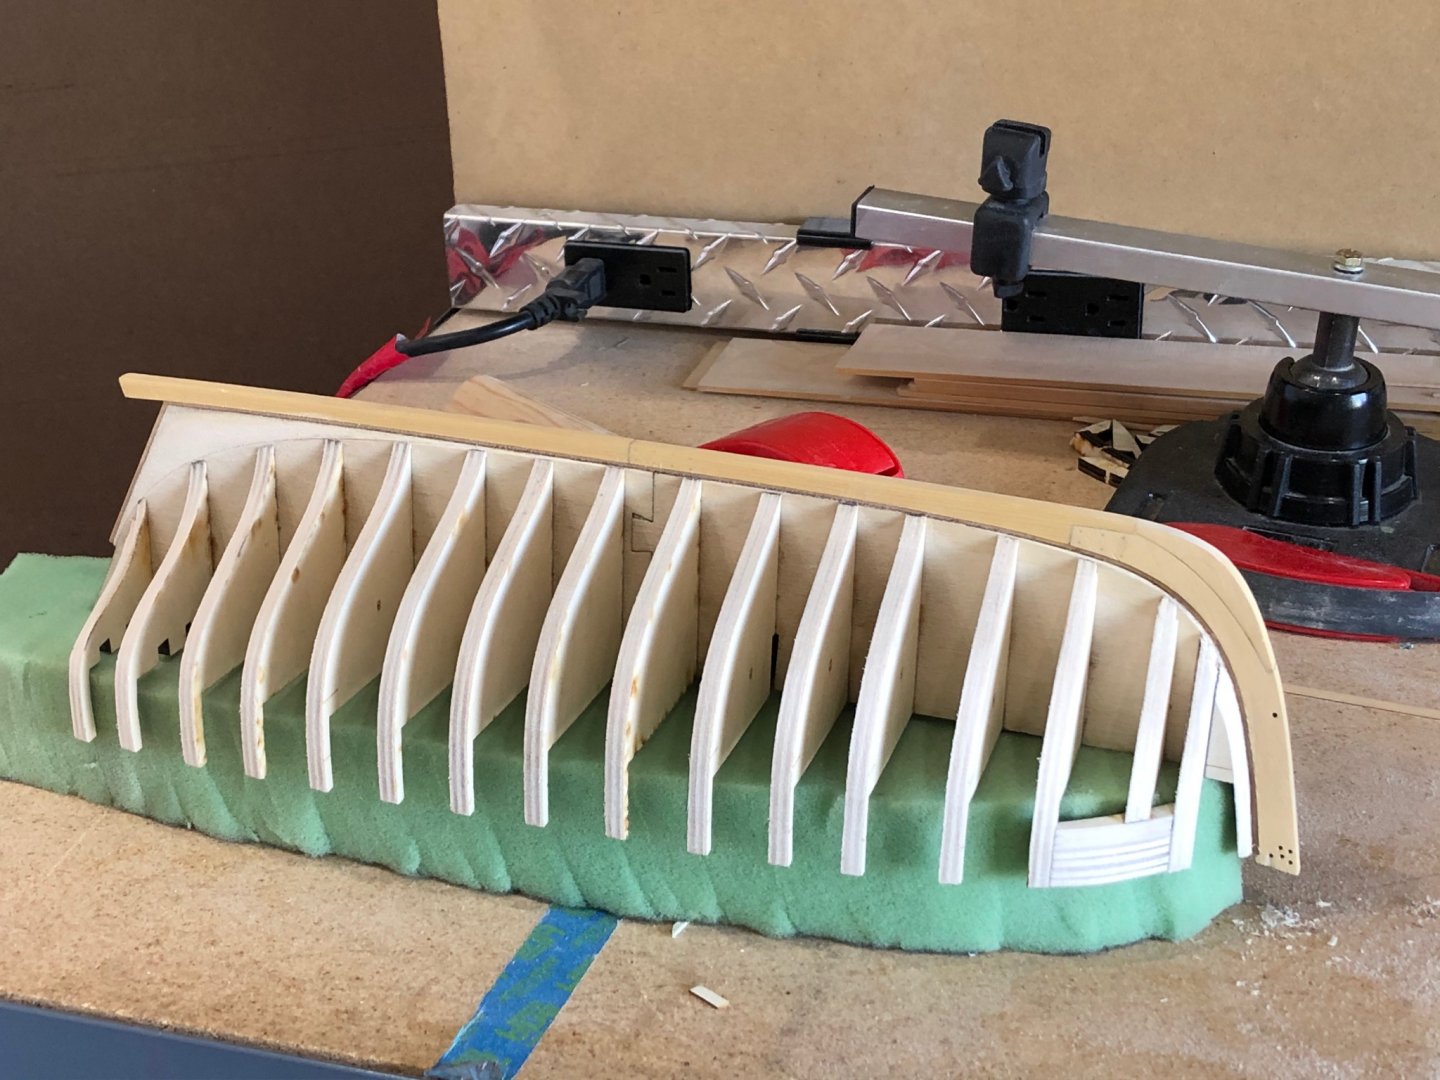
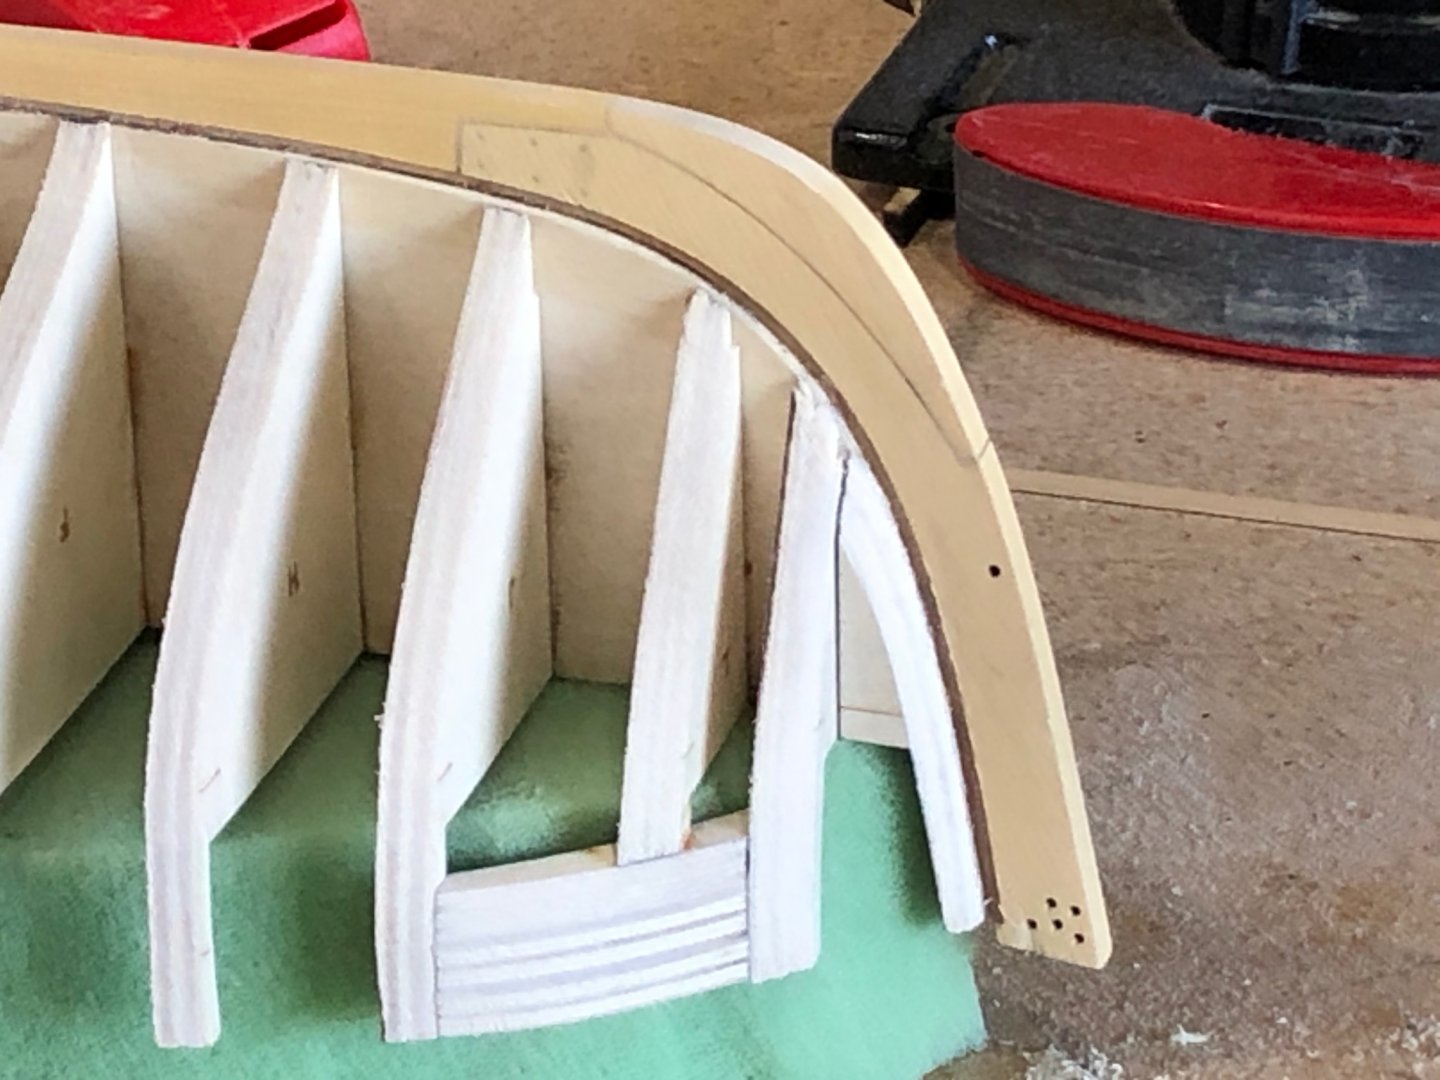
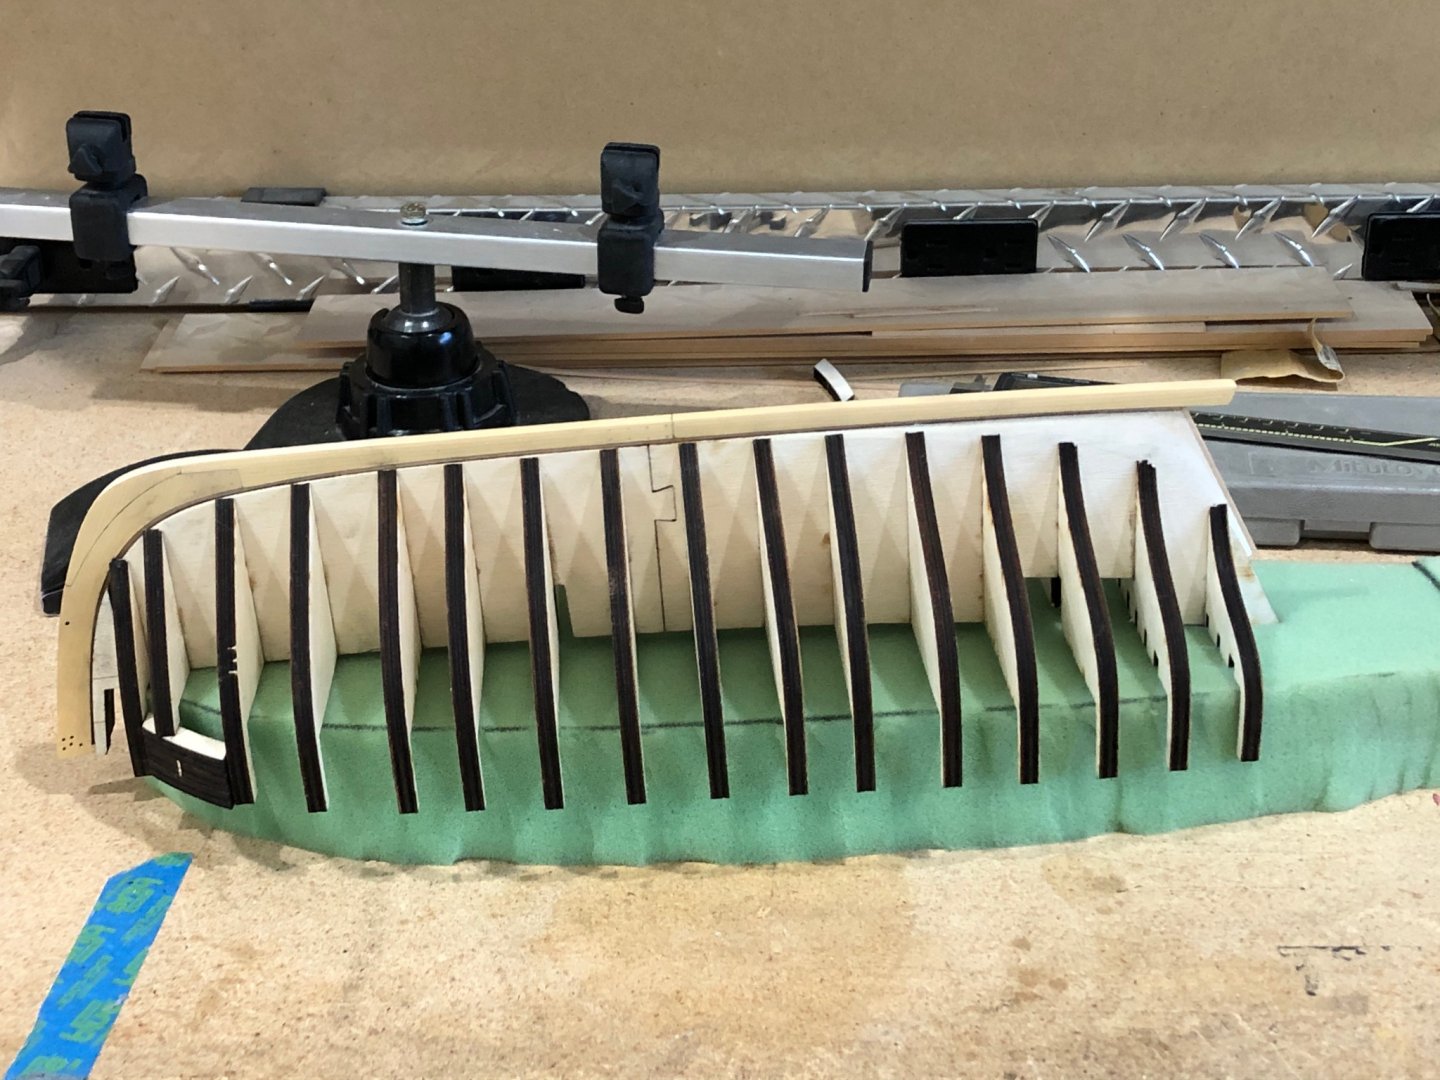
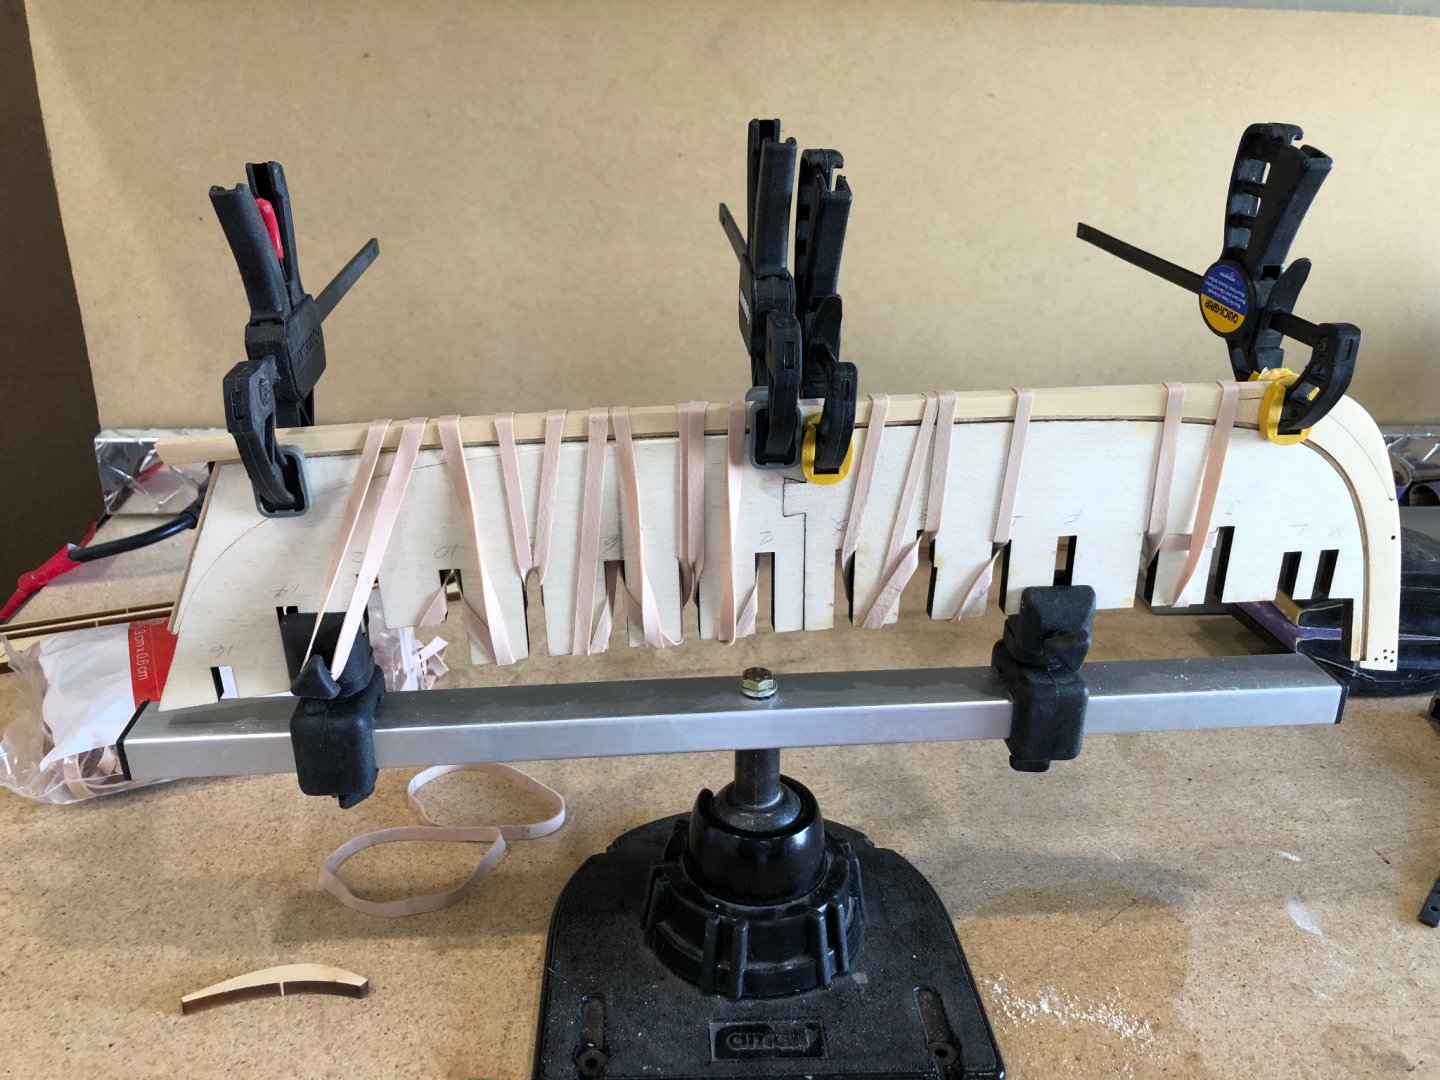
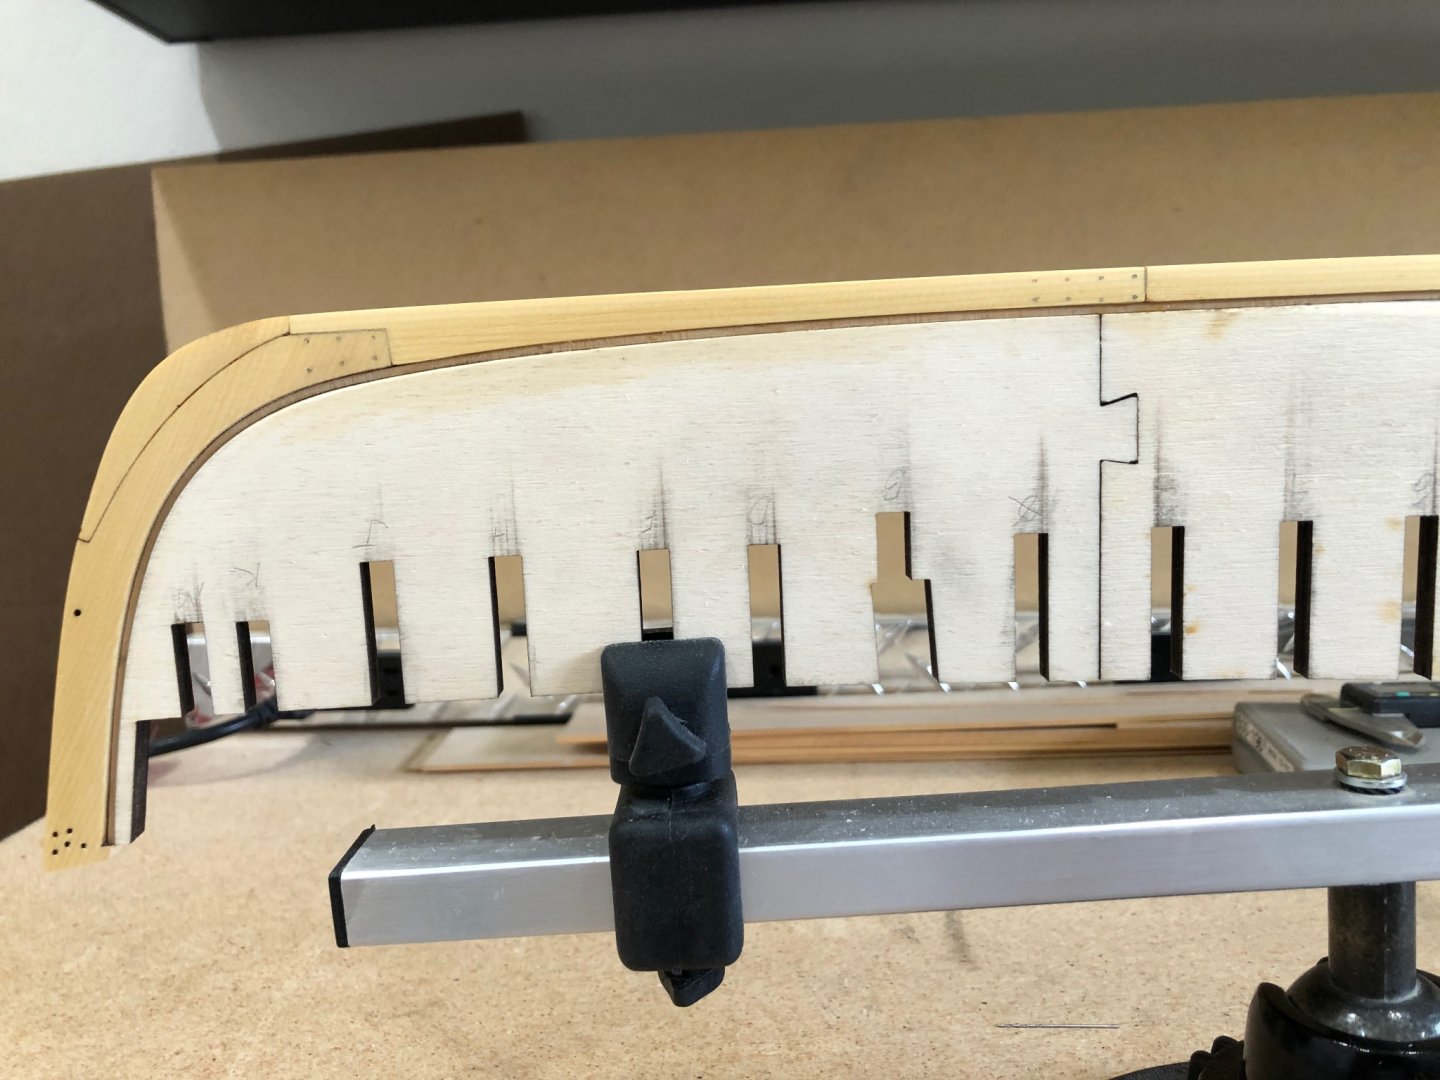
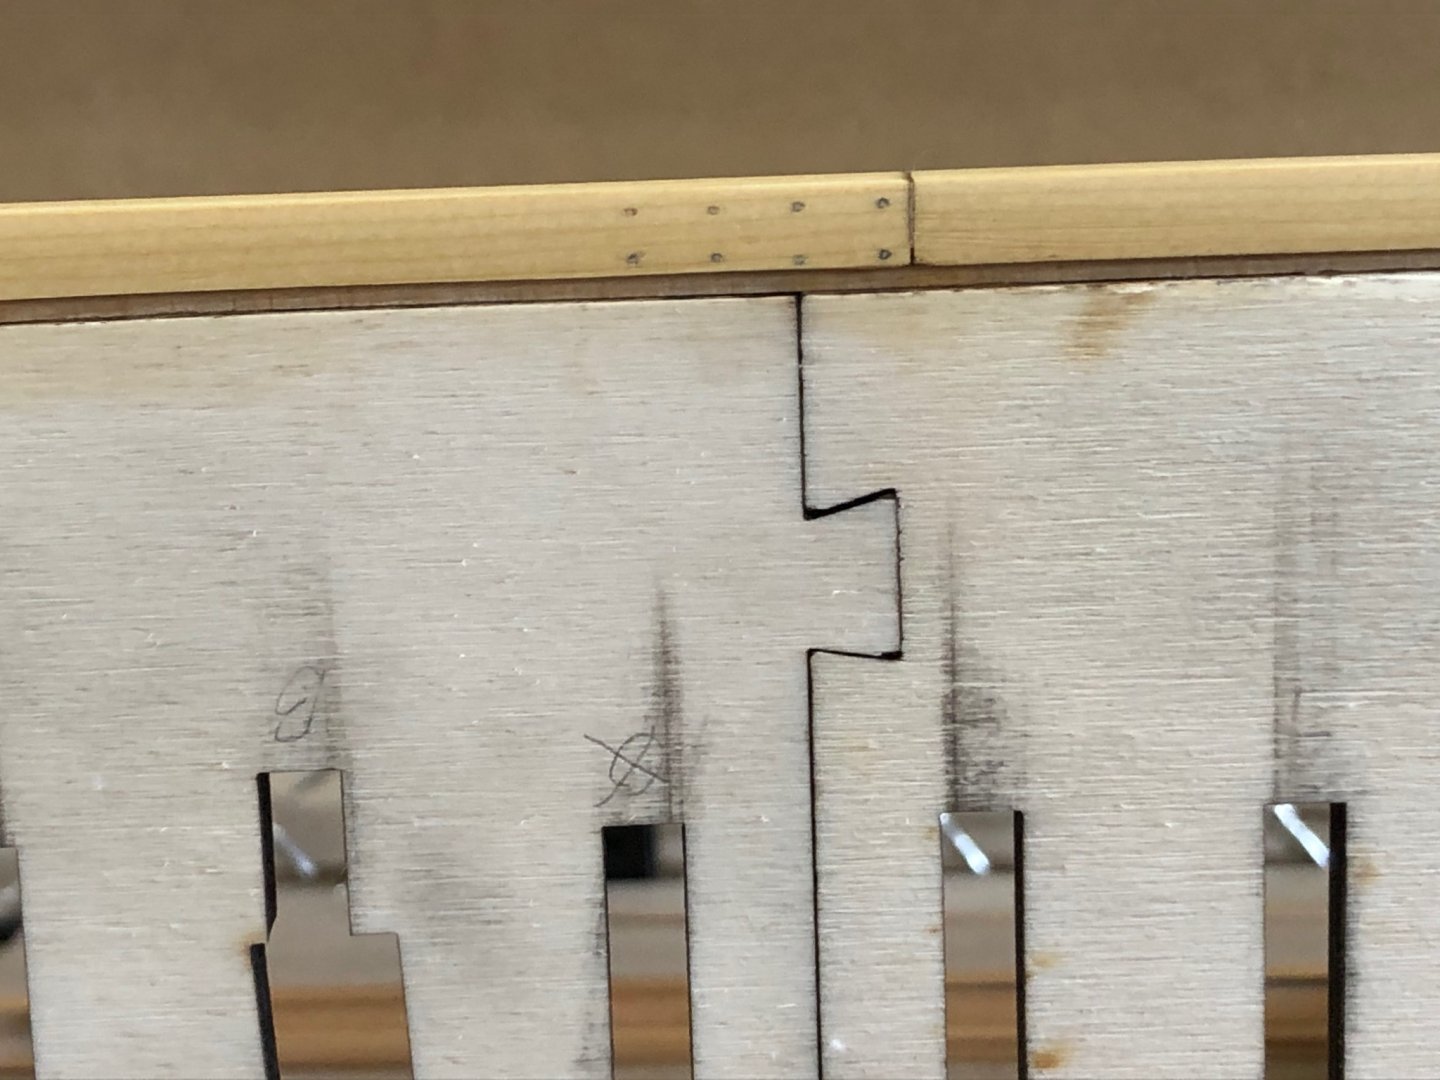
Finished fairing port and starboard sides. Made fairing strip 1/16" by 1/32" to verify rough fairing. Spent 2 days checking the fairing with the strips using 320 grit sandpaper until getting the fairing so each bulkhead had complete coverage. The bow was the hardest to get the fair into the stem rabbit. I tried to use 1/8" by 1/16" boxwood to verify the gunports but the boxwood split when a pin was pushed through and into the bulkhead making a uneven surface with bumps at the pin locations. Then decided to use basswood and ripped and milled two strips 1/8" by 3/64". I used 3/64" thick as that will be the planking thickness. Pinning the strips using the laser marks showed only very minor adjustment to 3 locations on the port side and 2 locations on the starboard. Viewed the strips from front, back, top and bottom when satisfied marked the outside face of the bulkheads. Next on the gunports sills and sides and I will also keep checking my lines before the gunports. Make it a good day Will


-
AH! toothpicks the wonder tool or wood of modeling. Great idea and as I said I noticed the different spacing of the coils. I did that on my carronade riggings coils to keep from being to uniform. Will
- 950 replies
-
- 1
-
-
- syren
- model shipways
- (and 1 more)
-
I looked at Tom Laurie rope coil video and i feel his method makes the coils too uniform. Looking at yours makes me keep looking and seeing more details. I really like the varying lengths of the coils. WELL DONE JUST LIKE THE REST OF THE SYREN I just finished chapter 13 and now onto chapter 14. Reading logs to see how you and others dealt with the hammock netting. Make it a good day Will
- 950 replies
-
- 4
-
-
- syren
- model shipways
- (and 1 more)
-
Amazing pumps and using the rod for alignment a great technique. Like match drilling on building hot rods in my past. Make it a good day Will
- 1,784 replies
-
- 1
-
-
- winchelsea
- Syren Ship Model Company
- (and 1 more)
-
Looking like a shipyard Maury all that timber waiting to be used. You're right about school glue once set it as hard as titebond to dissolve. Only good news it drys clear. Will
-
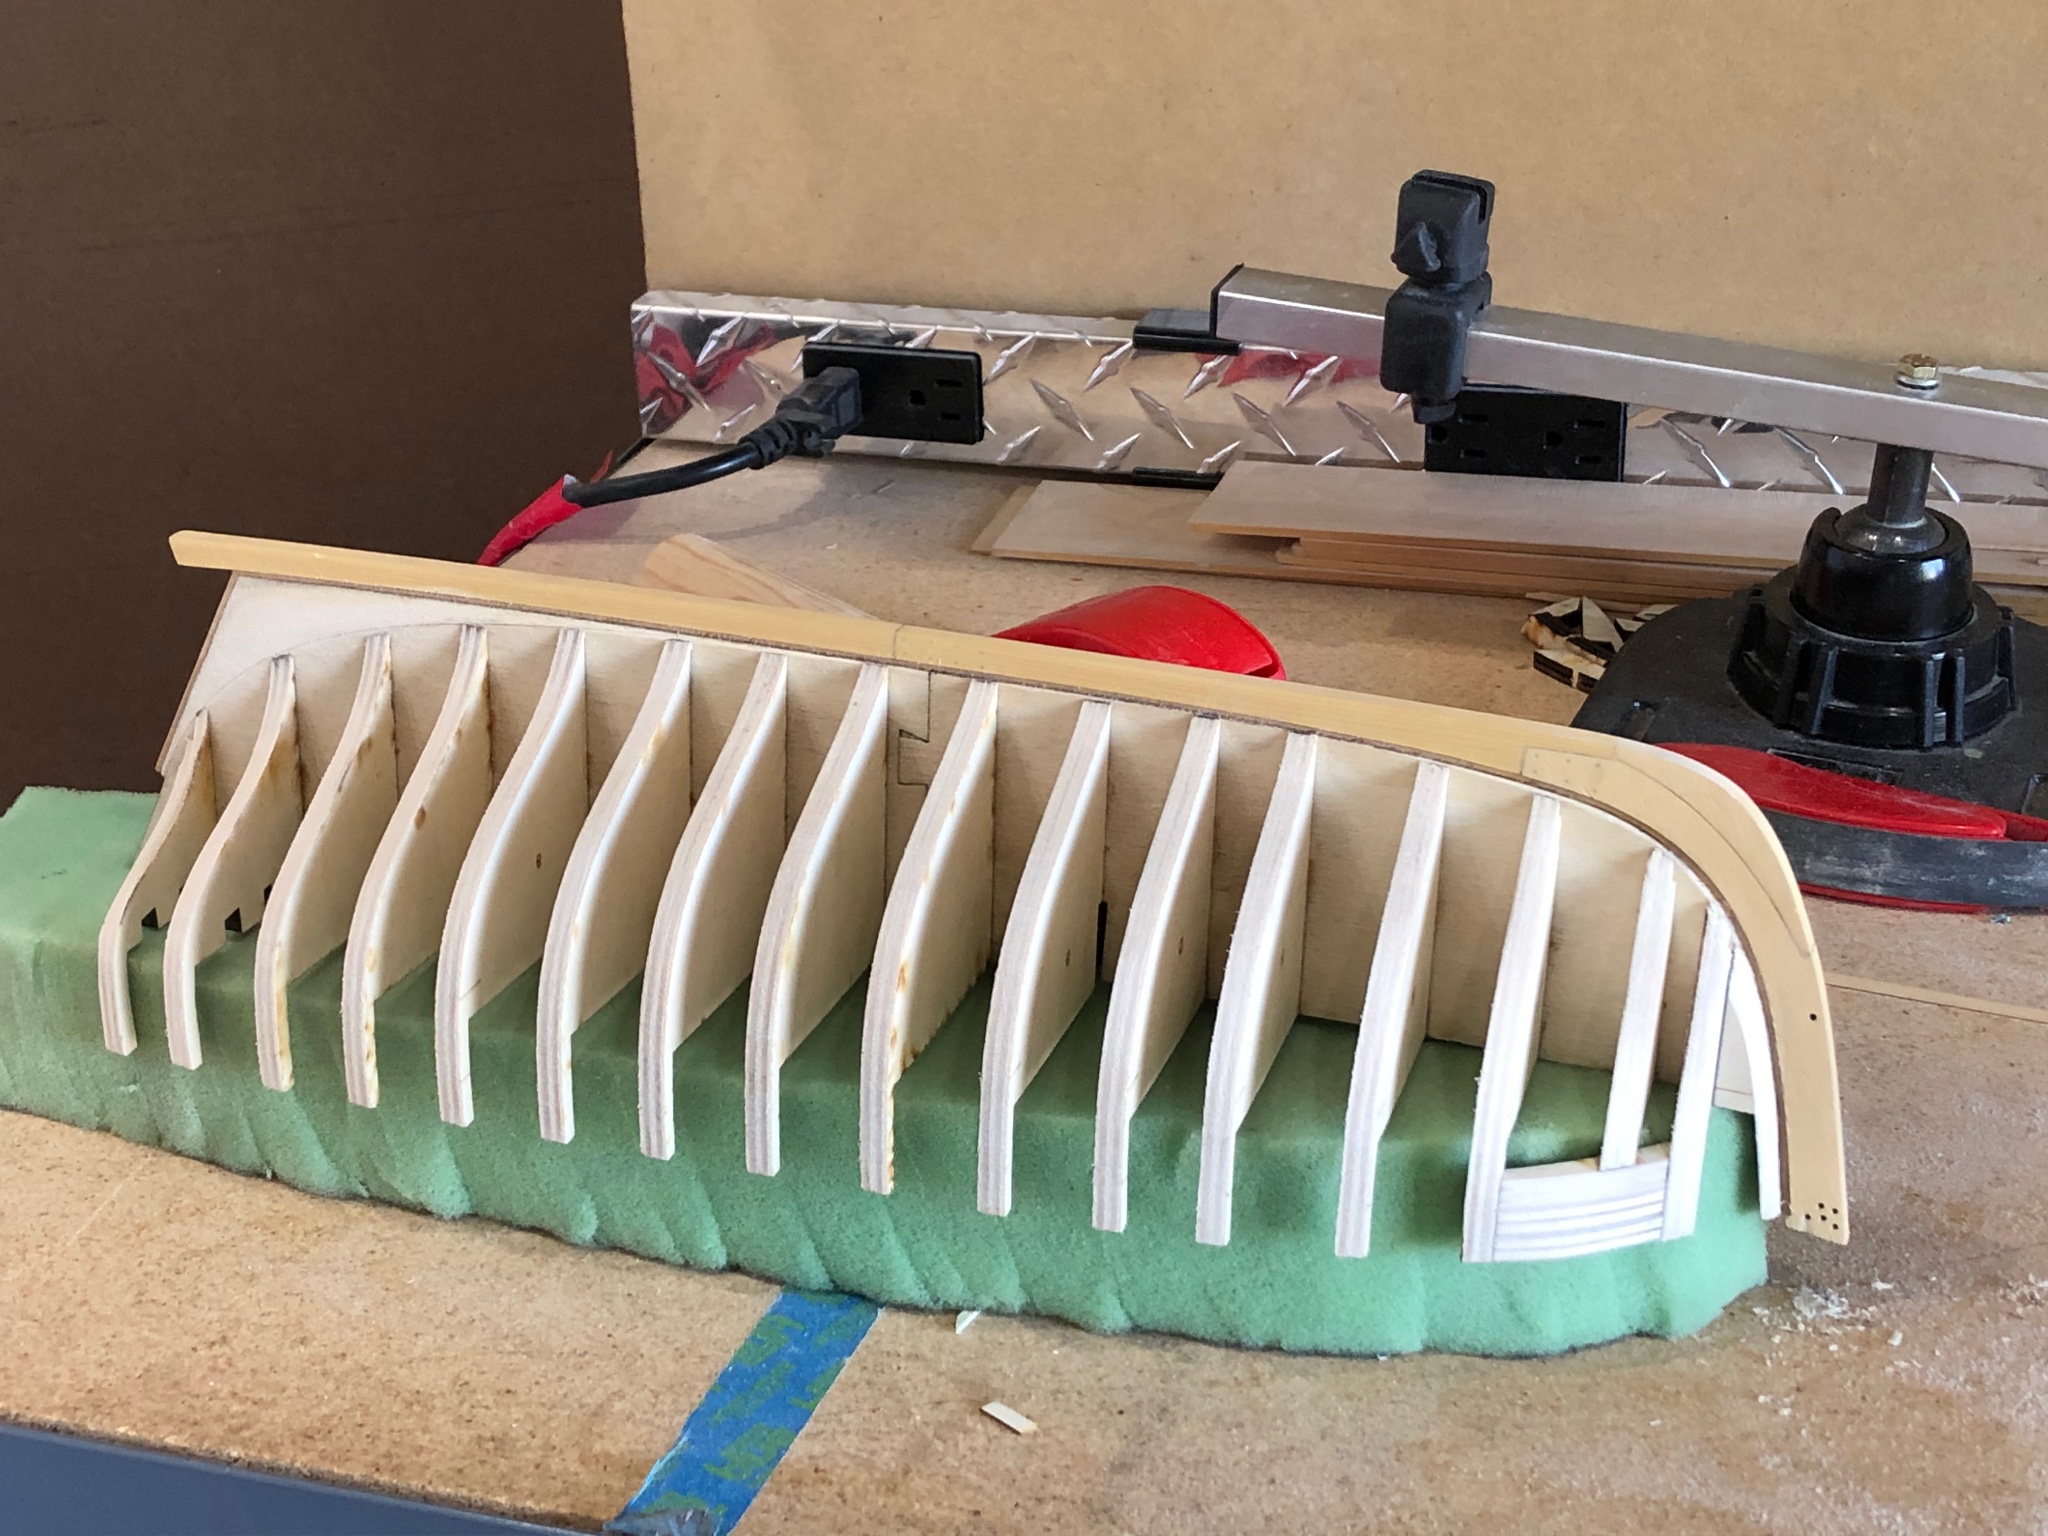
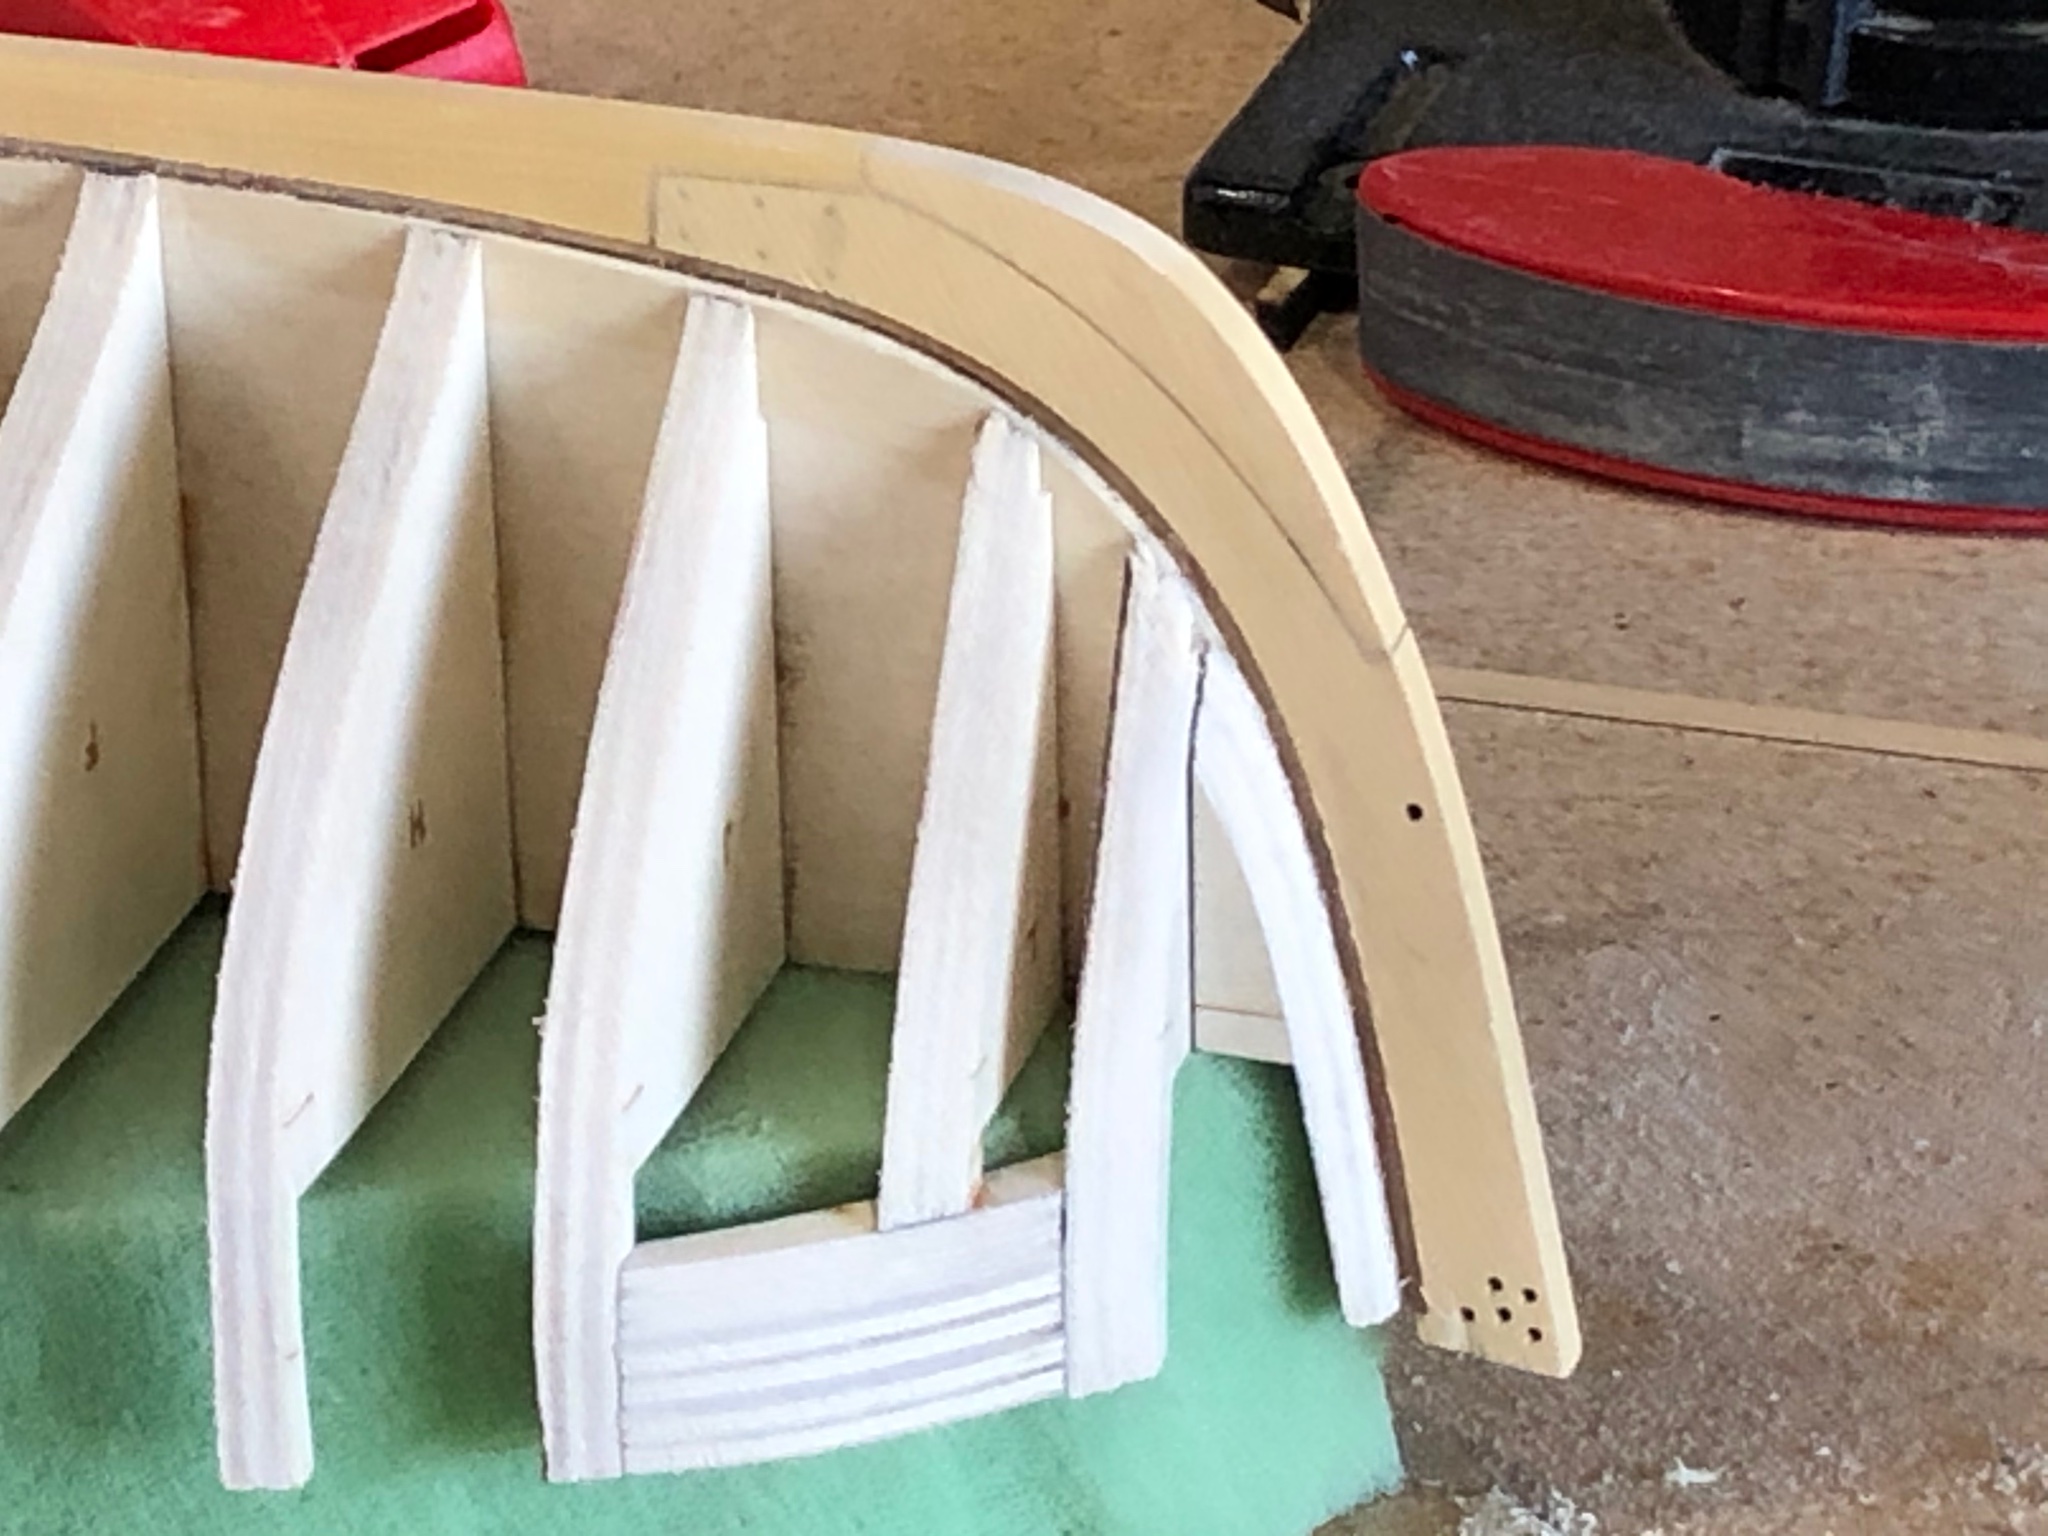
Thanks everyone for all the likes and comments it helps me stay motivated. Finished rough shaping of port side frames and the cutting into the stem rabbit. Next will be the fairing of the starboard side and then final shaping with battens checking the fairing. I have struggled with planes and chisels and since the result were less than satisfactory I bought a good set. I bought a Lie-Nielson modelers plane and violin makers plane along with a set of Narex paring chisels. I used the chisels on fairing the bearding line and a chisel on the fairing the forward filler into the rabbit. These tools are phenomenal the cut like it was butter with fantastic control. No slipping or gouging as you cut. I can't recommend good tools enough. Make it a good day Will
-
So you decided to leave the black scuffed as yard damage. Looks good and yes you are blazing a path to follow. Well done Will
- 101 replies
-
- 1
-
-
- emma c berry
- model shipways
- (and 1 more)
-
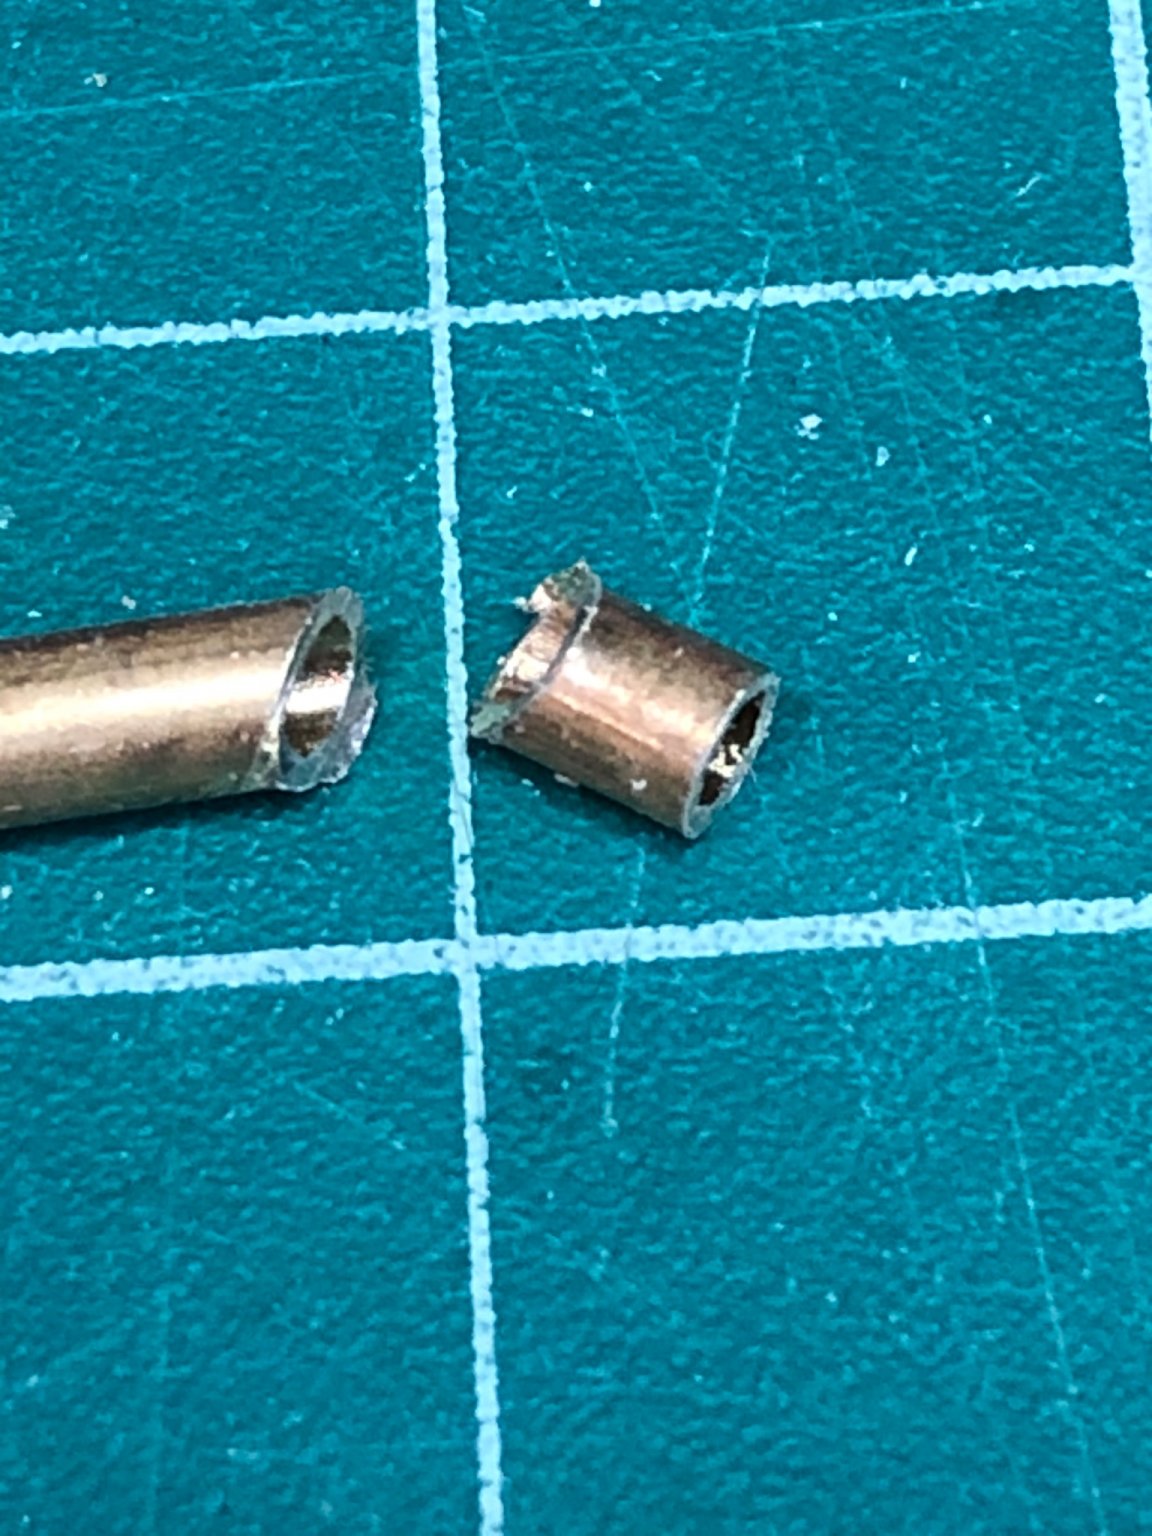
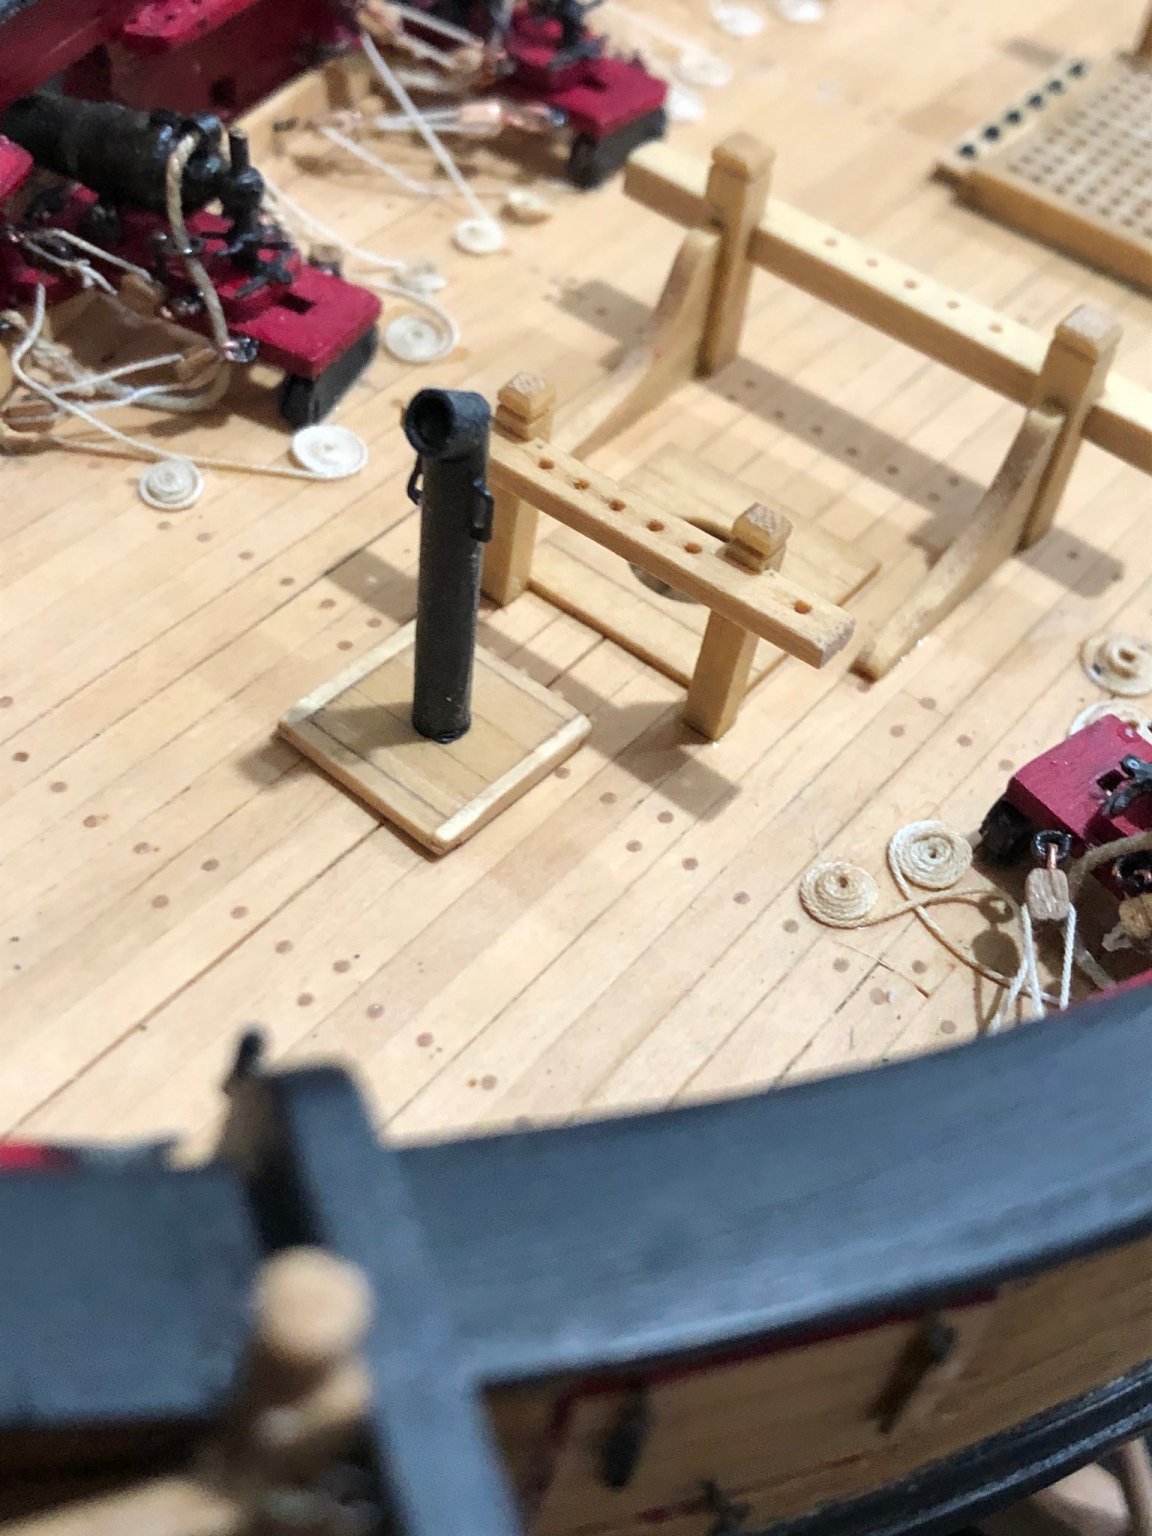
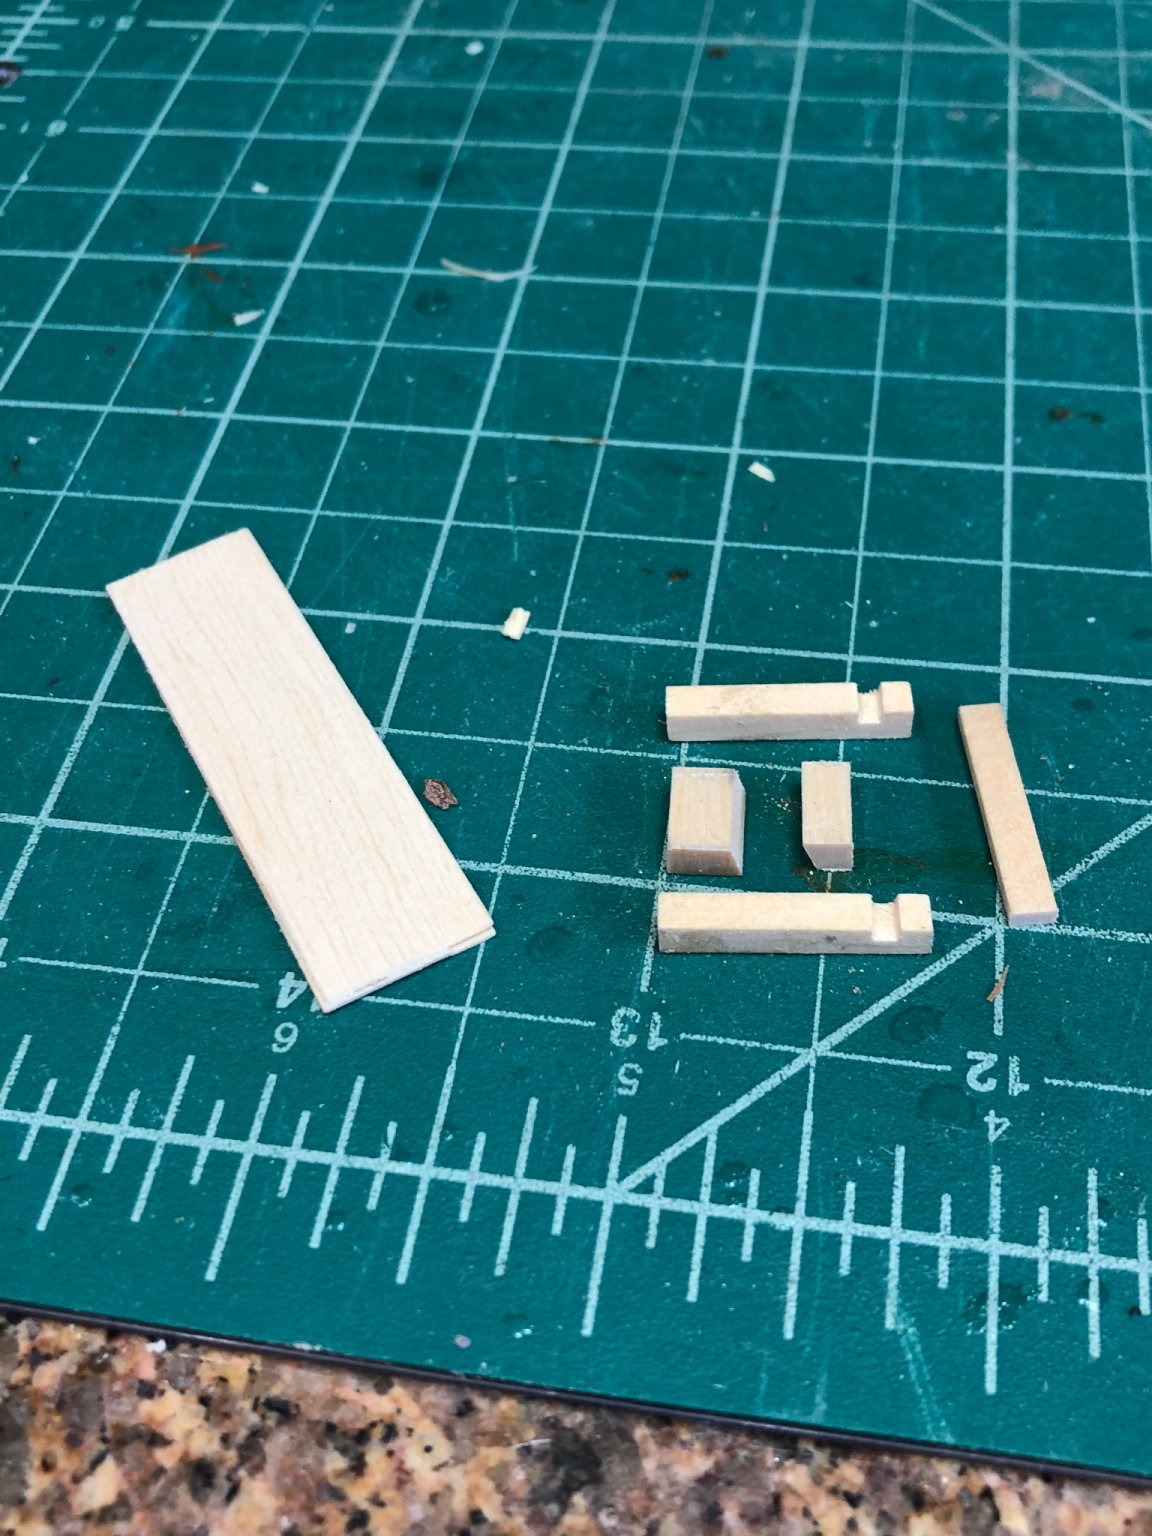
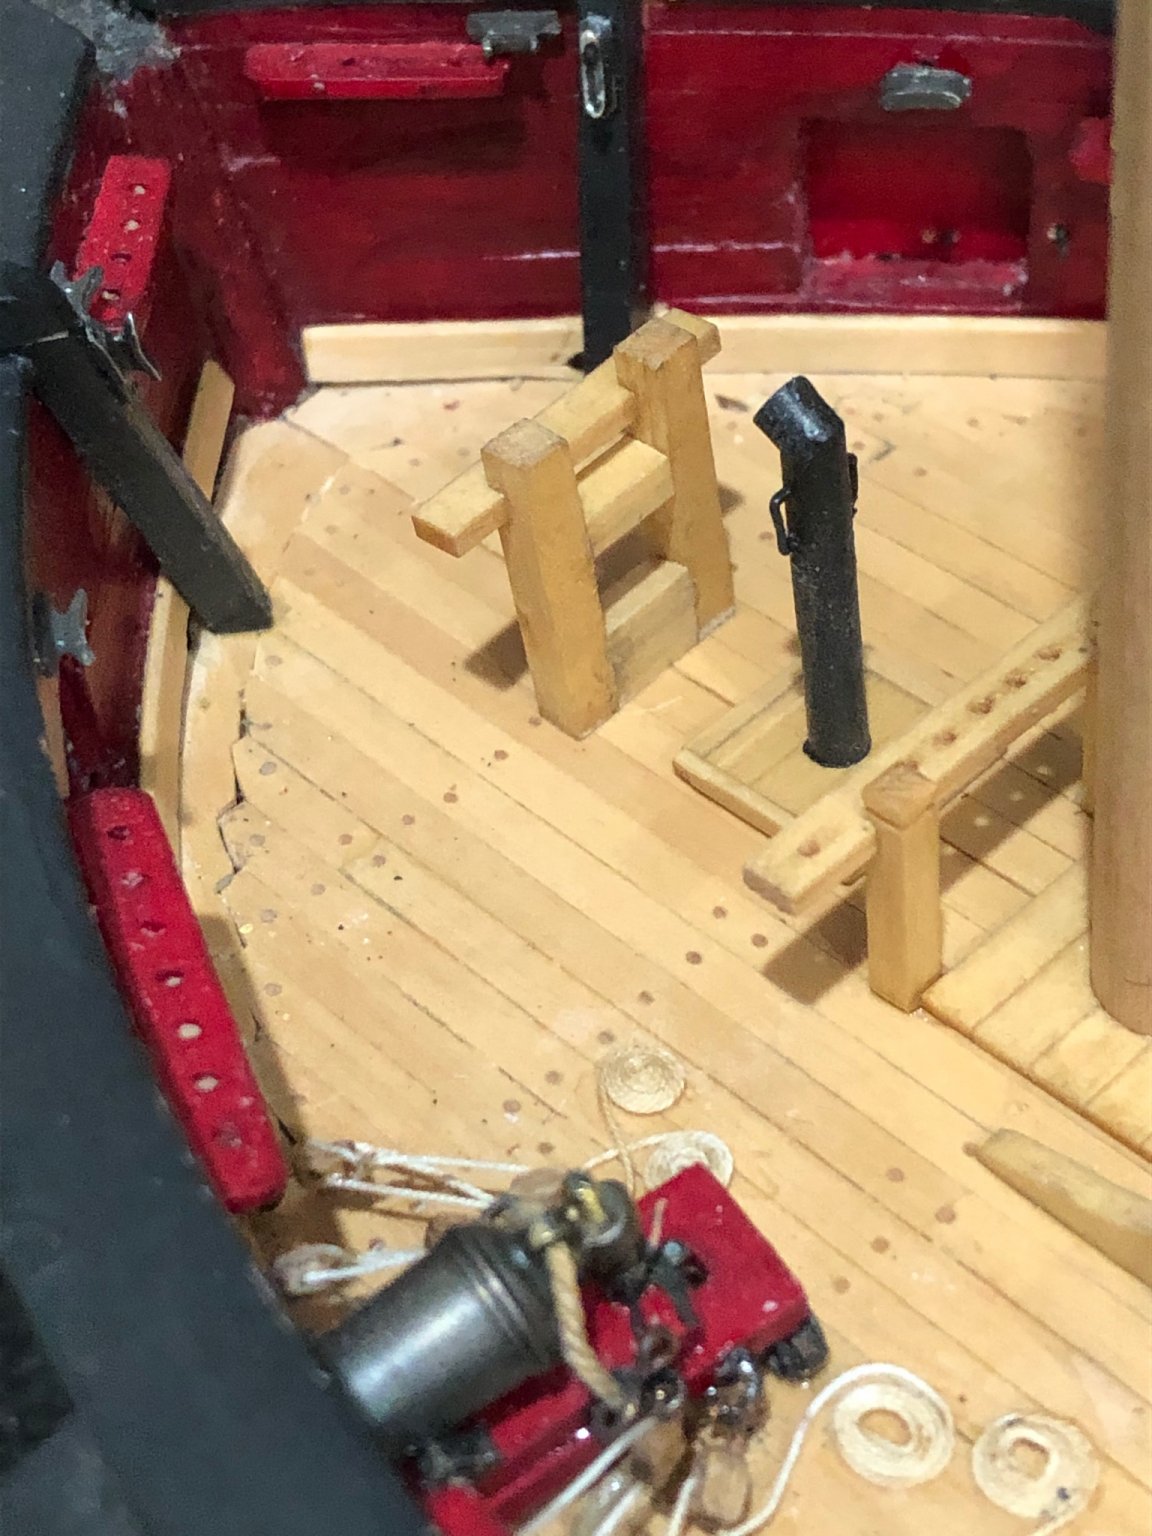
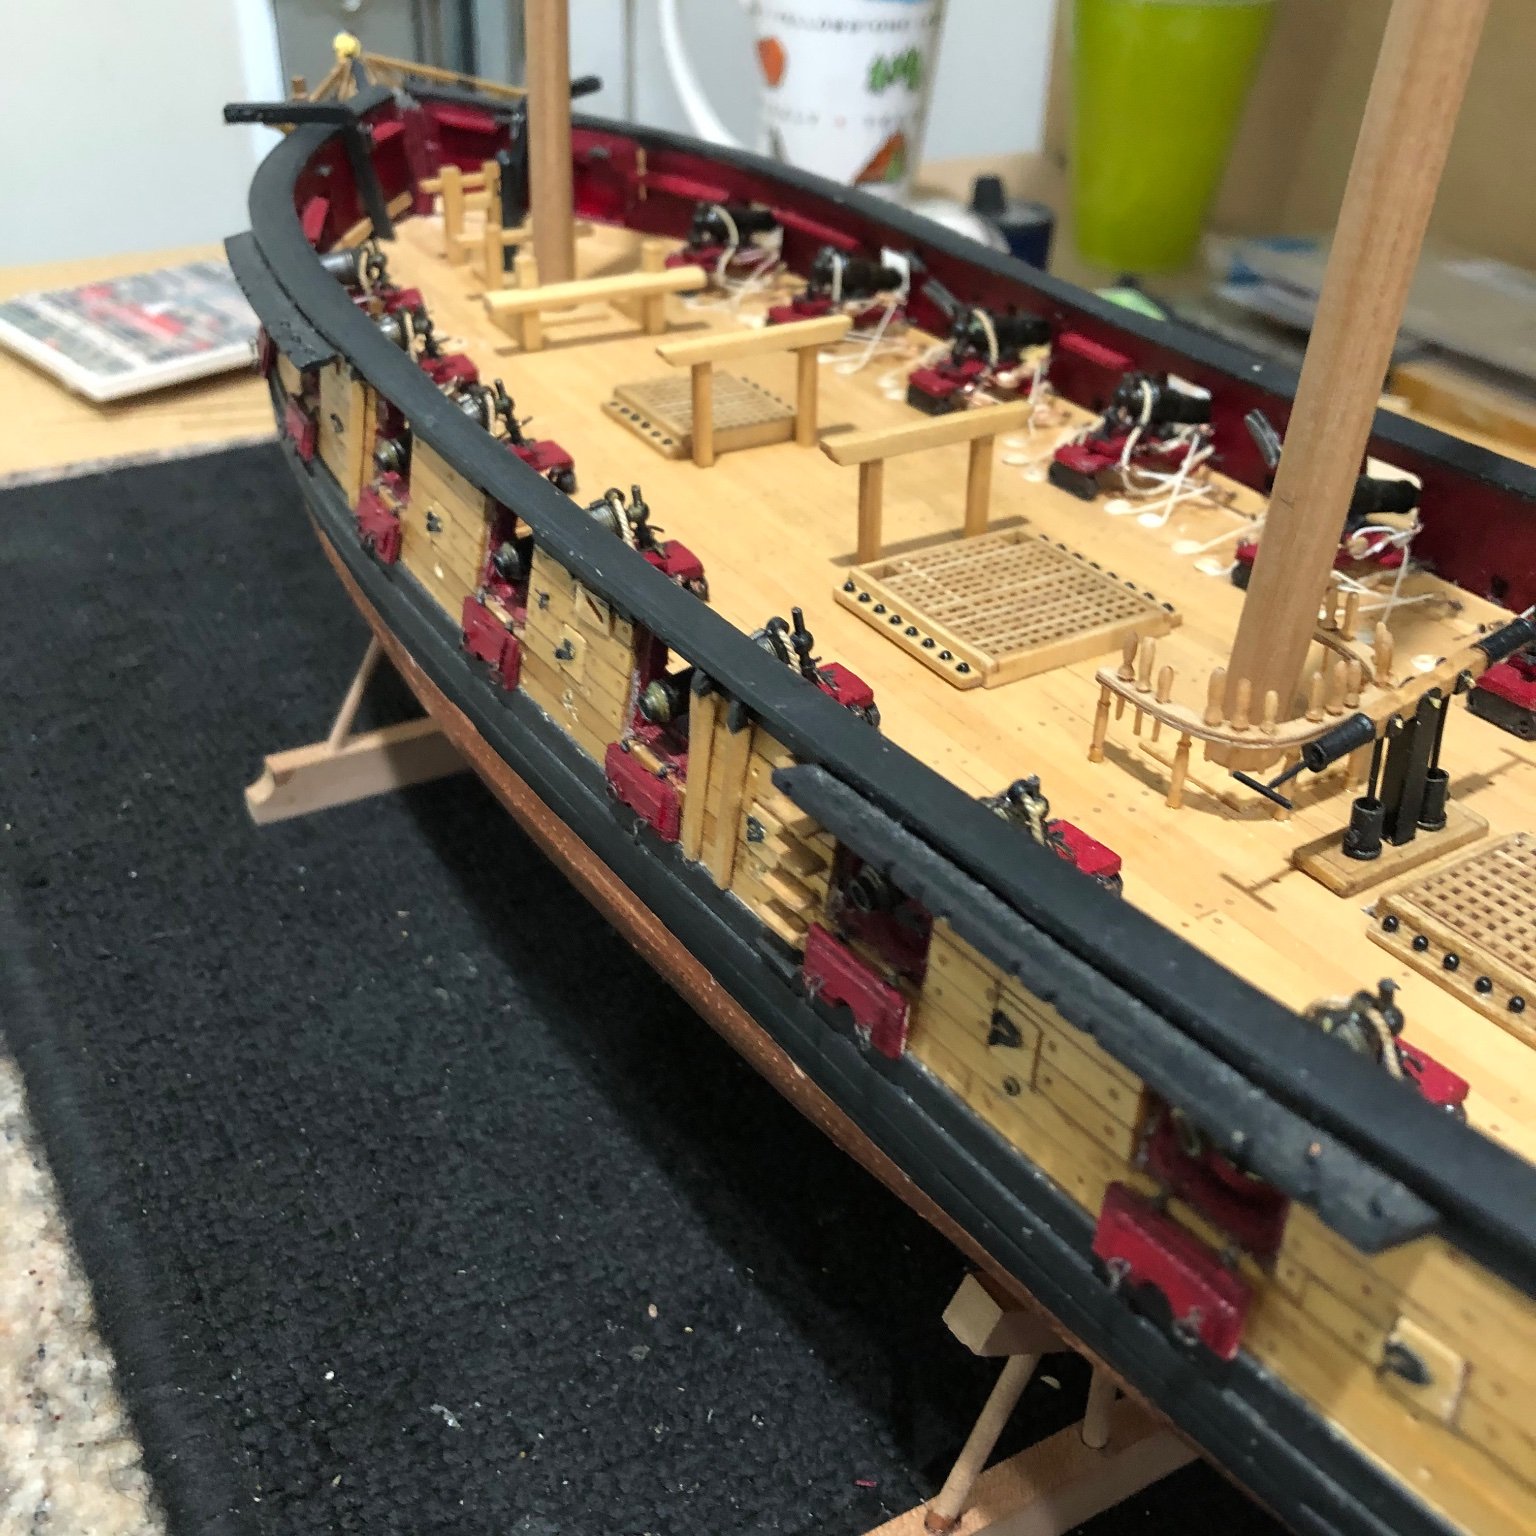
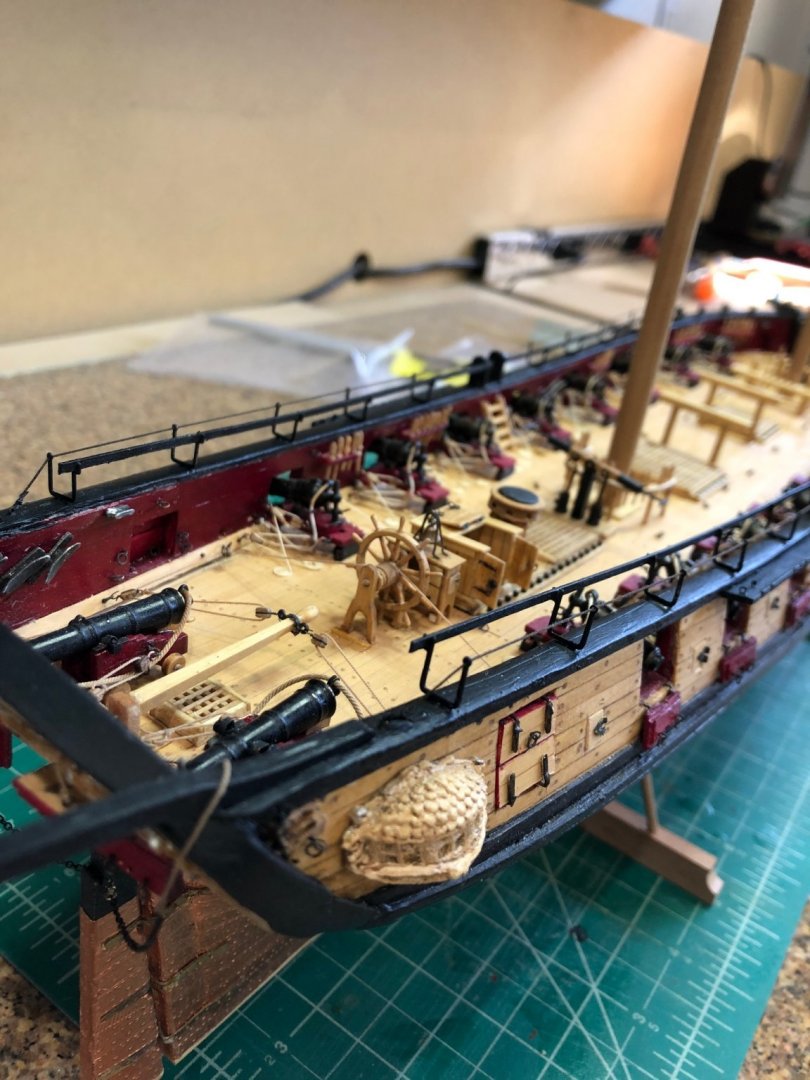
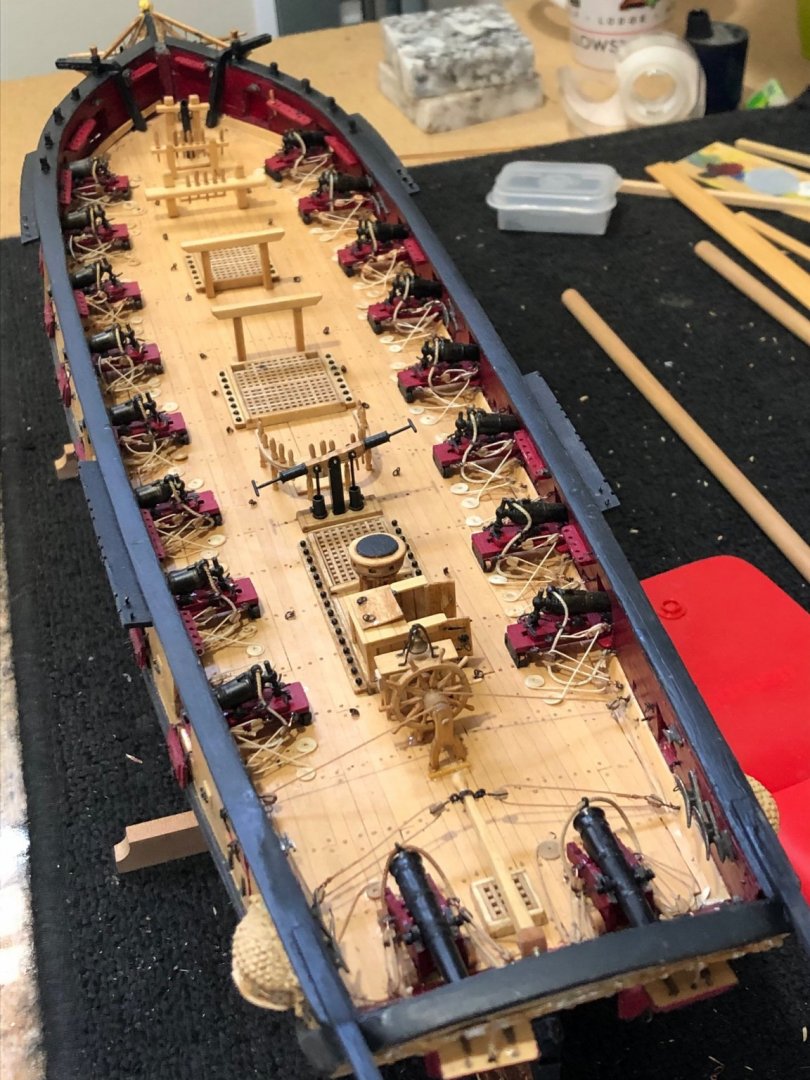
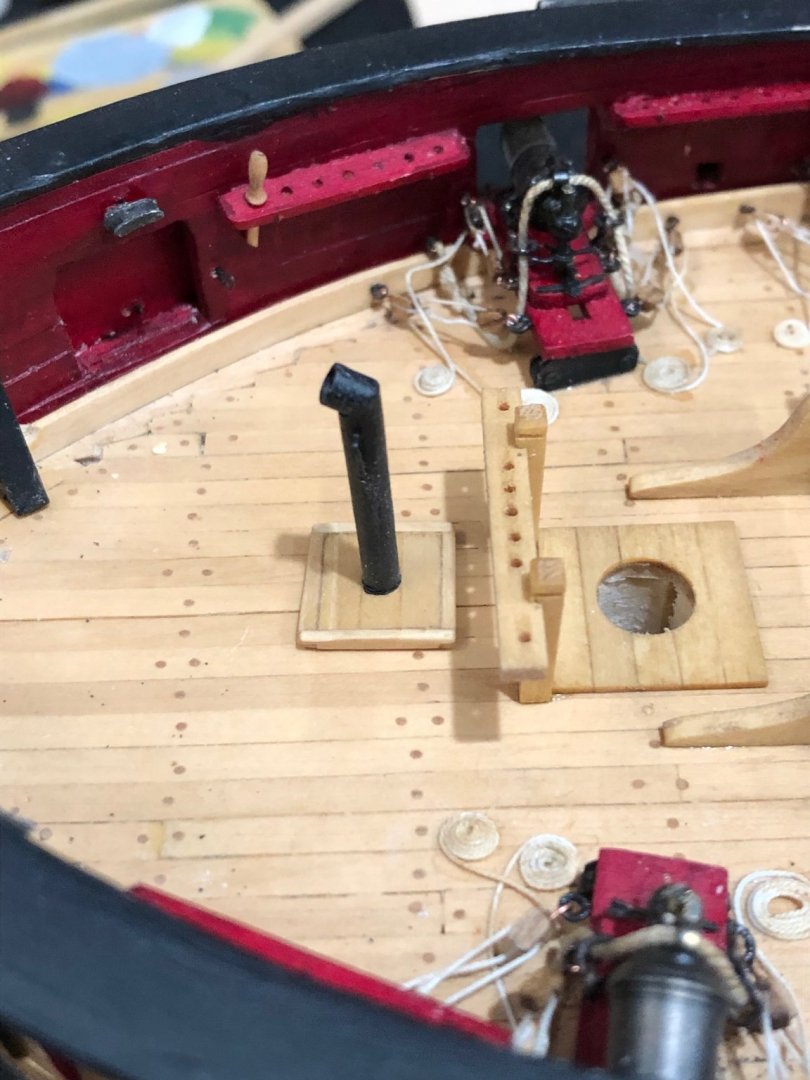
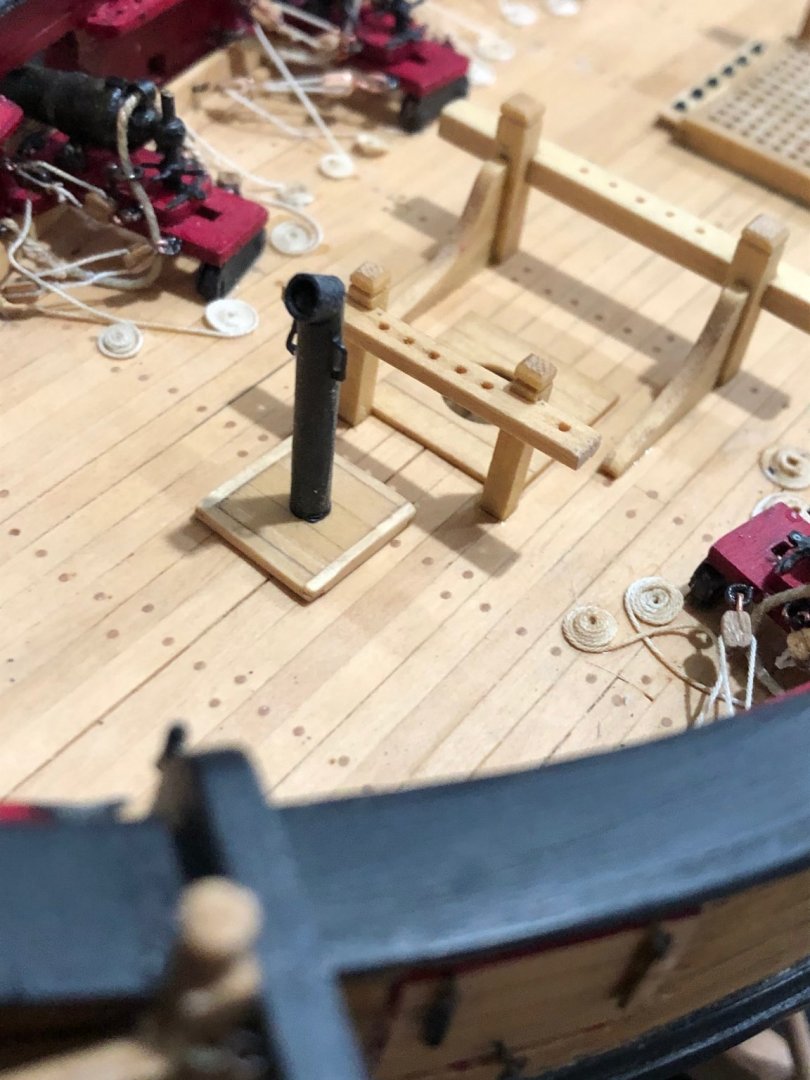
Spent the last few days making the galley stack, platform and the bowsprit bitt. The galley stack was made using 1/8" brass tubing, 26 AWG copper wire, and platform from Alaskan Yellow Cedar. The galley platform was like the mast bases and the coaming elsewhere. Using a mitre box I cut the tubing at a 30 degree angle to reverse them making the stack. No cleanup done after cutting The copper wire was used to form the handles. Using the jaws of needle nose pliers as a mandrel the wire was formed making the two handles. Before soldering the tubes together a .015 was drilled through the tube making a receptacle for the handles. Silver solder was used to flow into the joints rather than making a fillet as in soft soldering. The part was cut to proper lengths making the stacks correct length. Last part was to drill a 1/8" hole in the platform for the stack fitting into. The bowsprit bitt took some thinking of how to determine the size and angle for the bowsprit tenon. Using a protractor and the drawing a 20 degree angle was used making the bitt supports. The side support were a .03 piece of AYC. the large piece is the .03 side support and will be cut after the bitt is assembled and when the glue has cured they will be added. the front with the deck furniture complete except the eyebolts & rings. It's getting very busy but the nice thing is that I mostly used pieces from the scrap box to make all the deck fixtures except Chucks wheel. Now with almost all the wood construction done I'm not sure what I'll feed the scrap box. Make it a good day Will


-
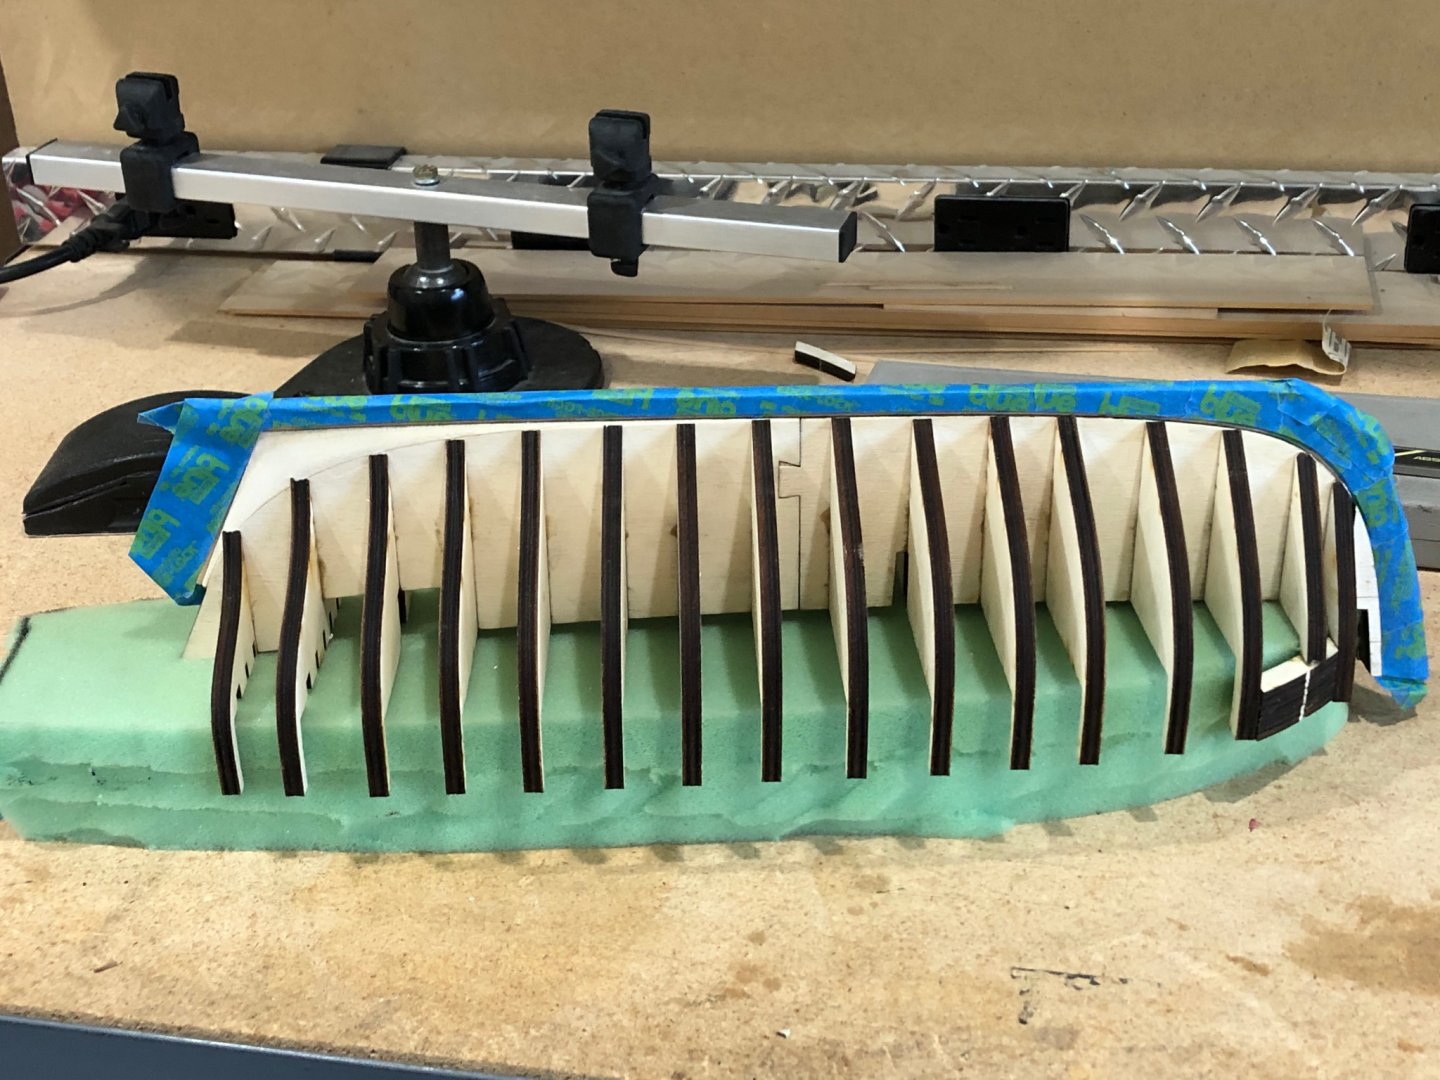
Thanks for all the likes and those following my log it helps me stay motivated. Spent some time these last couple days fairing. Finished the rough fairing on the port side being very carful not to remove to much. Tomorrow I'll start checking with battens and smoothing out the rough sanding. Still aways to go but so far I haven't broken any bulwark extensions. Sanding sanding sanding and more sanding to go. Make it a good day Will
-
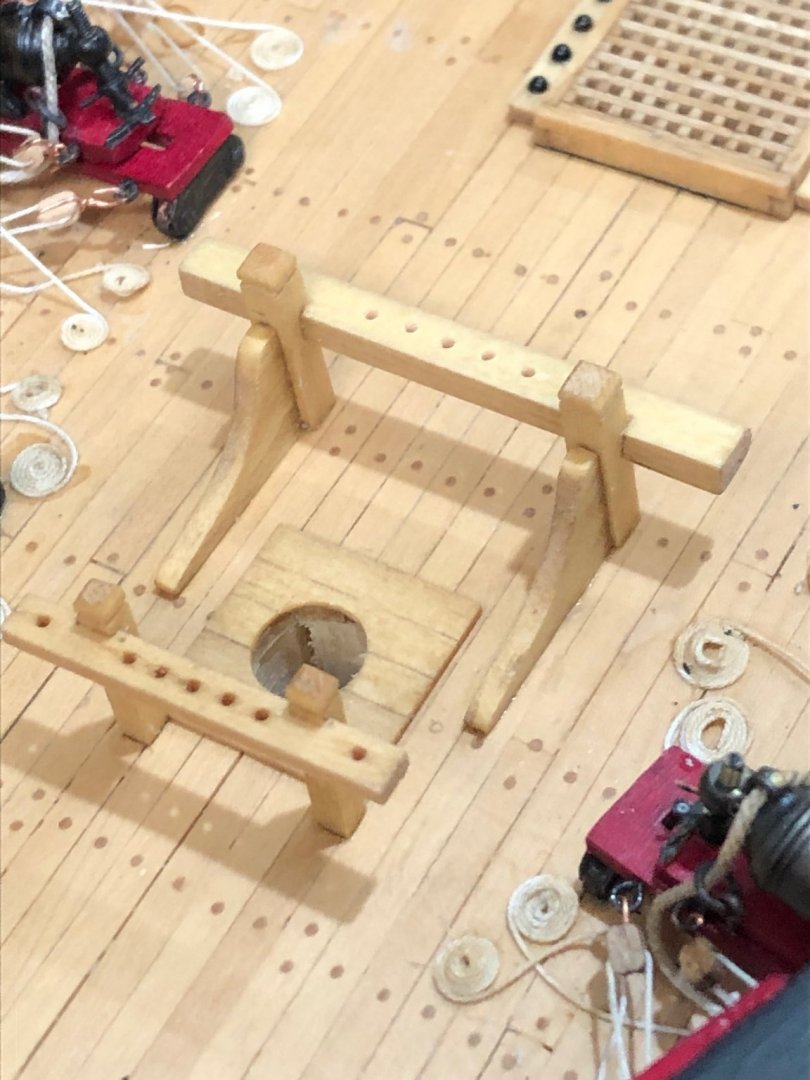
Finished the gallows bitts, riding bitts, fore bitts and now onto the galley stack , bowsprit bit along with 22 eye bolts with split rings. Make it a good day Will
-
simply fantastic what more can I say. almost party time 👋 Make it a good day Will
- 950 replies
-
- 2
-
-
-
- syren
- model shipways
- (and 1 more)
-
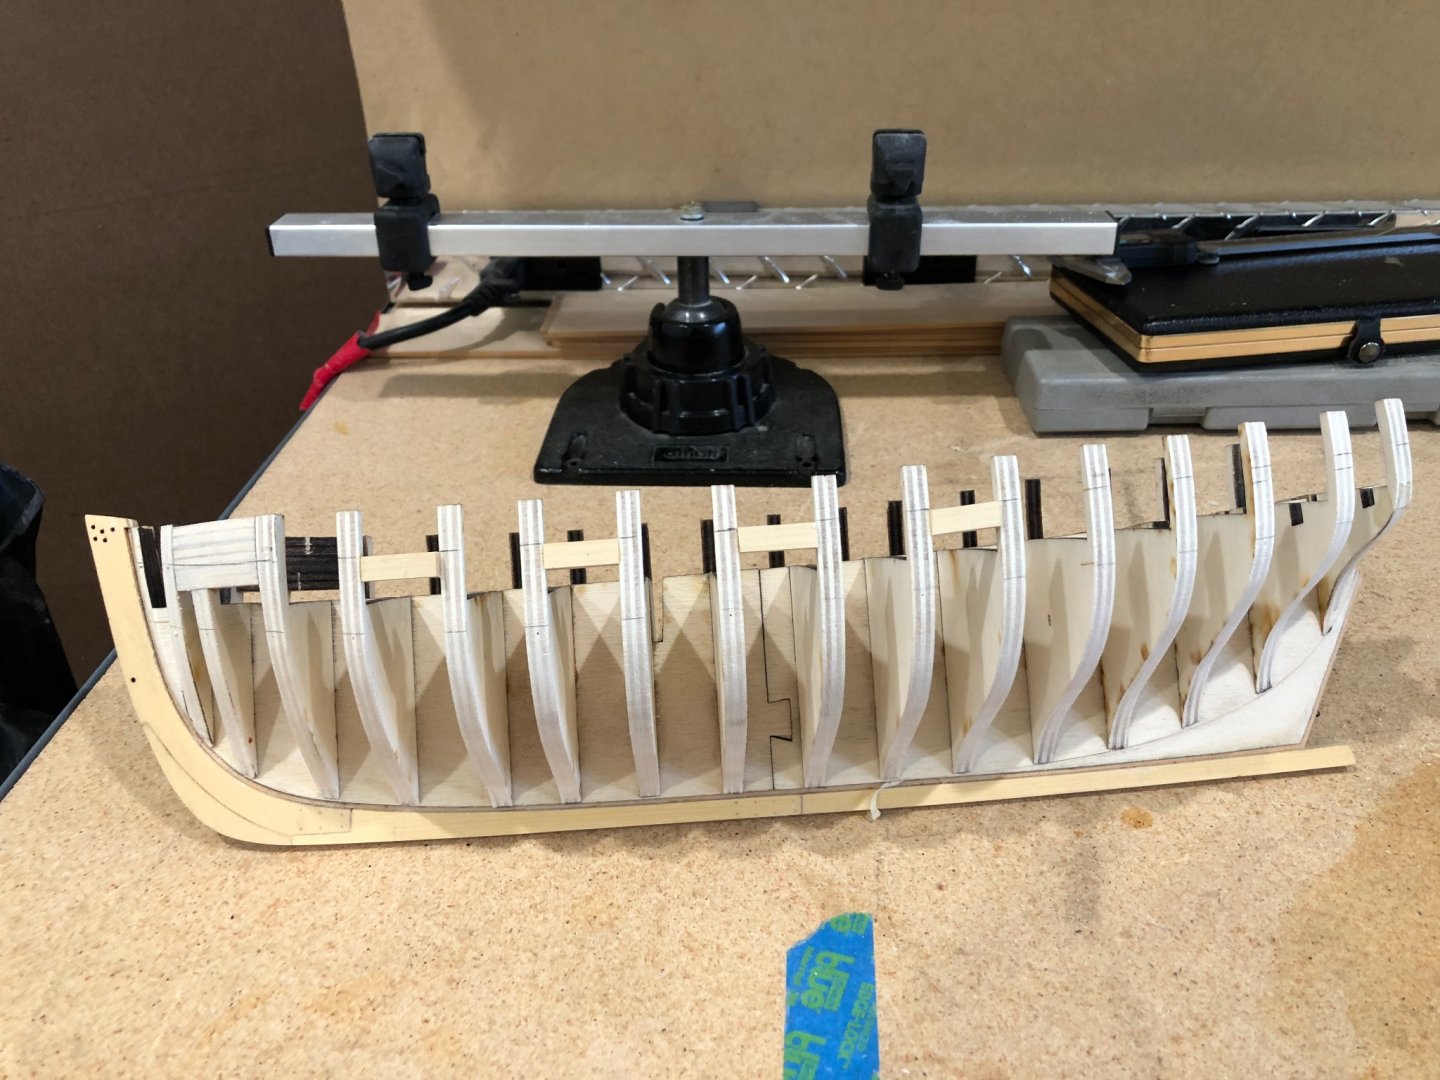
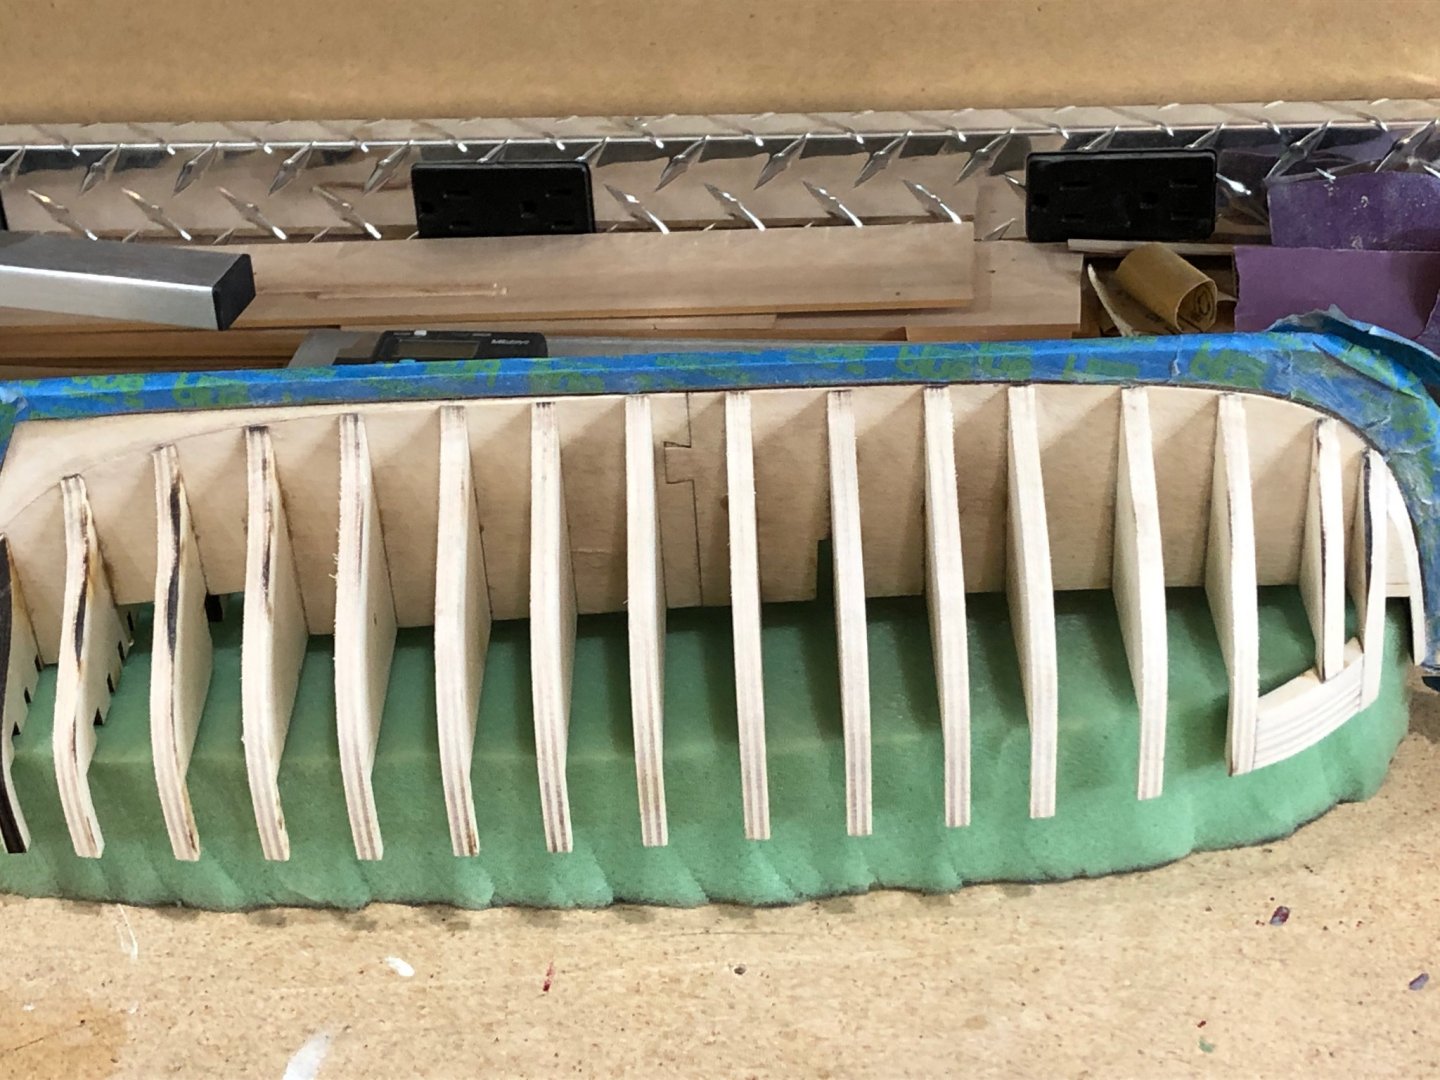
Well I got the bulkheads glued followings Chucks advice to simply let the glue ooze out and wipe extreme excess. Everything worked as planned all square, level and even. That done its time to cheerfully fair Cheerful. Taped the stem and keel to protect them so I'm ready to start. I think I'll go outside to do the sanding mess but since its 100 degrees I'll wait until this evening while sitting on the patio listening to the waterfall fountain. Bulkheads and fillers glued I use a piece of dense upholstery foam cut to fit between the bulkheads extensions. I started this on a previous model and it made handling the model easier and safer for the extensions as they are supported. All taped up and ready Tonight we make sanding dust Make it a good day Will
-
Question and help! When I dry fit the bulkheads to the BF they fit so tight I wonder how glue will remain between the fitting surfaces. Do I just glue in the slots? Do I glue a fillet along the joint between the BF and bulkhead? Please you thoughts and ideas Make it a good day Will
-
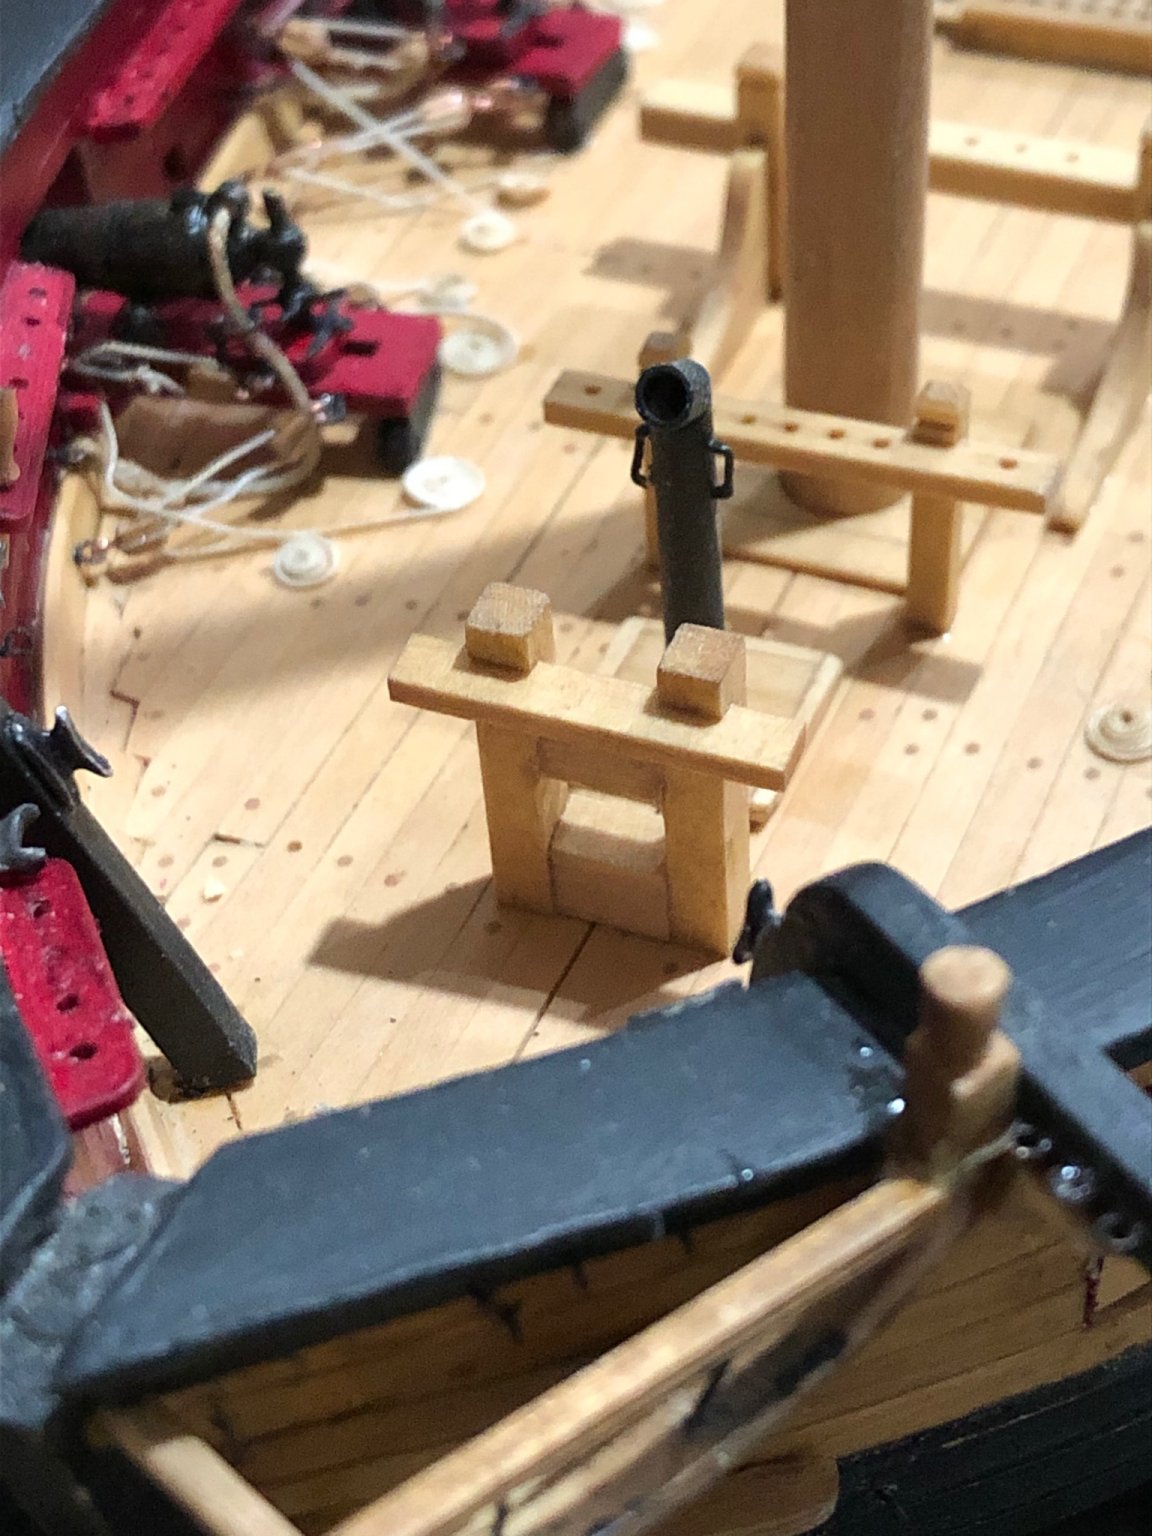
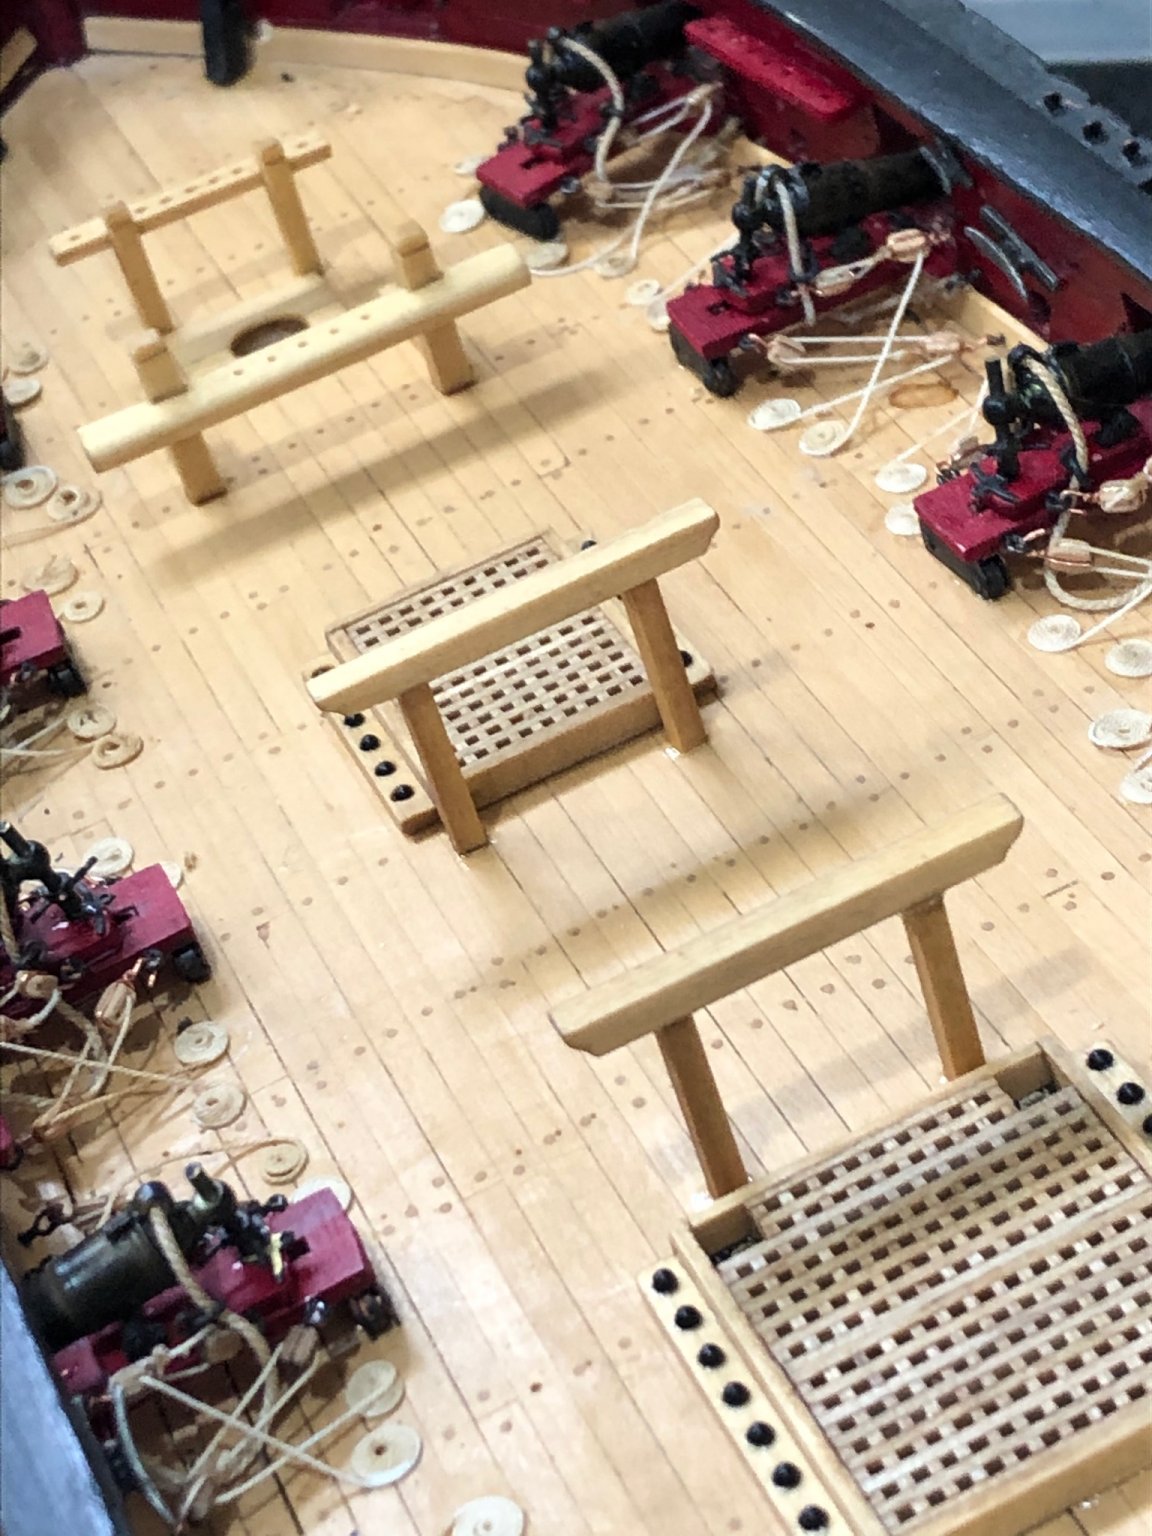
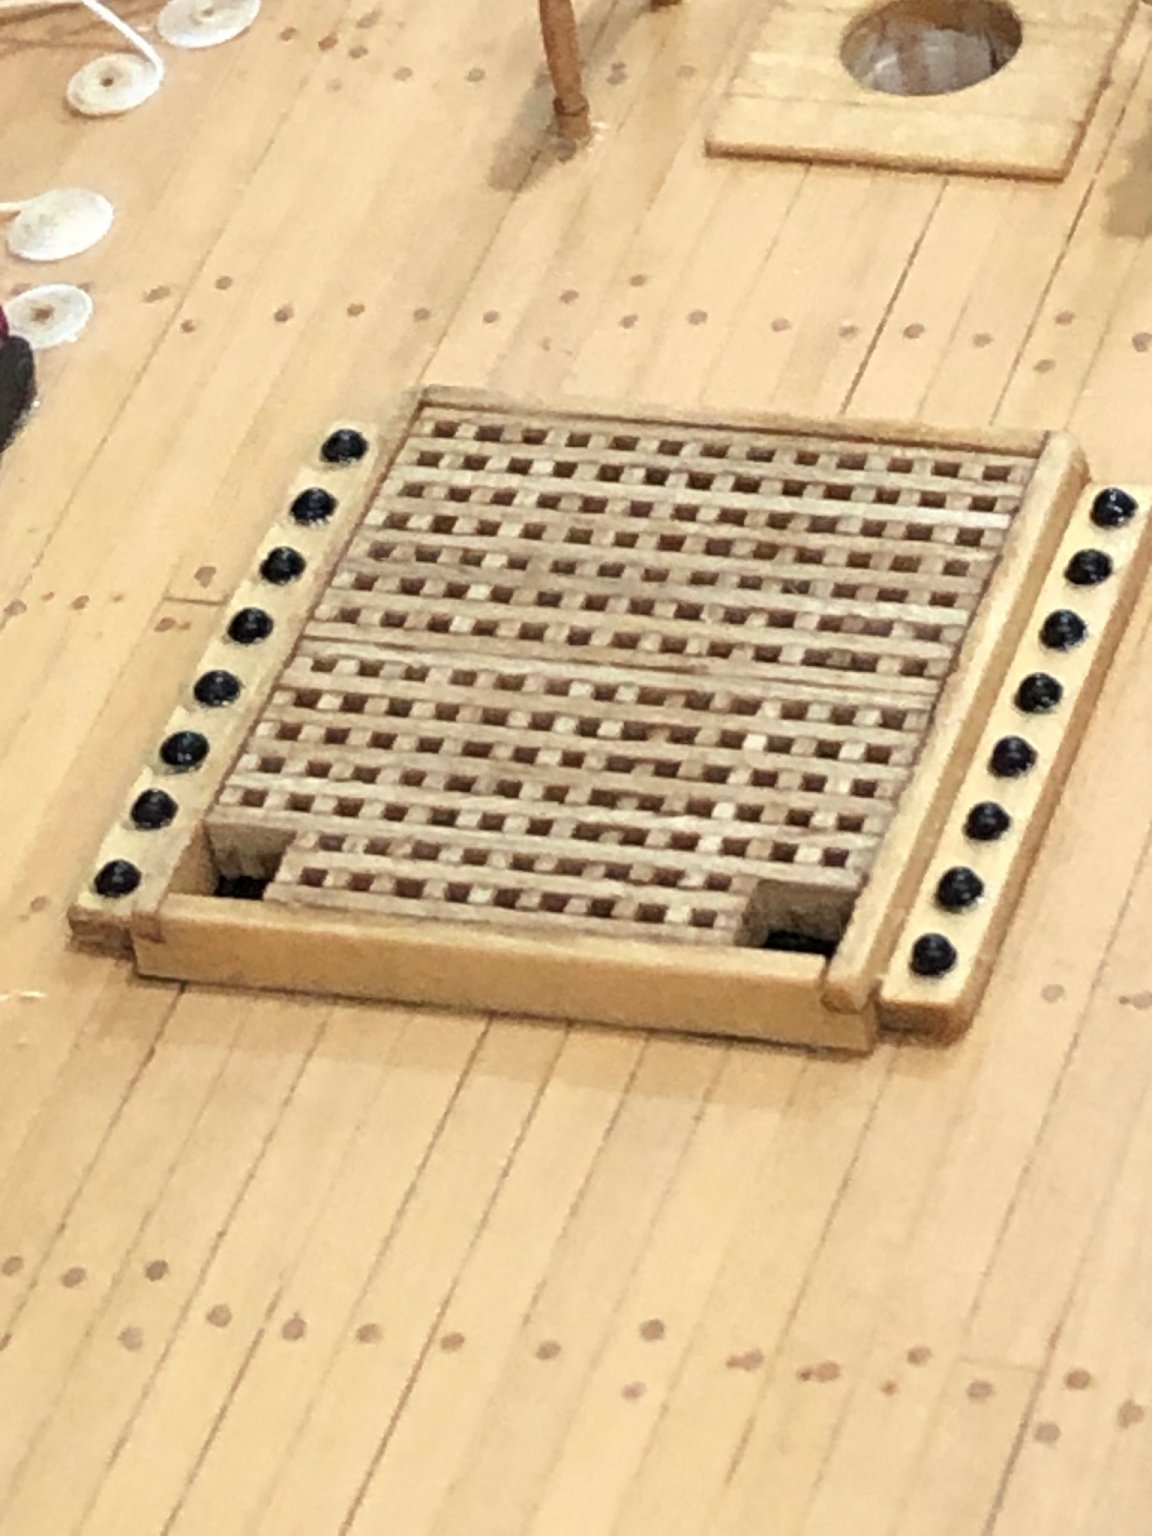
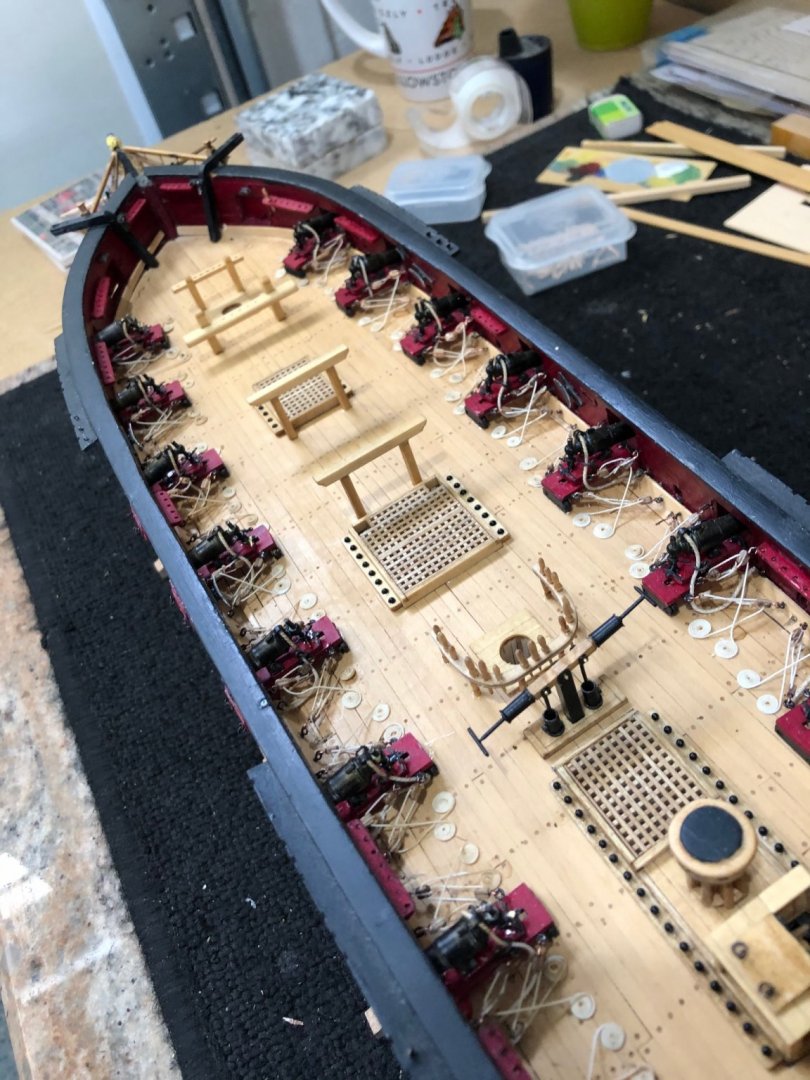
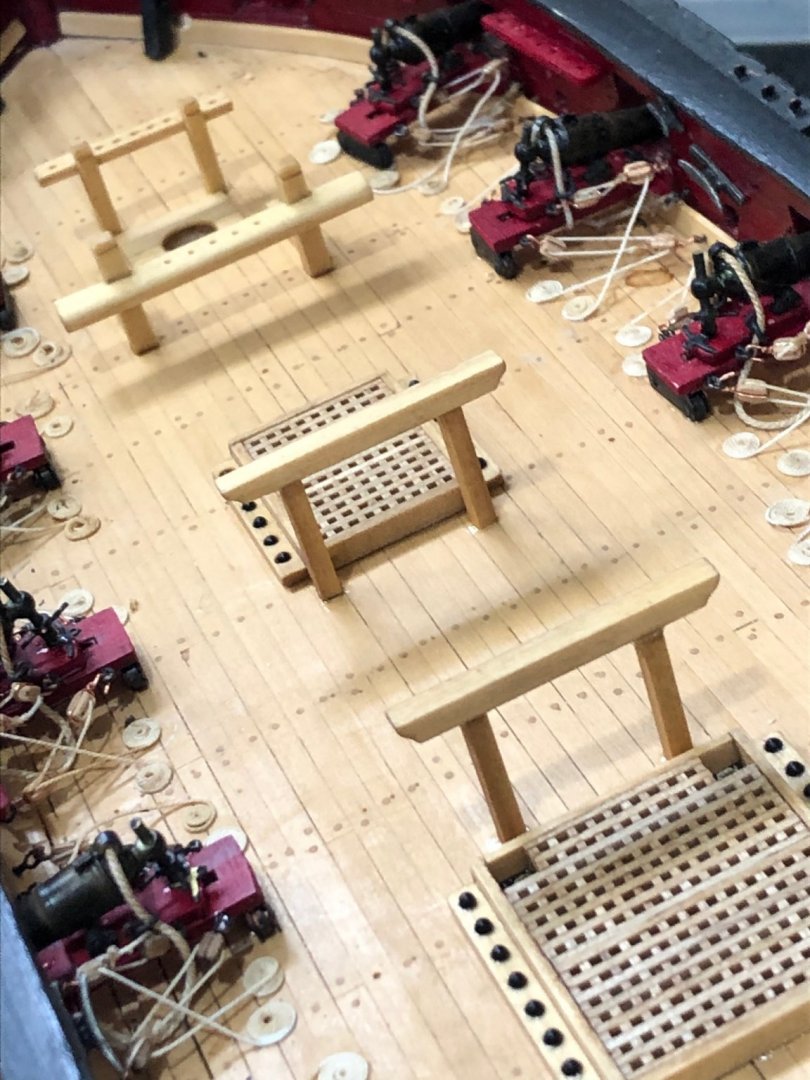
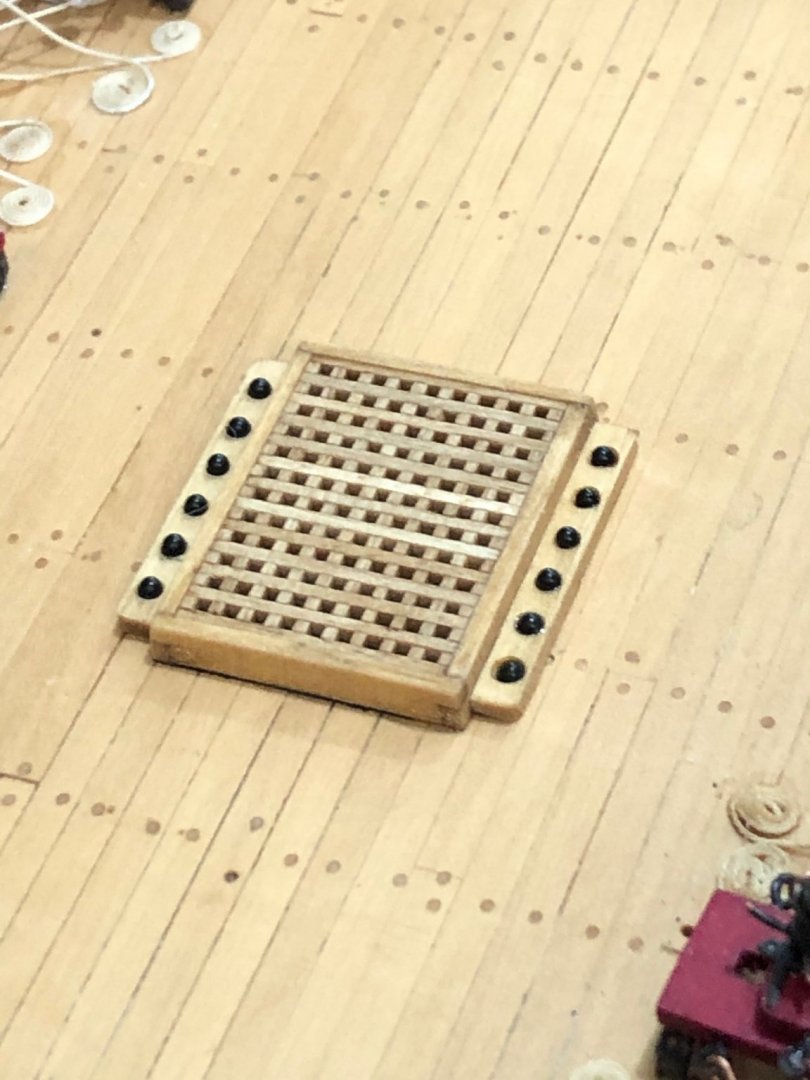
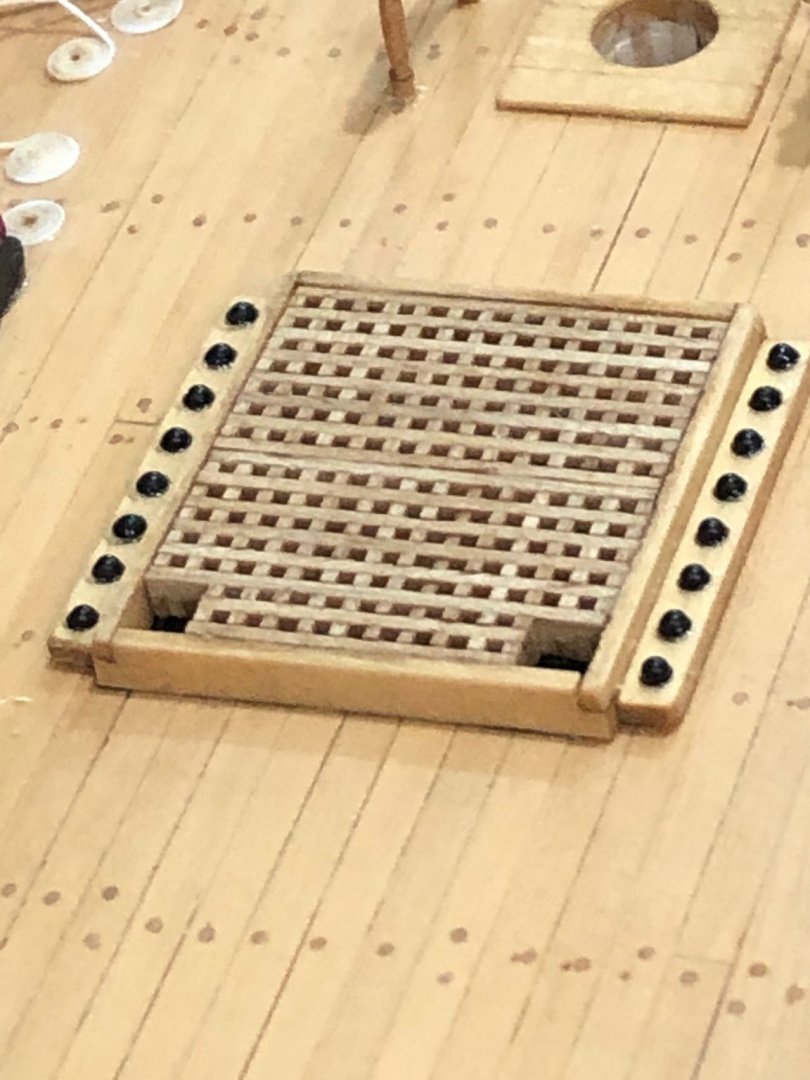
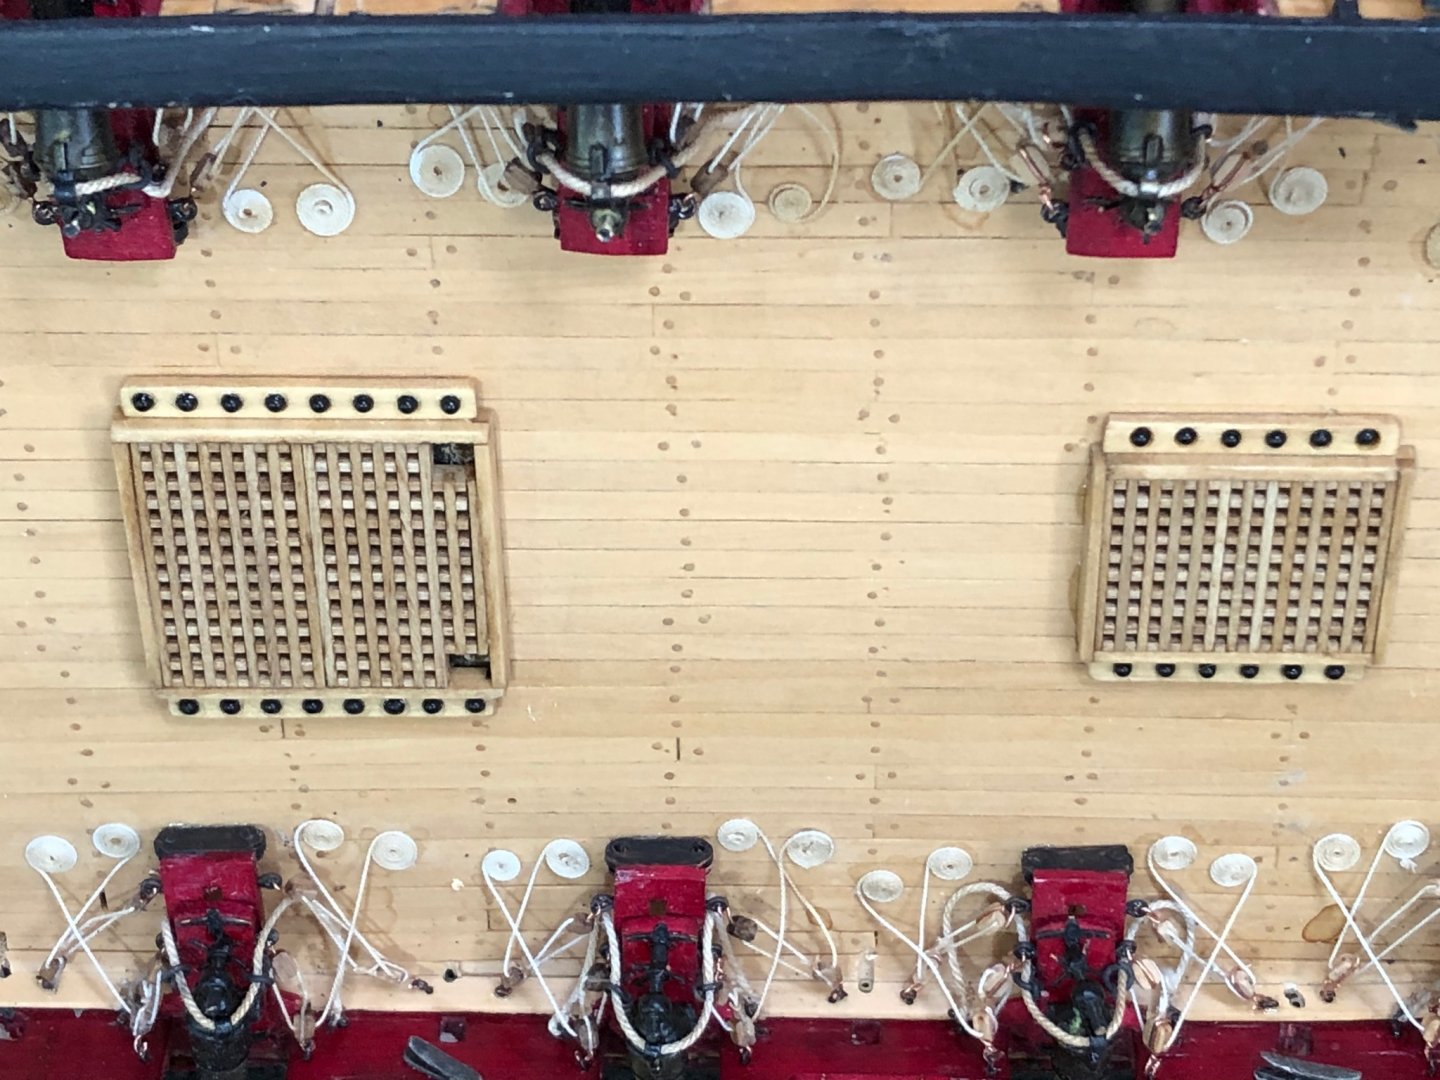
Got the forward and midship hatch gratings completed. Built the coamings and shot racks and when everything completed applied pre-stain and stain. Glued shot to racks and mounted everything to the deck. On to the gallows Make it a good day Will
-
Spent a little time on the stem and keel pieces gluing and sanding. Then made a copy of the stem and keel treenail patterns and transferred the patterns to the parts. Drilled the hole with a #76 bit, darkened the hole with start pencil point and added natural colored filler. Scraped off the filler with razor blade and sanded the parts again Applied the first coat of WOP and the AYC takes the WOP leaving a very nice color and finish. So following the monograph my next step is to place the bulkheads and fillers. KUDOS to Chuck the bulkheads fit perfectly in each slot and square to the BF. Attaching the keel Dry fit bulkheads KUDOS to Chuck everything is square fwd and aft and athwartship. Treenails and first WOP Make it a good day Will


-
The lines of the hull are really taking shape and showing what a great looking boat she is. Interesting way to hold the battens twisted copper wire I will keep that in mind for difficult areas in the future. Make it a good day Will