DSiemens
-
Posts
1,060 -
Joined
-
Last visited
Content Type
Profiles
Forums
Gallery
Events
Everything posted by DSiemens
-
 Masterfully done. I like the idea of tying the bottle down. I've often struggled with needing more then two hands to hold the bottle and manipulate the tools.
 -
Looking great John! Yea those blaring flash bulbs cause all sorts of problems. I find if you hold a napkin or other piece of paper in front of the flash it works as a poor mans diffuser. The flash will still work it will just have less intensity.
- 2,250 replies
-
- 2
-

-
- model shipways
- Charles W Morgan
- (and 1 more)
-
Thanks John. I will probably pop in and out periodically. I have full time work and full time school and two kids so time get's limited. It's nice to take a break for a second every now and again and enjoy some great builds.
- 2,250 replies
-
- 1
-
-
- model shipways
- Charles W Morgan
- (and 1 more)
-
Wow Augies right about warp speed. I blinked and missed half the build...and the poop deck jokes. All well she looks great! Seem's like I remember this being a ship no one ever finished. The rate your going she'll be an inspiration to those that haven't.
- 2,250 replies
-
- 3
-
-
- model shipways
- Charles W Morgan
- (and 1 more)
-
Mercury by DSiemens - FINISHED - BOTTLE
DSiemens replied to DSiemens's topic in - Build logs for subjects built 1801 - 1850
Well a small update for inquiring minds that would like to know if there be any. The Mercury was shipped and arrived safely to her knew destination several states away. I had to check with the ship in bottle forum to find the best way to ship her and found that first she must be epoxied in not just set or regular glued and then surrounded by bubble wrap and put in a box and that box put in a box of peanuts. I admit I was even skeptical of that since I used to work for FedEx and know first hand that if you can't drop kick it, stand on it or throw it against the wall you shouldn't ship it FedEx. So I went with UPS. Either way she arrived safely and the Pirate is ecstatic. He absolutely loved it and to my surprise paid me several times the negotiated price. While the extra money is nice I think the appreciation meant more to me. It's really nice to know the hard work that went into this is recognized and appreciated. On a final note I found that this particular pirate has an interesting website and I decided to share it. http://www.piratesurgeon.com/ He has got to be one of the most knowledgeable sources of medical practices during the golden age of piracy that I've ever encountered. Not that I look up the subject much but I don't think it's one that is easy to research. His research is thorough though with several period references. Makes for a fascinating read if you aren't to squeamish. -
I've melted Plasticine for my last two builds and it works out great. I like how you lay the clay snakes over each other the blending of colors will look awesome I'm sure. I may try that on a future build I actually found two methods of melting. First in the oven though I put the bottle in as it's heating up since I think the slower rise in temperature will prevent the bottle from breaking. So far so good. The other method I've used it holding the bottle over a hot burner to melt the Plasticine. I did this because I had laminated a card with the ship name my name and date and wanted to display it under the clay. I wasn't sure what the oven heat would do to the laminated card to I used a burner for more control. Actually worked really well just make sure to have oven mitts handy.
-
Mercury by DSiemens - FINISHED - BOTTLE
DSiemens replied to DSiemens's topic in - Build logs for subjects built 1801 - 1850
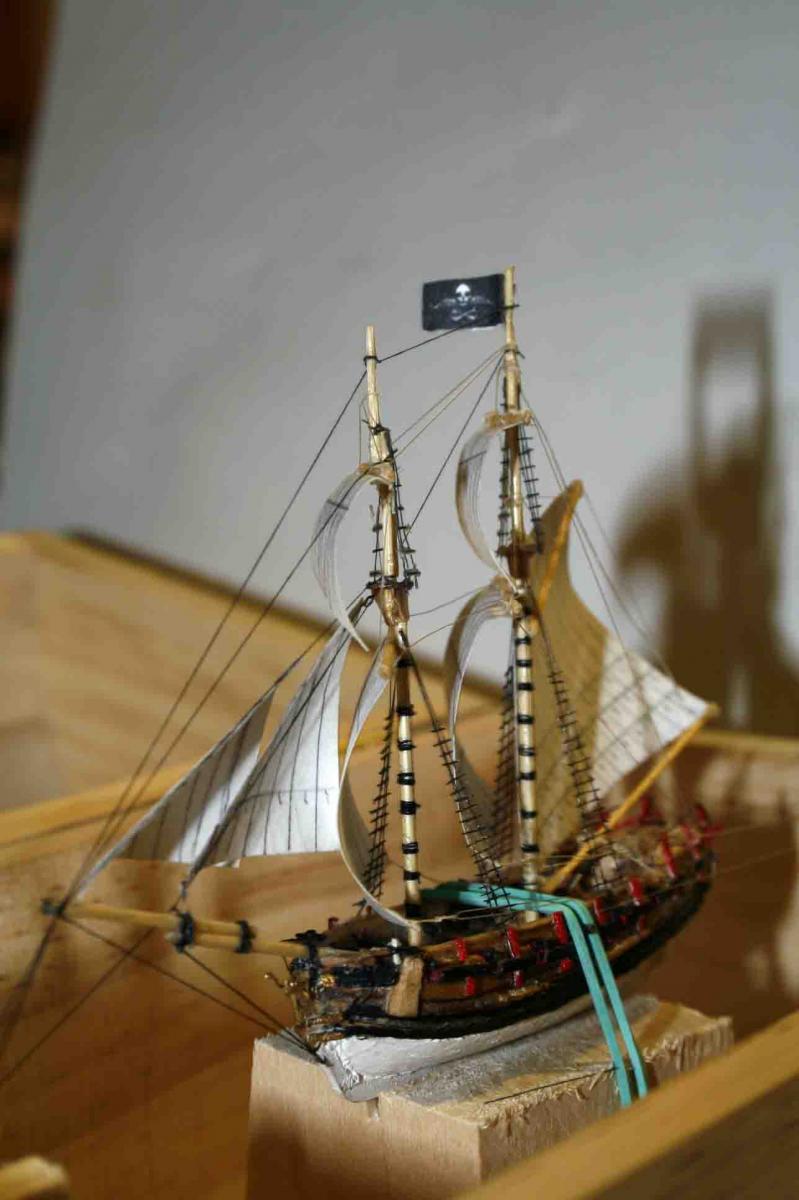
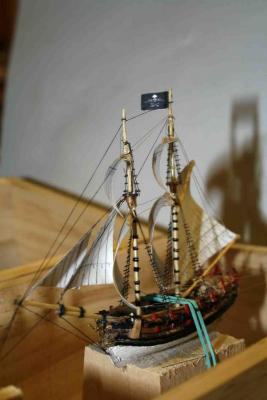
Thanks Augie. Your words are to true. This ship has been quiet the experience and is by far my best and it will keep getting better from here. Thanks Bob. Actually I put a lot of work into those sails. They naturally fall on a starboard tack. I wasn't watching and put the spanker in with a port tack. I should have just undid it and switched but just to see if I could I put in the running rigging and braced the sails to port. That's probably one of my favorite parts of this ship. Except for being glued down all of the rigging is functional. Matt thank you for your compliments. It means a lot coming from a SIB builder of your caliber. Which reminds me hows the Britannia coming along? -
Mercury by DSiemens - FINISHED - BOTTLE
DSiemens replied to DSiemens's topic in - Build logs for subjects built 1801 - 1850
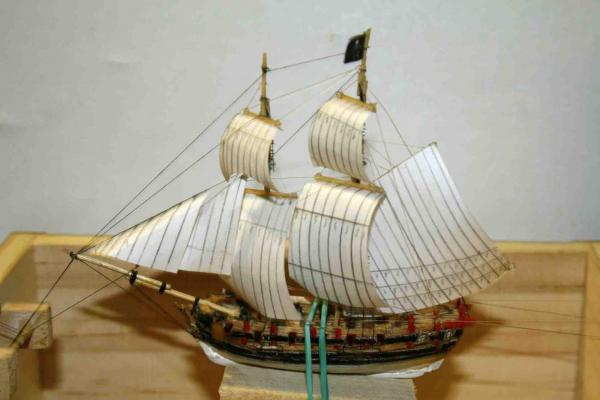
She's in! Lines are tight and she's sailing beautifully. This ship is by far my best work. The bottle it's in has the best clarity I've seen in a bottle. It's a tradition of mine to call the entering of the ship into the bottle her maiden voyage. Old sailor superstition has it that the maiden voyage is a reflection of the life of the ship. If that's the case the Mercury's got a good long life in front of her. She shook off the snag's and problems and came together with ease. She's been a pleasure to work on. I'm just sad I have to ship her away for some one else to enjoy. I still have to build a stand and put a turks head knot on the bottle but other then that she's good to go.- 149 replies
-
- 12
-
-
Mercury by DSiemens - FINISHED - BOTTLE
DSiemens replied to DSiemens's topic in - Build logs for subjects built 1801 - 1850
Oh one more thing of interest I thought I should mention. This ship was and incredibly tight fit. I actually took an eight of an inch off the keel after a test fit and still just barely fit her in. Which is perfect since the tighter the fit the more people wonder how the ship got in there. -
Mercury by DSiemens - FINISHED - BOTTLE
DSiemens replied to DSiemens's topic in - Build logs for subjects built 1801 - 1850
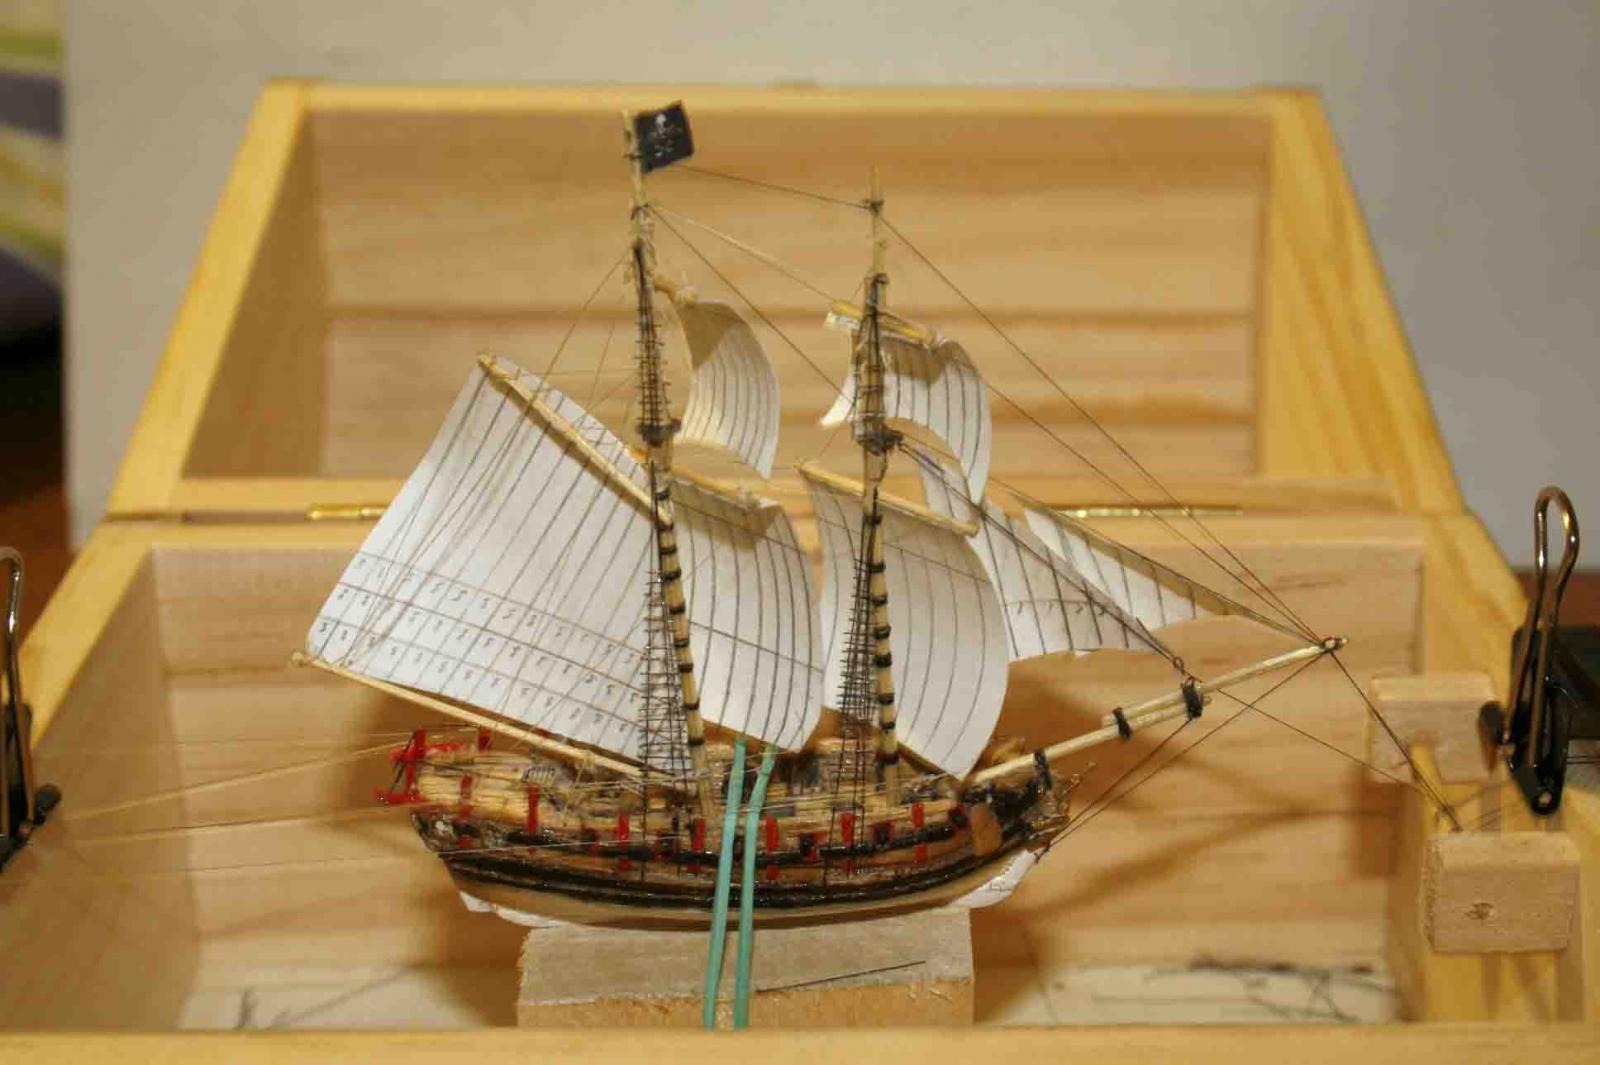
Thanks Popeye and Augie. Yea I didn't understand the wrapping technique when I first started and wondered how these builders could put a ship in a bottle with paper sails with out crinkling it up. I used to use only use cloth for that reason. After studying a few pictures I found that by wrapping them around the ship they don't crinkle and it helps keep the wind blown curve. There's still a lot to do. The stays are tight but I still have to tighten the braces. The sea around the ship needs a little work and I have to build a stand. -
Mercury by DSiemens - FINISHED - BOTTLE
DSiemens replied to DSiemens's topic in - Build logs for subjects built 1801 - 1850
Thanks Augie and Bob. Mark I think I will have to try a bigger model one of these days. She went in today and so far so good. I hope to have her wrapped up this weekend. -
Mercury by DSiemens - FINISHED - BOTTLE
DSiemens replied to DSiemens's topic in - Build logs for subjects built 1801 - 1850
I tried a new technique and really like the results. This is the launch that will be towed behind the ship. The Launch is made completely out of paper. I carved out a plug out of bass wood put a little wax on it. Then cut out small planks of paper and stained them. I then glued the planks together and planked the plug like it was a solid hull. Once dry I added a couple coats of clear nail polish to seal and harden it. I then cut out the plans and stained them then glued them into the stern bow and bottom of the launch. Last I cut out a few planks and made the seats. I put on one more coat of nail polish for good measure. I may try another since I really don't want this little boat sucking up the oils from the clay sea. Strangely enough the jollywatt which is smaller and kept on deck is made completely out of wood. I used a tried and true dremel technique for this one. Pictures and instructions can be found on my blog. I got the sea in the bottle. Just need a few more finishing touches and she's ready to bottle. -
Yea I thought of that. With metal rigging the way it is it would be impossible. I thought about just using the hull and building the mast and rigging but for the price I may as well carve one out myself.
-
I was at a hobby shop for the Rocky Mountain Shipwrights show. It was a Wednesday night so it was pretty slow. I noticed they had some of these Metal Earth models so I decided to try it out. I finished it in the three hours that I was there. It seems there is some interest in this forum for these ships so I took a lot of pictures to do a build log. I want to point out that this ship looks an awful lot like the Disney Pirates of the Caribbean Black Pearl. It is not Disney trade marked. I wondered about that at first and found the answer on the back of the package. It read's, "There once was a real ship named the Black Pearl captained by Henry Morgan. one of the world's most notorious pirates. The Black Pearl which first sailed in 1669 fought many battles, the most famous of which was an invasion in Panama in 1671." So keep in mind that this is Henry Morgans Black Pearl not Jack Sparrow's. They look an awful lot alike but they're not. Wink wink ..nod nod. So yea it's a knock off but since it's sold in the US so I think it's a legal knock off. Here's what came in the package. Two metal sheets and instructions. It's a little backwards you start with the masts. The hardest part about this ship is the tiny metal tabs. I do a lot of small stuff but these gave me some real trouble. If you decide to do one have a good pair of strong tweezers. Now you put on the hull. The instructions are vague on this part. Use the stand for the ship to figure out how wide the base should be. Since I didn't do this the bottom of mine is to thin which makes the stand useless. Also watch the tabs. Pre bend them to fit especially in the bow. That part took me way to long because I didn't set up for it. Also if you can glue the pieces together then bend that tabs that may be easier then just bending. Getting the hull together was the hardest part. Watch your tabs and know where they're going before you put the pieces together. Make sure they are bent in the right direction. Then the back piece and the sails. The sails were a bit of a pain to get through the rigging. Have patience they do fit. So their you have it. I Jerry rigged the stand to work sort of. I made a little better when I got home. For $16 it's not a bad little model. Definitely an attention grabber. I'm sure Jack Sparr...er Captain Morgan would be proud.
- 3 replies
-
- 2
-
-
- metal earth
- black pearl
- (and 2 more)
-
Mercury by DSiemens - FINISHED - BOTTLE
DSiemens replied to DSiemens's topic in - Build logs for subjects built 1801 - 1850
Thanks every one for your comments. I was hoping to post more but being back in school and a trip to Utah I haven't found the time. Maybe this week end. Jesse, I started the hard way and went back to the easy way. Solid hull really is the way to go with this scale. Trouble is it's harder to get to an exact scale. Then it is small enough the scale doesn't matter so much. Thank you for your comment. Mike, I am putting her in a bottle with water which is why I haven't bothered fixing the rudder. Water can be tricky I've used a couple of techniques. So far I've found Plasticine to be the easiest but it takes some patience. I roll it up like a clay snake and put it through the bottle neck. I then put the bottle in the oven at about 200 degrees. The melting point is 150 but my oven doesn't get that low. Then it's a matter of watching for the clay to melt and shaping it with a metal wire being careful not to get any of the now runny clay on the sides of the bottle or in the neck. Also be careful not to burn yourself. Another easy method is to roll up the clay and unroll it in the bottle. I explained that method on my blog. Siemensbottlingco.blogspot.com It's a little tricky but you can control the amount of clay easier and you don't burn yourself. Thank you for your compliments. -
The masts look great! I wouldn't worry to much about the tooth pick holes. I think people will be so focused on the kraken they'll never think to look. I'm interested to see how the fairlead works out. I'm used to drilling holes or using thread.
-
HEy happy birthday. Hope to see you at the next meeting if life doesn't stop getting in the way.
-
Holy mackerel how did I miss your birthday. Happy birthday and I hope you have many more! Keep making life fun Popeye it sure is a pleasure having you on the forum.
-
Wow your moving fast. And as always looking great. I think I've said it before but I really like the lines of this ship.
-
I haven't seen this done with brass rods so it will be interesting to see how it all comes together. I've gotten used to bamboo and thread blocks which eliminates drilling. Still bamboo can only go so small before it's to weak. I've been experimenting with rusting needles to get the brown wood look then adding clear nail polish to seal it a technique I learned from John Fox.
-
HMS Victory by Sven - FINISHED - 1:600 scale
DSiemens replied to Sven's topic in - Build logs for subjects built 1751 - 1800
Your knowledge and skill are impressive. I admit that I have an idea on what you mean but will have to look it up to be sure. Either way she turned out great. I need to pop over to your other build and see how the Britannia is coming along. -
That is incredible. This will really be an amazing build. Can't wait to see more.
-
Mercury by DSiemens - FINISHED - BOTTLE
DSiemens replied to DSiemens's topic in - Build logs for subjects built 1801 - 1850
Thanks Augie. The green line is nice and thick so they can keel haul the whole crew if needed. The Captain runs a tight ship. -
Mercury by DSiemens - FINISHED - BOTTLE
DSiemens replied to DSiemens's topic in - Build logs for subjects built 1801 - 1850
The ship it's self is done! Now just got to get the dory and the launch and bottle her all up.
-
What a great idea.! I like the idea of the ship being lifted out of the water. It will be fun to see how this one comes together.