DONATION DRIVE - SUPPORT MSW - DO YOUR PART TO KEEP THIS GREAT FORUM GOING!
×


DSiemens
-
Posts
1,060 -
Joined
-
Last visited
Content Type
Profiles
Forums
Gallery
Events
Everything posted by DSiemens
-
 Awesome! I totally agree I would have a hard time leaving the hull plain as well. Maybe I should consider a T37. Where would I look into this kit?
 -
What do I start on RC Sailboat electronics wise?
DSiemens replied to DSiemens's topic in RC Kits & Scratch building
Oh yea and as far as what I'm looking for in a RC ship. Just a pleasure cruiser. Doesn't have to be particularly fast it just has to be able to maneuver around a pool or pond. -
What do I start on RC Sailboat electronics wise?
DSiemens replied to DSiemens's topic in RC Kits & Scratch building
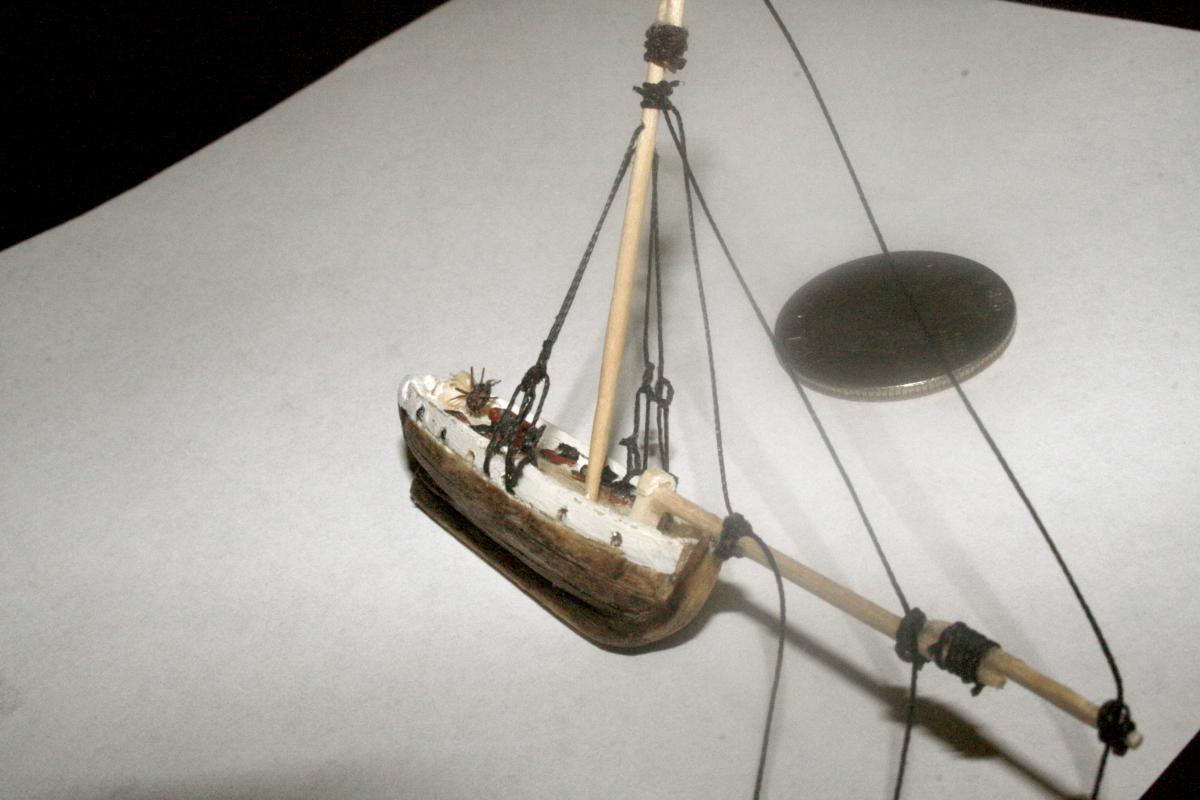
Actually that answers a lot of my questions. Thanks! Sorry about the T(numeral) I couldn't for the life of me remember what the number was. I'd have to get pictures of the plans but it's basically the same ship I used to create my ghost ship but with less holes in the sails. Not sure how well you can see that one but, it has one main mast and two jibs. I thought about having three servos one on the rudder one on the mainsail and one on the jibs. Do you think I could do all the sails on one servo? The certainly would make it easier to some degree. -
Thanks Bob I think I will. I don't know that I will be going into as much detail with this one. Should be a fun quick little build.
-
Thanks. Do you have pictures posted? I wouldn't mind a bigger ship to reference to.
-
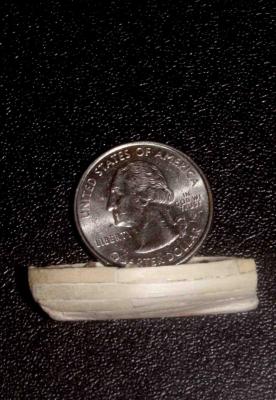
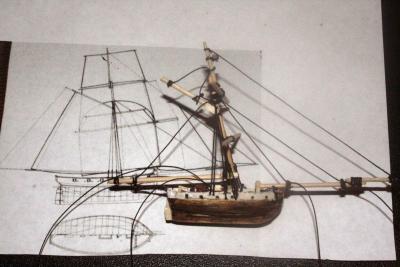
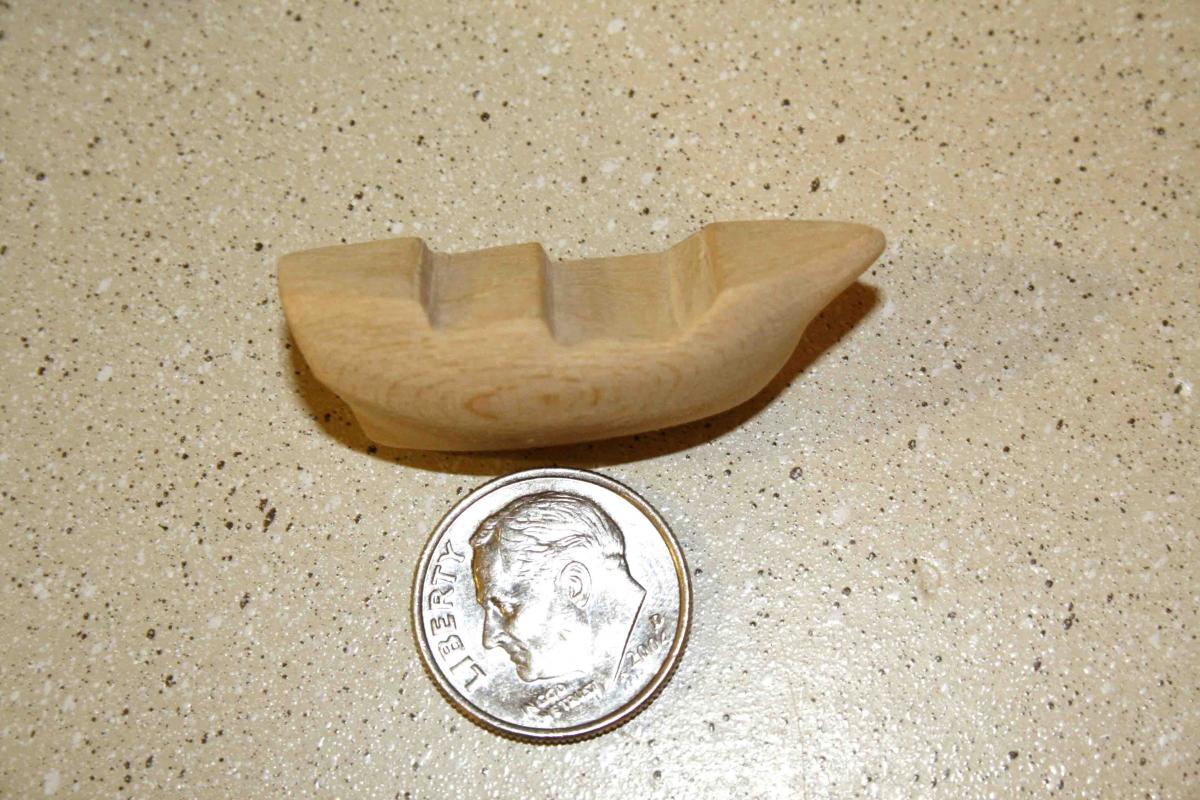
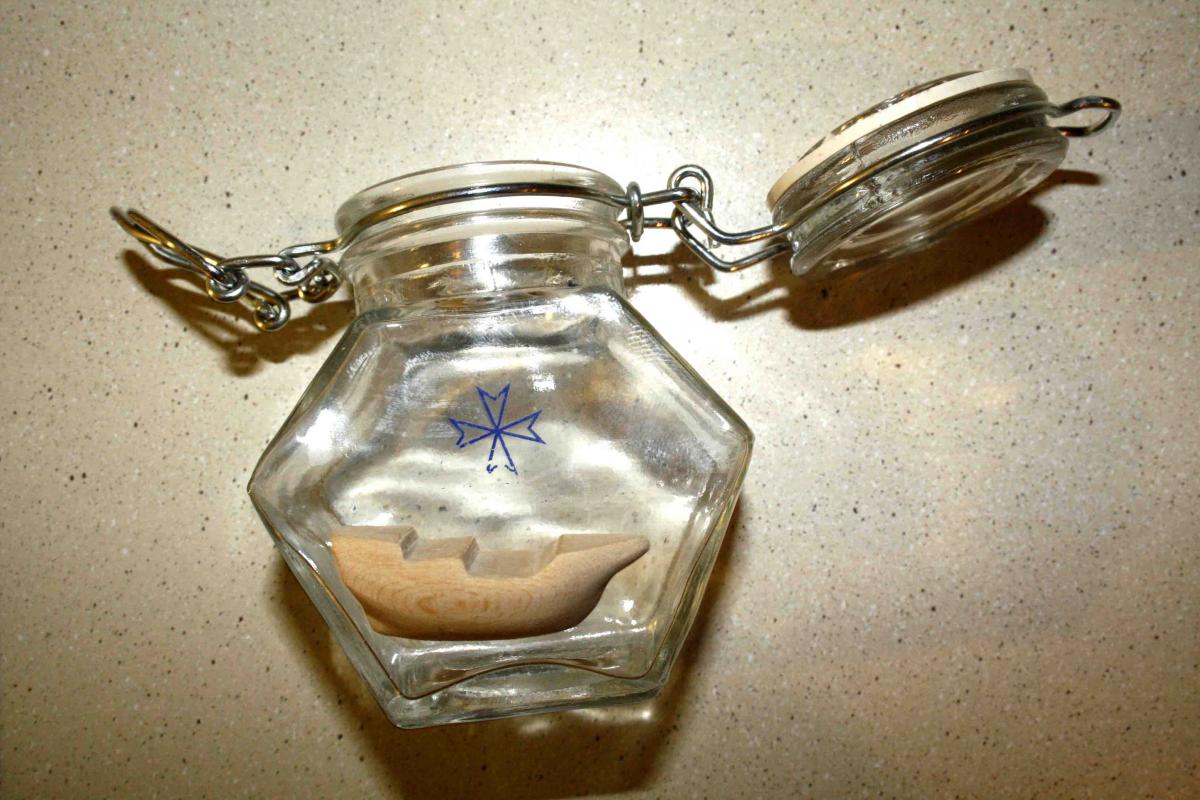
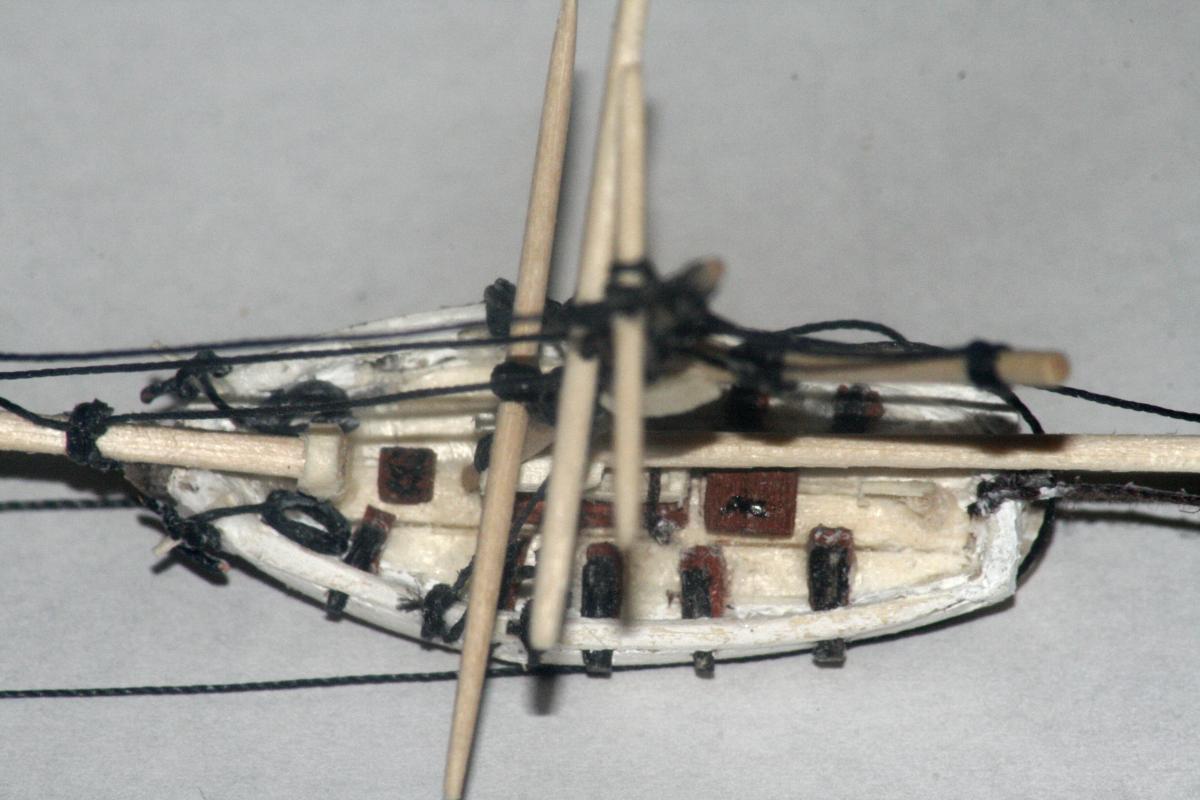
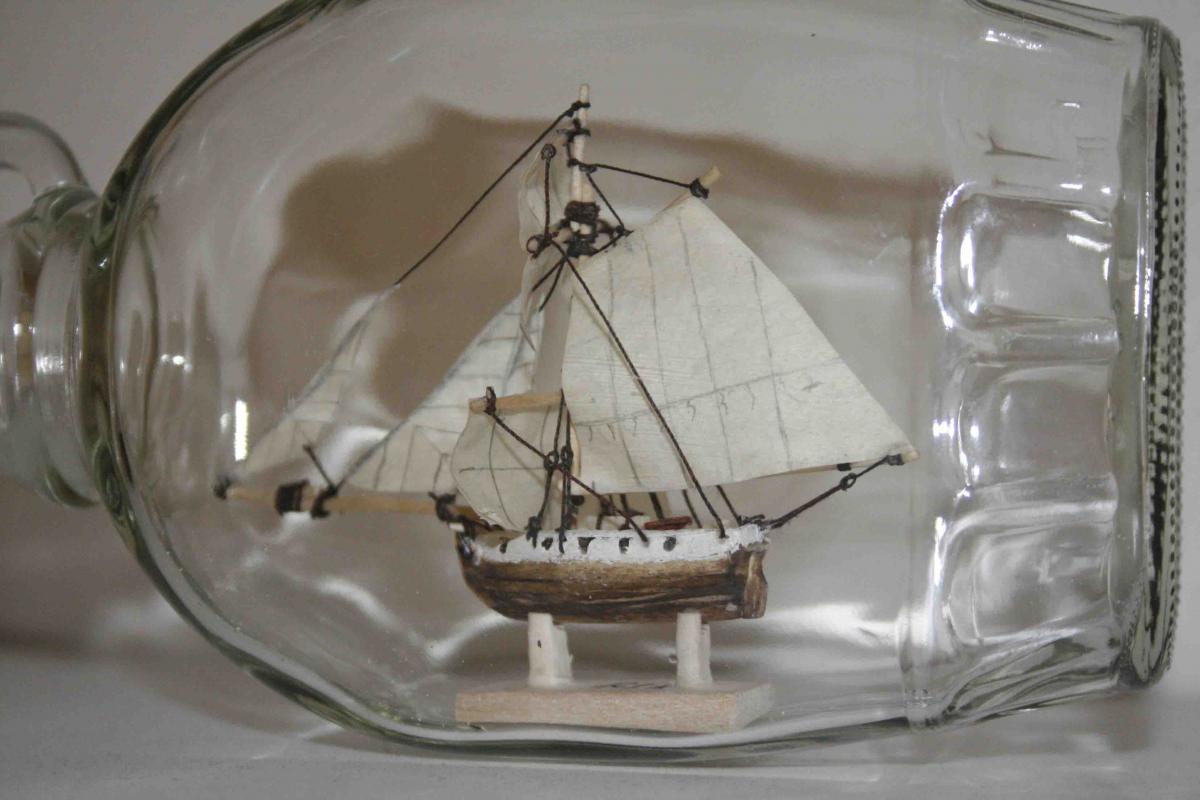
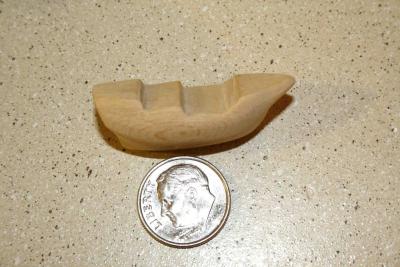
Some one once asked me during my building of the Bounty if it could get any smaller. Well ....we're about to find out. I had a friend at work that saw the bottles in my office and asked if I could do one for her. She handed me this strange little bottle more a jar really and I thought wow that would be a fun challenge. First a note on the scale. When I'm usually asked about scale I tell people it's on the itty bitty scale. The die hard scale people don't usually appreciate this joke so then I have to tell them the actual. Before I go into that I'll mention that I got my plans from page 55 of "Story of Sail" by Veres Laszlo and Richard Woodman. If you follow me at all you know I mention this book a lot. In truth almost every thing I build comes from Story of Sail. When I have a thousand plans all at ship in bottle size how can I resist. I may post plans with the model by it later but I'm always hesitant to post full out plans since I like the book and don't want to infringe the copy right. Back to scale. The original plans are noted as 1:300 scale. To fit this bottle I took a picture of the plans and reprinted them at a smaller size. I then calculated the ship according to the book to be 89 feet from the back of the hull to the front of the hull not including the bow. The model is 1.5 inches. So 89 times 12 is 1068 inches. Divided by 1.5 inches is 712. So 1:712 scale. If I'm wrong on this please correct me. So far I have carved the hull. I think it's ready to start adding the hull details. I may try scribing the planks but I'm not sure yet. I would like to give the hull a darker color and I'm afraid the scribed planks wouldn't show up. I'm open to suggestions on that one. Another quick not on the selection of the ship for this ...jar. The lady I'm building this for asked me to put a ship in it. As I always I asked what type of ship would you like. The most common response after that is either pirate ship or what do you think. IN this case it was the latter. So I looked at the bottle and say the emblem and thought that looks a lot like the emblem on the Santa Maria. So I through that out there. My client is of direct Spanish decent and thought that would be a perfect. I am as excited for this build as much as I am dreading it. I got really tired of the Bounty by the end which I built specifically small to get ready for this one. I do think though, using what I learned from the Bounty, this will be a much quicker and more delightful build.

- 62 replies
-
- 2
-

-
- santa maria
- finished
- (and 1 more)
-
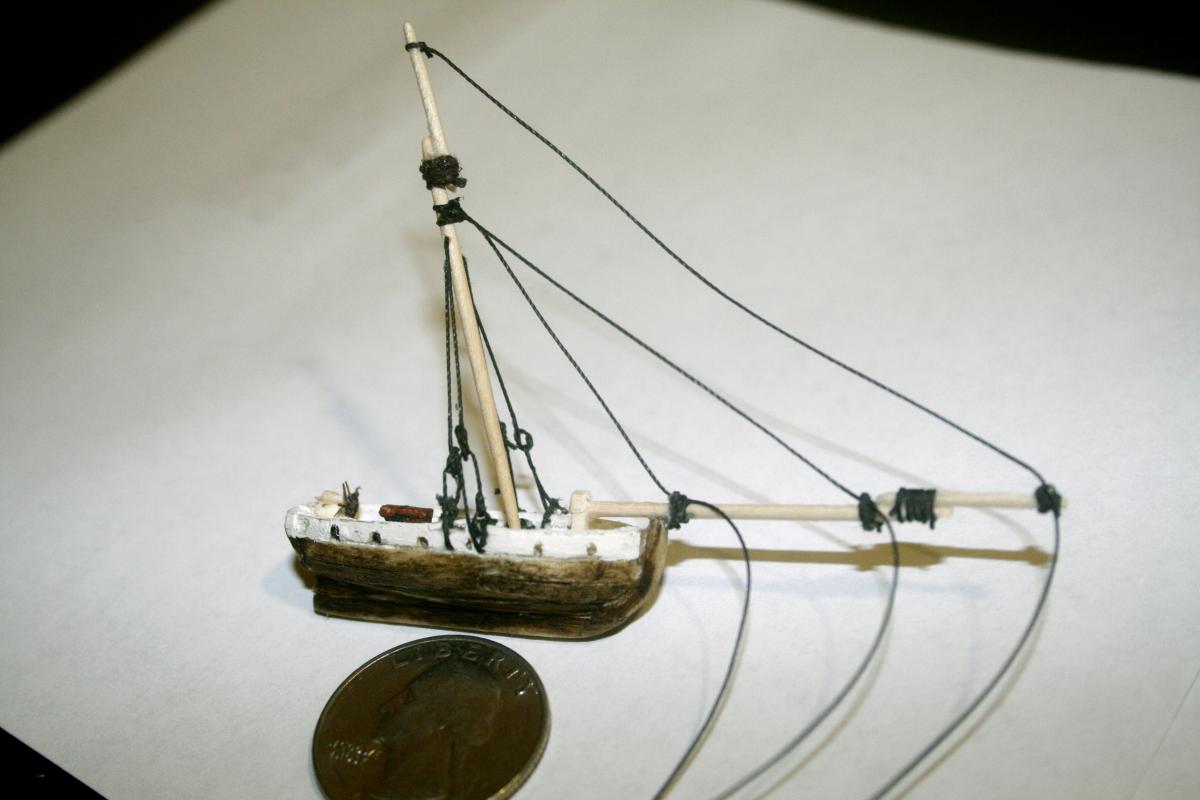
So I was pressed by the Admiral to sell my dream car a 1971 beetle. The car was out of capabilities to repair and she didn't like it sitting around. She was very generous though in that she told me I could take a portion of the money and get my self something. I have been wanting to build an rc sail boat for some time but now I finally have some money to throw at it. I will admit I am one of those crazies that doesn't want to do a T(numeral) kit. I want to do something I think is a little more fun. I know it's crazy but so am I. What I'm thinking of doing is a simple ship like the Ferret in the book "Story of Sail". The sails won't be far from a beginners kit type ship just a gaff along with the boom on the mainsail and an extra jib. I have the plans more or less figured out but I'm not sure what to do as far as electronics. I know I need servos a receiver and remote but which ones are best? Where's the best place to get them? Is there anything I'm missing or should know? Thank you for your advice.
-
A member in our local club recently passed away which was a huge loss to the club. I only wish I could have gotten to know him better. His family decided to sell his tools and kit's to club member's rather then throwing them out. I was able to acquire an old Model Shipways Elsie kit for a great price. I do think there are pieces missing but having done a lot from scratch I figure I can make it work. I got a little into it and I wonder if I'm in over my head. I wonder if any ones done this model that can post a log on it?
-
Bob I was hoping you would bring this build log back. I recently read the book as well and put the Spray on my list of ships to bottle. Your model is so well done I hope to use it as a reference when I do build the Spray. Thanks for bringing it back.
-
This build log had become way to much fun. Good work on the ship and the photoshop.
-
I knew it you are using little people! That's why it looks so good.
-
Incredible work as always! I'm glad you were able to setup this log again.
-
Incredible work! I love the life boat idea. I've done quite a few small ones but none that looked that good. Glad you got your build log back together it's been fun watching your progress.
-
Thanks!
-
Wow didn't know this one existed in the first place. I think I'll give this a try.
-
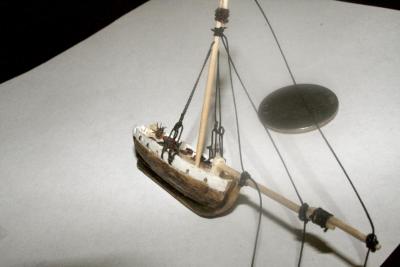
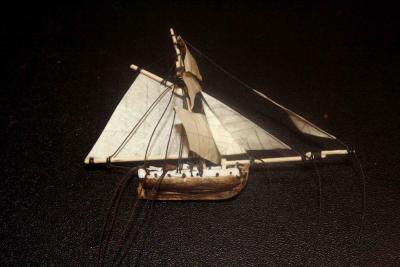
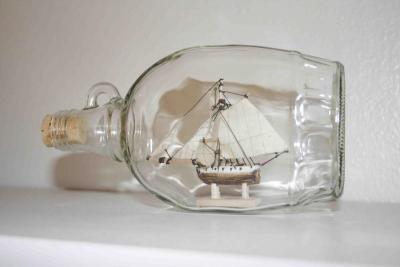
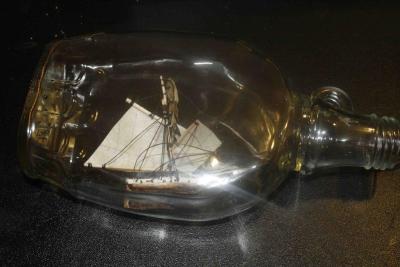
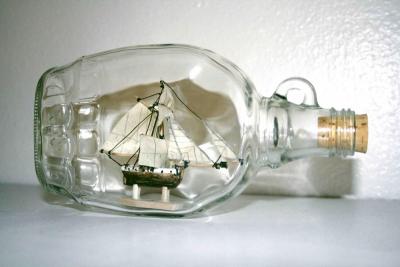
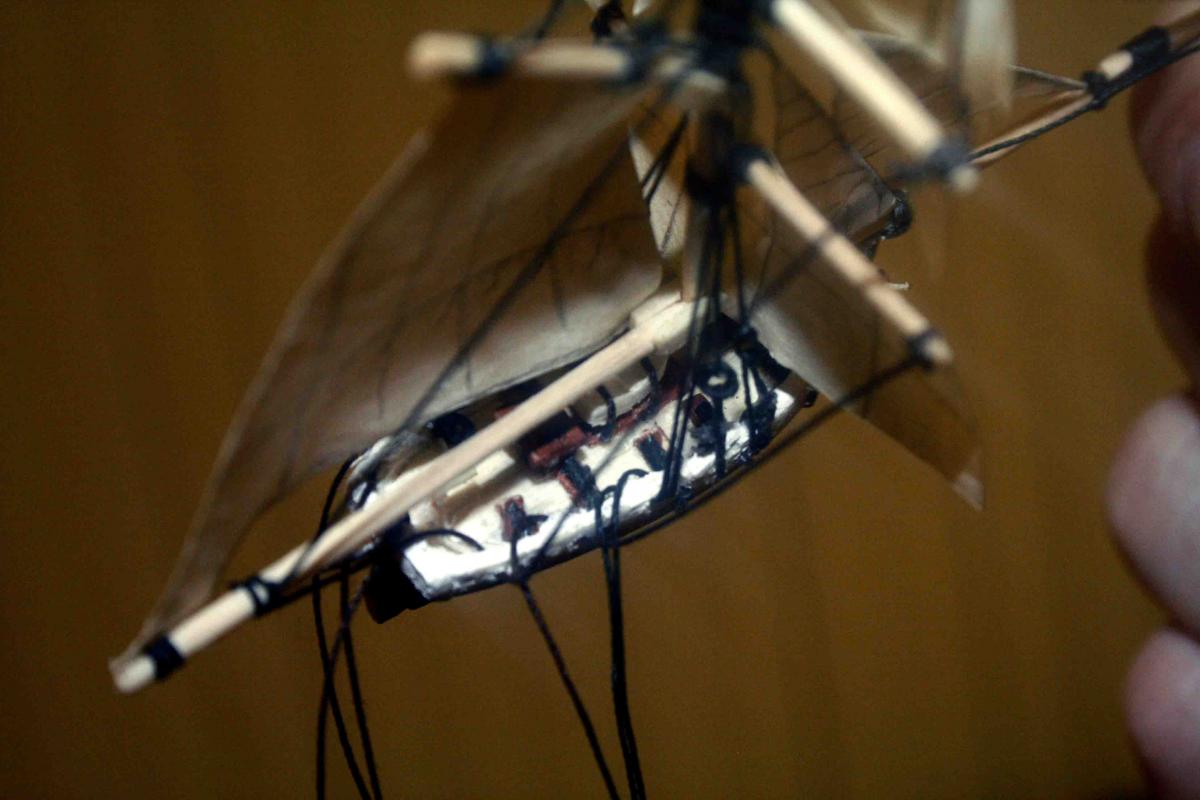
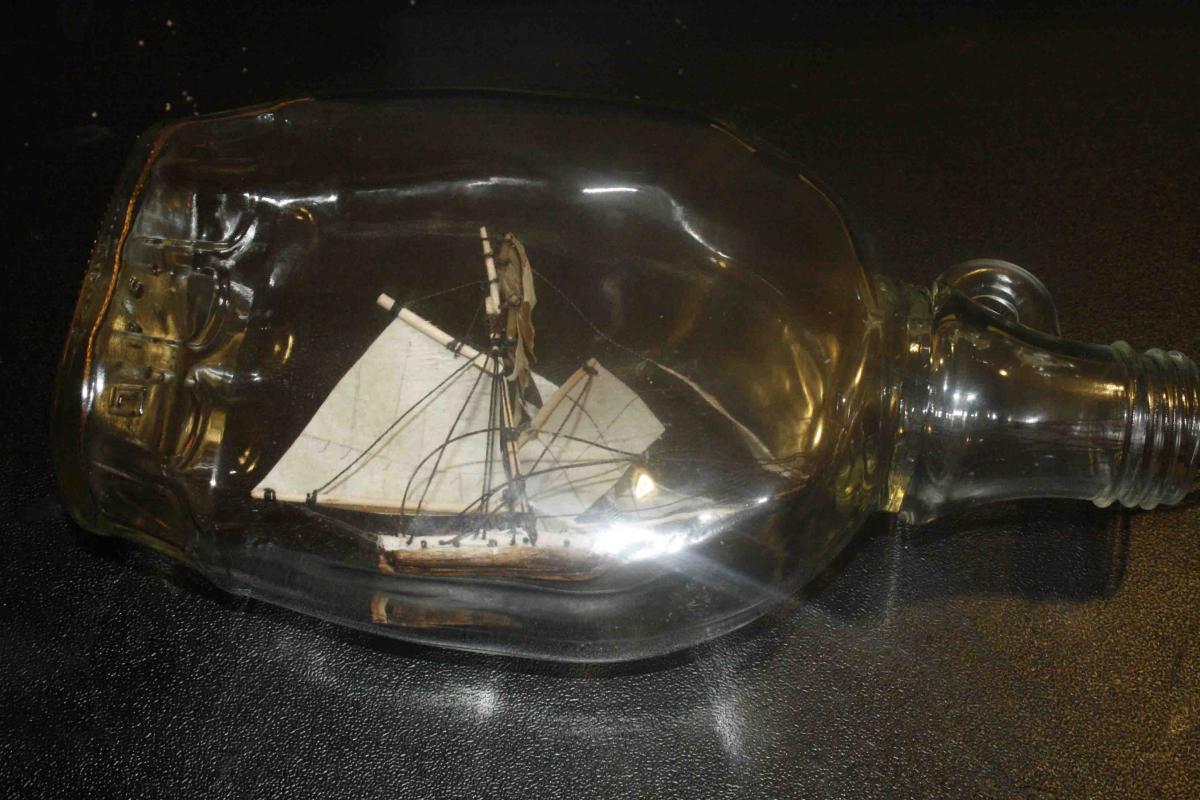
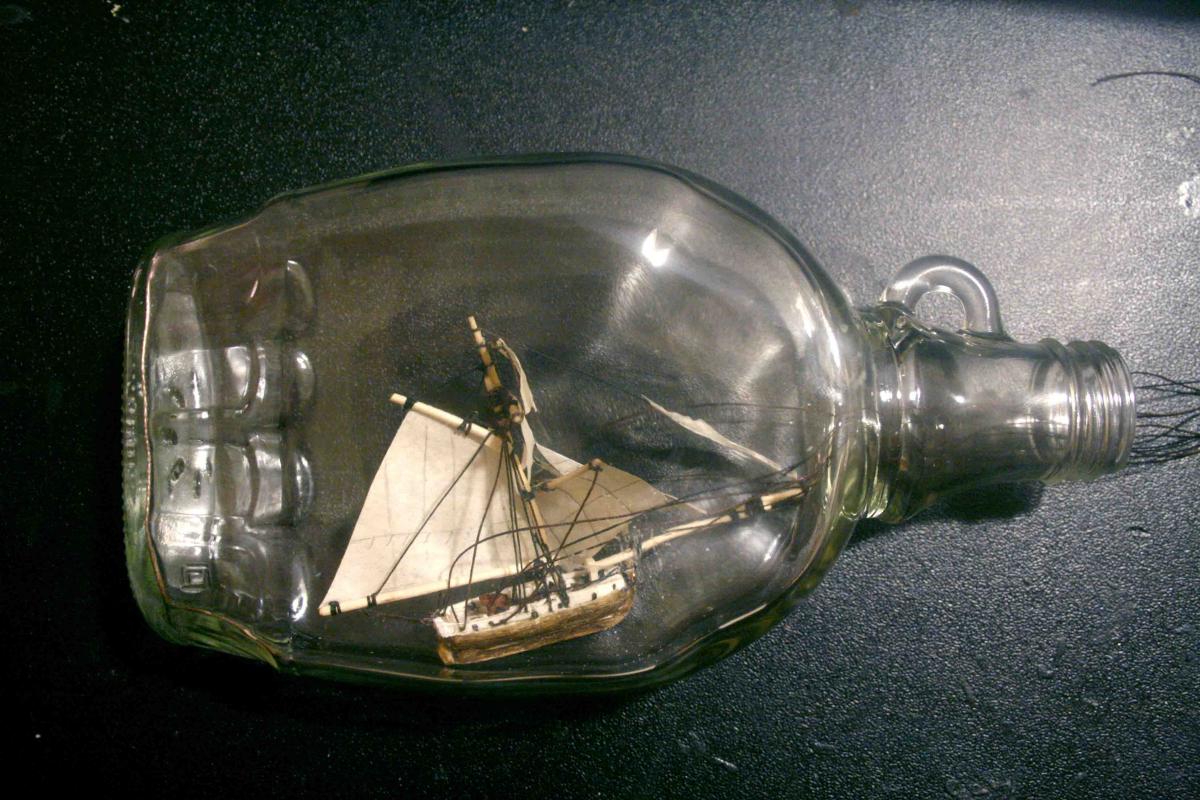
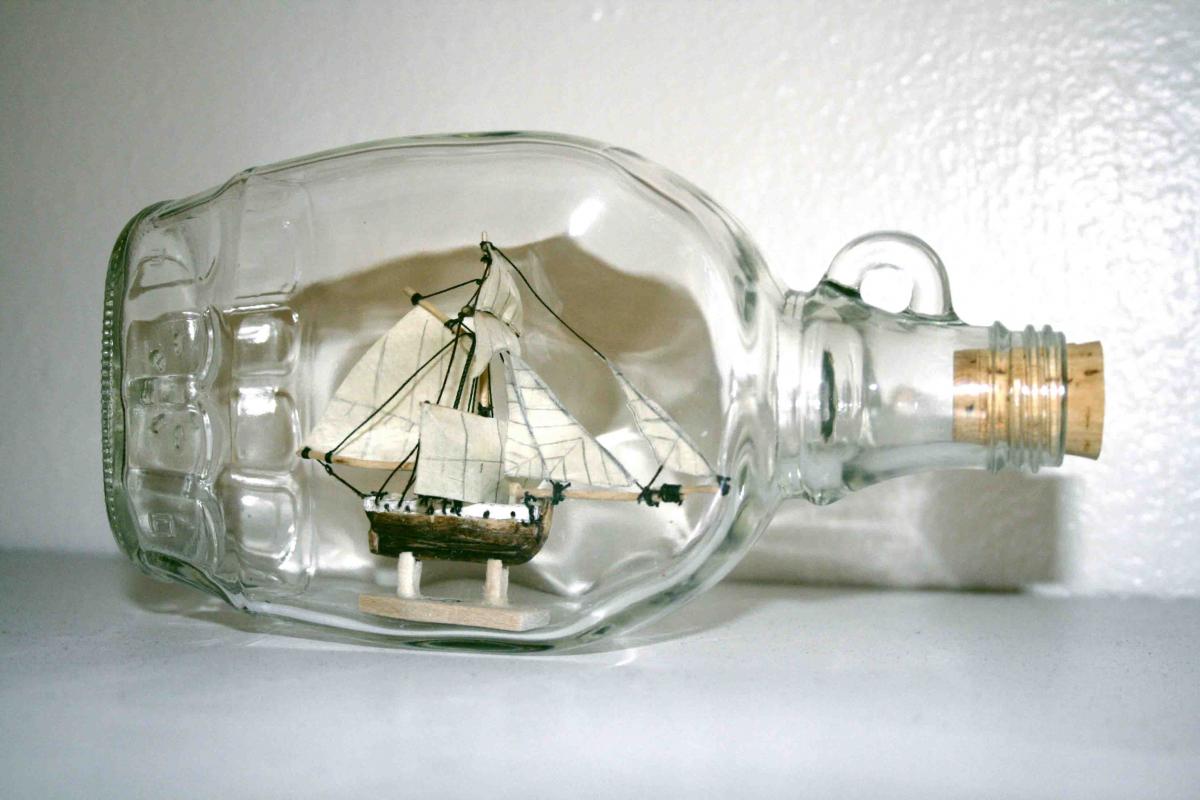
Once the rigging was done I used drawing paper to make my sails. It was probably a bit thick but it holds it's shape well which gives it a good full of wind effect. Once the sails were complete it was time to build the sea and bottle the ship. For the sea I used a technique from a video posted on the facebook site a while back. Robert Little explains the technique better then I can so I will let him tell you. The explanation starts at the 4:40 second mark. Using Robert Little's technique this is what I came up with. I used cardboard instead of wood since it was more readily available. Once that was done I put the ship in the bottle. The bottle I originally planned the Bounty to go into a light bulb but it didn't clean out well so I used a Christmas ornament turned upside down. The Bounty is a little small for it but not overly so. You can see with the sea being able to move around in the bottle why I didn't worry about having lines coming off the front and back of the ship. Here you see the ship is all set up and ready for the finishing touches on the sea. I added a little clay to make it appear to cut through the water as well as a small wake behind her. Here is the completed HMS Bounty in a bottle. I cut a hole in a block of wood and glued the top, now bottom of the ornament into it. I then painted on the name as well as my name and year completed. This one was a lot of work. The small size and amount of detail put it made for a very long build. At least longer then I'm used to. In then end I'm pleased with the results. Thank you for reading and if you haven't yet seen the other HMS Bounty build logs please check them out. They are all very well done. http://folkartinbottles.com/workshop/building-the-hms-bounty
-
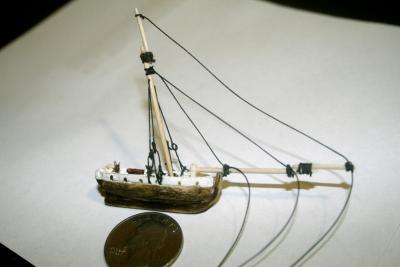
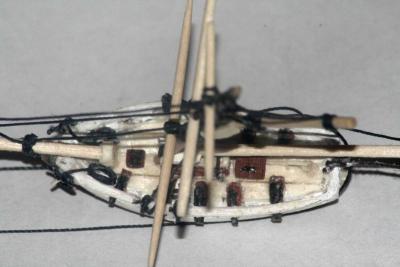
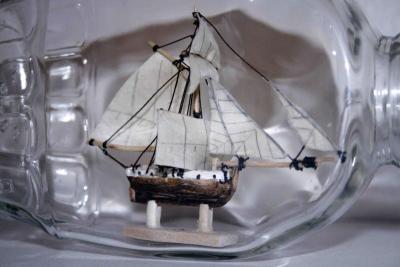
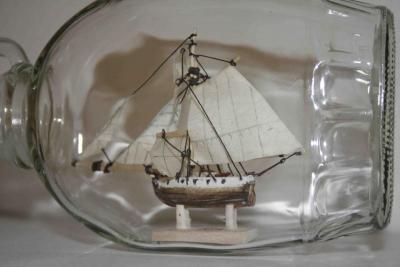
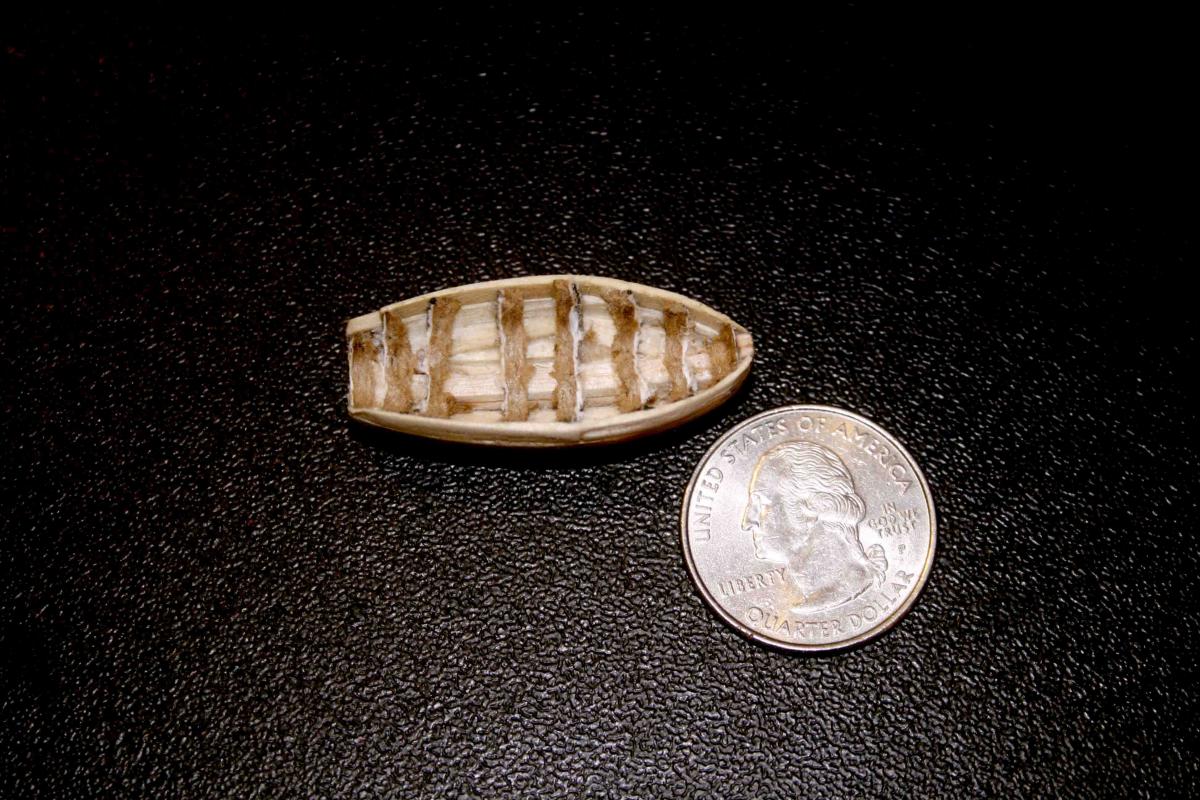
I went on to add the bow and the deck furniture. The helm was made by cutting a seed bead in half. This was kind of crazy but it worked. The cannons are pieces of wire. I build the launch out of match sticks using the same method I outlined in a former post "Ready the Longboats." The winch was made from match sticks and bamboo. The great thing about bamboo is that it remains strong even when it's cut very thin. The capstan is just a splinter glued in a hole with the top painted red. The hatches were tricky and I stumbled upon a new technique in creating them. I noticed that Greg Alvey did a terrific job on his hatches and I asked how he did it. He explained that he took the picture of the deck plan stained the hatches and glued the paper down as the hatch. I couldn't get my printer to print small enough with out the lines running together so I initially thought I will just stain some paper and no one would notice there were no lines in the hatch anyways. As I was gluing the paper down I pressed it down firmly with the exacto knife I was using to position it. I noticed the knife left a small divot in the paper. I then started lining up divots until I had all the lines in the hatches. I like to add anchors on all of my ships and the Bounty was no different. This time I got some smaller wire and made them particularly small. It was then off to the rigging yard. The masts and yards were all made from bamboo with paper and paint making up the platforms. I tied a lot of thread blocks since the masts were to small to drill through. I wanted to go with a more realistic rigging but then chickened out and used a usual SIB rigging. This constitutes the sheets all running aft to either the stay or mast behind the yards they control. That sentence was a bit technical for a beginners blog. Kudos to those that understood that. In lay mans terms the tan lines that control the sails are run towards the back of the ship. My rigging was a little different with this ship. I used a shallow hole to set the masts instead of the usual hinge method. This gave me a little more flexibility getting the ship in the bottle. I made it so the masts still folded backwards but used a slightly different technique on the mizzen mast. Since the forward stay ended at the base of the fore mast and I didn't want to drill a hole through my ship I had the line exit the top of the mizzen mast. I did this specifically because of the bottle and sea method I was using would allow it. Typically I wouldn't rig the line that way. I found a couple new methods on the shrouds that worked out well. I had recently seen a technique where the back stays are weaved back and forth through the ship. I wanted to try this technique but the size of the ship and angle I would have to drill made it all but impossible to go through the ship. So I drilled three holes below my chain plates where the chains would have been attached to the ship. I bent a small piece of wire a U shape with a gap just big enough to put thread through the U. I glued the wire in the hole and bent it upwards to act as the chain. I tried to make them so the came just below the bottom of the chain plate. I then threaded my back stays through the U of the chains back and forth as I had seen in the threading technique. With the ship being so small I only had to dab paint on the lines going over the chain plate to make it look like they were going through the chain plate. The other method I used for the shrouds above the platforms. I really got tired of gluing tiny piece of thread to the back stays and decided to make a jig that would help me make ratlines. I tried using pins and wood and things but they all just failed. Then I found tape. I used my finger nail polish bottle to wrap masking tape around so that it was sticky side up. I then carefully measured and applied thread to the sticky side of the tape with three lines to create the stays and a row of lines to create the rat lines. Once they were all pressed firmly onto the tape I slid the bottle out leaving my rat lines in mid air attached to the tape. I poured on the super glue and blew off the excess so I didn't have any between the lines. Once it dried I cut out my shrouds and glued them onto my masts.
-
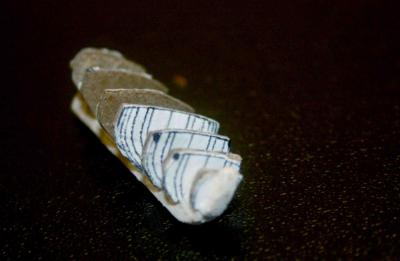
I created this build log for my blog. I figured I'd see if I couldn't just copy it over. I started the usual way by carving out the hull. I decided on doing a really small build. I had been reading a lot on miniature SIB's and figured I'd try it out. I then worked on the forecastle. I ended up cutting match sticks to splinters and gluing the splinters on the ship. Other builders used styrene which I may have to try out. I continued using match sticks to create the channels and chain plates. I painted the ship with acrylics and after checking it against a few photos I decided that my bulwarks were to high. So as I cut the top of the ship down to size. I did worry a little that the gun ports would not be big enough to put the cannons through but they ended up ok. You can also see in these photo's a much nicer deck then I usually have. The great part about the community build is that I was able to get ideas from other builders doing the same ship. As I watched Cecil Tiller build his ship I noticed his deck planking looked great. So I asked how he did it. He told me to take clear finger nail polish and coat the deck. After it dry's use a razor blade to cut the lines where the planking should go. Then stain the deck. The interesting thing about this method is that the stain darkens everything but where the nail polish is. Creating awesome and very visable contrast in the deck planking. To see more of Cecil's work click the link http://folkartinbottles.com/workshop/building-the-hms-bounty/223-cecil-tiller-building-log
-
I don't know if I ever saw the details of the chest and barrels. That's a very nice touch good job!
-
This is a ship I built from plans in "The Story of Sail" by Verez Laszlo and Richard Woodman. It's the first ship I ever build using plank on bulk head. I used match sticks to plank it. I'm not sure whether I will go through and recaption the photos yet. In a way I'm liking these photo only build logs gives you a good over view of the build.