DSiemens
-
Posts
1,060 -
Joined
-
Last visited
Content Type
Profiles
Forums
Gallery
Events
Everything posted by DSiemens
-
 She looks good floating in the water. She'll be a fun ship to sail for sure.
 -
David that does sound like a lot of fun. It would be really neat to meet John Fox III in person. I've spoken with him on a SIB forum and seen his work on his website and in the Bottle Shipwright magazine. He's an incredible ship in bottle builder. It is harder to get away with two young kiddos though. Maybe one of these day's I'll make it out. I don't know if they allow you to send models to be judged with out me being there. If that were the case I'd make one to send with Ralph. I think it would be fun to have a critique like that.
-
David that helps a lot. I did notice in other photo's there seemed to be multiple booms tied parallel to the mast when not in use. So that makes sense. I'm not going to go to crazy with it but I think I will put some slack in one of the aft back stays to give the sail more room. Dgbot I am a member of the Rocky Mountain Shipwrights. Ralph is helping me with my Elsie build. John has lent me a dozen or so books I wish I had time to read. I've met Steve but don't know him quiet as well. I'm actually giving a ship in bottle presentation in March. I think I'll build this ship in different stages and present it as a first build. It is an incredibly simple ship and would be great for anyone wanting to try ship in bottles for the first time. Popeye thanks! I decided I needed something simple to get back to basics. Your right I should just change the name. The color and the deck furniture are totally the Mariquita. The plans just don't say that exactly.
-
Rigging is almost done. Just one or two more little things. I have a question actually I hope some one can help me with. Looking at the plans she has some back stays that come from the top of the mast to the back of the ship. Once I got them on there I noticed how they really get in the way of the boom. I had heard once of ships that had removable back stays and wondered if that may be the case wit this one. It would make sense since with the way the back stays separate near the bottom like there's a block there. If that is the case I"m thinking of possibly taking a stay out so that she can tack properly. I just would like to know if that's right before I do it.
-
Moonbug I recently saw a method for launches at our ship club using cigarette paper and a wood plug. I've done similar for ship in bottle builds and was surprised that it could be used for the much larger builds as well. The results were pretty impressive and didn't take a lot of time. Something to look into maybe.
-
Beautiful photography and ship. Very nice!
-
Just found this log. Excellent work. She's a very pretty ship. I like the scale and the diorama style build too. Great job.
-
She's looking pretty.
-
Thanks Augie. I like her lines too. Thats mostly what attracted me to this ship. Shes simple but beautiful.
-
Some rigging completed. Put in a couple back stays. The rest is temporary just to hold everything in place for now.
-
I have heard that they may have gotten the idea from bamboo as it has divided sections in it. Even if that isn't the case it's amazing technology and amazing that they have done it for so long.
-
Thanks Michael. I hope I will but I think I'm more having fun with this one then anything else. She's simple enough to try new things on and so far they've worked well. Thanks Bob. She's turning out nice. I'll have to get more photo's up. I have the mast, gaff and boom and and it really brings her to life. I need the rigging to hold them in place though so I may build just a bit more.
-
I should rephrase that. I've used them to build not to put a ship into the bottle.
-
Popeye there's a SIB bidder in another forum that always says if the ship won't fit in the bottle get a bigger hammer. I've used them just not very often.
-
The frame looks good to me and I agree it will look nicer then the metal. I wonder though are you planning on making them bigger than the metal fittings?
-
The flash drive idea is really neat. What a cool way to store all of the information and photo's.
-
Just started reading and found she's already done. What a great log and a great build. She really turned out nice. Good job!.
-
Looks good. She's going to look great in the light bulb.
-
Great build she looks wonderful! Can't wait to see what you have planned next.
- 188 replies
-
- 1
-

-
- latin caravel
- artesania latina
- (and 1 more)
-
Max black is a good color for the rigging and one I use often. The reason these lines are black and running lines are tan is because the standing rigging doesn't move and is constantly exposed to the weather. To protect the lines from wearing out they would cover them with tar and sap which turned them black. The running lines on the other hand need to move through block and tackle and tar would gunk them up so they were left as is. As the lines wore out they would have to replace them. Which is why they keep big coils of rope below decks. Great work on your model she's really beautifully done.
-
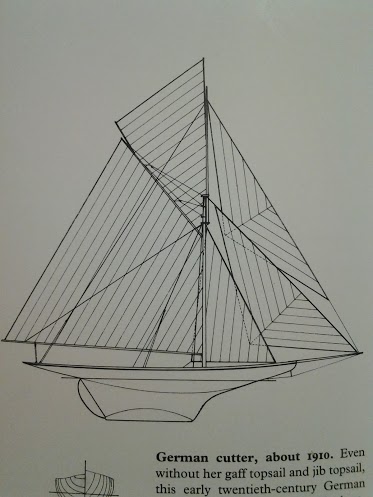
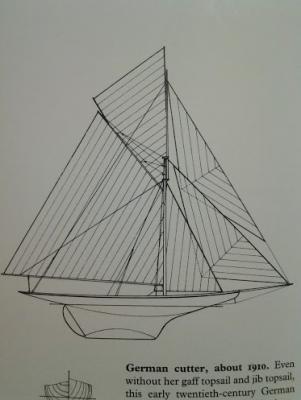
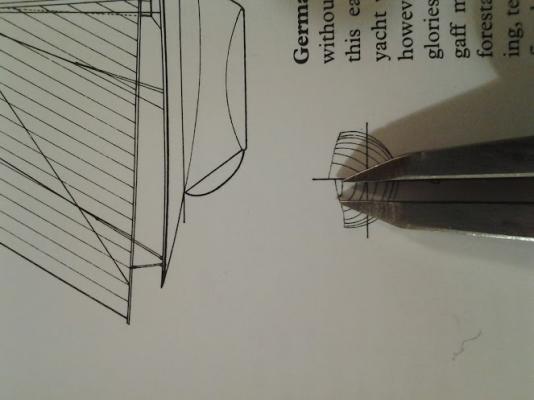
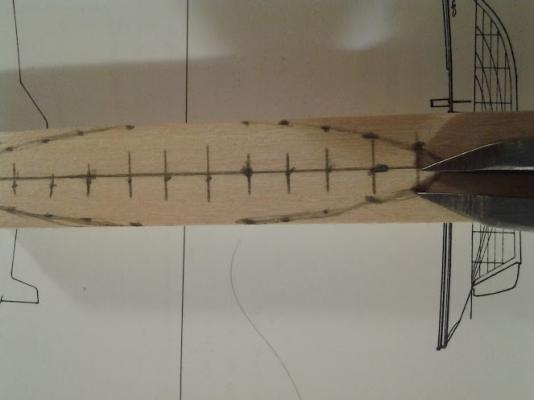
Seems as though I need to run into a rough patch before I hit some inspiration. Or maybe I'm just better at the 1:300 to 500 scale. In either case my current bottle build was giving me a lot of trouble and I hit a road block. So while I was thinking of how to fix that I went on to another project. I chose this one because I think I need to get back to basics again before proceeding. Also like so many of my best work it's for some one else. I may explain the story behind that later. Here's the ship. She's simple but beautiful. The only one in existence today is the Mariquita which I have based a lot of this model on. Still debating if I should break down and just call her the Mariquita but we'll see. I actually tried some thing new and did some rough measuring. The ship is a bit thin but she needs to fit in the bottle. I'm off less then a millimeter so I think it's okay even for this scale. This was actually pretty fascinating to see and I suggest trying it out just for fun. I measured out the center line and then lines on the plans. I counted twelve on the plans but the photo now shows more like 16. It's 1:300 scale kind of hard to see. Any ways. I divided the ships length by twelve and drew a line for each section. I then drew the center line. From there I went back and forth from the plans measuring each line from the center line and marking it on both sides of the center line on the wood. As I progressed the deck shape just appeared. This is probably the most fun I've ever had with a set of plans. I then carved out the hull and I apologize for not having more pictures because I tried a new technique for that as well. I've been looking at pictures of some of my favorite ship in bottle builders for a long time. One that has always intrigued me is Heather Rogers. I've posted a few pictures of her work and if you would like to see more click link. As I looked at her photo's I've found she carves ships very differently. She also did a model of the Mariquita so being I had a reference I decided to try it her way. What I found was incredible. I cut out the large pieces around the hull and then went to my usual dremel work. The proved difficult as the base got in the way. So I looked back and found that she uses chisels. I pulled out my chisels and started working with it. The grove between the base and the ship created a perfect guide. I place one end of the chisel in the groove, angled it to where I wanted to cut and slid the chisel against the hull. It was almost to easy. This hull is almost completely cut from a chisel and touched off with some sanding. I noticed though that Heather uses what appears to be harder woods. I think I may try that in the future as the bass wood is soft and dents easily. I then added the trim on the sides and the deck furniture. The ships wheel is made from a piece of a watch I bought from a jeweler for the spare parts. The deck house, hatches, skylights and dory are cut from match sticks. What's also interesting is that I'm about four hours into this build and I'm ready for masts yards and rigging. She's a quick fun build. Actually if any one wants to try ship in bottle building for the first time this ship would be a good one to start on.
-
Well I'm not at all happy with the masts. The shrouds look horrible. I tried to say to my self it's an experiment ship any ways but no, I can do better. There was a technique in a recent Bottle Shipwright magazine that used wire insulation as the mast allowing it to bend backwards while still being really small. Once I find some insulation the right size I'll continue this build. Let me know if you know of some where.