DONATION DRIVE - SUPPORT MSW - DO YOUR PART TO KEEP THIS GREAT FORUM GOING!
×


DSiemens
-
Posts
1,060 -
Joined
-
Last visited
Content Type
Profiles
Forums
Gallery
Events
Everything posted by DSiemens
-
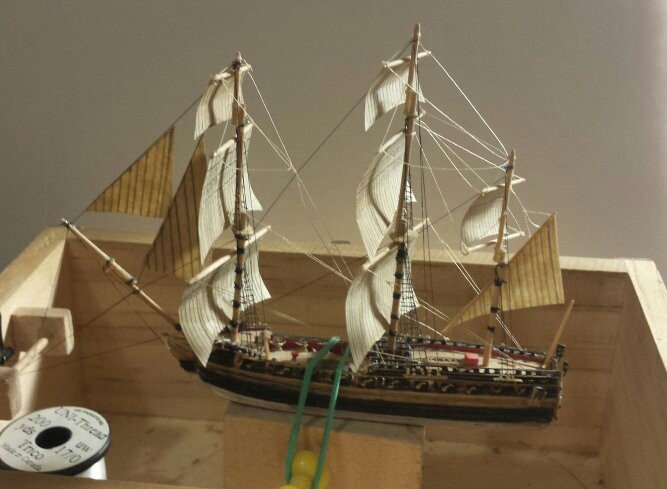
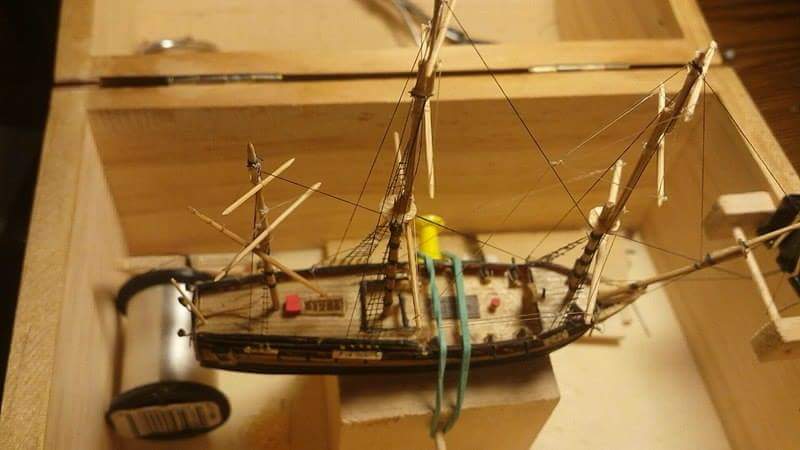
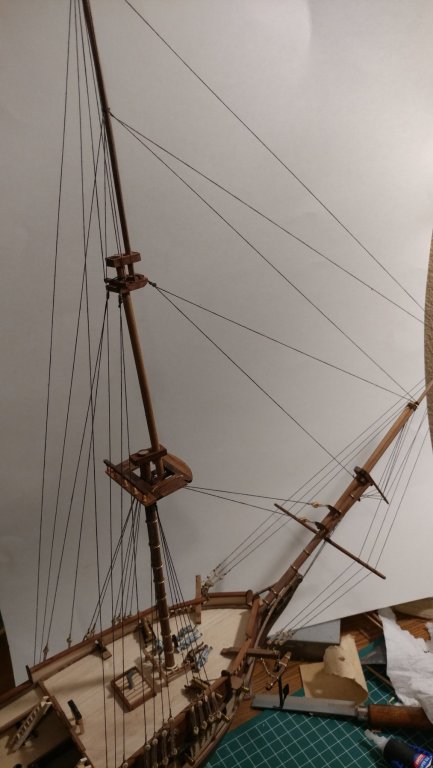
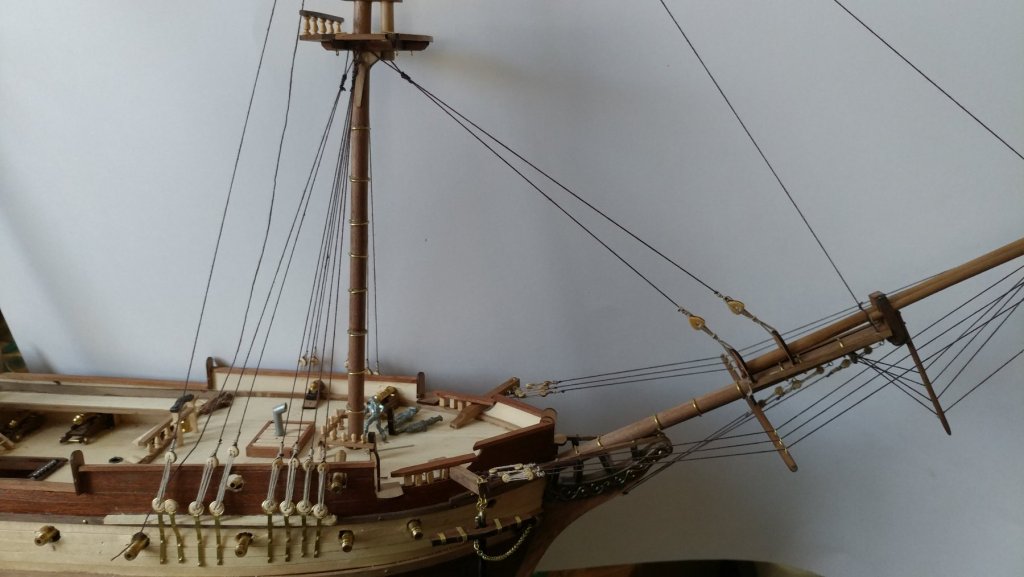
 Starboard ports are done. And the rigging is moving along. The bowsprit and fore mast standing rigging is almost done.
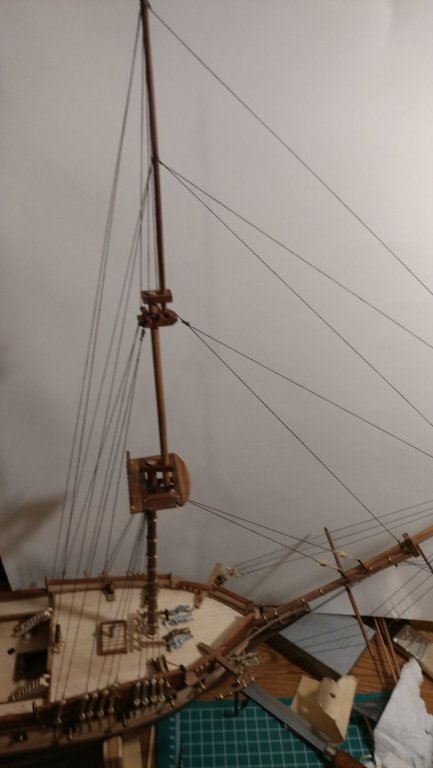
-
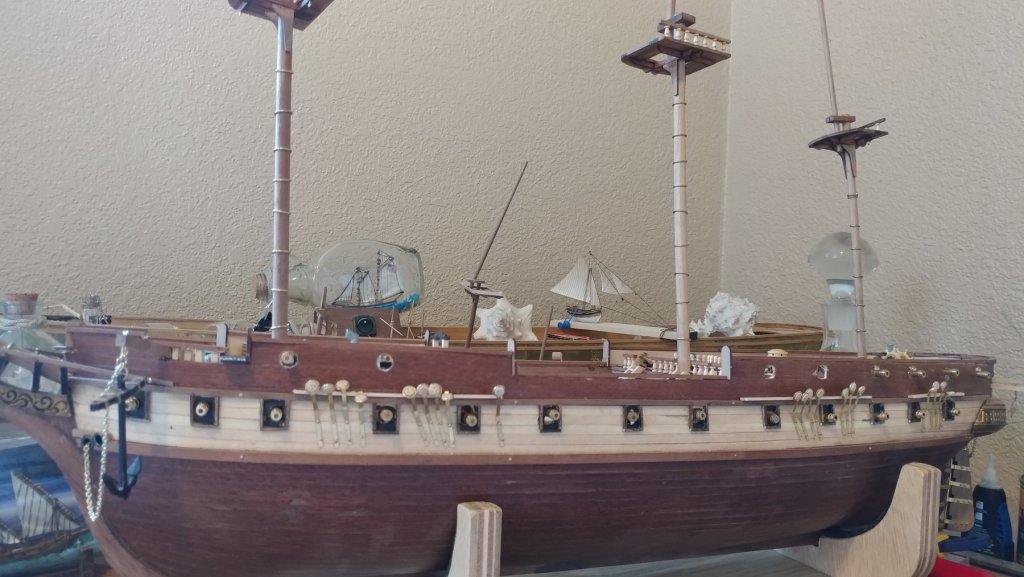
Also gun ports are done on the port side.
-
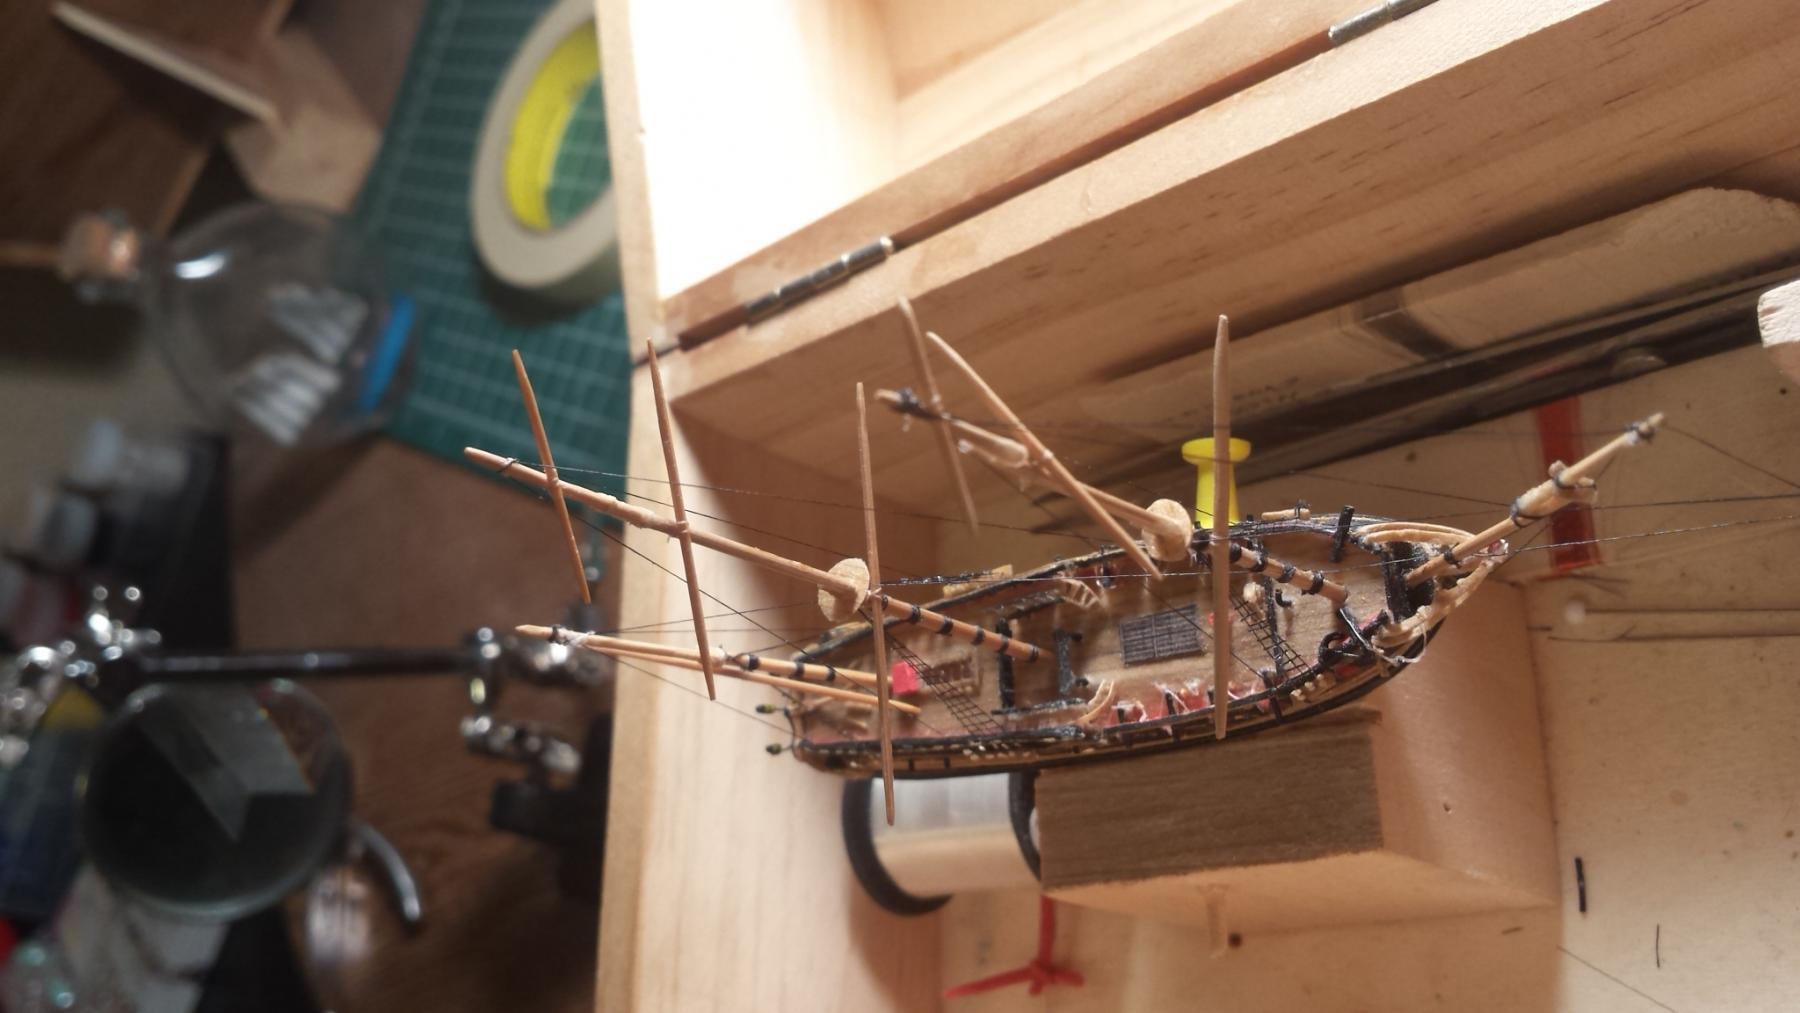
Thank you very much Popeye for your help. Your expertise is always appreciated. Thanks Jim. Some updates. Bow sprit is about done and standing rigging on the fore is well on it's way. You can see the little men lazing about. I aught to put them to work.
-
I've started on a project that I need to get done fast that involves rigging a Constellation. I'm wonder about how tight the rigging lines should be. I'll give some background. I am mainly a ship in bottle builder. The tension of the lines in ships in bottles is extremely important. The line tension sets the rake of the mast and can also be used to keep a mast straight side to side. I use flytying thread that has very little stretch so I know exactly where my masts will be when the lines are pulled tight. My current project is not a ship in bottle. Its a larger ship model so I can set the tension where ever I like. What I'm running into though is the lines for this kit are very stretchy. I'm not used to that at all. Also parts of the kit weren't built to the best standards so the masts tend to sit to one side. I've used the back stays to bring the mast back in place similar to what I've done in ship in bottle building but I want to check if this is a good solution on the long run. Will an overly taught shroud cause problems later? Mostly in the effect of when the model gets old will overly taught lines break faster than loose lines? If tension is a problem what should I be aware of to make sure the lines arent too tight.
-
Also gun ports are done on the port side.
-
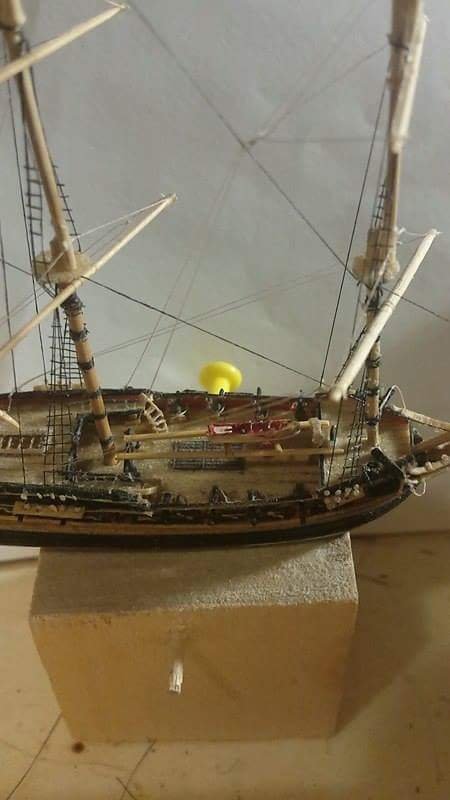
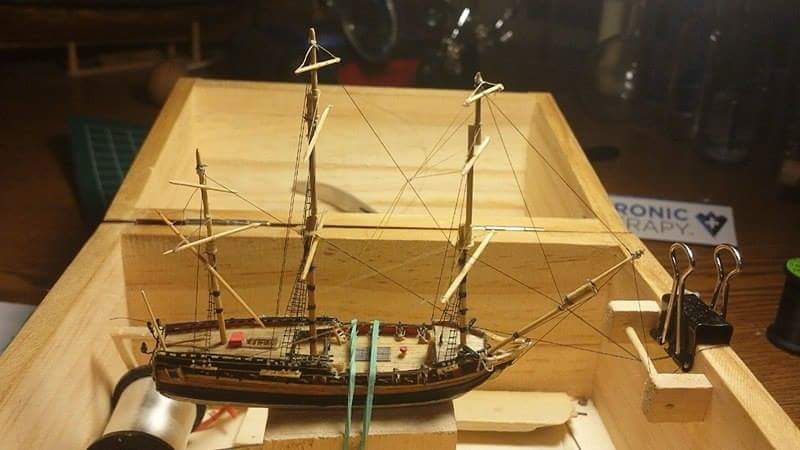
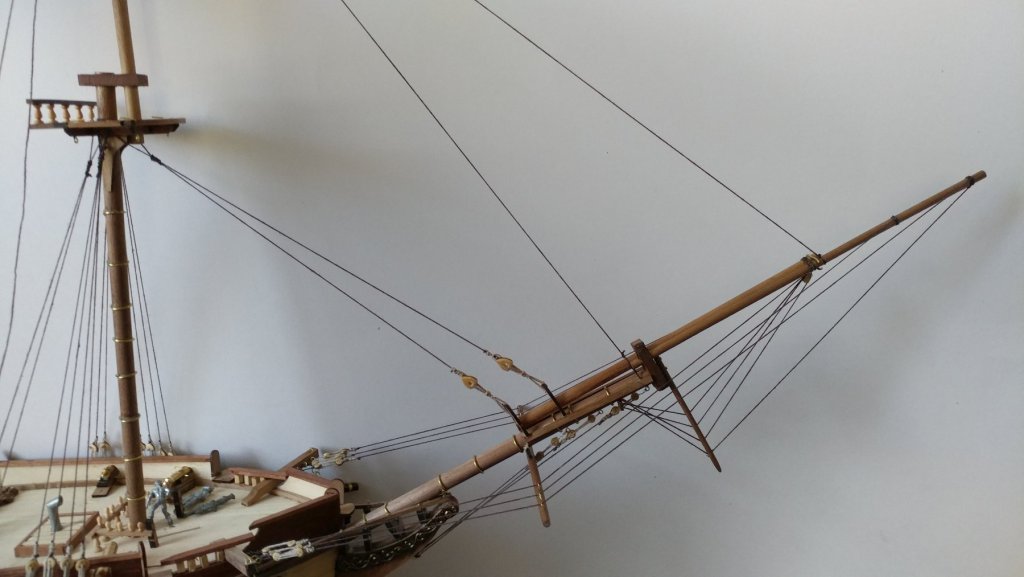
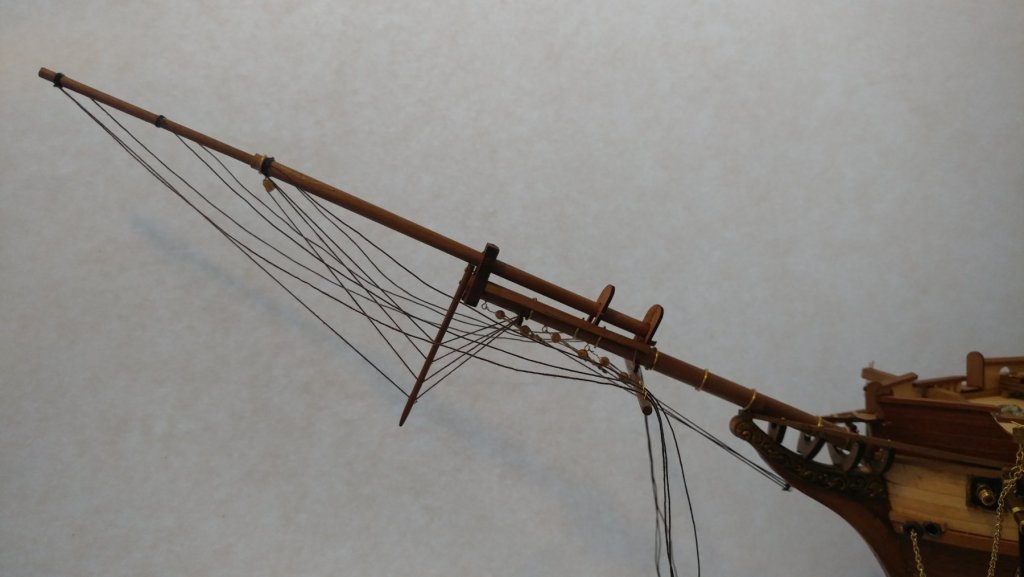
Well I kept the rigging basically as the plans dictate. I found the stem juts out to far to do what I was thinking so I just went with it. Got the spar built and in place just need to do the lanyards to the catheads. Then the bowsprit will be pretty much done. I'll leave the sail off the yard. Even if there's technically room I dont think they would have used one. Not with the stays and everythong else going on there. There's not really room for it.
-
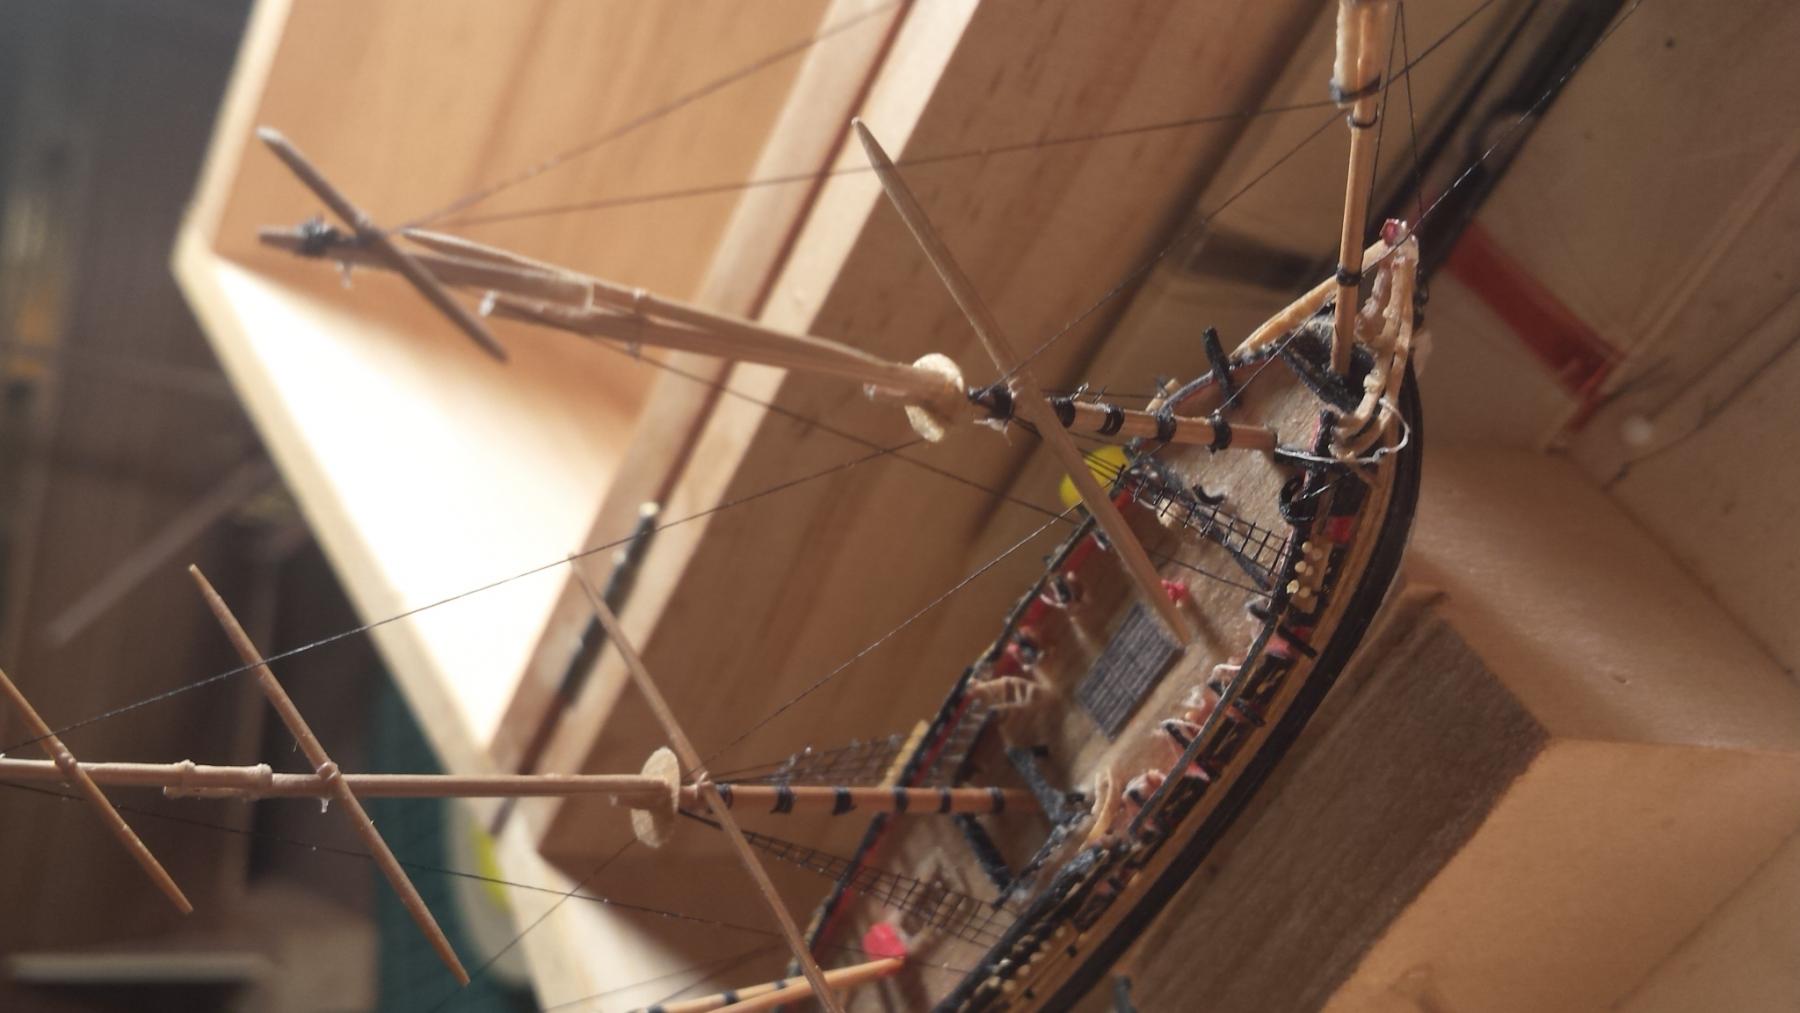
Popeye yeah my projects appear to be piling up. Quiet literally. The other big ship is a Cutty Sark. Some one came into the club a while ago and was giving away kit's to whom ever thought they would finish them. I initially kept it with an idea of doing a club model. One I could bring in and every one could work on here and there if they wanted. No one really took that on so I've been piddling away at it here and there. I've had a long going ship in bottle commission so it hasn't gotten a lot of attention. As far as the gun ports I do know what I'm doing with those. The upper deck I can get the cannons free and out of the way and I've been able to file them square. Go to do the forecastle yet but those are pretty much done. The lower deck I framed and painted the inside of the framing black to make it appear to be go into a dark hull. You can see a side by side above. This has worked out rather well. I have the port side done and it looks a lot better for it. I'll have to get more photos posted tonight. I see what your saying about the yard. That is helpful. From what I'm seeing there's stay lines going through the yard so I'm guessing it was more used for stabilization then an actual sprit sail. With the martingale lines going beneath it there's really no space to use it as an actual spritsail. I wonder if the creators of the kit got in wrong in that way. They do have stay lines going through the yard which I think would defeat the purpose of the spritsail because it wouldn't be able to be adjusted for the wind. They also bring the martingale lines way up to make room for the sail which defeats the purpose of the martingale because in that configuration it doesn't keep the bowsprit from flexing upward. I'm starting to think I should leave the sail off. Rig the martingale as it should be going all the way back to the stem and include the yard as a stabilizer and not a spritsail. In the long run I think this saves me time since I'm not attaching the sail and rigging lines. What do you think?
-
Yeah. I'm seeing that. There were a lot of steps missed or done incorrectly that I'm having to find creative ways to correct. Like the gun ports. If I were to venture a guess I'd say he built the hull which is done pretty well. I understand he had family members who tried to help and that started at the deck furniture and masts. These dont quiet have the same level of craftsmanship. I could spend a lot of time redoing things but I don't have time. At this point my mantra is, it doesn't have to be perfect it just needs to be done. I'm really debating what to do with the bowsprit. I've got it partially rigged but the rigging the kit asks for is a little ridiculous. This forum and my club has spoiled me as far as seeing whats realistic and whats not. Fort it calls for a sprit sail. In all the photos and drawings of this ship, 1797 and 1856 versions, they have never had a sprit sail. My understanding is spritsails fell out of use with the invention of the jib in the early 18th century almost 100 years before this ship was built. So...do I keep it as planned or change things up? I'm still deciding but I'm curious about what every one thinks.
-
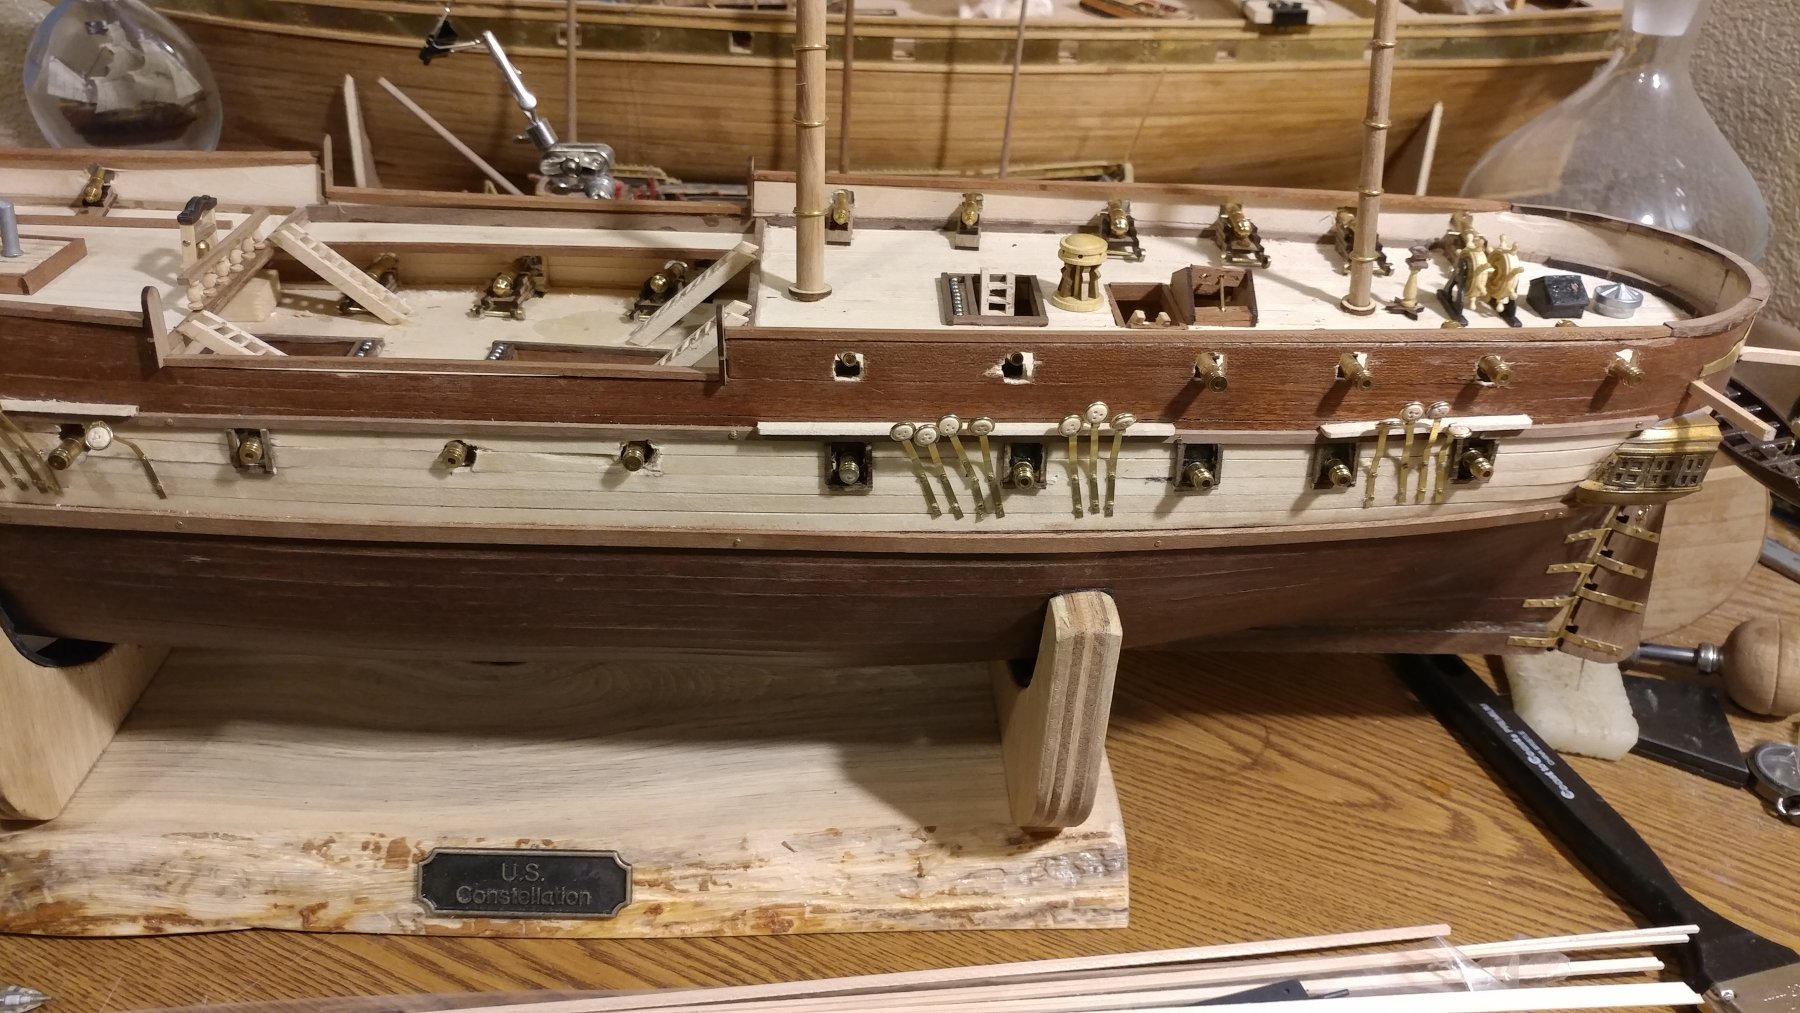
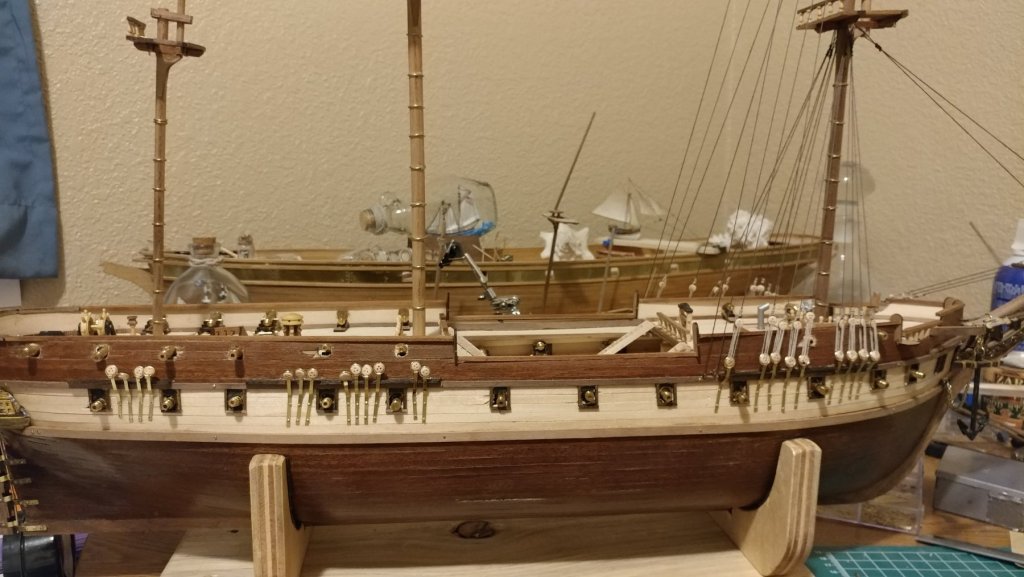
I tried to cut the cannon ports with a small saw and a file but I risked tearing the planking apart. So I went back to an old ship in bottle technique. I framed the gun ports and painted the inside black. It isn't as nice as open gun ports would be but it's nicer than torn up planking or no gun ports at all.

-
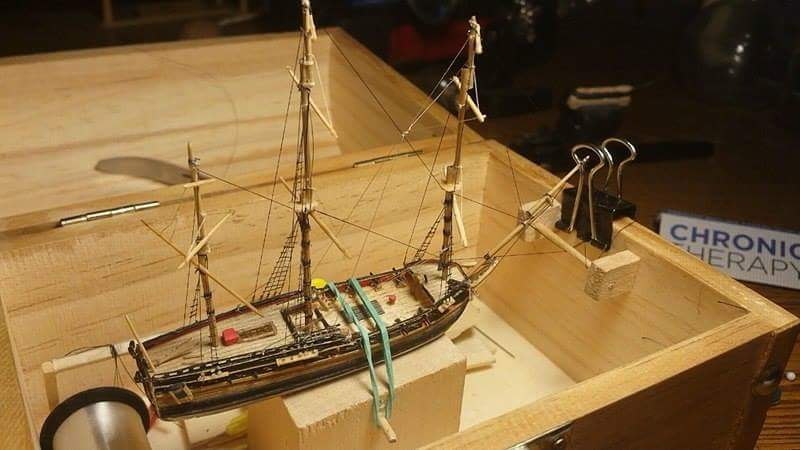
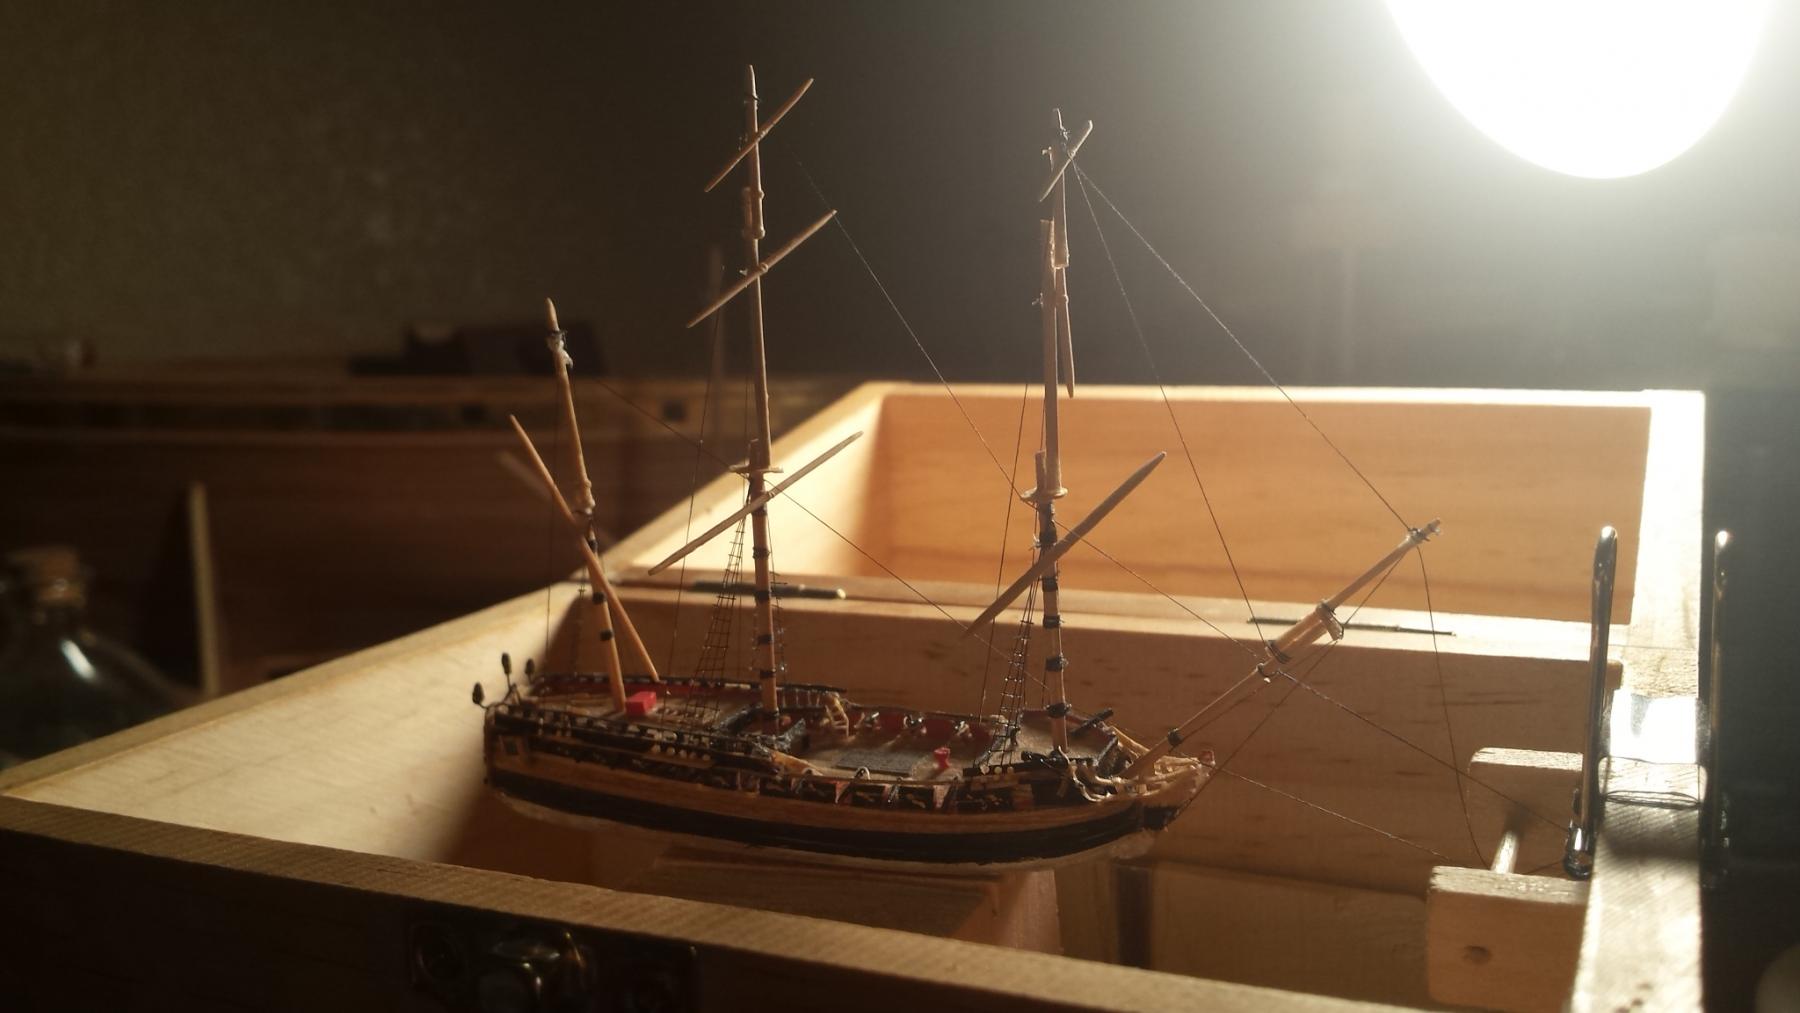
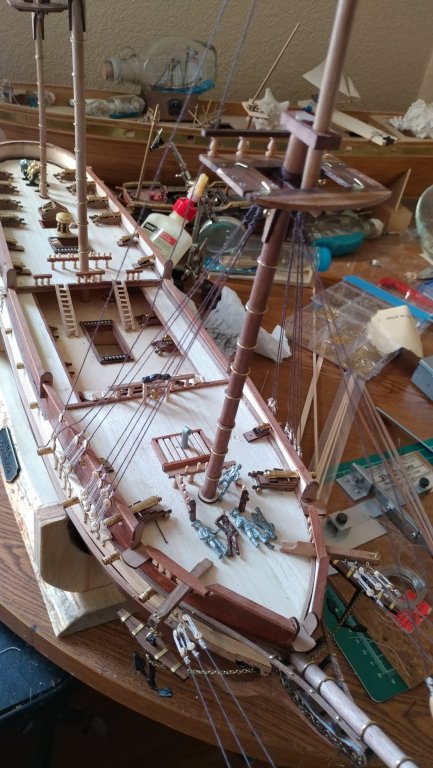
This build has a bit of a backstory to it. I'm currently the Skipper for the Rocky Mountain Shipwrights an incredible ship modeling club in the Denver area. I sometimes get calls from outside the club requesting help with models particularly fixing up old models. I try to help them best I can and there's a couple of us that don't mind helping people with that sort of work. Well I got a call from a lady that needed some help. Her father was trying to complete a ship model but his hands had gotten to shaky. I told her I'd come have a look. So I go and meet this man and have a look at the ship. He told me he had some family member's helping him out but they didn't have much time or knowledge. He had wanted to get the model done by his 97th birthday and that was two weeks ago. He was a marine and model builder though I think his expertise was in river boats. He has a model in the Cincinnati library if any one is around there. All the models he built he had either sold or were given away. This was to be his last model and I suspect the only one to be passed down within his family. Well my heart went out to him and I agreed to finish this model as soon as possible. So I took it home and started digging in. It had a few problems to fix right off the bat. The mast doublings were facing to the stern so I had to turn those around and the port holes were drilled in some cases just wide enough for the cannon and nothing more. There's a lot of deck fittings missing. So I've gone to work. This build is a race against time. He's 97 and I want him to be able to enjoy this model for as long as possible. Here she is after I got the masts in the right direction.

-
I ran into a similar situation with a ship that I consider now as one of my best. See the Mercury in my signature. I wanted to do it using a plank on bulkhead method and it fell flat and looked awful. I started completely over using a solid hull which I was more used to. Not to say you should start over with a new method but sometimes taking the lesson you learned and going back to the beginning is a good step forward. Even if it feels like a step back. I look forward to seeing how your ship comes together. Welcome back.
-
Thanks Brian. Mike- With this ship I'm using a hinge less method. The masts are set in shallow divots held in place by the rigging. When they are folded down the base of the mast will be loose which allows the masts to lay more flat. It's a bit harder lifting the mast up with loose ends but I like the look. To me it's more real and adds to the magic of ship in bottle building when the hinge is not there to show how it was done. For a schooner like your building I would suggest tying the forestay to the bowsprit and running it though a hole in the mast top then out the bottle. It's the same method just sort of revered. Instead of pulling the mast though the bowsprit your pulling it up through the mast top. See my Olympic 470 build in my signature. I used that method for that one. It sounds a lot like what your trying to do.
-
Yikes. Tieing in the bottle is tough. I've had that situation before and ended up cutting all forestays pulling the ship out and rerigging. Good luck. She's looking incredible.
-
Love it. She looks great. Nothing wrong with a quick build. Having fun is the most important part of this hobby.
- 20 replies
-
- 2
-

-
- jolly roger
- lindberg
- (and 1 more)
-
I like this quote. It's so true. Very often you look at the mess of lines and wonder how you'll ever get it straightened out. You do it though. One line at a time. I have no fears for you Igor. She'll make it in and looking great by the time your done.
-
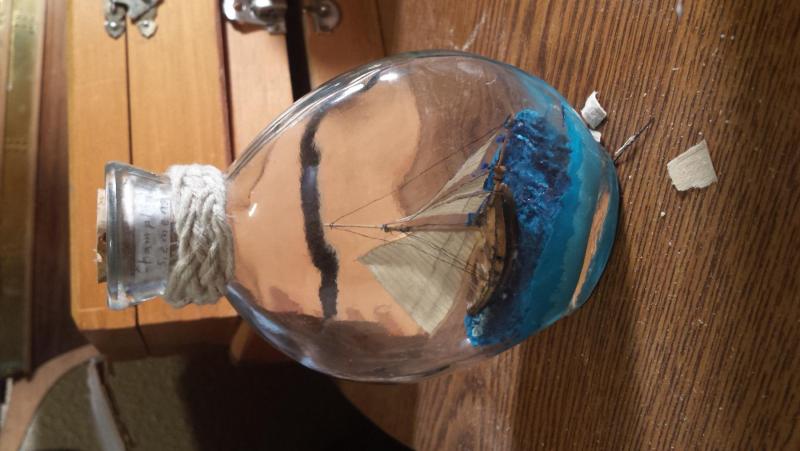
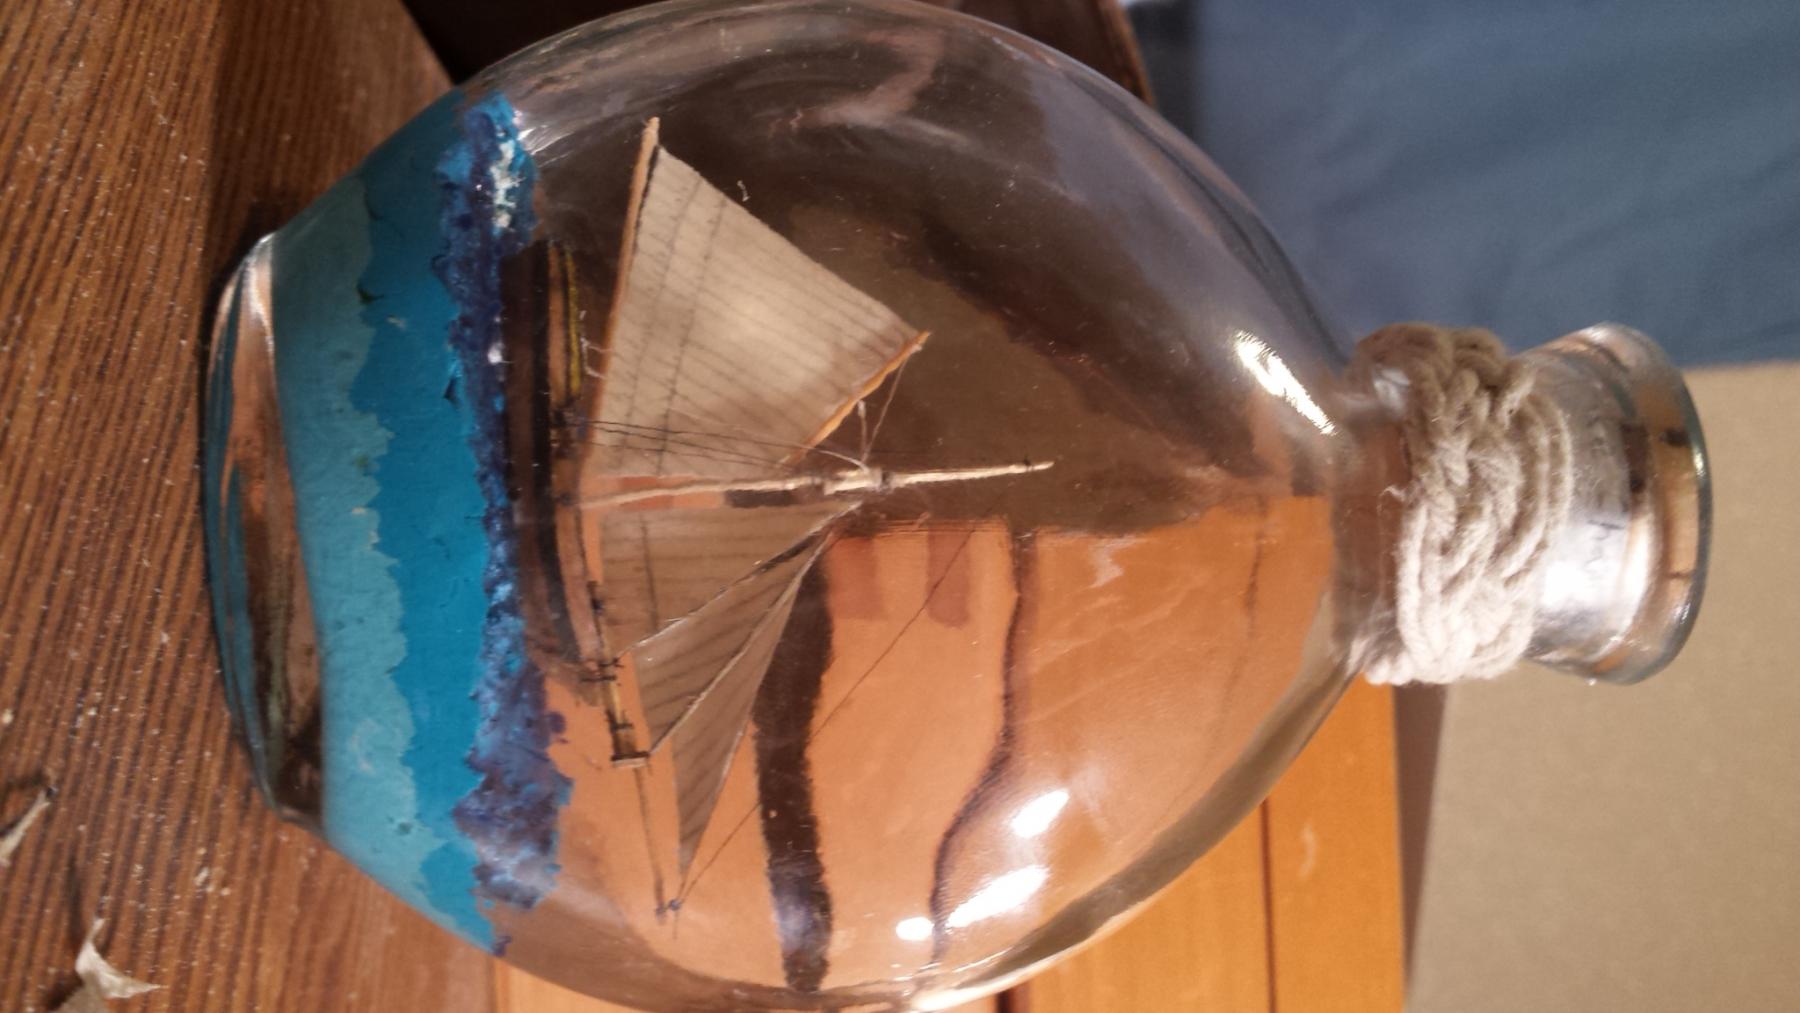
Thanks Piet. Igor the bottle is 11.5 cm by 9 cm. About 3 cm wide. If I remember right the ship is 1:400 scale.
-
Great work! She looks awesome. I built one of these a long time ago. I agree the plastic masts and rigging are hard to deal with. After 10 years of getting bumped around the masts on mine broke apart. I'm slowly restoring it with wood. Again great work.
- 20 replies
-
- 1
-
-
- jolly roger
- lindberg
- (and 1 more)
-
I don't know that I put this ship up yet but I wanted to show it off. This is a side project I've worked on for some time now. I would do a little here and there while working in between glue or paint dtying. Finally got close enough to done I just finished it up. It's a smaller 6 gun Lake Champlain sloop.