DONATION DRIVE - SUPPORT MSW - DO YOUR PART TO KEEP THIS GREAT FORUM GOING!
×


DSiemens
-
Posts
1,060 -
Joined
-
Last visited
Content Type
Profiles
Forums
Gallery
Events
Everything posted by DSiemens
-
 Thanks. It was not easy. Took me a very frustrating hour and a half. Still got one more to do. :/
 -
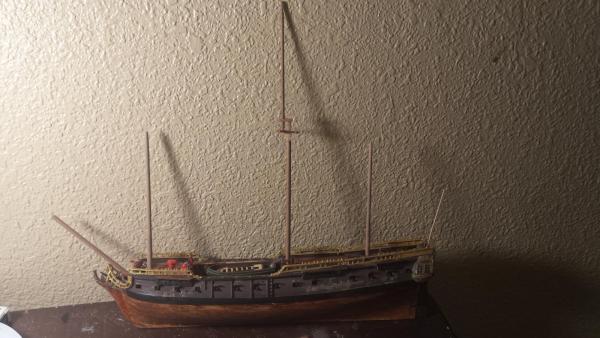
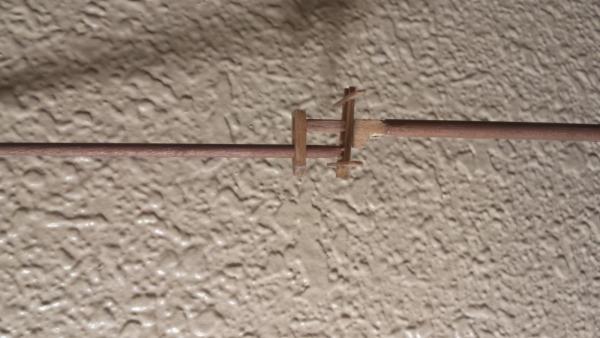
I hope I have this topic in the right place if not moderators please correct me. I figured scratch because it's a scratch project on an already built kit. I'll explain. My first ship model ever I got when I was 17. It's a Lindberg Jolly Roger plastic kit. I was used to building airplanes at that time so I built it in a similar way with just the pieces provided and some paint. At that time I didn't add rigging. It had the back stays but that was about it. As I got more into ship in bottle building I added some rigging. I guess you can say it was ship in bottle rigged since it was just the lines with no blocks. The lines them selves weren't even totally correct they just looked ...about right. In our last move the ship got really banged up. Broken bowsprit, broken plastic sails, bent masts all sorts of problems. I've decided to restore it using wood parts all scratch built. I've always had a problem building bigger ship models. I don't know what it is. It's probably that I find them intimidating. There's a lot of parts and pieces and a lot that I have a general idea about but not a thorough knowledge of. Since I enjoy rigging and how rigging looks and works I thought this might be a good project to get my feet wet so to speak. I decided I might as well post this since I feel like I'm getting stuck and I've made some good progress so far so I'd like to continue. Here's what I've got. This is me a few years ago....7 or 8 years I think. I post it because it's one of the few pictures I have of the model as I originally built it. This was preship in bottle building. This is what I've built so far. I have the masts in place and tapered and one cross tree in place. This is the cross tree I built. I think my spacing between the lower and upper mast might be to wide. I'm open to thoughts. Still got quiet a few more to do. Also on the original model there was an additional piece to the bowsprit. In small models I glue the pieces together and tie some string around but I want this one to look right. How were those two pieces held together? I'm also open to books I should read. I tried The Rigging of Ships by R.C. Anderson but I got very lost in the, "it was built this way with a lot of exceptions" style the author used. Let me know what you think.

- 11 replies
-
- 8
-

-
- jolly roger
- plastic
- (and 2 more)
-
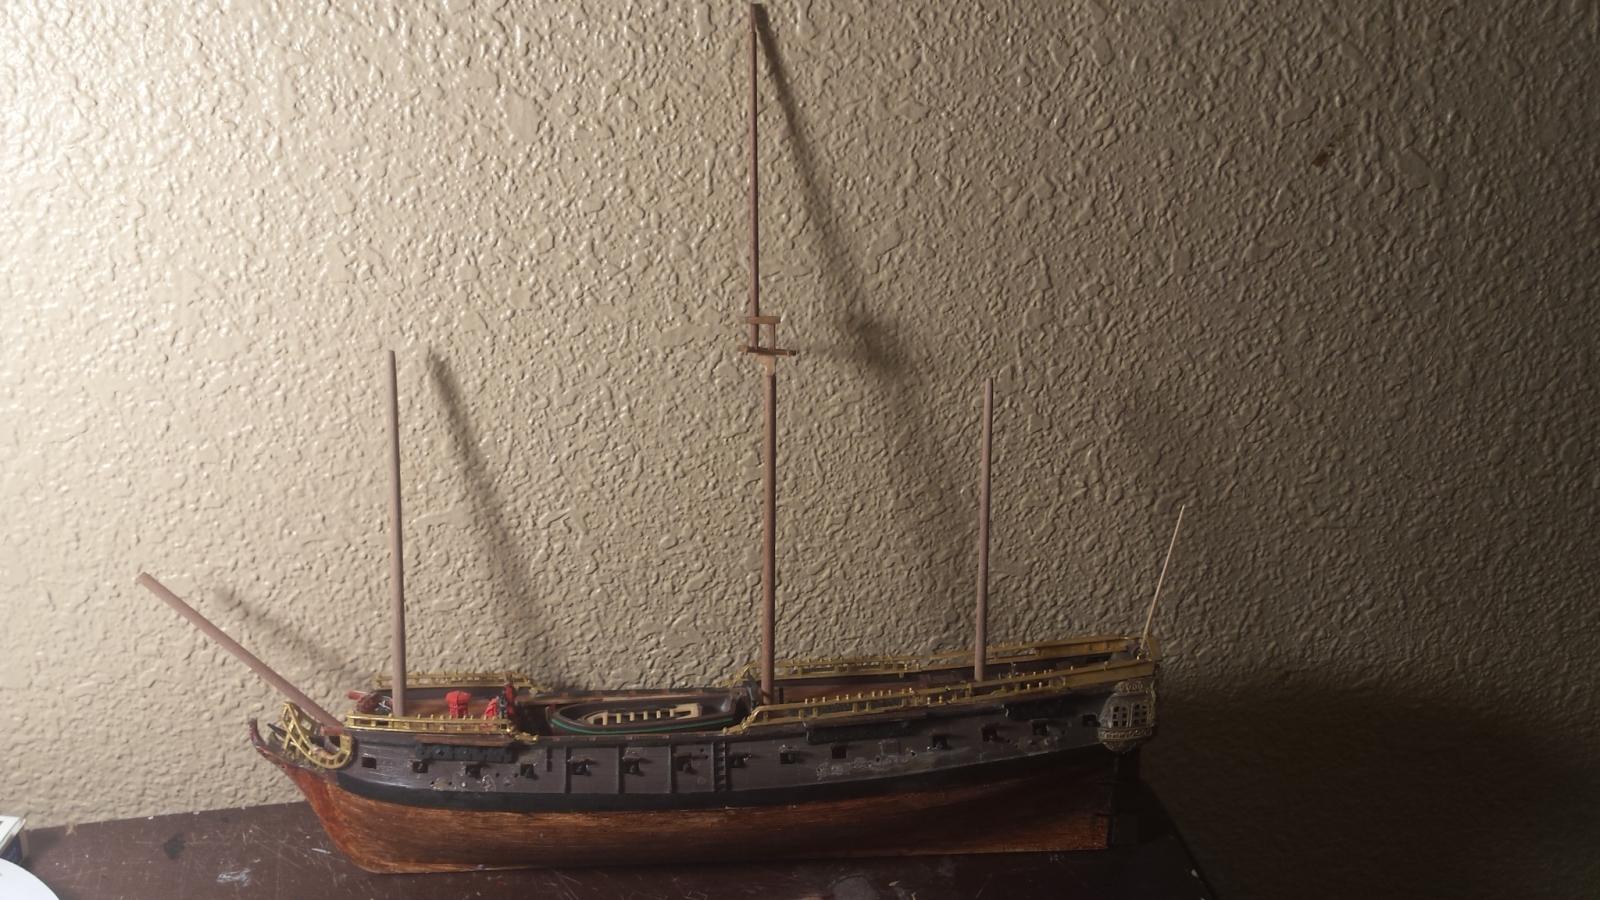
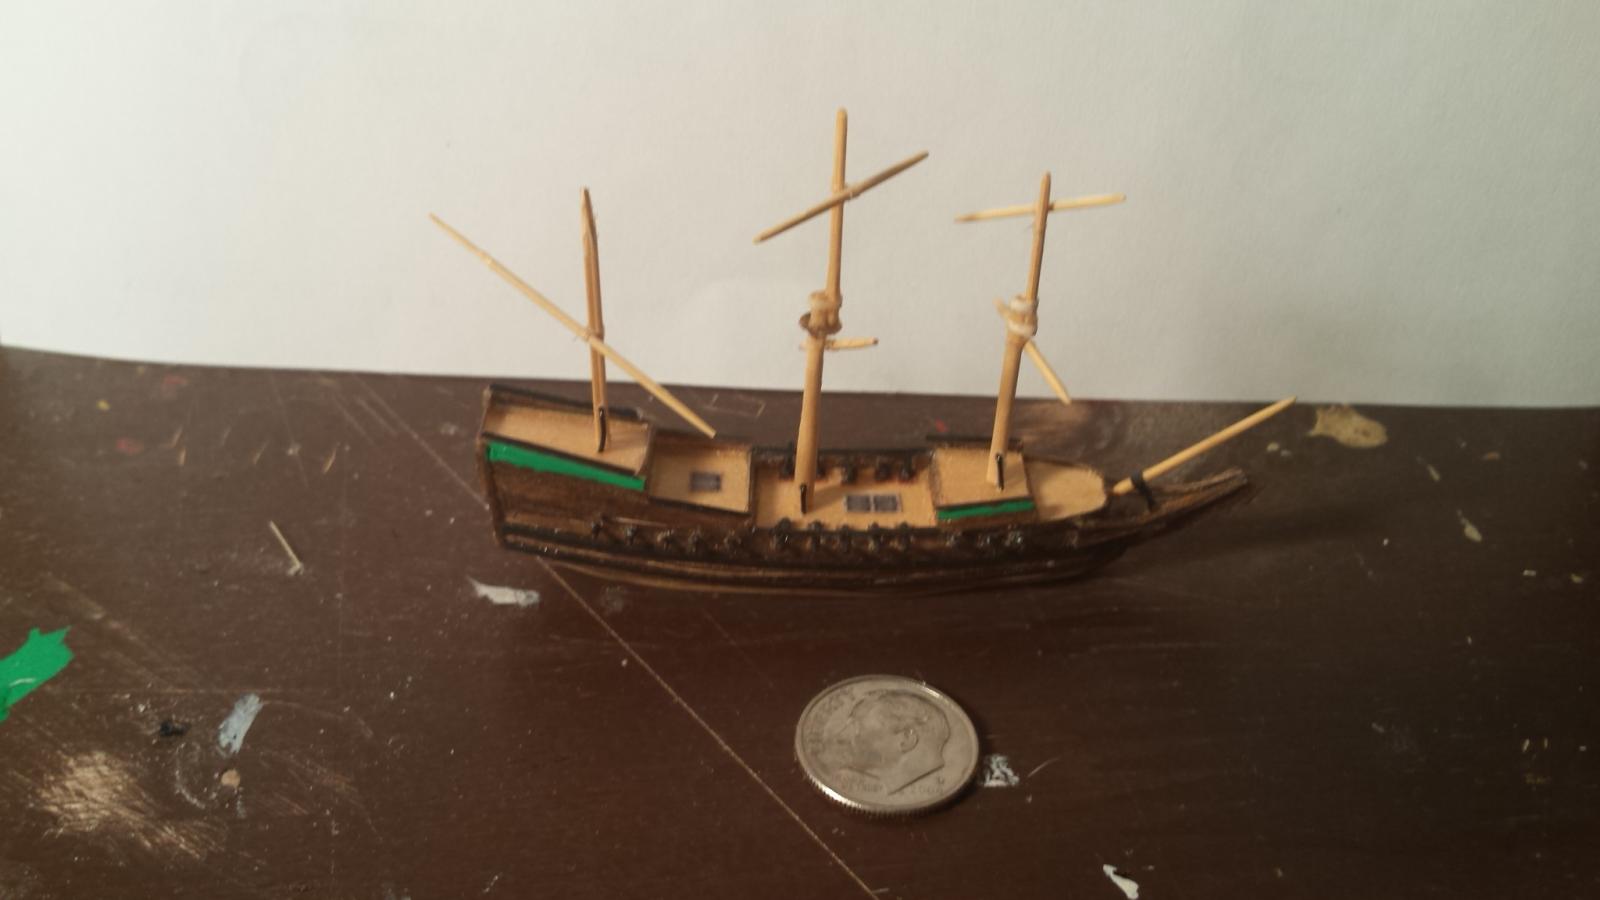
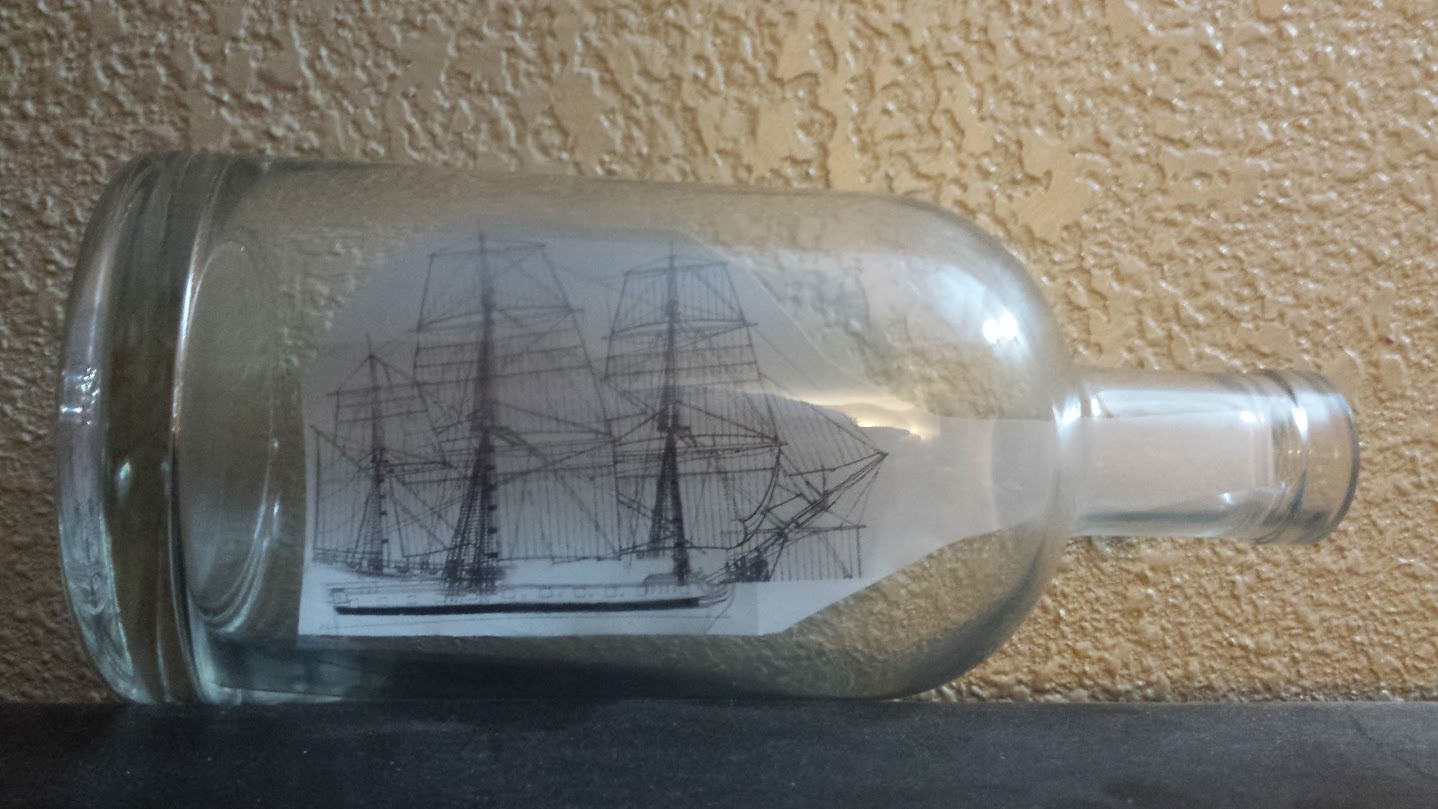
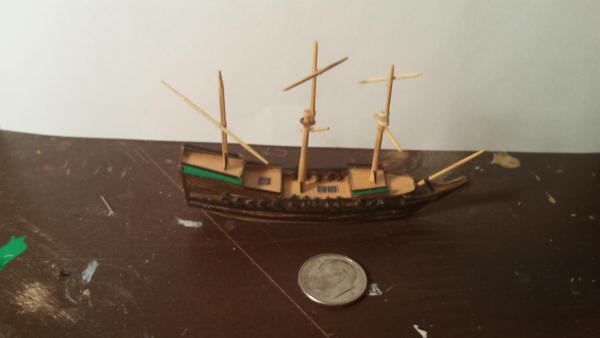
I have another update. Got the masts and spars in place. They are really low. More so then what the real ship should be but it's because of the bottle supplied with this kit. Since I am just bashing the kit I guess I'll keep the bottle with it. Also added a couple hatches and some green paint for good measure.
-
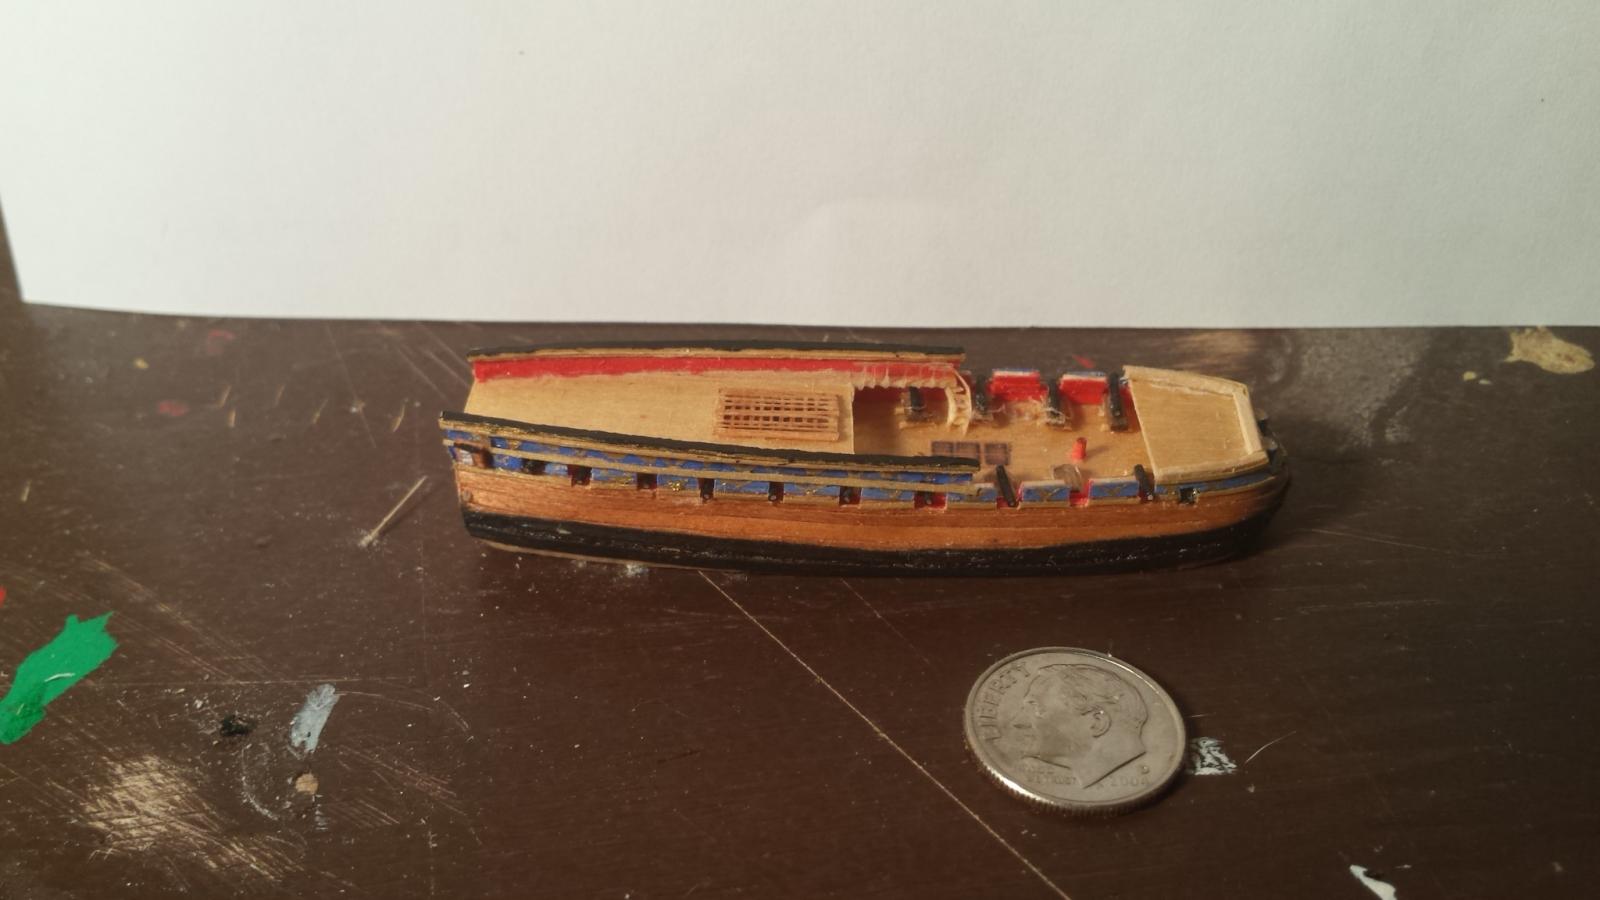
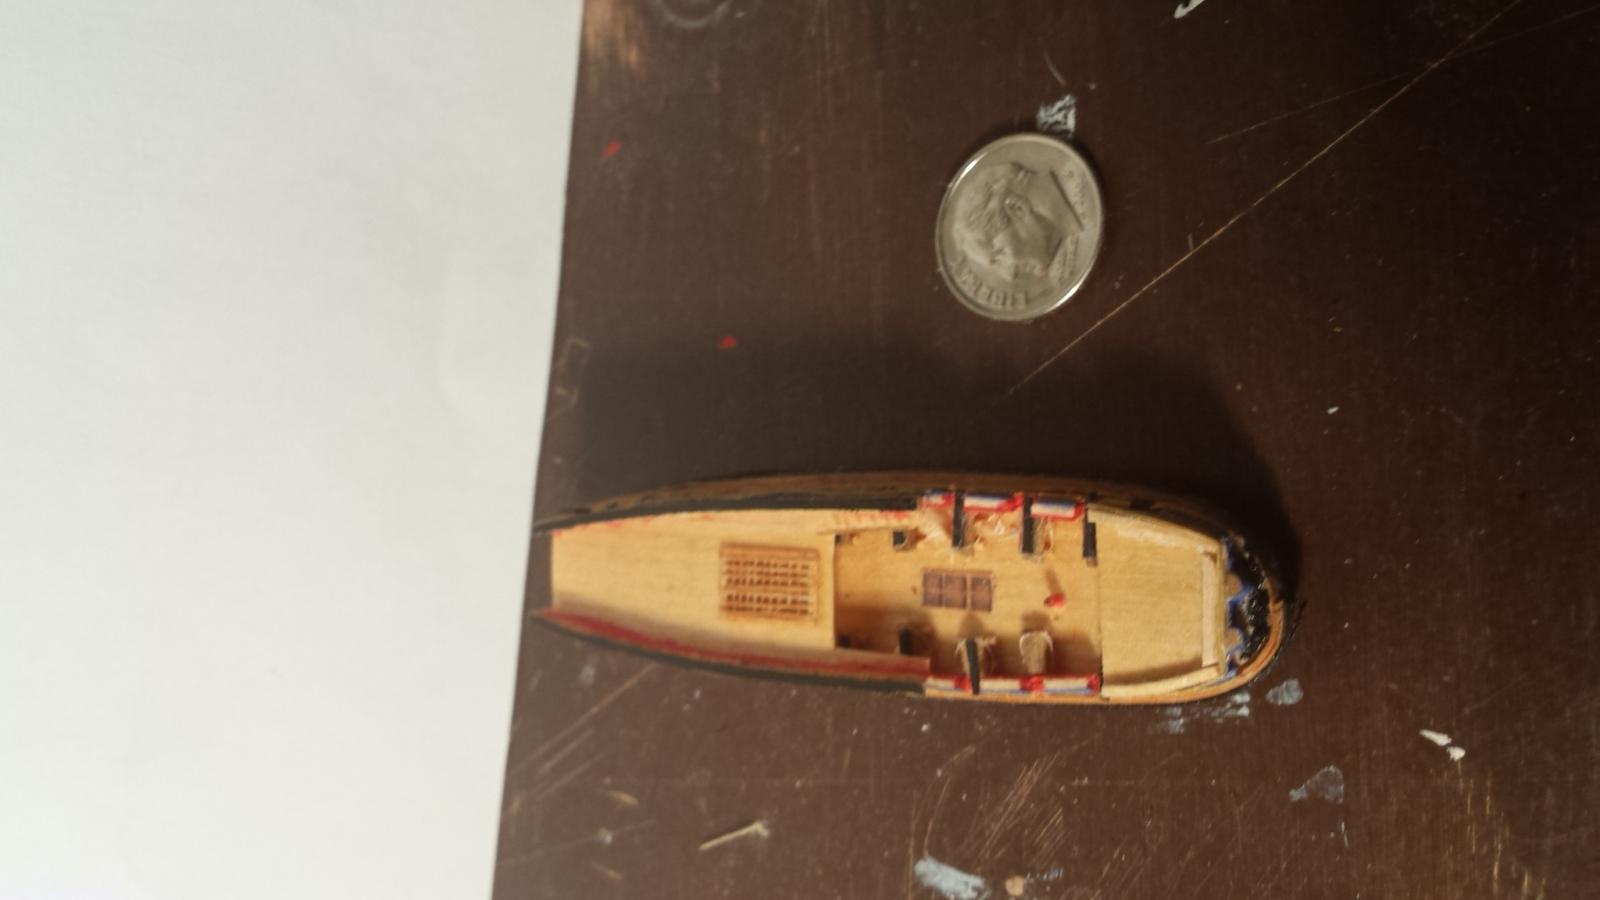
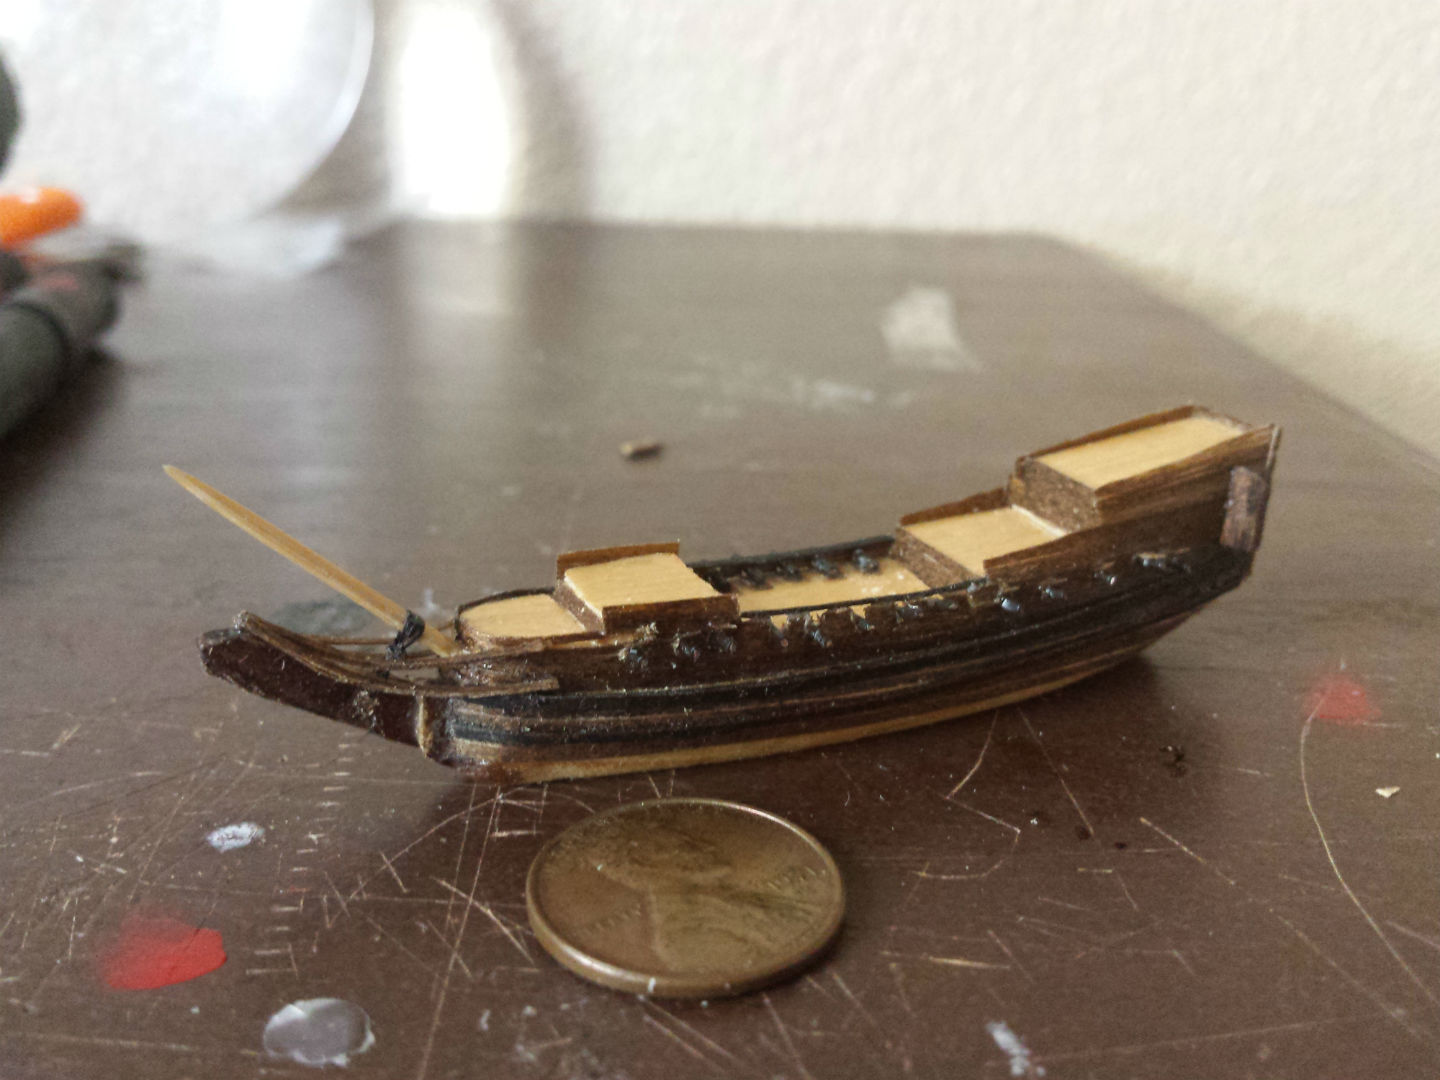
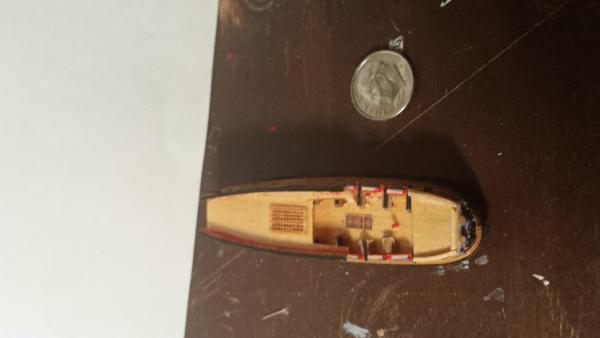
Did a bit more work on deck got some cap rails on and a capstan and hatch. Also worked on the stairs. That was a core and a half. I'm still debating whether I like the outcome. I might take it all out and try again.

- 83 replies
-
- 13
-
-
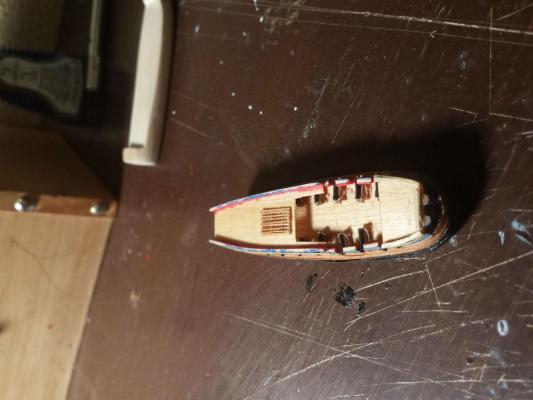
I then put in the upper deck. Since I actually have a deck below on this build I decided to do an actual hatch instead of the printing a hatch which I normally do. I cut a hole in the deck for the hatch and then put one together and placed it. It was tedious getting all the tiny pieces in place and I think I could have done it better but I guess it's not bad for a first try. Work on the cannon rigging continues. I have a lot of coils to do even if I'm only doing the exposed cannons.
- 83 replies
-
- 13
-
-
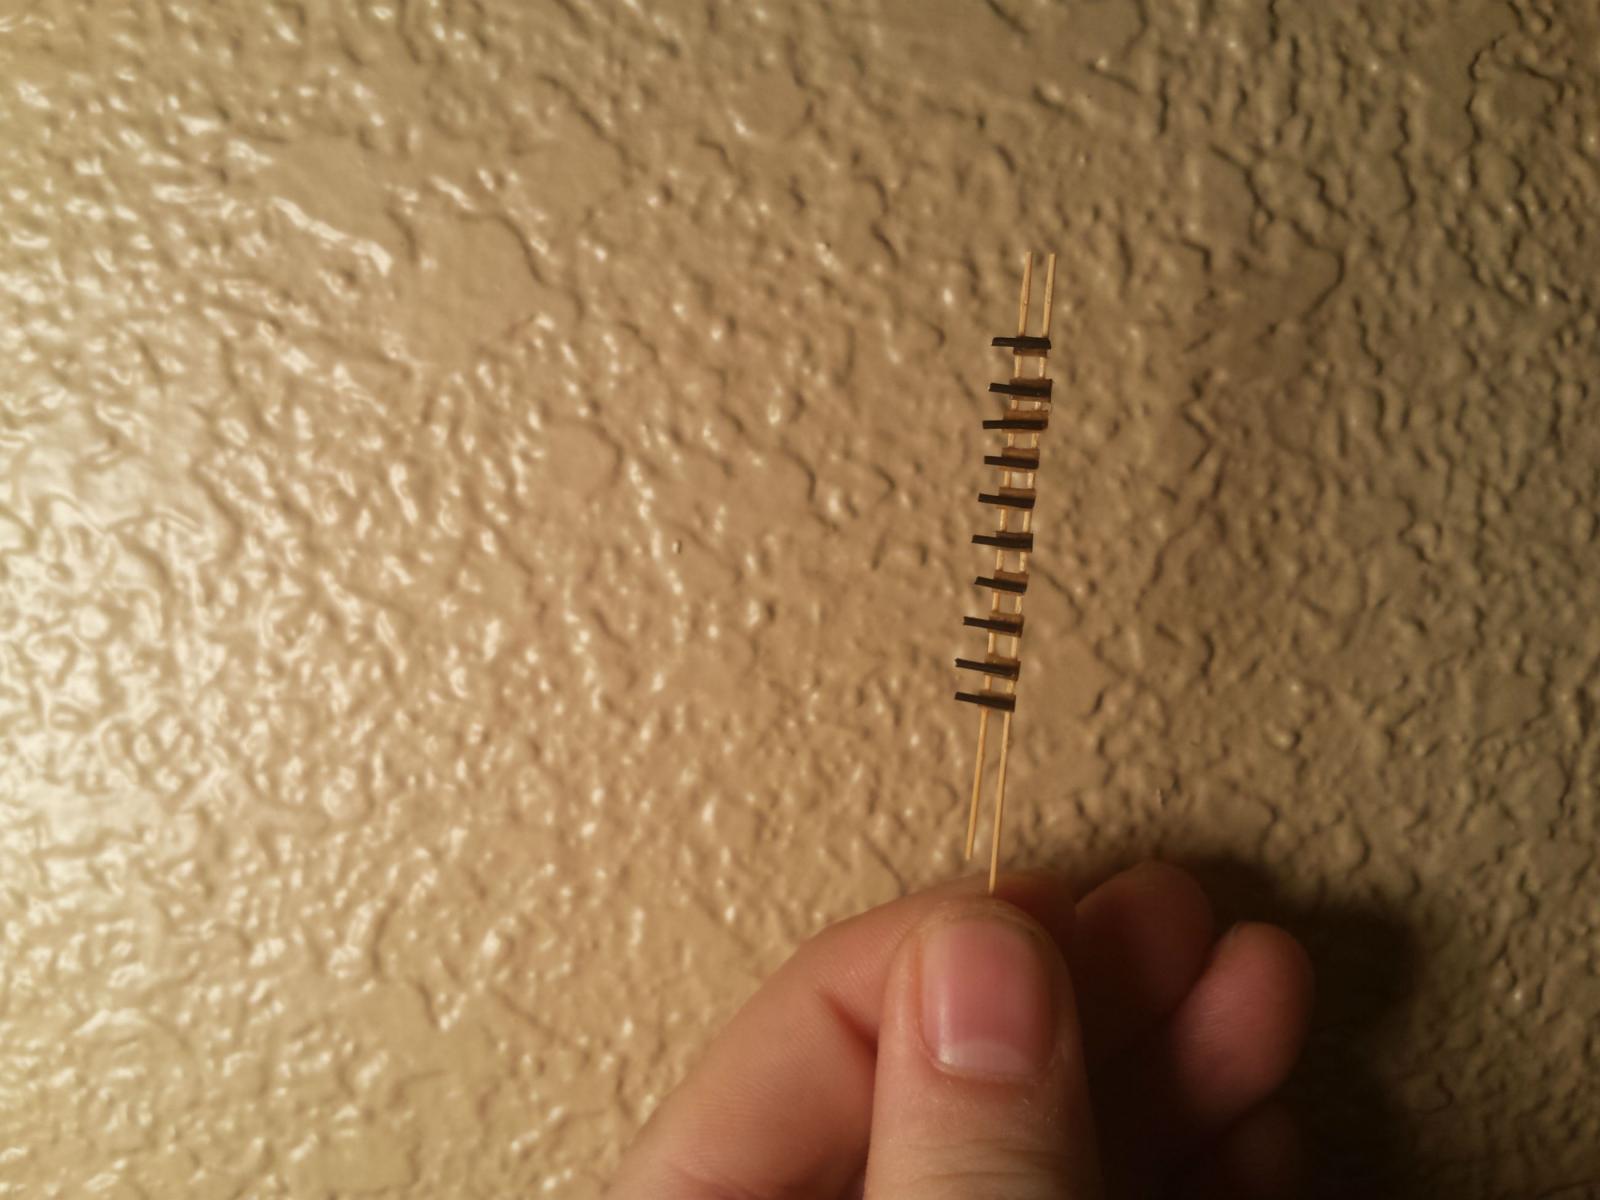
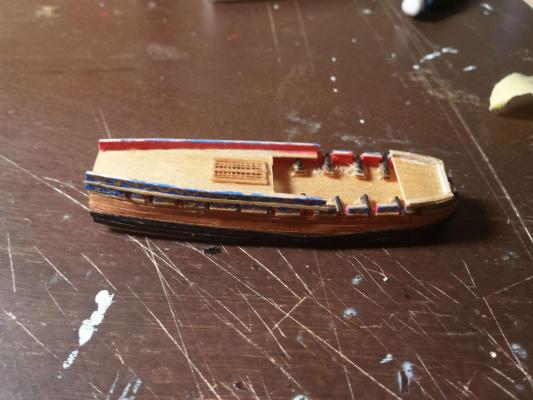
I've done a lot of work on this ship since my last post. I'll start with the cannons. Here's my method for ships at this scale. What I did was pulled a bamboo skewer through a draw plate until I had the wheel size. I then cut it in half and clamped the two pieces together at the right distance apart. I glued on a block for the gun carriage and then glued on the cannons. With the wheels being one piece the whole thing was easy to handle despite the parts being small. Once I was ready to put the cannons on the ship I cut out the wheels and glued them into place.

-
Looks like a fun build. I'm hoping to get my son's into model building as well. What do you think is a good age to start doing plastic models?
-
Oh a note on the cannons too. I figured out a new technique to make them stand out a bit more. The cannons themselves are wire out of a cell phone charger cable. I used draw plate to get a small diameter dowel from a bamboo skewer to use fr the cannon wheels. I then cut out thin pieces of wood for the carriage. I ct the dowel in half an laid the pieces parallel I then glued on the carriages to the dowels. One that dried I glued on the cannons. I had a whole line of cannons all connected by the wheels. I need to do the other side so I may post pictures of this technique later. Once it was all together I took my exacto knife and cute the cannons off leaving a bit of the wheel sticking out past the carriage. I then glues the cannon in place on the ship. I'm also attempting the cannon rigging. This won't be elaborate just a line running to the bulwarks but I think I'll had some coils on either side too.
-
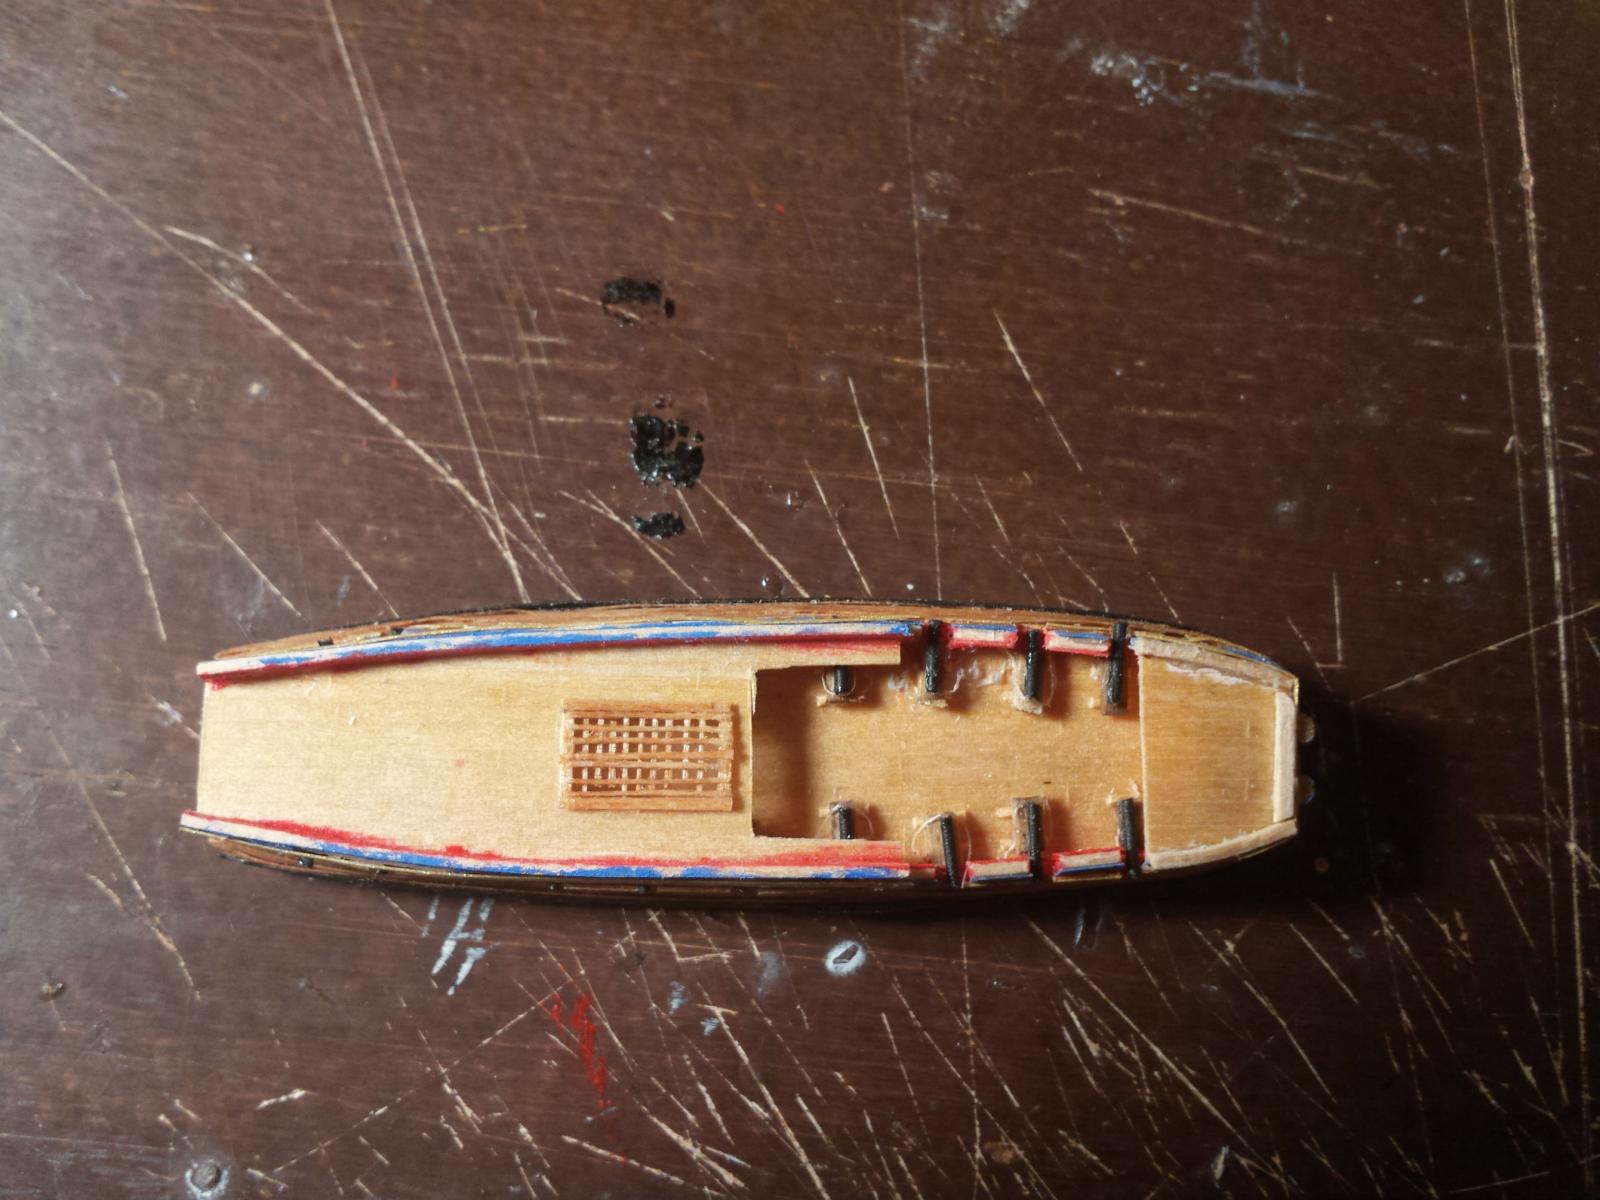
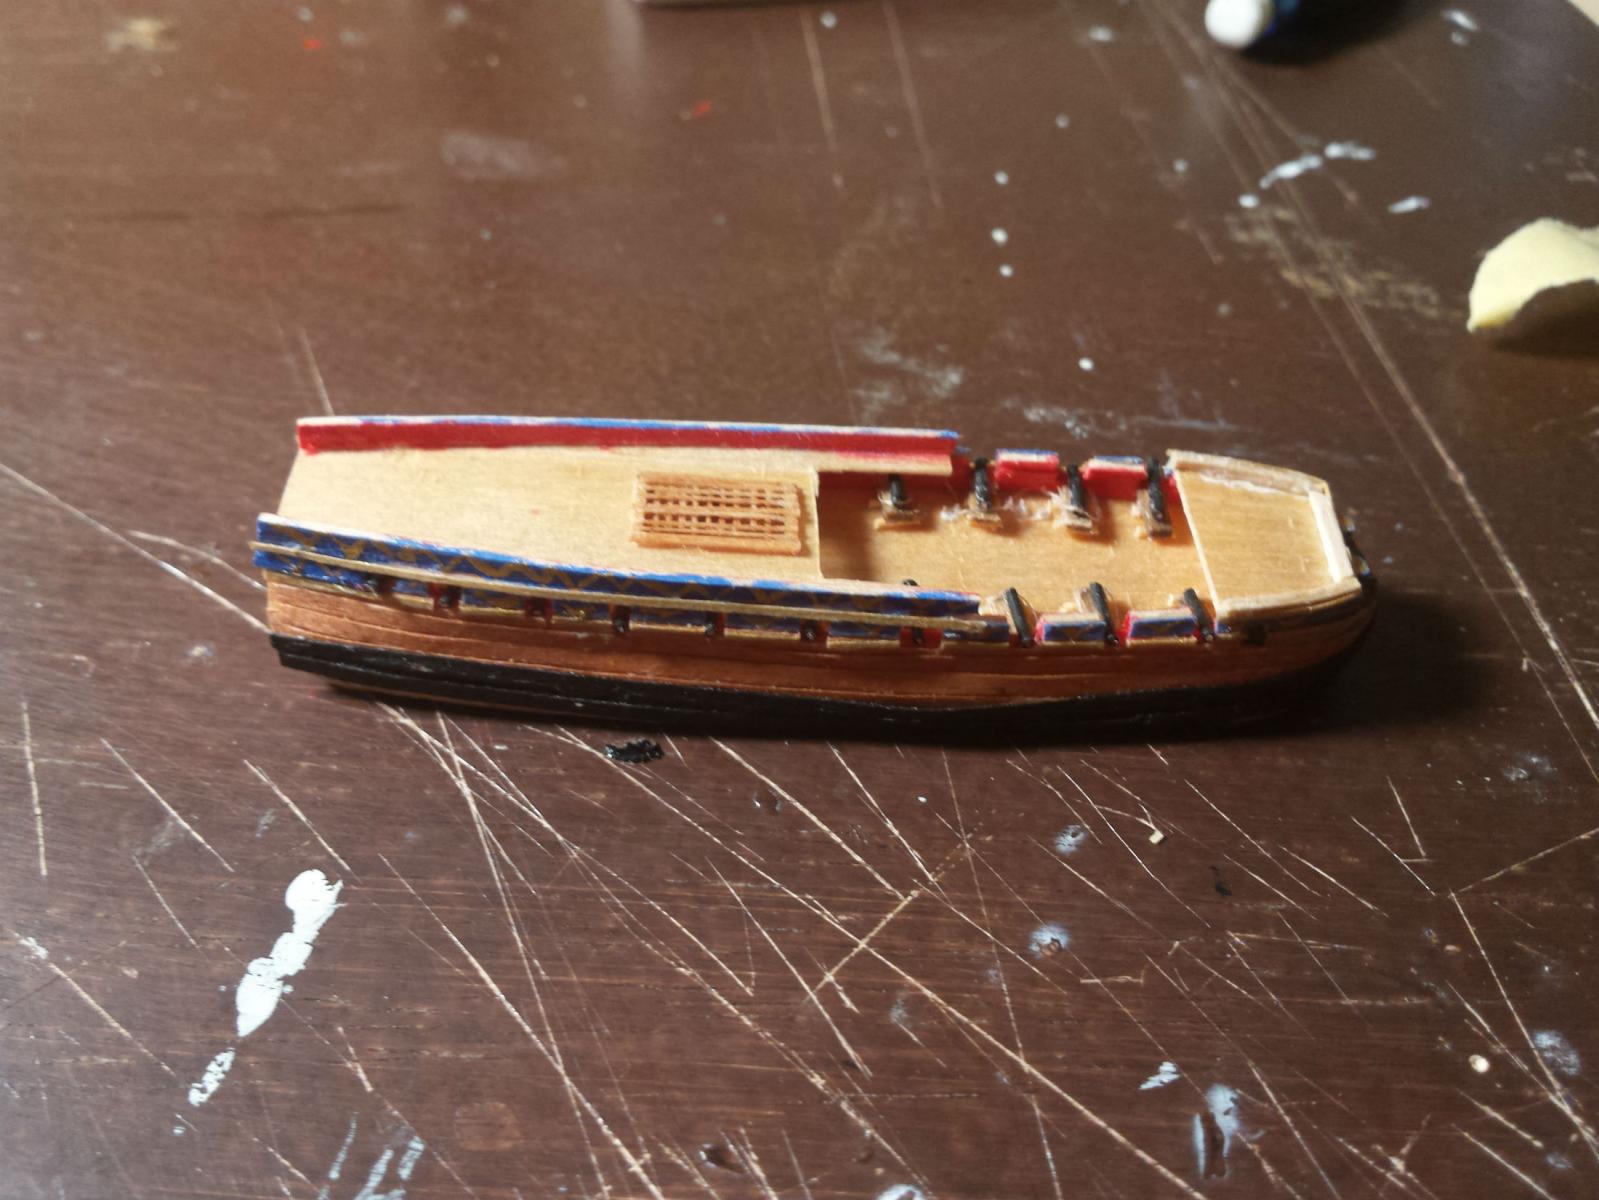
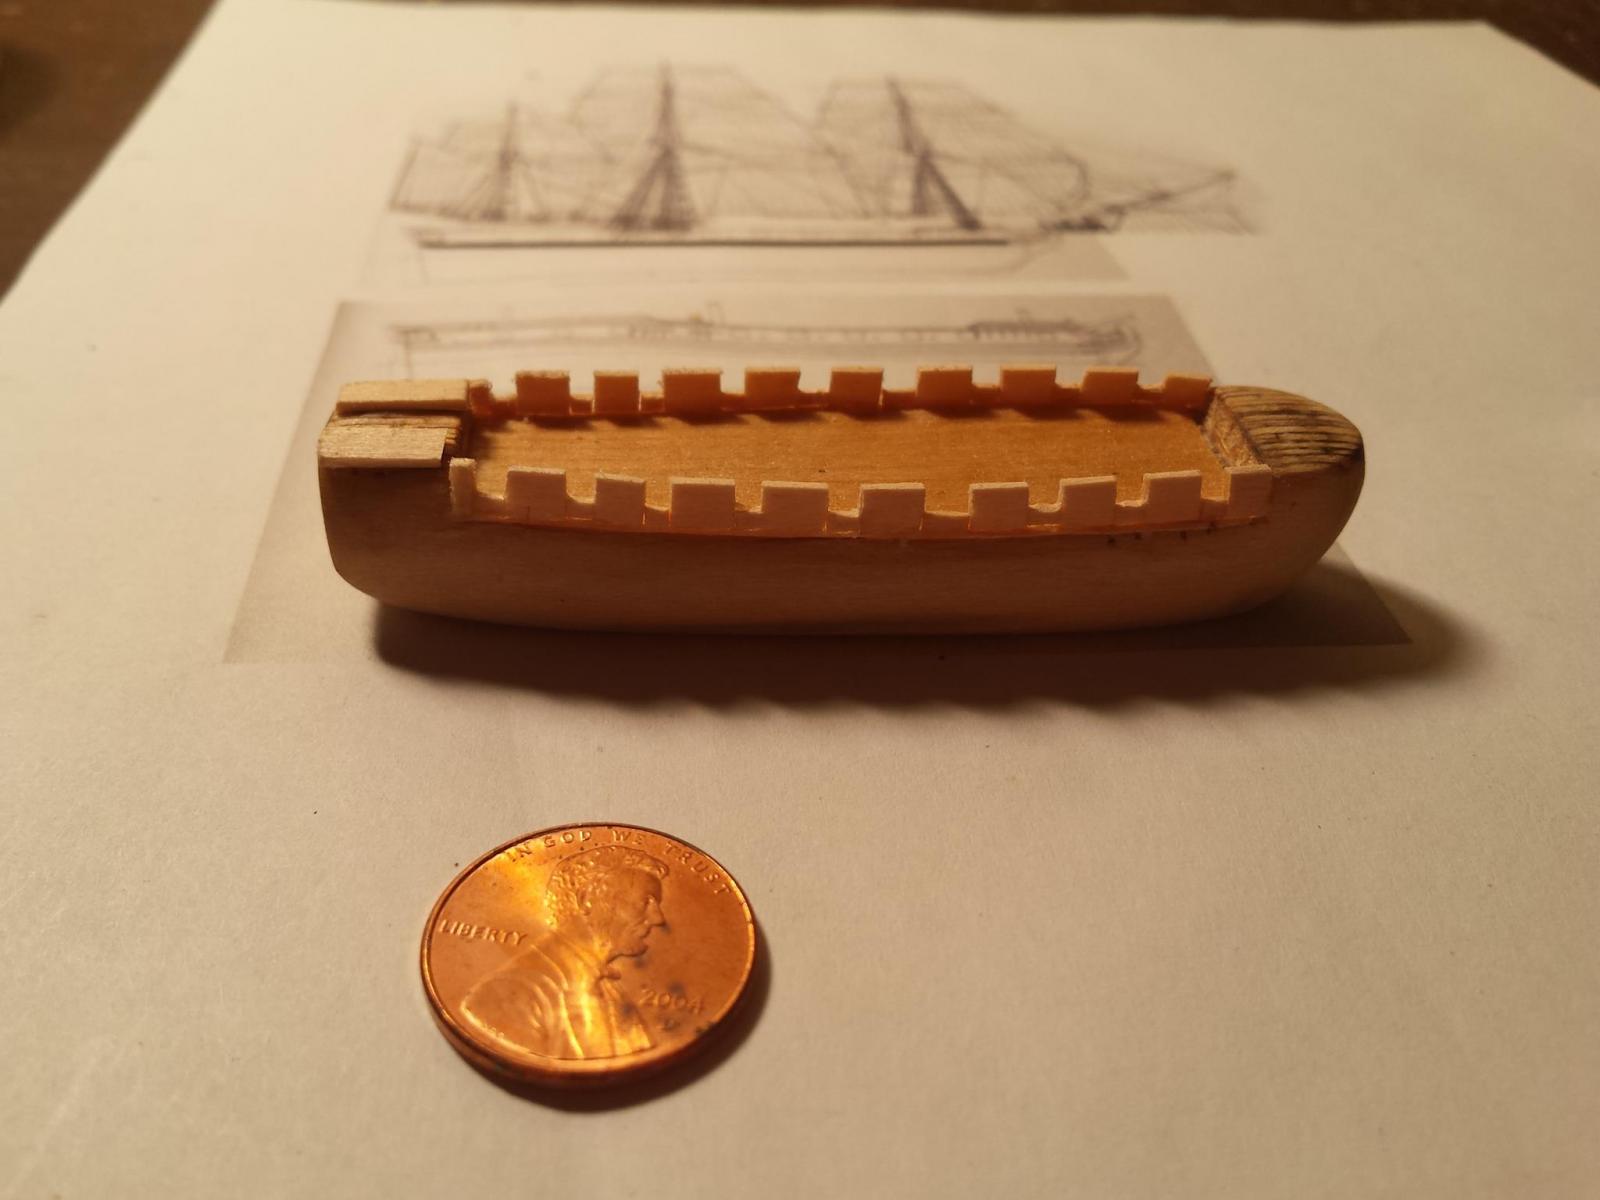
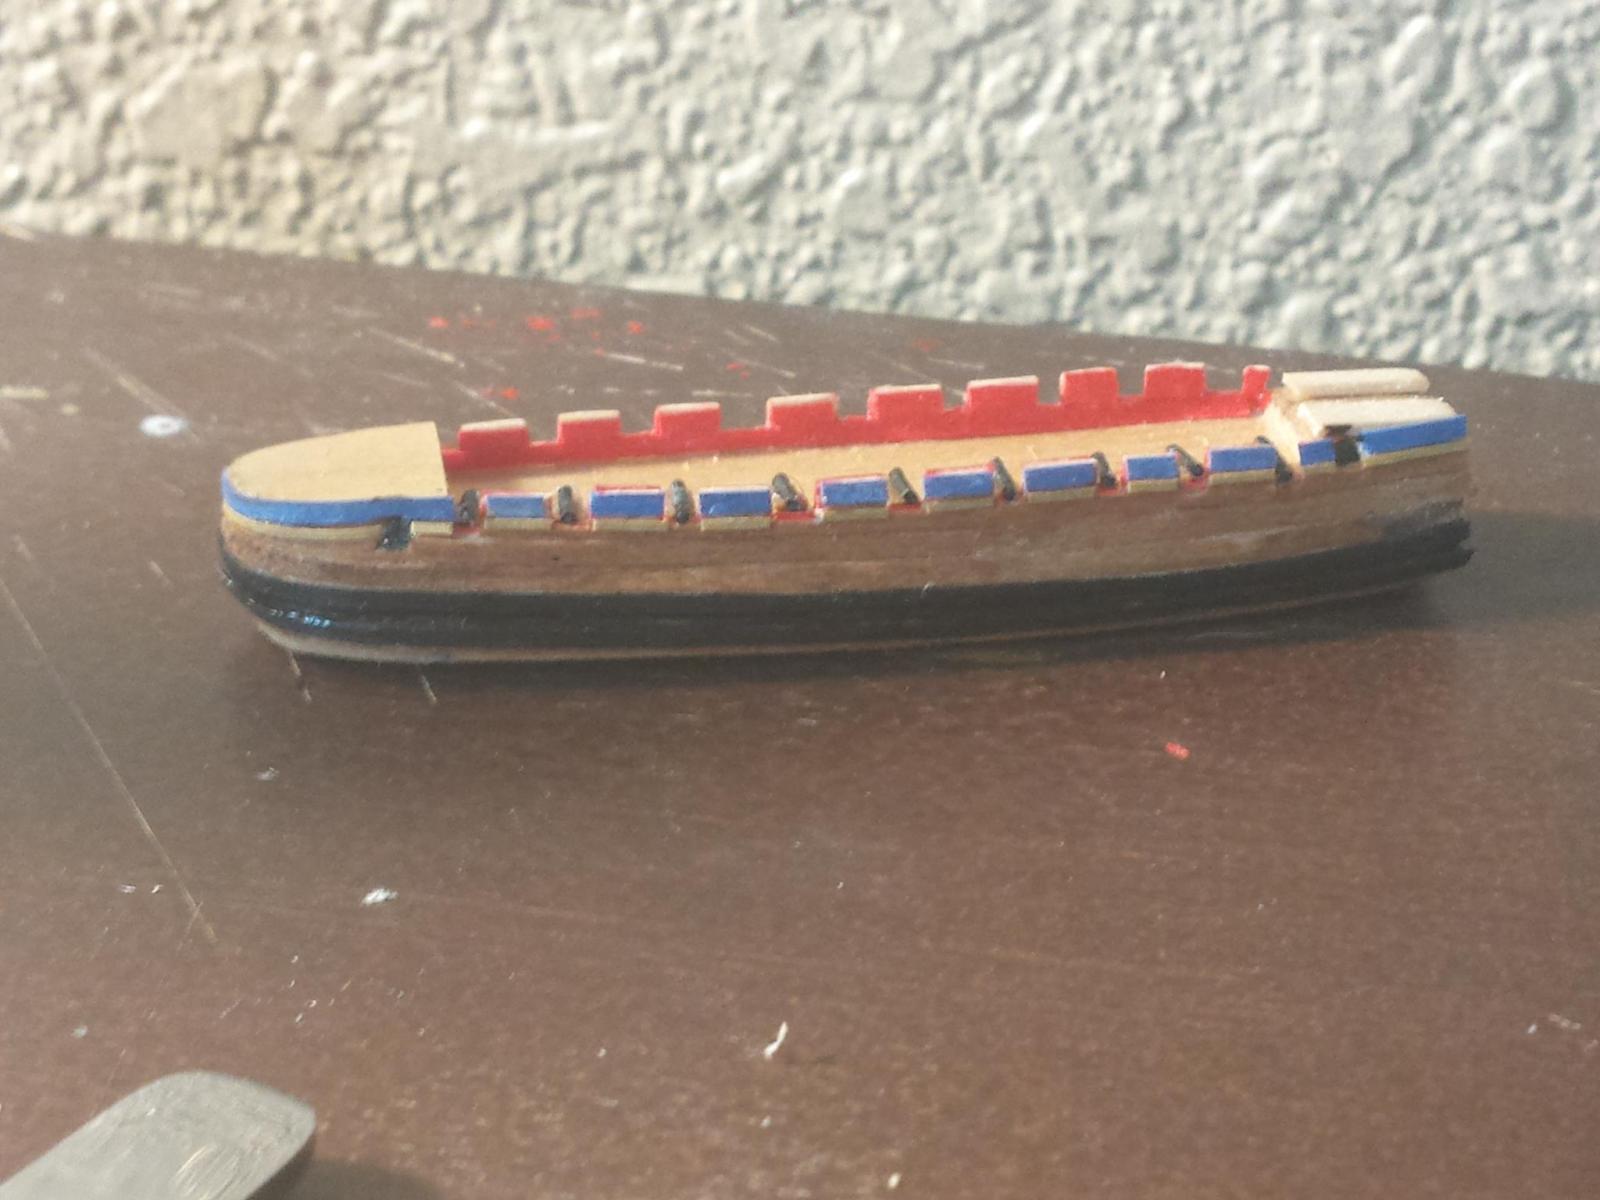
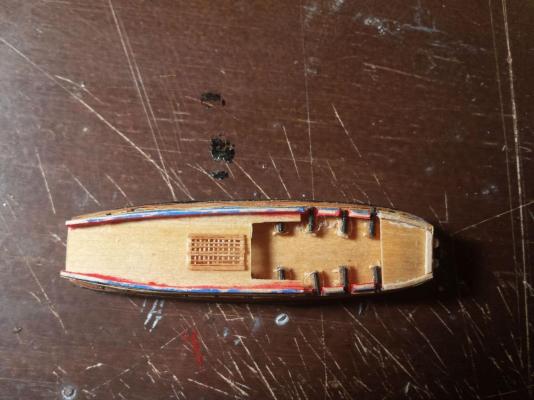
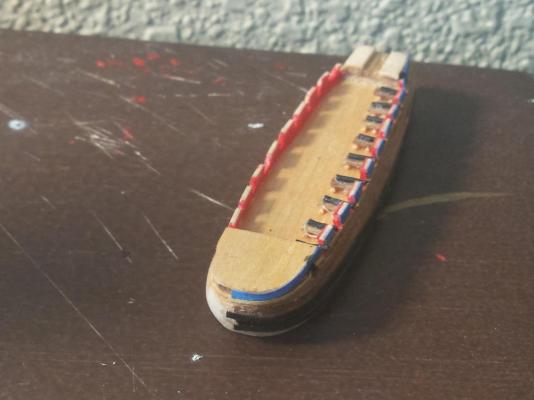
I then added the bulwarks. Chuck's Cheerful build gave me the idea. I measured the plans and cut out each section individually. This gave me a much more accurate bulwarks then I've gotten in the past with my dremel. I filed some of the rough edges straight afterwords. I then planked the ship with 1 mm planks. Probably still to bigger then they should be to scale but as close as I could get this time around. The inside of the bulwarks and outside are planked similarly to how the Cheerful was done.
-
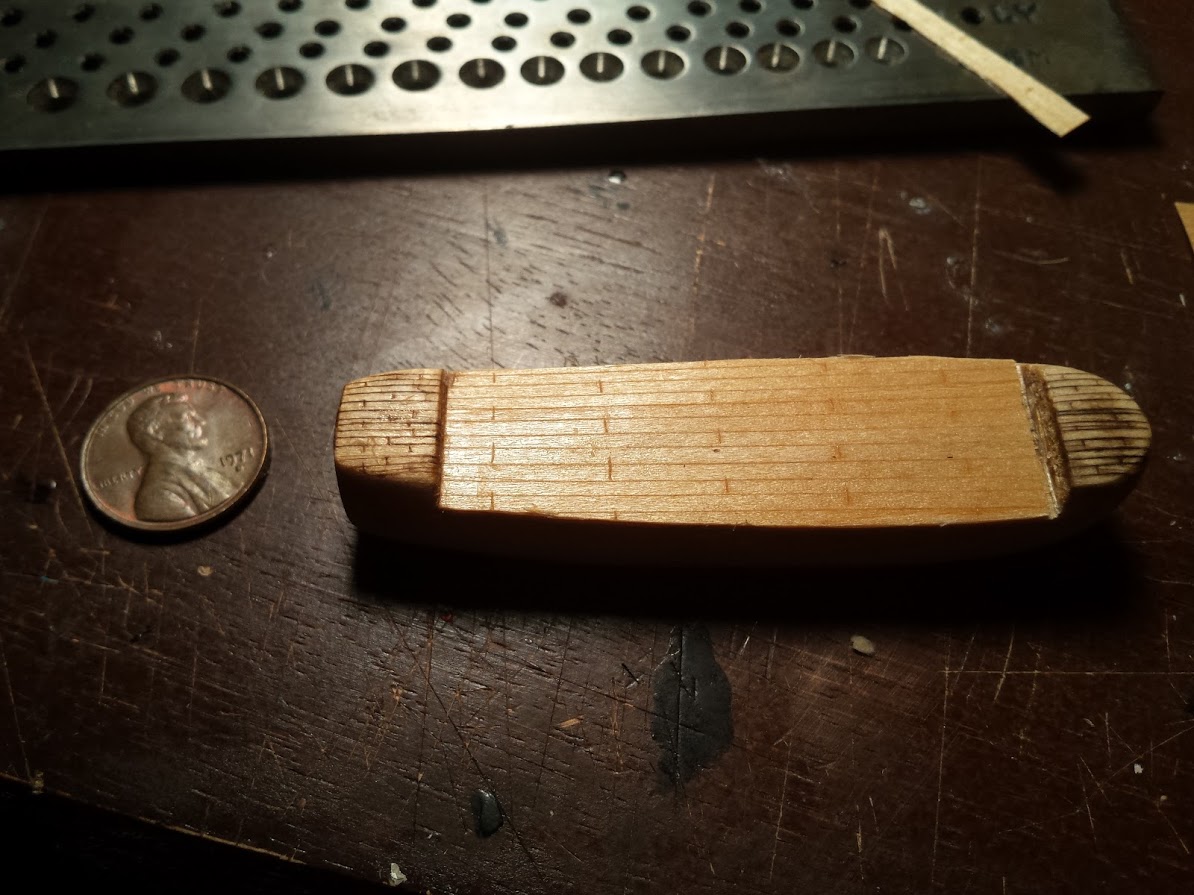
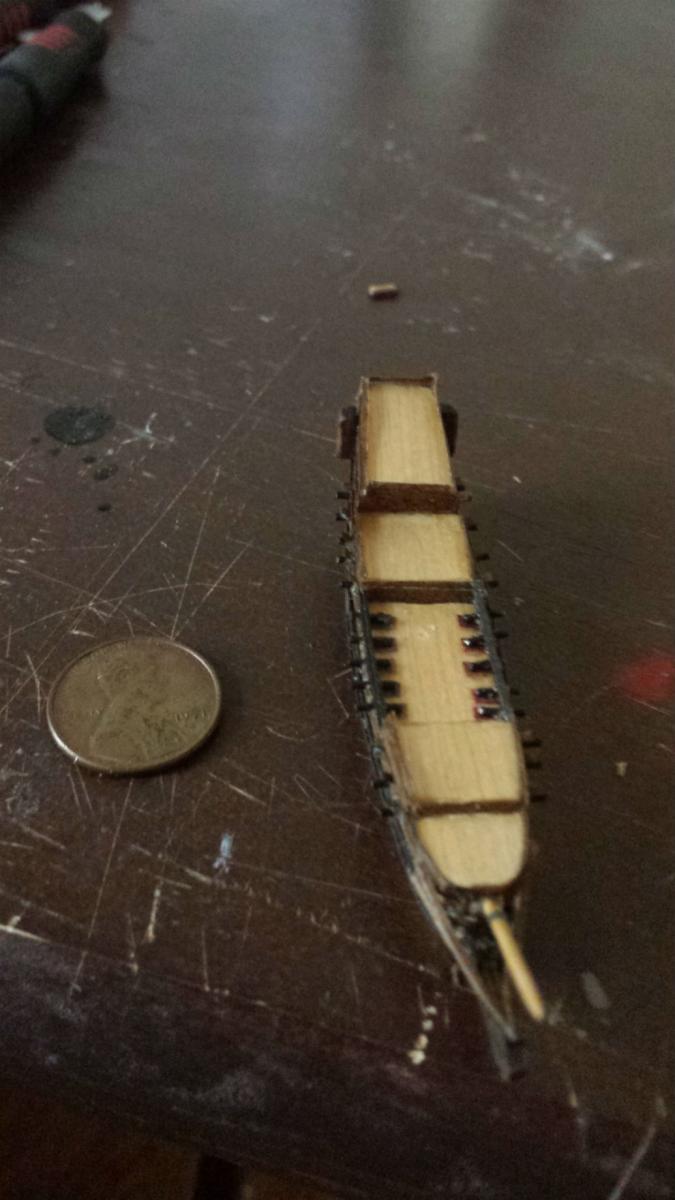
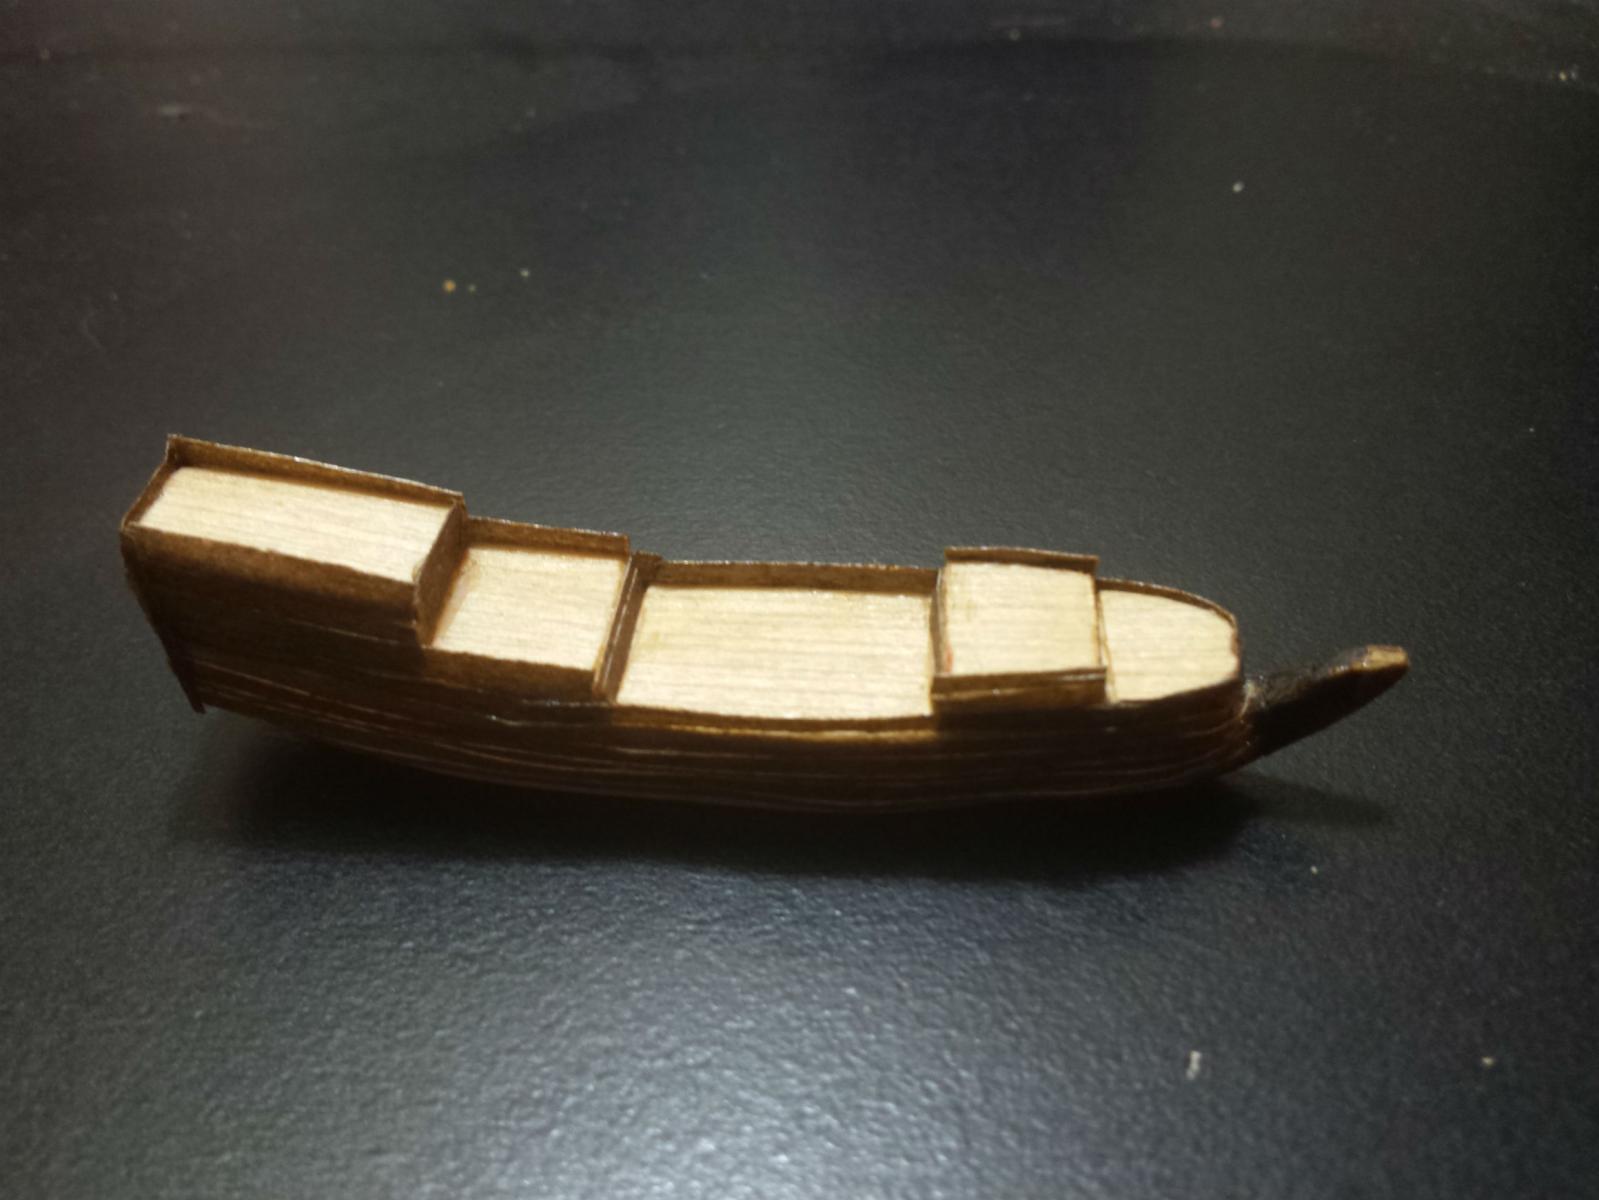
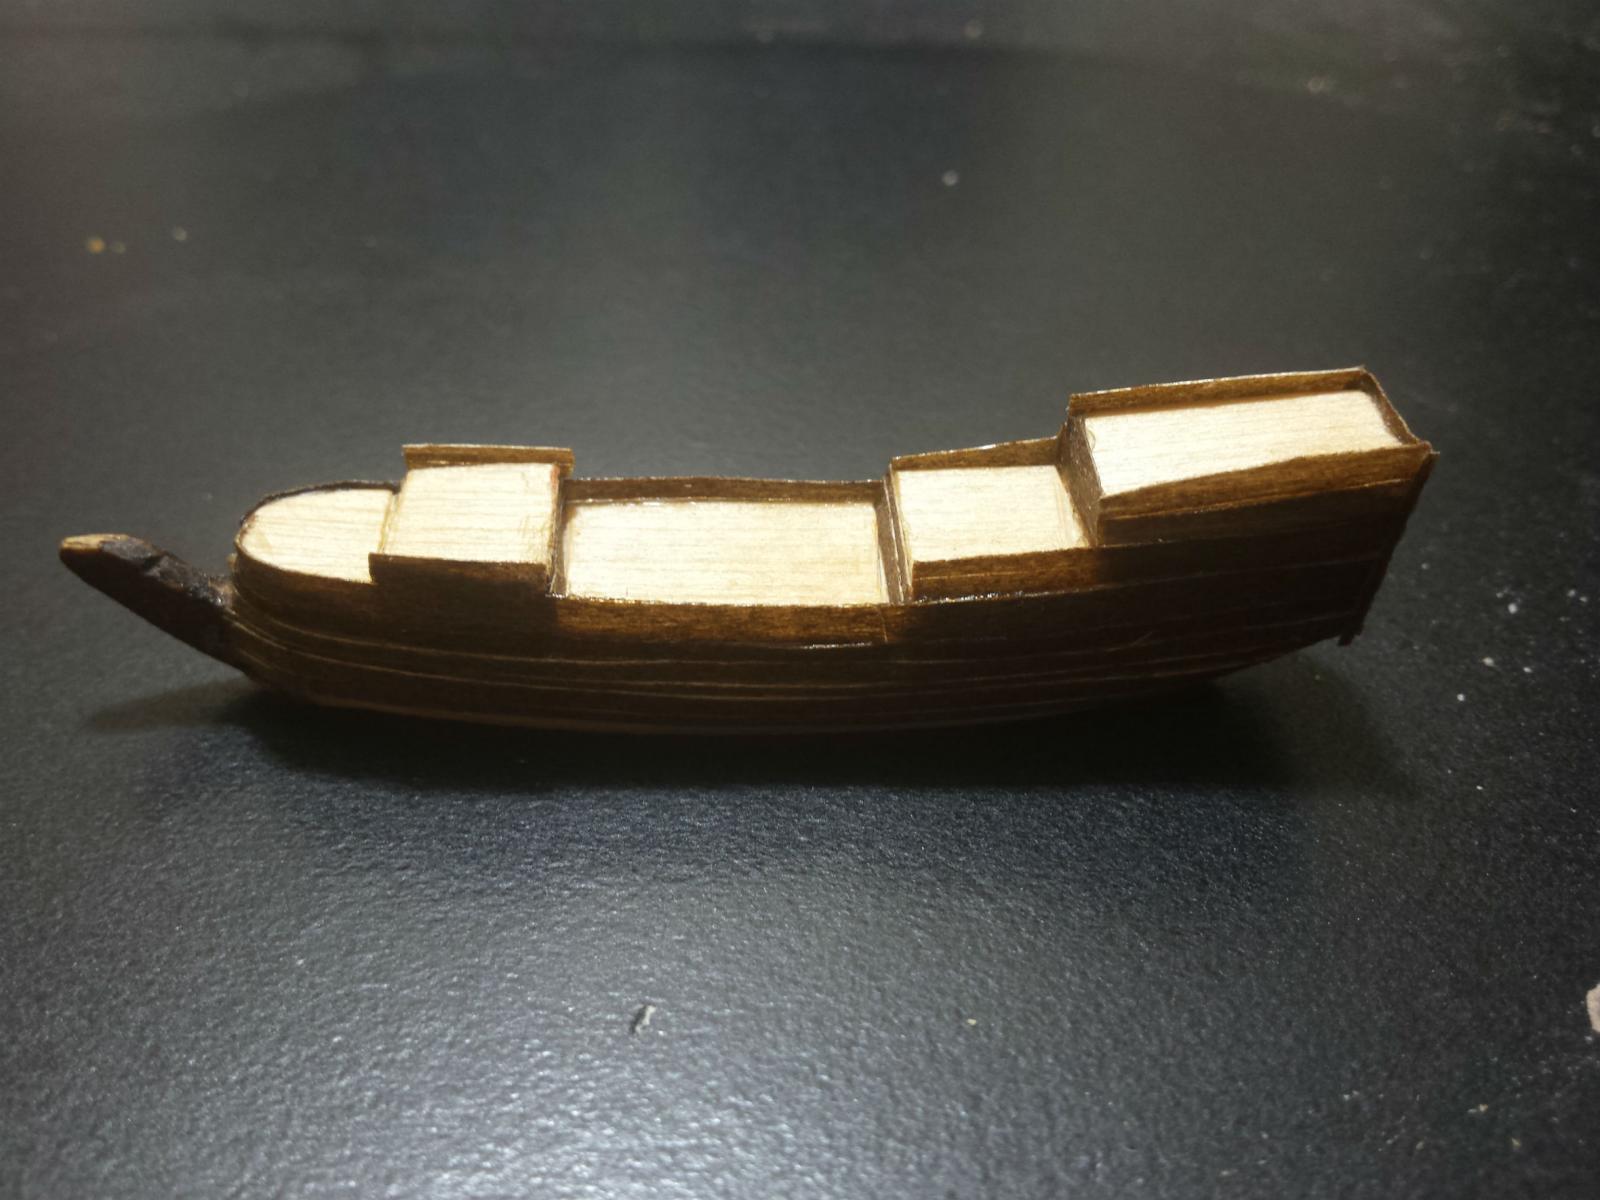
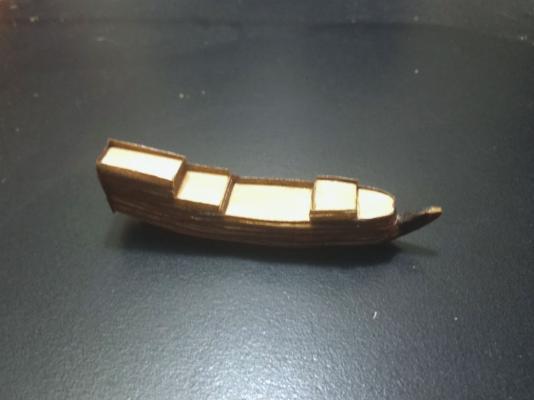
I went to my trusty book the Story of Sail and was able to find a few frigates matching similar years. They didn't have sail plans though so I photoshopped a similar sail plan on in order to make plans to measure in the bottle. I then went to carving. A note on the deck. I recently talked to a miniature model builder who showed me some of his techniques. It's completely changed my approach to ships in bottles. One of the things he showed me was some extremely thin veneer from a company called Cards of Wood. They sell veneer at .015 of an inch. I am now able to use the same planking techniques used in larger builds but at a very small scale. I'll show more of that later. The deck planking was done using the veneer coated in nail polish and then I scribed the planks with an exacto knife. I then coated it with a oak stain which stained the wood in the scribed lines but not the rest of the wood. The lines on the top deck were tests on the raw wood. They turned out horrible so I put the lines on the veneer. It's a lot easier when I can scribe the lines with a ruler guiding then cut out the piece to fit.


-
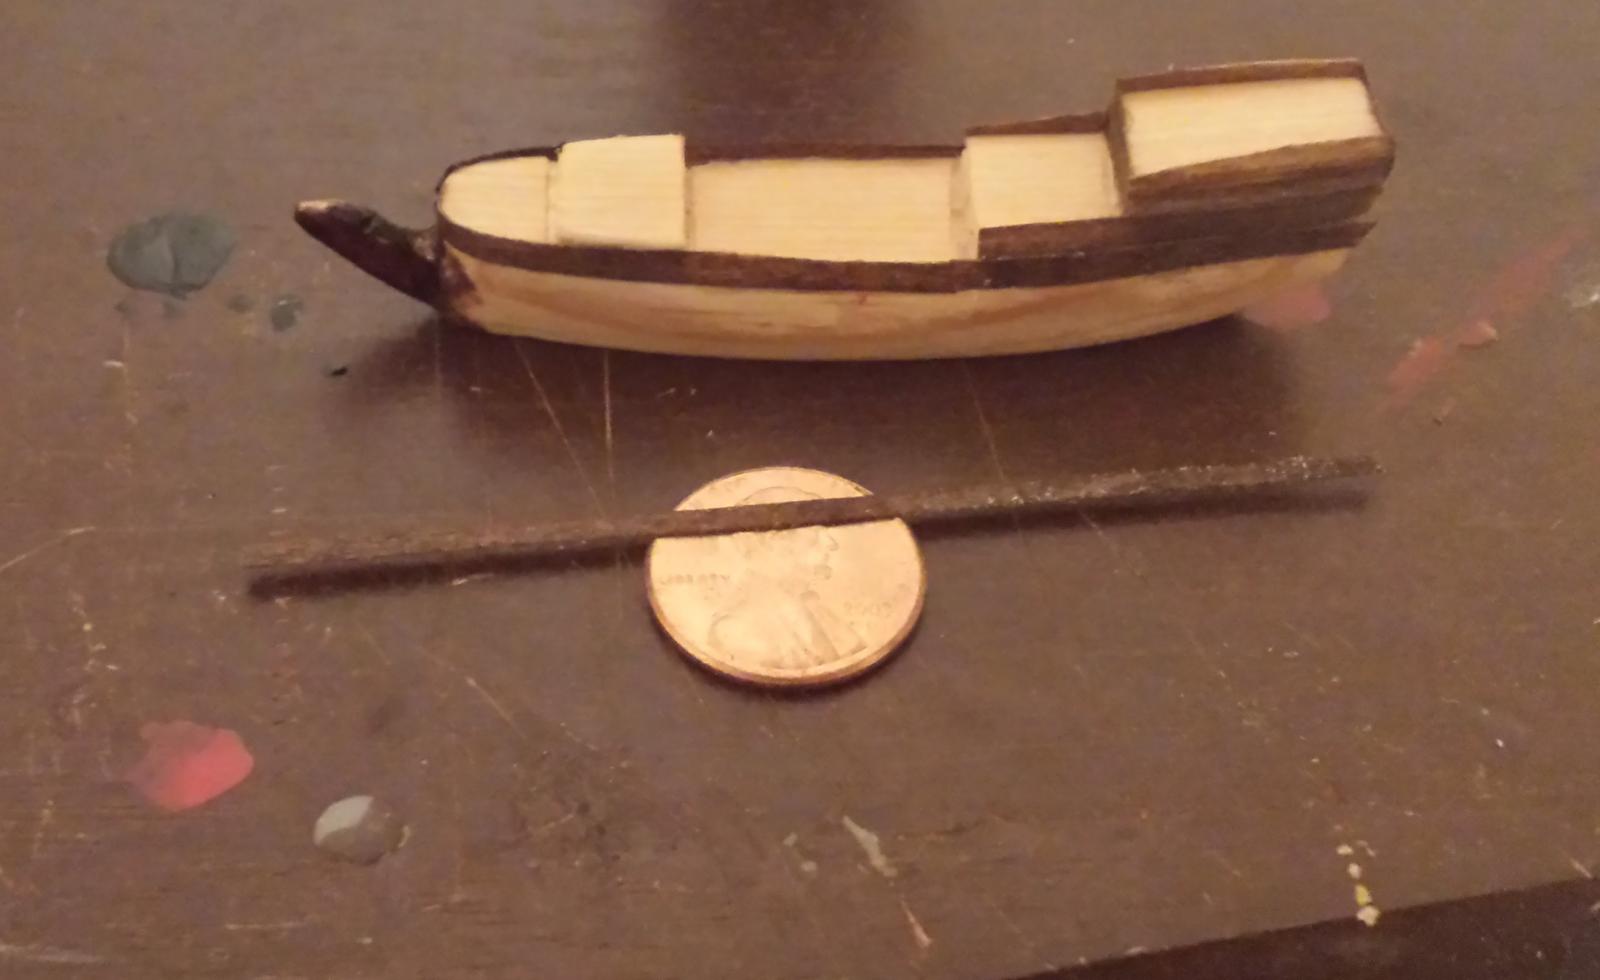
It's about time I start a log on this one since it's moving right a long. This build is another commission for a pirate rein-actor. The story of his crew is that they found the ship beached and got it back to sea worthy and made it their own pirate vessel. Basically he told me he wanted a sixth rate 20 gun frigate from around 1710. He also sent me a few photos of what he would like the ship to look like.
-
That is a very tedious amount of work and the final result is incredible! I'm just beginning to learn how satisfying it can be to work so hard on fine details. It's daunting at first but it feels good to see something you work that hard for come together.
- 274 replies
-
- 3
-
-
- Santa Maria
- Artesania Latina
- (and 2 more)
-
Thank you for all the ideas. It's been fun looking at the various ideas and how the fit my current project. My ship will be a 20 gun frigate from 1710ish. Companion ways are totally in I think I'll add those. Binnacles however weren't invented until mid 18th century. I will be doing a ships boat and boarding stairs. Ships wheels were interesting. They were invented around 1710 but not widely used until 1715. Per the friend I'm building this for I'm leaving the wheel off. Water barrels are a good idea. Buckets might be a bit much since the scale of the ship will be around 1:370 to 1:400. I have looked at a ton of photos and got a few good ideas. Most admiralty models it seems were focused on the beams and planking and left a lot of the furniture off. Chicken coops lockers and the like are great ideas though. I'll definently look into the figures. I don't thing I'll use them for this project but maybe another one. The ship will be bottled so I don't want to go too crazy but I wanted to add more detail then I have in the past. Your posts have all been really helpful.
-
I'm currently working on a 20 gun frigate. It's a fictions ship for a friend so I have some flexibility as to what goes into it. The plans I have aren't detailed when it comes to the deck so I've been planning out what I want where but I feel like I'm missing things. So far I have a general idea on where to put hatches, I know where the stove pipe is going. I have a general idea for the ships bell. I think the windlass went below the fore deck so I won't worry about that. What am I missing? Also to open it up a bit more what are the essentials furniture that should be on deck given you wave no plans for them?
-
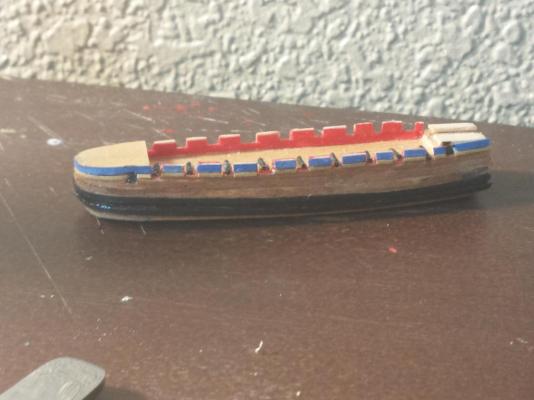
Some more progress on this one. I've added the channels and some more work on the bowsprit and I added cannons. One note on this particular kit. I'm not sure exactly what type of wood they put in my guess is pine. What ever it is it's extremely hard and brittle. I ended up breaking off the keel trying to drill a hole through it. It was easy enough to glue on a new piece of basswood as a replacement. The kit it's self though isn't meant to be bashed as much as I'm doing. At this point I've used the original piece of wood and scratch built an entirely new ship. Another problem I've found with this kit is the ship itself is to big for the bottle. The masts will be around a quarter to half inch shorter than they should be. If I weren't doing this to show how this kit could be bashed I would have picked a new bottle for this ship. The bottle it's self isn't bad. The clarity is good and for a beginners kit I like the wide opening it has. One problem I have with the Amati kit is they try and fit to much ship into to small of a hole. It's doable but I think it might be to much for people trying out ship's in bottles for the first time. The Wood Krafters kit is better in that they give you a decent beginner's bottle how ever the kit is a kin to what the reenactment community calls a polyester pirate and has little if any historical or actual ship basis which is what most builders in this forum look for. If I were to suggest a way to start ship in bottle building that would be easier for beginners and still have historical basis and actual hip basis it would be to go find one of these bottles. Then pick up some basswood and bamboo skewers or toothpicks and follow the directions in Don Hubbard's Ship in Bottles book. I might just put together a log on that. Any how I'll get off my soap box now and show you what I did. My bulwarks could be better. I'll see what I can figure out on that on a future build. I like how the bow worked out though. There's still a little bit more I want to add to that.


-
I don't mind if you do David. What ever it takes Mike Actually this build is helping me learn some different techniques that I think will help push me to the next level. More and more thought I'm finding I need to measure. I'm so used to eyeballing but to get better I need more accuracy. Well the planking is pretty much done. I did it pretty think. I think when I do this again I'll measure out and actually count the number of planks I'll need. One step closer to being a plank counter, what's happening to me?
-
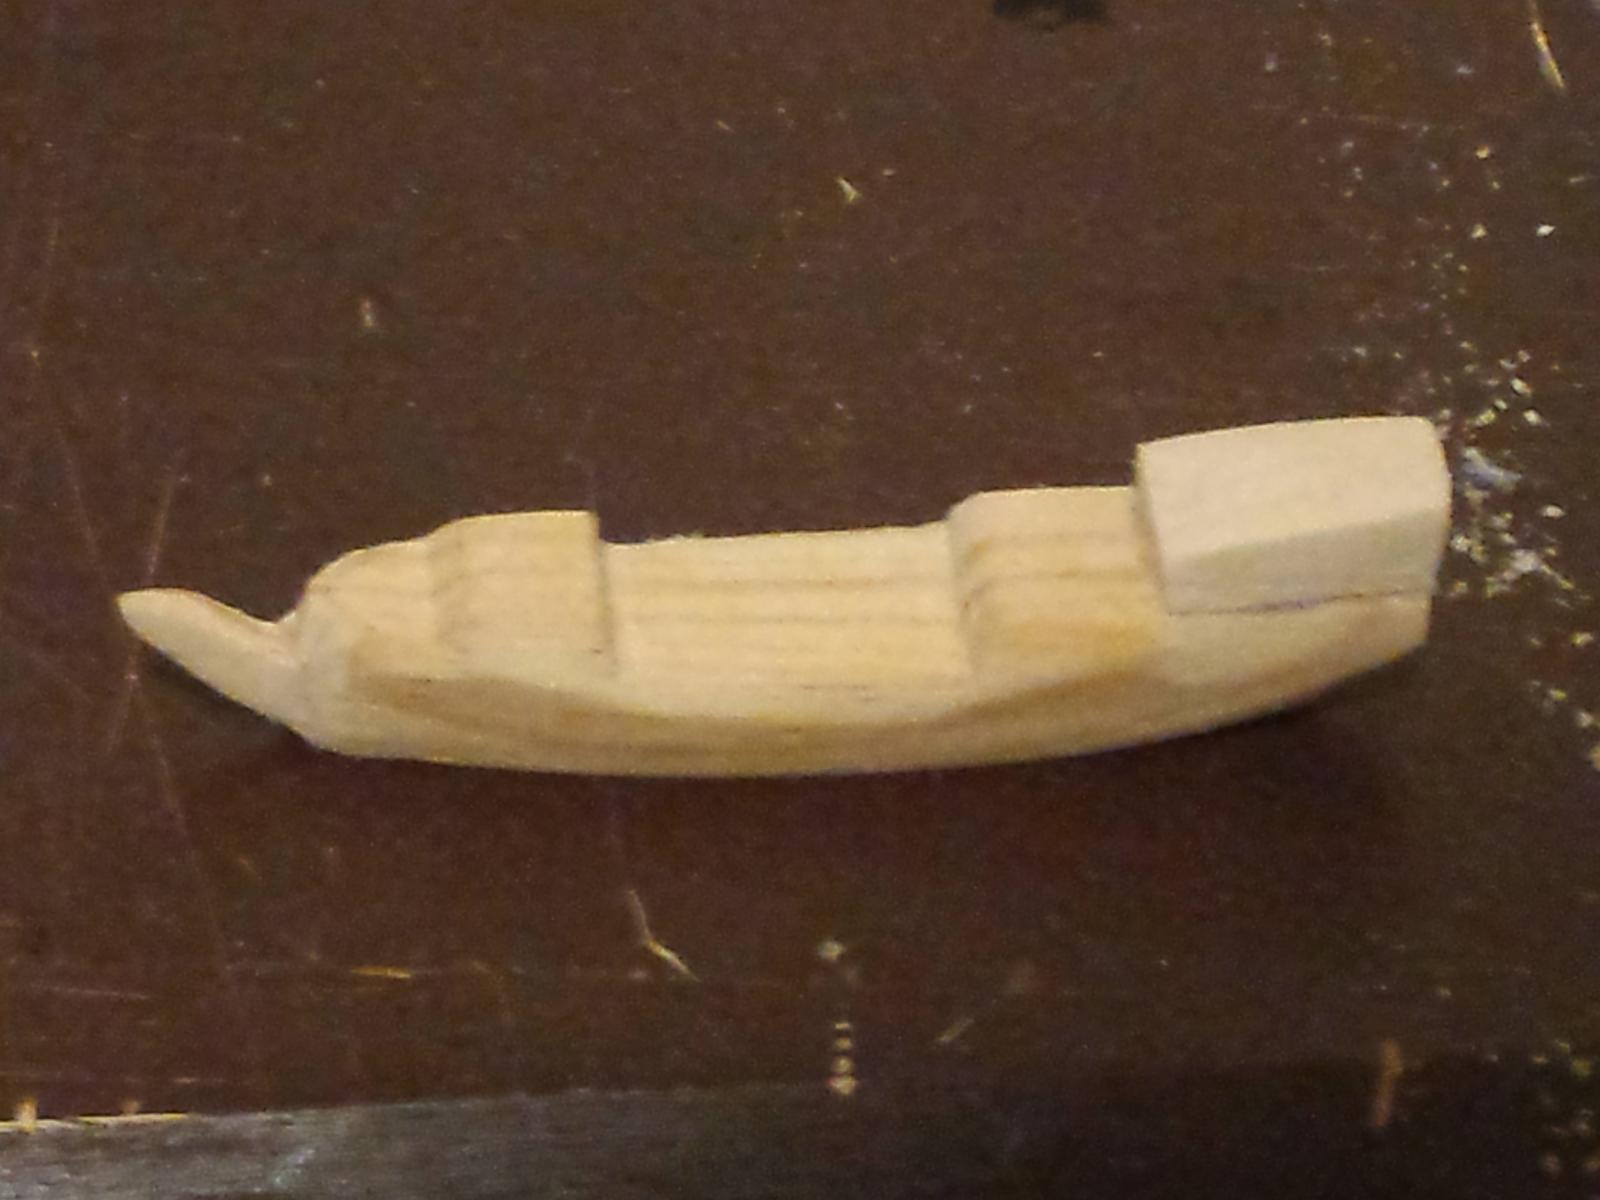
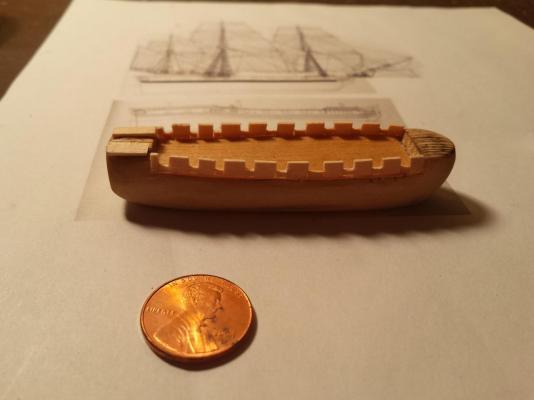
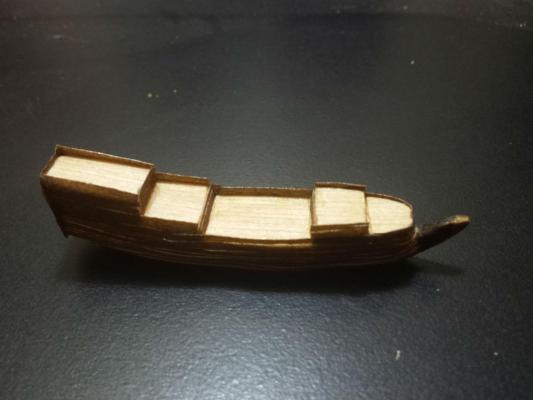
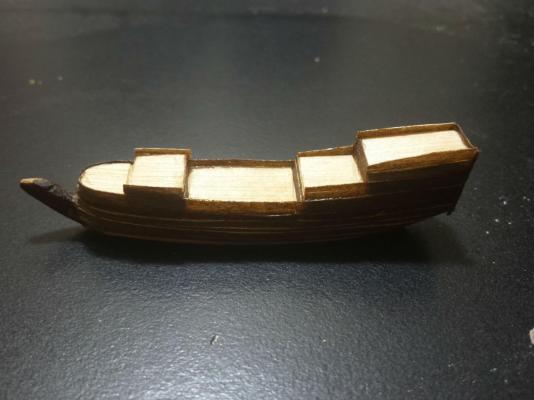
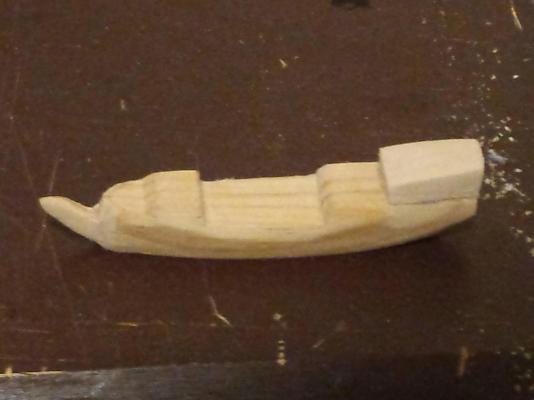
Finally making some progress on this one. I found an interesting technique that made my test with the previous ship more possible. There's a company called cards of wood that sells business and greeting cards made out of wood. They also sale blank sheets that are 1/100th of an inch thick. Before I get to that here's what I did to start bashing this kit. I moved the back edge of the forward deck up lengthening the weather deck. I also cut the front into a keel. I then added the extra deck on the stern. After I got all of that sanded I started planking. The deck I took took thin piece of wood and coated it in nail polish then when that dried I cut the planking lines and stained it. The stain seeps into the lines but doesn't stain the coated surface. I'll see if I can get a closer picture of that. I then stained some of the this wood and started planking.

-
Need info on "Ships-A-Sailin'" ship-in-bottle kit
DSiemens replied to BaxterB22's topic in Wood ship model kits
I can't find anything online about it. The address is a small home. It could have been a small business that some one started and since closed. The ship in bottle market in general isn't lucrative. I bought a hundred year old bottle for $250. I'm not sure how much the kit would go for. Sounds interesting though. Please post some pictures. -
I remember you asking me about this. I'm glad you got it to work out.
- 56 replies
-
- 5
-
-
- rouse simmons
- bottle
- (and 1 more)
-
At least the backward method helps bring the mast tip to the bottle neck. Had you done it conventionally it would be much harder to fix.
-
You have managed to fill the bottle well which makes for a great ship in bottle. Like a good photo filling up the frame and not leaving empty space on the edges. This problem happened from times to time. I know I've done it more than a few times. There's a few adjustments that can be made. Lower the mast, shorten the bow so the ship can be moved to a slightly taller part of the bottle, or lower the sea or stand the ship is sitting on. Either way your real close Dan. She's looking great.
-
https://books.google.com/books?id=_FCdAgS7HUoC&pg=PA2&dq=modeling+Thomas+miller+1667&hl=en&sa=X&ved=0CCcQ6AEwAWoVChMIqqzW1NS6yAIVRPJjCh2NRgXP#v=onepage&q=modeling%20Thomas%20miller%201667&f=false Some one showed this to me do I thought I would share. The book was written in 1667 and has a lot of the charts and info I've heard elsewhere on the forum. It's interesting to have the original source though.
- 1 reply
-
- 5
-
-
Great job Hamilton she really does look nice. Despite the problems it's still better than my first one. Don't take the Amati kit as a good representation on ship in bottle building in general. I've known many very skilled builders like yourself that have had a really hard time with this kit. The opening is way to small for the size of the model and your right the clarity of the glass isn't that great. The clarity of yous actually looks worse than most I've seen. They really didn't give you a great bottle. Any how scratch sib building is not as hard as this kit makes it out to be.