DONATION DRIVE - SUPPORT MSW - DO YOUR PART TO KEEP THIS GREAT FORUM GOING!
×


DSiemens
-
Posts
1,060 -
Joined
-
Last visited
Content Type
Profiles
Forums
Gallery
Events
Everything posted by DSiemens
-
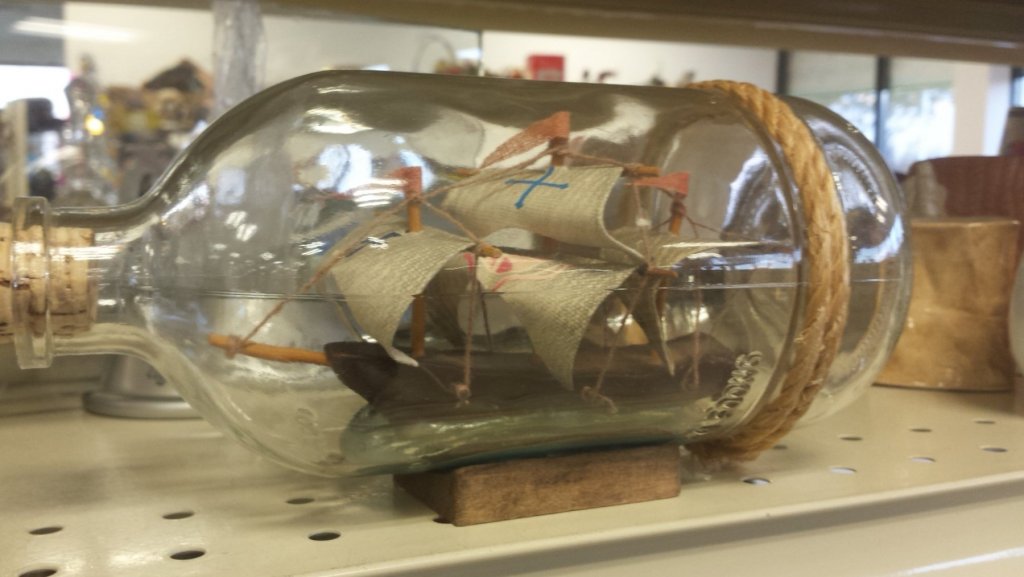
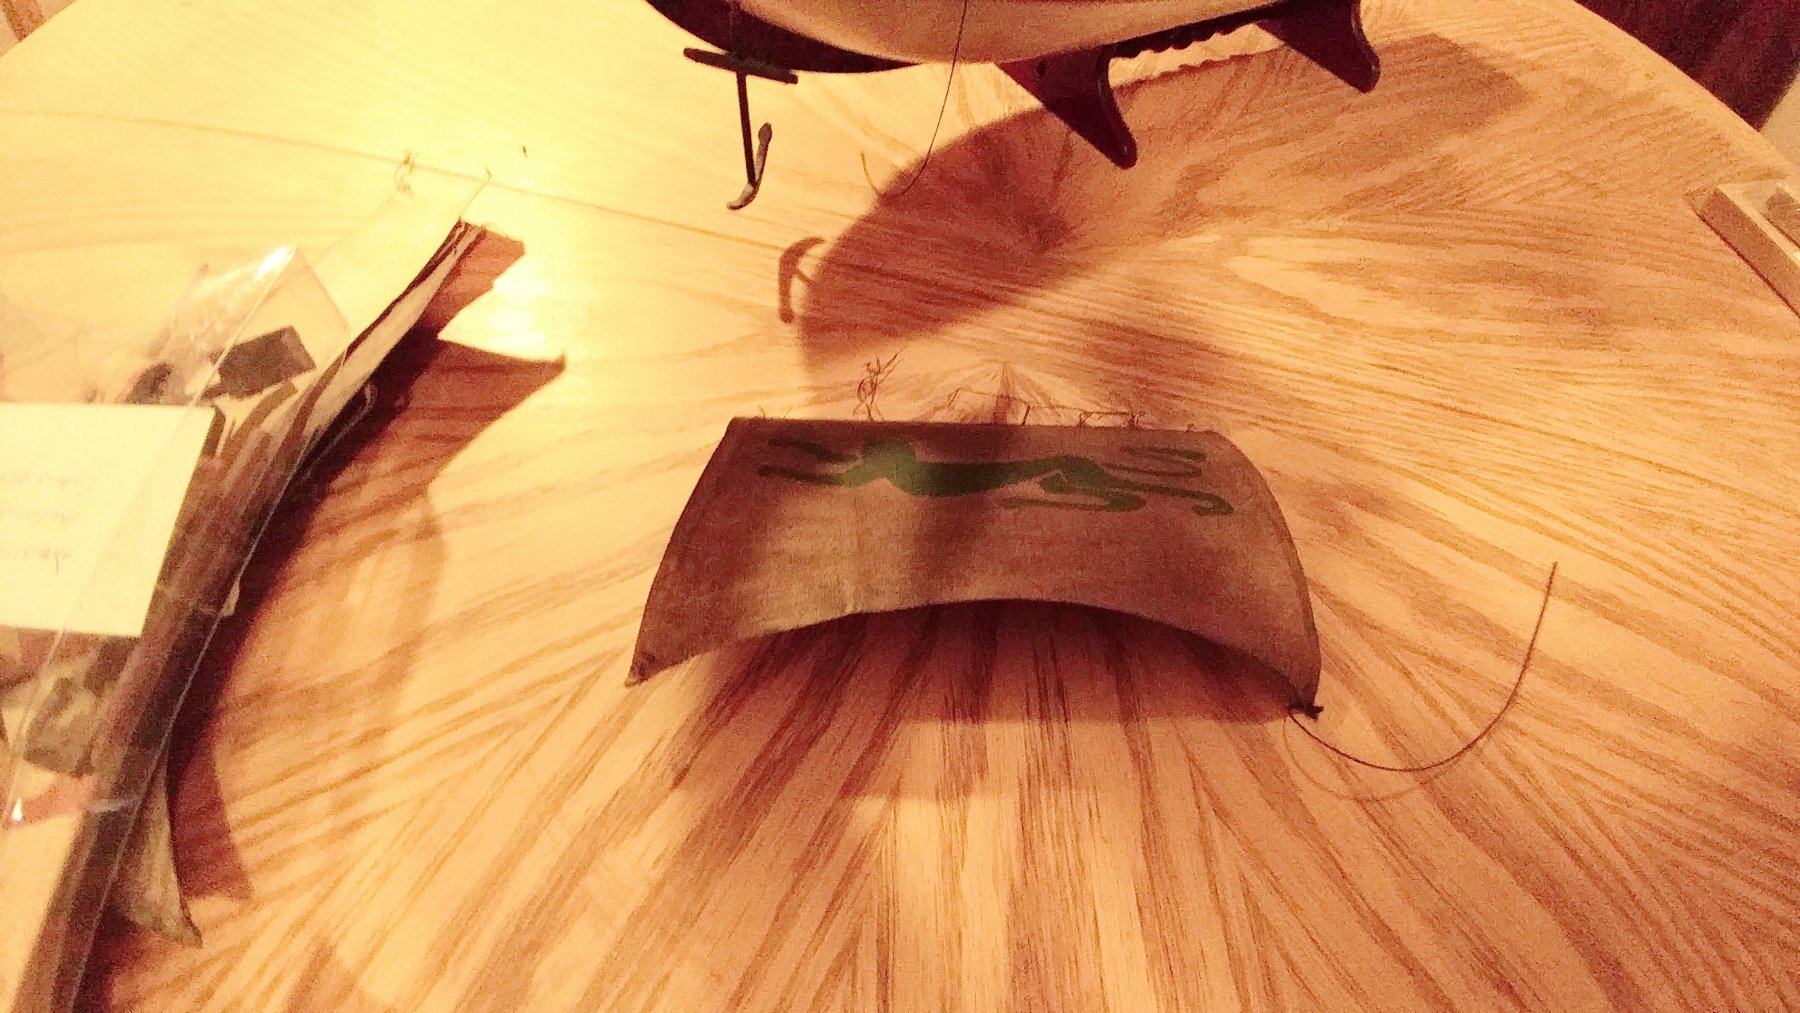
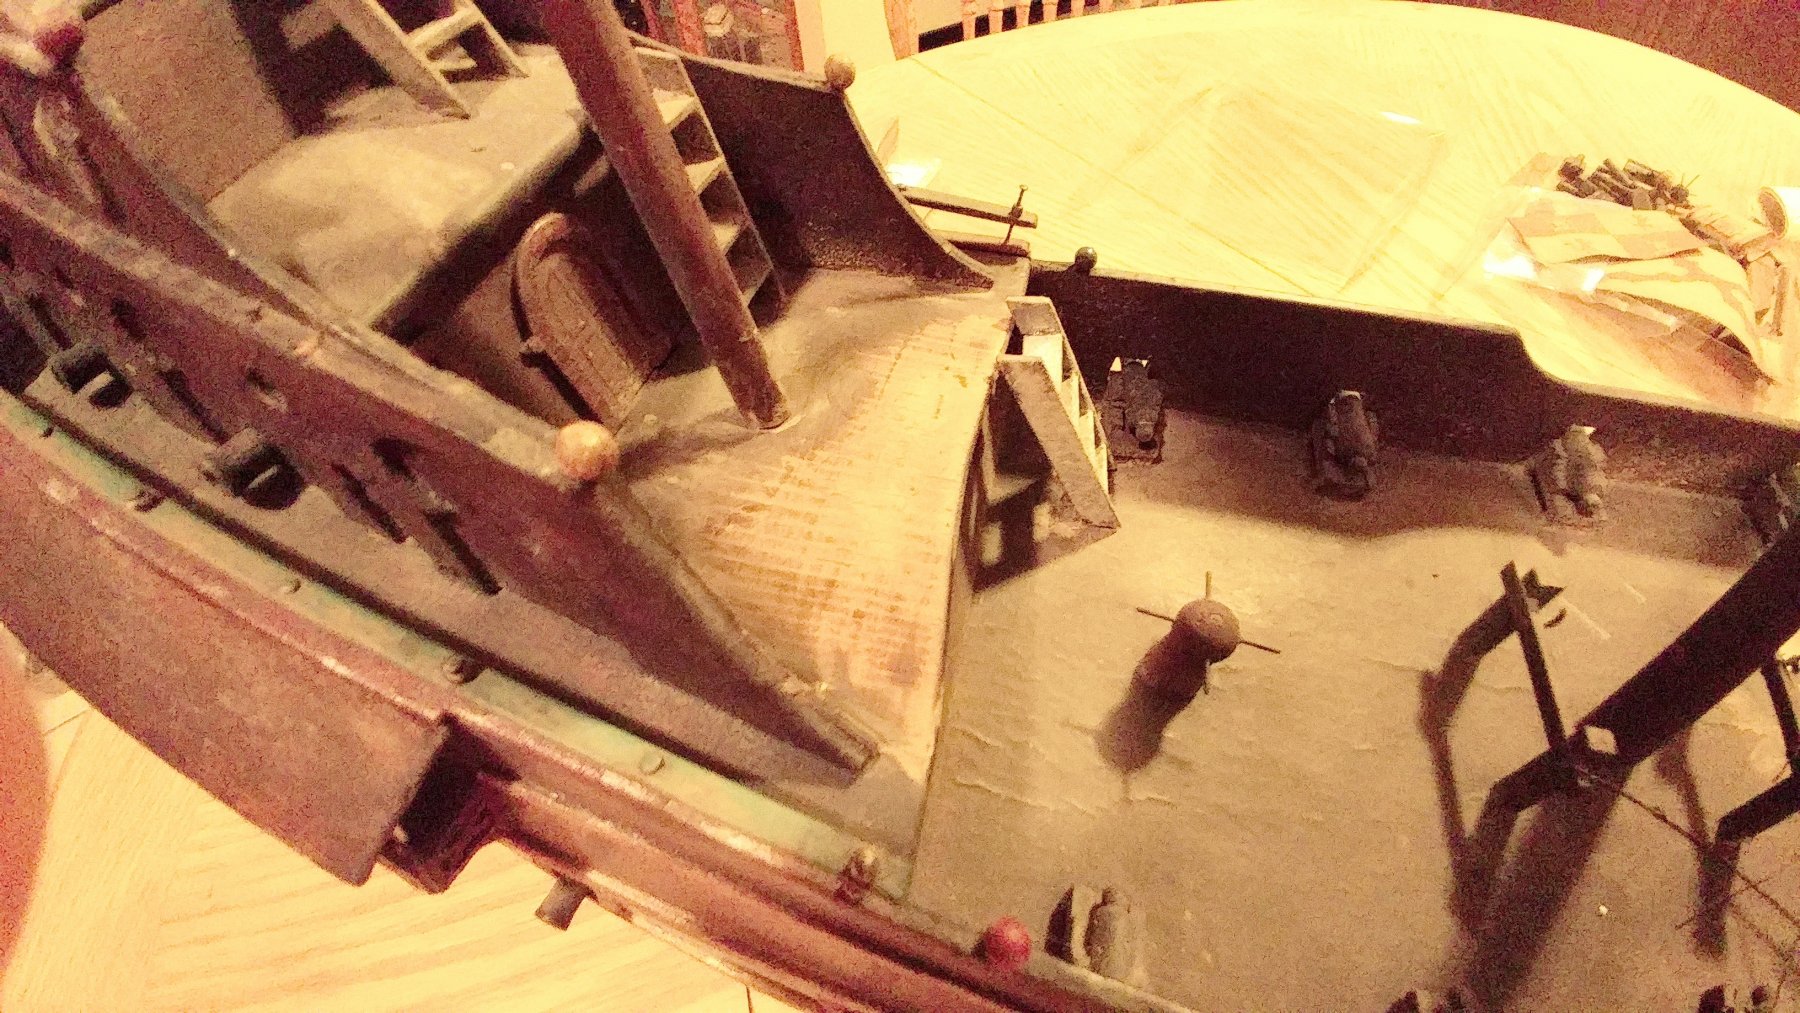
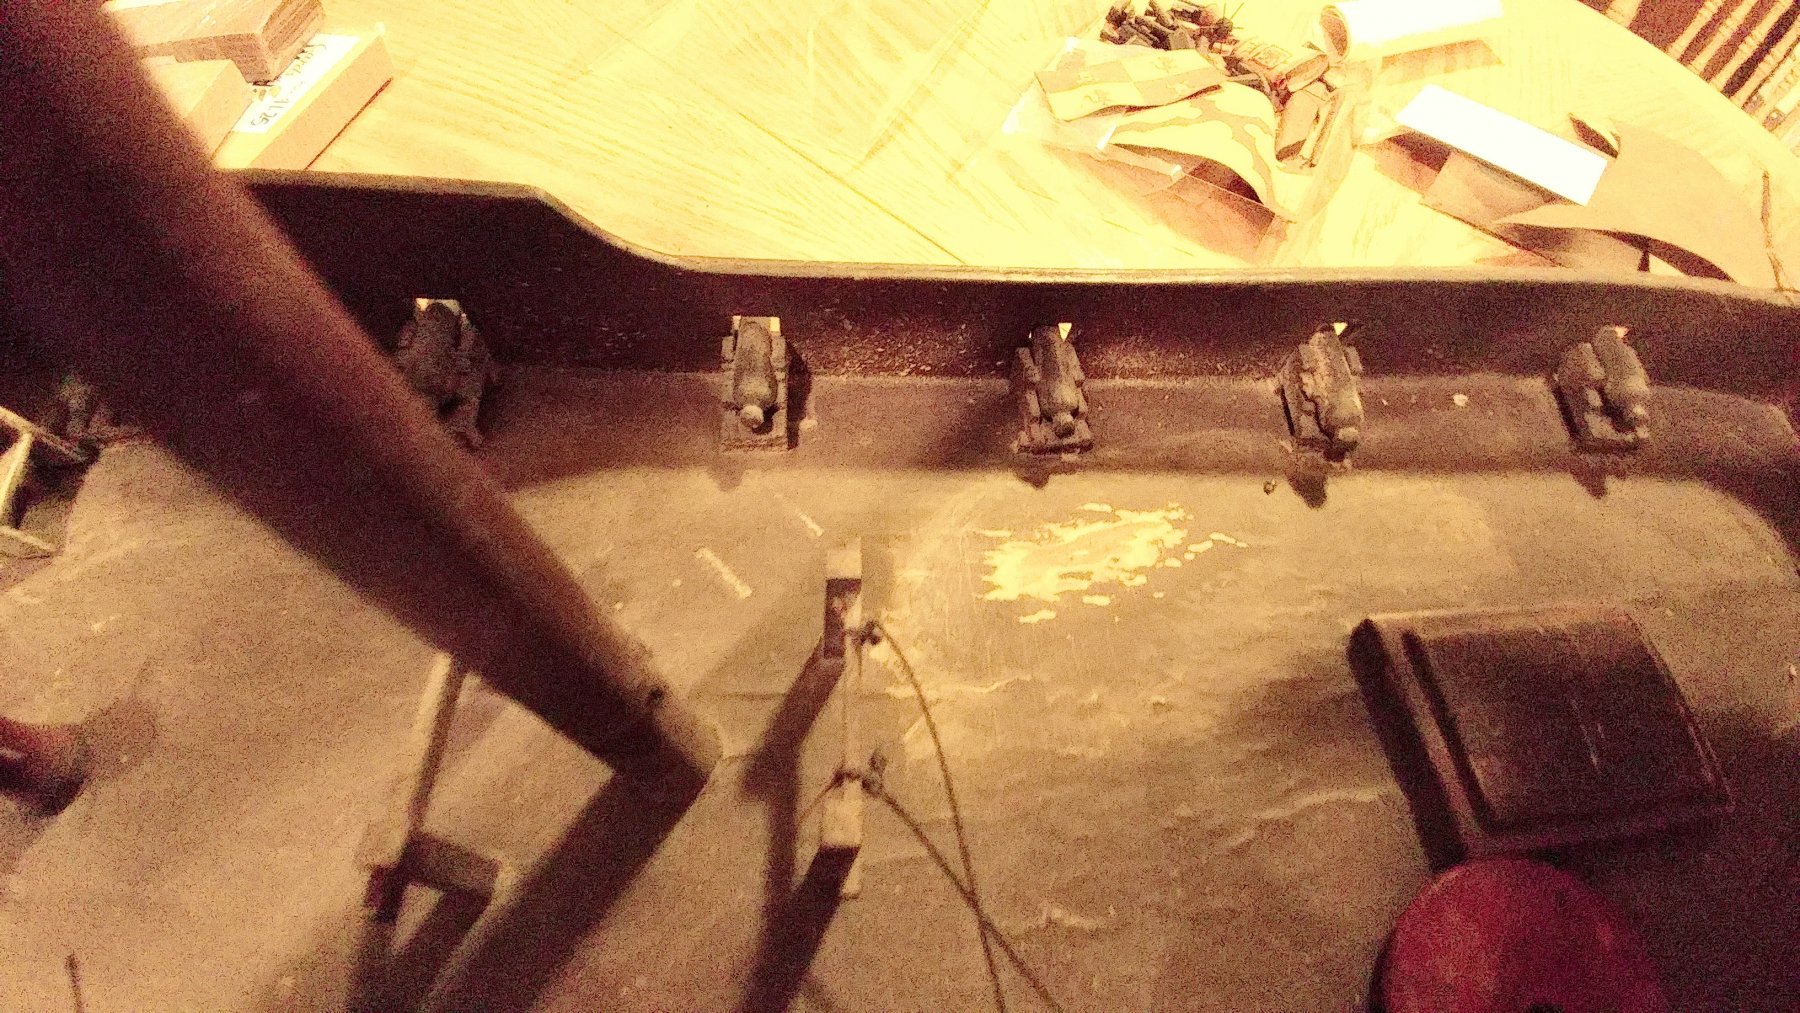
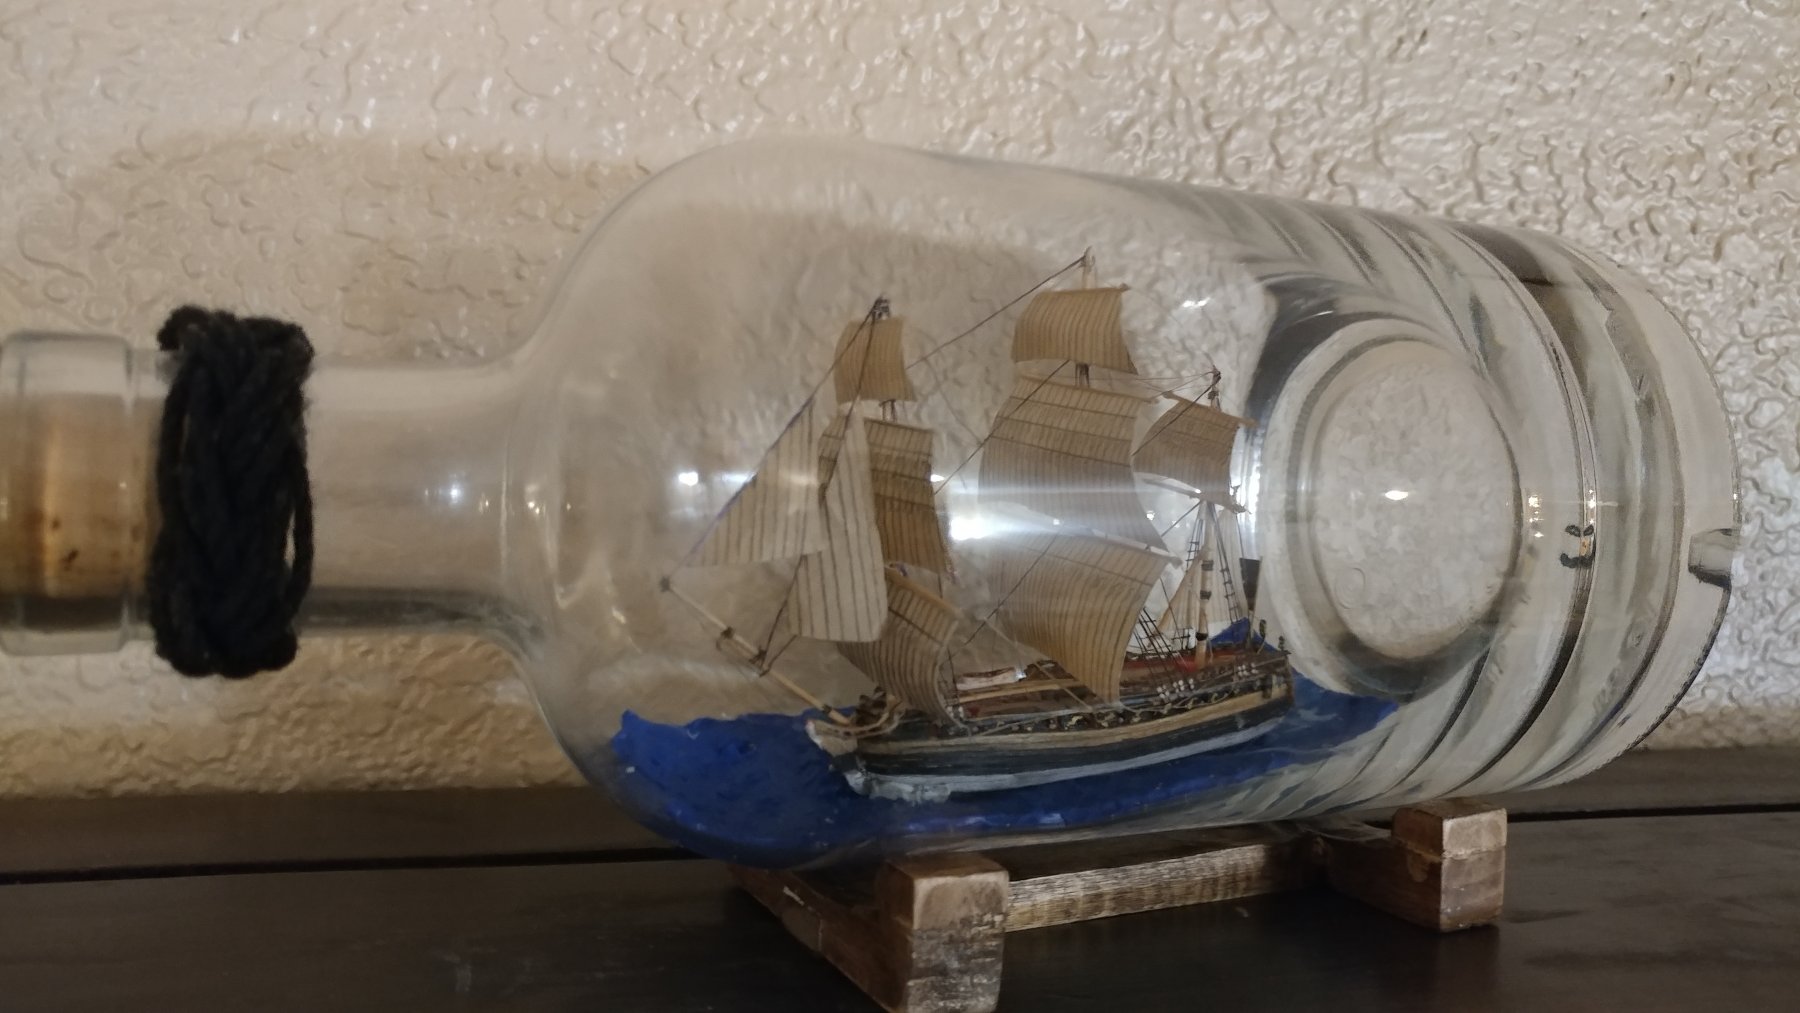
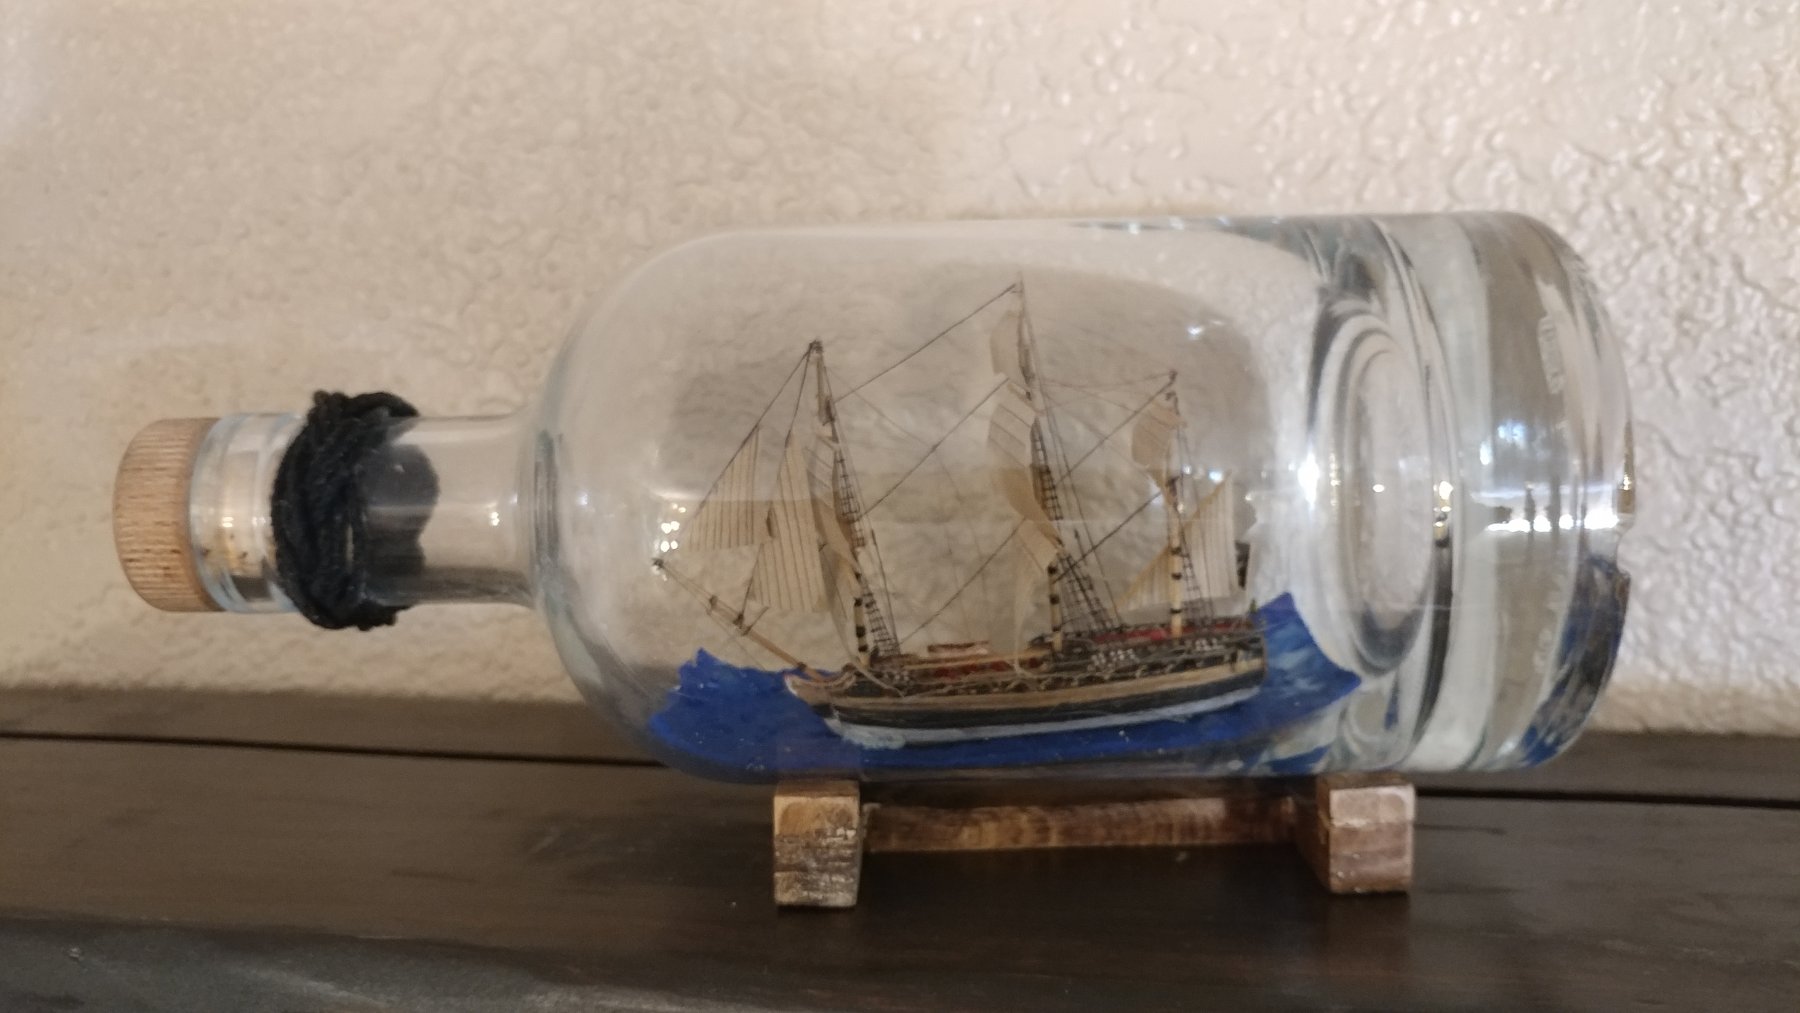
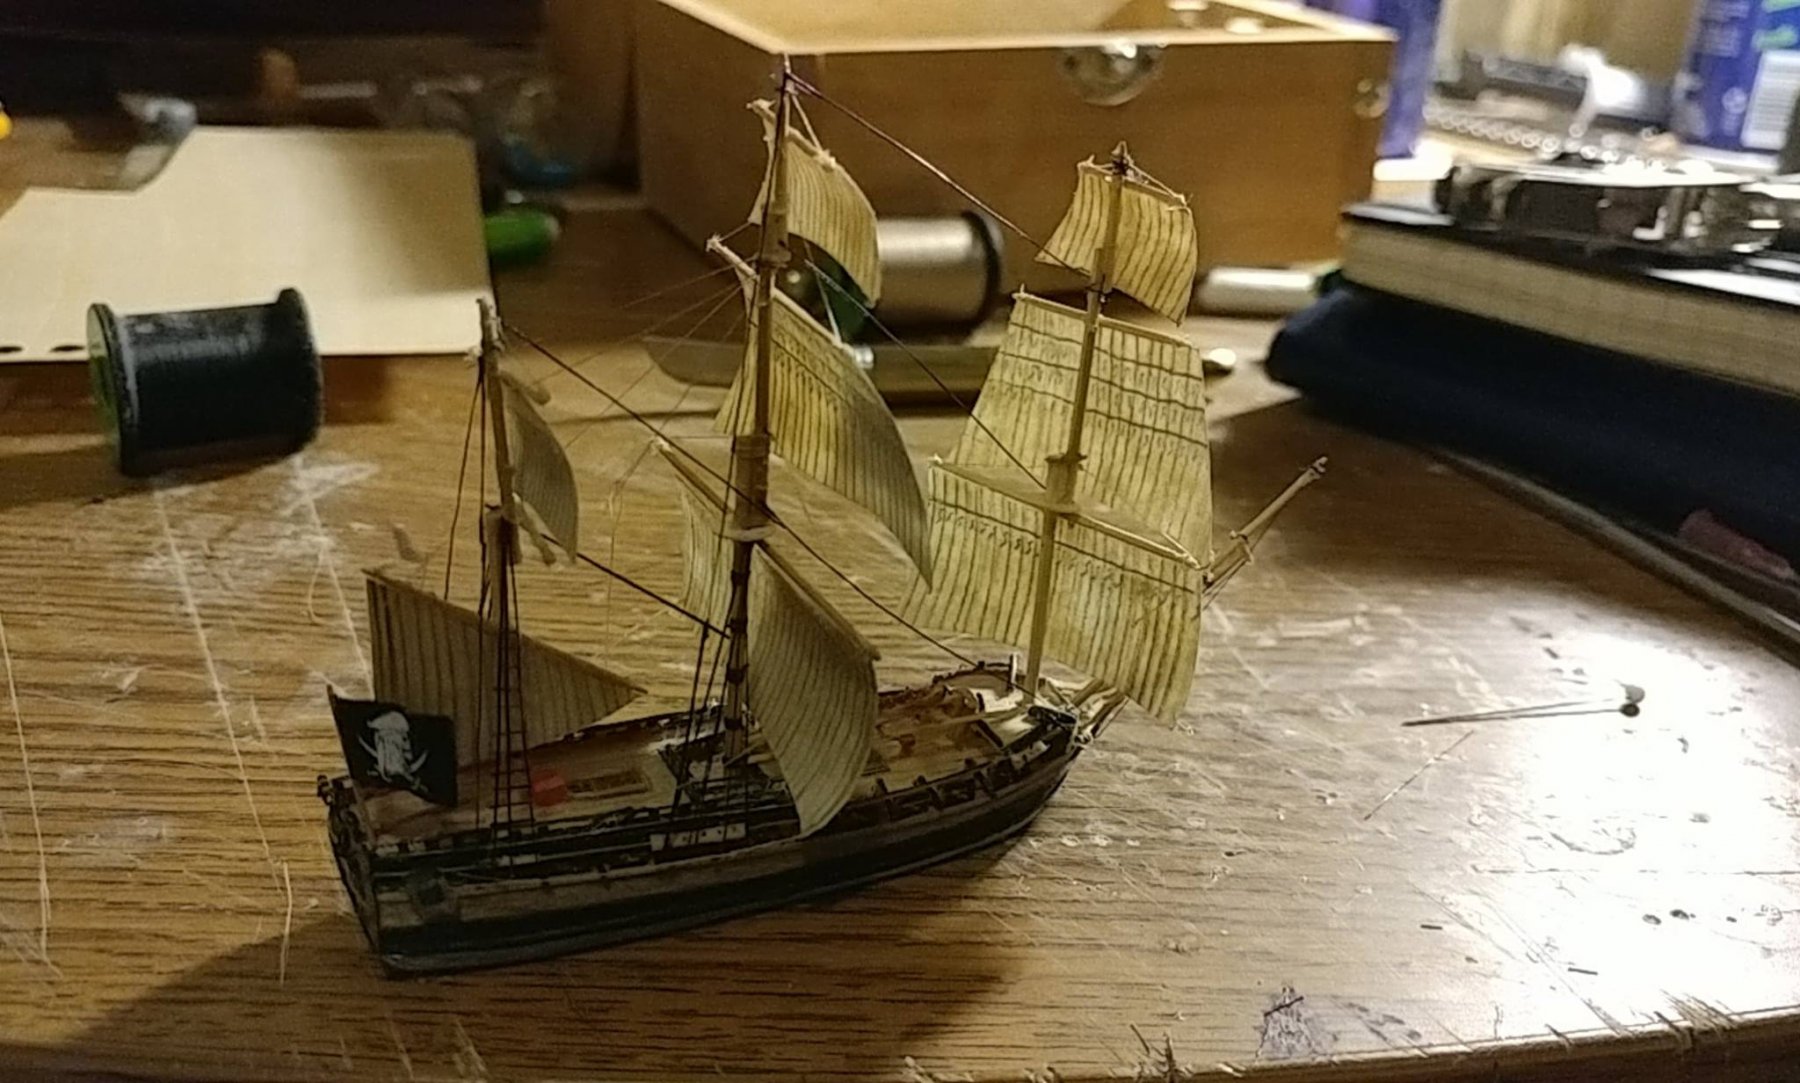
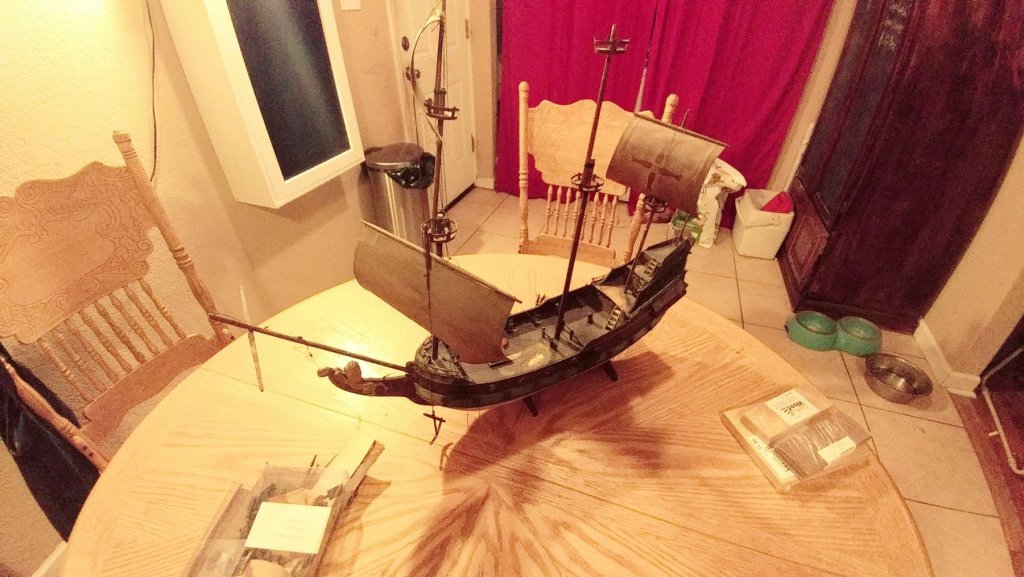
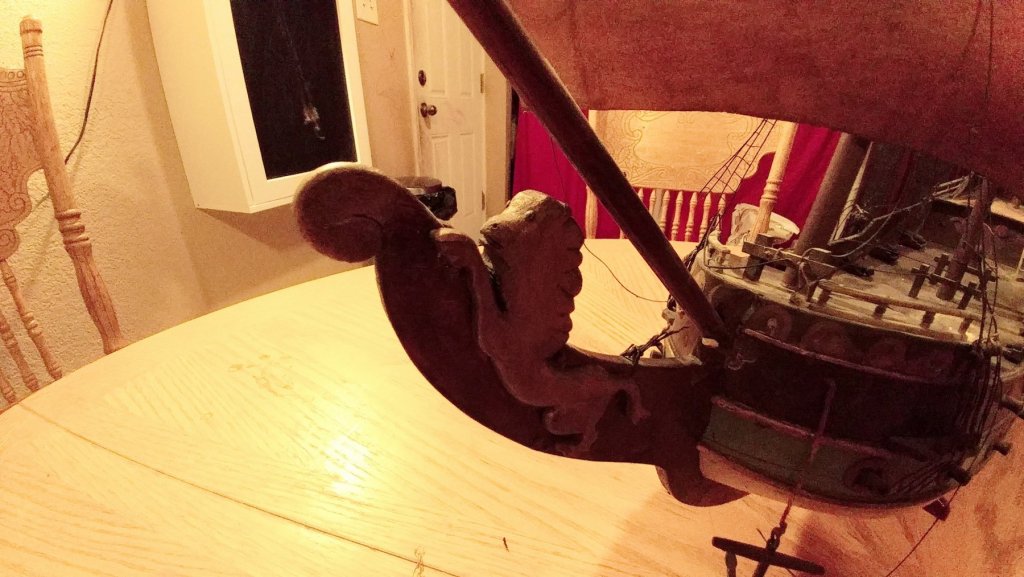
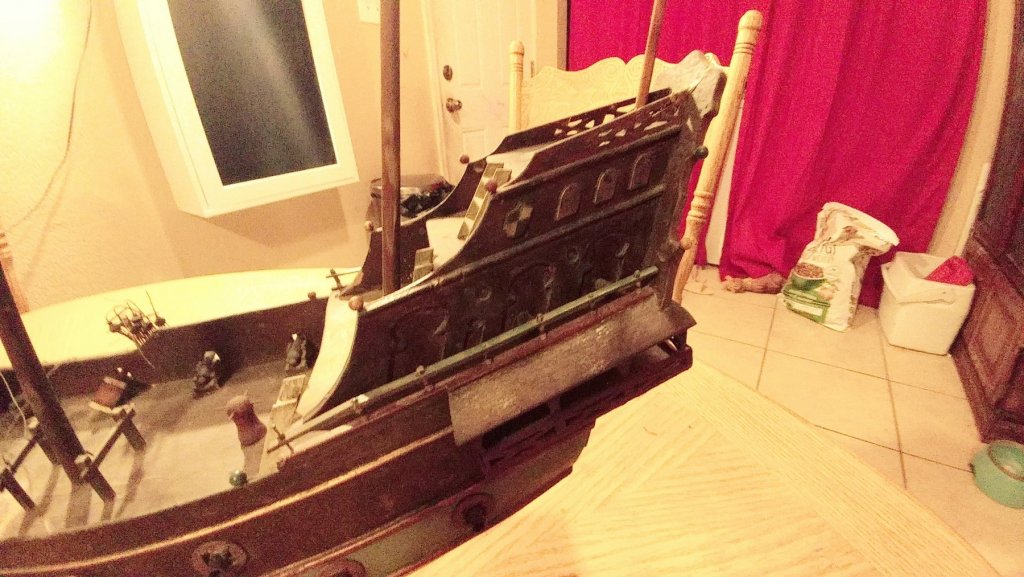
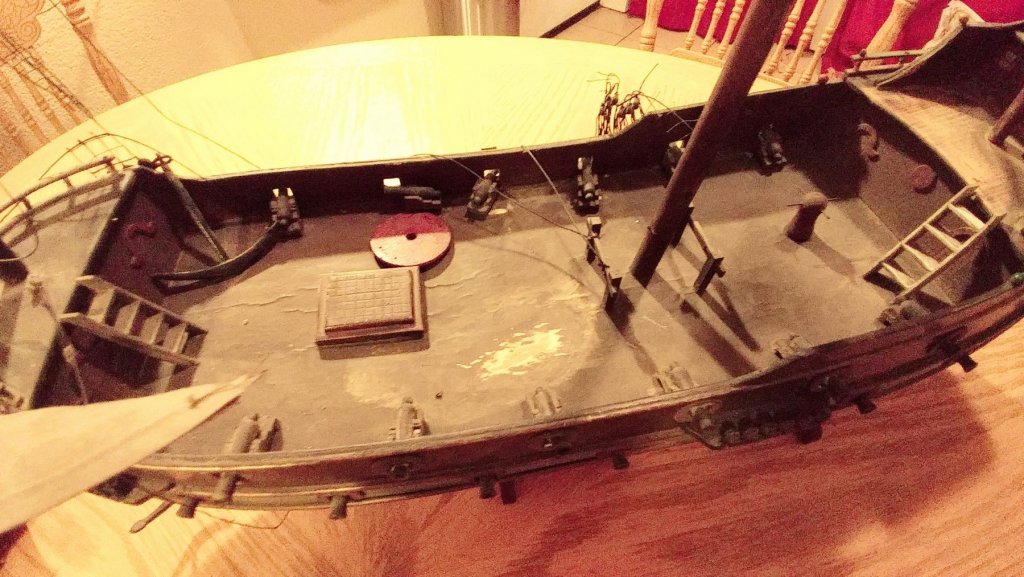
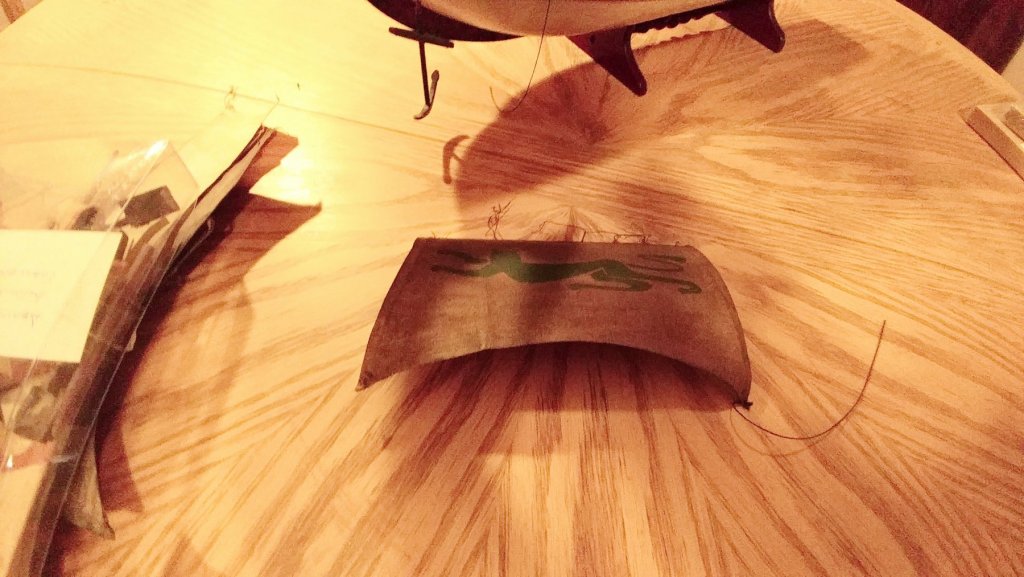
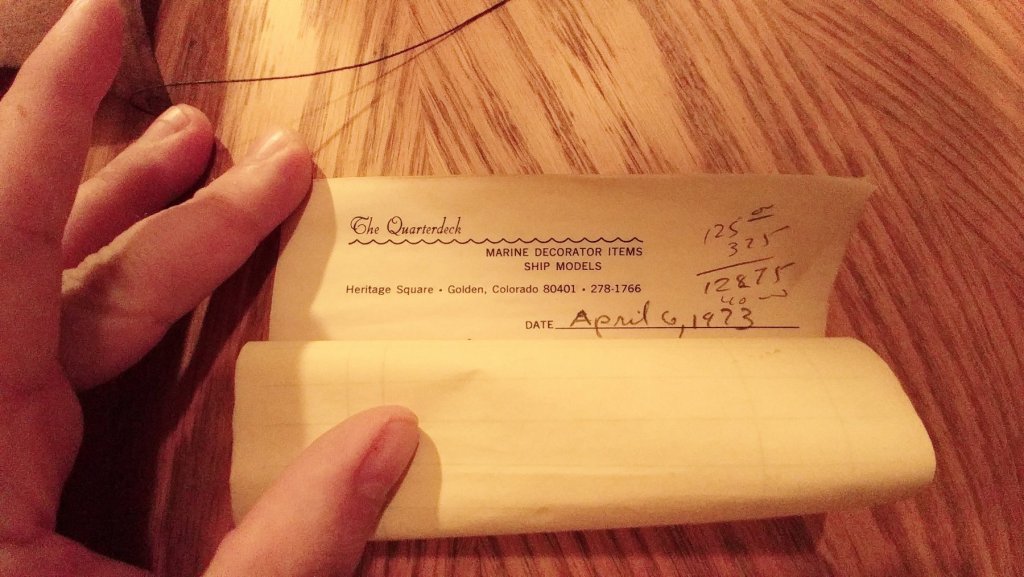
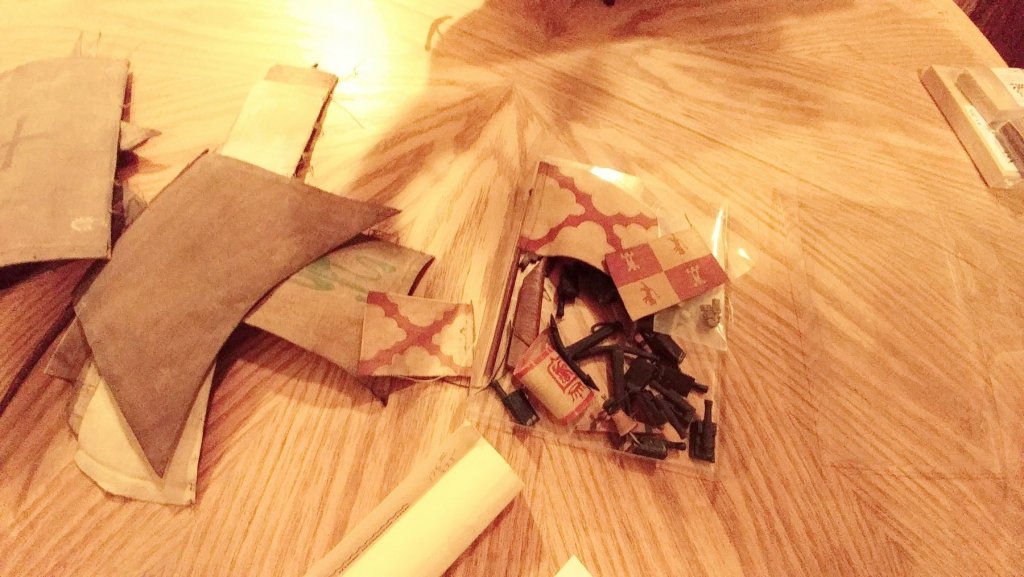
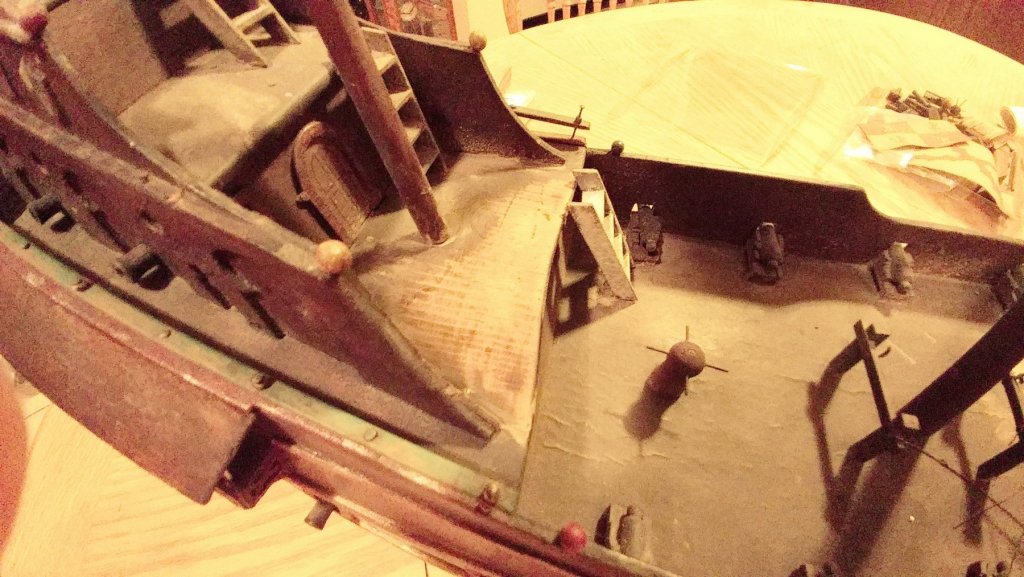
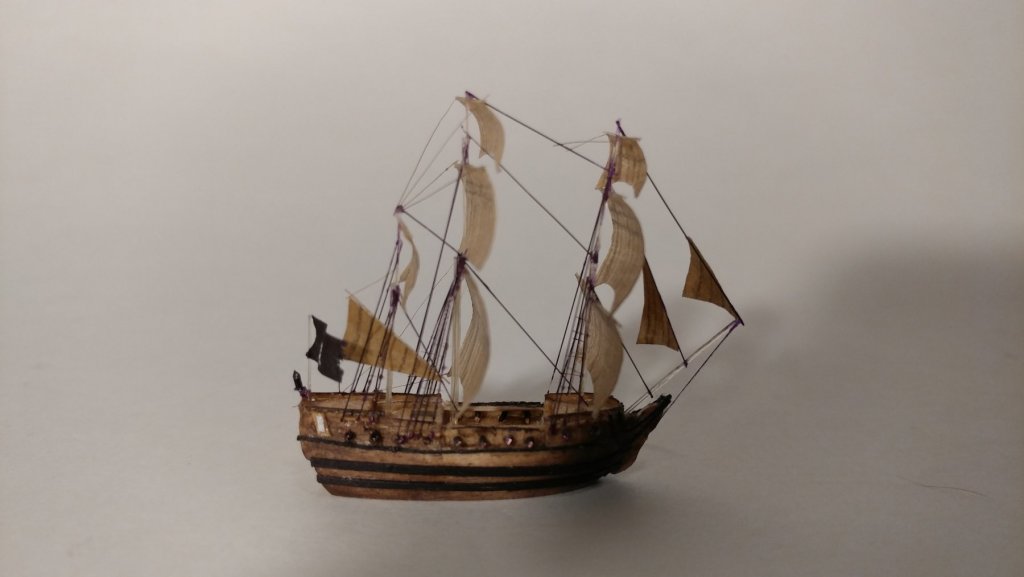
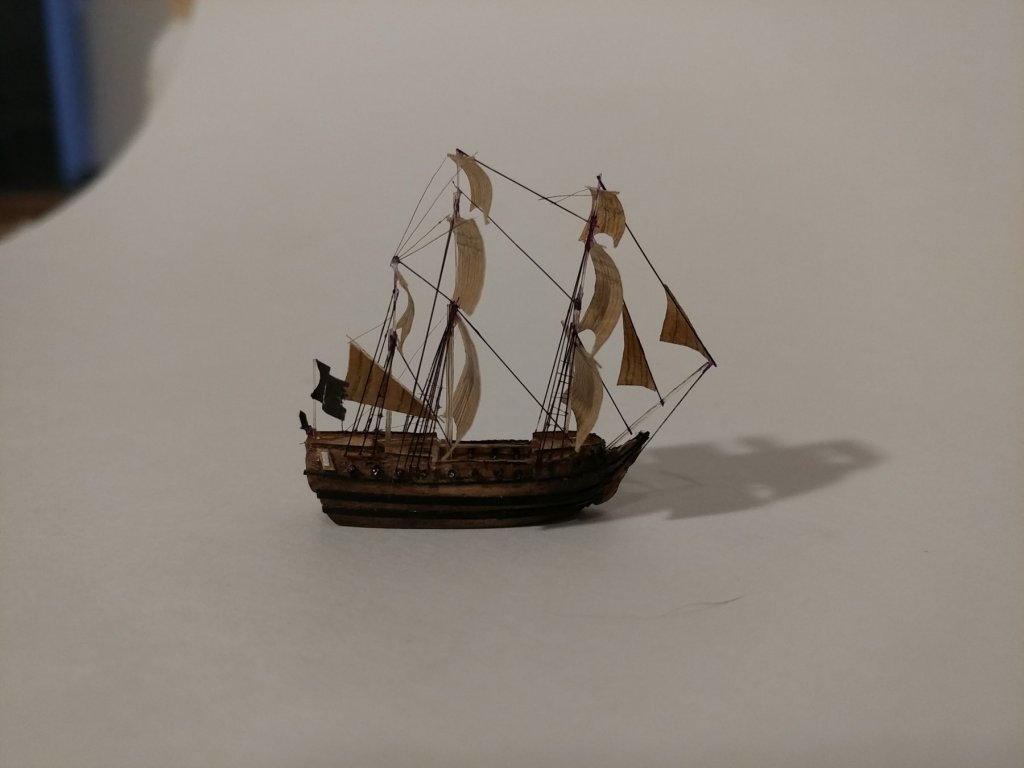
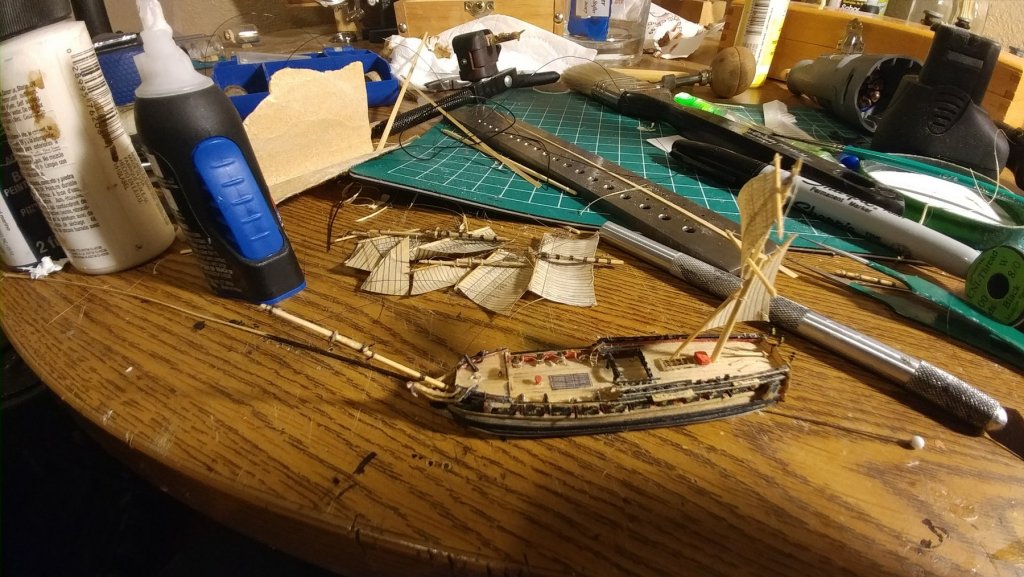
 I have had an interest for some time in the E. Armitage McCann models and always thought I'd try one someday. I came across a 1927 version of his Pirate fellucca and Spanish Galleon book on Amazon for $11 and decided to make the purchase. It was in great condition for a 91 year old book. It even had the plans in the back sleeve. A friend of mine if the Rocky Mountain Ship wrights happened to be restoring a McCann Constitution so I thought I'd show it to him. He recognized it right away as he has a 1926 copy and he asked how interested I was in building a McCann model. I told him I was very interested. He then told me he had a Spanish Galleon that needed some restoration amd that if I planned on restoring it he would let me have it. I jumped at the chance. I love old ship models. The older the better. I spent a bit of money on a 1915 ship in bottle just to have one from the era when ships in bottles became popular. So owneing an old McCann style model was right up my alley. Admitably I started work on her right away. So this is after some clean up but here she is. Note the receipt. The ship was sold at one point in 1973 so I know it is at least that old. To the best of my knowledge it between 50 to 90 years old. It is incredibly fragile. The rigging about fell apart looking at it. All of the rigging needs to be redone. Its bowsprit was broken and in need of repair. Surprisingly all cannons were present. Some of the stern sections were broken off and needed replacing. I have my work cut out for me. Good news is I have the 91 year old instruction manual. Bad news is I don't think theres such a thing as a notions counter anymore. 😜 I've been pouring through the book getting an idea of what goes where. The original builder stayed pretty close to the book but did do his own thing on some parts. I plan on doing a mix of the two. Bring some parts closer to the book and leave some parts as the builder had them. I started with the rigging. It all has to be removed. I saved what dead eyes I could but they are equally fragile. I may need to buy a celluloid knitting needle to teplace them as recomended by McCann. I then turned my attention to the deck. McCann states it should be a lighter color. The original builder painted it dark. This is where thing got a little funny as the admiral looking over my shoulder said, "The deck isnt right, its to dark." I told her I was thinking that and thought about painting it lighter per the book. She said, "No, you have taught me to much. It won't look right unless you plank it." She is right, theres nothing better than a nicely planked deck but, this is a McCann model. It was supposed to be simple. I fear my club and I have raised the admirals expectations in ship models. I guess thats not all bad. I'm still stuck in the middle on this idea but I purchased some wood to plank it with. (I needed more ship in bottle veneer anyway) From there I investigated the deck. With a little sanding I found,the upper decks are wood. I can sand them down to the wood and call it good. The main deck however is a some sort of composite and doesn't have a wood grain. The main deck will need planking. I purchased some wood from cards of wood that is paper thin. If I do plank it the increased height of the deck will be very minimal. Thats the question though. Do I paint it per the book or plank it because it would look better? I would plan on a weathered look on the planking to keep this ship looking old. There's a lot of charm in an old ship model and I don't want to lose that.
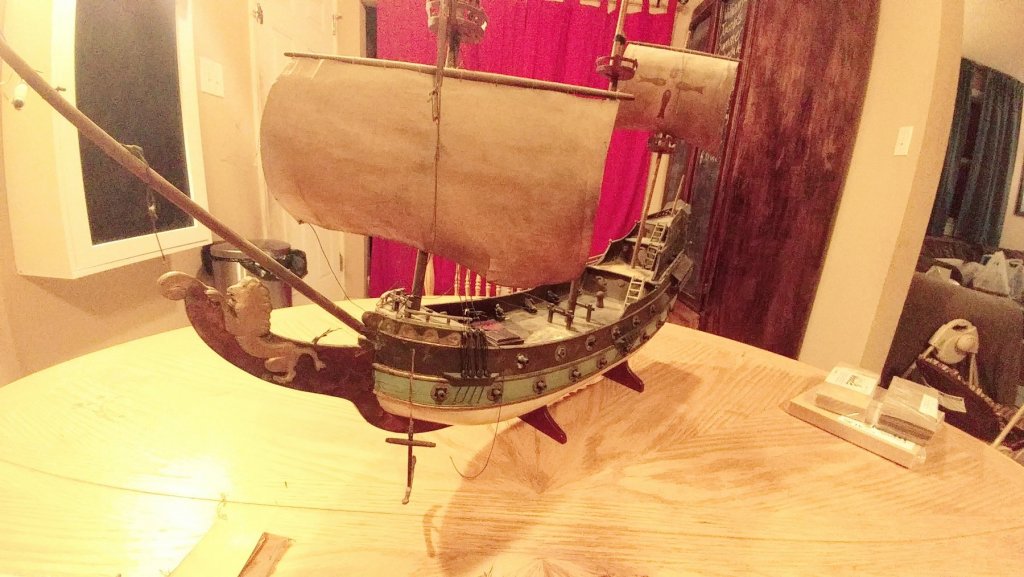

-
Skull decorations on ships: real or fake
DSiemens replied to ntmcd1's topic in Nautical/Naval History
Theres a pirate history podcast that explains the use of the skull and crossbones. I'd have to dig through and find which episode. It was more of a symbol of death and can be found on early 18th century grave stones which leads people to think they are pirate graves, which isn't true. The symbol was used to symbolize death before itbwas used to symbolize pirates. Also if they didn't die at sea pirates were likely burried in mass graves or unmarked graves in criminal grave yards. The skull and cross bones was more a fad of the time. When a sailor died at sea a captain would write the skull and cross bone symbol in the log book along with the name and cause of death. At the time captains could be ruthless. Corporal punishments were very harsh and could cause death. Sailors saw a lot of there friends killed by the hands of their own captains. So when they took to pirating they would fly a black flag. If they had the materials it would have the skull and crossbones symbolizing death is coming but also, in a remeber all our friends you killed? Now its your turn. I'm not aware of any skulls carved on pirate ships. It most likely a modern trope much like earings which weren't in fashion in the early 1700's. A lot of pirate tropes came the on the late 1800s to early 1900s. -
I'm coming very late to this build log but I have to say great job! I love Statenjachts they are beautiful little ships. Yours is a perfect example of their beautiful design. I bottled one some years ago and gave it away at a charity auction. One of these days I'll have to build me another one.
-
Mark out where you want the gun ports. I eyeballed it. Probably not the best method but it was a quick way of doing it. The good news for those starting scratch building is you don't have to be 100% perfect all the time. After that its time to make the bulwark. I used a 1mm or 1/8th inch piece of bass wood for the bulwarks. Hold them up to the plans and mark the width. At this point the cuts are straight even though the bulwark will be curved. Cut the pice to be a little longer than the ship. Remember the length of the bulwarks curves around the ship so its a little longer than the length on the plans. From here place the piece in a cup of hot water and let it soak for five minutes. This will help the wood bend. From here cut out the sections of the bulwark in between the gun ports. This way you don't have to bend the wood vertically just horizontally along the edge of the deck. It also makes nice square gun ports. For bending I use a technique called breaking the grain. You soak the wood then bend it with tweezers until you get a crease on the inside of the bulwark. Do this along the bulwark piece and it will bend where you want it. The crease will be on the inside edge so no one will see it. Also glue oneside of the wood and let that dry then apply glue and bend the wood around gluing down the other side. The already glued edge will help it stay in place. Give the bulwark a good sanding then it's time for the cap rail. I cut this piece to be a little longer than the bulwarks are wide. In this case 1.5 mm. I soaked it and used the same bending techniques only this time going along the top of the bulwarks. Also note I didn't go all the way to the front. The bow bulwark have the tightest bend so I did a separate piece for this section. Also note the 1mm high bulwark are big for the plans. This falls into one of my rules for building. Cut big then sand small. Now that the rail is on the bulwarks it can be sanded thinner. I cut another 1mm pice to act as a channel amd used the same technique to glue it right along the line where the bulwark meet the hull. This does a great job hiding the lines between the bulwarks and the hull. Its now starting to look like a Bermuda sloop.
-
Now I get into carving out the hull. First I start with the wood. I always talk about how inexpensive this craft is and this instance is no different. I went to hobby lobby and picked up some bass wood. In case you are wondering I am not sponsored by hobby lobby and this isn't ads for them. They just happen to be the closest hobby store to my location. Although if some one from hobby lobby reads this and feels like sponsoring a cool website that promotes ships in bottles....message me. Any way here's the prices for what I got. Honestly for $6 I can build twenty Bermuda sloops. Supplies go a long way in ship in bottle building. Part of the reason I show the prices is to show how inexpensive this hobby is. You can probably do this build for under $30. From here it's cutting out the size block I need. I compare the wood to the plans and make a cut. Then I cut the deck angle. This is something I think I do a little different. A lot of builders will carve the hull from a solid block. I actually love that method because it's a lot of fun. I do find this method to be a little easier though so I'm including it in the beginners build. First I cut out the plans at the water line and the deck line. For the deck line I use the bottom of the gun ports. Carving out the deck this way helps keep that nice curve the ship has. The cut out plans will be used to carve this out. The bulwarks will be glued on later. The hull will actually be pretty thin so I cut the wood down and then wen to my dremel for the curved cut of the deck. I've included the two tools I use. One is fast and the other smooths it out I then follow it up with hand sanding. I left a little under the water line since the ship will be embedded in the clay sea. Note. I made my length cut a bit long. Better to long than to short. From here I cut out the over head plans. I drew out the center line then drew out the hull shape based on the plans and made my cut. Something to note here. For ships that have a big tumble home you will need to account for it before you cut out the overhead plan. The deck may not be as wide as the hull itself. The Bermuda Sloop doesn't really have a tumble home so this isn't a problem. We will need to account for some slight tapering in the stern section but this will be done with the bulwarks and deck house later. Then comes the more intricate sanding out of the hull. Compare the hull to the plans and sand it out accordingly. Note the way the stern and bow tapers inward as you go down the plans. This needs to be replicated in the hull. The hull in this photo appears long for some reason. Weird angle I guess. Also note how the stern tapers inward when facing the back of the ship. Sand those corners in. I had a hard time getting a picture to show this. I hope this is good enough. Once the hull was done I drew in the deck planking. There's a lot of methods to this too. For this ship I drew it in with a pencil. I did it kind of quick so it isn't amazing I went back later and filled in a few more lines.
-
Once you have your plans you need to pick a bottle. For this build I'm using a clear bottle. I wanted to pick a bottle that people would have easy access to or at the very least was a common shape and size. I found this particular one at Hobby Lobby for around $8. If you get one from Hobby Lobby I suggest you go in person. The clarity of the glass differs so you will want to inspect it before you purchase it. Clarity is important in a ship in bottle. You want to be able to see the model once it's in the bottle. Too many distortions or bubbles can block or distort the view. The next step is sizing the plans. For this I copy my rigging plan to a software that will allow it to be resized. Personally I use Microsoft Word. It's easy to put things in and prints the same size consistently. Photoshop might work. You might try Pixlr which is a free online photo editing software. I think Google docs would work as well. What you need though is a program that will allow you to print a photo at variable sizes. I copied the photo into word twice and gave each photo two different sizes. One a little larger and one a little smaller but both about the size of what I think will fit in the bottle. I adjusted the paper to landscape and moved the photo's to the left side of the page. Then I cut out the plans with a long narrow strip going to the end of the page. What this does is allows me to put the plans into the bottle with the narrow strip sticking out. This narrow strip helps pull the plans out of the bottle. Cut the plans to the water line and to the top of that mast and close to the back of the ship. That way you can see if the ship will fit in the bottle. This is the smaller of the two plans. It turned out to be a bit to small. I pulled it toward the front of the bottle to point out the different aspects of sizing a ship in bottle. To get philosophical I personally think ship in bottle building is part modeling and part painting a picture. The bottle is the canvass that this painting will be on. When someone paints a picture they don't paint on one side of the canvass and leave the other side blank. They fill up the canvas. One aspect of a good ship in bottle is one that fills up the bottle. With the bottle laying down I will mostly be worrying about the height of the ship. The closer I can get the mast to the top of the bottle the more space the length of the ship will fill up. Going back to these particular plans notice that the ship will easily fit in this bottle but, there is a lot of extra space. I pulled the ship forward to point out that about a third of the bottle is empty. I have plenty of room to go up so I will need to make the plans bigger. Technically I could add a lighthouse or another ship to fill in that space. For this build though I'm just doing the ship. The bigger of the two plans has the opposite problem. The plans are too big. You can see the top mast curling around the top of the bottle. Notice lengthwise this ship really fills up the bottle. The trick is getting height length and width to work. There's another part to be careful about in sizing and it's a mistake I've made several times. Be mindful that you will also put sea into this bottle. I have carefully sized ships and got them to fit just perfectly but forgot to add a few millimeters for the sea and ended up with a ship that doesn't quiet fit. Every millimeter counts! Add a few for the sea going into the bottle. (Also a note on measurement. I'm not going to leave a lot of measurements in this log. It's going to take time to type out a detailed process let alone all the measurements that go with it. That said even though I am American when I do leave measurements I will use the metric system. There's a couple reasons for this. One, it's easier than the imperial system. Millimeters are just easier than 1/32 or 1/64th's of an inch. Two the ship in bottle community is very international. I've met people in Germany, France, Great Britain, Ukraine, the Philippines and many, many other countries. The metric system is more universal so I find it's easier for more people to understand.) Report post (IP: 73.229.234.33) Posted February 3 (edited) The first place to start in building a ship in bottle is the bottle itself. For this build I'm using a clear bottle. I wanted to pick a bottle that people would have easy access to or at the very least was a common shape and size. I found this particular one at Hobby Lobby for around $8. If you get one from Hobby Lobby I suggest you go in person. The clarity of the glass differs so you will want to inspect it before you purchase it. Clarity is important in a ship in bottle. You want to be able to see the model once it's in the bottle. To many distortions or bubbles can block or distort the view. The next step is sizing the plans. For this I copy my rigging plan to a software that will allow it to be resized. Personally I use Microsoft Word. It's easy to put things in and prints the same size consistently. Photoshop might work. You might try Pixlr which is a free online photo editing software. I think Google docs would work as well. What you need though is a program that will allow you to print a photo at variable sizes. I copied the photo into word twice and gave each photo two different sizes. One a little larger and one a little smaller but both about the size of what I think will fit in the bottle. I adjusted the paper to landscape and moved the photo's to the left side of the page. Then I cut out the plans with a long narrow strip going to the end of the page. What this does is allows me to put the plans into the bottle with the narrow strip sticking out. This narrow strip helps pull the plans out of the bottle. Cut the plans to the water line and to the top of that mast and close to the back of the ship. That way you can see if the ship will fit in the bottle. This is the smaller of the two plans. It turned out to be a bit to small. I pulled it toward the front of the bottle to point out the different aspects of sizing a ship in bottle. To get philosophical I personally think ship in bottle building is part modeling and part painting a picture. The bottle is the canvass that this painting will be on. When someone paints a picture they don't paint on one side of the canvass and leave the other side blank. They fill up the canvas. One aspect of a good ship in bottle is one that fills up the bottle. With the bottle laying down I will mostly be worrying about the height of the ship. The closer I can get the mast to the top of the bottle the more space the length of the ship will fill up. Going back to these particular plans notice that the ship will easily fit in this bottle but, there is a lot of extra space. I pulled the ship forward to point out that about a third of the bottle is empty. I have plenty of room to go up so I will need to make the plans bigger. Technically I could add a lighthouse or another ship to fill in that space. For this build though I'm just doing the ship. The bigger of the two plans has the opposite problem. The plans are too big. You can see the top mast curling around the top of the bottle. Notice lengthwise this ship really fills up the bottle. The trick is getting height length and width to work. There's another part to be careful about in sizing and it's a mistake I've made several times. Be mindful that you will also put sea into this bottle. I have carefully sized ships and got them to fit just perfectly but forgot to add a few millimeters for the sea and ended up with a ship that doesn't quiet fit. Every millimeter counts! Add a few for the sea going into the bottle. (Also a note on measurement. I'm not going to leave a lot of measurements in this log. It's going to take time to type out a detailed process let alone all the measurements that go with it. That said even though I am American when I do leave measurements I will use the metric system. There's a couple reasons for this. One, it's easier than the imperial system. Millimeters are just easier than 1/32 or 1/64th's of an inch. Two the ship in bottle community is very international. I've met people in Germany, France, Great Britain, Ukraine, the Philippines and many, many other countries. The metric system is more universal so I find it's easier for more people to understand.) I did a final resize and got the height right where I want it. I've accounted for the sea and left some room and the ship is filling up the bottle nicely. I did pull this forward as well to show the difference. The ship leaves about a fourth of the bottle empty. When it's centered it will be an eighth on each side which is pretty nominal. I put my other plans on word and adjusted them to the same size as my rigging plan. I then checked the width. The width of the plans is 9 cm. This is of coarse half the width of the hull. So the hull width will be 1.8 cm. The bottle opening is 2 cm. I have 2 mm to spare. I will need these additional millimeters because the cannons will protrude from the side of the hull. A long with that the main sail will need to wrap around the ship so I will need some space for the sail. 2 mm will be enough space for that cannons and the sail though so size of the plans are good to go. I then printed a few copies. I will be cutting them so I'll need more than one. I did pick this bottle specifically because I think it's a good beginner bottle. The standard U.S. size bottle opening is 1/2 an inch or 1.27 centimeters. This bottle has about a 3/4 inch opening or 2 cm making it slightly wider than standard bottles.It's not so wide as to take away from the magic of putting the ship into the bottle though. The next step will be carving the hull. Please feel free to ask questions. I want people to be able to follow this and build their own ship. So the more I can help people understand the better.
-
The first thing you need is the plans. Fortunately for the Bermuda sloop there's lots of options. Google Bermuda Sloop plans and look at images and you'll find a lot. Also the Greenwich museum has original plans on their website. http://prints.rmg.co.uk/art/494822/unnamed-58ft-bermudan-sloop-no-date The plans I'll be using come from Veres Laszlo who illustrated The Story of Sail. If you do get into ship in bottle building I highly recommend the book as a great source of plans. What you will need starting out is the sail plan. The plans have to be sized to the bottle you will be using so knowing the mast height is important. Here is a simple sail plan that can be used. Found here http://herossea.blogspot.com/2014/02/?m=1
-
I started this build on www.bottledshipbuilder.com. It fits with the mission of that site but the idea of this build is one I've had for a long time and it began with MSW members in mind so I thought I'd bring it over. To give a little history and the idea of what this build is, it started with a pet peave of mine. Those that have seen me on the forum have probably seen that I have been critical of ship in bottle kit's out there. I have seen a lot of MSW members and members of my local club take interest in ships in bottles then try a kit and end up never wanting to build ships in bottles again. As many of you also know ships in bottles is something I'm passionate about. Probably overly so. I'm not sure I can explain that passion. For me it's something magical. I get a ship into a bottle and I stand back and I'm still amazed that I was able to do it. I know the process but it still amazes me. The other part of that passion is those that helped me get to where I'm at. I feel like I was very lucky I got into ship in bottle building when I did. I found these small groups with cheerful members willing to share their ideas and I learned very quickly. I owe a lot to the members of the Ship in Bottle Association of America. Unfortunately SIBAA closed a couple years ago and www.bottledshipbuilder.com and the Facebook ship in bottle builder group what's left of the organization. Much like ship modeling in general ship in bottle building is a dying art. In an effort to keep it alive and pass on the knowledge that was given to me I like to share ship in bottle building methods and knowledge. So it bugs me a bit when a company puts out a model that is overly difficult and turns people off to building ships in bottles. In my personal opinion there is currently no kit on the market that gives what members of MSW would look for in a ship in bottle kit. The closest one is Amati's but I think they made their ship to tight of a fit which has given a lot of beginning ship in bottle builders trouble. Every other kit is to kiddish to be taken seriously by members of MSW. I had thought for a long time about making my own kit. I've explored that process and found a lot of complications to it. Besides that for a patience bottle builder I'm not very patient. I have a hard time measuring and writing all the details so I decided on a different approach. In an effort to give this information as freely as it was given to me I am posting a how to build log. It will detail all the steps for a simple ship in bottle build. The idea being if I were to make a ship in bottle kit for beginners this is what it would look like. Since I'm not detailing every measurement this also acts as a guide to scratch building. If you can build this ship you can use the same techniques to build others. Also this gives builders the ability to size it up or down as needed. I want this to be a great starting place for those want to try ship in bottle building and I'm hopeful I can present it in such a way that will share the magic of it and have builders wanting to try more.
-
Yeah sorry. The domain name didn't auto renew as it should have. Its fixed now. I'm glad you are enjoying the site.
-
I haven't built that kit but it may be talking about the clew lines. At this scale its easier to glue them on rather than thread them. Ships I've built with cloth sails I'd cut the sails a tad big glue the clew lines down with white glue, then cut the sail down to the clue lines. This gets rid of the frayed edges and the glued lines keep them from fraying.
- 1 reply
-
- 1
-

-
- ship in bottle
- hannah
- (and 2 more)
-
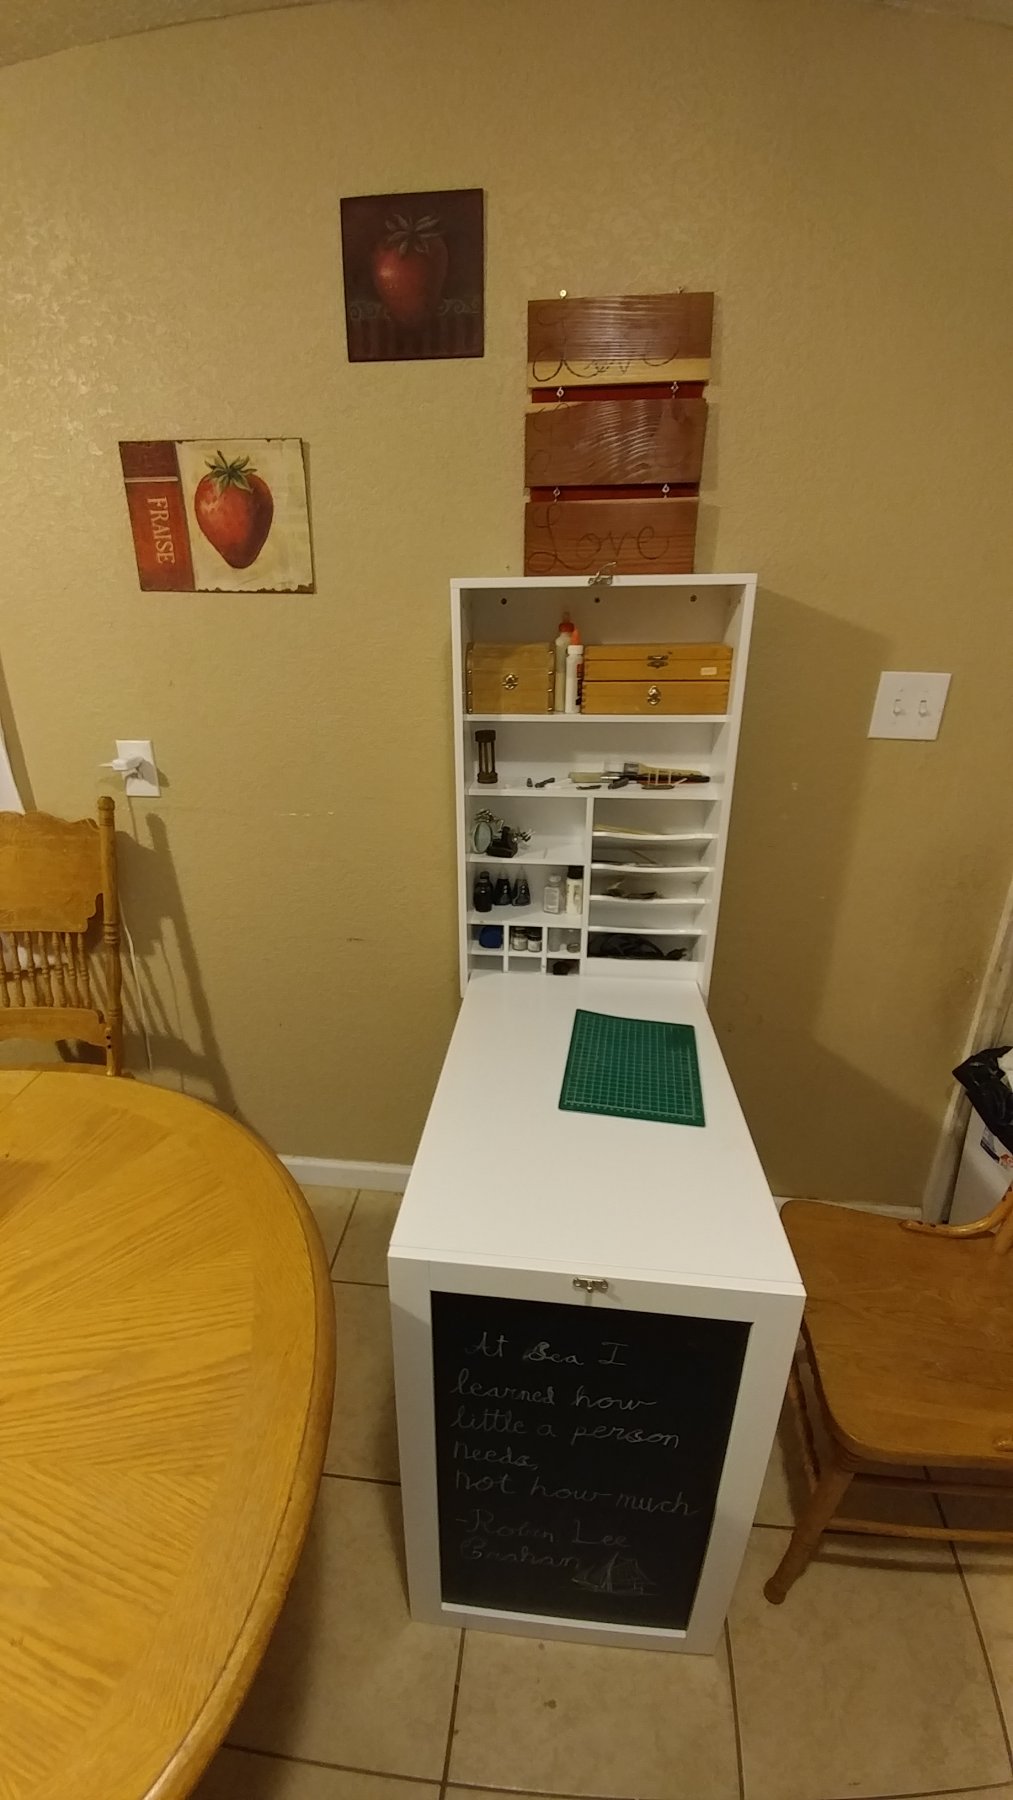
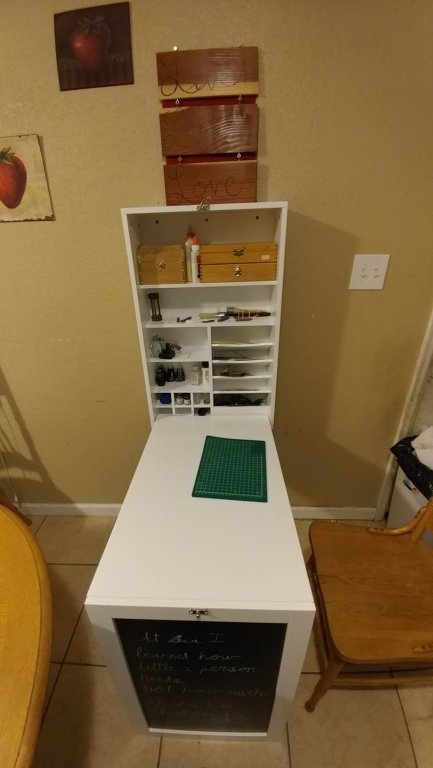
Popeye - I have another cabinet for storage in another room but as far as day to day modeling its all in there.
-
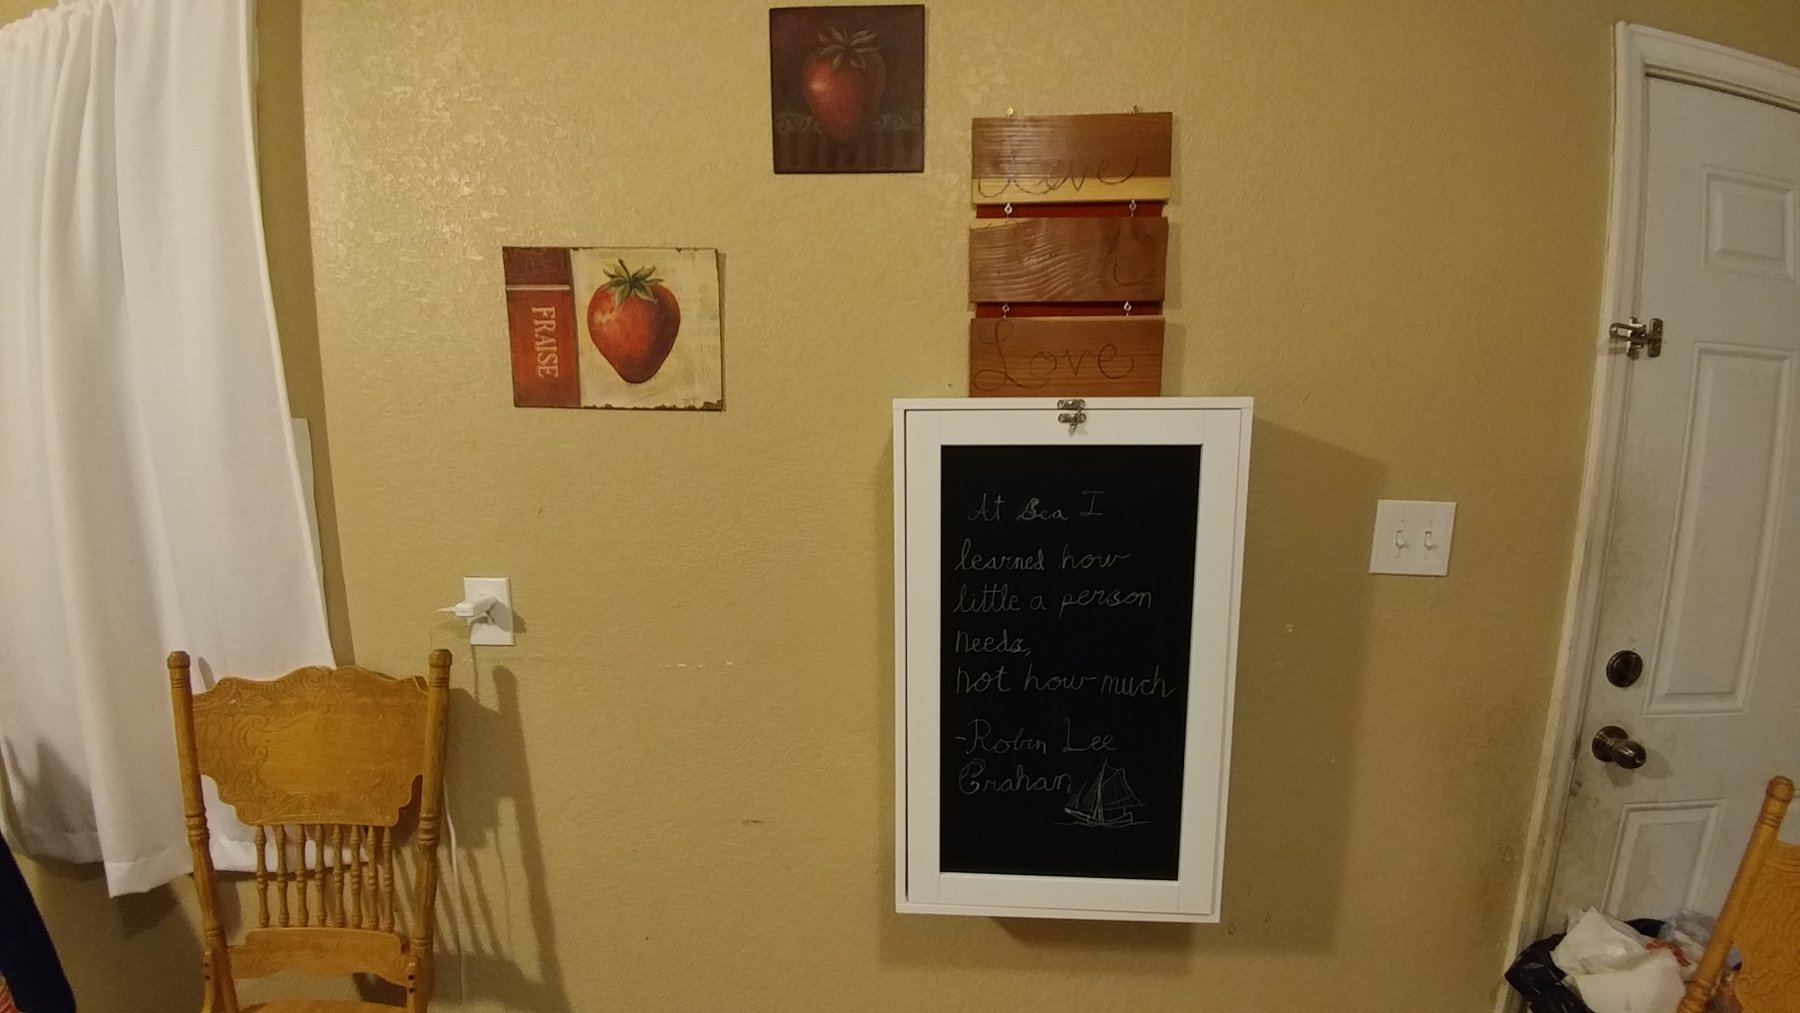
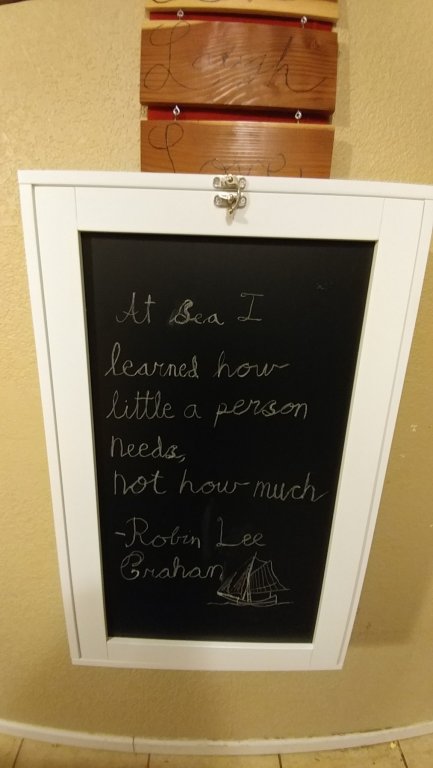
Thanks Popeye and Mike. Update on the workshop. I got a murphy desk. Now on to more fun.


-
Thats a good question. Right now my ship yeard is in flux. We are expecting a little one in February so I need to get my workshop out what will be the baby's room. I am getting a murphy desk so I'll move my workshop there. From there I have a few projects. More sibs of coarse but I've also gotten into a miniature naval warfare I made up and now play with my 5 and 8 year old. The rules are simple enough for them to play and I play as a sort of dungeon master making up ships and monsters that we fight. I want to make more miniature ships for that game. I'm doing 1:1200 scratch built ships like my Queen Anne's Revenge. I might do a Xebec or bermuda sloop at this scale.
-
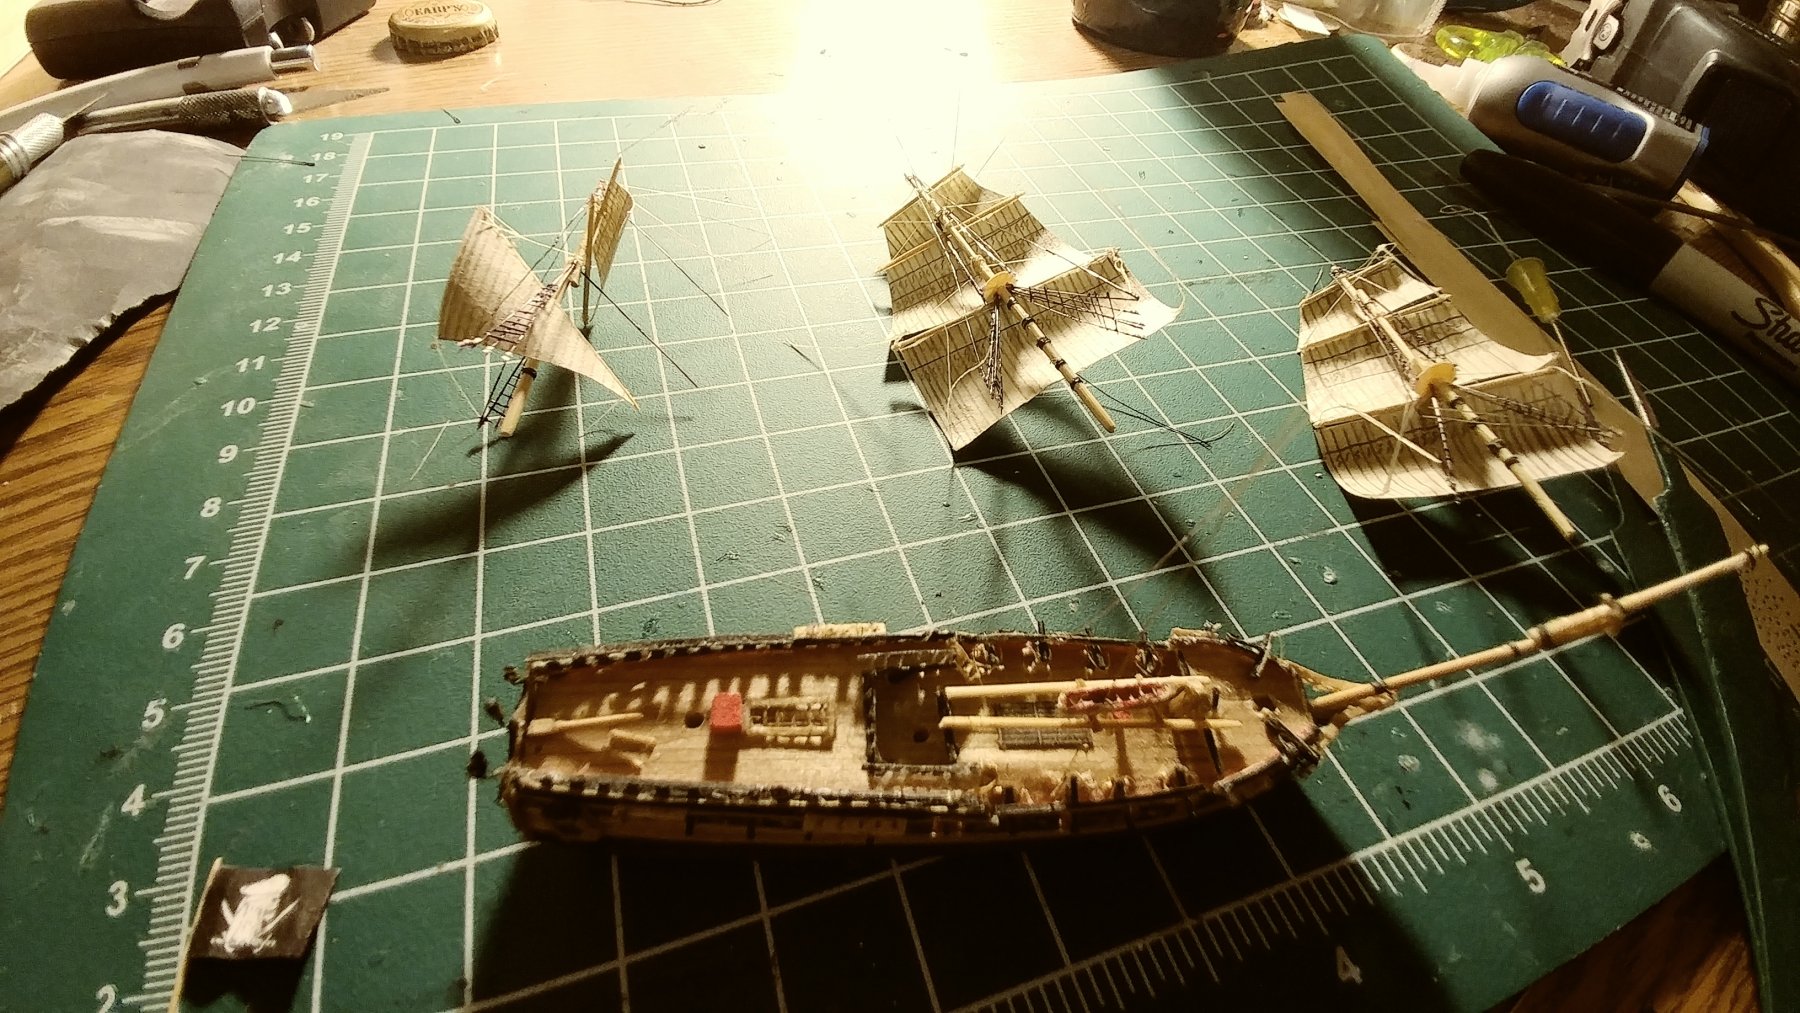
Mike, No long slack lines no. While puting the masts in one at a time is not new I did take on a new technique as far as the rigging is concerned. I used paint brush bristles which stay straight but still bend with out breaking and will spring back into place. All of the rigging was made from paint brush bristles. I cut the lines precisely so they would line up where they met the hull, masts, yard arms or bowsprit. Once in I dabbed some glue and glued them down. I didn't have to cut any lines in the bottle at all. Just careful manuevering and glueing.
-
Thanks every one. Popeye. The technique of putting the masts in one at a time has been around for a while. I've only done it once before and that was on a more folkart style model. With the way the ship broke up when I first tried to get her in I thought this approach would be better for this model. It worked out nicely I may have to use it in the future.
-
Incredible. Those chains look like a lot of work.
- 241 replies
-
- 2
-
-
- queen annes revenge
- pirate
- (and 2 more)
-
Thanks every one. Work continues. So far my idea is working The masts are completely removable and the rigging goes right a long with them.
-
Funny I run into this thread again. I completed another QAR at 1:1200. In bottled. It was more of test for war gaming scale. My skill have improved if I don't say so myself.
-
Great work. She looks incredible. Congrats!
-
Thanks Patrick. Its all part of the process. I have some plans that will make tgisbwork though. Starting on the rebuild.
-
Glad I could help. She's looking awesome. Great work.
-
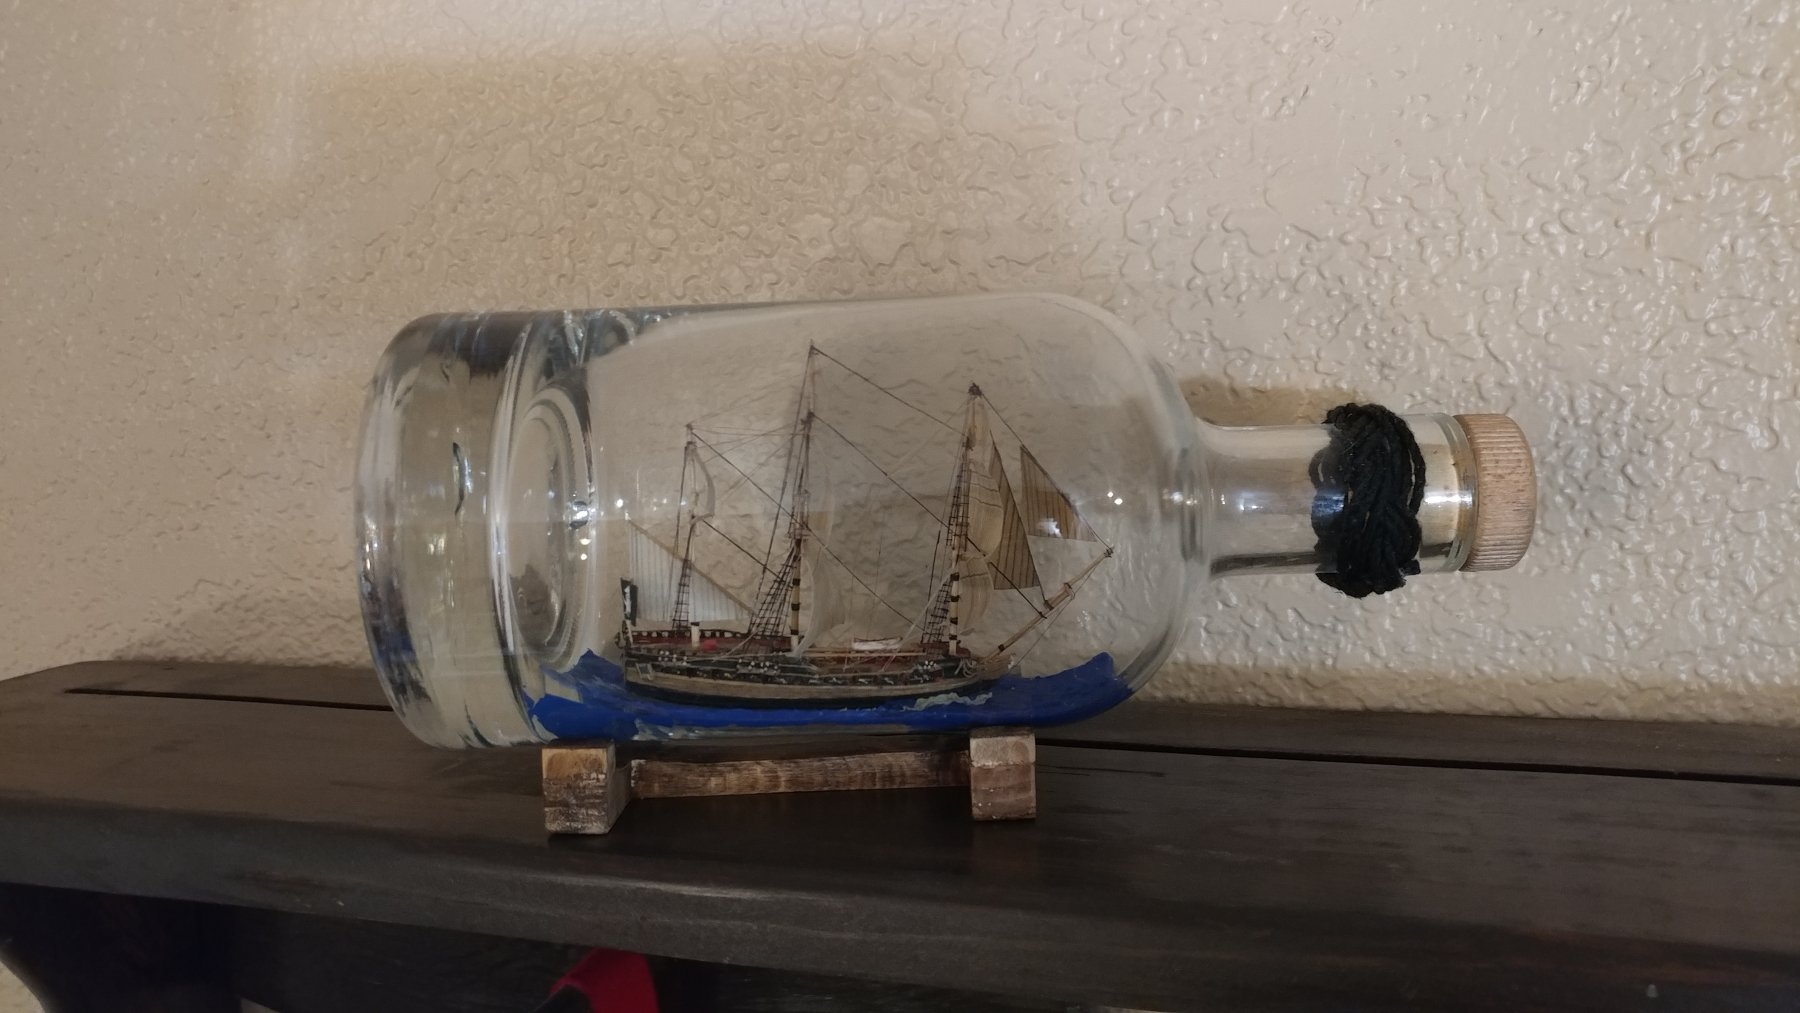
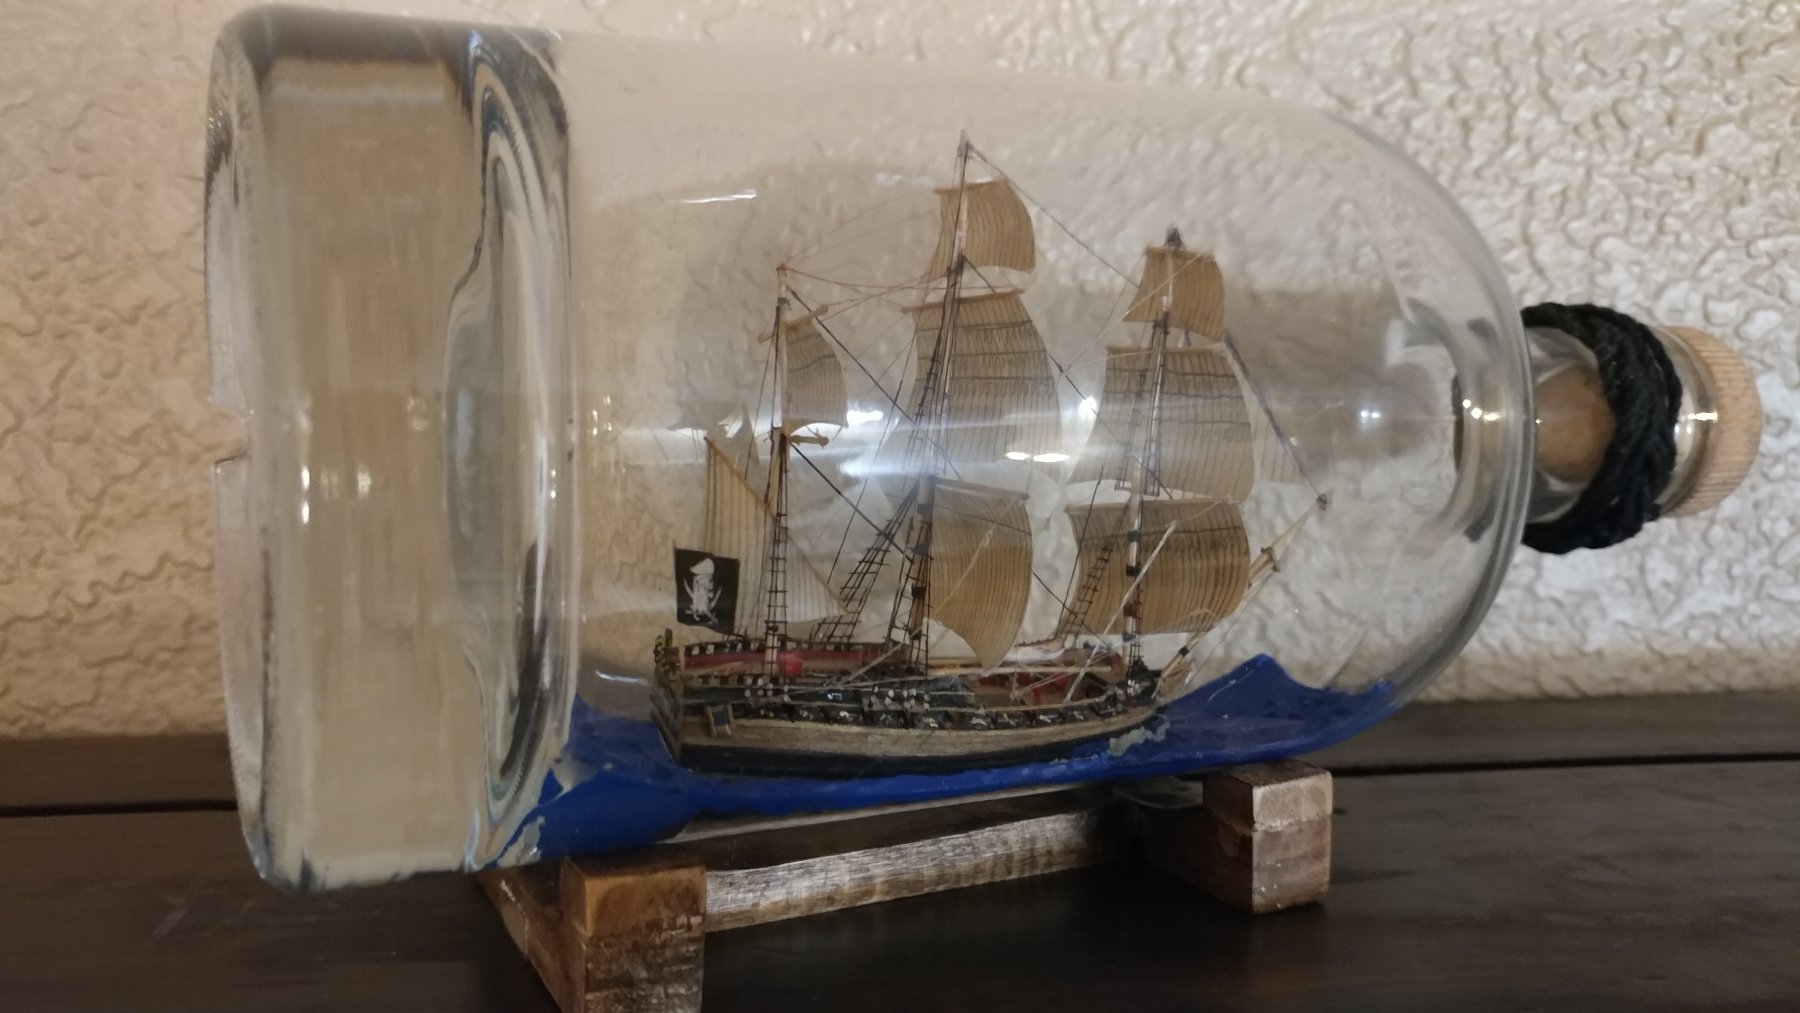
One more that I've seen a a surprising amount of and they have a cool history. In the late 1920's a man by the name of Captain E Armitage McCann advertised ship modeling books in popular science magazine. This was during the depression and his books were written to appeal to the poorer working class that might want an inexpensive hobby that would add some decor to their house. This was also during a time some times referred to as the arts and crafts period. The industrial revolution automated and mechanized so many thing so peoplewere afraid they would lose touch with real craftsmanship. So they would hand build house decorations to keep rooted in manual hand built arts and crafts. Any way Captain McCann did several books with these types of models and I've run into three such models that were built from his books. Here's one I found on Etsy. It sold,for around $50. Goes to show some have an interesting history and are antiques but they still aren't worth much. Still I wouldn't mind getting my hands on a McCann model built in the 1930's one of these days.
-
Great stuff. I've seen mystery models a lot on MSW as well as in my local club. I do enjoy the guessing game they can turn into but in general yeah they arent worth a fortune. There is some historical context that can be applied to a few of them. This one for example I found in a thrift store. I didnt purchase it because its worthless and I can build better. It is antique though as it comes from a ship in bottle kit from the fifties. A noticible aspect is the rope around the bottle. The kit came with a bittle precut that was glued together once the ship was inside. This was another aspect that makes it even more worthless. A true ship in bottle goes through the bottle neck. If the glass is cut a real collector will not give it a second glance.