


SkipW
-
Posts
50 -
Joined
-
Last visited
Content Type
Profiles
Forums
Gallery
Events
Posts posted by SkipW
-
-
Cannons and Gunport Strips
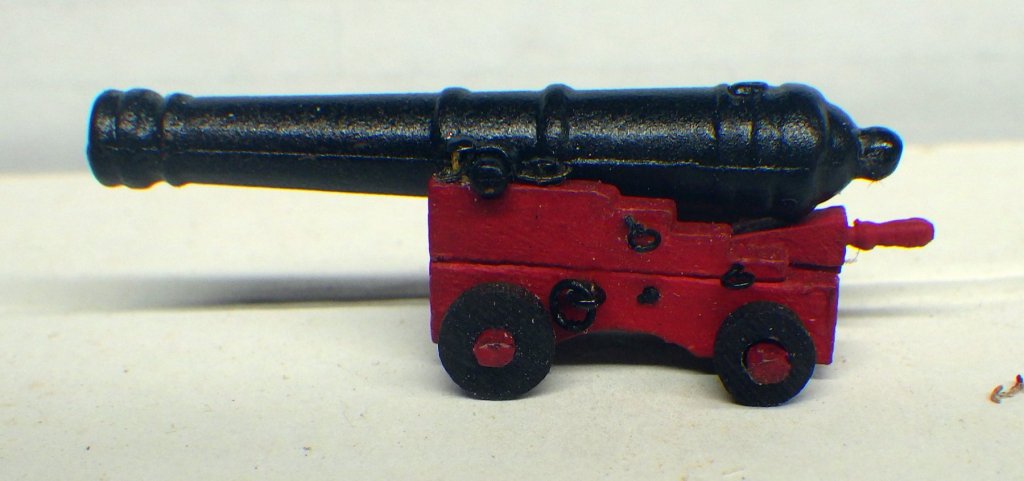
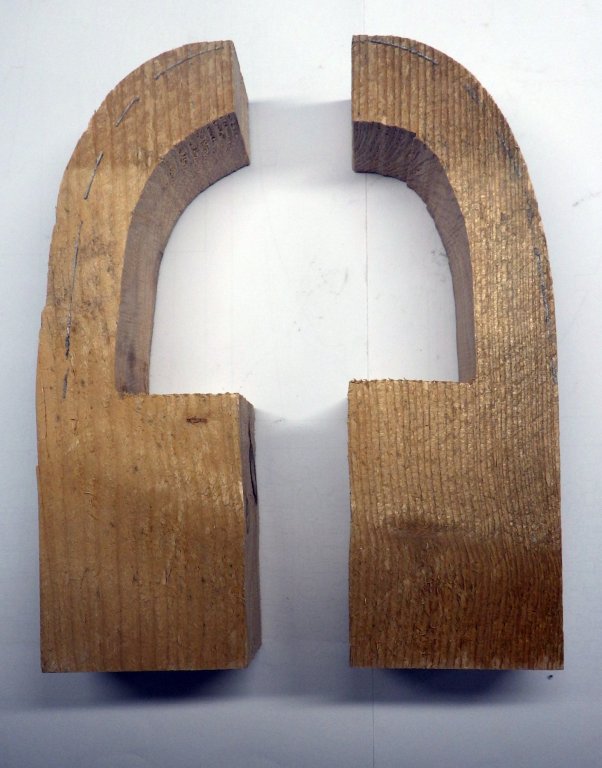
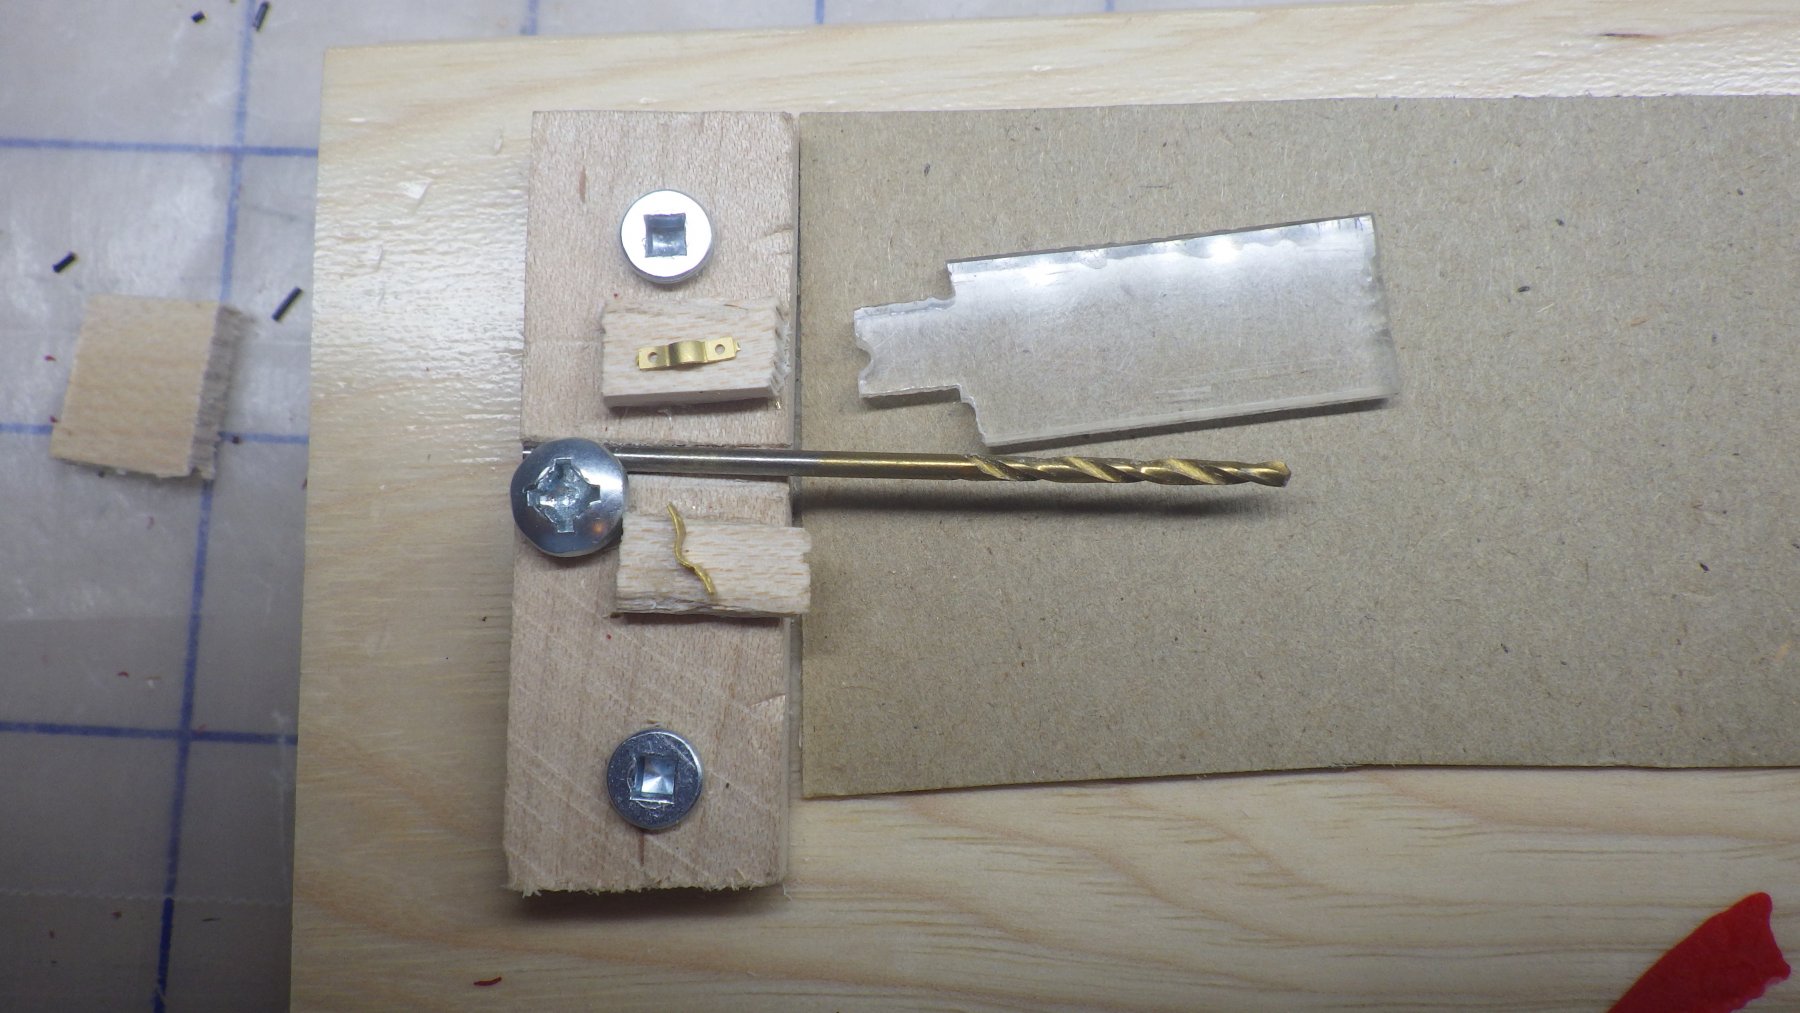
I took a sojourn into making cannons to get my head into working in Lilliputian scale. I found the carriages supplied with the kit a bit wanting, especially the wheels. So I bought the carriages from Syren. Really nice quality. Then I got a surprise, the Syren carriages are made for Chuck's turned brass 6 pound cannons, and since I convinced myself that the Amati cannons were OK, I found the that the carriages were to narrow for the supplied cannons. Hmmmmm. Solution, hybrid carriages, axle cross pieces from Amati and all the other parts from Syren. Worked out OK because I got the width I needed. Still a nerve racking as thinning down the axles and drilling out the wheels was very delicate. I found that holding the wheels cross-grained with pliers would keep them from splitting while being drilled. Once I did this I had no issues. I painted the cannons with Rustoleum matte black - looks OK to me. Making the brass trunnion caps was also a nice challenge - for that I made a jig similar to what Blue Ensign did. Not quite sure how to do it with card stock and get the sharp bends. Photo below.
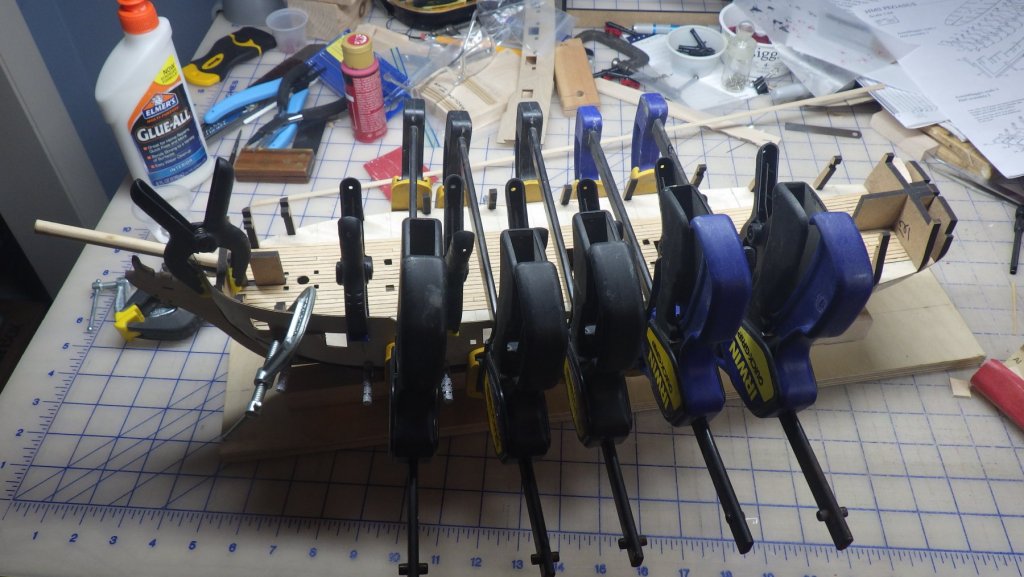
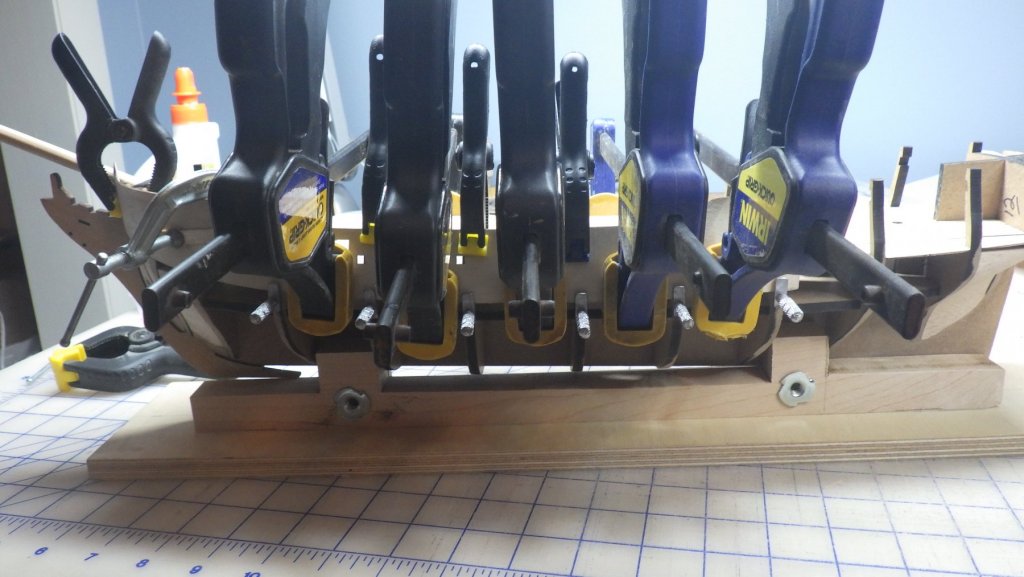
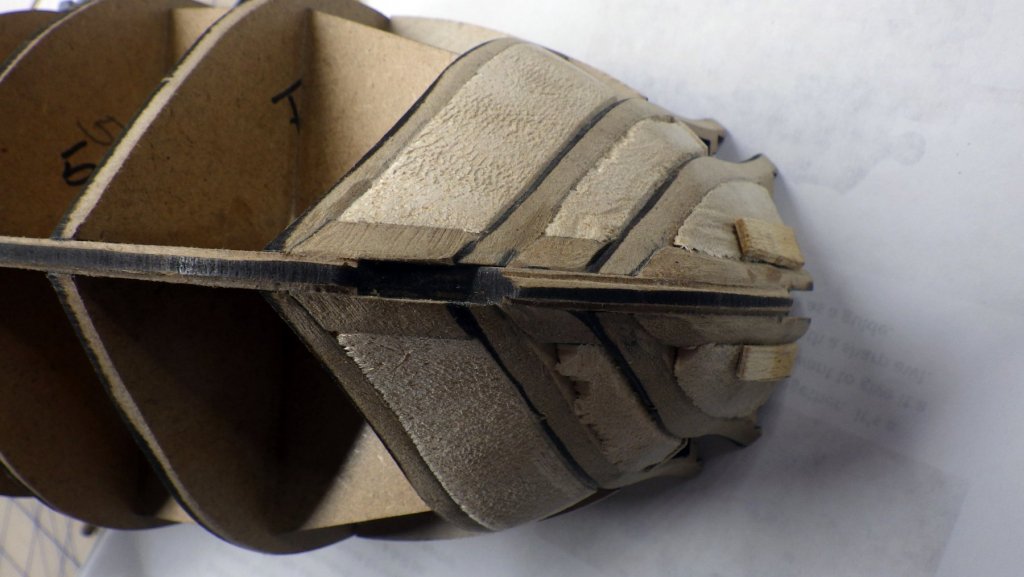
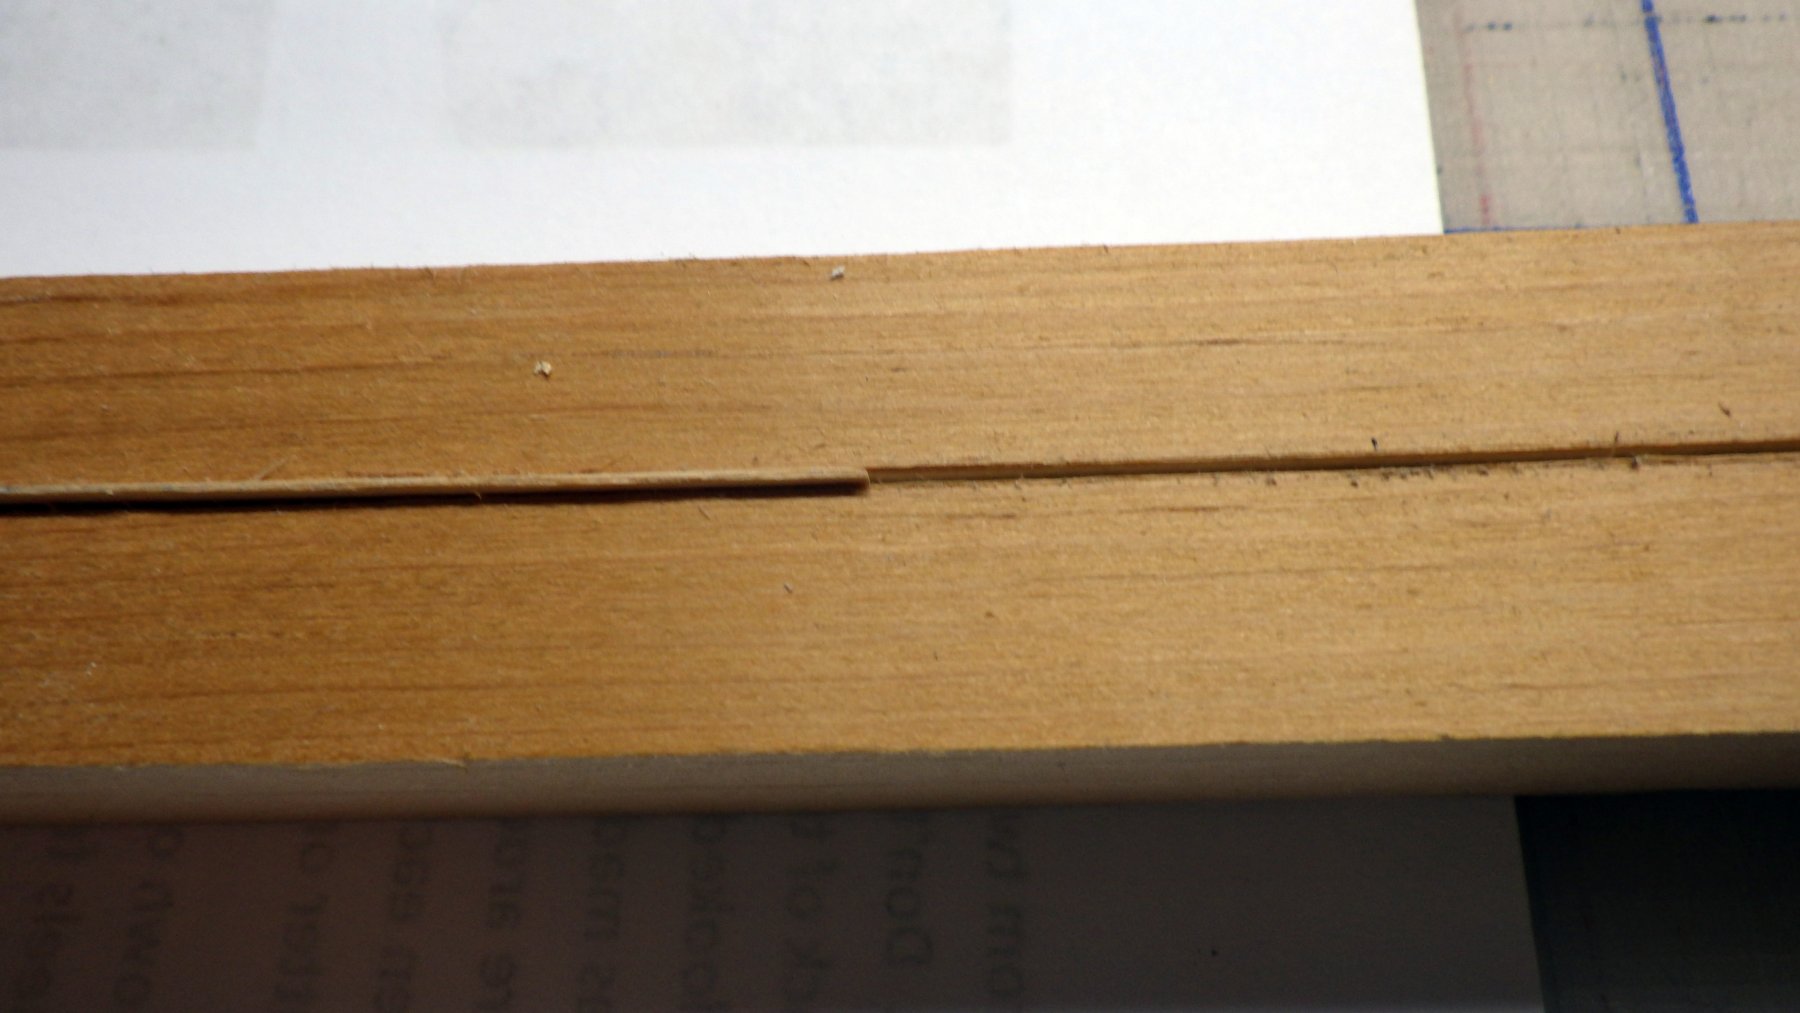
I soaked and formed the gunport strips after reading every blog I could find. No one has enjoyed this task. When satisfied I fitted a dummy bowsprit and glued the front sections on. The screw in clamps from Micro-Mark worked great - I found that drilling a small pilot hole helped get them started and kept them from splitting the mdf. I made one mistake - if you see the pictures, in my zeal to get everything tight and with the crowding along the frames I put pump type wood clamps between the frames - this resulted in some scalloping along the bottom of the strips which I would rather not have. Anyone gluing these strip in the future should probably avoid doing this. Some filler will make it "all go away" prior to second planking but it didn't need to happen. Another issue I had was that while I faired all the bulkheads really well - somehow I did not get the main deck faired as well and in a couple of areas it was proud of the bulkheads - - I all looked great from the top. However when the glue dried I had bulges where it distorted the gunport strip. This was remedied with a Dremel with a small burr - cutting away the deck behind where it was too large. Those "scars" will be covered by the deck planking so no harm done.
Have started the first planking and it is going smoothly. Will write on that later. At this point I have switched to Titebond glue as I had several joints where I used the White Glue come unglued with slight pressure. Not happening with the Titebond.

-
I probably haven't progressed much since my last log post - - have spent quite a bit of time fussing with cannons - - learning a few things along the way - I'll post that when they are done. Have not progressed on the hull past the initial planking of the center of the main deck. Building up my courage to tackle the gun port strips - I surely have the feeling they are the biggest hurdle on the hull construction. I did an initial shaping on my "forms" and have not gotten further. Quite a few summer time tasks and diversions!
-
-
Appreciate all the advice - all taken to heart.
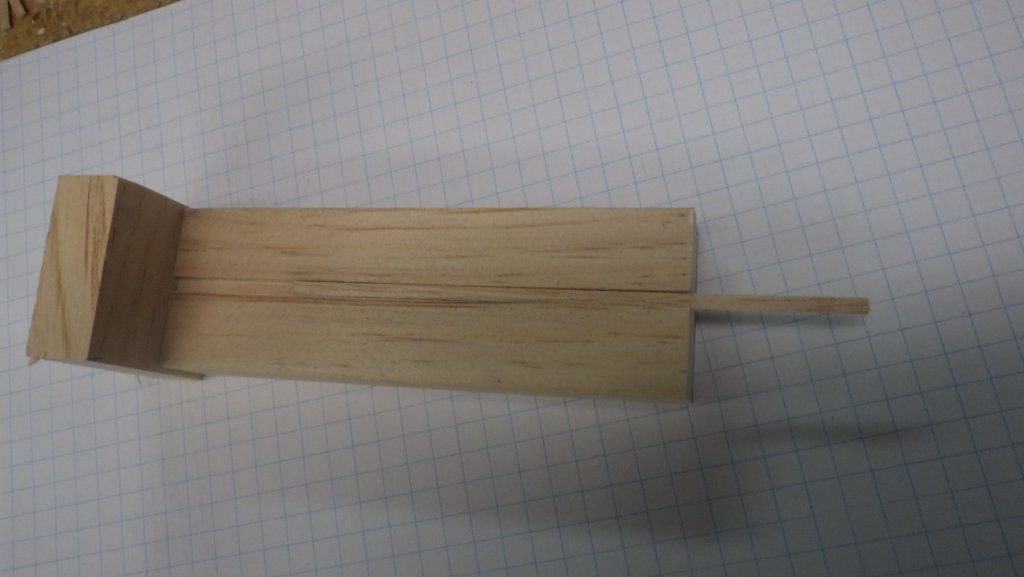
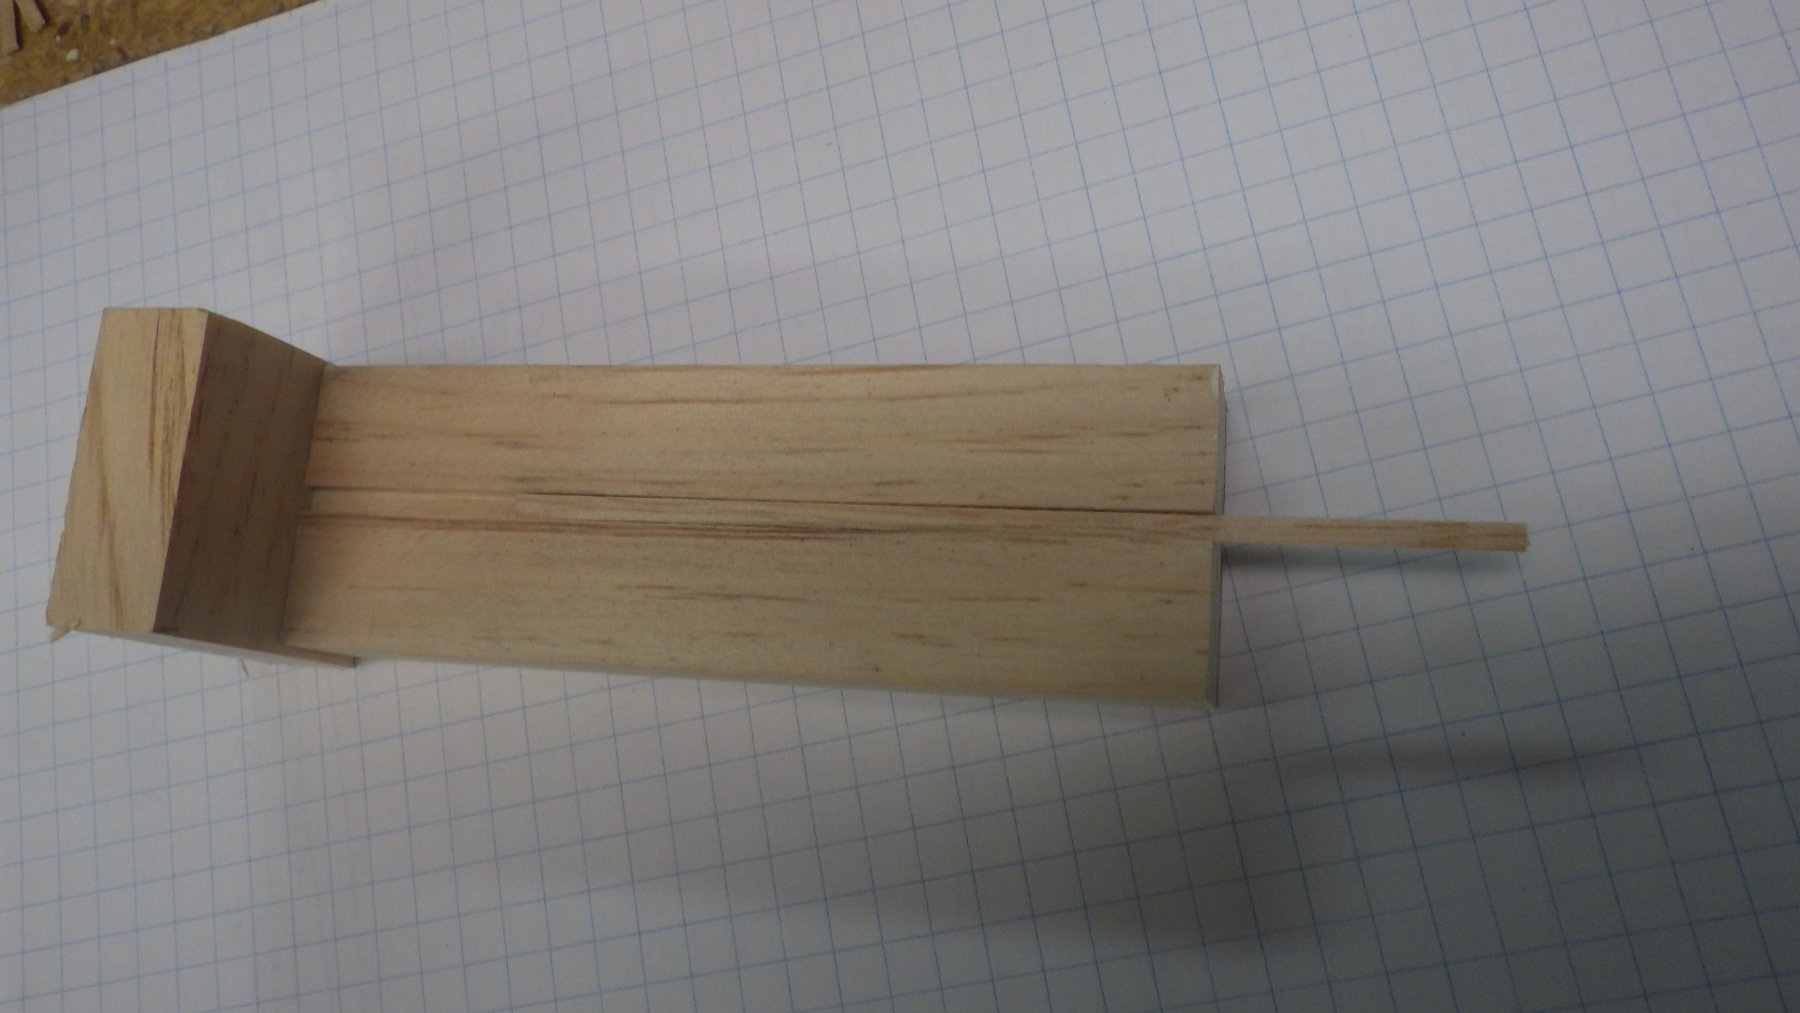
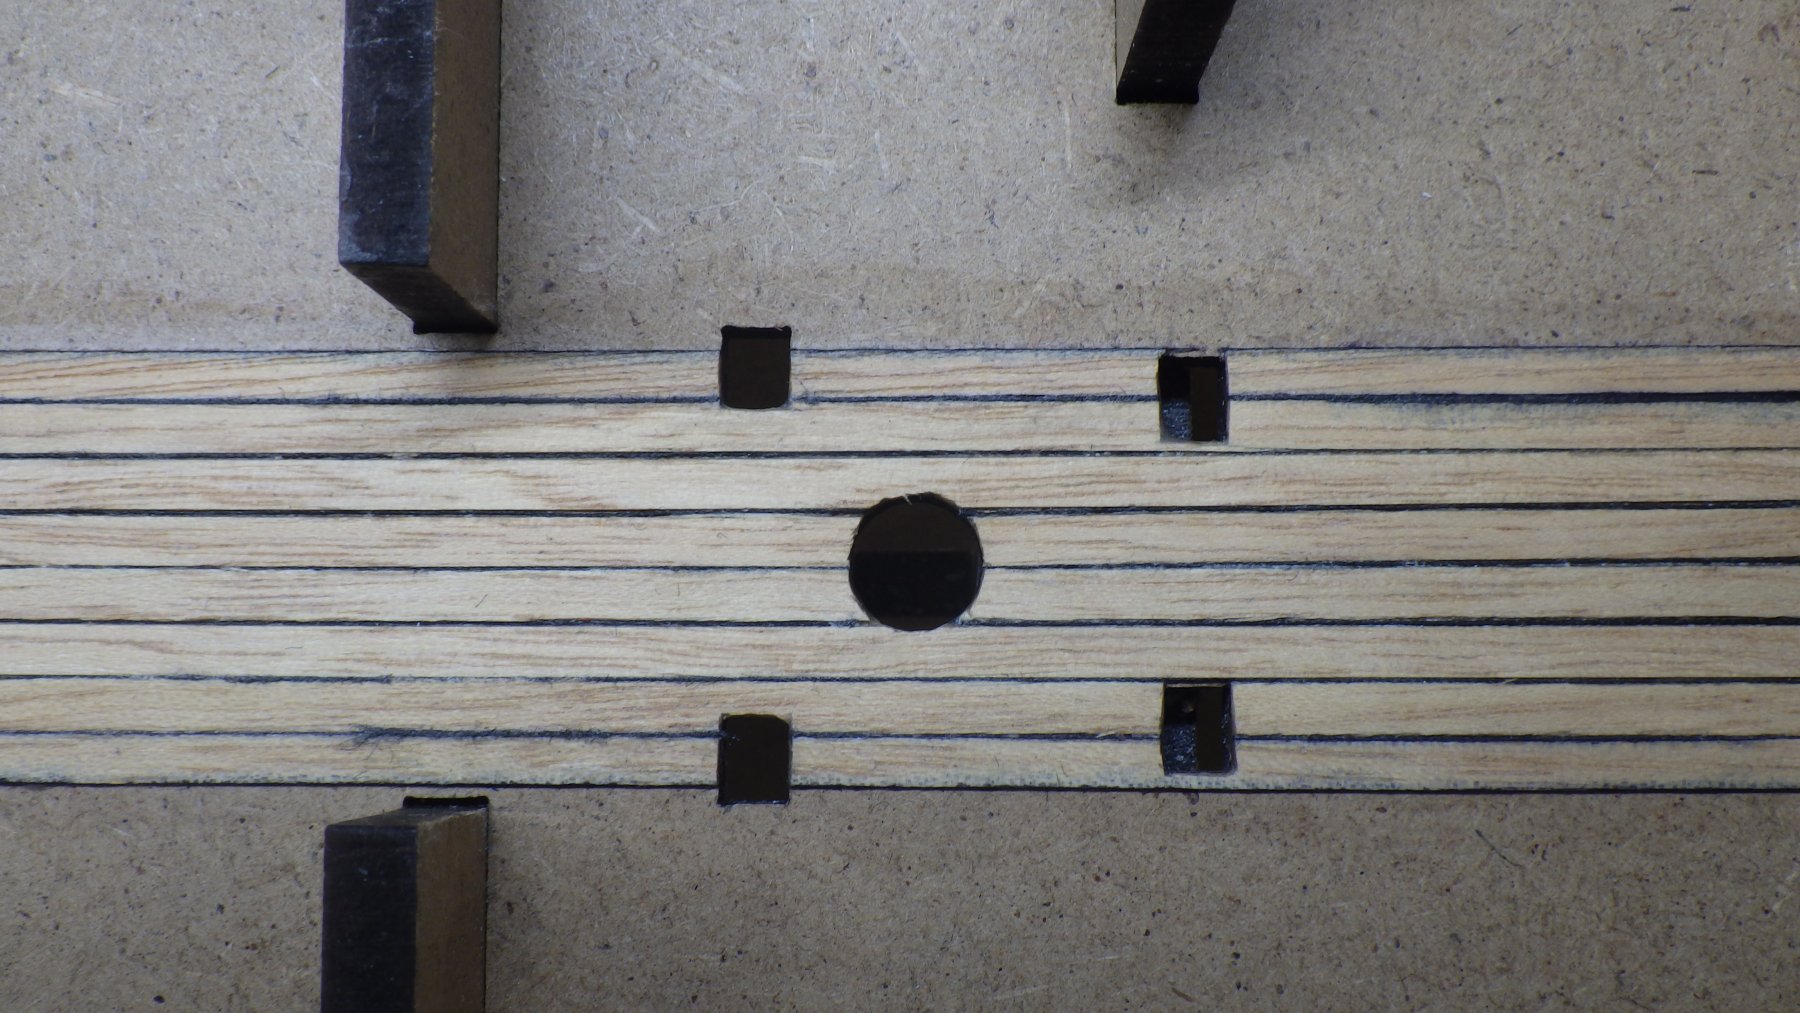
Now it's time to make the final decision on deck planking. I decided to go for a 1:3:5:2:4 butt shift pattern as shown in the NRG article. I chose the plank length of 120mm - that way each supplied Tanganyika plank yields 4 full planks. I made the jig shown in the attached photo to accurately size the planks. It is 119.9 mm (to allow a tiny space for the butt gaps). The planks are cut to about 121 mm in a razor saw miter box then sanded to actual length in the jig which gives a perfectly square, fuzz-free end.
I have pondered the addition of the deck pegging endlessly and have finally come to the conclusion to omit it. Looking at many build logs, photos of ship decks and models - I believe that in most cases the pegs are over-emphasized. A good photo can be found if you google "Fo'c'sle grating HMS Victory". It is a close-up of the grating and surrounding deck. The deck planking pegs can clearly be seen. They are about the size of the caulk-tar seams, look to be 1" or less in diameter. However they are exactly the same color as the deck and are only visible because of "dirt" in the joints. I believe at the scale of this model they would be invisible - so I will not be drilling and marking simulate planking pegs.
I also picked up from several other blogs a very good point, that the center 6 planks would not have butt joints in them. The distances between the various hatches would make it feasible for the carpenters to lay that section of decking with no "butts". In my scheme the next two outer planks only get one butt joint - the others would again fall in the openings.
In the photo - The overall length of the groove is 119.9 mm - it is hard to see the left end of the plank but it is pulled out past the end of the jig for illustration. A block with fine sandpaper is used to sand down the protruding end flush with the end of the jig.
- billocrates, KARAVOKIRIS, JpR62 and 1 other
-
 4
4
-
Hi David -
Since this is my first planked hull & deck build I don't have a good point of reference. As others have commented the quality of the MDF parts, and their fit, is great. I have not experienced any of the issues others have reported with the 1mm thick plywood decks - - again fit is remarkably good. The gunport strip of 1mm plywood leaves a bit to be desired as it is a complex shape and requires a lot of soaking/clamping to fit it properly. I have not mounted it yet - only begun the start of fitting it.
The tanganyika deck planking is a bit "fuzzy" and flimsy - - but so far the deck I have laid looks good.
I have not tried any of the 1mm limewood hull first planking yet - but most builders seem to find it acceptable. I am debating the 1mm walnut strips for the outer hull planking. It was Blue Ensign who substituted boxwood for this outer planking and found it very easy to work with. And, since 90% of it will be covered with the copper plates I am contemplating using the 0.6mm boxwood from Original Marquetry in the UK. I have checked with them and it is available - - I have time to make this decision as it will be a while before I get to that stage.
Hope this helps.
Skip
-
Thanks. I actually have given it one shot. To make it a bit easier I cut a couple of forms from scrap wood using the upper deck as a pattern. That way after soaking the strips in warm water for an hour I could get an initial shape to them with lots of clamping area. Now it will have to be done on the hull to get all the subtlety of the curvature both fore and aft and up and down.
I do have the stem on now. I saw a photo where someone actually clamped some small blocks to the stem to fix the forward end of the bulkhead strip in place for gluing - - I like that idea. I also saw several builders who did not put any deck fixtures on until the first planking was done - I also like that idea as it would be too easy to know things around while fidgeting with the hull and sanding it.
Right now I am learning how difficult working with small blocks is - playing at setting up the gun tackles. I need to learn a lot more about holding and manipulating these tiny parts. I am really in awe of some of the detail people can get in these models. I will push myself to try to emulate the best of what I have seen.
Any more hints you can share will be greatly appreciated.
-
Hi Chuck -
Not sure how else to get in touch with you. I have been studying your original build log of the Syren - - absolutely amazing. As a diversion - - to test my tolerance for frustration - I started trying to set up the tackles for the canons on my Pegasus. I am very envious of your tackles. I have the 28 ga wire for the hooks - but am having trouble gluing it into holes in the tops of the blocks. What I am puzzled by is how you get a good bond there. Because of the hole used to reeve the tackle - the hole for inserting the wire for the hook must be extremely shallow. Am I missing something? Also, if you have a jig/gadget/trick for holding these blocks while "operating on them" I would be very grateful to know how it is done.
Thanks,
Skip
-
-
Hi Spyglass - - Sorry for the missed attribution - I've just read so many build logs over the past month keeping all the various builders straight is not possible. Now I have a small notebook where I write down the most interesting/useful things I find - and where I found them. Because quire frequently I want to go back and I can't find where I first saw it. Thanks. The technique works great.
-
Hi Chuck -
I believe I've got it straightened out - my subsequent posts have been with the "Notify Me of Replies" "on" and I have been getting some replies - - so it was only that one almost "accidental" submission that was wrong. I think you could actually delete that first post (in the Build Log) as you will see I am working from the later one and have added several updates today to which I have some replies. Or, maybe just forget it and since the updates will all be from the "correct" one it may make no difference at all.
Many thanks,
Skip
-
-
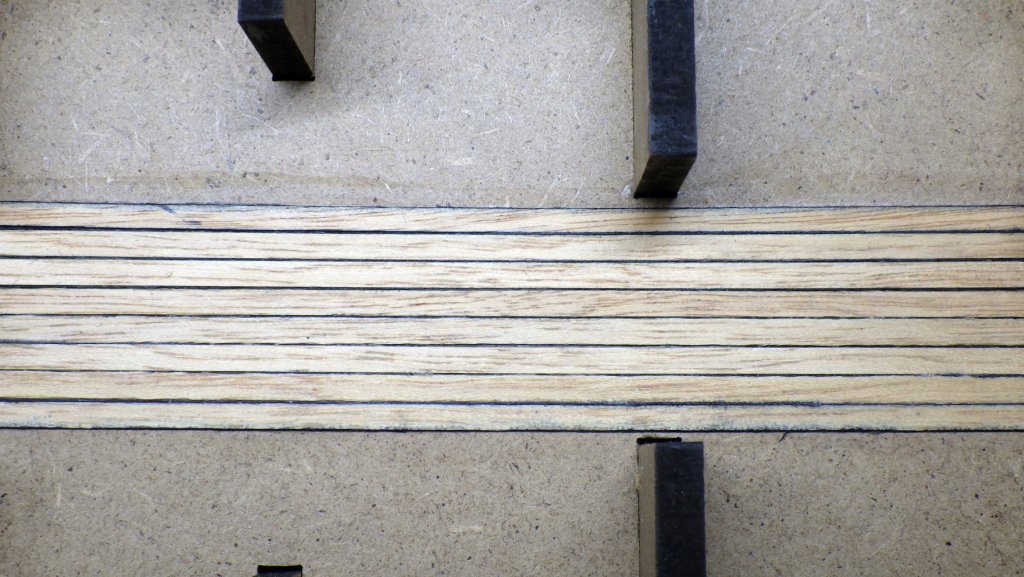
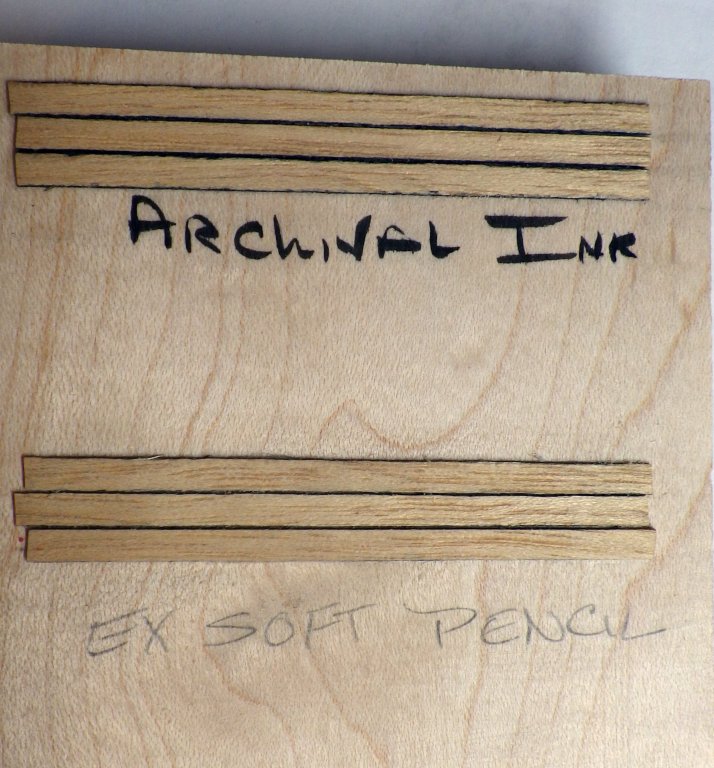
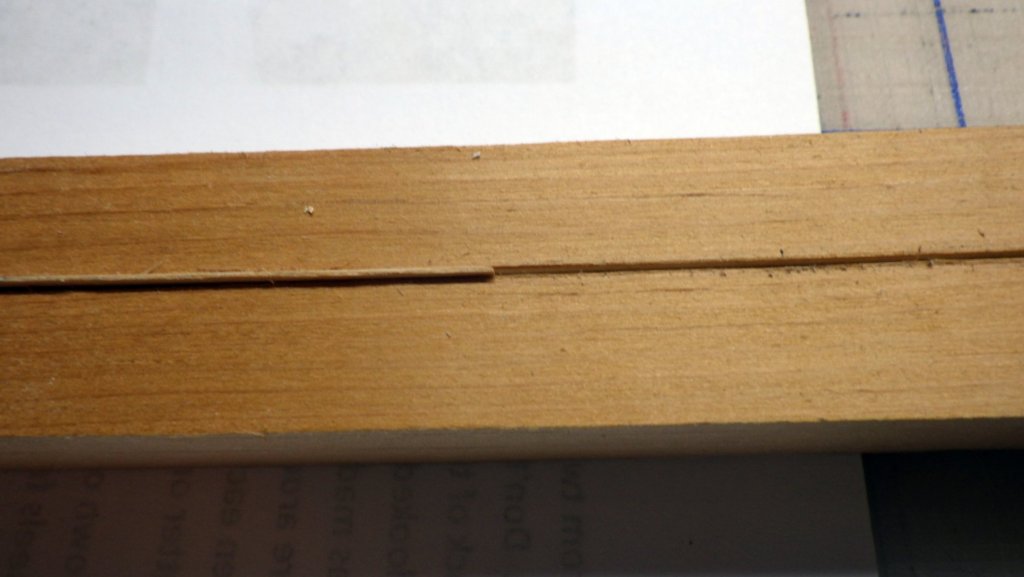
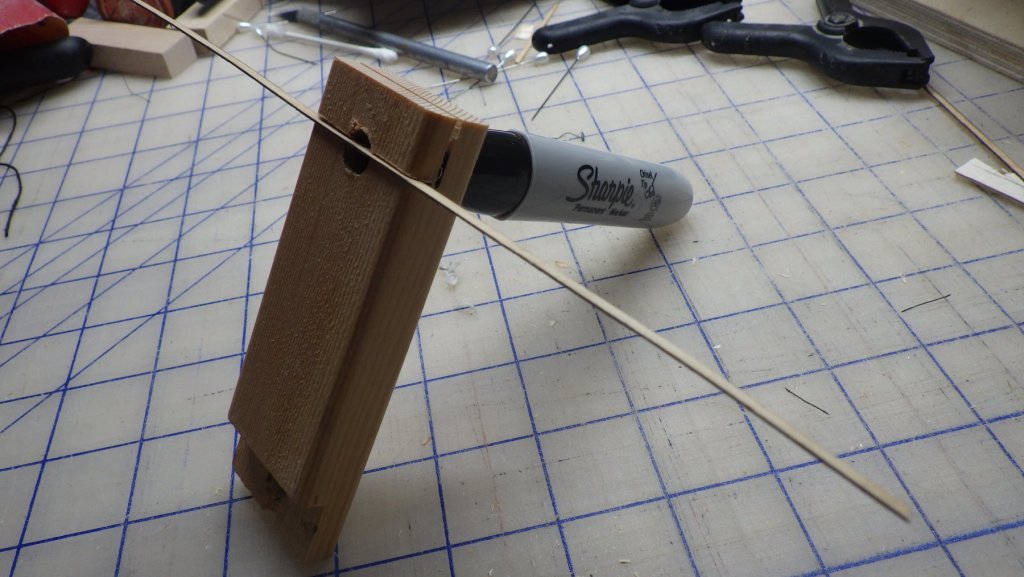
Again, after digesting a lot of good discussion in many build logs about deck planking and ways to do it I struck out to try a few methods. I tried edge blackening the Tanganyika planking with a Sharpie, Soft lead pencil and Archival marker. The Sharpie was a disaster as the ink bleed into the planks very badly. The Archival marker (suggestion from Danny) was much better. I also tried using black thread as done by Doug Fell. While I loved the look of this, it proved hard to do and the thread was difficult to get to stay in place. It also had the drawback of producing "fuzz" when sanded, even after being varnished (see photo). I planked the center section of the lower deck using the black thread and concluded while the look was good it had the potential to create a mess on the main decks. (The lower deck was "low risk" as it can only be seen thru the main deck hatches.) So I abandoned that method. I did trial sections with soft pencil and archival marker (see photo) and decided on the pencil lines as being adequate but not over doing it. I also adopted Doug's technique of spacing the planks with a 0.004(0.102 mm) feeler gauge to allow the edges to show slightly more. To aid in blackening the edges of the very thin and flexible Tanganyika strips I made a jig by cutting a ~1mm kerf in a strip of scrap wood about 2mm deep. (See photo) This allows me to hold the strips straight and use the pencil to blacken the edges and use some pressure to get an even black surface. I have now started planking the main deck using this method.
Lower deck planking - the edges of the two outer strips were blacked with the Sharpie - note the bleeding - but I used them as they really cannot be seen. The center was done with black thread.

- JpR62, Landlubber Mike, KARAVOKIRIS and 1 other
-
4
-
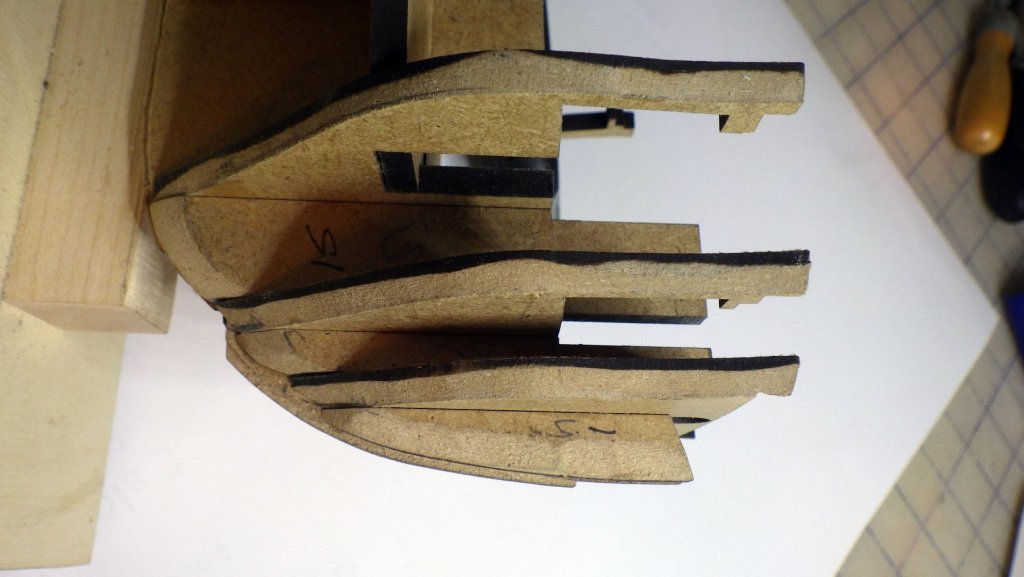
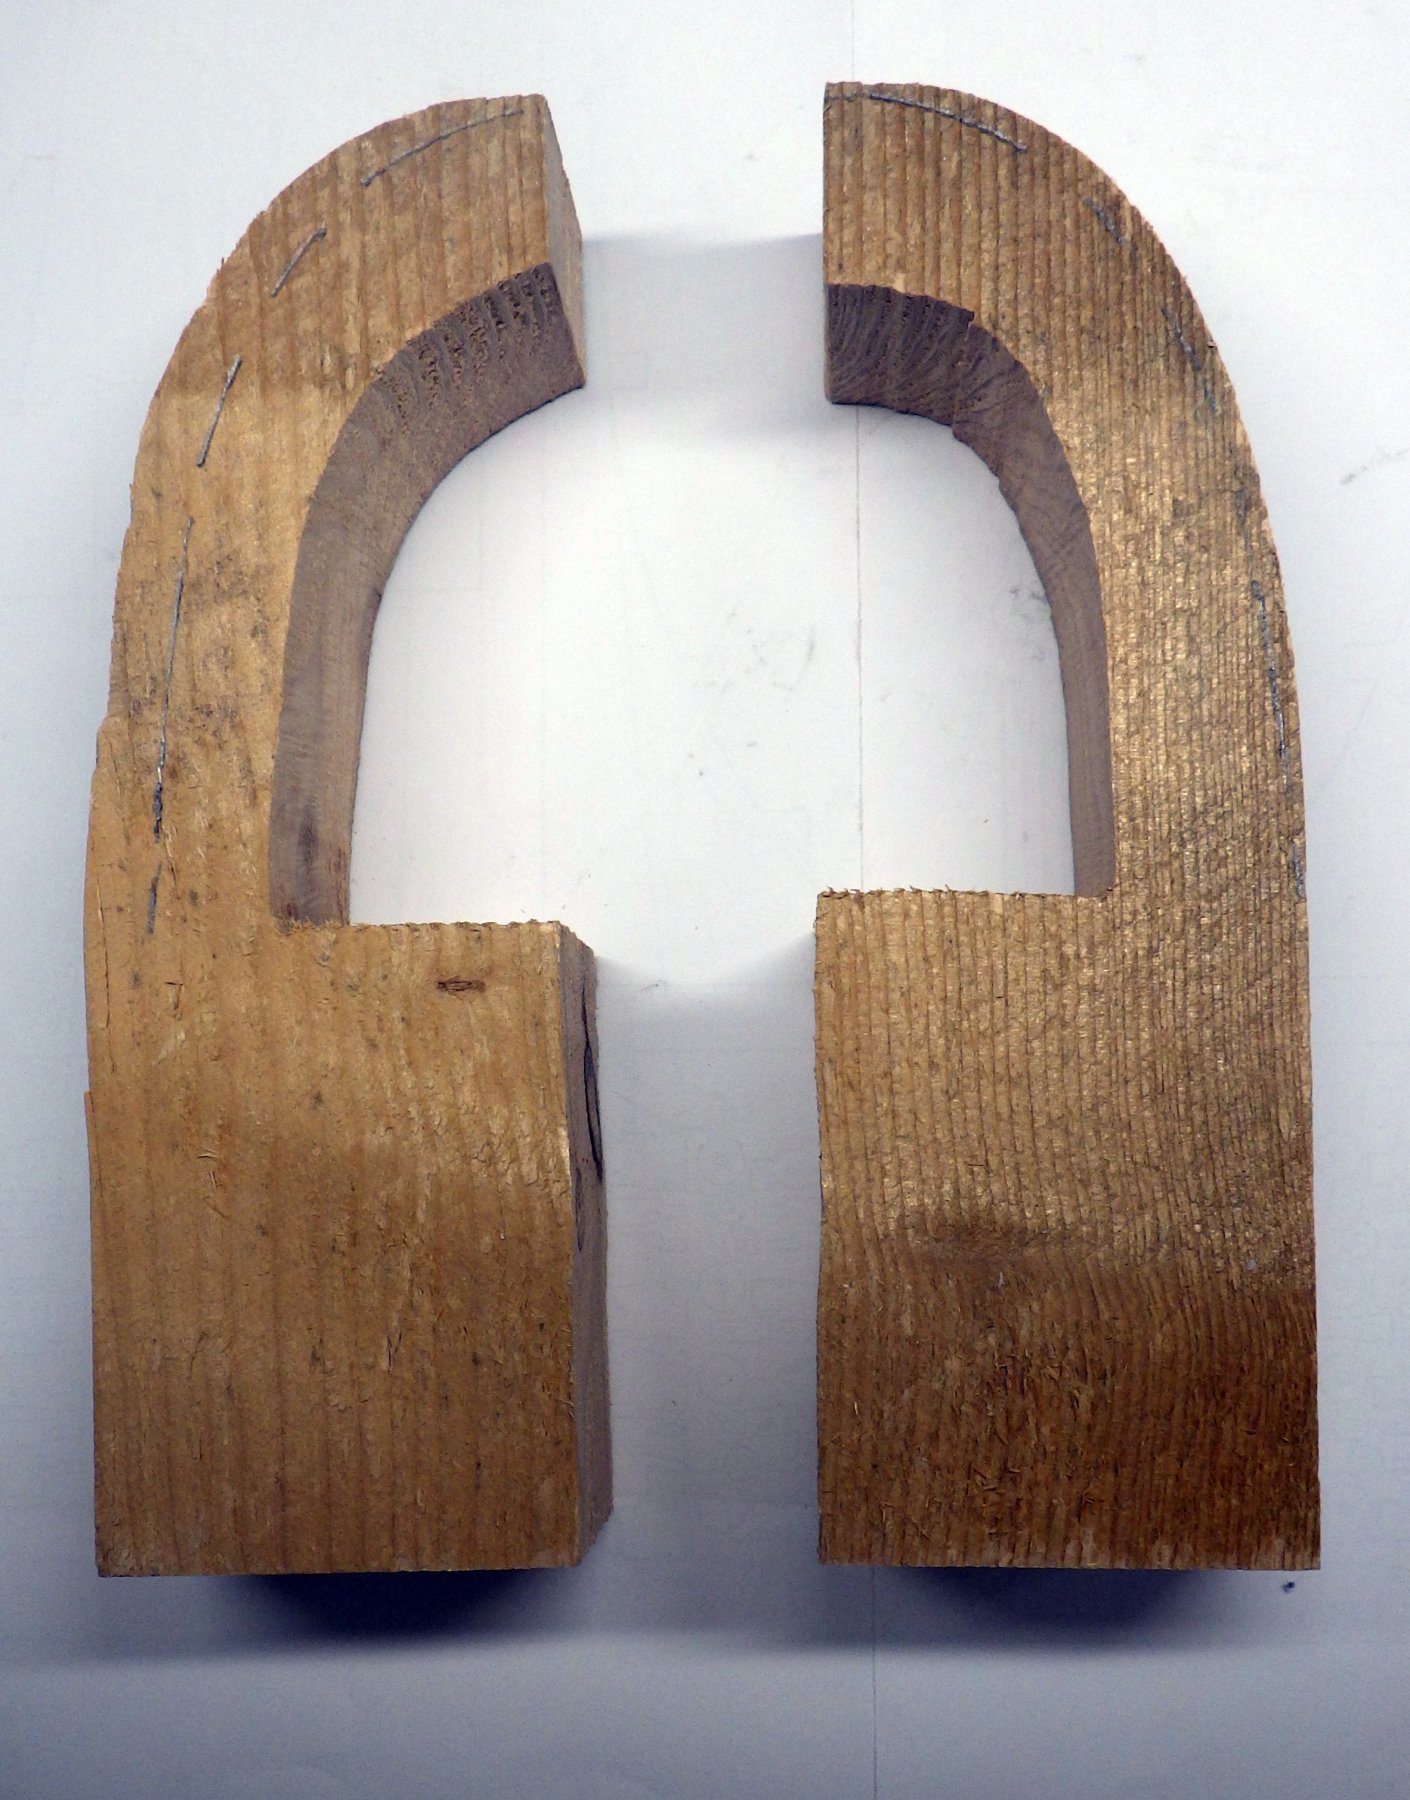
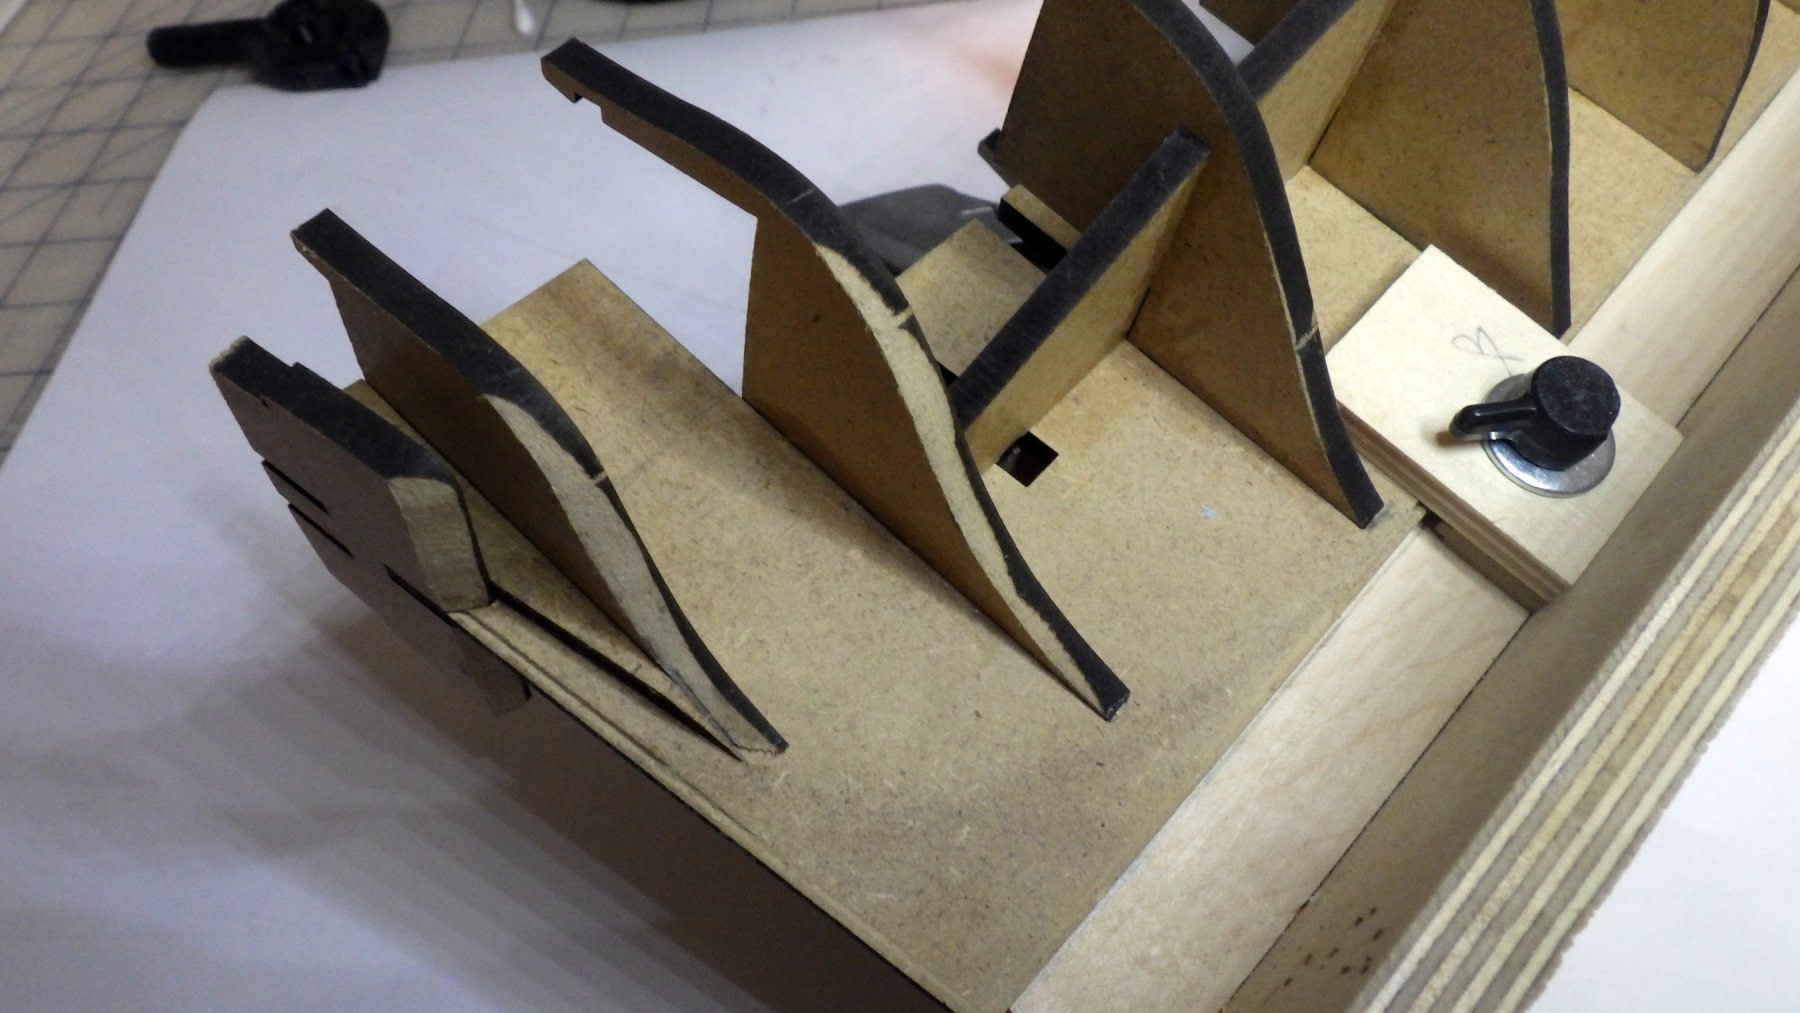
After reading many build logs I decided to add balsa filler blocks at the bow and stern to make sure that the curves would be smooth and there would be plenty of gluing surface. This was not hard to do with the already faired bulkheads. Although as others have observed the balsa does tend to "crumble" at the edges. So in a couple of places I added small hemlock fillers that were easily shaped and took the shaping better. Clearly I am obsessing about having a well faired hull prior to hull planking.
 Bow Fairing with Balsa Filler Blocks
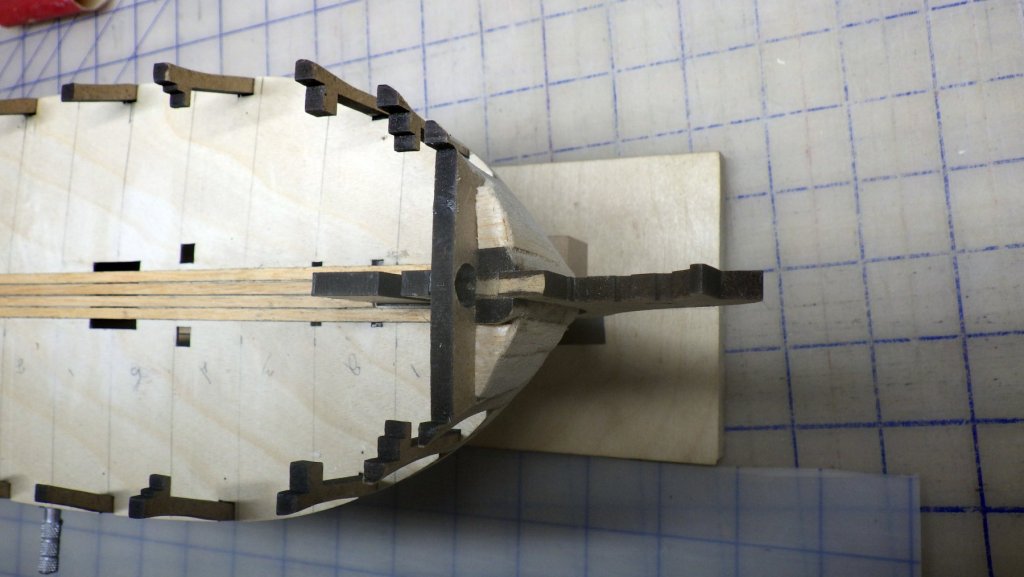 Stern Fairing with Balsa Filler Blocks
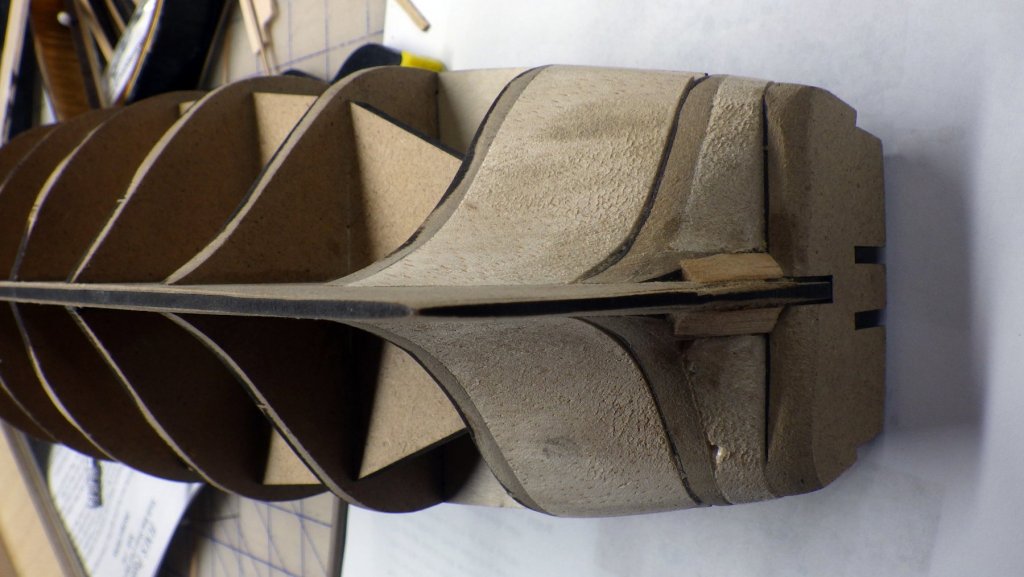
- BenD, Martin W, Haliburton and 2 others
-
5
-
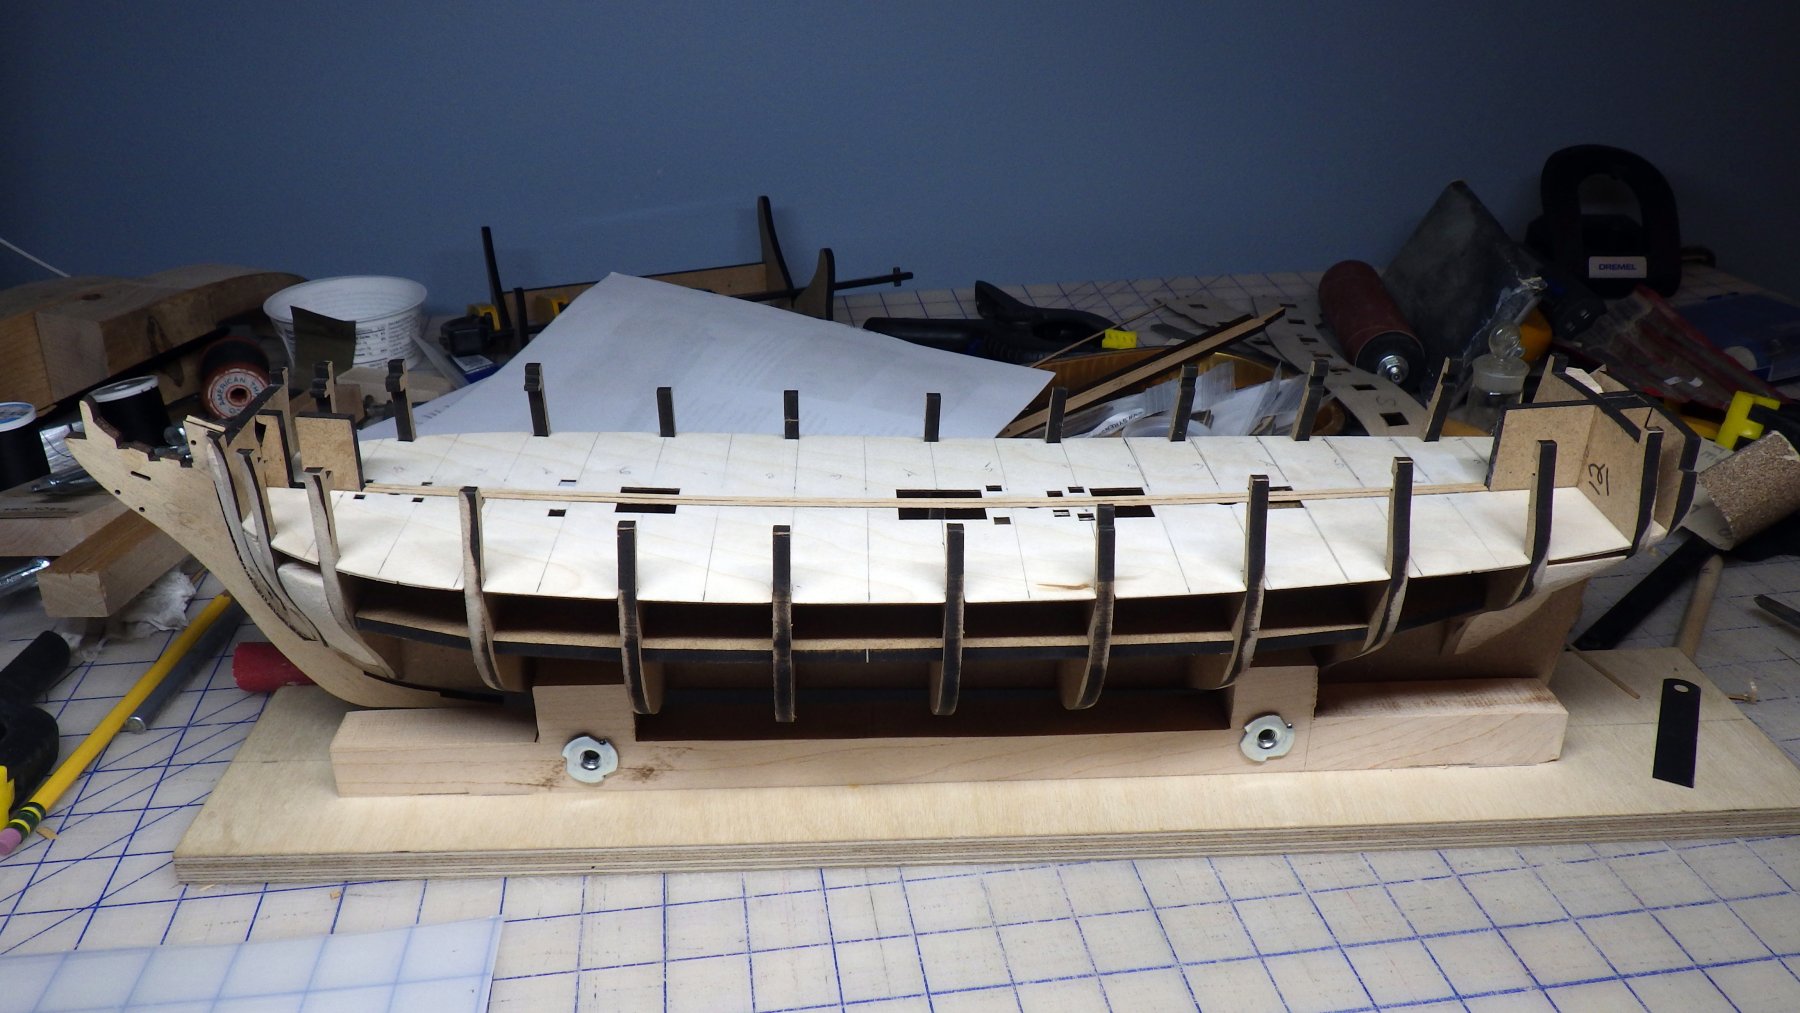
OK, to get started, I won't re-post all the pictures of the kit's contents - there are a number of good posts of those. I heeded all the advice about fairing the bulkheads as best as possible before gluing them to the spine. I also cut a 1mm deep by 2mm wide rabbet all along the stem, keep and stern post (leaving a 3mm wide surface) to aid in planking and with the bearding area forward of the stern post. I did not glue on the walnut prow at this point to keep from damaging it during the fairing process.


-
-
Hello Everyone -
I've just come back to ship modelling after a long hiatus - work and family took all my time and space - now I have both. Decided to start with the Swan class Pegasus. I've done several other models - the Revell Cutty Sark in the mid-60's and Model Shipways Rattlesnake in the 70's. Neither one has survived the intervening years.
I have read over twenty build logs on the Pegasus, Fly and Syren. Learned a lot before starting. I will try to only show/add things that I think others might benefit from slightly more detail - or things I have decided after looking at how many others approached the challenge. I am amazed at the quality of the builds out there - truly impressive.
I have already received some very good advice from a few members by asking questions about their builds - - it's a great help.
Look forward to interacting with the community.
SkipW

Just beginning main deck planking

- Tigersteve, ccoyle, GrandpaPhil and 5 others
-
8
-
Hello everyone - I have finally come back to wooden ship modelling after a 25 year lay-off - - seemed work & family ate up all my time and space. Now I have both. I have started an HMS Pegasus from Victory Amati. I have read over 20 build logs on the Pegasus, Syren, and Fly which have provided invaluable tips and techniques. Have also already gotten help from several members. I will be starting a Build Log shortly - not that I think I have new information or skills - but I love the helpful feedback and support that is given by other members here.
SkipW

-
Aha - so if I understand correctly - you scored the simulated plank butt joints after the planks were laid. Hadn't thought of that. I was pondering a jig to do it before laying them - but that requires very tight control of the strip fore-n-aft while you are laying it, as well as setting the gap from the previous plank. More to think about.
I am running a test with strips edge blackened with soft pencil, archival marker and then using better quality black thread - need to make a decision on the main deck planking.
-
I've ordered a couple archival pens and will experiment with them. I have extra soft lead pencils as well. I won't start the main deck until I am very happy with a method. I have Min-wax water based matte polyurethane varnish. I used it on the planking on the lower deck and it did not seem to move the marker edged black. The outer two strips had been edged with the Sharpie as a trial - but I didn't like it - went to the thread method. I used those two strips where they are really not visible. Thanks for the continuing advice. As I recall you did not actually cut the deck planking strips but scored them with a 0.006mm feeler gauge at the joints. That seems like a really practical way to get nicely aligned planking with uniform joints. I might adopt that method as well.
Thanks again for the benefit of all your experience.
-
Thanks Danny and Doug - This is great info. I finished the (practice) planking using the black thread on the lower deck. Not unhappy with the appearance (as little of it will be seen) but would not attempt this on the main deck. Also a picture of a jig I made to color plank edges with a large Sharpie. Solves the issue with getting ink on the faces of the planks - - but does not solve the bleeding problem. I was going to settle for it but now I will certainly get an Archival Ink Pen - - - many thanks for this tip. I tried a super soft pencil and while the edges of the plank were nice and black once laid down almost nothing showed. However, I have my feeler gauge "at the ready".
Skip

- Martin W and Tigersteve
-
2
-
Thanks, Doug.
I made a few attempts yesterday (planking the main deck where it is only visible thru the hatch gratings). I was coming to the conclusion that "glue was involved". I really like the look of the black paper on Dubz's Syren, but when you look closely he was planking with pear wood planks that he cut and they had to be 2 to 3 mm thick so it looks like he glued the paper to one side of the plank before laying it. Just not feasible with the 0.5mm Tanganyika.
Skip
-
Hi Doug -
Another question for you. I really like the look of your deck planking using the thread. I seem to get a lot of wicking with the markers and have trouble getting enough black on the edges of the planks for the pencil to work well producing a visible caulk seam (maybe I need a lot softer pencil). You comment that you use 0.05mm thread - - that seems way too small, especially when you say it "might be over scale". I have some 0.15 mm black thread, also some larger ones (up to 0.4mm - - wife is a quilter/sewer). The 0.15 thread in nicely visible with the 0.5mm thick deck planking. The question is, from a practical standpoint how do you control the thread, i.e. get it to stay where you want it while you apply the next plank?
Thanks, Skip
-
Thanks for the input.
I think I am obsessing on getting the chamfers correct. I already cut a 1 x 2mm rabett all along both sides of the keel and stem and stern post.
I'm trying to get this "as close to right without going too far" before gluing anything together. I will add the balsa blocks - if for no other reason than a bit more peace of mind.
If you guys are U.S. based - what did you use for paint? I can't find that Humbrol (the recommended paint) is available in the U.S. And all the other paints seem to be plastic model oriented - a lot of military type colors.
Within a few weeks I will likely start a blog - - not that I think I have a lot more to offer the group but because folks are so helpful with their suggestions. I have read probably 20+ blogs on Pegasus and Fly - - priceless information.
-


 Bow Fairing with Balsa Filler Blocks
 Stern Fairing with Balsa Filler Blocks


HMS Pegasus by SkipW - Amati/Victory Models - Scale 1:64
in - Kit build logs for subjects built from 1751 - 1800
Posted
The adventure of the first planking is completed. Again I benefitted from the many Pegasus and Fly blogs. Didn't have much trouble doing the planking. I used the method described by Chuck Passaro along with the Planking Fan that is on the NRG website. Came up with an easy way to soak planks - two feet of 1" PEX tubing with a cap on one end and a stopper in the top. Fill with hot water - drop in one or two planks - soak 30 minutes and pin to hull to dry. No problems. Having the rabbet in the stem made forming the planks quite easy. I also stopped the planks short of the stern post in the bearding area so that once sanded out the second planking will be flush. Not quite so lucky on the keel and will need to sand a bit there so the second planking will be flush with the keel when laid.
For the second planking. The kit says from the top of the gun port strips down. However looking at some blogs some guys seem to scribe the whale and use that as a guide for planking both down towards the keel and upward past the gun ports. Suggestions? I have a bit of sanding to do before starting the second planking. Also - kit say use CA glue - some builders have used PA - I'm more comfortable with PA (or Titebond is my favorite) is CA forgiving enough to locate planks tight and well positioned before it "bites"?
Bow Pre-Sanding