hollowneck
-
Posts
1,591 -
Joined
-
Last visited
Content Type
Profiles
Forums
Gallery
Events
Everything posted by hollowneck
-
 Congratulations, Chris. You, Chantelle and Jim have worked really hard to get to this impressive milestone! "....Full Steam Ahead!" (never mind the first part of this quote!) Ron
 -
Everything so far is looking good, Paul. with a slightly belated "Welcome to MSW". You'll soon discover there are lots of colleagues here that will help you at any stage of your new venture!
-
Cutters, Choppers, Guillotines, Slicers
hollowneck replied to MintGum's topic in Modeling tools and Workshop Equipment
I have used the NWSL Chopper II for more than 10 years and I've only had to replace the insert matts once (you can also reverse them). The razorblade edge does eventually wear a groove that's awkward, but the solution (other than replacing or flipping them over) is to rotate the matt 90 degrees and Voilá! The base is solid, doesn't move around and the footprint on your bench is small. This cutting tool is only appropriate for cutting thin strips. Also, one must tighten the separate angled stop pieces firmly to hold the measured position; the cutting action can slightly shift the wood piece and make repeatable items out of tolerance. You'll also need to change the single edge razorblades often. You'll know when to do this since they will crush the wood and make a raggedy cut when dulled. No biggie: I still have a box of many new razorblades I bought years ago. One caution with this device: after substantial use the cutting arm will loosen and want to "freefall" as you're placing stock up against the fence. Don't ask me how I learned this! -
I have a couple 8 yo grandchildren, boy(s) and girl(s). They like to look at my models but aren't ready to "craft." Two of them like art and draw; either of these two MIGHT be a candidate to entice...later. I'm giving only my direct experience, your mileage may differ! I would suggest 10-12 yo is a better time to introduce model making. My bias is to start with a plastic kit. Close supervision and involvement is obviously mandatory, even at 10. Thus far, I have many "fans and appreciators" but no "takers." The bright ones easily see the complexity and deep commitment of what Grandpa does and understandably show hesitation. I'm O.K. with that: a child's youthful impressions will last and may turn to interest and engagement in future decades...
-
Great News, Chris. You've taken an important step for the future of Vanguard Models. Hopefully, this business space isn't too far from home.
-
Darn. Ya' snooze, ya' lose.
-
I received mine earlier this week via email. I had one entry in the Masters Category. I've found the judge's commentary sheets very informative. I was a NRG judge for the 2021 event and took time to offer helpful comments on the entries I judged (Age of Sail models only).
-
Need small repair done on jibboom of Le Superbe model
hollowneck replied to Mr. Matt's topic in Masting, rigging and sails
Matt, Please check your Private Messages*. If you haven't found a more local source for your model's restoration, I may be able to help. Judging by your photos, it appears a competent repair can be made with only a few hours work but will require an overnight period afterwards to achieve a permanent fix. You'll also likely want to have the affected rigging adjusted once the bowsprit/jibboom is fixed; this is often the case with spar repairs. * upper right corner on the home page ("messages" within the double dialogue bubbles) -
Yes - and any vexillologist will know the proper manner to display an ensign on a spontoon.
-
Ditto. All positive news, Chris. Your investment in the pro 3D printers will pay off. I believe there is an eager person in your vicinity that you can hire and train to help with your growing production needs. The expanding facilities and gear is one thing, a dedicated production person to keep the business humming along is another - as you well know. So, before-the-fact: Congratulations! I can't wait to open my Jack Aubrey Surprise box next year...even with the 10% import tax (called a "tariff).
-
To flap or not to flap, that is the question. The true Vexillologist can also choose to drape.

-
On point. The most important resource needed for our ship modeling hobby - at any interest level, scratch or kit, tugboat or ship-of-the-line - is TIME.
-
Good News - but, were you "Surprised?"
-
...no judgments, Mike, unless of course, Bad Words turn into bad Deeds!
-
Will Vanguard be displaying its HMS Surprise prototype?
-
Niiiice!!! Kool build. Get small Mike! What would we do without those Bounty "Quicker PickerUpper" paper towels?
-
Your creativity is a great testament to the fun that can be had in our unique hobby: yet another brilliant idea and execution, Glen. Bravo - You got the SIB "Rizz!"
- 156 replies
-
- 4
-

-

-
- Queen Annes Revenge
- bottle
- (and 1 more)
-
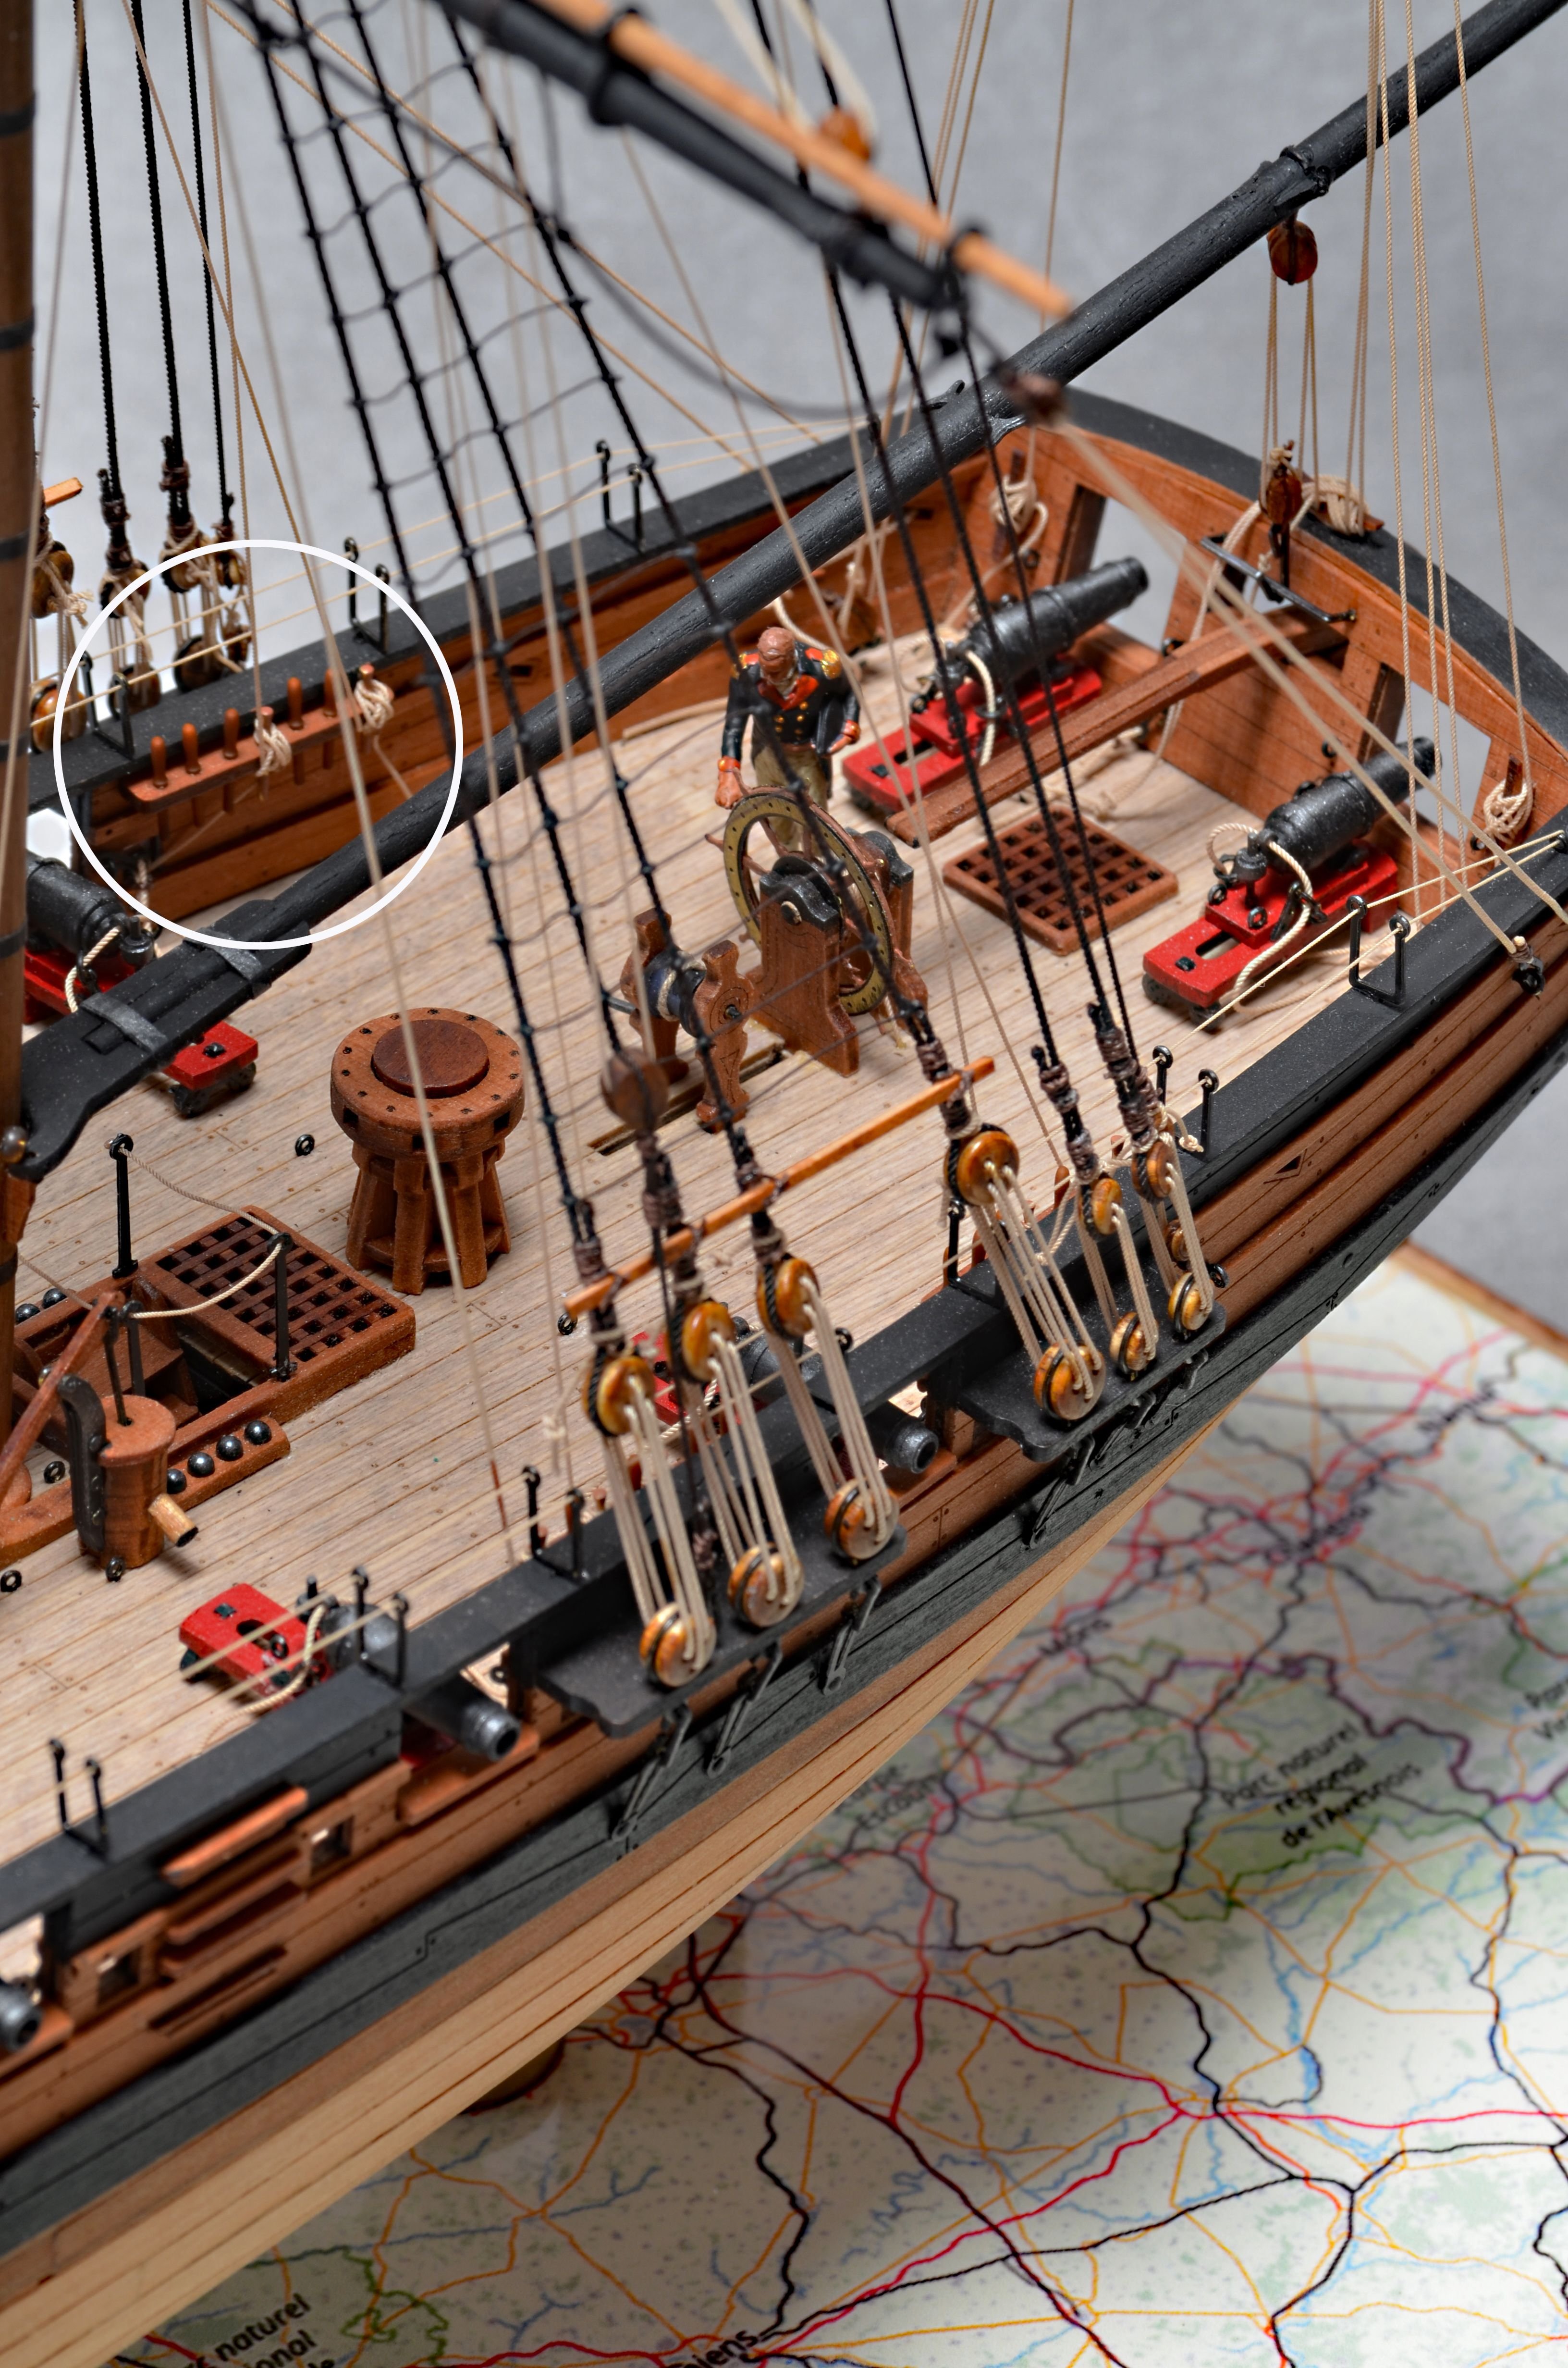
For accurately-scaled belaying pins I can recommend the new 3D printed ones at Syren Ship Models. Chuck offers a couple sizes, the smallest (7mm) are perfect for 1:64. The pin's color is printed into the resin, no painting necessary. They will also take rope tension when belaying lines and not break. Attached pic is for my Vanguard gun brig "HM Cracker"

-
Nyet! Falkonet is a Russian kit brand. Crafty Sailor (Canada) imported their stuff for a couple years along with Master Korabel (also Russian). Enter the invasion of Ukraine and... sanctions...Falkonet's aftermarket wood, perfectly-scaled belaying pins are excellent. The company still has a website: good luck ordering (and getting) merch from Russia (which is too bad).
-
I will guarantee that you will have no regrets.
-
Thank You, Igor. Your work to create these figures is exquisite.
-
Me too. I suggest a triptych (series of 3). $30-40 range would work. Place a subtle, small brand for Syren in one corner.
-
Glenn: https://www.agesofsail.com/shop-cat/vanguard-models-ship-model-kits/ Their indicated prices may be before the tariff debaucle and appear to be adjusted for the £ to USD premium. Hopefully, AOS have inventory pre-craziness so you don't have to navigate the U.S. Customs/tariff shipping nightmare.
-
Your work is superb, the attention to detail underscores your desire to create a work of art. I couldn't help but notice your use of the Sakura pen to mark tiny holes; I use my set in the same way, couldn't model without them!