hollowneck
-
Posts
1,589 -
Joined
-
Last visited
Content Type
Profiles
Forums
Gallery
Events
Everything posted by hollowneck
-
 Nice! Looking forward to following this log. Another interesting fact about the vessels is that the hulls were made of wood.
 -
Your model is stunning; I’m a big fan of properly done rigging and yours has plenty too study - and admire. When faithfully followed, the Ronnberg plans are some of the best ever created for the serious ship kit modeler. Congratulations.
-
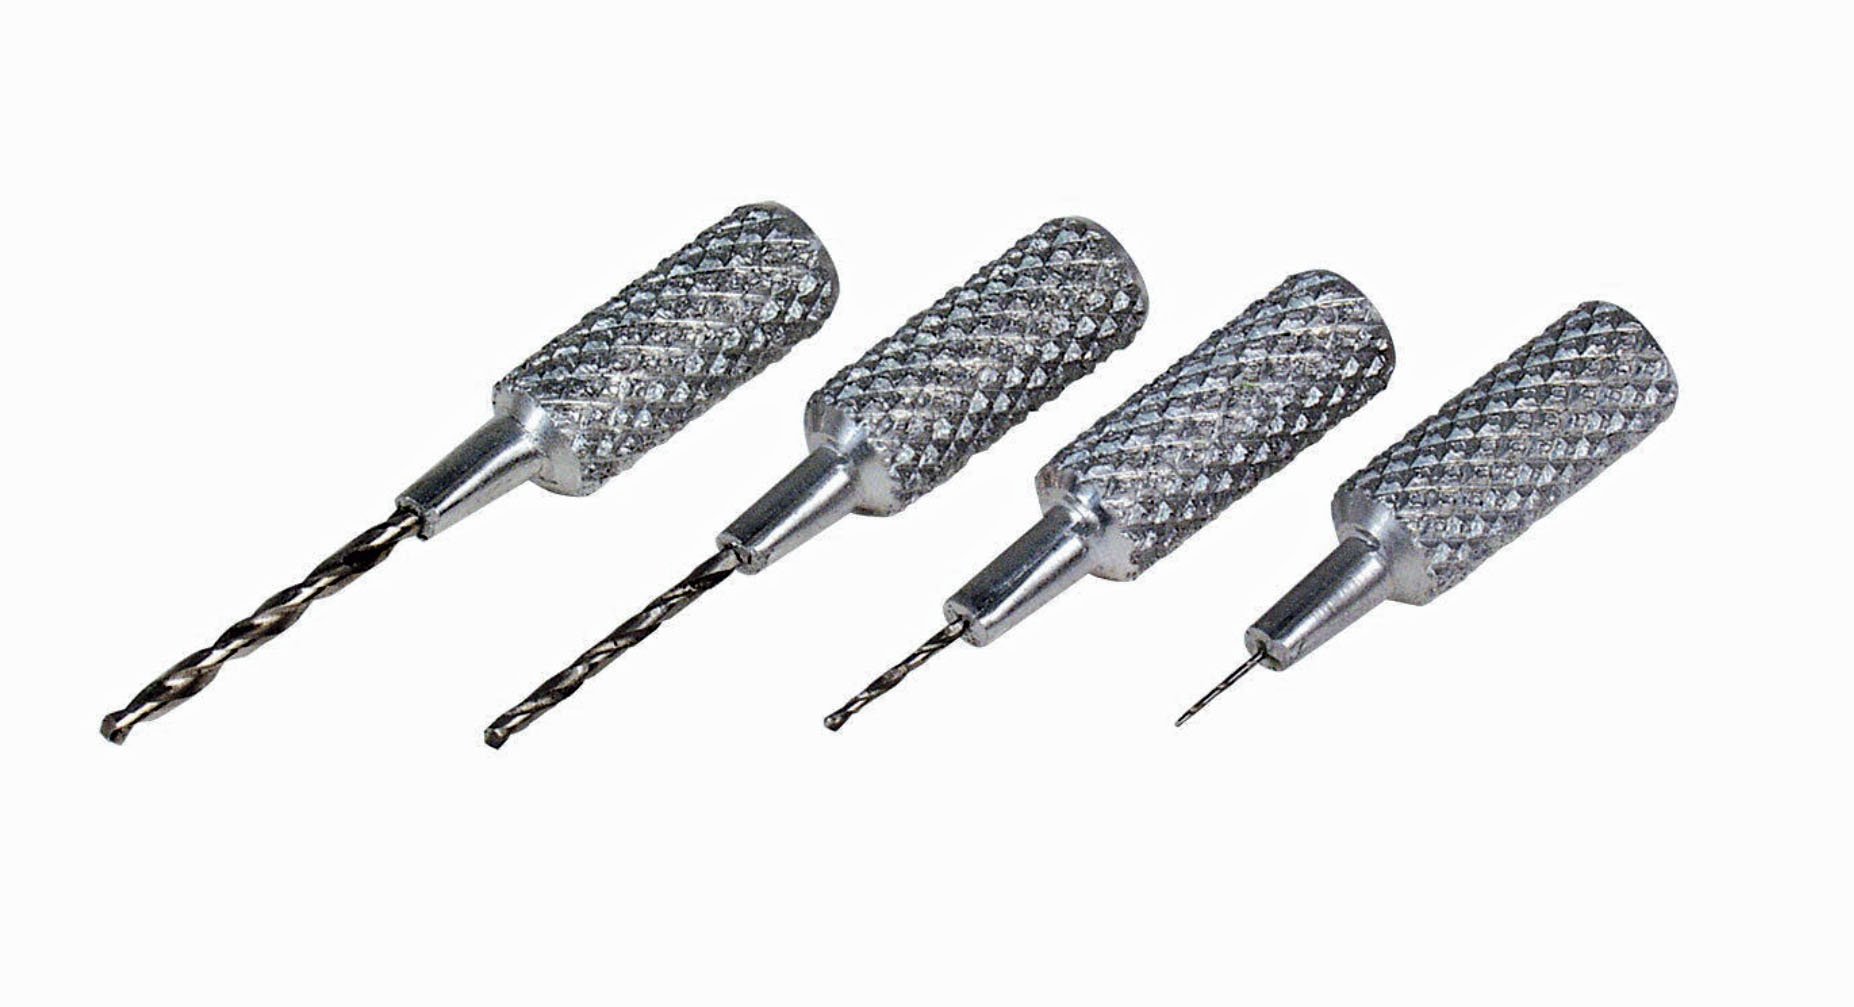
Colleagues, these are indispensable on my bench. I use these nearly every day. The bits are tool steel and have remained sharp after several years of use. Obviously, for wood only. https://micromark.com/collections/hand-drills-pin-vises/products/finger-drills-4pc-74-80

-
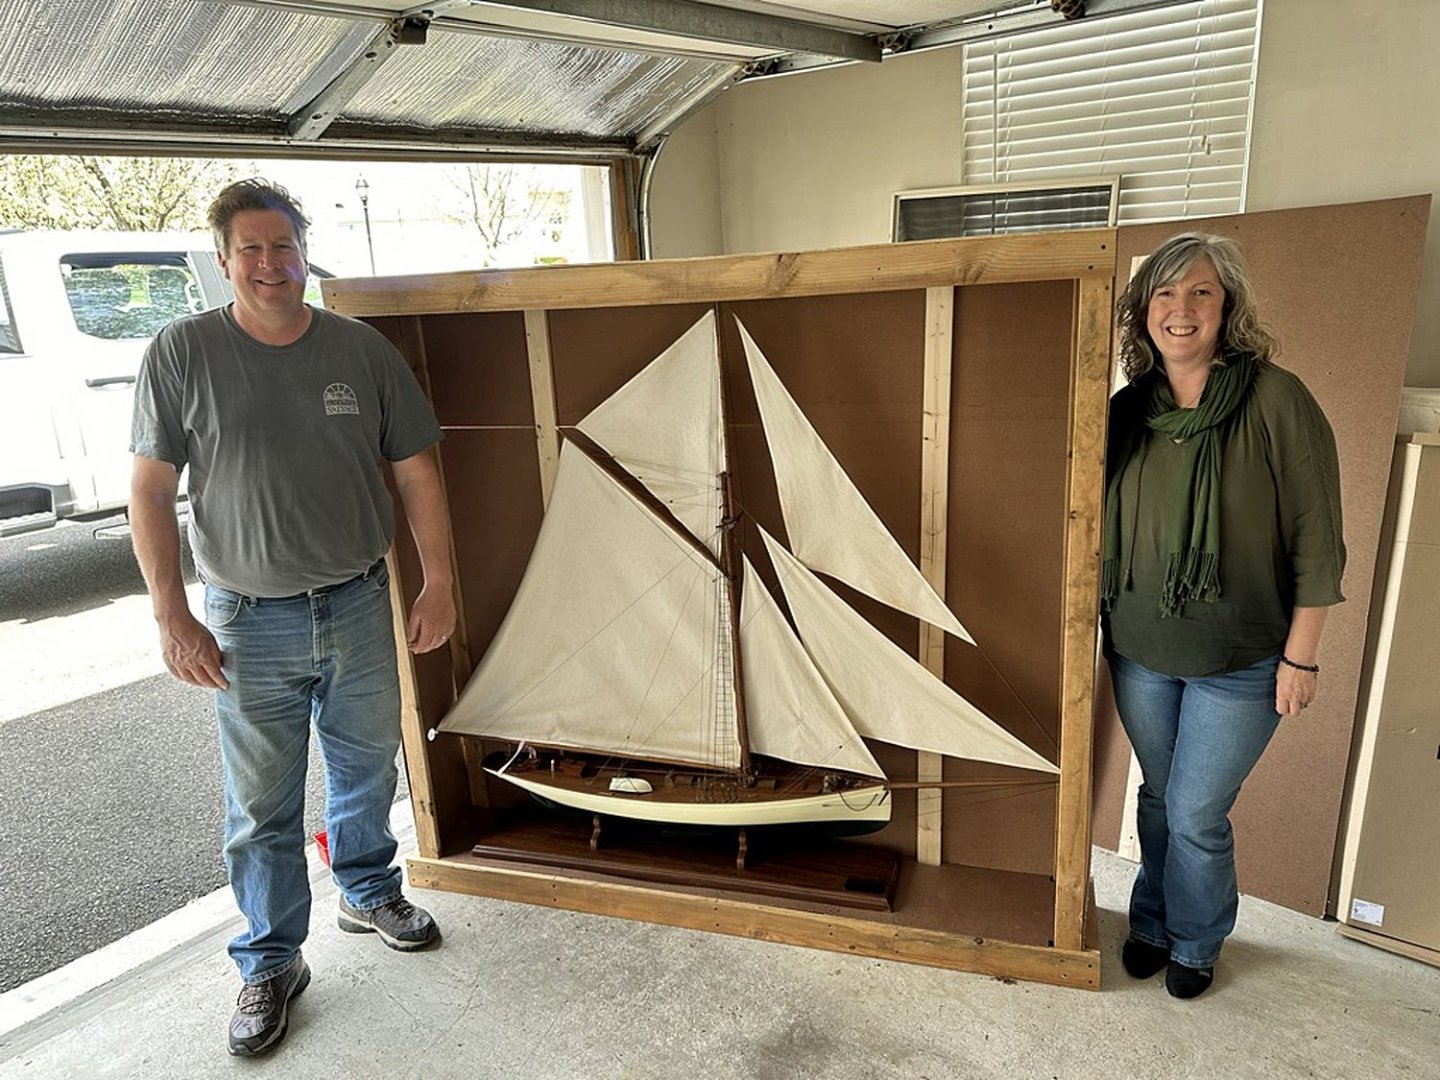
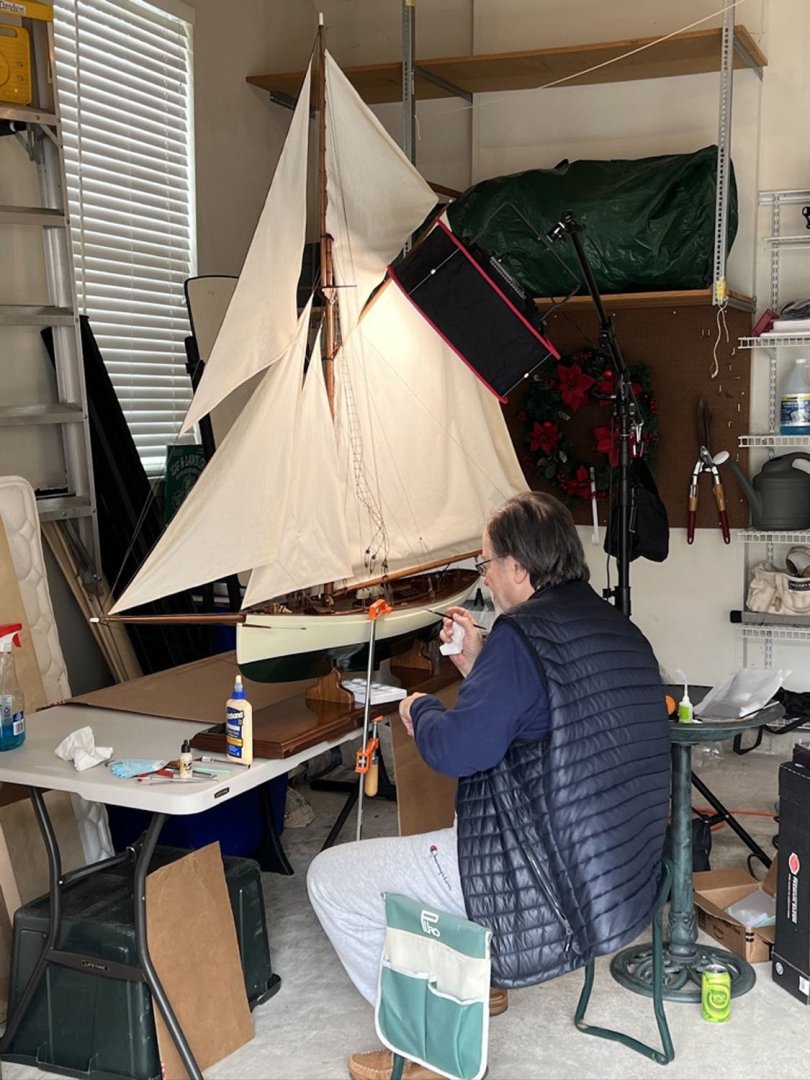
Thank You, Glen. I should mention that unlike my basement shop, my garage isn't heated (long-sleeved shirt, puffy vest, etc) The large model was beautifully built and came to me with broken rigging items (per normal challenges, an errant animal I was told). However, my principal task on the two week project was to thoroughly clean-off years of accumulated gunk and restore the model's beautiful natural woods (mostly mahogany) as well as all the impeccably-painted surfaces (some scratches needed tricky aged paint touch-ups). Unfortunately, after doing some internet research - it was a gift to my client - I was unable to trace its builder but I did discover to my amazement that such a finely made model came from a random nautical gift store somewhere in Massachusetts. I'm currently writing a detailed article on the "Restoration of the Puritan, the 1885 America's Cup Defender" for the NRG Journal with a focus on the materials and techniques I used to restore this beauty. I got detailed, nice closeup photos during my work. I understand the restored model is being donated to a Pennsylvania Historical Society.
- 301 replies
-
- 5
-

-

-
- Constitution
- Bluejacket Shipcrafters
- (and 1 more)
-
As the English say: "Horses For Courses" - I prefer matte, non-polished surfaces for the majority of my wood components, especially rigging. Thanks for the suggestion on using dull cote for your excellent blocks. I'll give that a try, hoping it doesn't plug or gum-up the tiny holes.
-
Chuck's new 3/D blocks rock. Thank you for all the work you've put into this effort. I recently ordered some "Swiss Pear" and "English" (boxwood color) 5/32" (3.8mm) ones and they look fine. As you can see in his photos, there is a very slight reflective "shine" since they are made from synthetic polymers. I touched-up a couple with colored markers to see if I could reduce this effect; it worked reasonably well, and they now faithfully resemble wood with little additional effort. These "3/D-ers" are faithful reproductions and the price is right.😊
-
Glen. On delivery day, the look on their faces says it all. Carson's smile will be your real award too, my friend. You'll do a stellar job! Yep, that's the transporting pick-up truck in my driveway... Moi, in El-Garage-o.
- 301 replies
-
- 10
-
-
-
- Constitution
- Bluejacket Shipcrafters
- (and 1 more)
-
I concur, Glen. Doing a restoration for others can be rewarding in many different ways. As you're aware, the principal challenge can be simply the logistics concerned. Earlier this year I did a restoration on a model that I had to work on in my garage because it was about 6 feet long. The beautifully-crafted model was in need of much TLC and when I finished, my clients were thrilled; the looks on their faces said it all when my garage door opened to show them their fully-restored 19th-C historical society racing yacht! It's a nice gift to share; bringing joy to others because of one's skills and talents.
- 301 replies
-
- 8
-
-

-
- Constitution
- Bluejacket Shipcrafters
- (and 1 more)
-
Congratulations, Dan. You've done a superb job with your model, including the rigging. I have the Adder box sitting in my shop and it will be my next up build when I'm done with my current one. Your Adder will be the Build log I refer too in just a few short weeks!
- 146 replies
-
- 1
-
-
- Adder
- Vanguard Models
- (and 1 more)
-
This also one of my favorite reference books on sailing. It is expensive, but well worth the investment. Some libraries also have it available.
- 146 replies
-
- 1
-
-
- Adder
- Vanguard Models
- (and 1 more)
-
I'm speculating, but I believe that once in a safe anchorage (port, a harbor) a squaresailer's upper yards were lowered with their sails still bent to them. I believe that most people saw these tall ships in this configuration, rather than seeing them on the open seas with yards raised, sails deployed. Also, it was a lot of work to remove and replace massive canvas sails. They were also expensive. By leaving them bent to their yards and lowered (at "rest" essentially), a Captain could then immediately "set sail" with favorable wind conditions to depart from an anchorage. Many times it was too difficult – if not impossible - for a sailing ship to haul anchor due to adverse wind conditions. Ships and their crews had to be ready at a moment's notice to depart. I've gleaned a lot of my knowledge about this subject by reading books about sailing, as well as the Patrick O'Brian Aubrey/Maturin series novels. I've also captained a 41' sailing ship (ketch) and learned a couple things about the physics of the wind, sea and gravity as they interact, in real-time.
- 146 replies
-
- 1
-
-
- Adder
- Vanguard Models
- (and 1 more)
-
Bear in mind that the forward cannon's line of sight would be clear once the spritsail yard was raised. You can see this for yourself by getting down to a low viewing angle on the model and viewing the cannon's muzzles. Gunboats were often anchored when they went into action which means their sails would be slackened or furled, thus out of the way for the 24 pounders at the prow to do their work.
- 146 replies
-
- 4
-
-
- Adder
- Vanguard Models
- (and 1 more)
-
I address this running rigging challenge by attaching small alligator clips to the falls (or halliards) temporarily on one side (say, Starboard), then I proceed on the larboard side with the complimentary lines and adjust these by hand and eye so there is visual symmetry and tighter runs for the opposing ropes - especially the lifts, braces and clew lines. In other words, I don't tie-off (secure) many rigging lines until both sides are nearly fully-rigged. I hope this description helps. I wish there were an online video on this process; I'm not aware of one. The "main yard" (also called a "course" whether on the fore or main mast), was fixed and wasn't raised or lowered while at sea. The topmast and topgallant yards were raised and lowered while sailing, but typically, these upper yards usually stayed fixed in their fully raised positions; their sails were furled (gathered and secured at the yard) or reefed (partially "reduced" or gathered) depending on the wind conditions. Also, the wind is much more forceful at greater heights above the water. Captains and sailing masters constantly worried about losing a topmast to its sail exerting a force that would break it. This was especially the case with the thinner topgallant masts. You've done an excellent job with your rigging. It looks "shipshape" to my eyes! Ron
- 146 replies
-
- 3
-
-
- Adder
- Vanguard Models
- (and 1 more)
-
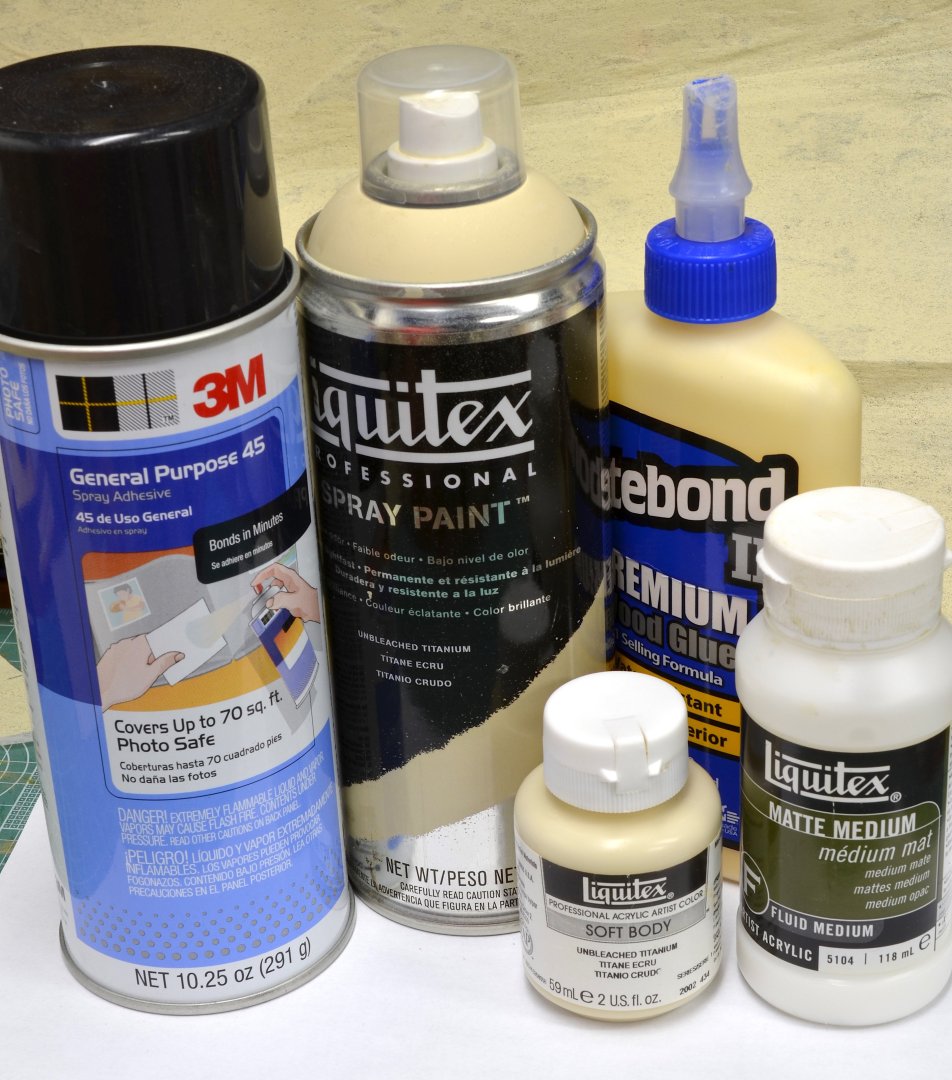
I agree, Andrew's sail looks great. In the attached, the Liquitex spray can and it's sister Liquitex soft body acrylic bottle - both in "unbleached titanium" color - are my go-to solution for approximating the color of working sail canvas.
-
Bravo. Your Henriette Marie looks very good, a convincing rendition. I employ a slightly different implementation than Mr. Laurie's, but use the same material.

- 50 replies
-
- 12
-
-
-
And now, you'll need to regularly submit mission plans to the Admiralty. Cheers!
-
I had the opportunity to visit Stockholm in 2016 with another member of my modeling club; it was an extraordinary experience to see the ship, first-hand as well as the extensive restoration that's still on-going. If this post catches you in-time, try to seek out a meeting Dr. Fred Hocker who is the Director of Research of the Vasa Museum. He's a friendly, outgoing American and is more than happy to meet with ship model makers:be sure to mention that you are one. The gift shop is worth a visit which has many very kool mementos, like Dr. Hocker's large, acclaimed research book on the Vasa's history and restoration project. While in Stockholm, try to go to the Swedish National Maritime Museum which is not far away from the Vasa. This museum has an extensive model collection and is well worth a day's visit. skål!
- 128 replies
-
- 1
-
-
- Christiania
- Vanguard Models
- (and 1 more)
-
Very nice work. The more I look at your photos the more I like the red color you've used. Can you please share this paint color and source? Thanks! I also use Vallejo black and then finish with a satin poly on the wales and cap rails, etc.
-
You've done an excellent job with this model Andrew. Sorry for the loss of one of your companions. Glad to hear you're back in the proverbial saddle!
-
Investing time and treasure with these 1:72 scale boats is a good move, Chris. As you're aware, there are quite a few kits from other manufacturers in this smaller scale (no names mentioned here) that need "upgrades." I'm almost certain that you'll continue to see orders for 1:72 figures for this same reason. 1:64 is the "sweet spot" for the majority of AOS kit builder/bashers; 1:72 comes in a close second. Good luck on moving house (and business!) and thank you for still paying close attention to your primary market!
-
Captain Aubrey just texted me to say that he and Lt. Pullings are on the Far Side of The World, in the Galapagos Islands. Works for me. I probably have a little time to locate a map...
-
Smart decision, Chris. The revised CAD drawings of the figure sculpts look excellent. For my figure set in 1:64, I'll design and print out a miniature, postage stamp sized color add-on to glue to the unfurled map. Where in the world might these officers be?
-
Ditto!!! When you're ready to jump back in there are many great choices amongst Vanguard's range.
- 152 replies
-
- 1
-
-
- Flirt
- Vanguard Models
- (and 1 more)
-
Very well done. I sometimes break-up rigging tasks into non-linear chunks. Some ratlines, then another task, then back to ratlines. There's no First Place Award for the ship modeler who completes his rigging in record time!
- 146 replies
-
- 3
-
-
- Adder
- Vanguard Models
- (and 1 more)