


Arctic37
-
Posts
56 -
Joined
-
Last visited
Content Type
Profiles
Forums
Gallery
Events
Posts posted by Arctic37
-
-
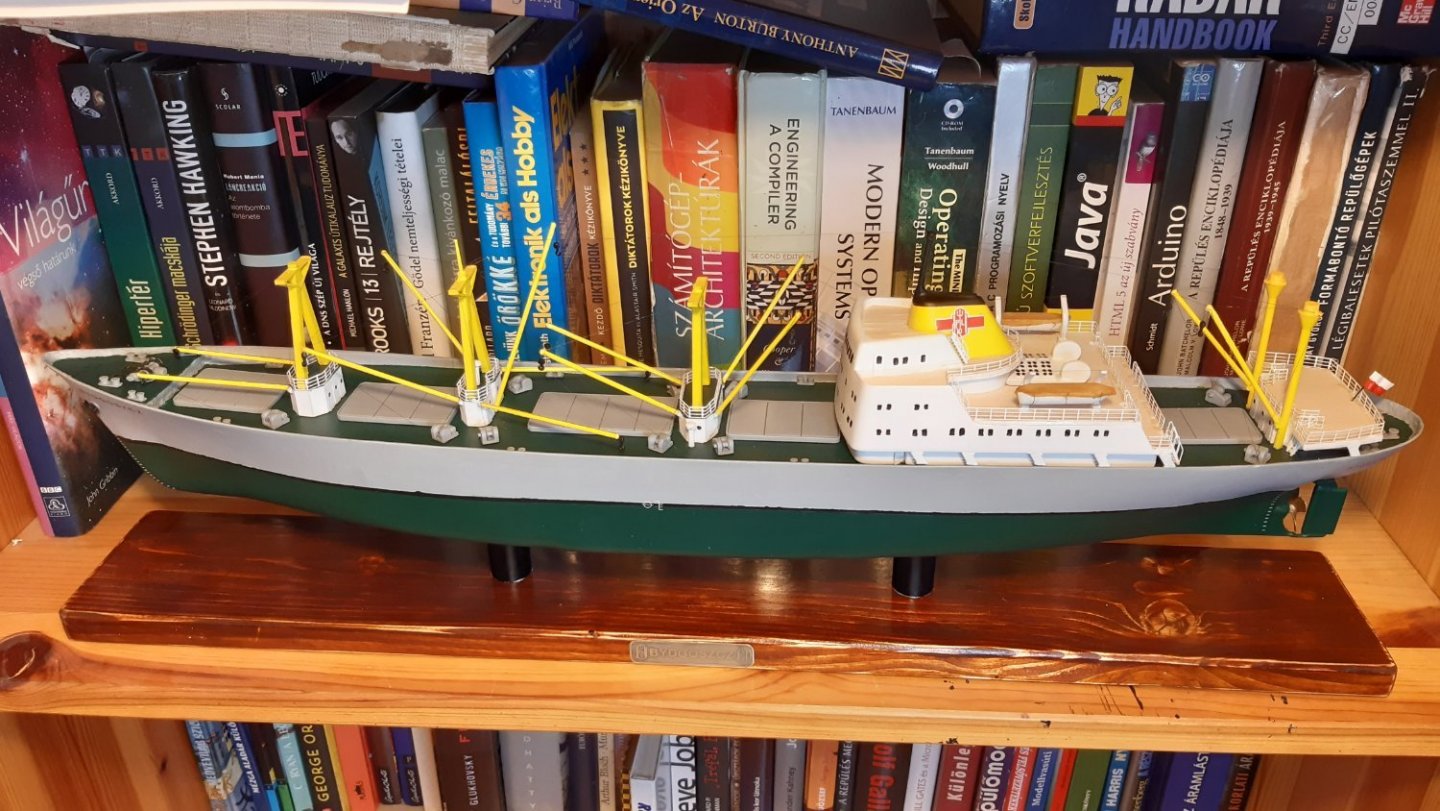
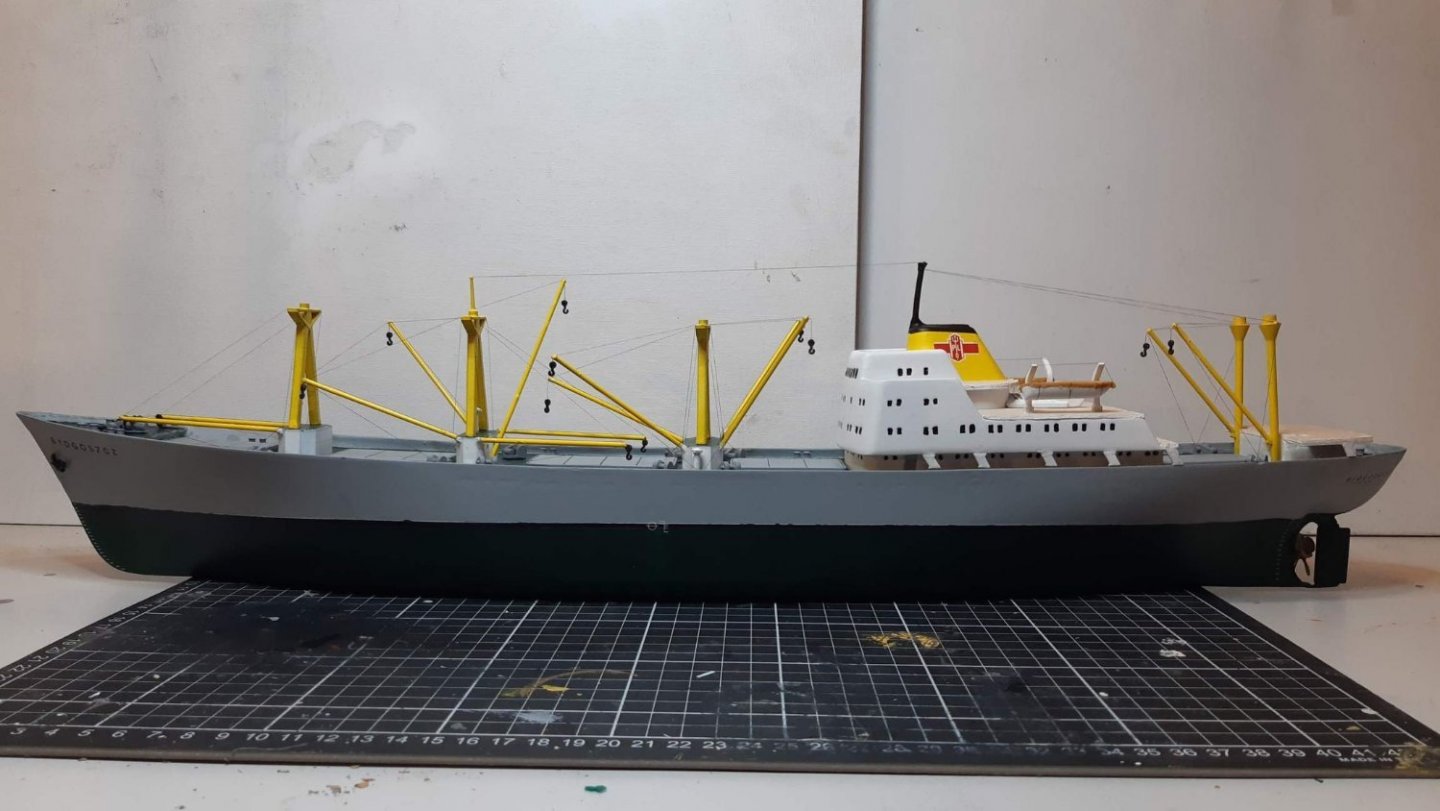
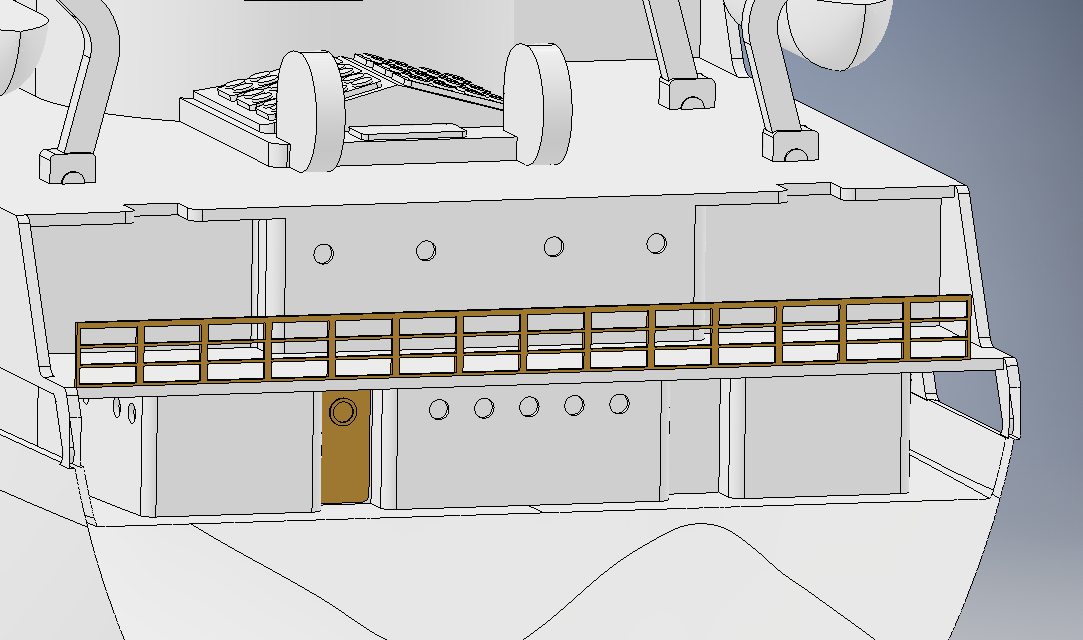
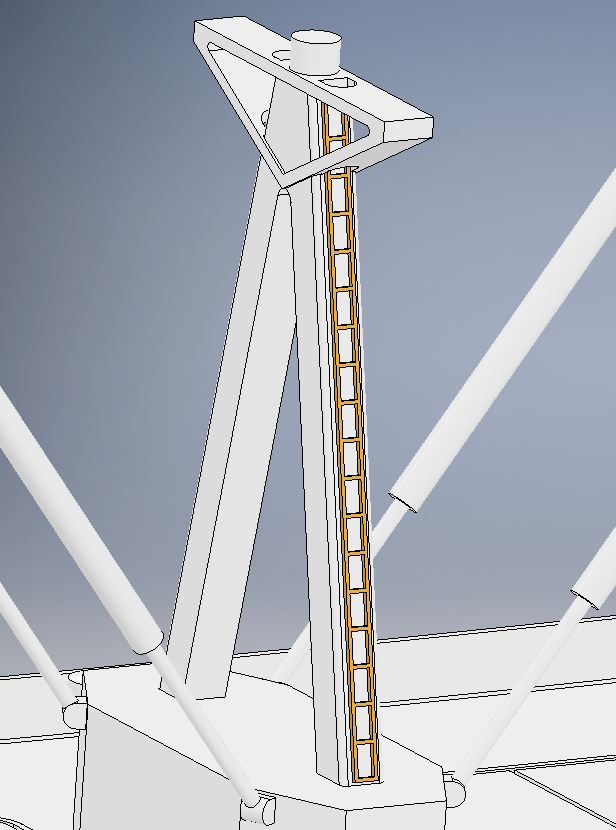
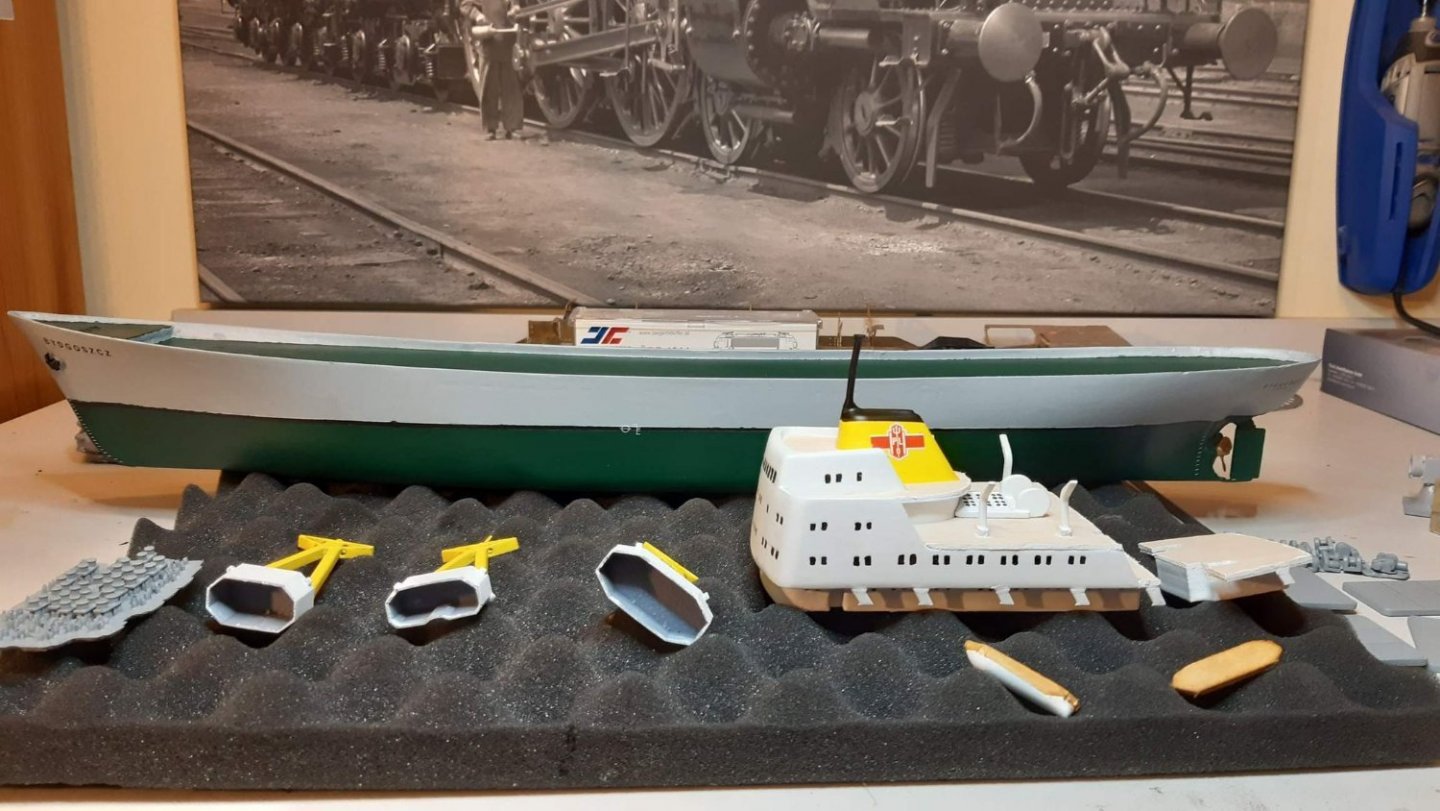
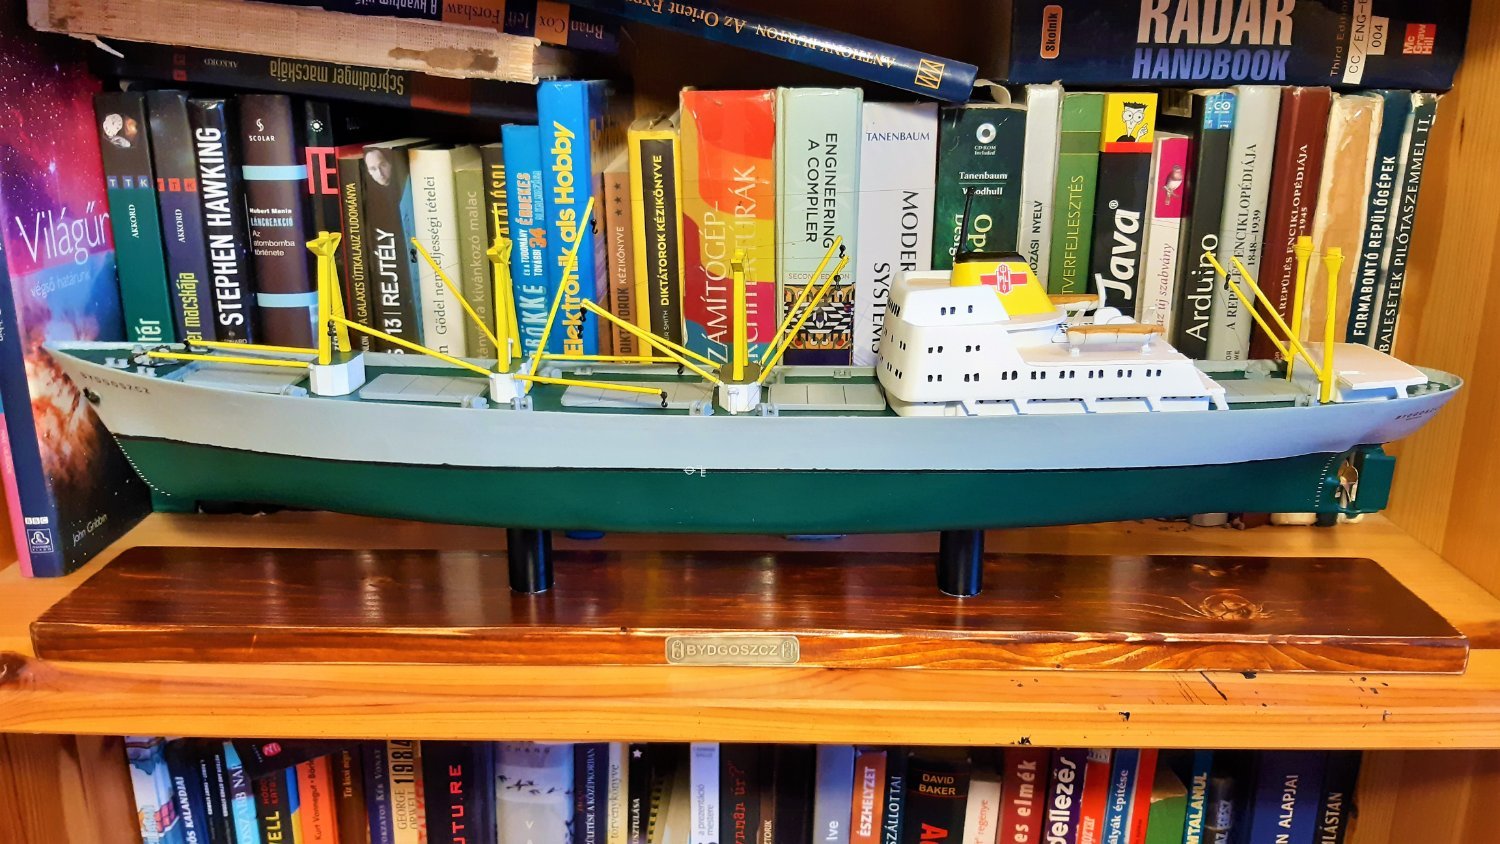
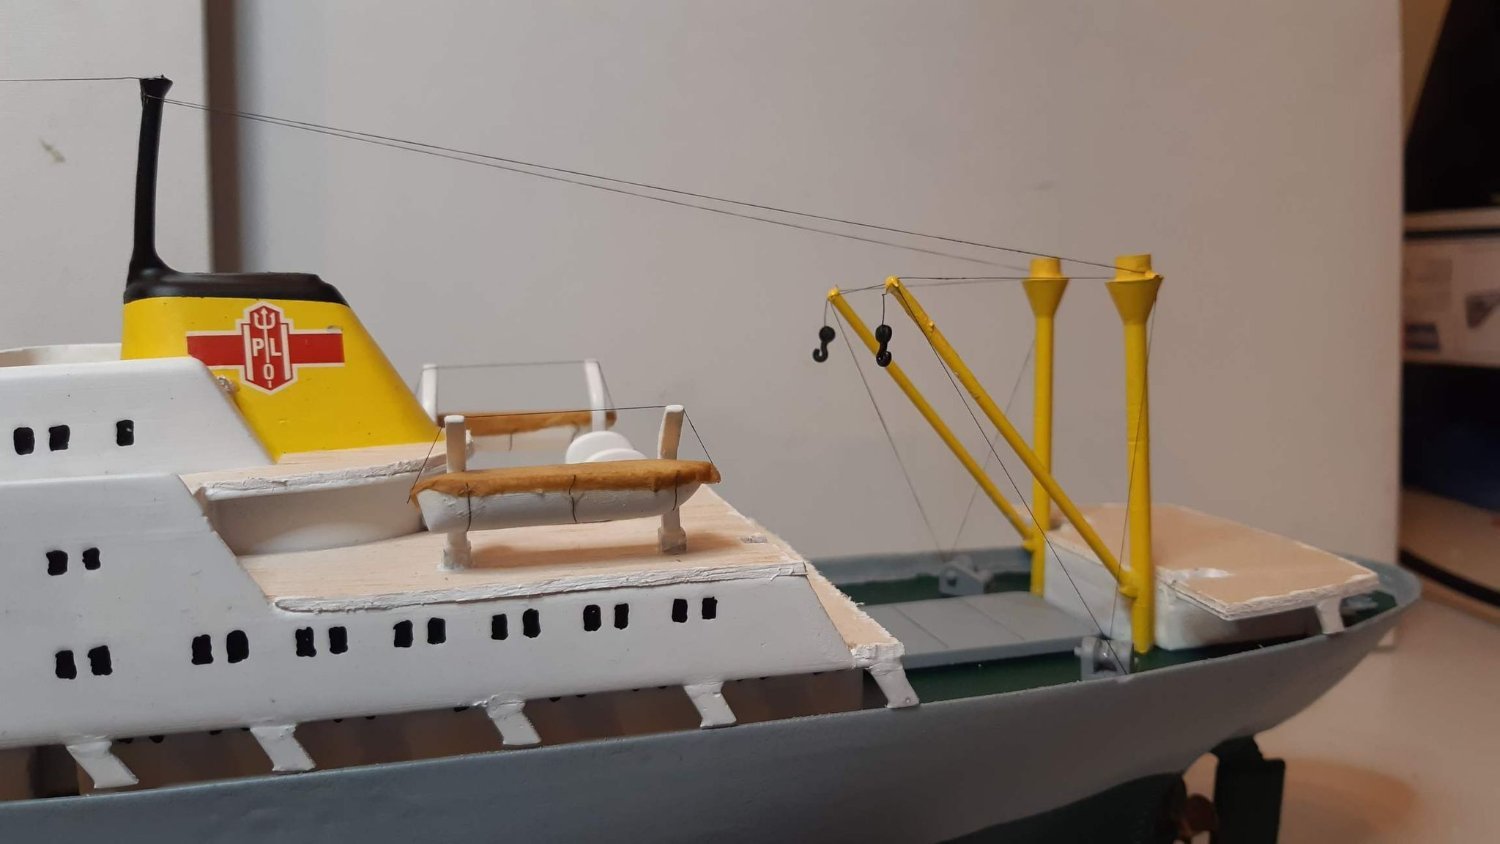
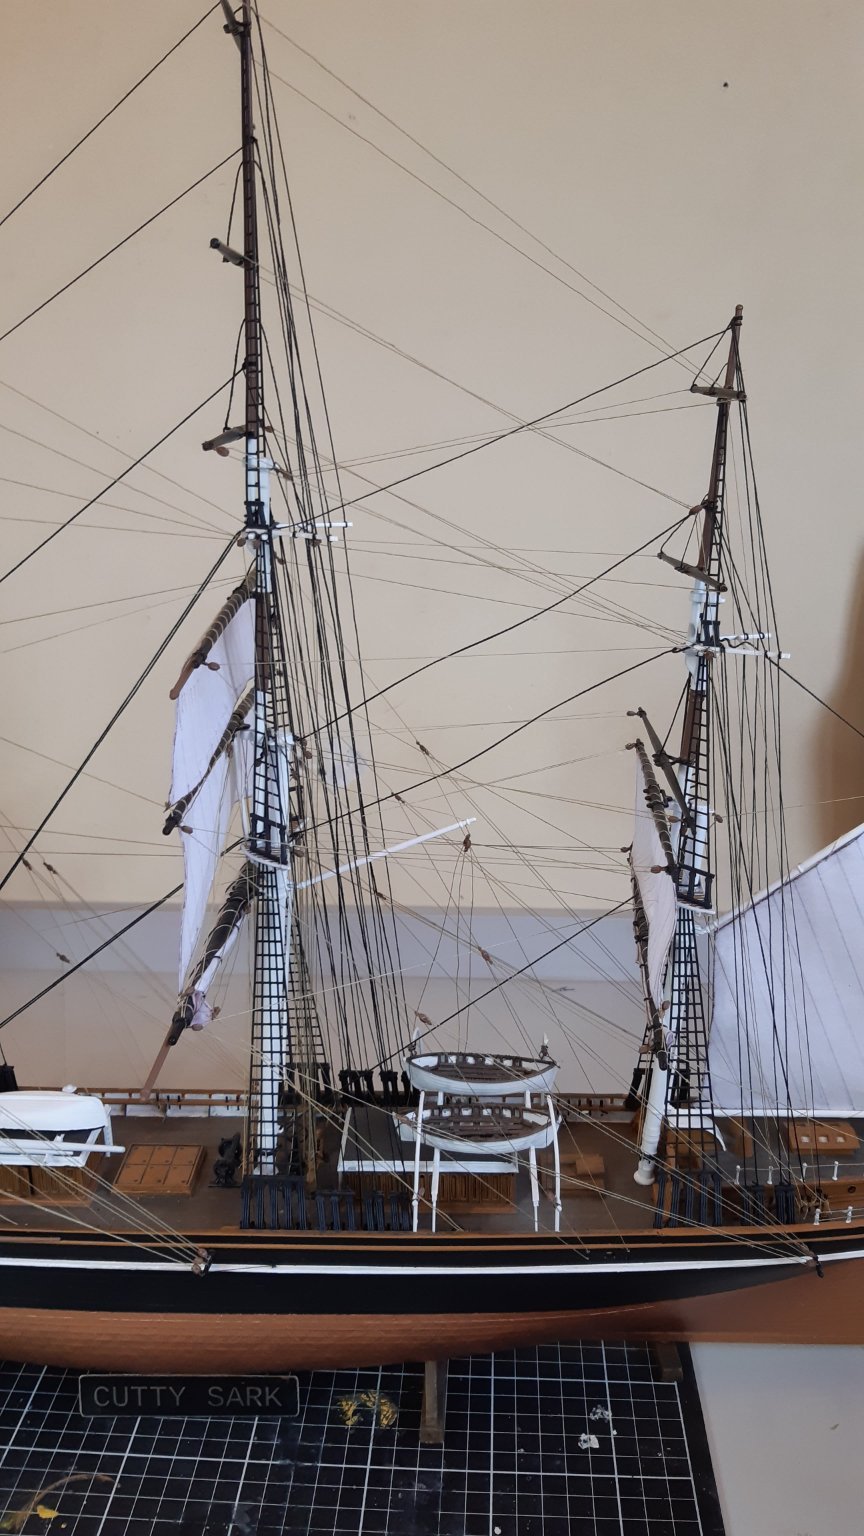
The photoetched accessories arrived yesterday, so I could finish the ship. They improve the look of the ship quite a bit.
If somebody is interested building the ship, can find the 3D files, decals, etching here: https://www.cgtrader.com/3d-print-models/hobby-diy/other/ms-bydgoszcz
-
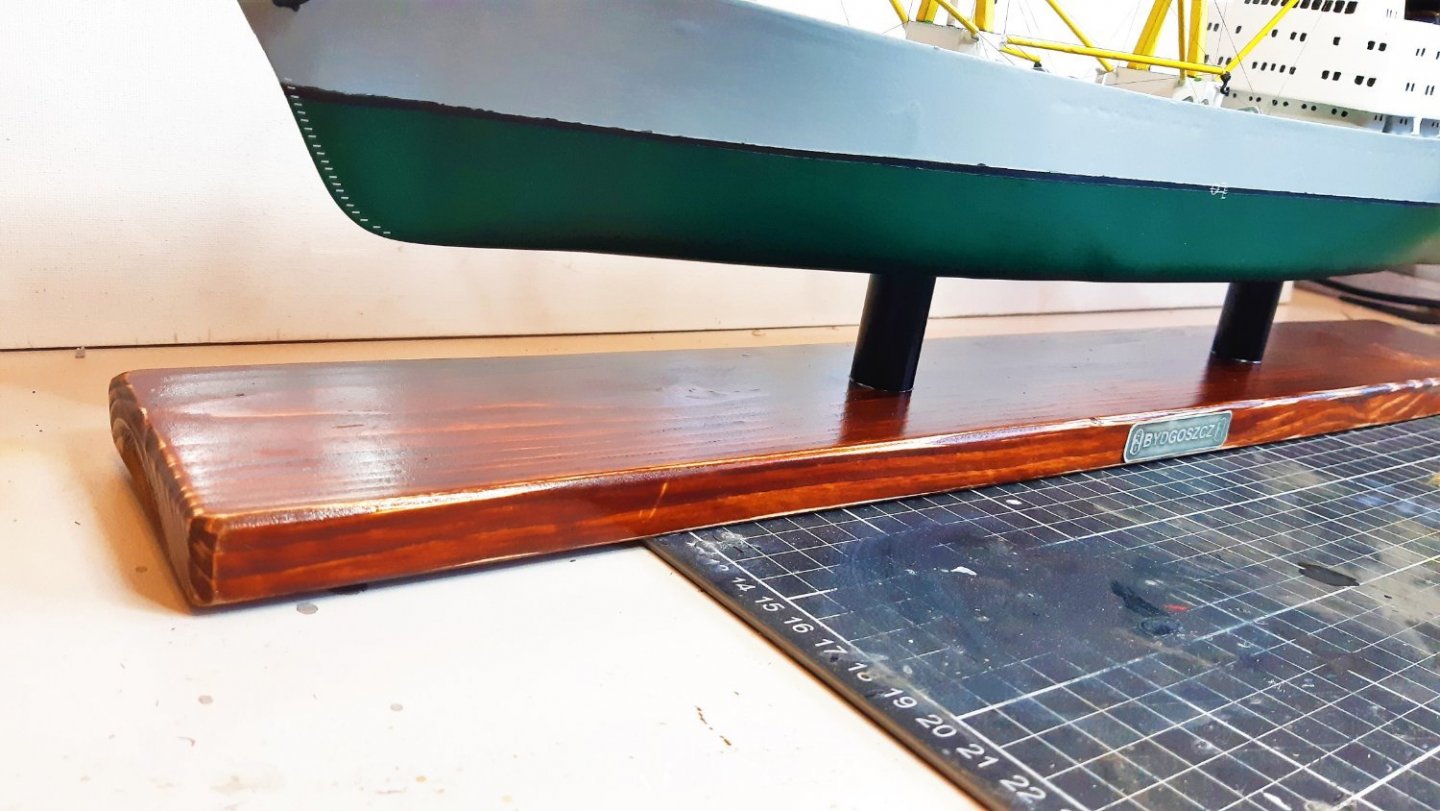
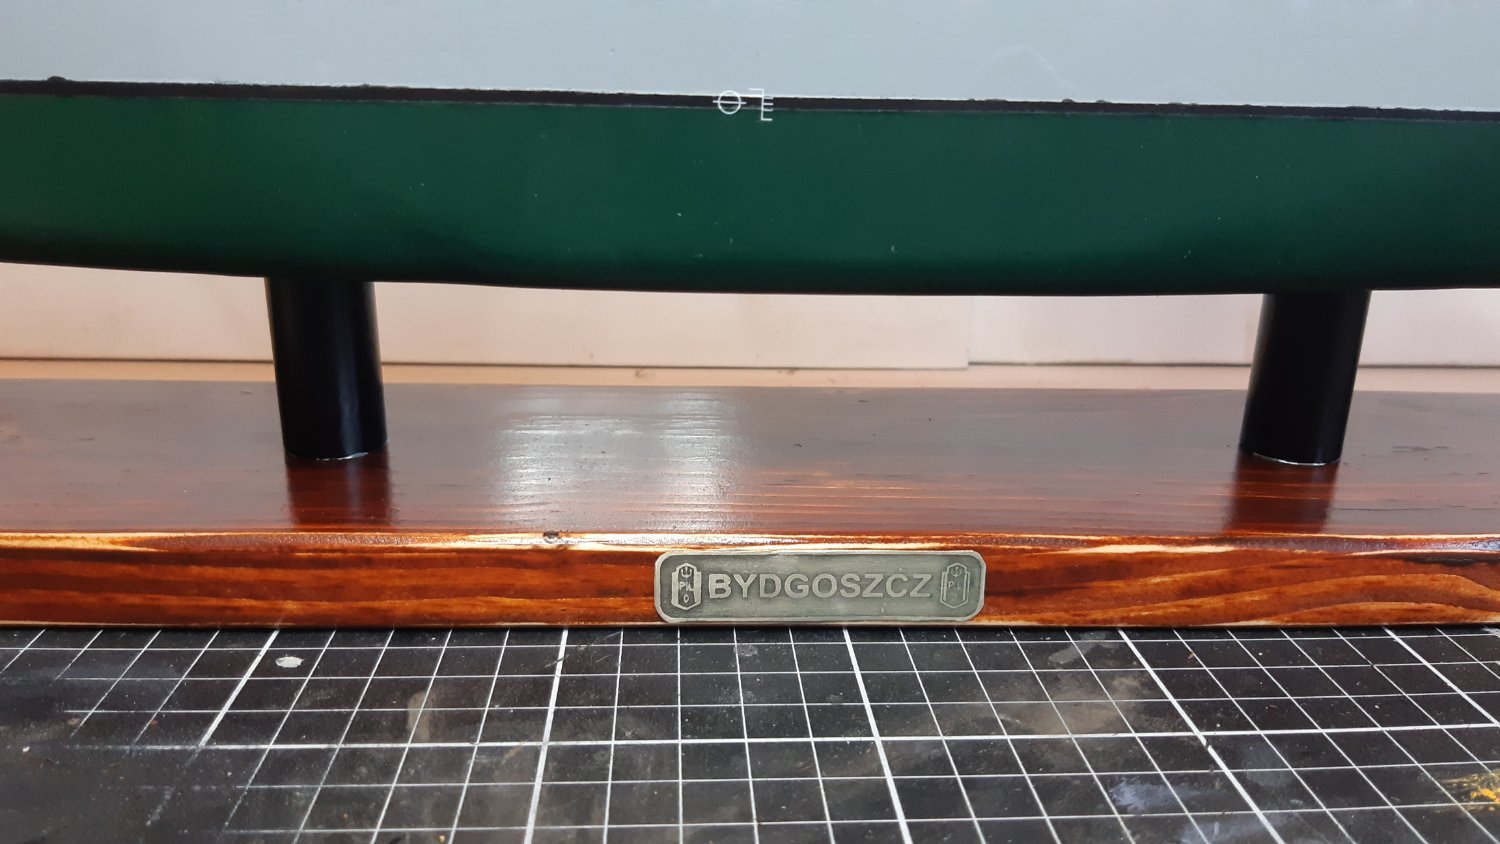
I finished the stand yesterday. It's made of pinewood, pickled with mahogany coloured stain. The nameplate is photoetched from nickel silver (it was made at home, so not perfect quality). The ships rests on two (20 mm diameter) brass tubes painted black.
The ship is finished at the moment, because I have to wait for the remaining photo etched parts (railings, etc.)

The full view
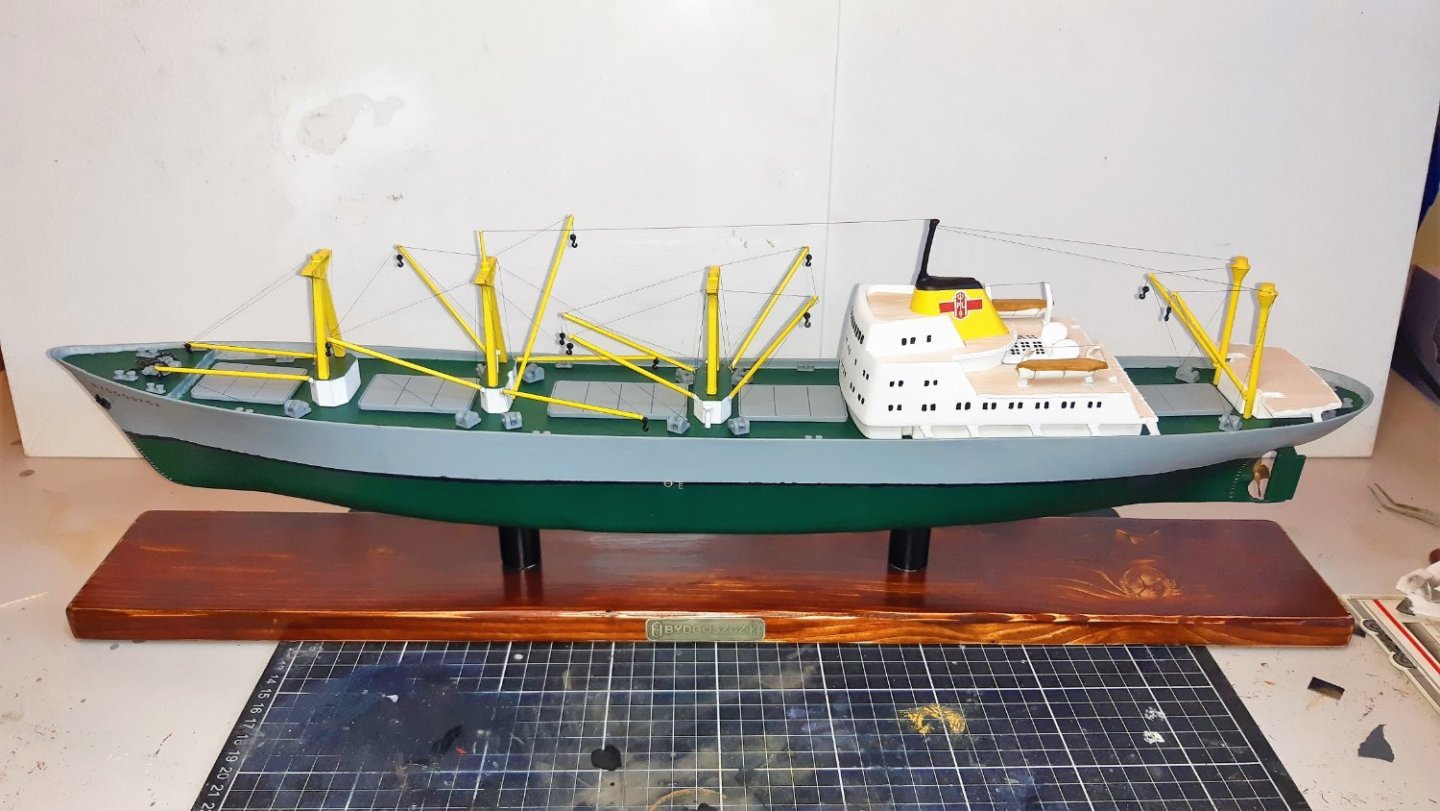
The ship at it's final place on the shelf

-
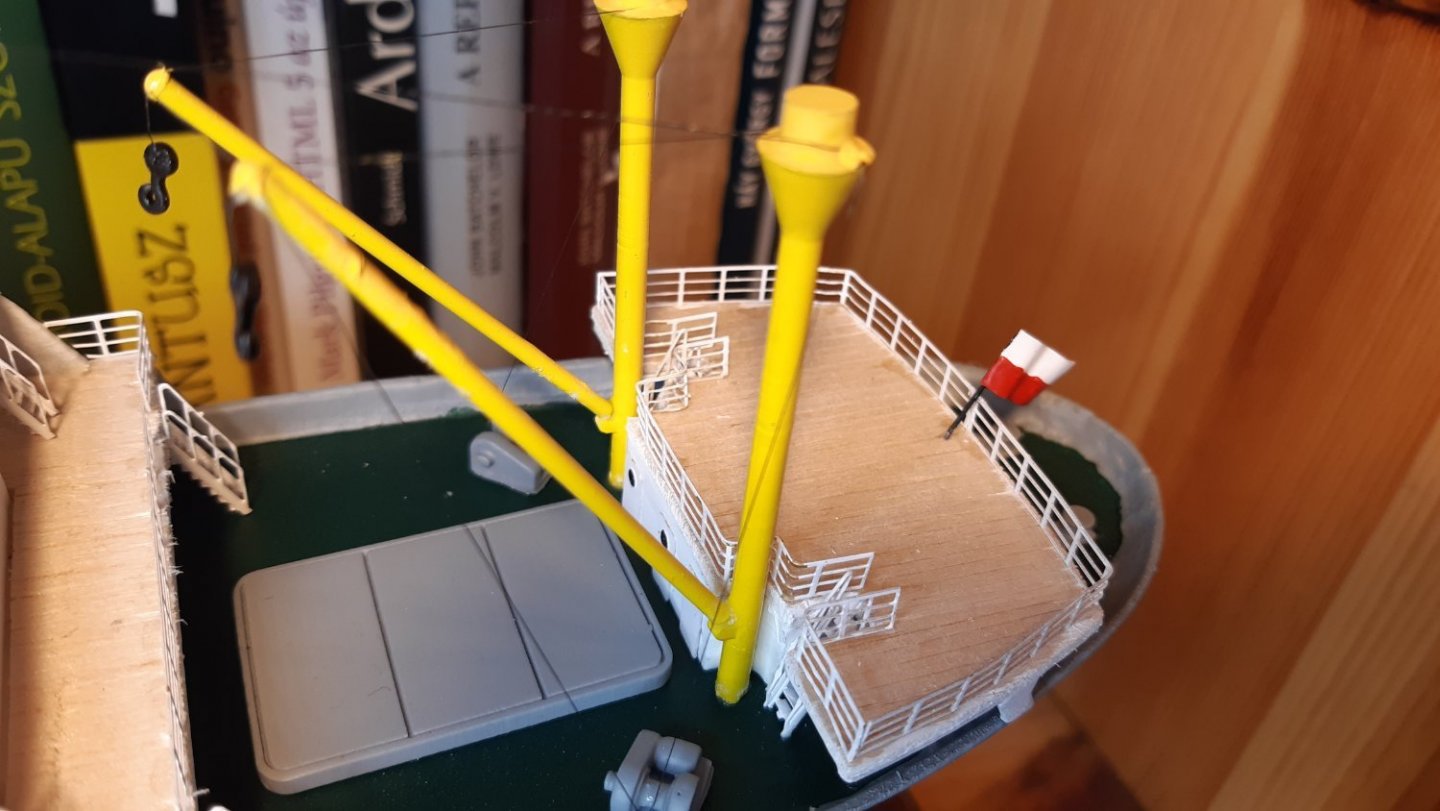
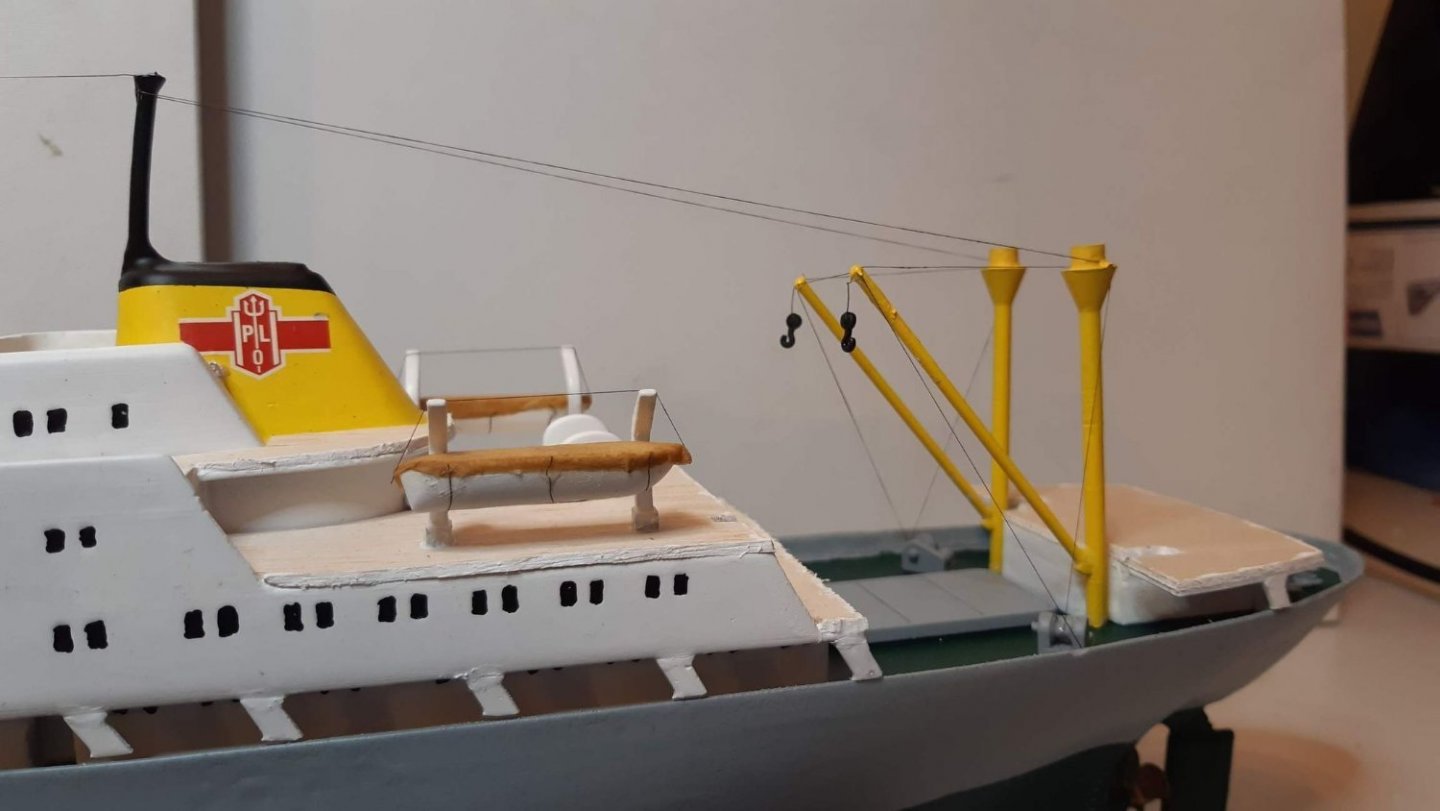
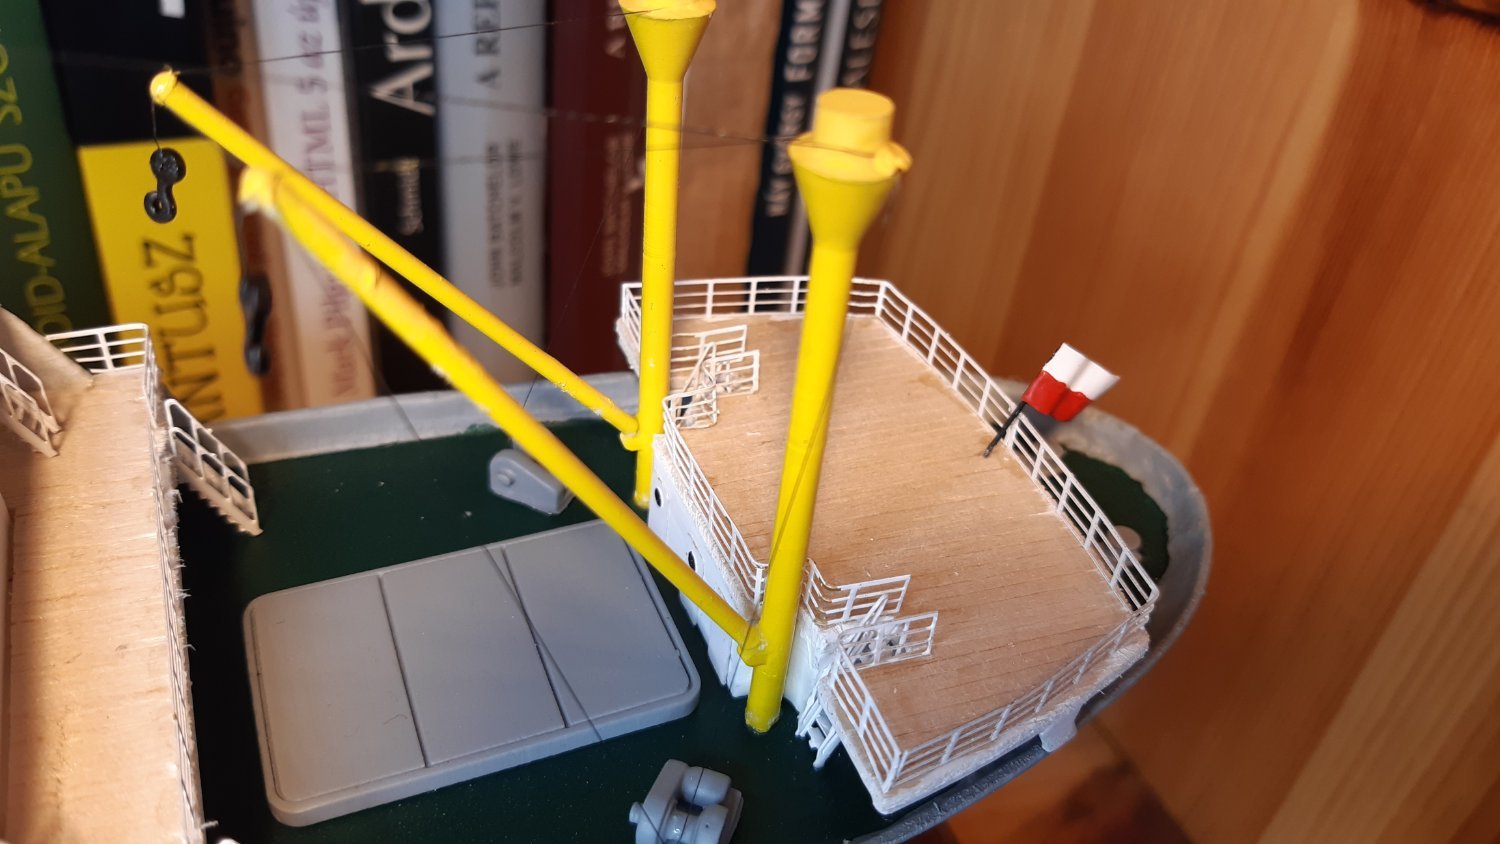
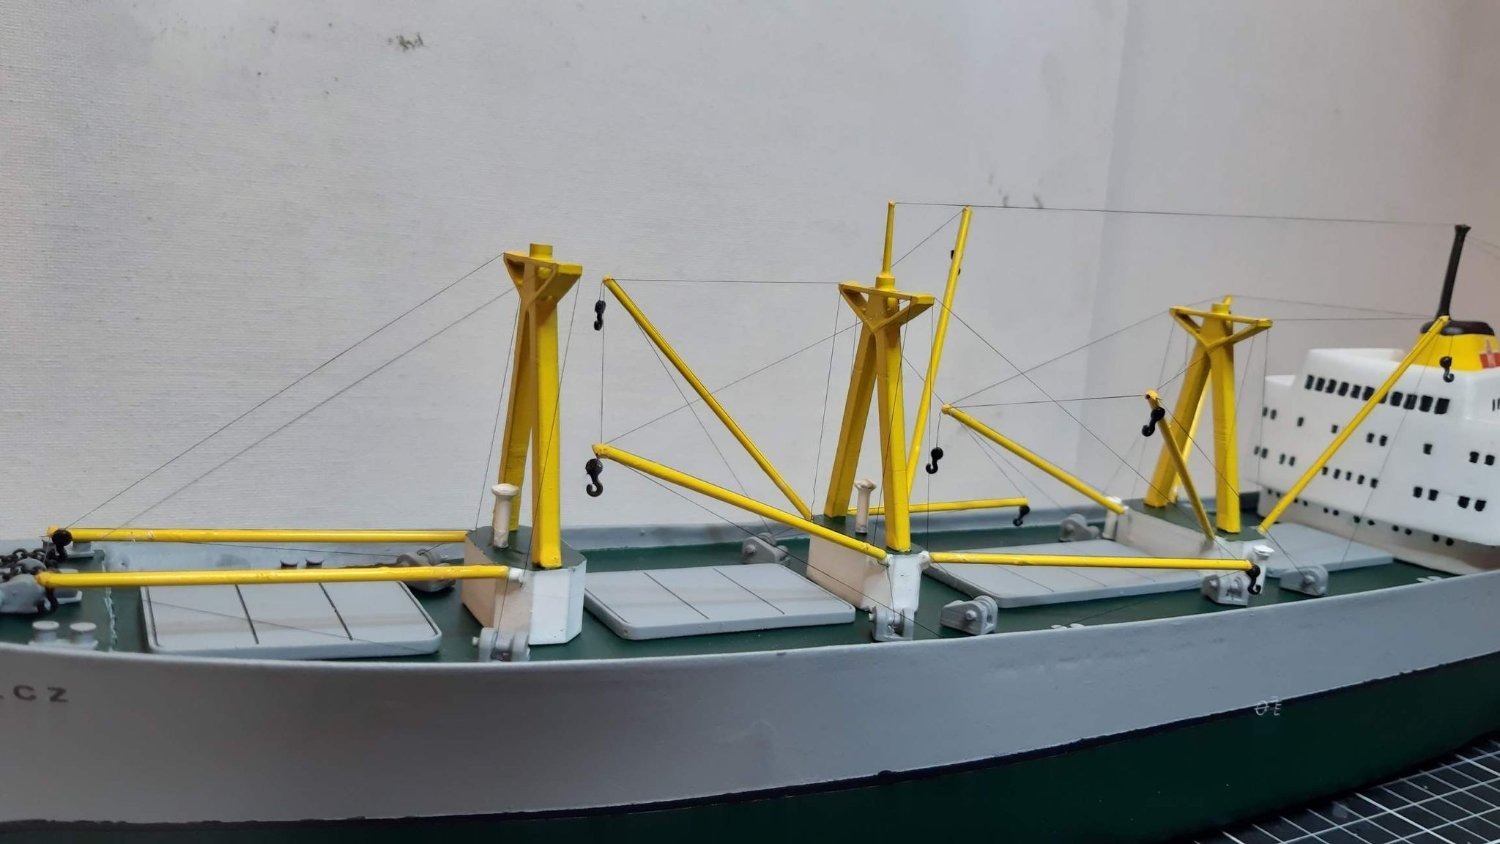
The finished rigging. I also added crane hooks.

- GrandpaPhil, mtaylor, gieb8688 and 2 others
-
 5
5
-
8 hours ago, KeithAug said:
Arctic - it would be good to know more about this please?
It's nothing special. The ship needs a lot of doors, railings, ladders, and stairs, which is cheaper to make "at home", than buy kits at a hobby-store.
First I design the parts in the 3D software
Then I create the graphic of the etching film in a vectorgraphics program
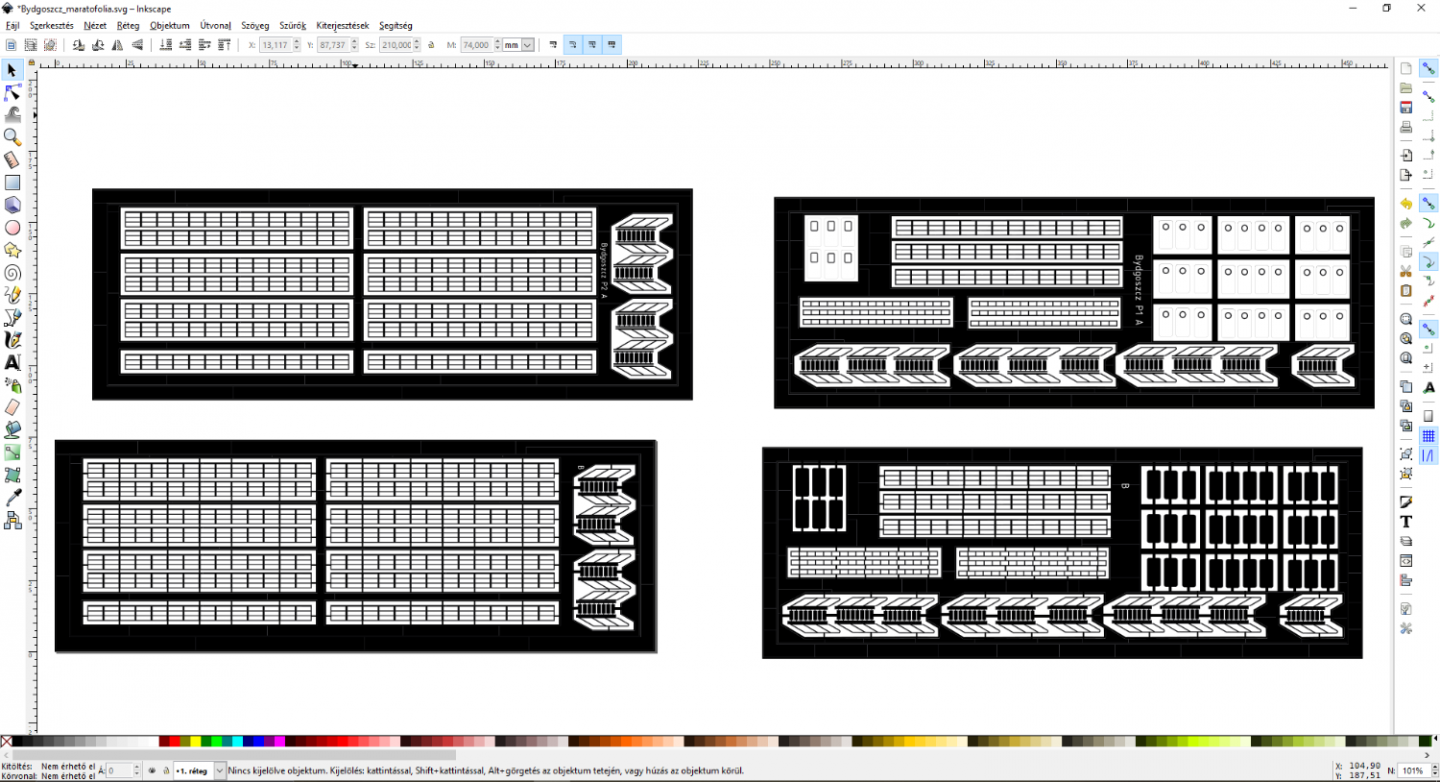
Finally I send the drawing to a company for photo-etching.
But hopefully in a few weeks I will be able to make photoetched parts at home, even more cheaper and faster, than with a company. I had quite a long disruption with the previous supplier, and took a long time to find the current one. Also making it at home have much shorter turnaround time, than with an external supply (few days, vs few weeks)
Feel free to ask, if you have other questions.- KeithAug, mtaylor, GrandpaPhil and 1 other
-
4
-
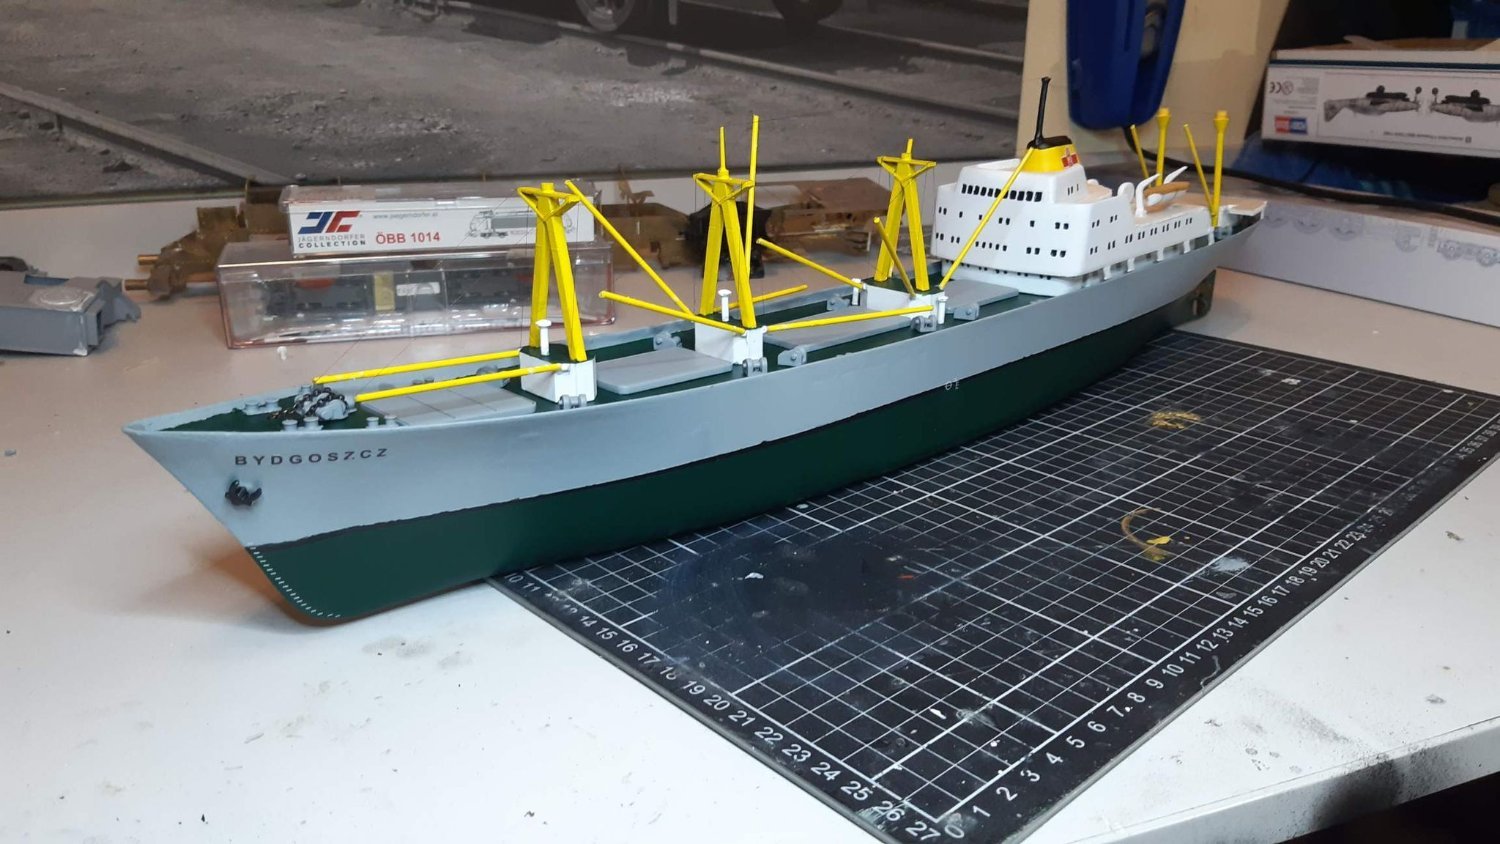
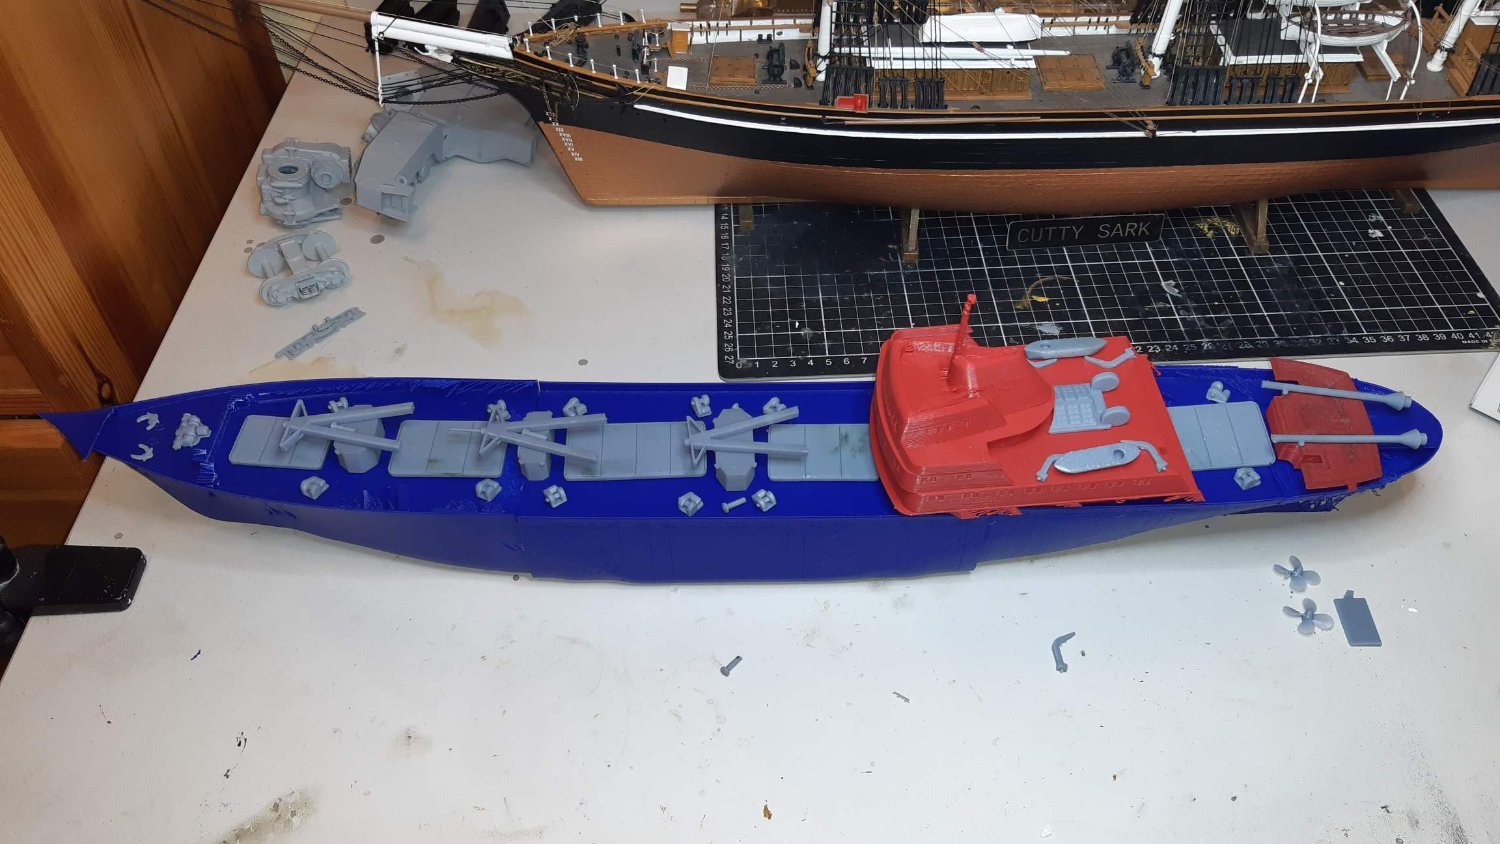
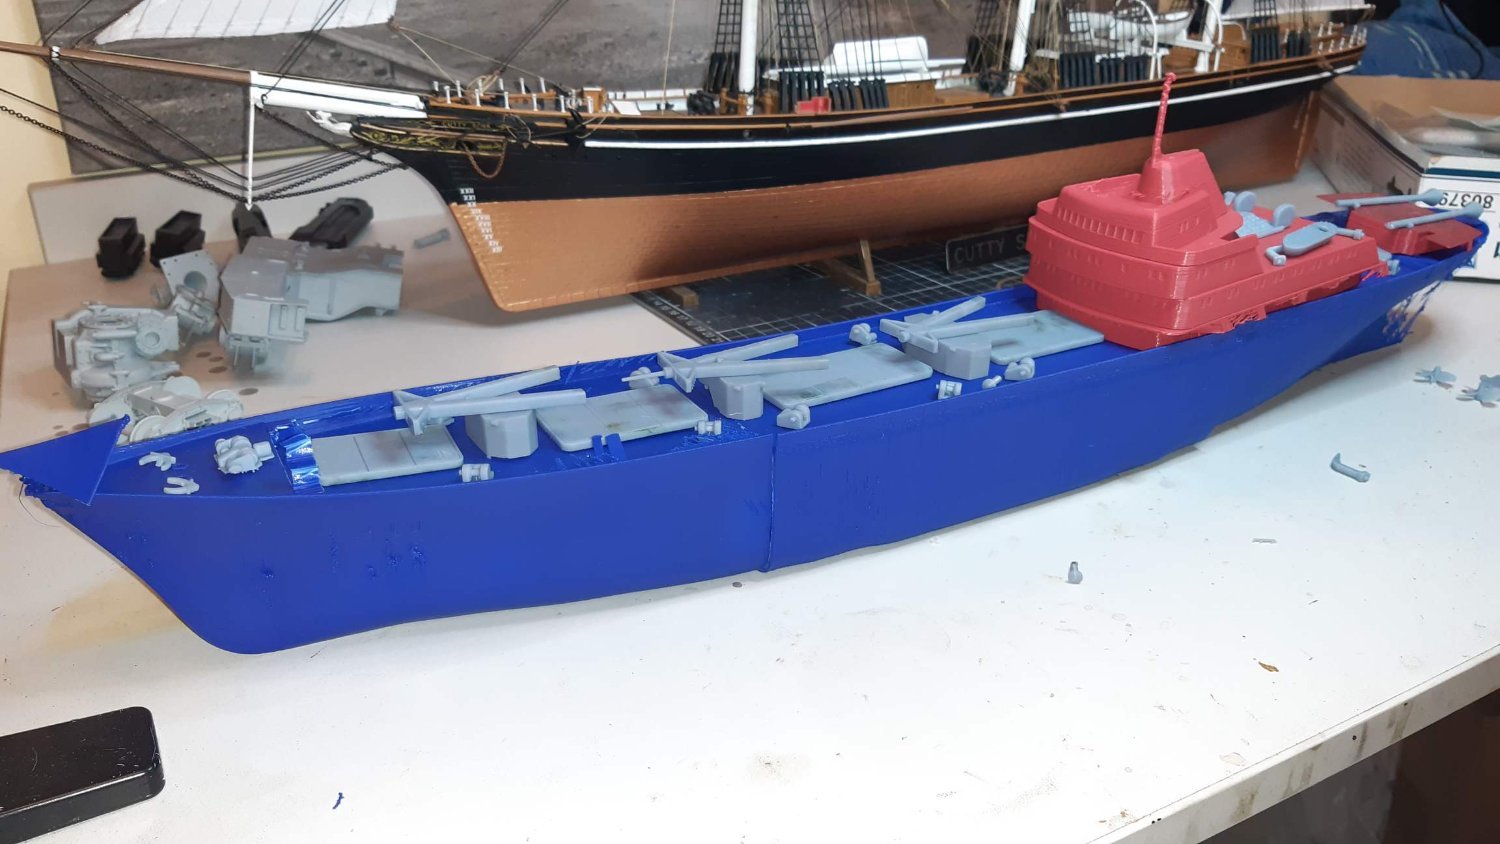
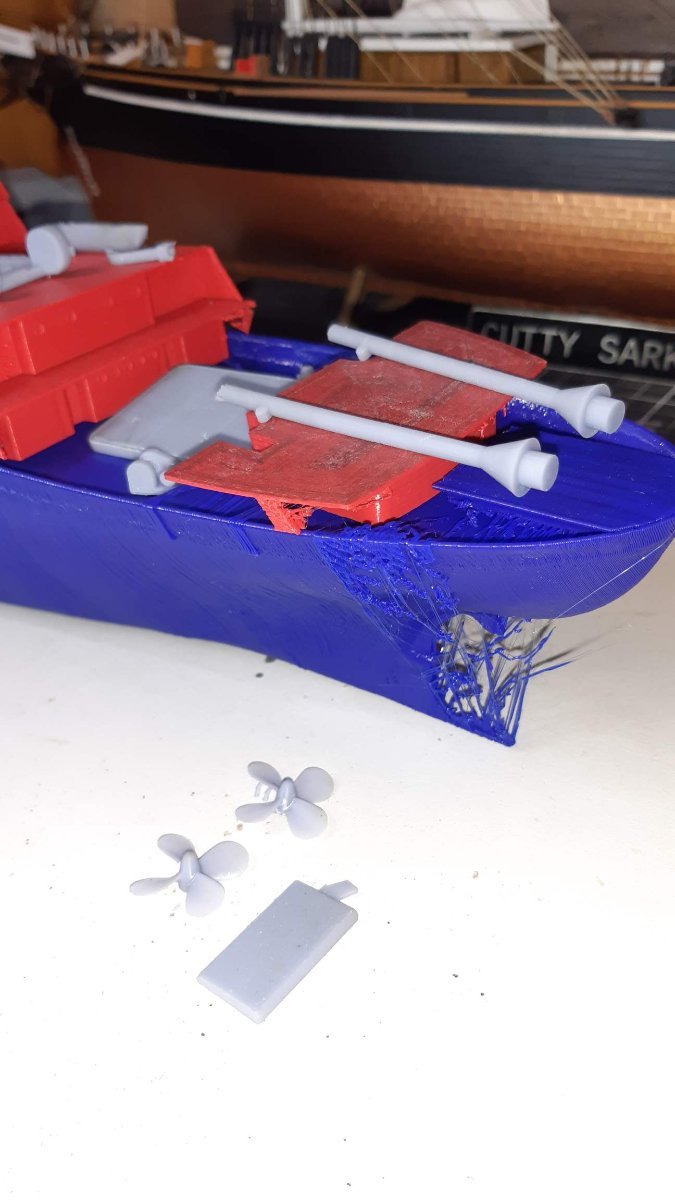
I finished assembling the ship, and put on the cranes. There is some rigging remaining (crane and hook control wires), which I could do at the moment.
Right now I'm waiting for my photoetch order to get to me (it's not an off-the-shelf kit of railings, stairs and ladders, cuz those were quite expensive, but a custom made kit after my design). After that I can finish the ship, and put it on stands (which are also being made at the moment)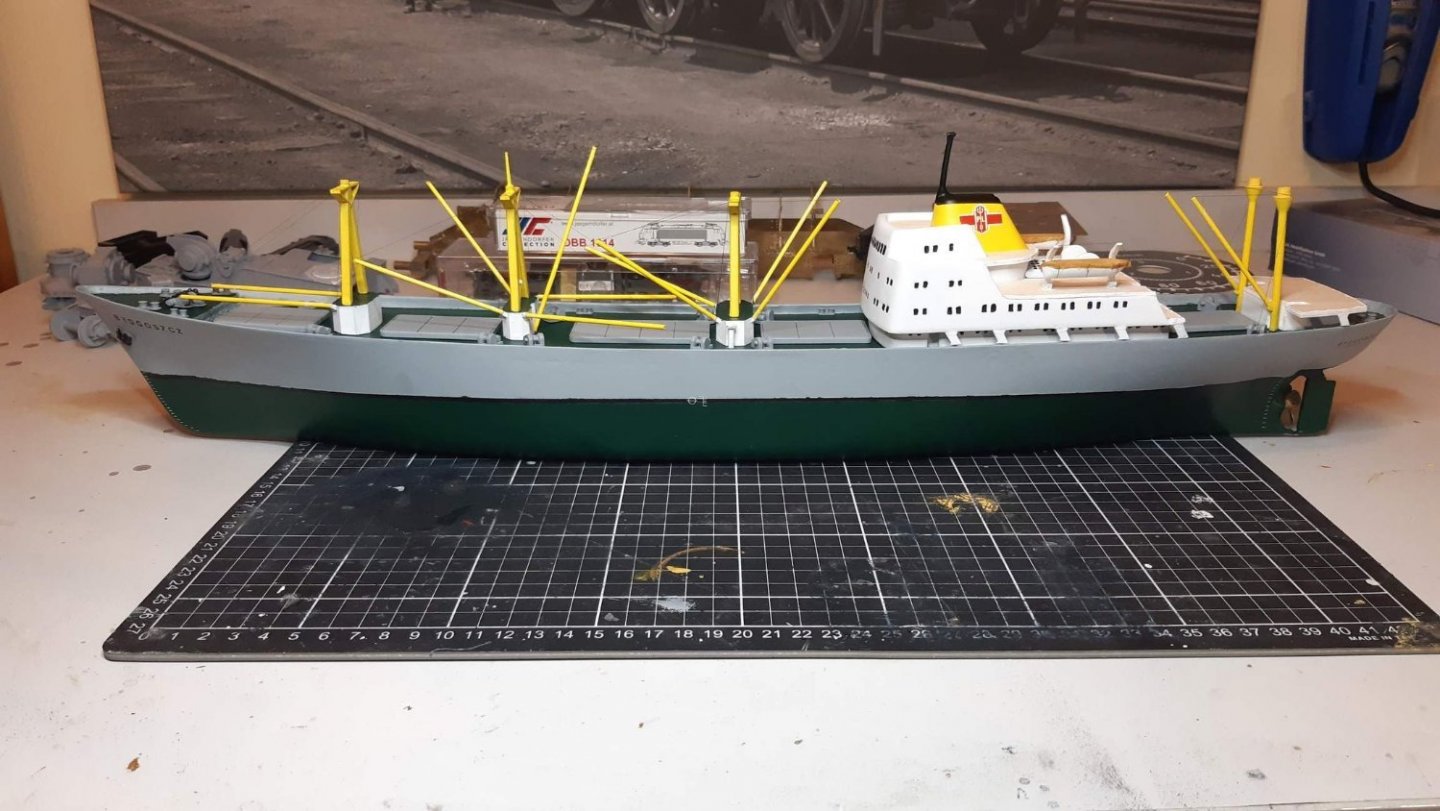

-
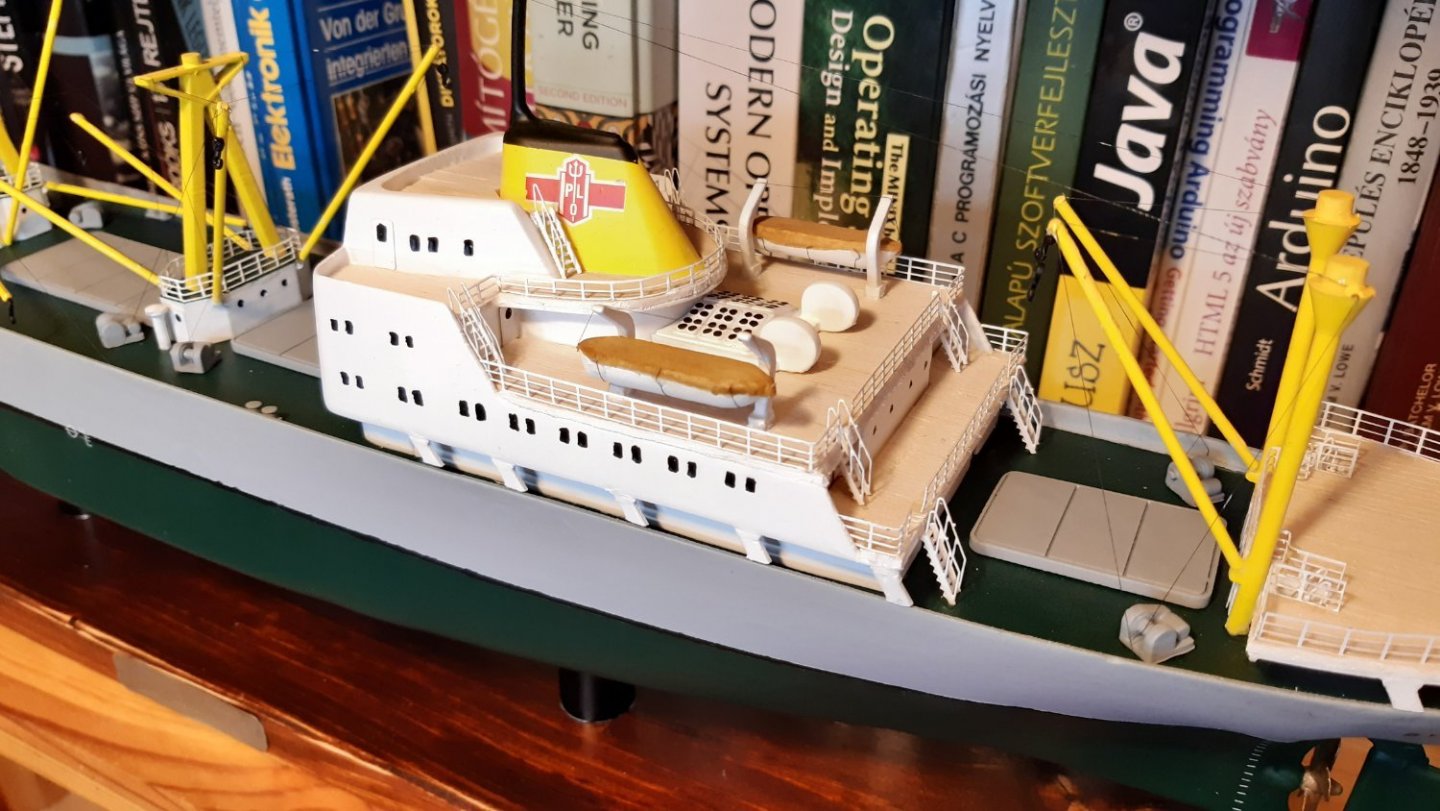
Painting is ready, decals are applied (custom made waterslide), and I put wooden deck on the superstructure (1 mm balsa).
Now it's time to glue the remaining parts together.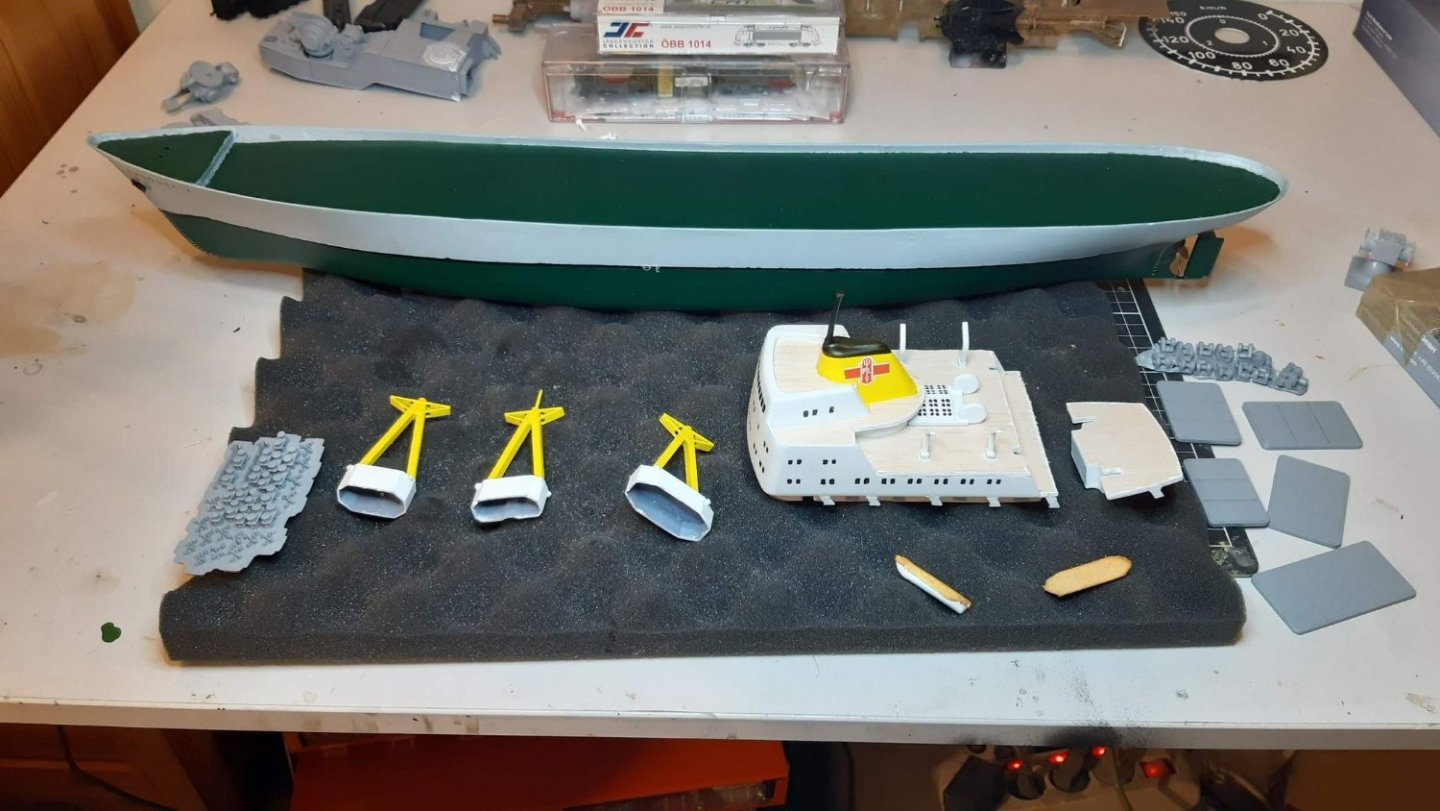
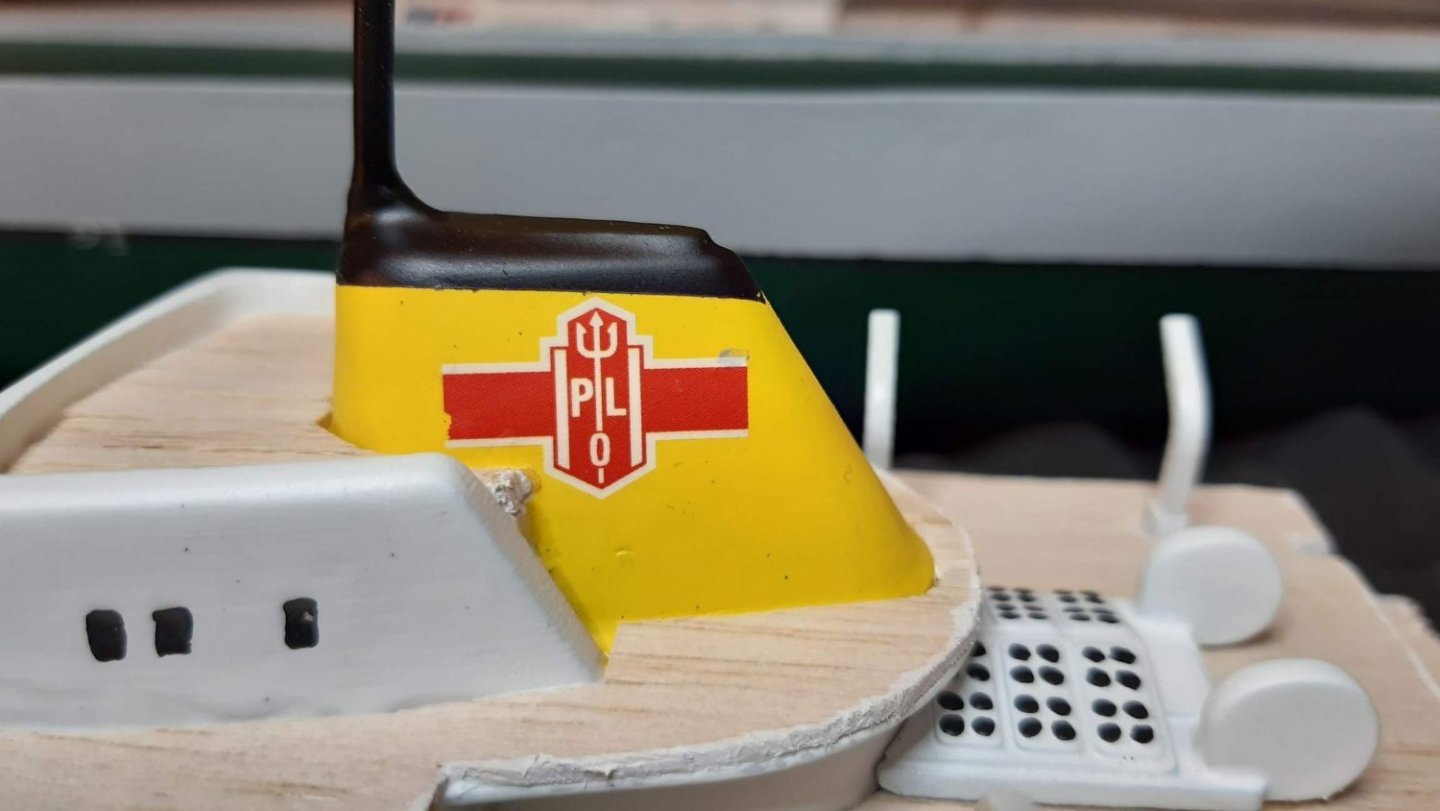
Logo of Polskie Linie Oceaniczne from decal
- mtaylor, GrandpaPhil, Veszett Roka and 4 others
-
7
-
My "professional" waterline marker

- GrandpaPhil, yvesvidal, Wintergreen and 3 others
-
5
-
 1
1
-
On 1/24/2022 at 10:24 PM, KeithAug said:
Whatever happened to those beautifully elegant cargo vessels, alas their modern replacements have all the elegance of a floating brick. At least modellers can record their passing.
Economy-of-scale happened, though I think bulk carriers and tankers could be considered somewhat elegant (or at least impressive)
-
-
-
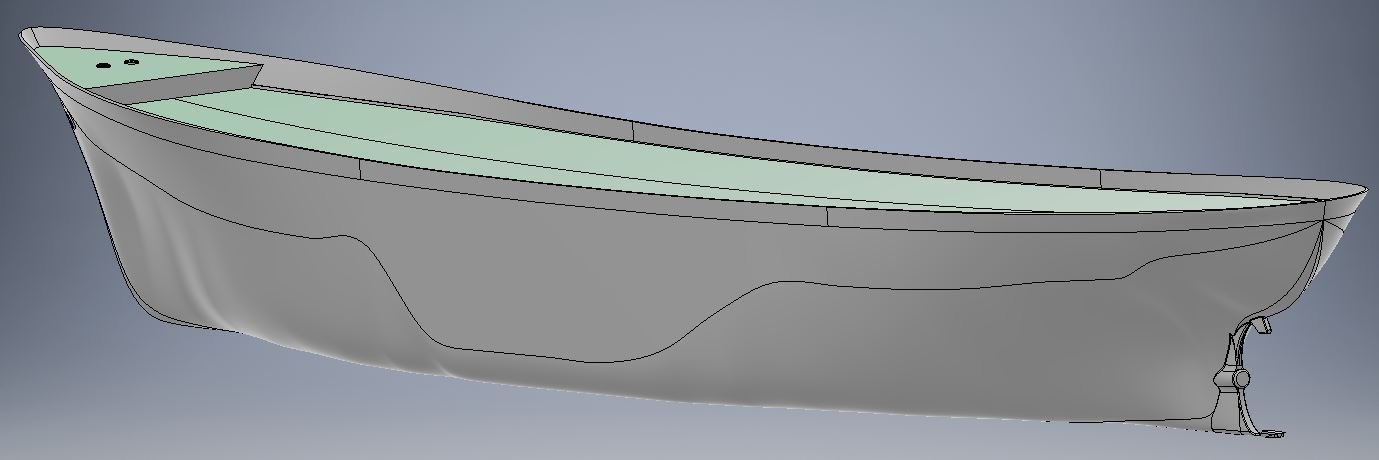
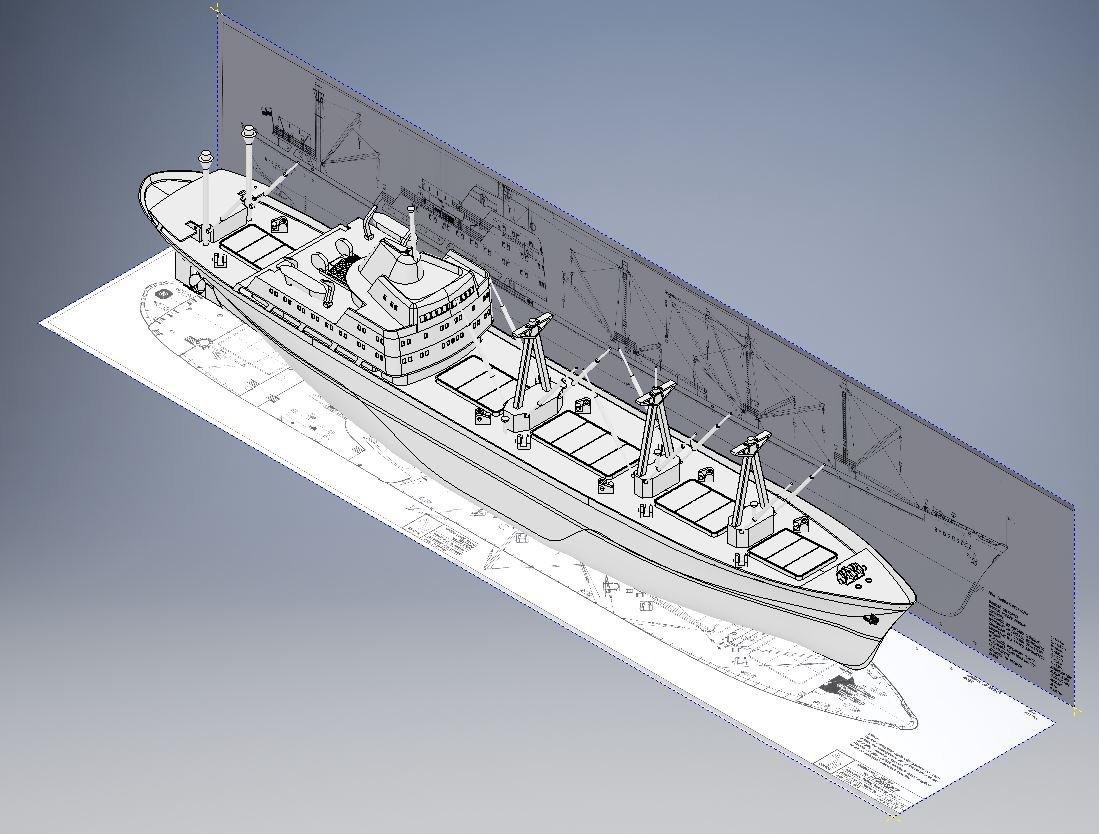
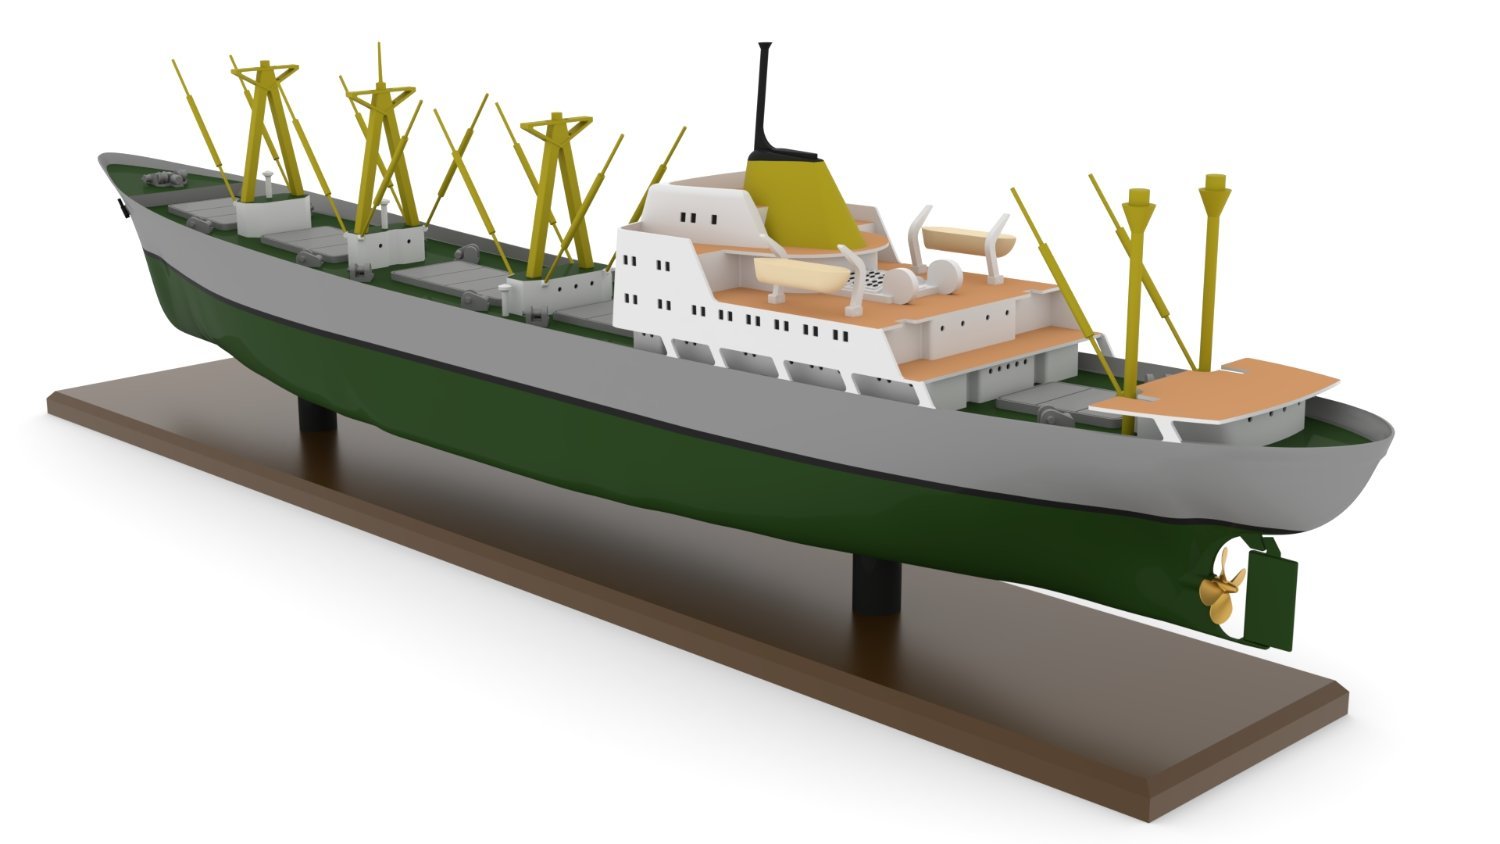
After finishing the Cutty Sark, I tought I should build something easier and modern. Since there aren't any large scale cargo ships I tought it would be a great opportunity to polish my CAD knowledge (I already have several hundred hours with designing train models, but never done a ship), so decided on scratchbuilding with CAD and 3D printing.
On http://freeshipplans.com/ (tons of plans, usually high quality scans) I stumbled upon the plans of Bydgoszcz. It is perfect, has nice lines, high resolution scans, and the ship is simple (no bulbous bow for example). Also I have a sweetspot for polish vehicles.The Bydgoszcz was a Type B-55 general cargo ship built in 1960 for the PLO (Polskie Linie Oceaniczne) and was in use until 1983

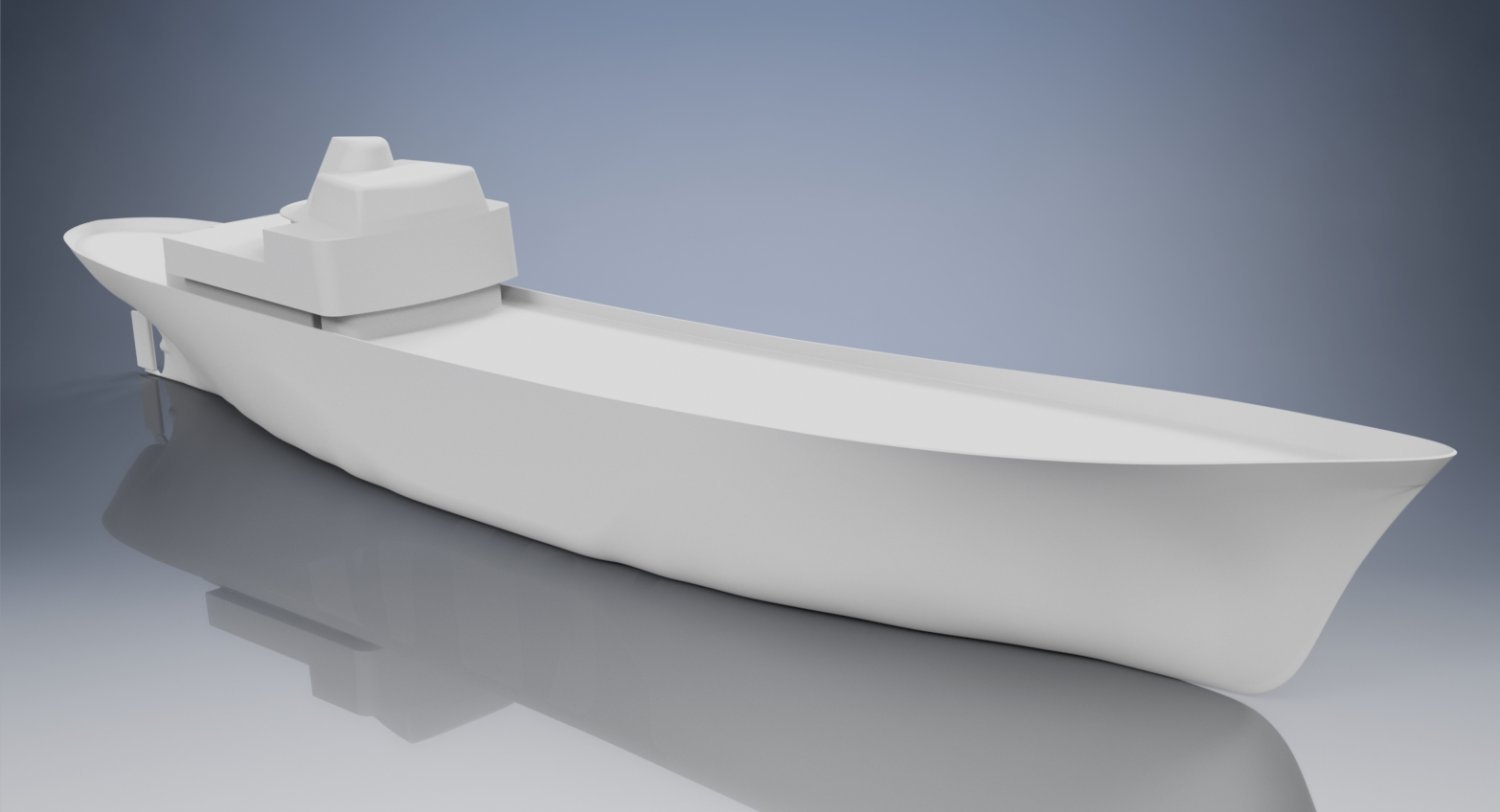
I started the modeling with drawing the lines for the ribs, deck and keel, then lofting them together to create the hull.
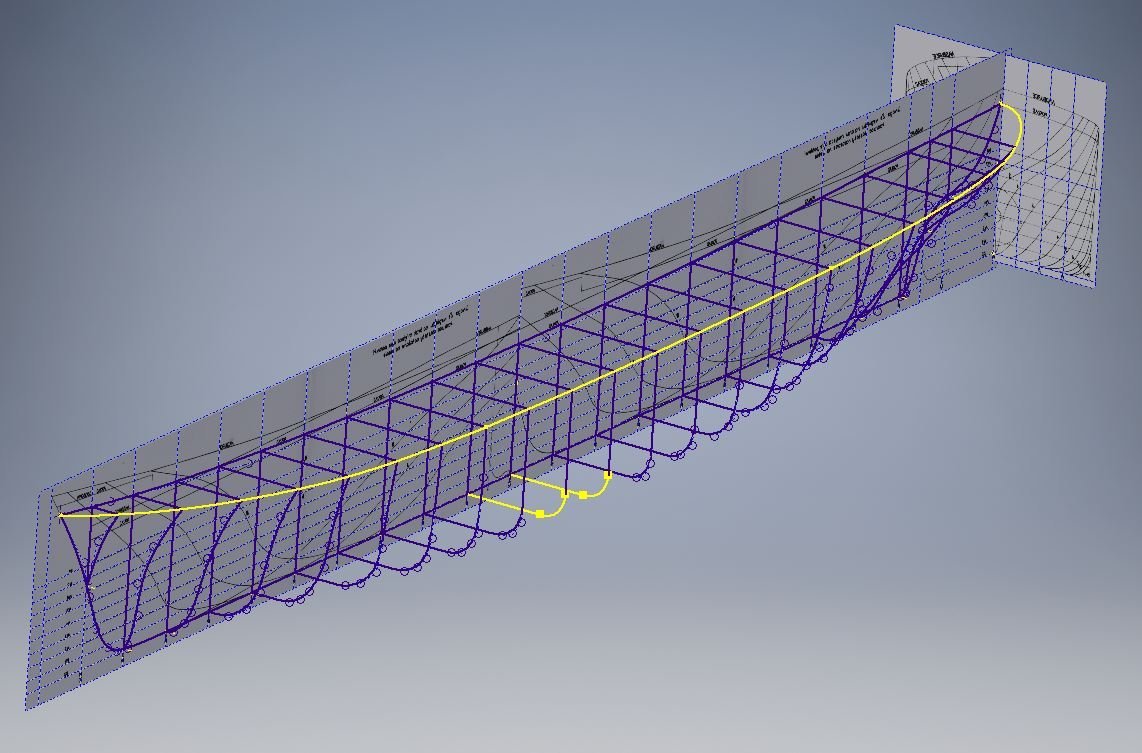
Sadly the loft feature of the Inventor is bit of a mess, and I couldn't add any more lines without an error message, so the hull isn't perfect (for the next model I will probably use Delftship, if I make myself to buy it). Also the keel extension around the propeller and rudder had to be modeled manually, because you cannot loft backwards. I will need a quite a bit of filling to correct the hull (after spending around 20 hours just to loft the hull without errors, I just got fed up with it...)
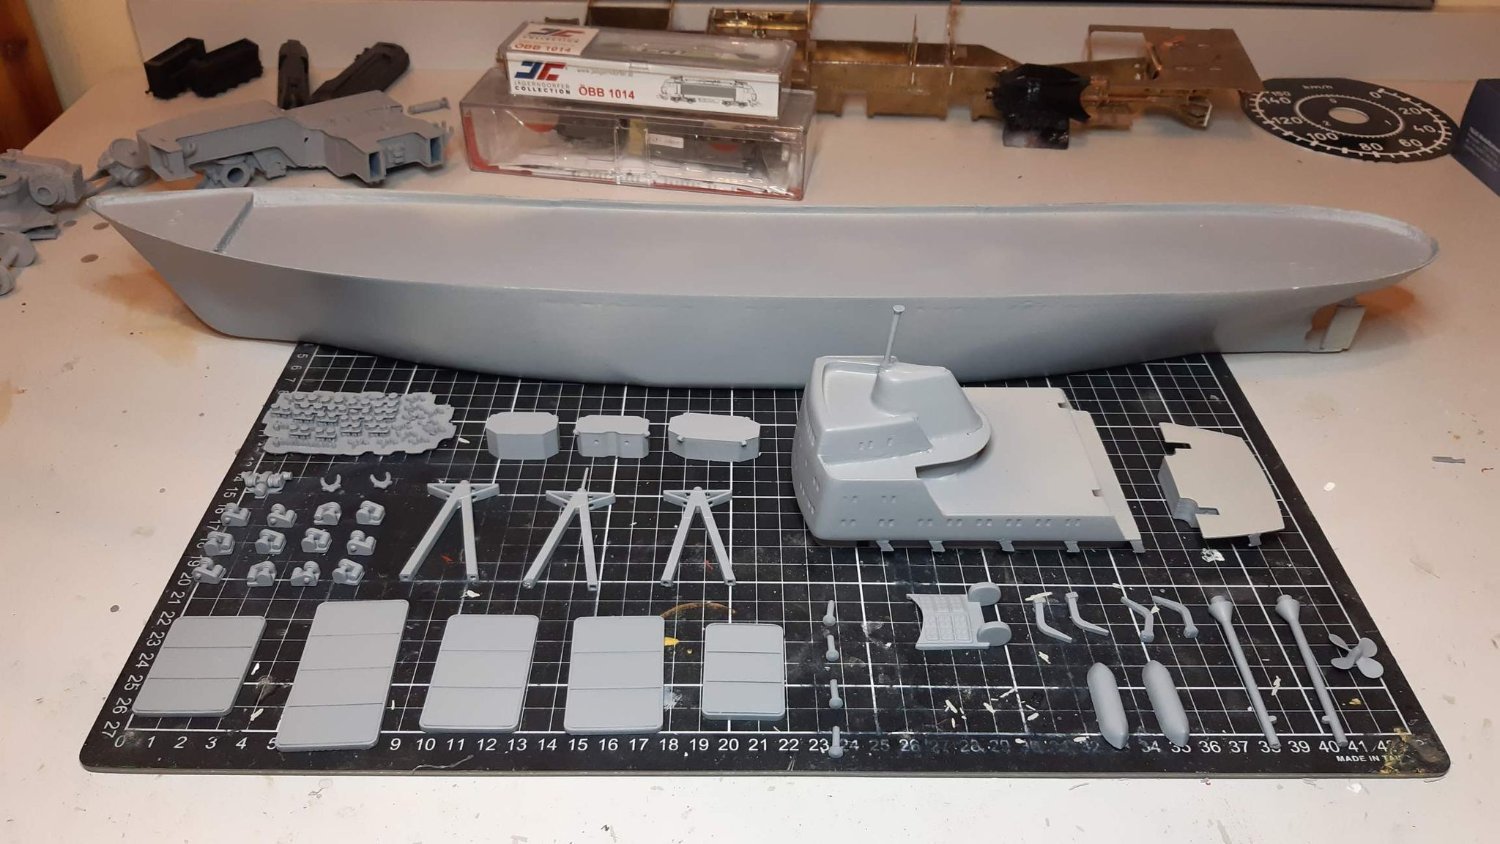
The modeling of the remaining parts went smoothly. First I modeled the remaining parts by making the rough outlines, then adding the details later.
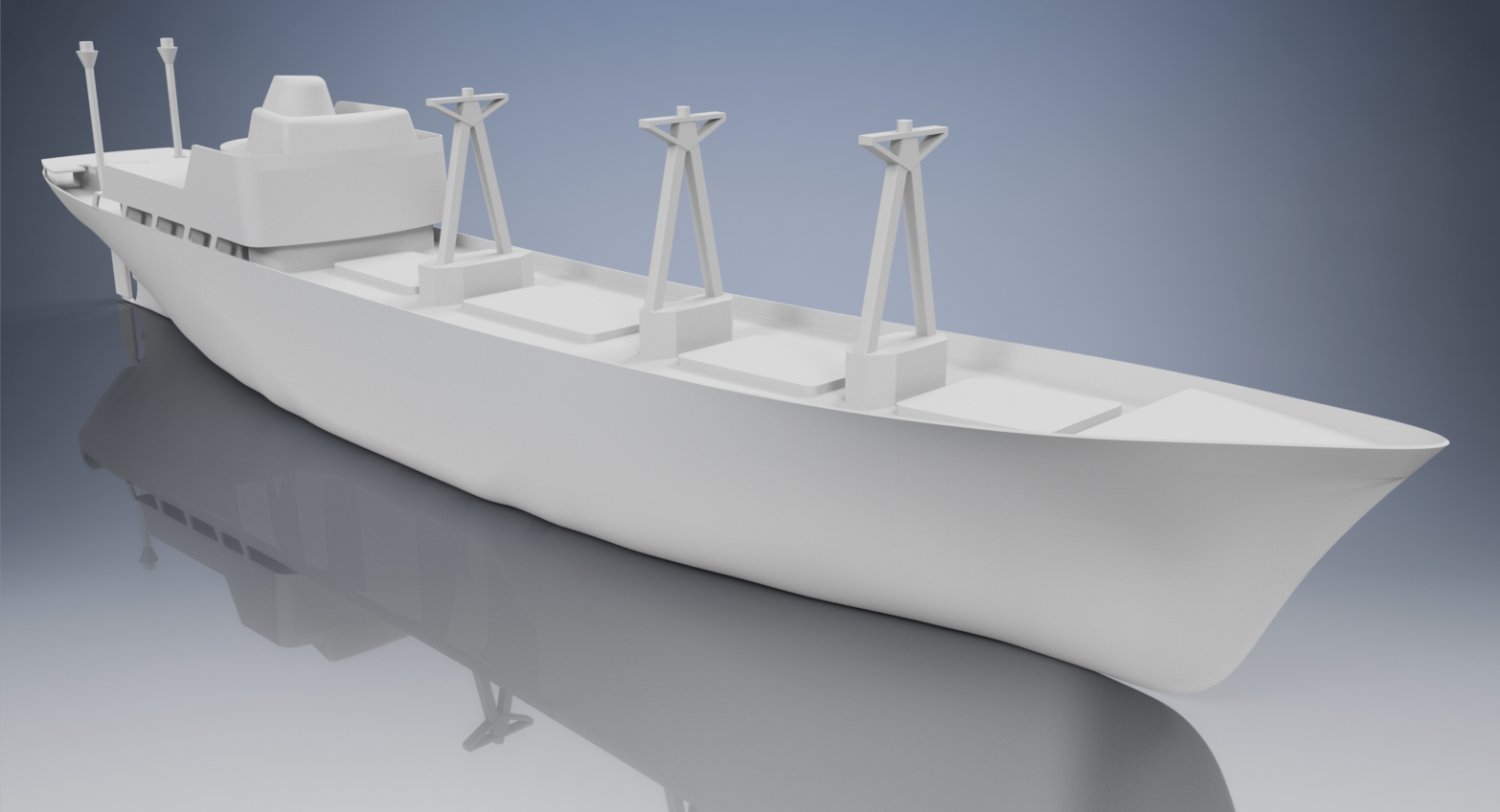
Firstly I made the superstructure
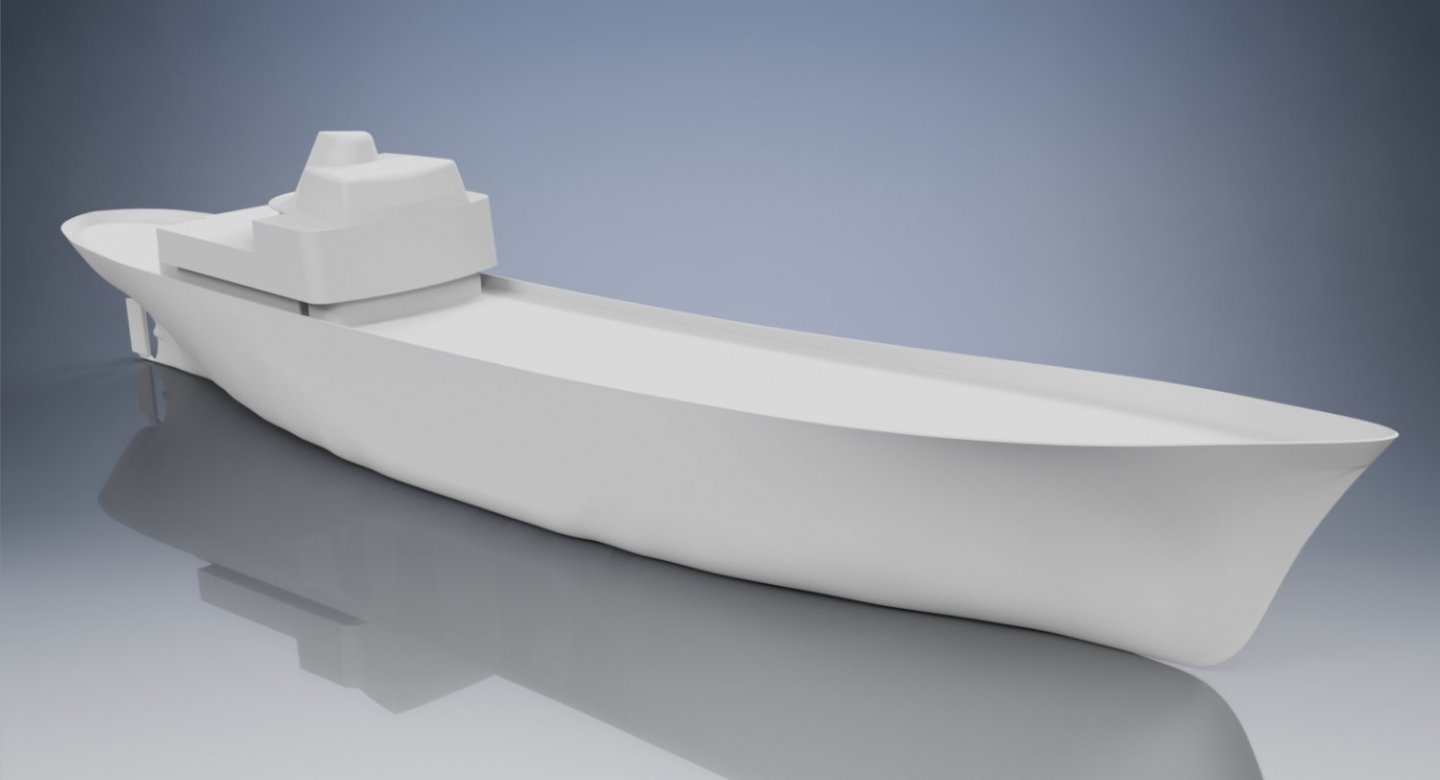
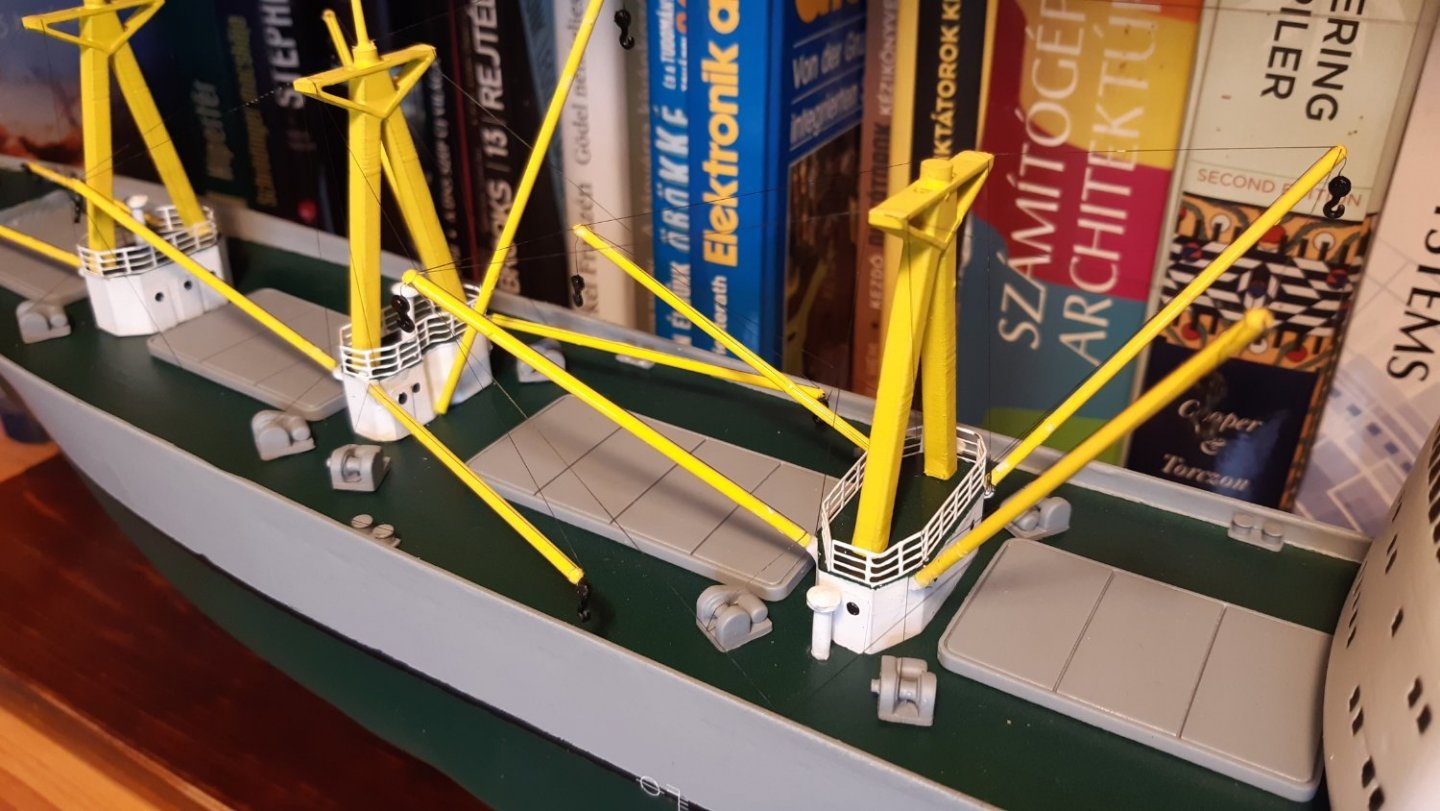
Then I continued with the cranes and loading openings (not sure if its the correct term)

Finally I added the details, like windows, rescue boats, anchor windlass, crane winches, etc...
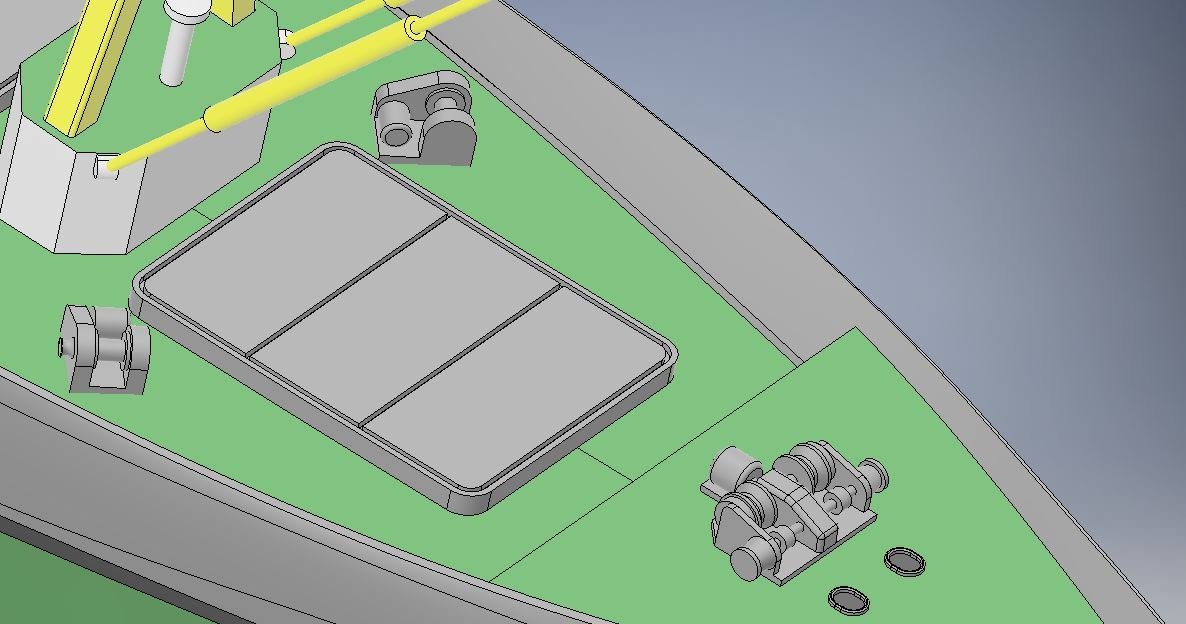

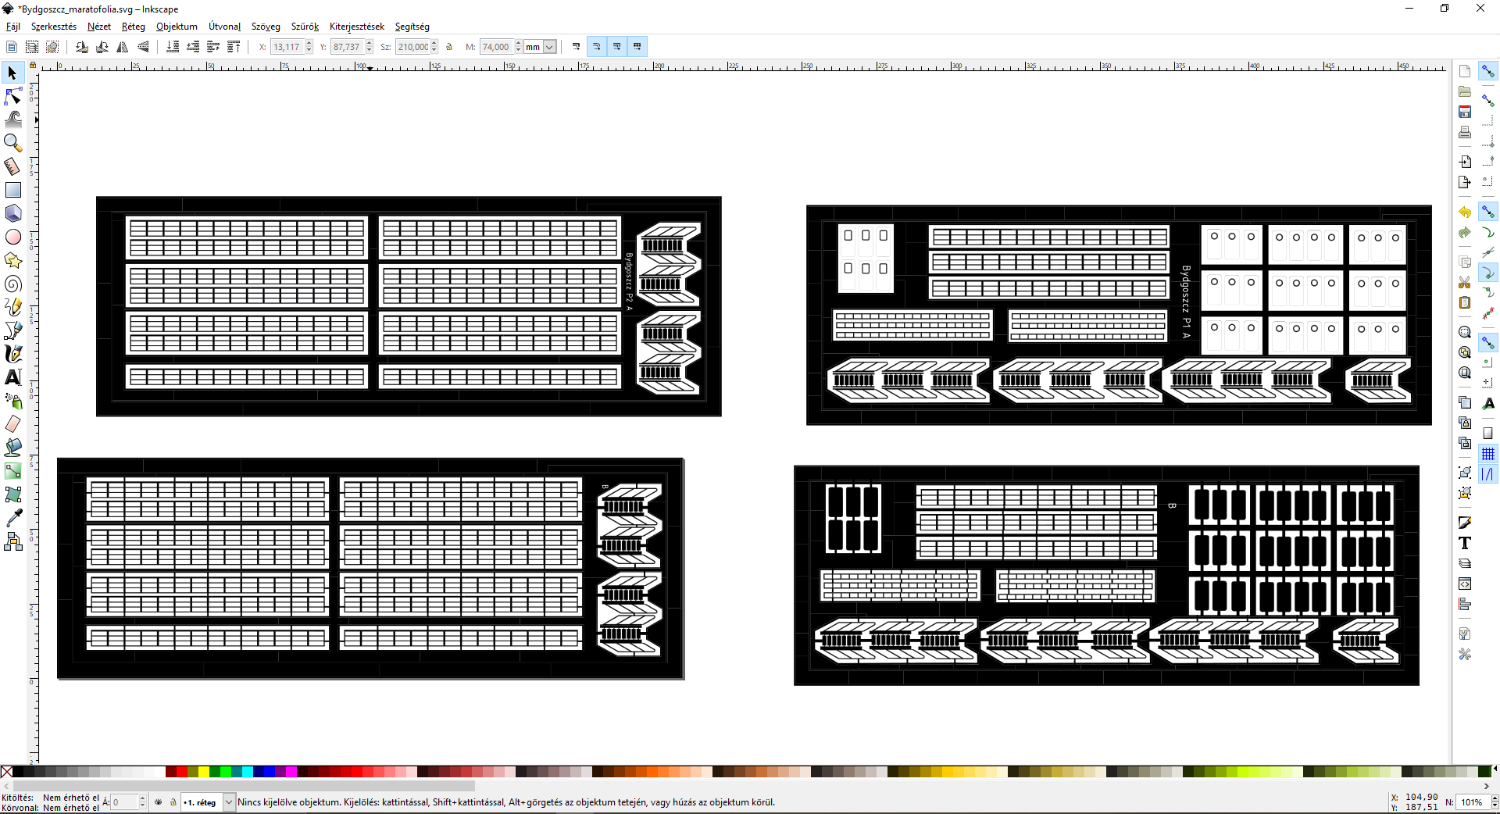
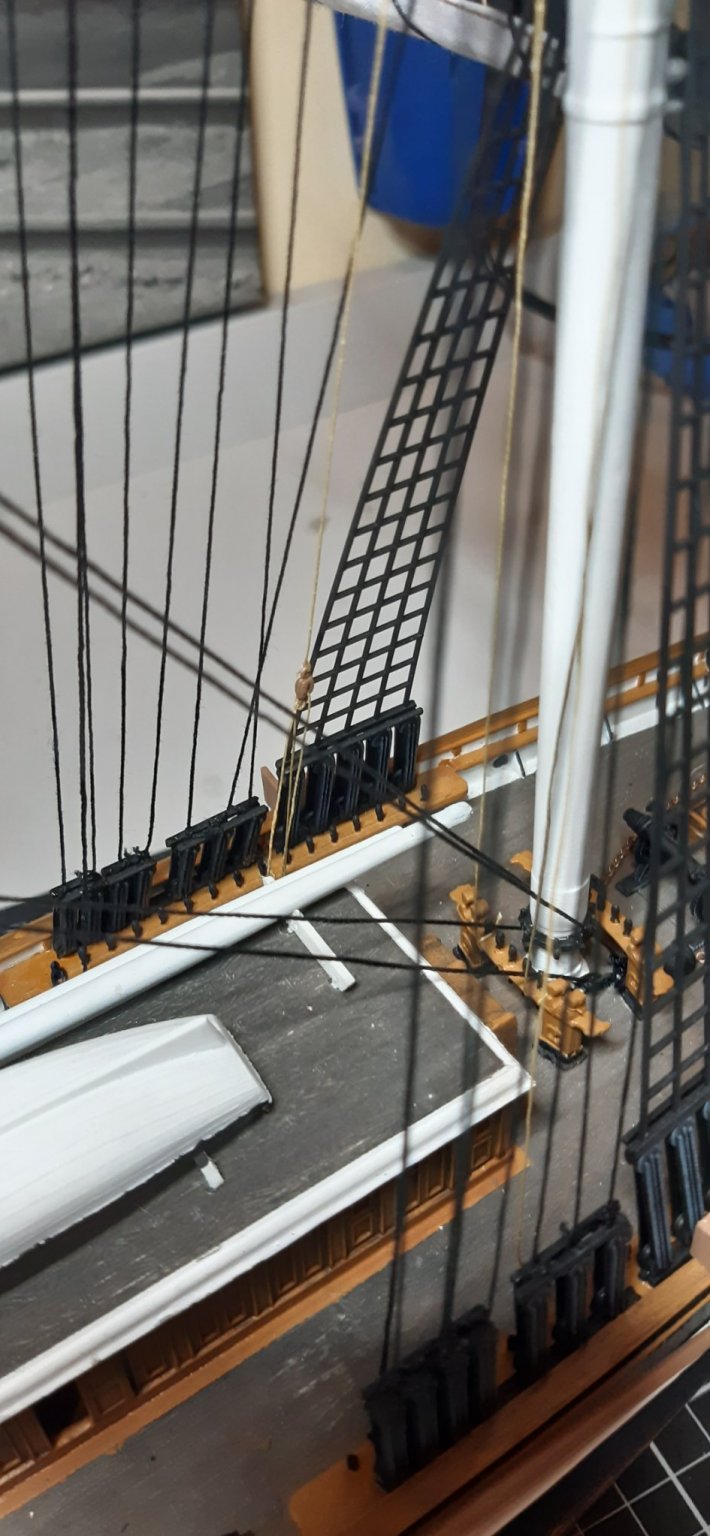
Some smaller details (stairs, doors, ladders, railings, ...) will be made from photo-etched parts. They are designed by me, but not placed in the assembly CAD-model, because mostly they need to be bent and cut to the desired shape and size by hand. This also applies for the rigging.
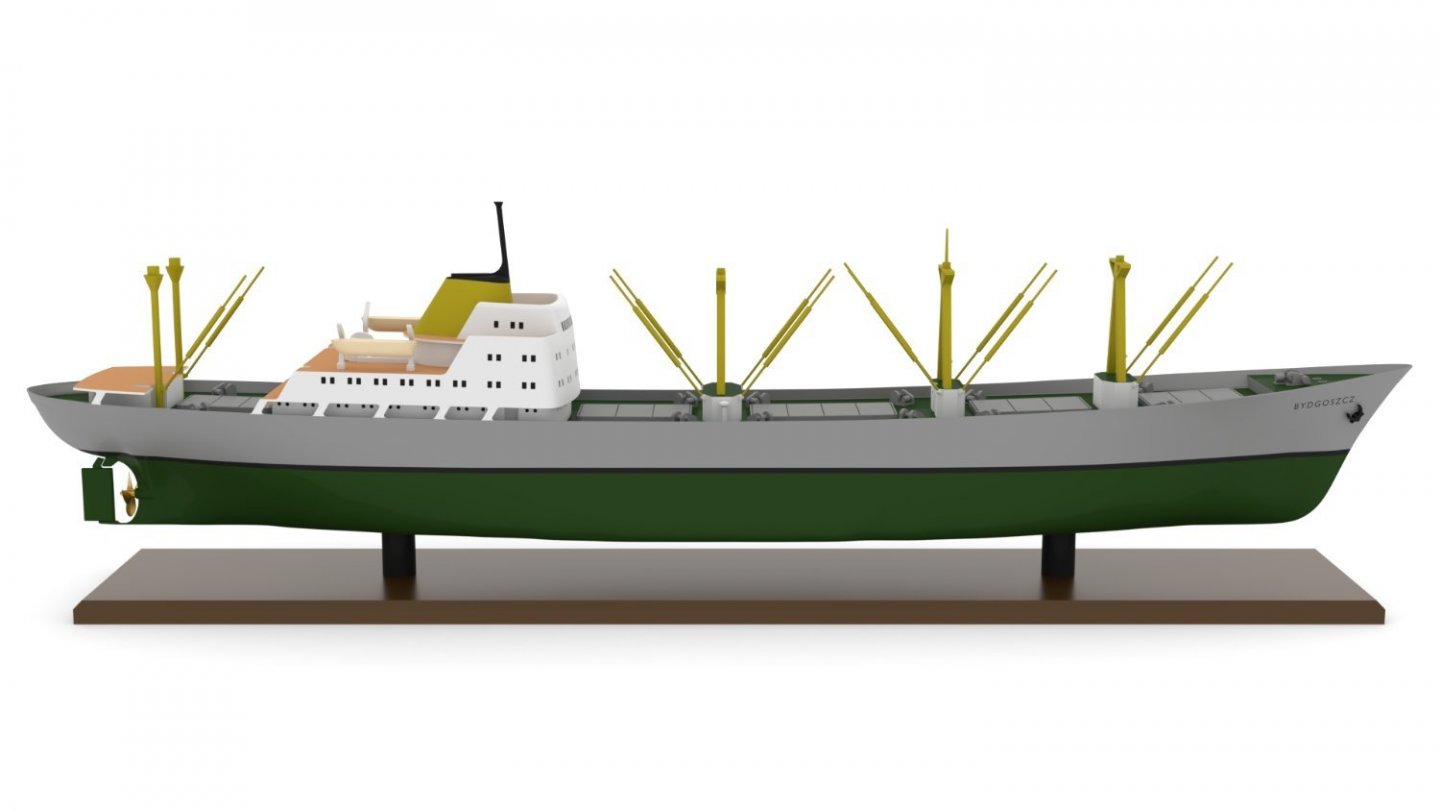
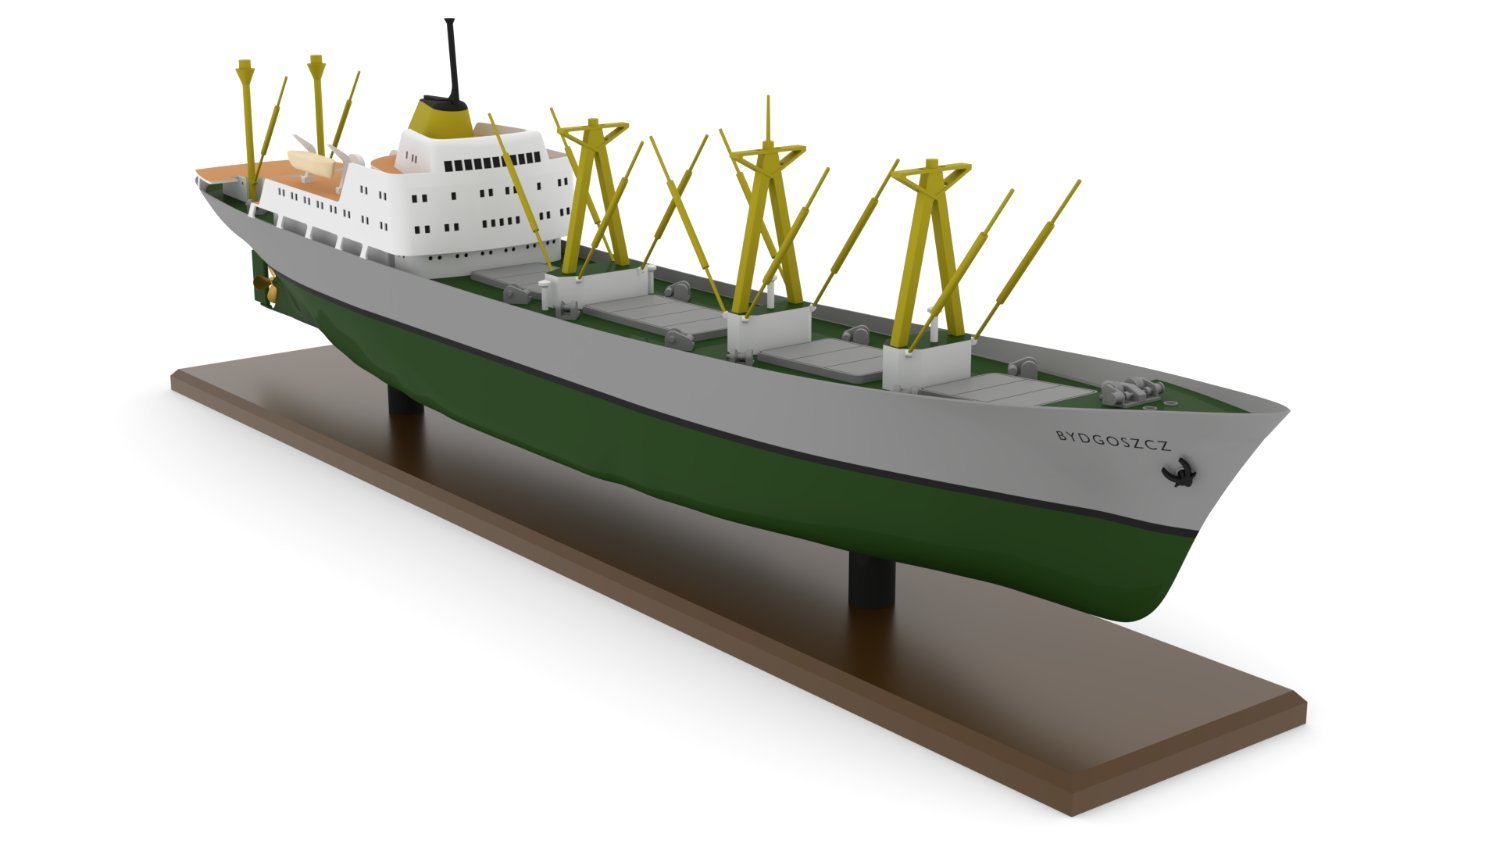
I also designed a stand for it, and with that I marked the ship model as completed,

and made a few renders in Blender just for good measure:


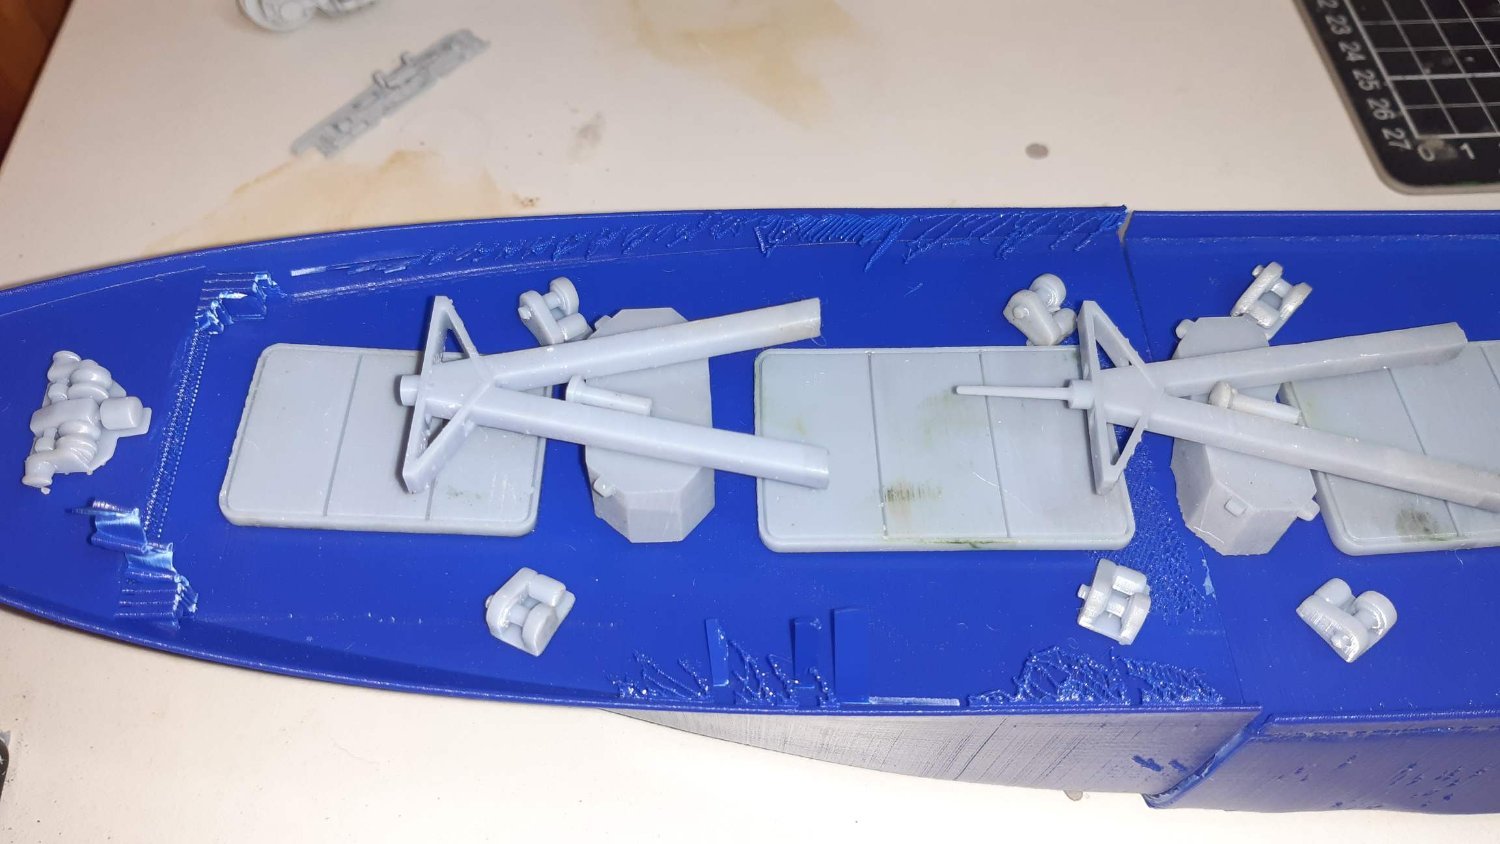
Now the parts are being made in my 3D printers (due to the size the hull and superstructure is made with FDM from PLA, but the smaller detailed parts are with DLP printer from resin), they will be ready in a few days.
Feel free to ask about the CAD process or the 3D printing, because a lot of things are self evident for me, but not for others, who are maybe not as familiar with these as I am
- bolin, yvesvidal, GrandpaPhil and 5 others
-
8
-
On 12/29/2021 at 11:13 PM, Mocko1962 said:
I may have missed in the build write up but what are the sails made of ?
Stunning by the way .. I am considering buying the kit to build ..
ian
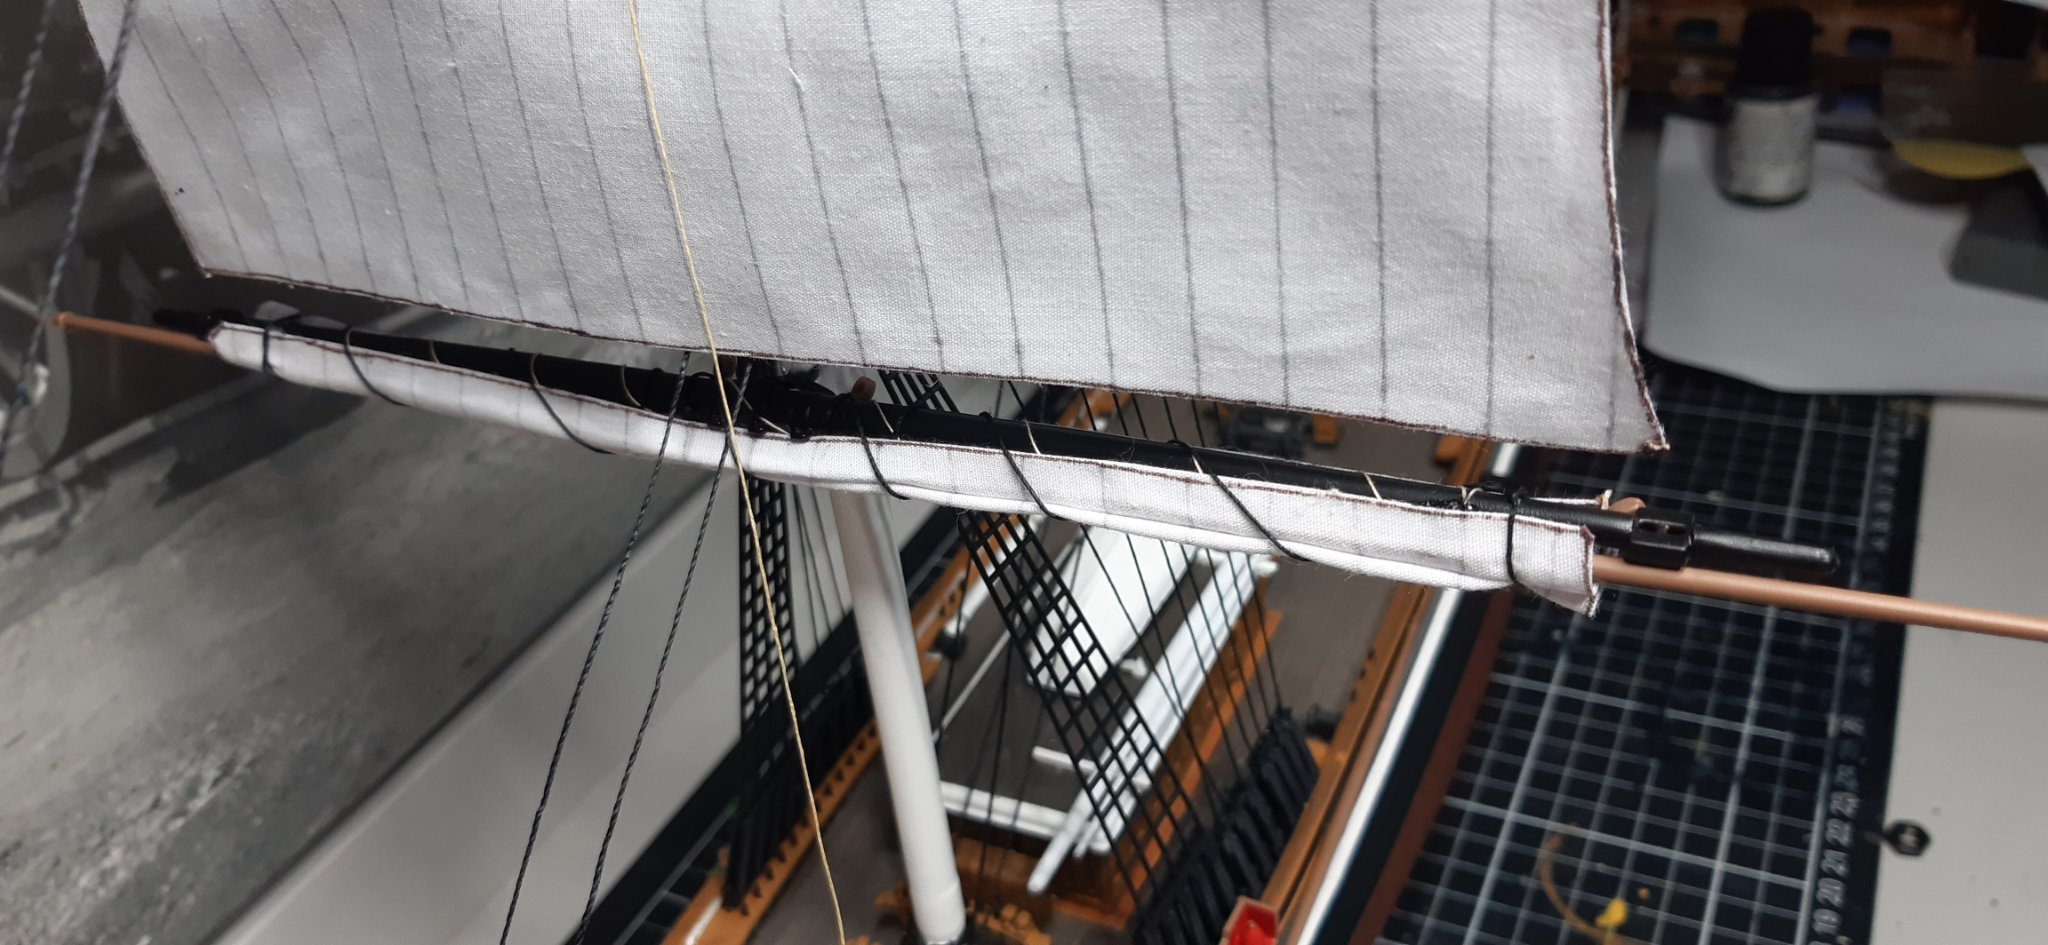
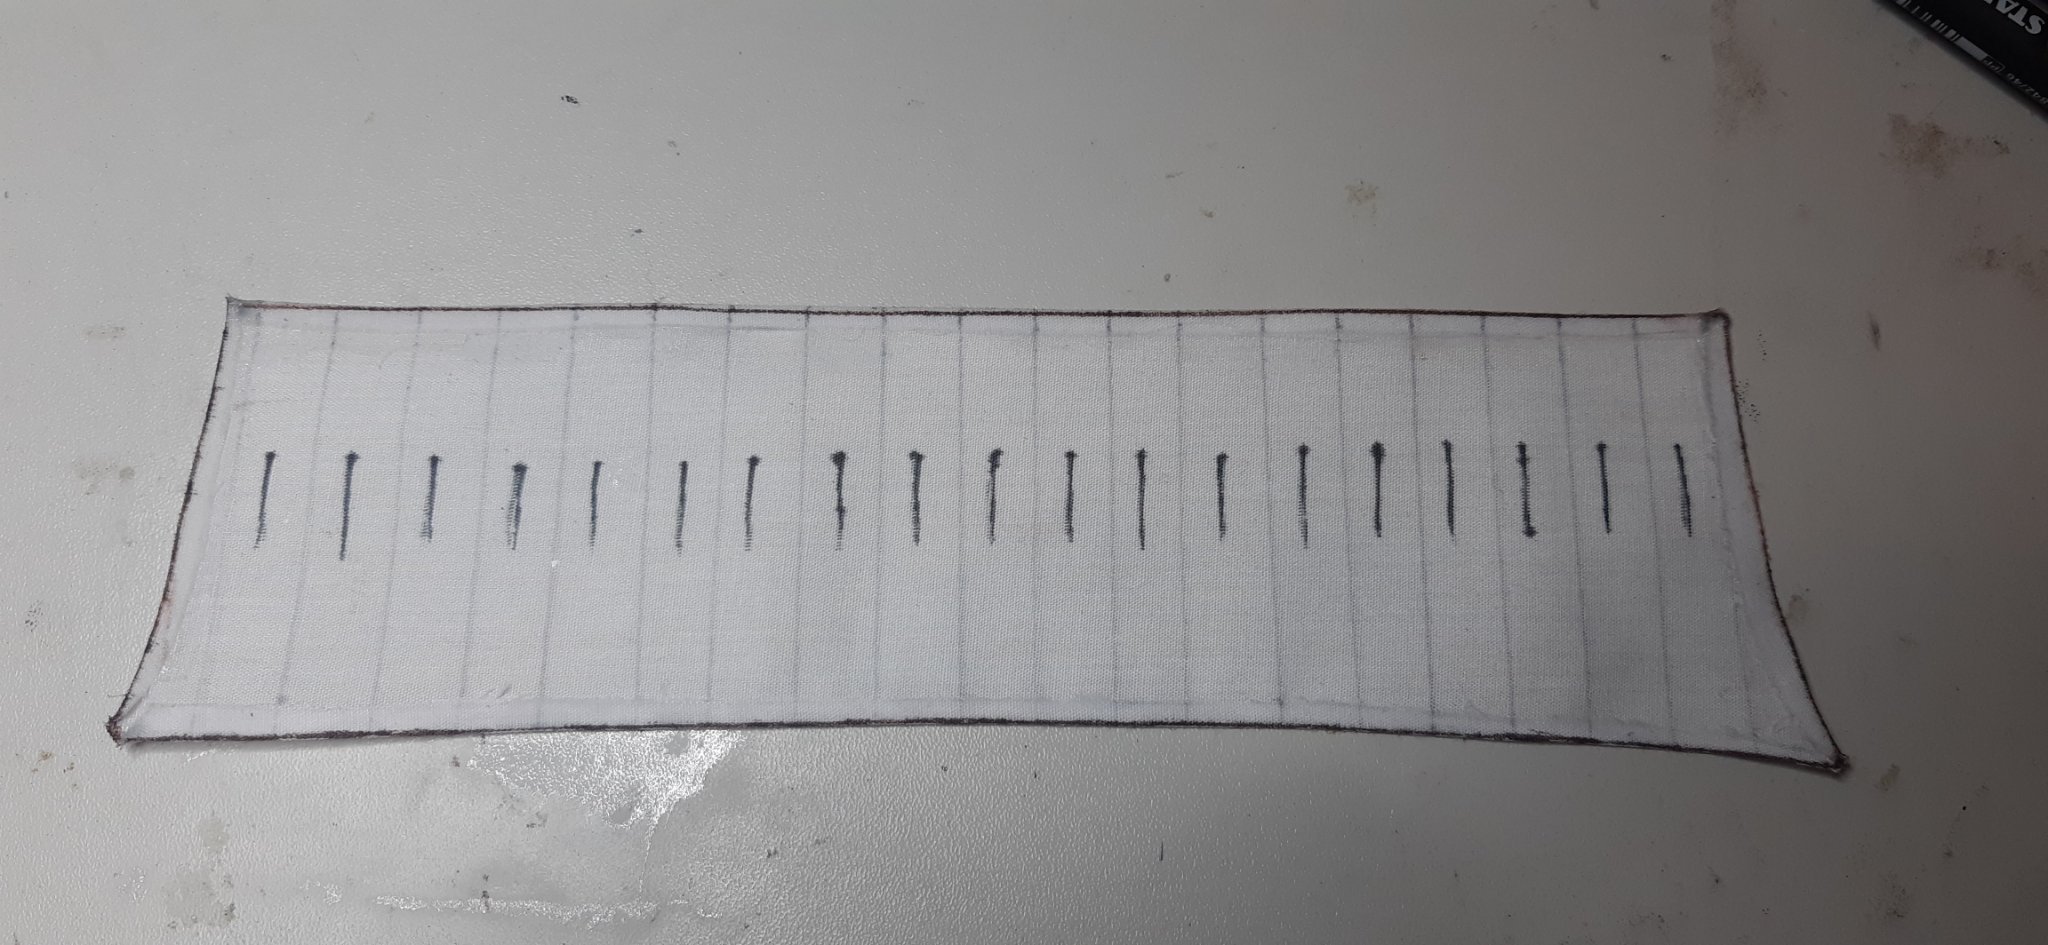
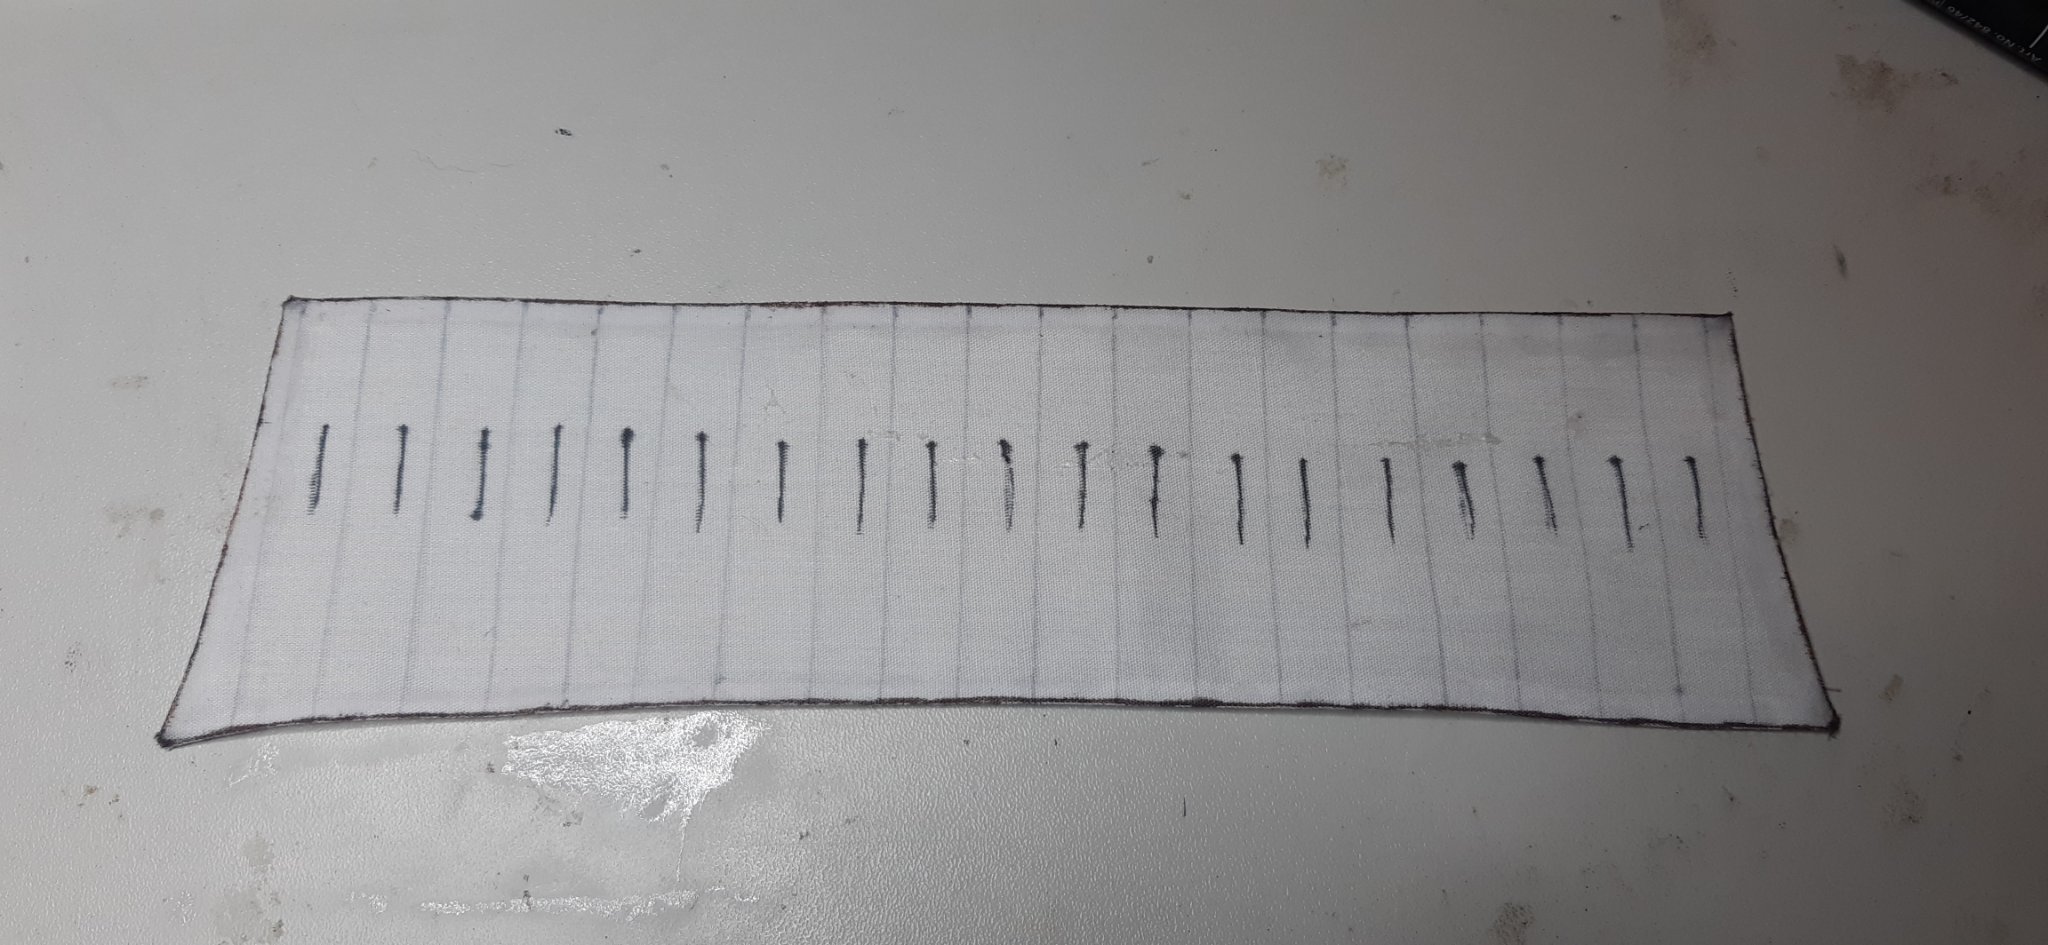
The sails are made from batiste.
Good luck building the kit, if you buy it
-
On 12/28/2021 at 11:46 AM, Kevin-the-lubber said:
You've made a nice job of that. My kit is from 1976 and, if yours was in similar shape, you've done well to get the parts looking as good as they do.
It is probably in the same shape, because the original moulds from '59 were still used in my kit... Sometimes there were more sanding, than glueing and painting
-
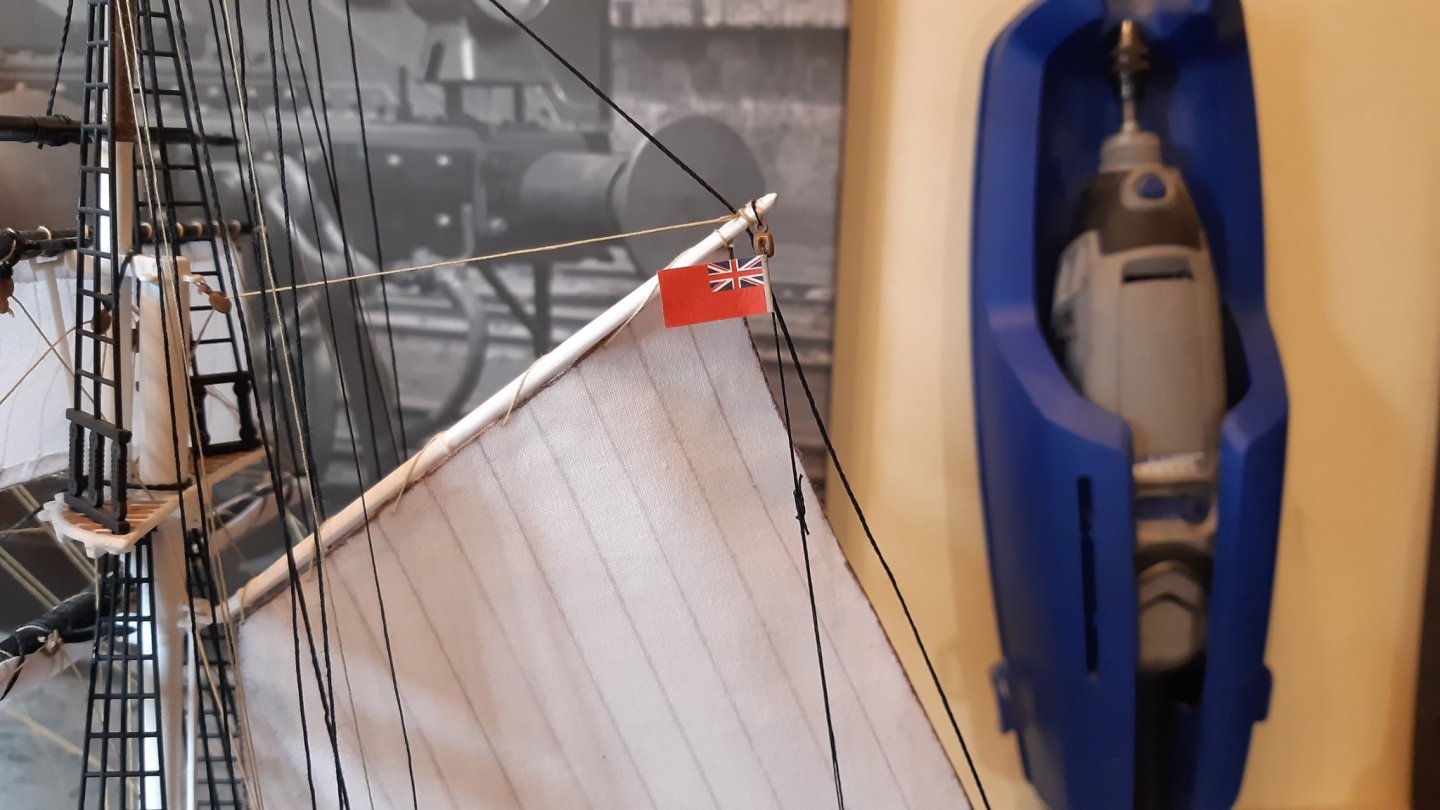
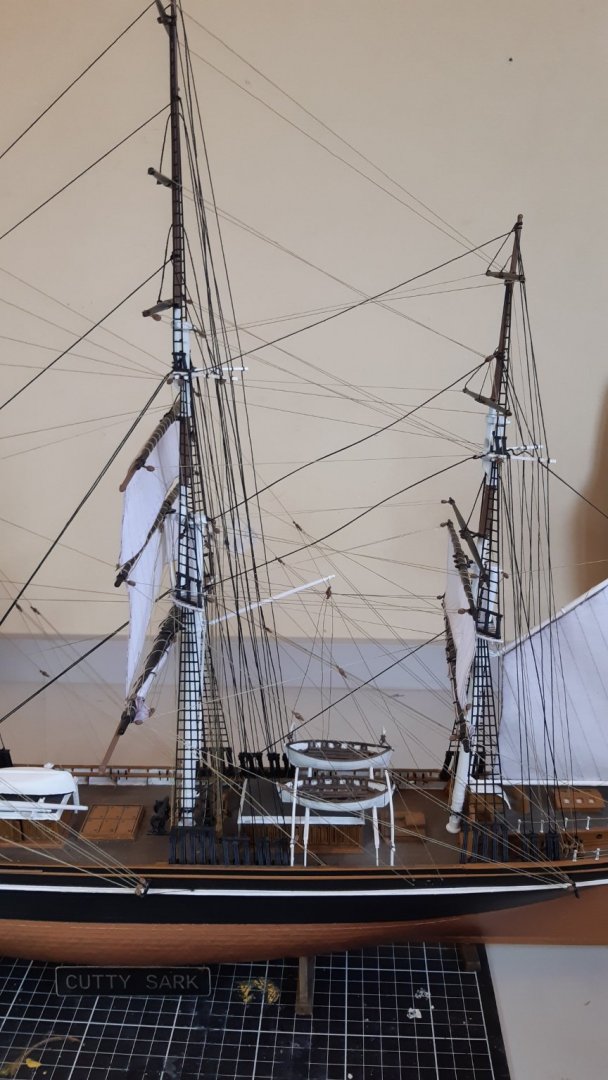
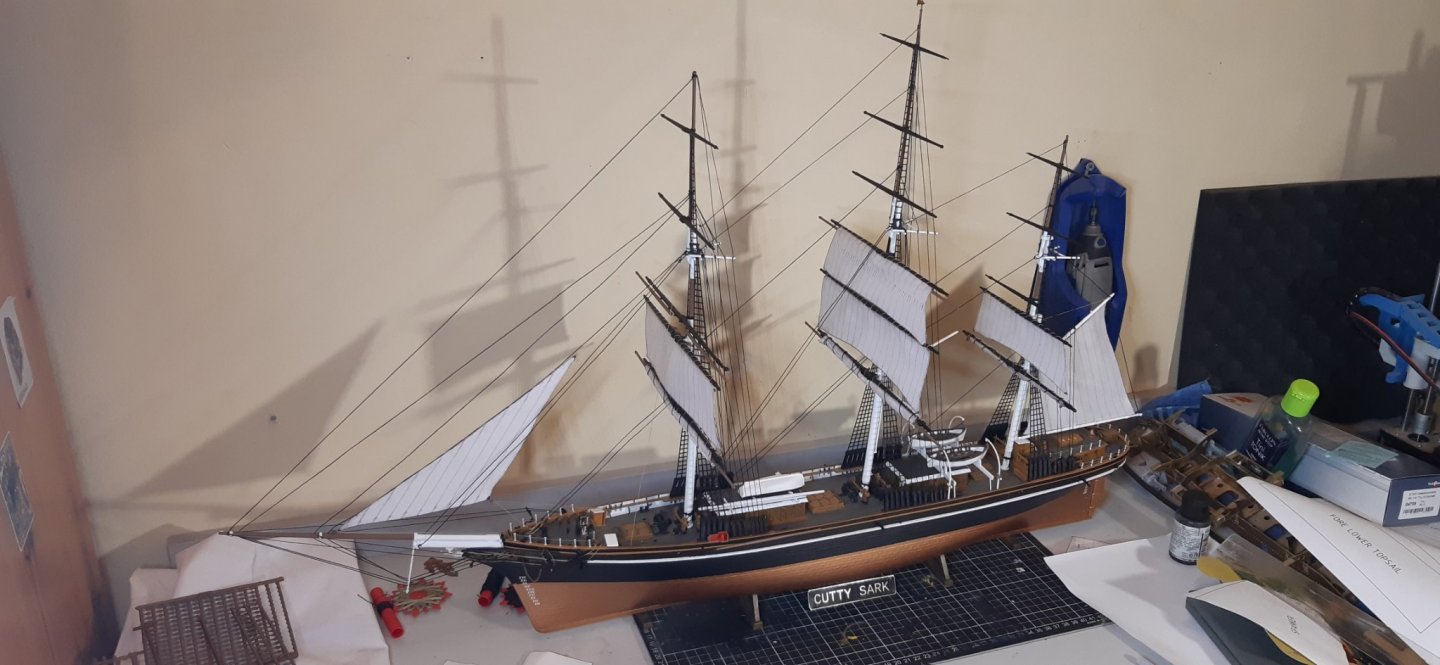
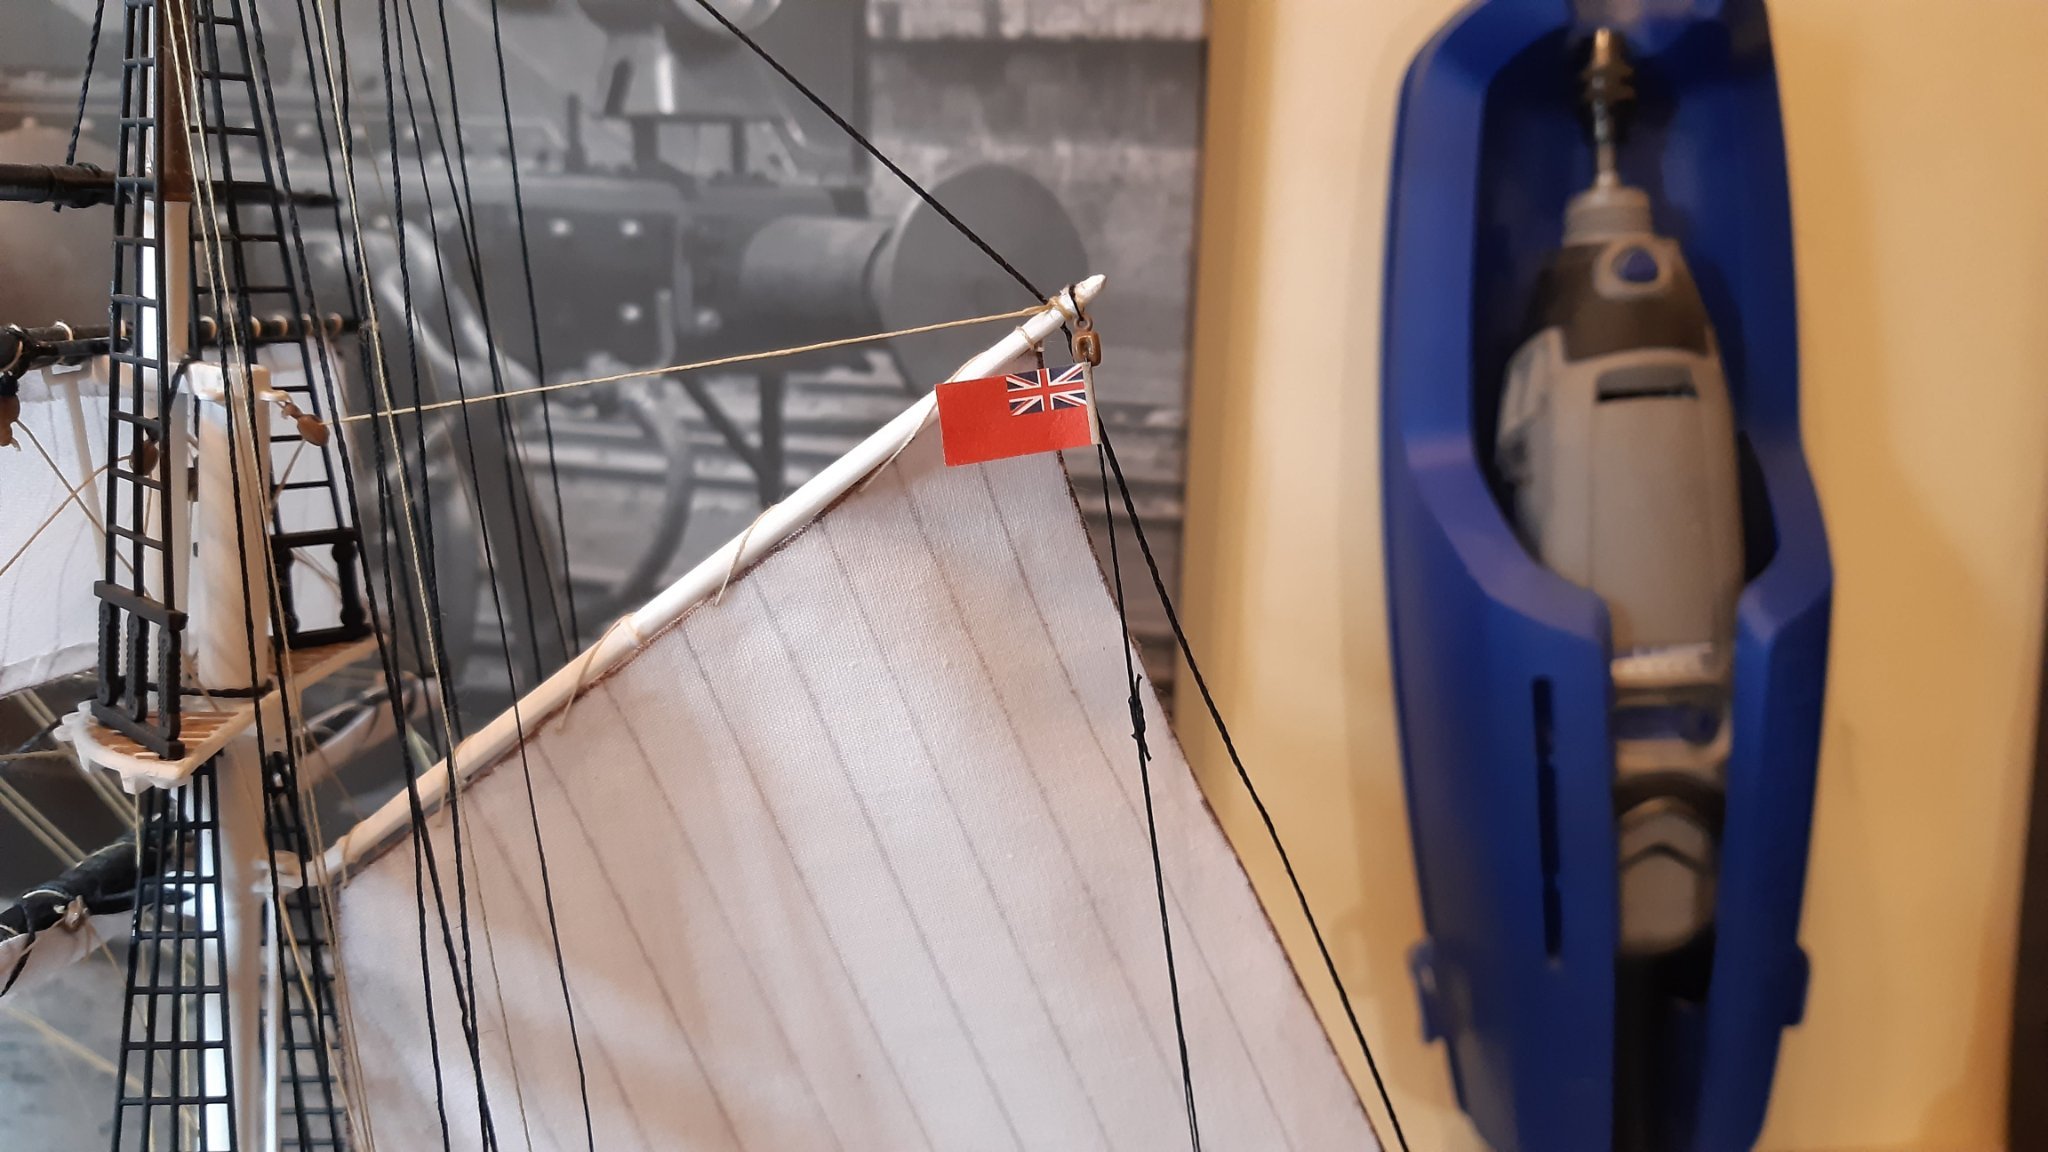
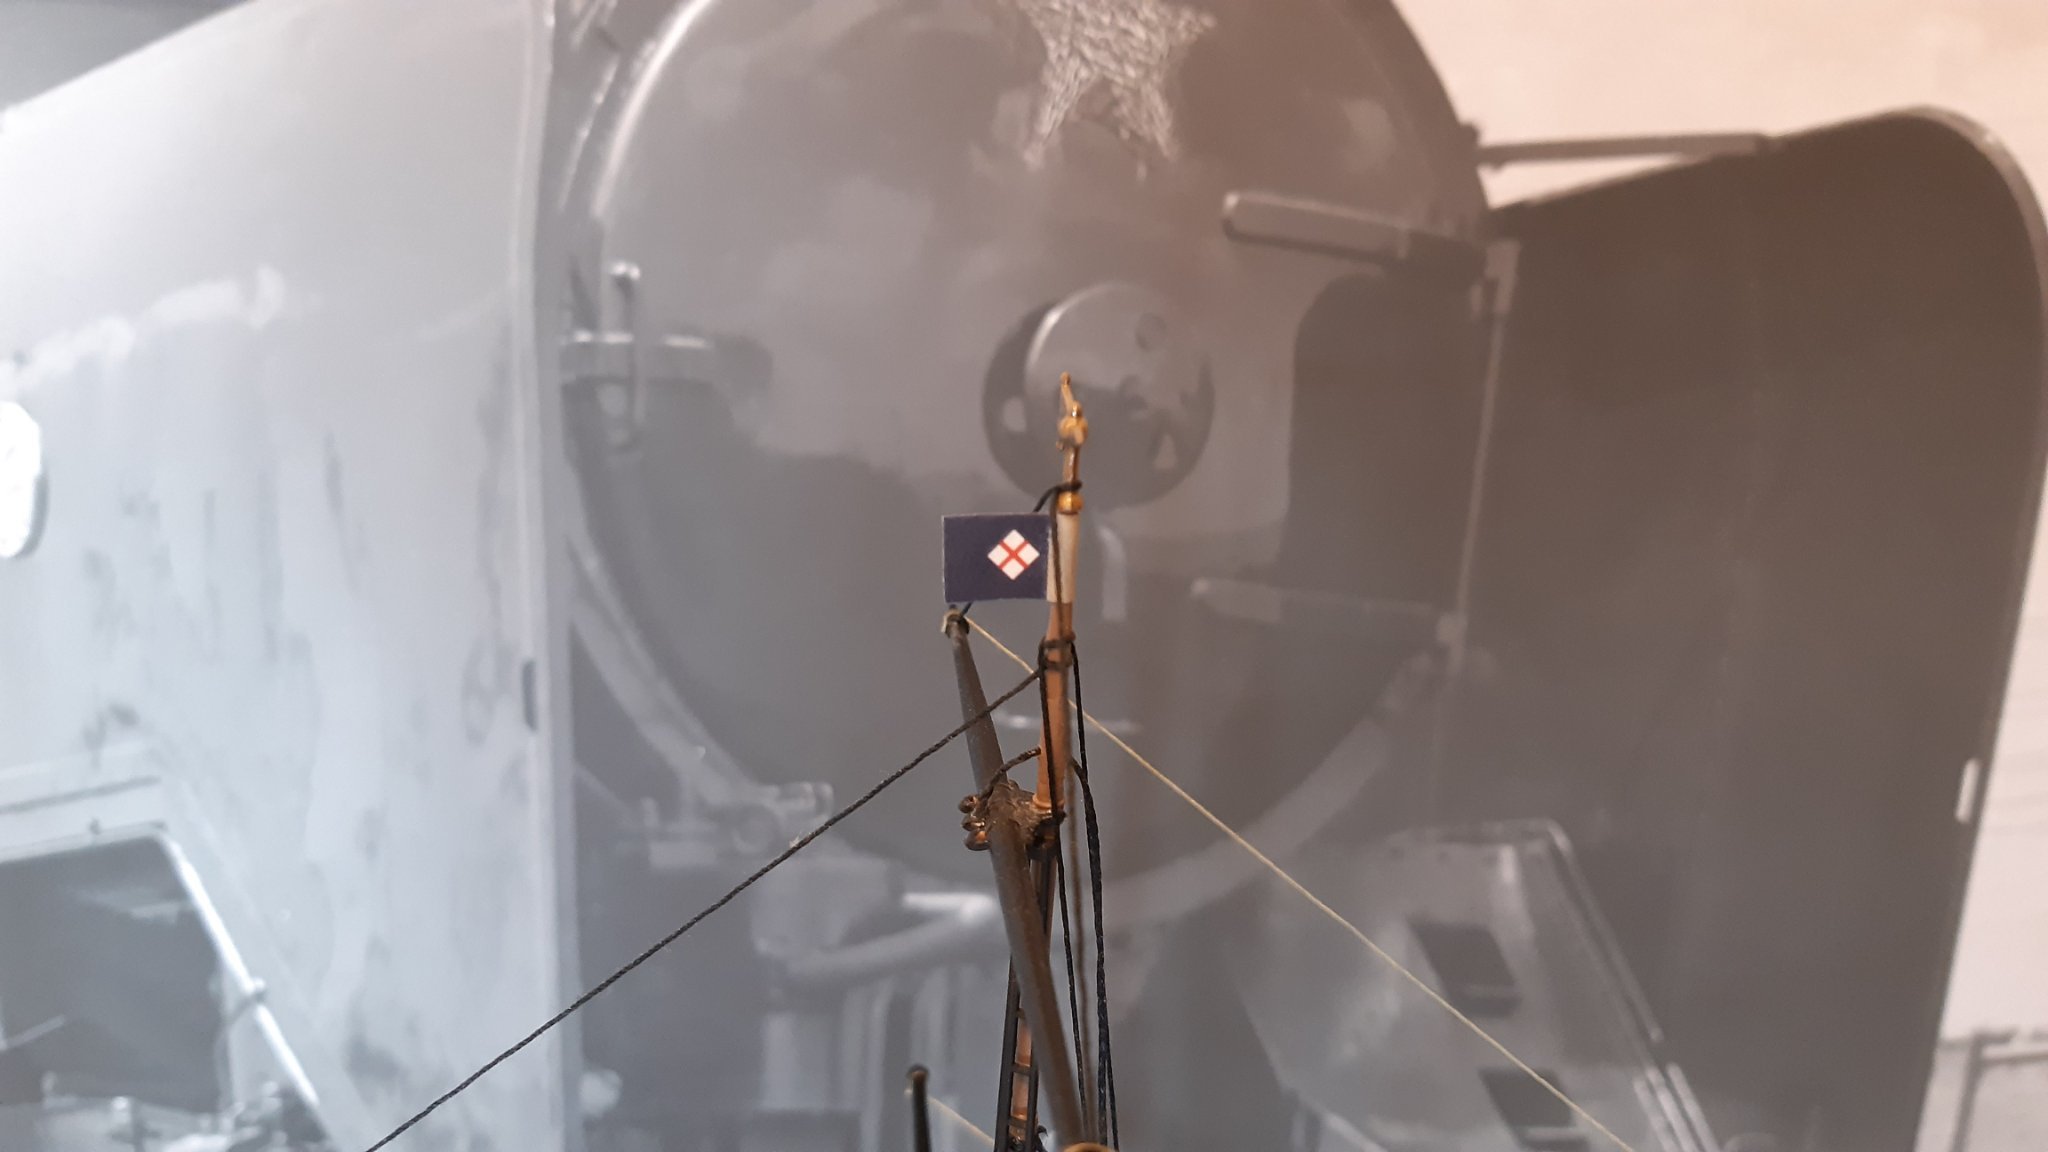
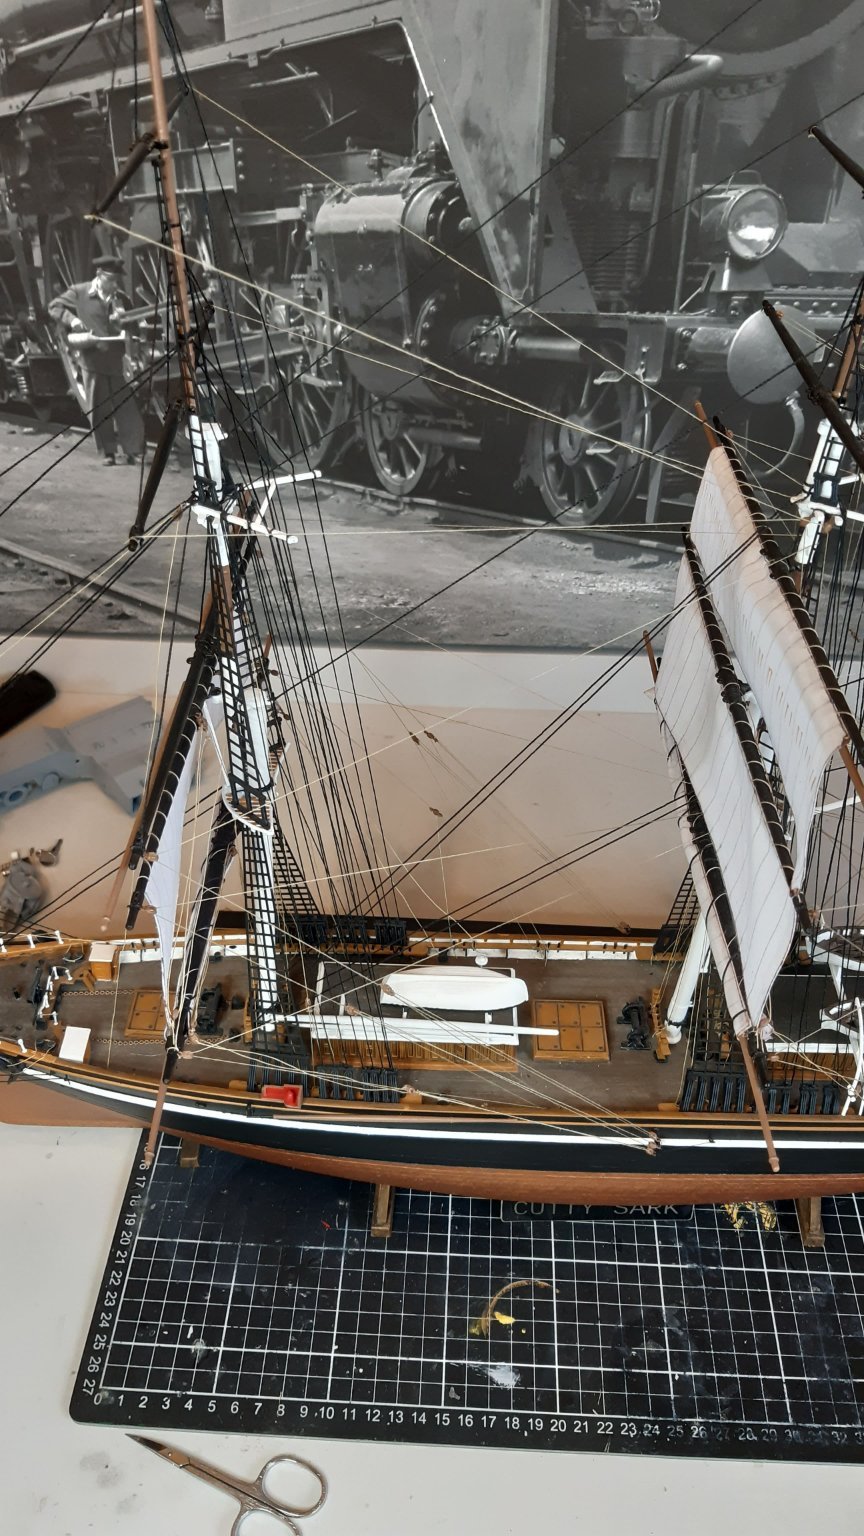
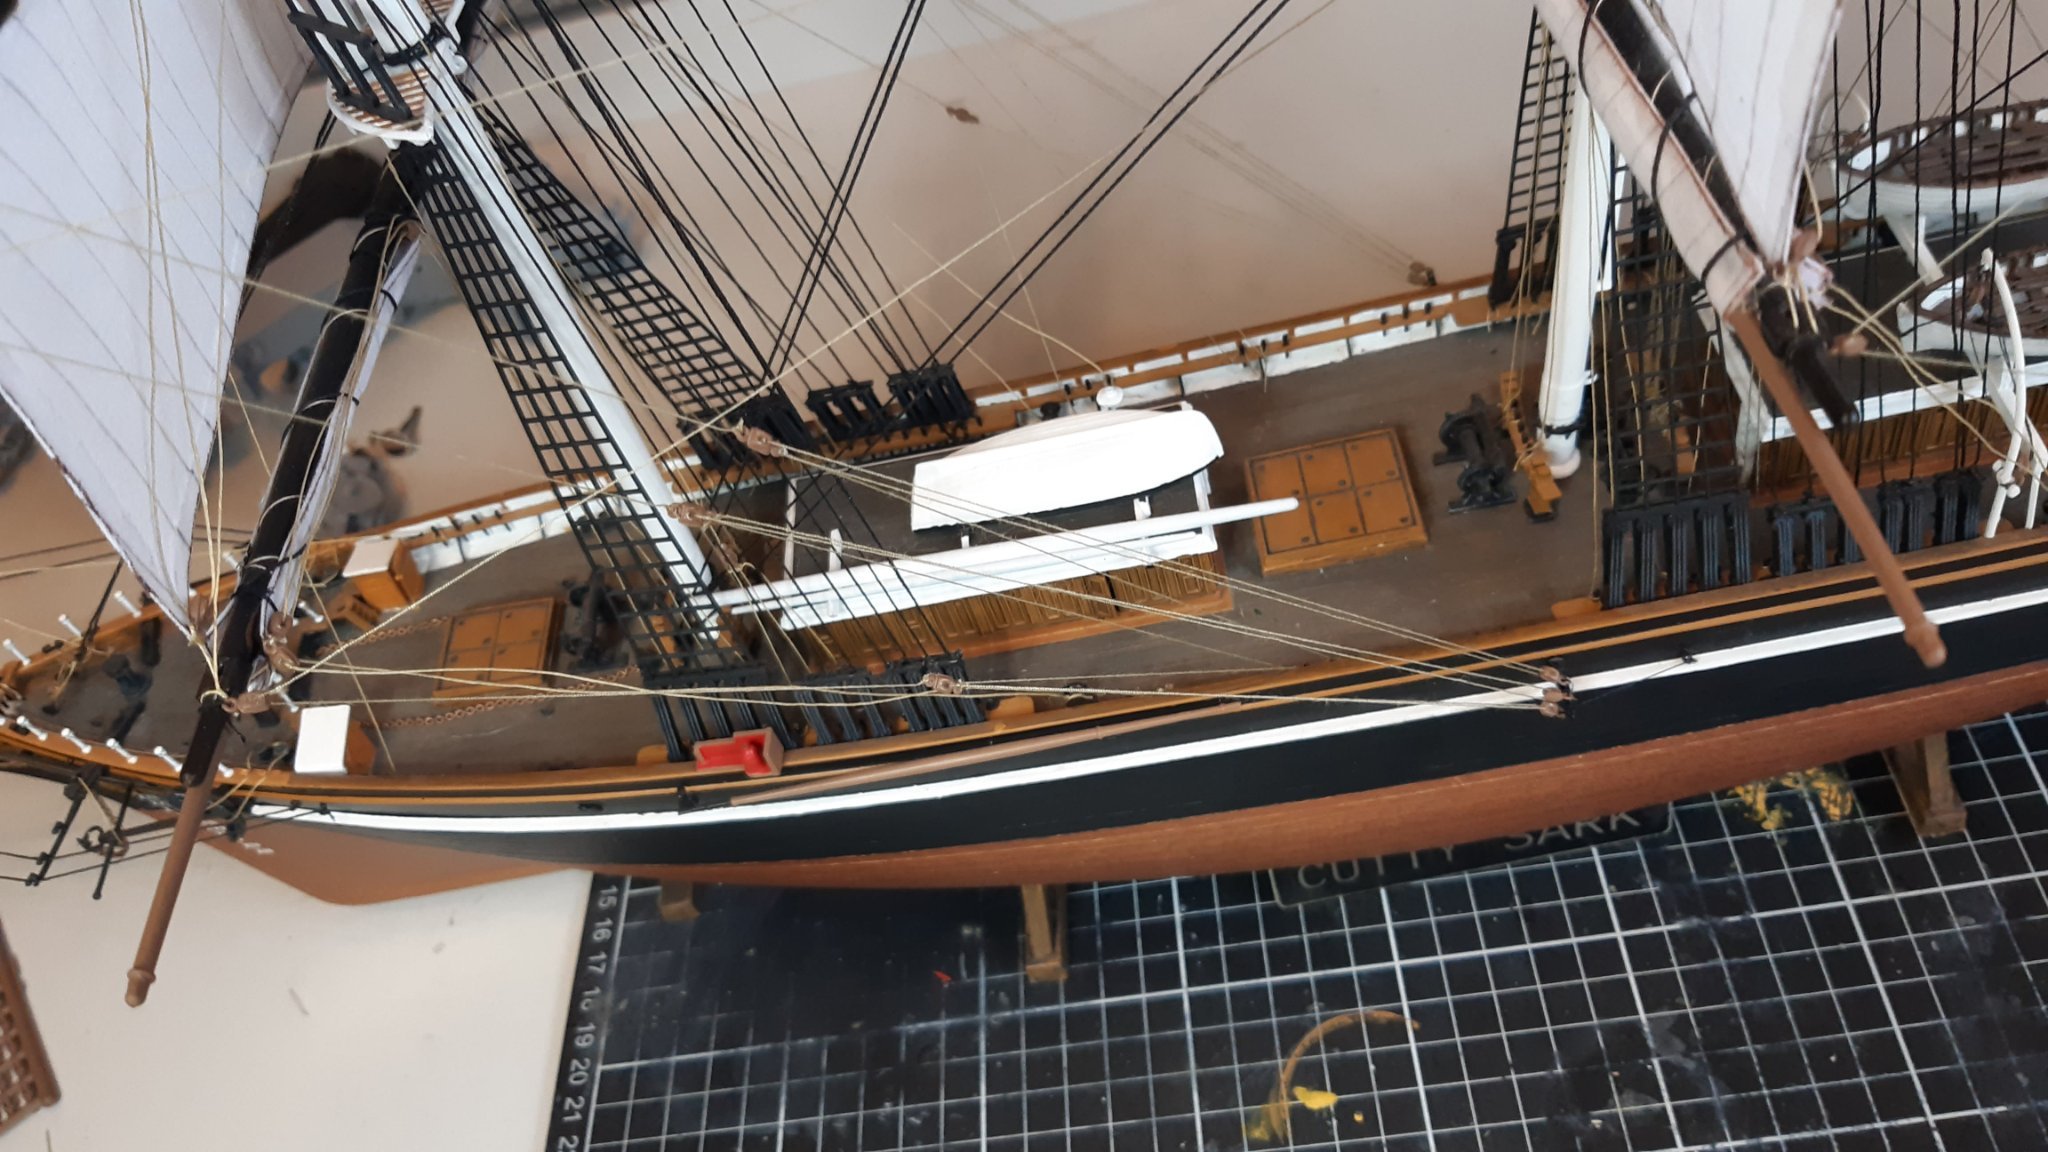
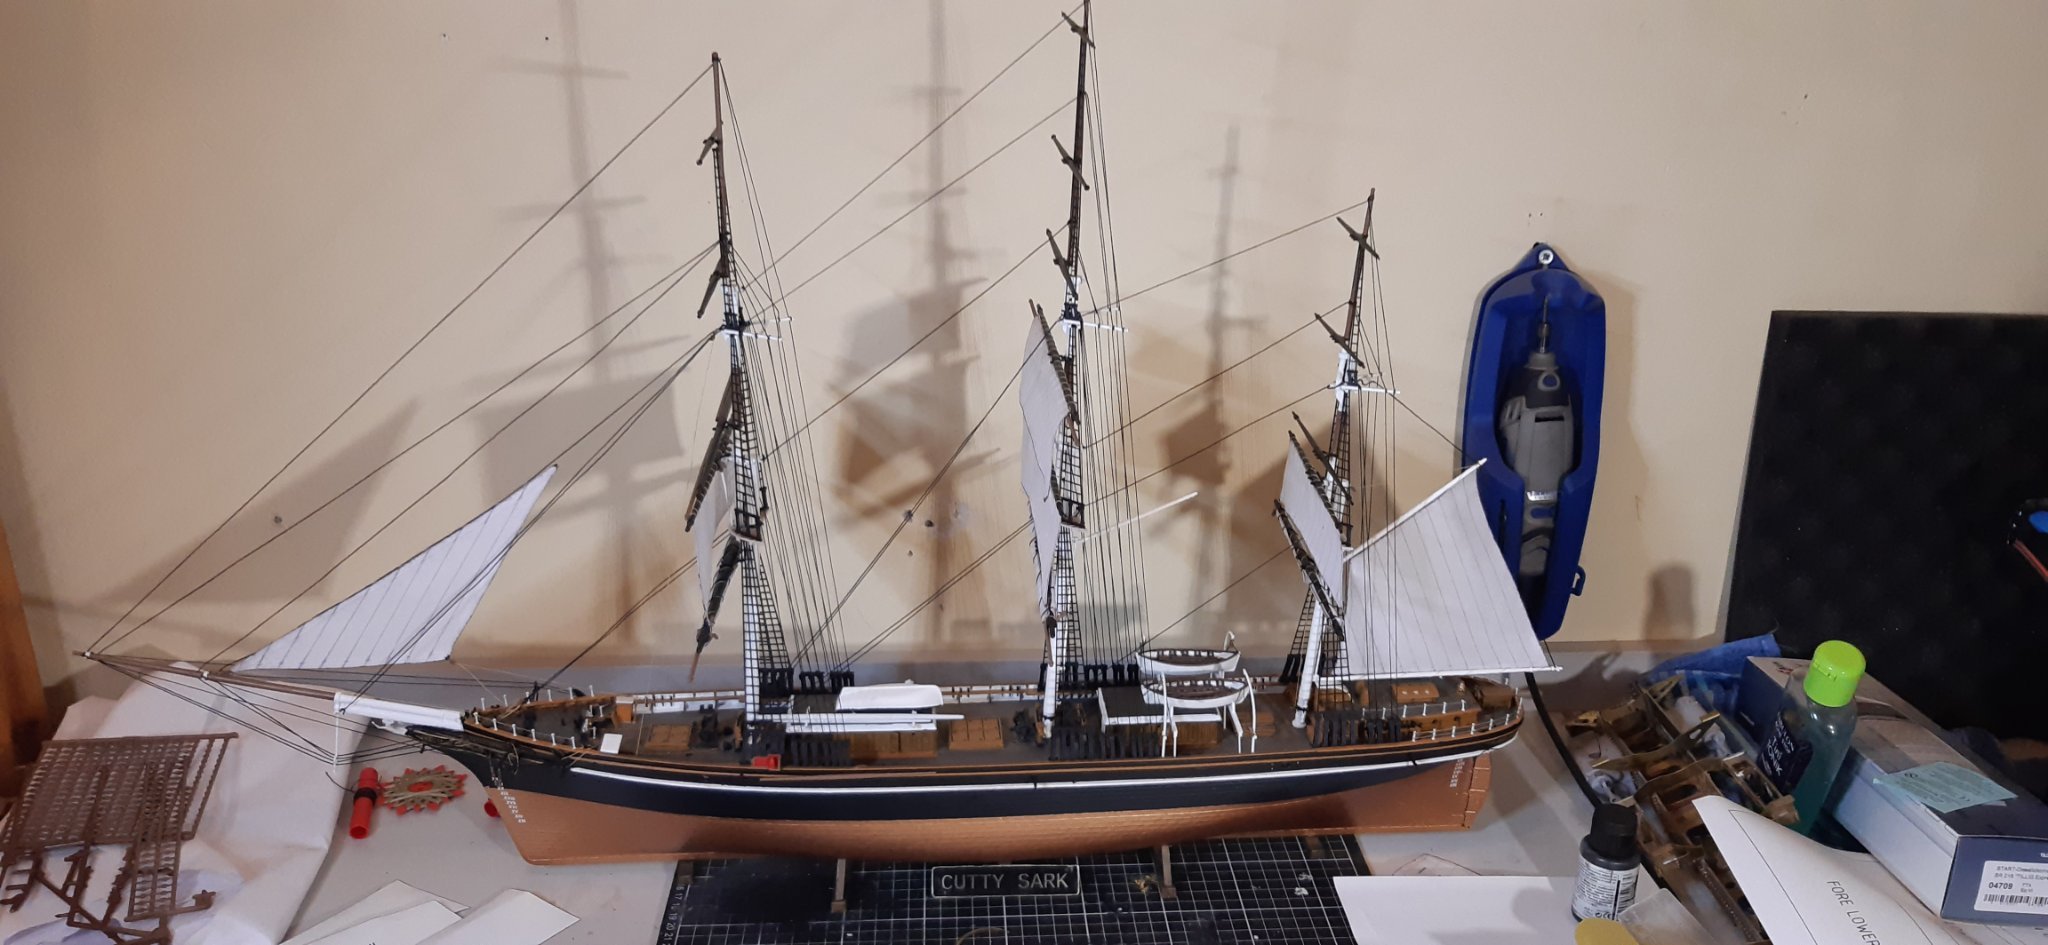
Now with the chains were fitted to the bowsprit and the ensigns to their places, the ship is finally finished.


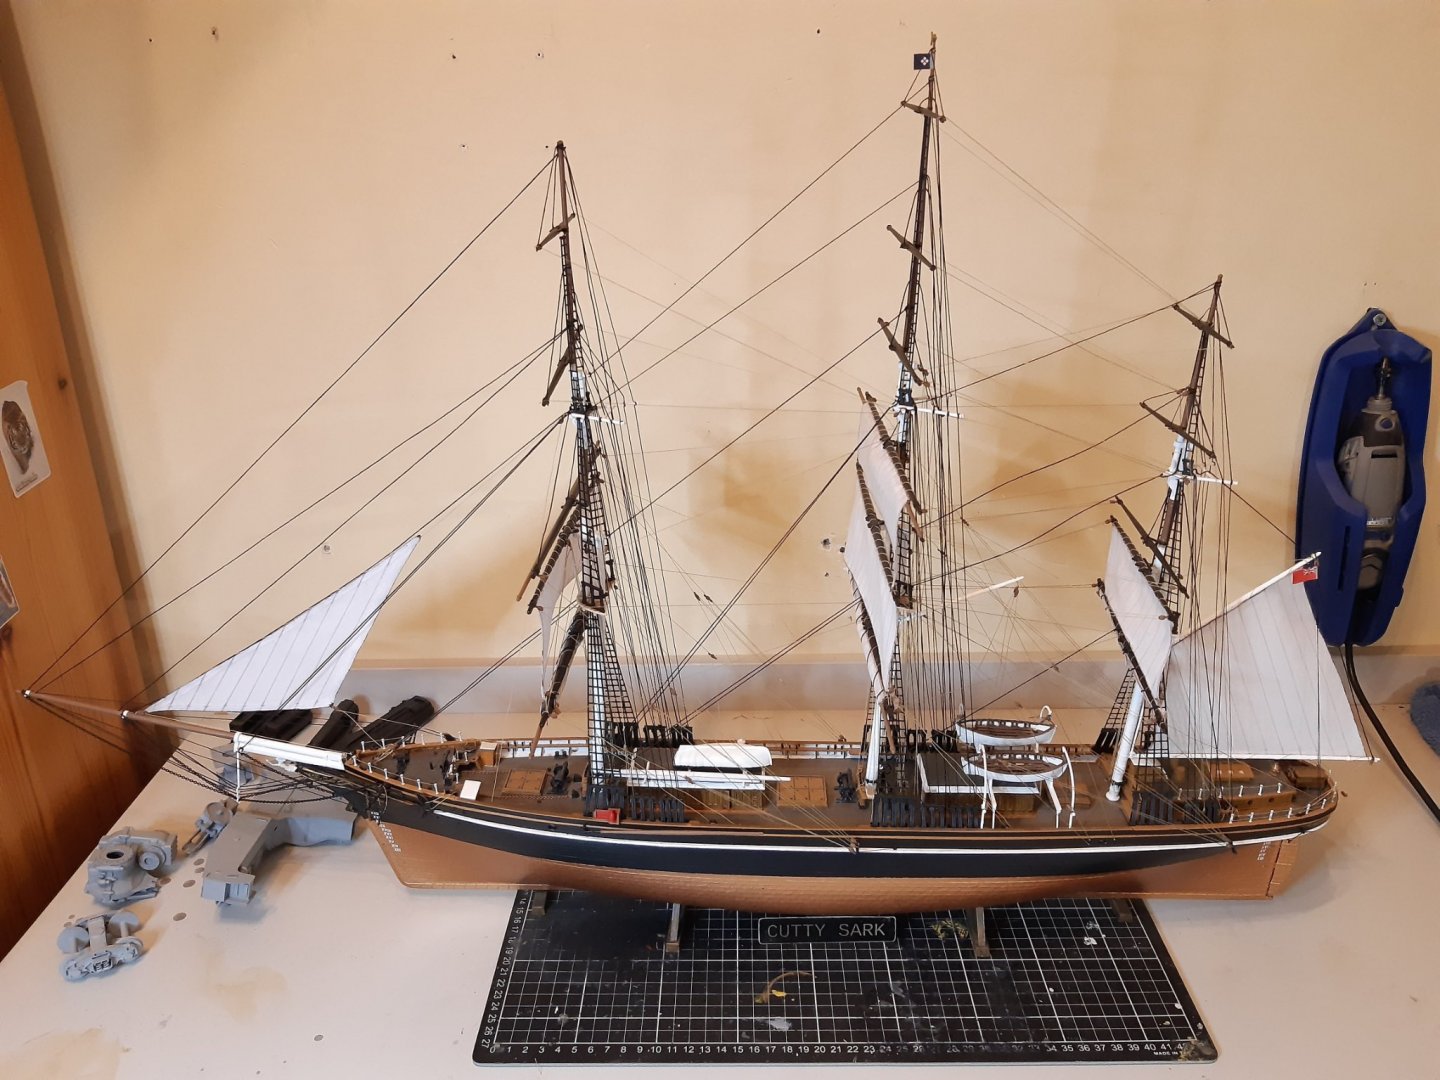
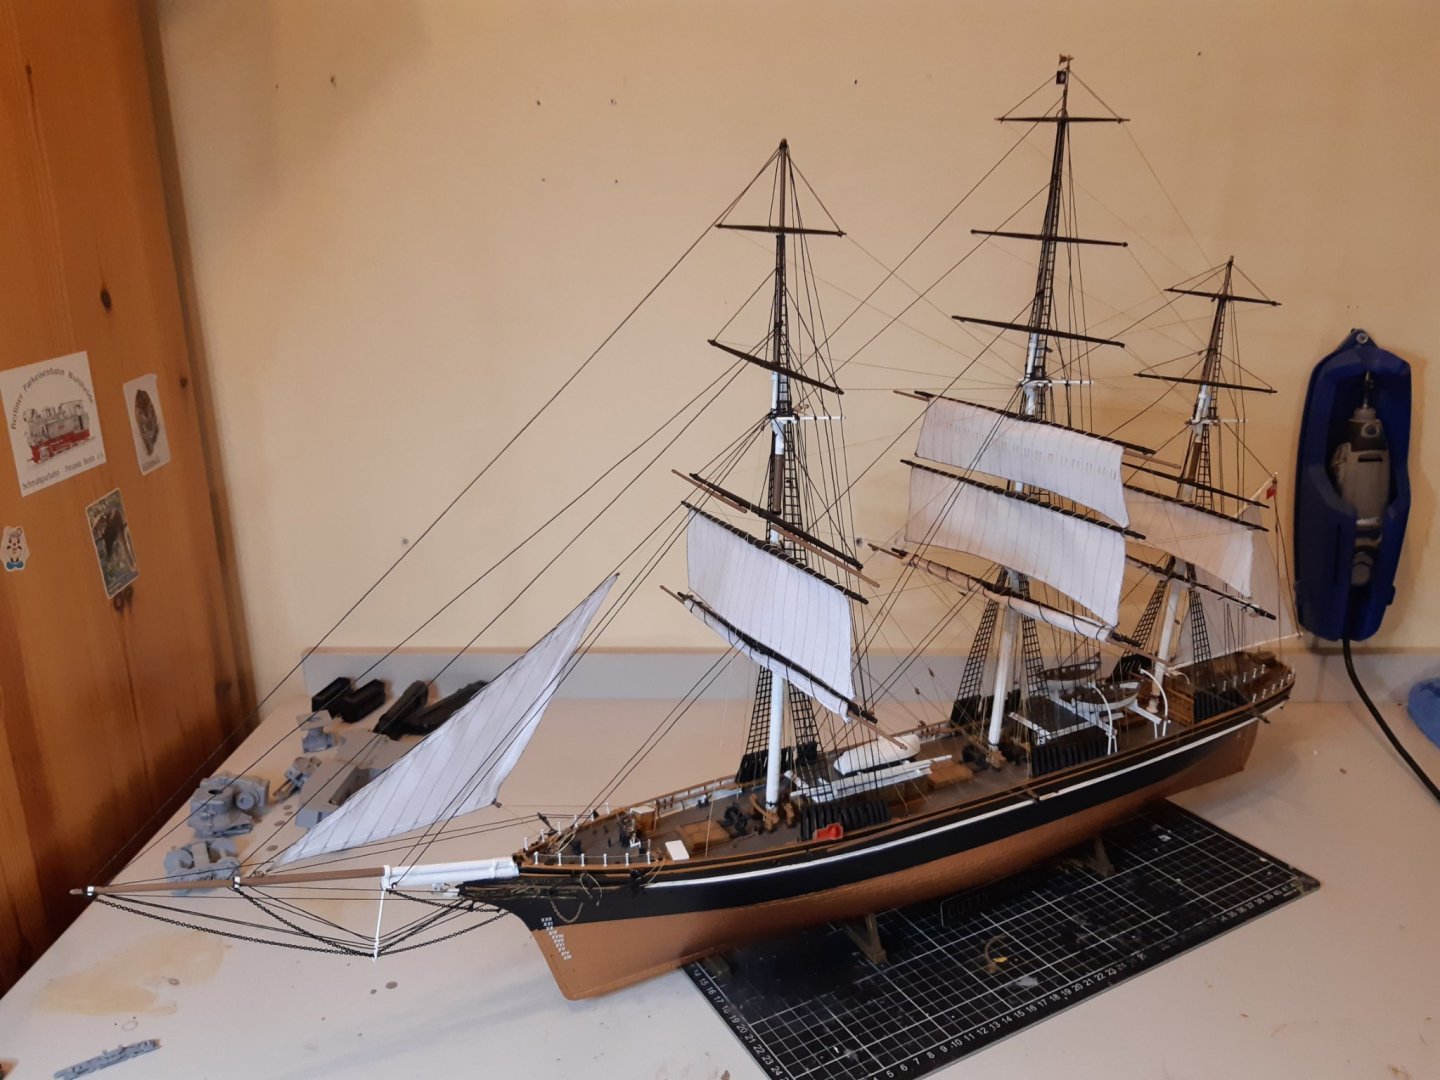
As my first sailing ship model (and not an easy one imo), I am satisfied with the result. Altough on the next sailing ship I will doe some thing differently
- Bob Fraser, Snug Harbor Johnny, oneslim and 5 others
-
6
-
 1
1
-
1
-
Merry Christmas Everyone!
It was a long time since the last post, cuz I had little free time to work on the ship, but in the meantime quite a progress has been made.
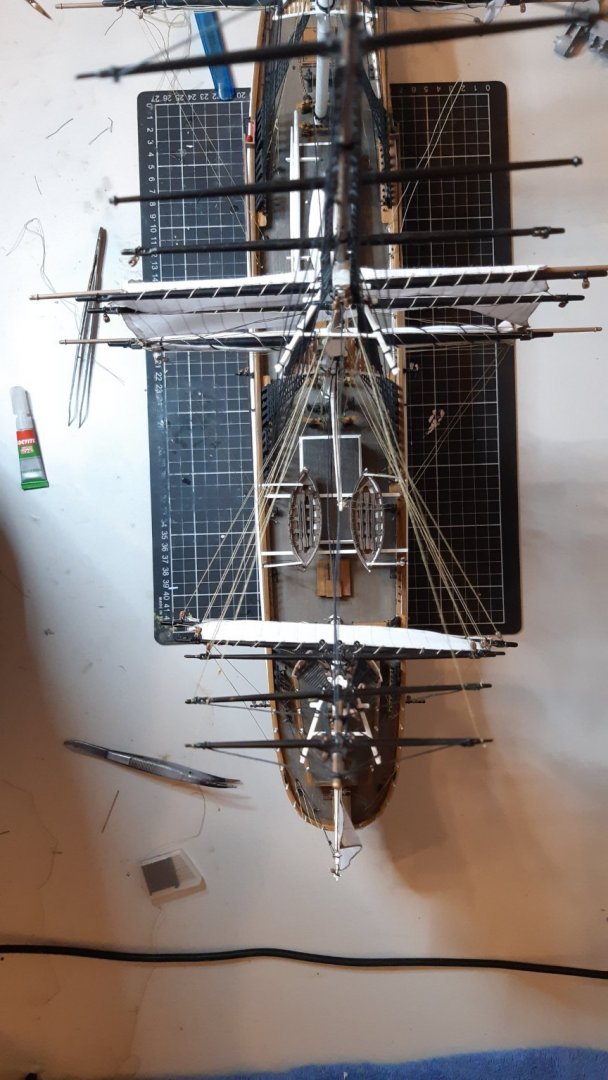
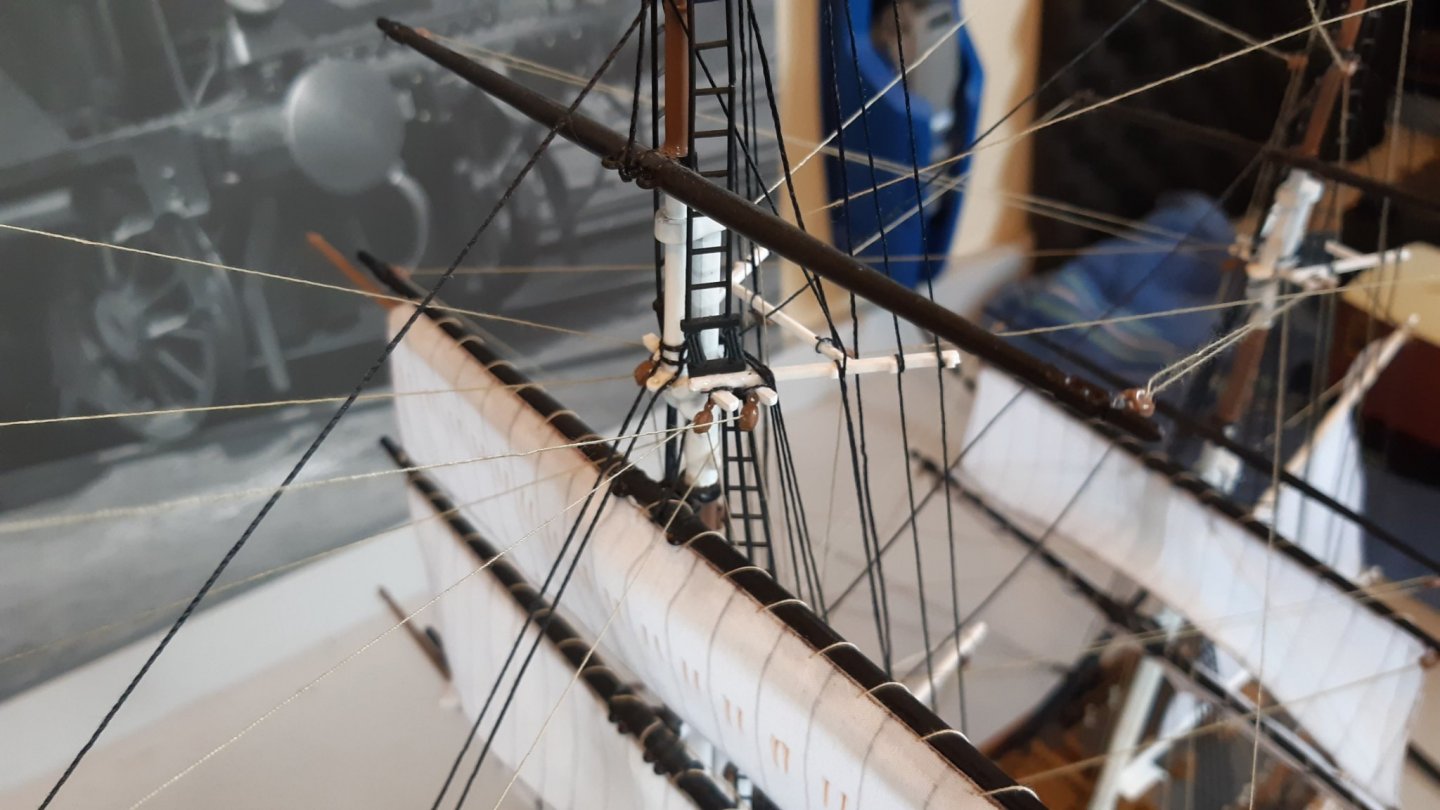
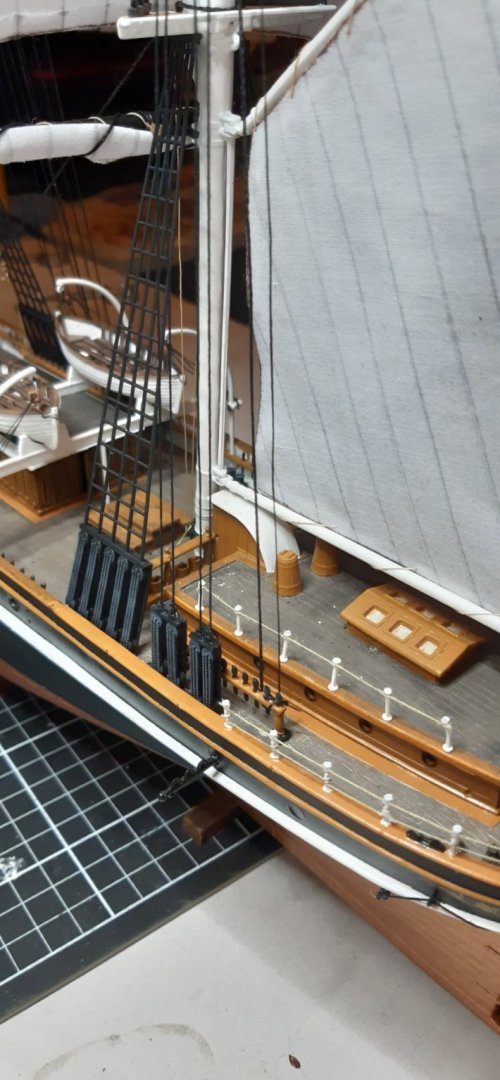
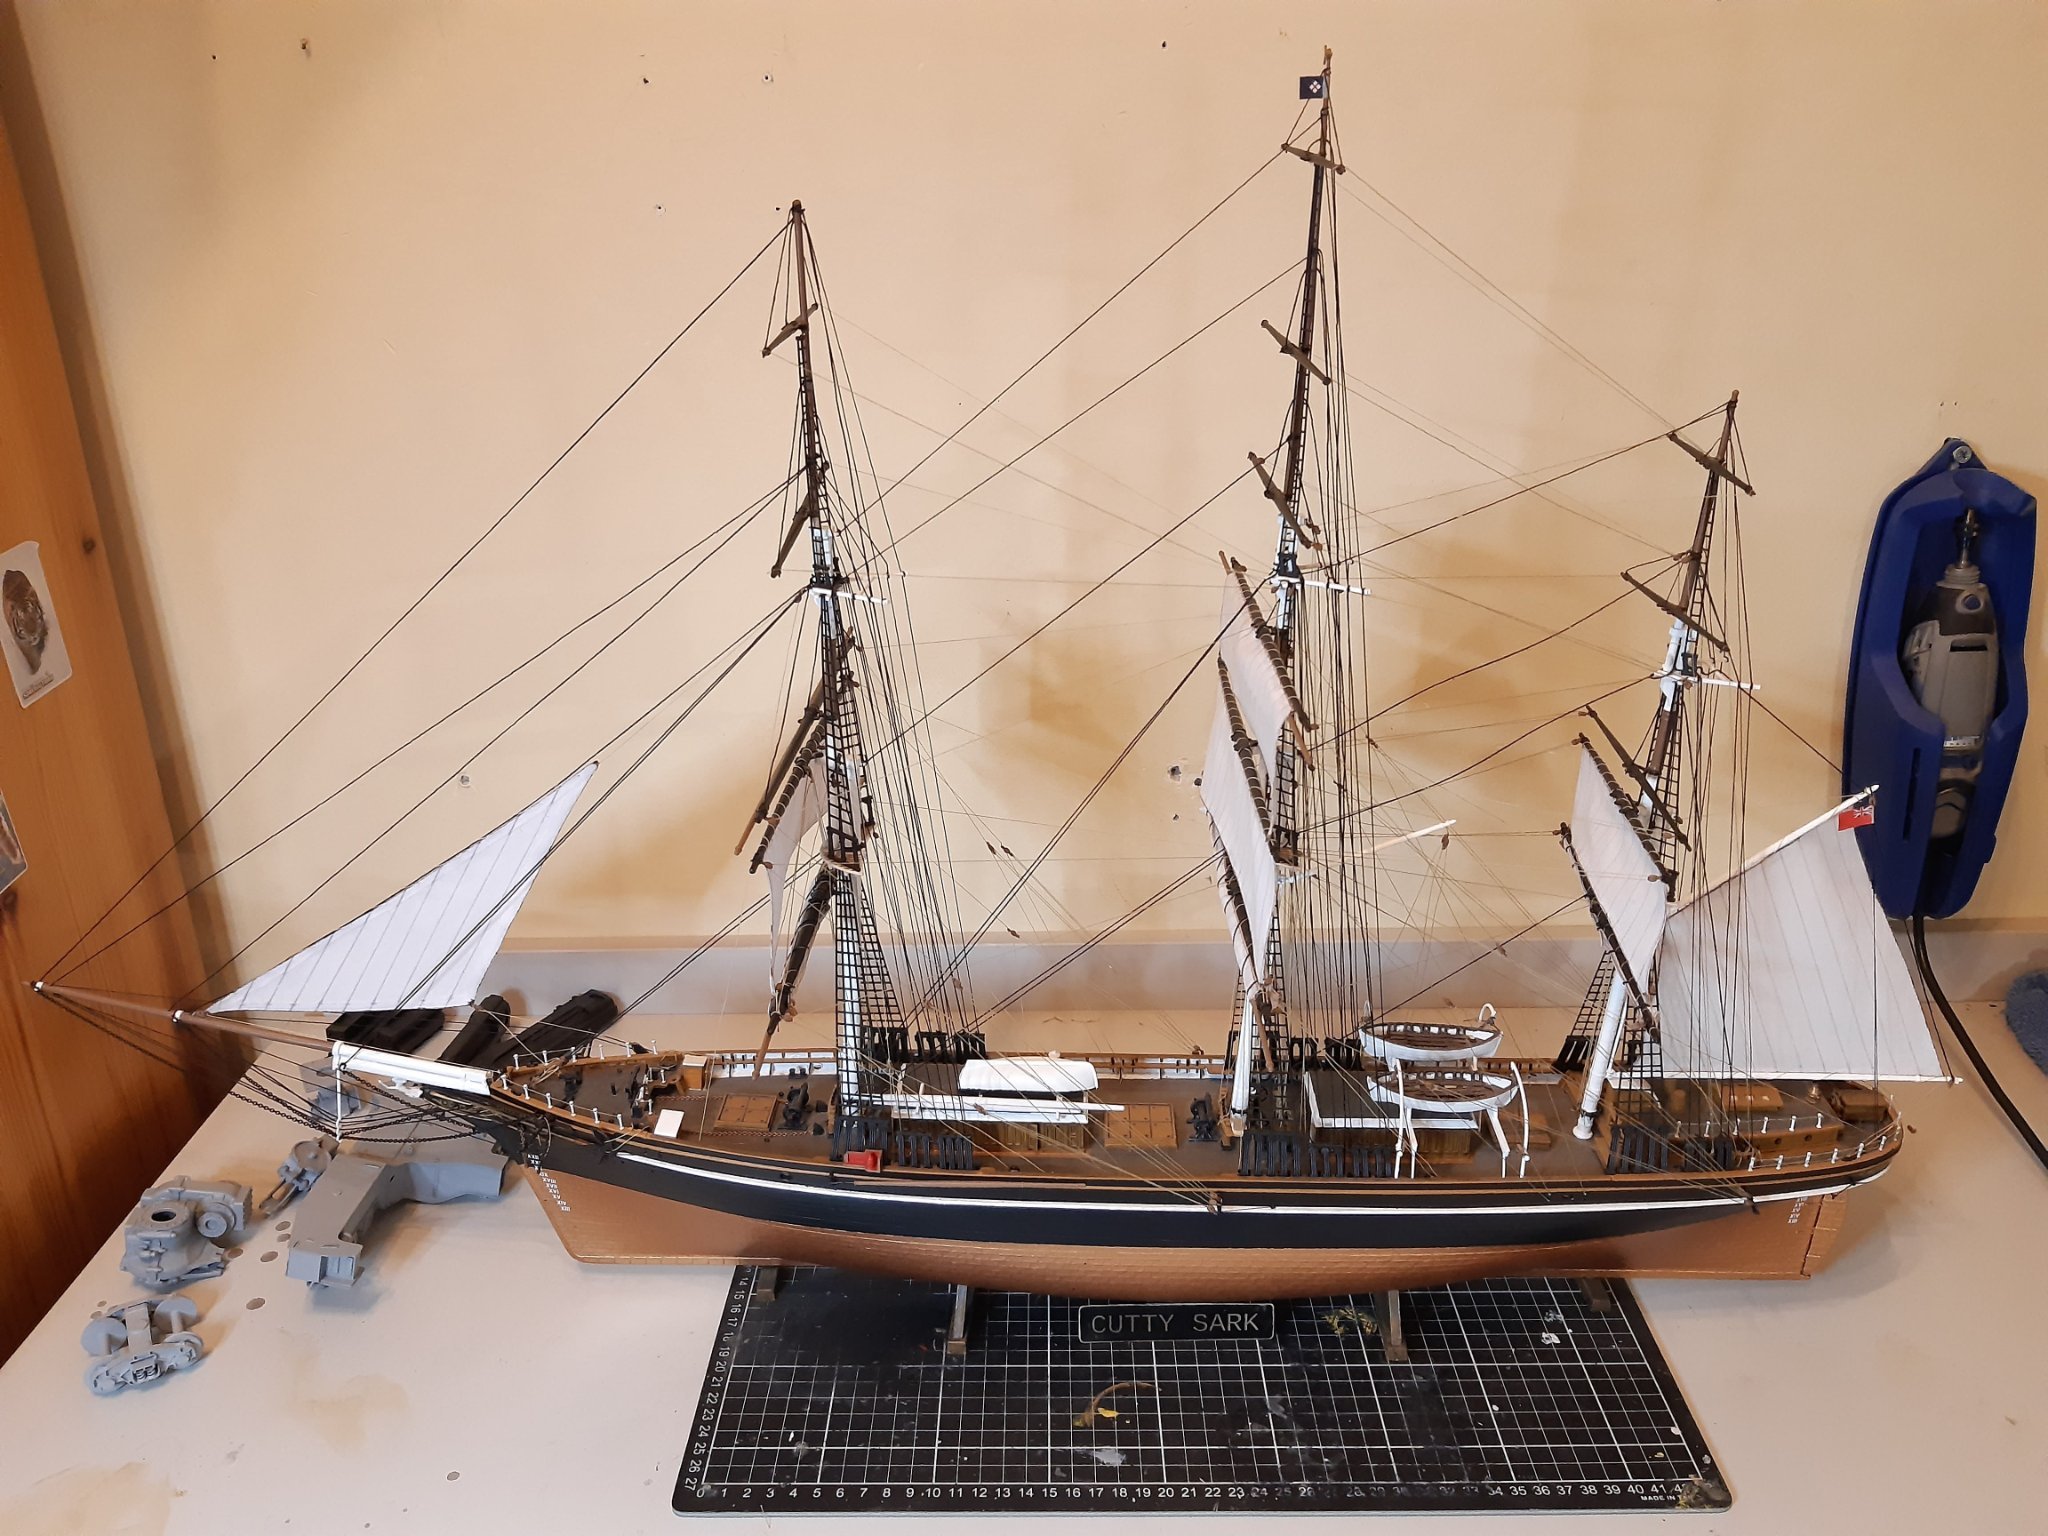
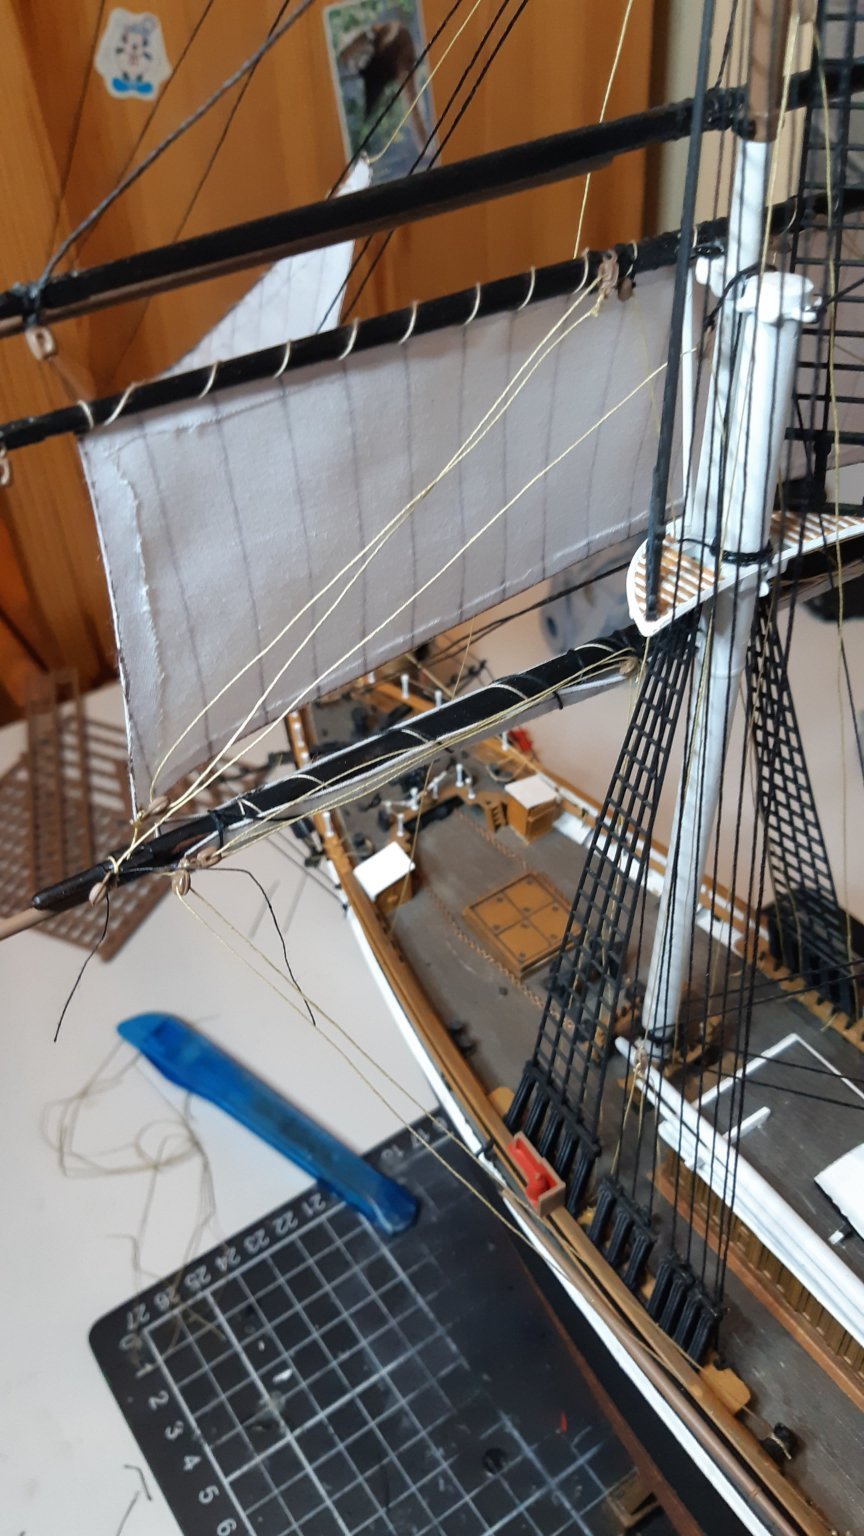
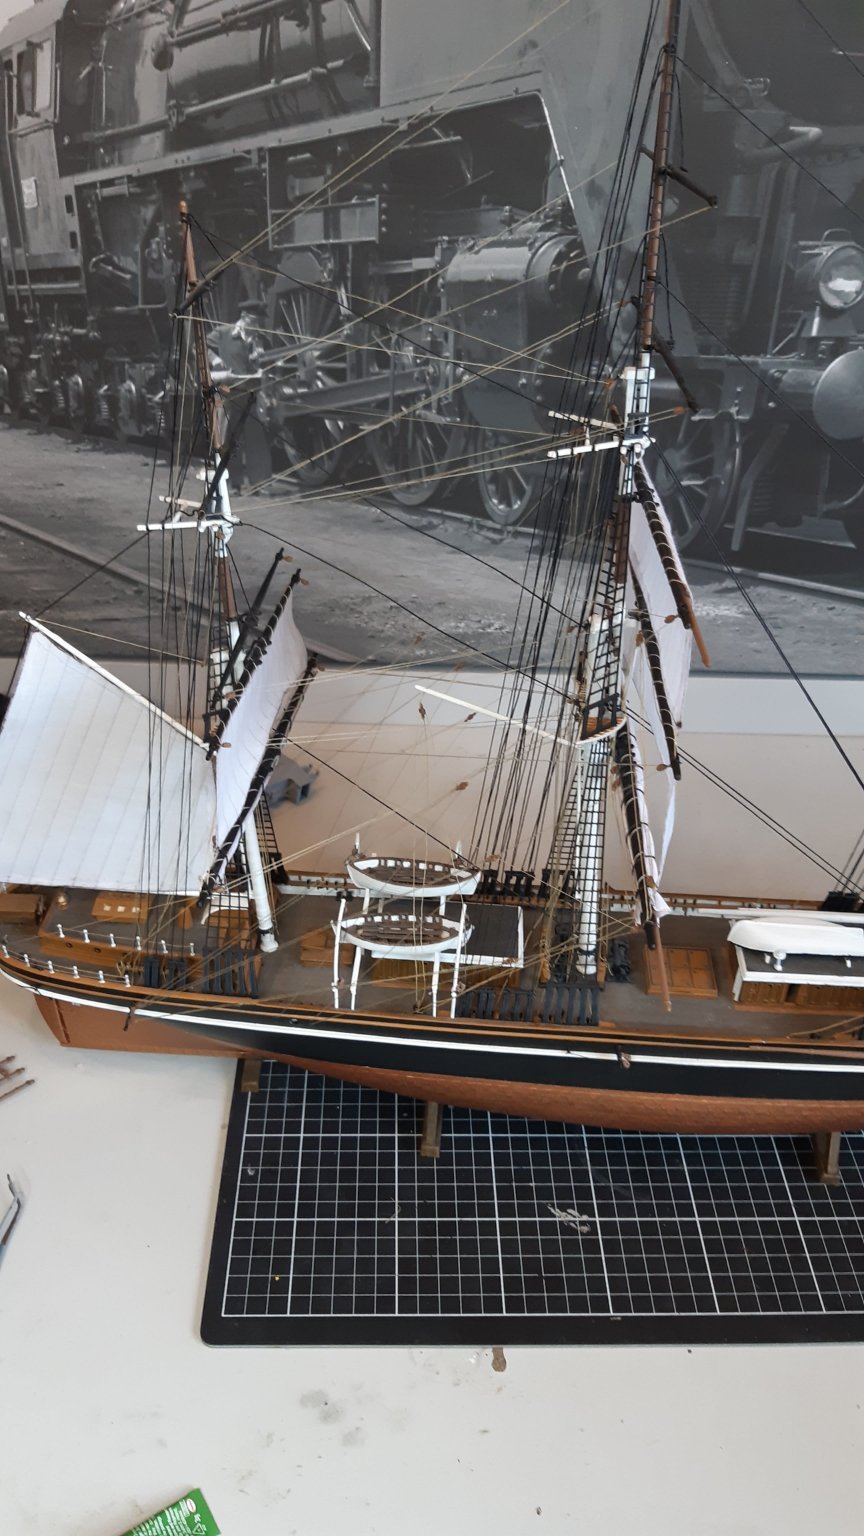
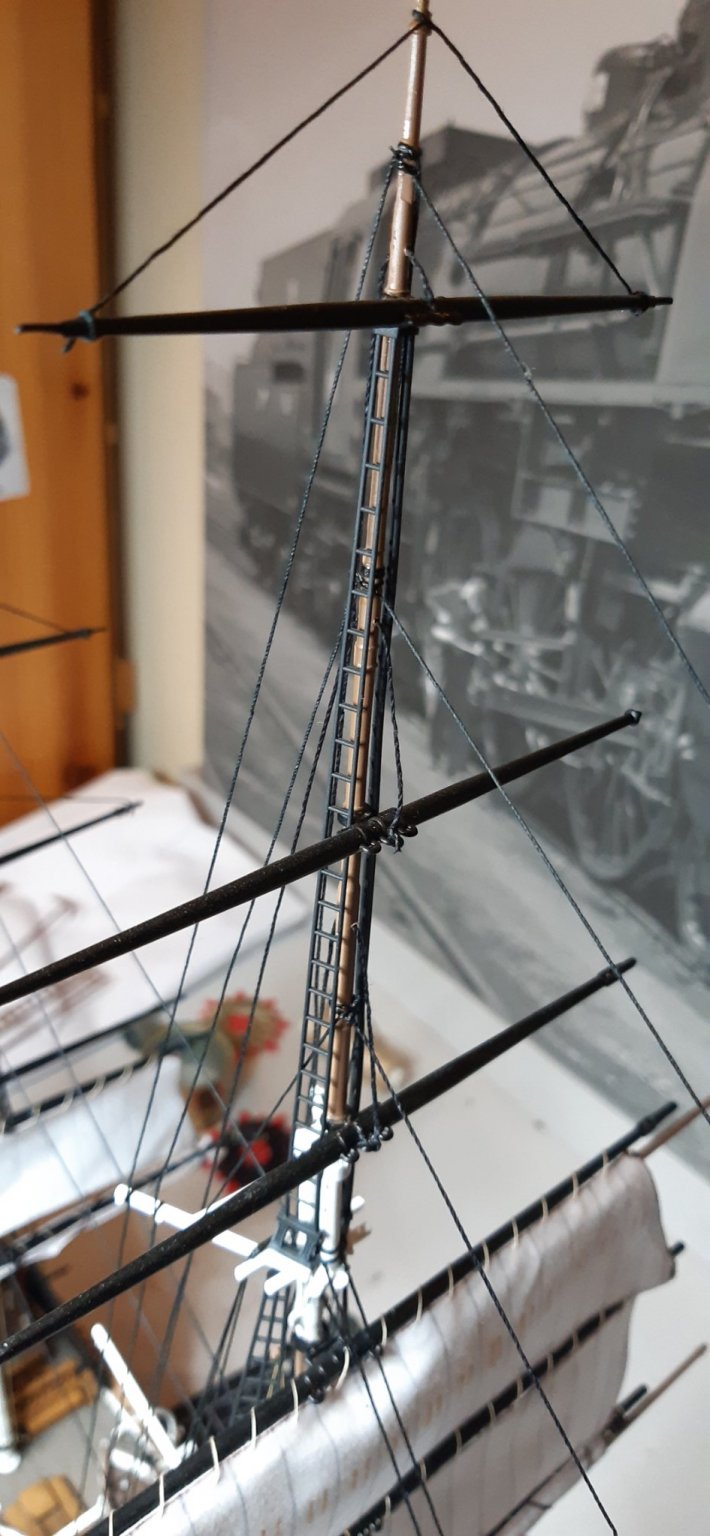
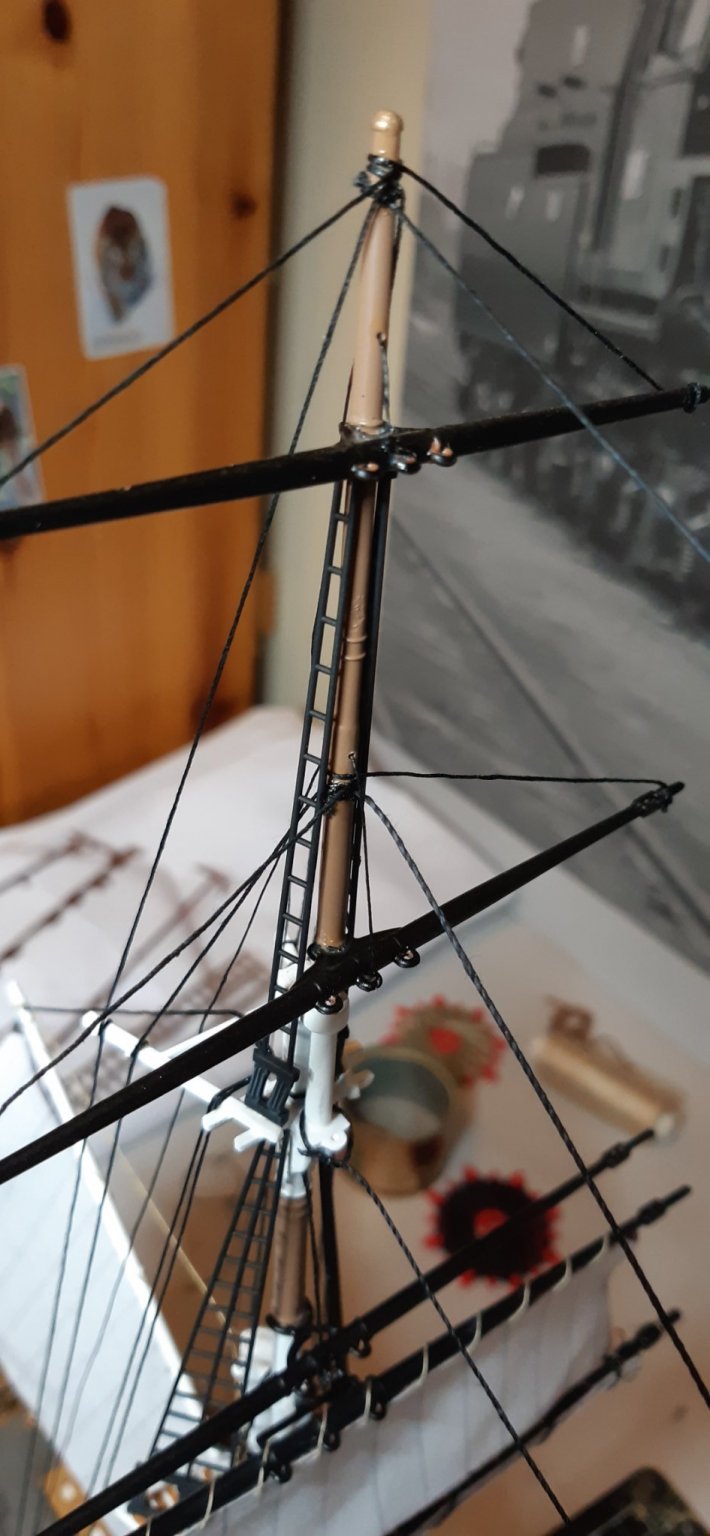
The build is almost at the finish line.After finishing the lifts, only the running rigging was remaining. I started with rigging the clewlines of the sails. Compared to later steps, it was simple, and relatively easy.
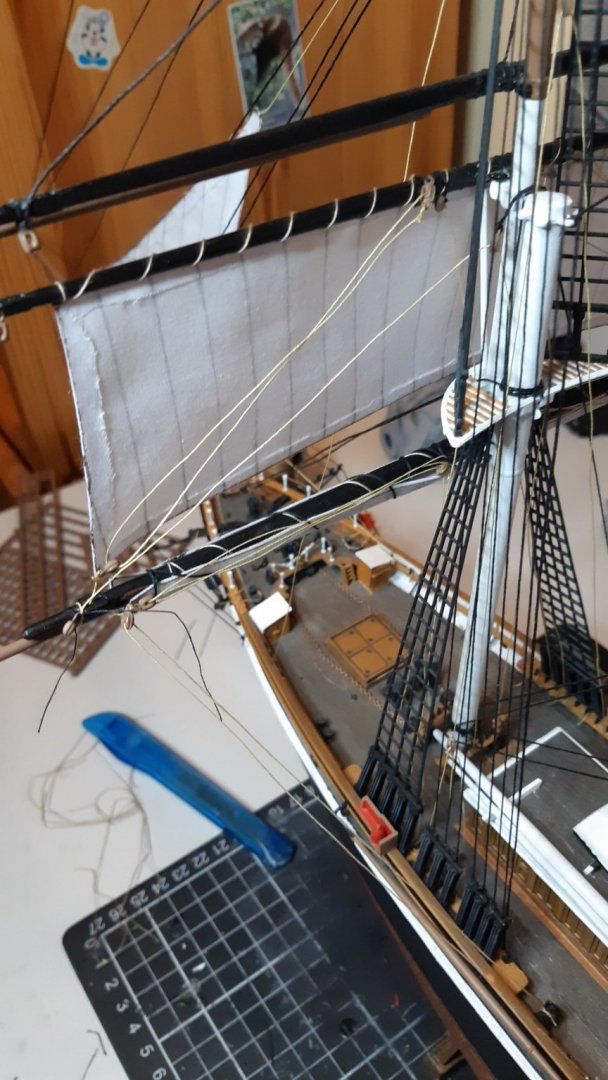
Then I continued with rigging the braces. I started from mizzenmast...

...then mainmast...
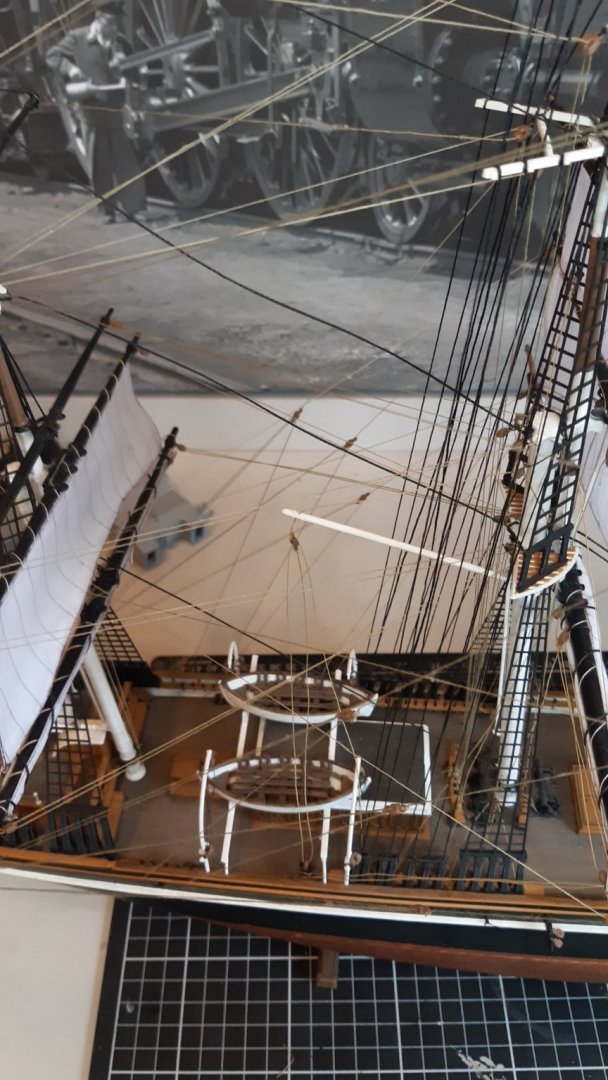

...and finally foremast
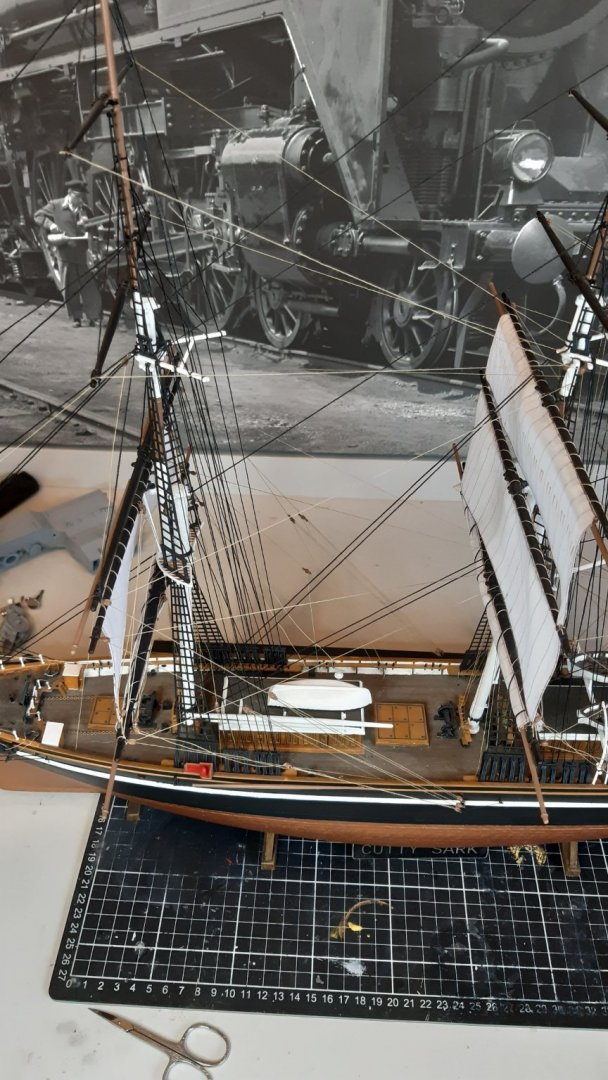

And a few pictures about the finished rigging and the ship near completion:
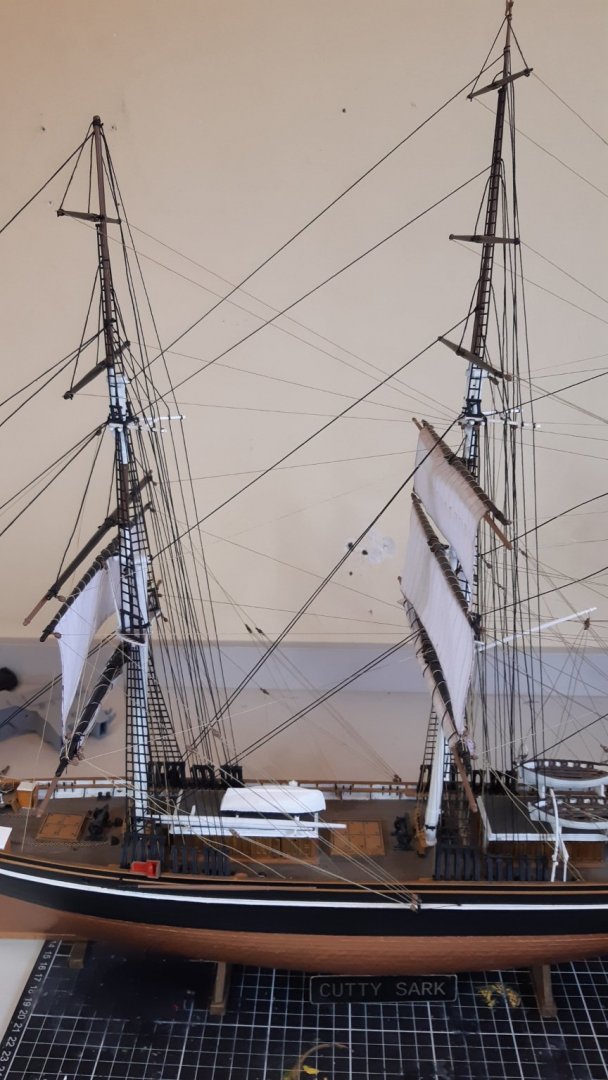
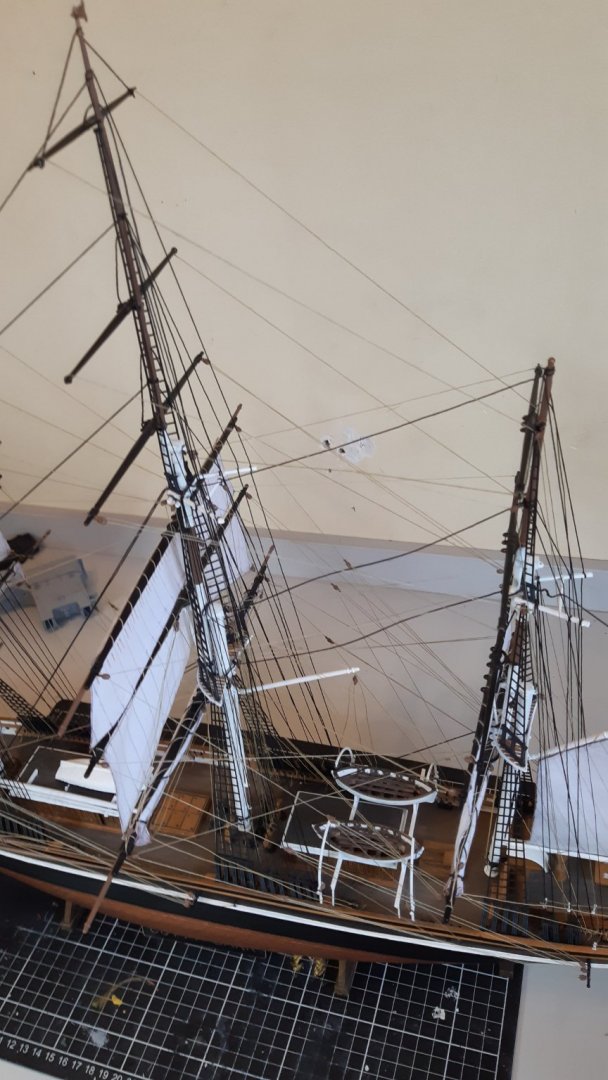
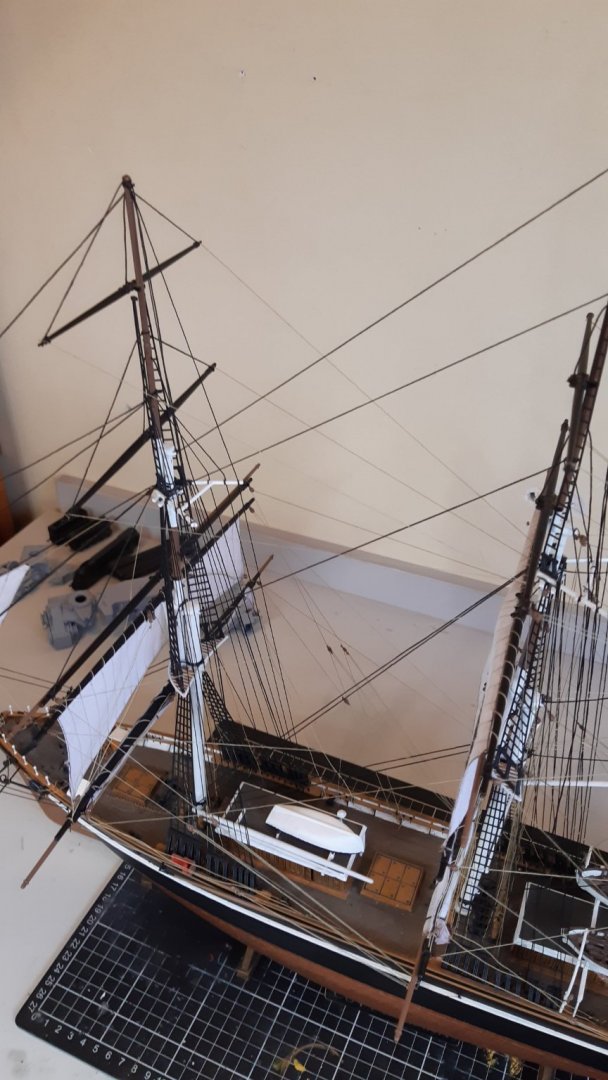

Towards the end the rigging started to look like a forest, and was quite the challenge to fix the ropes to their respective places, without breaking anything.
The ship is almost complete, the only things remaining are the ensigns, and the chain links on the bowsprit.
- Ian_Grant and Veszett Roka
-
1
-
1
-
On 9/5/2021 at 10:34 AM, Kevin-the-lubber said:
Somewhere on this site, in the last 2 or 3 months, there was a thread (no pun intended) on rigging and the use of various media to glue coils, end etc. (I really must start bookmarking these things). Anyway, I think one of the advantages of using a matt nail varnish sealer/topcoat (rather than for instance CA) to hold a rope shape was that it looked more natural, was more or less invisible. So, if it was me, I'd try printing up a little former to get the shape I want, see if a wet rope will dry to shape wrapped around this and then try the nail varnish thing. Something like this below.
Your ship looks stunning. I'm resisting for now, I know I'd get just as sidetracked doing a Thermopylae (love that green hull), but it's something to look forward to.

Thanks, I will try the varnish, I hope it will turn out good.
-
It took longer, than I anticipated, but I finished the lifts. It was tedious and not that easy. Especially that I had to secure the wires nex to the standing rigging. But it is finished, so the next step is to make the sail-outers (?), which I thin will be even more time consuming...


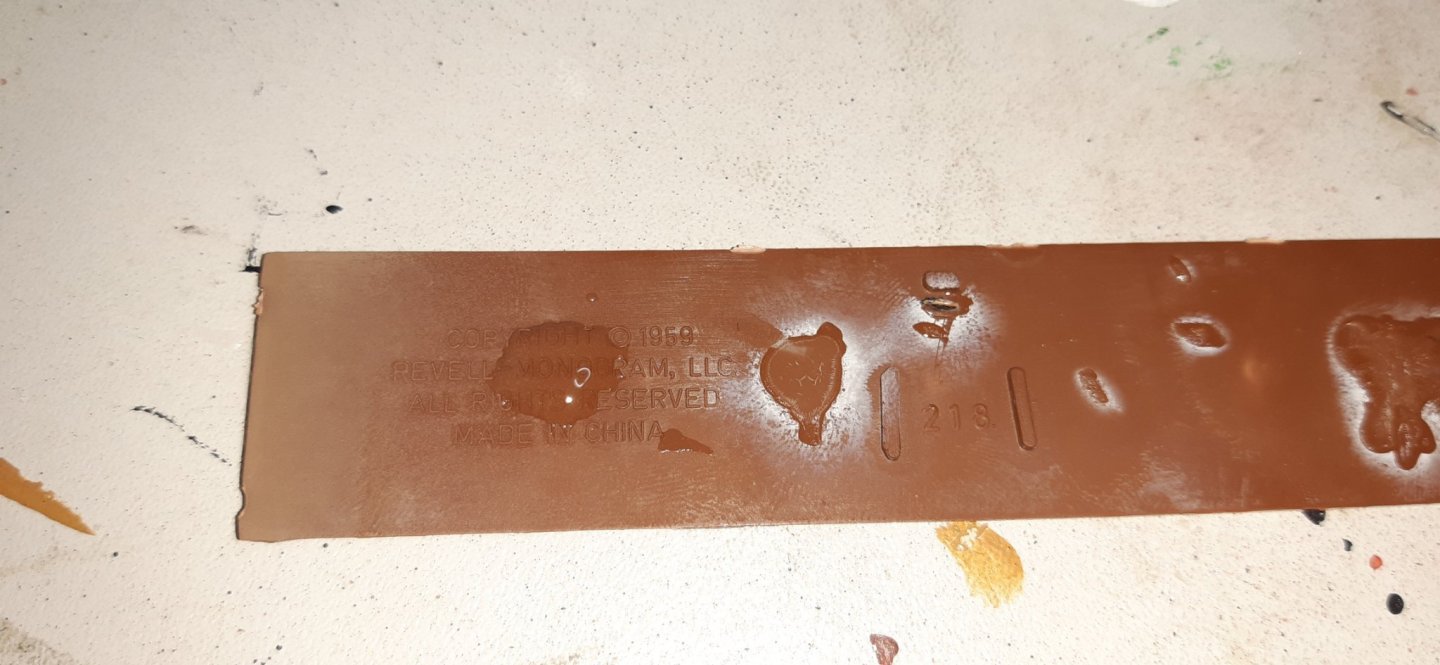
Also the age of the moulds are solved, since I found a date on the back of the plastic nameplate: 1959 🙂
- GrandpaPhil and ScottRC
-
2
-
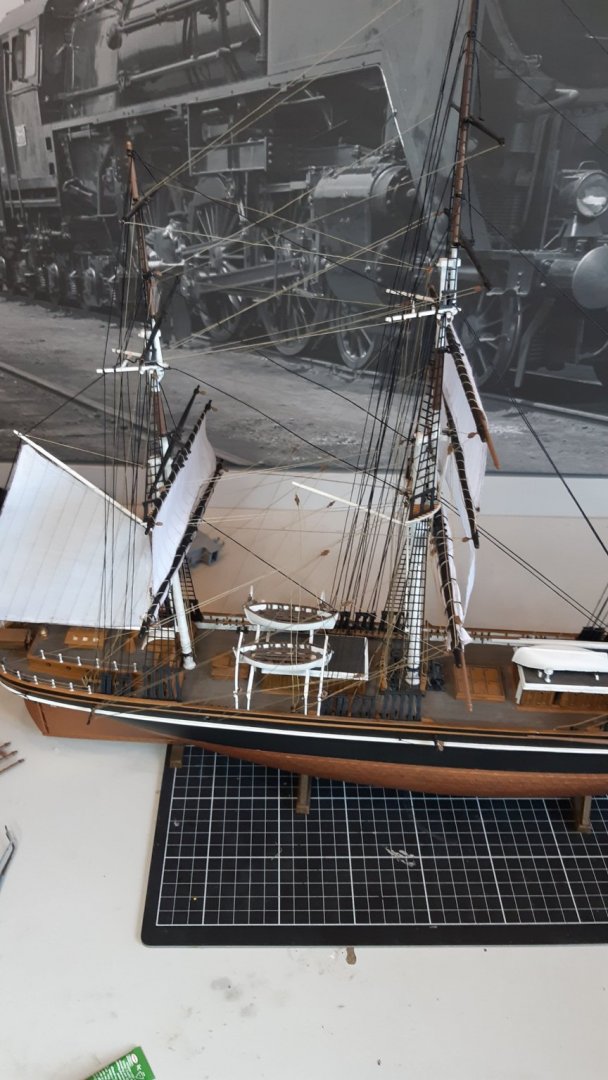
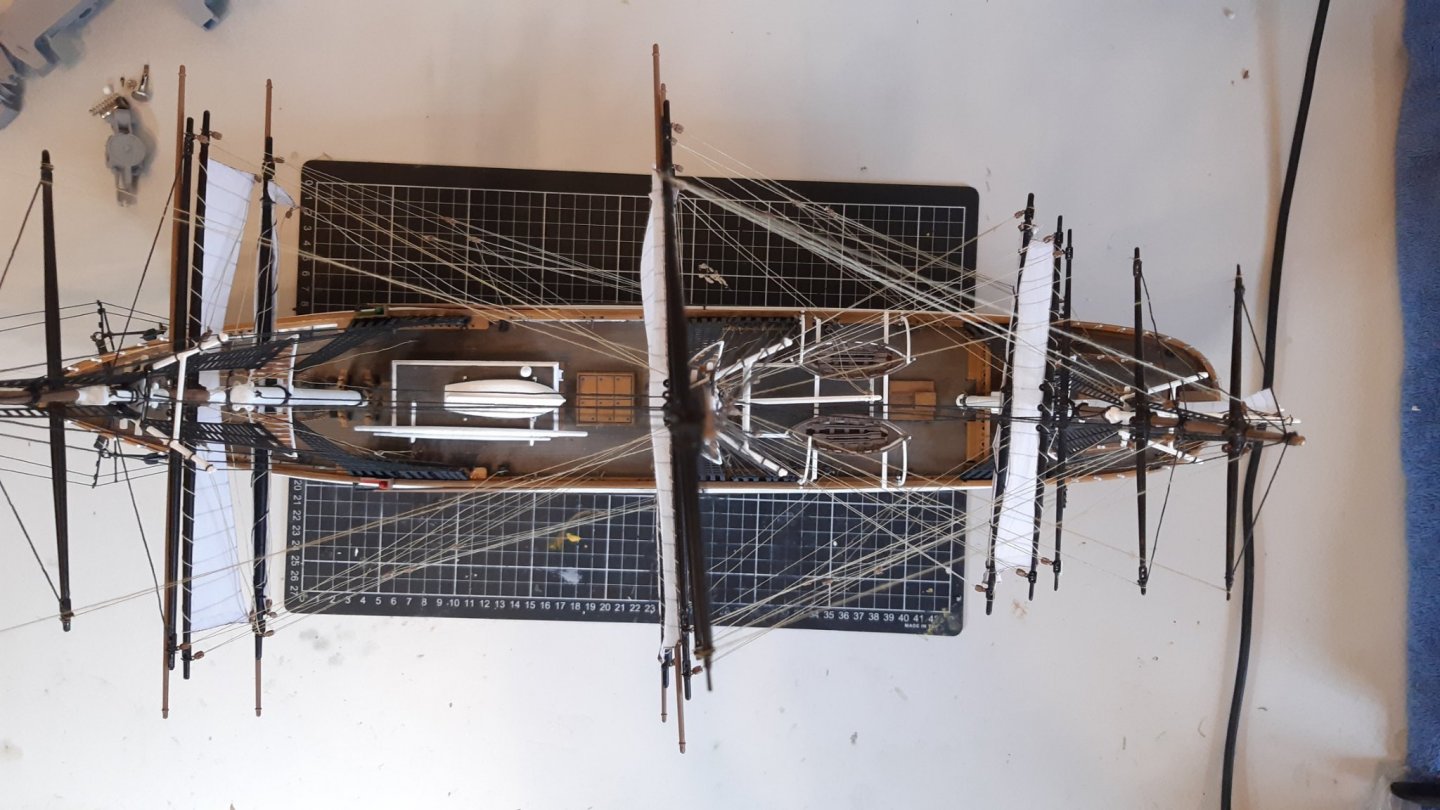
The sails and yards are finished and put into place. I didn't place the sails on the upper yards, so all three sail variants (empty yards, rolled up sails, hoisted sails) are shown (and of course, I didn't have to make an additional ~10 sails). Now only the running rigging remains, to finish the model.


- GrandpaPhil, hof00 and Veszett Roka
-
3
-
On 9/3/2021 at 1:21 PM, Kevin-the-lubber said:
So an older kit is probably better than a new one. I may just do a saved searched on eBay and wait for an old kit to come up. I don’t really want to feel I must re-make a lot of parts via 3D printing, at least not at the moment, because that would just be more of the same as I’m doing with the Heller Victory. After a while that becomes quite boring. I’ve never tried a real wood model, not sure I have the skills for that!
Probably, but I don't know if the molds shifts (which are the most annoying, and most difficult to correct problems imo), are the result of ageing or originally badly made moulds. Both new and old kits have pro and cons. New: better decals, and the shrouds are moulded, which is nice for a guy like me, who hates rigging. On the other hand the kit is out-of-date, and expensive for it's quality. Old: Probably better quality moulds (but it also the plastic sit in a box for 20-30 years in who know what conditions...), rope shrouds, which are more realistic, but the decals are worse, and the kit is not neccesarry cheaper than the new.
So the choice is up to you 🙂 -
18 hours ago, Kevin-the-lubber said:
I too stumbled across your log just this morning - I saw a part-built kit going cheap on eBay, hadn’t realised it’s available as a 1:96 (the smallest scale I’ll ever use!). Very nice work there. How do you rate the kit in terms of quality, fit accuracy etc? Like you I don’t mind doing a bit of resin printed part replacement.
Well, if you can get the kit for around $70 I would say it's worth it, but above that, the value for money starts to sink rapidly, in case you view it as a plastic kit, and don't compare it with wooden kits of the Cutty Sark. In the latter case (i.e. you want to build a tea clipper model) it could worth around $100-150.
Even the newly boxed kits use the same mold as the ones from the 80s, and they are starting to show their age. Lot of, if not all of the molds two sides are shifted, sometimes just slightly, but 0.5-1 mm shifts are not uncommon. There are lot of leaks between mold sides, the edges are not as sharp, and there are a lot of too deep or too high pinmarks. Also the fit is not that great for bigger parts you will need to sand for quite a while, to even be able to put them in place (except for the hull and mast-deck connection, which have good fit even for todays standard) -
-
Yay or nay?
First try on sails.


-
2 hours ago, Veszett Roka said:
Szia Attila,
it is coming along very nicely. How do you plan to display the sails, on full tack or furled?
I'm planning to make a storm sail, so only the lower topsails, one or two jibs and the aft spanker would be hoisted, the others will be lowered or put into storage (so not visible at all). Something like on this picture:

-
15 hours ago, Snug Harbor Johnny said:
'Love your build of a classic kit I did myself as a lad (model long gone, though). I've obtained a Revell Thermie kit (cloned from the Cutty), and I'm thinking to make it in the barkentine mode - an option provided for in the kit to represent her time in the timber trade in the Northwest. She was painted white then, and there are some good photos to model her as she was in that roughly 5 year period. Of course there were some compromises Revell made, as the ship has the same lines as the Cutty. The bow below the water line can be shaped to the 'Aberdeen' curve easily enough, but the stern profile represents a challenge - and the transition from the aft deck to the main deck is somewhat different than on the prototype.
The decision to be made (eventually) will be to either cut away the plastic above the prominent lower shear strake and plank in wood upwards from there (but leaving the forecastle alone) to increase accuracy (a harder way to go), or built her as provided - thus 'respecting' the classic kit. I can pare away the intermediate rub rail between the shear and the gunwale, as well as adjust the bow to the Aberdeen profile. No rush, mates - as there is much to do in the meantime. A stash of a mere 6 kits for what is hoped to be a 20 year retirement is hardly an excess. Just thinking and planning how to build (or bash) is for me as enjoyable as actually building. And it is a pleasure to review the many fine builds available on the forum like yours.
Fair sailing ! Johnny
Looking at the quality of the molds, my model is probably from the same era, as yours long gone, sadly.
Apart from leaving the hull as it is, the easiest method (for me) for the stern would be, to cast a resin block to the back of the ship, then carefully carve and sand the correct shape. Also unlike resin, wood have quite a different texture, compared to plastic, so I think it would be visible, that the stern was made from a different material, than the hull.


MS Bydgoszcz general cargo ship by Arctic37 - FINISHED - Scale 1:200
in - Build logs for subjects built 1901 - Present Day
Posted
I struggled with the hull too, the loft feature of Inventor isn't made for this (tough that feature is a buggy mess nonetheless). After 10-15 hours of struggling, I just left it as it is (of course far from perfect, but got fed up with that)
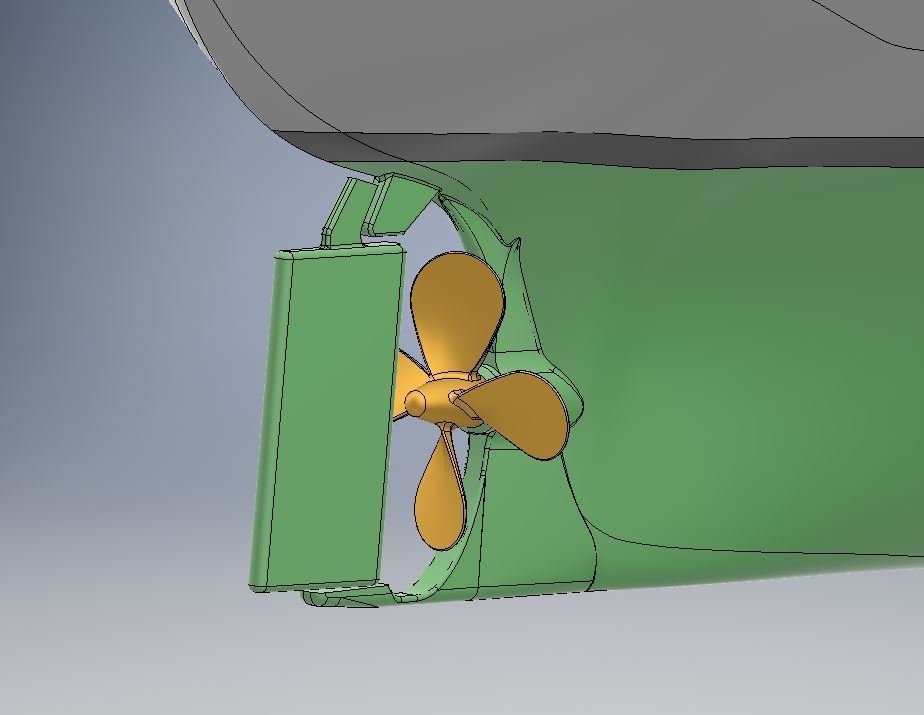
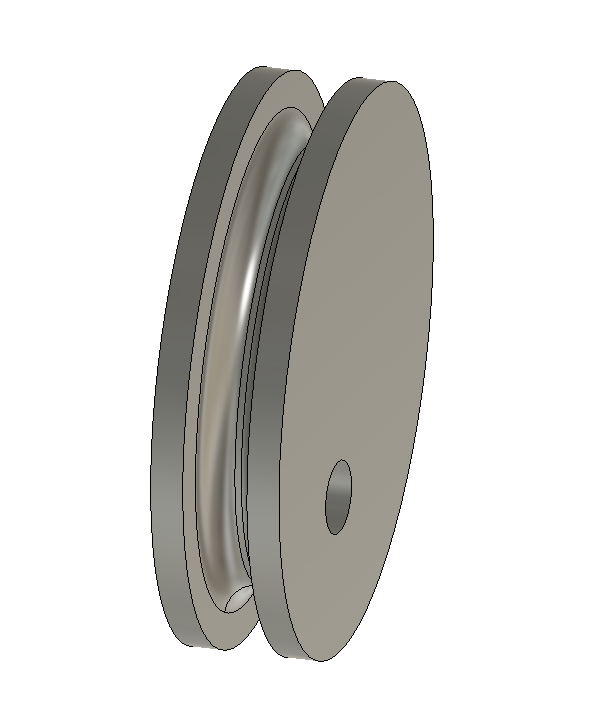
The propeller was easy, it's a helix (coil), cut around to the desired shape (see pictures). It's not perfect, but good enough
I have an Anet A8 FDM printer and an Anycubic Photon DLP printer. The former made the hull (from 3 parts) and the superstructure (4+1 parts). The other smaller parts are made by the DLP printer