


CPDDET
-
Posts
1,194 -
Joined
-
Last visited
Content Type
Profiles
Forums
Gallery
Events
Everything posted by CPDDET
-
This is great advice! If I were to begin again it's what I would do. I would also recommend the half hull planking project offered by Nautical Research Guild. Planking a hull correctly can be a tricky business and it's a skill that will serve you well in future builds. That said, welcome aboard! Dave
-

Decorative trim/rail
CPDDET replied to DaveBaxt's topic in Building, Framing, Planking and plating a ships hull and deck
I have used them on cherry wood with great results. Don't know about walnut. -
Welcome, while you will find all the help you need here, we are all looking forward with what you can share with us as well. Dave
-
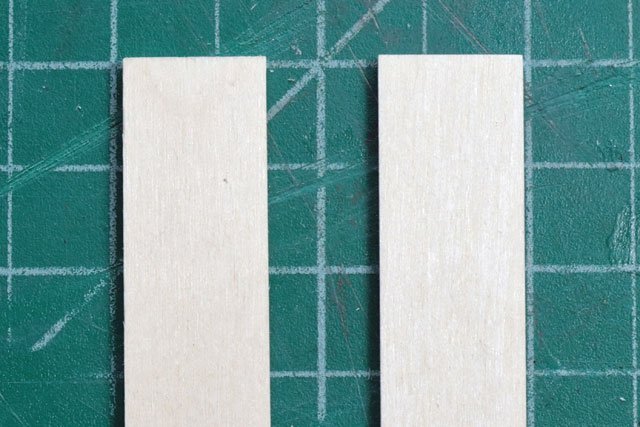
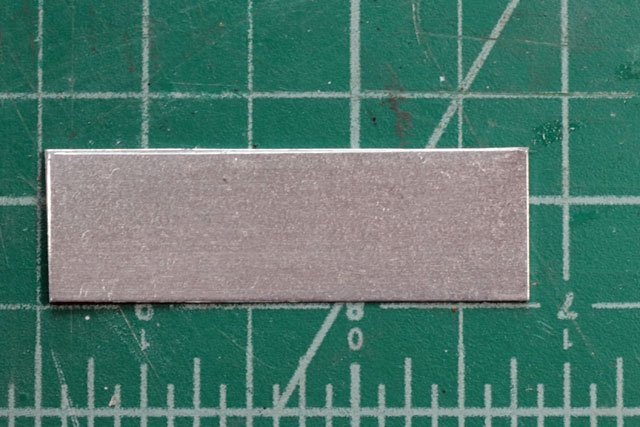
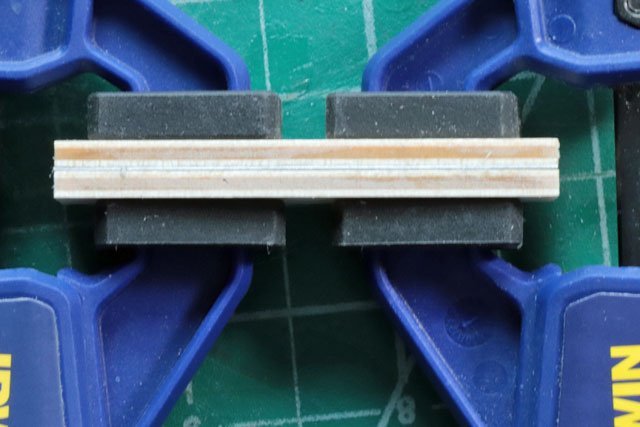
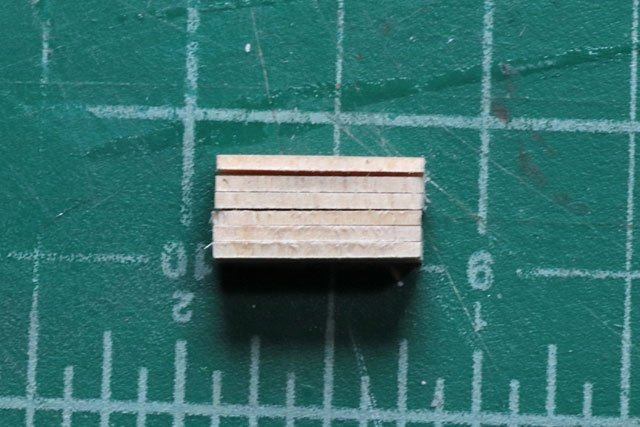
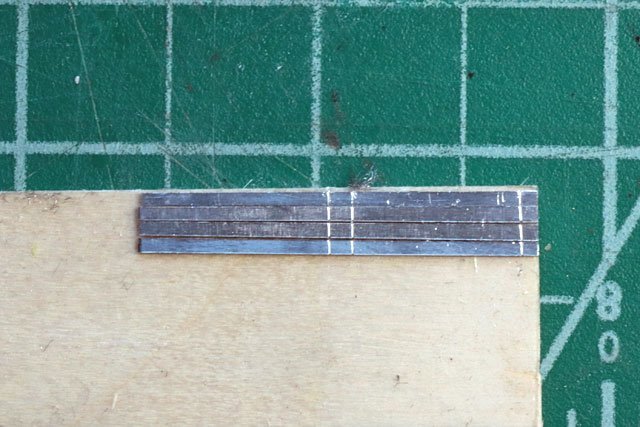
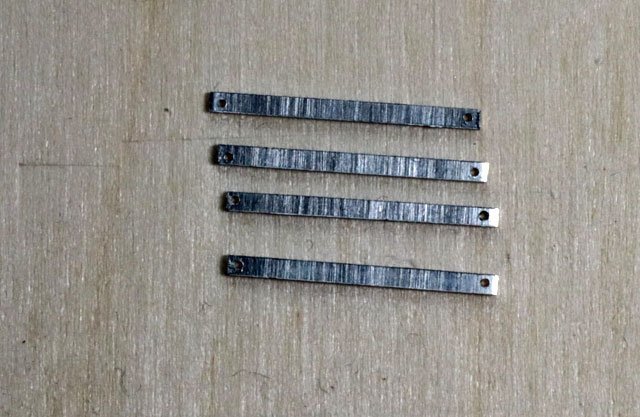
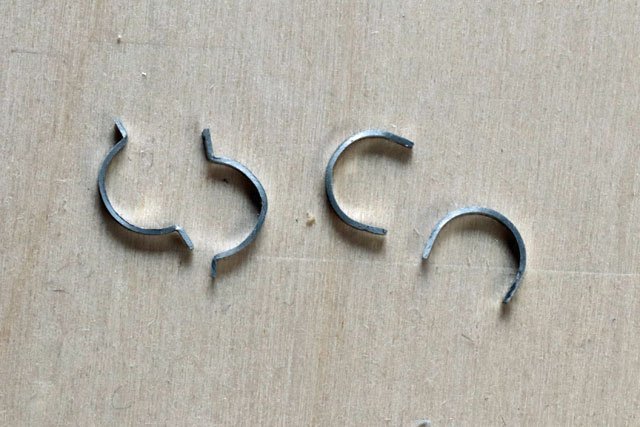
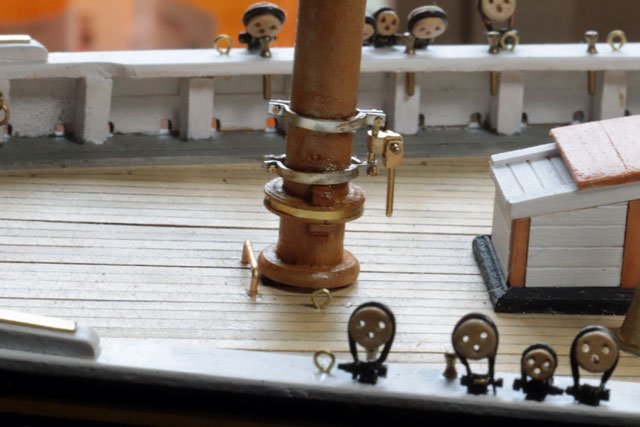
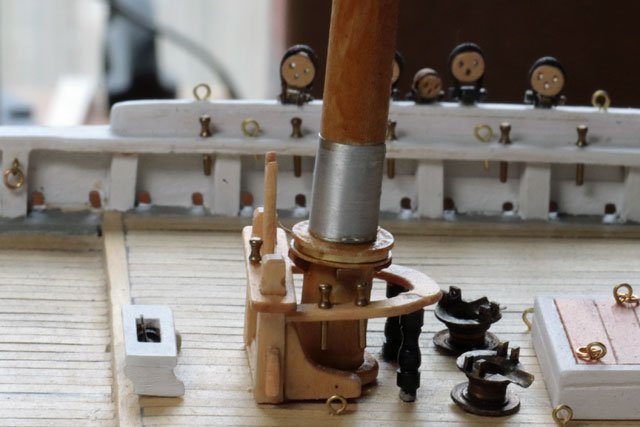
Since the plans called for these straps to be galvanized steel, I decided to make them out of aluminum instead of brass. Started with 2 pieces of 1/8 inch thick plywood Glued (CA) a piece .016 thick aluminum between the pieces of plywood and clamped until set up Then cut .05 wide strips on the Burns saw, needed 4 but cut a few extras After soaking the cut pieces in acetone to release them I marked where I needed to drill holes for the bolts. The far left mark is the cut off. Then drilled holes with a #77 bit After shaping the 4 halves I mounted the gooseneck to the bands and the bands to the foremast with .05mm bolts and nuts. Touched the bolts with CA to hold them in place then added a coat of amber shellac. Dropped both the foremast and mainmast into the model, but did not glue in place yet. Now it’s onto the foremast boom….
- 389 replies
-
- 3
-

-
- bluenose
- model shipways
- (and 1 more)
-
https://modelexpo-online.com/Model-Shipways-Shipwright-3-Kit-Combo-Series-with-Tools-and-Paint_p_5290.html
-
If I were just starting I would do the 3 kits, in order, offered by model shipways. I would also do the half hull planking kit offered by the Nautical Research Guild.
-
Planning on it if the creek don't rise and I'm still on the green side of the grass.
-
There is a product made by Flitz out of Wisconsin. Supposedly spray on and rince, no scrubbing needed. I have a very badly oxidized brass kick plate on our front door that hasn't been cleaned in 15 years. So I'm going to try this stuff. Brasso had little to no effect. I'll keep you posted.
-
That's quite a statement. You may want to sleep on it. Can the copper be cleaned? Would you consider applying Renaissance Wax and leaving it bright after cleaning? Or cleaning and then using a different method to "age" it? Just wondering what options you have available.
-
Glad to hear all is well, except for a few minor flaws. I'm sure you're pleased to be up and running again. Dave
-
Welcome! This is a great resource and has helped me tremendously. I'm sure you will find all the help you need here. Dave
-
Nice work! At this scale things can be a real challenge.
-
Only way I know of getting it right without too much waste.
-
Does This Wood Model Ship Have Any Monetary Value?
CPDDET replied to jtridexter's topic in New member Introductions
You have to remember that those who are on this site have a critical eye. The general public wouldn't look at this model the same way. Put it up on Ebay and see where things go. -
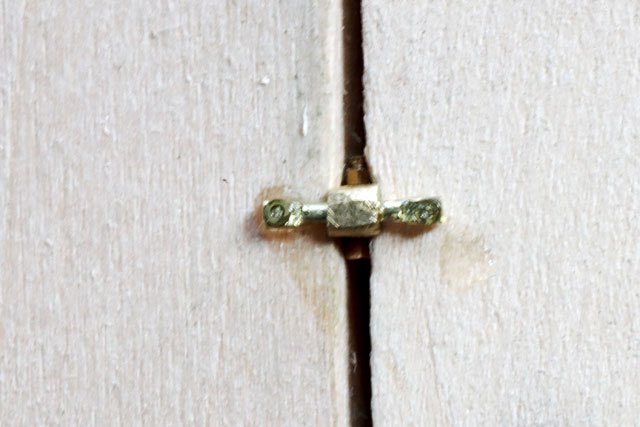
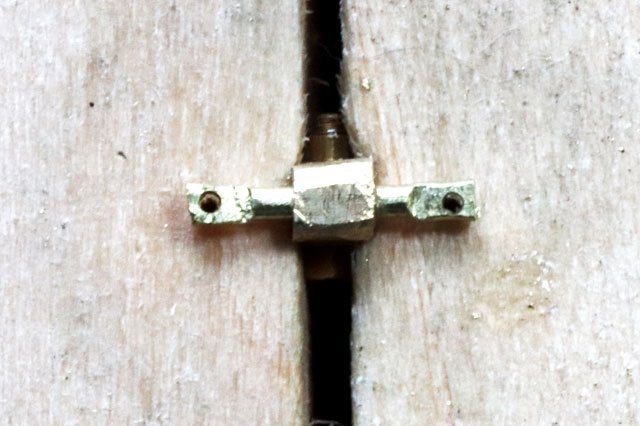
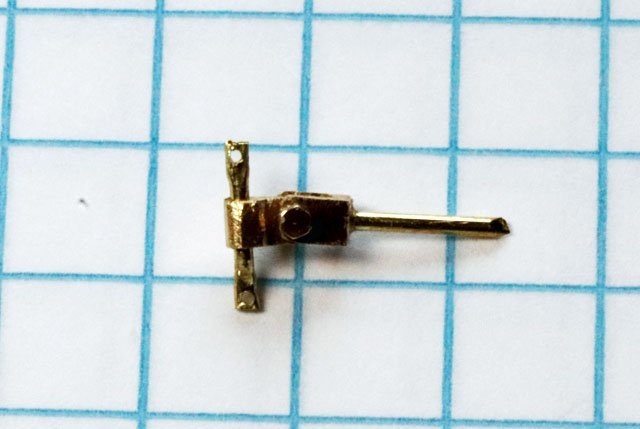
The next step was to make the vertical rod on which the gooseneck rides. I began by taking a piece of 1/32 inch brass round stock and flattening one end with a pin driver and hammer. Then slid the gooseneck on the round end before flattening that end with the pin driver. In order to drill the holes in the flat ends without the drill bit wandering, I glued (CA) a .05mm washer on each end to act as a guide for the drill bit. Then hand drilled the holes with a pin vice. After words I used acetone to remove the washers. Now to build the bands that attaches the gooseneck assembly to the foremast.
- 389 replies
-
- 2
-
-
- bluenose
- model shipways
- (and 1 more)
-
Welcome! Contributing and rendering help is what this site is all about. Dave
-
I use a clear spray acrylic matte finish over my painted parts. Adds some UV protection and makes the model easier to dust off.
-
sanding sealer
CPDDET replied to CLovehitch's topic in Building, Framing, Planking and plating a ships hull and deck
Zinsser, Varathane and Minwax all make sanding sealers as well. -
sanding sealer
CPDDET replied to CLovehitch's topic in Building, Framing, Planking and plating a ships hull and deck
I have been using Delta Ceramcoat on basswood and found it to work quite well. -
Good to hear things are moving along
-
Welcome aboard!
-
Glad to have you join us!
-
Welcome! Be sure to keep us posted. Would love to see pics of your dads build and kit.