


CPDDET
-
Posts
1,194 -
Joined
-
Last visited
Content Type
Profiles
Forums
Gallery
Events
Everything posted by CPDDET
-
Welcome! I'm sure you will get all the help you need on this site.
-
 Thanks again for your detailed info. It's going to be a big help as I proceed with the spars.
- 96 replies
-
- 1
-

-
- model shipways
- bluenose
- (and 1 more)
-
Wow! Looking very nice!
-
These highly detailed entries are going to be a huge help for me as I approach doing the spars. Thanks, Ed!
- 96 replies
-
- 1
-
-
- model shipways
- bluenose
- (and 1 more)
-
Yes, it's nice to have such a tool. But it's a huge learning curve for me. Having no experience at all with a mill, or lathe for that matter, has hampered my ability to use it to it's full advantage. These tools are great but having the knowledge on how to use them is the real key. No magic pill here.
- 389 replies
-
- 1
-
-
- bluenose
- model shipways
- (and 1 more)
-
Welcome Alex! Enjoy your new hobby.
-
Holy smokes!
-
Your ahead of me. At 71 years old my hands aren't steady enough for a carving knife.
-
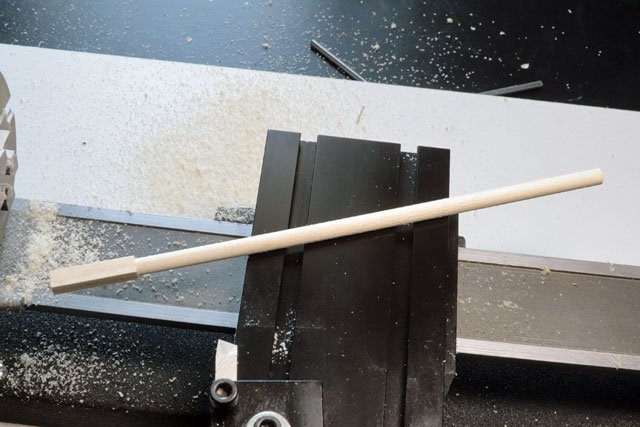
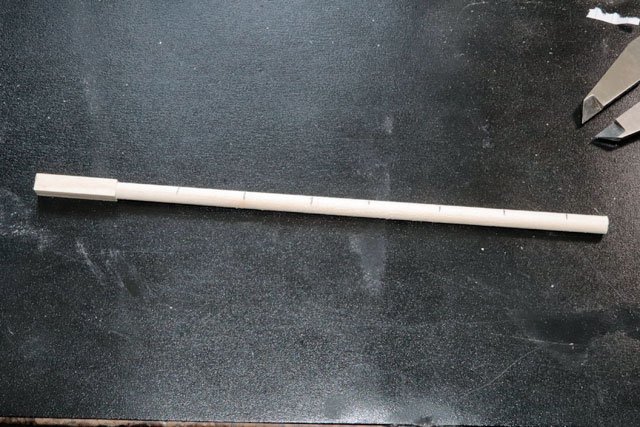
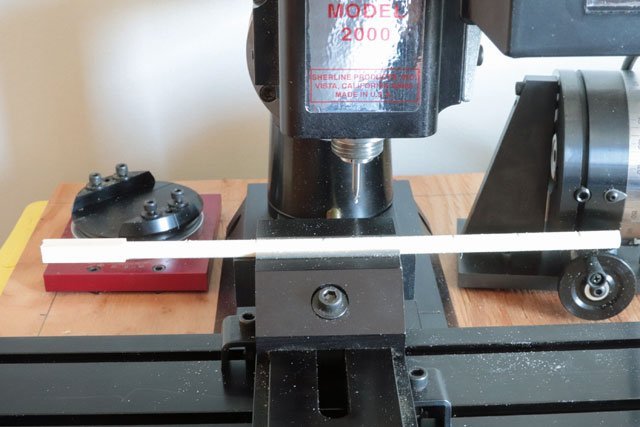
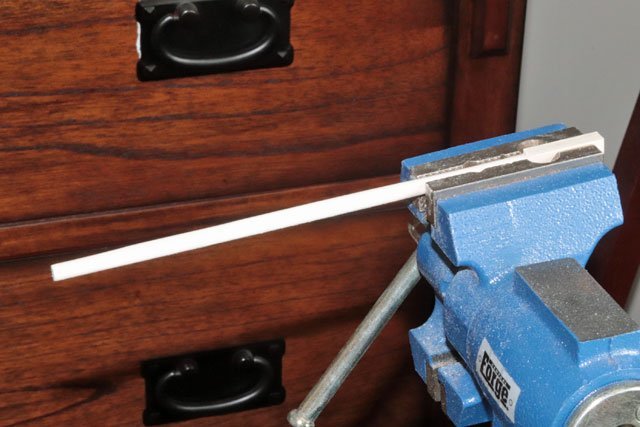
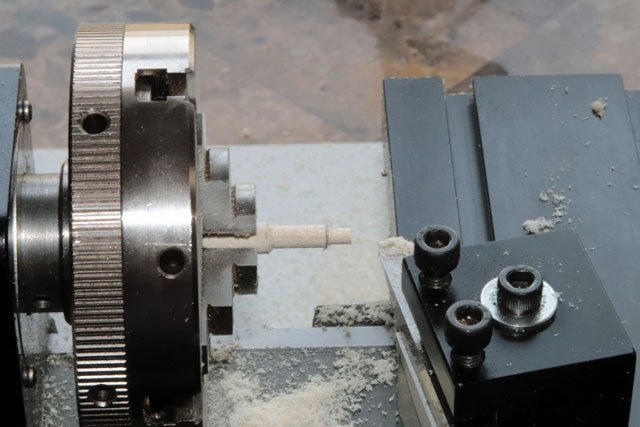
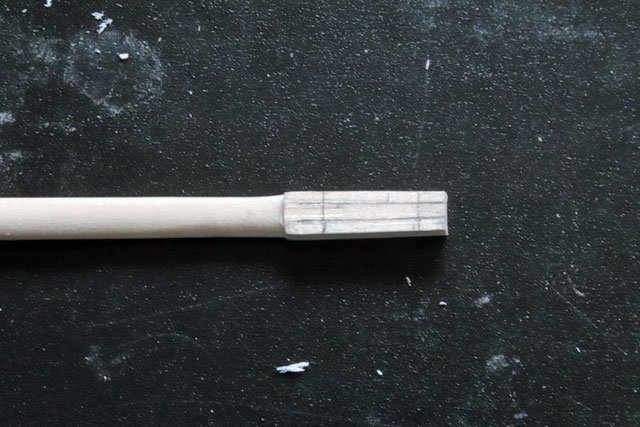
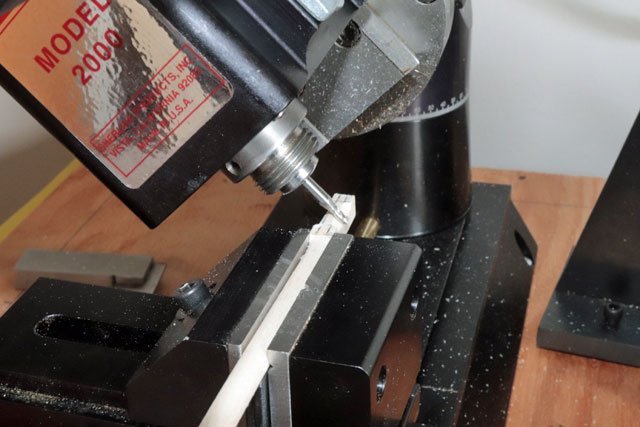
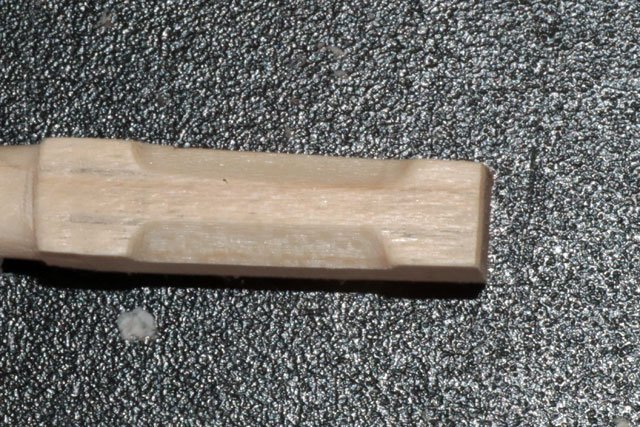
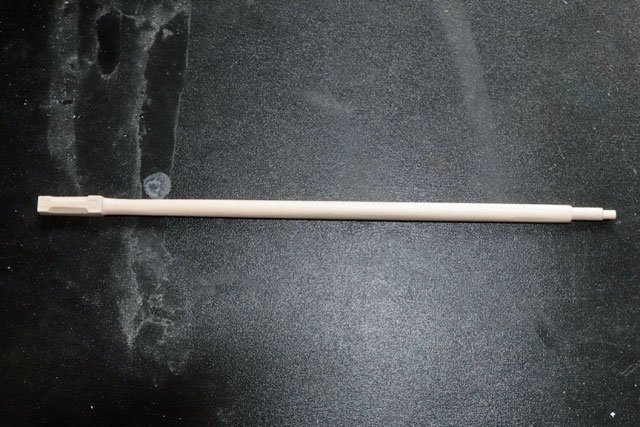
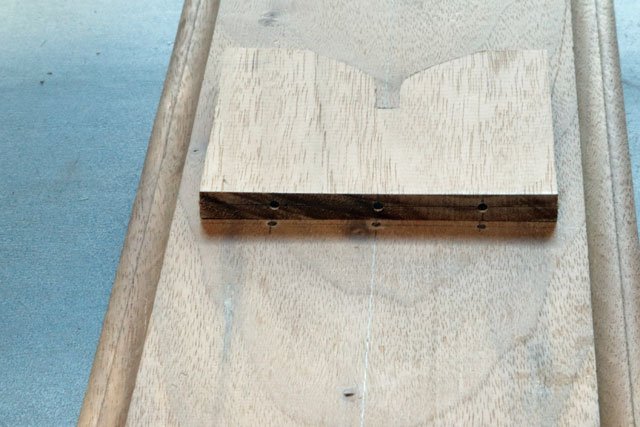
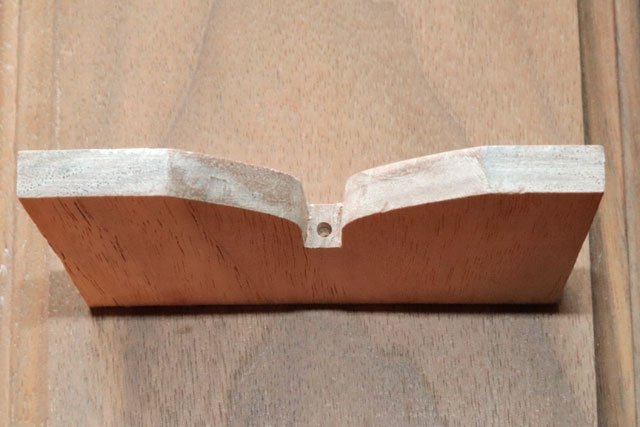
Thought I would post my building the bowsprit, even though it’s not totally finished. First off I would like to thank all of those who were kind enough to detail how they built this piece, including Suburban Ship Modeler, Ed KU20, Retired Guy and many others. Never could have done it without their documentation. I really wanted to build this part from scratch and decided to use poplar wood. It’s a step above basswood, cheap and readily available at big box stores like Lowes. But I fount still to be a bit too “fuzzy”, although it does give a bit better detail than basswood. Cherry would have been a better choice as it’s also readily available (at least where I live) not too expensive and allows much better detail than either poplar or basswood. When my skills progress further I will invest in more expensive wood types. While the plans call for the bowsprit to be painted white inboard and black outboard, I decided that I might want to stain the outboard portion and cherry wouldn’t have worked for that unless I wanted to do the masts in the same wood, which I didn’t. The poplar allowed me the option of either painting or staining the outboard portion. I started with a ¼ inch, square piece of poplar and turned it on the lathe Then, after taking several measurements, I marked the spar in locations for the taper at each end. Putting the spar on the mill, I cut grooves at the marked locations. The more the taper, the deeper the groove and vice versa. This would allow a guide when sanding to shape. I locked the spar in a vice and carefully sanded the top and sides to the proper shape, leaving the bottom of the spar a straight line (per the ships plans) Putting the spar back in the lathe, I cut the 2 stepped areas at the forward tip. After trimming the square area to the proper length, I tapered the sides I marked the square area for the chamfers Then put the piece back in the mill to cut the chamfers This is the finished square area. As you can see I didnt cut the tenon on the end as I didnt think far enough ahead and cut a mortise in the Samson post for it. But a test fit showed a nice snug fit between the deck and platform, and the tenon wouldn't show anyway. And this is the top view of the finished bowsprit All and all I was pretty happy with the shape, as it’s a bit tricky to get right with the bottom a straight line and the top kind of “humped”. Now it’s on to “dress” the bowsprit, which will put my metal working and soldering skills to the test.

- 389 replies
-
- 4
-
-
- bluenose
- model shipways
- (and 1 more)
-
1:54 HMB Endeavour
CPDDET replied to Tony_Brooks's topic in Building, Framing, Planking and plating a ships hull and deck
As you say, it's your model. So if your pleased with it that's all that really matters. I'm a firm believer in this approach. -
I'll second the use of fly tying line.
-
Nice way to "think outside the box", Richard. The scrolls came out beautiful!
-
Thanks Richard!
-
Welcome to MSW. Start a build log so we can all follow along.
-
Thanks for moving your notes to this build log. I will be following it closely
- 96 replies
-
- 1
-
-
- model shipways
- bluenose
- (and 1 more)
-
If you go the route of the cradles as I did, let me know. Using the contour gauge for this purpose is a bit tricky. I'll pass along some tips.
- 389 replies
-
- 1
-
-
- bluenose
- model shipways
- (and 1 more)
-
Welcome! You will find friendly people here and lots of help.
-
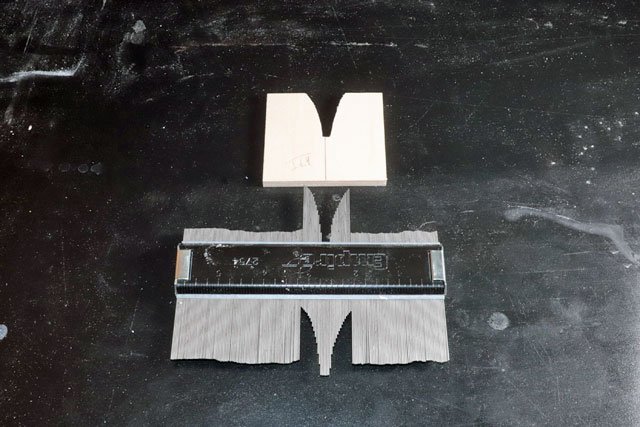
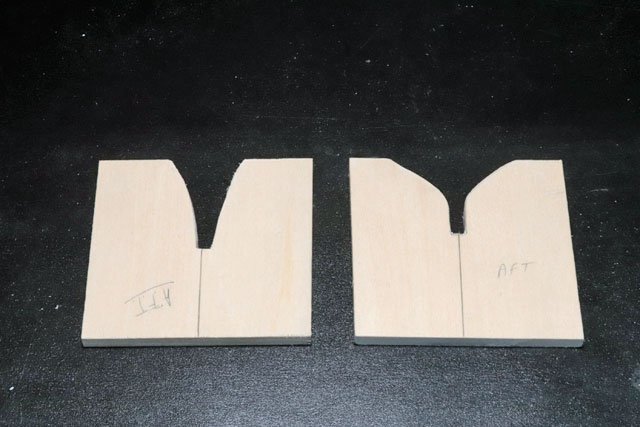
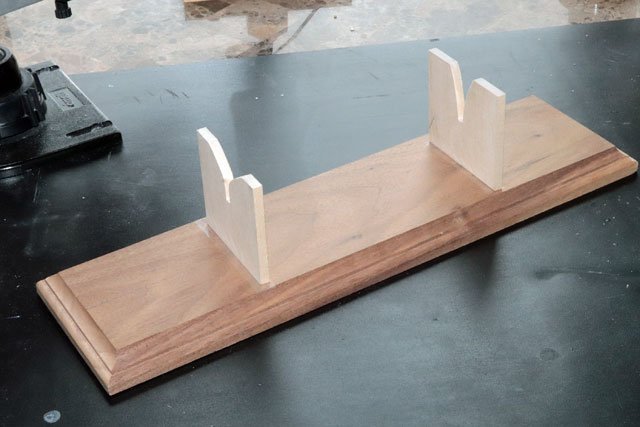
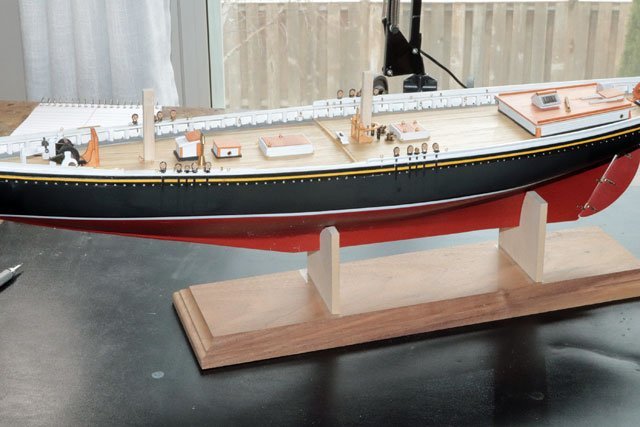
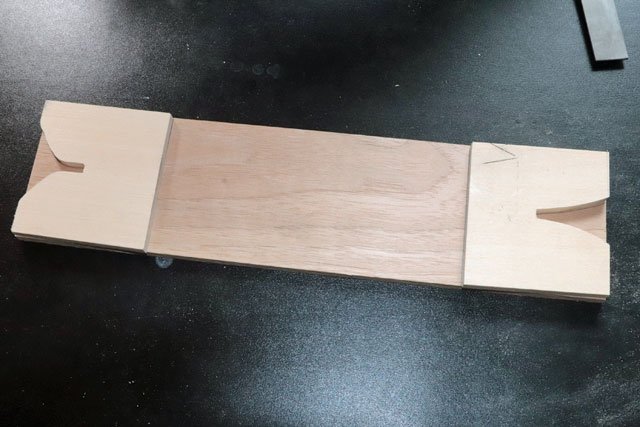
The first challenge was to figure out how to flip the ship over so I could design the cradle. Luckily I had a piece of balsa wood that was spongy enough to friction fit in the mast mounts. Then just mounted the ship upside down in the keel vice. Since I made the error of not prepping the keel/hull for mounting bolts I decided to use dowels to strengthen the cradle assembly. Using a profile gauge, I managed to copy the hull in two places and make cradles out of basswood. Then test fit the cradles on the hull. Using double stick tape, I mounted the basswood cradles on the walnut base and double checked the fit. Picked up a piece of walnut and used the basswood pieces as a pattern to mark the walnut and cut them on the scroll saw. Then drilled holes in both the base and cradle pieces I glued wood dowels into the base and glued the cradle pieces to these Then drilled holes in the base of the cradle pieces to accept dowels that I glued into the keel Then put 3 coats of wipe on poly on the finished piece. Now it’s on to the bow sprit.


- 389 replies
-
- 7
-
-
- bluenose
- model shipways
- (and 1 more)
-
Looking for a good "starter" pin vise set
CPDDET replied to Capella's topic in Modeling tools and Workshop Equipment
If your going to stay with this hobby don't buy tools till you need them and then buy the best you can afford. This is the advice I got years ago and it's done well by me. -
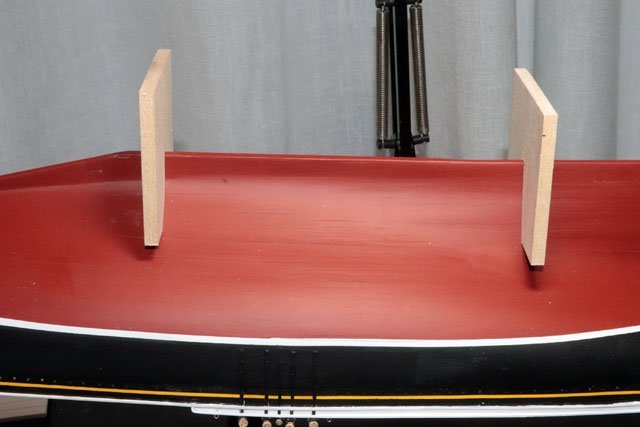
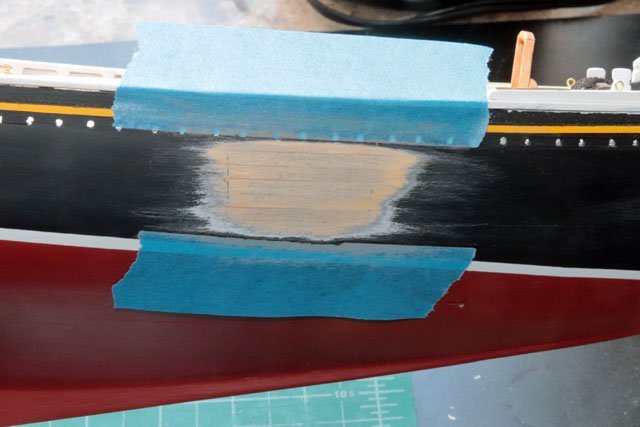
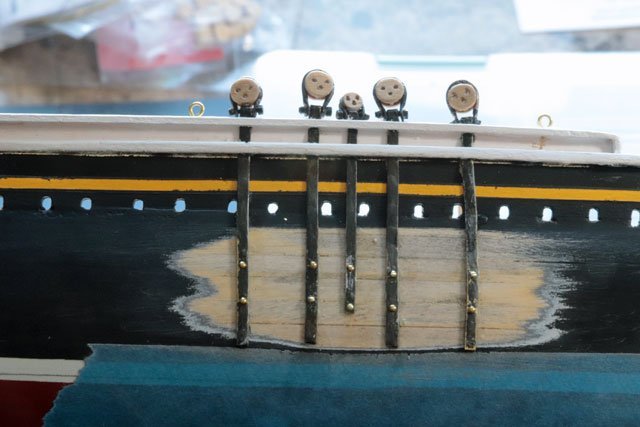
Repainting the hull went pretty smoothly. I used larger pieces of tracing paper and blue painters tape for masking. Then used my airbrush to repaint. I decided not to extend the yellow stripe over the chainplates as I wanted this detail to stand out a bit. Did a little brush work on the chainplates to finish them up, so that part of the build is now finished. I had planned on moving to the bow sprit next but decided that now was the time to get the ship mounted to a base. I already had a nice walnut base and brass standoffs but, do to ANOTHER beginners error, I neve prepped the keel / hull for mounting nuts / screws. So I've decided to build some type of cradle for the model. Going to have to get creative here as I need to secure the ship upside down to work on this step. Ill keep you all posted as that progresses.
- 389 replies
-
- 3
-
-
- bluenose
- model shipways
- (and 1 more)
-
I will add that Sherline customer service is very good. But again, I'm not familiar with Proxxon so can't comment on theirs. It may be just as good.
-
You might want to compare the available accessories from Sherline and Proxxon. Don't know much about Proxxon but Sherline has a wide range of accessories for it's mill. I find the Sherline sensitive drilling attachment very useful, among others.
-
I have a Sherline and have been very pleased with both the quality of the mill, variety of available add-ons and great customer service.
-
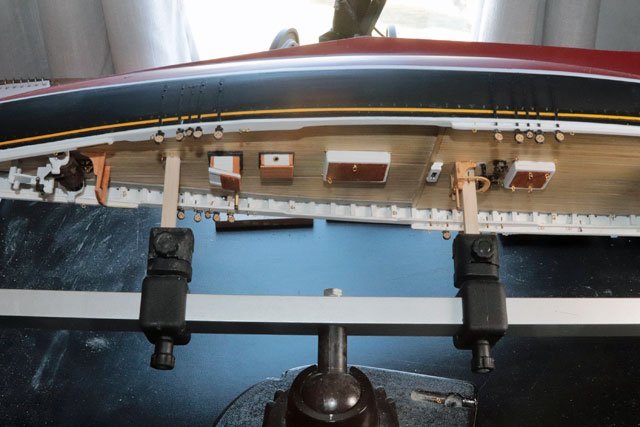
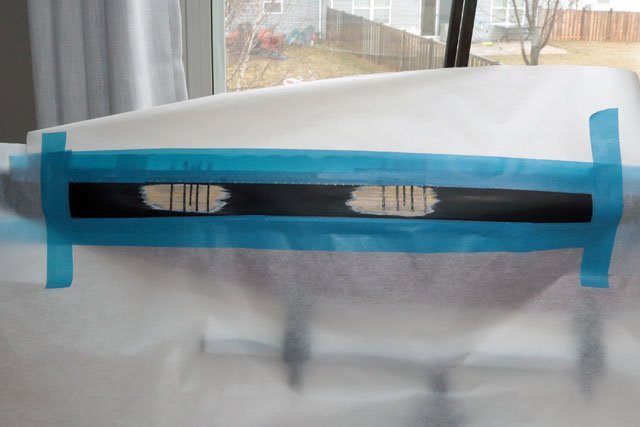
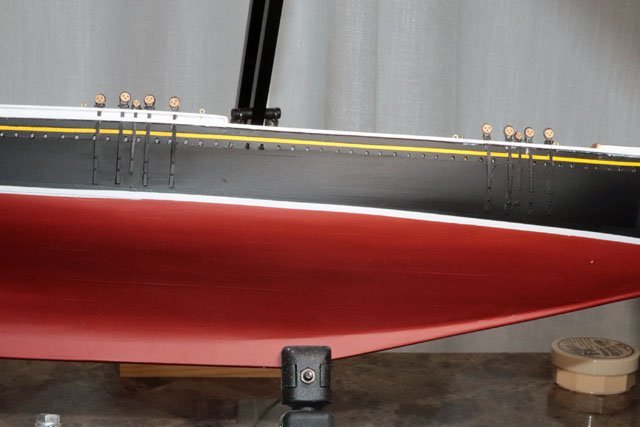
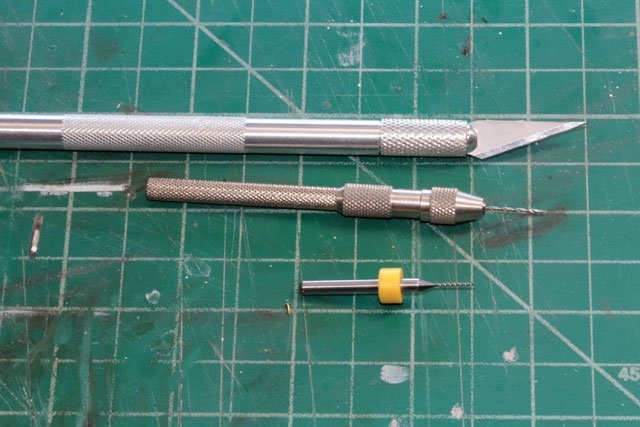
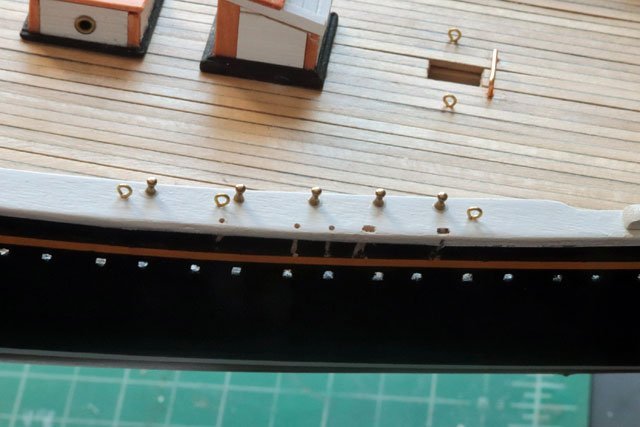
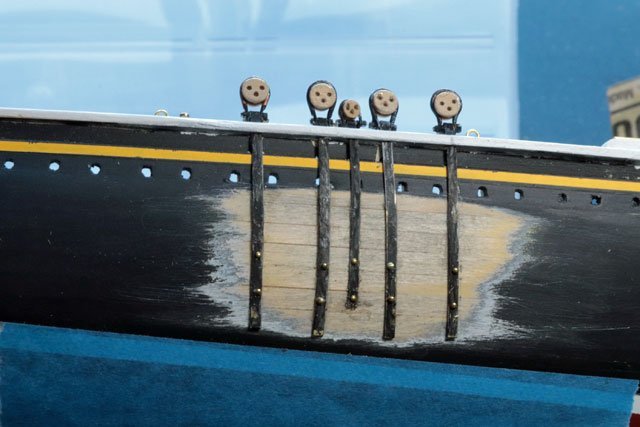
Installed the starboard side chainplates today. I used the 3 tools pictured here: a 1/32 drill bit mounted in a pin vice, a #11 knife and a 1/32 PCB drill bit. I received a set of the PCB drill bits for Christmas but haven't used them much as they seem to screw themselves into material rather than drilling a hole and clearing the shavings as a regular drill bit does. If you look closely your can see the difference between the bit in the pin vice and the PCB bit. While I'm not familiar with the correct names of drill bit parts, the PCB bit is more like a screw. But I found it works rather well when used as a file in this application to elongate the drilled holes. I started out by drilling 1/32 holes for each of the 5 chainplates and then used the PCB bit and #11 blade to elongate them. Wanting a strong bond to the hull, I sanded off a section of paint so that the chainplates would adhere directly to the wood instead of the paint. I used CA to attach the chainplates to the hull and added some small nails to simulate bolts. These small nail heads probable won't be very visible once painted but I thought they were a nice detail, even if only I know that they are there. This is the forward starboard side. This is the aft starboard side where I had to be a bit more precise with my drilling. The slot for the chainplate needed to go through the monkey rail, stay on the outboard side of the the monkey board and then through the main rail. Once I finish up the port side I will re-paint the hull.
- 389 replies
-
- 2
-
-
- bluenose
- model shipways
- (and 1 more)

