


CPDDET
-
Posts
955 -
Joined
-
Last visited
Content Type
Profiles
Forums
Gallery
Events
Posts posted by CPDDET
-
-
-
Welcome home!
- Keith Black and mtaylor
-
 2
2
-
Welcome to the forum!
- AJohnson, Keith Black, mtaylor and 1 other
-
4
-
5 hours ago, tlevine said:
Take a look at this from the Carving Glove Guy. I have used this to sharpen my microchisels for several years. https://thecarvinggloveguy.com/image_preview.html?img=TCGG-DYSTROPKT
Thanks Toni, I'll check it out.
- mtaylor, thibaultron and Canute
-
3
-
On 9/26/2023 at 11:56 AM, Gaetan Bordeleau said:
This tool was done for this many tears ago.

Looks like it could be an attachment for a Tormek
- Canute, mtaylor and thibaultron
-
3
-
I have1/4, 1/8 and 1/16 chisels along with the dogleg ones from Stumac. I think I will stick with those for now and hopefully improve with practice.
Although a micro plane is definitely in my future. Christmas isn't far off and maybe Santa will be good to me.
- Canute, Bob Cleek and thibaultron
-
3
-
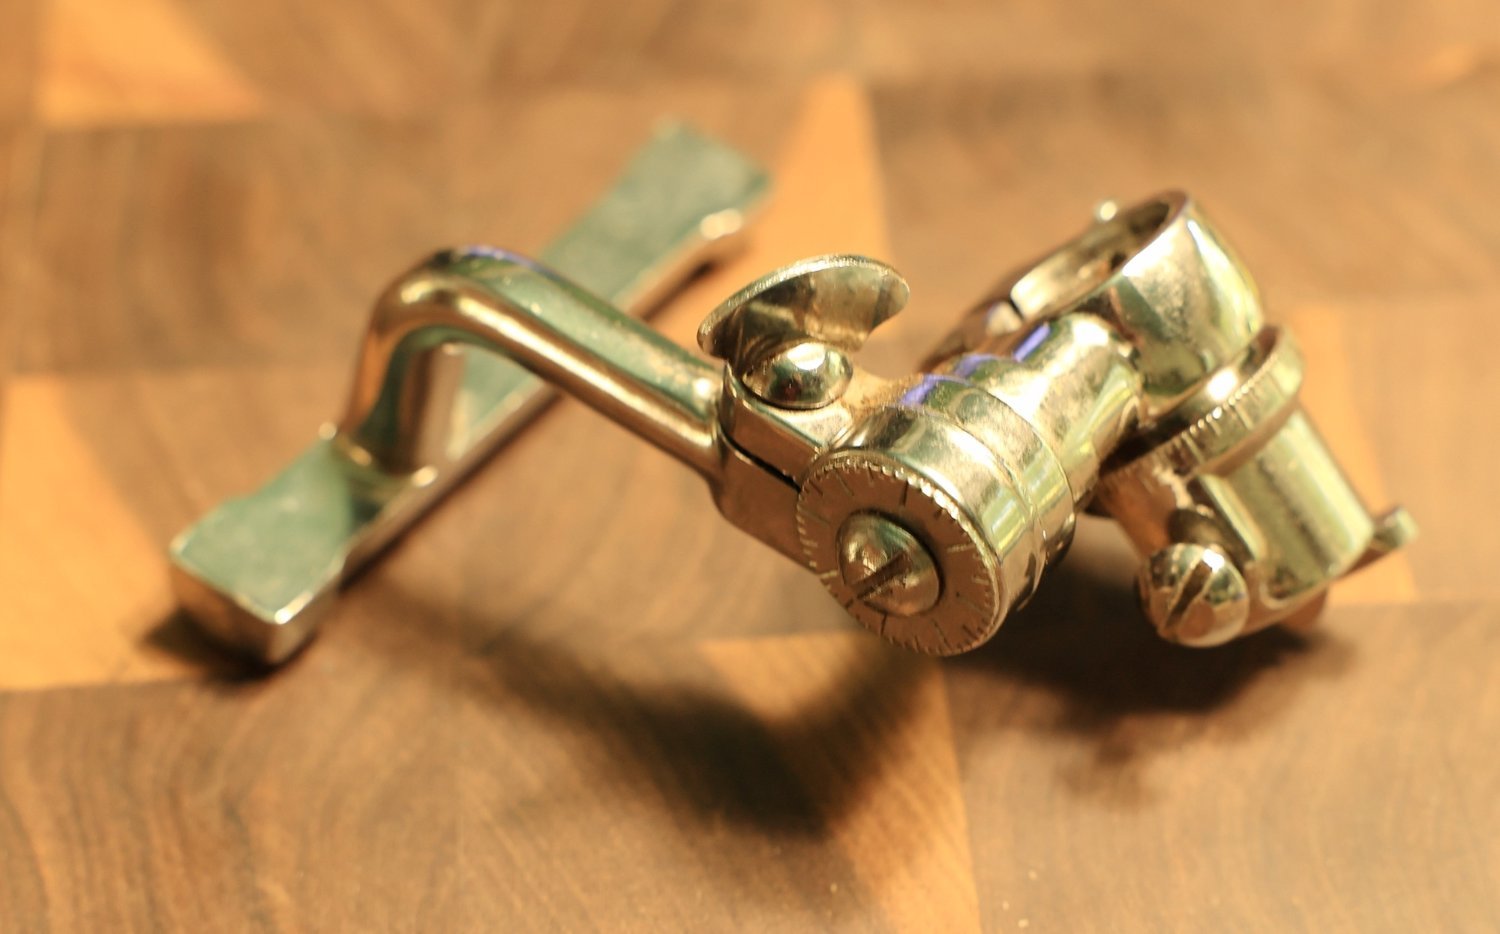
40 minutes ago, JohnLea said:
I bought this thing a while back. Like most of my tools it has been rarely used if at all.
Seems to me that the blade could be replaced with a straight one.

I considered something similar but thought it would limit me to 45 degree bevels. Seem like I rarely get a 90 or 45 when building my models. But vertais does make a very nice 45 bevel attachment for their plane. Tempting!
-
44 minutes ago, Bob Cleek said:
Thread drift? Moi?

The original poster asked:
Wondering how others are cutting chamfers, I'm having a bit of on issue getting smooth flat chamfers at different angles. ... I suppose some type of jig used with a hand chisel might work but just cant seem to find an easy, reliable method.
Anyone have a method their using that works well for them?
I'm not sure that a broader response is necessarily a "drift. He asked, "Anyone have a method their using that works well for them?" That sounds like an invitation to a pretty wide spectrum of answers. I think there's a world of difference between "make do" and "do best." We're always free to "cut corners" (especially in the case of bevels
) and take other shortcuts when modeling. It's up to the individual to determine where their personal standard lies on the precision spectrum. I qualified that my post was addressing "best practices" at the outset.

There is a wide range of both bevels and modeling skills. I think that the difference in "crispness" which I find to be a reliable measure of the quality of scale workmanship is often determined by a shape's having been created by cutting rather than abrading. Each shaping method has its place, of course, but as I look at models I made decades ago, the difference between those made in my earlier "sandpaper period" and later when I came to use blades and scrapers more often is very apparent to me. If one can easily form a bevel with sandpaper or a file which is indistinguishable from one made with a cutting blade or scraper, the entire discussion becomes academic, of course.
While sandpaper and files will work, I think they are perhaps the most difficult in attaining a crisp bevel that allows the greatest amount of glue area.
Thank you all for some great ideas. I think this is just another task that takes time and practice to develop with sharp hand tools.
- mtaylor, thibaultron and Canute
-
3
-
Wondering how others are cutting chamfers, I'm having a bit of on issue getting smooth flat chamfers at different angles. While I do have a burns saw, it doesn't have a tilt arbor and besides, most the time the pieces I need to chamfer are much to small for that anyway. I suppose some type of jig used with a hand chisel might work but just cant seem to find an easy, reliable method.
Anyone have a method their using that works well for them?
Dave
- mtaylor and thibaultron
-
2
-
9 minutes ago, Gaetan Bordeleau said:
This tool was done for this many tears ago.
Perhaps you could supply more information? Such as manufacturer, availability and so on.
- thibaultron, Canute and mtaylor
-
3
-
1 hour ago, Bob Cleek said:
While dissimilar in size and at opposite ends of the spectrum, I'd have to say that looking for a honing guide for your chisels is probably a lot like shopping for a set of "training wheels" for your new Harley-Davidson.
I doubt such a thing exists short of the state-of-the-art Tormek that system provides an adjustable-angled holding mechanism that will handle all sizes and shapes of micro-sized carving tools. Unfortunately, a Tormek machine will set you back around a grand.
Somebody may know of "a set of training wheels" for such chisels, but I've "been in town a long while" and have never seen such a thing. I would urge you, and everybody else, for that matter, to "study up" on "freehand sharpening" skills. Once acquired, you'll probably never look back. It's just not that difficult once you get the hang of "feeling" the sharpening angled face against the flat of your stone by rocking it back and forth. Sharpening is one of those things that seductively invites "better mousetraps" and a lot of them are pretty good. I think which method one uses is a matter of taste in large measure: oil stone, water stone, sandpaper on plate glass or your table saw table top, and on and on. YouTube is full of "How to Sharpen" videos and it shouldn't be too hard to find one that provides a method that works for you.
Over the years of shaving with a straight razor I have become pretty adapt to honing and stopping a razor. There was, of course, a learning curve but over that time I have acquired the stones and skill to do it.
I imagine, with time, a similar skill could be attained with these chisles.
Thank you for your thoughts and insights.
- mtaylor, thibaultron, Canute and 1 other
-
4
-
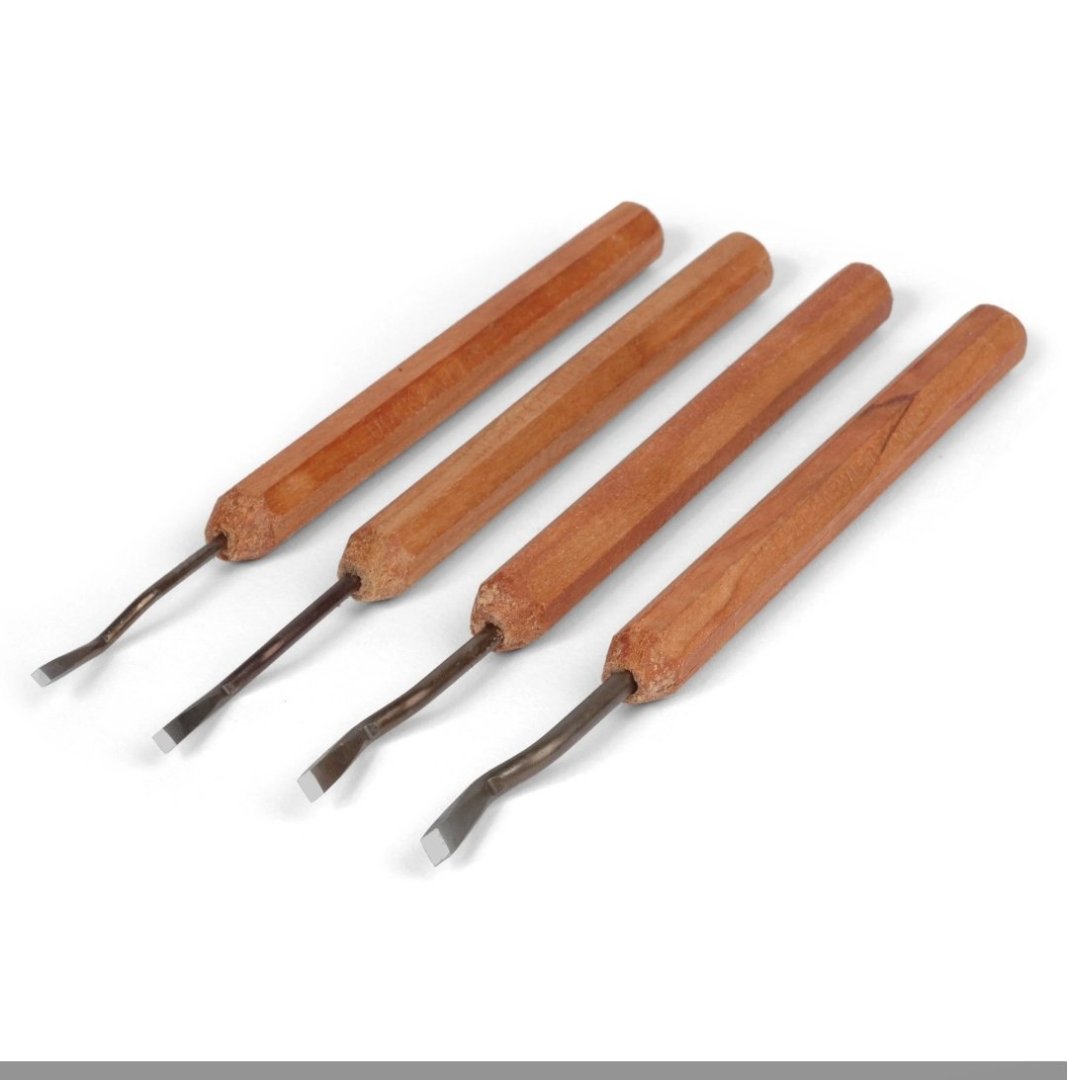
I recently purchased this set of 4 micro chisels from Stumac. I'm very pleased with them and the dogleg shape allows great control. Cutting widths include 2mm, 2.4mm, 2.75mm and 3.25mm
But I need to find a honing guide that will work with them. Anyone have ideas?
- mtaylor, Canute and thibaultron
-
3
-
-
Welcome Eric! Your joining a great group.
- One-Oh-Four, Keith Black and mtaylor
-
2
-
 1
1
-
Welcome, glad to have you aboard!
- Keith Black and mtaylor
-
2
-
-
Model Shipways Sailing Pram or Lobster Smack?
- Keith Black and mtaylor
-
2
-
I would rough the old surface, prime and repaint. But I'm no expert in the field.
- DMM, mtaylor and Snug Harbor Johnny
-
3
-
-
-
Hope your situation is soon rectified. And welcome to the grouo!
- PierreS, mtaylor and Keith Black
-
2
-
1
-
Finished installing all the frames.
After cutting the slots for frames 4, 4a, 5 and 5a deeper so the frames would meet the rabbet, I glued these into place. I also glued in 5b and a thin filler piece so they filled the space up to the rabbet.
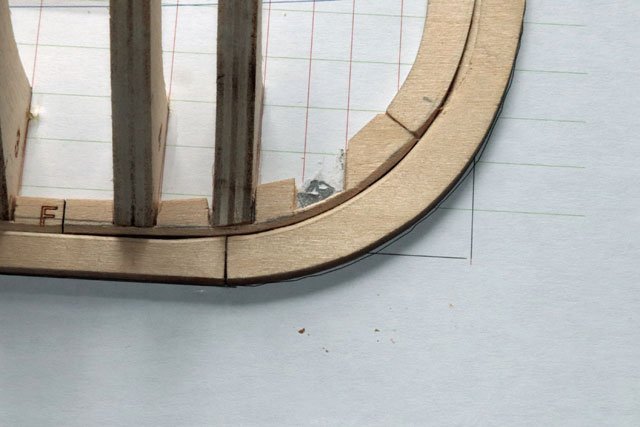
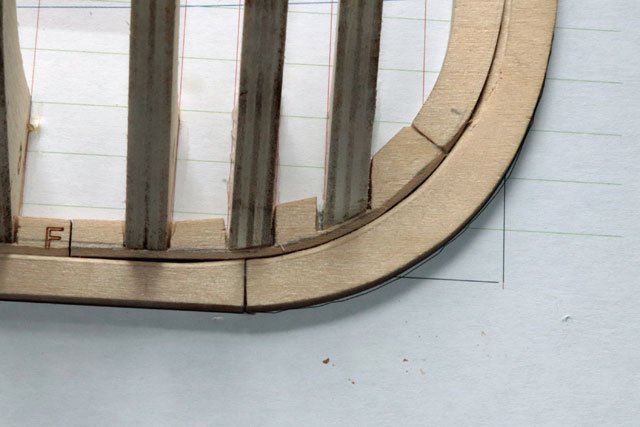
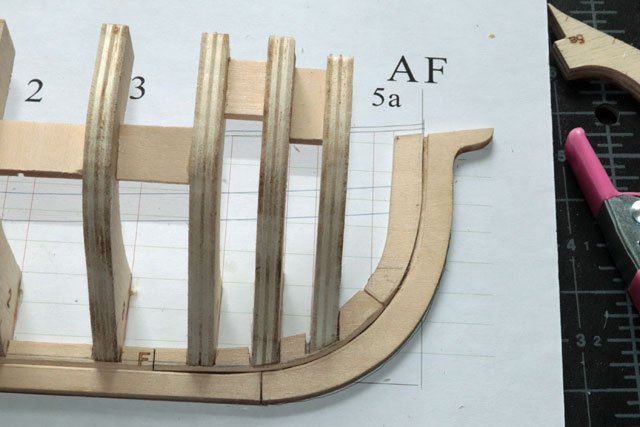
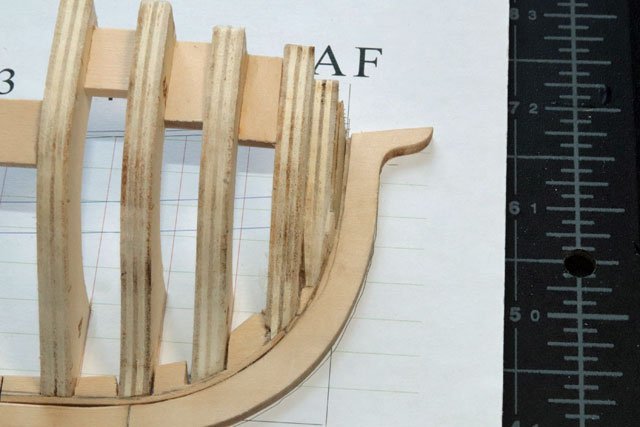
At the aft end I glued in frames Ga, Gb and H
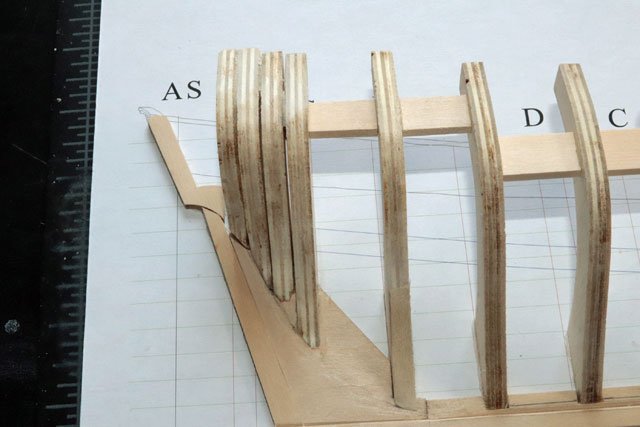
This finishes the frame install.
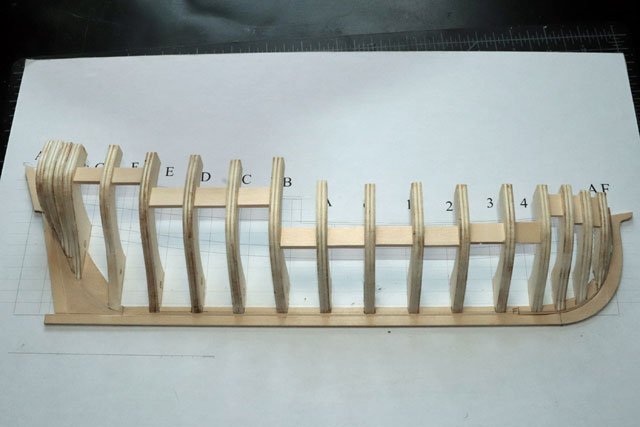
Since the transom piece will be a bit delicate, I decided to wait on installing this until after finishing the topline and fairing the frames.
So moving on to the topline trimming......
- robert952, Knocklouder, ferretmary1 and 4 others
-
7
-
-
Welcome!
- mtaylor and Keith Black
-
2


Does anyone have a drawing of a Link Belt Chain for 1920 fishing schooner
in Discussion for a Ship's Deck Furniture, Guns, boats and other Fittings
Posted
As always, splendid detail work!