grsjax
-
Posts
1,061 -
Joined
-
Last visited
Content Type
Profiles
Forums
Gallery
Events
Everything posted by grsjax
-
 While visiting family in Oregon recently I stopped in at Woodcrafts of Portland. They had a bin of Brazilian Ebony on sale. Anyone ever used this wood? Price was a fraction of Gabon Ebony. The wood is very hard, fine grained and black. Not as fine and black as true ebony but very close. It does have a visible grain when you look closely at it and the color is not as black as ebony. However after smoothing up a small piece and finishing it with a clear coat it looks good.
 -
New Workshop Bench Height ??
grsjax replied to PeteB's topic in Modeling tools and Workshop Equipment
I am one of the height challenged at 5'7". I find a bench height of 30" works well for sitting and one 36" for standing. Your mileage may vary. -
You might want to back track a bit and get the Model shipways Lowell Dory Kit as a place to start. It is the first model in their Ship Wright series and guides you step by step thorough the process. The Norwegian Pram is the next in the series. It will take you further along the path to mastering wooden model building.
-
Lovely blocks. The char doesn't seem to be that bad and as you say a dip in stain or ink takes care of the problem.
-
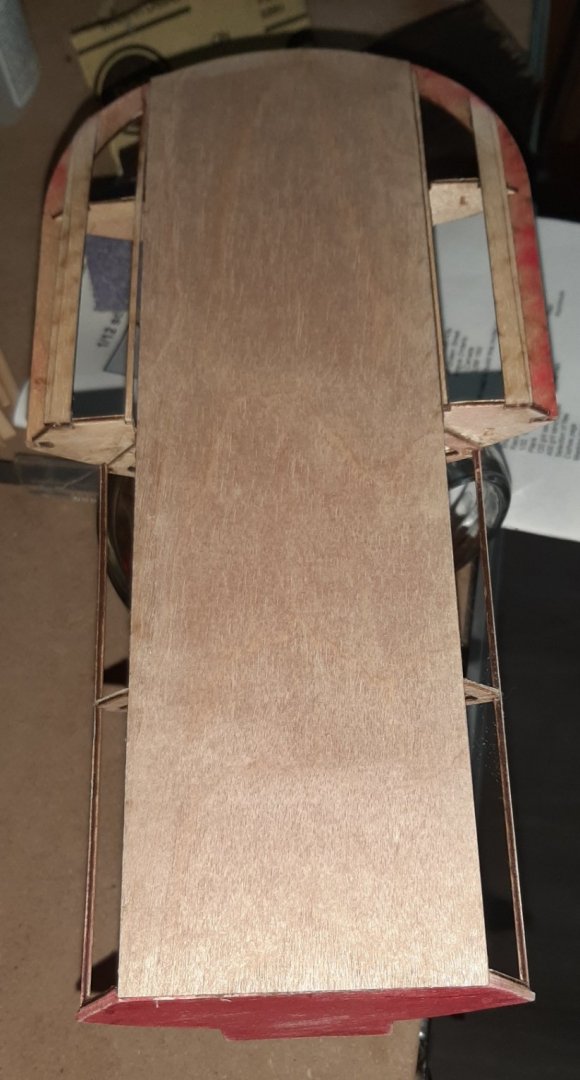
Thank you all for the good wishes. The surgery went well and I am almost pain free now. Got the first panel on the underside of the boat in place. The instructions say to very carefully line everything up to avoid twisting the frame. I was very careful but when I finished gluing the veneer to the frame sure enough the frame was slightly twisted. Looking at that very thin veneer and the very delicate frame stringers I was thinking that it was going to be impossible to get that panel unglued. I came up with a solution that actually worked and didn't destroy the boat. Lucky I used PVA glue to attach the veneer. Instead of trying to remove it I ran isopropyl alcohol along the glue line, let it sit for a few minutes and then put the boat upright on a flat surface and weighted it down all around and crossed my fingers. I seems the alcohol softened the glue enough that the parts could shift a little bit under pressure. After a full day I removed the weights and checked the alinement and everything was good.
- 14 replies
-
- 6
-

-
- Osborn Models
- Sea Flea
- (and 1 more)
-
Sorry about the long delay getting back to my build log. Had problems with my back and ended up in the hospital. Recovery from the surgery took longer than expected. Almost back to normal now and will start posting some pics soon.
- 14 replies
-
- 5
-
-
- Osborn Models
- Sea Flea
- (and 1 more)
-
Justifying the purchase of a mill
grsjax replied to Captain T's topic in Modeling tools and Workshop Equipment
If you have a lathe you can use it to mill parts. A milling attachment for a lathe is a lot cheaper than a mill and can do most of the milling necessary on a model. Here is a link to one for a Taig lathe sold by Little Machine Shop https://littlemachineshop.com/products/product_view.php?ProductID=1956 There are milling attachments for most lathes on the market so you shouldn't have a problem finding one to fit yours. -
Can't see the pictures.
-
Micro Mark Bending Machine 81356
grsjax replied to Railcardownunder's topic in Modeling tools and Workshop Equipment
This is called a slip roller or rolling mill. The MicroMark item looks pretty cheaply made from aluminum. For a few dollars more you can buy one on amazon that will be much stronger and produce better results. Some of them have rollers that can be changed for use with different size tubes. One thing to think about is that the rollers will flatten wood strips to some extent. one example https://www.amazon.com/Rolling-Machine-Combination-Jewelry-Tabletting/dp/B07G7ZCCSZ/ref=pd_di_sccai_6/143-4564824-7564258?pd_rd_w=ORekI&pf_rd_p=c9443270-b914-4430-a90b-72e3e7e784e0&pf_rd_r=DVFFA5K61C6HG1PNPCA5&pd_rd_r=1679c72e-430e-4e18-8f4c-0b448bac5f51&pd_rd_wg=t3d30&pd_rd_i=B07G7ZCCSZ&psc=1 -
For anyone interested in the indigenous boats of the world this is a great blog. http://indigenousboats.blogspot.com/
- 1 reply
-
- 8
-
-

-
I needed some small turnbuckles for a model and ran across a vendor called Harbor Models https://www.harbormodels.com/ . They mostly sell parts for RC ships but they had just what I needed, 5/16" long working turnbuckles in brass. Dimensions: M=M1 O=8mm (5/16") L-min=13mm (1/2") L-Max=18mm (23/32") D=1.8mm (1/16") f=.7mm (1/32") Price seems pretty reasonable at $2.75 for one or $26.90 for 10. Shipping was fast.
-
- 5
-
-
Using a hollow ground planer blade in a table saw you can cut pieces as thin a .04" thick. A zero tolerance insert and a precision fence is required. Using a sliding table is better. Still have a large kerf but for some common woods that isn't a big problem.
-
Looks like a good drill press but does it have heavy duty quill bearings able to take a side load during milling and does it have a solid or hollow column? Both of these issues are going to be important in doing any kind of milling.
-
The Bitumen Experiment
grsjax replied to ChrisLBren's topic in Painting, finishing and weathering products and techniques
Depends on the scale. For small scales I go down to 320. Larger scales I use 240. -
Taking a short break to do my taxes. Uncle Sam gets testy if I am late with my tribute.
- 14 replies
-
- 3
-
-
- Osborn Models
- Sea Flea
- (and 1 more)
-
On ebay https://www.ebay.com/itm/Historic-American-Merchant-Marine-Survey-Volume-1-ship-boat-blueprints-plans/363317650834 Not mine, just thought others here might want to take a look at this.
- 1 reply
-
- 2
-
-
Rotary tools - Proxxon and Dremel
grsjax replied to vaddoc's topic in Modeling tools and Workshop Equipment
I have never had a problem with the Dremel locking pin. I have a couple of older model tools and perhaps they were built better than the newer ones. I also have a Dremel cordless 7.2 volt tool that works very well. I like the adjustable speed of the Dremel. Mine goes from 5000 to 35000rpm giving a good working range for different uses. -
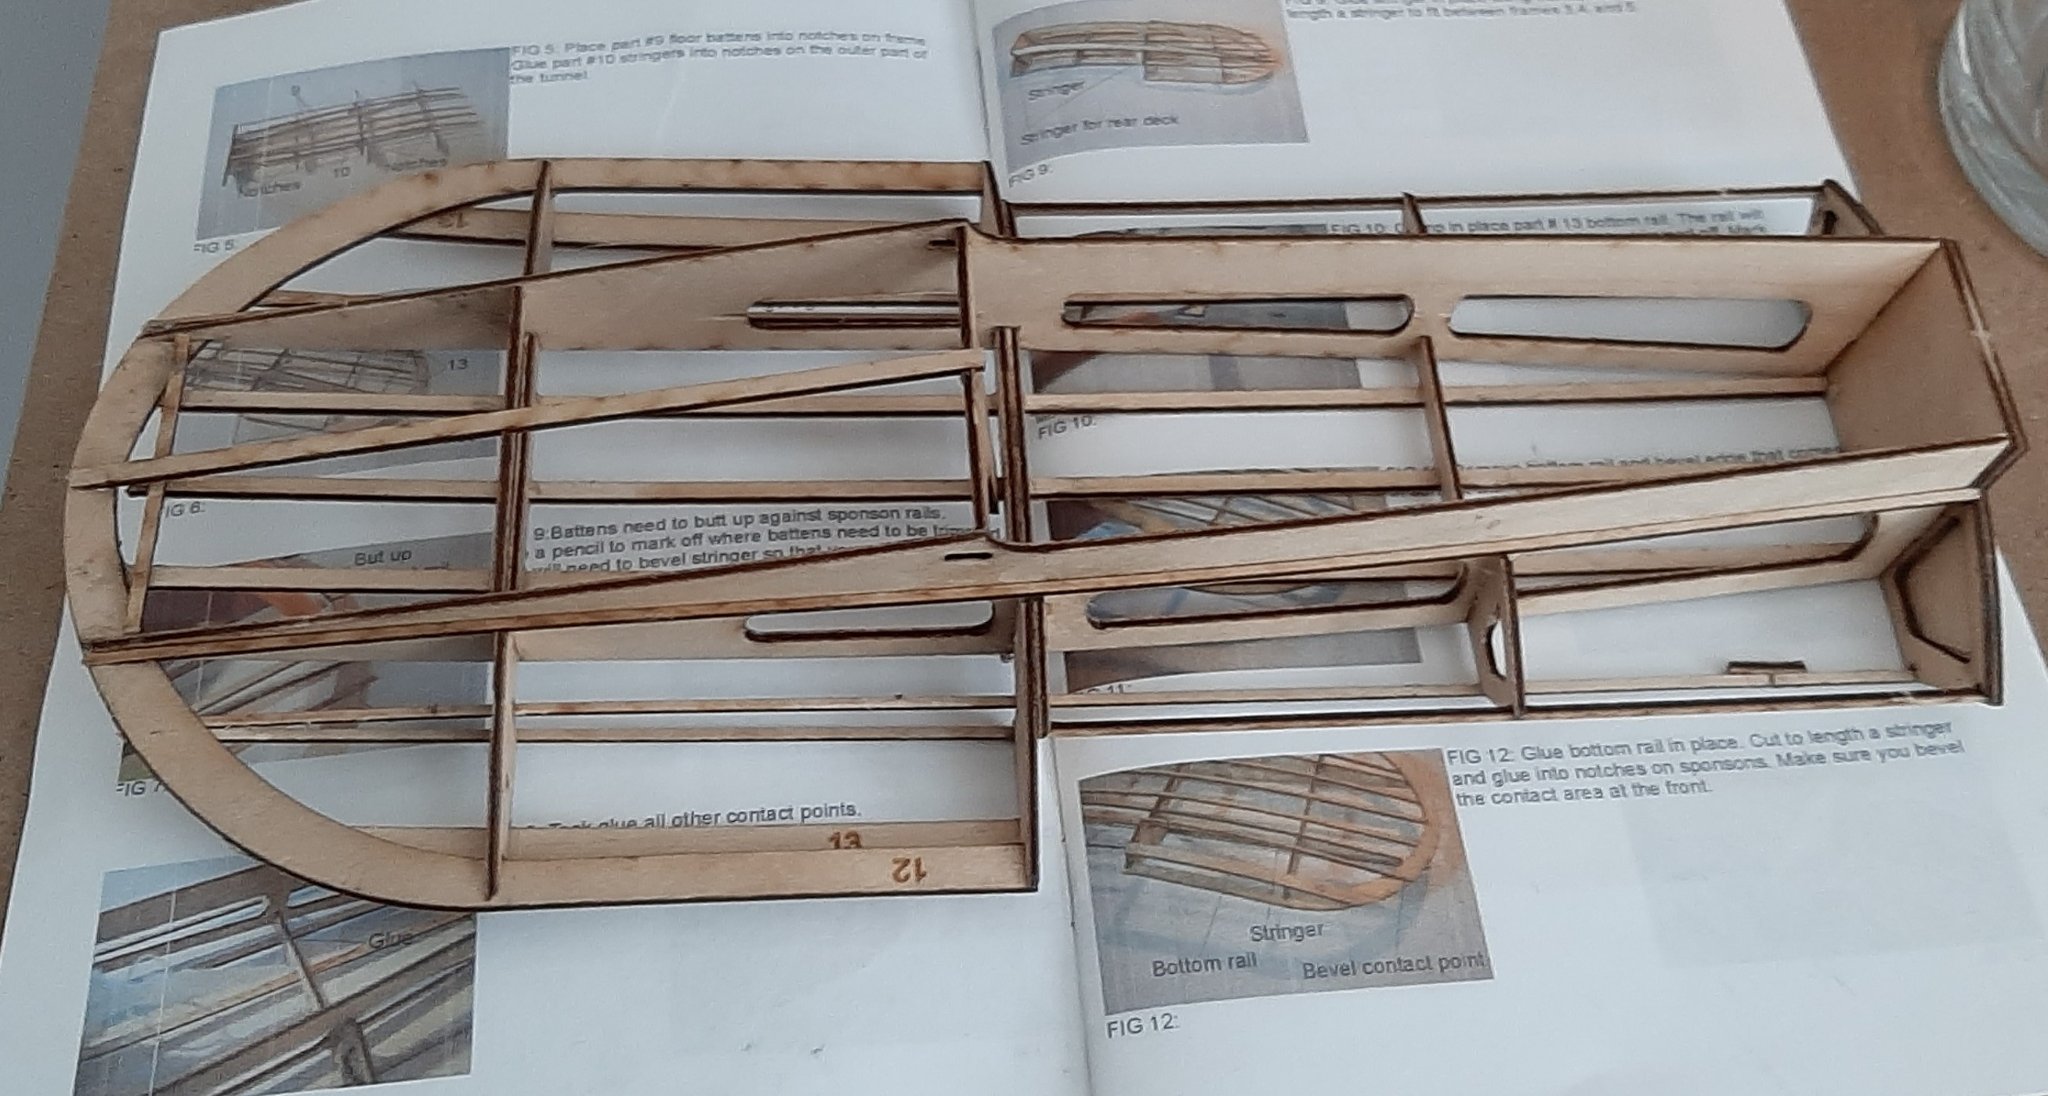
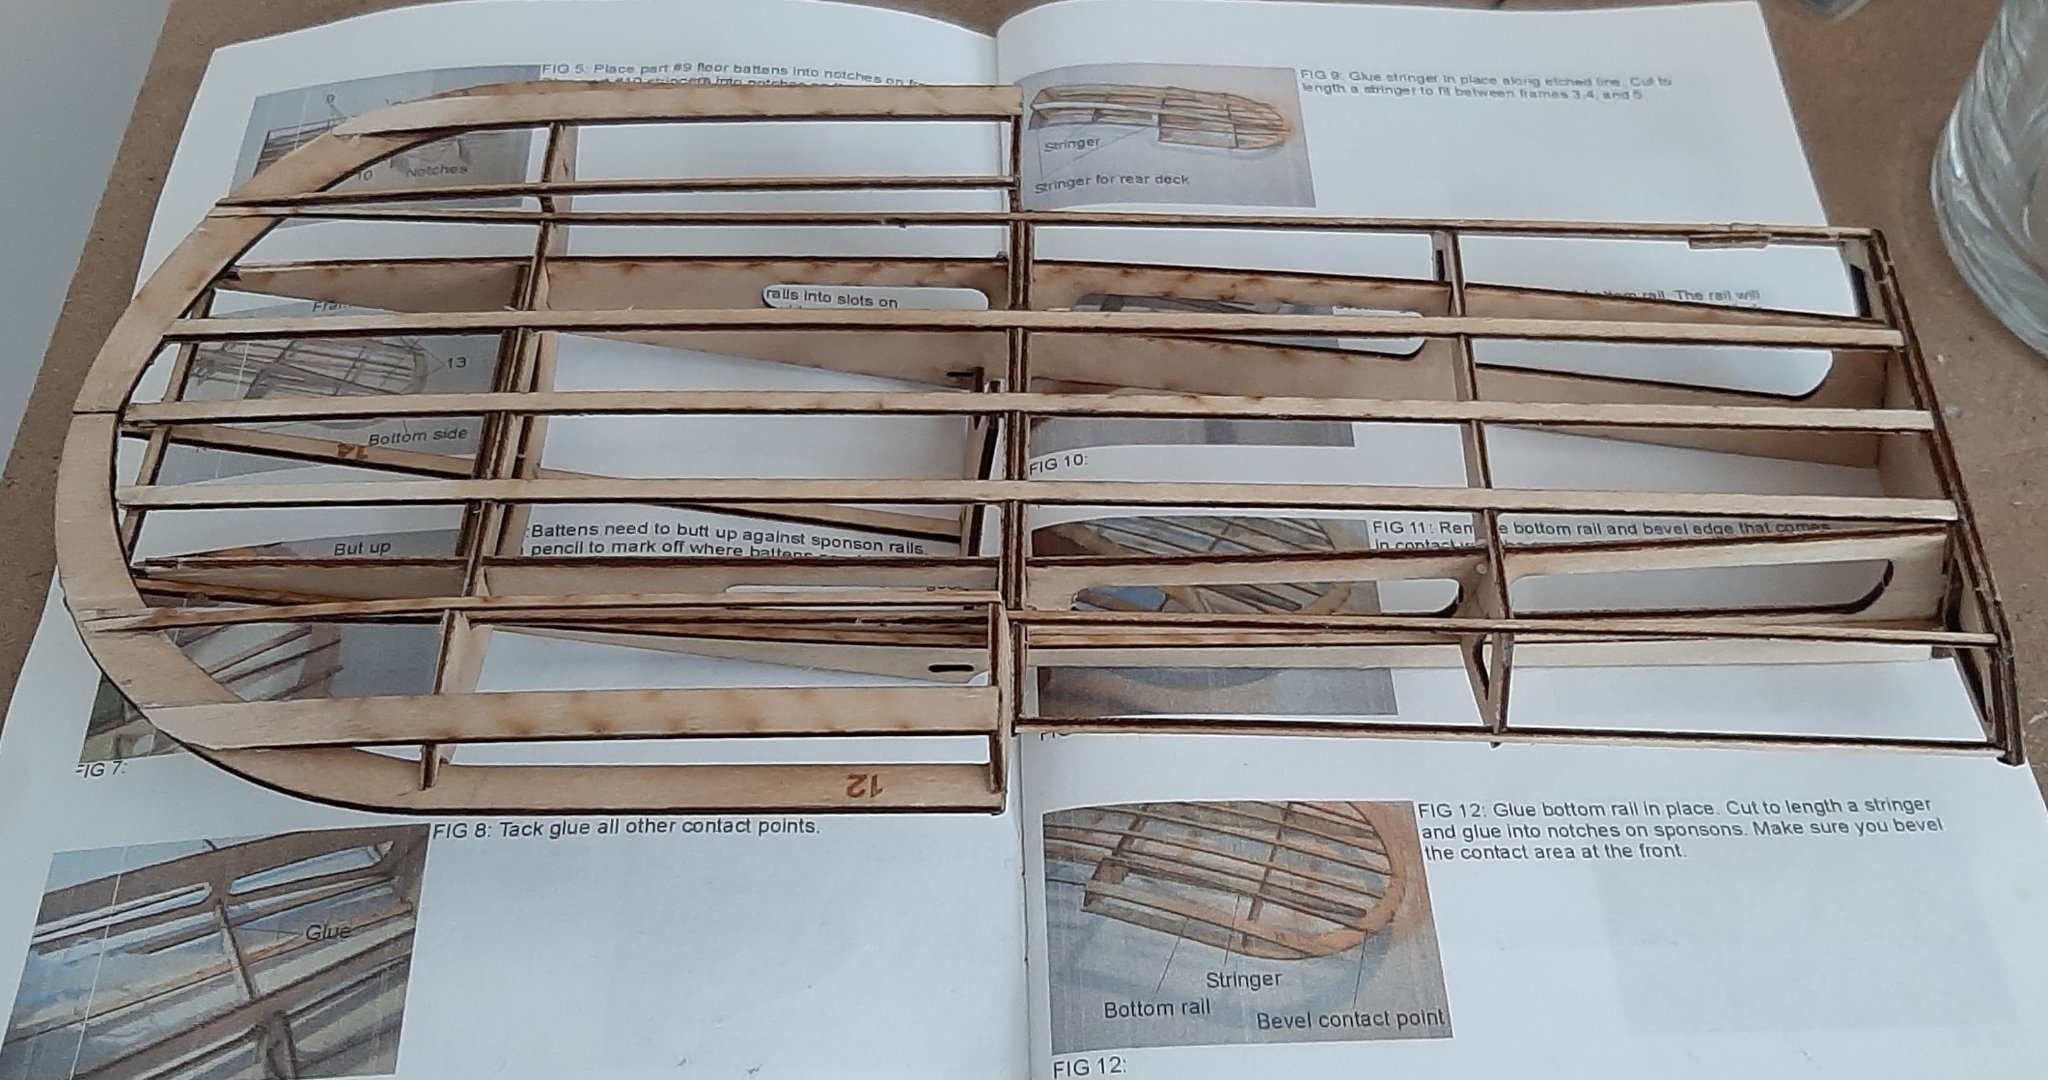
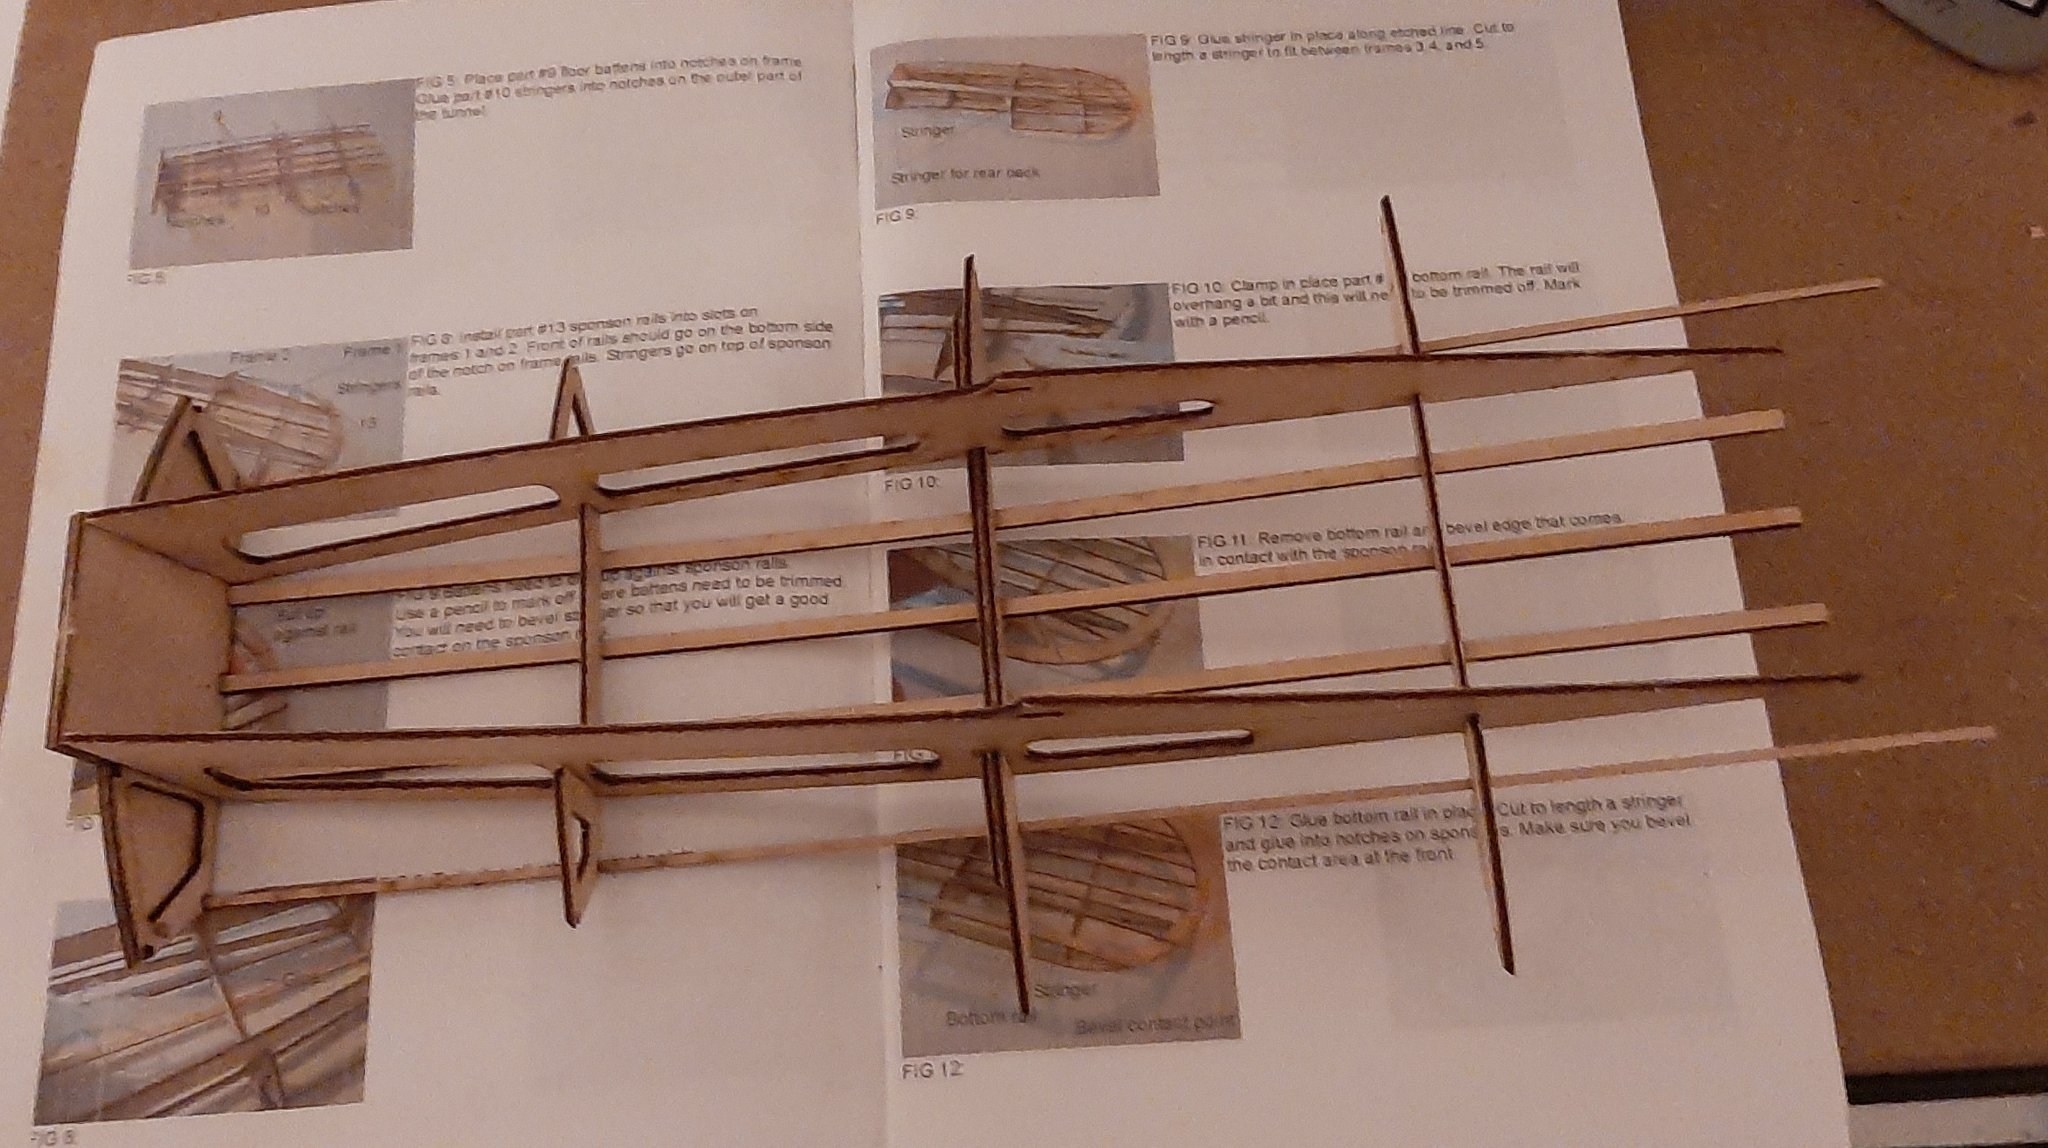
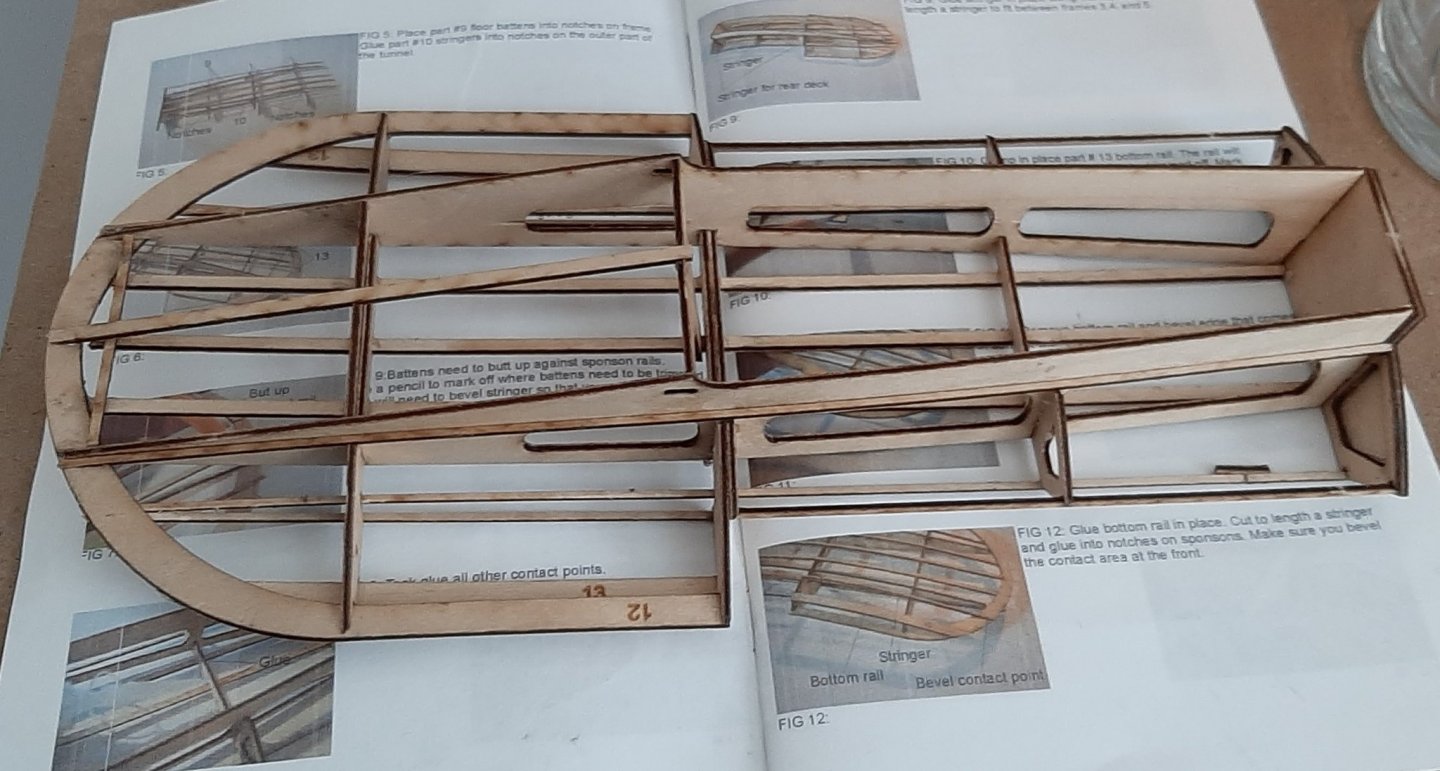
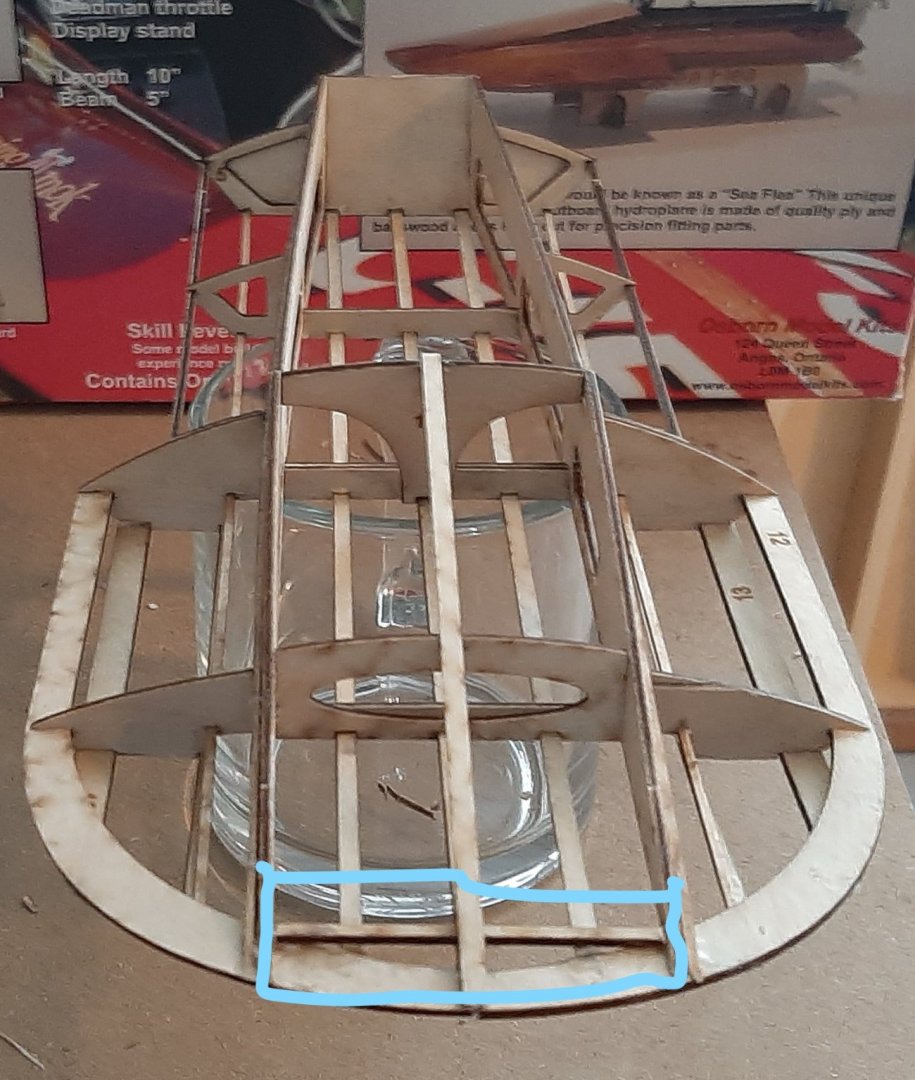
Finished putting the frame together The process of building the frame was pretty straight forward. Clamping was a challenge for some of the stringers as there is very little room to get a clamp in. Ended up using mini bulldog clamps and pieces of scrap to get everything set. Only ran into one issue and that was with the sponson rail (part 12) it is a two piece part that meets in the middle at the bow. It wanted to flex slightly into a shallow peak instead of making a smooth curve. This is a problem that can be solved by placing a short piece of stringer on top of the battens at the bow and gluing the top batten to it. The below picture shows the fix. Next up is sanding all of the mating surfaces smooth and some initial paint work on the side rails and cockpit.

- 14 replies
-
- 10
-
-
- Osborn Models
- Sea Flea
- (and 1 more)
-
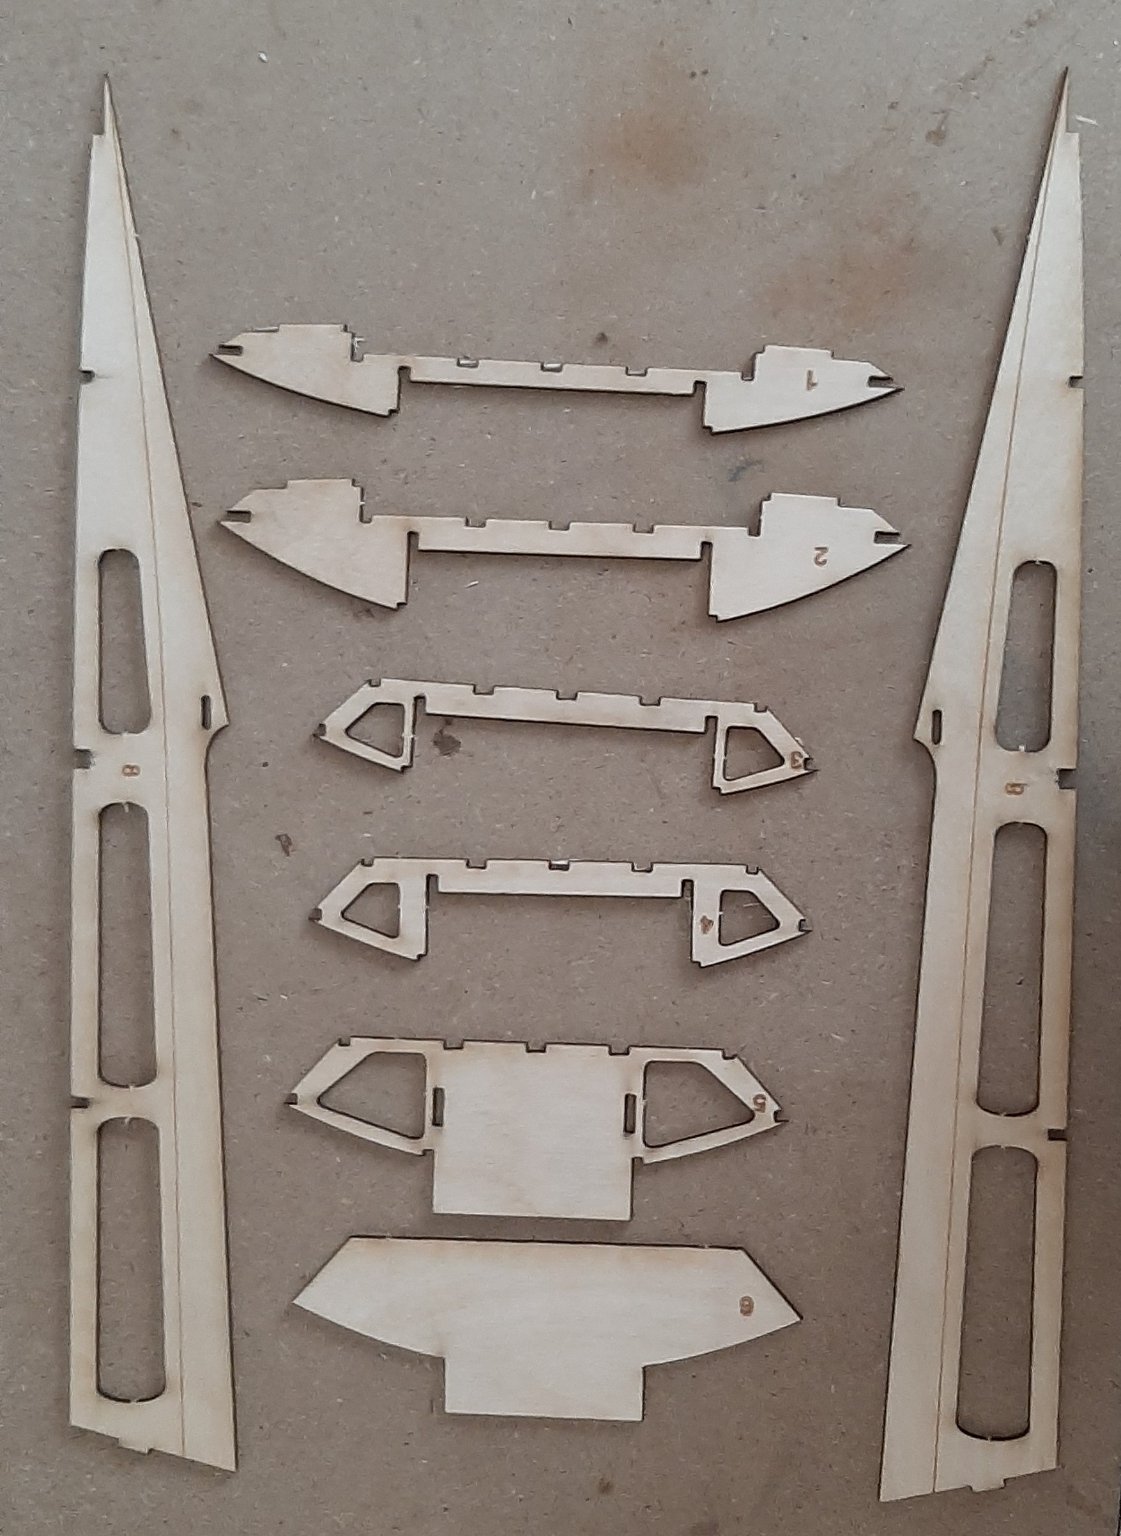
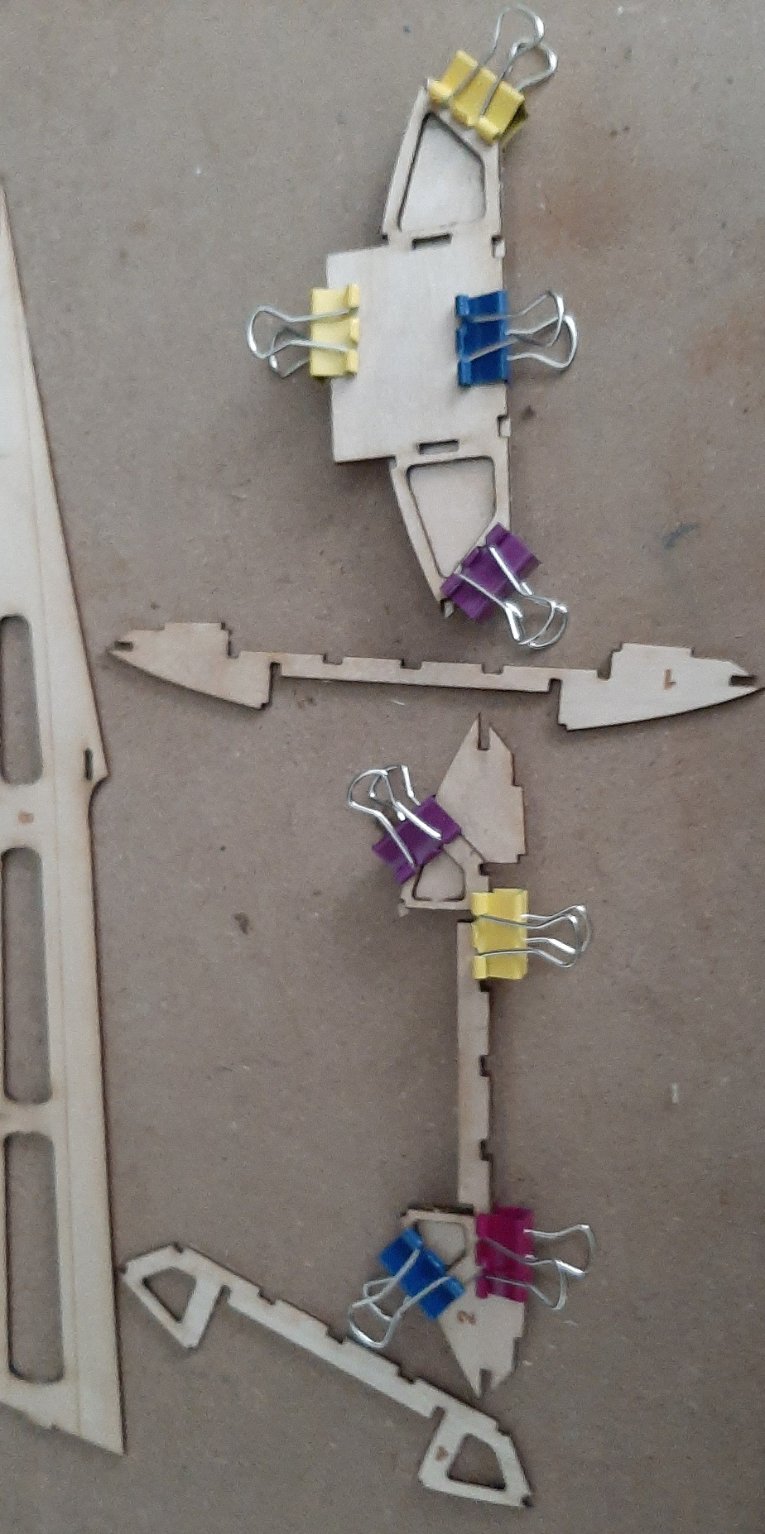
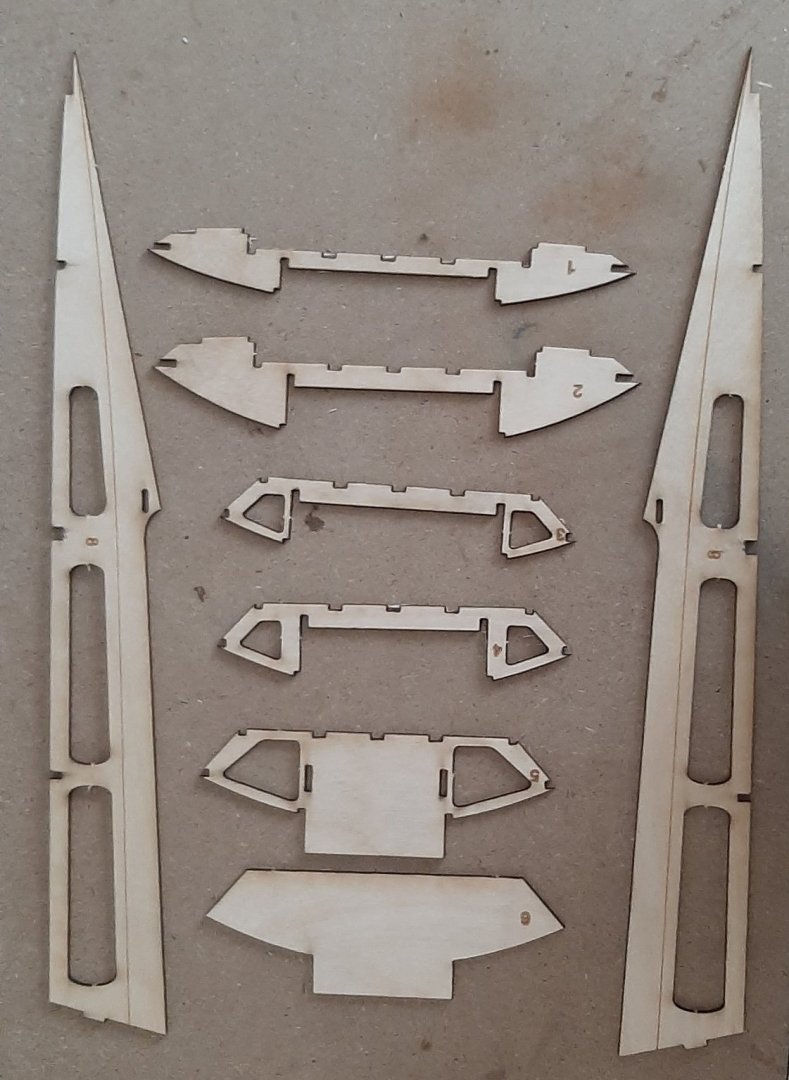
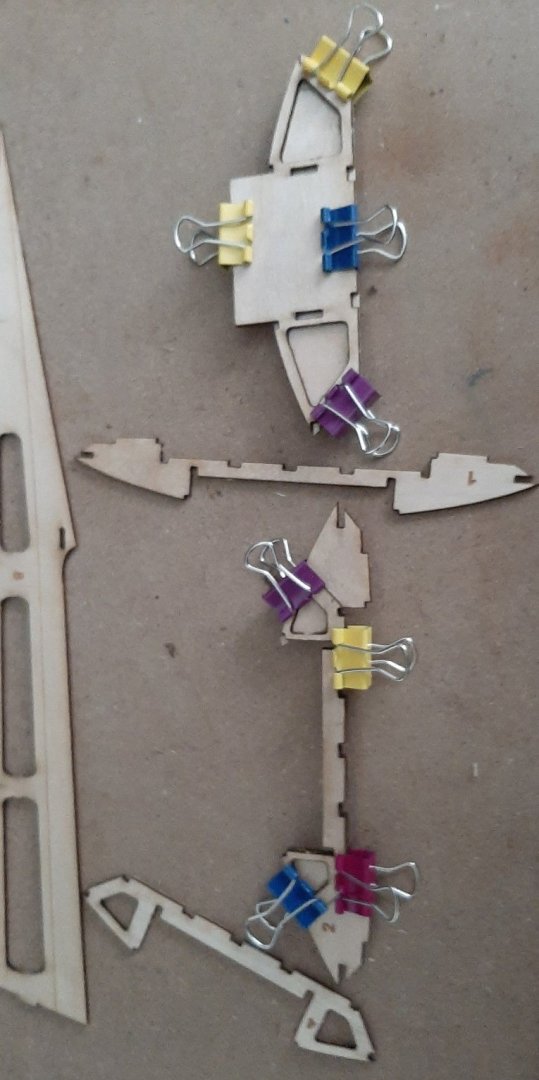
Time to get down to building this model. First step is to build up the basic ladder frame that is the foundation for everything else. These are the parts of the frame. The transom and frames attach to the side rails. The assembly is almost self aligning but care has to be taken that everything is straight before gluing things up. First step is to glue the transom (6) to the transom frame (5) and frames 2 and 3 together. Next the frames are attached to the rails. The notches in the frames are cut so that a minimum of sanding is needed to get things to go together smoothly. The addition of the 3 bottom battens and a couple of stringers and the basic frame is complete. I did make a mistake here. Although the notches all fit perfectly it is necessary to make sure that each frame is fully seated in the rails when you glue them. I failed to check this so had to go back and unglue a couple of frames and reset them. This is one reason I prefer PVA glue to CA. Much easier to correct these mistakes. One thing I think would have been a small improvement is beveling the aft end of the rails. They fit fine as is but they actually join the transom frame at a slight angle and a bit of beveling would have made a better joint.

- 14 replies
-
- 8
-
-
- Osborn Models
- Sea Flea
- (and 1 more)
-
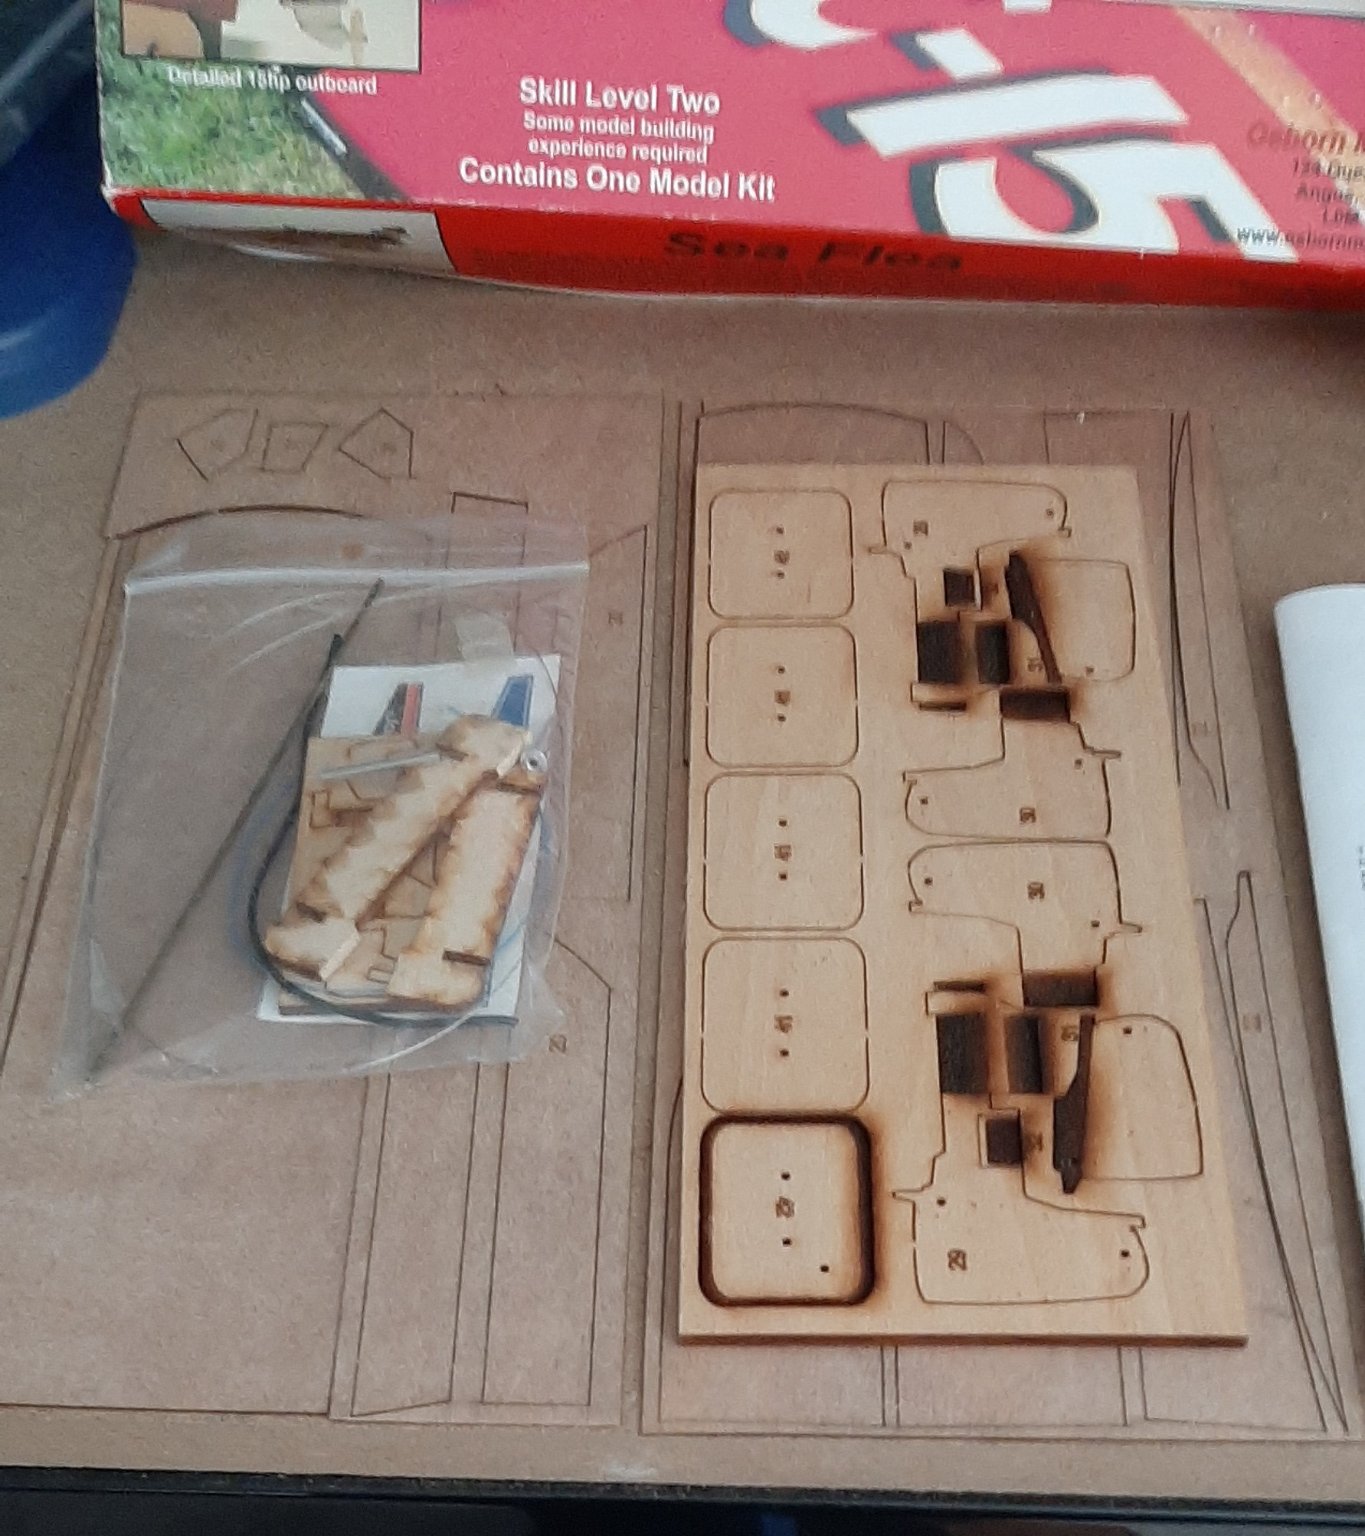
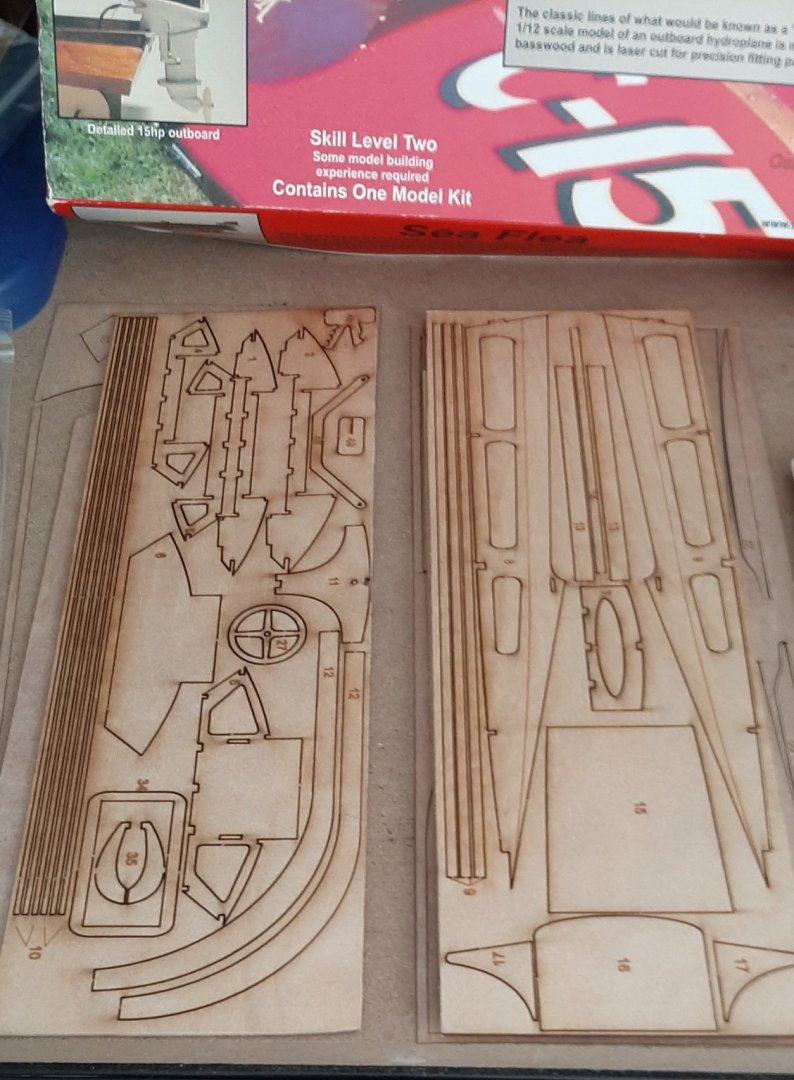
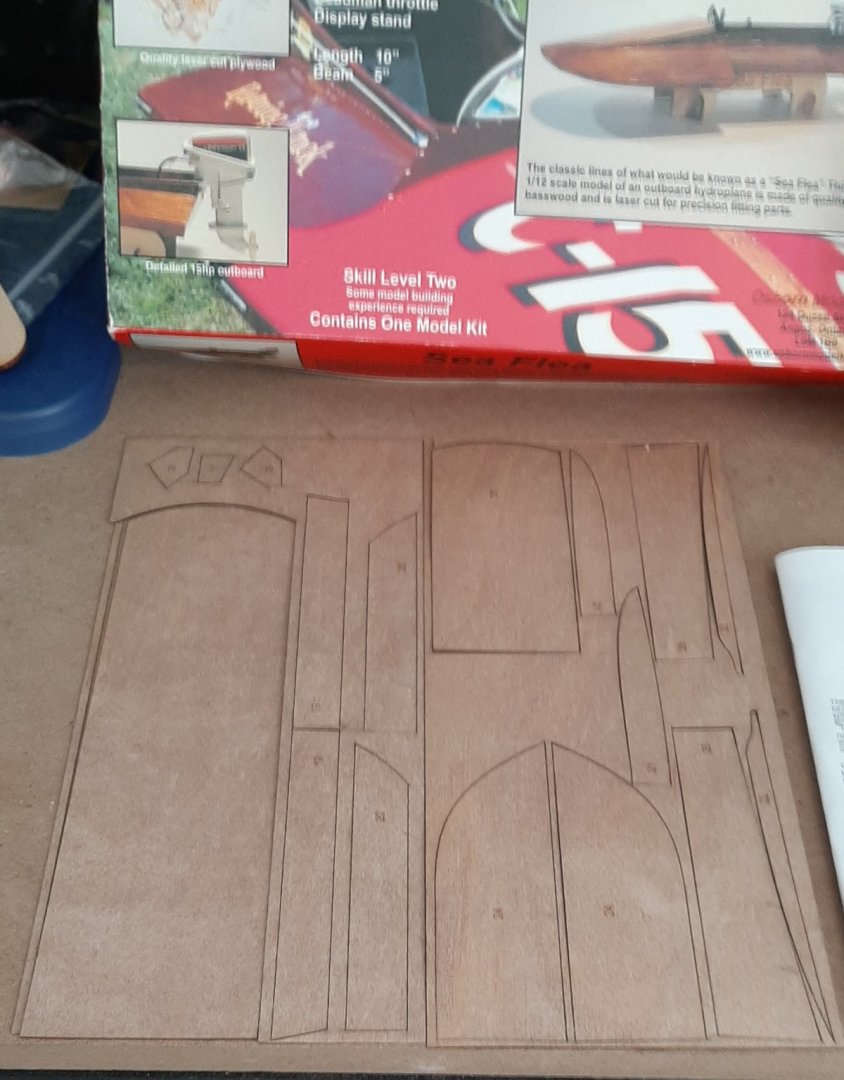
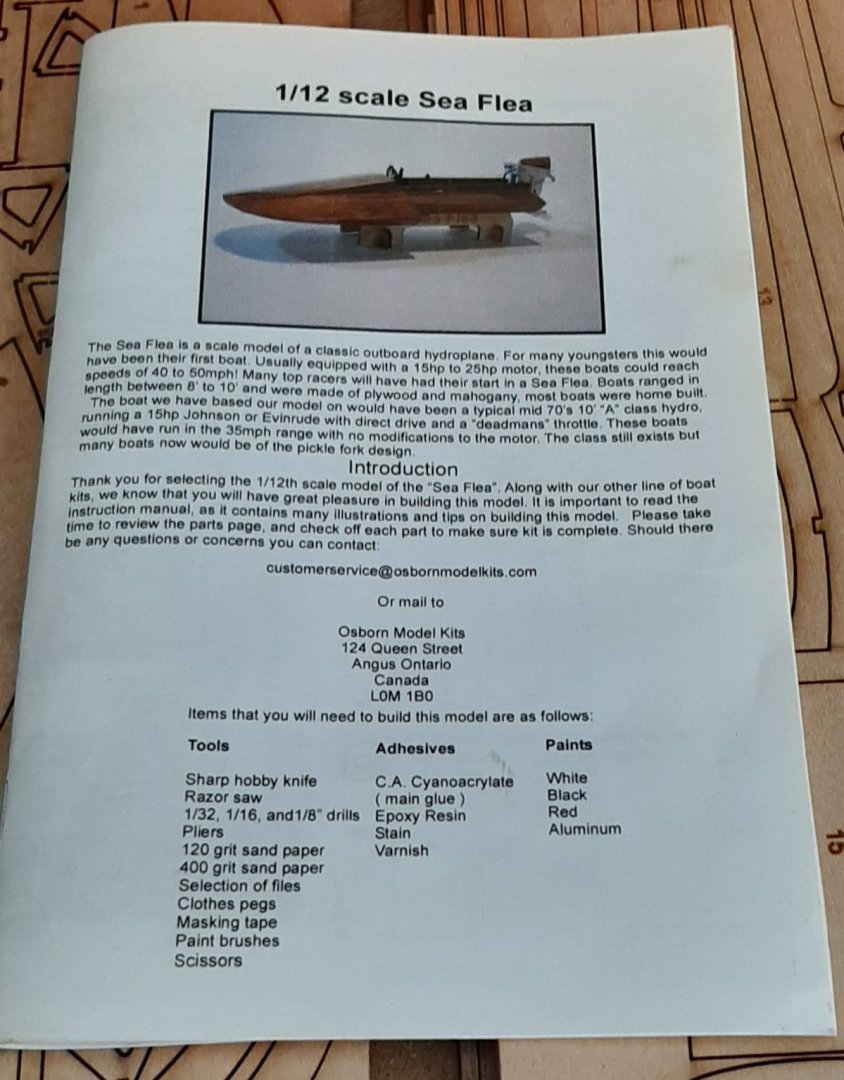
The kit consists of 5 sheets of laser cut wood, 2 of mahogany veneer, 2 of 1.5mm plywood and 1 of 3mm basswood (I think it is basswood). There is a 19 page booklet of instructions with numerous photographs. This is one area where I think there could be an improvement by adding some detail drawings. Not a big problem but it would make a few things a bit clearer. There is also a display stand of laser cut 3mm ply and a small bag of additional small parts and decals.

- 14 replies
-
- 8
-
-
- Osborn Models
- Sea Flea
- (and 1 more)
-
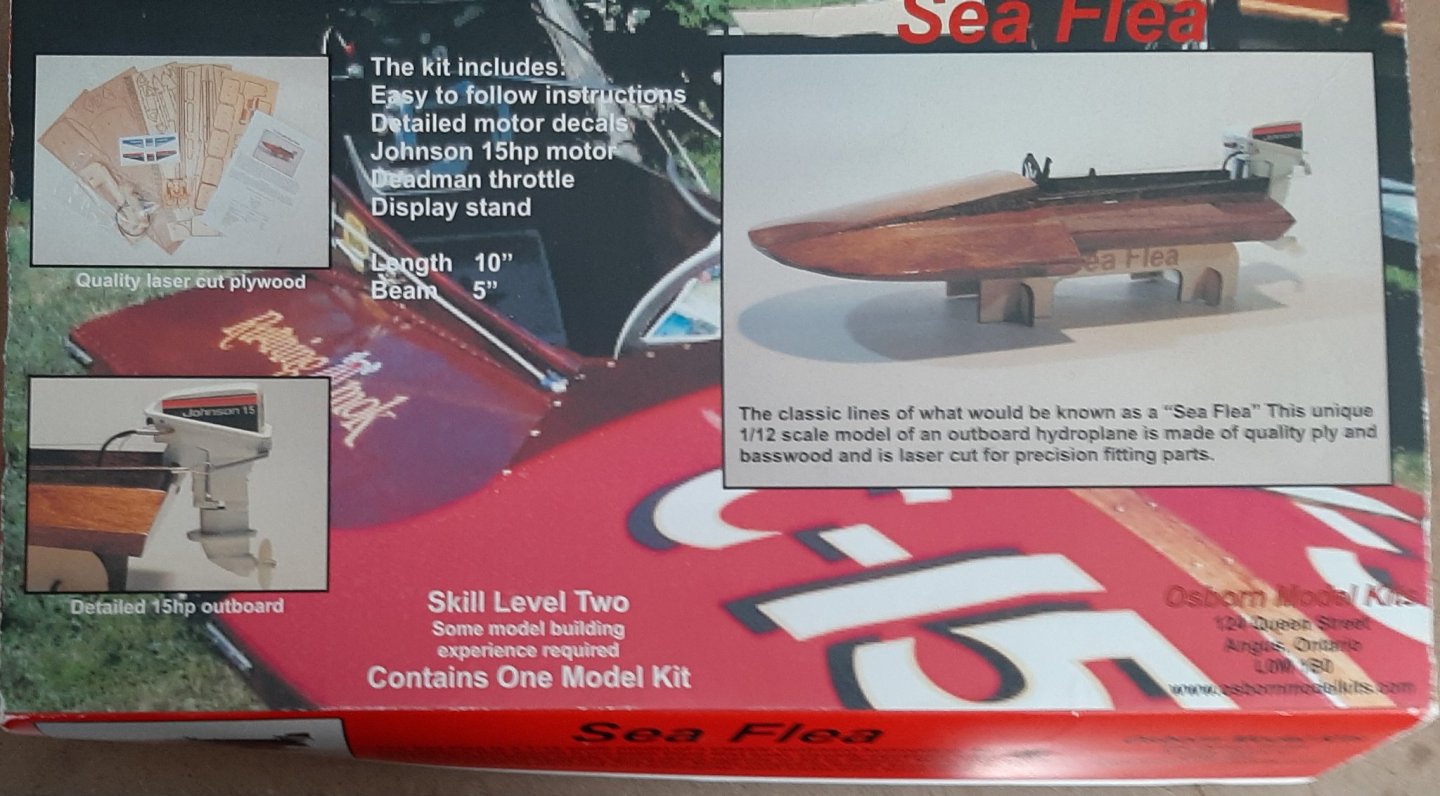
The seaflea is a 10 foot class A hydroplane. Osborn Models, mostly known for model trains, used to produce a line of static and RC model boat kitss of which this is one. I also have their 1:24 scale Miss Canada III and Mirror Dingy models which I hope to do build logs on in the future. Derek at Osborn Models has been a real help and tells me they have a few of their kits still in stock so if you are interested contact him at dosborn1210@rogers.com. I think he should start up production again but that is just my selfish desire to build more of these interesting boats. The kit is overall is excellent. There are few things that could be improved but in general I think this is one the best small kits I have seen. The laser cutting is very good and the innovative use of laser cut parts including some profile carving using a laser cutter to produce the outboard motor is excellent.
- 14 replies
-
- 7
-
-
- Osborn Models
- Sea Flea
- (and 1 more)
-
Ok, did some digging and found the reference. It was actually under Albatross/Swallow with Dapper Tom mentioned as an additional kit based on the same lines. Reference is NRJ vol 29 pages 90 and 91 and pages 133 through 135. Hope this helps.
-
Not sure but it was quite awhile back. I remember there were a couple of letters to the editor about it.
-
Pore filler lacquer Recommended
grsjax replied to Krupi's topic in Painting, finishing and weathering products and techniques
Depends on what finish you are going to use. If tung oil is going to be the finish than it should work to fill the pores as well. If you plan on painting the wood than you need to find a compatible filler to use.