
HOLIDAY DONATION DRIVE - SUPPORT MSW - DO YOUR PART TO KEEP THIS GREAT FORUM GOING! (Only 20 donations so far - C'mon guys!)
×


lraymo
-
Posts
297 -
Joined
-
Last visited
Content Type
Profiles
Forums
Gallery
Events
Everything posted by lraymo
-
Wow, Keith! Just wow! I'm so impressed and can't wait to see which way you go (love the cards to let you see what each would look like). I agree with all the comments that whichever way you go, it will be the best!
-
Great to hear, Keith. I've been using mine also (it held my ship hull at just the right angle to do the coppering!) Do you also have special magnifiers to work on such small parts? I wear glasses, and i bought a magnifying glass with an led light, but my eyes still get tired. So yesterday I bought a headset that hold magnifying lenses out in front of my glasses, and I'm hoping it will help with eye strain. But your details are so small, I wondered if there's anything special you use to see your work!
-
Thanks for the info. I've put in my Amazon order! And I'll probably buy more as I continue this journey. I still need to use the blades to continue to thin the bulwark. I've already whittled a bit too aggressively in some spots, but a little wood putty will fix it!
-
Wow, Keith! Amazing! Your detail work is fantastic! Also, it looks like you are using the Workmate Vise you found on ebay. Cool! Are you liking it?
-
Hey Keith, thanks for the link to the Keystone sanding products. What a wealth of info! I had made a few sanding sticks earlier, but the shape and sizes weren't very efficient. From amazon, I will order these ($13 is a bargain, considering I'm not very good at making my own!)
-
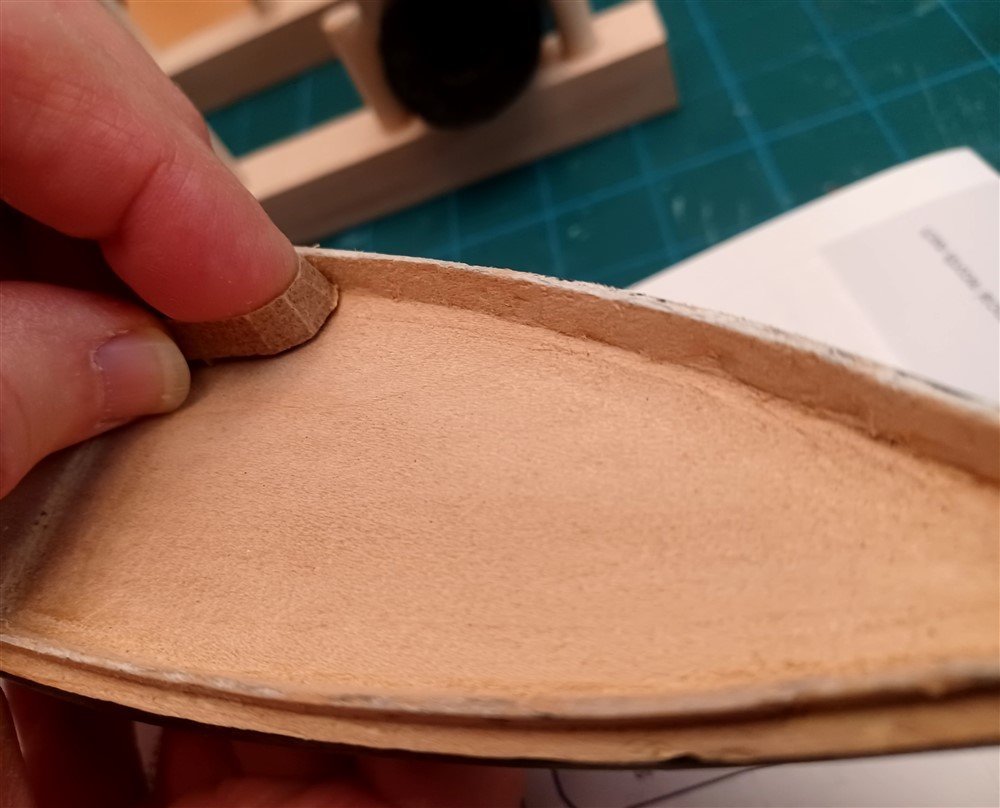
Thanks @Keith Black and @BrianK for the positive words! I appreciate your comments! So now I'm moving on to sanding the bulwarks and I have a question. I've managed to carve the bulwarks to about1/16th thick, and now they're supposed to be sanded down to 1/32" thick. Question: Is there any other way to sand the inside of the bulwarks other than wrapping a piece of sandpaper around my finger? Suggestions? Thanks!
-
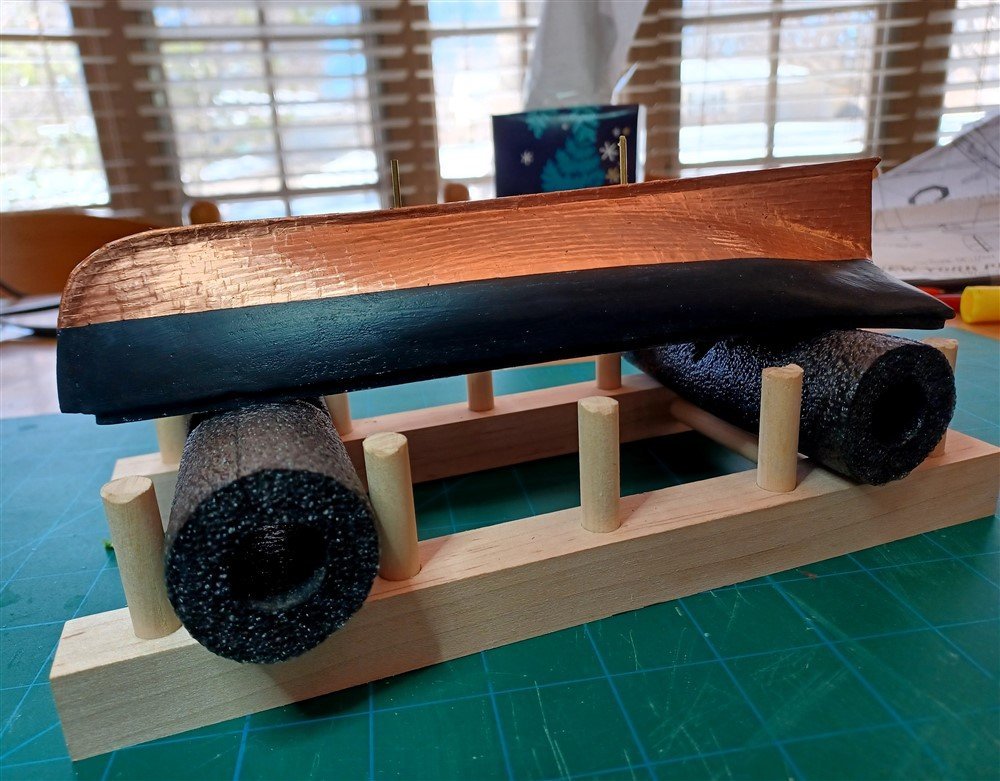
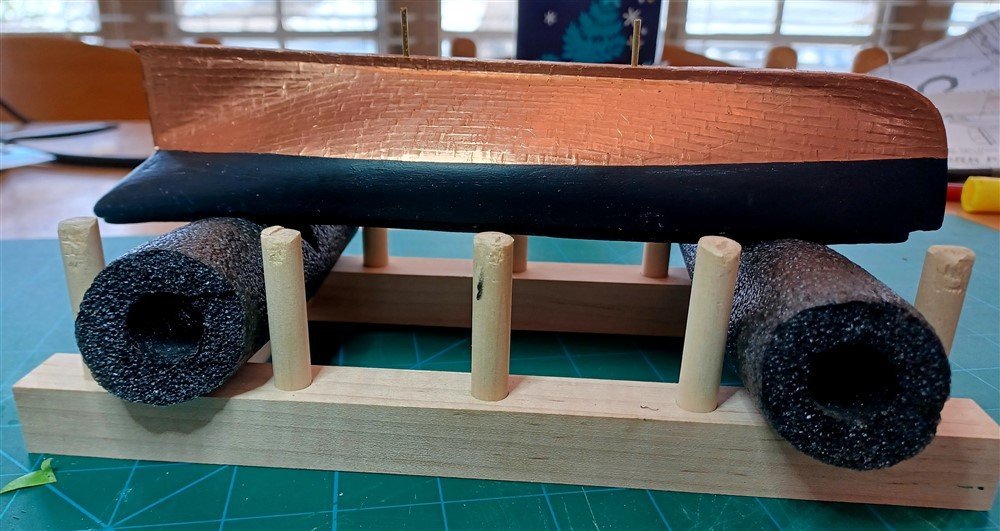
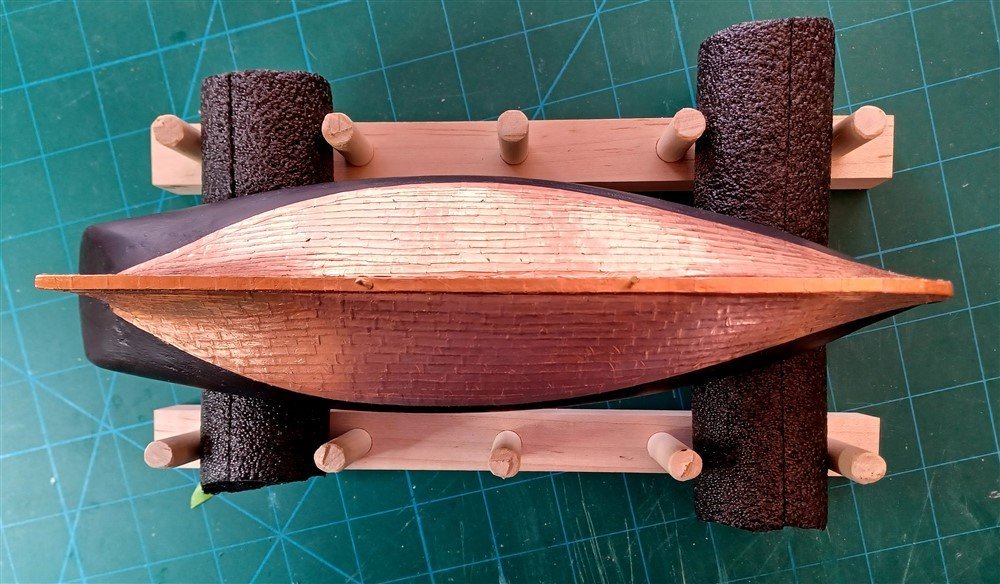
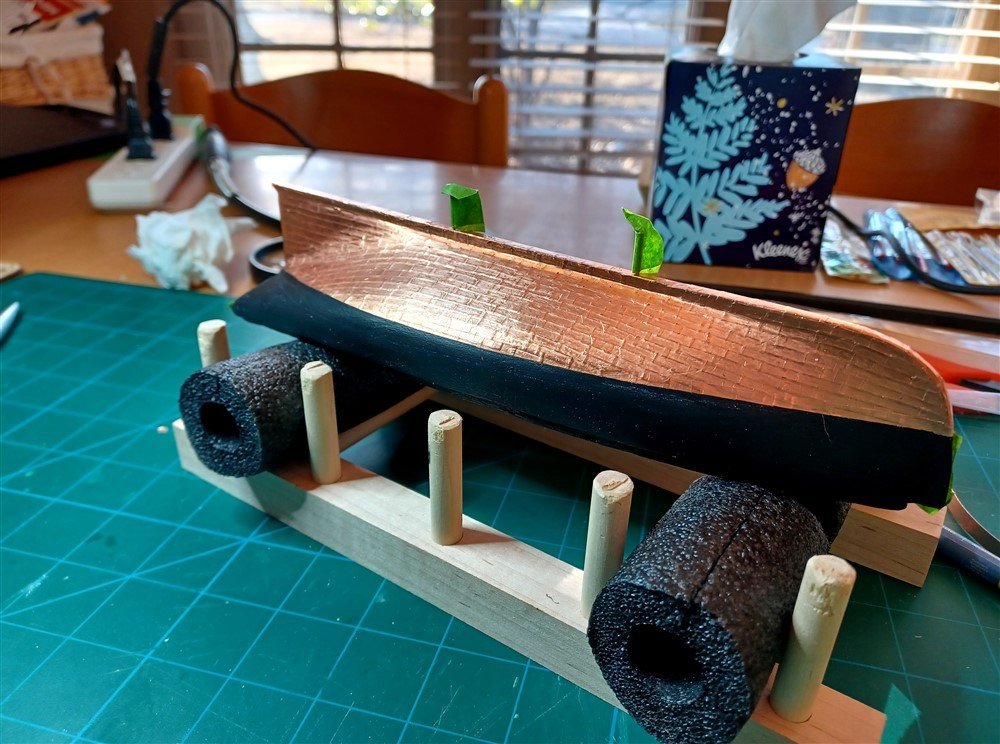
Coppering is finished! Both sides of the hull completed, and I was happy with the pic from straight overhead, which shows that the two sides mostly match! Yay! Next up is "thinning the bulwarks". The instructions point out this may be the most difficult part of the project, so I'm a bit intimidated. But I've seen @SkiBee's work, and my goal is to be able to do something similar, with his build log as a guide!
-
Started coppering the other half of the hull. @Cathead I'm working on doing a better "sweeping curve" this time! And @BrianK, I am a rank beginner, but thanks for the kind words! Also, @Keith Black let's nip that "coppertone" nickname in the bud! Teehee!
-
Great job finding the solution! Glad you didn't stew about it. I do that sometimes, and I end up more frustrated than at the beginning! Impressive, and good luck with the next 91 !
-
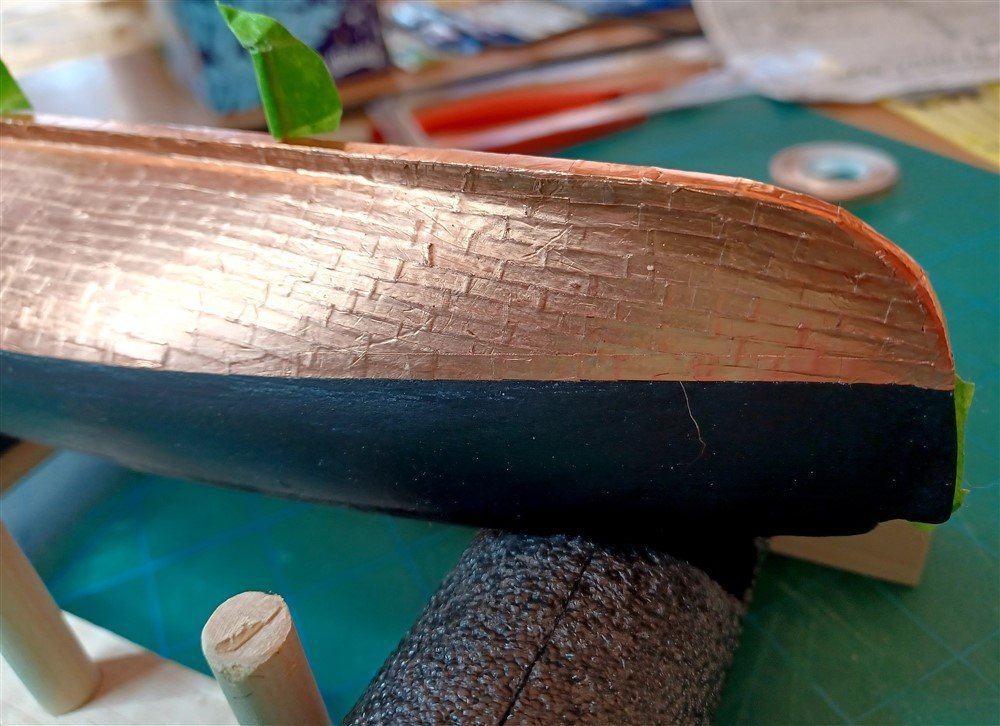
I've finished coppering ONE SIDE of the hull, and I'm excited about how it turned out! It was tedious putting each little copper "plate" on, but after awhile, it turned into a Zen-like experience! First, I decided that cutting little 3/8" pieces and trying to peel of the backing was just too tiny for my fingers, so I ended up cutting a 5" strip of copper tape, peeling off the back and laying it down on my work table, then slicing into the smaller pieces, and using tweezers to pick up and lay them on the hull. I've included the hull pics and a couple of close-ups, but if anyone has any suggestions or feedback before I start the other half, that would be cool! Thanks!

-
Wow! I just read your saga of 1.0, 2.0, and finally 3.0 success! What a journey! I'm impressed with your ability to overcome frustrations... you must've taken others advice to step back, take a break, etc, because 3.0 looks fantastic. Congratulations! At some point, my little model is going to have me attempting deadeyes... I'm going to have to come back here for inspiration!
-
Very good point, Eric! What's funny is that I thought I WAS making a "sweeping curve", but when done, it certainly looked exactly like a straight line! I liked your mark-up of the curve, and it helps me to visualize what to do! Thanks!
-
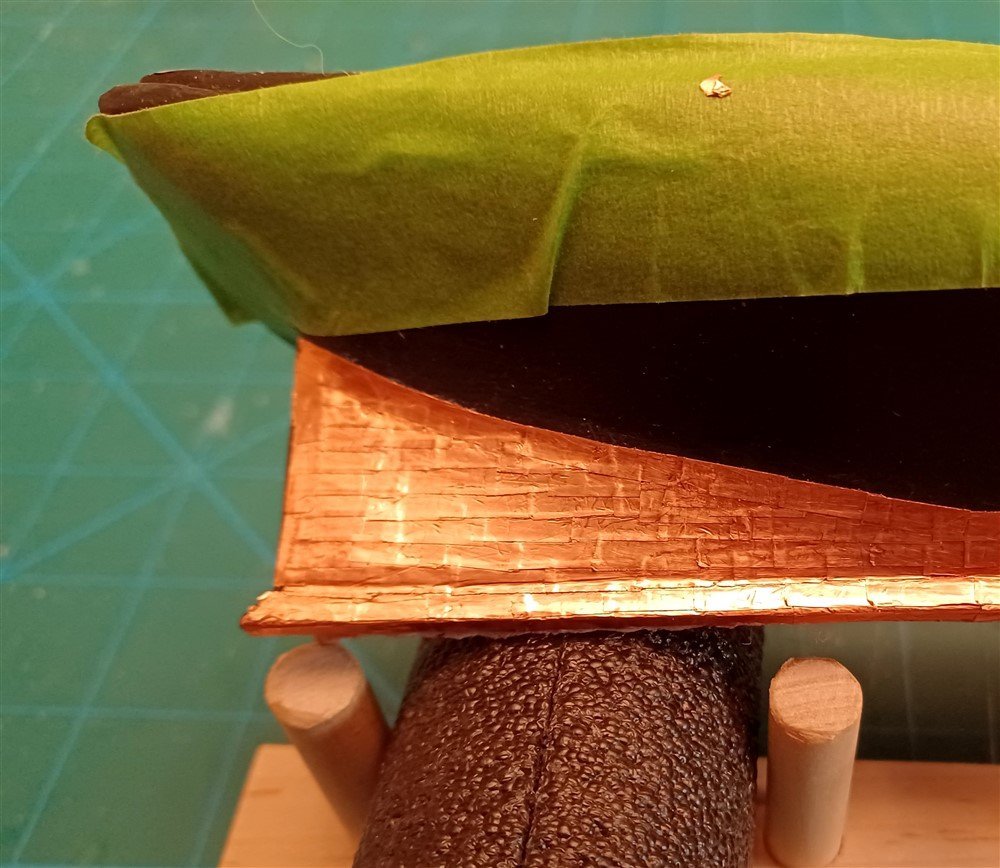
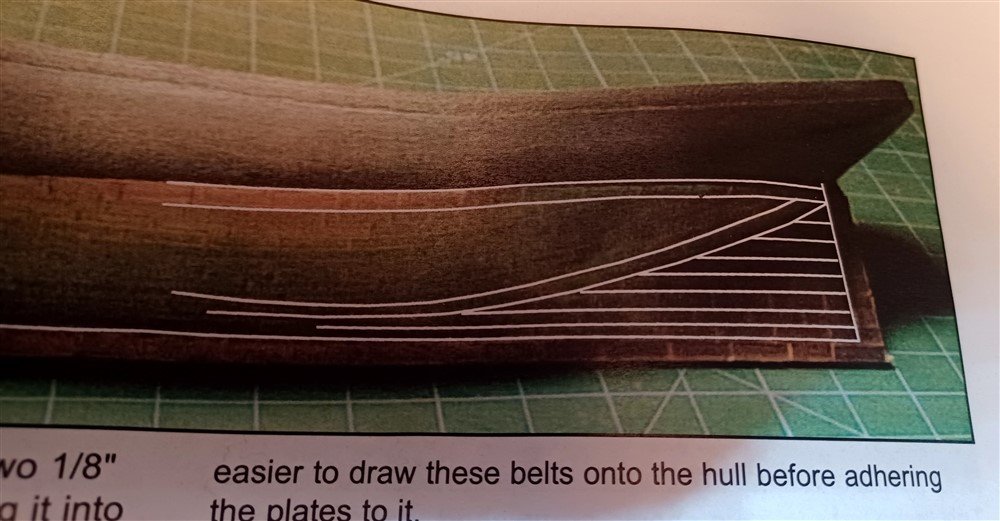
I'm finally back at it! The missing copper tape arrived, and I started the coppering of the hull. I'm trying to follow the pattern shown in the directions. It'll take some time to finish it, but at least I've got it started! I was able to "tape off" the waterline. And the Keel Pins are still attached (I covered them with tape so that I don't poke myself!). They are so securely fastened, I figured it would be easier to keep them in at this point! Beginning to attach the copper plates... The picture from the instructions...
_1000.jpg.d14186cfb913fc37c4ddb0eb4897c49e.jpg)
-
Congrats on 42 years! What a great story and history. Alaska is beautiful. I've taken a couple cruises to Alaska, and spent a few days in Denali.. but would love to go back and spend some serious time there, learning more about it. Again, 42 years! Congratulations! Thanks Brian! There's a few dribs and drabs, but I tried my best to clean up as much as I could!
-
SkiBee, its looking really good. I'm totally intimidated about what comes next after coppering... thinning the Bulwarks, and then seeing all the other work you've done so far! I will be coming back to your pages alot!
-
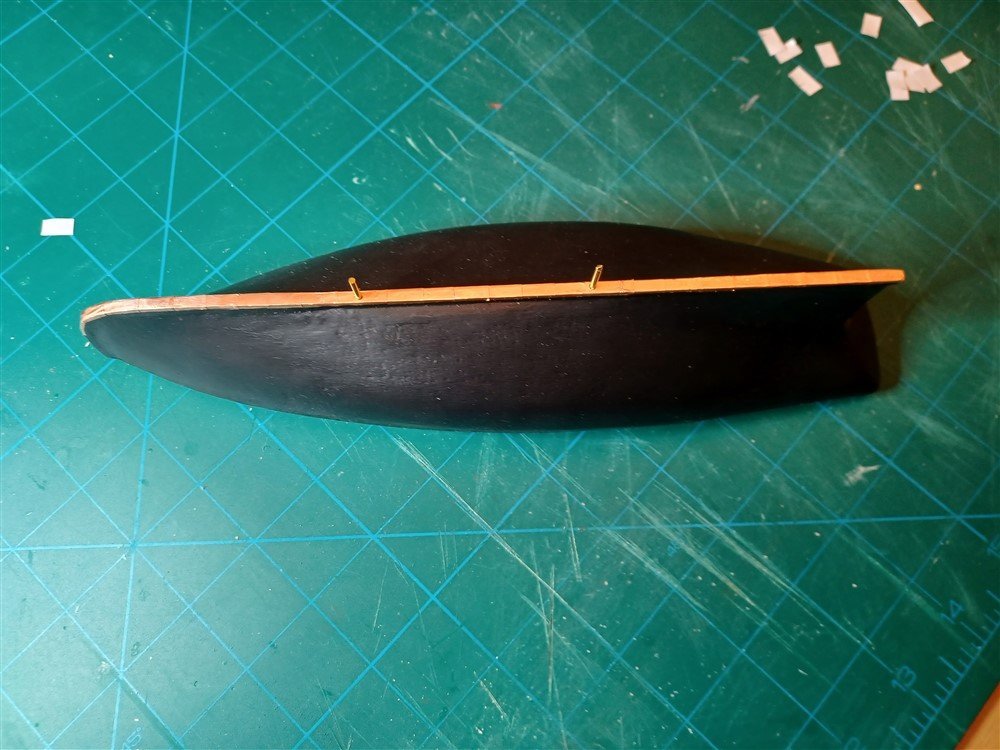
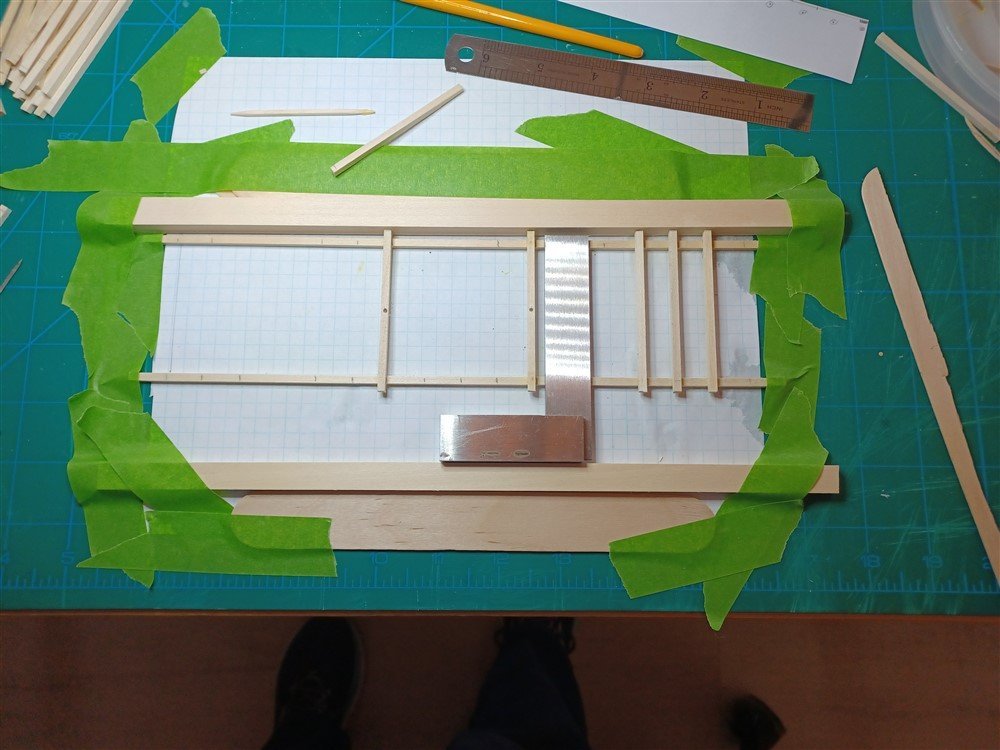
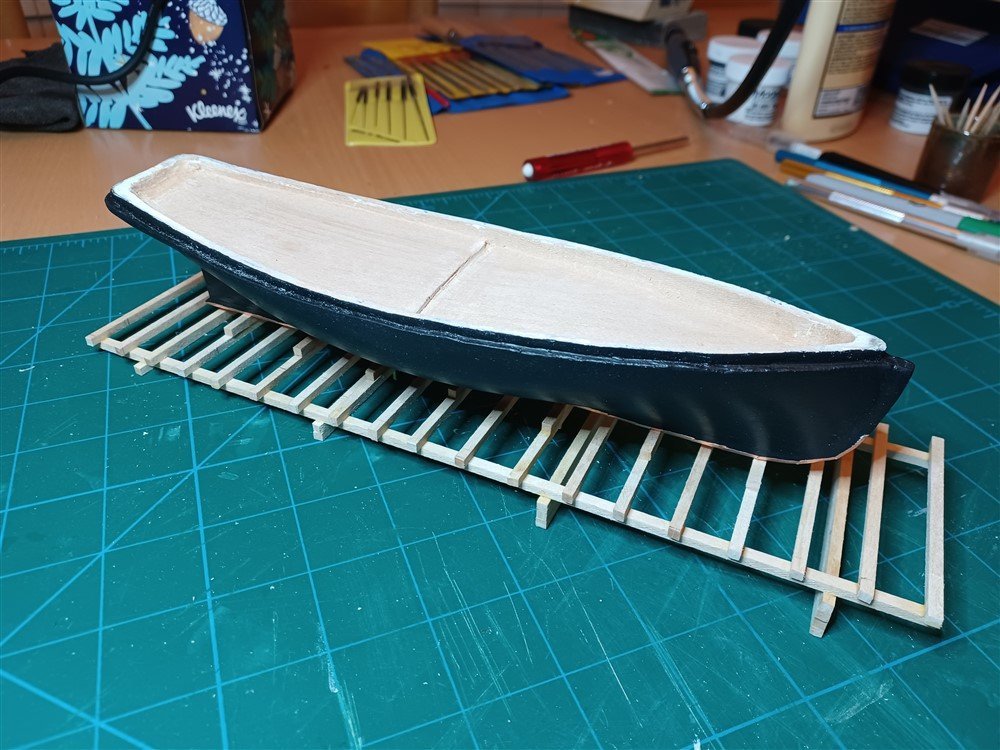
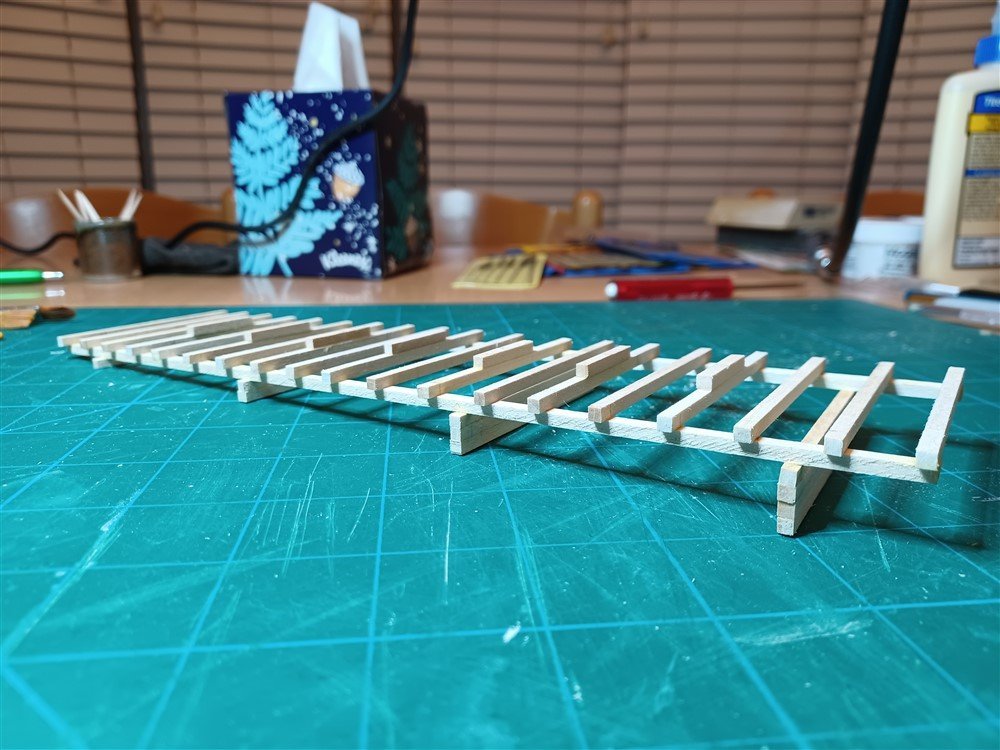
Just finished coppering the keel with the remaining few inches of tape from the kit. They only sent 14 inches, instead of the required 14 feet, and now its backordered for 15-20 days. So I found some copper tape on Amazon, and will give it a try. Meanwhile, I also set the keel "pins" which will secure it to the launchway. Having to wait on the remaining copper, I finished the Launchway. With my "precision" being somewhat suspect, i went ahead and built a little jig to help keep everything parallel, and it seemed to work out well. After it was finished, I did a "dry fit' to make sure everything fits. And I used my little broaches to widen the holes so that the pins would easily fit onto the launch. (I love all the advice you all have given me on tools!) I appreciate all the comments about the wood in boat docks (and thanks for the pics @BrianK! I had to give up on Starbucks, since they now charge $5.78 for my decaf sugar-free vanilla latte! And Keith, I like Jordan too! But i was happy to see Jim Furyk doing so well on the opening day of the Sony... although he didn't keep it going. Meanwhile, I think I'll wait till the Phantom is completed, before I decide what treatment to do on the Launchway. But this has been an interesting discussion on creosote. You worked on the docks in Alaska? Is that how you got interested in model ship building? Coppering the keel My "jig" Finished Dry Fit
-
Thanks for the feedback, Keith and SkiBee! Especially praying alot! LOL! I'm learning quite a bit, and realizing what a rank beginner I am, but its all a process, right? Meanwhile, I am waiting for the replacement copper tape before I can continue on that adventure (gulp!) Hopefully, it will work out ok, but I will definitely be doing some testing before I begin! Yay for eBay! 4 classic cars, and 800 purchases? I am impressed! Yay for golf on TV! (I watched the latest in Hawaii... wow, wish I was there!)
-
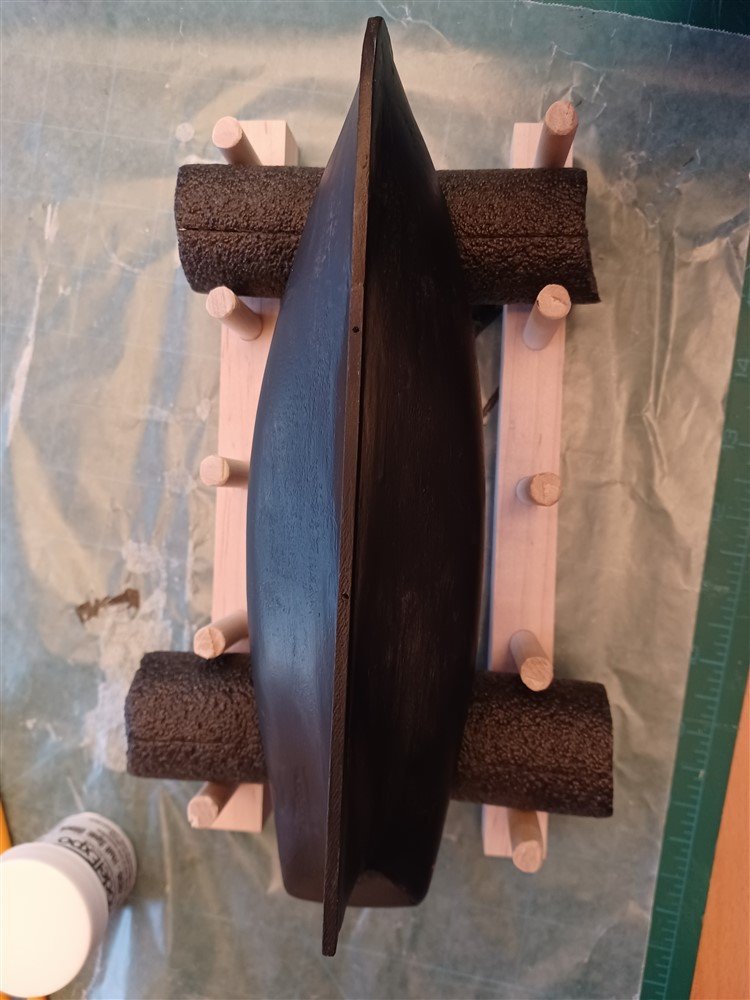
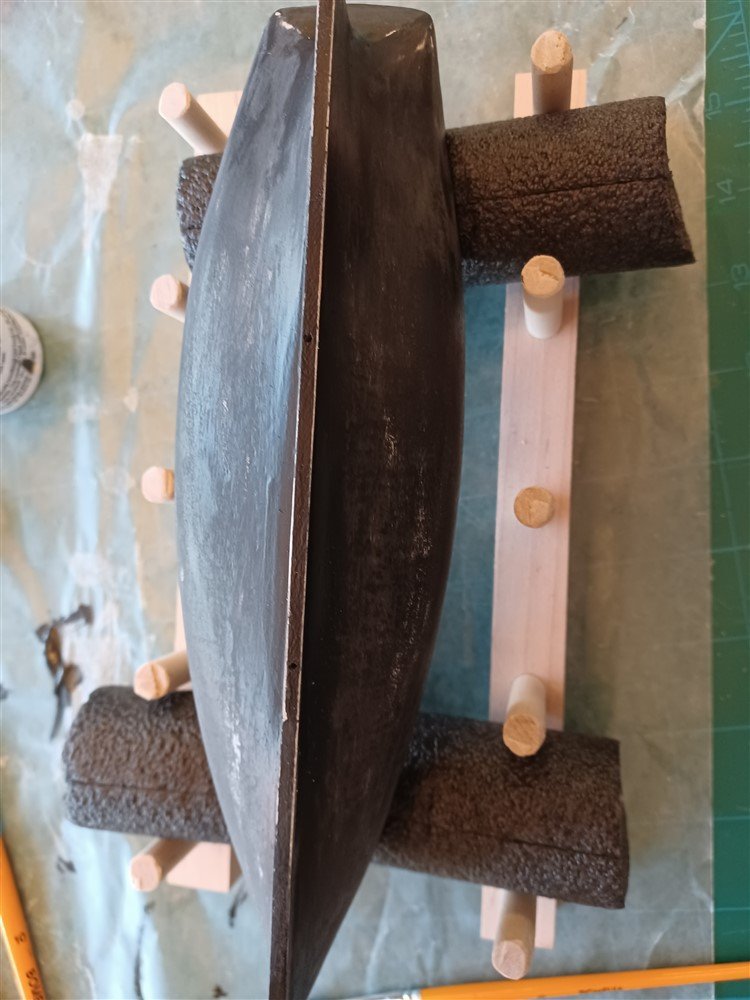
Back at it! First of all, yes, Keith, I received the vise, but haven't set it up yet. It was missing the liners, but the ebay seller found some replacements and sent them to me at his own expense. I was thankful! So to get back to work, I finished the rudder, and "copper-plated" it. I positioned it on the hull via some scotch tape, just to see how it looks, and I'm pleased with how it turned out! Next, I painted the hull. I think I need to find some instruction on how to paint and finish wood! The pictures below show the 2nd coat of paint, then sanding with 400 grit, then the 3rd coat of paint. I was surprised at how much paint came off after sanding. I think I need to use 1000 or higher grit for the next sanding pass. My goal for this model has always been to show off the masts and rigging, and I'm not so much worried about the hull, since it won't be seen as much as you look down on it. So I just want it to look fairly smooth, with no obvious globs of paint or major defects. After a few more rounds of sanding and painting, I'll be ready to copper the bottom. The kit only sent 14 inches of tape instead of the 14 feet required, per the parts list, so I am waiting for Model-Expo to send more copper tape, then I'll get started. (I'm a little intimidated by the prospect of adhering 100's of little pieces of tape to the hull, but I've got some tweezers that might come in handy!) The rudder! (I realized my inability to neatly wrap Christmas presents carries over into neatly wrapping copper tape! But I'm ok with how it looks!) 2nd coat of paint (will need many more!) After sanding with 400 grit 3rd coat of paint. I'll sand using 1000 or higher next time. Hopefully won't need too many more coats of paint.
_1000.jpg.deca5a353200bcd51feeb6db3b016d76.jpg)

-
Wow! Looks great!
-
Ha! Thanks Keith! You're always the voice of reason! I was getting a little caried away trying to decide, but what I really want to do is get back to the main goal of working on the hull, the coppering, etc. Now that I've got the launchway materials cut to length, I can keep them safely tucked away till i really need it, somewhere near the end of the project! (And then I can match the treatment to the way the Pilot Boat looks when its painted and coppered!) Today, I'm putting the workshop back together (I mean, really, meals don't have to be eaten at the table... the couch works just fine!!!)
-
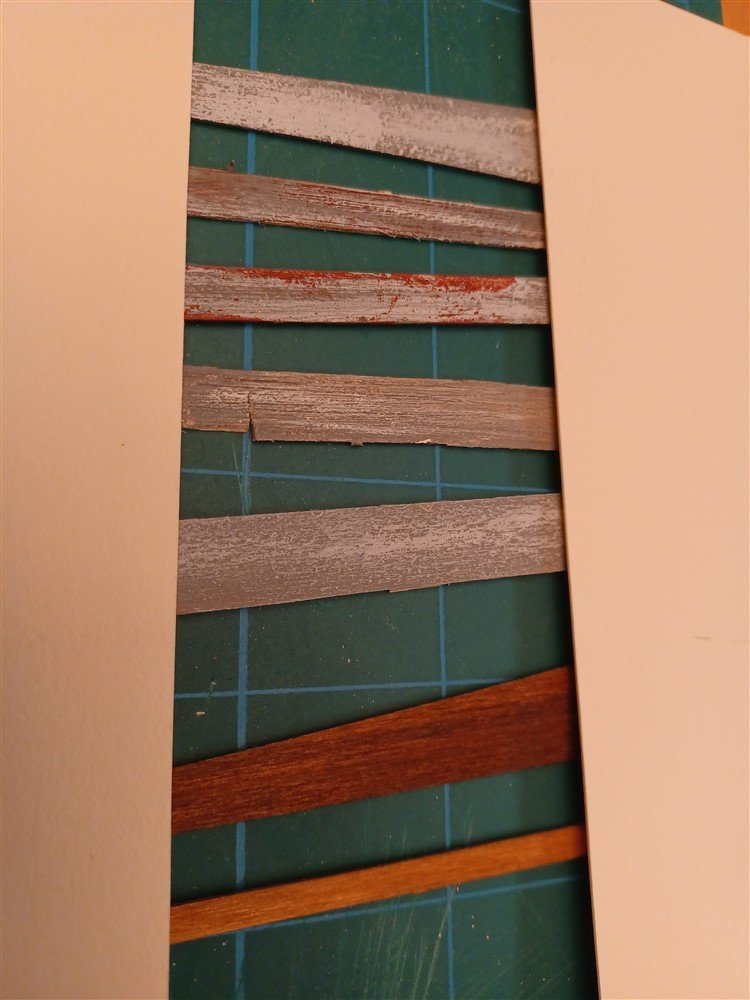
BrianK, first let me say your bridge frames look fantastic! Nice work! This whole idea of weathering has taken me on an entirely new path. I had put away my “workshop” (aka kitchen table) for the holidays, and thought I could ease back into the work by building the “easier” Launchway next, before starting back on the hull. Little did I know I would discover I have limited talent for cutting accurate lengths of wood (hence the purchase of the “cutter”), and now I’m off on this interesting tangent to find the right colors for the timbers, thanks to feedback from you, Keith, Cathead and others. You bring up a good point about “slightly” weathered wood. Your back fence is a good example. Now I’m thinking a light stain might look good with the copper plating. But no matter which way I go, this has been a fun experiment! The bottom two are samples of the only stains I currently have, and I think I like the lighter one better!
-
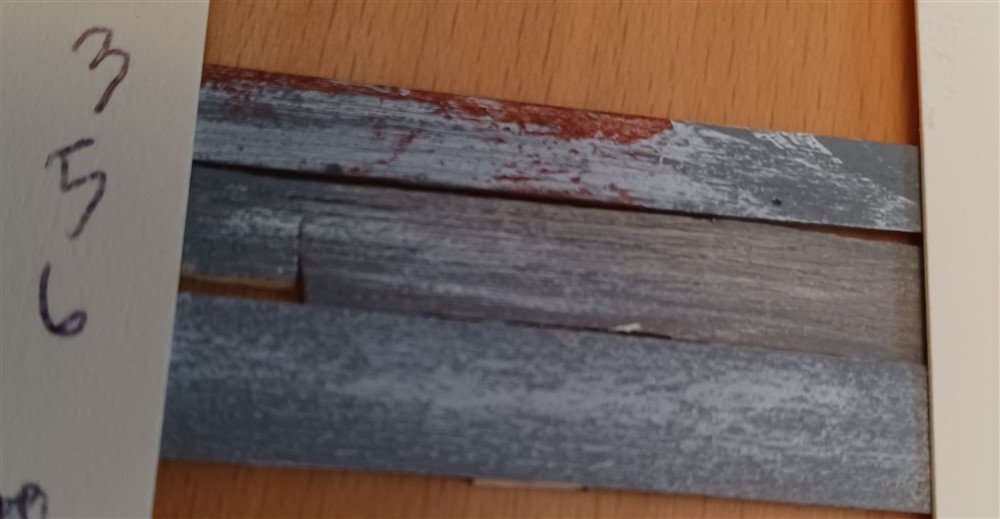
Here's 3, 5, and 6 next to each other. I think I can make each "timber" some version of these three, and then the whole "Launchway" will have a weathered look, with each piece having a bit different treatment. The Kit shows a Launchway of raw wood, but I think the weathered look would look good against the copper bottom. Thoughts?

-
@BrianK wow, I looked at Jason Jensen's modeling videos. What a resource! I don't have a multitude of paints or stains yet, but I can see i'll need to invest as I go forward. Thanks for the link... its great to see what can be achieved with skill and the right resources! I will keep these videos in my "How To" notes!


