HOLIDAY DONATION DRIVE - SUPPORT MSW - DO YOUR PART TO KEEP THIS GREAT FORUM GOING! (Only 13 donations so far - C'mon guys!)
×


src
-
Posts
2,300 -
Joined
-
Last visited
Content Type
Profiles
Forums
Gallery
Events
Everything posted by src
-
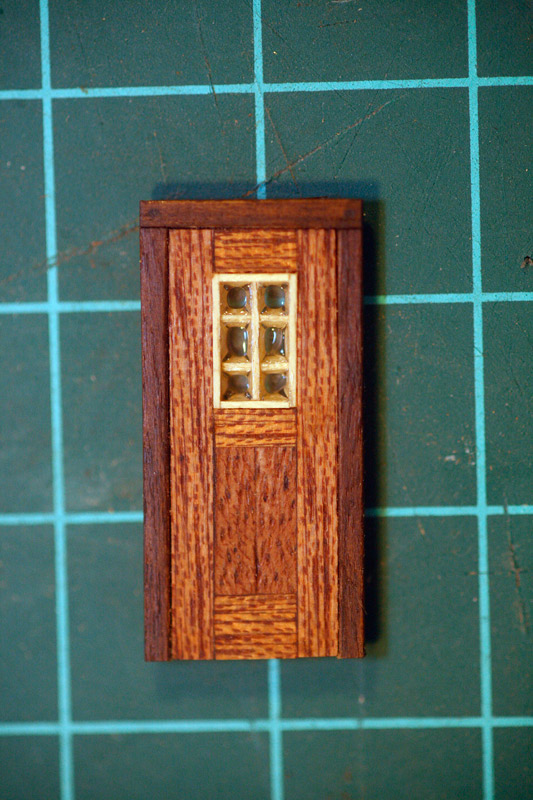
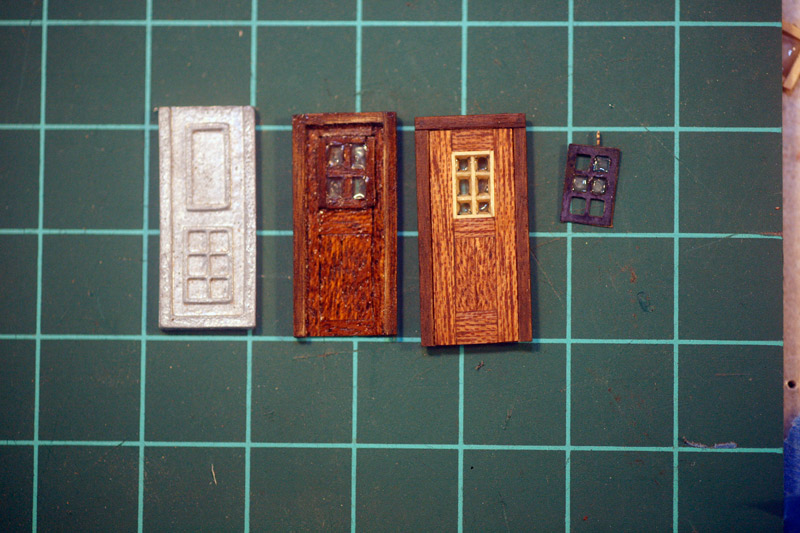
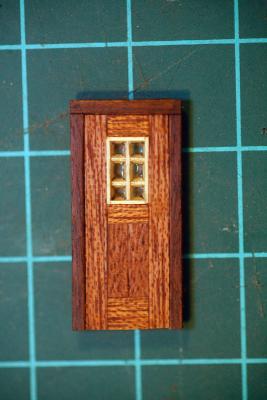
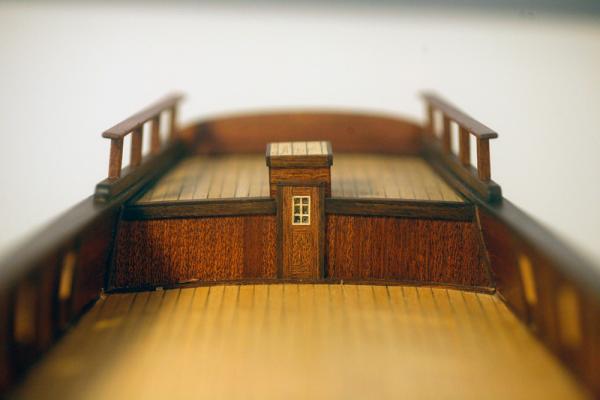
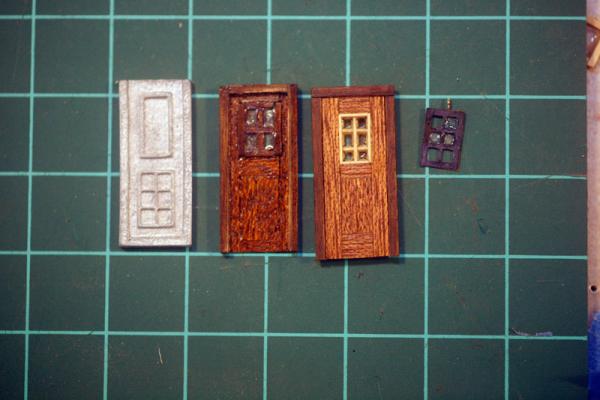
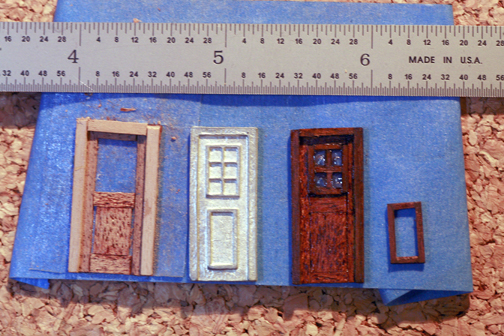
Brian, Thanks for stopping by, I never considered that. I saw another builder, Auger, redo his and thought, "Why not?" Then my nit picky nature kicked in and it had to be "perfect" whatever THAT is. Anyway I am mostly happy with the door, the window frames could be a bit more consistent. I set the door in place a few minutes ago and took an "installed" picture below. Other than my cabin being crooked I may leave it, the window frame is just set in place so I still have the option to push my sanity (and my eye sight) a bit more and re-do it. May need hinges and a door knob now too. Not sure what the hinges should look like, I havent found anything in any of my books - all 4 of them..... Ok here are the pics I couldnt post earlier this morning. The window frame. "Installed" in the door Door progression to date (edited for typos) [ Set in place, Not too bad except the cabin site crooked. Gonna have to rip that off tonight..... Thats all for now, Sam

-
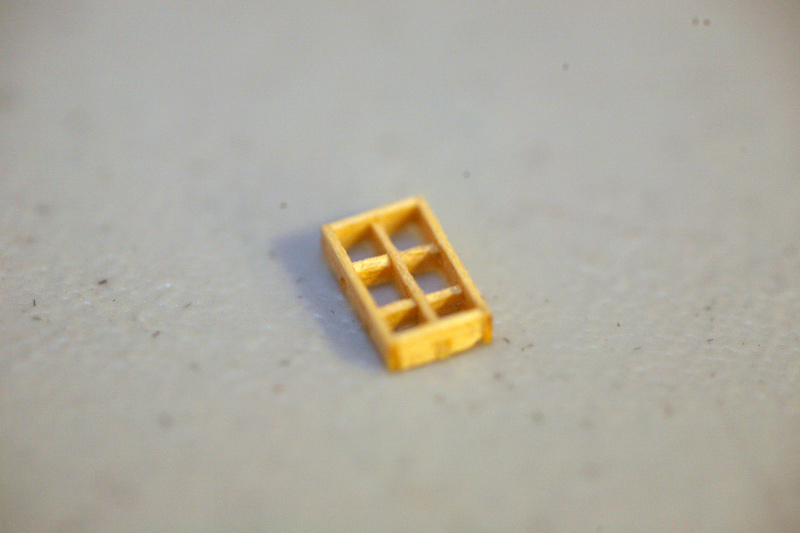
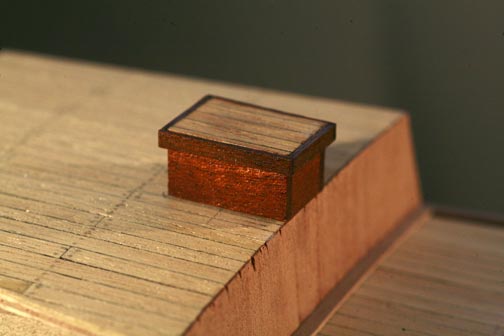
Not much progress the last few weeks. Between travel, family obligations, etc there has been precious little time to build. I did get a chance to see the log cabin that my grandmother lived in for a few years, it belonged to my great-great-grand parents. That was kinda cool, looks like "Little House on the Prairie" as you drive up to it. Rebuilt my window frame out of some 0.5mm deck planking, I thought it was bass wood but no. I like the frame work better than the photoetched part, just a bit crooked-y. Its not real noticeable except up close, I may just leave it. The "glass" on the other hand. I used a product called Gallery Glass from an arts and crafts store. I thought it would work well and in the couple of tests I did it appeared to. I didnt take into account shrinkage though. After I took the pictures I applied some more, We'll see how it looks tonight. Hmmm.... seems I cant get the uploader to work for pictures. It happened once before, I may need to restart safari hat fixed it last time. Its time to go to work now, rather than rewriting this, (I type REALLY slow) I will post and then edit wth pictures tonight. Sam
-
Robbyn, Ammonia should blacken brass. try Augies acetone first then perhaps some vinegar to "pickle" it. that might give the paint a bit more bite, we do this a work for galvanized steel. Maybe if you have some scrap to test on first? If none of that works re clean and try the ammonia. I dont know if household ammonia will get it dark enough for you, but it might be worth a try. Sam
-
Thanks Henry, clearing the gunports makes sense. You probably just saved me from a redo. I didnt phrase my question correctly. When I look at a shroud I see a triangle formed by the outer two shrouds and the channel as the base. What I am curious about is should the base of that triangle, the channel, be a certain percentage of the mast height or multiple of the diameter? Wow I just checked Amazon, The Masting and Rigging of English Ships of War 1625-1860 is $228.00 US. I have blown my building budget clear into September...... The Elements and Practice of Rigging And Seamanship. referenced above is available as an online reference and book copies are more in line with my budget at the moment. Looks like that will be my reference for the time being. Sam
-
JP, Looks great. The only thing I dont like about it is......I didnt do it. It is an inspiration for my next build. Seriously its your build, but if it was me, like others have said, I would be reconsidering paint. Sam
-
I have a ways to go before I get back to the channels since it appears I need to set the masts first. In the meantime I have noticed there seem to be a formula for everything shipbuilding. For instance I have seen mention of shroud diameter to be 1/x of the diameter of the mast. Based on the info Allan provided above I would assume that the Fore Mast on an 18 gun ship would have six shrouds; 7 bolts would leave 6 spaces between. But, what about shroud spacing? Is there a formula that says the space between shrouds is to be some fraction of the mast height or maybe of the diameter? Looks like I need to buy a rigging book, suggestions? Sam
-
Thanks Russ, the grillwork isnt cleaned up yet. That is resist on the brass, I just laid it up to see more or less what it would look like. If I use it it will be blackened. I have some 1x1mm bass wood here I may try to make a window out of that and go with whatever looks better. Sam
-
Brian, the planking looks great! .5mm strips with nothing behind them? I am afraid I would sand through. Like your new avatar, kinda miss Alfalfa though, the look on his face is similar to how I feel when building; "Yikes! How did I manage THAT!" Looking forward to seeing where you go with the finish. Sam
-
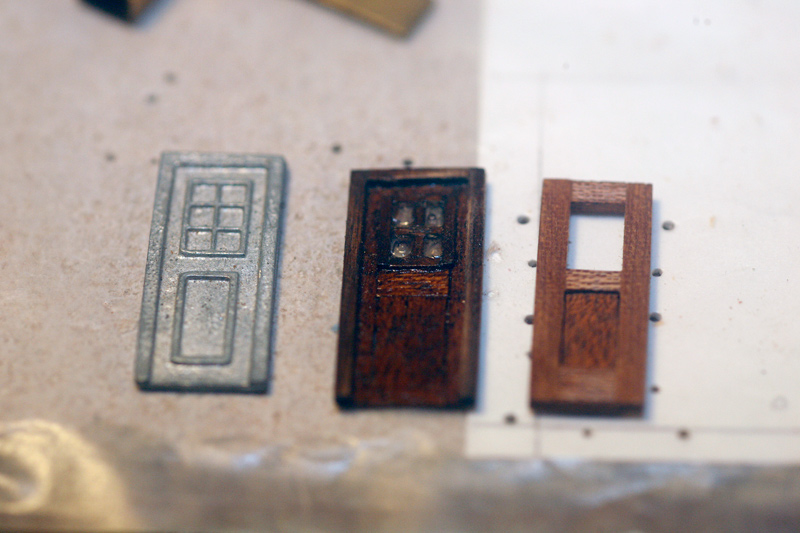
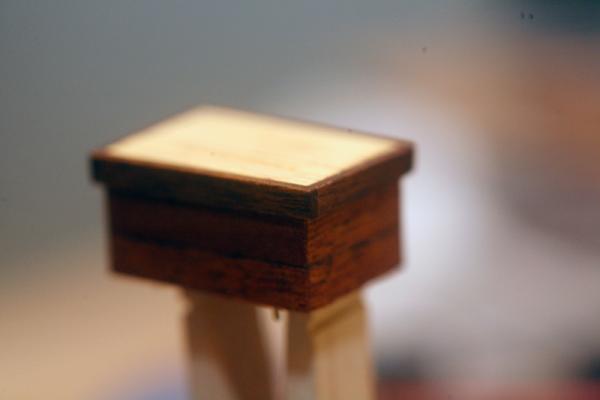
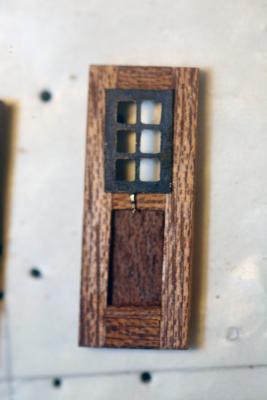
No worries Brian, I kind of look at my build log as a back and forth conversation. If it is reasonably close to being related to our builds, most anything that is not malicious ok with me. Build time has been limited the last few weeks, between work, summer traveling and "Domestic Bliss" (chores) I have not been able to build much. I have several mini projects going at once, stern gun ports, rails, cabin, door the stem. I decided to redo my gun port hinges, after some more reserch I noticed they were short and the barrels/knuckles of the hinge were incorrect. That required more solder of different melting temps to redo, still need to do that. I was looking at the captains cabin or the hood as the instructions call it. I had originally stained then shellacked it, It came out too glossy and with my decision to go with a rubbed oil finish I had to strip the finish off. then decided it should have been planked so I dug up a couple of my last bits of planking and planked it. Turns out I have a few more small bits left, my redo my gun ports too. My early attempts this weeks version Hmmmm... a bit like a jail cell. Sometime back I decided to scrap the door that came with the kit and go with a wooden one. I made and finished one but was never really happy with it so made plans to re-re-do it.(or is it re-re-re-do it? I can remember) I made some photo etched frames for the new one, not sure yet if I like it, looks too much like jail cell bars. I need to refigure the jambs around the door, that is going to require a bit of surgery on the upper waterways. Original stain replanked and restained That is about it for now, maybe the goddess of chores will be busy elsewhere and I can get some building done this weekend........Who am I kidding? Sam

-
Brian, That looks really REALLy clean! Nice work. Hmmmm lacy curtains huh? sam
-
Russ, just caught up with your build, as always, great work. Looking forward to seeing your rails. I dont know about you but there is something about looking at a well done scarf joint that makes me say "oh yeah!" Sam
-
Thanks for the info Brian, it will help when the time comes. FYI the enterprise is double planked, I tried to single plank and failed miserably. I do appreciate the compliment though, thanks. Gonna plop myself back down in my seat and take notes now. Sam
-
Brian, Been following along quietly here for a while. Coming along nicely, I like your moldings, I know what you mean about a camera YOU can control. When I first started my log I was using my little nikon point and shoot cause I didnt want to mess with getting the big guns out. Gave it up quick for the 5d and a tripod. The rattlesnake is the ship I would like to make my 2nd build, if you had to do it all over again would you choose this kit or the other offering - Model Shipway(?) Just curious. sam
-
Brian, Two humans and sheep for neighbors, how come that doesnt sound bad at all? Ya gotta love the internet, I try to buy from local hobby stores as much as is practical but even being blessed with multiple sources I have found that I still get most of my ship building supplies online. How is your bulkhead and deck fit up coming along? sam
-
Wood filler vs. spackle
src replied to rtropp's topic in Building, Framing, Planking and plating a ships hull and deck
Richard, I think it depends on what your goal is. Can you give us a picture of what you are working with and trying to accomplish? Do you want a smooth surface to do your second planking? Based on your response of being interested in sawdust filler and your question of staining patch and paint it sounds to me like you finished planking and are searching for a stainable filler? The wood dust is most likely your best bet if all you want is to fill minor gaps in the planking, if you need to "float" it over the hull and then stain, my opinion is your asking for trouble. Rockler, Woodcraft and Homesteadfinishing.com(S) all have sandable fillers as well as the local hardware stores. You will need to experiment with the right combination of filler and stain though. In my experience they dont always take the stain the same as the wood. If you re going to paint like Bob did (nice finish Bob) then a light weight filler may be the way to go. I have seen drywallers use a light water based topcoat for patching and touchups, they will smooth it on and use a wet sponge with most of the water wrung out and smooth the surface with that. Might be something to experiment with. Good luck, hope this helps. Sam -
Me-thinks I am being challenged! Sam
-
ZyXuz, Just checked out your blog, nice work. your little barrel switch gave me an idea. Too late to do it on this build, but next time I think I will try making the capstan into a switch. Now if only I could keep the cat from running off with parts!, She literally just ran off with my small bin of treenails! I would lock her out but she has torn up the carpet under the door. sam
-
Wow! Thank you everybody! Always appreciated. Brian, yes I was forced into the stern ring when my "cat ate it!" At least I am assuming that is what happened, I came in one night to work and found 2/3 of my part on the work bench, never did find the other 1/3. Best guess is its in one of her two favorite hiding places, under the sofa or on top of the book shelf. It turned out to be a good exercise in joinery. As far as the hobby store having brass in stock....I ended up ordering online, its getting harder and harder to get that stuff here, and I have 5 hobby stores in a ten mile radius! Do you live in the "country" as we call it here or is Wales "hobby store challenged"? Sometimes I forget how fortunate I am where I live, L.A. has everything you could ask for (and a lot you would never want) Ok now that Robbyn has reminded me I can re-do things I need to go see about re-doing my gun port hinges, they are several scale inches too short. Thanks Robbyn! Sam
-
Allen, thanks, I hadnt considered the water/dirt issue. I was going to mortice my channels into the hull since I have already stained and oiled her, gonna have to rethink my installation. Maybe Just smaller mortices although with mahogany thats interesting to say the least. I may change them to manzonia. As far as support, my channels butt right up against the upper wale, I am thinking a support below might be more appropriate? I still have limited research material, the closest I have to my ship is the "Fully Framed Swan Class" series. Thanks again everybody for the education. Sam
-
Wow, This turned into quit a discussion. I am getting an education, thank you. I see I need to be more concise in my questions. Perpendicular to the centerline of the ship is what I was envisioning which just happens to be at a slight angle to my hull. I was also interested in the tension/compression issue but dont have the engineering vocabulary to ask correctly. I saw the channels as a means to clear the cap rail but didnt see it as a way to widen the hull although that is exactly what is happening. Thanks for the information Sam
-
Alrighty-then, looks like channels wait for a bit. Sam
-
It will be fine Rich, minor detail. I probably should have kept my mouth shut, sorry. Sam
-
Russ, the filler piece is a great idea, I think I will go with that, thanks. Hmmm....Robbyn... is that an echo I hear? Your right of course, build it to your level of satisfaction. I have had to leave several things less that what I envisioned, they would have been major re-works to get right. I dont want that to become a habit though. I appreciate the compliments on the hull, thank you. I am trying to not dwell on the failings on it, stain grian filler and even the grain itself hide most of what I see as flaws. Ultimately, when I walk in the room and look at her I am pleased with what I see, thats the most important thing. Well I have a side project to finish up this morning; a friend bought his wife a Koa chair in Hawaii and it was severely dammaged in shipping. Koa is EXPENSIVE! An 8/4 plank 5" wide by 20" long was $90.00 plus shipping! And I thought this hobby was expensive.... Ok enough rambling, fix a chair and then off to the hobby store to buy some brass. Thanks for stopping by Onward! Sam
-
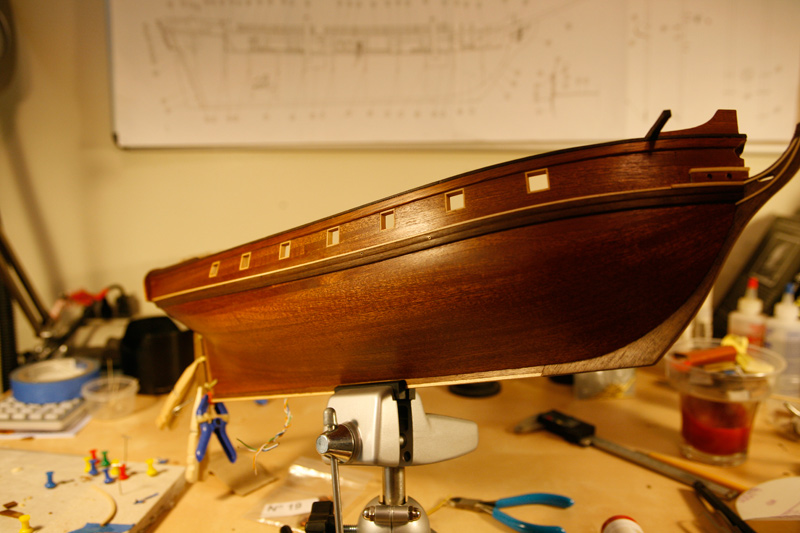
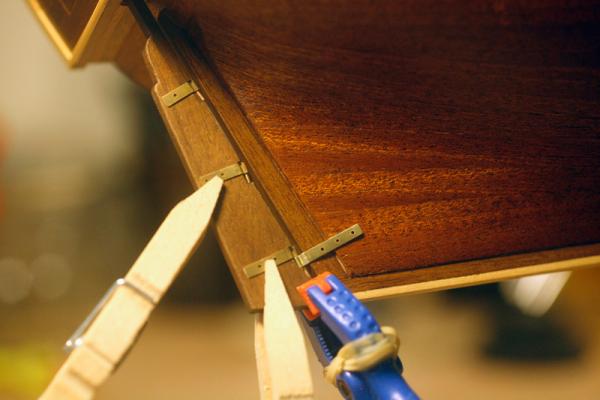
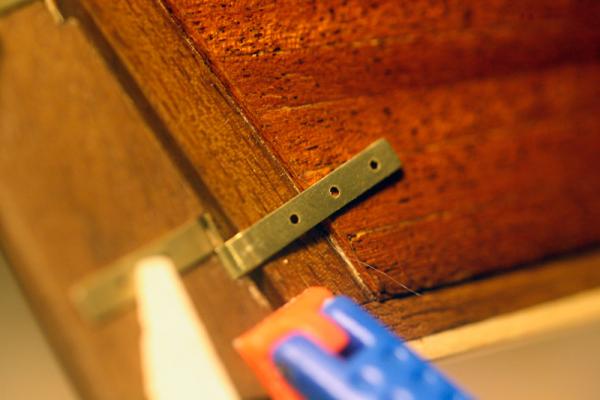
Spent some time this afternoon building. Got a coat of linseed oil on. I had planned on using blond shellac up until this morning. I didnt want a high gloss finish, I really prefer a more satin sheen but the more I though about it the less attractive rubbing a shellac finish to satin was becoming. I could have used a water based satin finish but I dont have much experience with water borne finishes and really didnt want to start learning on my build, I have enough to learn as it is! (see my rudder below) So I decided on rubbed oil and I think I like it. A few more coats and the hull should have that "you gotta touch it" look. Sorry Lorcan-Kitty its claws off the build for you...... On another note, I started mounting the gudgeons and pintles while the oil was drying. I was generally pleased with how the soldering and fitting went until I laid it up on the hull. The kit came with pre drilled parts, all the same length. You bend them in place and trim off the excess. all well and good except they drilled all the holes on the same spacing. I think the holes probably should have been drilled to the part after cutting to length. My lack of experience is showing on the stern, unfortunately I didnt taper the hull enough at the stern and now I am going to have a funny step in the bottom hinge. I also didnt research the rudder early enough in the build to mount it as close to the stern as it should be. I am going to have to live with those mistakes and chalk them up to the learning experience. All in all the rudder isnt terrible, I will most likely try to scratch some new pintles and gudgeons and maybe just fake the gap and not try to make a perfect fit, that will just highlight the issue. As always, comments suggestions and critiques are always welcome.

-
Awesome! Thanks everybody! If I am seeing this correctly the channels take the brunt of the load holding the masts in place. I am assuming then that the chainplates transfer a portion of the load to the hull? Looks like I need to get the masts at least mocked up before I can set the channels.