HOLIDAY DONATION DRIVE - SUPPORT MSW - DO YOUR PART TO KEEP THIS GREAT FORUM GOING! (Only 13 donations so far - C'mon guys!)
×


src
-
Posts
2,300 -
Joined
-
Last visited
Content Type
Profiles
Forums
Gallery
Events
Everything posted by src
-
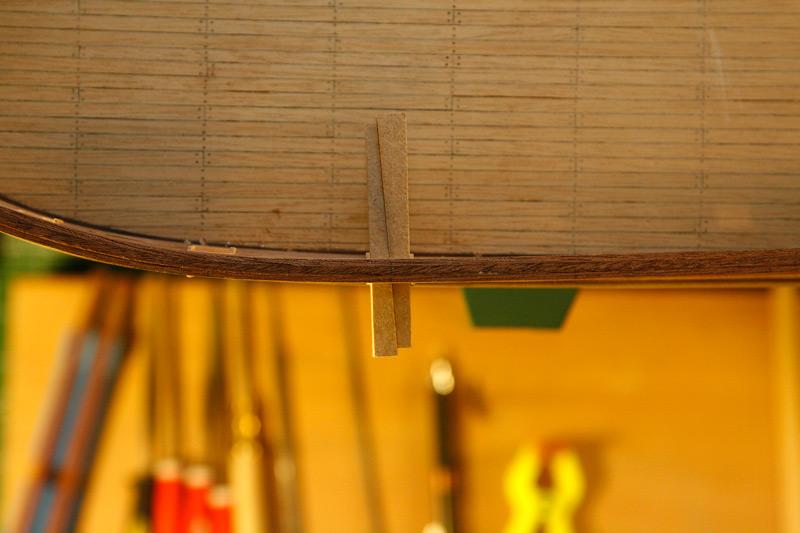
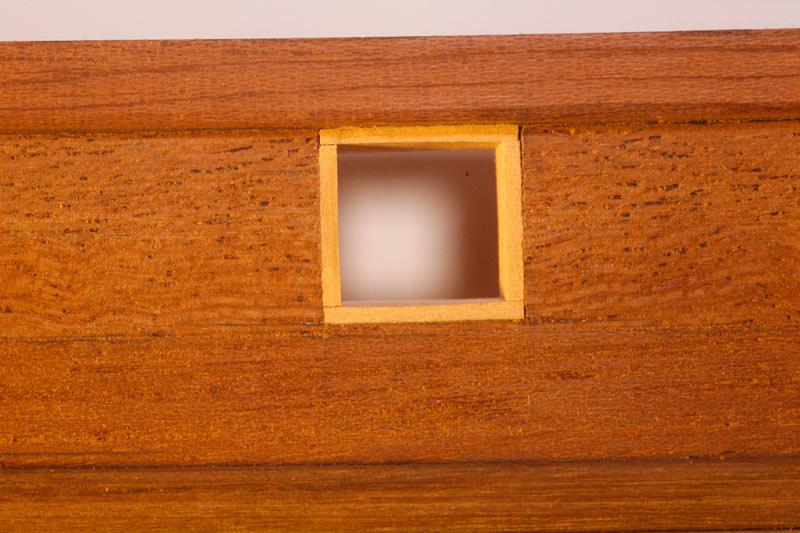
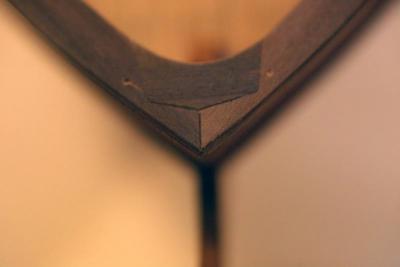
]Robbyn, Thank you!! I lined the gun ports with Box wood. I did the stiles; the vertical pieces firs,t and then the rails second. I am not sure if the cabinet terms for the parts follow ship building or not but that is what I called them. I was having trouble keeping them paralell and tight to the hull sides so I "stole" a trick I learned at work: two apposing wedges. If you have access to a miter saw and a 2-3" wide piece of wood or MDF which is what I used, several inches long (like 12" or more, gotta be safe ya know) Set your miter to 2-3 degrees, the actual angle is not important. Cut a sliver off and discard it. Then flip you pice over and cut another sliver of and save that piece. Continue flipping and cutting till you have a dozen or so pieces. You can appose these wedges to use as a clamp. Hope this helps. Sam
-
Robbyn, I know how you feel. I made a pretty good screw up on my build too. Got some of the planking wrong. Bothered me so much I got up at 4 A.M. and ripped them off before going to work. Its frustrating, but as many have pointed out you will have a much better model in the long run. I also agree with Russ, your rudder looks good!. Sam
-
Wow Rich! Your just cruising right along!!! No that I am following you, what was "fiddley" about the rudder?
-
Jp, I am liking your planking. Your attention to detail is going to pay of nicely. Have you decided about bleaching the entire hull yet? Sam
-
Bleaching your wood
src replied to JPett's topic in Building, Framing, Planking and plating a ships hull and deck
Will do. Just have to finish the "Job From He!!" We were supposed to be done two weeks ago. Feel free to PM me if you dont see anything in the next two to three weeks. Sam -
Bleaching your wood
src replied to JPett's topic in Building, Framing, Planking and plating a ships hull and deck
One other thing to watch out for. If you use ammonia on a wood with a high tannic acid content like oak, cherry, mahogany or even walnut, the ammonia will stain the wood. It can be a nice stain, especially on oak, but if your not aware of it, and just dab it in places you could be in for a nasty surprise. It was one of the reasons I brought up the oxalic acid in the first place. A lot of furniture makers, especially those who specialize in Mission or Arts and Crafts style furniture use a process called ammonia fuming to stain the wood. In my experience it is most effective in oak, cherry, and mahogany. I dont imagine to many of us will build a scale model out of oak, but I see a lot of mahogany and some cherry here. Always test on a sample first. JP, I should have warned you about the ammonia first. Sorry. I have been working 12 plus hour days seven days a week for four weeks and my head is not screwed on right at the moment. Fortunately no harm, this time. Ron, I have some wood finish books here that delve into the bleaching and stian removal on woods. I will try to look them up and post them here. If the Admins feel the information is worth it I would be more than happy to have it posted in the data base Sam -
Bleaching your wood
src replied to JPett's topic in Building, Framing, Planking and plating a ships hull and deck
JP, Sorry, didnt mean to give you a heart attack with the "G" word. I promise I will never use it in that context again. Well I may just whisper it just to watch you twitch from time to time......... It is usually a good idea to neutralize any chemical you apply to a project. In this case a mild vinegar solution would work. Even though you washed it with water there can still be traces of bleach in the wood. As far as doing the whole ship, you could make a small sample board and do part with bleach and part with out, then stain and see what happens. I would agree with Richard, bleach worked so no need to try anything stronger. As far as the Oxalic Acid, you absolutely need to take the proper precautions; eye and skin protection for sure, a dust mask when mixing is not a bad idea either since it comes in a crystal form. In the world of chemicals its not as bad as nitric acid or lye, both of which have applications in staining woods btw, but you should always take precautions. Sam -
Bleaching your wood
src replied to JPett's topic in Building, Framing, Planking and plating a ships hull and deck
JP. Are these the spots you point out on your build? or are they different? In the picture I am referring to, Pg 2, planking 11.jpg, they almost look like glue spots in the picture. That is always tricky to remove completely. Do you recall if anything was pressed/clamped down in those spots? Can you recreate it on some scrap wood? That I think might be your first step. If it is something else entirely can you post a picture? If they are grey or bluish black spots, sometimes that is either iron/mineral deposits in the water you used to wipe your glue off reacting with the tannic acid the wood or even a metal clamp or pin coming into contact with the wood. This is fairly common on woods like oak and cherry. I am not sure though if bass wood has much tannic acid. IF that is the what happend, you can try Oxalic Acid in a water solution. Sam -
Pasi, nice to see you back. looking forward to seeing more. I have learned a tremendous amount looking over your shoulder. Sam
-
Sarah, Nice work on the smoke stack. I love how we all gravitate to what is familiar. I would never have thought of nail polish for model building. Making a trip into the girlfriends makeup box this weekend......"I am going in boys cover me...." Will somebody please pass the popcorn? Sam
-
Brian, I will be following along here. This is a ship I would like to build next. Just dont know which kit I will buy. Sam
-
I did notice that the water way would be covered before i moved the Lower wales, But now they show again, Whats best to try and hide them? Rich, Not following you on this one. What are you trying to hide? Sam
-
Dominik, I too am curious how you will handle the wires as I will have the same issue on my build. Love all the details your adding. Even if you cant see it its nice to know they are in there. On your smoke generator, dont those RC generators create an oily residue? What will that do to your finish? Sam
-
Robbyn, I did a down and dirty mock up of what I was trying to explain. I believe this is the correct way. It is possable that the pin goes pointing UP and the rudder drops over. On the old MSW there was a tip in the building tips forum that showed this as well as a cool little tool to make the crimp, its gone for now. Good luck, hope this helps. Sam


-
Robbyn, Just discovered your build. Its coming along nicely. Looks like you got your stain problem fixed? What!?!?! your not watching the Oscars? As far as your hinge question about the hinges. THink about your hinges on your house or cabinet doors. the hinge knuckle which would be the brass strips need something to pivot around. That would be the hinge pin or your wire bits. I have not had to do this yet on my build, but I think you will need to glue, epoxy or solder your pins to one half of the knuckle and then drop it into the other half so gravity hold it in place. I hope this helps I know I am not explaining it as well as I should. I can see it in my minds eye, but am having trouble converting that to words. Sam
-
Sarah, Really nice work, I like all the details you put in. I missed this build on the old MSW somehow. Nice little soft boxes your using, what are you using for diffuser material? I know what you mean about pets, the FA (Future Admiral) came home home from a shoot with a "Squeaking-Ball-O-Fur" last July. She has grown into close to 9 pounds of Frolicking Feline Fury. Anything on my work bench is a toy. Looking forward to more builds form you. Sam
-
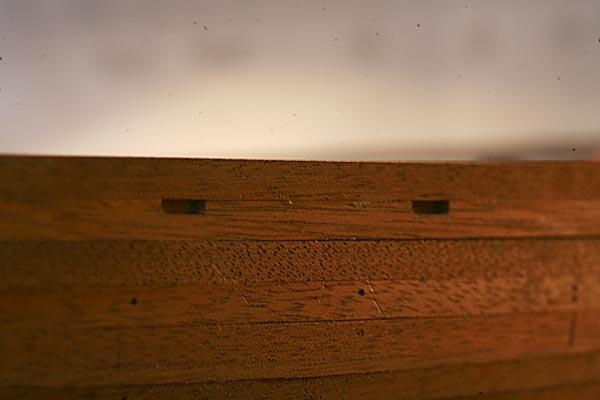
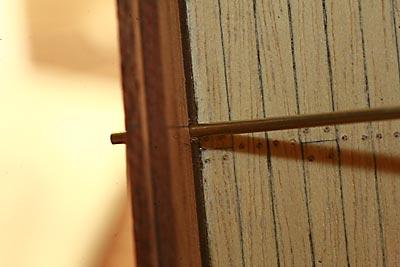
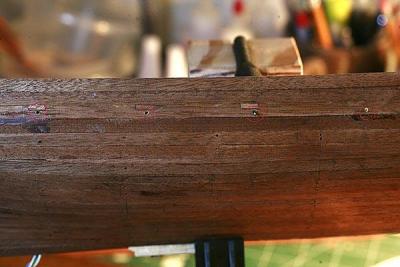
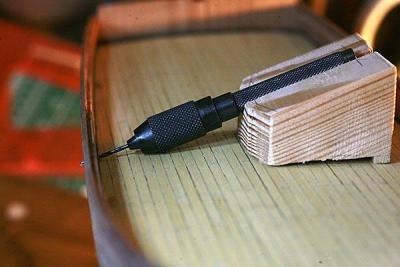
Sarah, Thank you!! Outside of the mahogany for the planking and the somewhat obscure instructions its not a bad kit although since this is my first wooden ship model I may not be in the best position to judge kit quality. In my opinion a heavy open grain wood like mahogany is not really suited to this kind of work. It can be great for building furniture but is too splintery/grainy for this kind of work. If I had to do it again I would get some new planking material. Just my thoughts. Carl, thanks! The drill jig was a head scratcher for me, the scuppers had to enter and exit in just the right spot. Its not really noticeable in the pictures but even with the jig I missed on a couple. Still I am pleased with how they came out. Sam
-
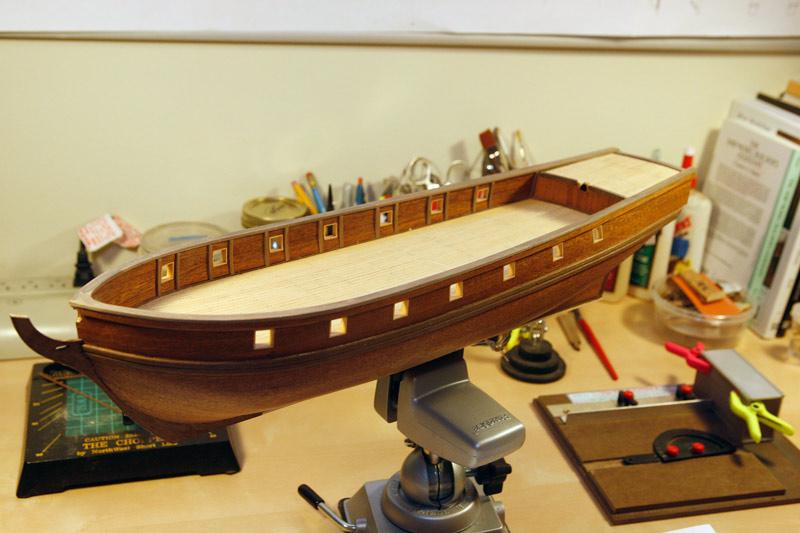
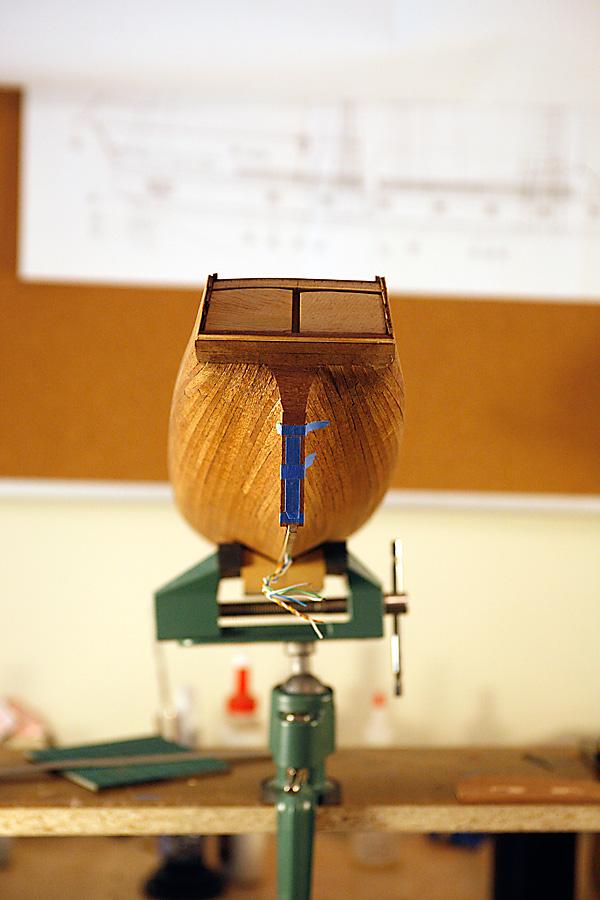
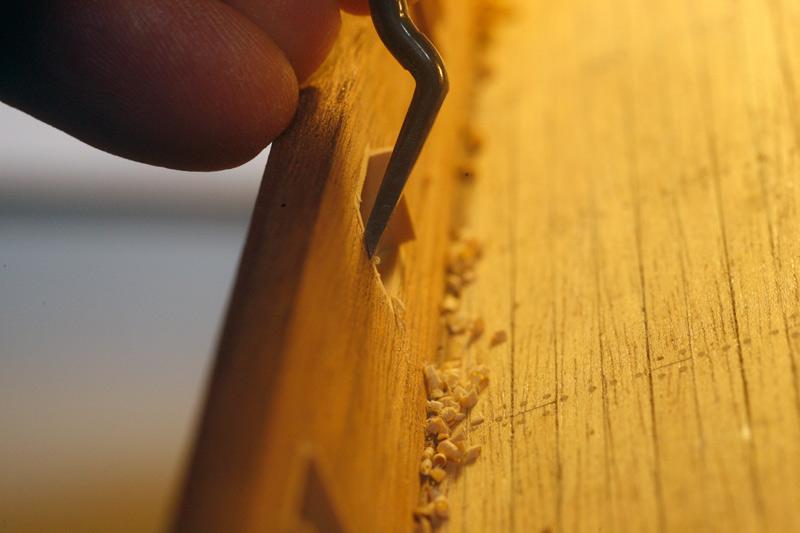
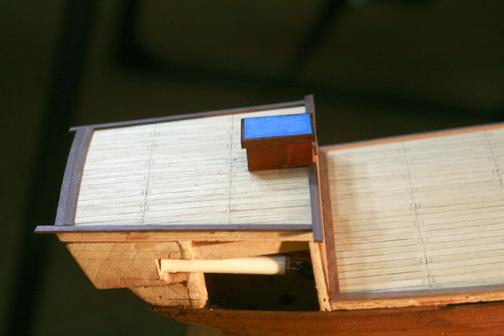
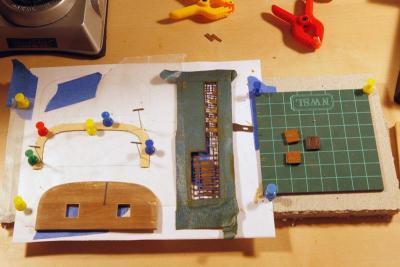
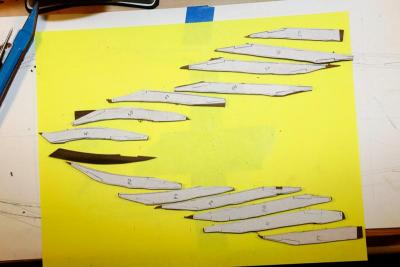
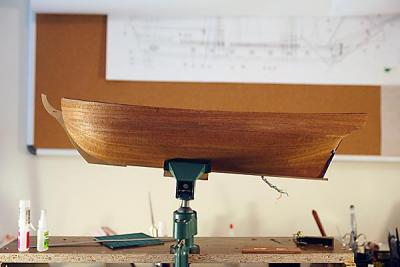
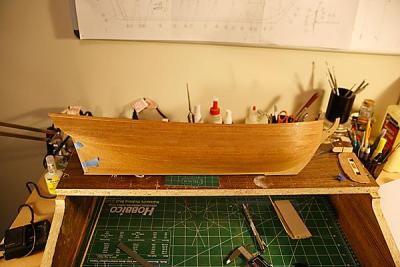
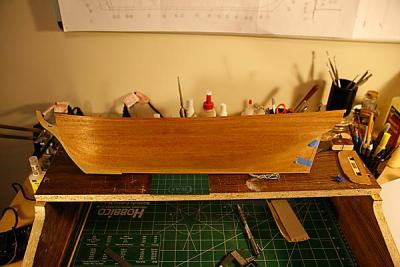
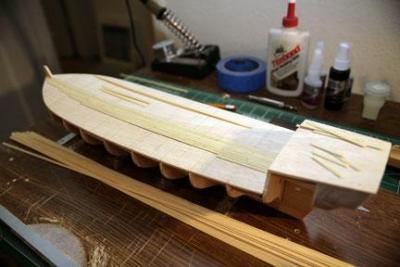
A quick update to where I am at the moment. I have stripped the stern ring off like i mentioned in an earlier post. Cut out for the gun ports, started new ports based on information provided by Russ(?) I dont recall whose input it was at the moment, if it was not Russ, i apologize. Late last year while I was waiting for replacement lumber I started playing with photo etching. The plate and one of the rough port hinges is there also. The rough hinge is laying on the transom. Its long to give me room to experiment with bending and fitting. I only need four plus there are more on my first attempt so I should be able to get 4 good ones plus the other half of the knuckle to mount it to the transom. Also in the picture is the window frames that I plan on using to replace the Gallery windows and the door That is about it for now. Hope to get some work done over the next few days. Work and guests are going to affect that but I hope to get a couple of hours in this week. Sam
-
Rich, Good to see you back. She is coming along nicely. At this rate I will be following in your footsteps!! I know what you mean about the gun ports, if I had to do it over I think I would try to frame them in as I planked. Sam
-
Russ, Good to see you back. That is some tiny carving! I think my eyes would have fallen out. Nice! Thanks for reposting this. I would never ask for the circumstances that required it, but I am kind of enjoying all the "Reader Digest Condensed" versions of f the couple of build logs I have had a chance to look at. Sam
-
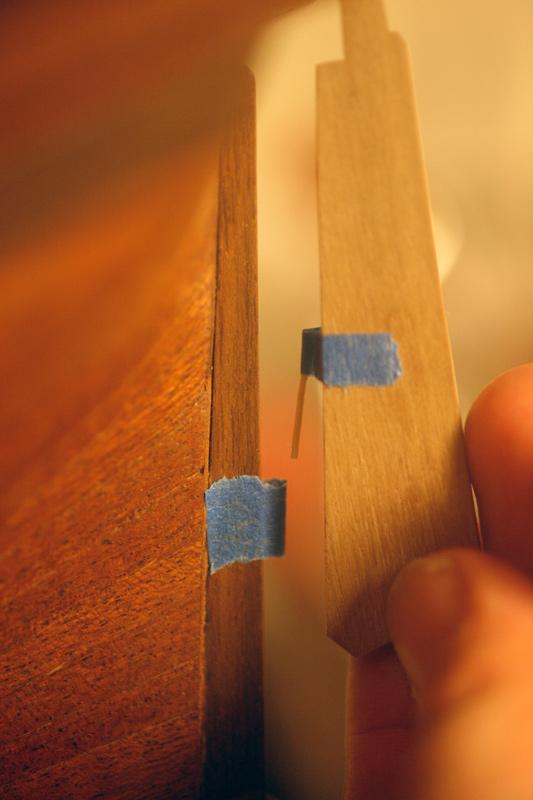
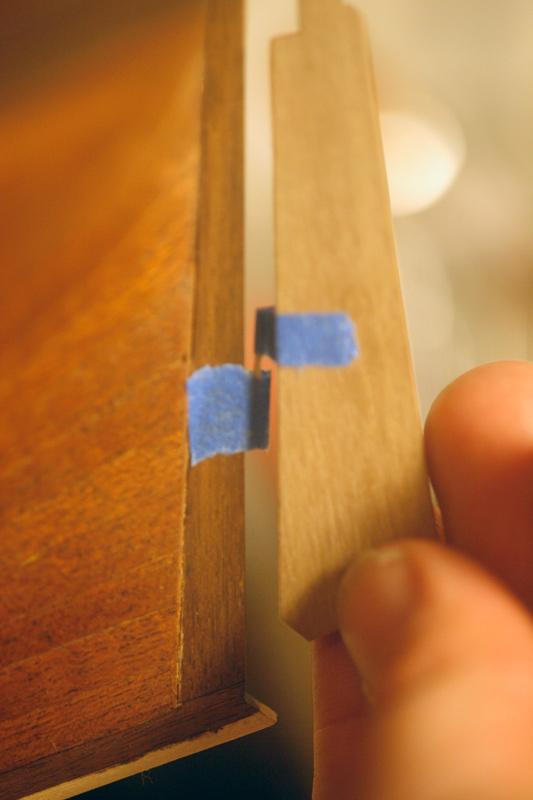
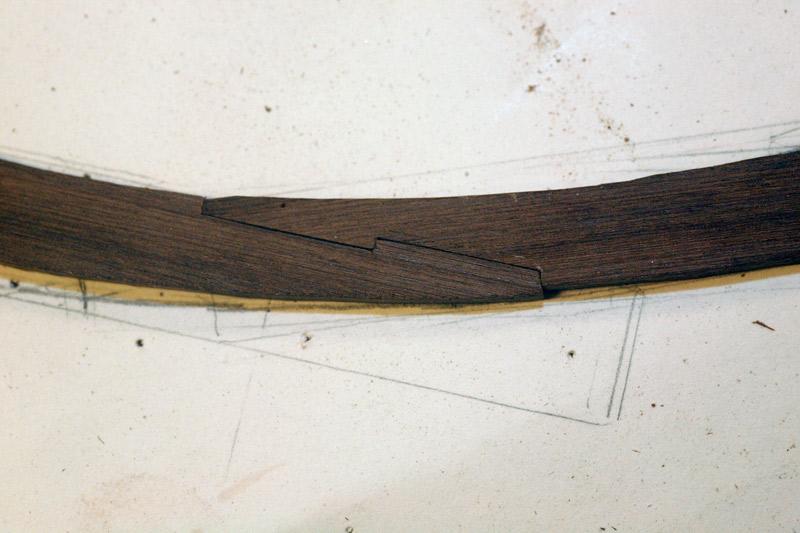
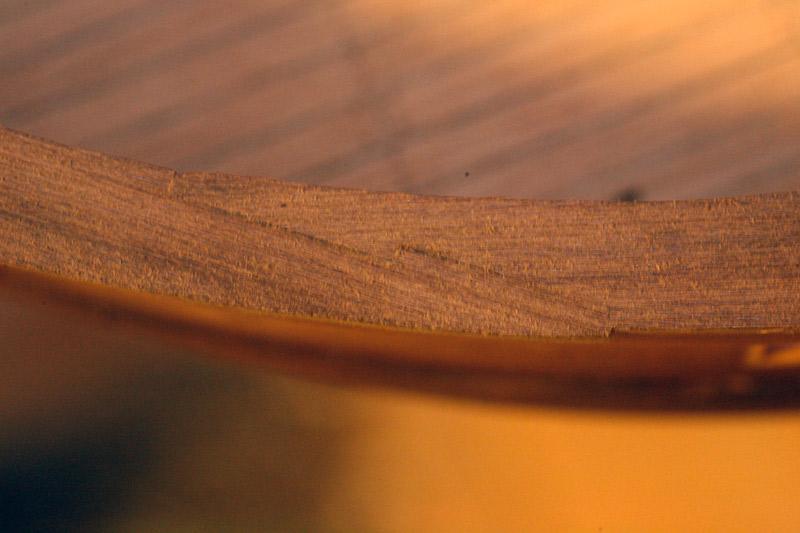
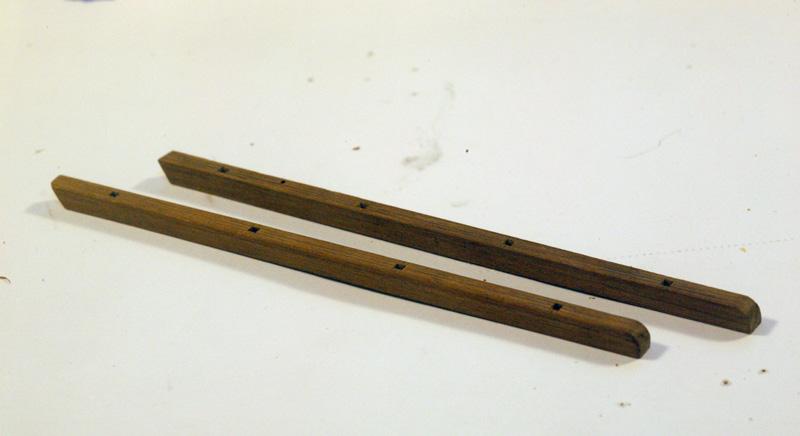
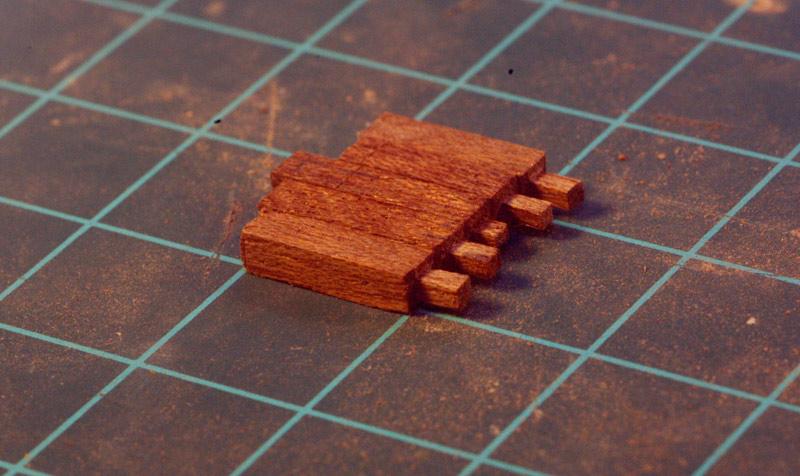
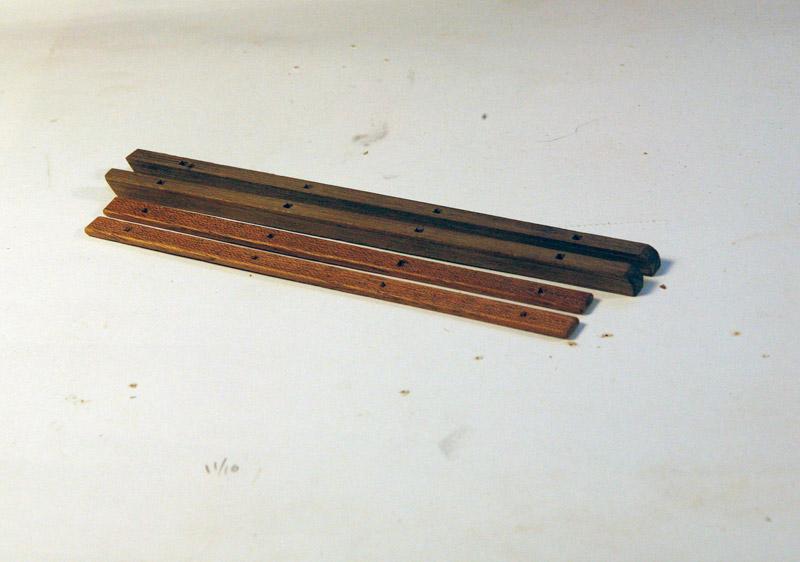
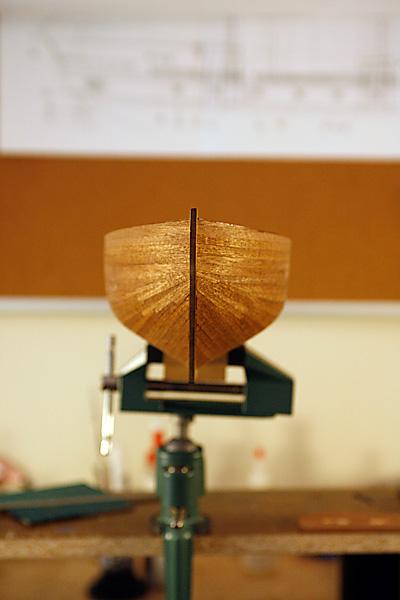
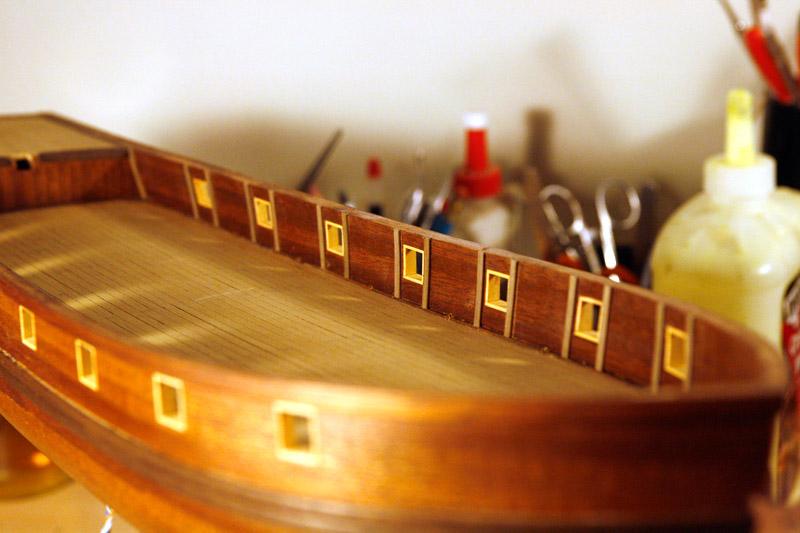
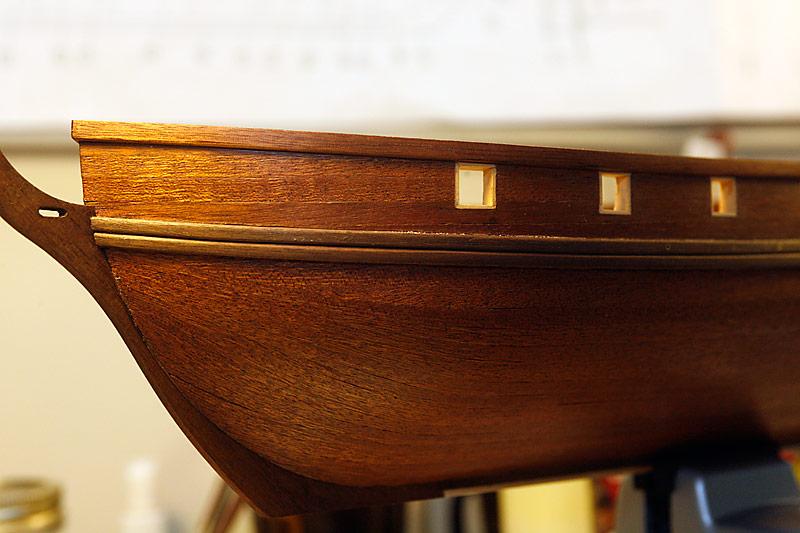
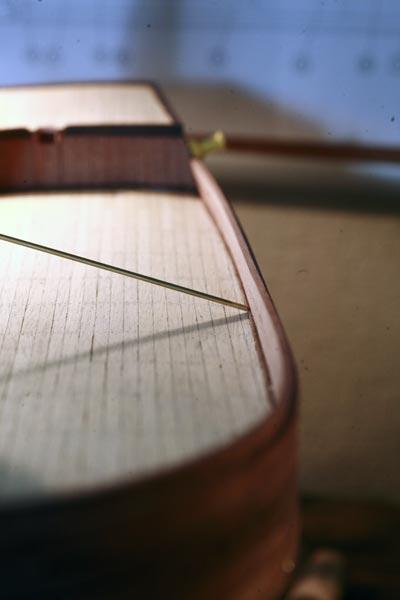
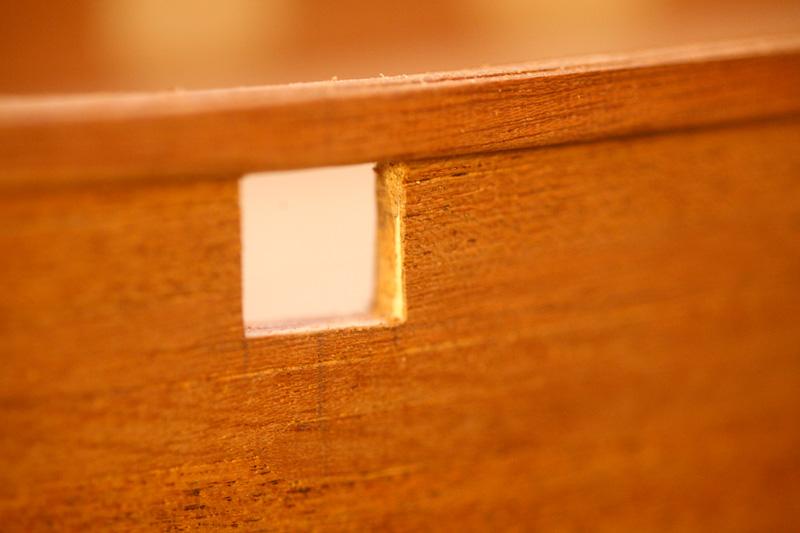
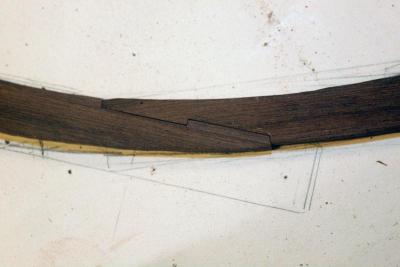
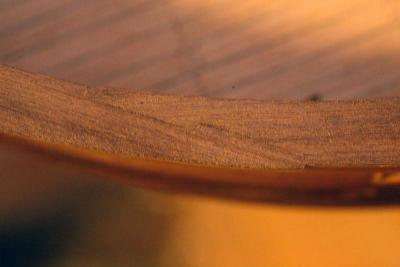
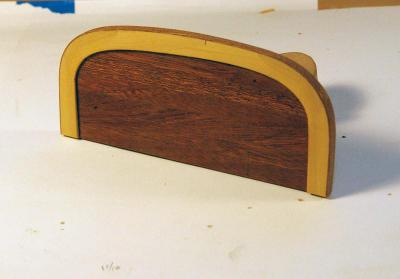
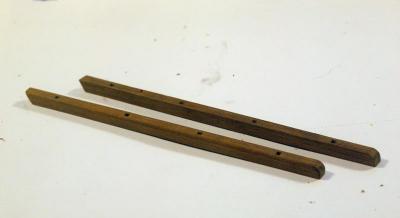
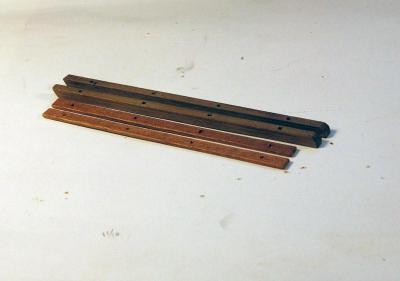
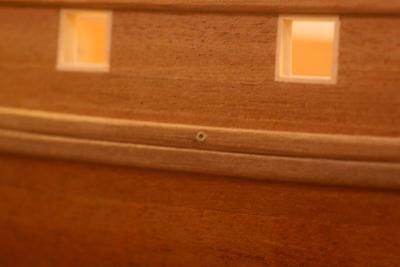
Sometime before I did the gunports I noticed a slight situation. The instructions called for the cap rail to be made from three pieces of 2x2mm manzonia laid edge to edge to create a 2x6mm rail. Unfortunately the material they supplied was so mismatched that i really felt that I would not be happy with the result. I ordered some manzonia to make a more traditional scarfed joint cap rail. (I also had to order some boxwood to line the gun ports with since I had kind of screwed up my hull thickness and curve.) Cap rails were formed and installed I built the transom but was not happy with the way the band of mahogany looked laid over the boxwood stern ring. As of right now I have stripped that and am in the process of rebuilding the stern ring. Pictures to follow I have also stated in on the poop rails. I was having problems making the little tiny tennons required for the stanchions out of mahogany by hand, just couldnt keep them consistent. I think with a finer grain wood I could do it. since I am somewhat stuck with mahogany I bought a router base for my dremmel tool, we will see how that works out. That is about where I am at the moment. There has been very little progress in the last few weeks cause of work. That should end in the next week or two and I can get back to work. Comments, suggestions and constructive criticism alway welcome. Sam


-
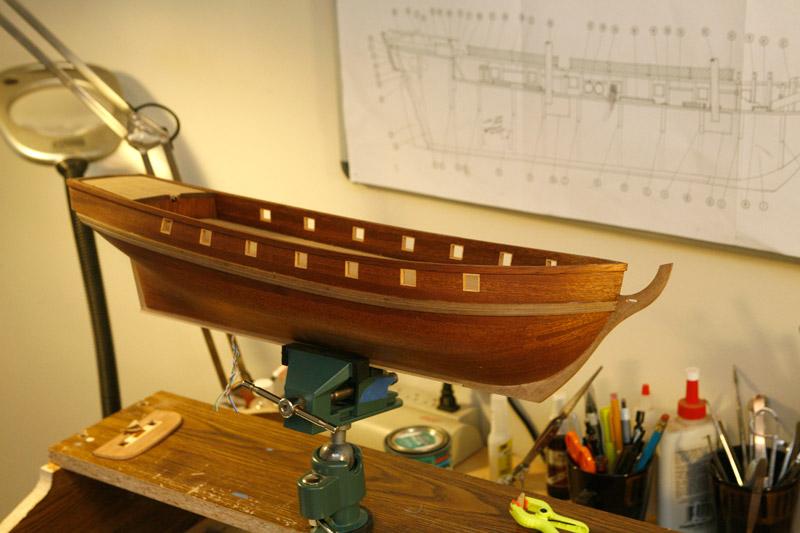
At about this time based on my picture dates I meet my Future Admiral (FA). As sometimes happens a new relationship takes over your life, I finally finished planking the hull in August of 2012. Wales were next Then gunports Final installation of the scuppers Finally some stain


-
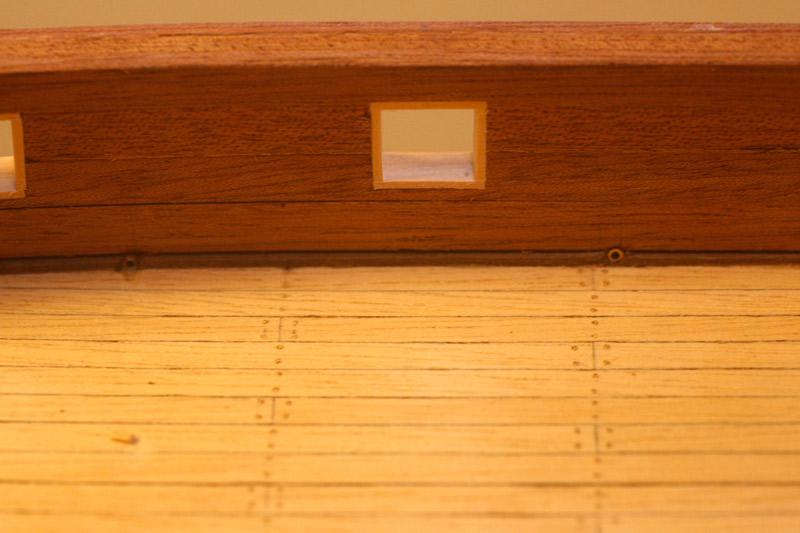
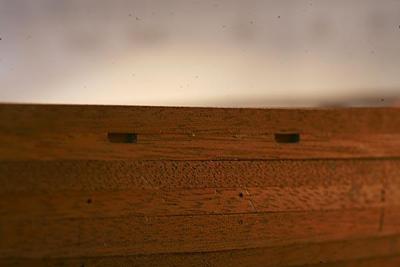
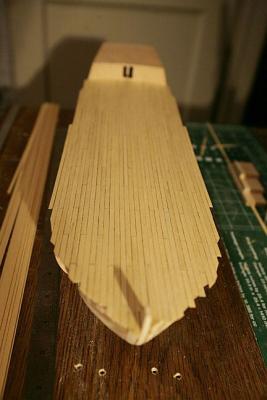
After the lights came the lay out for the planking Then the dreaded first planking. My plan was to try to do my first plank as the finish plank knowing I could alway do a second plank if I screwed it up. I quickly found that a second plank would be necessary. Waterways were next Then per the instructions were the scuppers. At this point Russ pointed out that the scuppers were wrong for this type of ship and recommended a more correct style. A back and forth exchange ensued as well as some brainstorming on my end to figure out how to do what was needed


-
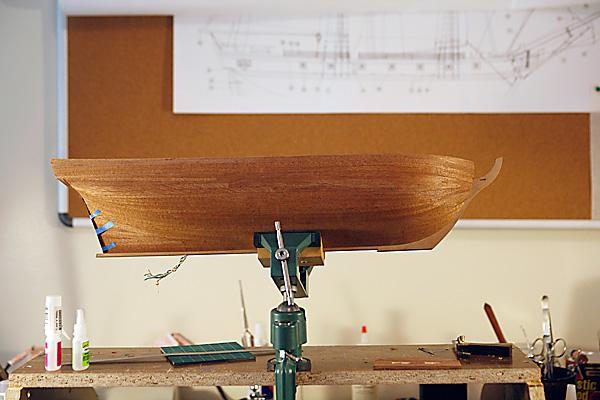
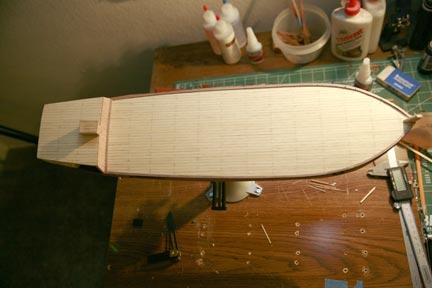
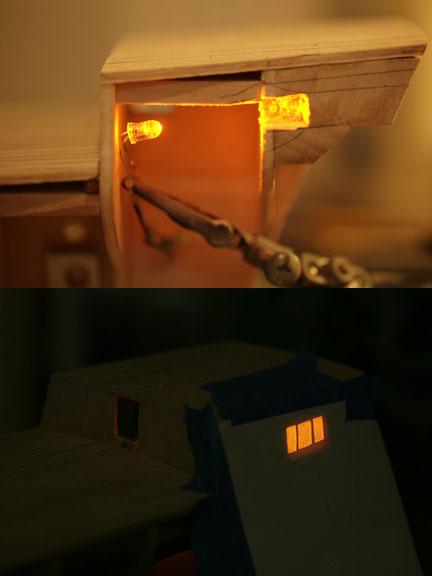
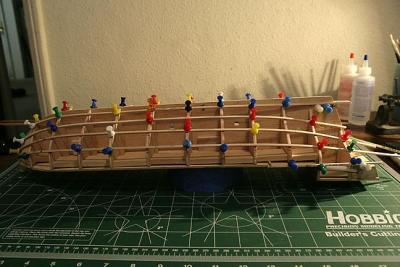
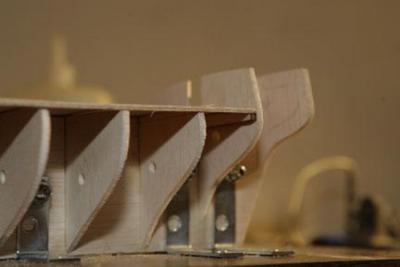
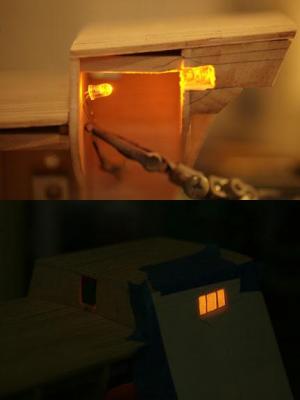
I originally started this build when I was unemployed. It looked like a great way to keep my sanity while looking for a job a=in a really tough marketplace. I bought the Enterprise without much thought as to what it would take to build in the way of tools and time. It was May 6 2009 when I laid the false keel. Right after that I was rehired at my old company where we build theme park attractions. There have been many starts and stops due to work, but I have managed to keep a steady if not slow progress. I started with the usual fitting up of bulkheads Then the deck planking Then I got the idea to light the captains cabin More to follow
-
Well.... as soon as I figure out how to post a photo...... Right now its off to bed Sam