HOLIDAY DONATION DRIVE - SUPPORT MSW - DO YOUR PART TO KEEP THIS GREAT FORUM GOING! (Only 13 donations so far - C'mon guys!)
×


src
-
Posts
2,300 -
Joined
-
Last visited
Content Type
Profiles
Forums
Gallery
Events
Everything posted by src
-
Sjors, Very Very nice!!. I think I should have held on to one of your gnomes so they could teach mine how to do it right!! Sam
-
Of course you can Rich! Just show them your Niagra then say "Yes I can" It works for both parties of our government! Why not you?? "Hated taking Java in school" but you dont mind drinking it.... Sam
-
Sjors, Nope they should all be back, I know you need them with all your rigging and a second build to finish then starting another. Thanks! Robbyn thanks. I do like how they turned out, I just liked the aged look for some reason. No matter what, this is better than corroded metal. Now, I cant believe I am going to say this, but if work would just slow down a bit I could get some steady build time in. I find for how my mind works that 1 hour blocks of build time are not enough to get anything done. I just cant wrap my mind around what I have to do and then do it in an hour. The quater badges are looking very fiddley to me and I dont know if I want to jump on them when I cant devote the time I feel they need. Maybe i will start dinking with the cannons. we will see.
-
Sjors, I dont think I could convince them to stay any longer then necessary! They kept saying something about "He who shall not be named will be angry" and ran off. They made it back ok I see. My gudgeons started sweating and turning green I noticed. After some time in the metal working forum I cleaned them up and washed them in some baking soda and then some vinegar. got them all cleaned up and then painted them. The black is still a bit too black, I want to see if I can cut that and add a blue tinge to it on some scrap. If not I am more than happy to have them this way rather than sweating and corroding. The sweating doesnt really show in the pictures, but it looked like little drops of water or glycerine Gudgeons are painted, I plan to do some more tests on some scrap if I can cut the black a bit more then I will do everything that way otherwise I will match the pintles to the gudgeons and be done with it. I will miss the aged look on the rudder, but this is much better than corroded brass. Next up is chain plates and then some quarter badges. The Byrnes table saw is looking really attractive, not sure I can justify the cost though. I have been hoping a job would turn up at work so I could use that as an excuse to buy one. No such luck yet. Sam

-
Robbyn coming along nicely, cant wait to see a completed ship!! Mmmmm! Plank bending! Sam
-
Chuck, Thanks for replying. The ship is the Constructo Enterprise 1:51. The kit came with 2 spools each of black and tan "yarn" as they call it. The black are approximately .020" and .040". The tan are .016" and .024-.025" No lengths are given in the instructions. going by the spreadsheet above I figure I will need 3-4 sizes of each. I havent figured out my sizes yet, just though there might be a formula that would get me in the ball park. Sam
-
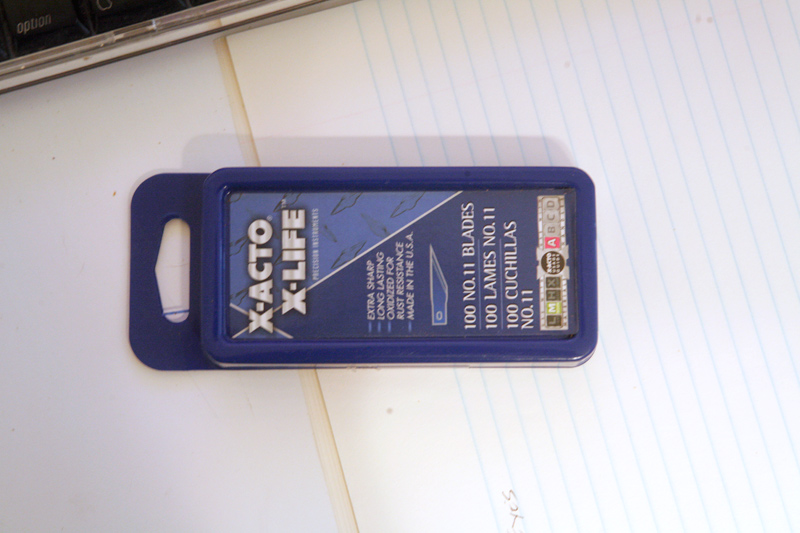
JP, I will have to try that strop. John, the package doesnt say anything about any special coating, just long life. They skate across wood rather than cutting. The regular #11s I have been buying are far superior to what that packing in the picture contains, at more than half the per blade cost IIRC. Maybe JP's strop idea will fix 'em. Actually I had considered taking them to the leather wheel on the Tormek, but never got around to it; they were pushed to the back of the drawer till this topic reminded me of them. Sam
-
I am considering scrapping my kit rope and replacing it with Chucks rope; somebody please tell me why I bought a kit again?? I am using the "Period Ship Scale" spread sheet from the database here to get my sizes but I am unsure how much to purchase. Does anybody have some rough guidelines on how much rope to buy? I know, I know, enough to hang myself with! I can see it would be very easy to get too much - expensive, or too little, annoying and a waste of time. Having to order more could also get me different dye lots - out of any manufacturers controll but still annoying. Thanks for any advice, Sam
-
JP, like always, looks great - no green eyed monster here! I am curious how you will dye with an oil based paint? My understanding of paint, stain, and dye is that they have a progressively smaller pigment. Following your progress I have no doubt it will look great, just not following the concept. I will be watching and learning. edit How rude of me not to sign my name! Sam
-
I just "throw" mine in a small plastic bin to, theoretically, turn into other tools. So far I have made an entire set on of one. The smaller stuff I too sharpen on a water stone, the larger - 1/4" and up I will tune up on a water stone but when I really need to get in grind you cant beat the Tormek system for speed. I have 50+ chisles at work from cheap Harbor Freight tools up to big hand made mortising chisels that John Wayne would be proud to use. I have brought 15 -20 home before, some with divots in them from chopping into fiberglass - Harbor Freight tools are great for that, and had a very nice working edge on all of them in just a couple of hours. There are even some attachments that will hold the miniature tools I see used here. Just my 2 pennies worth. And yes, it can become an addiction. As far as the zirconium #11 blades.. do you men these? Perhaps I got a bad batch but these cut horribly, you might as well try cutting wood with the back of a plastic butter knife. I havent tried sharpening them, seems like adding insult to injury to me. Sam

-
Dangling like earrings.... Hope you dont have a cat like we do here, they will look like Warrior-Kitten Chain Swings! Sam
-
That would be kind of thin, is it too late to try to mortice them in?
-
Rich, how thick are the two laminates? could you just pin the top or bottom half? sam
-
JP, Great to see you back at it. Ports look good to me. I started a fresh batch of popcorn and the adult beverages are cooling in the fridge over in the corner. Sam
-
Rich, great Job!! Congratulations!! Something to look back on and WHY would you want a dislike button??! Sam
-
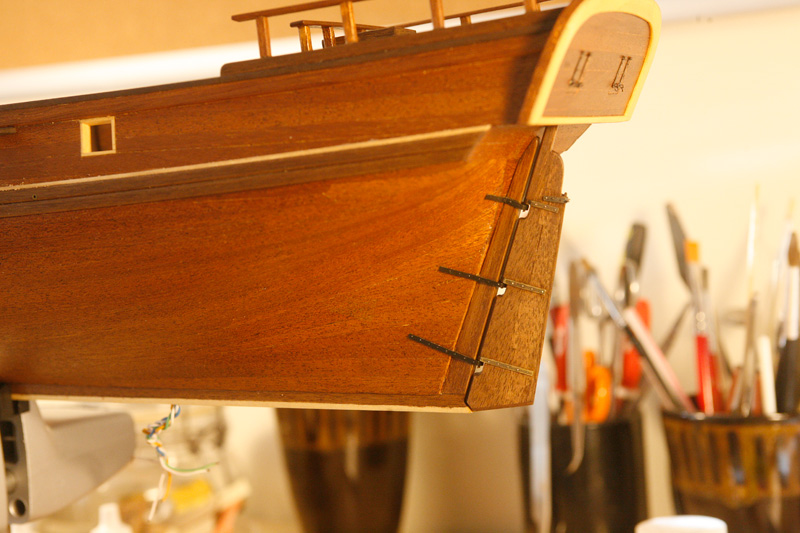
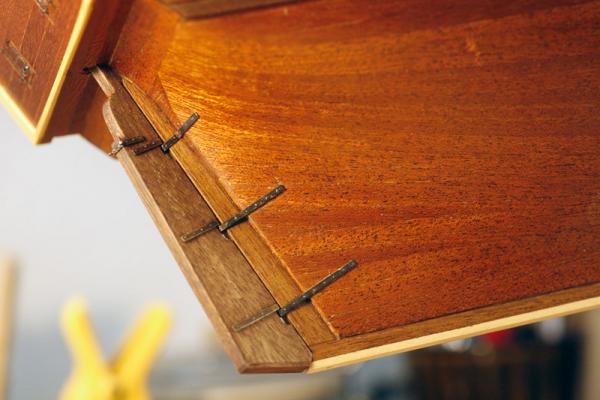
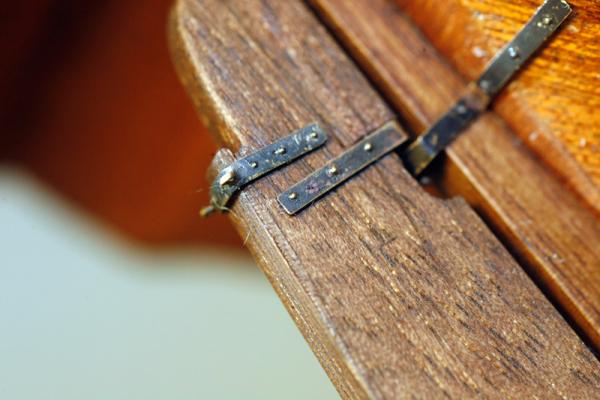
Yikes! My gudgeons are sweating!!
src replied to src's topic in Metal Work, Soldering and Metal Fittings
Thanks Jay I have a suspicion baking soda will do the trick. Sam -
Yikes! My gudgeons are sweating!!
src replied to src's topic in Metal Work, Soldering and Metal Fittings
Jay, I dont think I will try, those "rivets" are brass rod hammered over to form a head and epoxied in also. On a side note I wish I had seen the posting here about making nails, I could have made mine on less than half the time it took to heat and mushroom over. Based on Keith's observations, if I can get the reaction to stop I will try to airbrush some color over them. It was something I planed to do anyway. I was ok with the pintles, from normal viewing distances they looked aged and I kid of liked the look. I was going to try to get the gudgeons a bit closer and call it a learning experience. Sam -
Yikes! My gudgeons are sweating!!
src replied to src's topic in Metal Work, Soldering and Metal Fittings
Below is the PM I just sent Keith. A couple of things occurred to me as I was responding. Minor detail - parts were filed to #4 cut file not #6. I dont think this played a part The gudgeons were blackened separately not at the same time. I know because I remember trying to match the color on the gudgeons to the pintles. I believe all the parts were made from the same brass stock but I cant swear to it. I bought a full box of 1/64x1/16 brass strips from an online hobby store, I need to look up the store but I want to say omnimodels.com. I think I may have had a package from my LHS but it was still K&S brand I am 90% certain we started a new bottle of dish soap between blackenings. Somebody asked about flux, yes I used Ottoflux from OttoFrei.com all excess solder was filed off and I had a nice bright shiny bras part when I started the cleaning process All my water was distilled water - I have done a fair amount of chemical wood staining in the past and learned the hard way about tap water and chemicals. The oil used is Tried and True Boiled linseed oil - a true boiled oil; no chemical dryers used, its non-toxic they claim you can use it on wooden bowls but I have never tried it. The rest of the process is detailed below Keith, Thanks for responding. My gut was telling me that you would give me an answer like that. No worries. I cant say for sure whether the pintles and gudgeons were from the same brass stock, I want to say yes of course. I have bought numerous brass pieces over the last several months. It is very possible they came from two different sources although my memory is that they all came from the same box of brass. I have found its easier to buy a whole box of brass online rather than one or two sleeves. 7 bags of two strips was almost the same price as 2 bags at my LHS. But like I said I have bought brass several times over the last year both online and at my LHS so I really cant say for sure. Thinking back the gudgeons were blackened separately but the process was the same. With the exception of the soapy water and first and final rinses the containers had the same solutions in them As far as touching the parts, once they were cleaned in soap and water I used latex gloves and tweezers to tie them to some 2 lb fishing leader. The entire process was Anneal form silver solder Mark and drill the "rivet" holes File with #2 then #4 cut swiss files rub with purple nylon scrubby pad where I could tie o fishing leader Wash with hot distilled water rinse with distilled water soak in 50/50 muriatic acid - diluted with distilled water - agitated every 10 minutes or so for an hour Quick dunk in distilled water and baking soda final rinse in distilled water soak in 50/50 blacken-it and distilled water for 10-15 minutes agitating every couple of minutes and watching for color Not sure what happened between blackening one set of parts to the next but now I am thinking something contaminated one of the solutions. They are kept in tupperware style containers - glad disposables. We did change dish soaps come to think of it, I wonder if that may have anything to do with it? Thanks again for your time Sam BTW, loving the Pink Floyd themed build! -
Hey Rich, how is the build coming? sam
-
Robbyn, Looks great, great work! do you like the rope your using? Morerope i think? I am thinking about replacing my kit rope. Heard good things about both Morerope and Chucks rope Rotties are great dogs - is there truly a bad dog though? A friend had one that thought it was a lap dog. Sam
-
Yikes! My gudgeons are sweating!!
src replied to src's topic in Metal Work, Soldering and Metal Fittings
Thanks everybody. gonna try a PM to Keith and see where that leads me. Will keep you posted -
Yikes! My gudgeons are sweating!!
src replied to src's topic in Metal Work, Soldering and Metal Fittings
Jay, great idea, I just gave the same advice to another builder in regards to mixing pint paint with CA. LOL Sam -
Yikes! My gudgeons are sweating!!
src replied to src's topic in Metal Work, Soldering and Metal Fittings
Jay, you posted while I was responding. I wore gloves and tied everything to some 2lb nylon leader material sam