HOLIDAY DONATION DRIVE - SUPPORT MSW - DO YOUR PART TO KEEP THIS GREAT FORUM GOING! (Only 13 donations so far - C'mon guys!)
×


src
-
Posts
2,300 -
Joined
-
Last visited
Content Type
Profiles
Forums
Gallery
Events
Everything posted by src
-
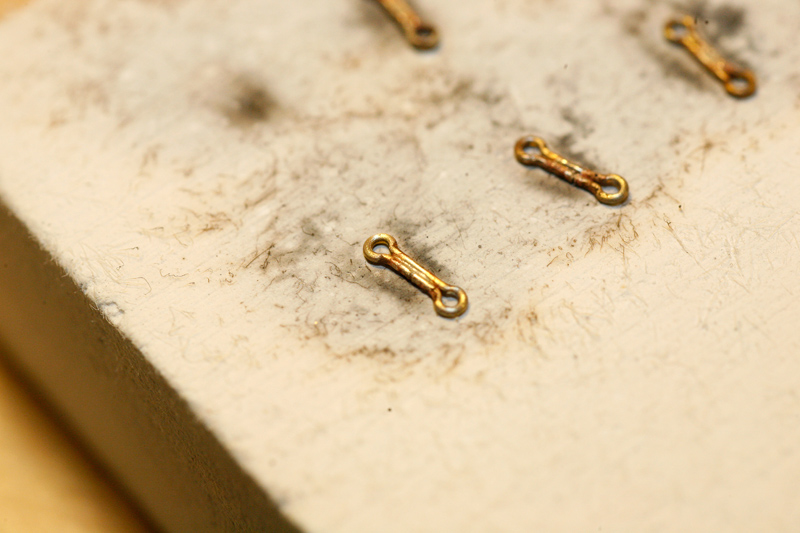
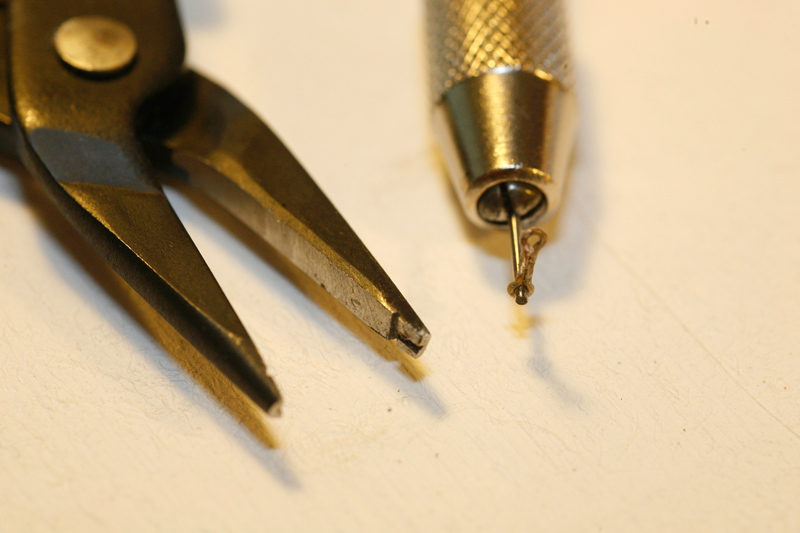
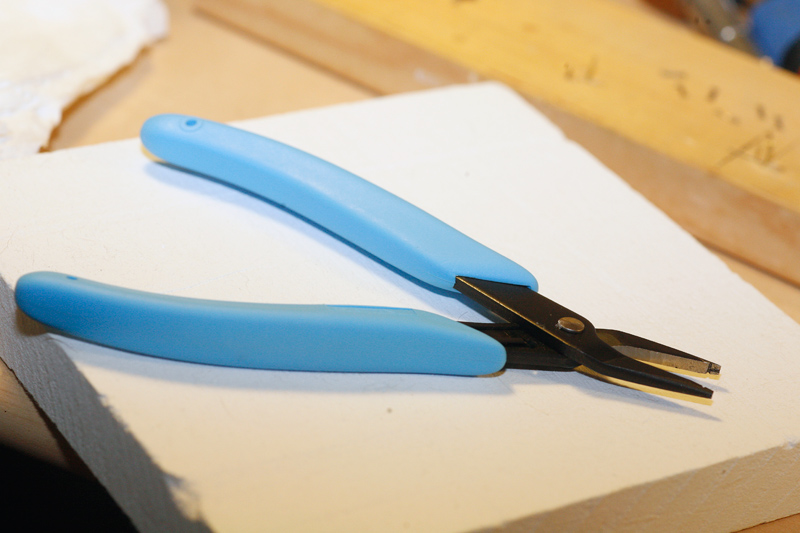
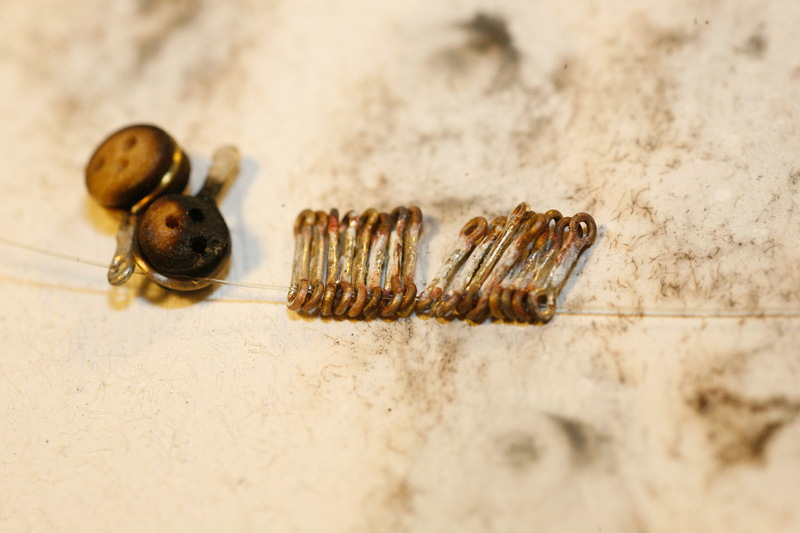
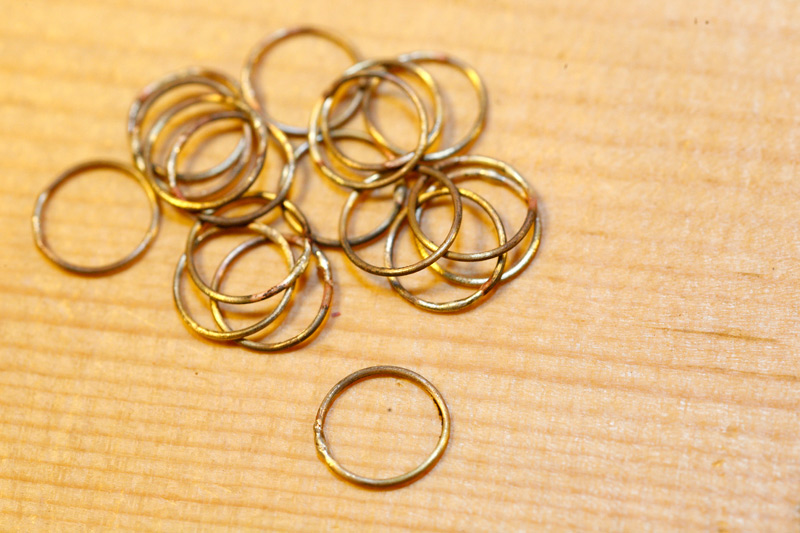
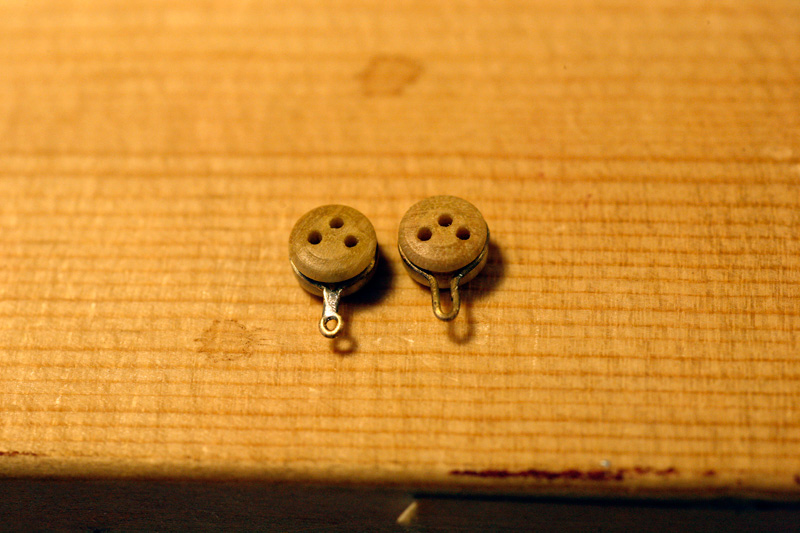
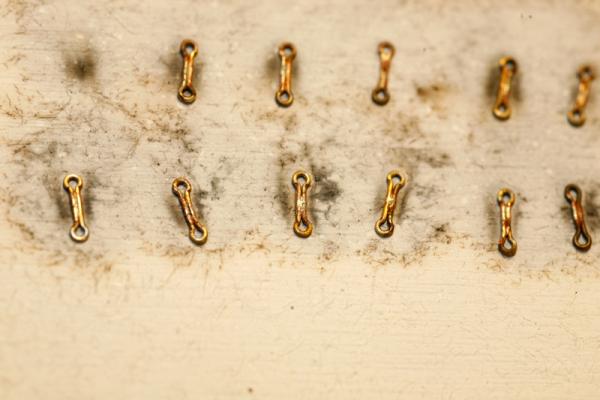
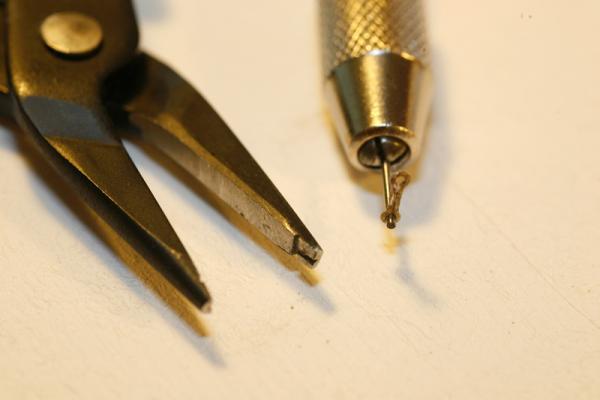
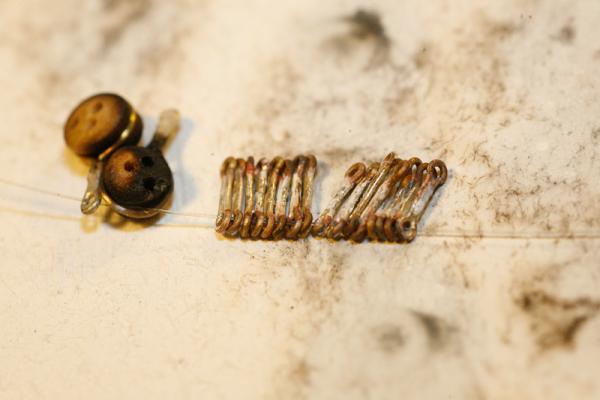
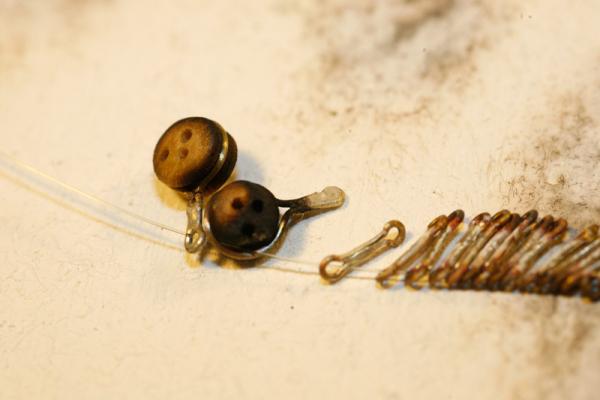
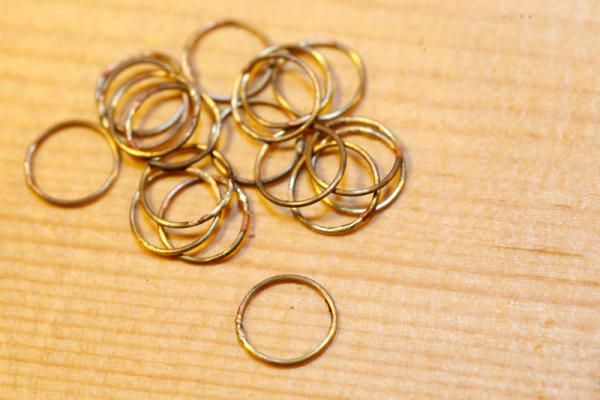
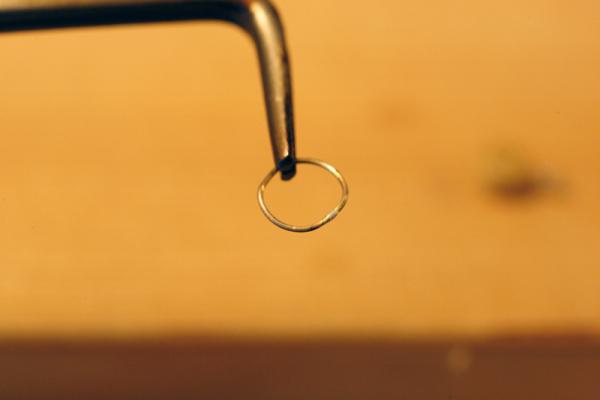
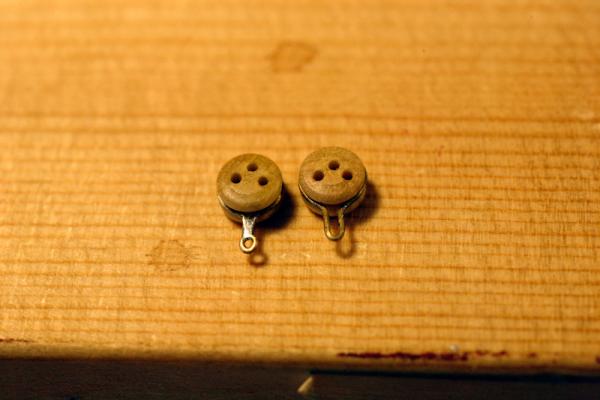
I am continuing on with journey into chain plate manufacturing. I made the small plates that bolt to the hull, I have seen both double bolted plates and a single bolt on the last chain, not sure what is correct for this ship, I went with doubles. I started by making a ring like I did for the strops, a number 23 bit was just about right. The first couple were soldered the same way I have been soldering, dab on a bit-O-flux, dig out the tiniest bit of solder from my 'drip experiment' from a few weeks ago, heat and start all over. Between solder bits falling off the brush used for placing it with to the flux sometimes knocking the solder right off as it boiled up, it was taking close to 10 minutes to make a joint! That doesnt include all the usual prep work of filling and bending to shape. I ordered some solder paste from Ottofrei.com, it came in on Thursday. What was I thinking with the wire?!?!?! This is SOOOO much faster and easier. Make up 20 pc, put a microscopic dab of paste and do all 20 in like ten minutes!! Much faster and far less cleanup. I was generally pleased with my earlier joints but they were taking forever and placing the solder was trying my patience. After I had my rings I shaped them with a set of pliers I picked up a while ago at a Hobby Train store, they are made for pulling and placing railroad spikes, very similar to ring makers pliers but cheaper. They worked well for crimping the wire around a drill bit. Once I had my parts shaped I dabbed on some more solder and re-soldered everything, that was a mistake, TOO much solder. Start over. The second set is much cleaner. Some of my second set of plates The tools I used to form them Sometime back I read in one of the forums about using an ultrasonic cleaner for cleaning brass before blackening so I stopped by Harbor Freight and picked one up. I figured i could practice on my failures. Other than rinsing off the flux I just dropped them in and ran the unit for 5 three minute cycles with the optional cleaning powder. Soaked them in Muriatic Acid for about an hour agitating every 20 minutes or so. Neutralized them in a baking soda solution and rinsed in distilled water. I then soaked them in Blacken it for 10 minutes or so, I didnt time them just waited till they were nice and black. They came out surprisingly well considering I did minimal cleanup on them. Also included were the two briquettes I made the other day to see what the acid and blackening solution would do to the deadeye. They discolored slightly but that may just be moisture, all told they were in various liquids for probably close to two hours. My first attempt as well as couple of failed deadeye strops. This is exactly how they came out of the c ultrasonic cleaner. Fresh out of the blackening solution. The deadeye on the right is untreated for comparison All in all a fairly productive weekend for me, now if the FA will stay out on her luncheon with girlfriends I just might get the chains made also. Sam


-
Slog, I dont know how I managed to post that on your build!!! Sorry about that! Build looks great. Been following your deadeye and chain plate. Very nice. You mentioned smaller diameter wire for your carriages, there is a place called Detail Associates that carry brass wire down to 0.008". I have found it melts really easy though. Keep up he great work. Sam
-
Around the world Happy Dance for Rich!! Sam
-
Brian, nice! I was eye balling the blocks the other night too...... Once again why did I buy a kit?? Sam
-
Sjors, Platforms look great! Am I understanding you have MORE Ratlines to do?? masochist! Any idea why the ship builders of the day chose to make the platforms with "joists" radiating out from the center instead of a simple box frame? Sam
- 1,873 replies
-
- 1
-

-
- occre
- san ildefonso
- (and 1 more)
-
Robbyn, anytime! Rich, nice! I'll be watching for it. BTW you commented elswere about being having been on Win 3.1 and that made you feel old. Maybe this will make you feel younger. I was a network manager in the late 80s on one of the early Novell Netware systems (2.x IIRC). Back in the days of the 286 when a math coprocessor was an entirely separate board and 1 megabyte of RAM was a lot. Brian, hank you, butt jointed, never thought of scarfing them. Dont know how to answer your other question maybe someone with more knowledge can say? Now I am curious. They do look like the rings for the sails dont they. Sam
-
Well I placed an order with Chuck last night had a couple of questions that I PM got a fast response back including a note that would not get a chance to fill the order till Sat the 12th, earlier than what i expected. Got home from work to a PM that the order was completed toady!! Woo Hoo! Thanks Chuck!! Sam
-
Rich, Great looking ladders! As far as the rope, somebody mentioned somewhere that the Mororope unravels but I understand Chucks Syren rope does not. He is about $5 for 20'. I dont know how that compares to Mororope price wise, Just an option. Since we are talking about rope, what diameter do the ropes you used on your carronades scale out to? Sam
-
Great news Rich. How is the Niagara coming? Sam
-
Minor update. Soldered up a bunch of hoops l the last couple of nights. Hopefully I can get them filed and and cleaned up tonight and tomorrow. Will try blackening one on the deadeye before I do them all. I am not sure what the blacken it will do to the wood yet, then again I dont know if crimping them pre blackened will be an issue either. More 'sperimenting in my future I see. Sam
-
NP Jay, looking at your picture of the circlip plier, they might be just the thing to crimp the strop around the deadeye. Sam
-
Jay, I think he is talking about round nose pliers. Try a web search for that. MicroMark may have them. Any good jewelry supply place will have them. Ottofrei.com i where I by mine. sam
-
Brian, I had thought about doing just that but I didnt want to get to a point and not have enough. Looking at Chucks prices of $5.00 pack its really not that expensive - $0.40/foot. Right at the moment since I have never rigged a ship before its kind of a "Dark Art" to me. Based on what came with the kit and what I have measured I think I am good to go, just wanted some input from the more experienced here. Looking at all the part names in the spreadsheet I kinda feel like my wife looking under the hood with the mechanic, or me looking in her broadcast truck at work. Sam
-
So Using Sarah's method I come up with 81' of small black thread .020 and 90' of large black .040 call it 100' of each to round up. I will worry about the running rigging later since a the rate I am building it will be a while before I get to that point. Below is what I figured based on the ship scale spreadsheet mentioned before. I have listed the available sizes how they relate in 1:51 scale and my estimated amount as well as how much I think I need to order. I figure I will use the .008" for seising also. I measured everything off the plans and multiplied by 1.5 and then rounded up to the nearest 20' amount The first number is the diameter given on the spreadsheet for each item, the second is the closest available size, in some cases rounded down since I assumed smaller was better. The next number is how much I estimate I need. In a couple of cases it appears that the size I need is unavailable, for instance the Fore and Main stays are much larger than what I understand to be available so I went with the largest. I think I have covered all the standing rigging , I am not sure. Thanks again for any input or advise. Sam Available Rope Sizes from Syren Ship Co. - 20' units .008 - 1/2” .012 - 3/4” .025 - 1-1/4” .035 - 1-3/4” .045 - 2-1/4” .054 - 2-3/4” .062 – 3-1/4” Standing Rigging Dark Brown Totals .008 – 28' – Order 80' .035 – 12' Order 20' .045 – 9' – Order 20' .054 – 22' – Order 40' .062 – 48' – Order 80' Bow Bobstay 2.96” - .062 - 3' Shrouds – 2.6” - .054 - 3' Gammoning – 2.6 - .054 - 3' Fore Mast Fore Stay – 5.91 - .062 (.115”) - 4' Fore Top Mast Stay – 2.96 - .054 - 4' Back Stays – 3.55 - .062 - 3' Fore Shroud – 3.55 - .062 - 12' Fore Top Mast Shrouds – 2.34 - .045 - 9' Ratlines - .48 - .008 – 11' Lanyards -1.77” - .035 - 6' Main Mast Main Stay – 6.57 - .062 (0.40) - 4' Main Top Mast Stay – 3.28 - .062 - 4' Back Stays – 3.94 - .062 -3' Main Shrouds – 3.94 - .062 - 15' Main Top Mast Shrouds – 2.60 - .054 - 12' Main ratlines – 0.48 - .008 – 14' Lanyards – 1.97” - .035 - - 6'
-
Good to see you again Rich, Thanks. Got a new build ready? Sam
-
Sjors, thanks! The soldering isnt difficult really. I am finding this is a bit more touchy than soldering brass and copper lamps together, getting that microscopic bit of solder to sit where you want it can be "fun." I will happily loan you my soldering gnomes, just dont let them drink too much of that Belgian beer, they get..... excitable. I dont know what the conversion is but you should be able to get a small butane torch and some silver solder for about $50.00 USD. Robbyn thank you, PM away! Always happy to pass on what others have taught me, although there is a tutorial in the metalworking forum that 'splains it quit well. I am finding with these tiny parts its more a game of cleanup and getting the solder in place before even touching the torch. In addition to Russes guidance I used this resource http://modelshipworld.com/index.php?/topic/1724-deadeye-straps/#entry108284 Sam EDIT - I should probably add in that I am usig wire solder rather than the pre fluxed paste that seems popular here. I ordered some yesterday, see if that doesnt make life a bit easier.
-
Triple WOW Robbyn! Do I hear the Syren calling quietly in the background? Sam
-
Russ, I know about busy. Thanks for taking the time to help. Sam
-
Hey Russ, Thank you for the advice. Havent seen much of you lately, is all well? I found this posting in the metal working forum. It appeared to be a good combination of your advice and my skill level: http://modelshipworld.com/index.php?/topic/1724-deadeye-straps/#entry108284 Something more like one of the two below? I made a couple of rings with hard solder and then crimped them around the deadeyes. The one on the left I used soft solder to fill the void after crimping around an .020 rod, the one on the right has been left open.Both ways are MUCH easier than how I was trying to do things! Based on the drawing twintrow posted in the rigging forum I am leaning towards the left hand strop. Sam
-
Thanks for posting this, I am at that stage right now and was trying to solder my parts in place and creating briquettes in the process. Gonna try this, thanks again. One question, are you using hard silver solder or silver bearing plumbers solder? Ok two questions, are you blackening after crimping to your deadeye? Sam
-
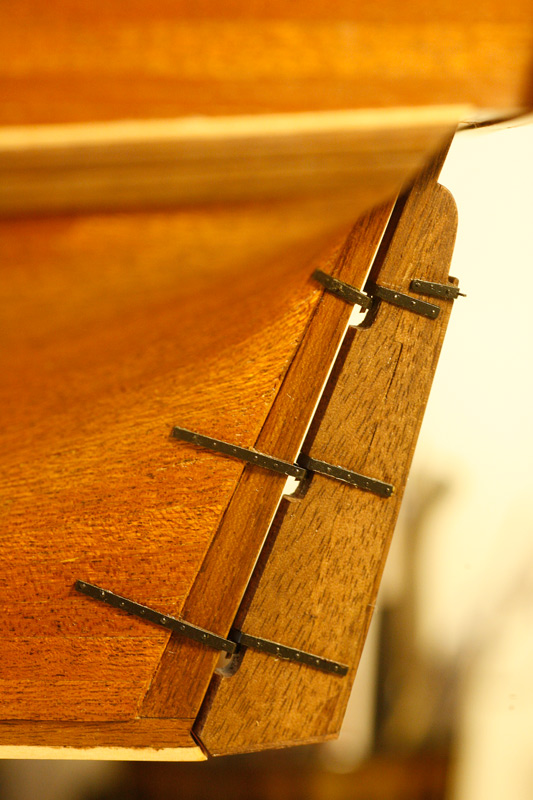
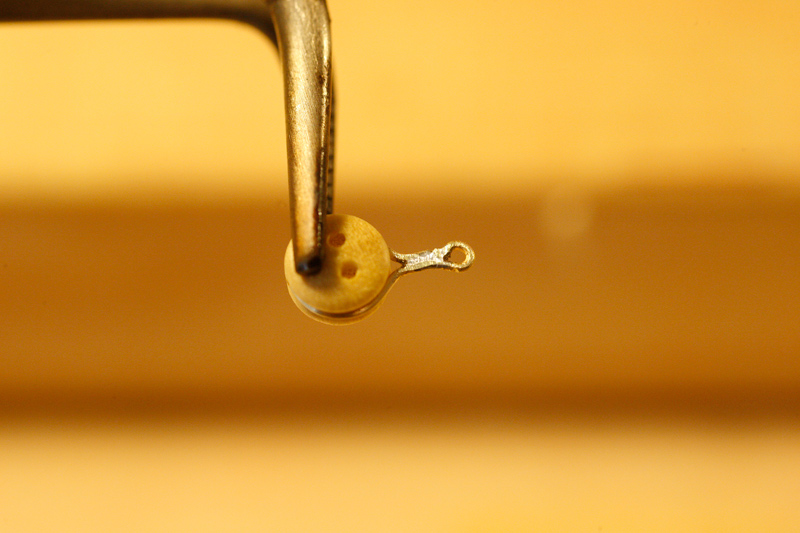
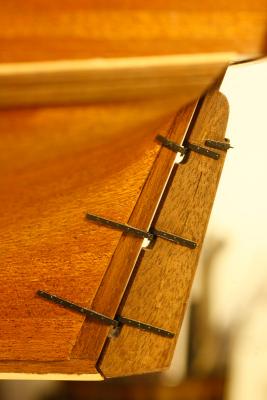
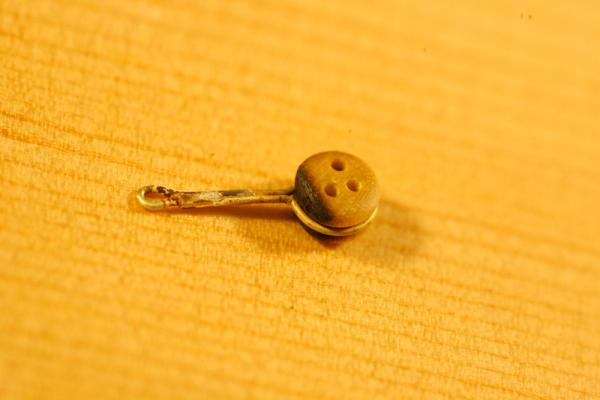
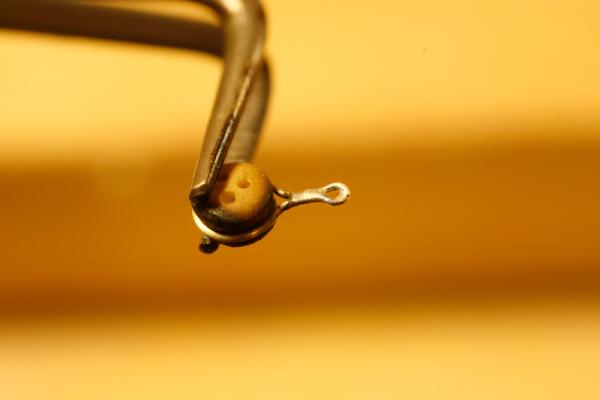
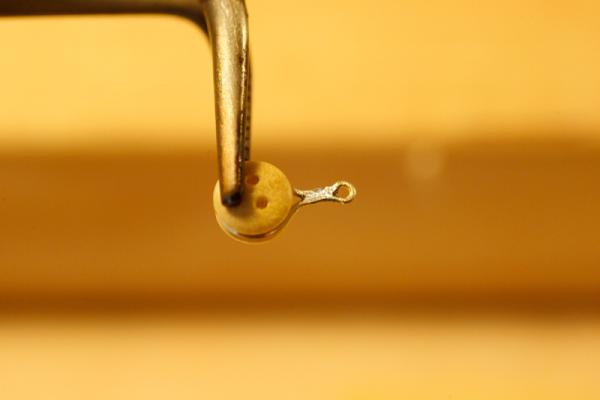
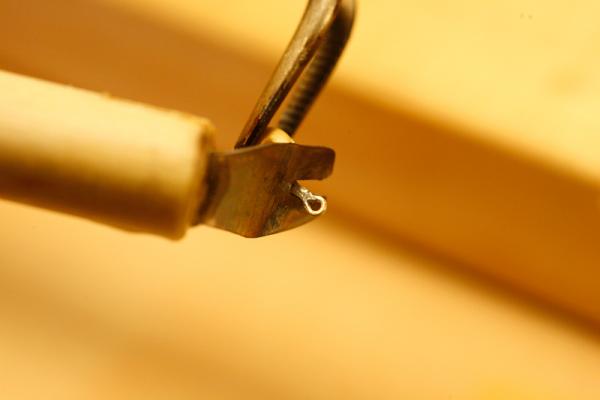
Finished fixing the rudder. Glazing some blue didnt work on scrap so I just went with what I had. Much better than the corrosion! Now if I can figure out what happened in the first place. I am generally pleased with the end results although in hindsight there are things I would do differently on my next build. Things like separating the spectacle plate and the top hinge set. This was a good learning experience. The white lines on the edges are mostly reflections from my work lights, not unpainted areas. There are a couple of touchups need though. I have started in in the chain plates. Over in the rigging forum I recieved quite an education learning about channel location and proper chain plate angles and styles. I learned that the chain plates provided with the kit are incorrect for the period. While the plates supplied would have made a perfectly respectable model, especially for a first build I have made so many deviations already a few more wont hurt. I decided to try to fabricate my own more correct chain plates. Its turning into an "adventure". Soldering these little buggers without demonstrating the effect of an open flame on wood is....... interesting. My first attempt created something very close to the briquettes in my BBQ, or perhaps the asparagus that fell through the grate the other night. My second and third attempt were better but still charing the wood so I made a little shield out of a broken exacto blade. That helped but if I get the shield too hot I still scorch the deadeye. I am using "extra easy" hard solder for my joints, it has a melting temp of 1250 degrees, maybe 1300 I need to look it up. If I drop down to a silver bearing plumbers solder - soft solder - I can get a really nice looking solder joint with some clean up. I am concerned that this joint wont hold up though, I have read a couple of horror stories about plates breaking a year or two after completion. This is my 3rd attempt still getting some charing A little shield mght help This is the same deadeye from above with a new piece soldered on using the shield this time, better but still charred. Soldered with a low temp silver bearing plumbers solder. Much better but will it hold up? Thoughts anybody? Sam
-
Thanks for reposting the picture of the clove hitch, I will be using that sometime in the - hopefully - near future. Sam
-
Rich, Yea your better off being honest. Even if all your other skills are above average all they will remember is you lied. Been dealing with that at work trying to find scenic painters. Looks like your staying focused and positive, like Adam said, thats probably most of the battle. Plus you have your build as a distraction, and bacon of course. Life without a slice of bacon isnt worth living. Sam
-
#^@%!$@ Women!!! Thanks Sarah that is just WAY too easy!! Jan yes I have only 1/2 kit under my belt but that seems to be the consensus here, thanks for the reminder. tomorrow is Saturday and I should have the day off and will have time to figure sizes and quantities. That is of course if Warrior Kitten stays off the work bench....caught her playing house hockey with a bottle of CA a few minutes ago... Sam