HOLIDAY DONATION DRIVE - SUPPORT MSW - DO YOUR PART TO KEEP THIS GREAT FORUM GOING! (Only 13 donations so far - C'mon guys!)
×


src
-
Posts
2,300 -
Joined
-
Last visited
Content Type
Profiles
Forums
Gallery
Events
Everything posted by src
-
Rich, She is coming along. Something I just learned in the Rigging Forums, the chain plates want to follow the same line/angle as the shrouds rather than perpendicular to the channels. Dont know if it is too late for you to change, just a thought. I have not seen anything in the instructions that indicate what the two additional hole in the chain plates are for, have you? Sam
-
Rich, Work has been keeping me hopping, which of course interferes with build time..... Right now I am vacillating on the chain plates, I am not sure if what the kit supplied is correct, looks like it is time to post a question in the Rigging forums sam
-
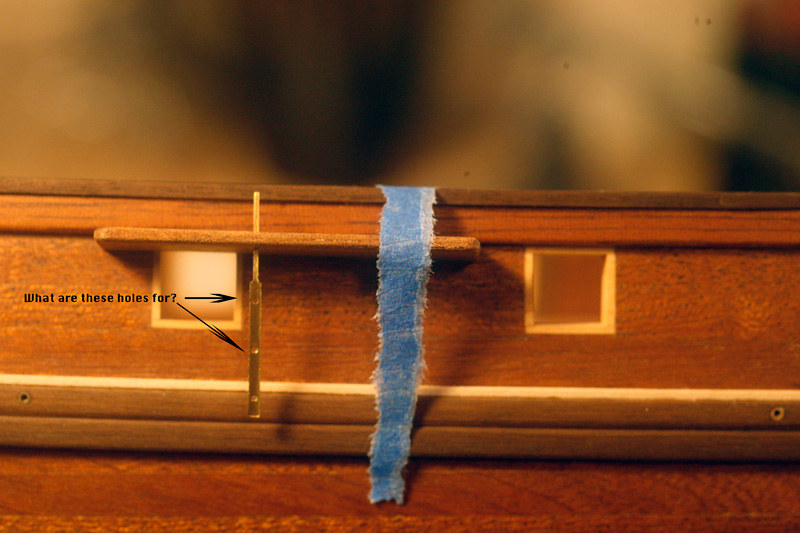
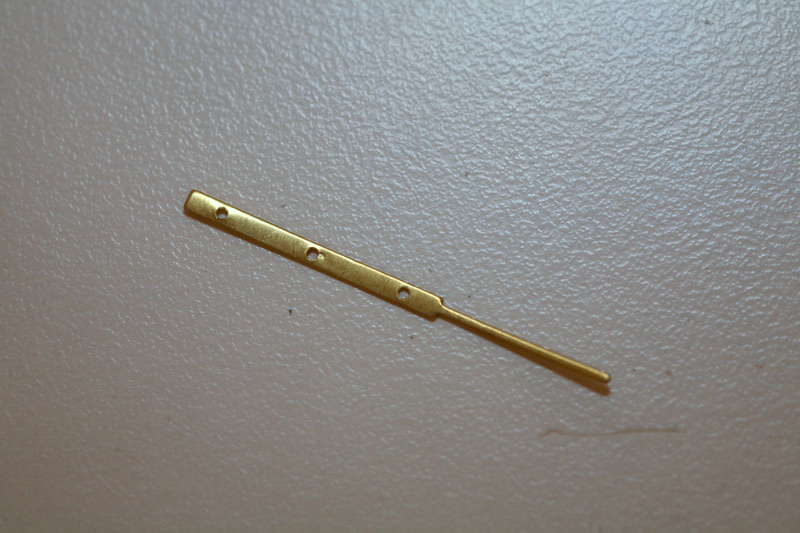
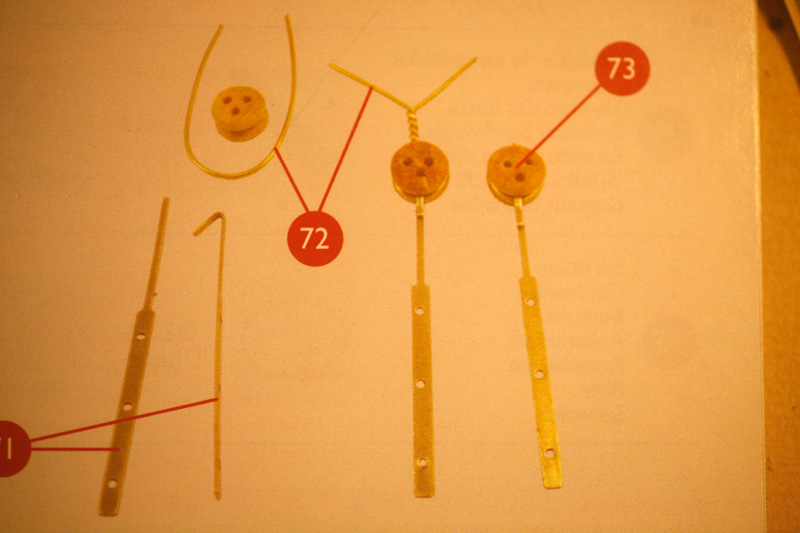
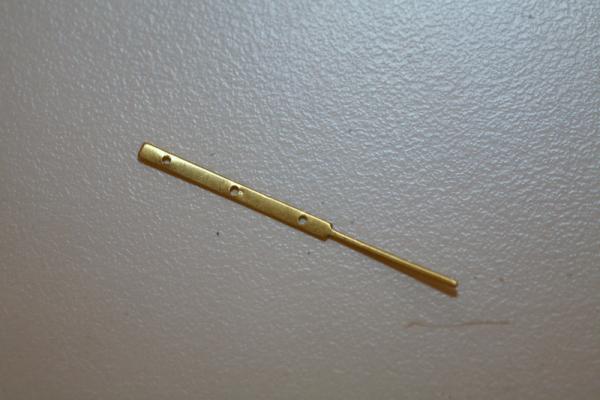
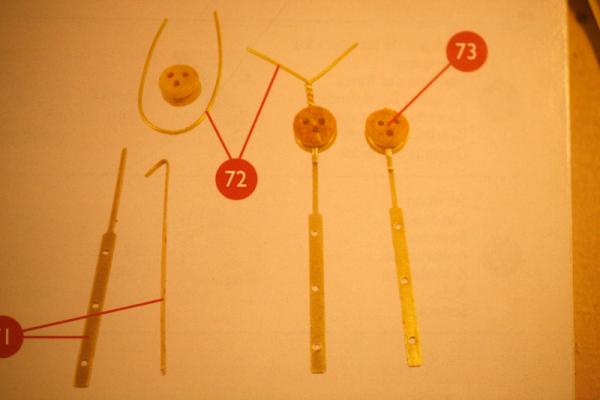
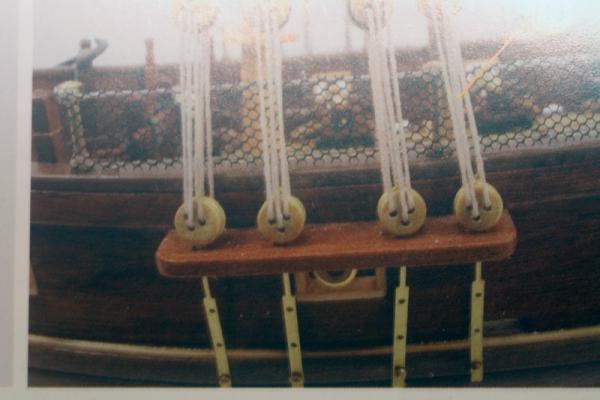
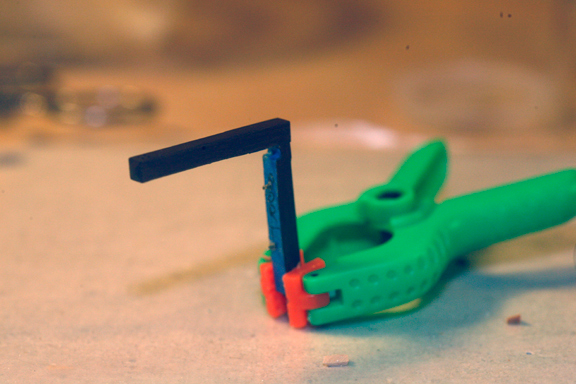
Hey All, Not sure if this belongs in furniture or rigging I am sure the admins will kindly move it if its in the wrong forum so here goes. The instructions for my Enterprise call for a simple plank protruding out from the hull for the channels. This seems rather weak, I have seen a couple of pictures around showing a "shelf bracket" (Knee??) underneath for support. In Antscherl's Fully Framed Model he shows a bracket above for the Swan class. Are the channels simply there to direct the shrouds out and away from the hull or do they also come under stress? I guess what I am trying to ask is do I need additional support? As far as the Chain Plates are concerned, the kit supplied me with stamped/photo etched parts to make chain plates. There are three holes in them to mount to the hull. The instructions show the bottom hole used but no mention about the other two? Are the kit supplied parts and directions any where near correct for this class/period ship (1780's-1810)? Since this is classed as an "intermediate" kit - whatever that is - I suspect this is simply the manufacturers method of keeping the build simple. I know I can have a respectable looking ship going with the kit parts, but I am trying to educate myself at the same time. Daffi has a great tutorial on chain plates here: http://modelshipworld.com/index.php?/topic/487-chain-plates/ If its correct for my build I am considering going his rout but would like some input from others. Kit supplied Chain Plate Mocked up, What are the two extra holes for and should there be a Knee (correct term?) for support of the channel? Manufacturers suggested assembly Manufacturers suggested installation. Shouldnt the Chain Plates continue the angle of the shroud instead of 90 degrees to the channel? Thoughts? Suggestions? Thanks for your time. Sam

-
Robbyn, You cant beat quality material to work with but I totally get not wanting to keep spending and waiting, waiting and spending. In my "vast" experience with basswood, I have not found any method that is 100% perfect and from what others are saying maybe there isnt anything. I have found that scraping rather than sanding works better. A REALLY sharp chisel or Exacto blade works well. It shears the fibers instead of abrading them away like sand paper does. Just hold your blade perpendicular to the surface and drag it along. You should see very fine shavings build up on the blade. try it on some scrap first naturally. Once you get the hang of it you will be amazed at how nice a finish you get compared to just sanding. A good set of needle files will also work sometimes I have found - there I go....spending and waiting again....
- 234 replies
-
- 1
-

-
- 18th century longboat
- model shipways
- (and 1 more)
-
Robbyn, A little late to the party here, but it sounds like you made the right decision. No matter how great everything else comes out you will always look at her and see what you dont like. Sam
-
Constructo Enterprise vs. Golden Kits Enterprise
src replied to capnharv2's topic in Wood ship model kits
Harry, I cant say much about the Golden Kits model, but I have noticed that some of my parts have matched the plans, but when I went to install them they were smaller than what I needed. Both my Stern post and the Stem turned out to be too small/short. The stern post was a relatively minor fix, the stem, somewhat more complicated in my mind. I assumed both were due to my inexperience, and it may well be that but now I am wondering. Sam -
You even got the blue reflection.
-
Rich, Lookin good! I especially like the last shot #0670, add an oean horizon and some clouds in the background and could almost look real. Those pesky little parts, They grow legs the minute you turn your back, before you know it they are halfway to the local pub for a pint! Sam
-
No building for me today. A quiet day. I was somewhat surprised and gladdened by the number of flags flying on our street, not only today but all weekend. Not only known "American" homes but Immigrant homes as well. Thanks you Vets, each and every one of you. Sam
-
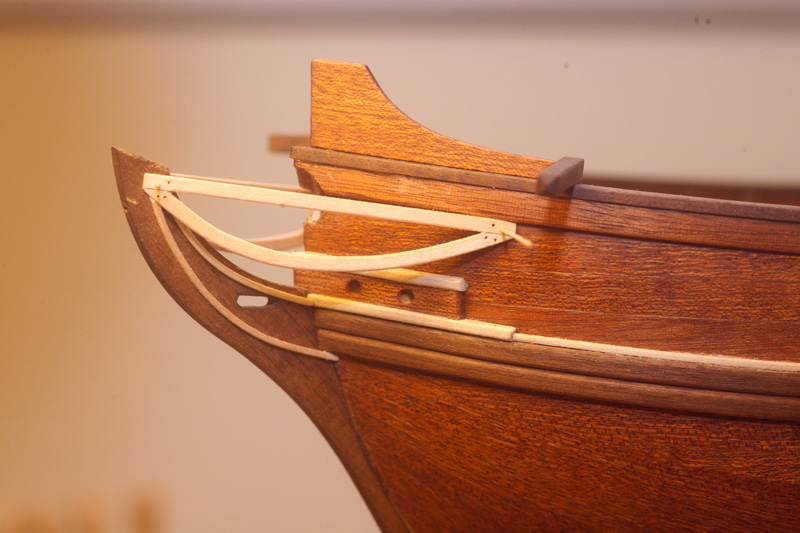
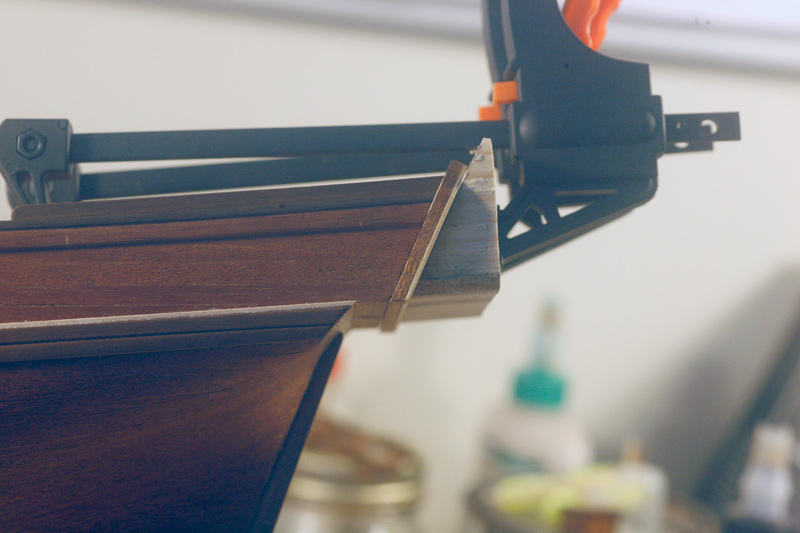
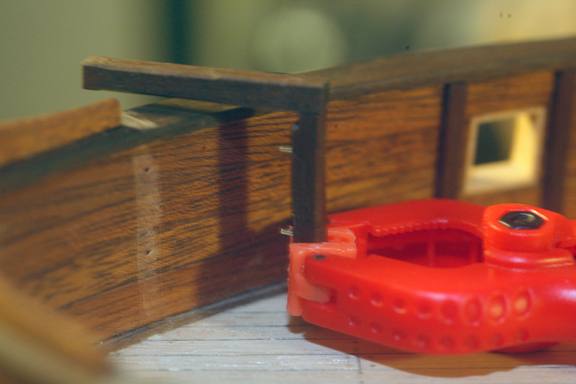
Well I finished fitting up the braces last night and temporarily pinned the headrails in place. The work around came out OK. I think I will wait to glue the headrails in until I clear coat the hull. It will be much easier to get a clean smooth finish with those out of the way. I can scrape the top coat away to get a good glue joint and then reinforce with the dowels. I may have opened up a can of worms with the dowels though, outside of the deck they are the only ones visible at the moment. Now if I can come up with a good solution to Commander Lorcans "improvements" to the stem.... I pulled the clamps off the transom and and overall I like how it looks. I am not 100% satisfied with the gunports but I am pretty much out of Mahogany strips at this point so I am not sure I can do any better. If all goes as planned I will get the hinges re-blackened today and see if that doesnt improve the look enough. Onward!! Sam

-
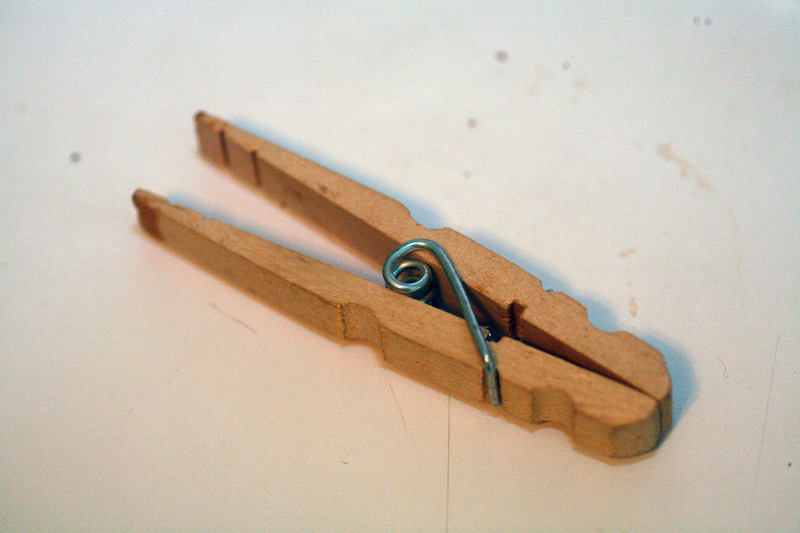
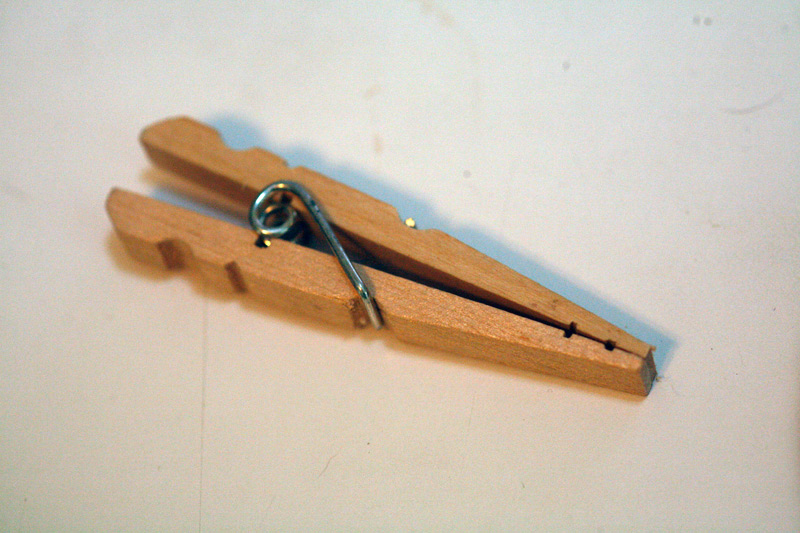
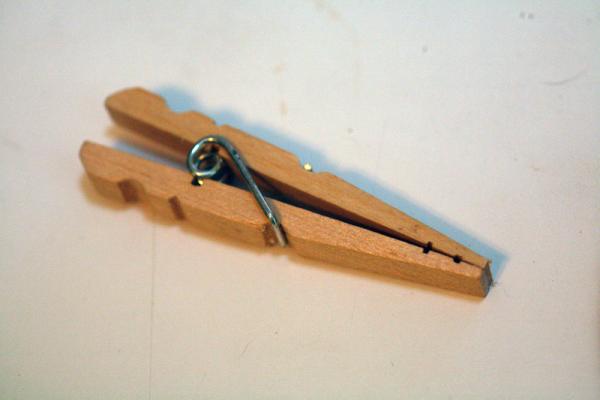
Thanks Russ. Its really a shame all the bits of knowledge lost in the crash. This is one of those indispensable bits that I have found I cant build with out. Its become so second nature a thing to reach for one and carve on it to suit my needs that I totally forgot there might be someone who had never seen/thought to reverse one themselves, I know I didnt till I saw it.
-
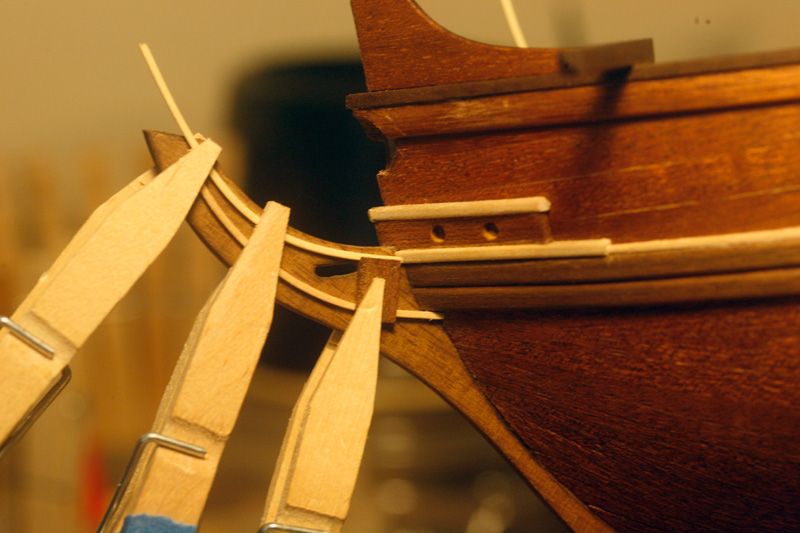
Quick post, nothing new to show on the build, but received a PM asking about the clothes pin clamps used in post 71, "Laundry Pegs" as I now know they are called by our friends on the other side of the pond. They are nothing more than your everyday clothes pin reversed and turned inside out. This was something I saw on the Old MSW in the tips or tool section I cant remember. I use two versions but I dont recall if both were found on the old site or if I "improved" on the original. For the clamps used in post 71 I needed more room to maneuver so I used a sharp chisel and made needle nosed clamps out of them. I like the wooded pegs for this reason, they are very easy to modify. Hope this answers the question and maybe helps somebody in the future as well. Sam

-
Auger, welcome back! I'll be keeping an eye out for your build log. Russ, I re-read my post from a couple of days ago and didnt thank you for your input on the catheads, I hope you didnt think my "cathead" picture was poking fun at your response, I truly appreciate and value your input. Over the last few days I have managed to straighten out the bottom edge of the transom and glued up a whole two braces on the port side. tonight, if I am luck I will get one if the races on the starboard side glued on. Getting those little twigs to follow the curve of the stem has been a bit of a challenge. I blackened my port hinges, but the blackening rubbed right off, gonna try again this weekend....... Thats all for now, Sam


-
Robbyn, Nice work! You are progressing so fast I am going to have to drop by more than 2x a week or I miss out on a lot. (I have to visit MSW more often, isnt that a shame?)
-
Mark, Just got caught up on your build. Nice work. Sorry to hear about your mishap. Looks like your doing better. Sounds like the safety gods tapped you on the shoulder? Sam
-
Rich, She is looking great. Any good news on the job hunt? Waiting to hear back is the worst. Sam
-
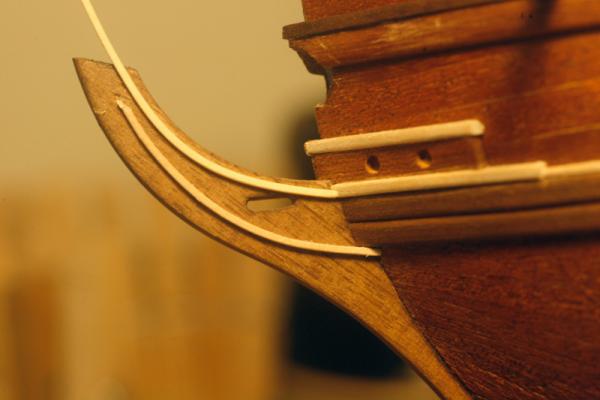
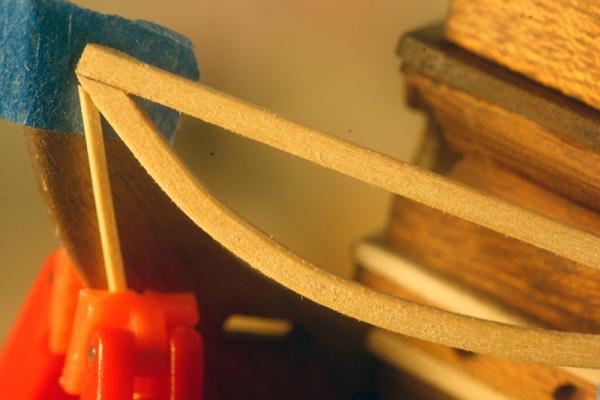
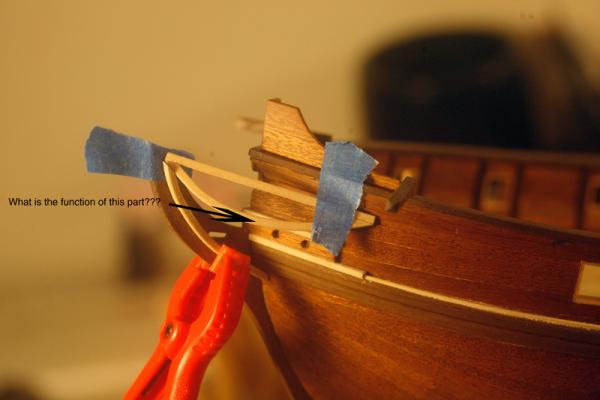
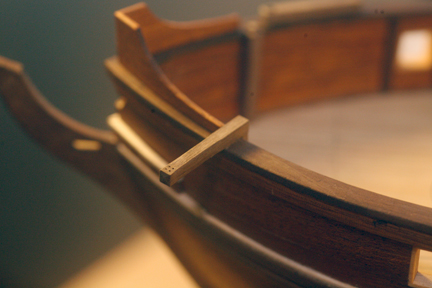
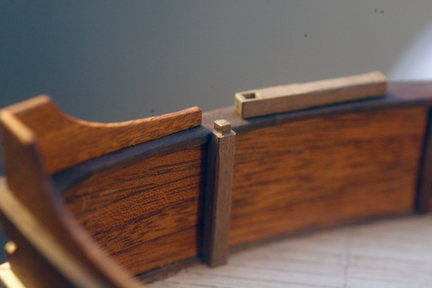
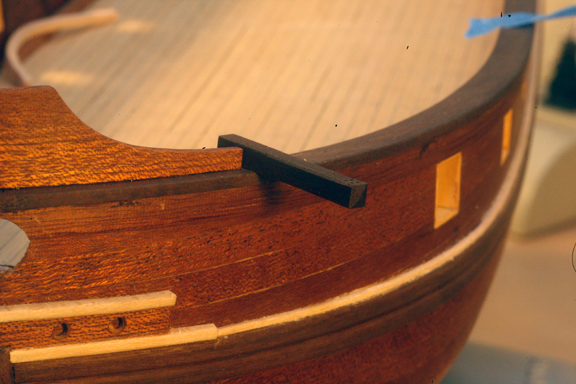
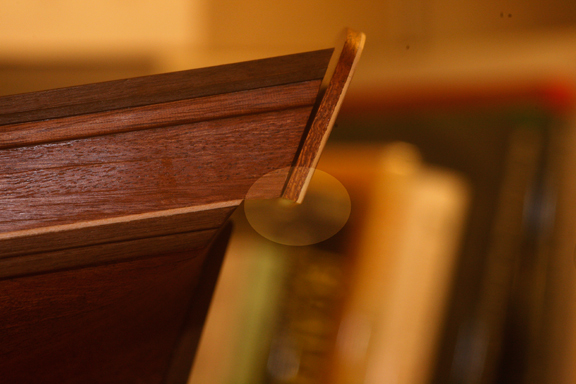
I have been noodeling over my stem off and on over the last couple of nights. The instructions call for the "headrails" and braces to be all made out of 2x2mm stock. Everything then comes together in a rather small area at the top of the stem. right now the way I have built things it all come together in a cludgy mess. The instructions dont give a real clear picture of the joinery: I am thinking I will need to make some changes and go with 1x1mm stock for the braces: Now another question. On the head rails, the instructions show/callout for two pieces, one straight, one somewhat elliptical running from the upper trailing edge of the stem to just under the cap rail. One set each port and starboard. I can see how the straight piece would help brace the stem, but I am not seeing any function for the lower elliptical shaped piece attached to it. Am I missing something or is this "Artistic License" on the part of the manufacture? Maybe to simplify the kit and keep it at an intermediate level?

-
Rich, she looks great. Welcome back. got a question for you. How did you tie parts 67 and 68 together on the stem? The instructions dont give a clear picture of the joinery. So far I am unsatisfied with what I am getting. Sam
-
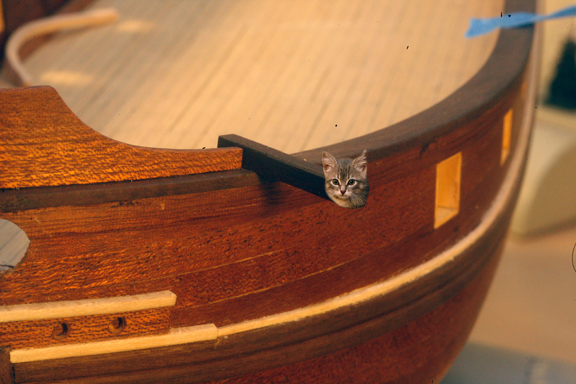
Hey Auger! Thanks for stopping by, was wondering where you had got to. I see you just re-joined yesterday and I am your first post? I am honored. Will we be seeing some new builds from you? I imagine dusting these beasties is quite q chore, should I ever actually finish this one I will have to put her under glass. we live somewhat close to a freeway and having a 10 month old kitten all those fun and cloth and hangy-down-thingies will be a cat toy in the waiting. Sam
-
Robbyn, thank you. How is that garden coming? Carl, Yes sometimes I feel like Janus, but looking on "two" many directions at once! Sorry, couldnt resist the pun. The gap at the top is just gravity pulling the transom away from the hull, there are 6 brass pins I am using both as locators and as reinforcement when I took the picture there was nothing holding the part in place other then the friction of the pins so it fell away a bit. The real problem is I never beveled the bottom edge for some reason, probably because I have been working on multiple subassemblies at once and didnt pay enough attention to the edge. I have corrected the angle and glued a new trim strip to the stern ring. I will get a picture of that tonight or tomorrow, hopefully I can get the transom glued up this weekend. Russ, catheads huh? I have heard the term but didnt really know how it applied, any idea where the name came from? Maybe i made a mistake and they are supposed to look like this?? Ok, enough play, time to go to work. Sam
-
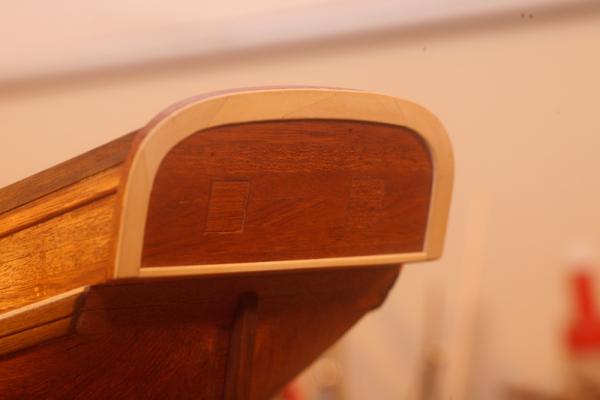
Progress has been slow, but I have been getting some build time in here and there. I built, finished and installed what the instructions call the "Boat Davits" I think it is a translation error since its the part that will hold the anchor. Whatever the are called it took a couple of hours (nights) to build and then another to stain and install. I am liking how they turned out. I vacillated on the details; round over the edge or chamfer the edges, chamfer the edges or pyramid them, that was part of why it took a couple of nights to complete. Sometimes I just need to kick myself in the backside and say "Get on with it!" I went to install the transom and discovered I never fit up the bottom edge! I had to carefully plane the edge to match the angle, now I have to redo the lower edge of the stern ring. I just realized I never took pictures of the stern ring installed. I will have to get pictures after I re-complete it..... Sorry for the poor quality on some of these shots, I was too lazy to get a tripod out last night and was hand holding a macro lens Port and Stbd fit up before staining Brass reinforcements and stain Stbd Final port install @$#@^&**!!!!!!! Thats it for now, Sam
-
Robbyn, Your start on rigging looks great, you'll figure out how to keep everything lined up. I will be observing and taking notes quietly from the back row, If all goes well I will be rigging myself by the end of spring and your log will be a great tutorial I am sure. I know what you mean about "furry little vacuum cleaners." Mine has run off with more than a few parts. She thinks my work table is her personal toy box. I see there are some here who are still trying to convince you to let the second-build-gremlins out, you must resist!!! Ladies get jealous when you give attention to others. Maybe what you could do is take a hi-rez picture of the open box with all the contents, cut it up into tiny odd shaped pieces like a jigsaw puzzle and start a new build log. Post a piece a day and let the "trouble makers" put it back together with the promise you will start building after the first post of the completed picture. Then again, I understand there is a "doghouse" out back? Your just an extension cord and can of air freshener away from all the room you need....... We really need and emoticon for "running and ducking" or "hiding under the desk" on this site. Keep up the great work. Sam
- 773 replies
-
- 1
-
-
- san francisco ii
- artesania latina
- (and 1 more)
-
JP, I cant say any more than what has already been said, She looks great! You made basswood look awesome! Sam
-
JP, great job!! I am even jealous-er now. And no, I would never let jealousy lead to destruction, thats too much like destroying a book or art. It gives me/us something to strive for. As far as your color, have you considered one of the Watco Danish oils or perhaps a dark or ruby shellac? Rockler has these in flake form. There is always the option of a washcoat of clear before you stain. Whatever you choose with the patience and resolve you have shown with your planking I have no doubt your going to end up with a model you can be very proud of.
-
Wow sarah, you dont stop do you? Nice start, gonna grab a seat here before they are all gone. Sjors, will you please pass me the popcorn? Did I see an Iron Chef episode in the background there?? Sam