Mahuna
-
Posts
1,504 -
Joined
-
Last visited
Content Type
Profiles
Forums
Gallery
Events
Everything posted by Mahuna
-
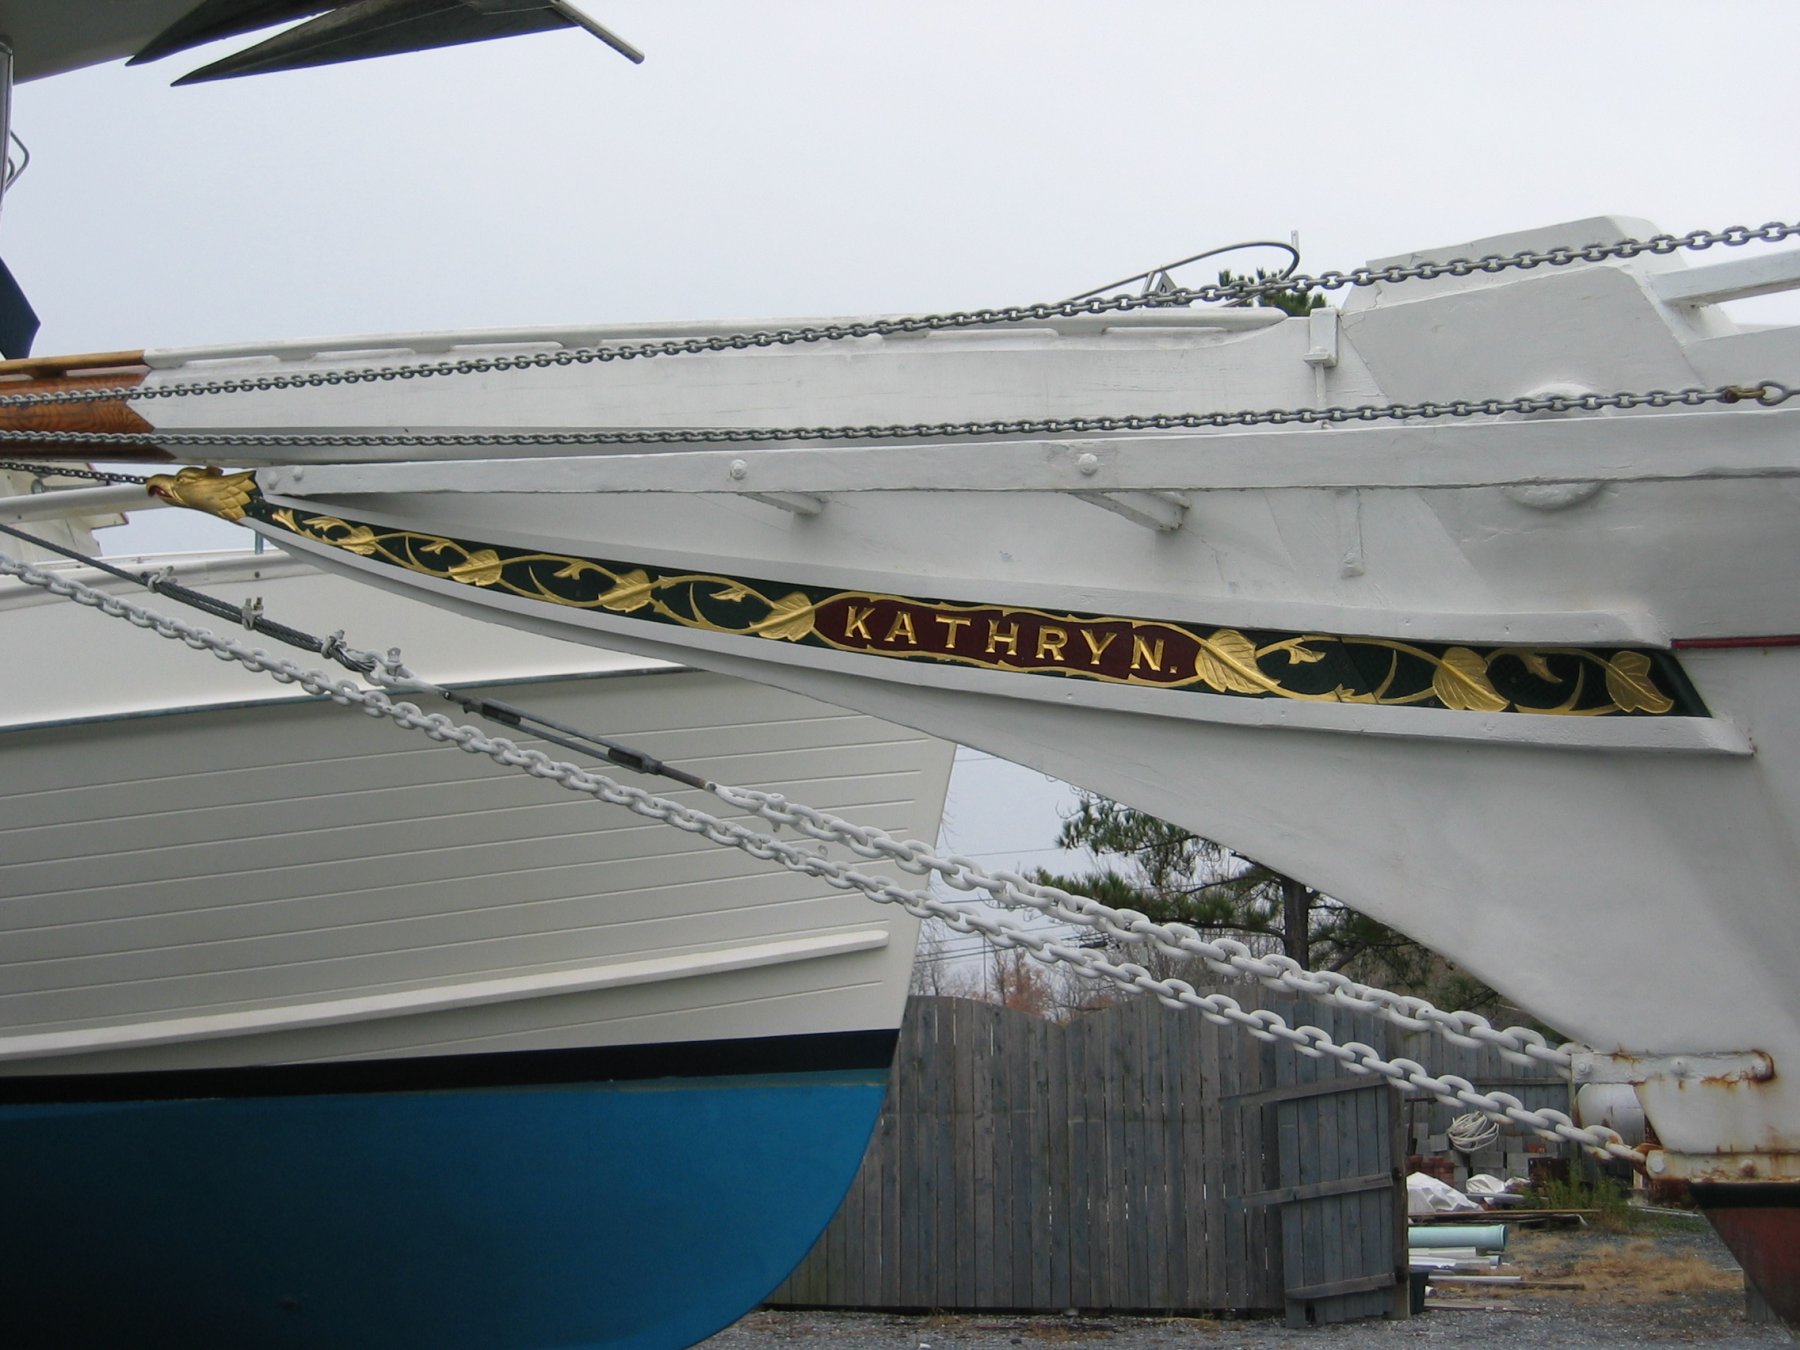
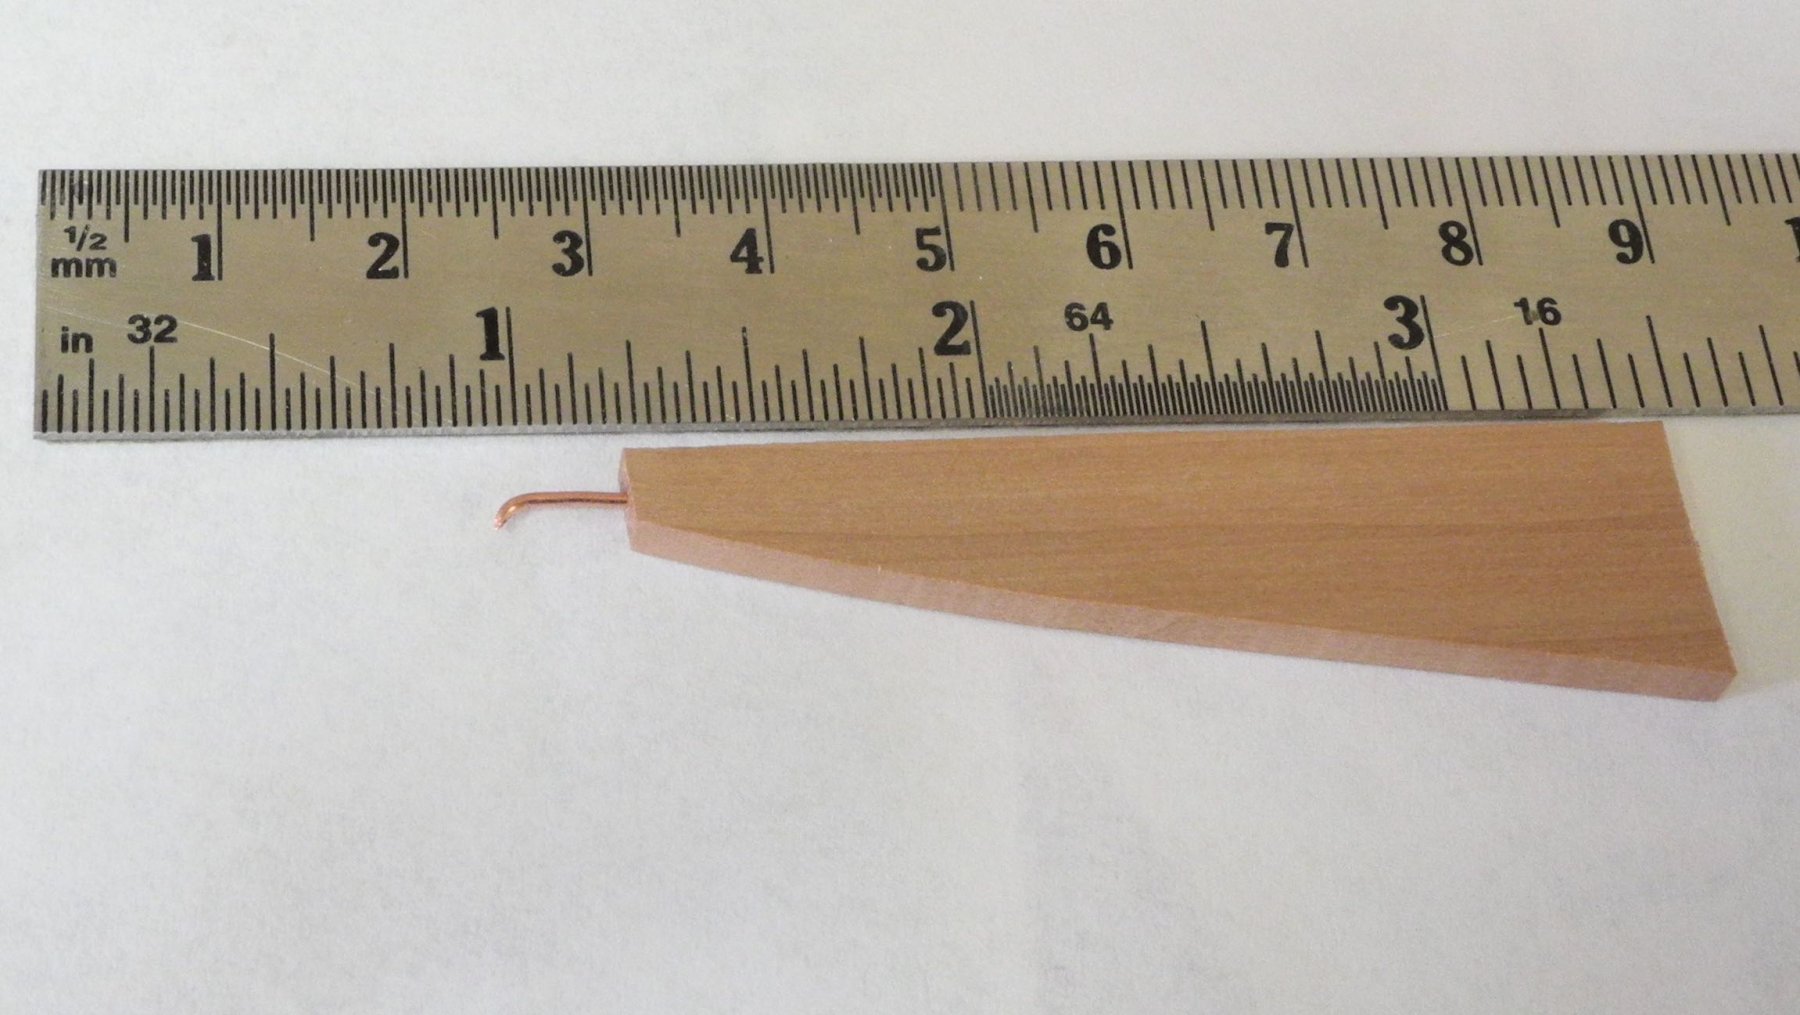
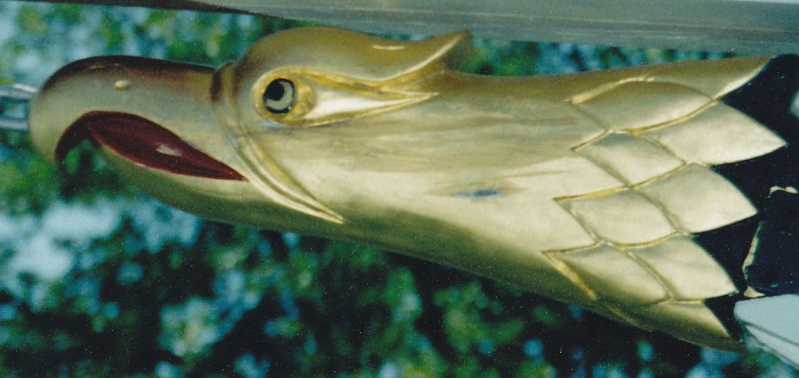
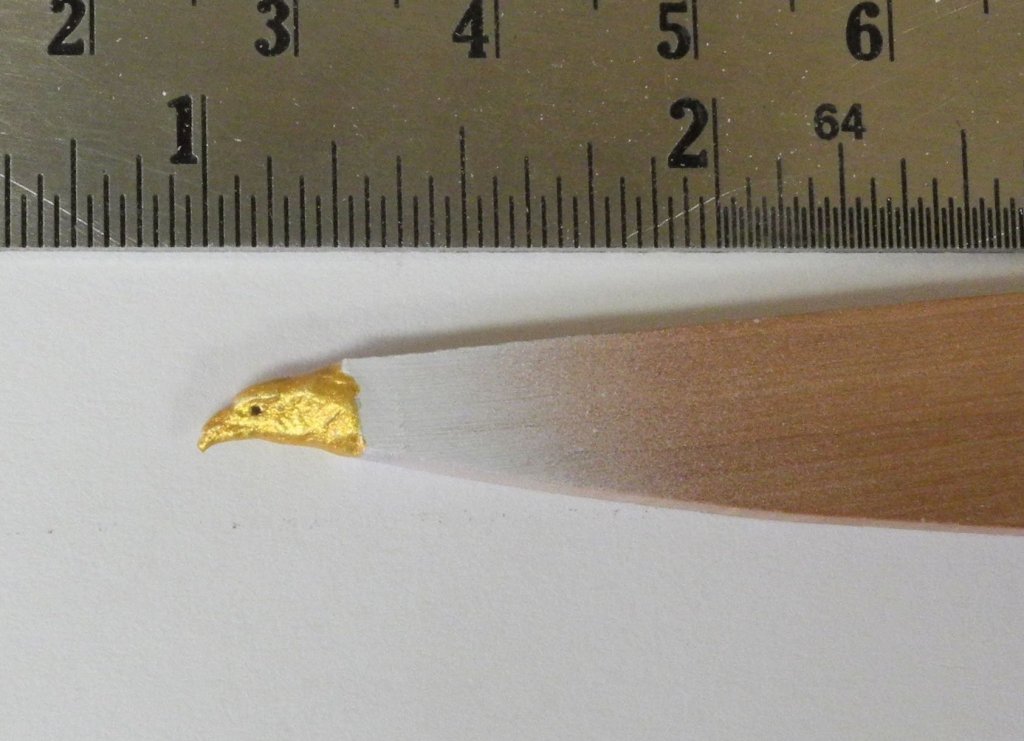
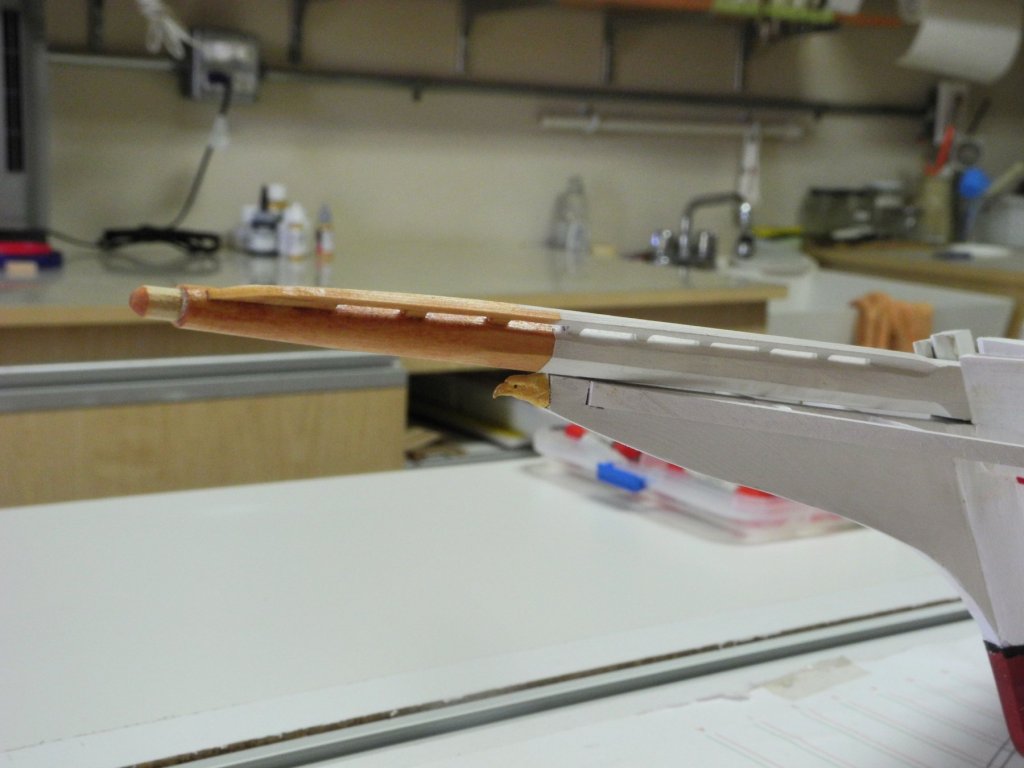
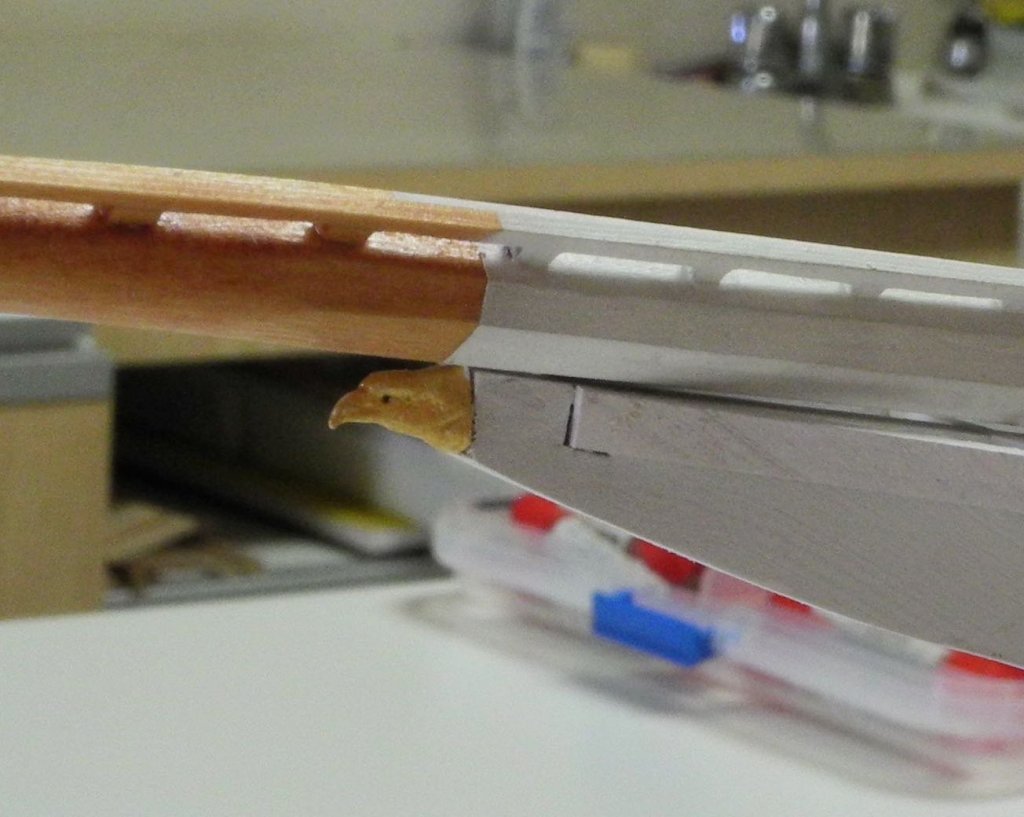
 Part 36 – Eagle Figurehead Kathryn has a small carving of an eagle as its figurehead, as in the following photo: The carving is a little ‘cartoonish’, and to my eye doesn’t look much like an eagle. So, even though I’m trying to replicate Kathryn as close to the real boat as possible, I couldn’t bring myself to copy her figurehead (and I’m not sure I even could at this scale). So I decided to make the figurehead as realistic as possible. Carving the figurehead at this scale is quite a challenge, so I decided to model it in Sculpy – still a challenge but more within my capabilities. A piece of 20-gauge copper wire was used as an armature, and the end of the wire was shaped and carved for the hook of the beak. The wood is a piece that replicates the end of the cutwater – this let me sculpt the base of the figurehead to the correct size. I didn’t take photos of the sculpting process. It consisted of first baking a very small piece of sculpy that was formed around the base of the wire. This gave a base for the rest of the sculpting. I used some very small clay modeling tools and a hobby knife to do the sculpting. The figurehead was painted with spray primer to ensure the acrylic paint would adhere to the copper beak, and then was painted with gold model paint. The following photos show the figurehead temporarily in place on the model. The figurehead was a welcome break from my current work – which hopefully will be introduced in the next post. For those of you who live in the area affected by Hurricane Harvey, I hope you and your loved ones are safe and dry. Watching the videos of the storm make me feel like our occasional dust storms are nothing we should complain about. Be well, everyone!

- 878 replies
-
- 20
-

-
Thanks, Rich. I haven't been making much progress lately but I'm hoping to get back to it soon.
-
Wonderful work, Ed. Your attention to detail and research into actual practice continues to impress.
- 3,618 replies
-
- 4
-
-
- young america
- clipper
- (and 1 more)
-
Hi Russ: Your Lugger is coming along very well - will be a good looking boat.
- 420 replies
-
- 1
-
-
- captain roy
- lugger
- (and 2 more)
-
Thanks Elia. It was great meeting you, and I hope you let me know when you're in the area again. Your recommendations on the sail making booklet and on the HAER drawings of the Lettie were great - I've been studying both. David's booklet on sail making has answered lots of my questions on how to rig Kathryn's sails. Looking forward to seeing progress on Arethusa.
-
Thanks Druxey Thanks JD, and welcome aboard. I got the suggestion for Corian from a very experienced modeler - works real well.
-
Thanks Russ. Corian is a great material for these small jigs for soldering. Thanks Patrick.
-
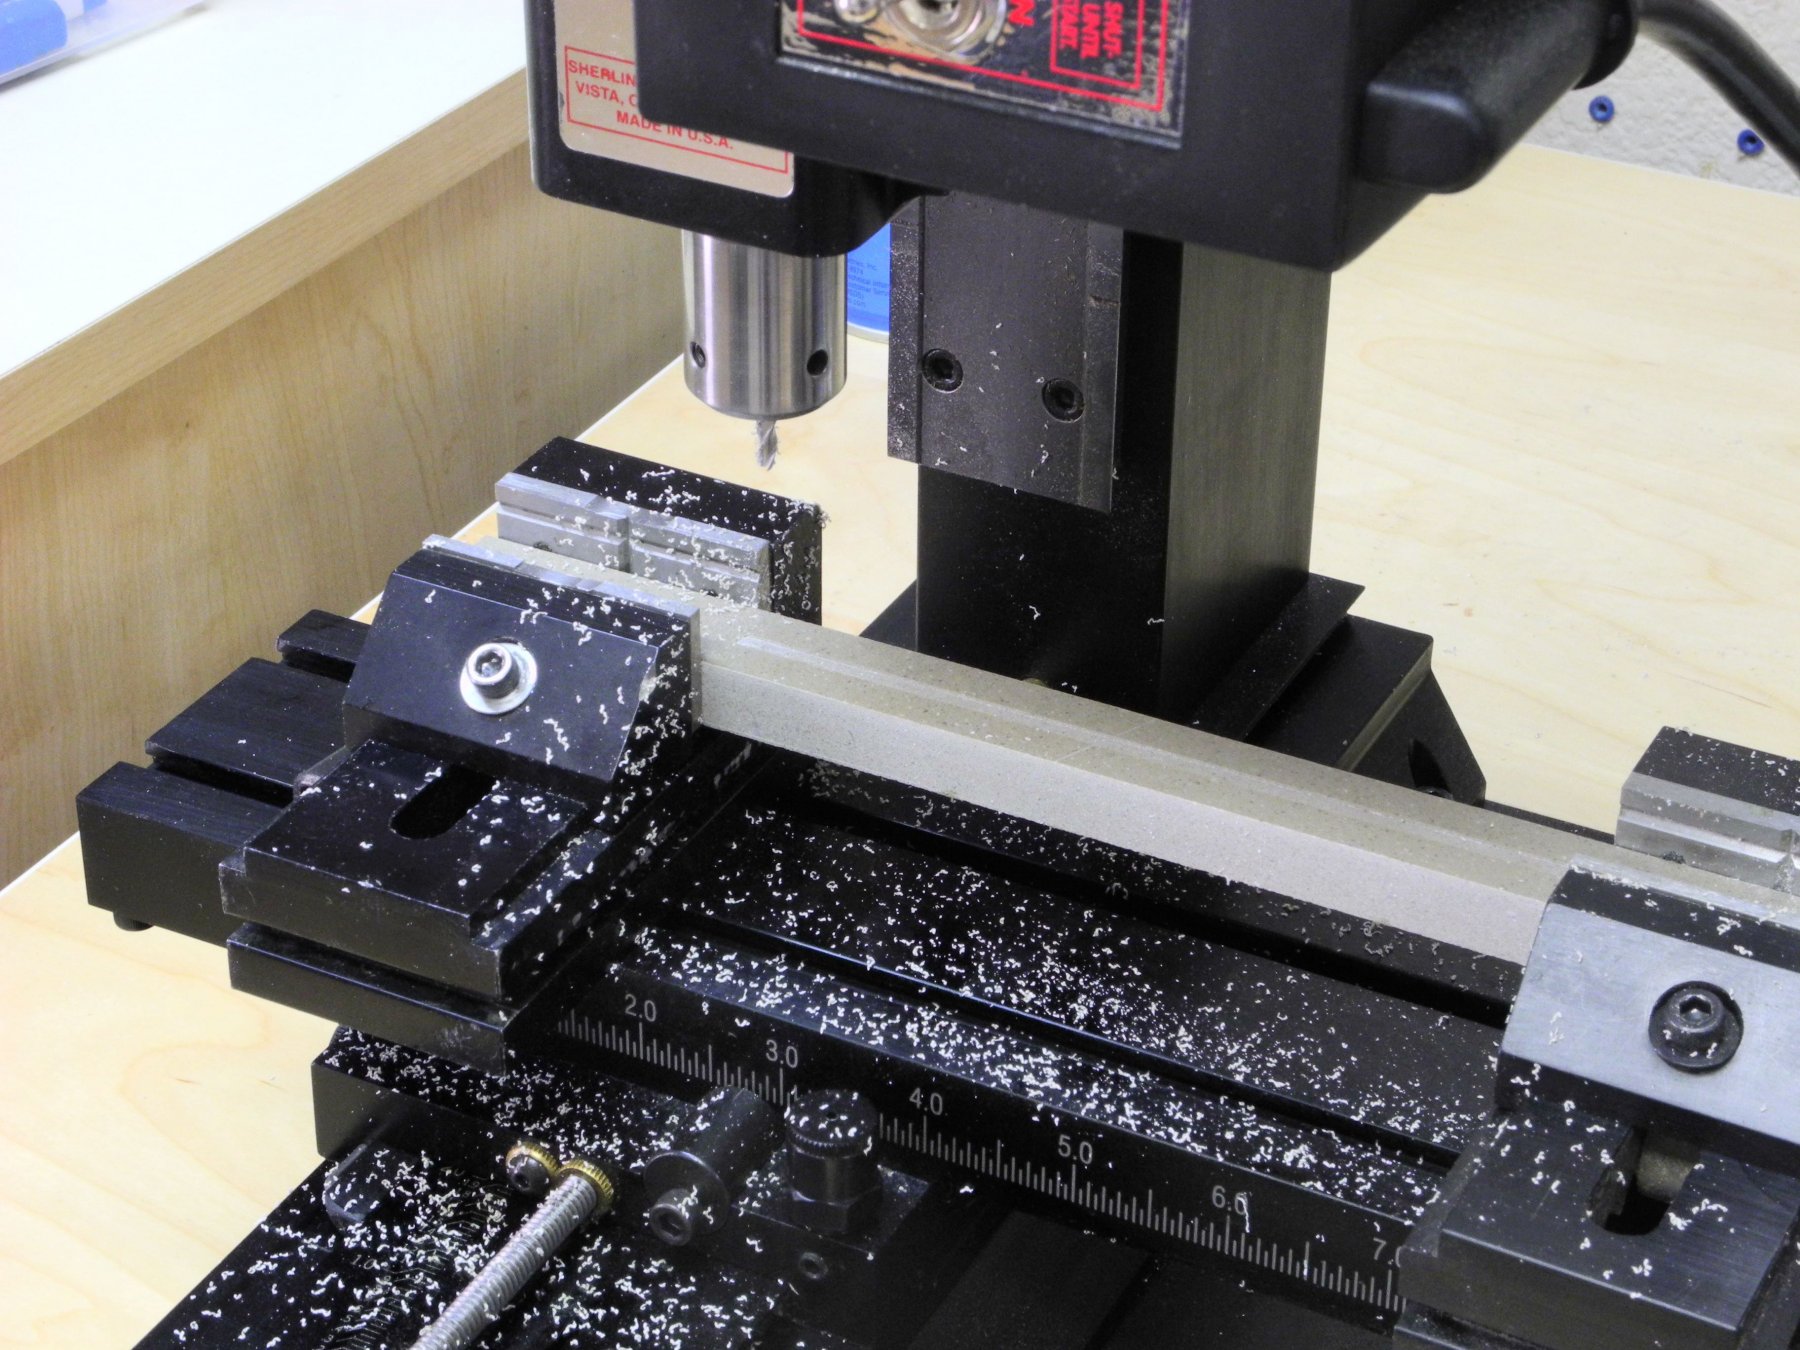
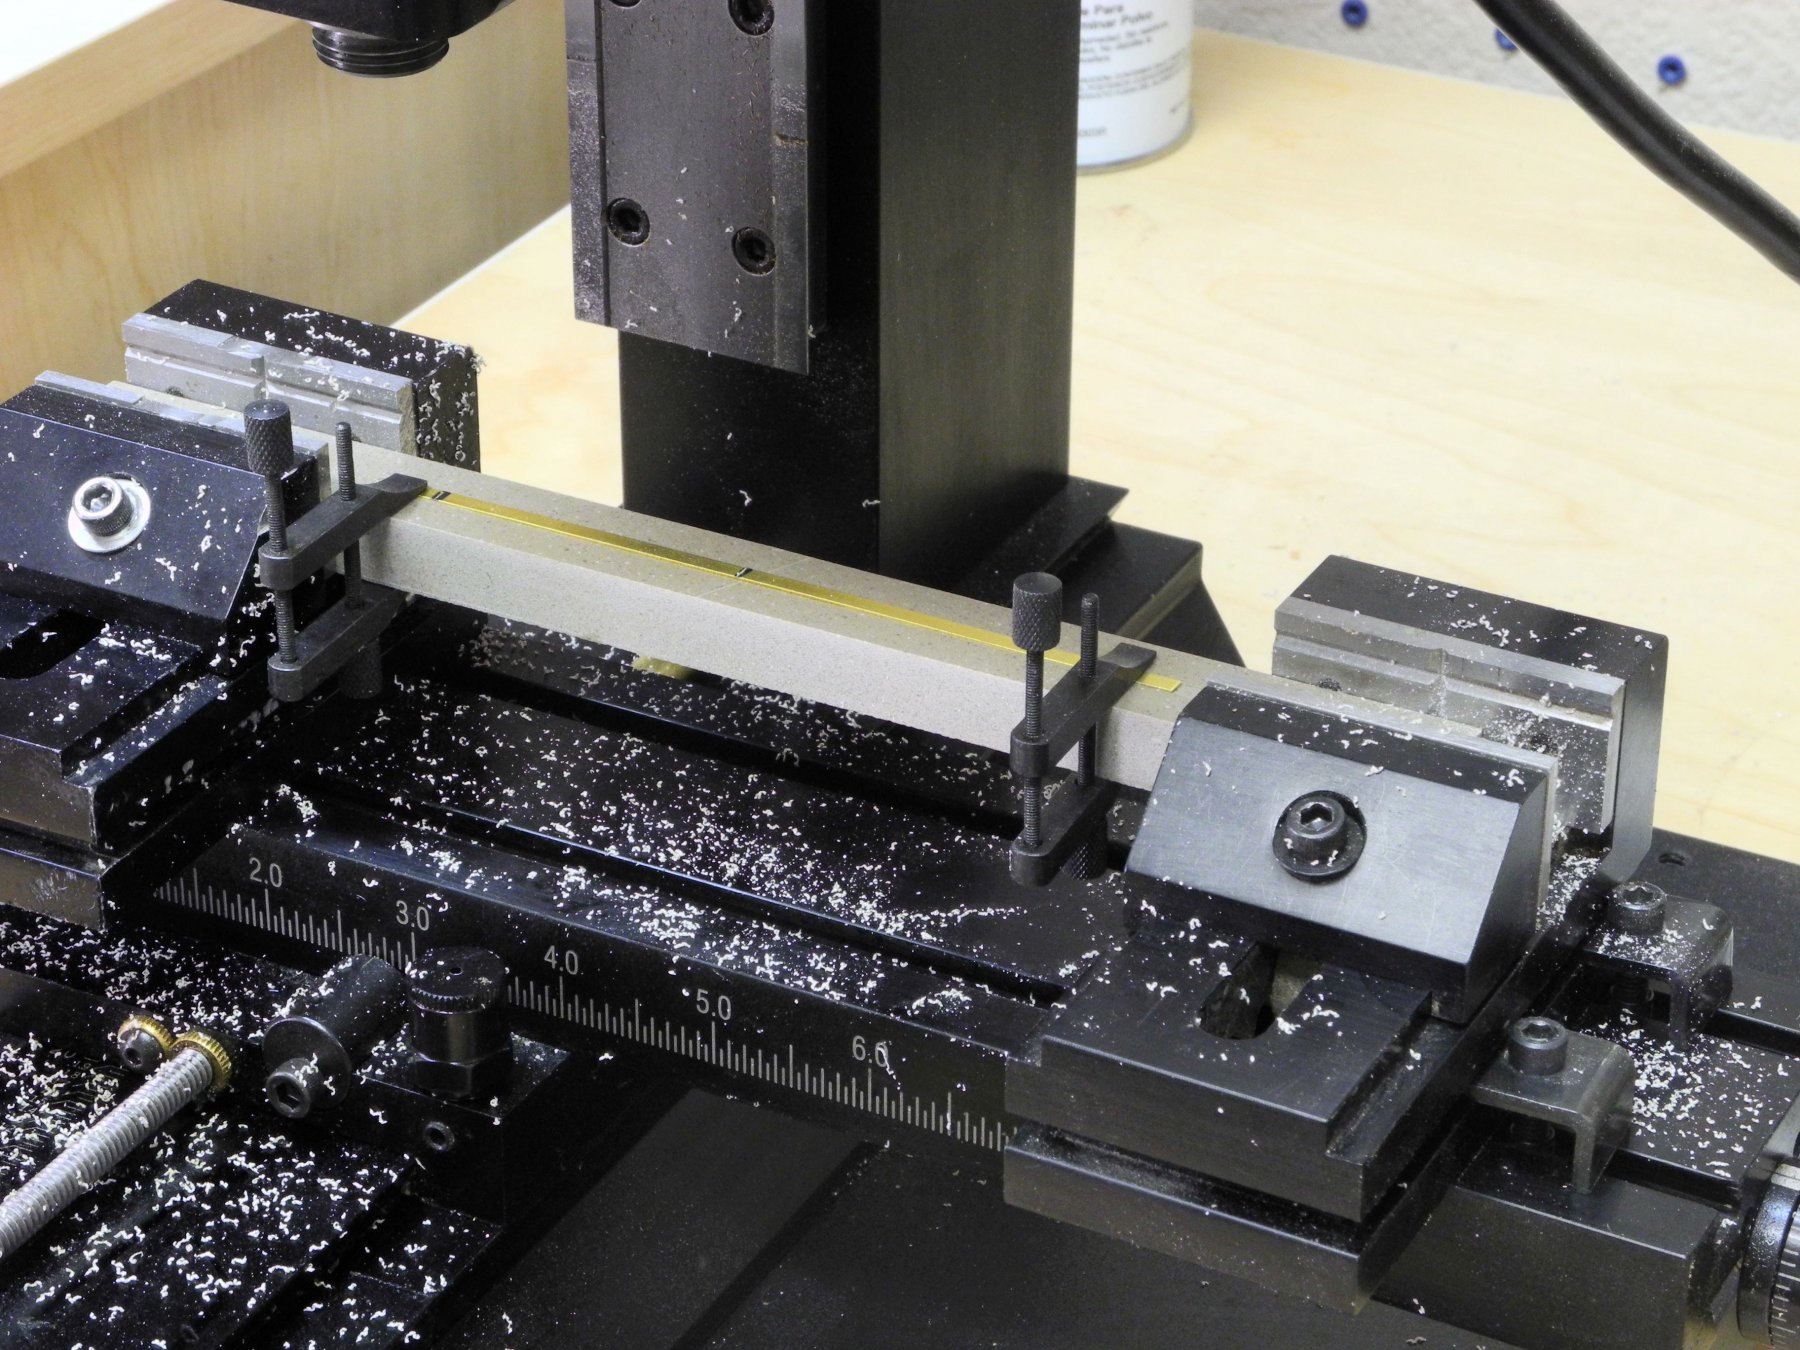
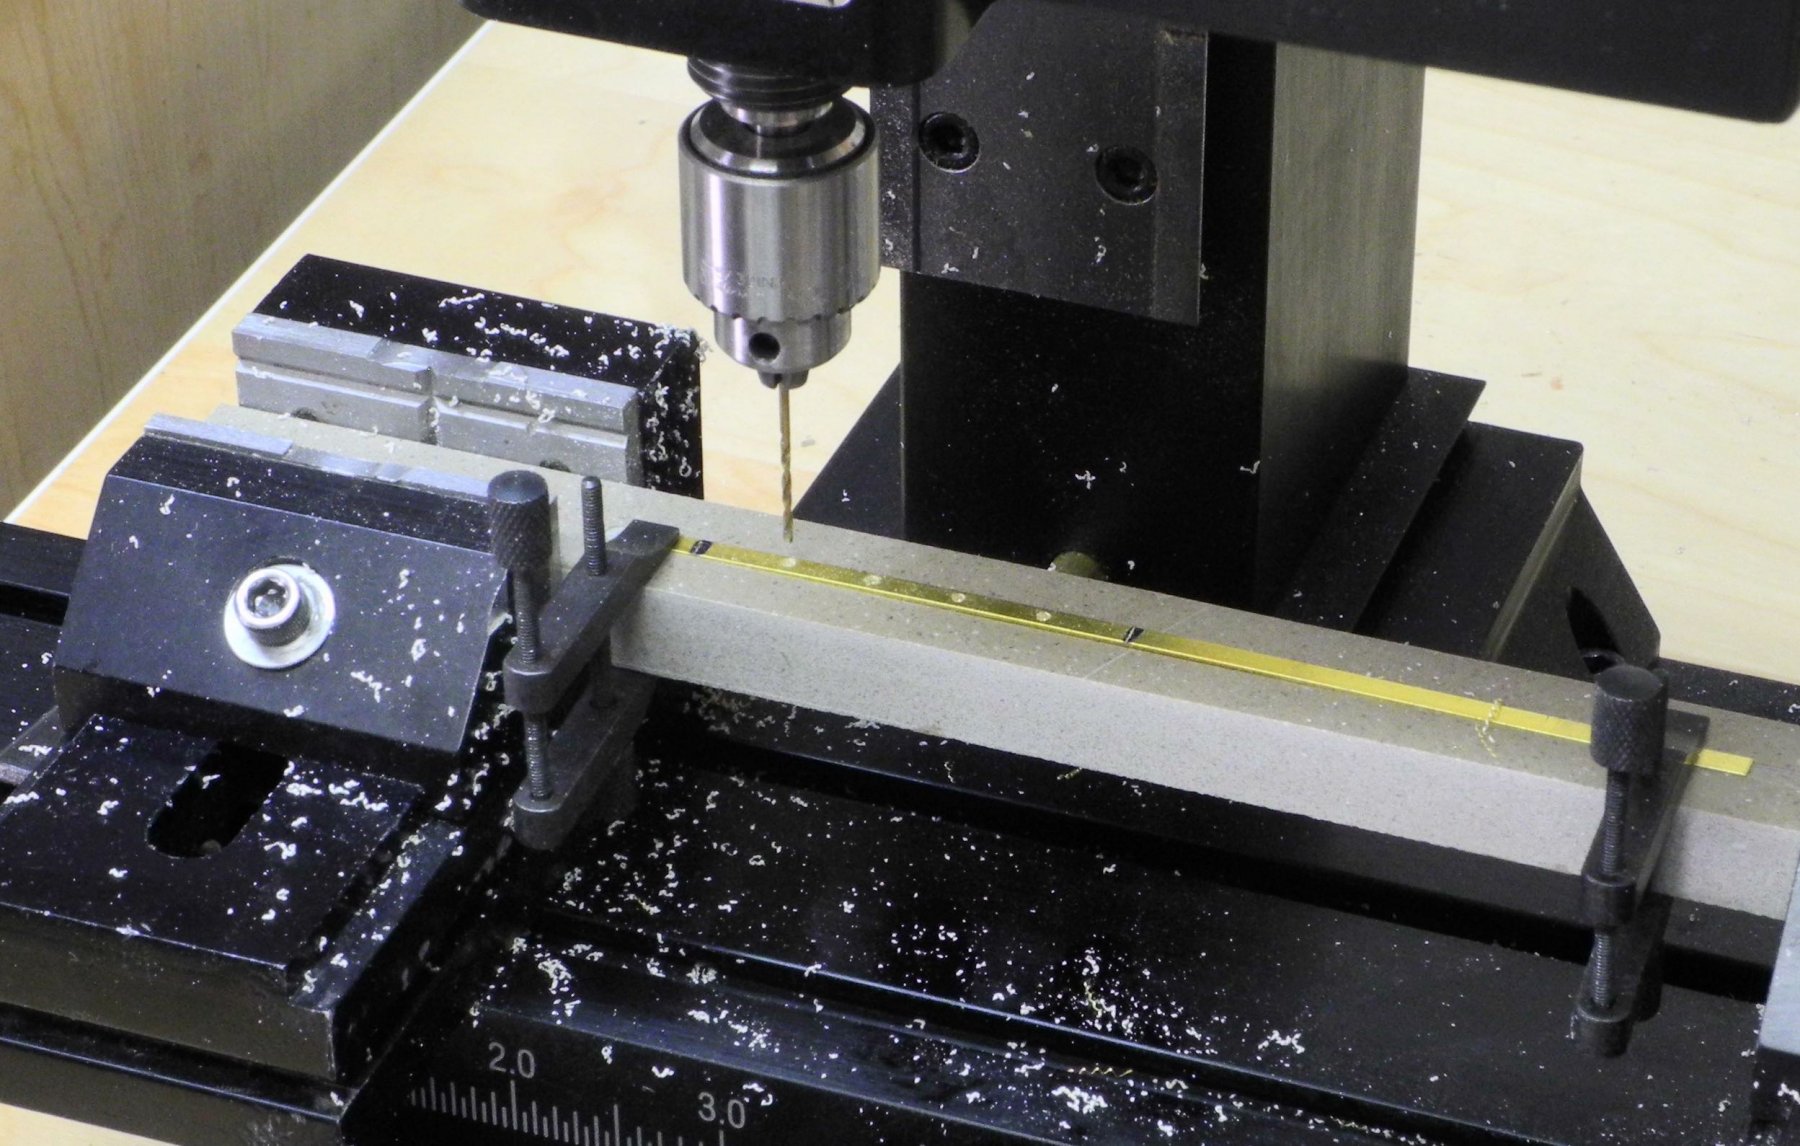
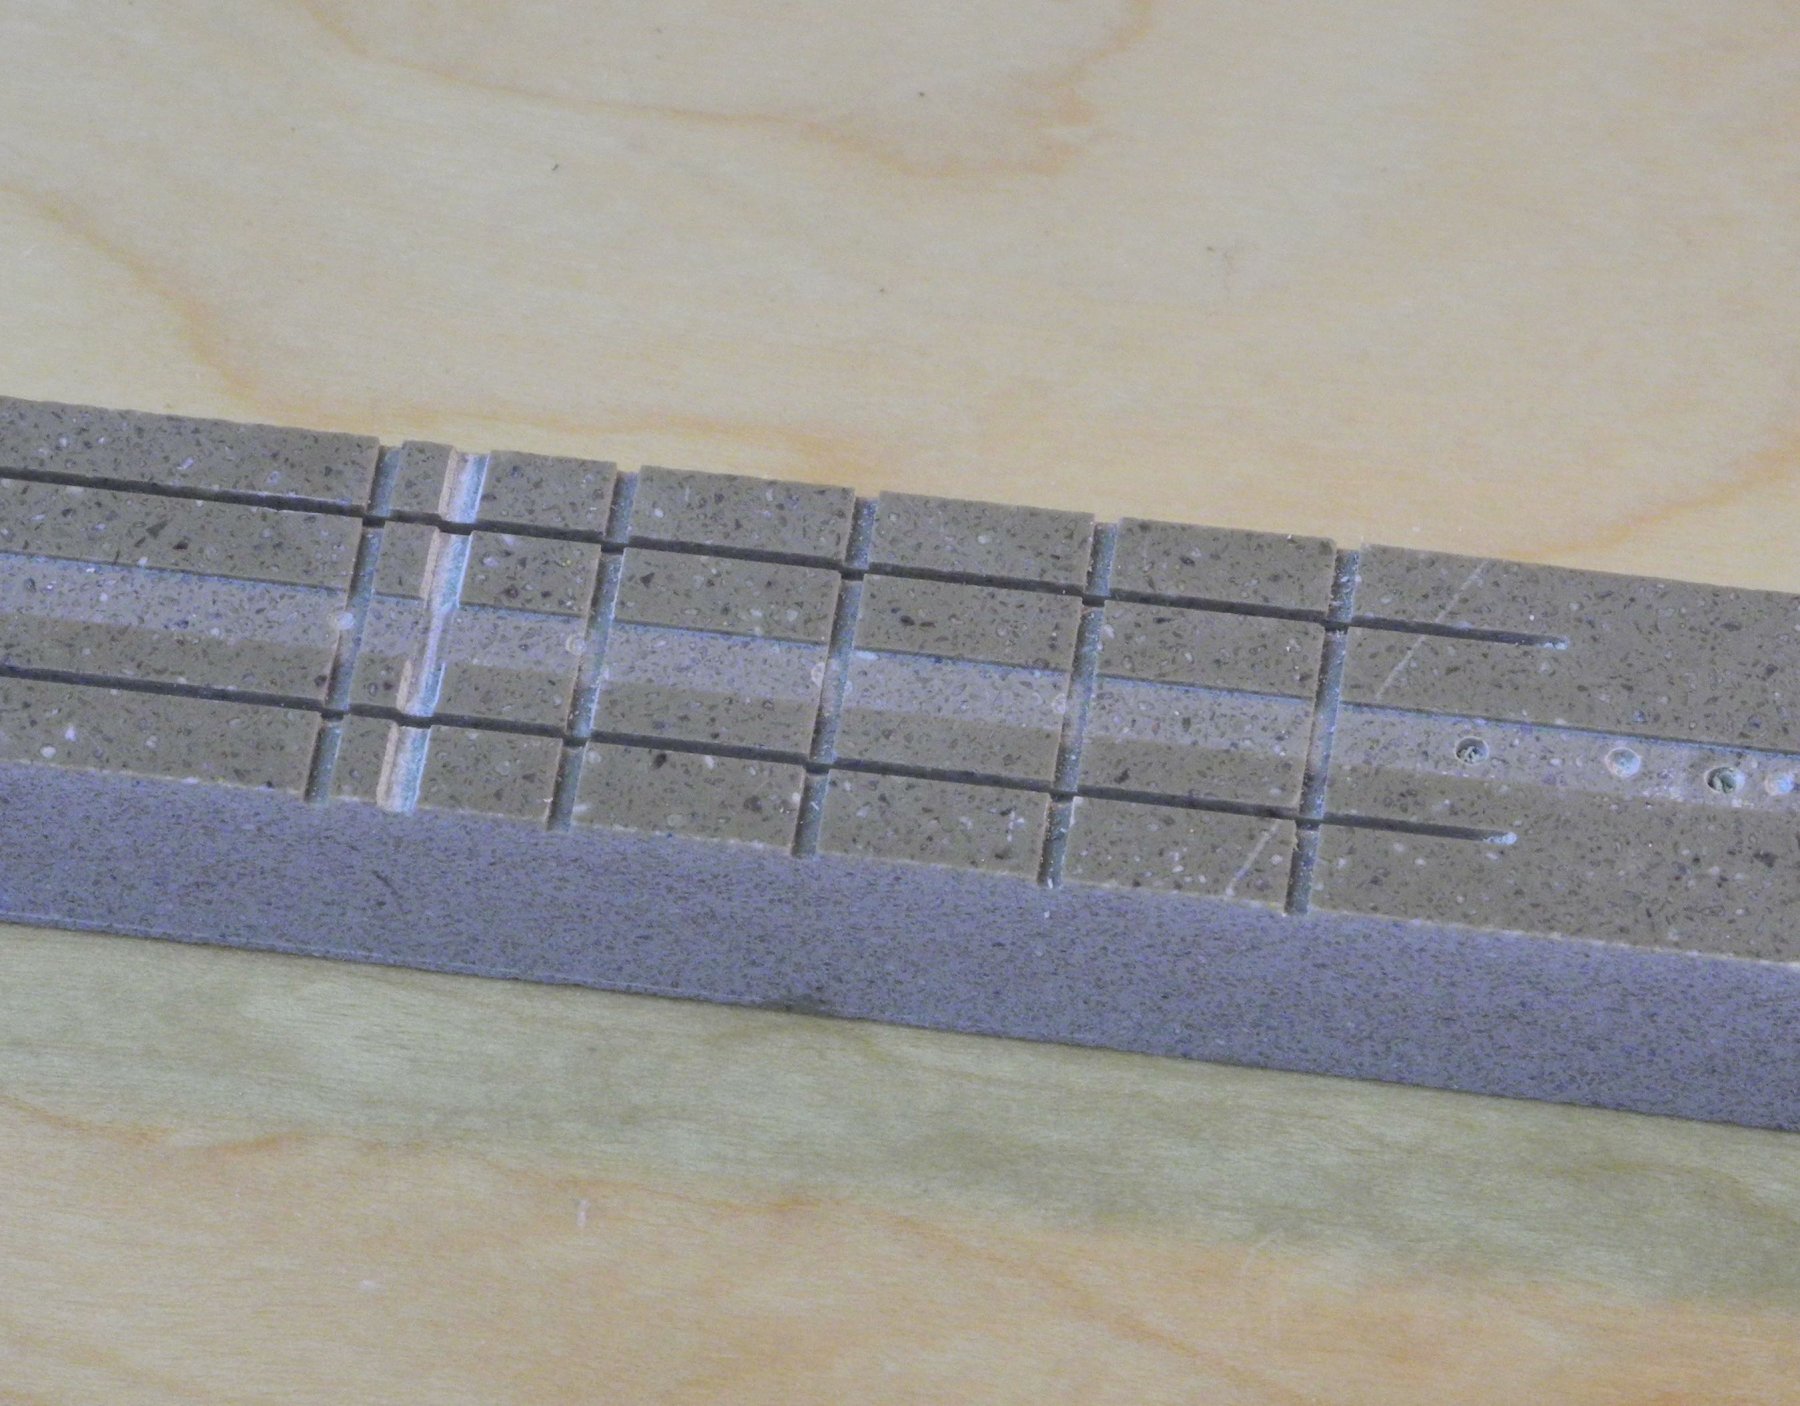
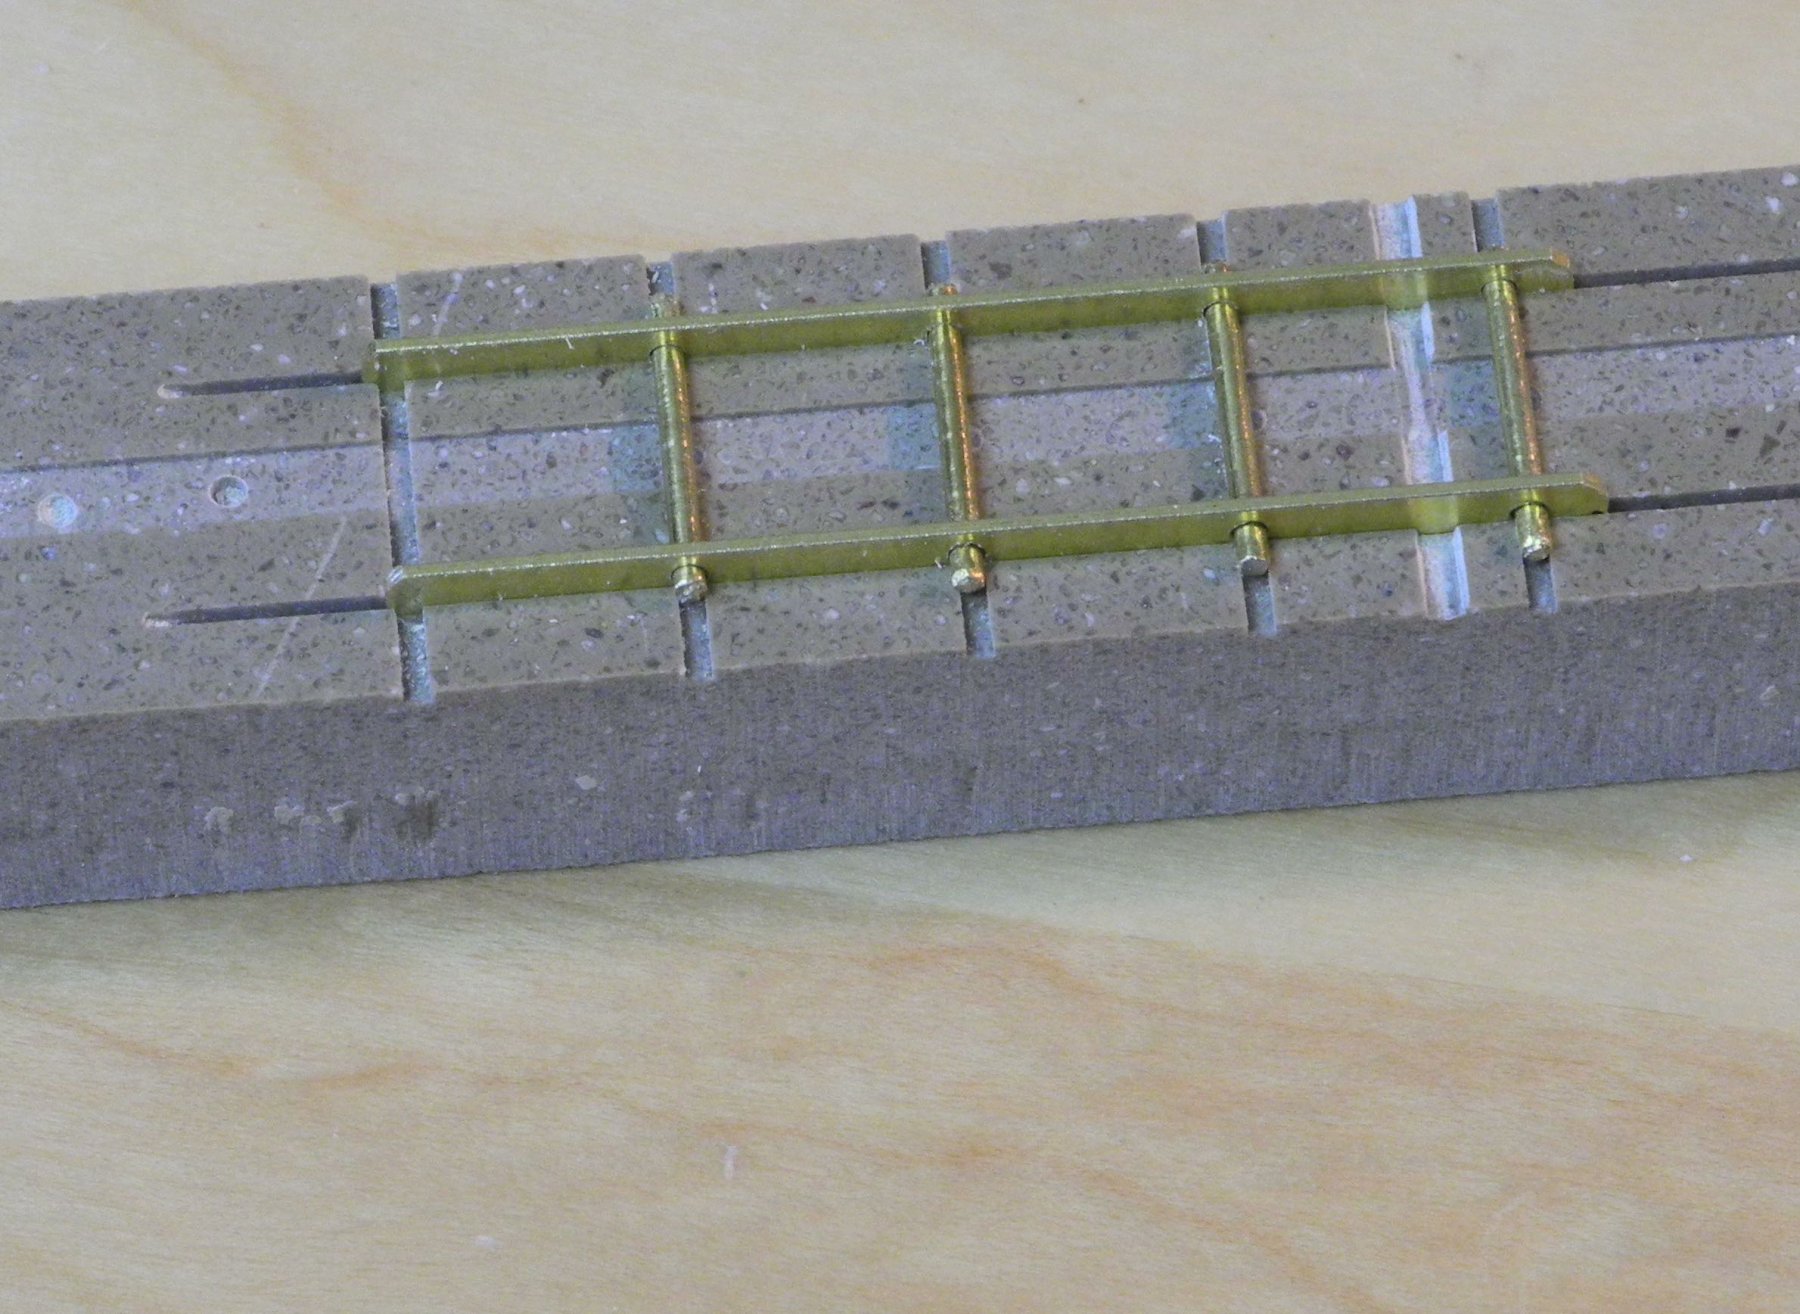
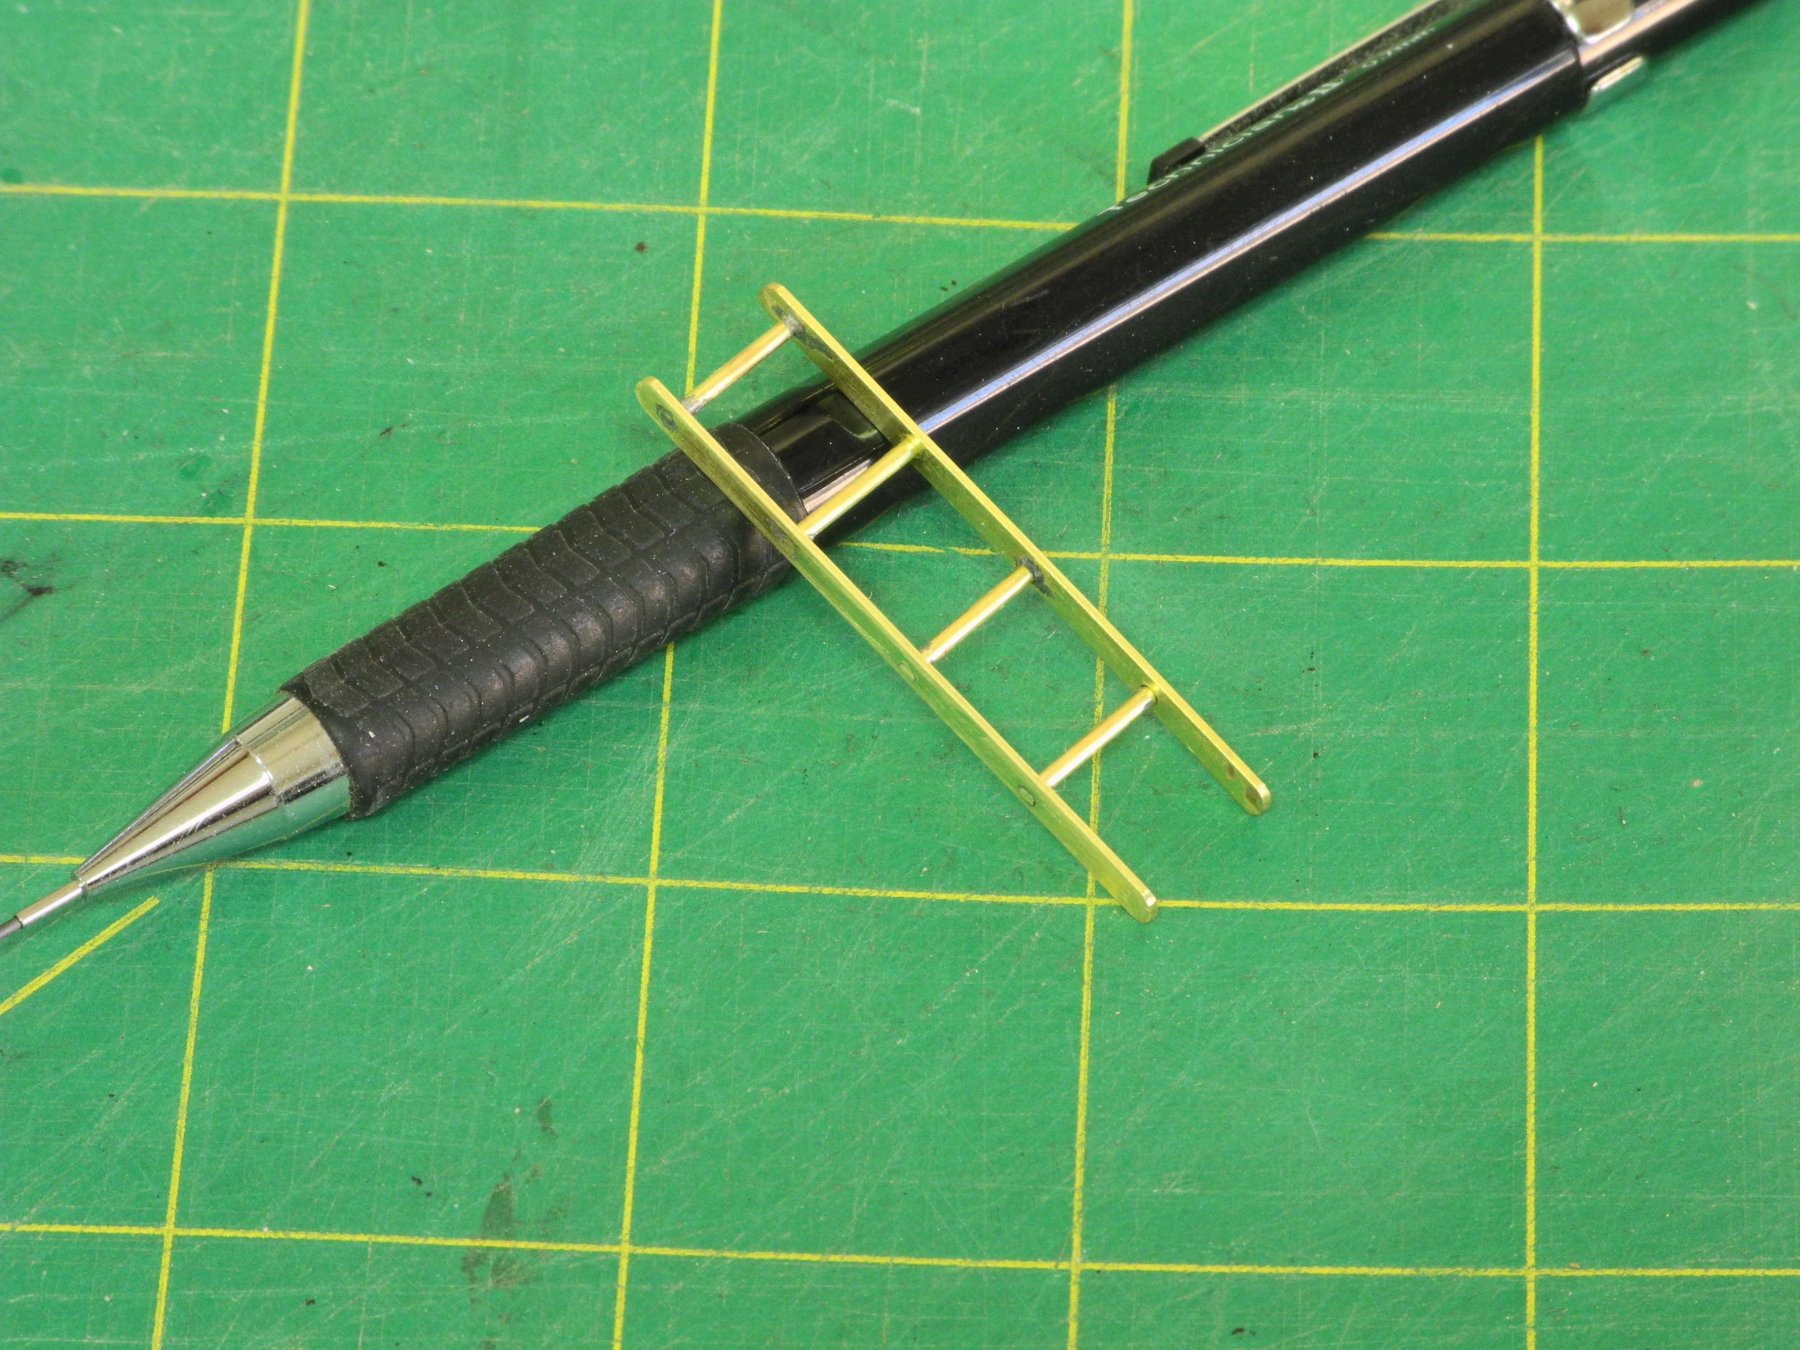
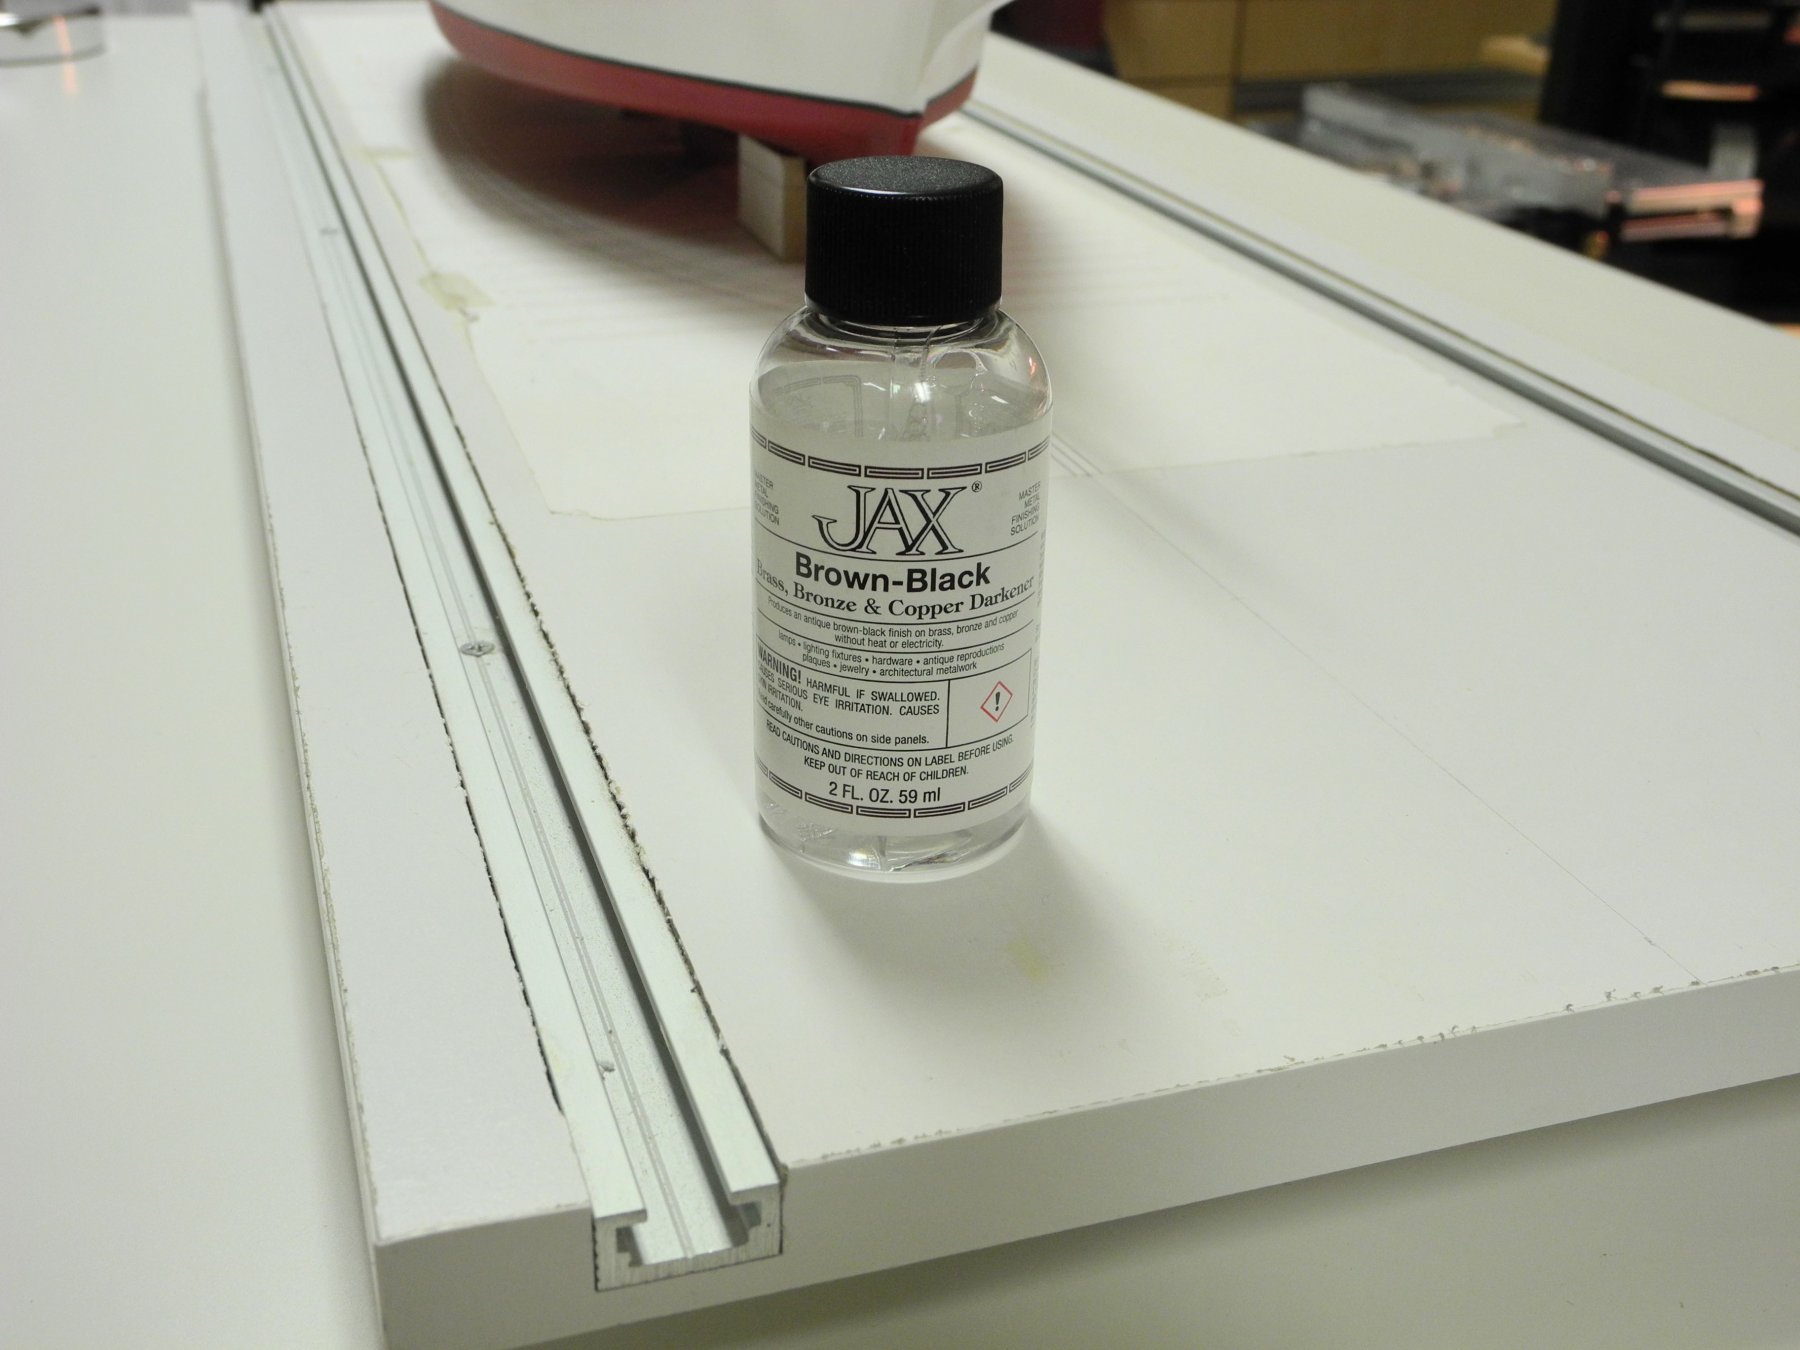
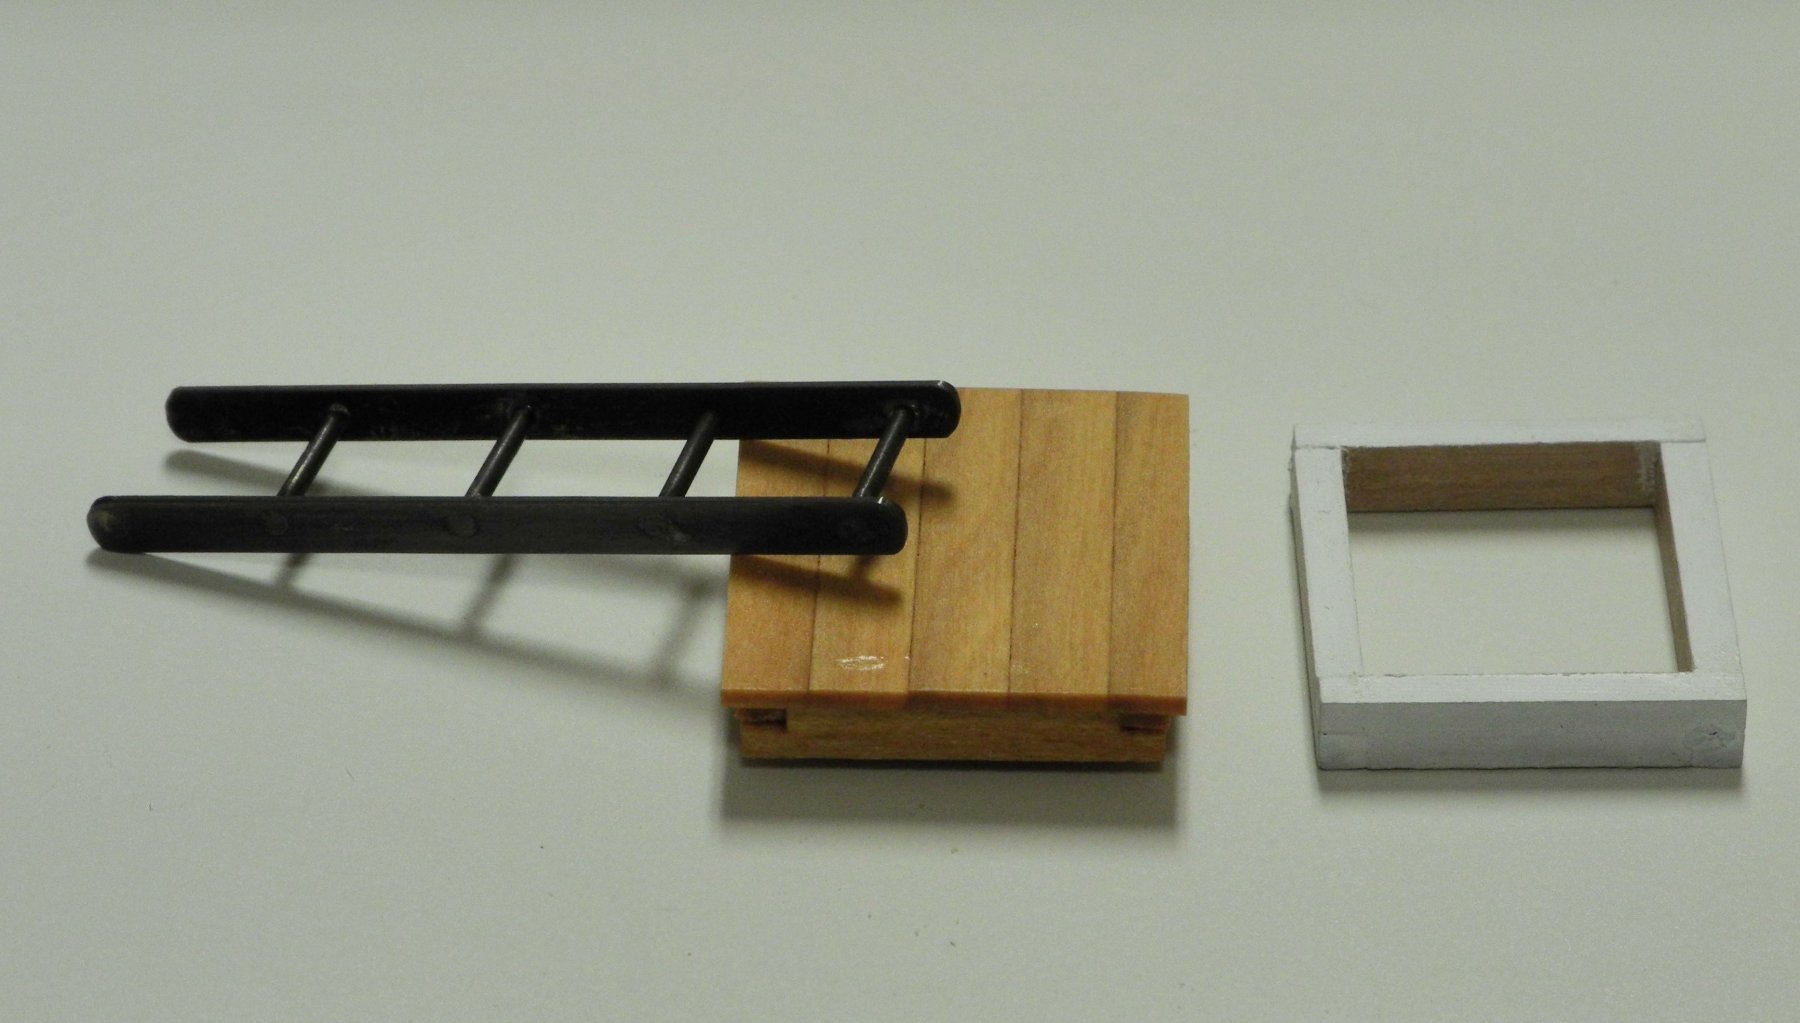
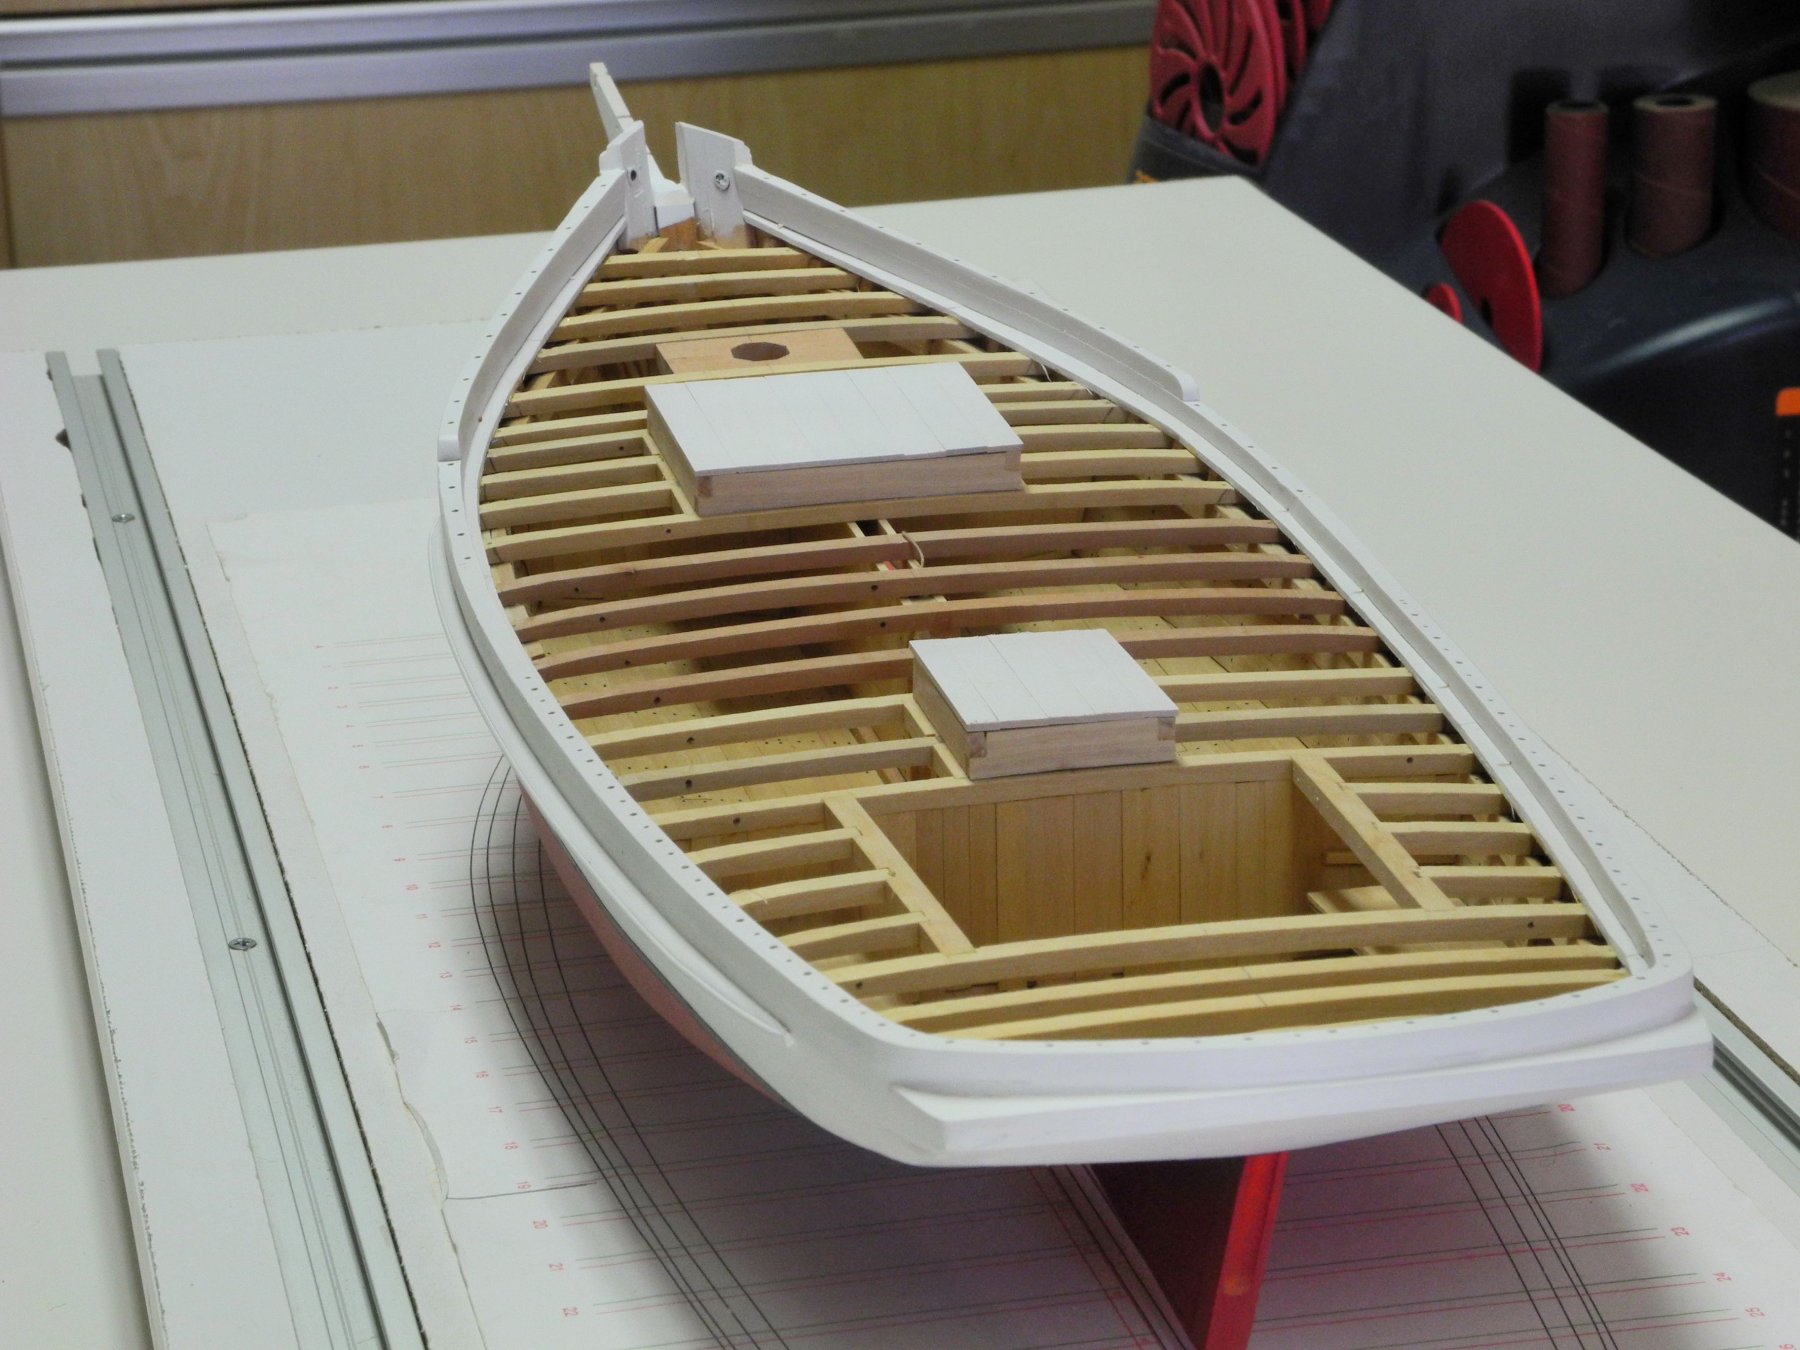
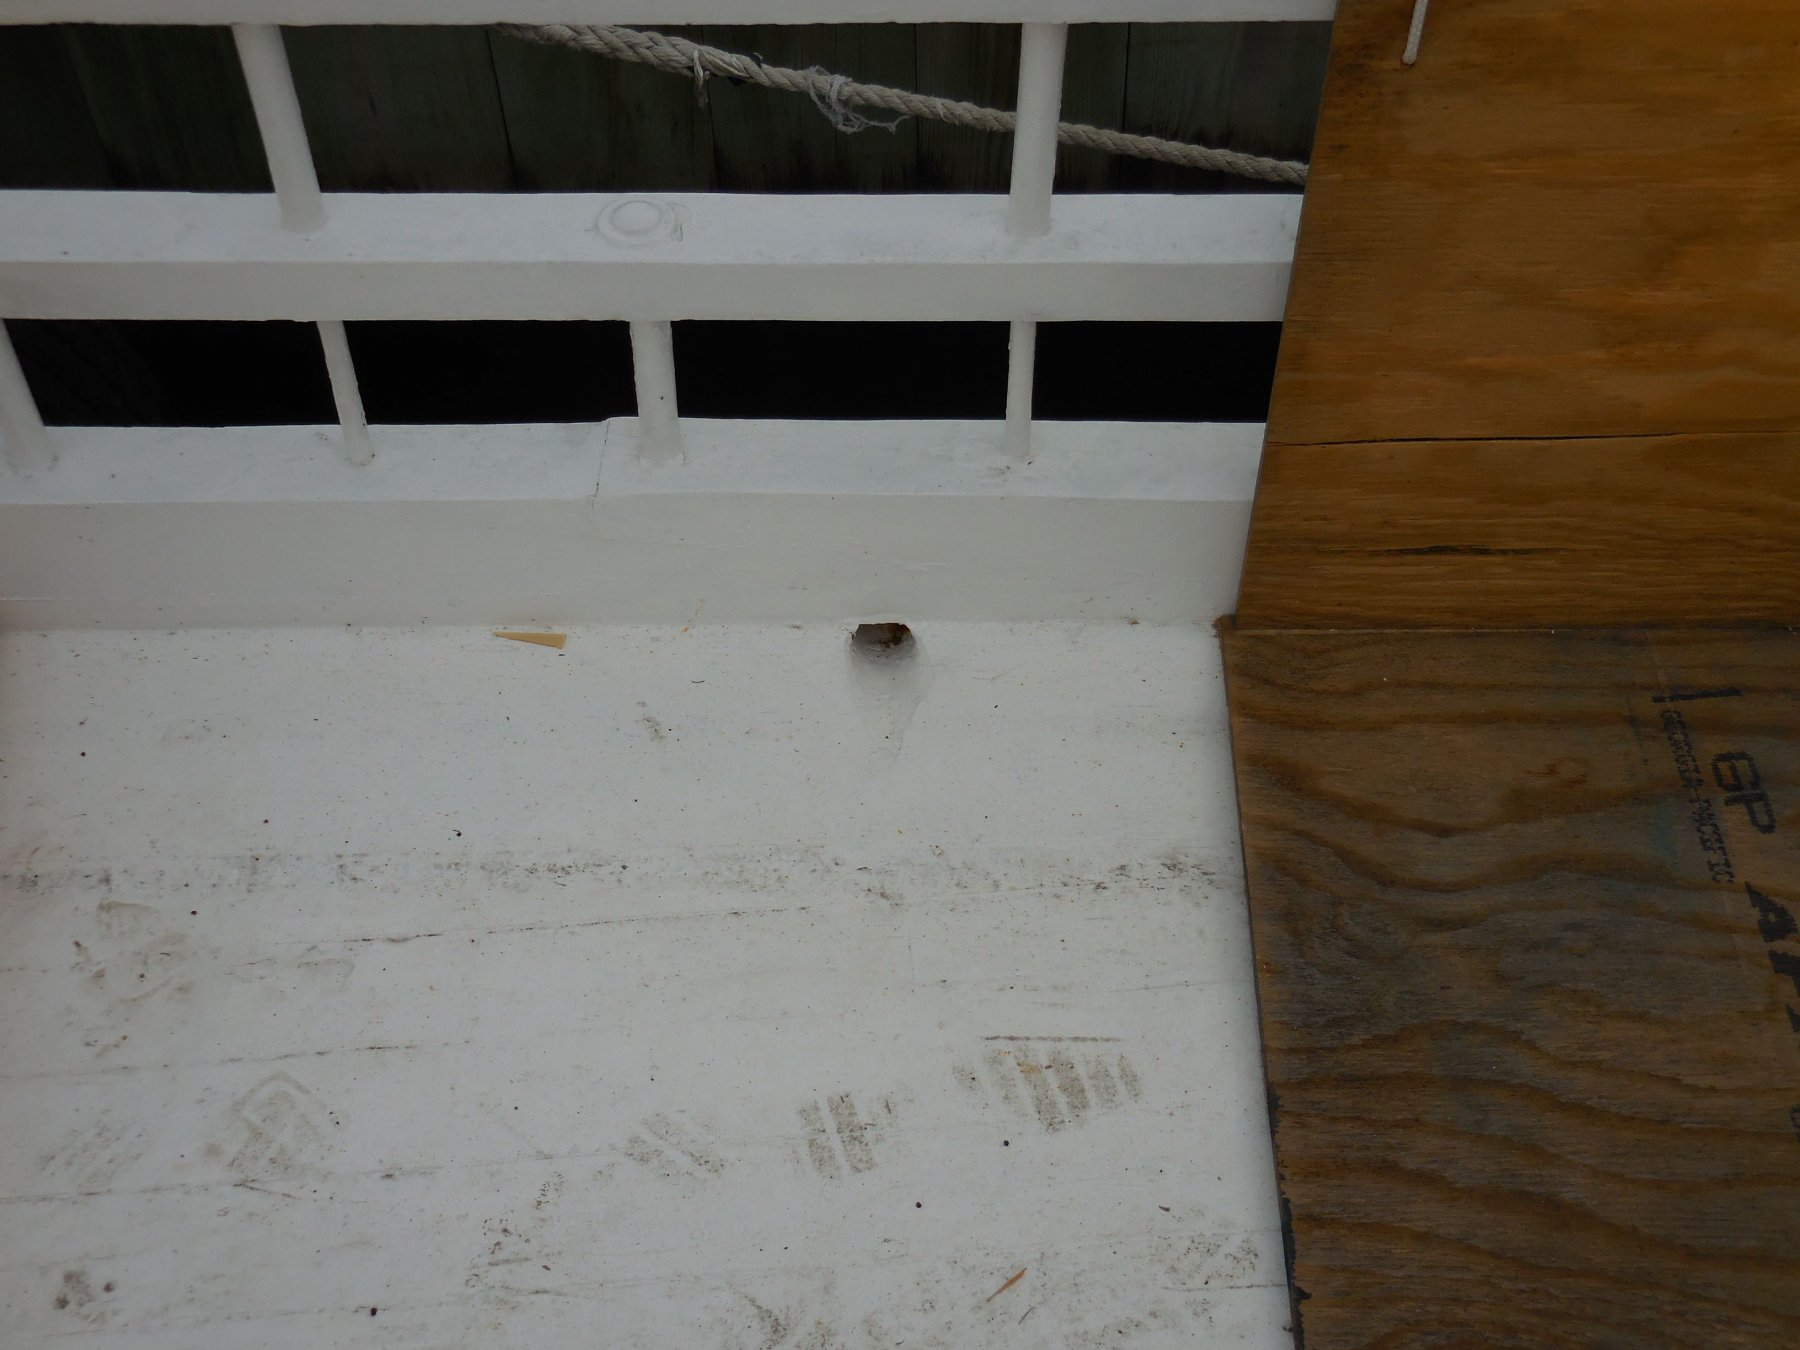
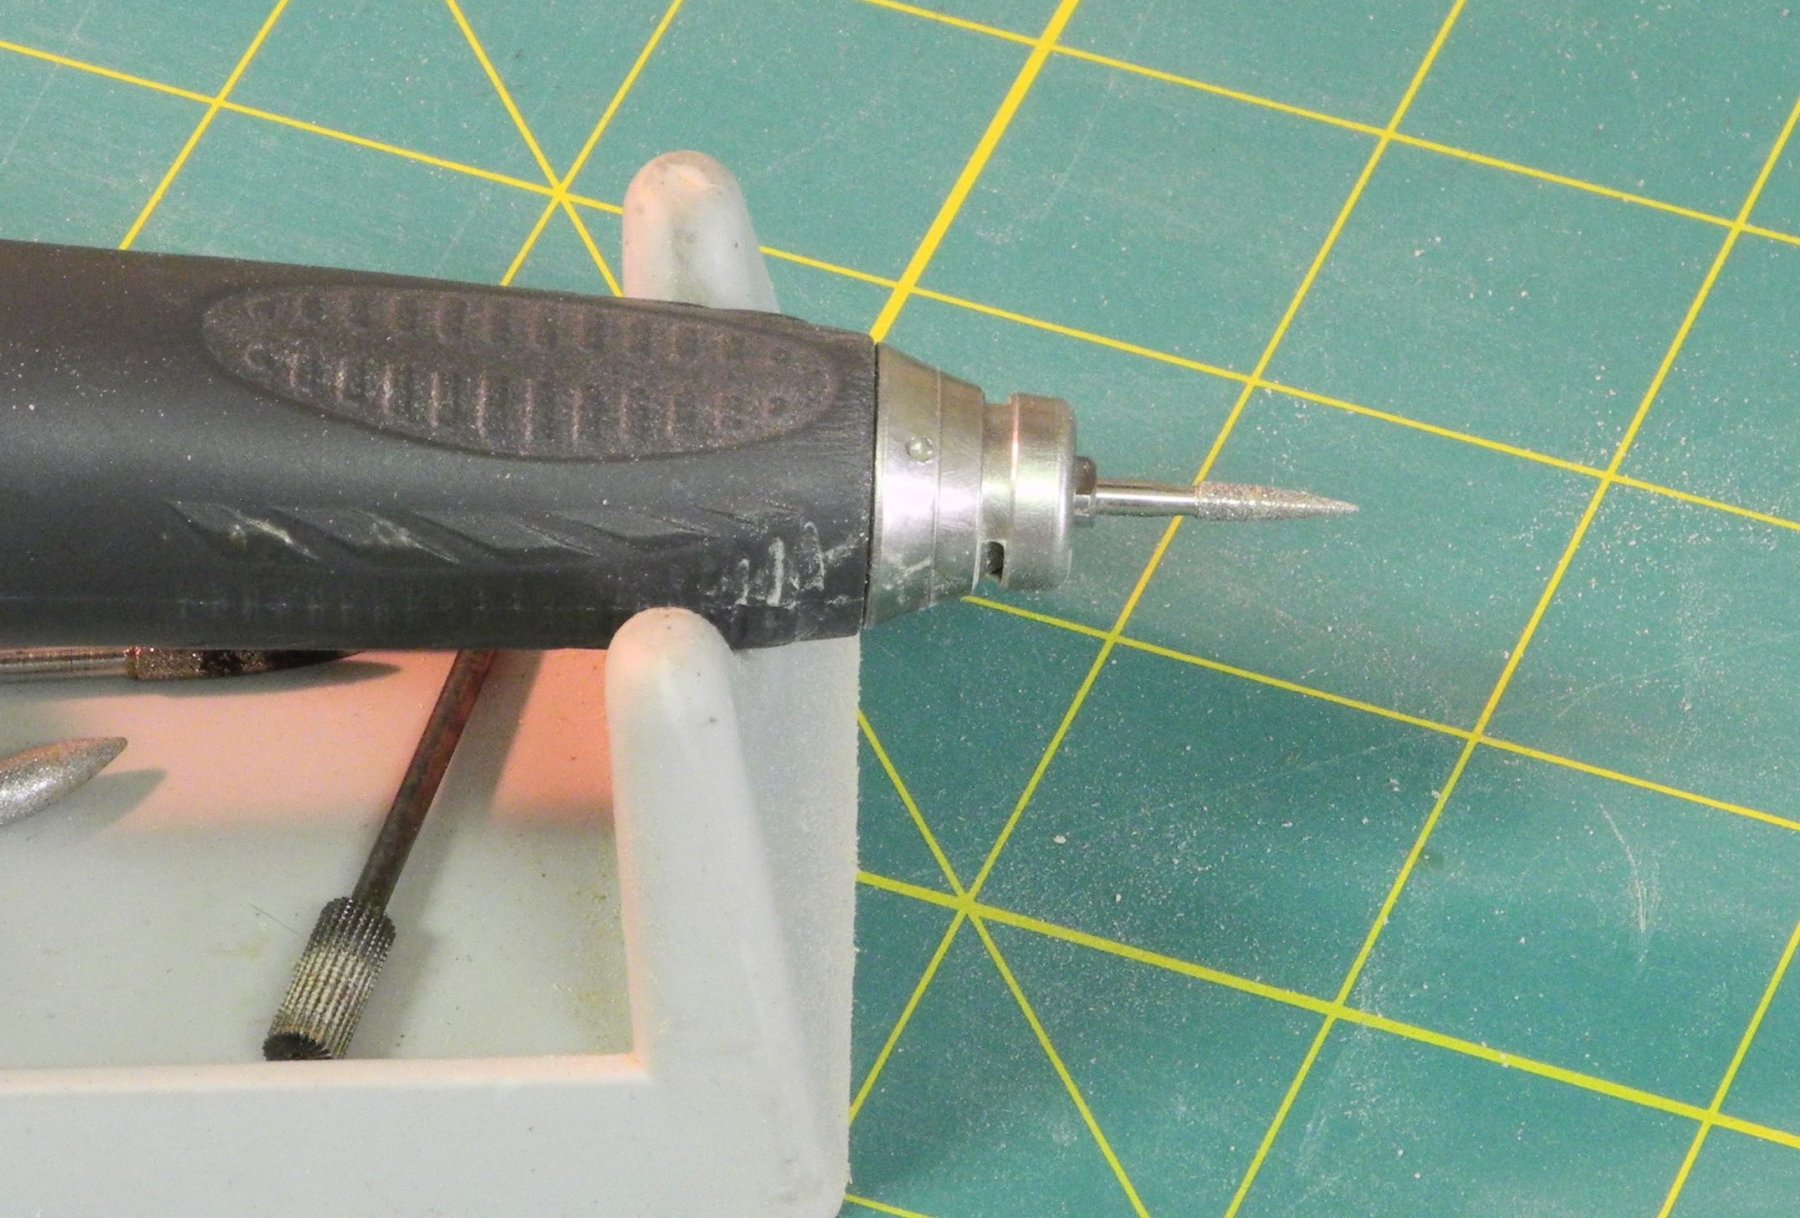
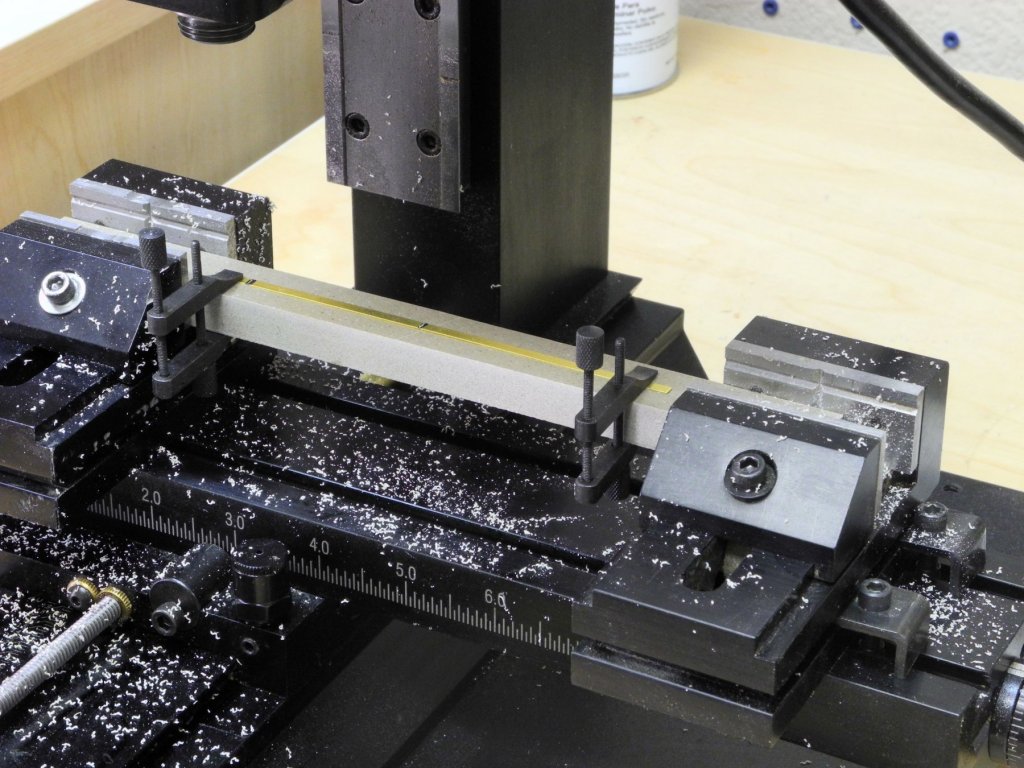
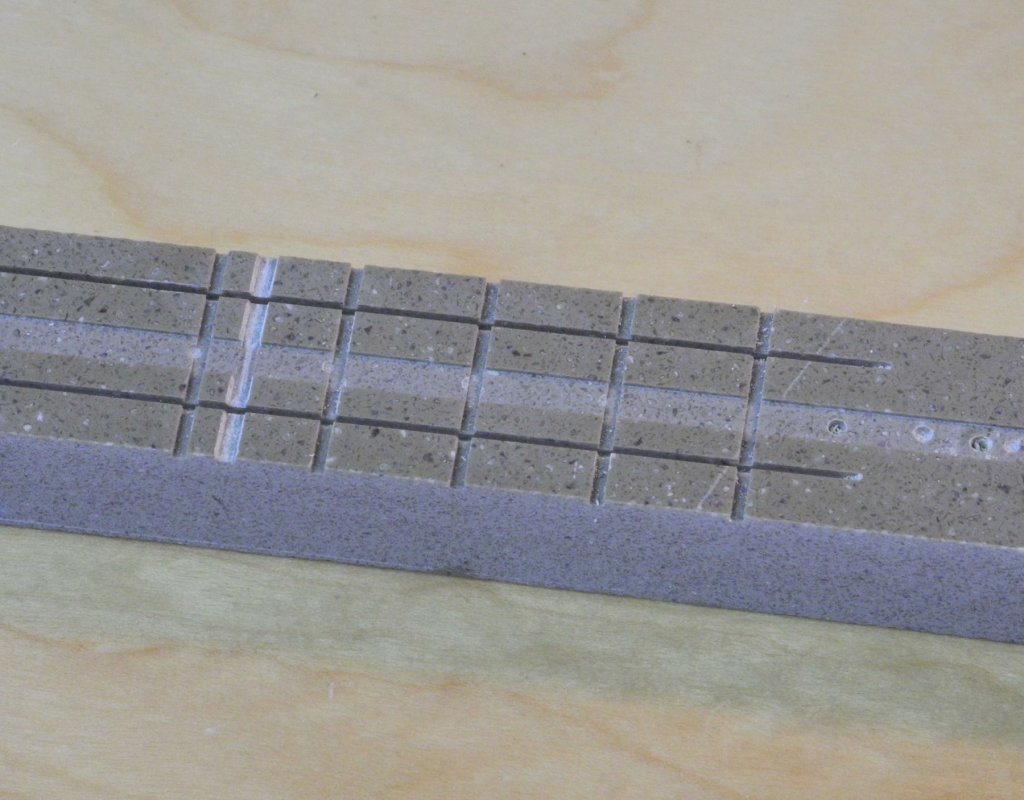
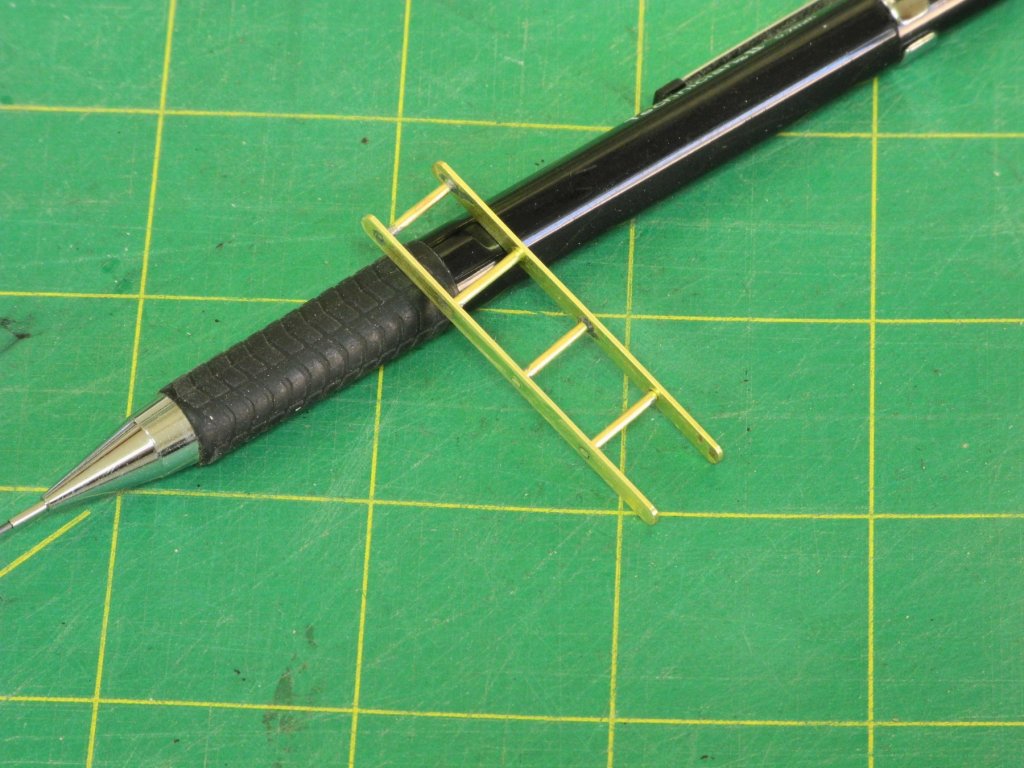
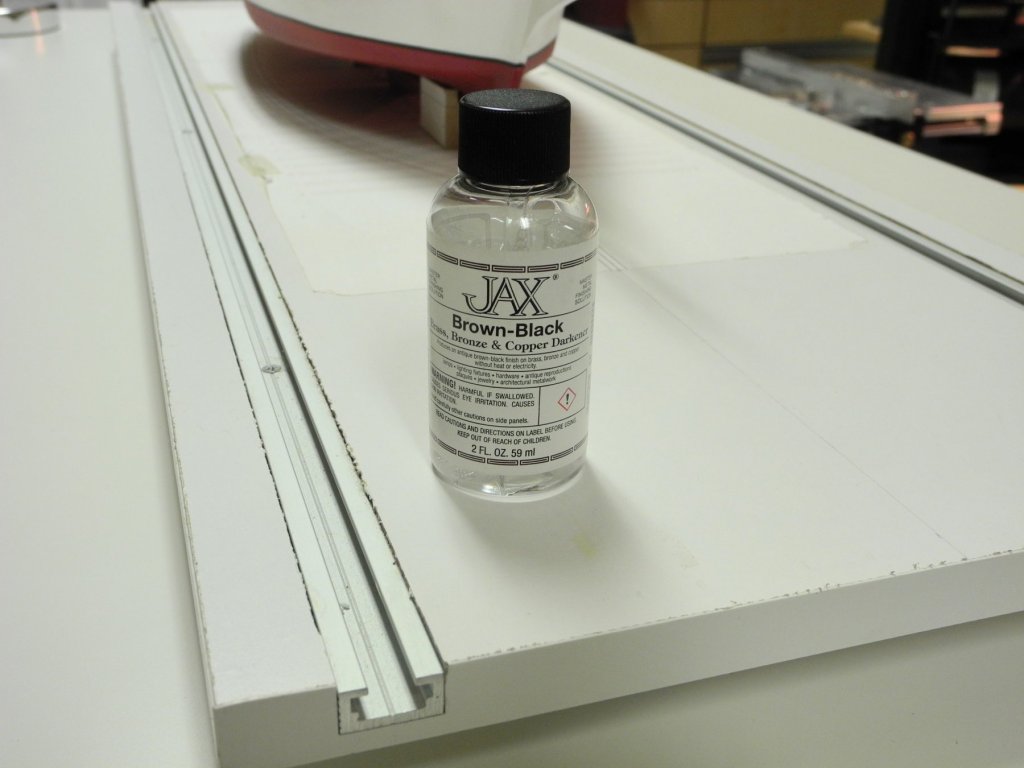
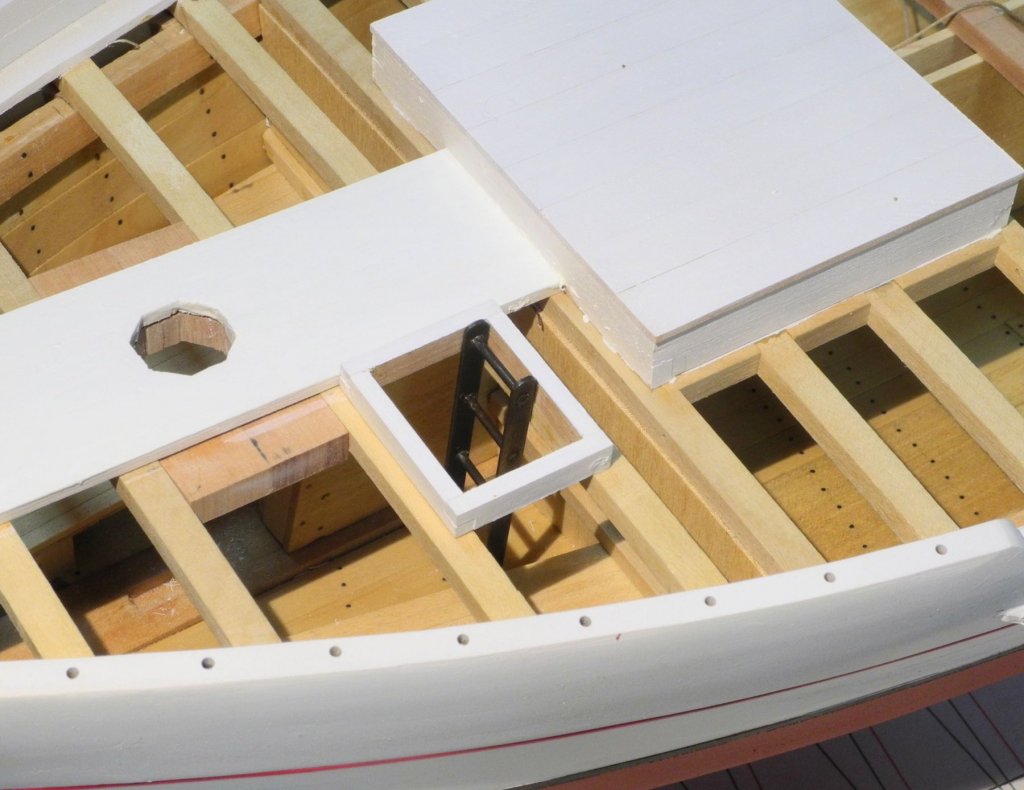
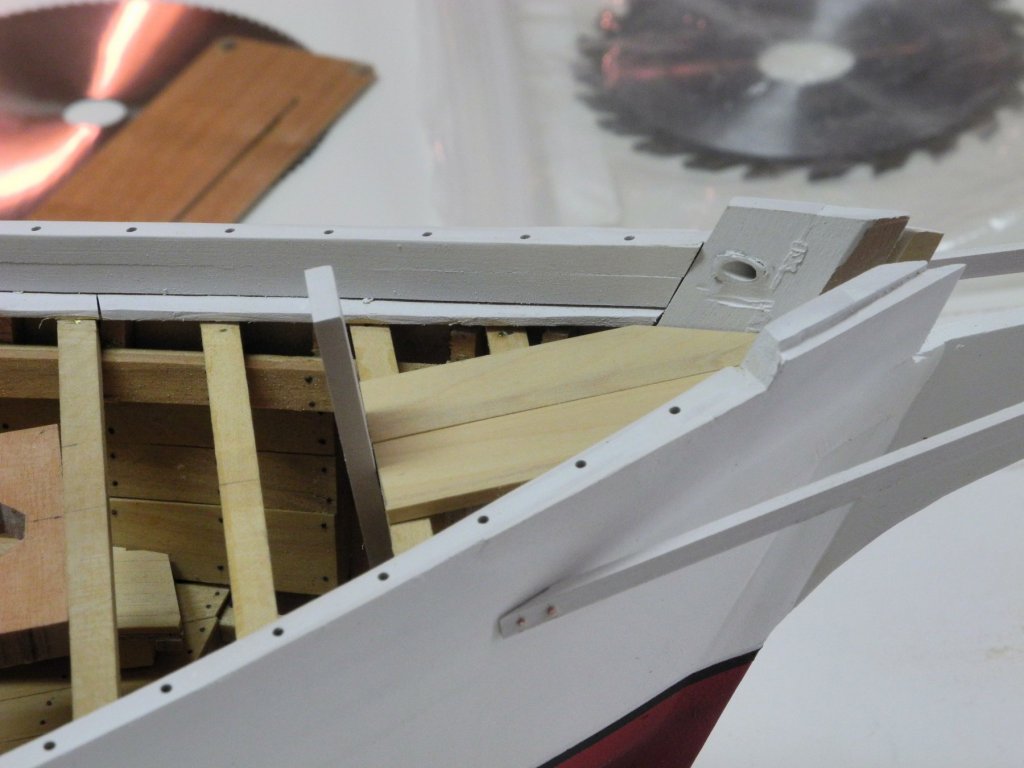
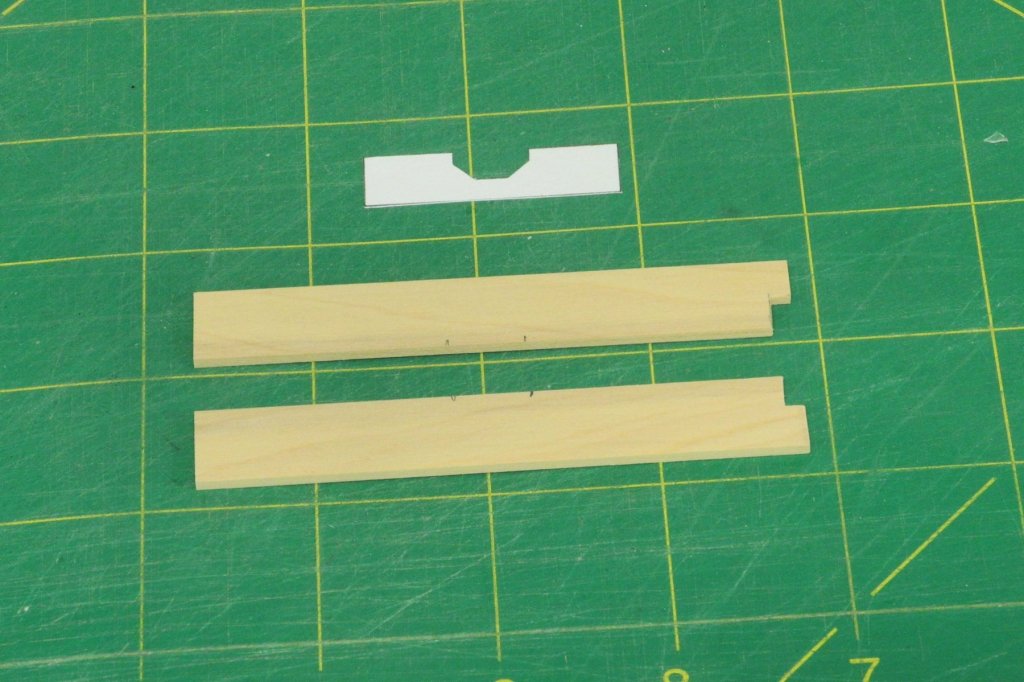
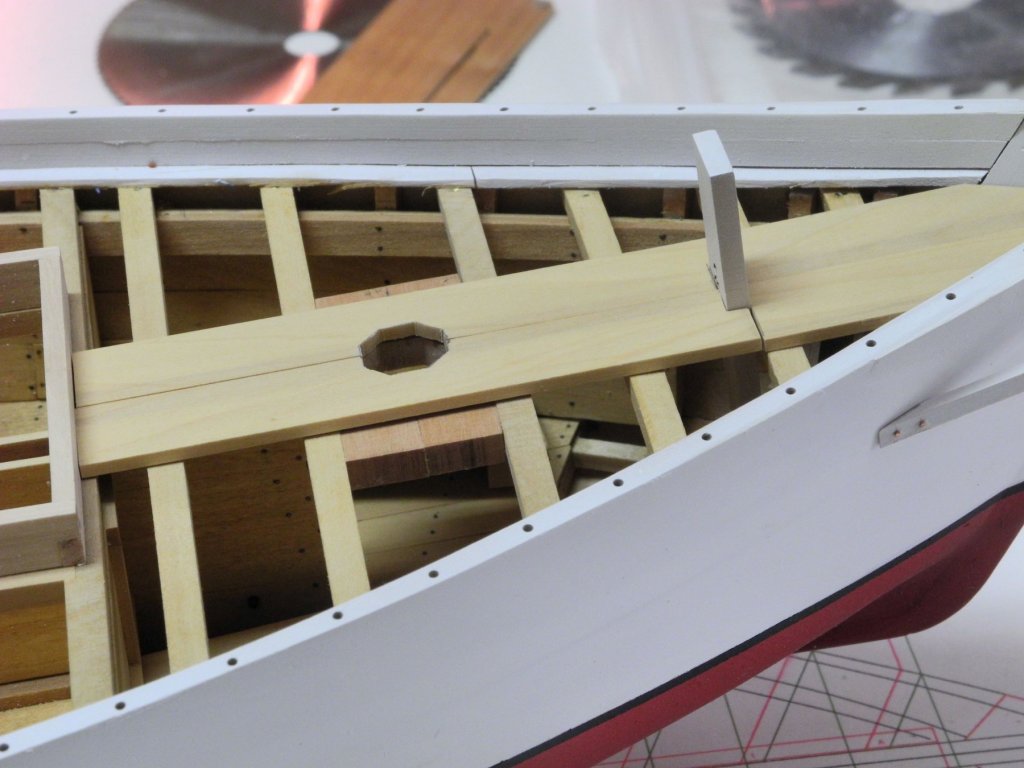
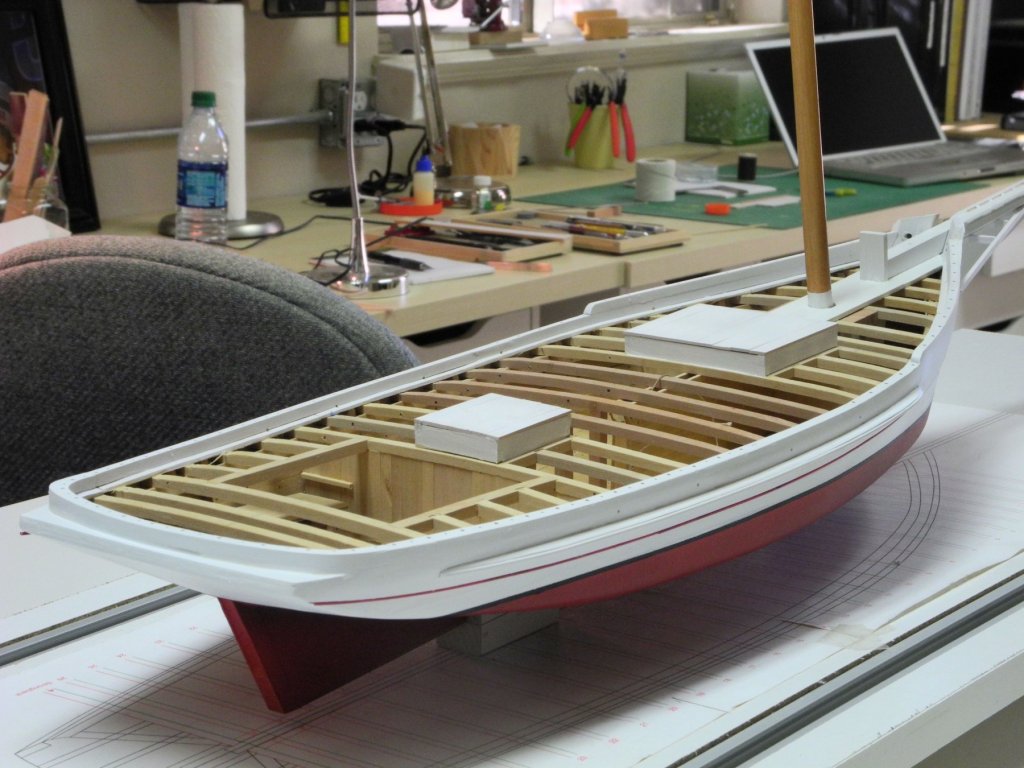
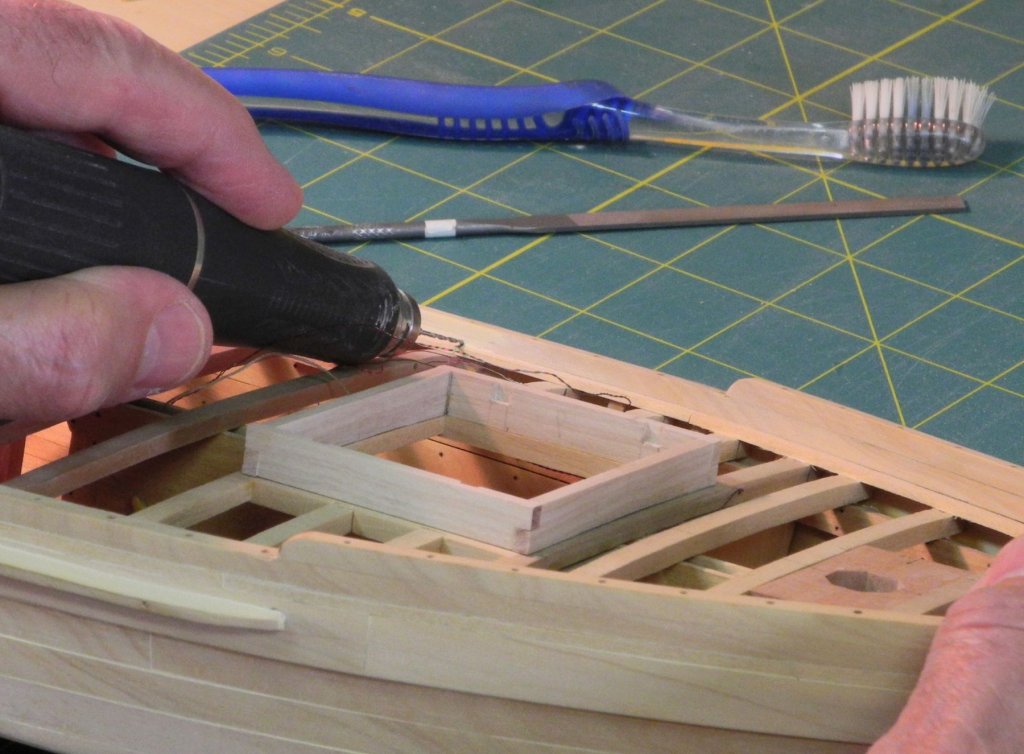
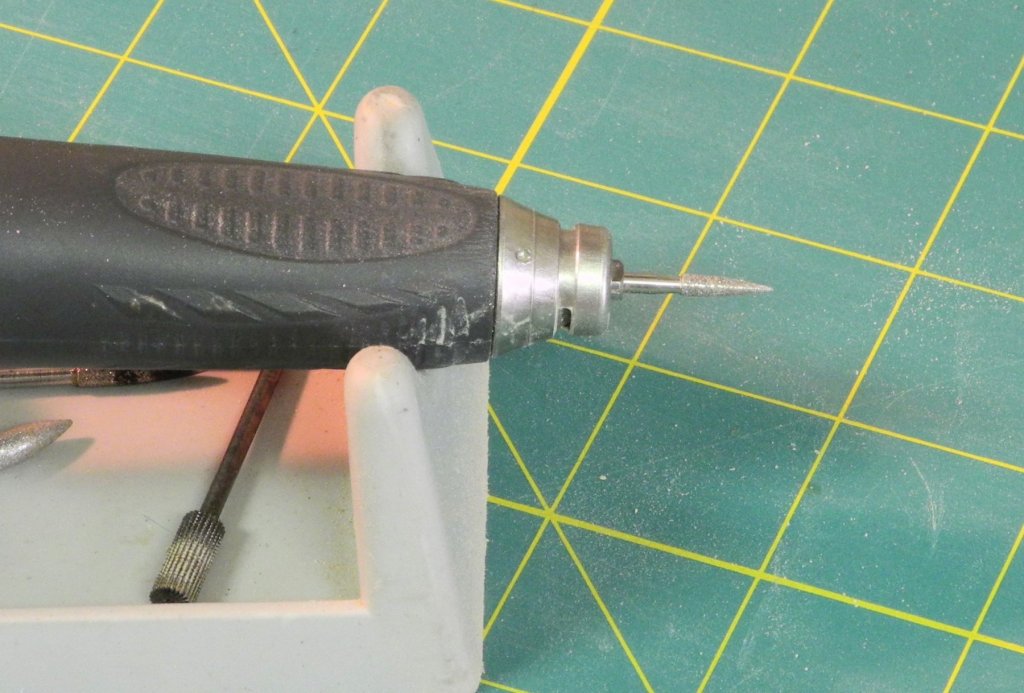
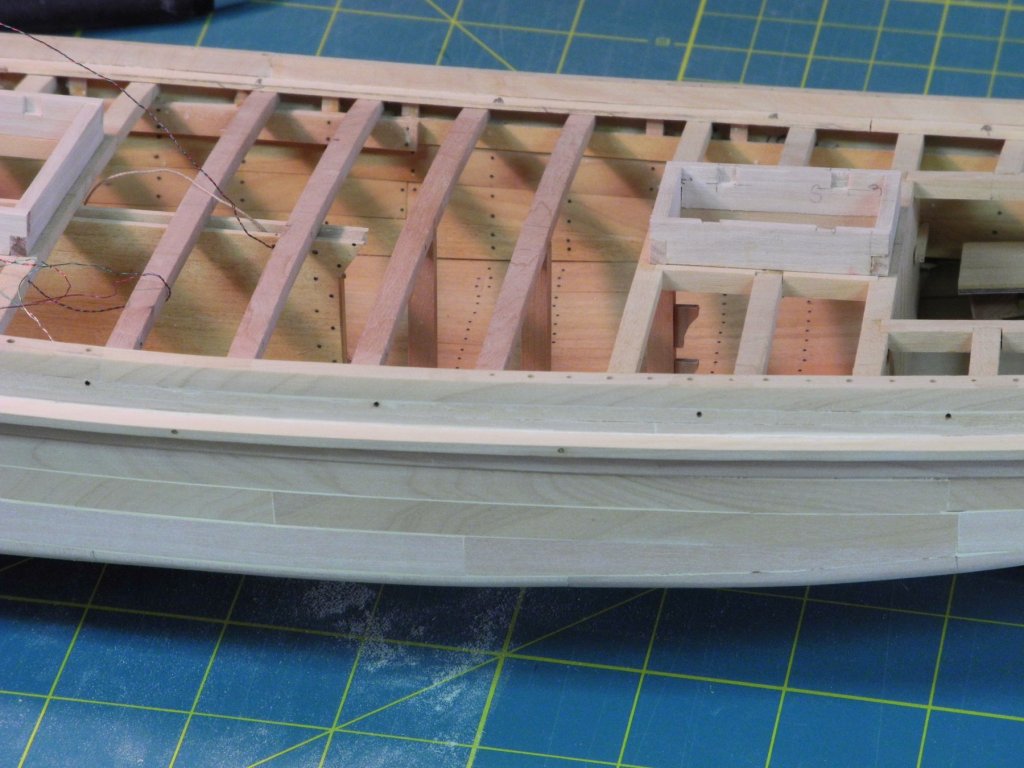
Part 35 – Forward Companionway Kathryn has a small hatch leading to the area that used to contain the forward berths, shown in the following photo. The HAER drawings show a metal ladder leading to the forward berths. This ladder (as well as the forward berths) no longer exists, but in keeping with the details shown in the HAER drawings, the ladder will be added to the model (since the berths already have been built). The ladder is 13.5” wide, and the distance between rungs is also 13.5”. The sides of the ladder were constructed using 1/8” x .024” brass strip stock. The rungs are made of 3/64” round stock. Preparing the ladder required a jig to ensure that the holes for the rungs were inline and properly spaced. A length of Corian was used for the jig. First a groove .015 deep and 1/8” wide was milled in the Corian. The brass strip was inserted into this groove, and was held in place by miniature machinist clamps. Holes were drilled .042” apart. A pilot hole was first drilled using a centering drill – this prevented the drill from wandering on the hard brass surface. The hole was then fully bored using a #55 drill. Once the sides were drilled, the jig was developed further. Two parallel tracks were cut into the jig using a .025 end mill. The tracks are .050” deep and .042” apart. The depth allowed the ladder sides to sit vertically in the tracks, while still exposing most of the holes for the rungs. Tracks for the rungs were milled perpendicular to the side tracks using a .046 end mill. These tracks were milled .020” deep and .042” apart. The following photos show the jig ready for the ladder components and in use. After soldering the ladder sides were shaped using files and diamond bits on the rotary tool, and the ends of the rungs were trimmed using the same tools. After cleanup with 400 grit wet/dry paper and steel wool the ladder was blackened using JAX Brown-Black. This is a new product I had decided to try out. The finish is more of a warm black (leaning towards brown) rather than the cool black (leaning towards blue) provided by JAX Pewter Black. The difference doesn’t show well in the photos, but in real life it’s noticeable. As can be seen in the last photo, the hatch coamings were made off the model, and the hatch lid is deeper than the other hatch covers and is natural rather than painted. The hatch coaming was glued in place, and the ladder was then epoxied in place. The lid on the actual Kathryn is hinged, but I decided to make it a press fit on the model. I still haven’t started the planning for the cabin yet. I may decide to do some other work first. I hope to make that decision in the next few days, and will cover that in the next post.


- 878 replies
-
- 23
-
-
Hi Rich - hmmm ... isn't that the general idea? Hi Druxey, and welcome back! Yup - been getting some work done after my own trips.
-
Beautiful work, Ed. It must take patience and dexterity to get this level of detail.
- 3,618 replies
-
- 2
-
-
- young america
- clipper
- (and 1 more)
-
Thanks Brian. It was good to see you yesterday, and I hope I'll be seeing some progress on your build(s) soon. Thanks Patrick. It's great to get the hull mostly finished so we can see what she'll look like, and I have to say I'm pleased with it so far.
-
Hi Patrick Your work at this scale continues to amaze! I do like the photos of your fleet. They're every bit as good as most larger models. Great work.
-
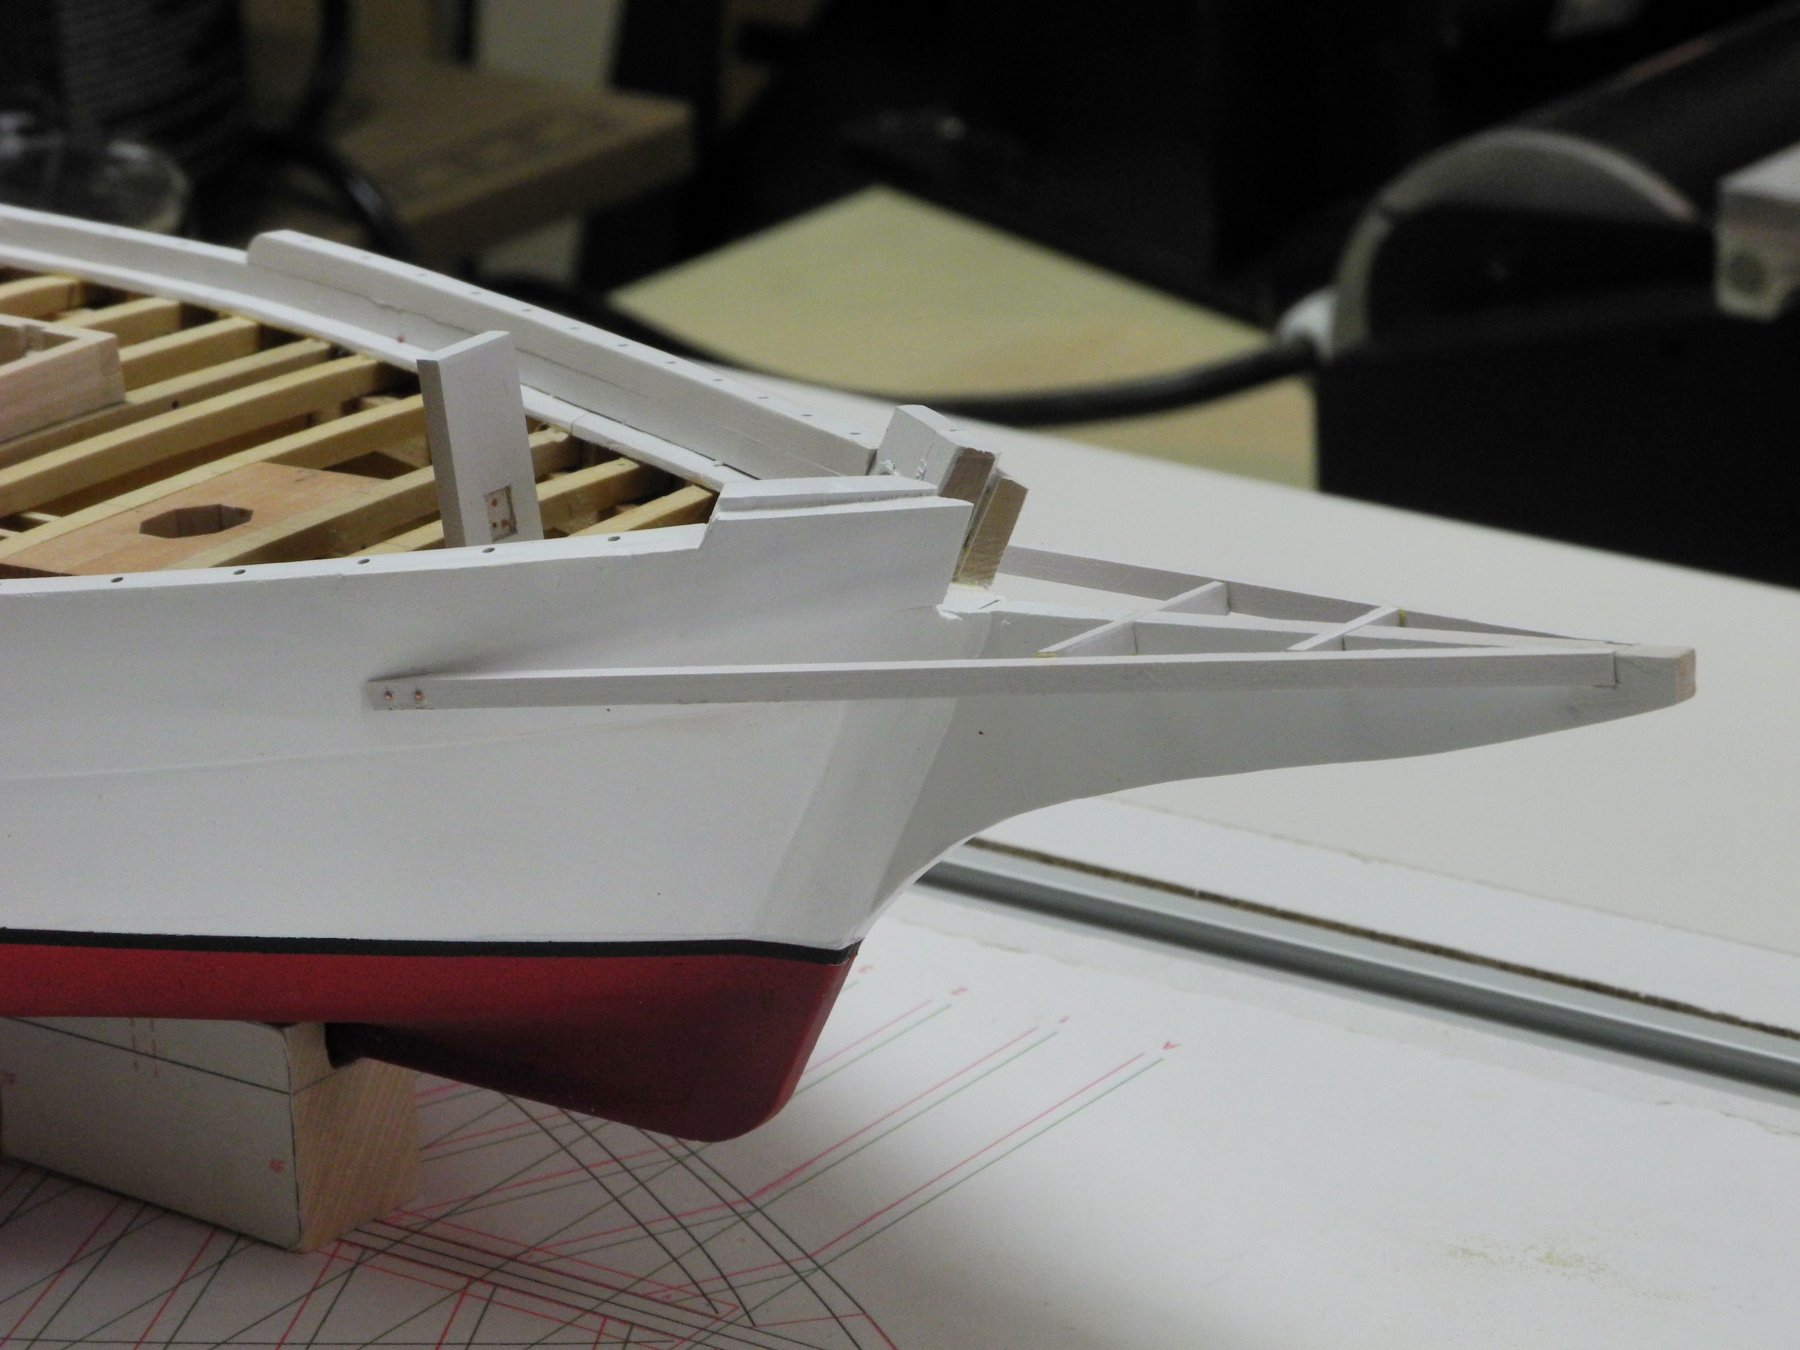
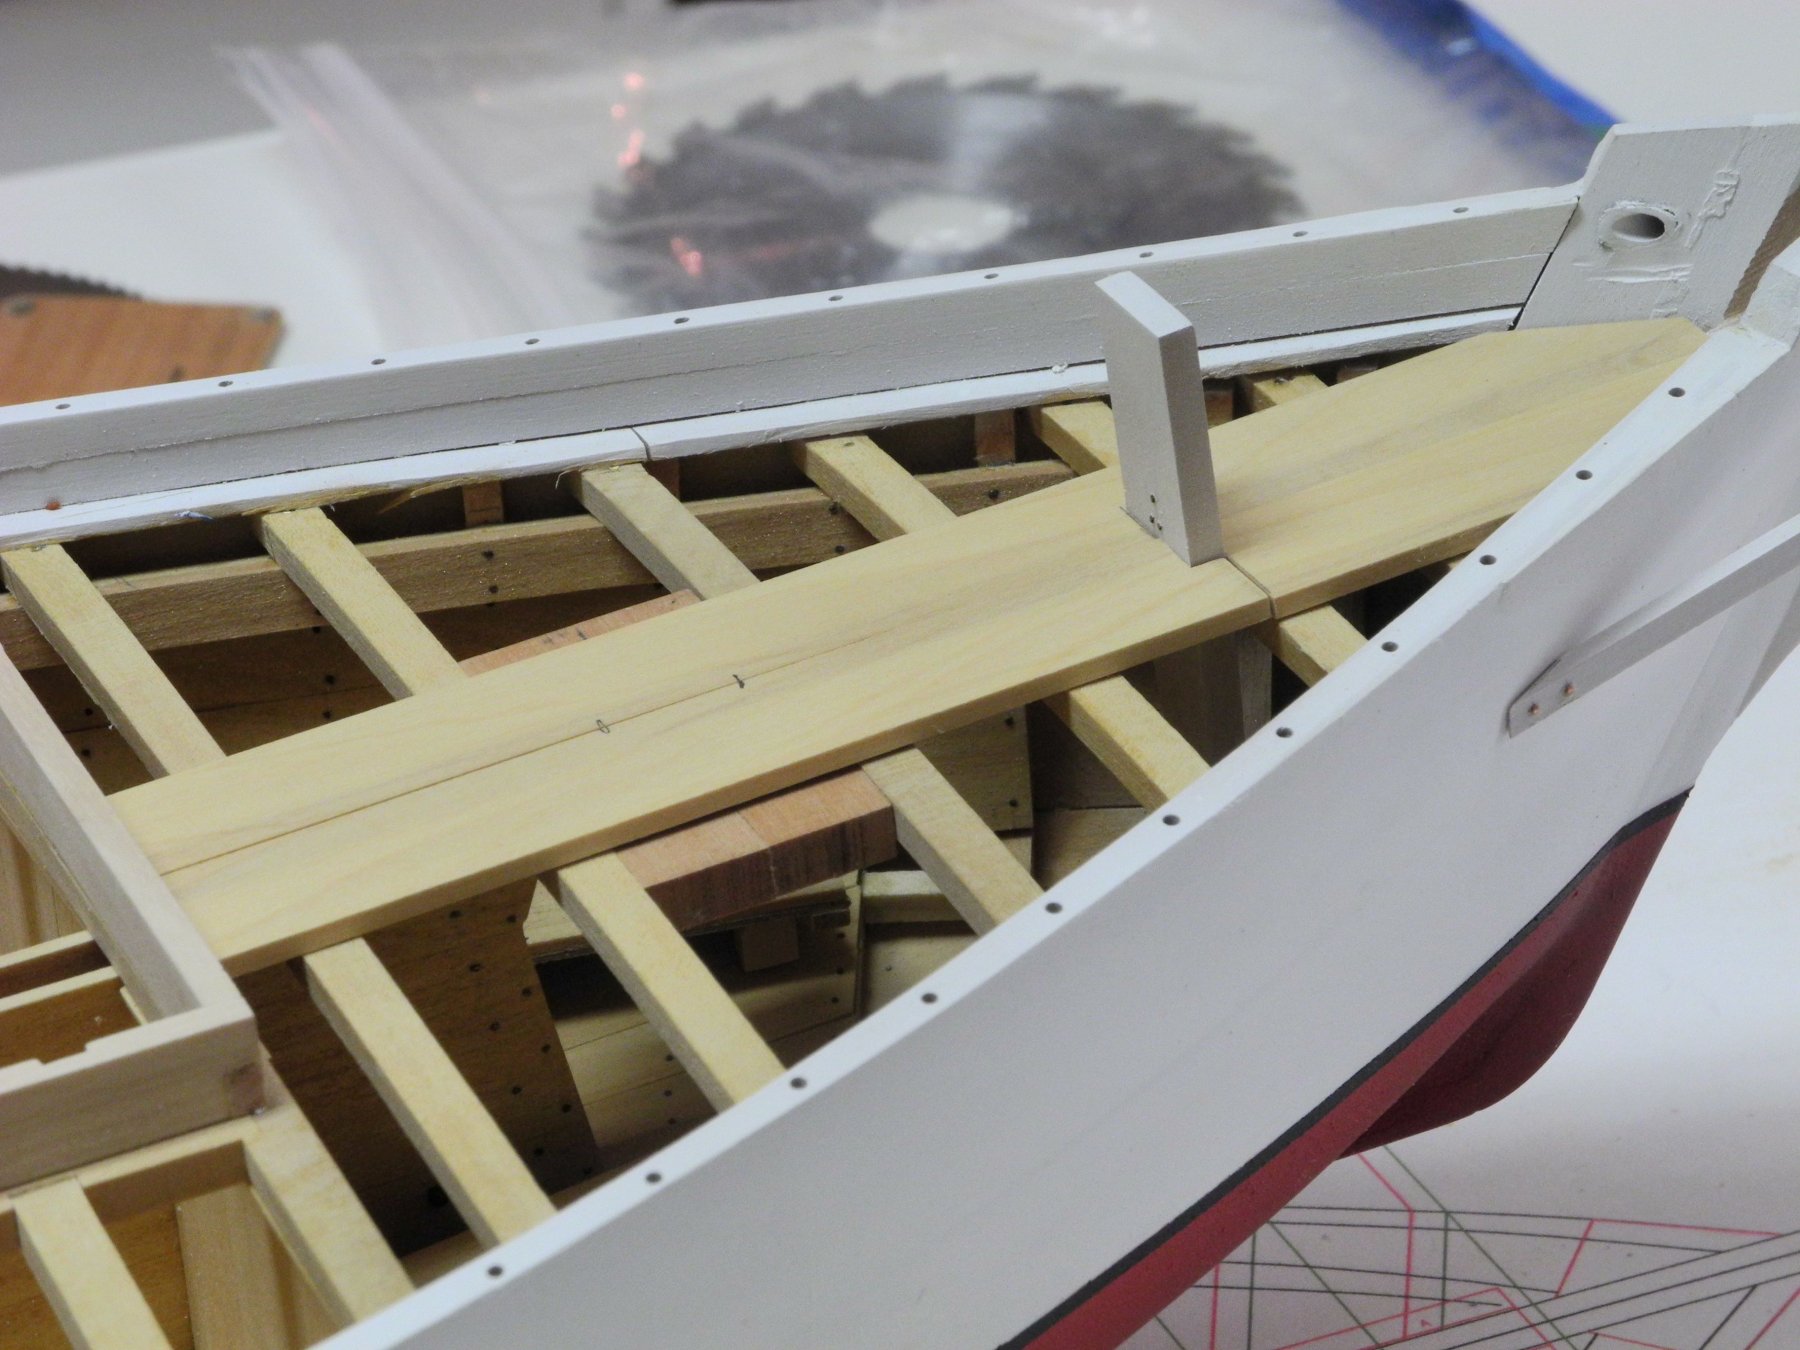
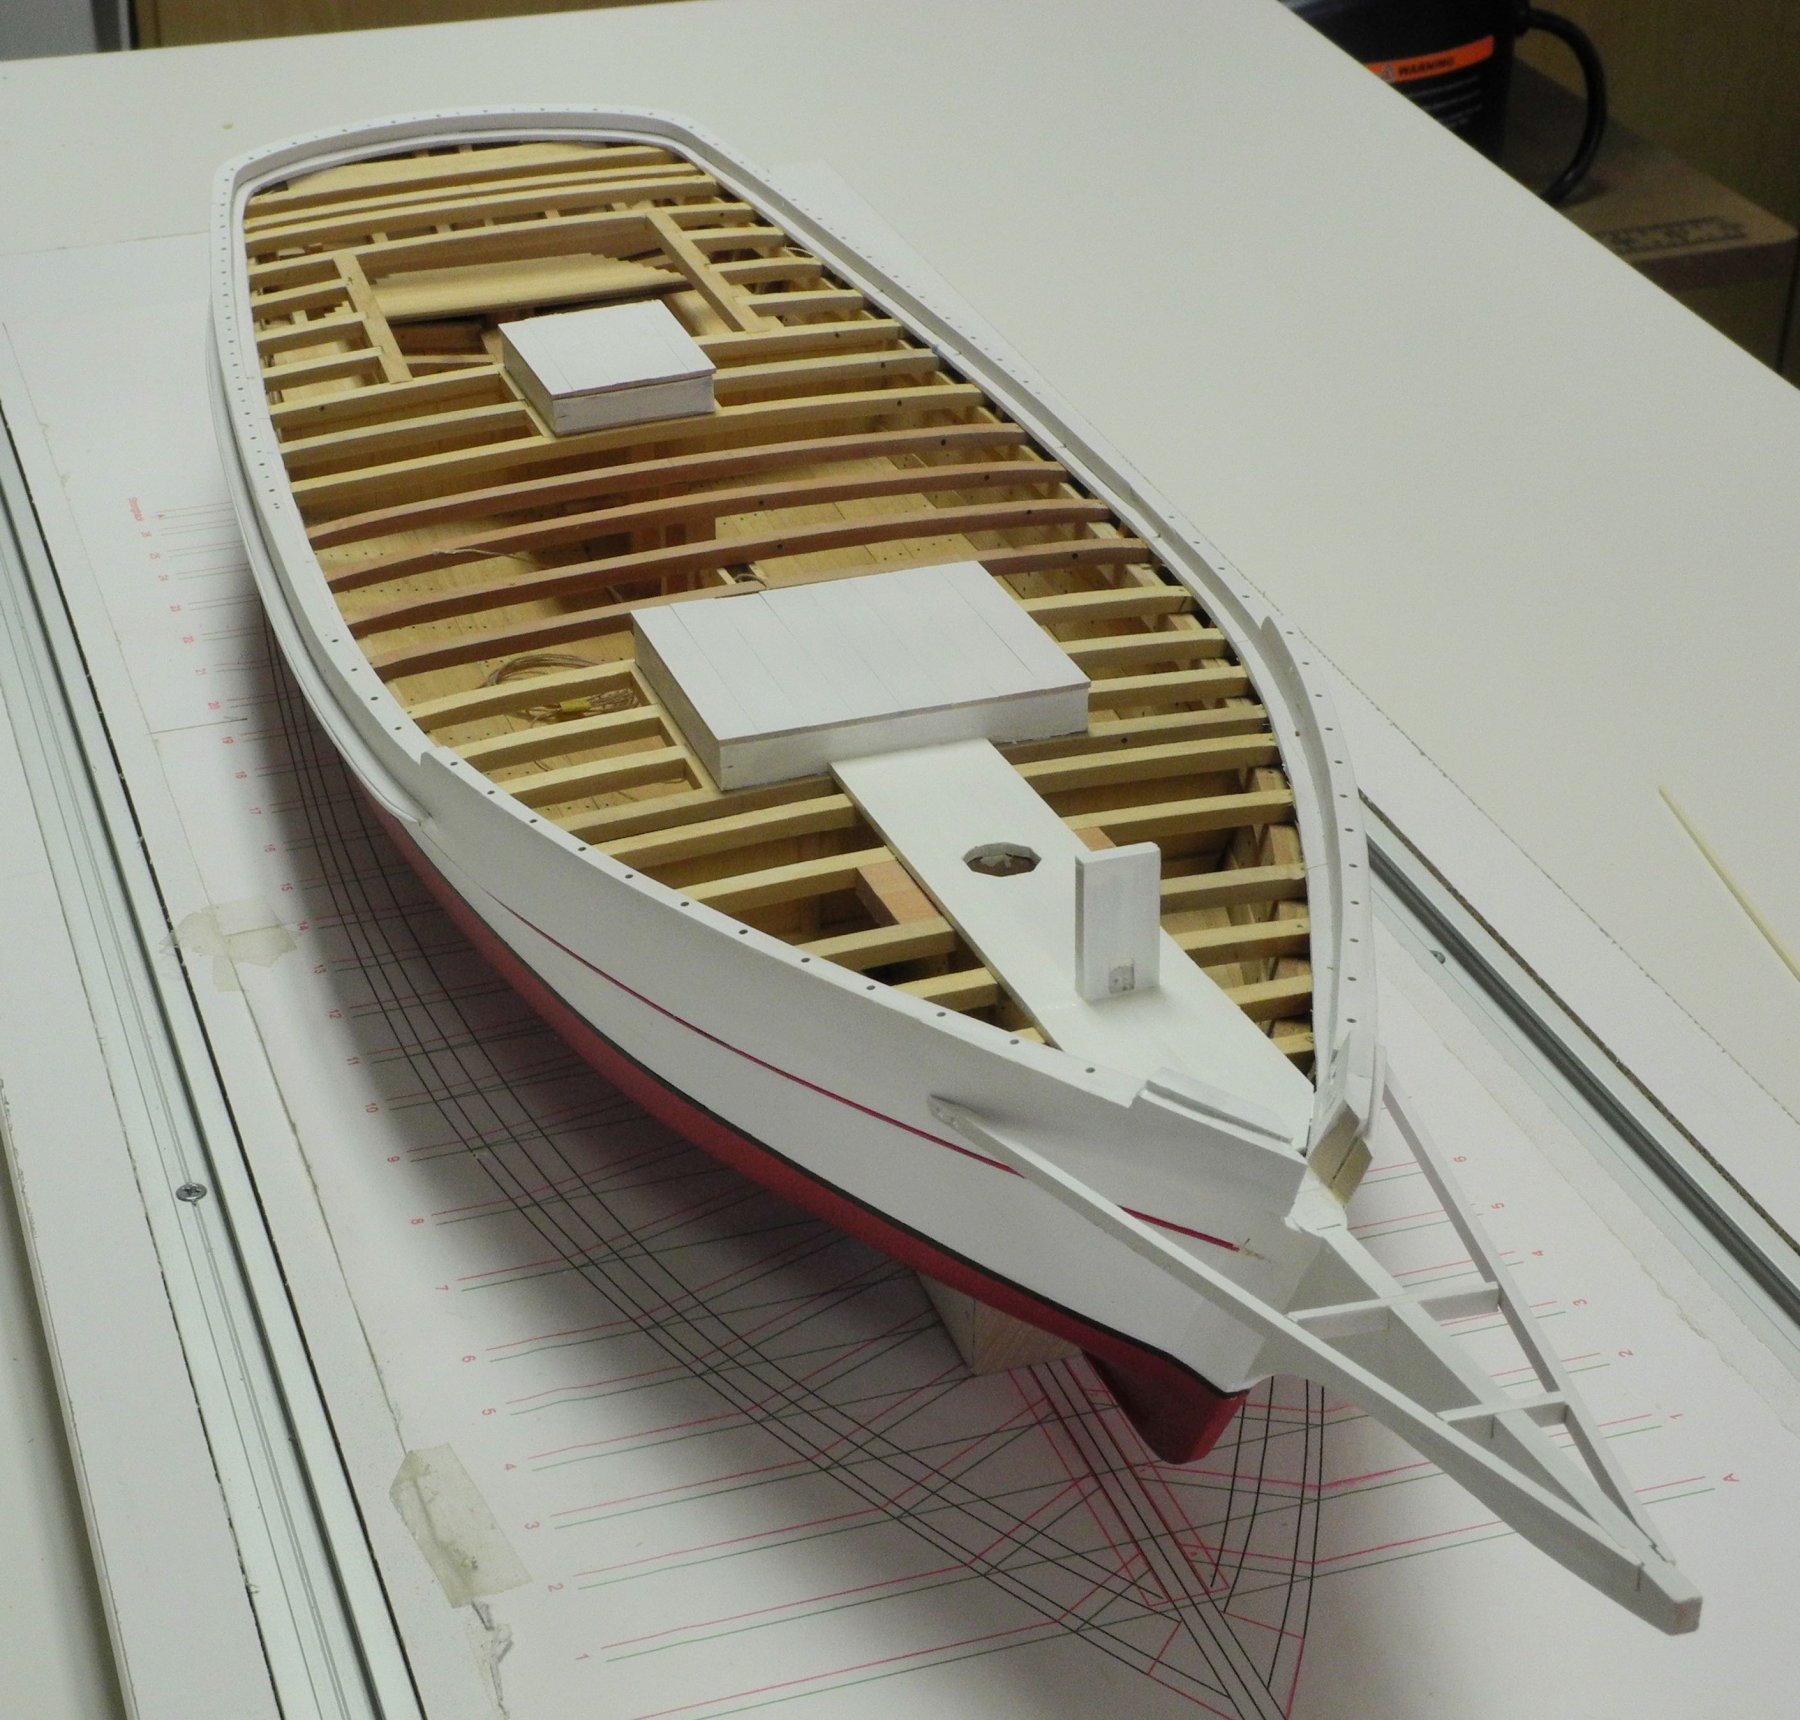
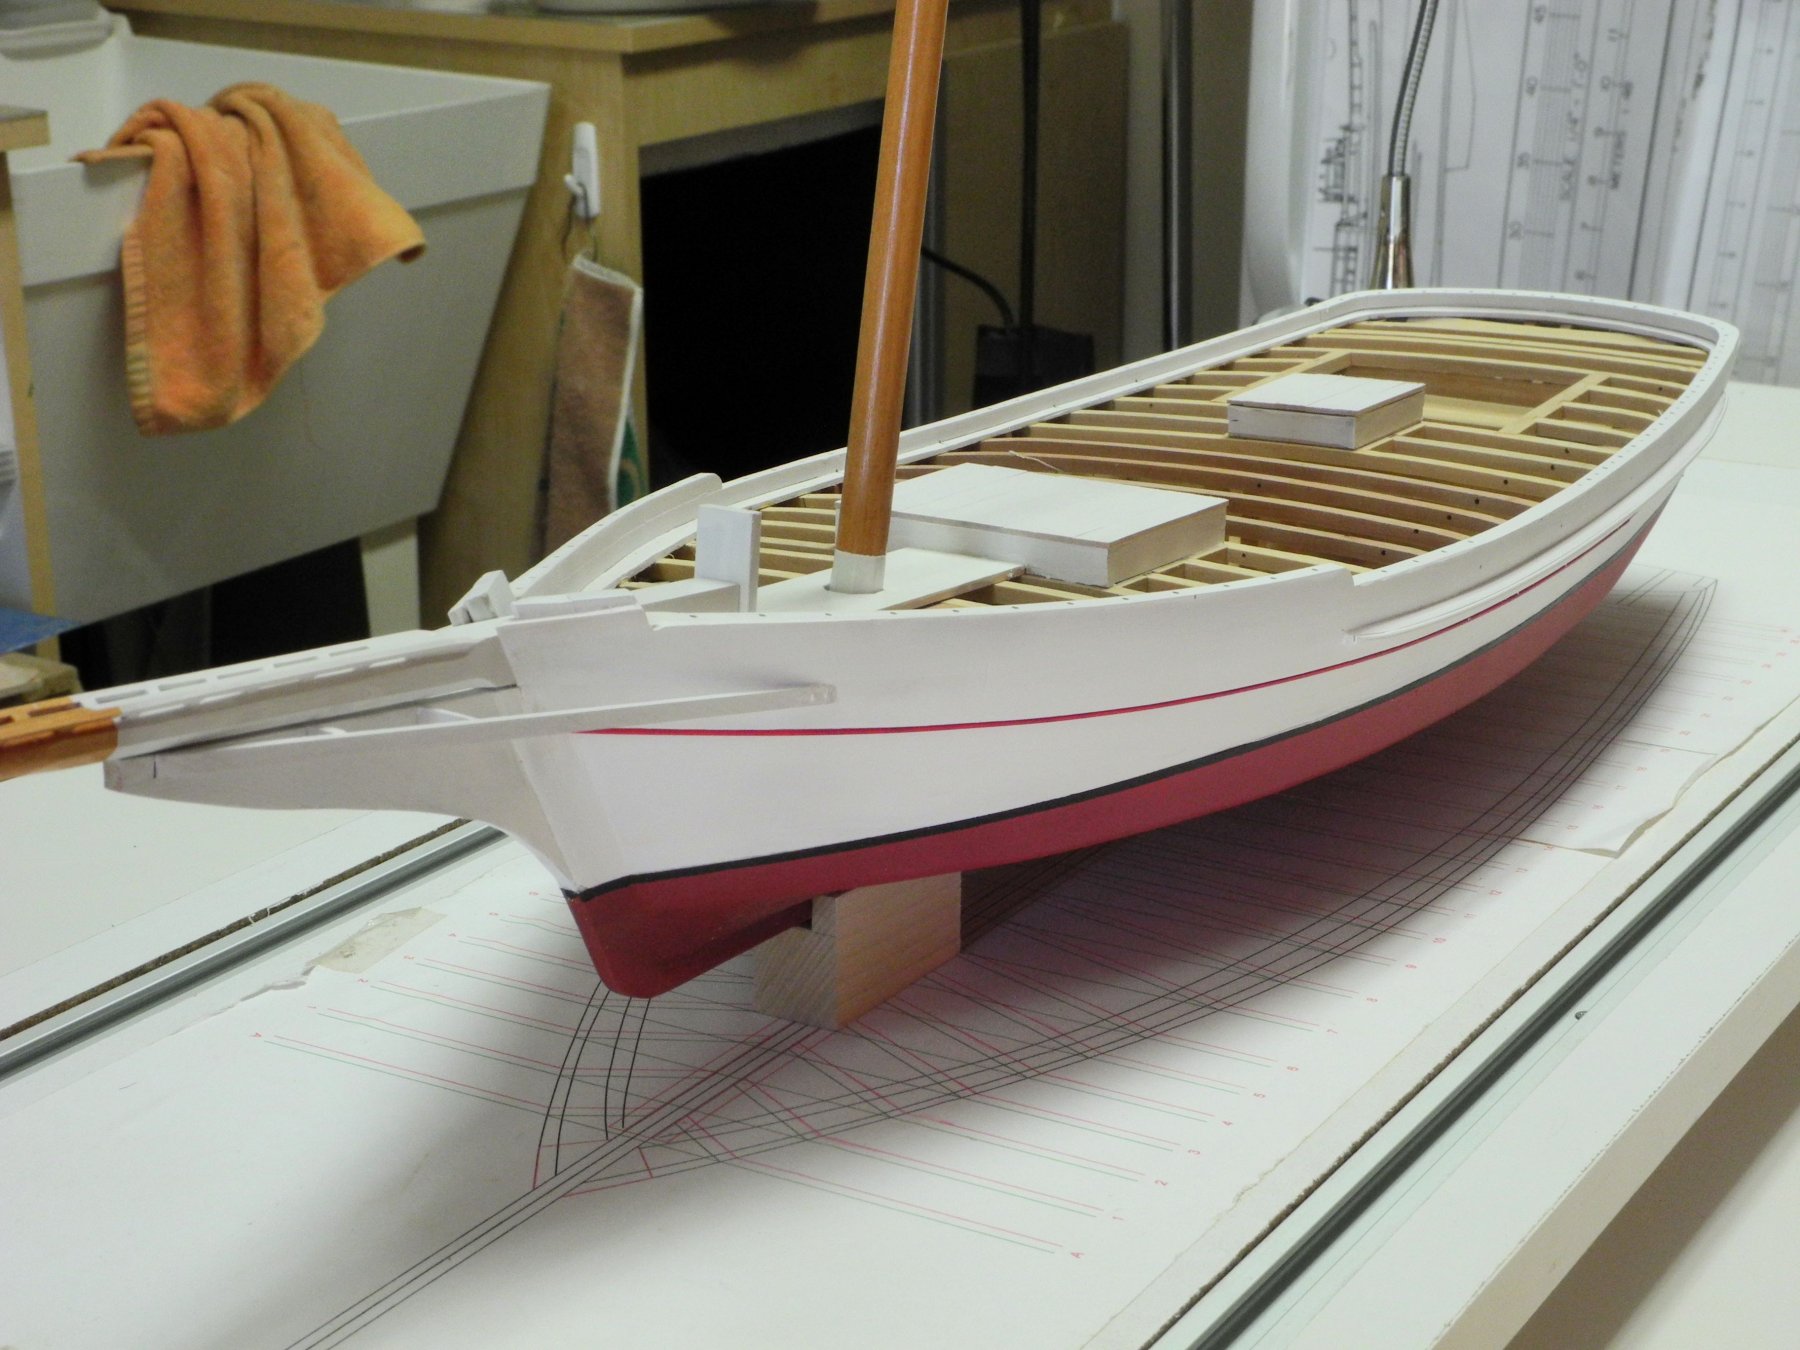
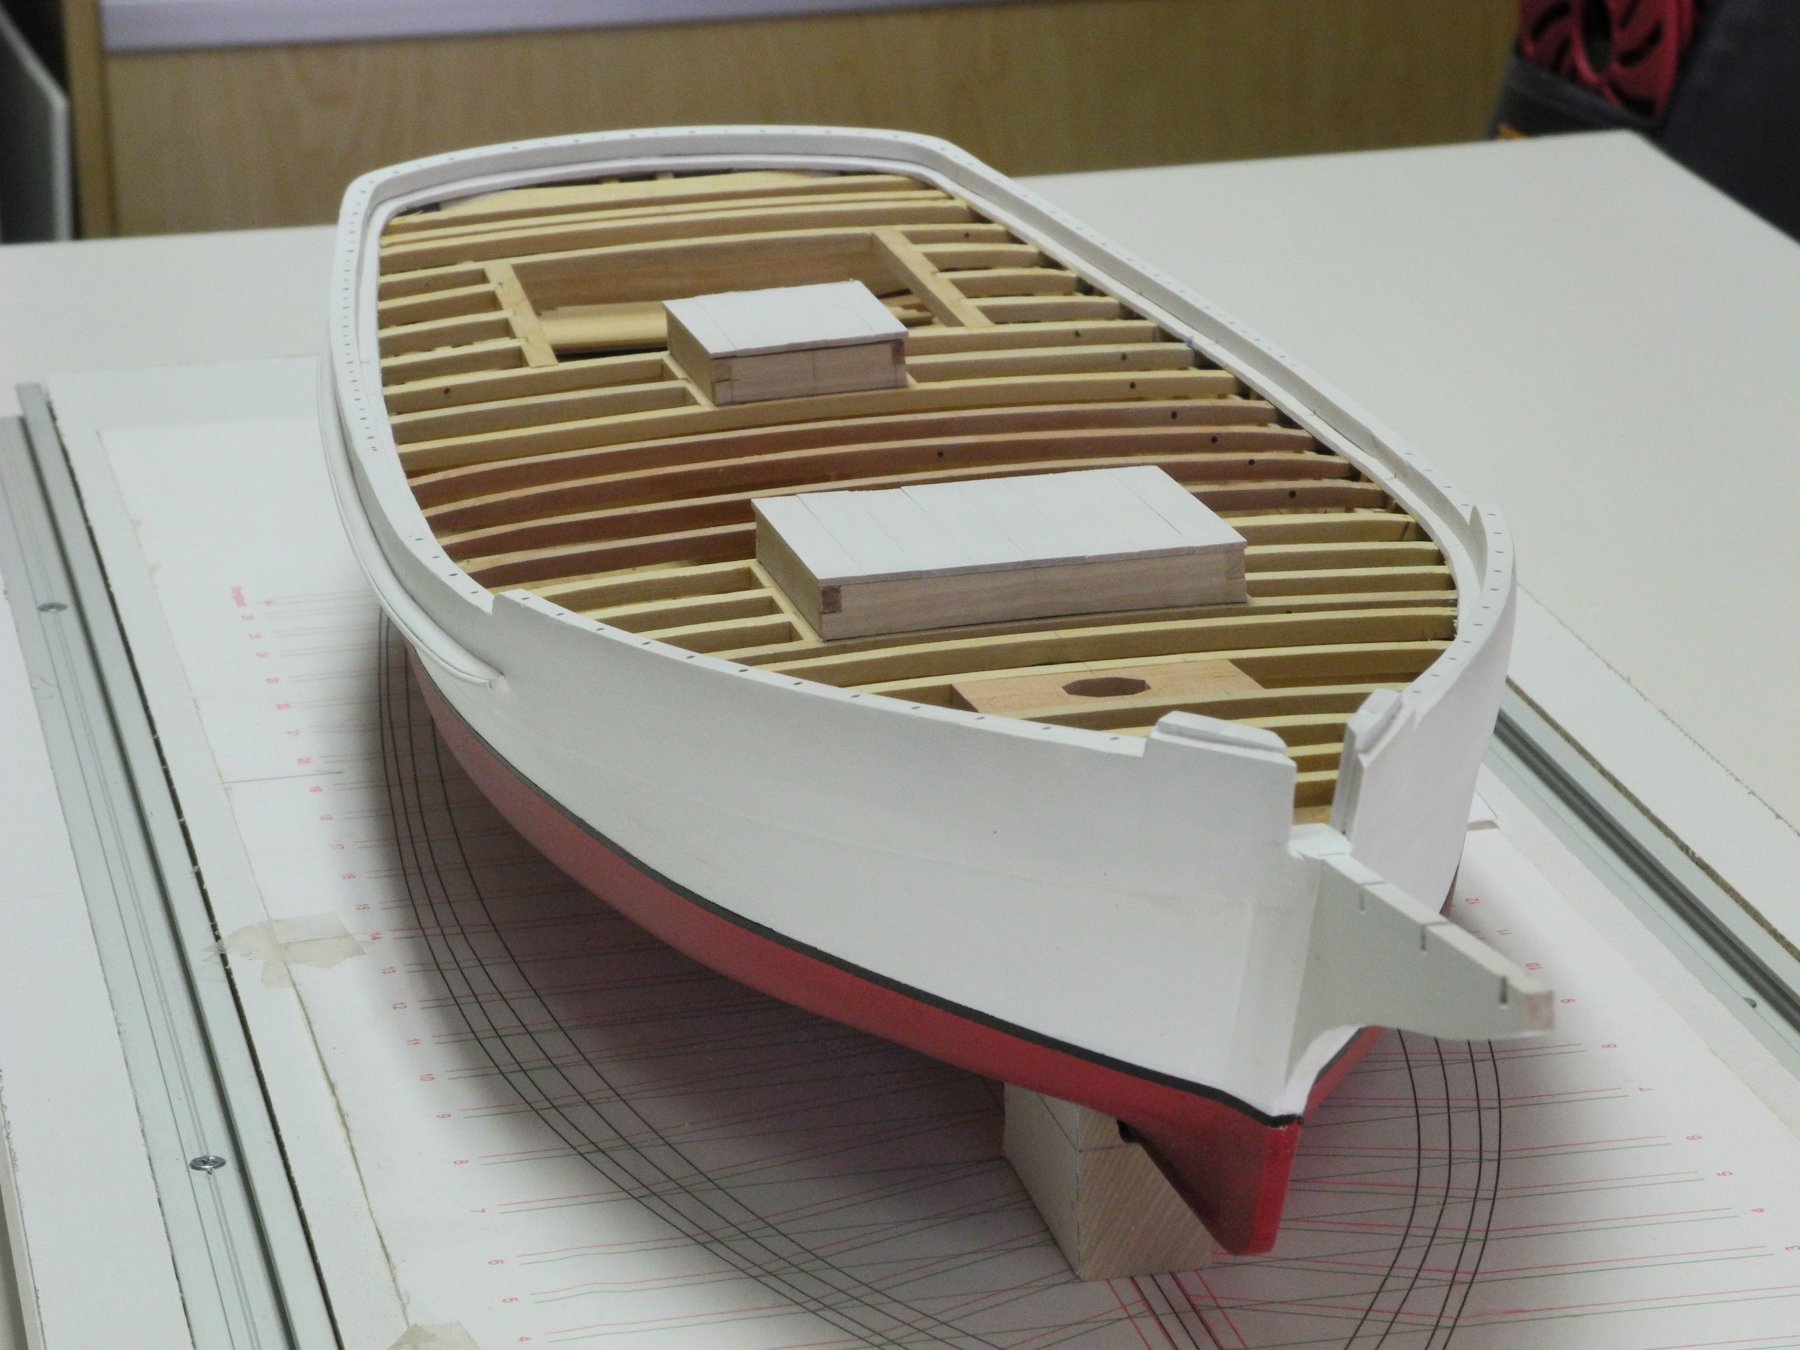
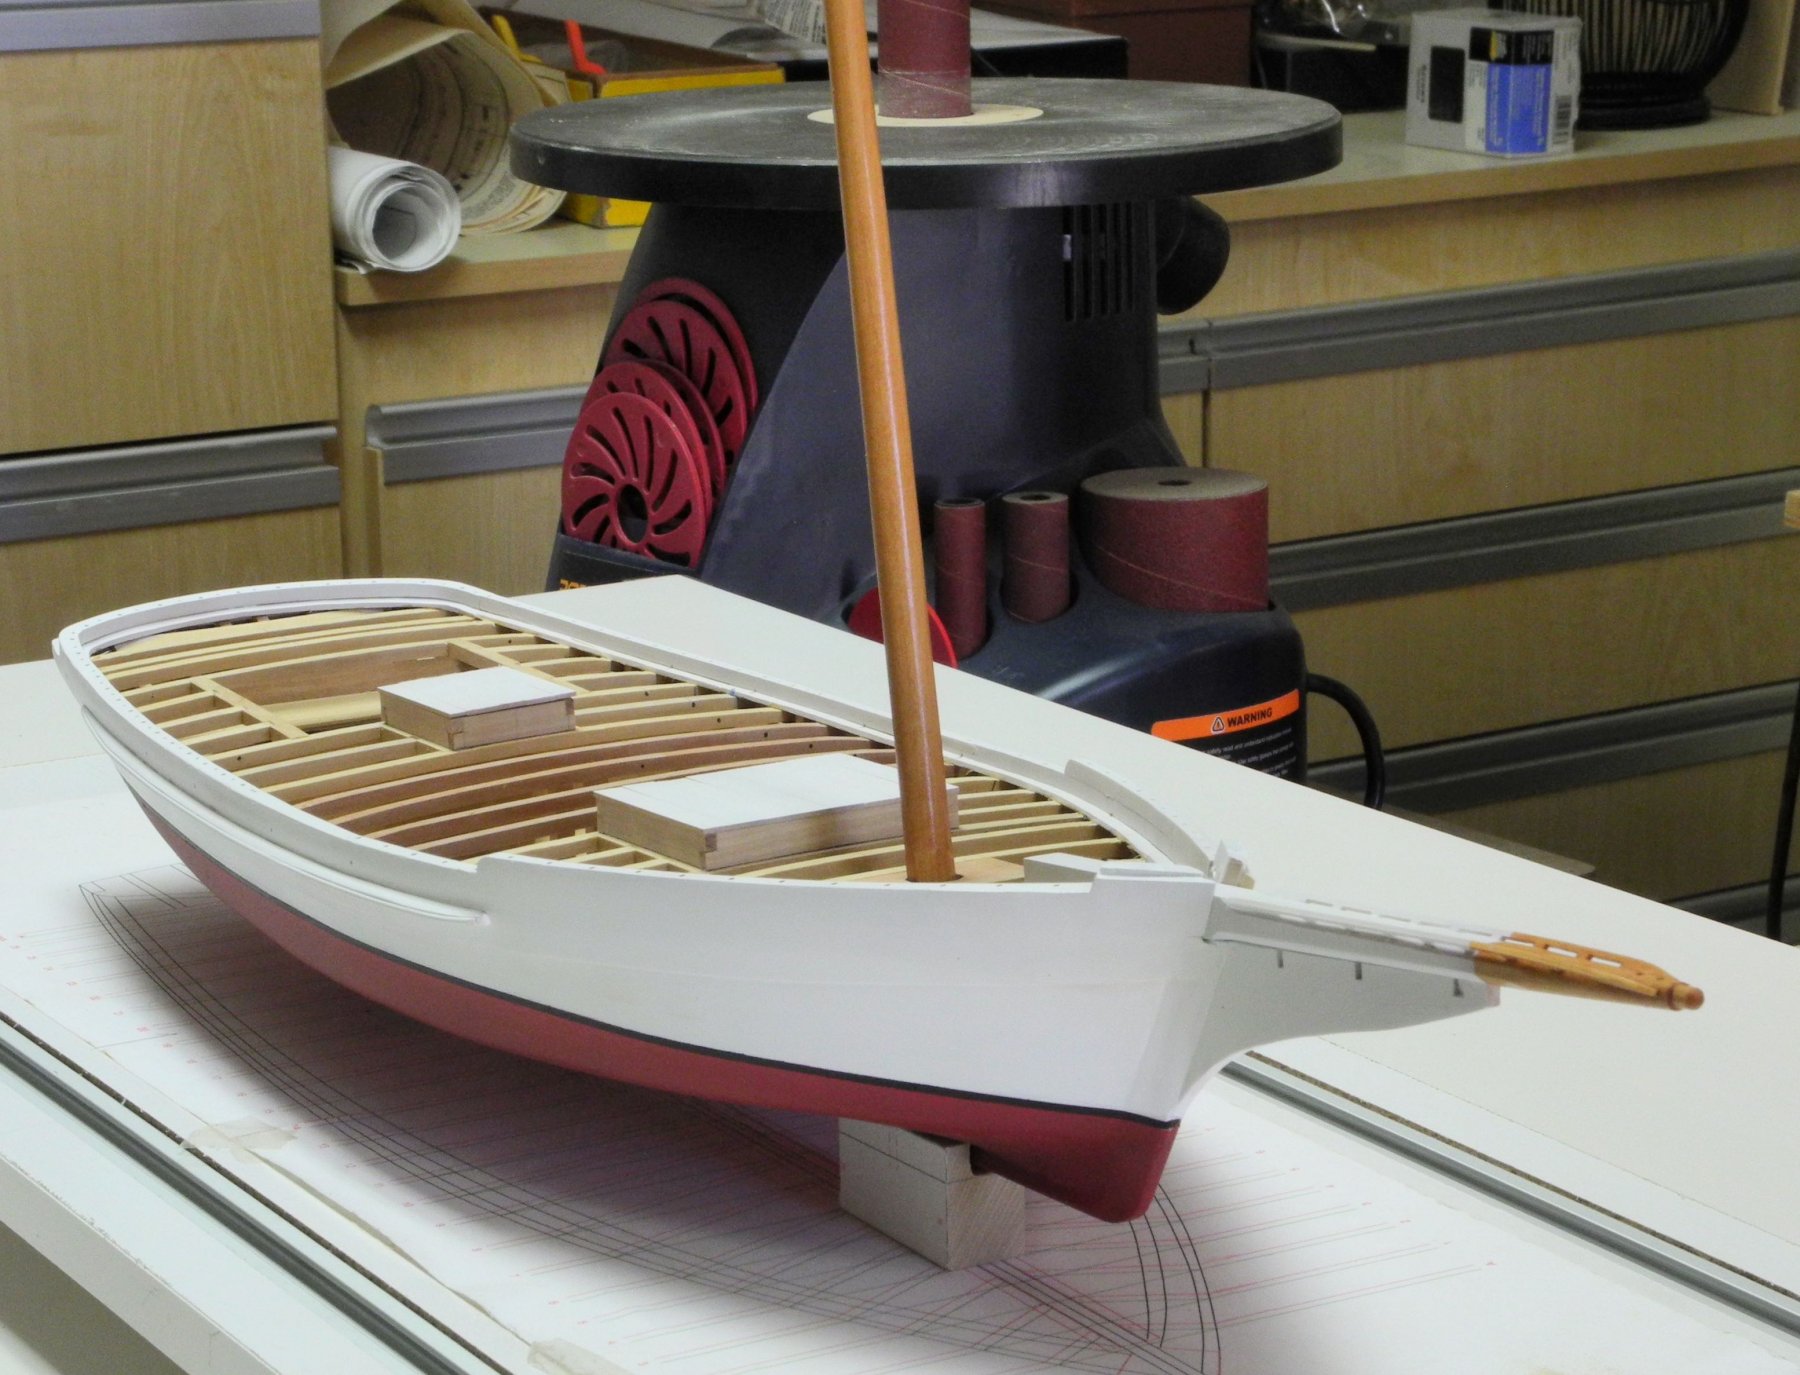
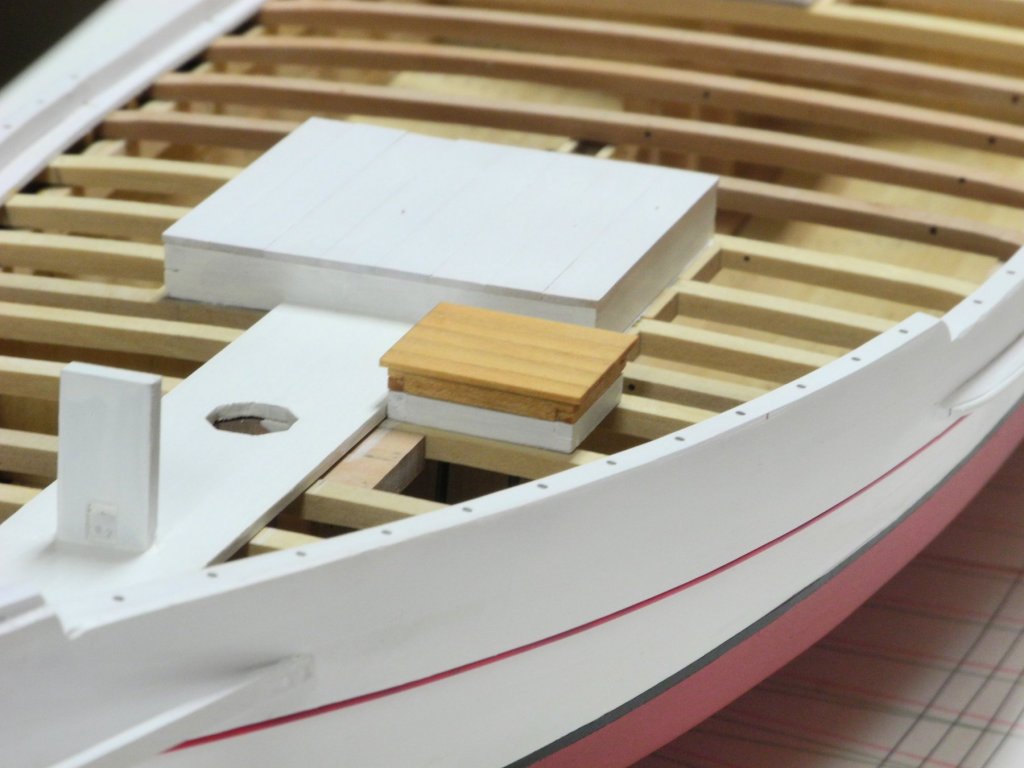
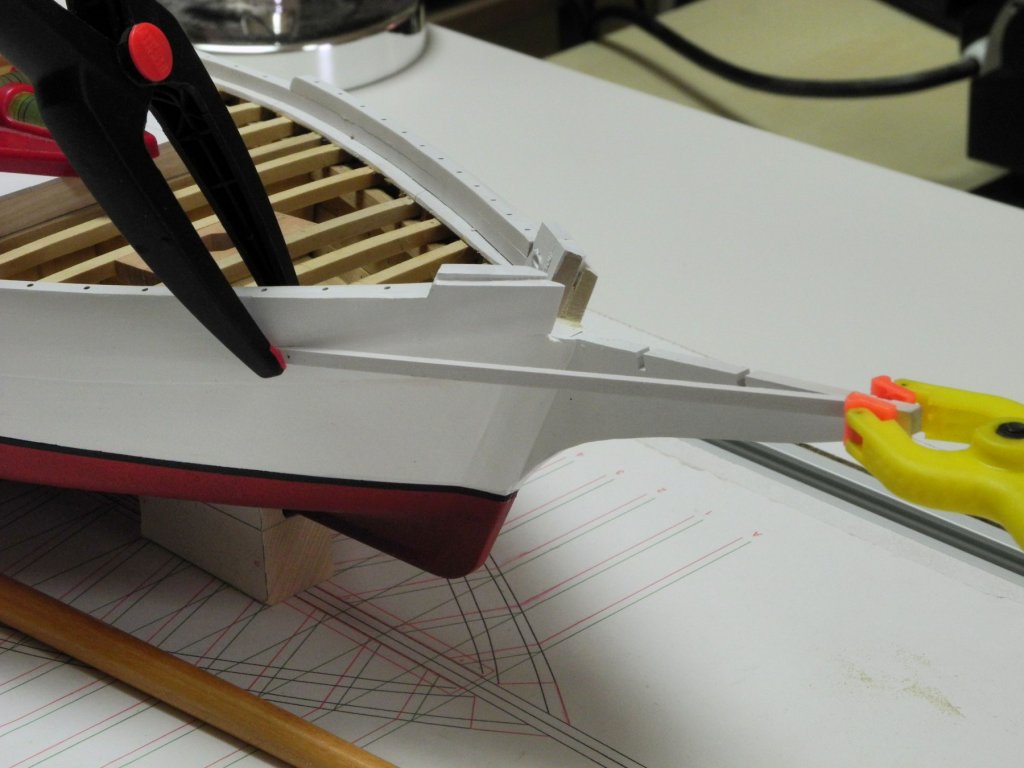
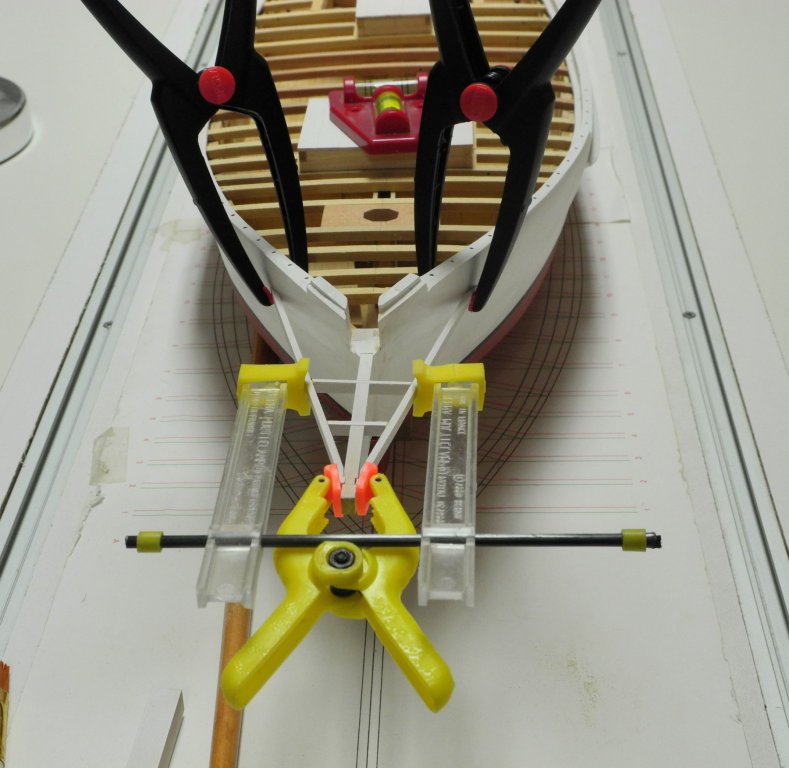
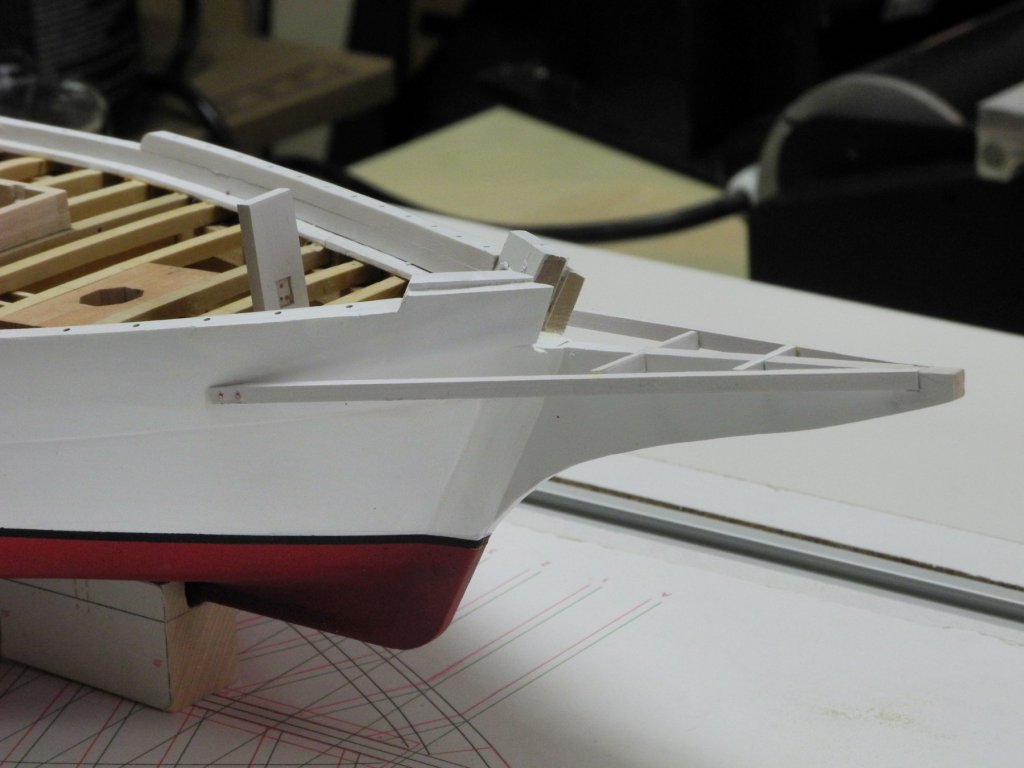
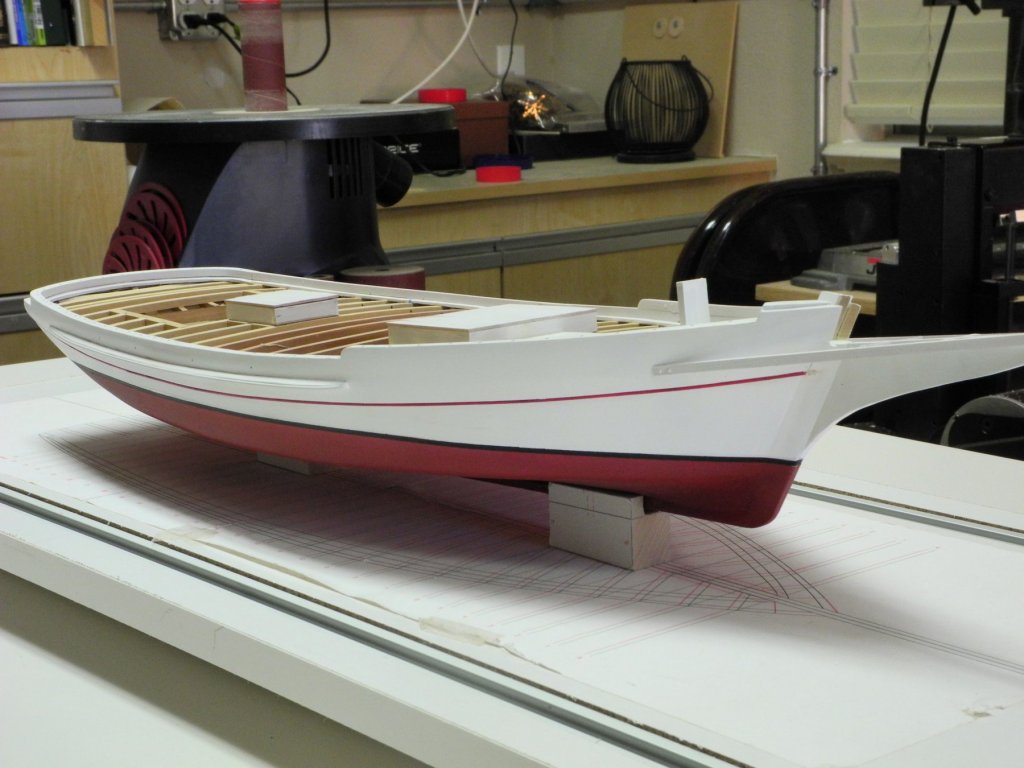
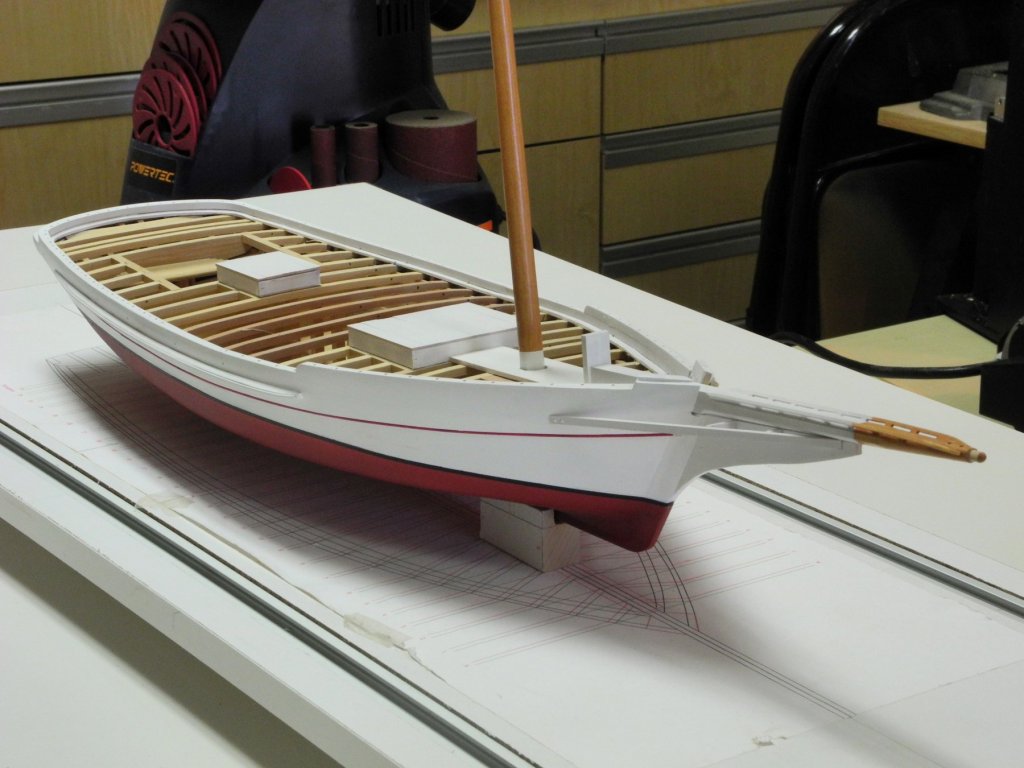
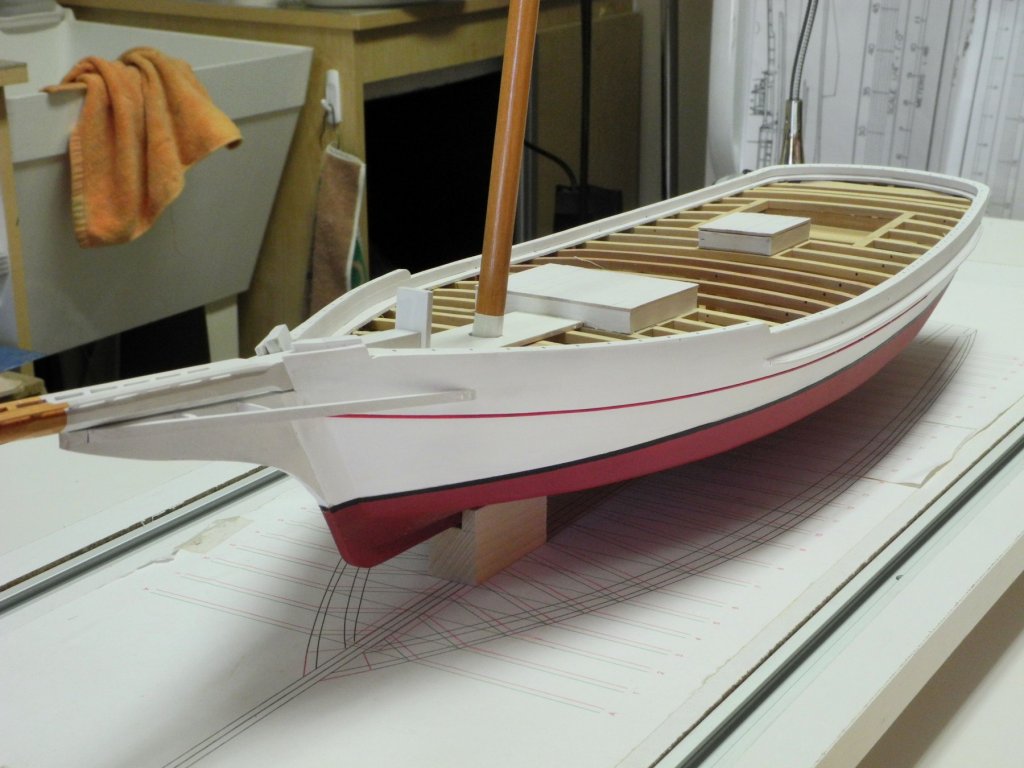
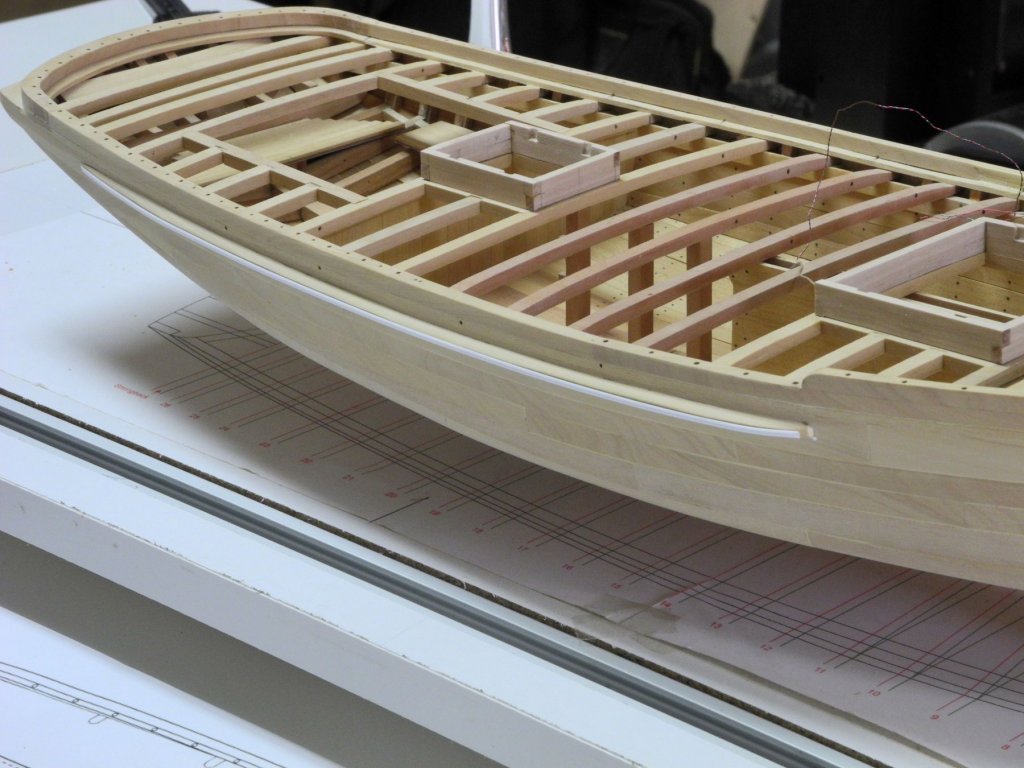
Part 34 – Headrails, King Plank, Accent Stripe The components for the headrails were painted at the same time as the hull was painted, so installation was simply a matter of gluing and clamping. Kathryn’s headrails are bolted to the hull, and the bolt heads are painted to match the hull. Work-hardened copper wire was used as functional bolts to provide additional security for the headrails. These bolts will be painted to match the hull. The king plank consists of two planks that are 16.5” wide and 2.5” thick (the rest of the deck planks are 1.75” thick). The Sampson post and the mast both pass through the king plank. On the model, the king plank is made of four separate pieces. First, the two pieces that are forward of the Sampson post were fitted, butting the Sampson post. Then the aft two pieces were notched to fit around the Sampson post and were butted against the forward hatch. The aft pieces were marked and cut for the hexagonal opening for the mast. In the post on painting the model I mentioned that I was awaiting some 1/32” red pinstripe tape that would be used for the narrow stripe at the bottom edge of the wale. This tape arrived, but I didn’t like the effect it provided. This narrow stripe is actually a bead cut into the bottom edge of the wale. I was able to find .030” quarter-round styrene strips, which would be much more realistic. The styrene strips were held onto a board using 2-sided tape and were brush-painted a crimson color. The quarter-round strip was glued to the hull using Ambroid glue applied sparingly with the tip of a needle. The hatch coamings and the king plank were then painted white, and the base of the mast and the bolt heads on the headrail were also painted white. The following photos show Kathryn with the mast and bowsprit temporarily installed. One or two more small items can be completed before working on the cabin and deck planking. Thanks for the ‘Likes’, and for following the build log.


- 878 replies
-
- 24
-
-
Thanks Popeye. Sometimes it's hard to keep my patience during the prep work. Thanks Peter. Seeing the great work you've done on your models inspired me (but I'm a long way from 'museum quality' work!).
-
Great work Patrick. I can't imagine how you sand such small items. Do you have miniature sanding sticks?
-
Thanks Patrick. I'm fairly pleased with the results. There's a little touch-up required, but I'll wait on that.
-
Thanks Russ. I have a friend who is a very good modeler and who specializes in the working craft of the Chesapeake. These are the colors he recommended.
-
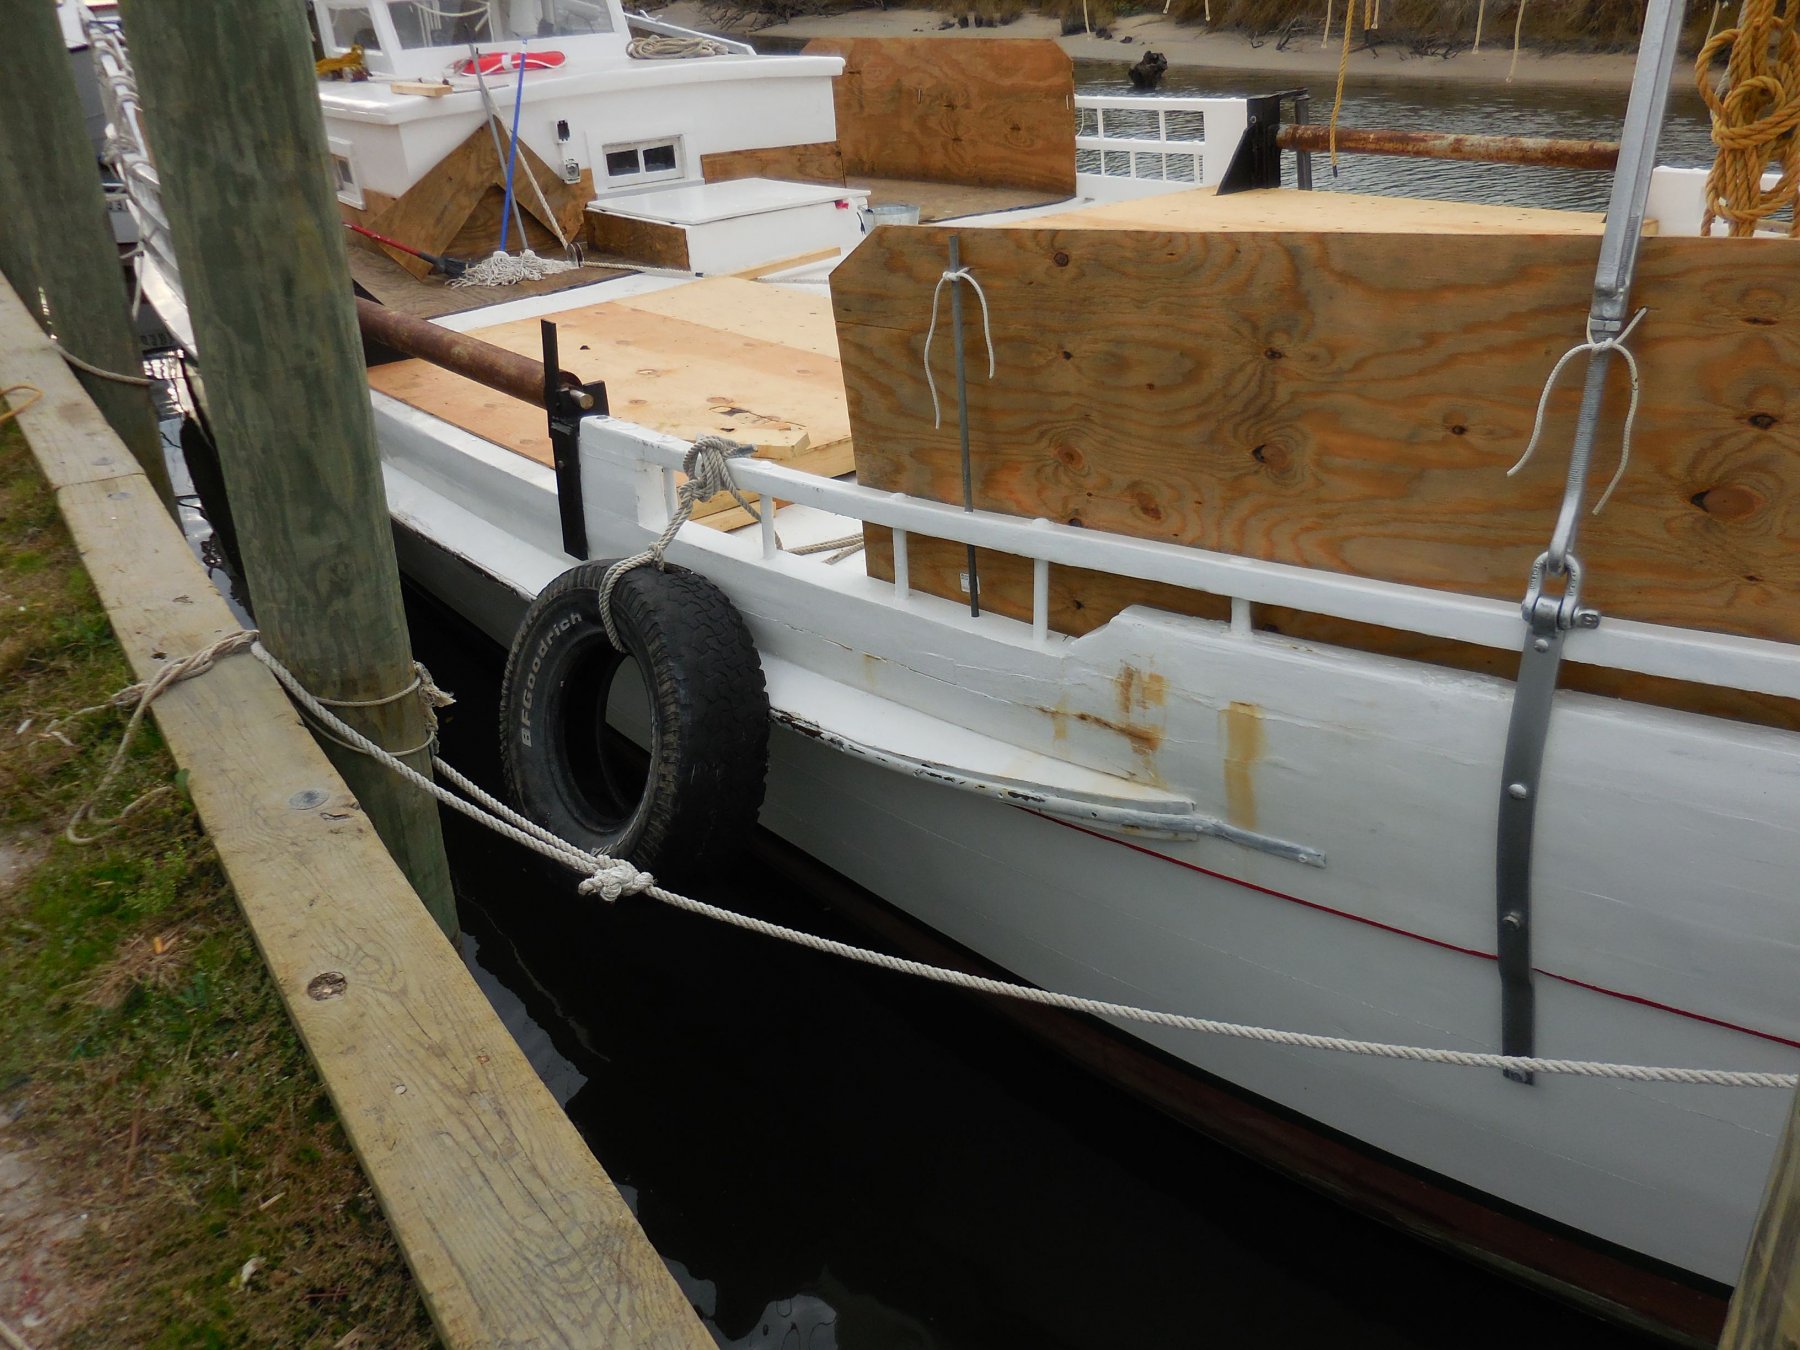
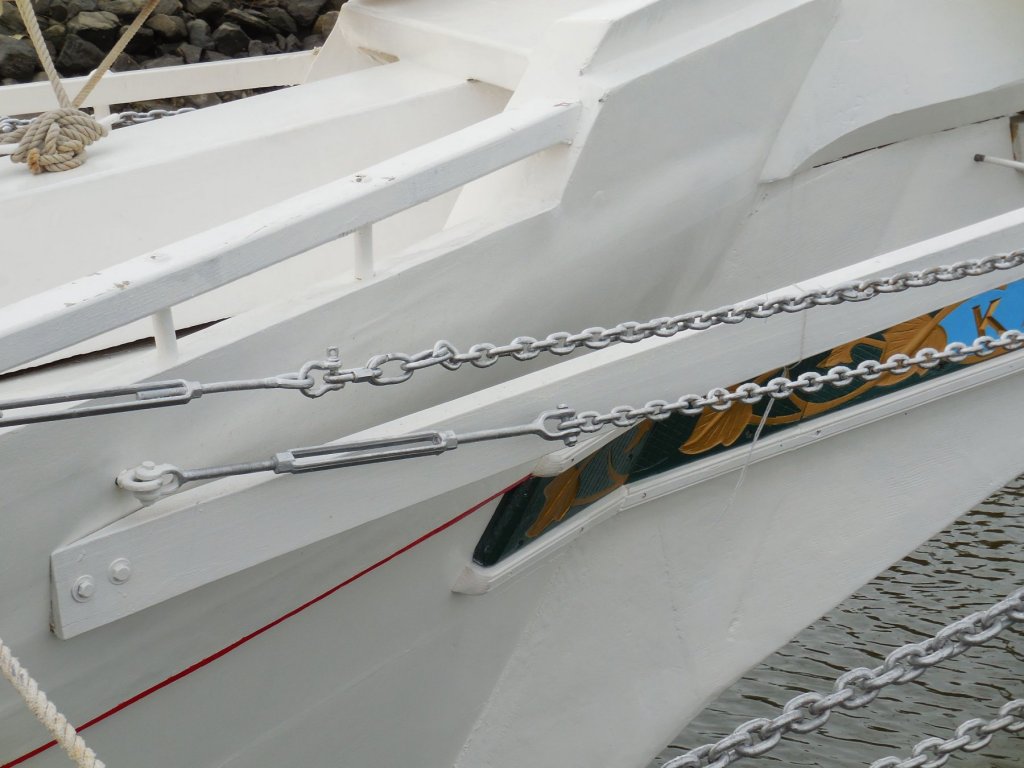
The photography in the book "Working Skipjacks of Deal Island" is all black and white. This photo of Kathryn during the recent rebuild shows the color of the paneling inside the cabin, and also shows the frames and ceiling planks left natural. When I visited the Kathryn after the rebuild the interior planking that I was able to see was all natural, and I think I remember the cabin deck and settees being grey. The exterior colors I'm using are Liquitex acrylics. The white is Titanium White and the bottom color is Burnt Sienna. The black stripe is Mars Black. These paints will develop a shine after a few coats, so I mix Liquitex Matte Medium into the paint to prevent too much sheen.

-
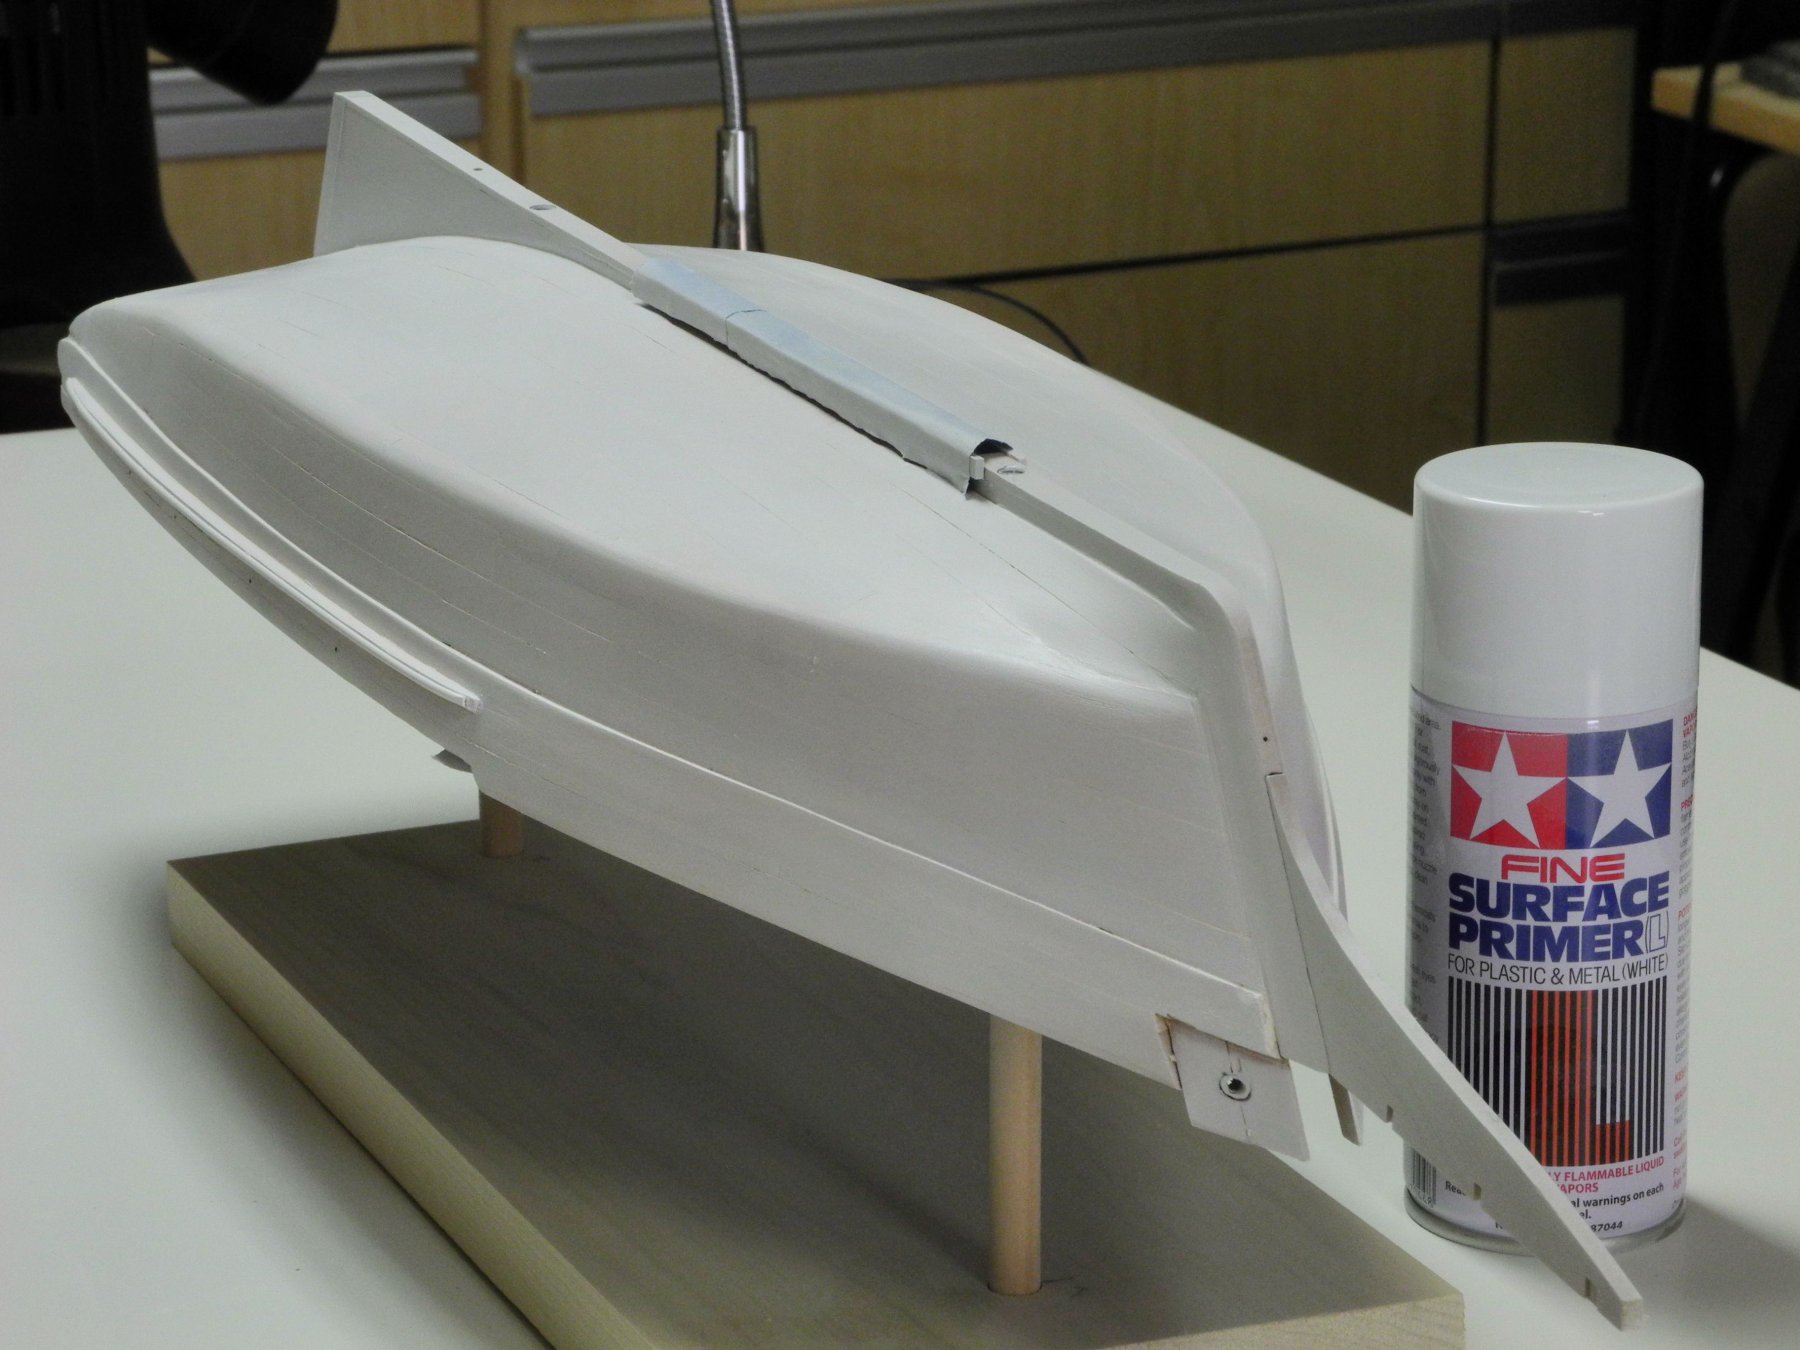
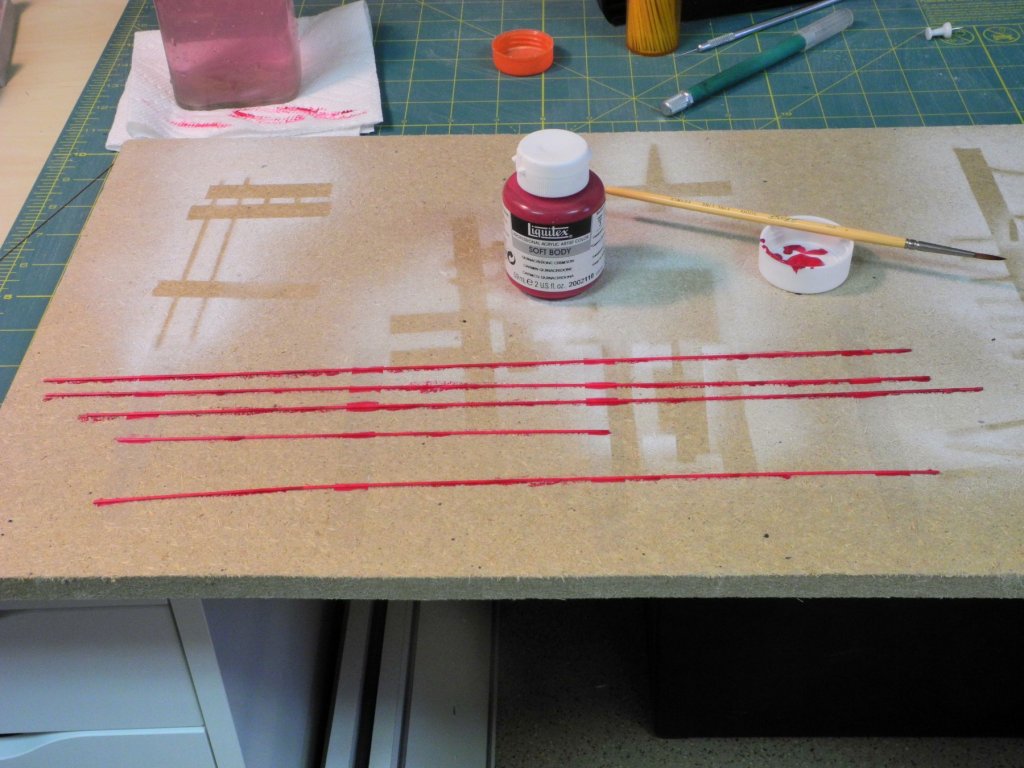
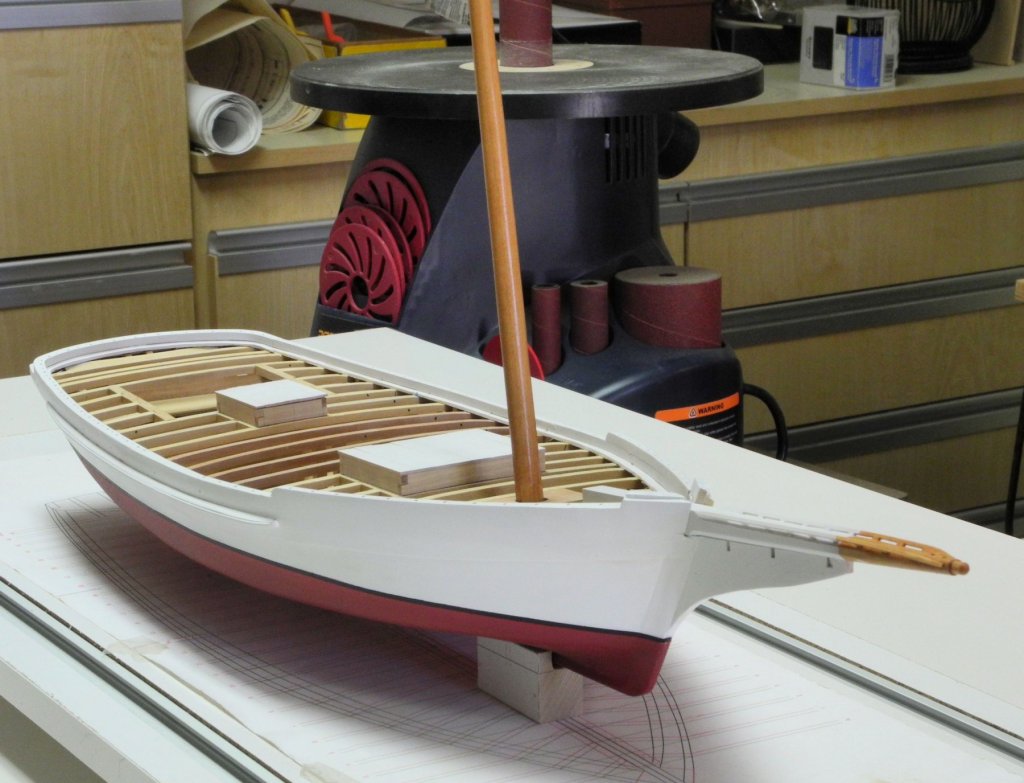
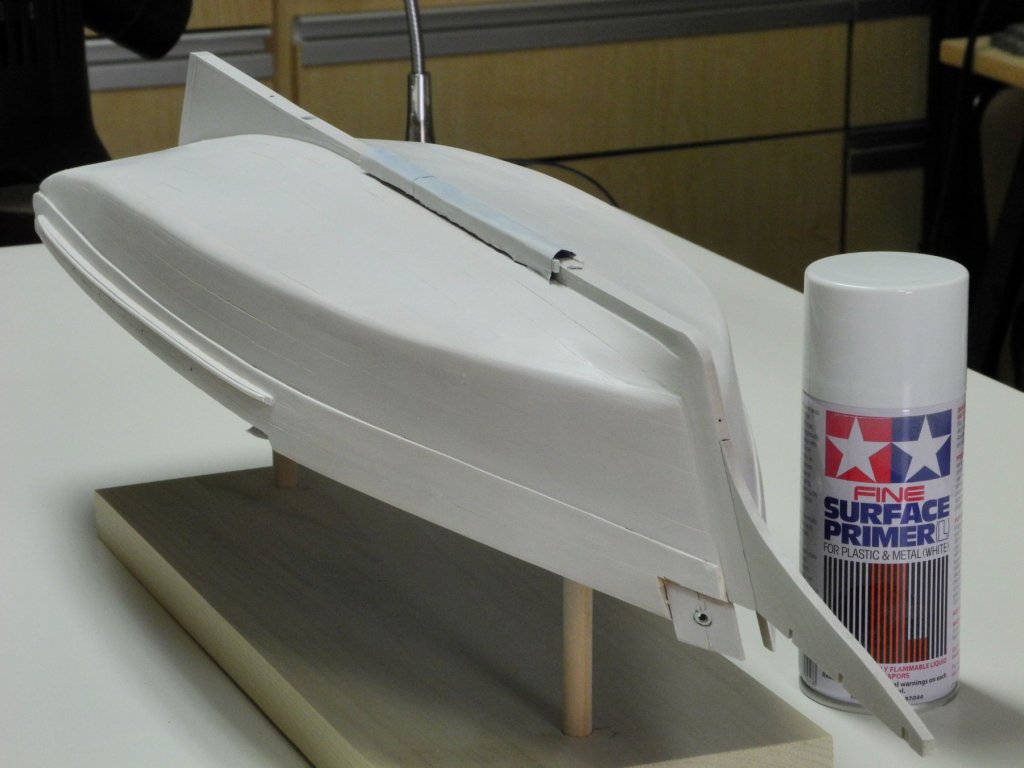
Part 33 – Painting the Hull The preparation for painting took longer than the actual painting, which makes sense when you consider that the quality of the end result is really based on the quality of the item to be painted. Preparation consisted of priming the hull, which shows a lot of the imperfections, and then addressing the imperfections by sanding down the high areas and filling in any depressions that may exist. I used a white model primer since the hull will be mostly white, and Liquitex Modeling Paste (very much like a thick gesso) as a filler. After letting the modeling paste dry completely it can be scraped (I used a single-sided razor blade) and sanded. I used wet and dry sandpaper (mostly left dry) up to 400 grit. The top of Kathryn was completely masked, leaving the waterway and log rails unmasked since these need to be painted. I used an airbrush for all of the top and bottom painting. The following photo shows the painting setup. The entire sides of Kathryn were painted white and left to dry for over 24 hours before masking at the waterline. While the white was available the small parts were also painted white. These were mounted on a fiberboard using two-sided tape to keep them from being blown around by the airbrush. The paints I used were Liquitex Titanium White for all white areas and Liquitex Burnt Sienna for the hull bottom. The paint was diluted with Liquitex Airbrush Medium. Since Liquitex acrylics tend to develop a sheen I also mixed in a generous amount of Liquitex Matte Medium to reduce the sheen. Kathryn has a narrow black stripe between the sides and bottom. After completing the airbrushing of both areas and removing the original masking tape I ran 1/16” chart tape where the black stripe would be (at the top edge of the hull bottom color), then masked above and below the chart tape. After removing the chart tape I painted the black stripe using Liquitex Mars Black with a small artist’s brush. The following photos show Kathryn after painting. A part of the bowsprit and most of the mast are left natural, as covered in a previous post. I used Minwax Colonial Maple stain on castello to achieve the color needed for these areas, and finished that with Polyurethane. Kathryn has a very narrow red stripe under the bends (wale). This is not something I feel that I can achieve through painting, so I’ve ordered some 1/32” red pinstriping tape. Once that arrives and is installed the preparation of the hull will be completed. The next major construction item is the cabin. This will take some planning and experimenting, and there are a few more small pieces of construction still ahead before the deck can be planked. Thanks everyone, and Happy Modeling!


- 878 replies
-
- 14
-
-
Thanks Patrick. It's only white primer, but it did change the look. I think I'll be painting the hull for a while yet.
-
Hi Elia, and thank you! I've made 3 masts and 5 bowsprits so far, and I think the final versions will work. The stain issue was only the latest problem with them. I assume your work in the Phoenix area is finished by now. Let me know if you ever get back out to Arizona - I'd still like to get together with you.
-
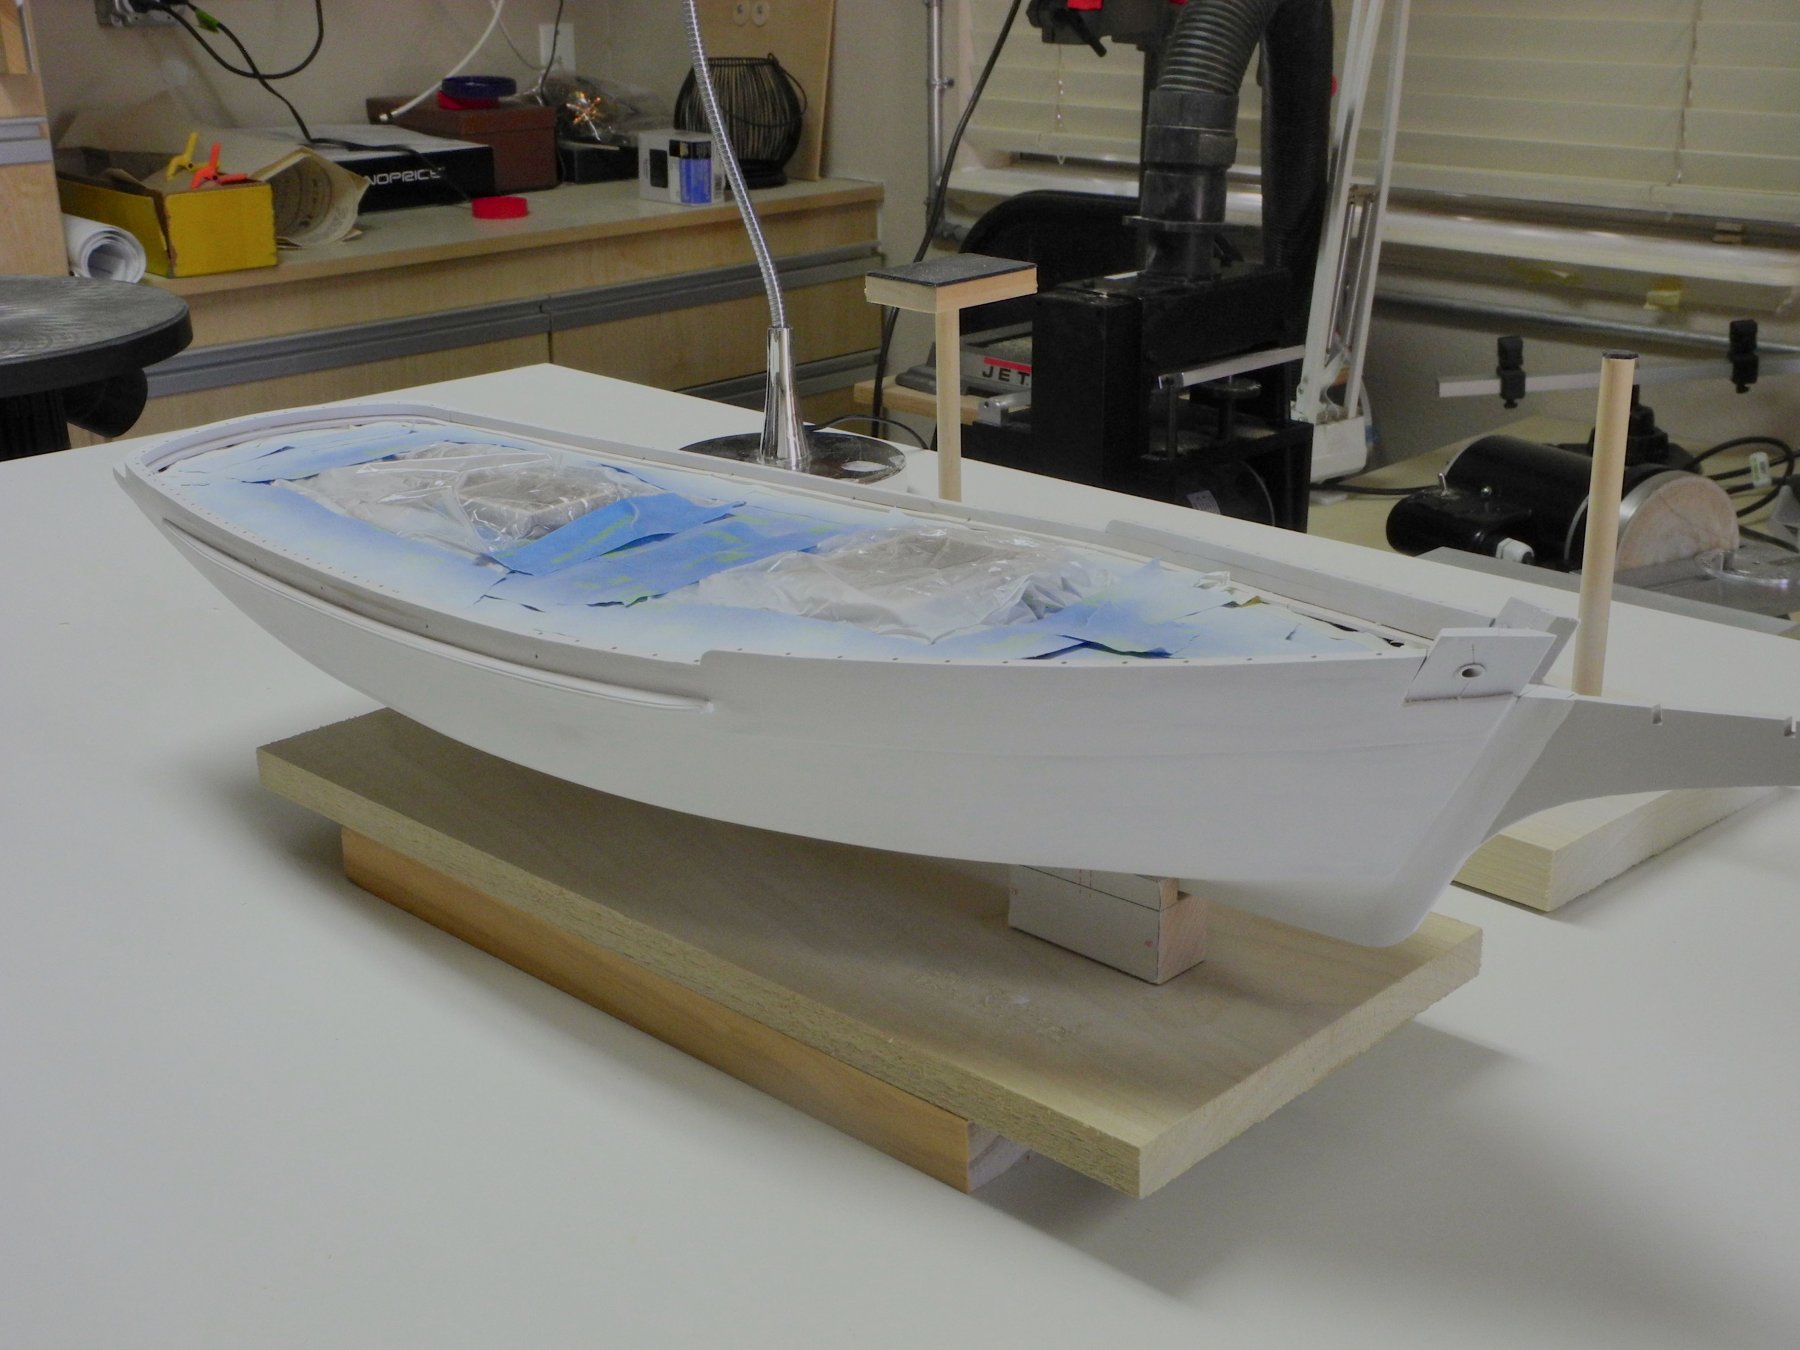
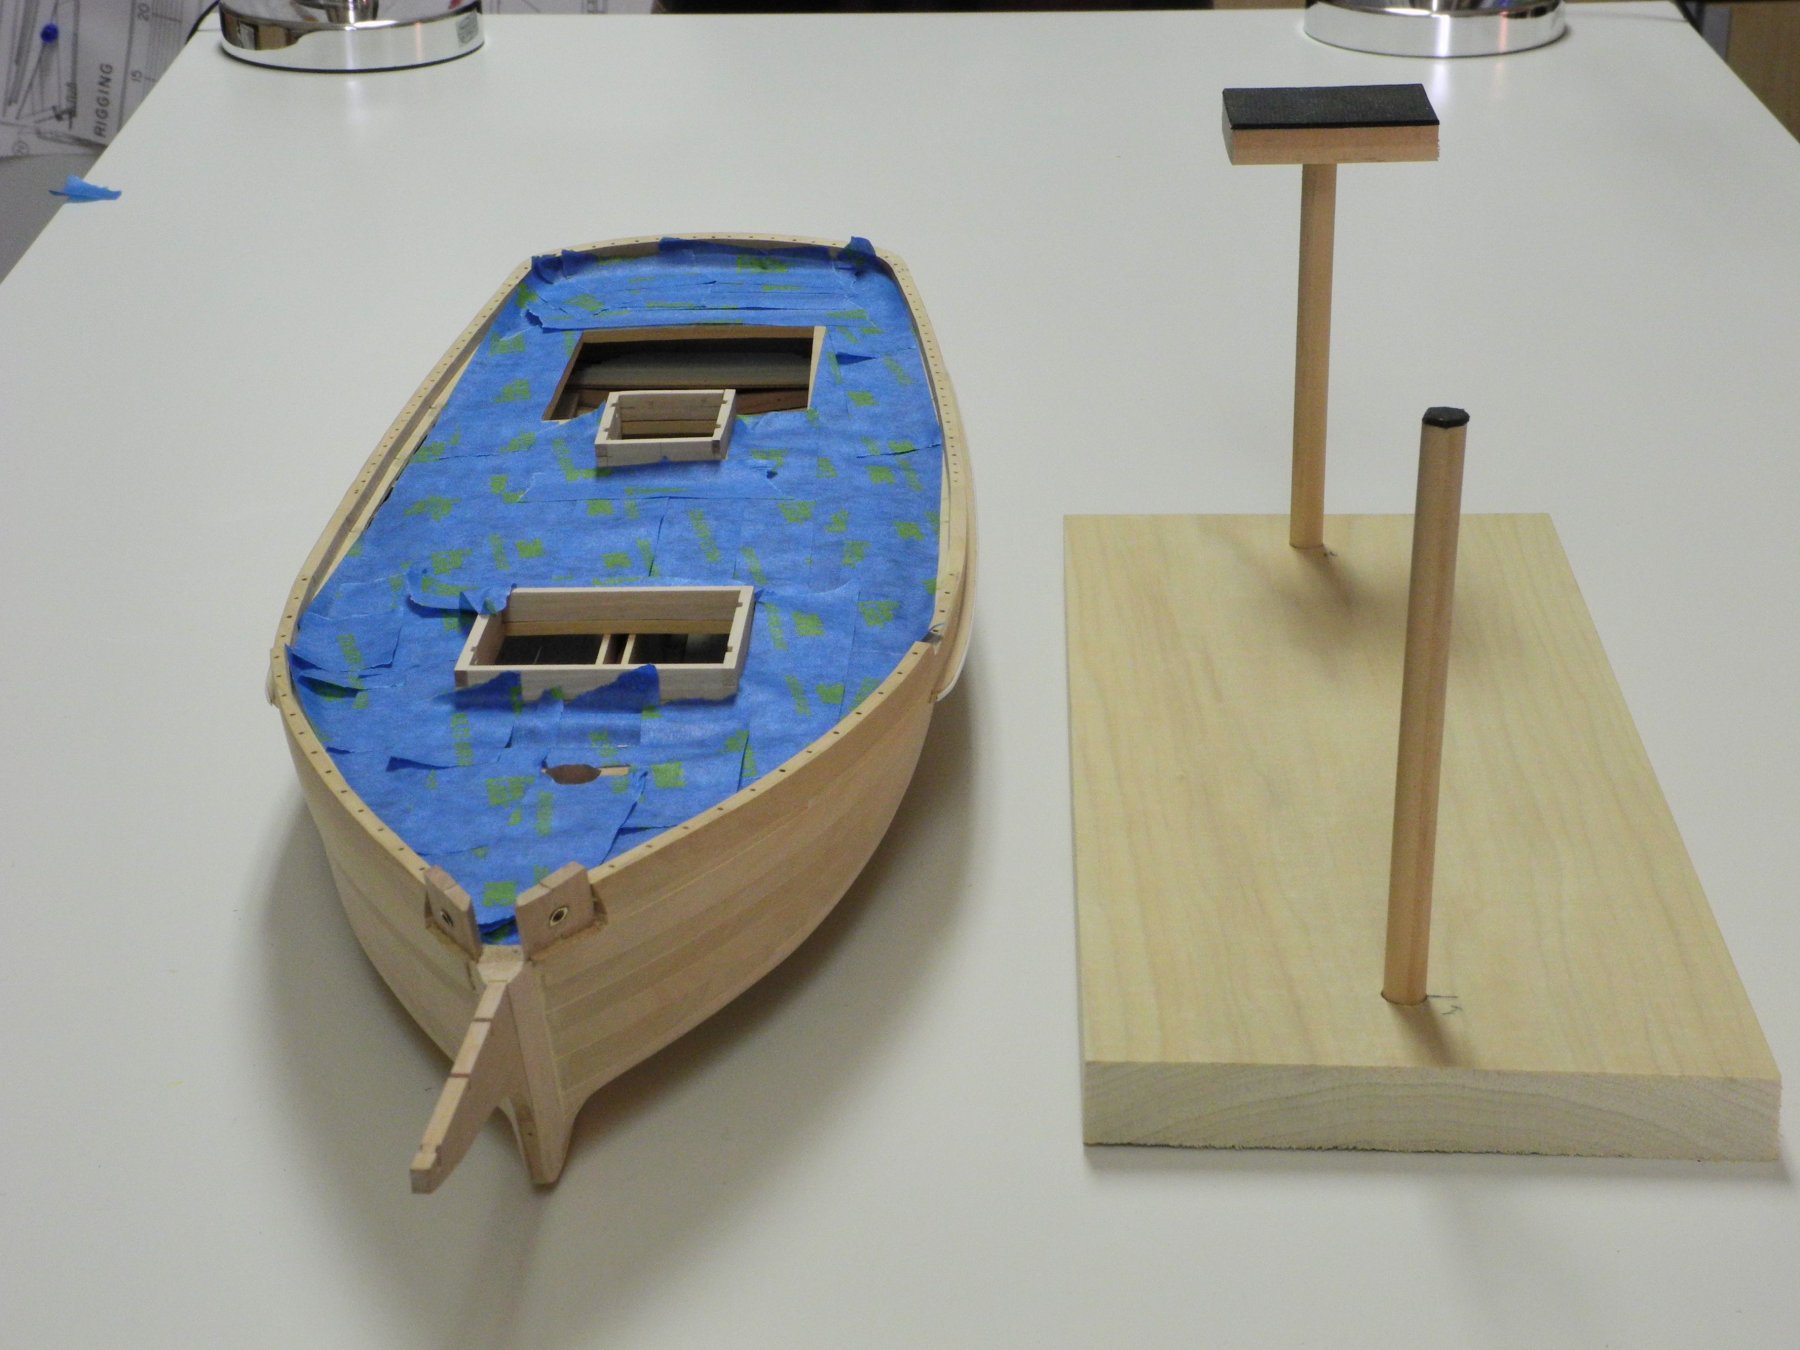
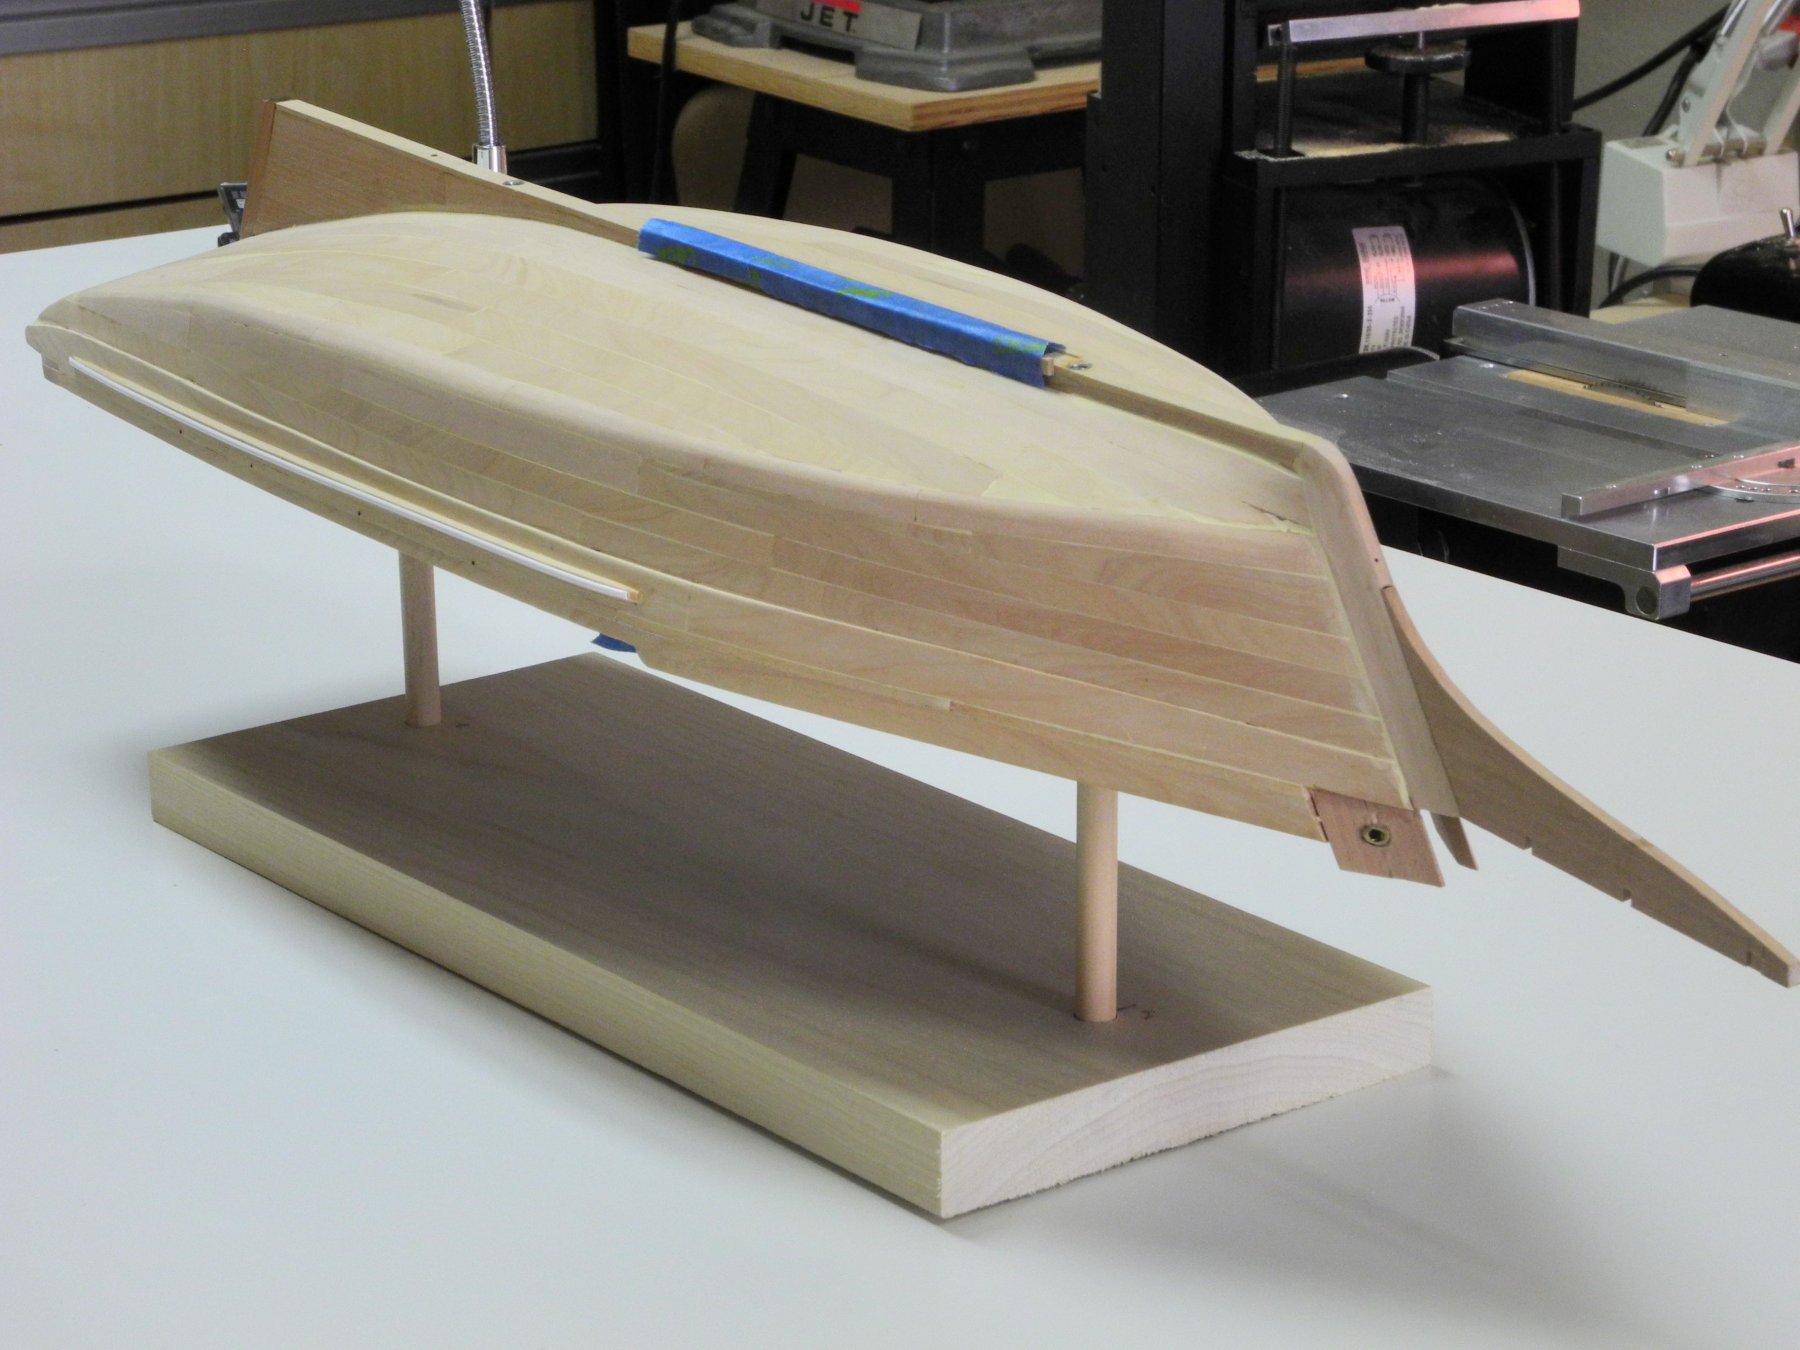
Part 32 – Preparing to Paint I’ve learned a few hard lessons since the last post – mostly having to do with thinking steps through and being sure of how things will work. The bowsprit will be painted white, but there’s an area at the forward end that is left varnished. The mast is also mostly varnished – only the area within a few inches of the deck is painted white. Since the madrone wood that I used for the bowsprit and mast is very white I needed to find an appropriate stain to match the varnished areas of the mast and bowsprit. I tried some stains on a scrap piece of the same wood, and unfortunately found that this wood didn’t take the stain properly – the stain wound up very splotchy, even after using a stain prep to condition the wood. I tested some stain on a piece of castello and it was very satisfactory, so I decided to make another mast and bowsprit out of castello. This was work that could have been avoided if I had thought through the staining before making the mast and bowsprit. Since the next major step in building Kathryn is to paint the hull, there were a few minor items I needed to finish. The first of these is the scuppers. Skipjacks have very basic scuppers. These essentially are a few holes drilled through the waterway, as in the following photo of one of Kathryn’s scuppers. There are 4 scuppers on each side. I marked the scupper locations, made a pilot hole using a miniature awl, then drilled the scuppers from inside. There’s a small trench in the waterway leading to the scupper. I used a small diamond flame in a rotary tool to shape these trenches. The following photo shows the scuppers from the outside of the model. Kathryn has a small metal strip on the outside of the hull guards, presumably to provide additional protection from scuffing. This strip can be seen in the following photo. I used a piece of half-round styrene to simulate this metal strip, using CA to glue the strip to the guard. Since the hull would be painted in an upside-down position, I made a jig to hold the model for painting. The forward post goes through the hole for the mast, and the square block on the rear post keeps the model in a relatively secure position. Both devices have some 1/16" thick rubber glued to the area that will touch the model, as cushioning. The deck beams were covered with masking tape to keep stray paint from the interior. A first coat of primer was applied. I’ll be spending some time fixing the imperfections that show up from the primer before proceeding with the actual painting.

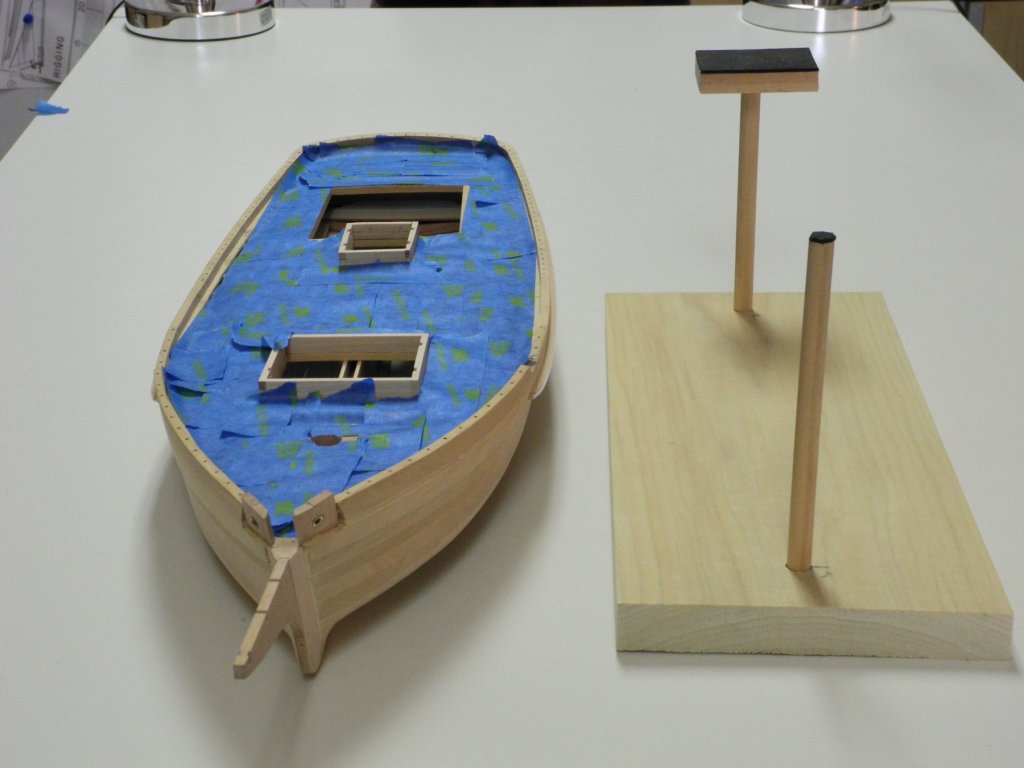
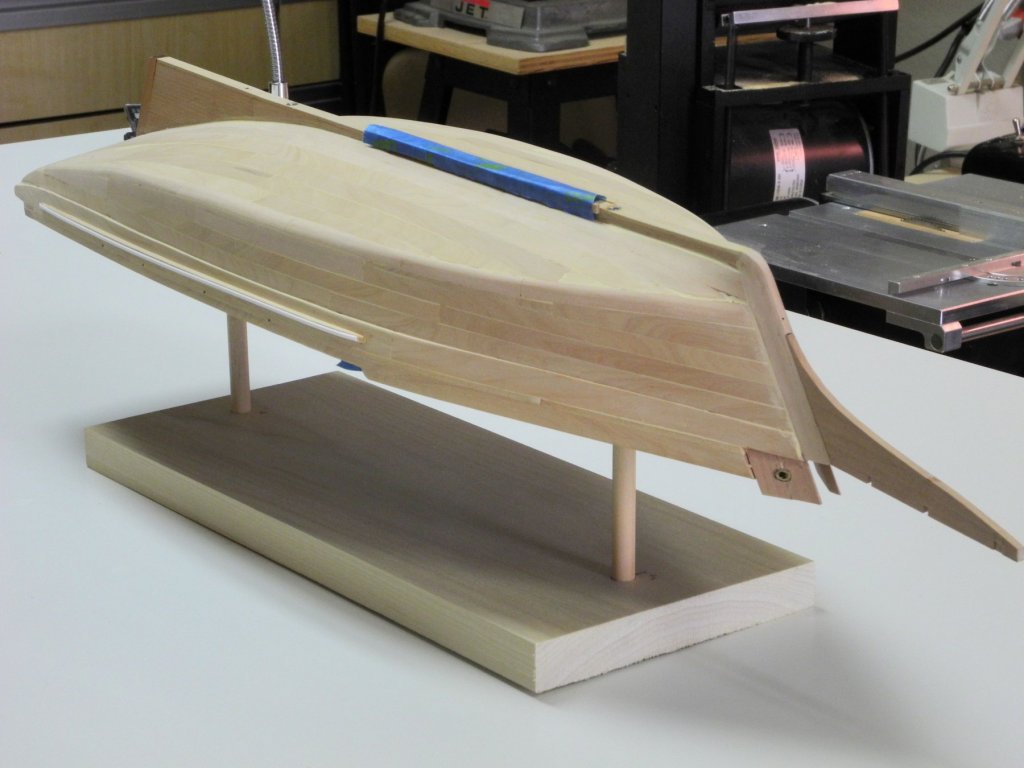
- 878 replies
-
- 17
-