


woodartist
-
Posts
119 -
Joined
-
Last visited
Content Type
Profiles
Forums
Gallery
Events
Posts posted by woodartist
-
-
This is a photo of the finished 2nd planking on Fife. The walnut is beautiful. It is a shame to have to paint it.

-
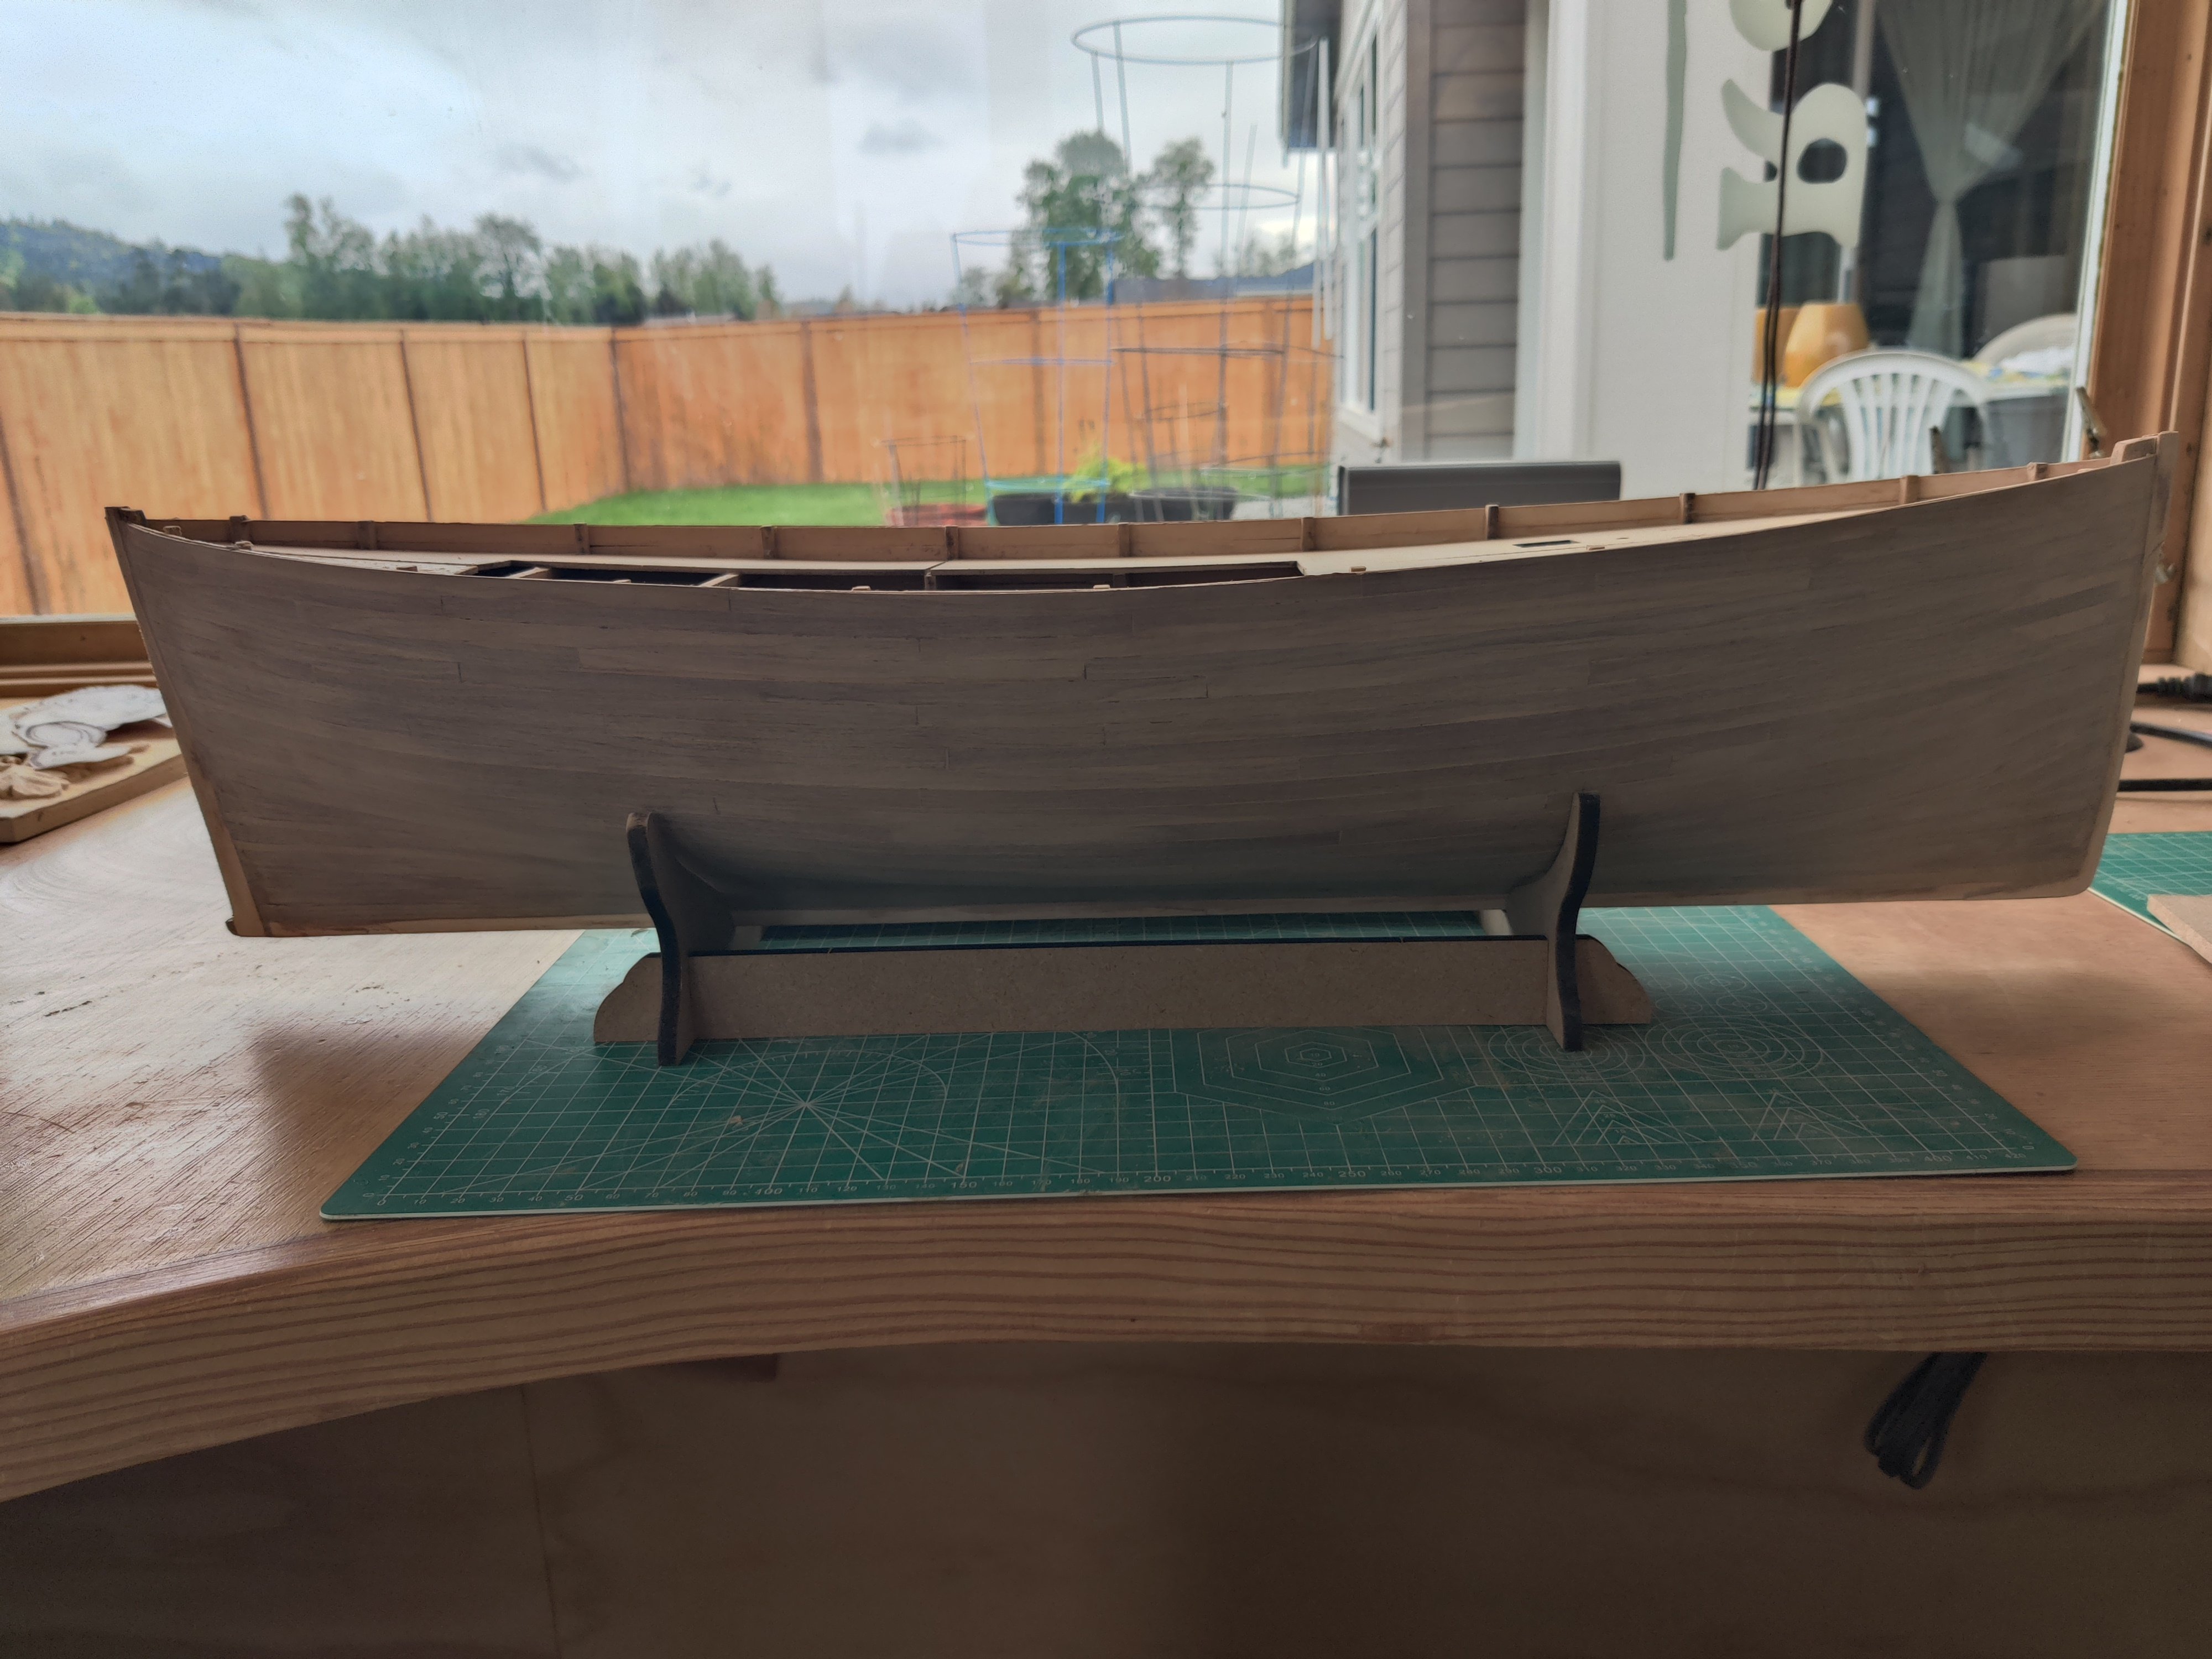
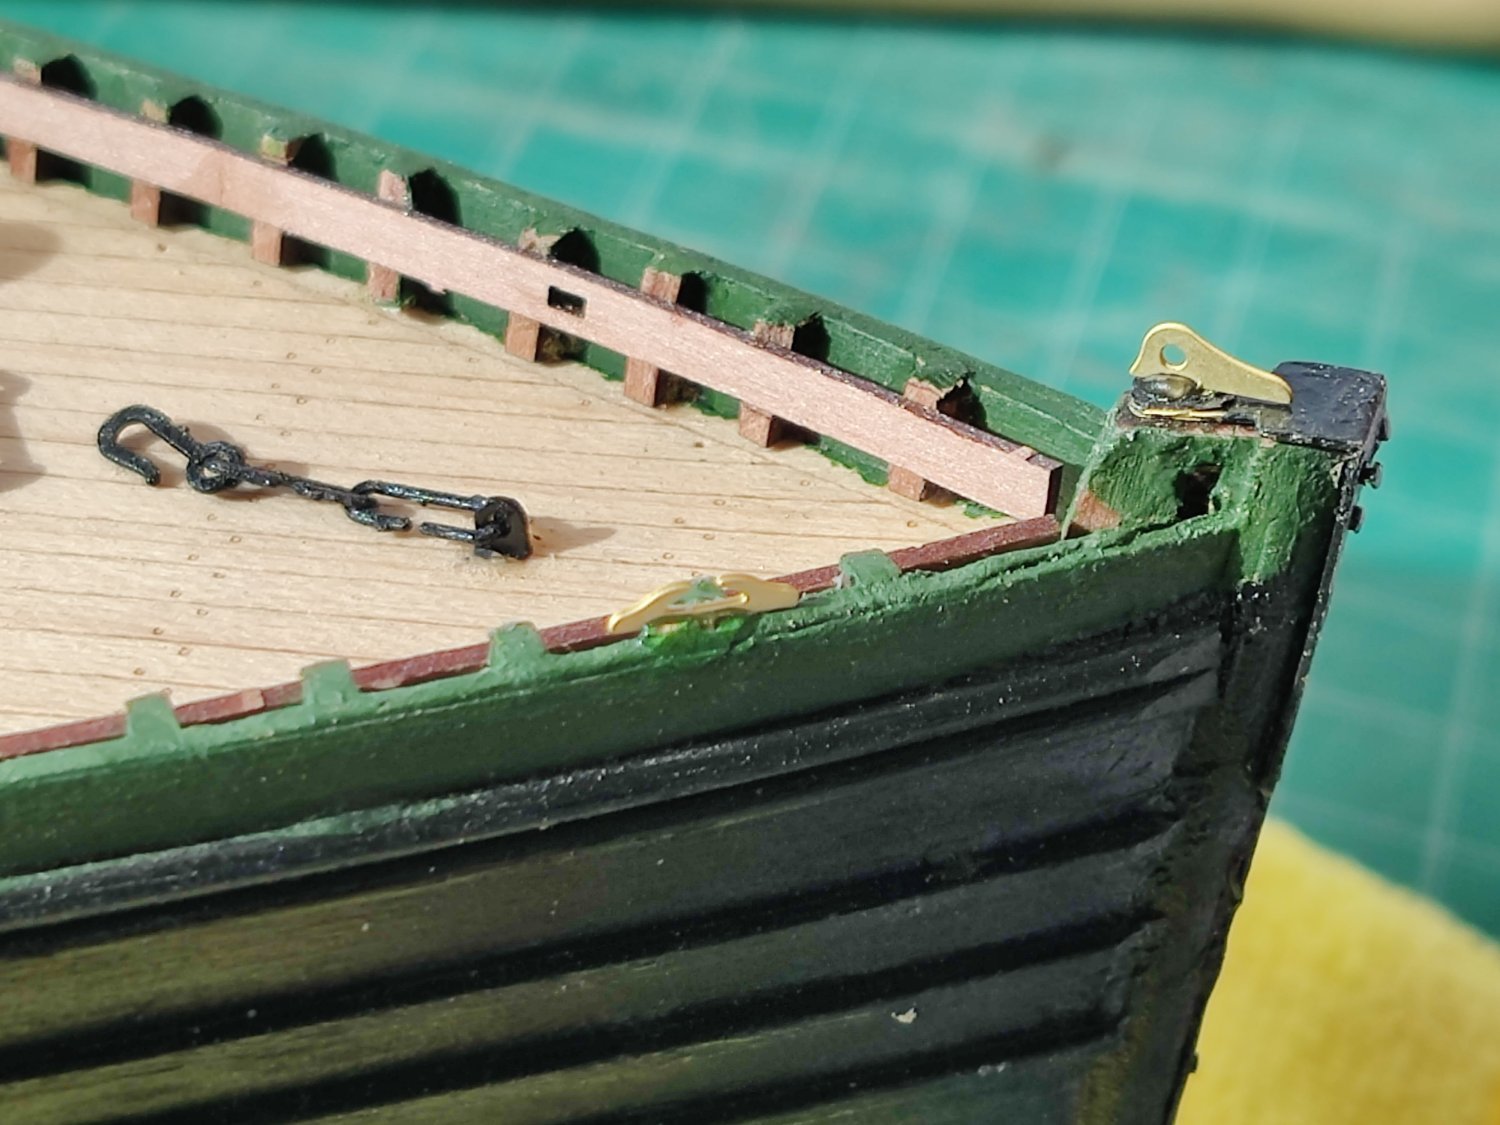
Some observations regarding planking on Fife: The thicker pear pieces that are to be used for the first planking, are much harder to bend than the thinner planks of walnut for the second planking. I was able to plank 8 rows without tapering on the pear first planking and could do 11 rows on the second planking of walnut with out tapering. In the instruction manual the pictures show the keel pieces that appear to be the same wood type as the second planking. That appears to be a consistent practice of the boat designer Chris Watton. However, since Chris left Amati, that does not appear to be the practice. The instruction manual discussed the possibility of not painting all of the hull to show off the beautiful walnut used to plank it. Because the keel is now made with pear wood that is not a realistic possibility. I tried staining the keel to get it darker to match the walnut but could not get a good enough match to do that so that beautiful walnut will be painted. Having the keel a different color than the planking just does not work. I do like the shape of the hull and it is easier to plank than most models.
-
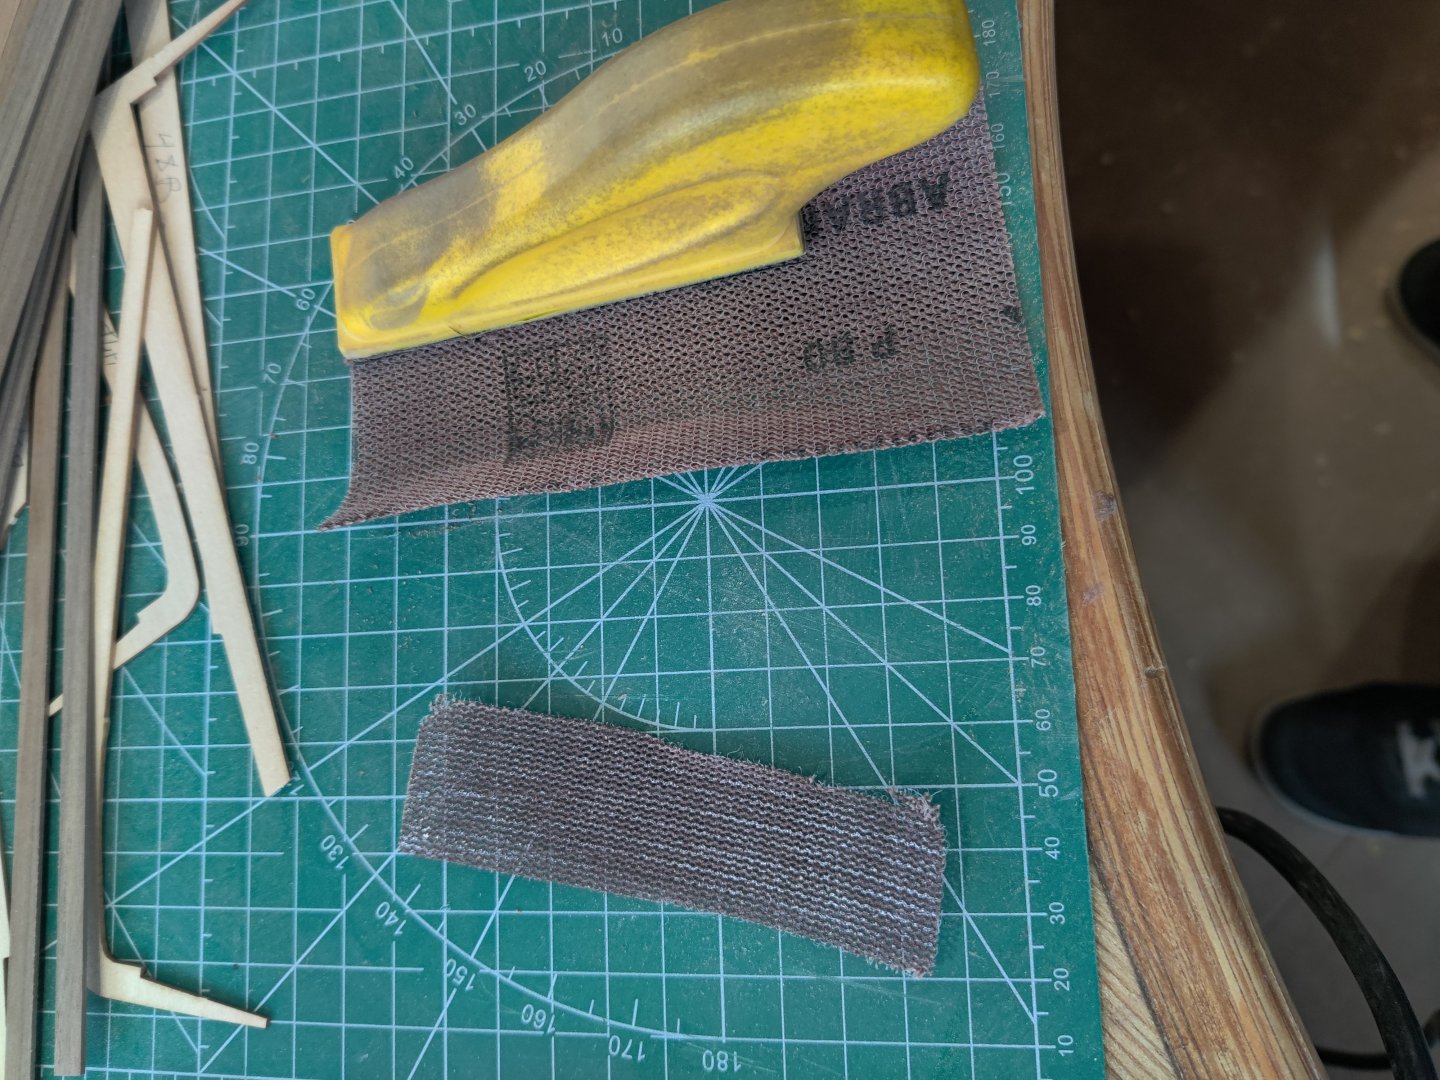
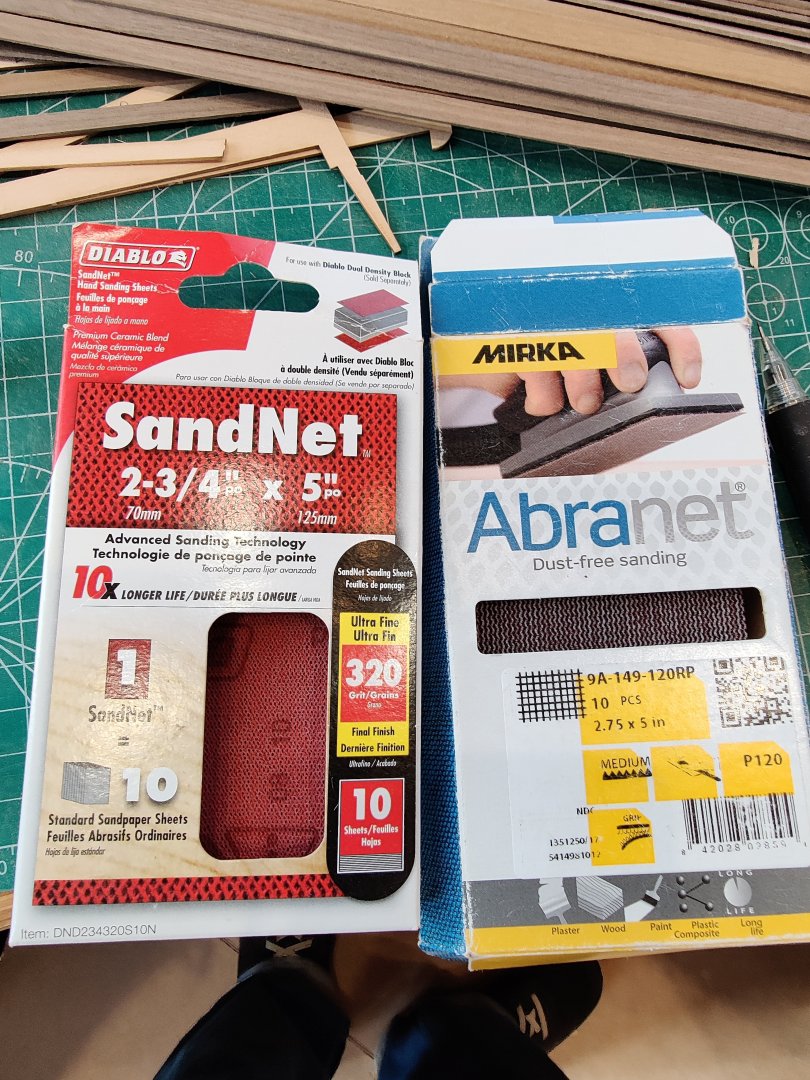
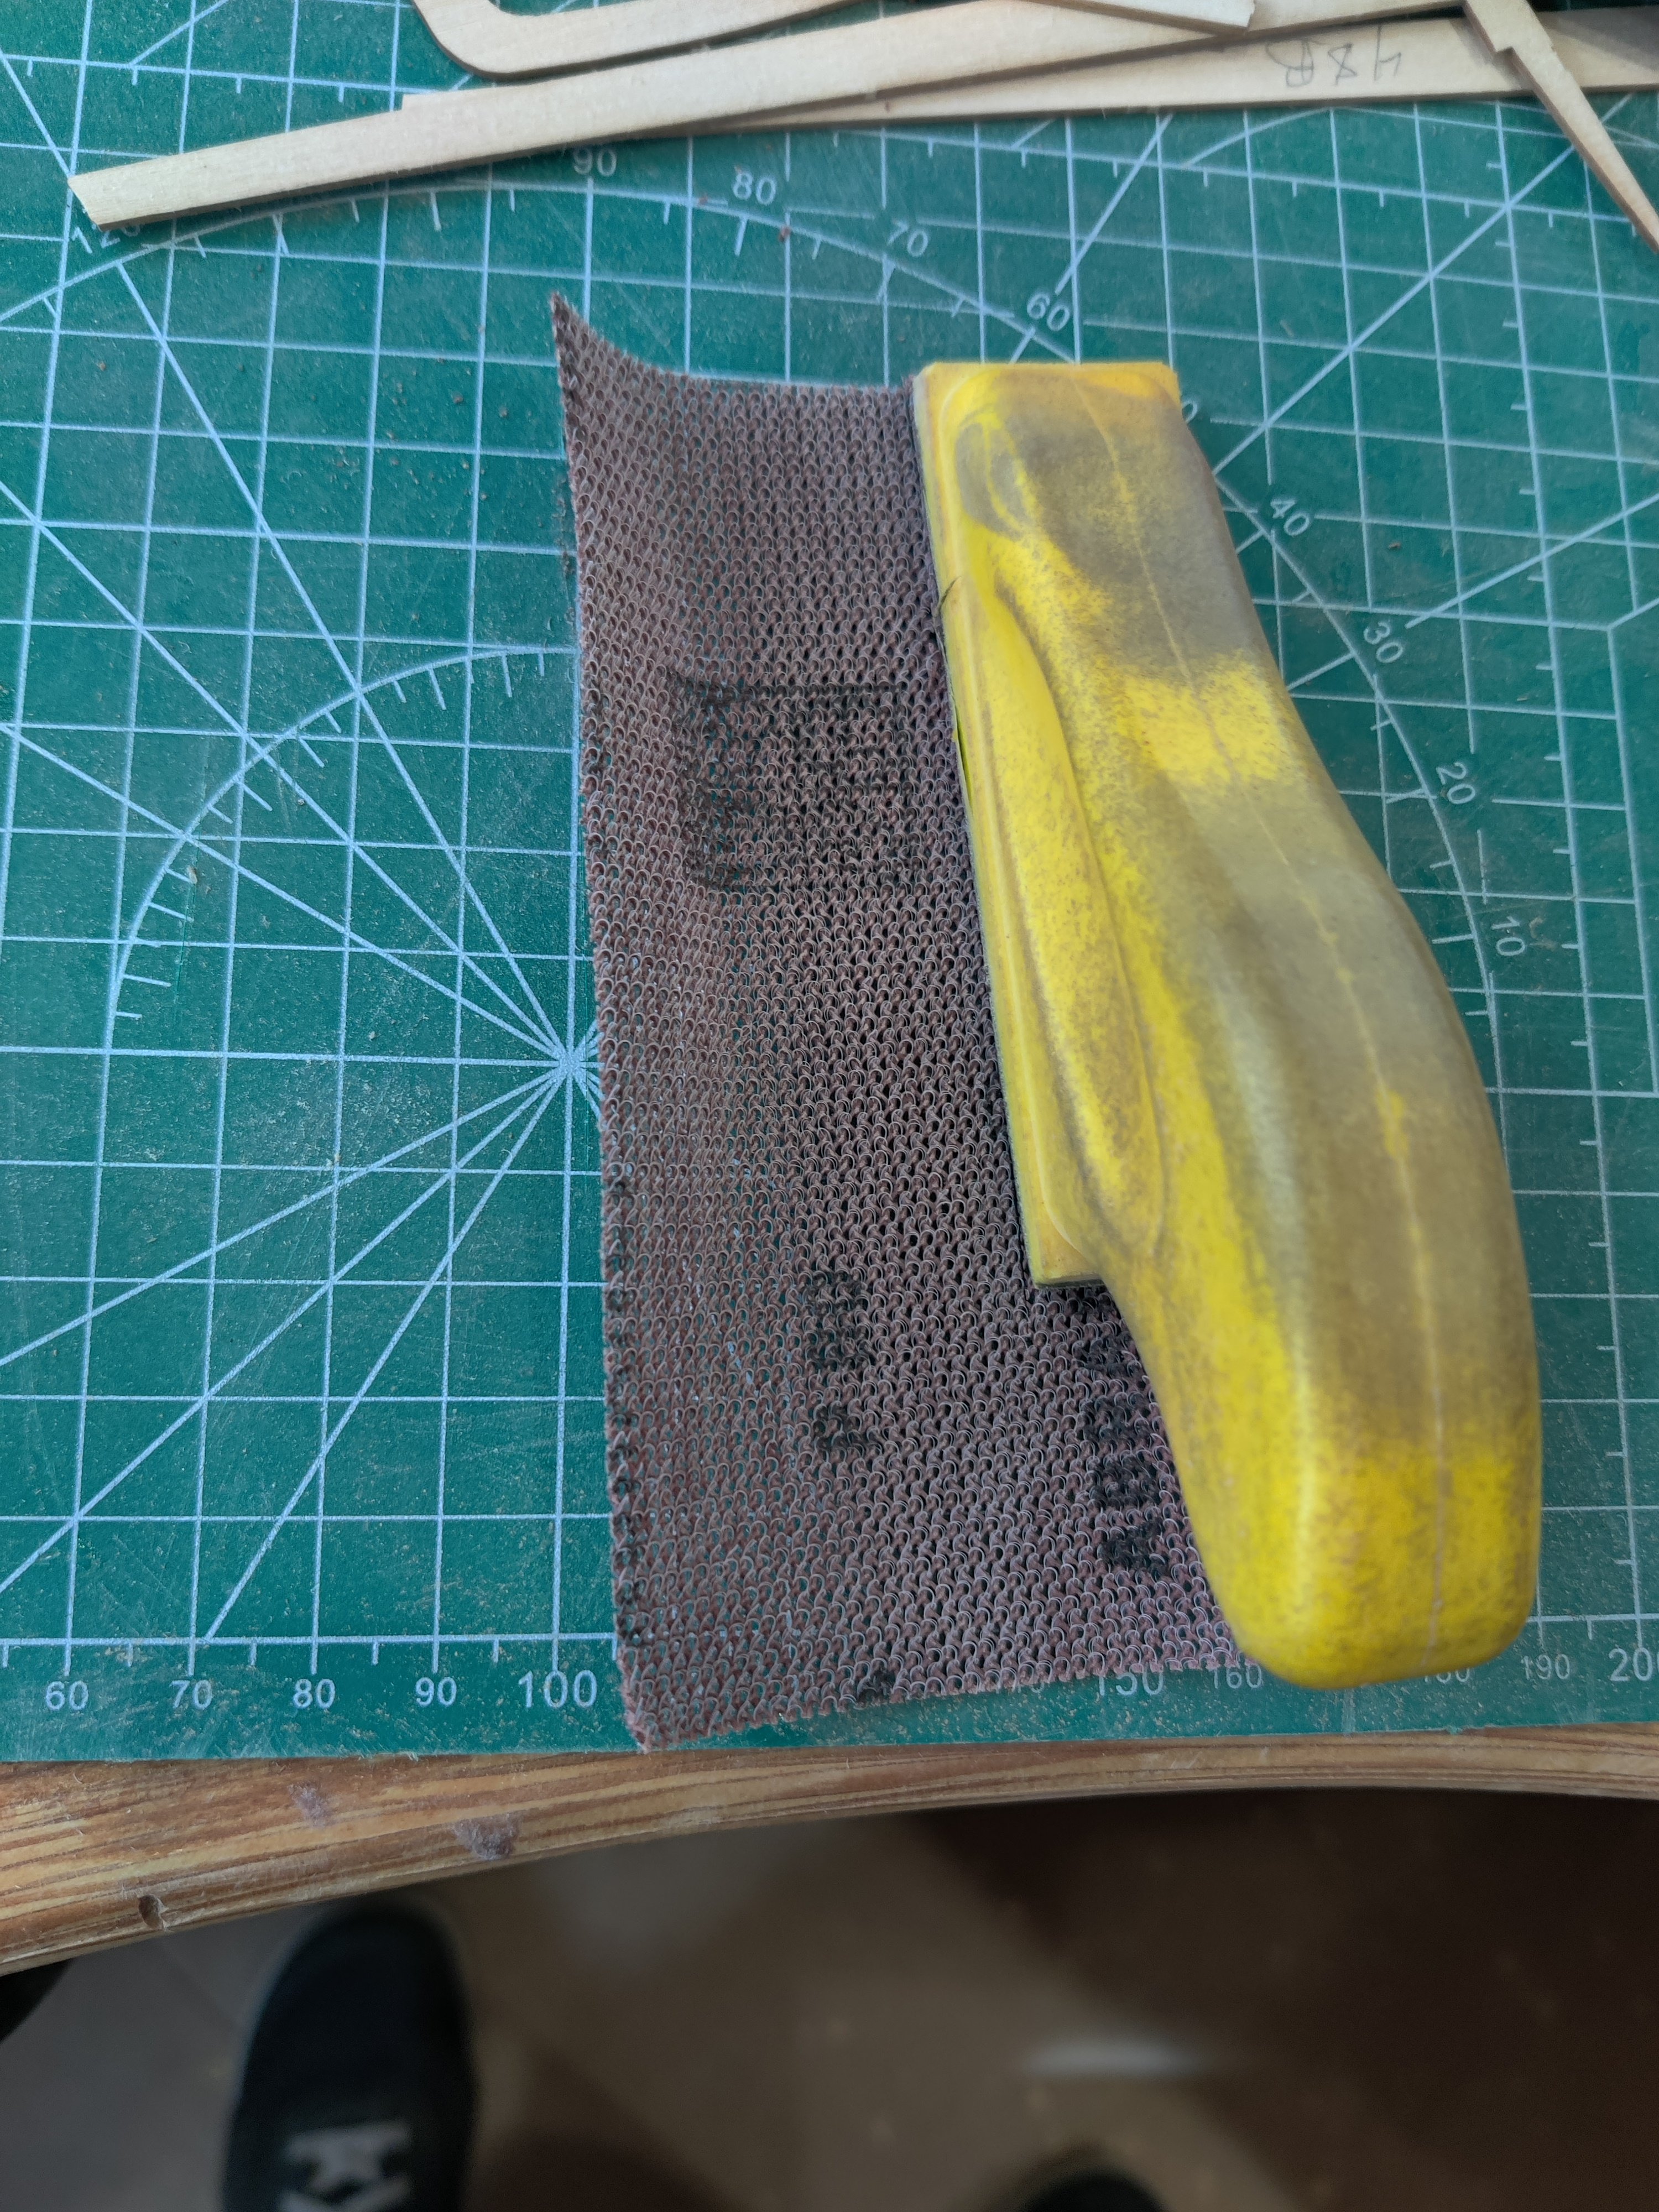
For those who have used traditional sandpaper with a paper backing the improvements in sanding paper took a major advancement when they started producing self cleaning sand paper. There are several brands, I prefer Abranet, made by Myrka. it lasts longer ad self cleans better. It works really well with the soft sanding blocks that have the backing that grips the sand paper. Just cut it to fit. The other characteristic is that it never really wears out it just changes the grit as it ages. After long use 80 grit becomes 120 grit and with more wear becomes 220 grit etc. Try it and you will never go back to traditional sand paper.

-
-
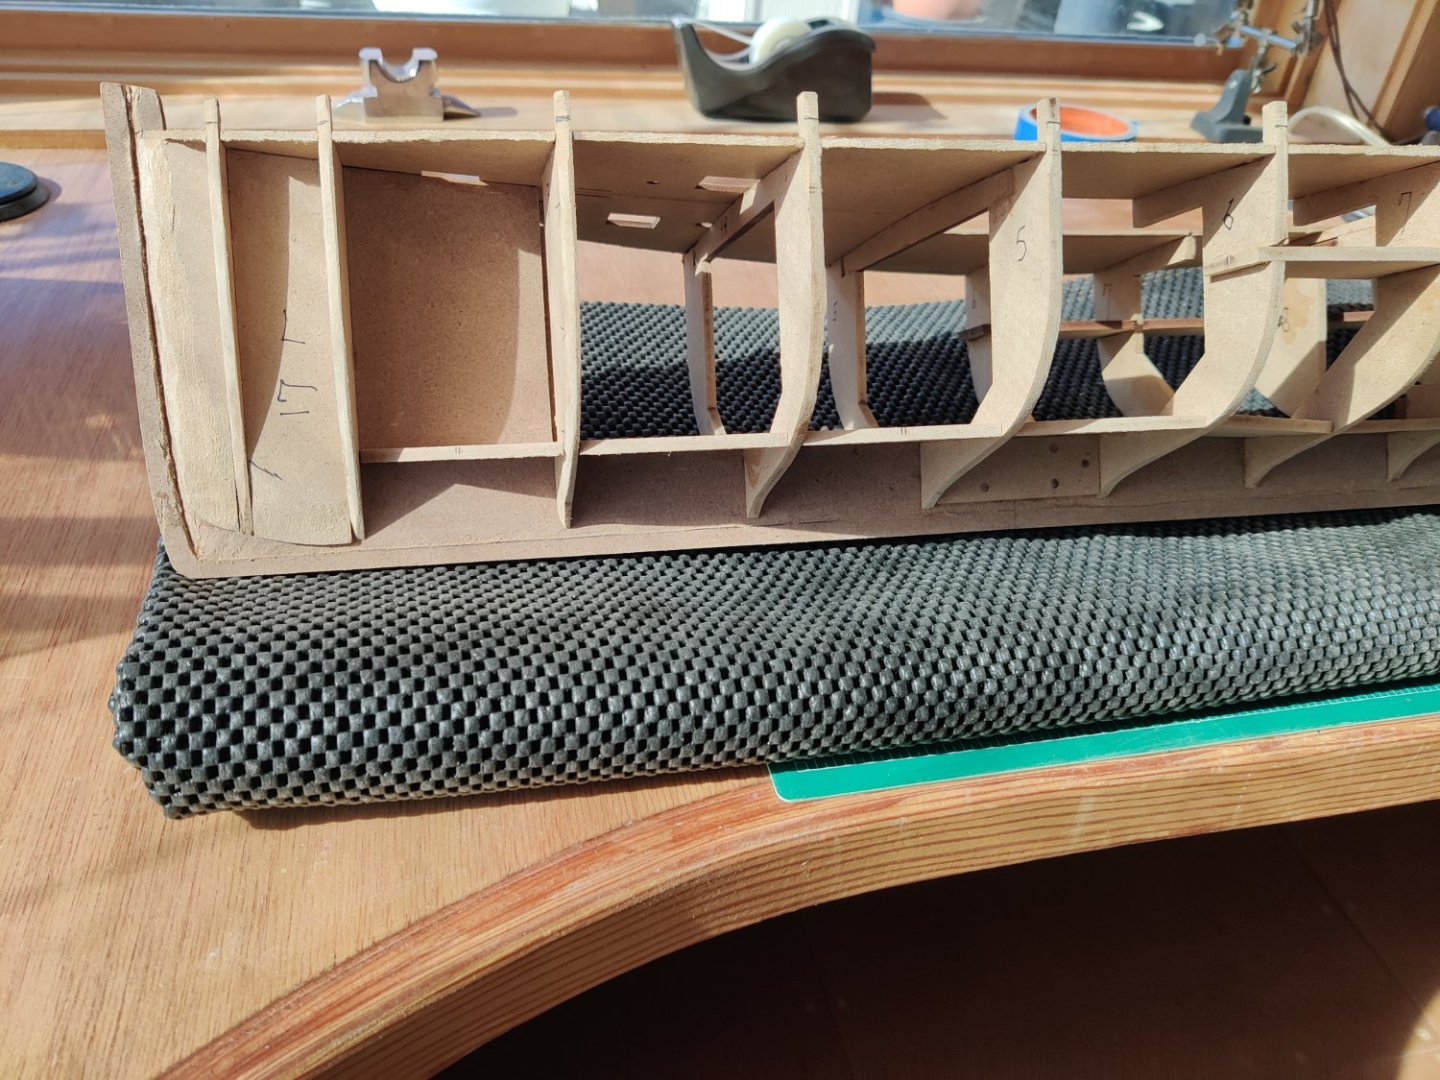
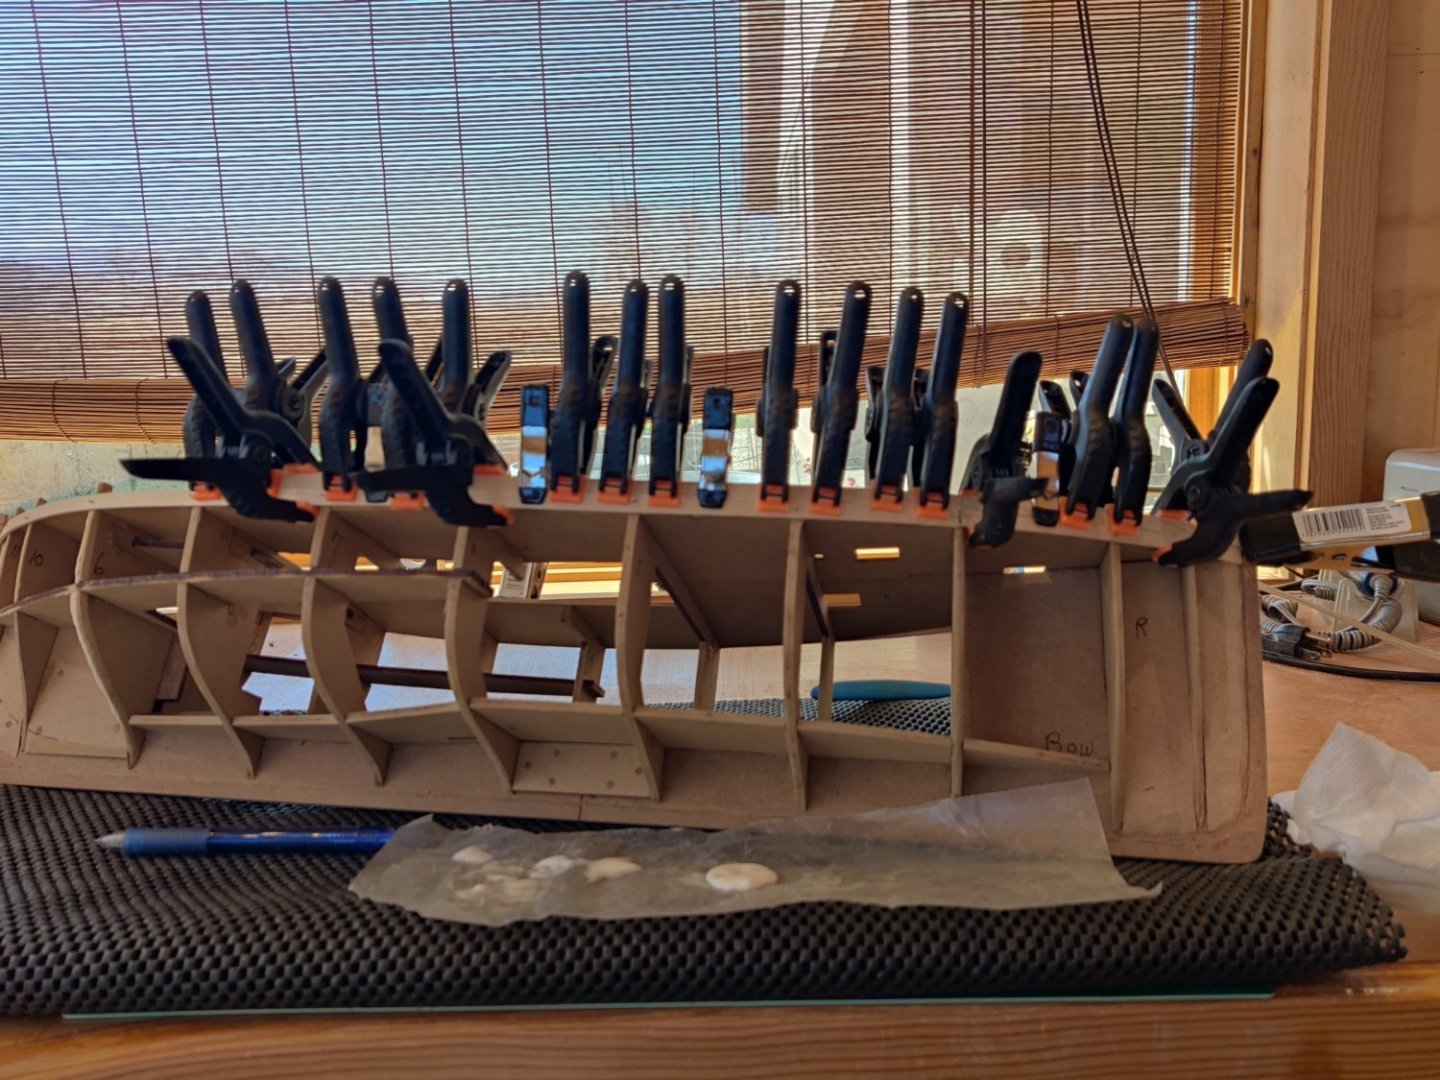
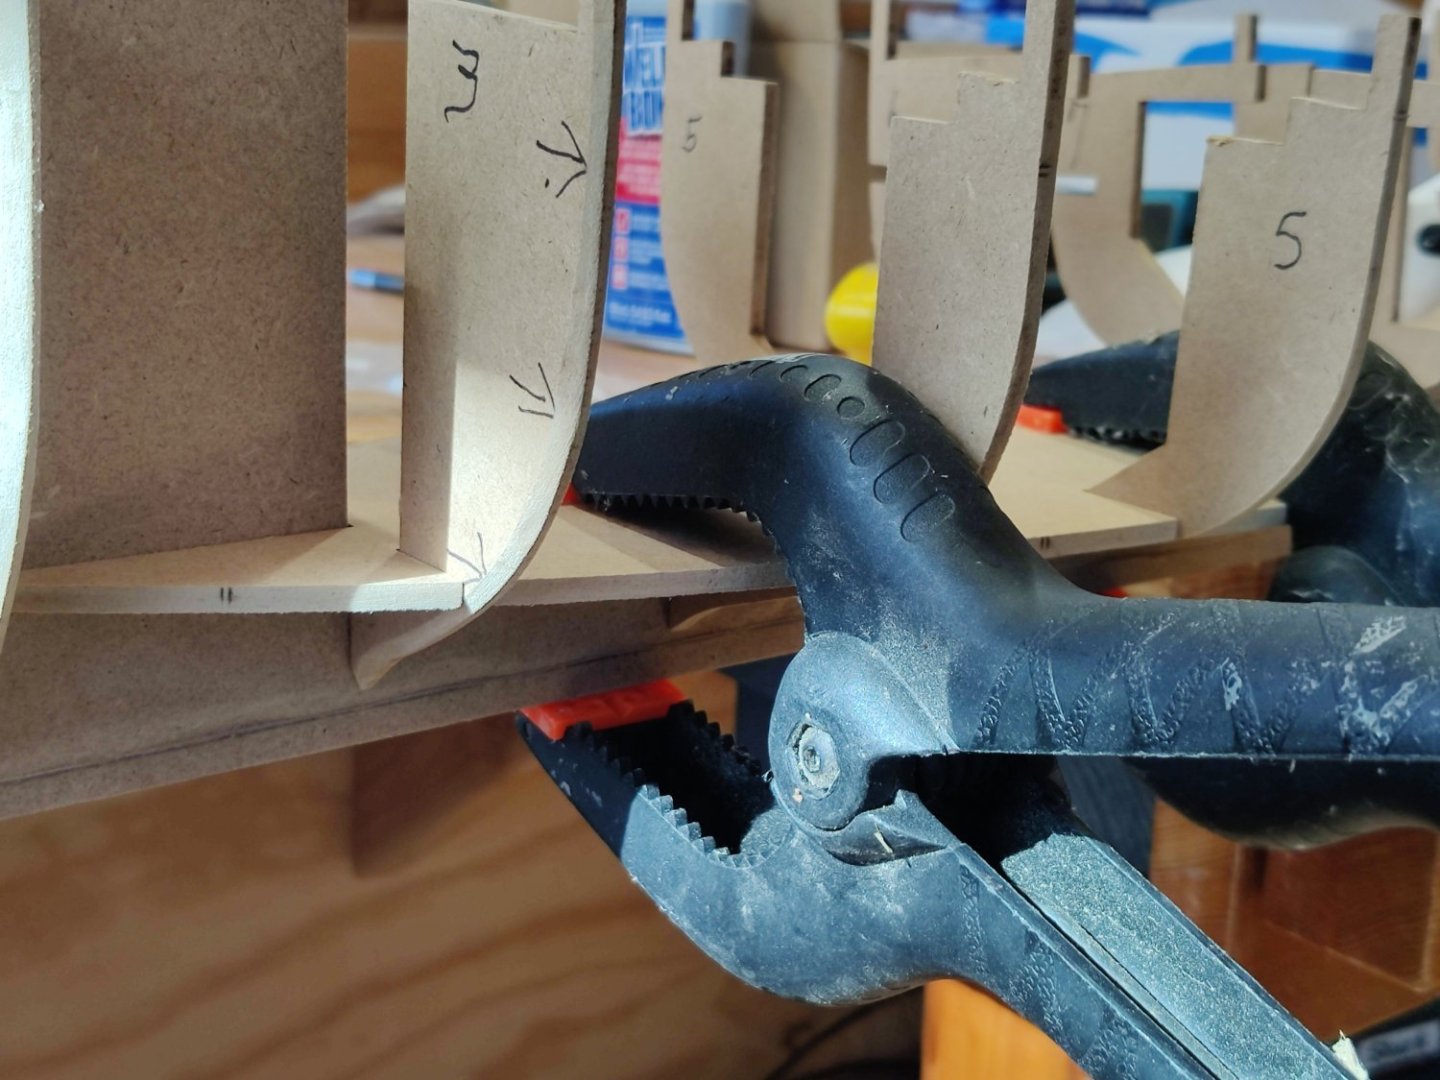
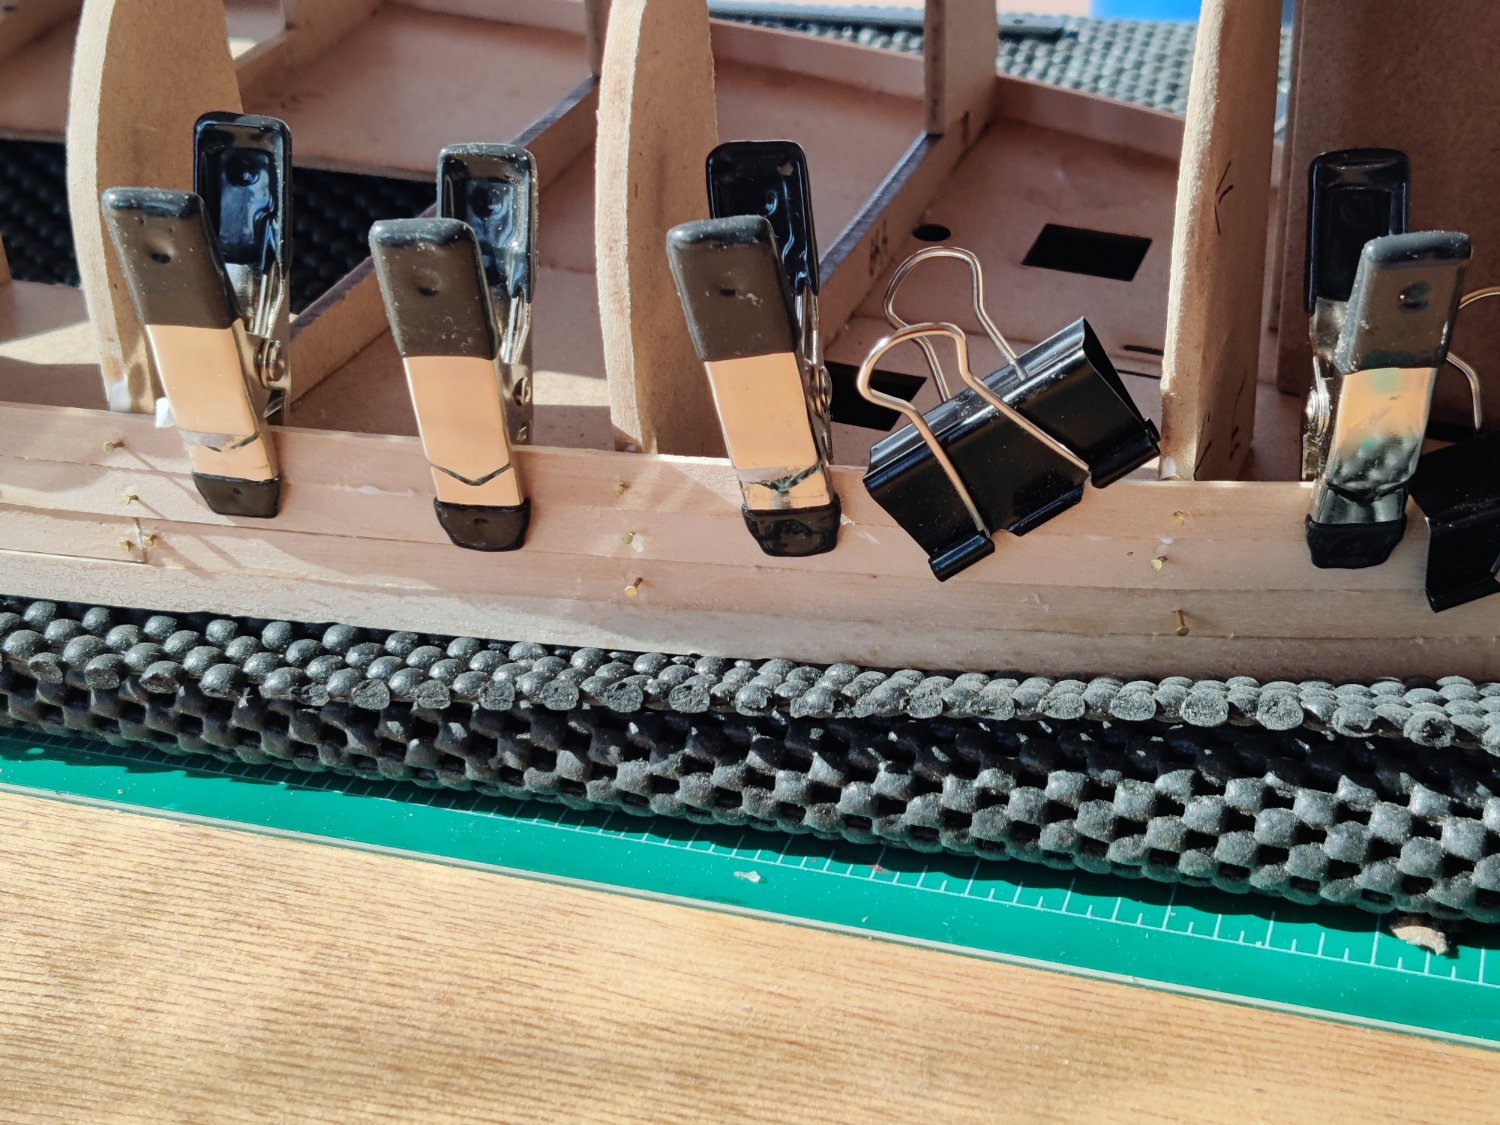
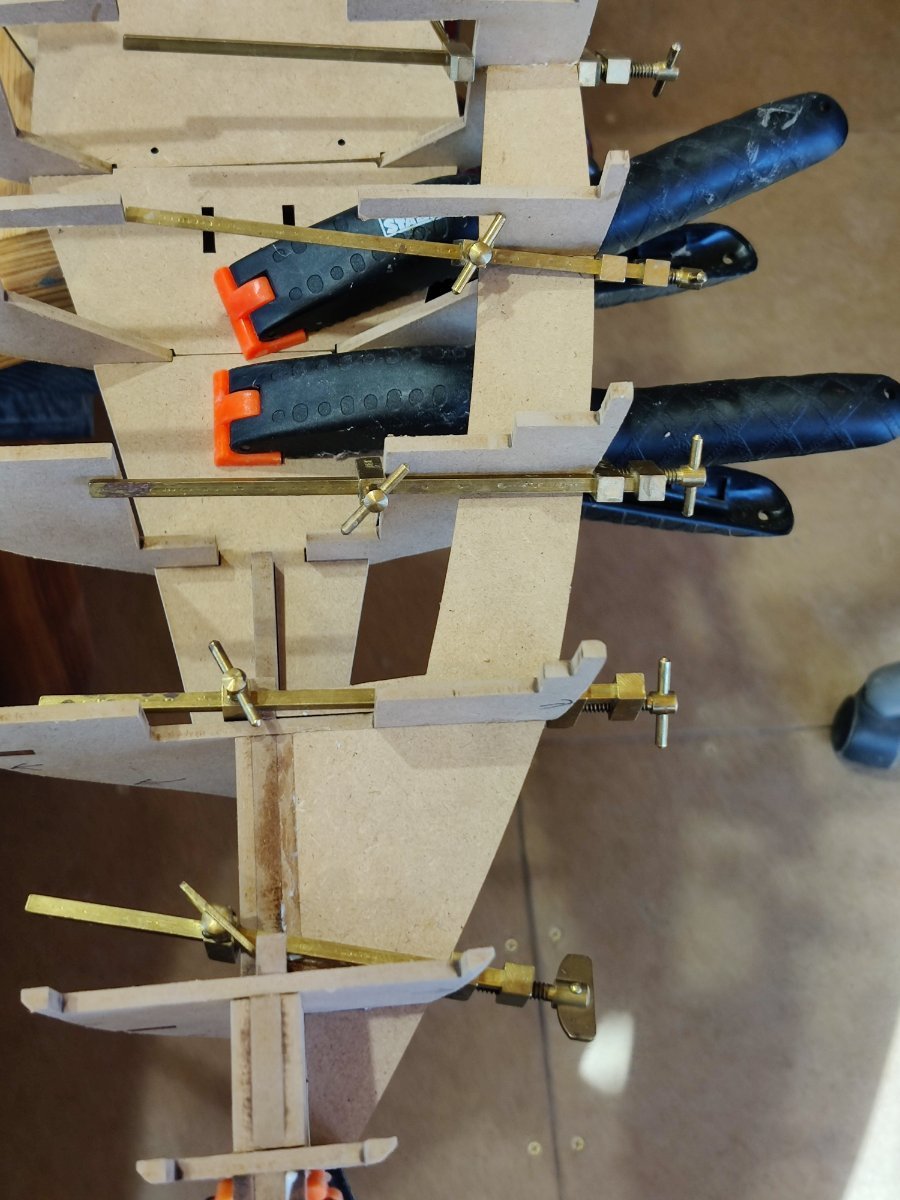
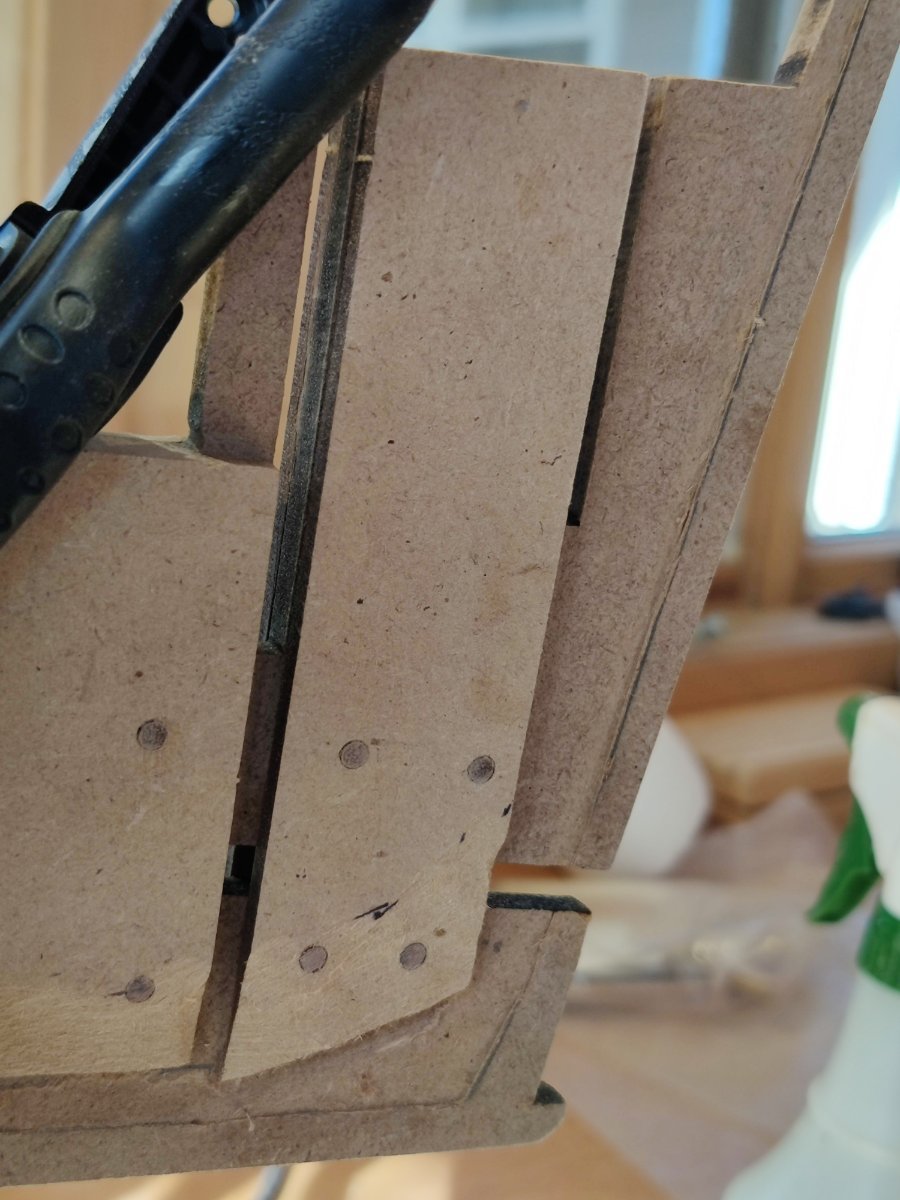
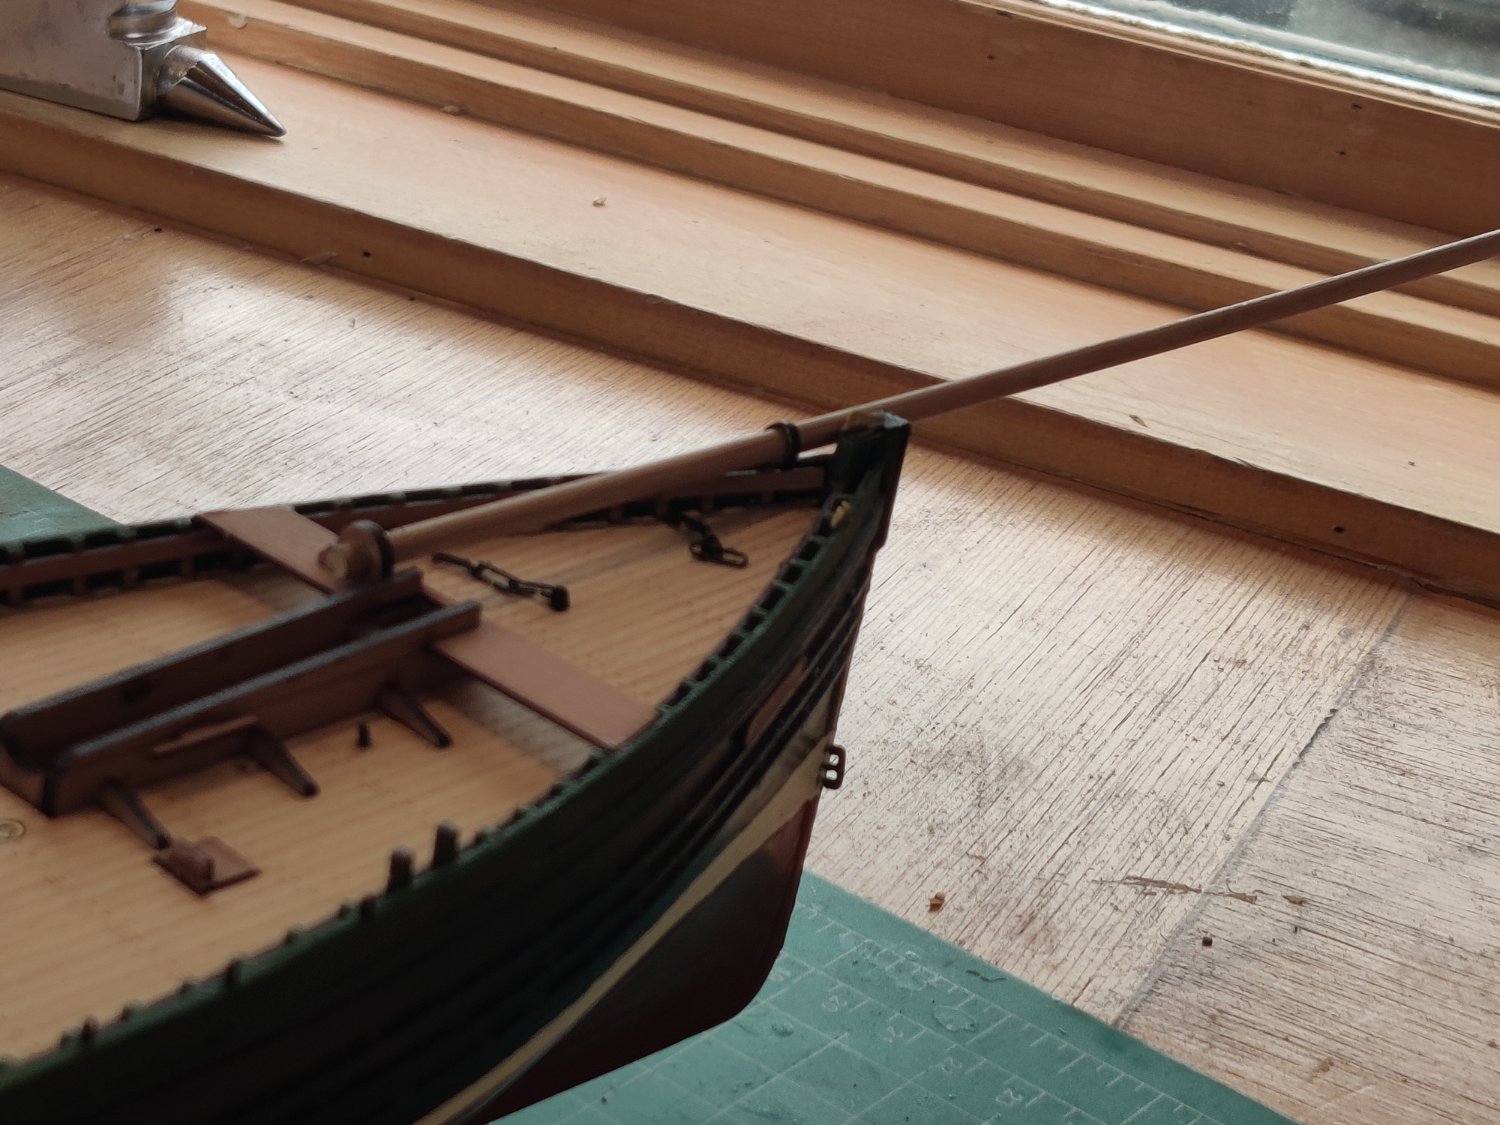
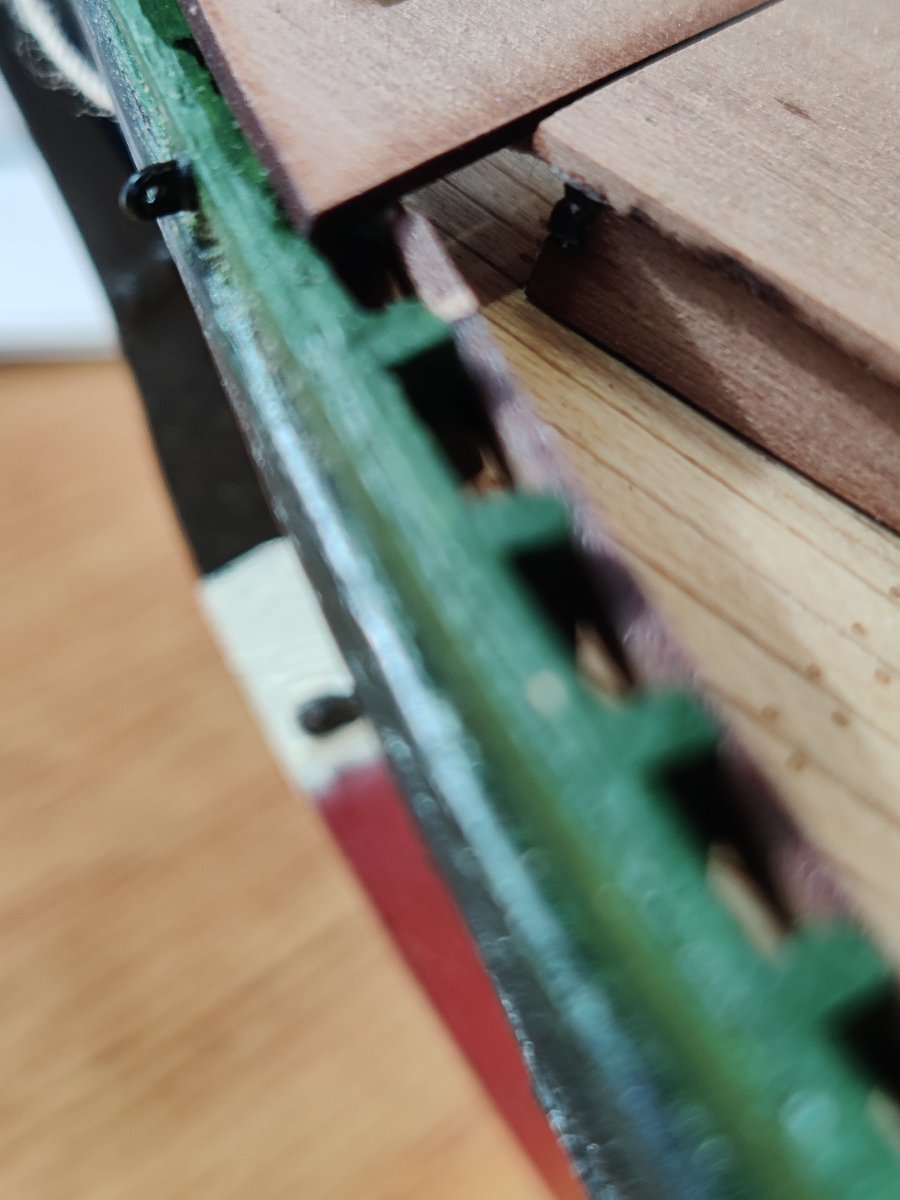
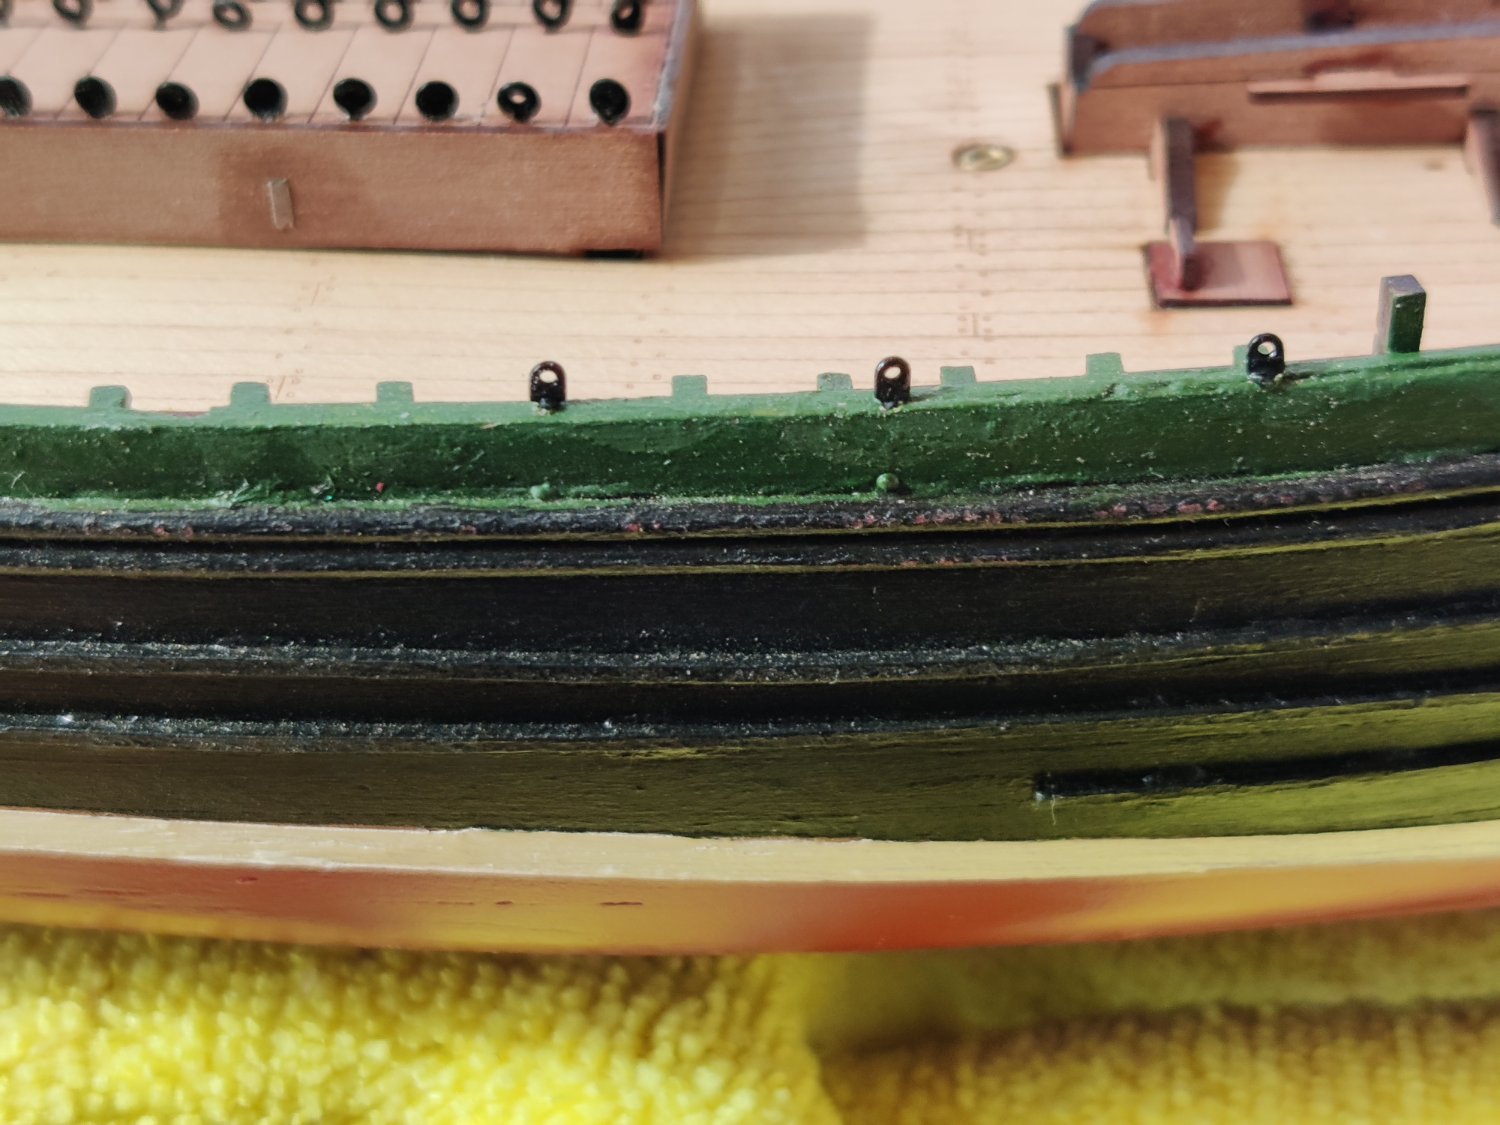
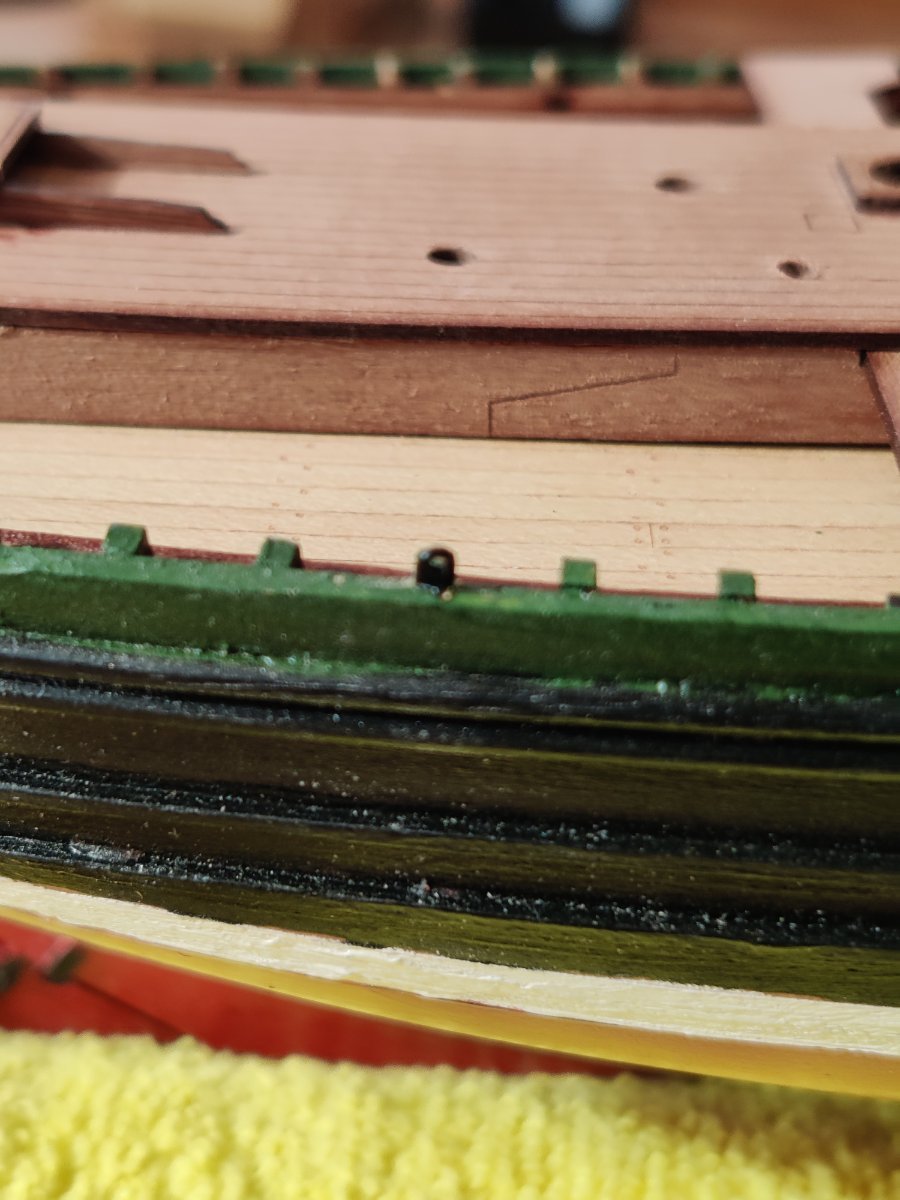
When planking it is easier for me to lye the boat on a flat surface. To protect it and keep it from moving I take a large roll of rubber shop shelf liner and make a tick wide bed to lat the boat on. One of the lessons I learned from the Lady Isabelle build was that when you have a double hull it is critical to get the rabbit at least as deep as the thickness of the first layer of planking.I did not do that so i had to have paper thin edges on the plank ends. Also MDF does not cut as cleanly as wood, so a very sharp knife is essential to get a sharp rabbit. I made a knife cut with a sharp blade and then used a v tool chisel to clean out the cut. That leaves a crisp edge. Because the bulkhead ends that extend above the top deck are going to be removed and replaced with other wood beams it makes installation of the first two planks more challenging. If you glue the planks to the bulkheads it makes it more difficult to remove them later. I found it easier to install the 2nd plank first by gluing it to the edge of the top deck and that portion of the bulkhead below the top deck, and to pin it in place also. Then install the top plank by gluing the bottom edge of the top plank to the top edge of the 2nd plank. This requires some creative clamping. A clamp that keeps the two planks in line a plank the squeezes the the tow planks together and a clamp that keeps both planks in line with the bulk heads. So if you look closely you can see the clamp sequence.
-
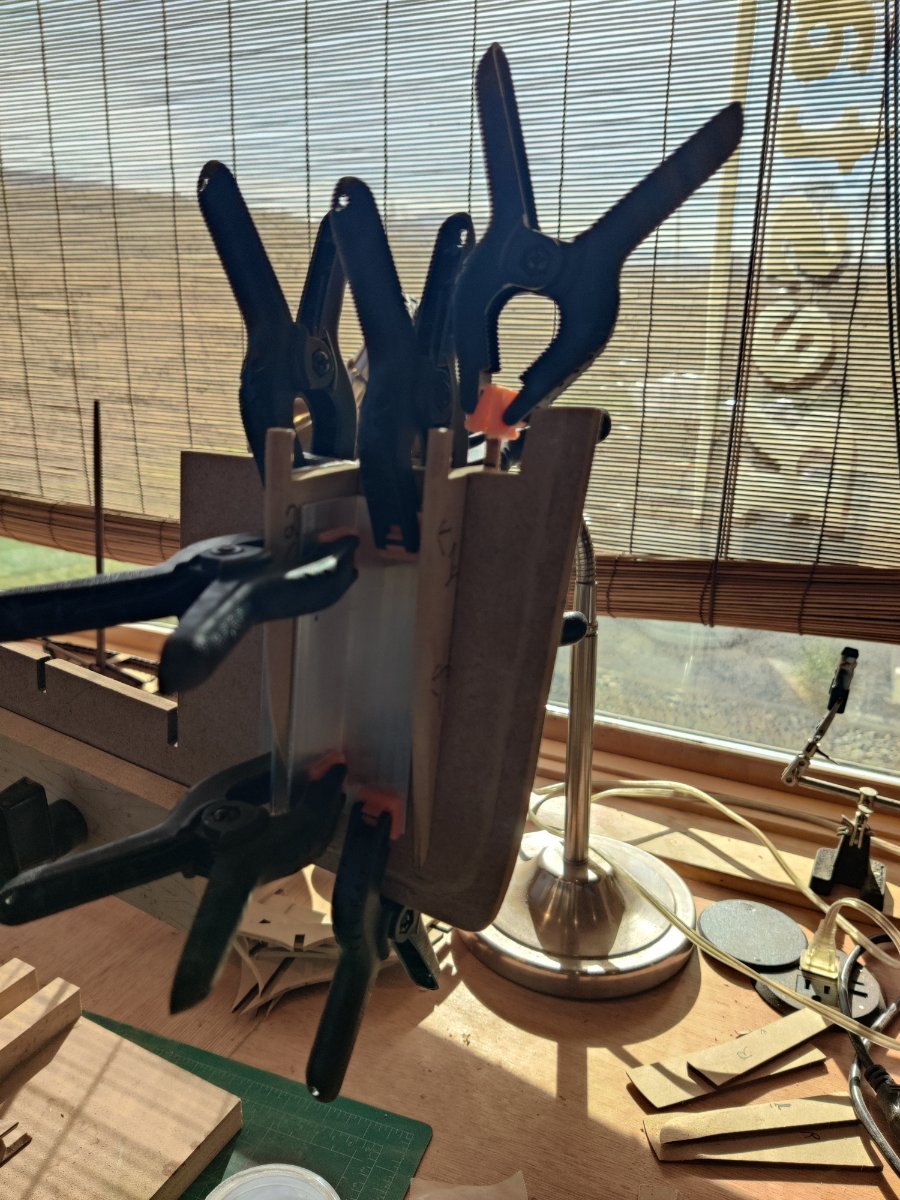
I have an assortment of clamps which is very helpful. You can never have too many clamps. On the Fifie you need some deep clamps to secure the super structure and deck pieces to the bulk heads. As other builders have noted the MDF used for the super structure and bulkheads is very hard and it takes supreme effort to piece with pins. Having the keel firmly secured in a vice is essential. Clamping is easier than pinning and I only use pins where I was unable to get clamps. Long bar clamps are also helpful in keep
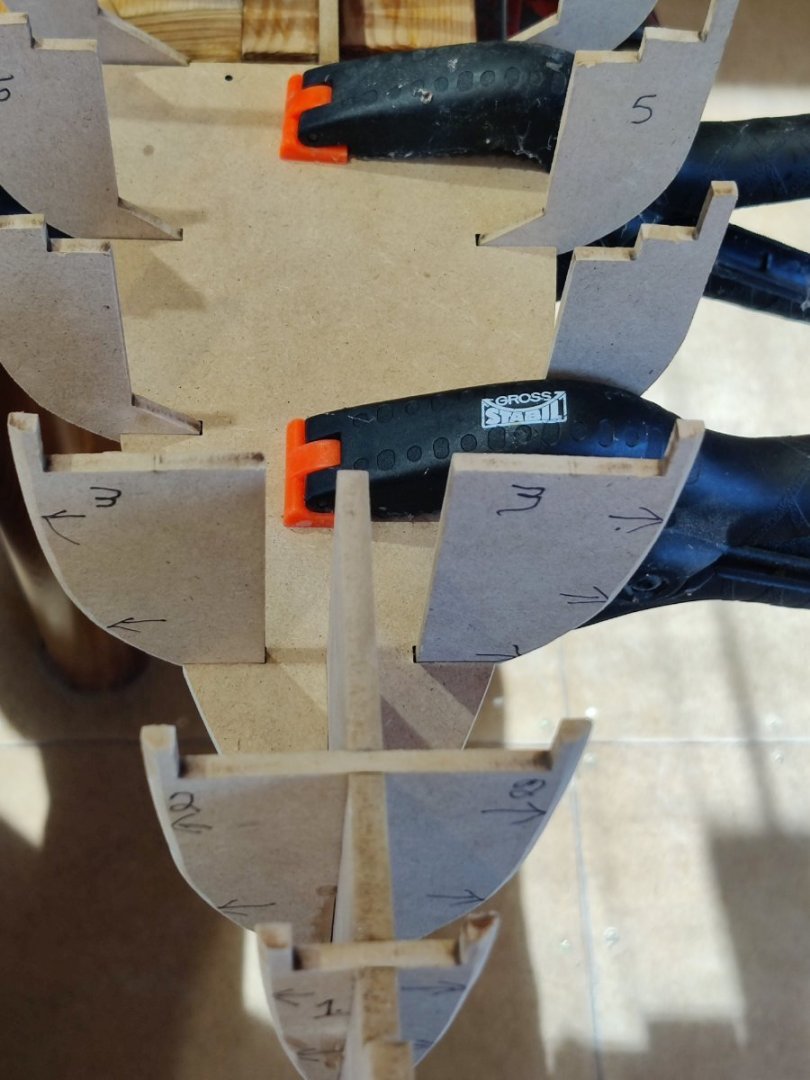

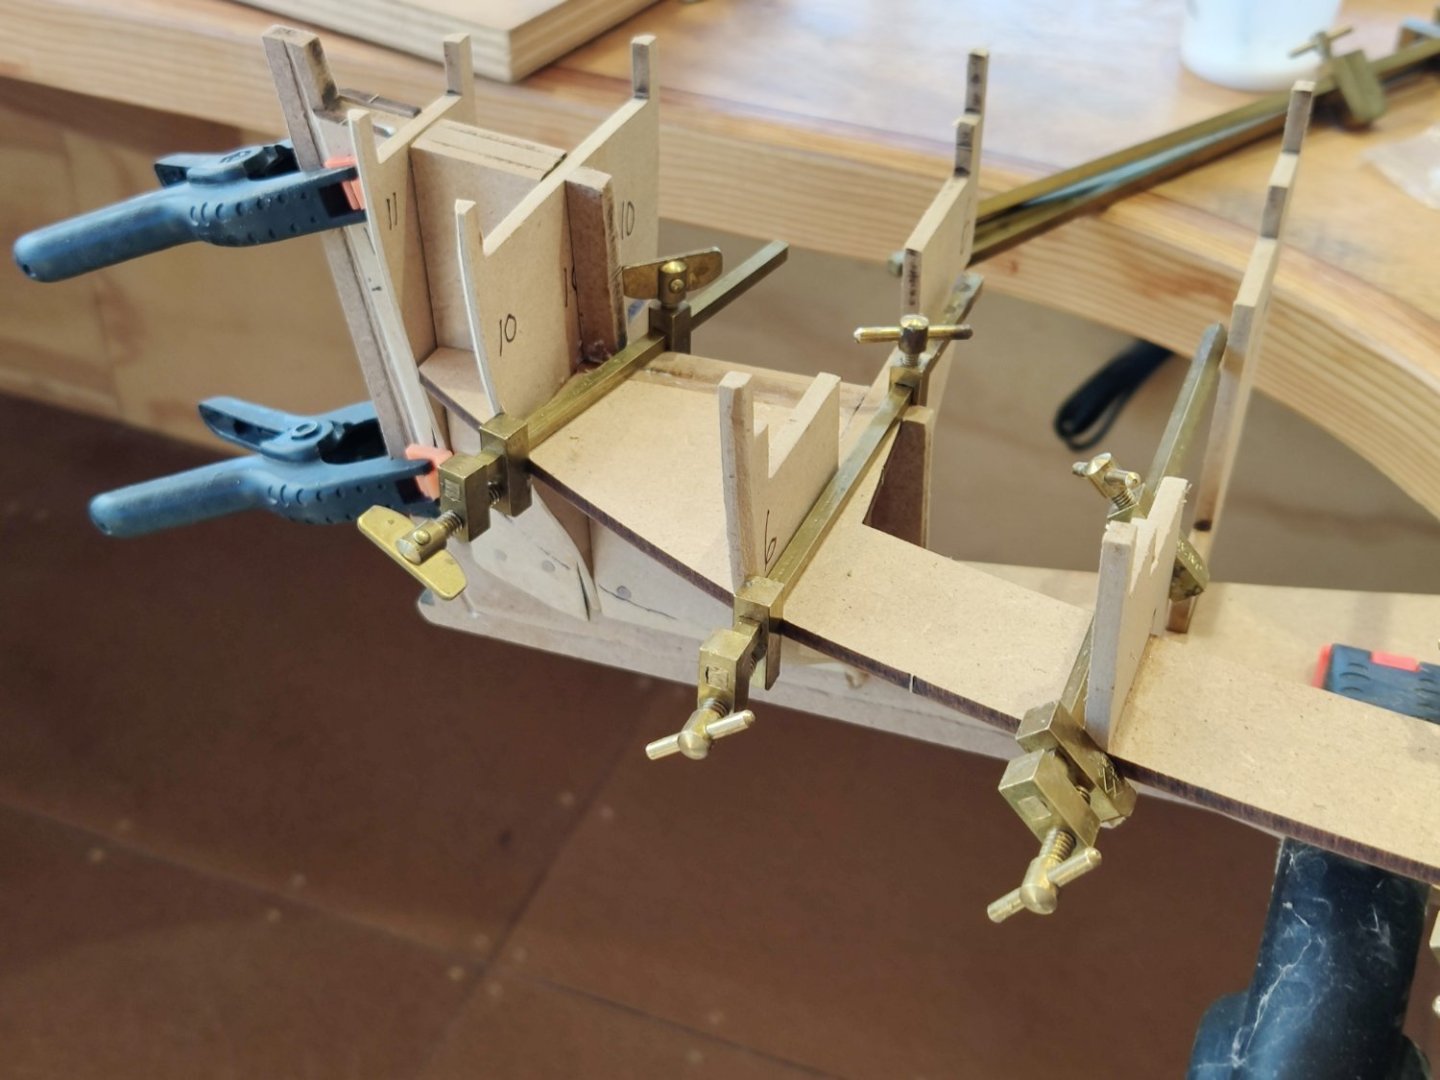
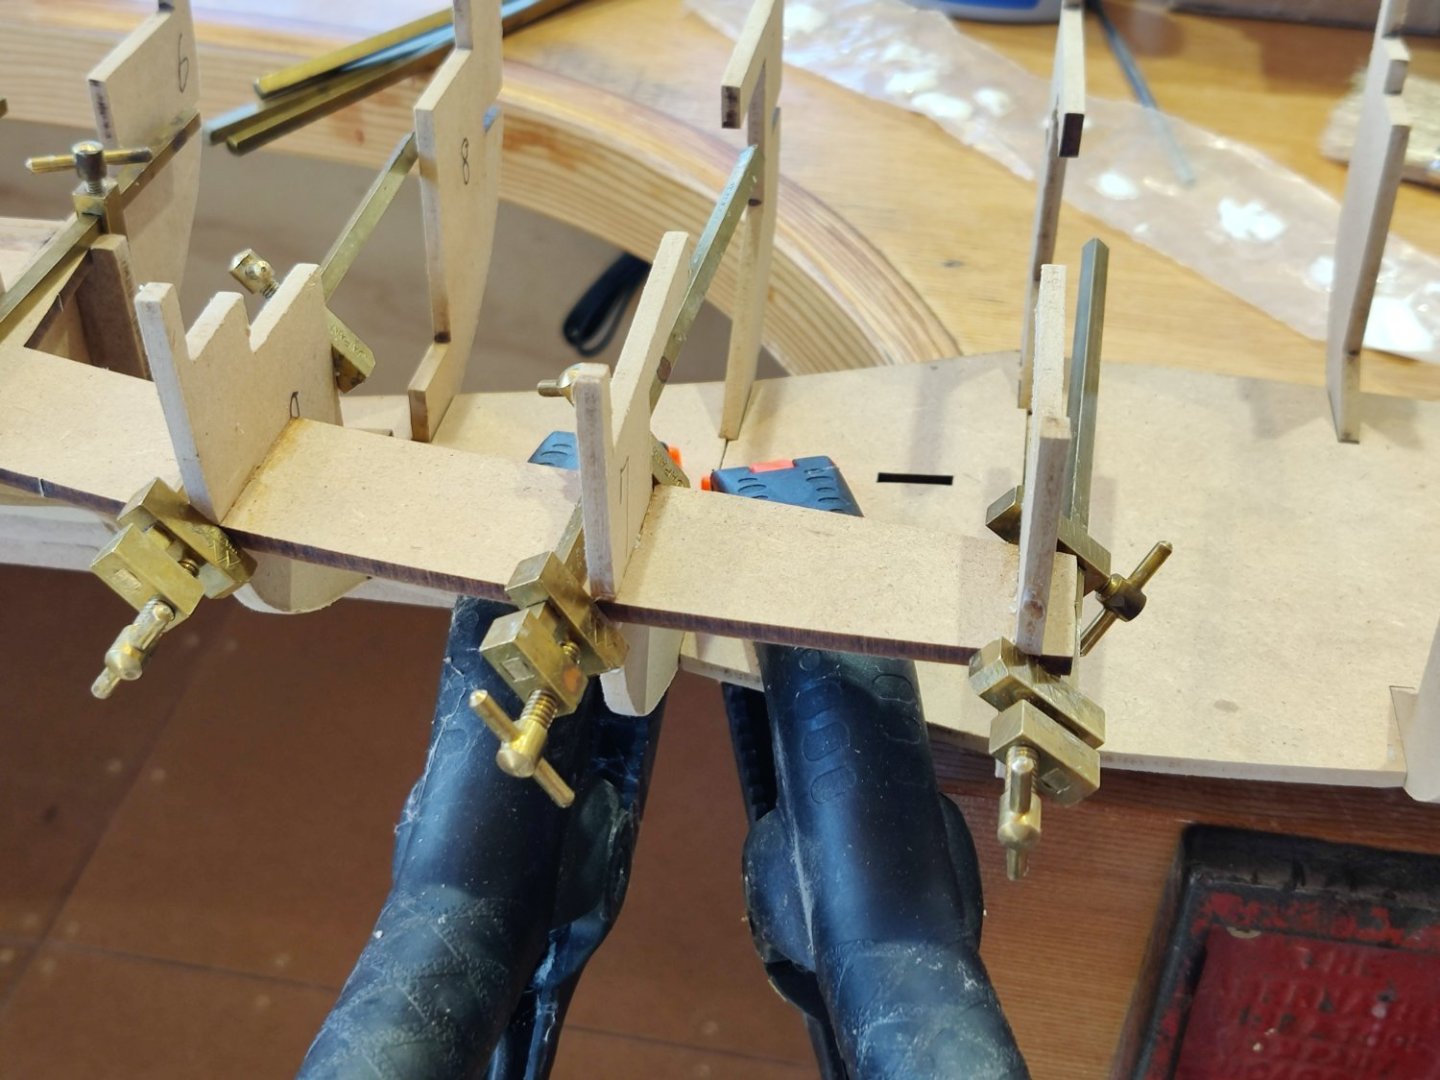
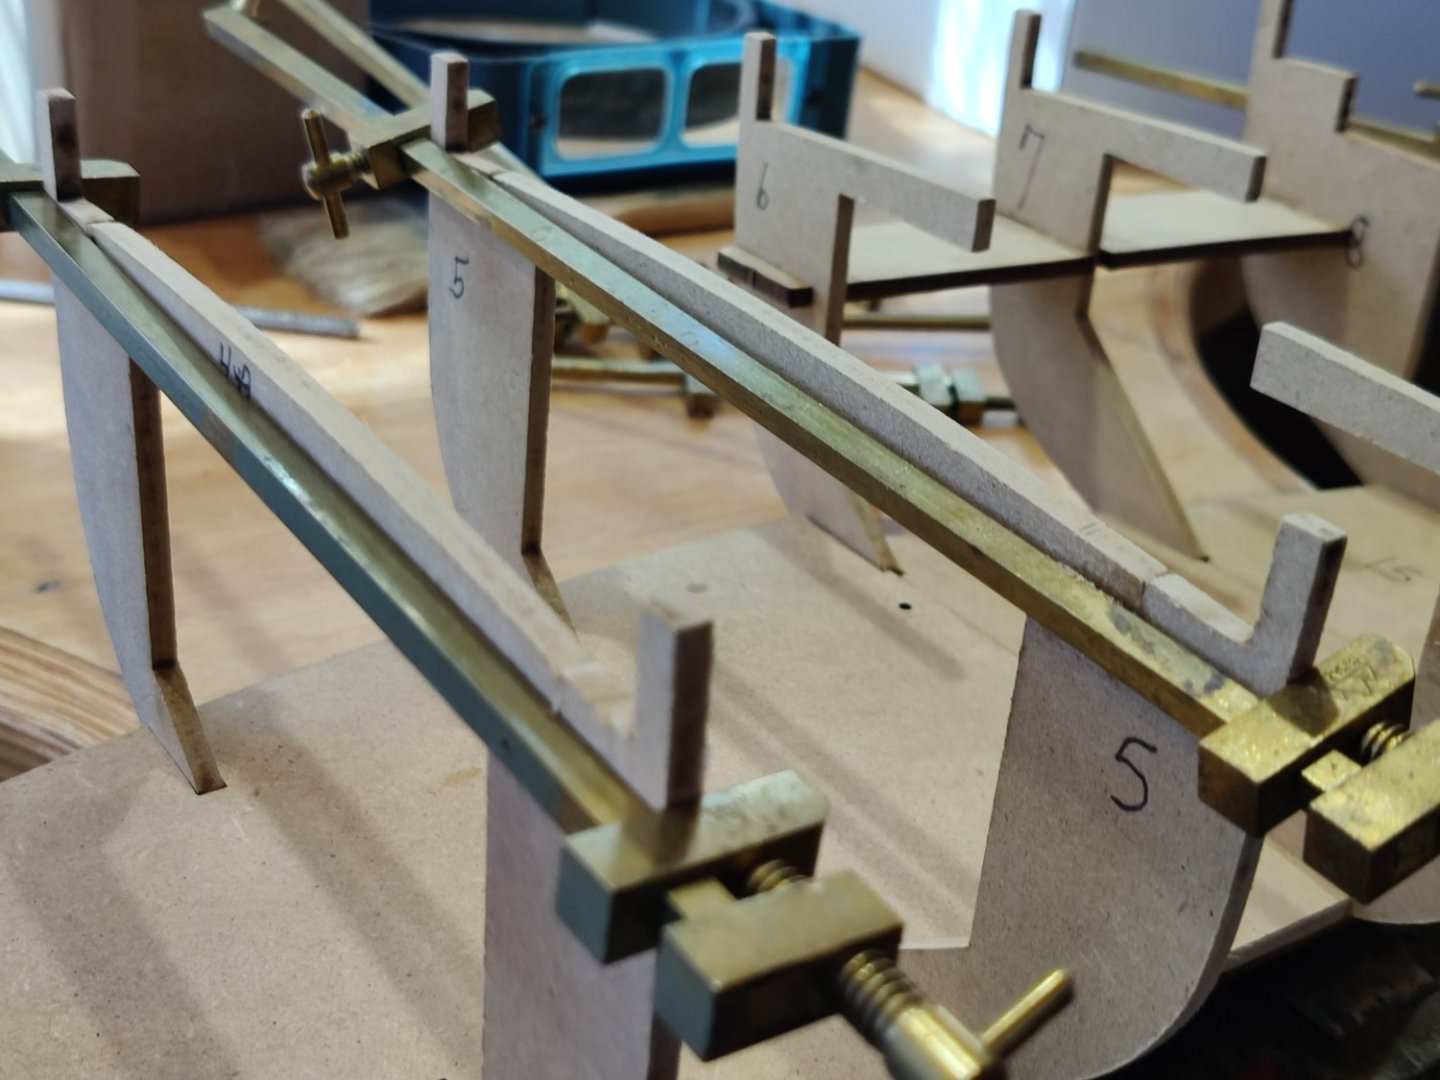 ing the super structure squared up with the bulkheads. Also as noted by others the parts are not number identified on the parts and the bevel lines are not marked on the bulkheads or the other pieces so it is critical to mark them before removing them. I did that but still made a mistake on the piece below because i beveled it on the wrong edge. There was plenty of scrap MDF material and I was able to cut another one out.
-
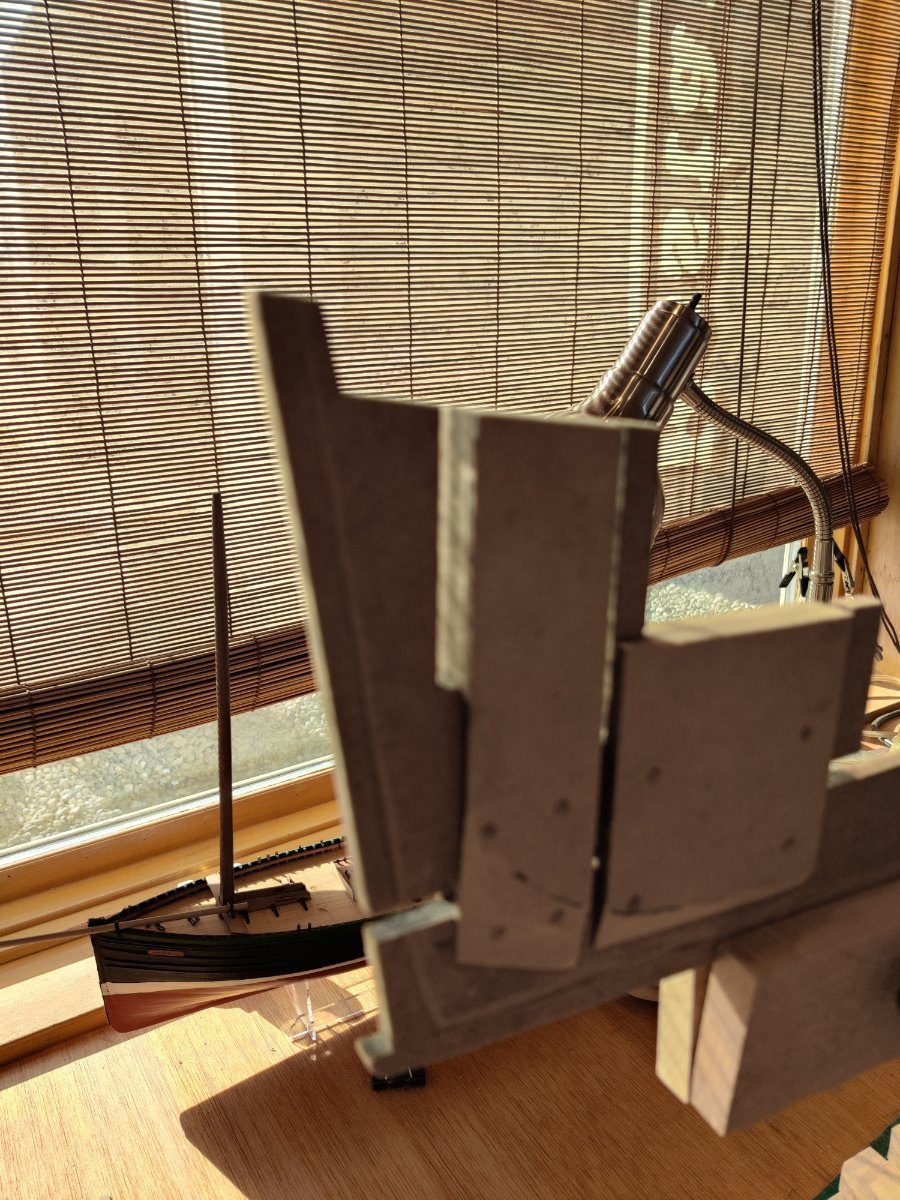
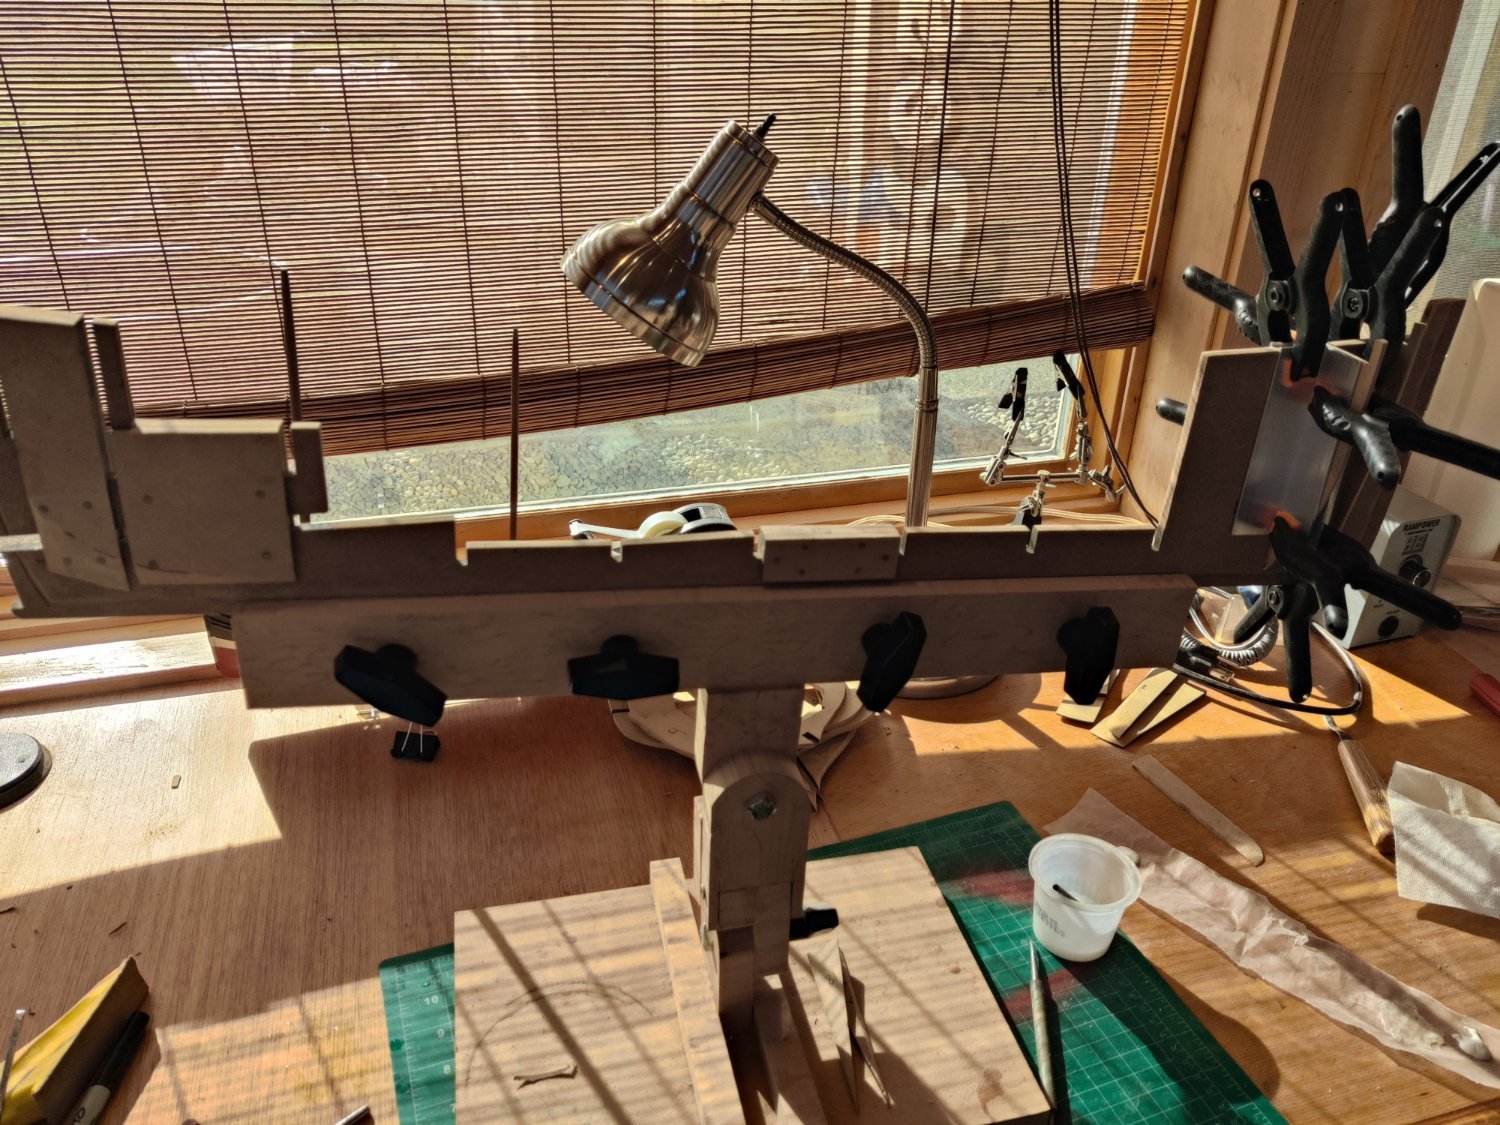
After almost completing Lady Isabelle, by Chris from Vanguard Models I knew I wanted to do another model by Chris. Lady Isabelle created plenty of challenges for a newbie yet it was gratifying to be successful and learn new skills at the same time. I have yet to complete the rigging on Lady Isabelle. Having never done any rigging it is all new. The challenge I have is that I only have complete use of one arm, I have severed the motor nerve for my right bicep so I am unable to lift my right arm. I can put in place on a chair arm or table and then have limited use of my right hand. The challenge is not being able to elevate the arm or hand so tying knots or doing seizing is a one handed process, even with the use of a third hand clamp it is very difficult. So far after 40 hours of work I have gotten two blocks seized and one hank completed. It is exhausting mentally to do it. So I decided to do another boat and work on the rigging for just two hours a day, with the hope of eventually getting it the masts at least rigged. I decided to do the Fifie because it is 1/30 scale and hope that rigging will be easier with the bigger scale. We shall see. Because there are some great build logs for Fifie by DSmith20639, PJG, Tim Moore, and Ken I will not show the box or parts. However, I will echo their sentiments that Chris Watton is a great designer of boat models. I will concentrate on showing how I have been able with my physical limitations to complete some tasks which may be helpful to other newbies who have not yet gained the skills of the awesome model makers on this site. The first pictures below show the keel clamp I have made. It Is able to hold a long keel. it can rotate forward and back ward as well as left and right. It is essential to me being able to reach things with both hands simultaneously. It also shows the aluminum quarter rounds that I use to make sure the bulkheads are perfectly square. I have 4 of them to completely lock the bulkhead square. I also have them in 1/2", 3/4", 1", sizes in lengths of 2" and 4" so that they can be used on smaller scale models, like Lady Isabelle and larger scale models like Fifie.
-
After almost completing Lady Isabelle, by Chris from Vanguard Models I knew I wanted to do another model by Chris. Lady Isabelle created plenty of challenges for a newbie yet it was gratifying to be successful and learn new skills at the same time. I have yet to complete the rigging on Lady Isabelle. Having never done any rigging it is all new. The challenge I have is that I only have complete use of one arm, I have severed the motor nerve for my right bicep so I am unable to lift my right arm. I can put in place on a chair arm or table and then have limited use of my right hand. The challenge is not being able to elevate the arm or hand so tying knots or doing seizing is a one handed process, even with the use of a third hand clamp it is very difficult. So far after 40 hours of work I have gotten two blocks seized and one hank completed. It is exhausting mentally to do it. So I decided to do another boat and work on the rigging for just two hours a day, with the hope of eventually getting it the masts at least rigged. I decided to do the Fifie because it is 1/30 scale and hope that rigging will be easier with the bigger scale. We shall see. Because there are some great build logs for Fifie by DSmith20639, PJG, Tim Moore, and Ken I will not show the box or parts. However, I will echo their sentiments that Chris Watton is a great designer of boat models. I will concentrate on showing how I have been able with my physical limitations to complete some tasks which may be helpful to other newbies who have not yet gained the skills of the awesome model makers
-
Thanks, I found a great set of videos on You Tube by an Englishman that showed how to seize the blocks and how to create a hank for the block.
- Ryland Craze, Keith Black, mtaylor and 1 other
-
 4
4
-
I am rigging my first boat, Lady Isabelle. It does not have a lot of rigging but I have no idea where to begin but thought I would start with the double blocks. The blocks need a circle of rope that can attach to a hook on one end. How do you make that circle? On others you need a line that runs to another block. How do you secure the block in place. It looks line line is wrapped around its self but how is that accomplished. I know this is ultra basic but I have tried to do this for hours with no success. Is there a manual or book that has those basics? Are there videos?
- Keith Black and mtaylor
-
2
-
Thanks, the boat builders here are awesome. I read it every day. Without their experience, expertise and guidance, I would have quit long ago.
-
On 3/7/2024 at 2:45 PM, Der Alte Rentner said:
Not at all, I've done the same thing with other build logs. I was hoping to be able to quote Mustafa when I did the same thing at his build log, but couldn't find the post. (I'm sure Jon will chime in with the particulars, however. I believe he and I were having an exchange of thoughts in Mustafa's build log).
The gist of it was this, that's what these build logs and this website is for (IMHO).
As to your earlier comment on the Hunt WTF moment. I can't find this either, but I posted pretty much the exact same comment about that reference to the 1/8" addition to the transom frames. Deja vous all over again..
I am finding a use for the proportional dividers after all. With every new strake, I double check the math on that spreadsheet. It's an easy tool to use to mark the distance between tick mark on the bulkhead and the last strake. I put the pointy ends on a metric ruler to get the measurement and divide that measurement by the number of remaining strakes in the zone. Turns out, there are quite a few on the fly changes.
One other tool I use a LOT is a 3/8" chisel. I keep a very sharp edge on it and use it to trim the newly added strake. It really saves a lot of sanding time.
You've got lots of fun stuff to look forward to.
😁
Where did you find your proportional dividers? I have been looking for a pair but the only ones I see on ebay are $100 plus.
-
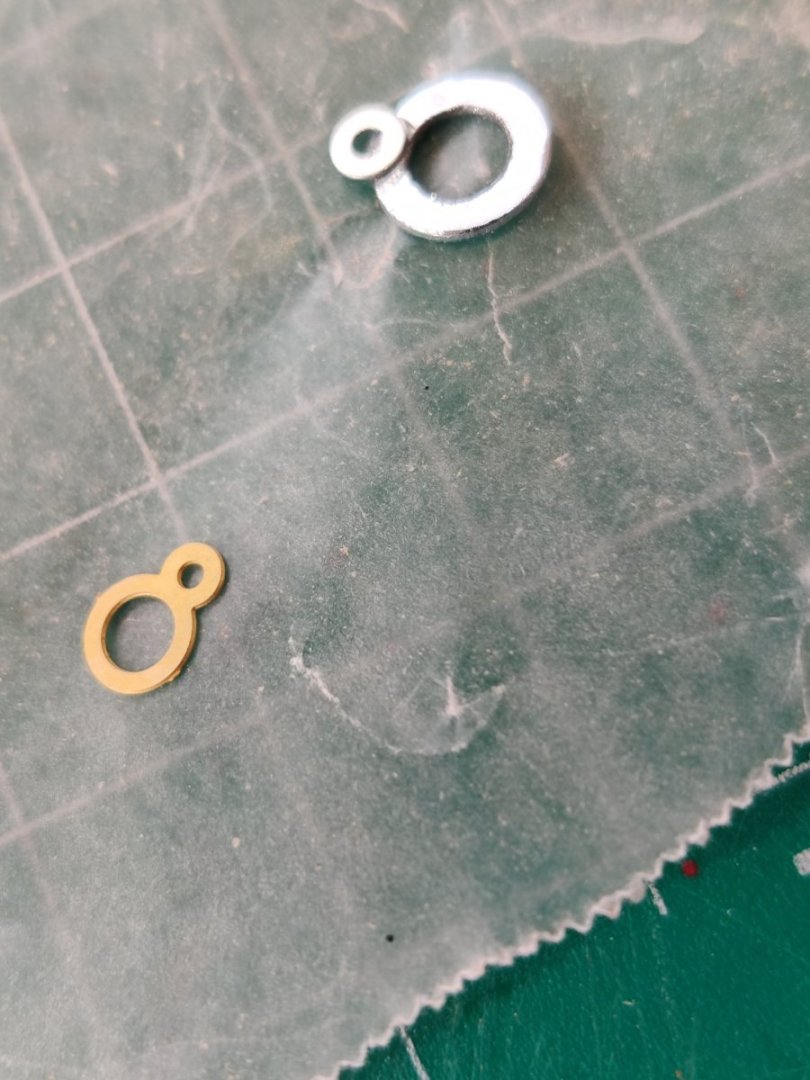
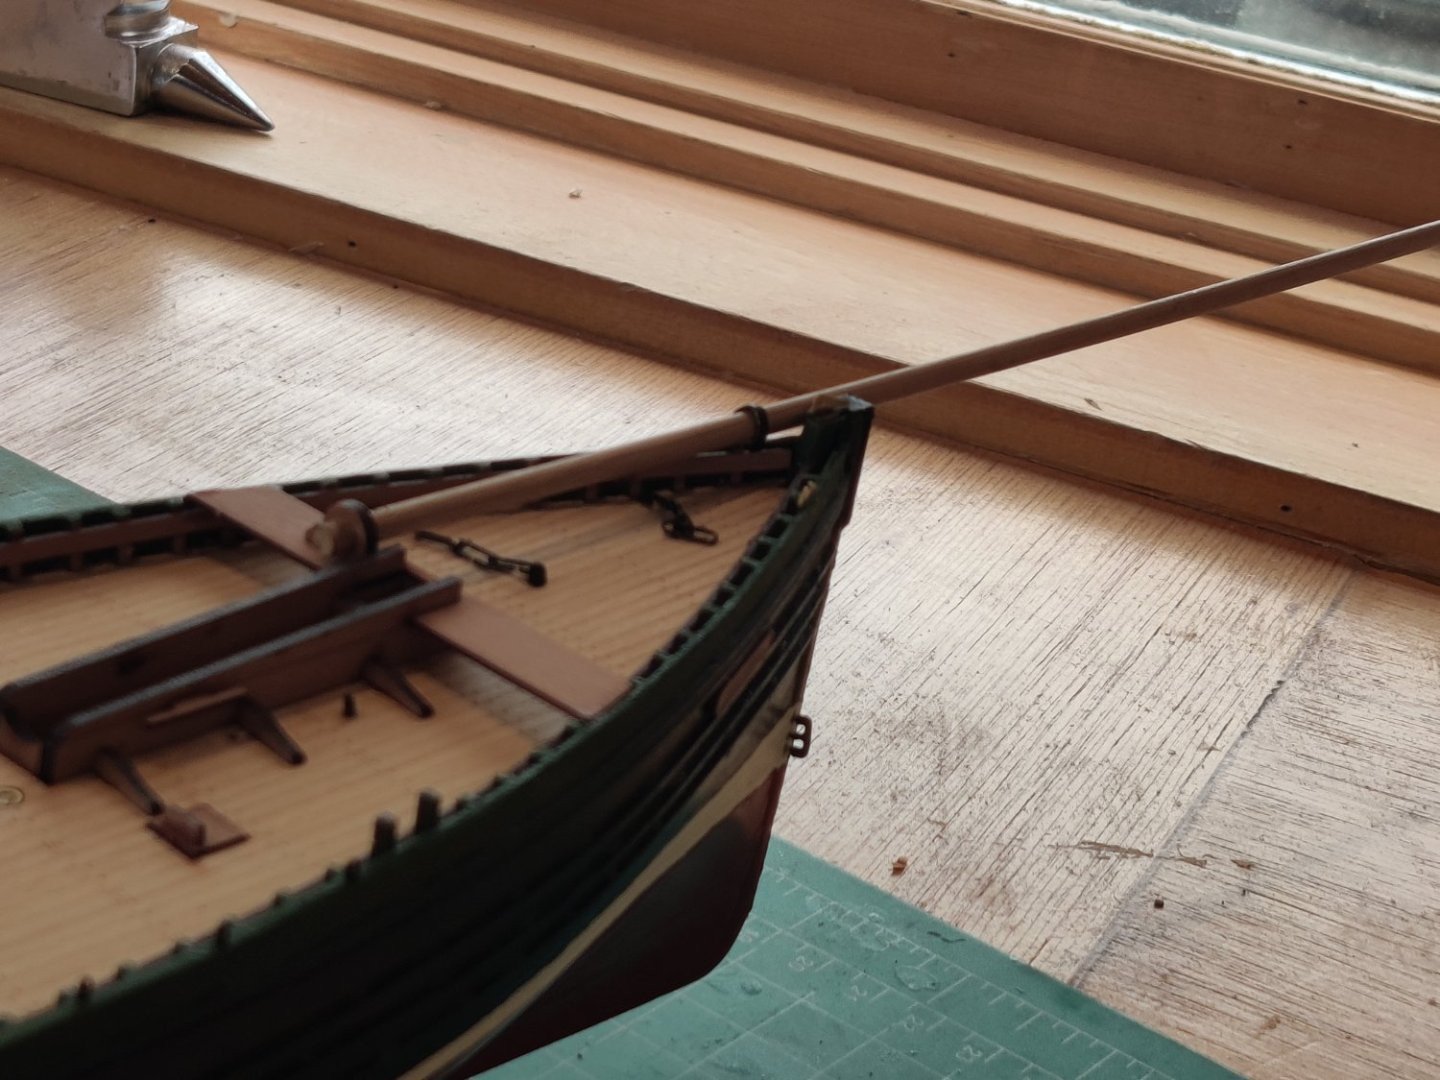
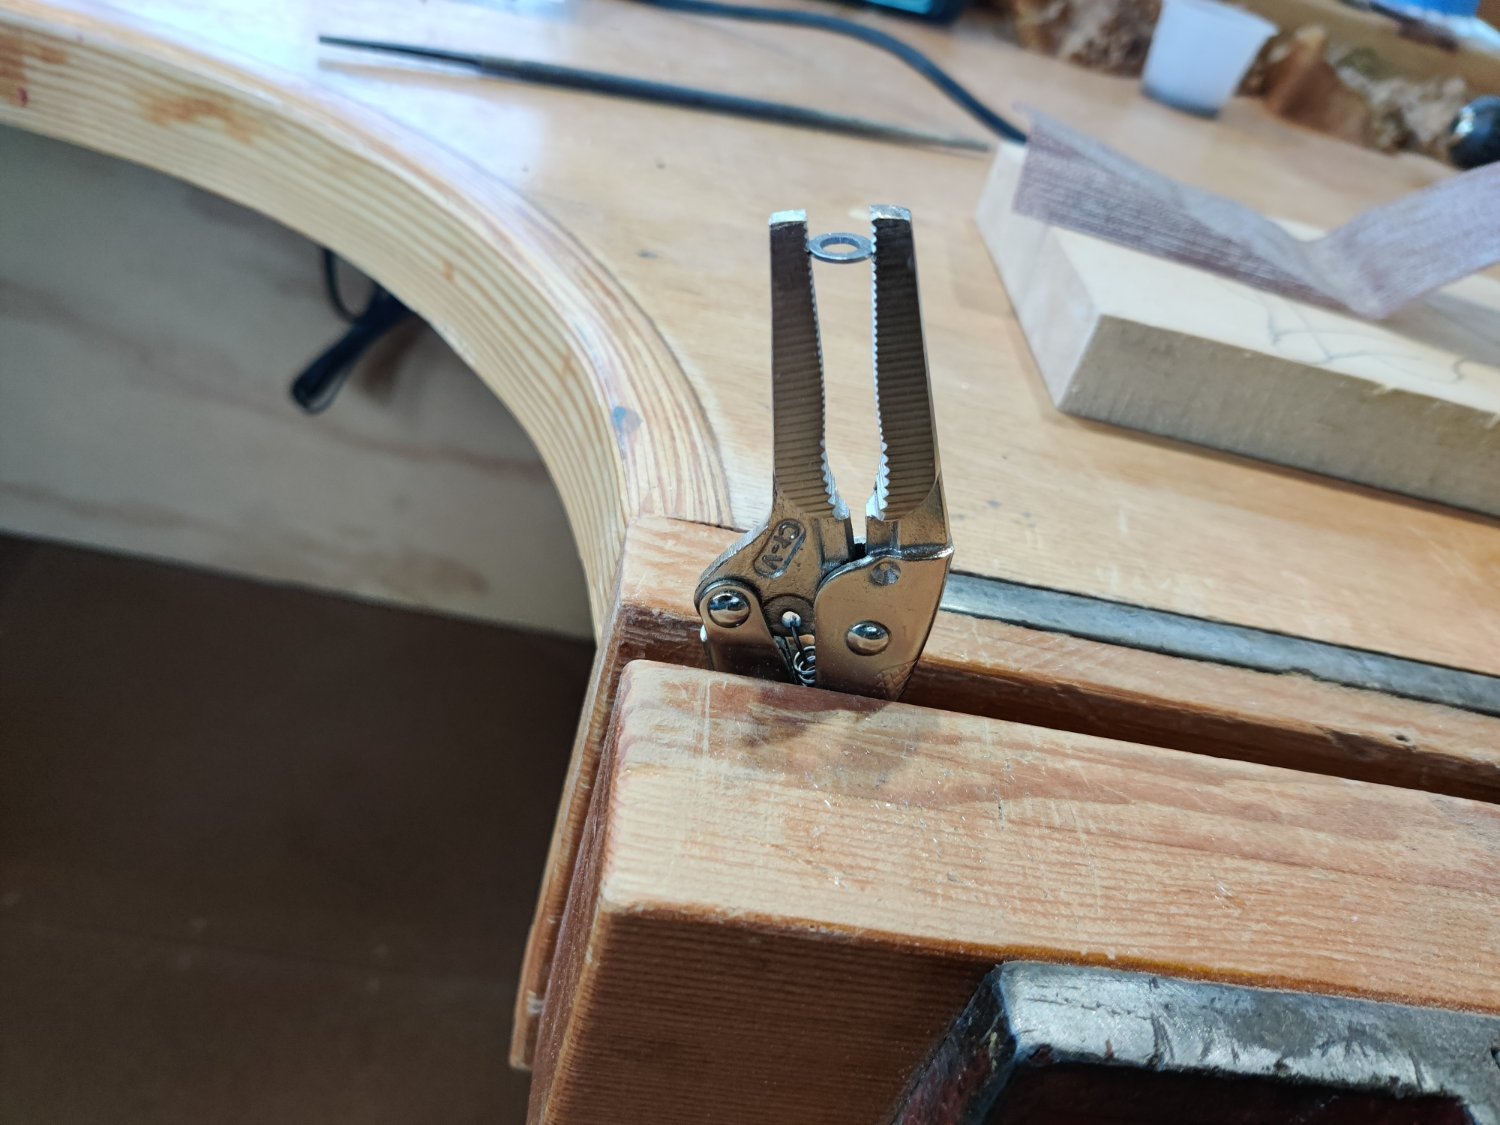
The sails arrived this morning ad I started tapering the masts as per the plans. I started with the main mast which was square walnut. I was using the mast ring piece to determine if I had got it narrow enough. Some how in the process I lost the mast ring piece.
I searched for two hours and did not find it. So I decided I would try and make a replacement. I got the smallest washers I could find. I had to drill the center of the larger washer out to get it to match the size in the plans. I clamped the washer in a vice grip, then put the vice grip in my wood vice to keep it secure. I will need to paint it black but it will work. not as elegant as the brass mast ring but it will perform the same function. Now back to tapering.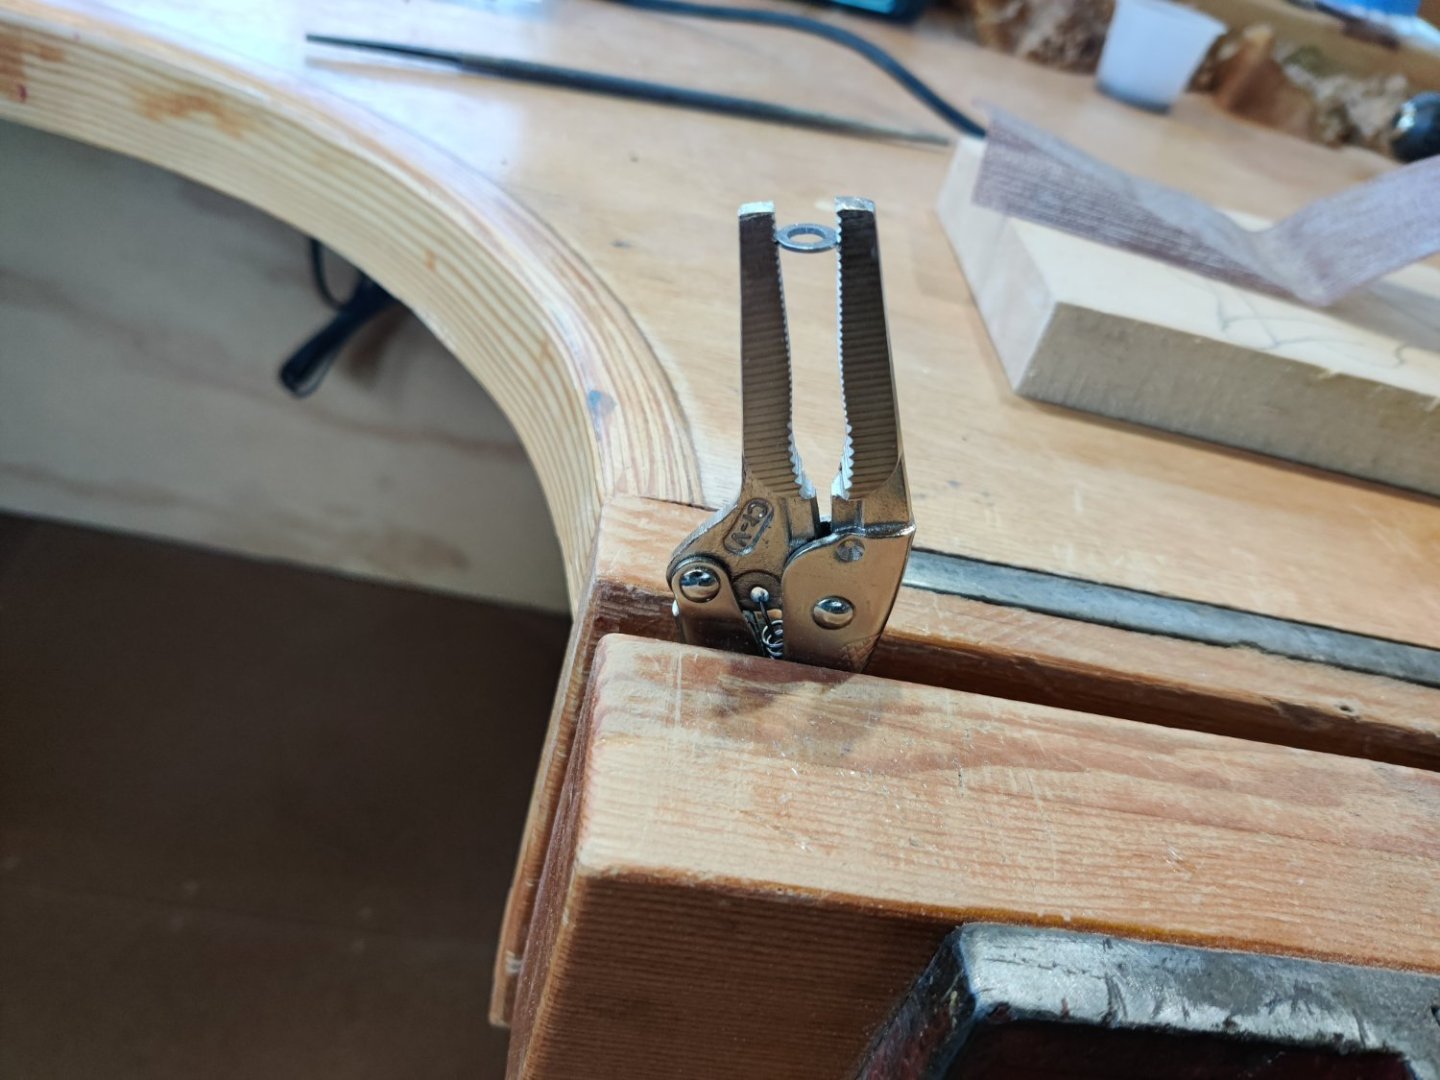
-
Lady Issabelle is done until the sails arrive. I did not use the wood slings/for the bow sprint mast or the aft spar. Instead I made a metal ring that secures the spars. I have not tapered the spars yet. This has bee a really fun build. Can not wait for the sails and the chance to rig my first boat.

- ccoyle, chris watton, Knocklouder and 2 others
-
4
-
 1
1
-
-
The parts are included with the kit, but it is still challenging due to their small size and fragility.
-
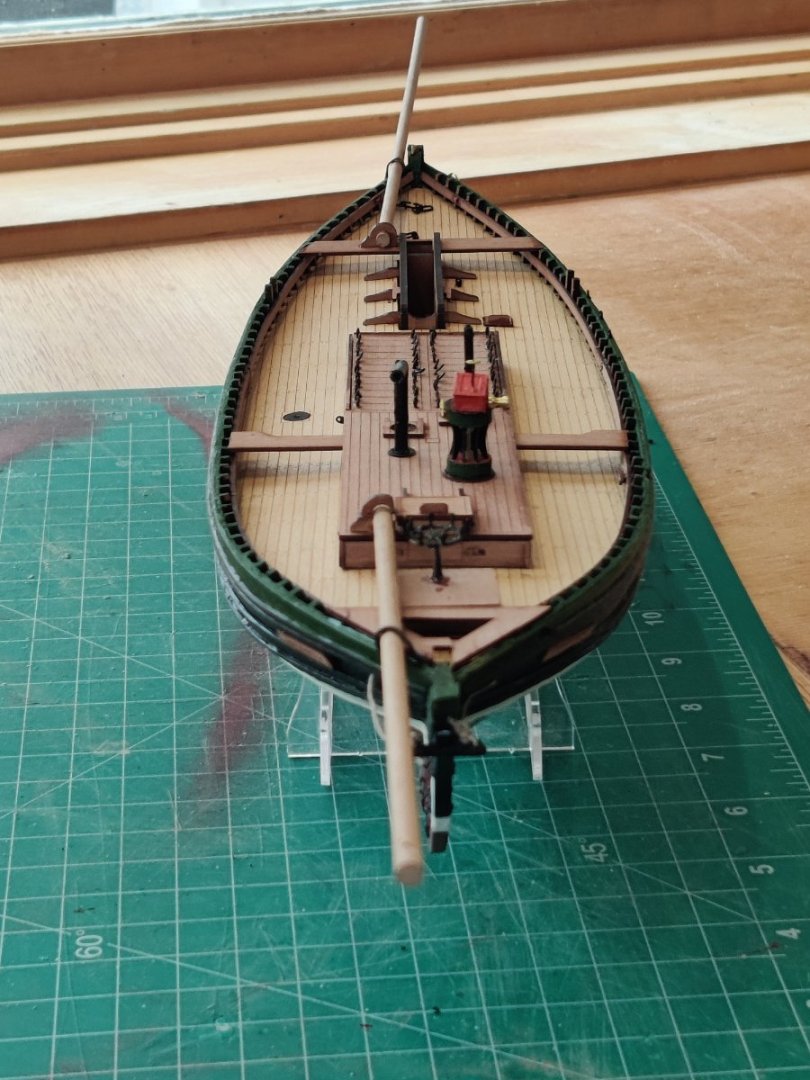
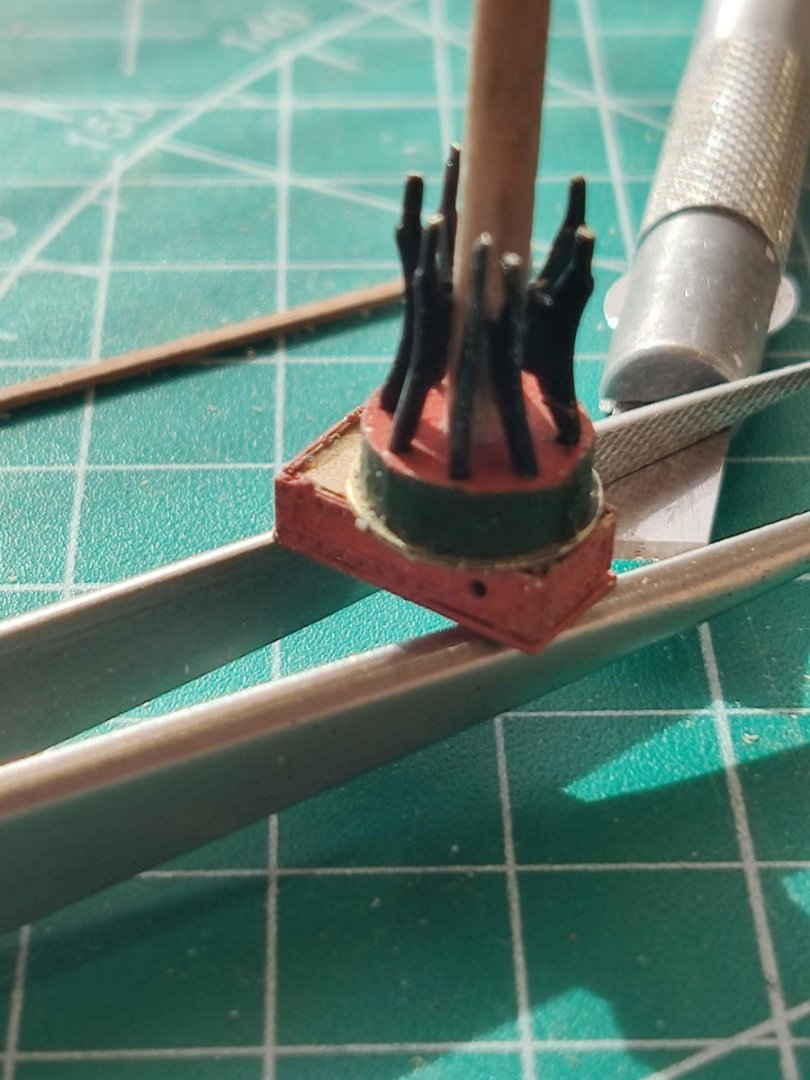
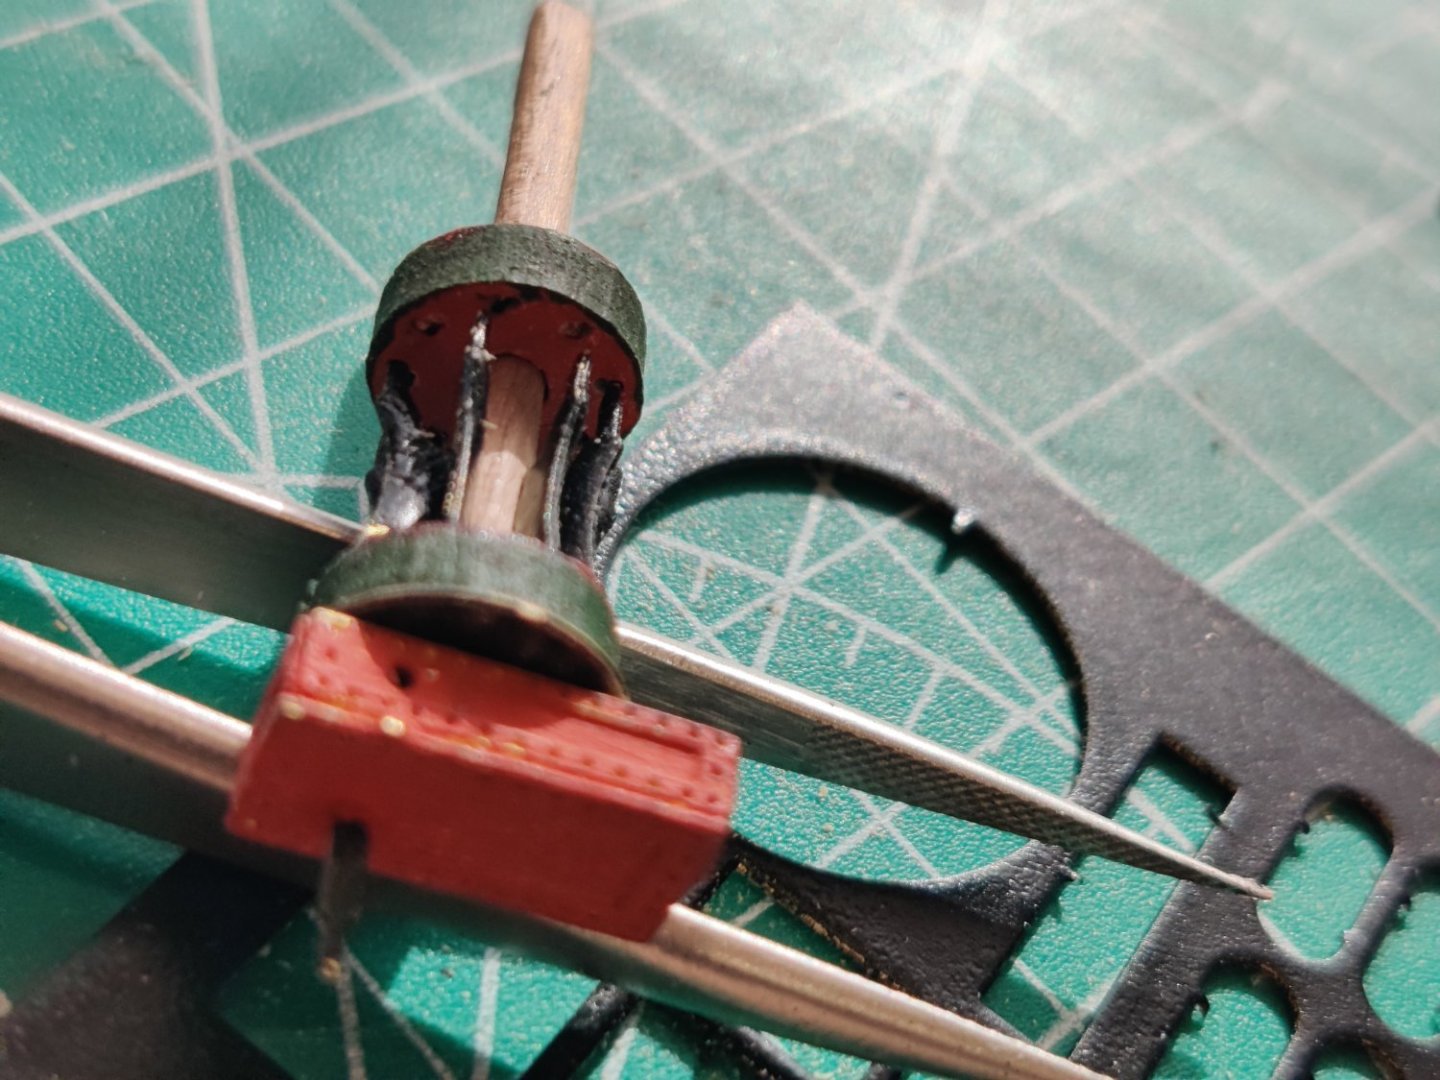
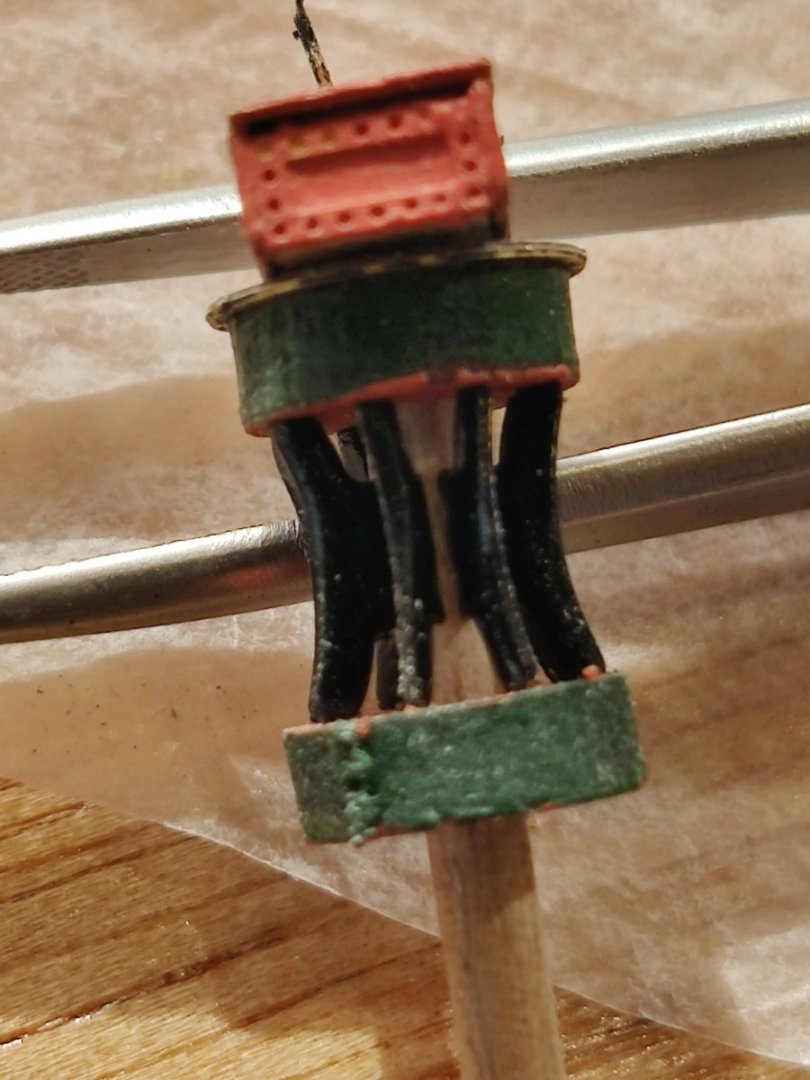
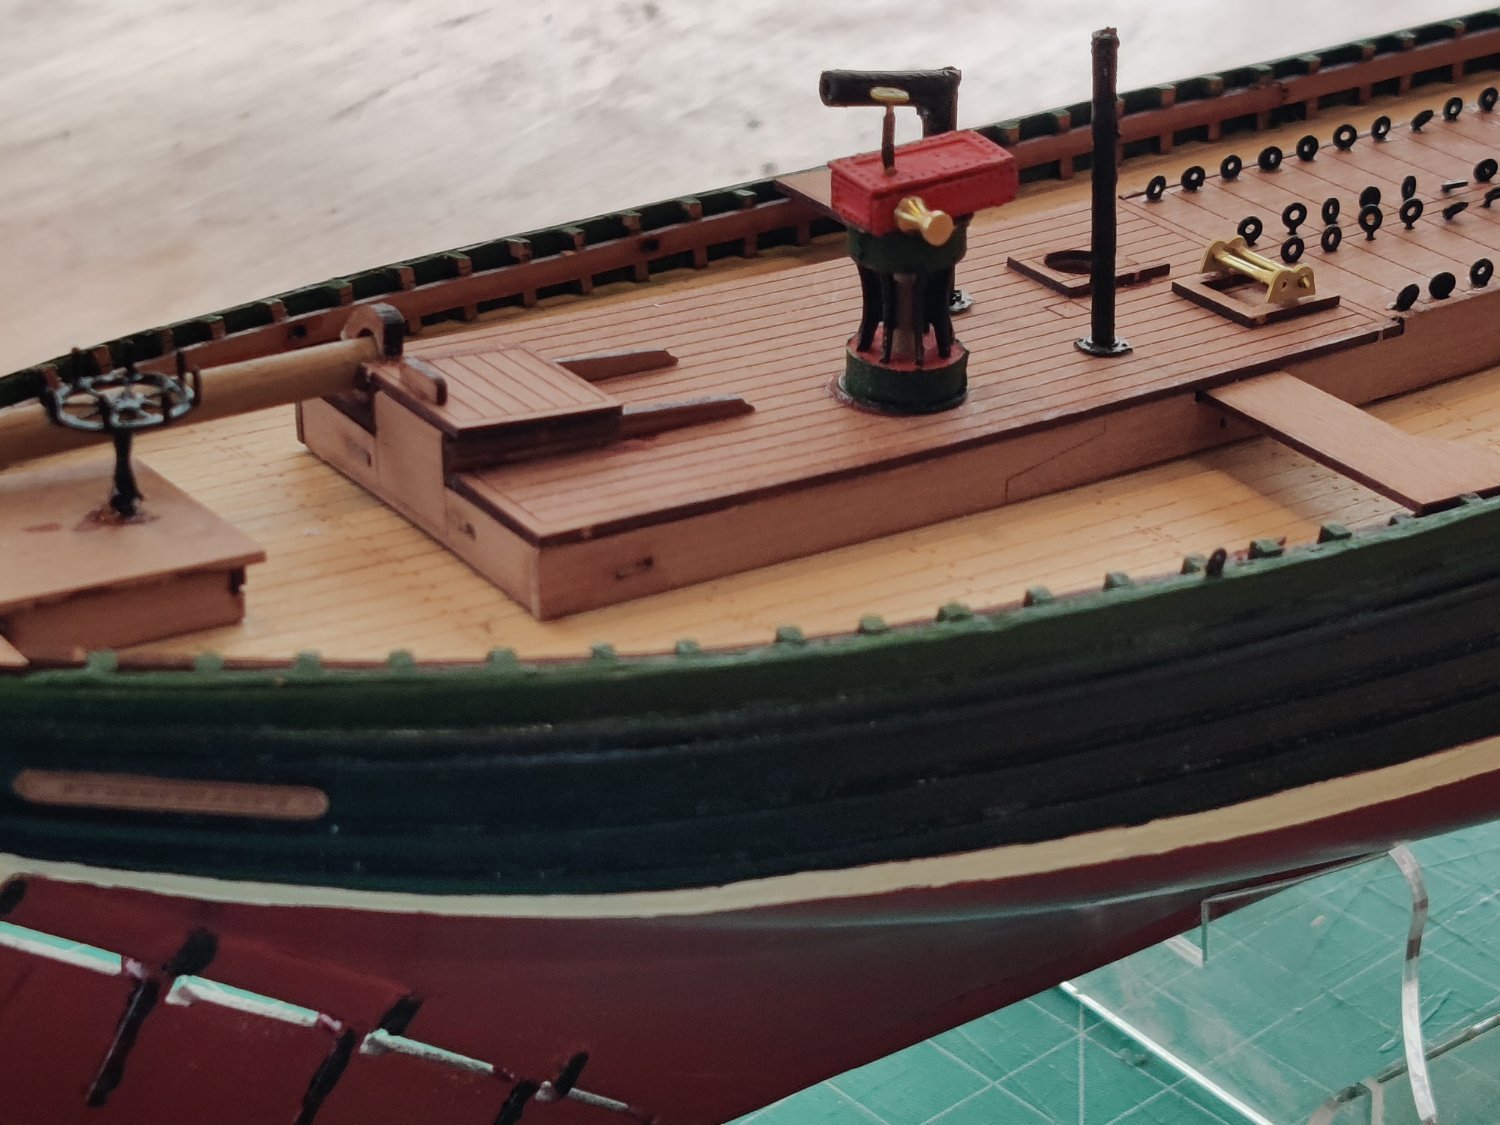
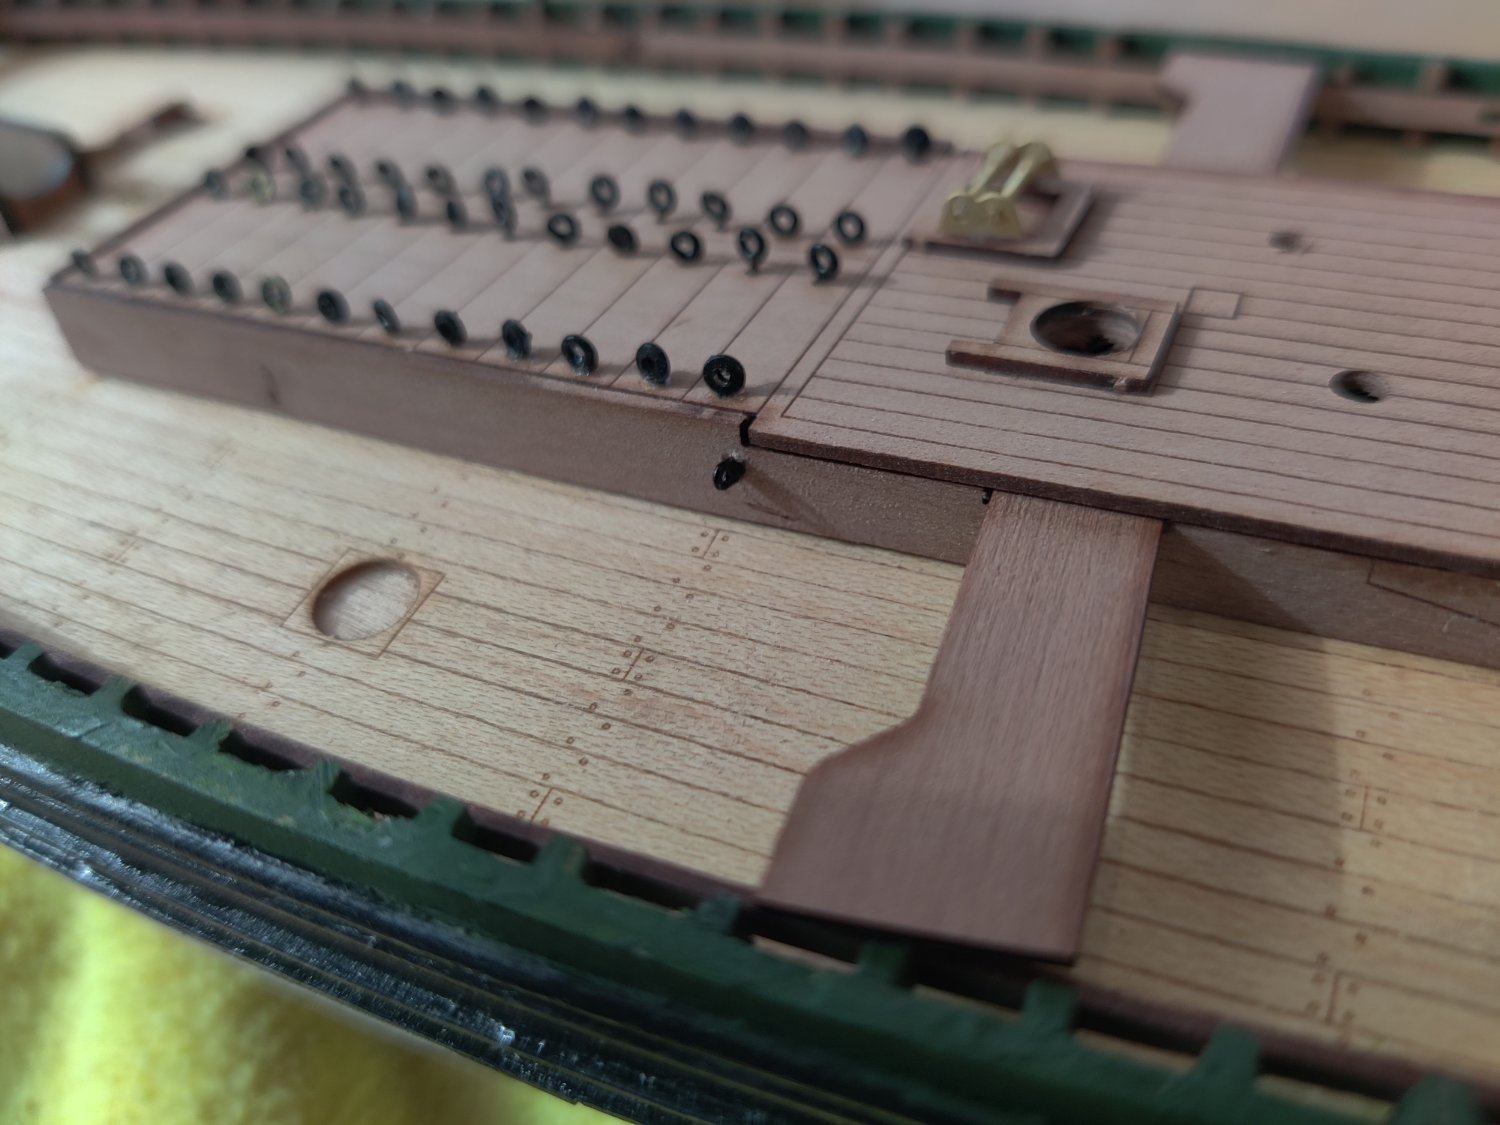
The steam winch completed. Some tips to make it easier: 1. sand the dowel before you cut it until the pieces fit on smoothly. It is much easier to sand while still one piece. 2. paint the pieces before assembly, then do touch up after completed. 3. after the wood circles are painted, re-drill the holes and the inserts will fit in better. 4. Do not install the top stem until after the circle inserts are completed, it is easier to be able to sit it flat when installing the inserts. 5. These inserts are fragile be careful, go slowly, and use fie tweezers to align inserts.


-
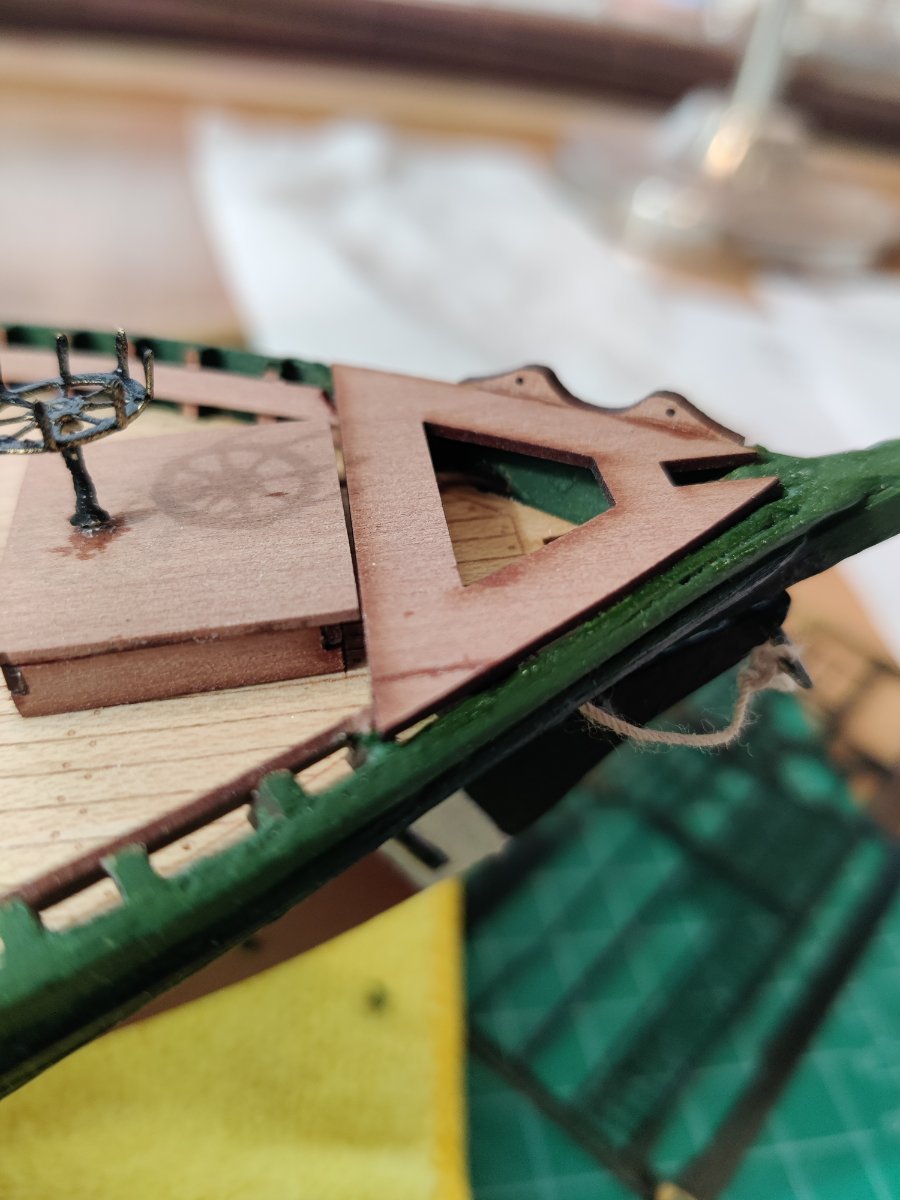
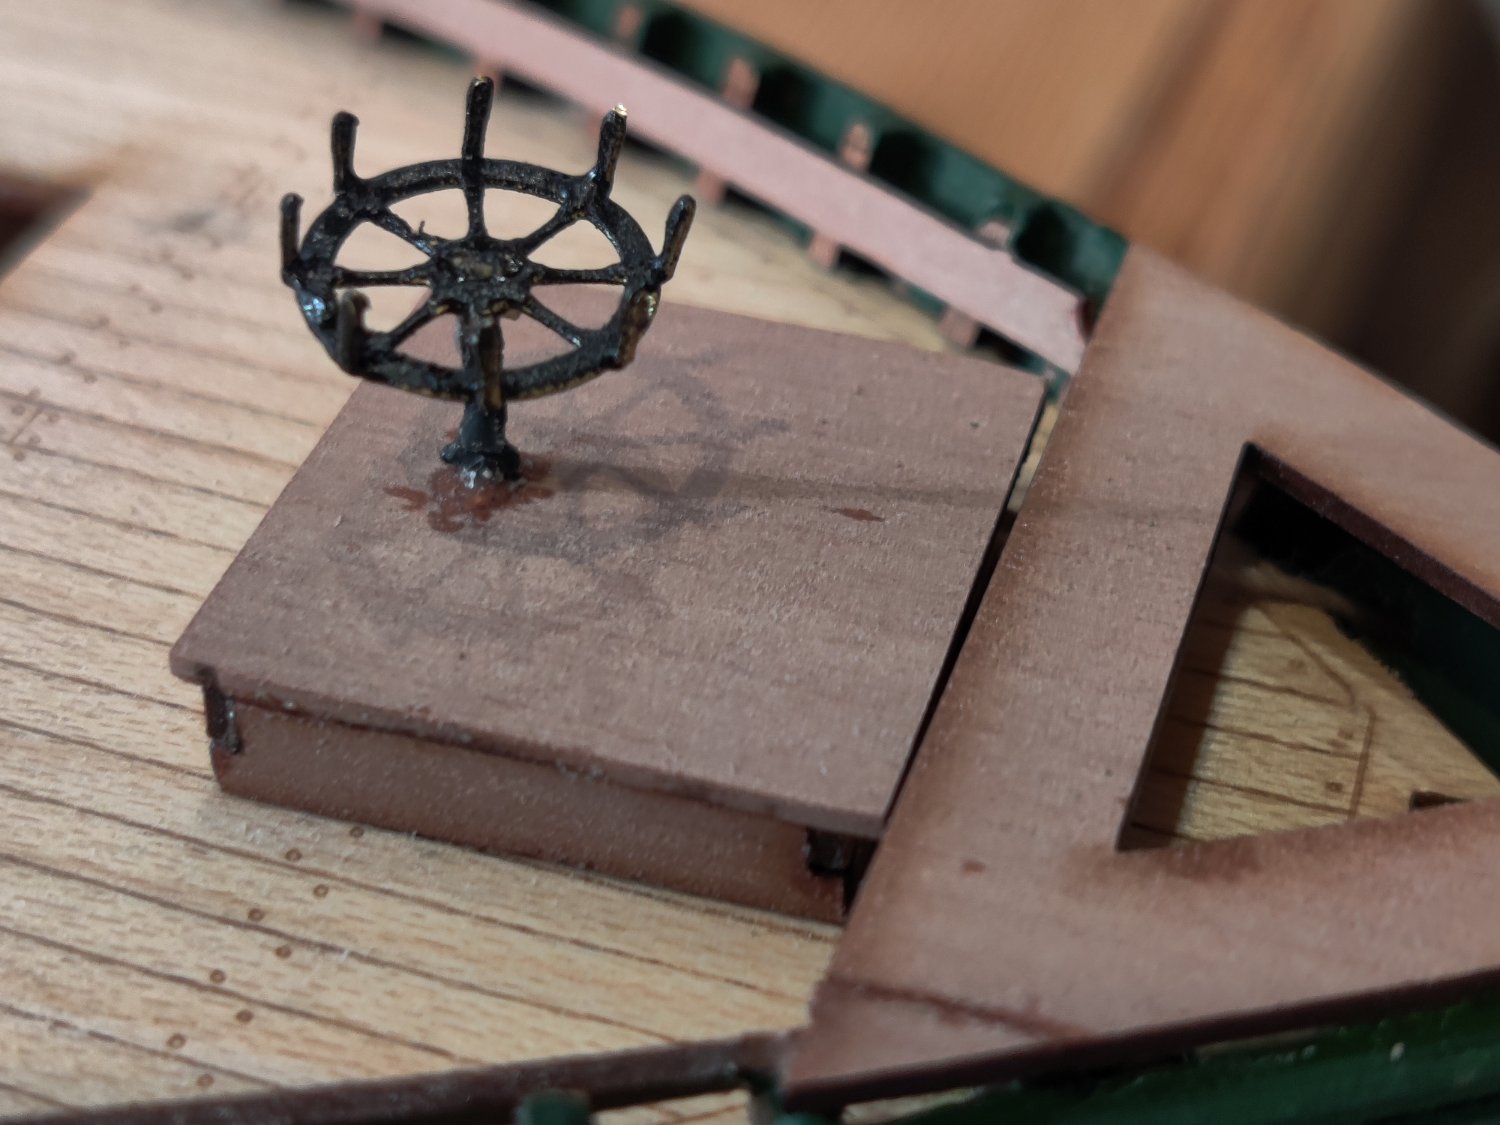
The Steering box is installed with the ropes connected to the rudder. Be very careful when installing the triangular corner in the stern. it is fragile , as can be seen I cracked it and had to reinforce it with glue on the back side but a little CA seeped thru even then.

-
The rudder is in place, and the rope to the helm was threaded into the stern tiller box. Fr newbies it is important to thread the string in the back piece of the steering box before assembling the box. It is much easier that way.

-
2 hours ago, JSGerson said:
It looks like your planking is coming along very nicely. I did a variation of your method of planking. Instead of putting tick marks on the bulkheads, I marking the planks with the bulkhead position, and calculated the proper width the plank should be at that point. Then using a micrometer, shaped the plank ensuring that at each bulkhead mark, the plank was the correct width for each bulkhead position, for each zone. I just couldn't trust my tick marks on the bulkhead. At these scales, the width of a pencil mark can have big consequences.
Jon
I used the same technique on Lady Isabelle, I had the same issue with tick marks. I used the protruding pin on the micrometer to due the measurement.
-
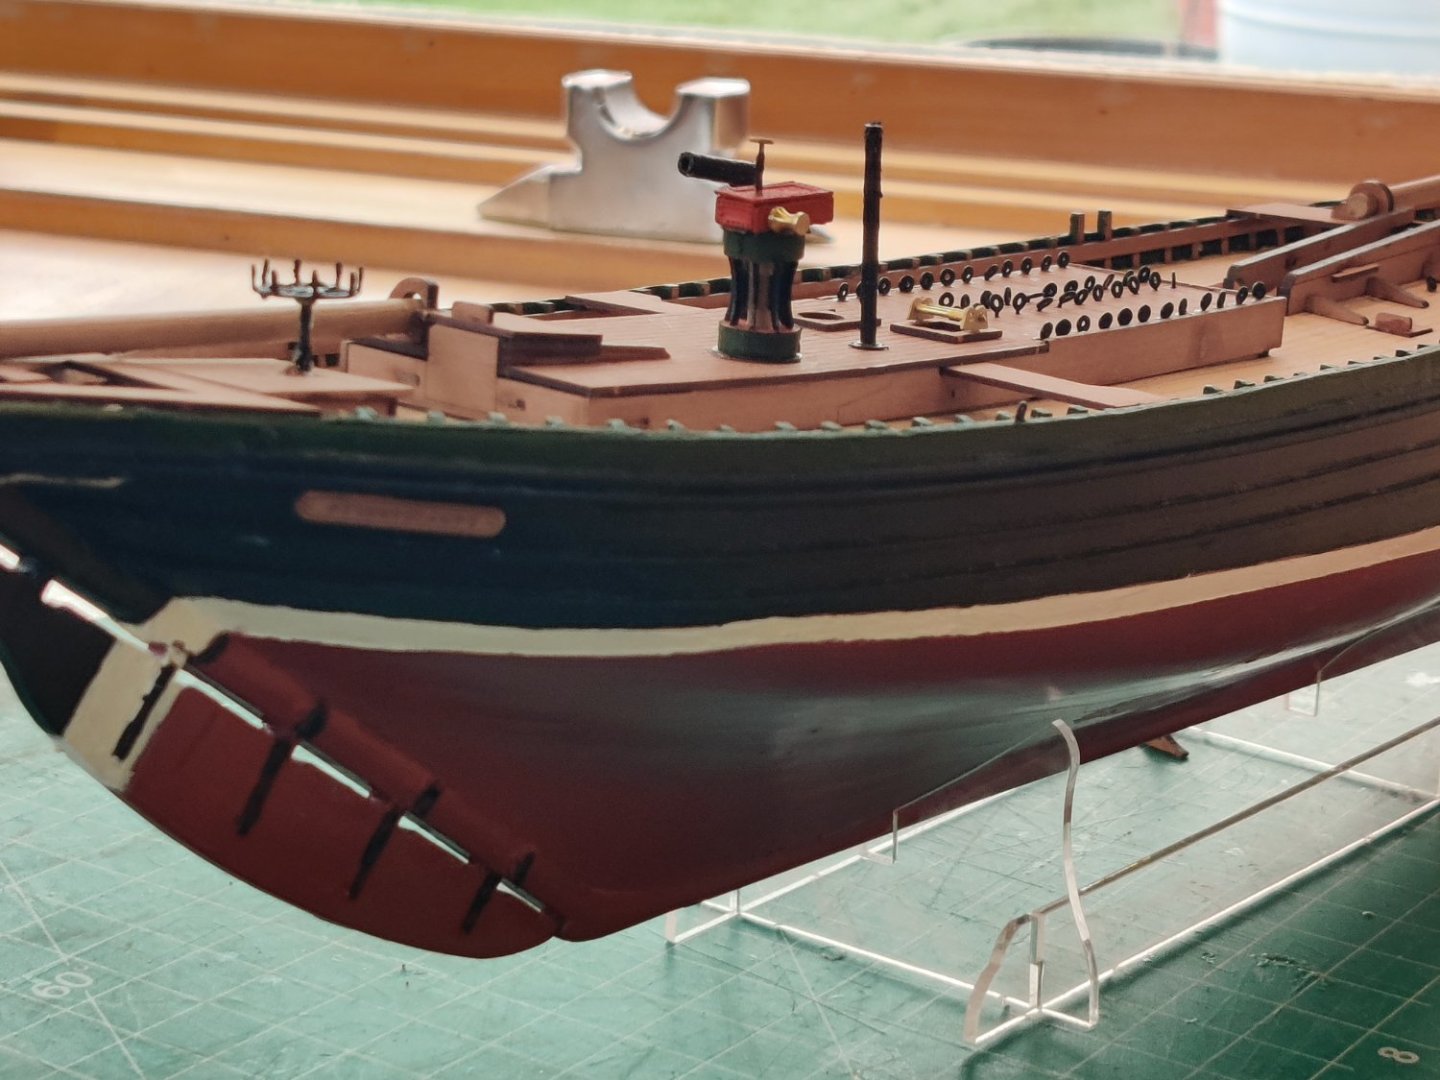
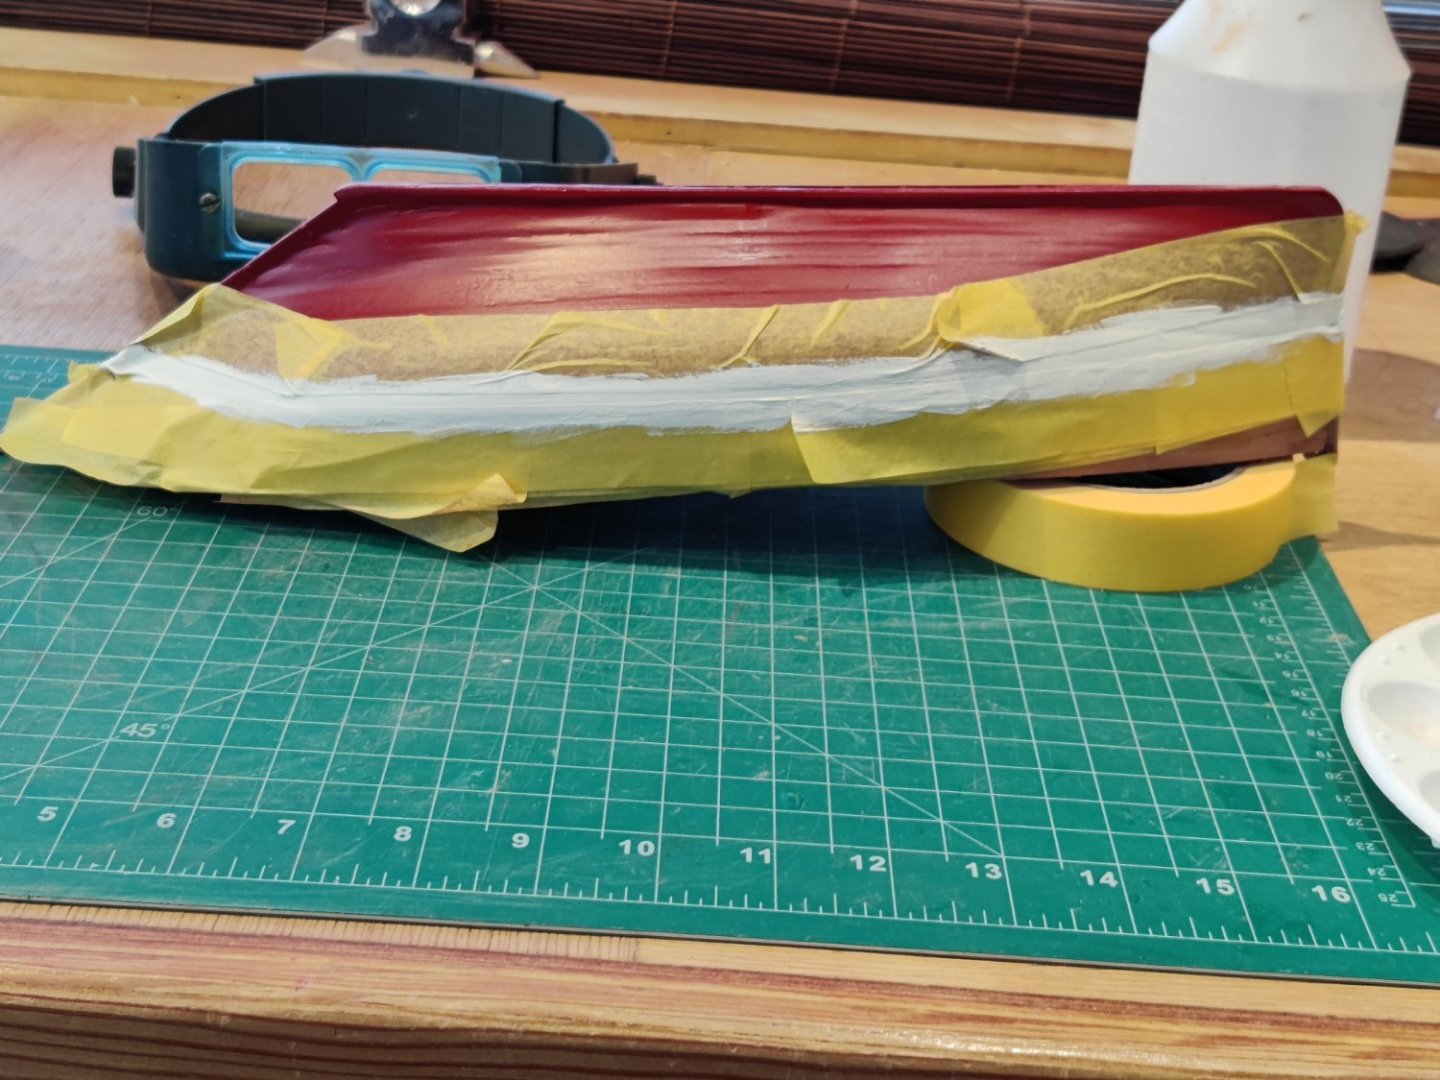
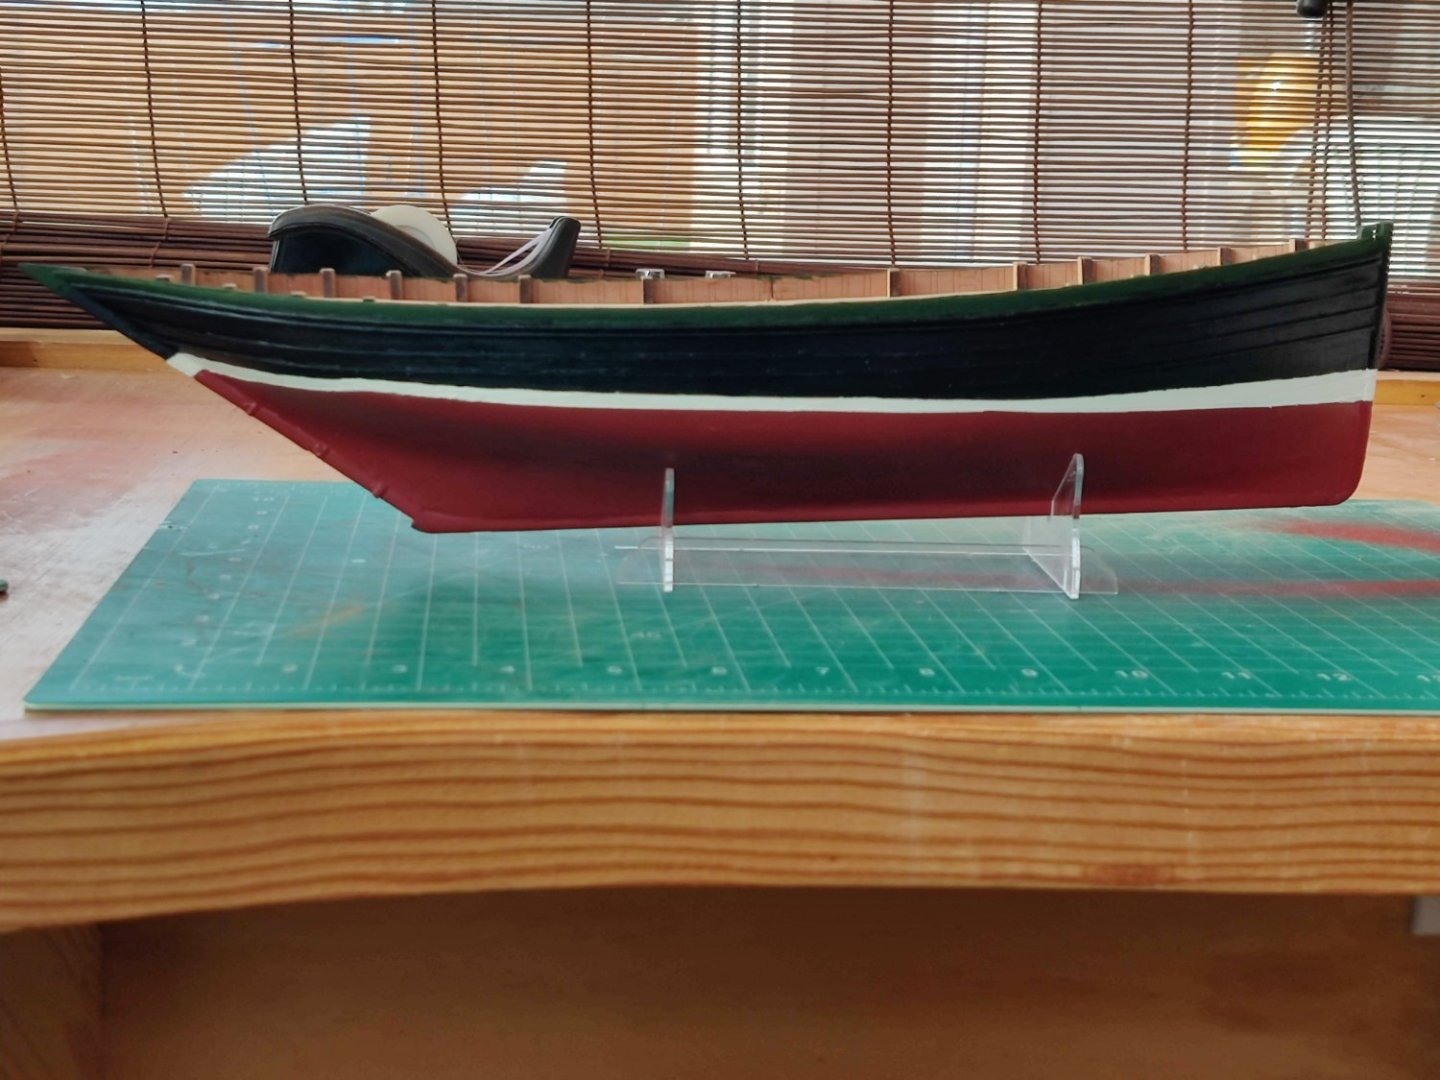
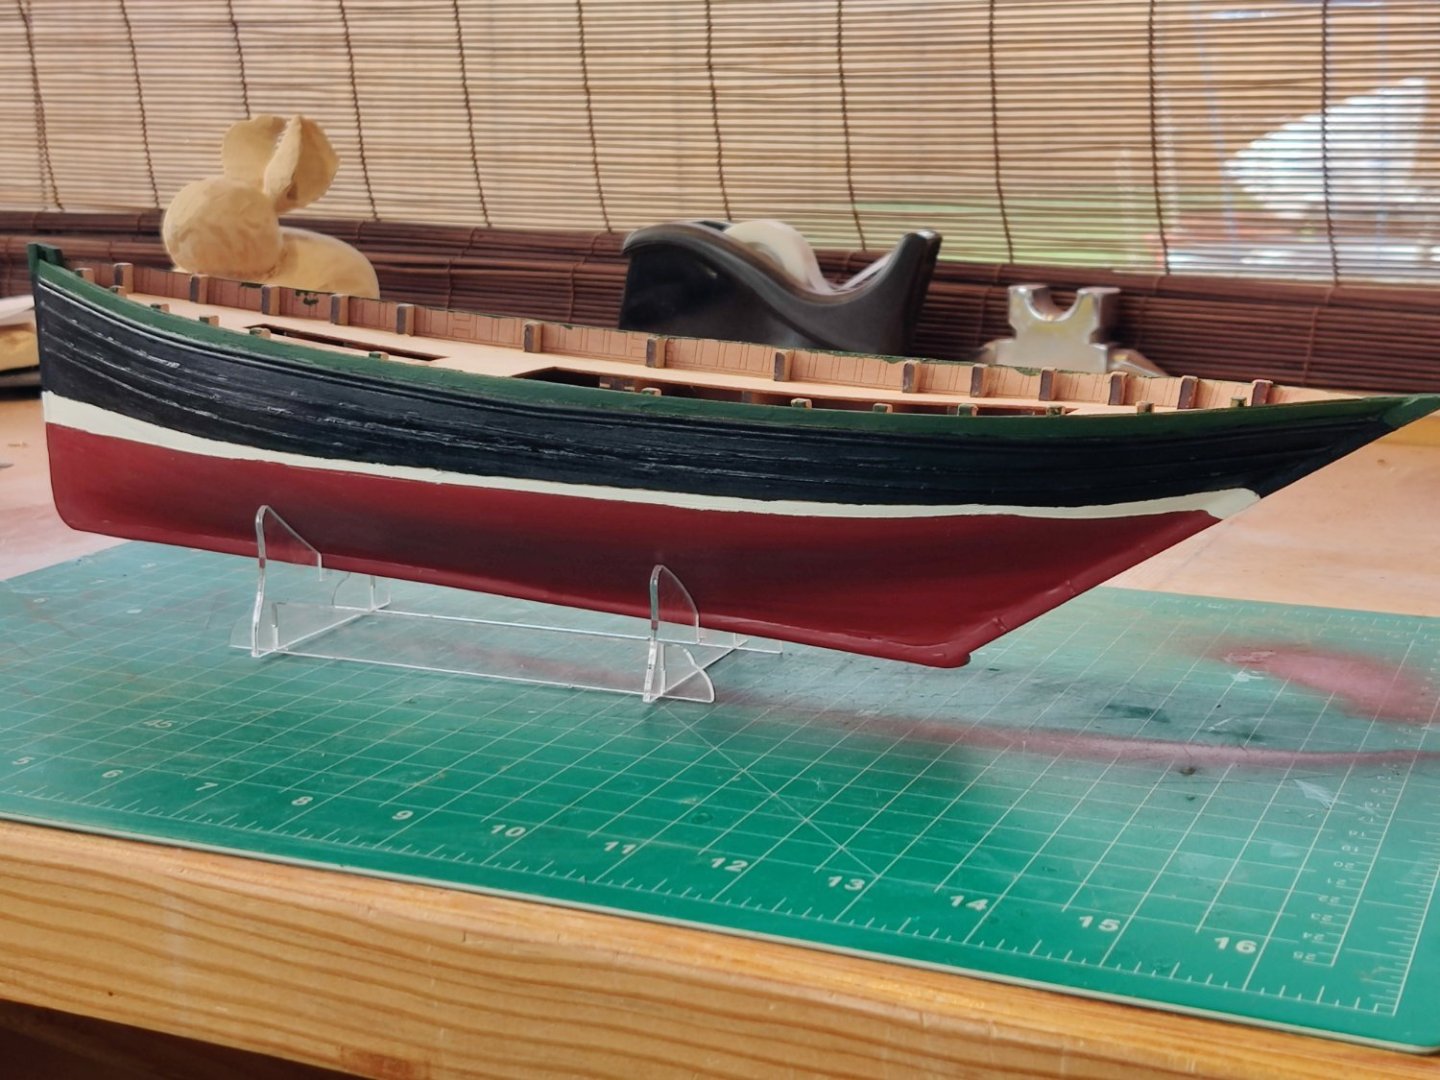
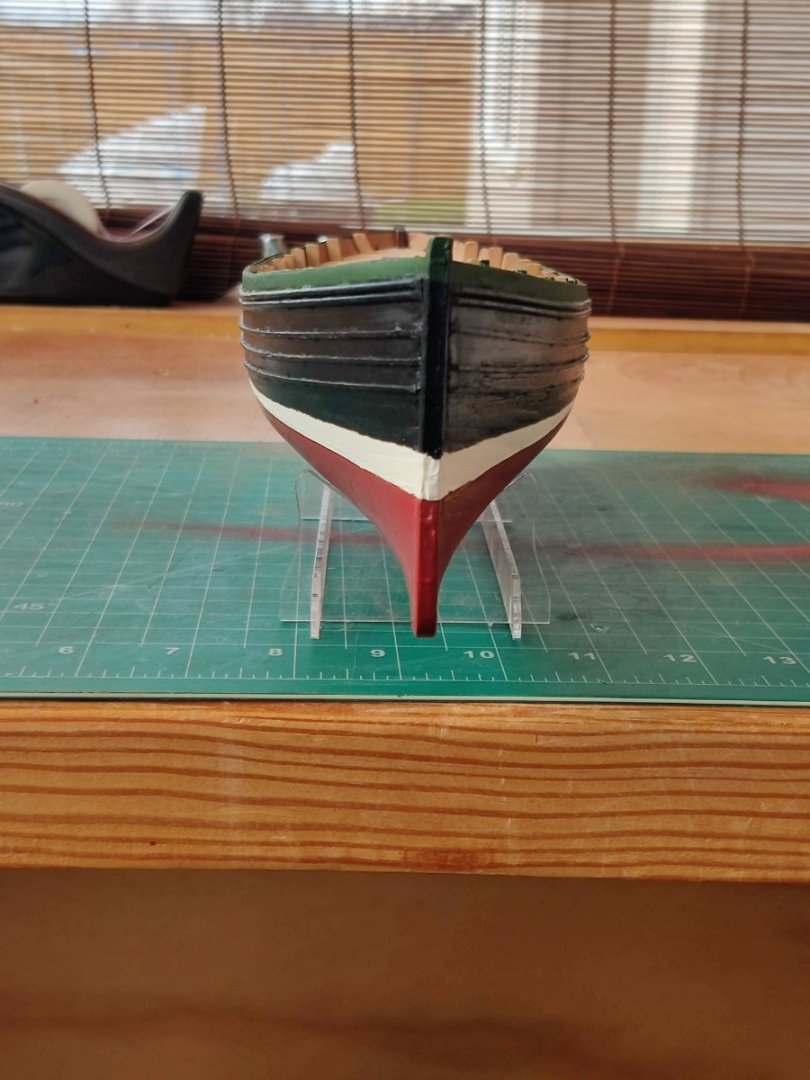
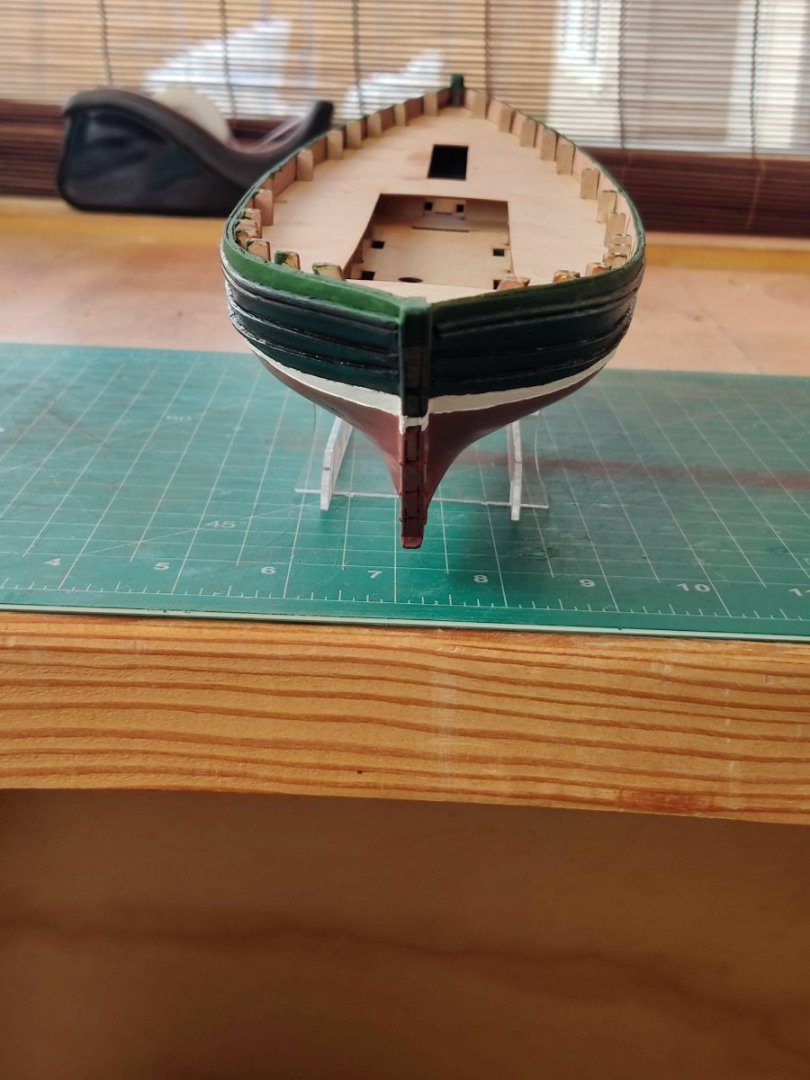
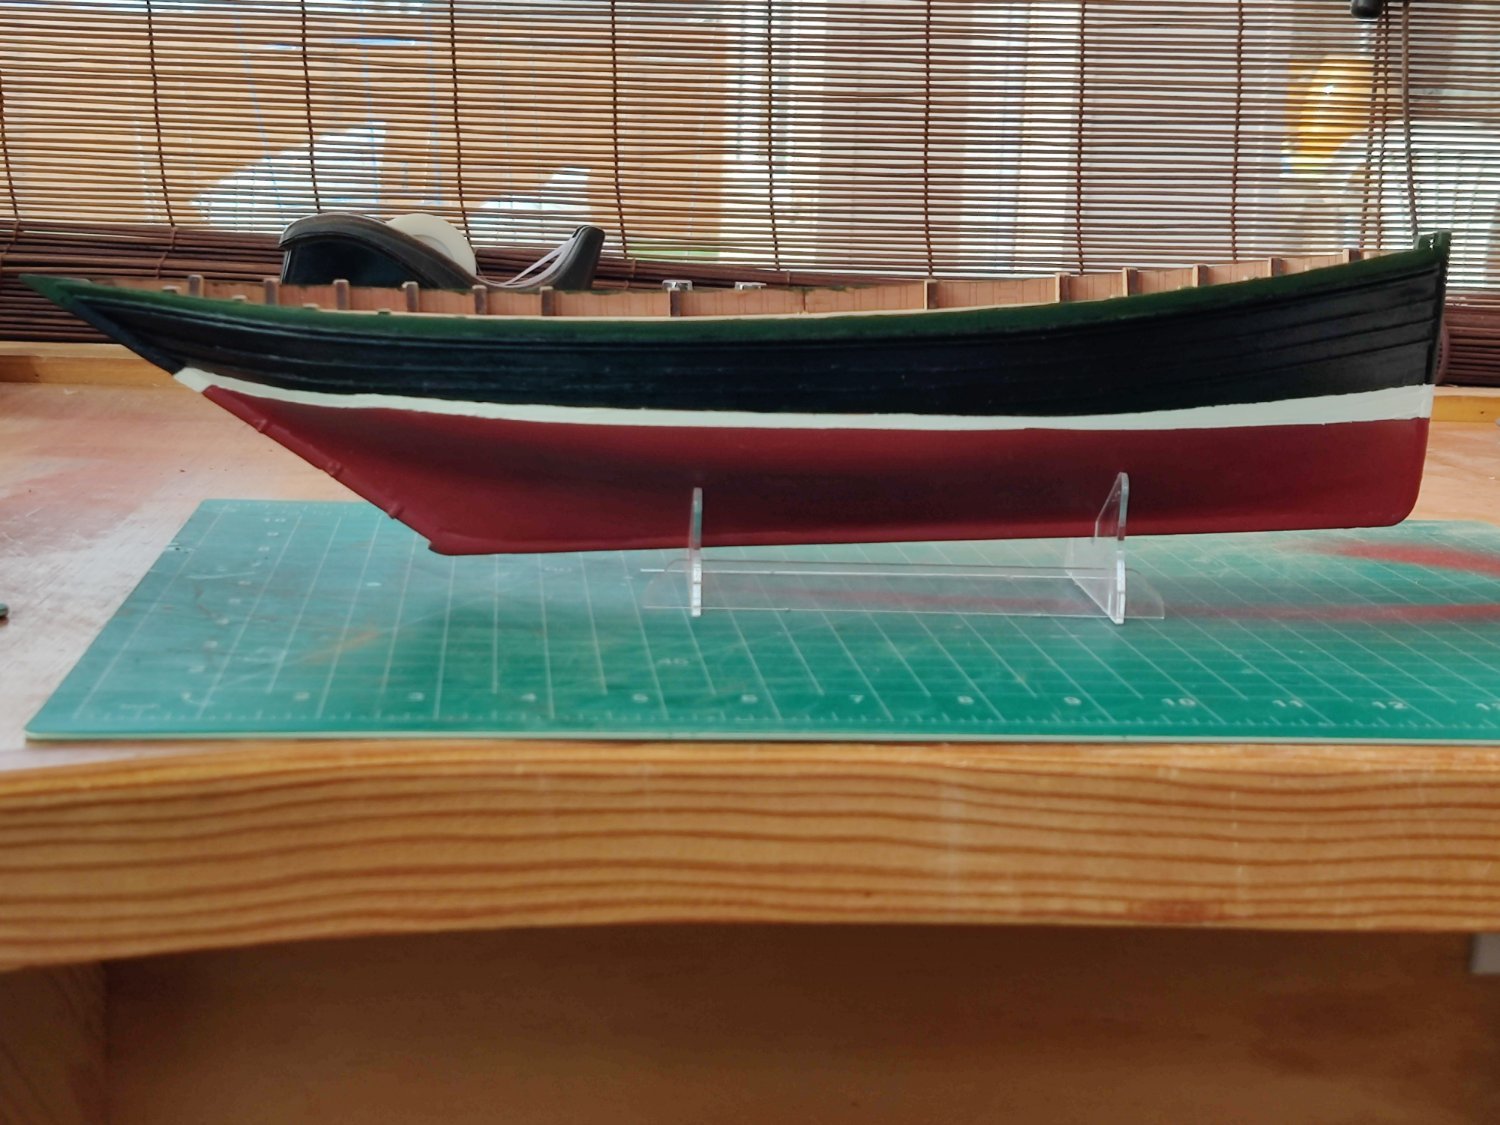
The painting is finished, I sprayed the rust below the waterline, then used a brush to paint the white stripe, added the rubbing rails, the brush painted the black, finished the area above the rails with pine green. Trying to decide whether to also use pine green on the interior sides and contrast that with the natural wood look for the posts and rails.
-
On 1/26/2024 at 8:17 AM, GrandpaPhil said:
Does cherry carve well and hold detail well?
Bearing in mind that I paint everything.
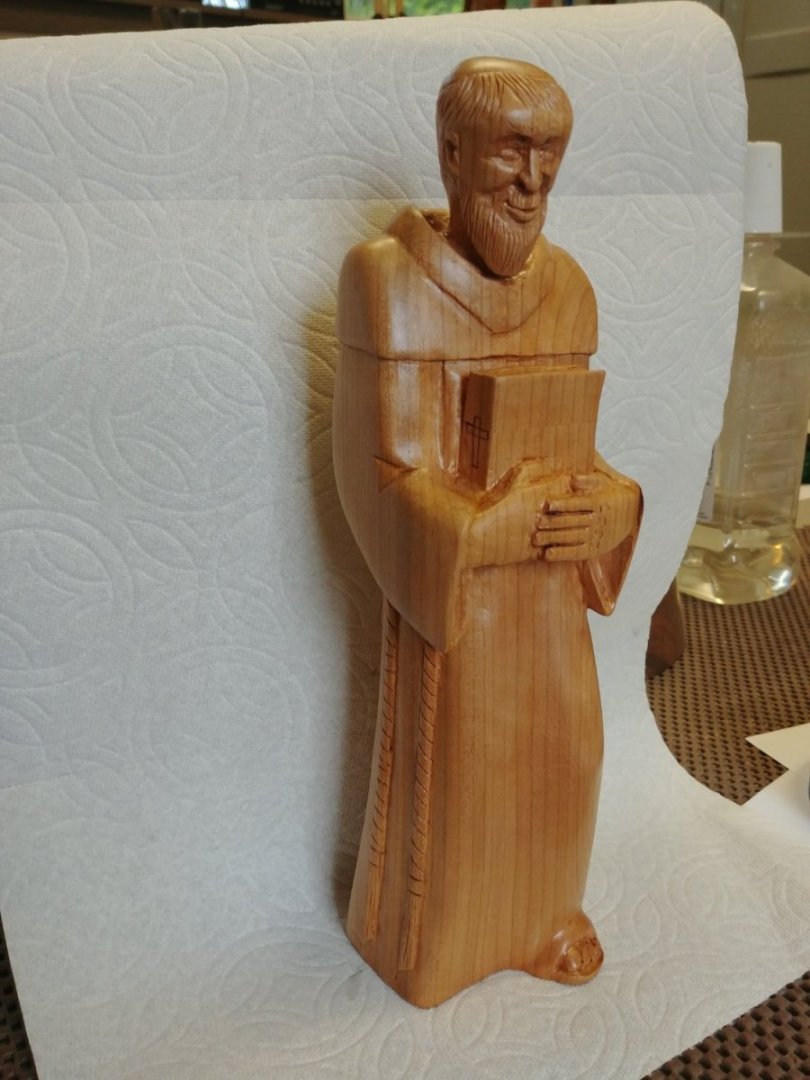
Cherry carves very well, holds detail. is hard to crush, and is not prone to splitting. Below are two carvings I did in cherry.

- Seventynet, Steef66, GrandpaPhil and 1 other
-
3
-
 1
1
-
amazing to see such craftsmanship. impressive!!
- mtaylor and modeller_masa
-
1
-
1
-
-
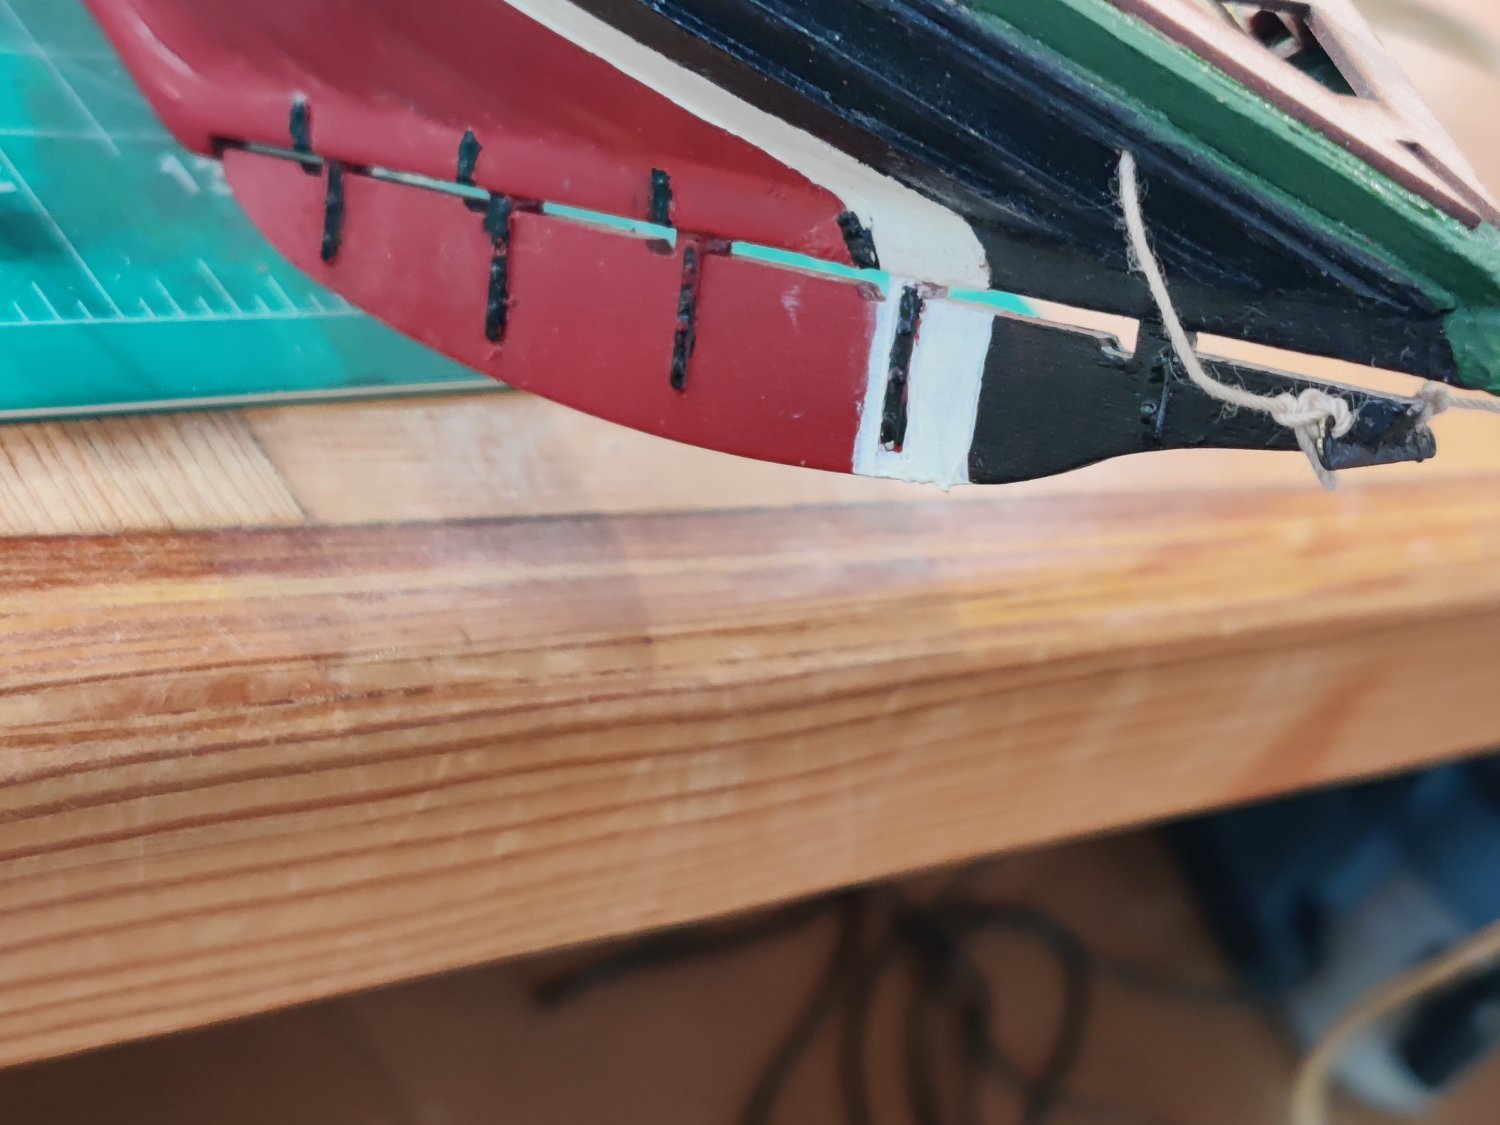
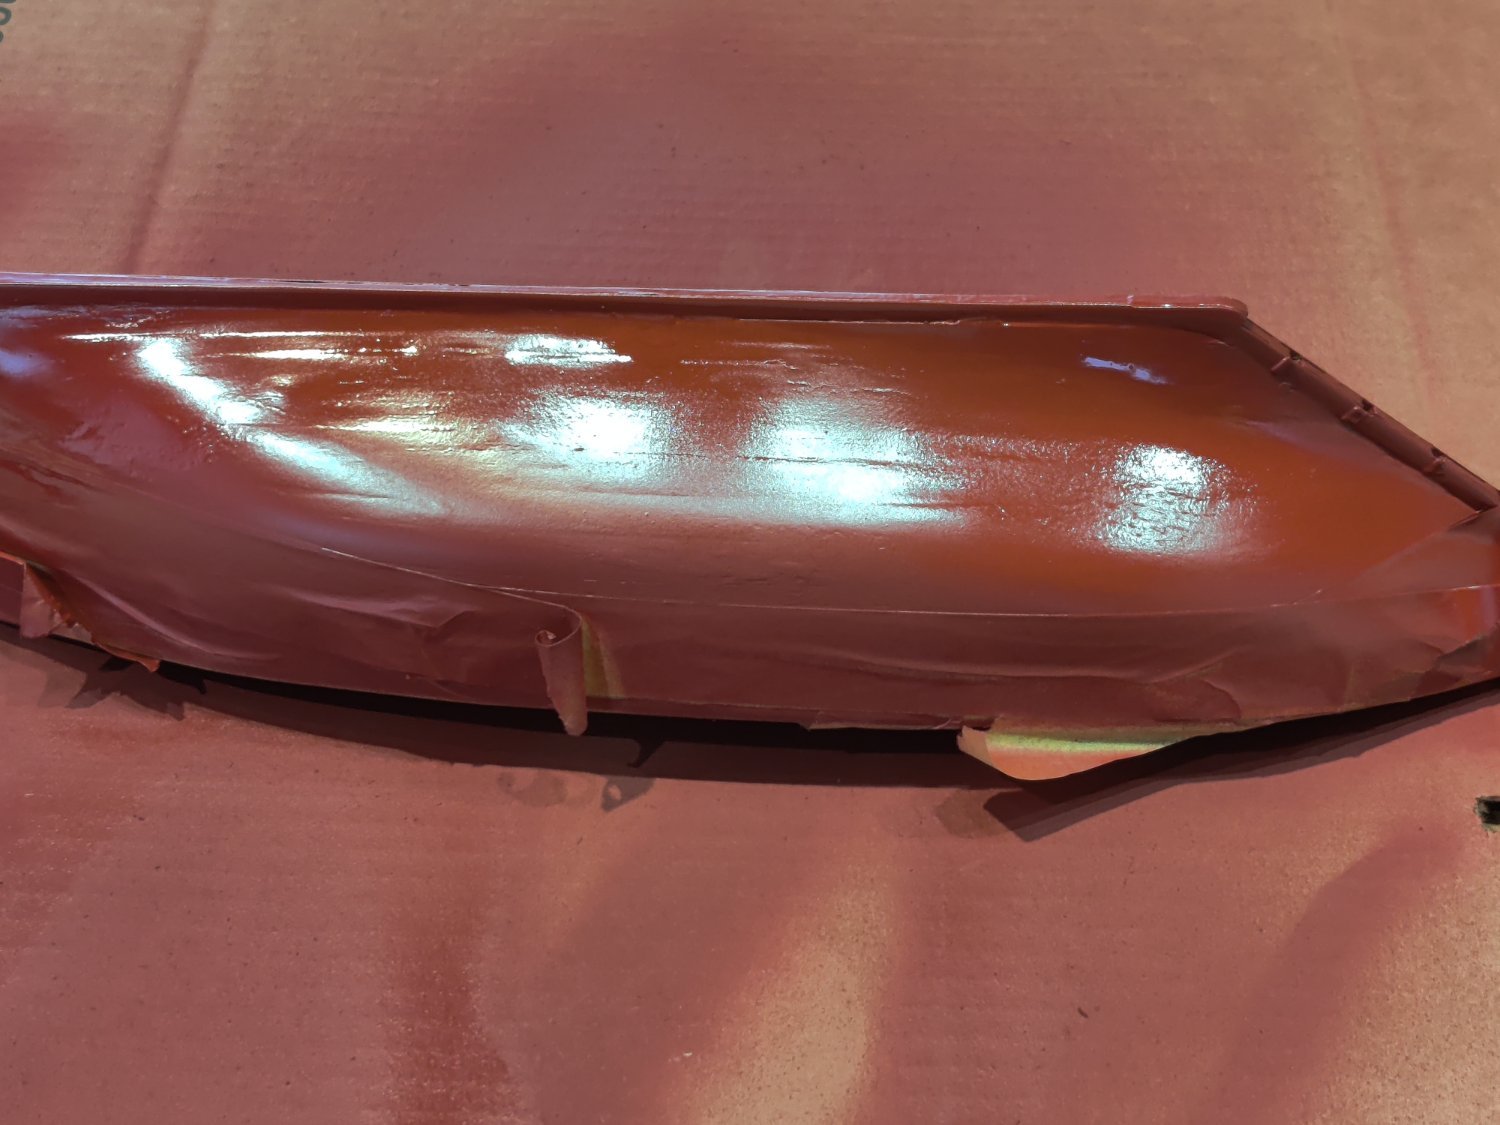
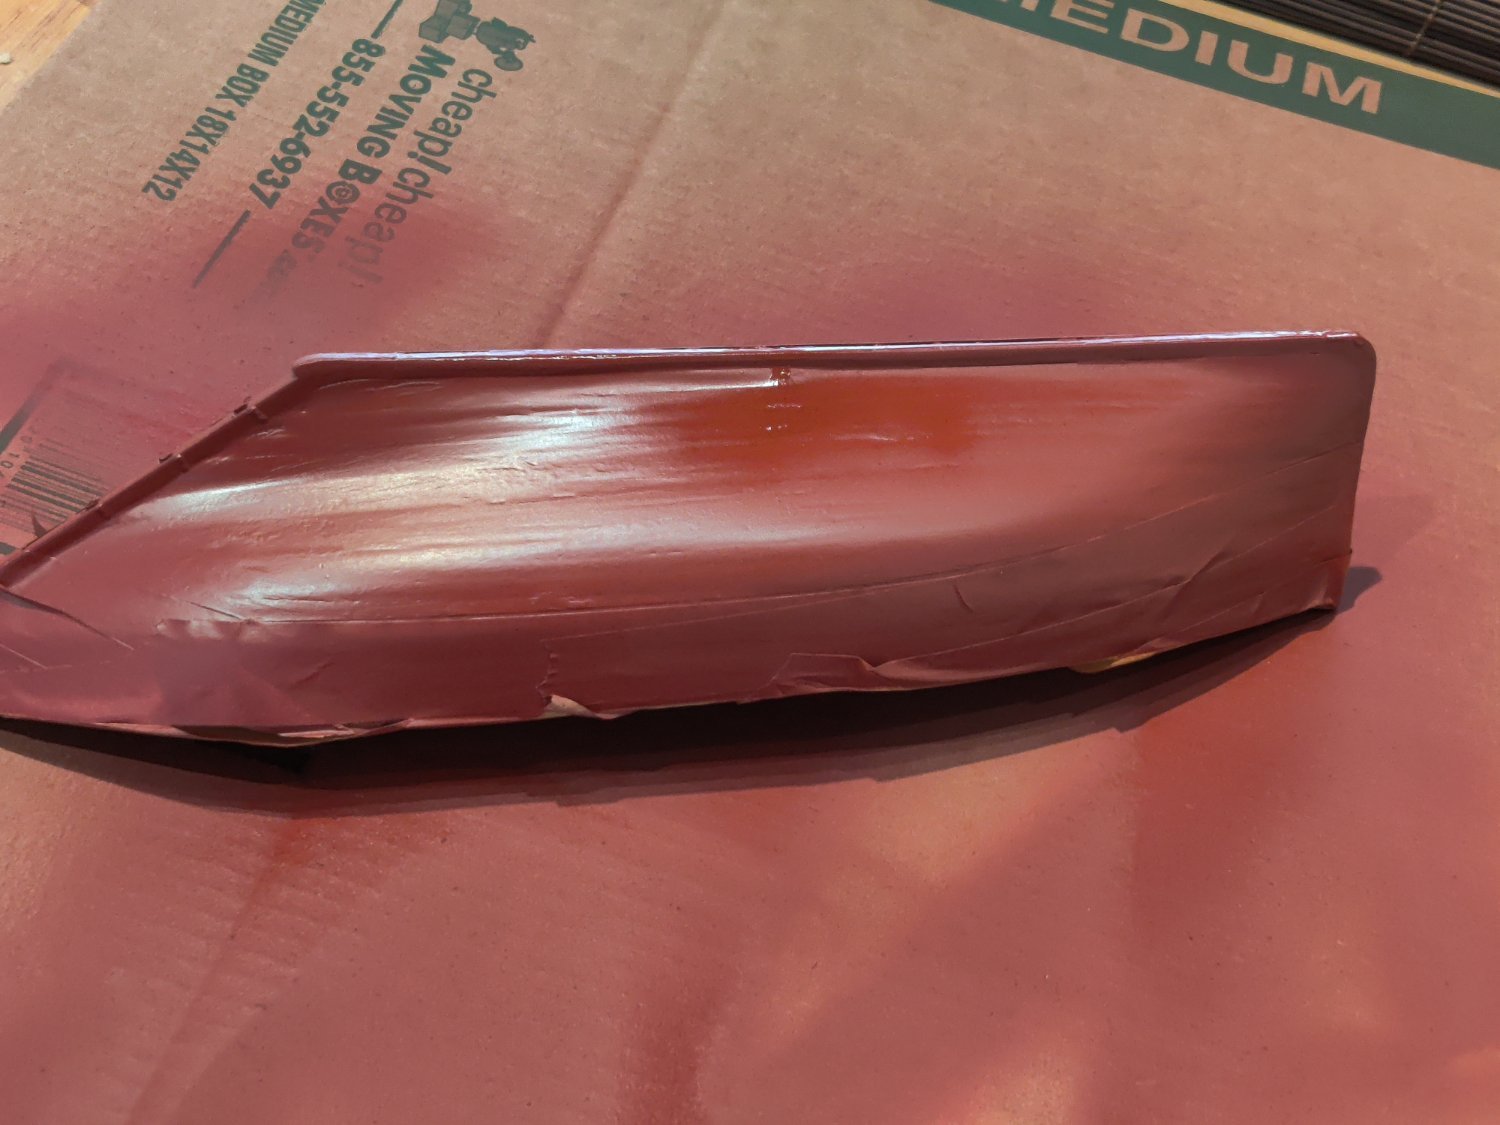
I have painted the hull below the waterline. It has five coats with sanding between each coat. Next is the white line above the waterline and painting the rudder.


Fifie by woodartist - Amati - 1/30 scale
in - Kit build logs for subjects built from 1901 - Present Day
Posted
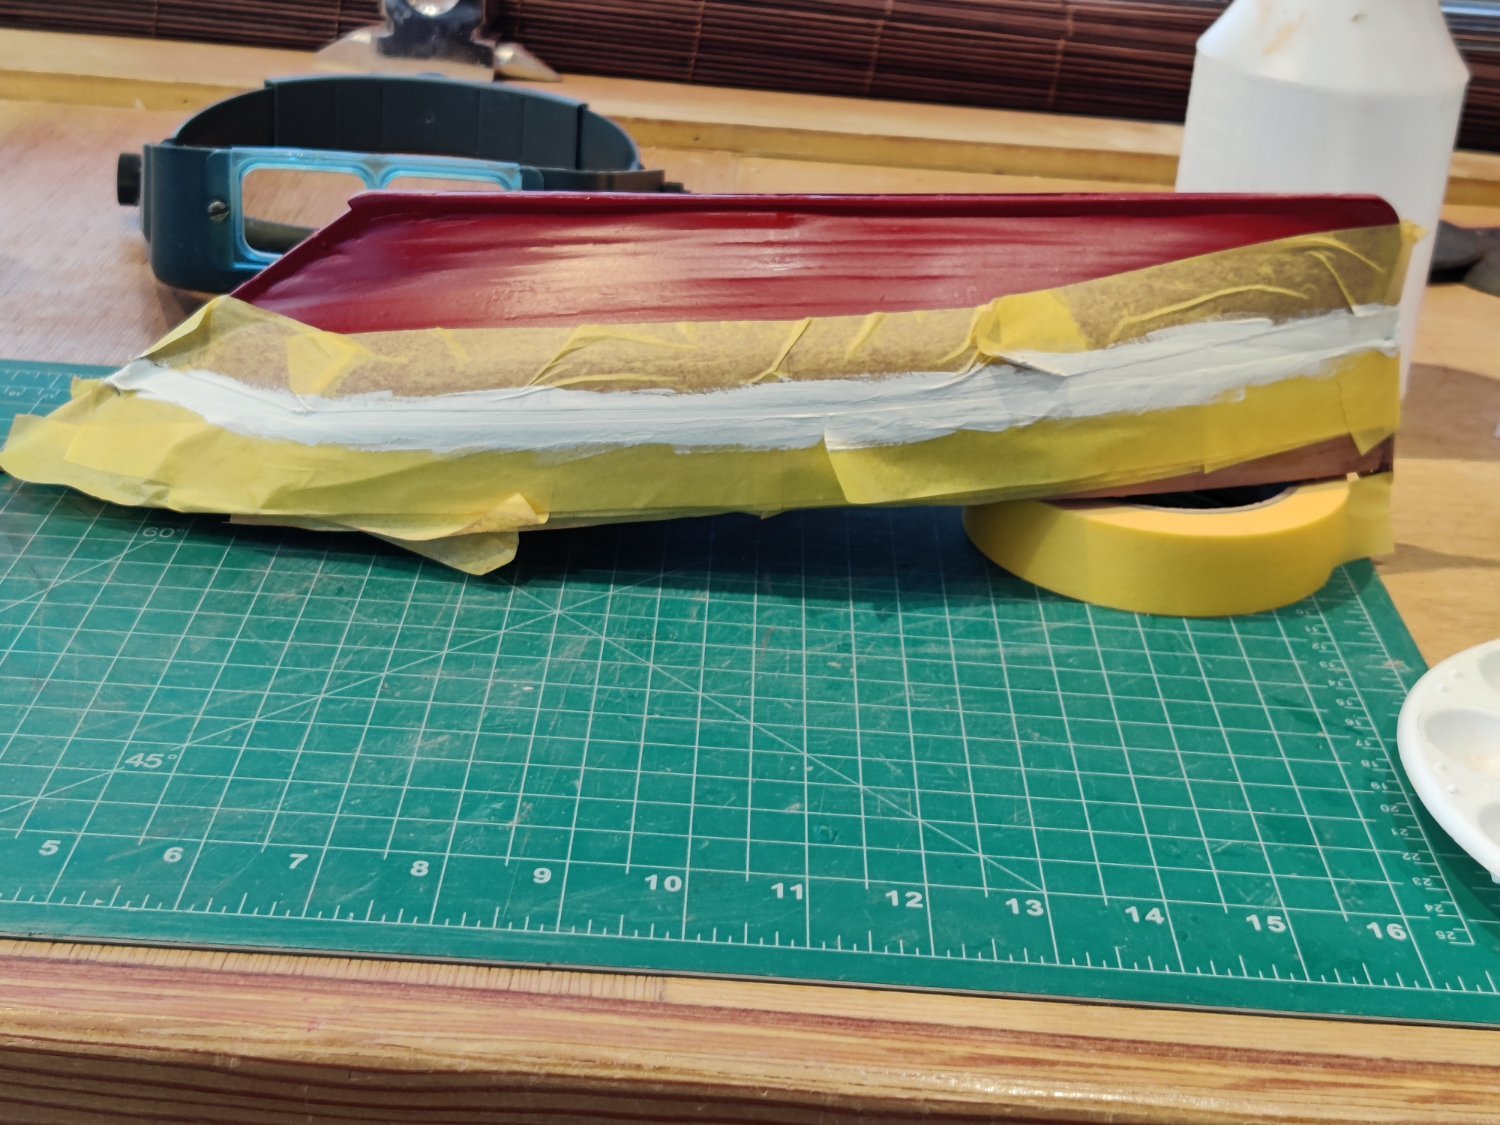
How to mark waterline for painting.
I am trying to mark the waterline for Fifie by Amati. The manual shows that the hull is placed on the provided cradle to mark the waterline. the plans show the distance on the bow and stern for the waterline. At the bow the width of the stripe is 1"+ at the stern the stripe is about 3/8". I measured and marked the stripes width on the bow and set up my marker with those widths. I used the marker and the stripe does not narrow but remains the same width at the stern as the bow. When the boat sits on the cradle the at the location where the boats fits the shape of the cradle. the bow ad stern are at approximately the same level. If that is true how can the stripe narrow at the stern? What have I missed. She pictures below for illustration. The first pictures are from the manual my boat pictures follow.