

Duanelaker
-
Posts
571 -
Joined
-
Last visited
Content Type
Profiles
Forums
Gallery
Events
Posts posted by Duanelaker
-
-
The front was a little difficult to brace, thinking about putting this extra piece of wood In as shown...

I have begun fairing the hull...wish me luck lol.

- GrandpaPhil, yvesvidal, bruce d and 1 other
-
 4
4
-
-
-
Merry Christmas to you! Your boat looks beautiful!
-
And that is where we stand. Merry Christmas to everyone that happens upon this build log. 🌲 🎁
-
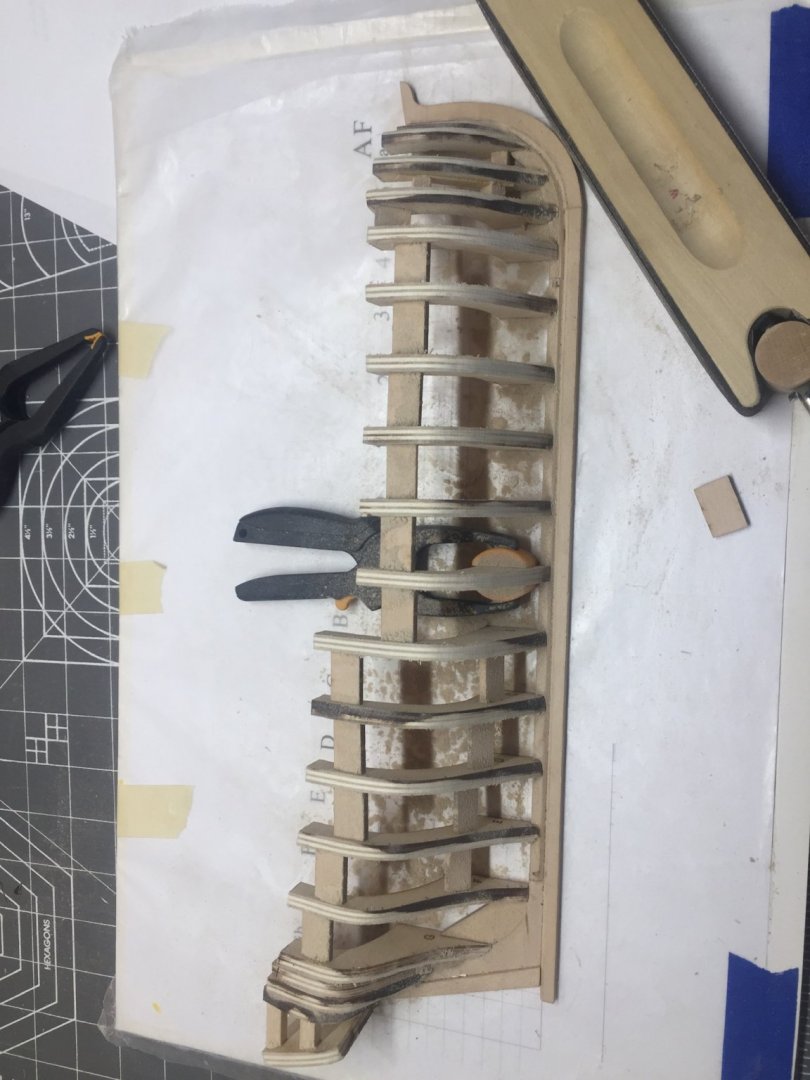
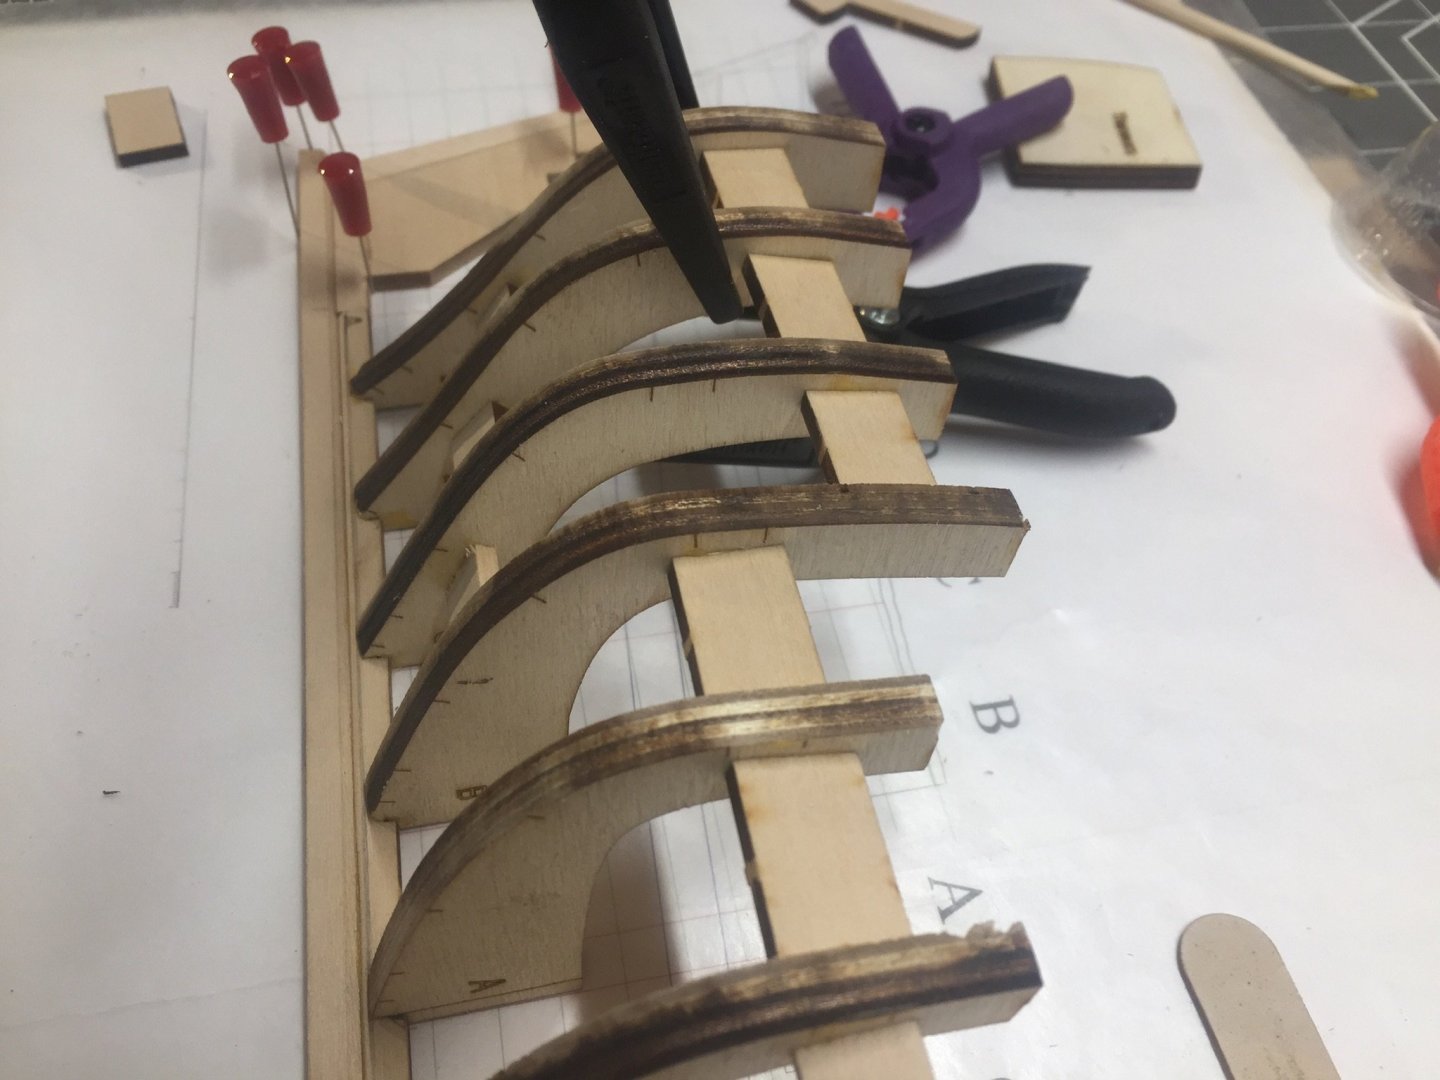
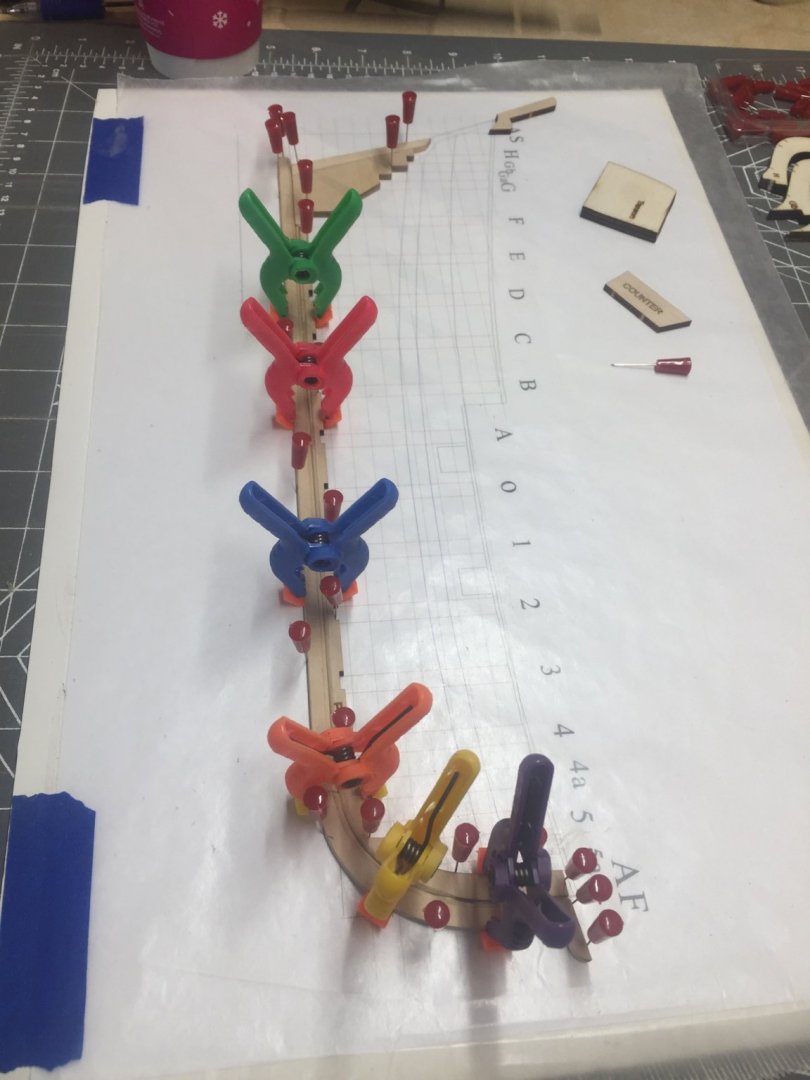
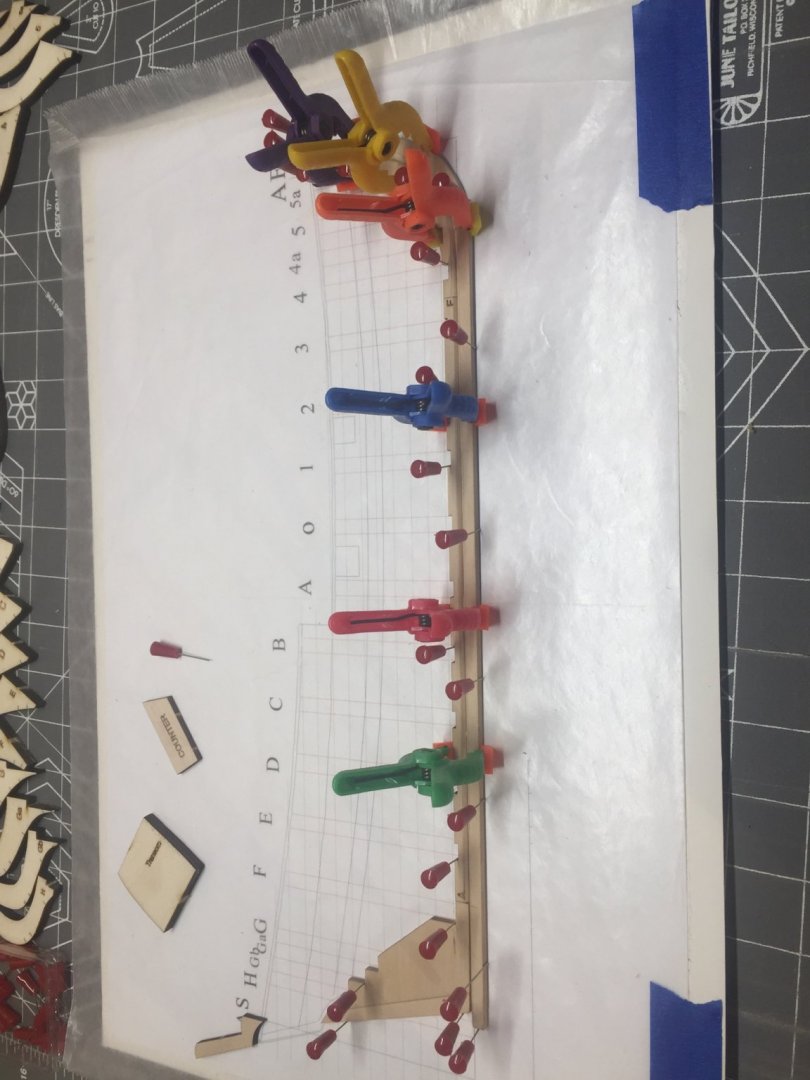
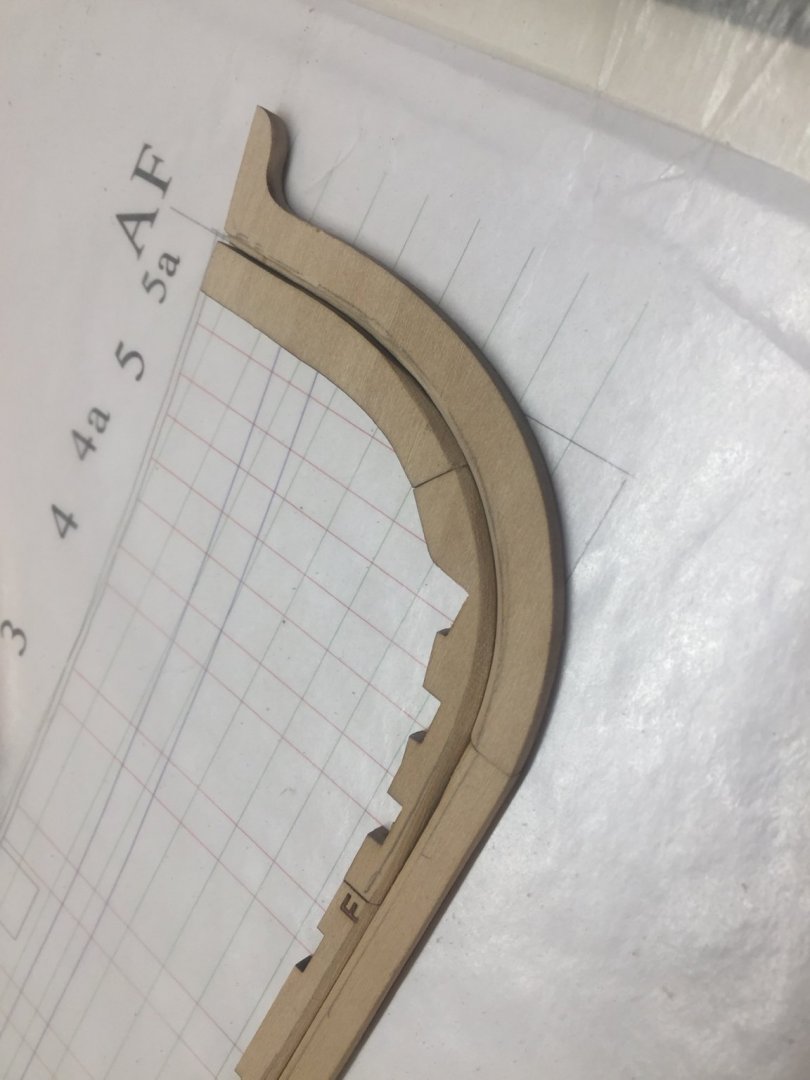
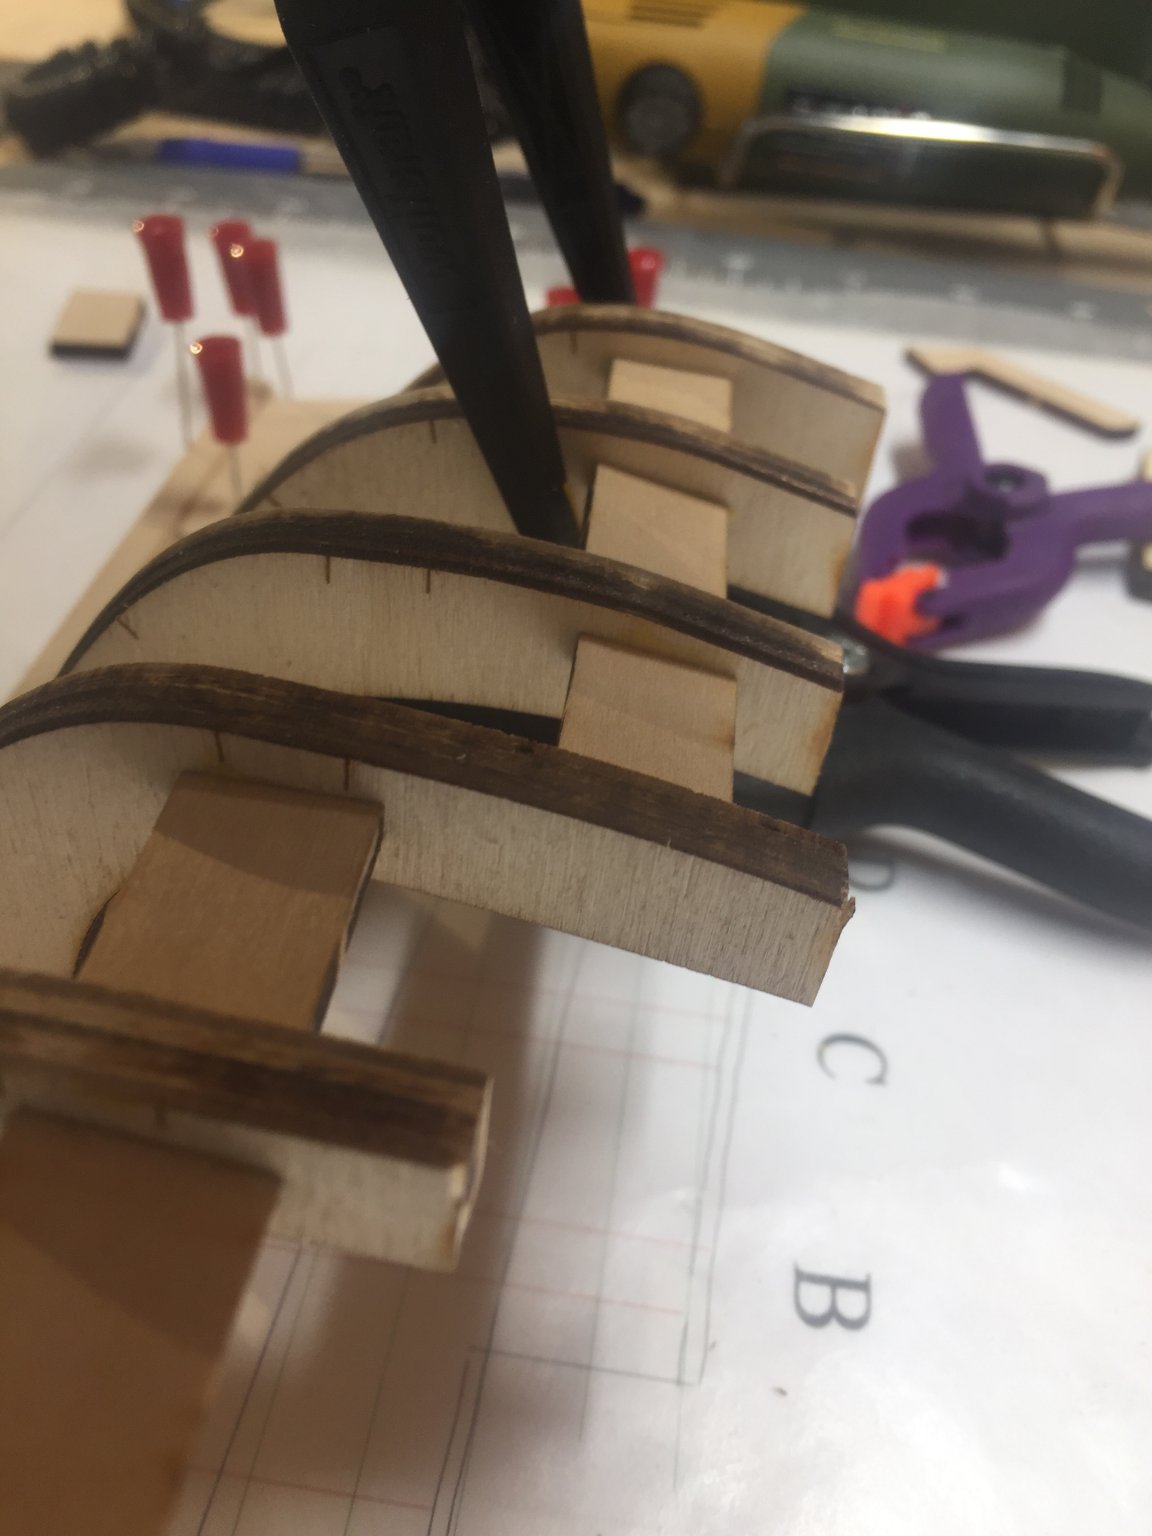
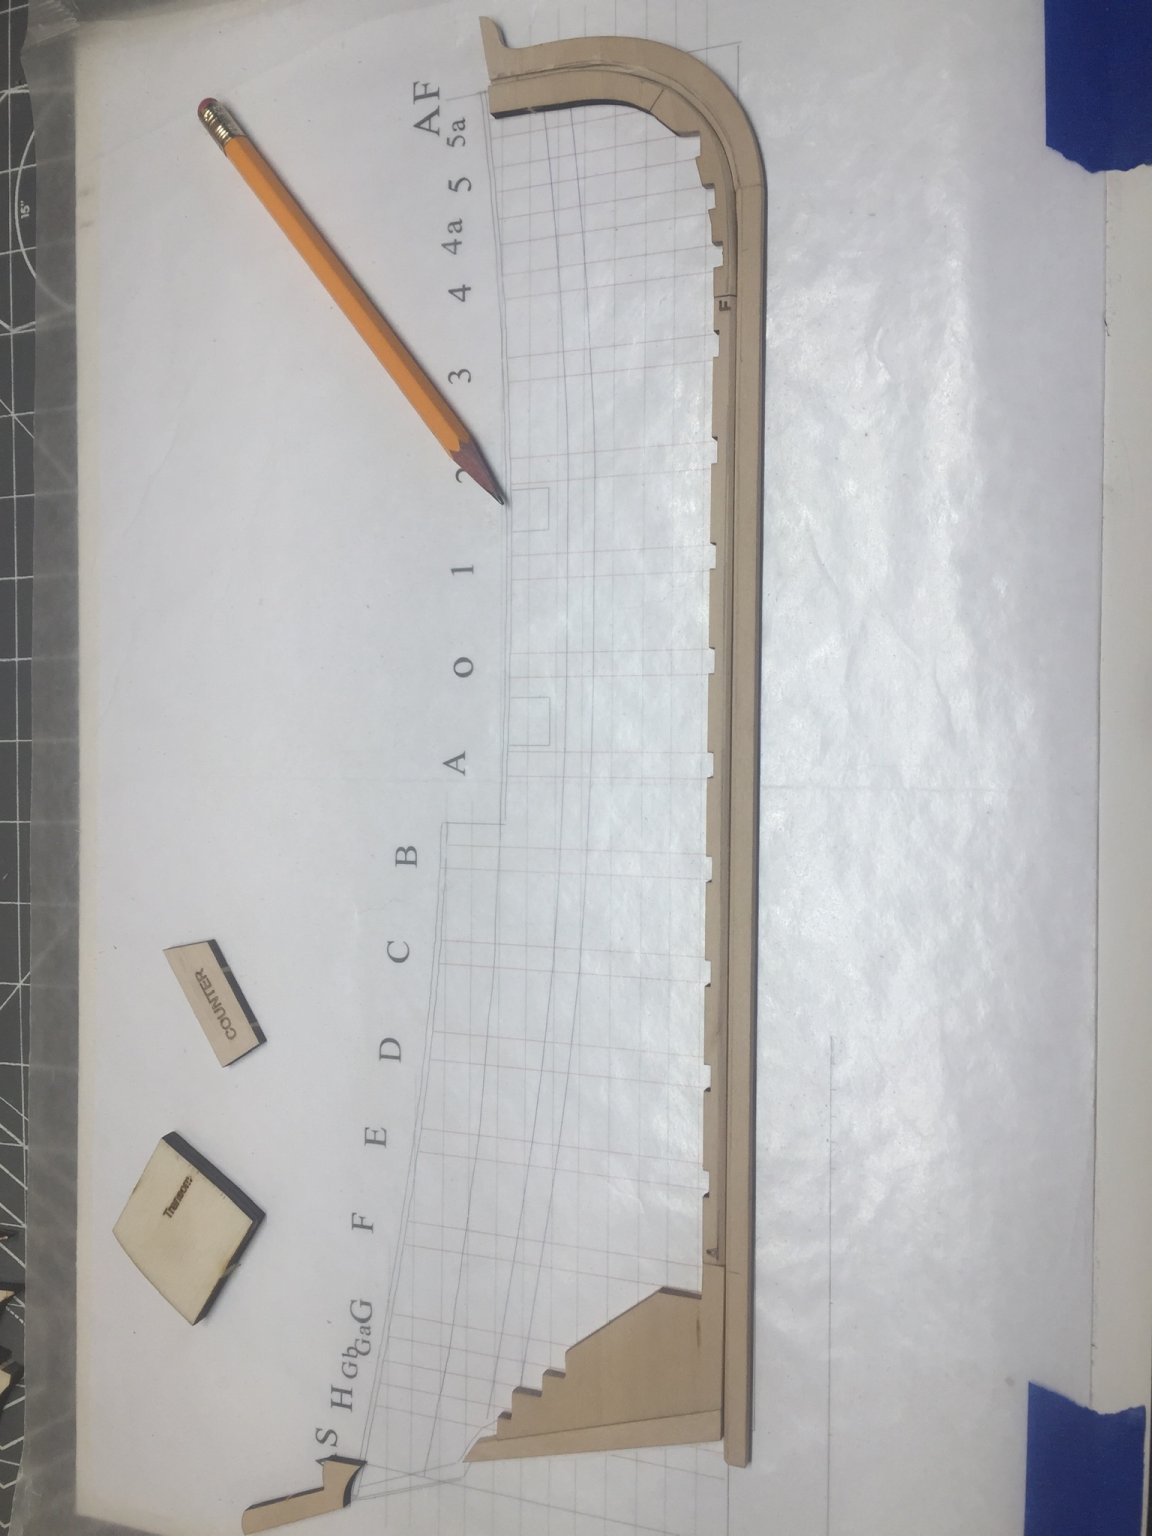
I marked out where the bow framing goes...Not sure the best way to do it, but I did end up splitting the stem post, but since it was glued to everything else it wasn’t a big deal. I was not sure what the best way to cut it out was, but I cut to deep and fast with a razor.


-
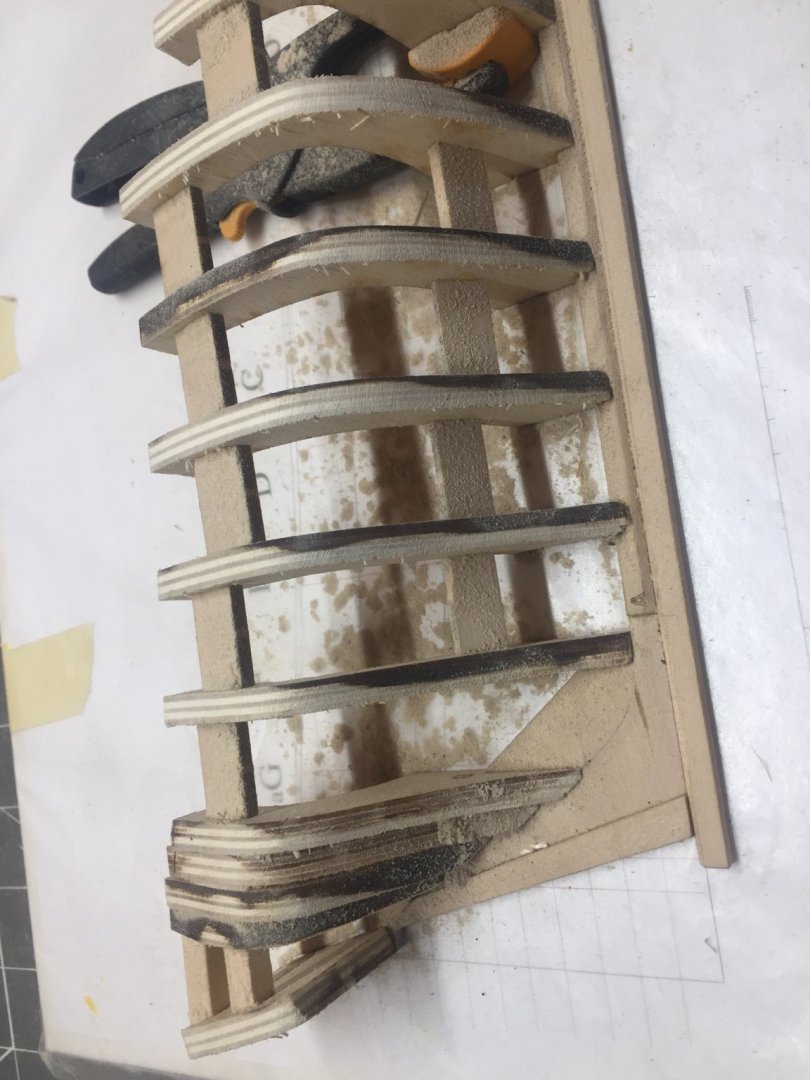
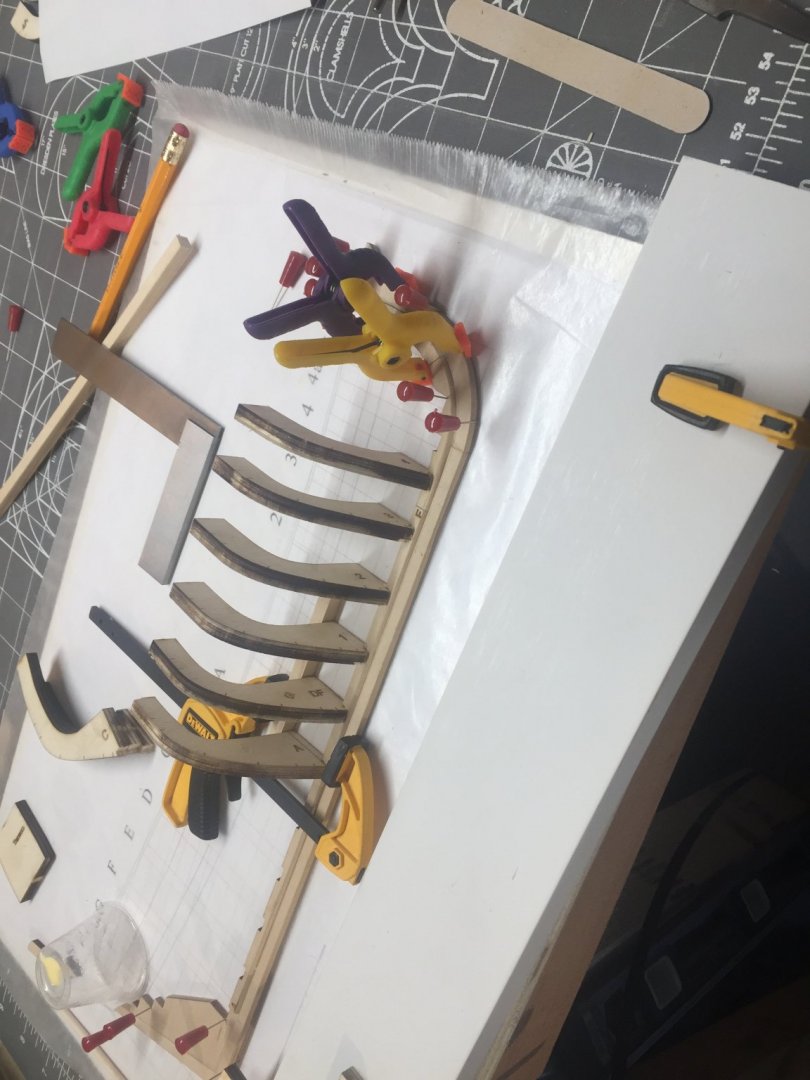
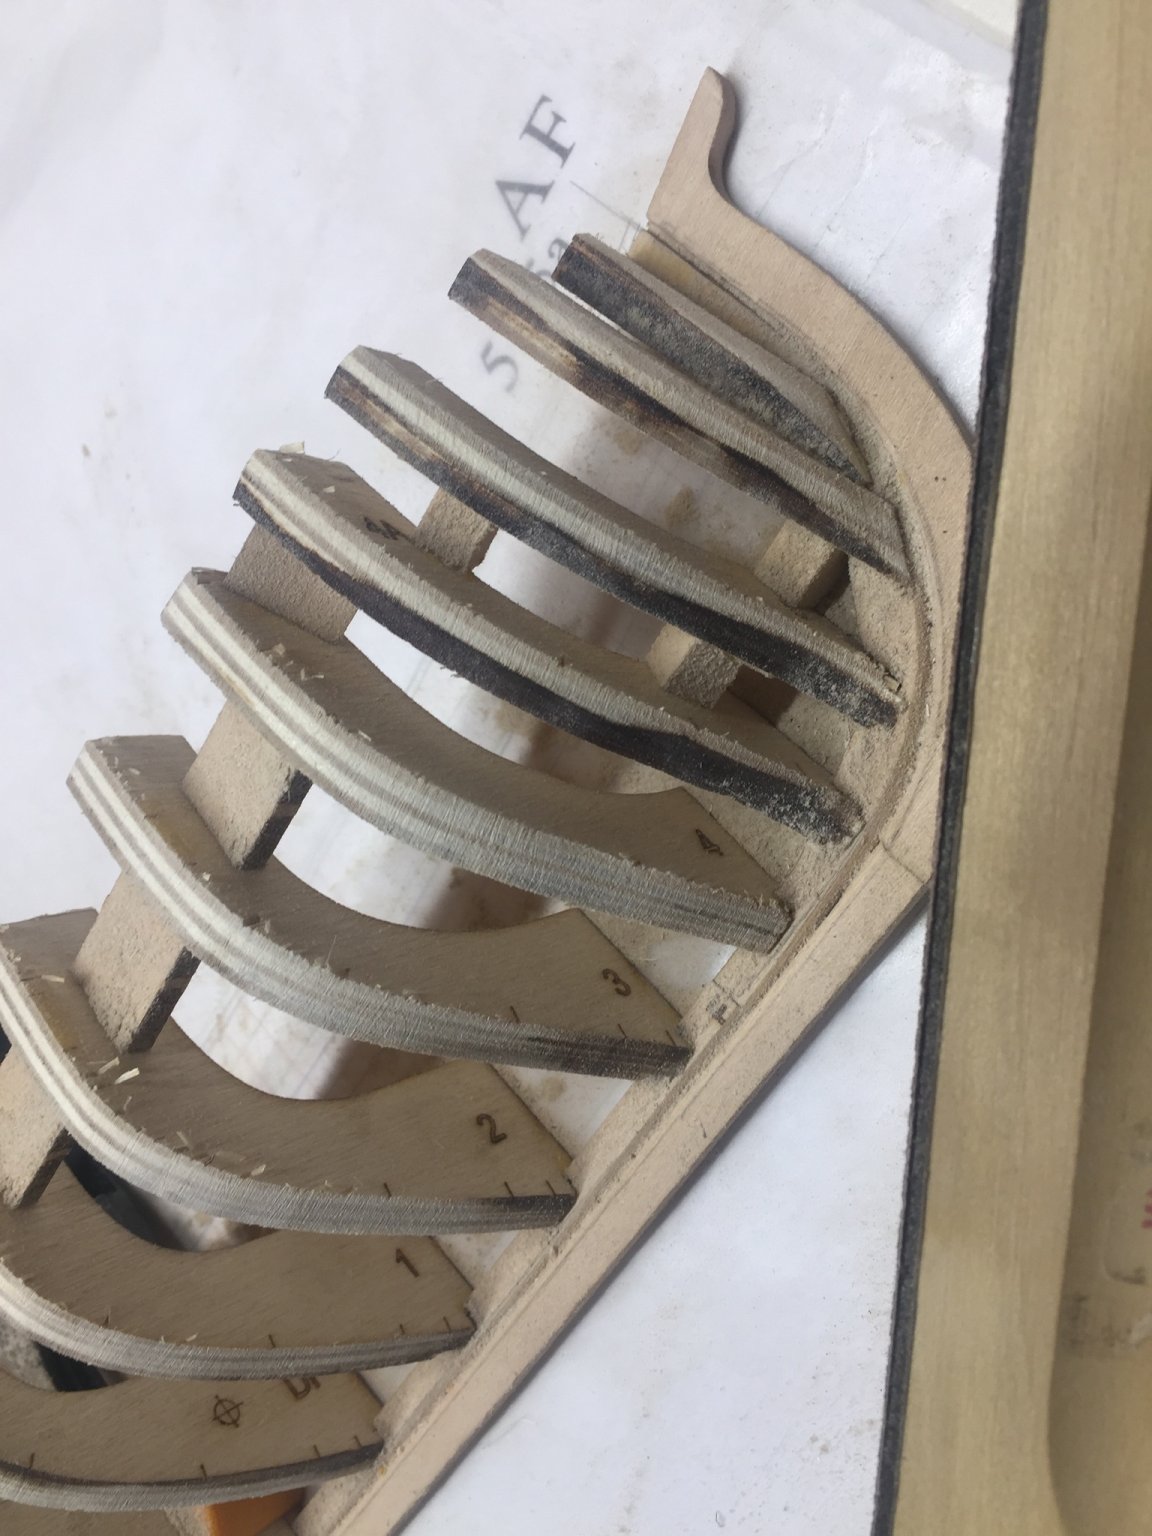
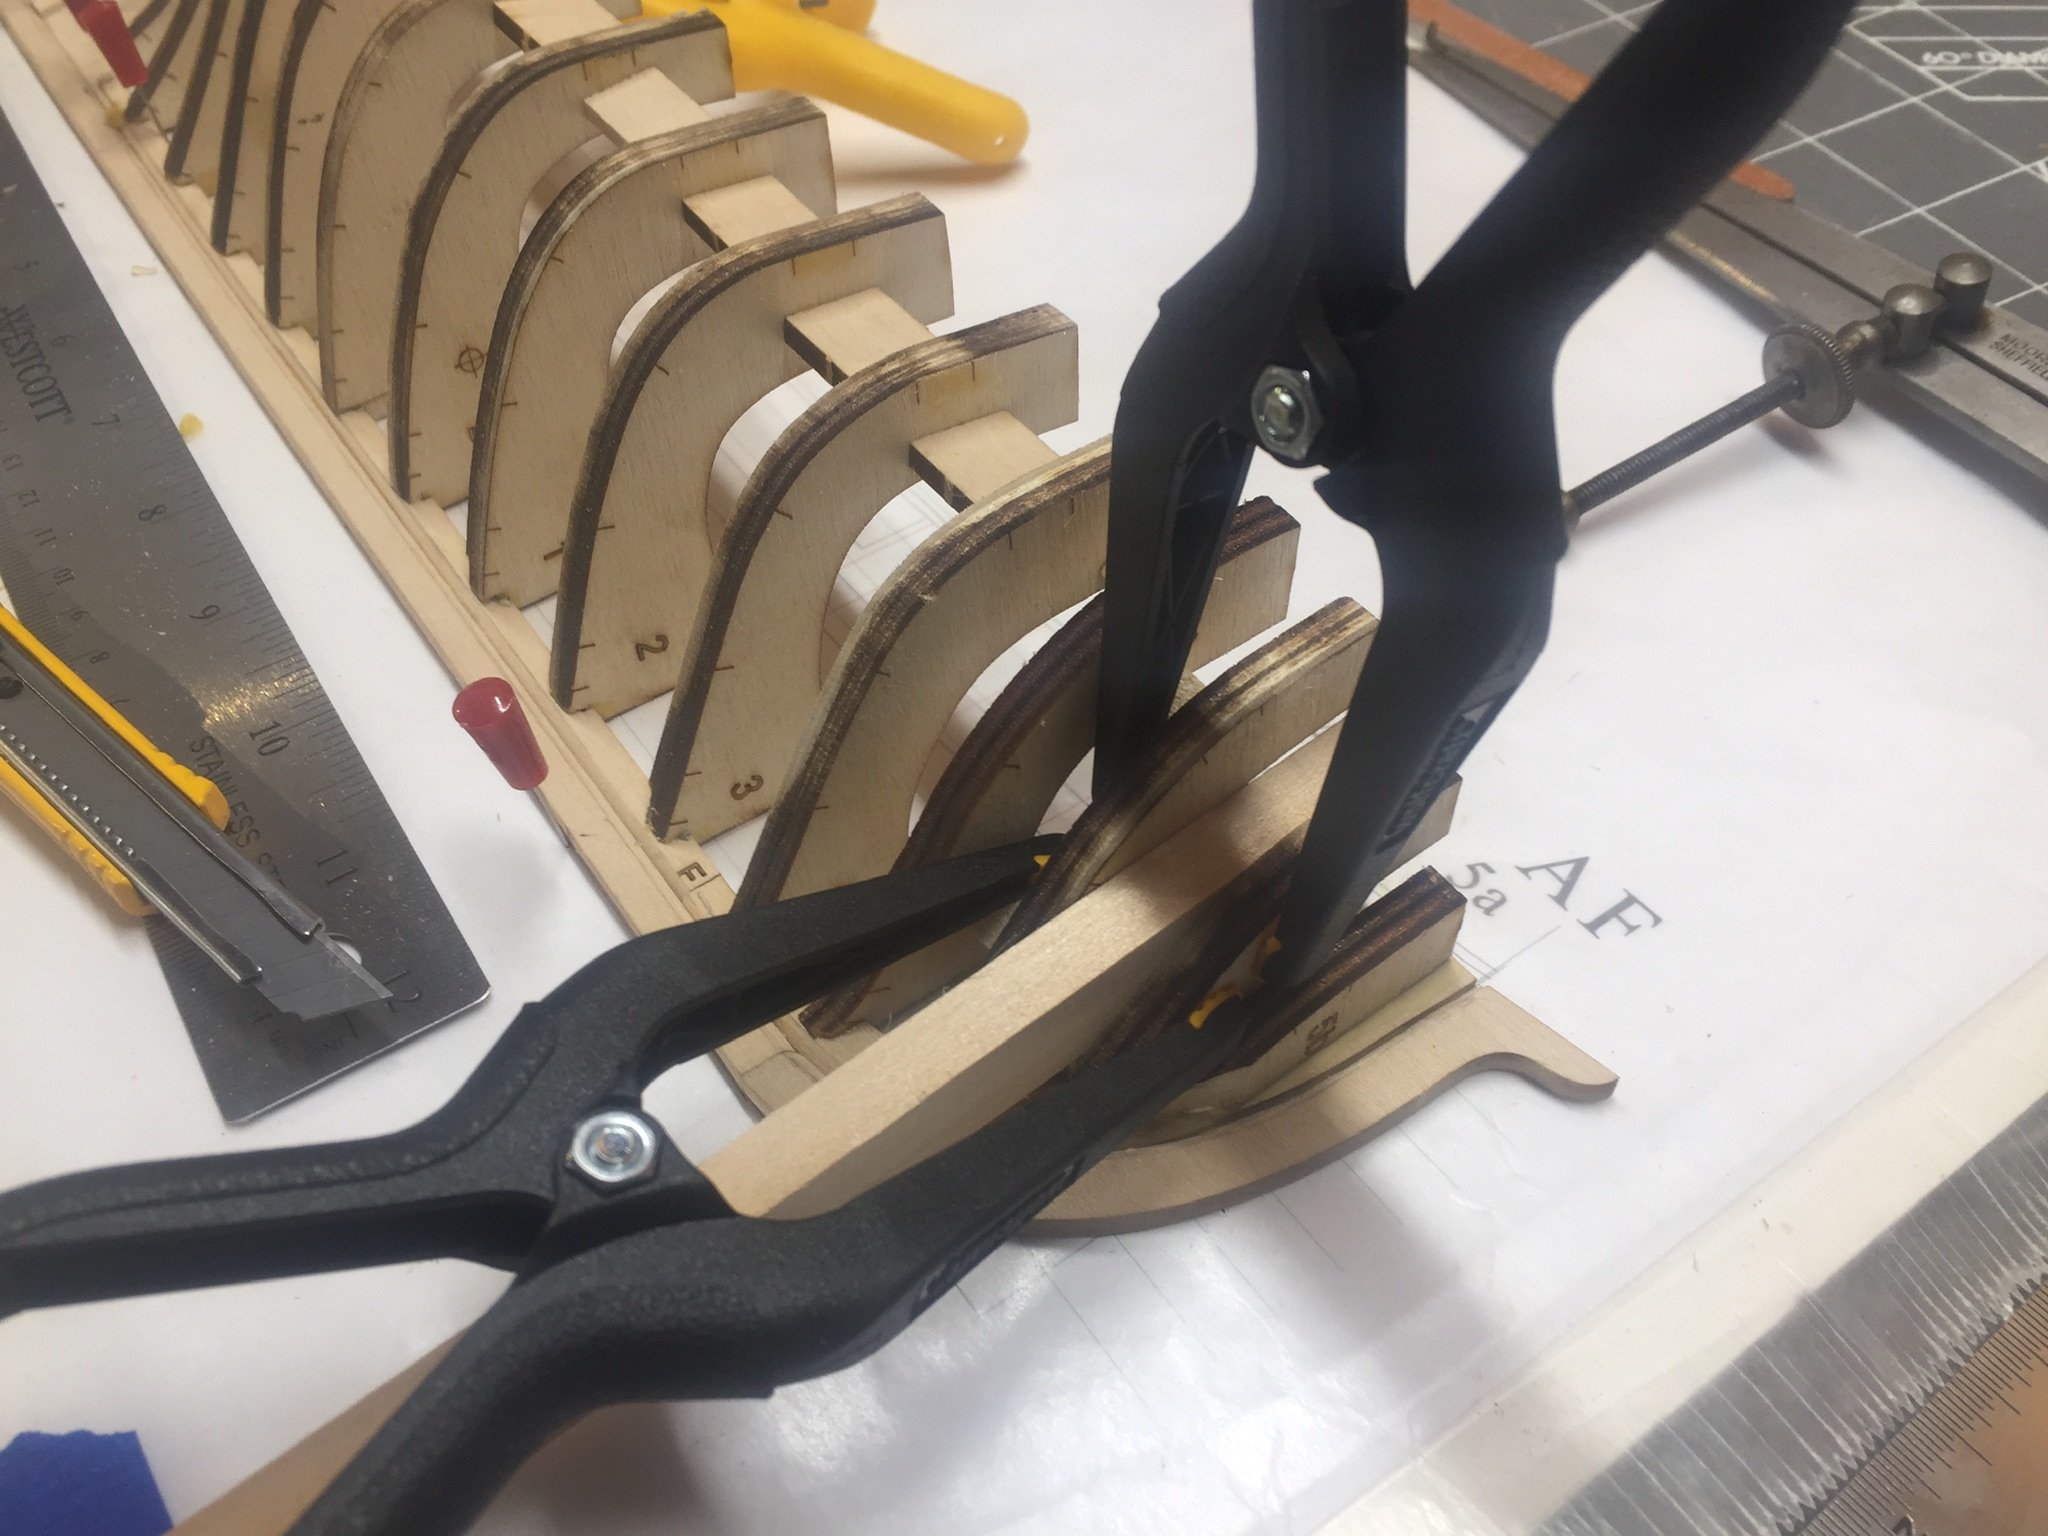
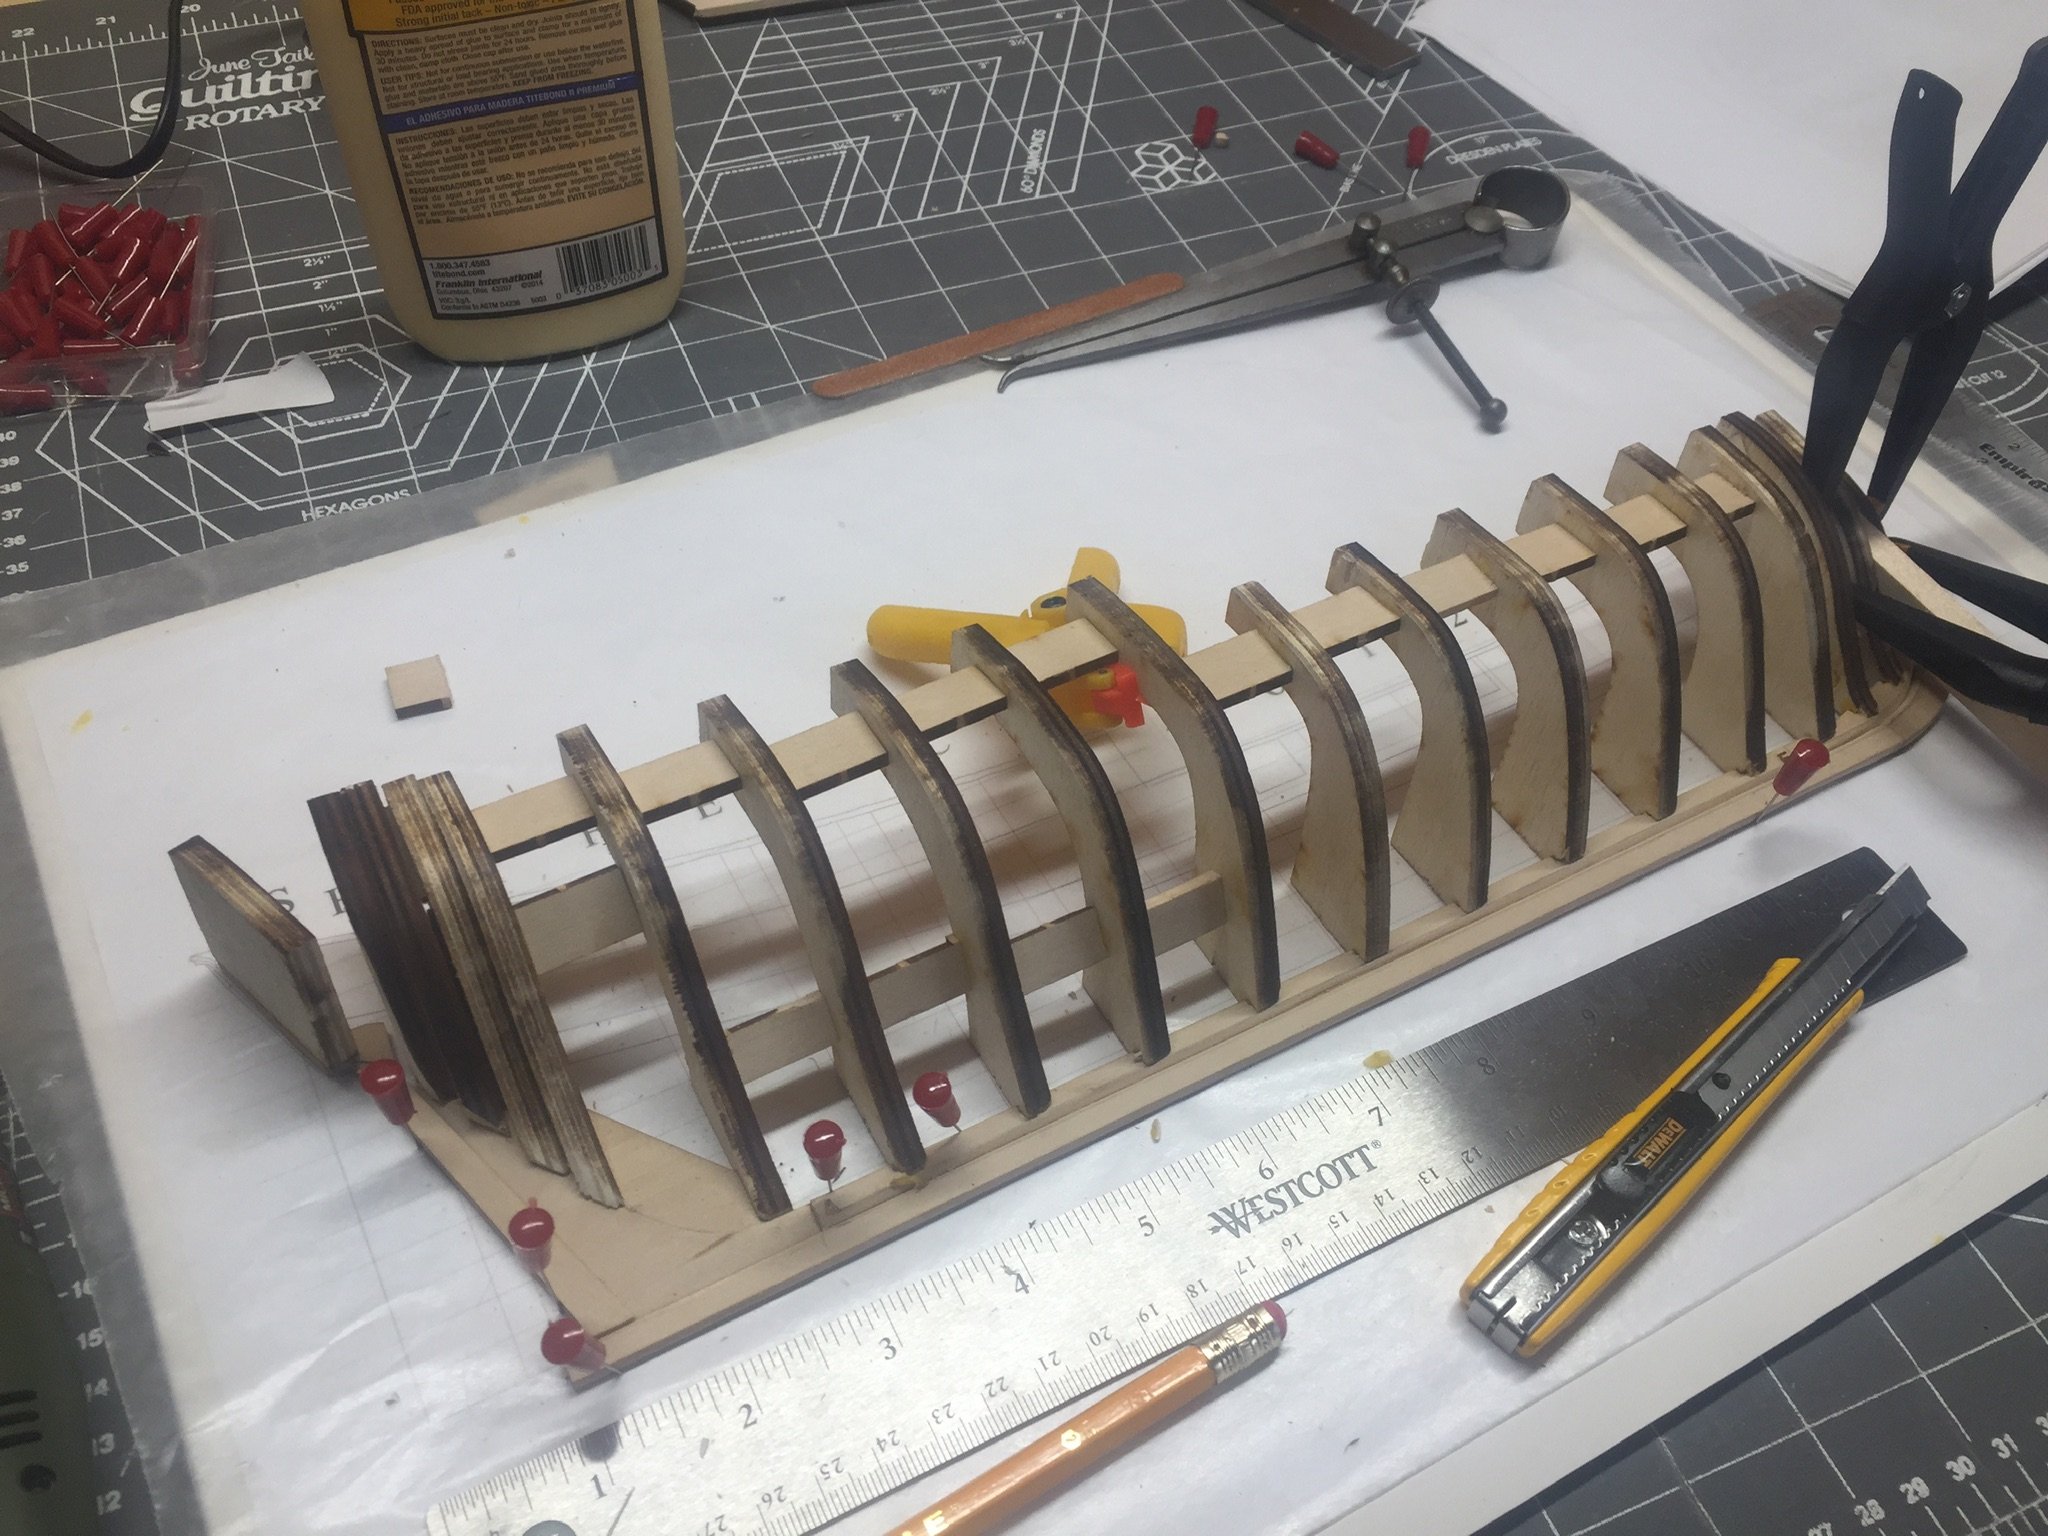
I began adding the additional spacers/framing and it work out nicely. I also added another row on the bottom of the frames to the stern.

-
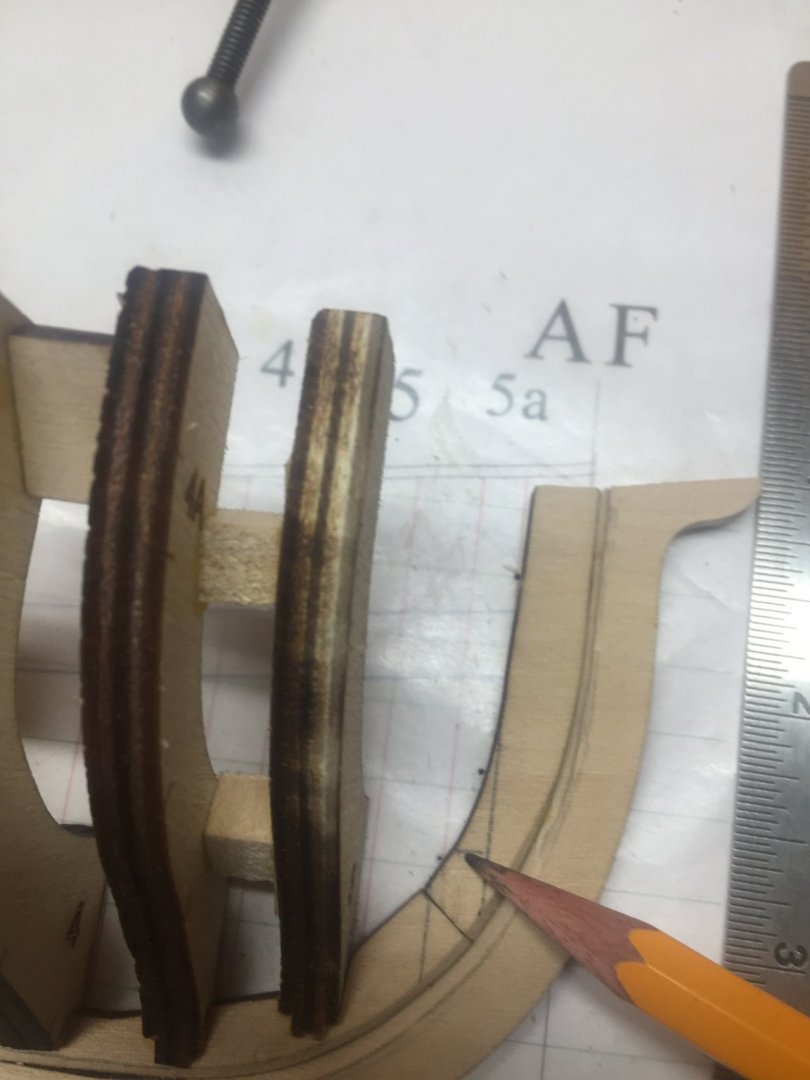
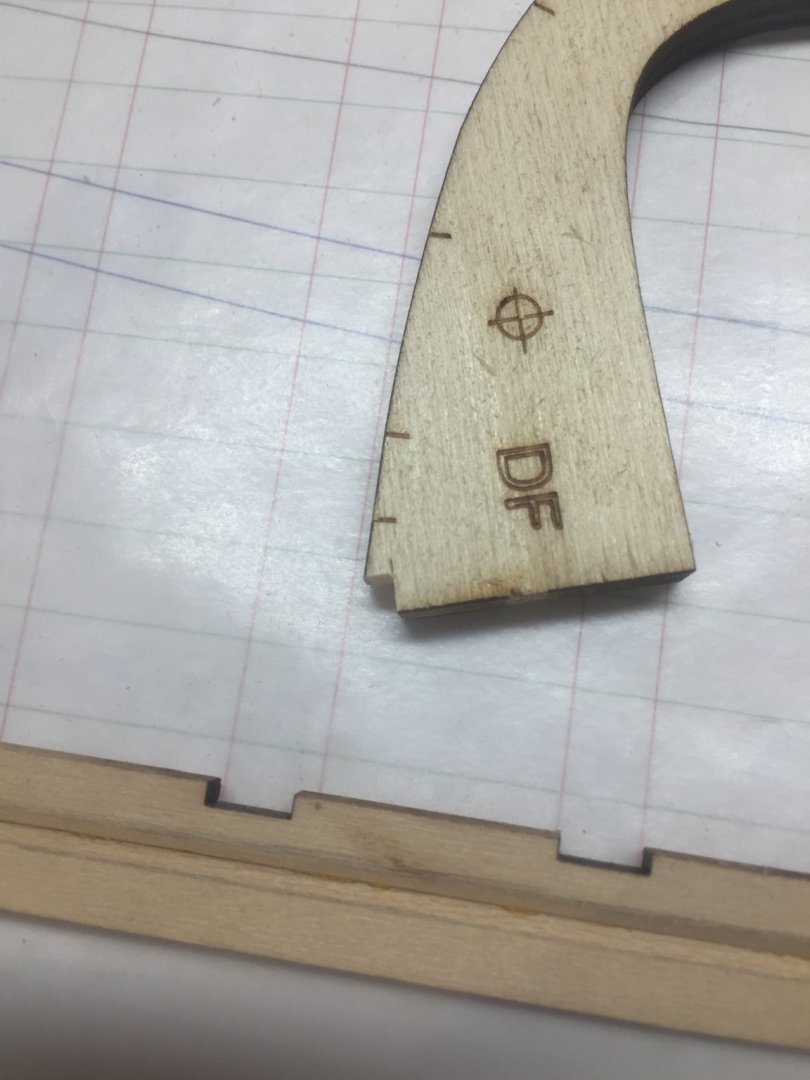
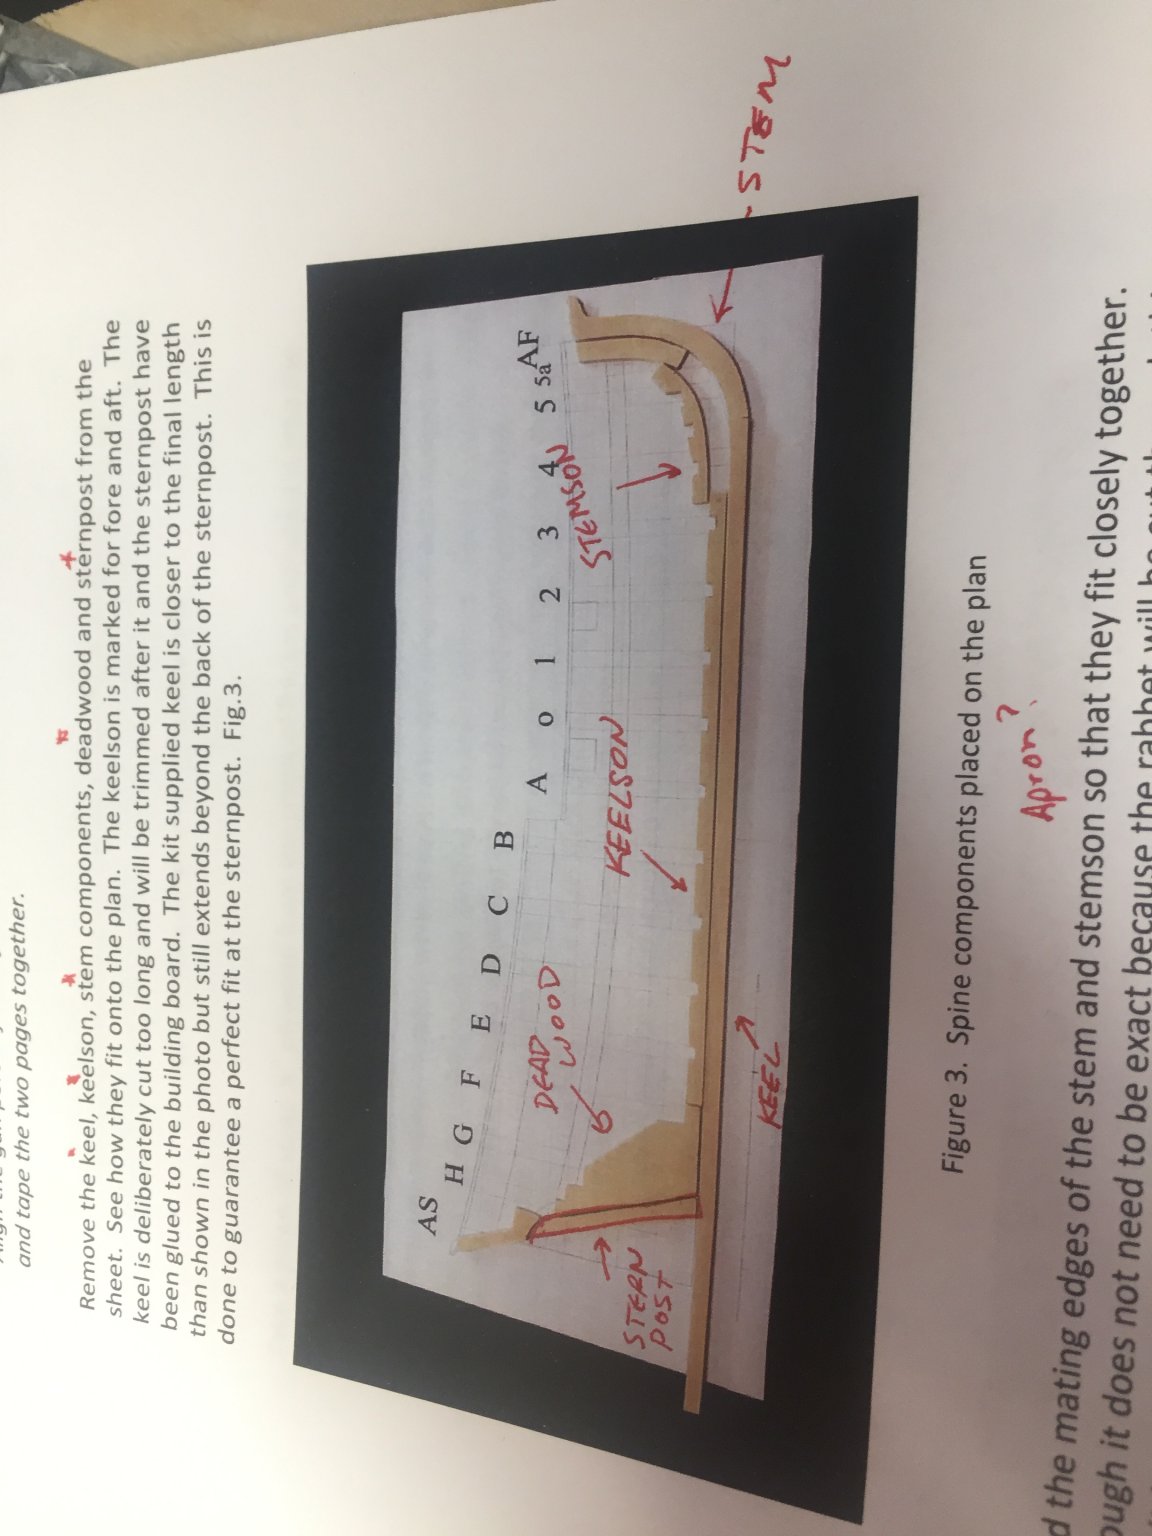
First question was wether or not DF was what the drawing template called as 0...I’m guessing yes because it was the only one left and it had a center mark on it...
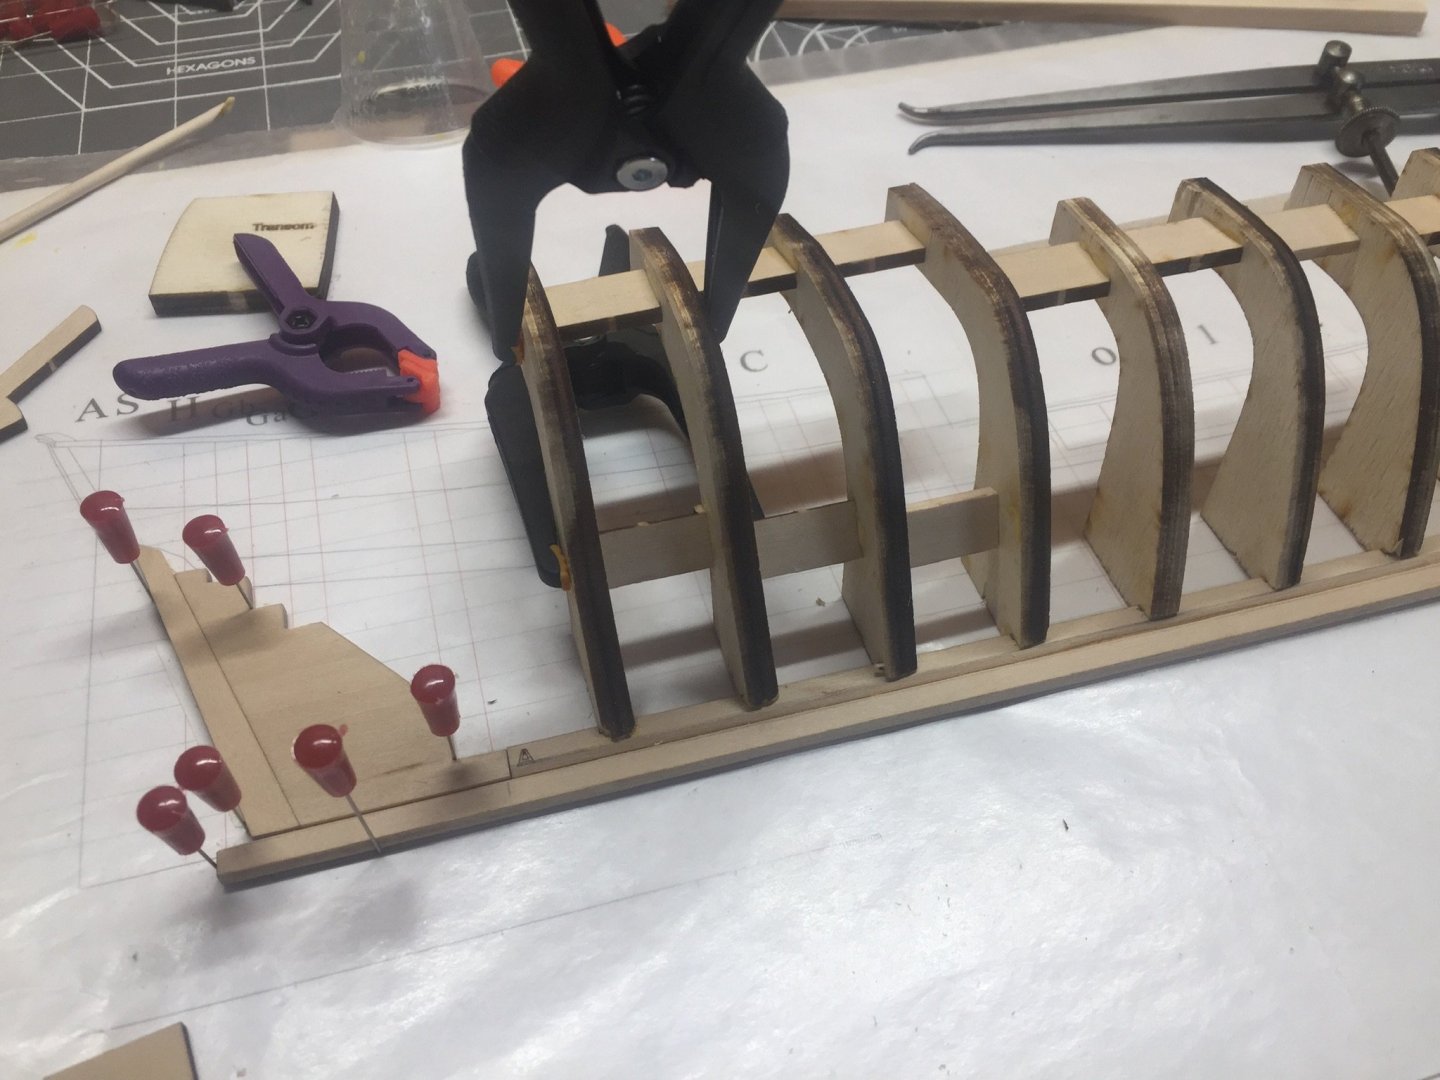
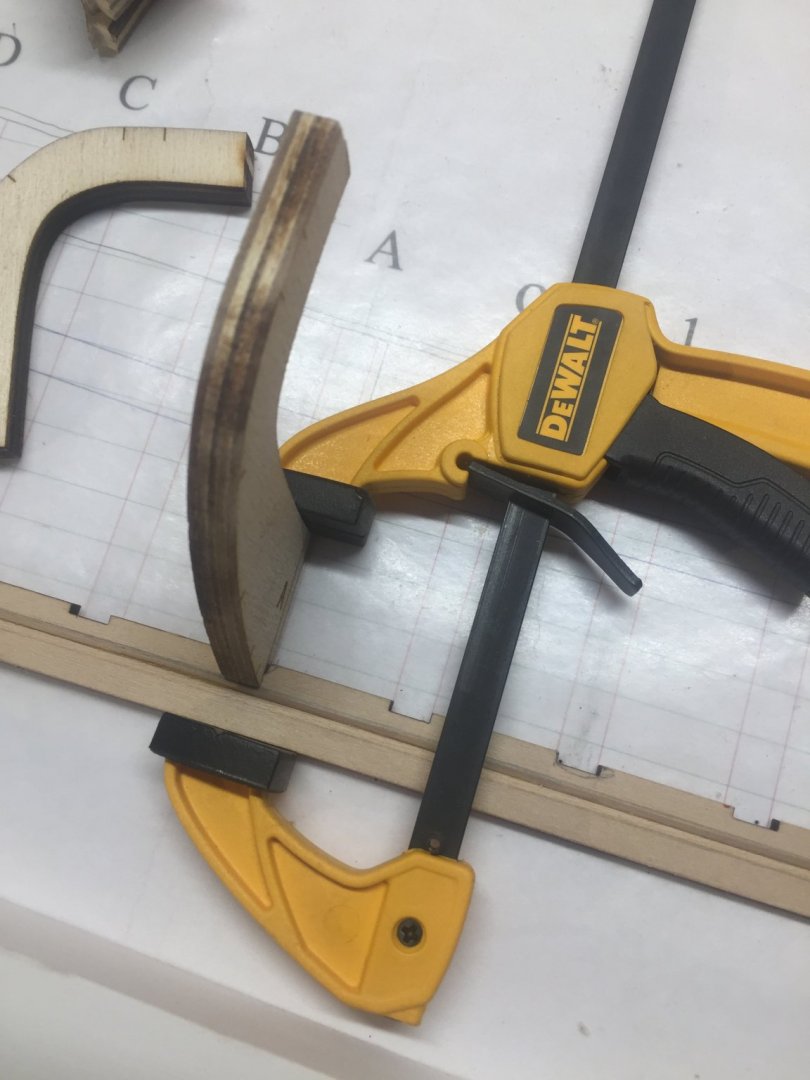
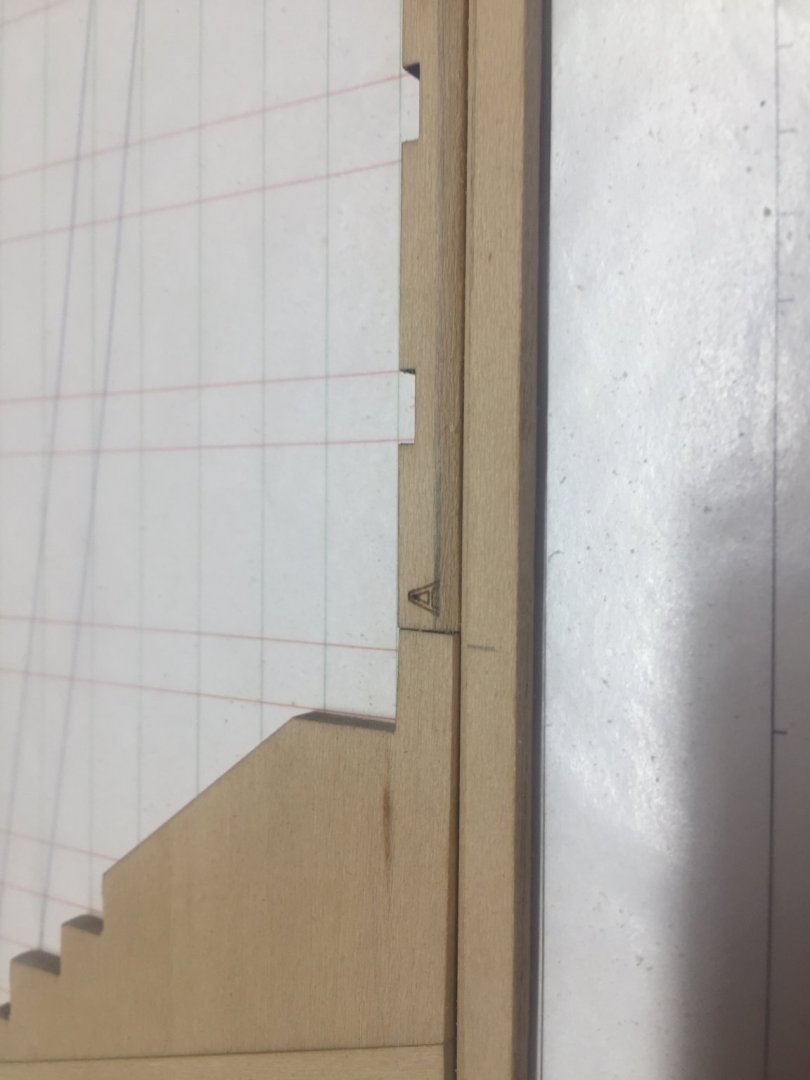
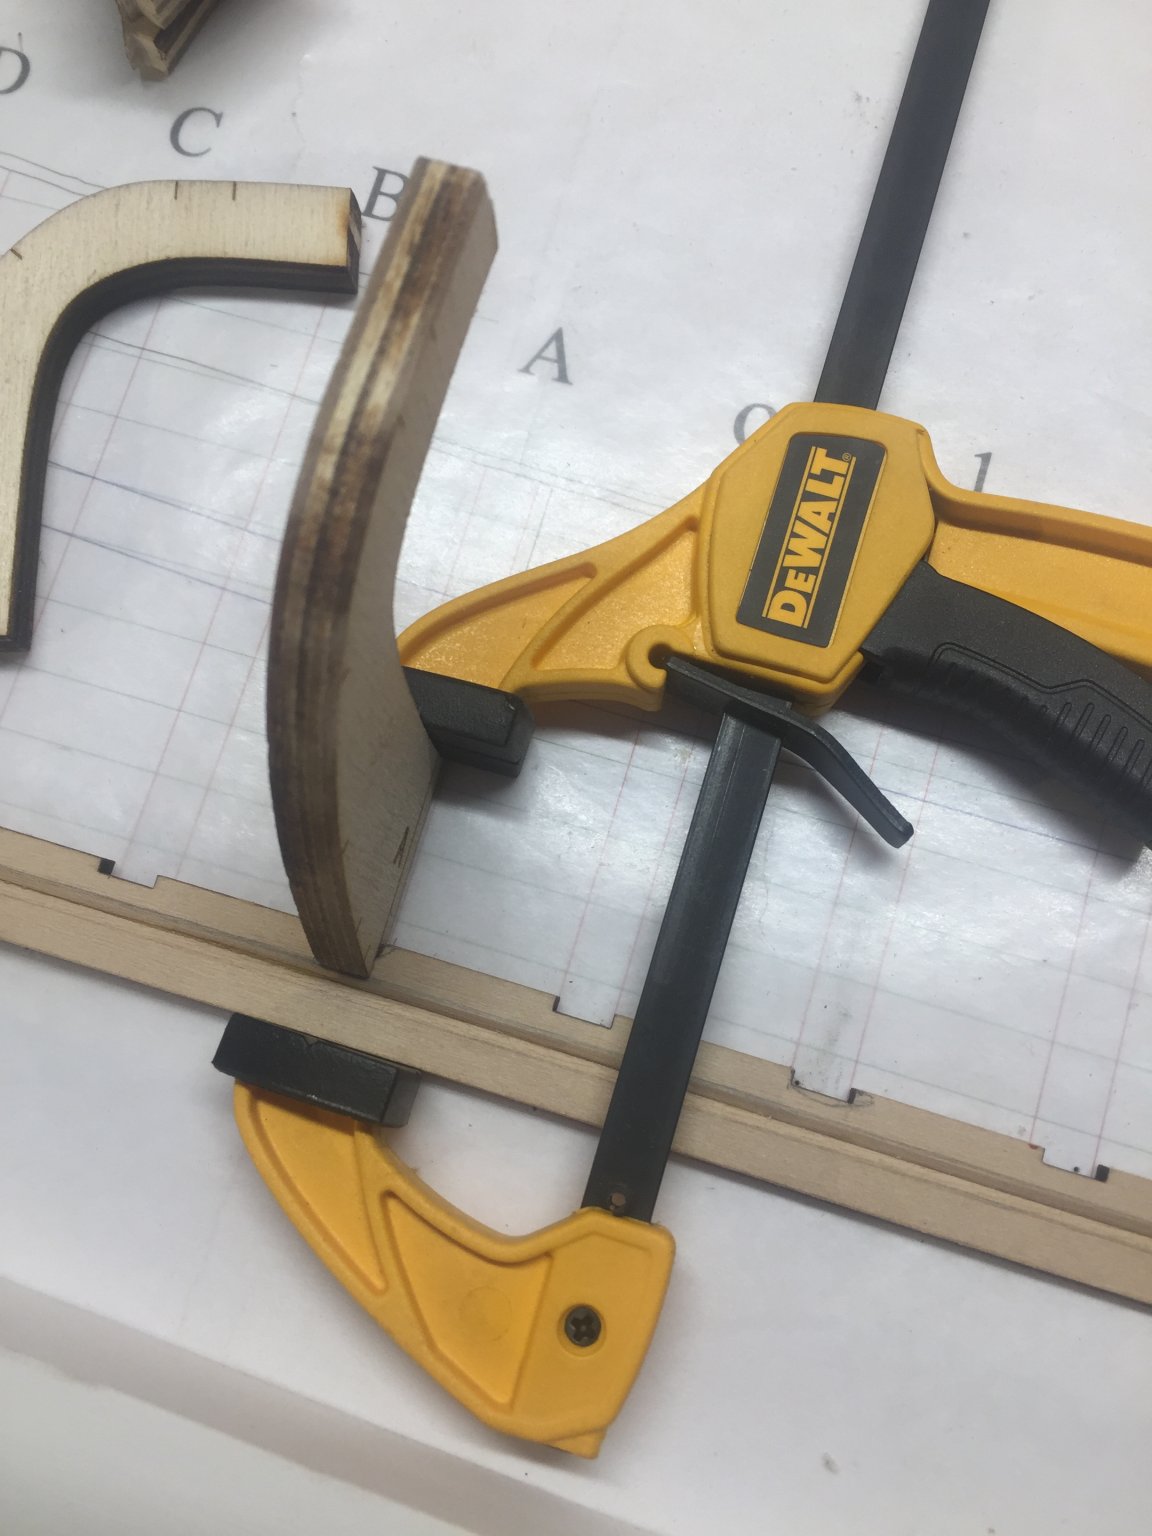
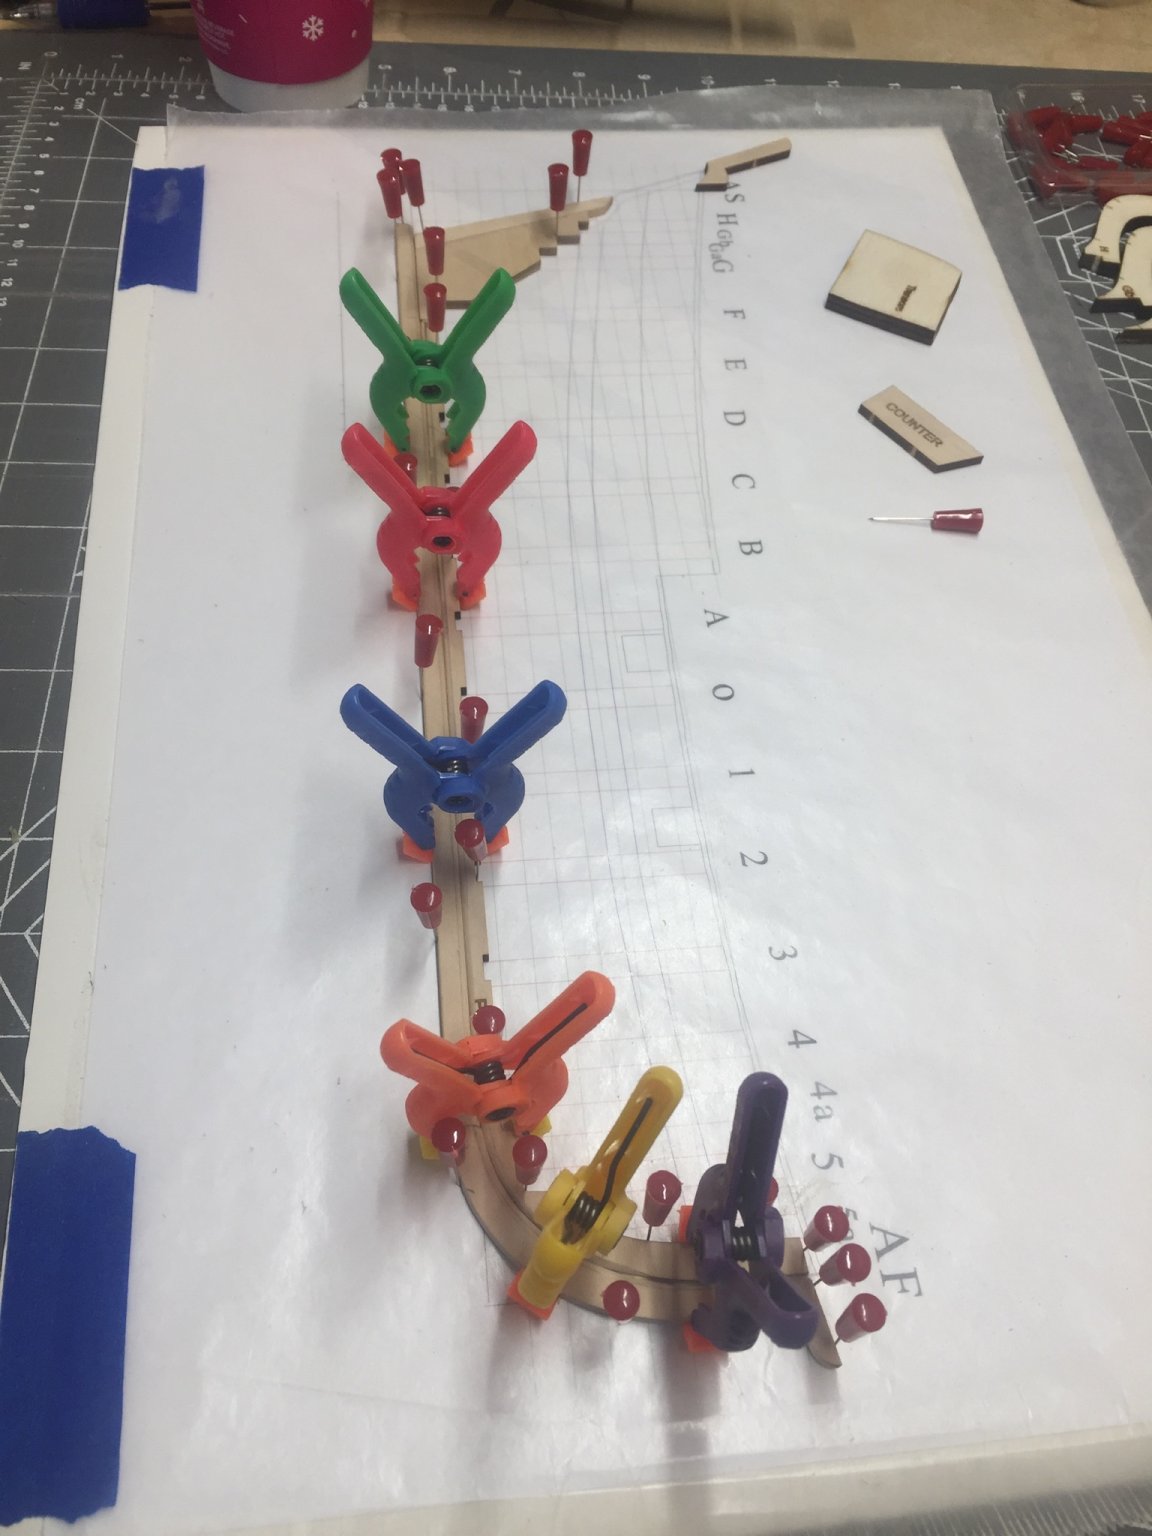
instead of cutting out more of the keelson I opted to cut out the frames a little bit so the went to the rabbet. I also screwed around with different clamping methods. One problem I had was that the foam board was not perfectly flat.
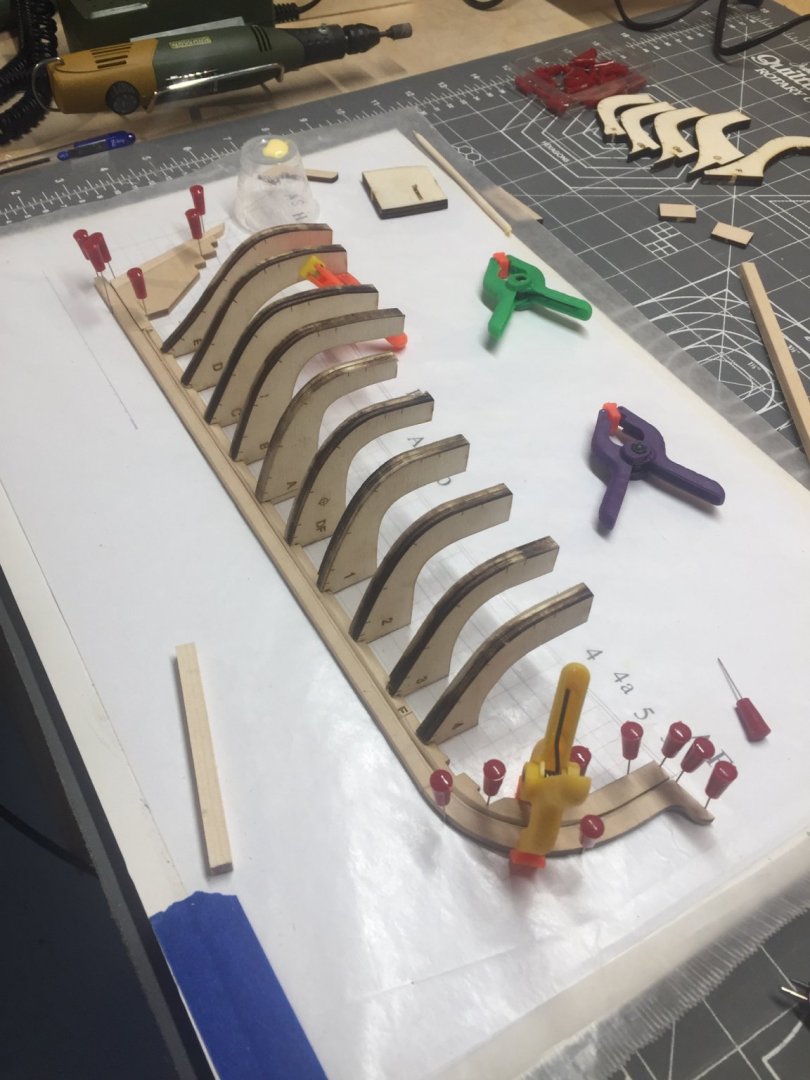
-
So moving along...I will agree with others that have stated that doing this build has really forced me to get an understanding for the rabbet and how the planking works...now if only I can actually gain the skill to do it.
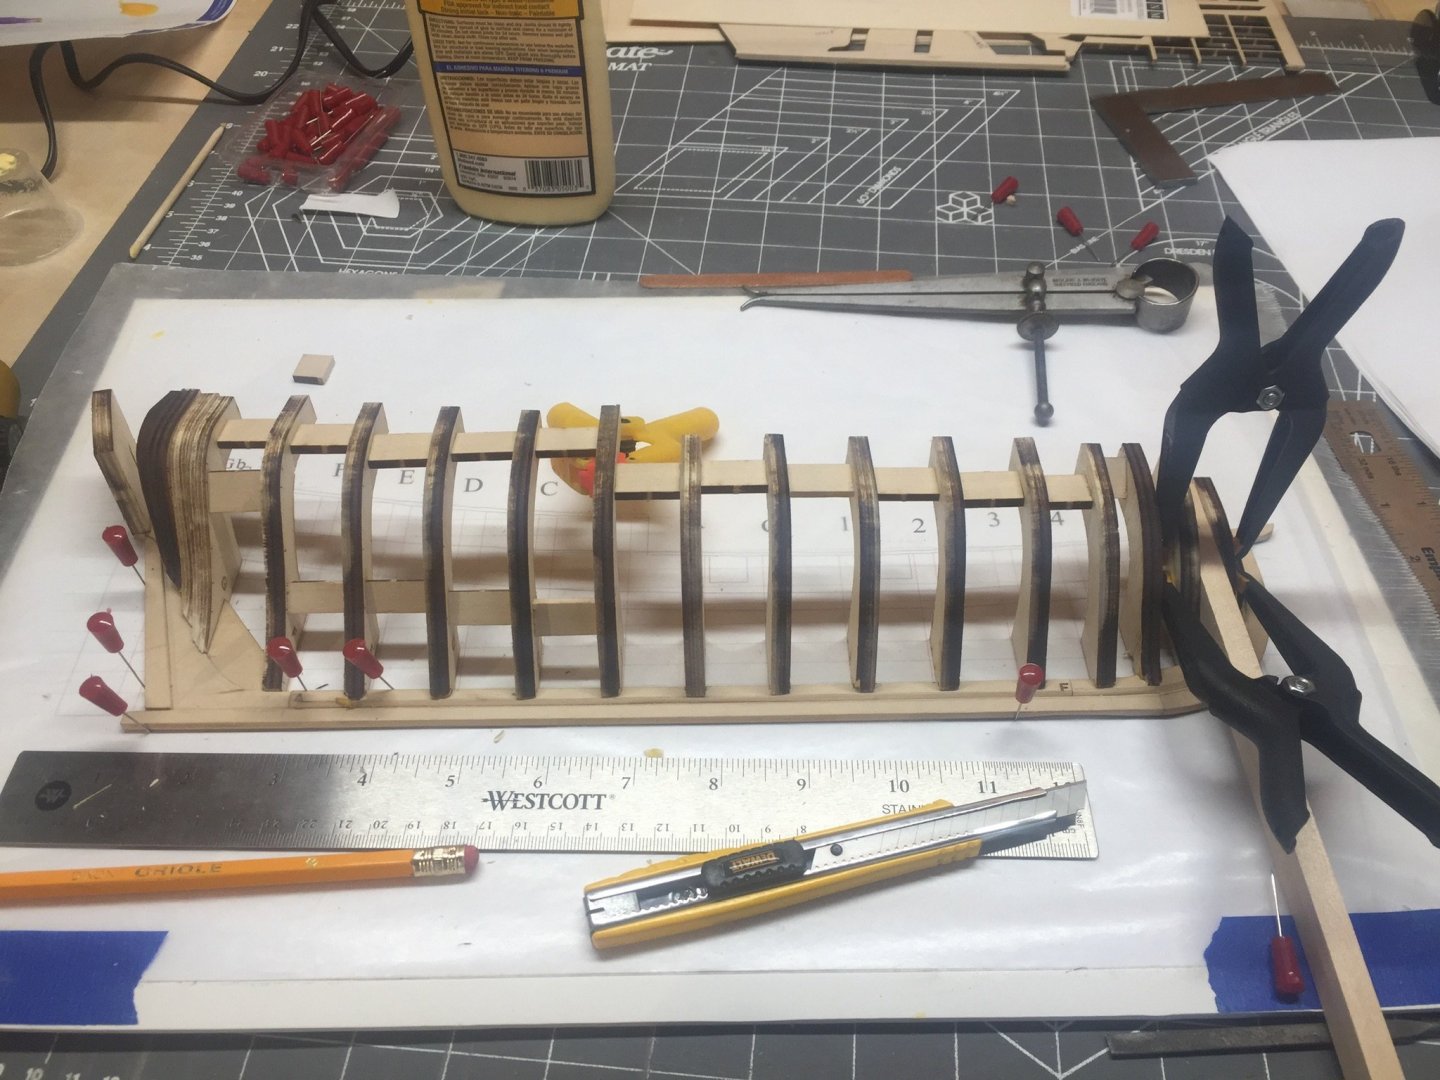
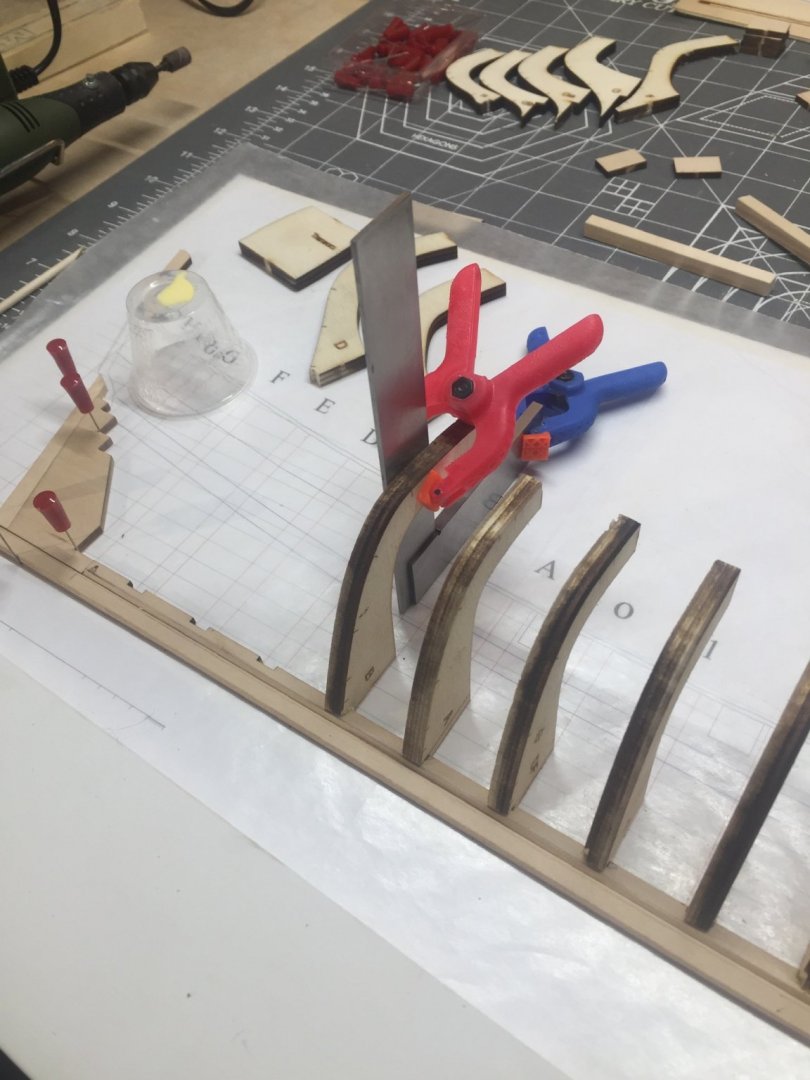
so I glued the keel, keelson, stem, stemson and started framing.
-
So I read and re-read and have done as such. So far things have gone very well.
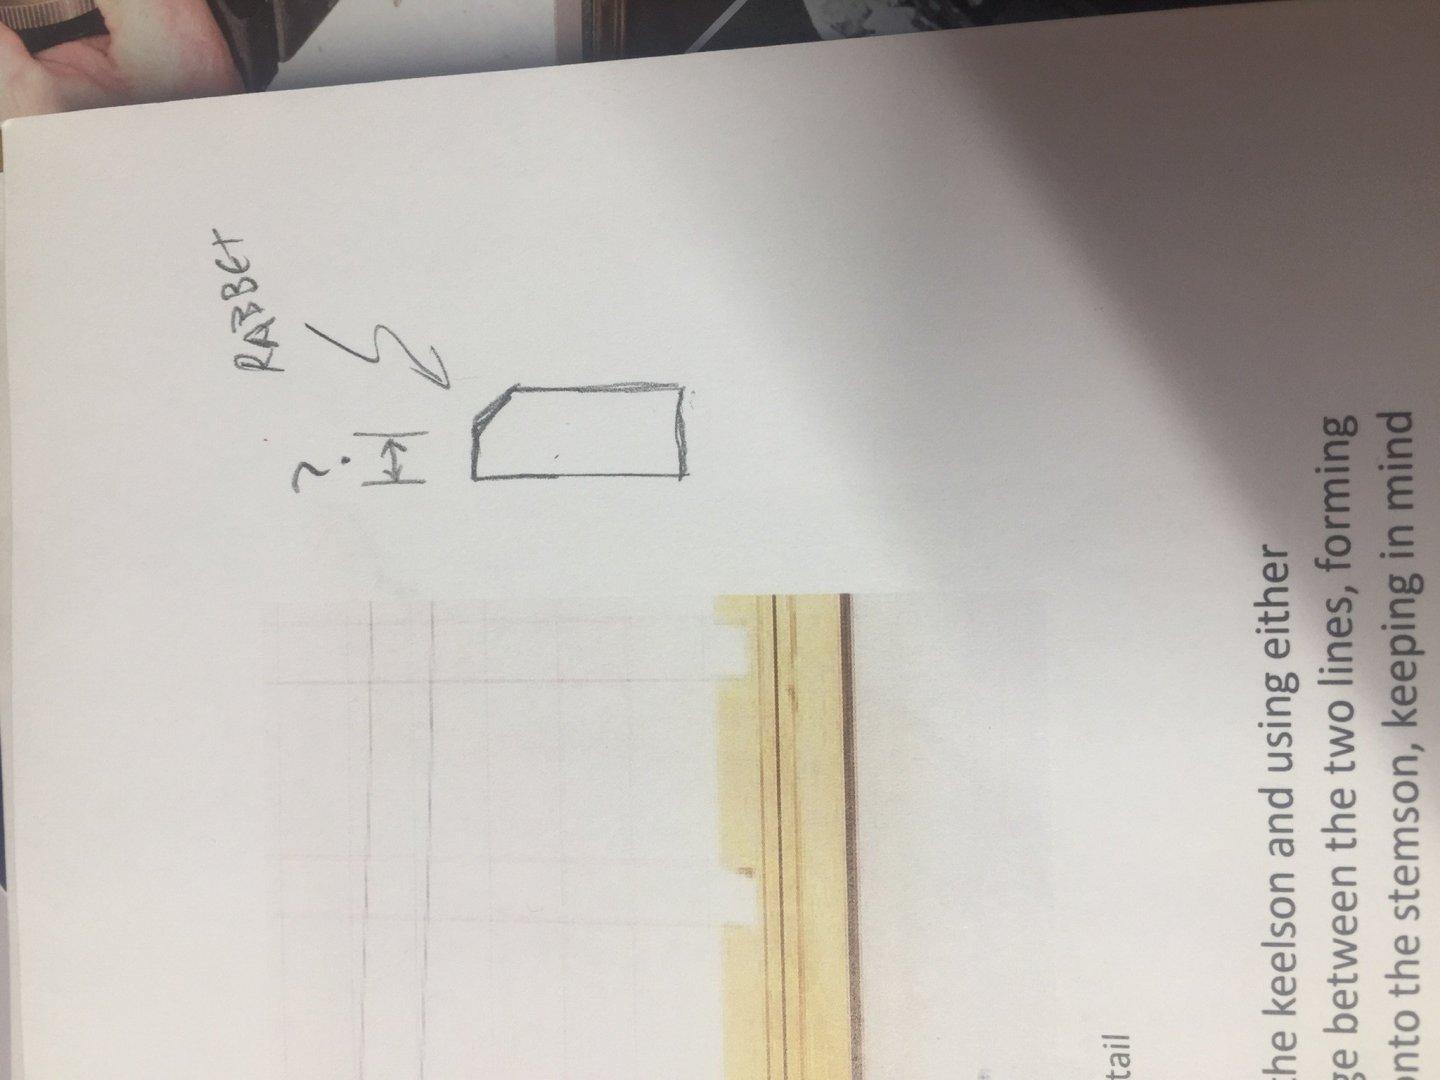
i have also made a cheat sheet so I can remember the terminology as I go...

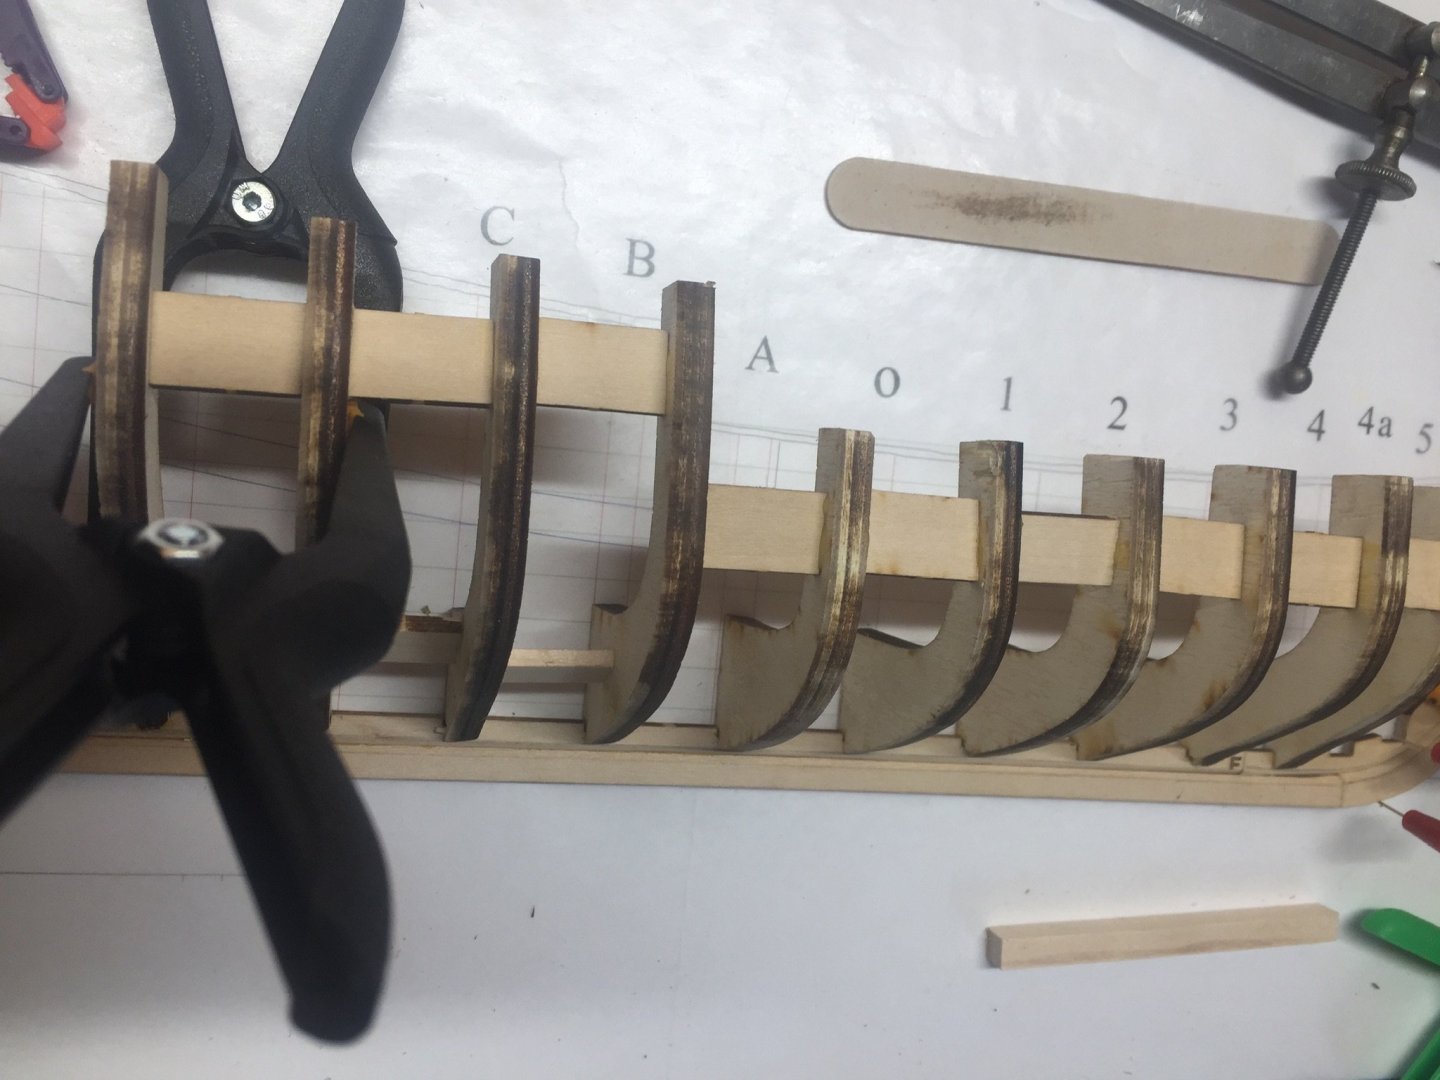
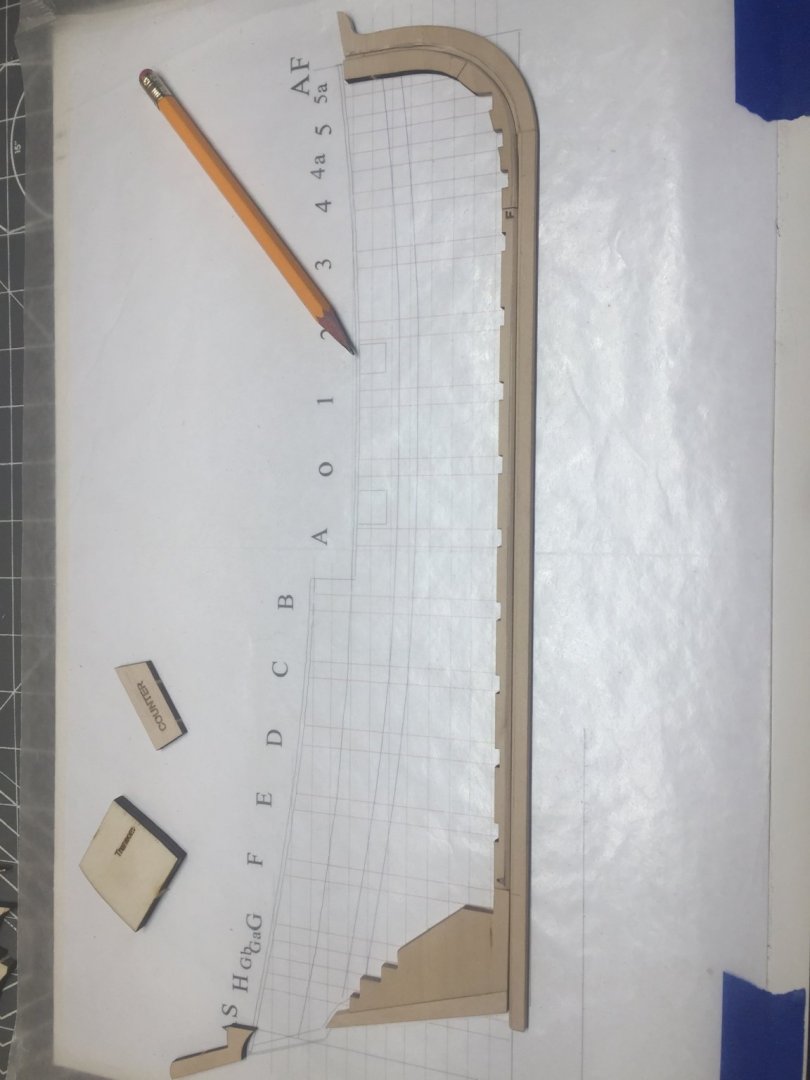
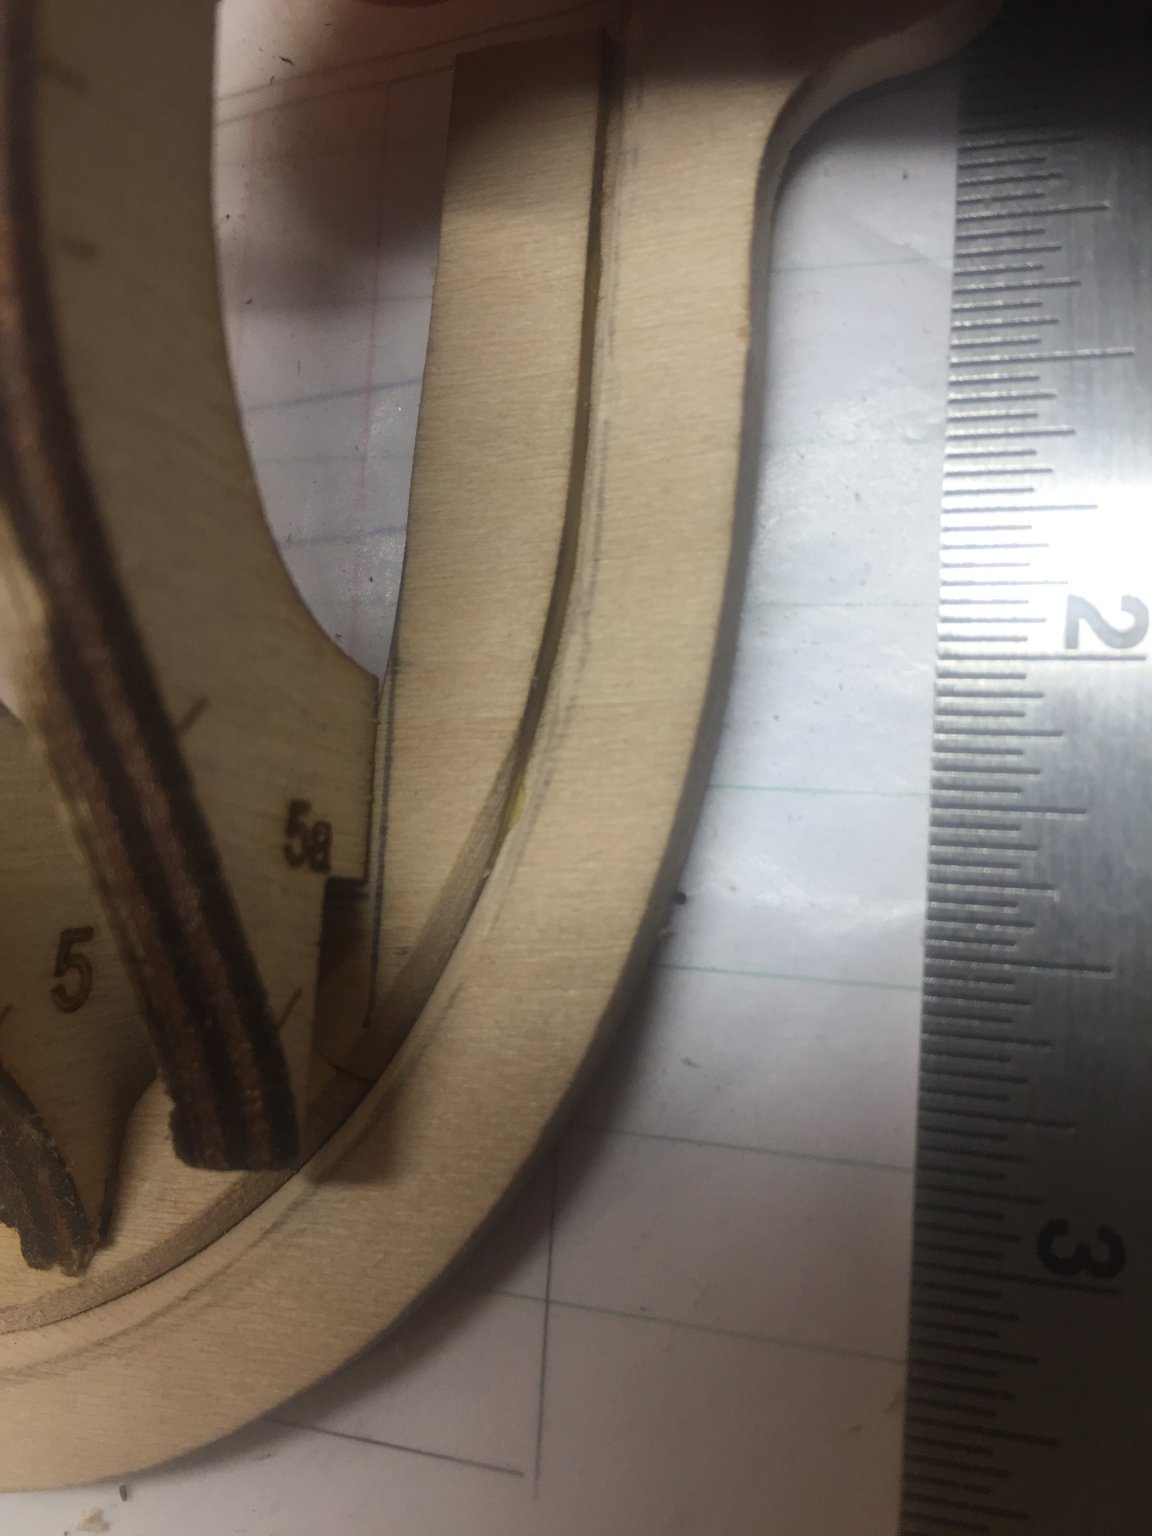
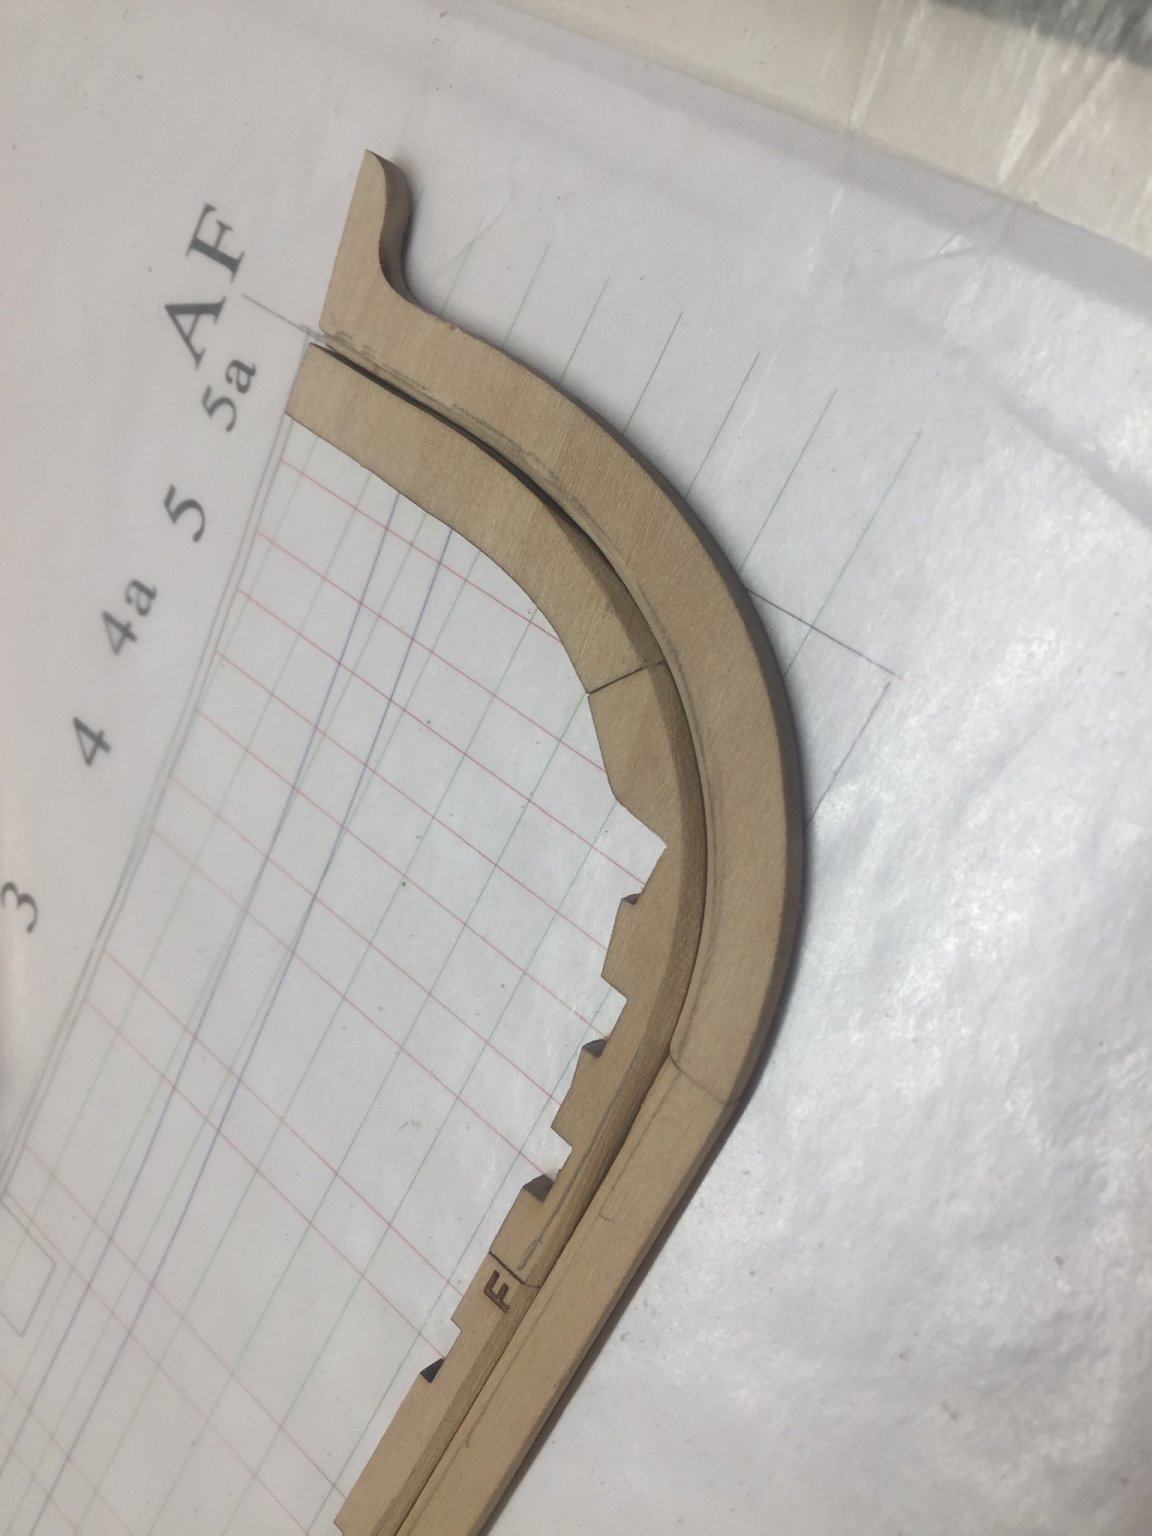
First question is what if anything is done to the high spot on the keel (shown pointing with pencil)? It says to fit the stemson and this piece interferes, I would think by modifying the stemson it would be weak? Does what I did look acceptable? It fits pretty nice.
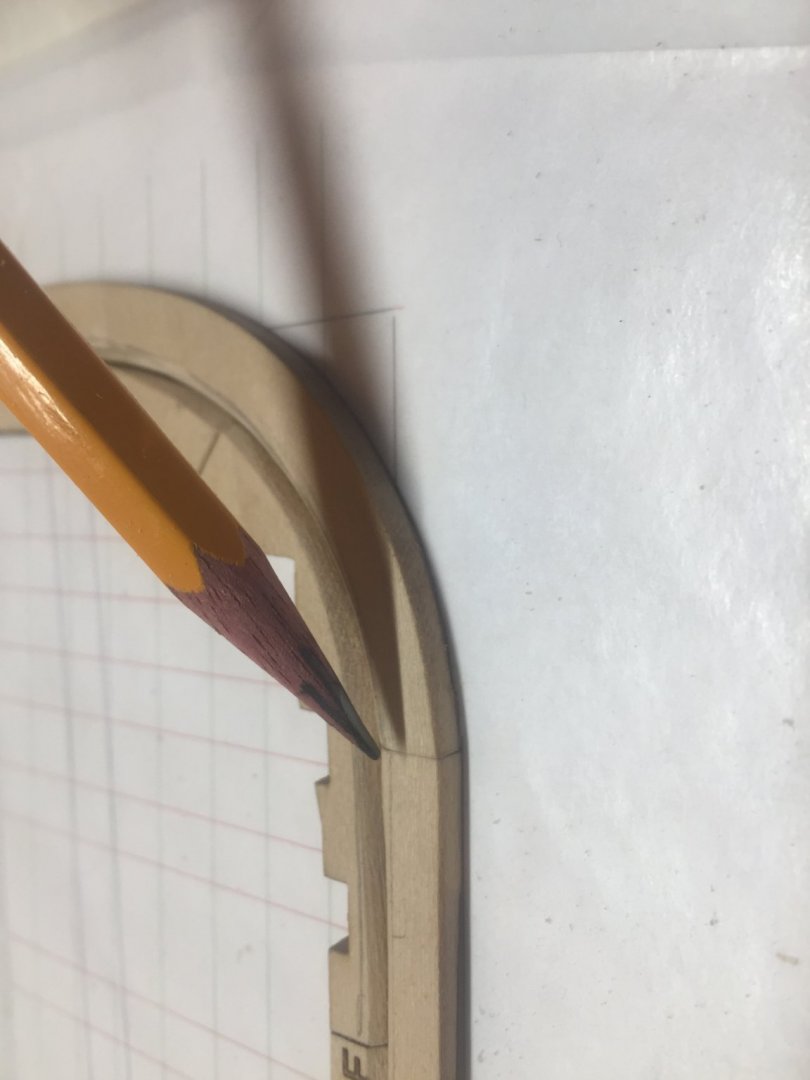
second question would be how deep does the rabbit get cut? See pencil drawing below....
- Ryland Craze, bruce d, GrandpaPhil and 2 others
-
5
-
-
-
Also curious if anyone would suspect this boat would also have oars and oarlocks? I imagine there were times they needed to paddle?
-
22 hours ago, kurtvd19 said:
Go to the link below to see the clubs that might be near you. Not every club is listed
Note to others reading this: If your clubs isn't listed send your info to the NRG so it can be put up onto the lists - also check if it's accurate - things might have changed since the info was put up there.
Kurt
https://thenrg.org/links-and-sources-for-the-ship-modeler.php
sadly I am located in the center of NY state and there are no apparent clubs to be found within a few hundred miles. Thank you for the link and response! -
Hello and welcome!
-
1 hour ago, Heronguy said:
I’ll look forward to sharing experiences on this project. Slow is my mantra as well. It should be fun.
I’m hoping by end of the week I will have everything frame work wise mounted. But I have my doubts. It’ll be nice having multiple logs to watch as this unfolds.
-
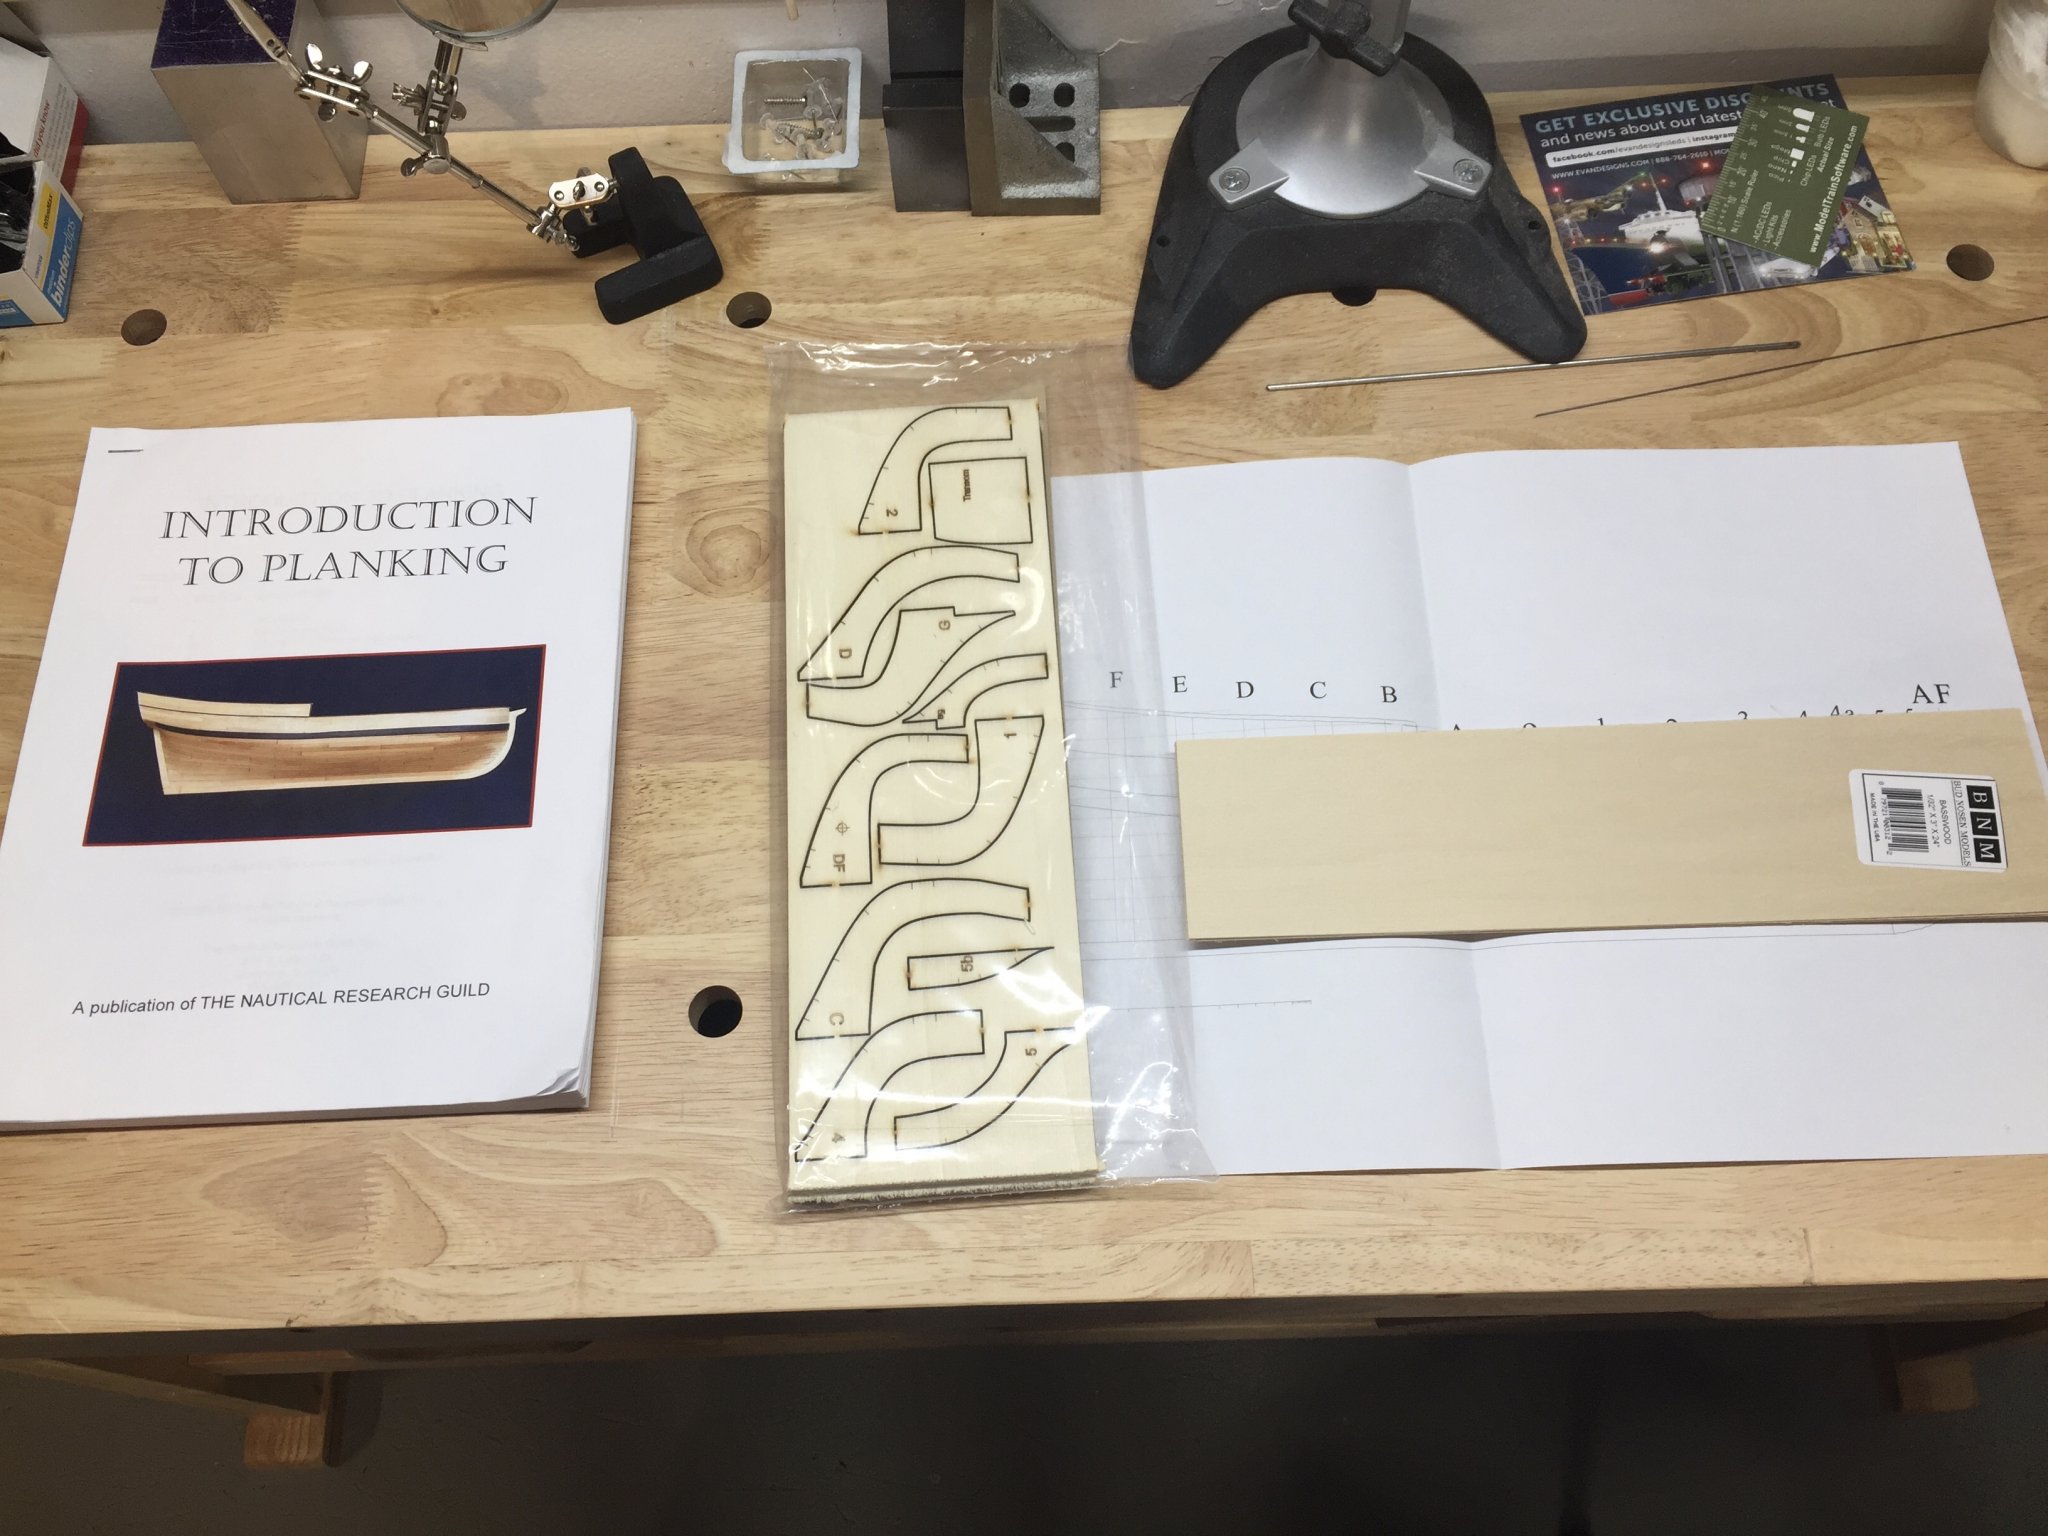
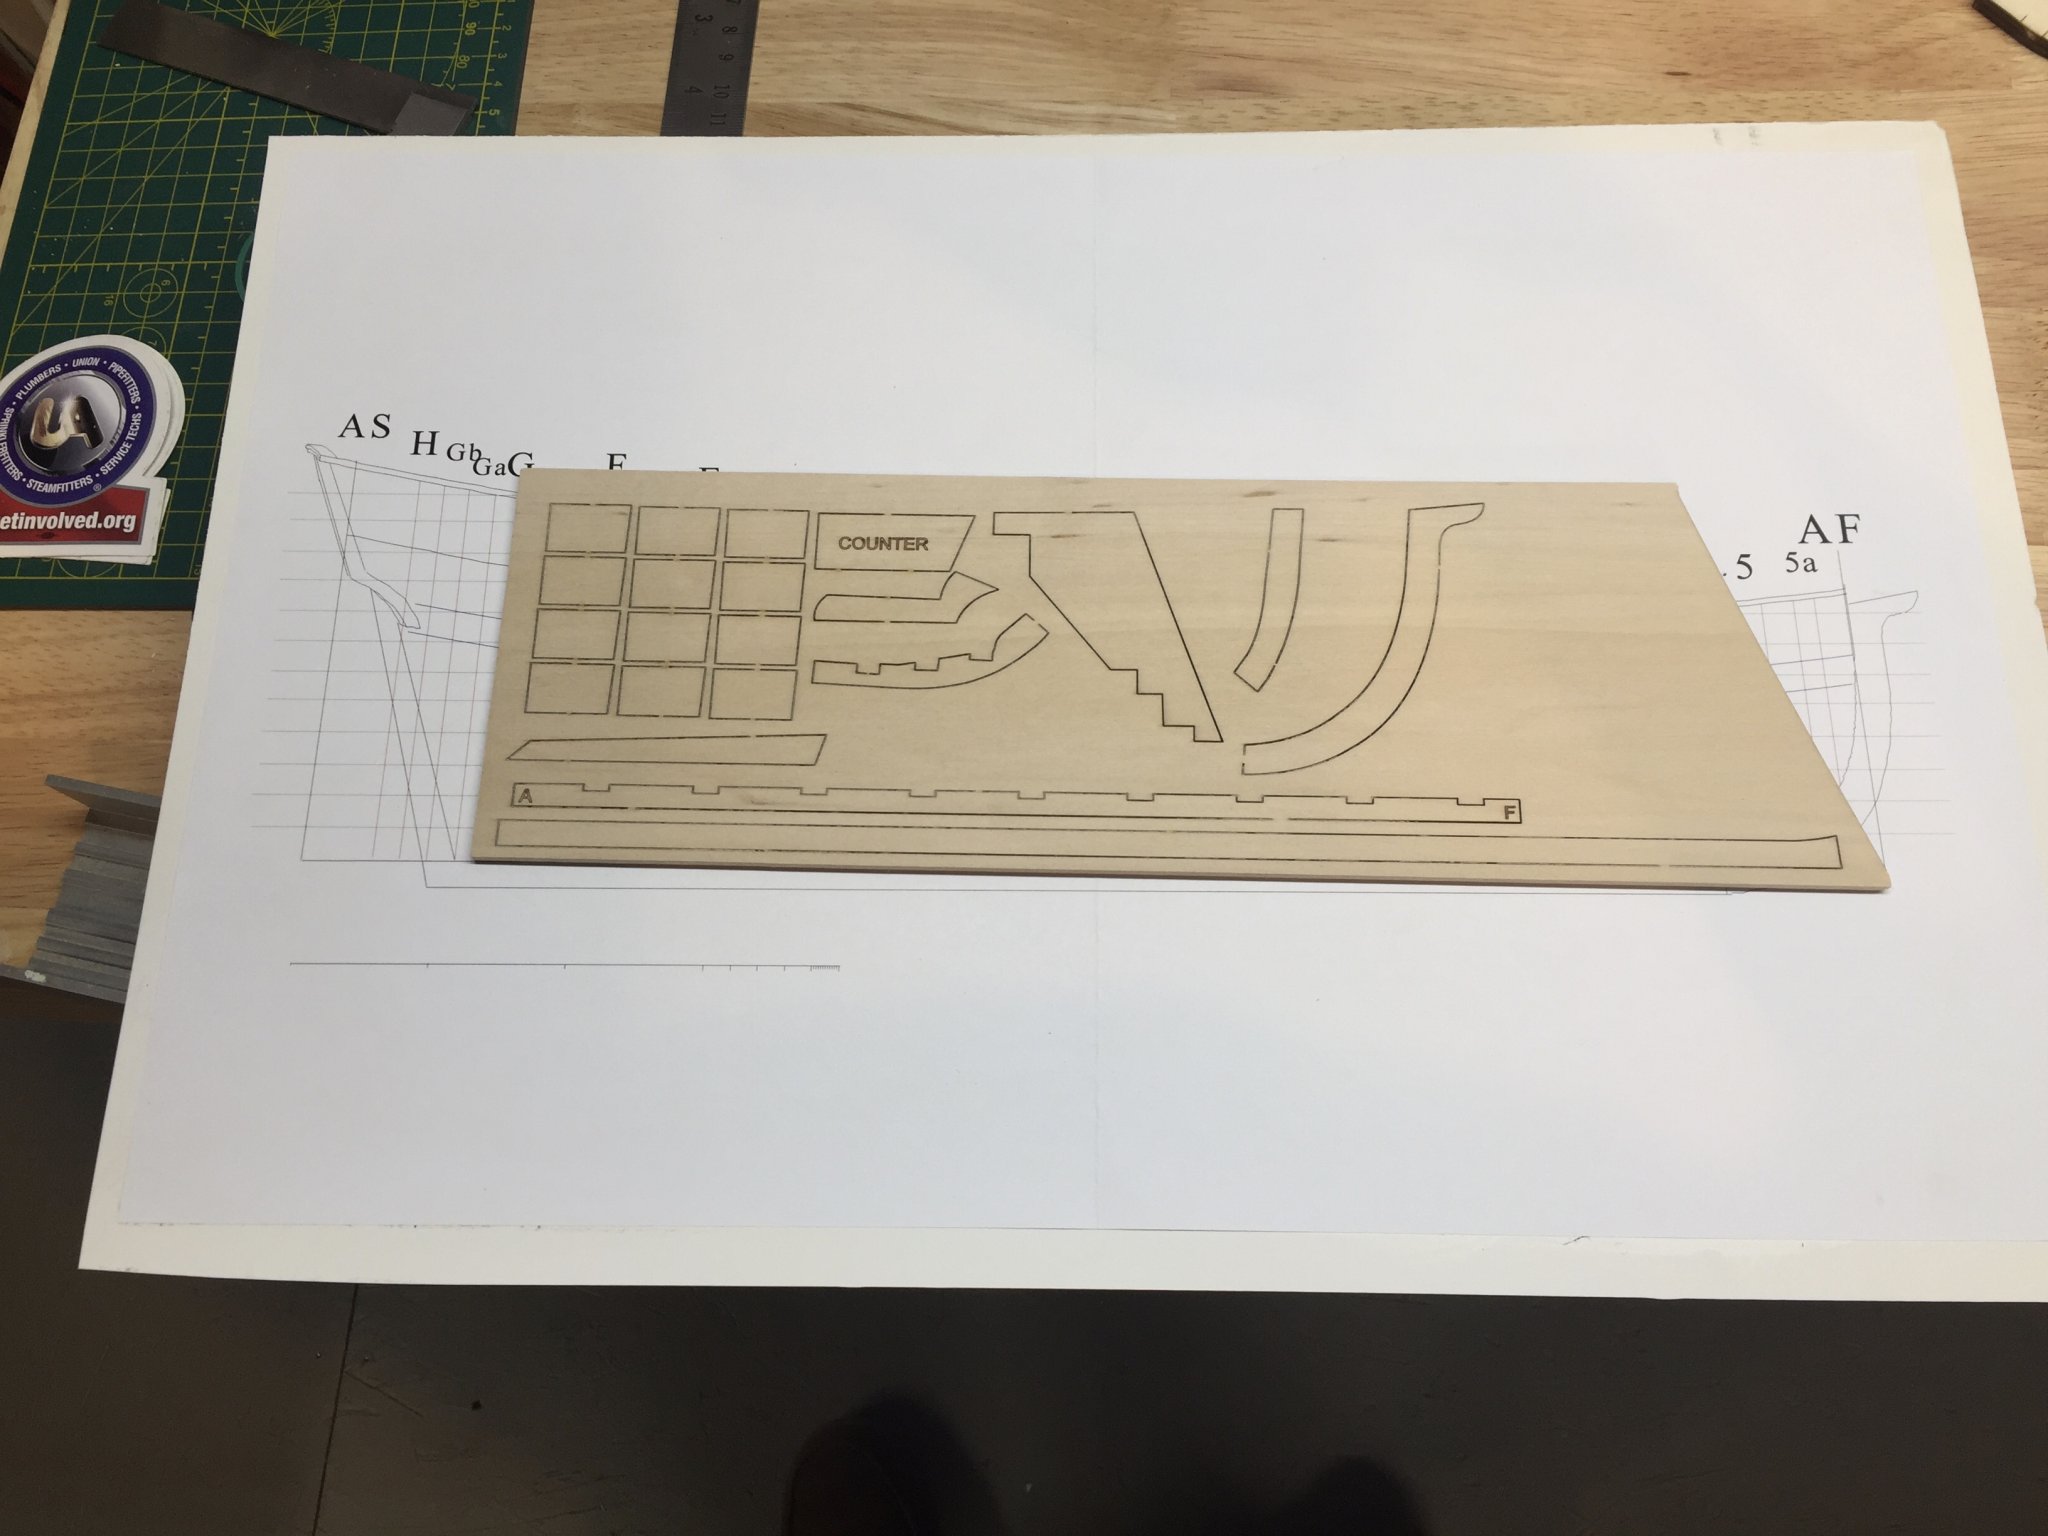
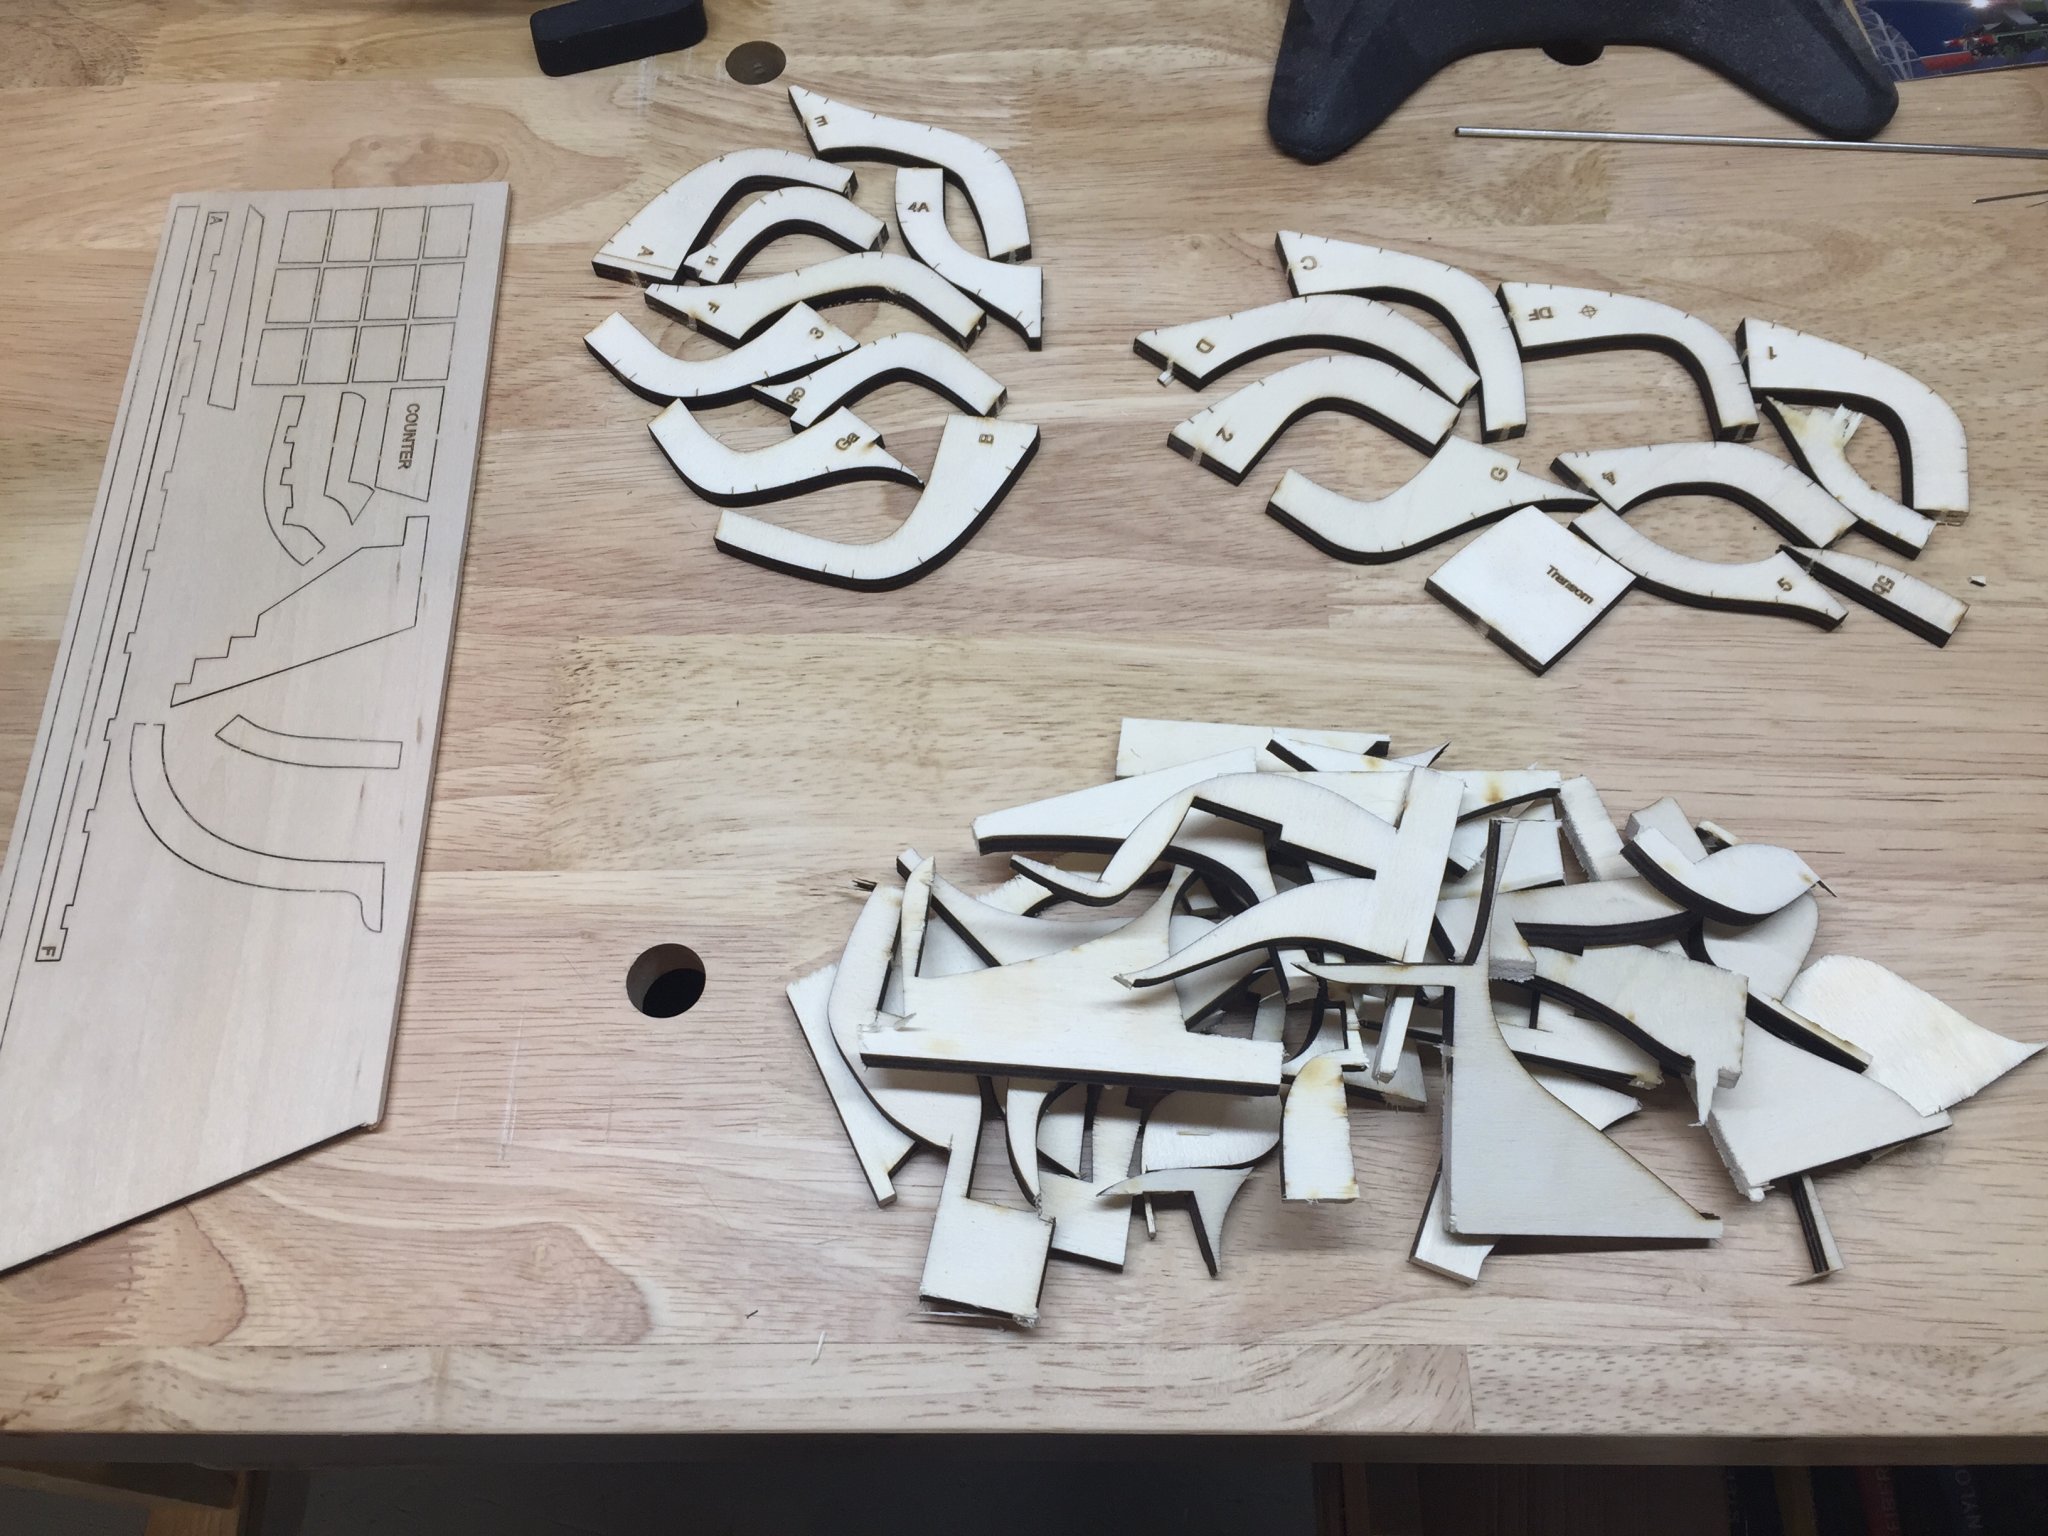
I opened the kit....

i glued the build log to foam core board. (I used rubber cement and didn’t have any issues)
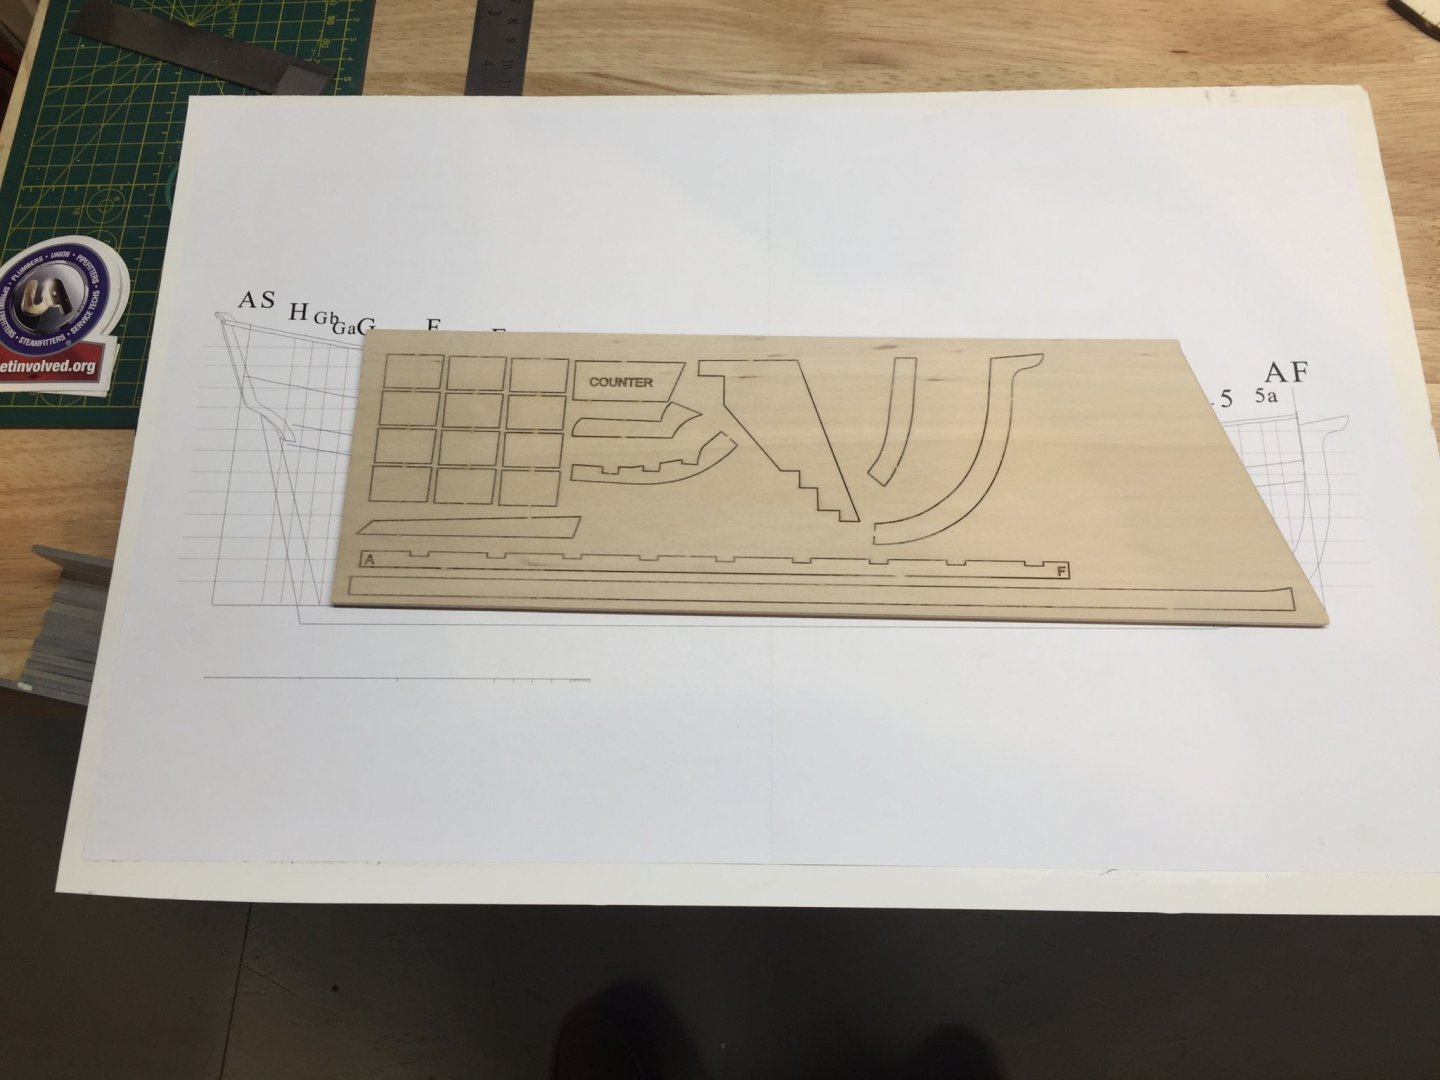
I then began separating the plywood pieces from the cut out

Now it’s back to rereading everything...
-
This will be my first attempt at planking “correctly”. I did complete AL Bounty Jolly which was planked, but in a strange way (I followed the instructions). I have quite a few projects in the shipyard that are POB and POF so I’d rather start with a less expensive kit and fail then ruin the kits I have already purchased in hopes of learning this hobby.
I will be taking this build slow as I have other logs going on, as well as a stressful job and a four year old that I chase around on the weekends.
My plan will be to finish this half hull with a stained hull...I’m also contemplating coppering the hull as a learning experience as well.
-
1 hour ago, GrandpaPhil said:
Congratulations! Well done!
Thank you so much! I have maxed out my paypal on eBay buying all the Midwest models I can find 😝...I believe I have found them all!
-
Thanks for looking in! This is my second finished wood model and I am certainly obsessed to say the least, a week doesn’t go by without me buying something lol. Thanks for the compliment, it means a lot coming from this forum.
-
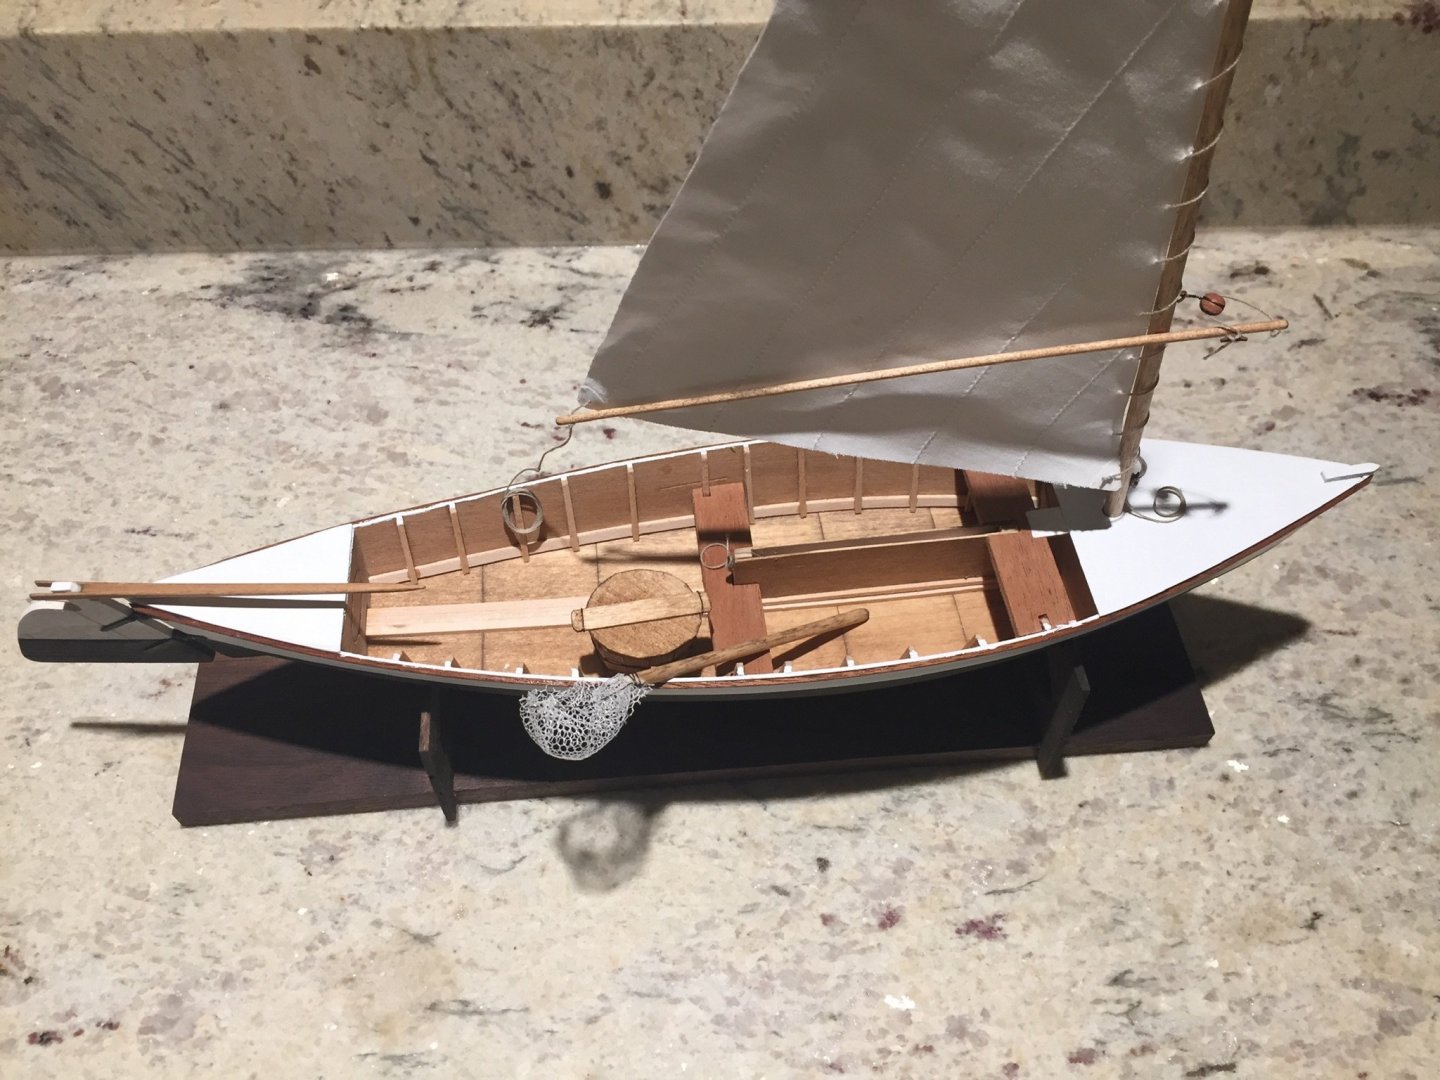
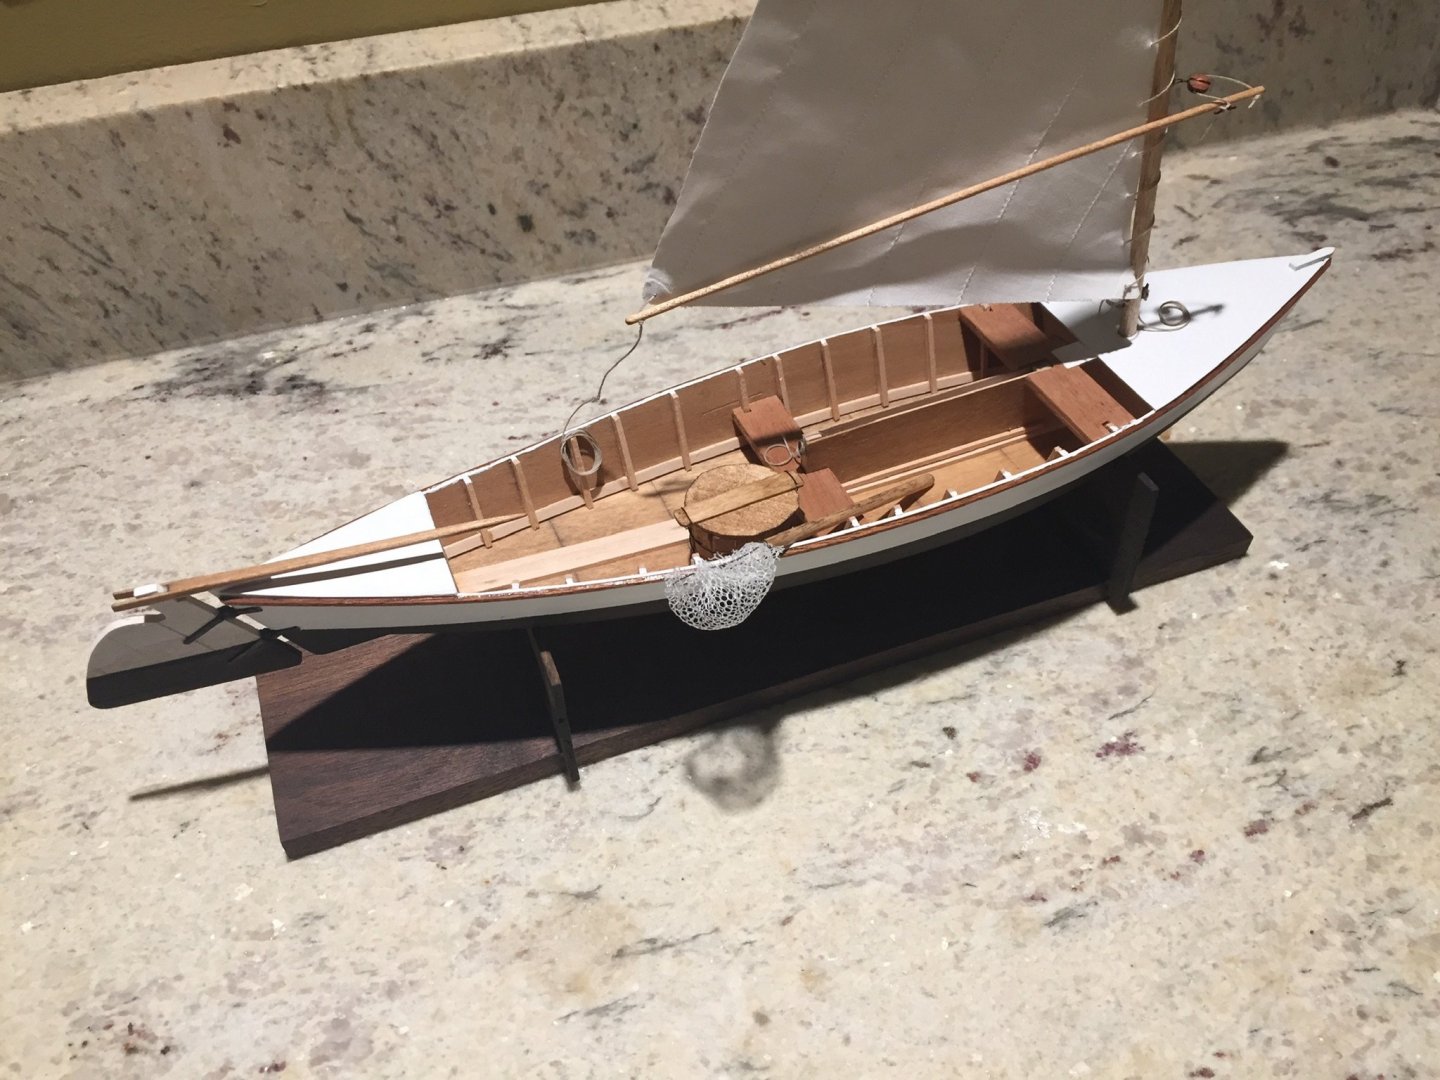
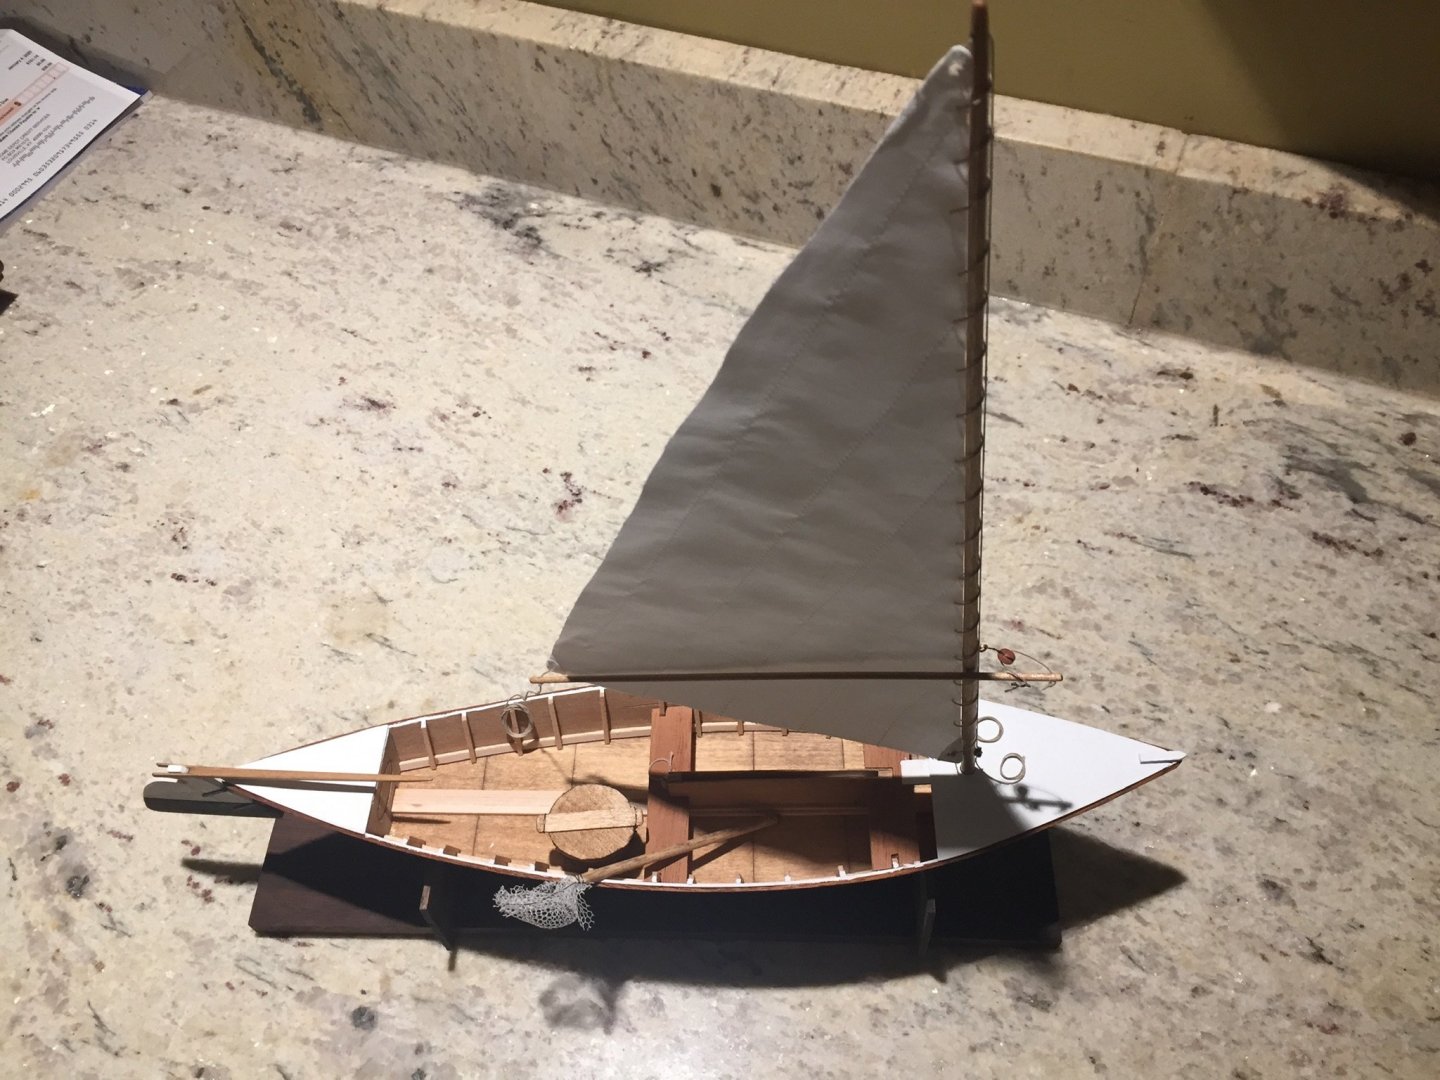
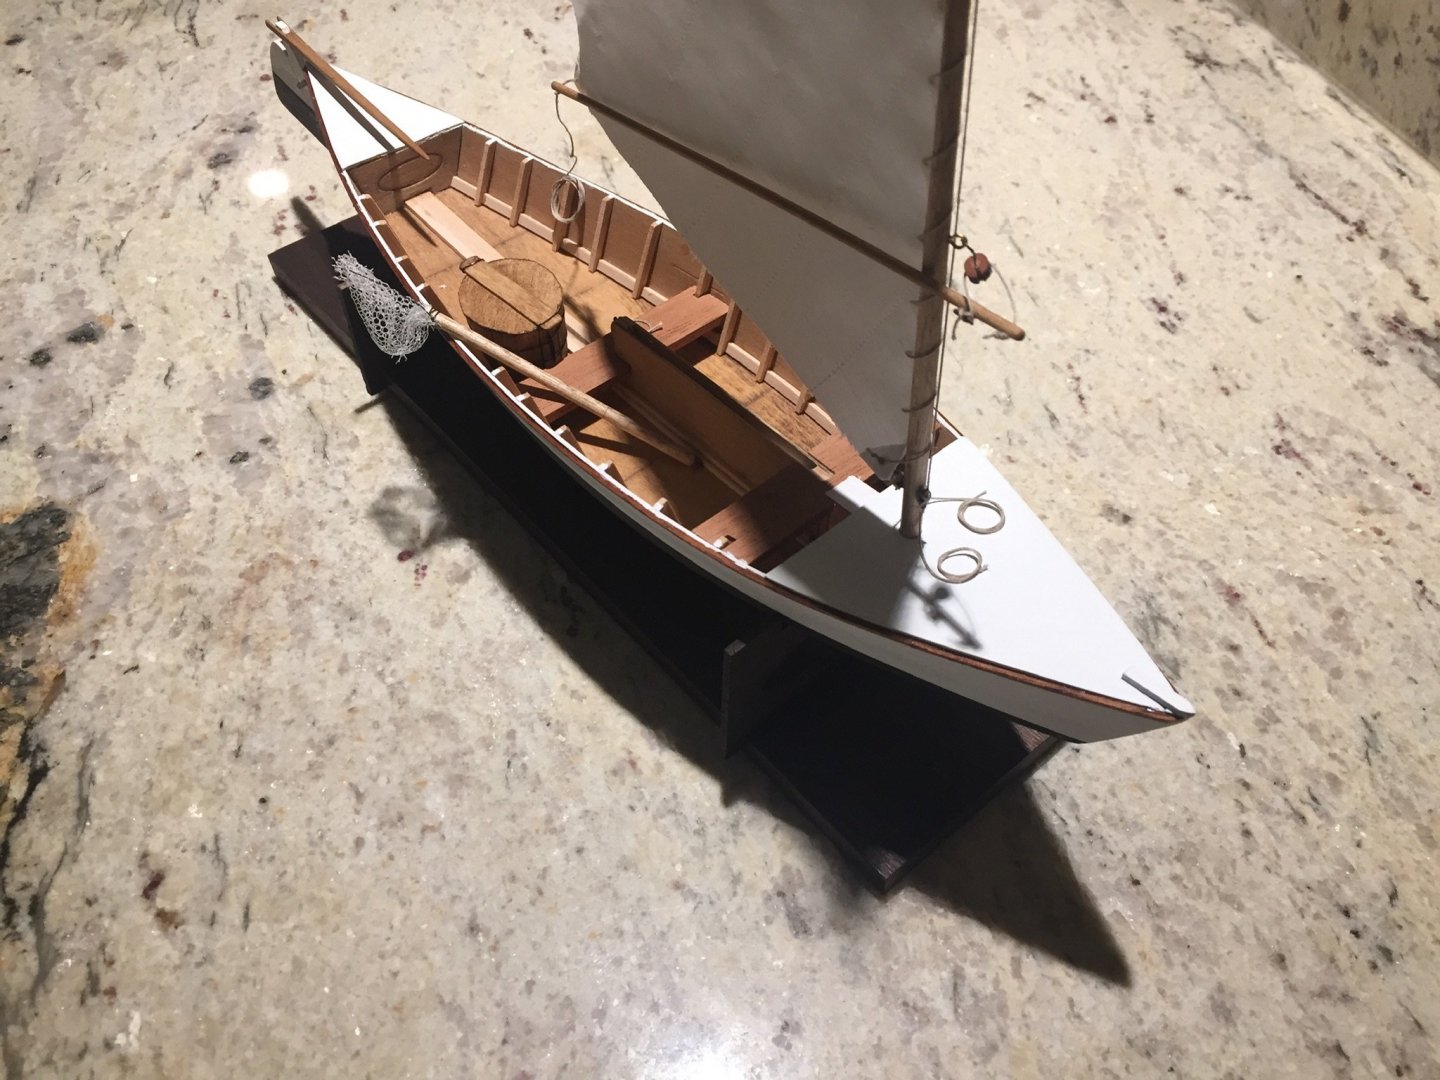
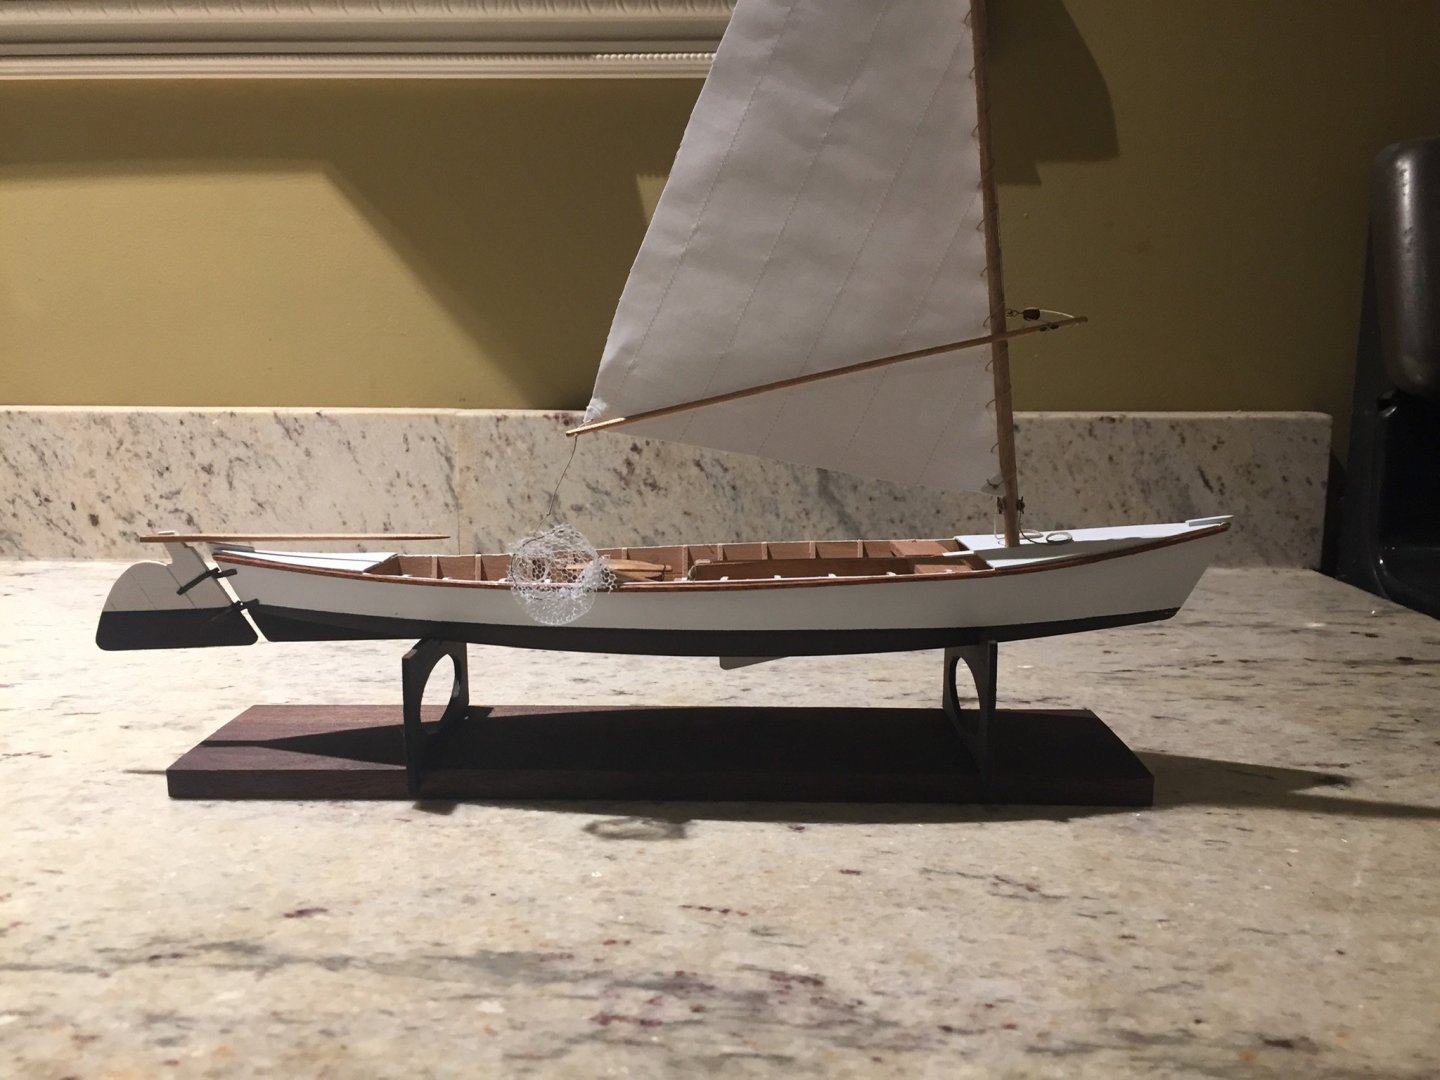
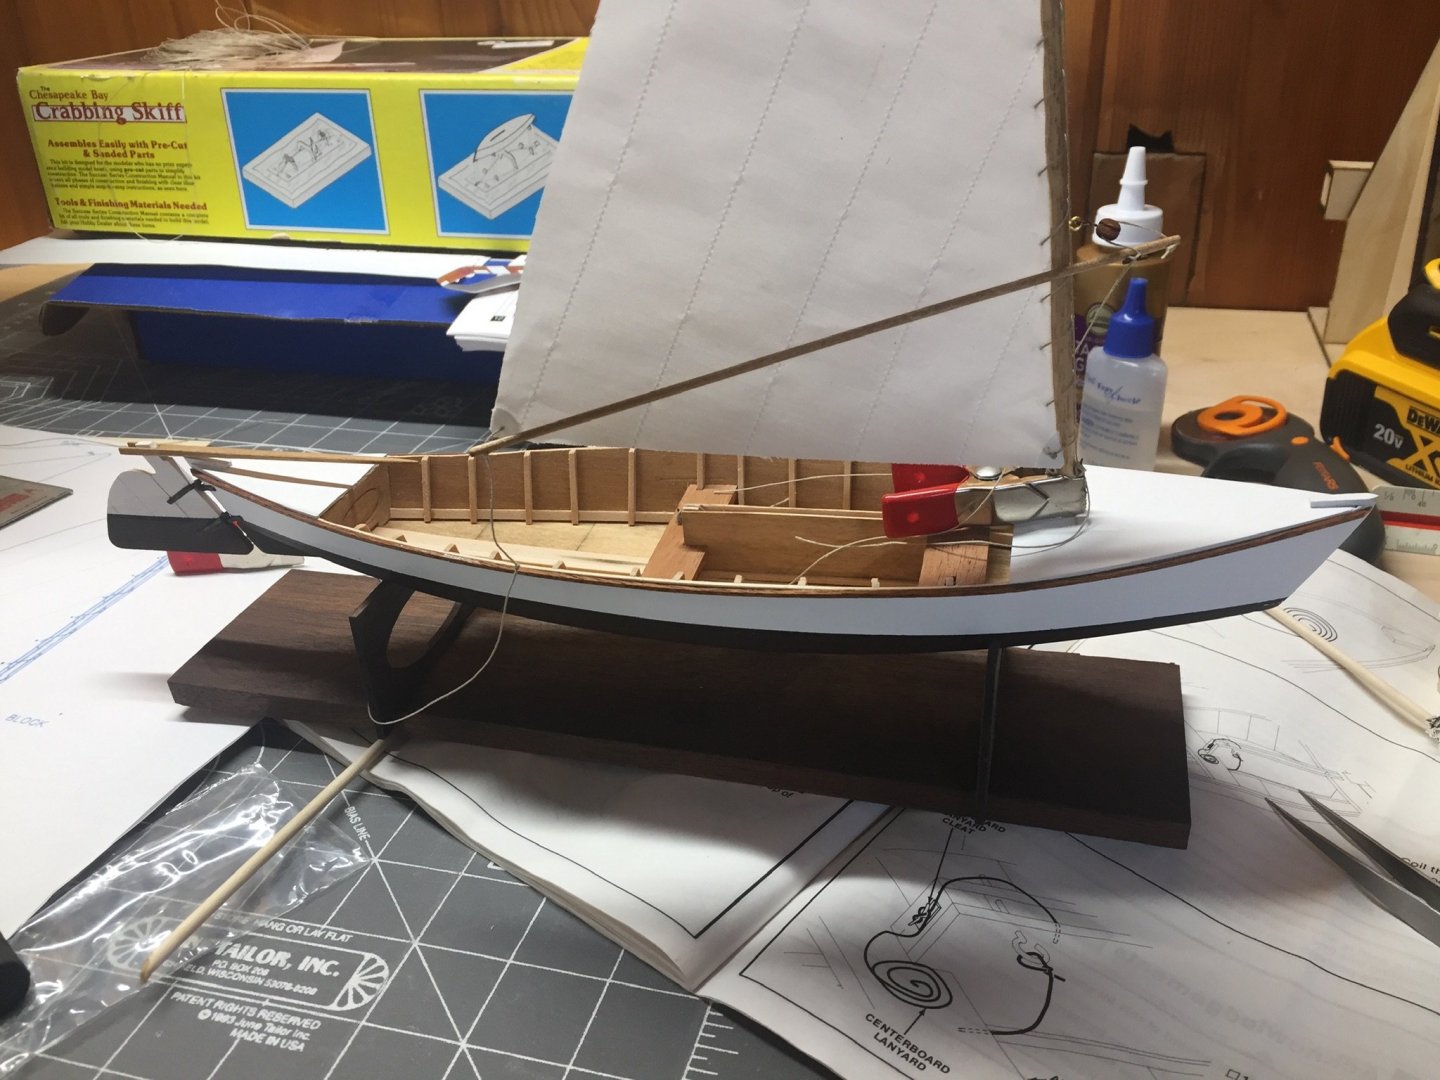
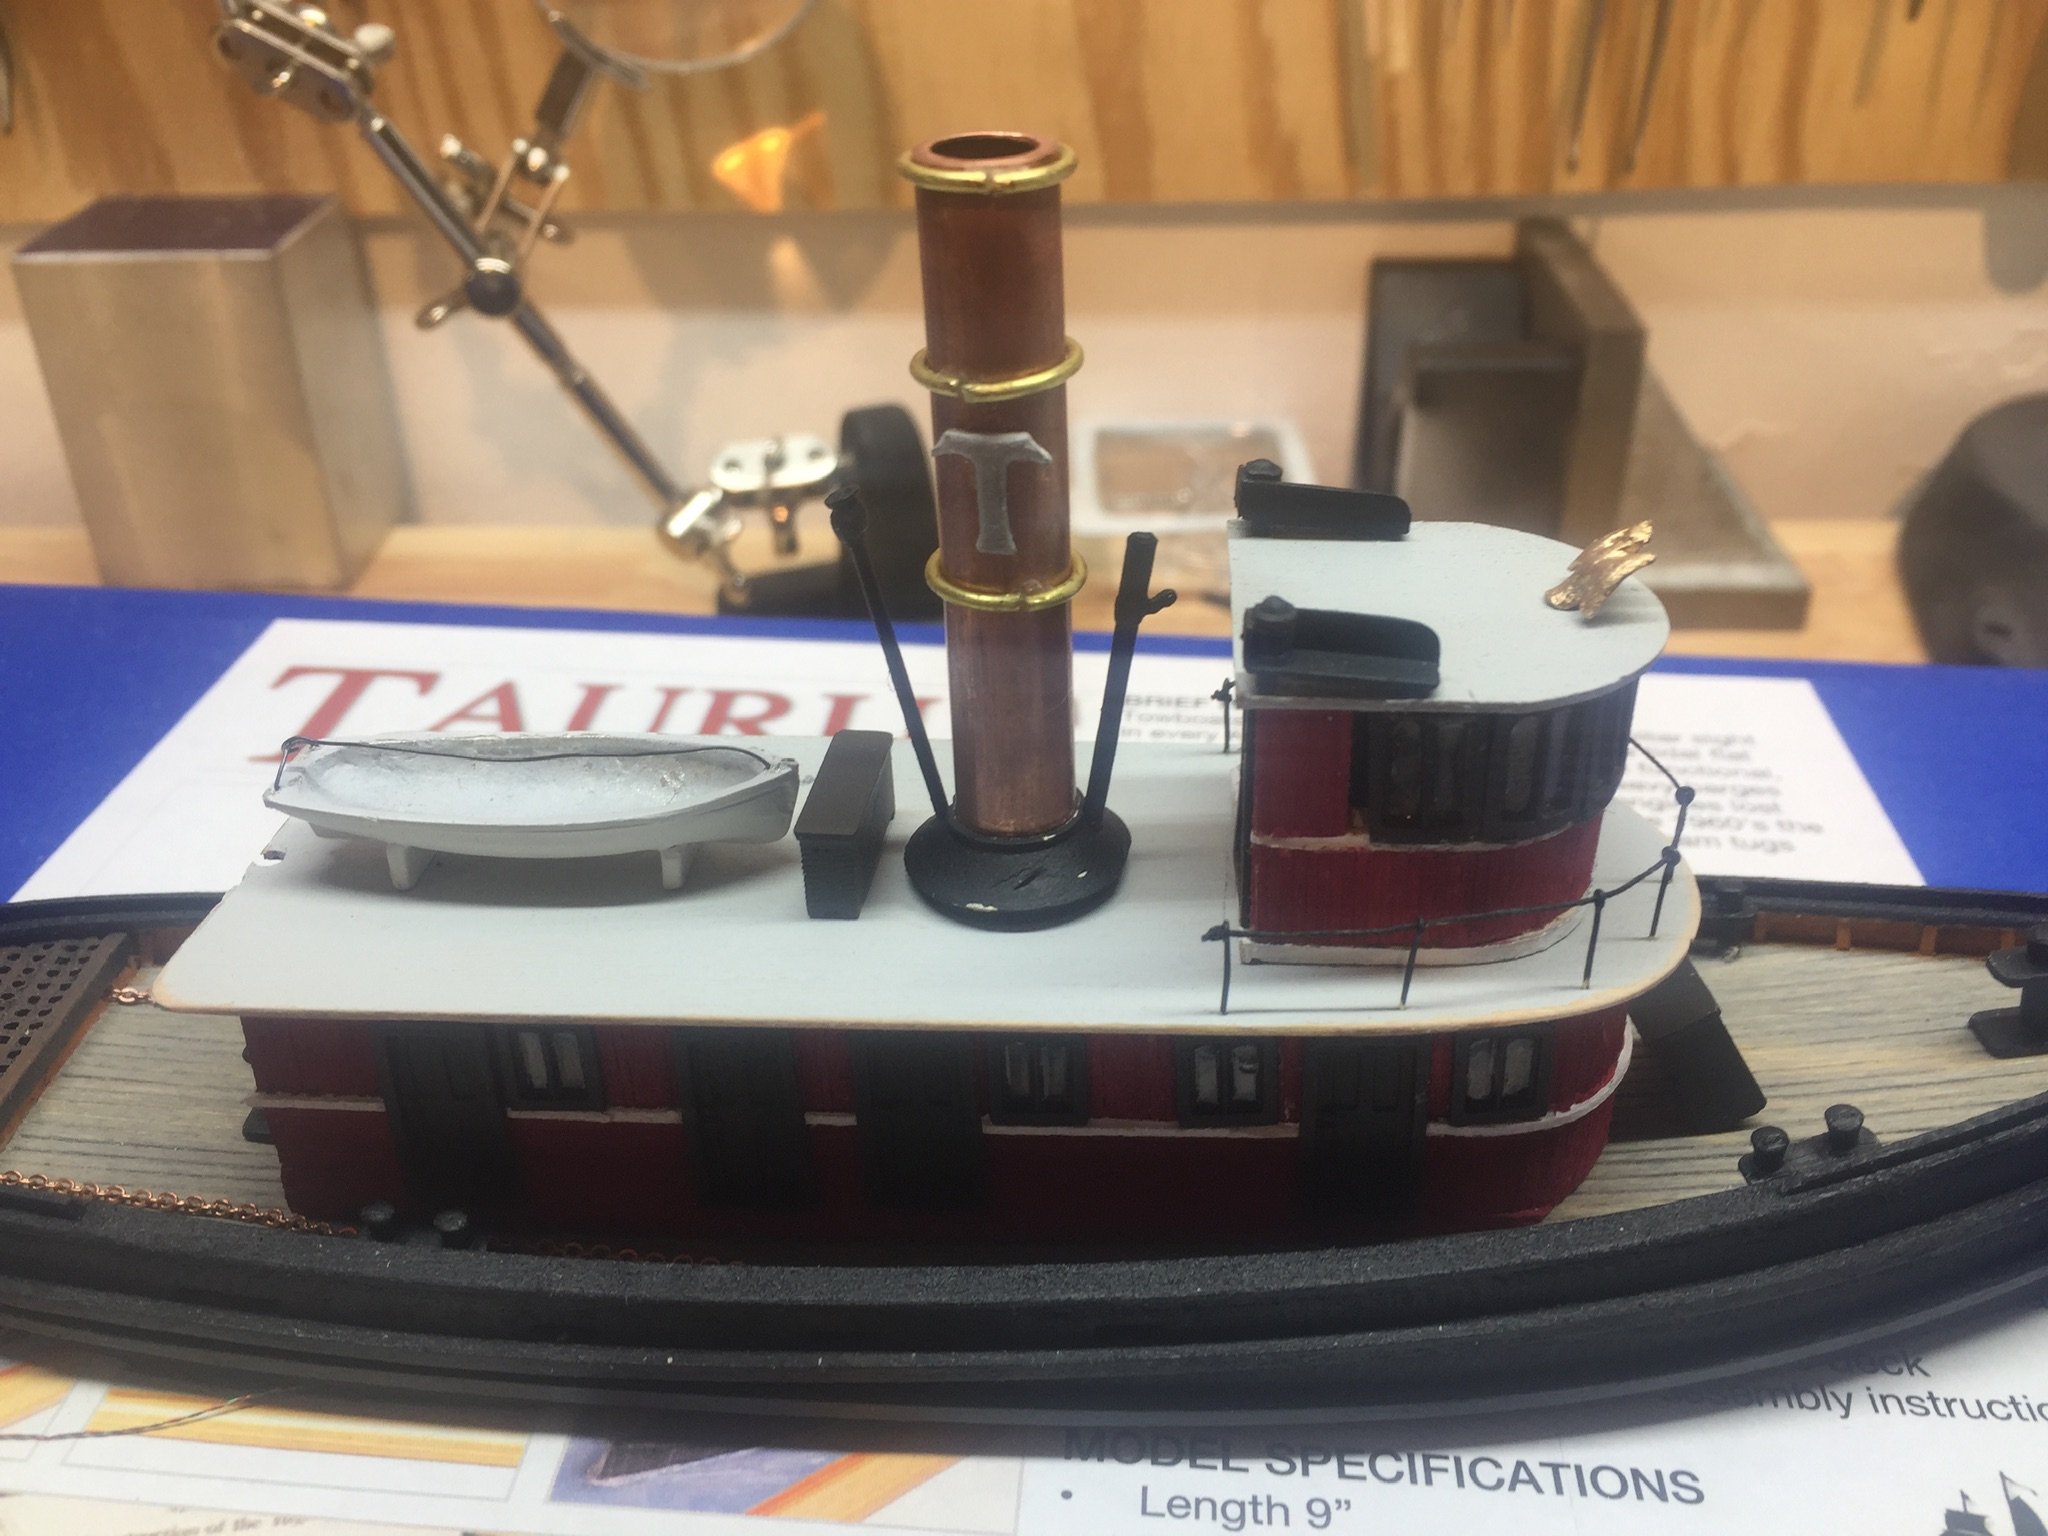
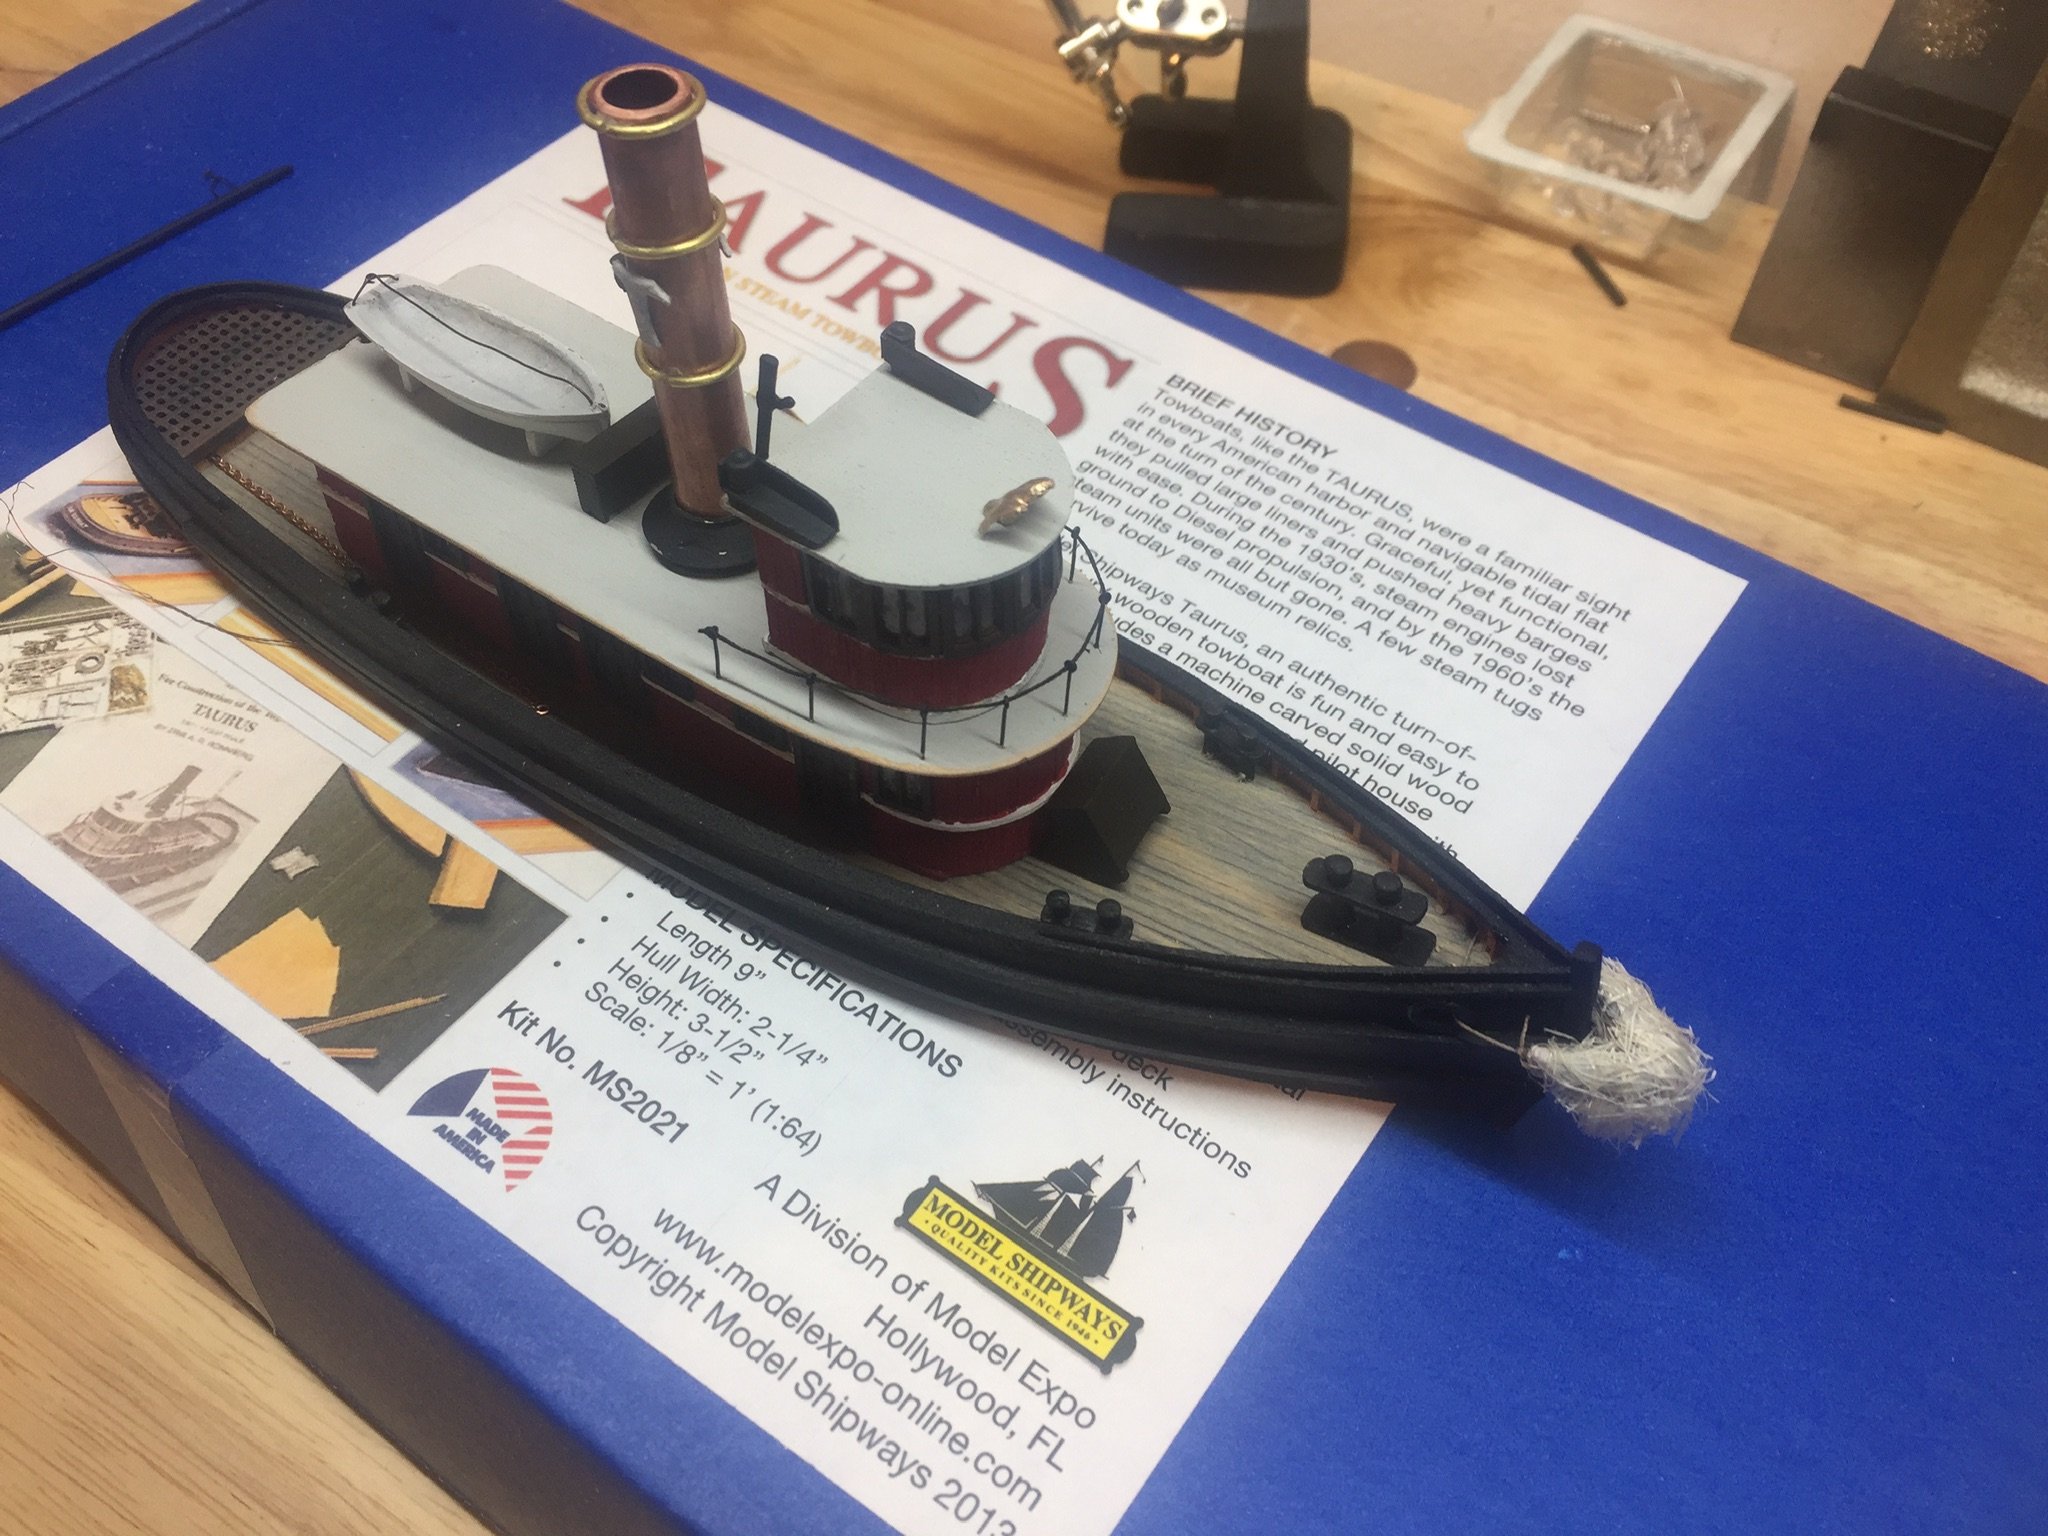
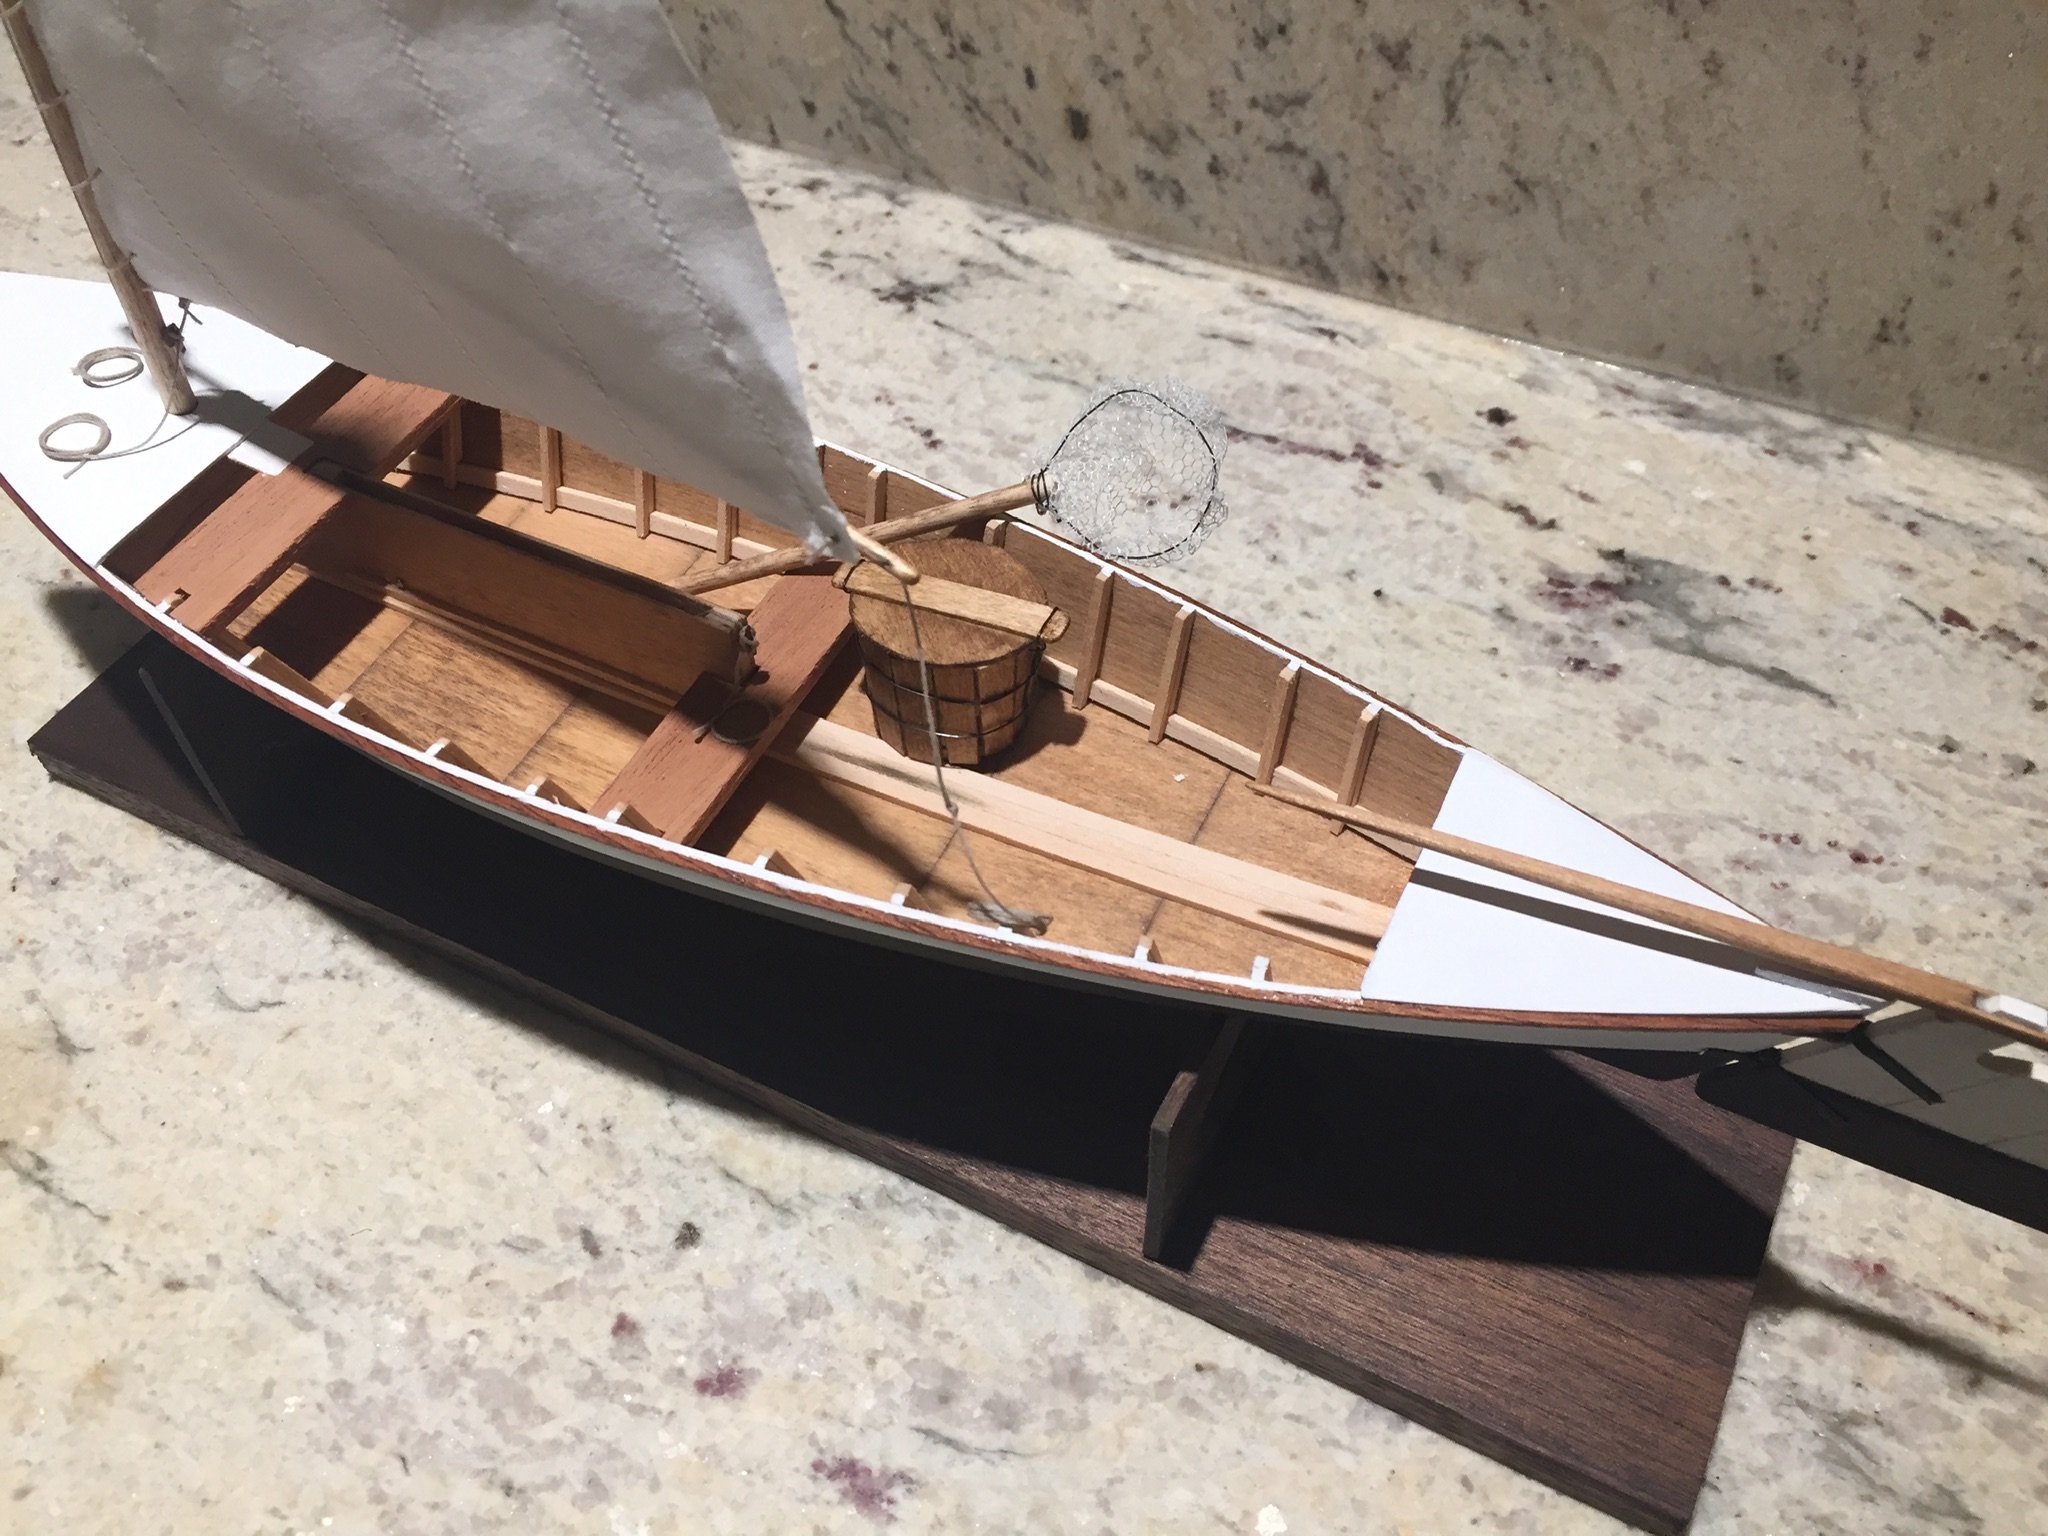
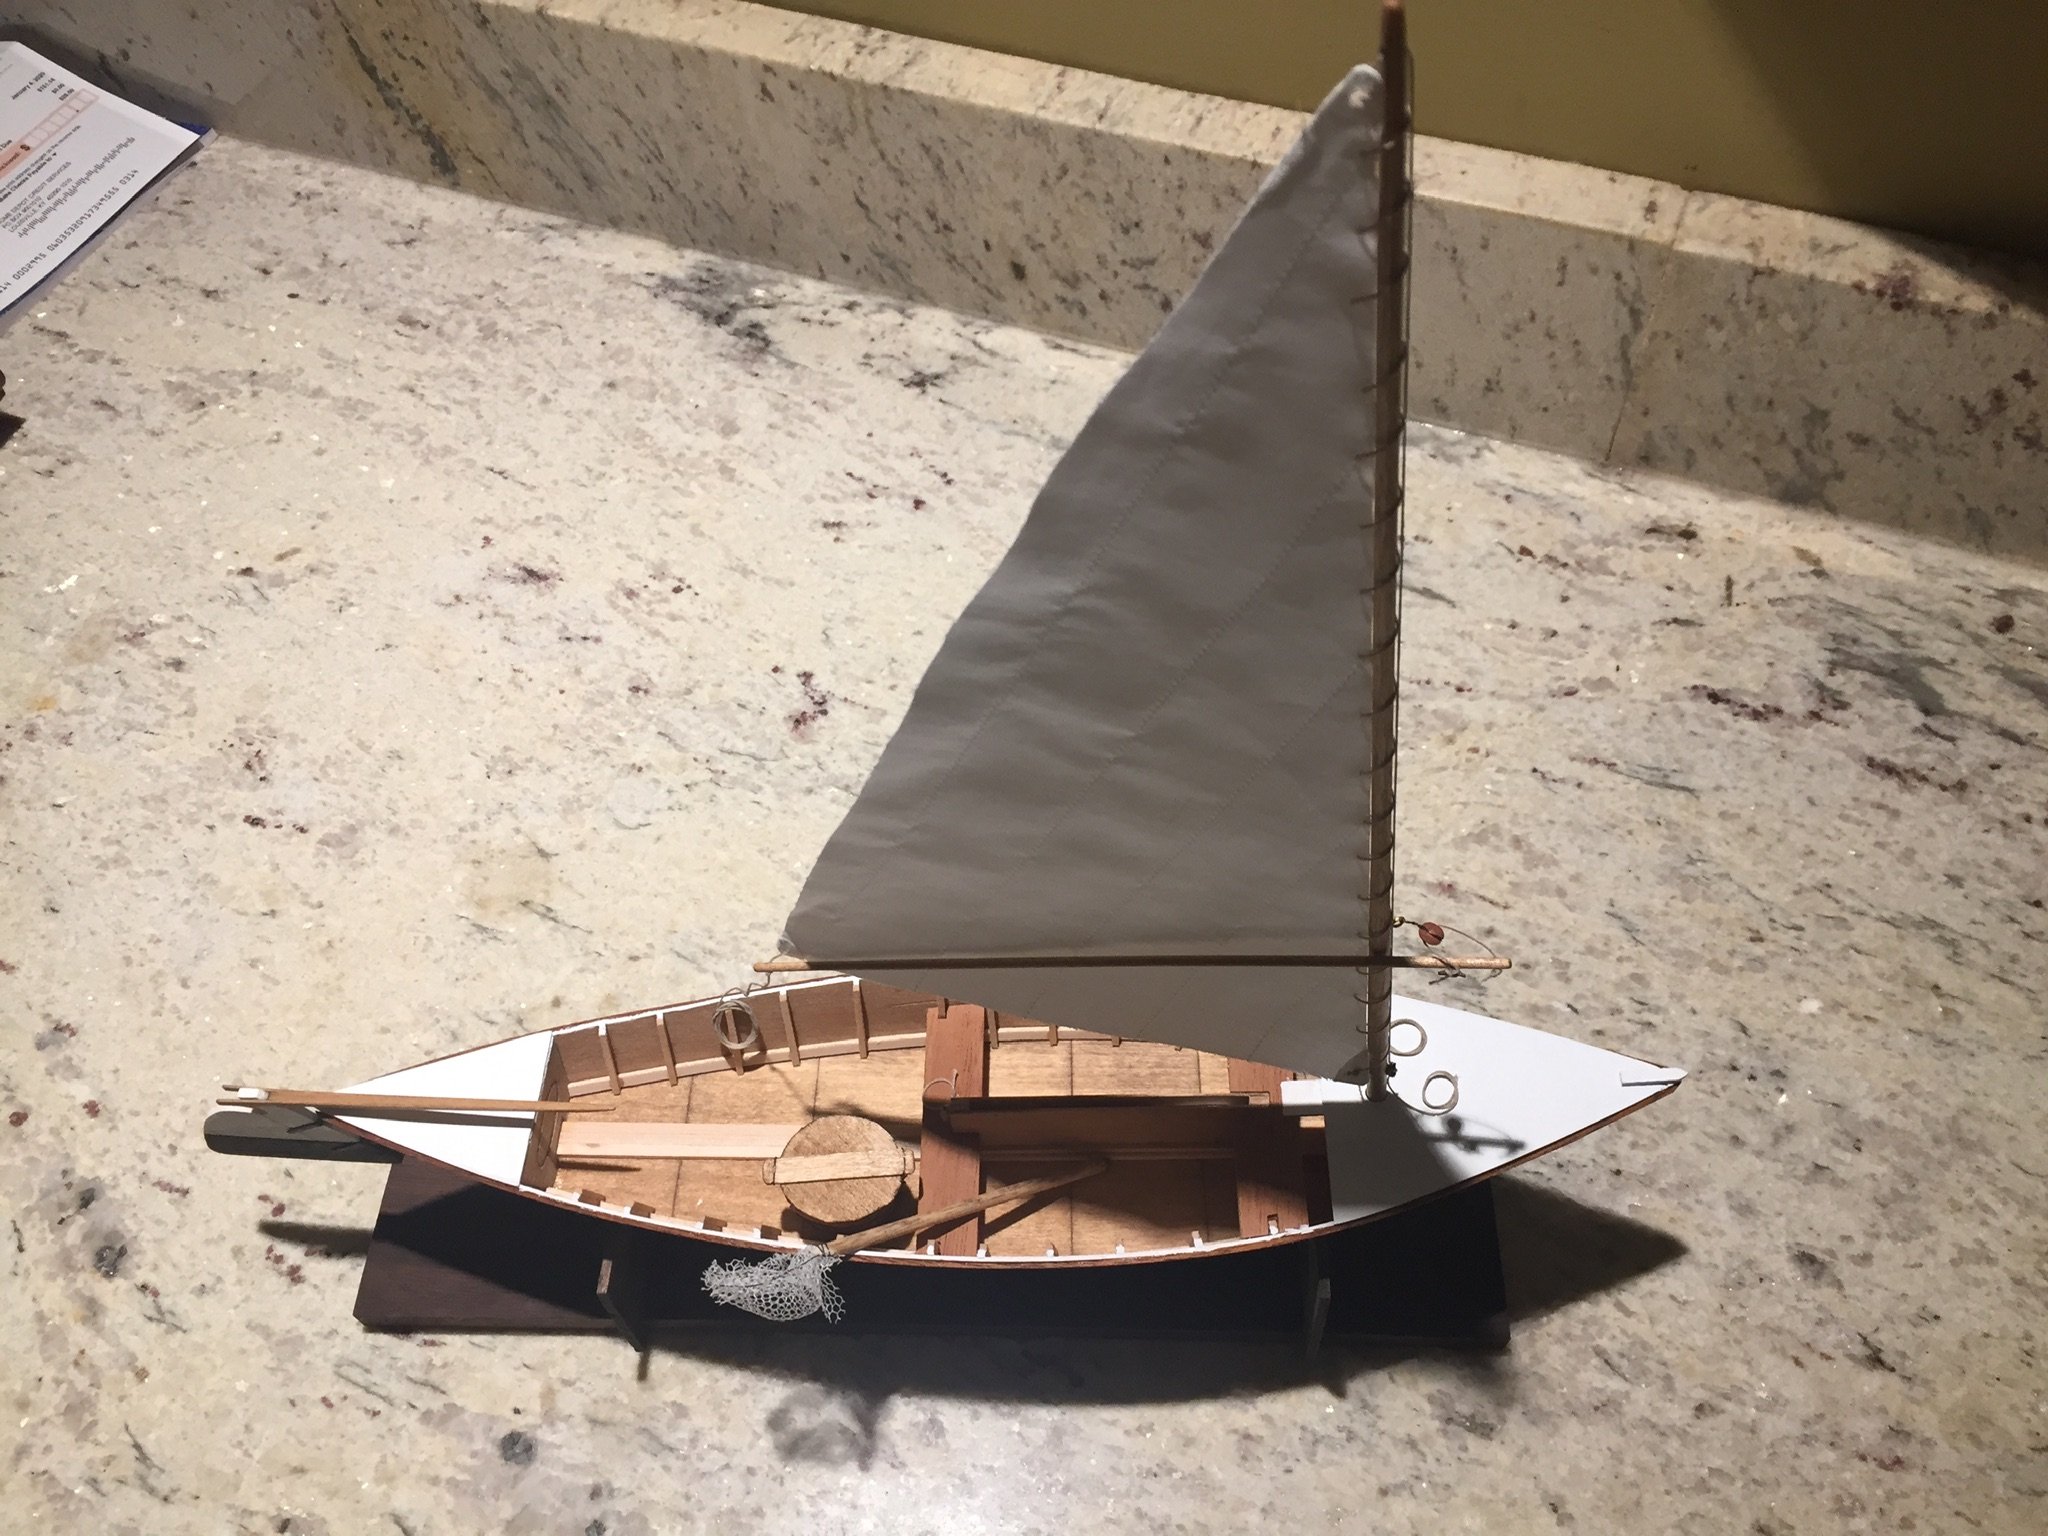
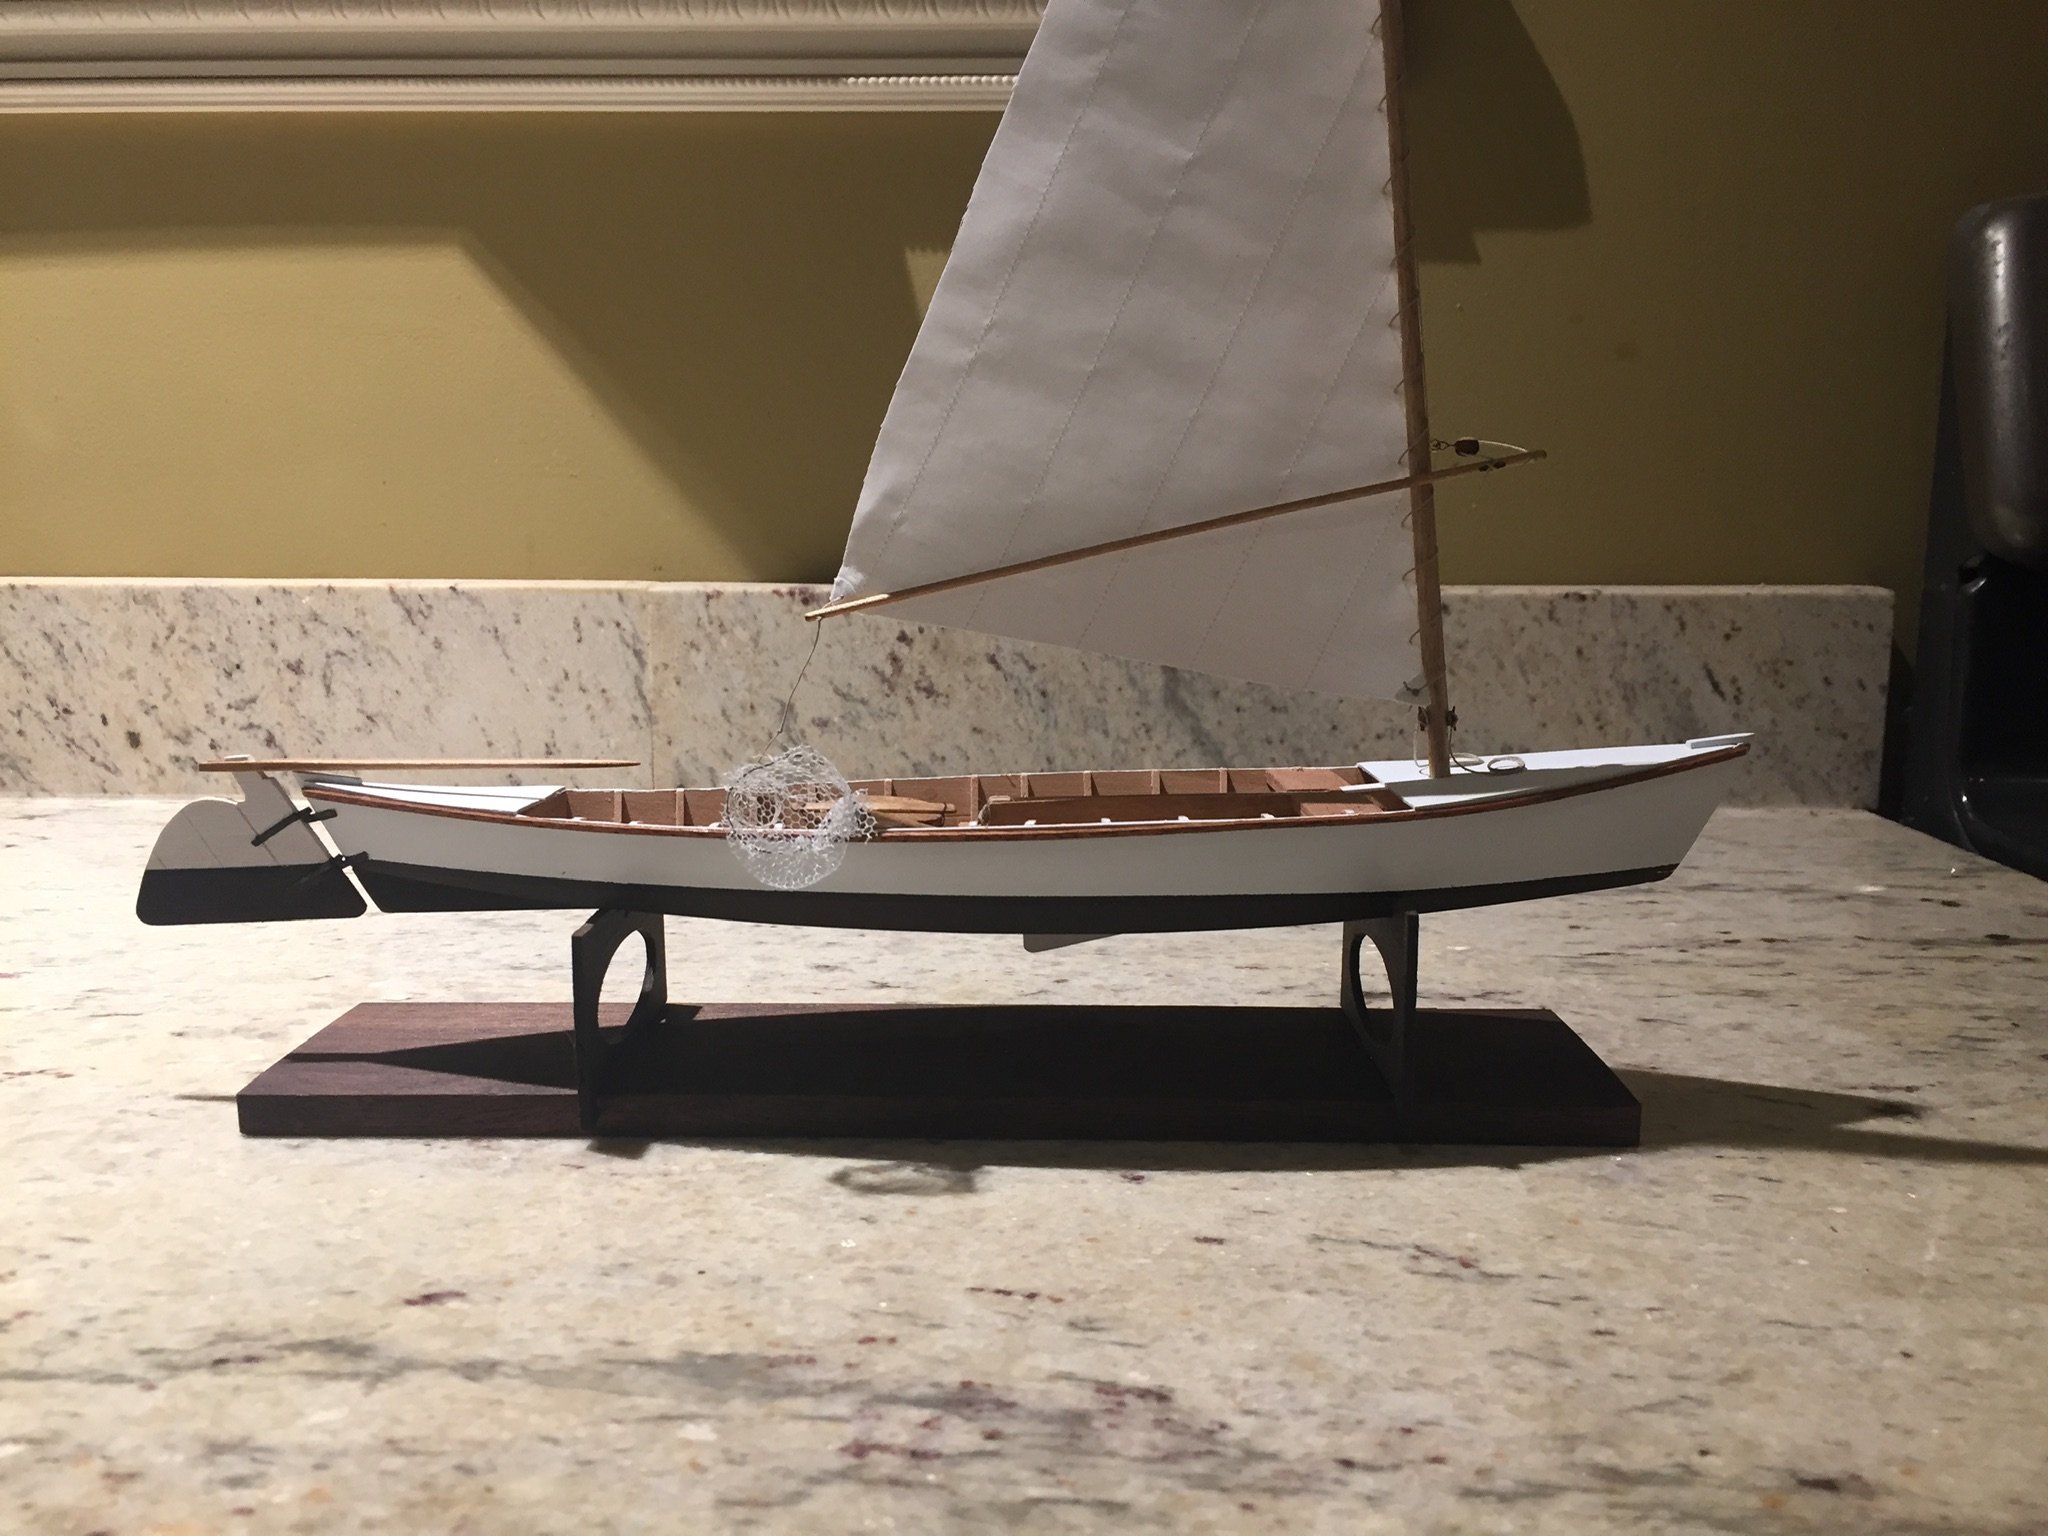
I am going to declare this build complete. I added a little glue to the cleats and I am over all very happy with the way this turned out. Also added a scratch built net and basket!


-
53 minutes ago, VTHokiEE said:
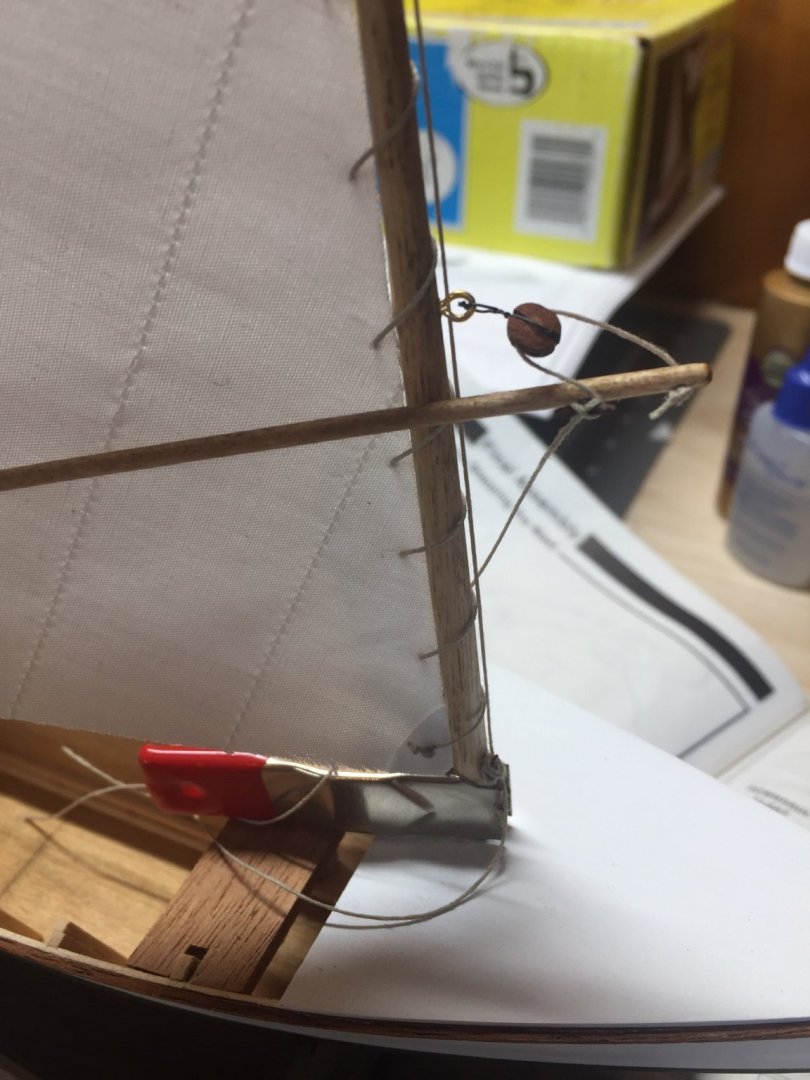
Out of curiosity, what causes you issues with the cleats?
On my first build I definitely didn’t tie them right, and it made it look sloppy. So this time I wanted to make sure I did it proper, but also didn’t want to glue them as the instructions imply (is this a silly notion, should I just glue it once tied, or can I tie them correctly so they do not come loose?). I ended up snapping off one and that irritated me. I found it difficult to finish with the back under loop and pull tight at the end.
-
Does anyone have any info on how the chains operated the steering? There is the picture in the drawings that came with the tug, but they aren’t so clear and there is little documentation. Wondering if a 3” pipe would be accurate to tie the chains together. (It appears chains on the rudder near the grating would then go to pipe, then go back to chain and run under the cabin to the steering wheel).
- Canute and GrandpaPhil
-
2
-
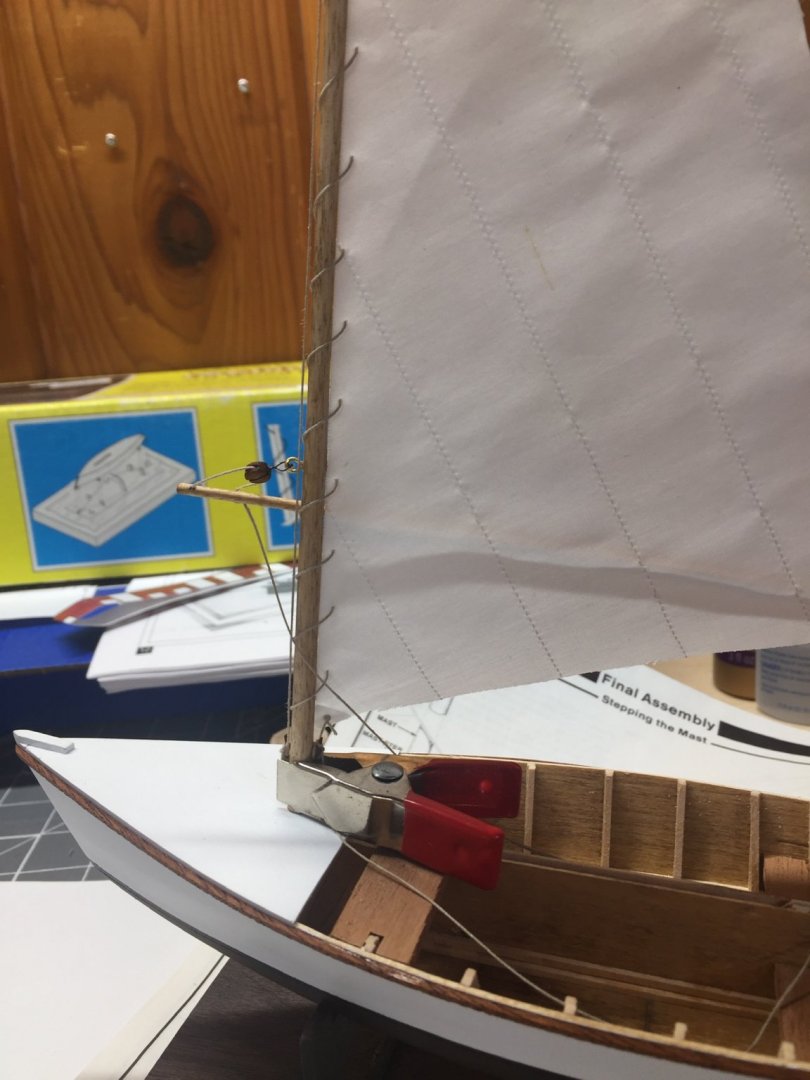
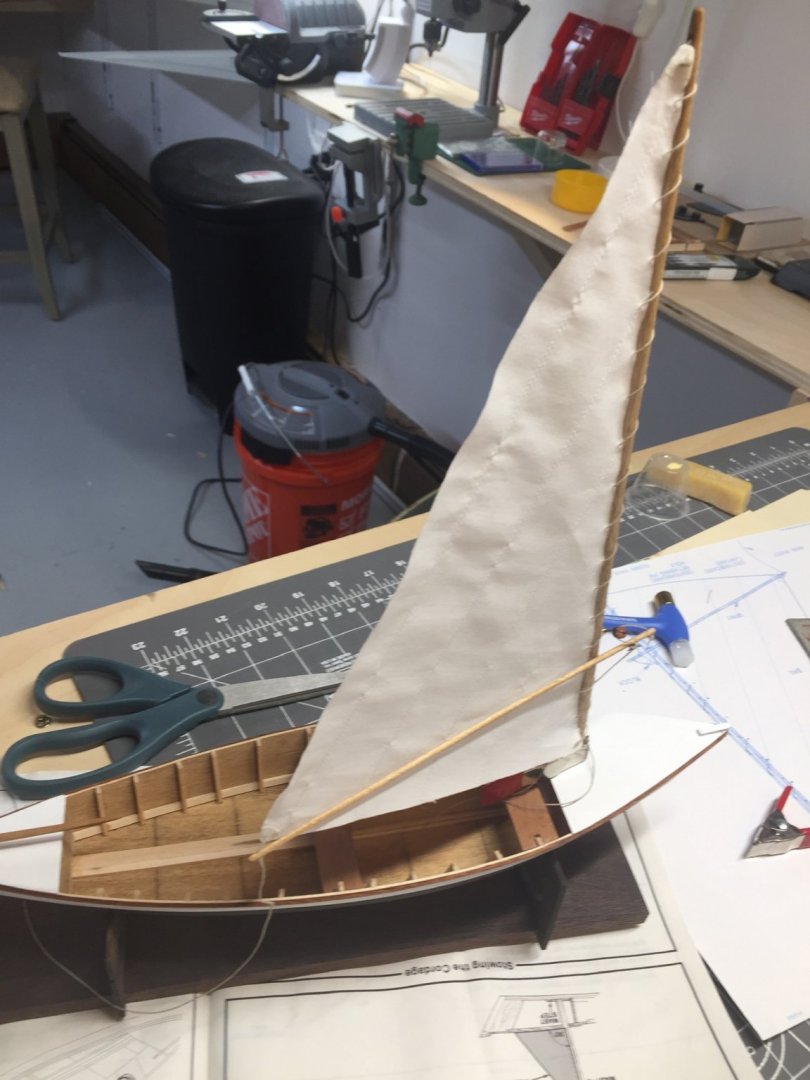
So I have gotten the sails on...tying cleats is not easy. Should be wrapping this one up pretty soon.

- VTHokiEE, GrandpaPhil, JeffT and 1 other
-
4


Hello from Belgium
in New member Introductions
Posted
Merry Christmas to you! After reading about that kit (nice info in the kit review section, which I believe states that they mislabeled it as 1:60 but it is in fact a 1:75), it is a very interesting subject for sure! Please start a log as I would love to follow along 😃