


PhillH
-
Posts
61 -
Joined
-
Last visited
Content Type
Profiles
Forums
Gallery
Events
Posts posted by PhillH
-
-
Looks like the fitting, tweaking and re-fitting paid off. Excellent work again Mike.
-
-
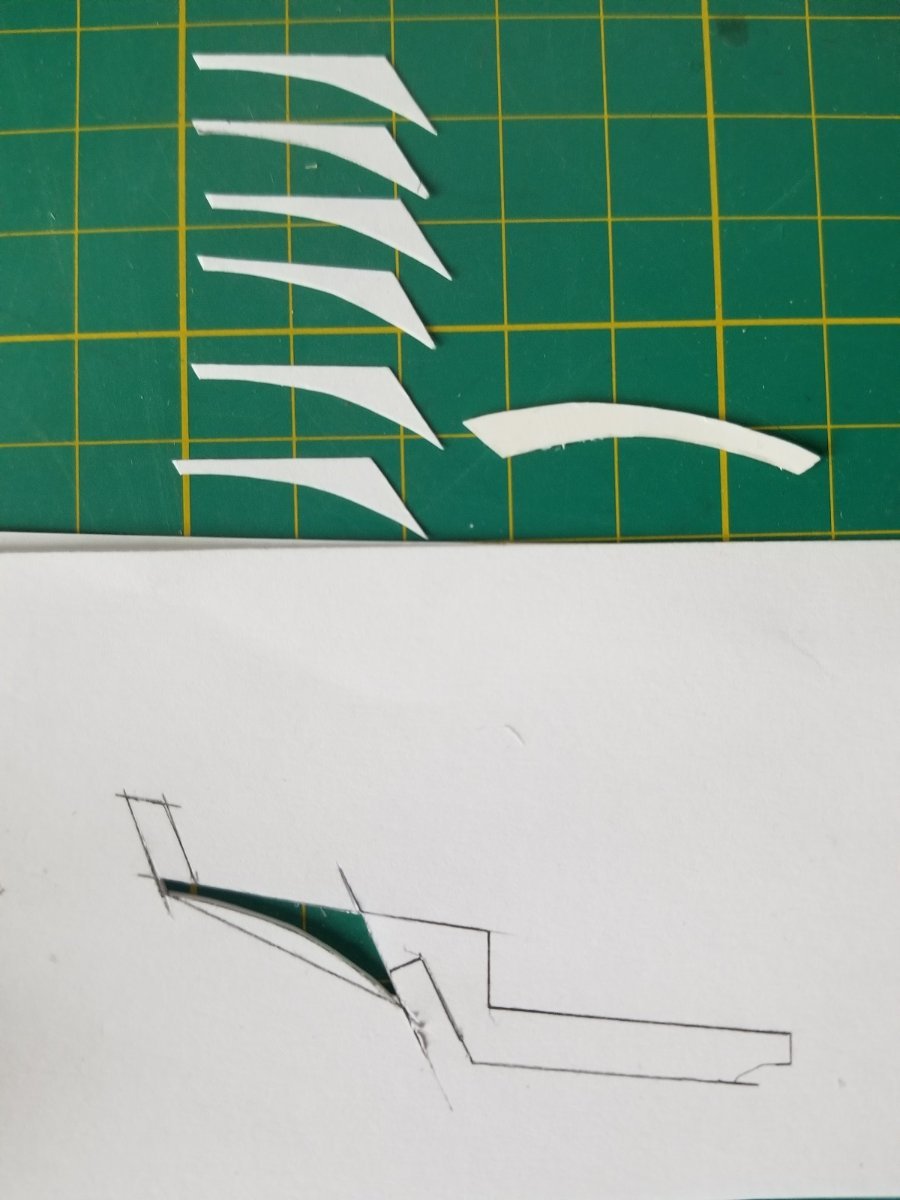
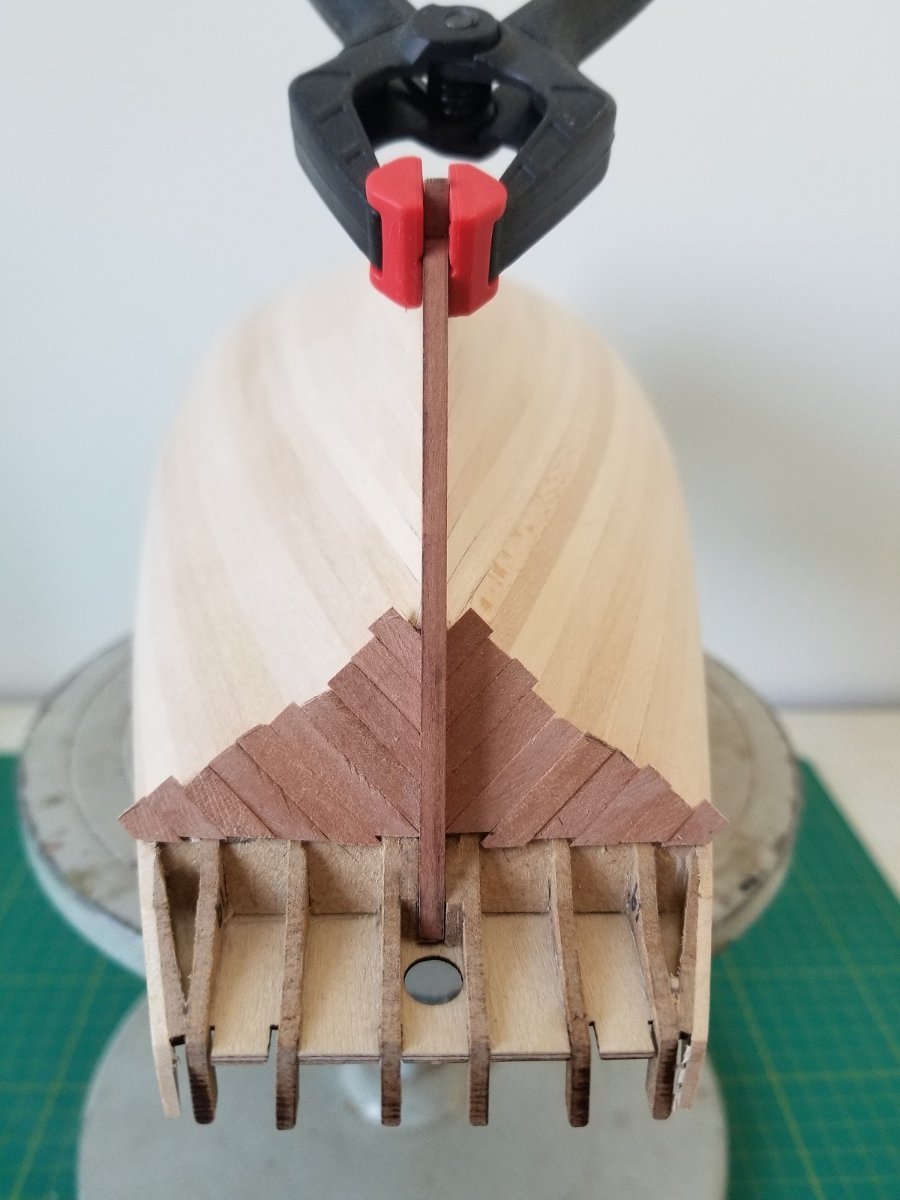
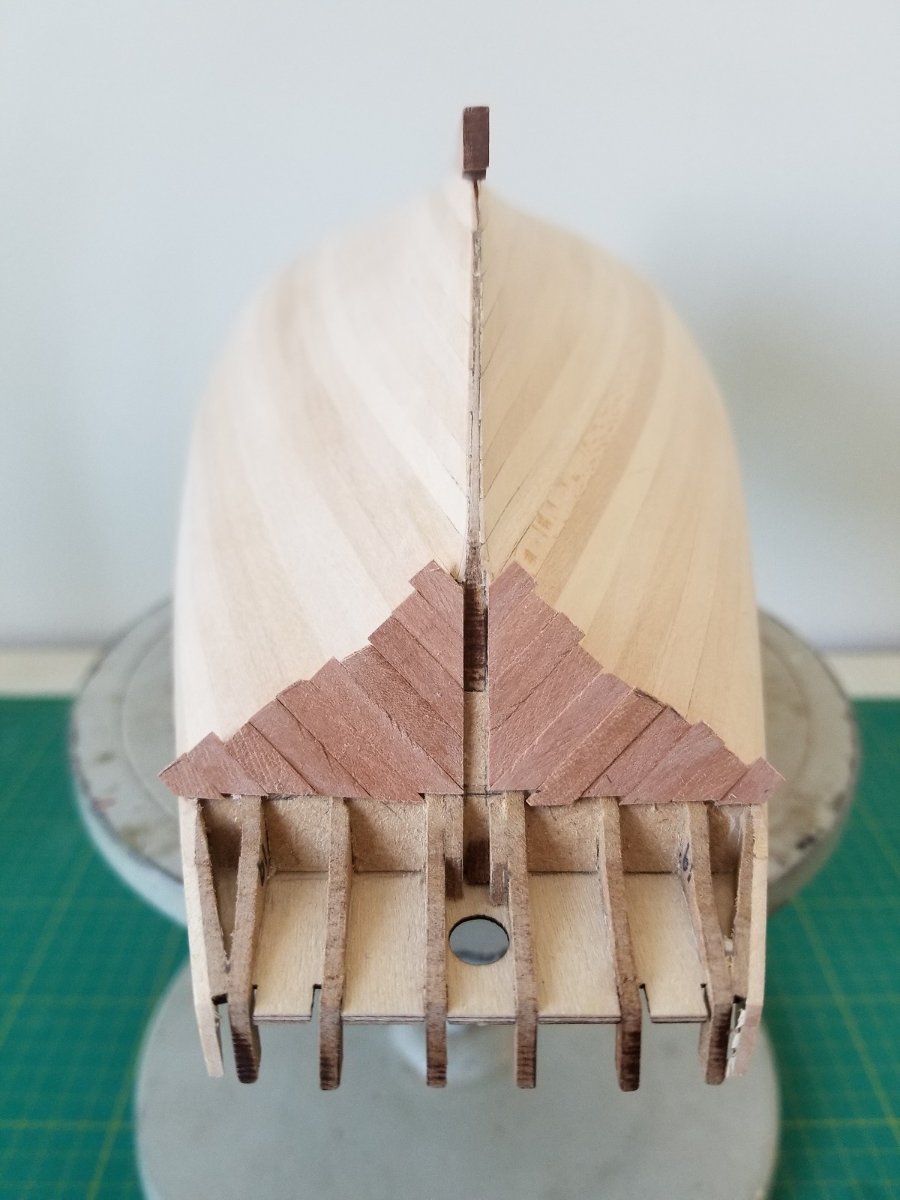
To achieve a curved counter, I needed to put a corresponding curve into the bottom of the transom frames.
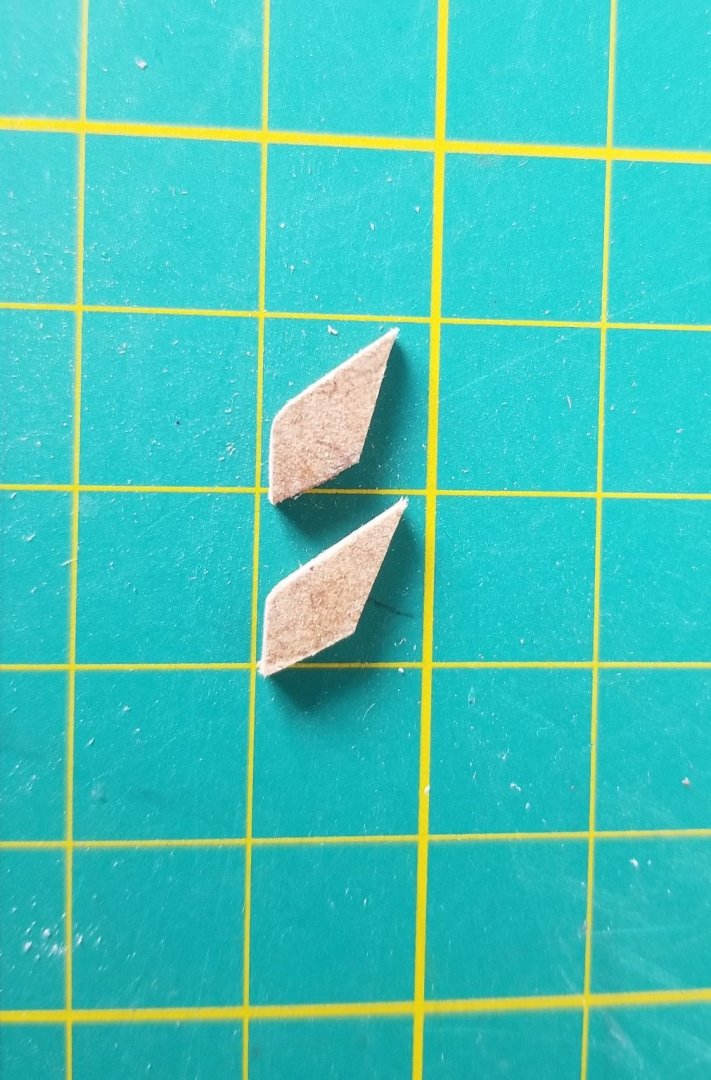
I used the scrap material pattern left after removing the transom frames, to draw a small sketch of the transom area. I then cut out a cardboard version of part 76 and used this to draw on the stern planking and onto the sketch the required curve which allowed me to determine the shape the transom frames would need to be modified to.
I then layered several sheets of paper under the sketch and cut multiple patterns with a scalpel.
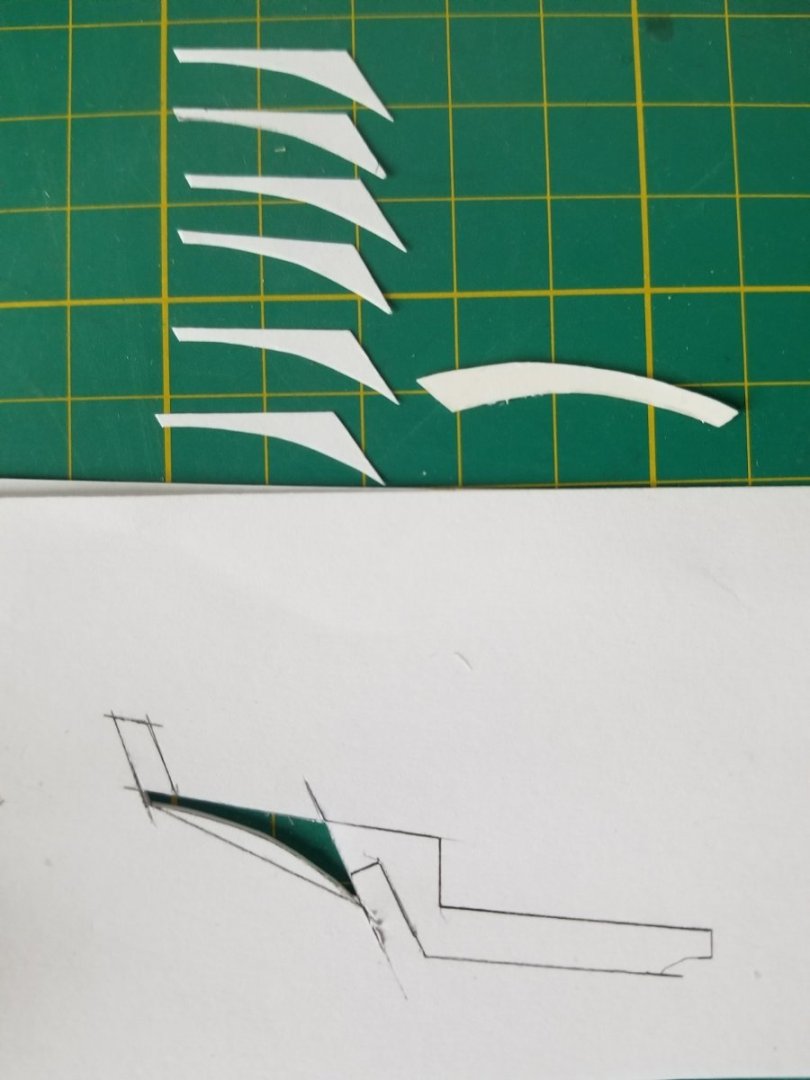
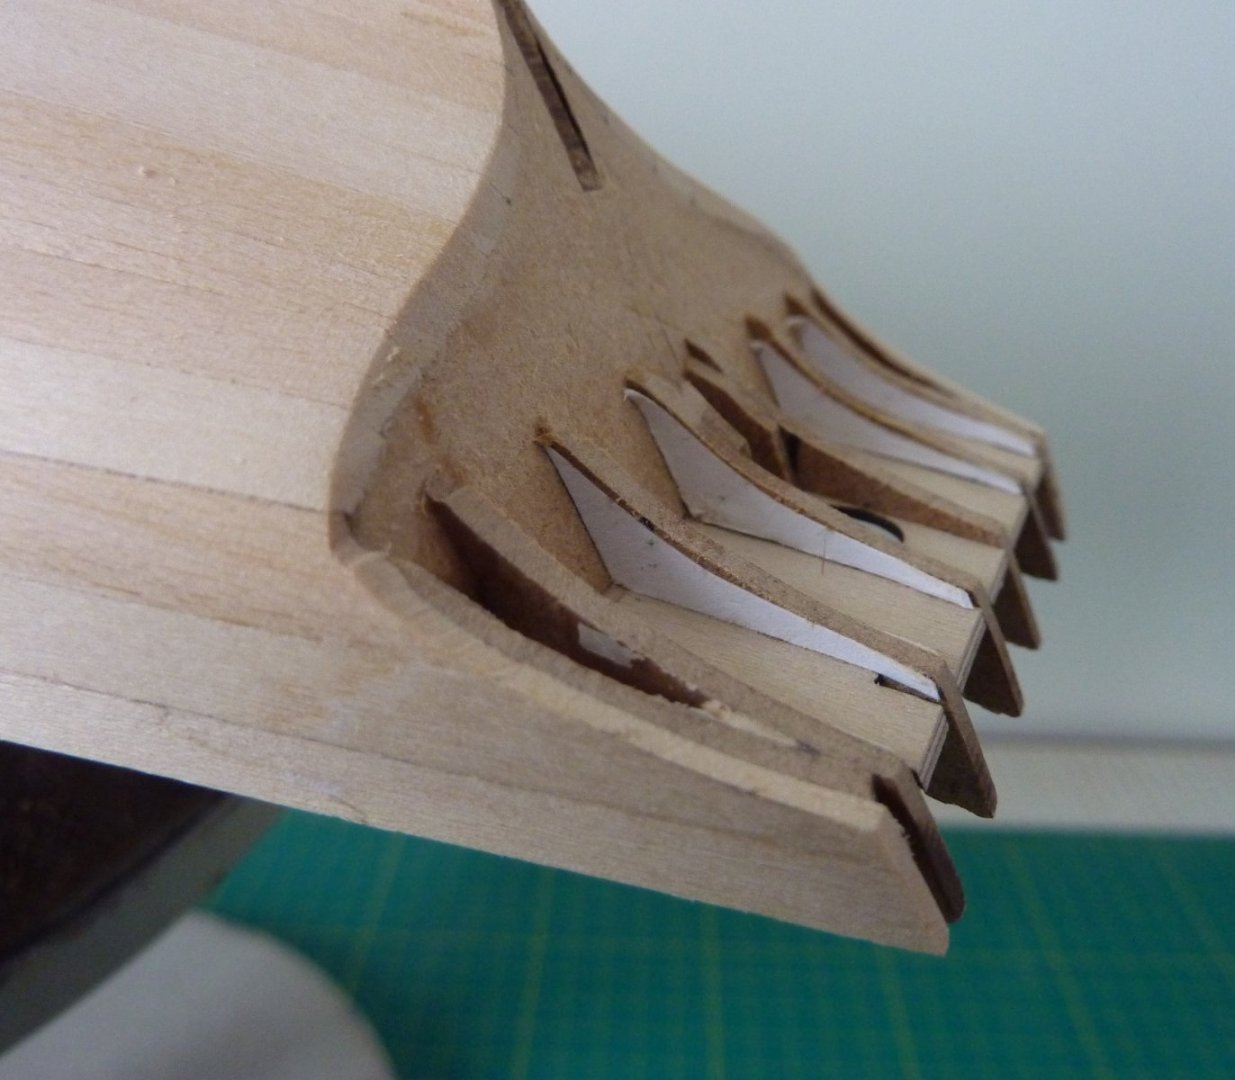
These patterns where then glued to the transom frames to give a guide for sanding.

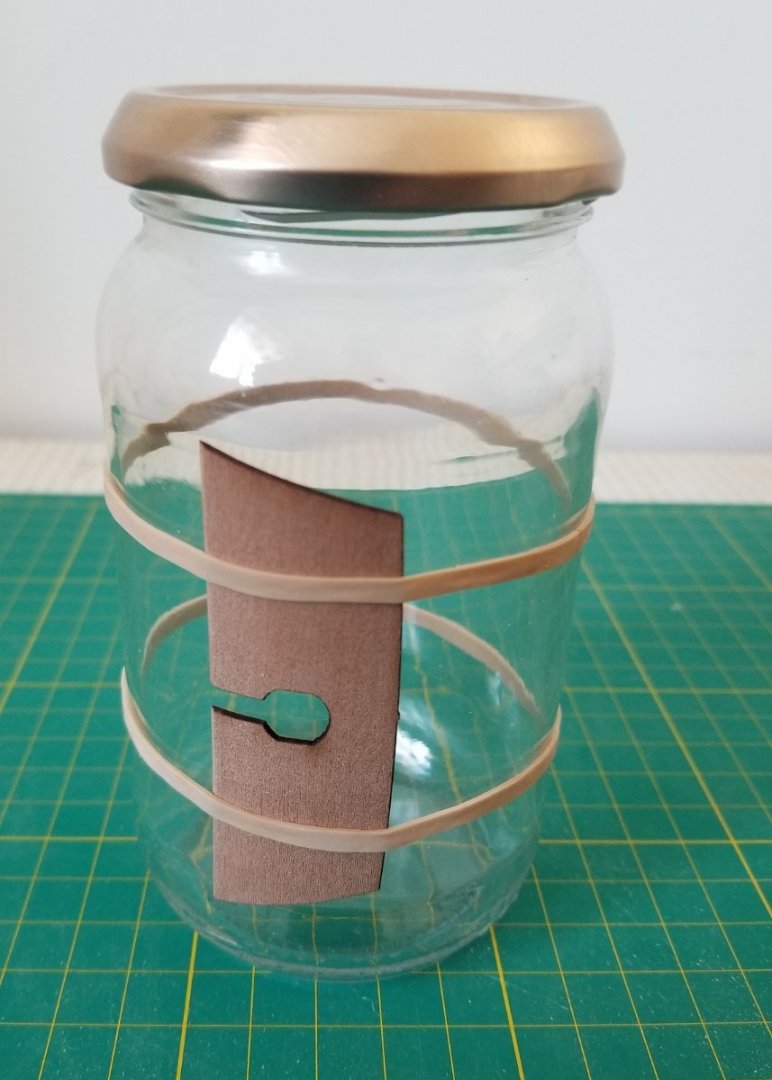
I used the curve of part 76 to find an item with a similar curvature to use as a sanding guide and in the end the best fit was a jam jar. I wrapped sandpaper around the jam jar and gradually sanded back the frames until I reached the patterns I had glued on.
The counter was next soaked in hot water and clamped to the same jam jar and left to dry.
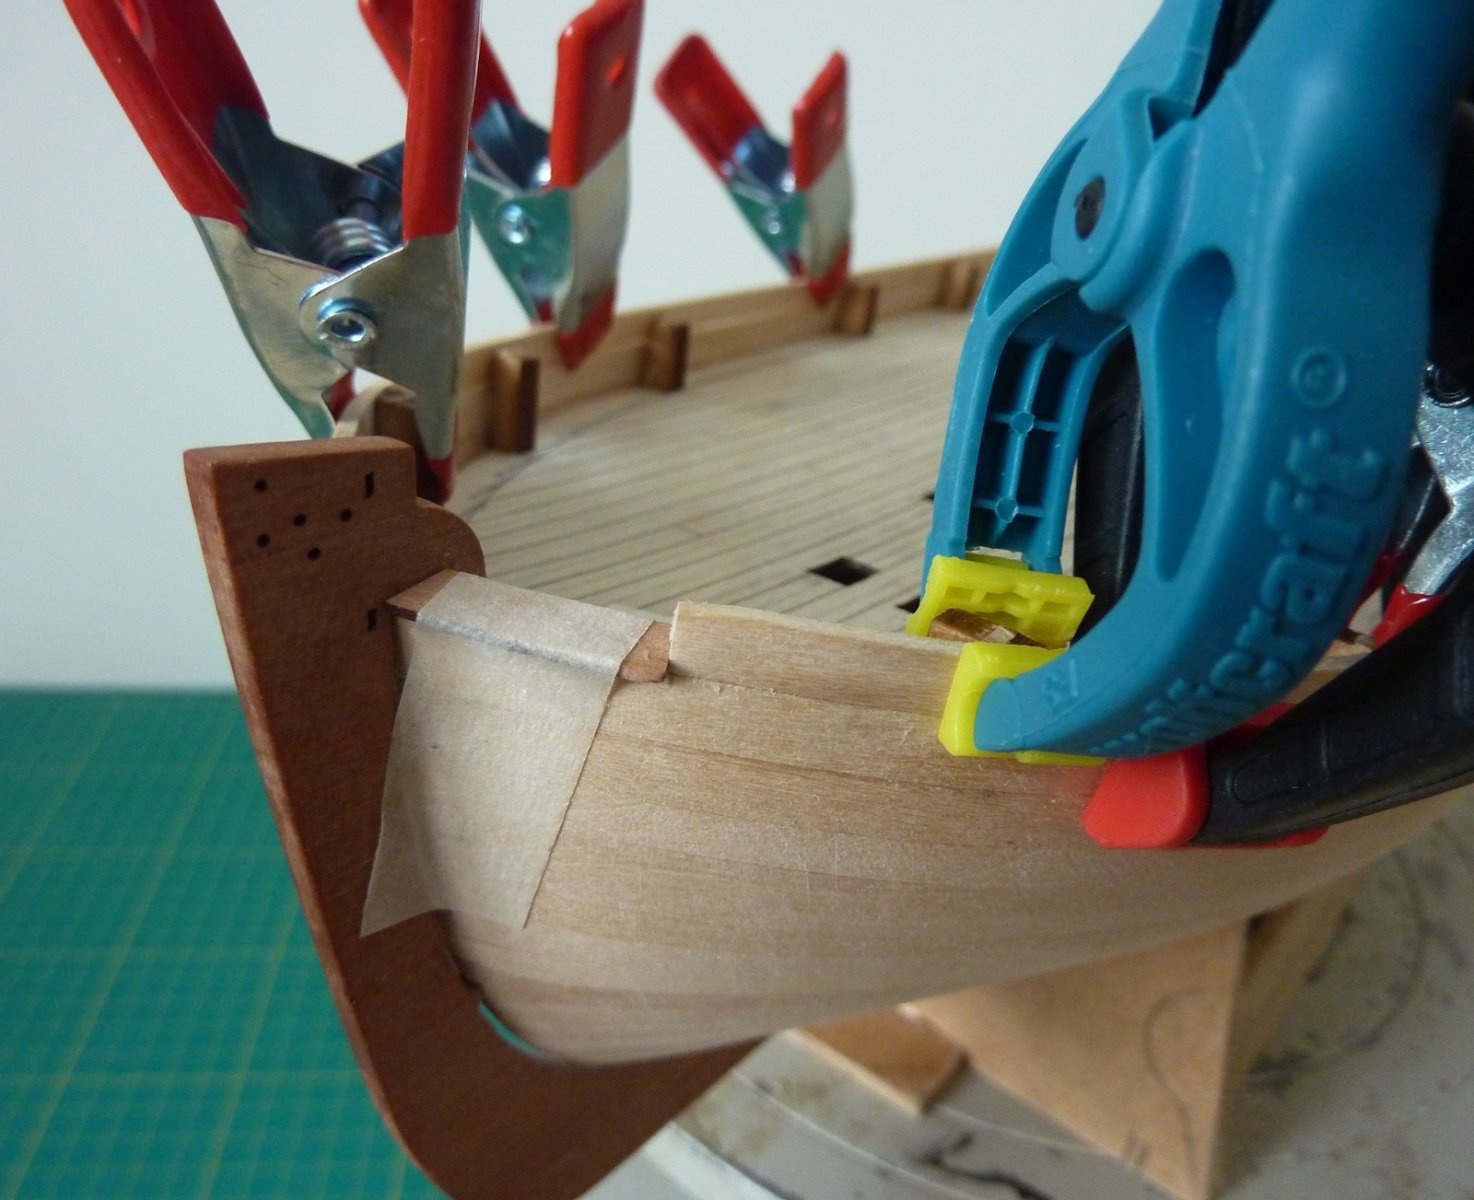
I decided not to glue the sternpost permanently in place at this stage but used the packing pieces previously fitted to hold the top in place while the base was held with a clamp. The stern angled planking was then cut and glued in place using PVA.

I then removed the temporarily fitted sternpost

and sanded the stern planking.
I will leave the sternpost off for now as this will allow me to fit the planks overlapping the stern.
The planks will then be cut back flush, and the stern piece refitted once all the sanding has been completed.

The curved counter was next removed from its jam jar former and glued in place.
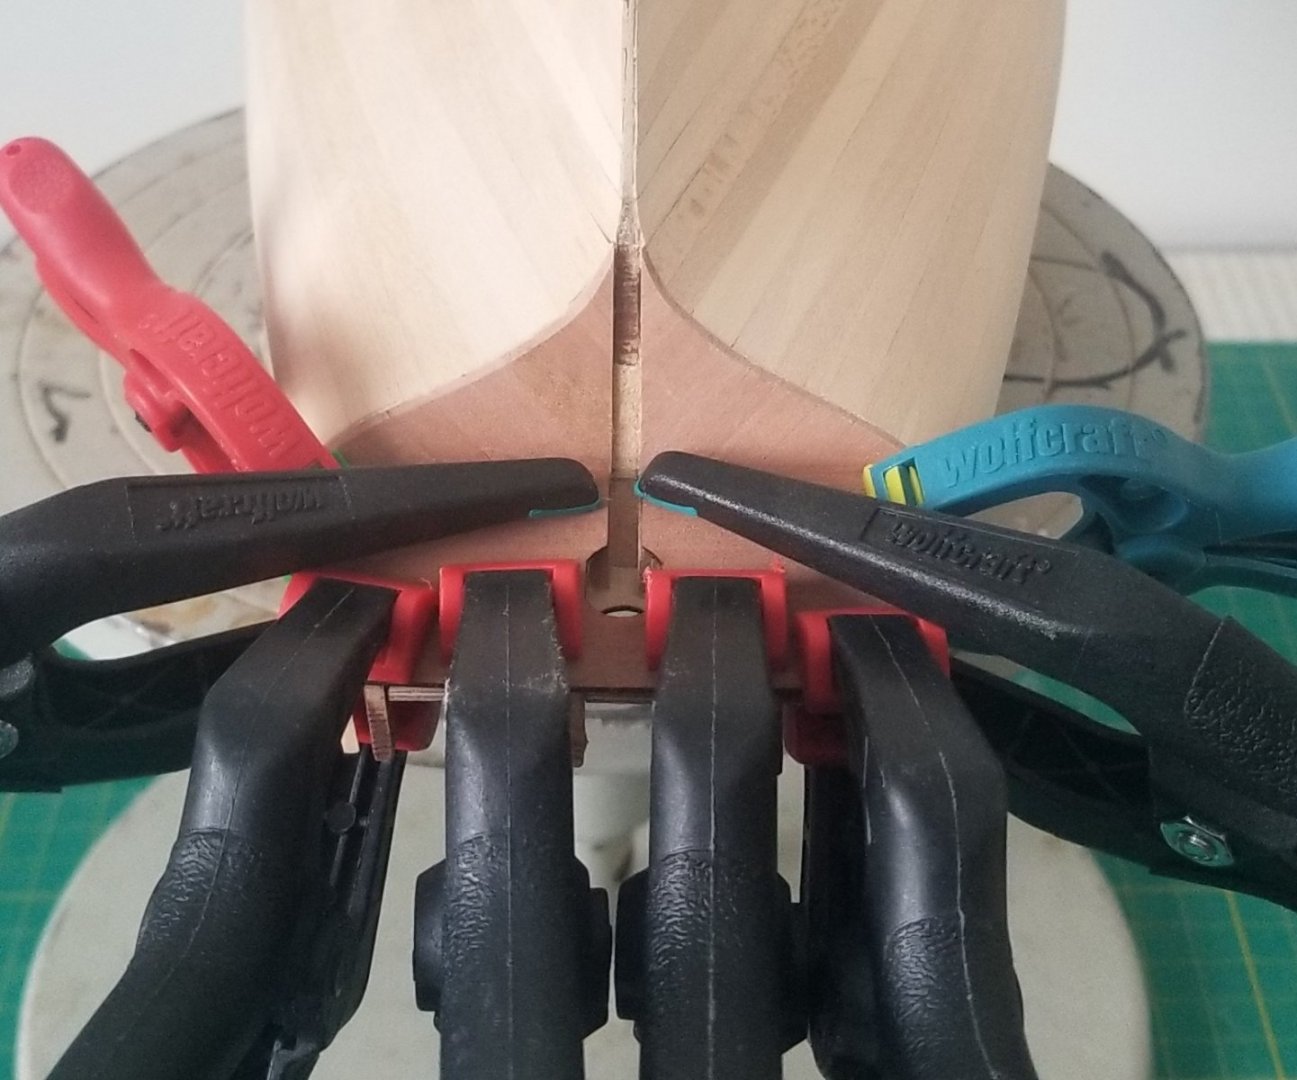
Finally, the counter was sanded back to align with the hull planking.

The next challenge is the second layer of planking.
Phill
- jpalmer1970, iosto, Theodosius and 9 others
-
 12
12
-
Thanks RDDP and Diver for the kind words and to everyone for the "Likes".
@Diver I agree, without patience you will never achieve your desired result. I would prefer to spend a day getting a plank correct than to look back with regret because I rushed things, which is why this build is taking so long.
@RDDP I was an industrial controls system specialist but some of my customers made me feel like I was pulling teeth.😉Phill
-
20 minutes ago, Theodosius said:
@PhillH: Thanks for your suggestion about the wipe on poly! I would love to test this, but I have no idear, what I have to look for!? I live in germany, so I need a product that I can get here. Anybody any tips on this? 🙂
WOP is basically a thinned down oil based Polyurethane Varnish.
The recipe I made a note of is "thin it down 50/50 with White spirit to make your own wipe-on".
I have not used it yet but I am sure there are others with more experience who will be able to provide more advice.
- bruce d and Theodosius
-
2
-
Next on the agenda was the counter which is an area that I had been trying to decide on for some time.
The manual shows that part 76 should be cut to fit along the top edge of the main wale with a straight counter.
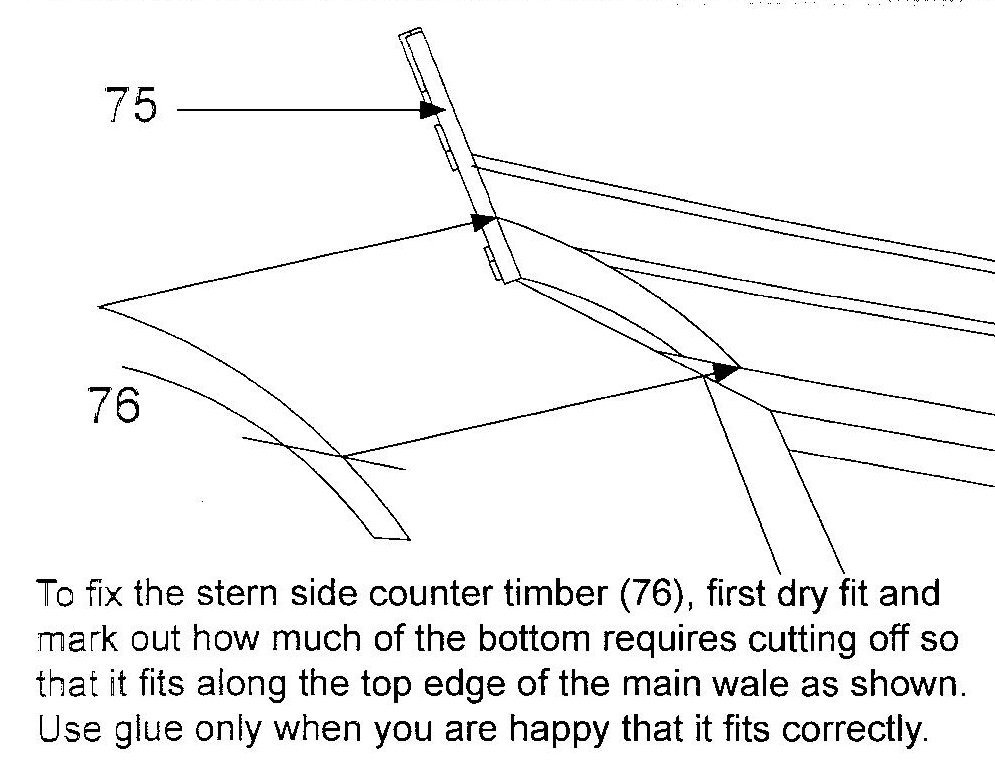
However, this picture shows it cut to fit along the top edge of the main wale with a more curved counter.
And finally in this picture it is fitted abaft of the main wale with a curved counter as per the ATOS book
I was unsure whether to go with a flat or curved counter but have finally decided on a curved counter which looks the most appealing to my eye.
Phill
- jpalmer1970, Paul Le Wol, ccoyle and 2 others
-
5
-
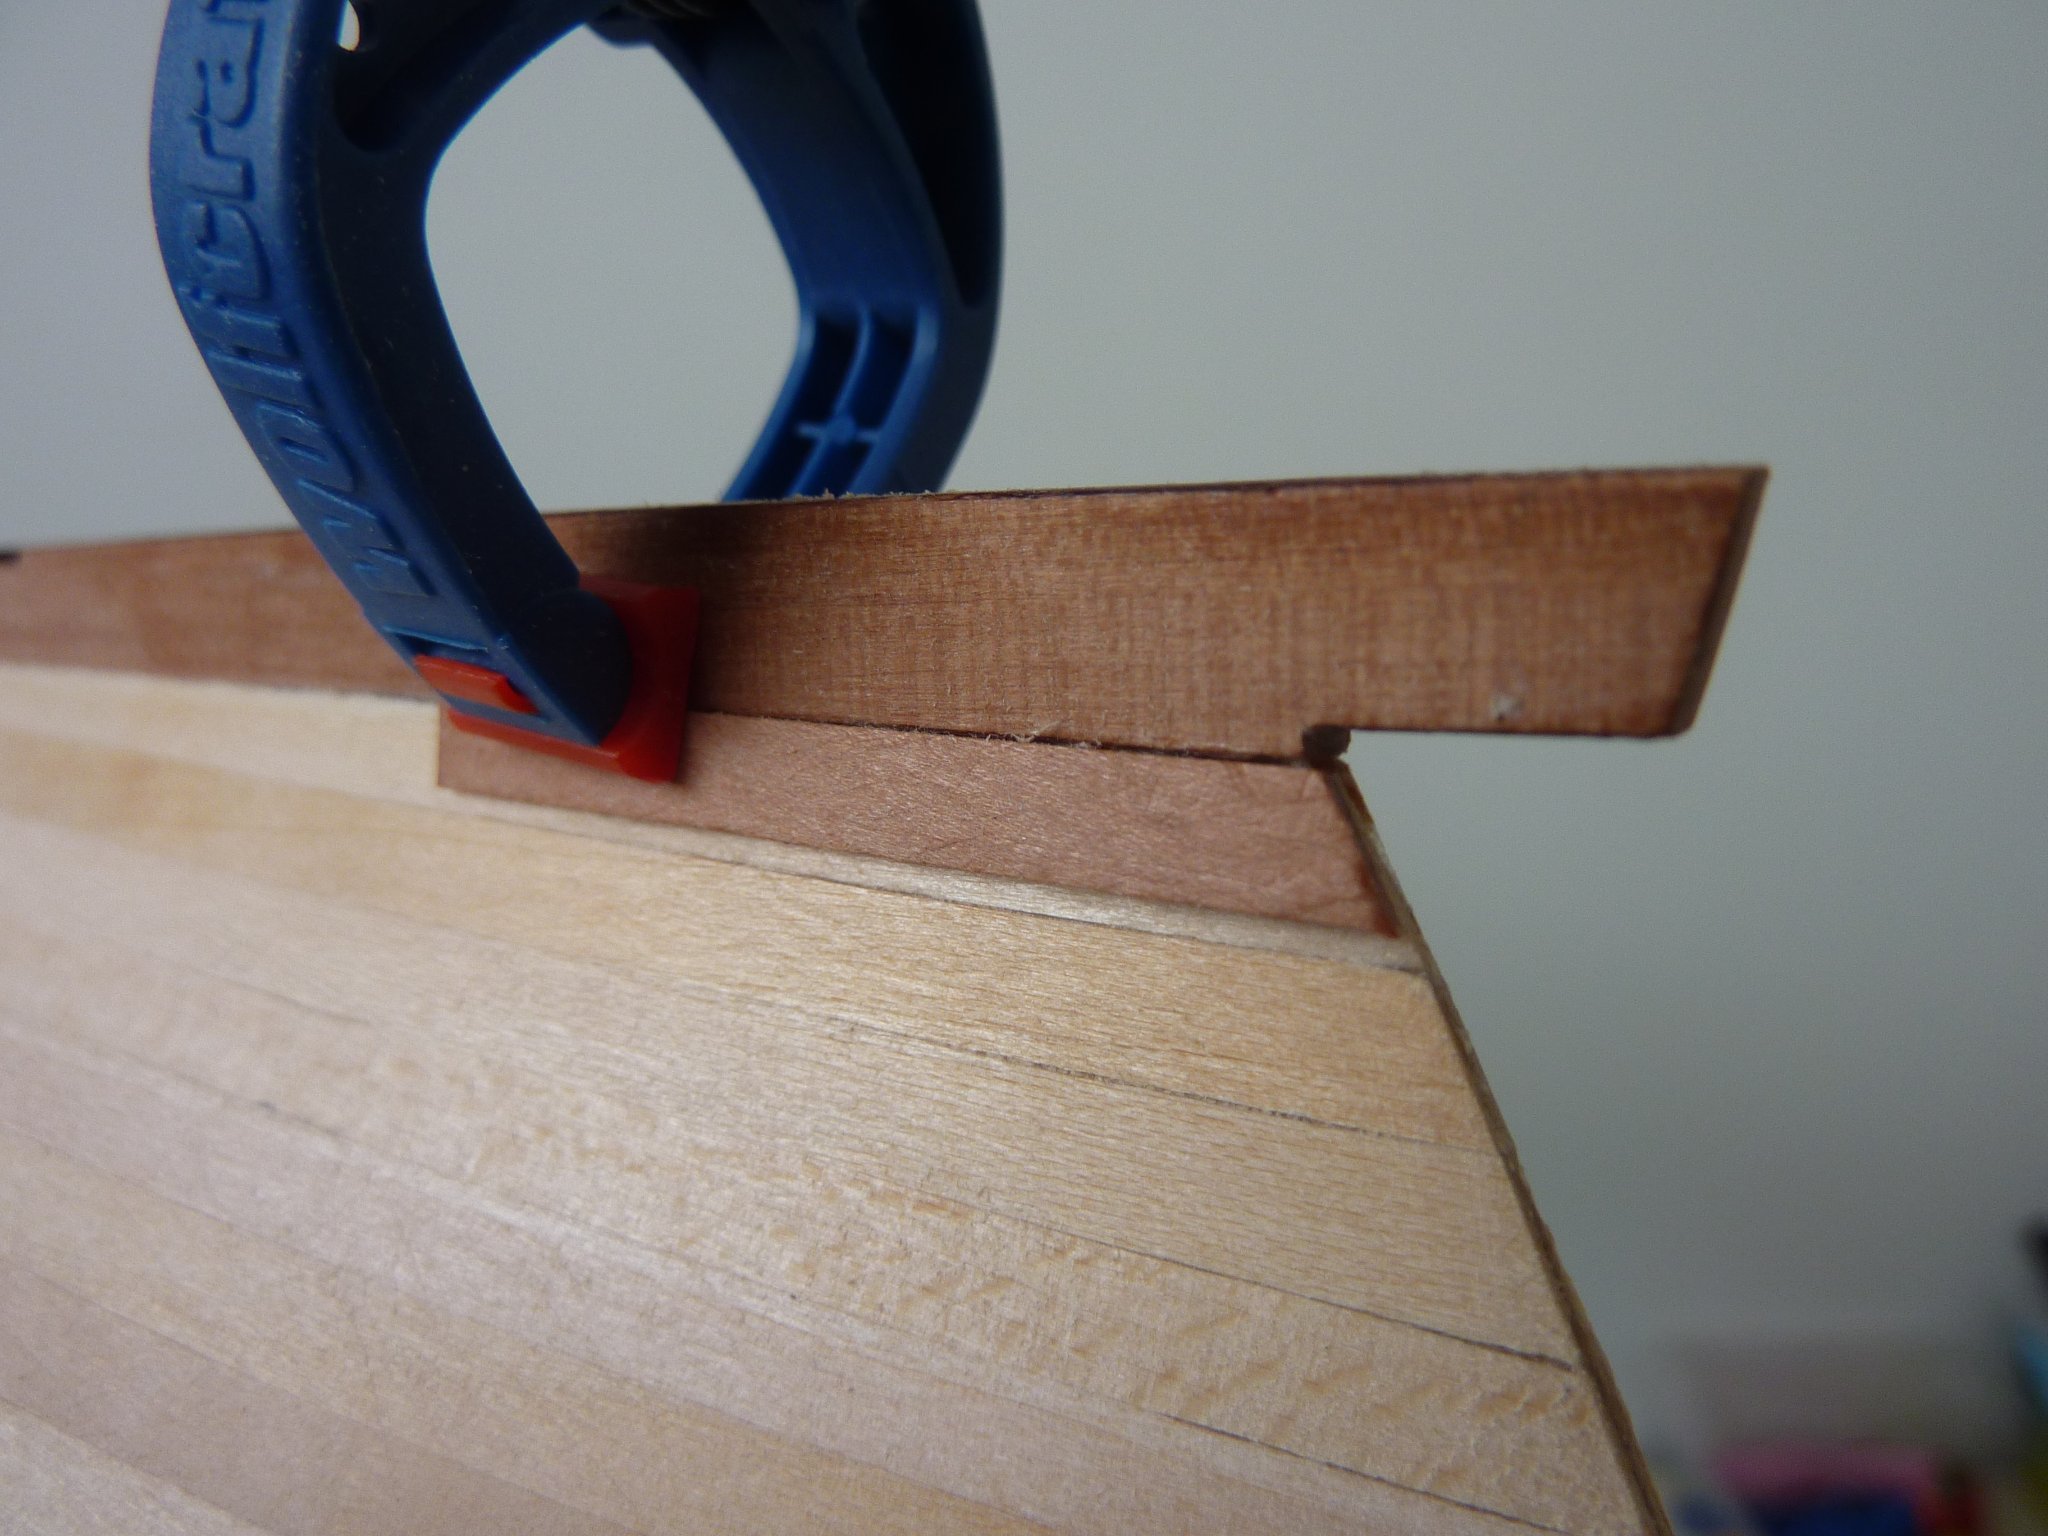
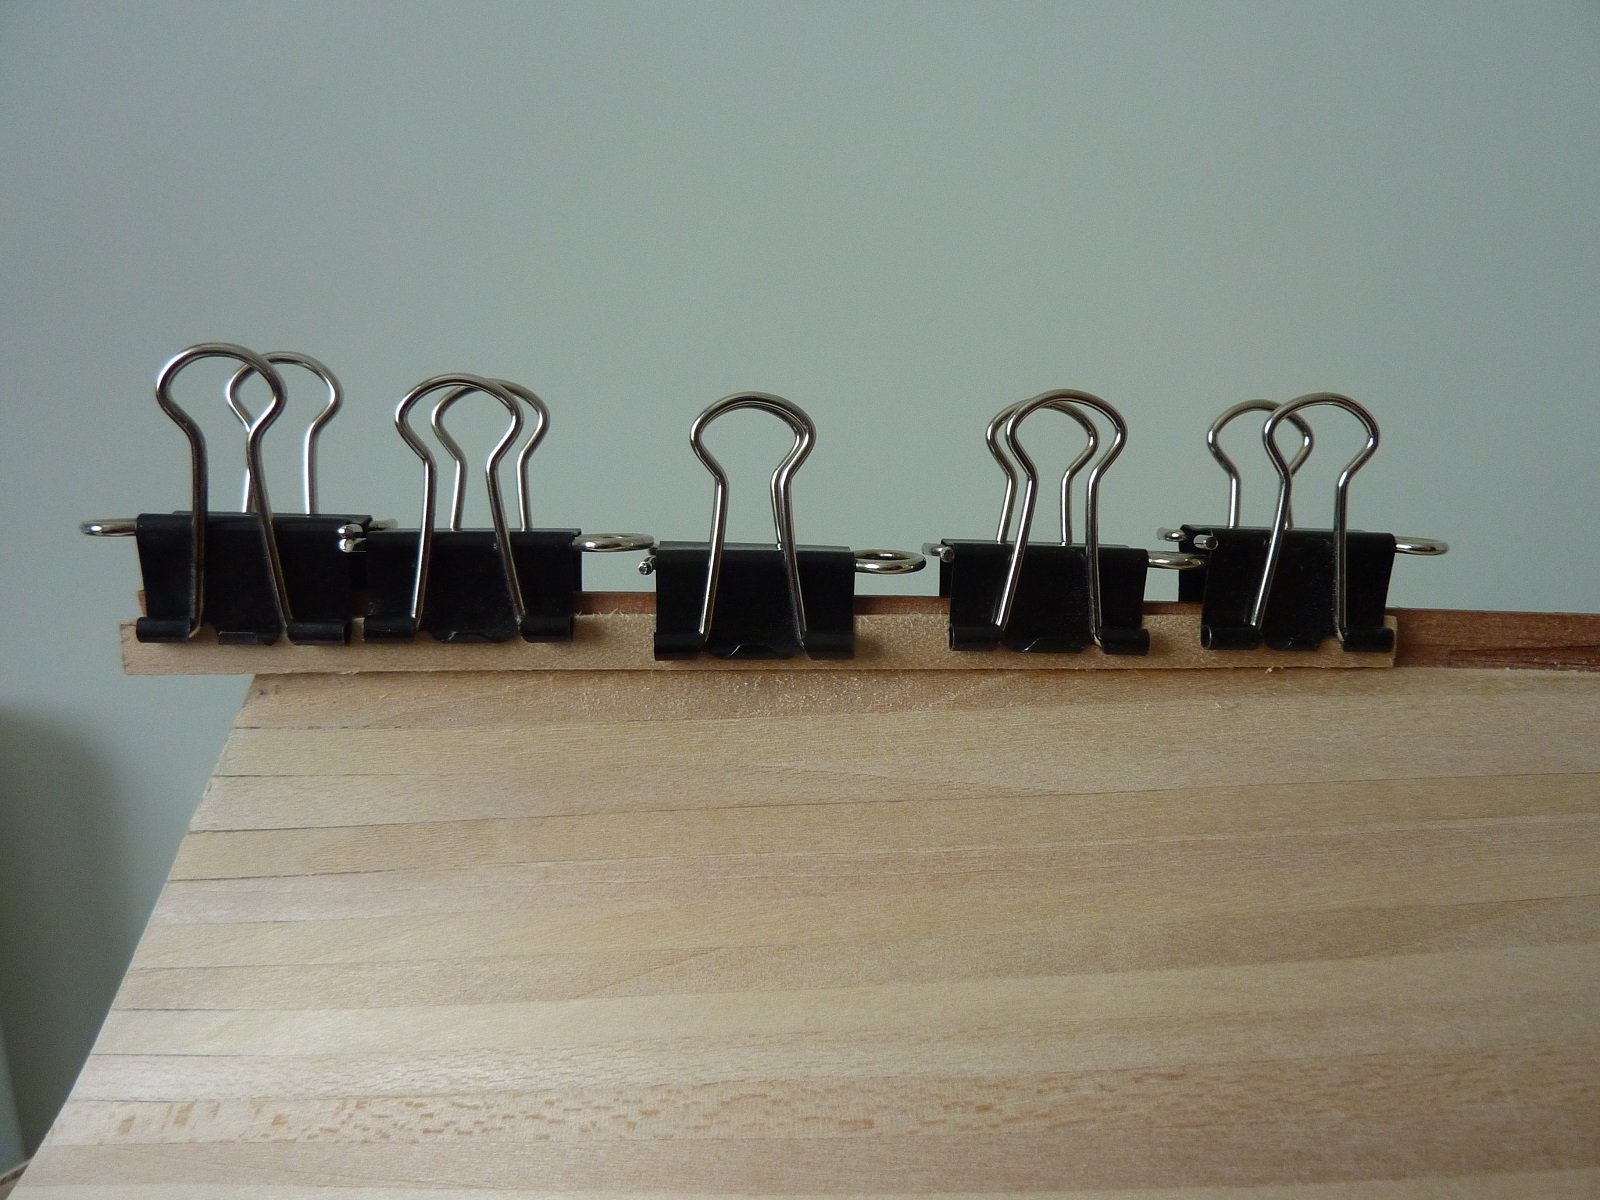
I used masking tape as others have done to temporarily fit the spacer for the top 4mm planks which finish off the first planking and then glued in place the final two planks.

Phill
- GrandpaPhil and AJohnson
-
2
-
Good to hear that the fix for your eyes has worked. 👍
- Keith Black, Dave_E, Old Collingwood and 1 other
-
4
-
Looking good. I would go with the darker blue.
Have you considered doing a test with Wipe On Poly (WOP) for the planking.
Phill
-
On 2/13/2022 at 11:20 AM, Theodosius said:
Great build so far! How's your second planking going? 🙂
Thanks, there has been very little time spent at the shipyard Theodosius. I have been spending a lot of time caring for my father who is suffering from Alzheimer's and I have been making the most of the time we have together. That said I have managed some work on the counter so I must get round to updating my log with progress so far.
Phill
-
-
It is really coming along now Theodosius and looks great to my eyes. Keep up the good work. 👍
Phill
-
27 minutes ago, Kevin said:
if you don't like it, dont hide it, just re-do
Could not agree more Kevin 👍
- Old Collingwood, mtaylor, EJ_L and 1 other
-
4
-
Good to see this build back on the slipway Kevin.
It looks like it is coming along well. I will be following along.
Phill
- Kevin, mtaylor, Old Collingwood and 1 other
-
4
-
18 hours ago, Jasseji said:
My point is, UK Glenn writes 30sec with the Bender Tool, BE claims 2-3 Minutes with Travel Iron, you write 10-15secs with Travel Iron, I am trying to decide how not to use 2 Tools, as taking out the Travel Iron is a complicated operation for me (have to lock myself in my Homeoffice/Workshop due to Kid + Cat
 )
)
The Electric Plank Bender seems a Tool easier to handle in such a situation, hence i ask
")
Jacek,
I found that around 30 sec with my mini iron on limewood strips worked fine after dampening with a paintbrush and water. I then left them to cool to room temperature.
Phill
-
Thukydides, I like your idea on the main wale that is were I judge it to be as well.
When I finished the first planking I noted how different the wood strip colours were on that and made a mental note to sort the final planking by colour as well.
Anything that is very off can be consigned to wale duty given that it will be painted.
Phill
- Obormotov and Thukydides
-
2
-
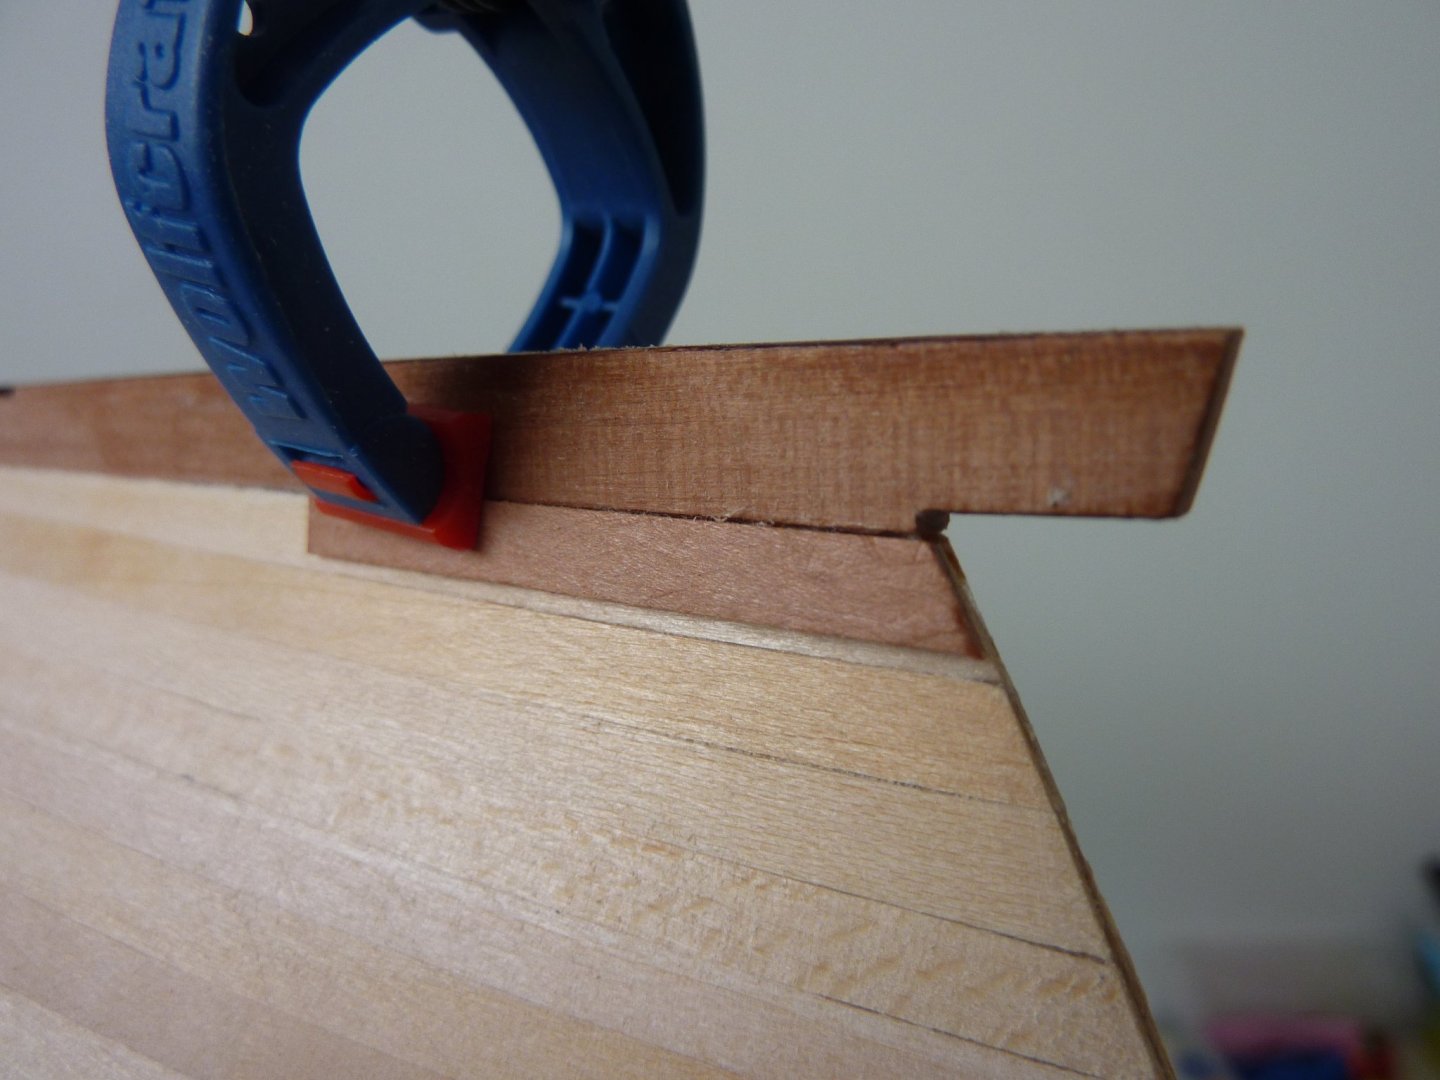
34 minutes ago, Thukydides said:
Now you have me second guessing on how much I sanded away the garboard plank, given how much better your first planking turned out than mine I may go do another pass on trying to provide a rabbet for the next layer :).
I think the important thing to remember is that the second layer garboard plank sits next to the keel at the stern almost like another plank and then as you move towards the bows it is at a more acute angle which I am hoping can be achieved by chamfering the back corner of the plank.
Of course if the final finish will be painted then filler can always be used. I am just trying to get some practice at getting a good result for that day when I cannot rescue the planking with filler.
Here is a picture of my test piece of plank at the stern.
Phill
- GrandpaPhil, jpalmer1970 and Jeff5115
-
3
-
Thukydides I think the position of part 76 will depend on how you have curvered the transom before fitting the counter although it is extra long so may not be an issue. Alternatively there is alot of spare material left on the sheet it comes on to cut another of the desired shape.
The thickness of the second planking used for the wale is 1mm and part 76 is 1.5 mm so I think the best option is to thin it down after fitting to just blend into wale.
The interesting thing is there are no instructions to actually fit the wales they just appear in the drawing regarding the gun port openings.
Phill
- Thukydides, jpalmer1970 and Obormotov
-
3
-
Thanks jpalmer1970 and RockinBudgie and to everyone else for the likes.
Whether to fit the side counter timbers as per the kit instructions or the ATOS drawings has me in a quandary at present, so I have been finding things to do to put off the decision.
I have been carefully using a few scalpels to scrape away at the garboard plank to provide a rabbet for the next layer of planking but cannot get a picture that looks like I have achieved anything.
I now need to get back to making a decision and jump one way or the other with the counter.
Phill
-
All looking good Thukydides your racing ahead of me.
The counter is an area that I have been considering as well .
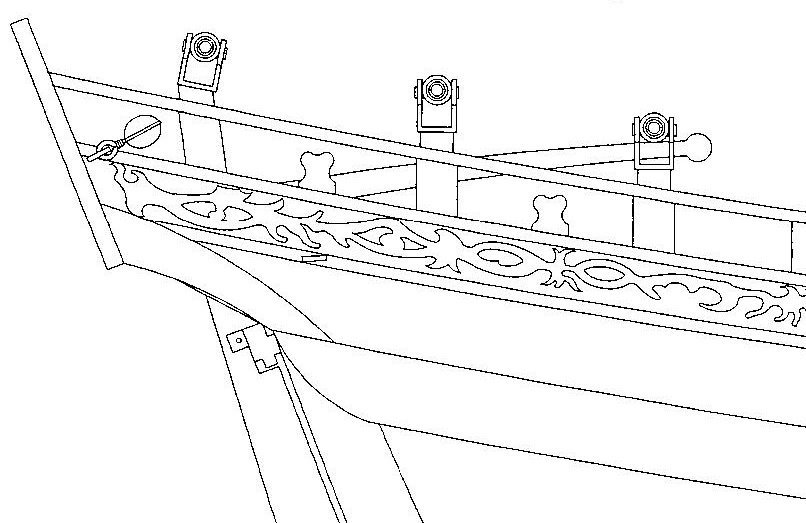
The manual shows that part 76 should be cut to fit along the top edge of the main wale and the later pictures of the completed model show this as well.
The drawings of the ship in the rigging section of the manual however show the counter timber abaft the main wale as per the ATOS book.
I think I may end up going with what looks most appealing which at present is a curved counter like yourself and BE.
Phill
- jpalmer1970 and Obormotov
-
2
-
Thanks Thukydides, I have tried to approach it as if it were a single planked model as a practice run for the second planking.
I used PVA only for the first planking but will have to try superglue for the second as there will be much less opportunity to clamp planks in place.
At the moment life is getting in the way of building so things are progressing slowly.
Phill
- jpalmer1970 and VTHokiEE
-
2
-
Thanks Maurice and to all for the likes.
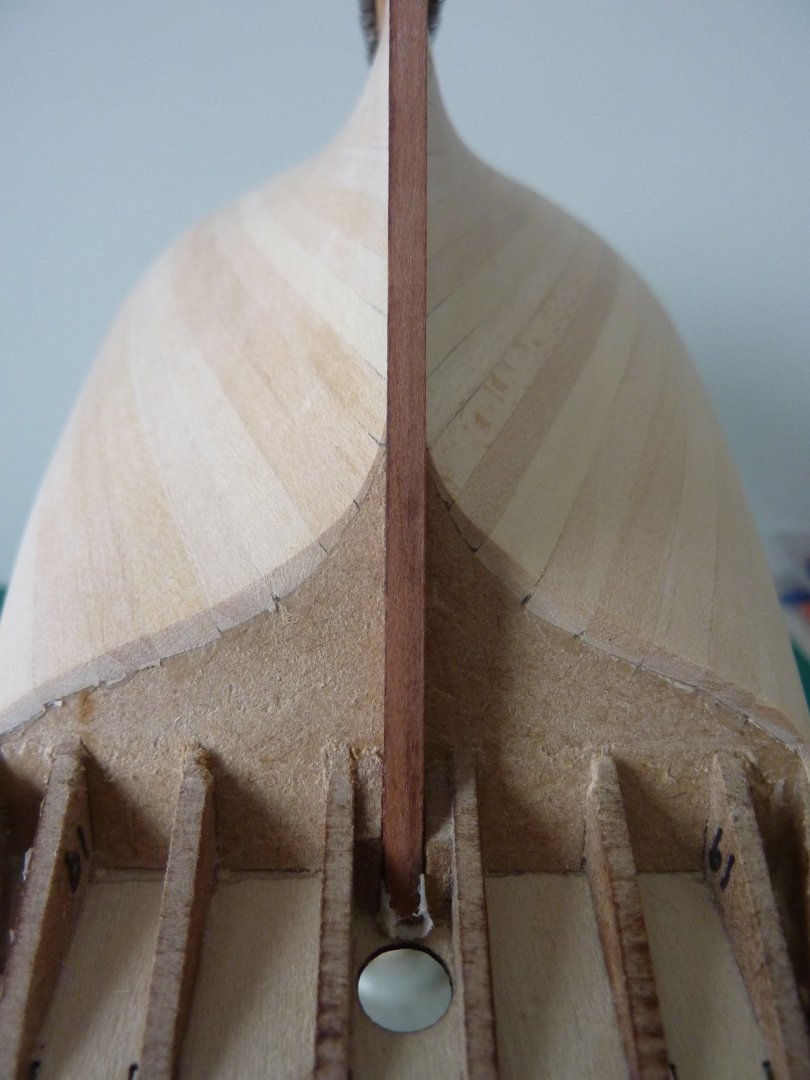
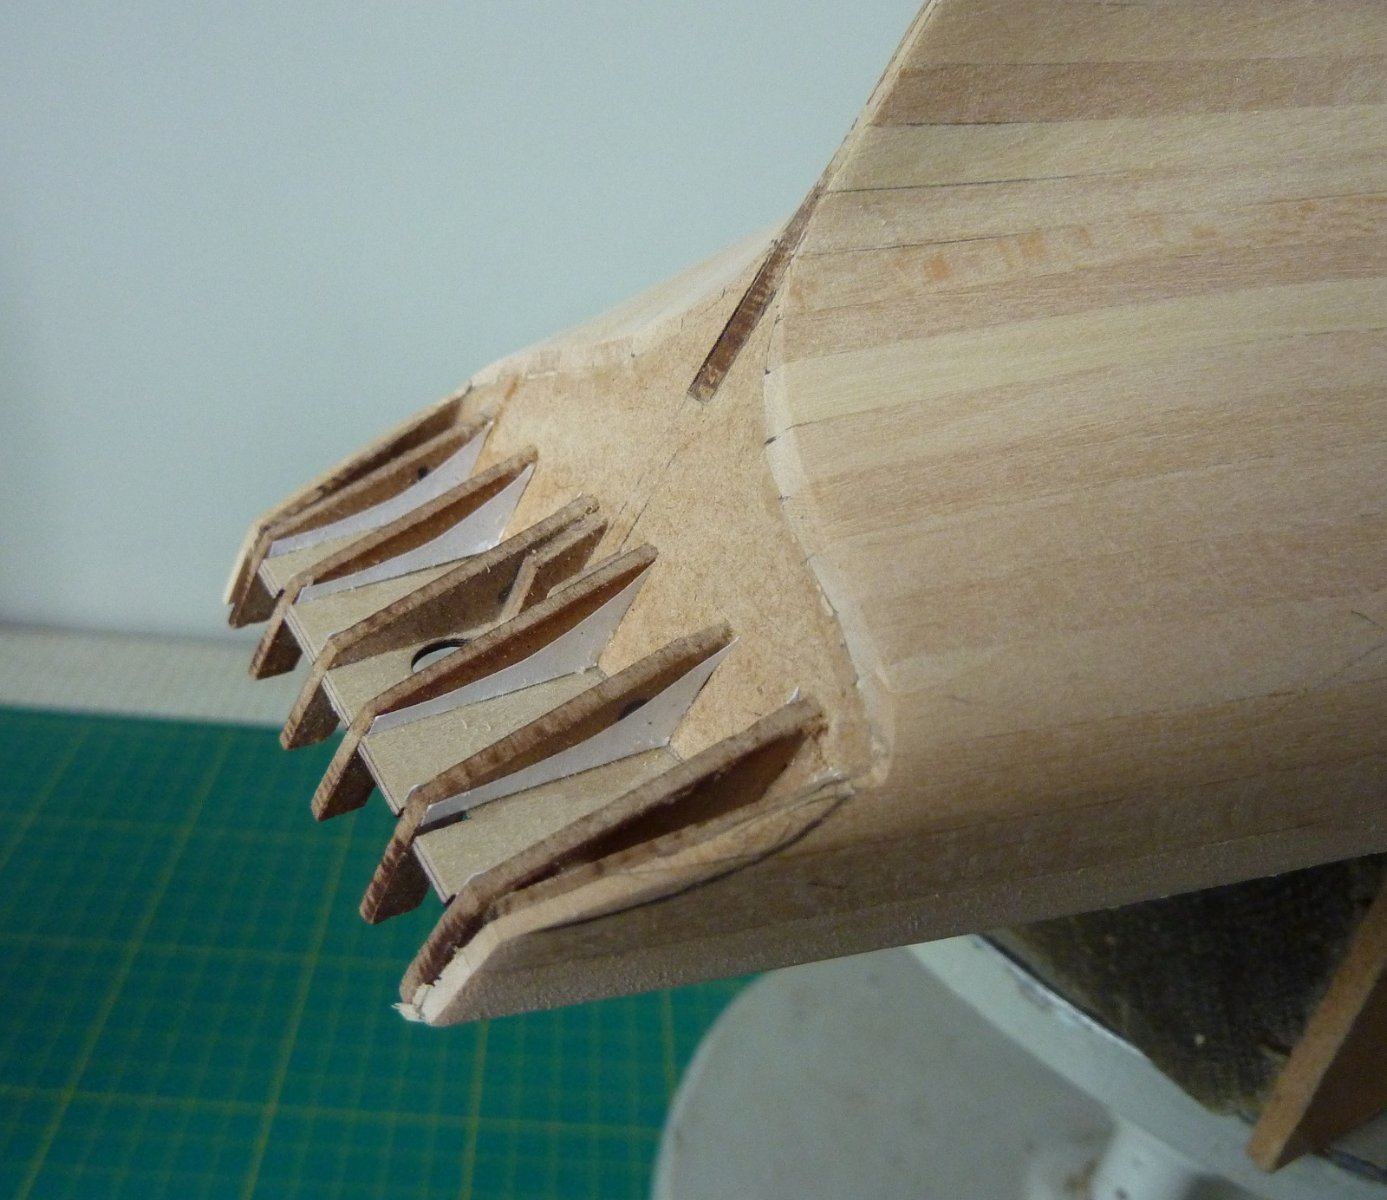
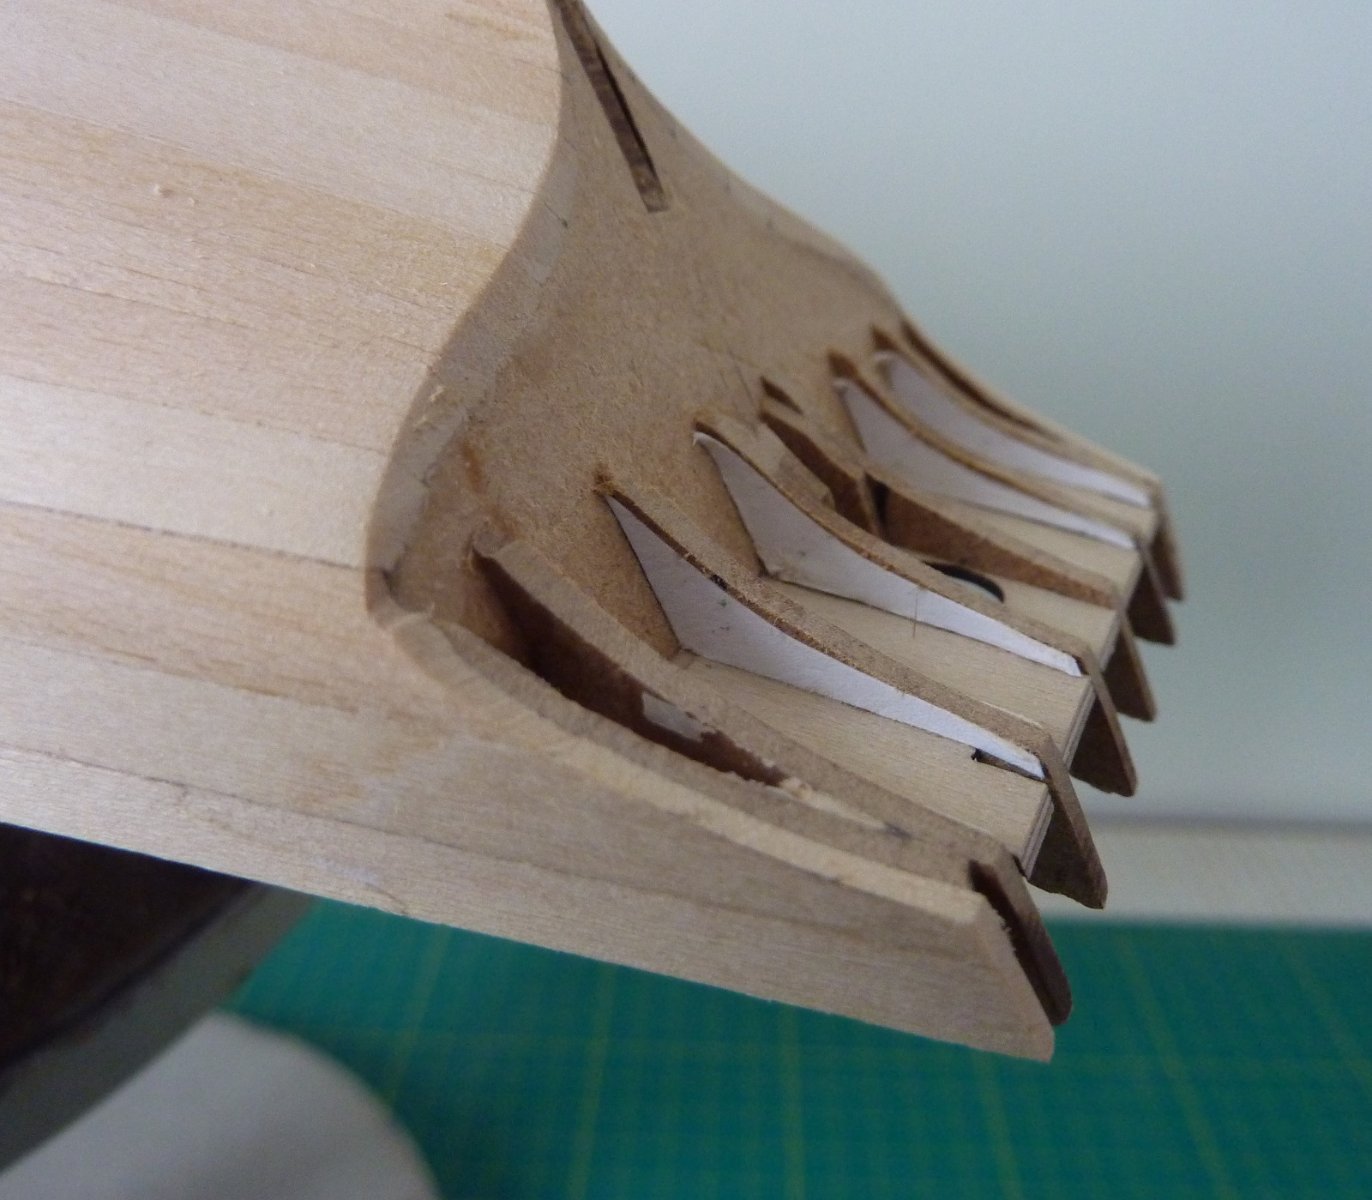
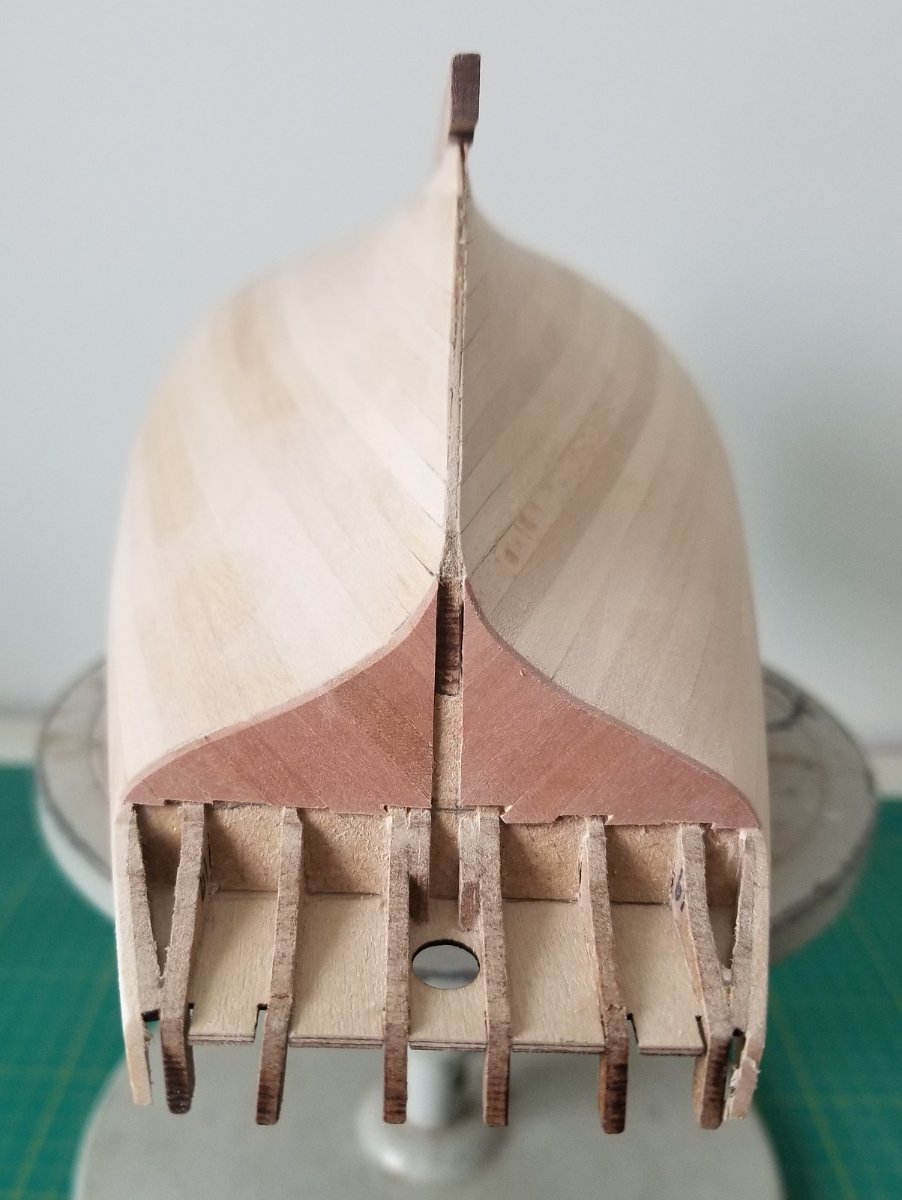
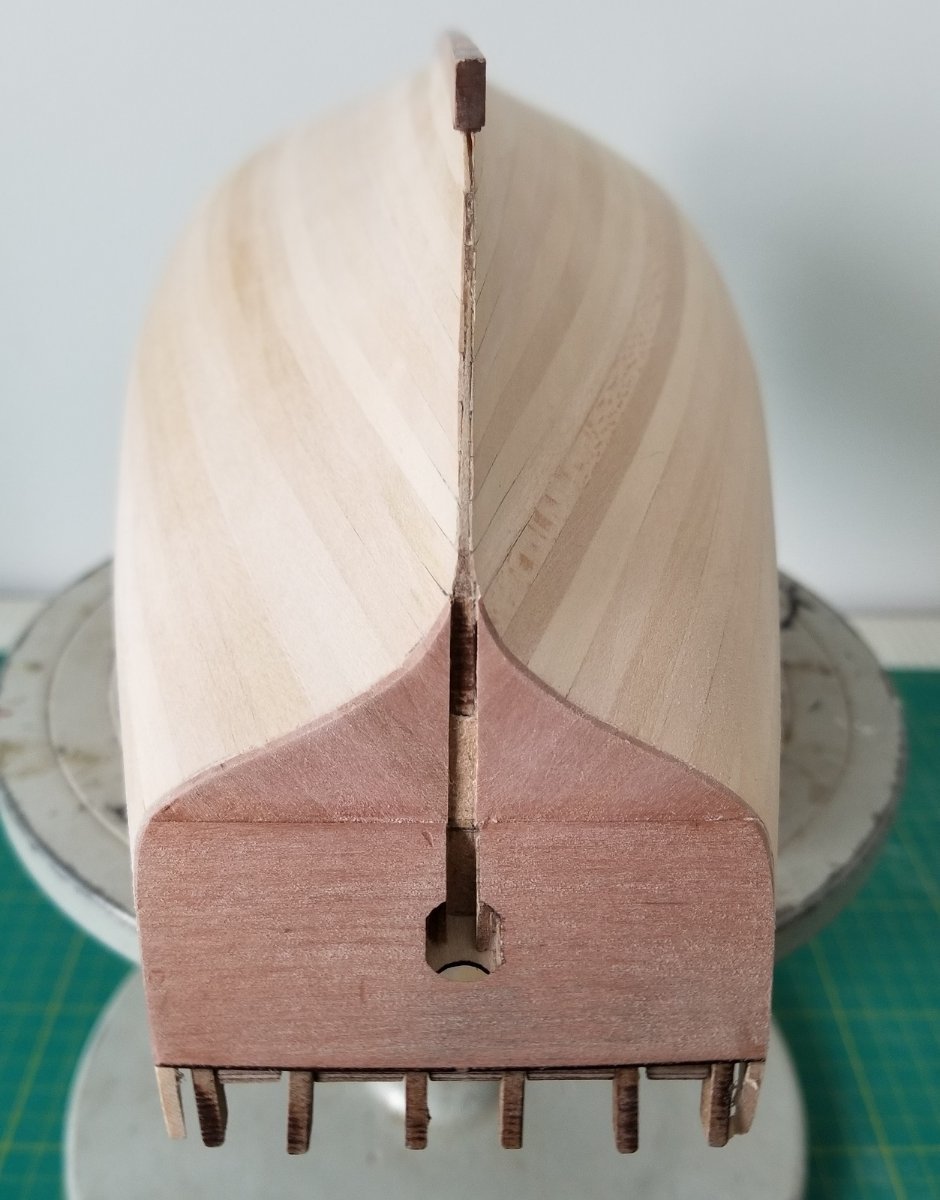
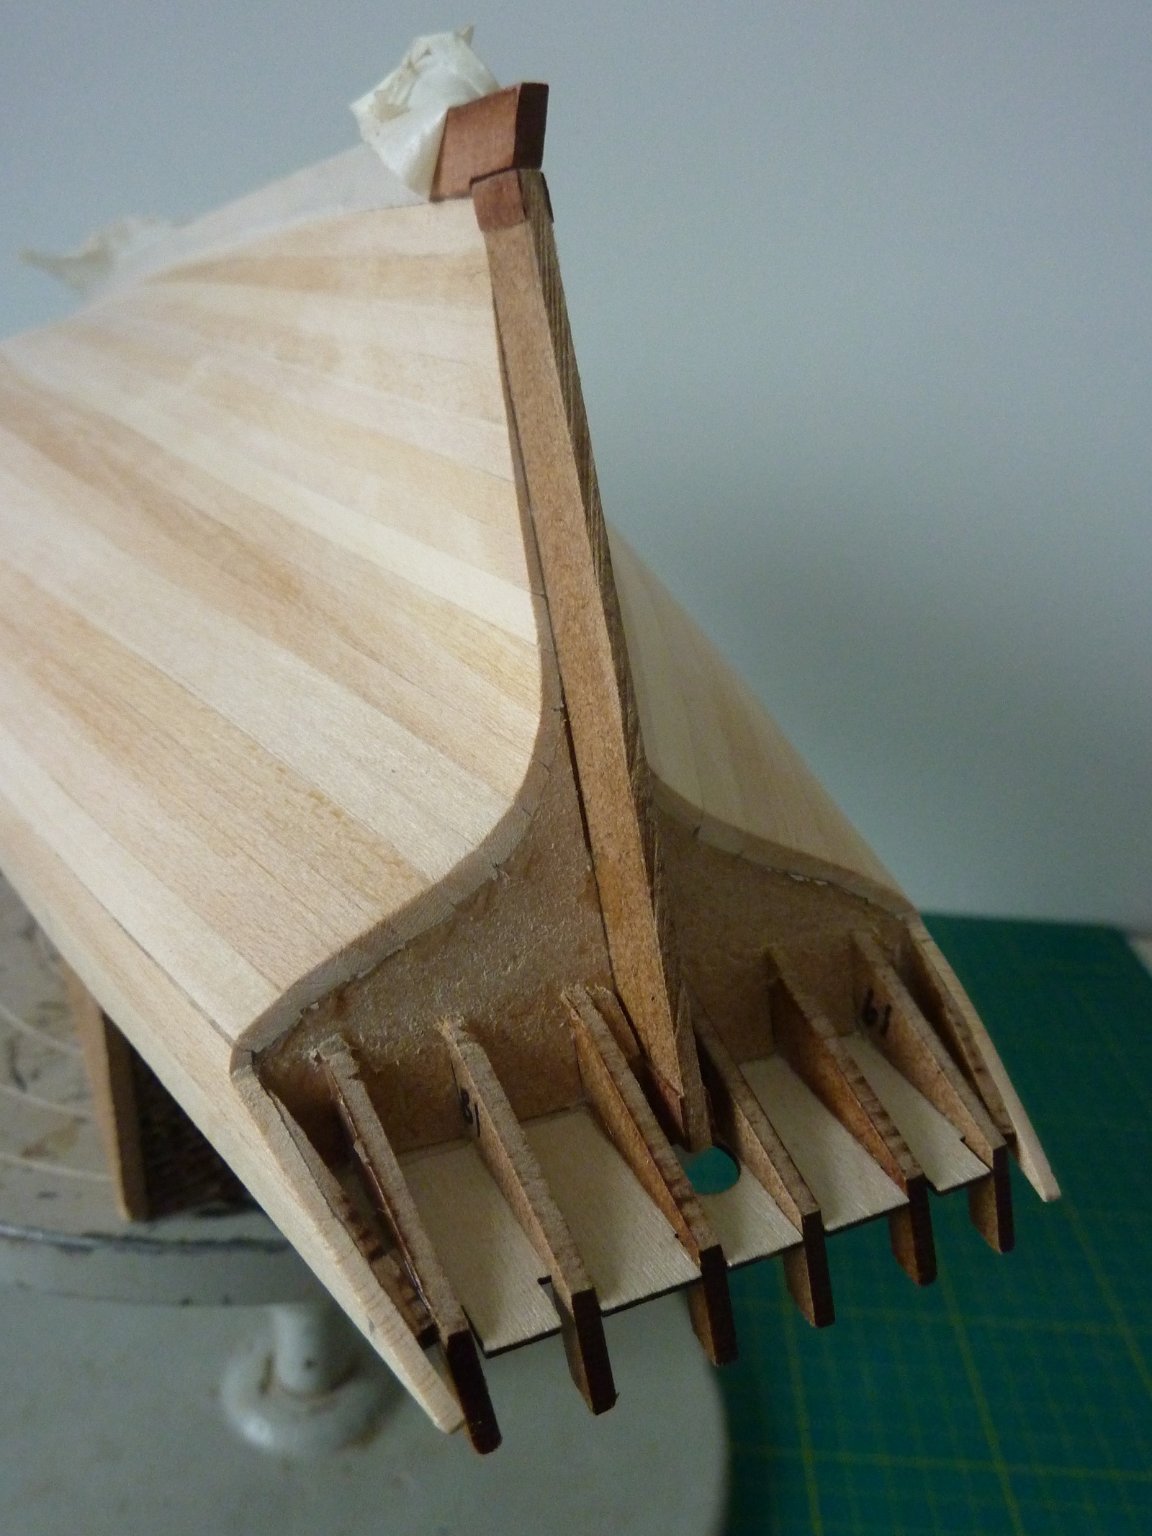
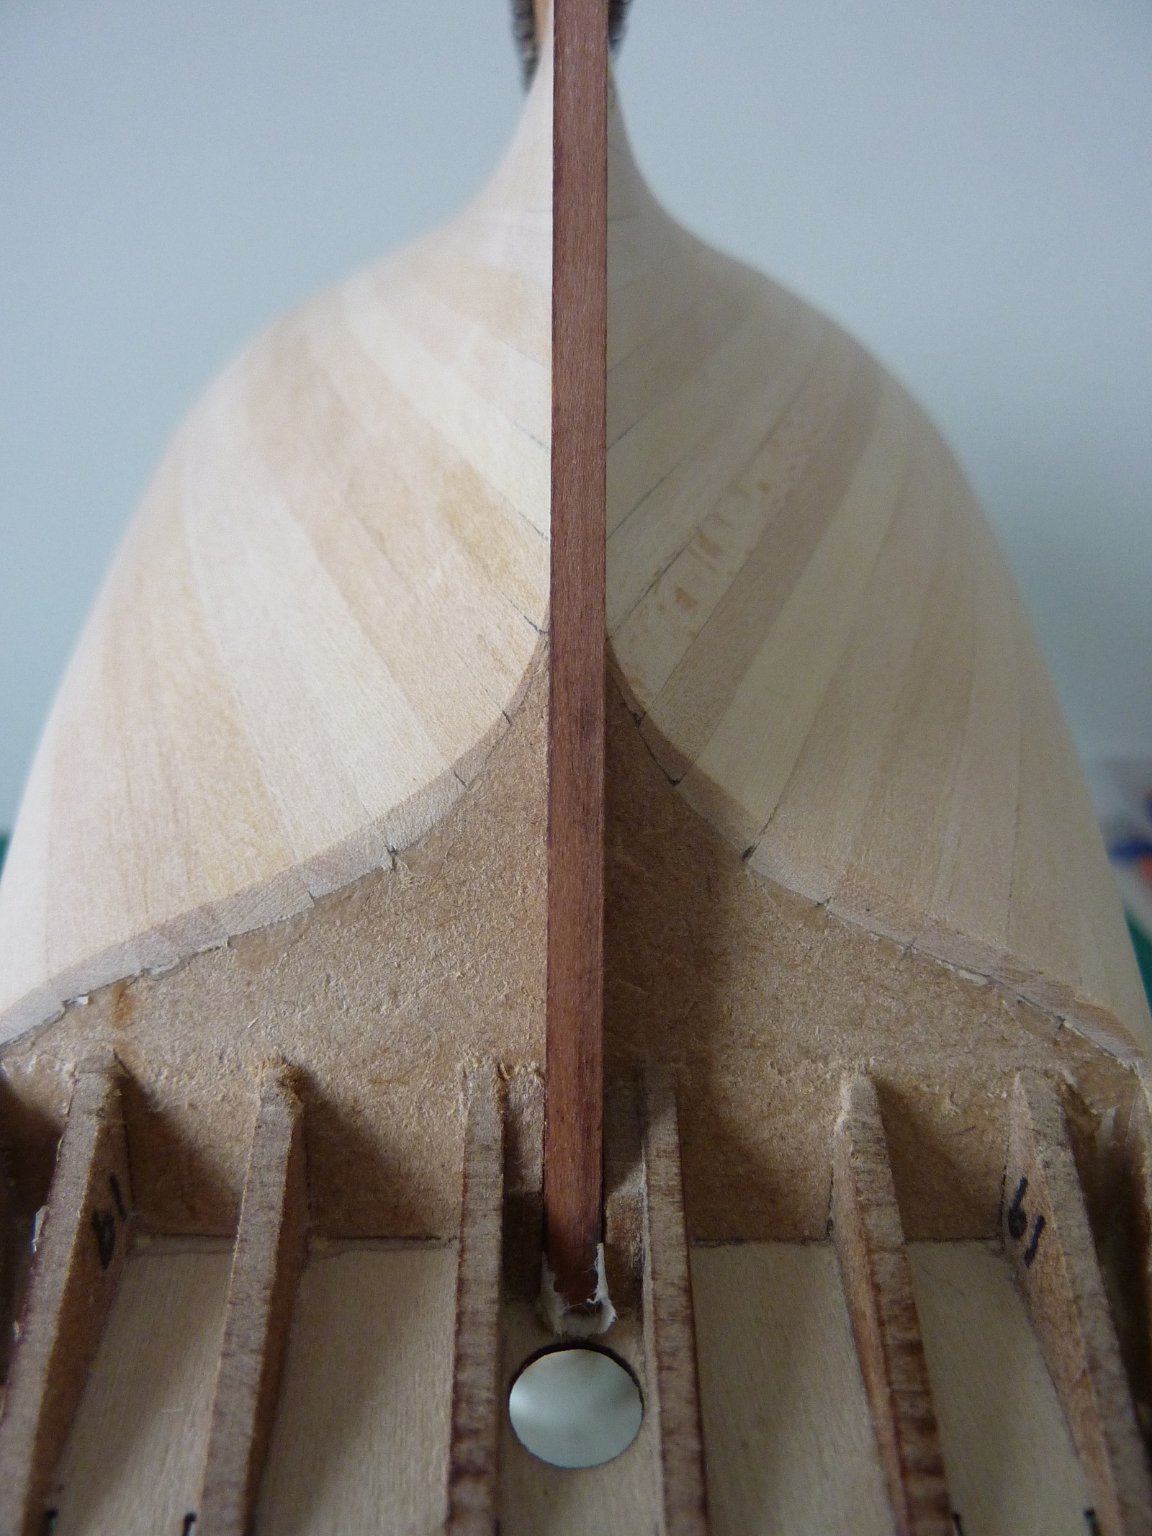
To complete the first planking the stern must be reduced to about 2mm to accommodate the sternpost and allow space for the final planking.
To achieve this, I cut out 2 packing pieces from the same material as the lower deck and rear transoms (2mm) and glued them onto the inner faces of transom parts 17. These will hold and support the top of the sternpost.
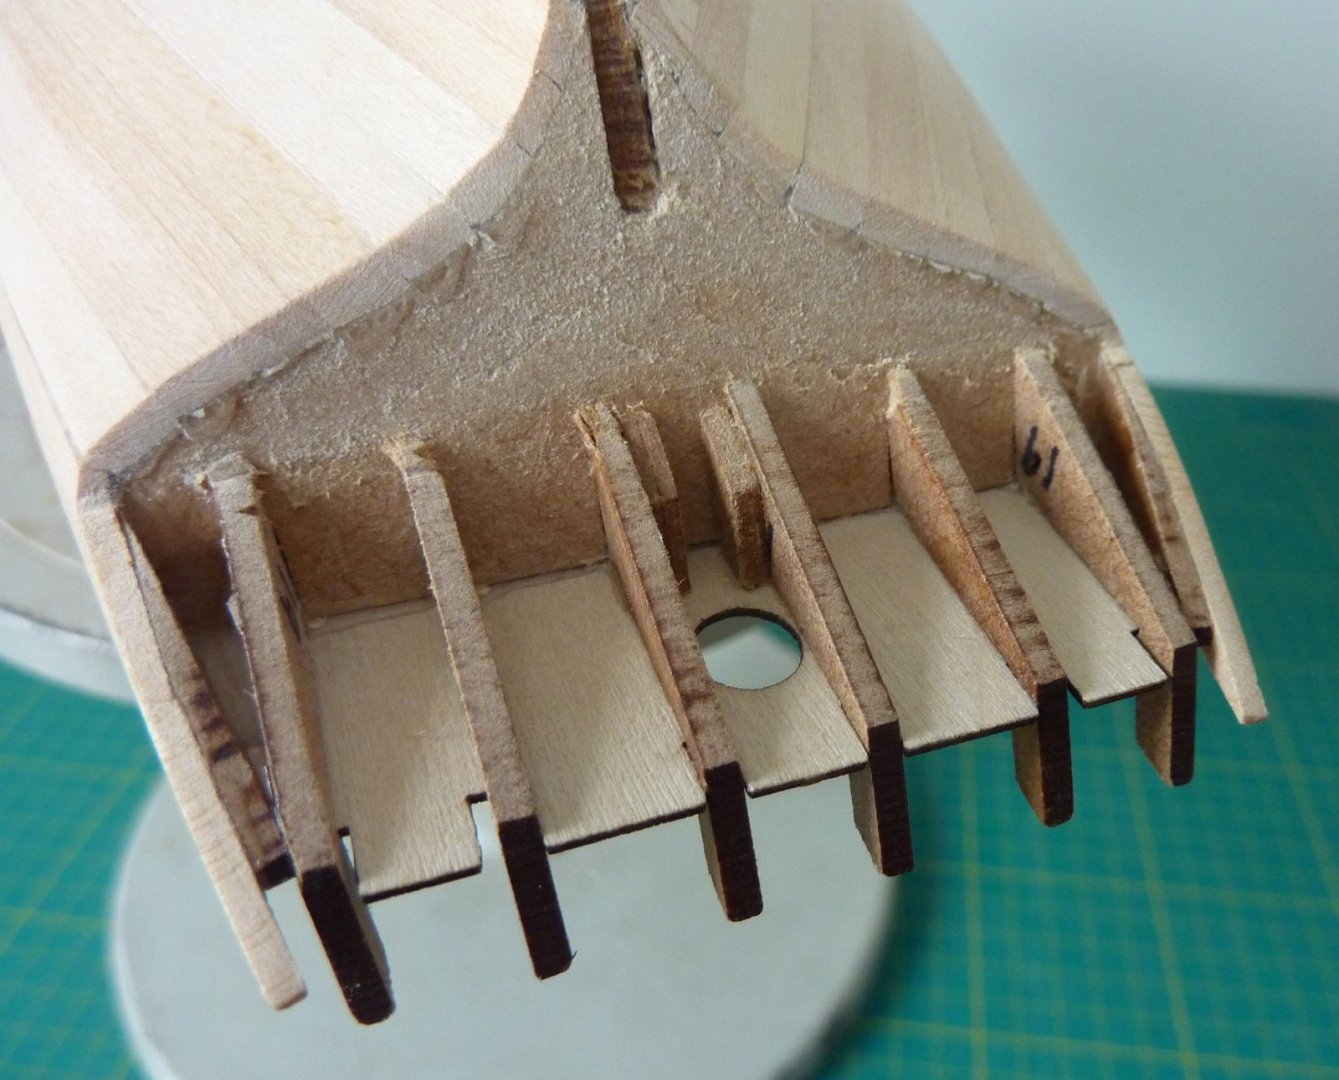
I then cut out a false sternpost from the same material and together with some 0.5mm padding pieces at the top and bottom fixed it temporarily in position. This will be used as a marker to sand down the stern planking to the same 2mm width. As the stern post is 3mm and the second planking is 1mm thick this should leave enough for some light sanding of the final planking.
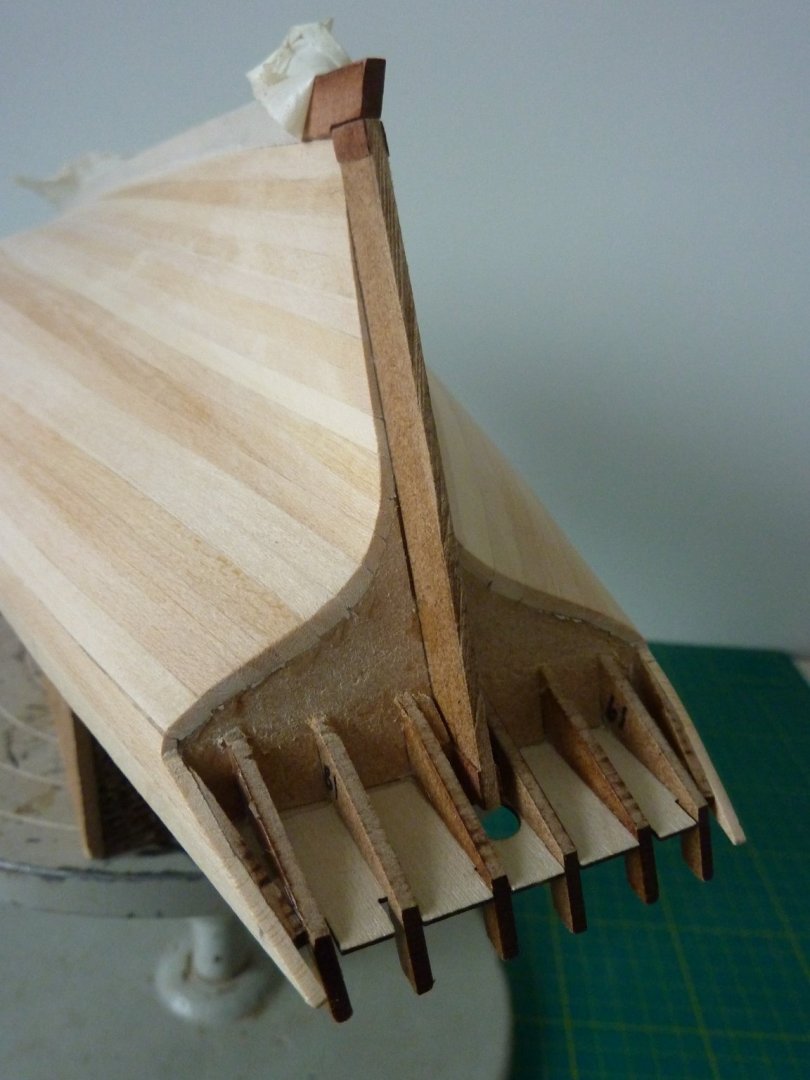
I also attached two short lengths of limewood which were offcuts from the first planking to the sides of the keel and held them in place with bulldog clips.
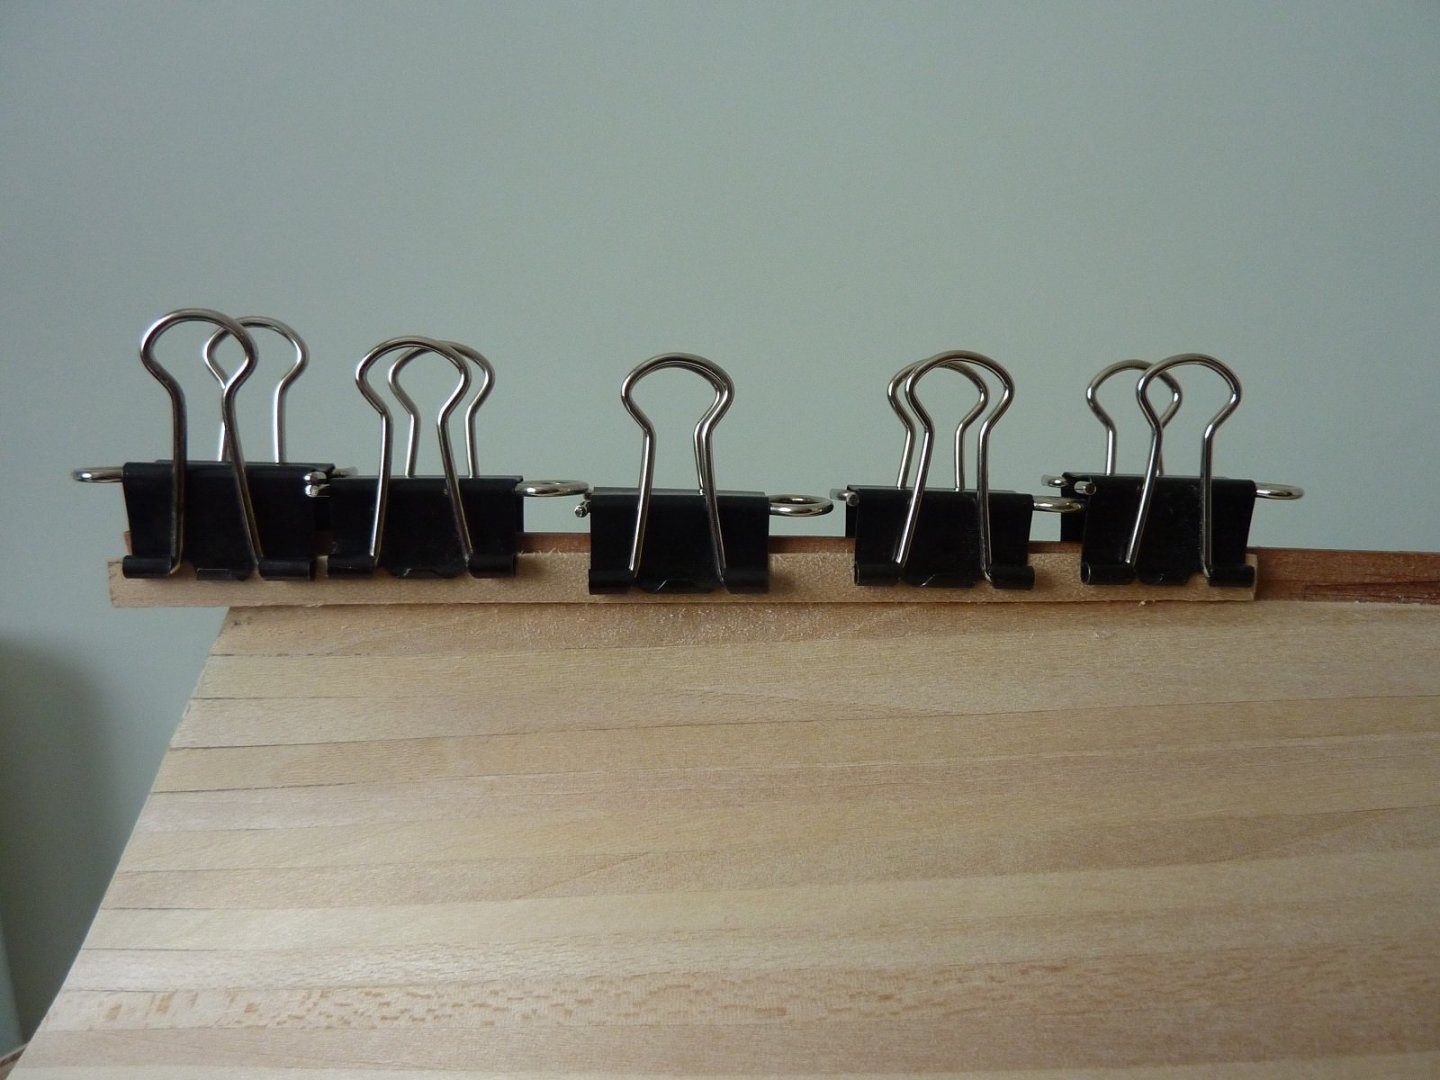
These pieces protect the keel during sanding and because of the notch in the rear of the keel held the foot of the false sternpost and actual sternpost in position.
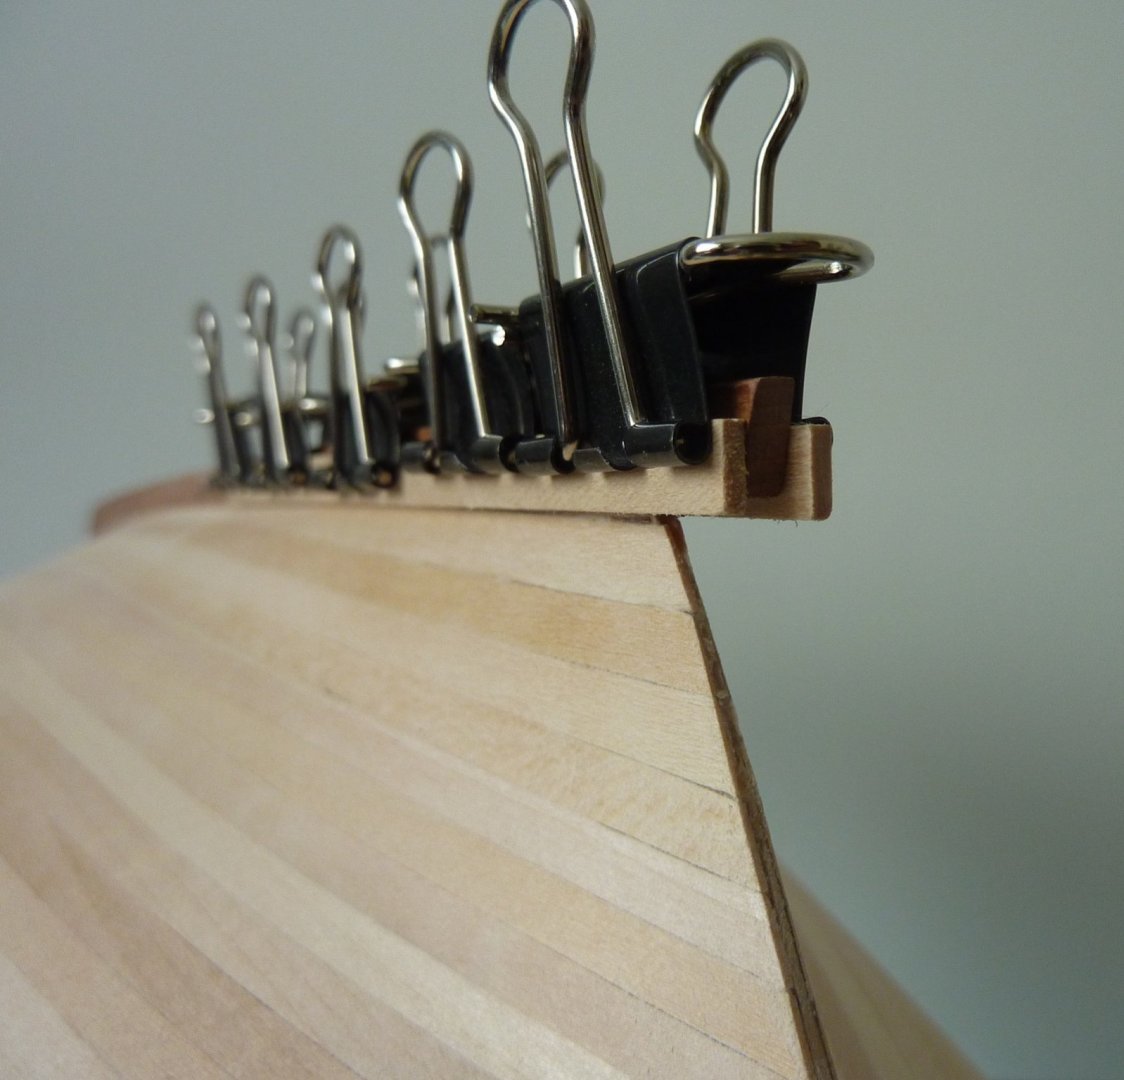
This allowed me to sand down the stern section and then slip in the sternpost to better visualise the gap left for final planking.
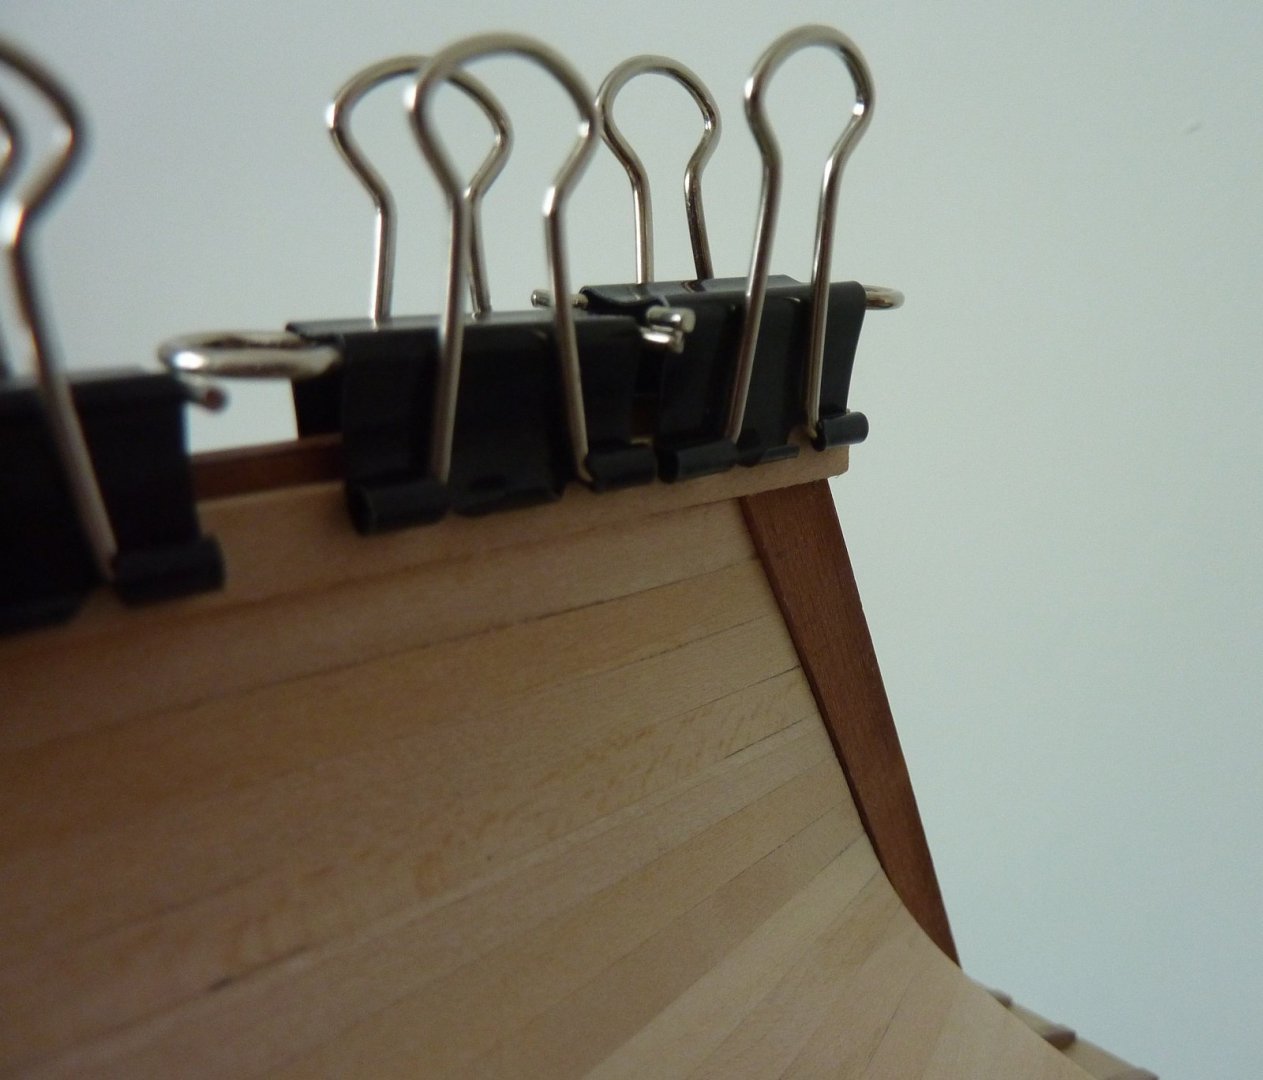
I now just need to add the top 4mm plank to finish off the first planking.
Phill
-
-


HMS Winchelsea 1764 by Stuntflyer (Mike) - FINISHED - 1/4" scale
in Member Build logs for the HMS Winchelsea
Posted
Stunning work Mike and and insperation to us all.