


tmj
-
Posts
773 -
Joined
-
Last visited
Content Type
Profiles
Forums
Gallery
Events
Everything posted by tmj
-

Good 'Hobby Quality' Metal Lathes
tmj replied to tmj's topic in Modeling tools and Workshop Equipment
I'm actually eyeballing a used Unimat jeweler's lathe right now, wooden case and a handful of accessories included. Not sure if I'll ever want to cut threads, as so far I haven't yet had the need to do that. I typically use taps and dies when threads are required. I'm reading everyone's posts and simply trying to narrow things down. Keep the banter going and I'll surely land on something for certain real soon! Thanks for all of the feedback, so far! -
Good 'Hobby Quality' Metal Lathes
tmj replied to tmj's topic in Modeling tools and Workshop Equipment
Well said David! Small, occasional parts of medium precision will be my only use of such a lathe. I have large, accurate lathes at work, but they are no fun. I want a lathe to make small, not extremely precise parts while watching TV and relaxing at home with my 'unprecise' hobbies. Brass or steel cannons, wooden stanchions, aluminum doodads, etc. Fancy, 'yes'... 'precise', not so much! 🙂 -
Good 'Hobby Quality' Metal Lathes
tmj replied to tmj's topic in Modeling tools and Workshop Equipment
Very impressive, and 'also' quite informative, Julie! Something tells me that you also probably know what E=mc² 'truly' represents! 😏 -
Good 'Hobby Quality' Metal Lathes
tmj replied to tmj's topic in Modeling tools and Workshop Equipment
What do you 'love' about it? Elaborate, please! -
I want a lathe. There are lots of them out there. Some are good, some are bad... and prices are all over the place. I'm not interested in a wood lathe as I already have one of those. I also don't need a $3,000 dollar metal lathe. I'd never get my money's worth out of something like that! Have any of you guys bought any of those cheaper table-top 'Amazon' lathes, Proxxon, etc.? I'd like to know what your firsthand experiences have been with your machines. Please, don't respond with "I've seen," "I've heard," etc. I've seen and 'heard' too! I want to hear facts from people who actually own and use these machines.
-
La Renommee 1744 by ChrisLBren - 1/48 - 2025
tmj replied to ChrisLBren's topic in - Build logs for subjects built 1501 - 1750
Mike, take a look at this. There are a lot of videos out there about sharpening scrapers, but this is my favorite. A little more work than a lot of the methods shown, but I prefer doing it this way. -
La Renommee 1744 by ChrisLBren - 1/48 - 2025
tmj replied to ChrisLBren's topic in - Build logs for subjects built 1501 - 1750
"Beautiful!" -
Super-sonic reports vs surface area and velocity can be quite violent indeed, however. The indirect damage, via a small body (cannonball), simply travelling at supersonic speeds would be minimal indeed. Such a small object simply flying through the air might burst a delicate eardrum if zipping within an inch or so of someone's ear, but I doubt that much more damage would occur. Could cannonballs fly that fast in the 18th century? 'Yes', they actually 'could'... but they'd have to powder the behinds of those cannonballs close to the maximum charge allowed before blowing up the cannon! Not a good thing to do if you intend for that piece of artillery to survive the battle! Odds are that most of those cannonballs were flying below the speed of sound where minimal effect would be noticed until that ball actually 'hit' something, then all hell would break loose, splinters would fly, rocks would become deadly projectiles, etc. Reports of 'Wind' injuring and killing people were likely nothing but circumstantial observations made by folks who were too damned busy being scared to death, during battle, to truly pay attention to who really got hit by what! Lots of 'legends' come to life from stuff like this. Gregory 'Pappy' Boyington is a perfect example of exaggerated truth! He's definitely one of my hero's, but if you read 'his' book... you'd also do well to take most of it with a grain of salt. As with 'anything'... take great care in what you truly choose to believe! 🤔
-
Looks really good Bryan! Keep an eye on how those port and starboard planks align with each other at the bow and the stern. Your math seems to be working well, however. You also sometimes have to ditch the math and go by eye alone! Math is perfect, but our human hand crafting methods... 'not so much'! If it were 'me', I'd put the next 'port' upper plank on first, then ditch the math for the starboard side. Make 'em look even on both sides and then proceed with the math again until things once again start to get out of alignment, then revert to the ol' eyeball once more. Keep up the good work! You're doing a great job!
- 45 replies
-
- 4
-

-

-
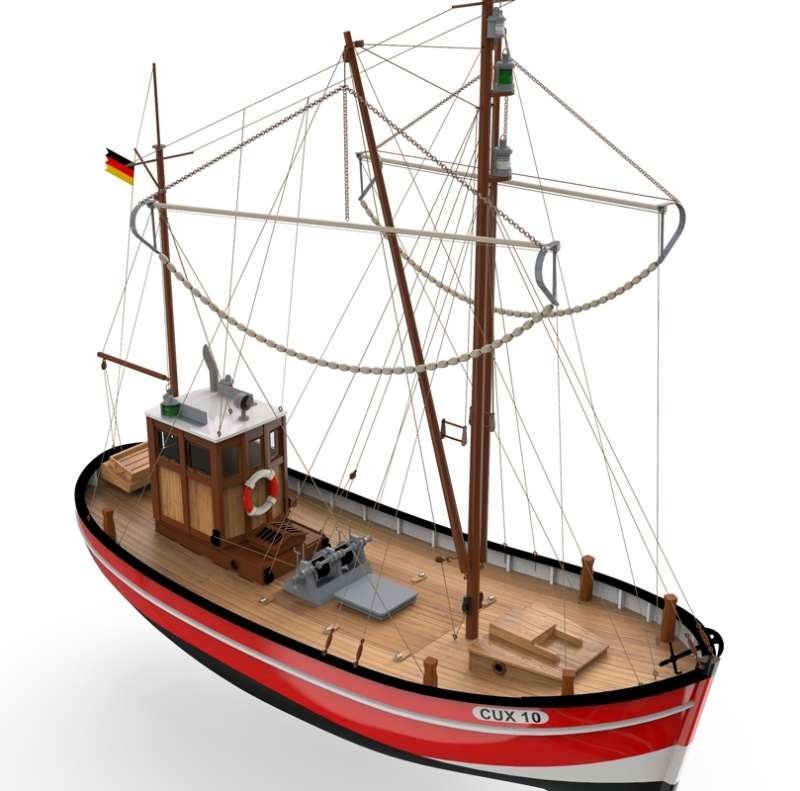
- Fischkutter
- Laser Creation World
- (and 1 more)
-
I can relate to that 110%! I'm currently playing with a simple "Launch That Never Was!" An easy little build just for fun and relaxation! I'll go back to the 'other' stuff next year! 🙂
-
I choose things that interest 'ME'! I do 'NOT' choose thing that interest 'others' more than 'ME'! You need to really like what you're working on if you plan to enjoy it and do a good job on it. You also need to know your current skill level and not exceed that less you seek certain failure. So... how do you choose a ship to build? You find something that appeals to 'you', something that you're capable of... and you build it!
-
I've had similar anomalies occur myself. I have to delete the entire post when that happens, then repost only what I want seen. Can't say why stuff like this sometimes happens but it does. By the way... very fine-looking model, fine 'indeed'!
-
Need small repair done on jibboom of Le Superbe model
tmj replied to Mr. Matt's topic in Masting, rigging and sails
I agree with everyone so far. #1, the repair should be quite simple. #2, "Do Not" mess with the splintered ends where the break is. Simply 'dob' some clear PVA glue into the splintered ends, press the two parts tightly together, wipe all squeeze-out off with a 'very moist' paper towel, cover the joint with saran wrap, then 'tightly' wrap the freshly glued joint with string until the glue dries. Keep a close eye on things for the first half hour or so just to make certain that you have the splinted pieces absolutely straight, and nothing shifts, and/or goes crooked on you while the glue is setting up. be creative in bracing to temporarily hold things firmly in place. Give it a solid day or two before unwrapping the bandages. Being wrapped in cling wrap will trap the joint in a humid environment and effectively delay the PVA glue's typical drying time. Once unbandaged, give it another day to dry, then use 400 grit sandpaper to smooth things out. You'll then need to observe the tint/colors of the surrounding finish, paint, etc. and determine what type of 'new' finish would best make your new repair blend in with its surroundings. It's doubtful that you, nor anyone else will ever make the repair totally invisible, but if you do a good job of this repair nobody will ever notice it unless they put it under a microscope, per se. Last, but not least... if there is uneven tension on the rigging, wanting to pull things in one direction, you'll need to readjust that tension to balance it out and keep such extra stress(s) off of that repaired joint. Not totally necessary, but good insurance for future integrity and longevity! Good luck! -
You'll find something else 'bizarre', I have no doubts! FWIW, speaking of bizarre... when I lived on Treasure Island, in Florida, there was a 'Tops' grocery store that had boat docks on the intercoastal waterway. While hanging out on 'my' dock, about a mile away from the store, I often saw this 'teeny-tiny' little homemade boat go by, heading for the grocery store. I honestly don't think it was even as long as a 'bathtub'! Barely enough room for the driver and a couple bags of groceries, LOL!
-
Without belaying pins, how would the sails have been properly set, tied off and fixed into any needed position for 'sailing'? The sails would just swing wildly in the wind with nothing to hold them in place!
-
"Where can I find hull seeds that will grow trunnels like that?"
-
Ship base display advice
tmj replied to mastic's topic in Painting, finishing and weathering products and techniques
If they are like 'this', you could just drill all the way through the pedestal and run a long screw through the bottom of your base, through the pedestals and into/through the bottom of your keel. Depending on the type of screw you use, you might need to drill/tap threads into your keel for a good 'grab' (machine screw) or just drill a proper sized pilot hole through the keel to keep the screw from bulging or splitting the keel (wood screw).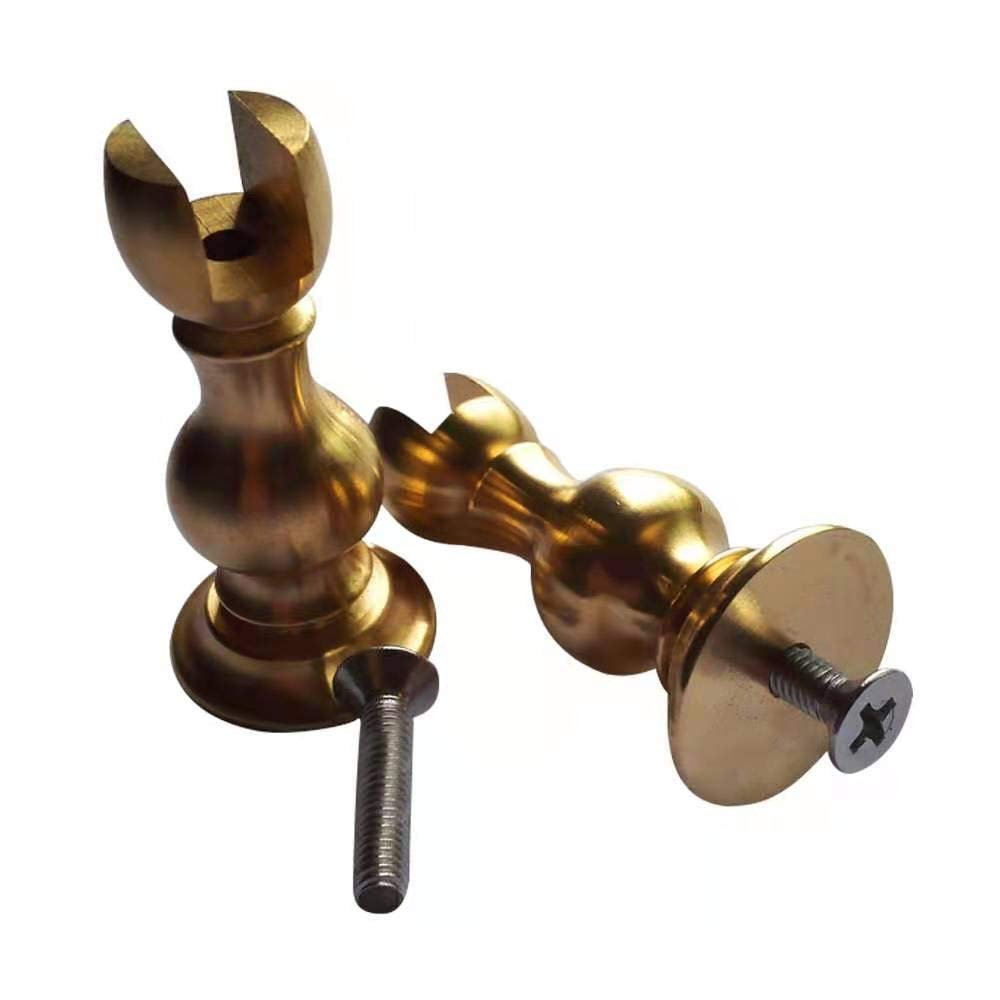
-
Maybe 'this' stuff will be helpful... 1582619702_1495448238-bb474-cux-87-main-plan.pdf


- 45 replies
-
- 5
-
-
-
- Fischkutter
- Laser Creation World
- (and 1 more)
-
Yep, this would have been a coastal vessel used for shrimp, herring, cod, etc. in Bavaria. Nice subject!
- 45 replies
-
- 1
-
-
- Fischkutter
- Laser Creation World
- (and 1 more)
-
Deck coloring
tmj replied to sgrez's topic in Painting, finishing and weathering products and techniques
"What Johnny said." I use mineral oil on my kitchen cutting boards to keep them oiled and to prevent the wood from drying out and cracking. Not sure I'd want to use it on my model ships as an under-coat below additional finish. If you're looking for a light-colored deck, sand it with 220 grit paper and give it two light coats of 'Tru-Oil'... then sand it again with 400 grit paper. The Tru-Oil will give it a warm, white oak sort of look. You won't notice any glue trails, either. -
Oh my... "That's NICE!" "Beautiful!"
-
I don't have a clue where they might begin, 'or' end! I don't care to guess, either! I only rendered what I personally see in the original photo... then rotated that 3D view a bit for better observation, consideration and thought. What If the engine was chain driven to the paddle wheels? Could the engine have been off centered to keep the chain(s) centered on the paddle shaft (or whatever it's called), and in such the PH was off set, to the opposite side of the boat, as a counterweight? I'm sure you know exactly where I'm pulling this curious train of thought from, LOL. Maybe I'm just trying to make ol' Billy a bit 'quirkier' than she really was!

