.jpeg.9d9bab3fa66f4349cae83f4155046894.jpeg)
rkwz
-
Posts
241 -
Joined
-
Last visited
Content Type
Profiles
Forums
Gallery
Events
Everything posted by rkwz
-
.thumb.jpeg.d239701c2f7247a100a3f432822c4eda.jpeg) Thanks for noticing, but yes those extra boats haven't been painted yet and I intend to rig them keel down as you mentioned. They are temporarily in place to hide my horrible lower deck cannons and deck paint work 🤫.
Thanks for noticing, but yes those extra boats haven't been painted yet and I intend to rig them keel down as you mentioned. They are temporarily in place to hide my horrible lower deck cannons and deck paint work 🤫. -
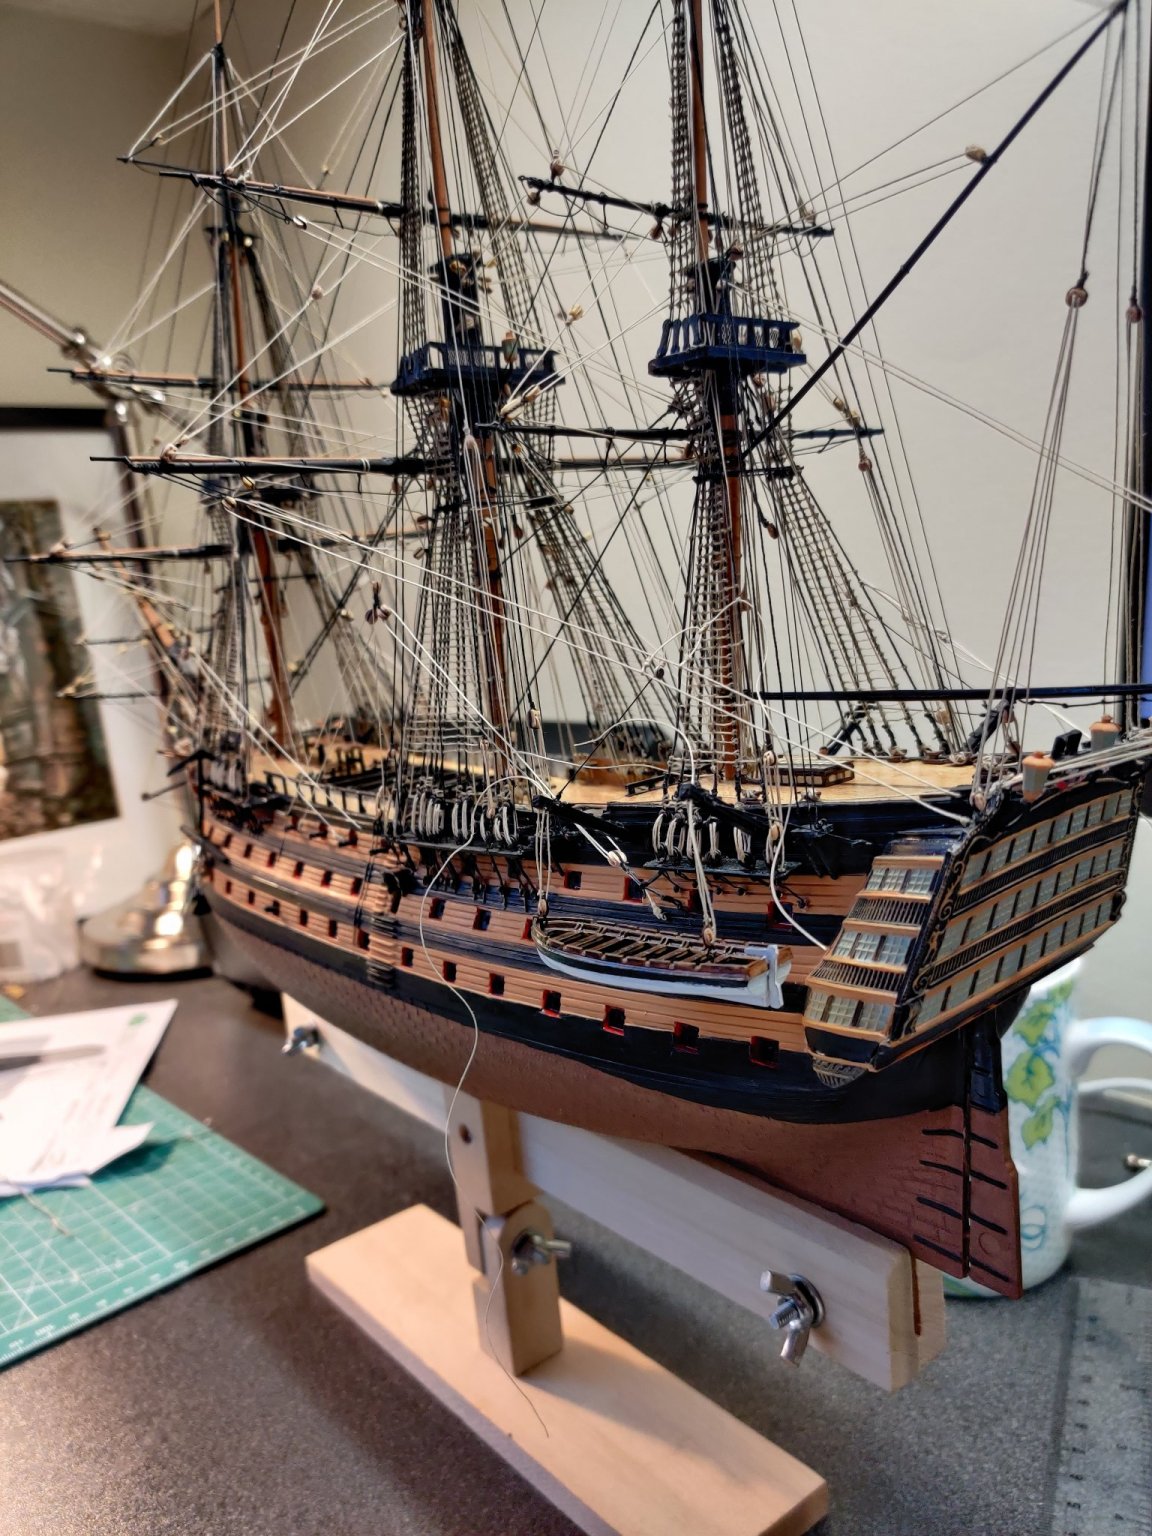
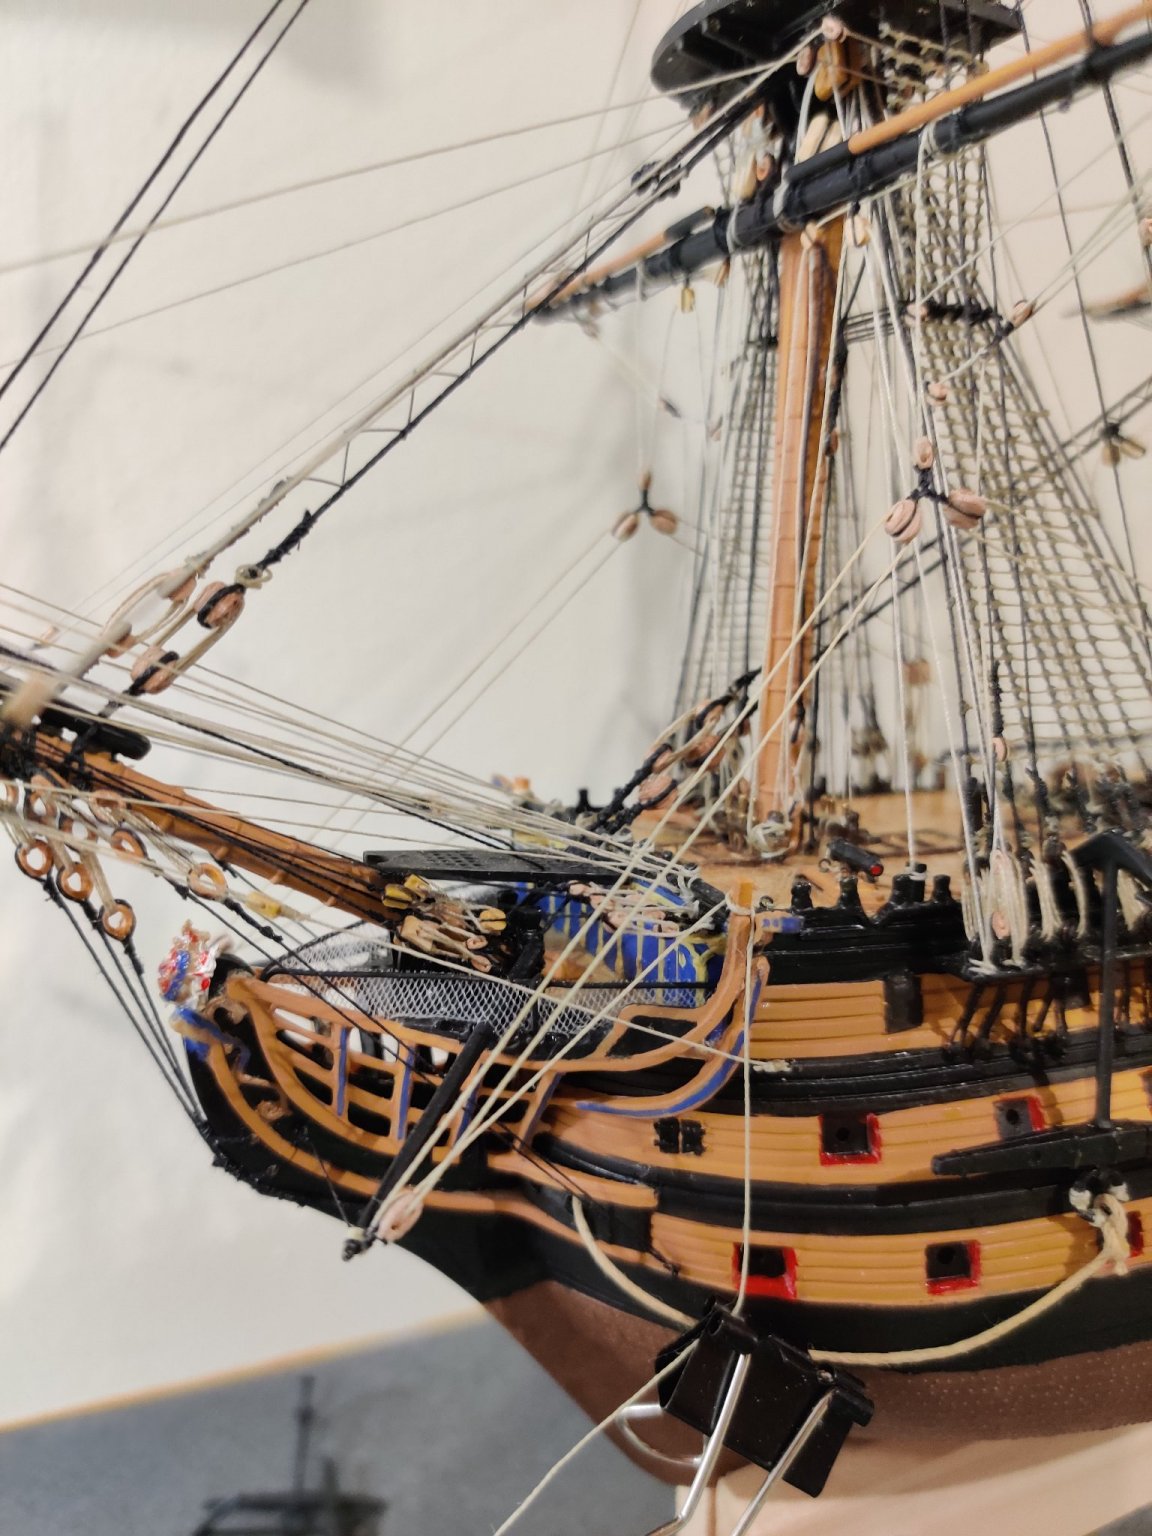
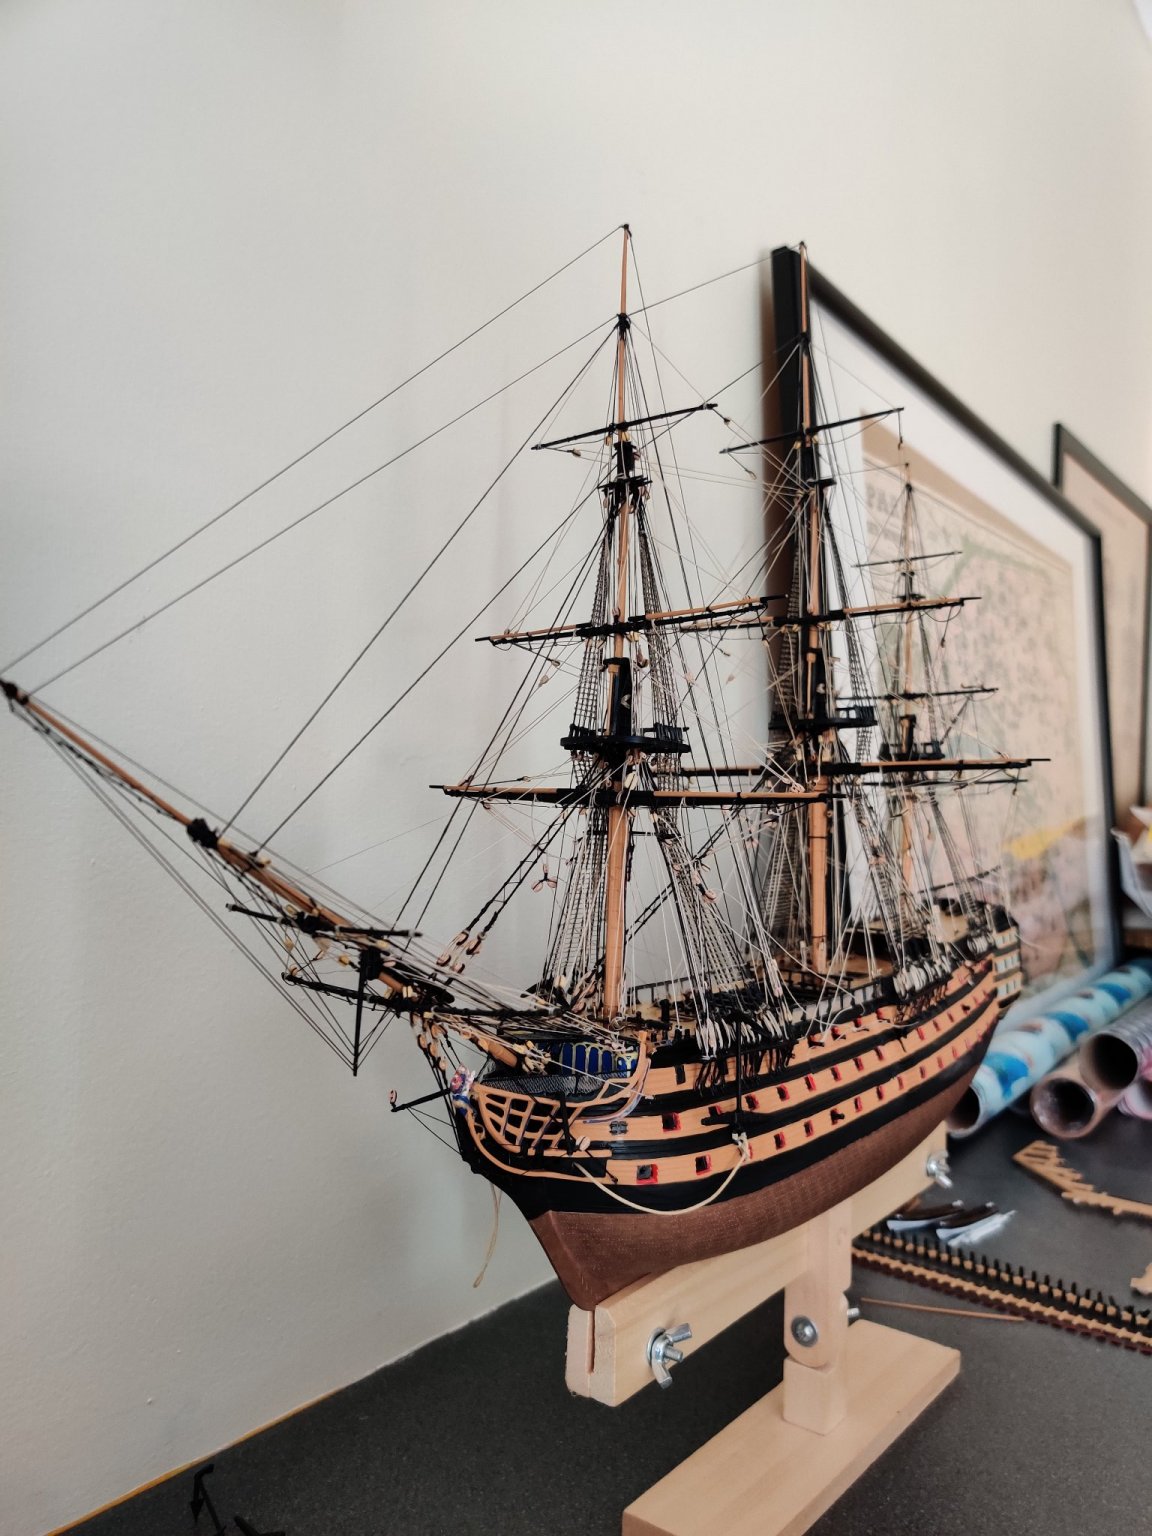
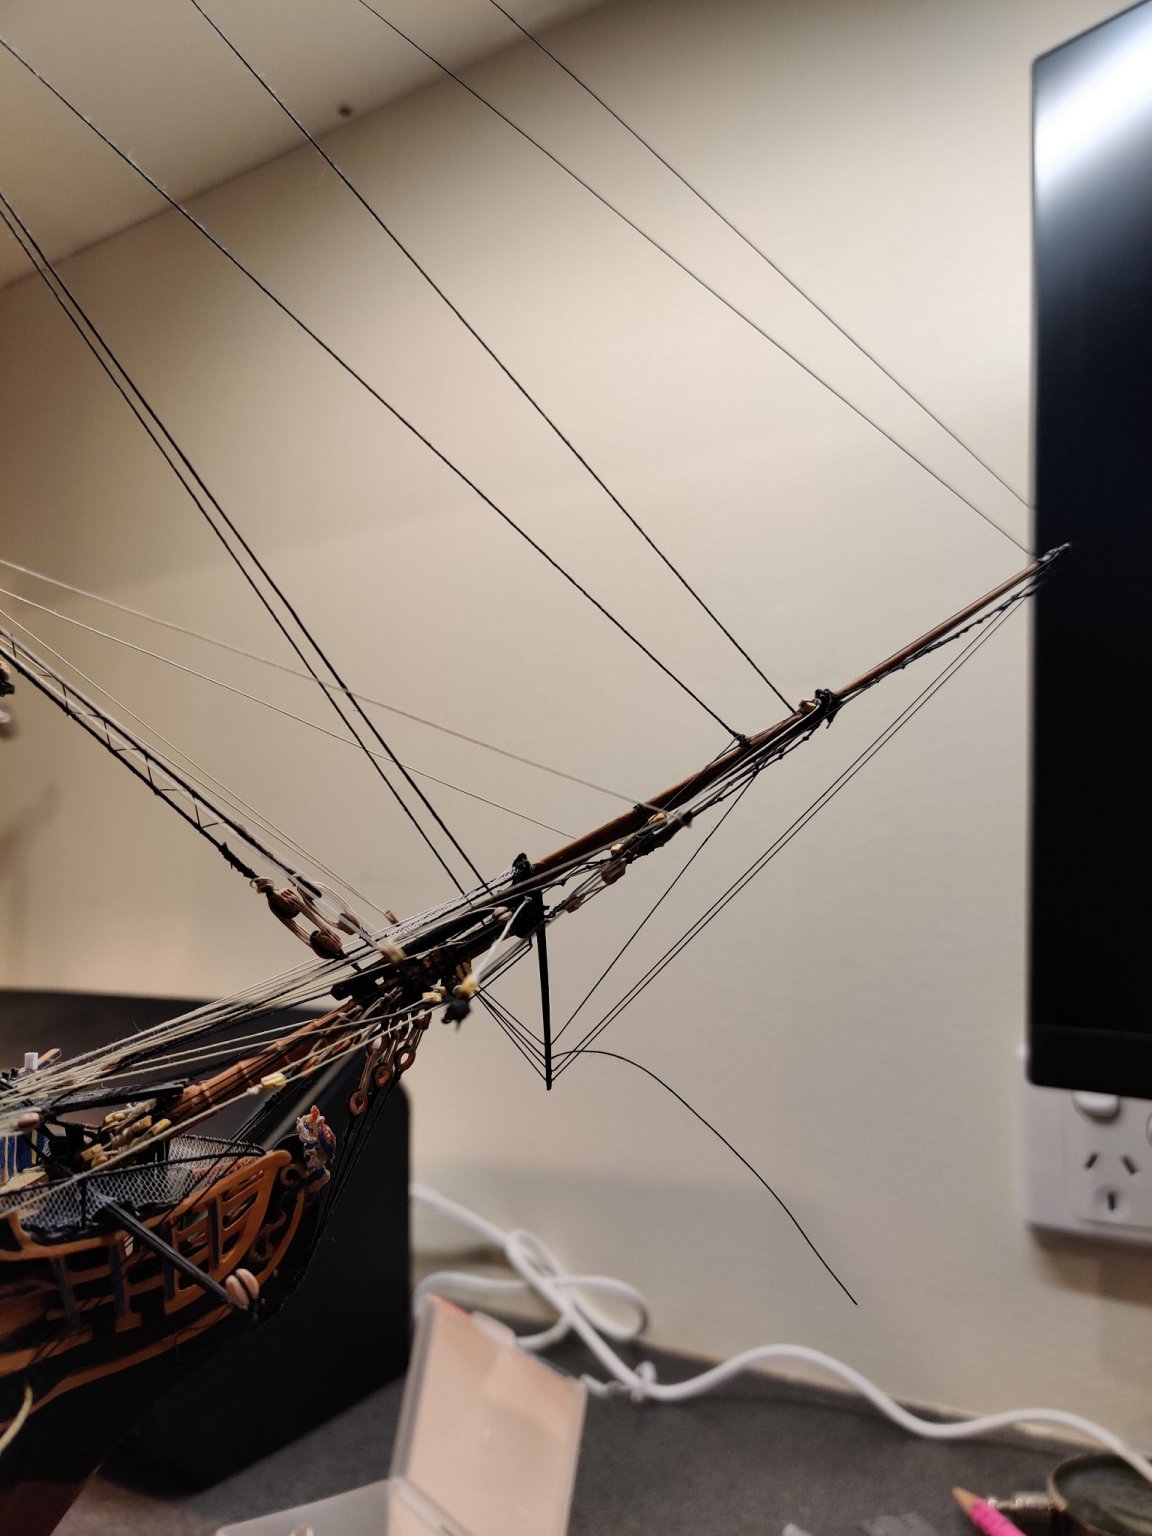
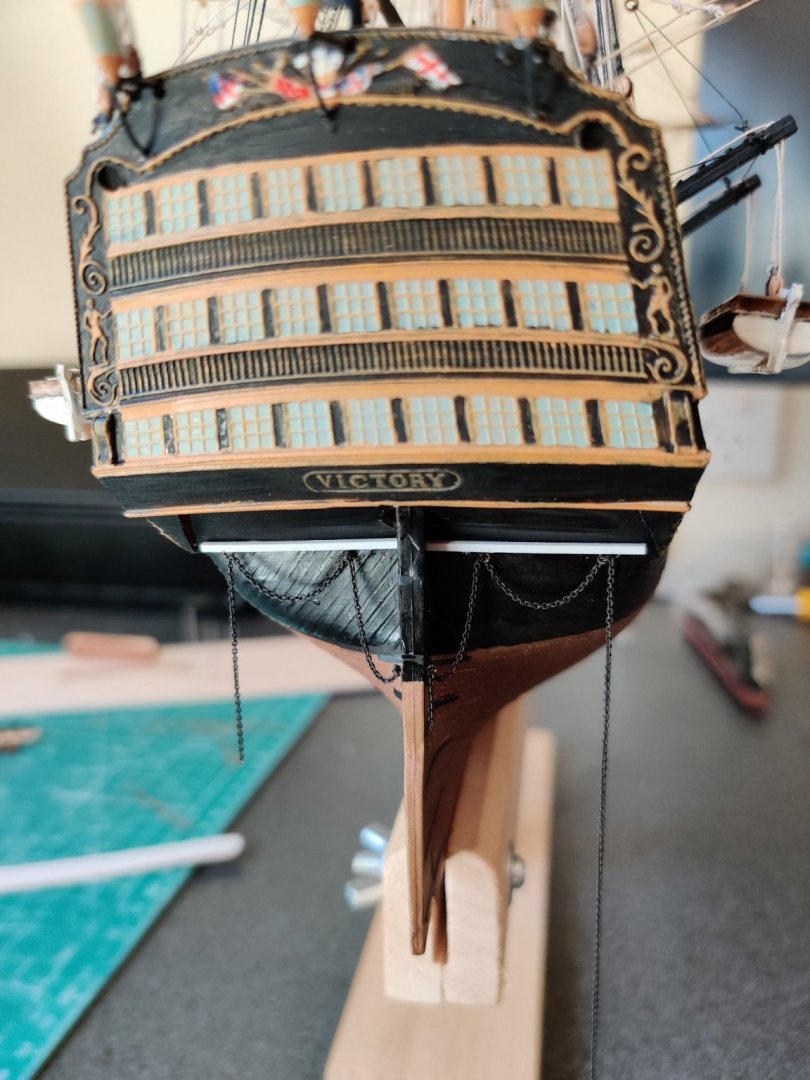
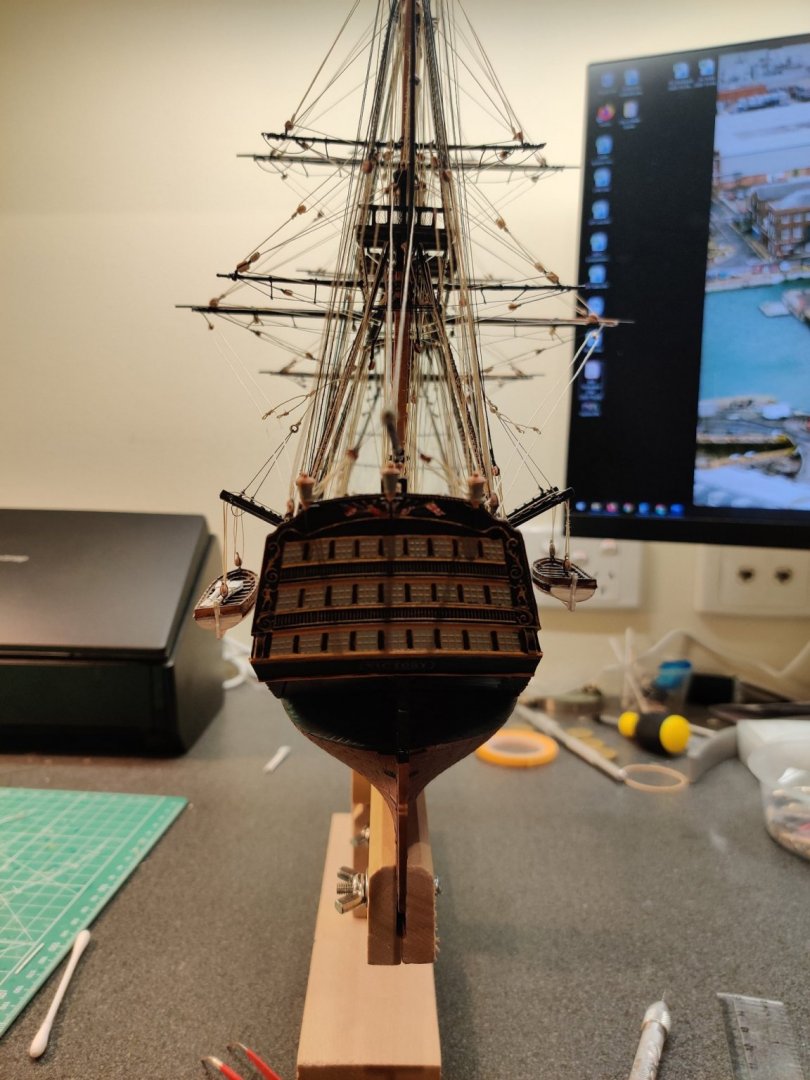
Bower and Sheet anchors rigged finally. Sorry if the photo isn't clear enough... Port Starboard Continued on with the gunport rig... Not a huge difference making eye splices by threading to itself so I resorted to overhead knots 😓 Getting there slowly. It is becoming difficult focusing and staying motivated to complete this model whilst shopping around for the next project. Cheers, Ron


-
Patrick, great to hear you are recovering well. The fresh air will do you good Wow, your Bounty becomes more impressive with each update, keep em coming!
-
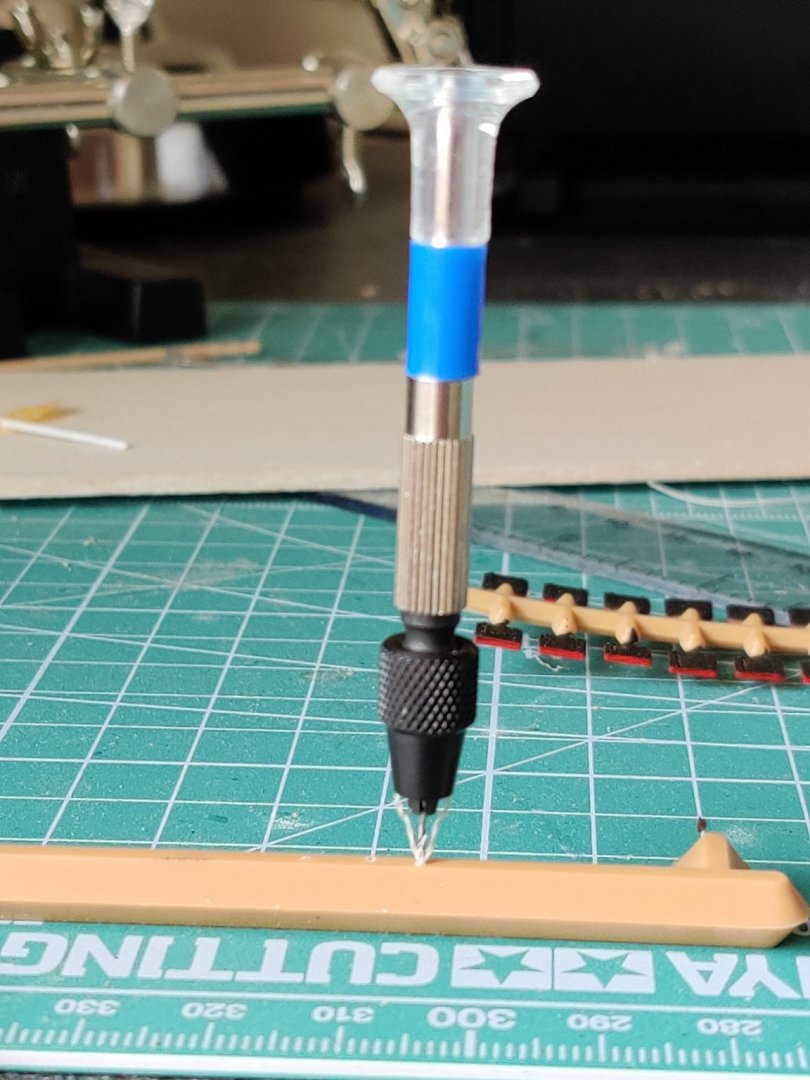
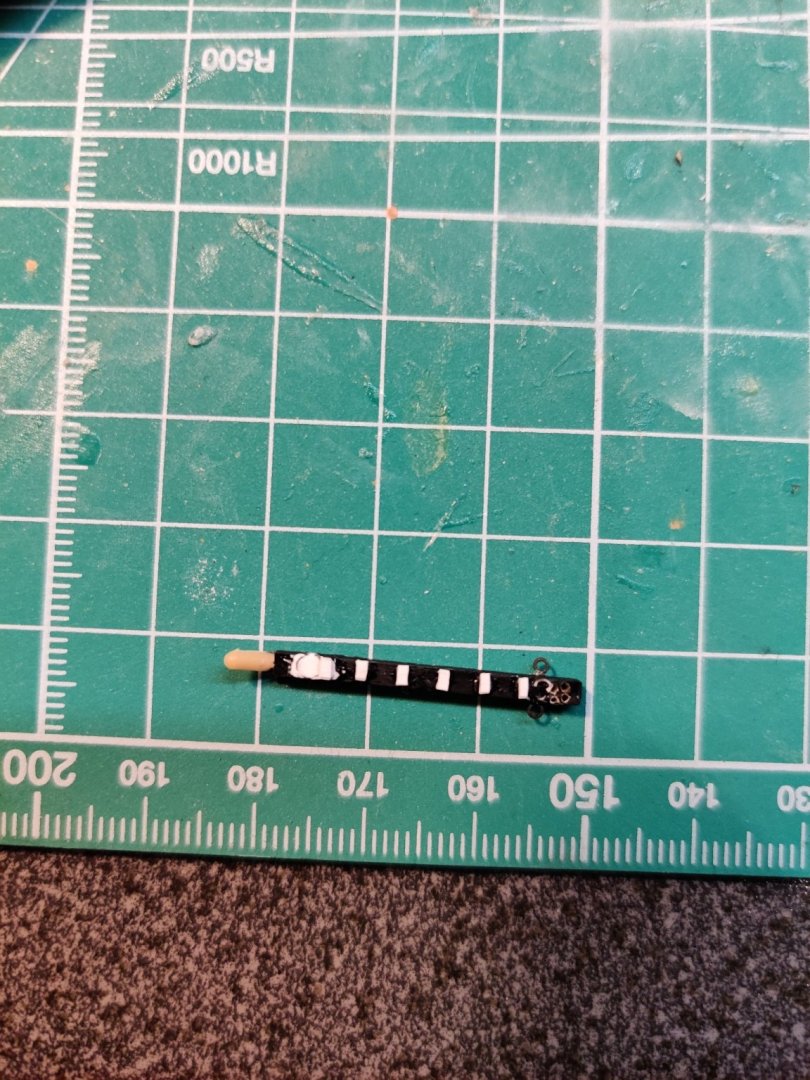
Sorry I couldn't help but rave about this new purchase I made today... This is the GodHand PBM Acrylic Micro Power Pin Vise and I wish I'd bought this ages ago. Having worn out a couple of chucks in my old Excel pin vise, I decided to invest in a more durable tool and this beauty certainly delivers! I think the chuck is made of hardened iron and there is plenty of leverage to drill tiny holes into plastic. Feels like drilling into butter.
-
That is an amazing and fine looking ship!
-
Wow that is excellent service 😮 I'm sorry to hear about your test results and hope you have a speedy recovery. Take care of yourself, Patrick! Cheers from Australia, Ron
-
Not an expert but my cheap and nasty method is to unfold a paperclip and use the pointy end to apply a tiny amount of CA. Later you can scrape off any excess hardened CA with a knife.
-
Wow, your model is really amazing. Especially like the tightly furled sails which I've heard is a more accurate depiction. 54lpi brass chain is ridiculously fine... I had some real difficulty hooking mine onto the eyebolts on the rudder. Not sure how I'll manage with the seized hook on the other end but we shall see. The only model of the Bounty I could find on ebay currently was some french guy selling an empty box (had to do a double take to make sure) 😂 I guess I'll just have to keep my eye out for this kit online...
-
Thanks Daniel. Seems like this build is never ending... I haven't forgotten the hammock netting in case you were wondering haha. Still tossing up some ideas involving putty, staples and tulle 😁
-
Only thought about the Golden Hind as I got my hands on a copy of Hackney's Mayflower guide #2... Also the Airfix Mayflower kit isn't very popular or easy to find over here... I definitely will consider the Bounty... You've sold me on the kit without a ship-load (pardon the pun) of guns to rig! Again I am having difficulty finding an AIRFIX Bounty kit here in Melb, but the Revell version seems to be readily available 🤔 Meanwhile, I finally got my hands on some decent scale brass anchor chain material ... 40 links per inch seems to do the job and pre-blackened which was a plus. Gave a little test run for the rudder pendants. Seems ok. However then I realised later that'll I'd need double the length in order to finish off the anchor ties too. Cheers
-
Thanks for posting your log and wonderful work with the weathering of wood on plastic! I'll pull up my chair and follow your journey if you don't mind
- 265 replies
-
- 2
-

-
- Golden Hind
- Airfix
- (and 1 more)
-
Congratulations, she's a beaut! Thanks for sharing your journey too.
-
Thank you for your kind comments. Having gained some valuable experience during this build, I shudder when looking through my older posts. Glad I was able to cover up my shoddy hull work in a sea of rigging though haha. Actually if you shop around 2nd hand book sites, you should be able to pickup Hackney's manuals at a reasonable price (I got mine for £4.99!). Just picked up manual #2 (the Mayflower) for a little bit more at approx £15! I would suggest to go for a larger scale build (although this 1/180 scale does sit nicely on the desk), it is so much easier to rig, seize lines, access belaying pins etc... Will save you depositing a fortune into your swear jar 🙂.
-
Honestly I'm not sure if it is worth the trouble, but I would've felt strange seeing the gunports hanging of it's own volition without the eyebolts + rope... Unfortunately that means I'll need 400+ eyebolts since I've committed to it now 🤣 One day when I'm more resourceful and experienced, I might just give it a shot at hand made eyebolts, Patrick! Maybe at a larger scale though... By the way, shipman, since you've had extensive experience with Noel Hackney's books, I wanted to ask whether there is much difference building the Golden Hind compared to the Mayflower? Book 2 deals with the Mayflower but I think they are ships of a similar era? Also would you recommend the AIRFIX or Revell versions for either? Cheers Ron
-
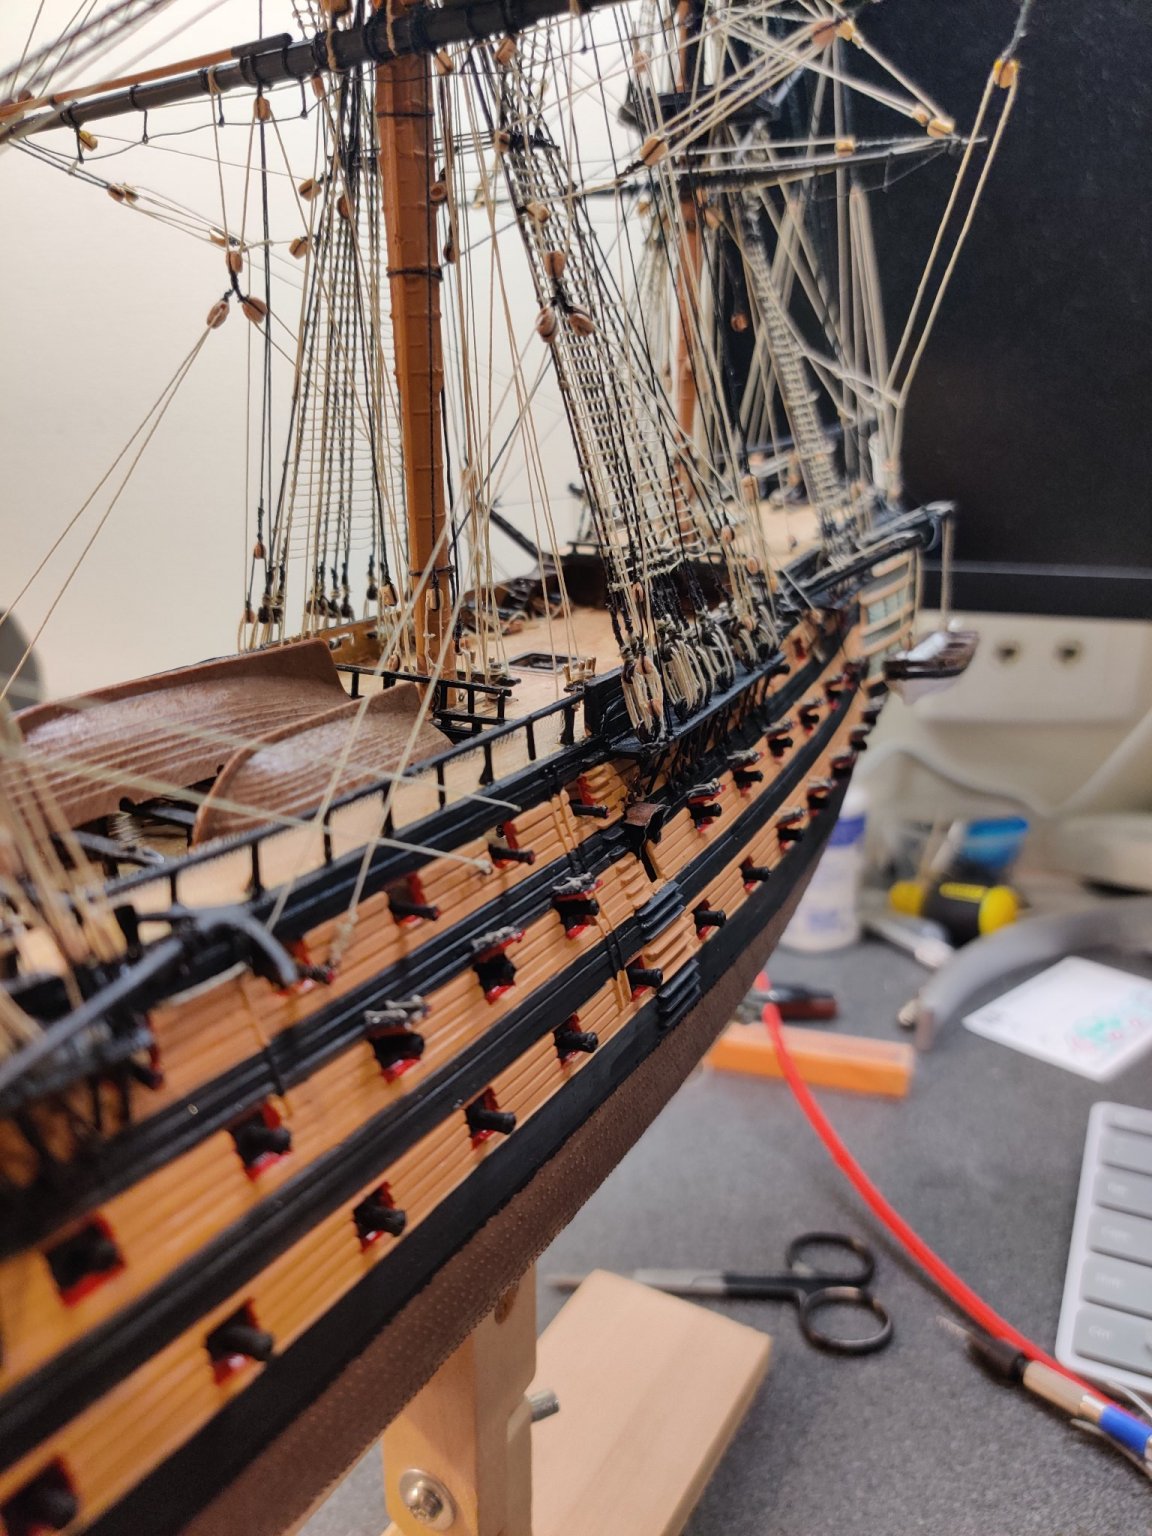
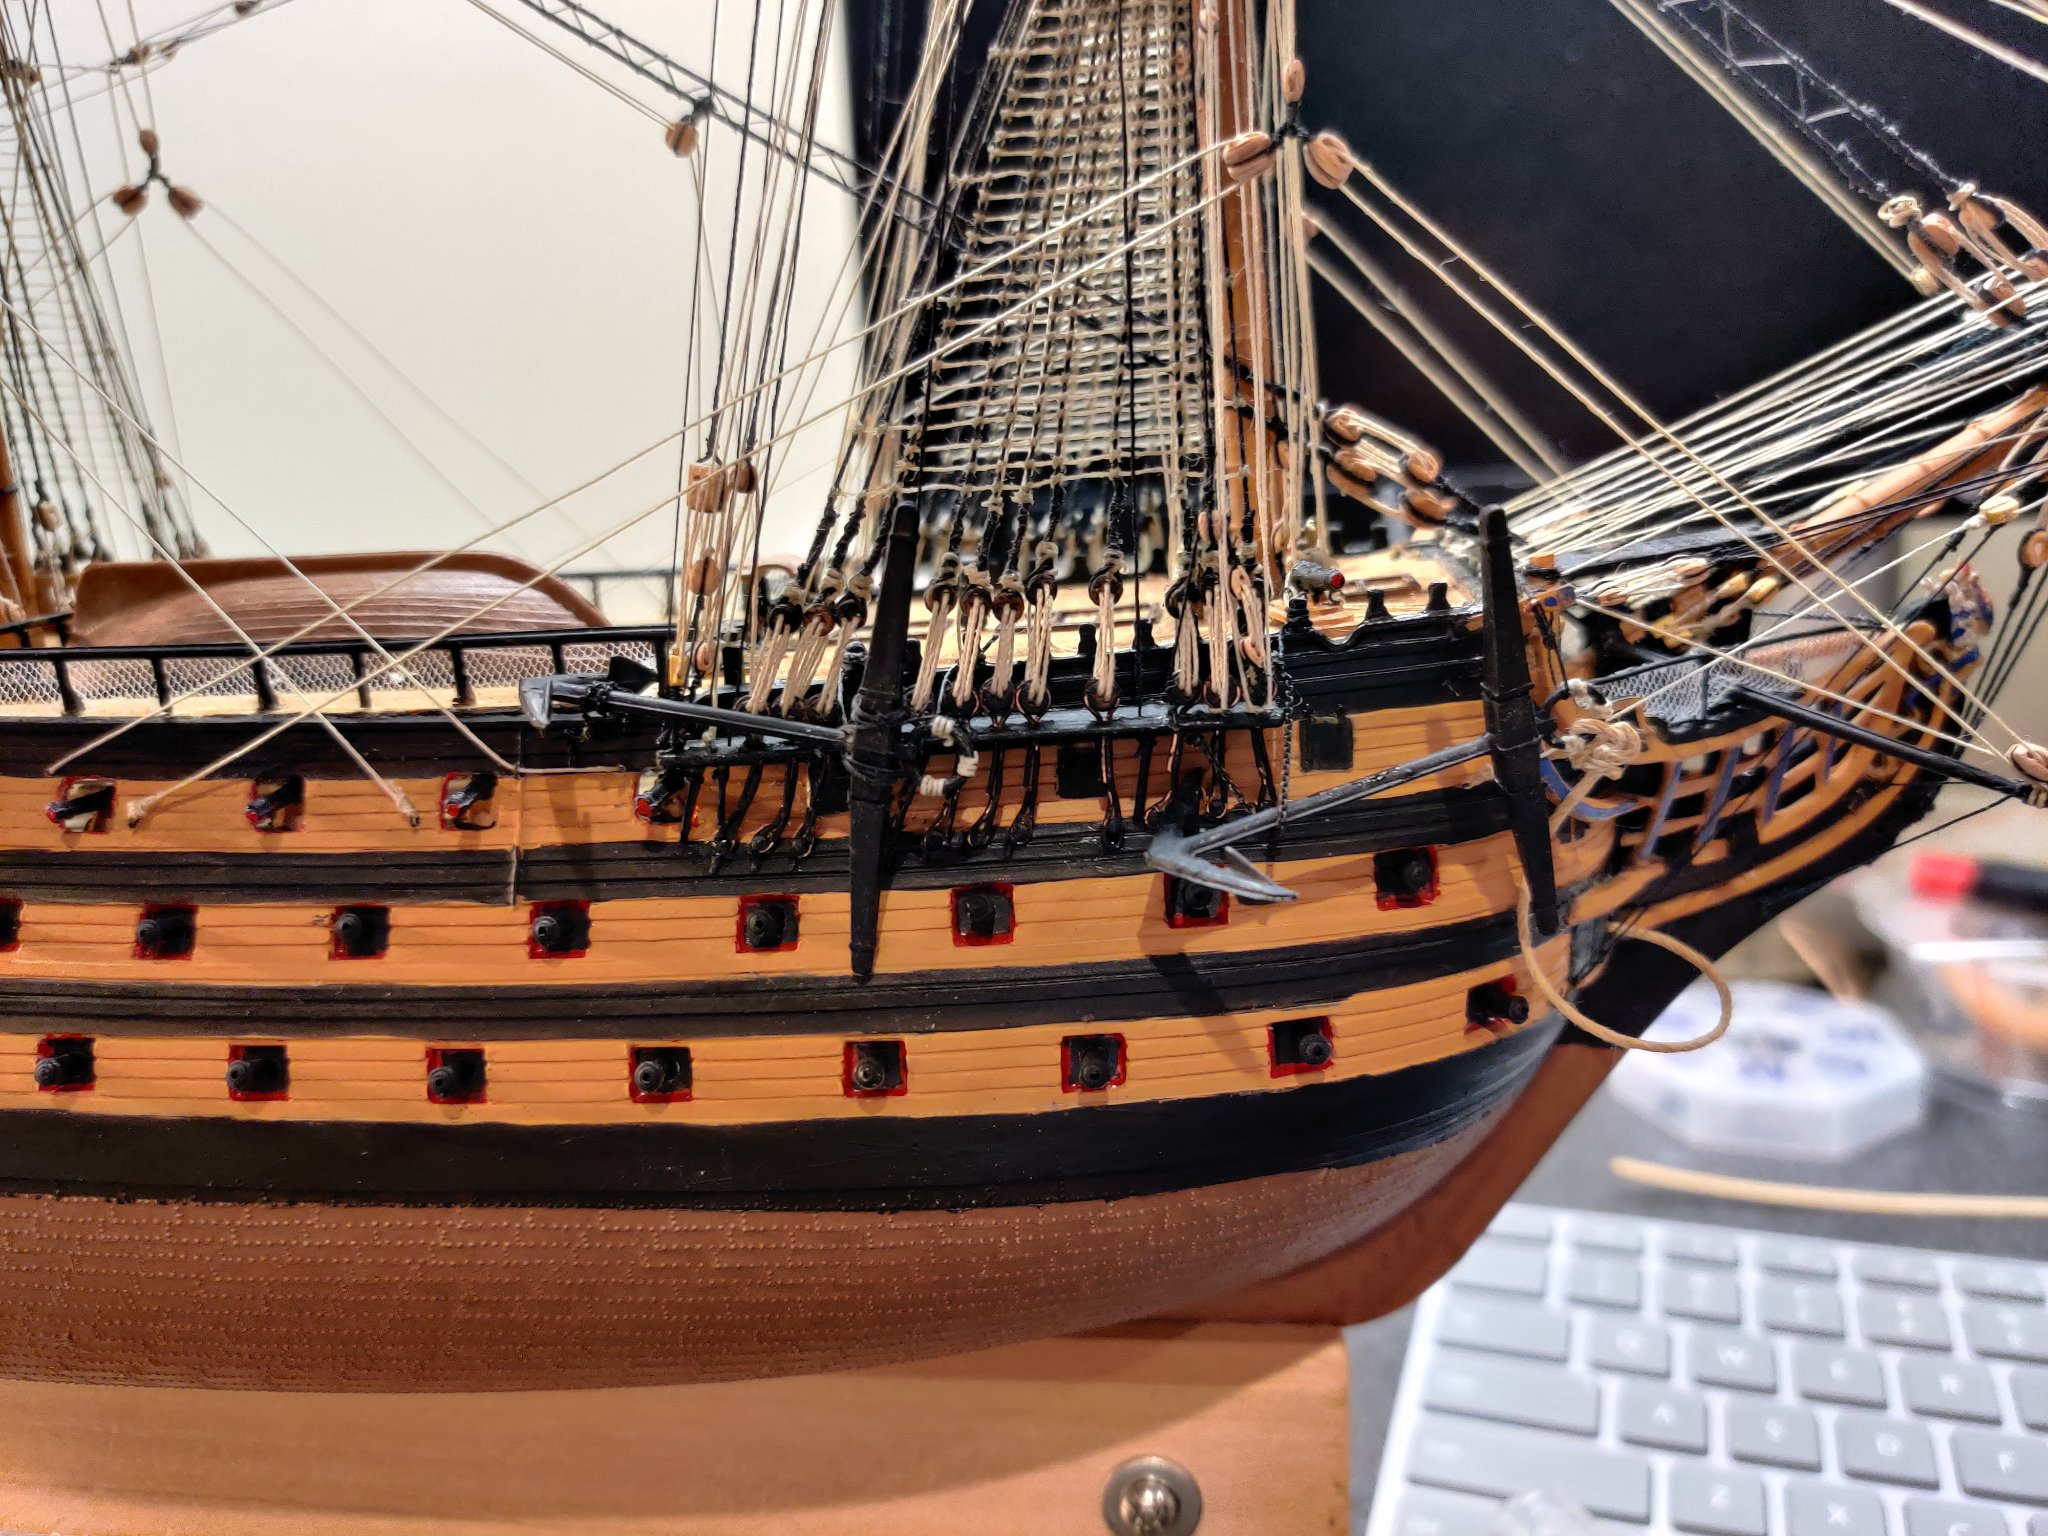
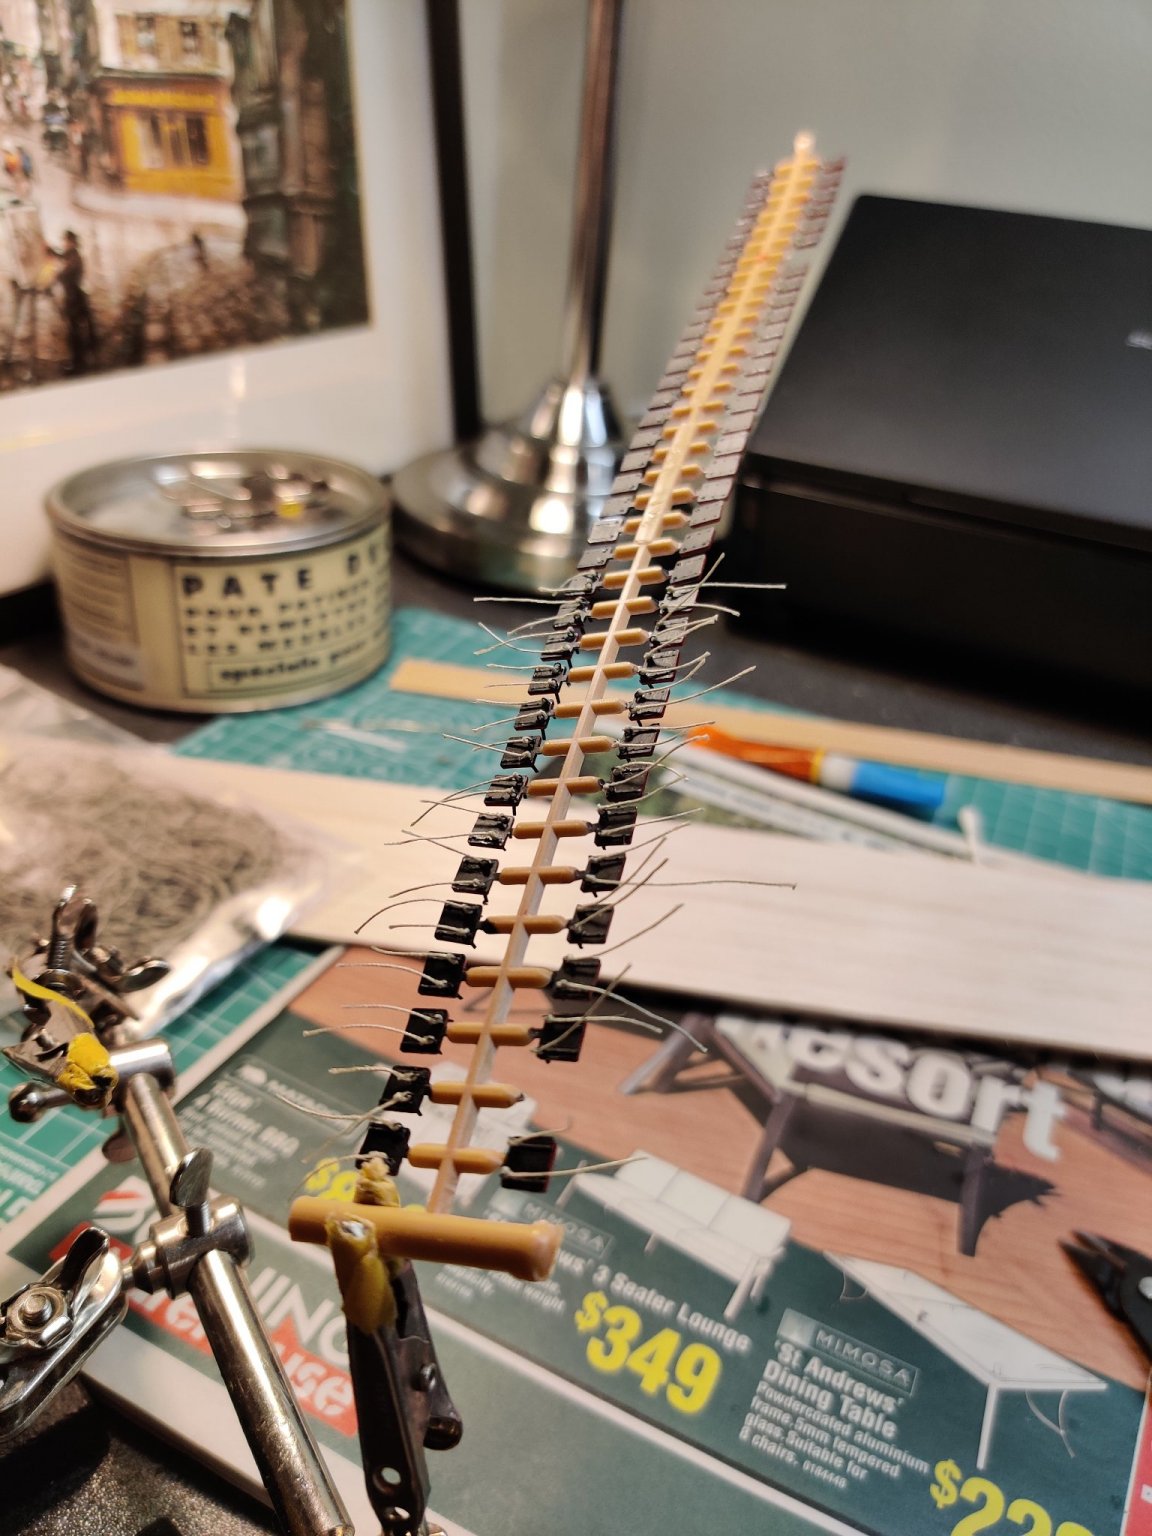
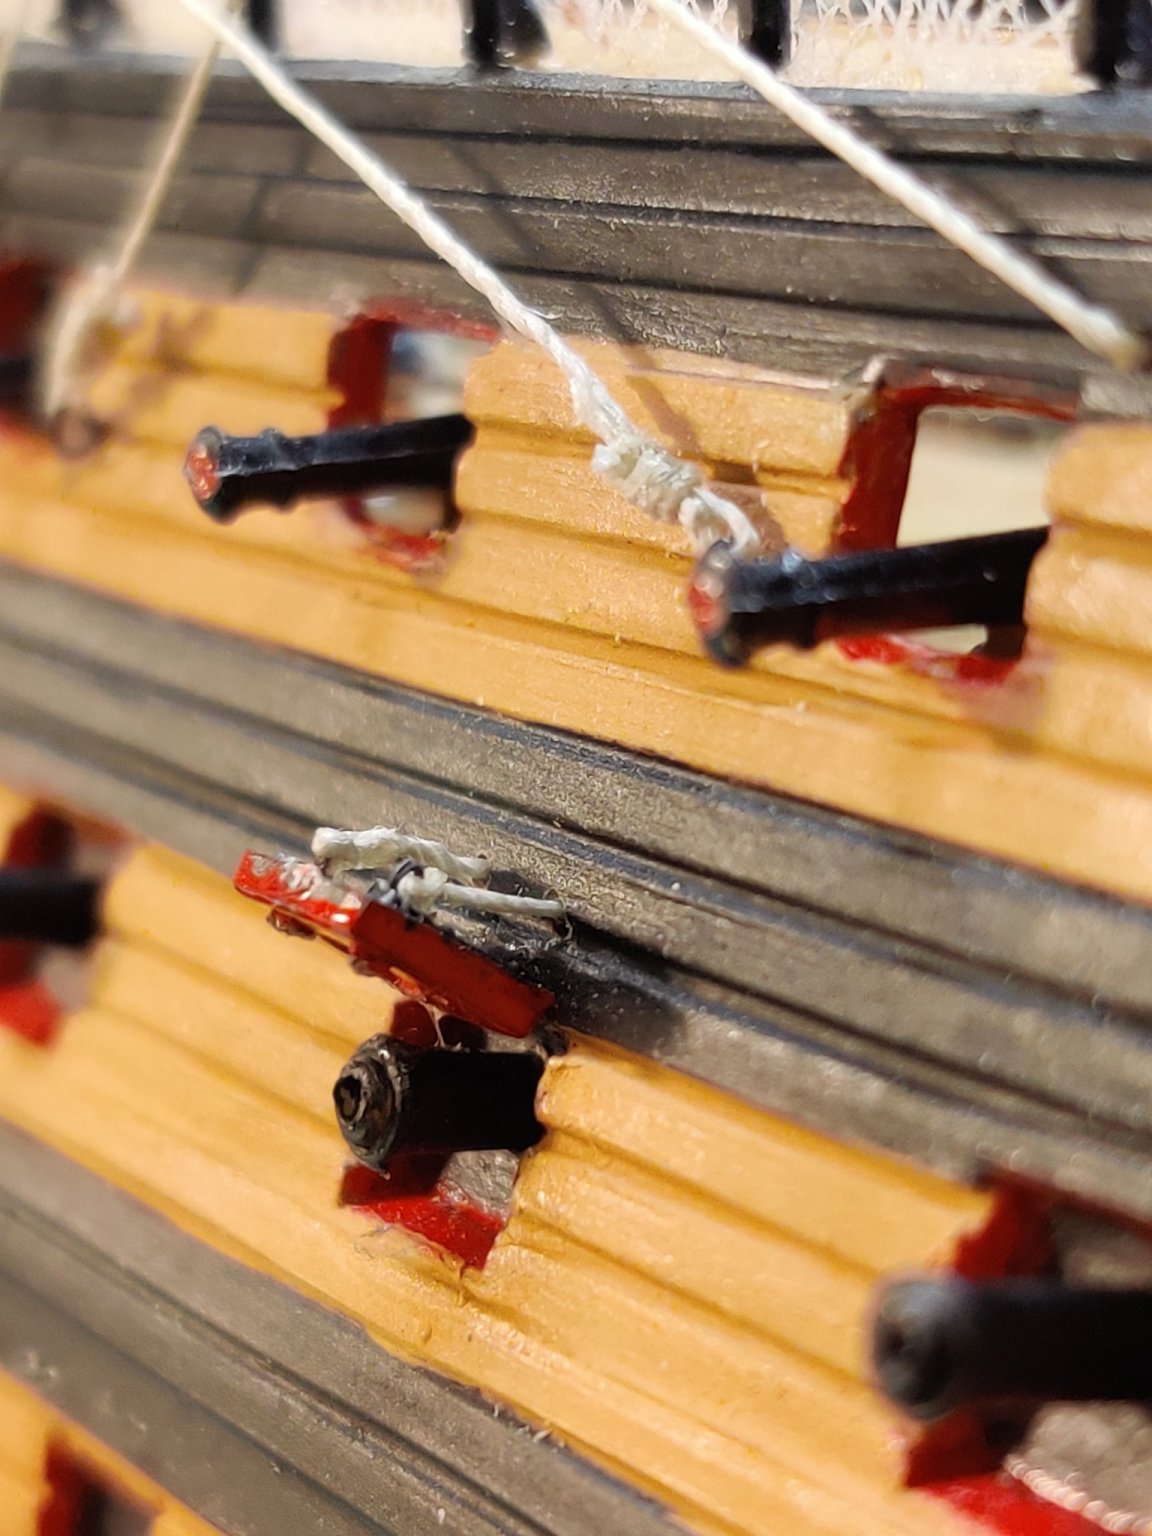
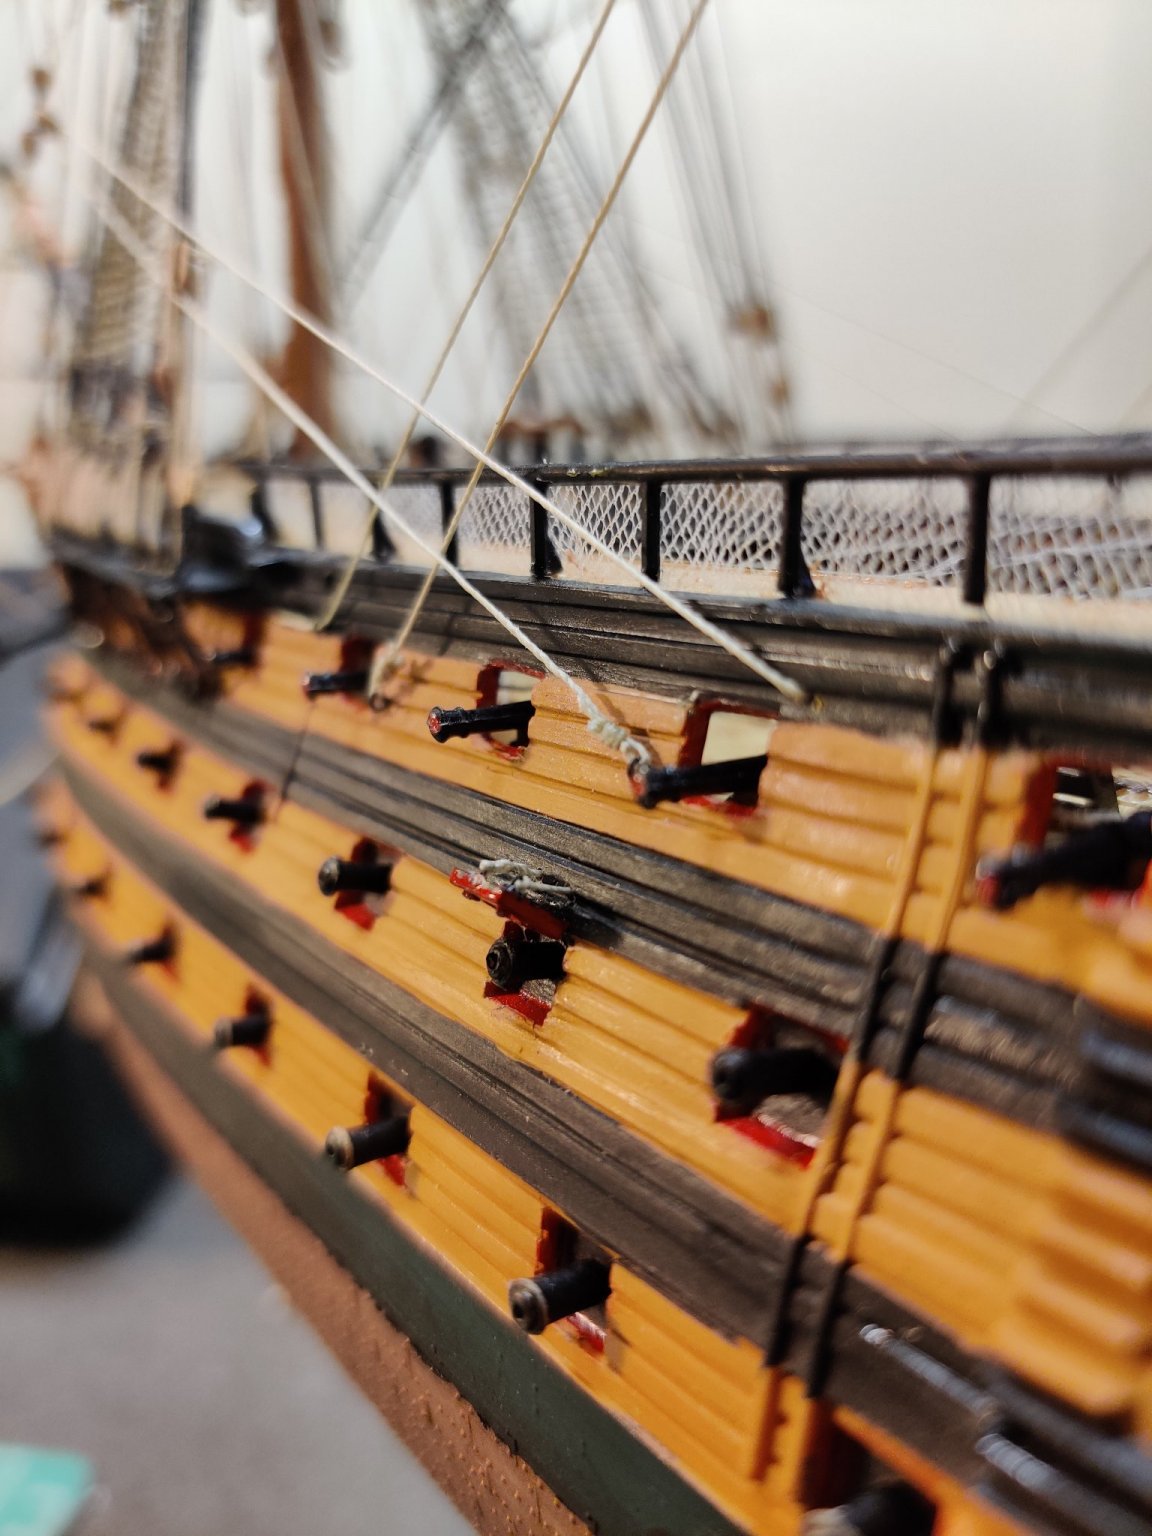
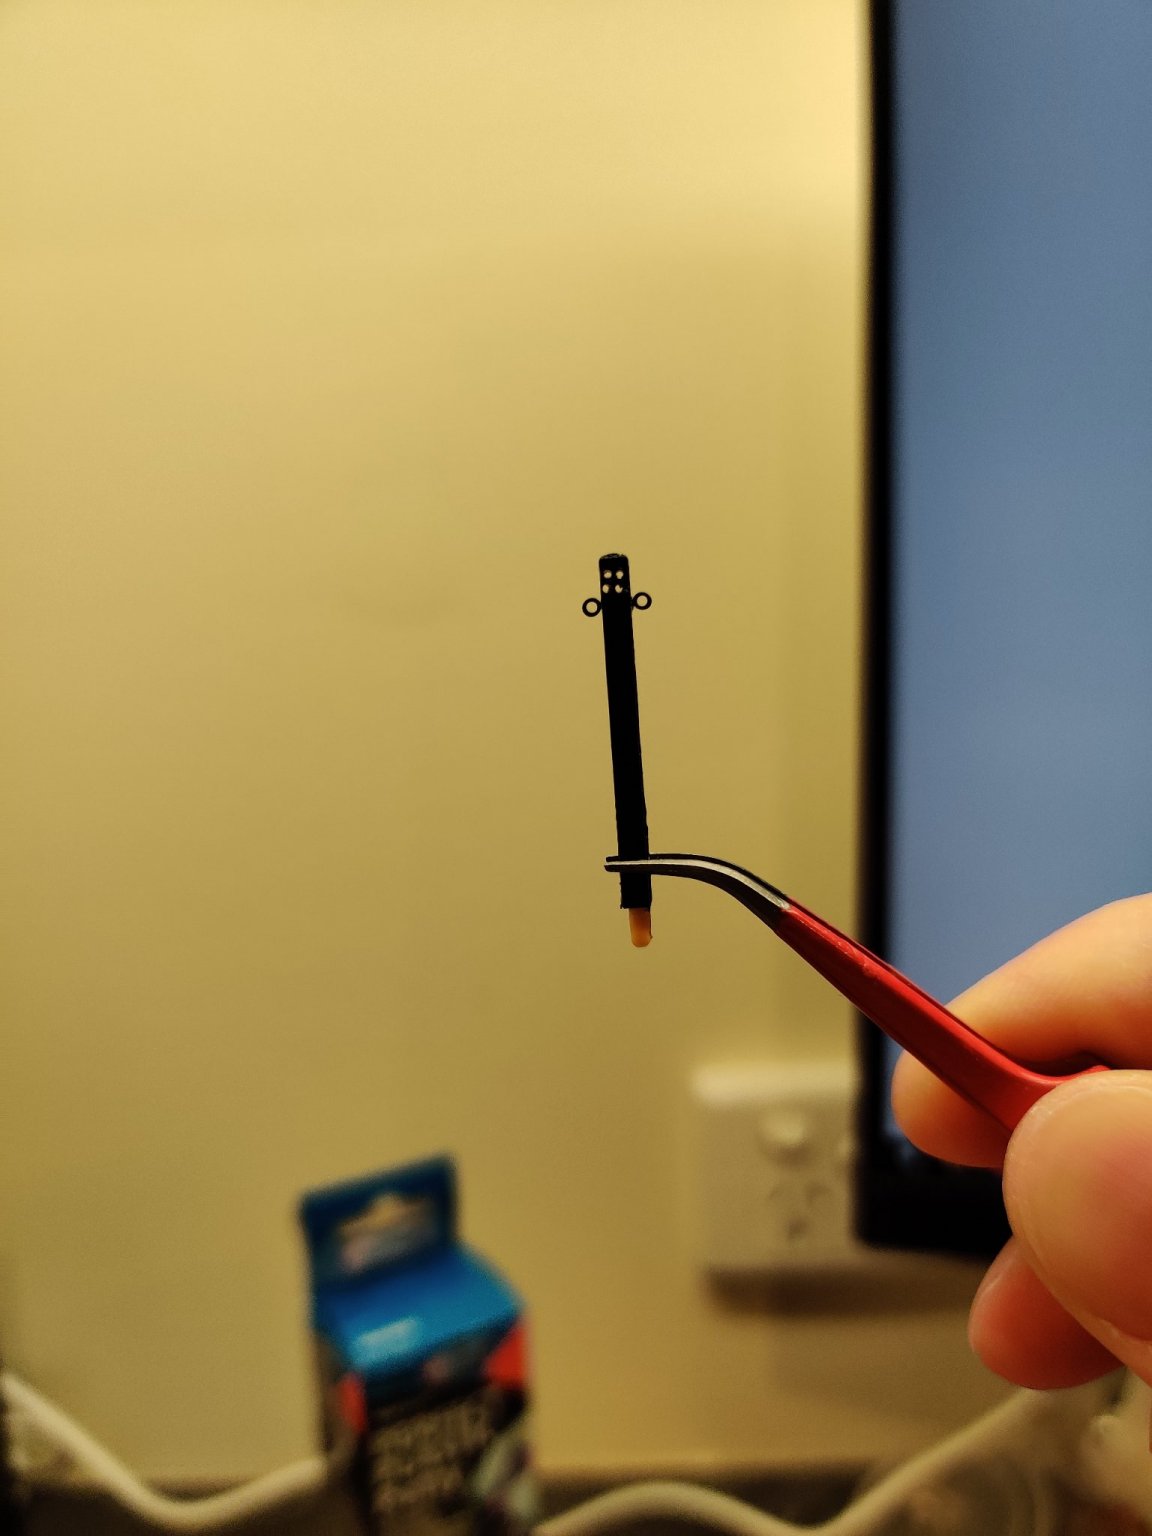
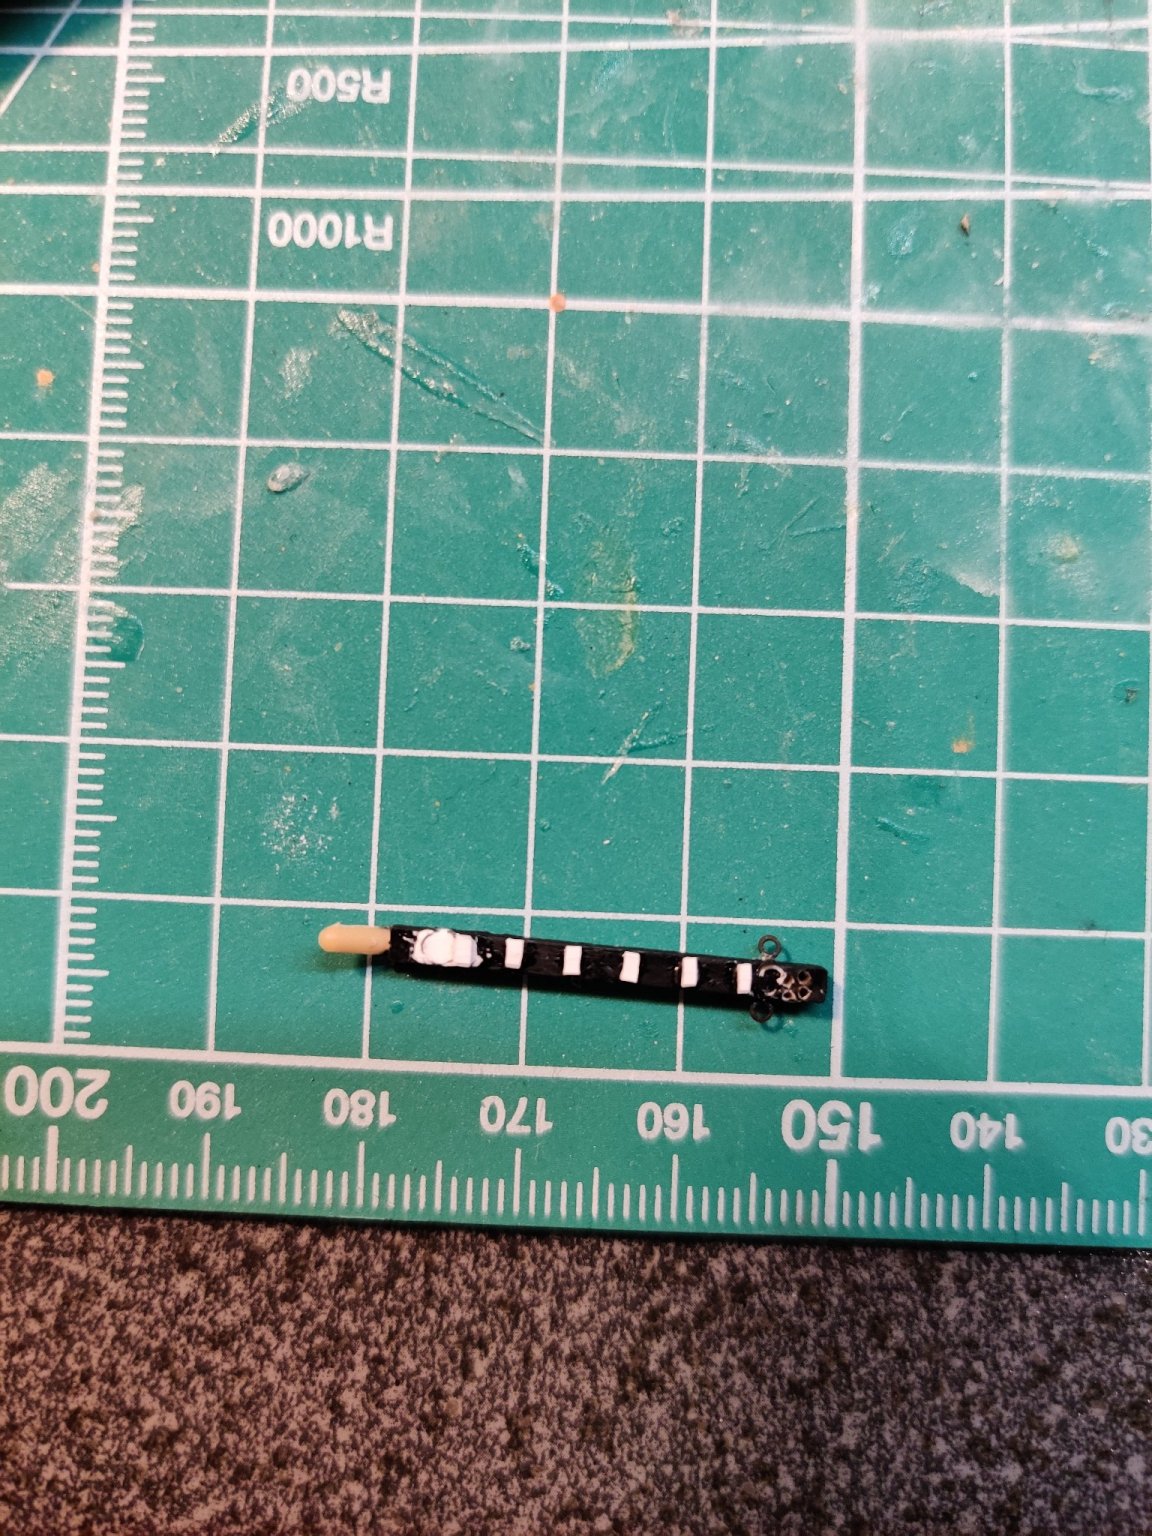
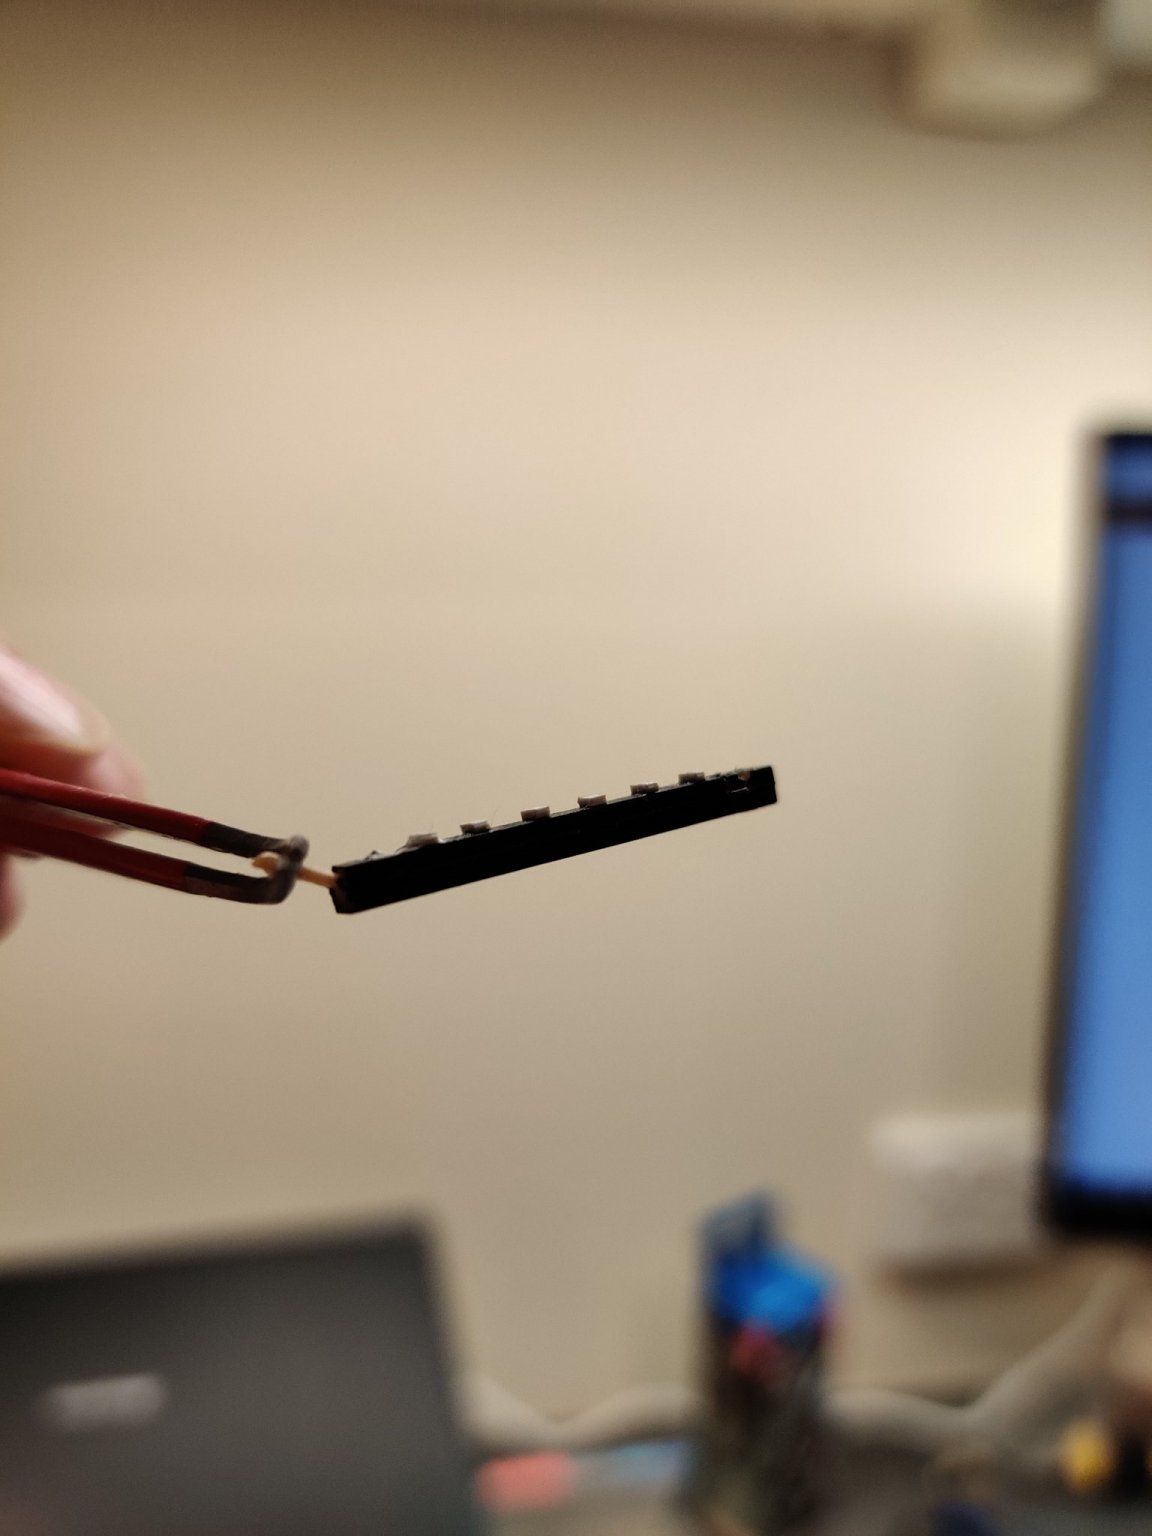
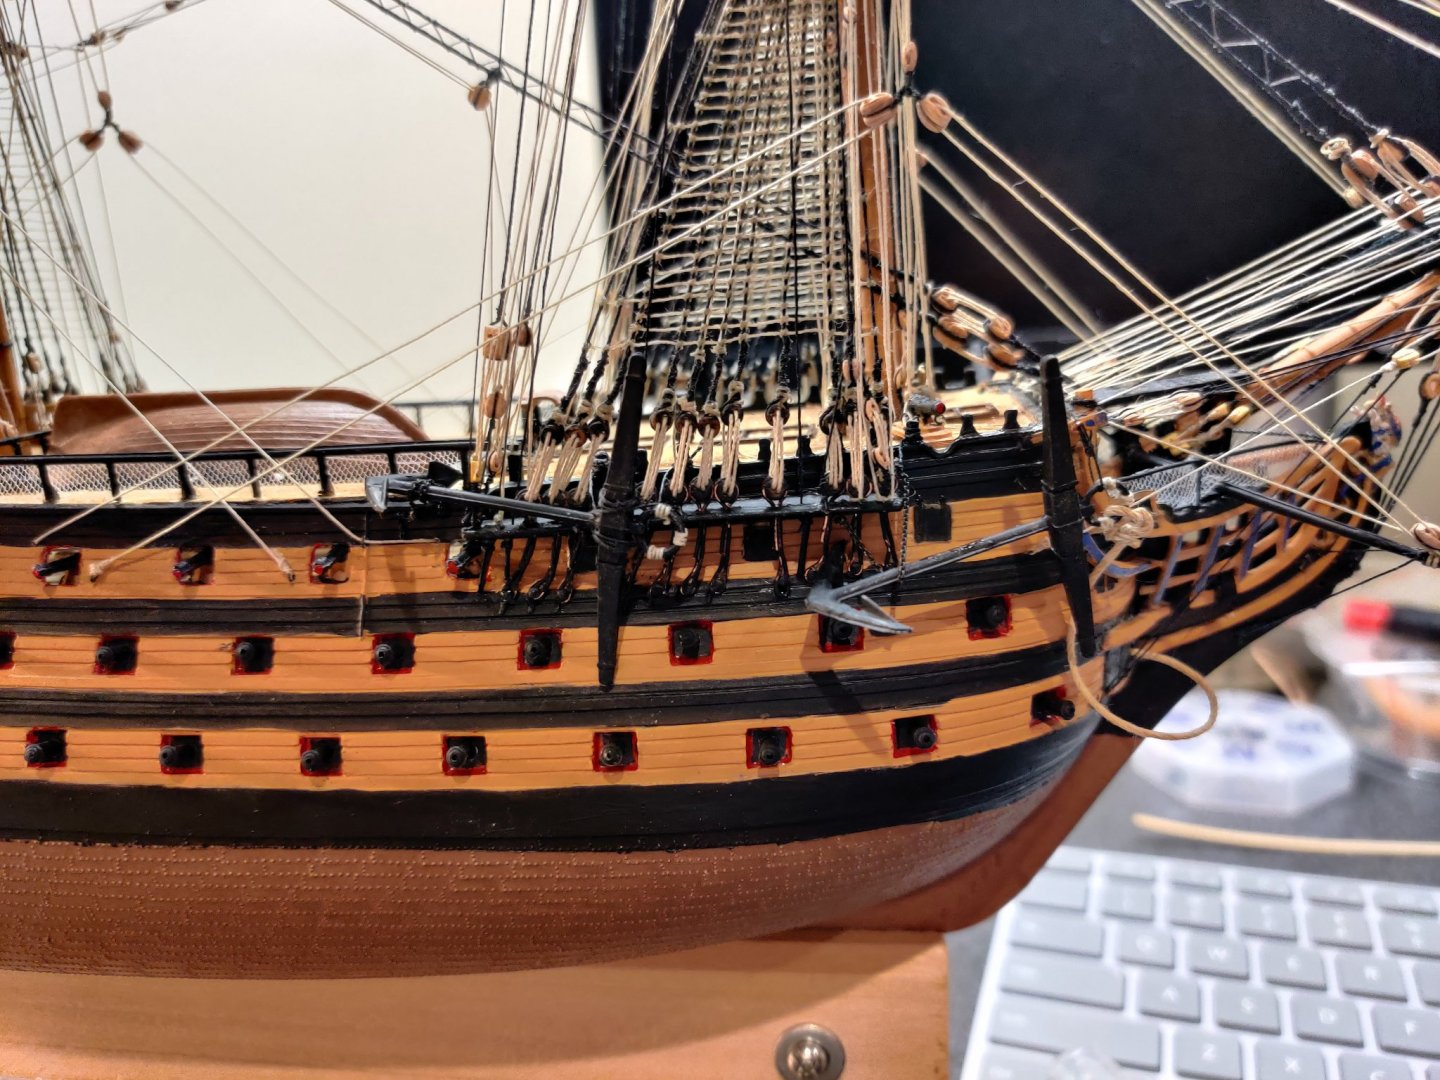
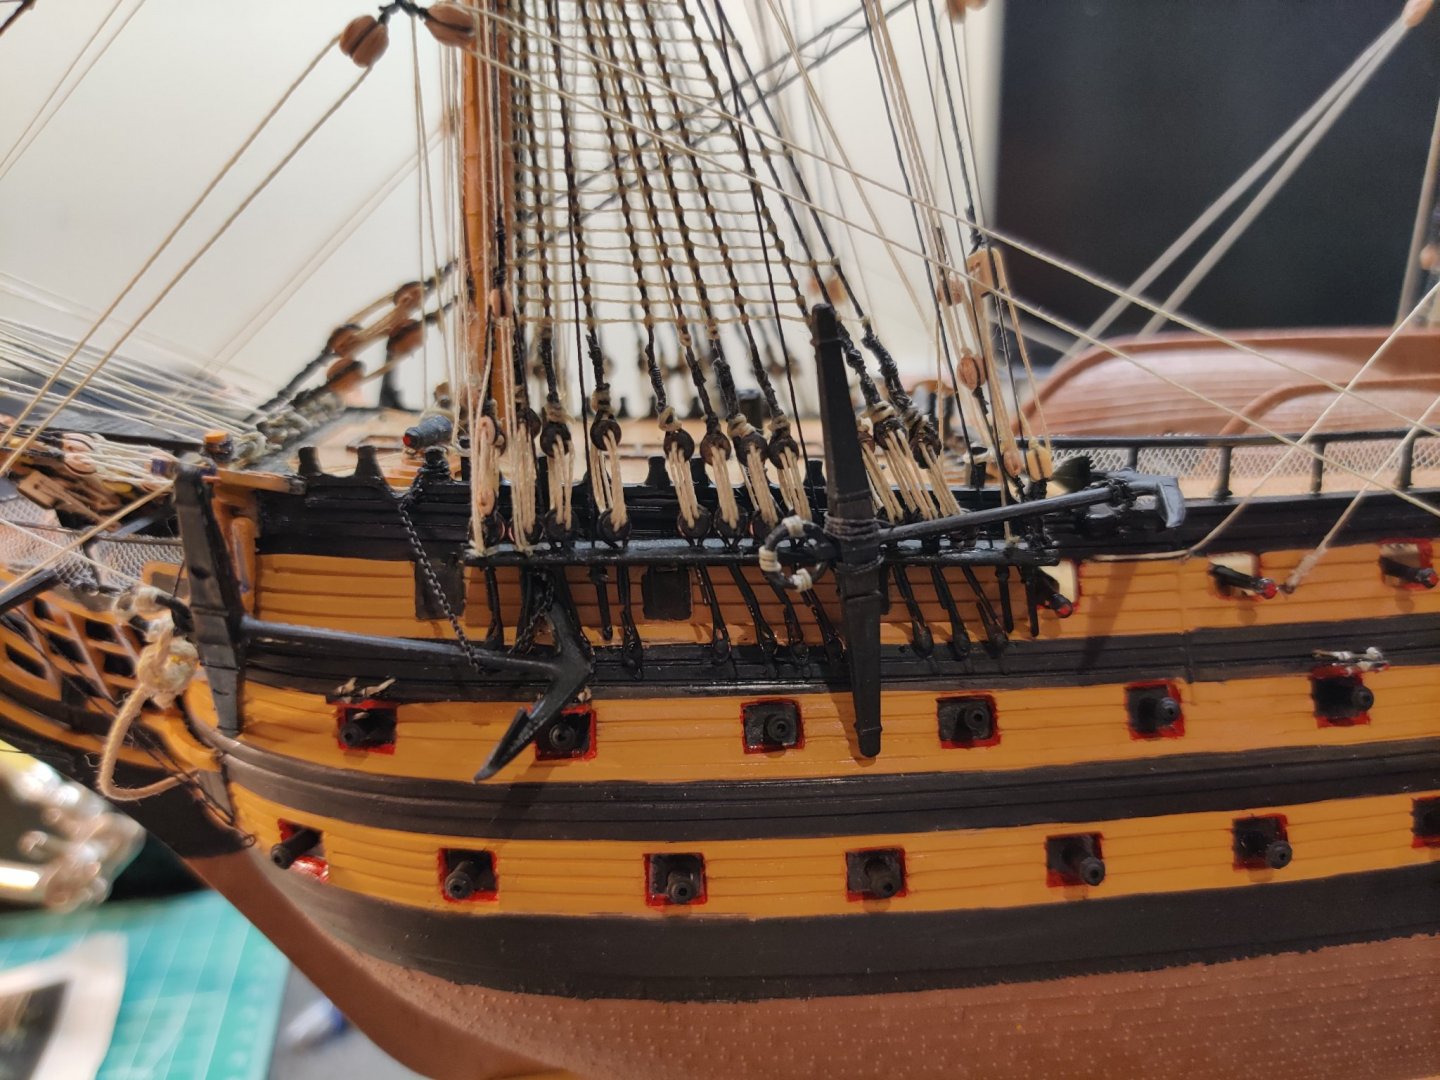
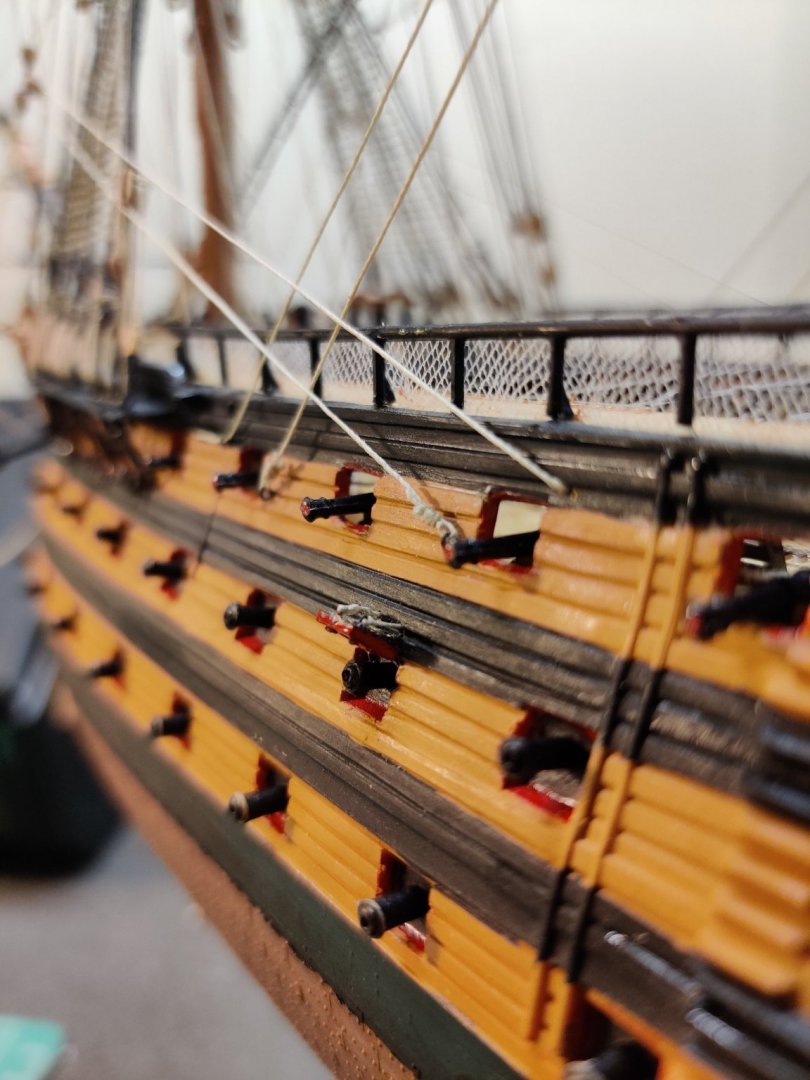
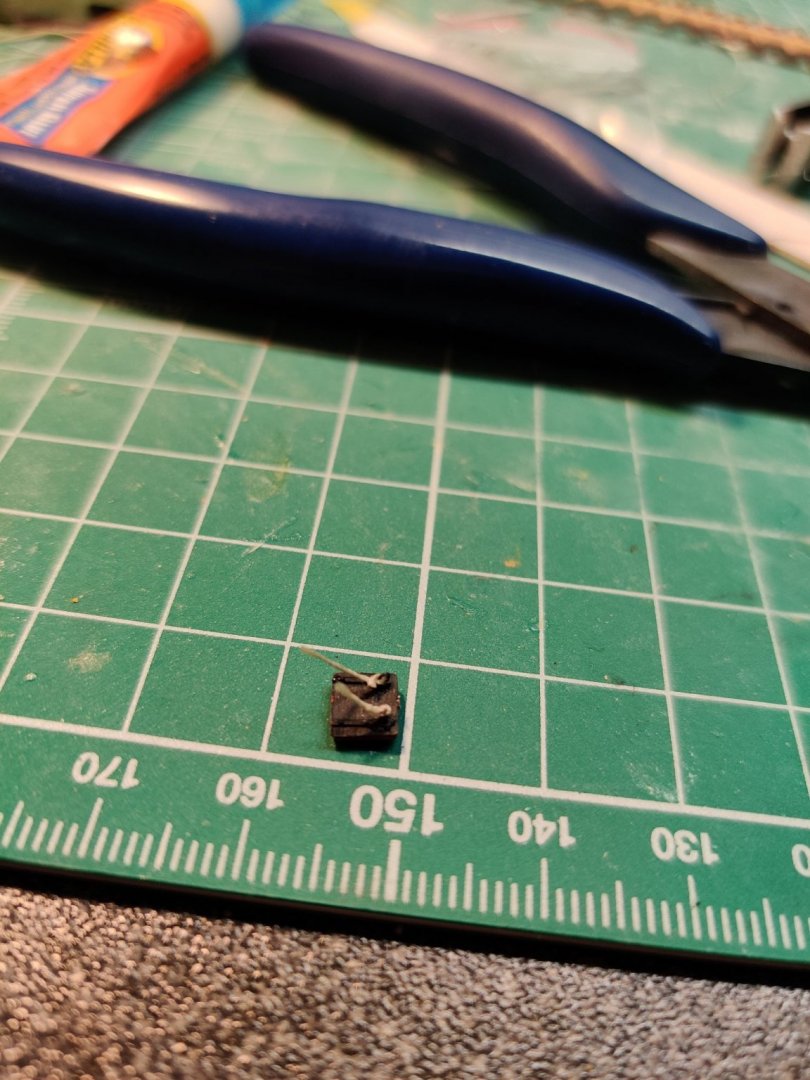
Yet another update... Boats rigged to davits. A bit too much slack between the quarter davits on the port side so I will have to redo the seizing again... curses. Pseudo-cannons mounted, however the horrible kit holes to accept them were all of varying sizes. Spent quite a bit of time widening them... Next I had a test run on the gun port covers using 1mm brass eyebolts. I couldn't get my hands on finer thread (if it exists in this colour) as most retail stores are still shut over here in Melbourne so I used 0.10mm beige thread. Tied off the eyebolts by passing a sewing needle through itself and a drop of CA to secure it. Unfortunately the CA does actually cause the thread to swell up a bit which was a pity. The ends of the thread were stiffened with CA as well in order to thread them into the hull. And now for the horrible macro close up, warts and all. There isn't much space left to drill into the covers but maybe I could cut some eyebolts and directly CA it to the undersides... Again this was just a test run before I go ahead and order a (lot) more of these difficult to find 1mm eyebolts online. It is a tad overscale. Maybe silk thread (if I can get my hands on it) might be a better material? Cheers, Ron

-
Thanks, Daniel. I discovered some of your earlier posts regarding the davits after I posted this! 😂 I do have yet another ignorant landlubber question then... how were the smaller boats lowered into the sea in the absence of the stern and quarter/aft davits? Great eye for detail! Hopefully they were maintaining adequate 1.5m social distancing if the photo was taken during the spanish flu epidemic... Cheers, Ron
-
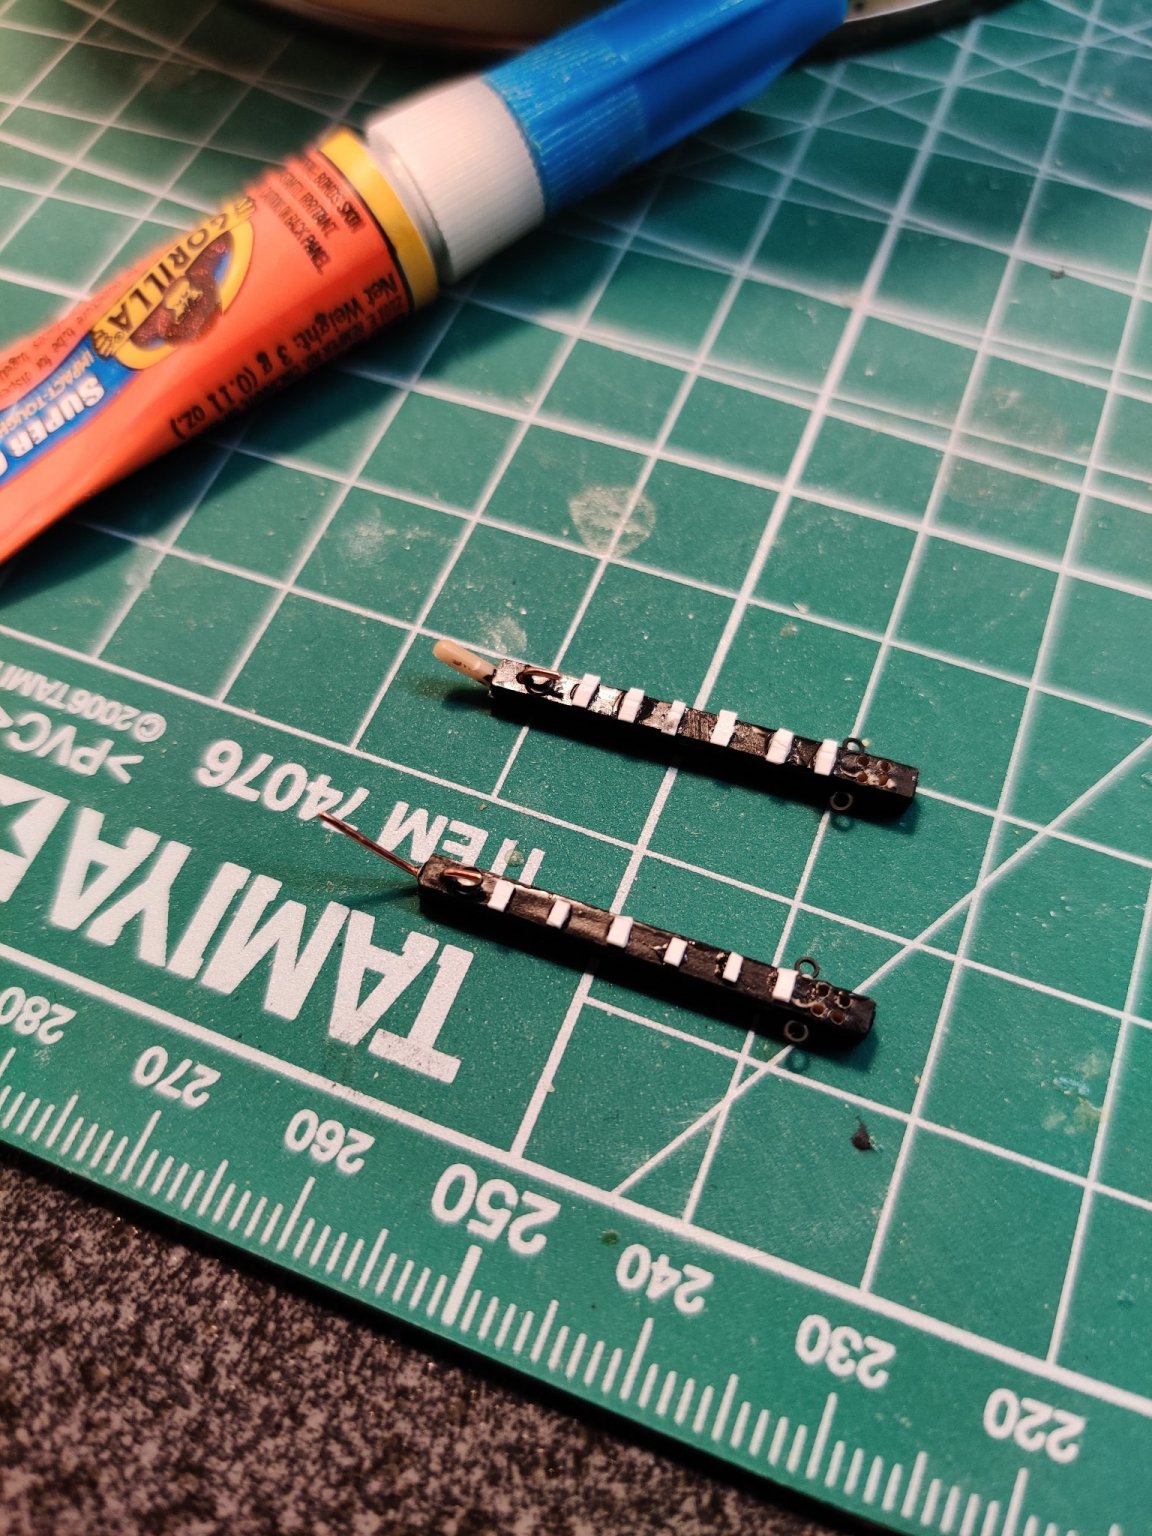
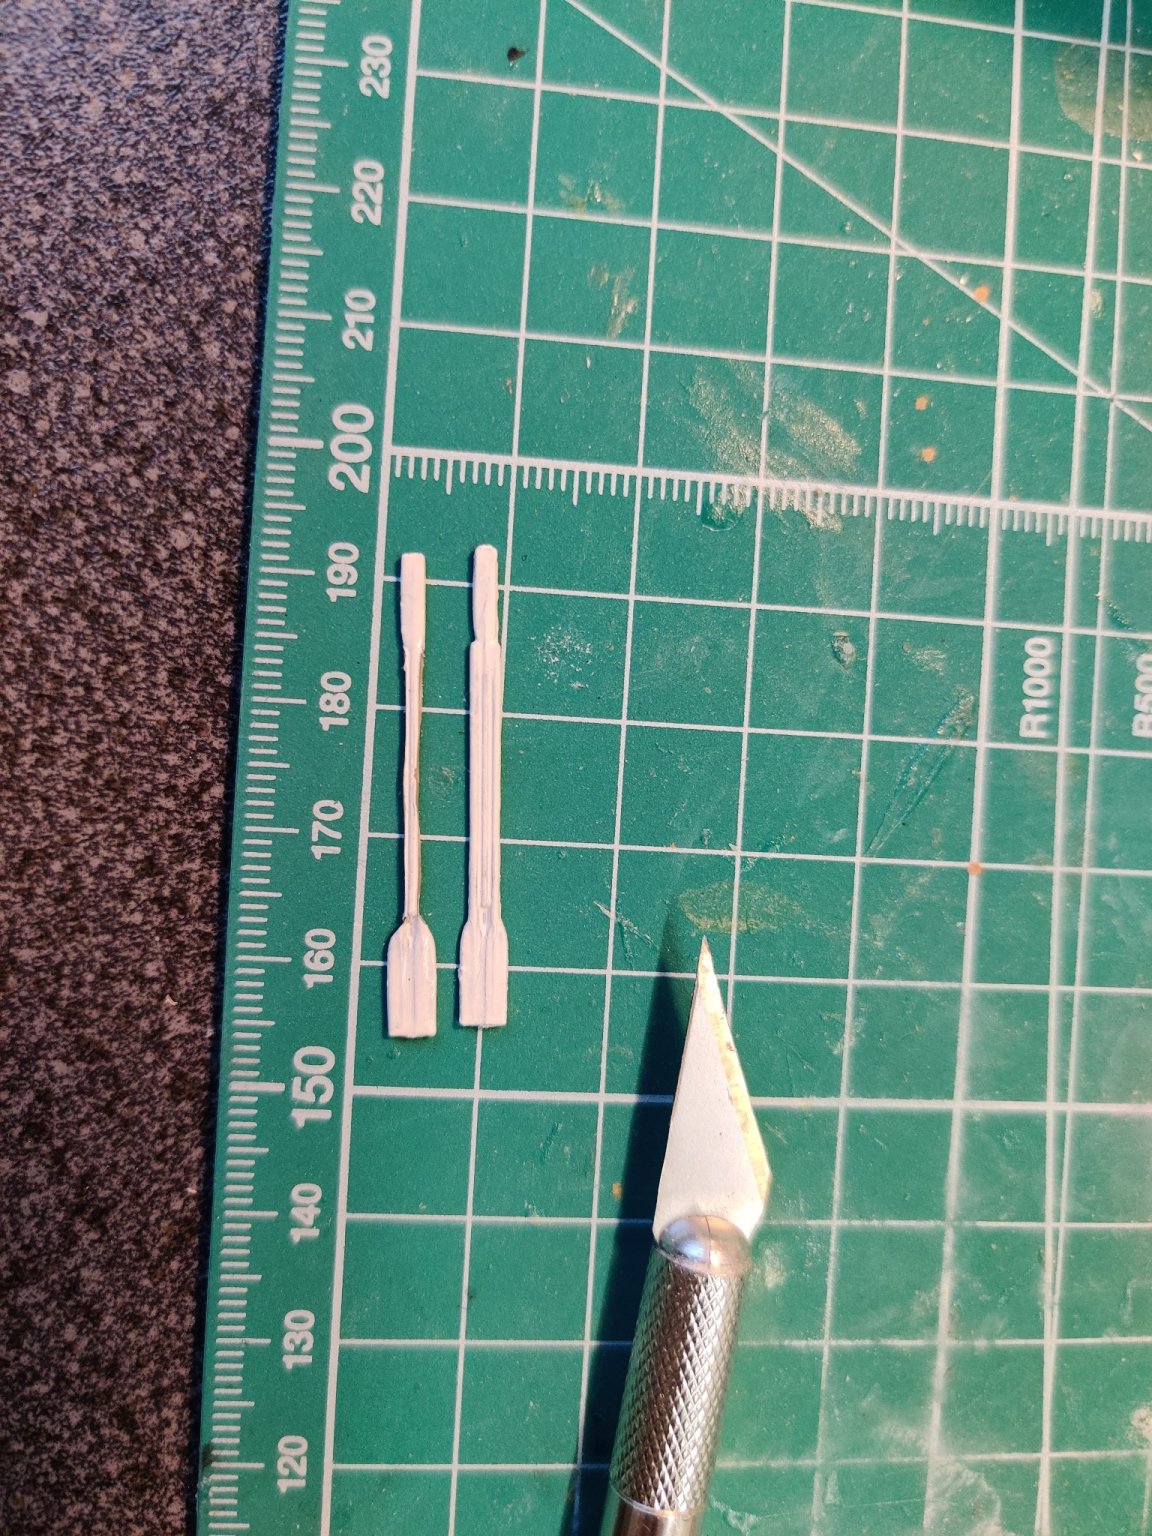
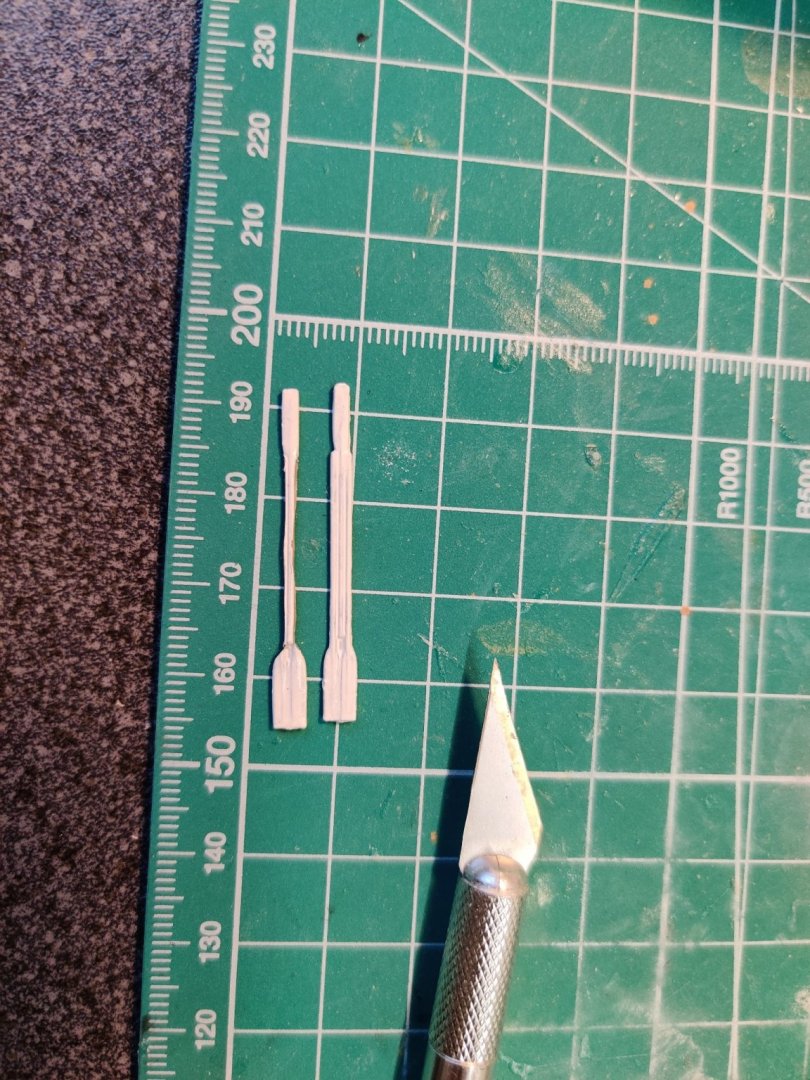
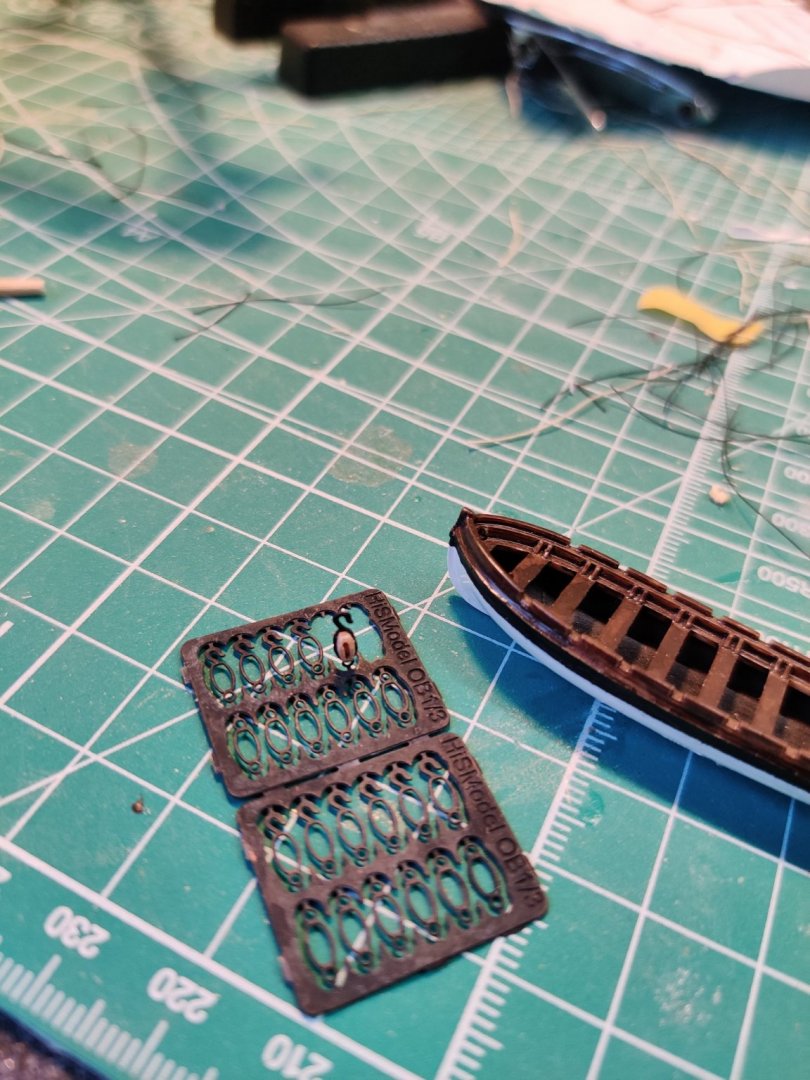
Continuing on with the quarter davits... Because I had snapped one of the davits earlier on in the build, copper wire was drilled in as a replacement to bite into the hull. Actually I found this made it easier to adjust their positions due to its malleability. Then it was time to make use of the pre-etched 3mm single block hooks (with a pre-formed becket strop). Although rigging it with thread would've been just as acceptable. \ I wasn't happy with the kit molded oars for the boats so I had a go at slicing it up. It will be difficult to sand this as the oar diameter is now about 1.5mm thick. Perhaps it won't be so obvious once they are lashed together? Maybe I will continue carefully slicing off bits to even it out... And now a little test fitting of the boats. I was able to repurpose some parrel beads for the topping lifts. My custom cleats made from copper wire weren't fit for purpose unfortunately so I may have to resort to tying off the falls around the davits... I think I'll leave it untied for now and tread carefully in case the boat gets in the way of the anchors later. Cheers, Ron


-
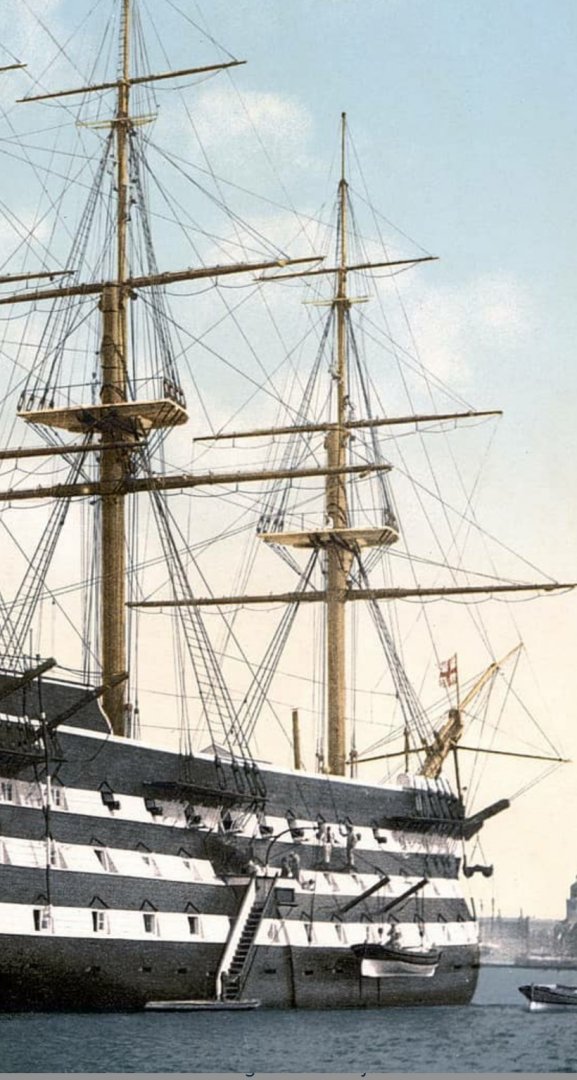
Thanks everyone. Longridge makes no mention of these lower davits in the fore section of the ships hull so I suppose they were an addition post Trafalgar. Thank you for the tip. I wish I'd paid more attention the last time I was at the V&A (over 7 years now - 1 day is hardly enough time)... hopefully I'll have the chance to visit again once travel returns to normal.
-
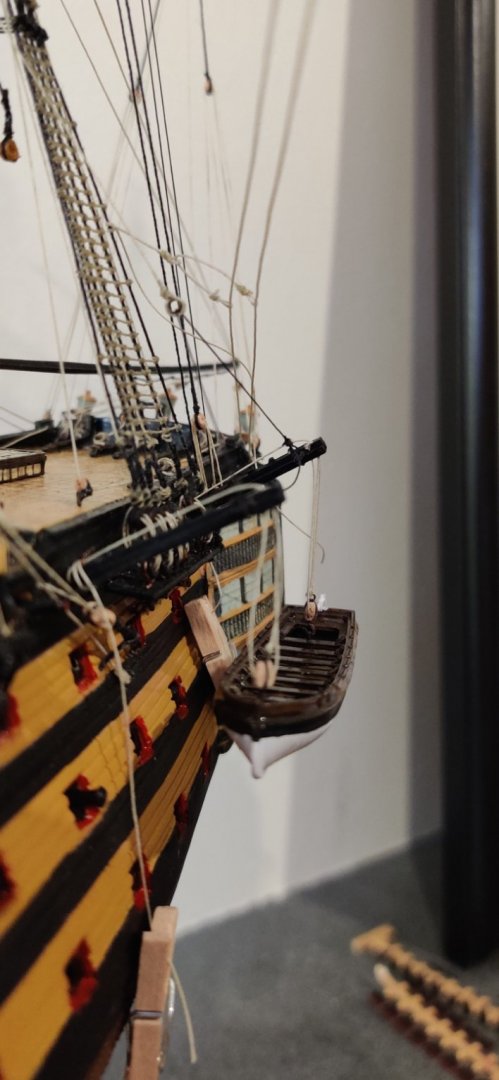
Hello all , I was just wondering if the Trafalgar period HMS Victory would have had the same davits sitting just above the lower gun deck like those from a picture (colorised photo?) of her in the 19th century I believe:
-
Certainly been a fun build and steep learning curve. There is so much I wish I had done differently now, but I guess that's the beauty of hindsight isn't it? I think I will use your bamboo skewer idea (was thinking toothpicks intially but realised they won't be long enough) after all to complete the main lower studding sail booms which weren't included in the kit...thank you for that suggestion!
-
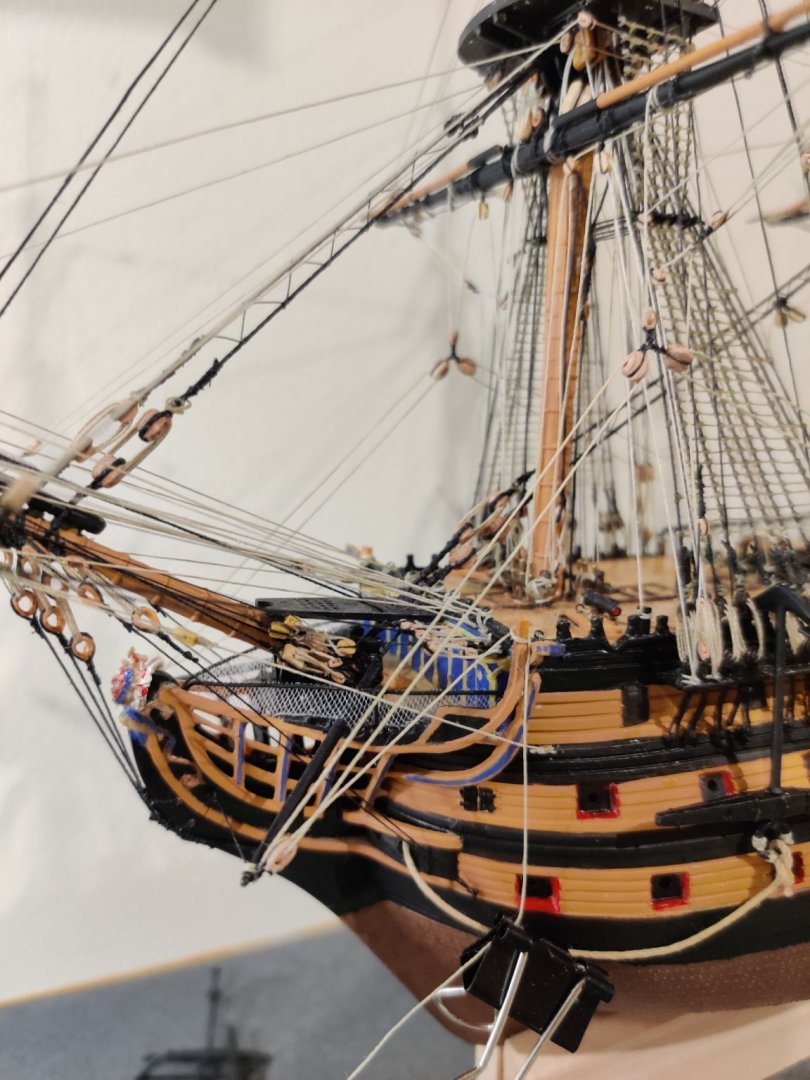
Thank you Keith, that is very kind of you. I think I got a little carried away with this build during the pandemic... The plastic spars look good proportionally but is definitely lacking in tensile strength. The spritsail yard is horribly curved upwards! I wish I had the confidence and skill to replace them with wood/brass.... Tapering them would be a real challenge? I am avoiding tackling the cannons and gunport covers until I can decide whether to cover those nasty ridges along the ship's hull with putty to achieve a smoother surface, or perhaps weather the hull instead. Or both. Cheers, Ron
-
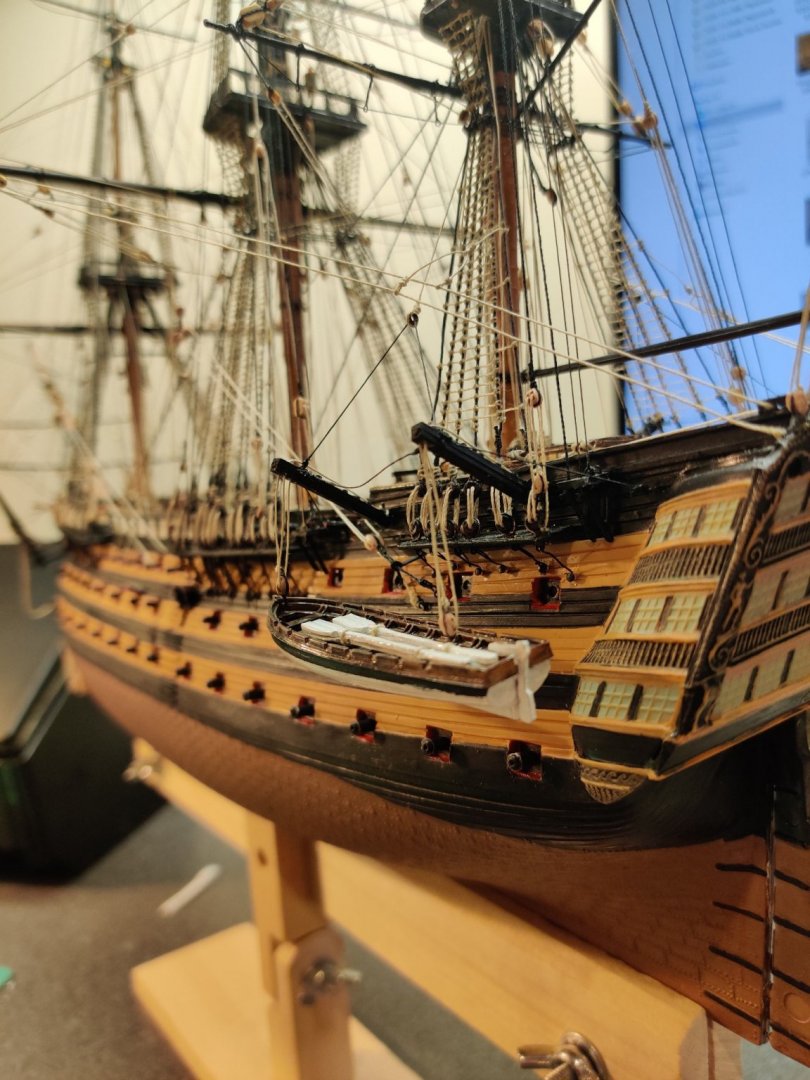
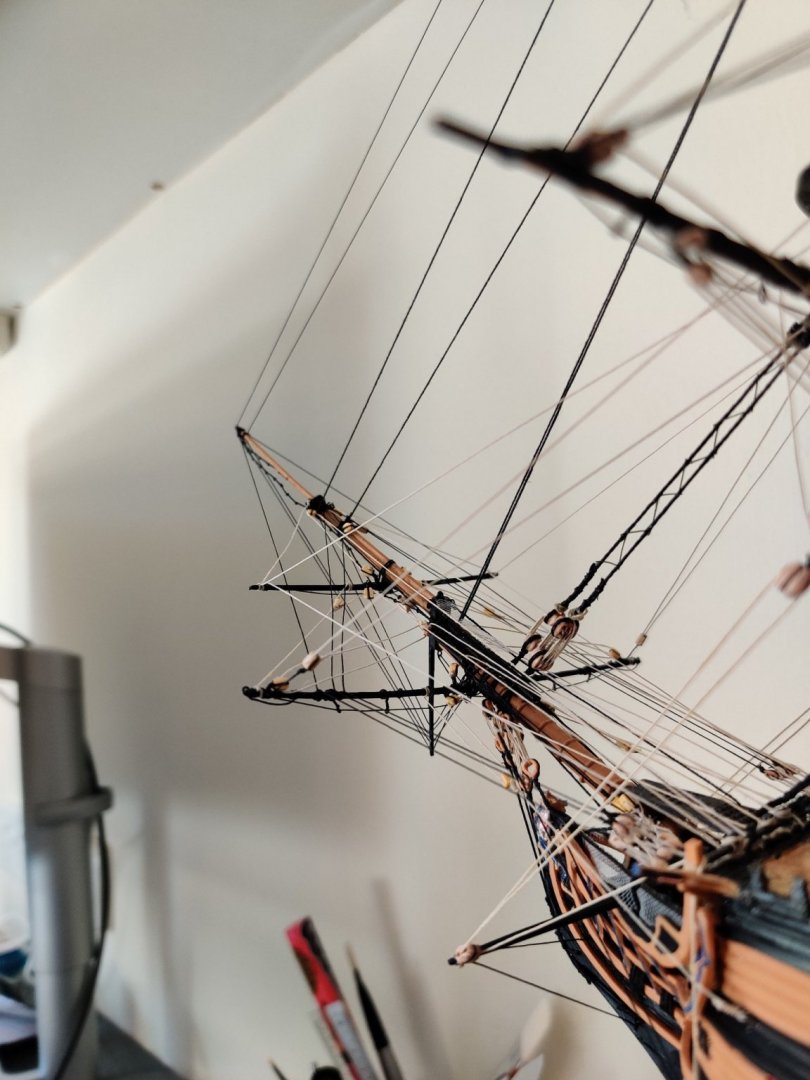
Tied off the fore tack. Had to fashion an extra square styrene block to the forecastle rail to tie off to... I am pretty sure I fit the head rails properly though, perhaps an error in the Airfix kit? Now to tackle the davit lifts. Test drilled 4 holes so I can rig the tackle for one of the lifeboats. Eyebolts (a little large at 2mm) added to the sides. Some putty to tidy up some holes in the kit supplied bit. Added foot steps using thinly sliced styrene, it'll look better once it's painted 😅


-
It has been a while since my last update, but after some accidents... And more struggles with the sail rig (minus sails), trying to understand how to tie off certain lines etc. I lost patience and finally installed the studdingsail booms. I decided not to make changes to the kit molded booms but perhaps with more foresight earlier on in the build, I should have molded the boom supports out of copper wire...