

Bruma
-
Posts
179 -
Joined
-
Last visited
Content Type
Profiles
Forums
Gallery
Events
Posts posted by Bruma
-
-
Thank you Phil for taking the time to answer my question.
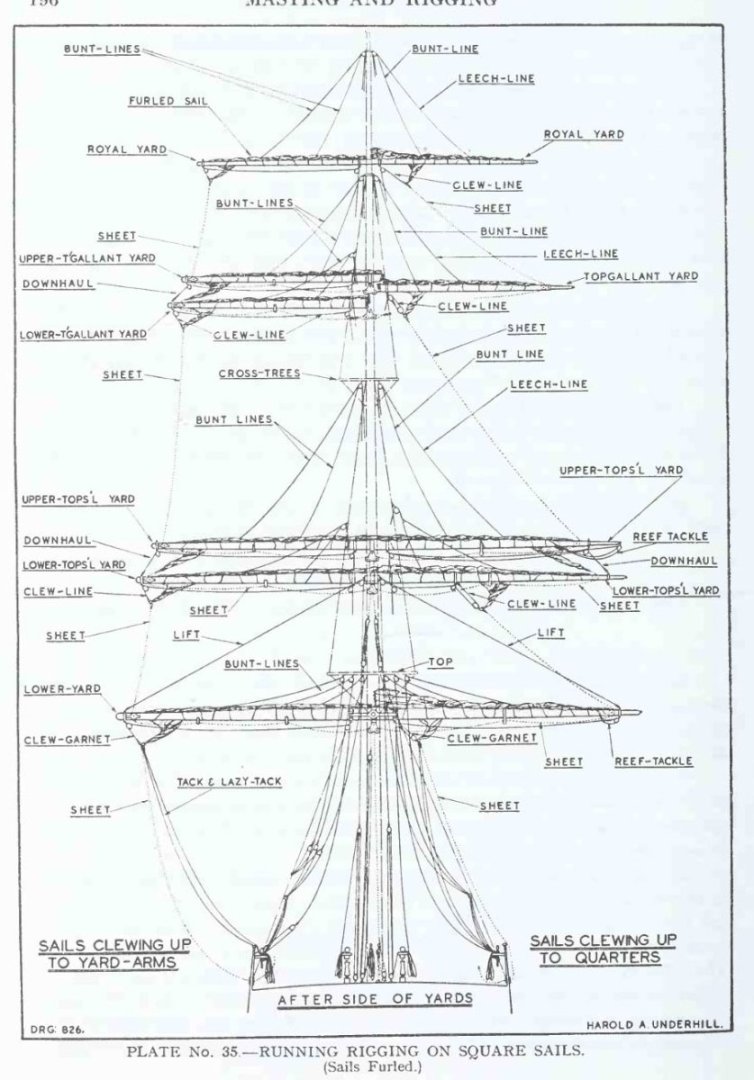
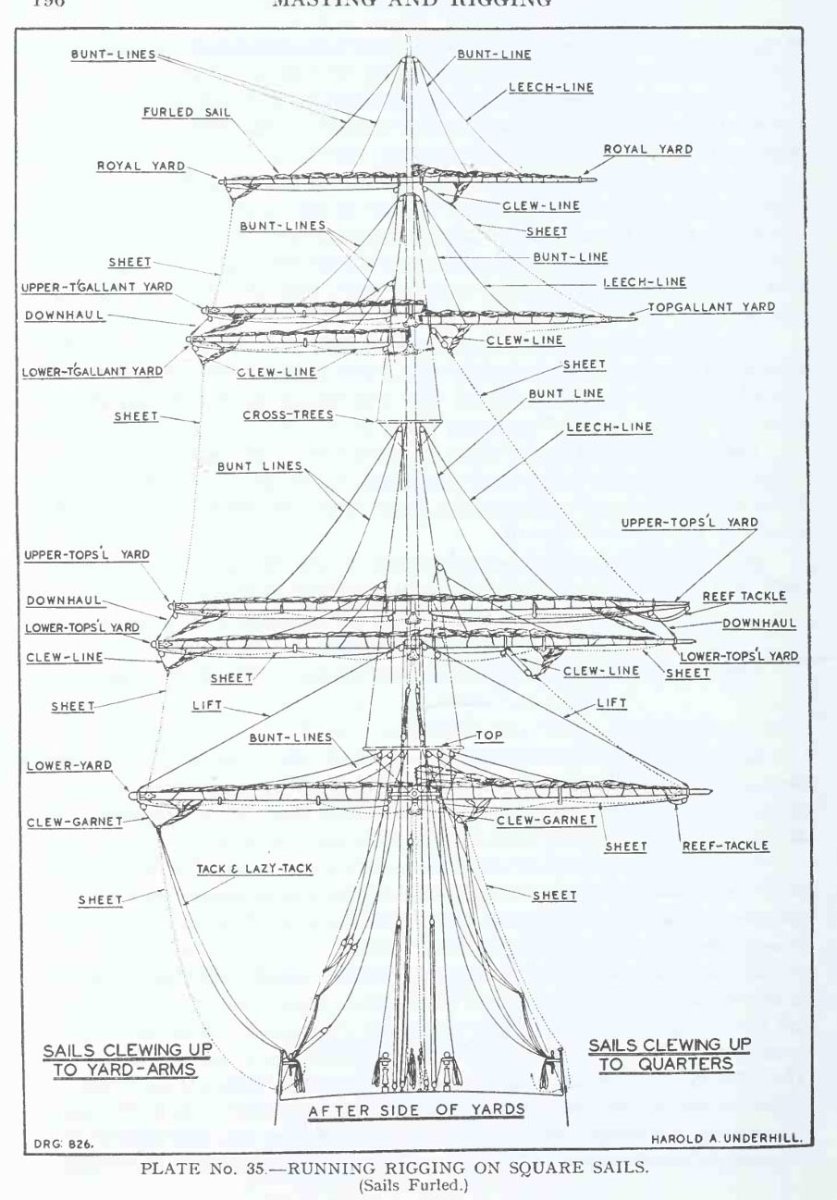
I have Masting and rigging from Underhill, it is indeed a great resource, but it shows the general rules and, at least in this case, I think that cannot be applied to the Cutty Sark.
Here is the plan from Underhill:
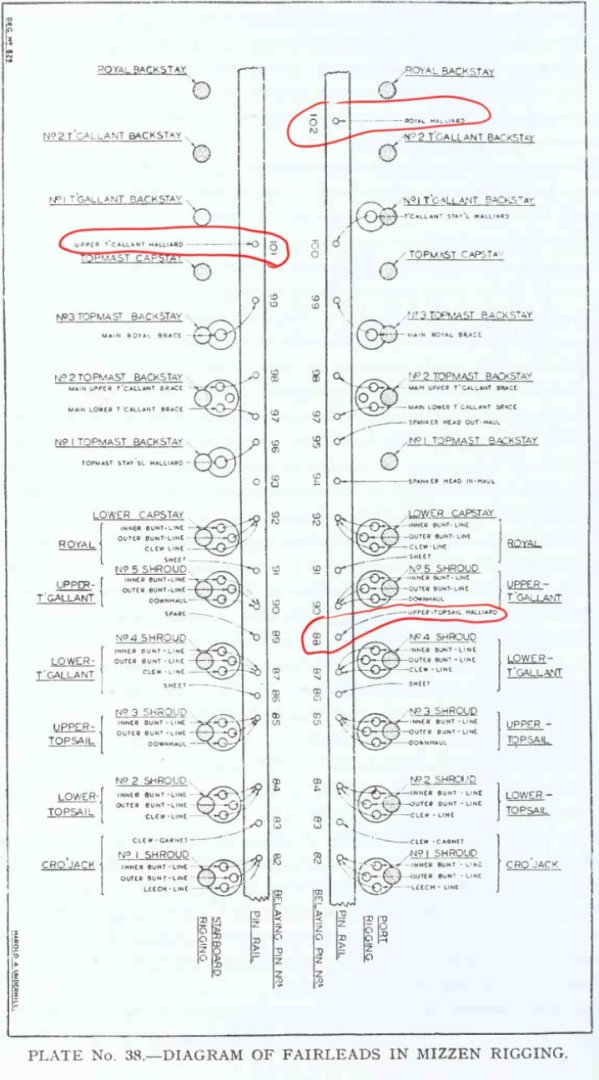
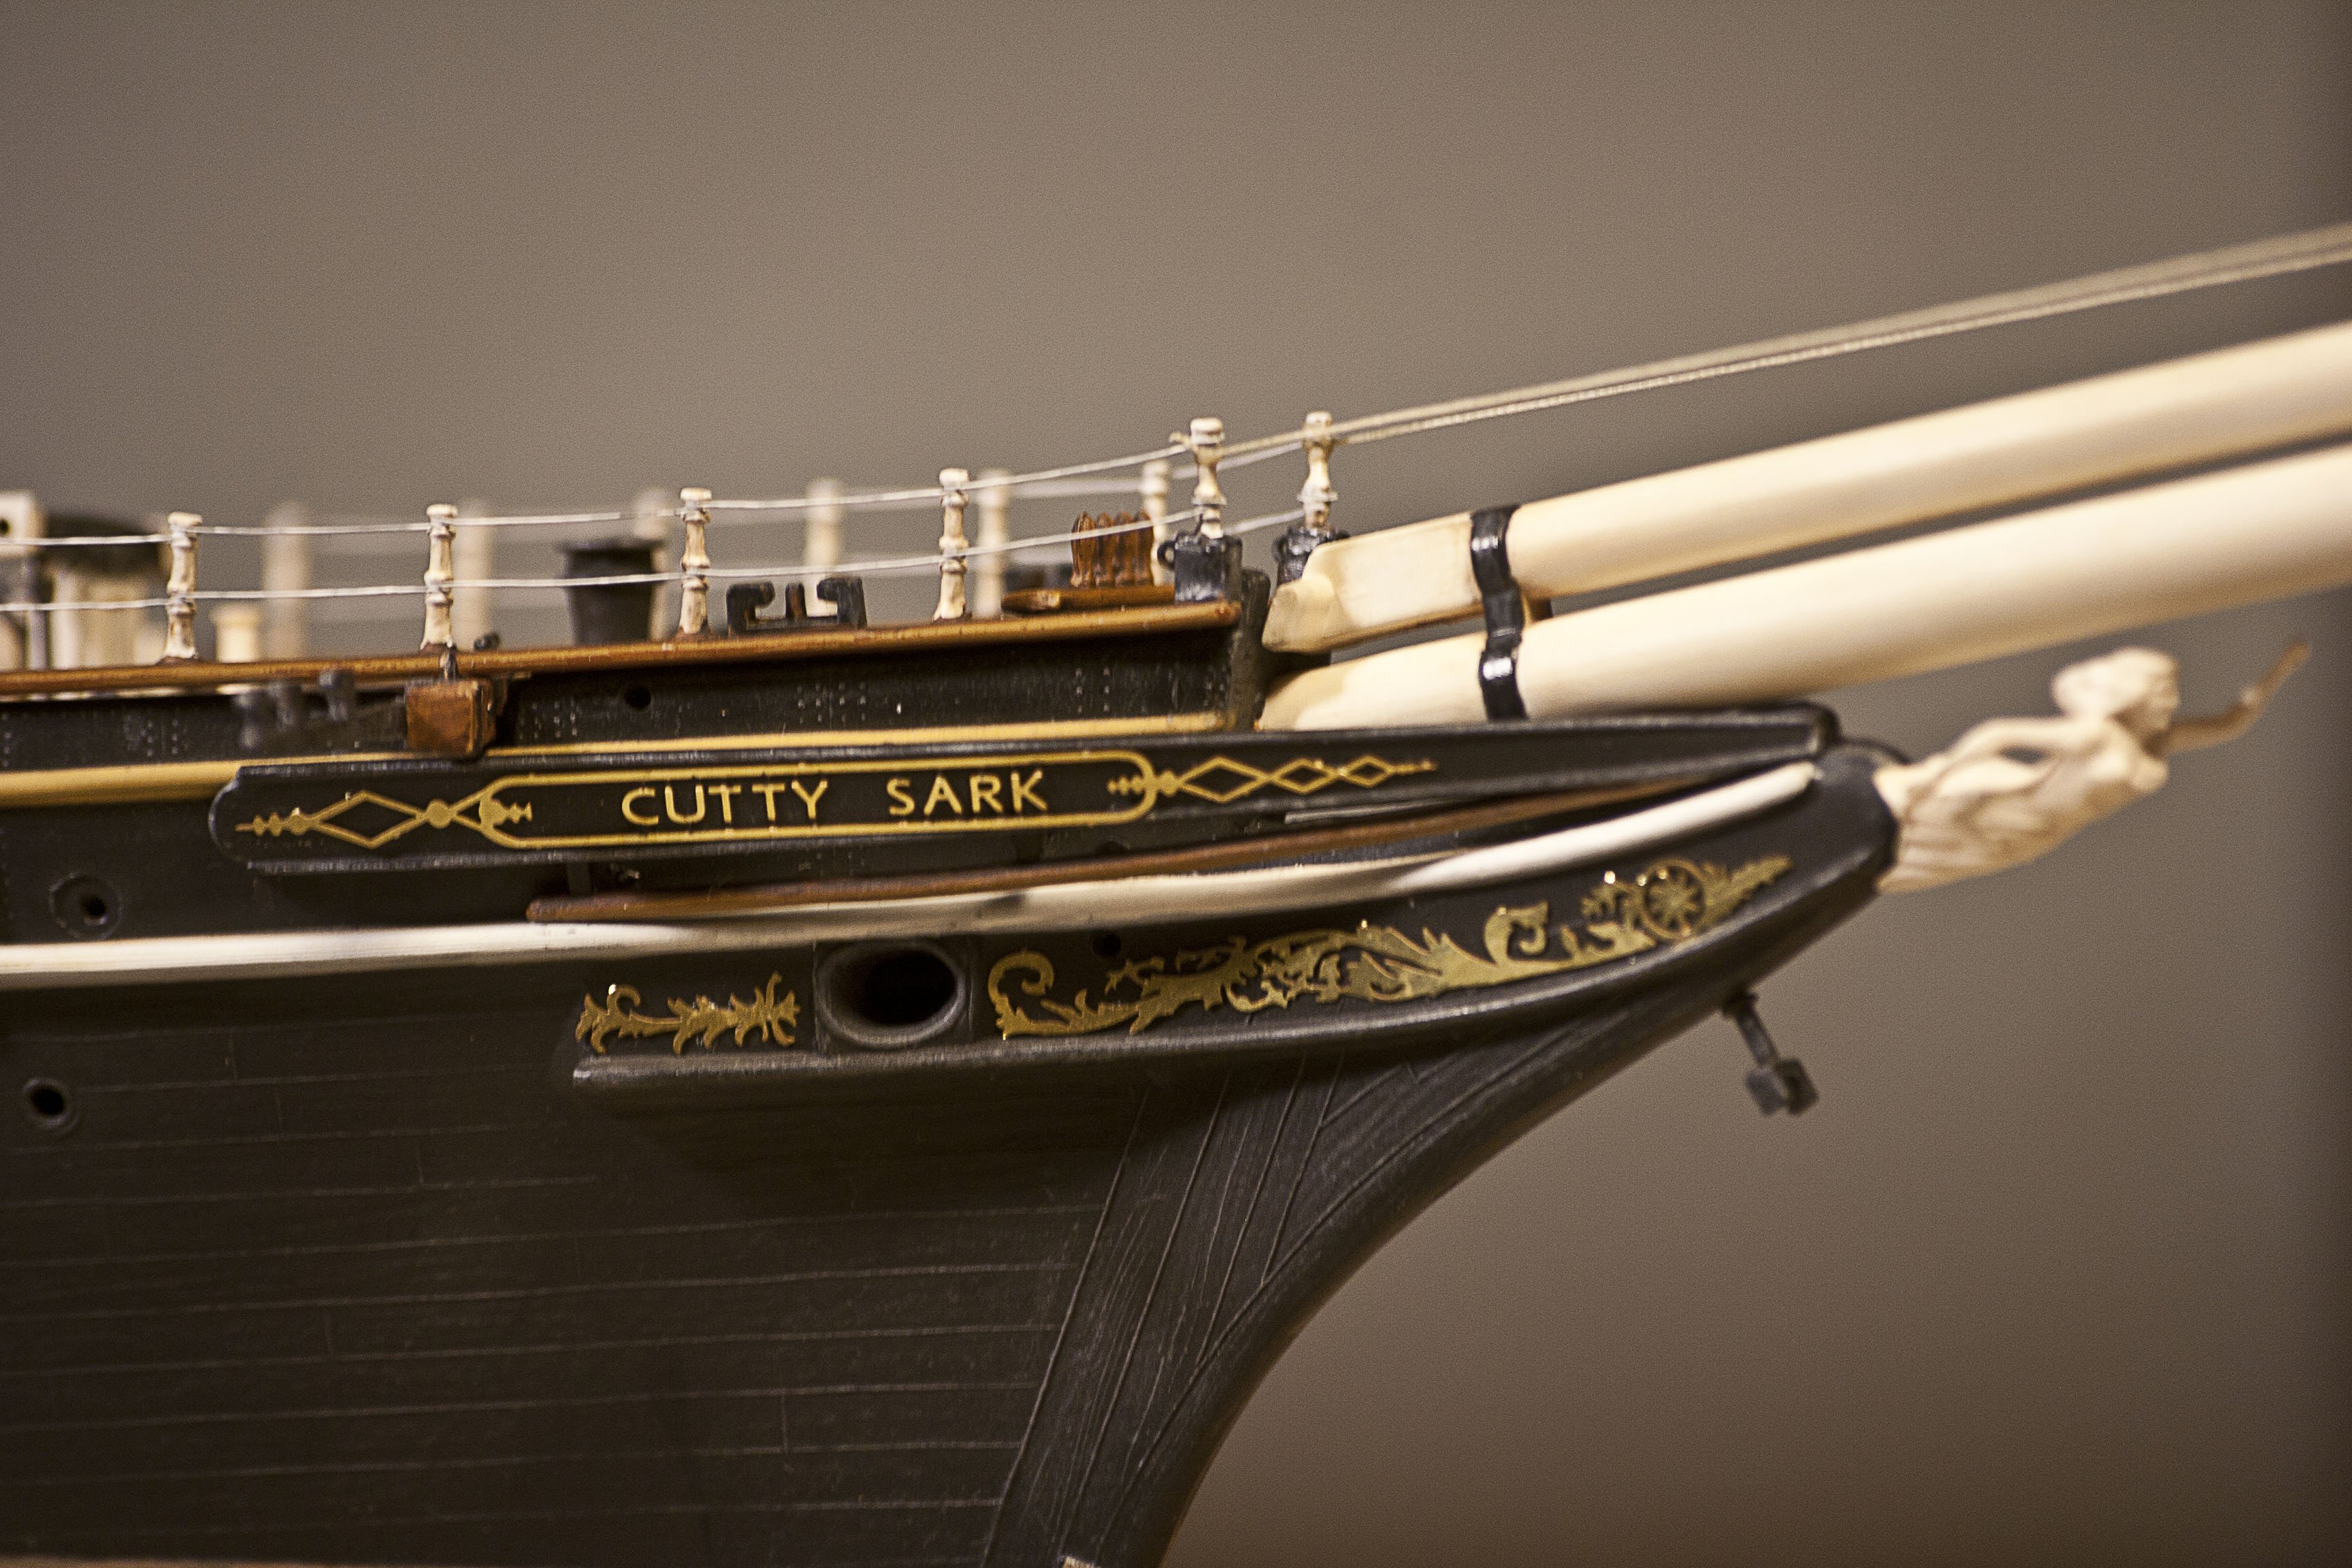
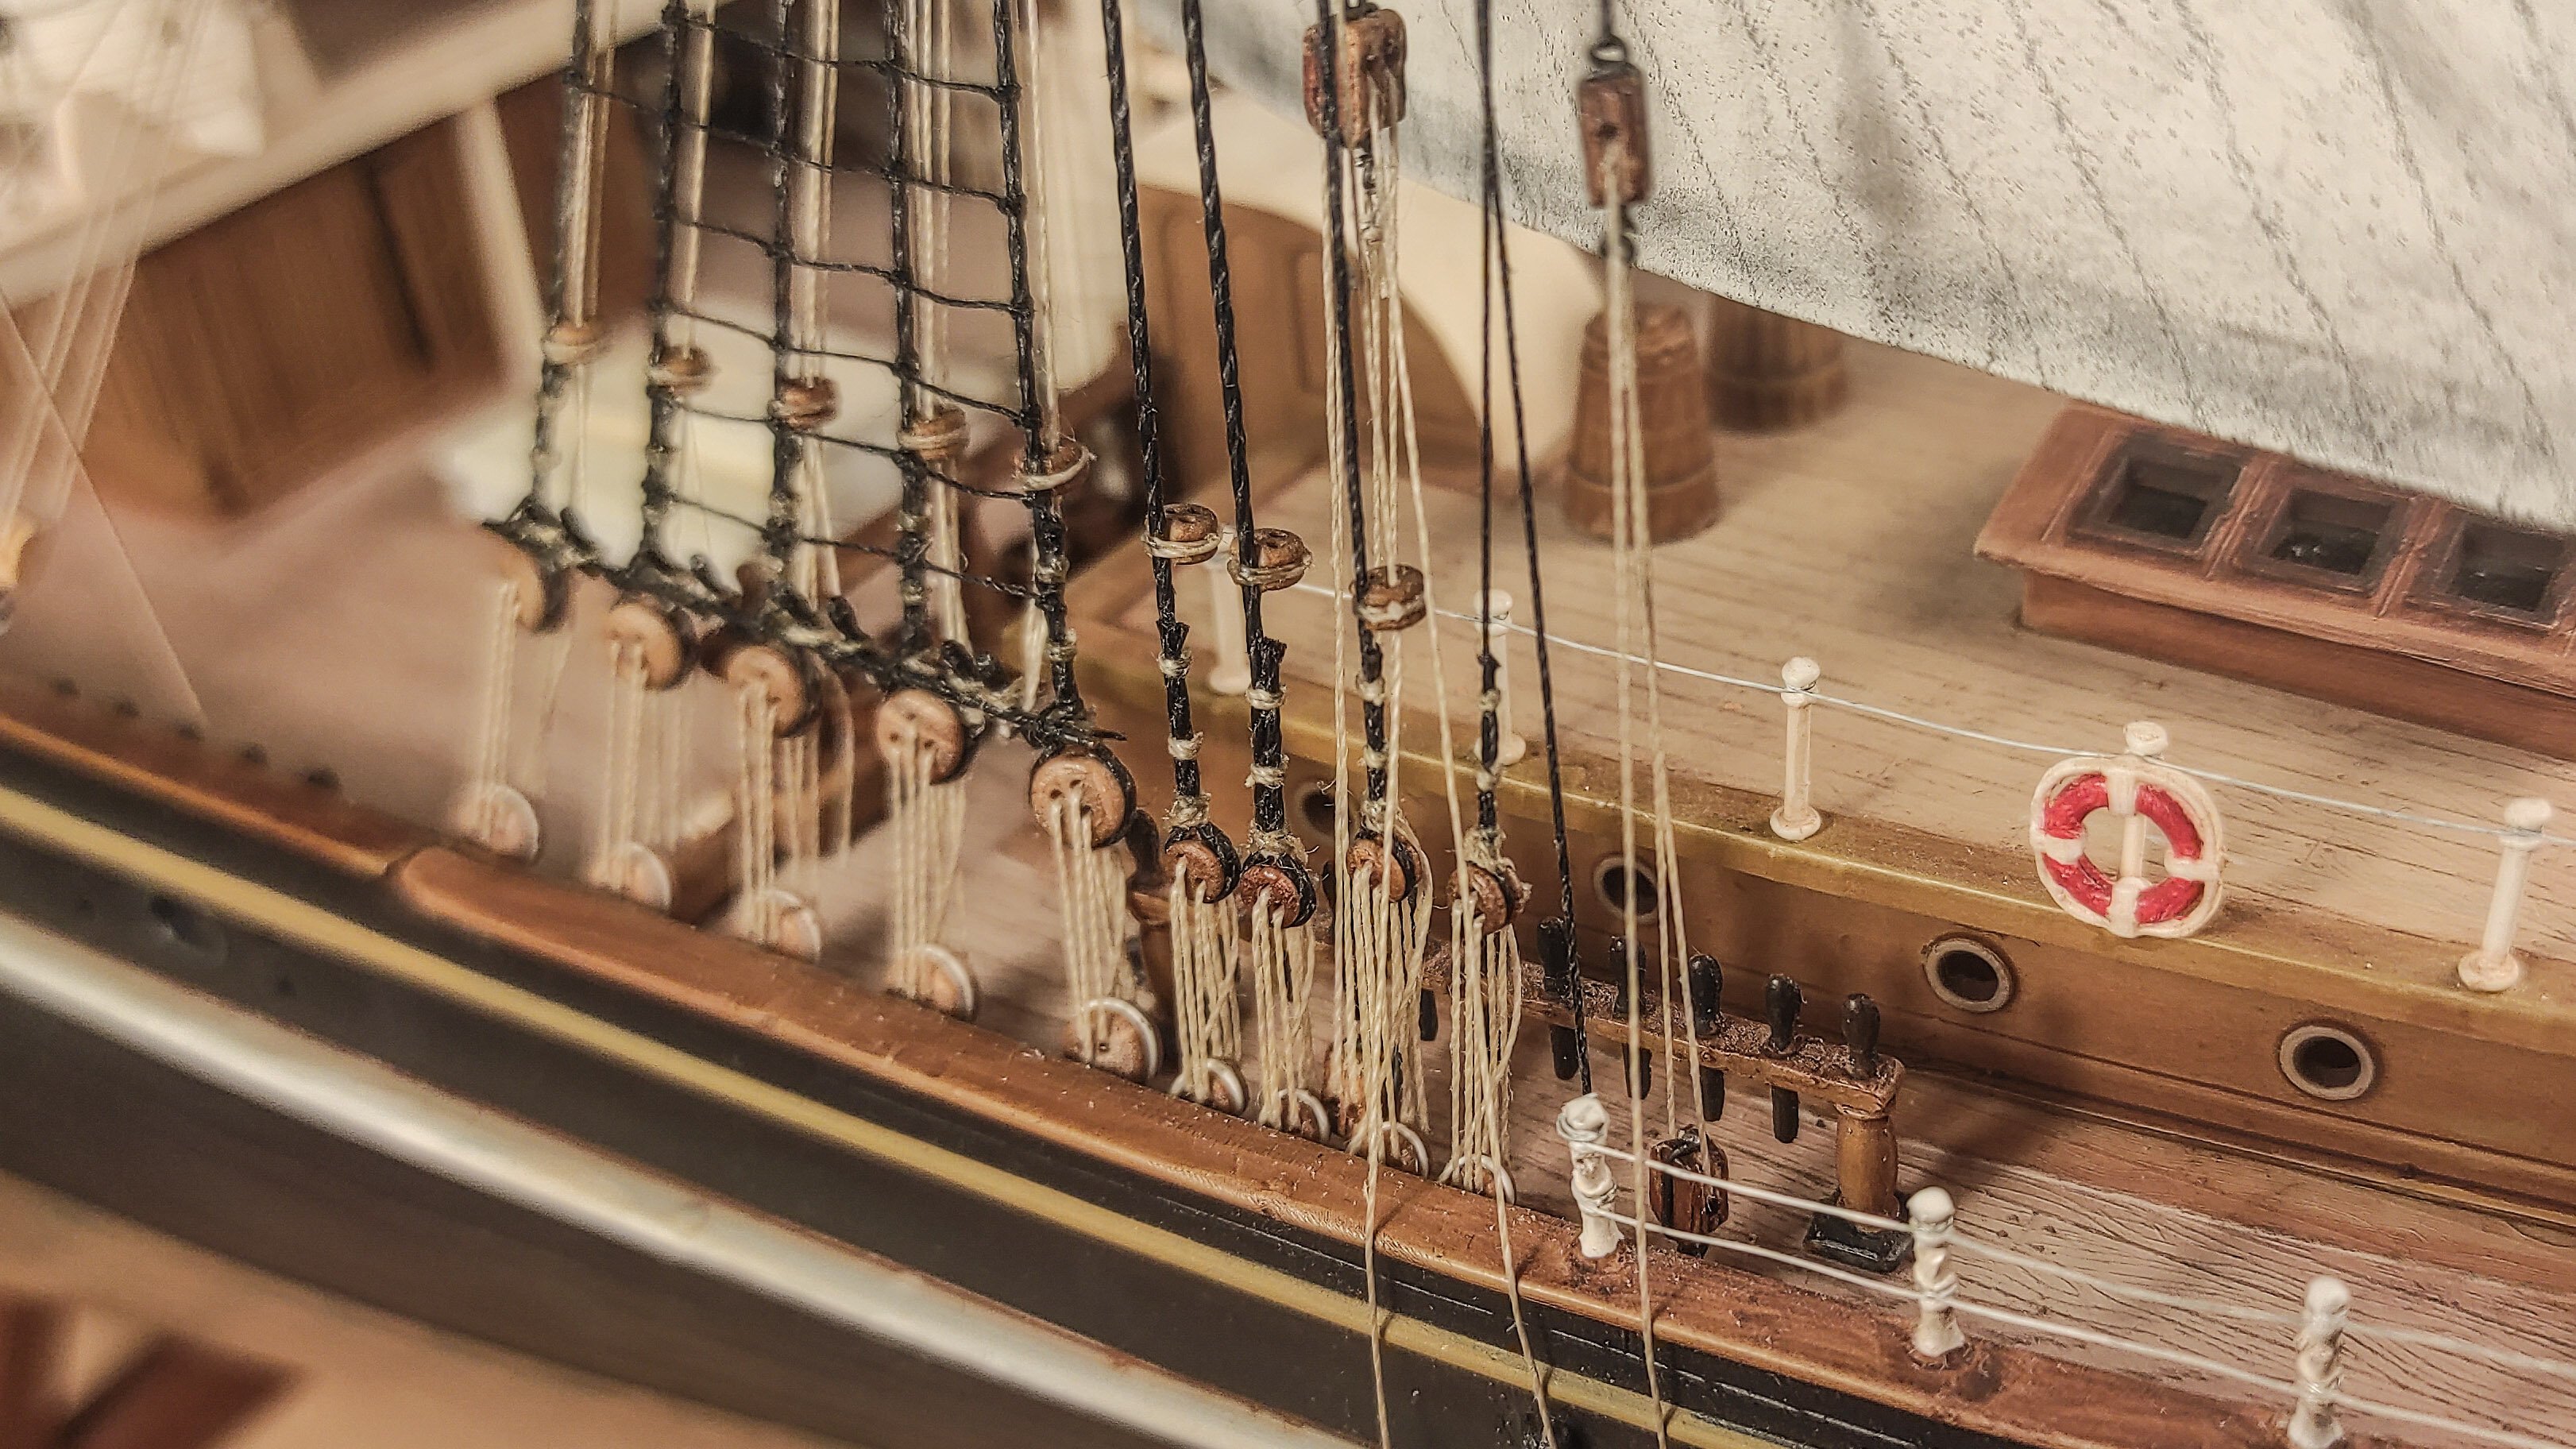
All the three halliard are clearly located, but on the Cutty Sark there are no pins in this location. Not in the Revell model, as you can see here from my model:


And, most notably, not in Campbell's plans, as can be seen from the image posted in the first post.
Only the standing part is indicated, with the eyebolt for the purchase line, but not the "free side" of the line and the respective pin.
The only pins available are the one on the shrouds (already busy) and the one on the pin rail.
- mtaylor and Keith Black
-
 2
2
-
Ok, sorry, I completely forgot the main braces! They are belayed to the mizzen pin rail.
Still, I can’t understand where to belay the mizzen halliard… They are asymmetrical, and the only pin available are the one on the pin rail, can anyone confirm this assumption?
Thank you again!
- Keith Black and mtaylor
-
2
-
Hello everyone,
Do you know what lines are supposed to be belayed on the pin rail of the mizzen mast?
I’m referring to this one:
Looking at the Campbell’s plans I can only see the spanker outhaul, but it seems strange to have an entire pin rail on both sides just for one line.
On the other hand, I can't figure out where to belay the mizzen halliards.
Are they supposed to be belayed on the pin rail?
If not, do you know where to belay them? I can’t find useful information on Longridge and on Masting and rigging…
Thank you for your help!
- mtaylor and Keith Black
-
2
-
Thank you again Kirill, and sorry for the delay in answering.
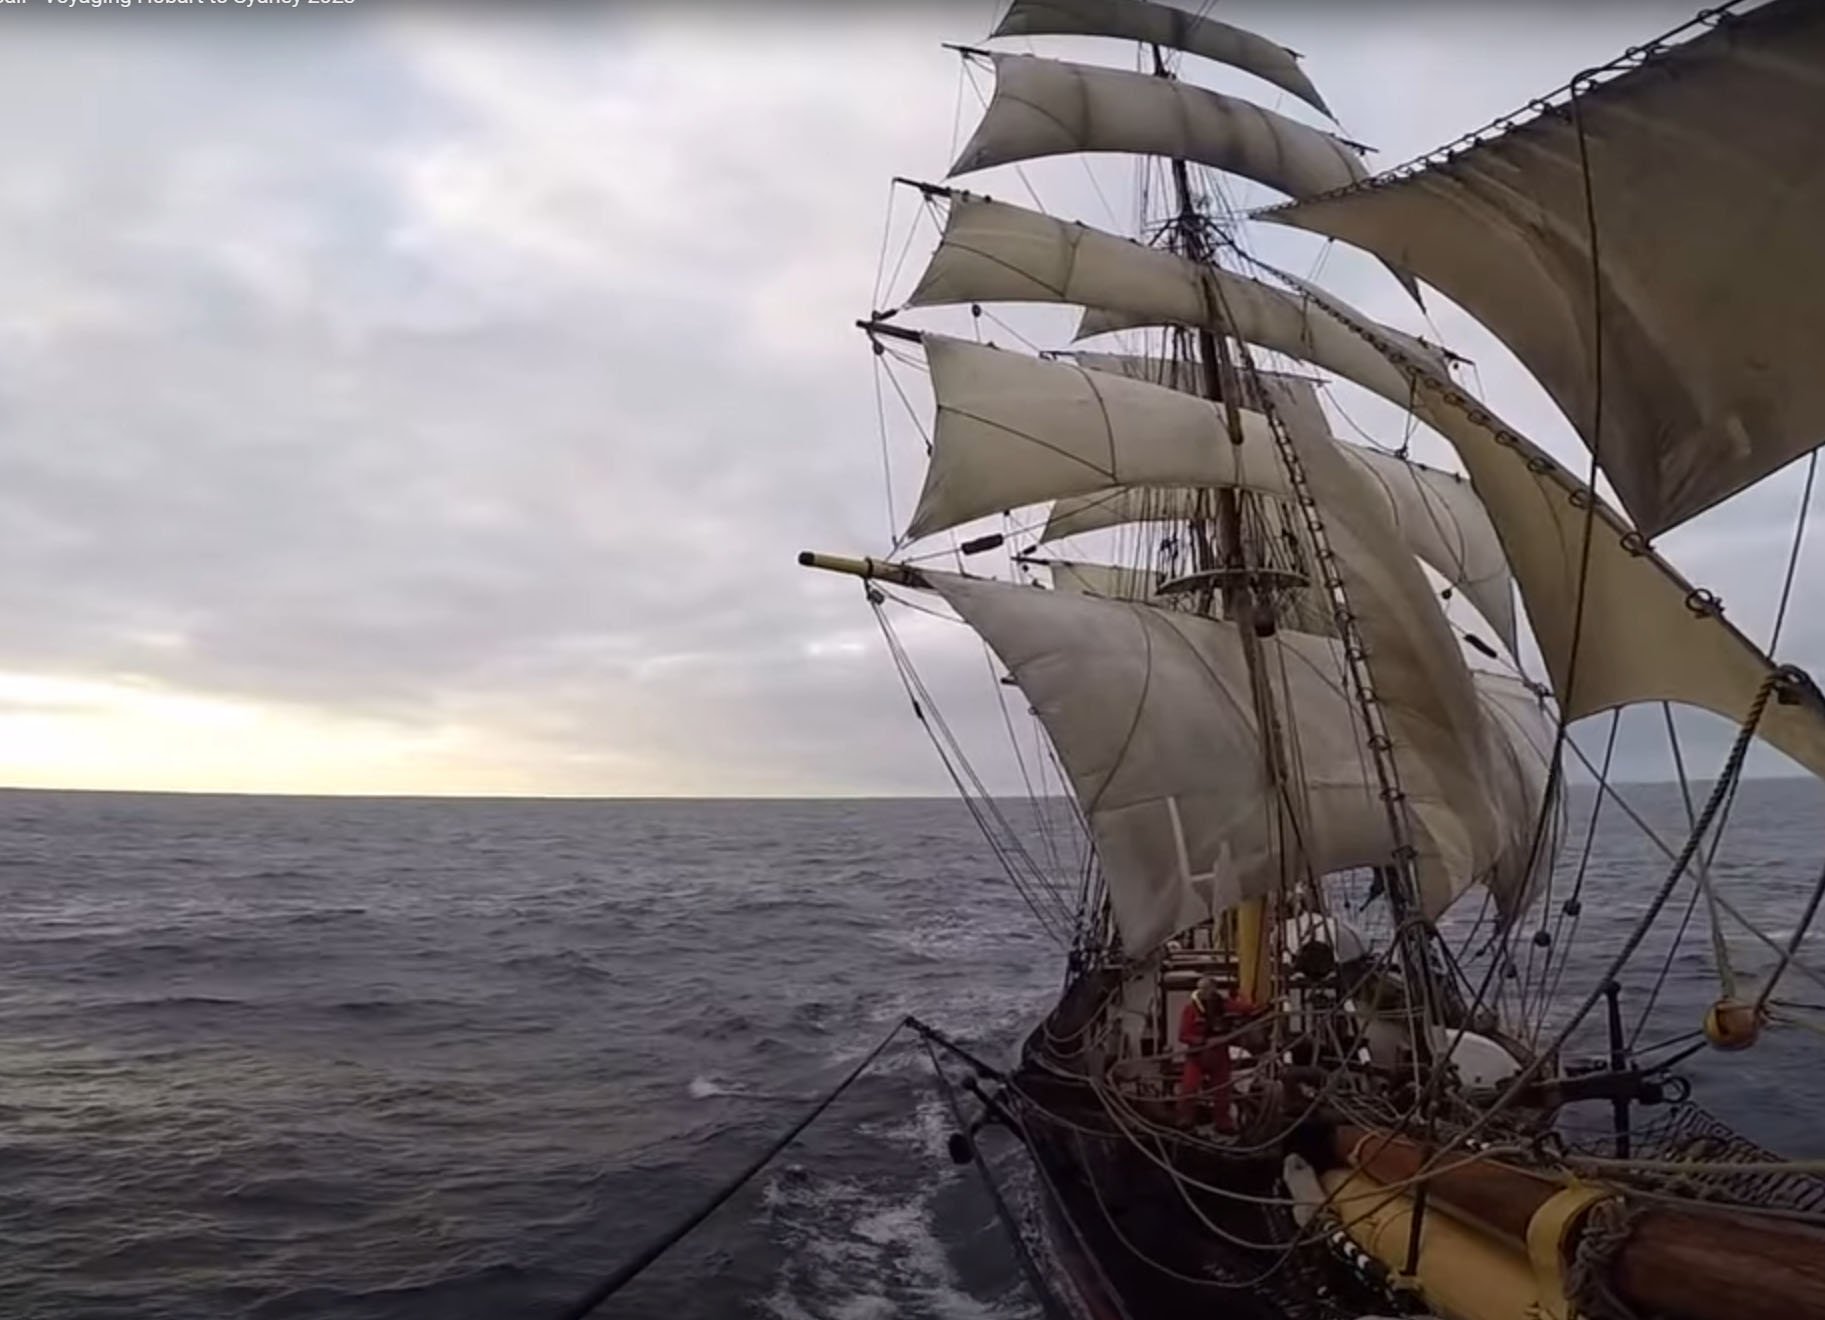
I tend not to use models or painting as reference, so I have looked for more picture of real ships in the same condition.
Here is a collection of James Craig, Europa and Star of india:


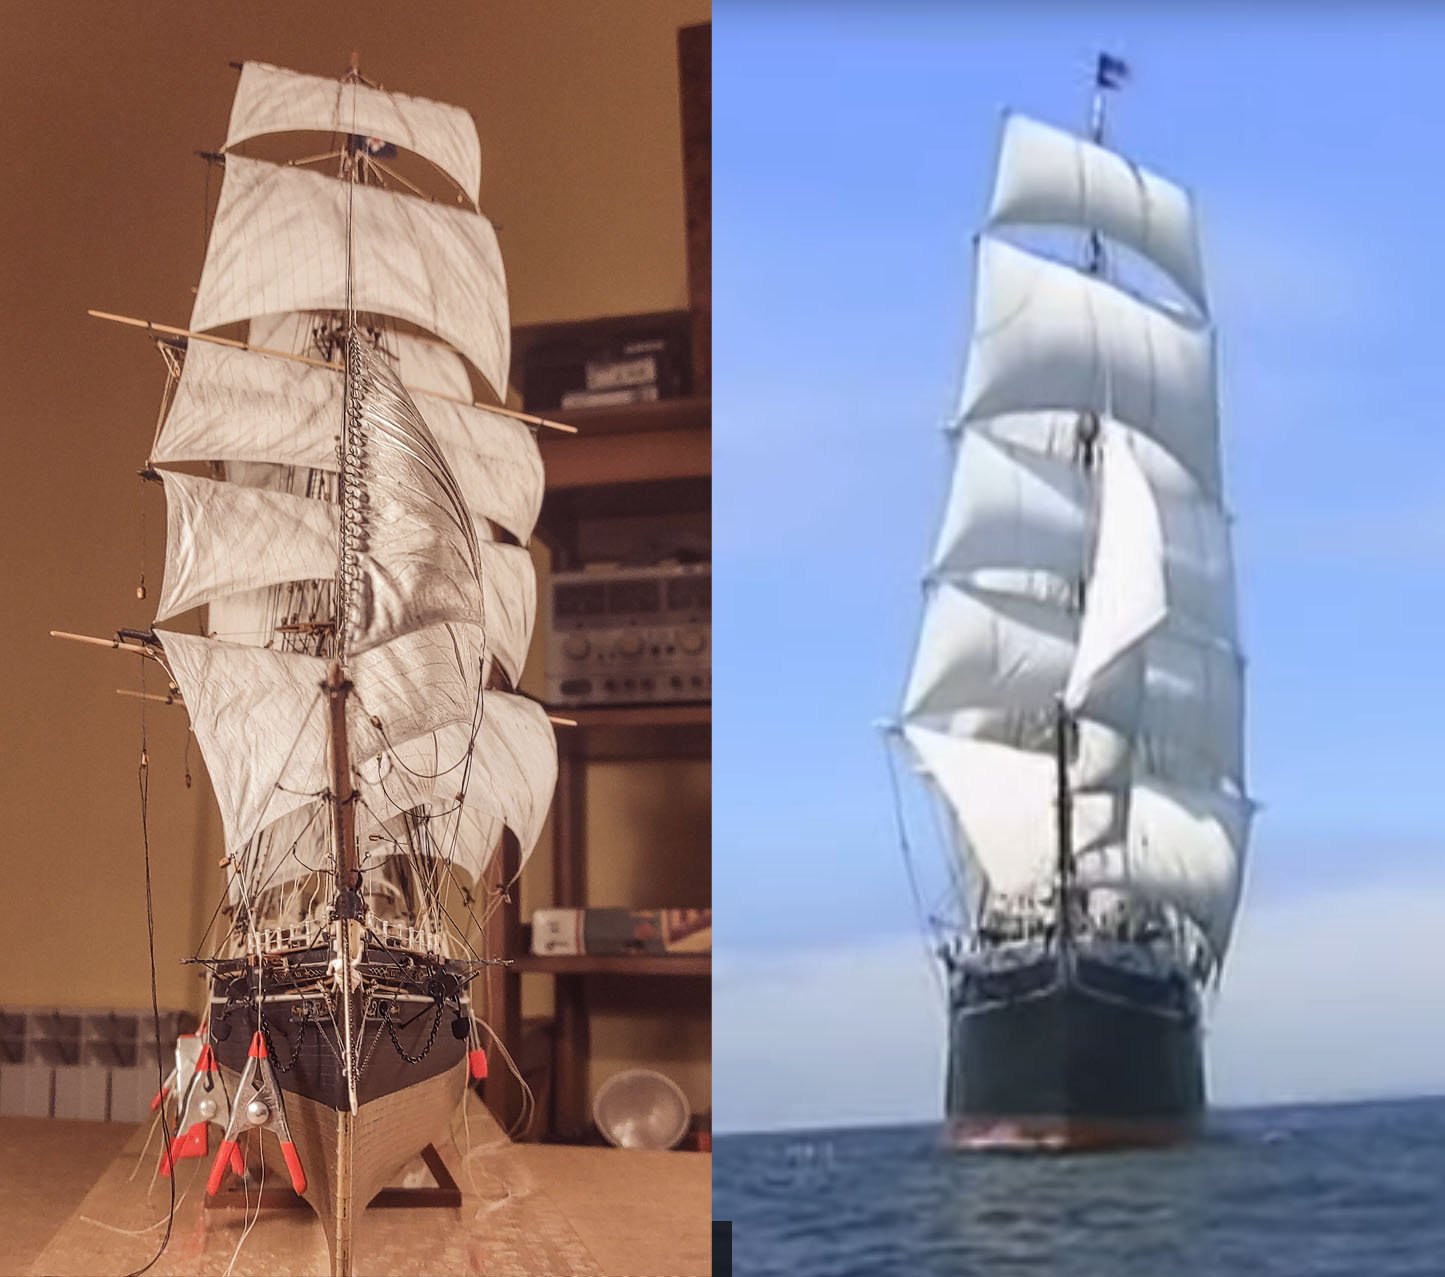
As you can see, they all seem to match my model and I’m more and more convinced to present the cutty sark with the thack on the windward.
I will further shape the sails, but this configuration appears to be vastly more frequent than the original one. Thank you for helping me to change my mind about it!
Lastly a comparison between my Cutty Sark and the Star of India:

Not too bad in my opinion, surely better than the previous one!
- kirill4, Keith Black, Scottish Guy and 2 others
-
5
-
On 4/6/2024 at 10:25 AM, Kevin-the-lubber said:
What an interesting project! And very nicely printed, I don’t see any supports scars anywhere. I couldn’t hear or see any gears grinding but have been told by a pro that candle wax is a great lubricant for 3d printed gears, if you are having that problem. I’ve been meaning to try it on my rope seizing machine but as I’ve parked the Cutty Sark for now that may be a while.
Thank you, that is good advice, I’ll try it out for sure!
17 hours ago, kirill4 said:Good day,
Dear Bruma,
Sorry, I thought You depicted position "C"... regarding my comments ... only by my private opinion, may be positiin C of the sails cold be more "artistic" if I could say that ,"as wall of sails" .. :)))
...I was under impression of this picture
No apologies needed, Kirill! It is quite the opposite! Thank you for bringing this point to my attention.
I'm still in doubt about what to do... And I'll be glad to read about this topic from others. I'm still not sure about my explanation, and I see many examples on real ship where it seems that you are right.
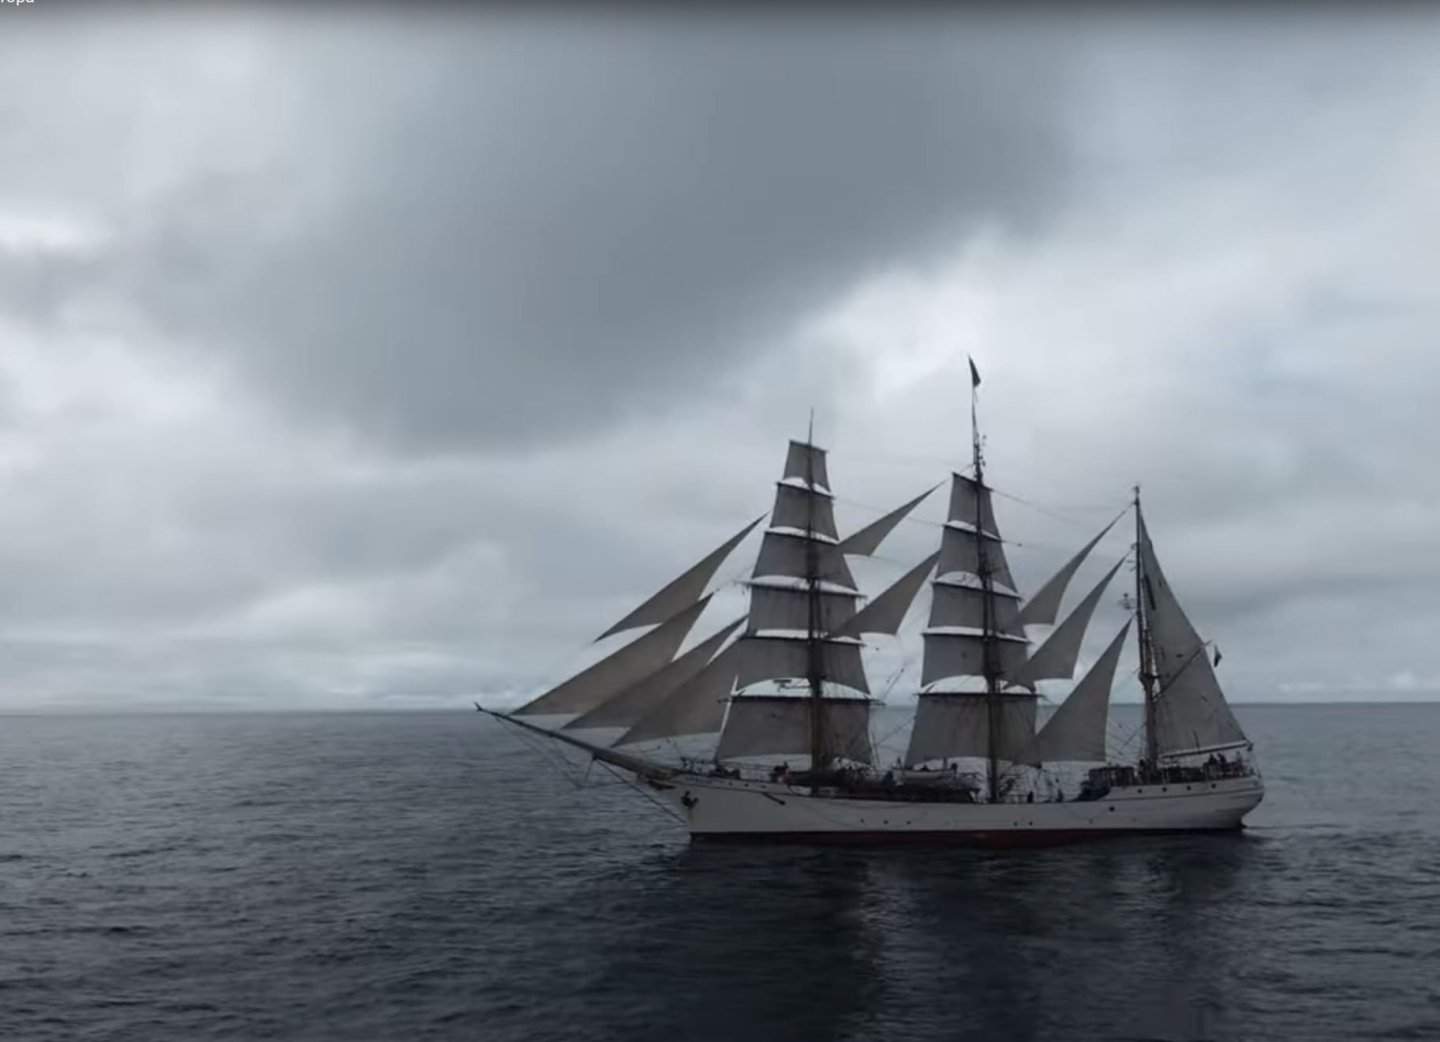
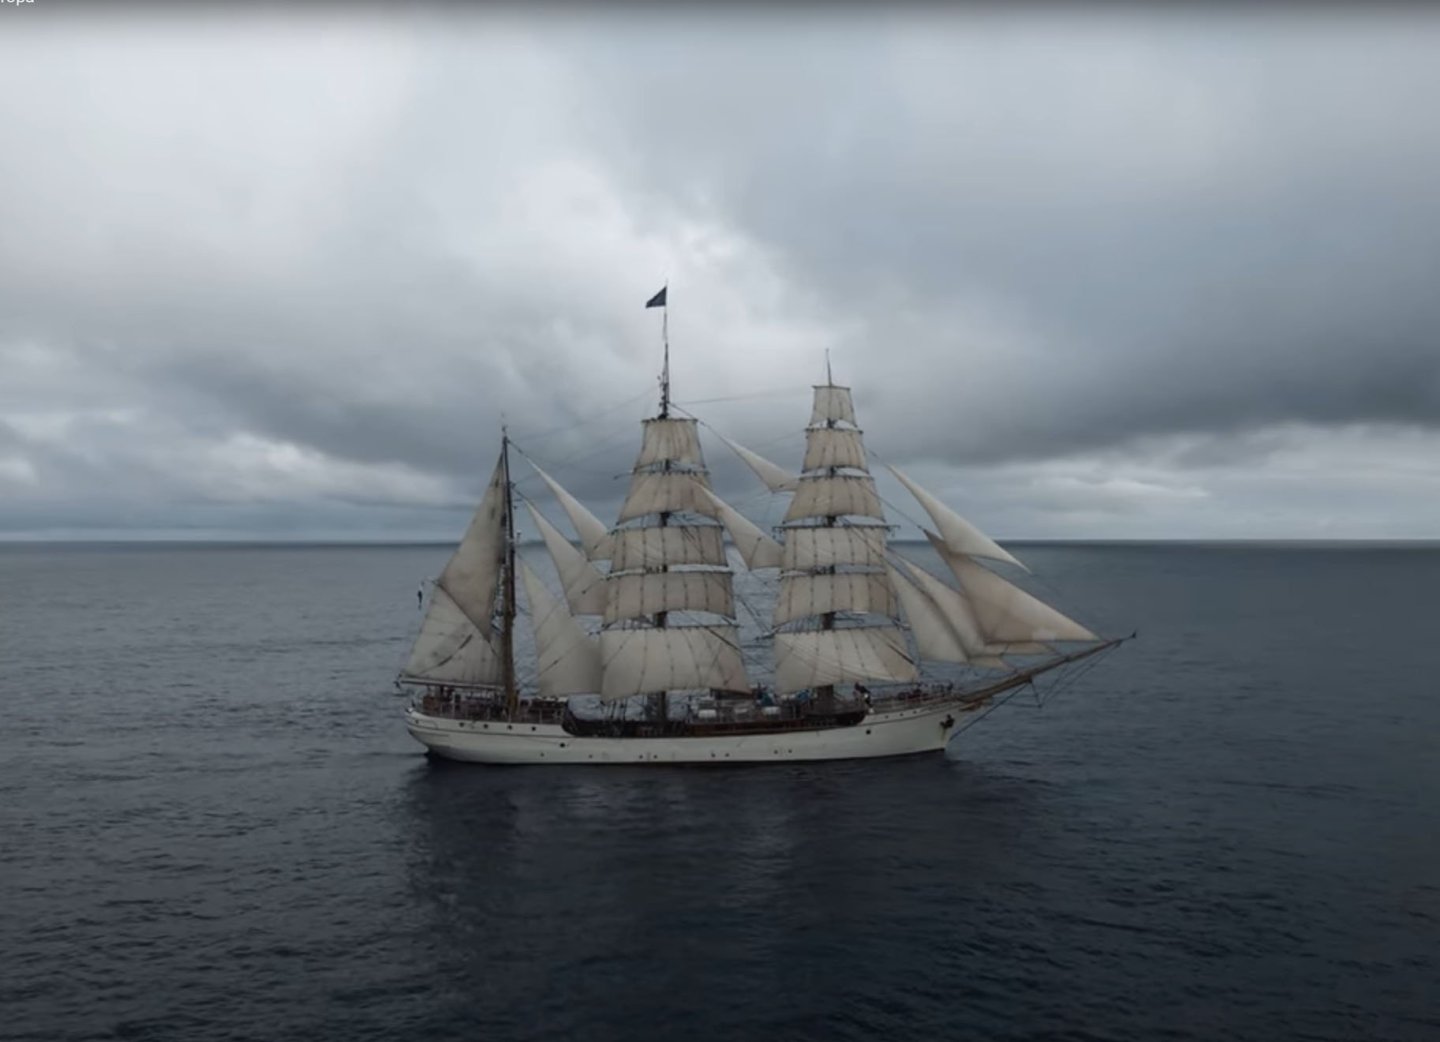
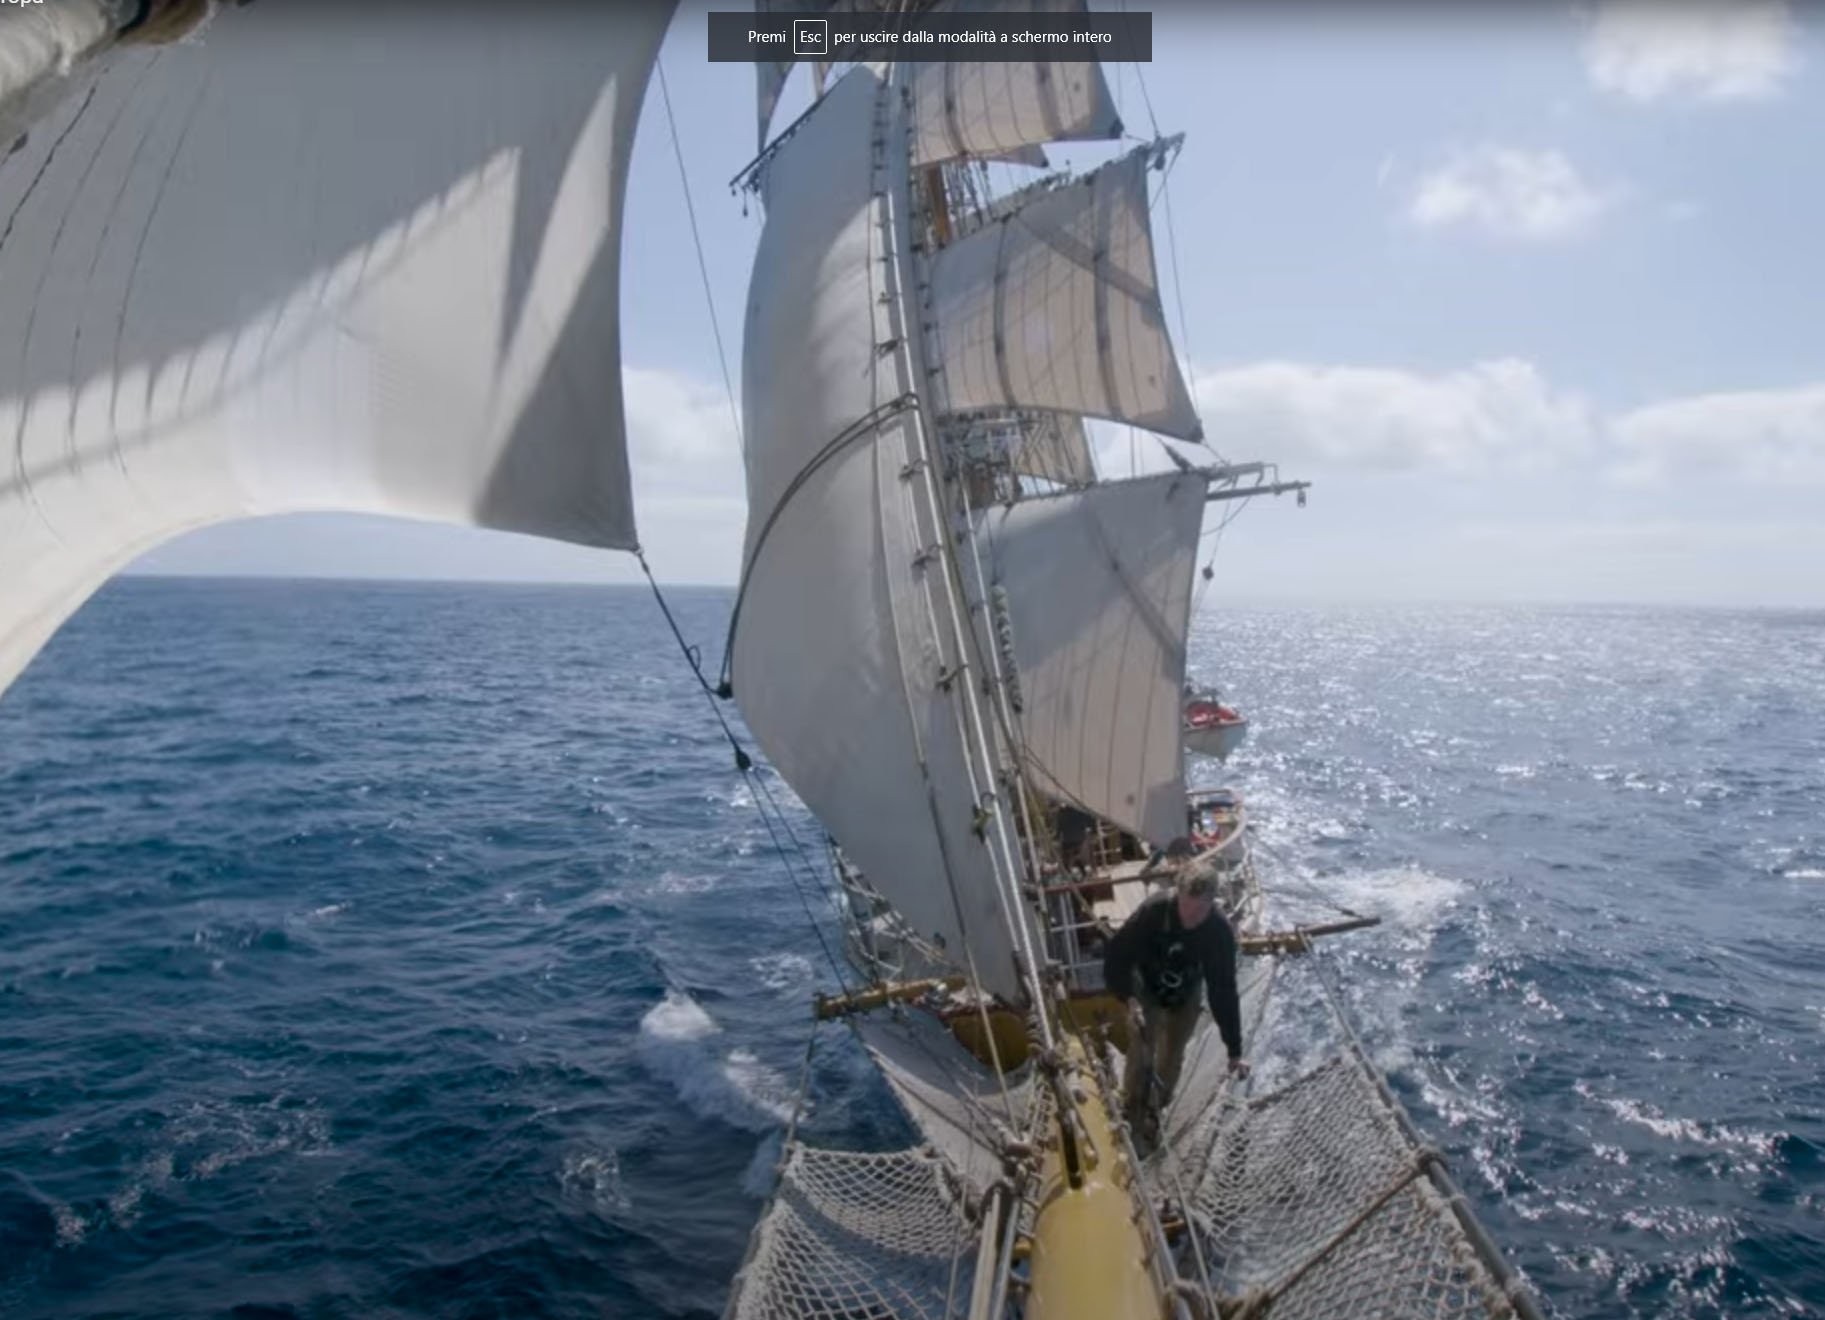
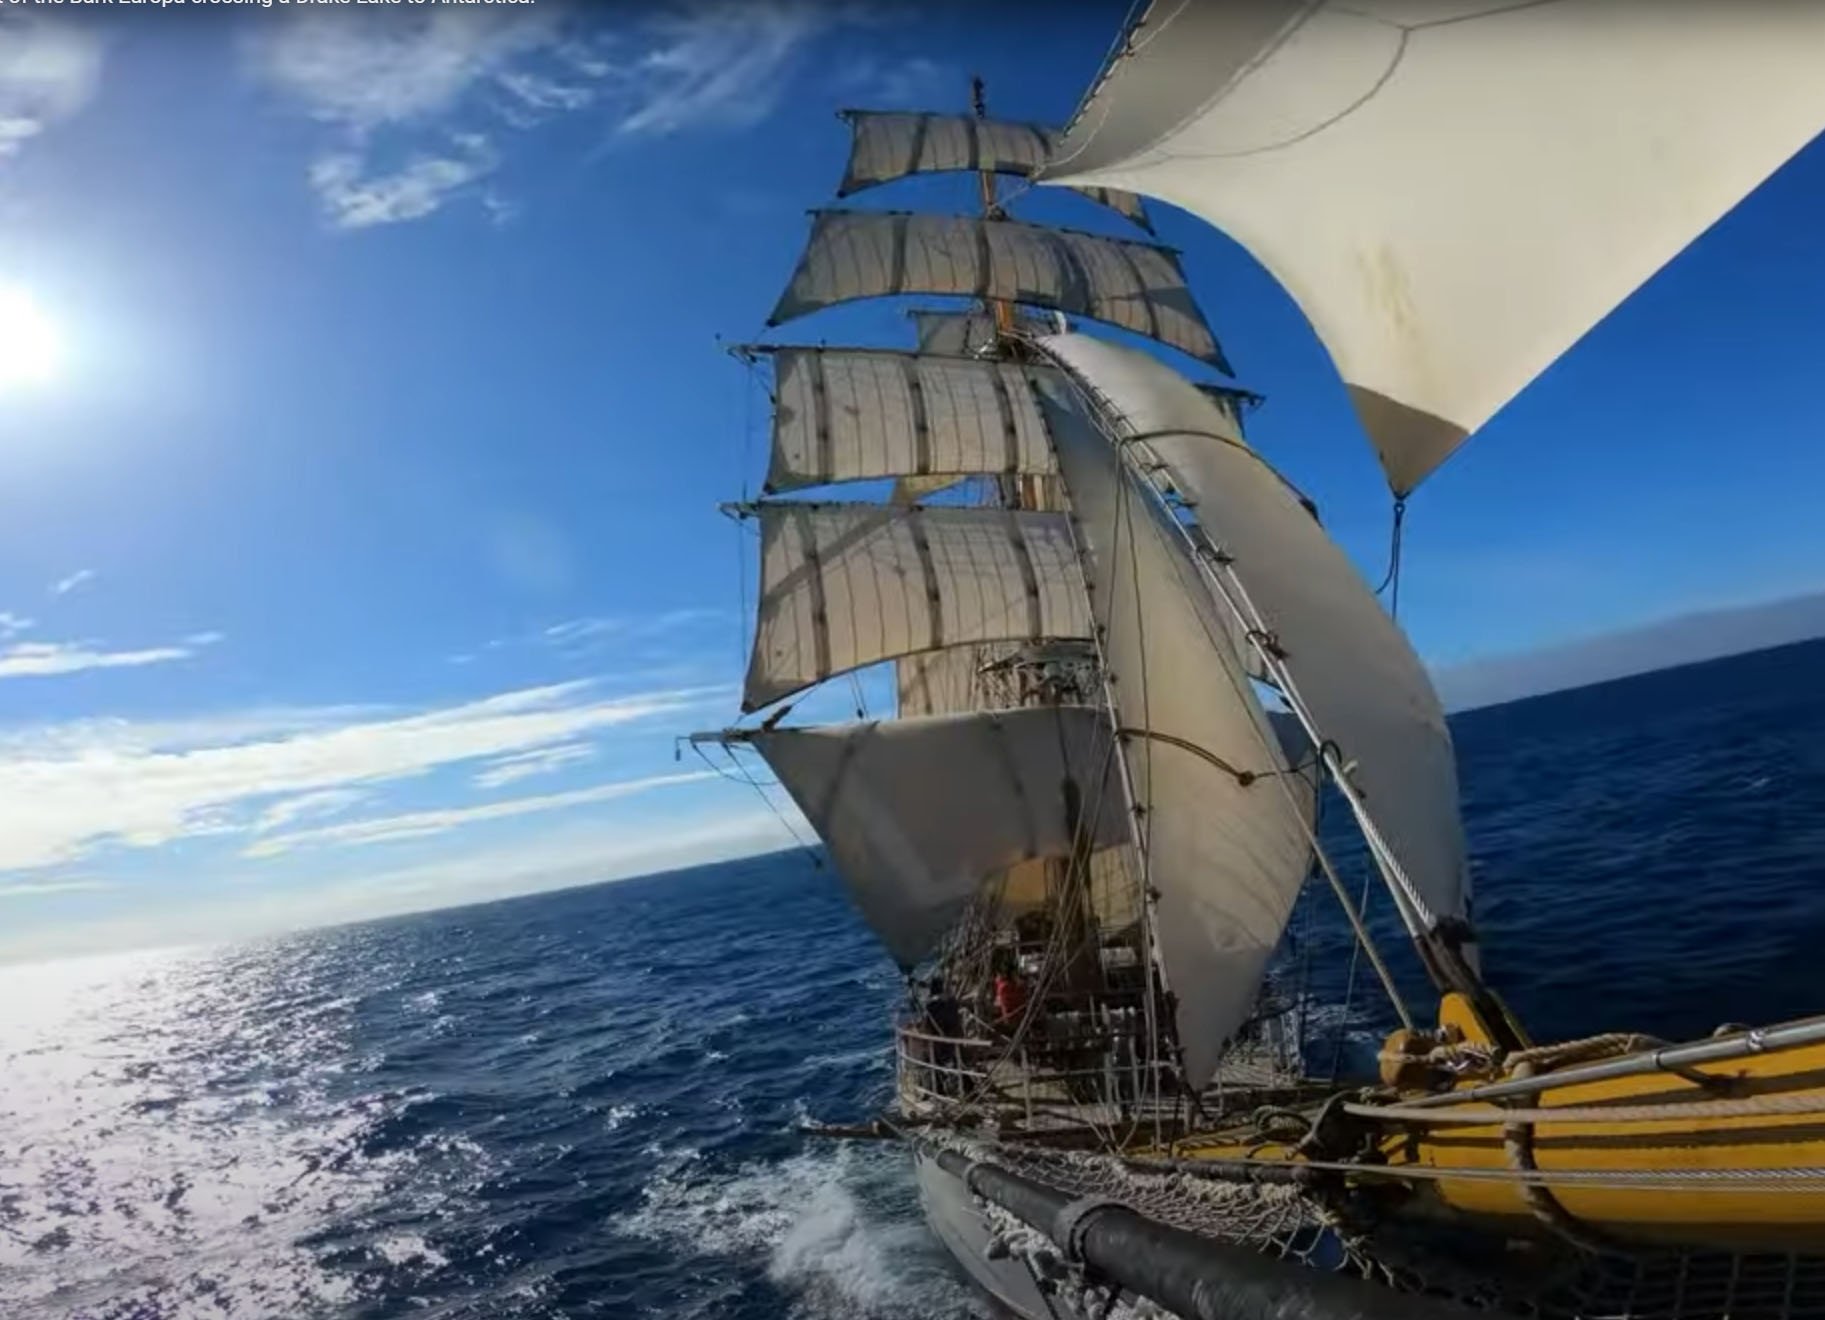
Here is an example from Bark Europa:
At 14:19 or at 14:59 she seems to be setted as you suggested, but looking at the flag on the main mast, she seems to be at “C” configuration, with the wind ahead.
Here is another video:
And at 7:17 it seems to be as I depicted them. But at 34:24, with almost no wind, the tack is clearly being used…
I have also made a quick test on my model. The tack for the fore course is on the cathead, but it is really far ahead! It seems weird to me… I’m I missing something?
This is the result of a firs quick test:

I really need some help to be sure to make the right choice! If anyone knows the answer, please let me know!
- Keith Black and Scottish Guy
-
2
-
Hello everyone!
First, sorry for not answering your post for so long, and thank you everyone for the comments and likes. I really appreciate all of them.
On 3/29/2024 at 1:41 PM, schooner said:Great build and build log, nice clear photos!
I really appreciate your posting of the video of how to do ratlines back in September. Although I use clove hitches all the time on my real boat somehow when using thread around another vertical thread I keep screwing it up. Your video is great because you tie the knots slowly and your use of tweezers keeps your fingers from blocking the view of what you are doing. I'm no in the process of tying stress-free clove hitches!
I’m really happy you find it useful! Thank you!
I have been away because I’m again in love with a side project related to steam locomotives…. This time, I tried to make my 3d printed locomotive move!
Here is the result:
Still a lot to do, but promising I guess! It is at 1:87 scale.
But now, let’s get back to the Cutty Sark.
I will post updates in the next few days, I need some free time to take some decent pictures.
Meanwhile, I would like to address Kirill’s question about the courses.
On 3/11/2024 at 9:00 PM, kirill4 said:I have some doubts about whether the tension of some rigging of the lower sails is shown correctly in this scenario of the position of the yards...
would it be more logical to see tight tacks and loosened sheets on the windward side and vice versa on the leeward side of the main sails ...? Clews of the windward side of main sails pointed aft maybe looks a little strange ?
I meant it should be looks like this ...?

First, thank you, Kirill for pointing it out. I really appreciate this kind of constructive criticism; it makes me think and raises questions, which is part of the never-ending learning process.
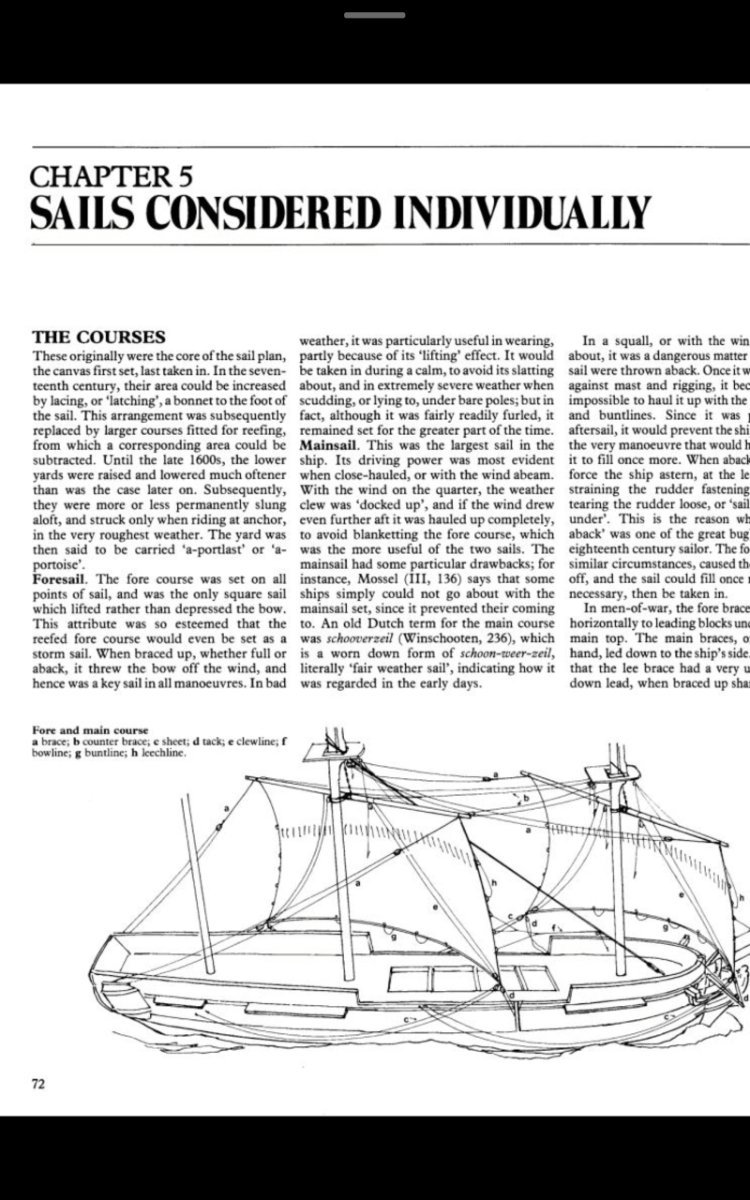
I have had the same doubt. In order to better understand my point of view, let my use this picture from “Seamanship in the age of sails”:
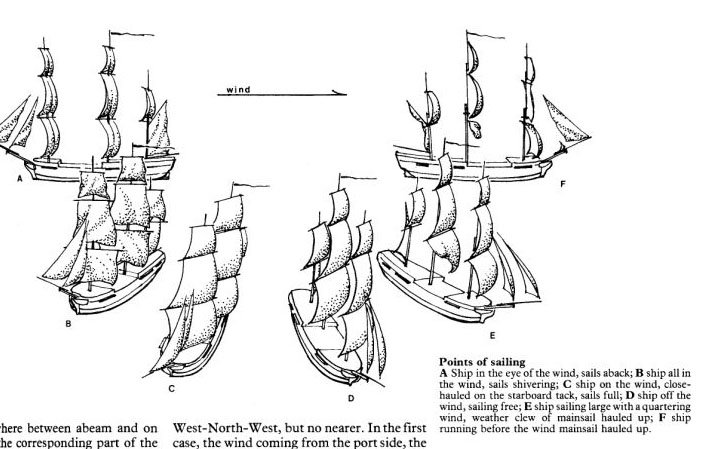
To me, if you are sailing from F to D, the courses need to be set as I depicted them. The wind is still pushing “from behind”. As soon as you move to position C, you have a wind component “pushing against you”, and you must use the tacks to catch the wind (together with braced yardharms).
Since with my Cutty Sark I’m trying to represent the point of sail indicated with the letter “D”, I think I get it right, but I would be glad to read opinions from others, more experienced, sails masters. The good news is that, if needed, I can remedy and shape the course with the tack tightened. I just want to be 100% sure about what to do!
Thank you all!
-
On 1/25/2024 at 6:20 PM, Vladimir_Wairoa said:
so sweeet Bruma.
Thank you Vladimir!
-
-
Thank you all for your comments and likes!
I really appreciate all of them.And please, if you see something wrong, strange or missing, do not hesitate to point it out!11 hours ago, Jim Lad said:Bruma, take that main clew garnet straight to the pin - not through a fairlead.
John
Thank you, John, for helping me again, just to be clear: do you mean the pin on the main rail, port and starboard, or the fife rail at the mast foot?I'm tempted for the first answer, but the fife rail seems better for avoiding interference on the walkways...Thank you again!- shipman and Keith Black
-
2
-
George,
I have somehow missed the finish of your wonderful model.Congratulations on this great achievement! She is really a beauty!How do you feel now after working for so long on her?I've been working on my cutty sark for so many years that she is now part of my weekly routine... -
Dear Johann,
I've been following this masterpiece in religious silence for a long time, but now, for what is worth from a novice like me, I feel the need to compliments with you on this marvelous work of art. It's really a joy to watch and a great inspiration.Thank you for sharing your journey with us. -
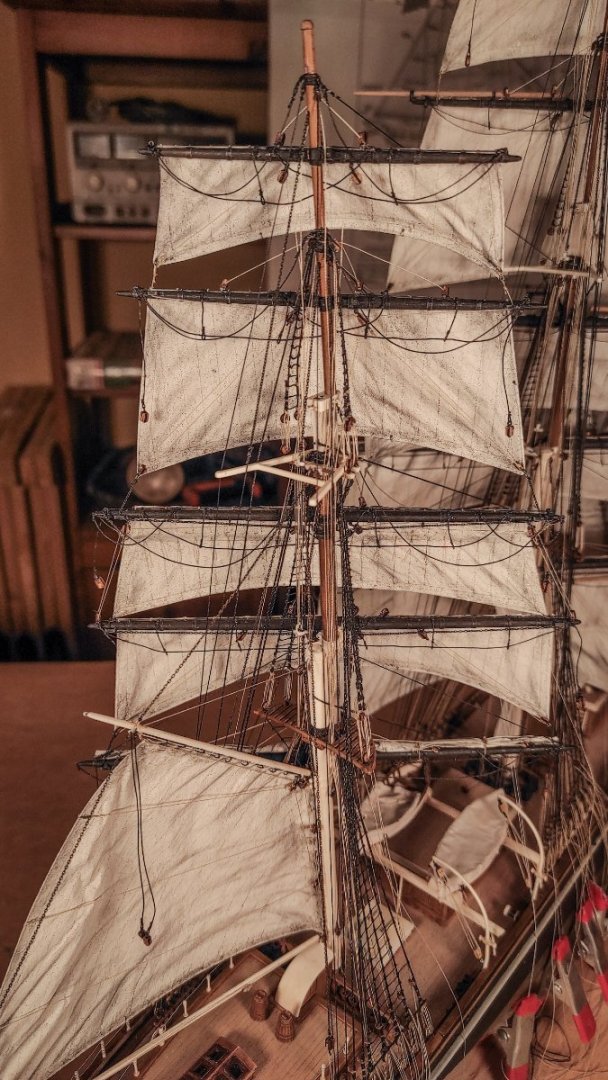
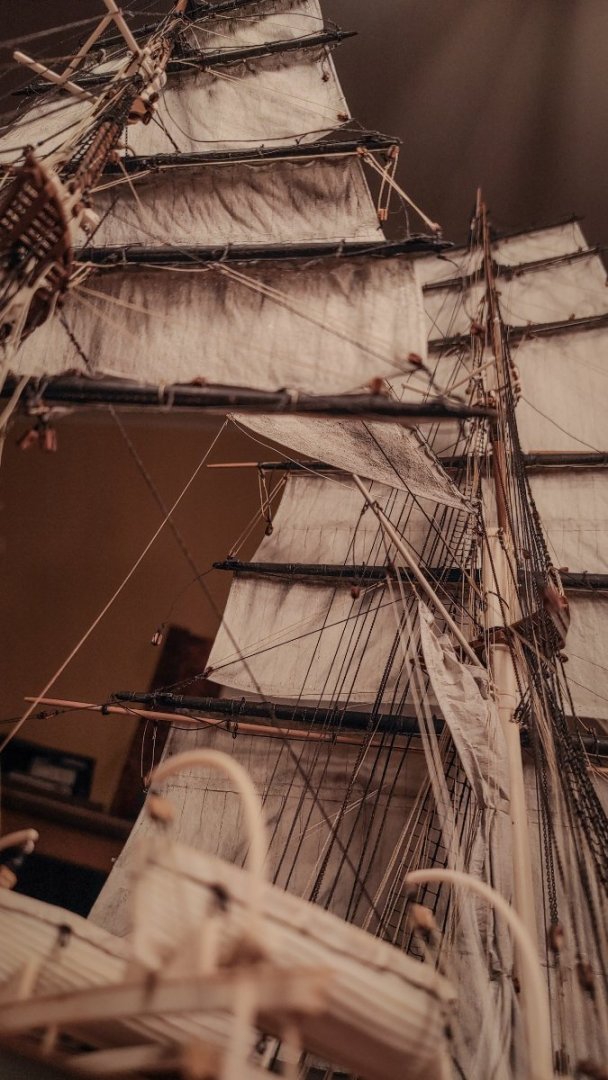
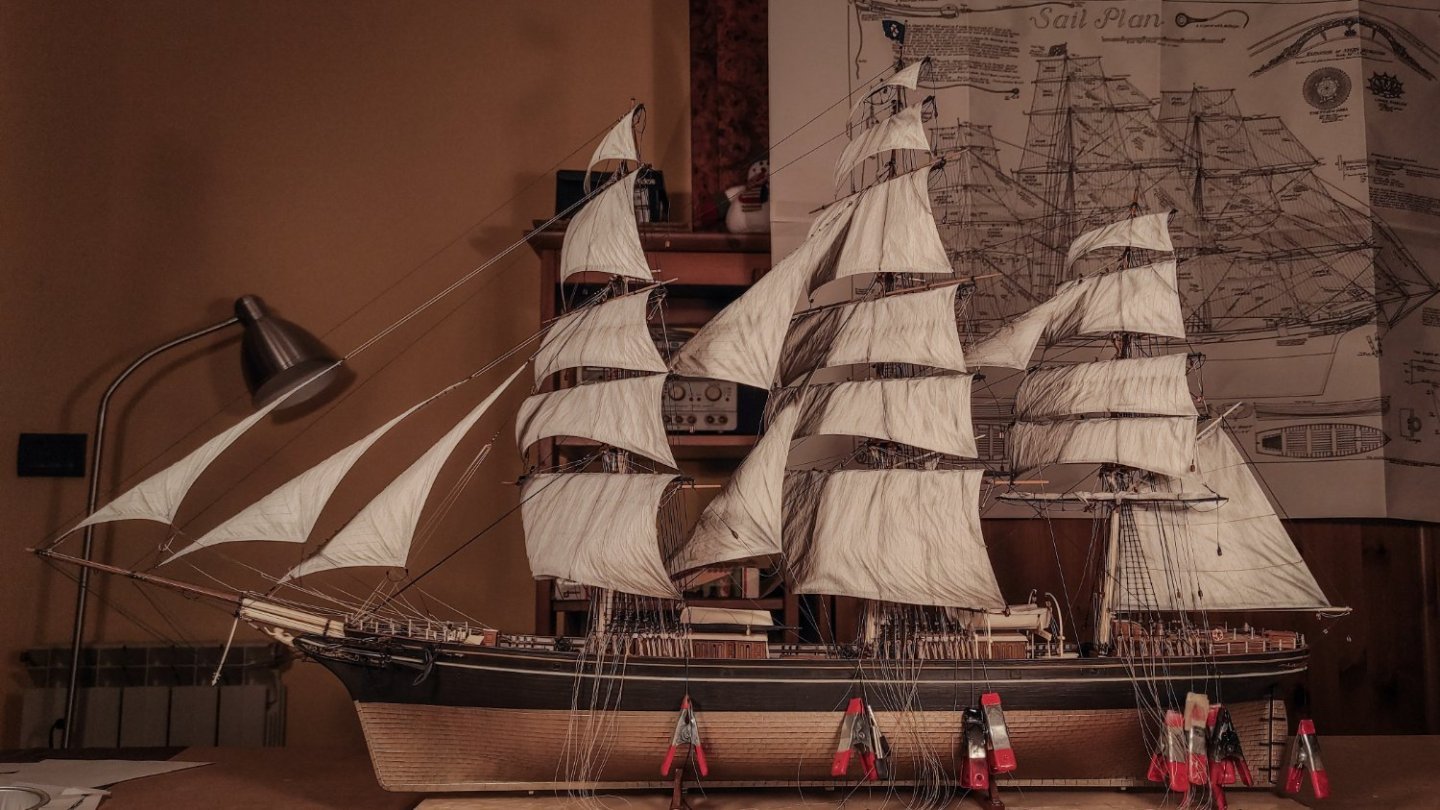
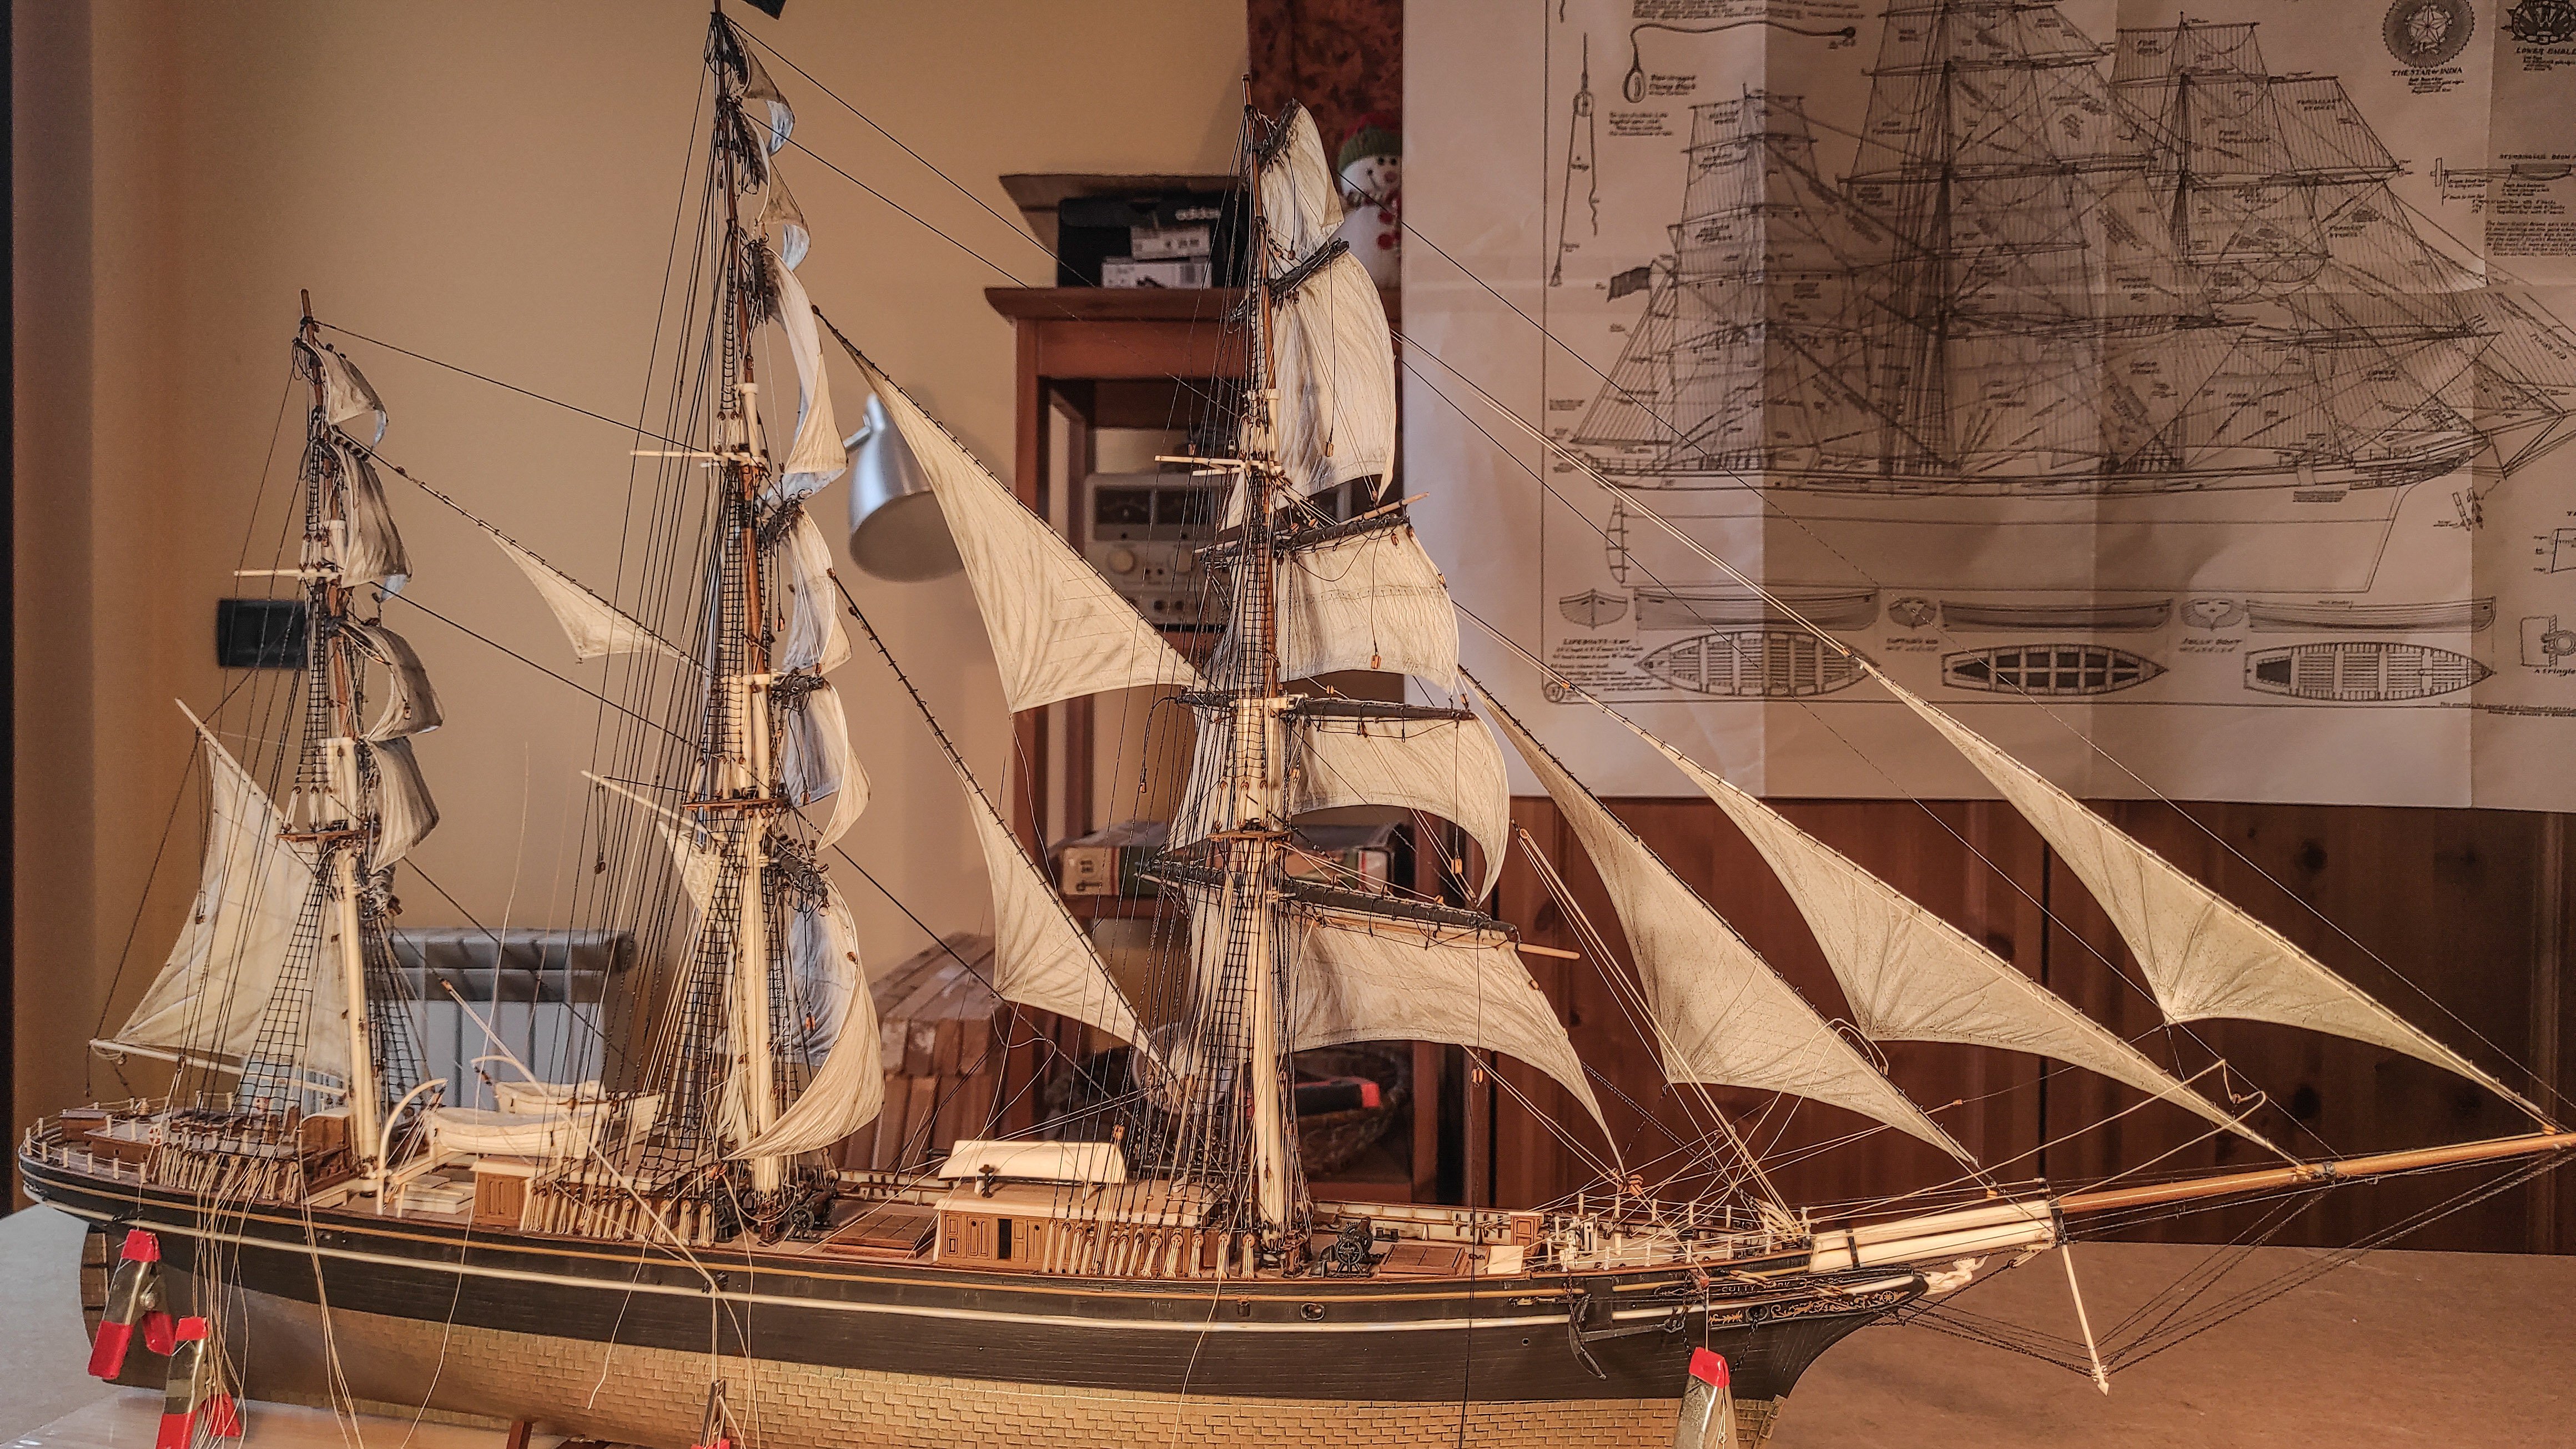
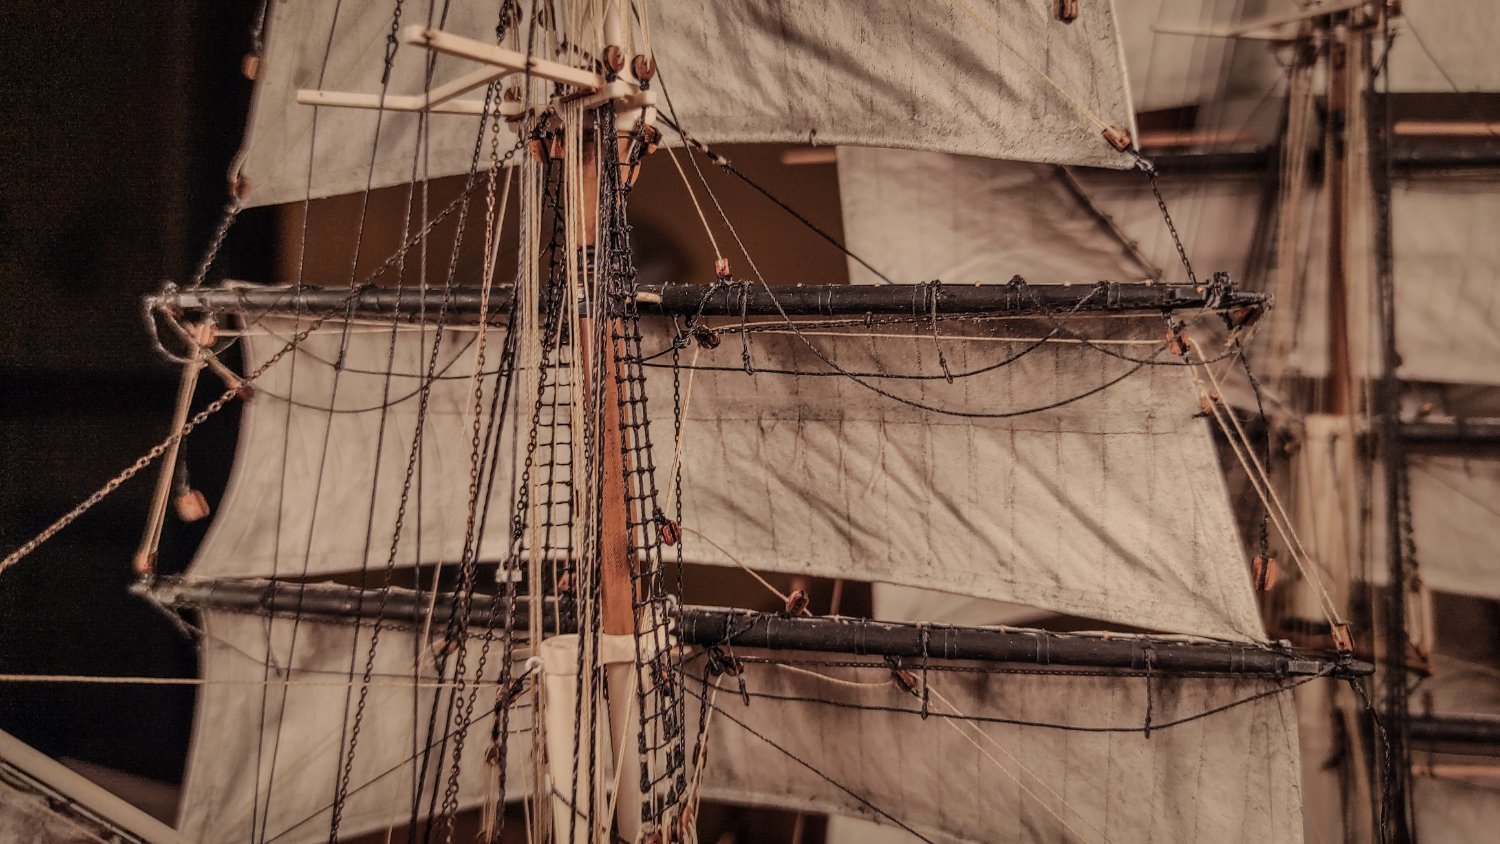
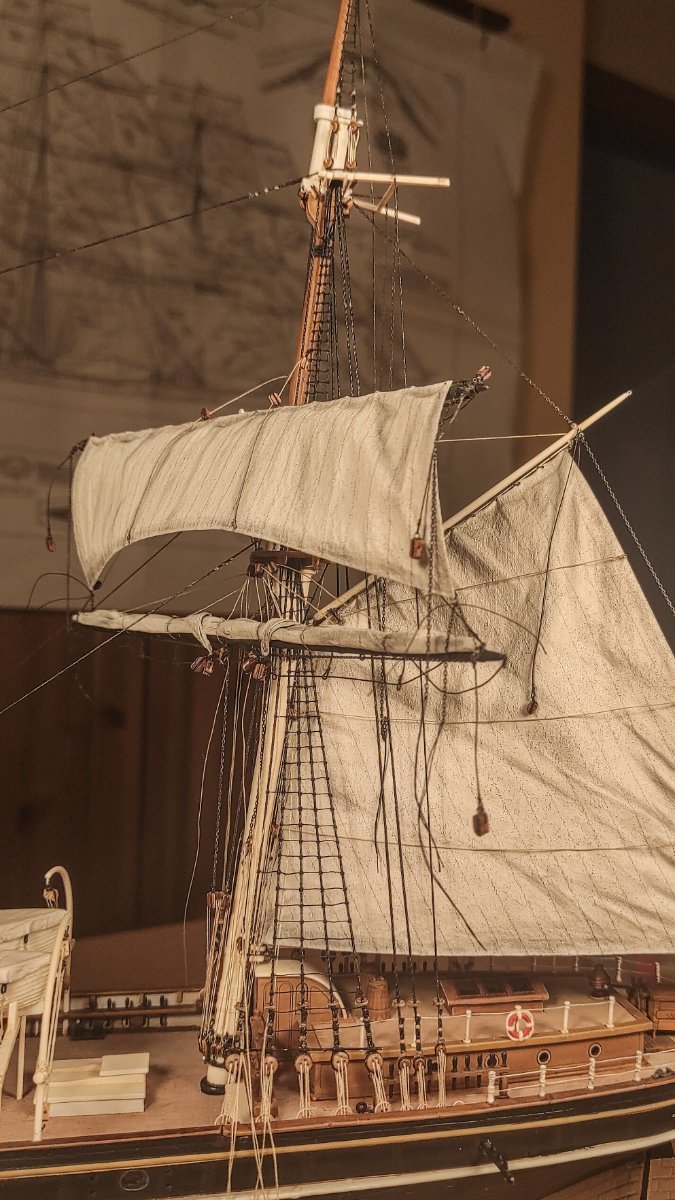
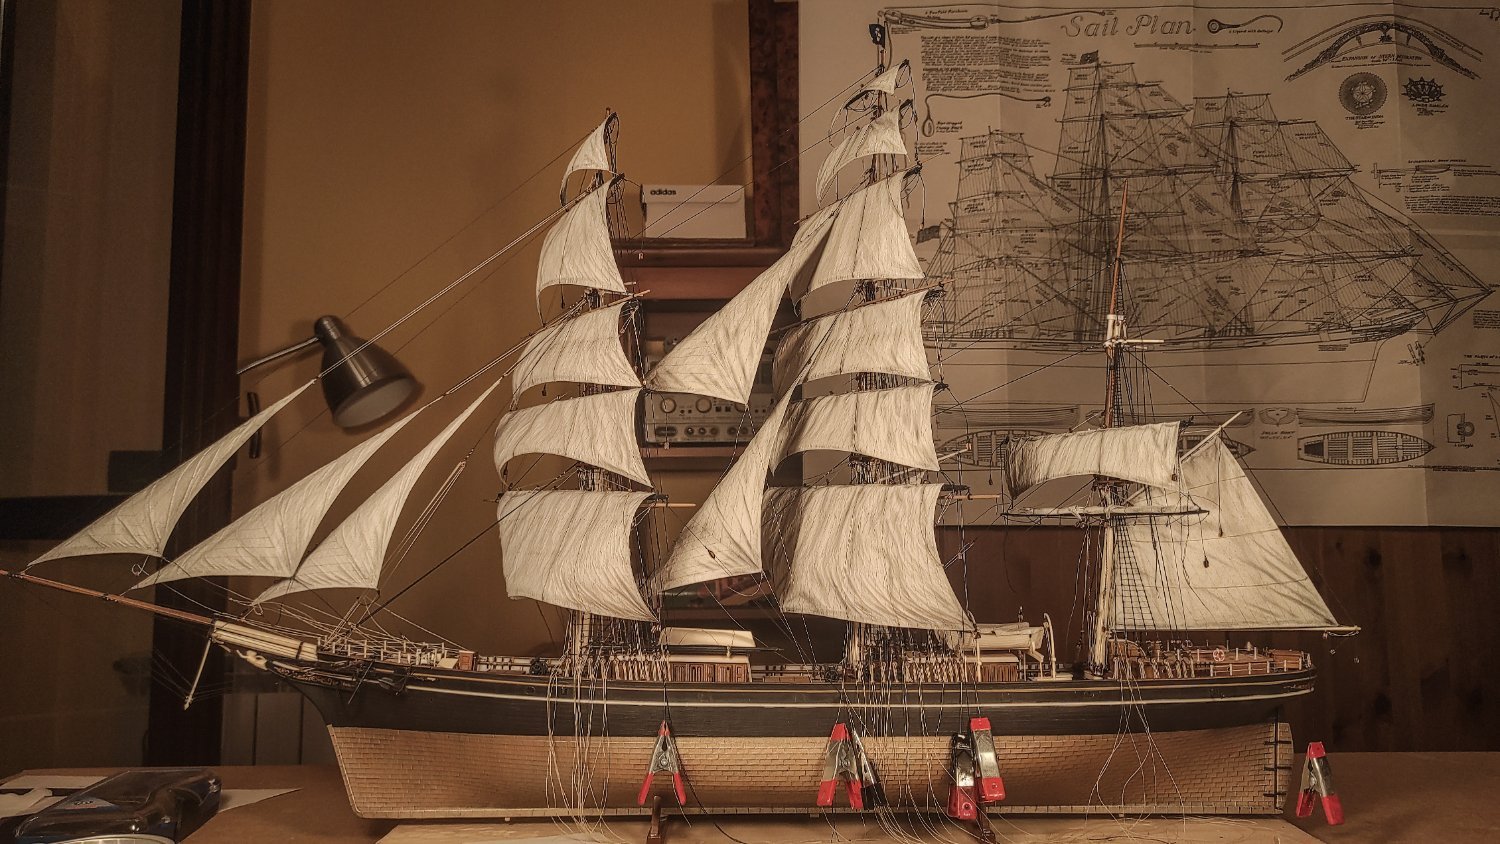
Hello everyone!
I'm sorry for the long absence, but finally I have some updates to share:
Mizzen mast completed and all sails completed!
Yes, finally, even the last mast is completed!
There is not so much left to say; the mizzen is similar to the main and foremast...
The only thing worth mentioning is that I decided not to mount the Mizzen Staysail and the Main Royal Staysail. The Mizzen Staysail has been sacrificed in order to see the deck better. Without the Mizzen Staysail, it seemed to me a good idea not to mount the Main Royal Staysail too, in order to better balance the appearance of the ship.
As for all the other masts, also the mizzen has been trimmed a bit, about 1 centimeter on top.
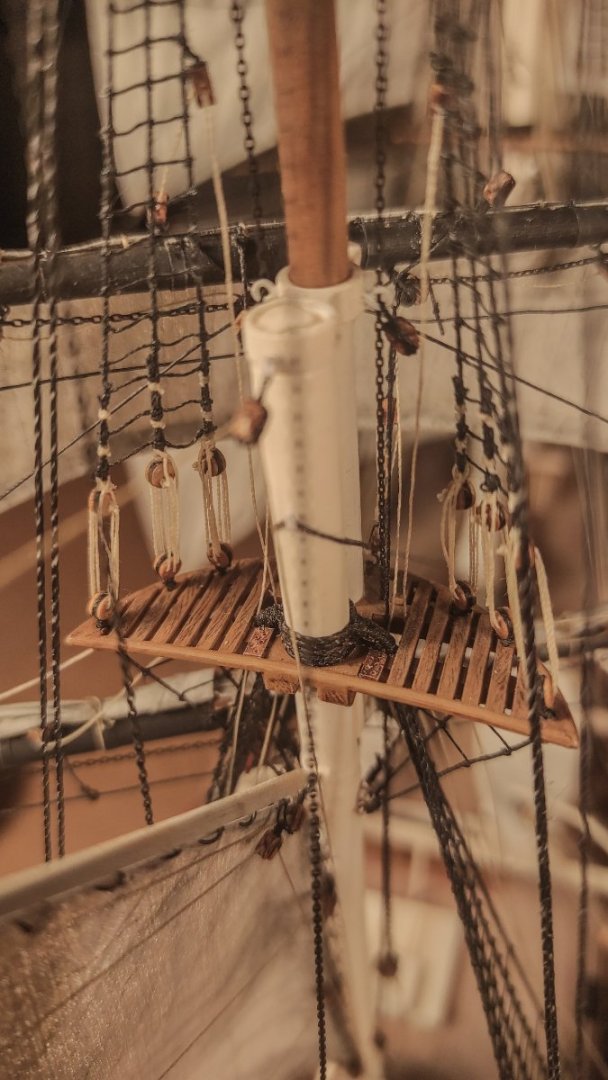
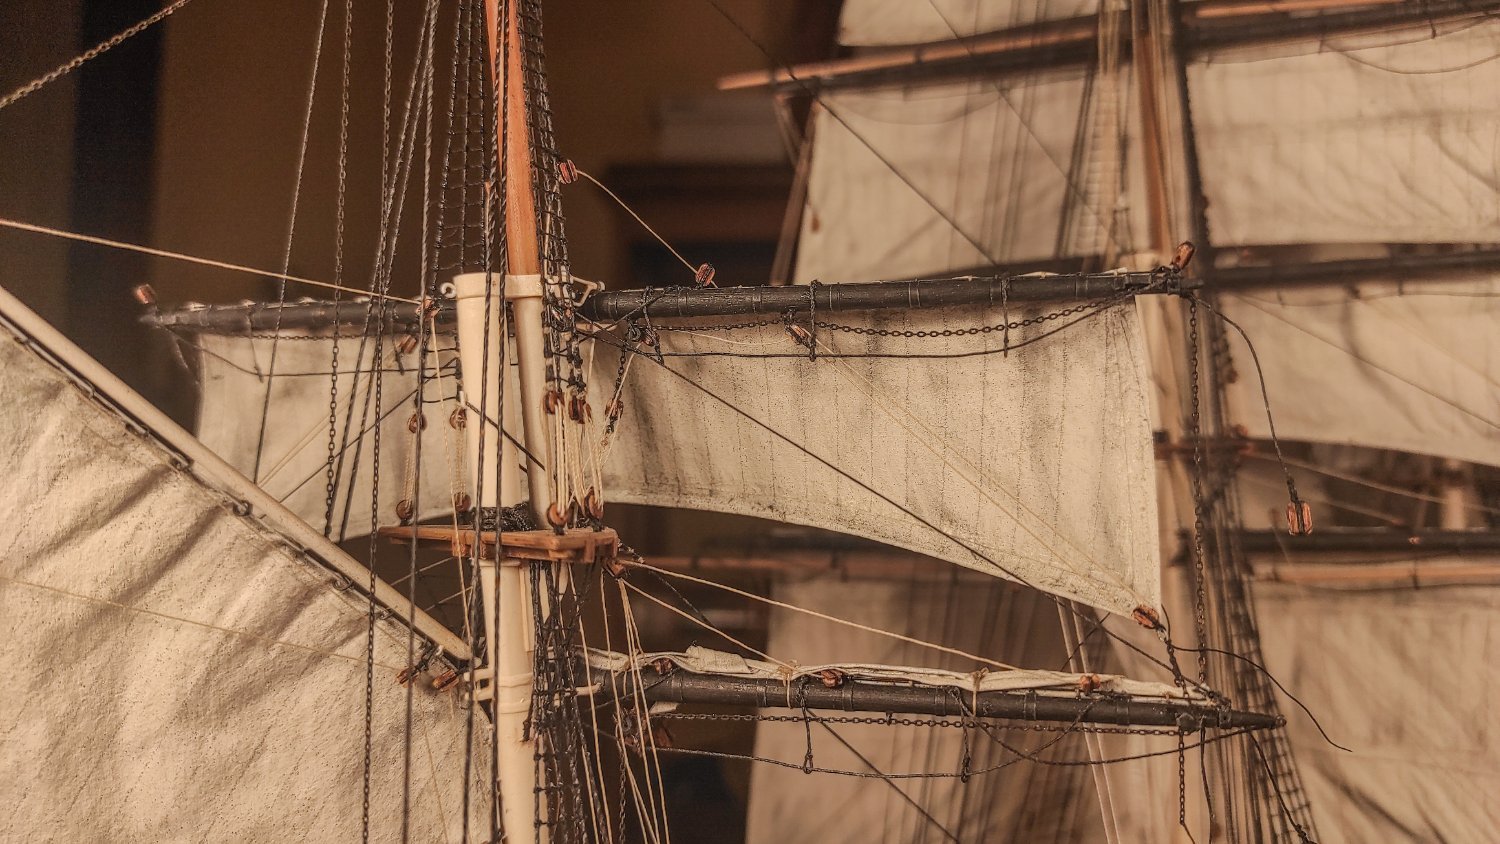
Here are some pictures of mizzen completed:

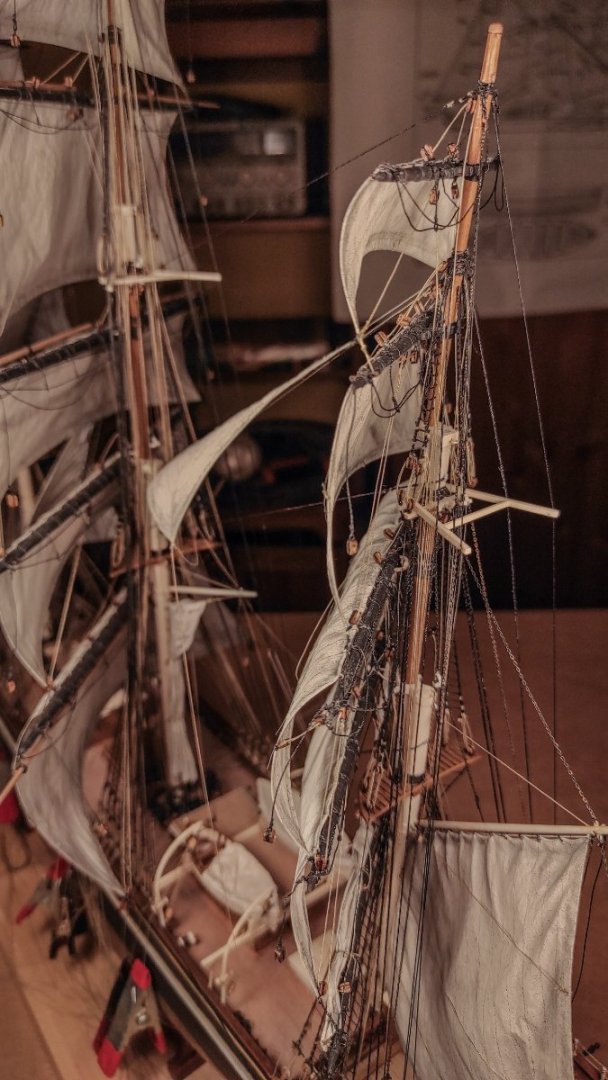


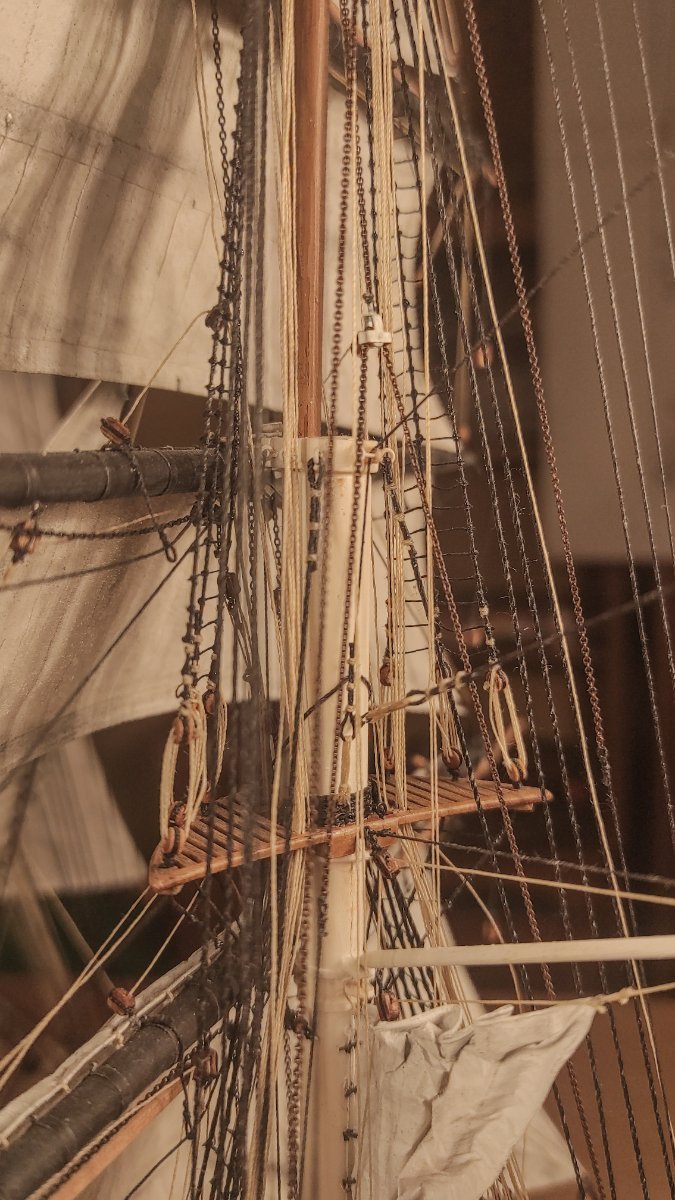
Some details:


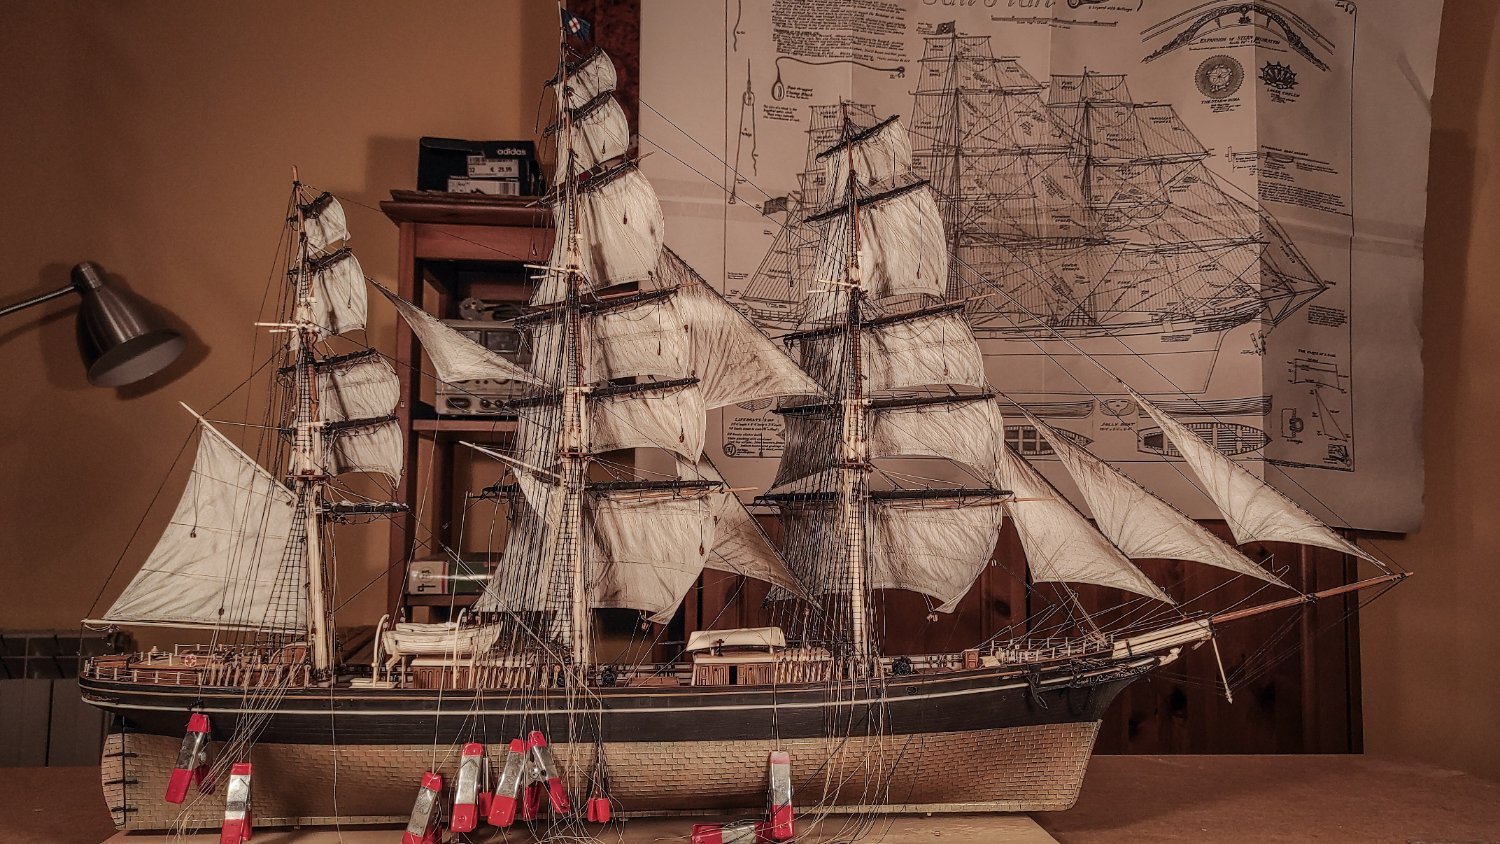
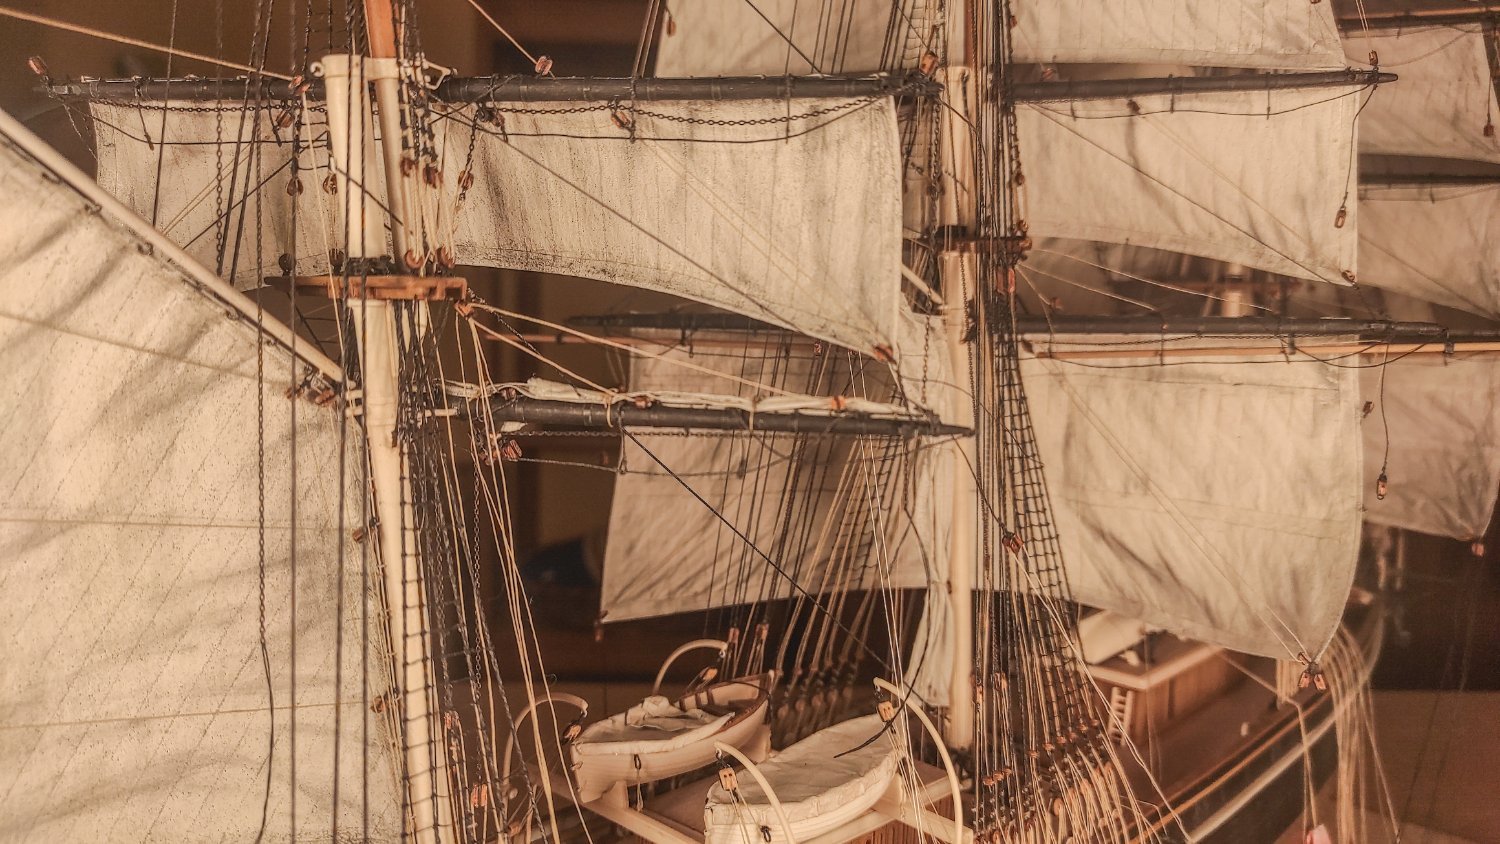
And here the ship as she is now:
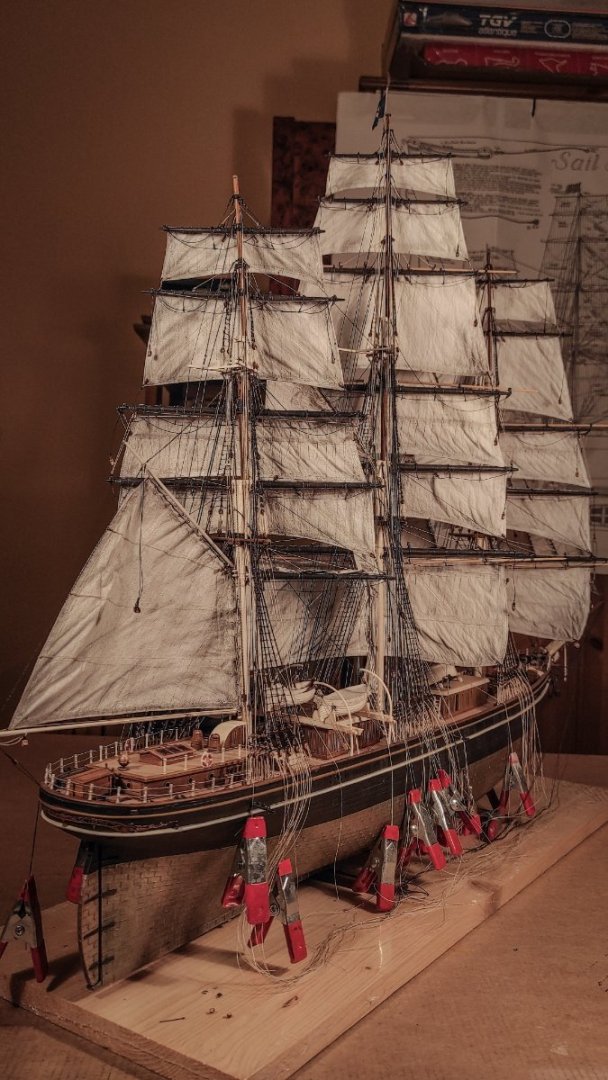

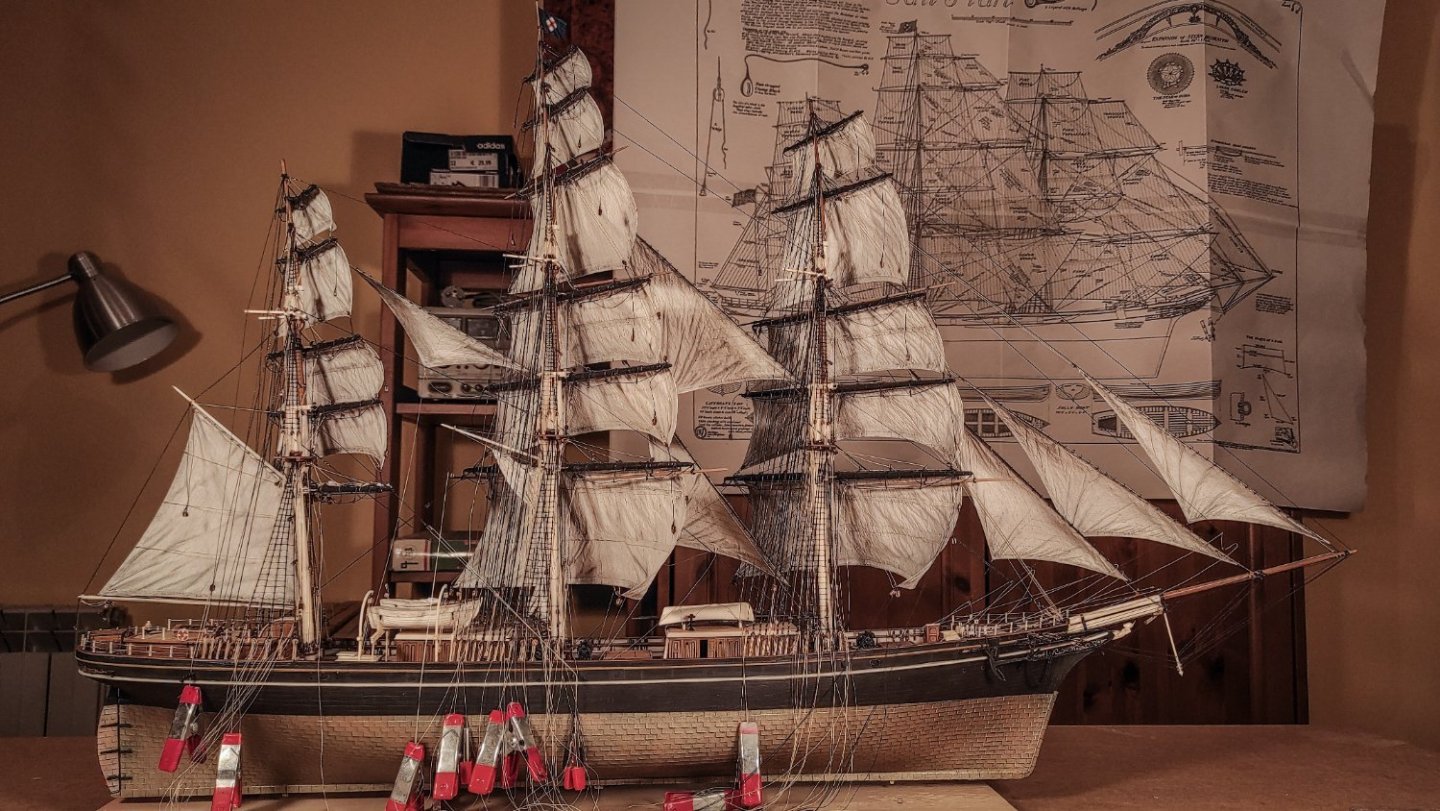
And here is a quick test of focus stacking, hoping to get you on board!
That’s it for now, still many things to be done, but I finally see the end.
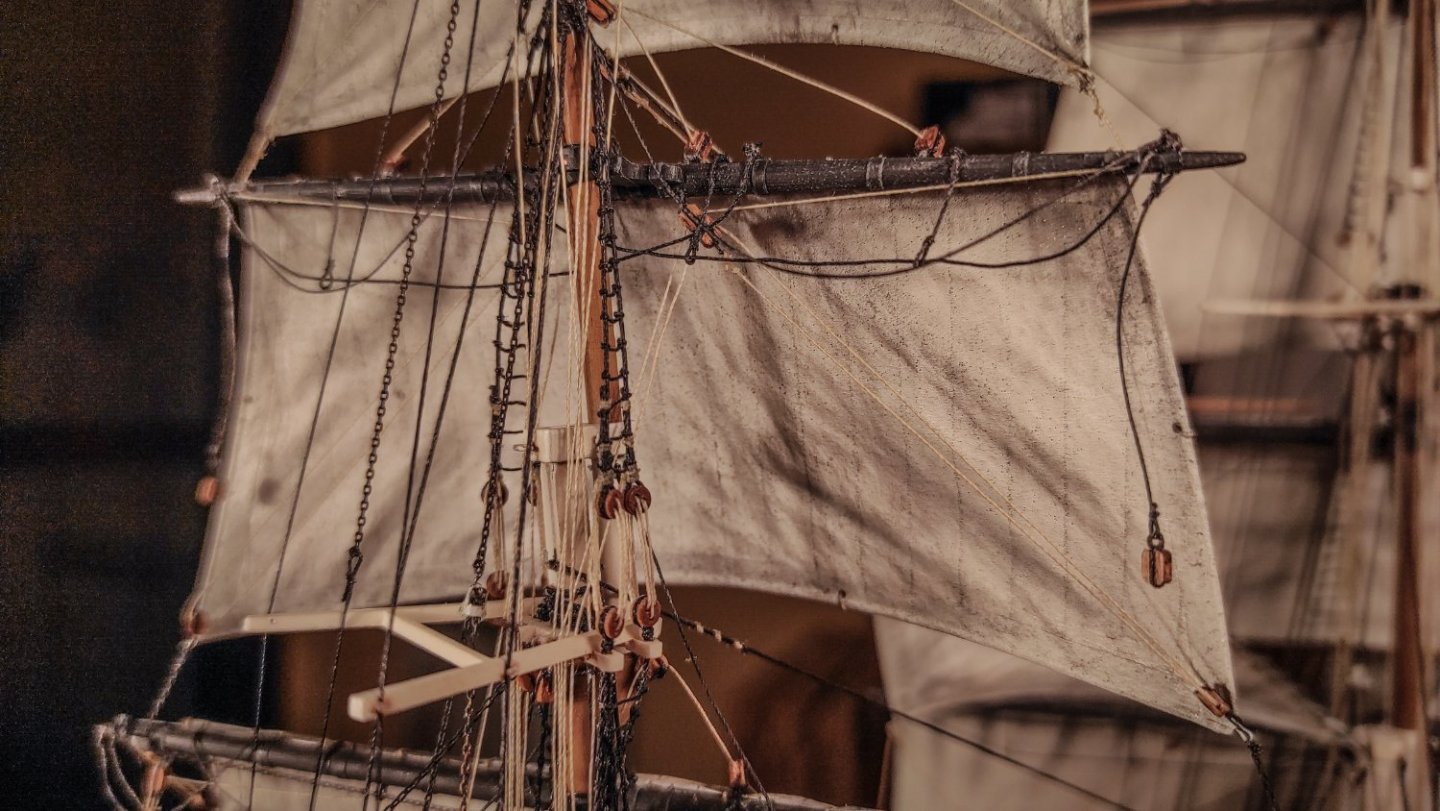
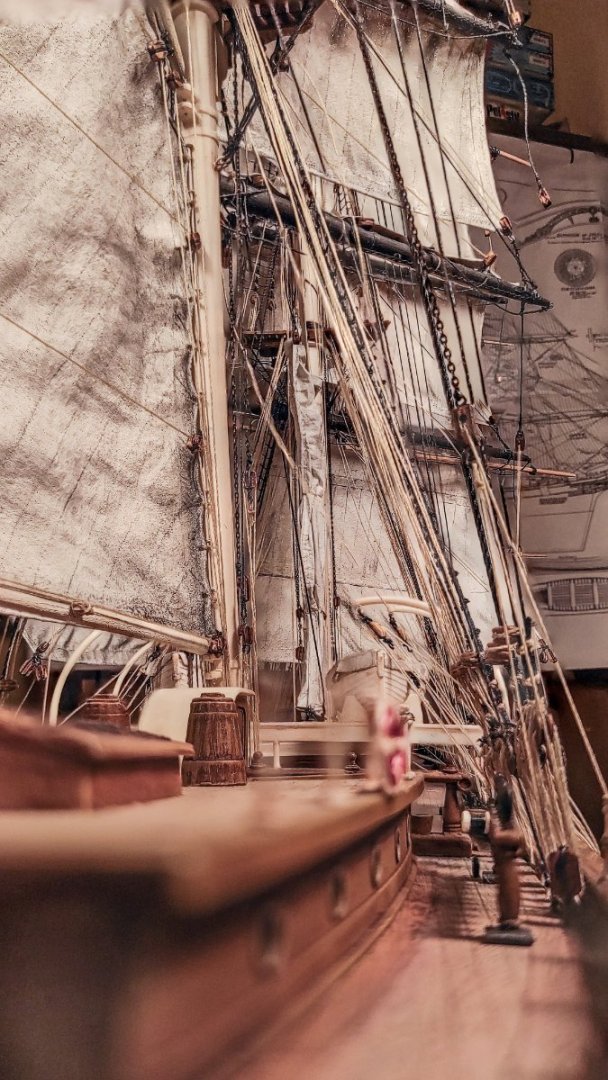
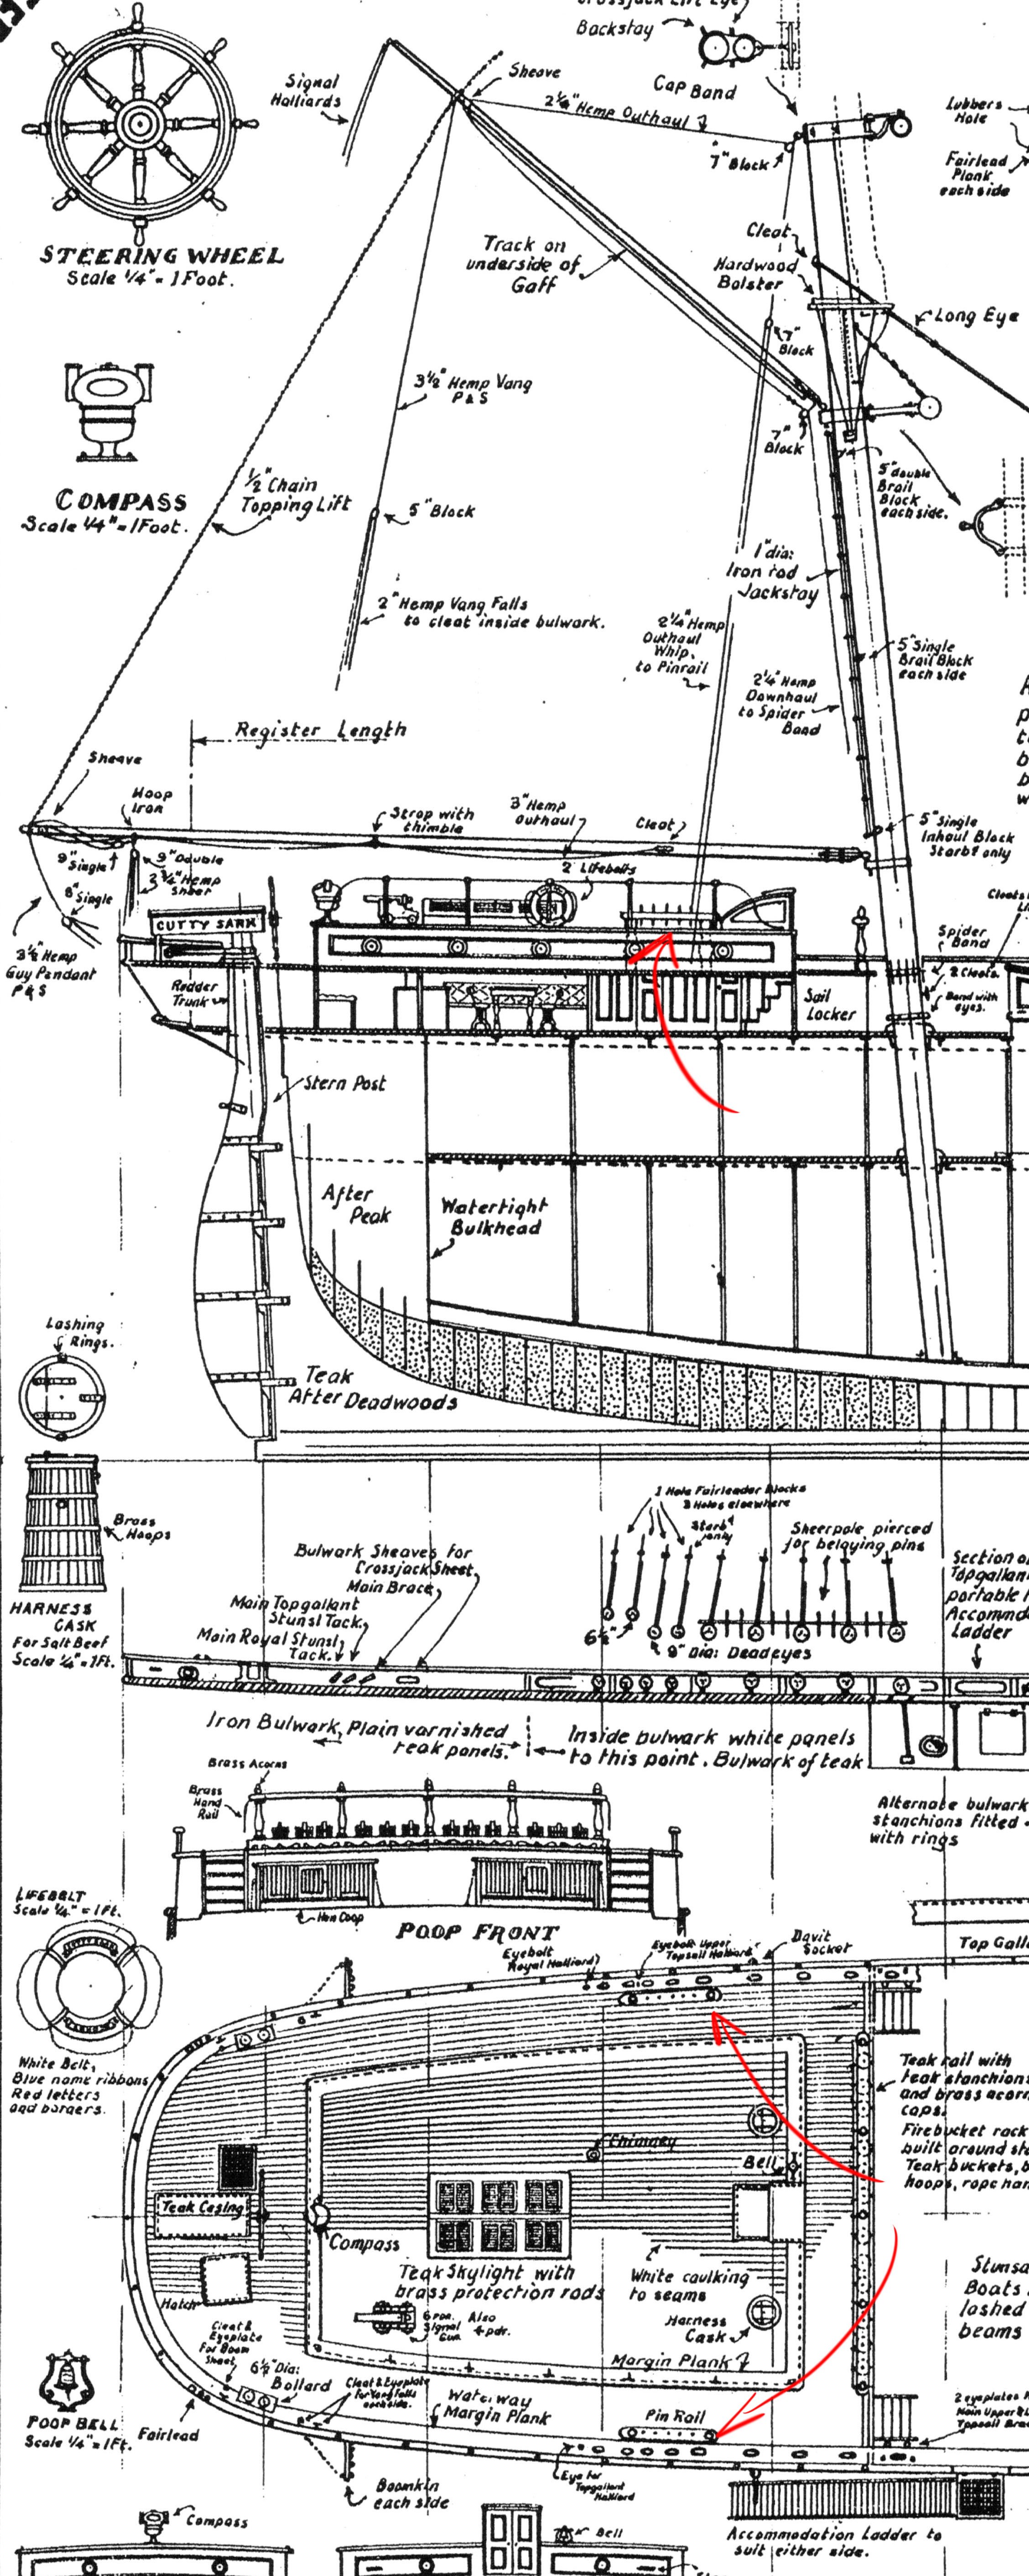
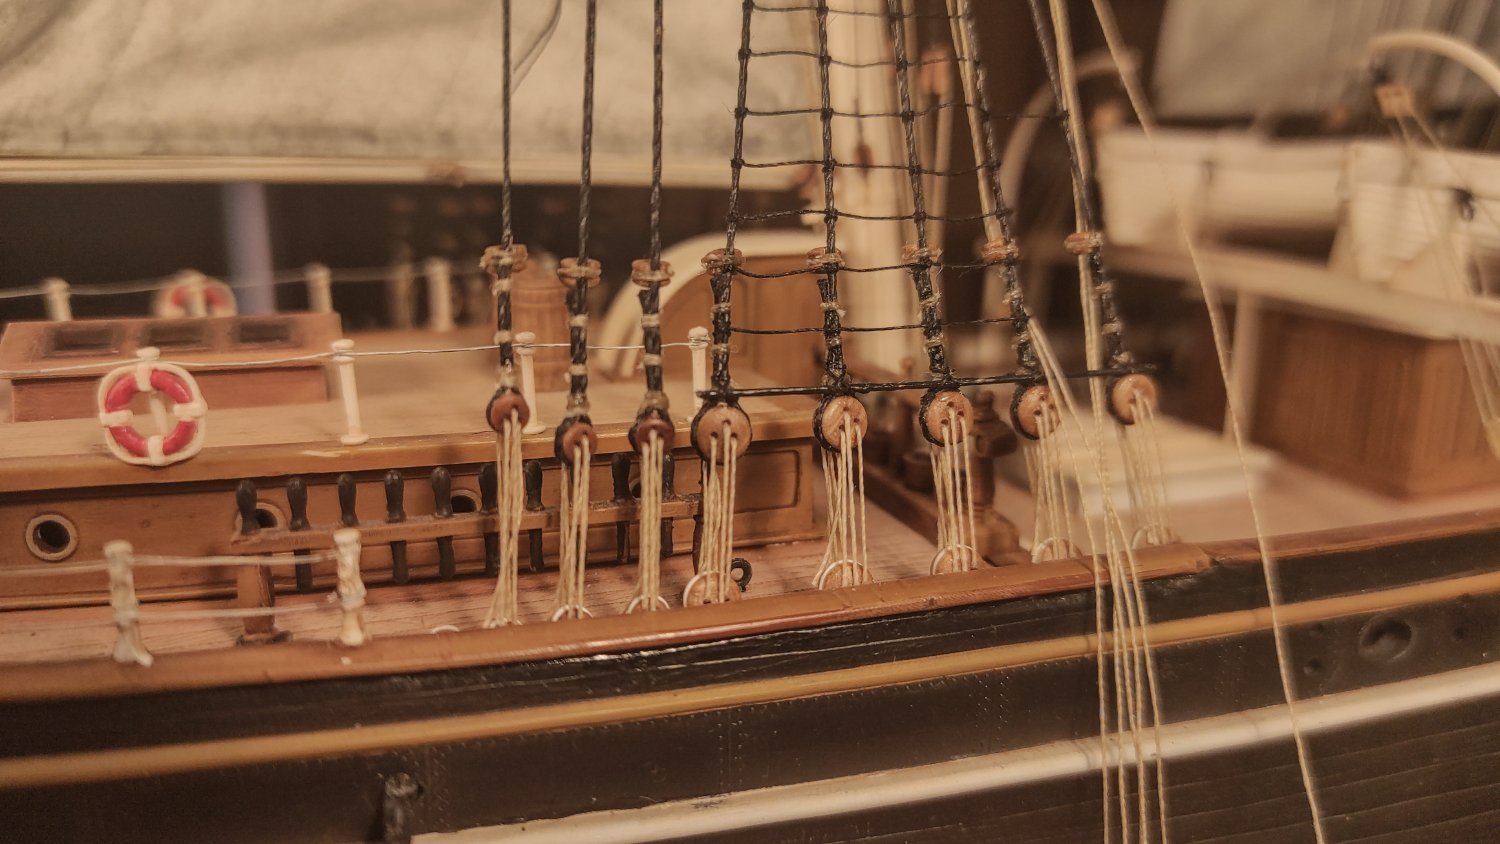
Oh, a question for all of you rigging masters: what is the path followed by the course's clewlines?
As you can see here they are visible here but the line is interrupted:
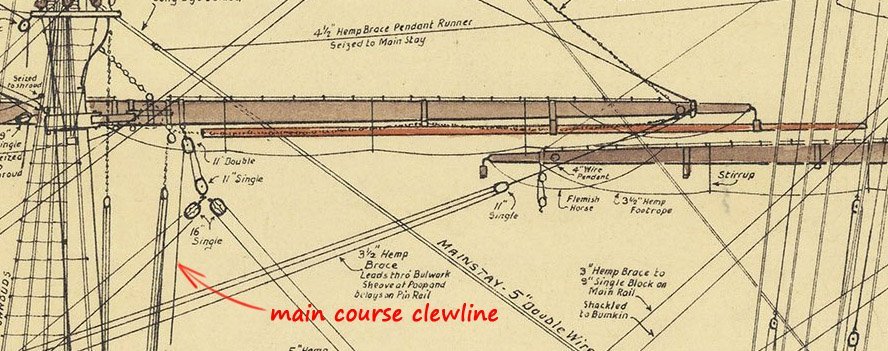
But they are not present in the main fairleads diagram:
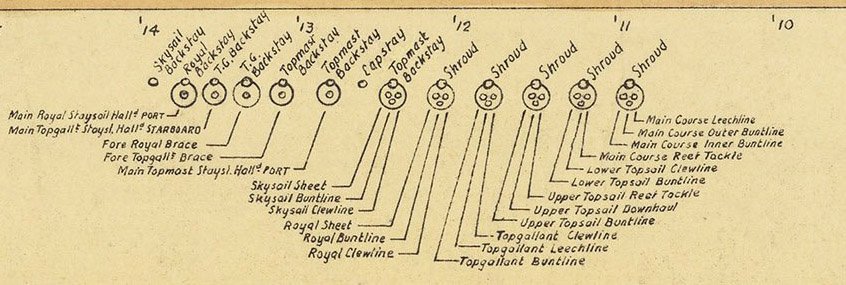
Am I supposed to belay them directly to the pin rail port and starboard without passing through the fairlead or should I belay them elsewhere? If so, where?
Thank you!
-
You are doing a wonderful job! A real joy to watch, keep going!
-
-
Thank you all for the likes, and thank you to Keith and Kevin for the comments.
On 10/6/2023 at 8:08 PM, Kevin-the-lubber said:Every so often I make another attempt at forming a 'half-gathered' sail like those shown in the second picture of post #361, but no matter how much I make it wet, EzeTissue won't 'sag' or distort enough for this. Did you find the same? I can drag and shape it as much as I want, but when it's dried, if I flatten it out again it is still perfectly true to it's original cut shape. In other words, it behaves just like paper (unsurprisingly) when you seem to have got it to behave a little bit like cloth.
That sounds strange to me, my experience is really different. Once wet, the material behaves like cloth, and it can be shaped at will. Once it's dried it retain the shapes usually.Two things come to mind:Did you use thin metal wire all around the sail like I do? I think it is quite important for the final result, it gives some fixed reference.Did you paint the material before shaping it? The color might help keeping the shape once dried.If I can help, please write me, modelspan is really a great resource!On 10/6/2023 at 8:08 PM, Kevin-the-lubber said:Marco, these last few photos are very helpful for me to understand what additional fixings I need to put on my masts and yards before I commit to assembly. I omitted all the eyebolts apart from those for the jackstays as the load bearing eyebolts will be better made from wire, and I want to do all the hole drilling before I go any further.
Once again, if I can help, please write me. It is really a huge task... -
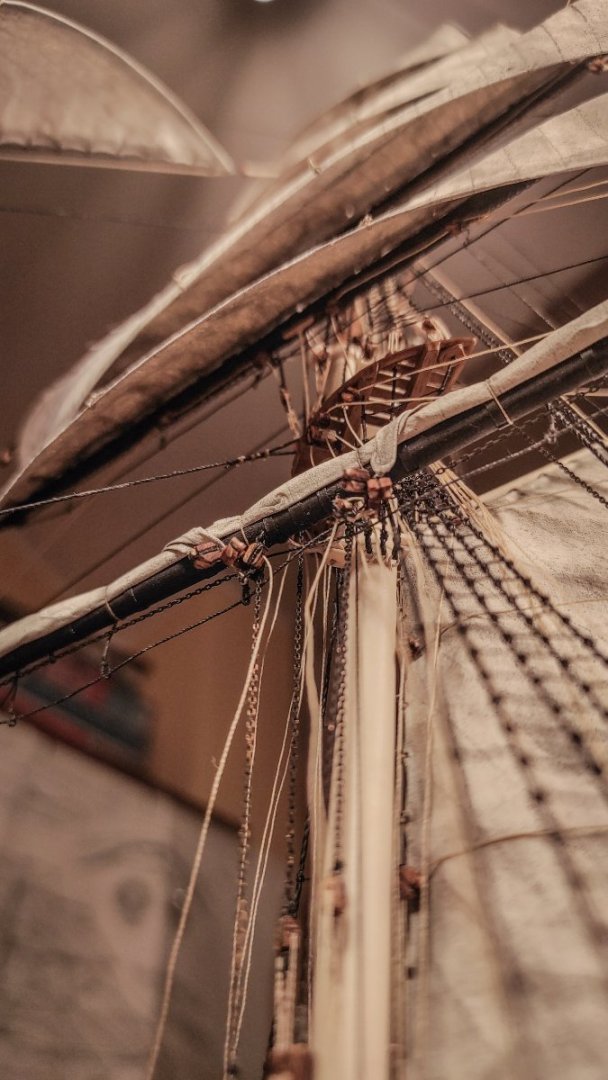
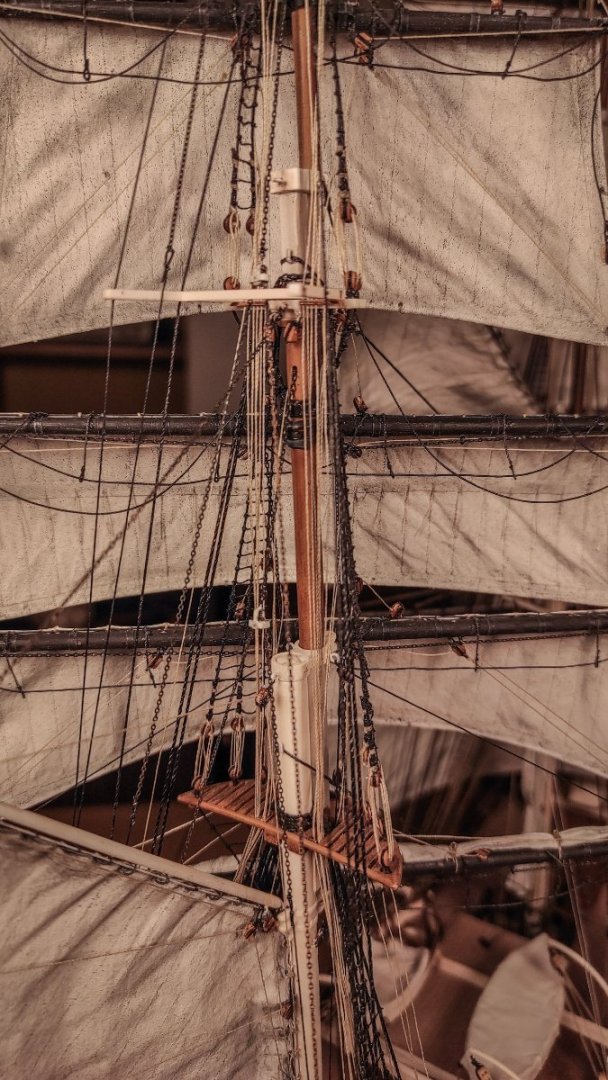
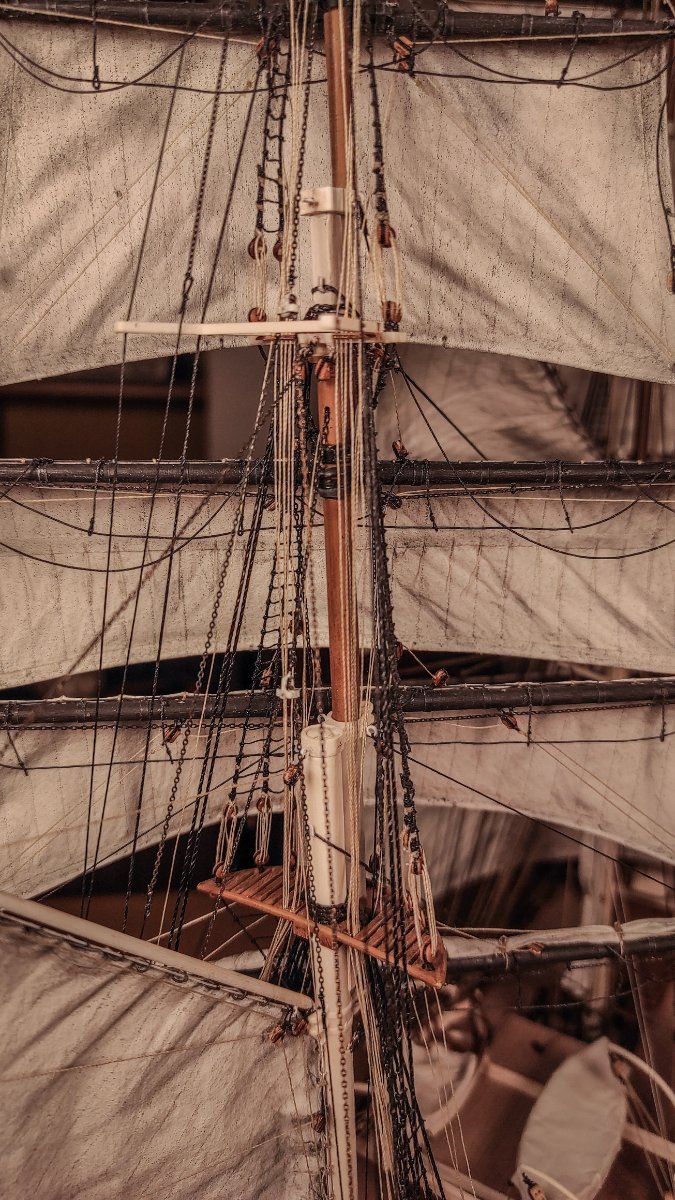
Hello! Here I am again with some updates:
Mizzen mast has been stepped up, crojack and mizzen lower topsail in place.
Stepping the mizzen is the same business as the main and fore mast. The only thing I changed is that the mizzen is not glued, but held in place just by the shrouds. No real reasons for this; I just wanted to try something slightly different. In the end, the glue is not needed, and I’m happy with this choice.
Shrouds in place, ratlines, fairleads, all as usual.
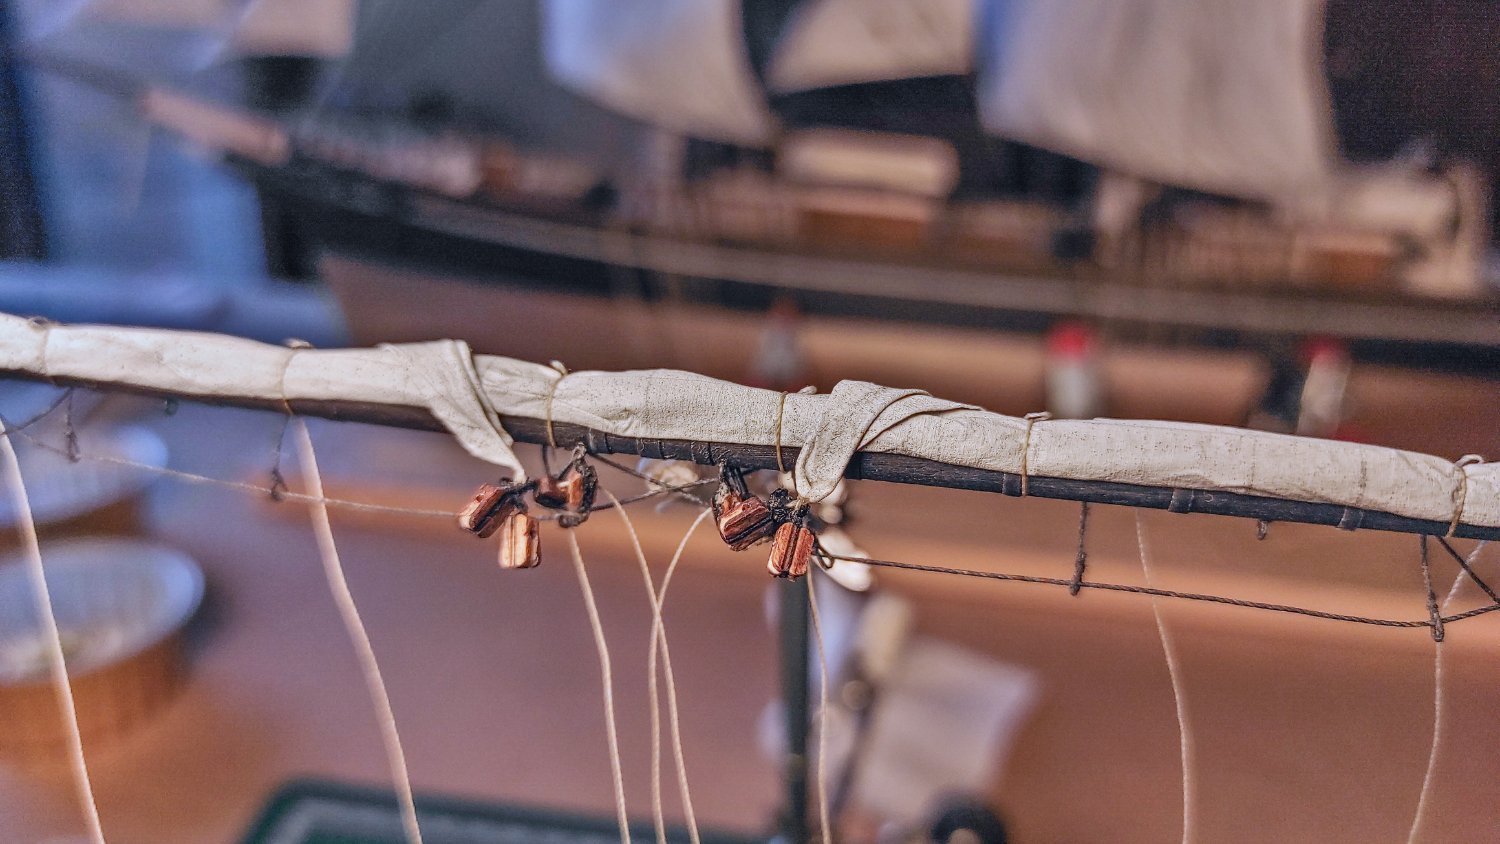
Here is a close up of the fairleads:

Since these are the last ratlines on my Cutty Sark, I took the opportunity to make a small video of the process.
No audio, slow and not so steady hands due to the uncomfortable position, with the smartphone in the middle, but just to share a long and repetitive process that I ended up liking.
If you struggle to get a sleep, here it is:
Once the mast was stepped, I installed and rigged the crojack and the lower topsail.
Once again, the process is similar to the other sails and other masts. Sails are prepared before installation, and rigged as much as possible before being installed on the mast.
Here are some images:


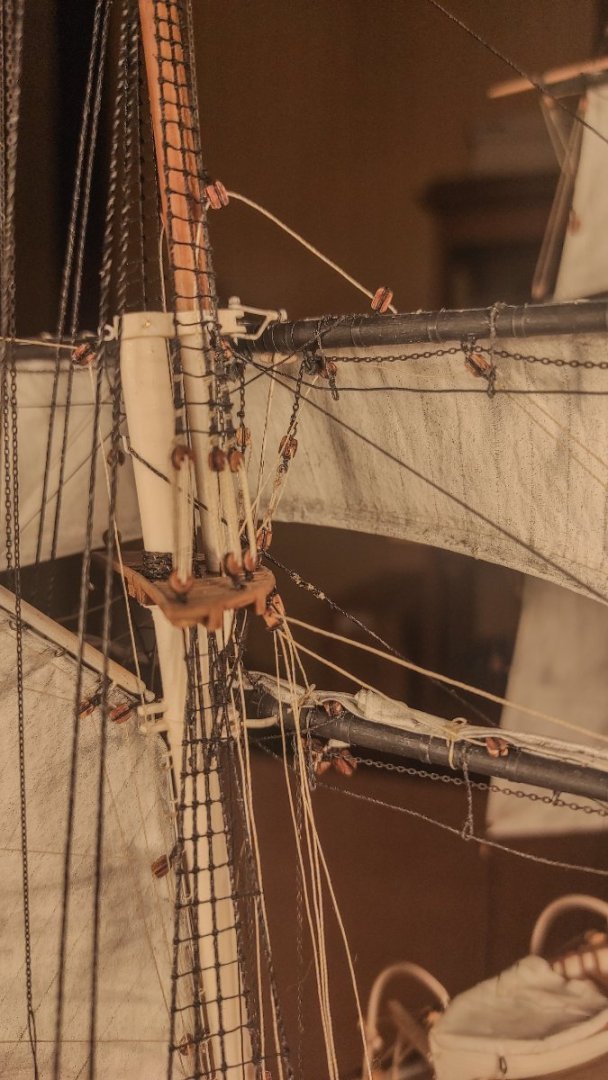
A small mention for the stays: It would have been better to pre-install them starting from the main mast. I thought I was smart pre-installing them on the mizzen mast before stepping it, but it is better to do the opposite in my opinion. I ended up removing them from the mizzen and starting all over again to be fitted on the main mast. Here is a close-up of the topmast and topgallant stay on the aft of the main mast:

As you can see it’s quite crowded, not an ideal place to work with knots and tweezers.
And, at last, the Cutty as she is now:

Thank you all for passing by!
-
Welcome to the Cutty Sark "plastic" family!
You seem to have two hulls: one glued and the other still divided in half!
Let us know your progress, it's always nice to see a beautiful clipper growing.
-
Wonderful job, Kevin!
I really like the tops.How do you print the masts? Are they fdm or resin? I really like the sheaves on the topmast. I completely missed them at the beginning of my build, I was too inexperienced, and now I regret not having them.A side note for the crane of the lower topsail and the forked truss for the lower yard: they are nice, but are you sure they will be strong enough? Resin tends to be brittle, and it might become worse with time. -
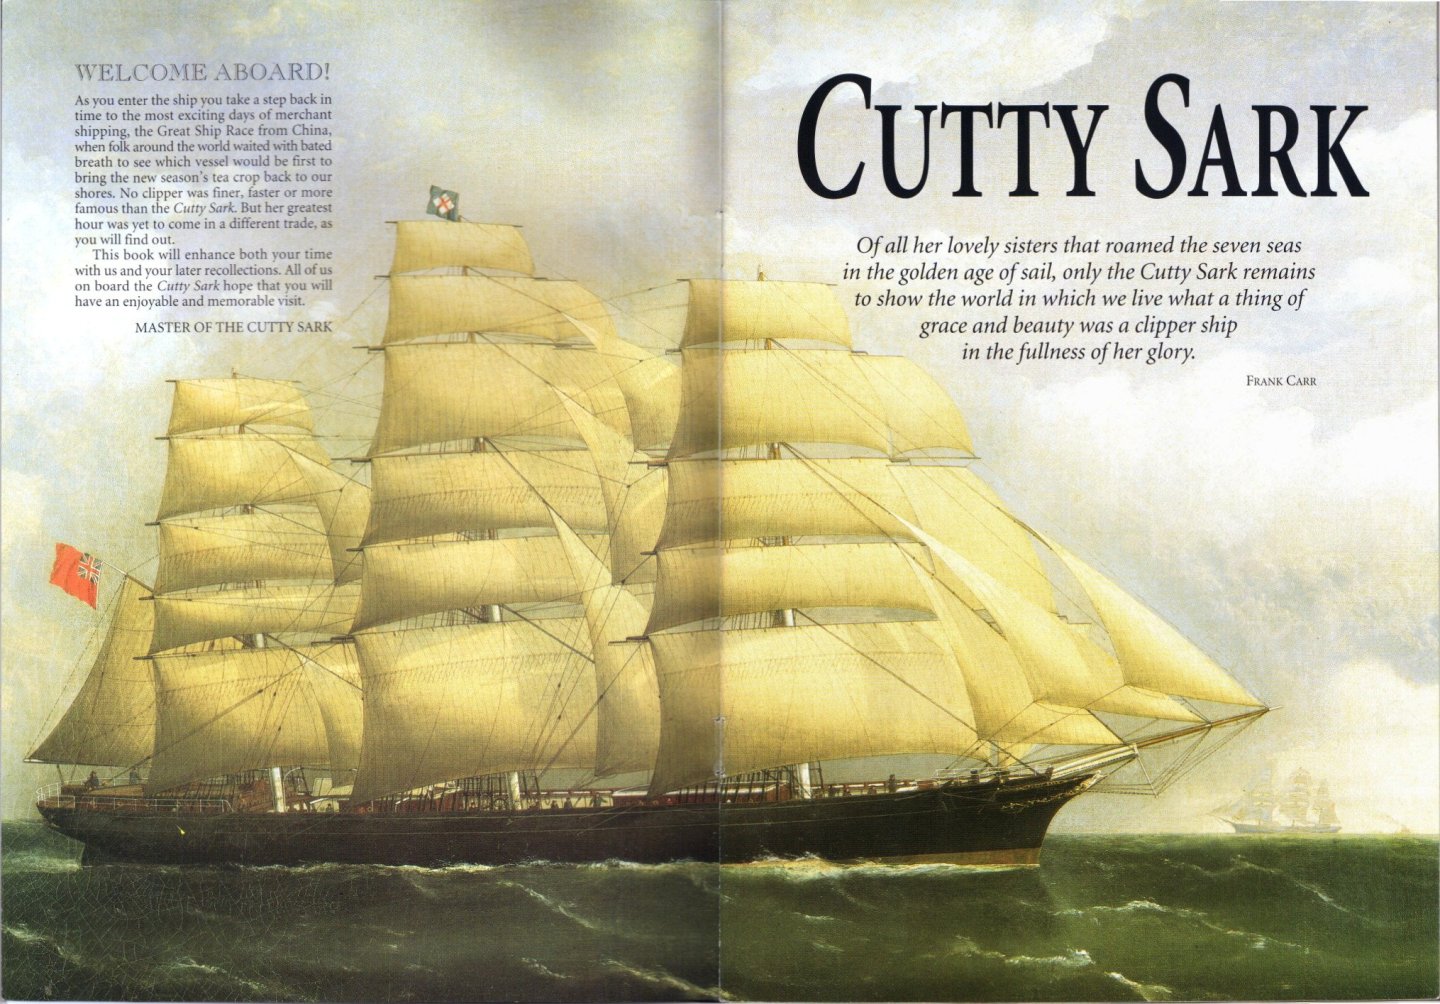
Hello everyone!
Just a small break before summer holidays: a recently discovered picture of Cutty Sark sailing in the South Atlantic during the Tea Trade, spring 1871, under full sails.Note the unusual rectangular shaped clouds, never seen before or after this peculiar day! 🤣 😜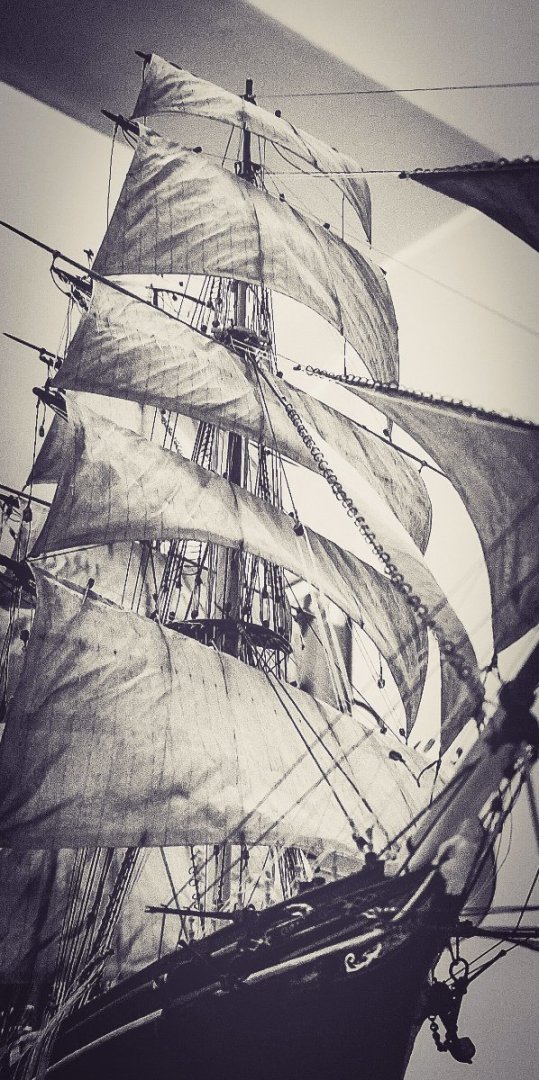
-
Thank you, Jim, for posting the images.
I don't know why I didn't look at those pictures myself, but now it's fair to say that the question is settled!
Thank you again.
- Keith Black and Jim Lad
-
2
-
Thank you both, Rob and Kirill for taking the time to discuss this fascinating topic.
6 hours ago, rwiederrich said:Bruma....from what I gather...men of war were clewed to quarters and commercial ships clewed to the yard.
Clewing the yard meant a more even lay of the sail on the yard...where as, Quartering caused the sail to bunch up fuller at center yard. Many images of combatant sailing vessels demonstrates this. However....I'm sure captains had their own preferences.
Personally, from my experience.......clippers were generally rigged to the yard. but I'm sure there were exceptions.....as there always is.
Great job by the way. One note...when I furled cloth(or in your case silkspan), I tapered the short sail so that there was no bunching or squaring at the yard end.
Your stuff looks fantastic using silkspan.
Rob
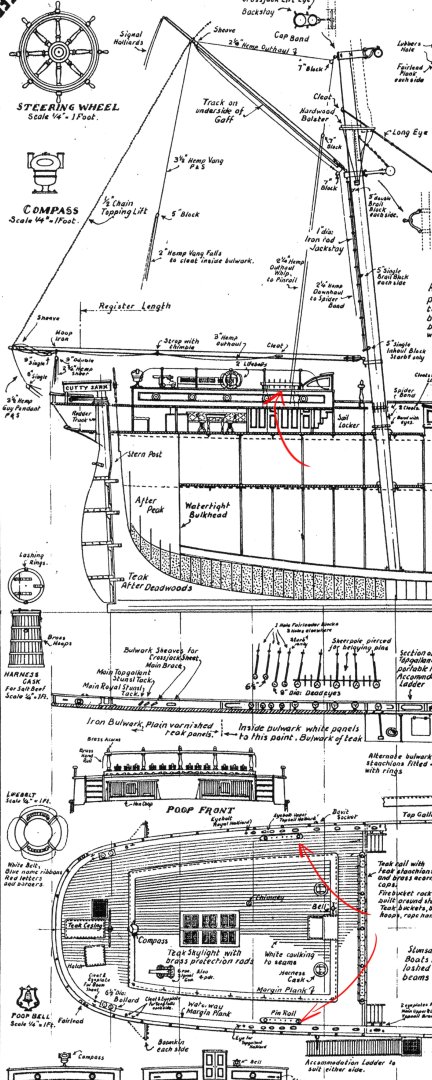
You might be right, Rob as a general rule, but, according to Campbell's pans, the Cutty Sark was clewed to quarters.
The clew garnet is clearly visible in the plans, here is a detail of the mizzen mast: And Cutty Sark as it is today shows the same evidence:
 That's why I depicted it this way.Moreover, in "Masting and rigging" by Undehill, both methods are mentioned and displayed, as in the image posted before, without preferences.In the end, I hope I get it right!Thank you again for these great discussions!
- Keith Black and Scottish Guy
-
2
-
Thank you all for the likes and to Kirill4 and Keith for the comments.
On 8/4/2023 at 4:53 PM, kirill4 said:Good afternoon Bruma,
in my opinion it looks just great, even in this form, as the sail is shown in the photo.
For the sake of objectivity, maybe it makes sense to post a photo with a real sail laid in the same way as on the model ...
then it will be possible to say how similar it is to the real one?
Although I repeat, I liked this current option too ... in general, I watch your construction site with great pleasure ... it turns out very cool !!!
All the best!
Kirill
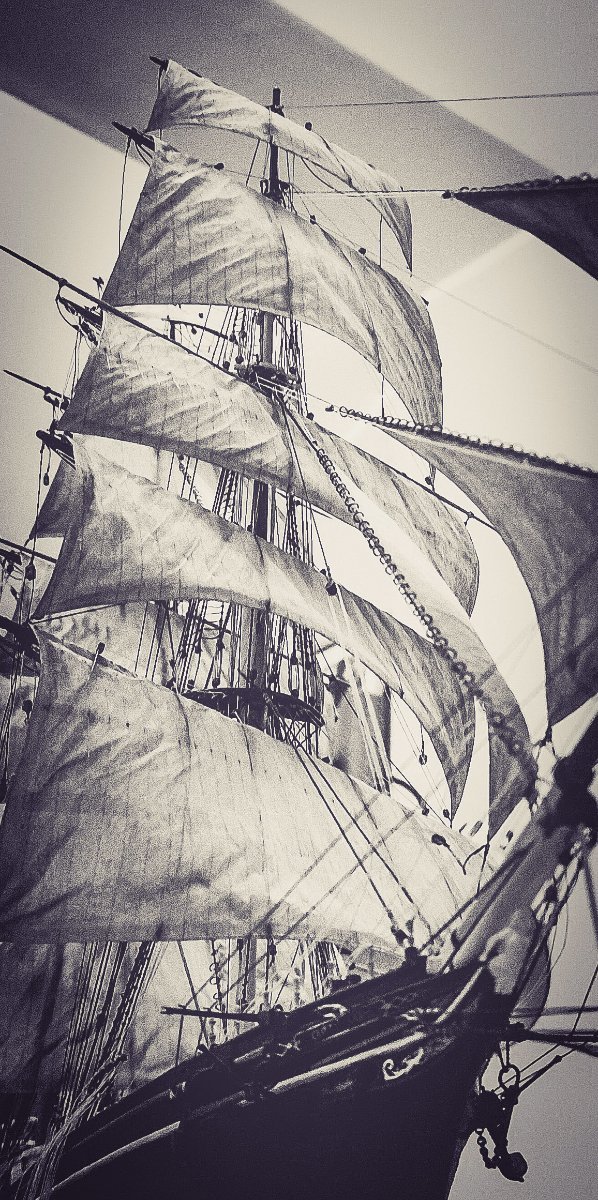
I wasn’t able to find an example of a furled sail clewed to quarter, the vast majority of still operating square rigged ships seem to adopt the yardarm clewing.
My main source was this video:
https://www.youtube.com/watch?v=07Xezns1nEE
Which is not exactly the same method used on Cutty Sark, in particular for the last phases, but still valuable for the folding techniques. .
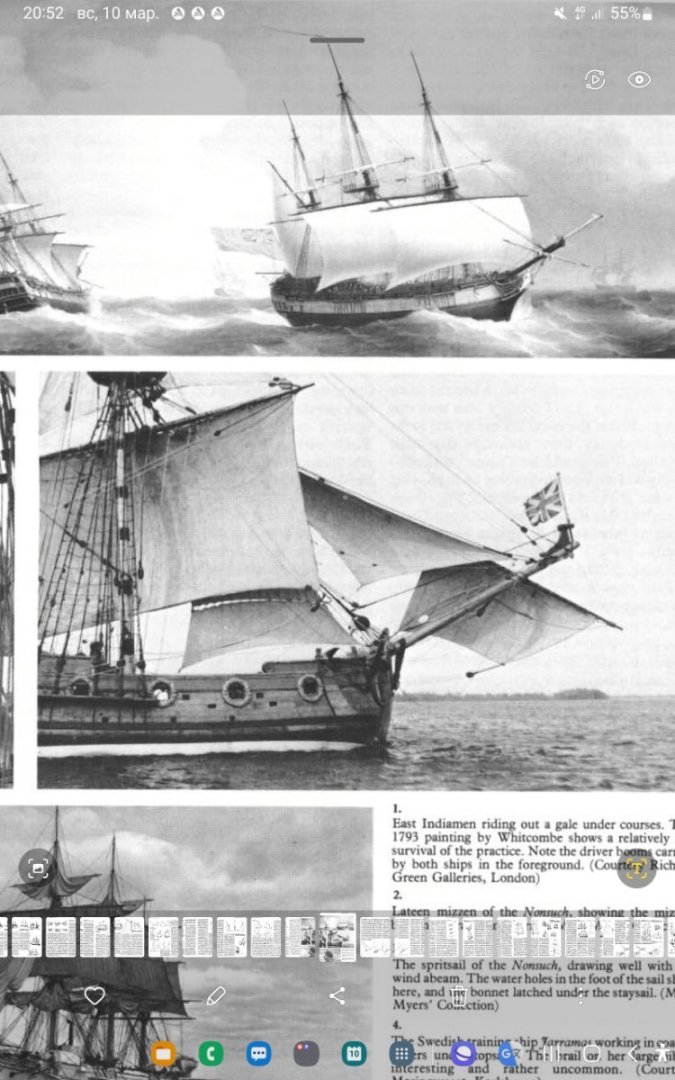
Then, the other source was Underhill, in particular this picture:
An many other videos such as this one:
https://www.youtube.com/watch?v=RCShq8cpai0&t=1176s
Witch is a gem in his class.
-
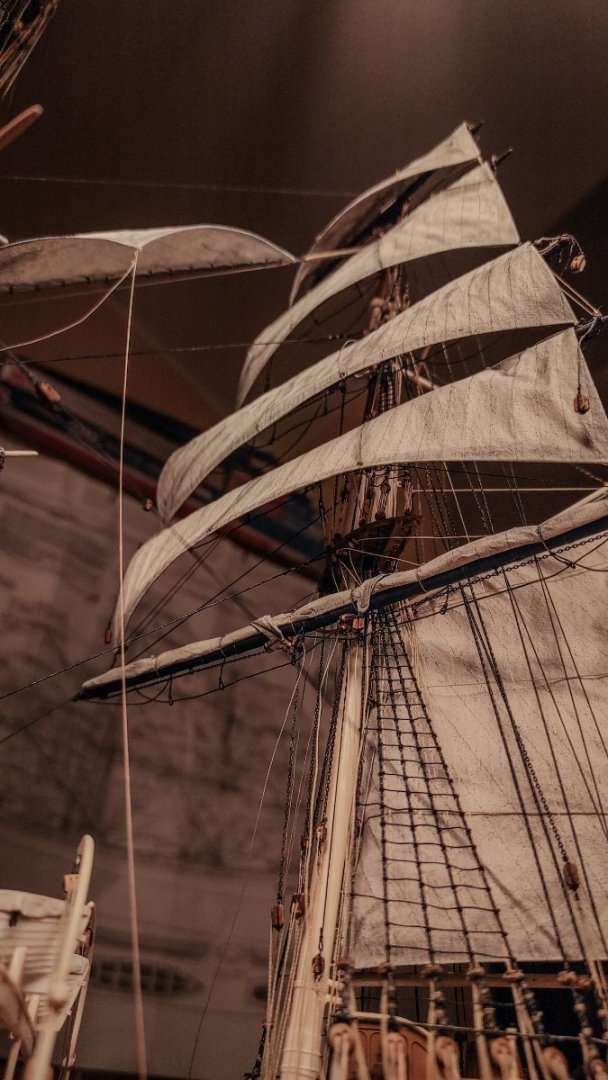
Hello everyone!
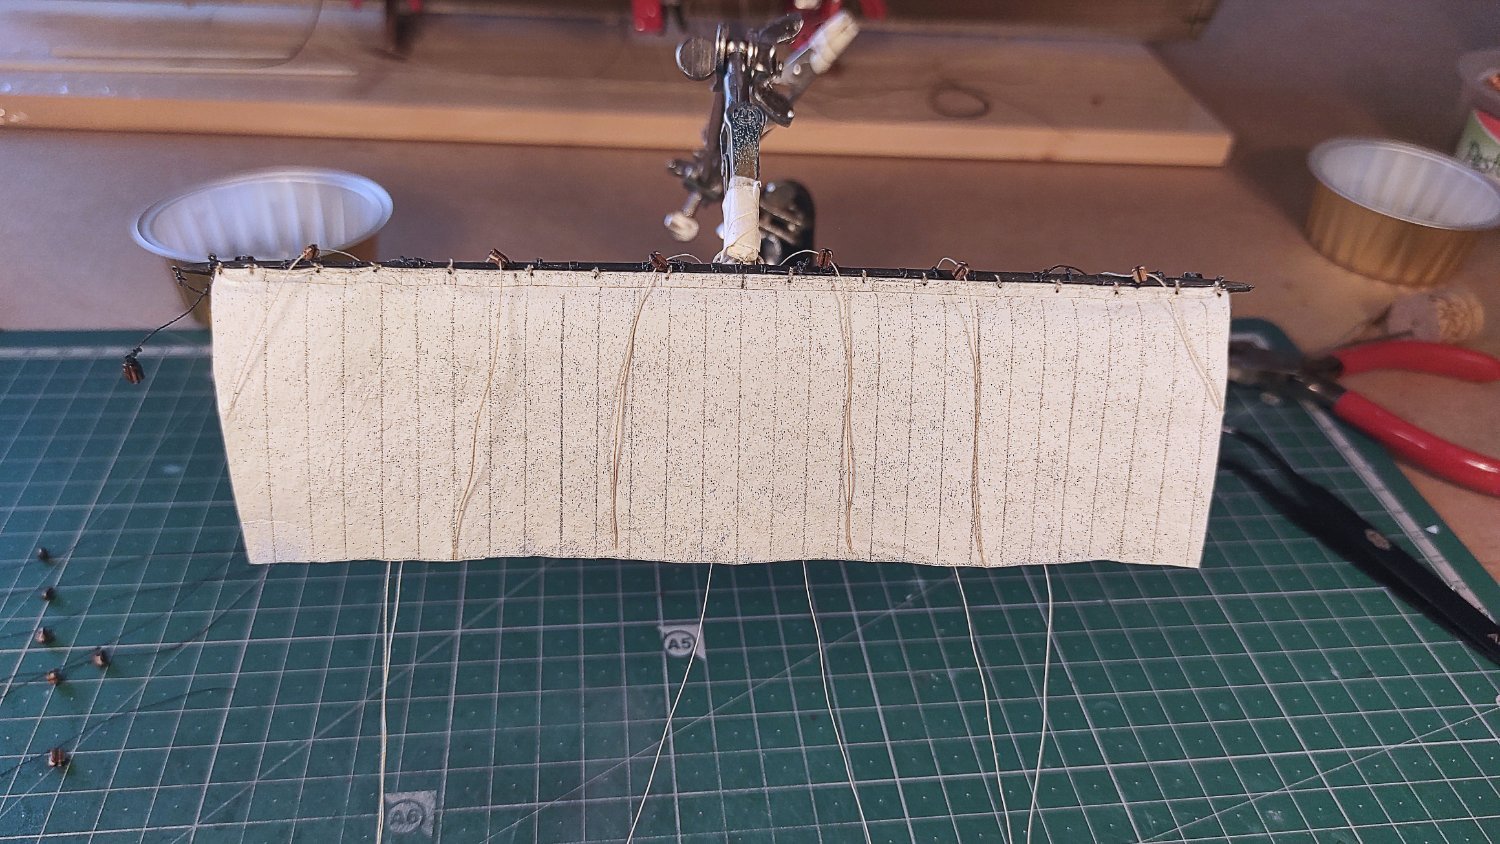
Another small update: Cro’jack furled sail!
I have always wanted to depict the cro’jack furled but furled sails are not that easy to reproduce. Moreover, the Cutty Sark sails are clewed to quarter, not to yard arms.
I have no experience in furled square sails, the only furled sail till now has been the spencer.
I opted for a two/third length version of the sail, whit separated clew corner.
Here is the starting point:
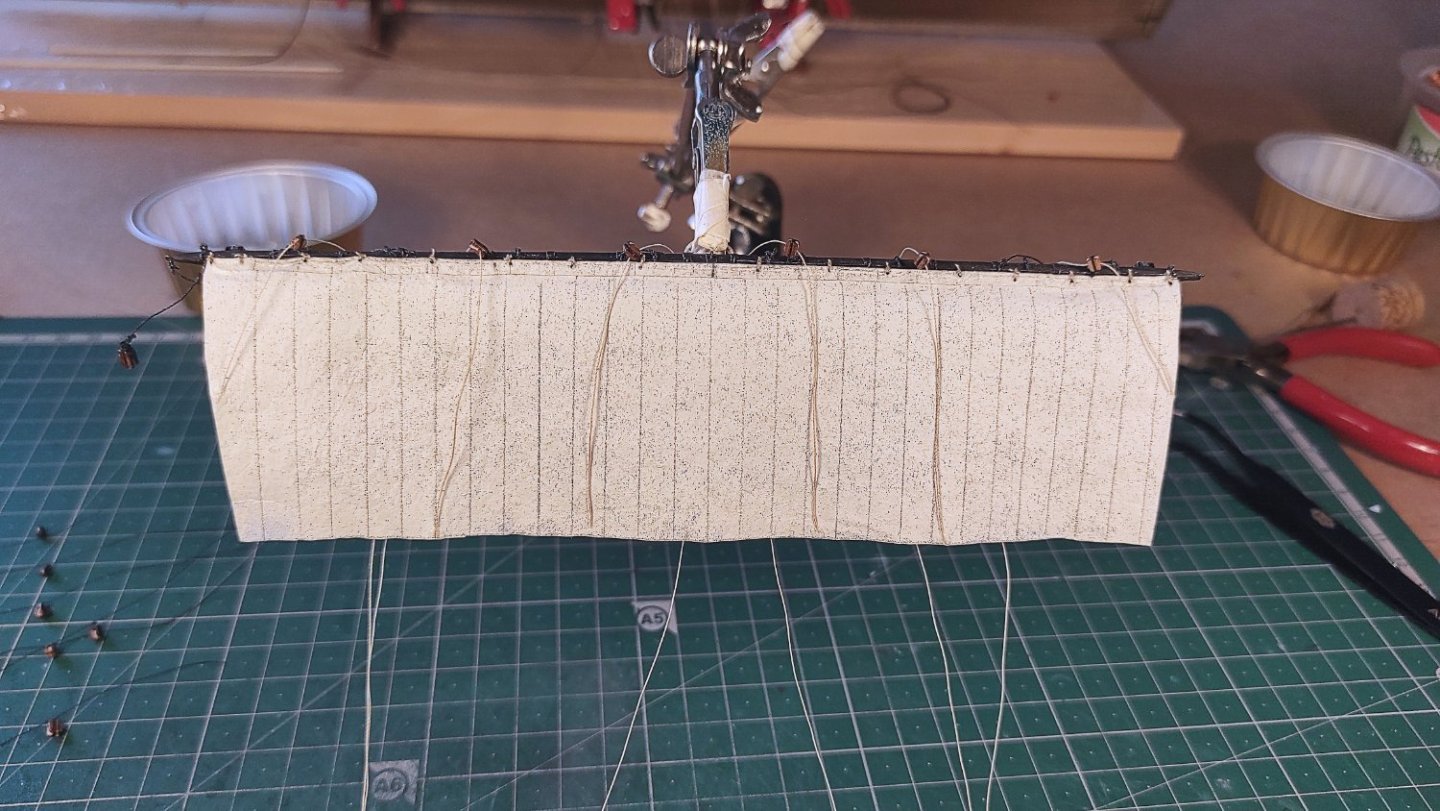
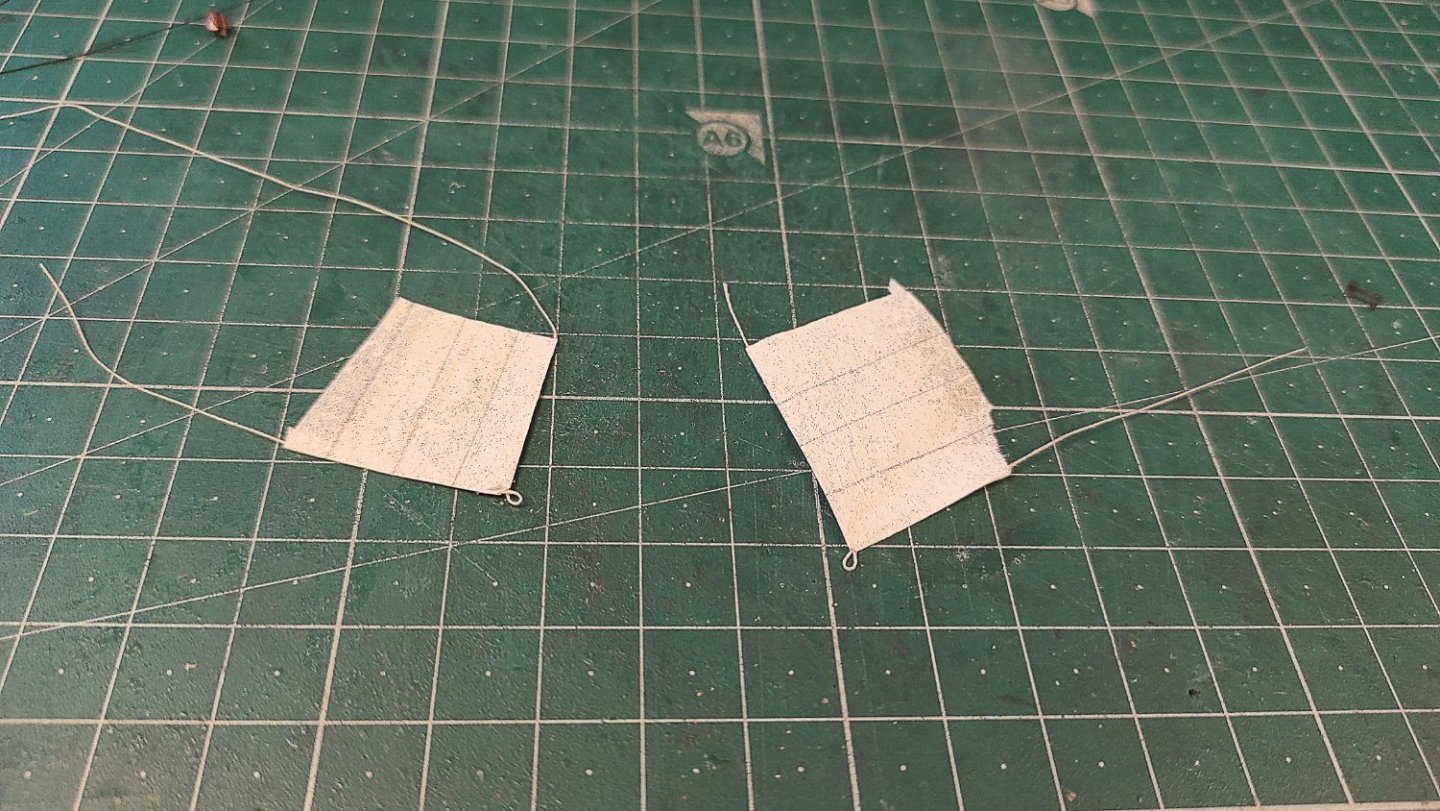
All the blocks are also added in this phase.
Then I wetted the sail and started to fold it in the same way the real one was folded. The clew corners are added and shaped during the process.
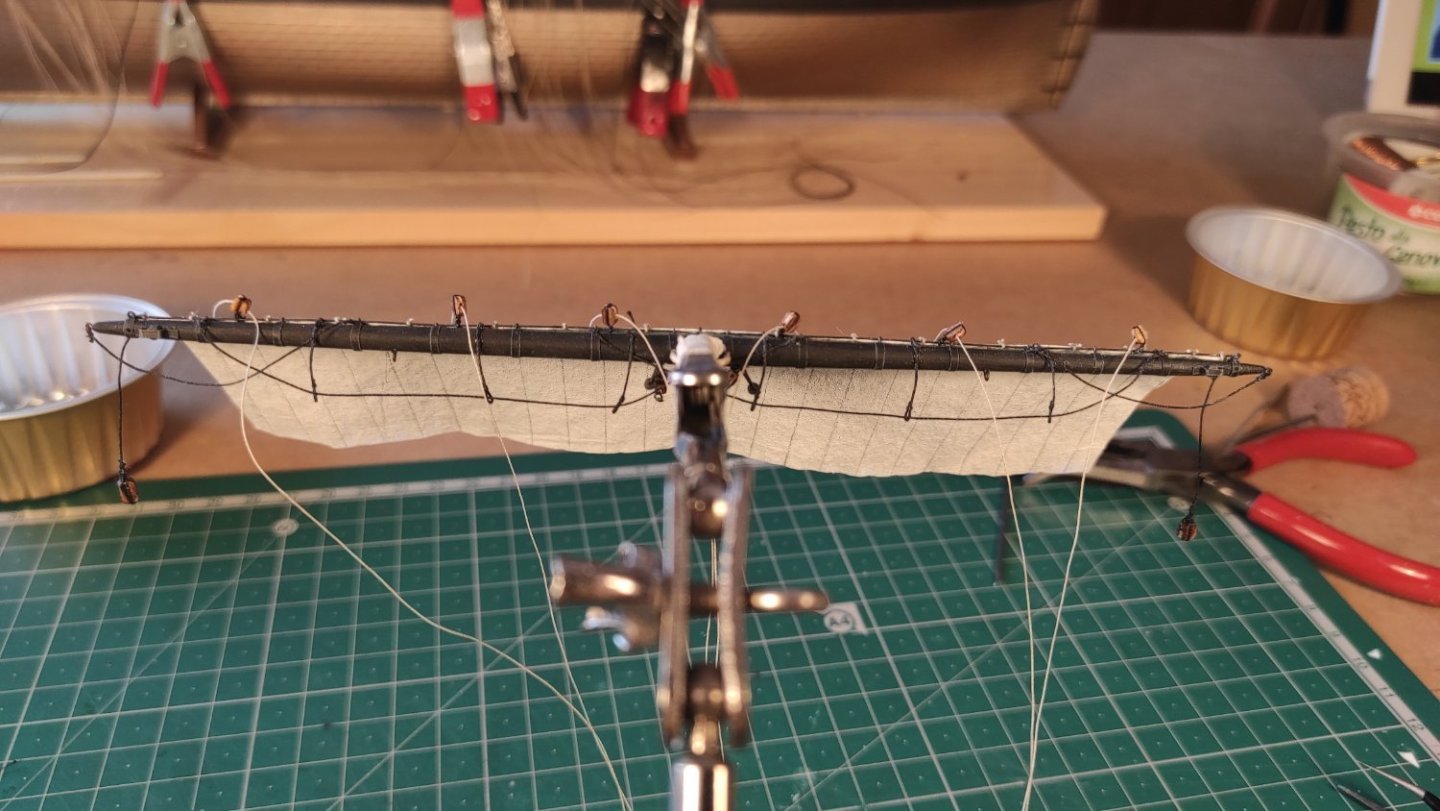
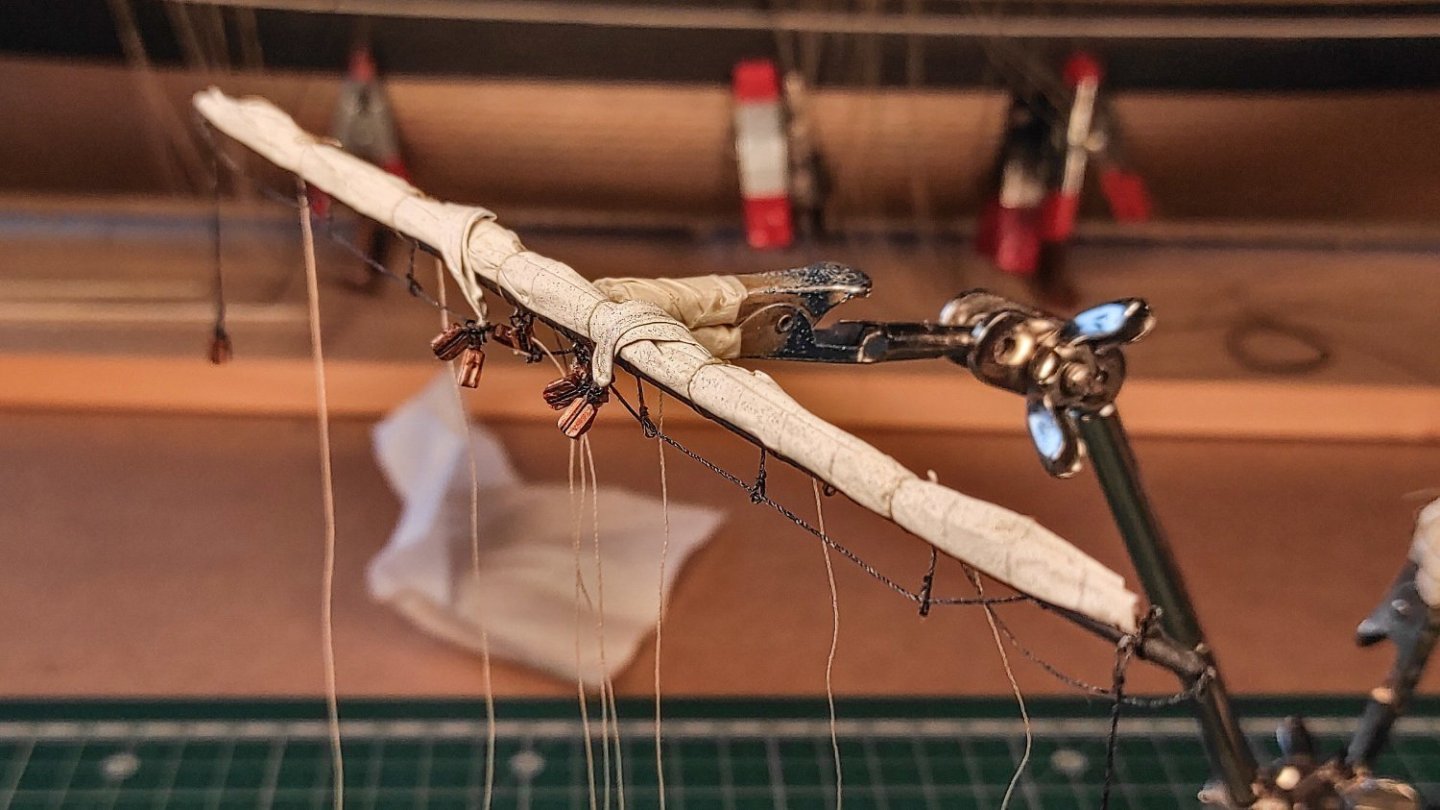
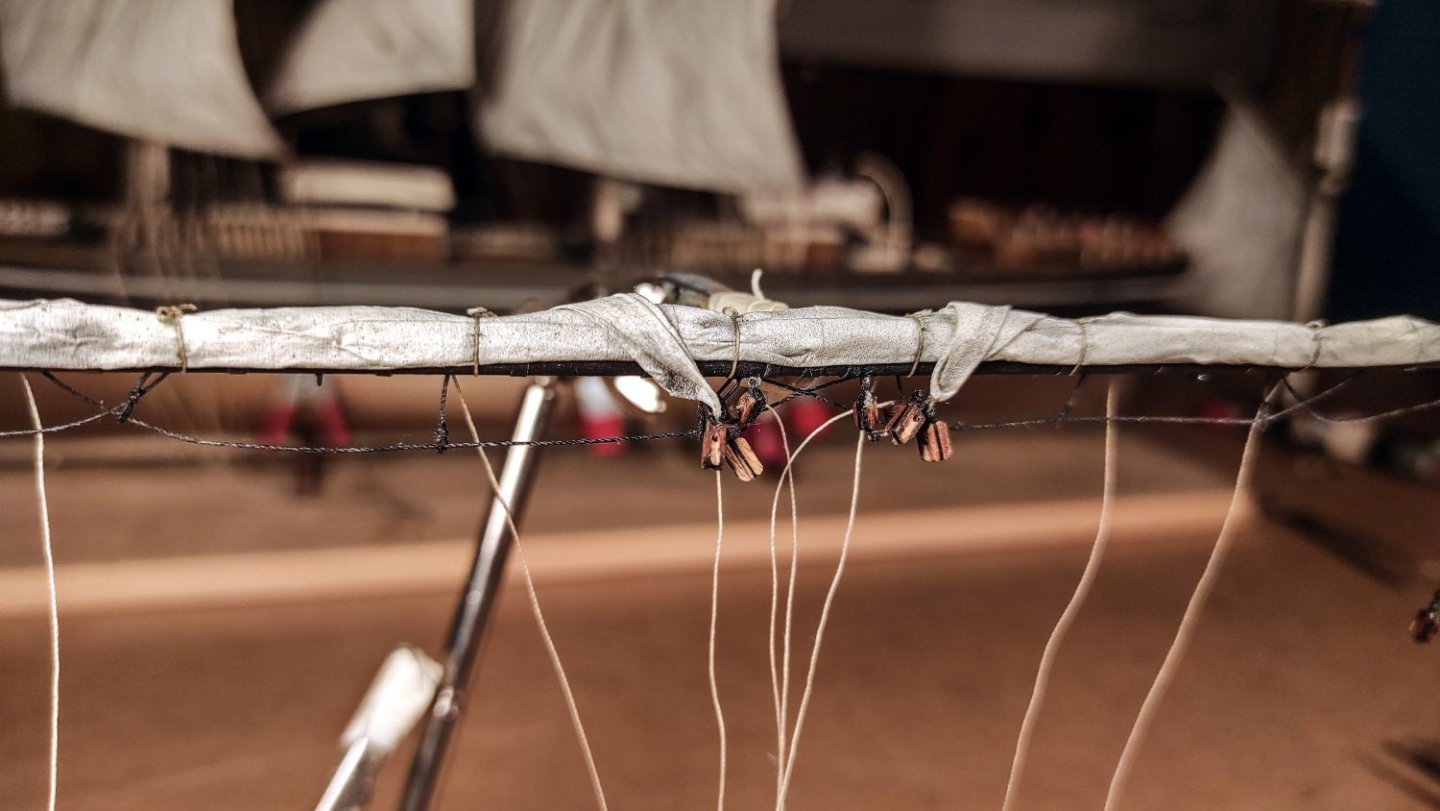
With the sail folded and leaning on top of the yard , I started adding the gaskets. I tried to replicate small wrinkles close to the gasket lines, to give a proper sense of scale.
While the sail dries, I keep shaping the sail, adding small pieces of sail under the fold to inflate the fold a bit in between tho gaskets.
This is the end result:


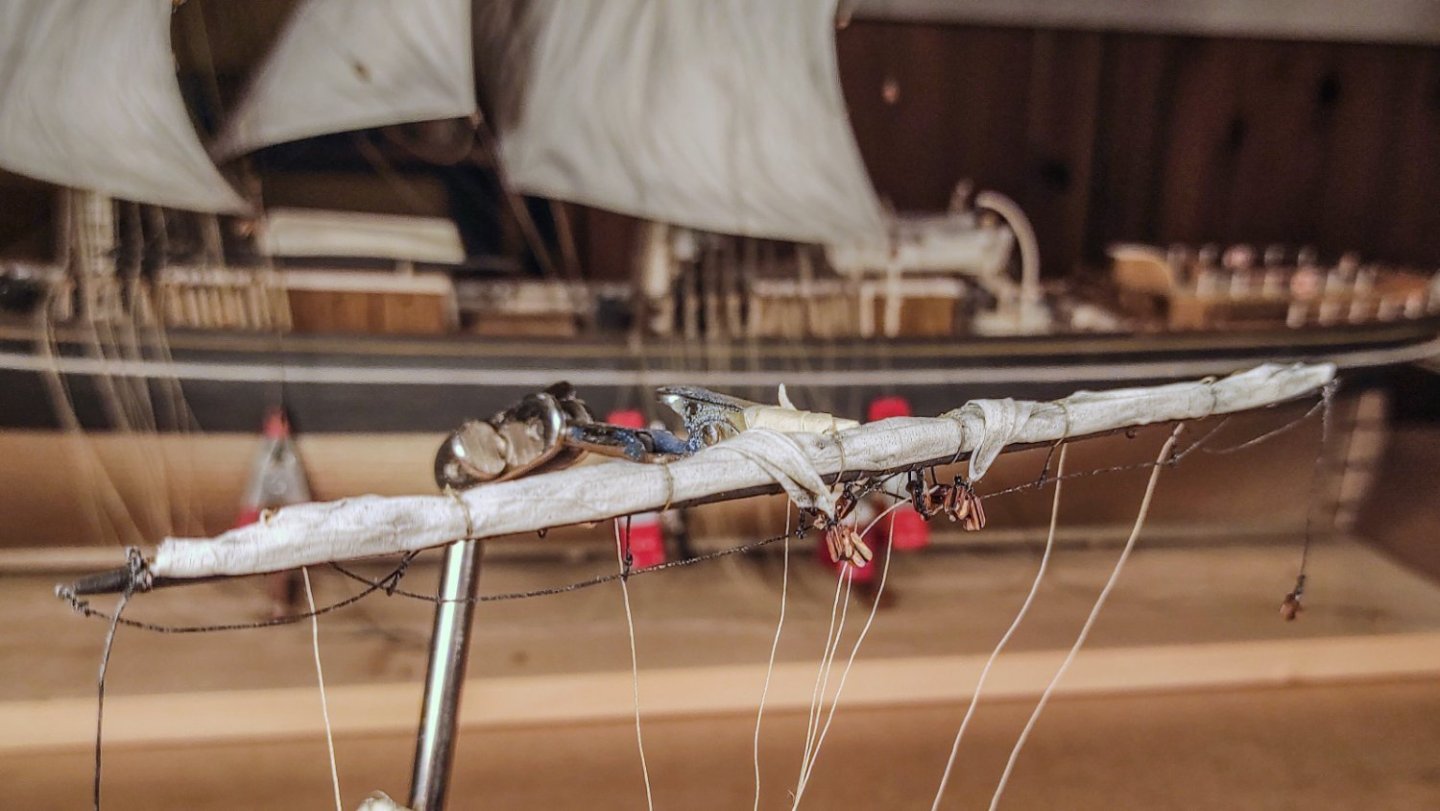
What do you think? Is it acceptable?
Thanks for watching!
- VitusBering, Cirdan, Veszett Roka and 5 others
-
3
-
 5
5
-
What a wonderful project!
May I ask you what game engine you are using?I've been thinking about something similar, but on a much smaller scale, using Godot.Also, in post number 103, you seem to be using an old version of blender for modeling; why aren't you upgrading to a newer version?Thank you!


Cutty Sark mizzen pin rail belaying pins and mizzen halliards
in Masting, rigging and sails
Posted
Thank you both for helping me out!
It seems you agreed that the separated pin rail solution is the right one, I just wanted to be sure, thank again!
Ok, my doubt was that Underhill doesn't mention the separated pin rail, but he shows the pins aligned with the deadeyes.
The question was if it’s ok to use the separated pin rail. Thank you!