HOLIDAY DONATION DRIVE - SUPPORT MSW - DO YOUR PART TO KEEP THIS GREAT FORUM GOING!
×


Mirabell61
-
Posts
7,407 -
Joined
-
Last visited
Content Type
Profiles
Forums
Gallery
Events
Everything posted by Mirabell61
-
 very interesting technique Michael, laminated Frames (= high strength), I`m curious and tuned in for further Progress.. .. Nils
 -
Thank you Michael, for your congrats and Kind comment, very much appreciated, the hights between the decks are of best possible rating I could get out of the given scale. Considering that I left away all the portside cabins for better view to the interior, one can imagine what a tough Job those guys had I wish you a happy Christmas time and a good new year... Nils
-
Thank you Sal, I like those Little figurines, they bring a Little life into the ship and one`s Imagination.... appreciate your nice compliment, wish you a nice relaxing Christmas time and all the best for 2016 Nils
-
beautiful work Tony, love your way of thinking ahead with the rigging, Fixing jigs, etc. and the Standing rigging next to the wonderful built hull..., she`ll be a Beauty... Nils
- 269 replies
-
- 2
-

-
- Caldercraft
- First build
- (and 3 more)
-
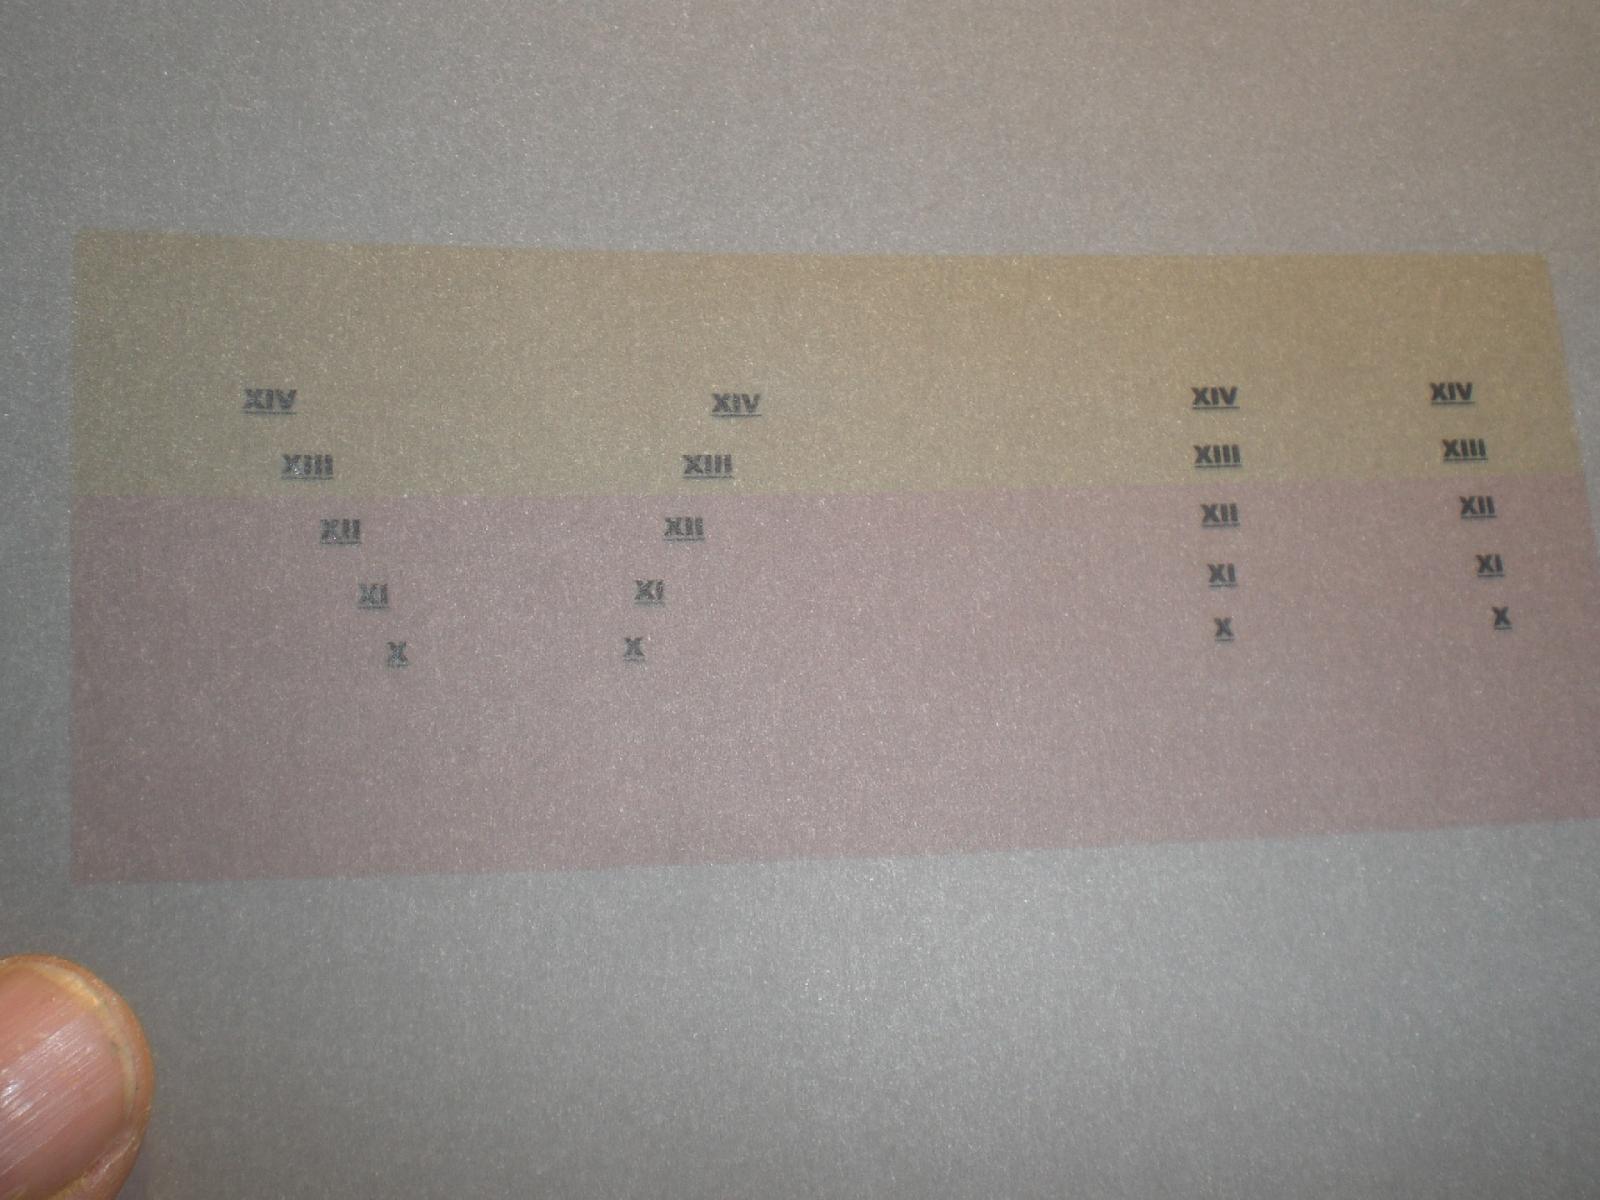
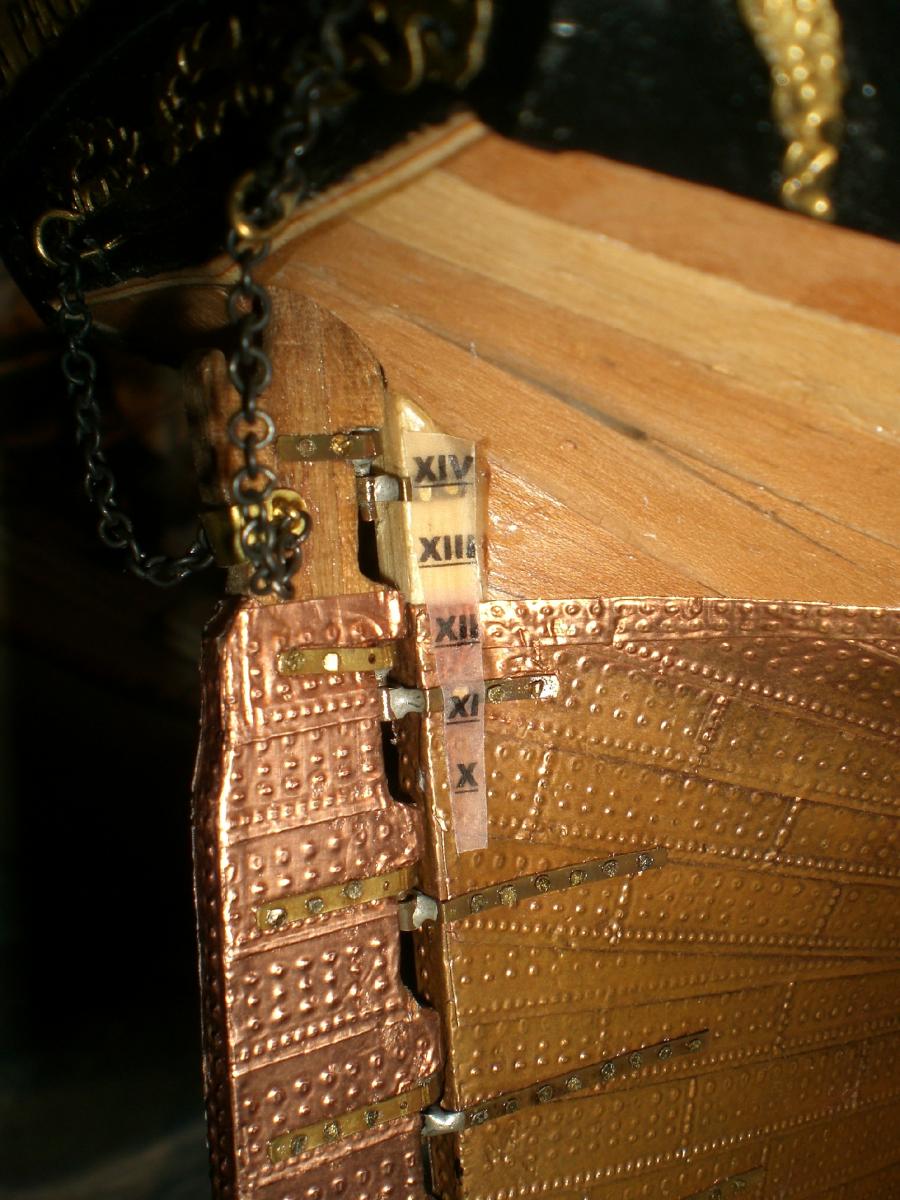
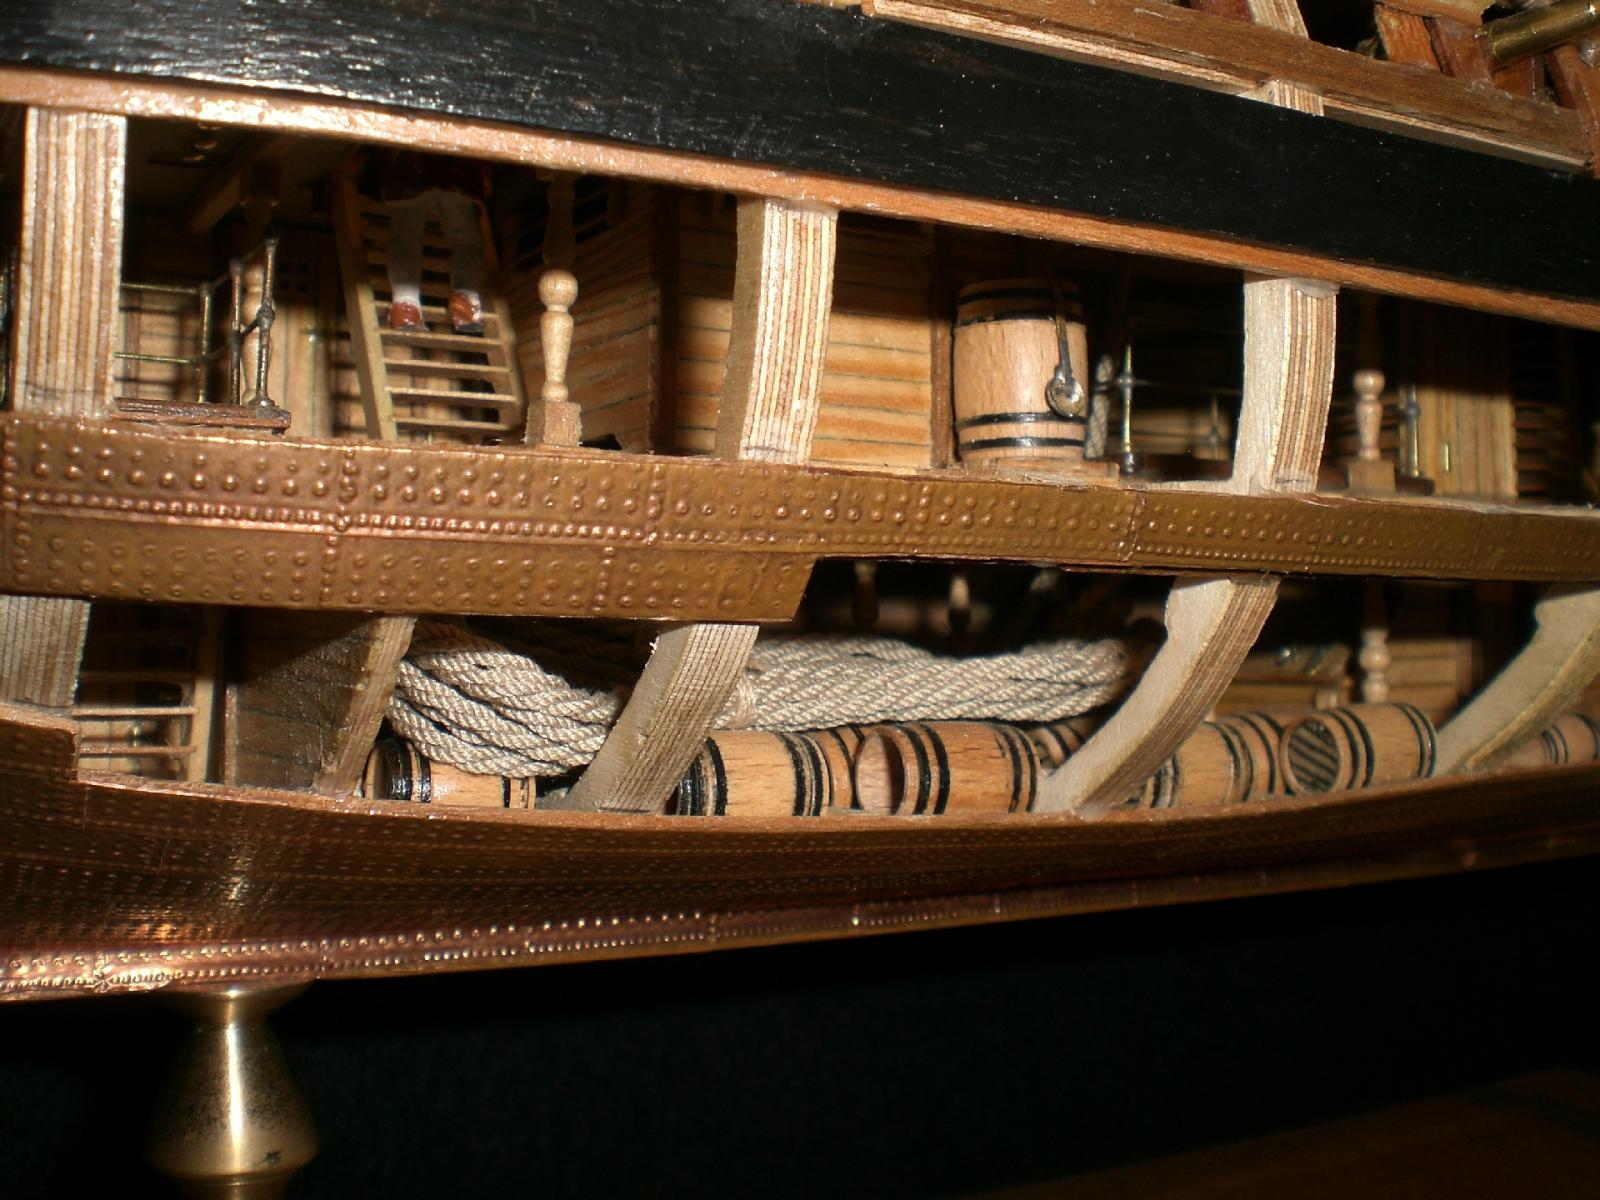
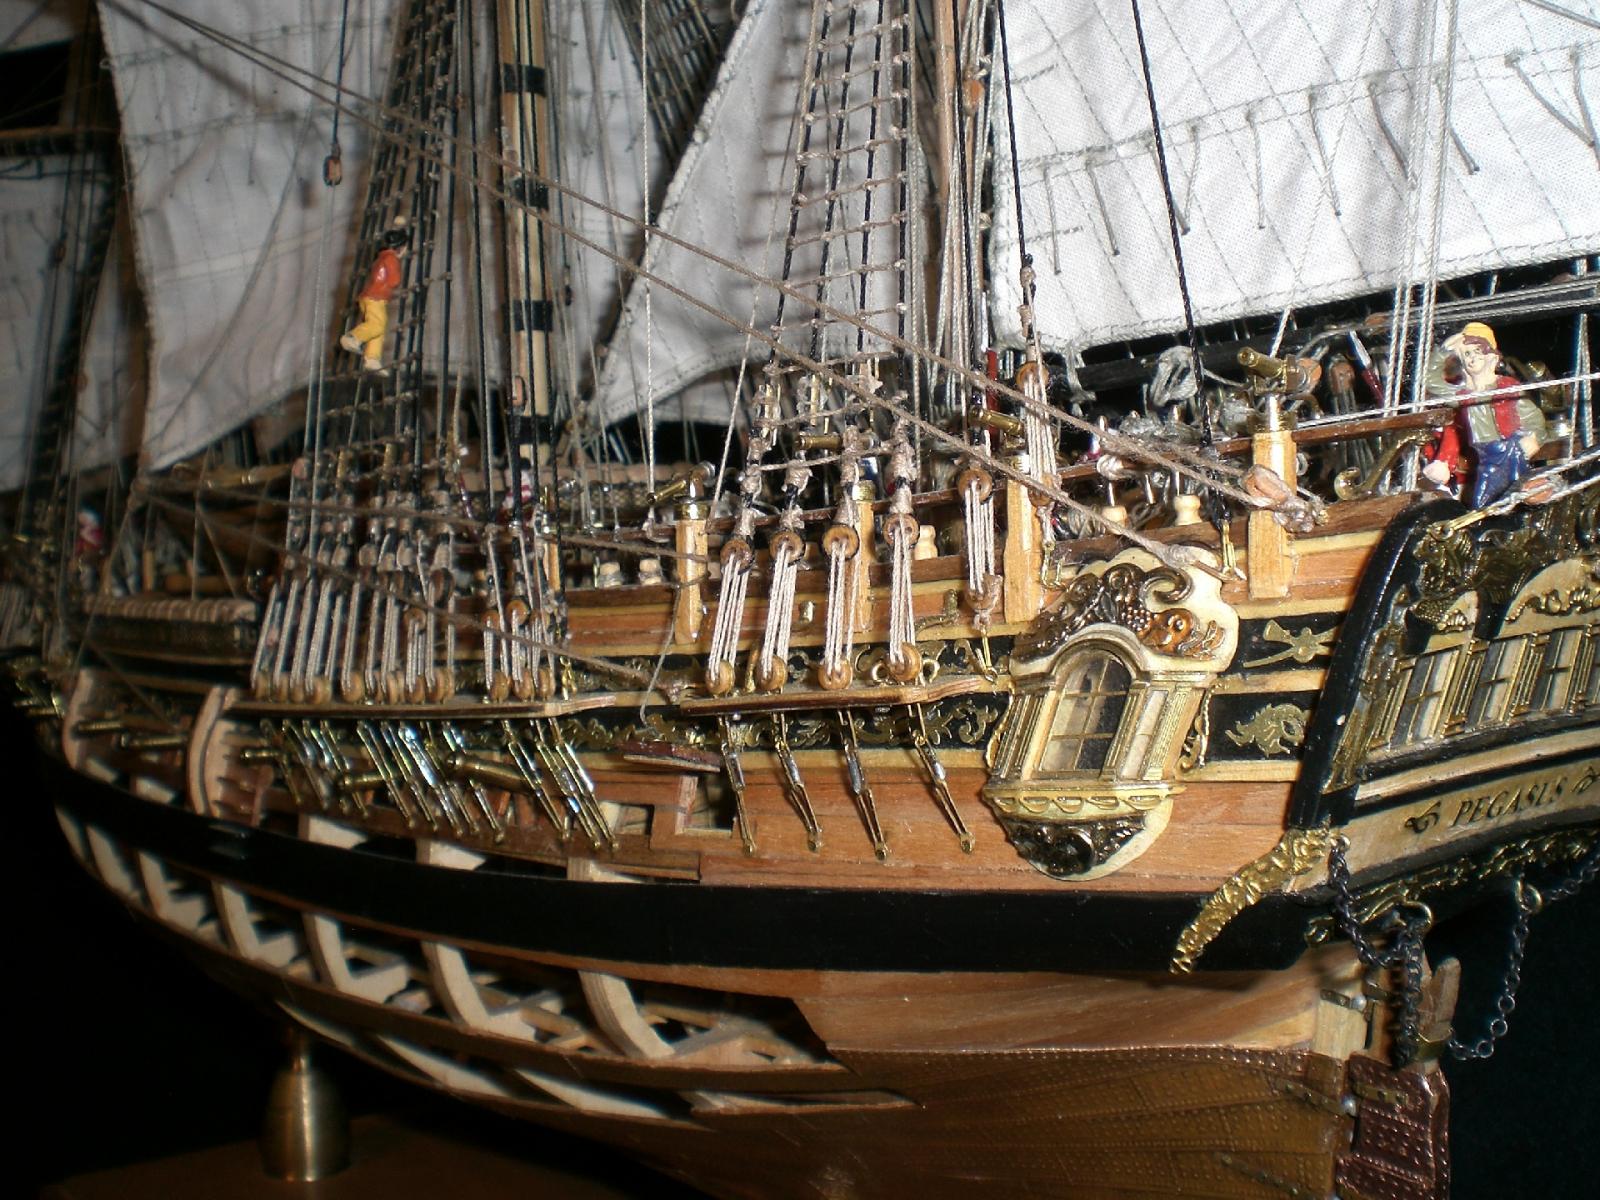
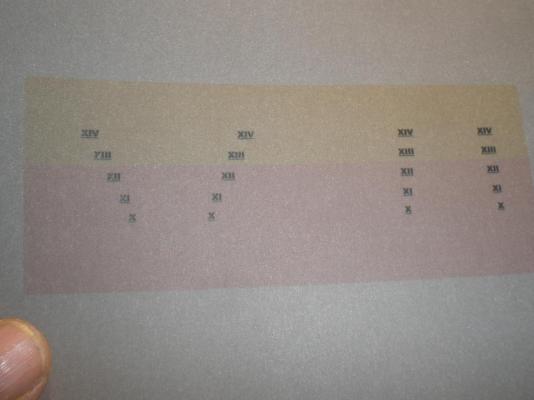
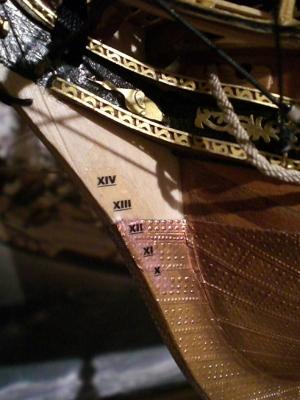
just recognized that there are no depth markings on my Pegasus, sorry, so here they come now.... Nils letters made with Excel and ink printer on semi transperant paper paper glue and a little transp. varnish over it...


-
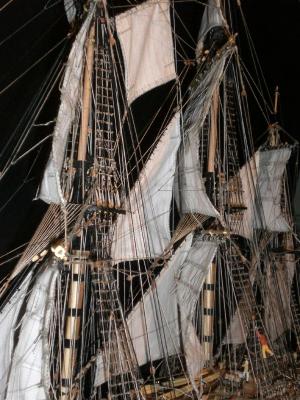
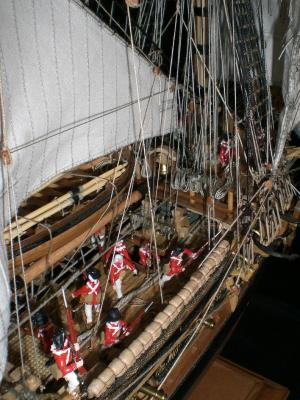
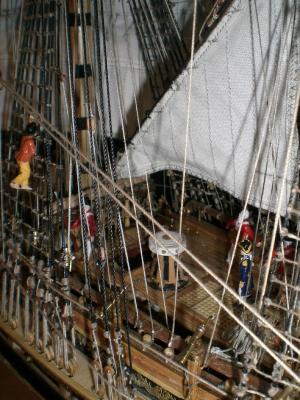
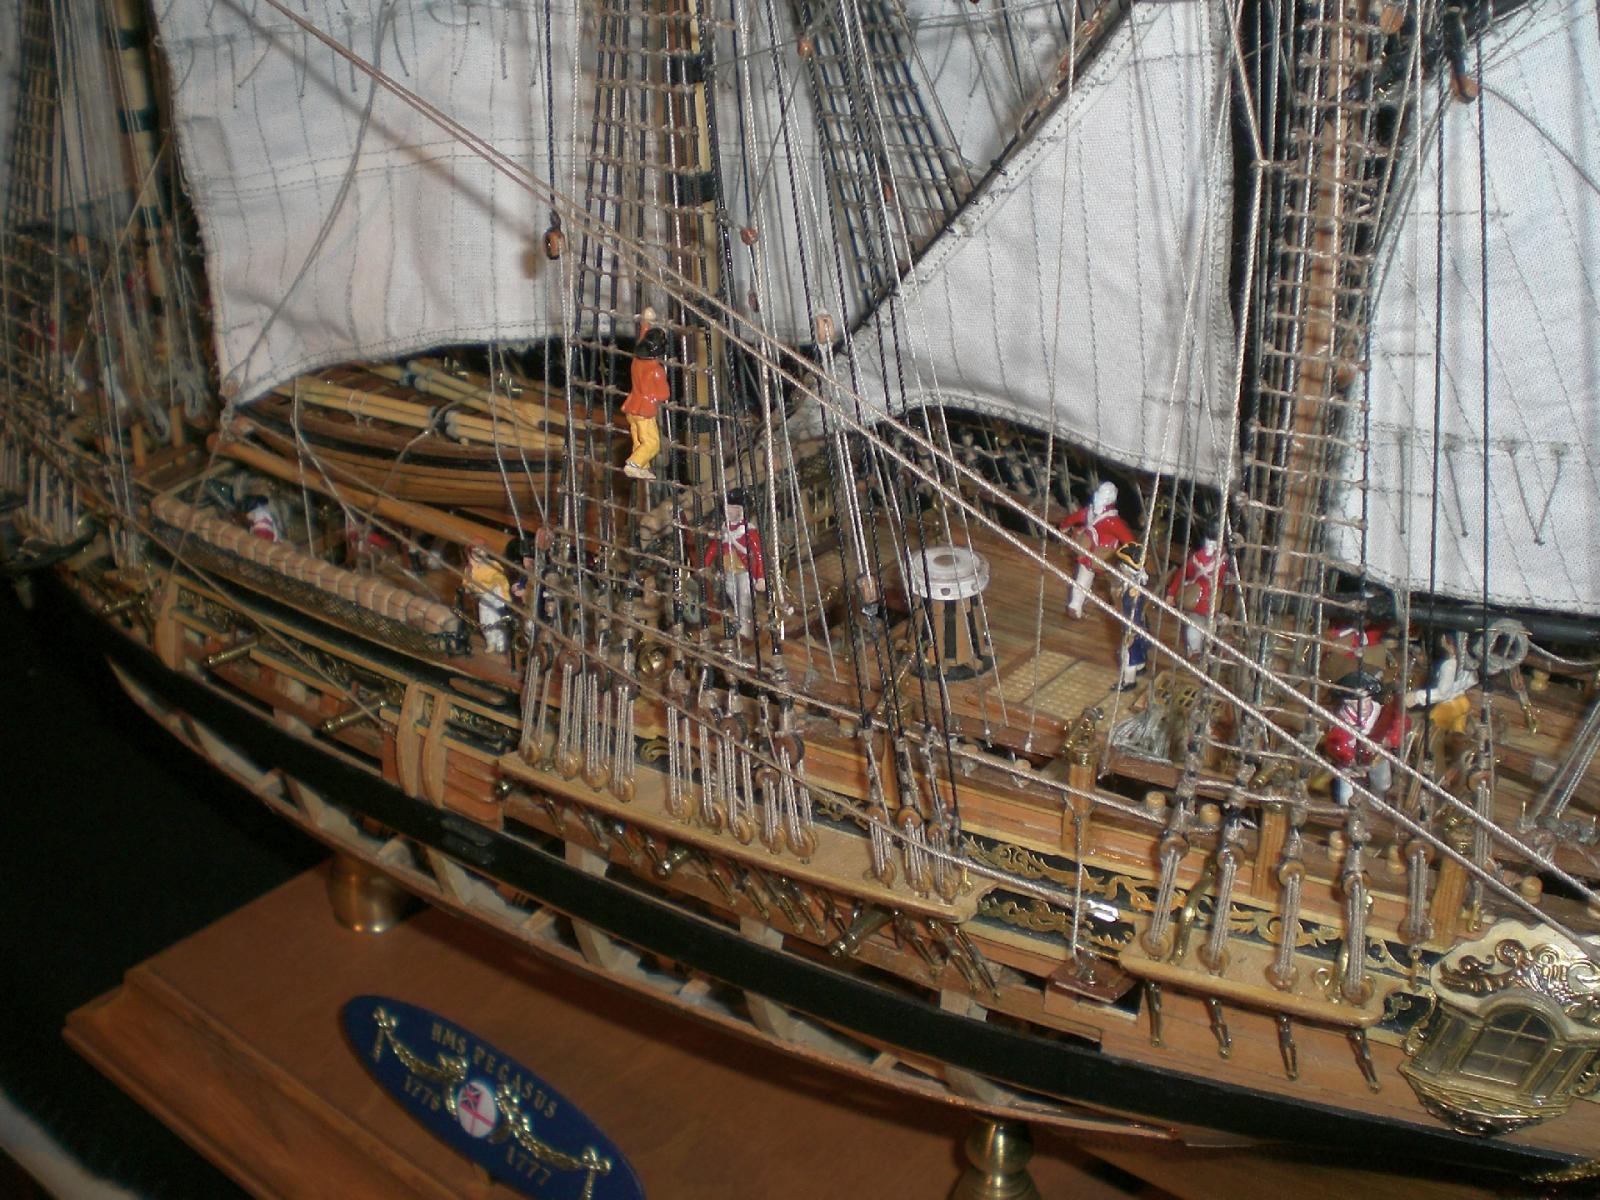
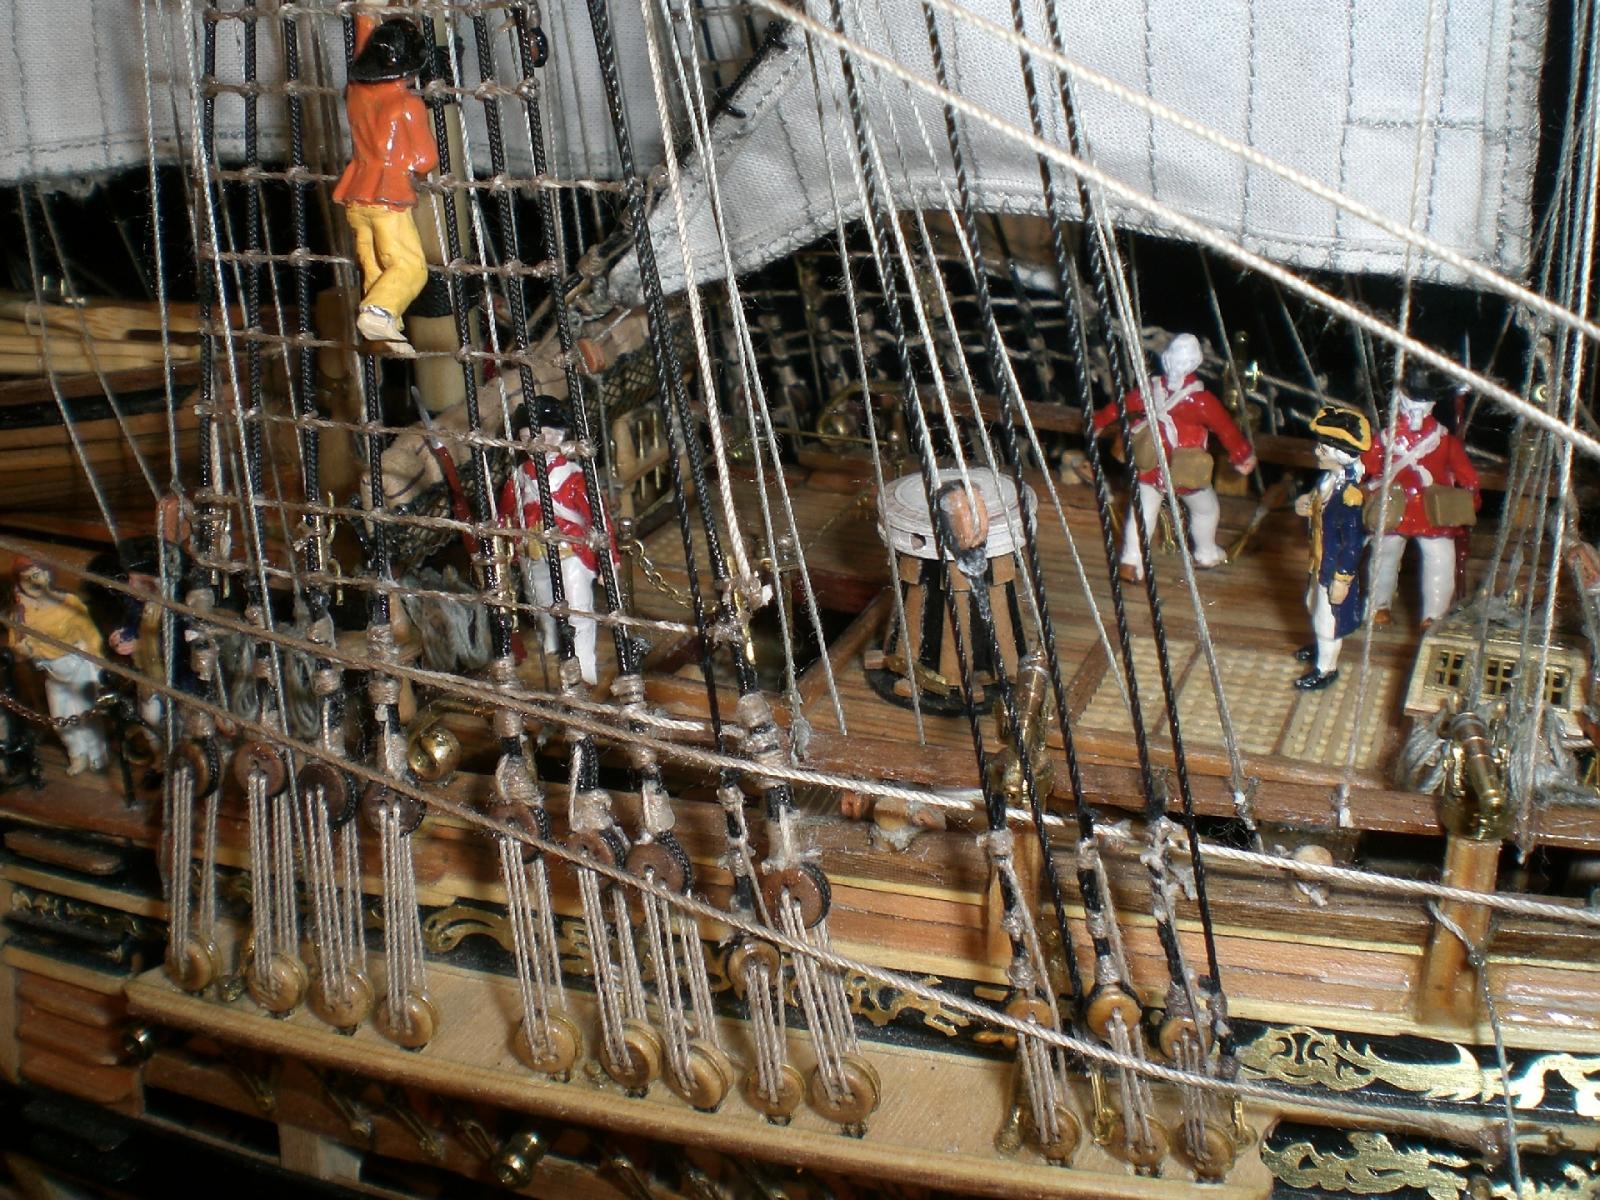
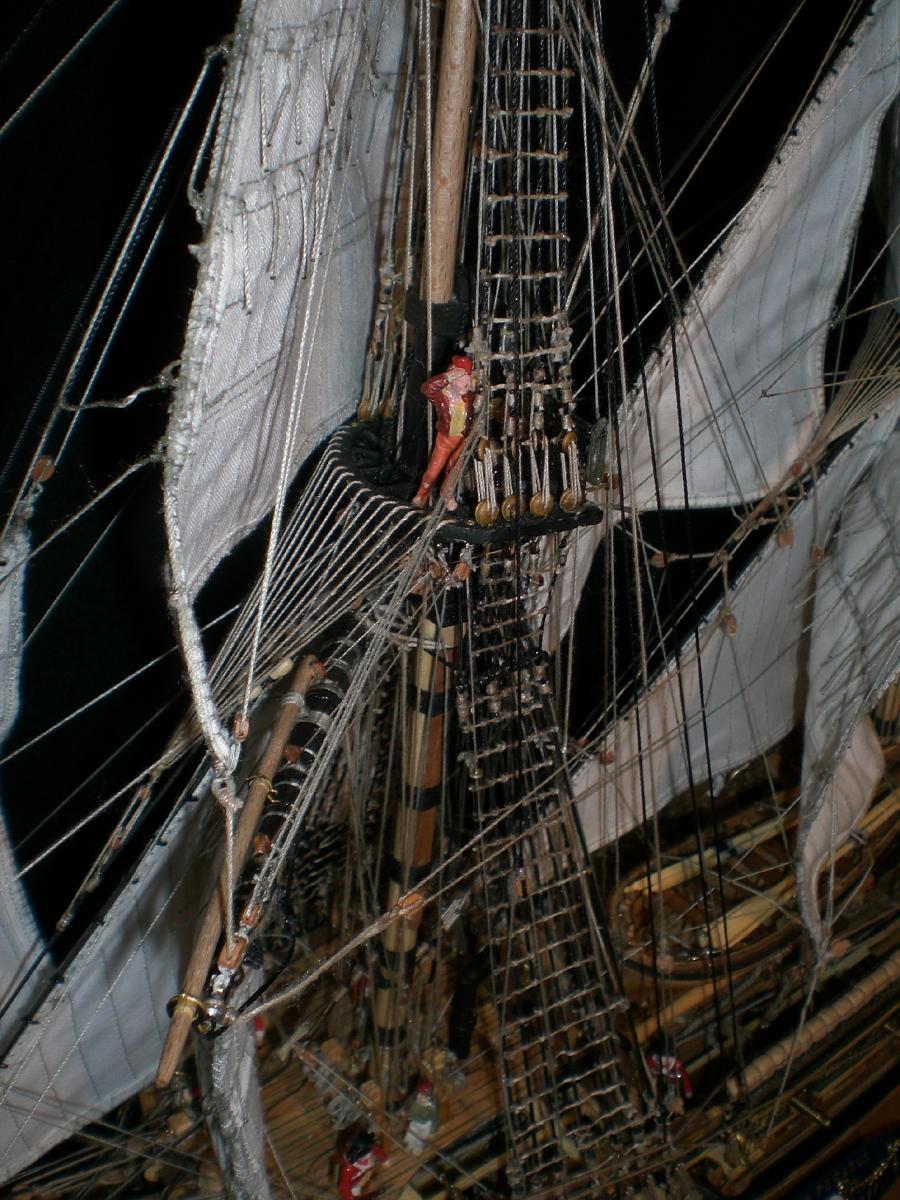
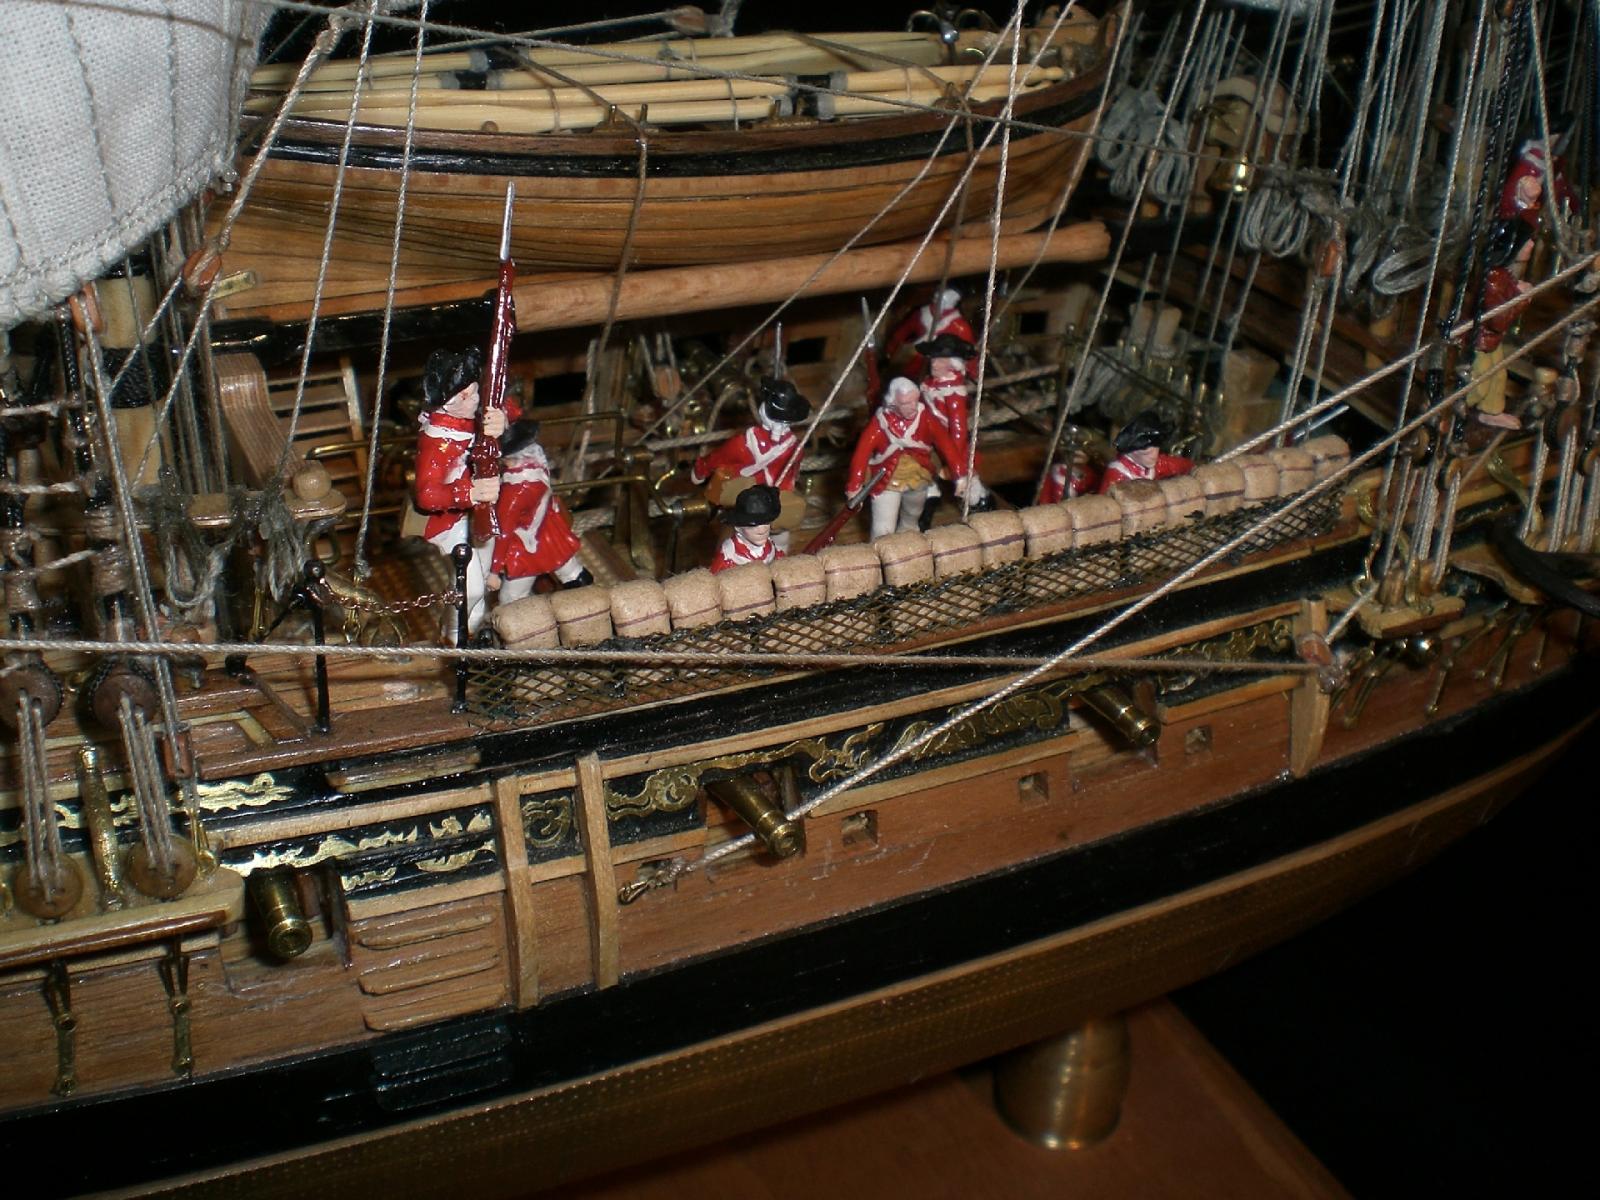
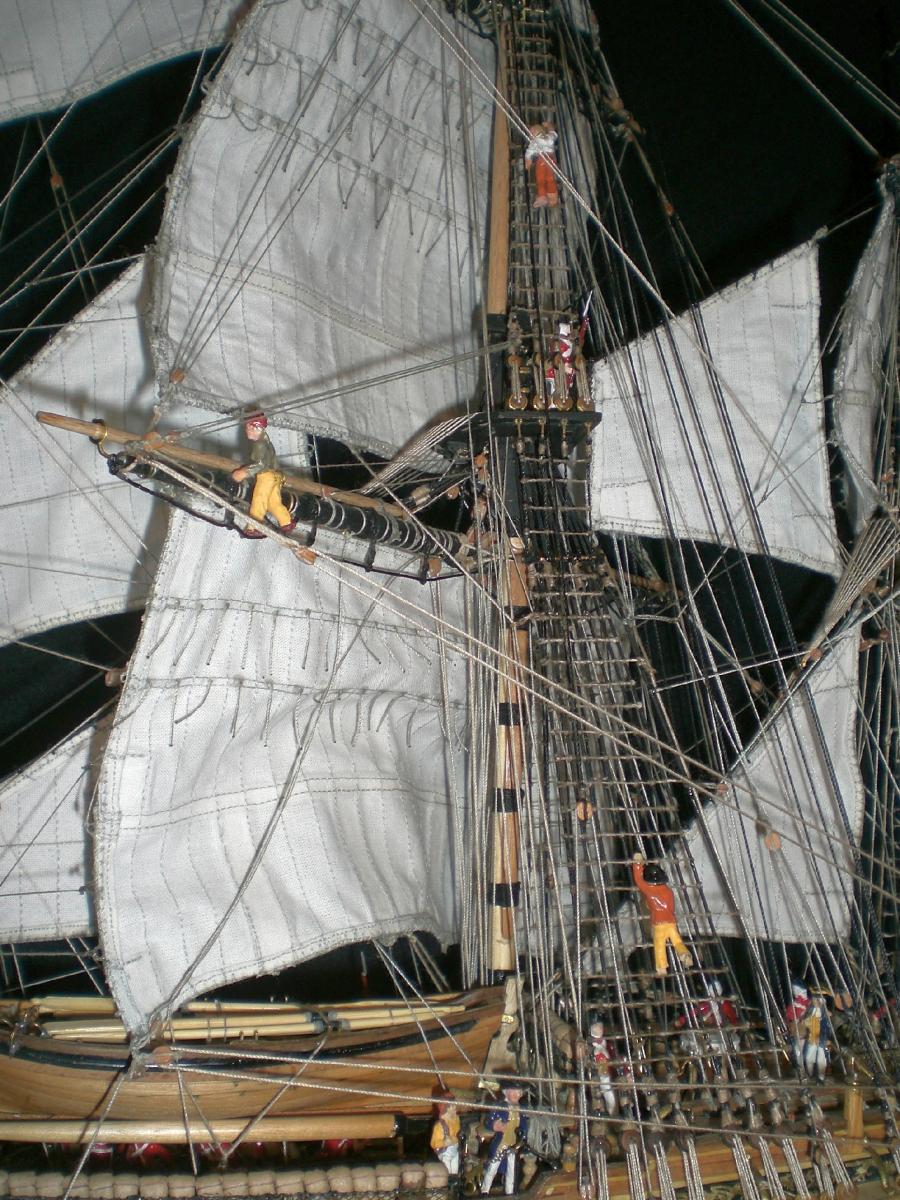
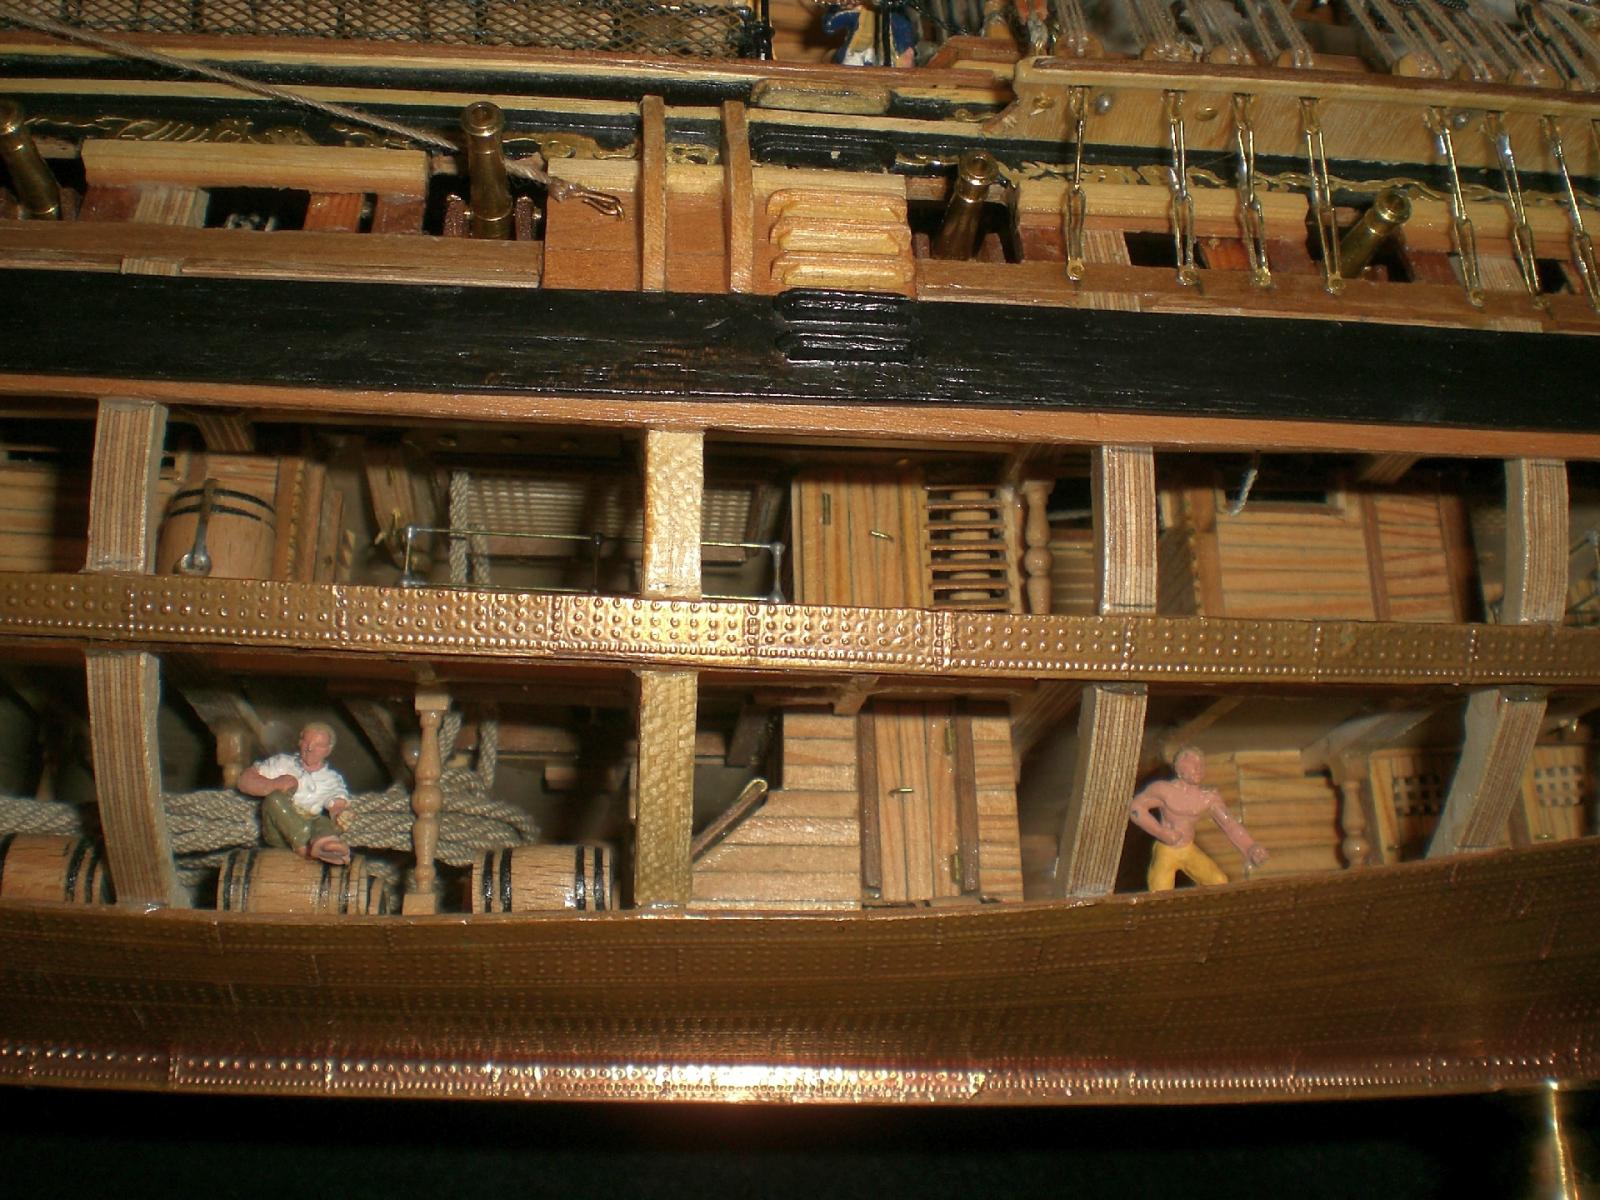
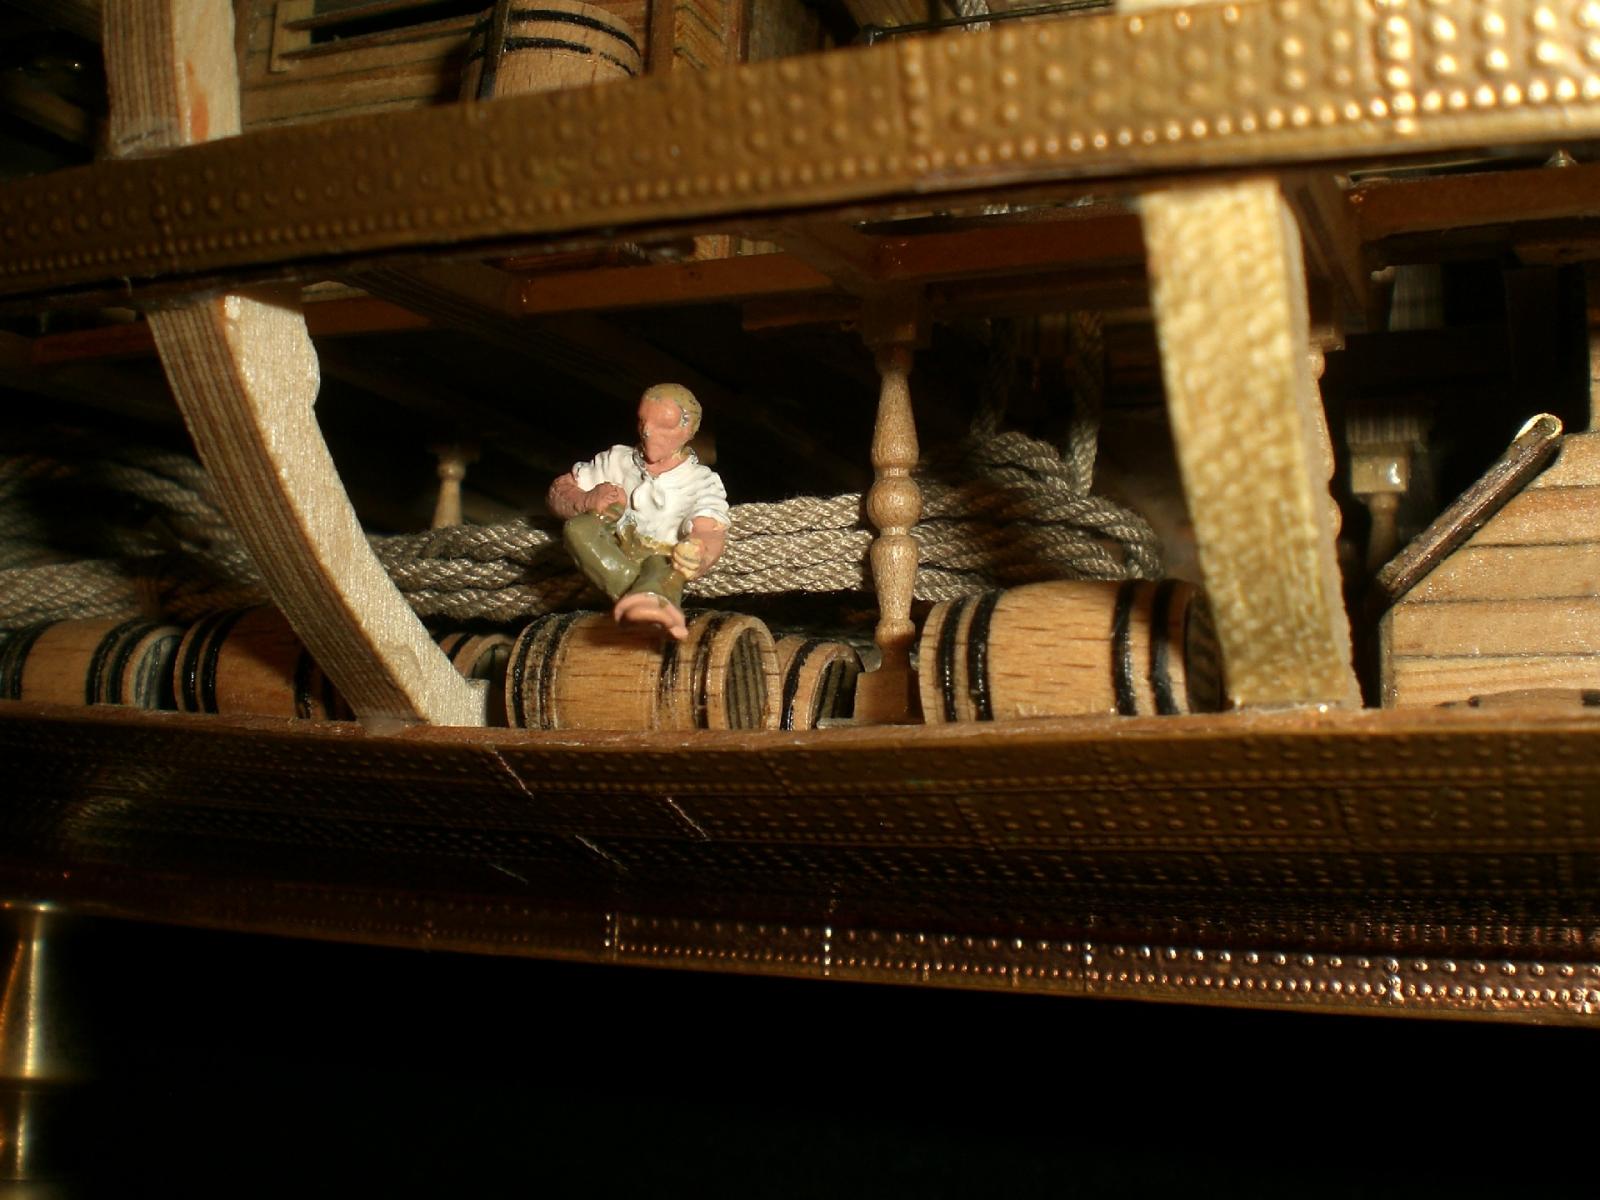
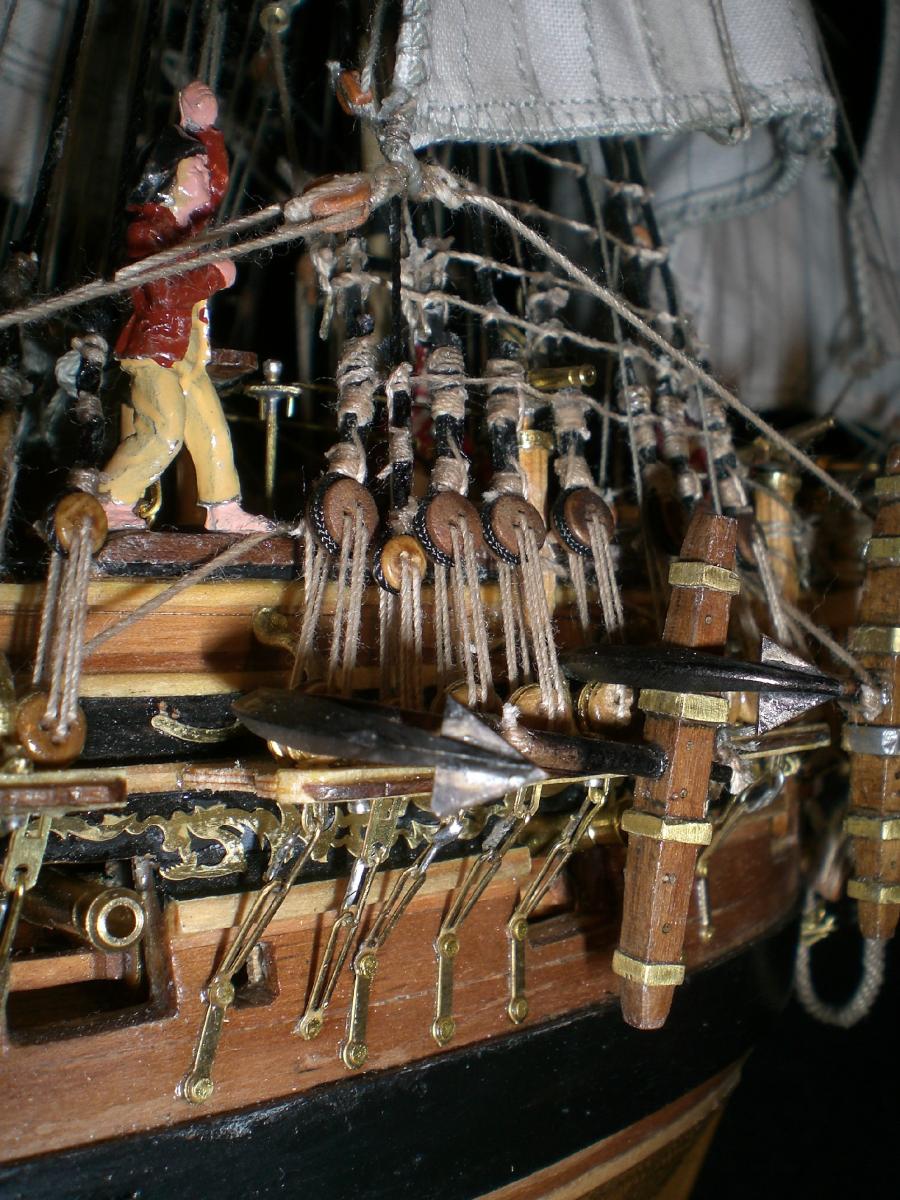
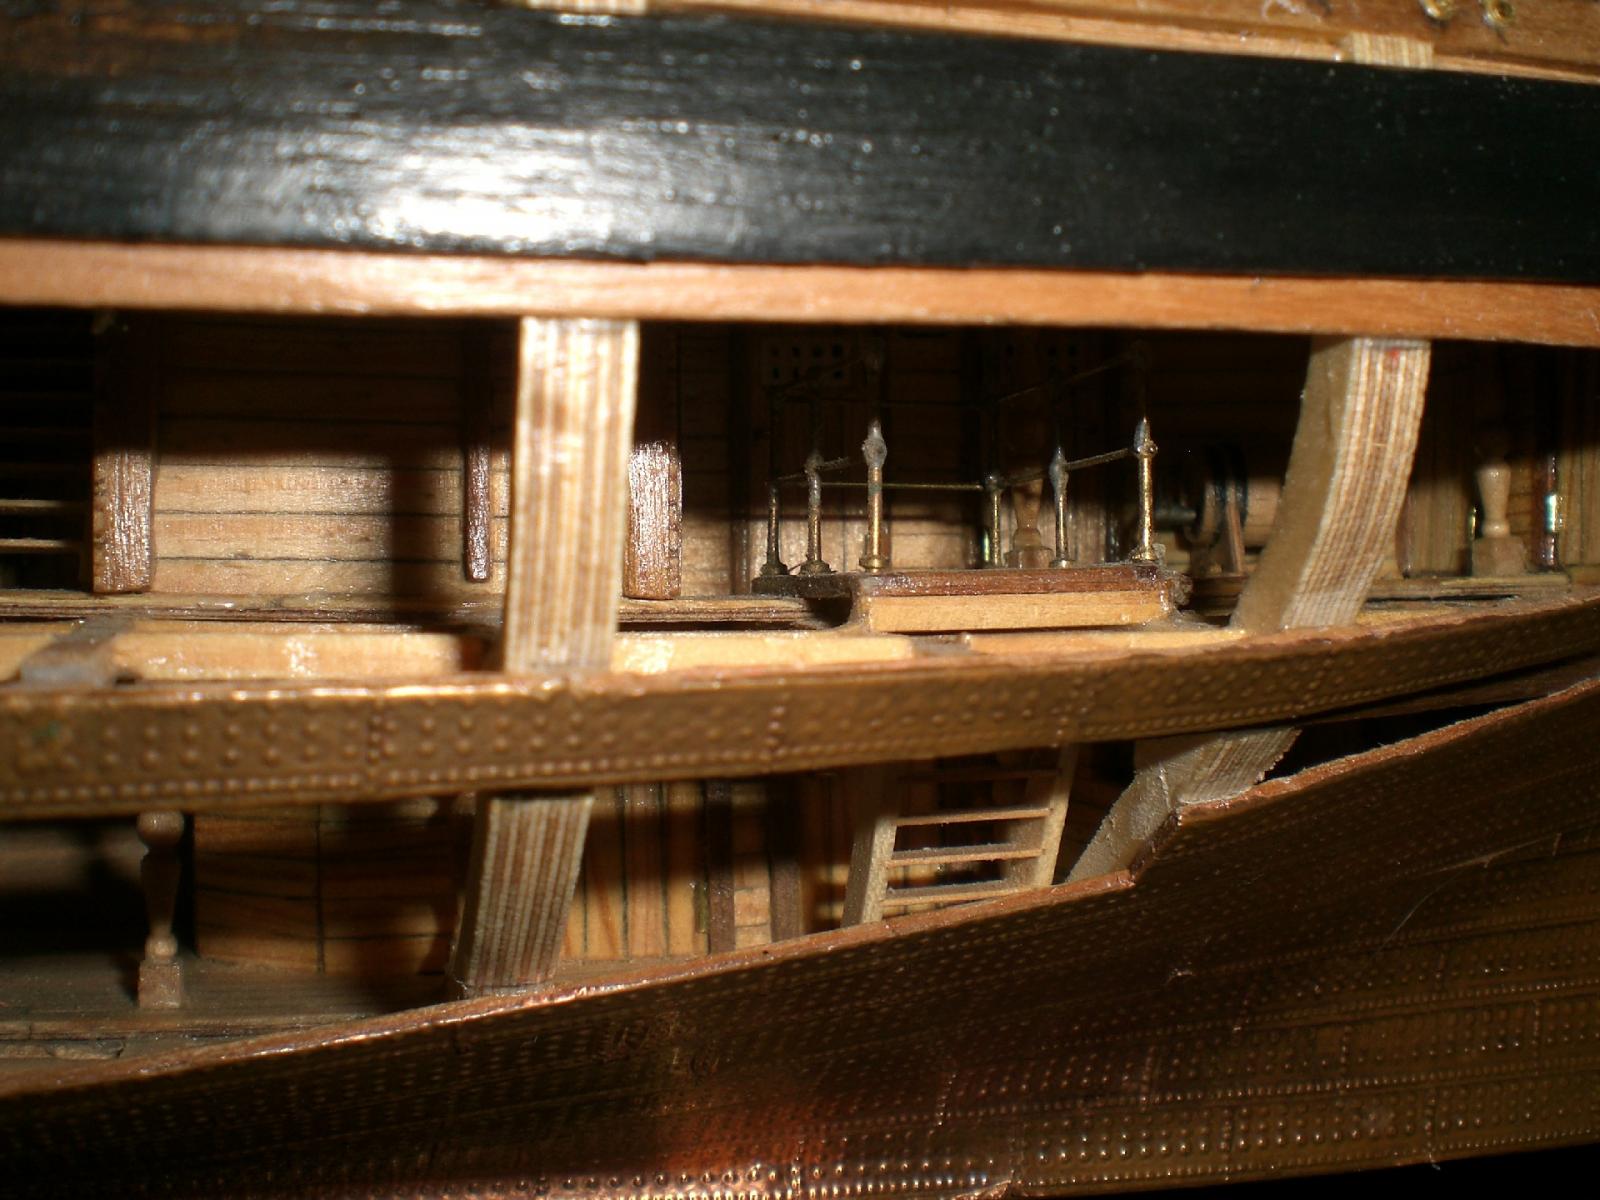
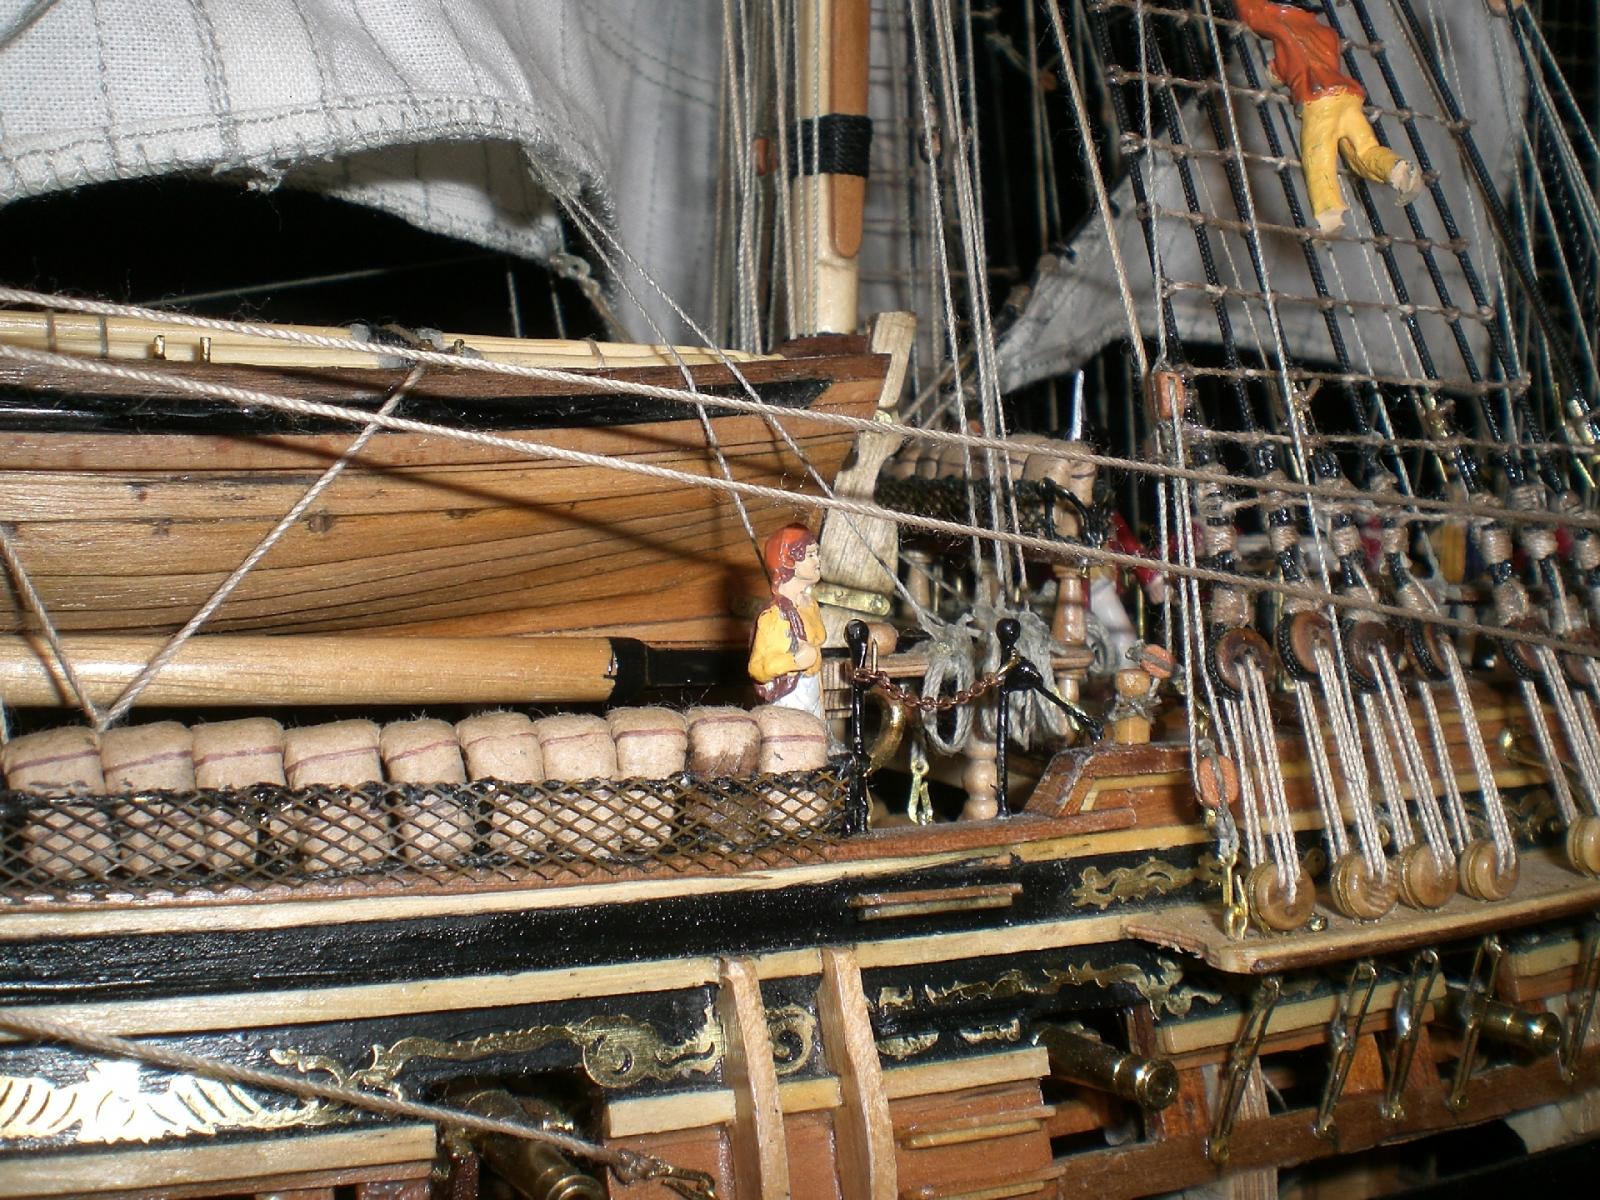
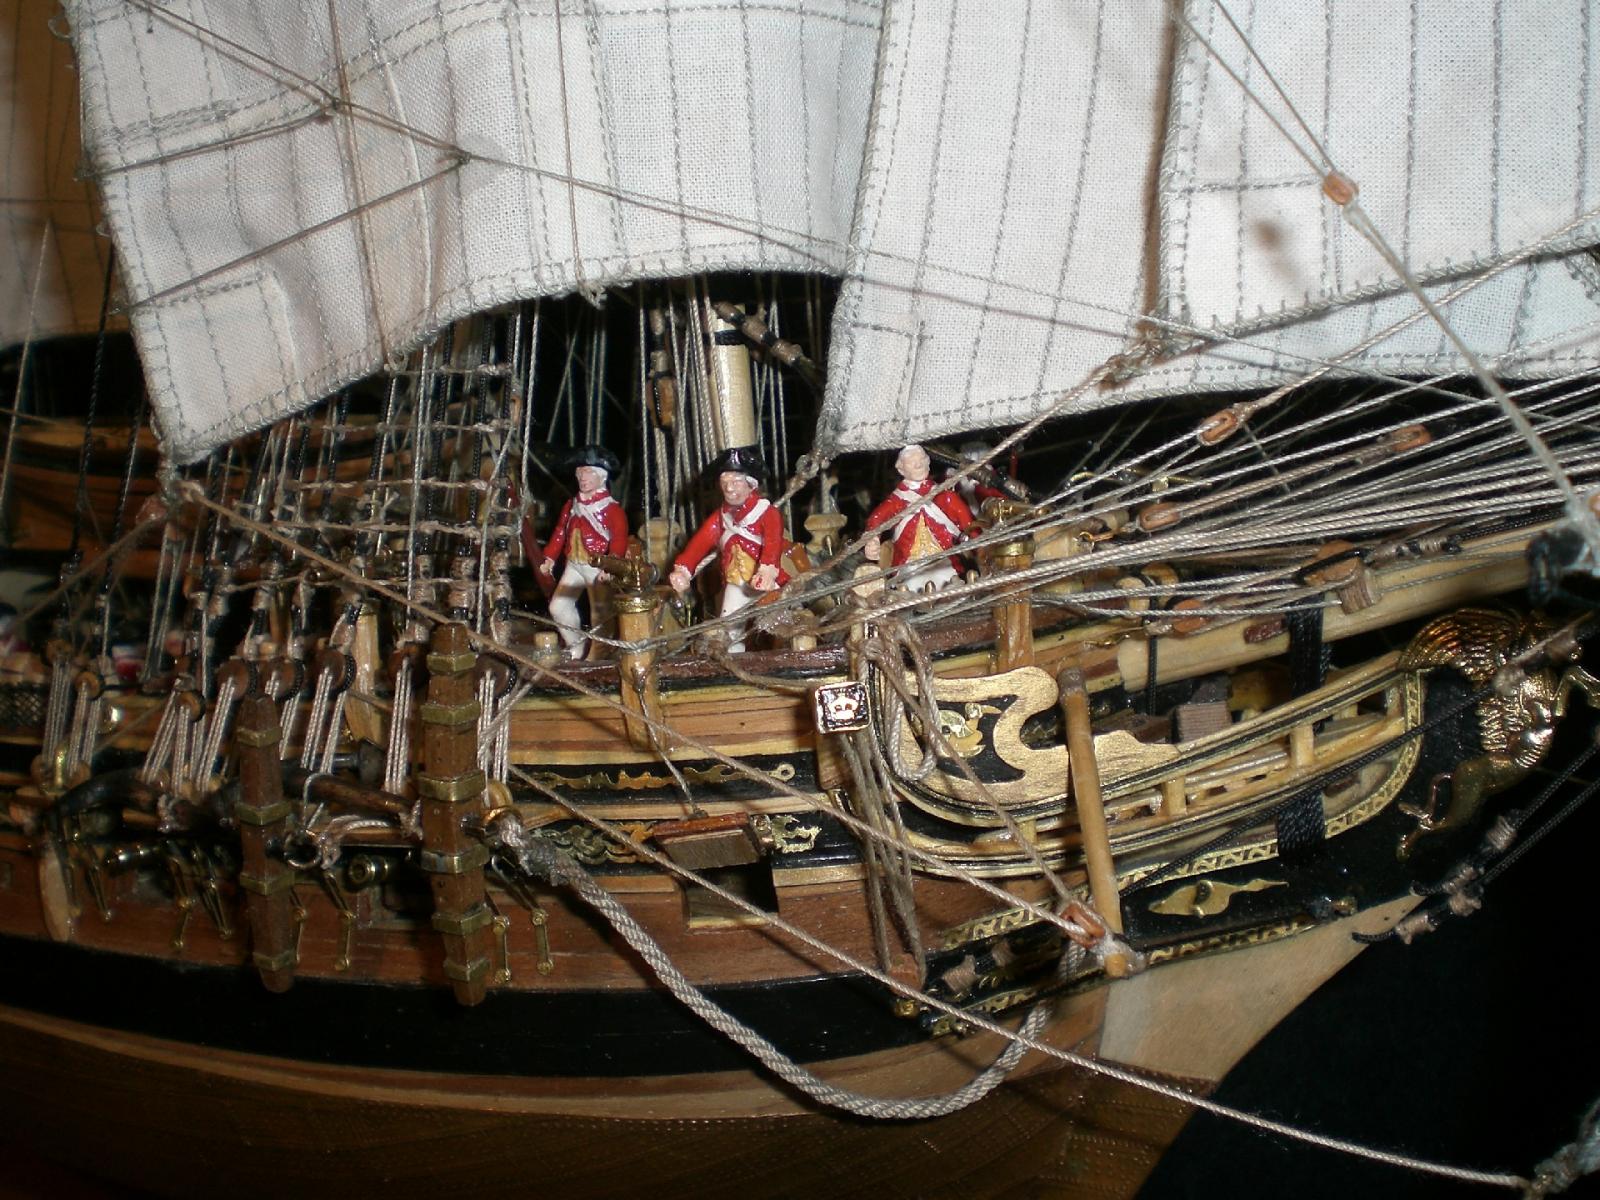
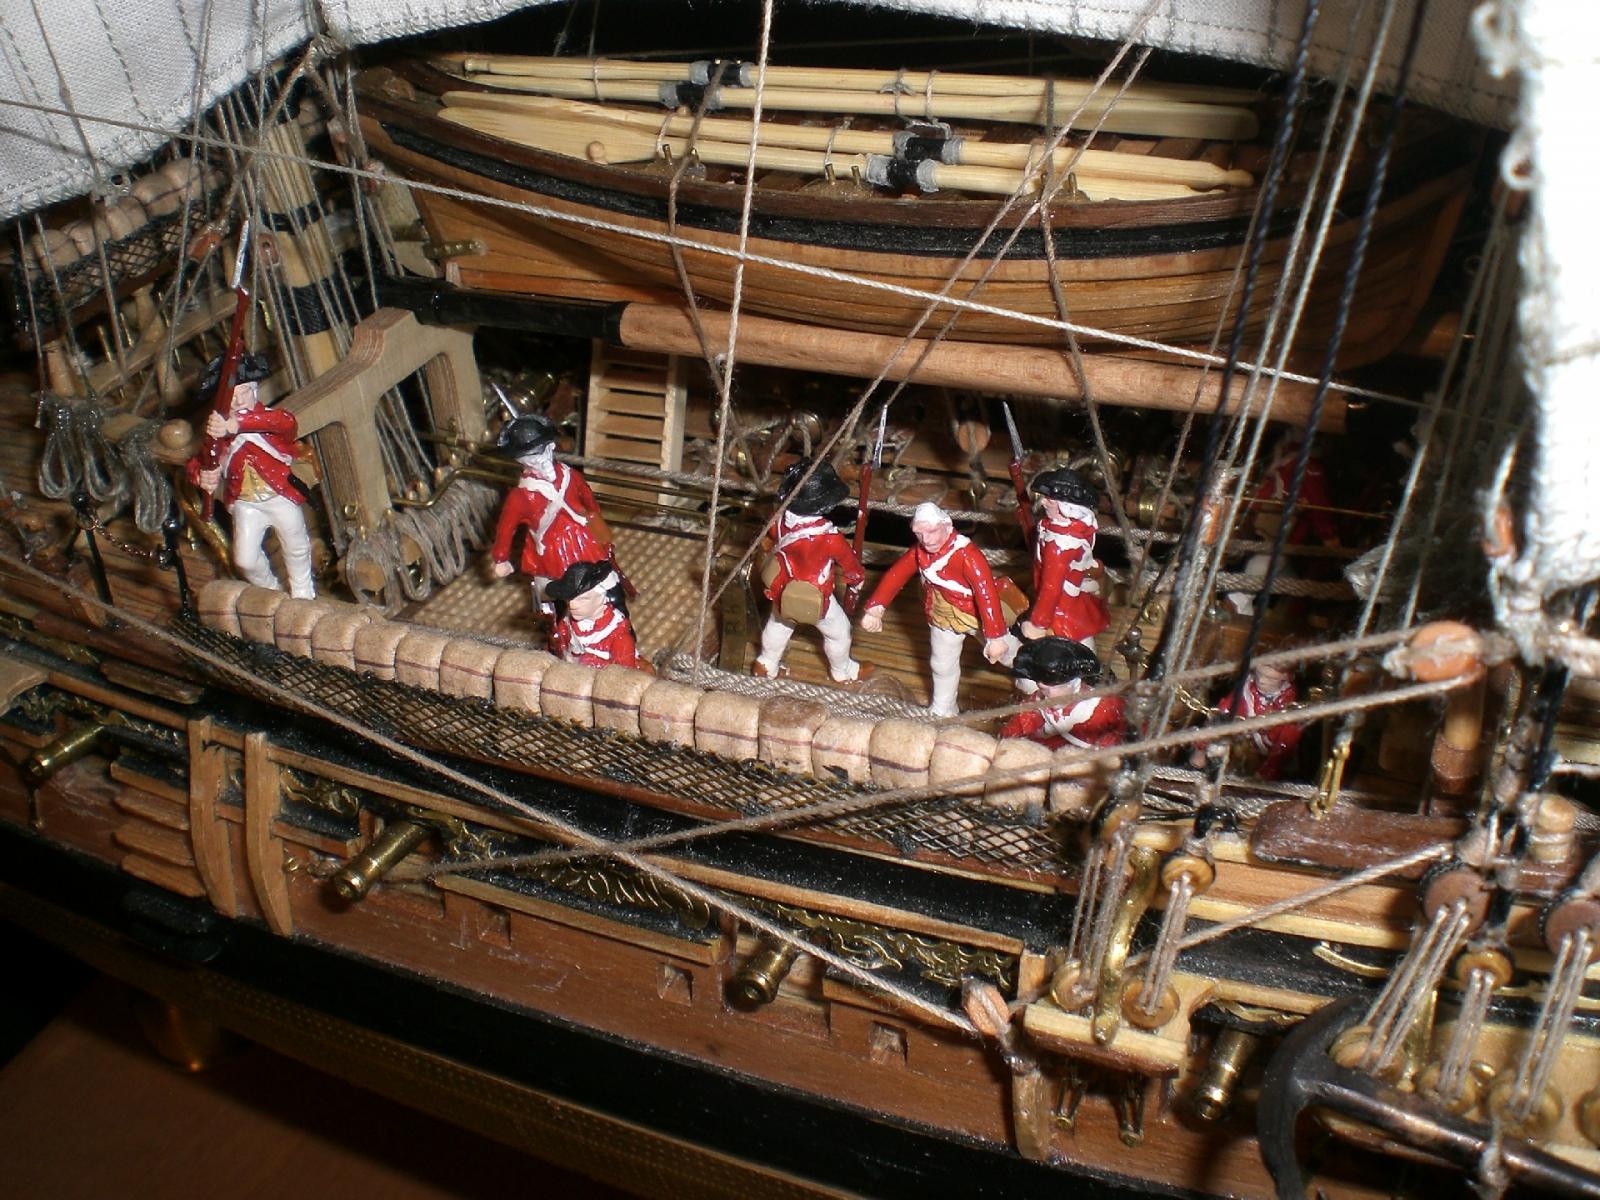
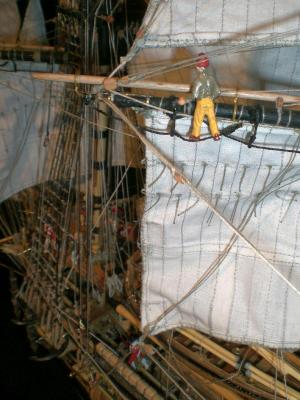
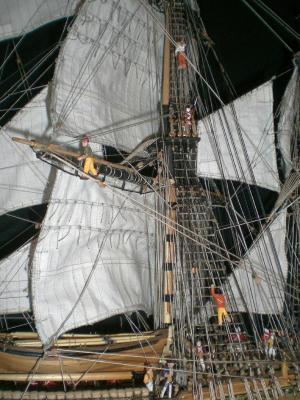
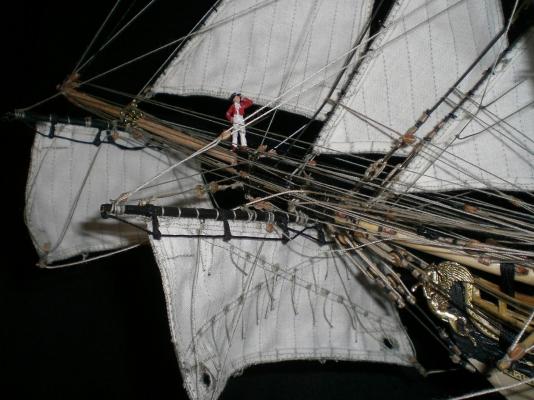
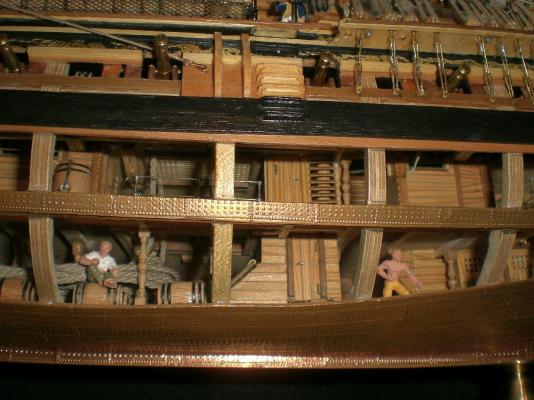
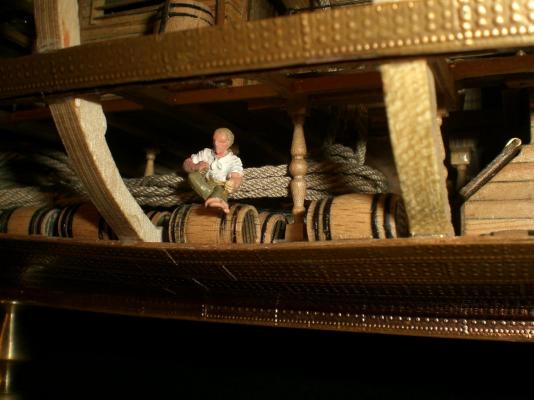
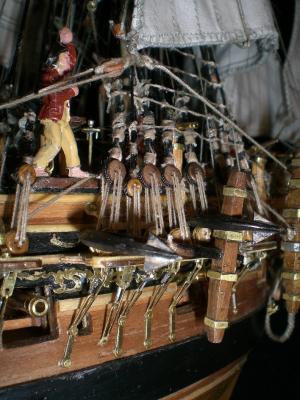
Hi Greg, have taken up your suggestion and added two of the crew in the hold area.... Also placed some sailors, after painting them, into the rigging Cheers Nils
-
Many thanks to - Mobsie - Don - Ed - Tom - Mike - Martin,.... for the nice appraisals to the final presentation of my model. I am so happy and also overwhelmed that this build finds such a resonance with my fellow modelers..... Also many thanks to those who hit the "likes" button Mobsie, thank you, much appreciated, it was not my first ship, but the first 18.th century model square-rigged sailer, which I was not so sure if it can be done this way to please my set obligation when I started the project Don, Thanks for your Kind words Ed, Thanks Ed, and I`m returning a big compliment in credit with your beautiful built Clipper ships under way.... Tom, Thanks to you, I`m glad you liked and enjoyed the build Mike, thanks a lot, a very charming compliment Martin, A very nice appreciation of yours, I`m happy that you like it A happy and enjoyable Christmas season to all freinds and fellow builders and a wonderful and successful 2016 Nils
-
Thank you very much David, there are so many nice places in the world I have not seen yet, and I often look up the cities or states where my fellow modelers are located in, just to get a Impression of how wide this lovely forum is spread around the globe Nils
-
Lawrence, thank you so much your kind words wich are very much appreciated. Wishing you and your Family a wonderful Christmas time, and a good start for 2016, your freind Nils
-
Toni, beautiful Fitting out of the great cabin, so far, lovely to see the Joints of the timbers and Details of the panels Nils
-
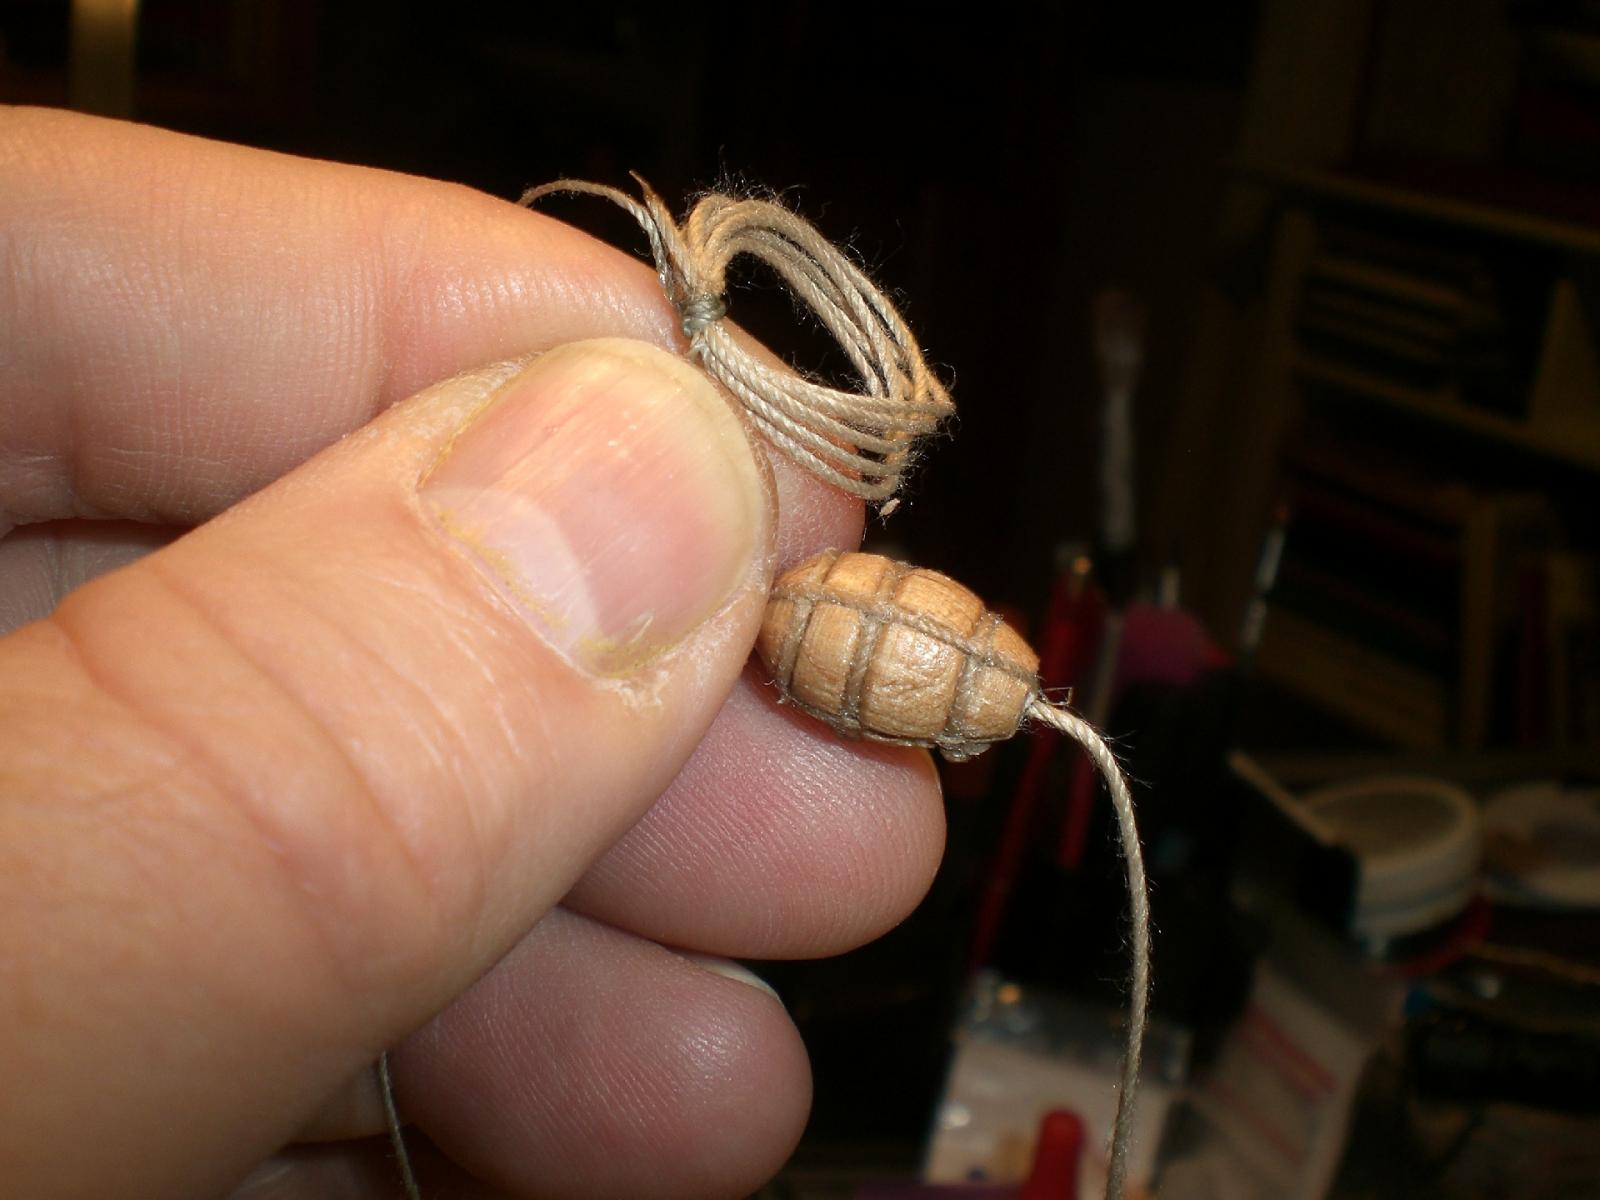
Crackers, thanks for this Input, (beeswax) I did`nt know that before in order to prevent radiation weakening dammage, and will Keep it in mind. now`s too late for my rigging anyhow.... The main reason I use Polyester thread is, the "dead material" dos`nt sag and by thinning out the Ends per gastourch when fiddeling into the block`s sheaveholes I have given up that fiddeling- in procedure with ordenary cotton thread. Nils
-
A real nice comment Bob, thank you very much,.... and I`m happy that non of the intended details needed to be given up along the way. I have the complete rigging in polyester thread, hoping that this may not be a disadvantage versa Cotton based thread, due to ultraviolet radiation by sunlight over the years Nils
-
very nice build Sal, I like the way you put the sweeps on the gallows, this is seen far to seldom on a model, beautiful work. This gives me Inspiration.... Nils
- 659 replies
-
- 4
-
-
- syren
- model shipways
- (and 1 more)
-
Thank you Peter, yes, not a bad idea, I`ve been thinking of that before already, perhaps sided paddle wheels, but first the concentration carries on for the KWdG, which will take a lot of time.... Wishing you much fun with "Pickles" Progress and a good Christmas season to you as well.... Nils
-
Thank you all so much for your congrats and appreciative words to the completion of my build, - Greg - Mark (Tiedens) - Dimitris - Boyd - Bug - Nenad - Bob (Rafine) - Crackers - Patrick - Druxey - Piet - Mark (Taylor) an all the many "likes" A happy Christmas time to all my fellow modelers, much fun and success with this fine Hobby and your projects, and the best wishes for the coming new year.... Greg, a good idea, Ì`ve tried it allready but the figurines mostly slipped out out the tweezers grip, and fell into the hold somewhere..., well think another try should be worth it... Initially I wanted to do a sitting Group (ship`s officers) in the great cabin, but could`nt find suitable figurines Mark (Tiedens) thanks for your nice words... Dimitris, I`m glad you like the results of this "Swan Class" Boyd, kind comment, thanks very much... Bug, would love to see another Pegasus being built in your shipyard, allthough that stage Coach also Looks very interesting Nenad, thanks for those nice words, glad you enjoyed the build Bob (Rafine) thank you very much Bob, I can return the compliment to your "Cheerful" build and for the completed "Essex" Crackers, your Kind words are always much appreciated, many thanks Patrick, thank you very much, and a happy Christmas time, and new year to you and your family Druxey, Thank you very much for your word, and season`s greetings to you as well as a most relaxing and enjoyable Christmas time Piet, many thanks for words , and for dropping in regulary, glad you enjoyed the ride Mark (Taylor) nice comment , thanks very much, it`s hard to believe that the actual ship was carrying over hundred persons, here shown only a fraction of those "crowds" Nils
-
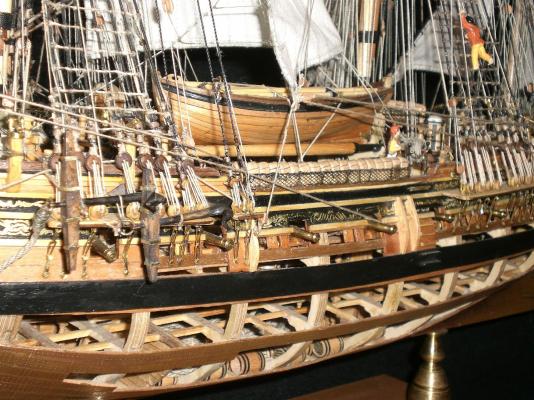
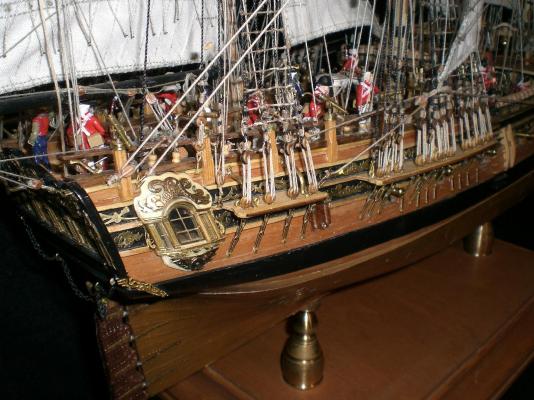
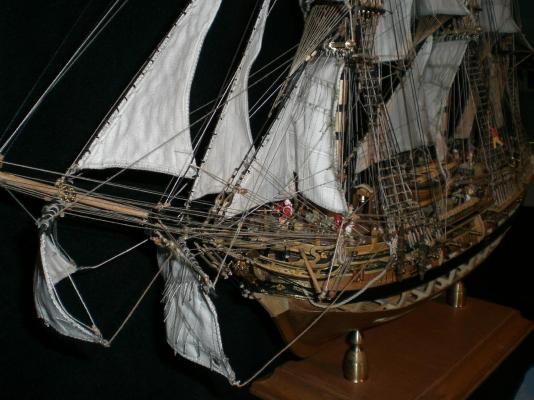
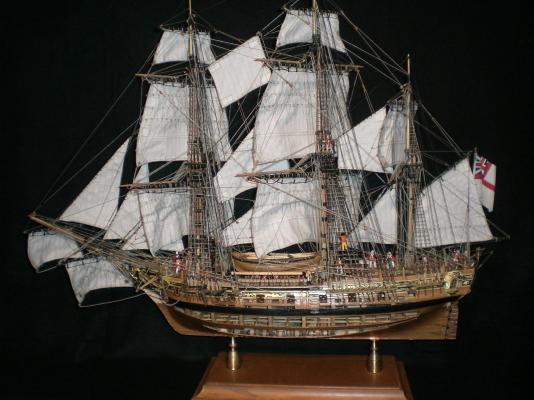
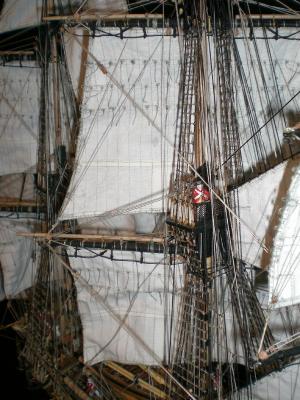
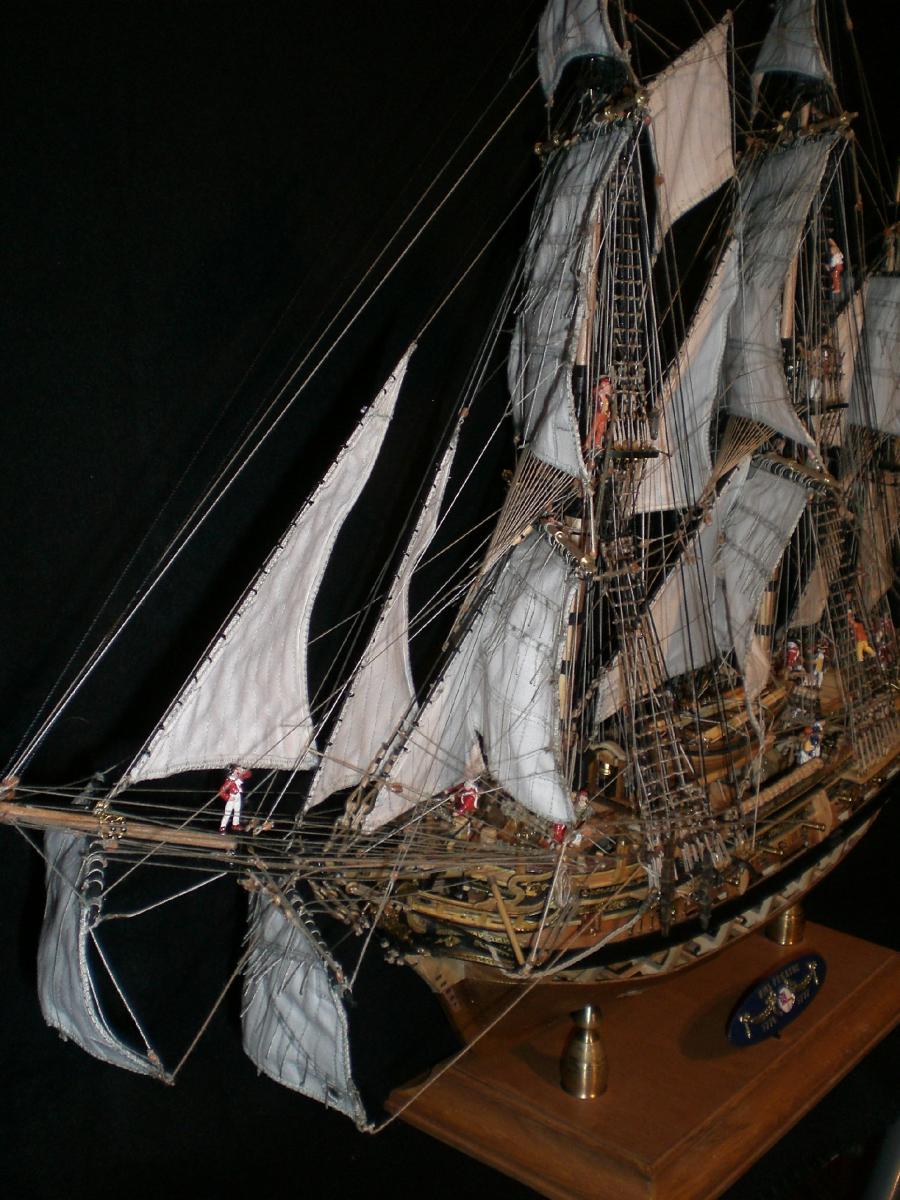
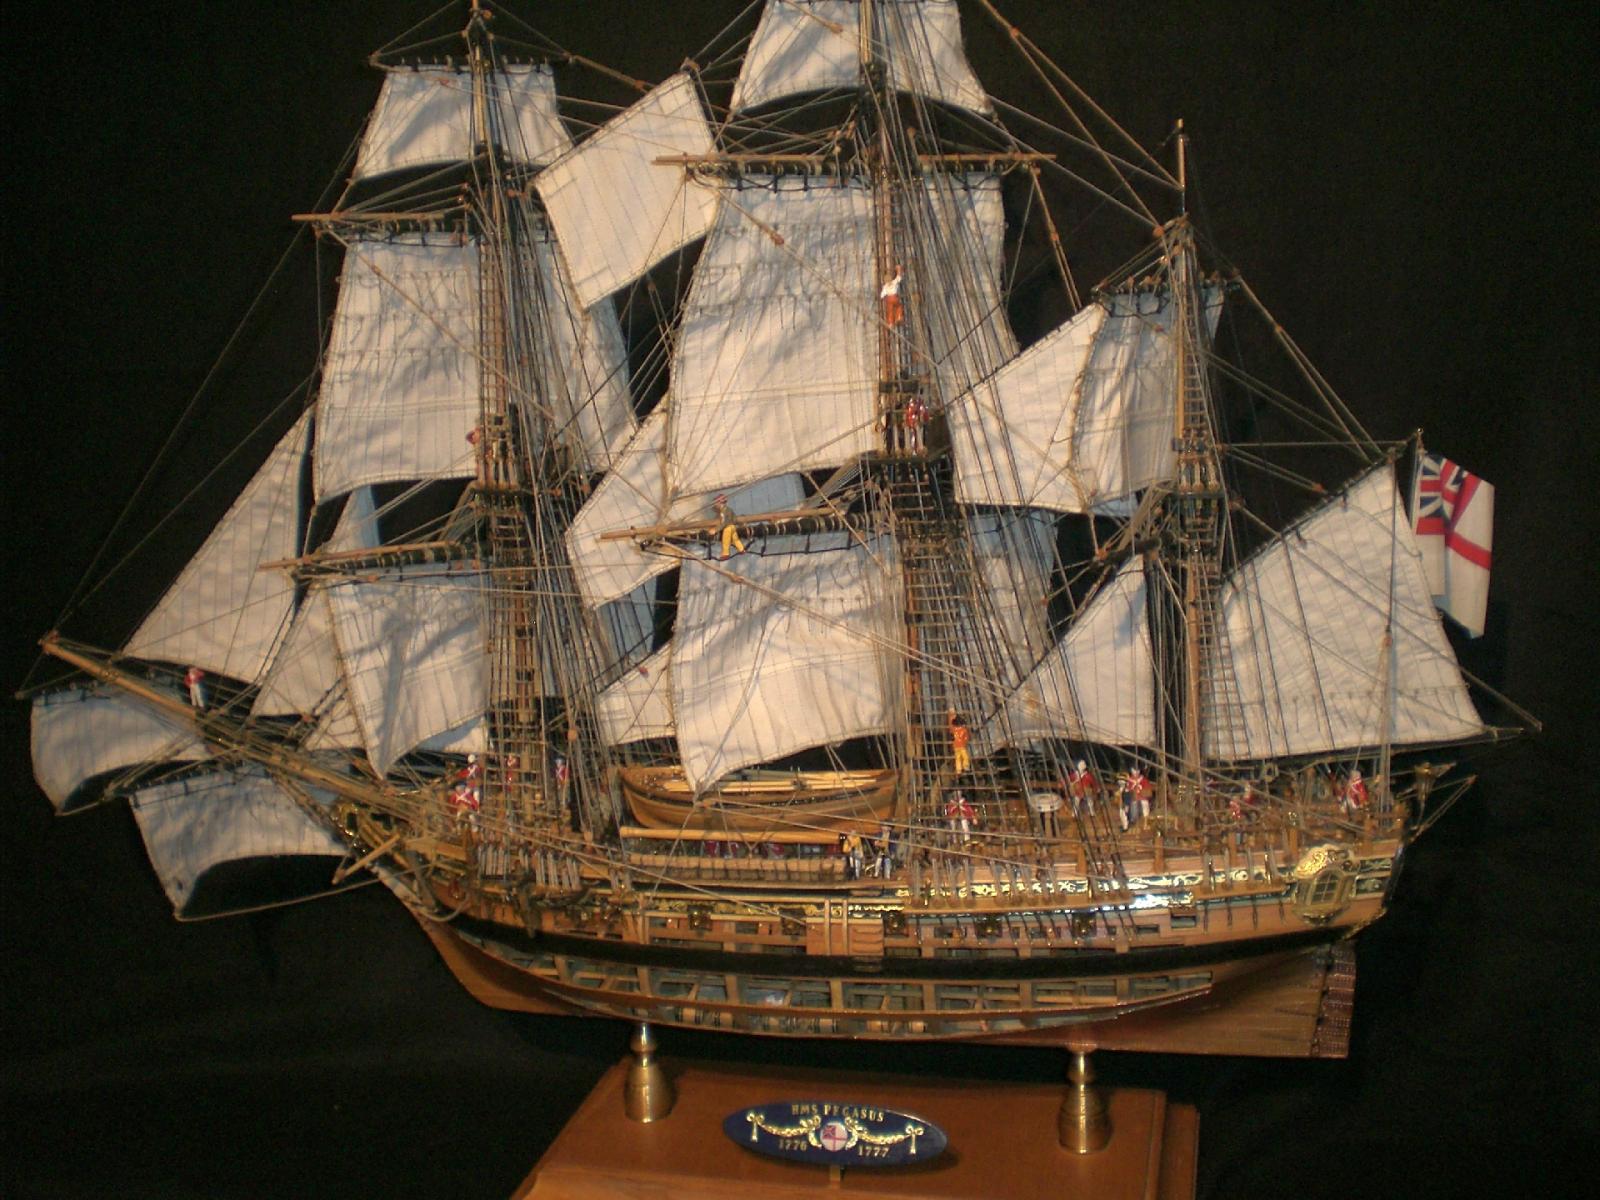
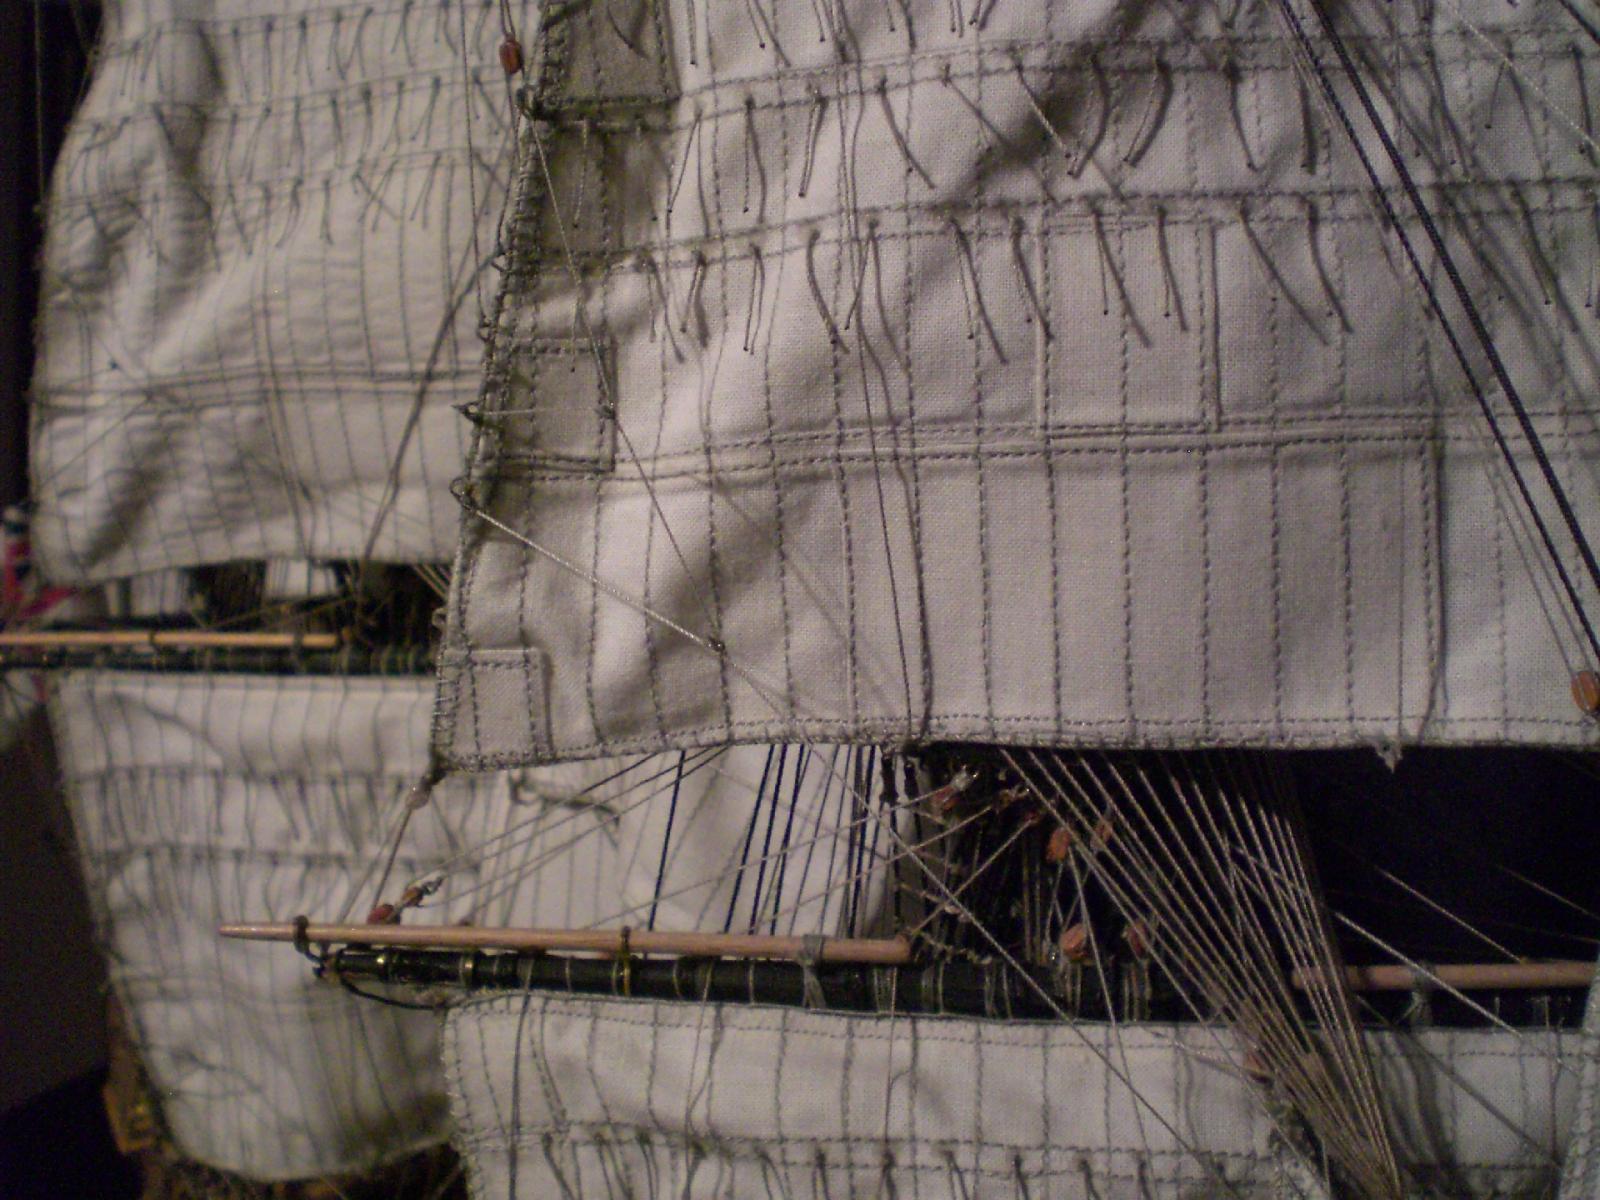
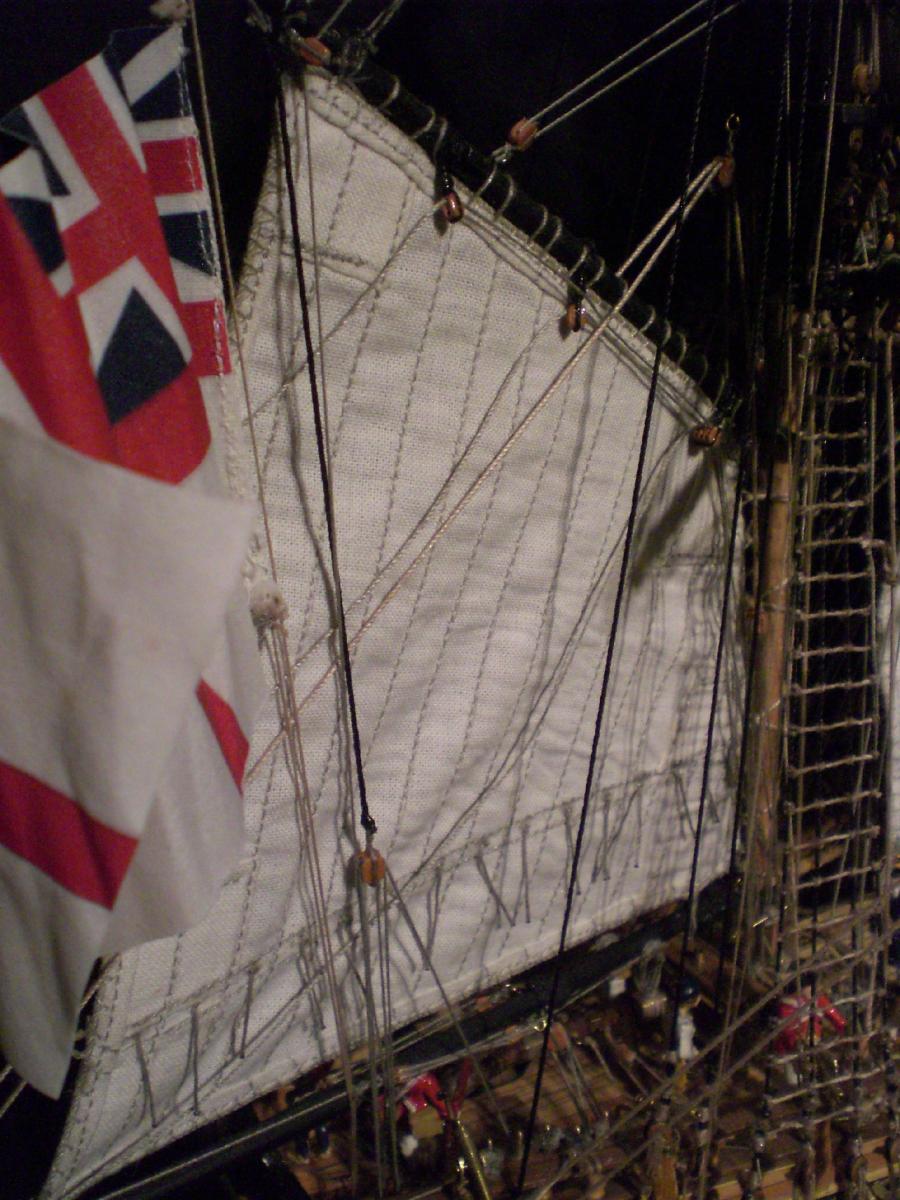
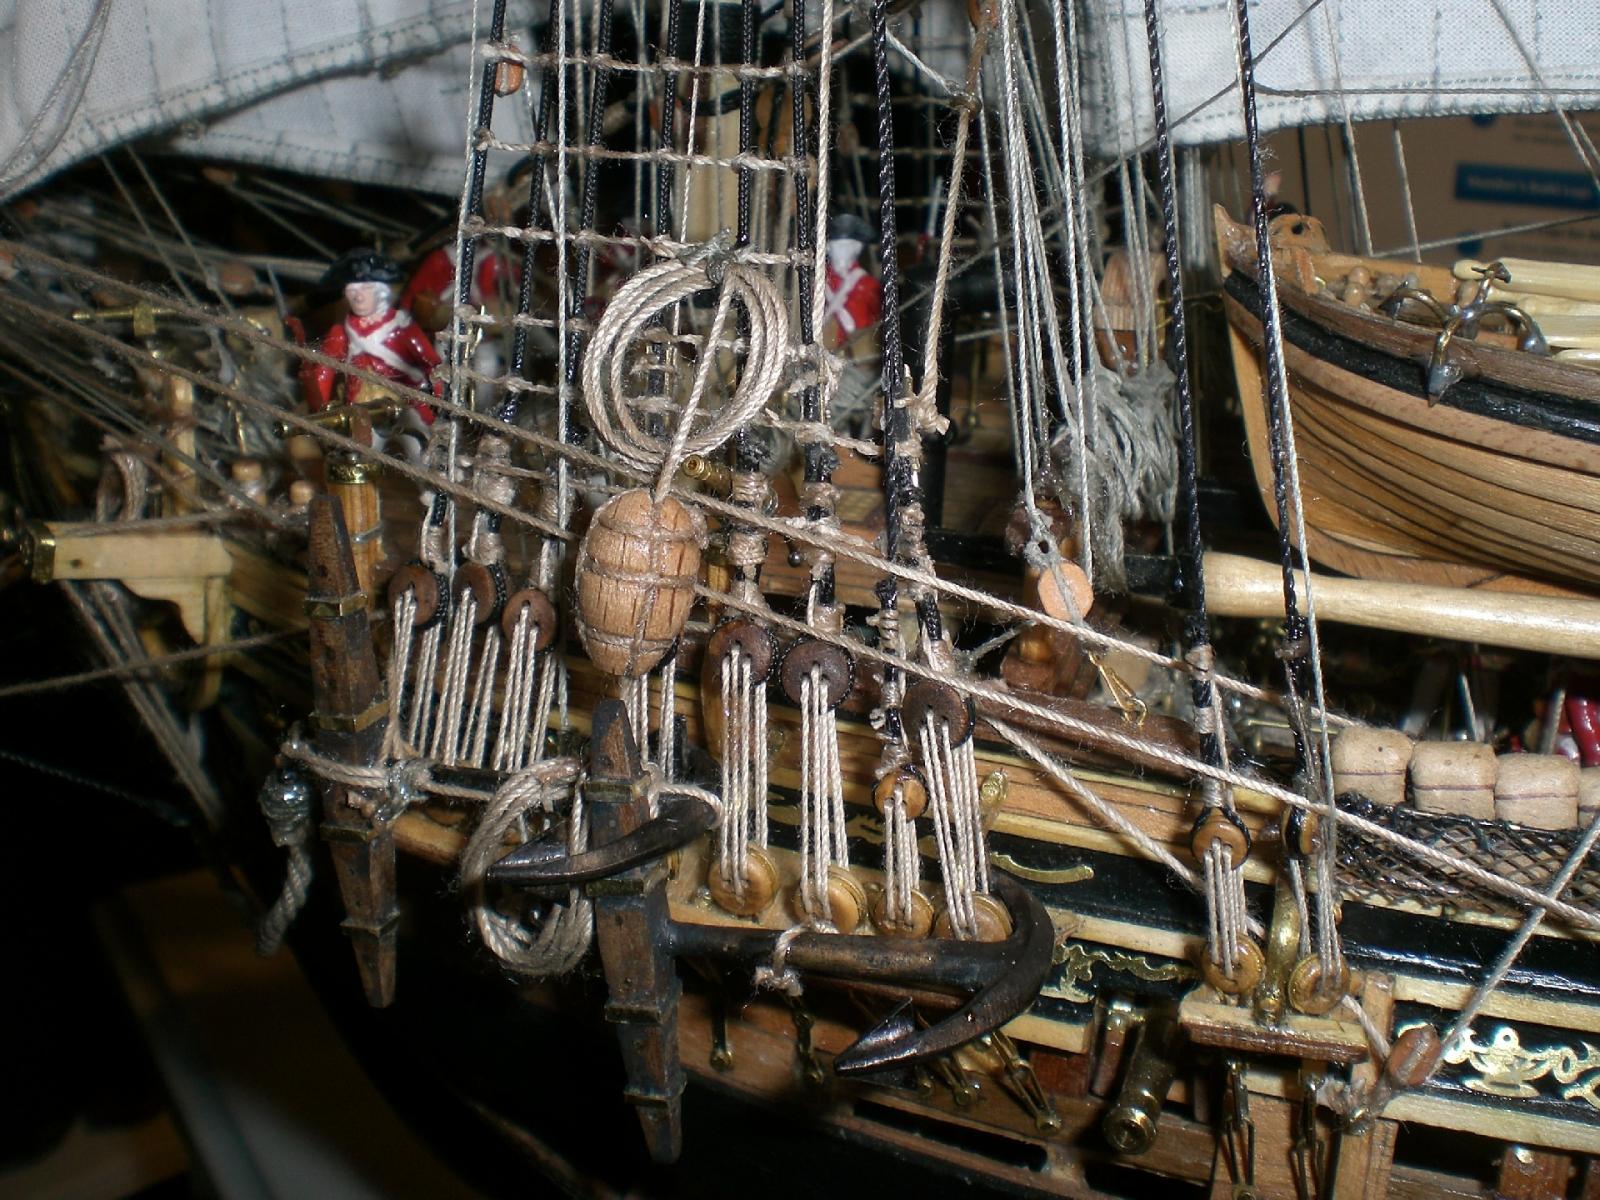
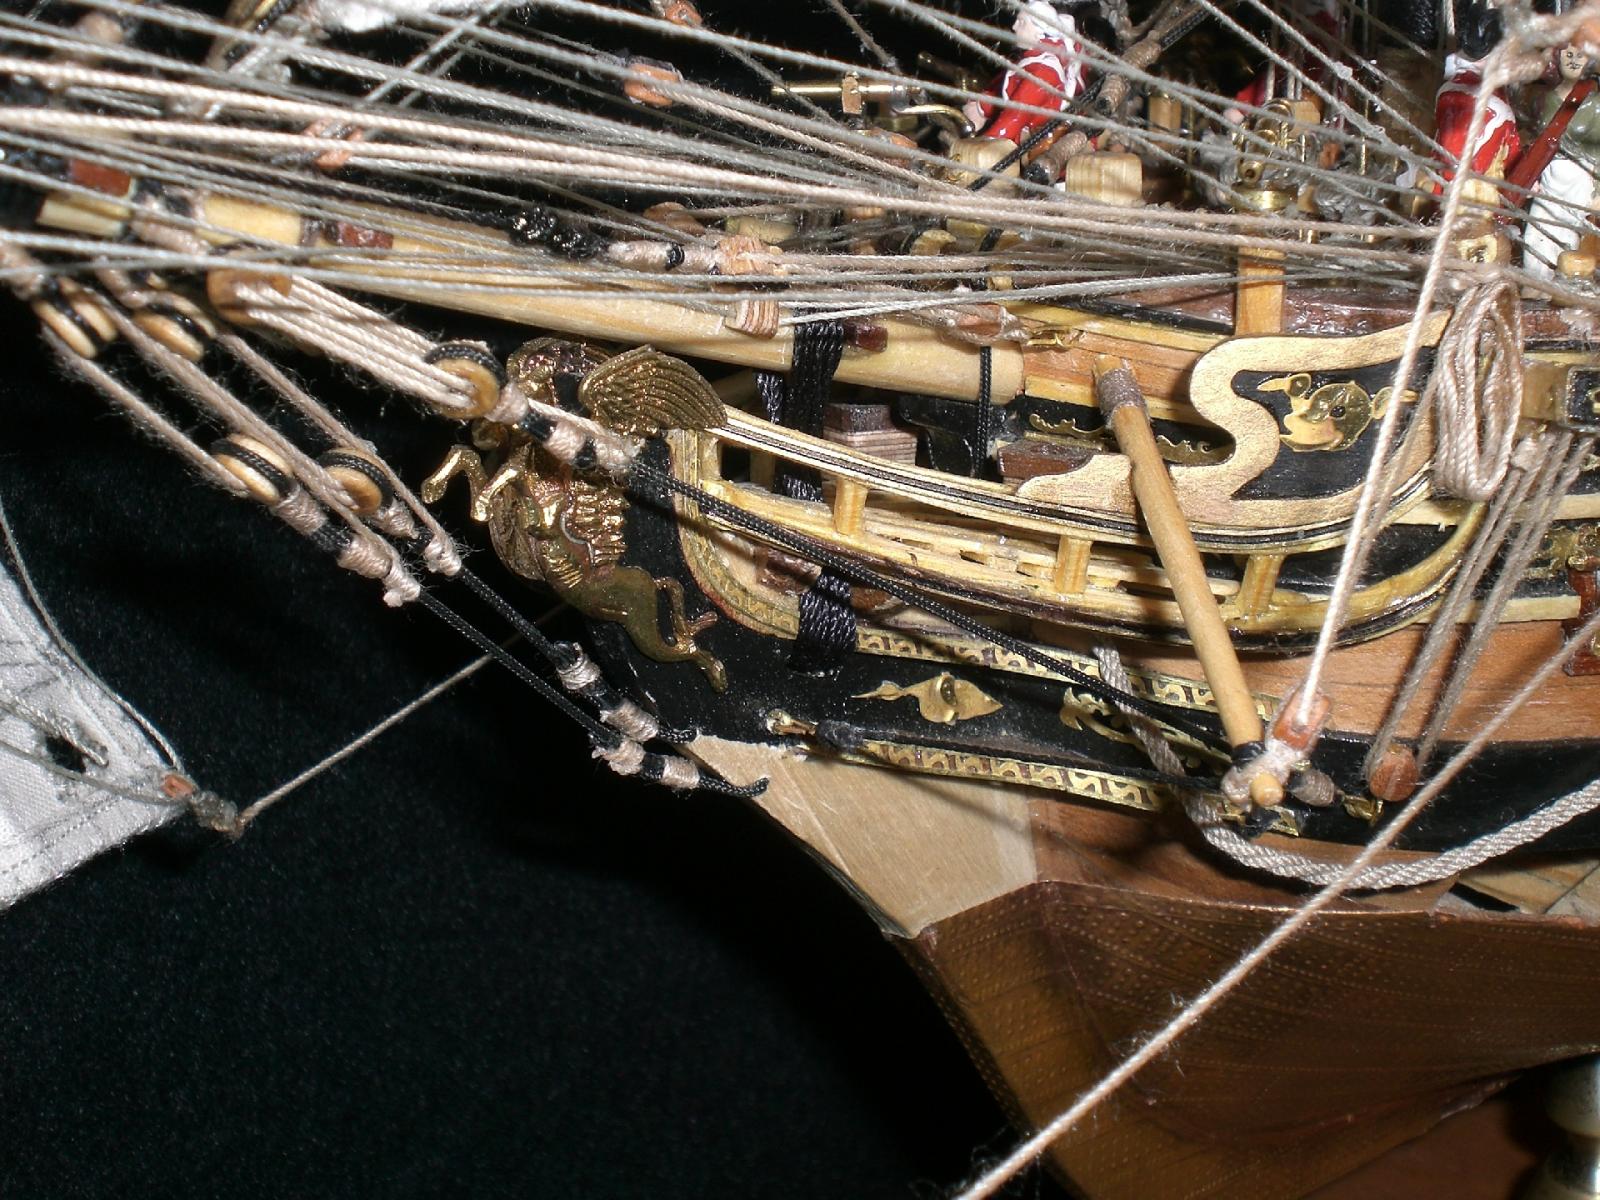
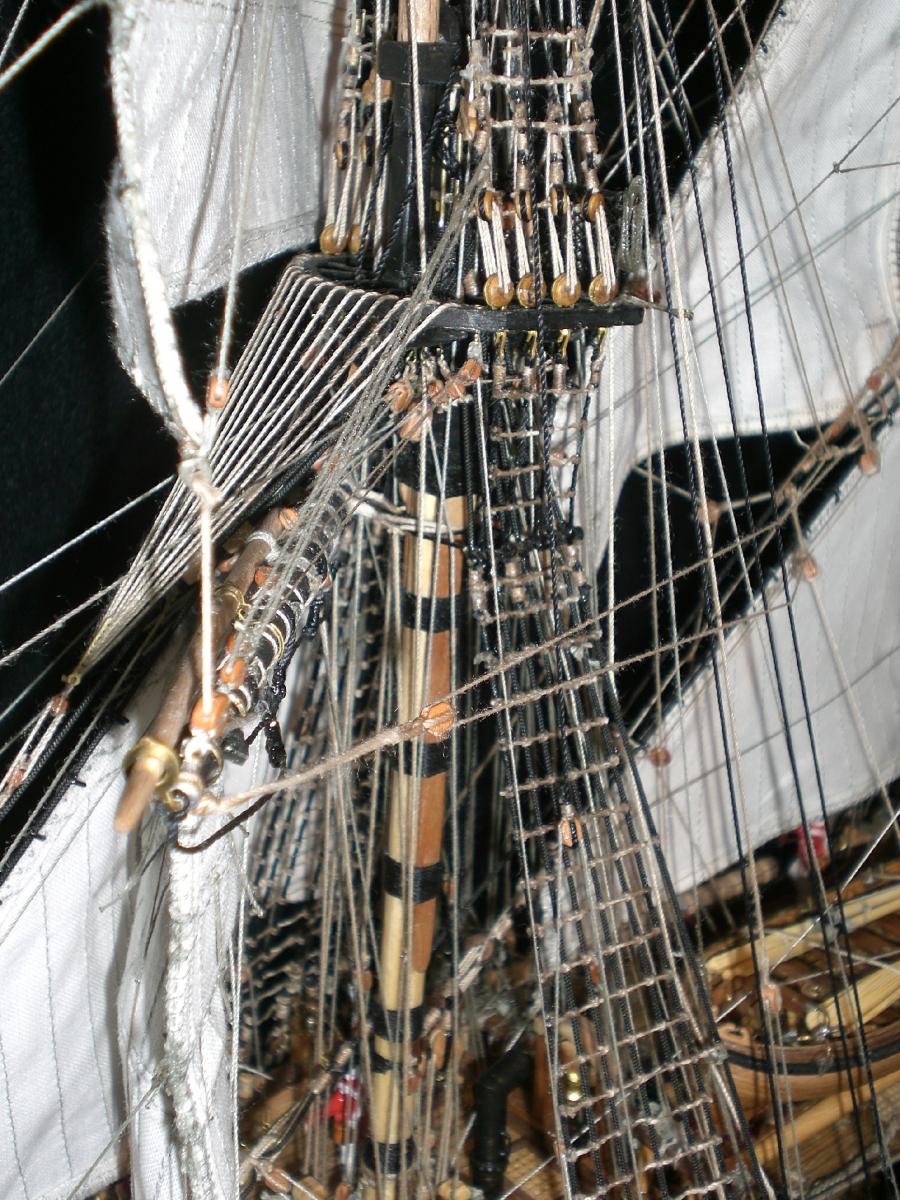
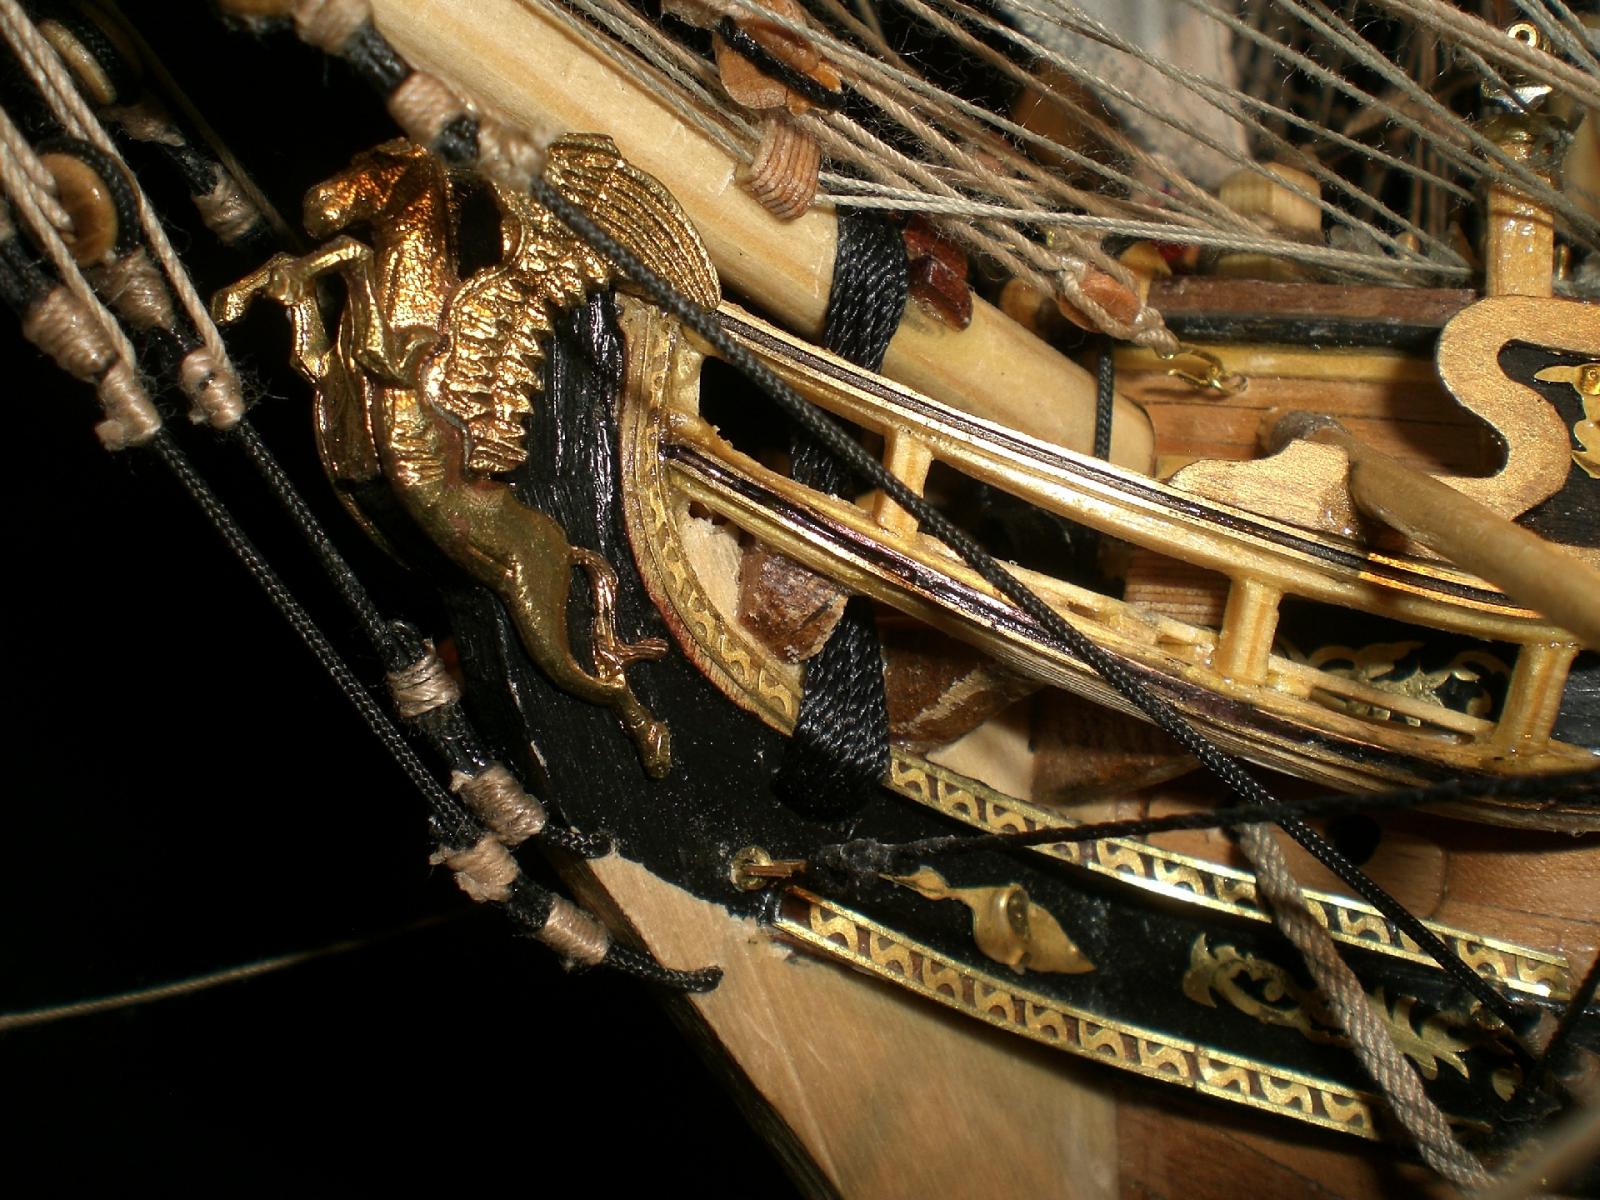
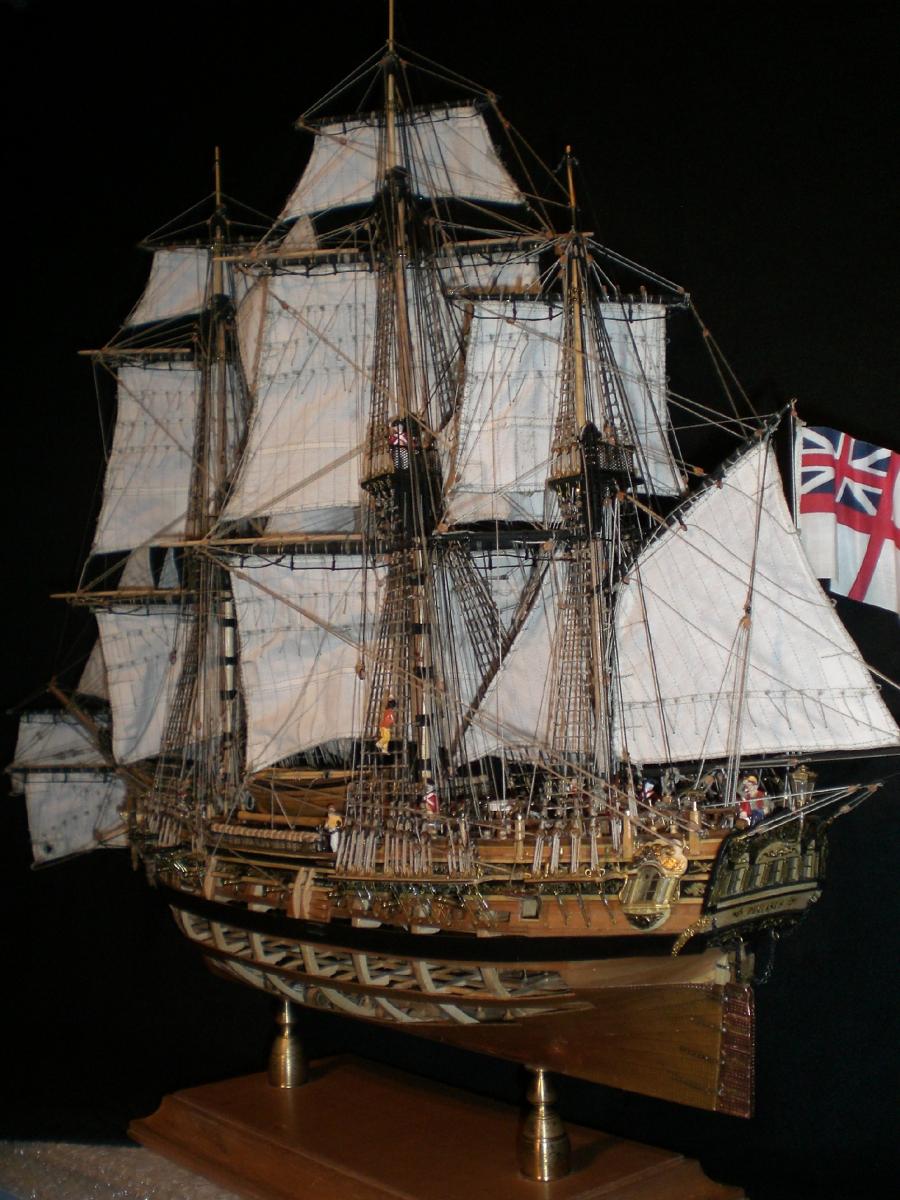
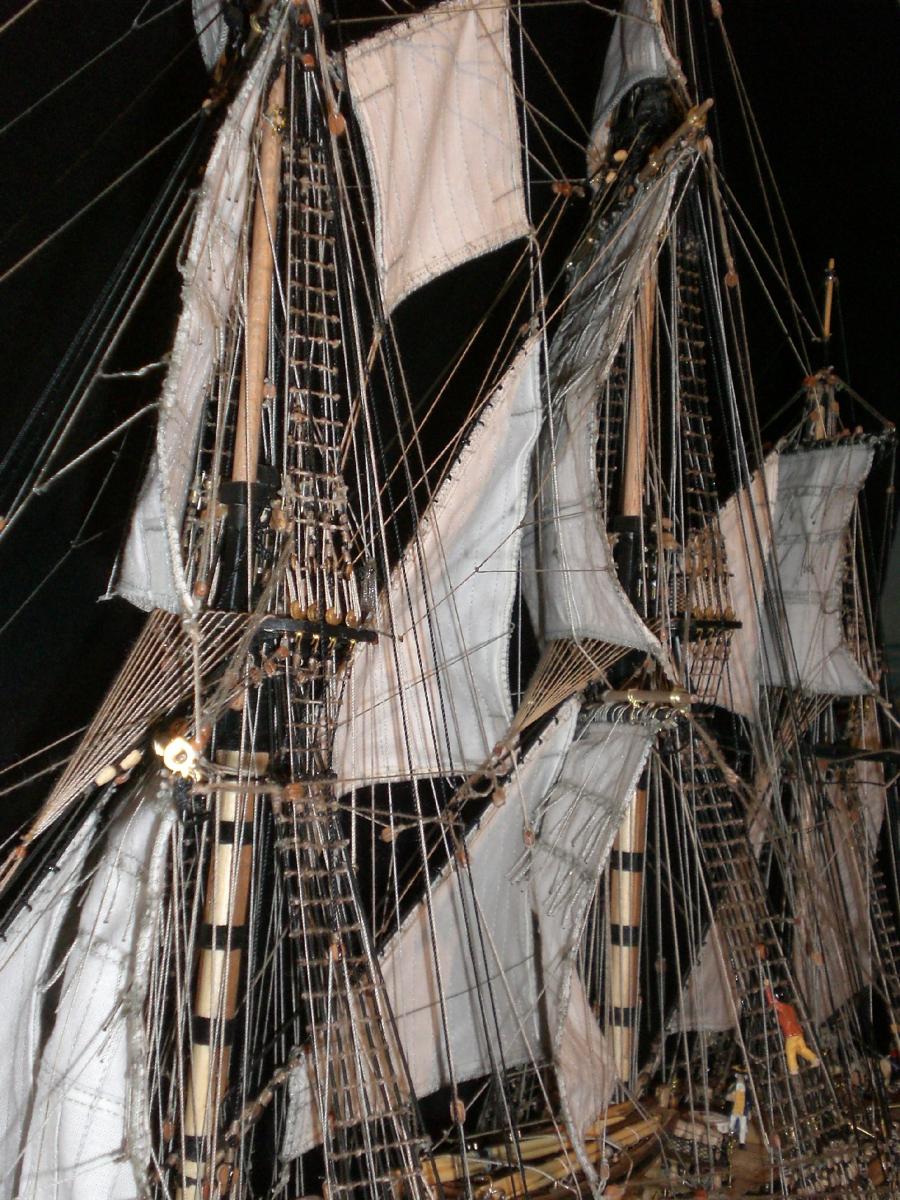
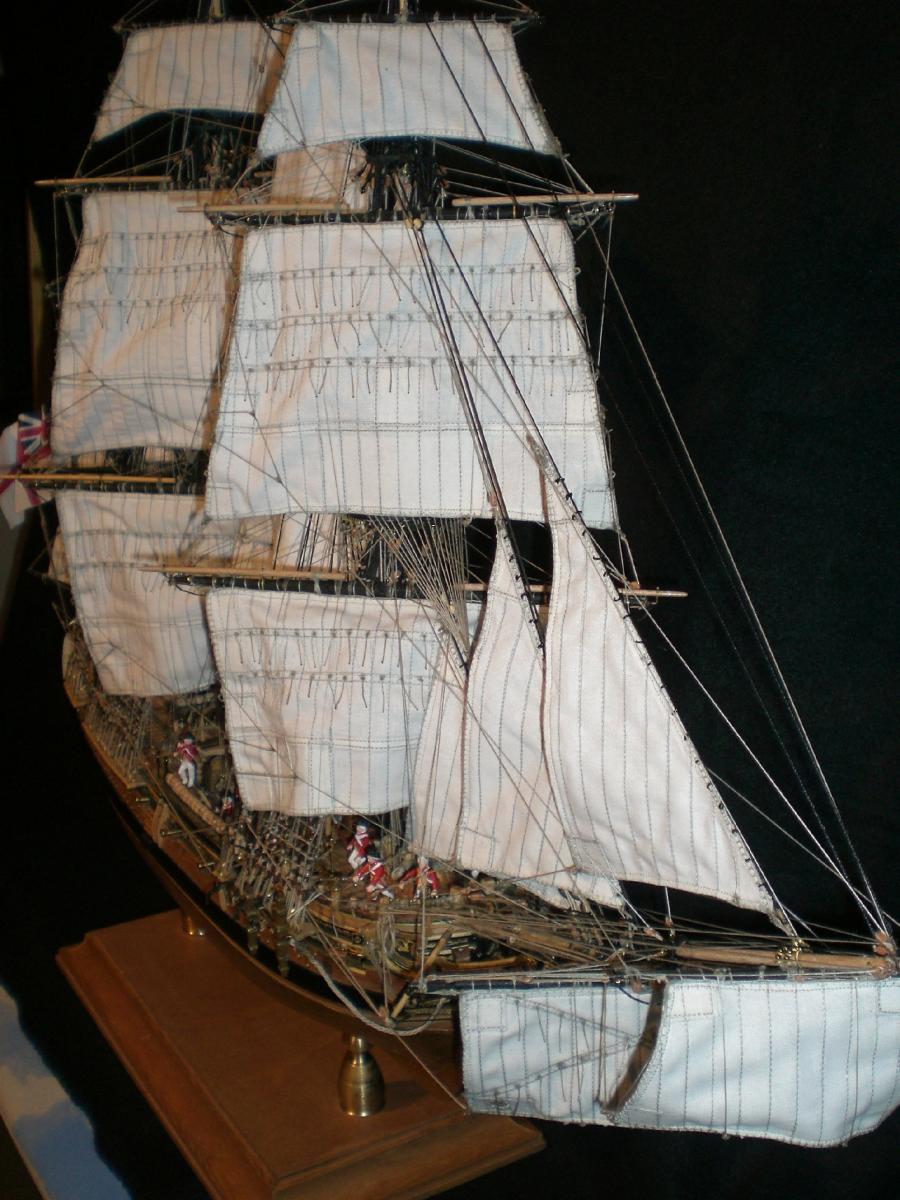
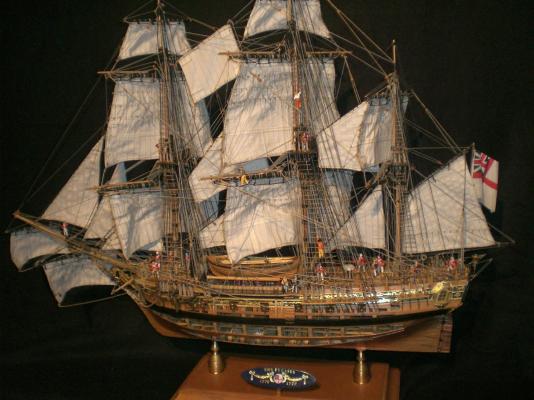
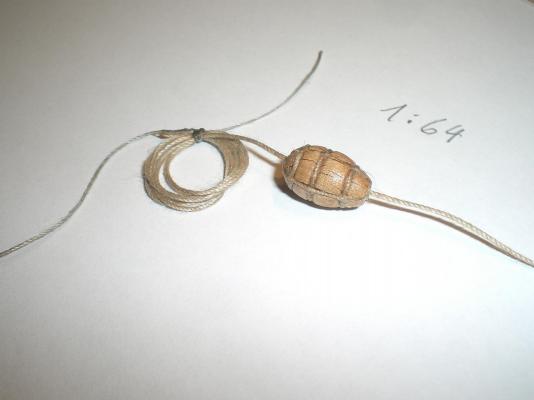
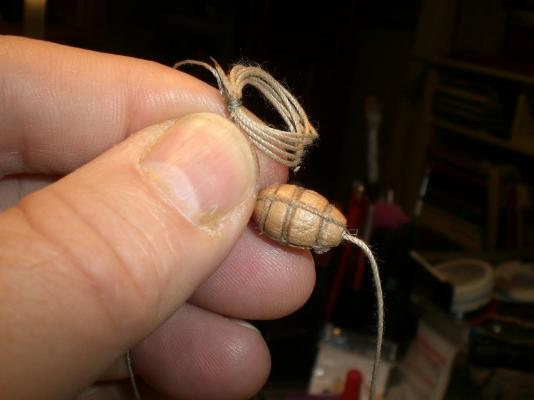
Build log part 94 COMPLETE This post rounds up and completes the 29 months build duration of my HMS Pegasus in scale 1:64. After putting on rudder chains, all bow-lines with their bridles to the squaresails, and appropriate rigging, the crew and some naval infantry men shipped in today to take over an interception and patrol mission in the northern Atlantic. Perhaps there will still be anchor buoys fitted to the lower fore-shrouds.... Its been much fun to do this build and especially it`s extensive rigging with all those tiny blocks, but now she is a nice sight with all those sails and pushing her wake, riding on starboard bow with braced sails. Putting on nearly all lines the actual ship had, it was a good lesson in rigging. Next week I`ll put the final pictures in my Gallery. Now its time to do the glass display case for dust protection. Due to the modification of the 12 sheet Amati plan set, and building it from scratch (no kit) there are : the large open port side, the half planked decks, the interior decks and the visible inside fitting out. The POB scratch built ship`s boat is an extra, and the access to the forecastle is by a seperate stair / ladderway . Many thanks to all that visited this build along the ride from beginning on, and so many thanks to all comments and appreciations, and "likes", it has been a pleasure and was very encouraging for me here are the first 10 of appr. 20 final pics...... Enjoy the pictures Nils