Mirabell61
-
Posts
7,422 -
Joined
-
Last visited
Content Type
Profiles
Forums
Gallery
Events
Everything posted by Mirabell61
-
 good work Peta, nice, neat assembly so far... Nils
 -
Thanks to all the "Likes" The centerboard case is ready for attaching now, a few ribs will be added later on, when it is integrated into deck timbers and to bulkhead with stffening out knees (front side) Nils

- 401 replies
-
- 21
-

-
Hi Peta, the design/construction of the Avos kit model looks realy professional thought through, great work, this is a wonderful basis for a super model... Nils
-
many thanks to Antony, I`m pleased you like this clinker hull, I am myself happy with the first hull planking over a plug and for using pear wood instead of pine wood, except for those small ships boats made for HMS Pegasus and for the Chebec Nils
-
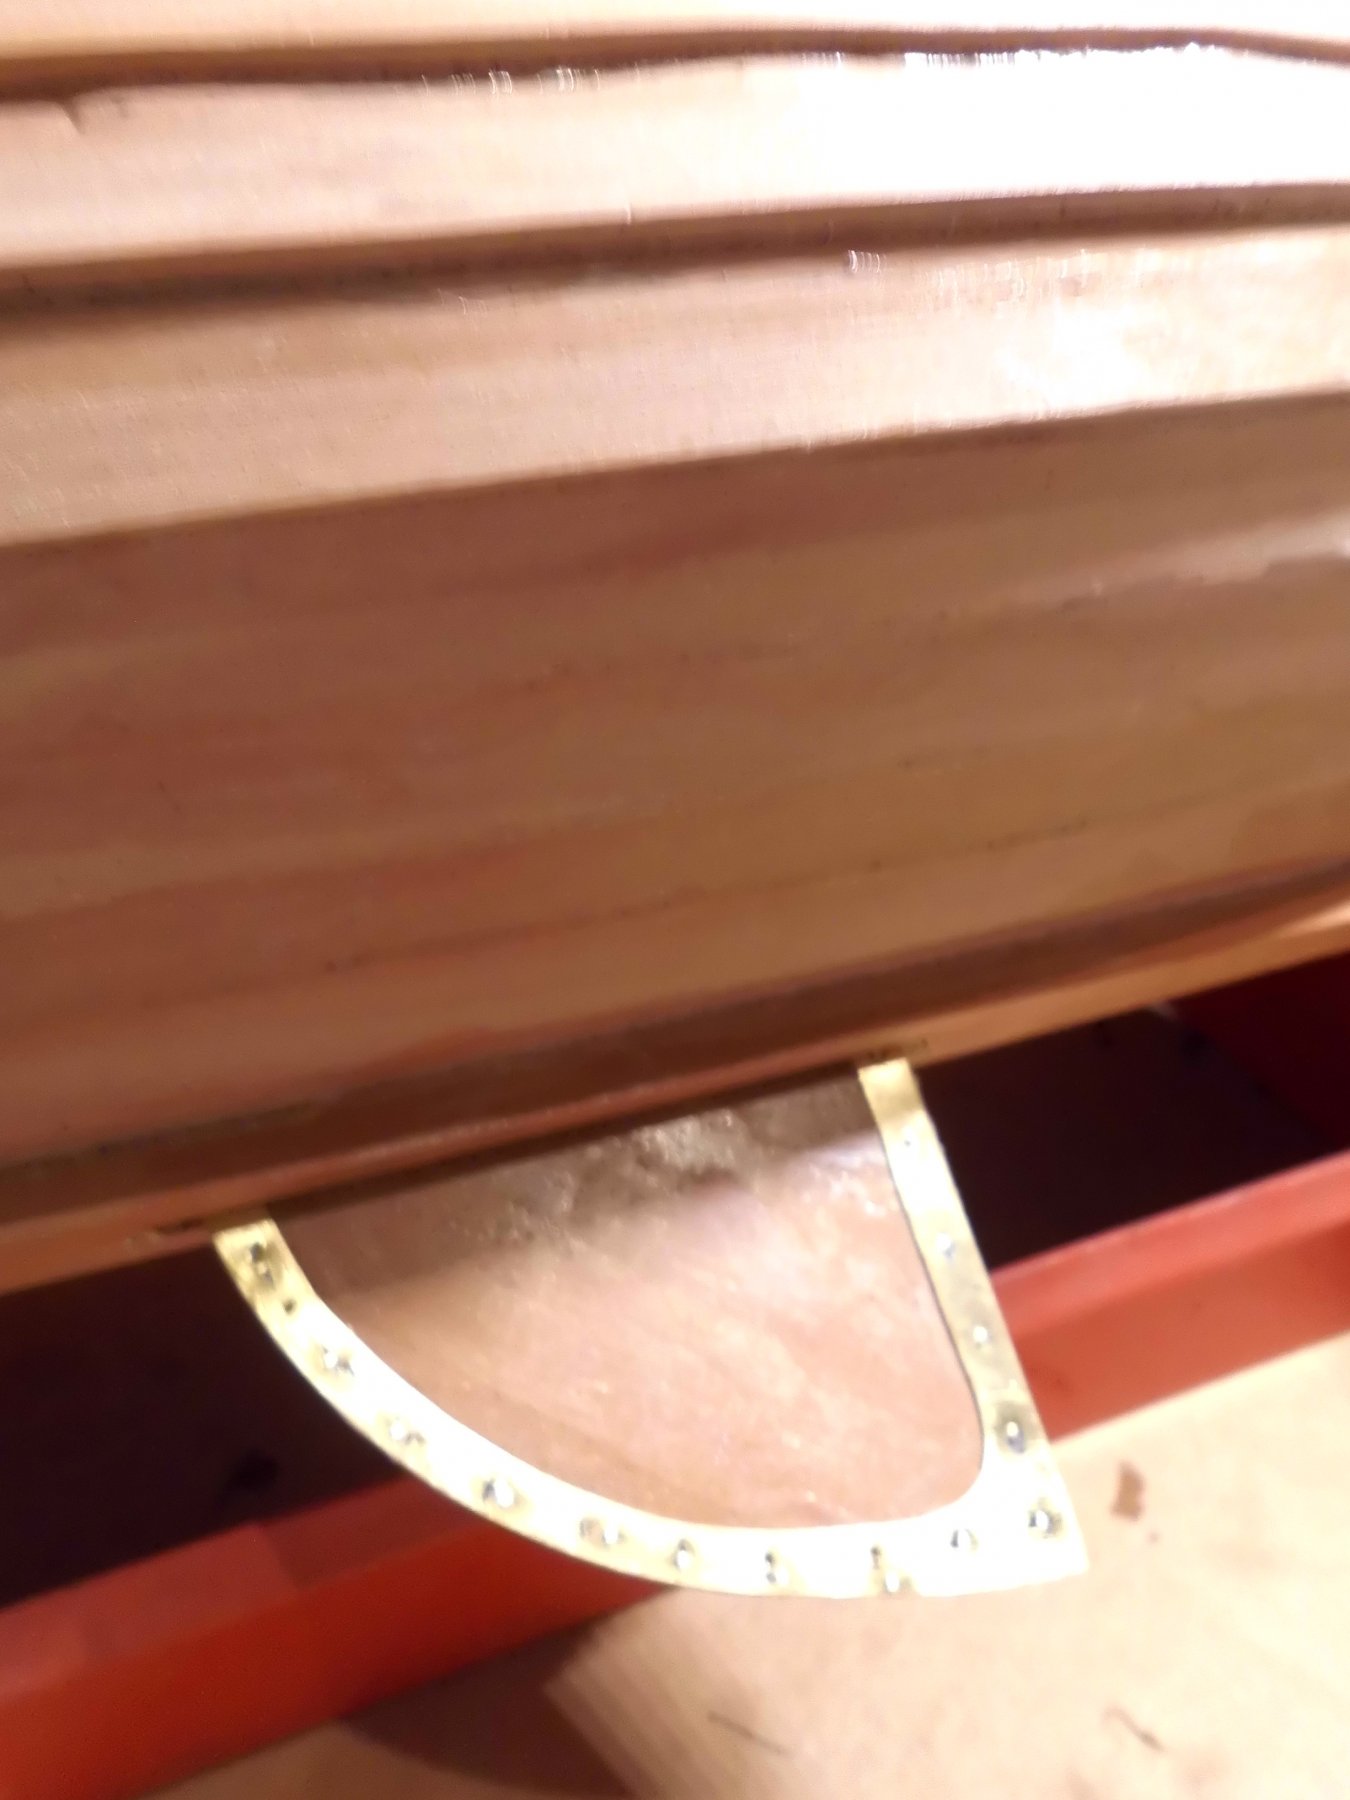
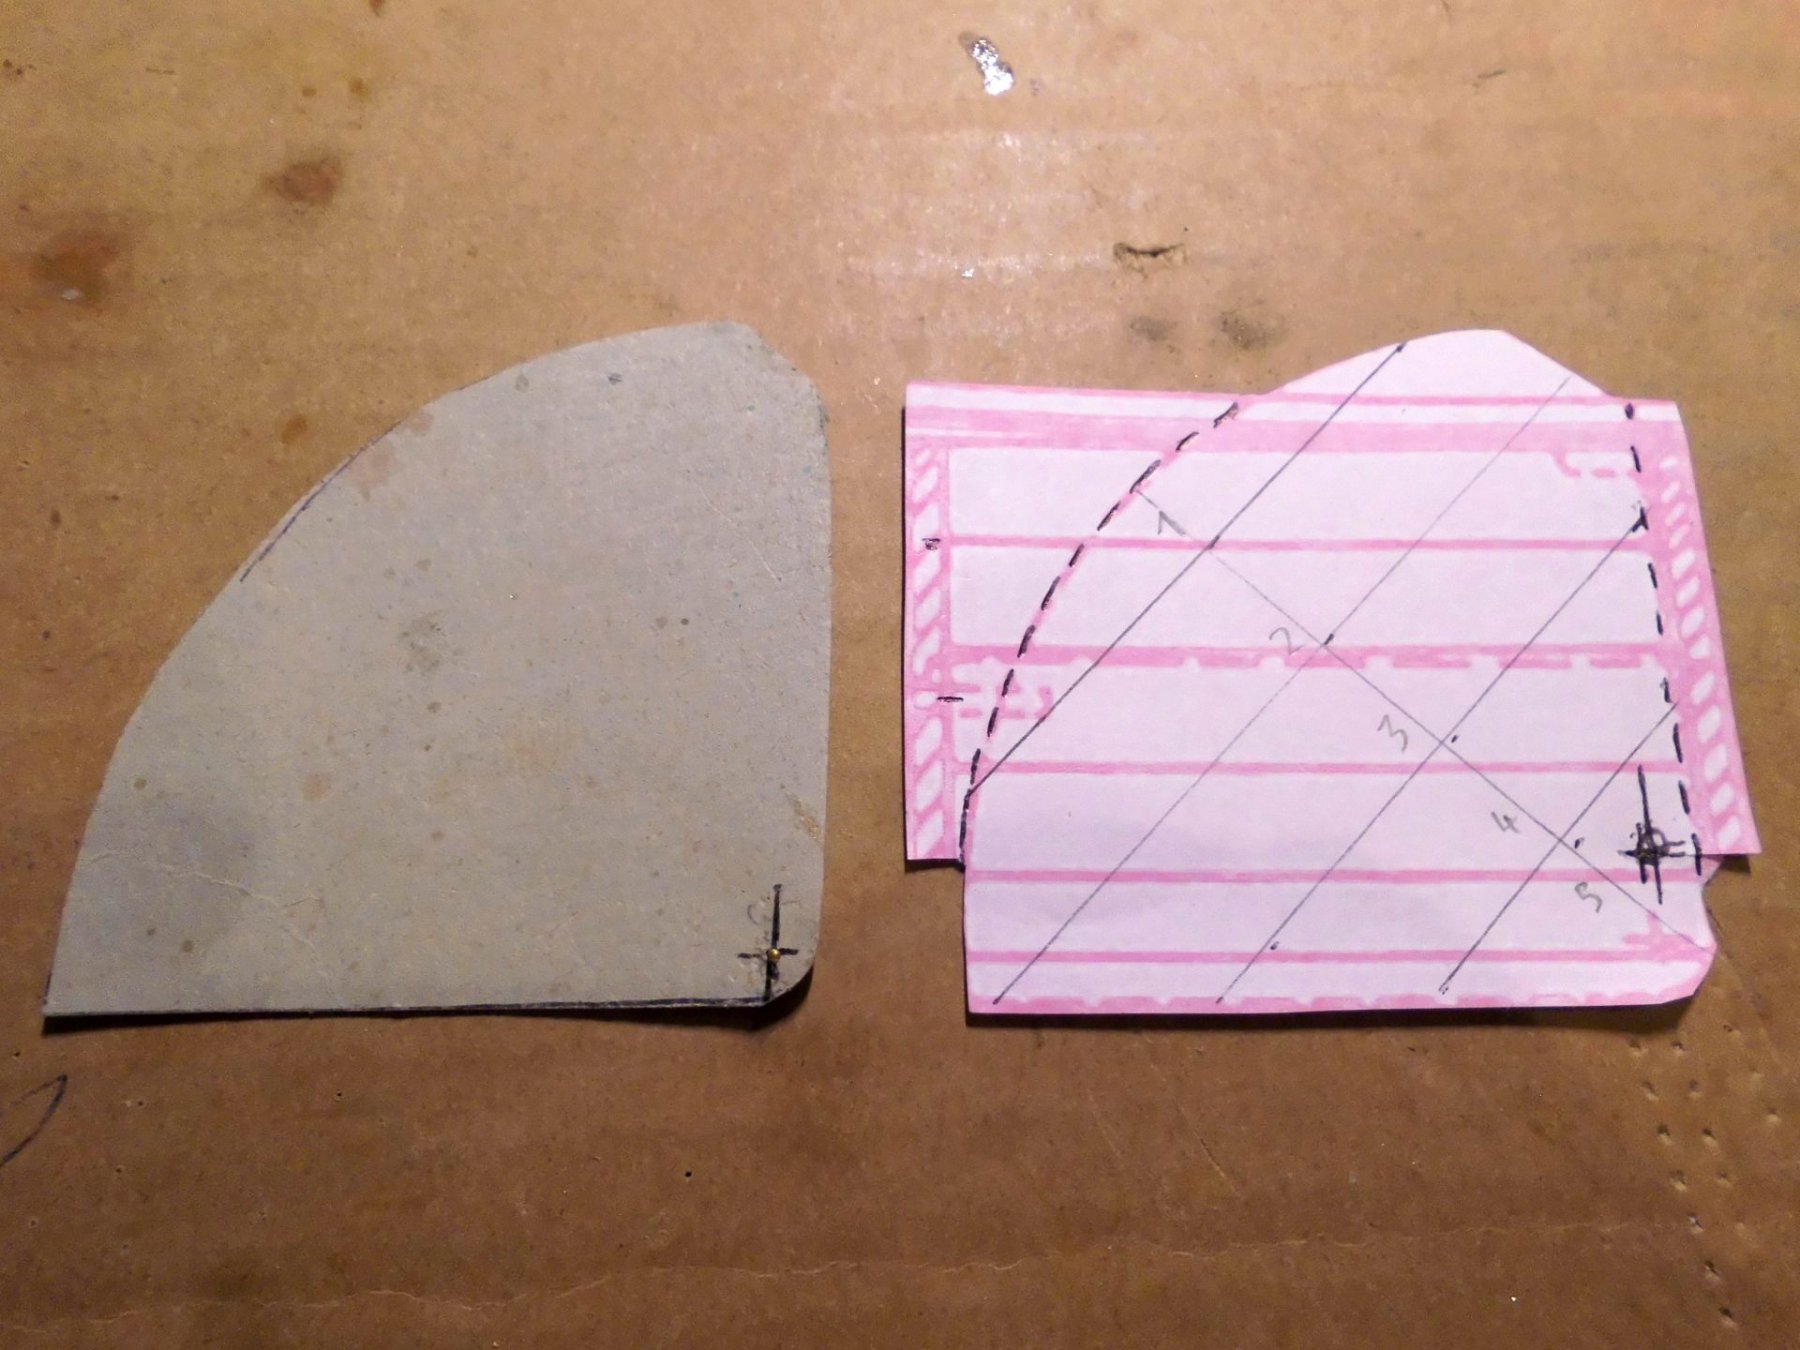
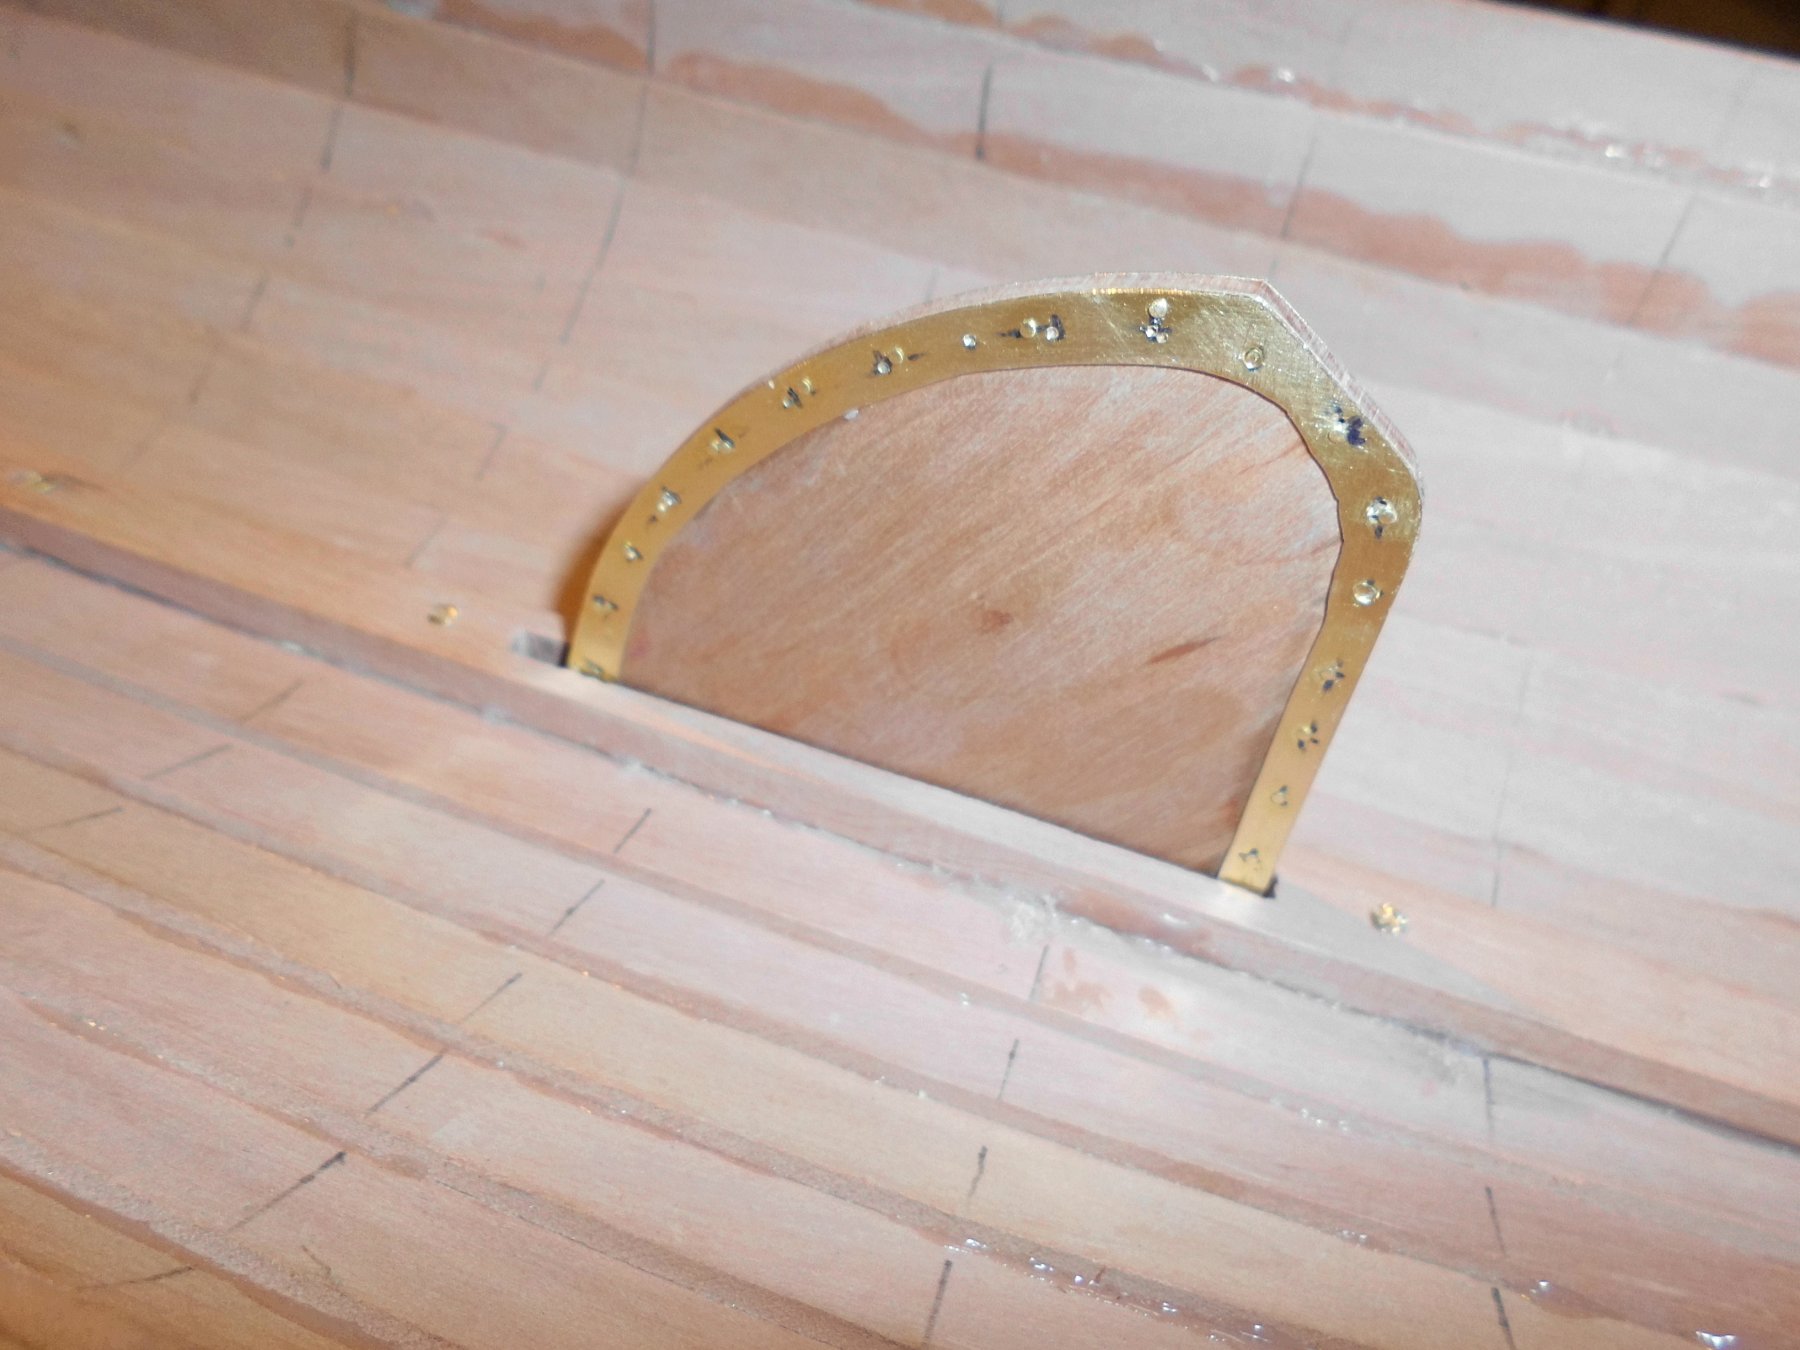
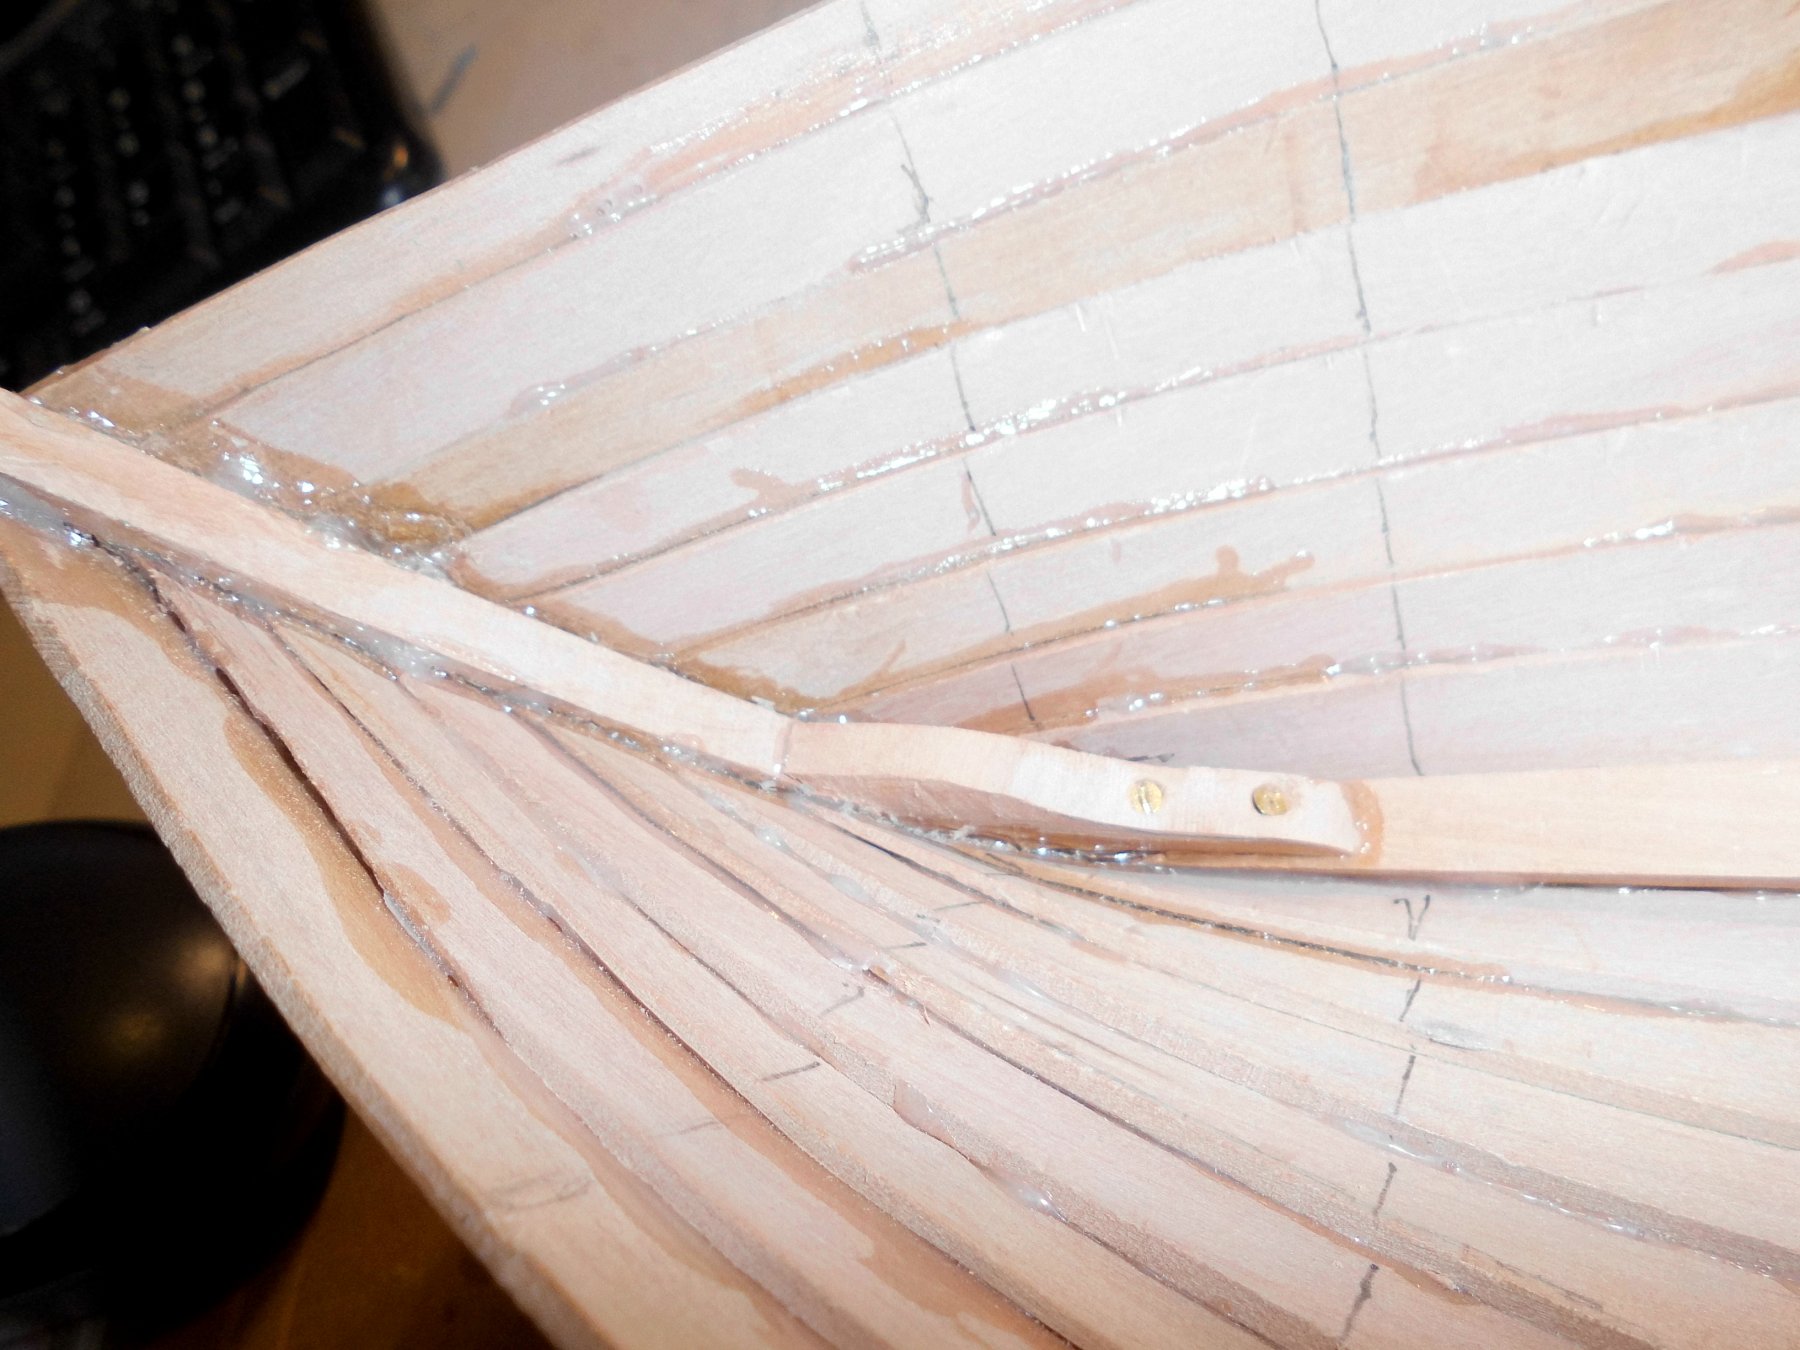
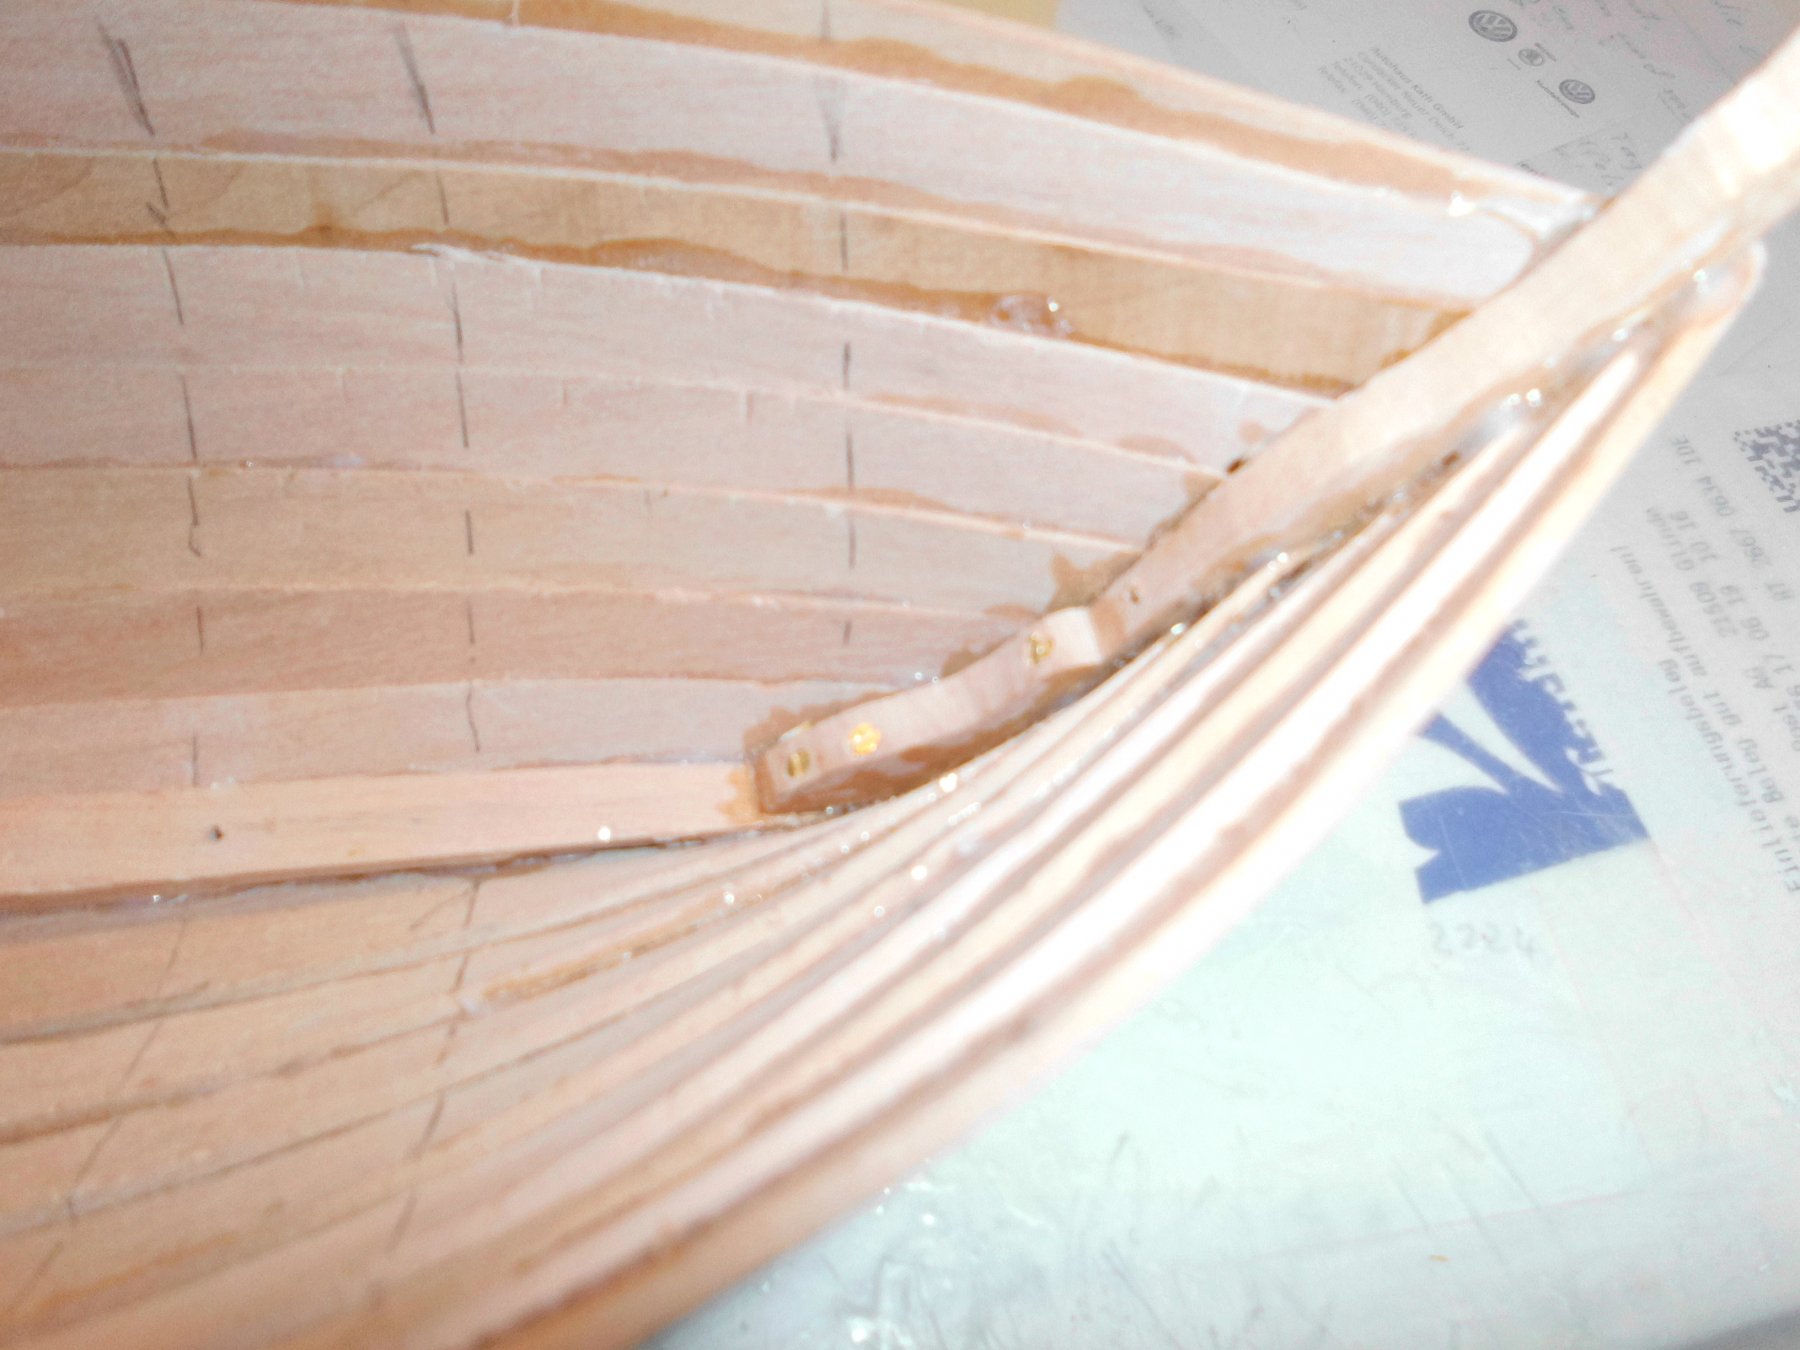
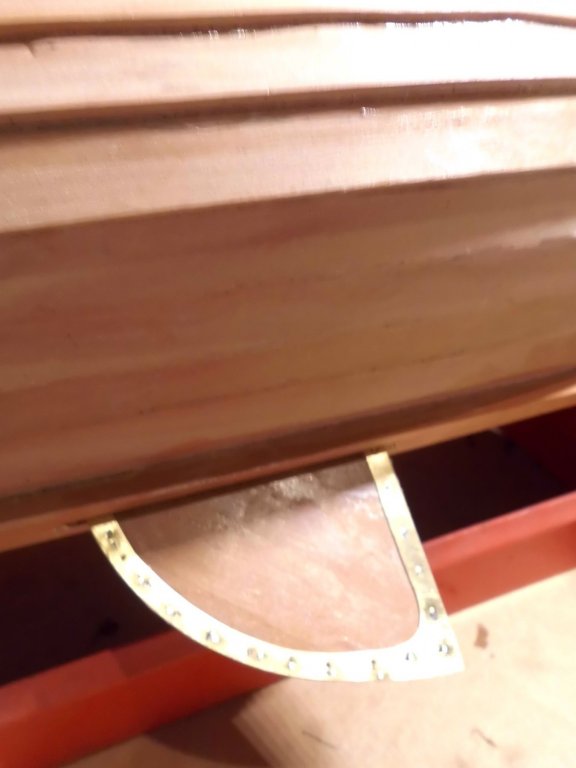
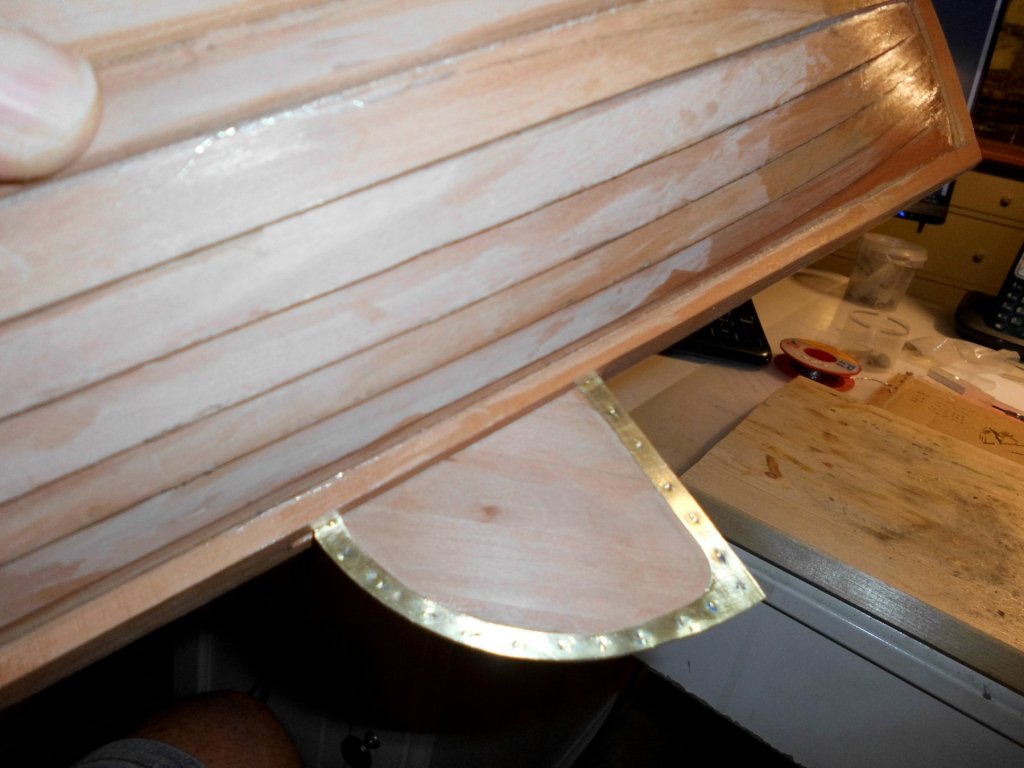
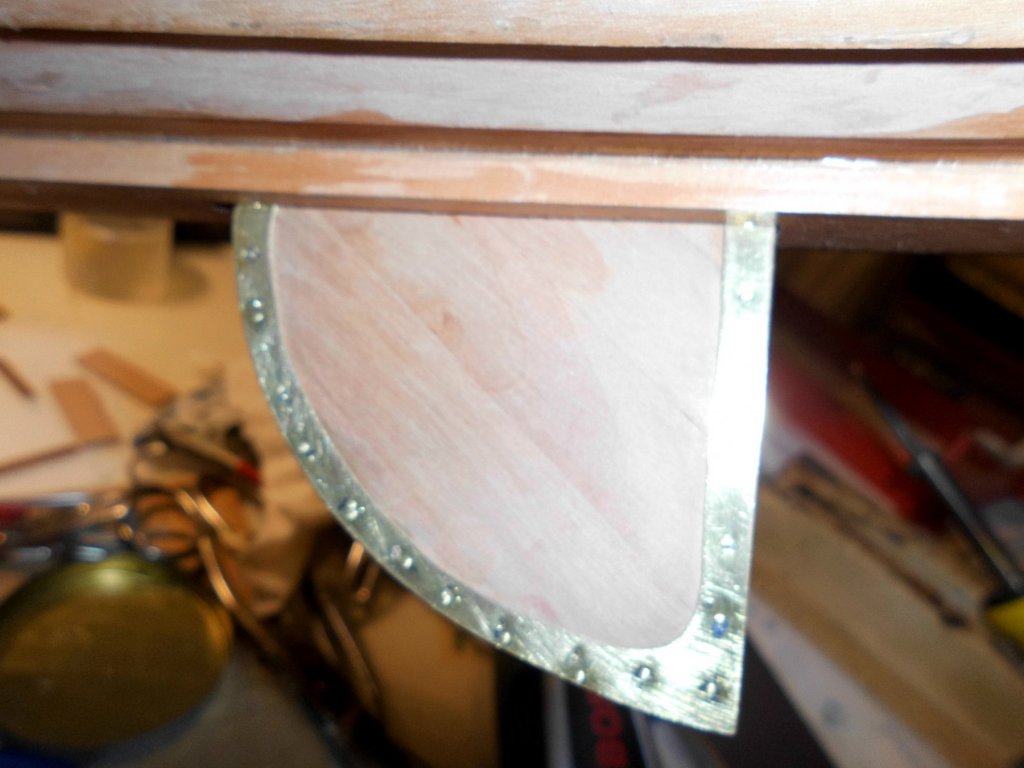
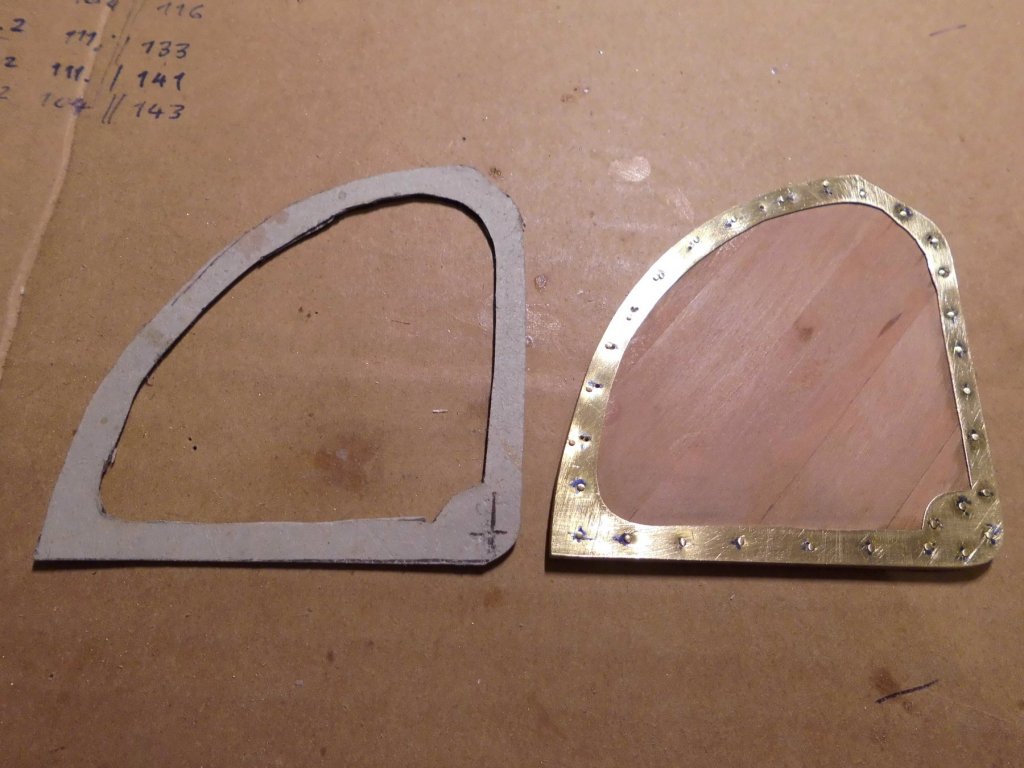
Thank you Steve for looking in, and for your kind words.... yes, its one piece of 0,3 mm thick brass sheet. I cut it out by laying a part of the sheet on a scrap bit of 4 mm plywood, dilling a small hole through Brass and ply, and then cutting out the center part with a jig saw. This way the brass had adequate support from beneath and it stayed relatively flat as well Nils
-
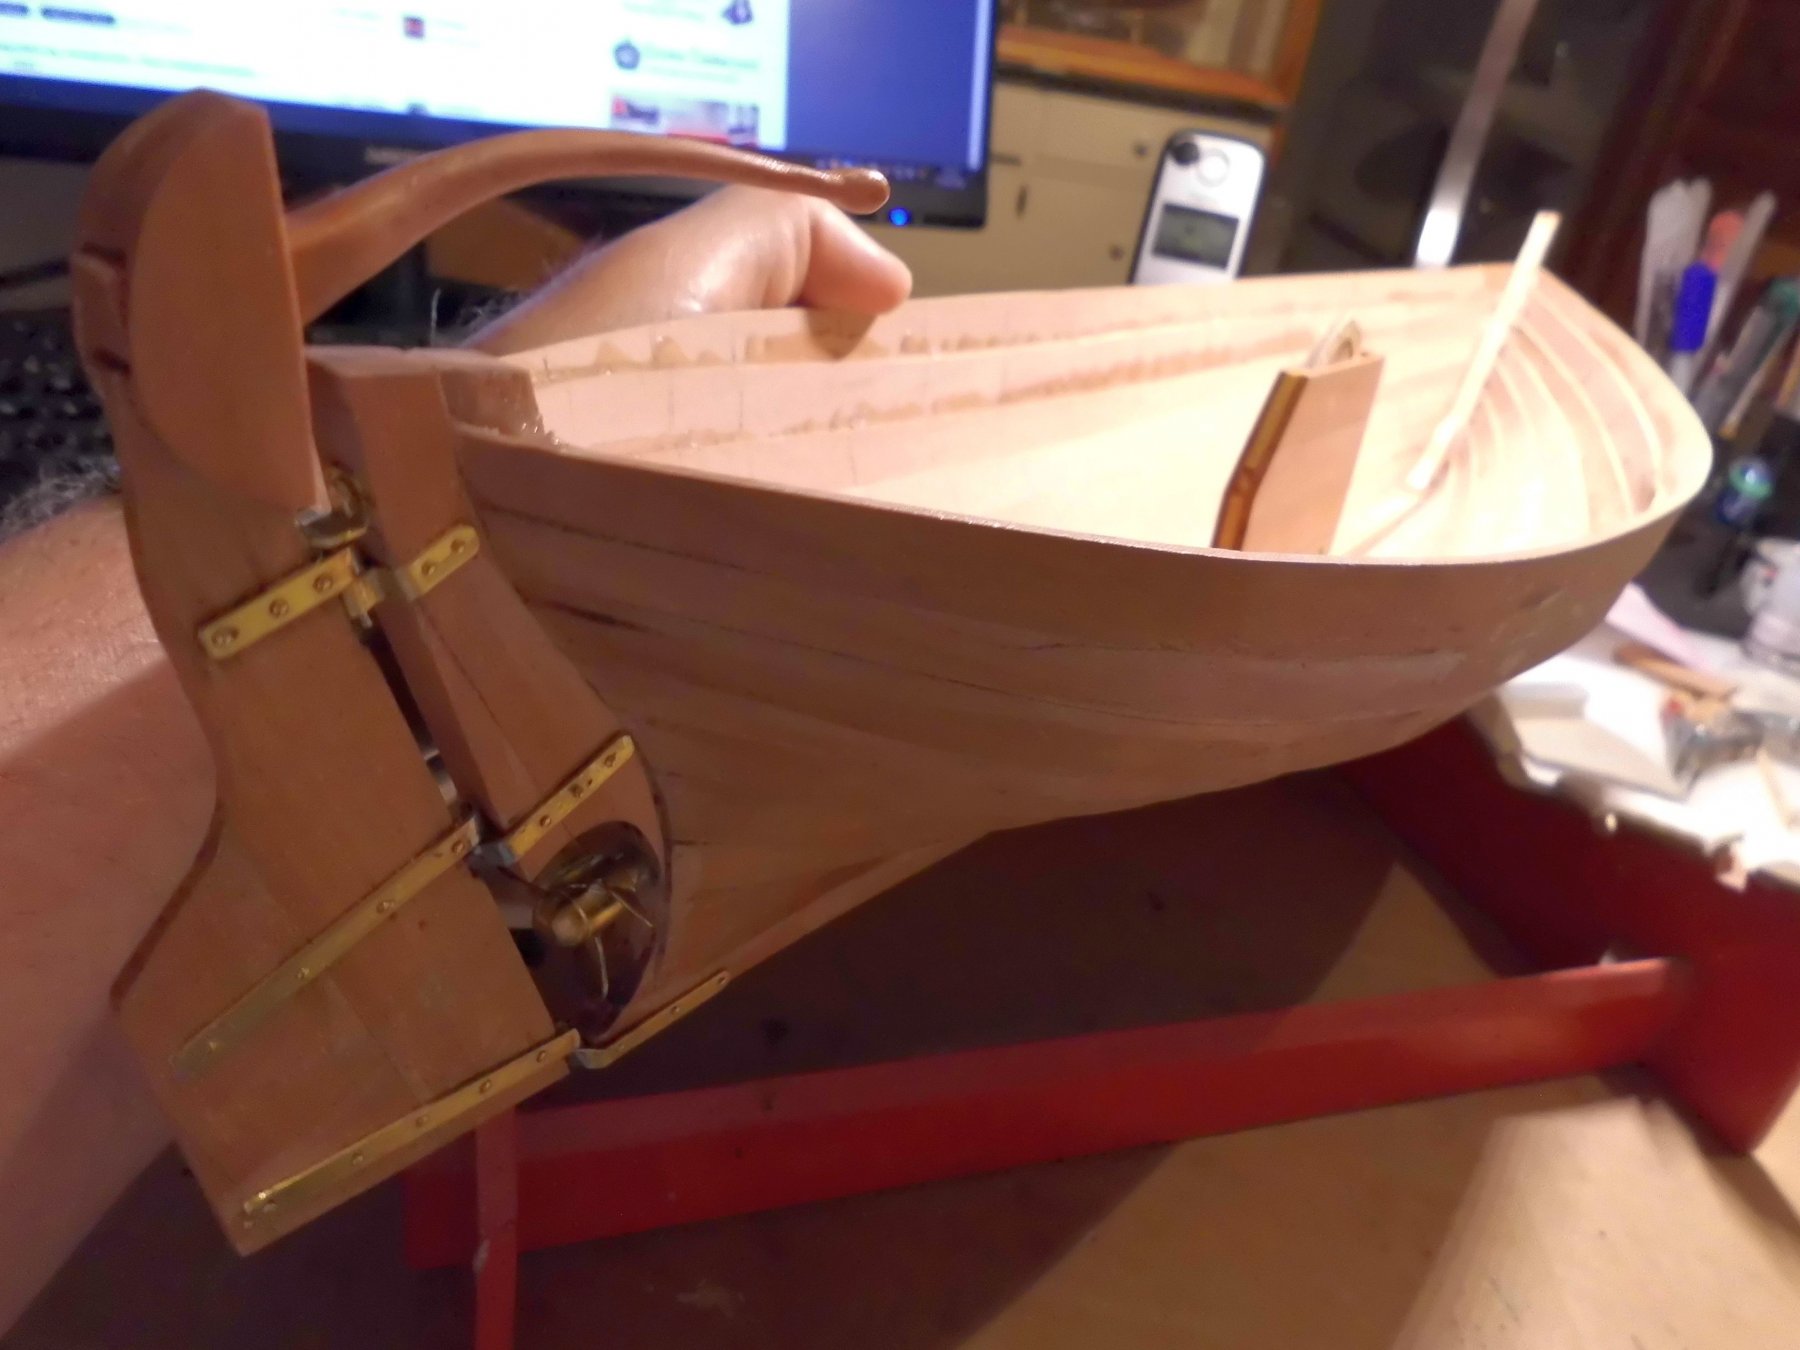
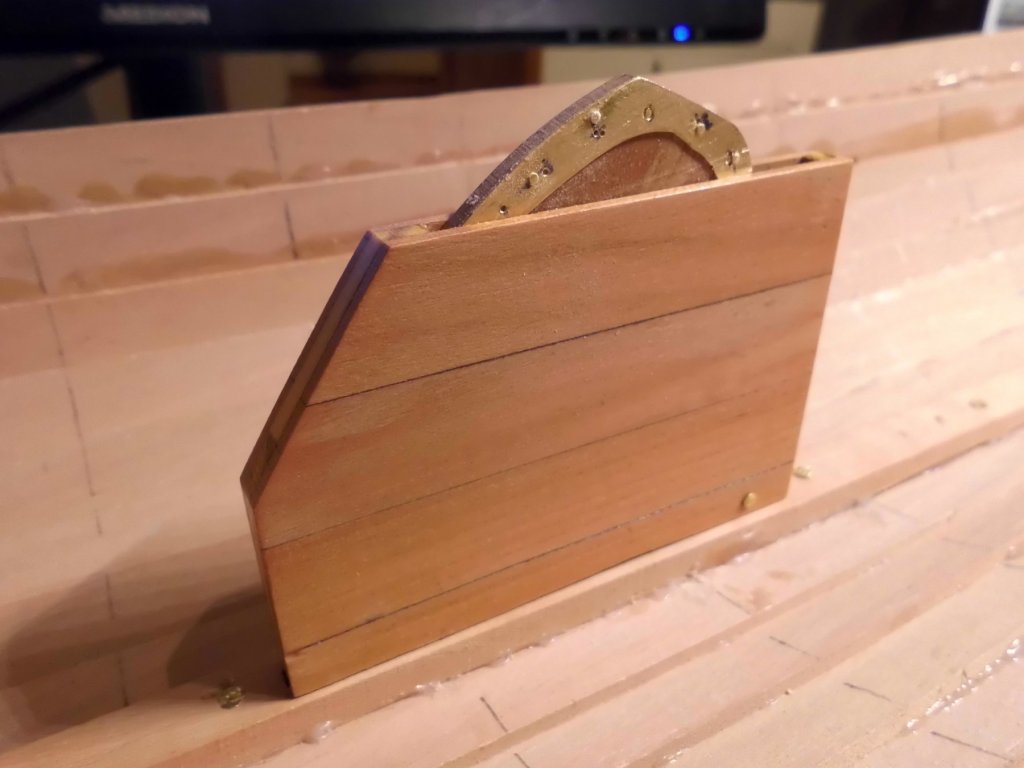
Next is the swivible centerboard... Nils template reinforcement frame board lowered down to max. extent board raised inside


- 401 replies
-
- 23
-
-
Super build Javier, it must be fun doing these mini-models in this way. I lke the deck curvature in this case, very realistic Nils
-
I agree Martin, he had a hard life up to now, so he`ll just make the best out of it, and visit the nearby finess studio regularly, they also do neck-massages there... .😏 Nils
-
Ab and Wefalk, thanks to both of you,.... the pros and cons (PVA vs. Epoxy) must carefuly be considered, I`ll try and gain more experience from my side Nils
-
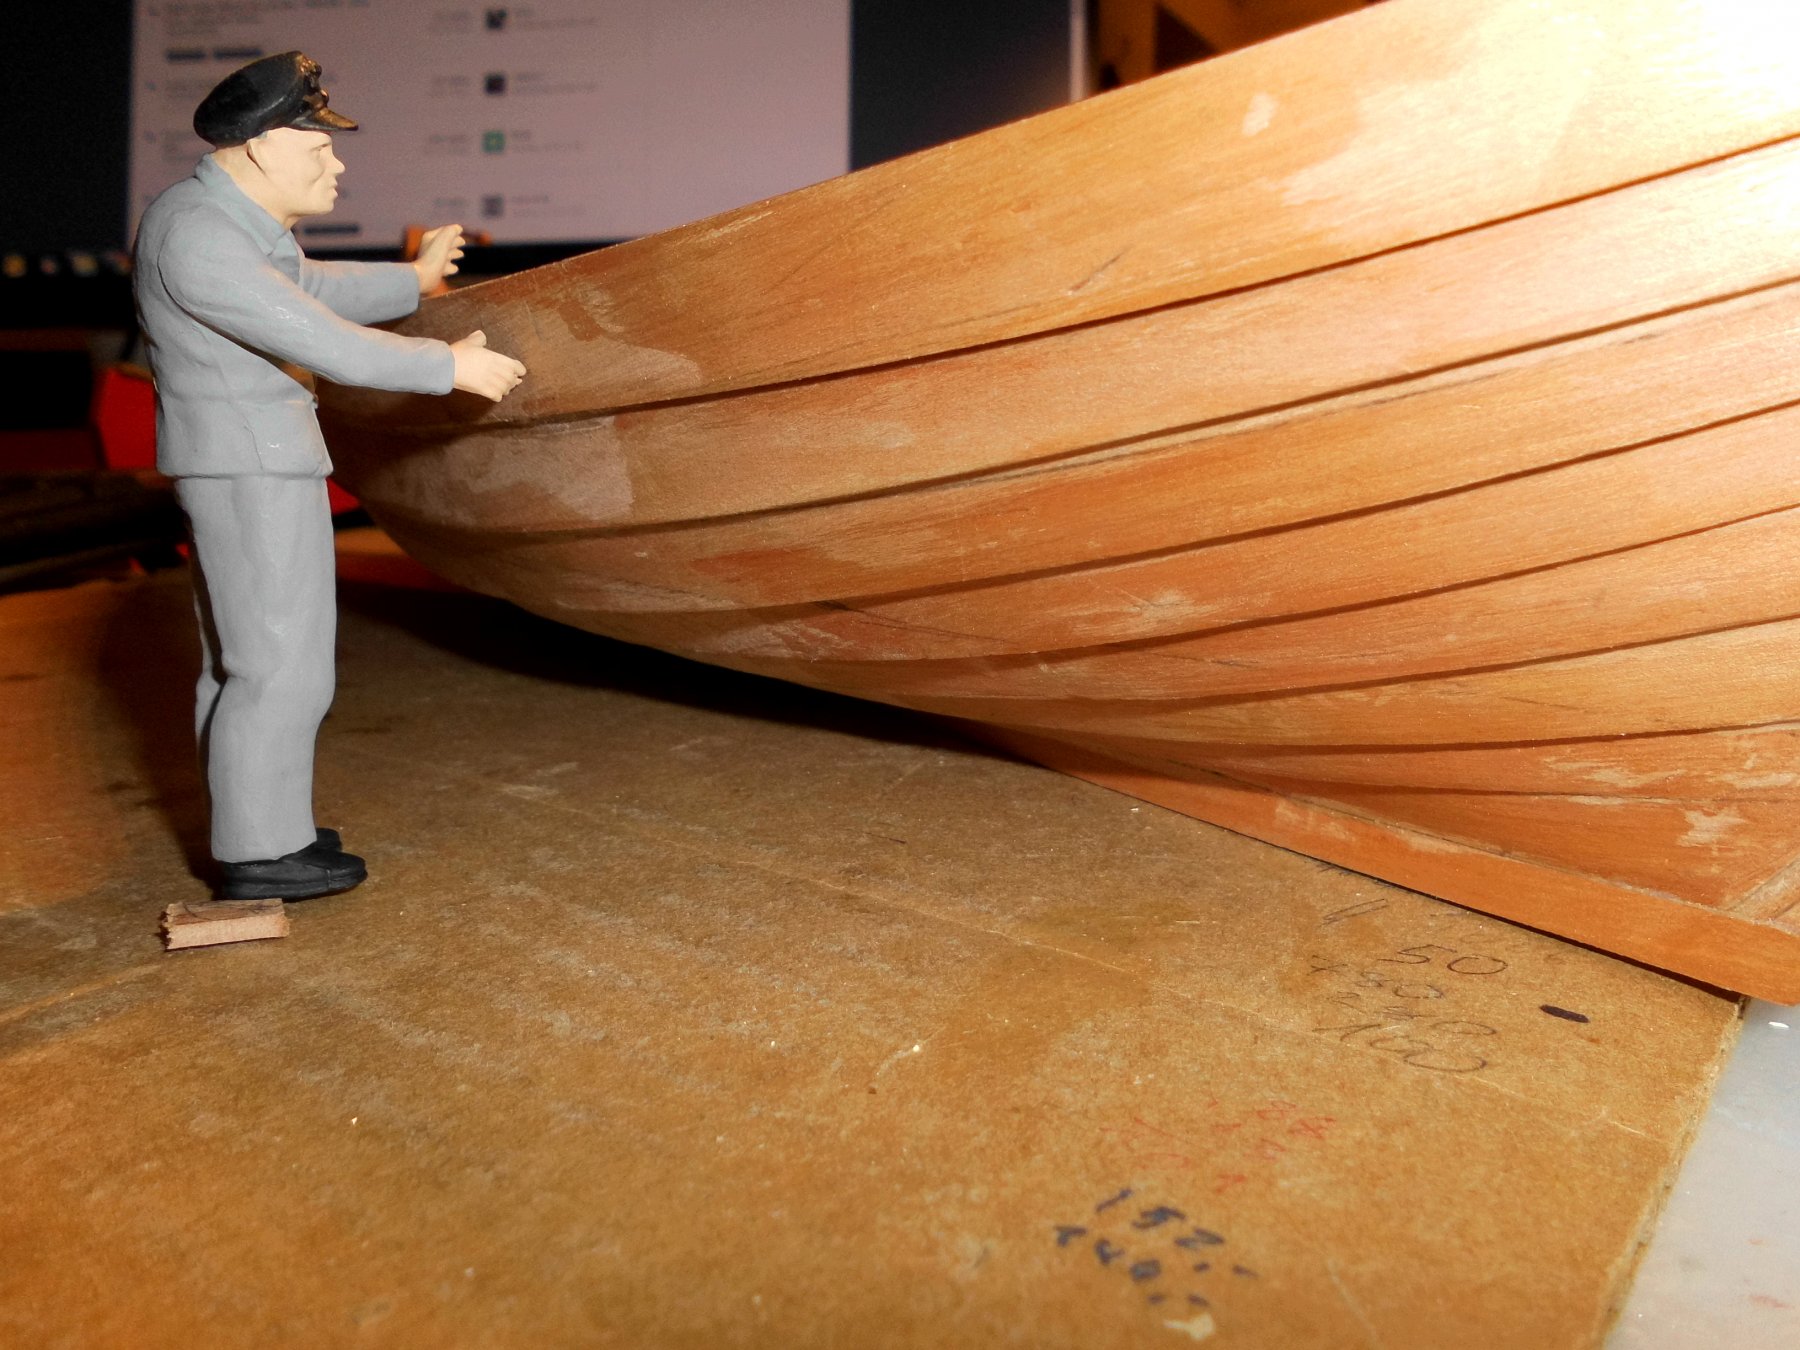
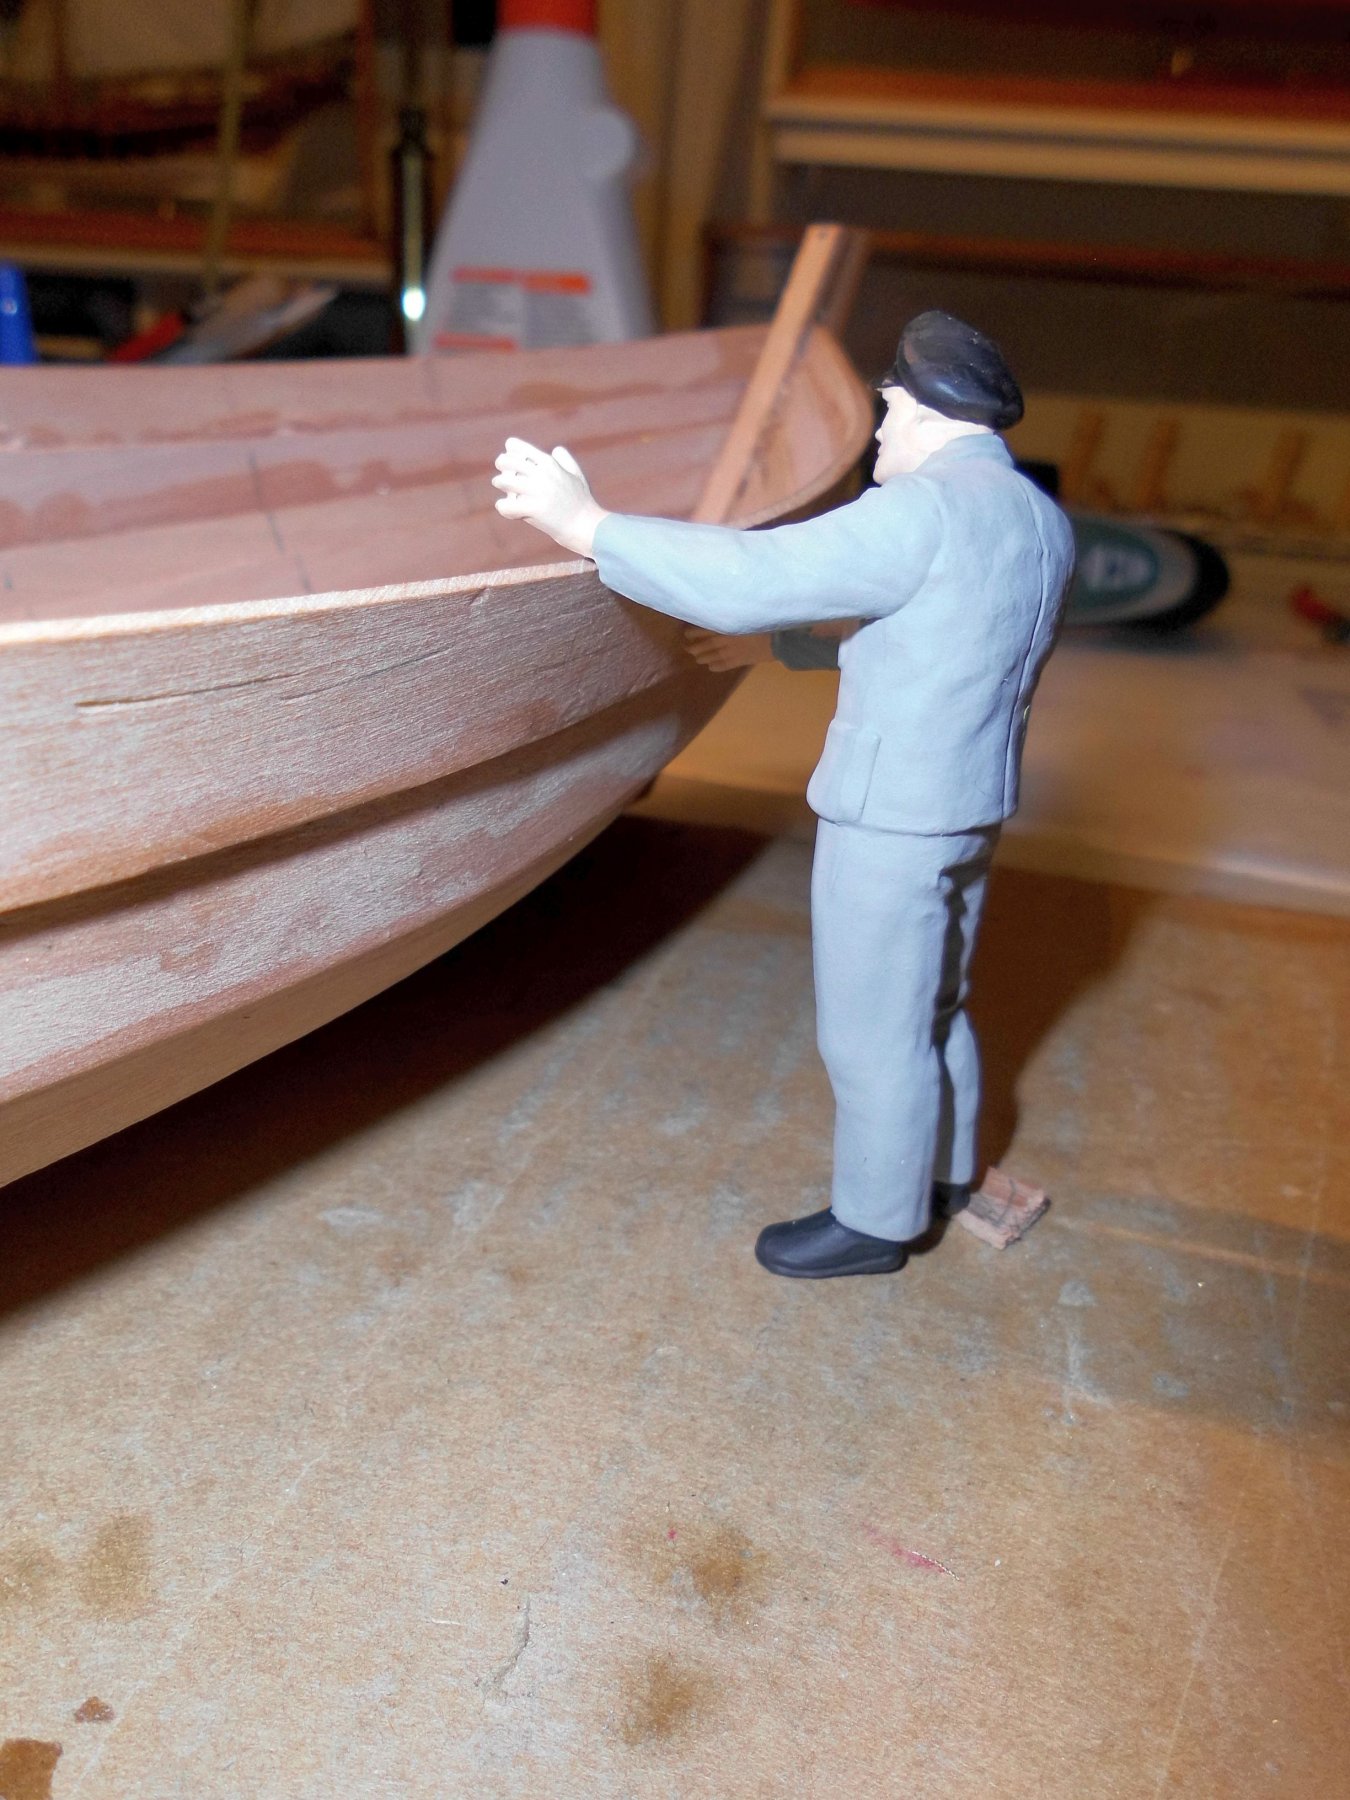
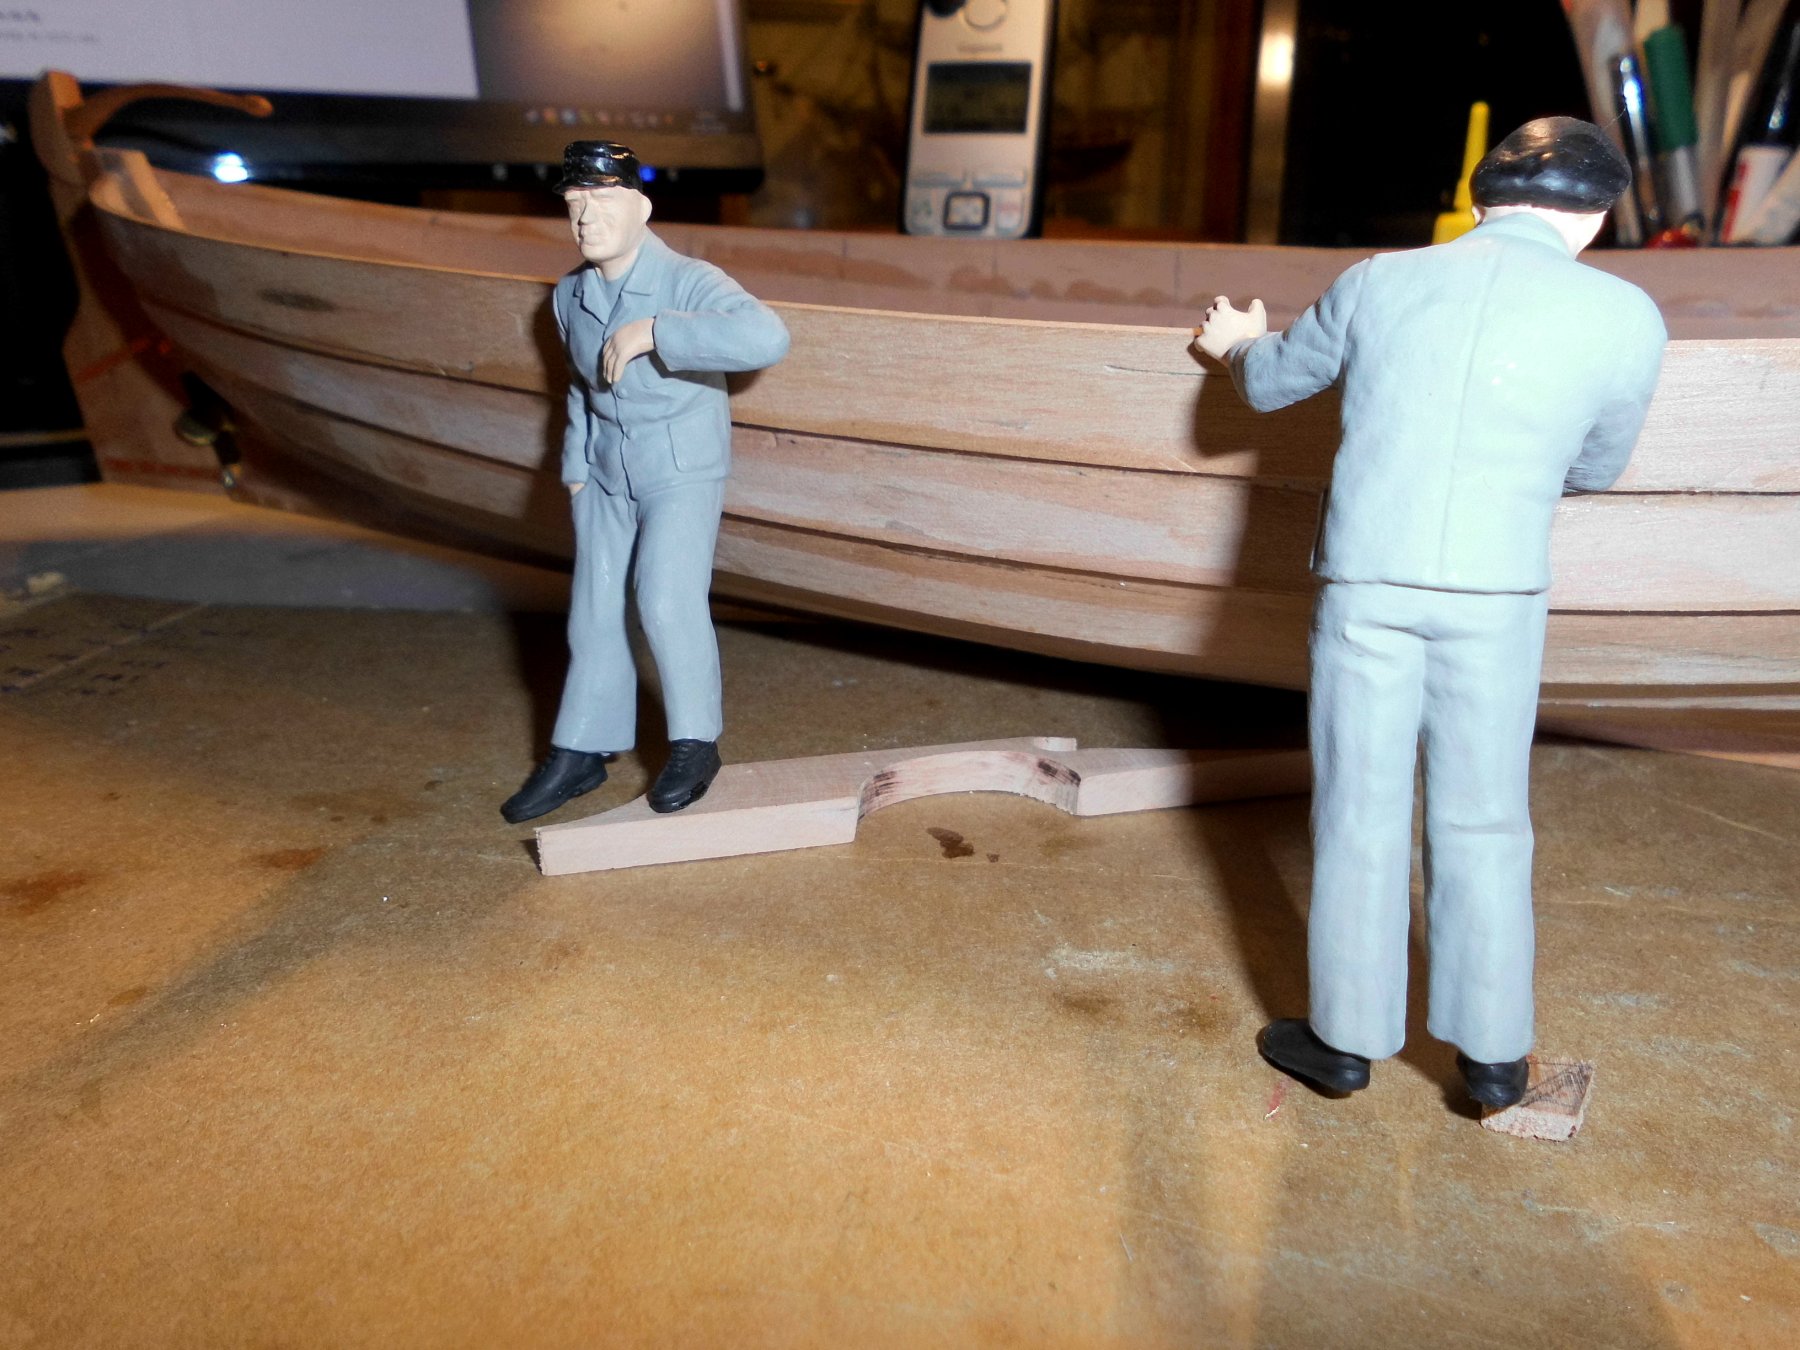
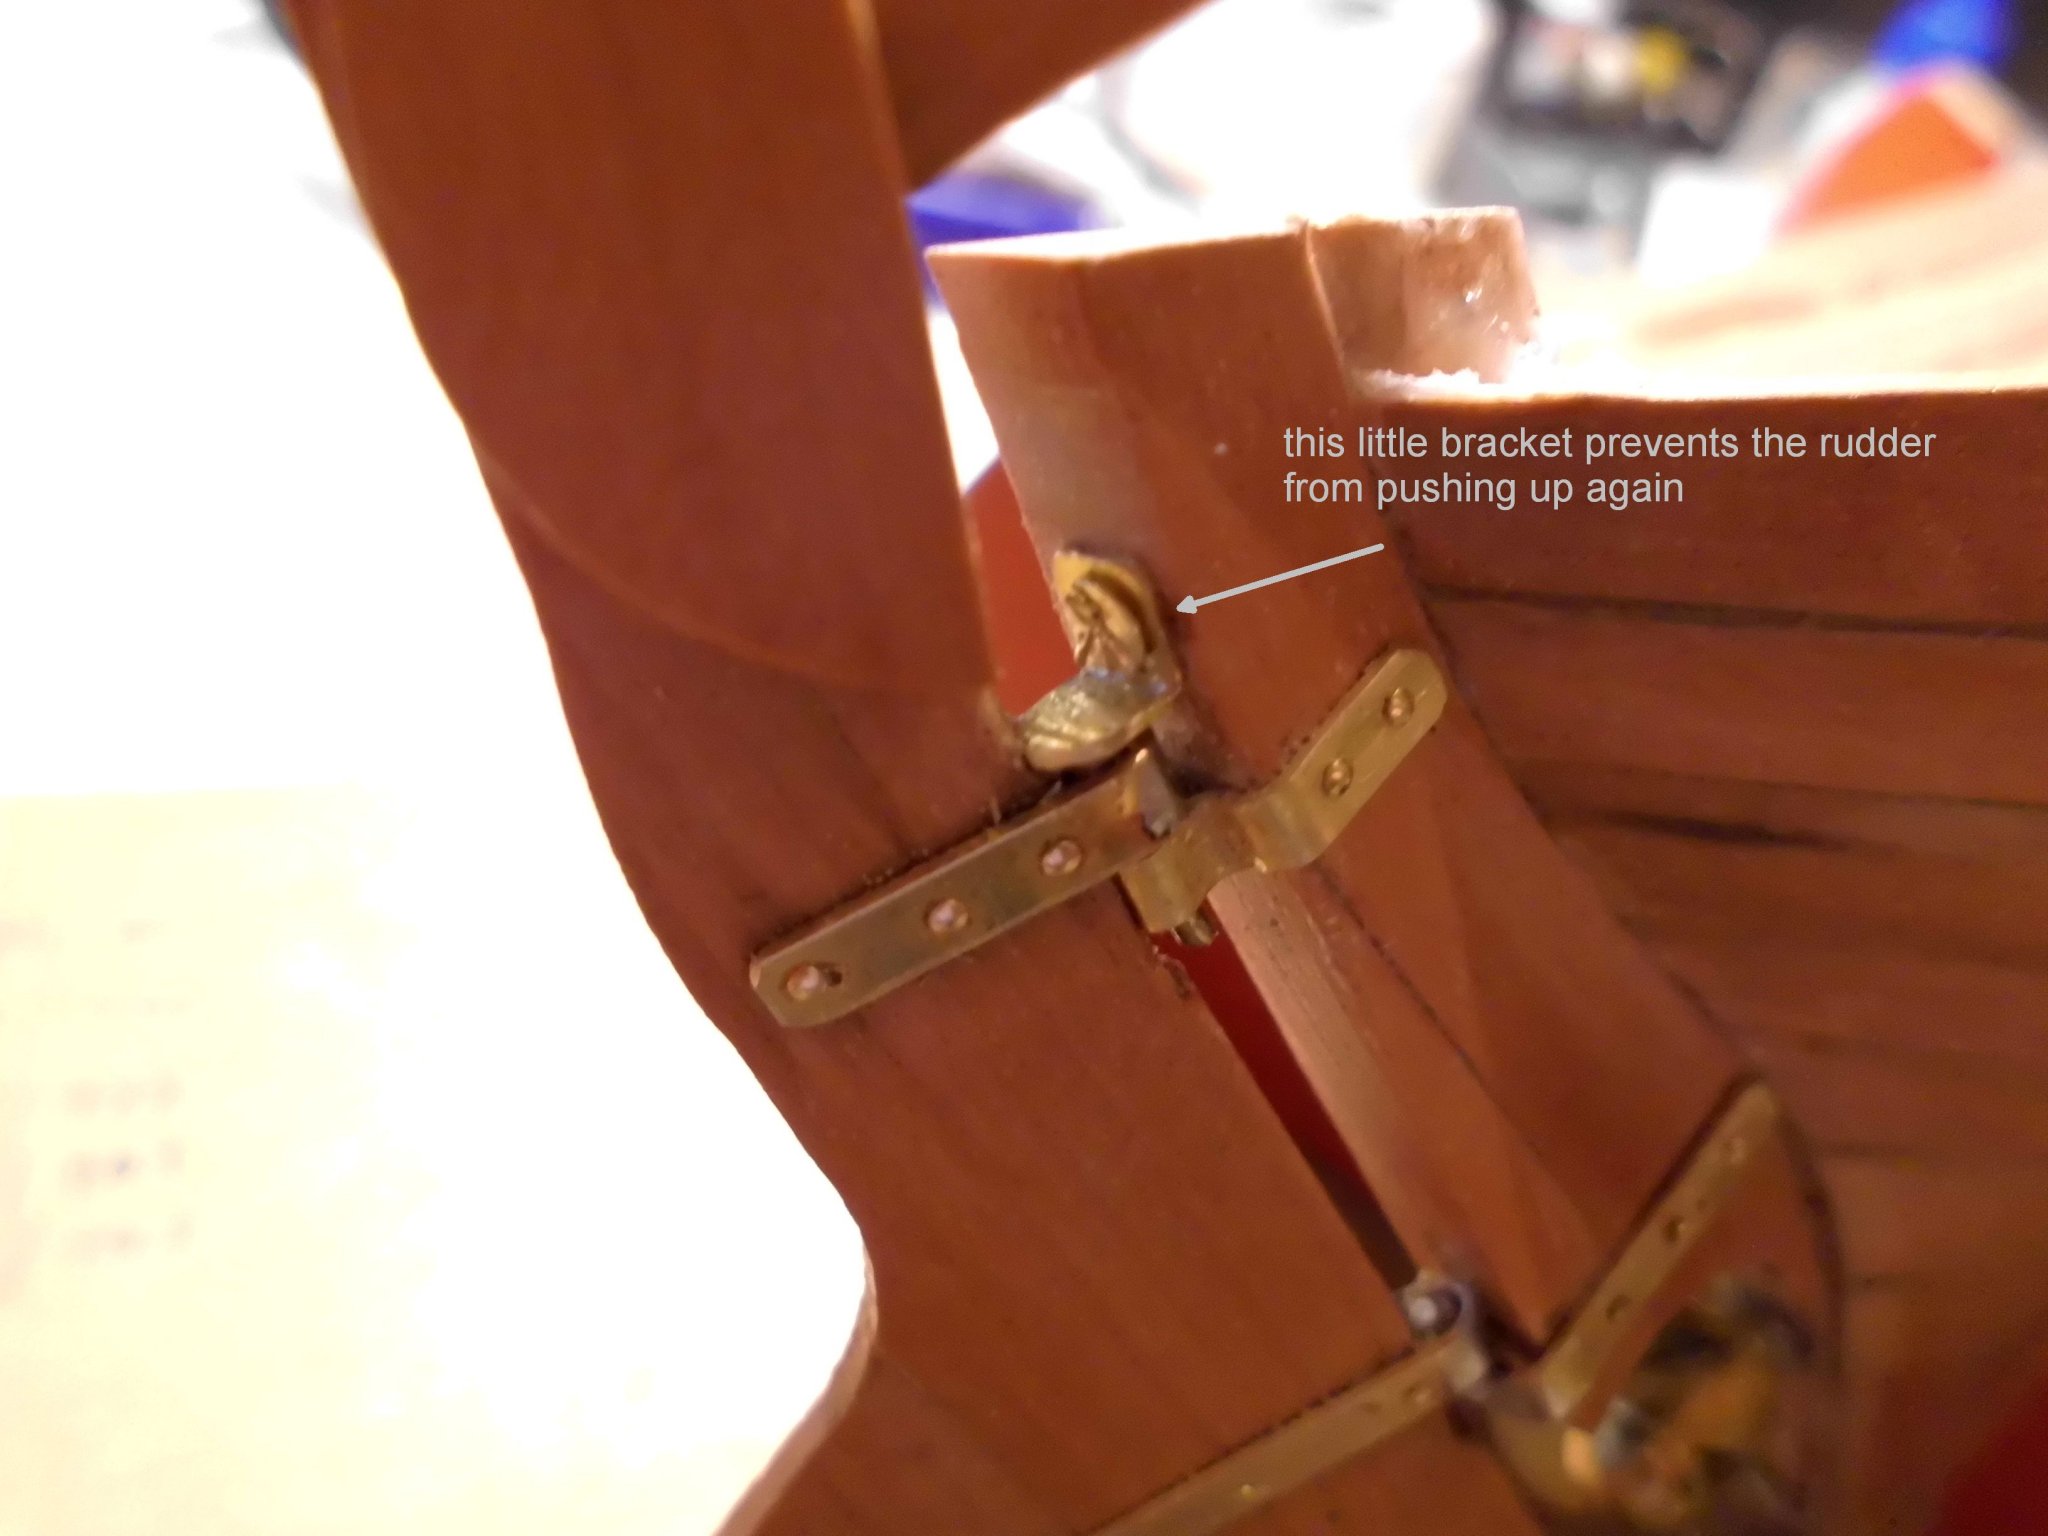
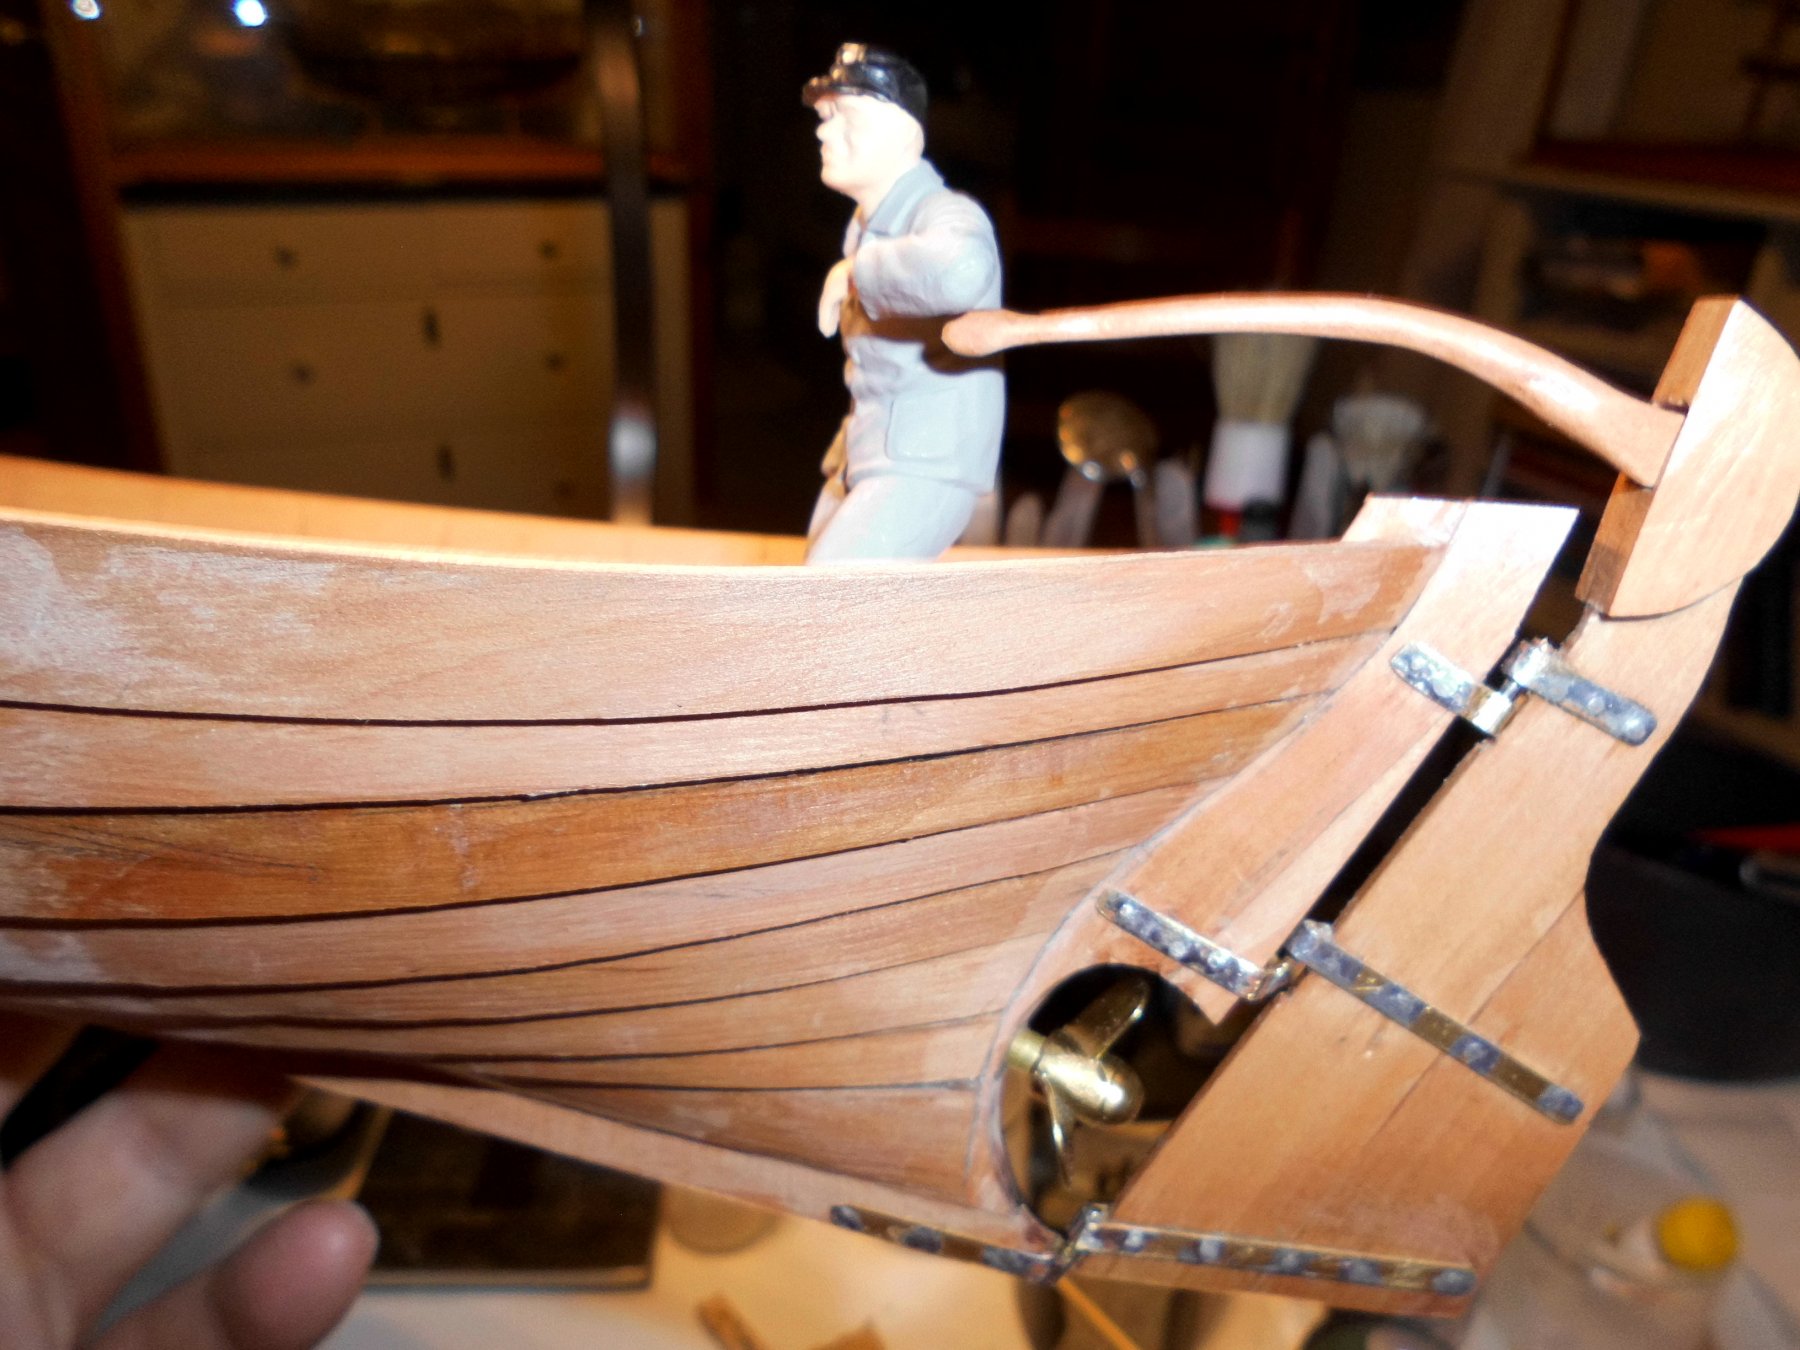
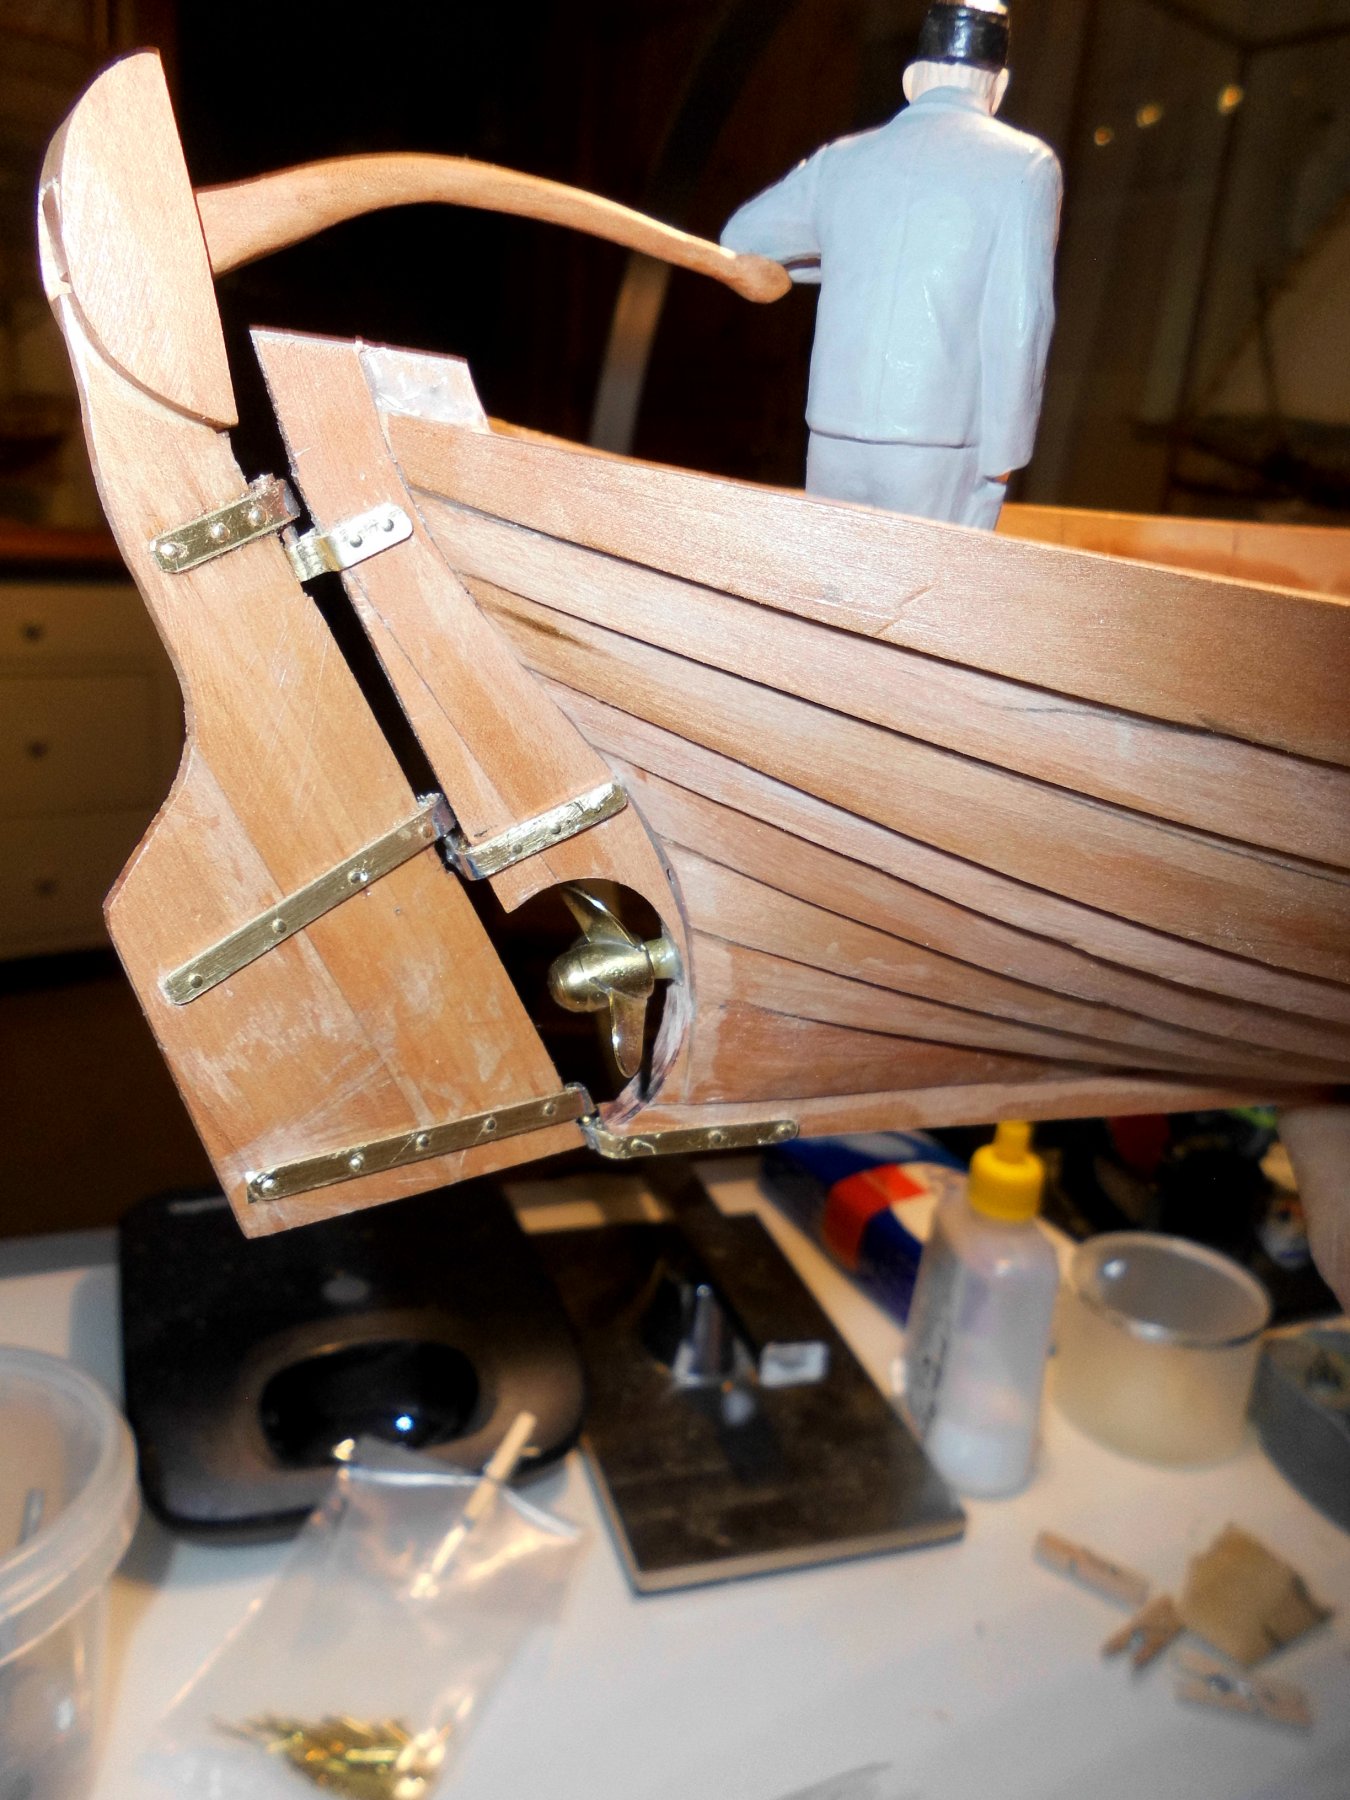
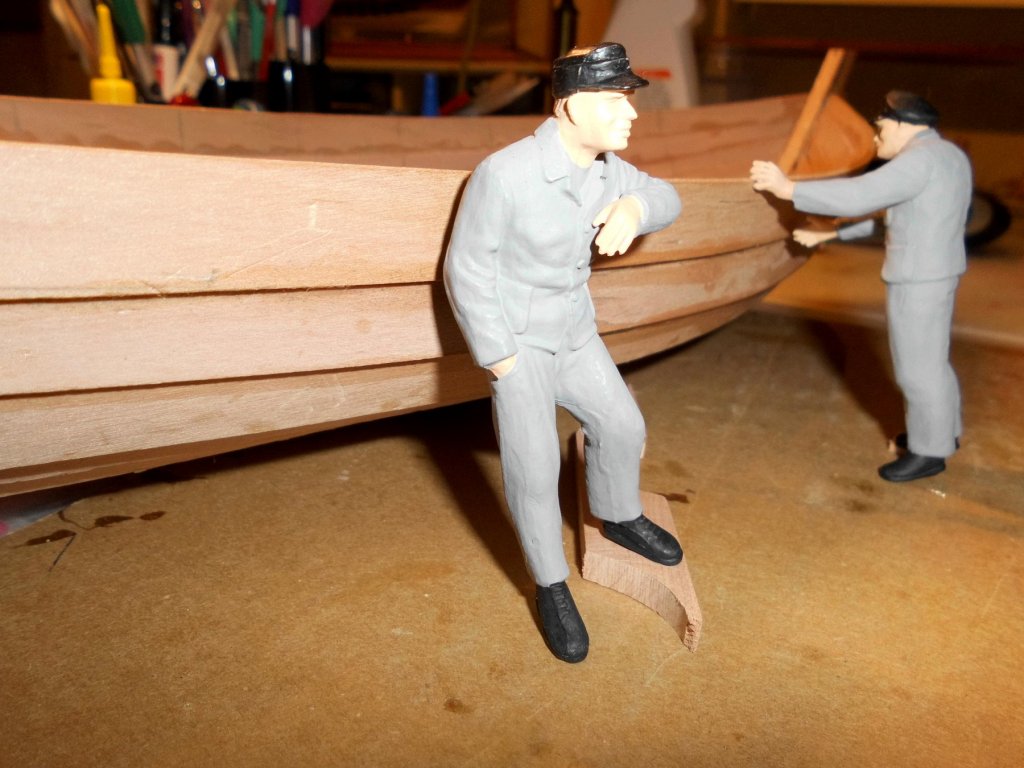
thank you Geert, I also used a wet cloth for wiping off surplus glue before it cured on the wood. The point is that the "stains" appeear when liquid wood primer is applied to the areas, even there where one thought that they had been removed........ Here is a little removable jig to hold down the rudder from pushing up from the stern hinges In the small baltic shipyard two "Zeesener"fishermen are just inspecting their new boat being built Nils preventer bracket (removable) father fisherman..., with the new ordered boat in build... together with his son, next generation, who will be the new skipper both in scale "G" 1:24


- 401 replies
-
- 16
-
-
Thanks Ab, yes, you`re right, I also experienced stains on the wood due to use of white glue. I`m still intending to check with every visible plank (outside) to remove the stains by sanding carefuly. I tried to avoid larger stains by using the white glue sparsely and also because the horizontal overlapping lines will be nailed and quench locked from the inside hull, but that will be done after the inside framework is put in place Nils
-
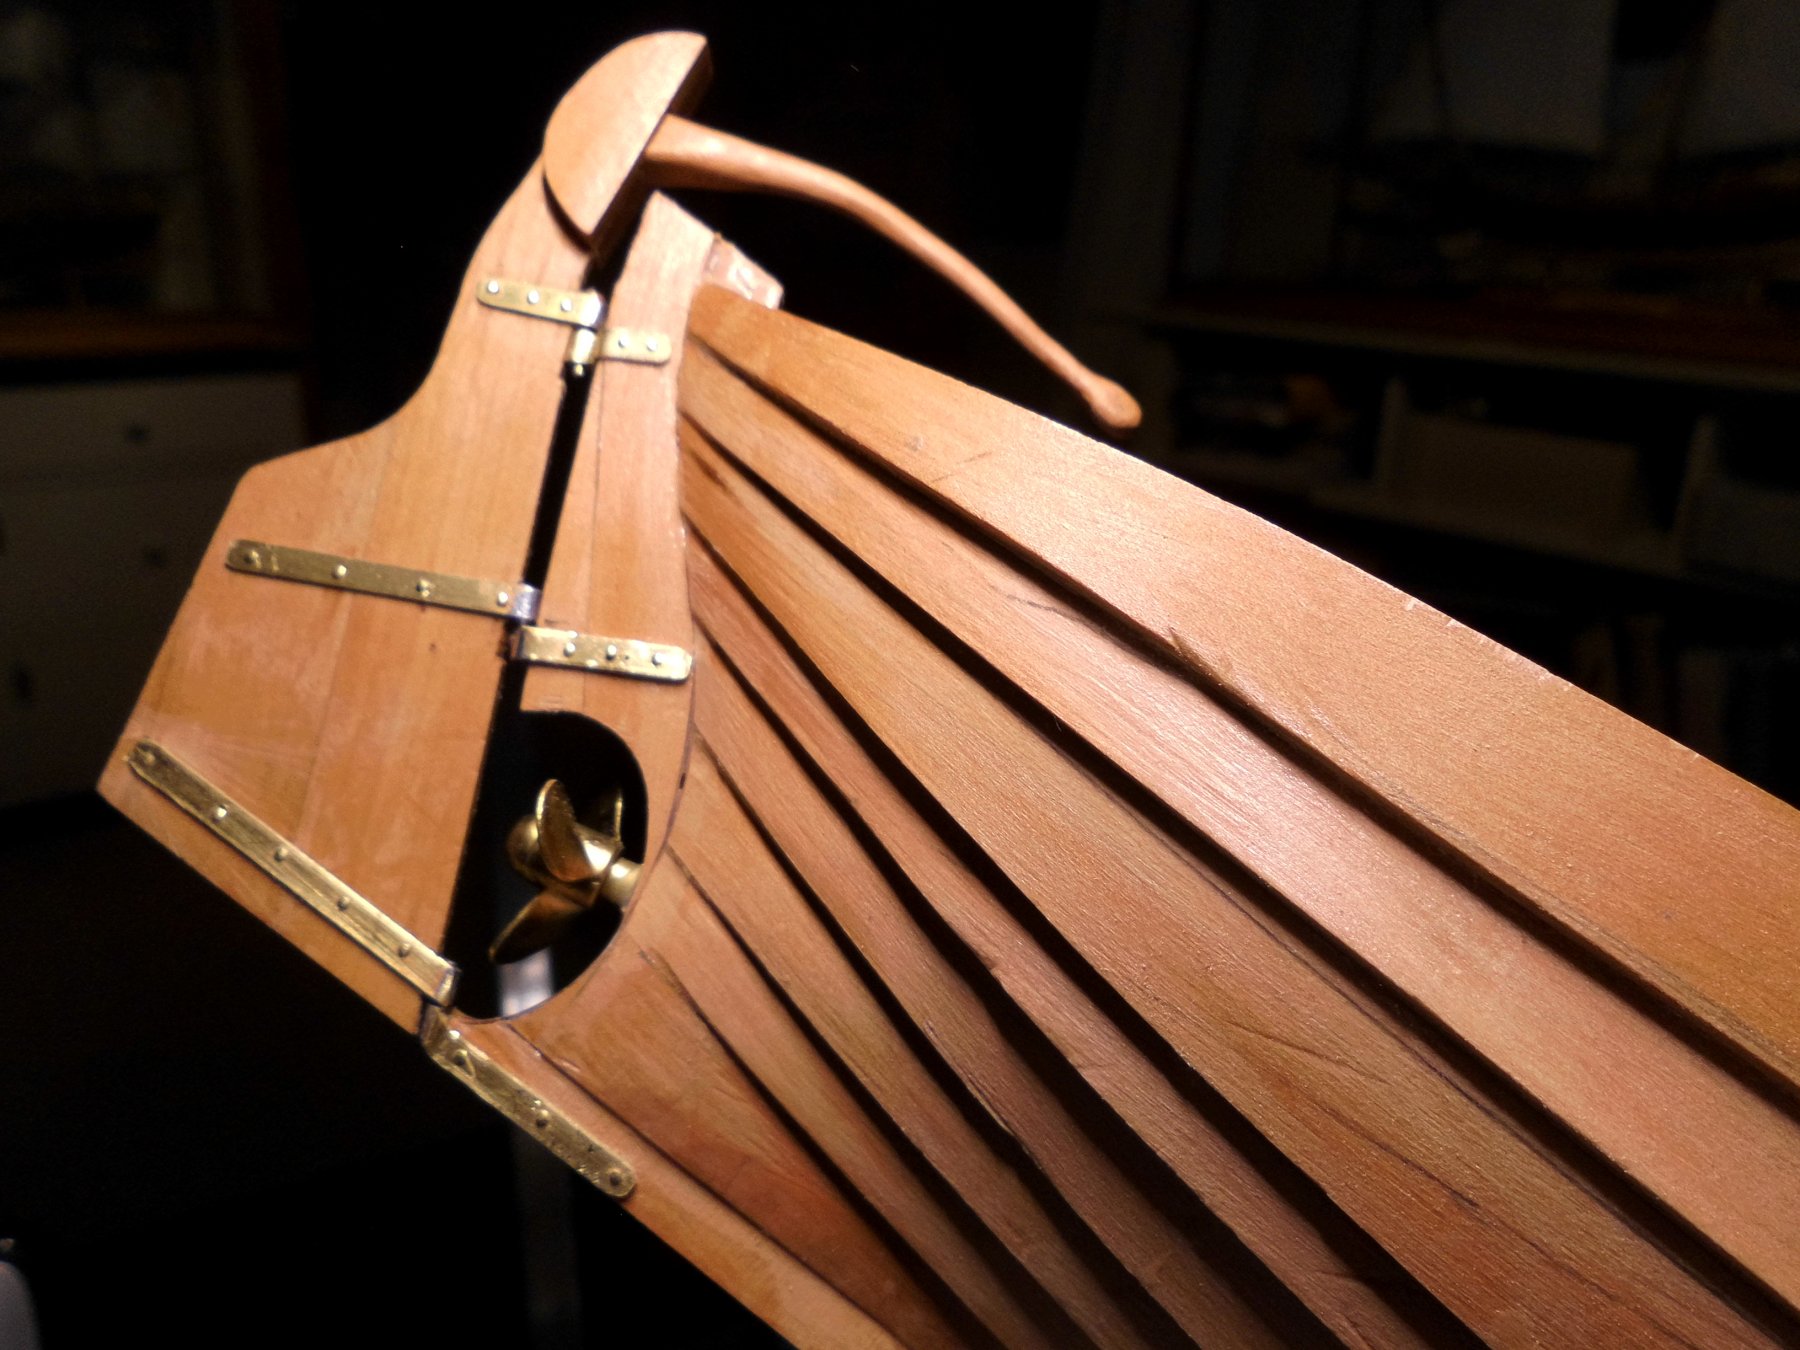
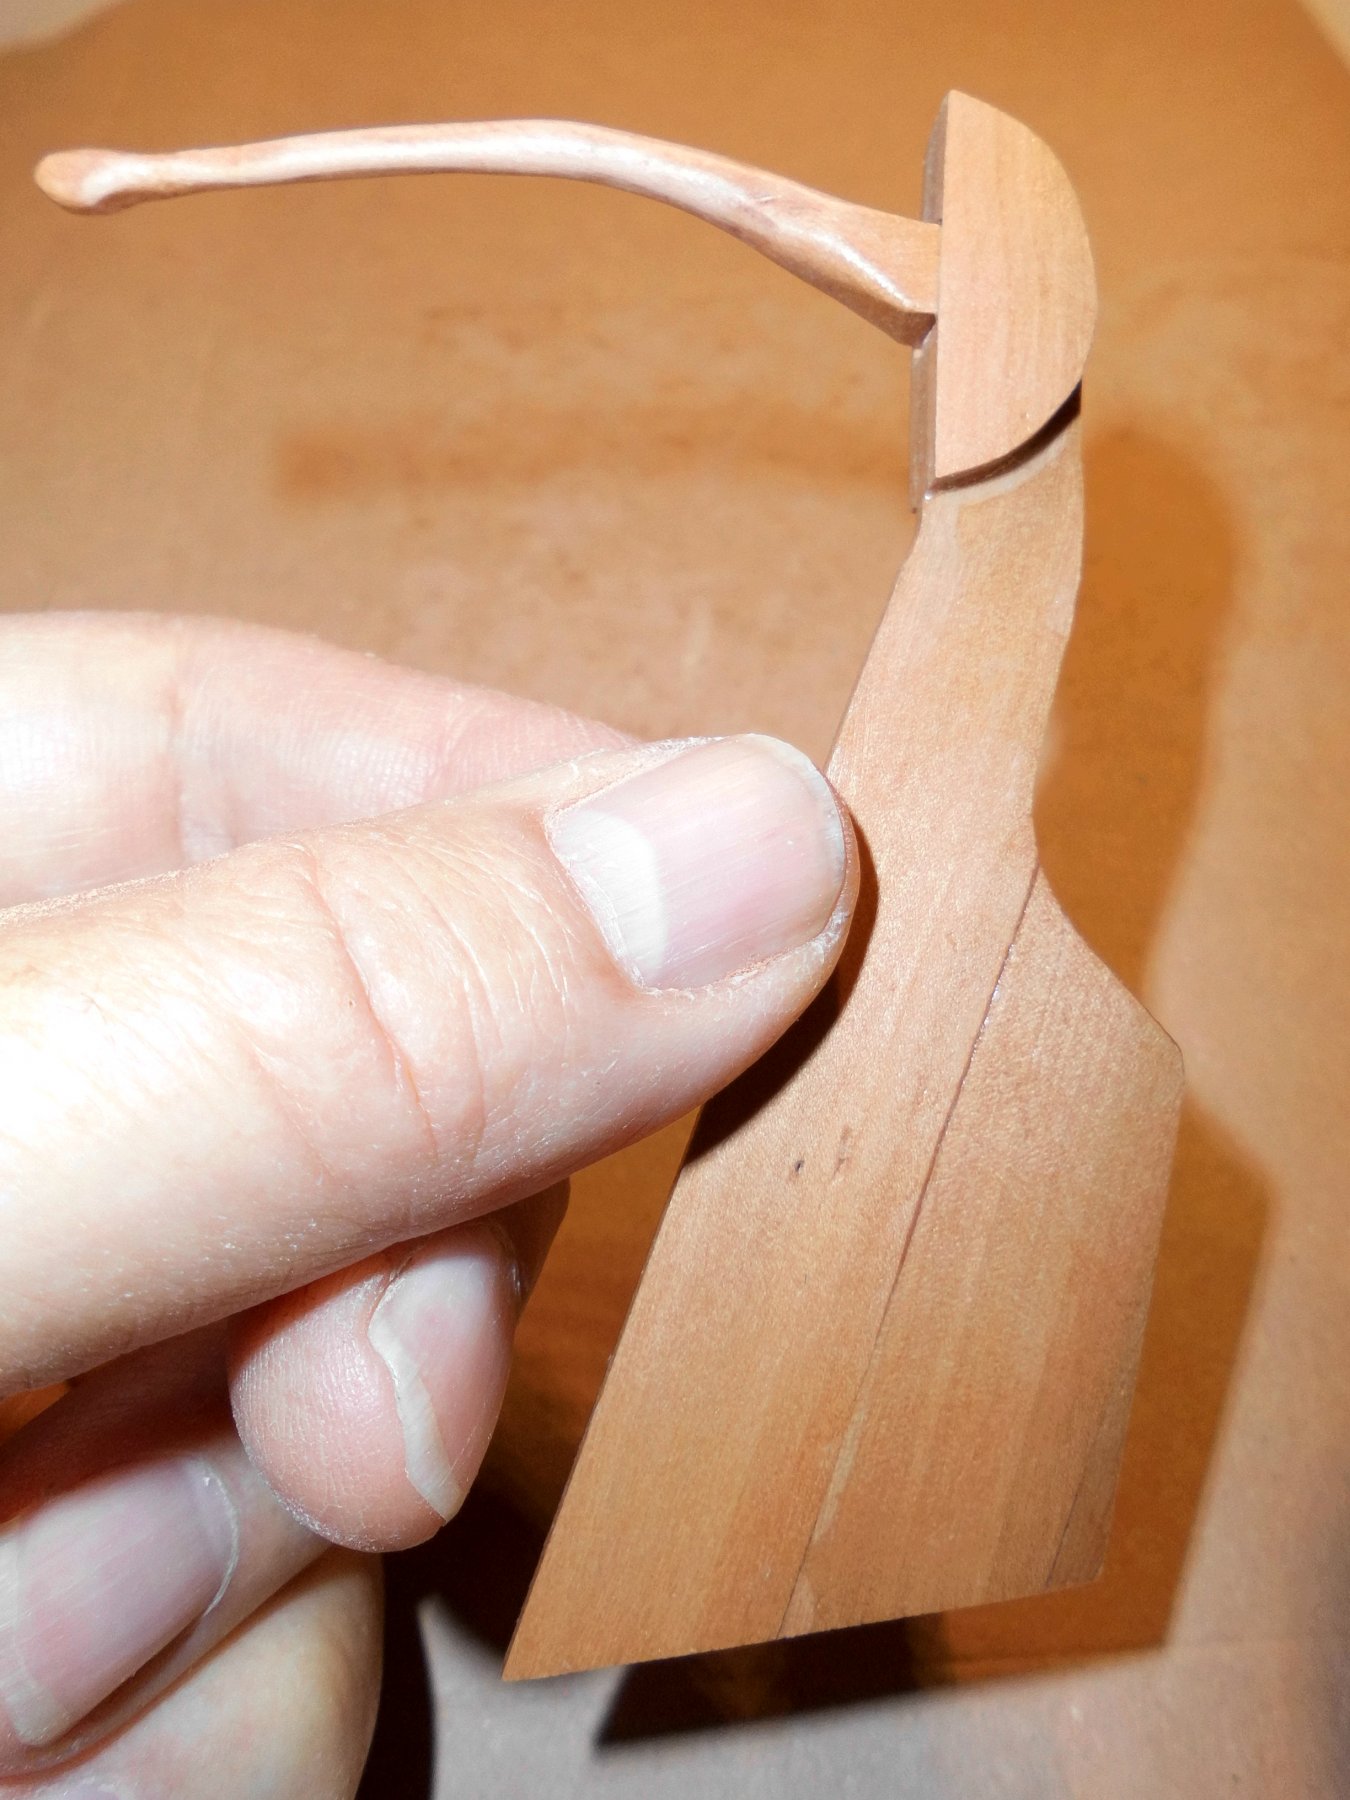
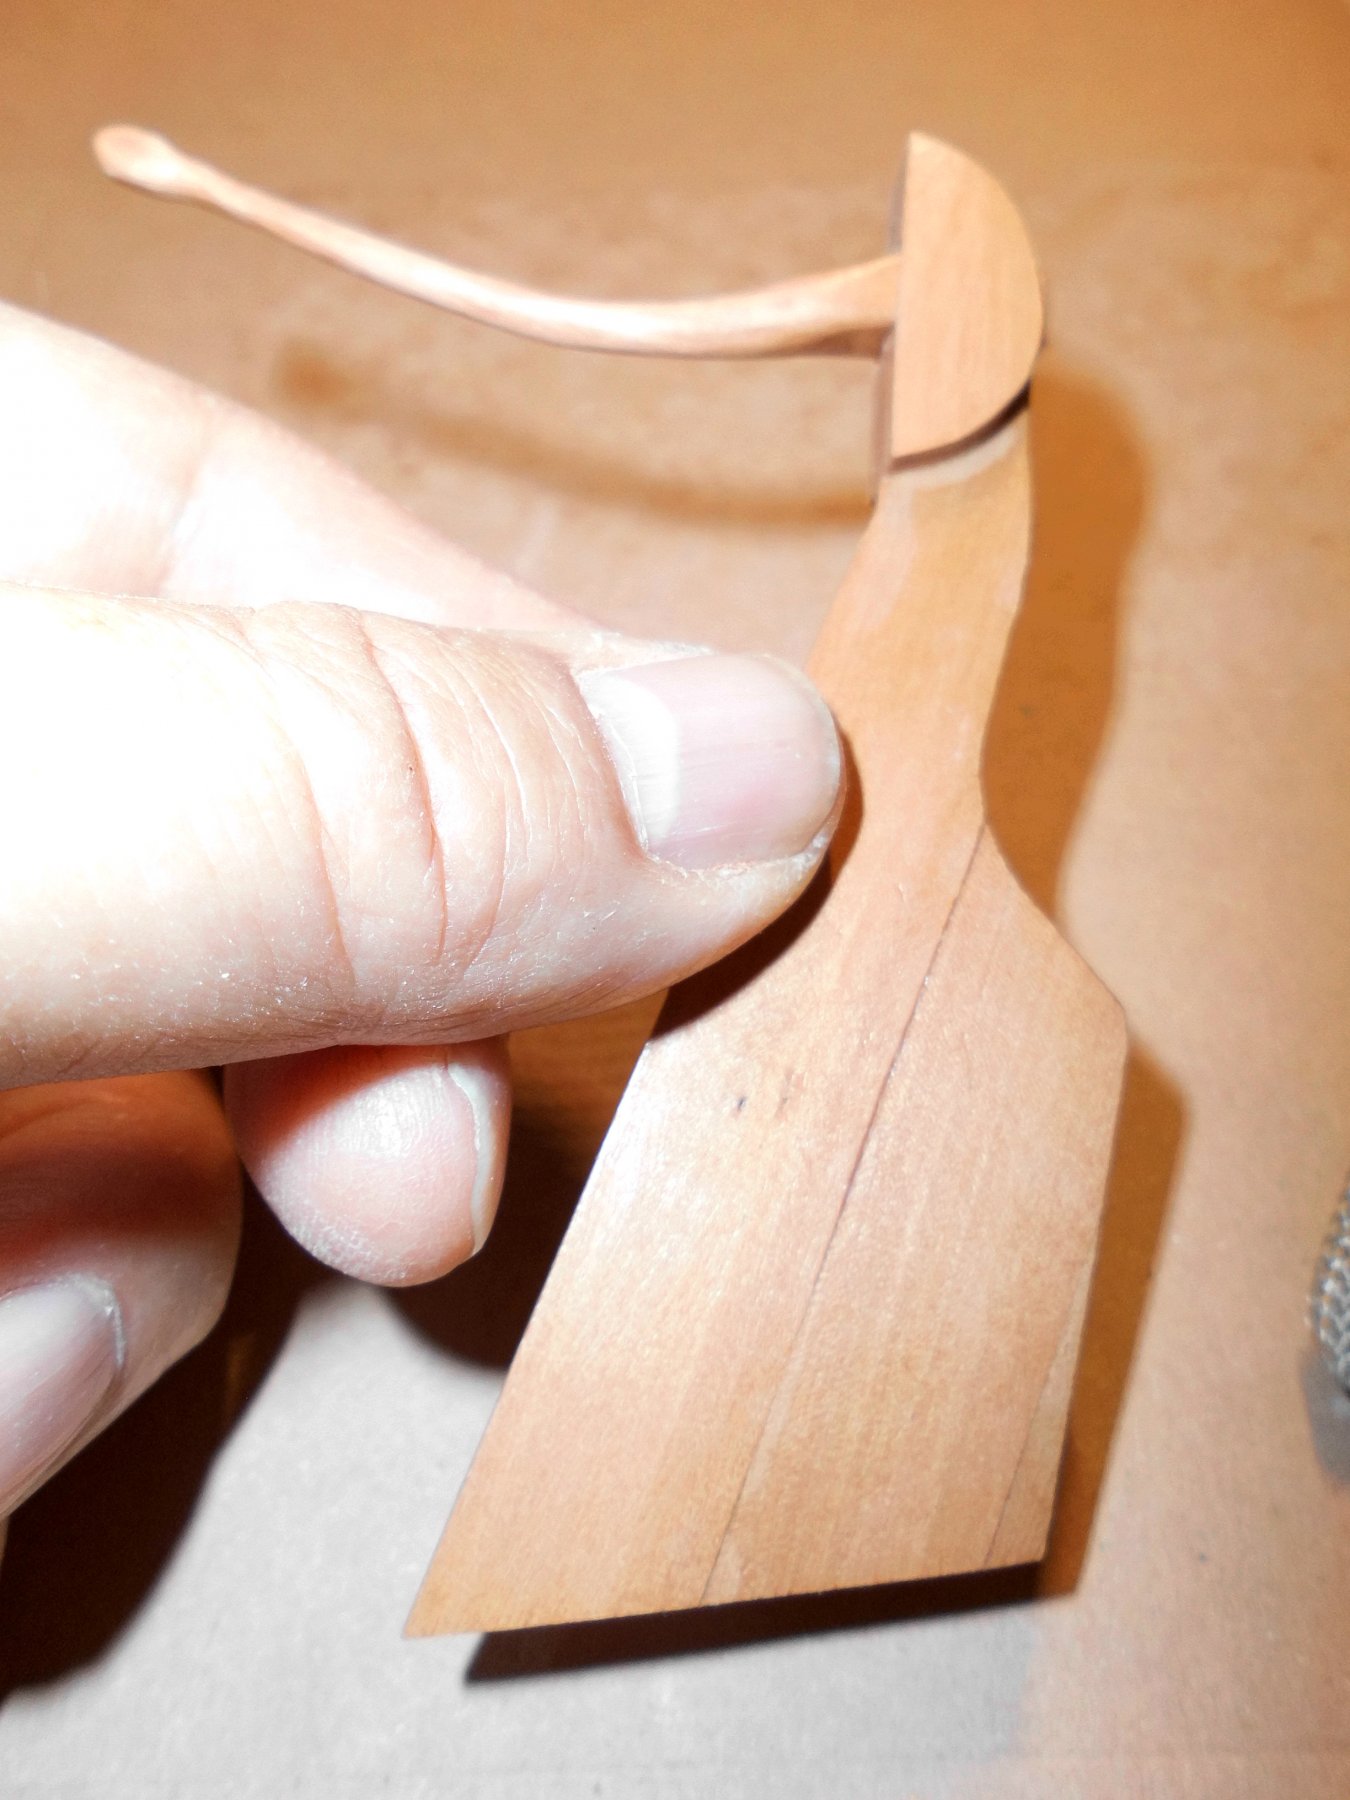
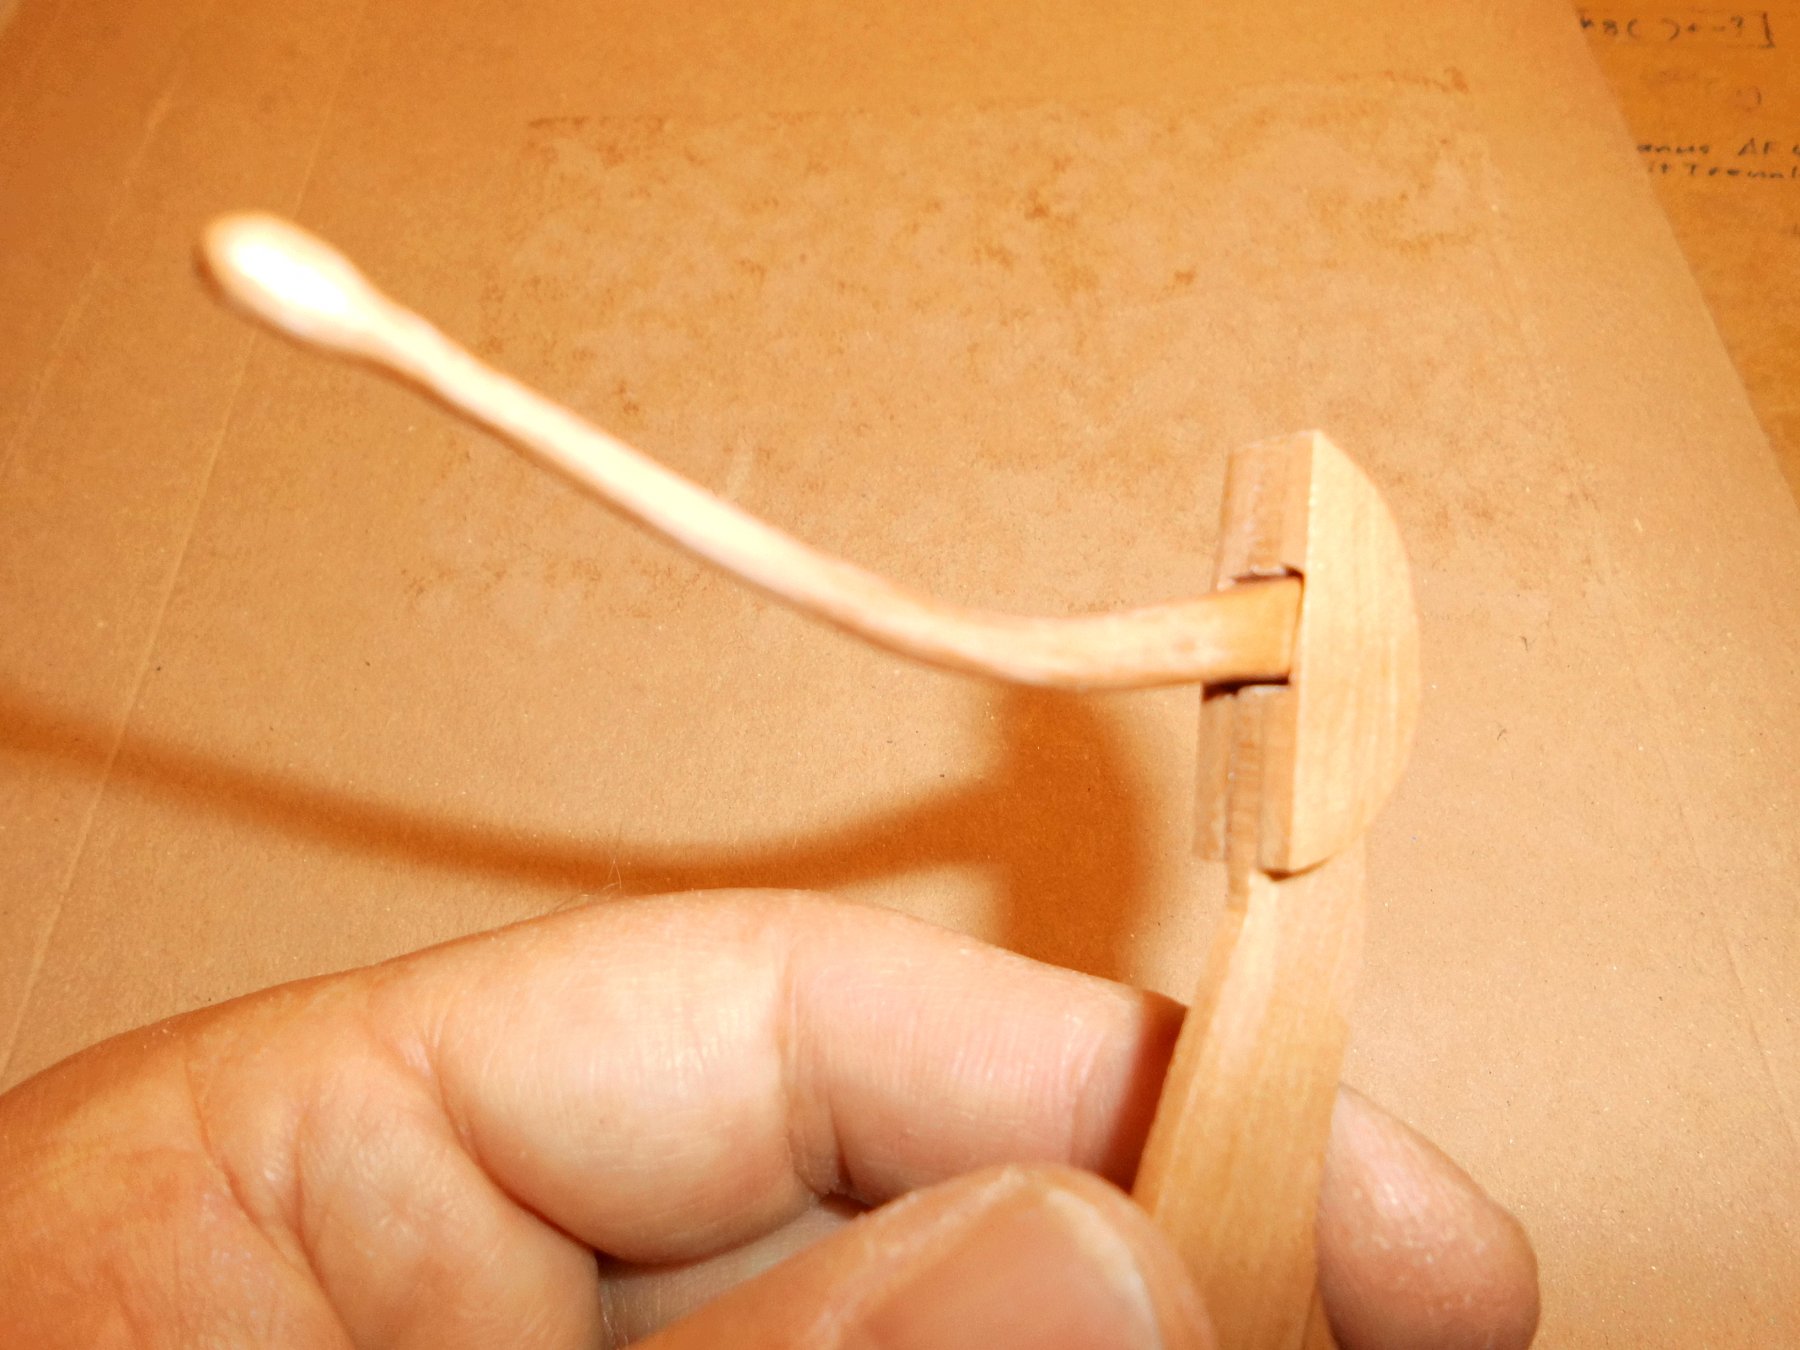
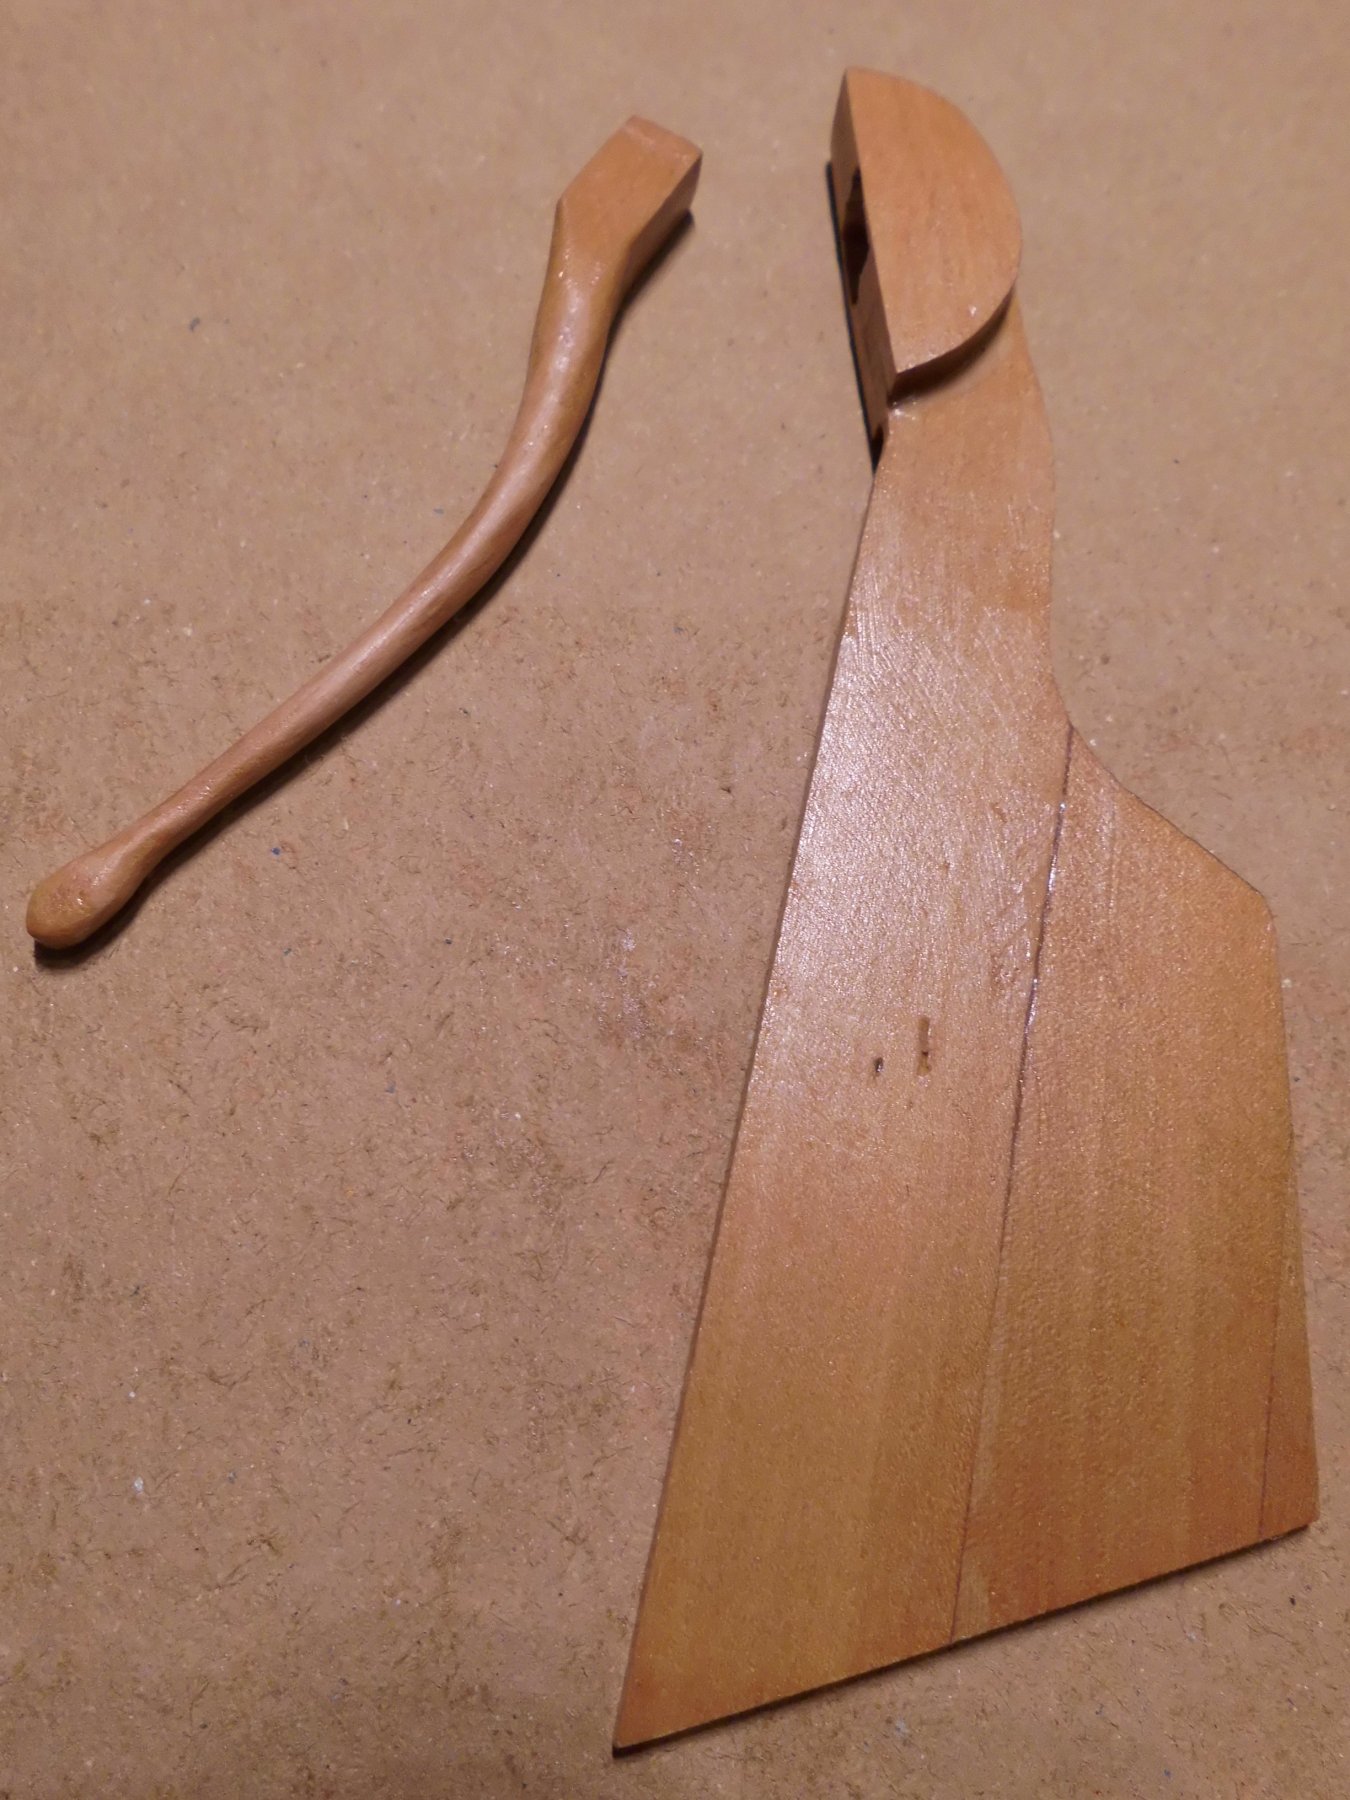
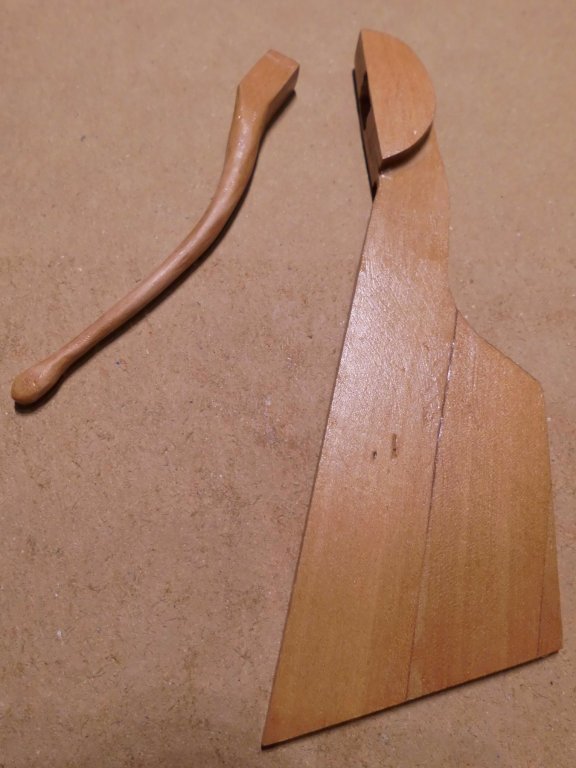
Rudder and tiller, the rudder will be operated by the helmsman either in standing or in sitting mode. The fittings (pintles and gudgeons) will be made from flat brass... Nils tiller turned around 180° all in pear wood


- 401 replies
-
- 16
-
-
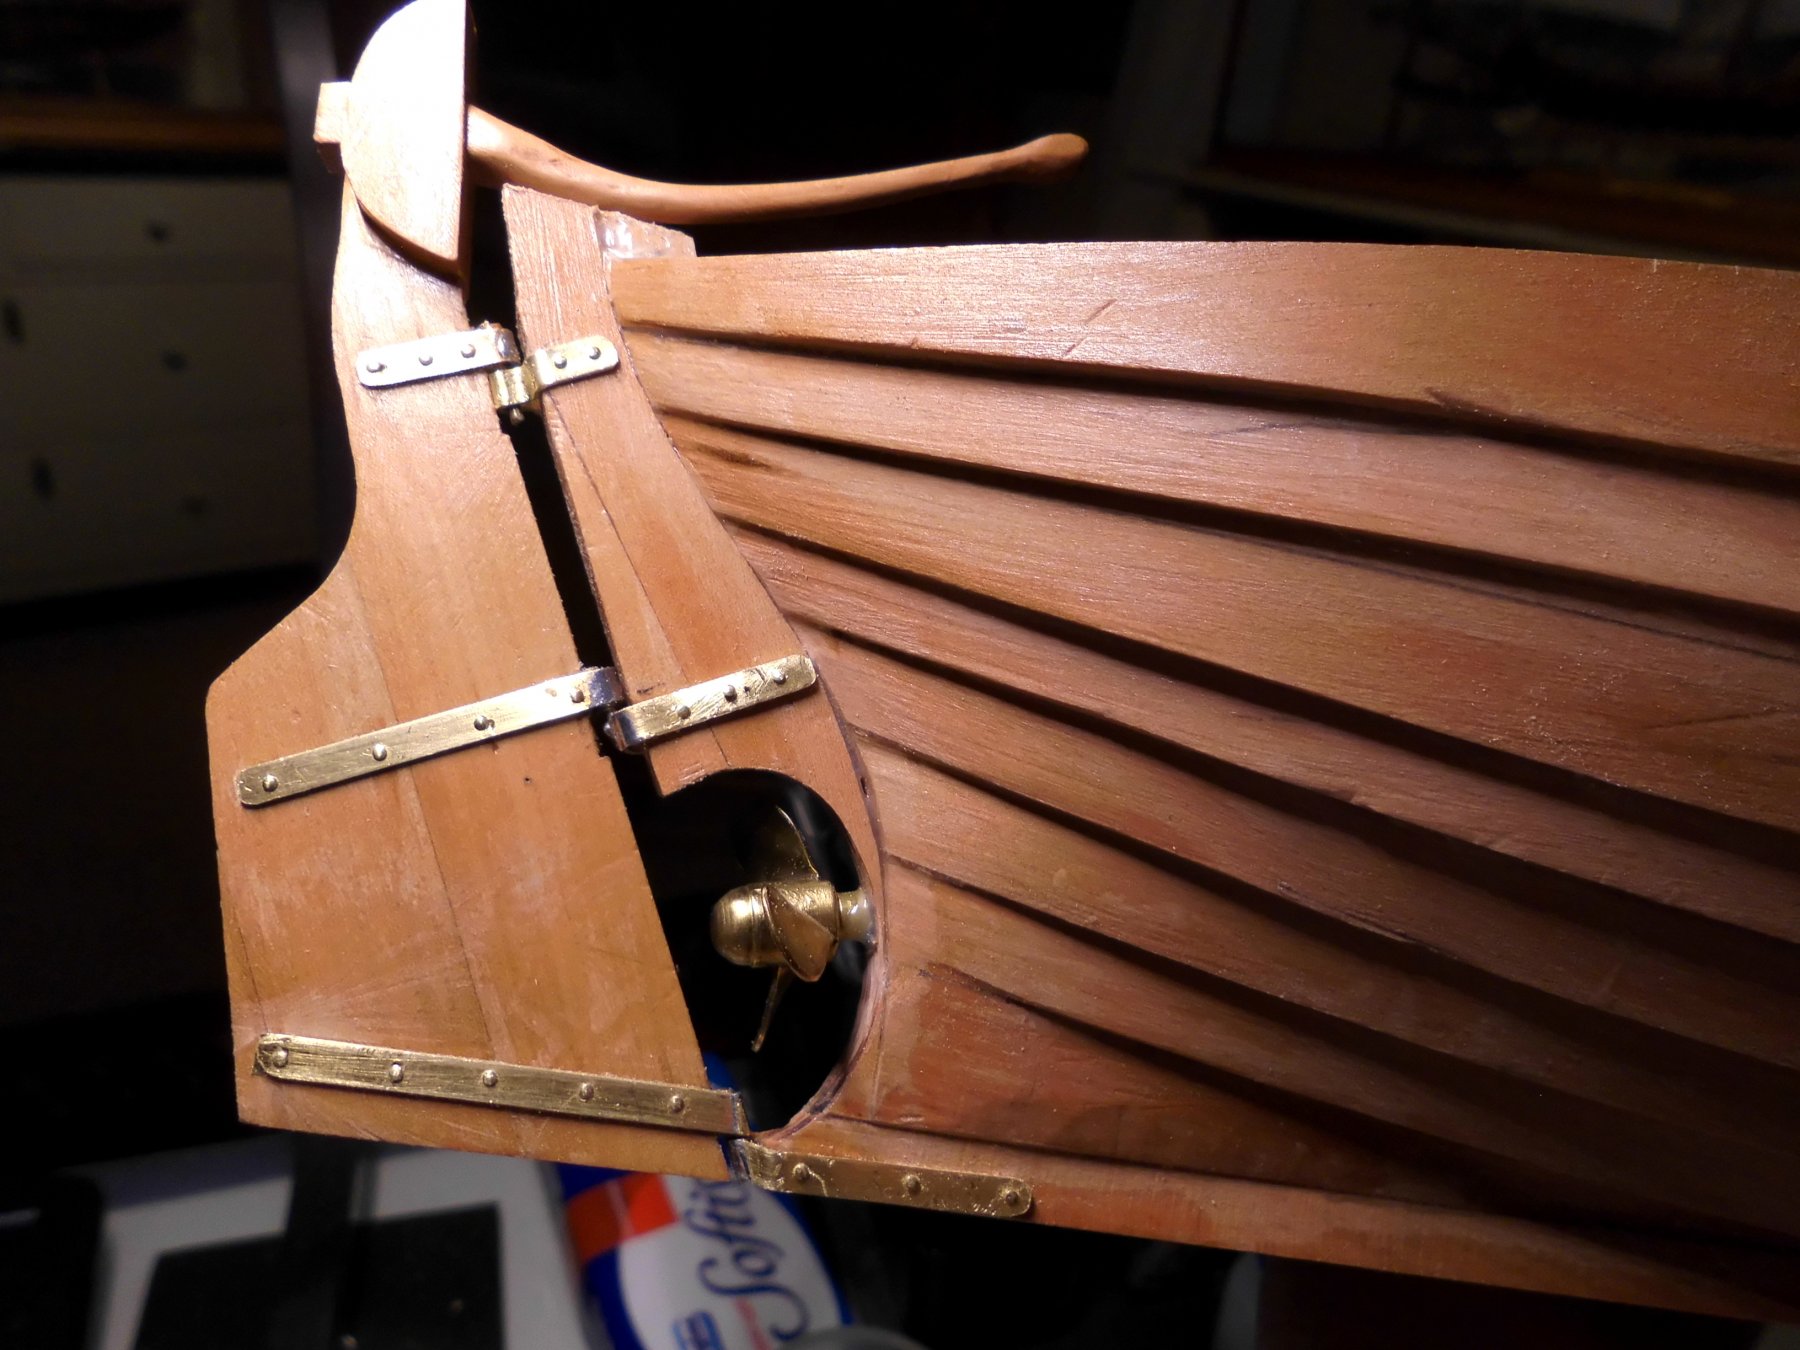
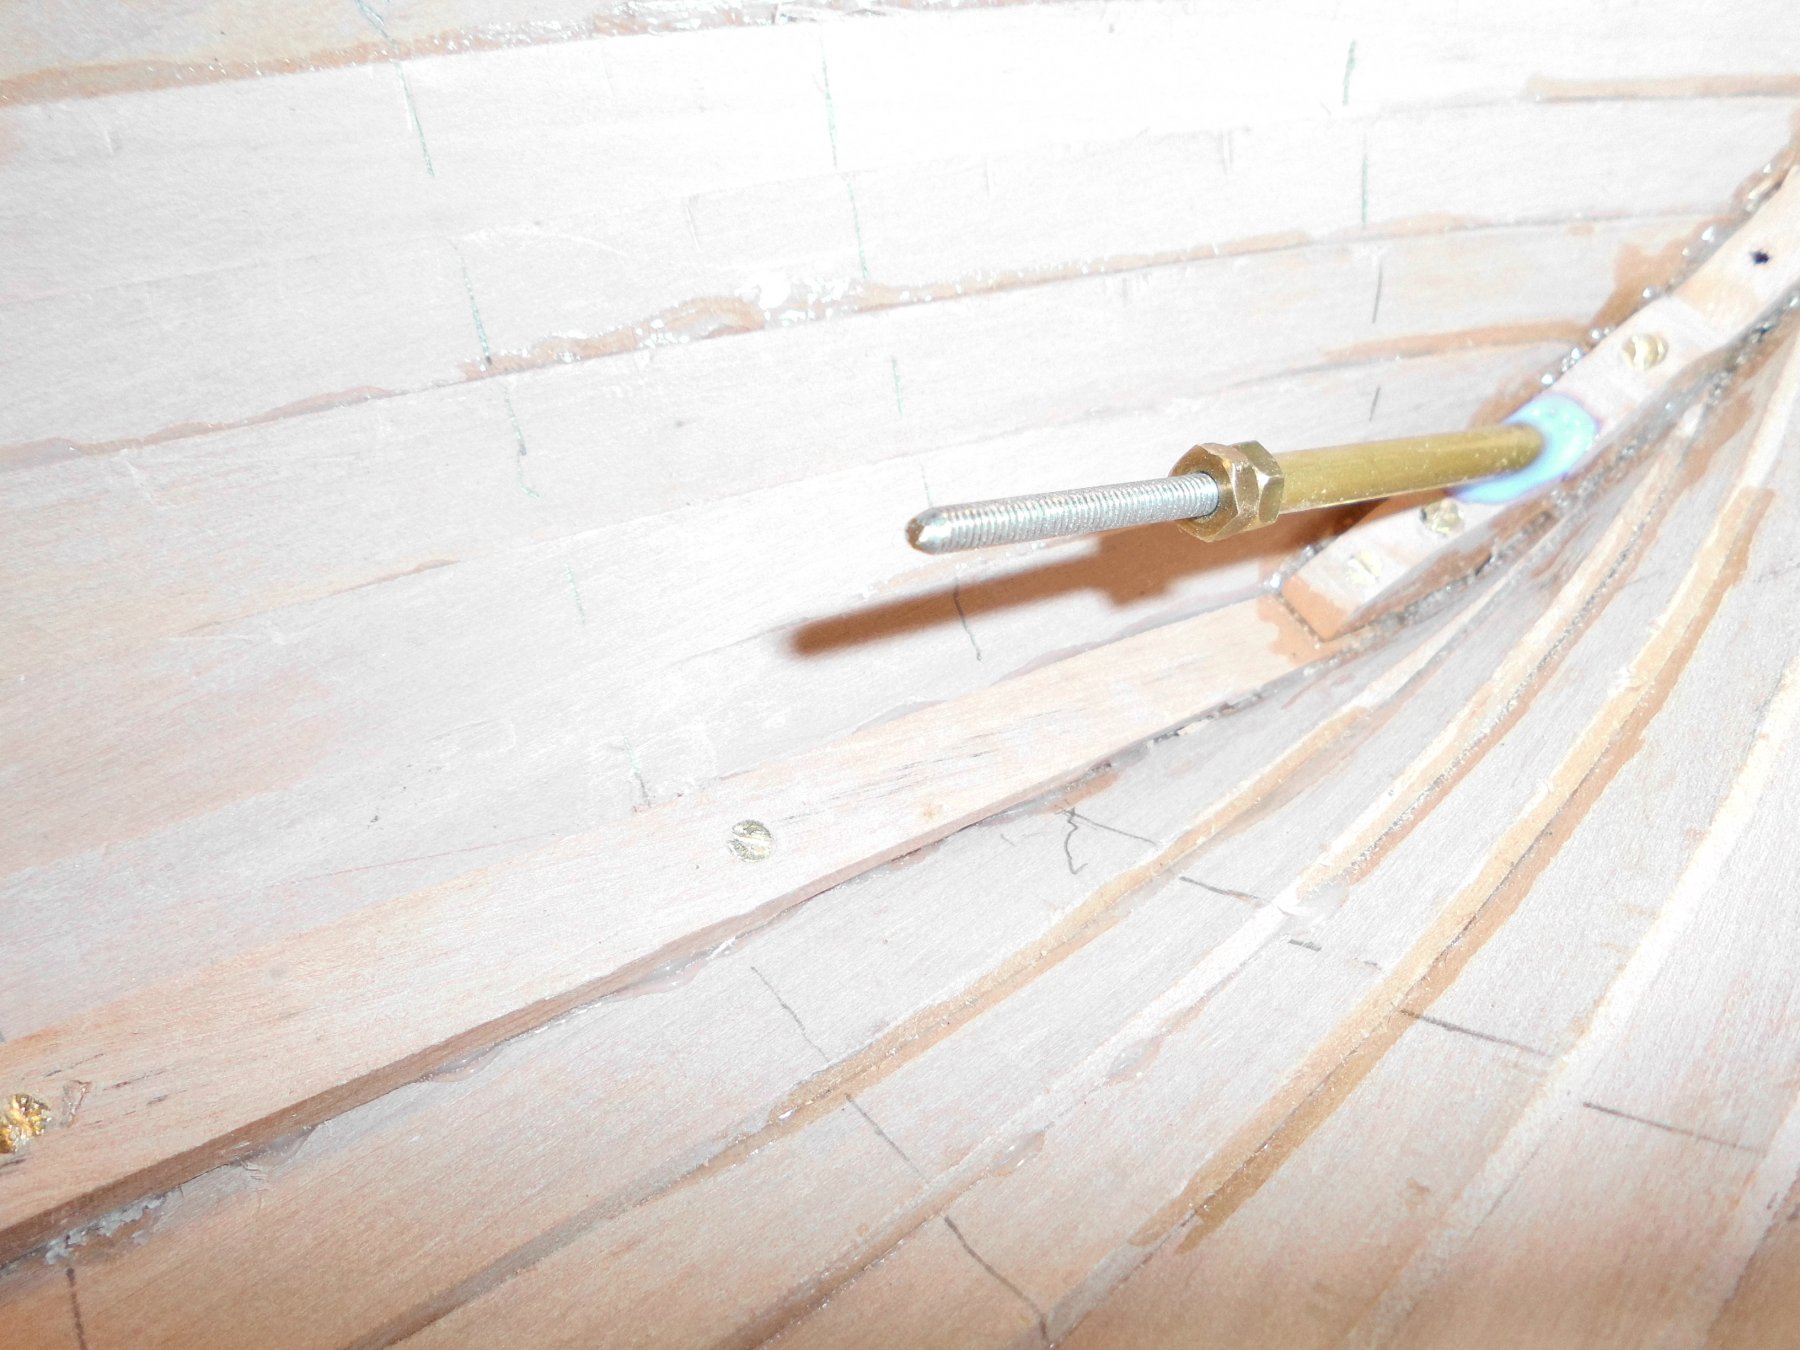
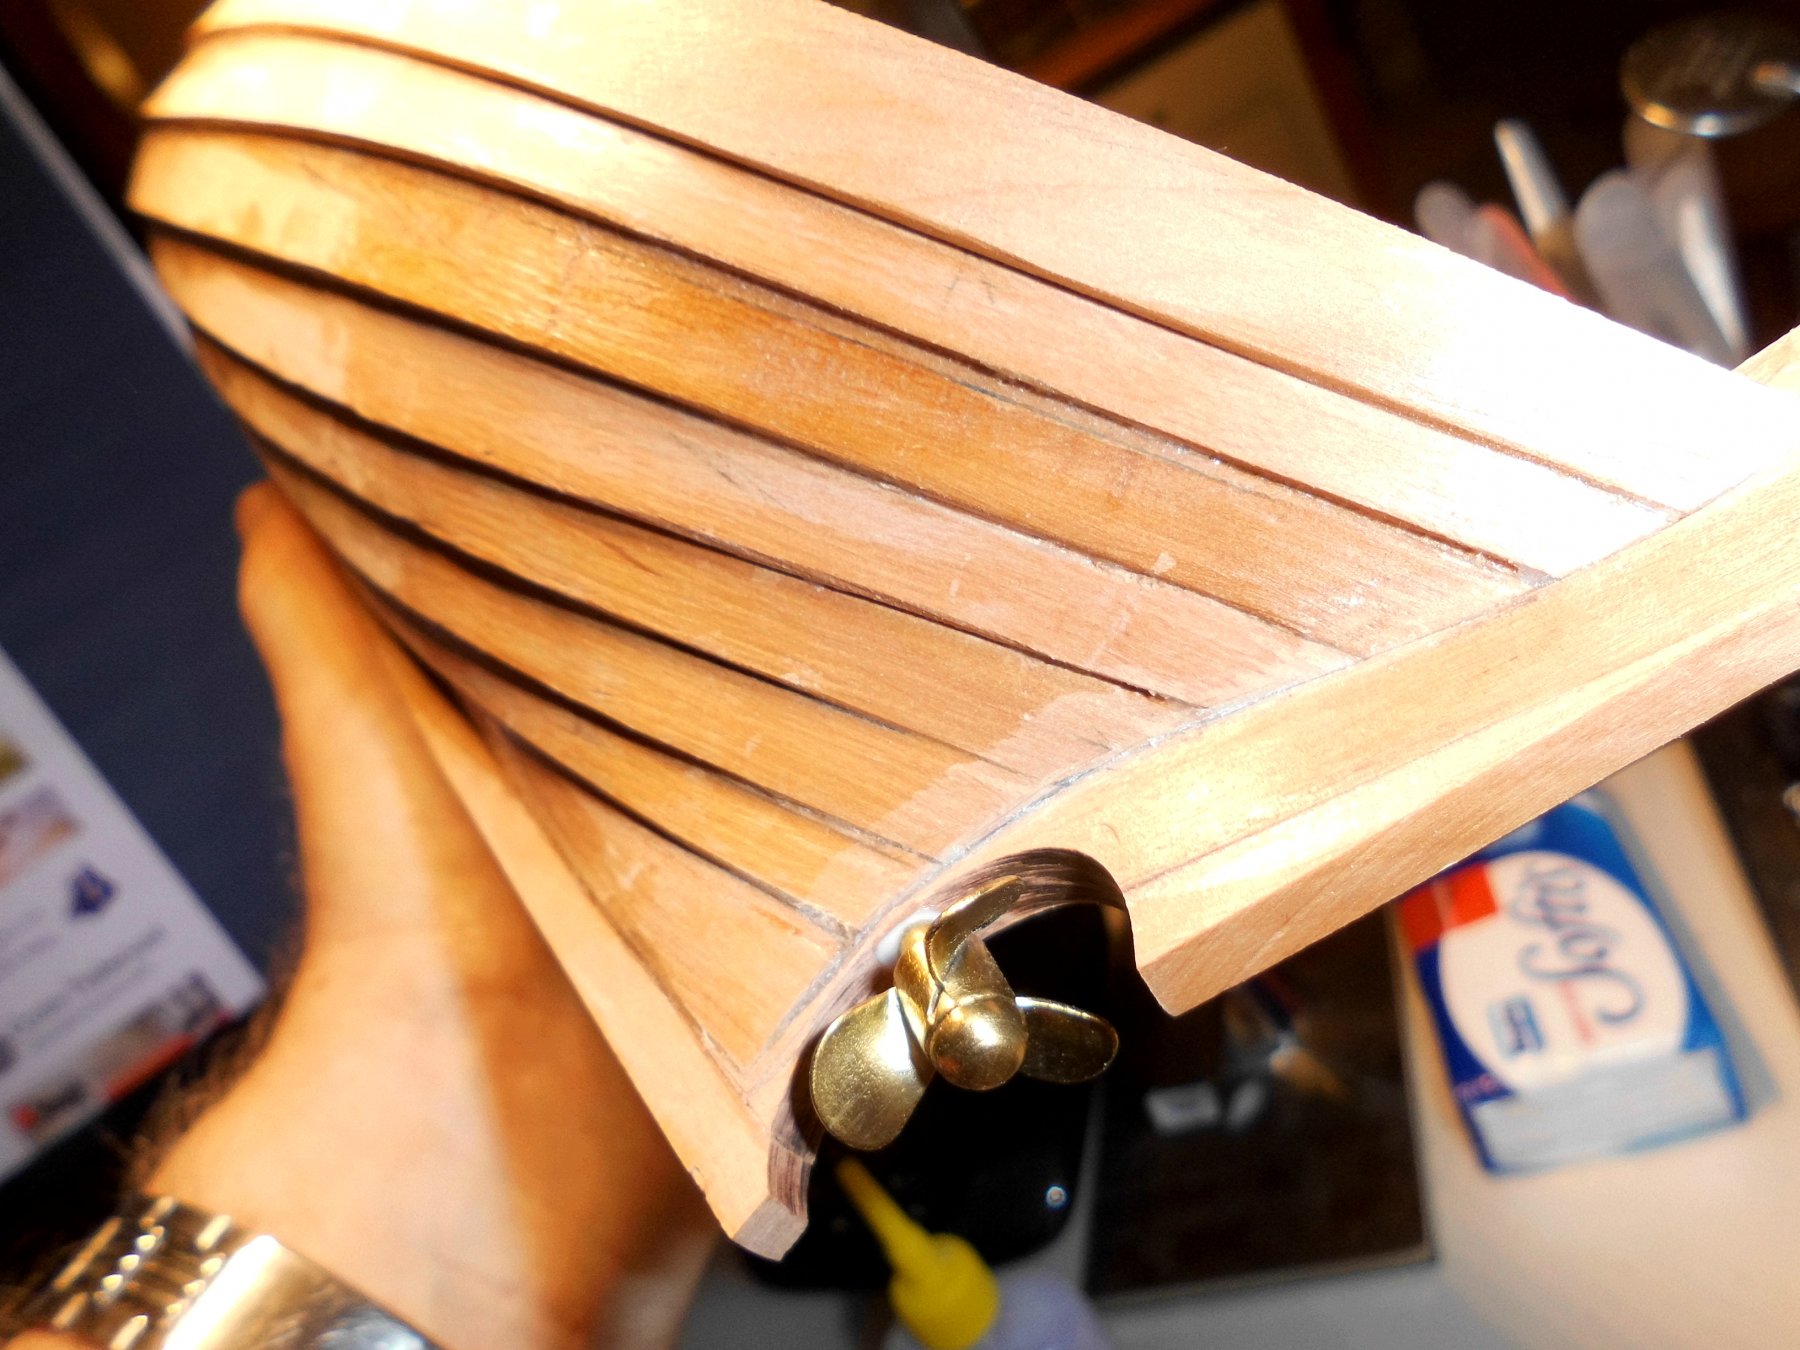
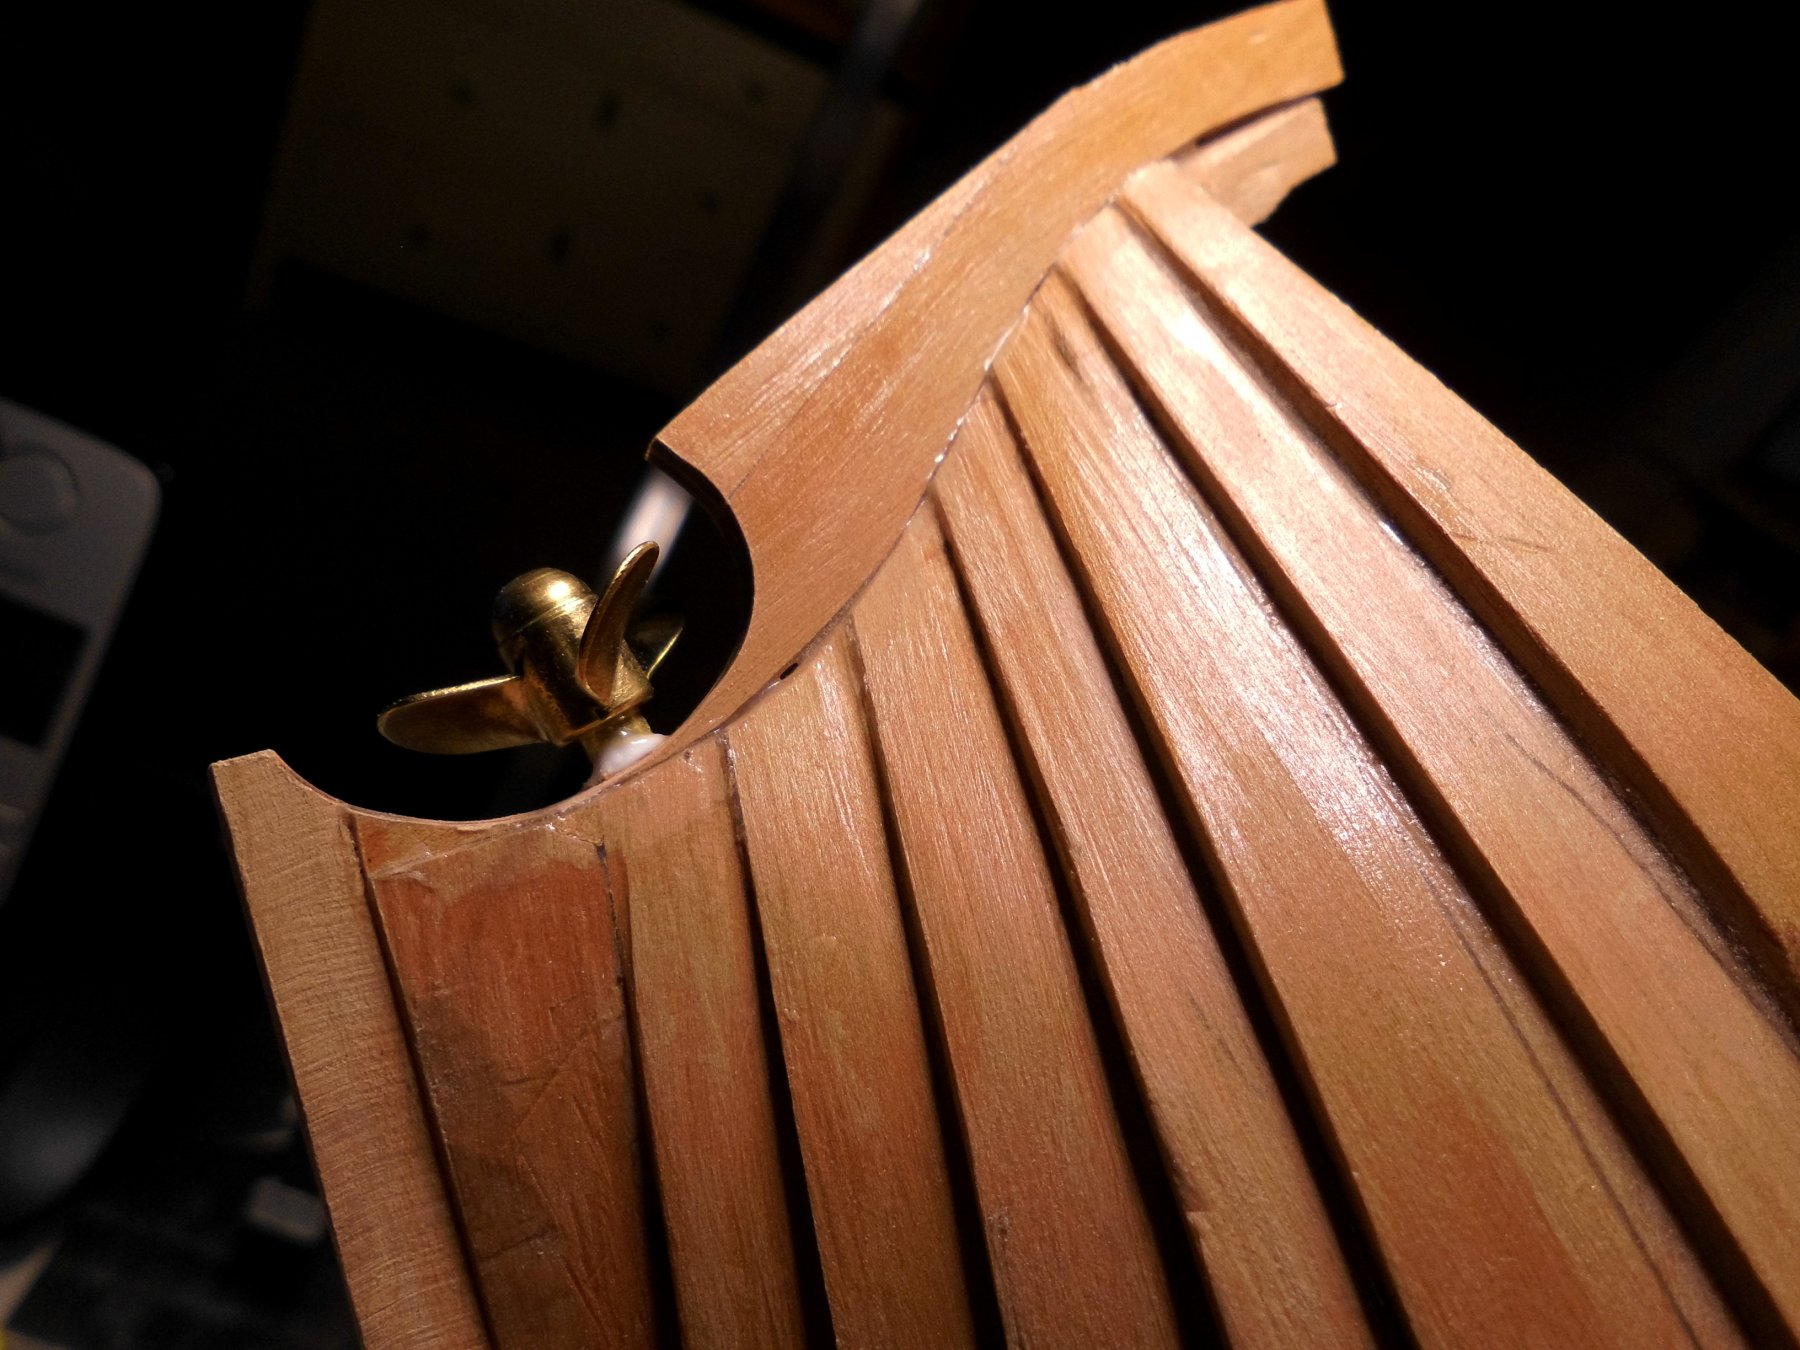
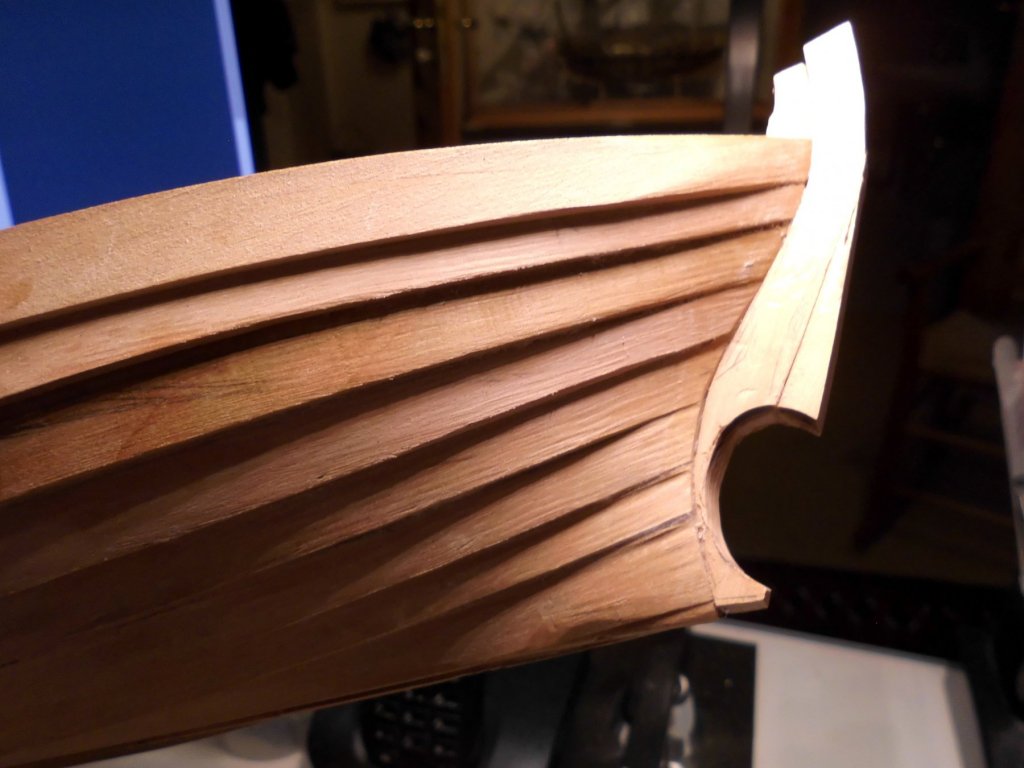
Thank you very much Marcus, meanwhile also the sternpost with outcut for the prop, and to take up the rudder-blade assembly has been fixed. On the bottom line the false keel will now be fitted.... Nils Sternpost fixed with outcut for propellor
- 401 replies
-
- 17
-
-
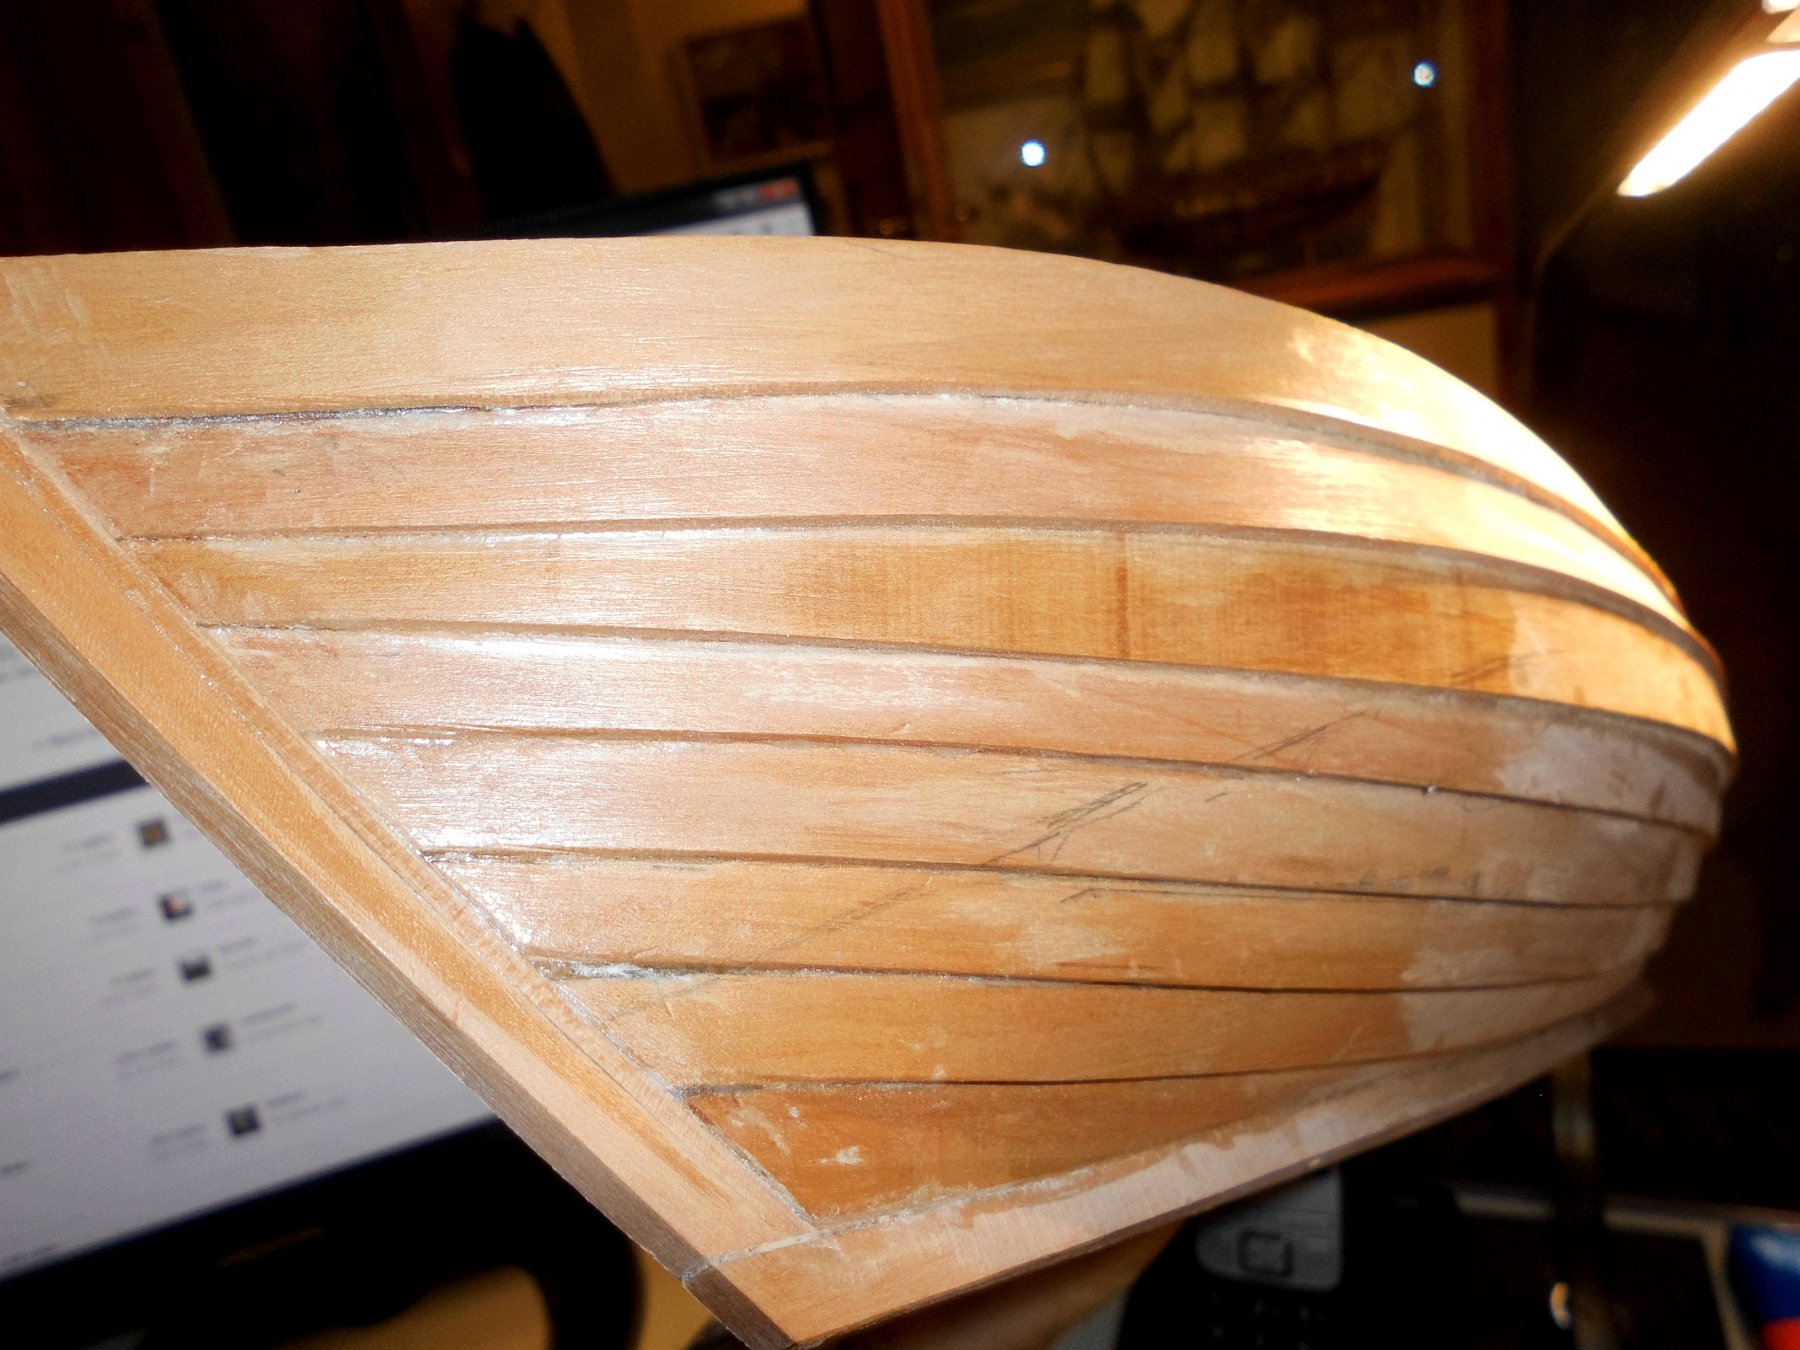
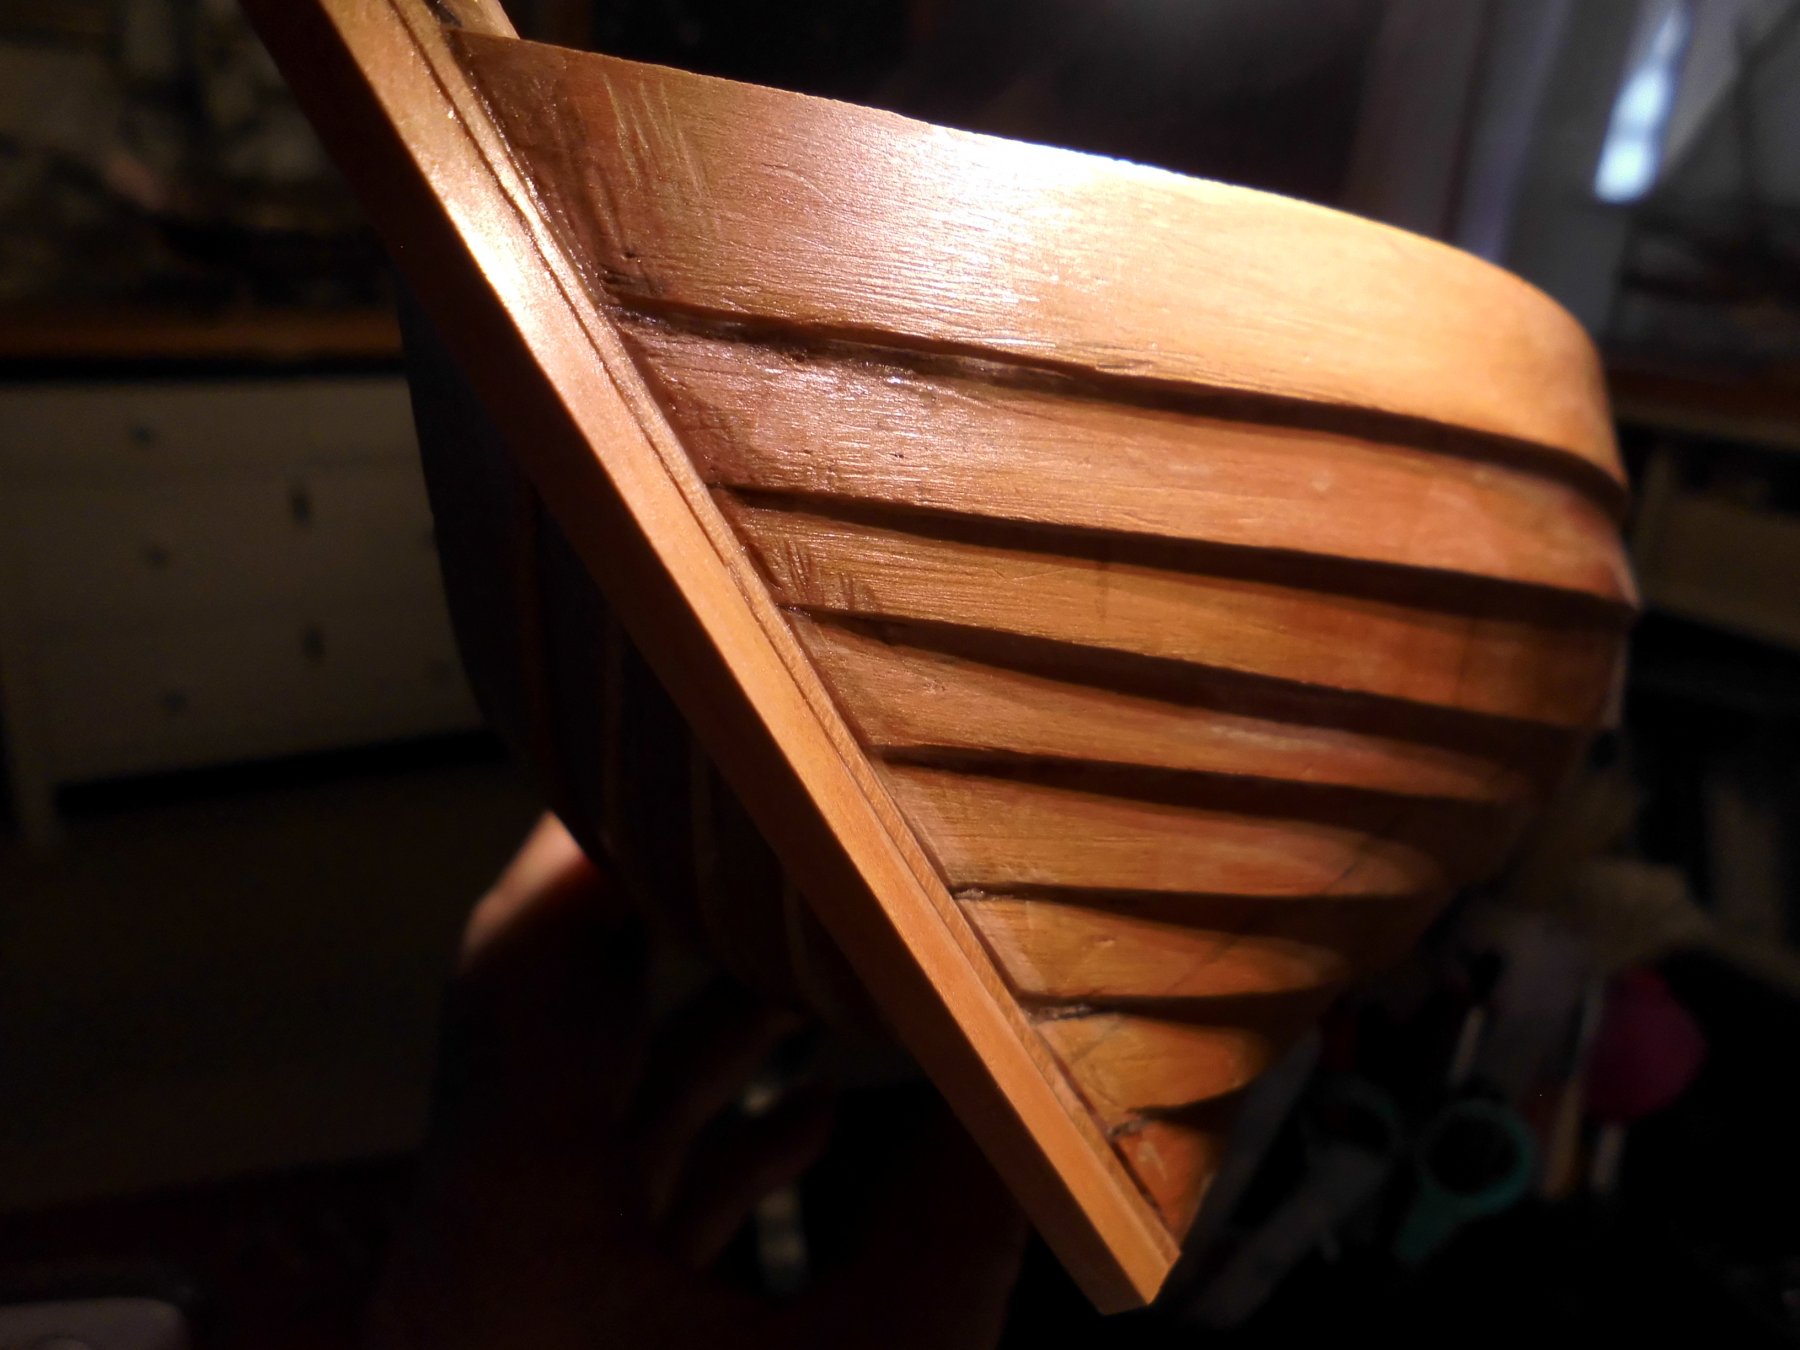
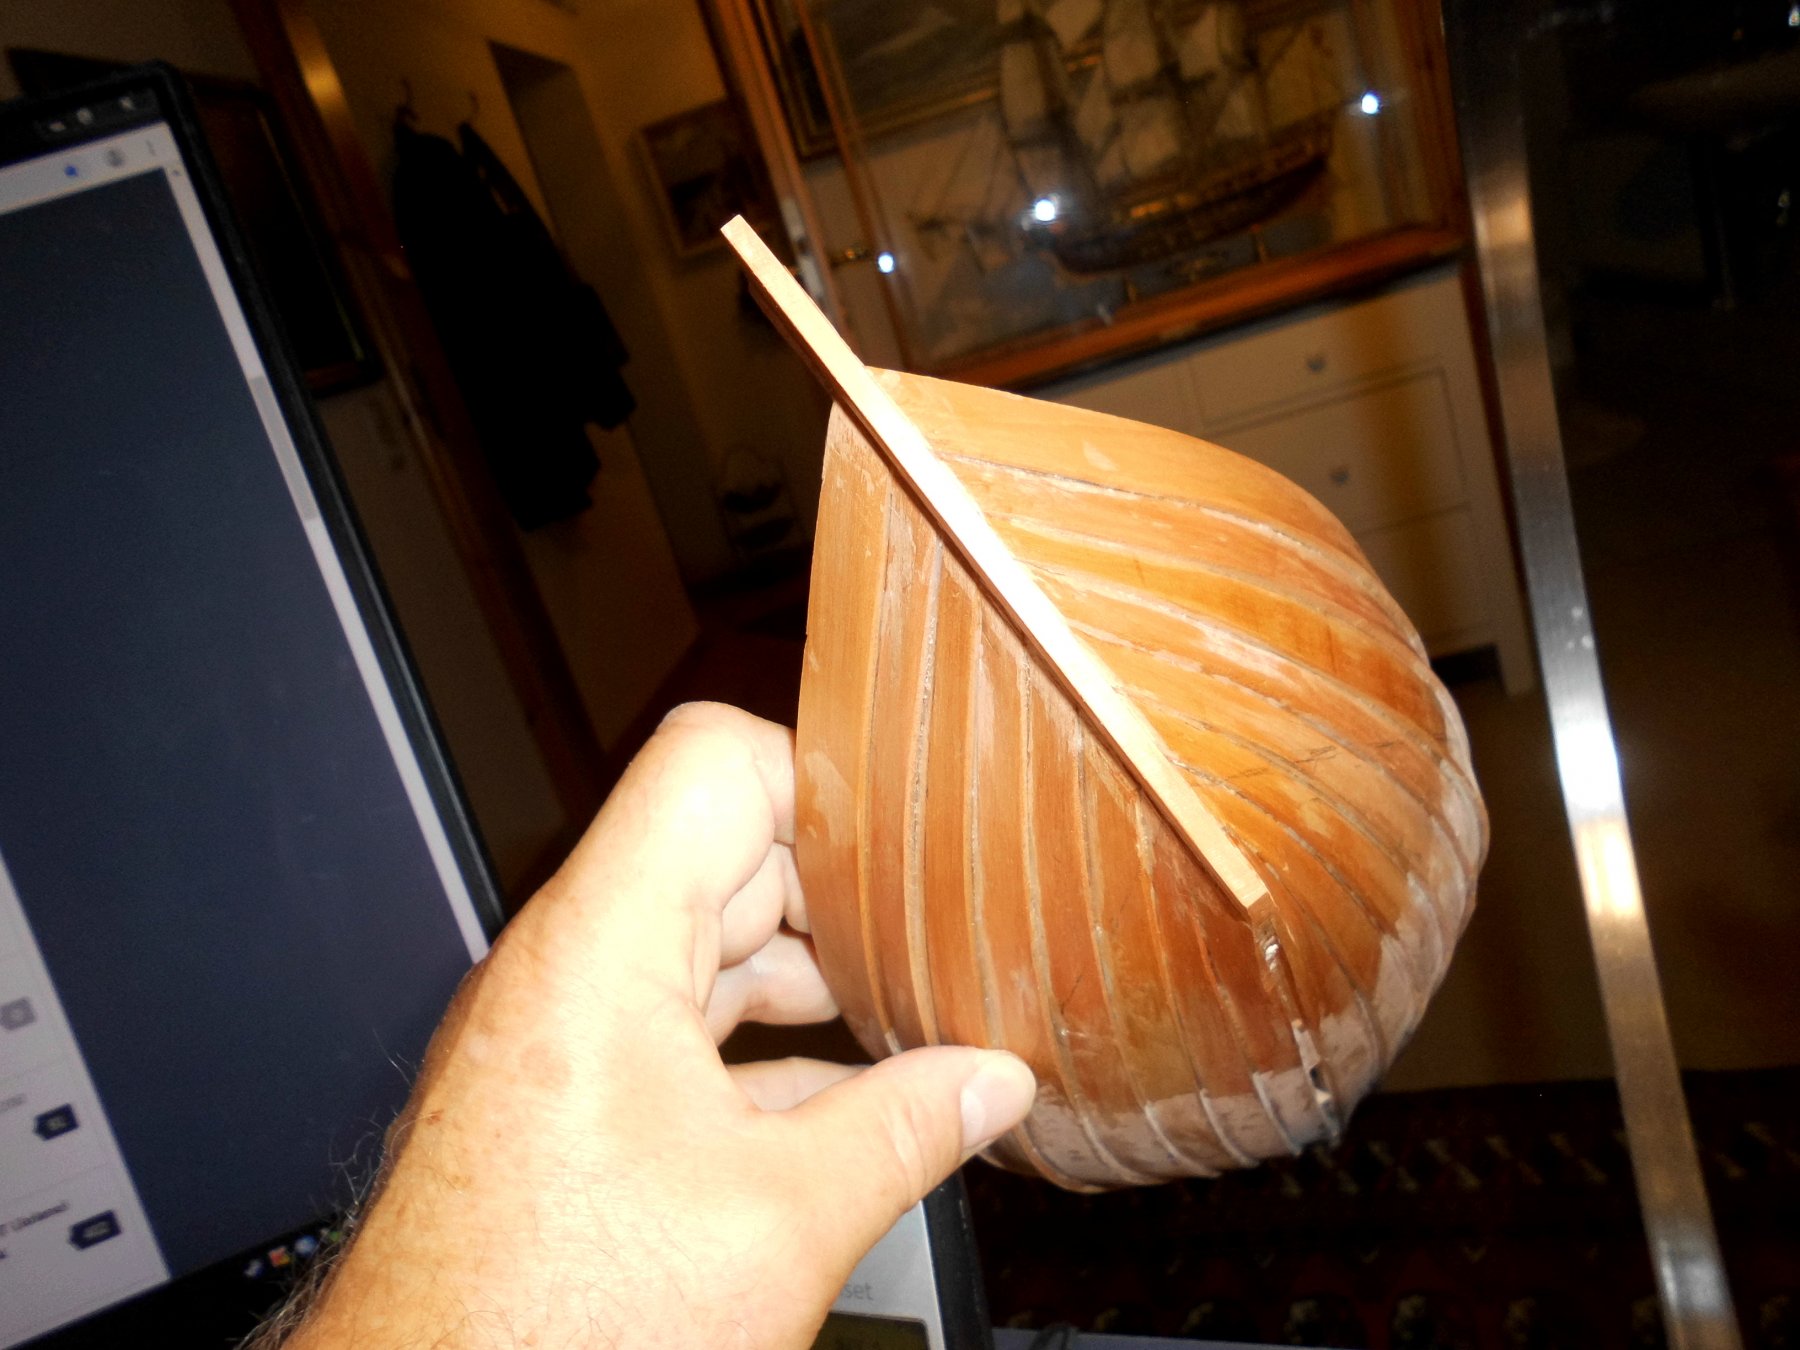
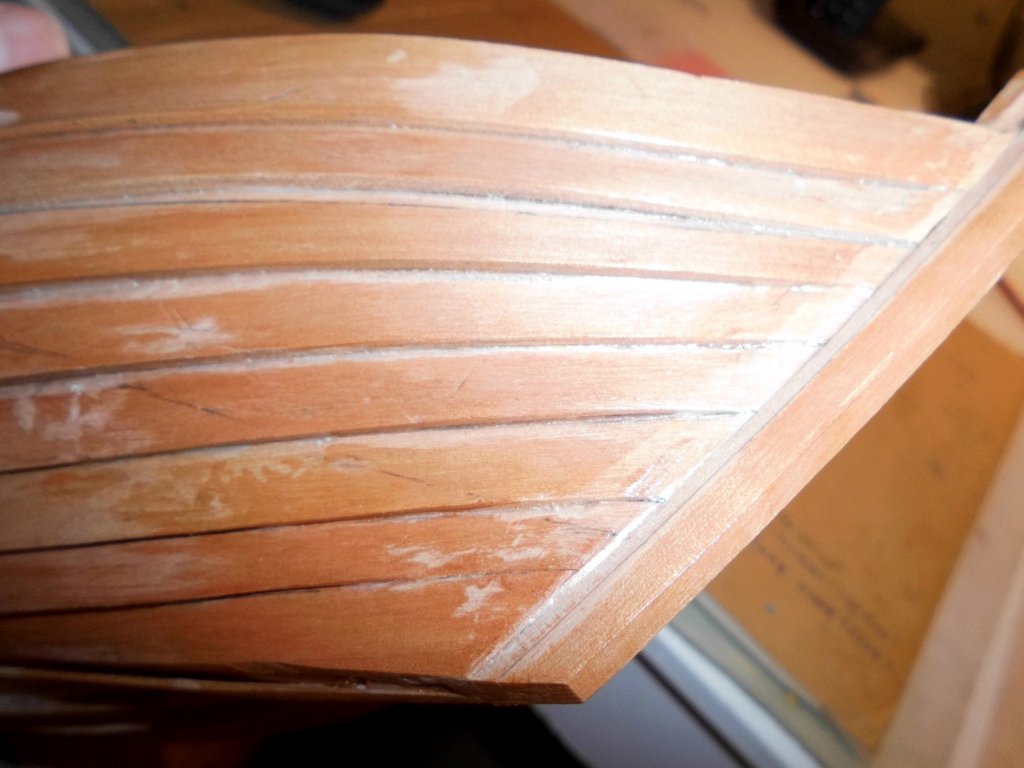
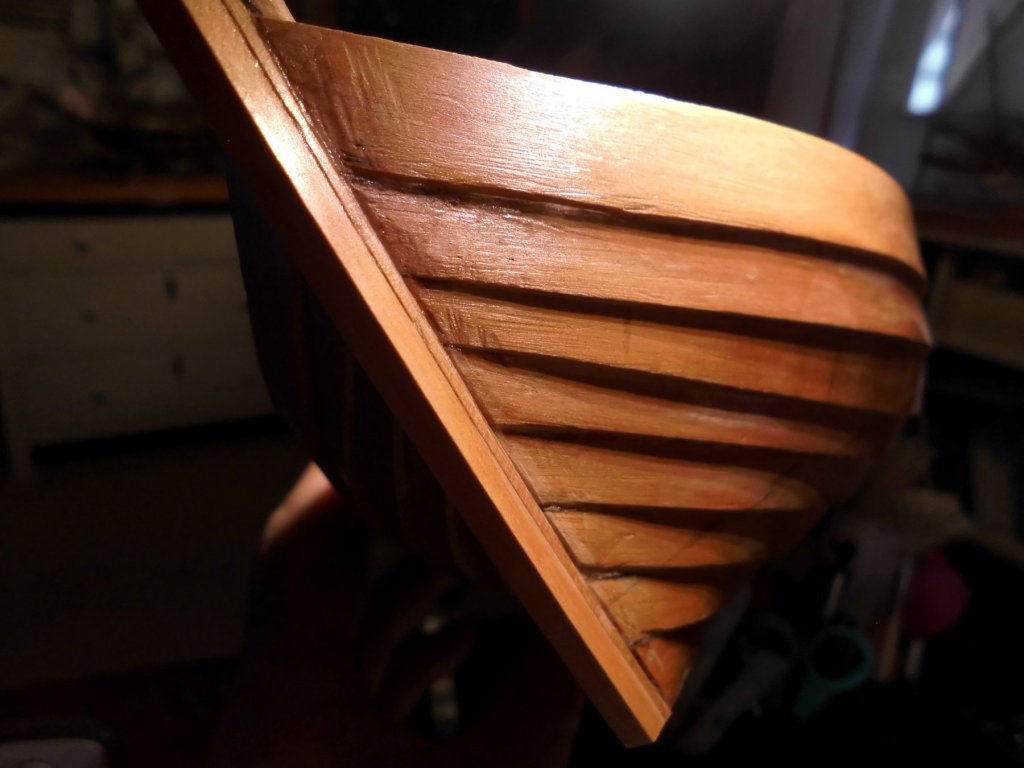
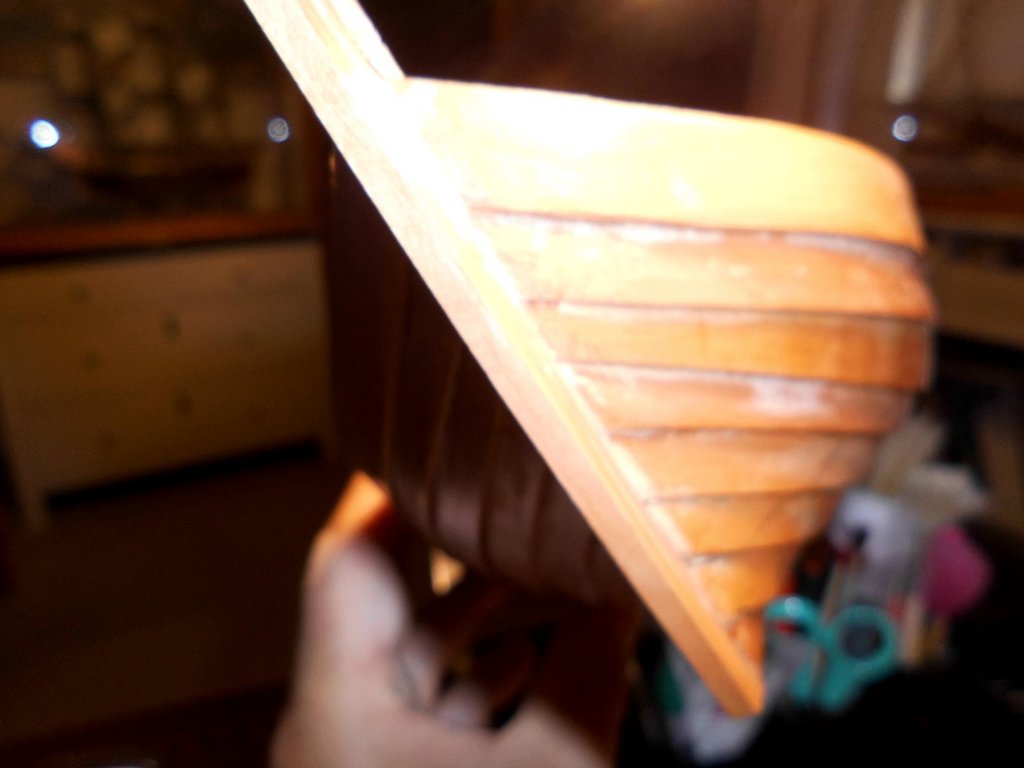
With reference to my post# 48, this is showing how the false bow post fits to the hull.... Nils


- 401 replies
-
- 23
-
-
Top rendering job QiGang, Would like to learn more about this planed kit Nils
-
Thank you Geert, yes, I think its a bout the scale you built your "Ostend Shrimper" in.... Nils
-
Thank you very much Peta, I also wish you much fun and a good sucsess with your "Tender Avos" build (I love that cutter kit). The already completed ships boats look fantastic Nils
-
thats exactly the way I`m doing it Eberhard, the difference will not be seen later on, except that it saved me a lot of time (planklengths cutting several times) during the planking session. My Chebec bow post was also done in this way... Nils