


Kevin-the-lubber
-
Posts
1,070 -
Joined
-
Last visited
Content Type
Profiles
Forums
Gallery
Events
Posts posted by Kevin-the-lubber
-
-
-
7 hours ago, Waldemar said:
That's right Kevin, just two moulds are used for shaping the whole hull.
Perfect, many many thanks Waldemar. I'll need to spend an hour or two properly digesting and playing around with this at the weekend and then compare the outcome with the quick'n'dirty version below, done as outlined in post #7.
-
Hi Kris
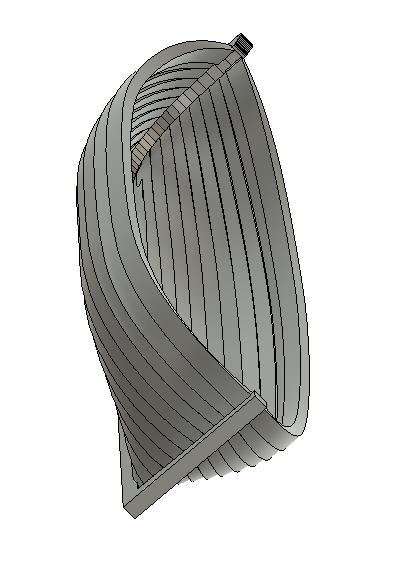
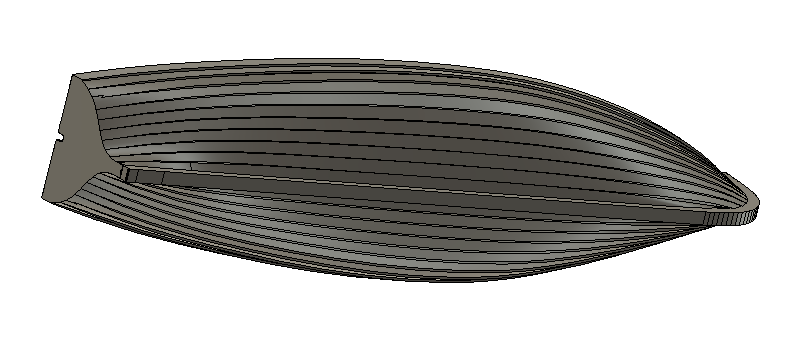
Well, F360 is free for hobbyists. It has it's foibles and can be frustratingly clunky at times but I've managed to find ways to do everything I've wanted so far, including clinker hulls (screengrab below), despite on many occasions saying I was going to properly try Rhino with a view to switching. Declaration of self-interest here, I'd love someone who has used both tools to give an objective appraisal so I know if Rhino is worth the learning curve and cost!
(These boats are a work in progress but they print fine)
I don't know if it can import rhino files but it can certainly import .fbx files. Though working with these is a bit of a PITA as they come through as meshes.
I suspect you really won't need this but I found this F360 tutorial very helpful to get going quickly https://diyodemag.com/education/exploring_3d_part_1_beginners_guide_to_fusion_360
Good luck, it would be good to hear what you land on, what it's like etc. I've just had a pretty quick skim through your build log and FYI, I've initially lofted each strake separately as F360 can give you the runaround with lofting if the profiles are too complex (relatively speaking) but I'm no expert on this. Just noted that you look like you've lofted as whole station profiles on yours. I'll try to find the time to read your log properly over the next week as you seem to have run into problems with Rhino but here's a link to a man who can almost certainly help you there
- mtaylor and thibaultron
-
 2
2
-
Waldemar, many thanks, that's exactly what I'm looking for, the logical projection method. I have forgotten so much over the years. Have you used a constant radius based on the '0' station? From a pattern developers perspective I think that is all that's needed to get a fair shape from these three views.
-
Gosh but this is getting a bit involved! For what it's worth, my experience of shop floor engineering, as a craftsman, is that very little was really done by eye. Back in the '70's we used to make 10 foot long, 3 foot diameter helixes on a forge and would swear blind it was all art, neglecting to mention the many templates used to get the right twist. So while it's perfectly possible that the cutty's boats were made by eye, many other boats would have been made using scientific methods like whole moulding. What I'm interested in is those methods, rather than getting hold of lines plans - I have enough info from the 3D jolly boat to produce the goods, but I'll be none the wiser as to how boatbuilders knew the station profiles to begin with.
-
I agree Roger, this has nothing to do with CAD, it’s a process question. What I’m asking is whether there are common methods for deriving the profiles and the answer seems to be yes, lots of them, and it depends on the type of boat, the era, and where in the world the boat is from. I think I’ll see what I can learn from the references but at 1/96 anything close to the sketches will be more than good enough.
-
33 minutes ago, Bill97 said:
Landlubber Mike's technique for furled sails
Bill, I like the look of that and it's very nicely explained. Have you seen Bruma's sails on his Cutty Sark? Absolutely exquisite, but far too ambitious for me this time round. Ditto Rob's method on his Glory of the Seas, which is a completely different approach.
-
7 hours ago, Bill97 said:
Kevin I took some time today to get get caught up on your Cutty Sark build. I am amazed at your skill and ability to print the pieces and modify their size from the OOTB pieces to make them more visually appealing. Your painting is fantastic as well. I am following your inner debate about furled sails. I am having the same inner debate for my Victory. Can not decide.
Hi Bill, I also now just catch up on others logs periodically via the weekly digest, as I was spending more time on logs than the model!
The sails are a dilemma, aren’t they. For me this is largely because I don’t yet know if I have the ability to make something that I’ll be happy with. This is one area where 3D printing probably isn’t going to be the way to go, though I’ll certainly be giving it a go.
-
-
-
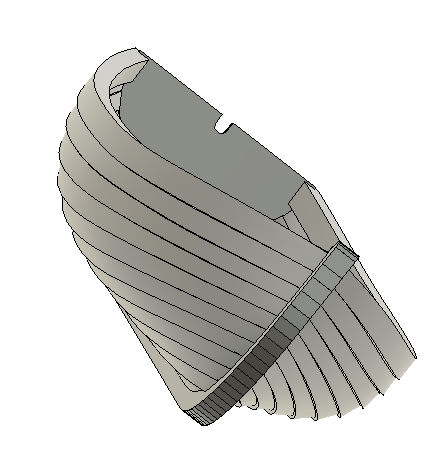
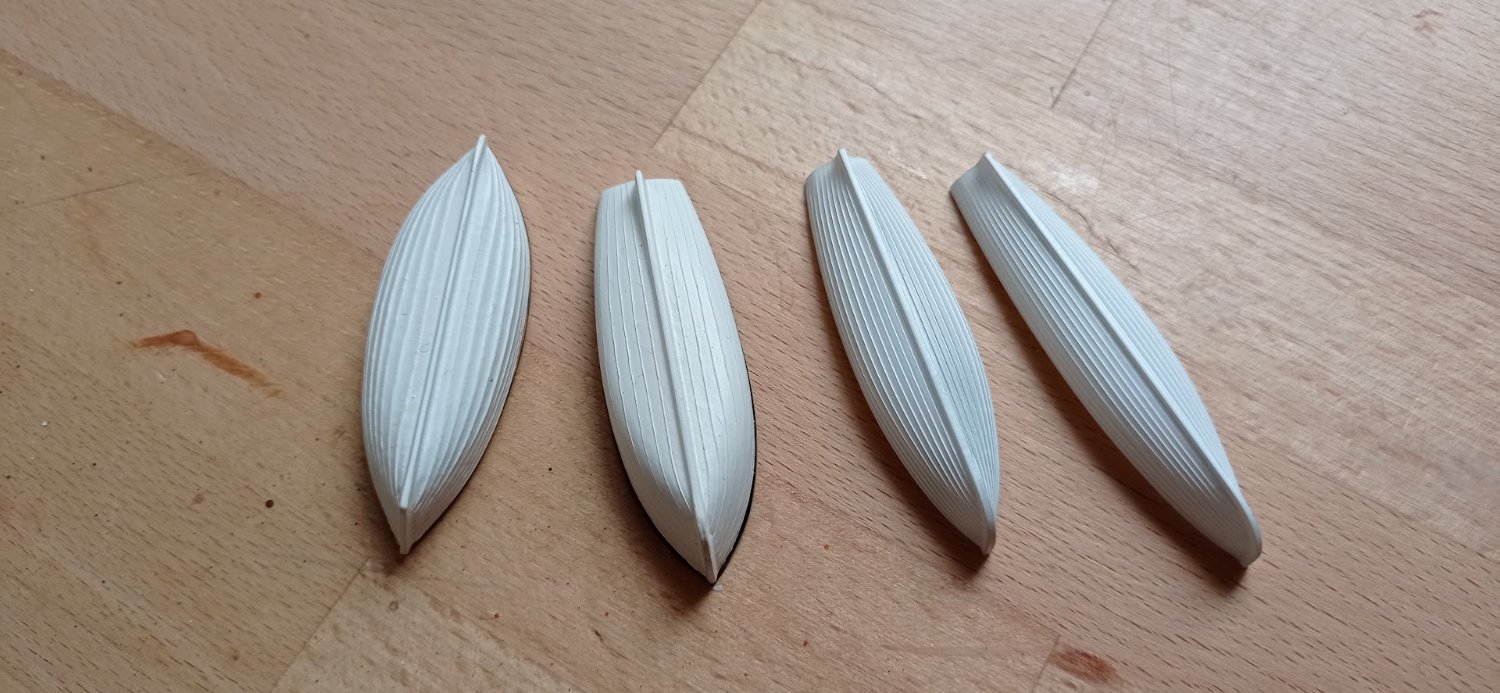
The aim of this particular exercise is three-fold - it's partly to make a better set of boats for the 1:96 cutty sark I'm building, via 3D development and printing; partly to have a set of 'stock boats' that I can tweak through scaling to get something reasonable for just about any ship that had clinker-built boats; but also to learn how to build hulls properly before I launch into building them for ships. I've already created the hulls for a jolly and a gig, see below; the two on the left come with the revell kit, the two on the right are mine, the gig is just a re-scaling of the jolly. I can of course re-scale and mirror (more or less) the front half of the jolly to get a quick result for the lifeboat on the left and probably will just to maintain progress, but that would leave me still not knowing how to develop the station profiles. I think whole-moulding and other ancient arts will be the way to go, I'll probably enjoy learning that as I love those old, often incredibly clever ways of doing things.

-
Thanks both, there has been a little voice in my head telling me that I'm mis-remembering. I've just had a quick google on whole-moulding, don't fully understand it yet but it looks to be the 'scientific' approach I'd expect to find, especially for ships as opposed to little boats, where you could probably just get there by a bit of trial and error.
-
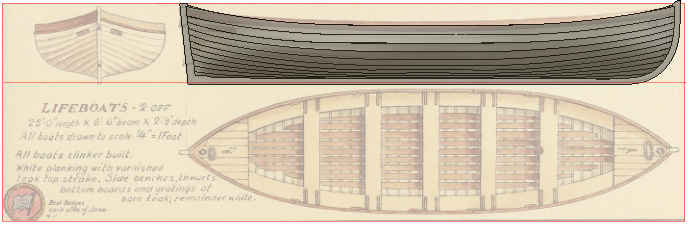
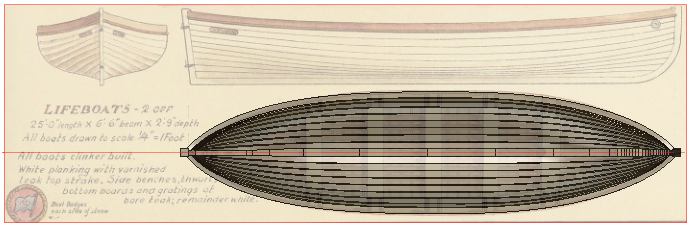
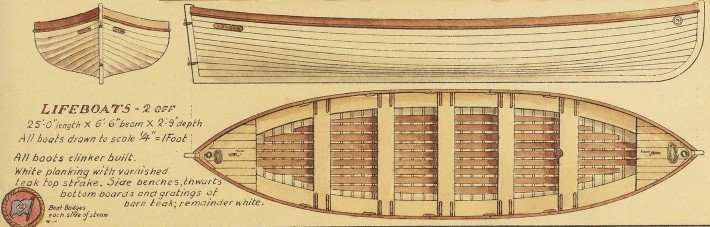
Morning all. I may be having a senior moment but for the life of me I cannot figure out how to derive station profiles from the drawing below. Am I being dense and, if so, what's the method? As a one time pattern developer many decades back, I'm convinced I should be able to derive them using projection but I'm getting nowhere on this.
I know plenty of ways of cheating here but that's not the goal - I'm looking for the scientific method, if anyone can help.
-
Bill, unless you’ve already done so, I’d recommend starting to play around with inks (and oils) about now so that you have less trial and error on the model itself. I think Marc seriously understates his considerable knowledge of painting and that is a factor in his results. I’ve loved the effects you can get with ink but think it does need a bit of practice, mostly so you make a mighty mess a few times and have to learn how to extricate yourself from that. Not that I’ve been too successful in that department. And although I’m not sure if Marc uses them, lately I’ve been using oils for the washes and feel this is a very, very good idea while I’m learning, because whereas with acrylics and inks you have a few minutes to get it right, with oils you have hours and hours and can even just wipe it all off and start again if it’s not what you had in mind.
-
-
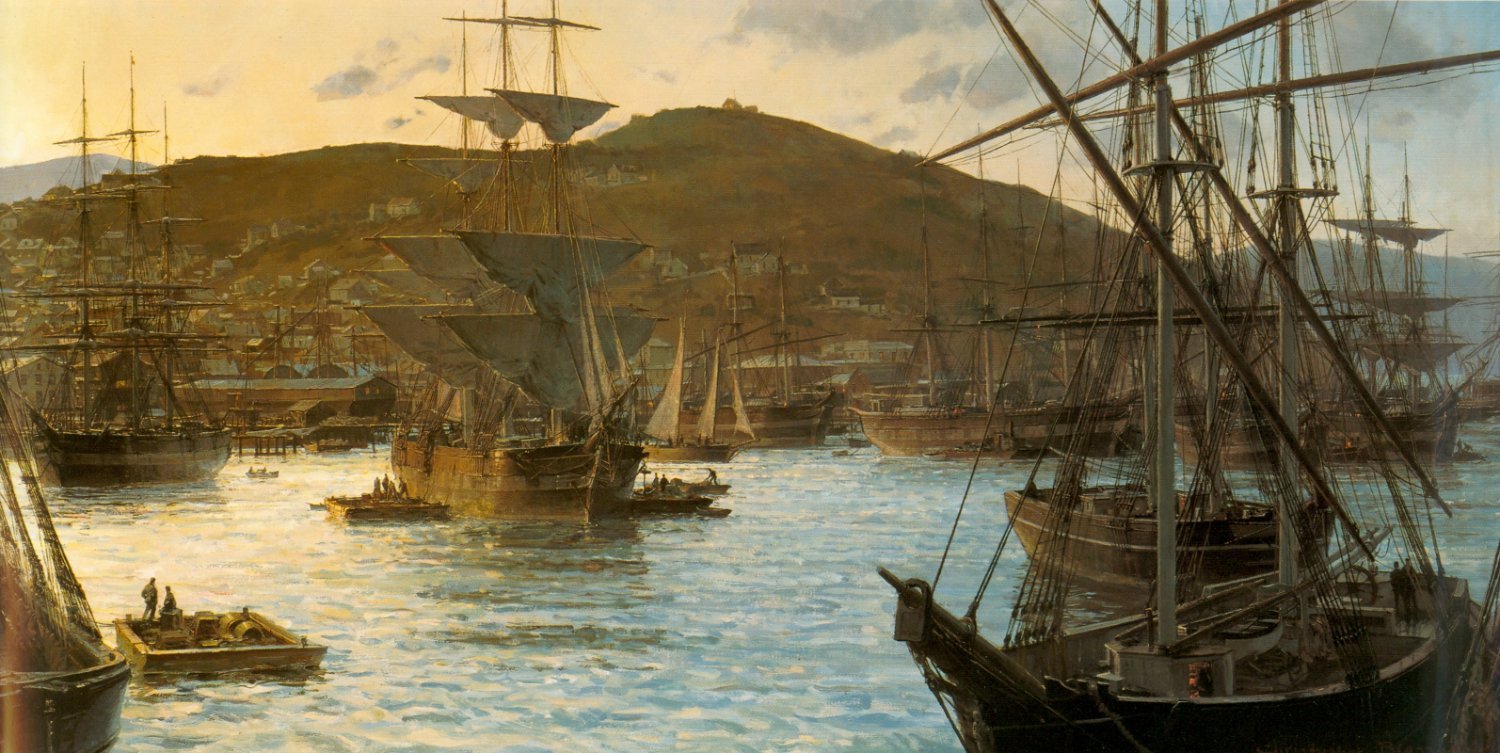
Johnny, I'm still far from decided on what to do now, but realise I need to make that decision before starting work proper on the masts and yards. I quite like the type of look in the pic below, but that may be beyond my abilities. The approach you demonstrated in Bruma's log looks more likely, or something in between. I want the ship to clearly have sails, just for these to not obscure the view too much and, and far as possible, I want to avoid running rigging as I'll be hard pressed to even make a decent job of standing rigging. I expect I'll have to do quite a bit of trying things out first and the absolute fall-back is no sails, if necessary.
Meanwhile, I've been trying out making the masts and spars in resin, with carbon fibre inserts to give them strength. The results have been good so I'll be persevering with this and making up the complete foremast assembly first. To be honest it shouldn't really be any hassle to include the jackstays, or any other feature; it's easy enough to include the cleats and slide some 0.3mm or 0.2mm wire through them afterwards. My problem right now is that I'm seeing so many different versions of yards that I'm not sure which design to follow, and to a lesser extent, the same with the masts and fittings. Underhill says one thing, Hackney another, Campbells drawing give an entirely different size, scale and design to revell, and so on! I managed to find the answer to the question I raised above, about the futtock shrouds, on p.90 of Underhill; the lower deadeye is stropped to the head of the futtock shroud where it protrudes through the top. I guess I'm going to be looking for answers to the same kind of question many times on each mast assembly, as I try to figure out what cleats, for instance, need to be included and where, as I don't think I can simply copy revell.
-
Eleven days on and still reading rather than doing. I know this will be anathema to some of you, but is there an easy read 'rigging for clippers' book out there, a kind of 'rigging for dummies'? Whilst Harold Underhill clearly had enormous passion and knowledge, it feels like I'd need to read 'Masting & Rigging' cover to cover at least twice in order to have some idea of where to find answers to questions!
While writing can I ask one quick, simple question - do the futtock shrouds pass through the fore mast top and connect to the fore topmast shrouds via the lower set of fore topmast deadeyes?
-
Looking at the yards more closely, there are a good few 'eye bolts' missing so I may need to give some thought to this. I've also been looking at Bruma's log again this afternoon, which is probably fatal, especially as I'm finding the yards to be a bit brittle (am I just looking for excuses to remake them all?). Now that I've started reading Underhill I better understand what you've done on the Glory, with the sails furled on top of the yards. That's another pause-for-thought issue for me - I now understand that the image I have in my mind is from a much earlier age of sail, when the sails would indeed have hung from the bottom of the yards whereas that wouldn't have been the case on clippers.
-
On 6/7/2022 at 6:18 PM, Bruma said:
Why oils and not acrylics? Well, oils are softer, they dry really slowly so that you can adjust the effect as you like. They are really fun and easy to use!
So, I tried oils on top of acrylics for the deck furniture and very much like that method. While I love the effects you can get with inks you have to work quickly (too much so for me) and to some extent the end result is a lottery. With oils I can see that you should eventually be able to get at least very close to what's in the mind's eye. I tried weathering the muntz with some blue-green acrylic I bought especially for the purpose, but just couldn't get it as I wanted so quickly washed off as much as I could. I'll go and buy some oils tomorrow and try again.
- Keith Black and FrankWouts
-
2
-
Thanks both; that decides it, I'll spend some time reading Underhill's 'Masting & Rigging' properly now, before I do the ship a mischief. I was just being lazy and looking for shortcuts. I have some 0.3mm jewellery wire which I suspect would be close enough to scale but affixing it could be a bit of a challenge.
-
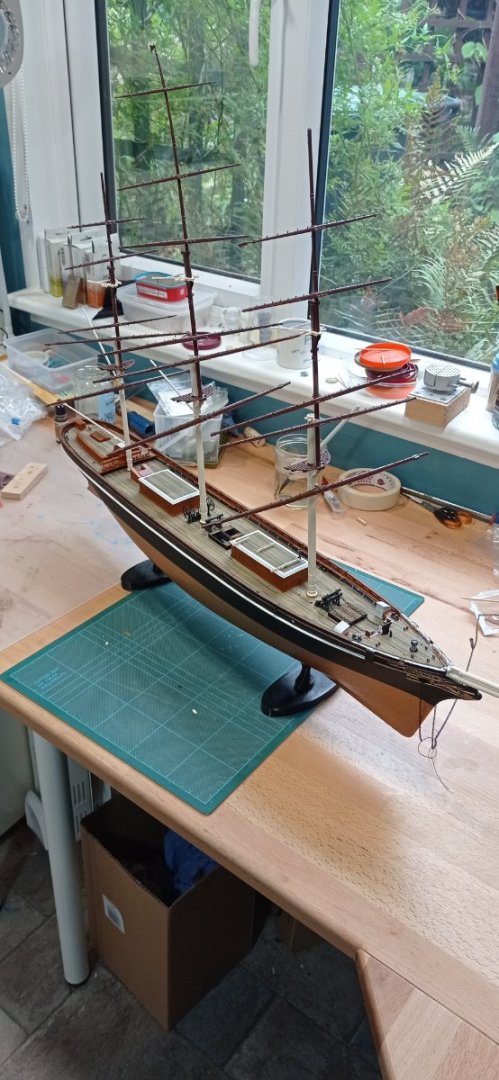
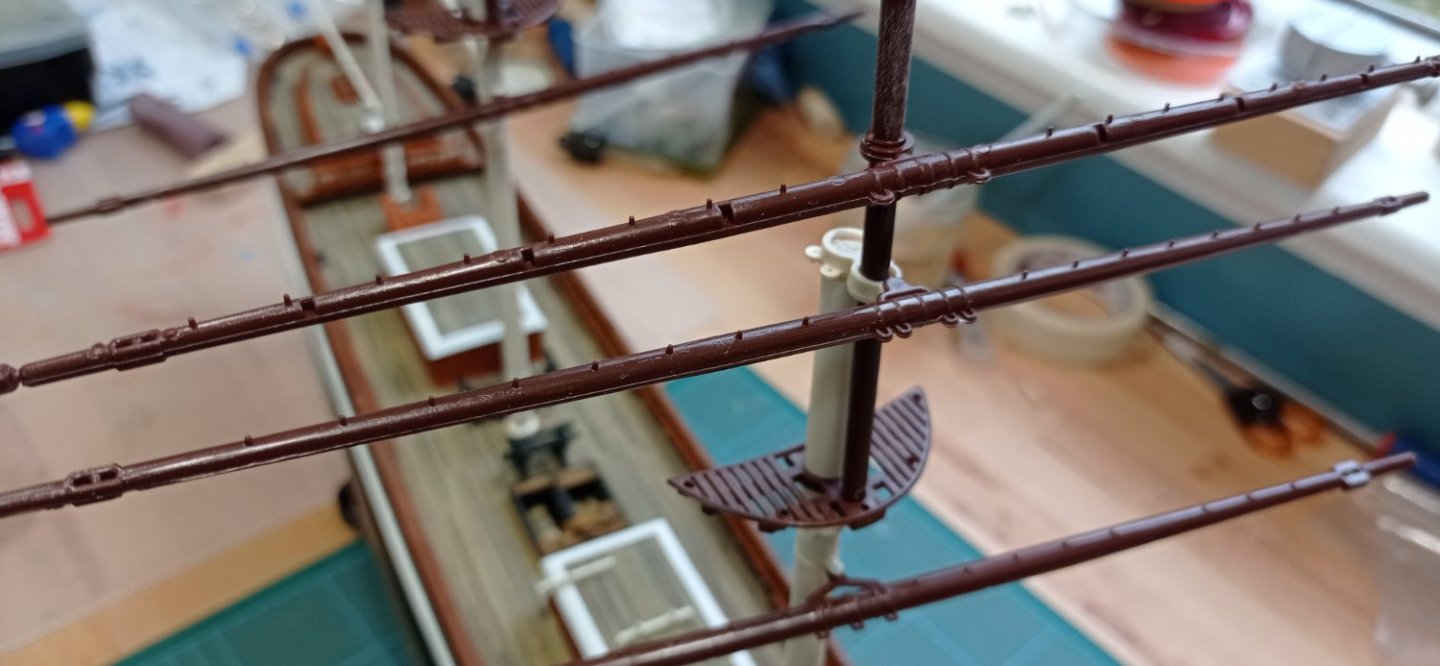
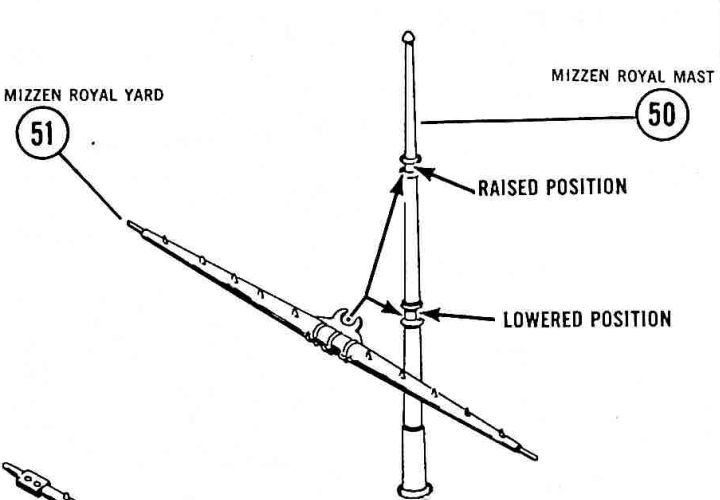
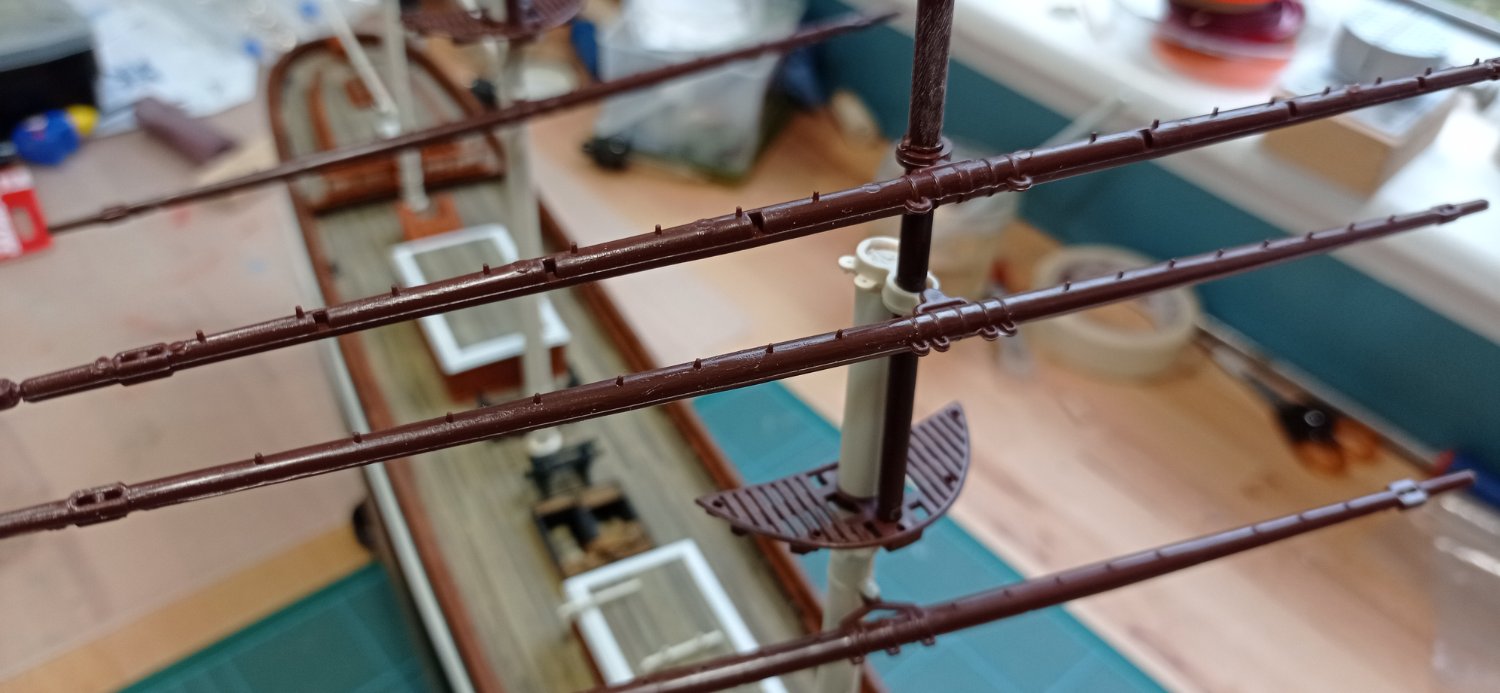
A dry fit of all the masts and yards while I wait for paint to dry on various bits needed to finish the hull, and to start thinking about the masts and rigging. I have to dry fit everything like this first to be able to understand where I'm headed, what might need fiddling with and so on. Can any of you gents tell me what the small 'pins' are for, that are on the tops of all the yards? (in the second photo). I assume these are a revell device to help hang the sails? And am I right in thinking that the 'rings' on the mast sections for with/without sails (raised/lowered on the snip from the instructions) are also just a modelling device, not true to real ships.
To be honest, I don't want to spend too much more time on modifying this kit, as I think the rigging alone is likely to take quite a long time to complete, with the risk of terminal boredom. The OOTB masts and yards aren't too bad, only a couple are warped and might come true with a bit of heat. As mentioned previously, at this stage I'm intending to try to have hanging, furled sails. I haven't even begun experimenting with this yet, the plan is to use blue ensigns' tissue+dilute PVA method, and if that doesn't go well, I'll just have standing rigging and no sails.
-
It's worth trying things out several times on scrap, Leo, to get a feel for how each coat and colour combo affects the whole. Though on a wood model I'd be more than a little tempted to just use teak varnish. I noticed today that I do actually have some on a shelf, I must try that out on plastic. It would be slightly gut-wrenching if it gave the perfect result straight out of the tin 🙂
- shipman, Ian_Grant and Hubac's Historian
-
2
-
 1
1
-
Hello again Ian & Marc and thanks for your kind comments. Obviously it's quicker doing things second time round as there's less head scratching. In addition, I make slightly fewer beginners mistakes, especially on the paintwork side of things. The teak is a funny one - it works best on larger objects but even so, you need to get up close to really see it. From any distance it tends to look anything from orangey-brown to raw umber, depending on the light.
-
There, I knew the louvres would look better in brass.
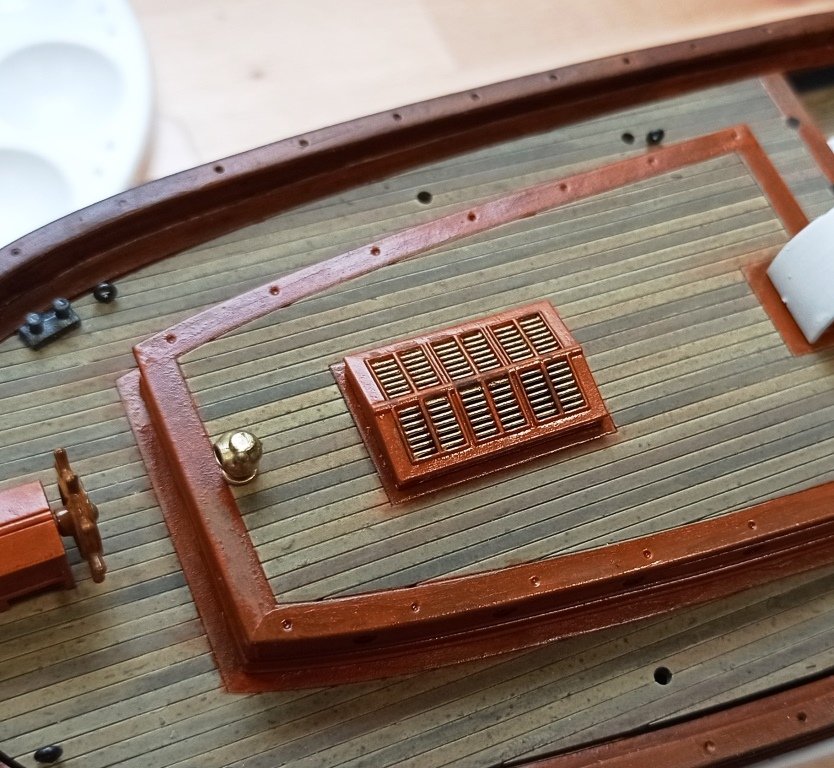
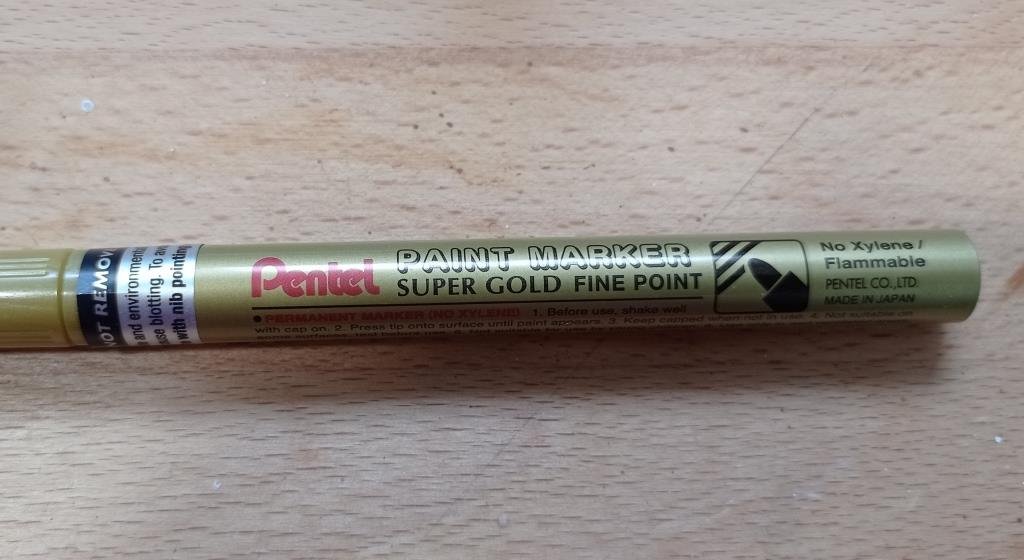
I also touched up the binnacle, having remembered that I got a much more smooth, shiny gold/brass effect if I used the paint pen rather than metallic paint. If you share that view, this is what I used.


Redoing Oseberg
in CAD and 3D Modelling/Drafting Plans with Software
Posted
You could always do what I did, and take up 3D printing. It doesn’t have the same satisfaction as making something by hand but, if like me you can’t do that anyway, you still have the design challenges.