Rick310
-
Posts
378 -
Joined
-
Last visited
Content Type
Profiles
Forums
Gallery
Events
Everything posted by Rick310
-
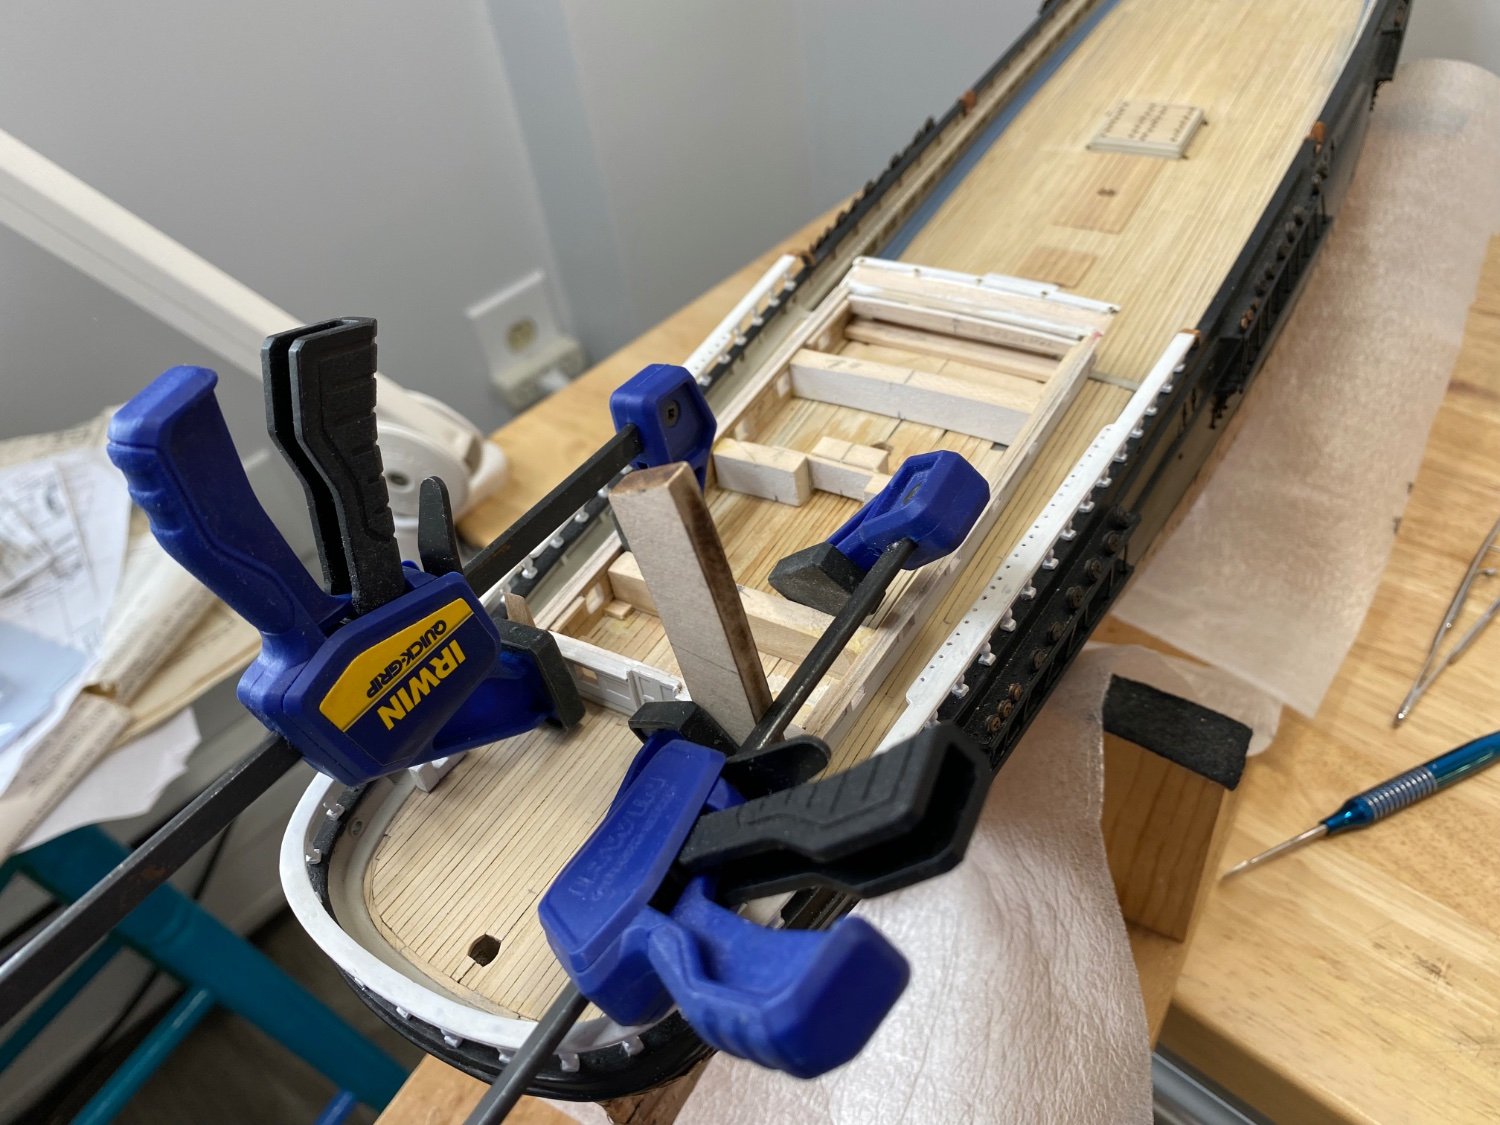
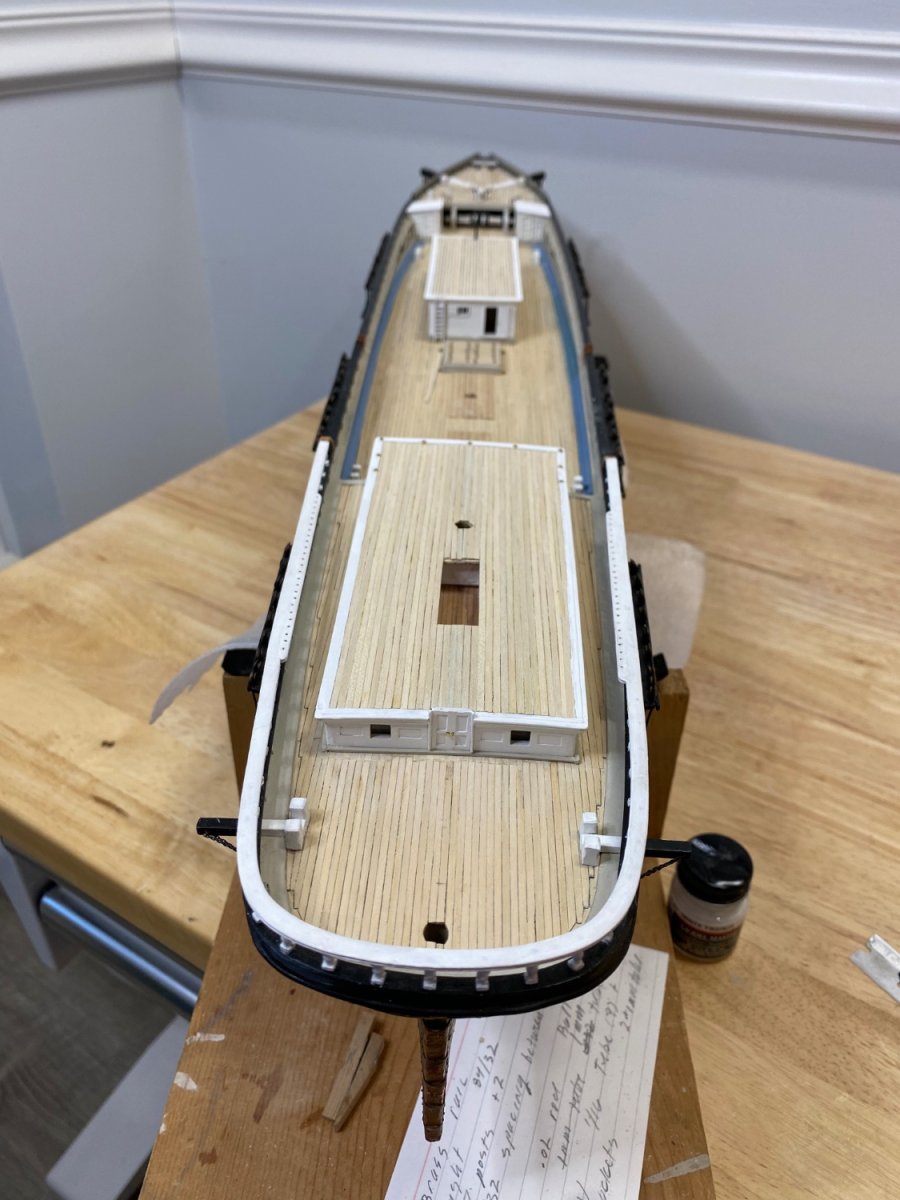
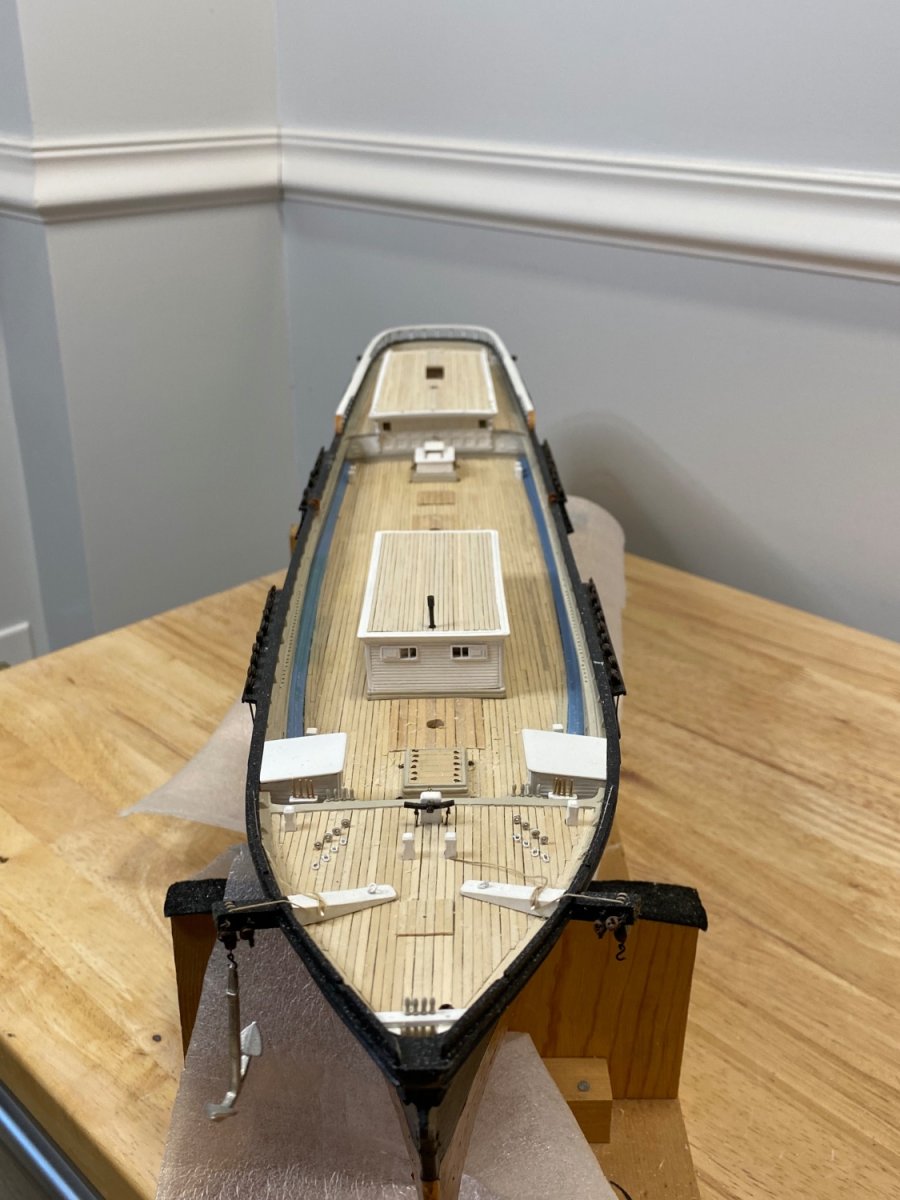
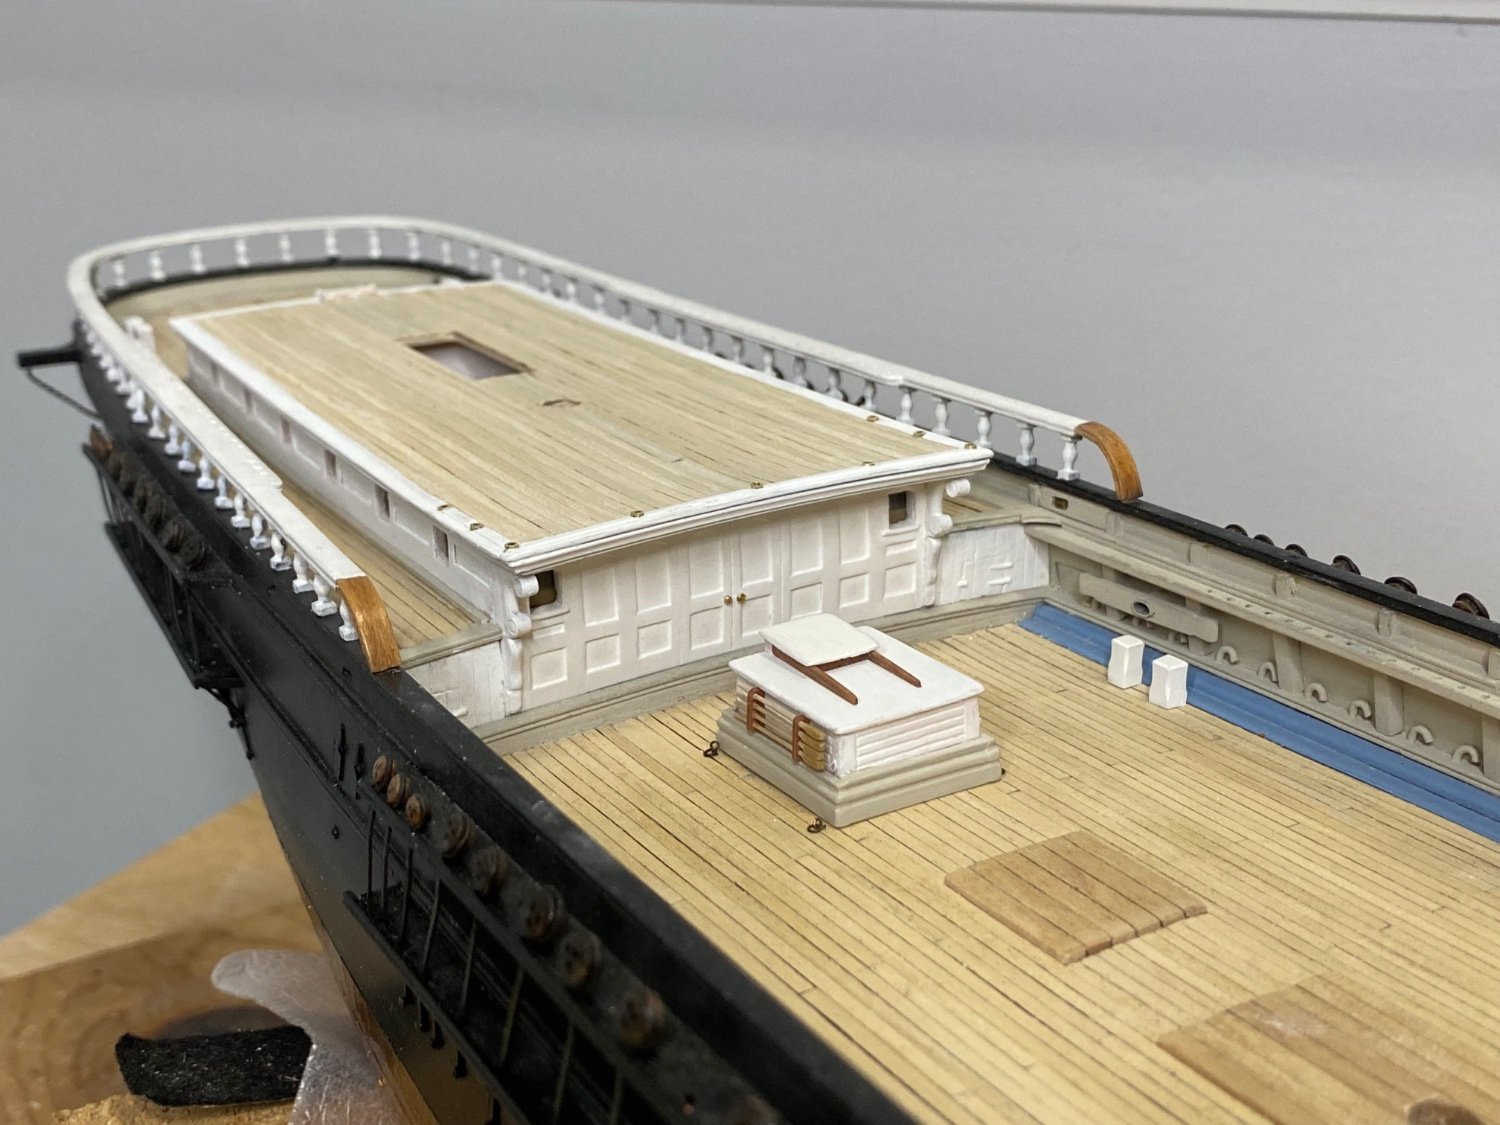
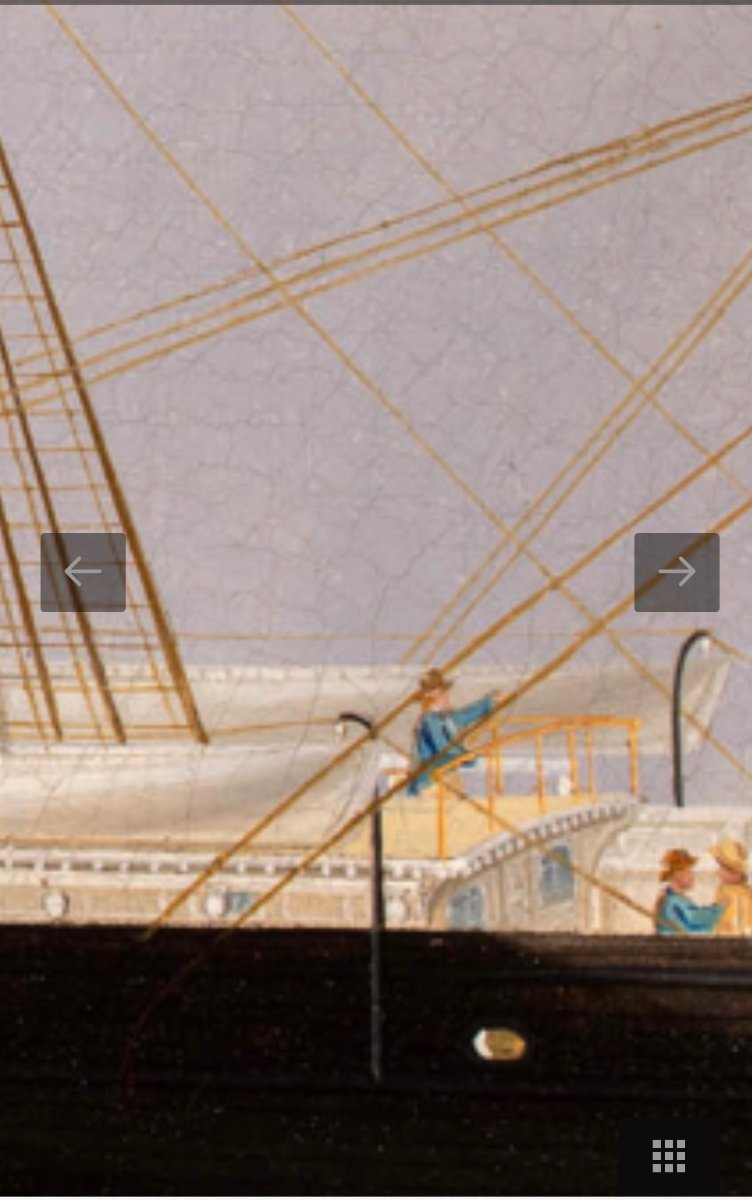
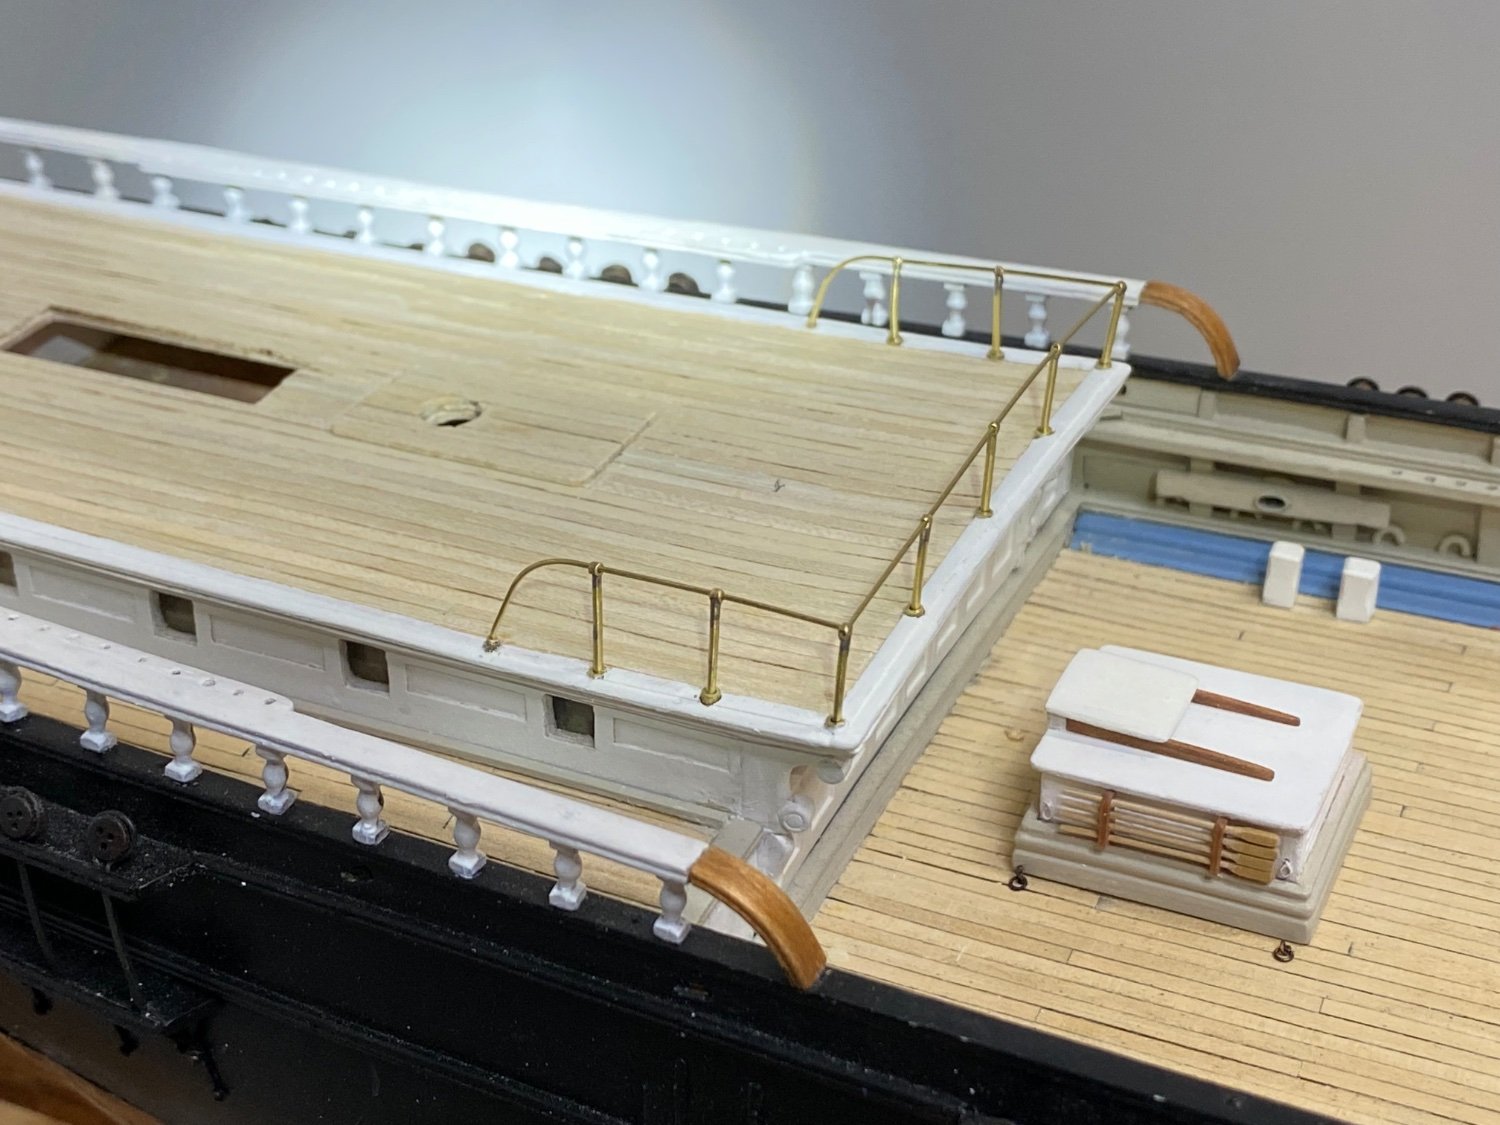
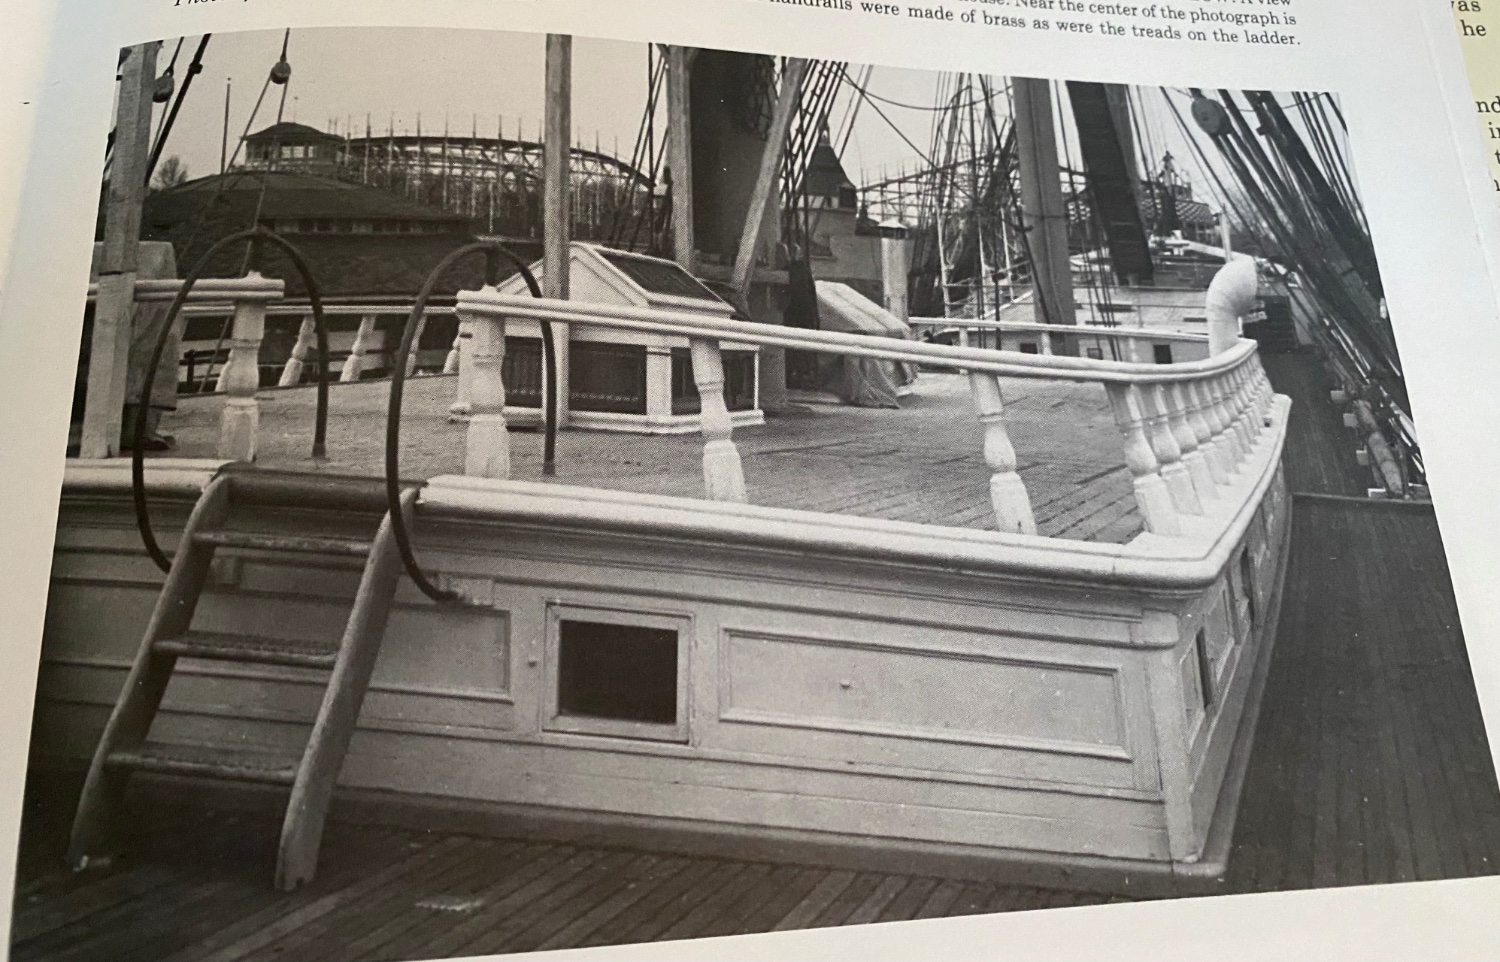
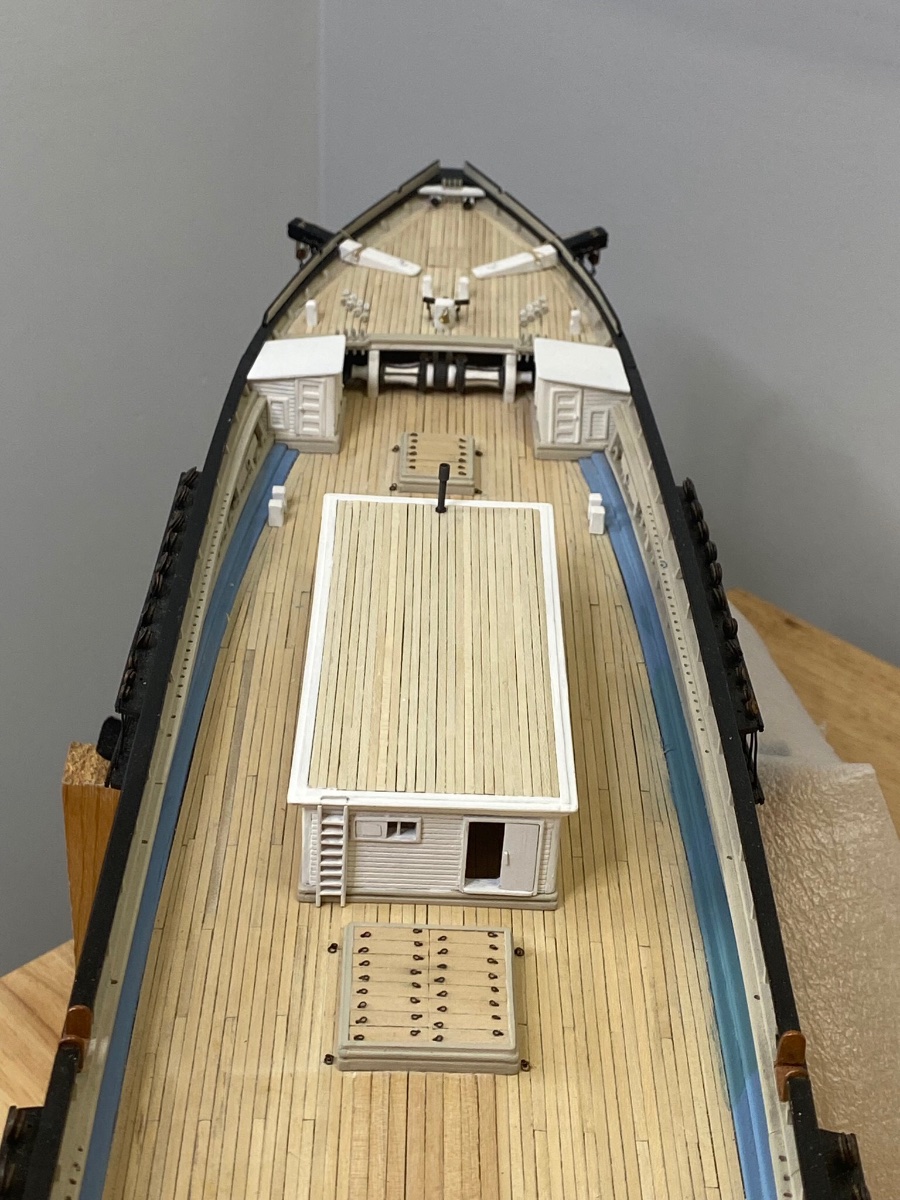
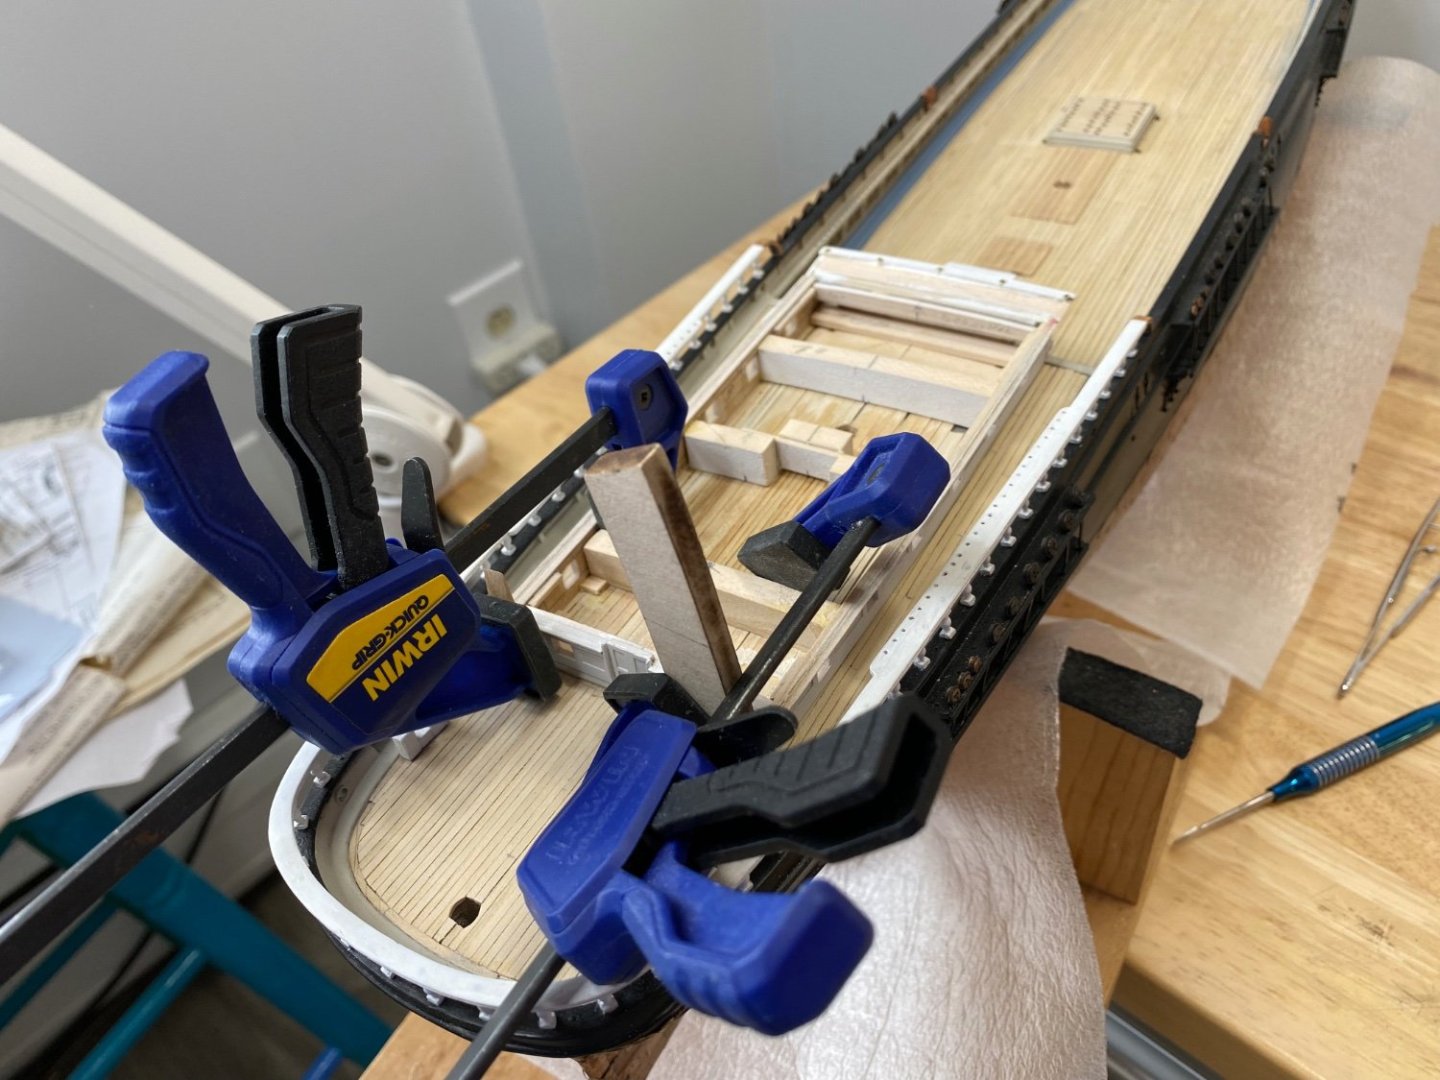
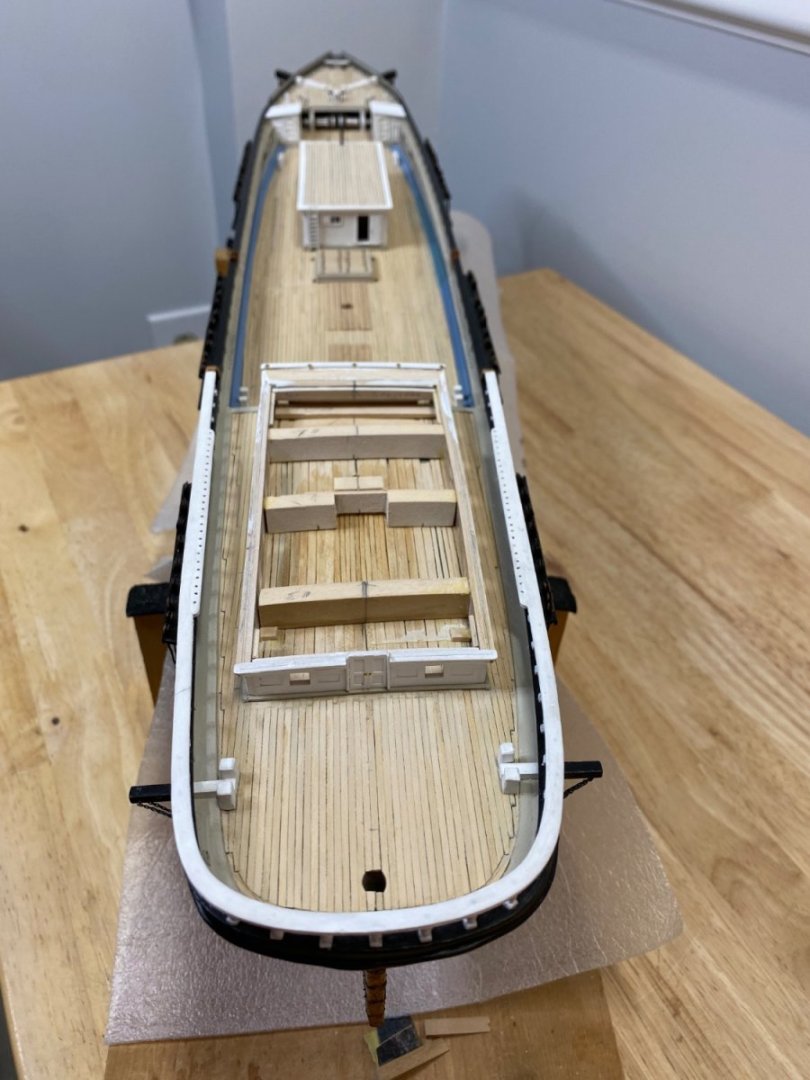
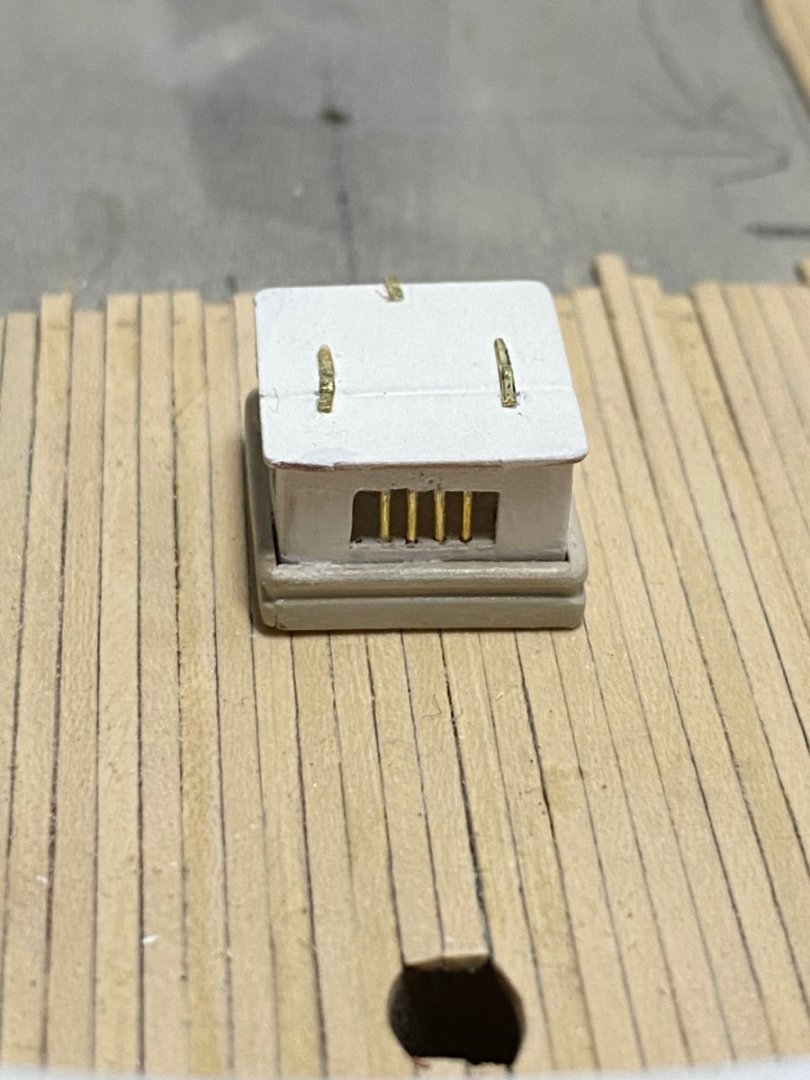
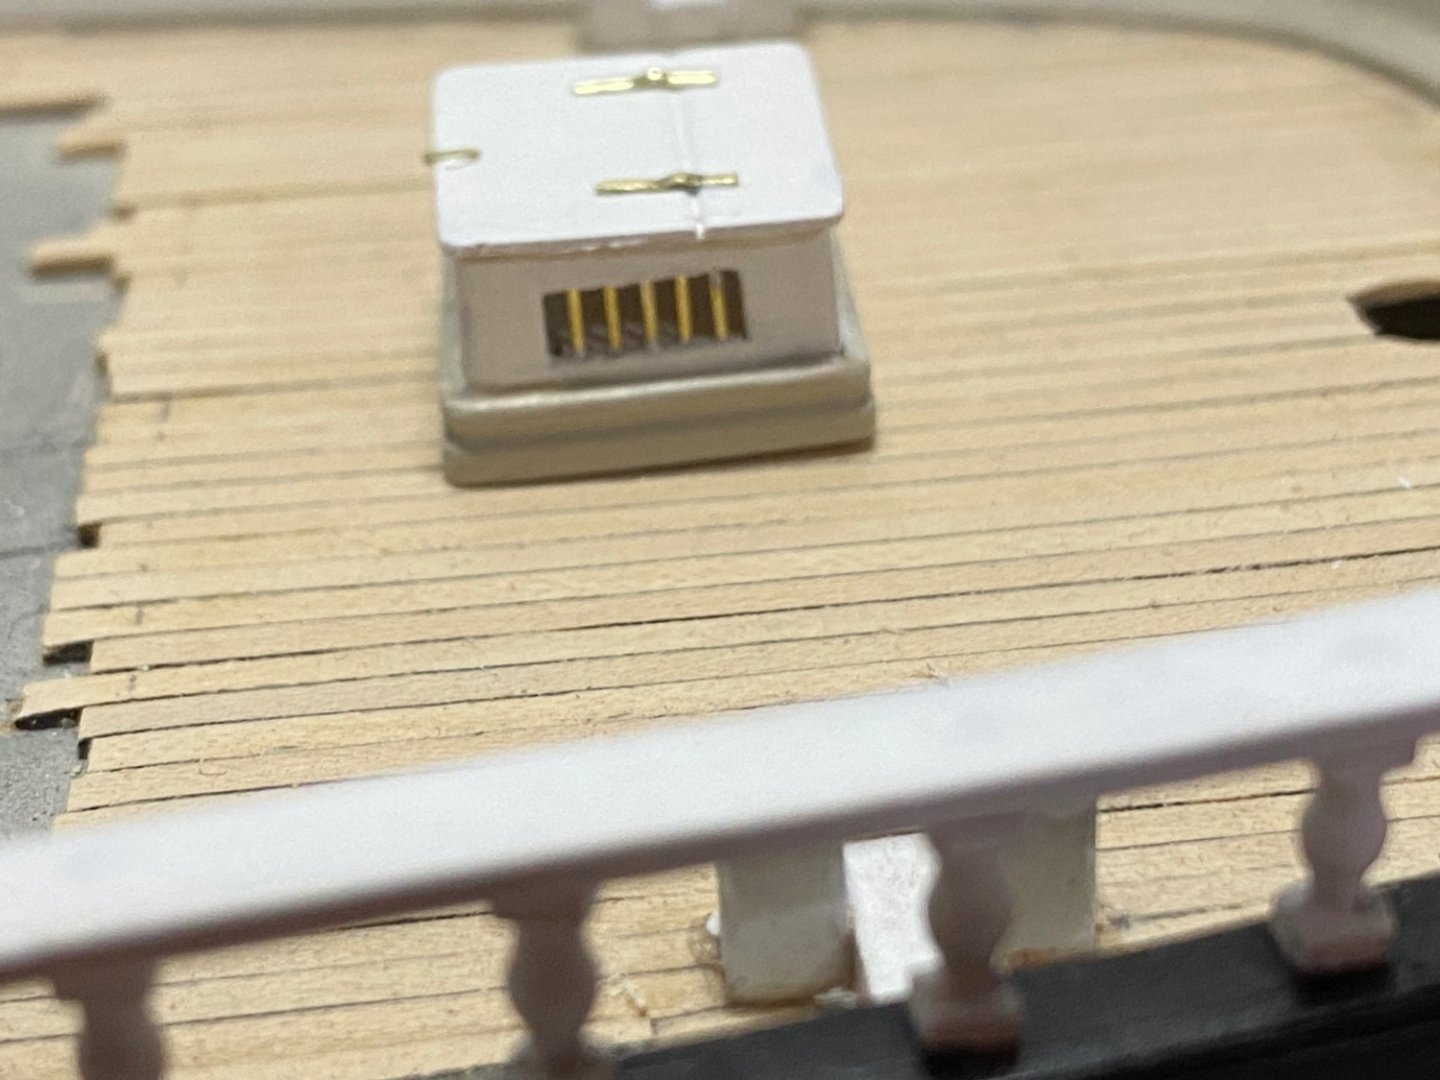
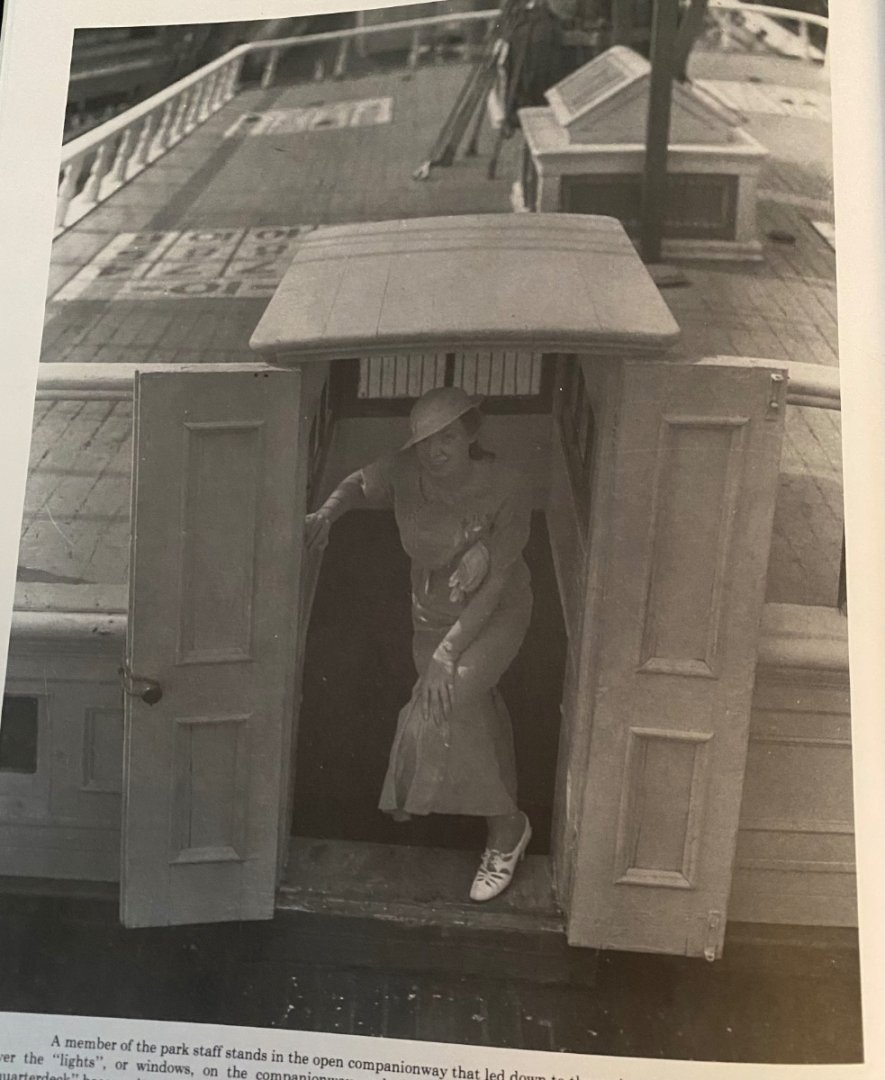
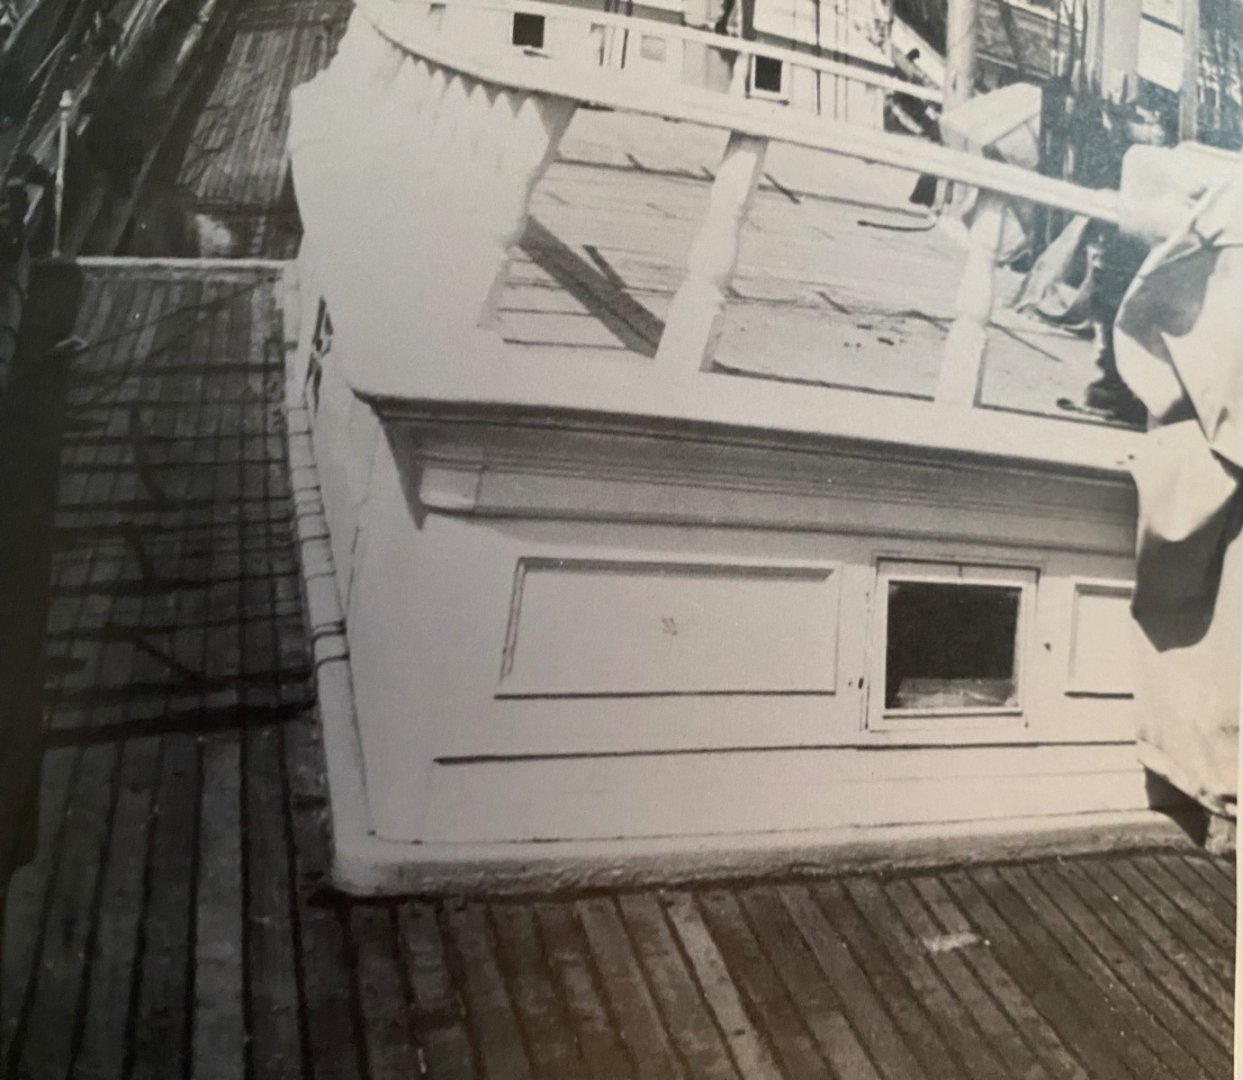
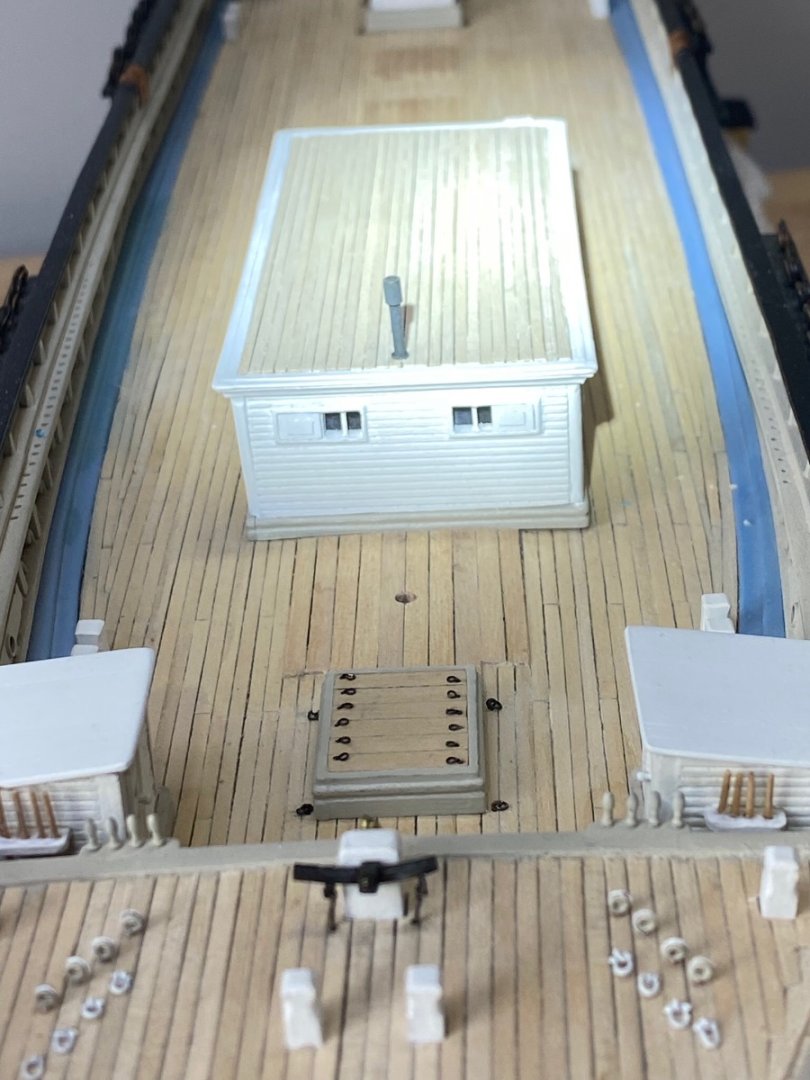
Completed the aft deck house except for the skylight. Because the sides taper towards the stern, I was concerned about bending the sides to meet the aft end of the cabin without splitting or breaking the wood panels. I made 3 bulkheads to support the sides and the subdeck for planking later. The tops and the bottoms of the bulkheads were sanded to match the deck camber. I previously stained the deck under the skylight a darker color per the Benjamin Packard, as I don’t know how much can be seen through the skylight. For the same reason, I painted the bulkheads white. The waterways were then installed and the roof planked. I decided not to paint the plank edges to simulate caulking as the individual planks seem to be apparent enough without if.(?) After planking the roof, I was finally able to assemble the brass rail. Once again I deviated from the plans as I only used 5 stanchions across the front edge of the waterway. This was based on the Buttersworth painting although the China trade painting shows more stanchions, but no side stanchions as does Buttersworth. I also made the aft companionway. This leaves only the skylight and about a dozen more deck items to be made and installed and then I can finally move on to masking and rigging.


- 186 replies
-
- 2
-

-
- Flying Fish
- Model Shipways
- (and 1 more)
-
I am so often appalled when I take a picture of something that I think came out really well!!
-
Congratulations Clipperfan, looking forward to reading your article!!
-
Really beautiful work, I really like your metal work. Very impressive!! I need to learn how to use my lathe!! Rick
-
Keith, Cangarda is in Front Street Ship yard yard, here in Belfast Maine, which is about a mile from my house. My son n law captain’s several boats that are stored there for the winter. I can probably get photos if you need them. I don’t know if she has been wrapped, probably not, if she is stored inside. I can certainly find out. Rick
-
George your FF is coming along. Well done!! I’m still trying to finish up the aft cabin which has taken longer than expected. I’m learning a lot from your experience. Keep up the good work. FF looks great!! Rick
-
Sorry this happened. I’ve really enjoyed your build, you are doing a great job!! Looks like you’ve made a nice recovery! Hang in there, you are so close to the finish line.
-
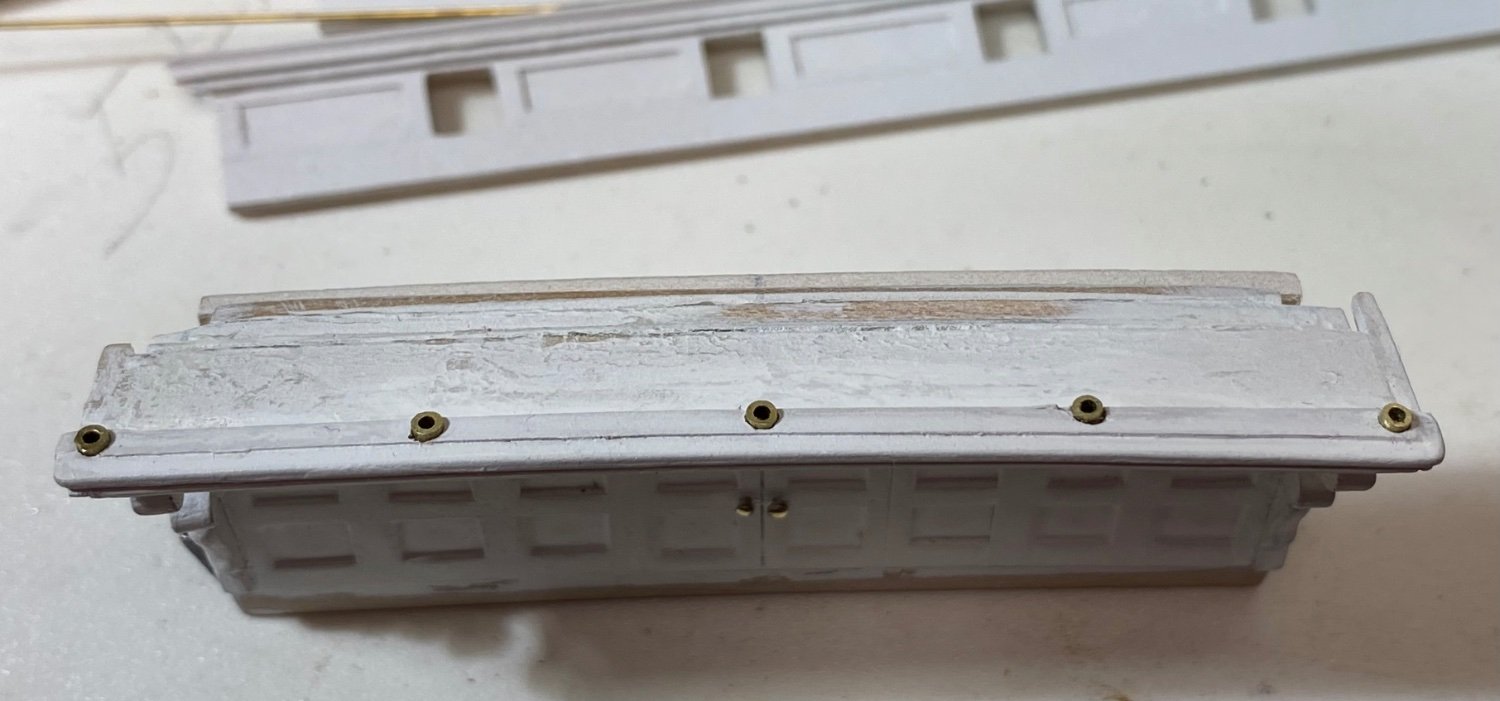
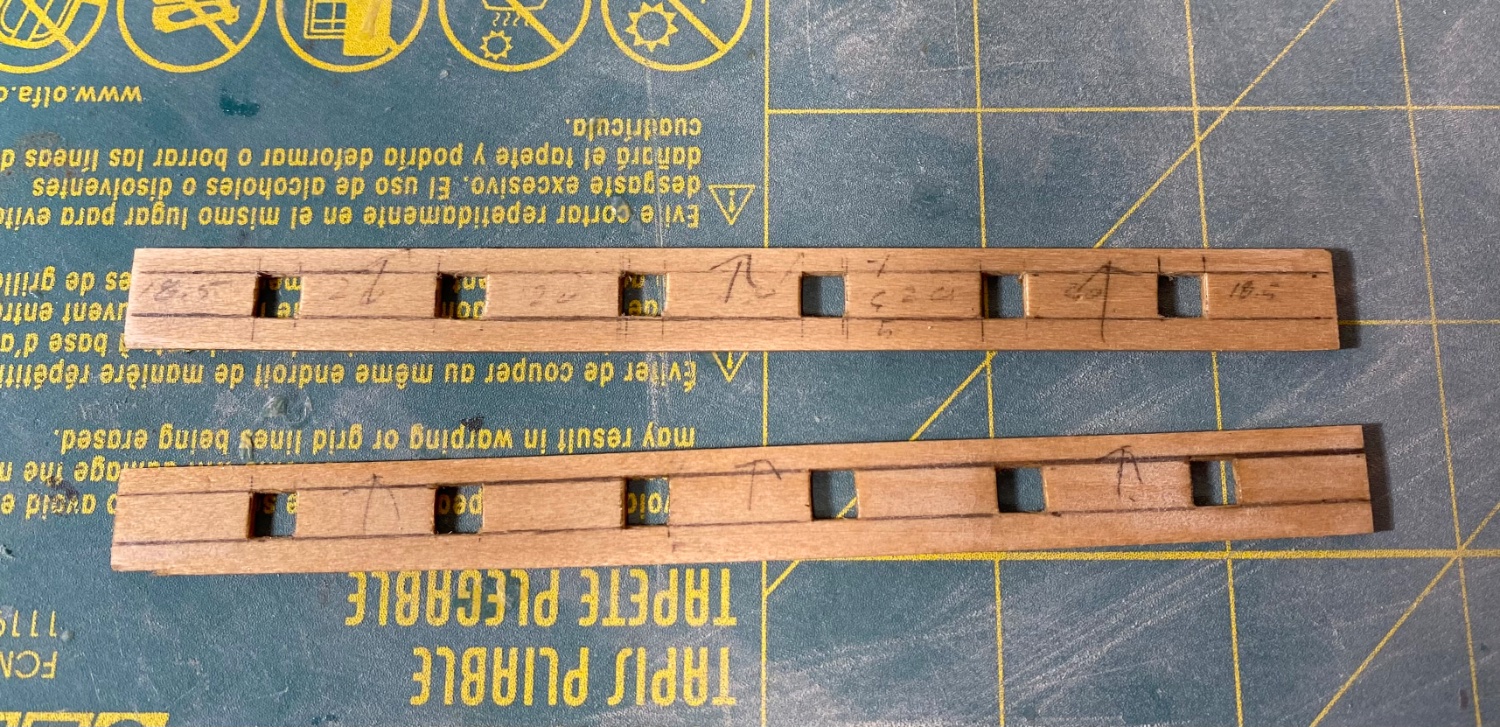
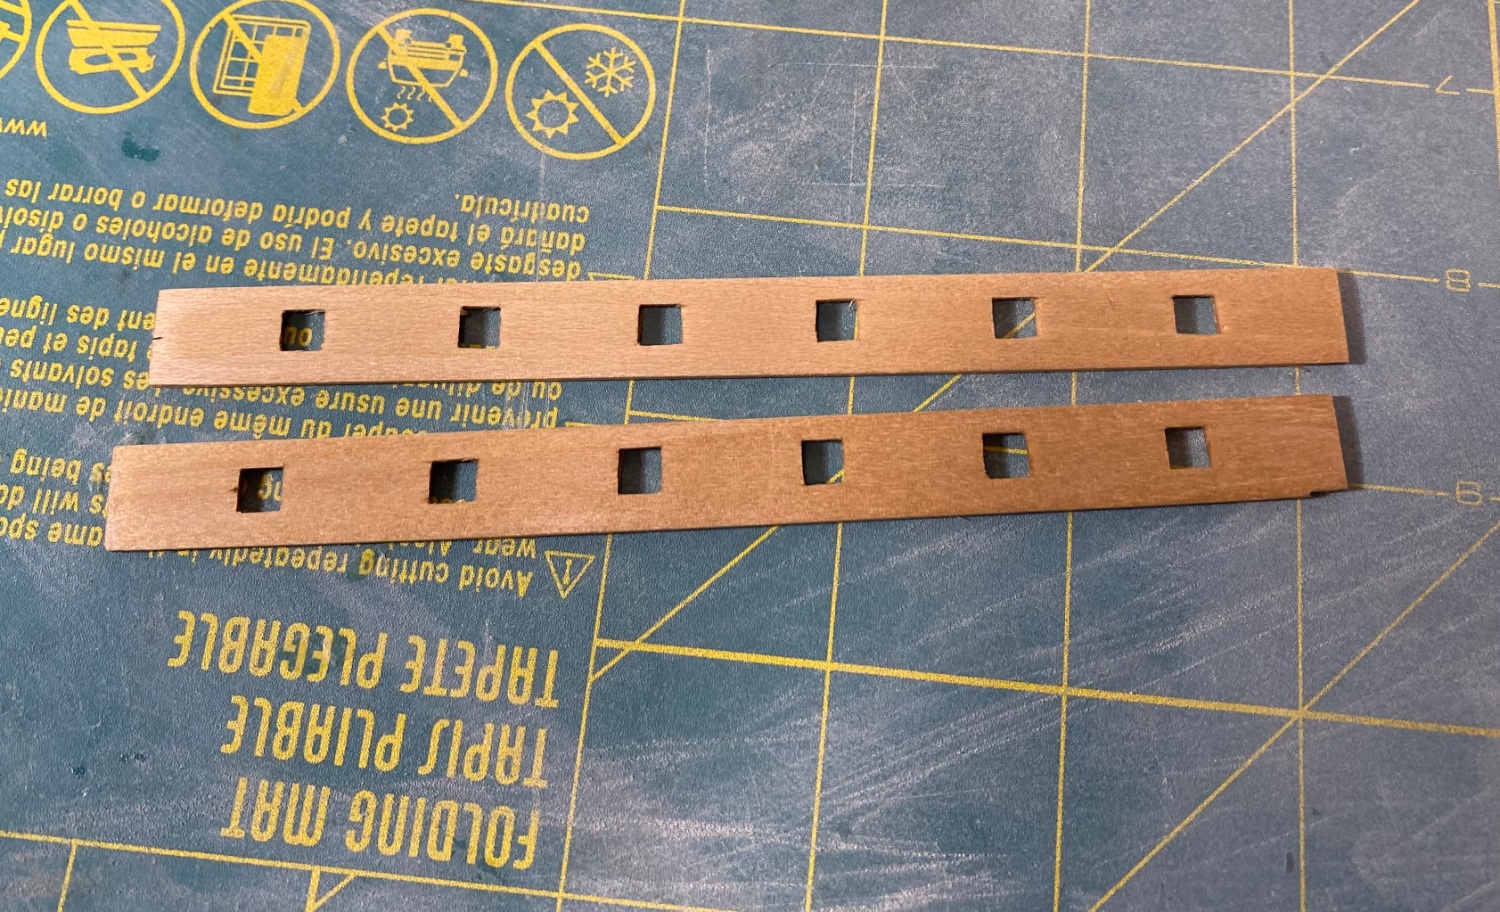
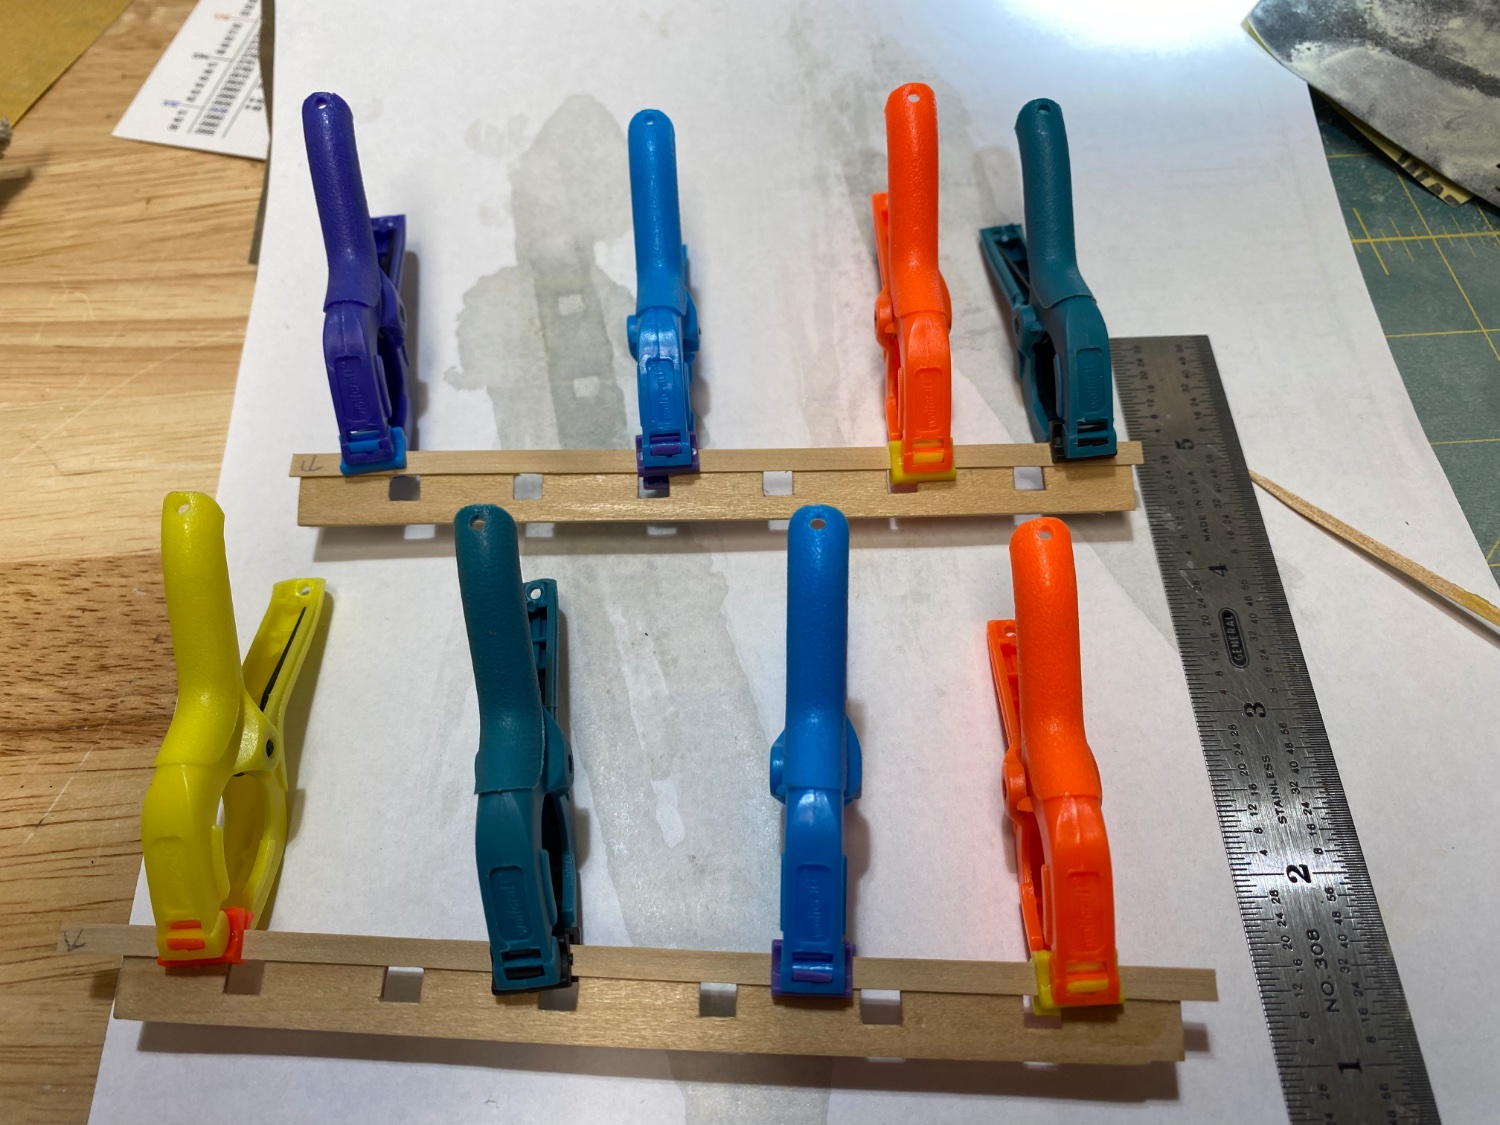
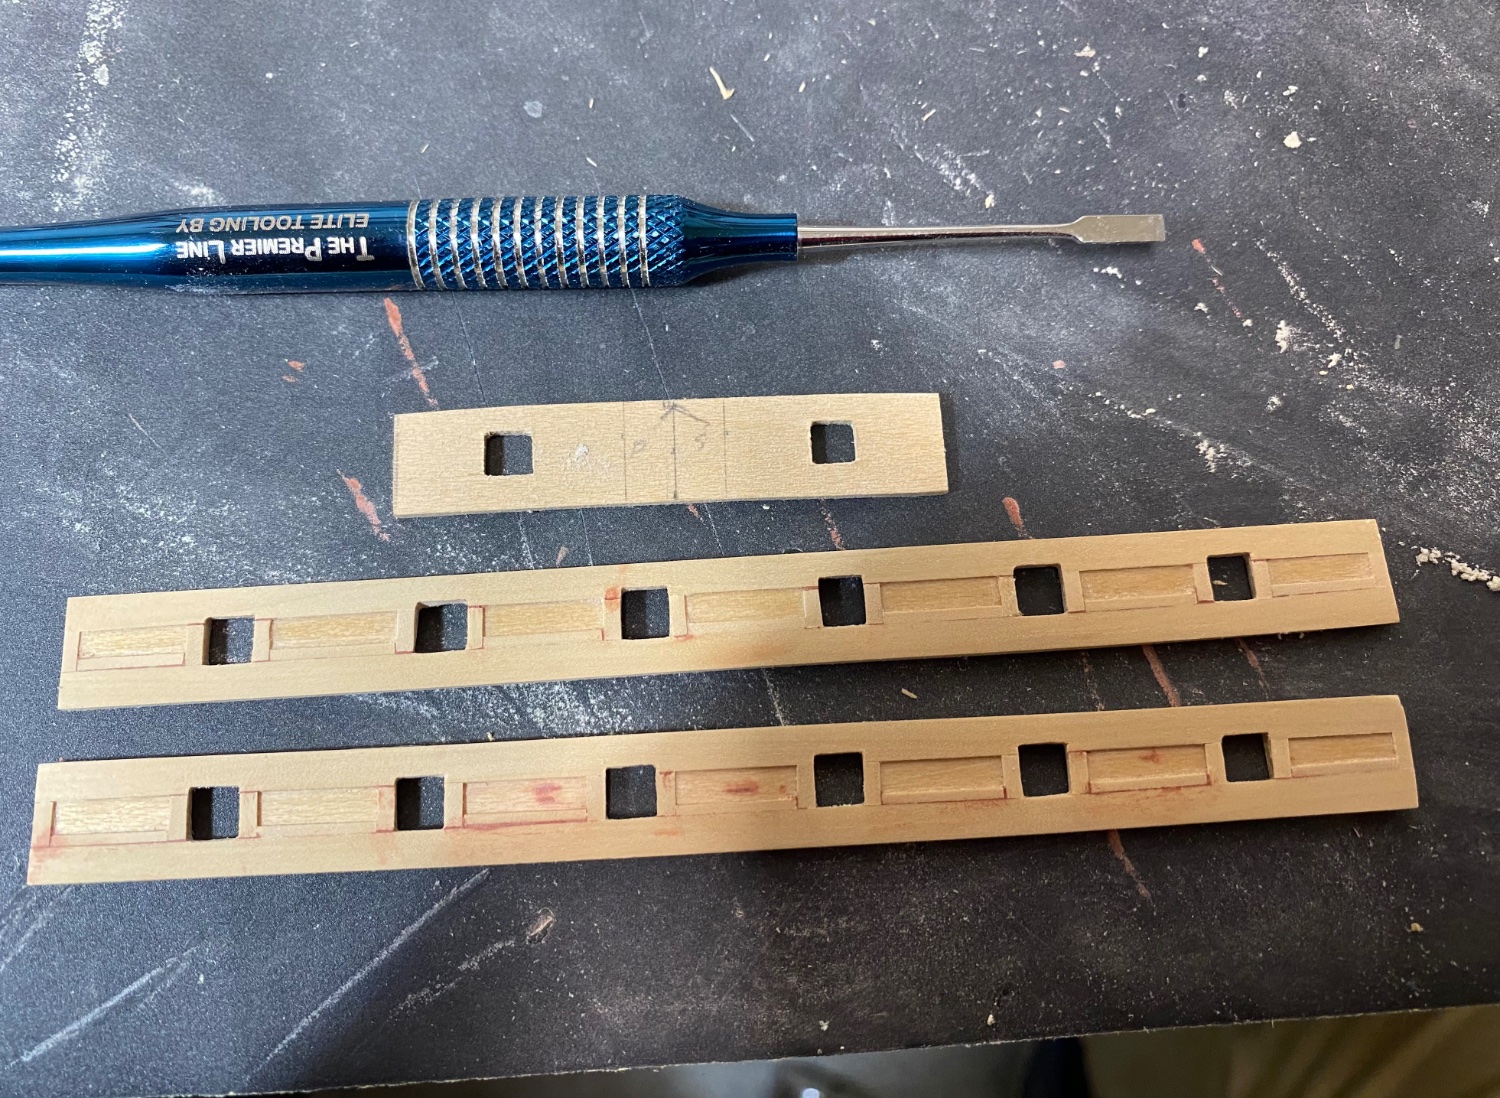
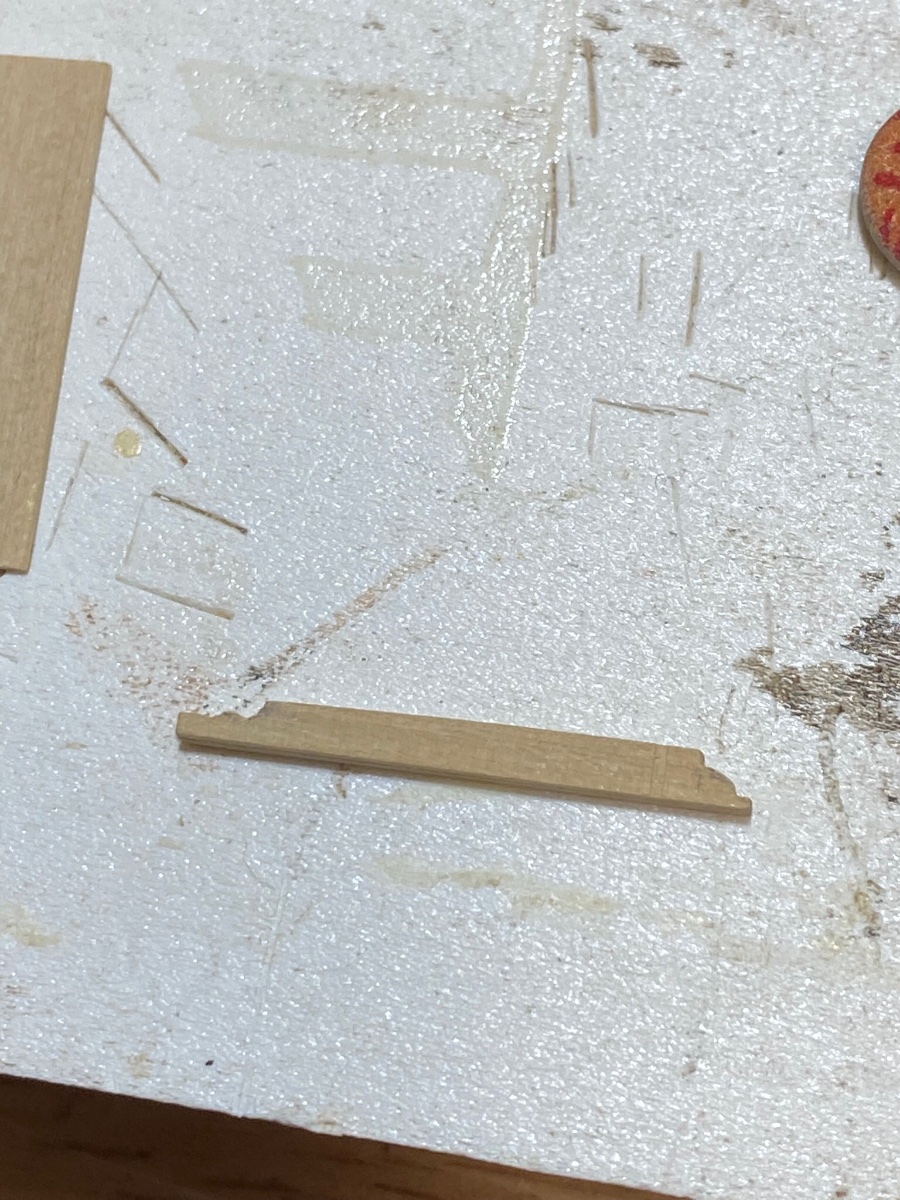
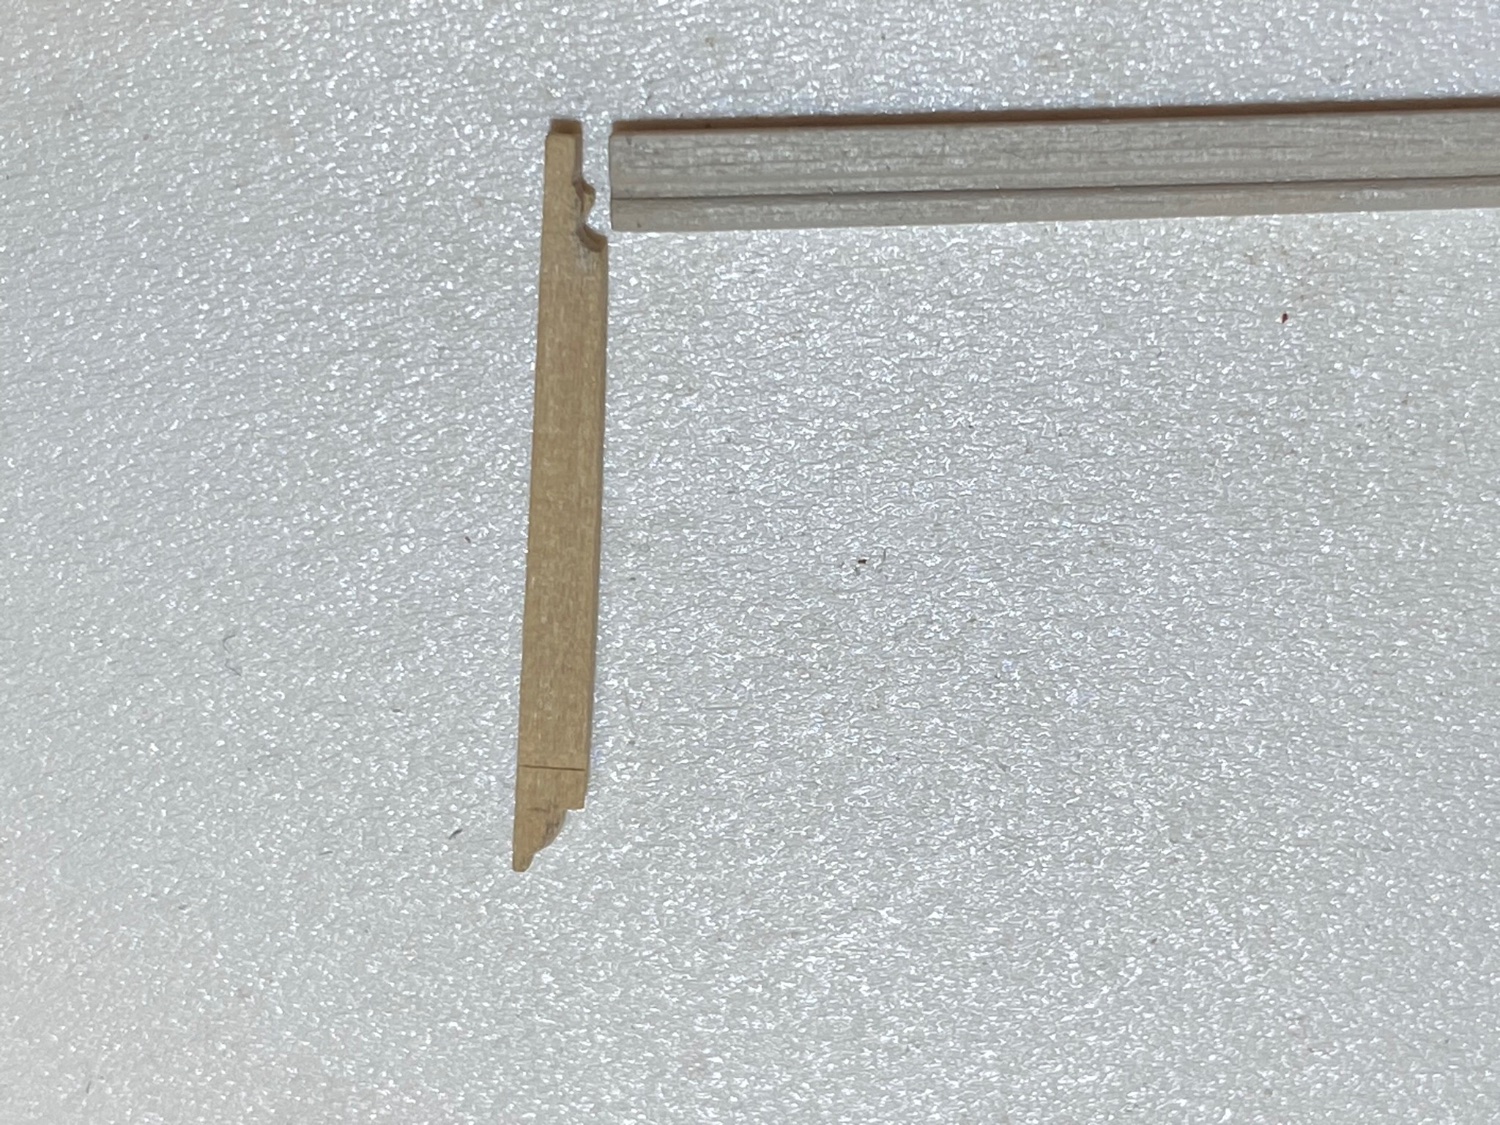
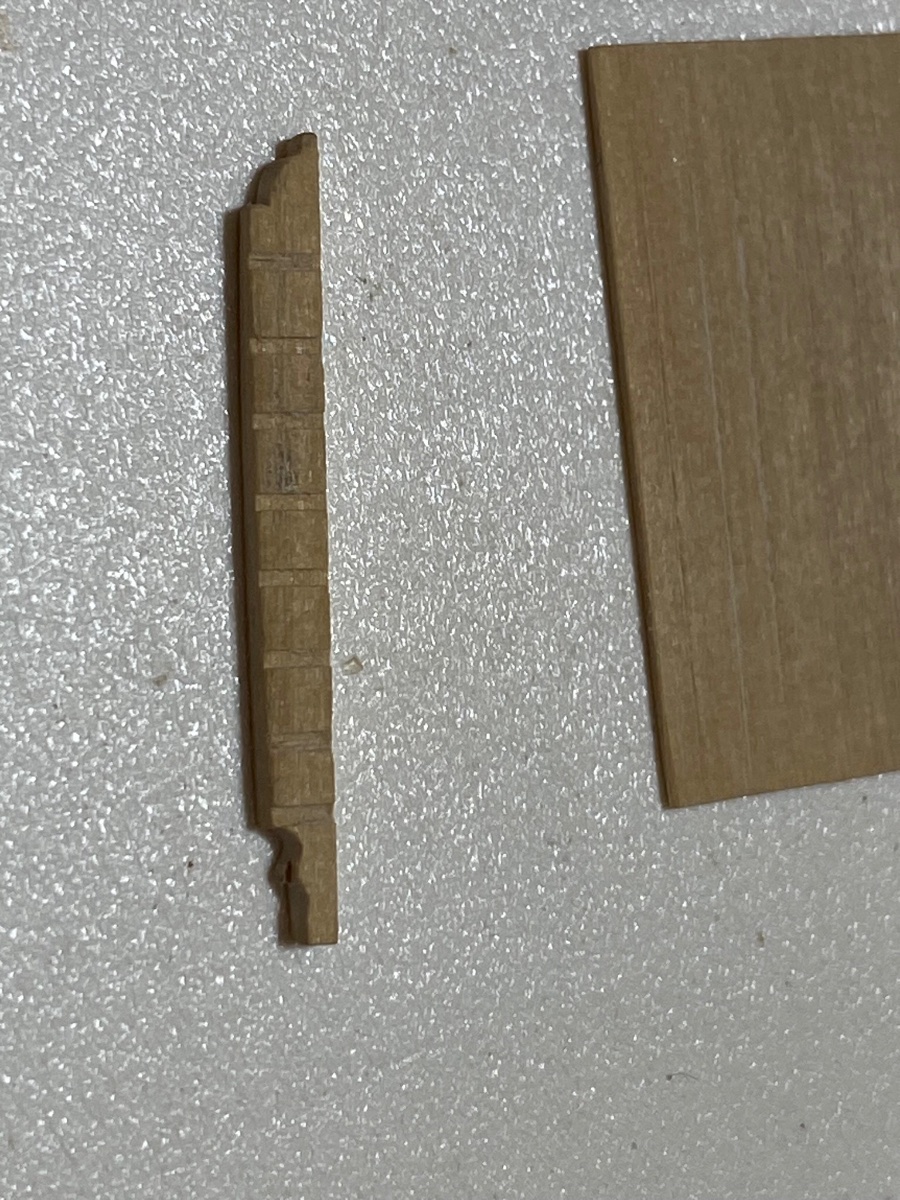
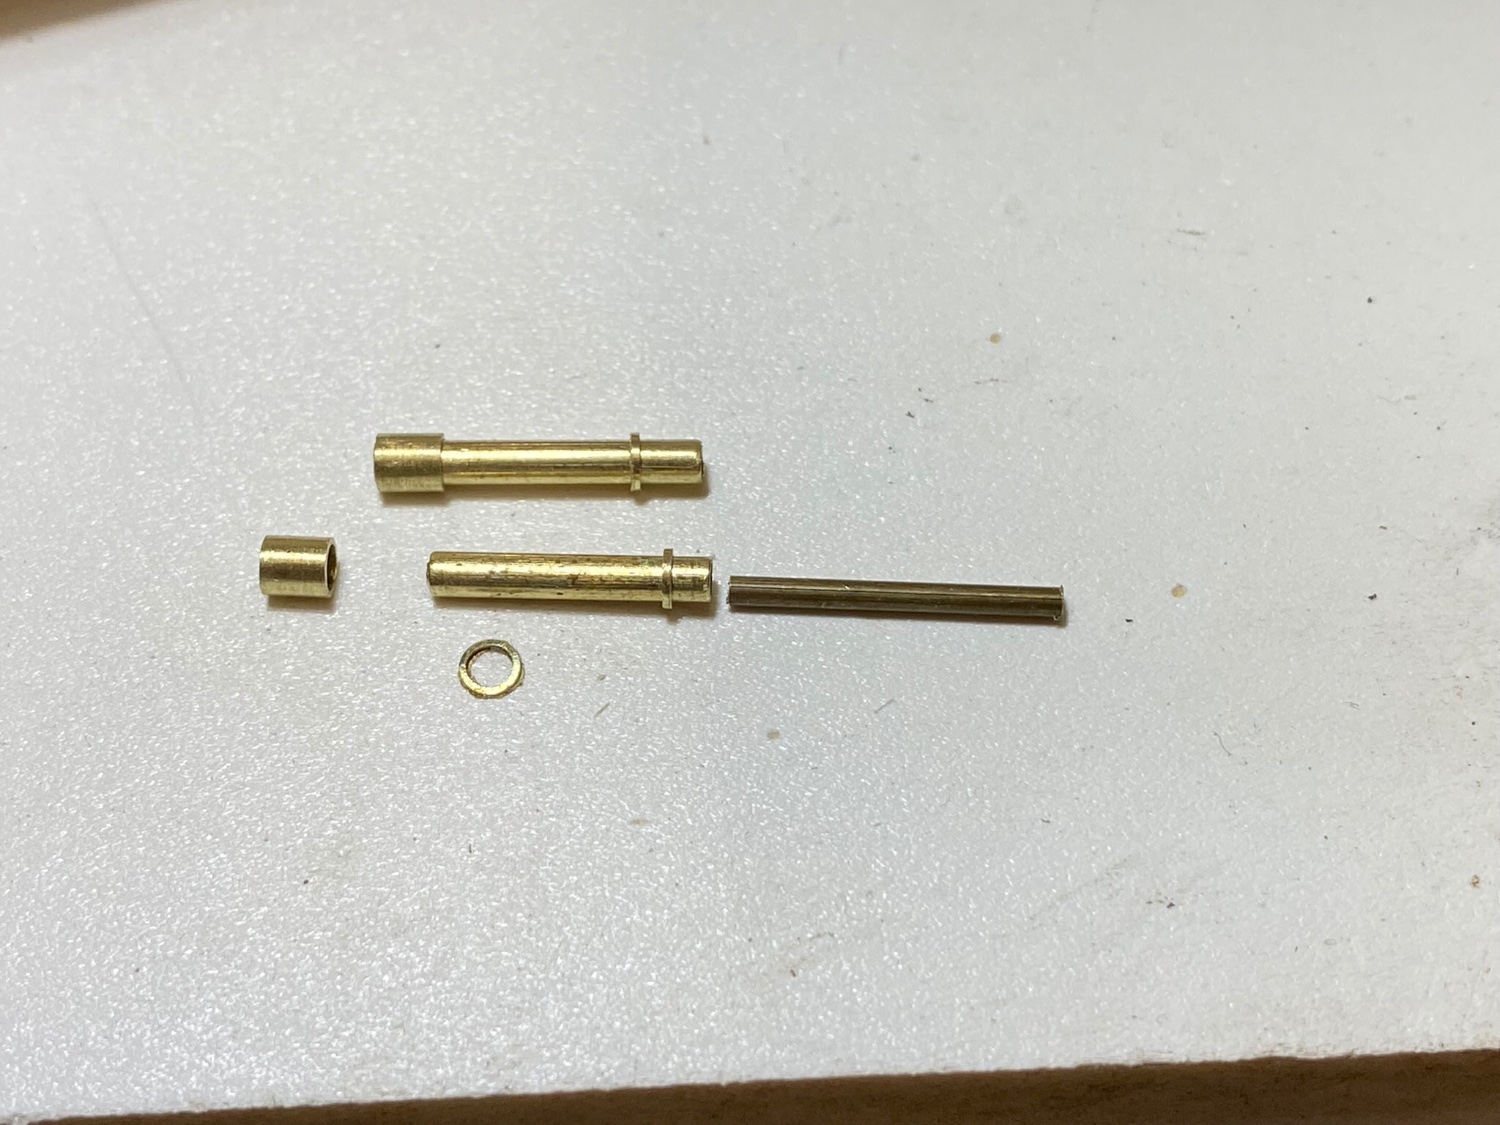
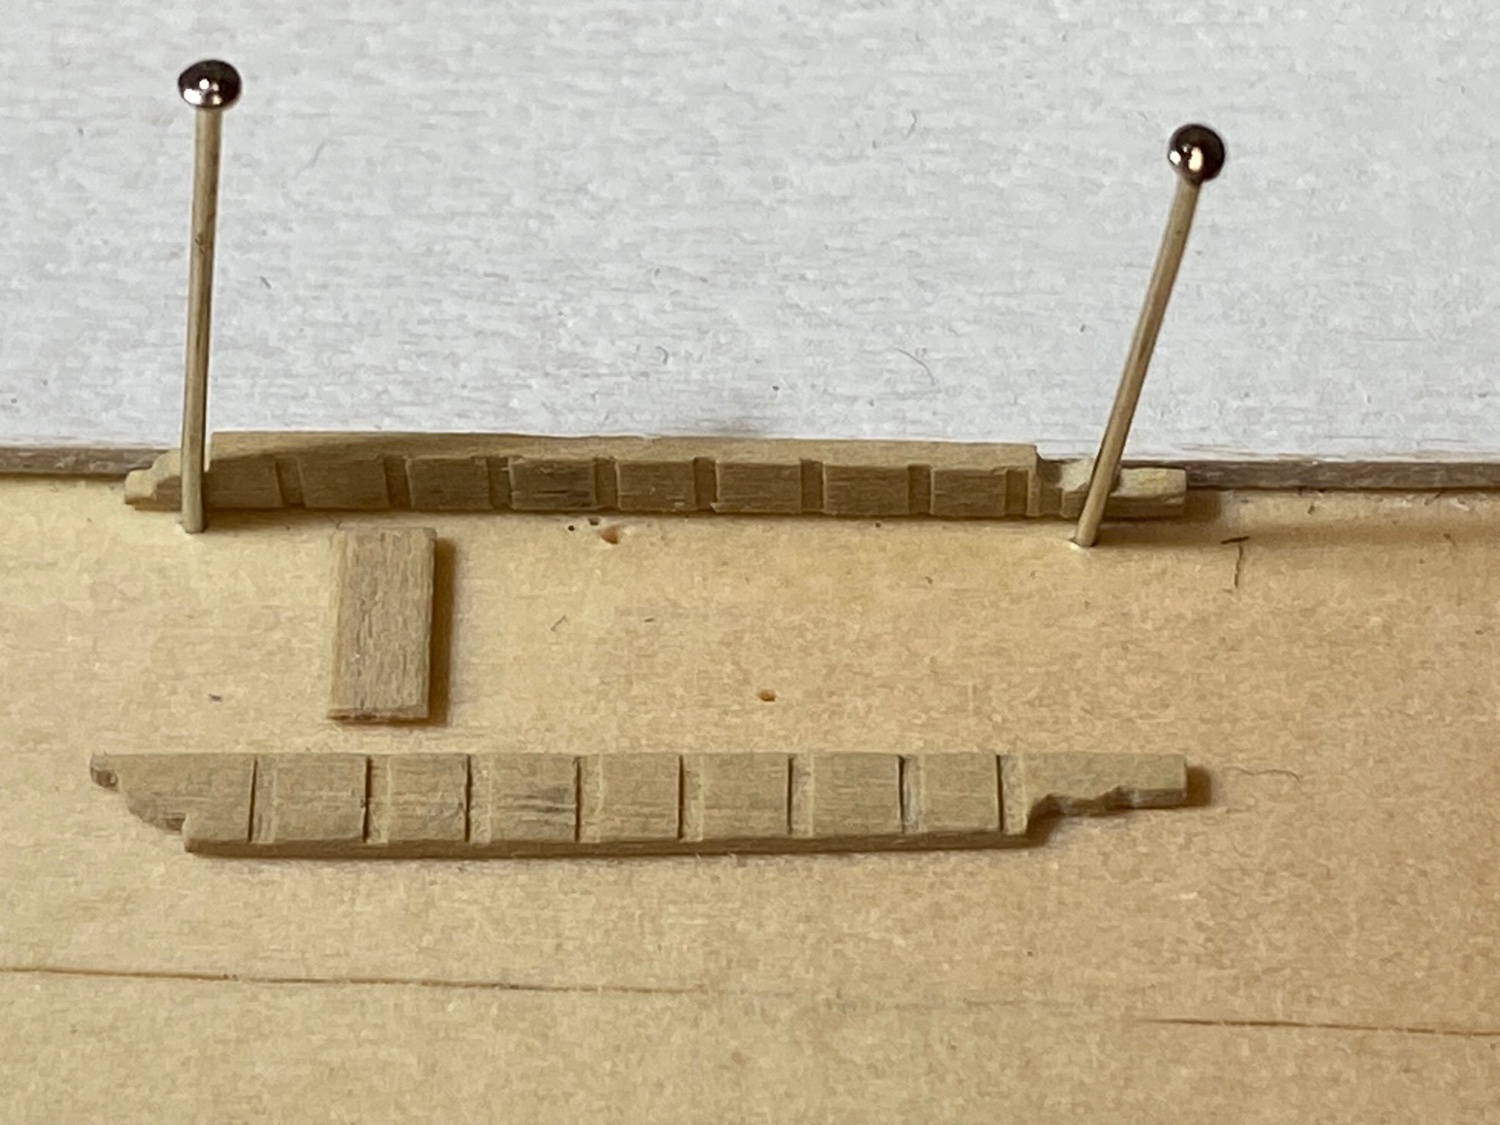
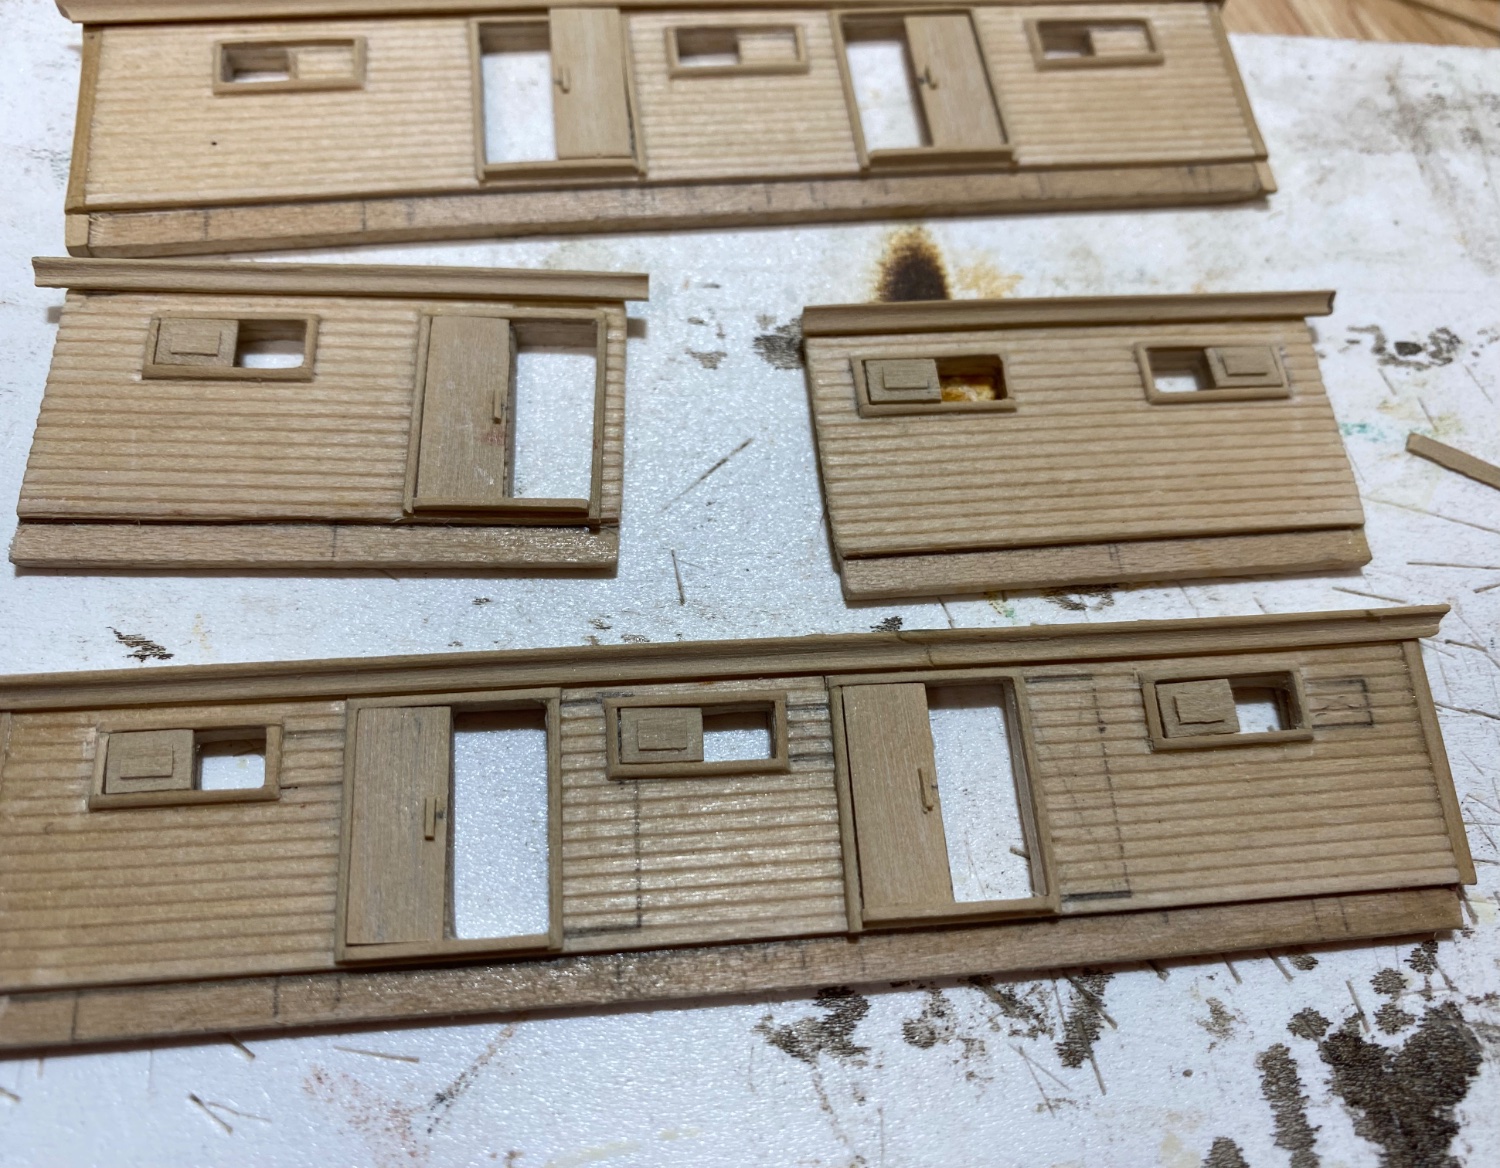
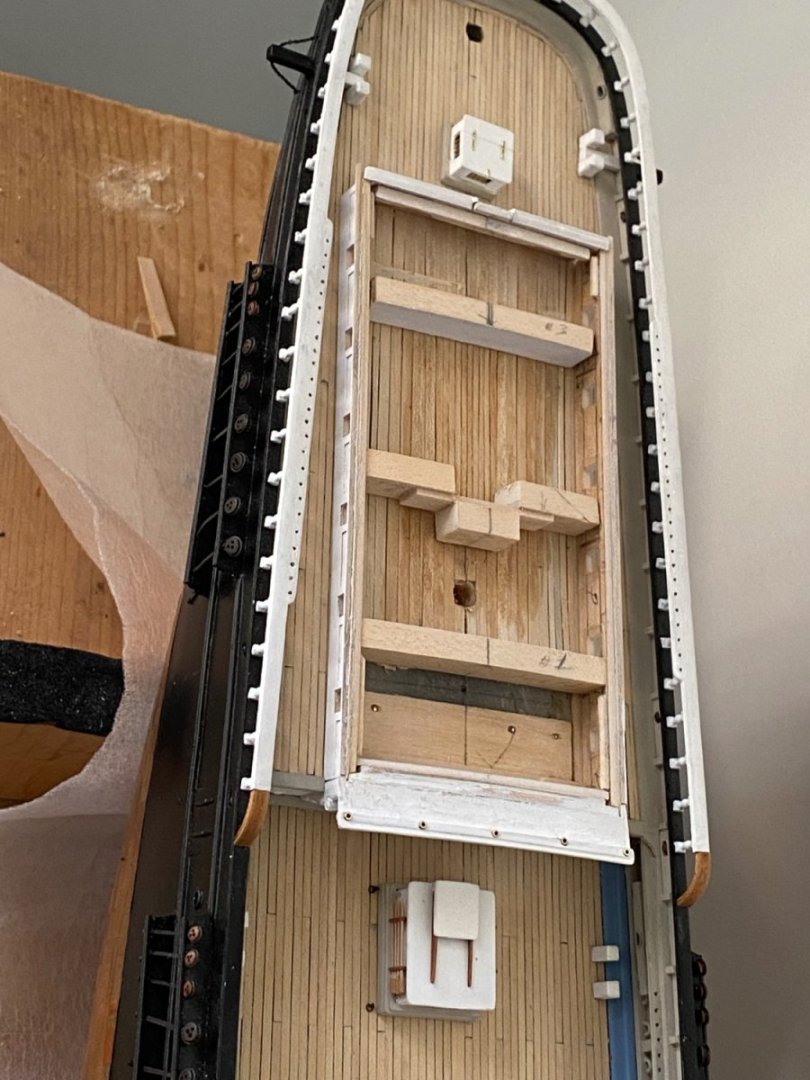
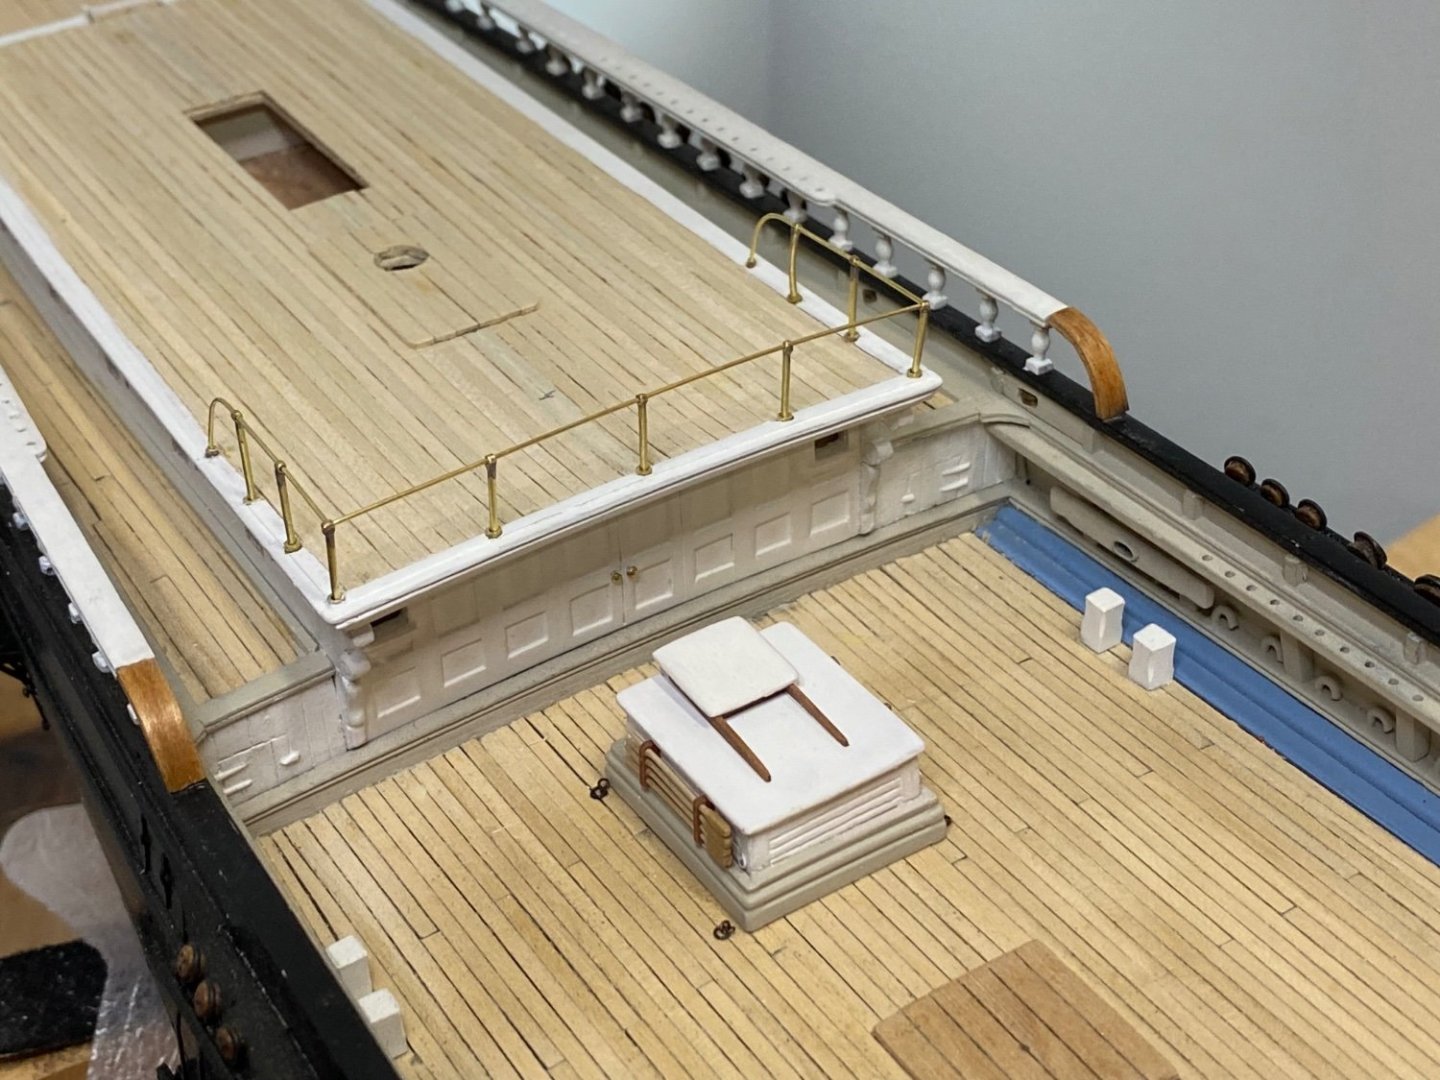
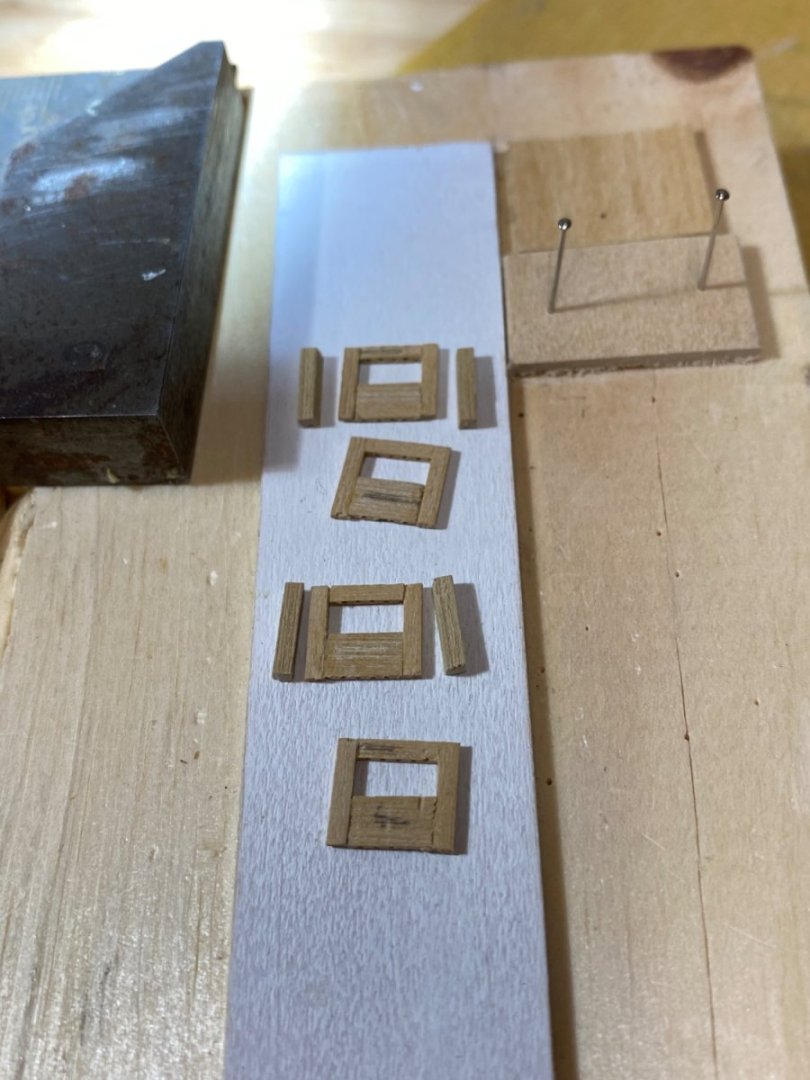
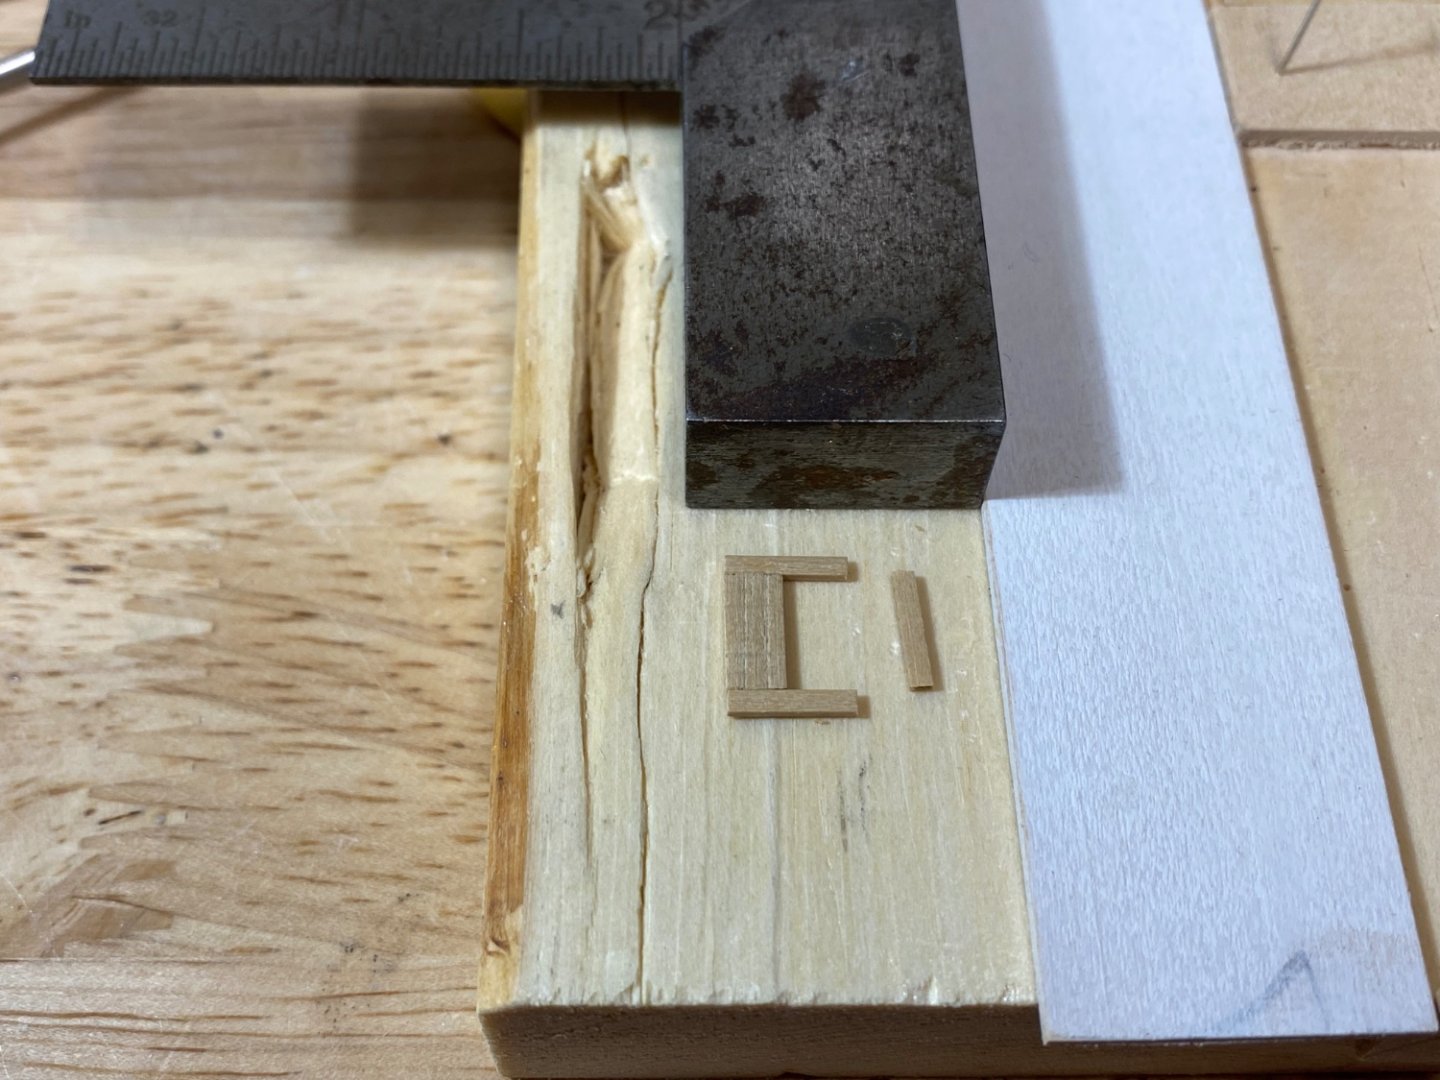
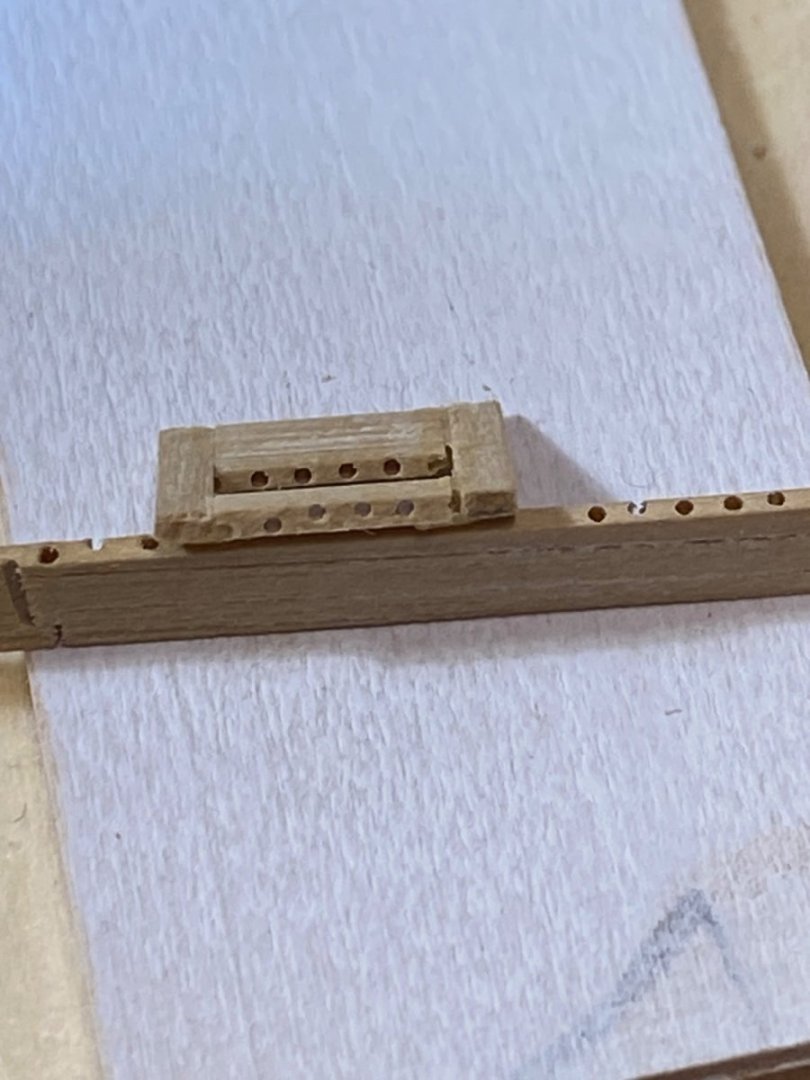
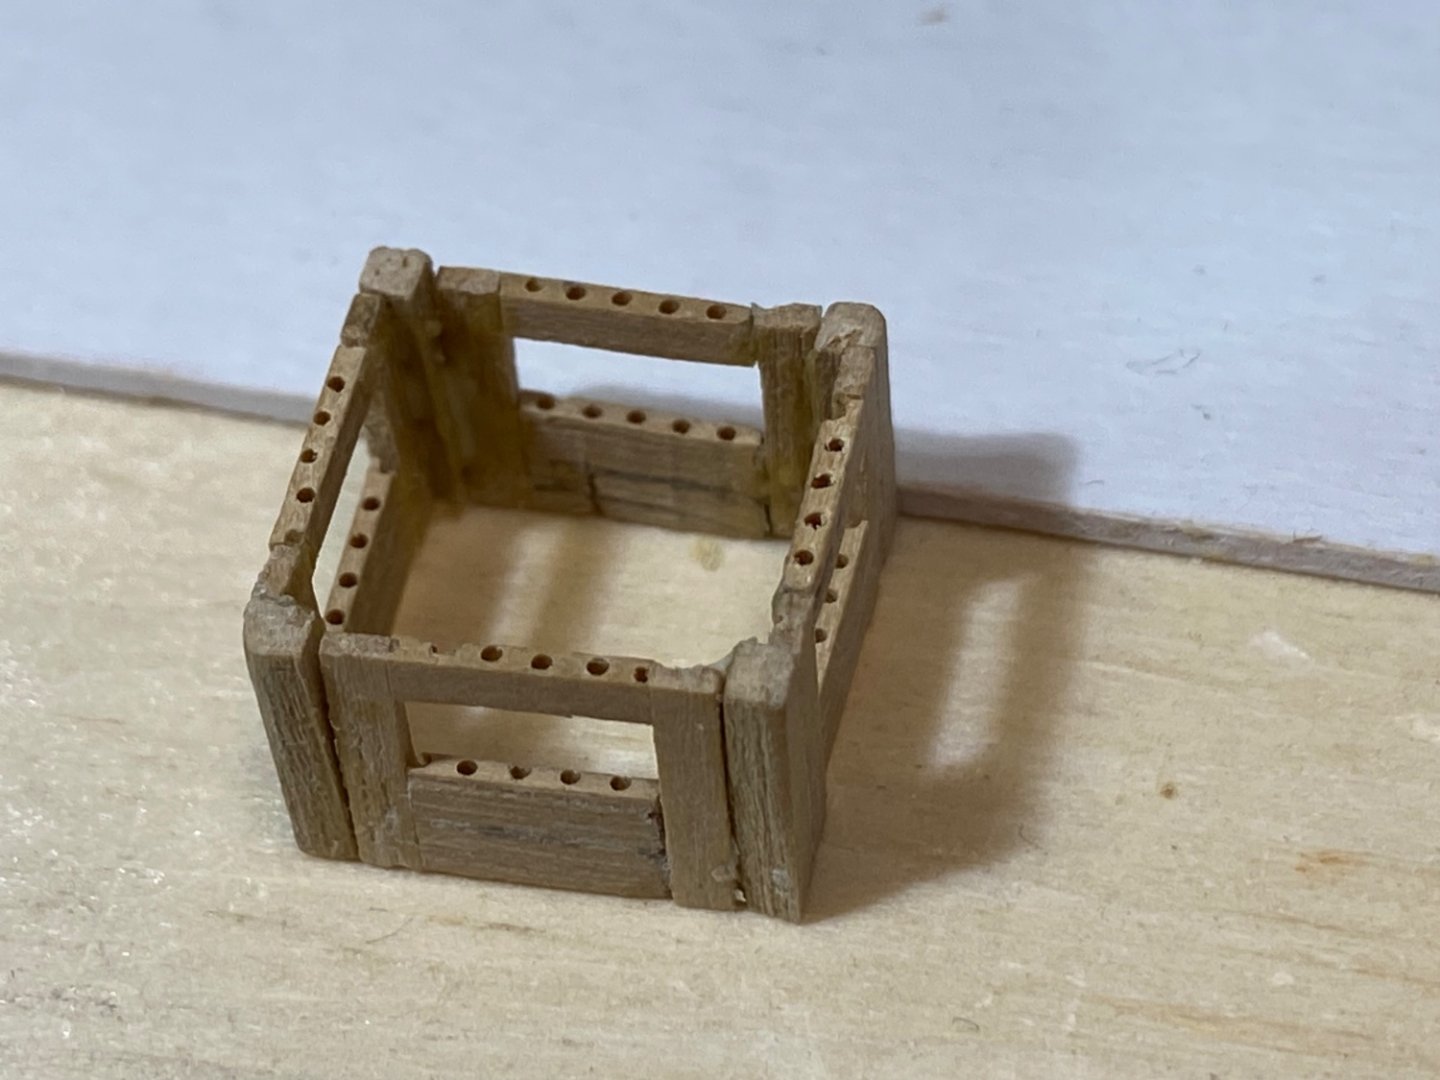
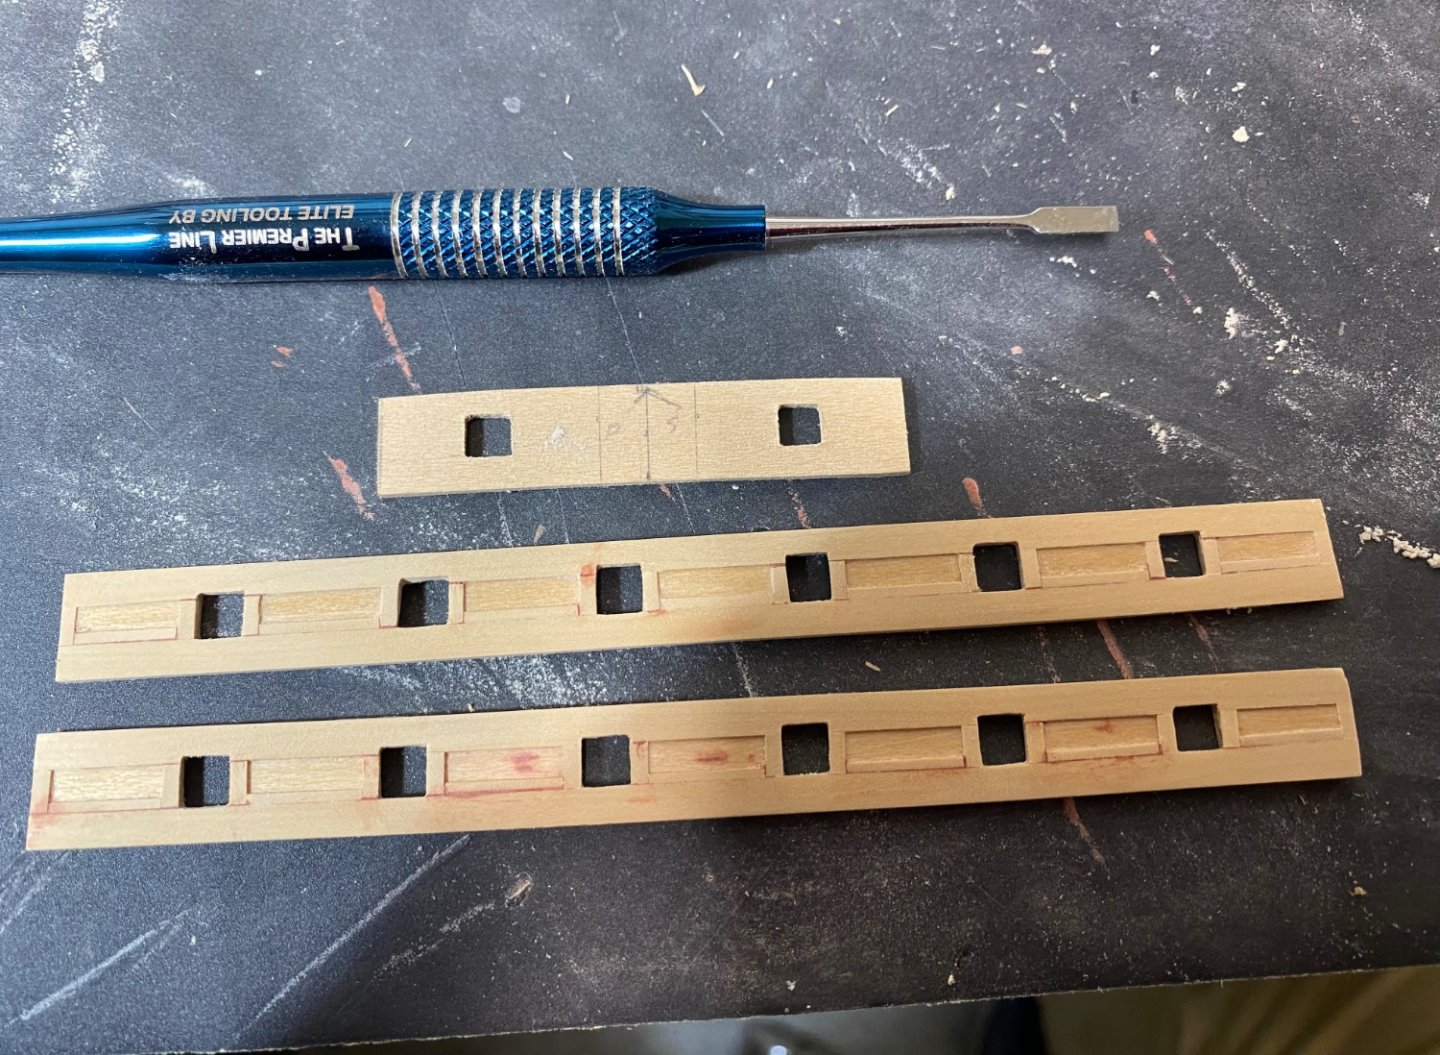
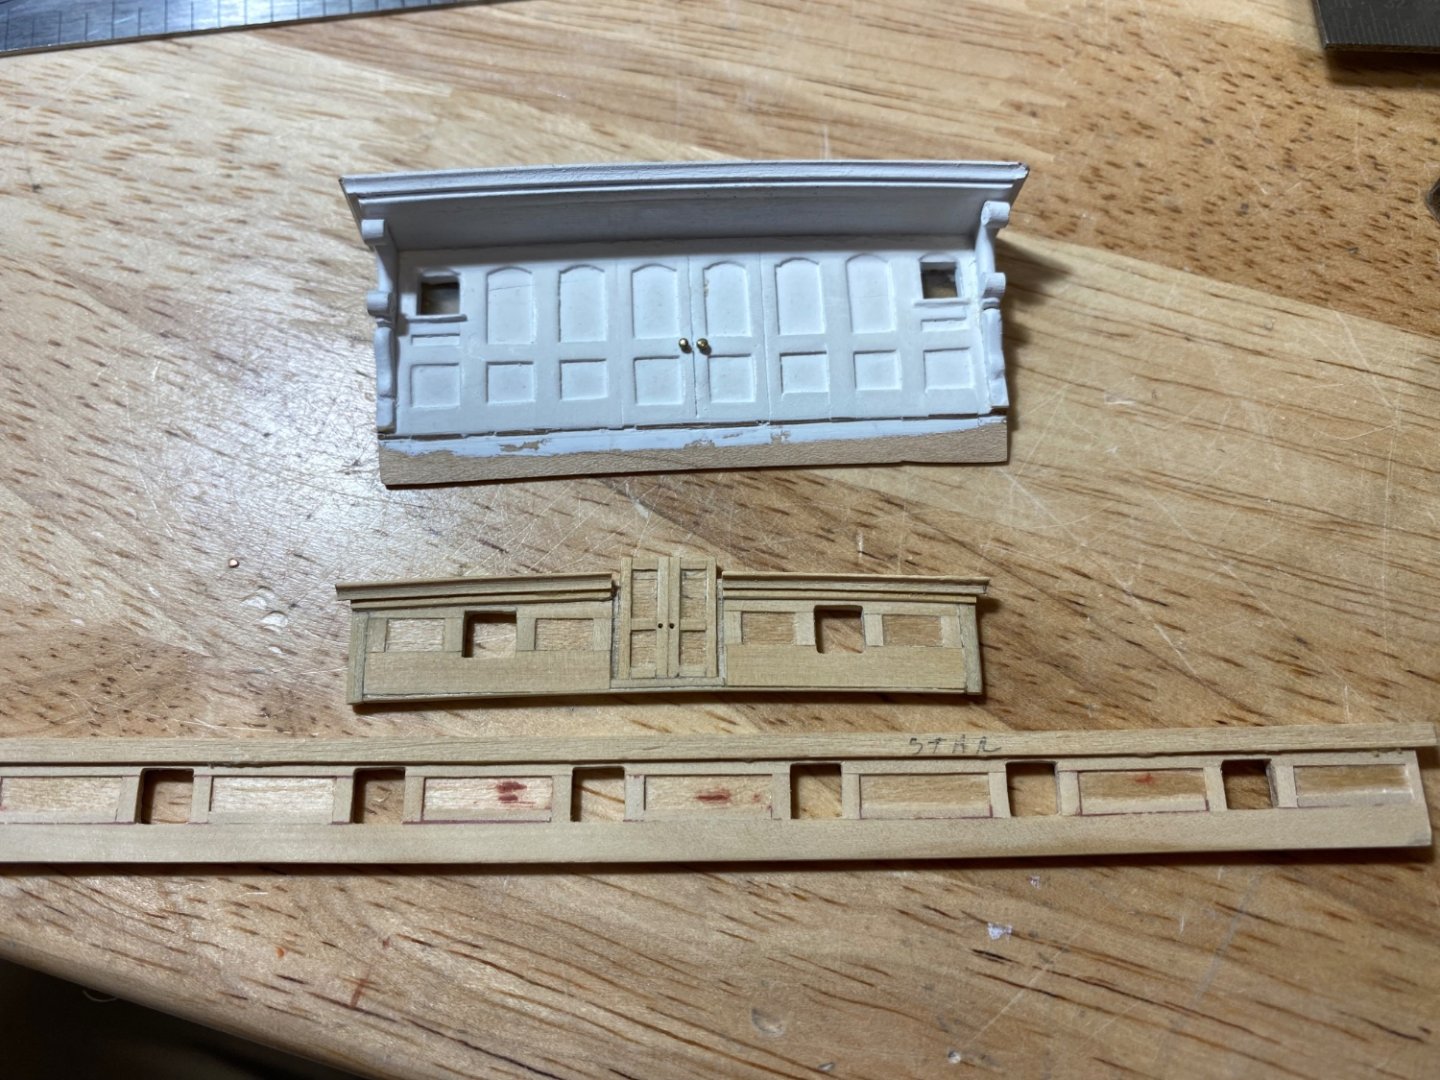
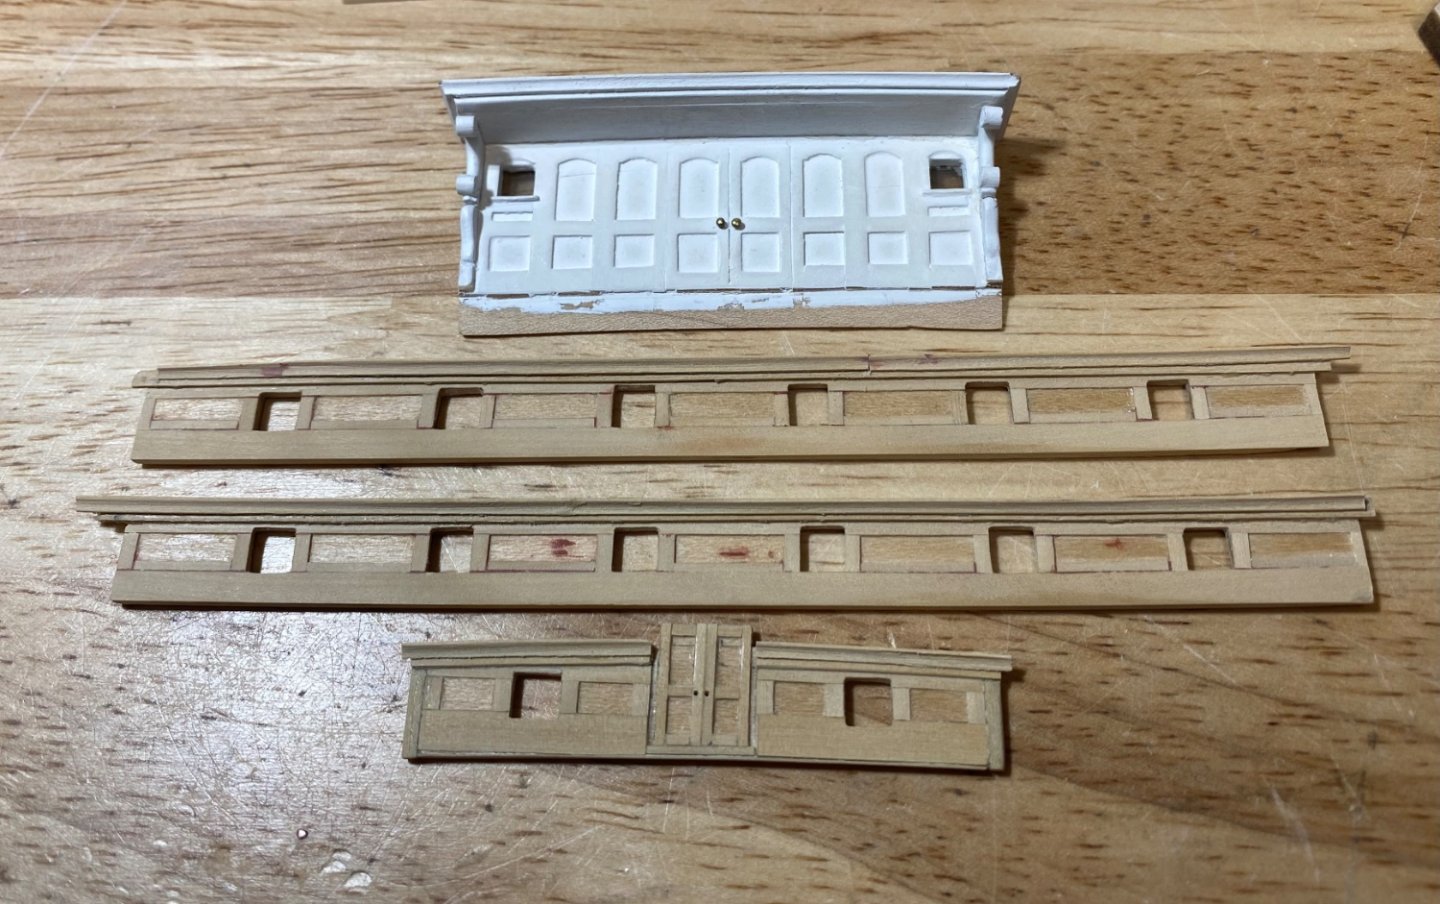
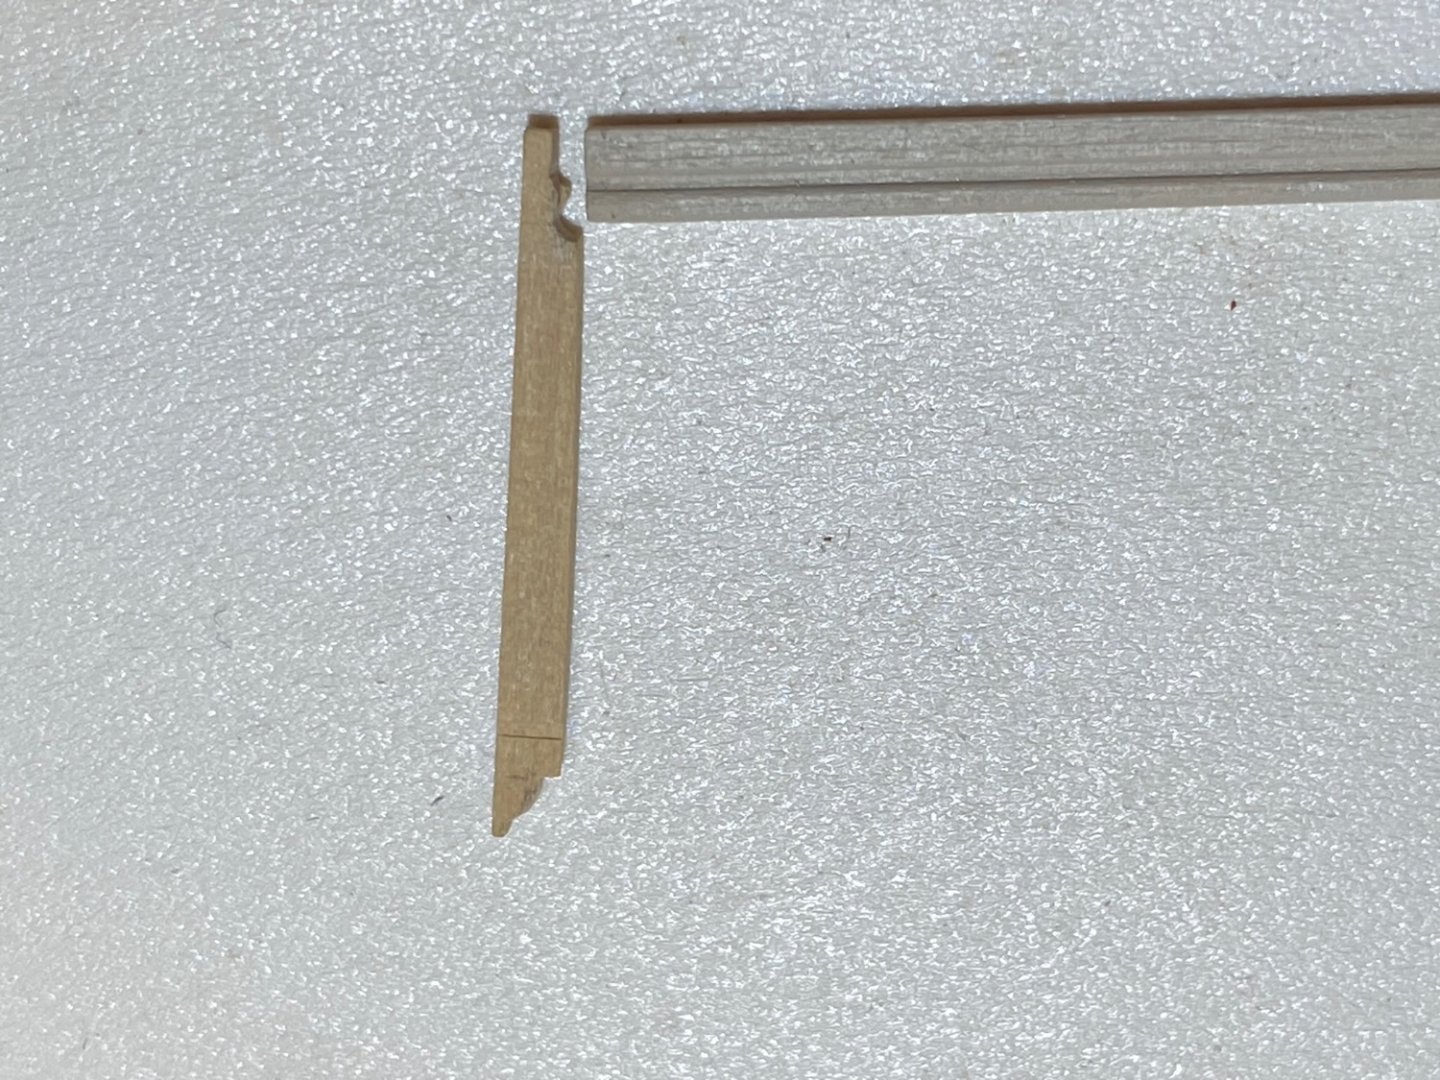
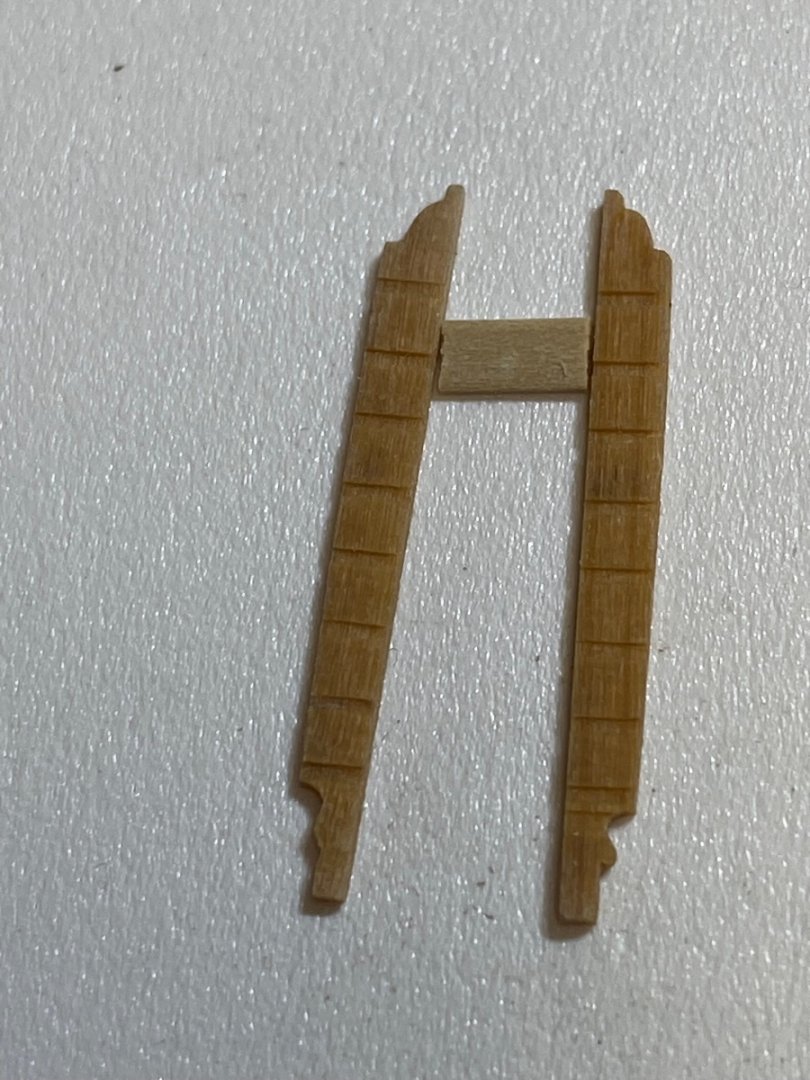
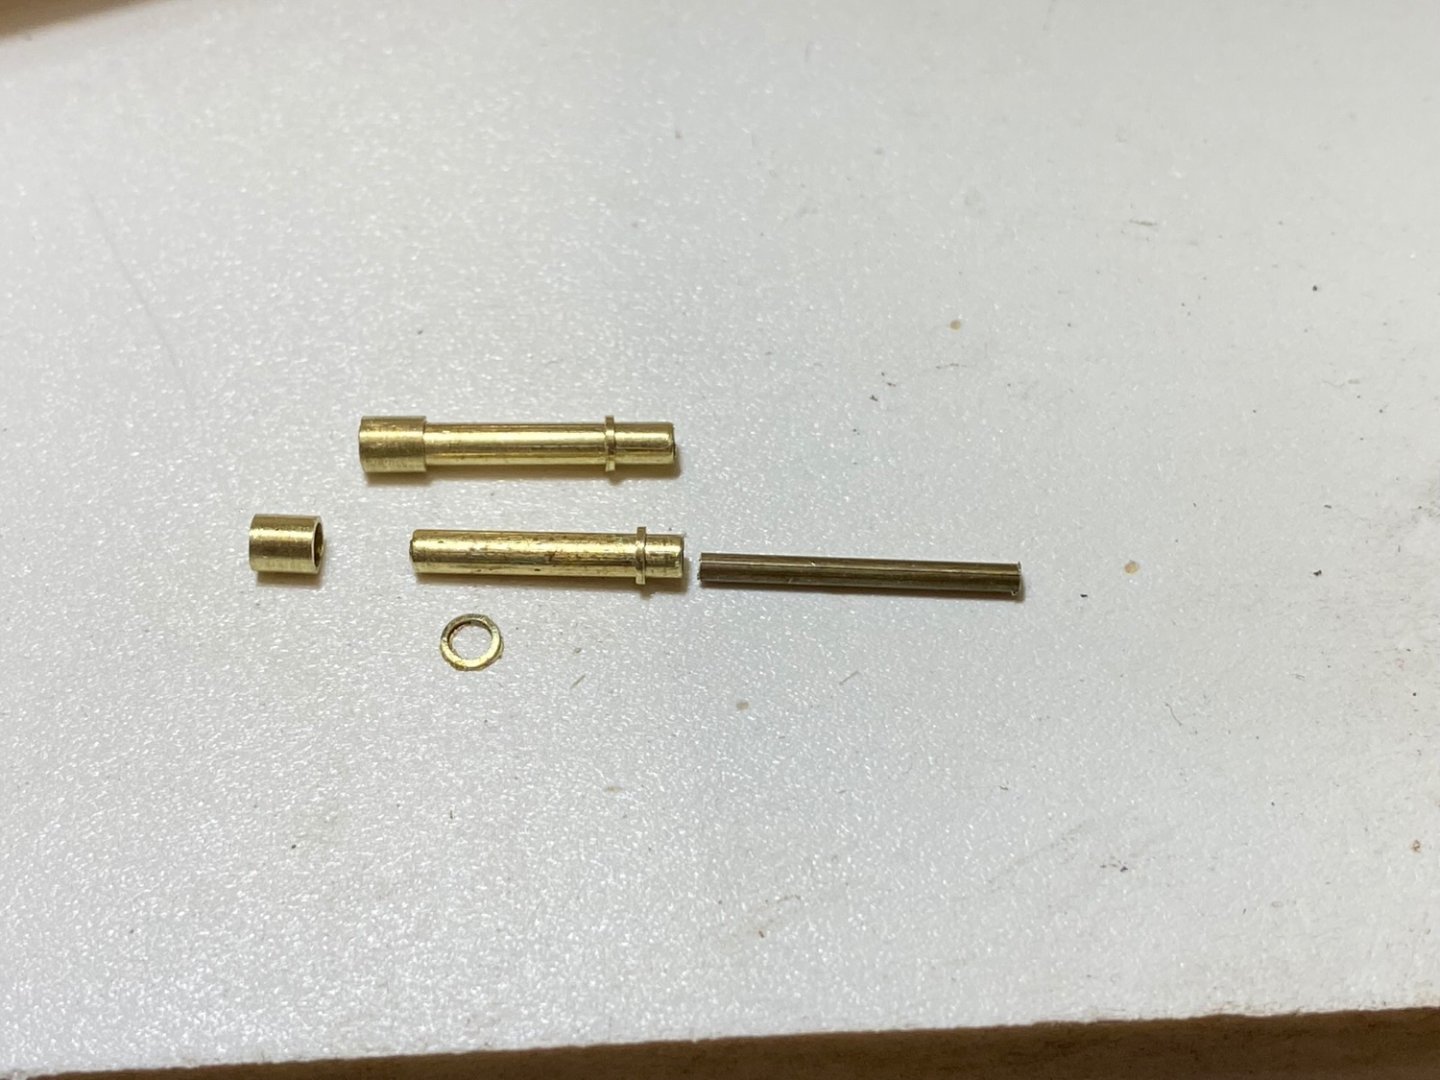
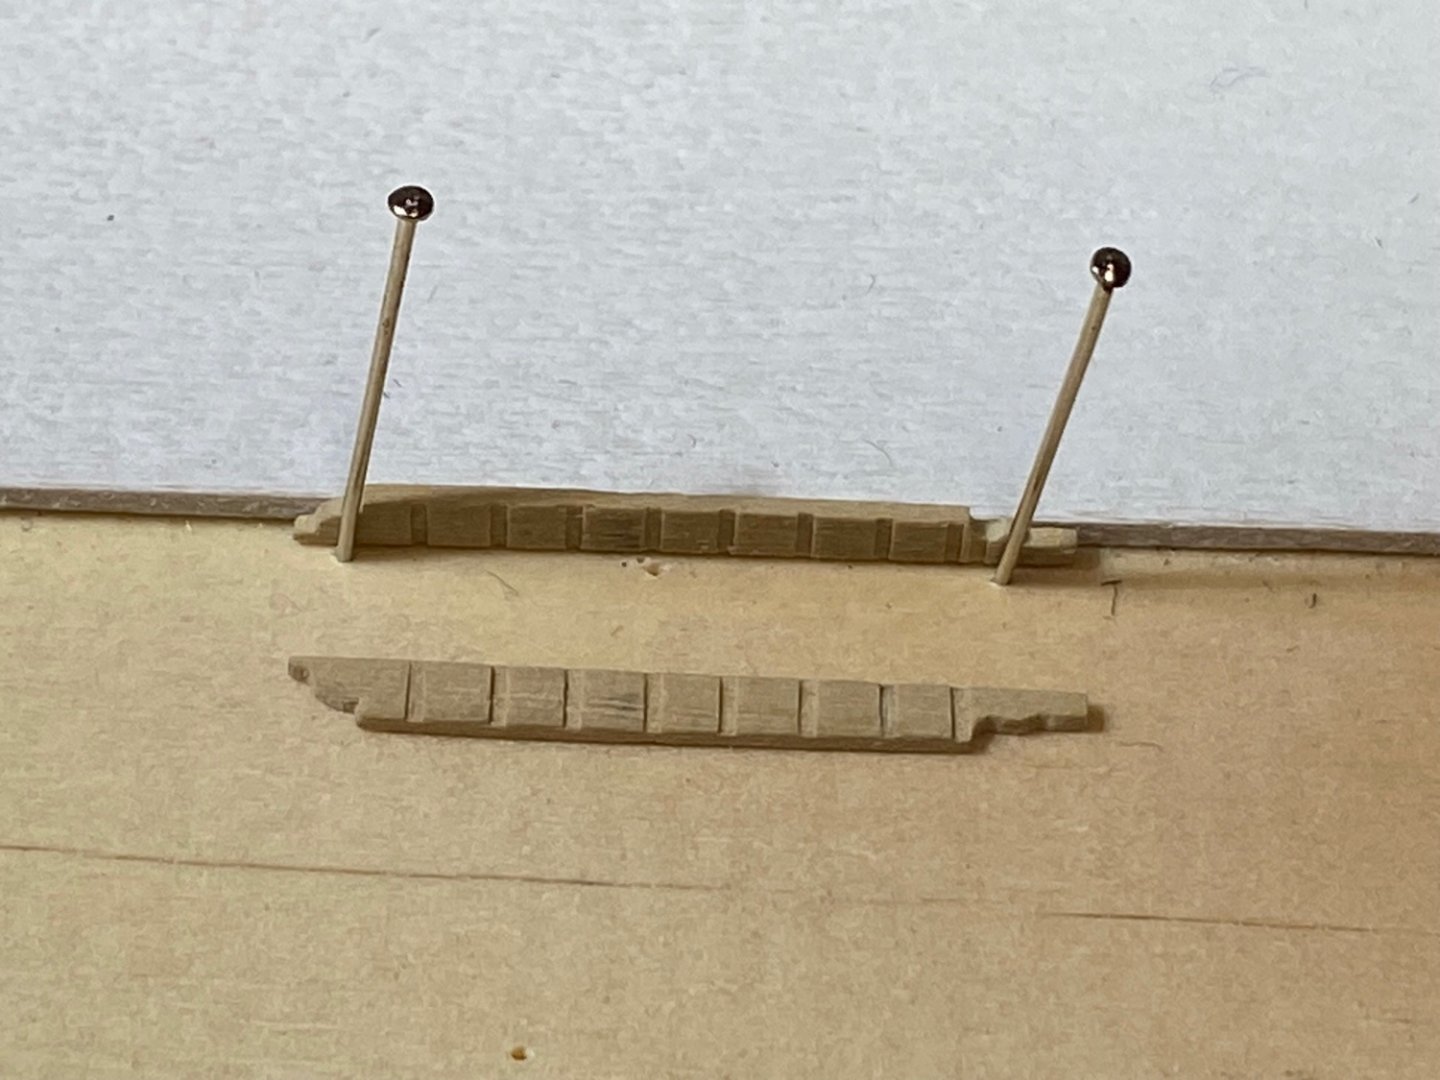
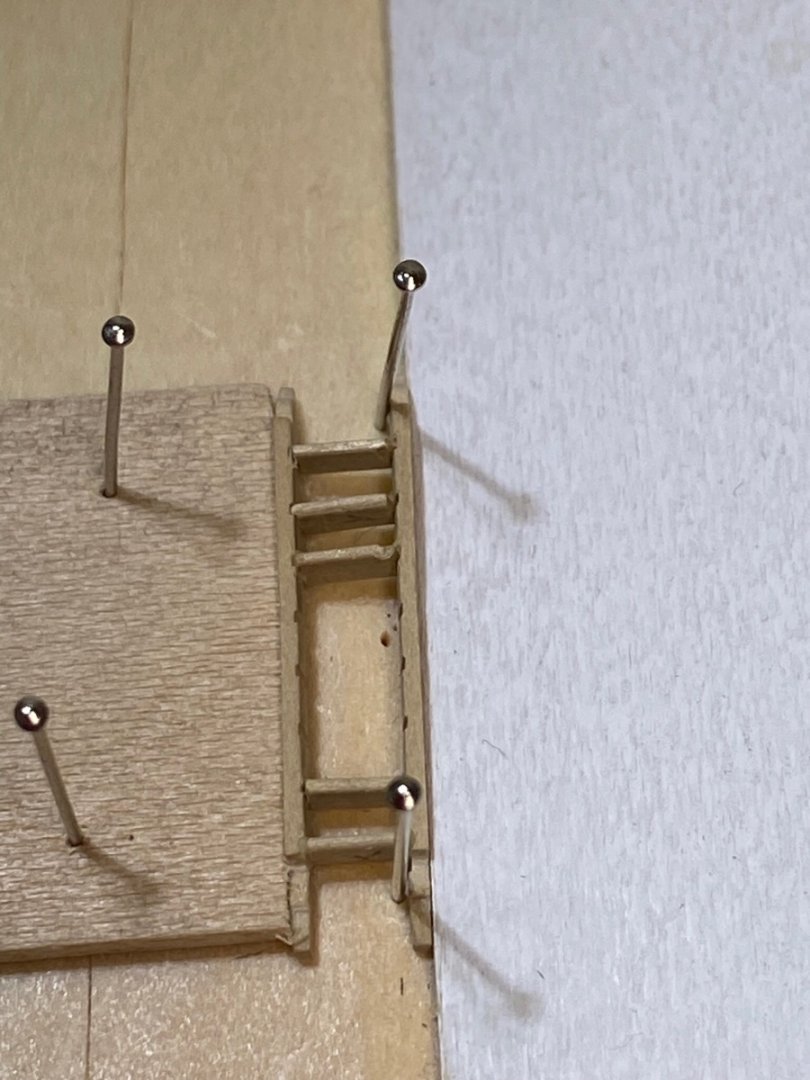
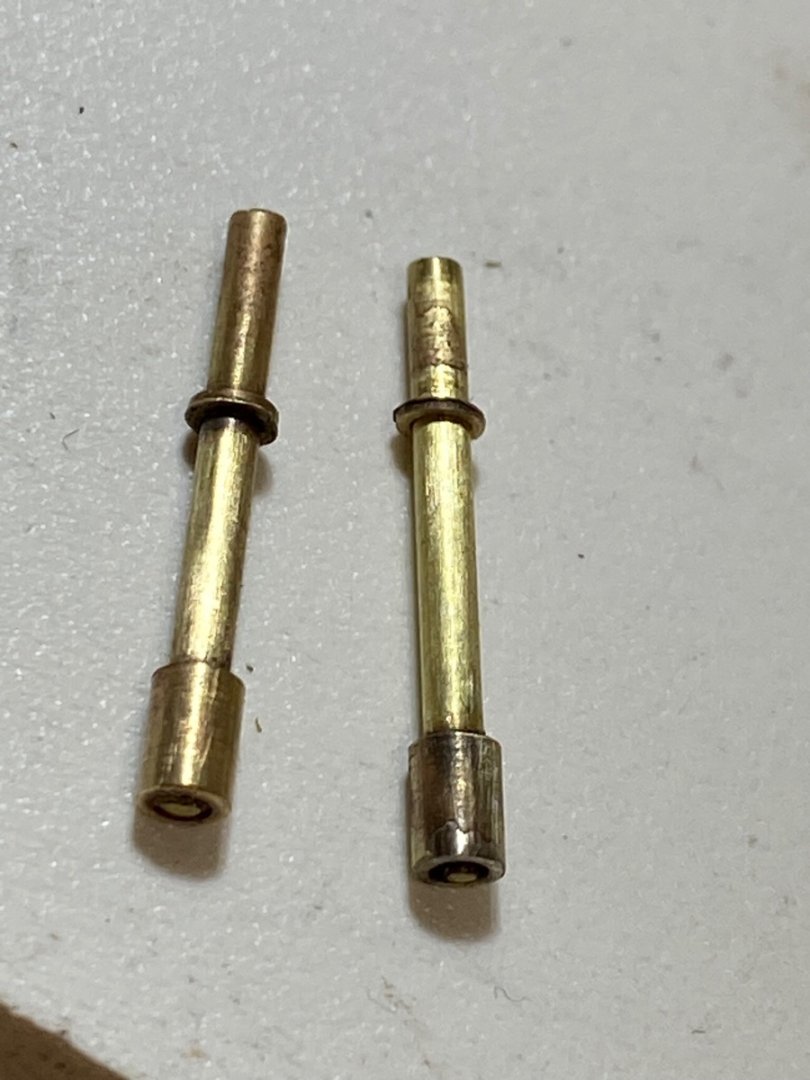
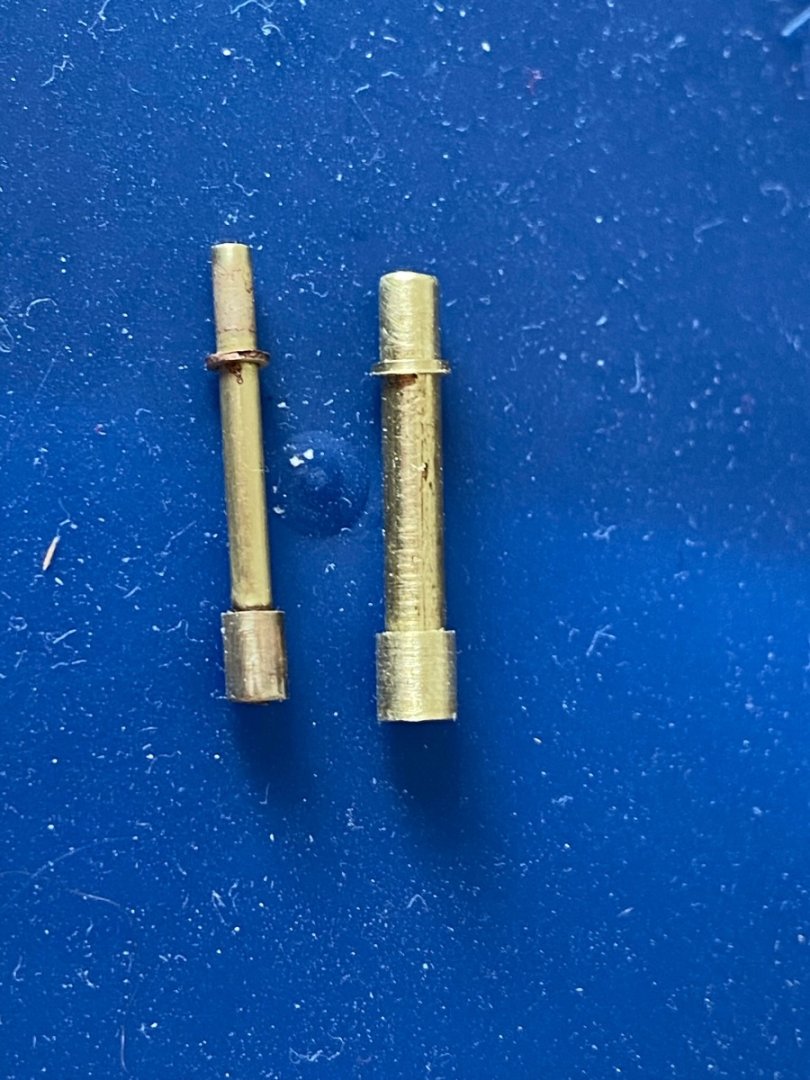
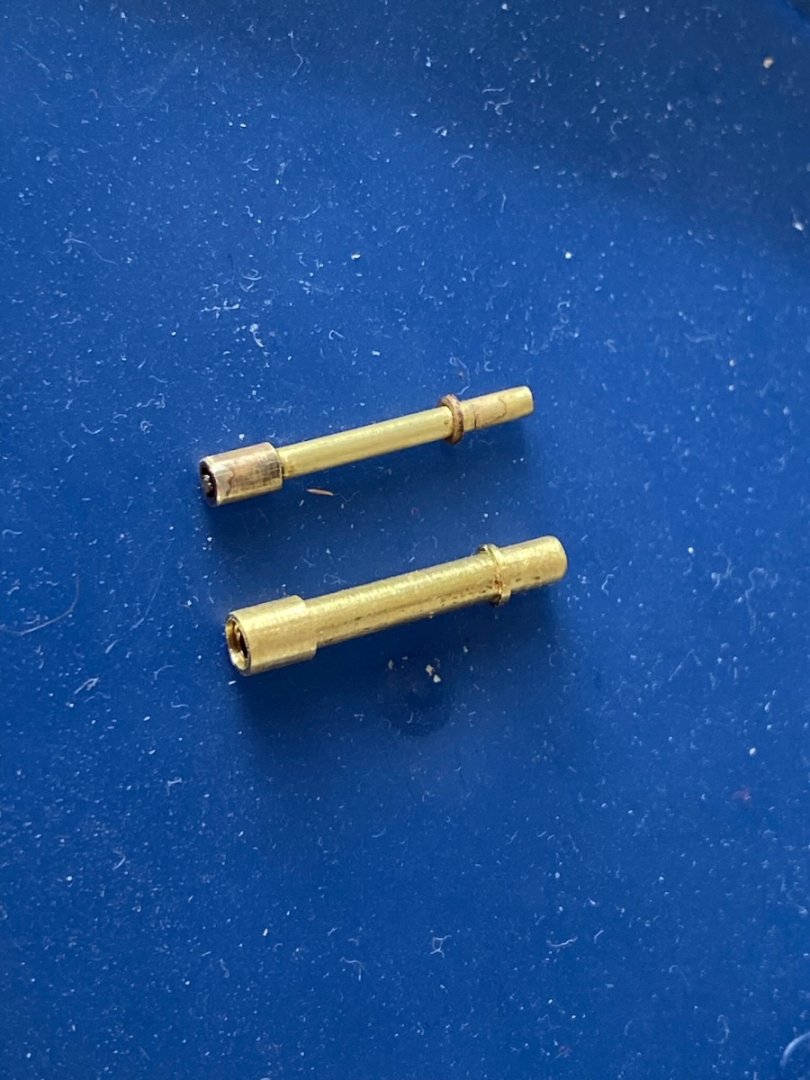
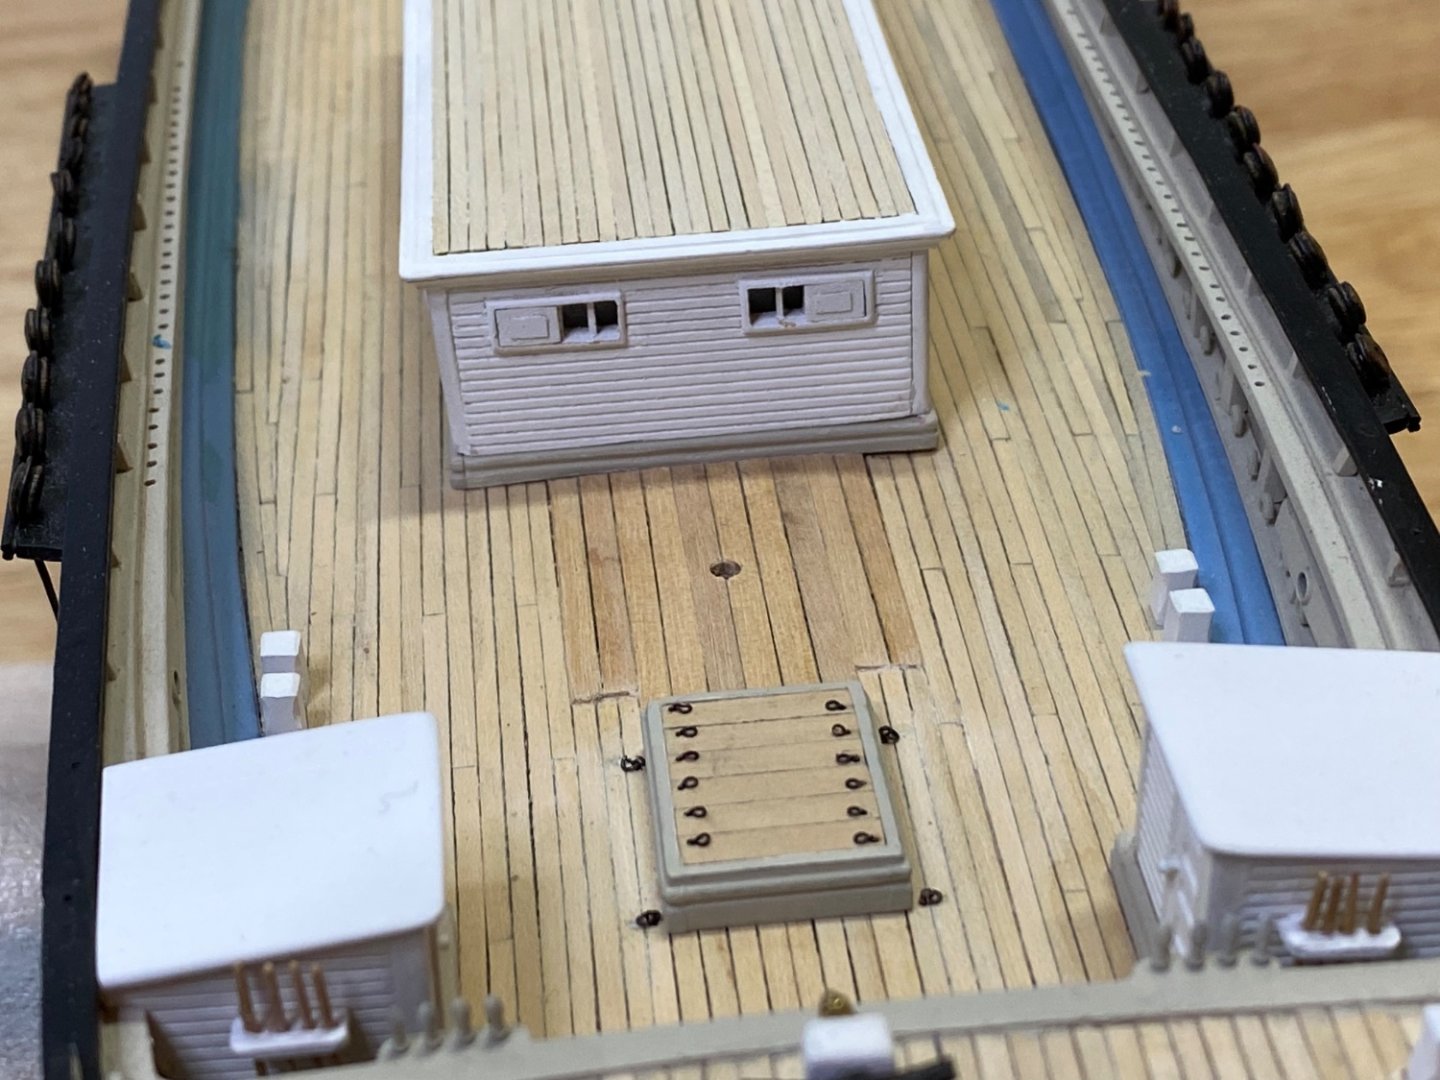
I went ahead and made the aft storage hatch since I had the coamings already made. The walls were made of 3/64 boxwood that were drilled with a #75 drill bit spaced .1 inches apart. This allows a 26 ga brass wire to be used as the bar. I somehow ended with 4 bars fore and aft and 5 bars port and starboard. So much for careful measurement. The hinges and latch were made from 28 ga brass wire hammered flat and filed to shape. I am currently working on the aft cabin. I decided to model this after the Benjamin Packard. I don’t like the plans for the Flying Fish which show the windows not evenly spaced. From what I can determine of the Packard and the the Henry Hyde ( check out the book, Henry Hyde, Downeaster, byRK Brandon, full of good information), these cabin windows are evenly space, which is more aesthetically appealing. The sides were again made from 1/16 basswood (as much as I don’t like it) which were sealed with sanding sealer twice and sanded smooth. The paneling was made from 1/64 boxwood which I ran through a Byrnes thickness sander . After it was all glued up, I continued to sand it down until it ‘looks about right.’ The quarter round moulding was made from 3/64 square boxwood, shaped with round diamond files. The small step in the waterways was made on the table saw. I also added 2 windows to the aft end. I can’t imagine that the captan would have to leave his cabin to communicate with the helm when he was he was down below., thus the window on the starboard side. The port window is debatable. I just finished making the brass railing that spans the forward edge of the aft cabin. I miscounted the number of posts and originally drilled for7 across the front. When I went back and checked the Buttersworth’s painting,he shows5 posts. I re-drilled for 5 posts and filled the other holes with Bondo. I copied EdT’s brass rail except I made the post from 1/32 brass rod per Young America. The brass ball I made from 1 mm brass tube that I bought with the idea of using it for thimbles if I could find a way to cut it. The rail is .02 brass rod which fits through the tube. The ball was soldered to the brass rod. The .02 tube for the ball was cut on the Byrnes table saw. I reversed the blade which someone on Model Ship World recommended and I wrapped the end of the tube with painter’s tape. This was then taped to a strip of 1/16 basswood and run through the saw. The fence was set at approximately 3/64 width.this worked really well and the tape and the basswood kept the brass ball from flying off. After the ball and rod were soldered together, the ball was filed with a metal file and polished in the lathe. I am waiting for the 1/16 brass tube that will be used for the sockets/ flanges. Hope to start painting tomorrow and putting the pieces together.


- 186 replies
-
- 3
-
-
- Flying Fish
- Model Shipways
- (and 1 more)
-
Nice!!!
-
Beautiful work!!
-
Really looks good George! I like your idea of using the overhand knot and it looks really good on your model. Can’t wait to get to the stage you’re at. Keep up the great work Rick
- 600 replies
-
- 1
-
-
- Flying Fish
- Model Shipways
- (and 2 more)
-
Looks good Nic. Are you going to add the top on the foremast?
-
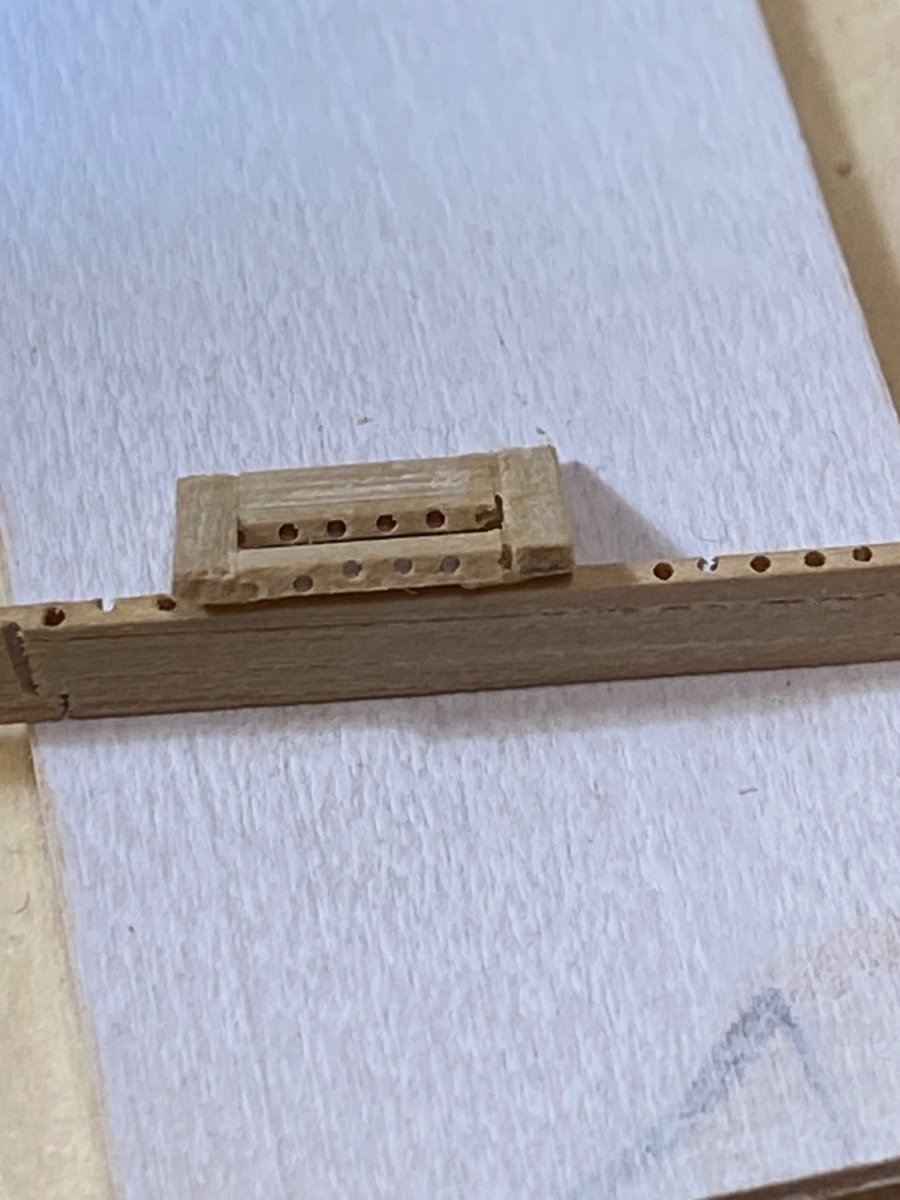
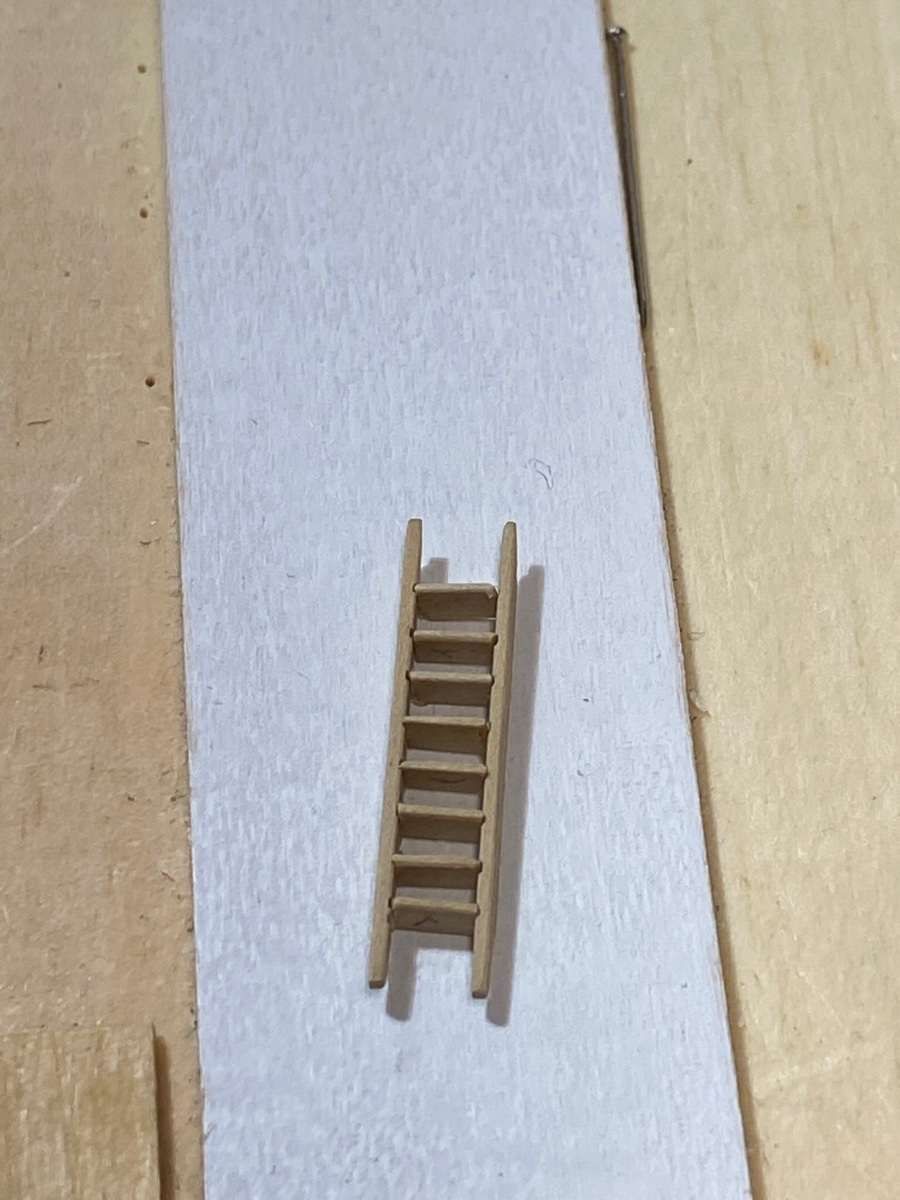
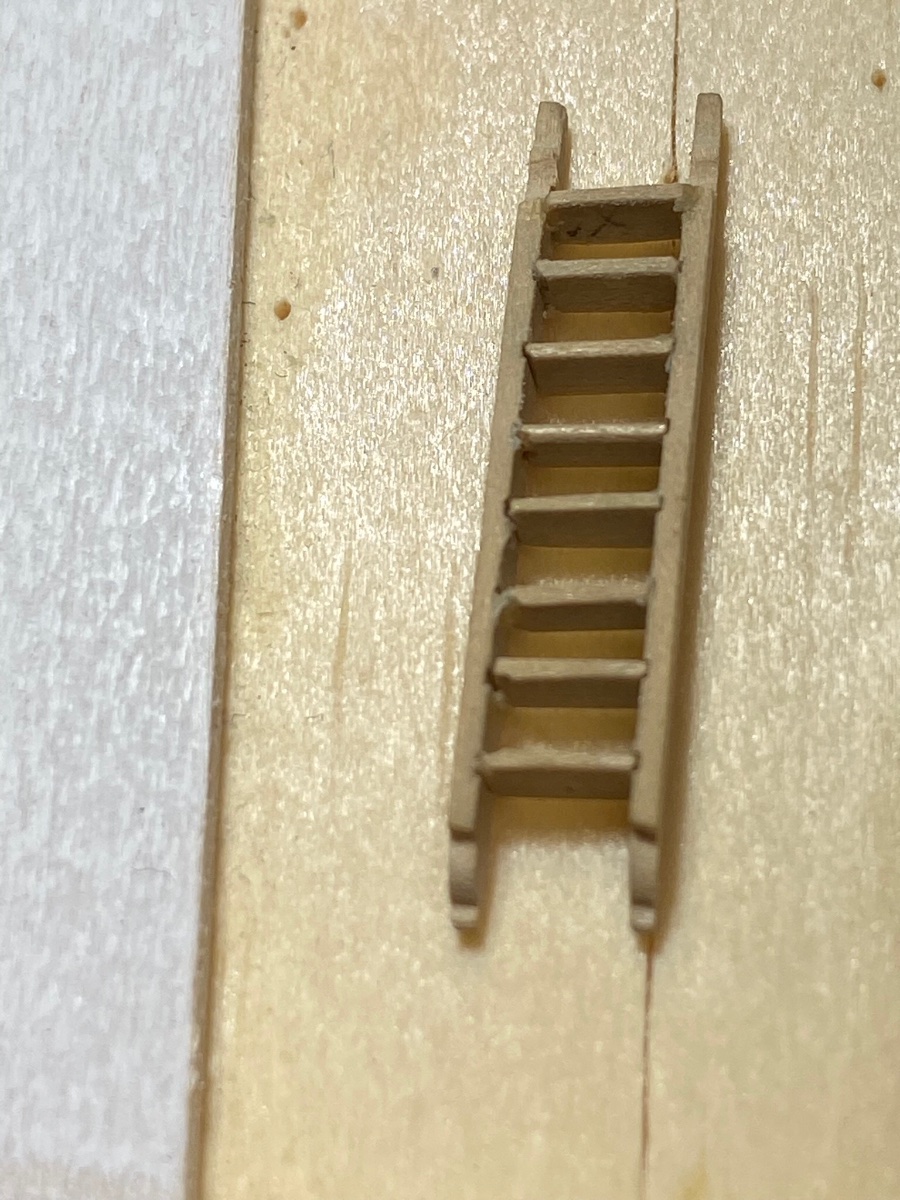
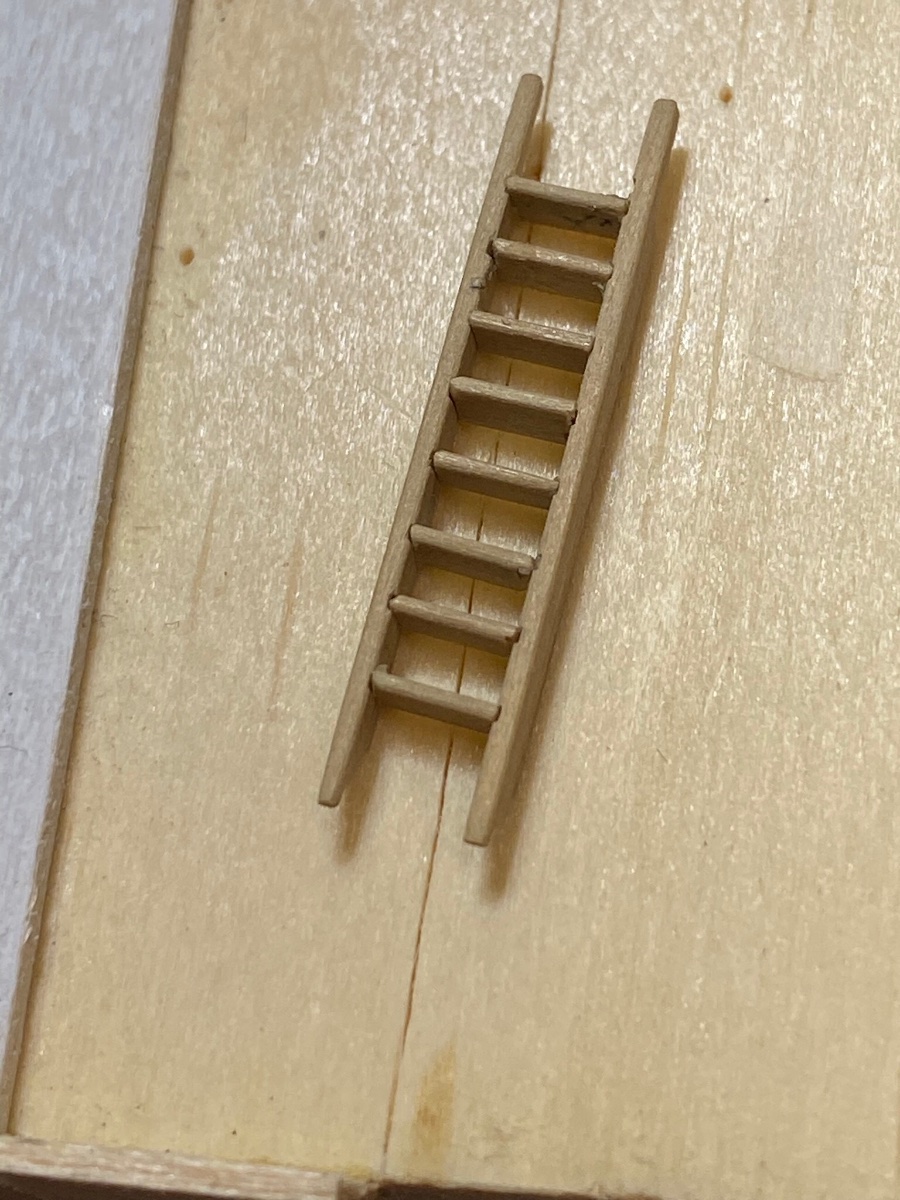
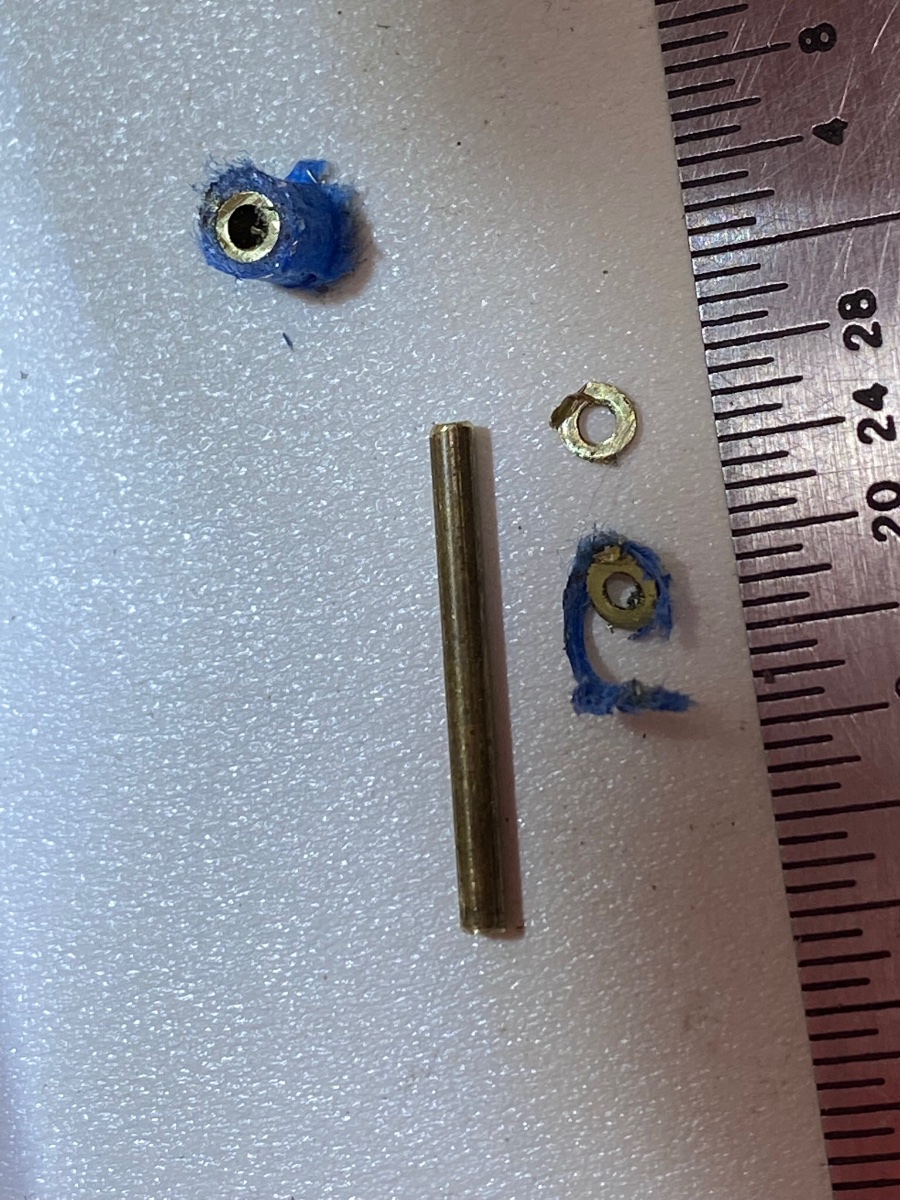
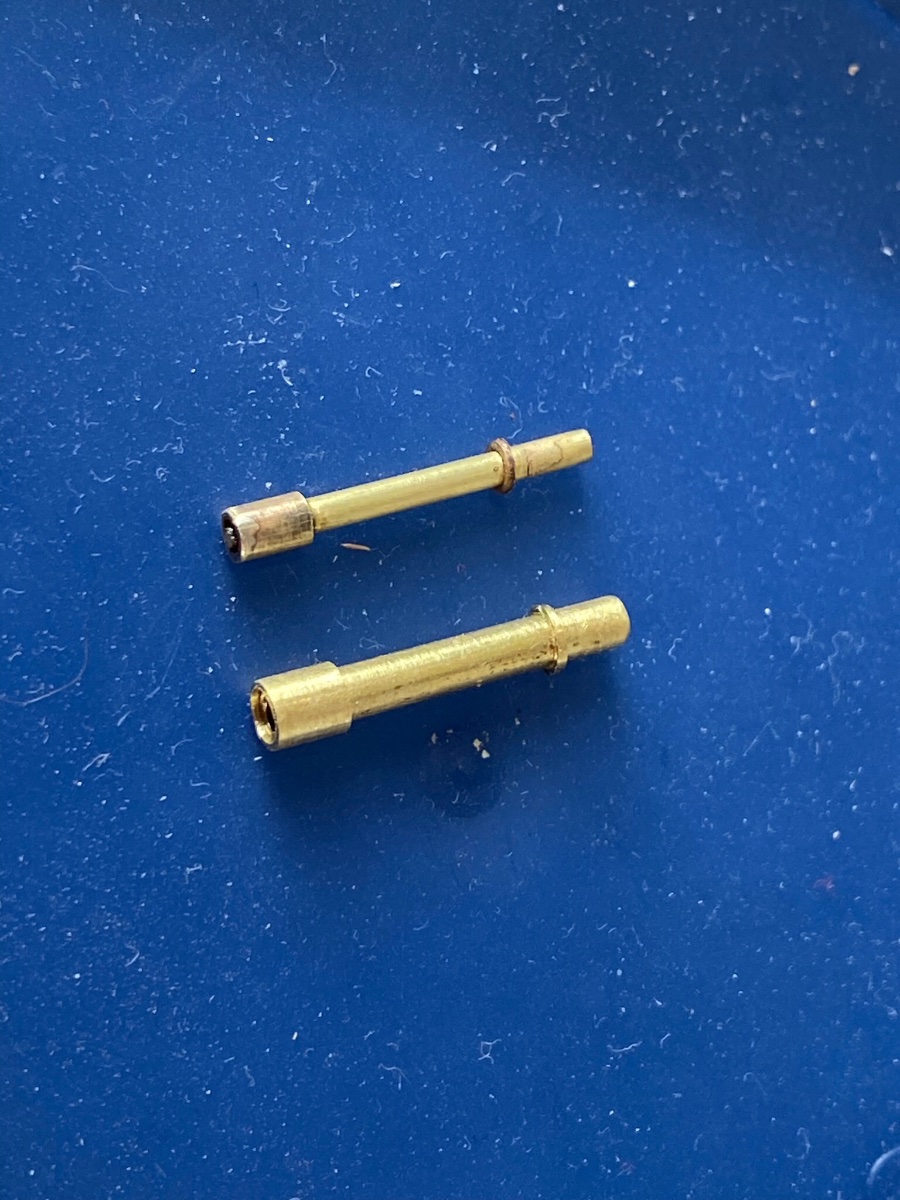
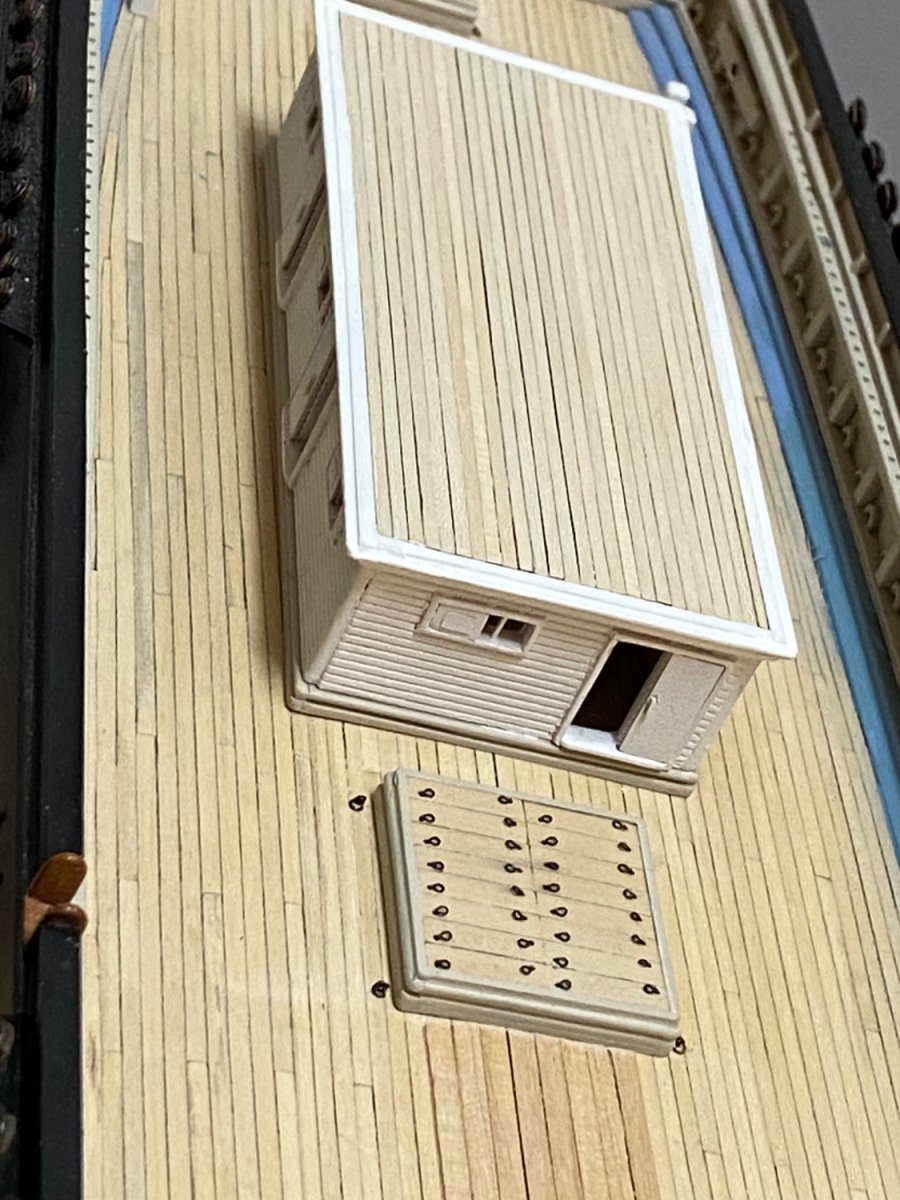
I made the ladder and the Galley stack next. The ladder was made from 3/64 boxwood which was eventually sanded down to approx 1/32. I glued the rails together with Elmer’s glue so that when I shaped the ends to fit around the coamings and the mouldings under the roof, and cut the slots for he treads, I would have matched pairs. I also made a jig to cut out the steps. The slots in the rails were cut on the Byrnes table saw using a .02 kerf (width) blade barely protruding above the base of the table saw. Unfortunately the slot was thinner than the treads which caused problems when assembling them. I have a .03 blade but was afraid to use it as it has fewer teeth and is more aggressive. After the slots were cut, the rails were soaked in water to separate them. I also made a jig to assemble the ladder. I had to sand the ends of the treads down to fit in the slots which introduced more error. I am really convinced when I see a really good ship model such as EDT and Keith Aug, Rob, that one of the things that makes a really good ship model stand out is the joinery work. It seems that no matter how careful I am when I’m making the pieces, when I go to assemble them the joinery is never nearly as good as I had hoped. I seem to really struggle with this. The really good ship models have just beautiful joinery cabins hatches lifeboats etc. The ladder was painted white and glued to the back of the fore cabin, the handhold-was made from 28 gauge copper wire. The galley stack was made from telescoping brass tubing and rod. These were cut out on the table saw including the flange. I had read some time ago that when cutting copper or brass tubing and rod to first wrap the ends in blue painters tape which I did and this was very successful. The flanges are only .02 inches in thickness. After I made the first two I decided they were too wide and remade them smaller. The aft stack is higher than the one on the fore cabin. These were blackened and the stack on the fore cabin set in place. I won’t glue either the stack or the cabin in place until figure out the boats and the boat skids. Working on the aft hatch now with the brass bars.


- 186 replies
-
- 5
-
-
- Flying Fish
- Model Shipways
- (and 1 more)
-
Rob, Glory looks right at home on your study! Truly magnificent clipperfan, hope you and your family get back into your home soon and wishing you a better 2023
-
George, I think it would be great fun to compare Flying Fish models when we are all finished.
-
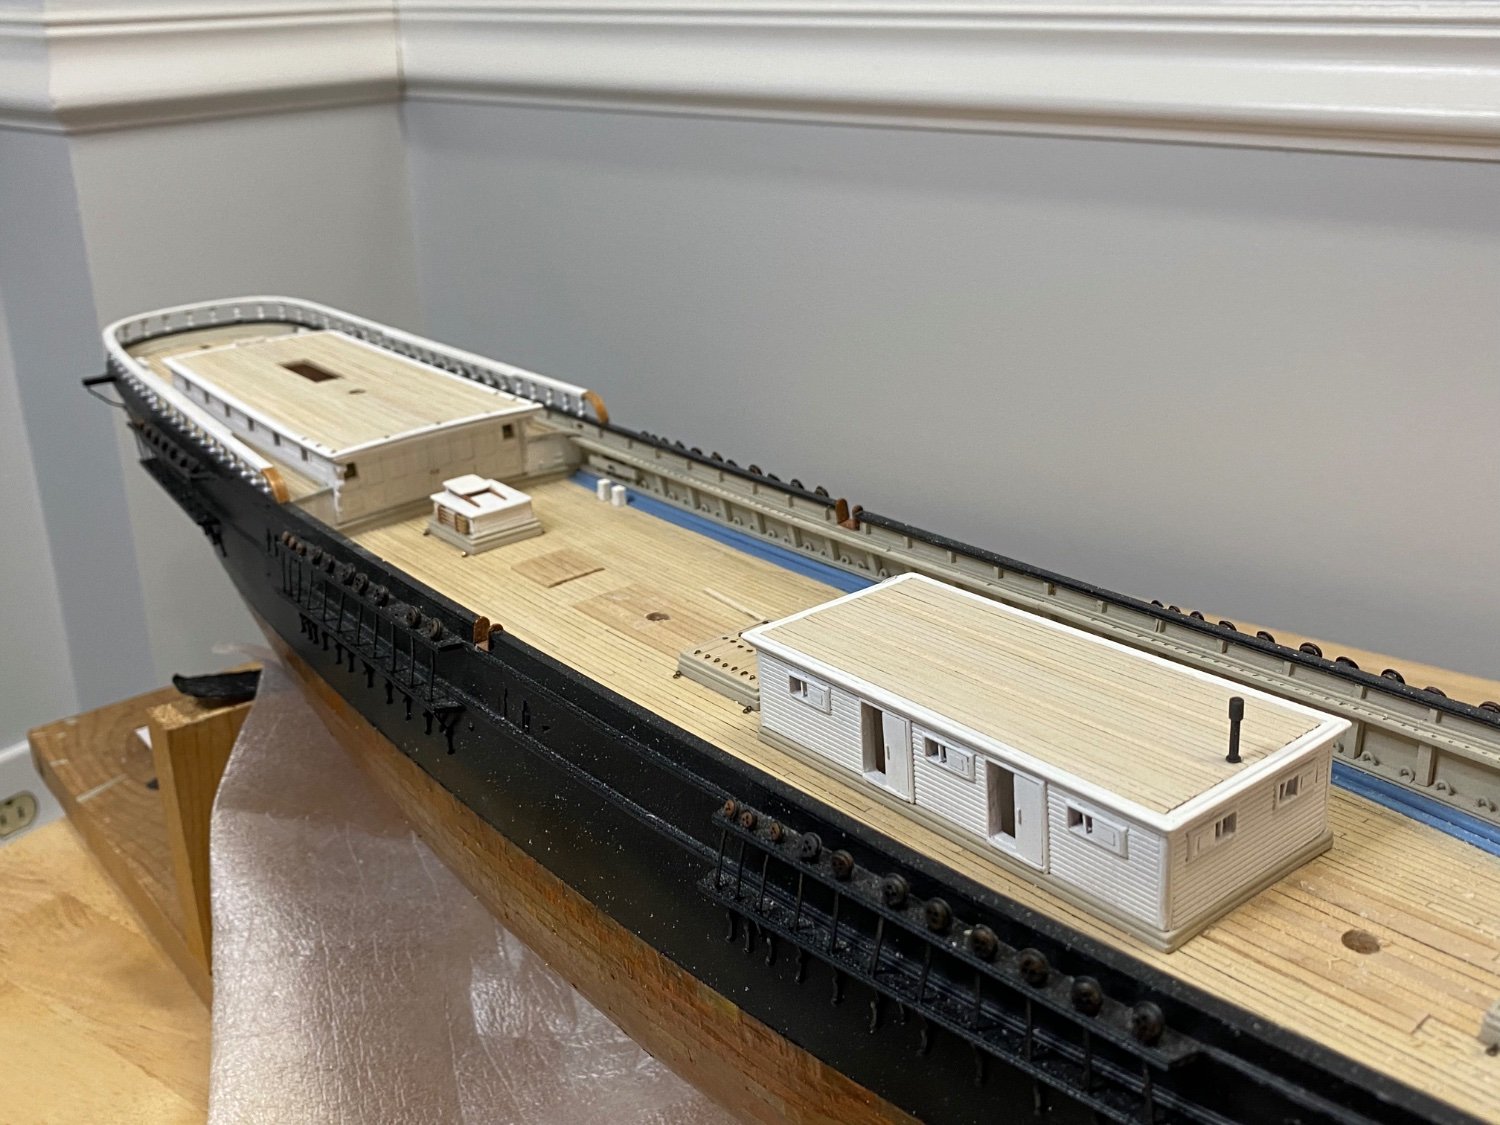
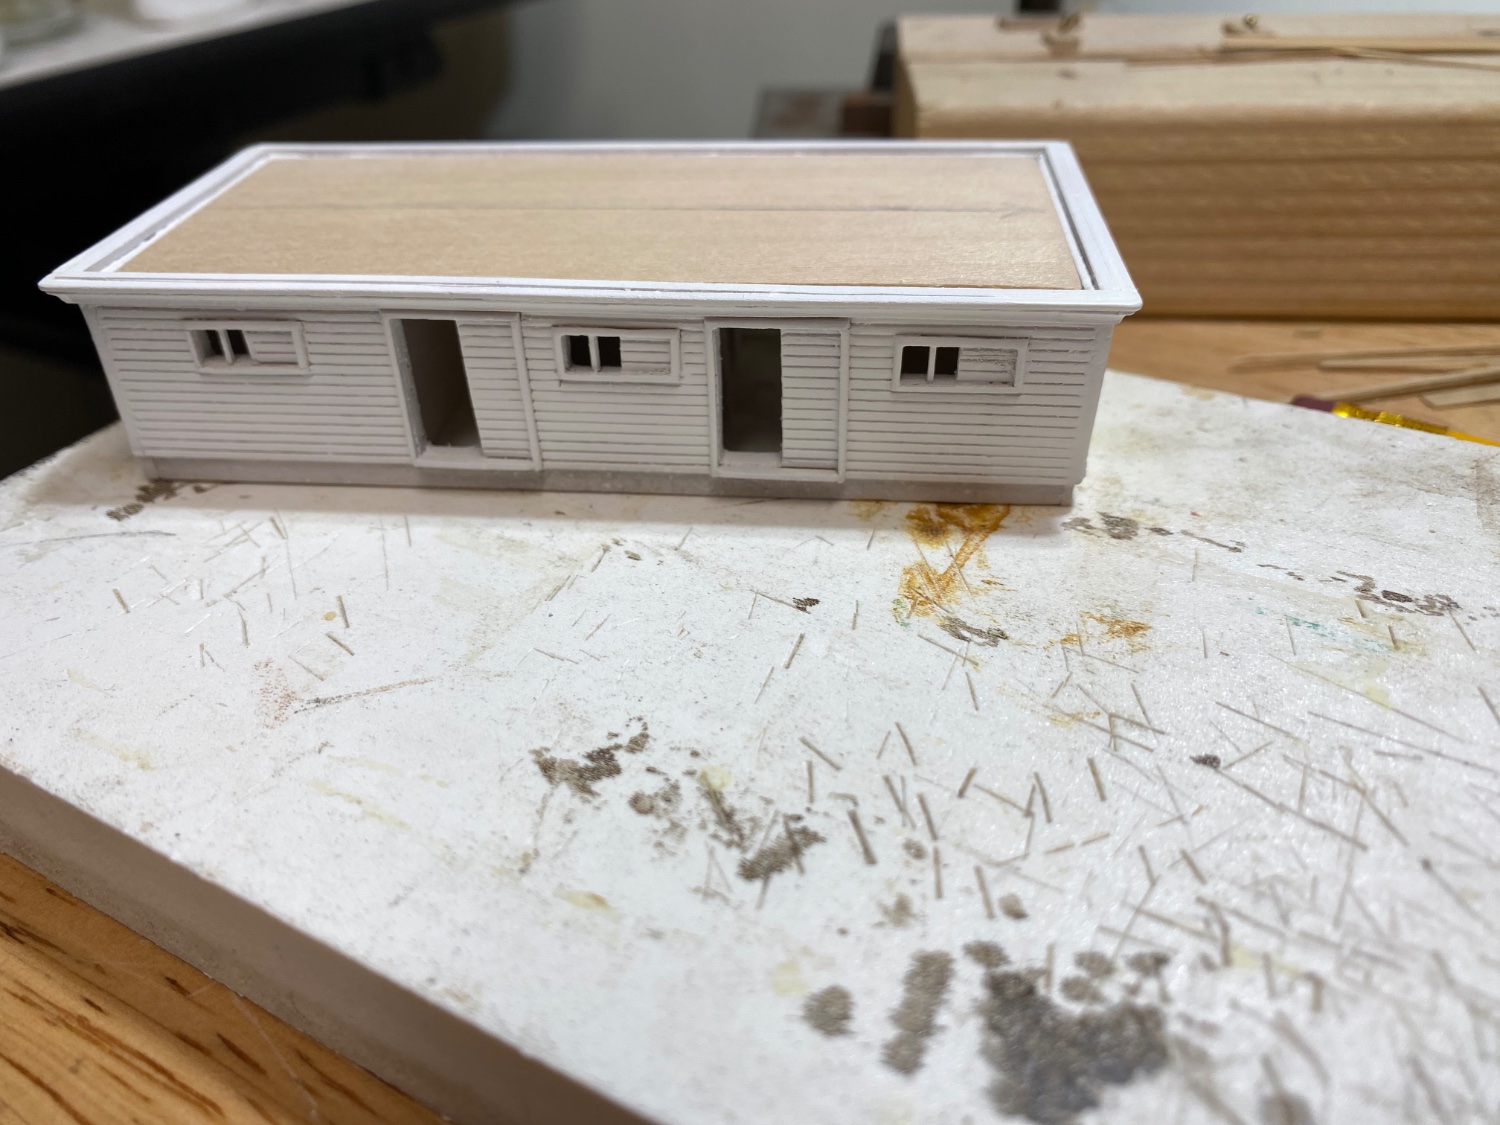
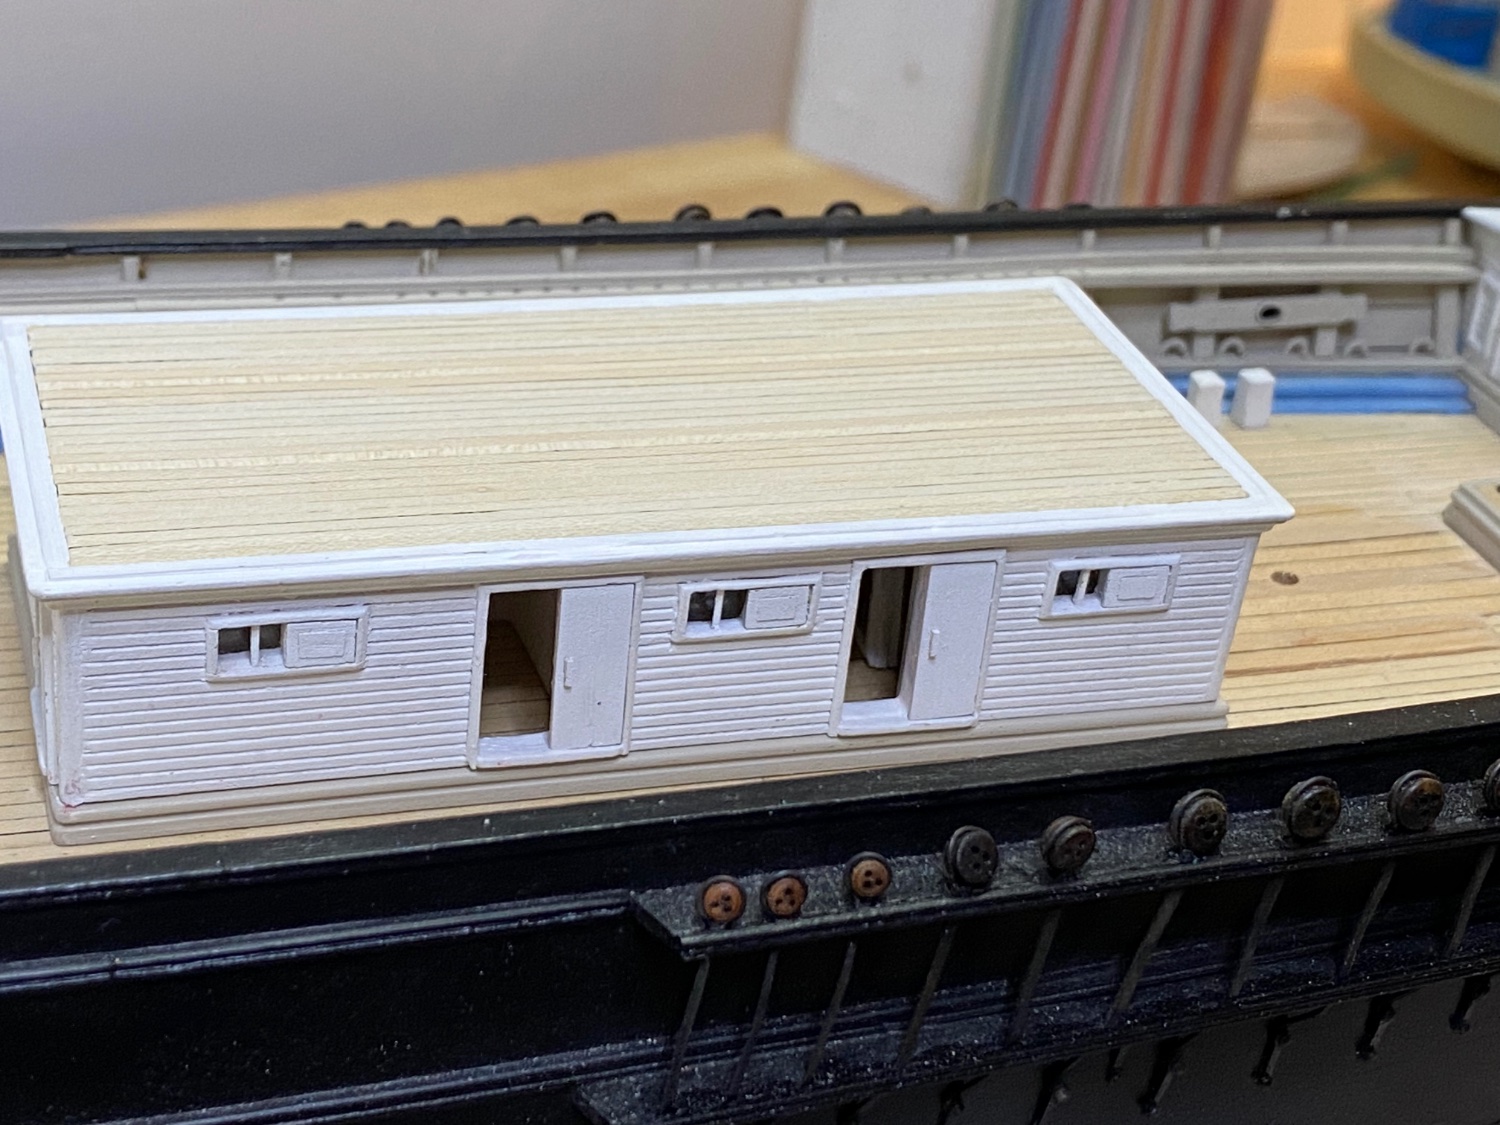
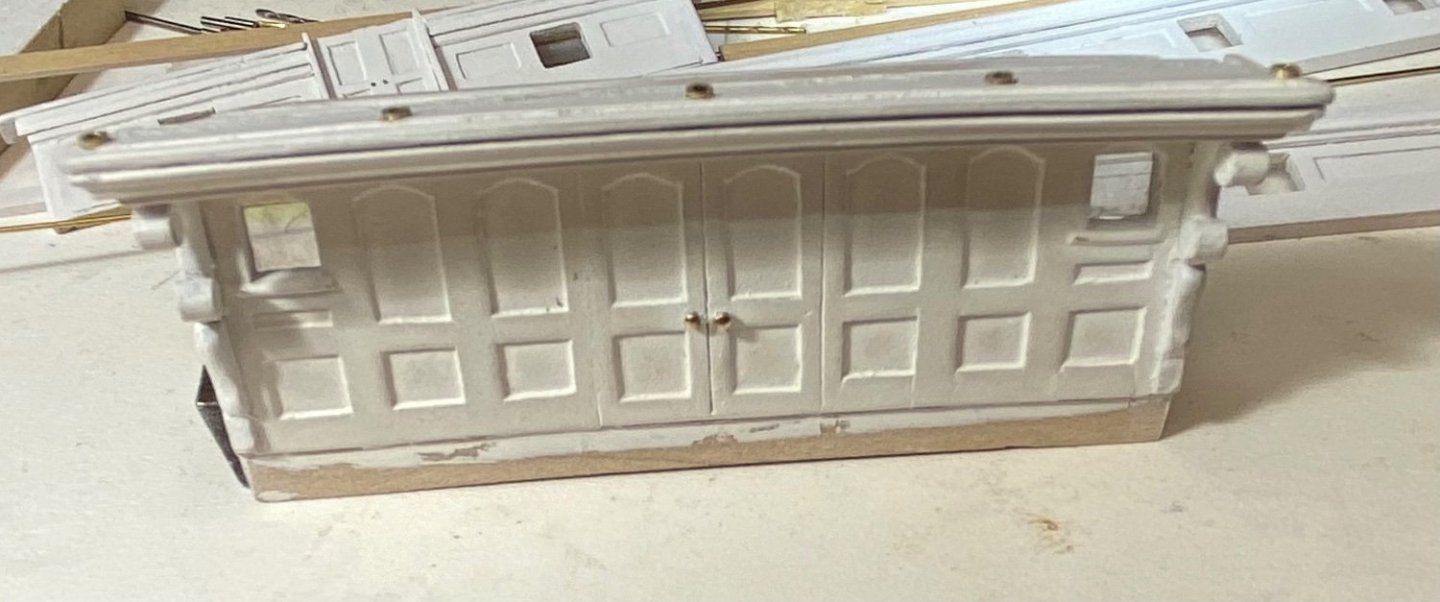
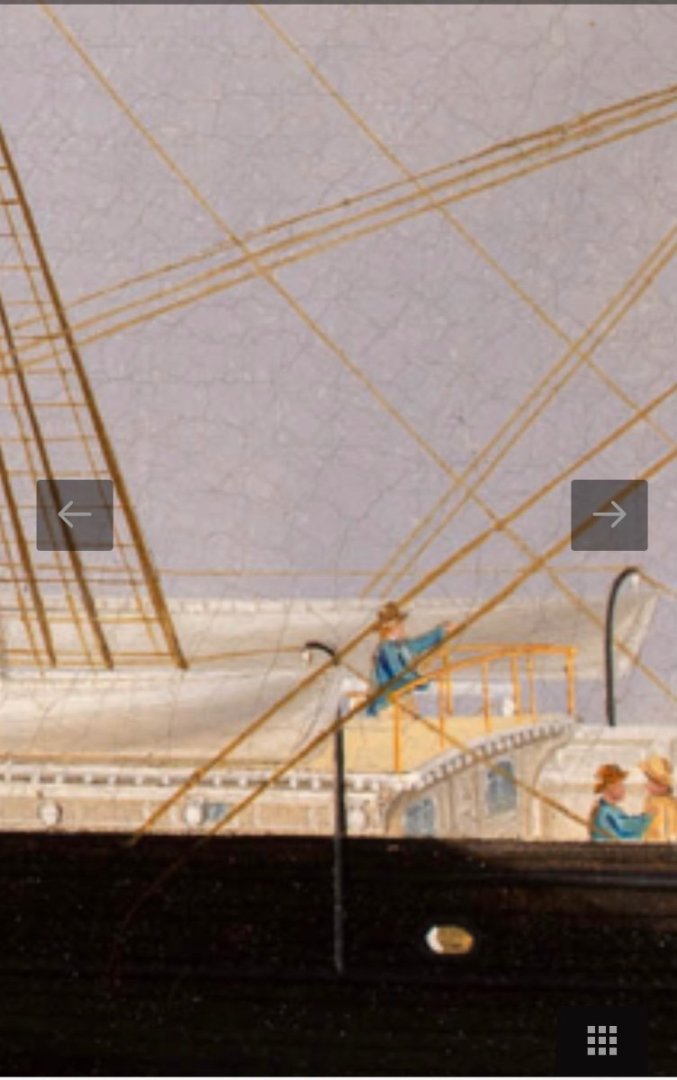
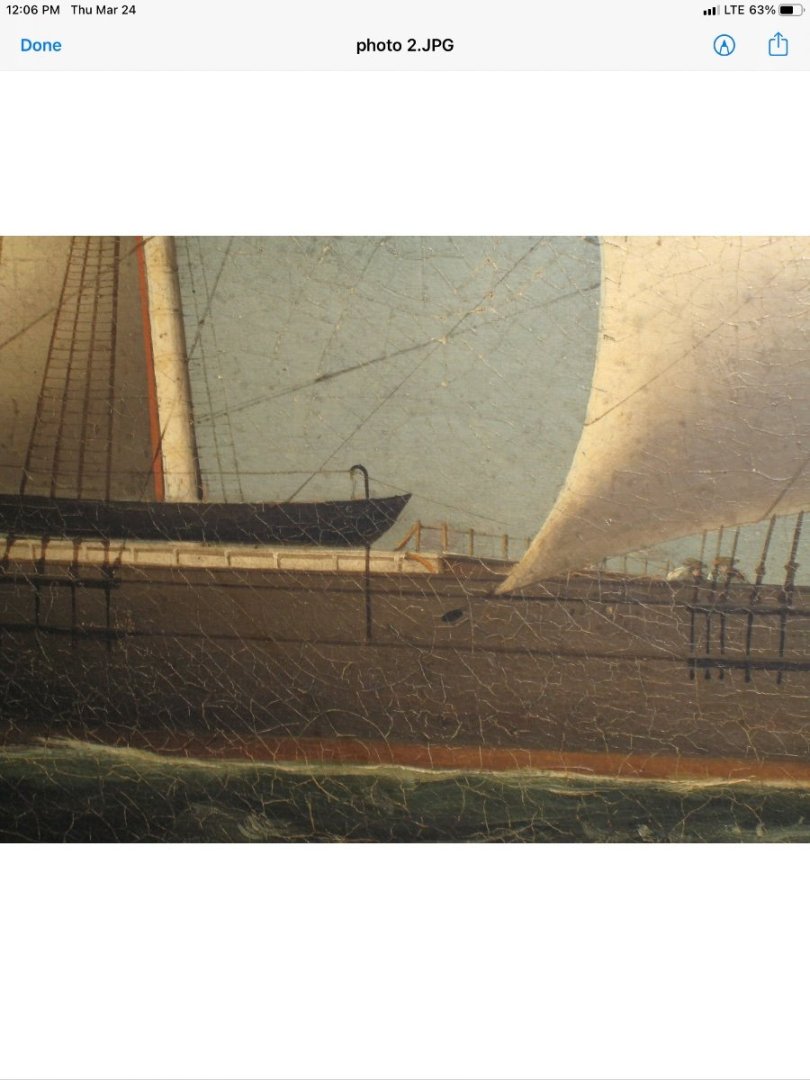
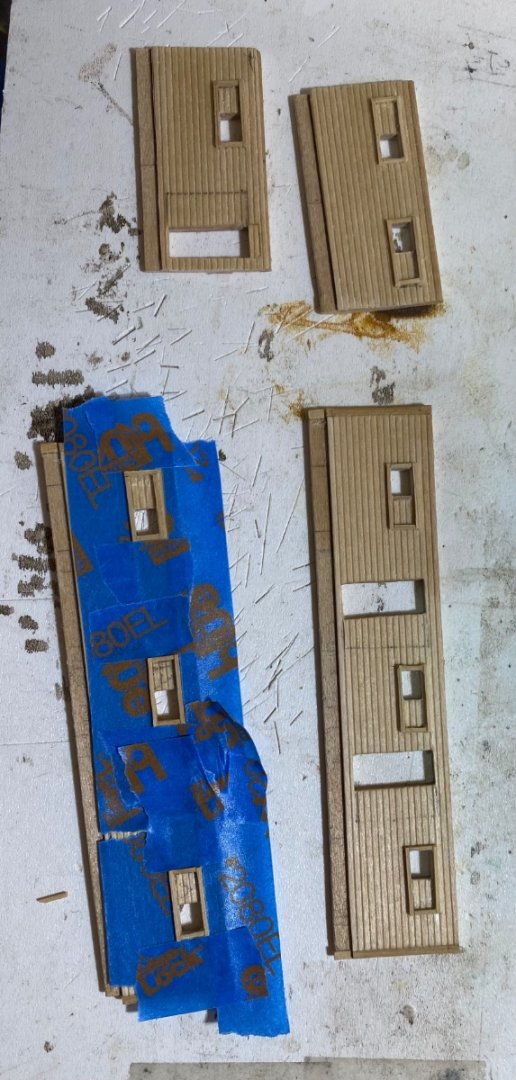
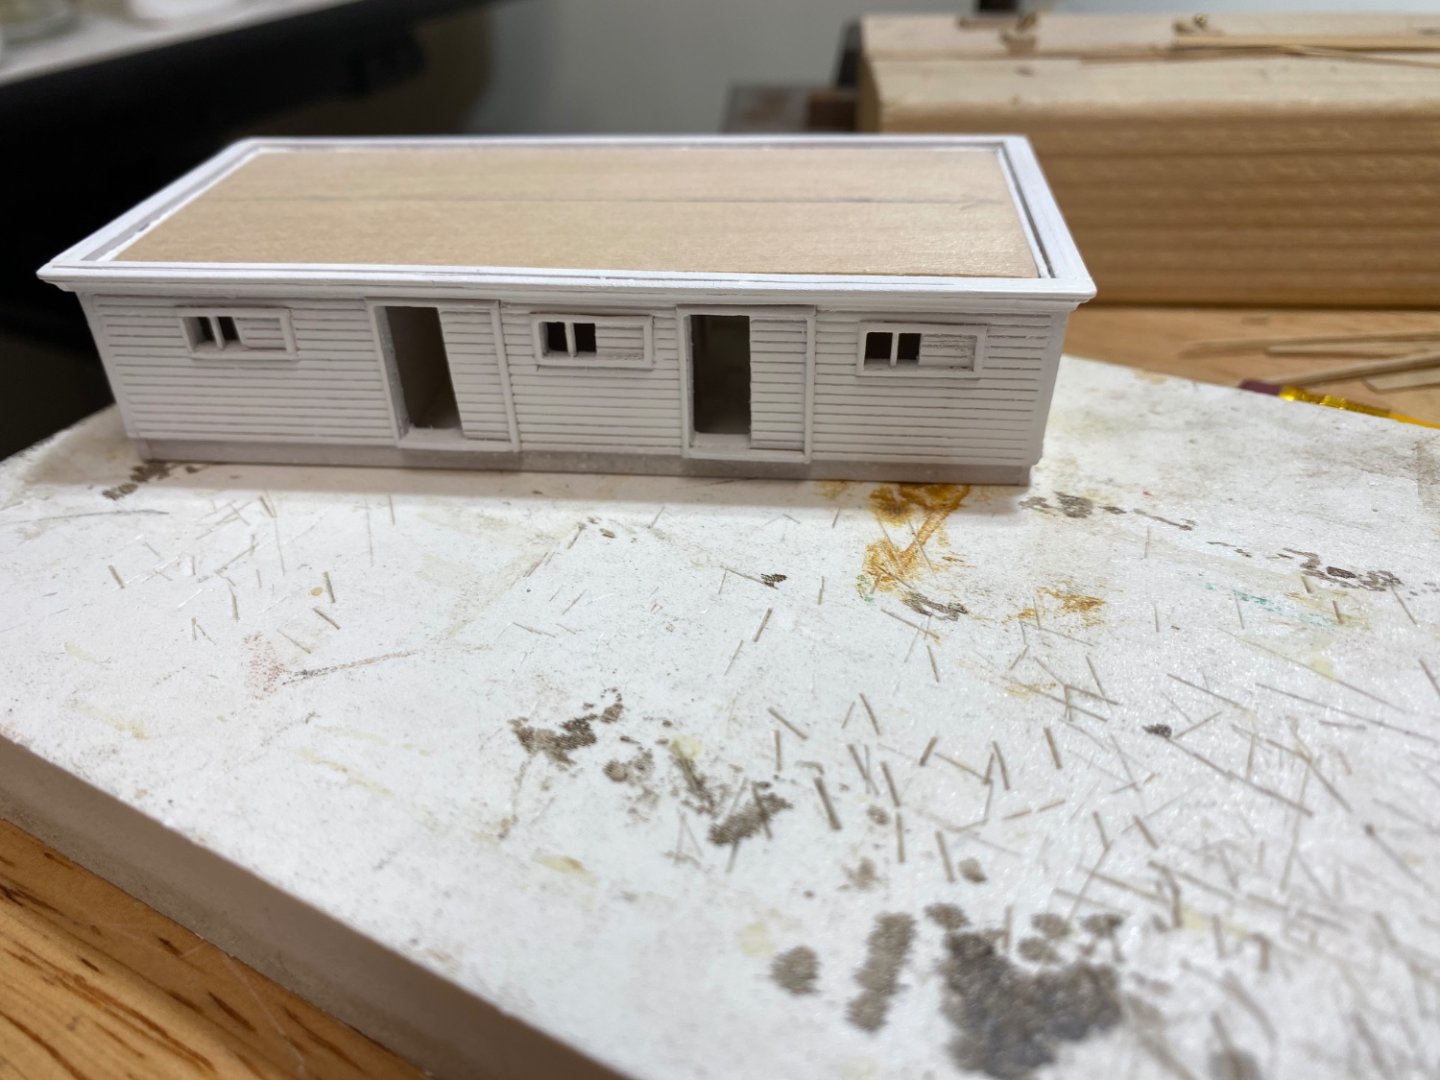
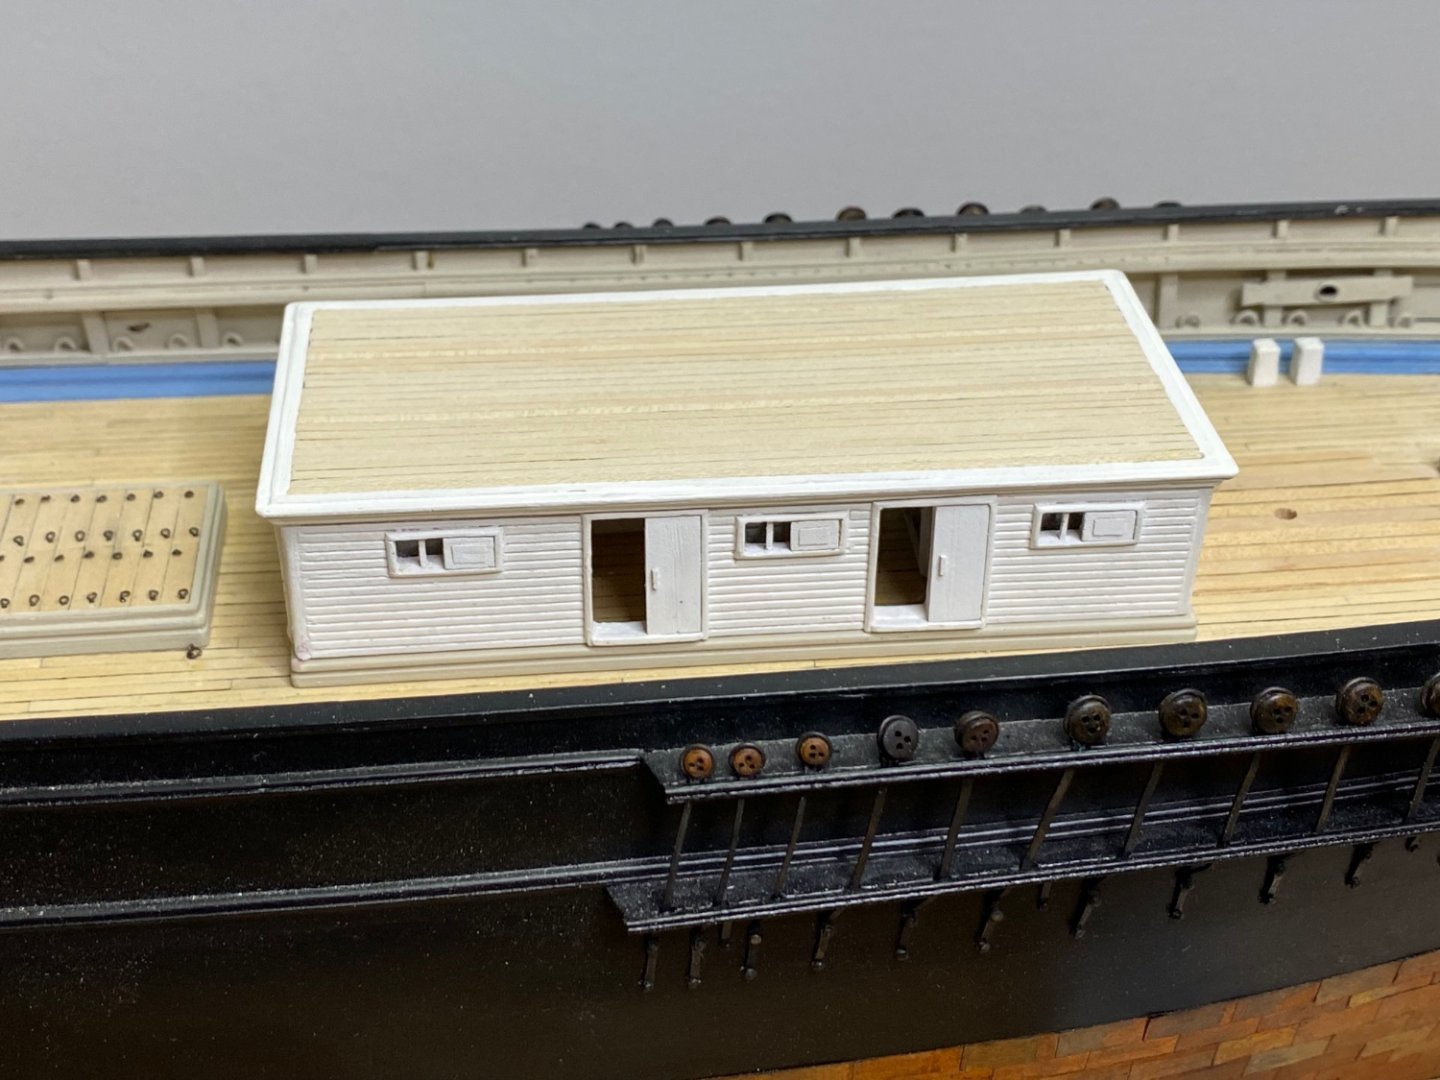
Thanks George, your model really looks great! One thing I did you may have noticed is that I changed the configuration on the house from two windows to three based on the Buttersworth painting which shows three windows. This involved remeasuring spaces between the doors and windows in the ends of the house with no sense that it was necessarily correct. Again, I think it’s very possible that buttersworth took some artistic license when painting 3 windows. The fore cabin in the Buttersworth painting looks much longer than what is shown on the plans for the flying fish. The cabin dimensions were based on the Duncan McLean article so we know those are correct. Again I often wonder how much artistic license Buttersworth took when I view his painting and I see stay sail halyards on the main stays and have to wonder if they would really have been there given that the fore and main masts both have spencers. Just kind of interesting to think about. Have a merry Christmas and a happy new year.
-
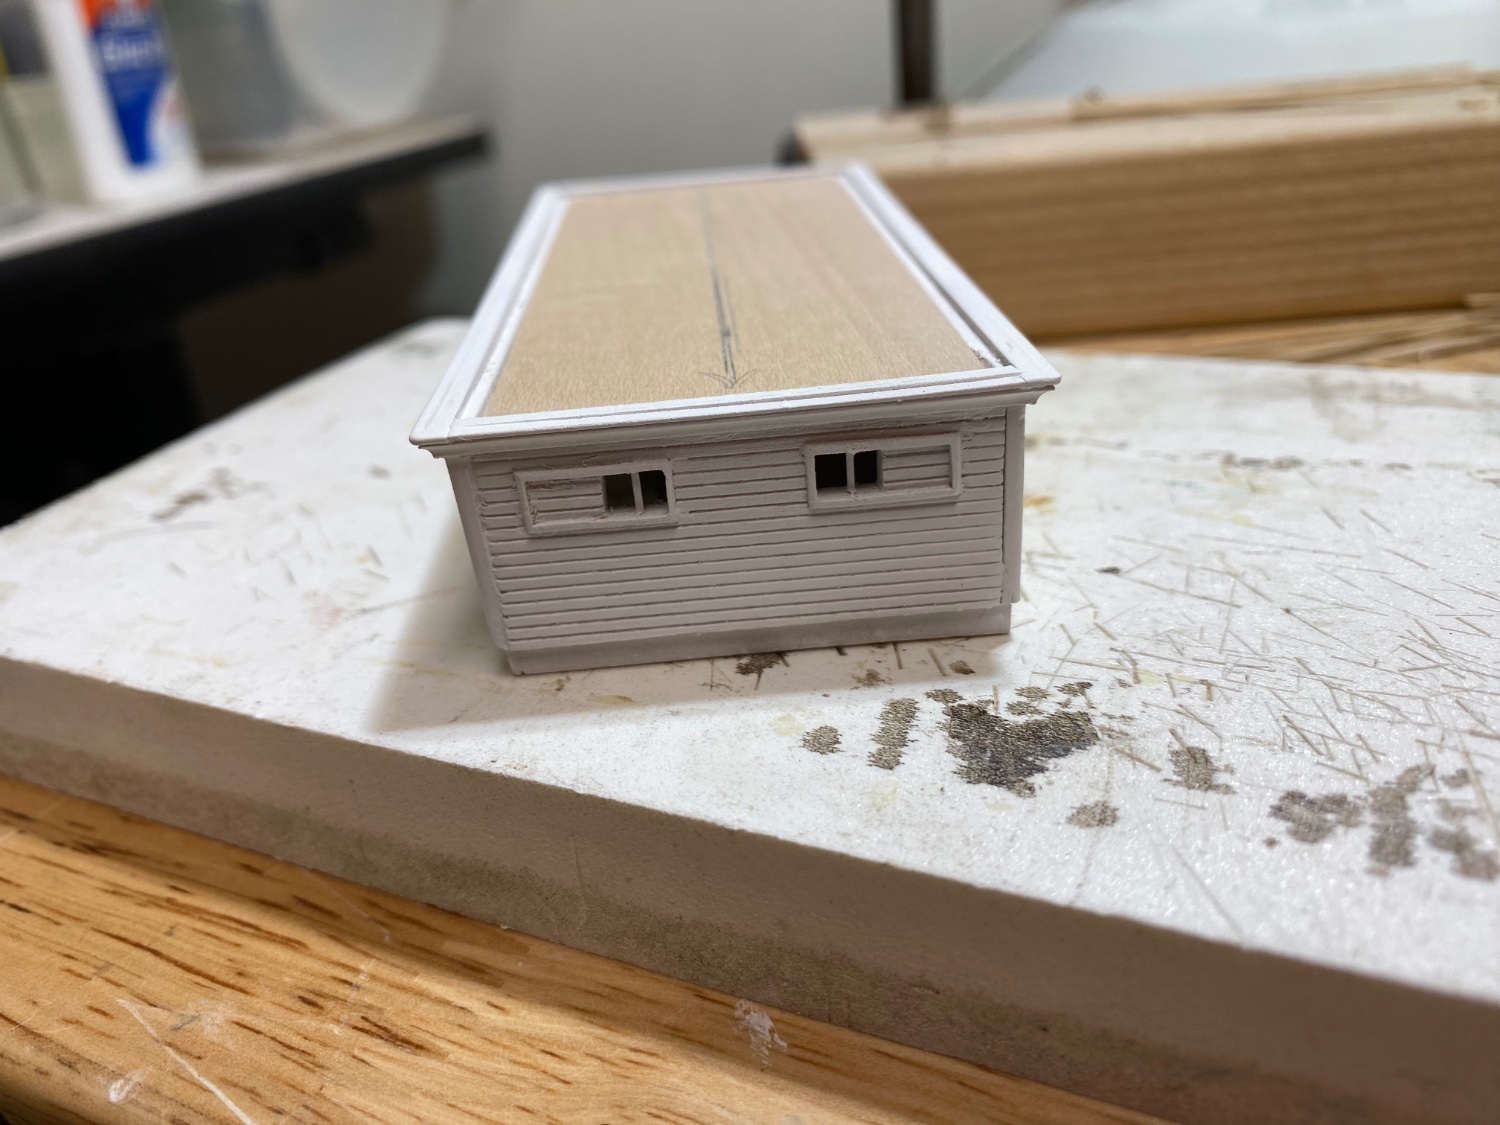
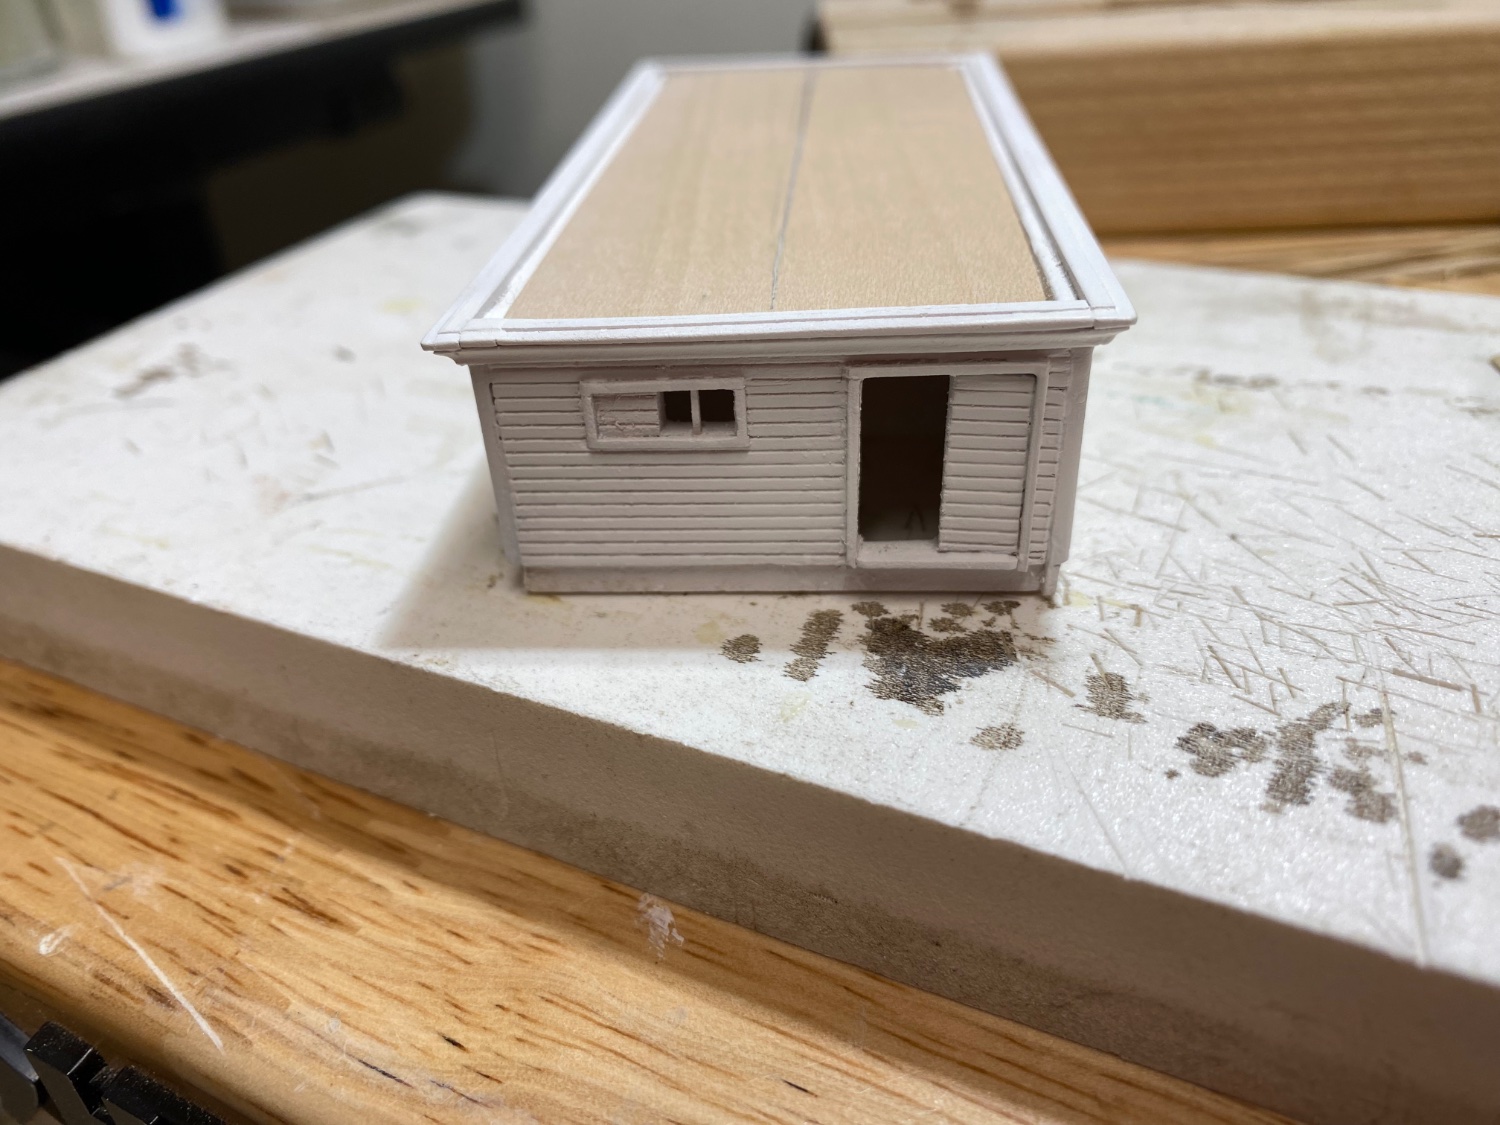
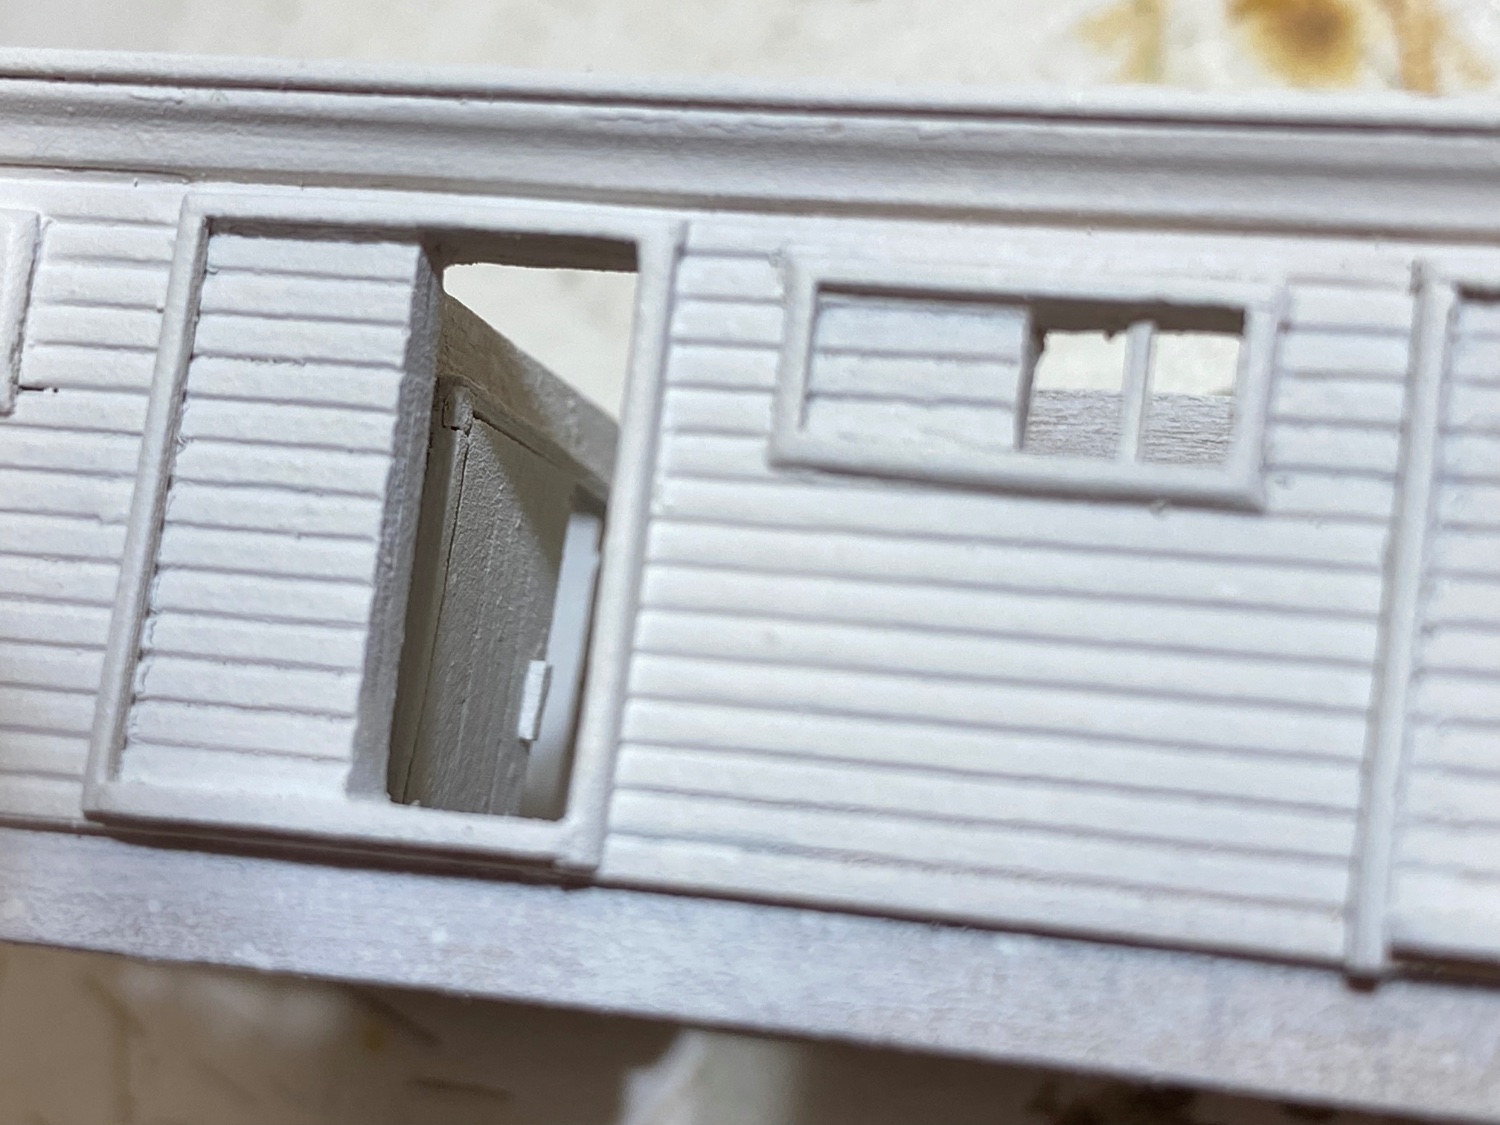
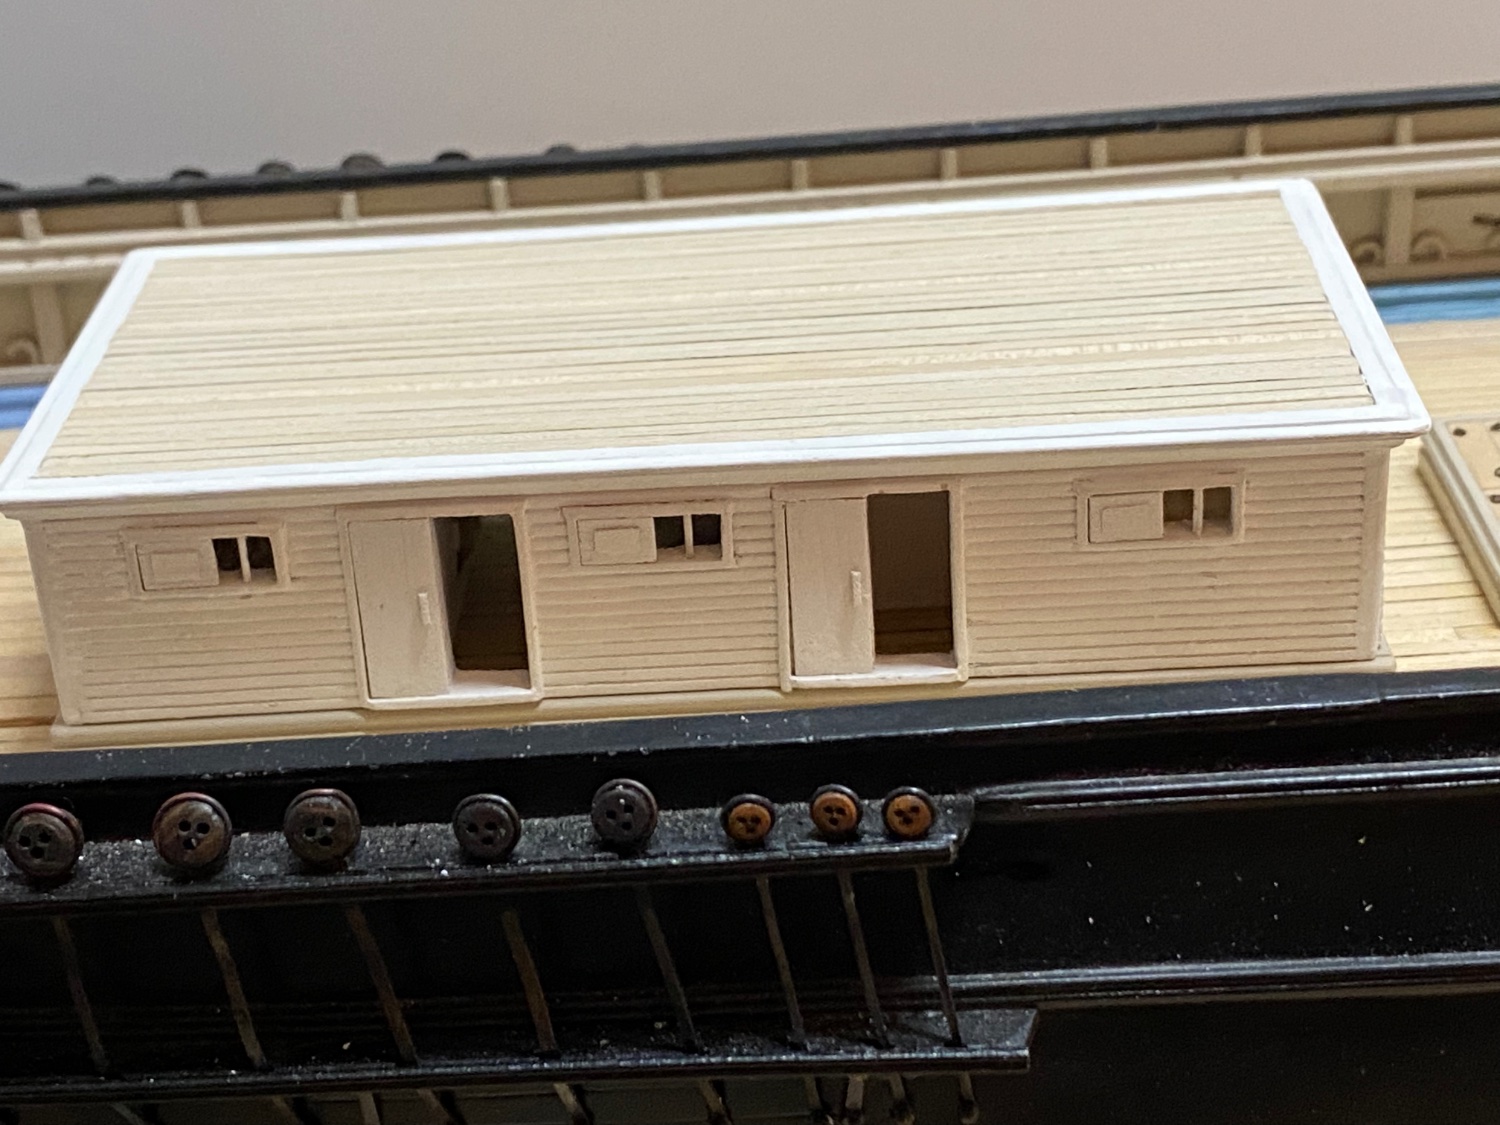
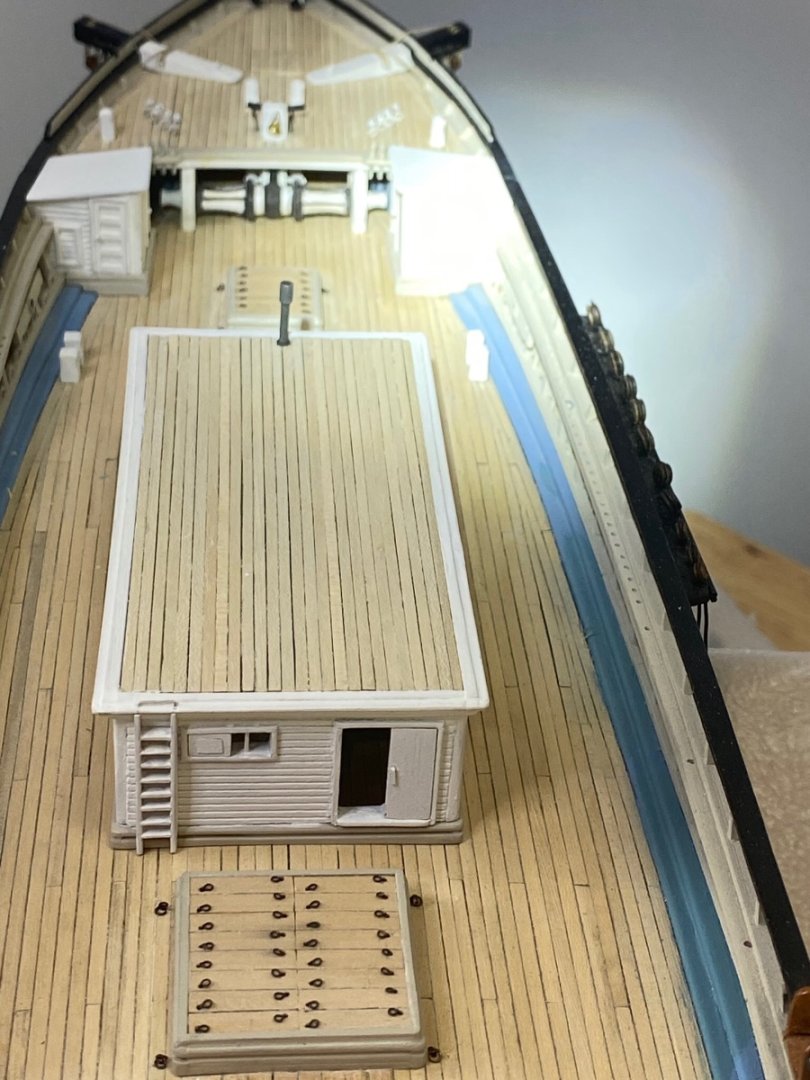
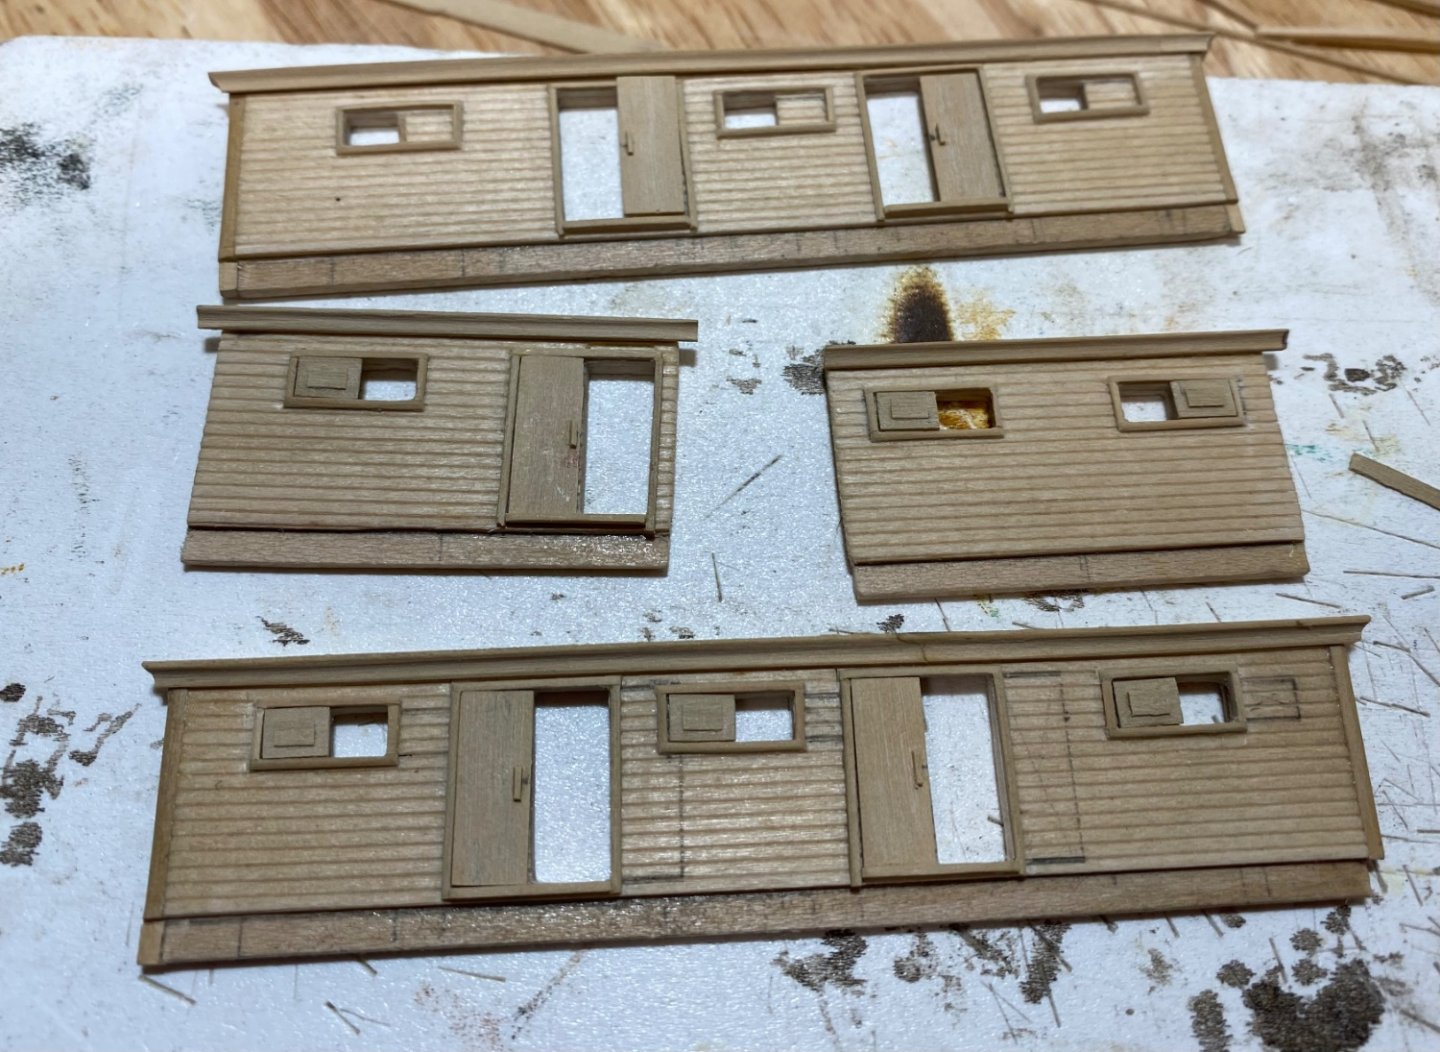
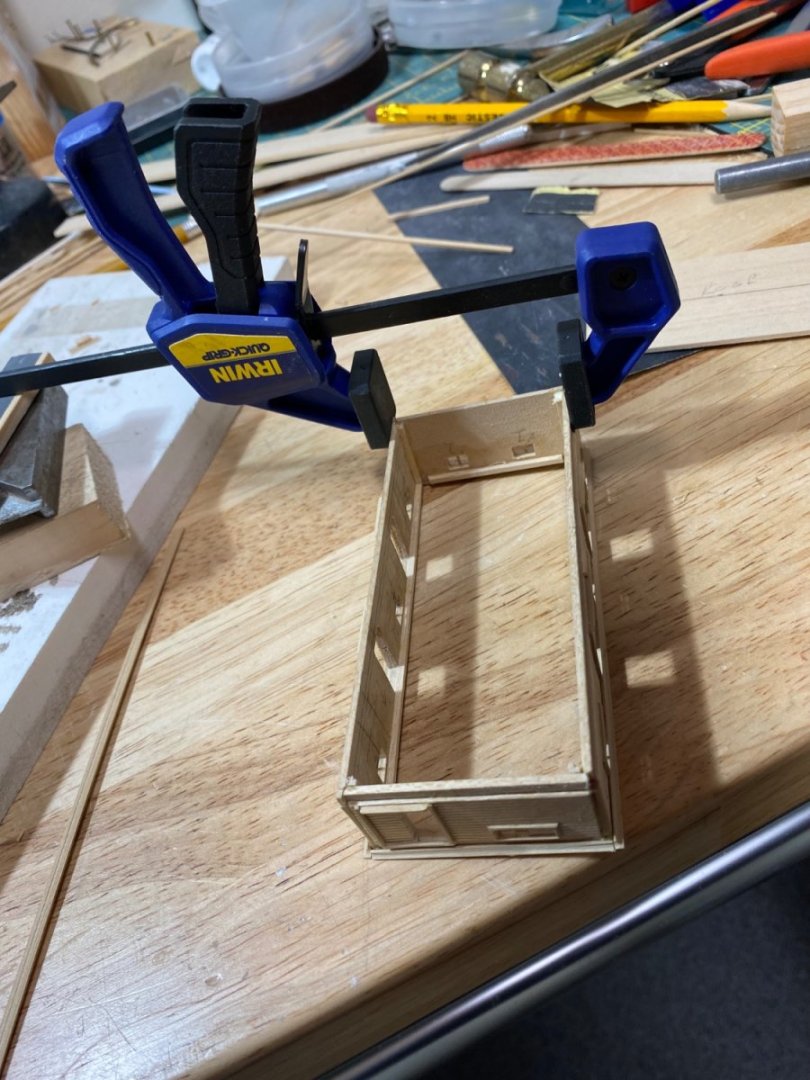
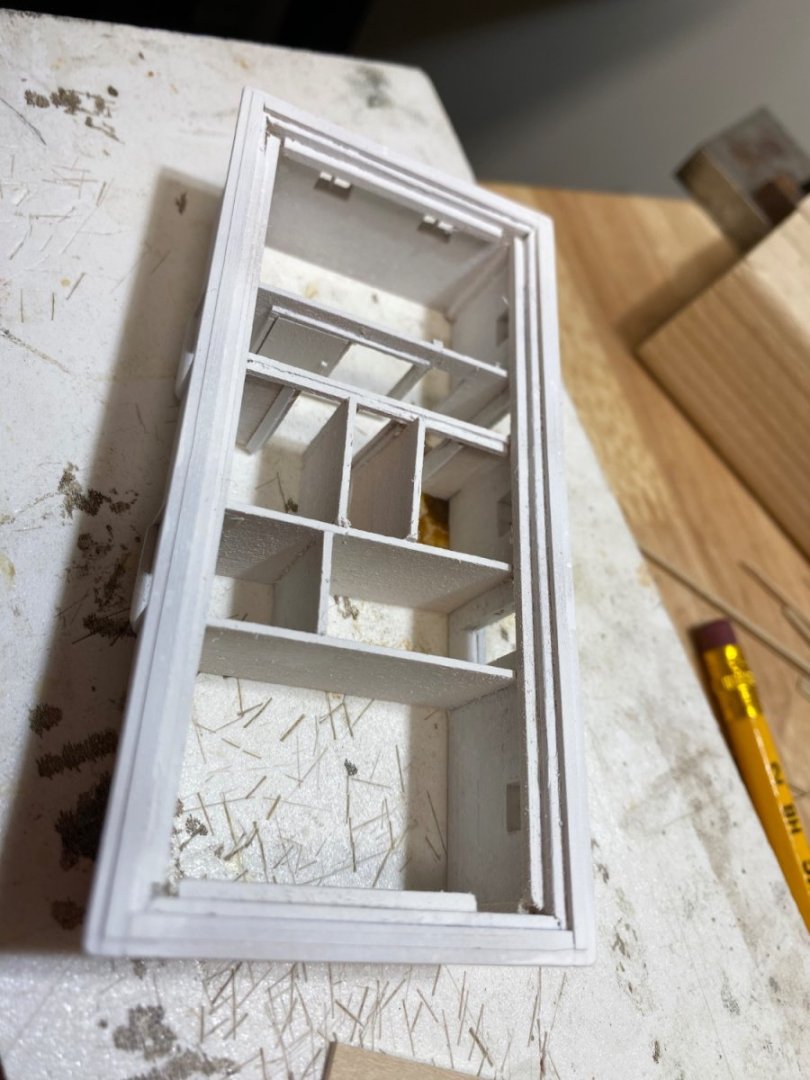
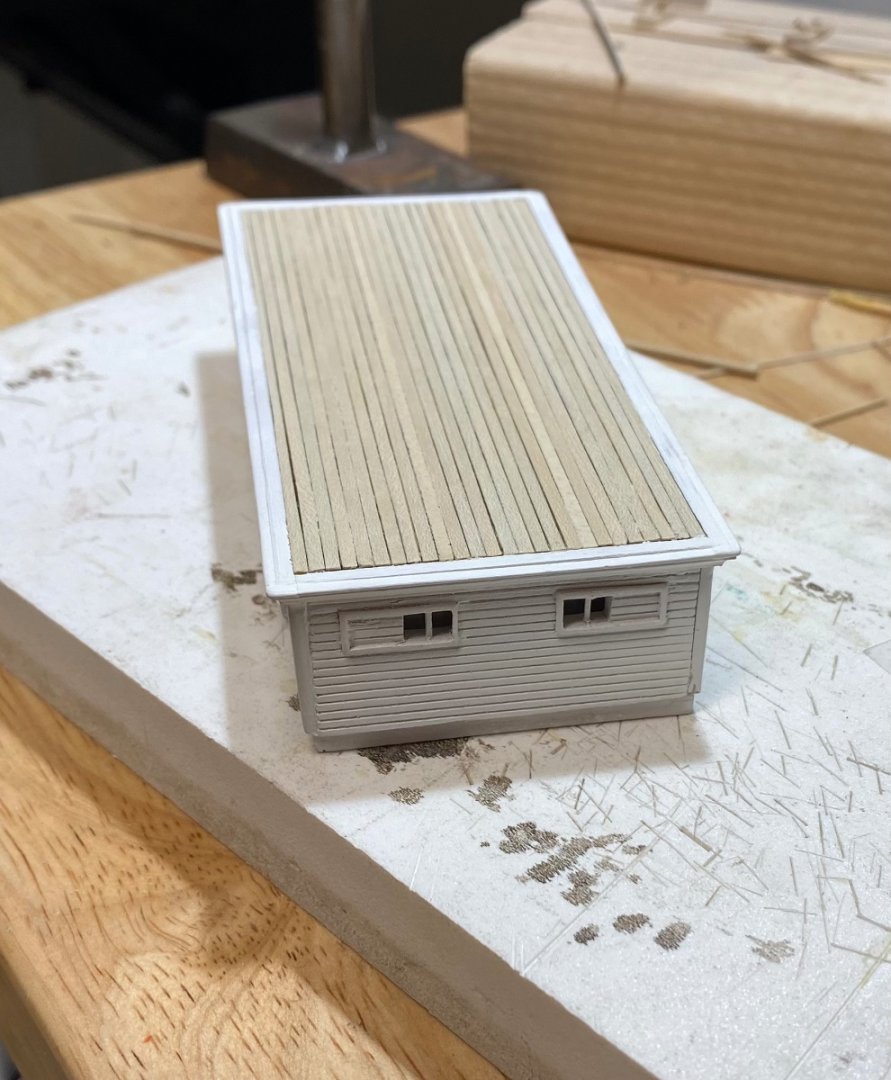
Merry Christmas, Happy New Year and Happy Holidays to all. Just about done with the fore deck house, need to add the ladder, the galley stack and touch up the paint. I made the house by laminating 1/32 planking to1/16 basswood. I used 1/16 basswood because when I previously used 1/32, it warped when I painted it. I really don’t like using basswood as I find it very hard to get smooth when I sand it, and it seems to fuzz even after sanding and using sanding sealer when painted. In the future I’ll use boxwood although harder to chisel out the doors and the windows. I used boxwood for all the window and door frames and for the doors and the window shutters. In The picture you will notice the blue tape which I placed on the sides when I rounded off the edges of the windows and the door frames. I decided to leave the doors open so I placed interior walls and doors, very crudely done. The only detail was the sliding door for the galley.


- 186 replies
-
- 5
-
-
- Flying Fish
- Model Shipways
- (and 1 more)
-
Merry Christmas to you and your family as well!! I too will be sad when this build is over as I have learned so much . You have set the bar high and given all of us something to aspire too!!
-
Looks great!!! I really like the serving on the stays!!
-
Ding a great job!! She really looks great. When I get to the rigging, I’m going to take your advice and start from the mizzen