HOLIDAY DONATION DRIVE - SUPPORT MSW - DO YOUR PART TO KEEP THIS GREAT FORUM GOING! (Only 20 donations so far - C'mon guys!)
×


John Ruy
-
Posts
1,567 -
Joined
-
Last visited
Content Type
Profiles
Forums
Gallery
Events
Everything posted by John Ruy
-
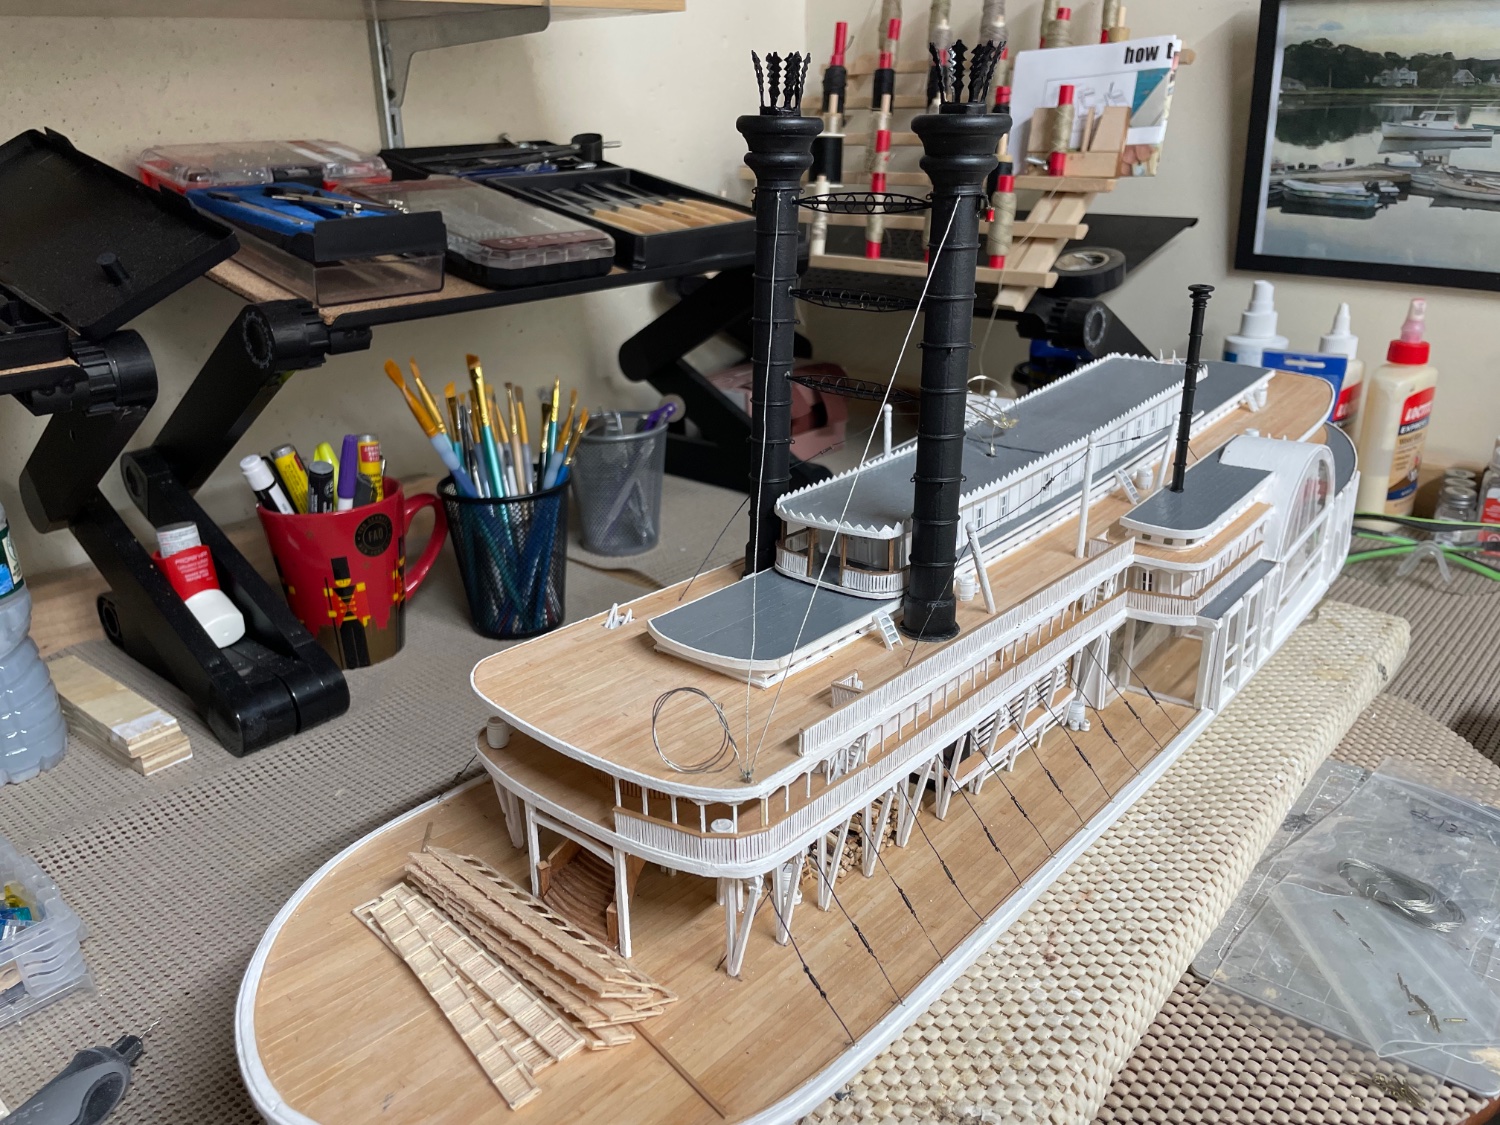
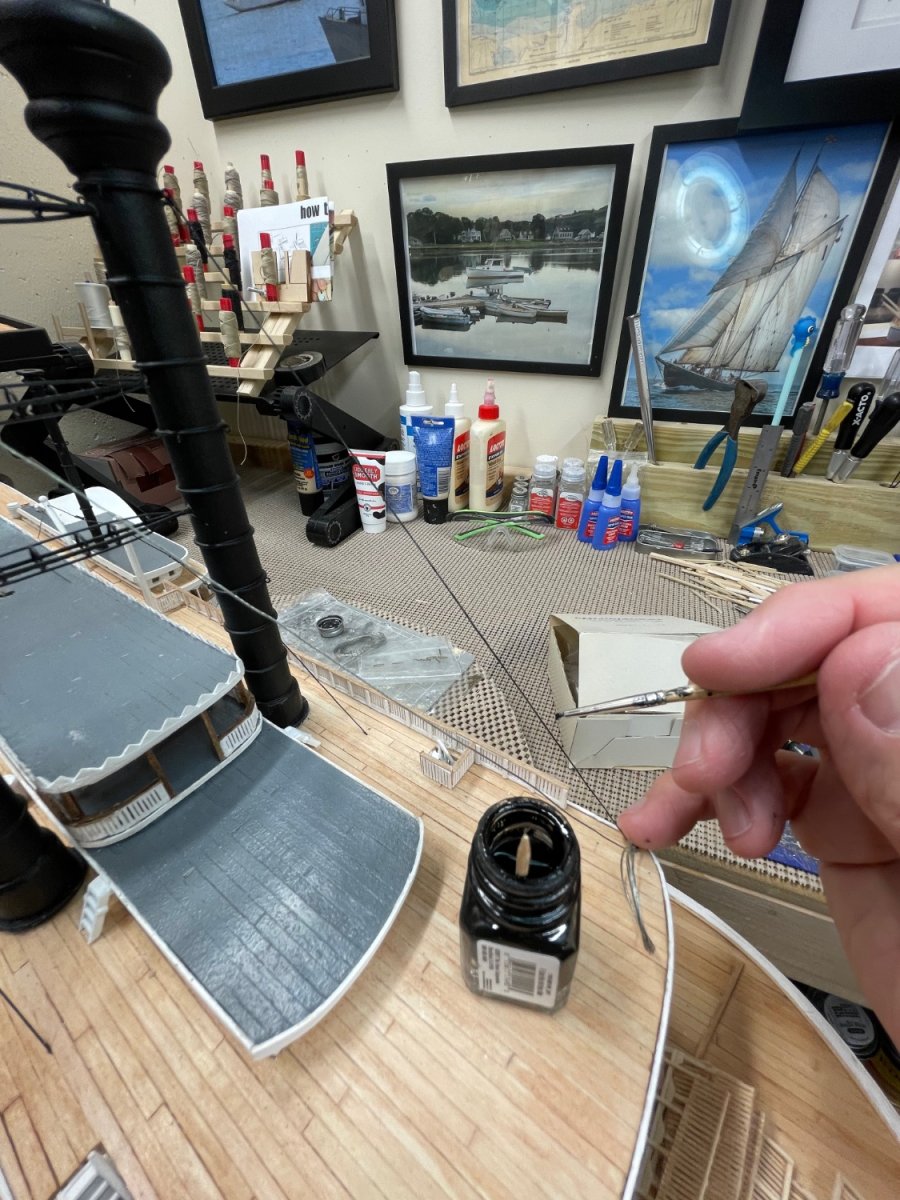
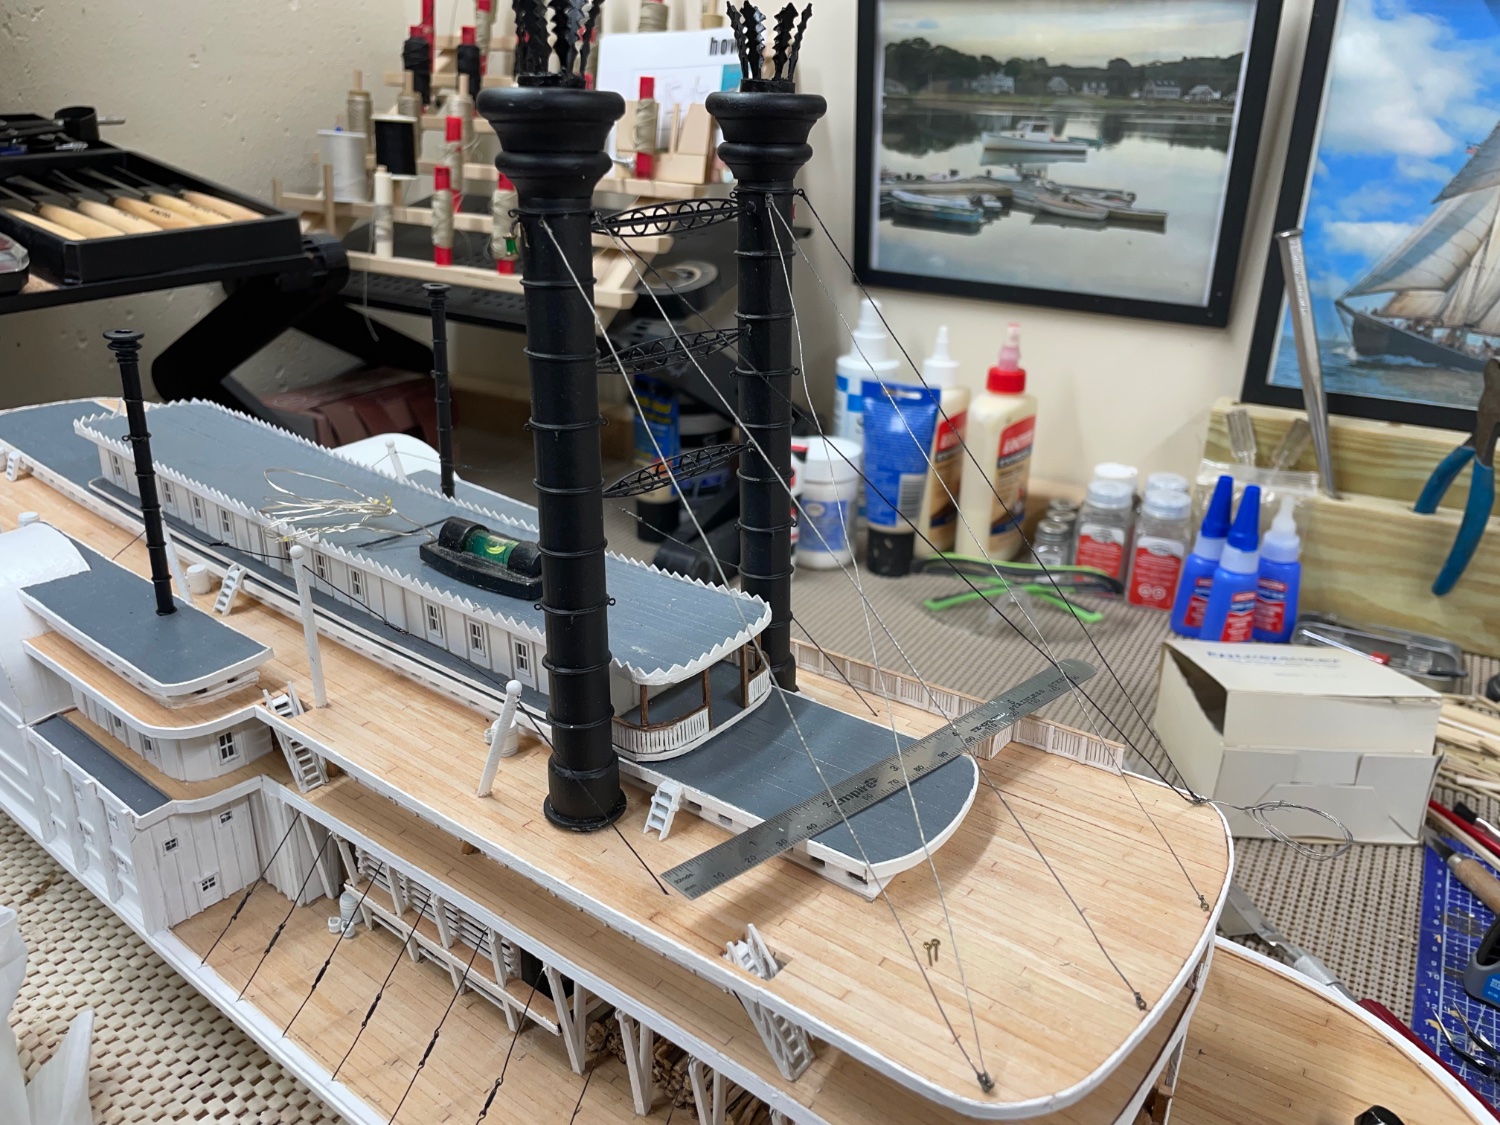
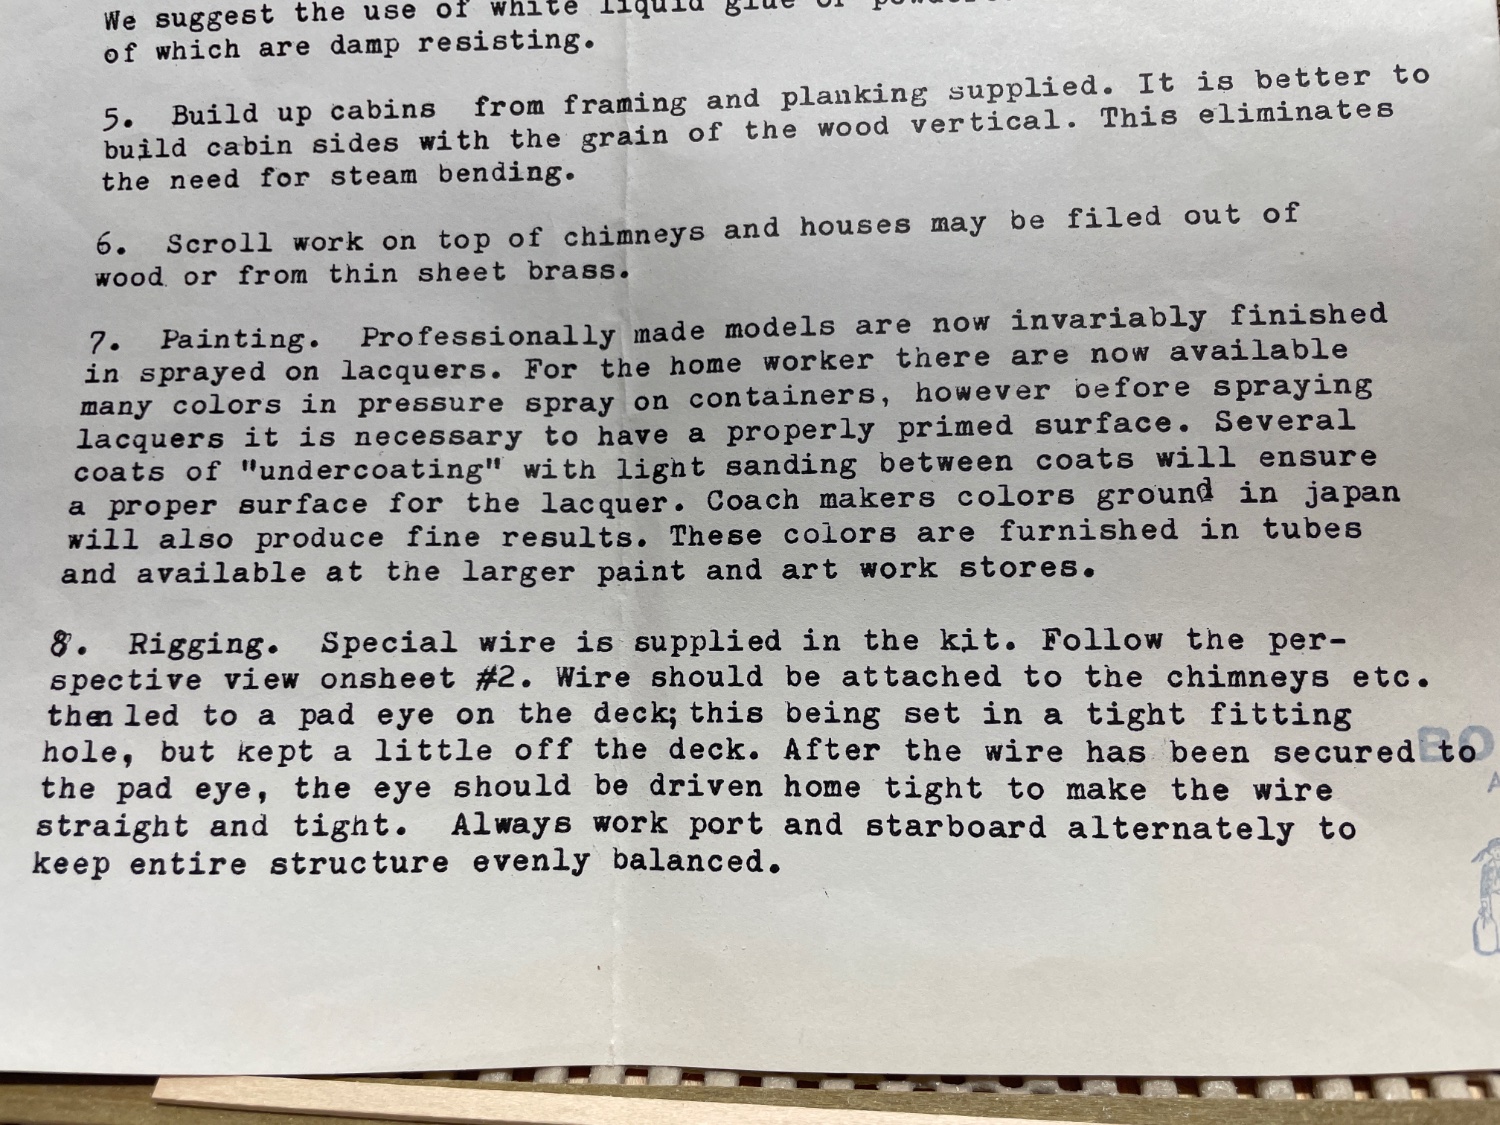
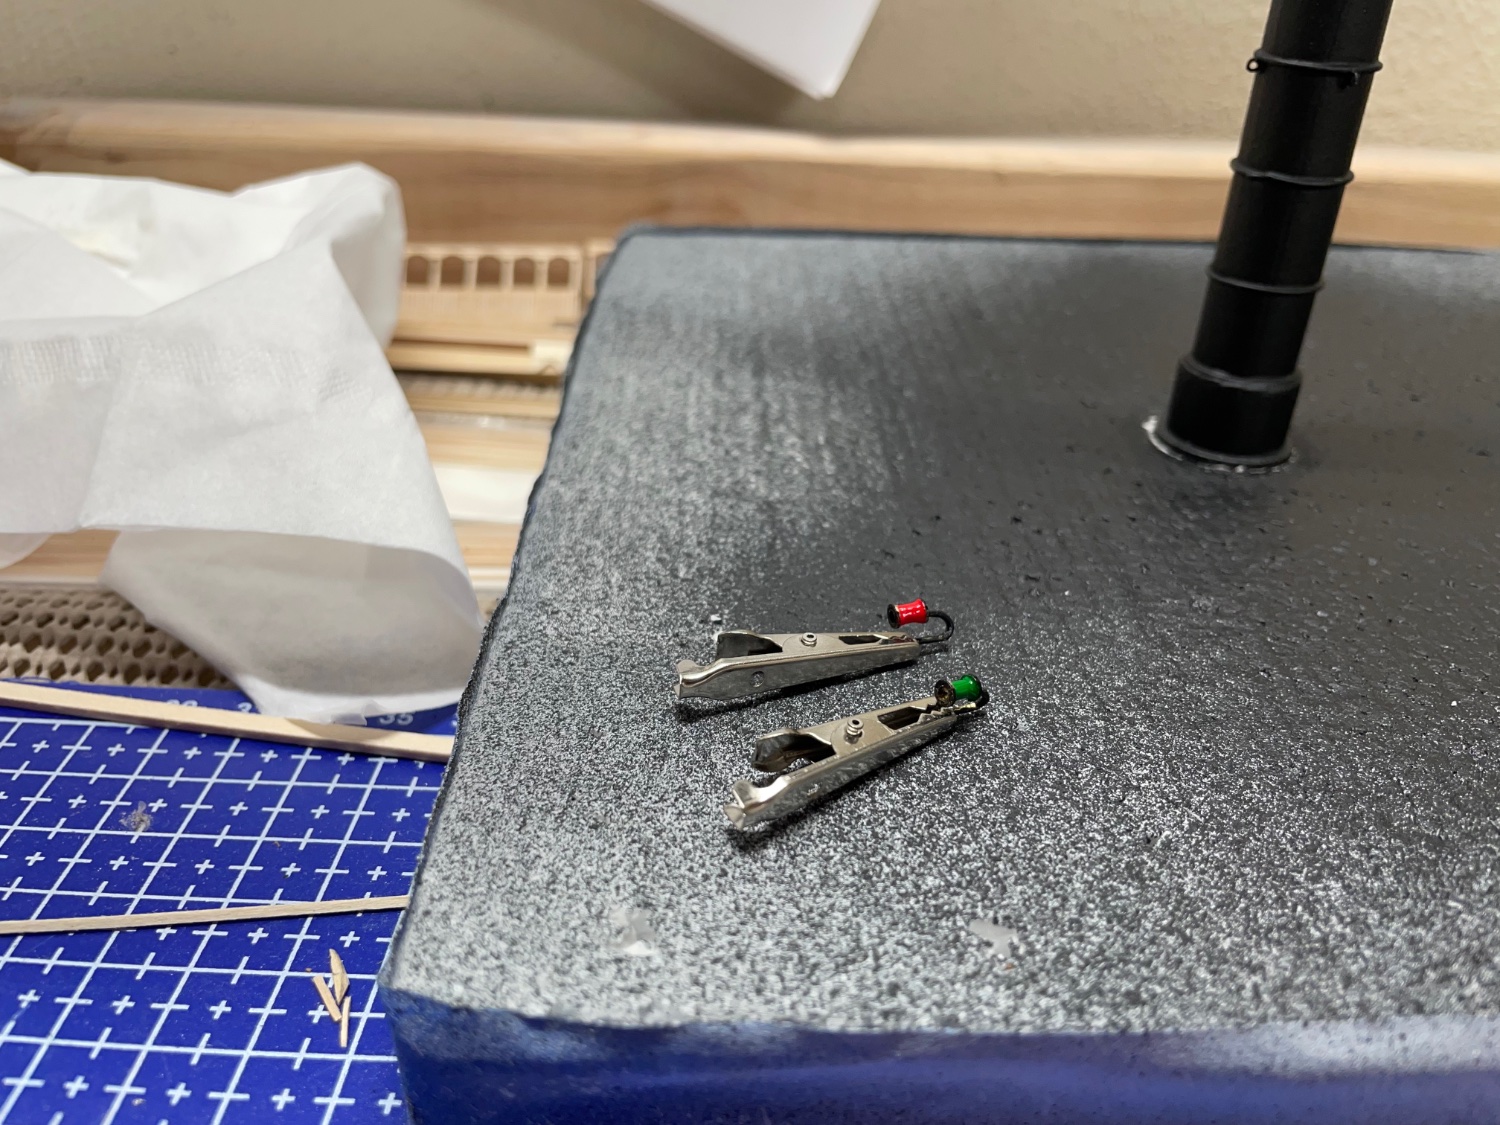
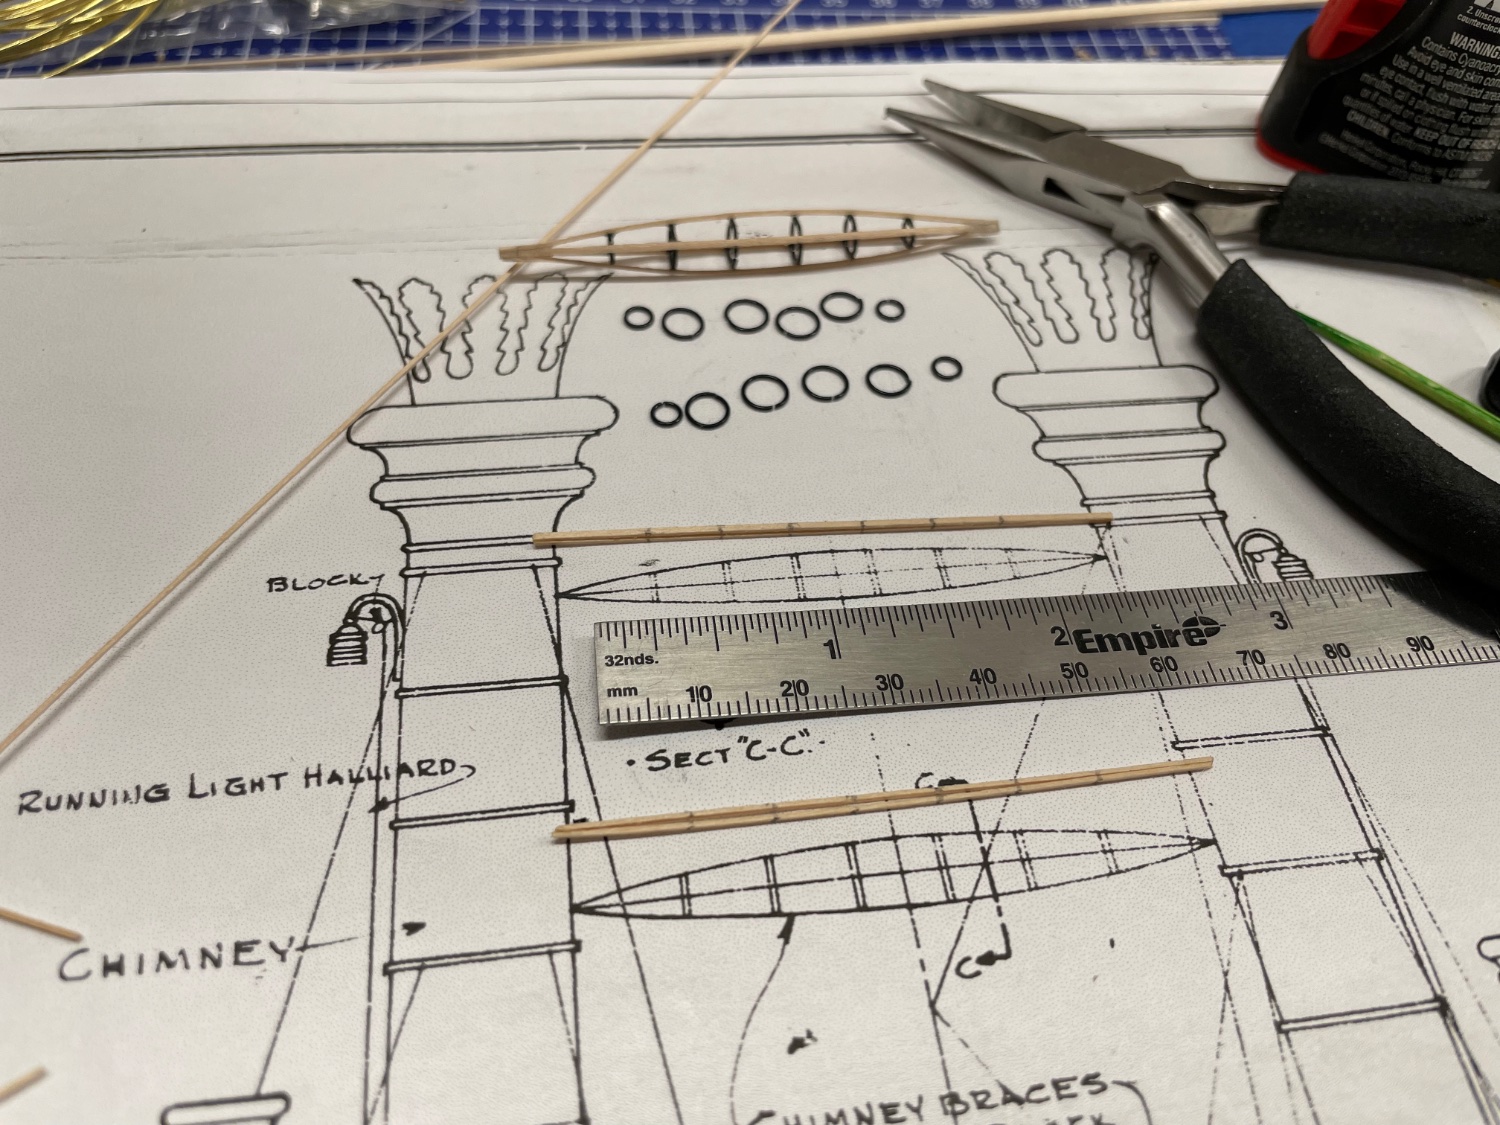
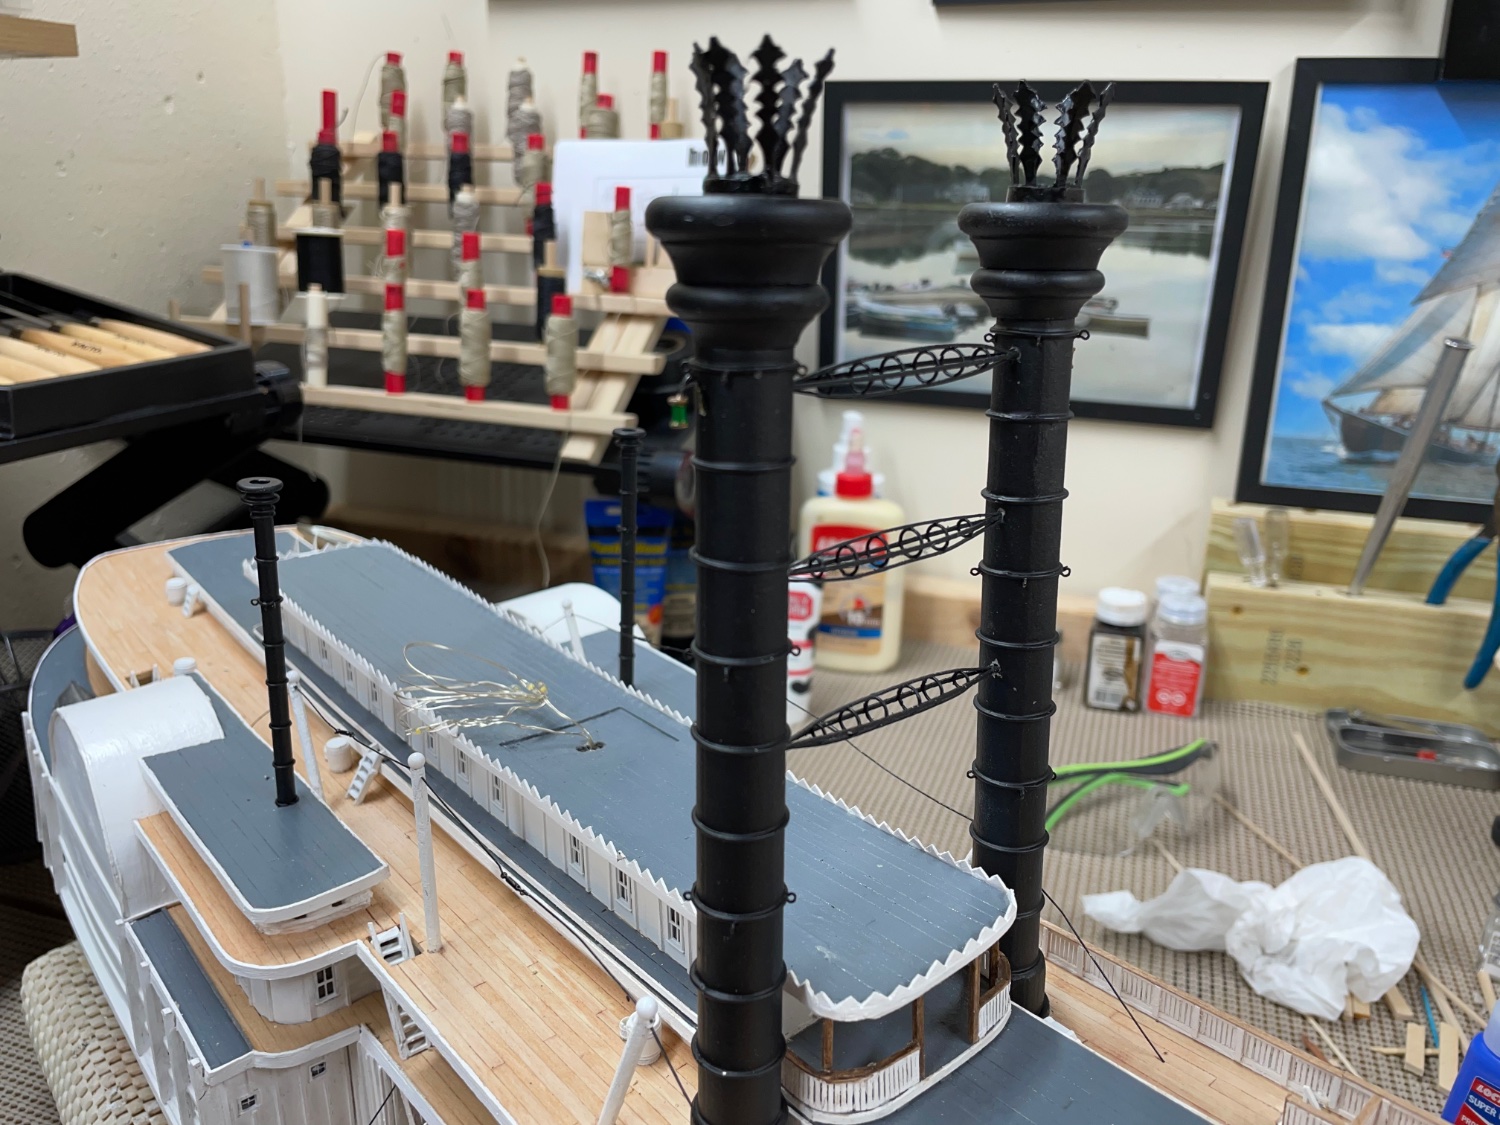
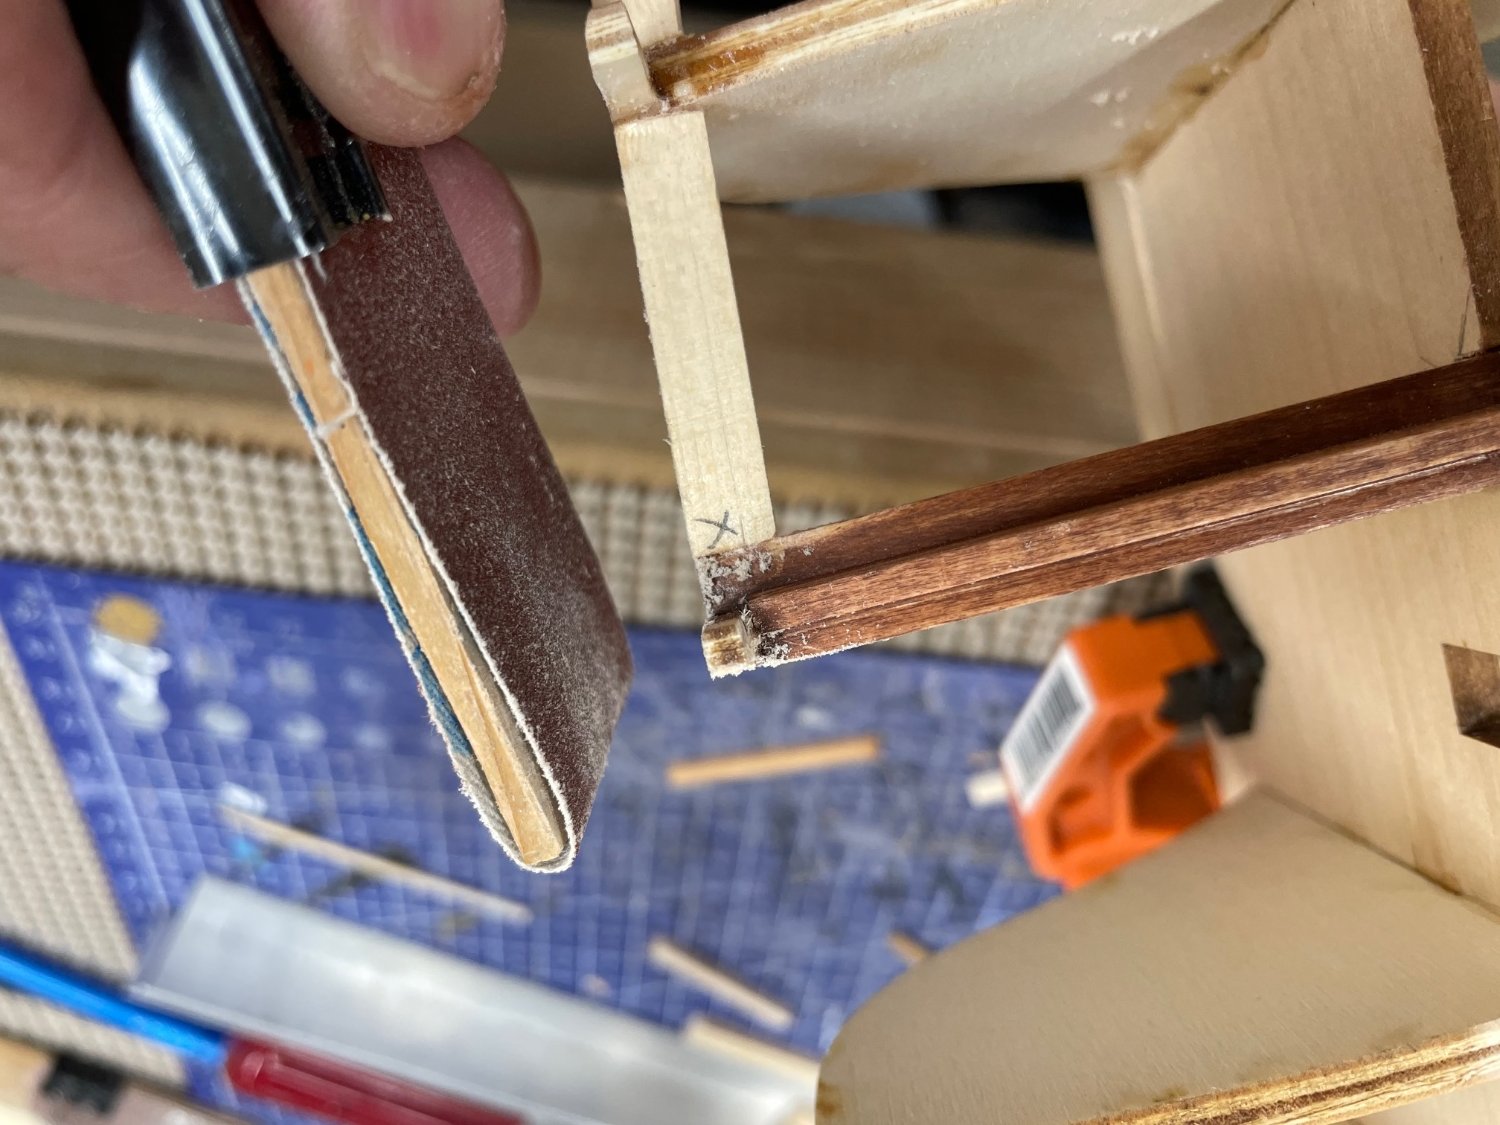
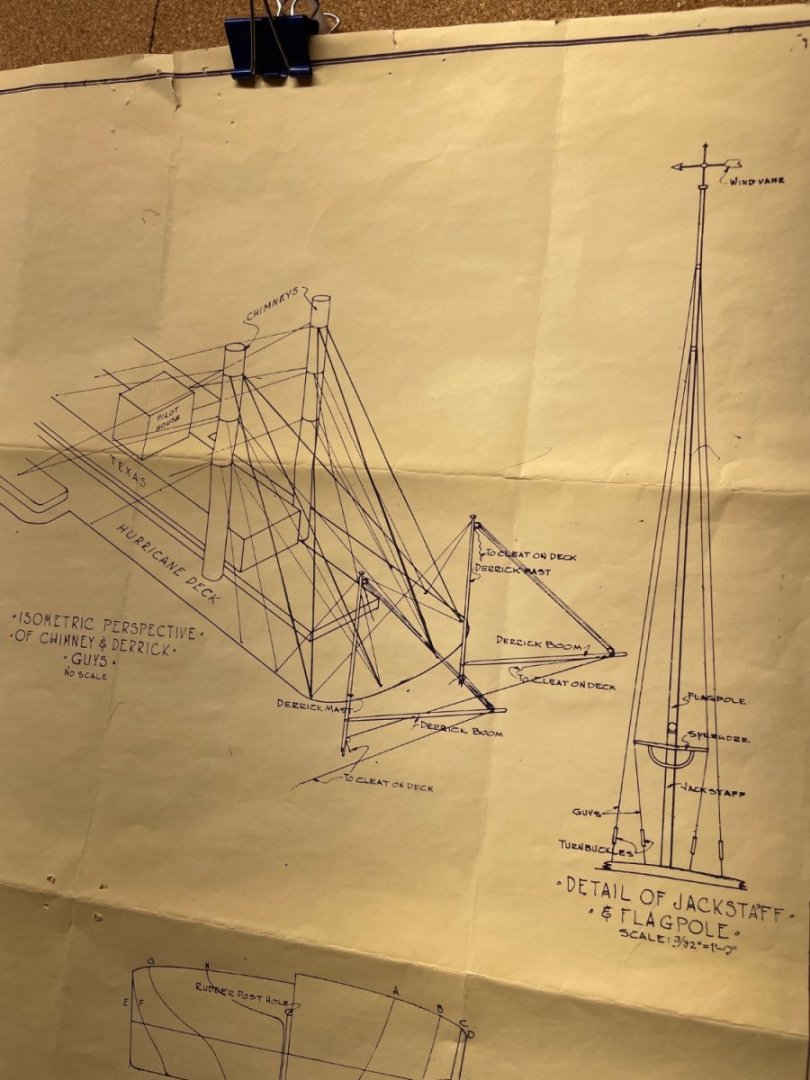
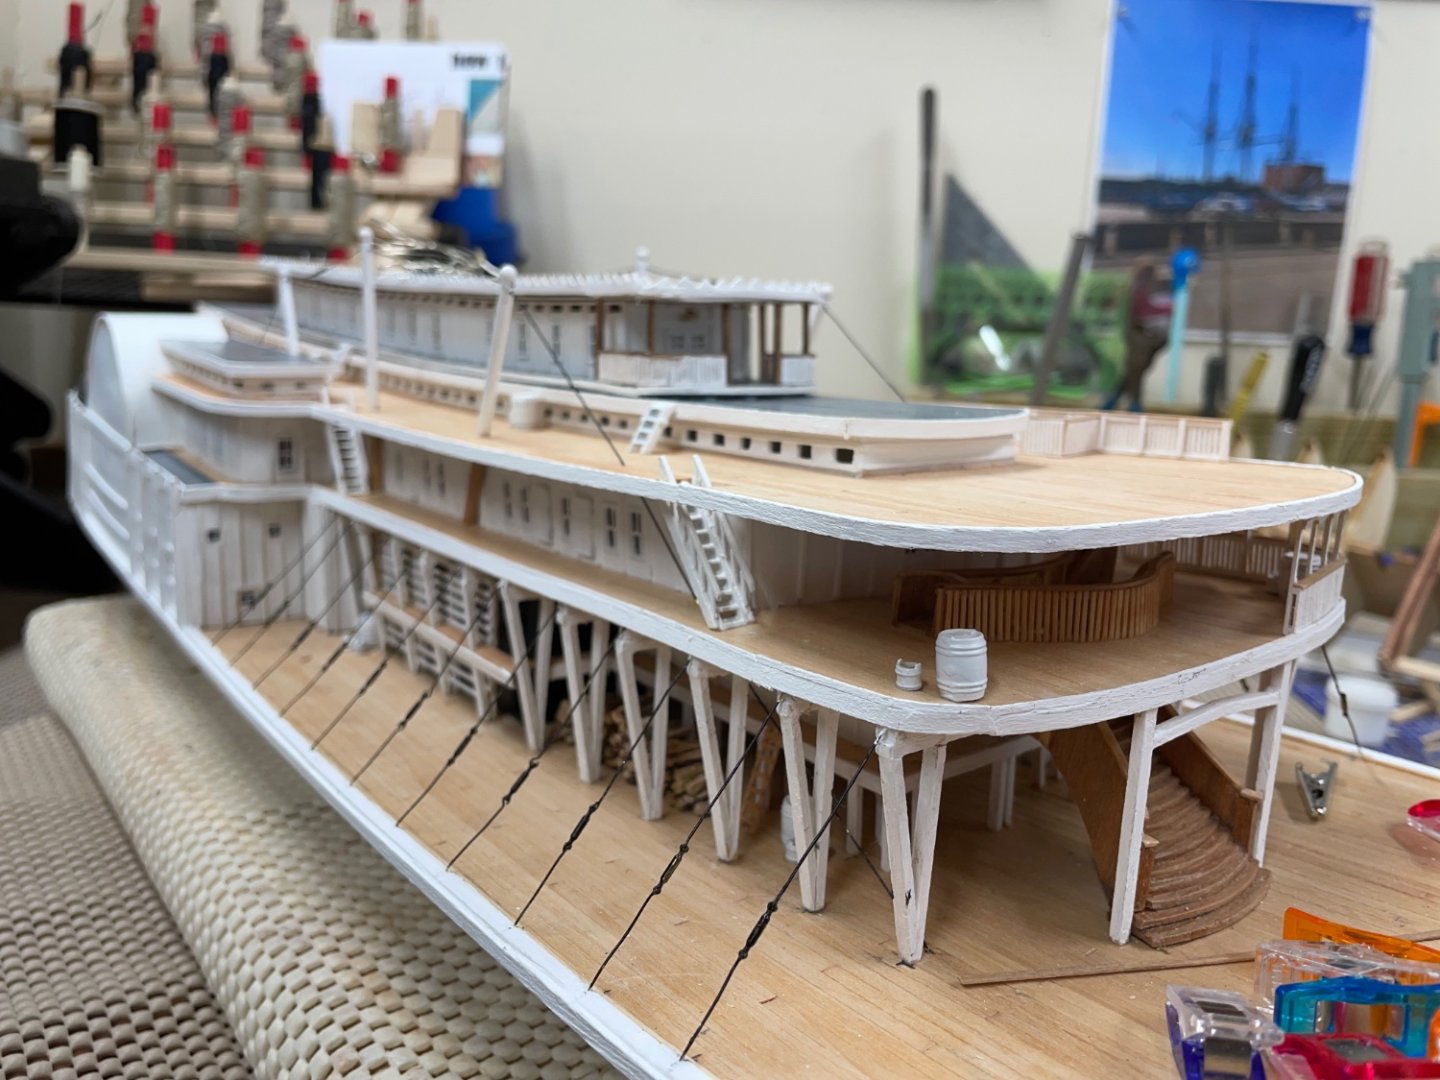
 Back from a stretch with the Bluenose. Still building out those “finicky” railings, when I noticed I would need to anchor the Chimney Guys to the Hurricane Deck before I could install the railing. I needed to study the drawings carefully to fully understand the guy cables. Bluejacket has supplied stranded wire for this purpose. Given the following instructions, this rigging is no simple task. 🤪 So here I begin on yet another tedious task. So far it’s going well. This endeavor has now moved me to build the Derrick Masts, tapering 1/8” dowel and painting them white. They are also part of the guying system. You will notice in the above photo those “finicky” railings needing to be painted. 1 of 3 forward cable guy systems installed. Another three sets will need to go aft of the chimneys to keep everything taught. As you can see in the drawing provide above. I originally thought I might be a year to finish. It may just be a bit longer. 😆 But then this is what we live for right? Cheers 🍻


- 238 replies
-
- 5
-

-
- Robert E Lee
- steamboat
- (and 3 more)
-
Thanks for the details… I’ll let you know how it works out. 🍻
- 200 replies
-
- 2
-
-
- Whaling Bark
- Charles W Morgan
- (and 1 more)
-
Thanks Tom… The only question I have, Is the base for the drill end stationary or does it adjust? How is it secured? Can’t wait to start this build, I have a new table saw just waiting for a project. 😆
- 200 replies
-
- 1
-
-
- Whaling Bark
- Charles W Morgan
- (and 1 more)
-
As much as you are willing to build for your own satisfaction. I personally build what is viewable through hatches, gun ports and windows. Most at that would not be viewable as displayed in a case, but a good photographic record would of your build makes nice documentation to go with the model in to the future. 😎 John
-
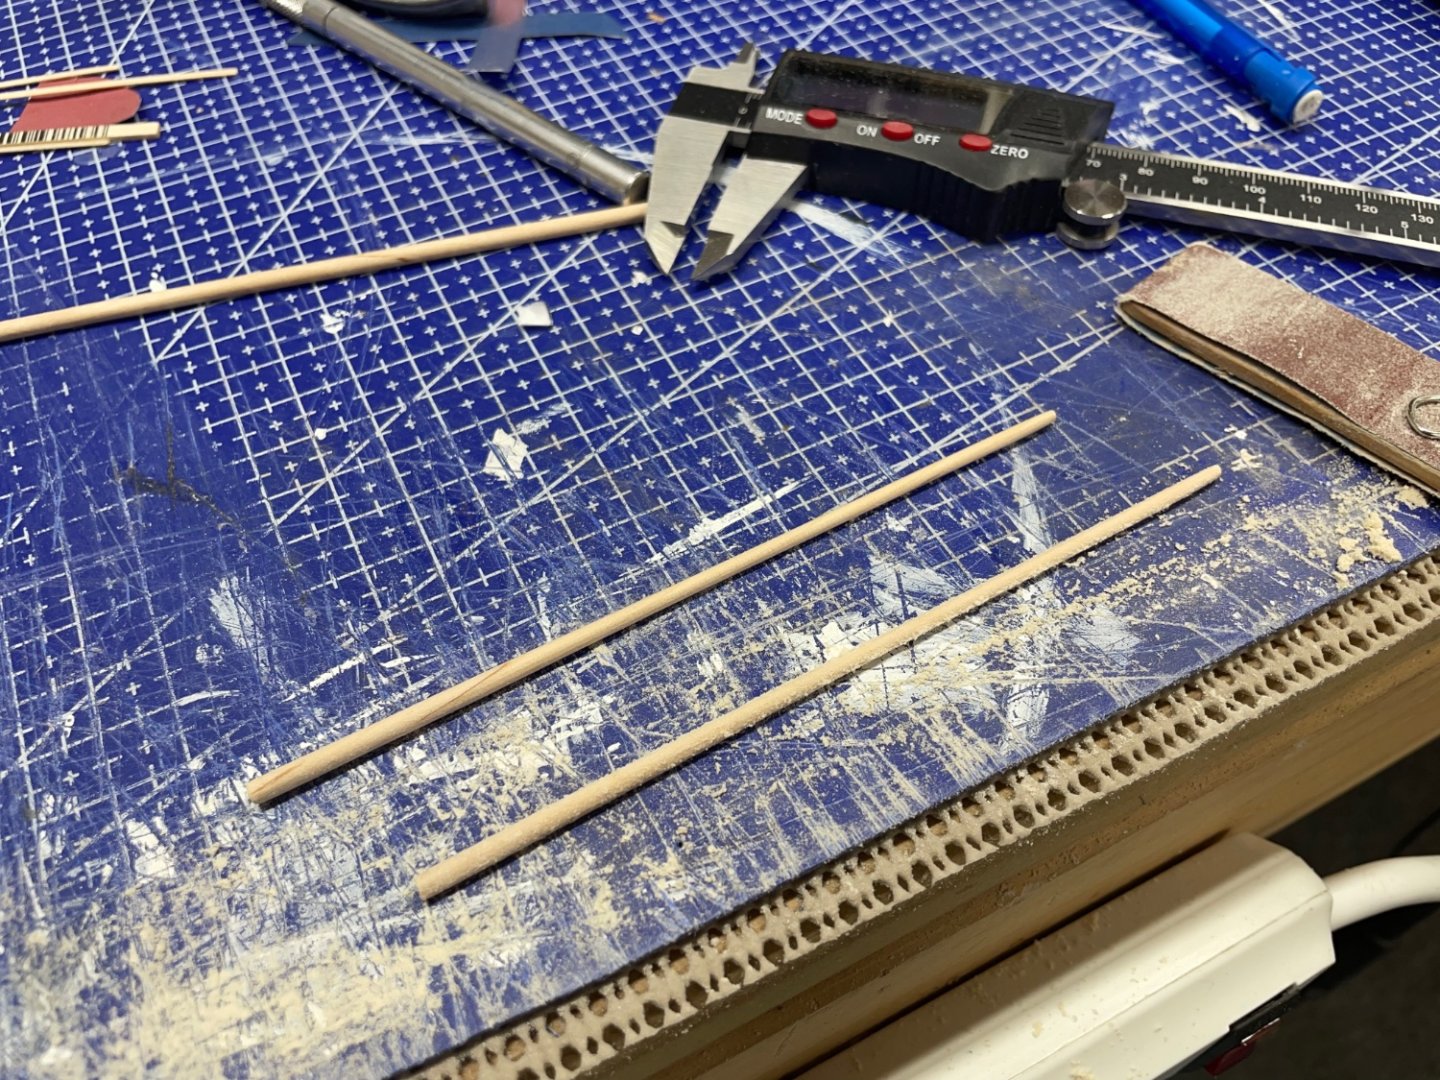
I love it… I hate tapering masts and spars by hand, but just can’t white go there with a mini-lathe. (Not in the Admirals budget) How does this work for tapering dowels? Mind if I copy your technique? I don’t want to violate any patents here. 😆 I think I’ll have a go at it, if you don’t mind. Thanks for sharing. John
- 200 replies
-
- 2
-

-
-
- Whaling Bark
- Charles W Morgan
- (and 1 more)
-
Nice “work” on the Tryworks, Tom. I’m with you on the “journey” my railings on the Robert E Lee are maddening. 🤪 You know it’s worth every excruciating second. 😂 Looking excellent very realistic. John
- 200 replies
-
- 3
-

-
-
- Whaling Bark
- Charles W Morgan
- (and 1 more)
-
Yves, Its tough when such beautiful work has to be covered up, but we know it’s there. Thanks for sharing such an excellent work. Wow 😮
-
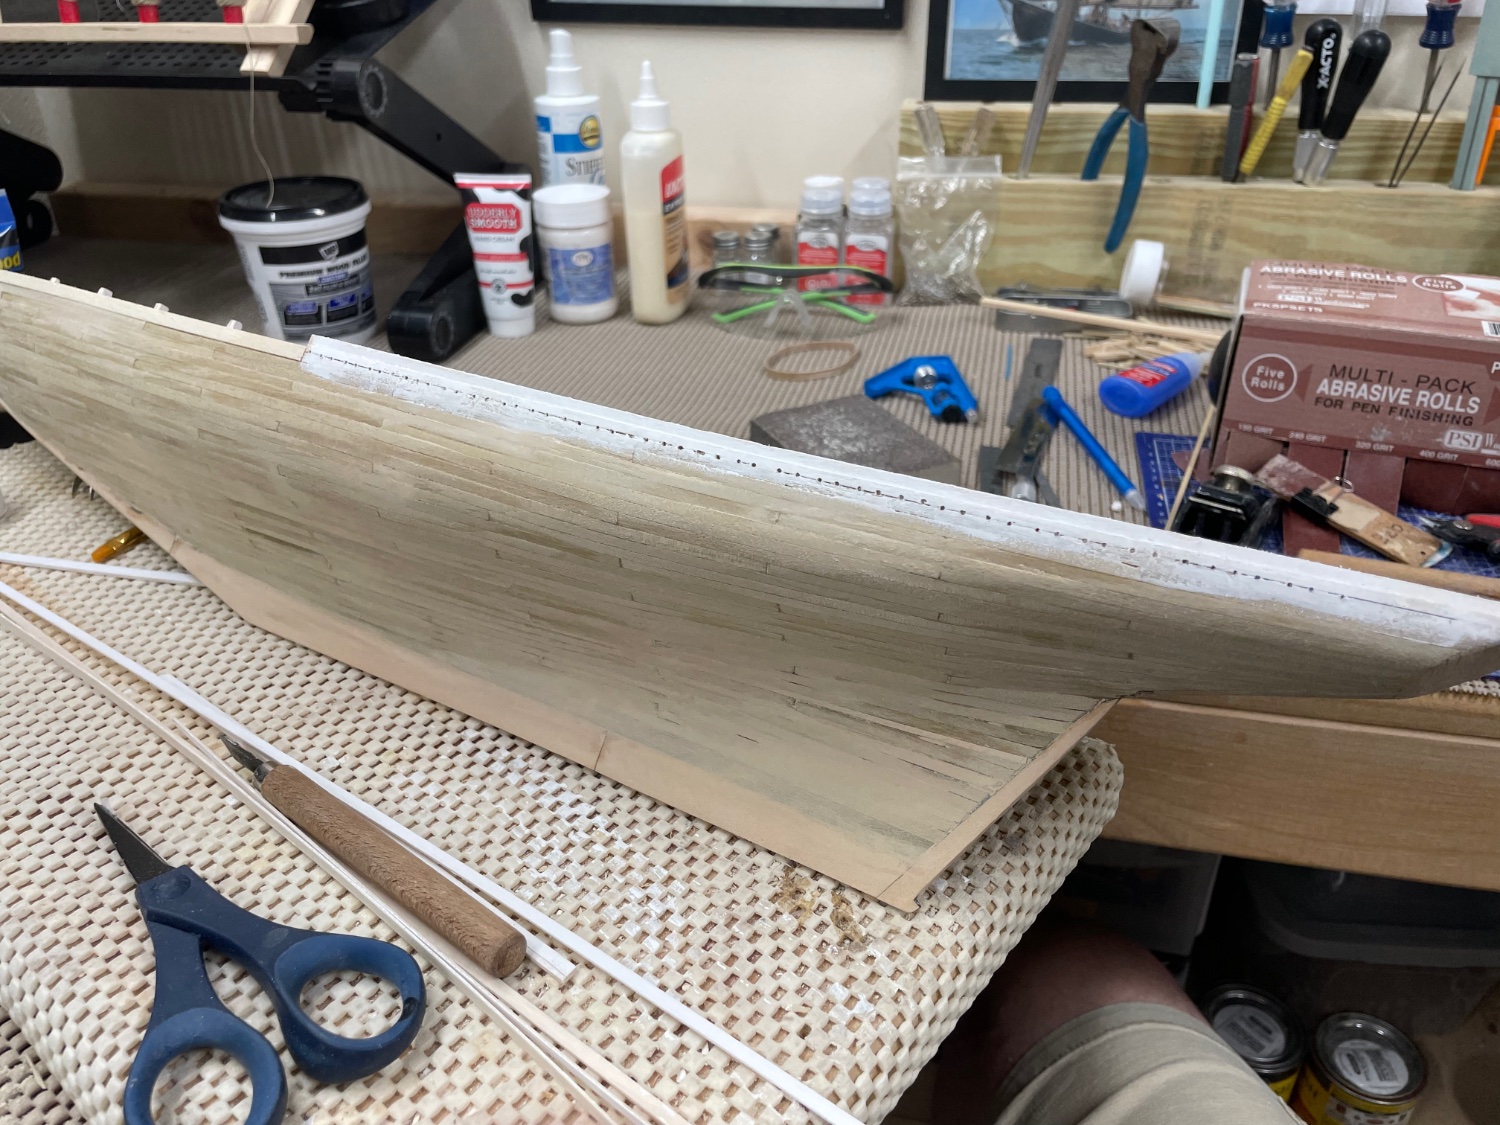
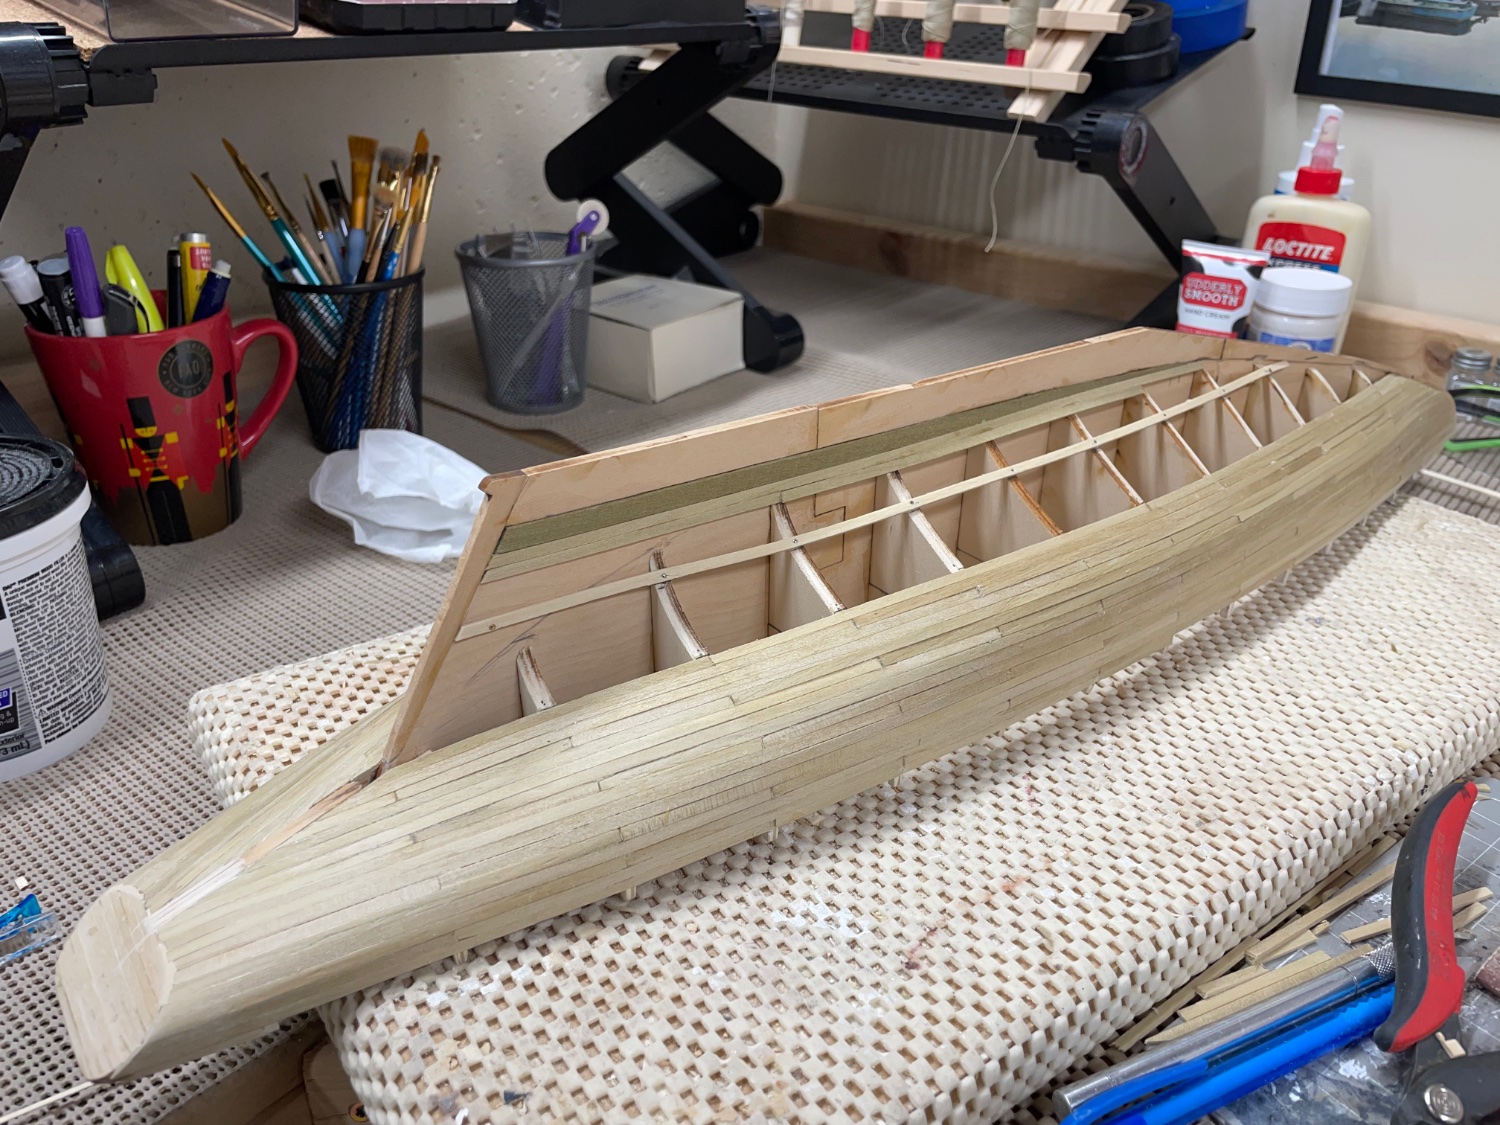
Hull Planking continued… Hull planked, let the sanding begin. 🍻


- 282 replies
-
- 9
-
-
- Bluenose
- Model Shipways
- (and 1 more)
-
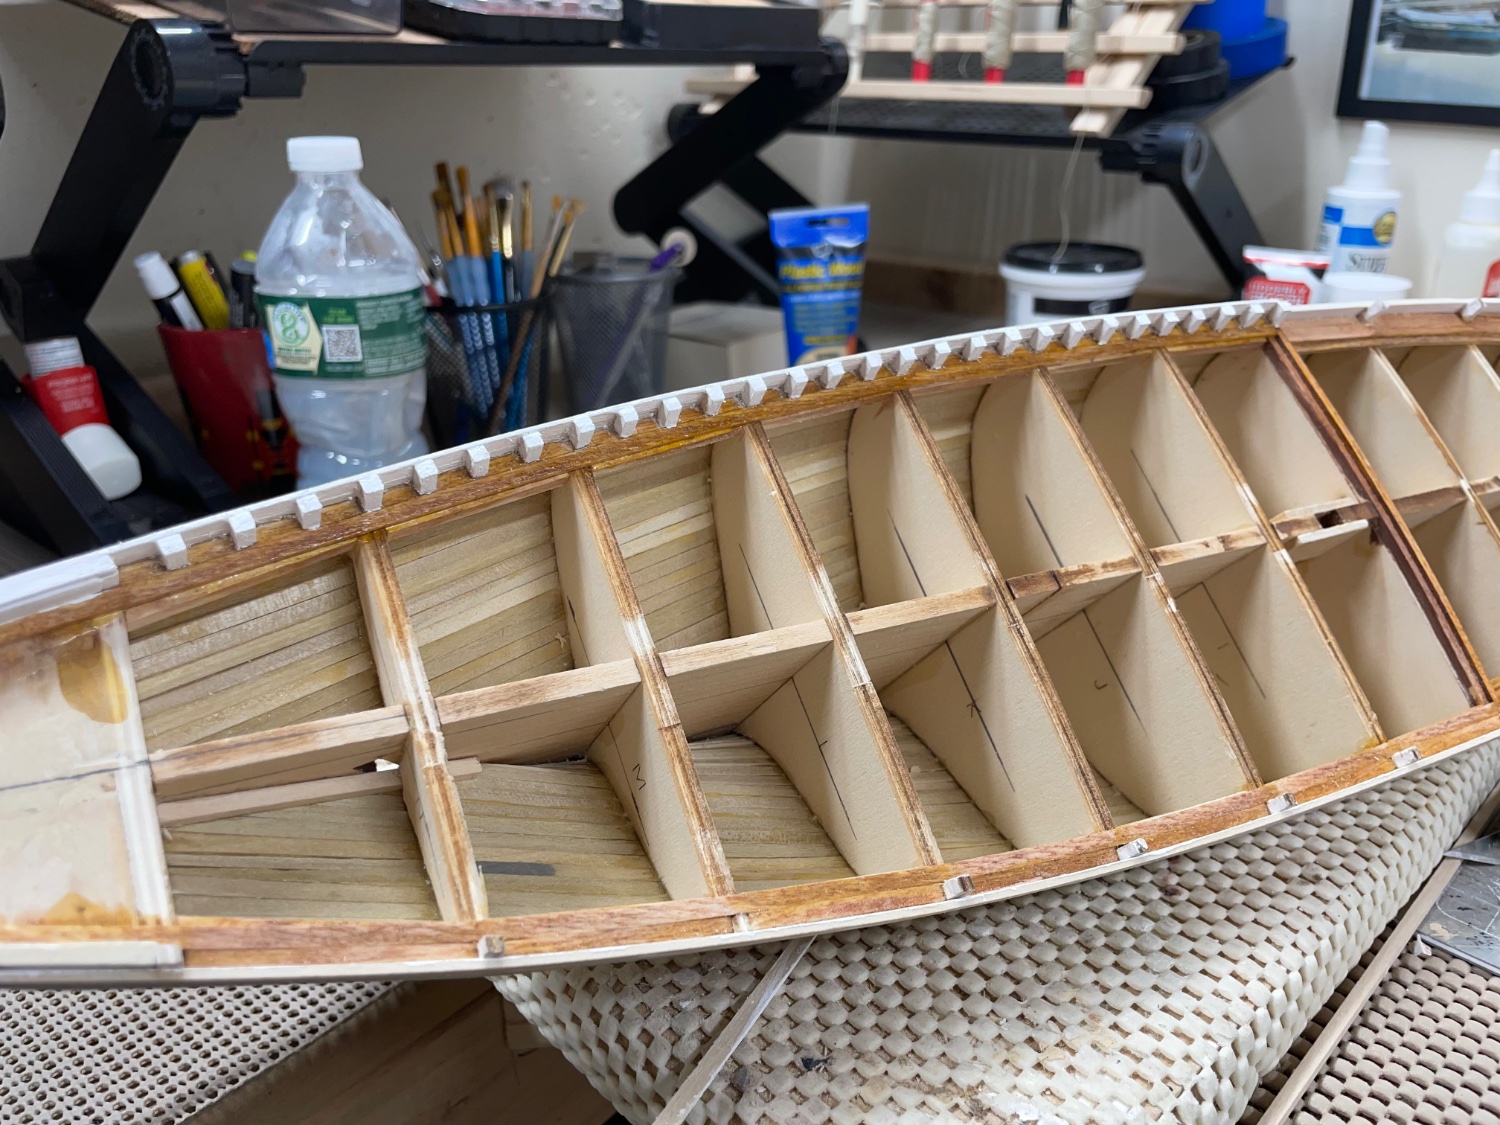
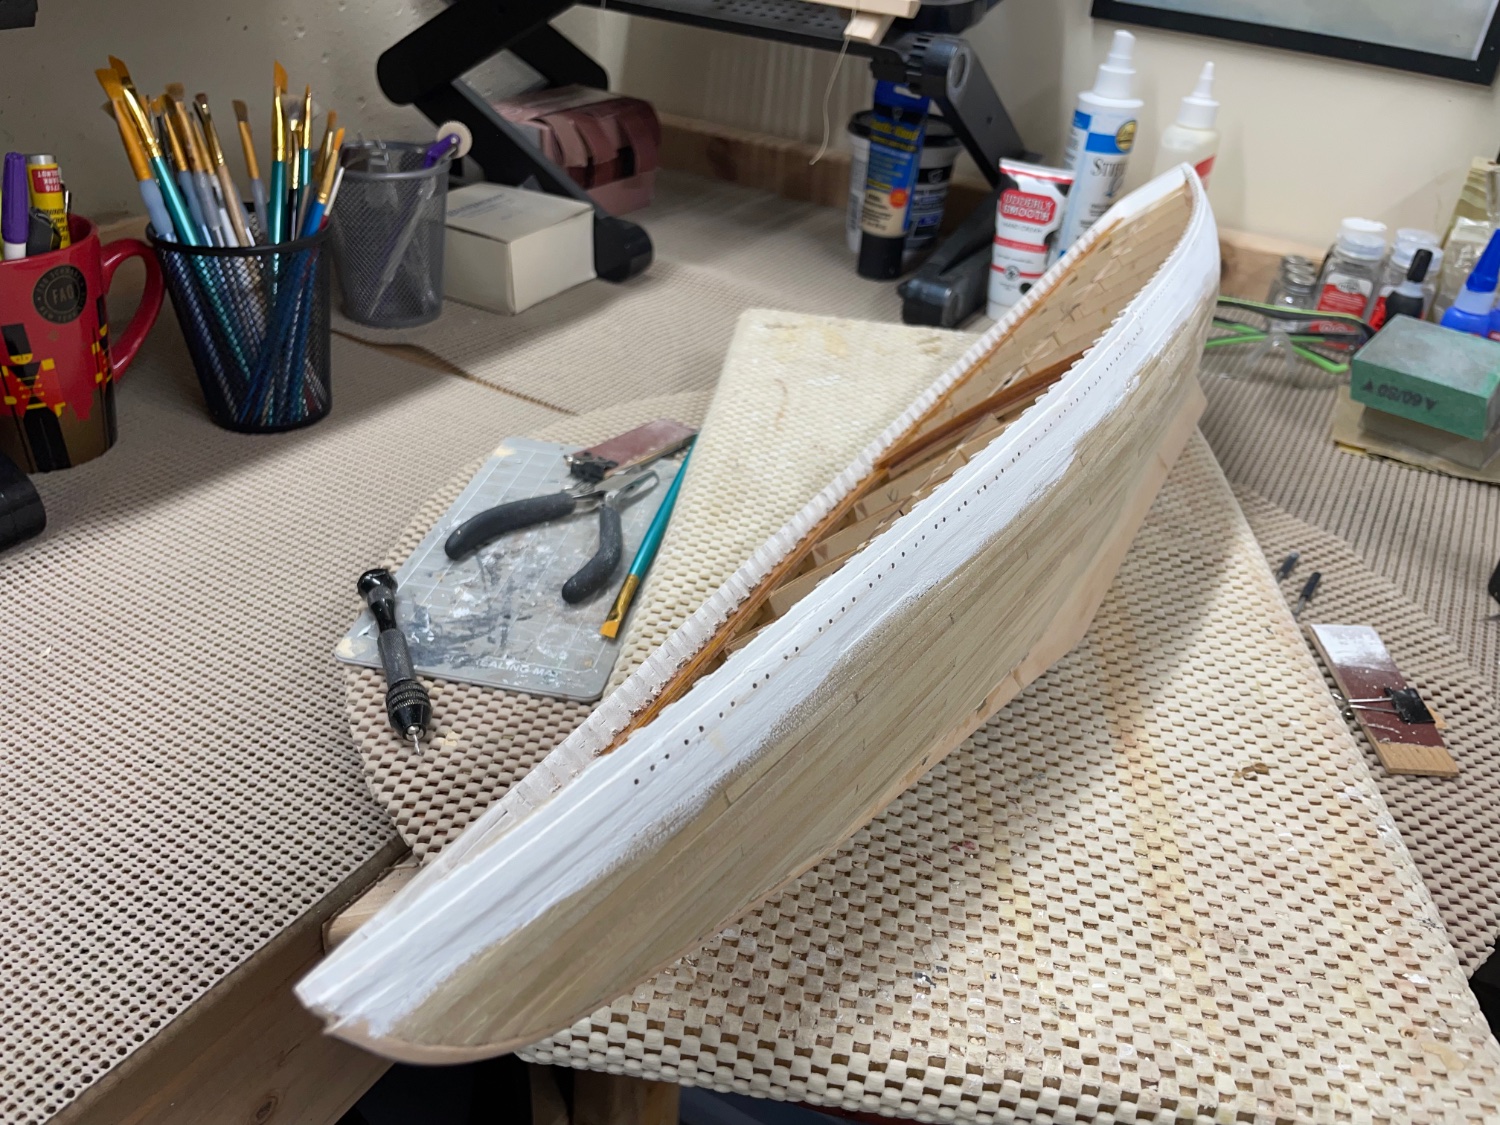
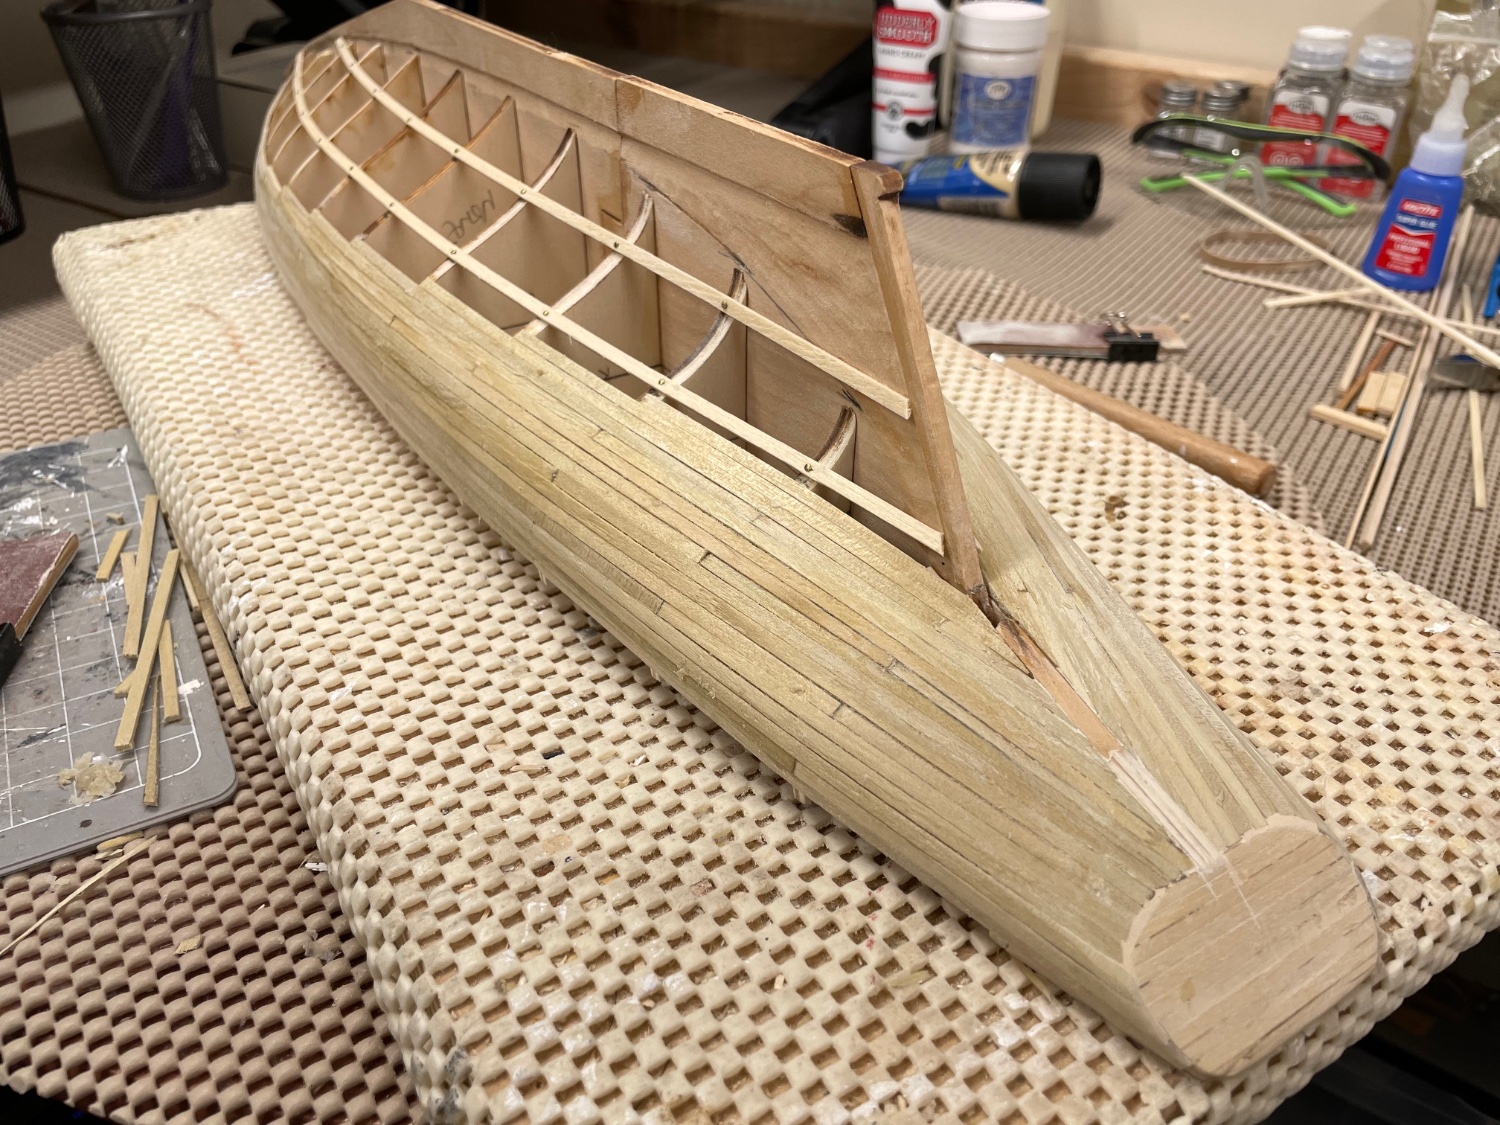
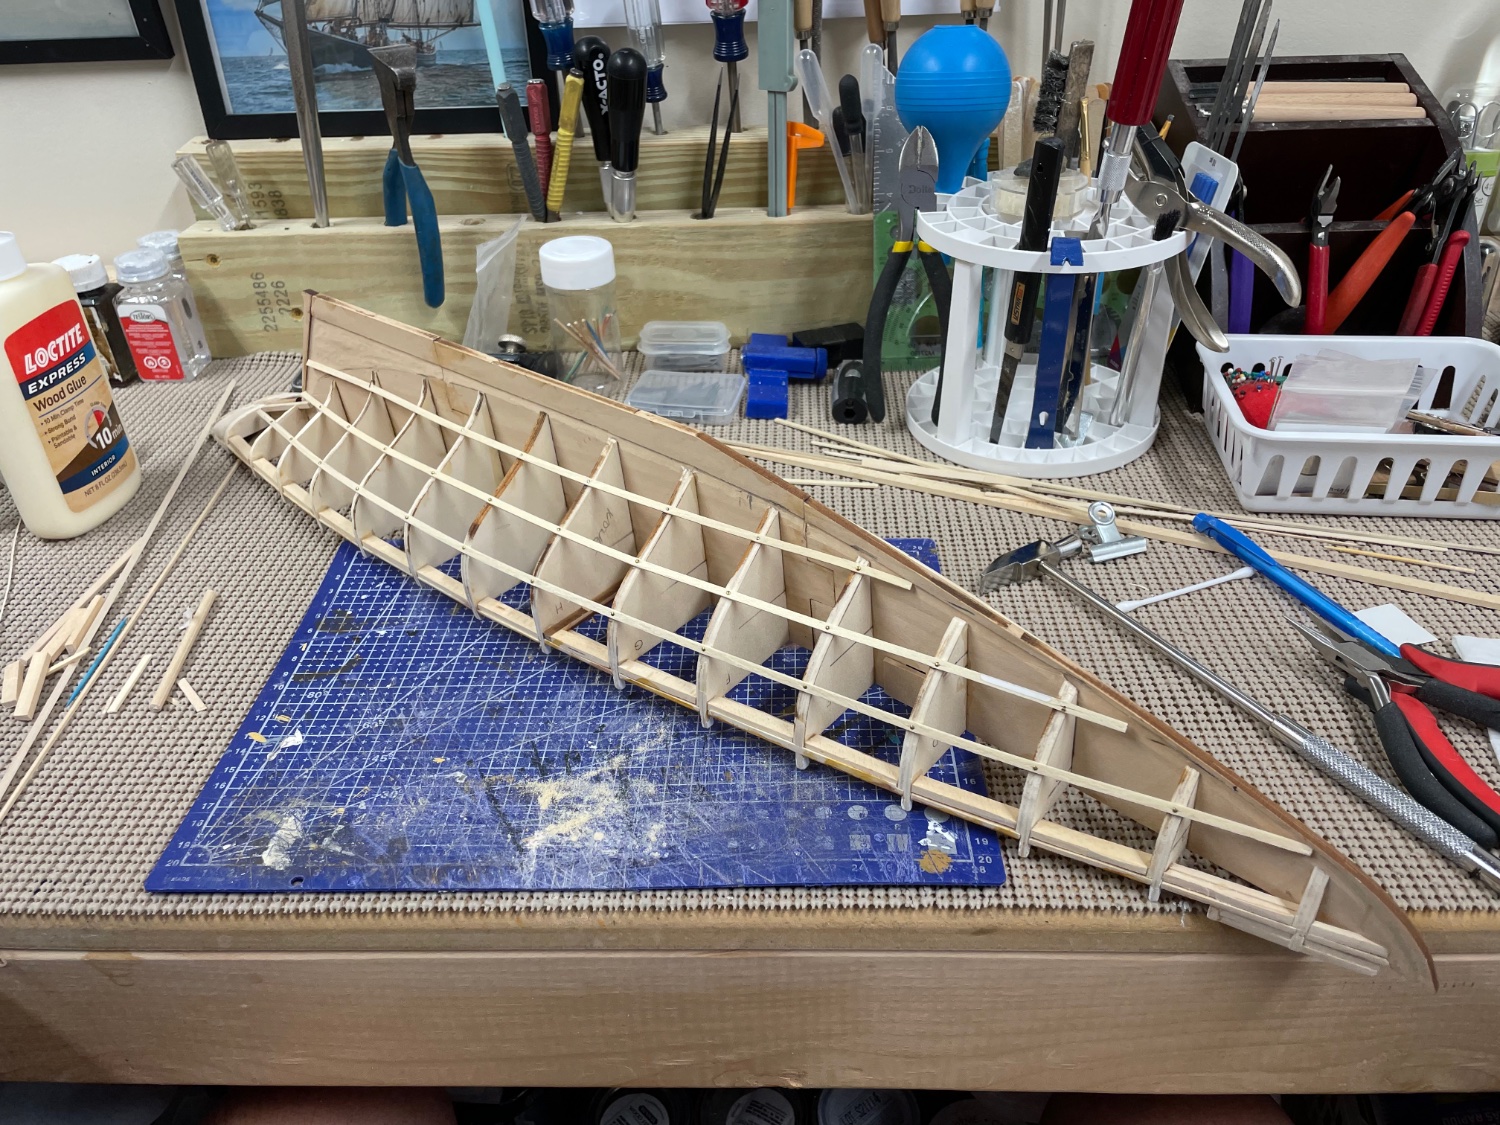
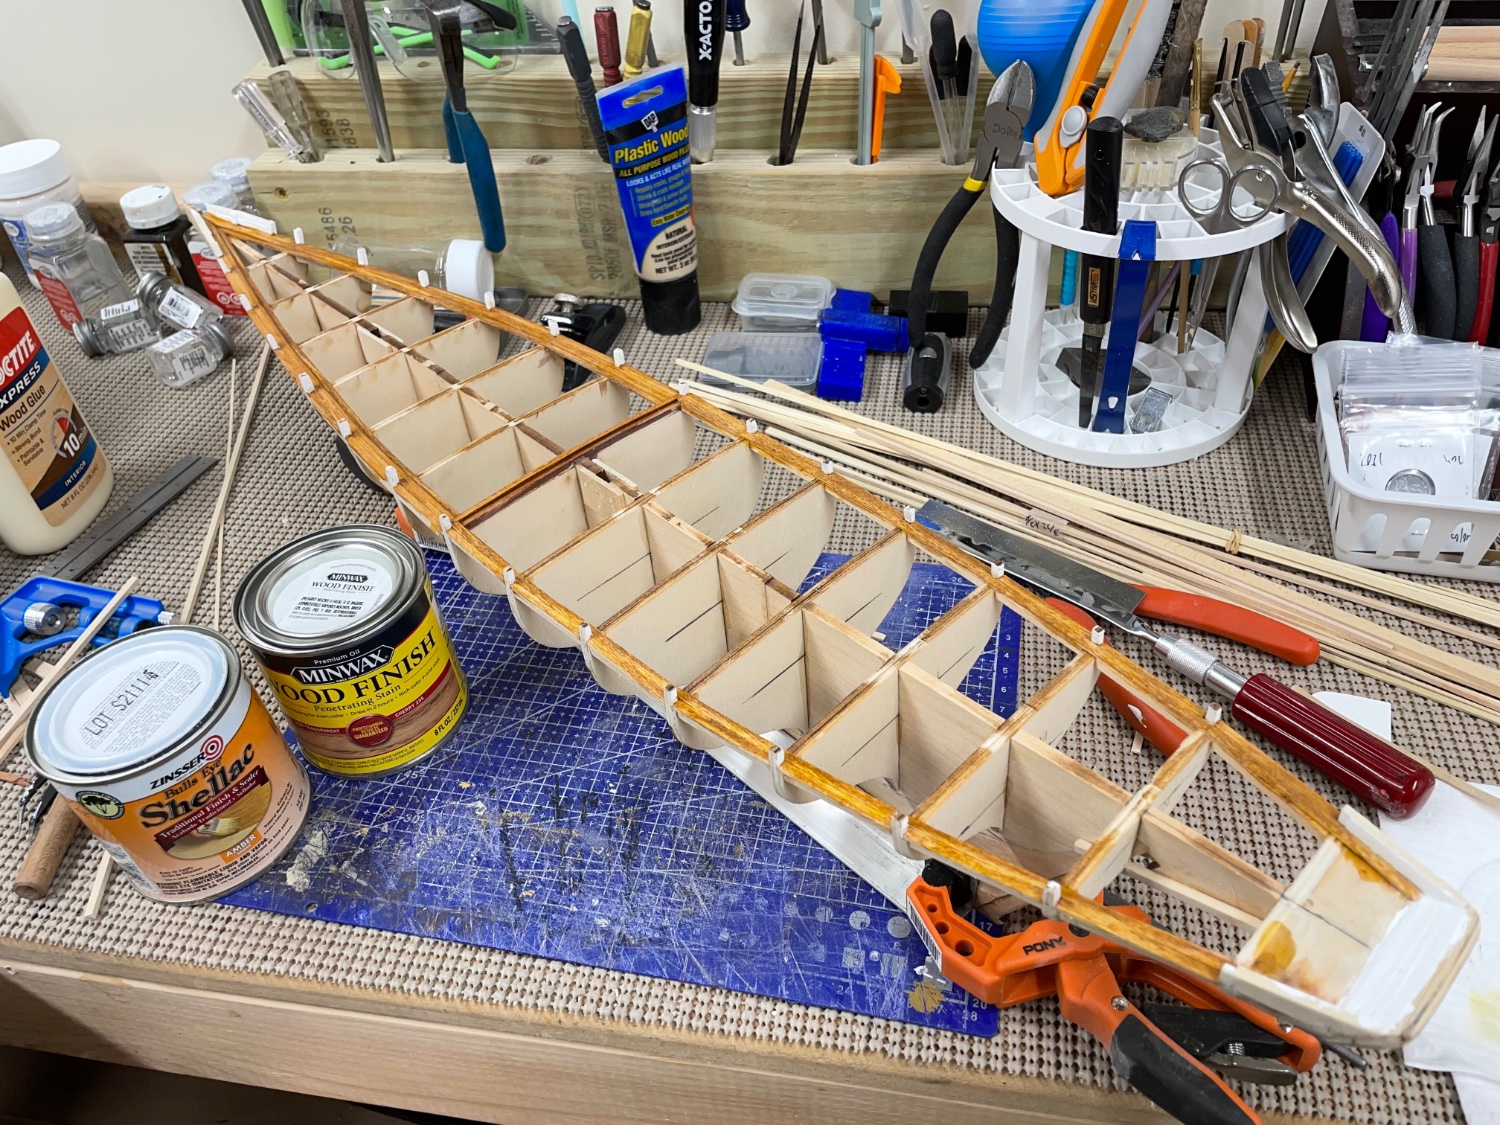
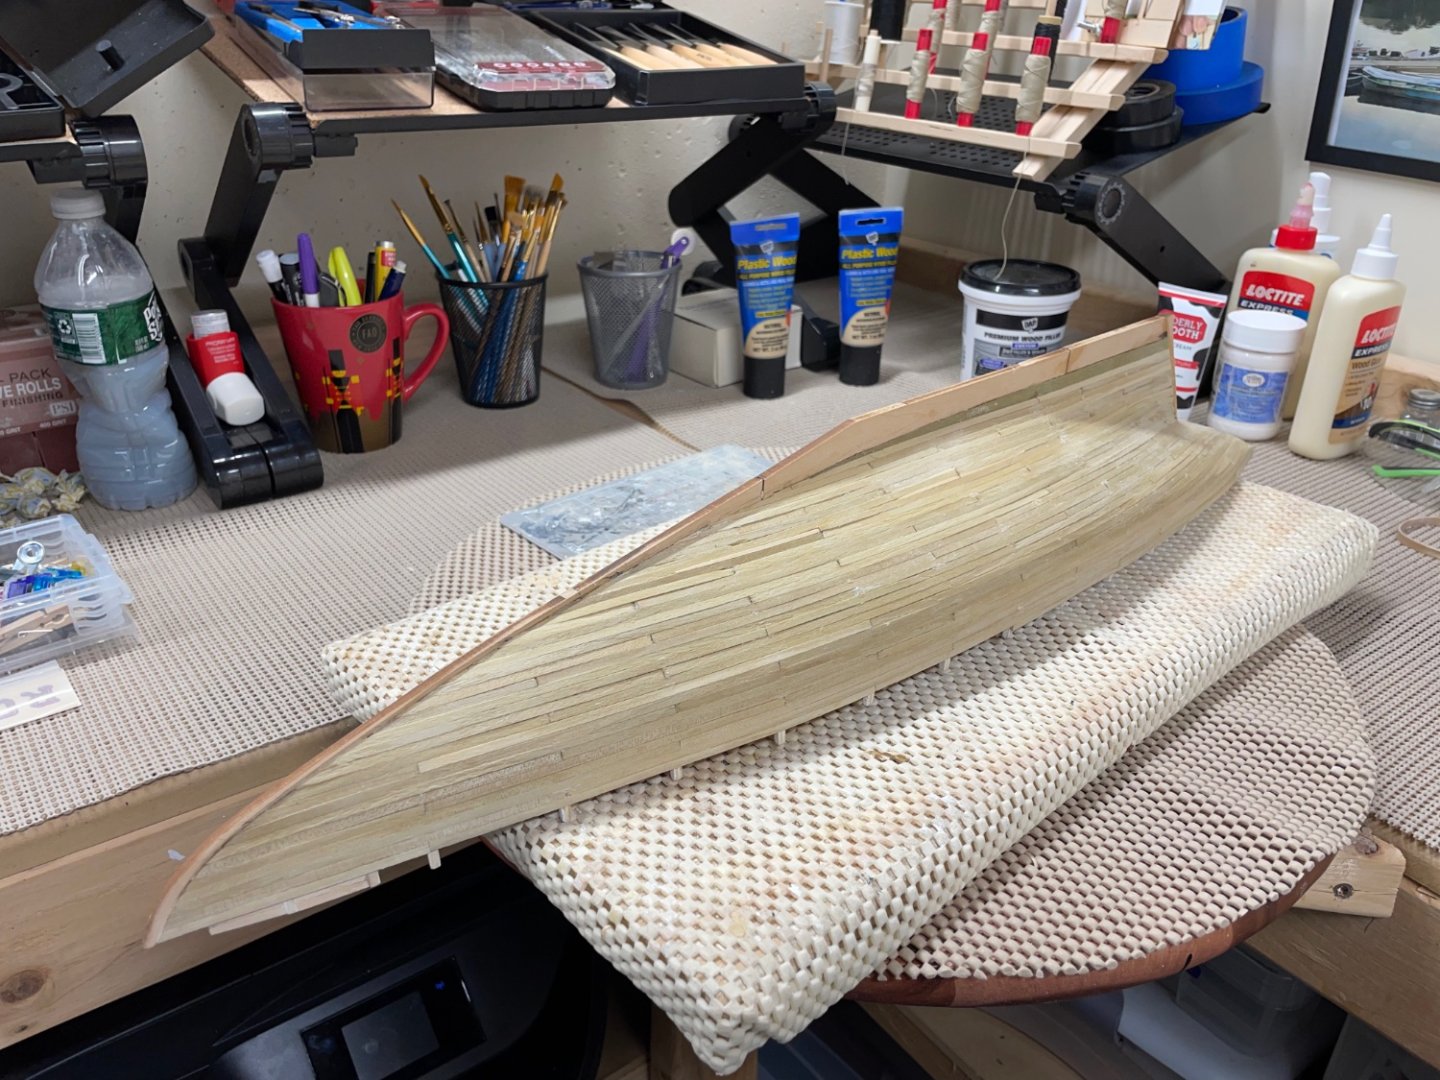
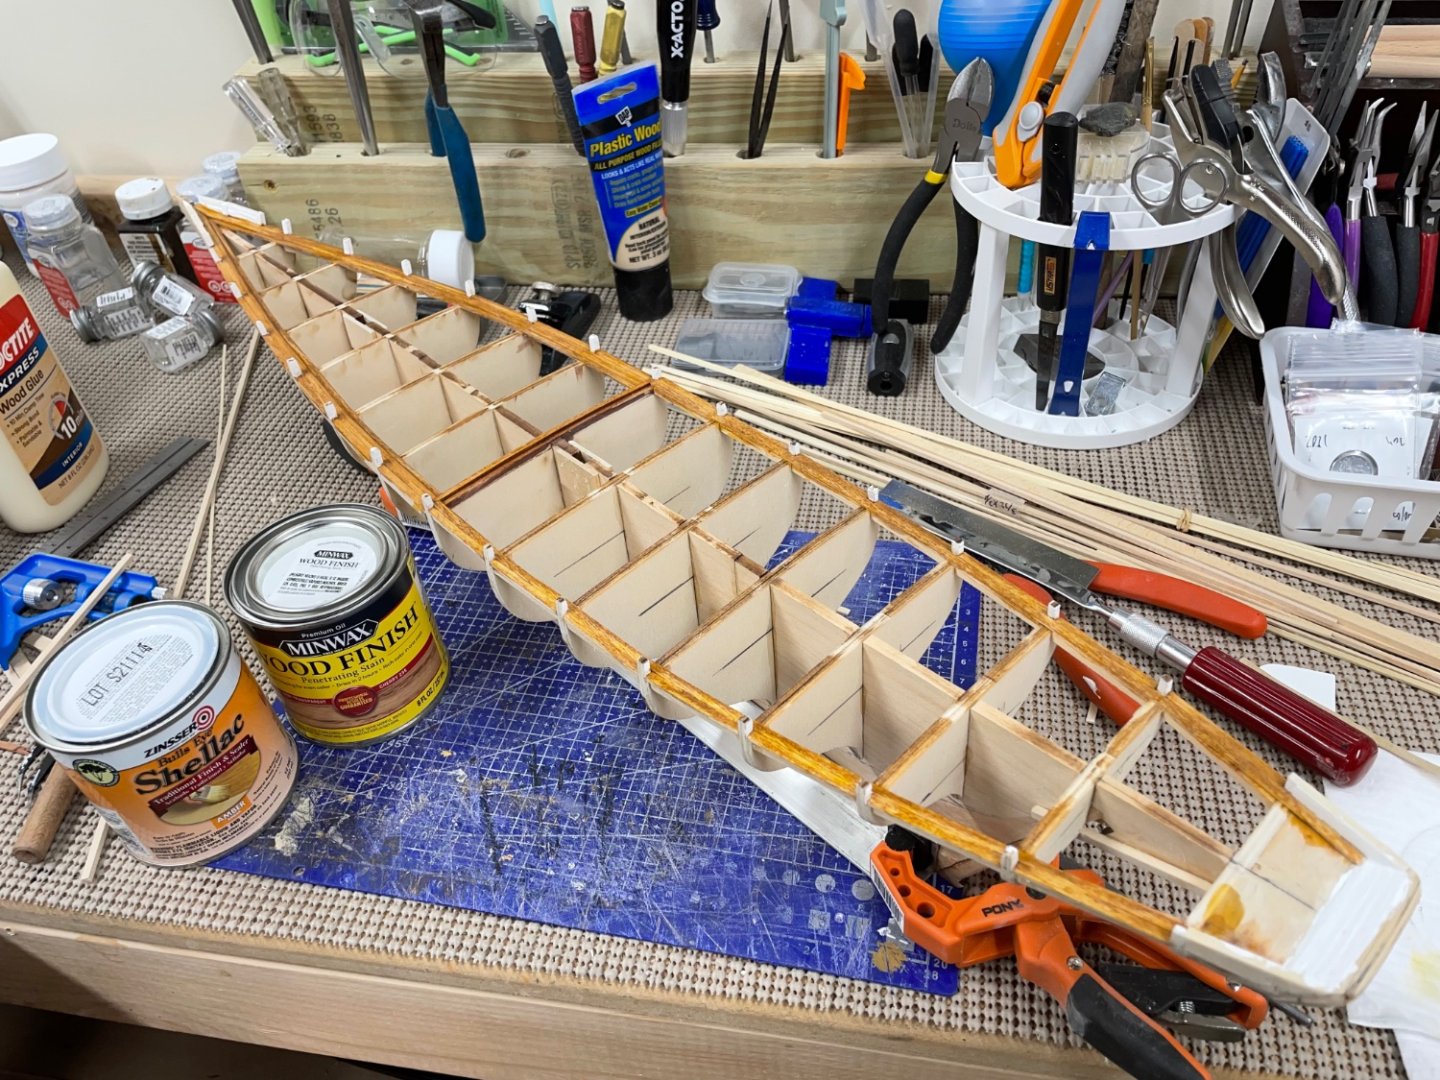
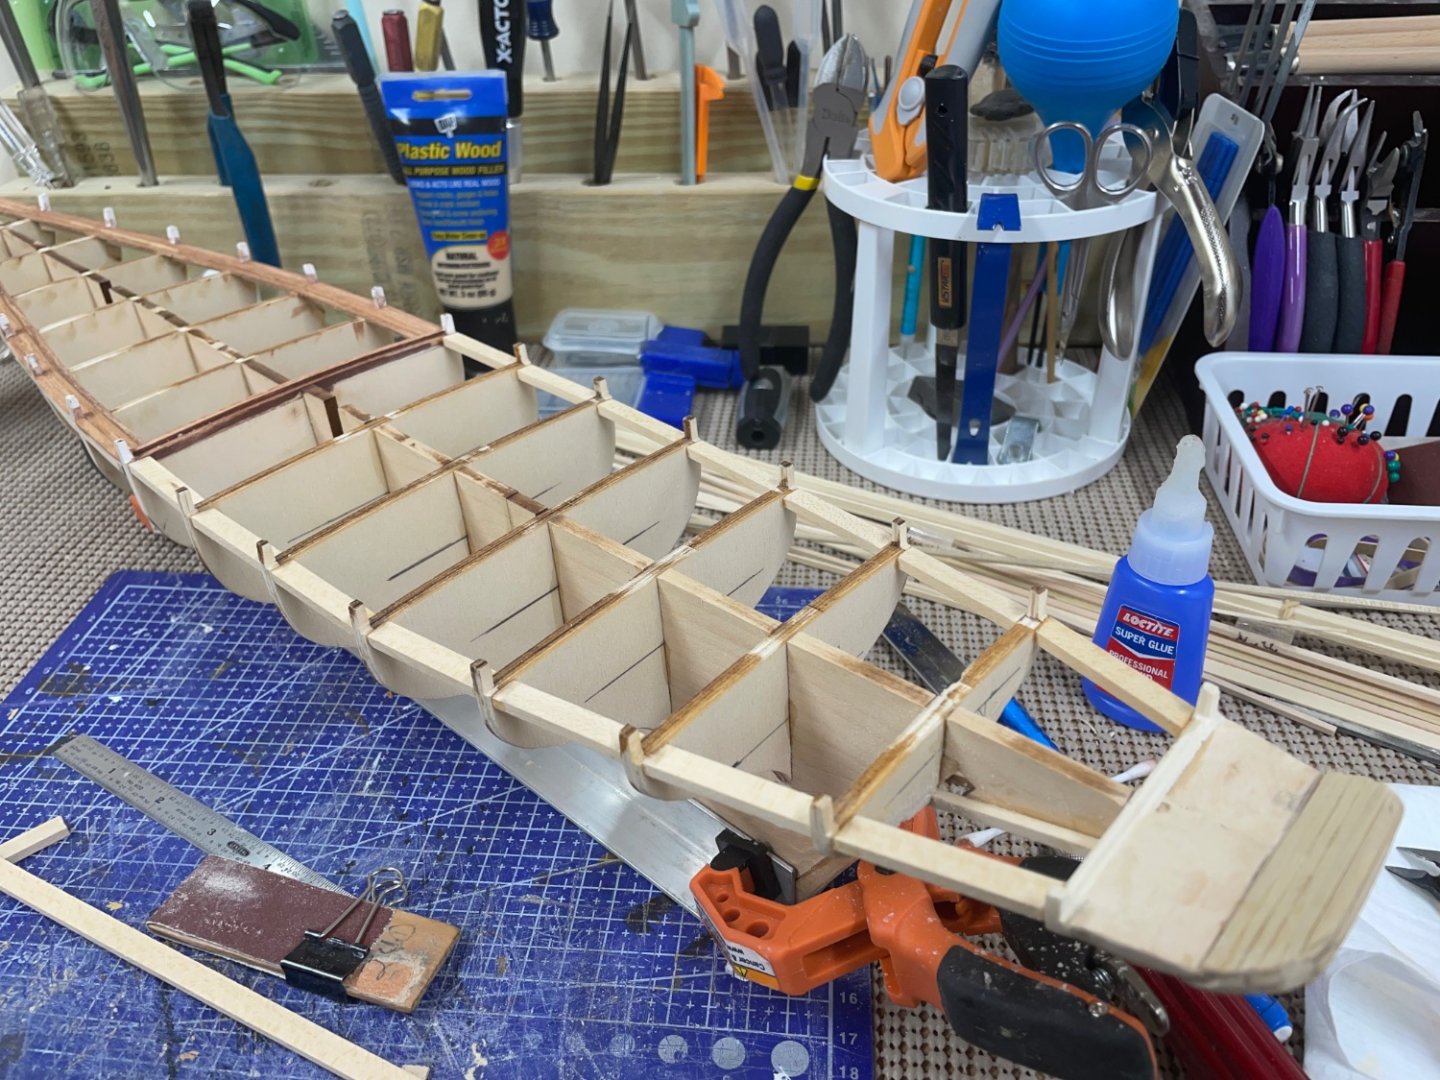
I’m back… Need another respite from the Robert E Lee. Planking the hull… Installed temporary battens to help maintain proper alignment of the planking. Per Model Shipways instructions. Had to correct an issue with the hull on my first strake. I used 1/64” strip wood to fill and fair out the dip. Also found some of the water ways a bit high and was able to sand them down flush with the first strake. Model Shipways instructions are very good, this is the first time I have used this technique of planking. Each plank is no longer than 4 bulkhead spans. Using PVA for the edges and CA to attach to the bulk heads. 30 seconds of finger clamping is all that’s required. Beveling the edges at the stern for a tight fit. Minimal filler required at this point. She is coming along well thus far. Cheers 🍻
- 282 replies
-
- 8
-
-
- Bluenose
- Model Shipways
- (and 1 more)
-
Congratulations Ron… 🥂
-
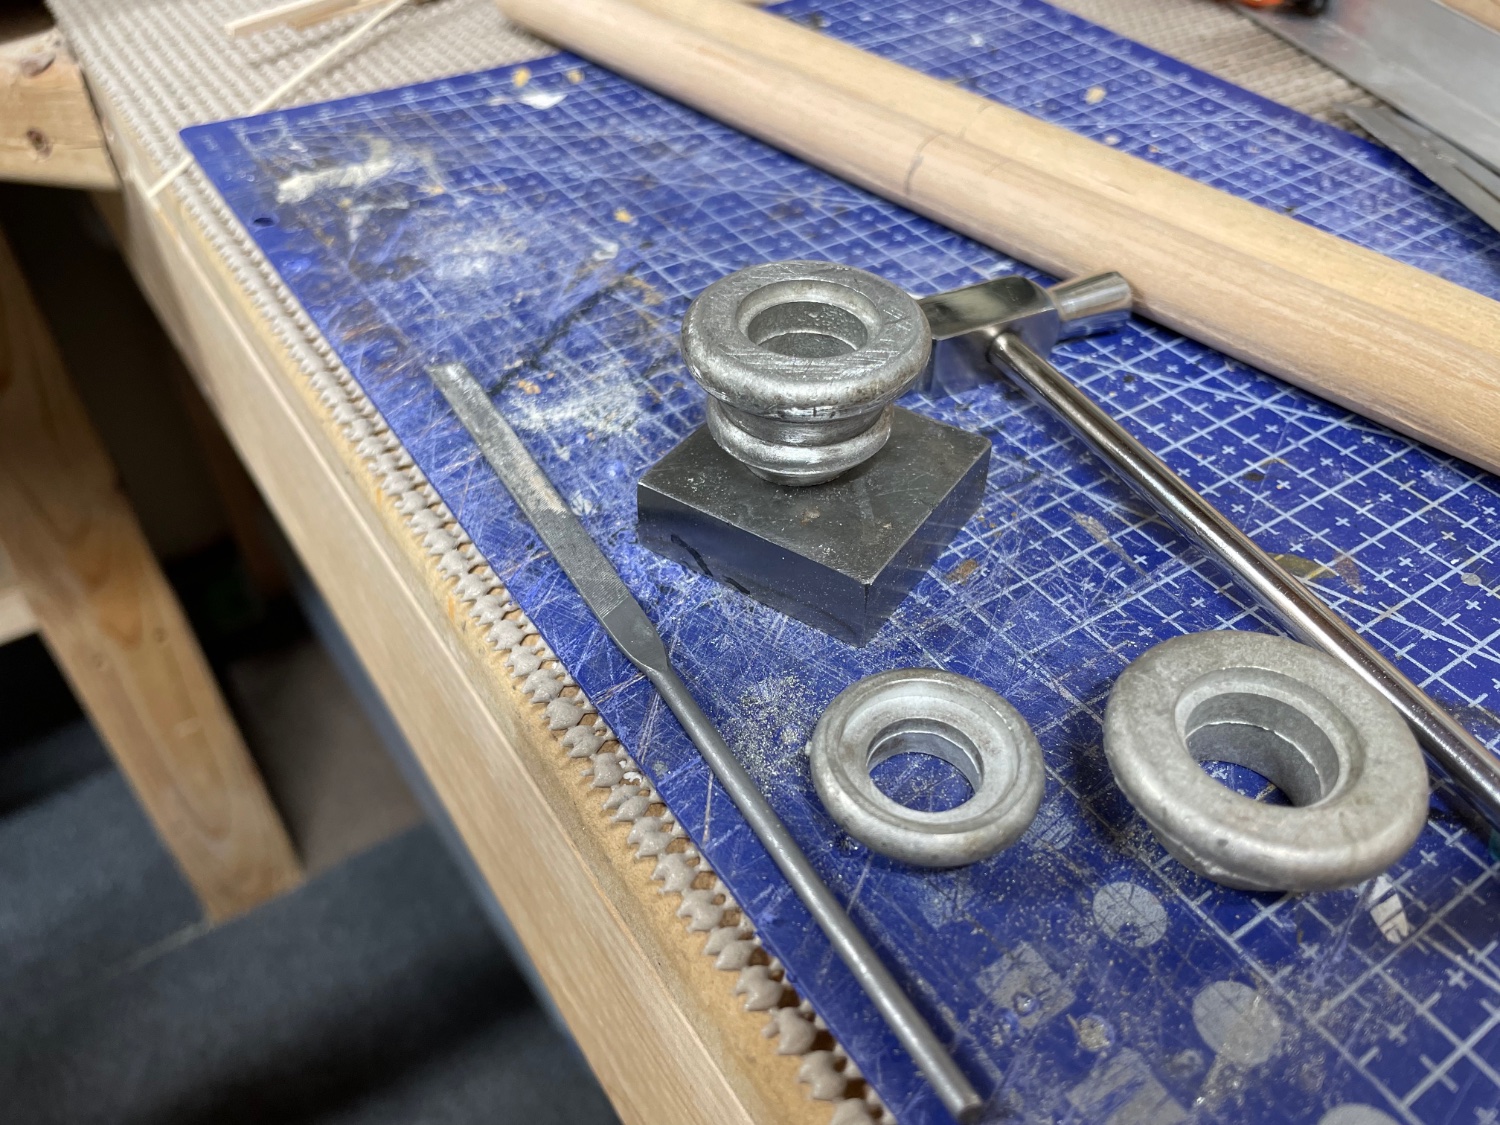
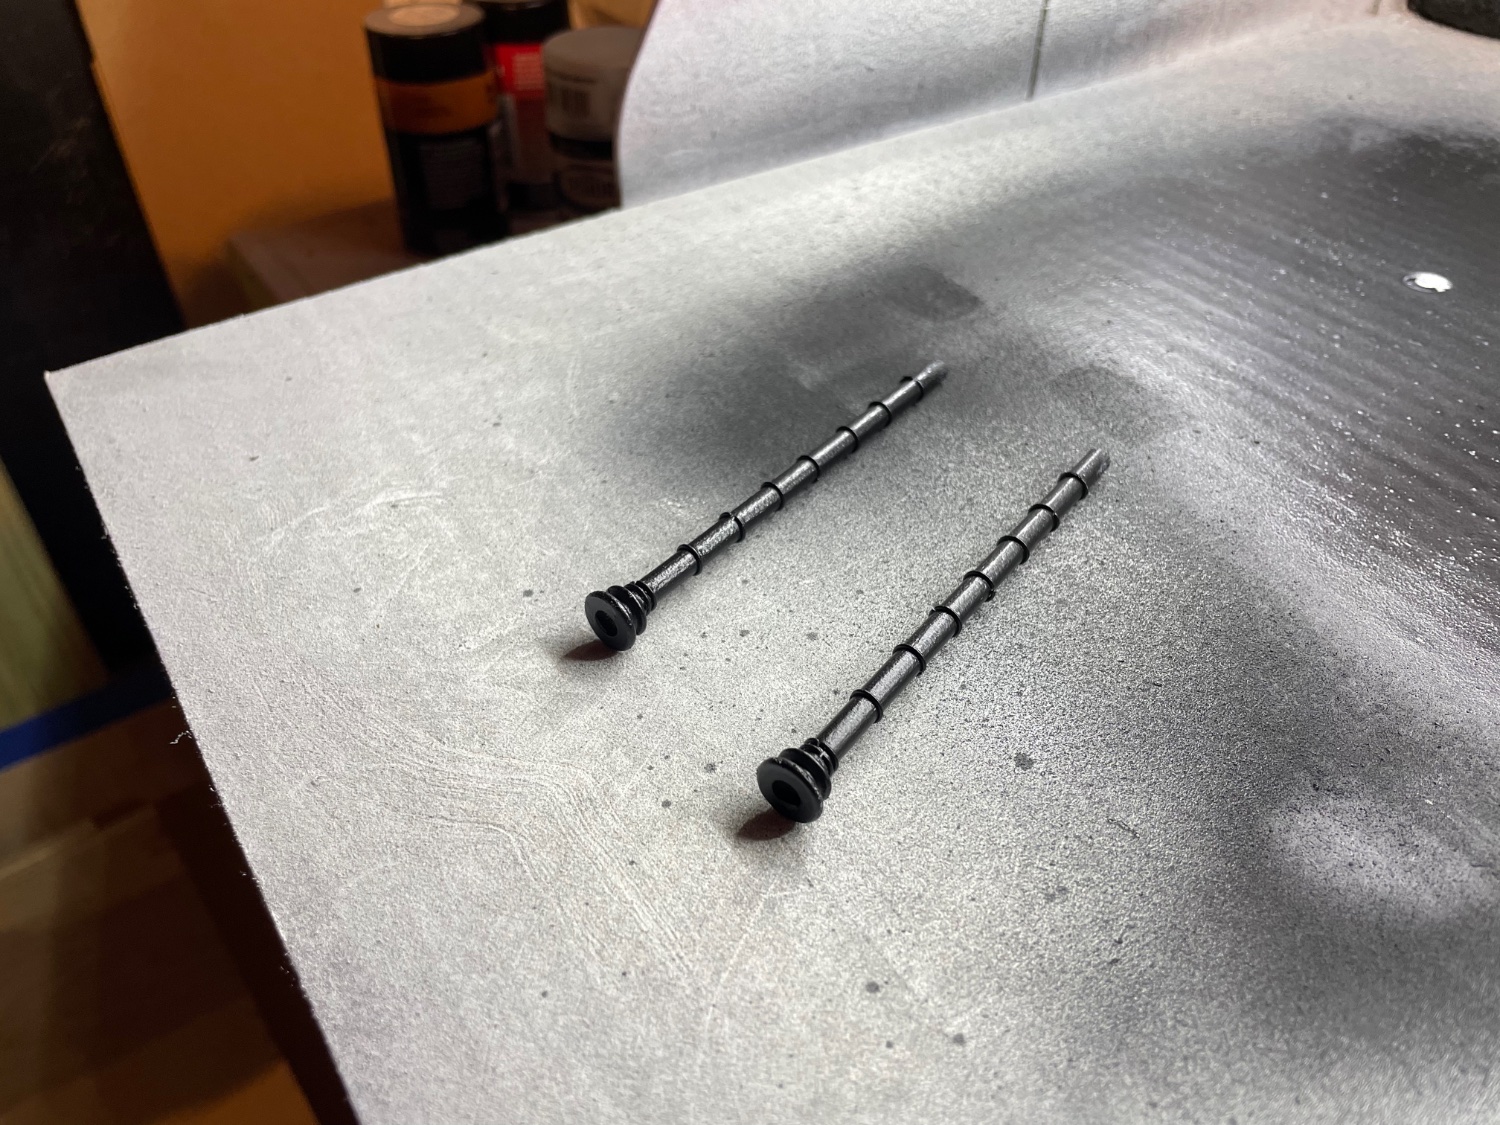
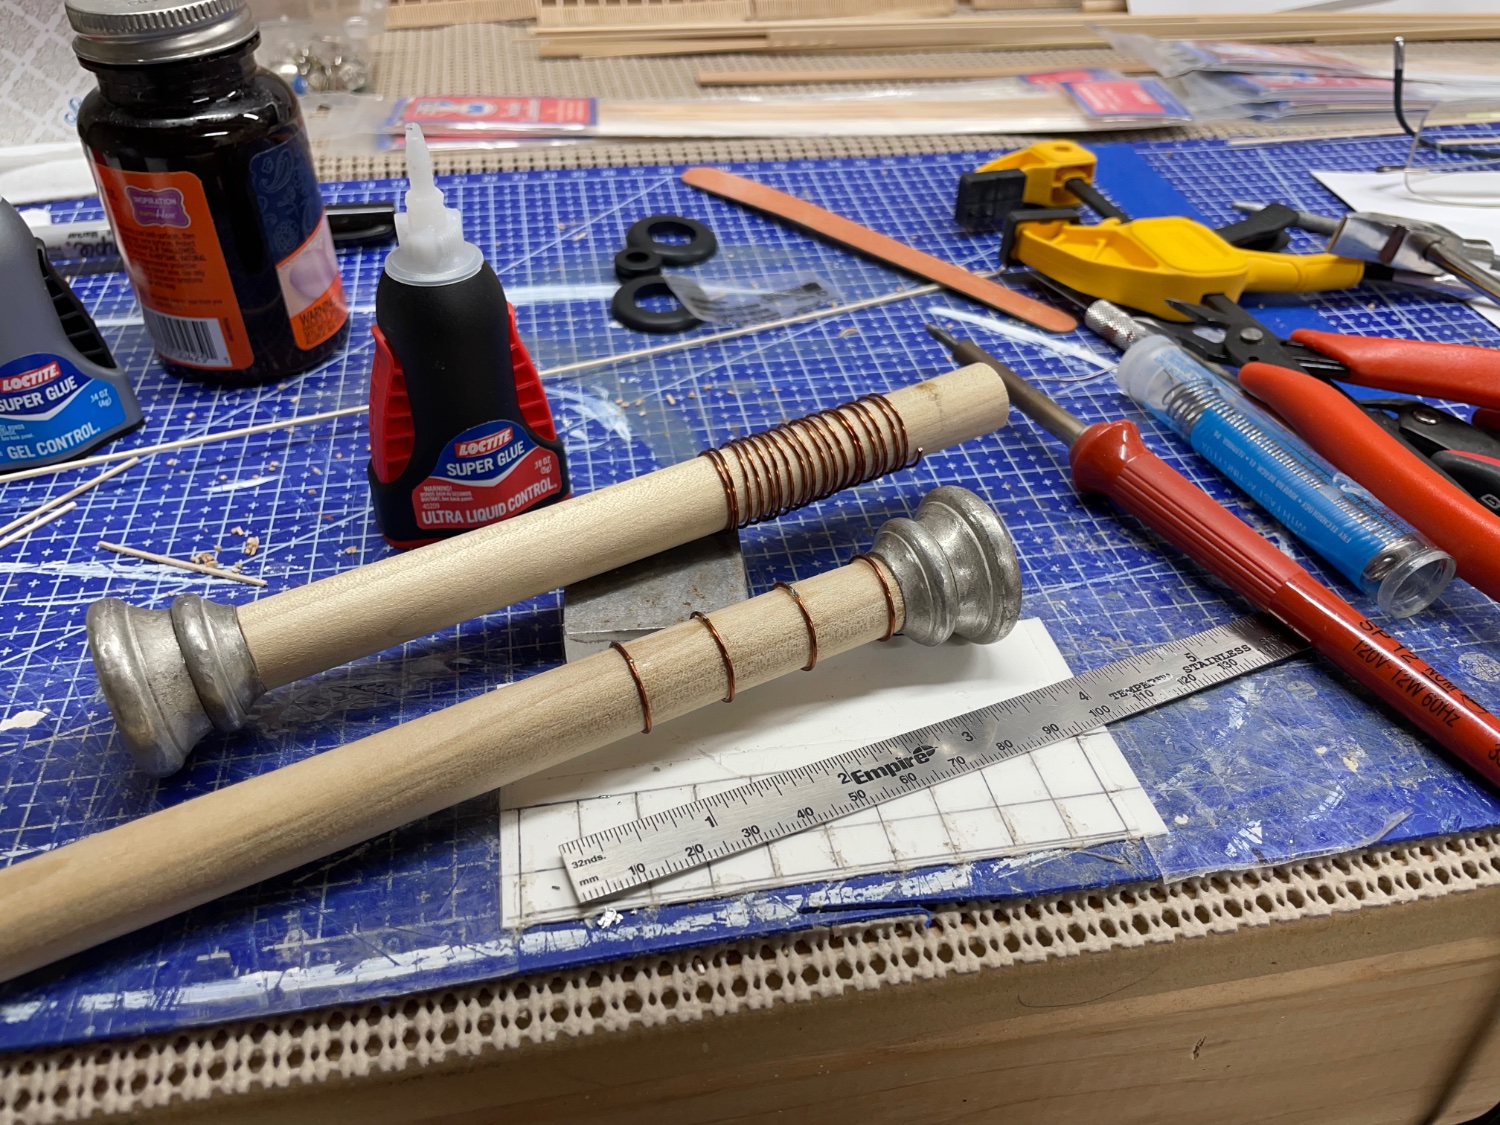
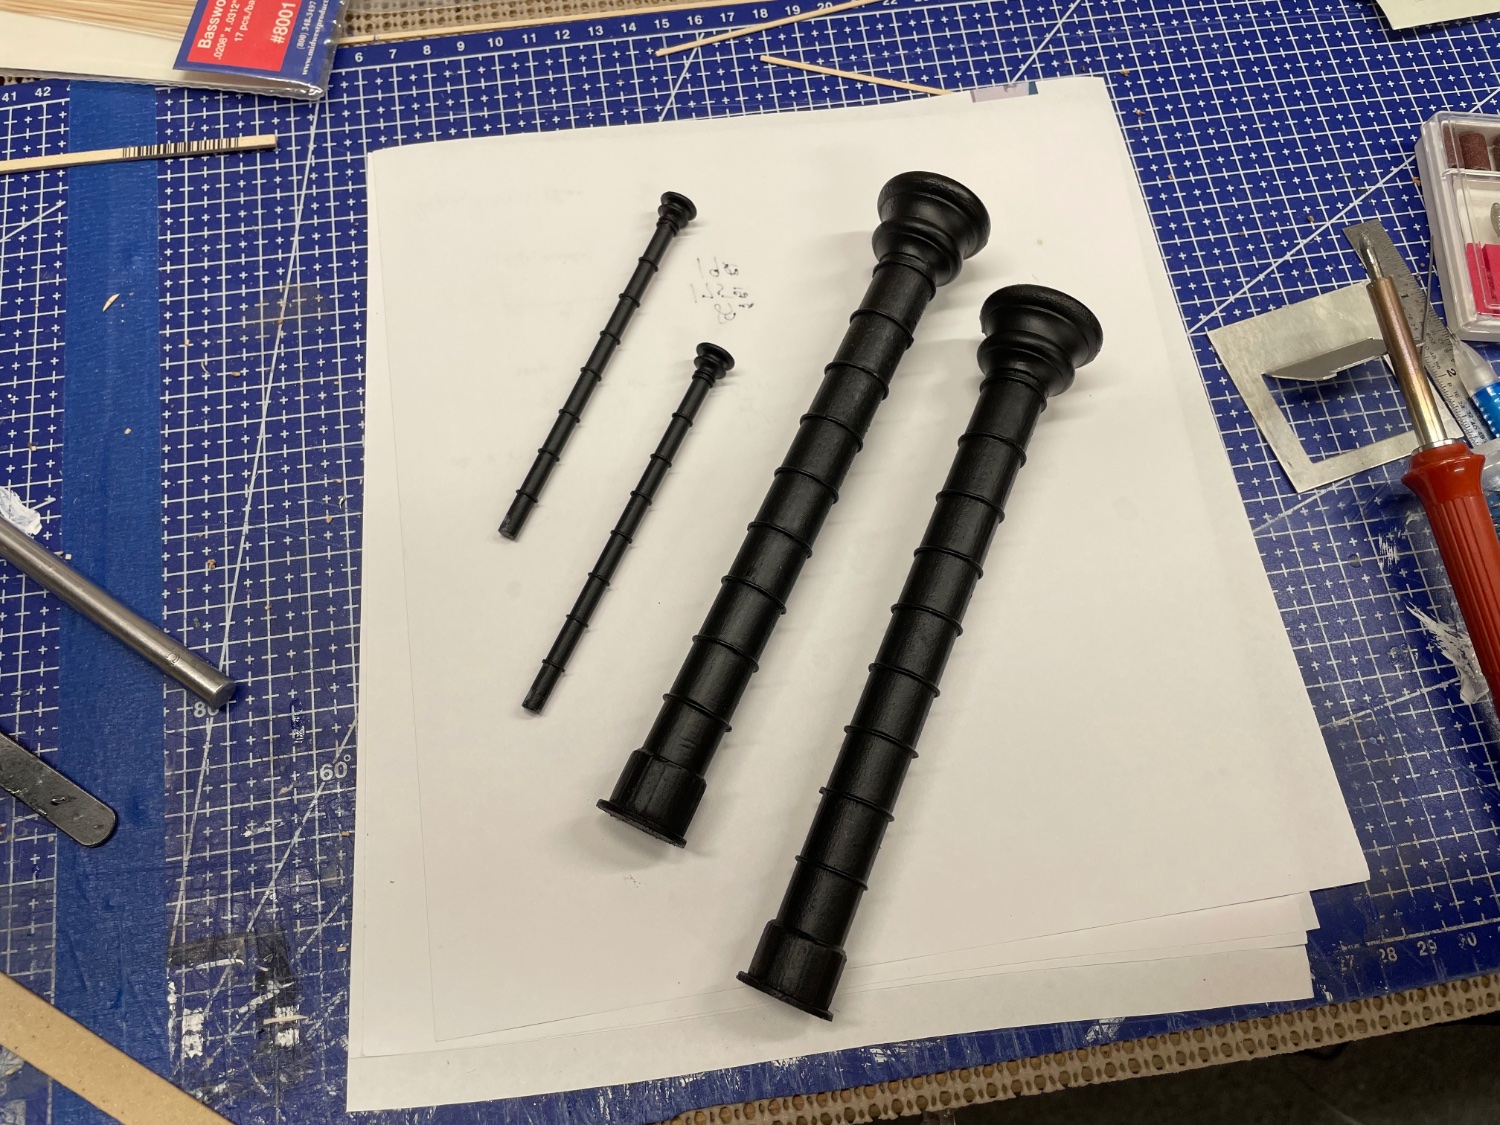
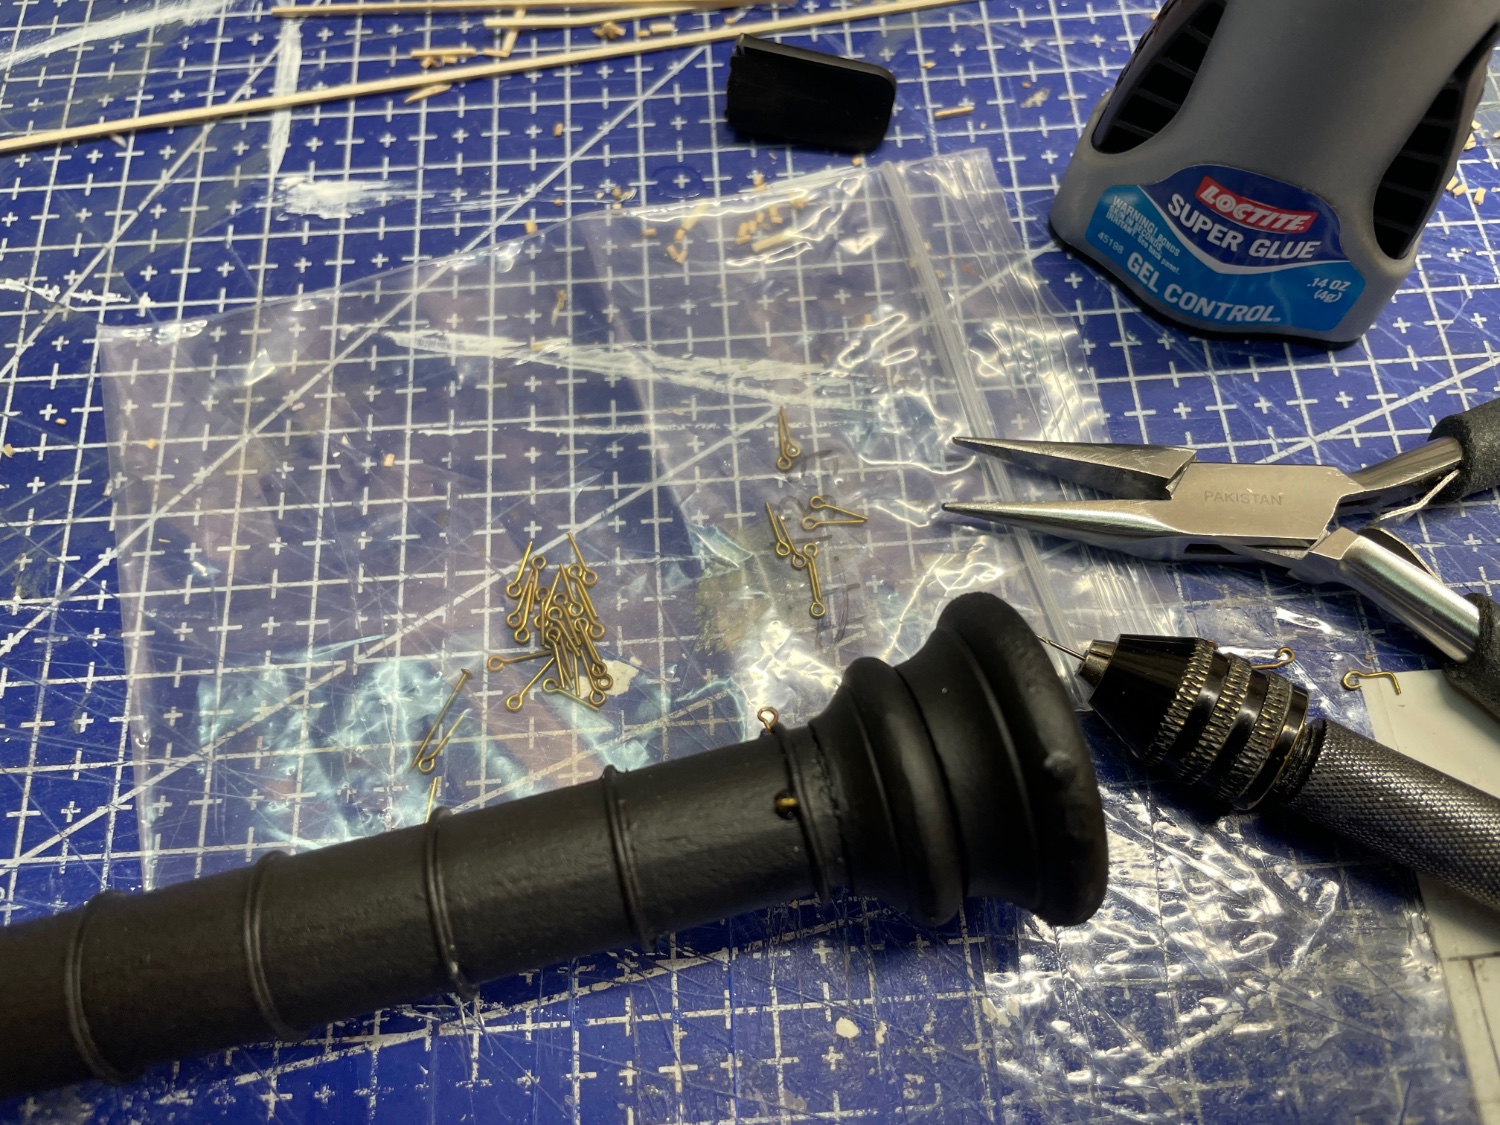
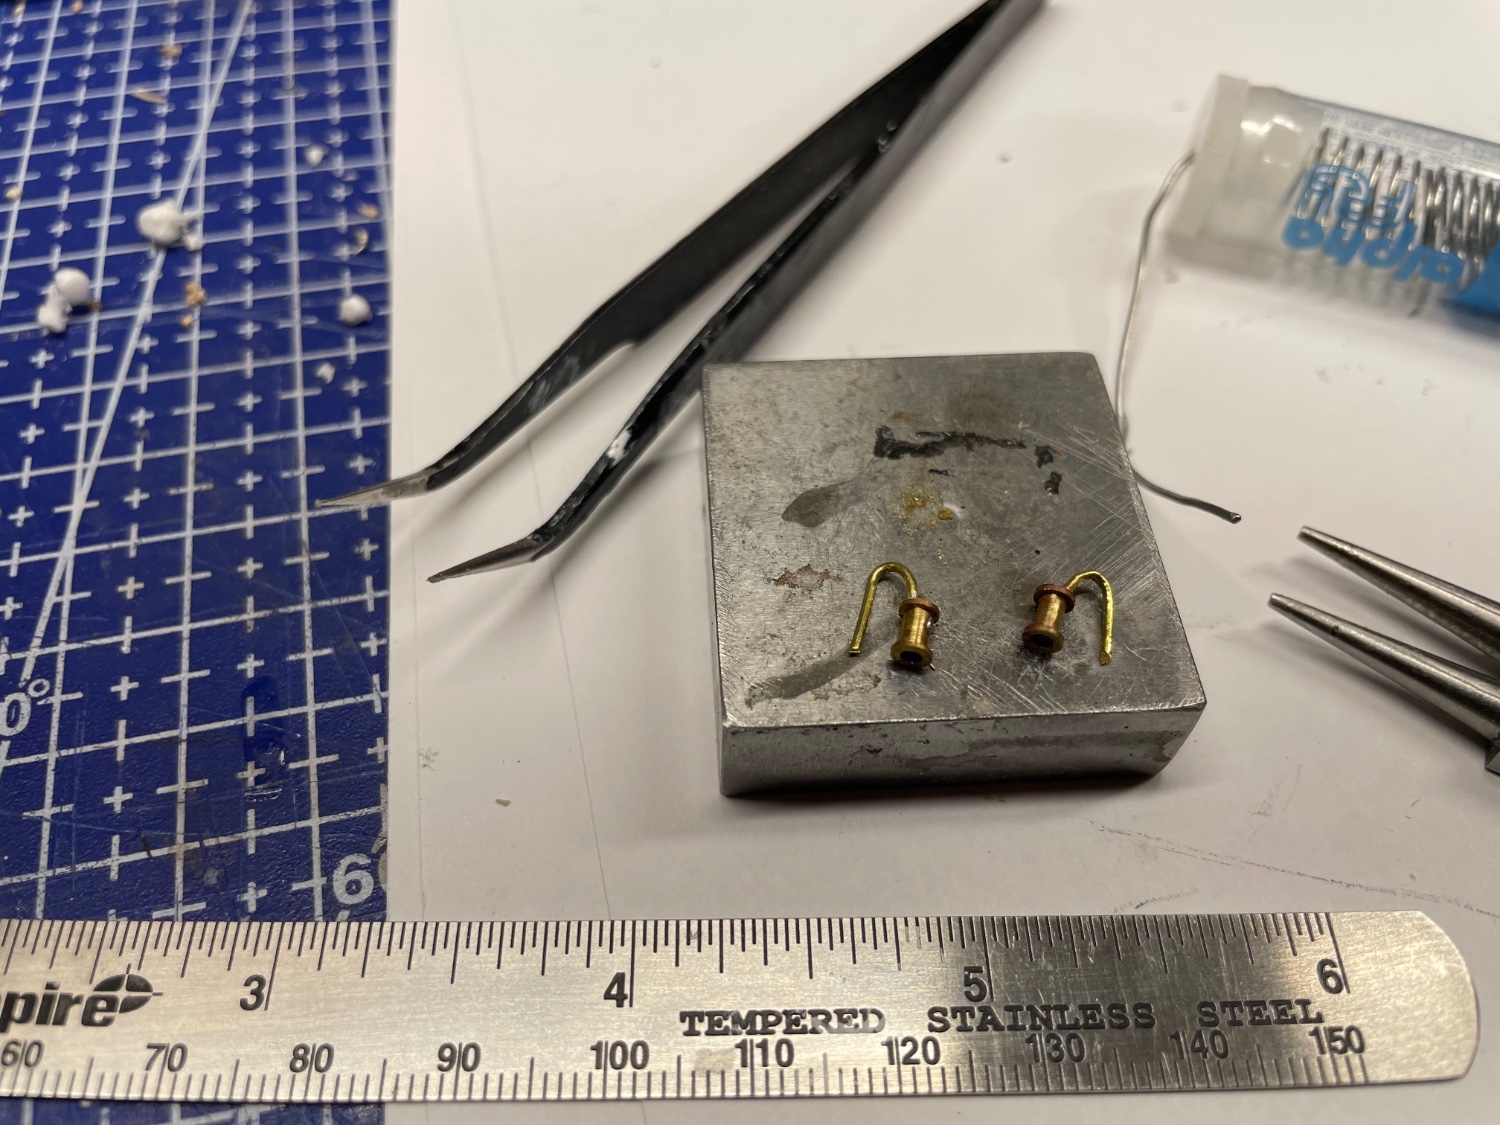
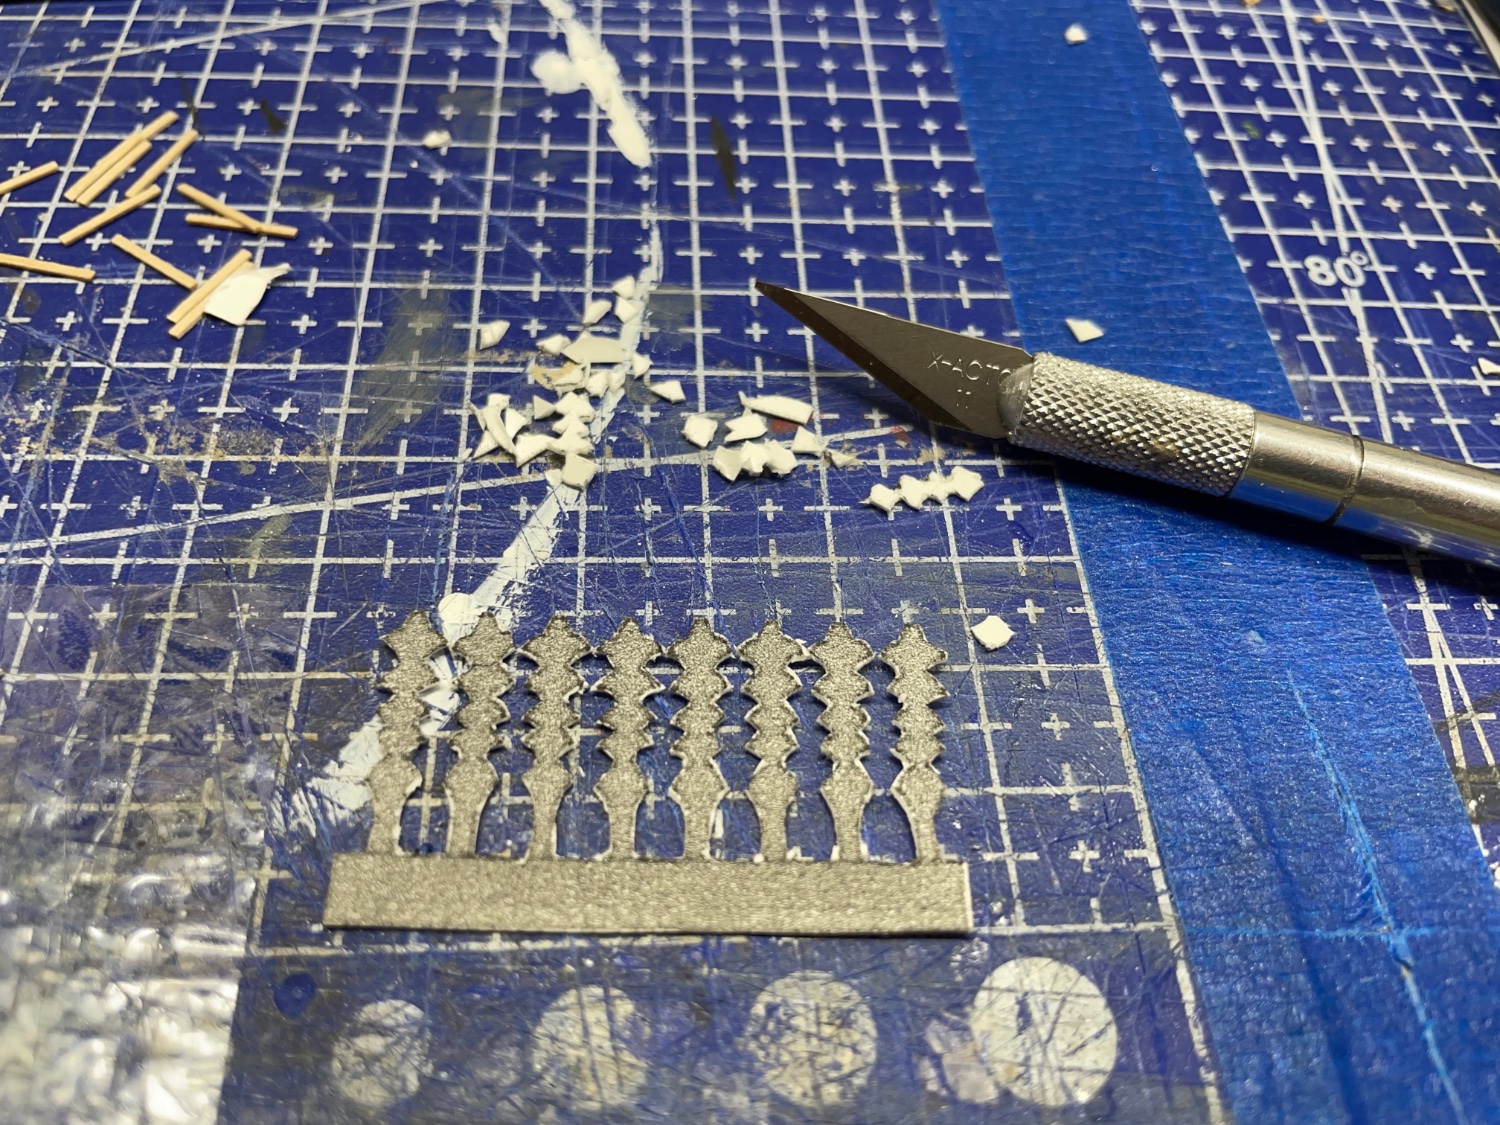
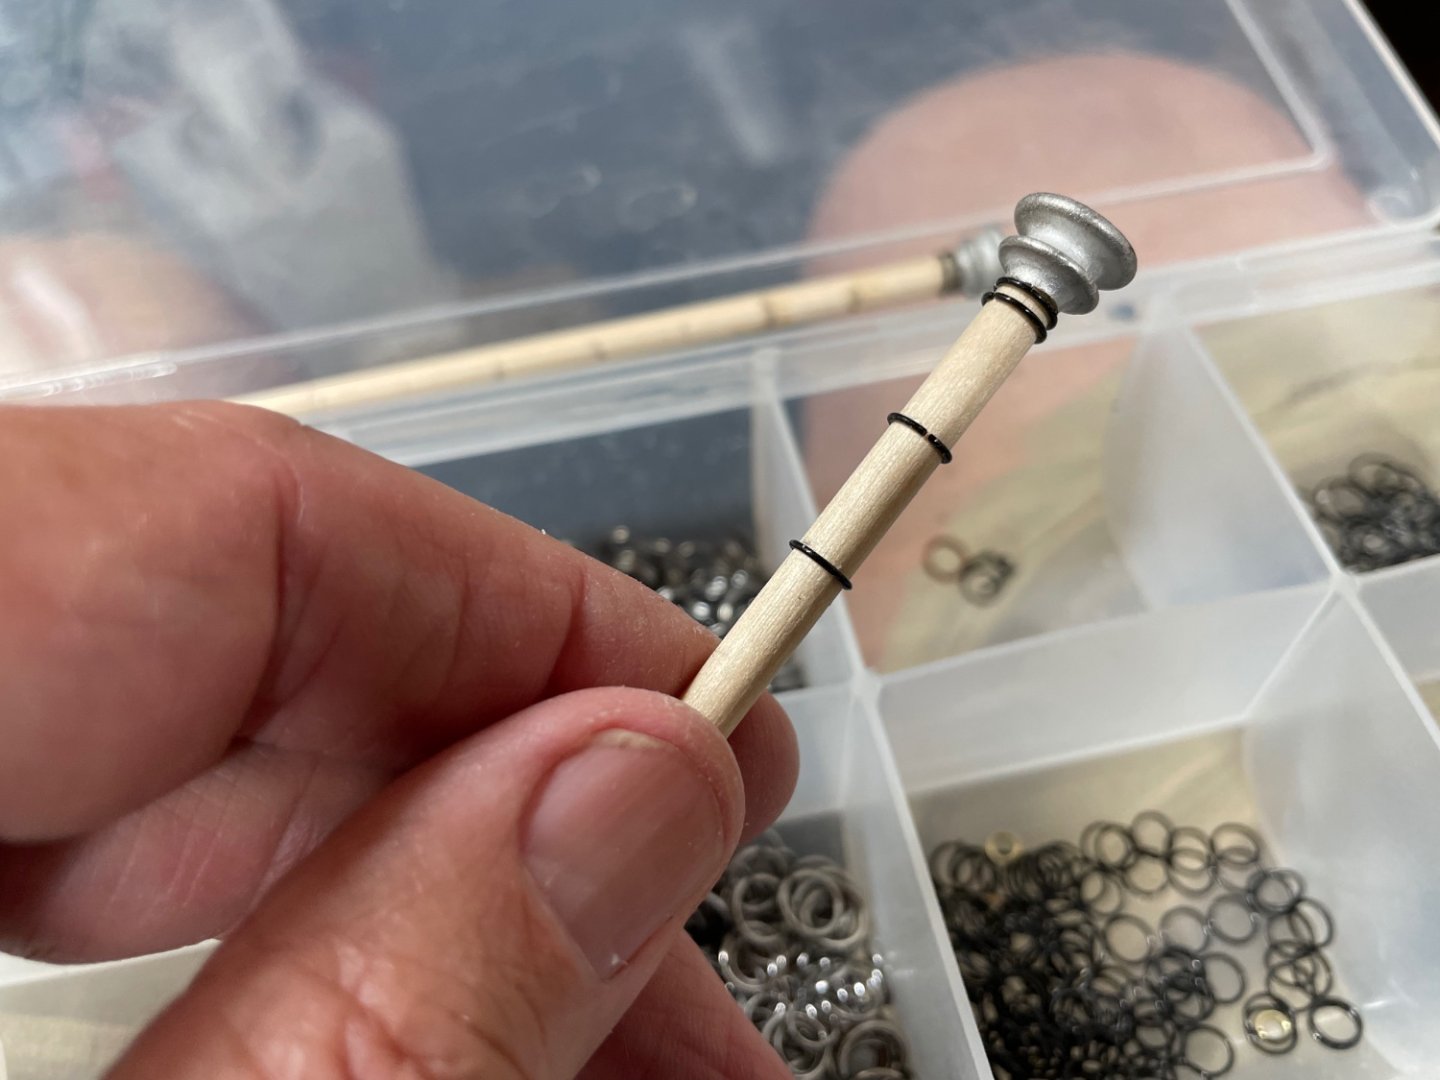
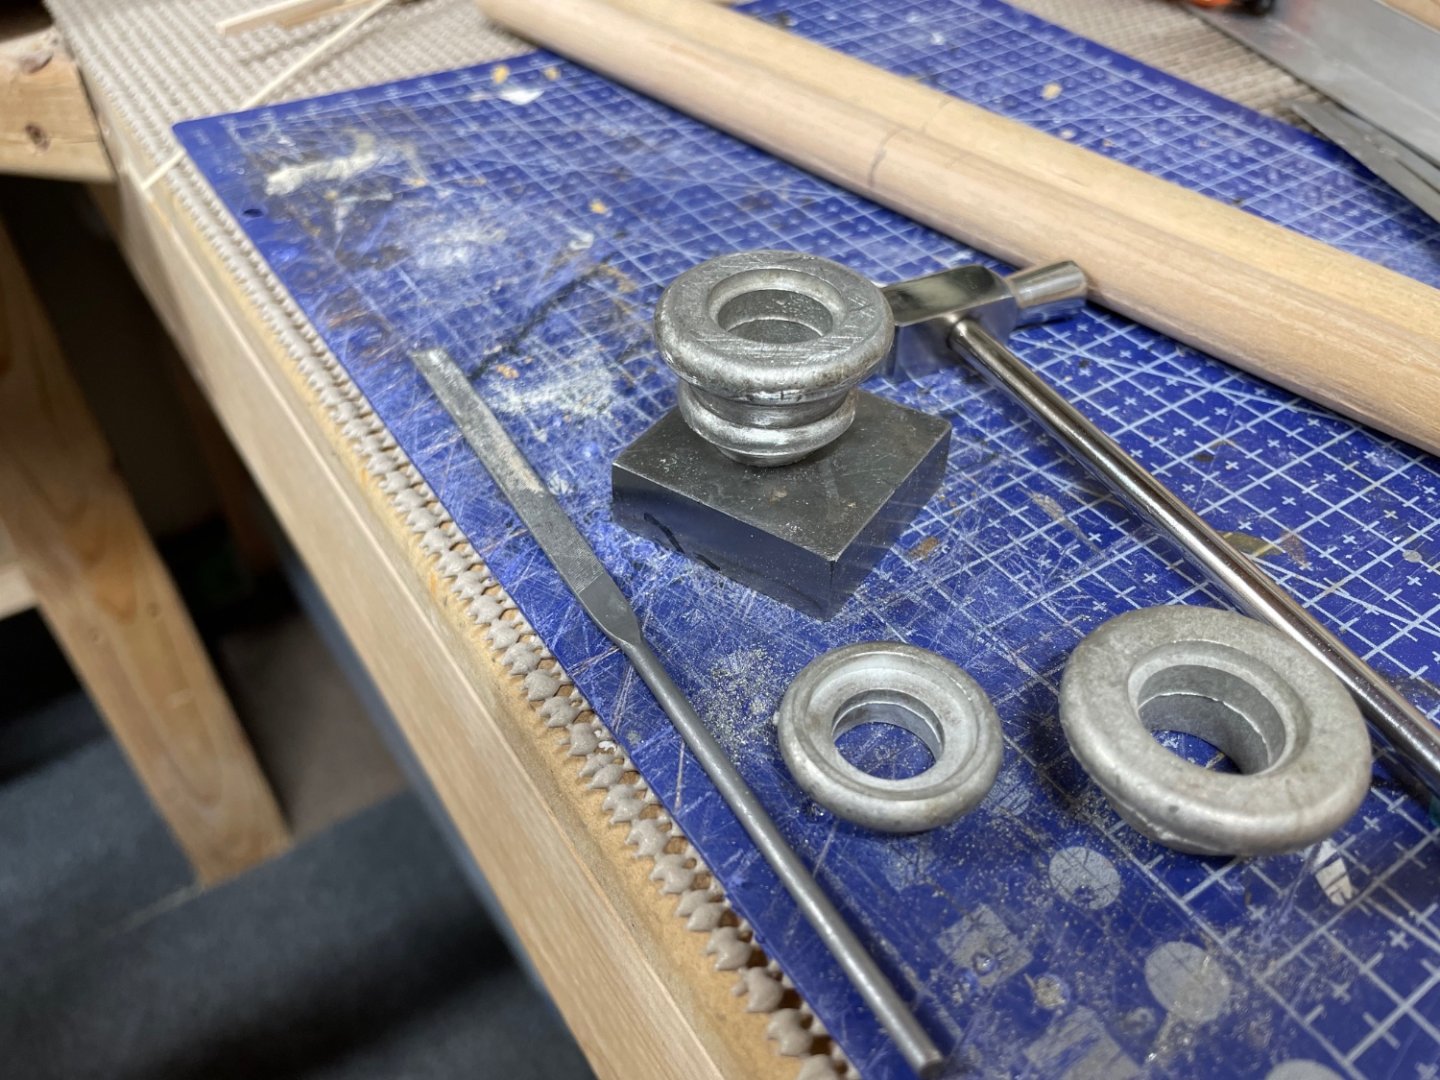
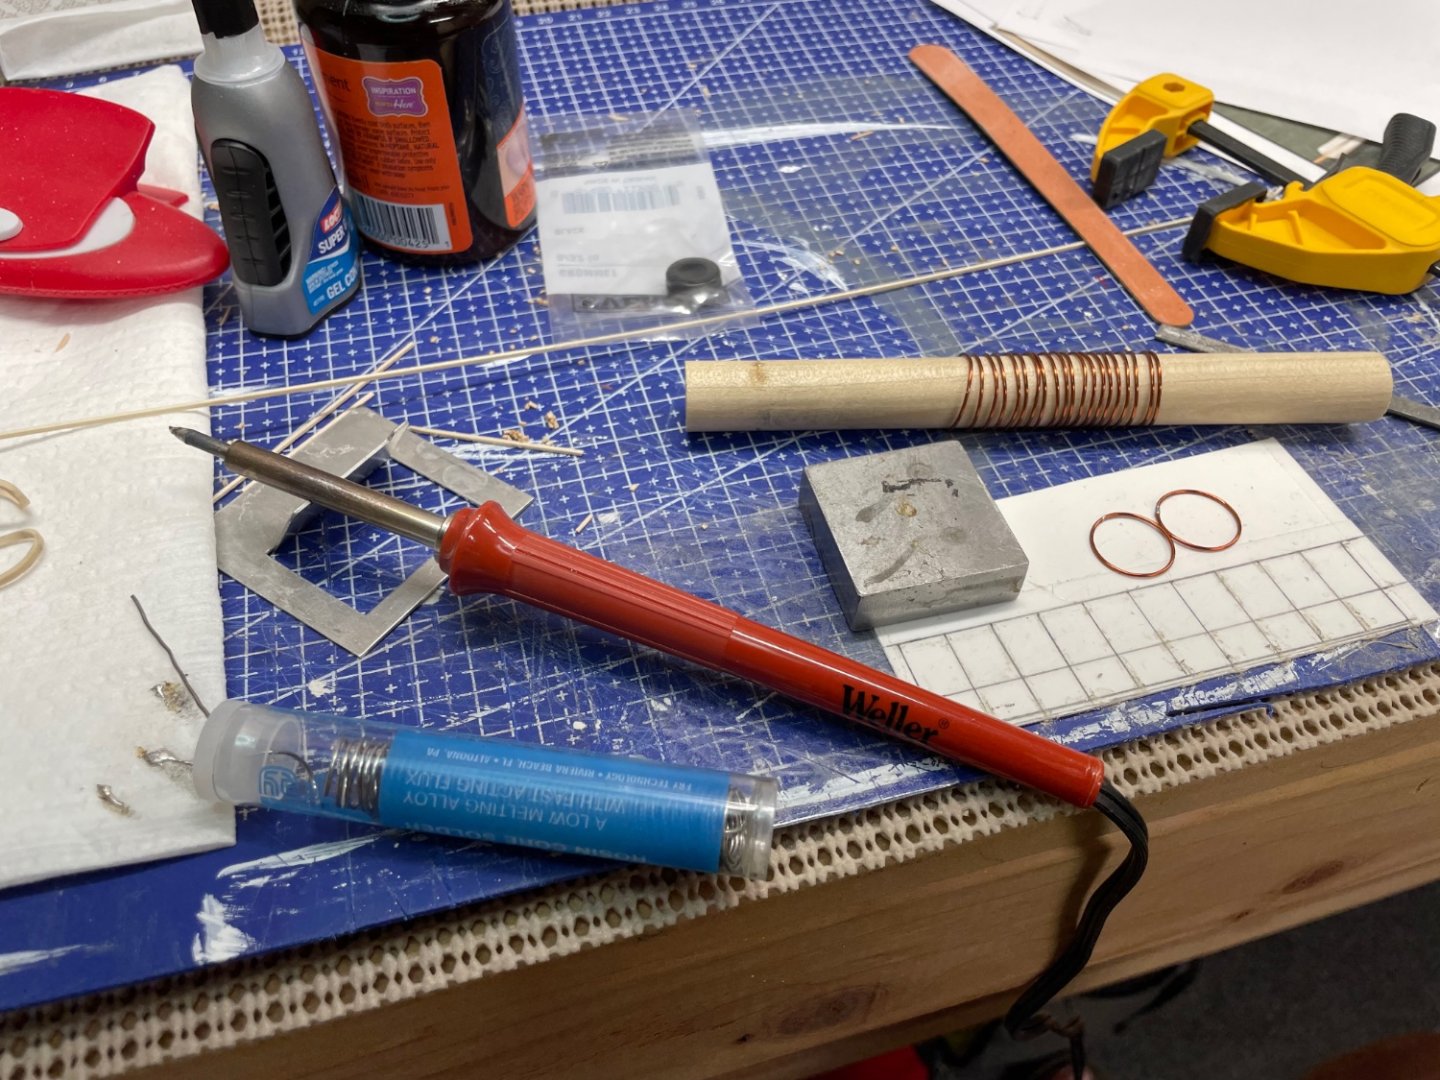
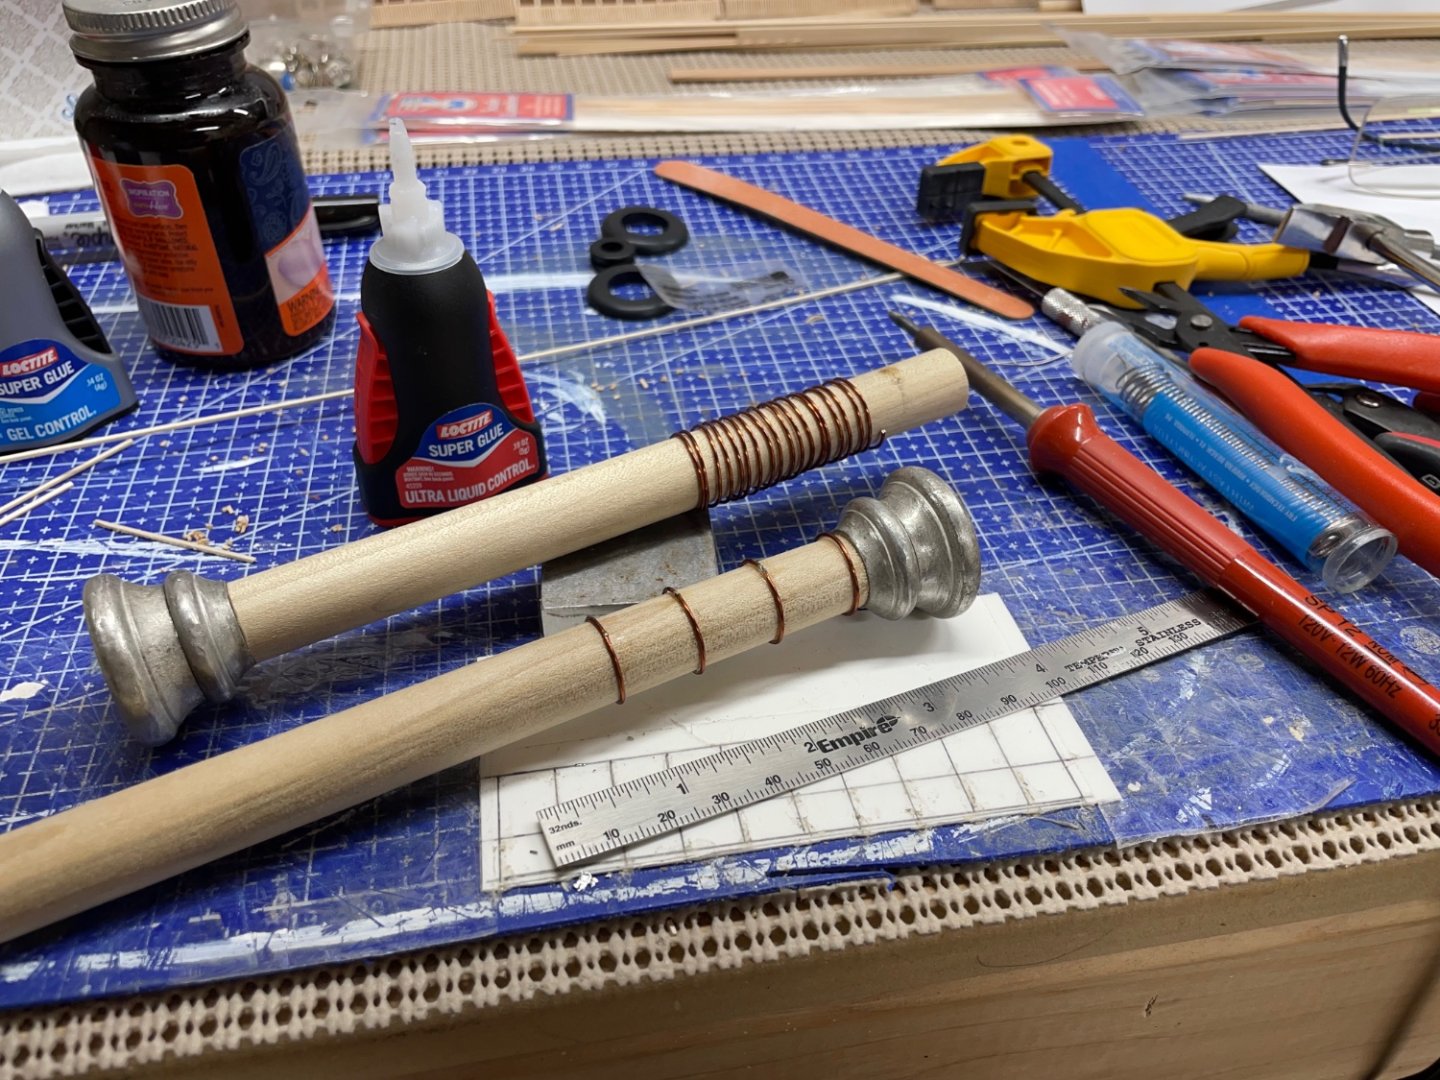
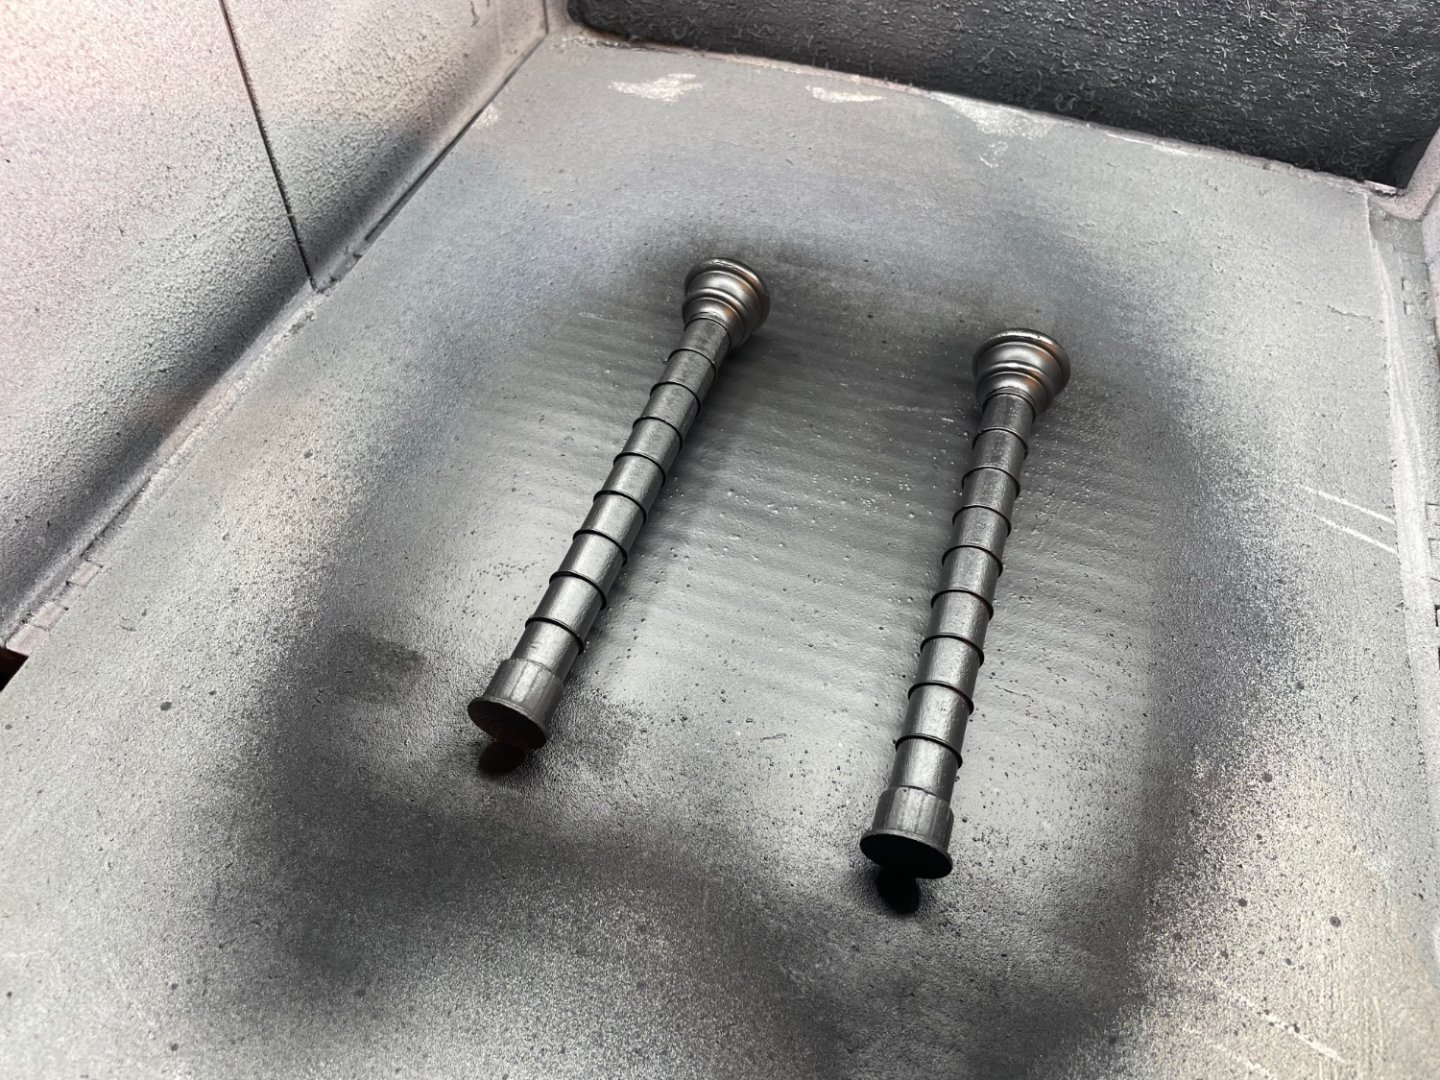
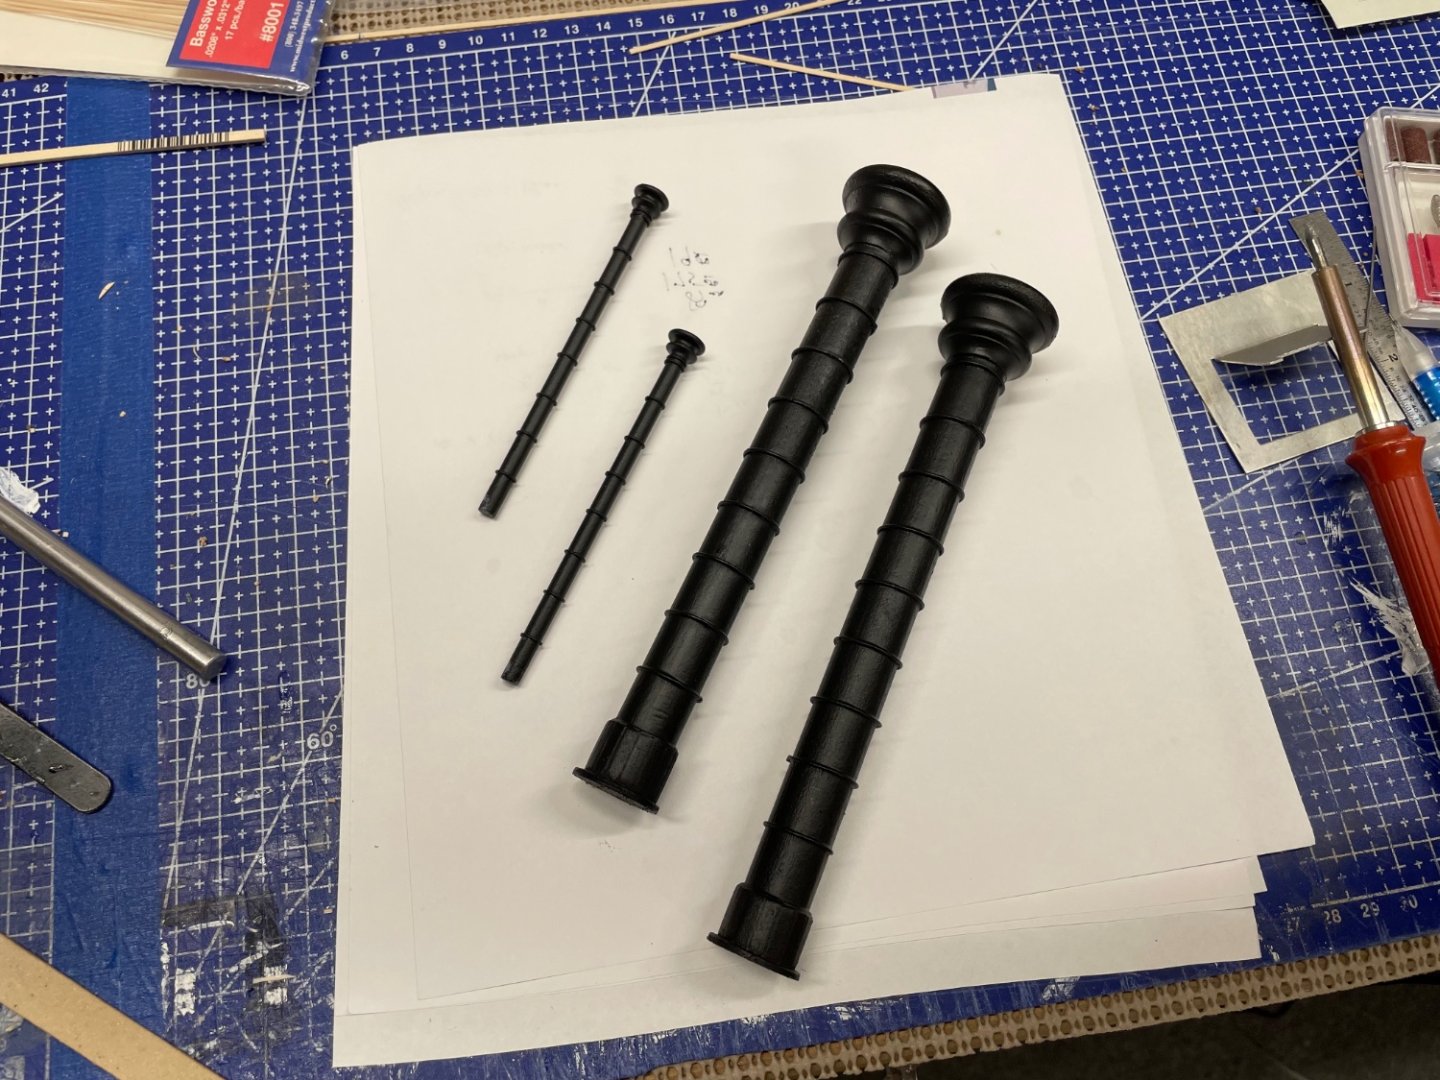
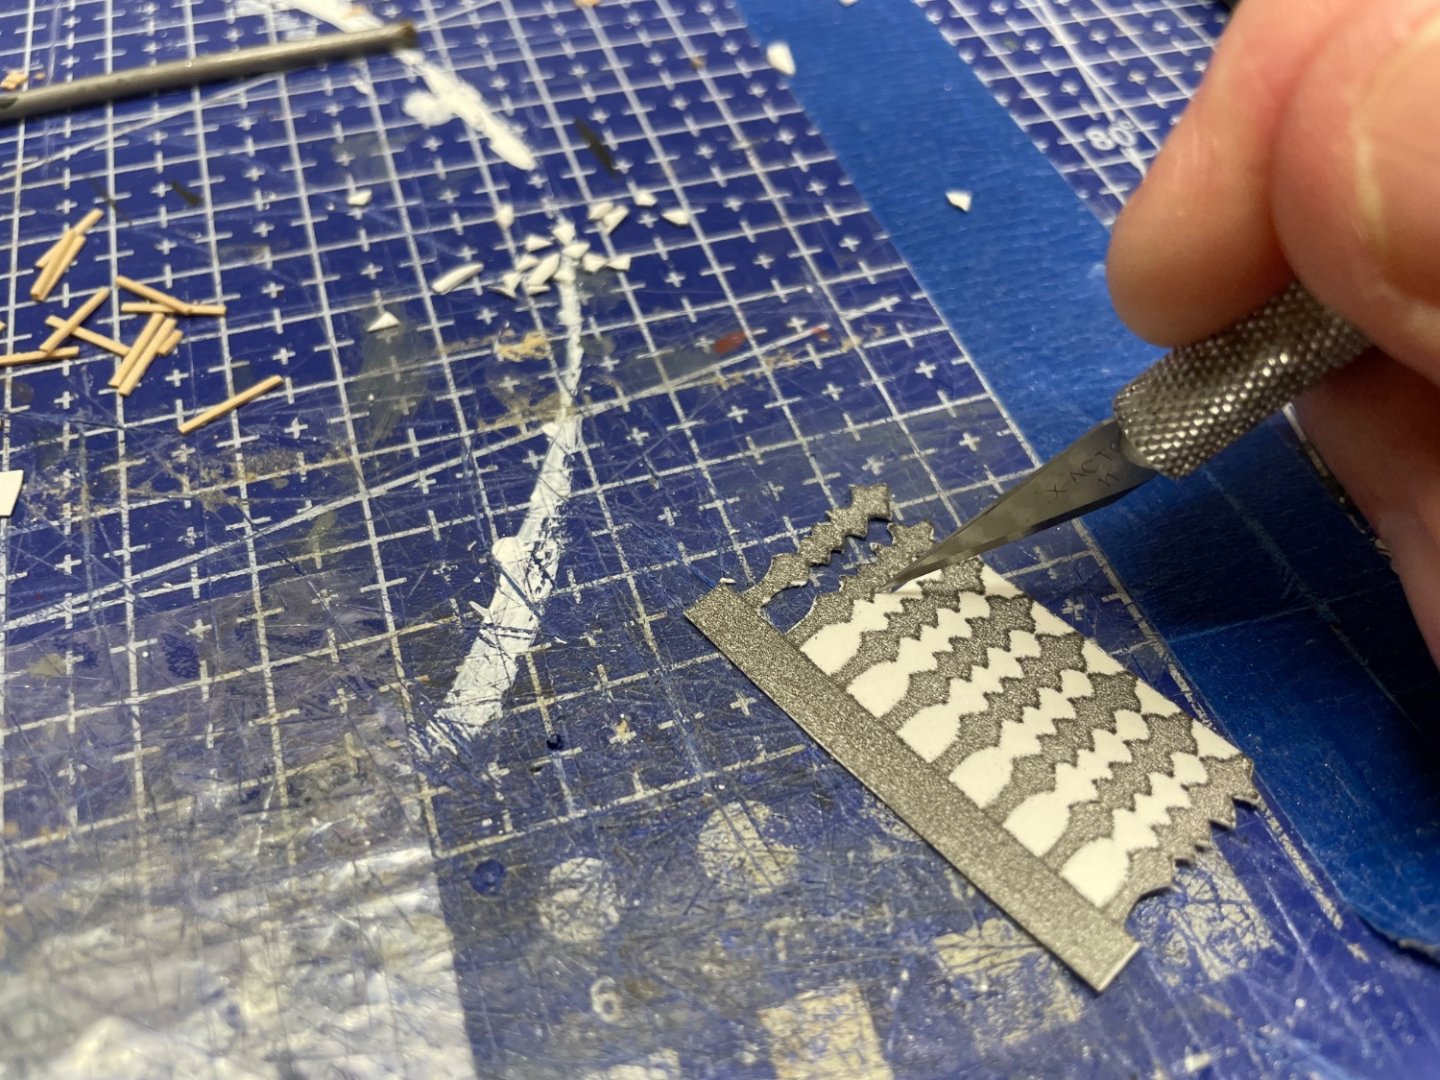
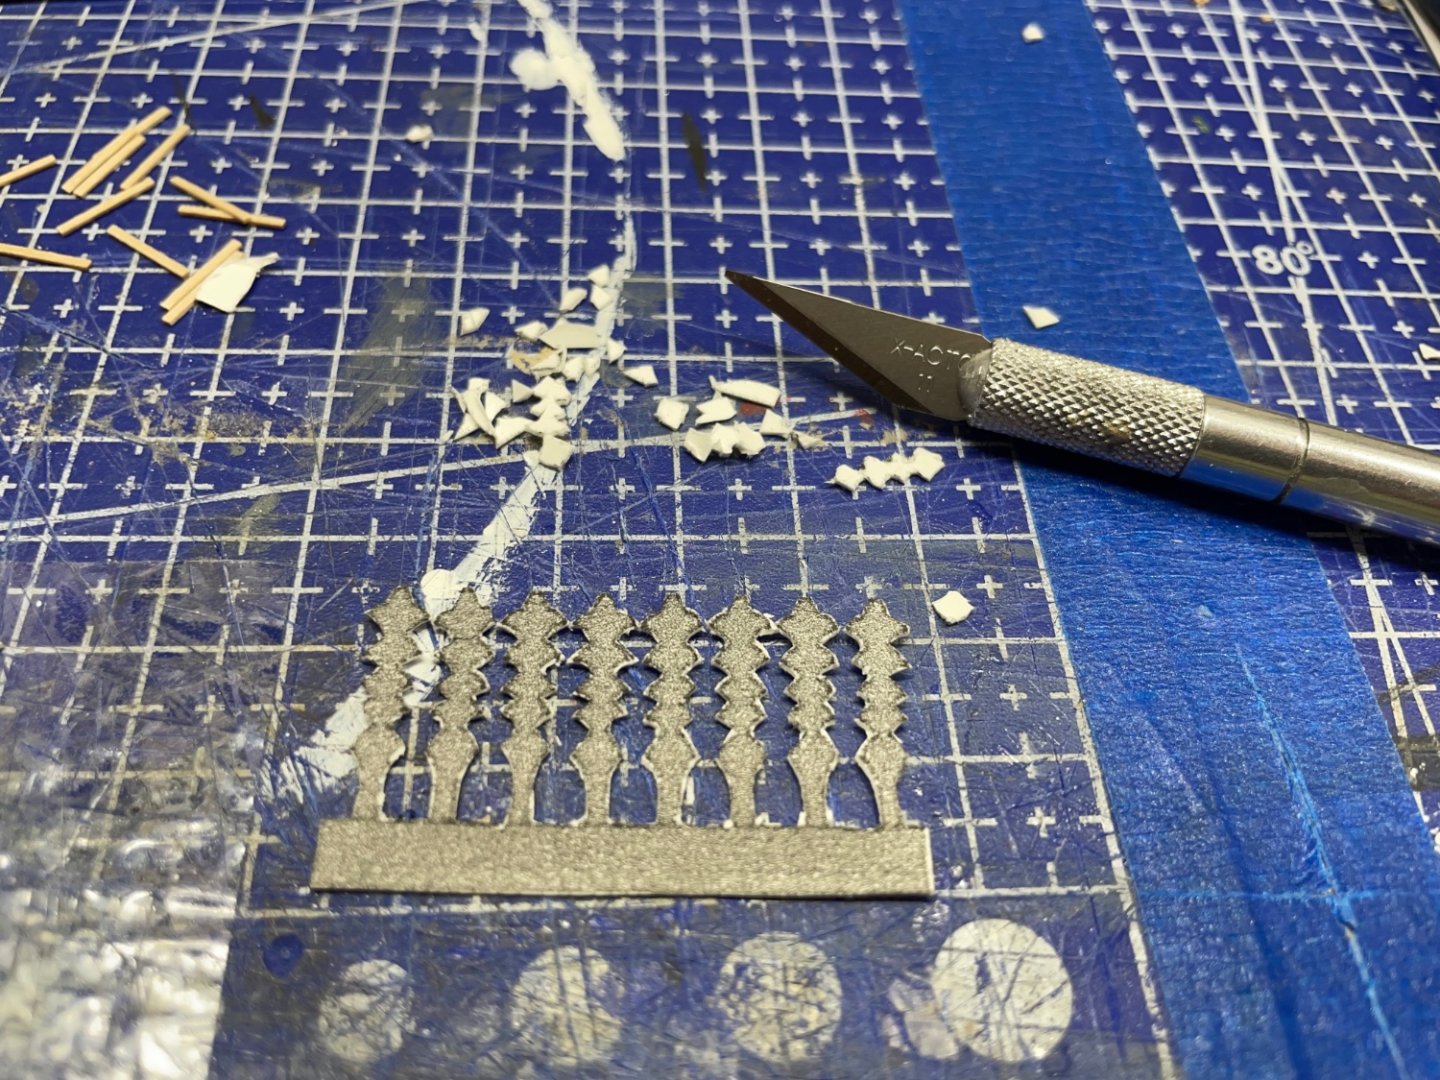
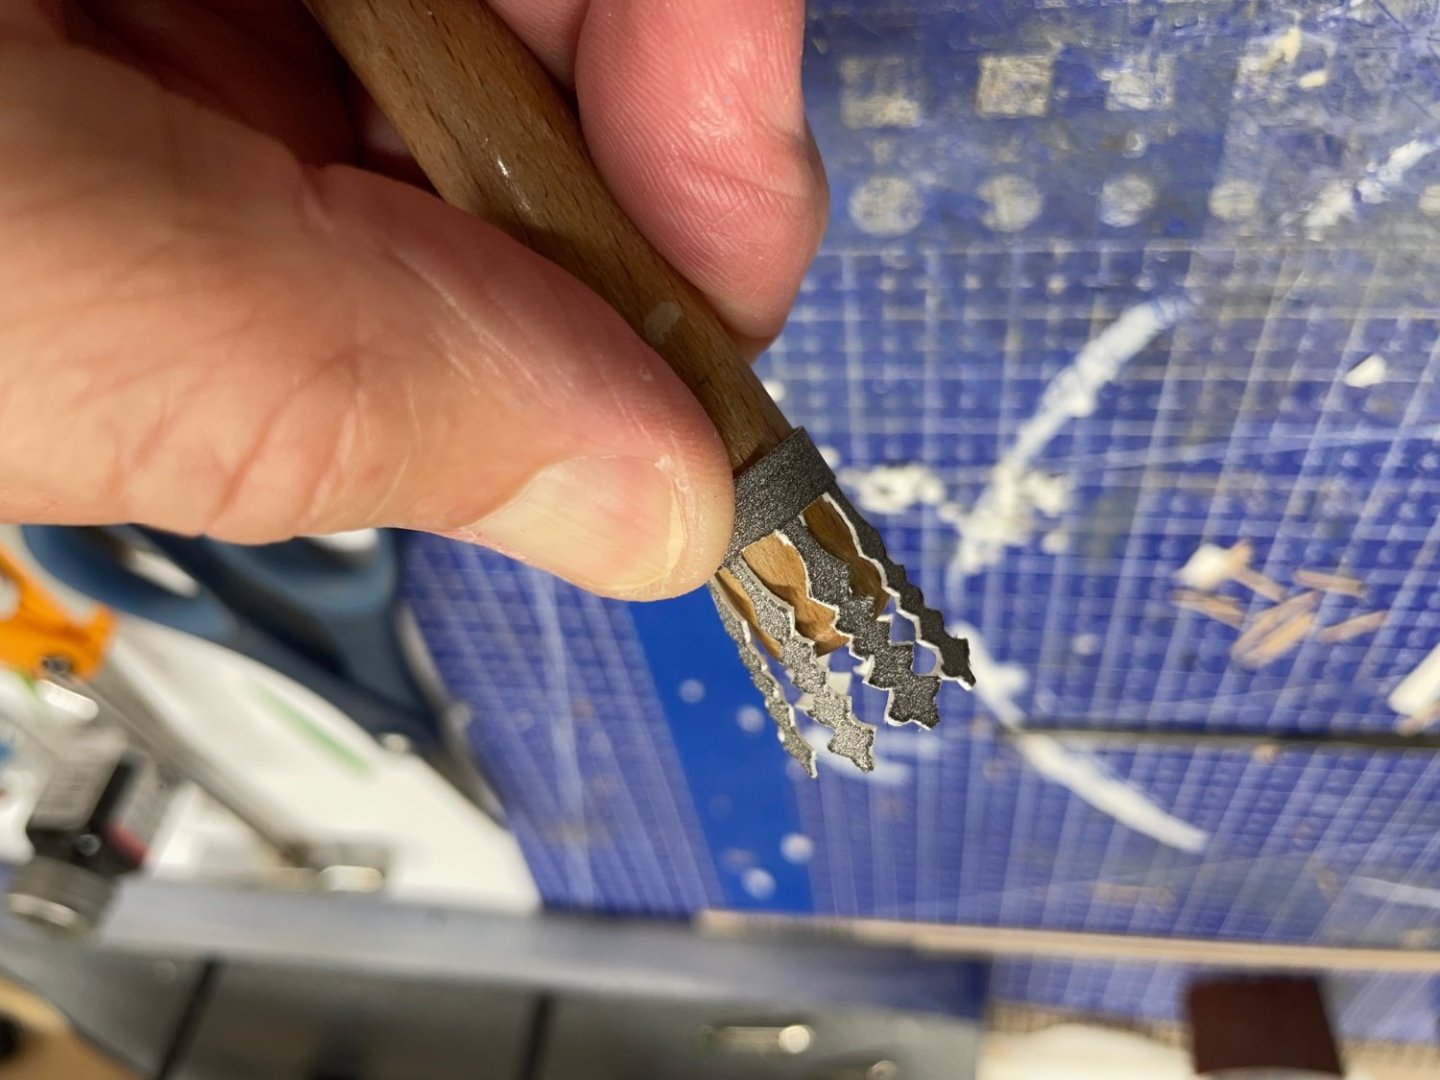
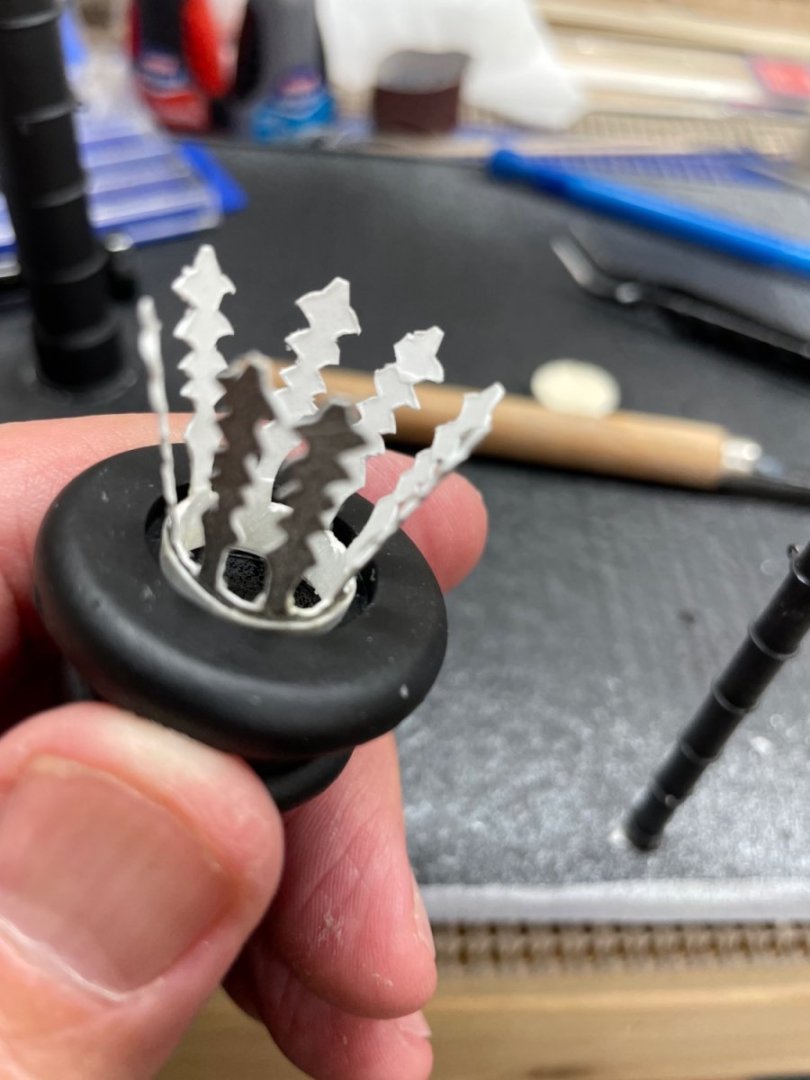
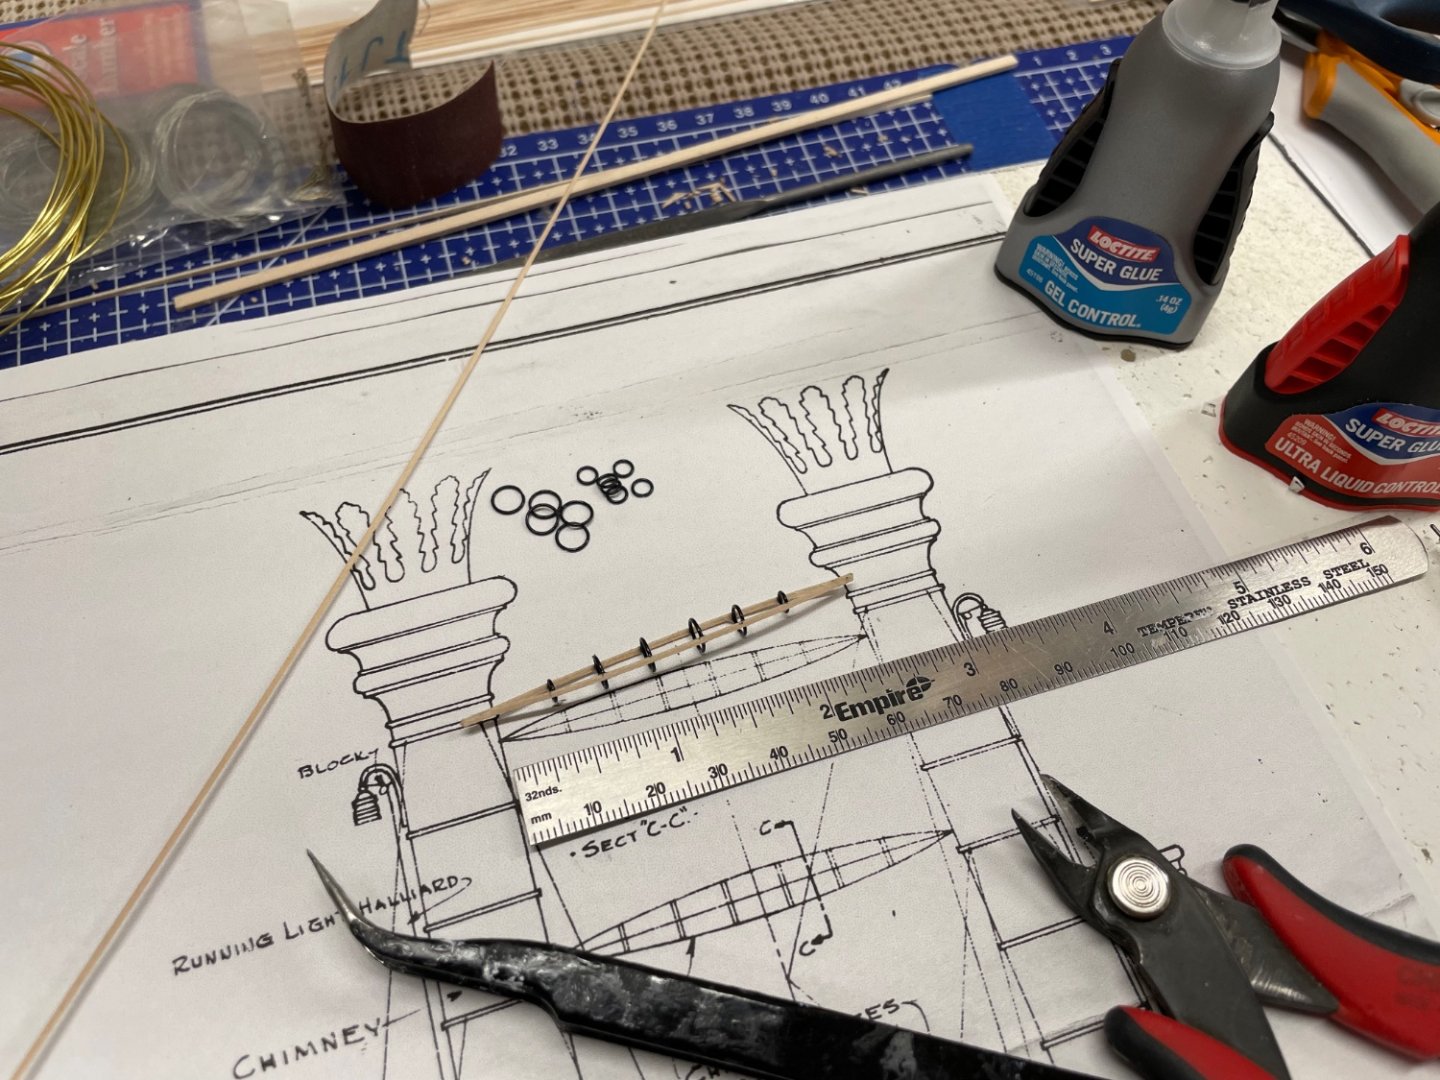
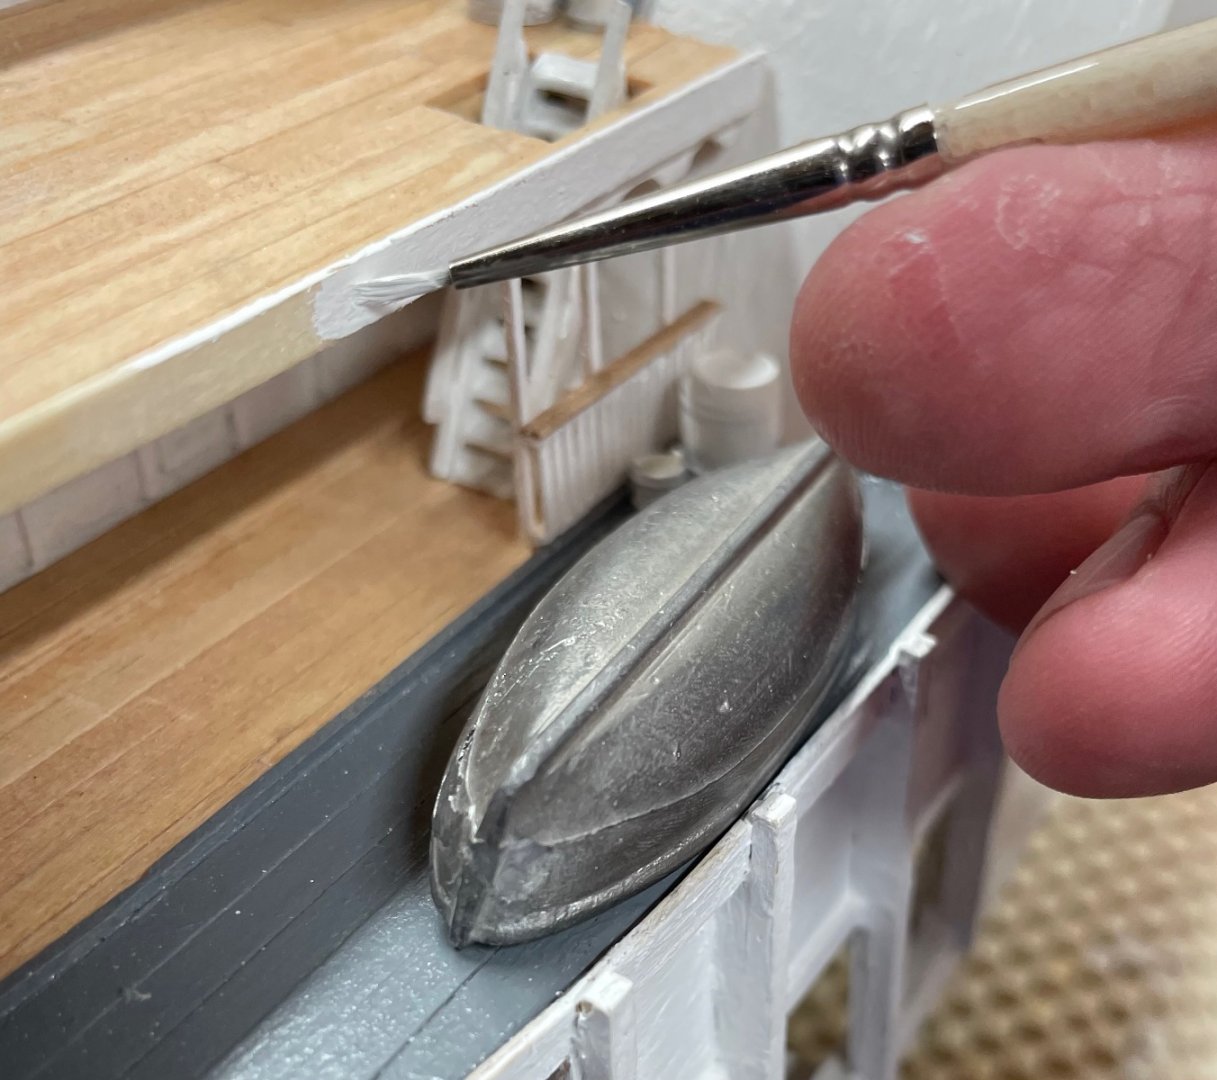
Chimney and Escape pipes… A much needed diversion from Railings, resulted in progress on details of Smoke and Steam Stacks. Steam Escape pipes built using kit supplied flanges and split rings from my supply drawer. Metal flanges supplied in the kit… Rings fashioned from copper wire… Painted Flat Black… Set eyelets for guy wires… Fashioned Navigational Lanterns… Fashioned decorative elements from card stock… Not sure what to call these, but a pain in the … 🤪 Then came the hardest item to scratch build with no instruction, only the drawing and photos for guidance. 3 step process x 3… I’m not even going to share the number of failed attempts before getting these right. Sometimes I wonder why do I do this to myself, then it all comes together. 😎 Stacks and Steam Pipes completed… Stacking those railings up on the Main Deck. Cheers 🍻


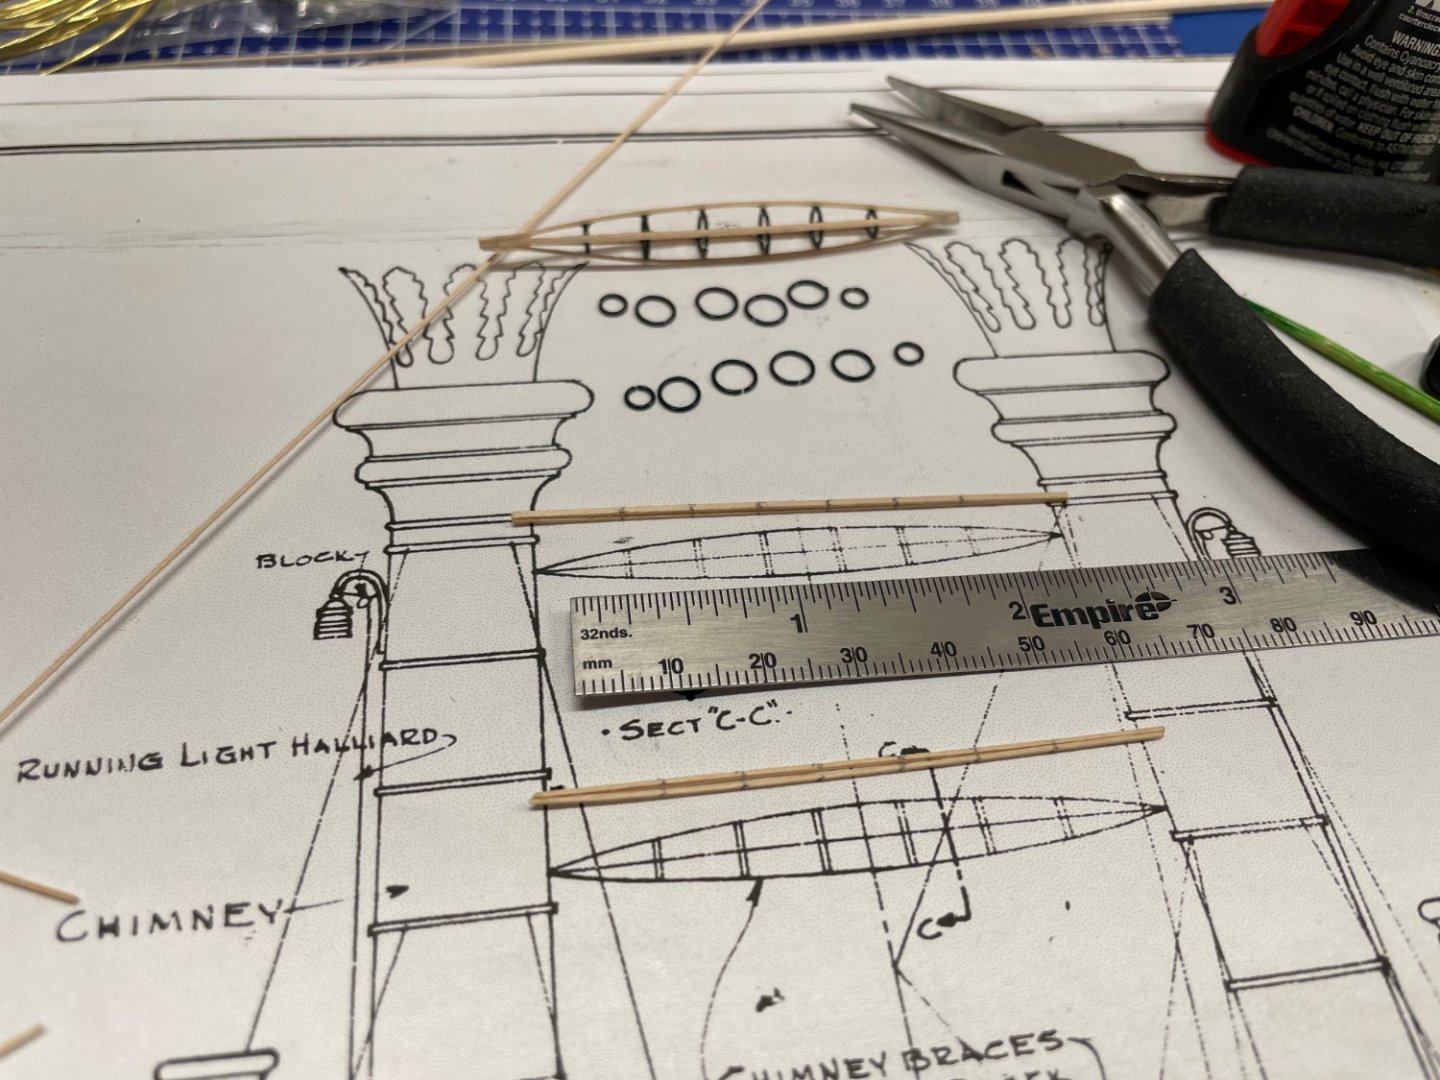
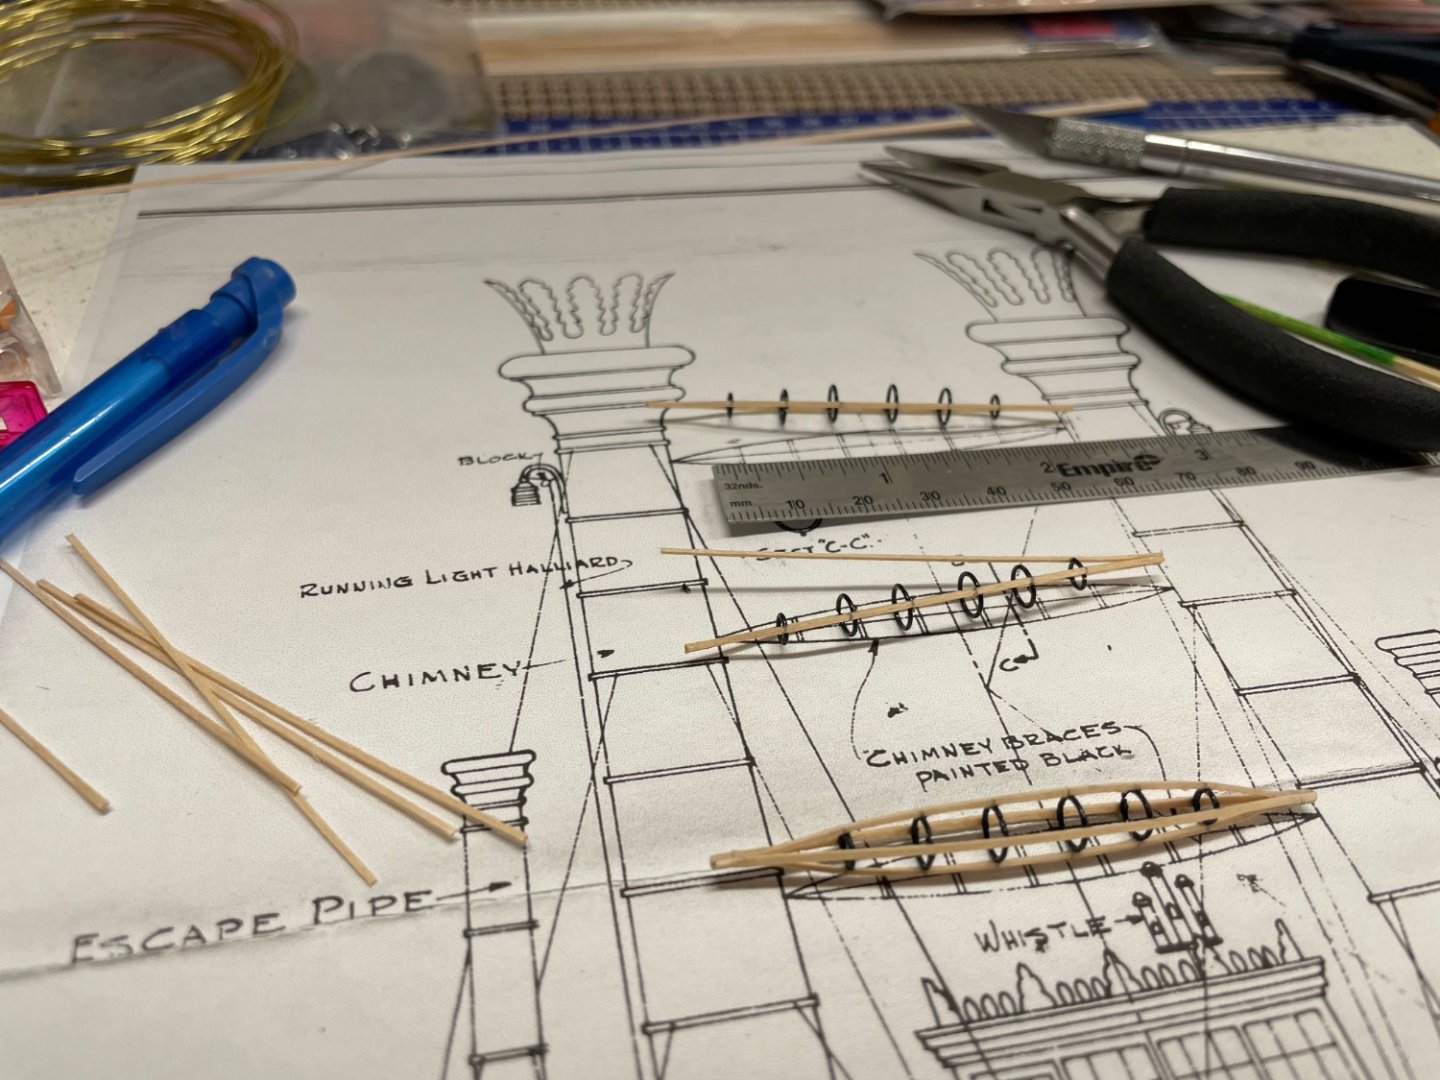
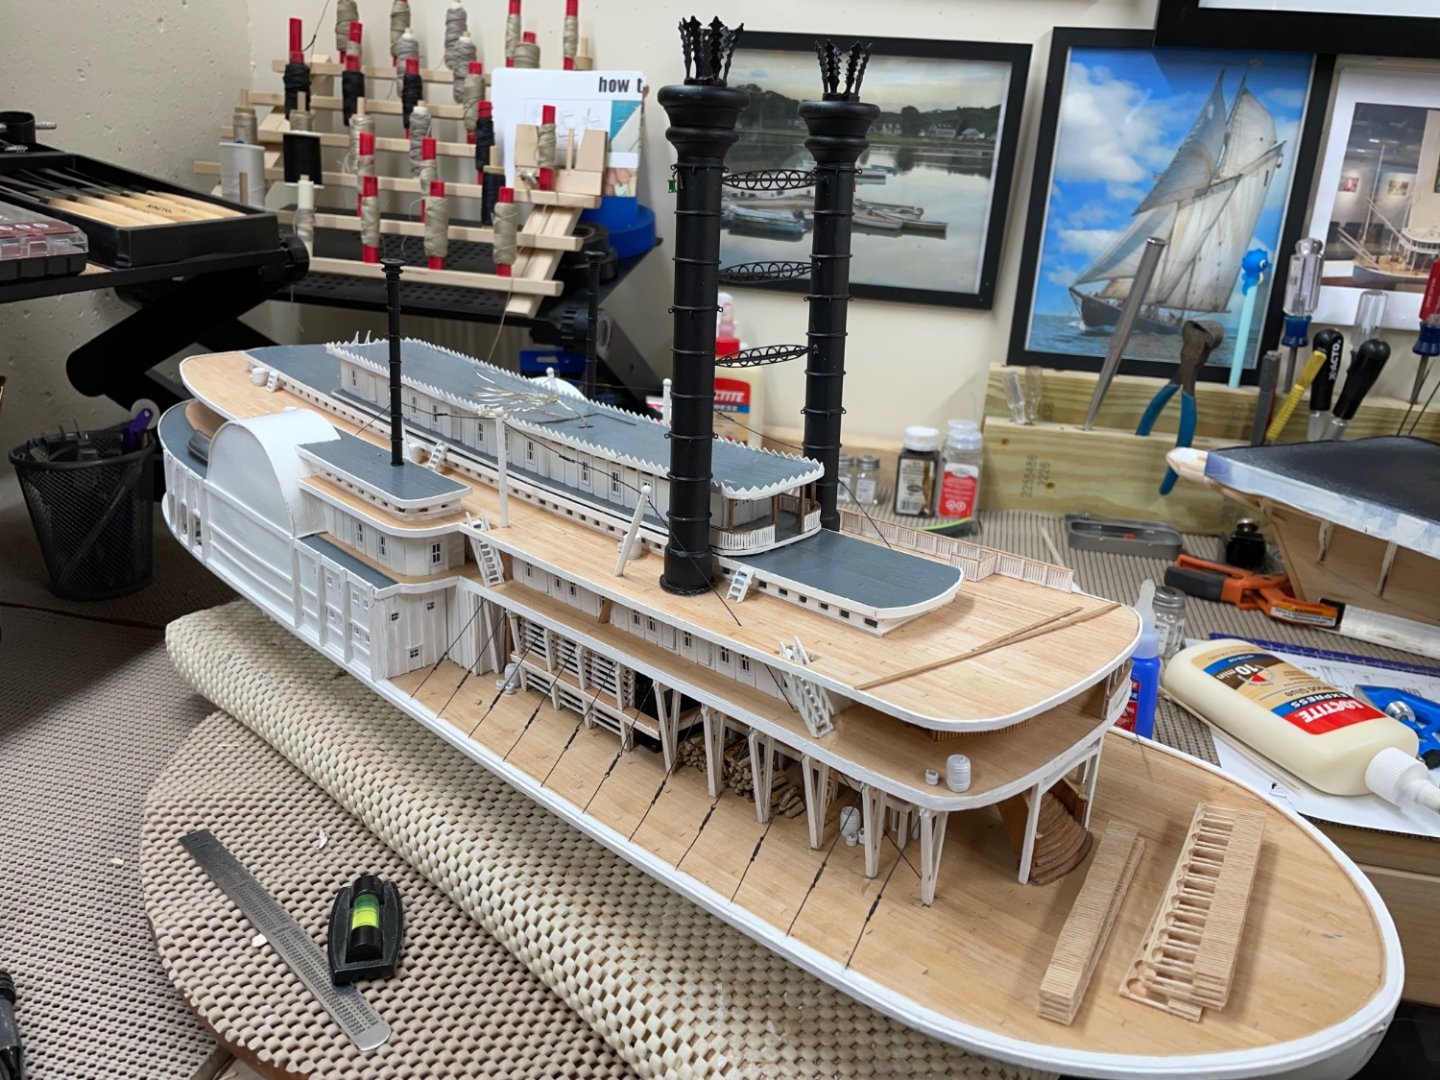

- 238 replies
-
- 9
-
-

-
- Robert E Lee
- steamboat
- (and 3 more)
-
I agree, lots of tiny detail… and I had kit supplied metal parts. 😆 Nice job!
- 200 replies
-
- 3
-
-
-
- Whaling Bark
- Charles W Morgan
- (and 1 more)
-
Railing materials arrived today. Yeah! Micro Carpentry may continue without interruption. 🤪 Cheers 🍻
- 238 replies
-
- 6
-
-
- Robert E Lee
- steamboat
- (and 3 more)
-
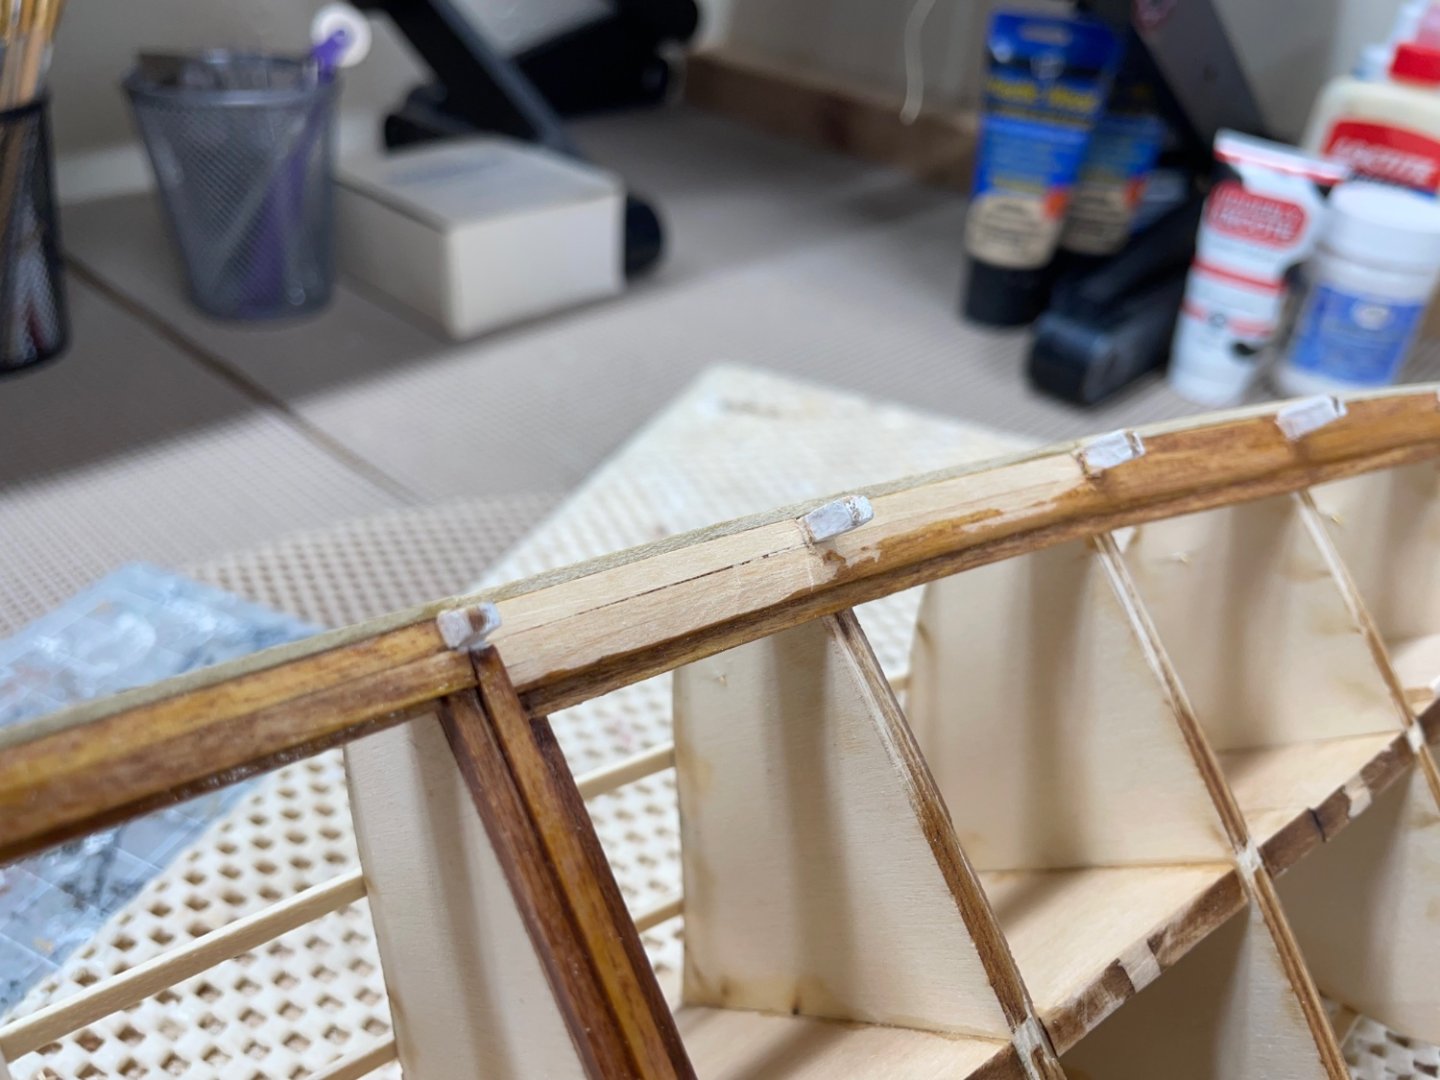
More progress… Railing construction now taking just 2 hours per 100 mm of railing. 👍
- 238 replies
-
- 4
-
-
- Robert E Lee
- steamboat
- (and 3 more)
-
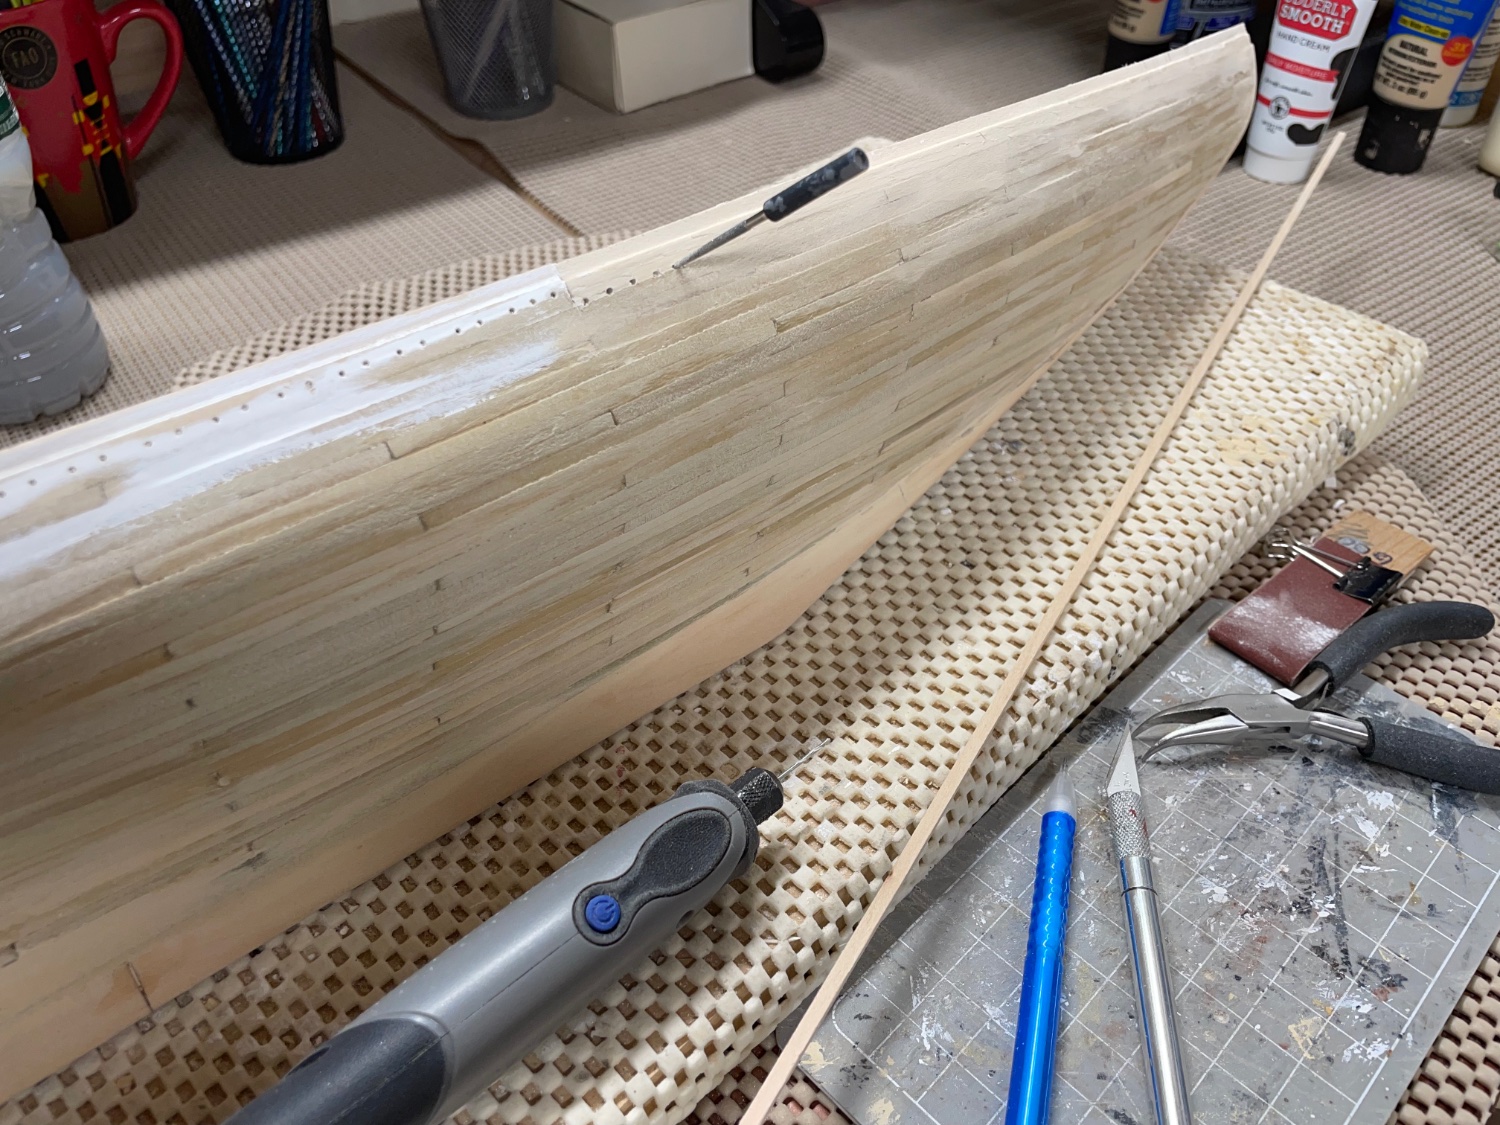
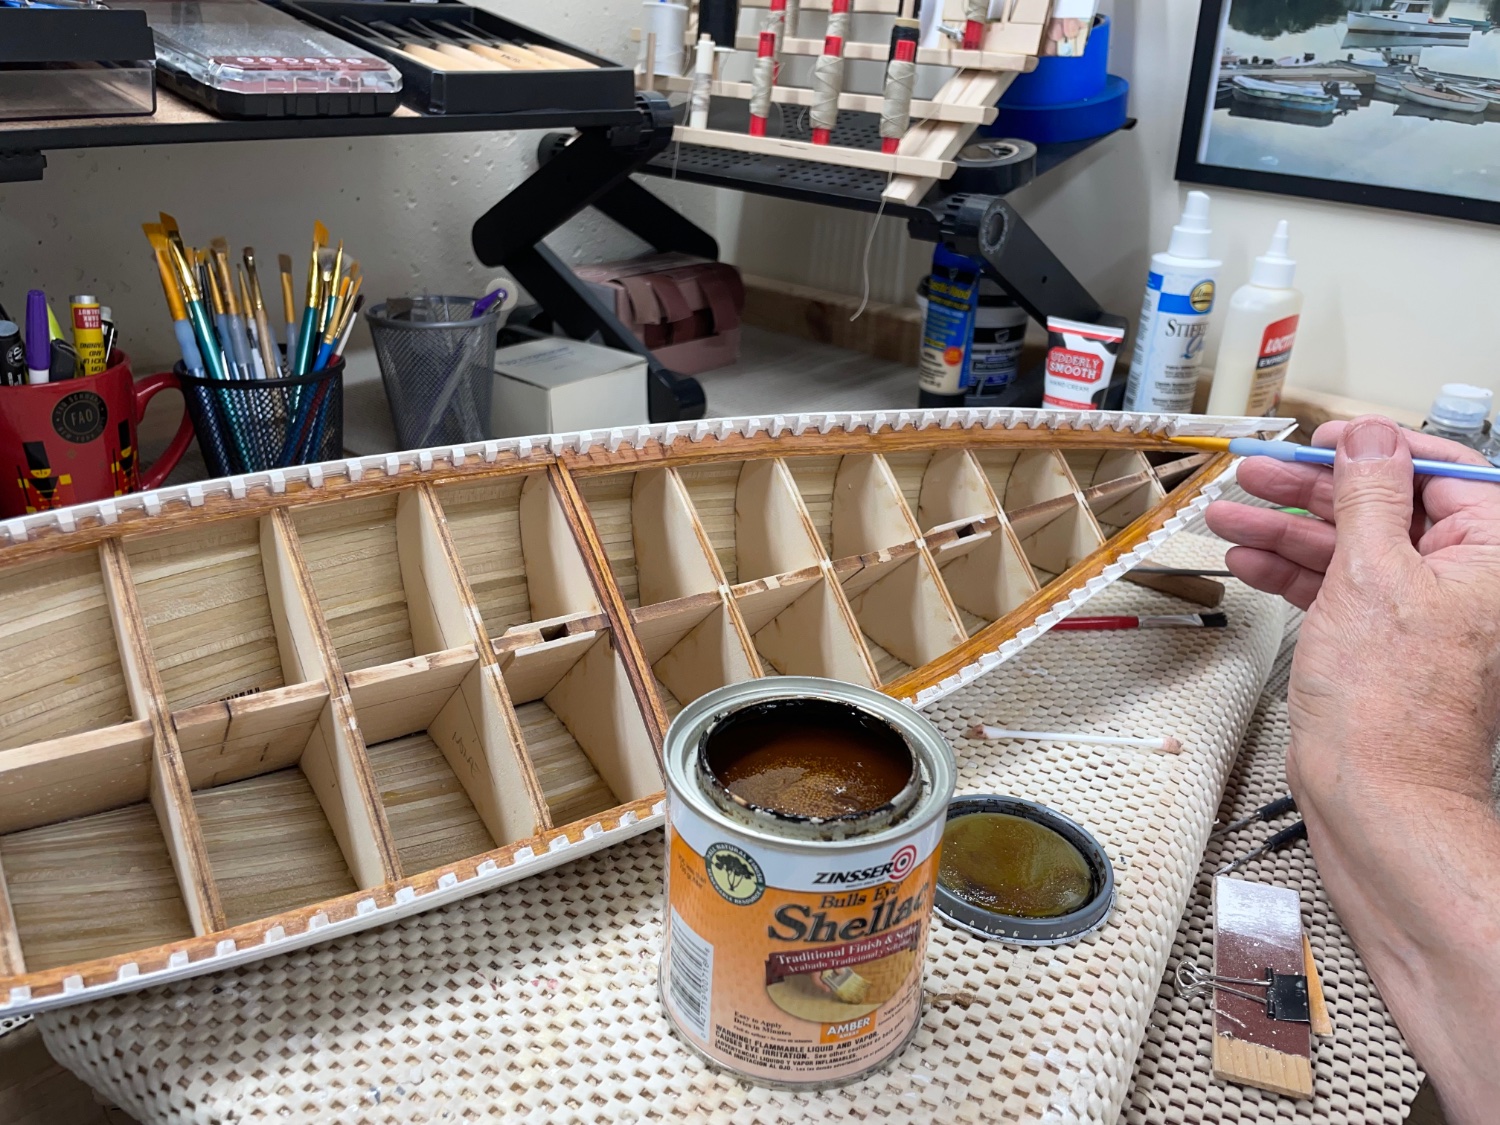
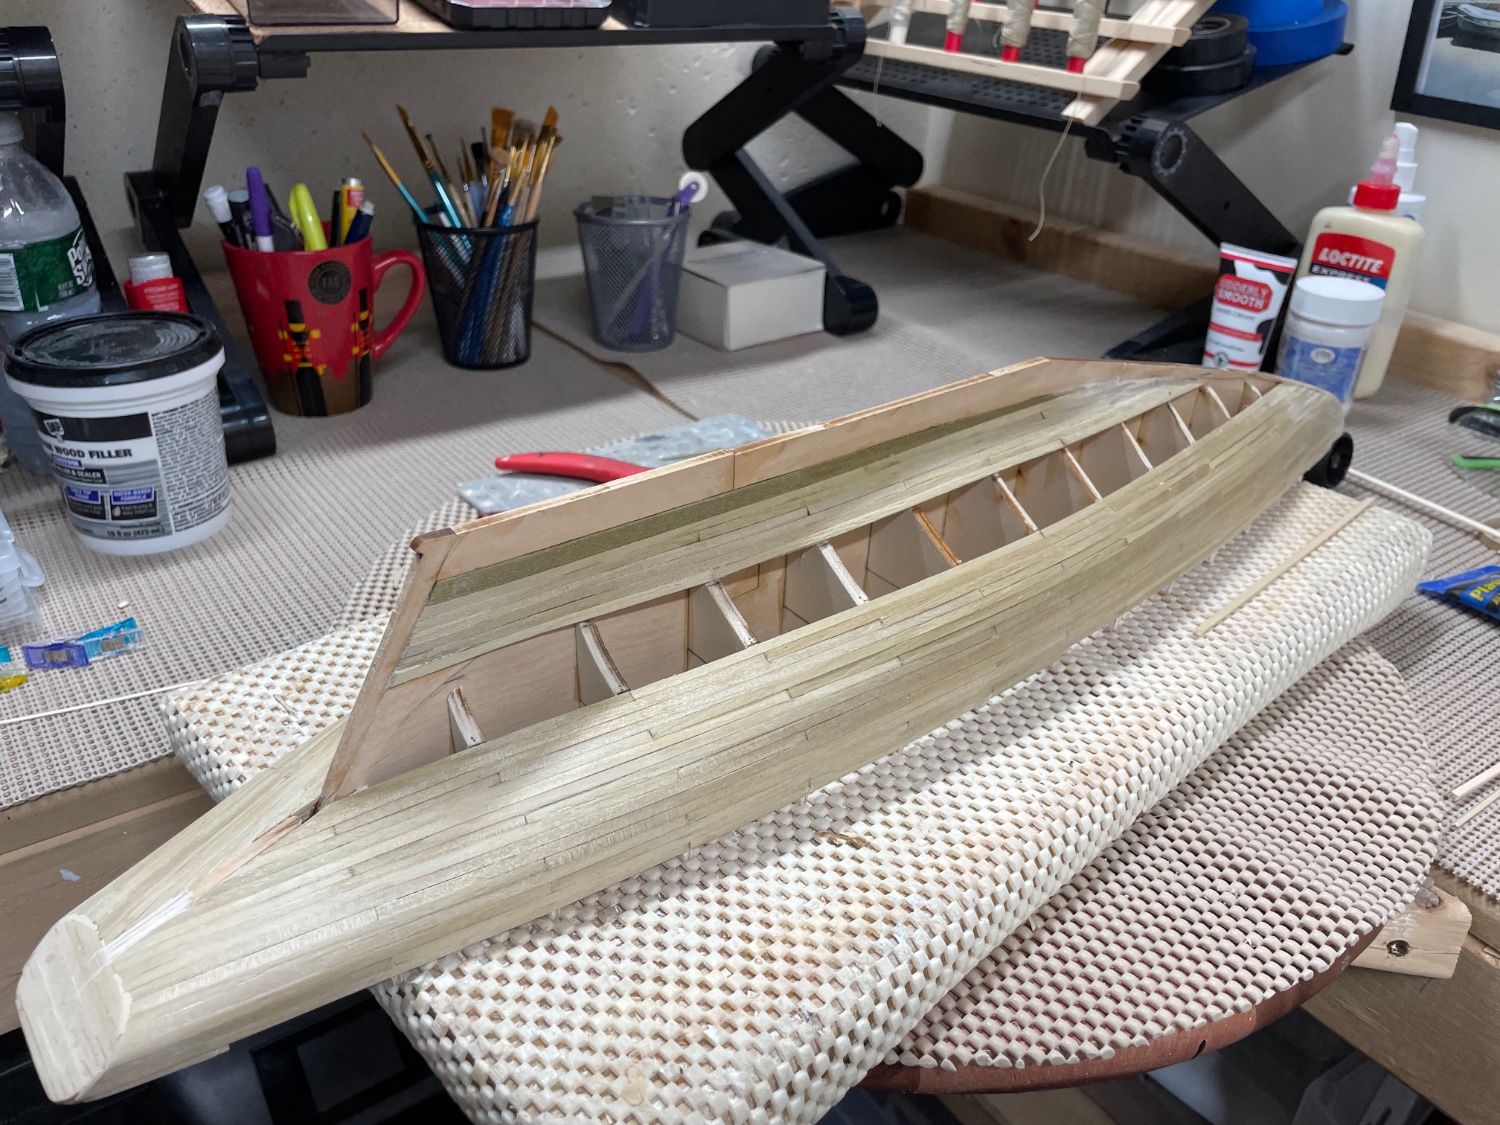
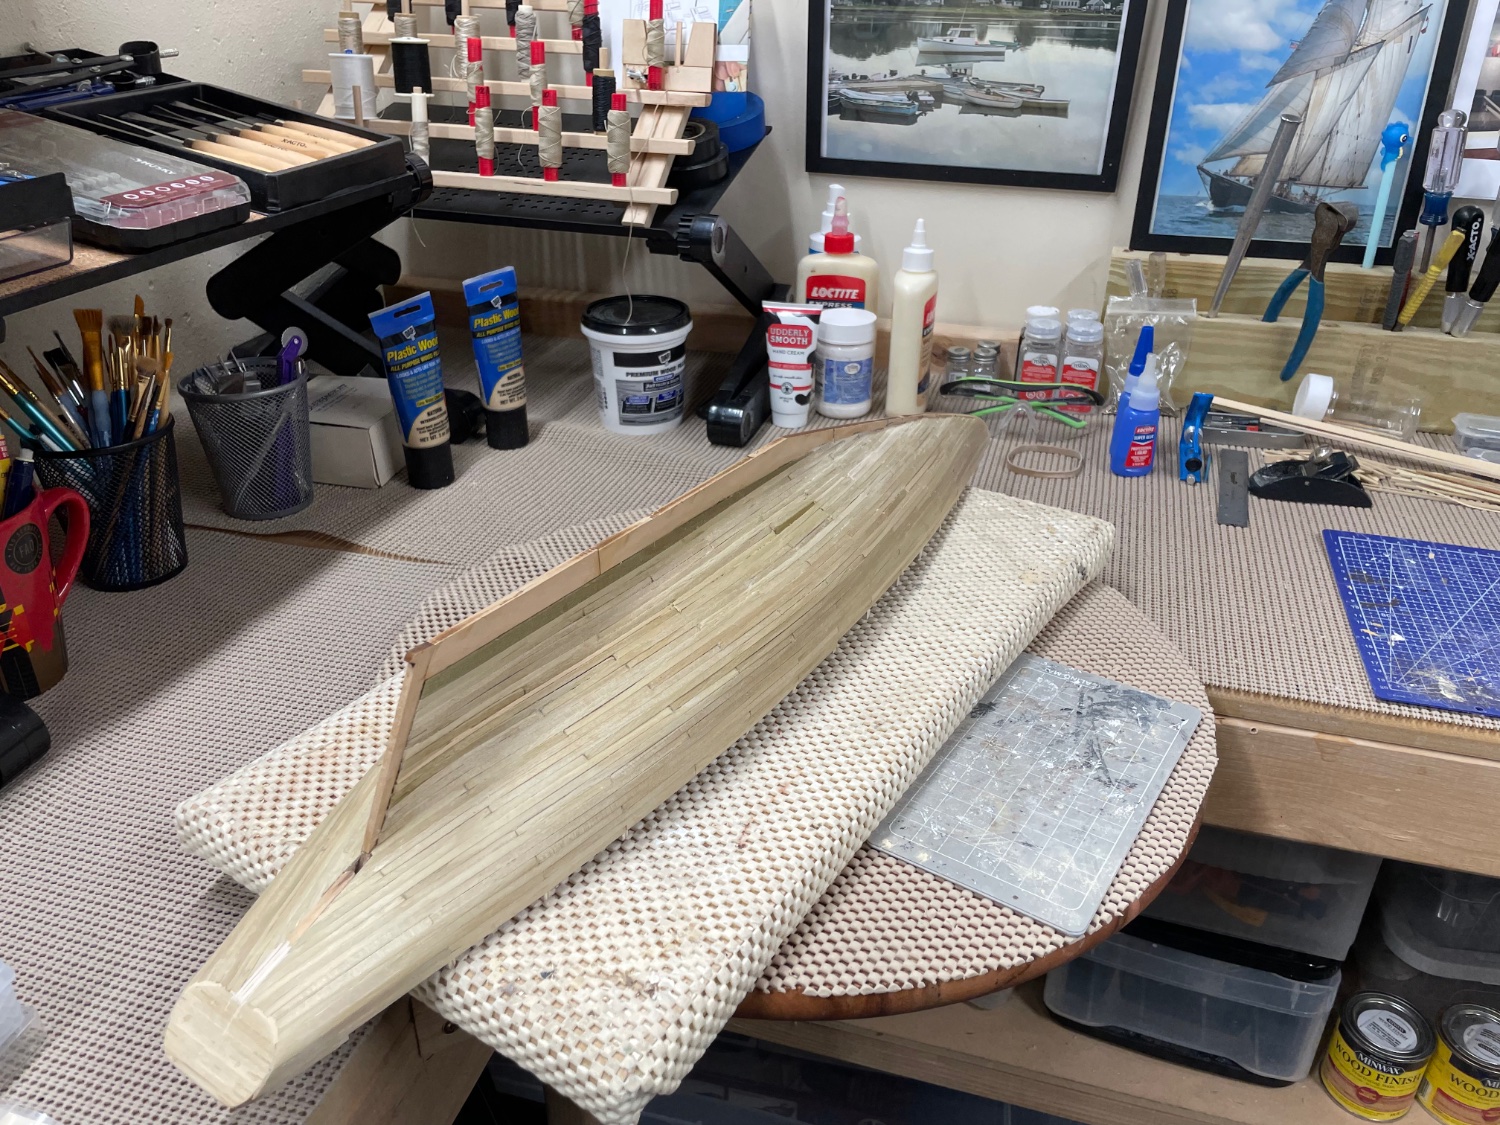
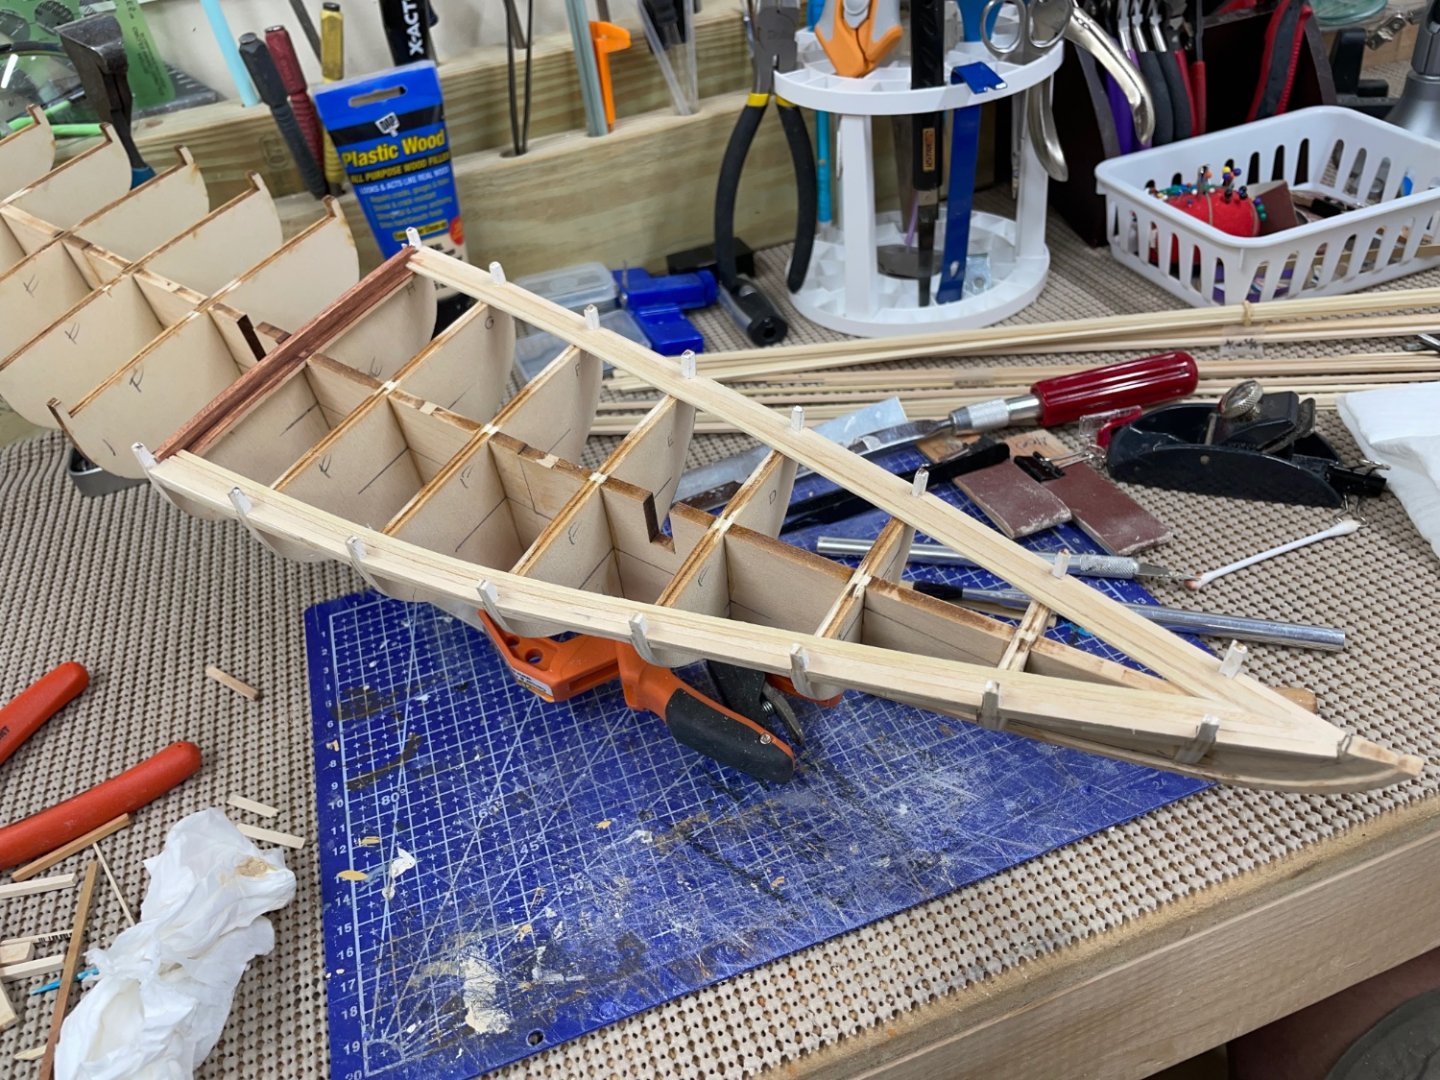
Waterways completed… I have chosen to use Amber Shellac over top a Cherry Stain for the decking. I think it gives that natural oil finish the plans call for. Cheers 🍻
- 282 replies
-
- 4
-
-
- Bluenose
- Model Shipways
- (and 1 more)
-
Brian, Thanks for the lumber source. They have what I needed and more. Great resource. 👍
- 238 replies
-
- 1
-
-
- Robert E Lee
- steamboat
- (and 3 more)
-
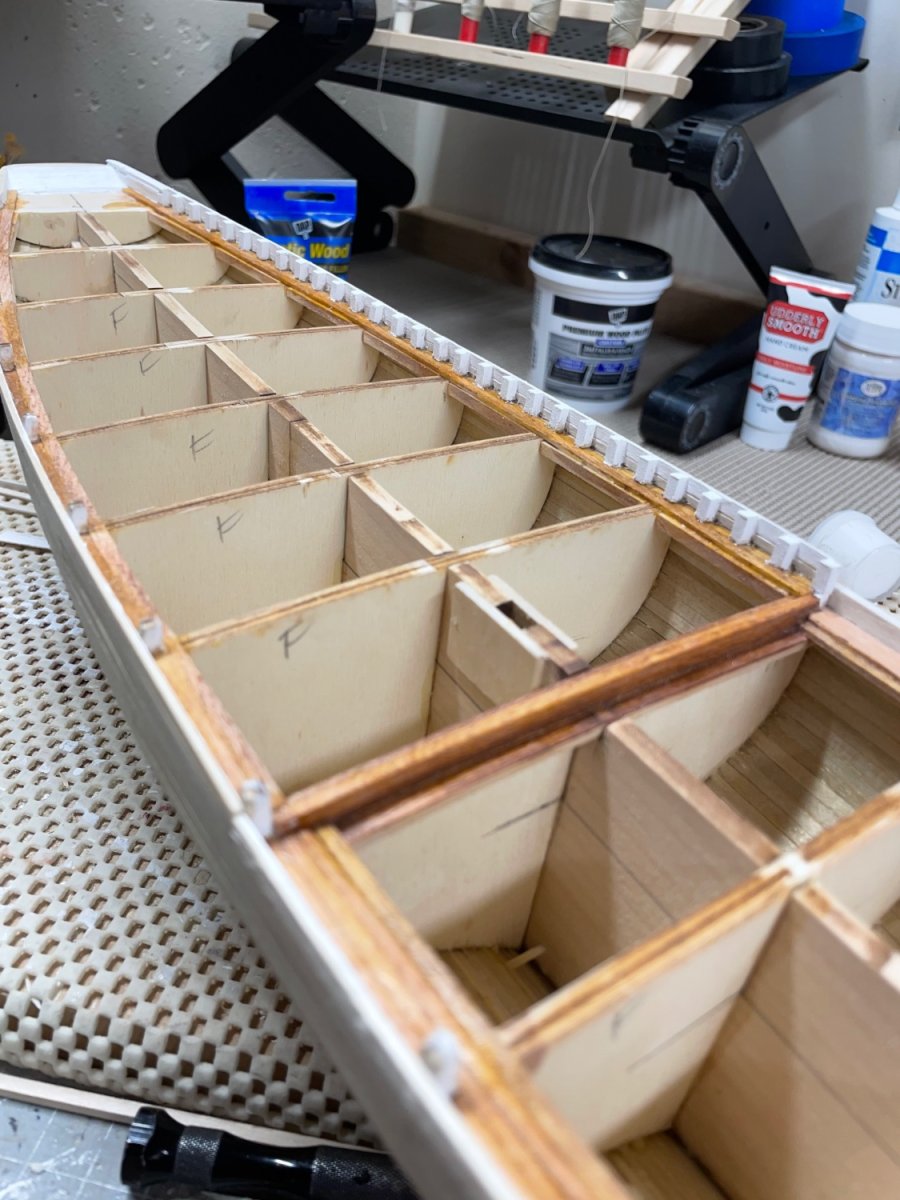
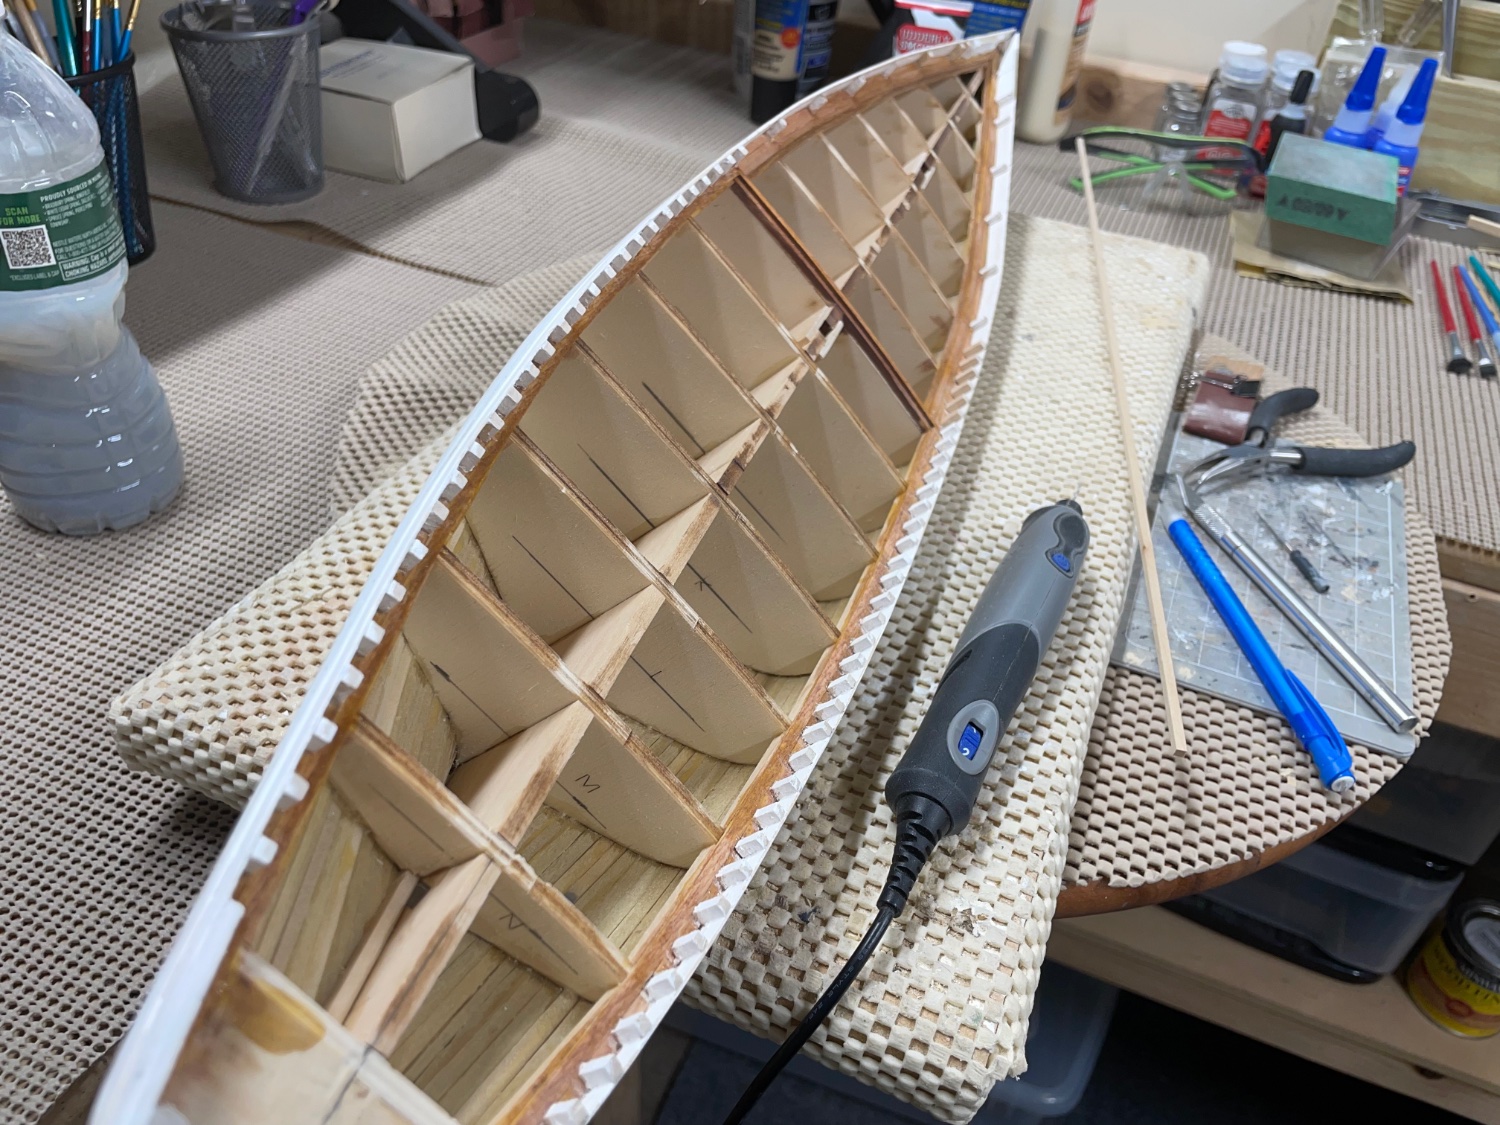
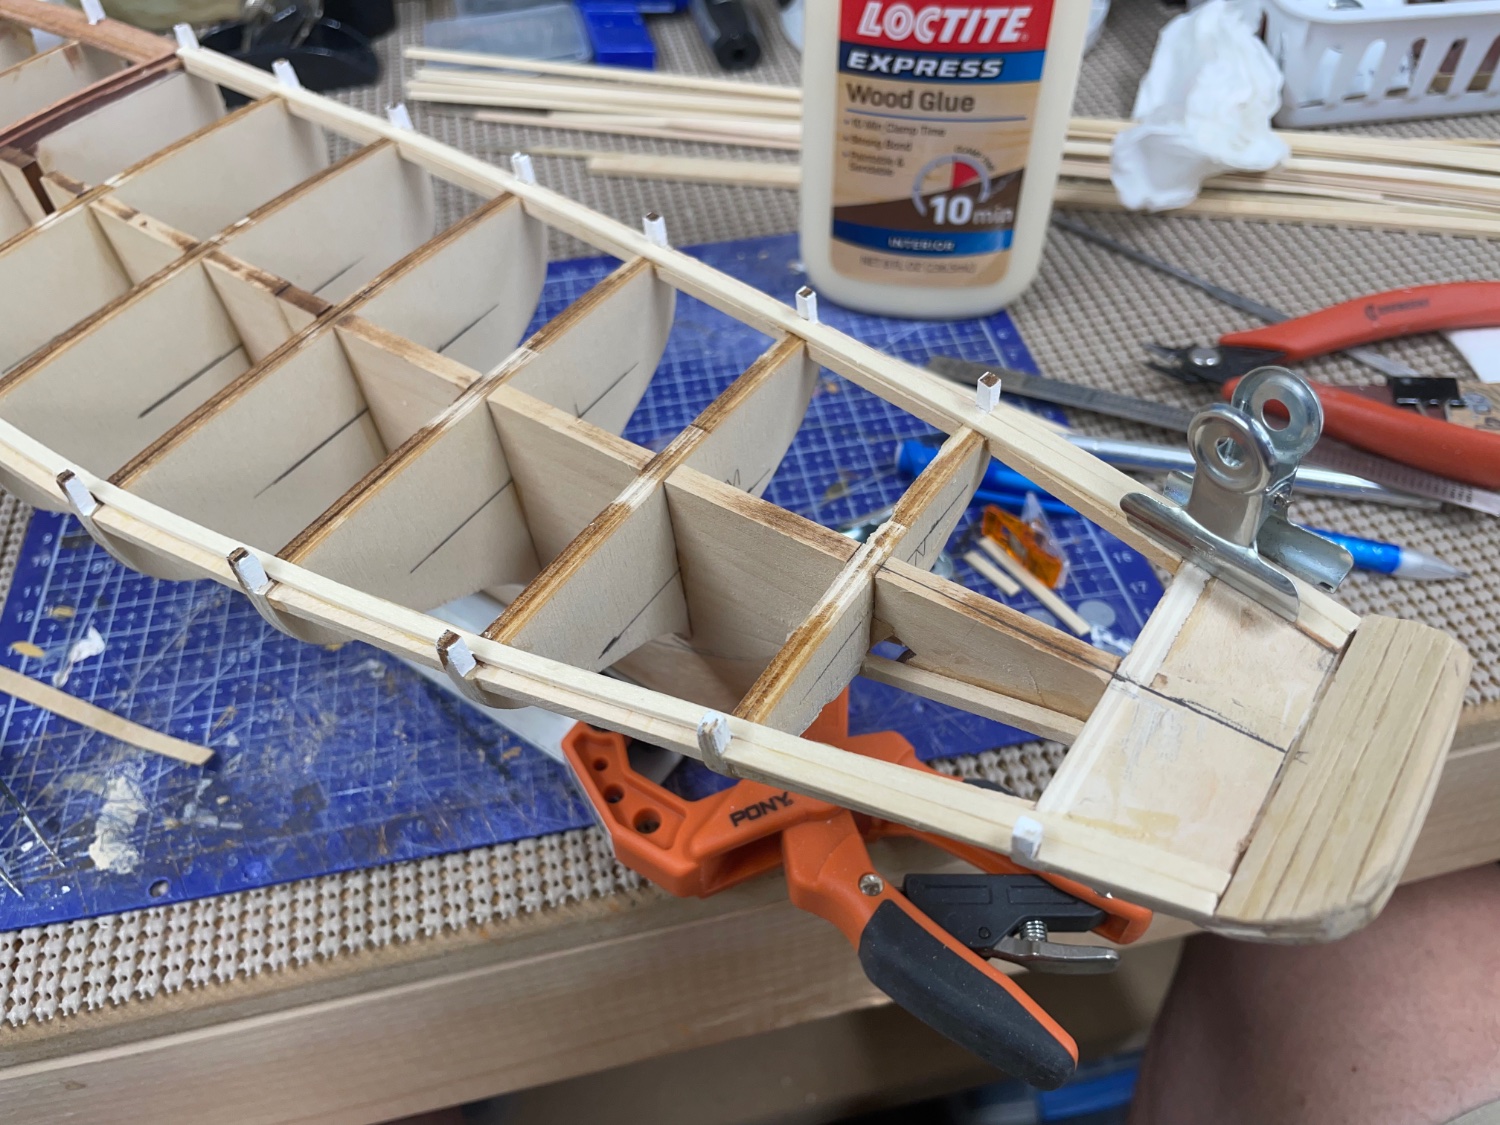
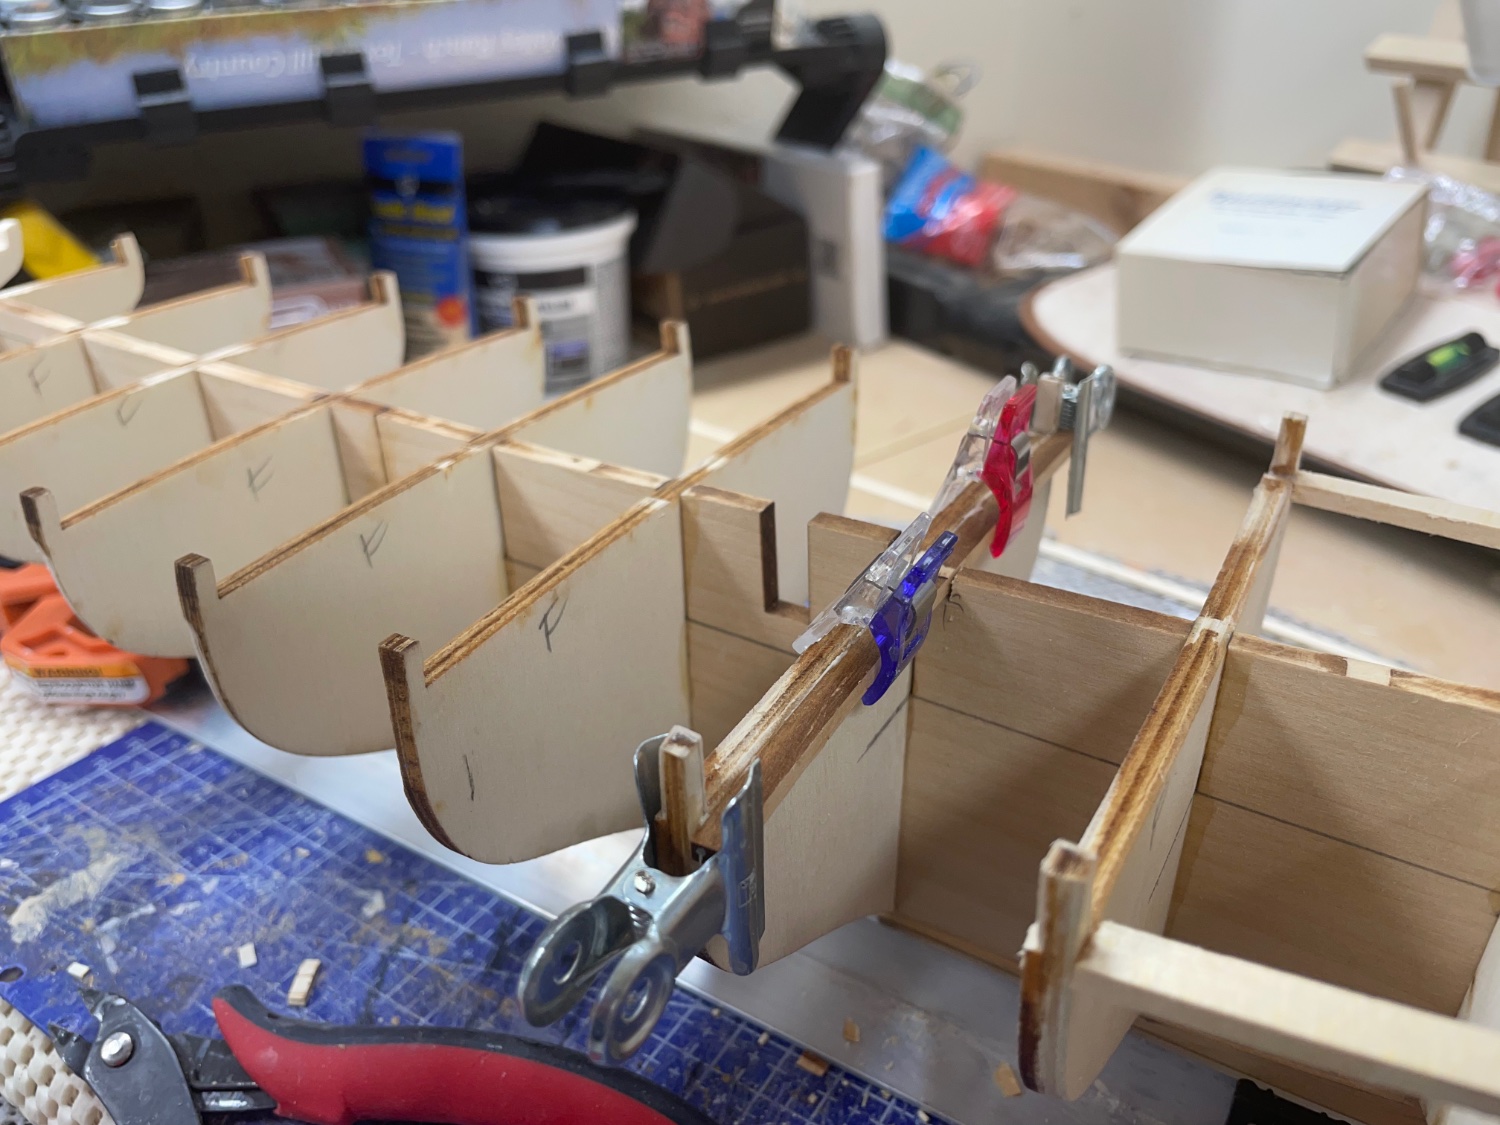
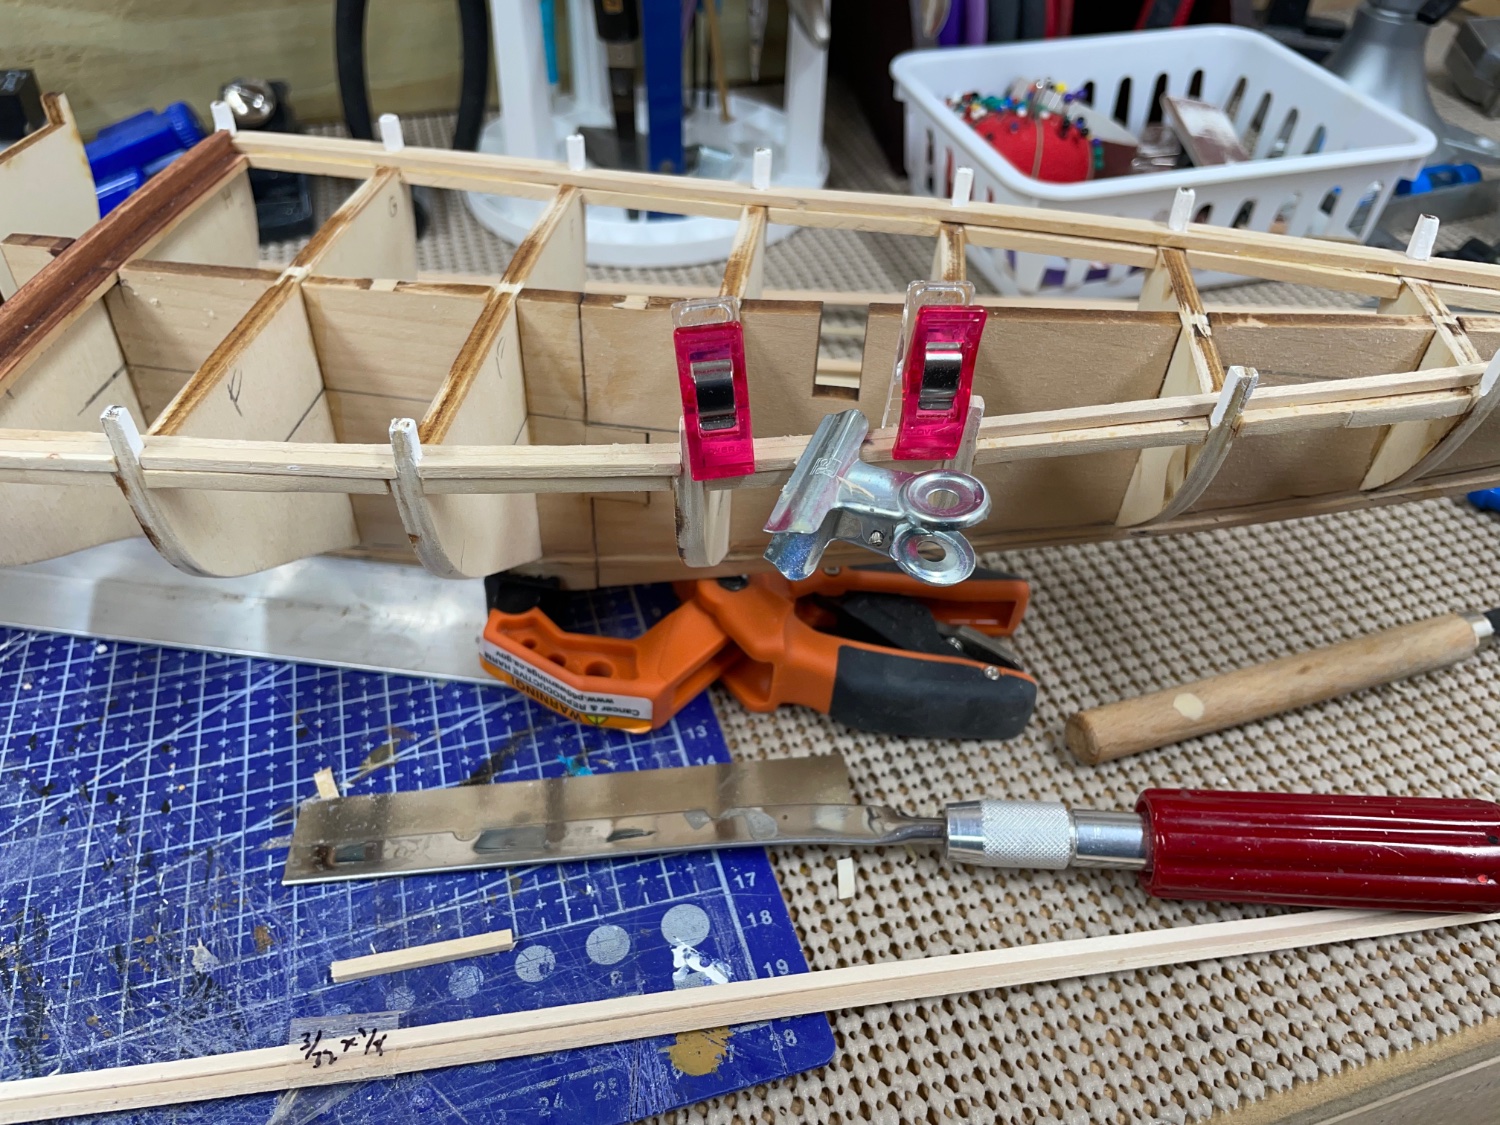
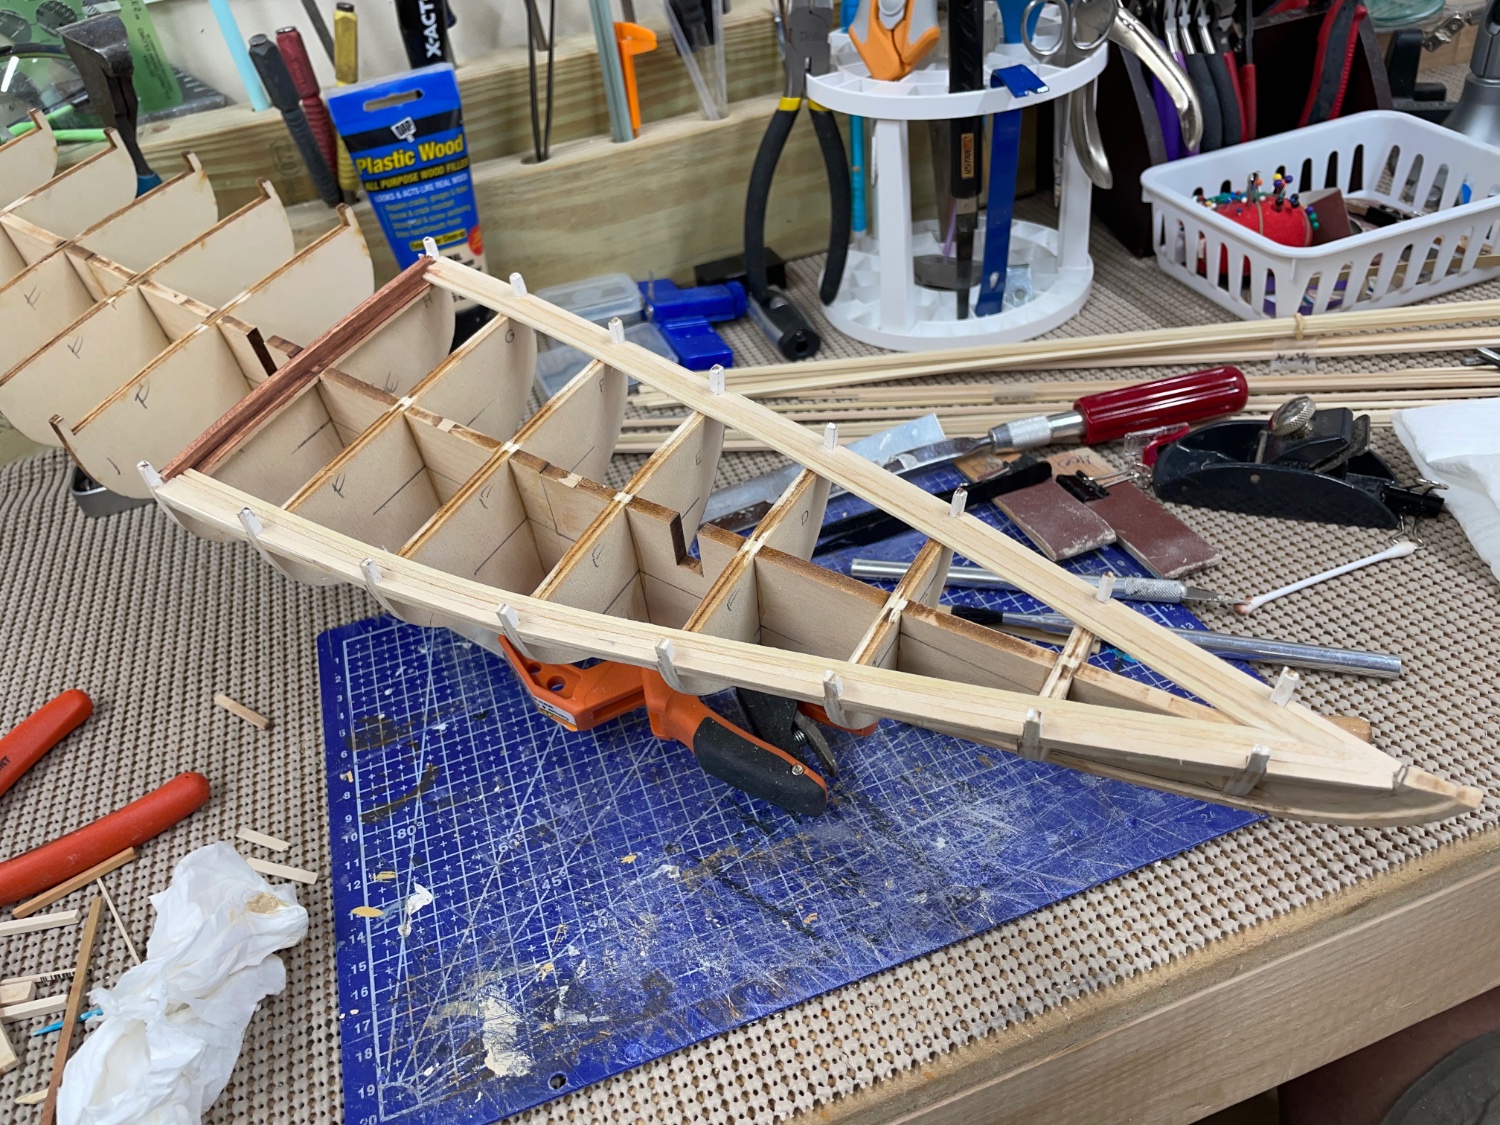
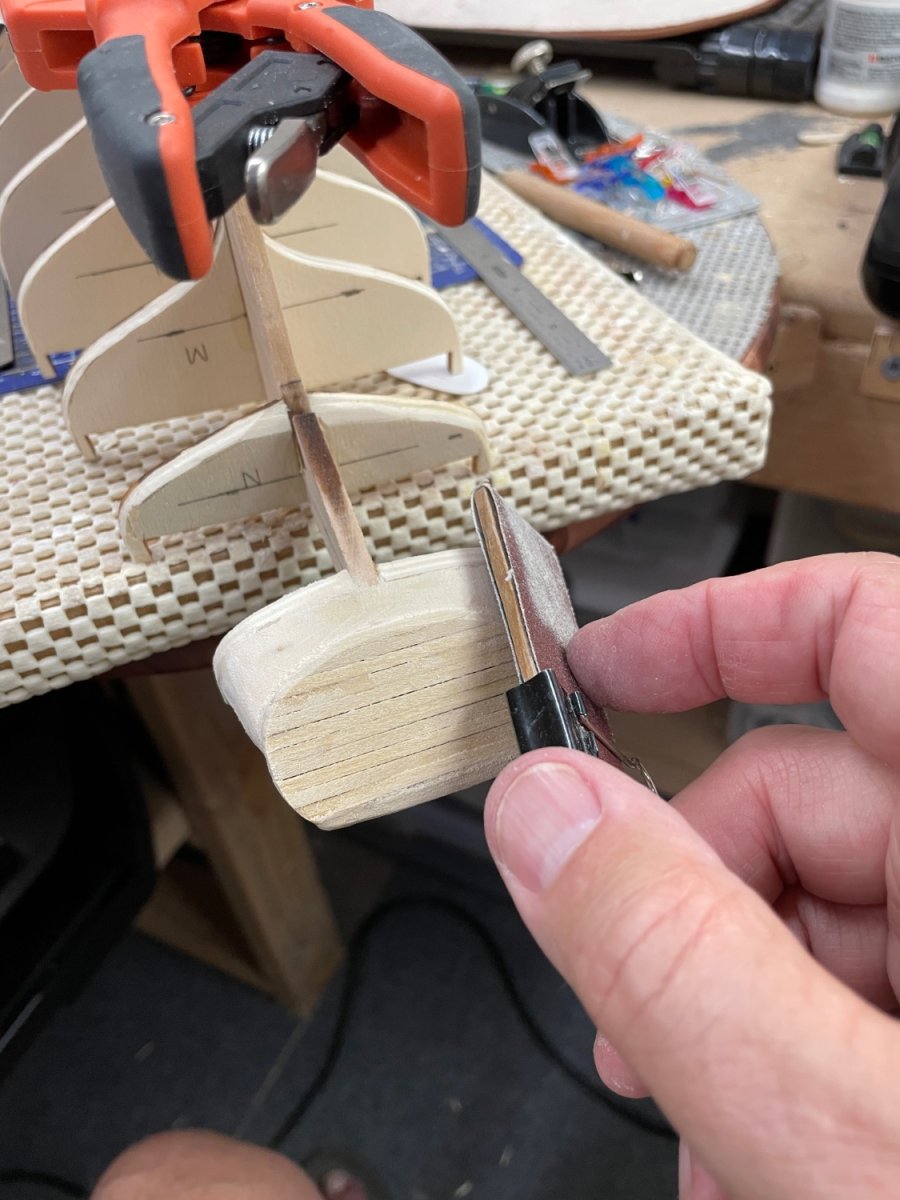
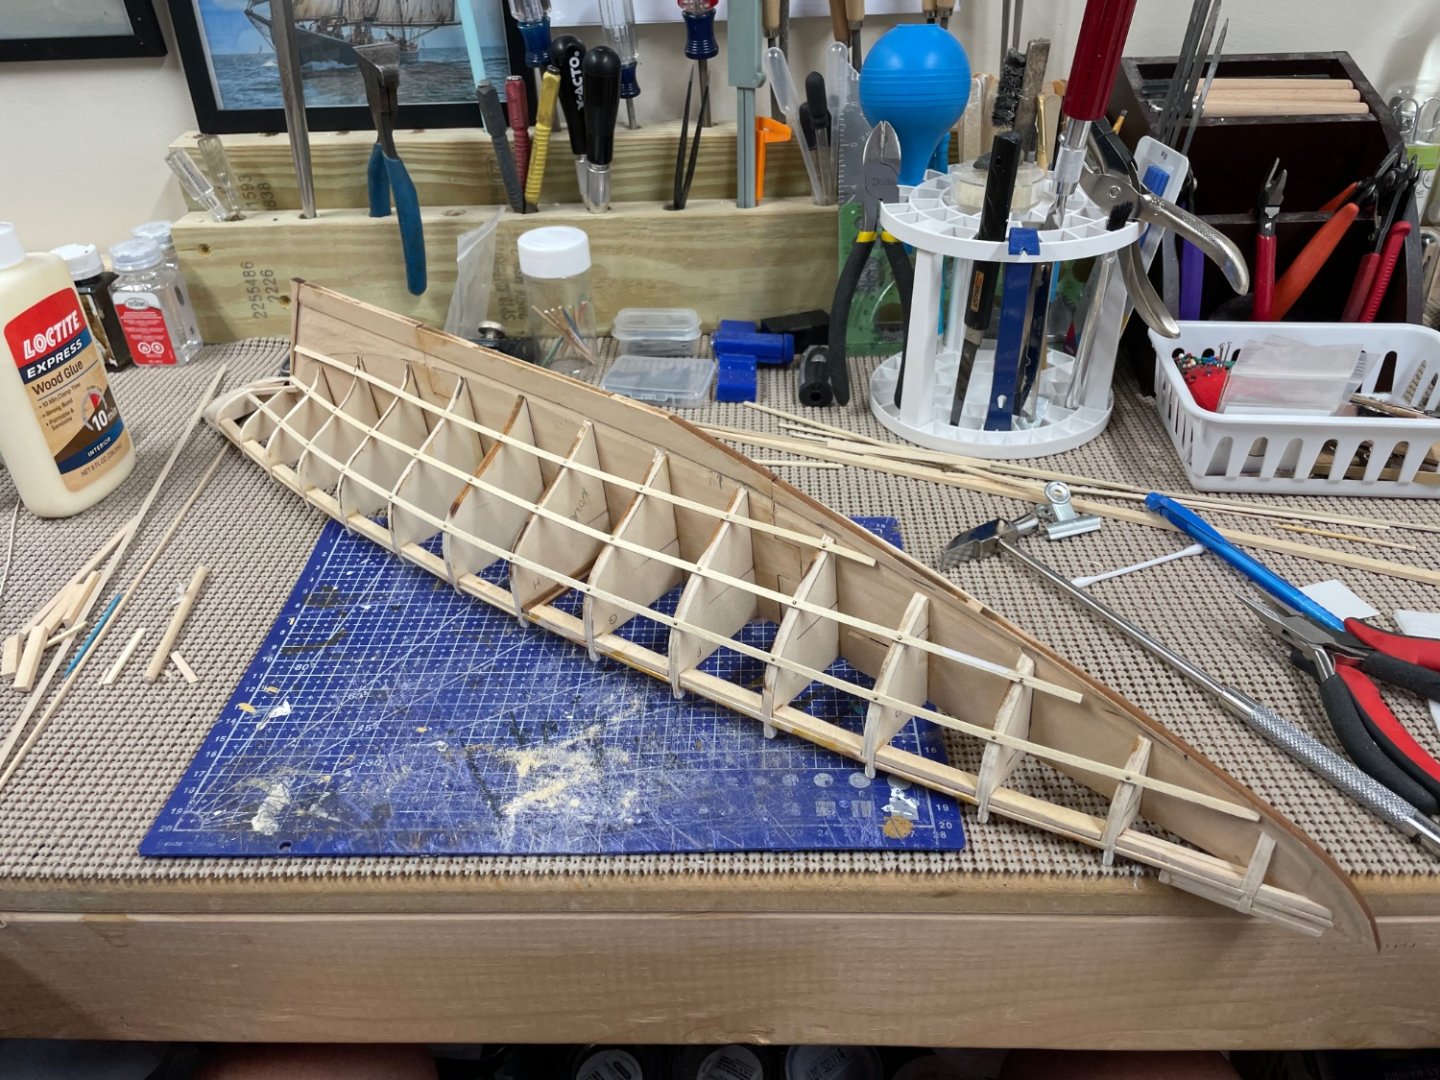
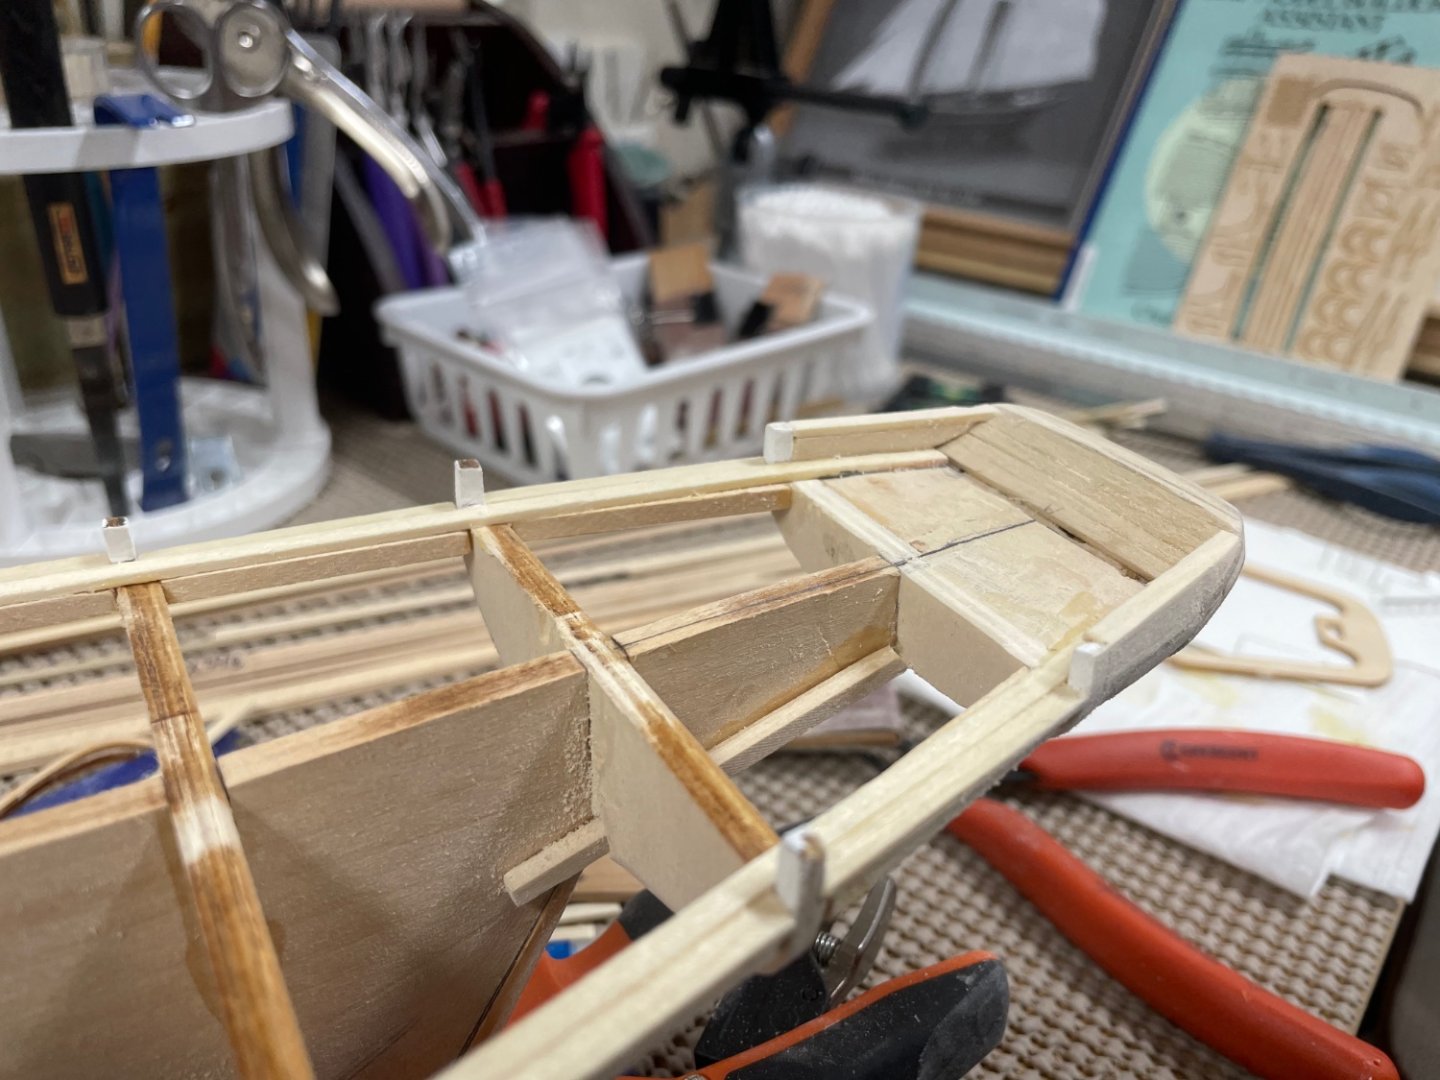
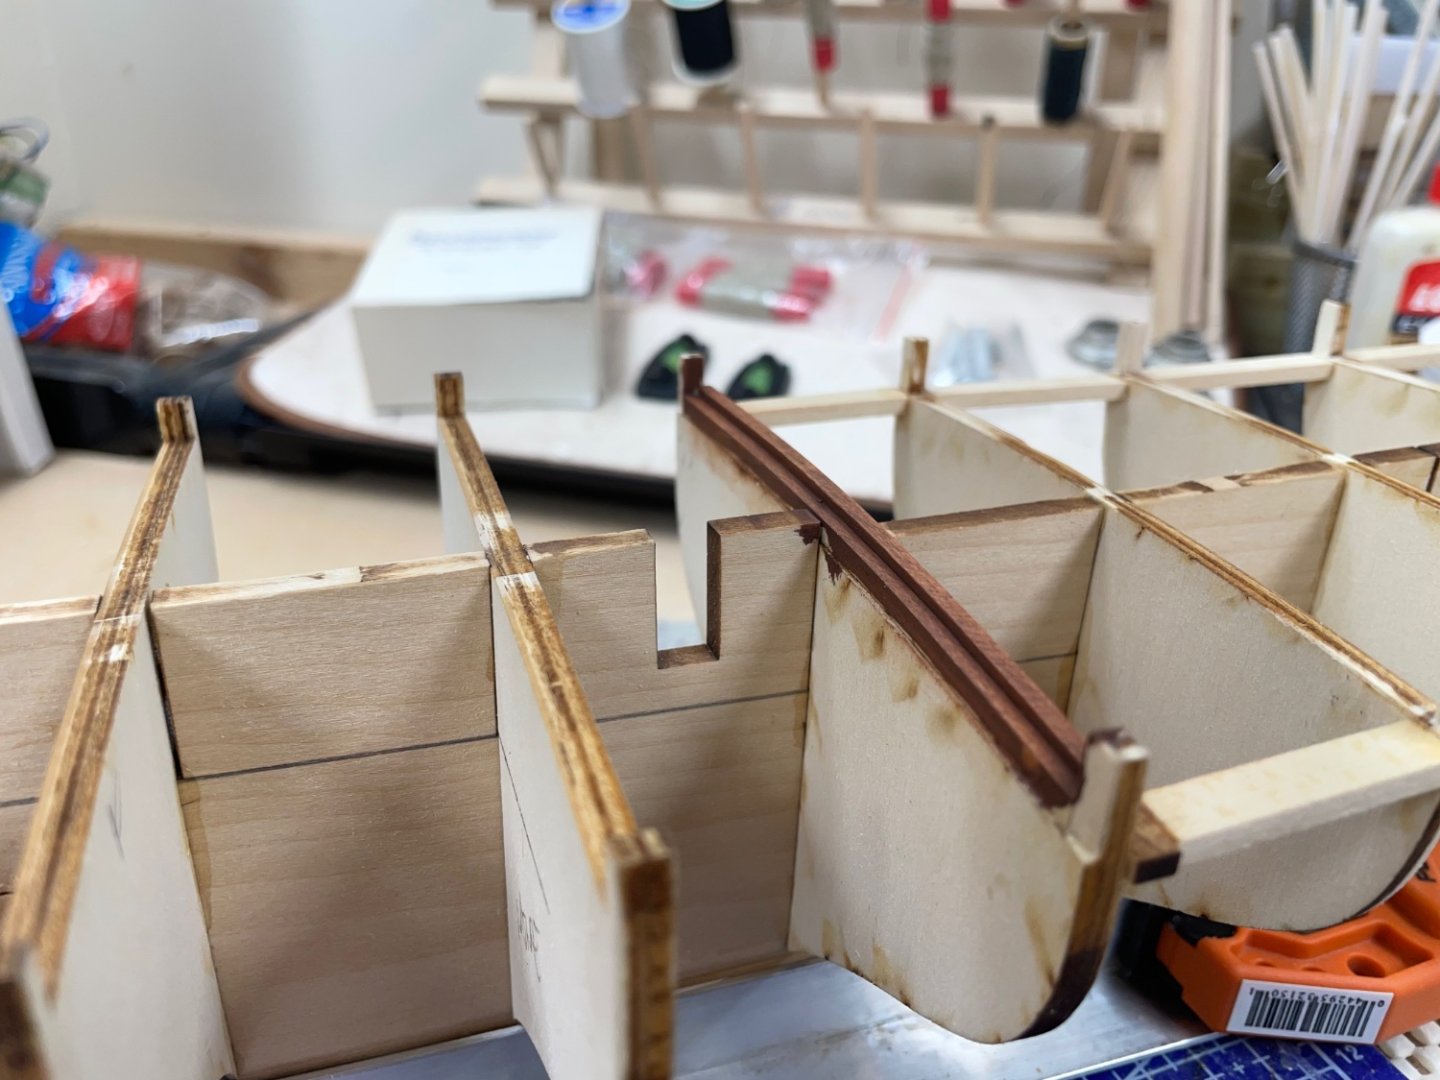
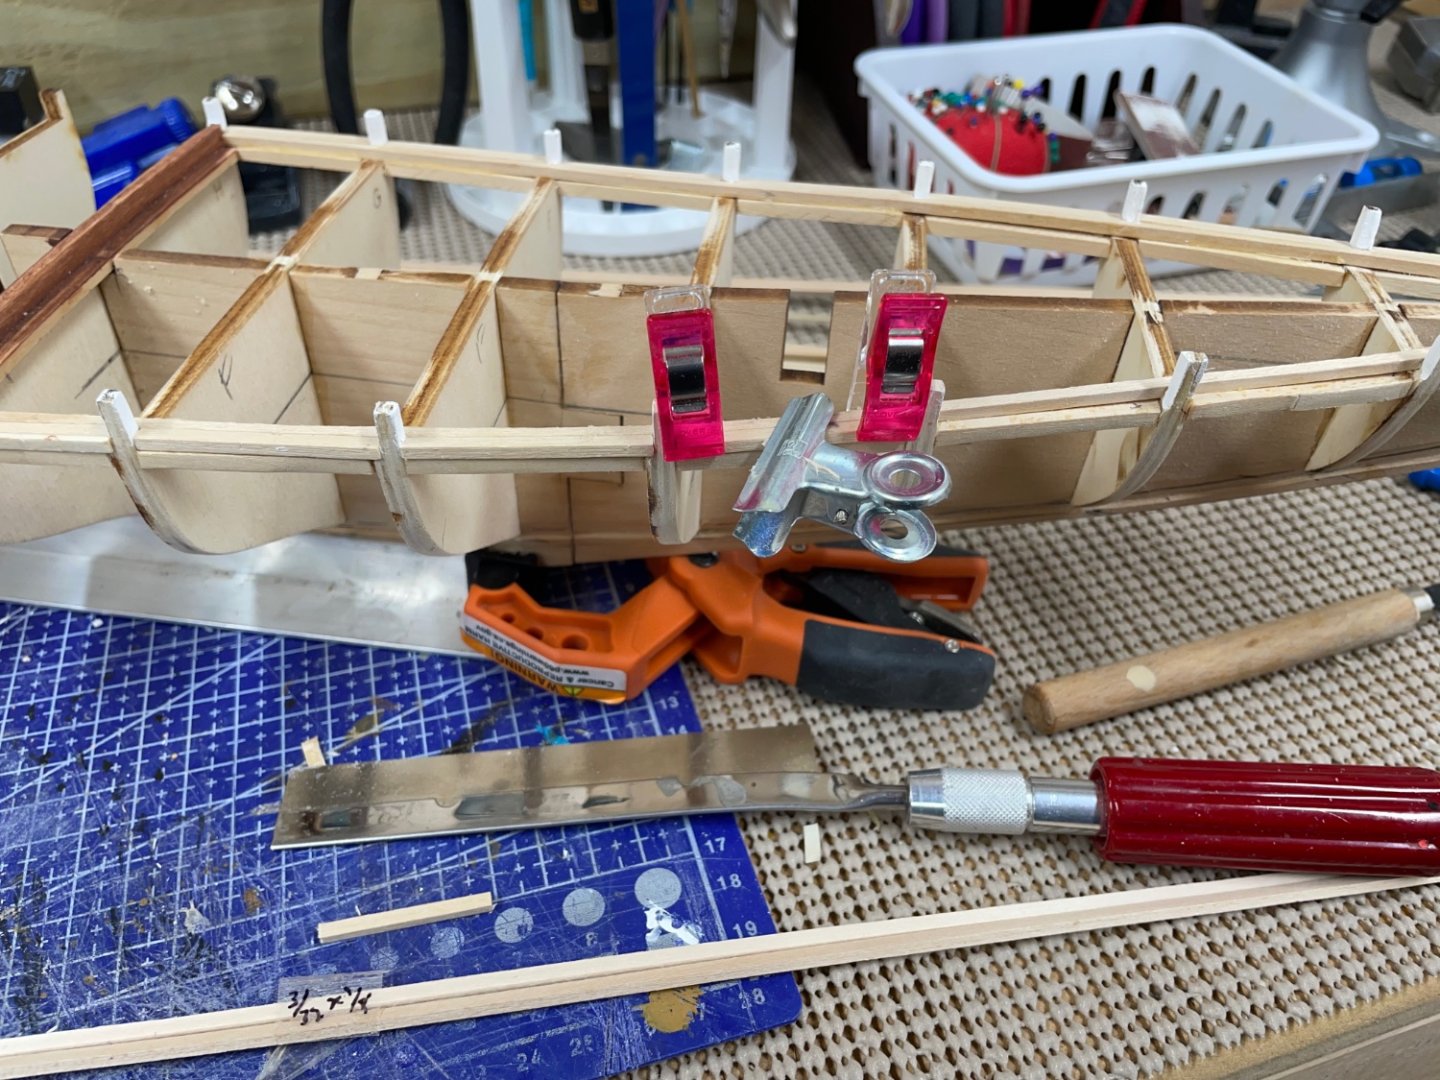
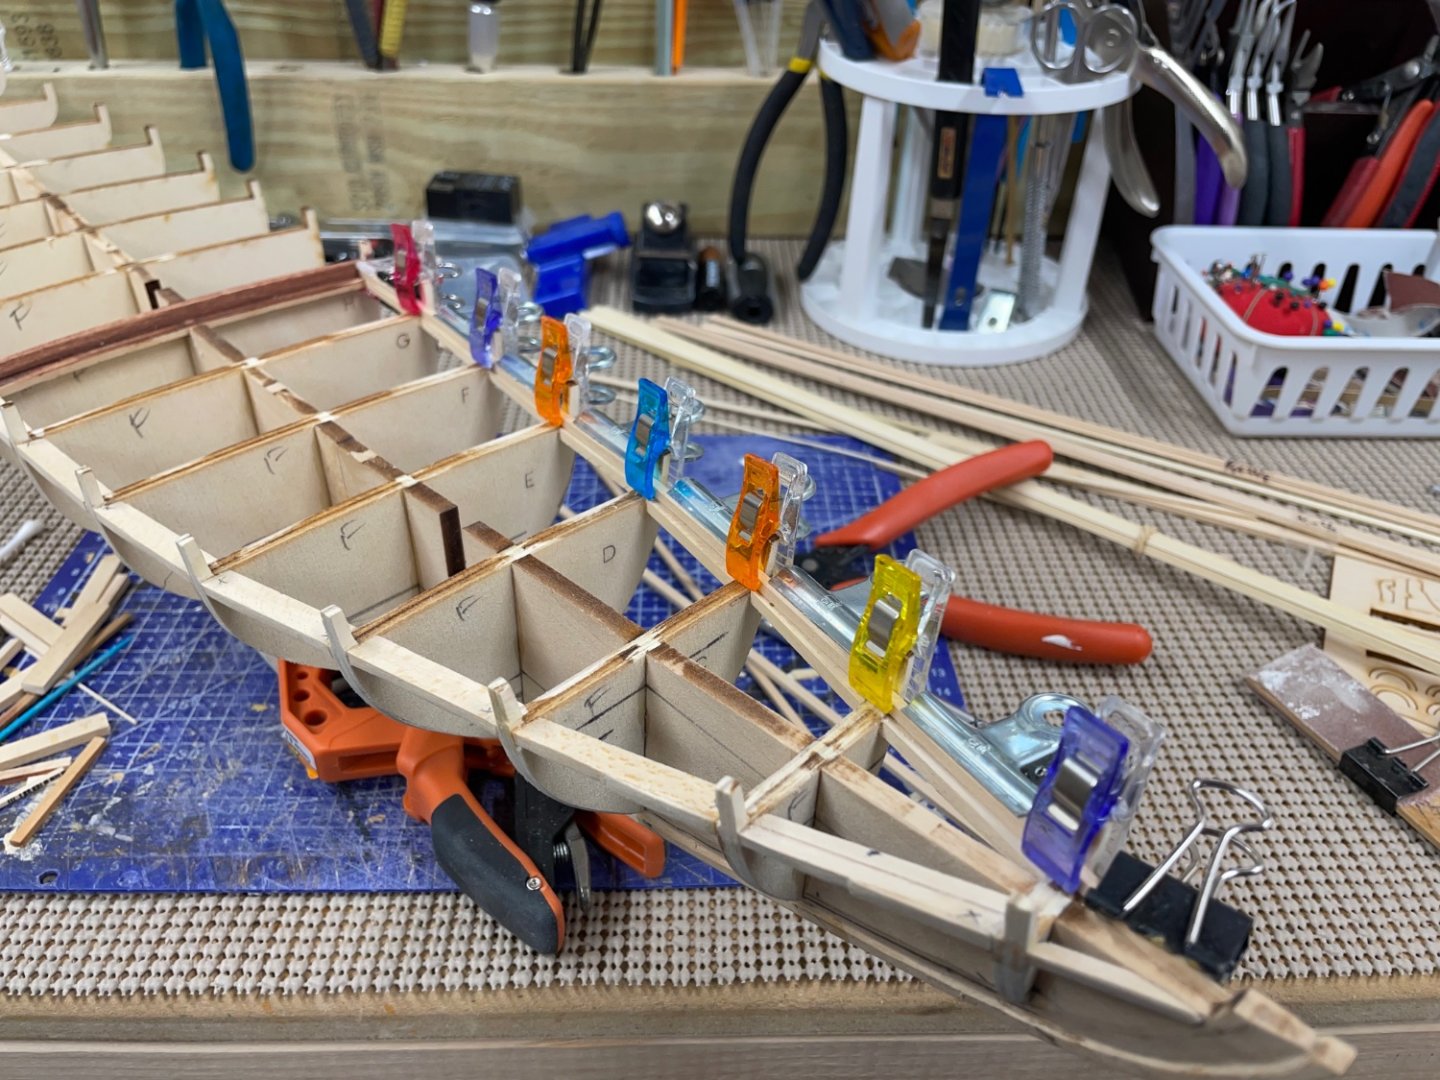
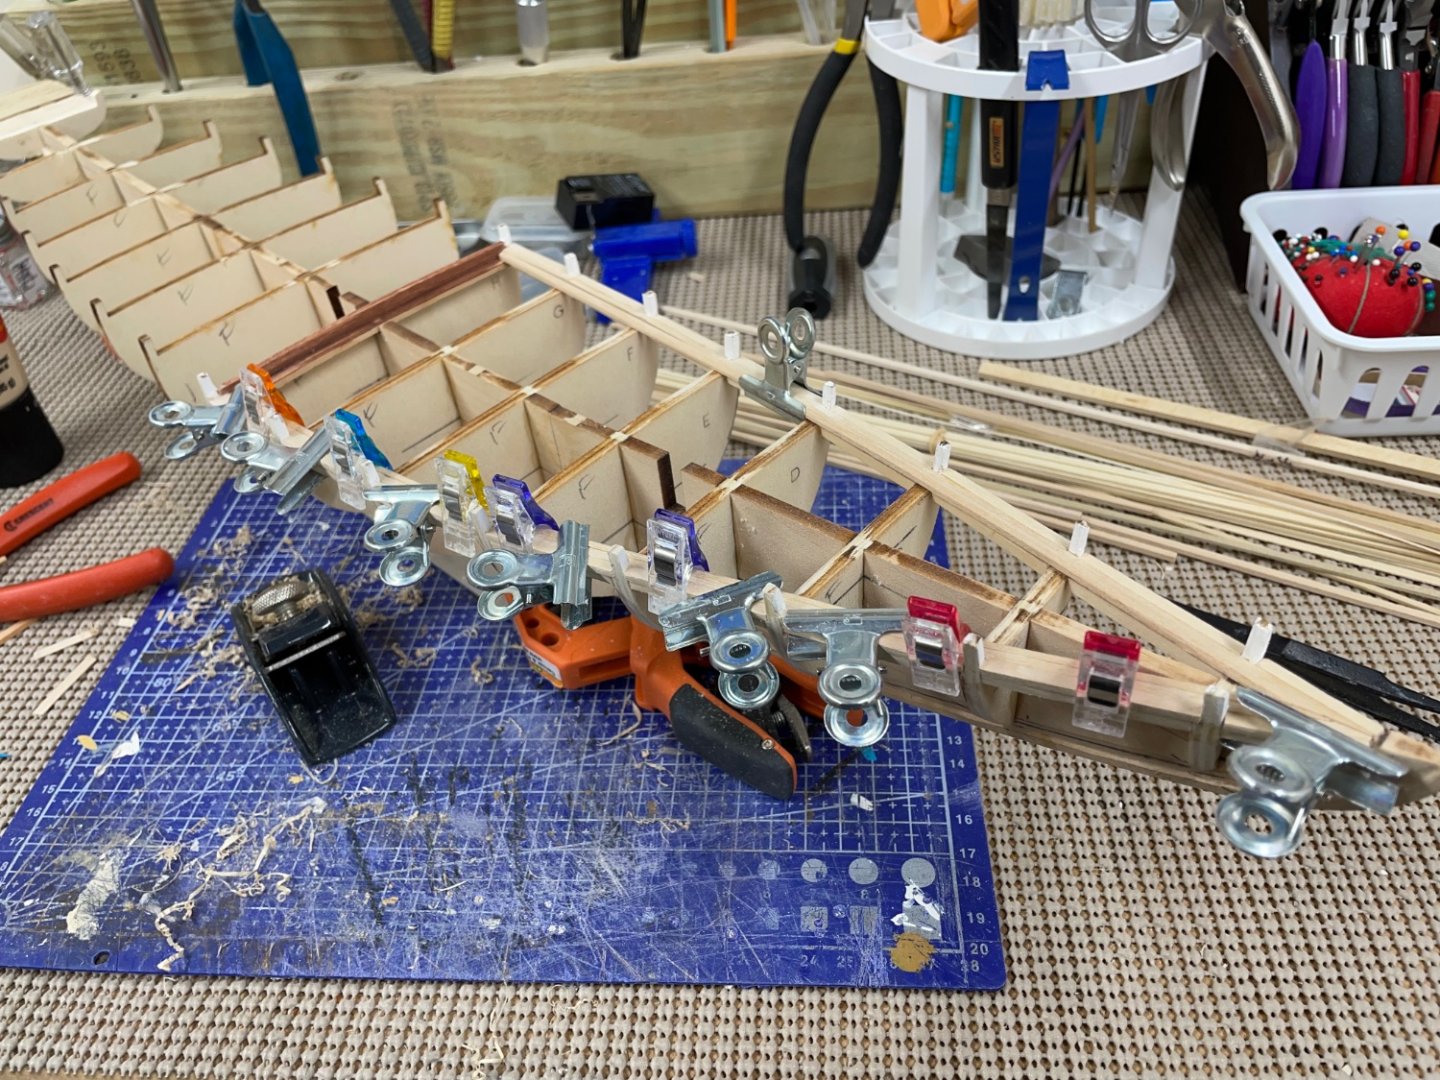
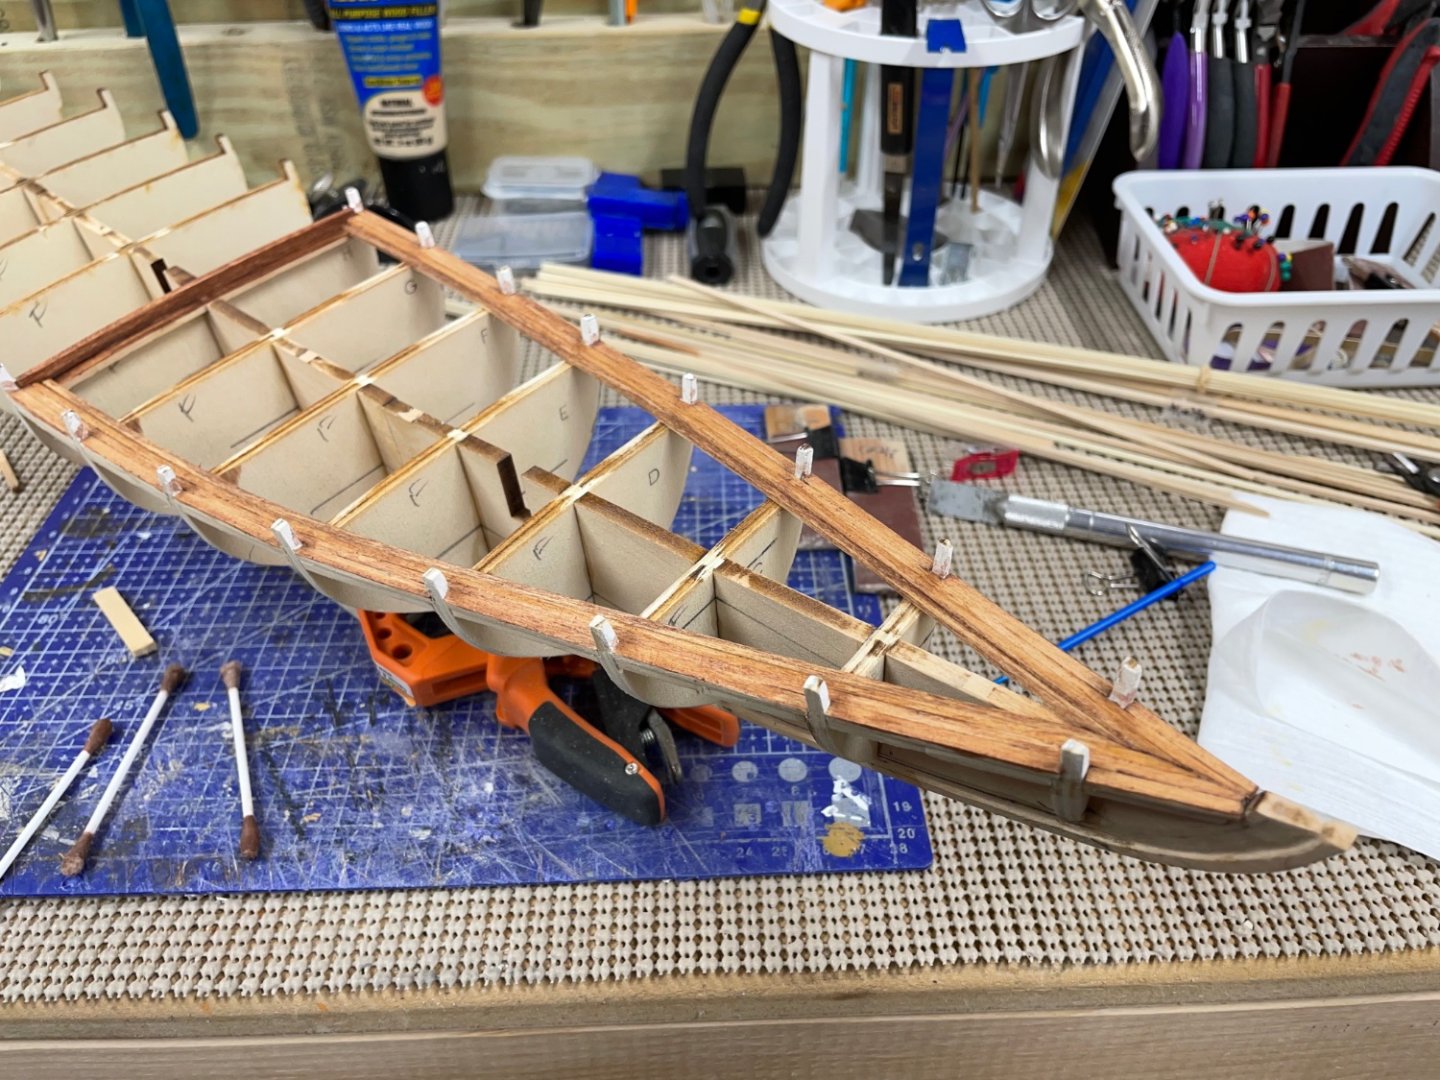
Quarter Deck Waterways etc… Installed bracing below deck… Installing waterways… Finished out Transom Framing… Hawse Timbers placed… Cheers 🍻


- 282 replies
-
- 5
-
-
- Bluenose
- Model Shipways
- (and 1 more)
-
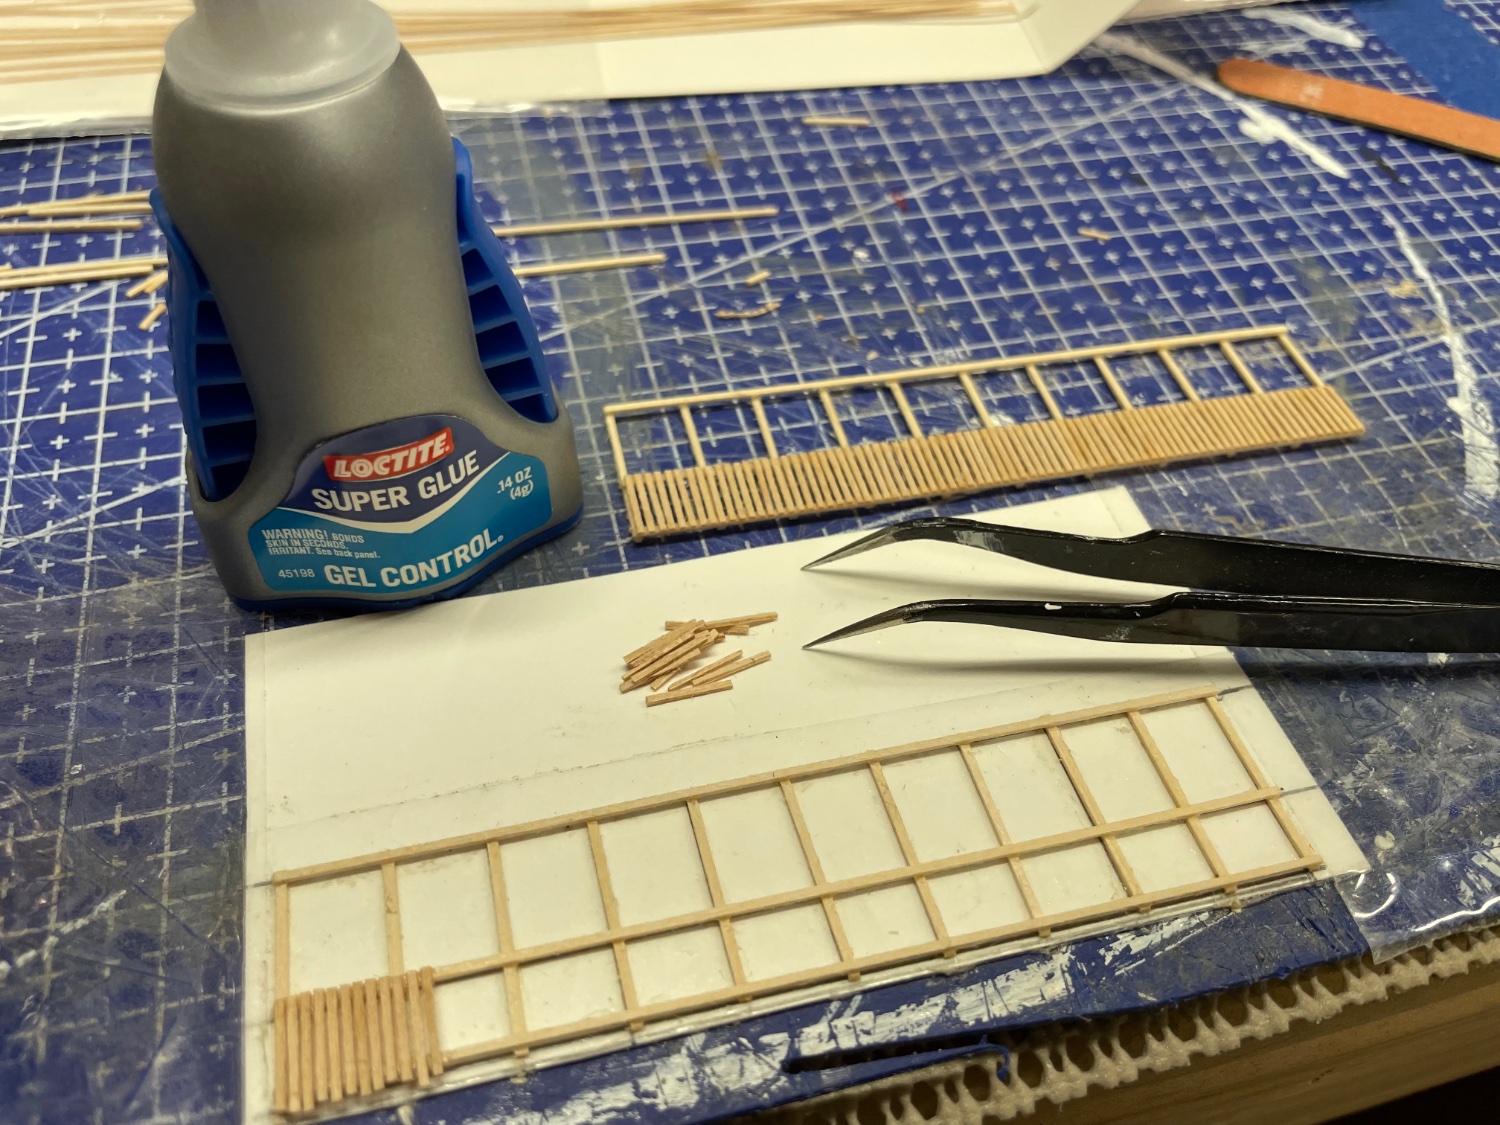
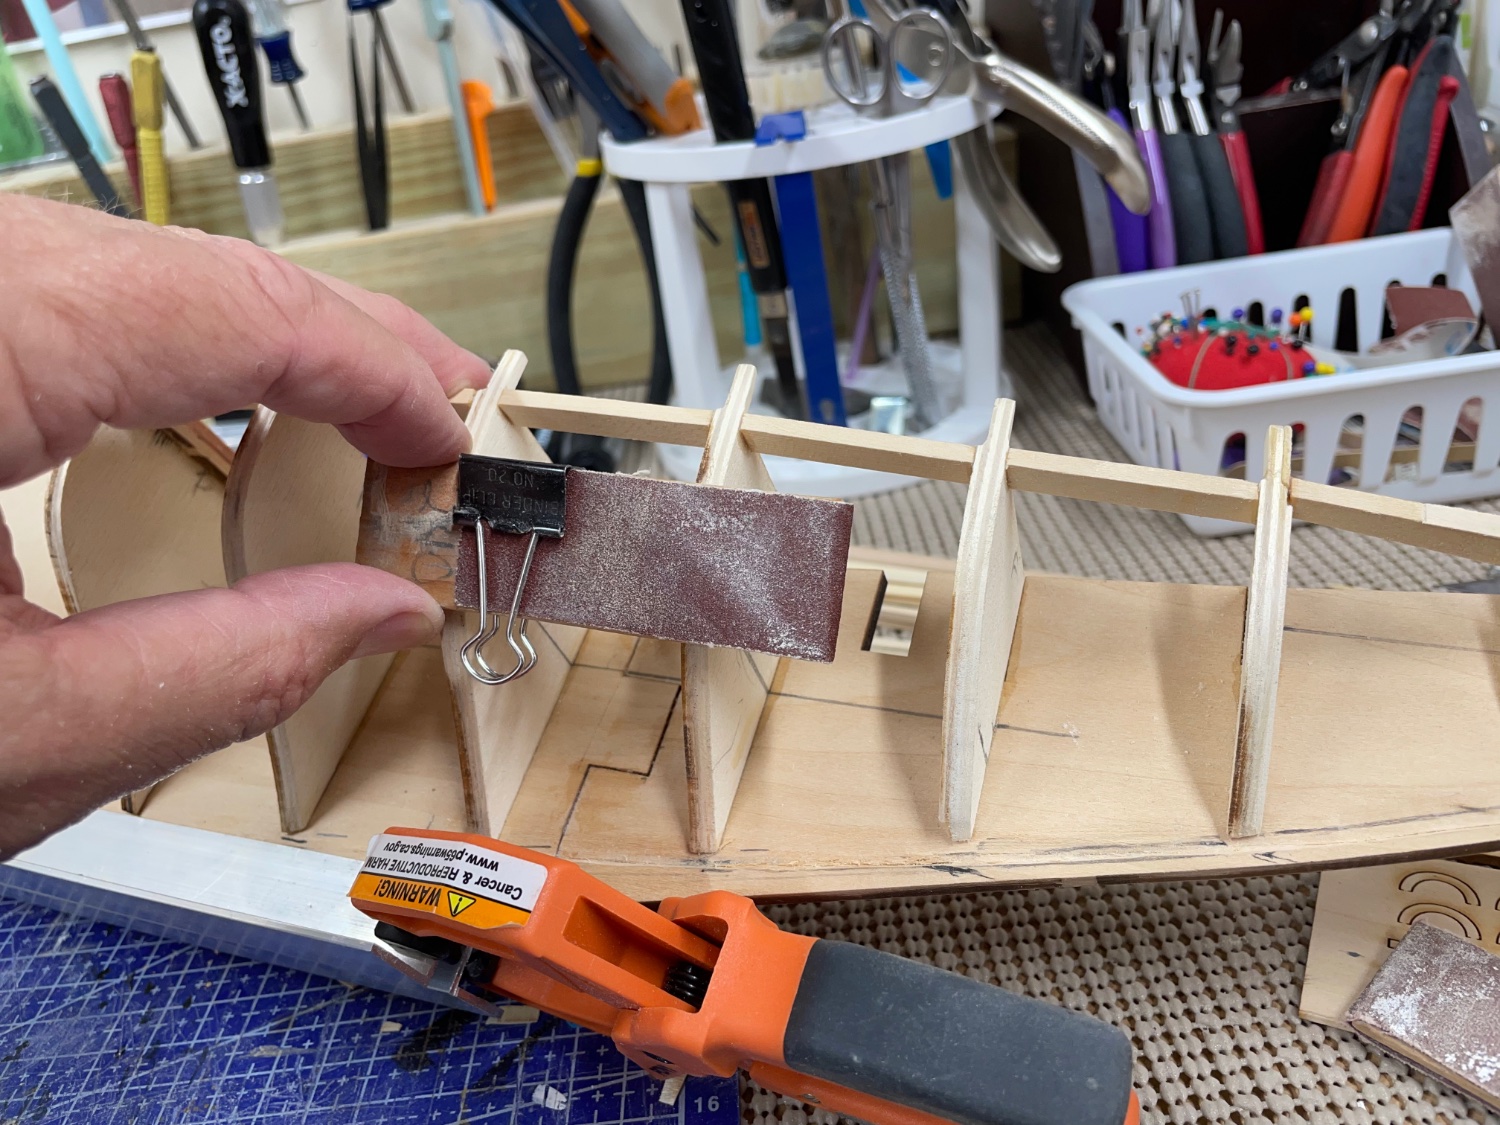
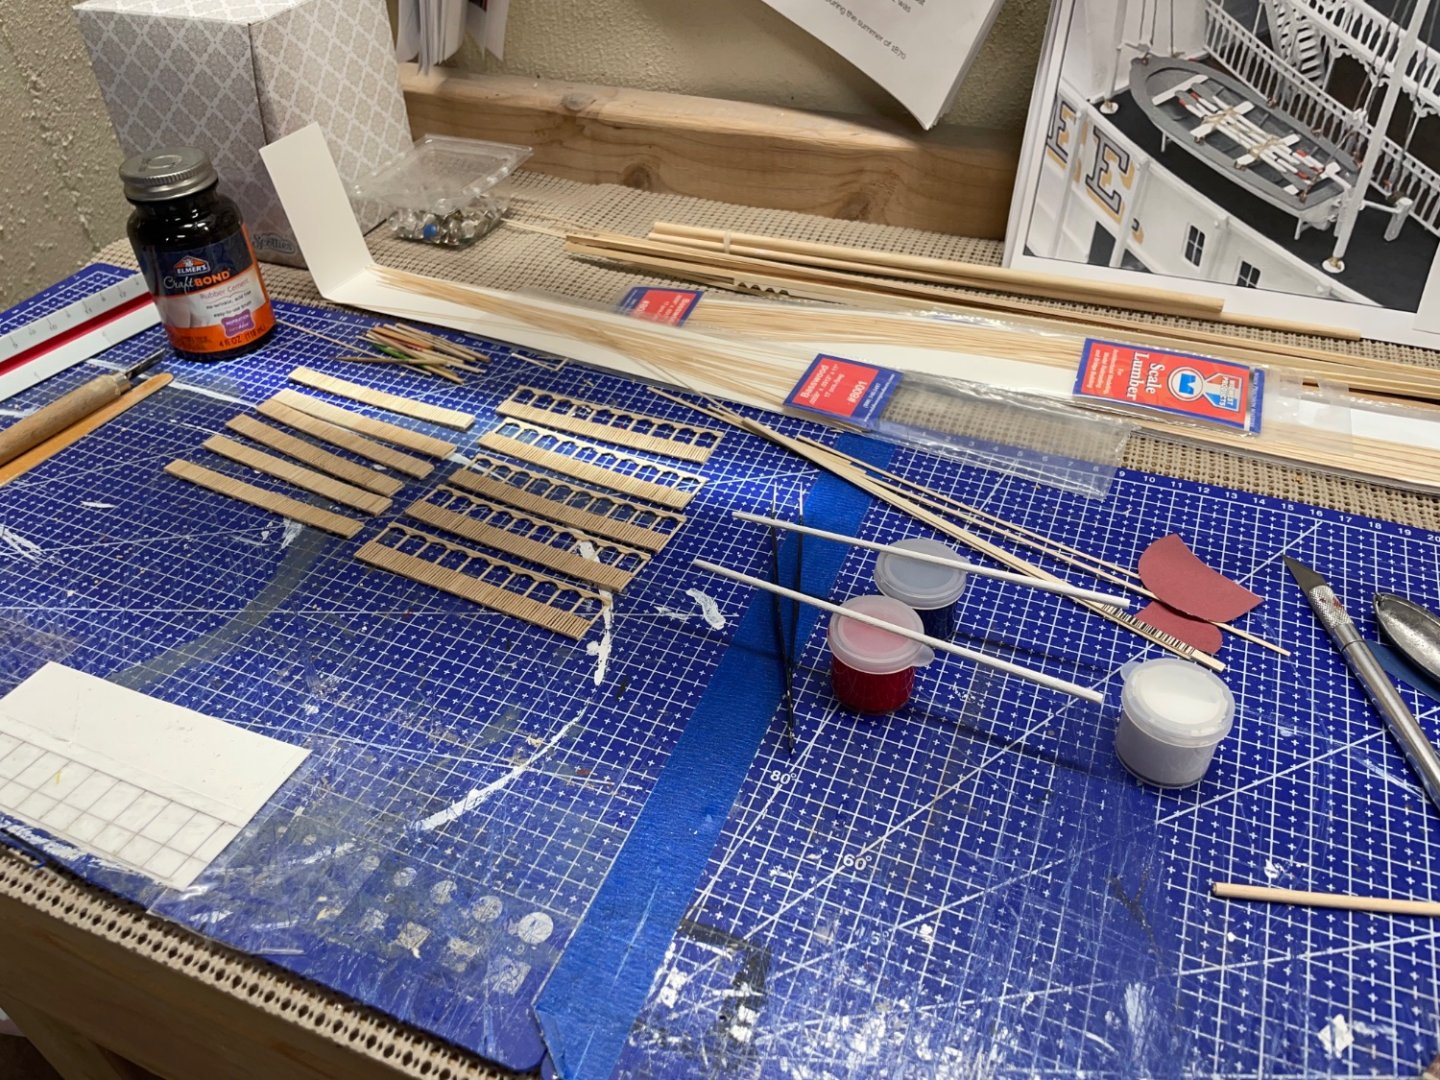
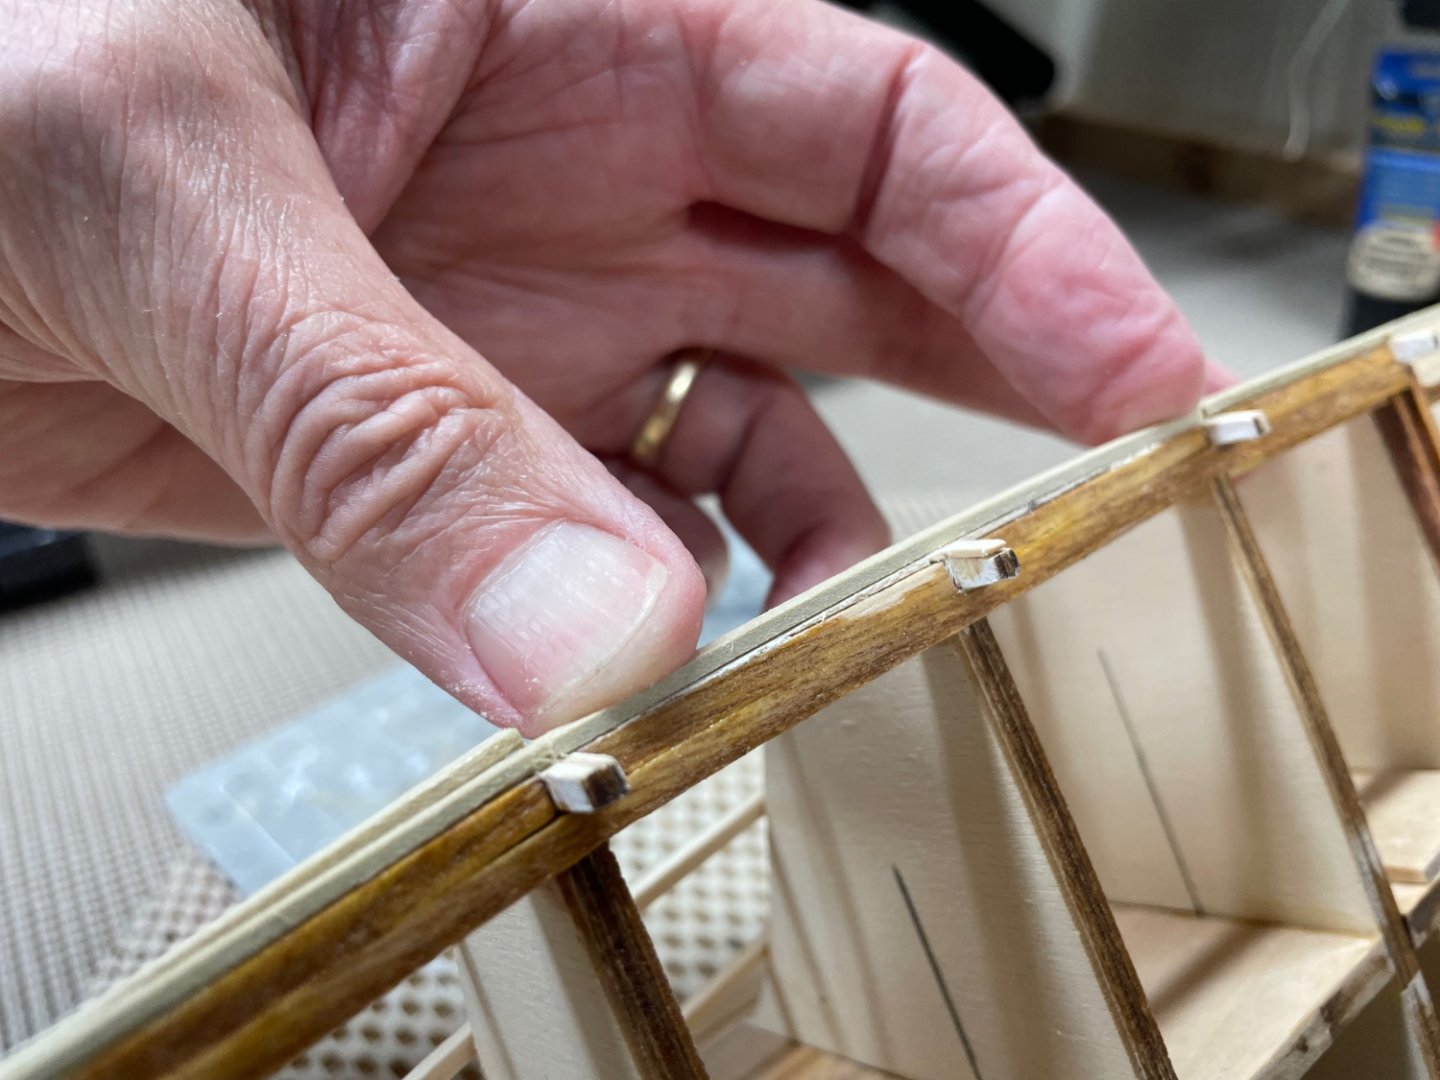
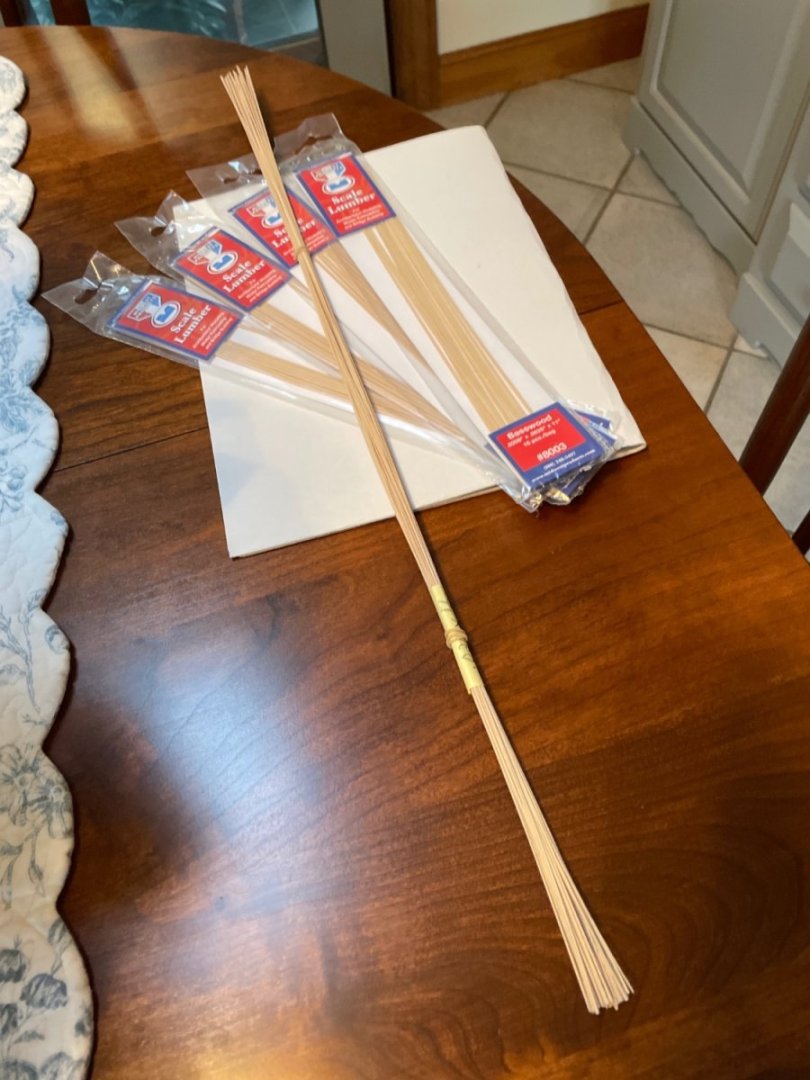
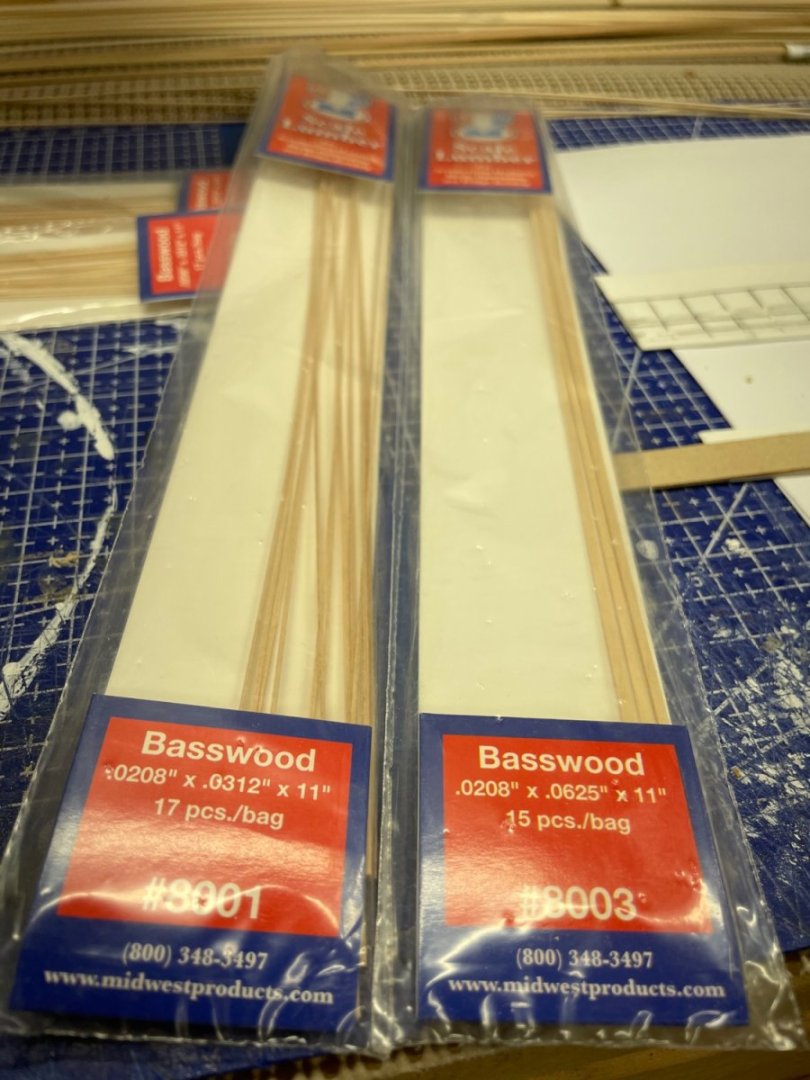
Hurricane Deck edging… As I progress with the railings, I am starting to get a better picture of the material needs. Mid west Products is out of stock on these items. 🤨 I have been able source some from University Bookstores. I need more packets of the .0208 x .0312. My order for these is back ordered until September. I am hoping Midwest can step up production. A 100 mm length of railing is now taking me about 4 hours to complete construction. That’s an improvement over when I started. 🤪 Progress, albeit minimal… Cheers 🍻

- 238 replies
-
- 7
-
-
- Robert E Lee
- steamboat
- (and 3 more)
-
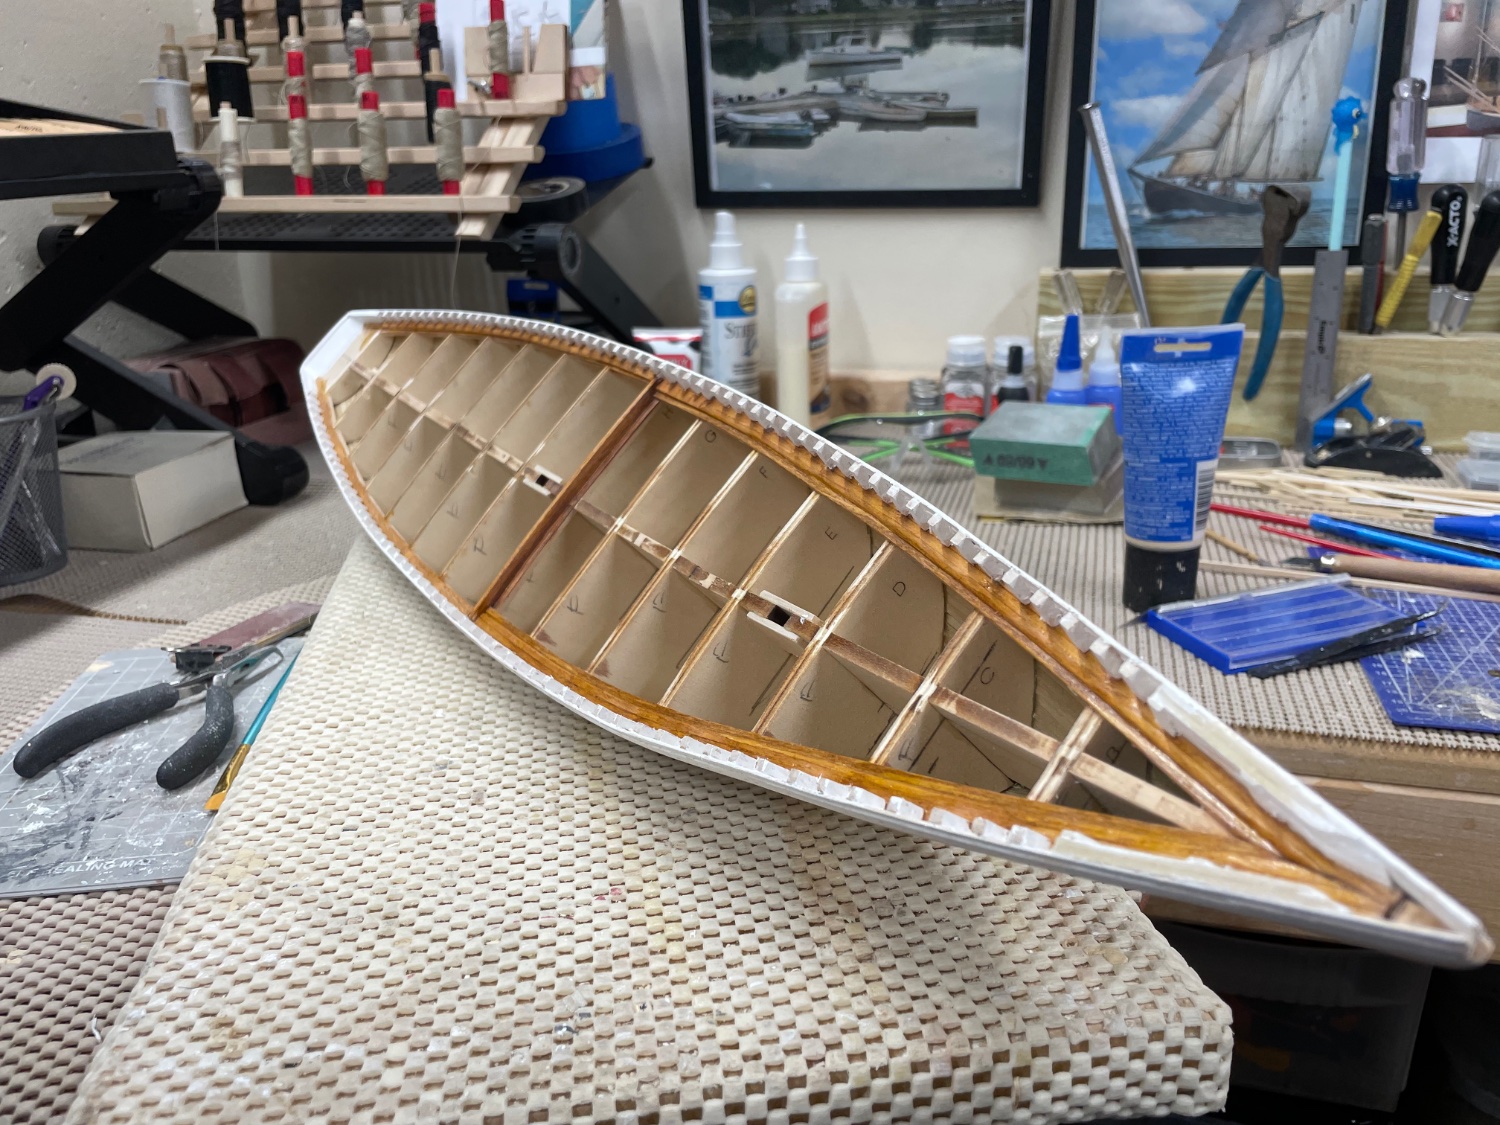
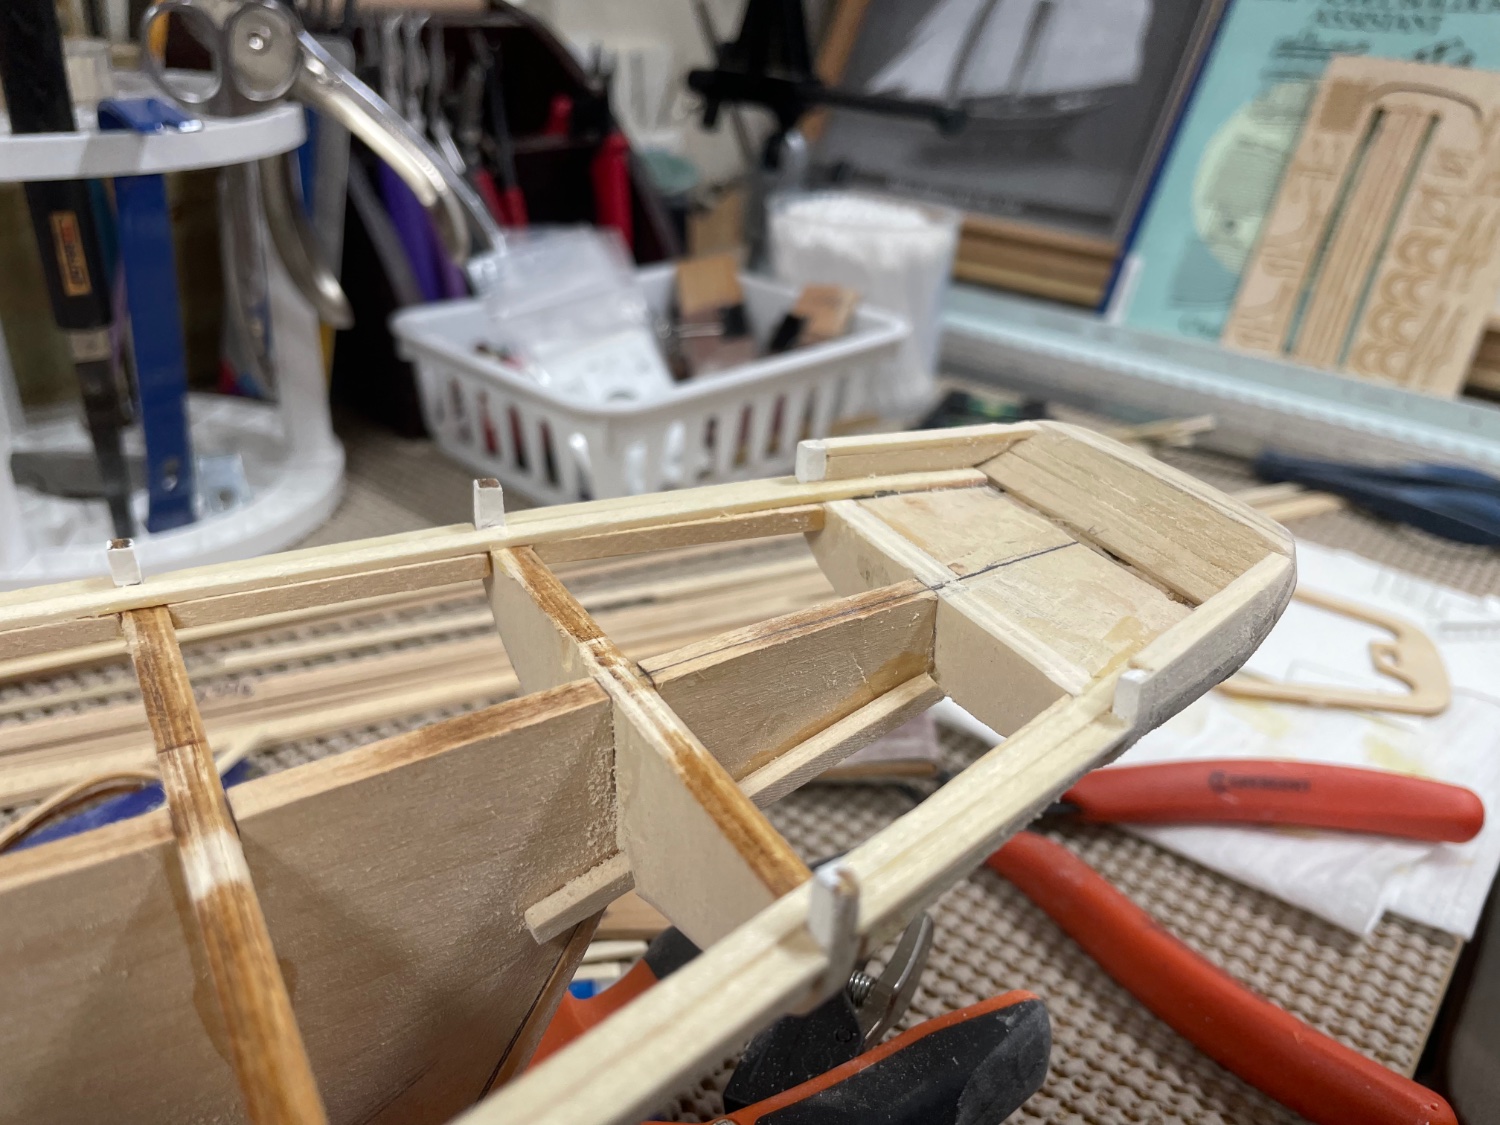
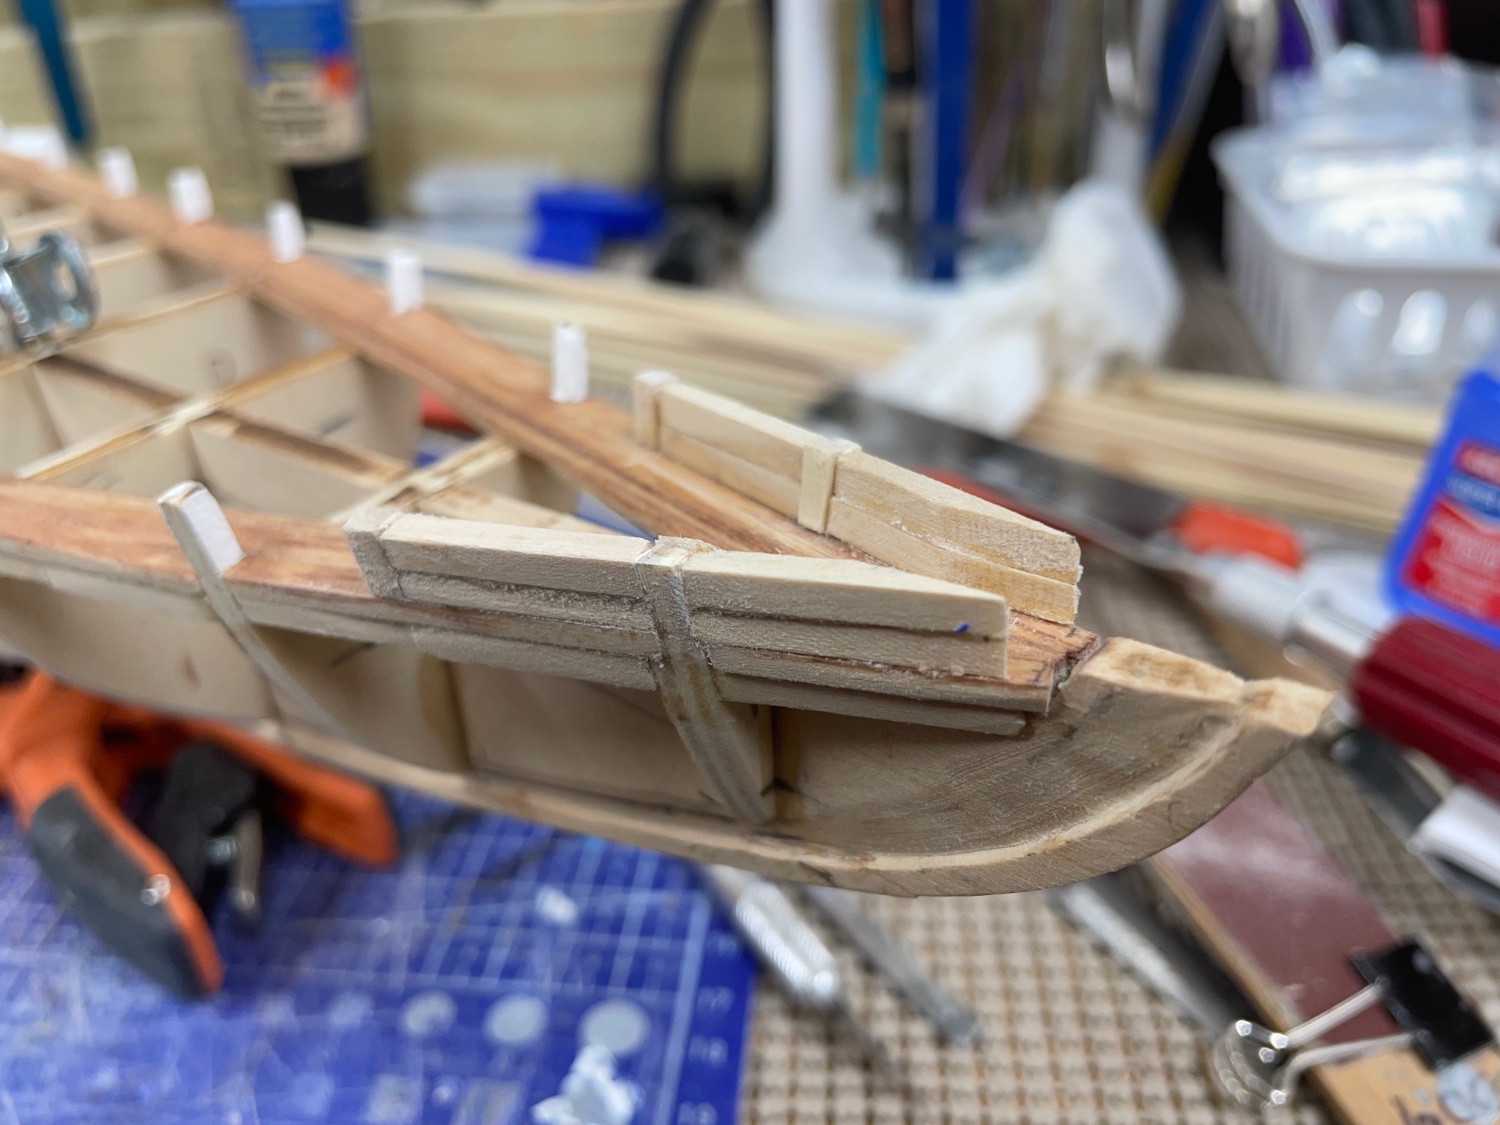
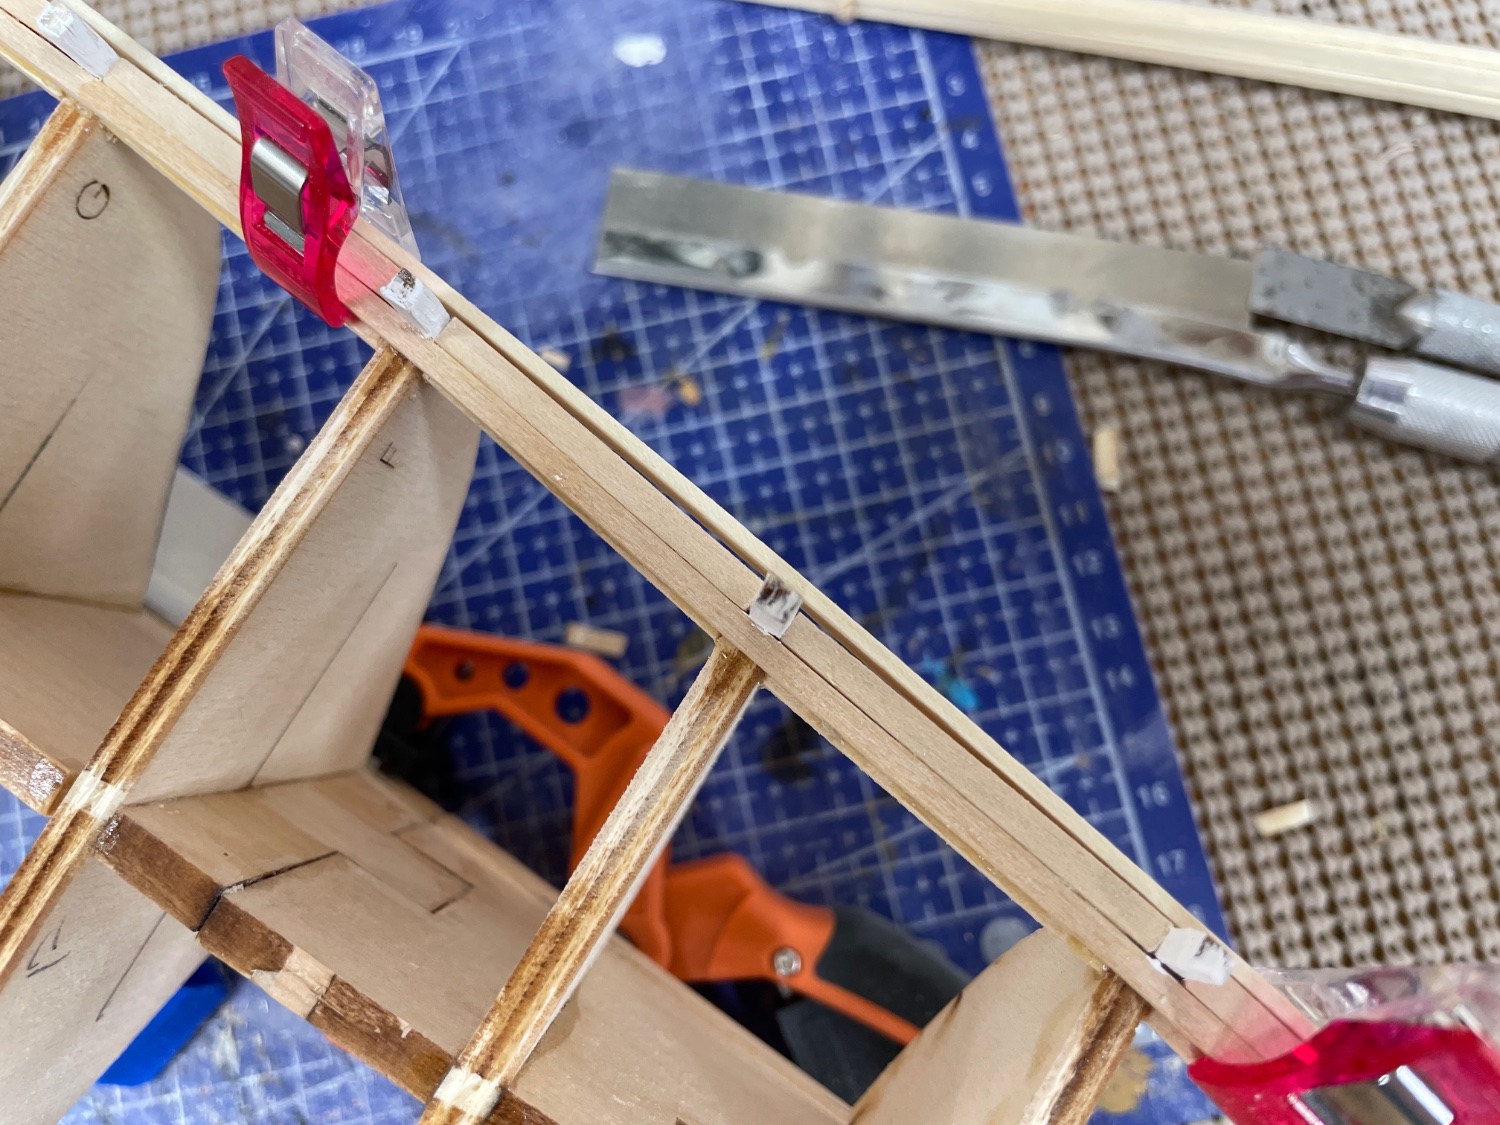
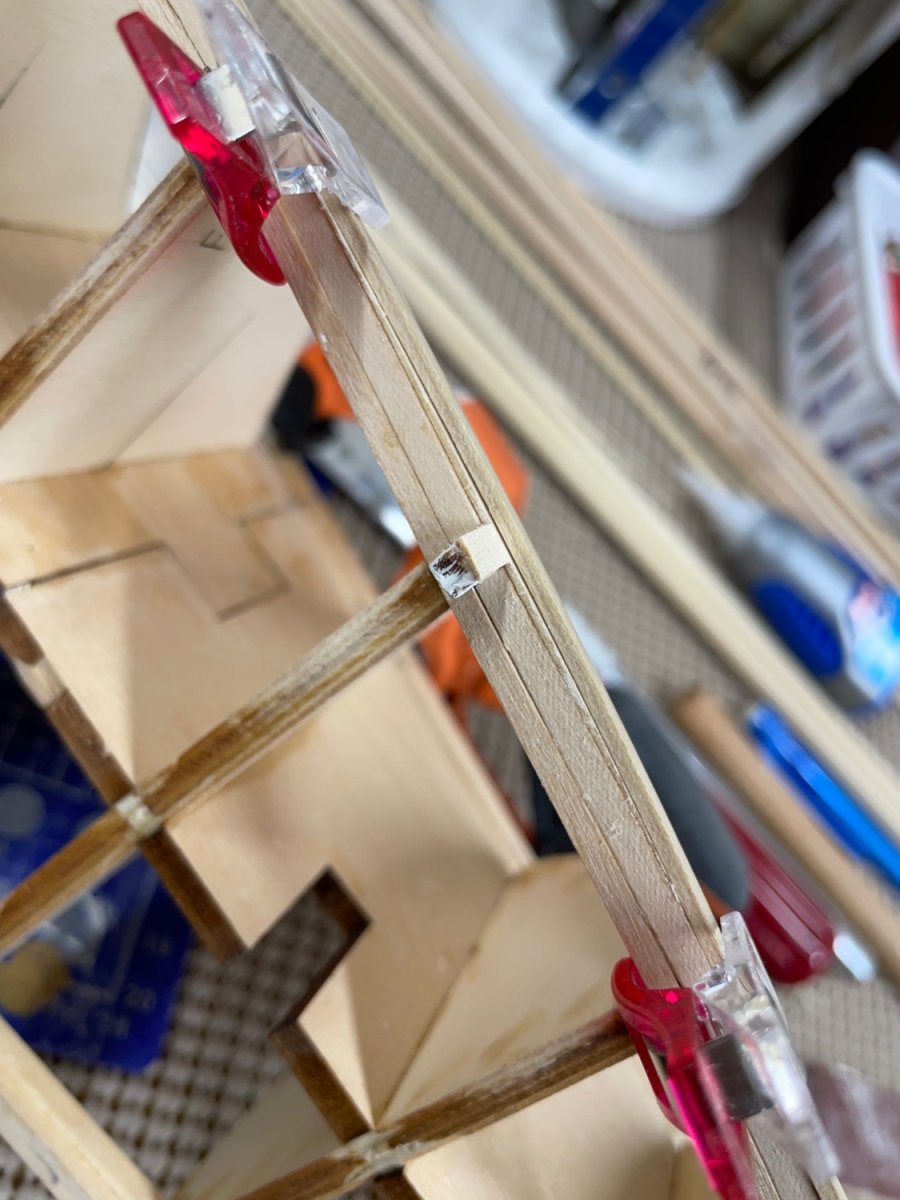
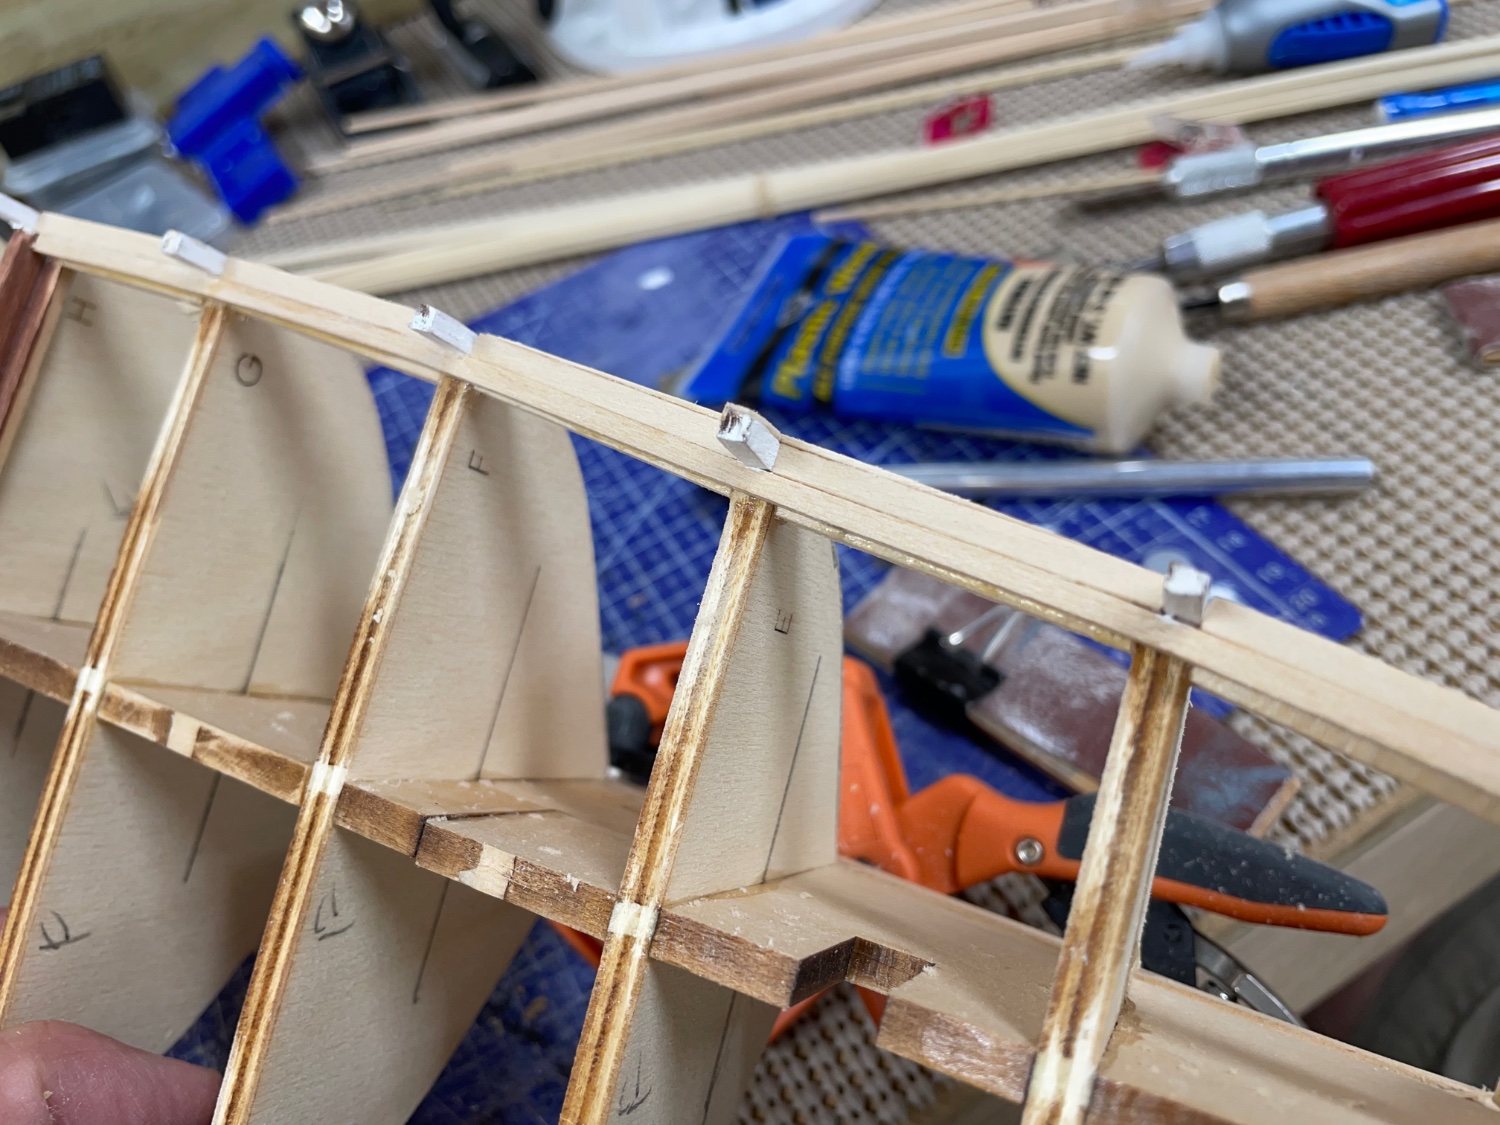
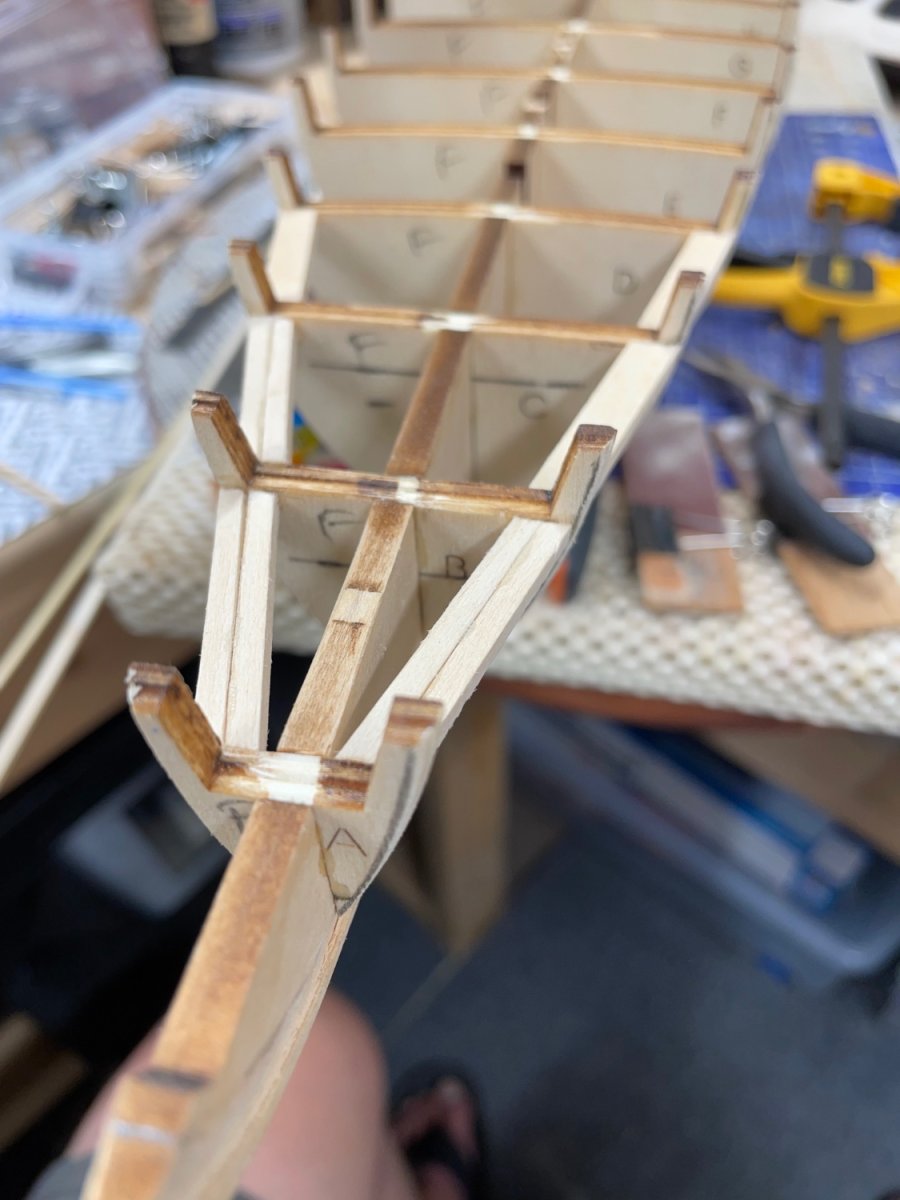
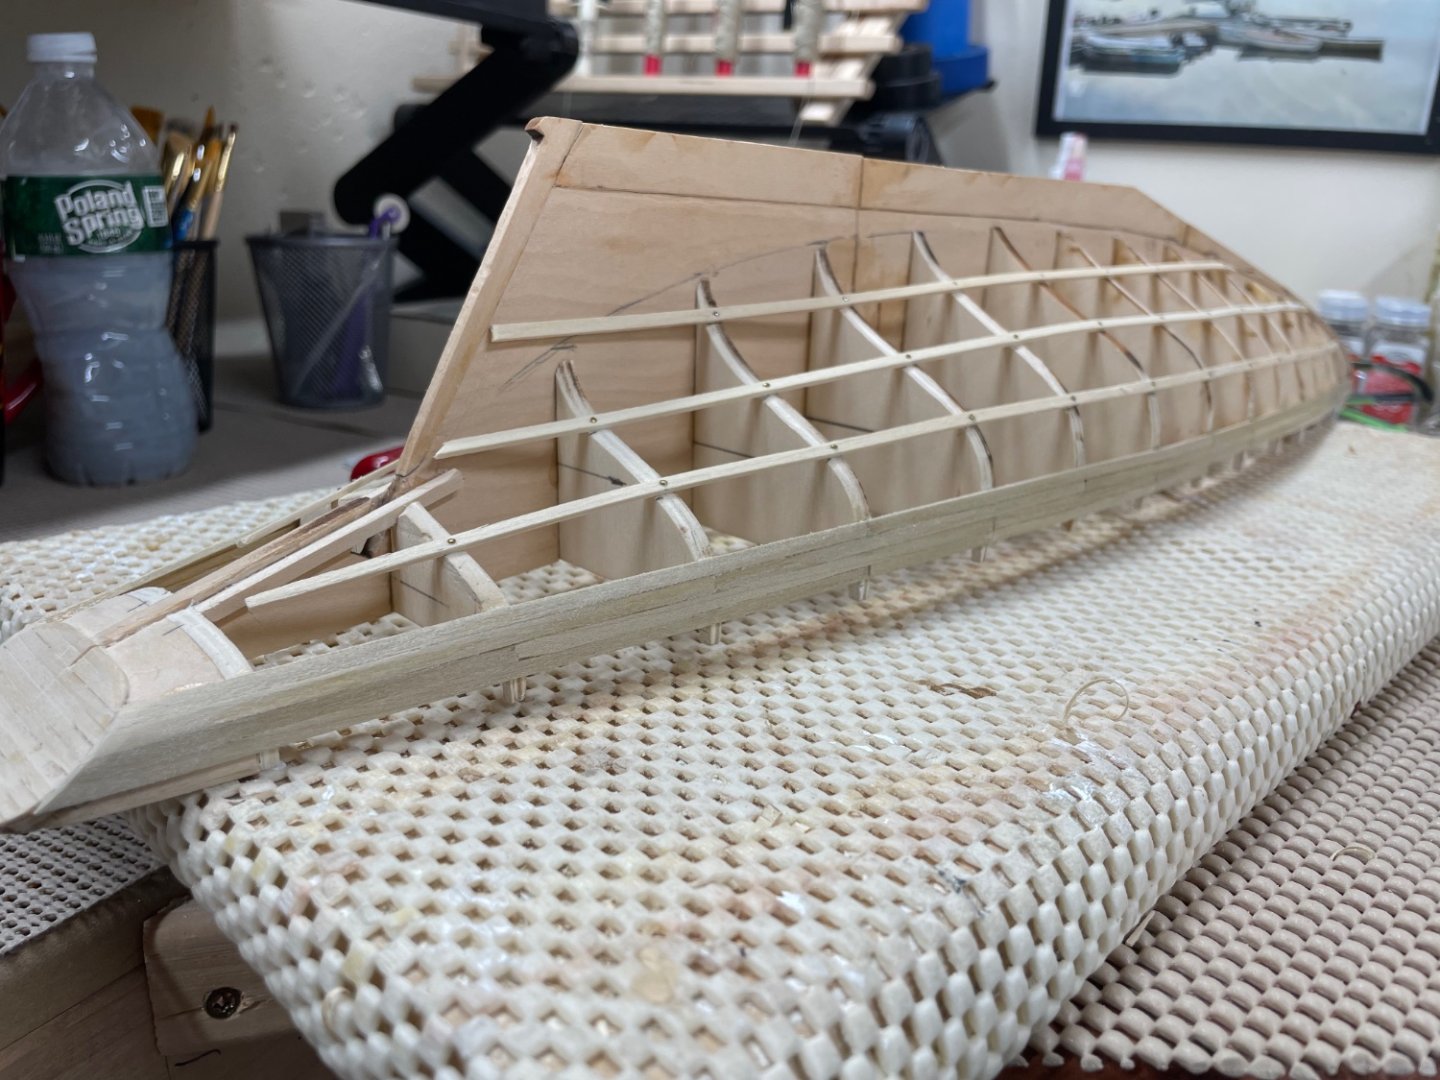
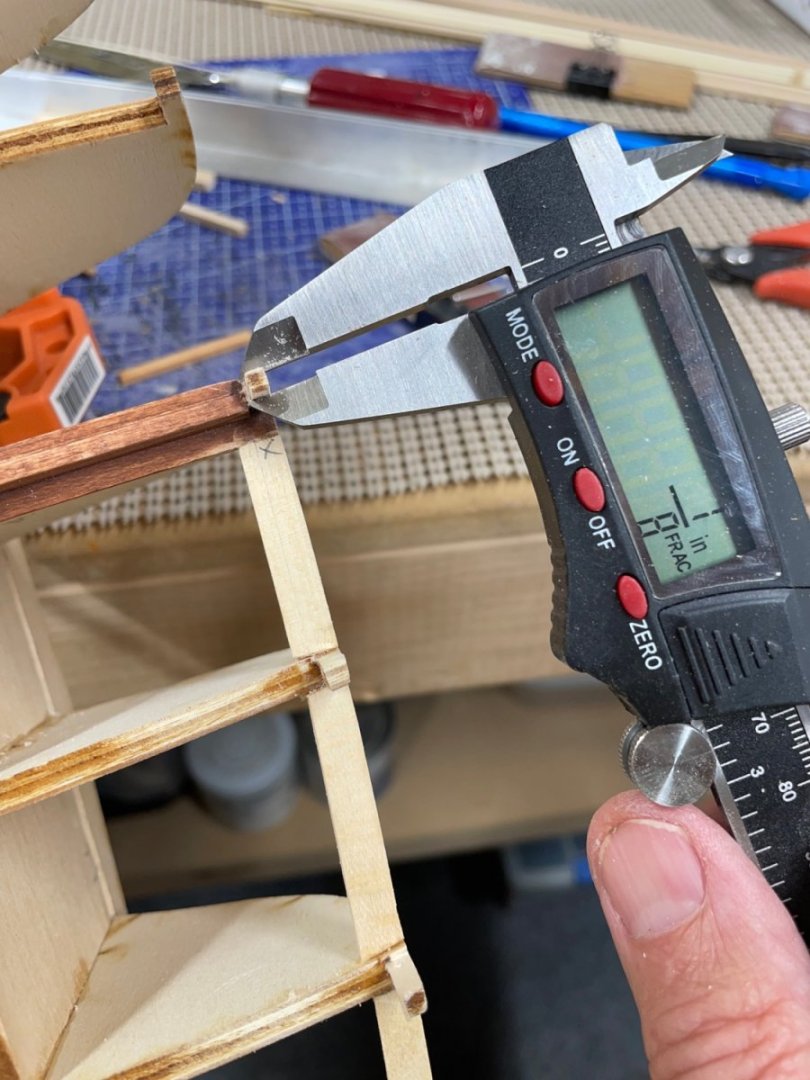
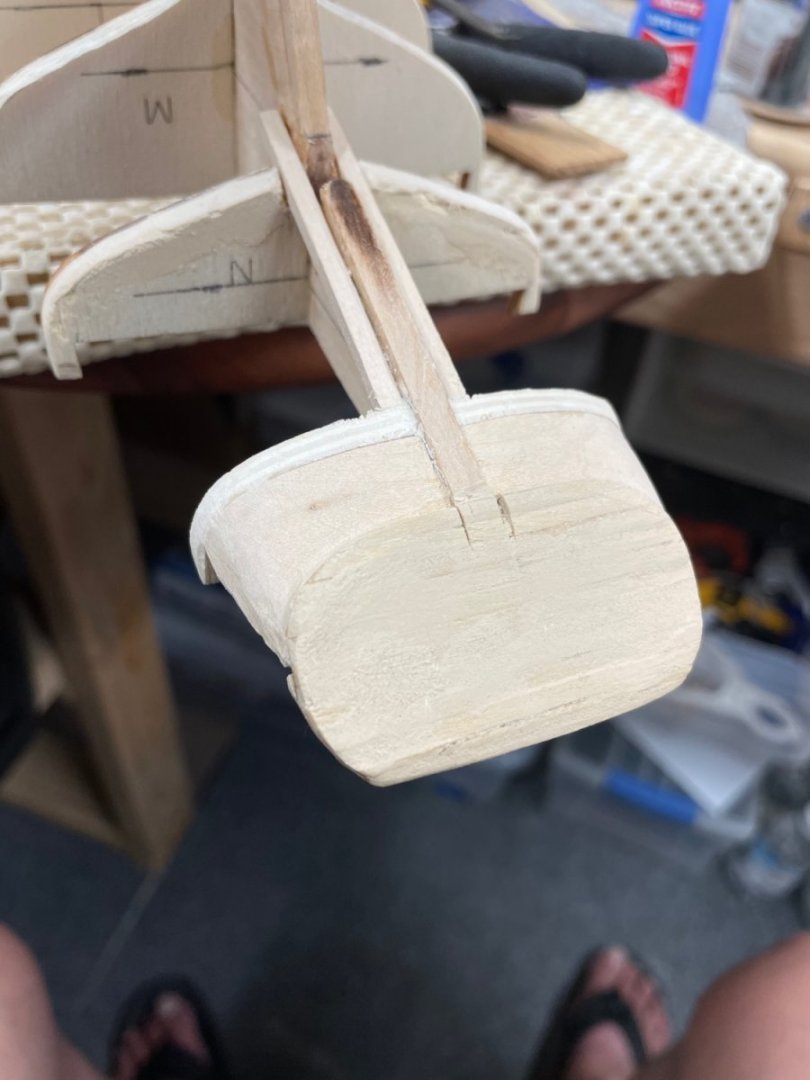
Great Beam… Three laser cut pieces fit together like a puzzle. 😆 GreatBeam completed, now working on shaping the bulkheads extensions into stanchions. stanchions completed, on to fairing out the bulkheads. Installing my first waterways. Need some filling to fair out the planking. Finishing waterways… Finished waterways and added mobbing planks. Fore Deck waterways completed. Now it’s on to the Quarter Deck. Cheers 🍻


- 282 replies
-
- 6
-
-
- Bluenose
- Model Shipways
- (and 1 more)
-
If you take a look at my first page of this build log, you will find photos of the two drawings that came with the one page of instructions. The kit is estimated to be from 1972. Vintage kits like these never have much in the way of instruction beyond the blueprints. As for the blueprints, I like to keep them for display. Paying for copies of the blueprints and shipping to you may be an option, but I wouldn’t guarantee to quality due to the age of these prints. You might just copy the photos from my build, for your purposes. Unless you are planning to scratch build, I wouldn’t suggest buying the plans. Most of my additional detail, particularly the engine room, came from researching the Robert E Lee. As was suggested to me by @Cathead, I would suggest getting a copy of The Western Rivers Engineroom Cyclopœdium by Alan Bates. It's rare but you can find it used in places, or you could always put in an interlibrary loan request. Its out of print but I found it being copied at the Howard Steamboat Museum in Jeffersonville, IN. His companion volume The Western Rivers Steamboat Cyclopoedium would also be an excellent resource, and has some basic information on engine design and layout. Take care John
- 238 replies
-
- 2
-
-
- Robert E Lee
- steamboat
- (and 3 more)
-
thanks… I started with a Plastic model of the Cutty Sark. The first time I opened a wood model, it scared the heck out of me. I resold it on eBay. 😂 Start with a small schooner, you might like it. Warning ⛔️ Wood Ship Modeling is addictive. LOL 😆
- 238 replies
-
- 4
-
-
- Robert E Lee
- steamboat
- (and 3 more)
-
Stern Block and transom shaping… Horn Timbers installed… Installing additional struts between bulkheads… Cheers 🍻


- 282 replies
-
- 4
-
-
- Bluenose
- Model Shipways
- (and 1 more)