Check out our new MSW Sponsor Innocraftsman
×

ZyXuz
-
Posts
429 -
Joined
-
Last visited
Content Type
Profiles
Forums
Gallery
Events
Everything posted by ZyXuz
-
 the axles really look better in wood well done!
- 803 replies
-
- 2
-

-
- colonial cutter
- modellers shipyard
- (and 1 more)
-
nice and neat Mike I love everything inside the boat!
-
brilliant work on the painting! and I love the capstan
-
nice work on the rigging, Mobbsie I love the mouse especially
- 1,279 replies
-
- 1
-
-
- agamemnon
- caldercraft
- (and 1 more)
-
Hi Michael, Thanks for your compliment. It is called a peg clamp/Universal holder tool. I bought it from an ebay store, but currently ran out of stock. Anyway, here's another link on ebay: http://www.ebay.com/itm/PEG-CLAMP-UNIVERSAL-WORK-HOLDER-FOR-ENGRAVERS-JEWELERS-JEWELRY-ENGRAVING-TOOL-/151140919490?pt=LH_DefaultDomain_0&hash=item2330b368c2 The one I bought is a Rolson brand, and the handle is removable.. not sure about this one Or you can buy from CMB too, an Amati's brand.. but much expensive http://www.cornwallmodelboats.co.uk/acatalog/amati_7387.html Search around for the cheapest price!
-
Well done Richard! I love the clean cut on the those ports Best wishes on your 2nd planking
- 55 replies
-
- 1
-
-
- mercury
- victory models
- (and 1 more)
-
Thanks Mark and Jeff for your kind words. Anyway, I think I really need to learn to prevent making too much CA clouds.. they're really disturbing Any possible way to remove them?
-
she looks just fantastic! Great job!
-
clean and neat, Pete! Well done
- 209 replies
-
- 1
-
-
- muscongus bay lobster smack
- midwest products
- (and 1 more)
-
Ladder Stanchion Making Some fast updates recently, and hope they are not too rash. I've finally put my ladder's stanchions on, and it's the first rigging done for this build. I first drilled holes at the 4 corners, and put the stanchions on which I already blacken. My plan was to add two platforms for the stanchions at the end of the ladder, so that when the rigging is done I'll just need to put the whole completed piece to the deck. But when I done the platform, it didn't look good. The platforms seem like an extra piece of wood below the stanchions. So, I changed my mind to directly stick them on to the orlop. The challenge of this is I'll need to drill through the little ladder hole, and glue the stanchion on, and make sure it's in the correct direction. After sometimes of squeezing and twisting, I finally managed to fit the first one on. And of course, the knot is already done before I put it in. Here comes the challenging part... I'll need to put the last stanchion to the orlop with the ladder blocking, and the stopper knot tied. What I did is, I put the stanchion with thread to the orlop first, got a desired tension, and made a mark at the end of the stanchion. There will be the point where the stopper knot located. Marking the end point with the ladder on is even tougher.. got it after few minutes. So, I took the stanchion out again and made that stopper knot, cut the end and glue it on the orlop. The last stanchion as seen from top. Group photo with the gratings. In this photo, I've already adjusted the tension of the thread to tighter above the deck, and those going into the orlop, looser. Thanks for viewing!
-
Thanks Jeff and Ian for your kind words.
-
nice planking on the stem, Sam
-
Well done, Glennard. Glad to hear that your HMS Victory arrived your house door. Hope to see you start a build log soon
-
Very nice work on the ratlines, Jim
-
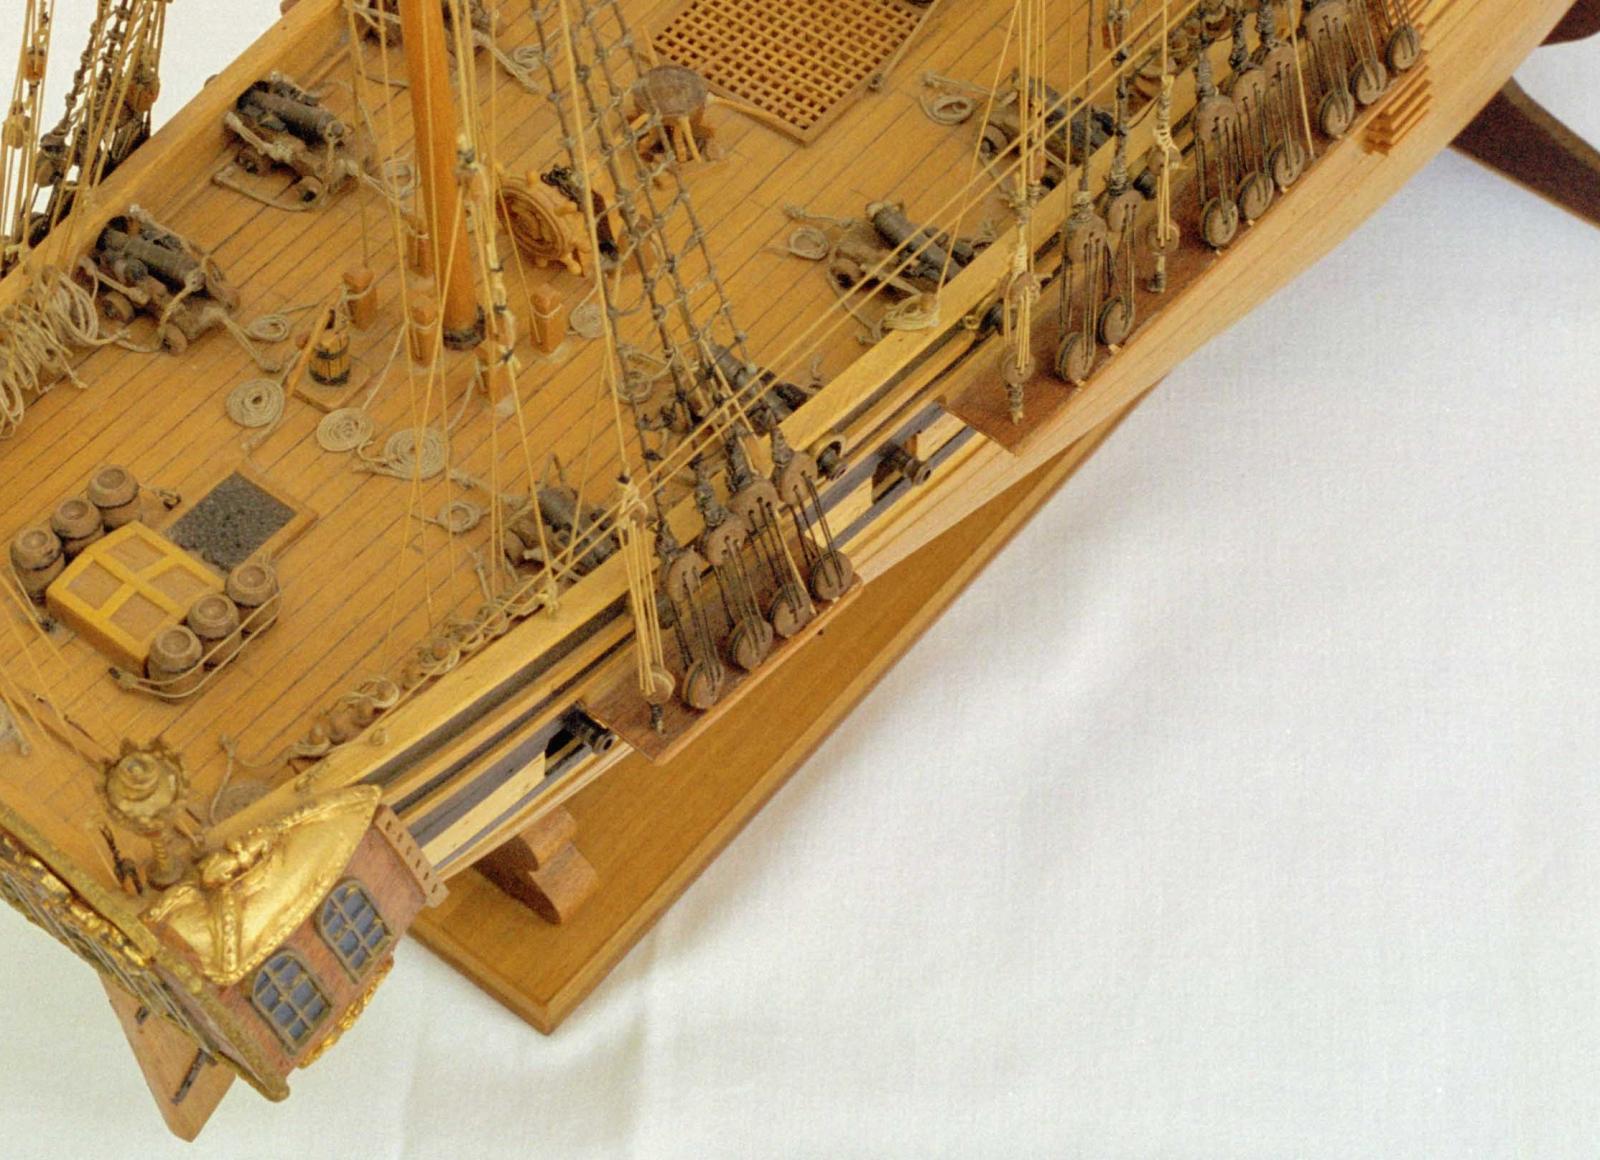
Bulwark Planking & Gratings Here's some recent updates on my ship, much relaxing and quicker comparing to the stern modification last time. If referring to the HMS Unicorn (1824), the bulwark is painted to ocher green. But, since I don't have any green paint currently, I decided to paint them to red. I did some sanding and tapering on the lowest plank to meet the deck's level, and pre-cut those wood strips between gun ports. After the planking is done, I repainted them for a better finish. From the picture below, you can see that the beams are actually done too. Corel suggests to use the kit provided birch wood strip (4mm x 4mm), but instead, I used balsa. Birch strips are too nice for beam. Then I started to drill holes for the eye bolts. I used an unused piece of plywood for more precise distance marking from the gun port. Done! And you can also see that the remaining deck planking is done too. I continued to the gratings making on the same day. Gratings that provided by Corel is real bad in quality, so I purchased OcCre ones to replace them from CMB. For the surrounds, I used 2mm x 3mm wood strips. This is how my deck looks like now with gratings and ladder on. Also, treenails detail are added. I'm using the same technique as my Race Horse, which is chalked by using a mechanical pencil. Thanks for viewing.
-
very clean work, Sam the bits shd look perfect after sanding
-
Hi Tongaman,. Right click on the file/files you want, open with Microsoft Office Picture Manager. In the app, Edit pictures > Resize you can do batch resize too Hope this help
-
I can sure it will be fun! I first carving experience was during my 2ndary school. I 'stole' few chalks home, flatted them on the side and carved my surname on it in Chinese protruding. It looks terrible, but the whole process was fun!! And I shew it to my mom... she had no idea what I've carved :D The opening gun ports look fine for me Since everyone is making own version of Unicorn, I think it will be great if someone can make one historical accurate Unicorn Good luck on whatever you've decided
-
Hi Mike & Ian, Thanks for pointing that out. I did not notice the difference between Corel and Chapman's plan on the stern gallery on your previous sharing until you mentioned here. Carving the gallery in such detail is really not an easy job, I did not even give myself a try I really hope I can do it one day, but doing this without any experience seems too ambiguous for me. Anyway, I have included the Lion and Unicorn British Coat of Arm in my order from CMB. That's an Amati's product, check this out: Item 5349 (17mm) 5350 (27mm) http://www.cornwallmodelboats.co.uk/acatalog/amati_decoration.html They look much better than the Corel one, at least from the pictures I bought the 27mm because the other one is currently out of stock, and I'm not so sure whether the 27mm is the height or width of it.. hope it's the width, because 27mm in height will be too big for my ship. If everything works fine, and I might able to add rear chaser gun at my quarter deck For the decoration at both sides of the badge, I think they should be 'Trophy of Arms' like what we can see from HMS Victory stern decoration. Ya, the quarter deck gunport was what I noticed on your previous sharing on Chapman's plan. If you look closely to the Chapman's plan, you can see the dotted line which I think it represents the quarter deck level, and it's not going parallel with the gunports (higher at the rear side). That's why the gunports tend to open up proceeding to the bow direction. Corel plan is to align the gunports with the deck, going parallel. My plan was to follow Chapman's, but cutting the thick round brass gunports hold me back to Corel's suggestion. Regarding the height issue, I haven't thought of a clear idea. My draft one is to spare out some space (like 2 to 3mm) using the 'camber' structure of a ship deck - higher in the middle, lower at board sides. I have just done the beams for the deck yesterday, and will test them out over the weekends. I think Ian did move up the gunports level, and caused the round brass 'emerged' out from the rail. Anyway, it saves the cannons to point to a good angle If not, the cannons might perhaps point to a downward direction like this. If the camber structure can't help on saving the gunports level, then I might really need a clear plan on fixing this. Most probably by adding one more strip

-
wow.. these are some fast progress! and neat works well done!
-
Congratulation on your new kit and good luck on your build
-
Thanks Matt and Ollyweb That really motivates me Ollyweb, Thanks! Yea, I saw your stern modification on the gallery too! That's cool! And I actually 'stole' your idea on the rectangular windows