HOLIDAY DONATION DRIVE - SUPPORT MSW - DO YOUR PART TO KEEP THIS GREAT FORUM GOING! (Only 69 donations so far out of 49,000 members - Can we at least get 100? C'mon guys!)
×
Robert Taylor
-
Posts
208 -
Joined
-
Last visited
Content Type
Profiles
Forums
Gallery
Events
Everything posted by Robert Taylor
-
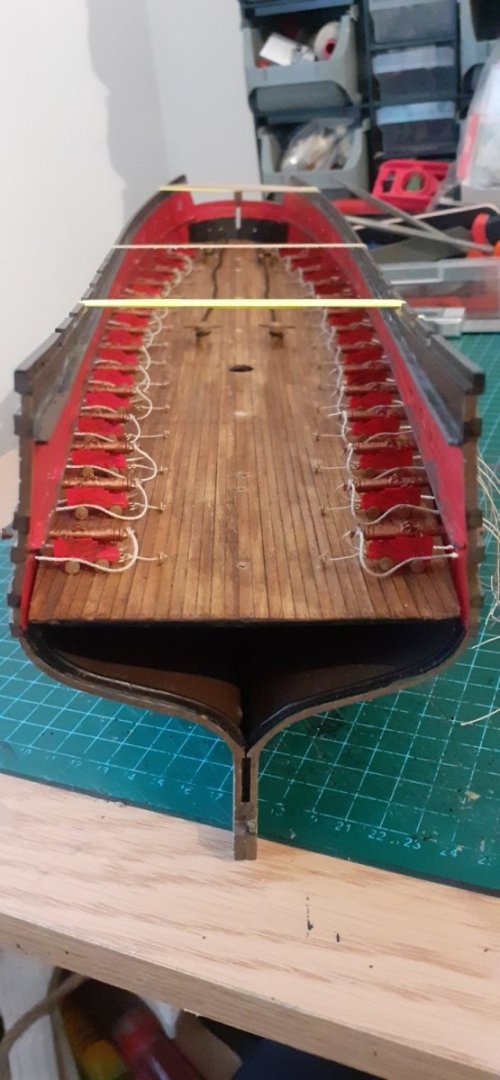
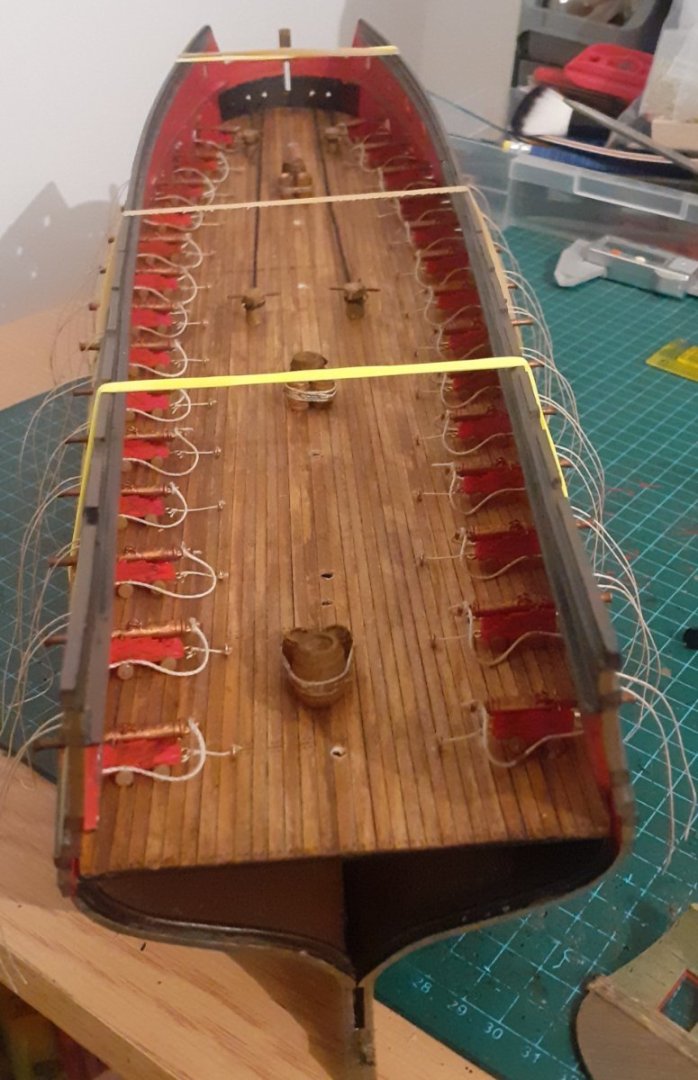
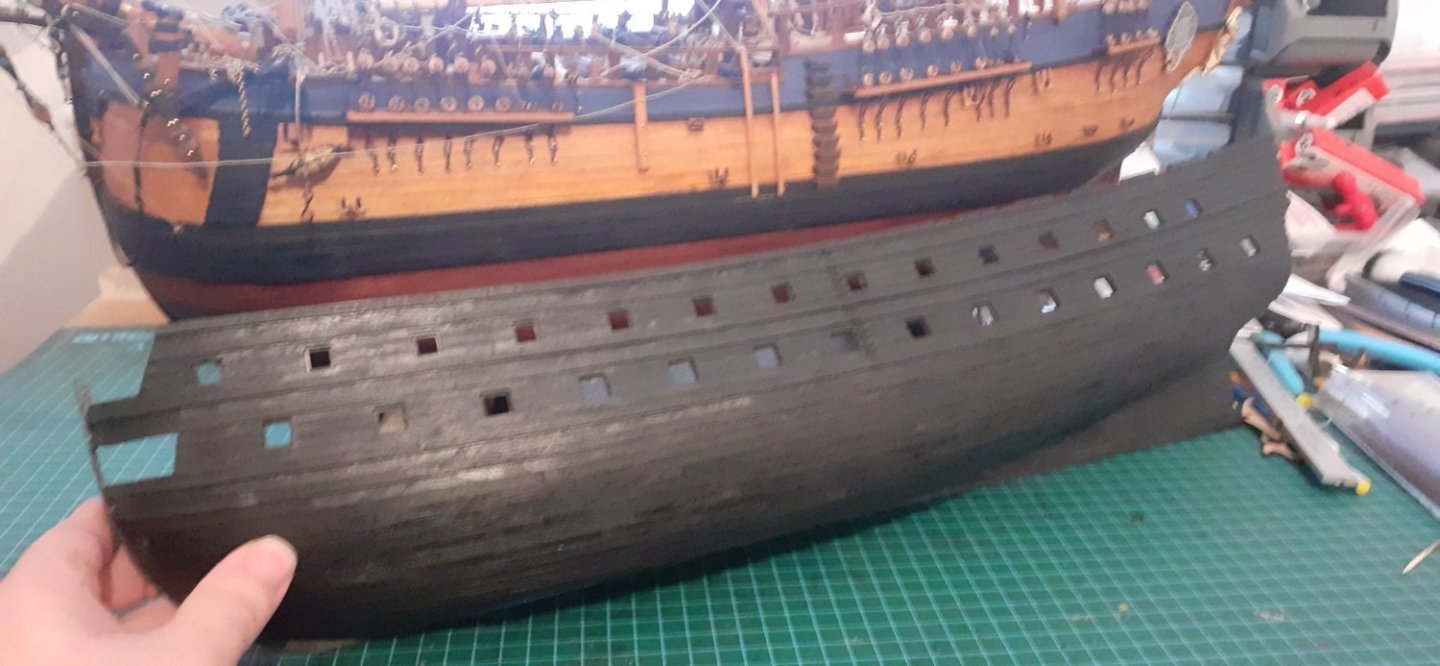
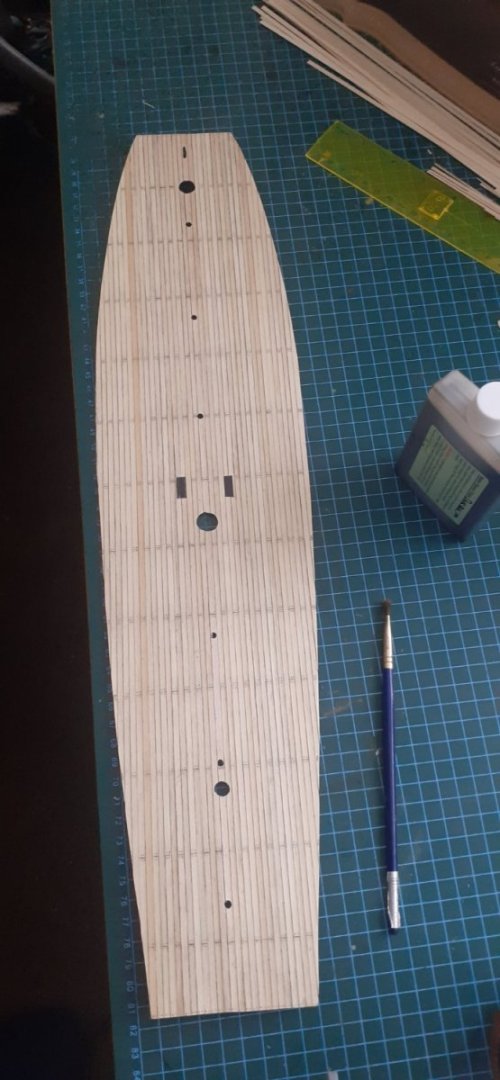
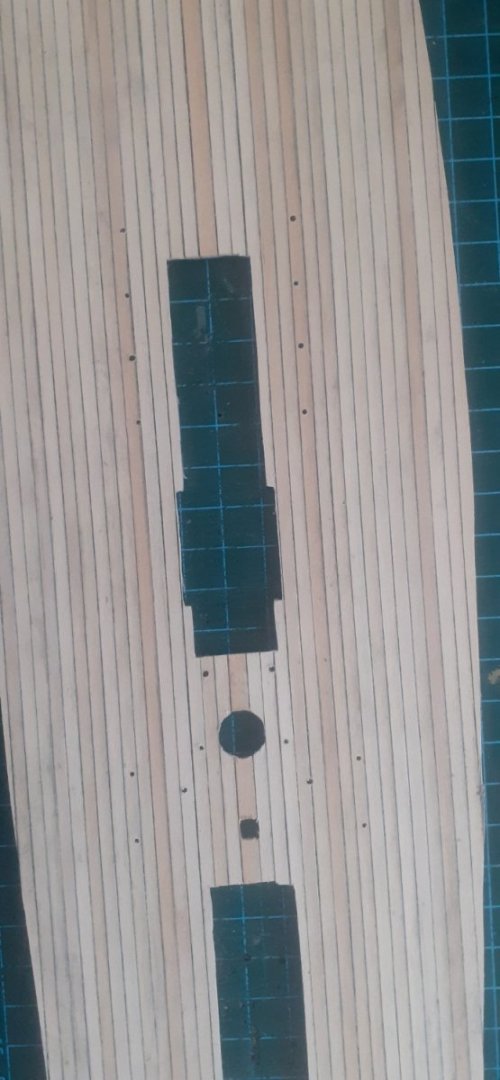
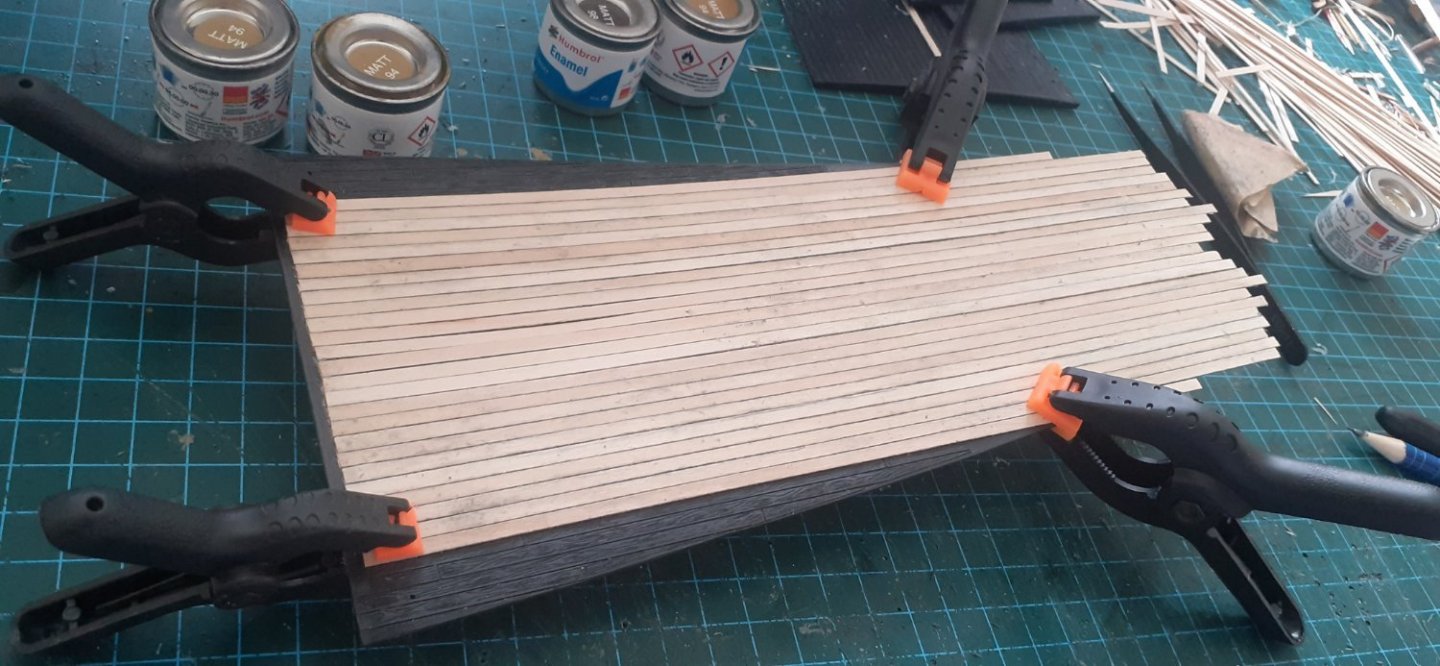
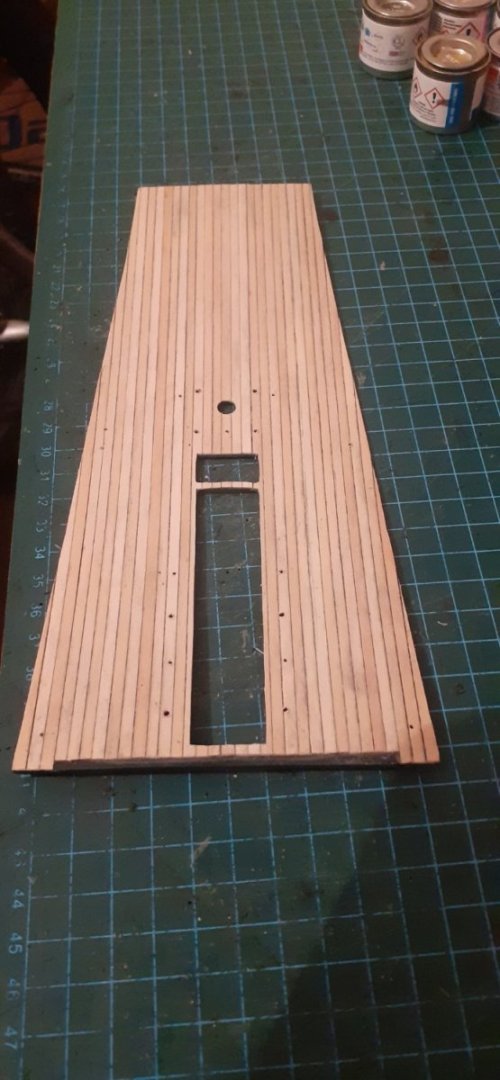
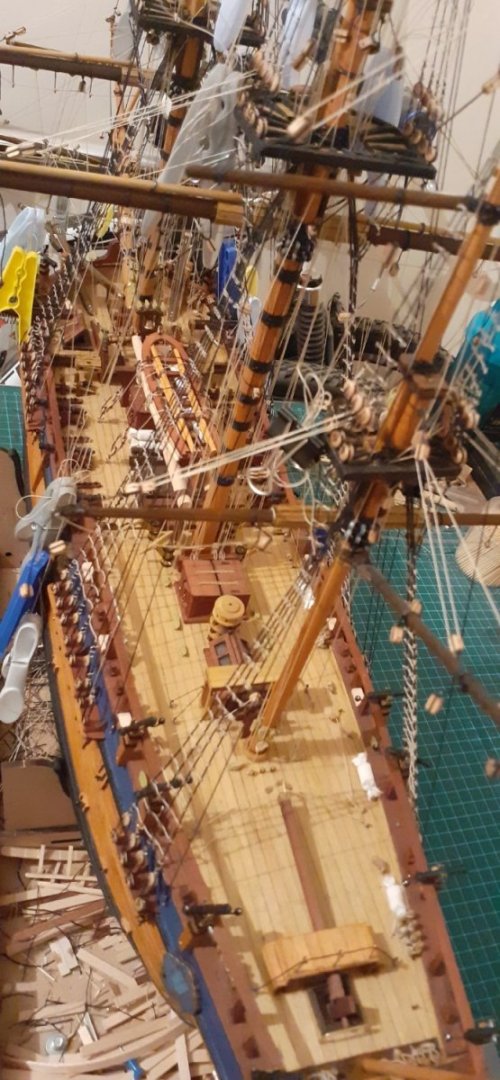
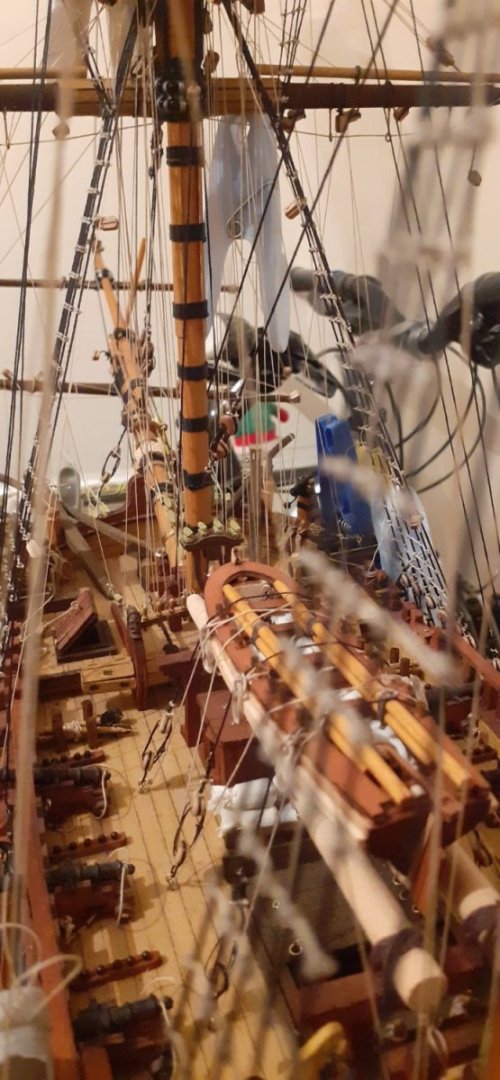
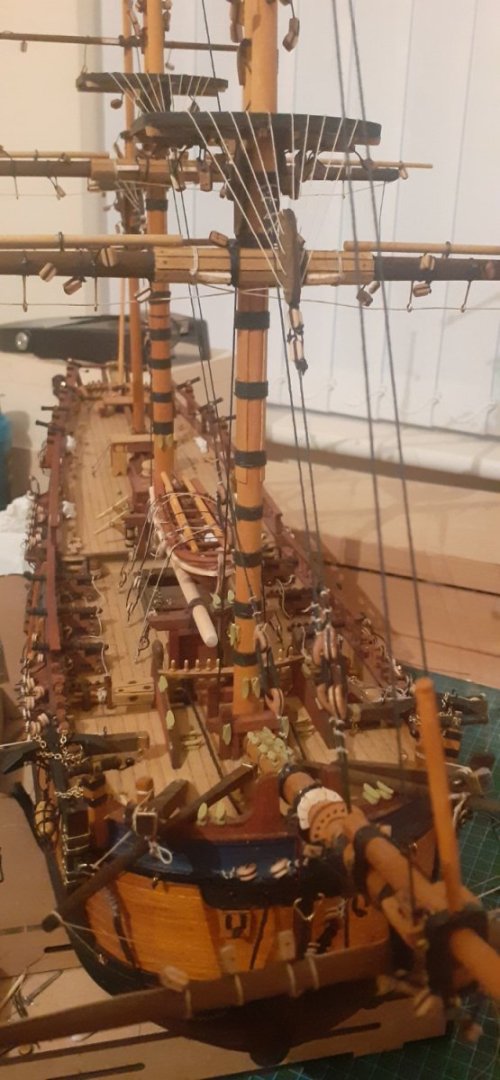
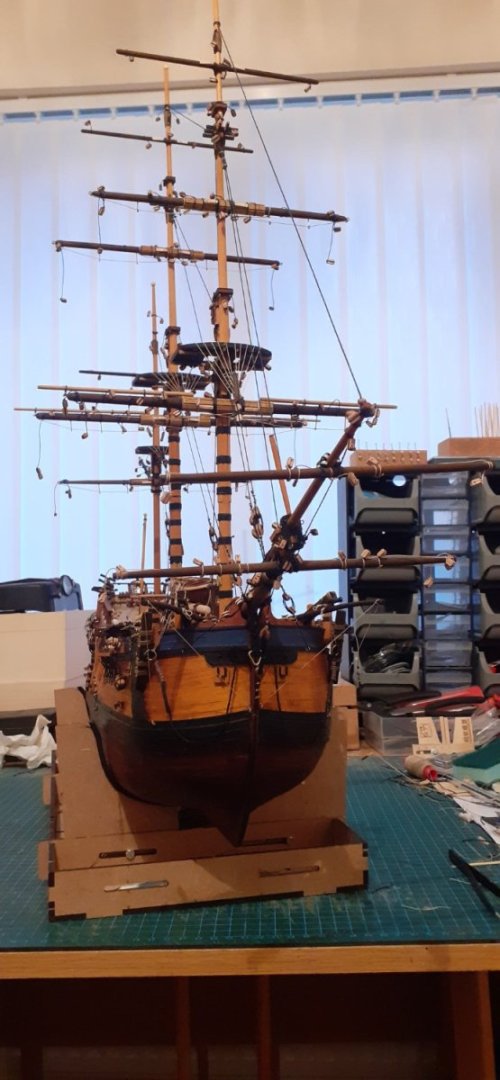
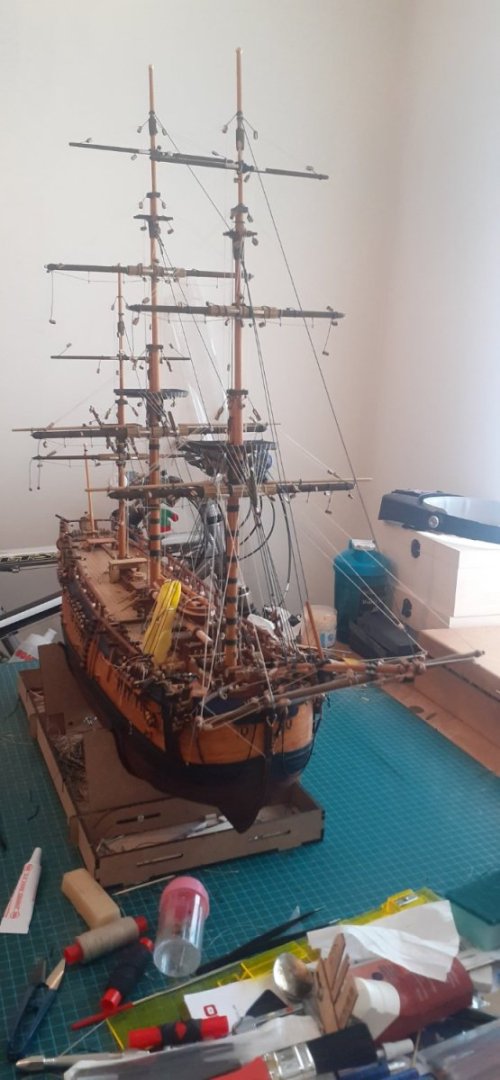
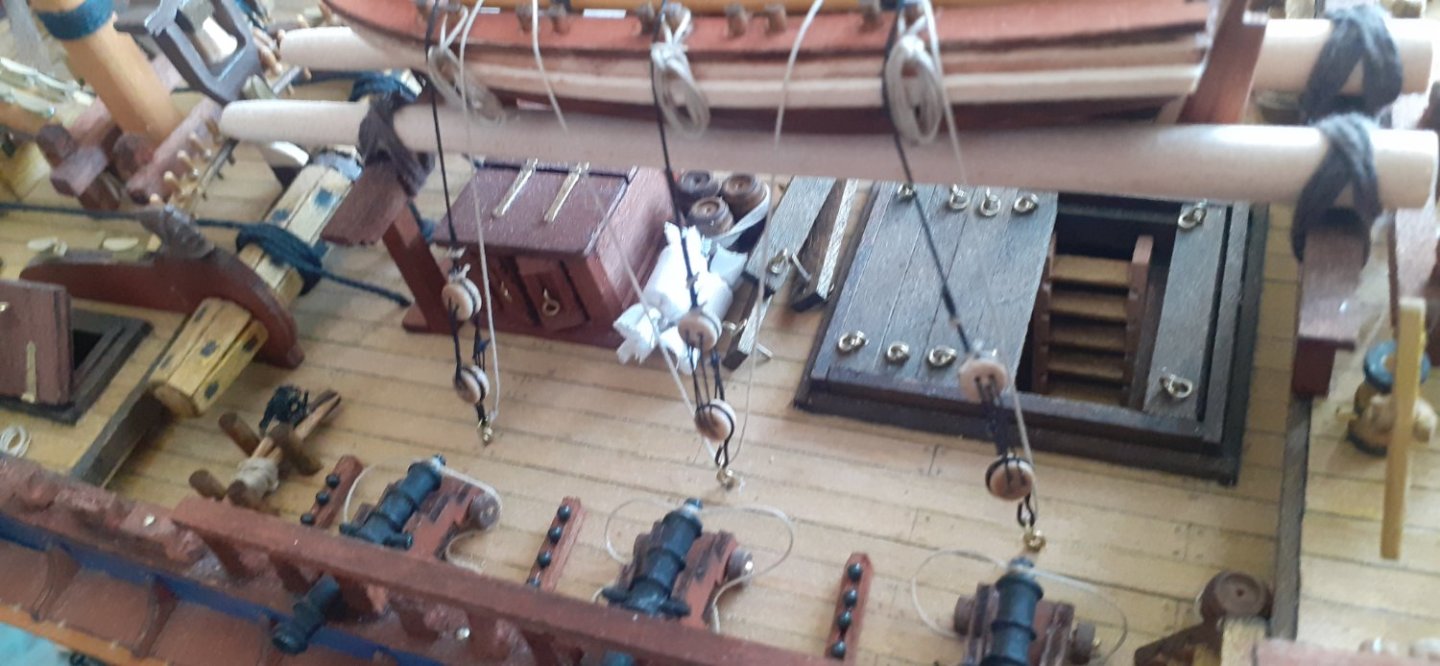
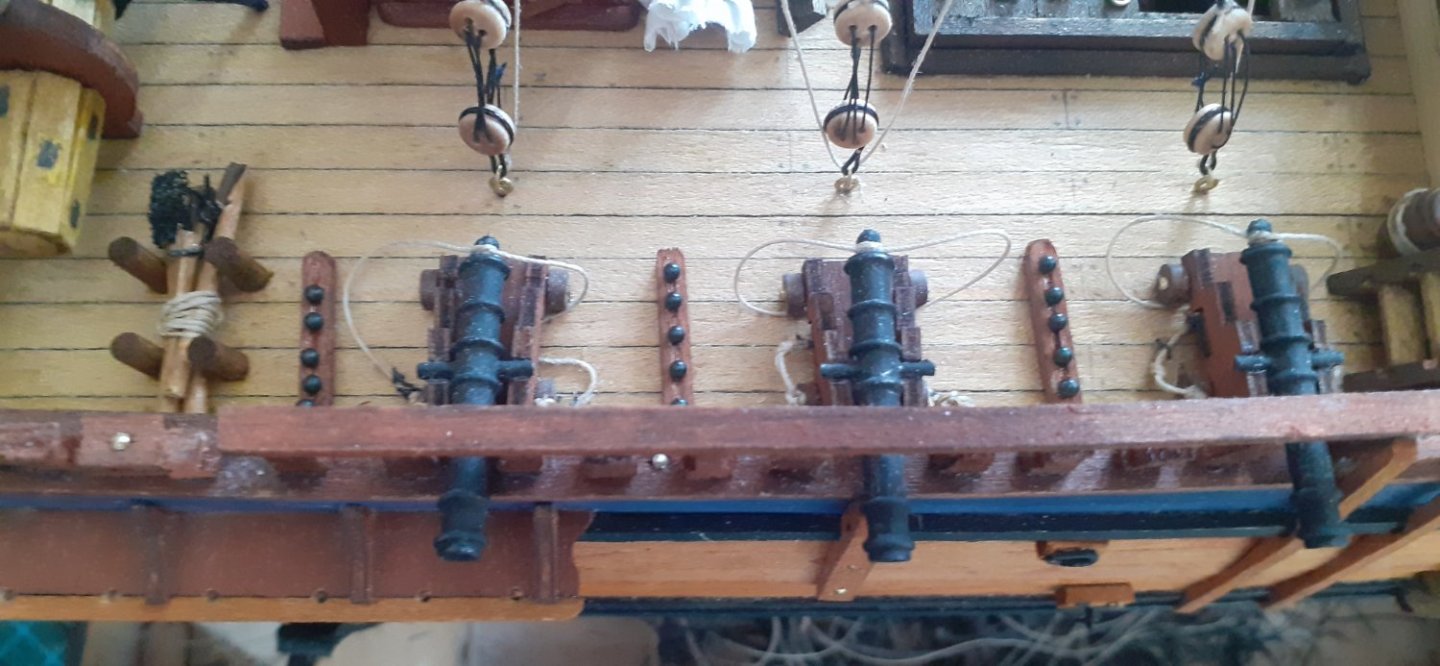
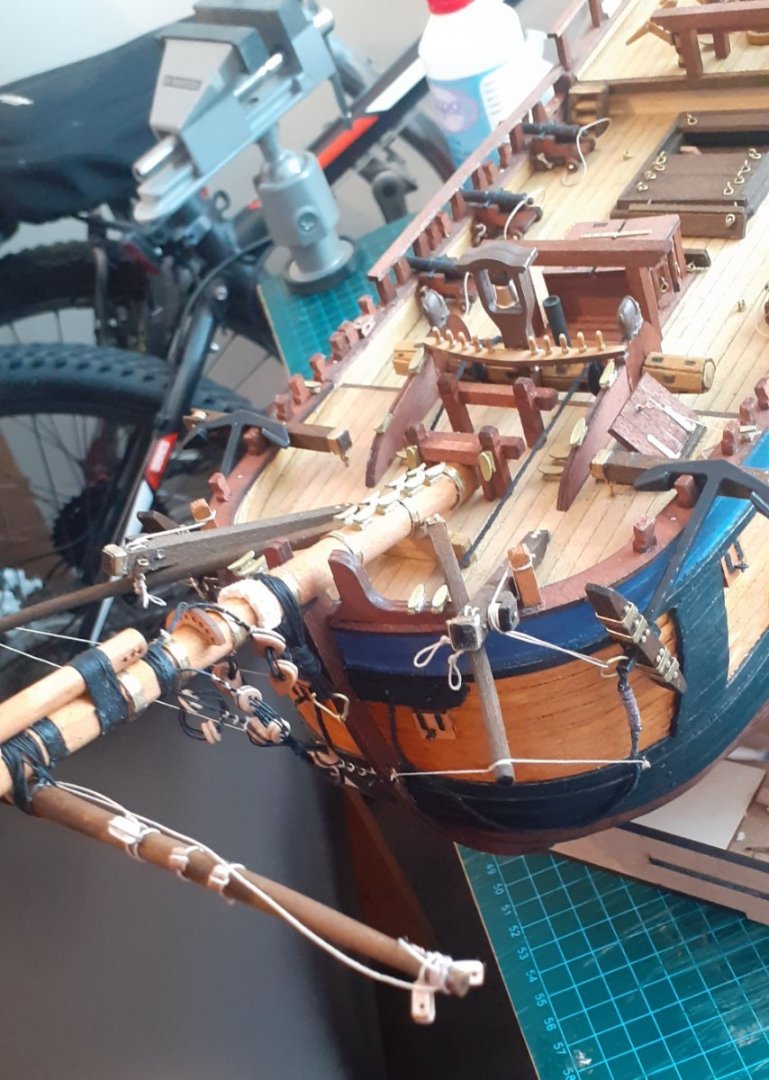
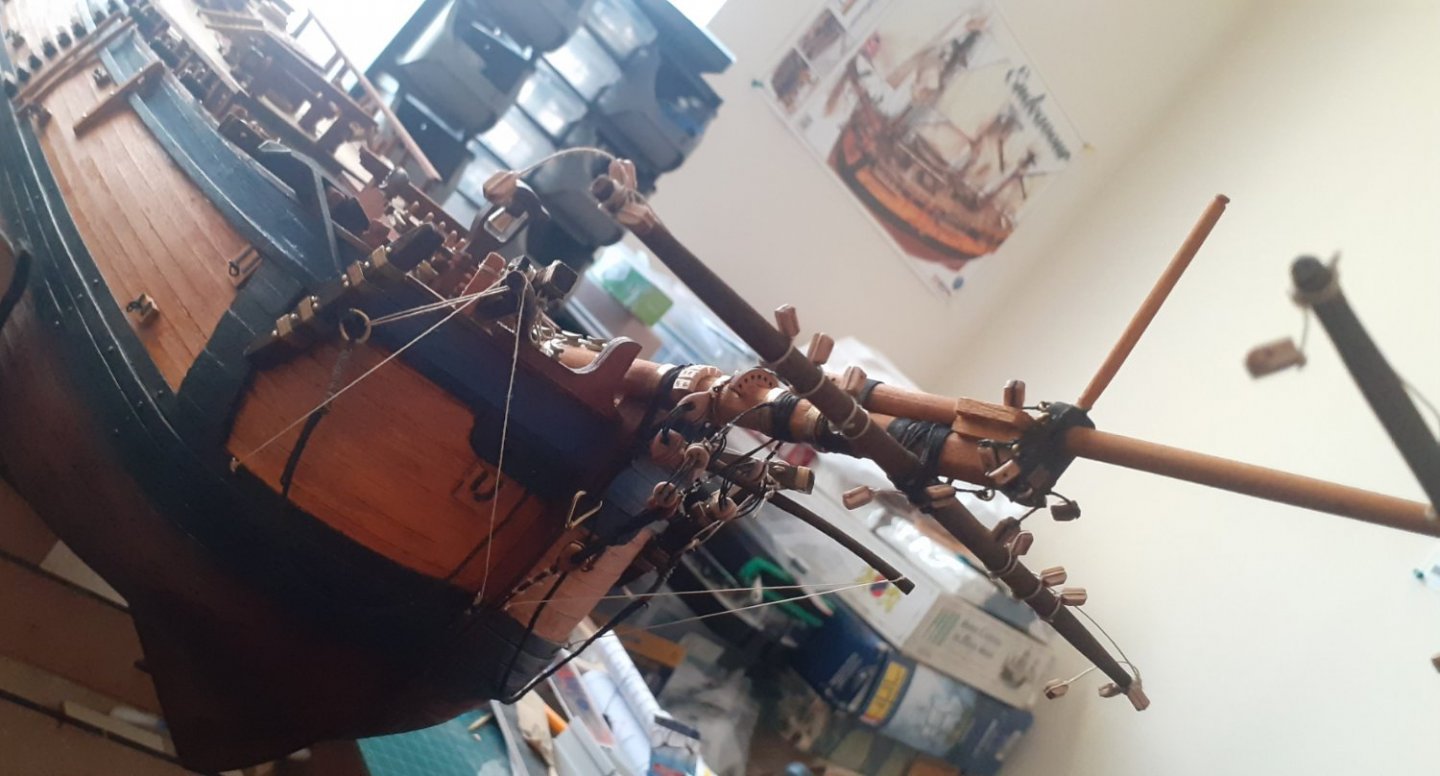
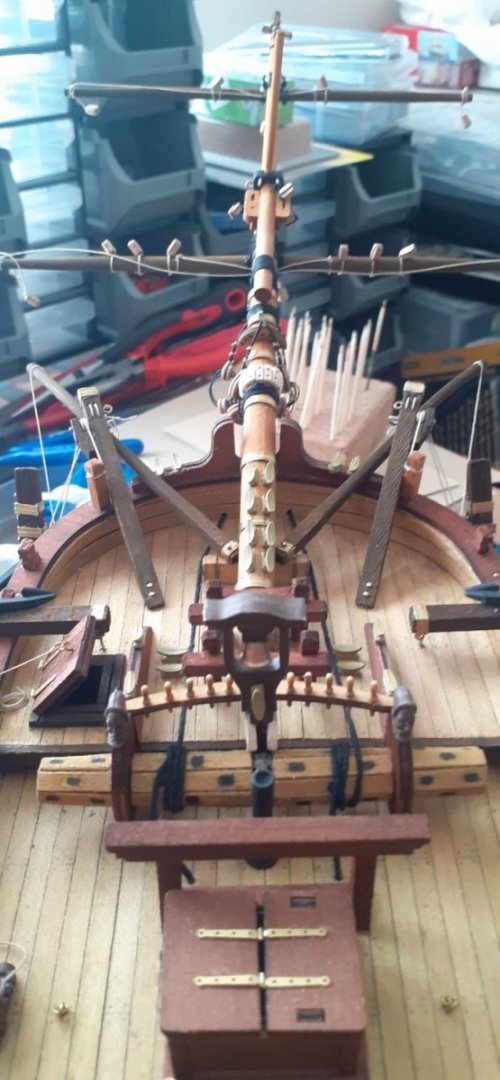
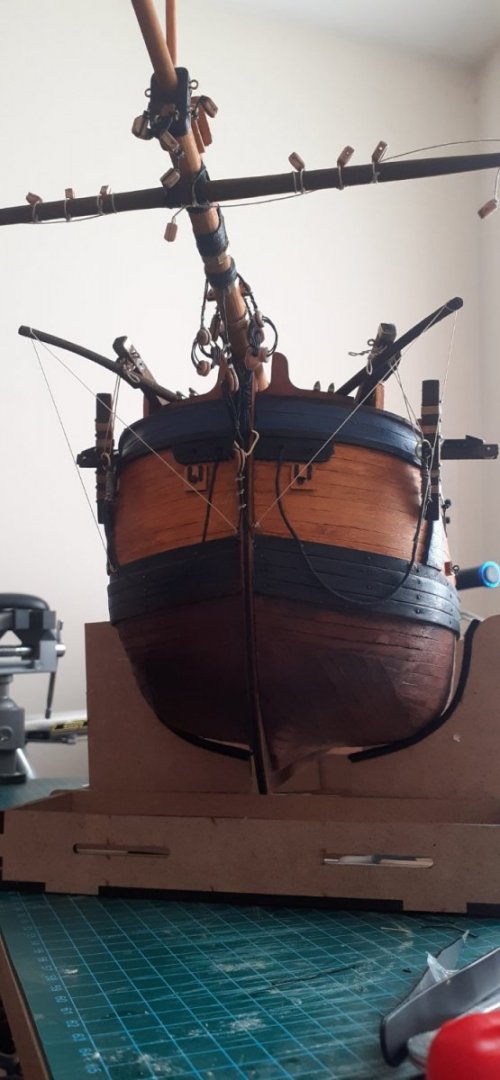
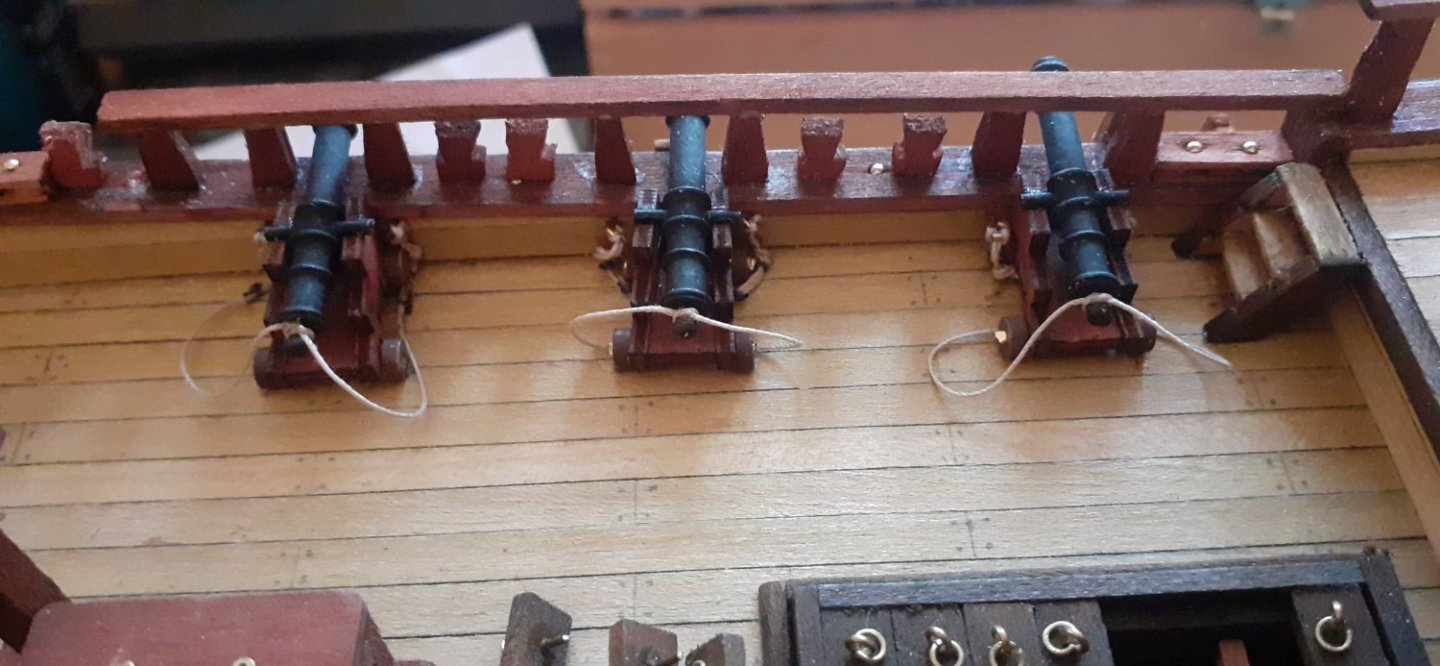
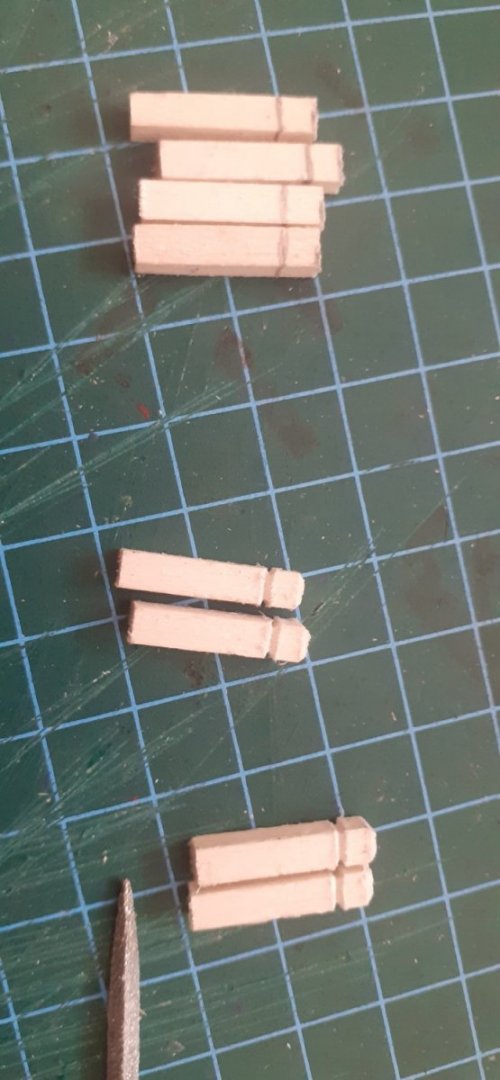
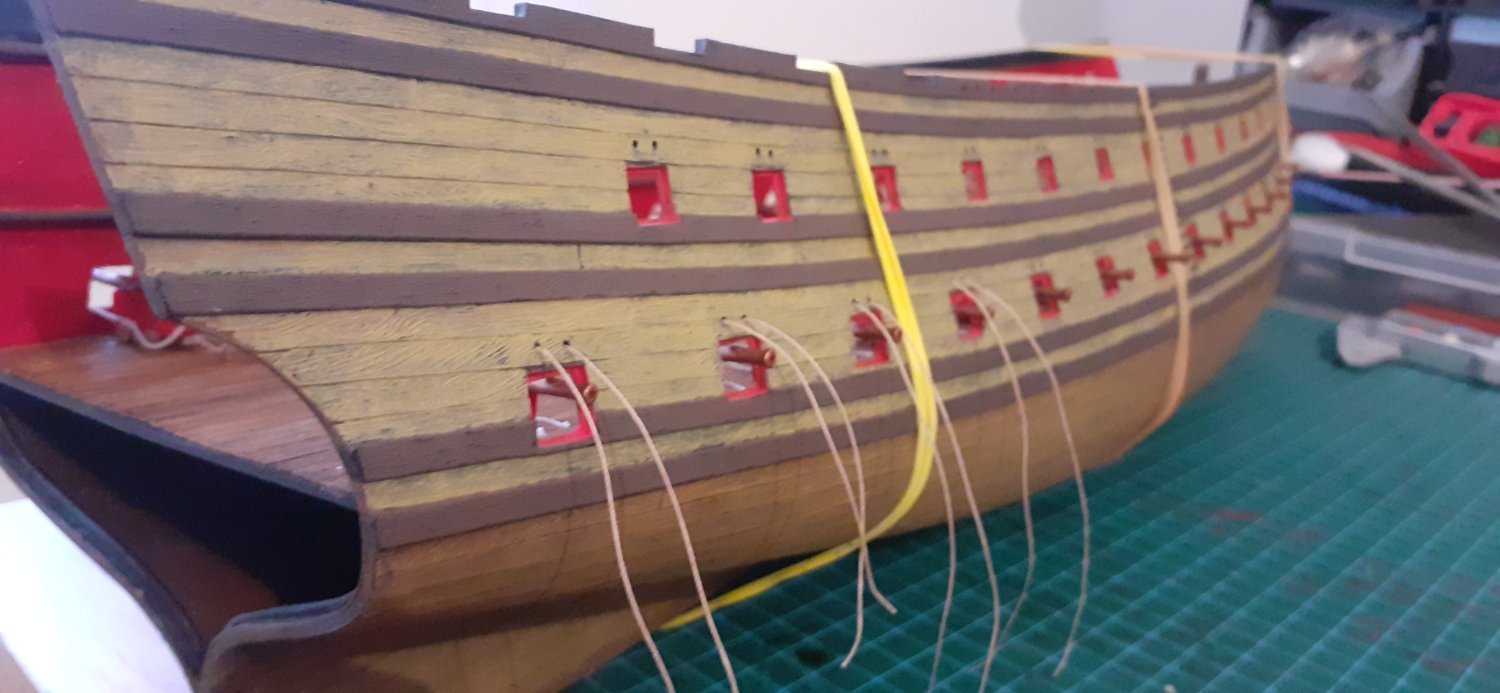
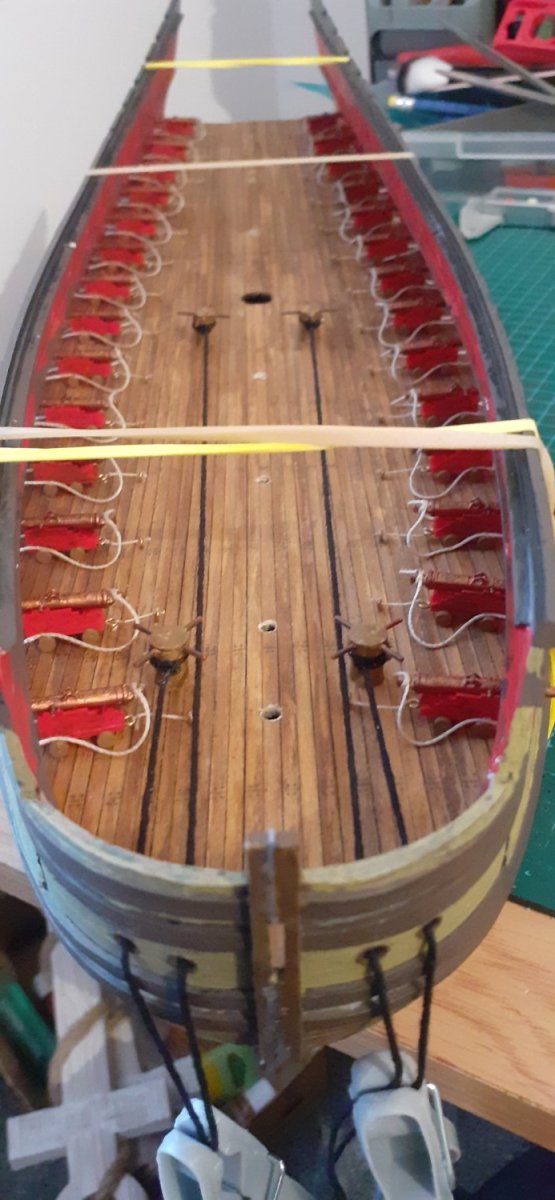
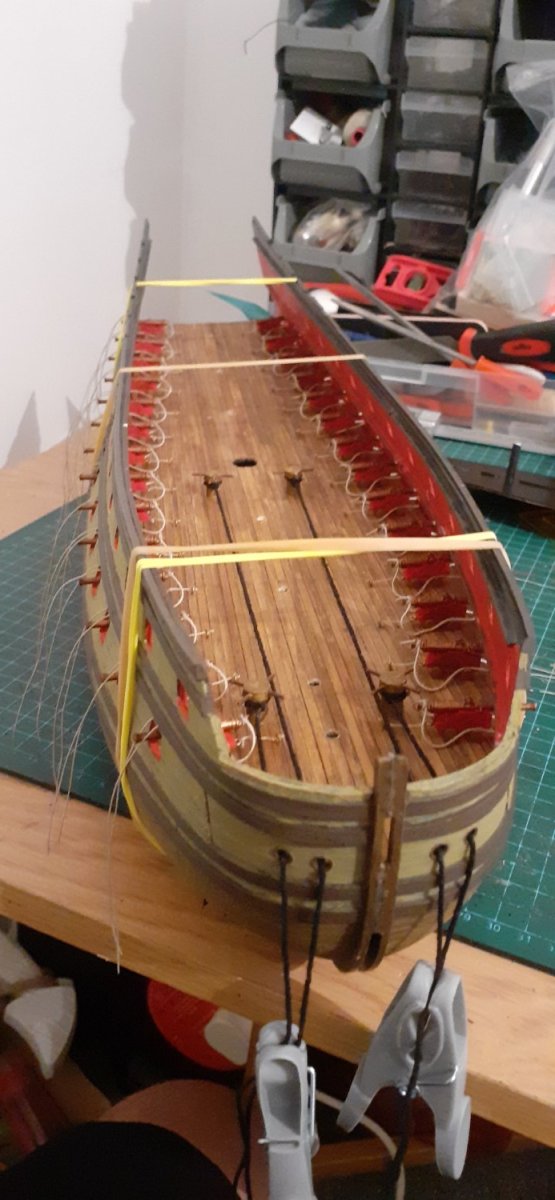
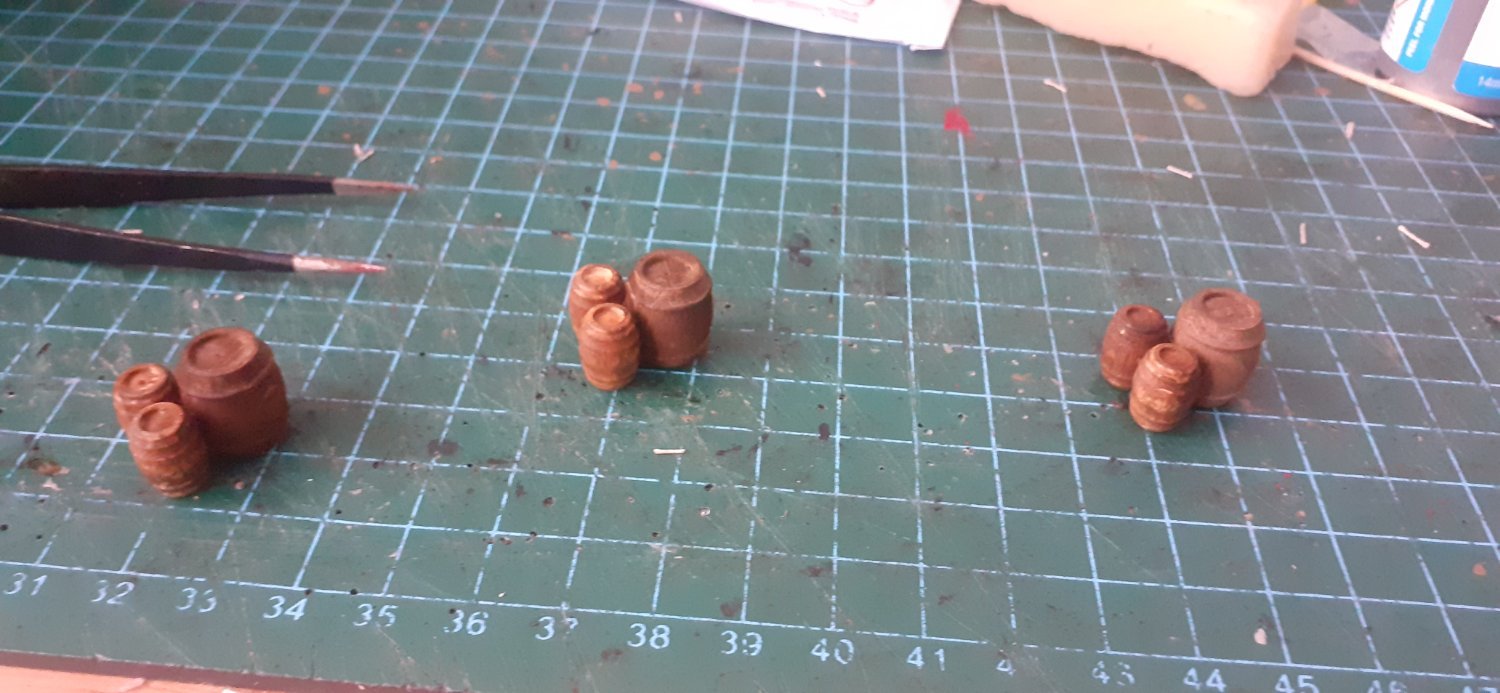
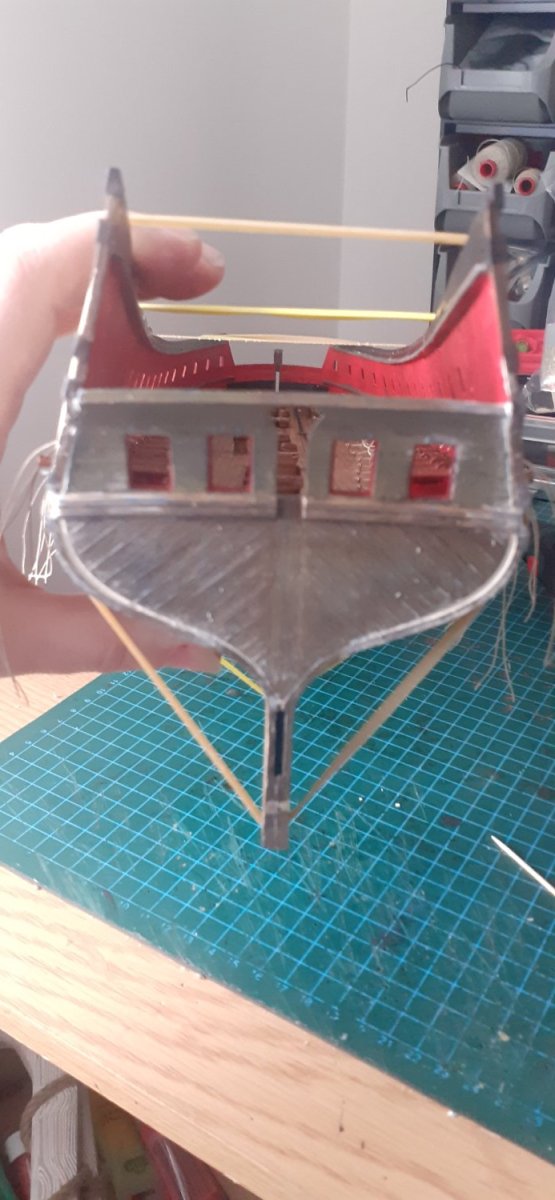
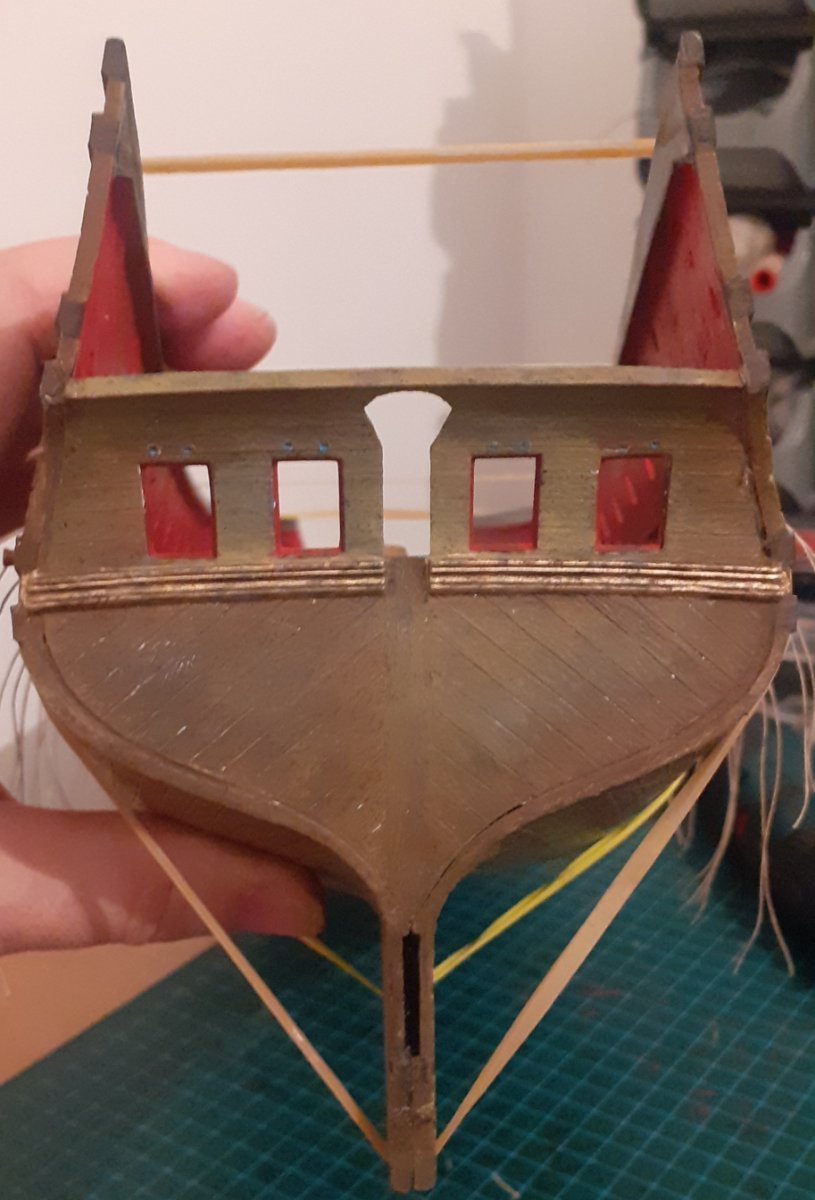
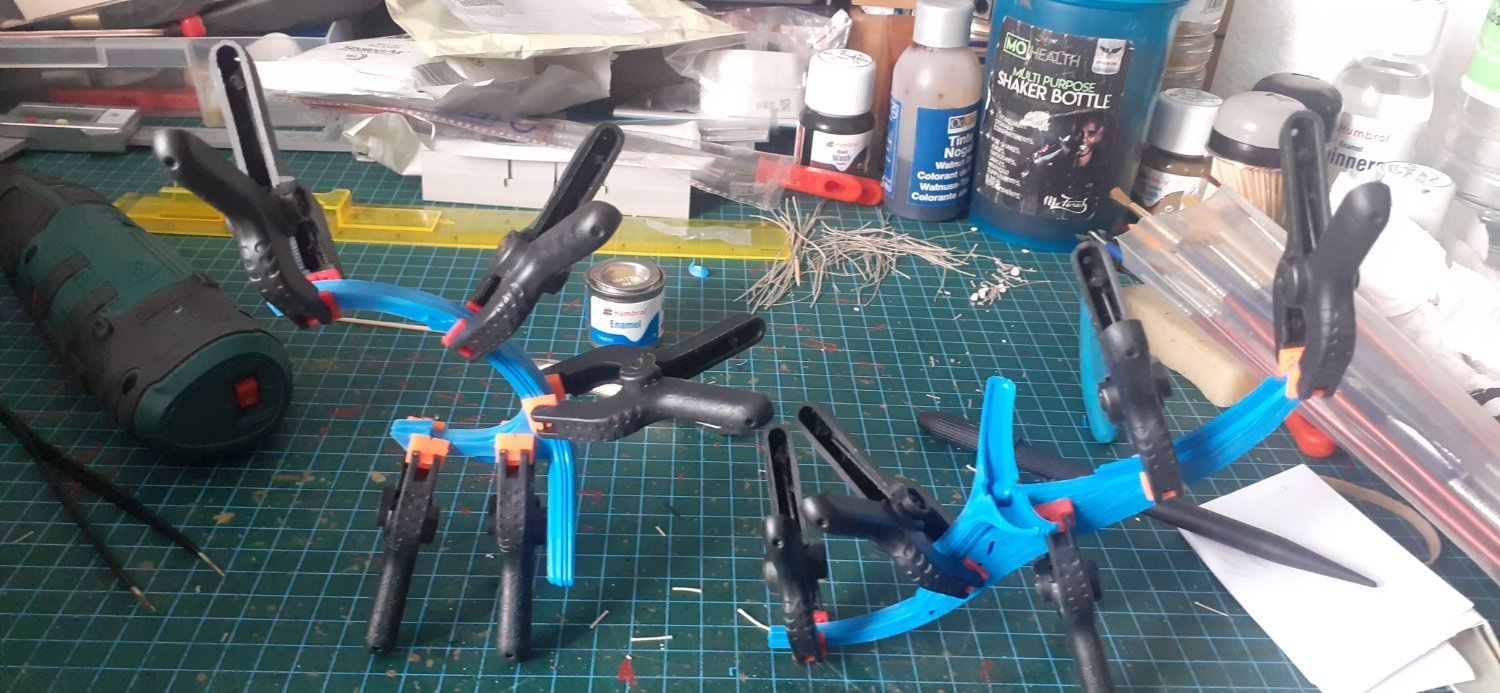
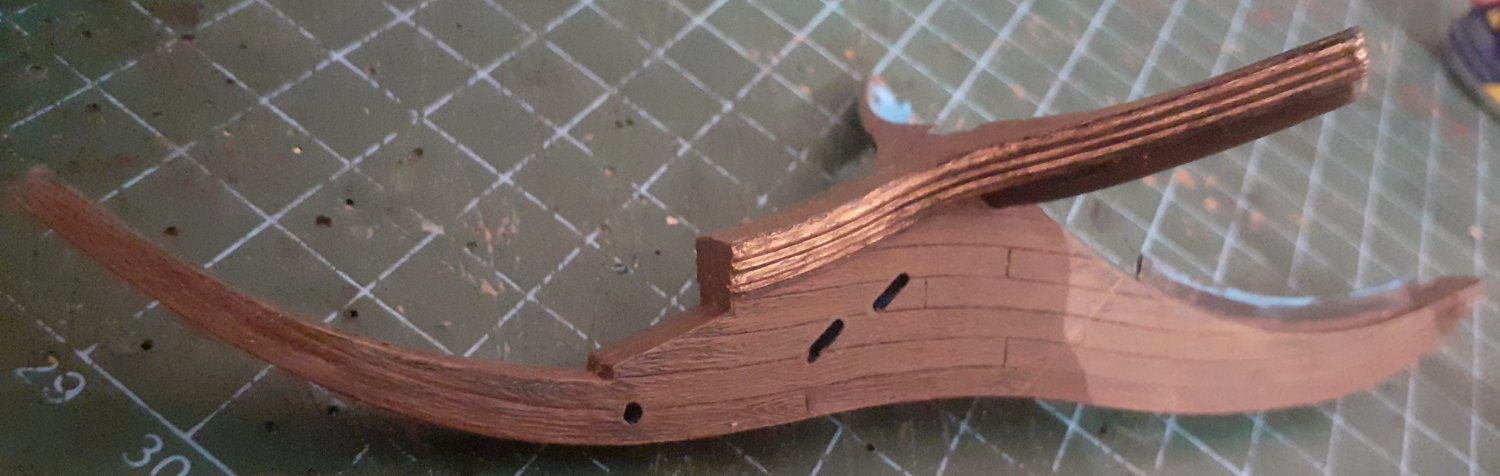
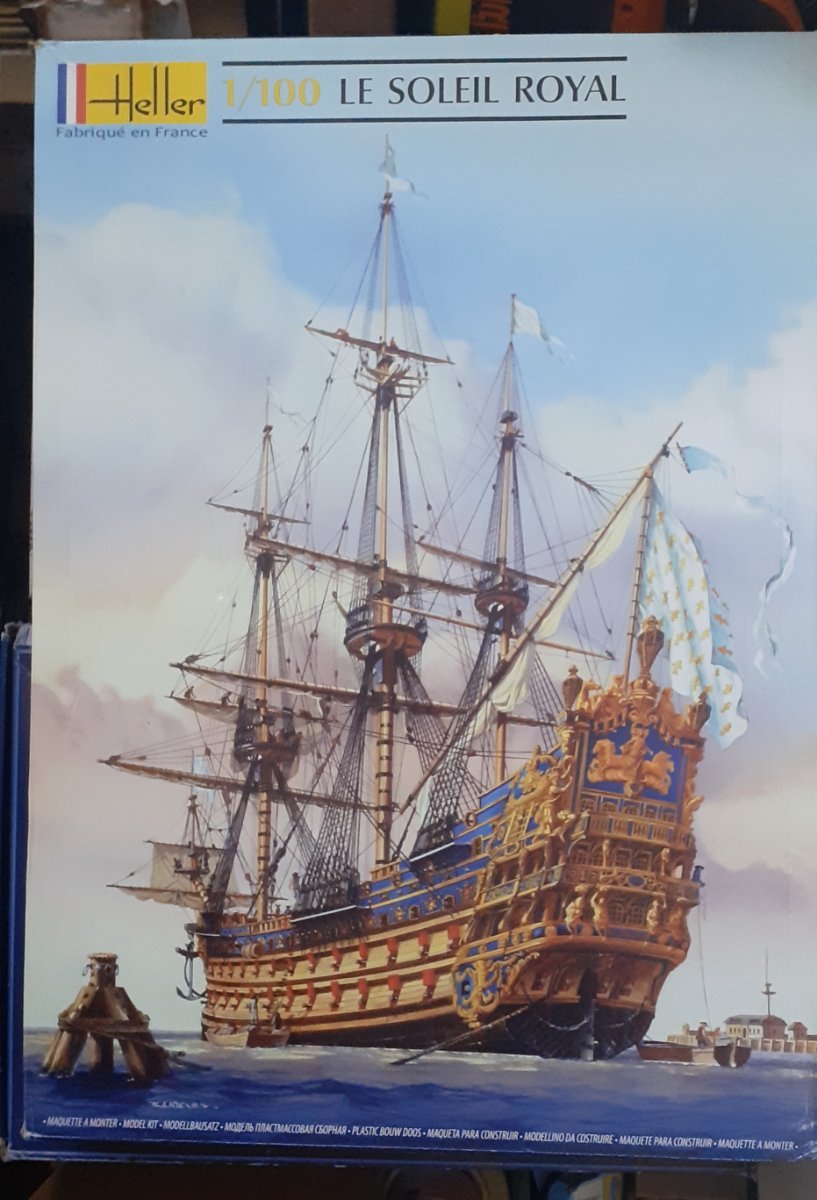
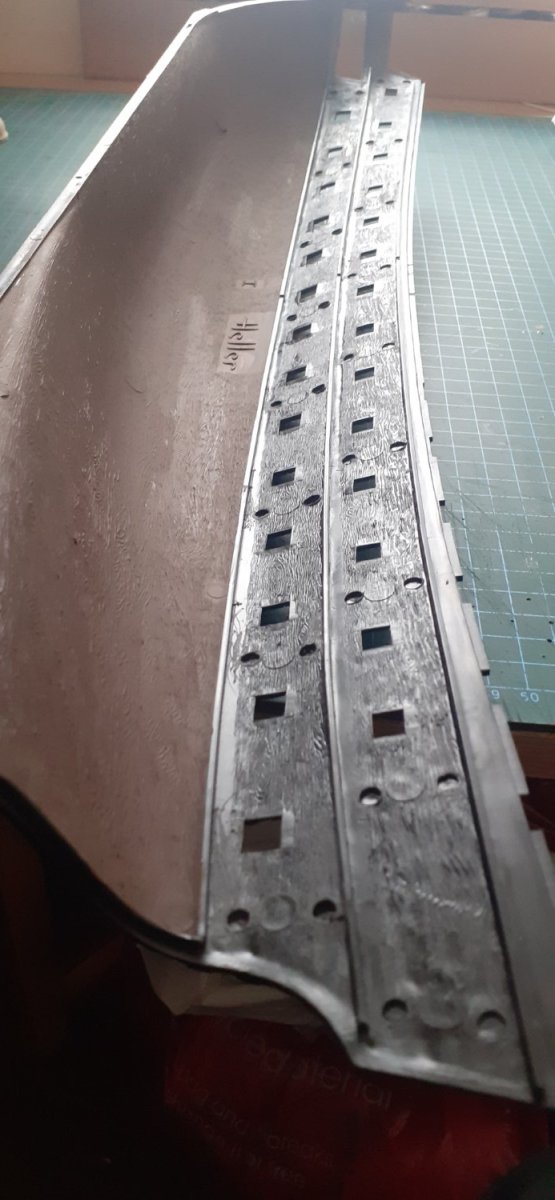
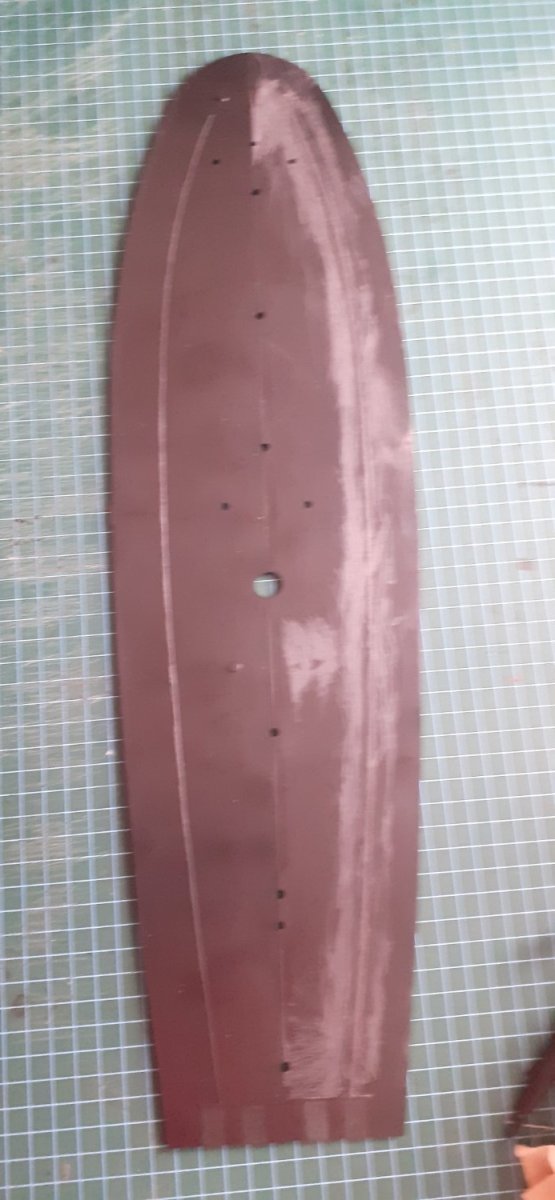
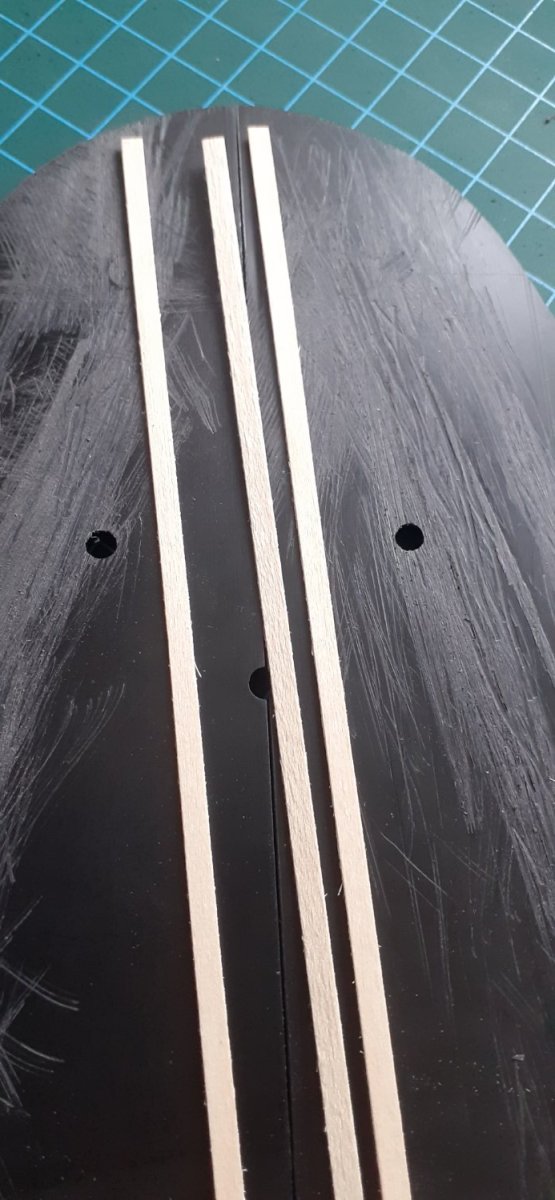
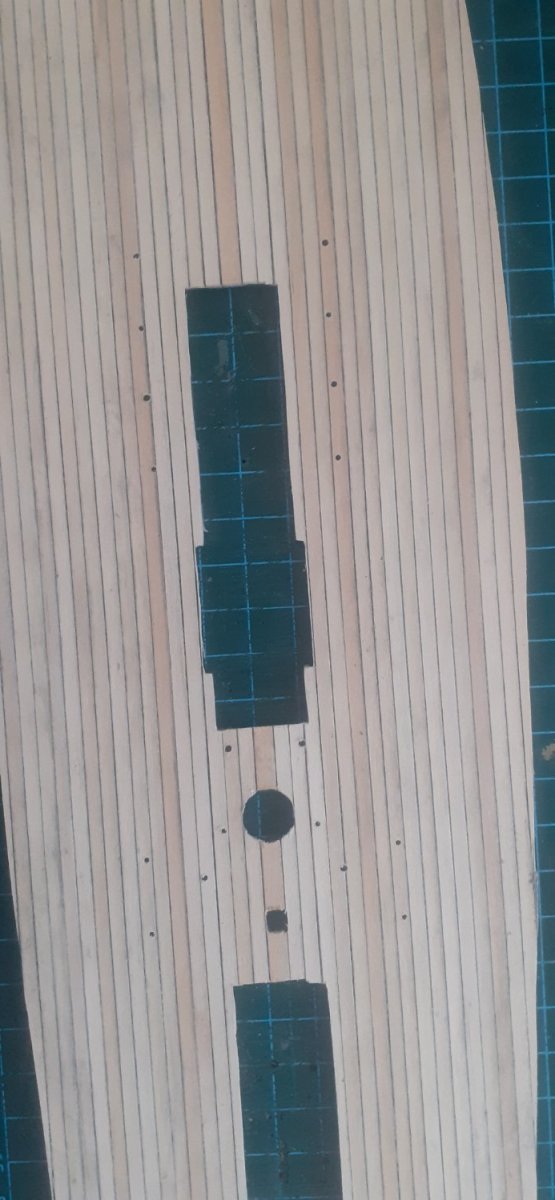
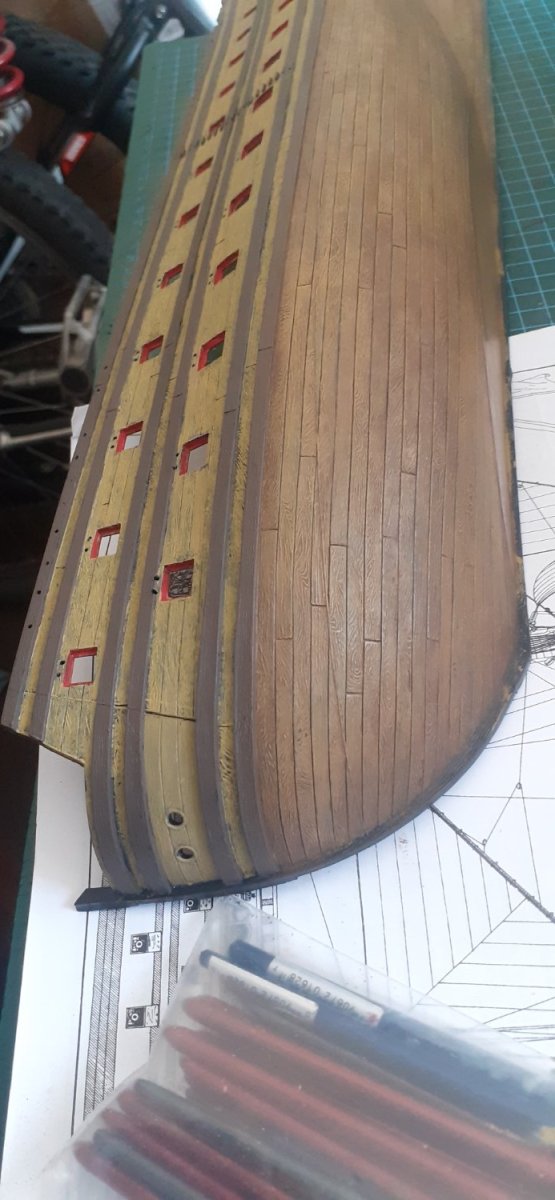
 Well after several months of major house refurbishments it's bk to Heller's SOLEIL ROYAL. The lower deck and 2 sides of the Hull are now joined, I have rigged up the lower deck Cannons using 2 sizes of thread, using 1mm & 0.5mm Amati beige thread, albeit not fully as the angle curvature of the plastic Hull made this impossible, obviously with wood you have a lot more leeway regards space as your building the Hull. I have also rigged up the 4 Capstans on the lower deck using 1.30mm Caldercraft thread, and I am now in the process of rigging the ropes for the Gunport Hatches using 0.5mm Amati beige thread, the Hatches obviously will be added much later into the build. I am tempted to add more detail to this deck but not sure if I should as this deck will be hidden completely from view. Cannon balls, Cannon loading utensils, belaying pins, Rope hanks and Barrels/kegs spring to mind for detail addition. Not the best of Lower Stern fittings on the Soleil Royal having to fill with putty then obviously will be painted once dried. Just glueing together the bow structures before painting begins. Have added some deck detail regards to barrels will be adding cannon shot as well once they arrive as I Don't have enough in stock to do the whole bottom deck. Was thinking about a couple of belaying pins with rope hanks but will need to get them at a scale that doesn't look out of place. The bow segments have now been painted and wash applied to both the wood effect and the Gold architecture rails(black wash).This was done slightly differently from the Hull to get the same shade of wood effect. This was because the 2 Hull halves were moulded in black so only needed Humbrol matt 94 brown yellow applied thinly and drybrushed then the Humbrol Dark brown was applied. The bottom of the stern and bow sections were moulded in a light blue colour, while the Rudder sections were moulded in white, so to get the same shade effect I dry brushed Revell matt 8 black firstly òn the base of these sections, then obviously once dry, again drybrushed Humbrol matt 94 brown yellow, before applying the Humbrol Dark brown wash again to get the weathered effect. Next will be to size up cartridges to hold the cannon balls which arrived yesterday. As well as building the Ship stand within the kit as I will be nearing adding the bow sections and Rudder as well as the 2nd deck. Small steps but slowly coming together 👍🤺⚓


- 44 replies
-
- 5
-

-
- soleil royal
- Heller
- (and 5 more)
-
Hi Jeff Tbh I haven't really thought about it atm. I am not really a lighting guy, just my view but I think lighting takes away the representation of a model ship, its purpose and development and turns it into just an ornament imho. Interior work could be a possibility again I haven't really though too much about as yet as their is no construction work going on atm as my house is getting a refurbishment. The scale is good to work with but it will need some long term thought.
- 44 replies
-
- 1
-
-
- soleil royal
- Heller
- (and 5 more)
-
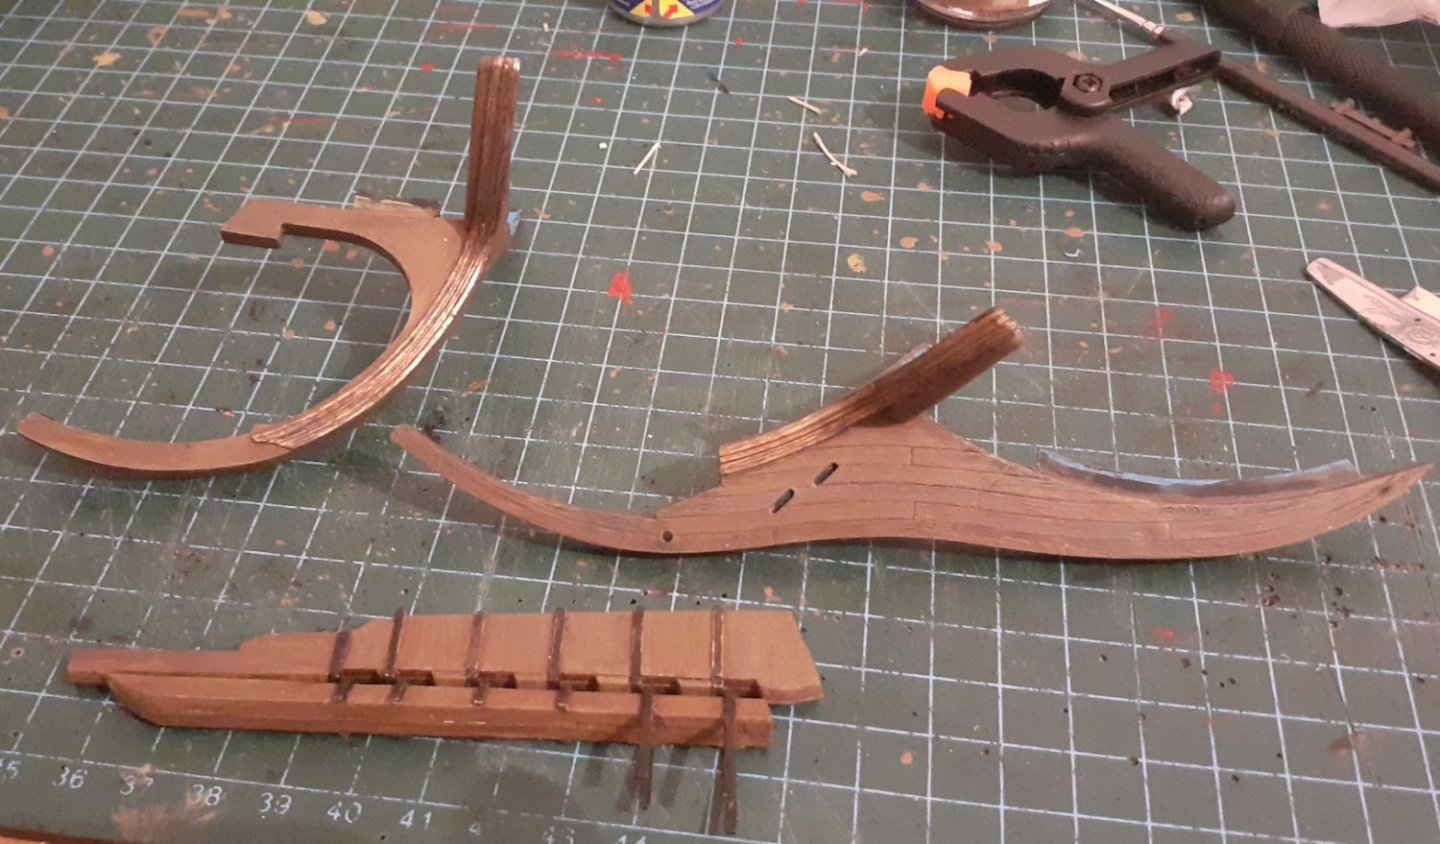
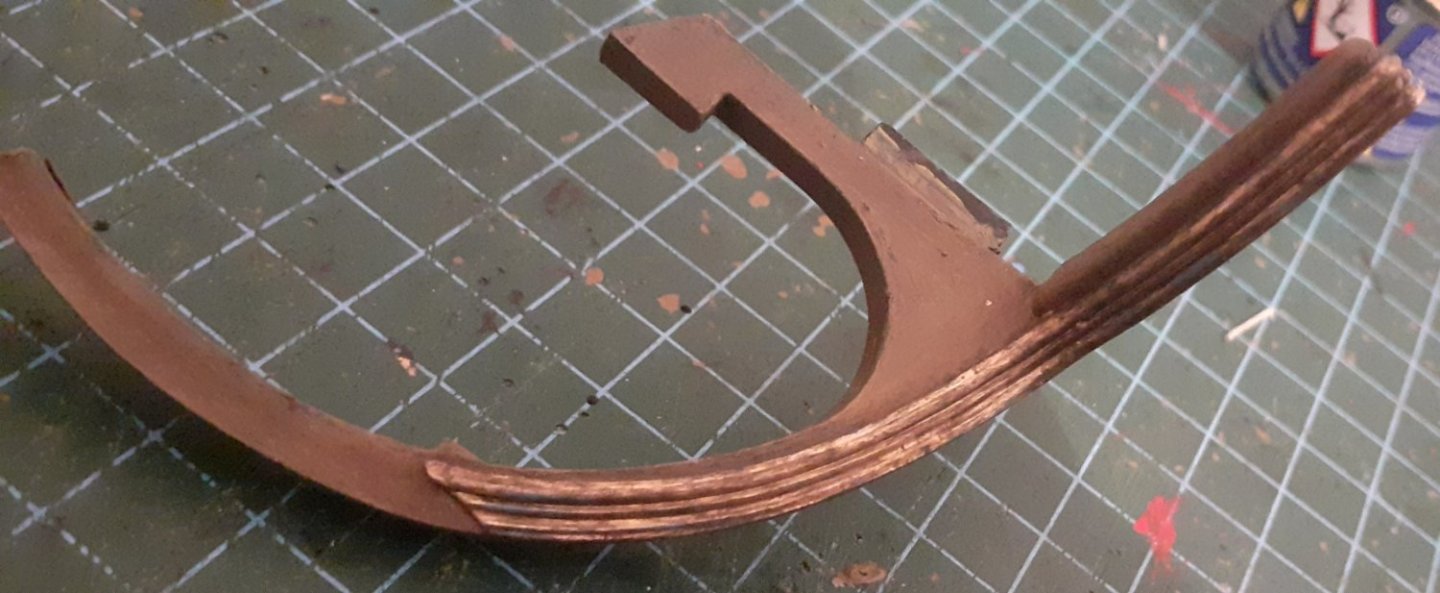
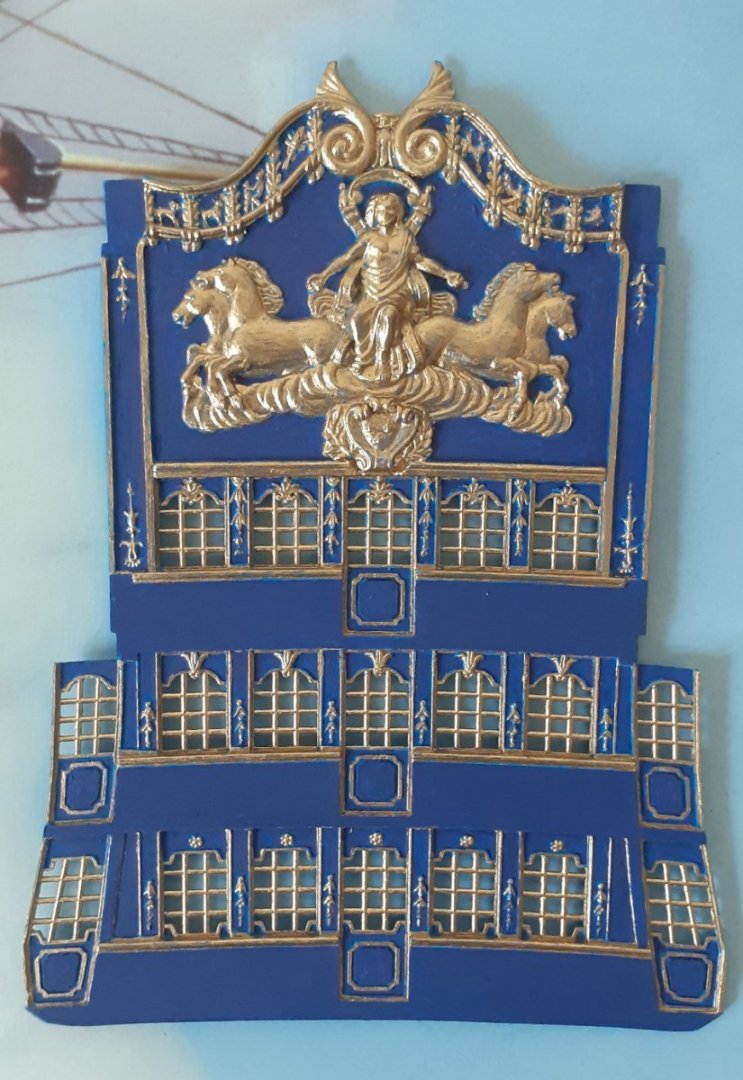
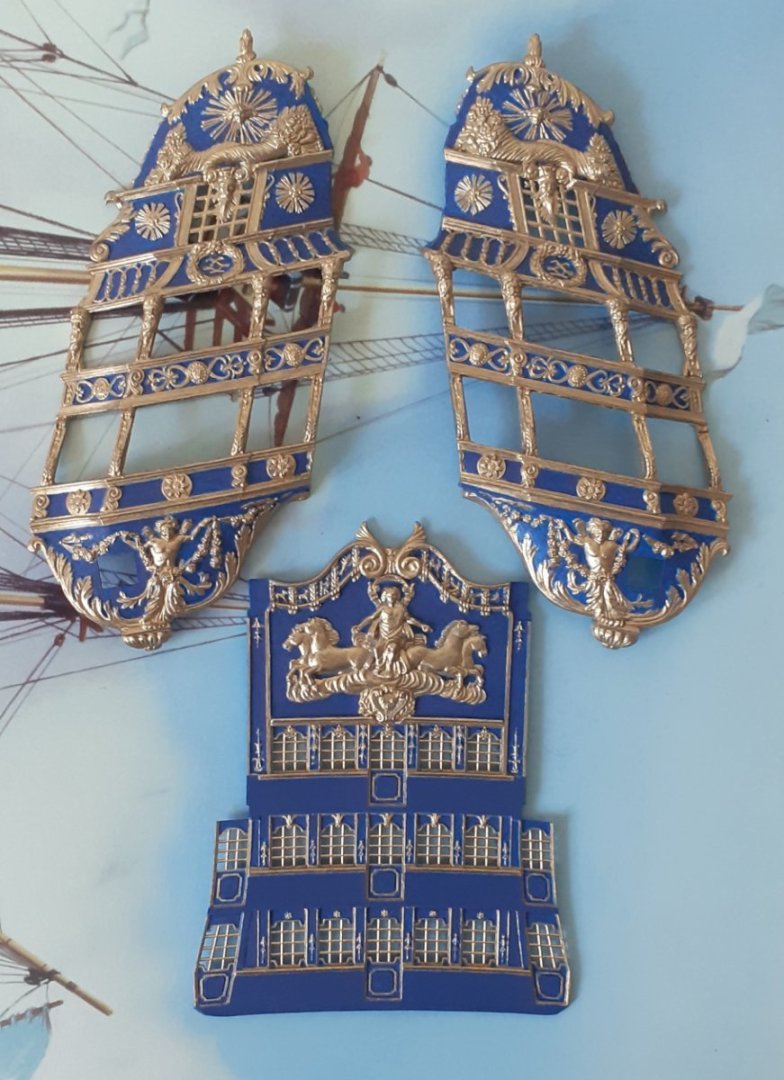
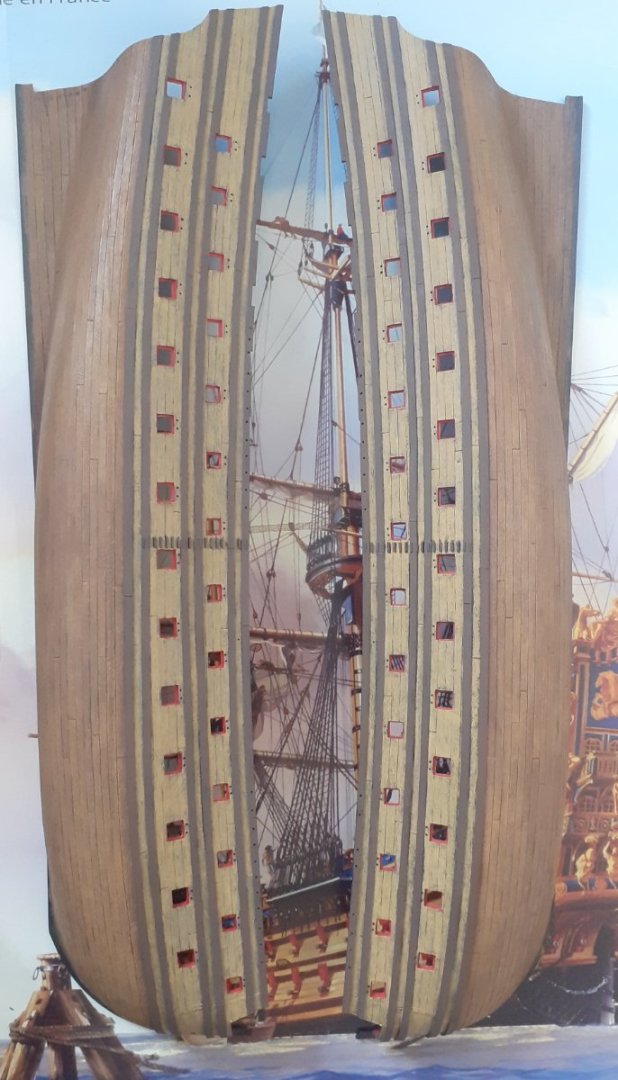
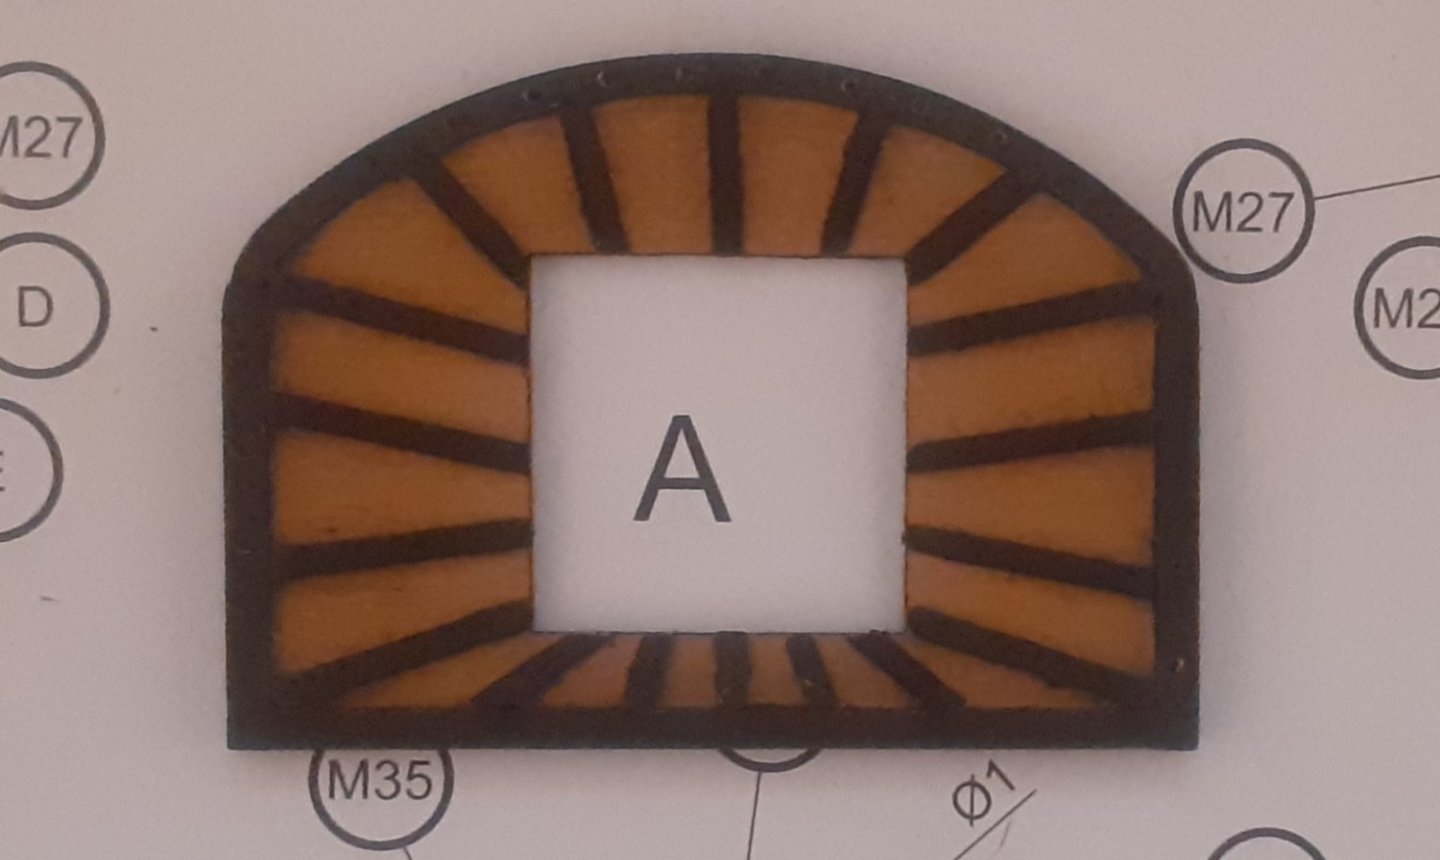
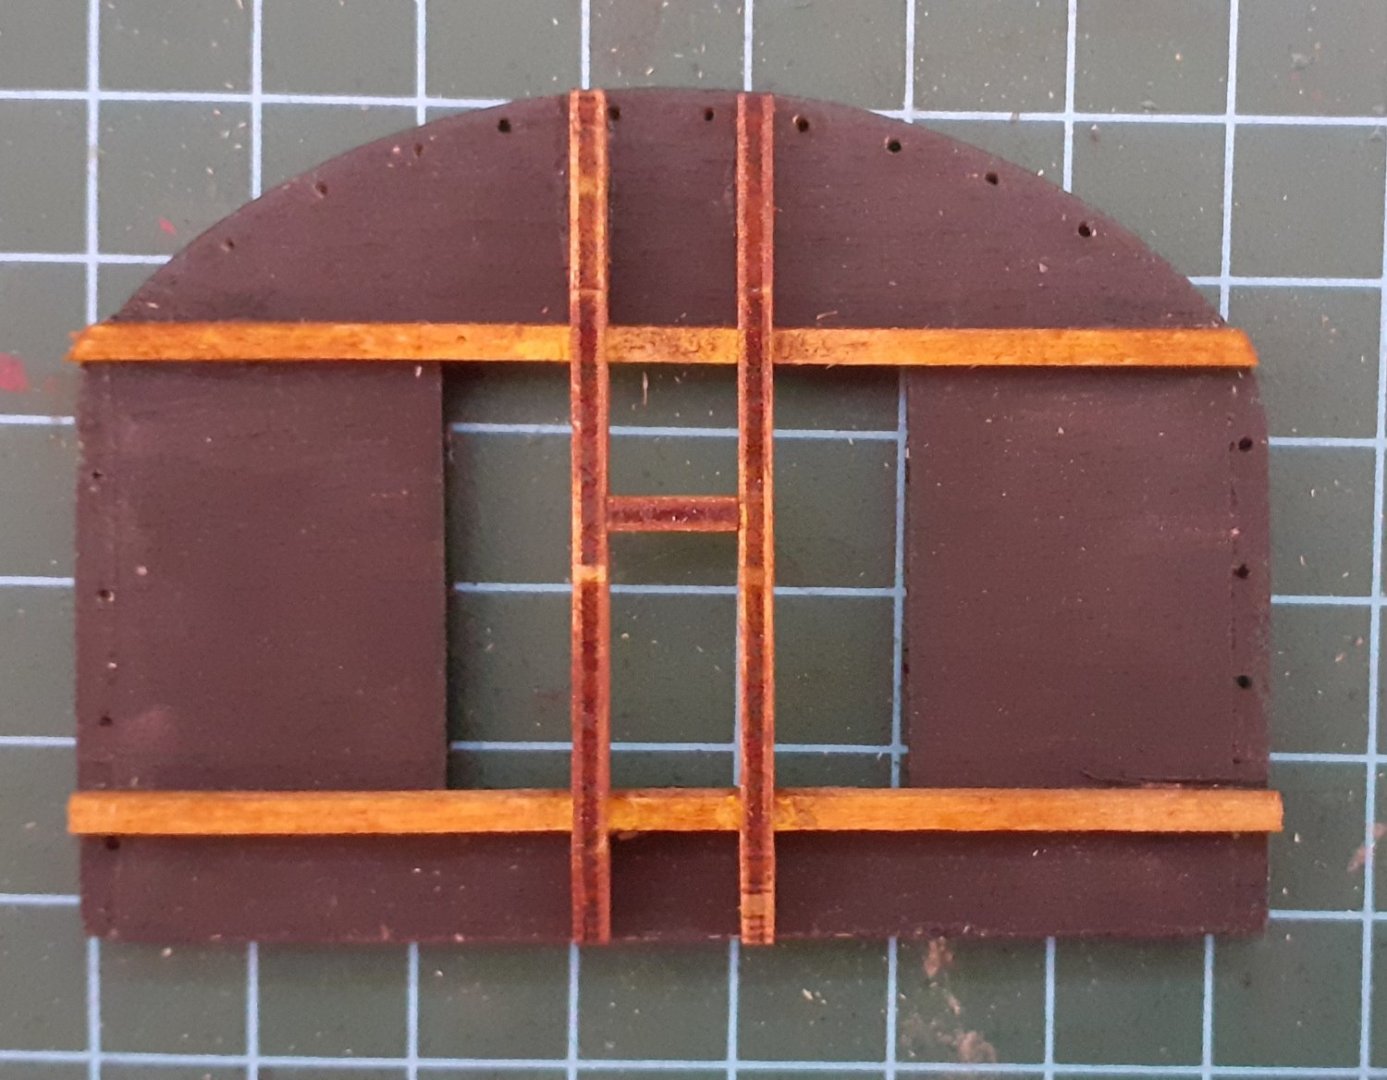
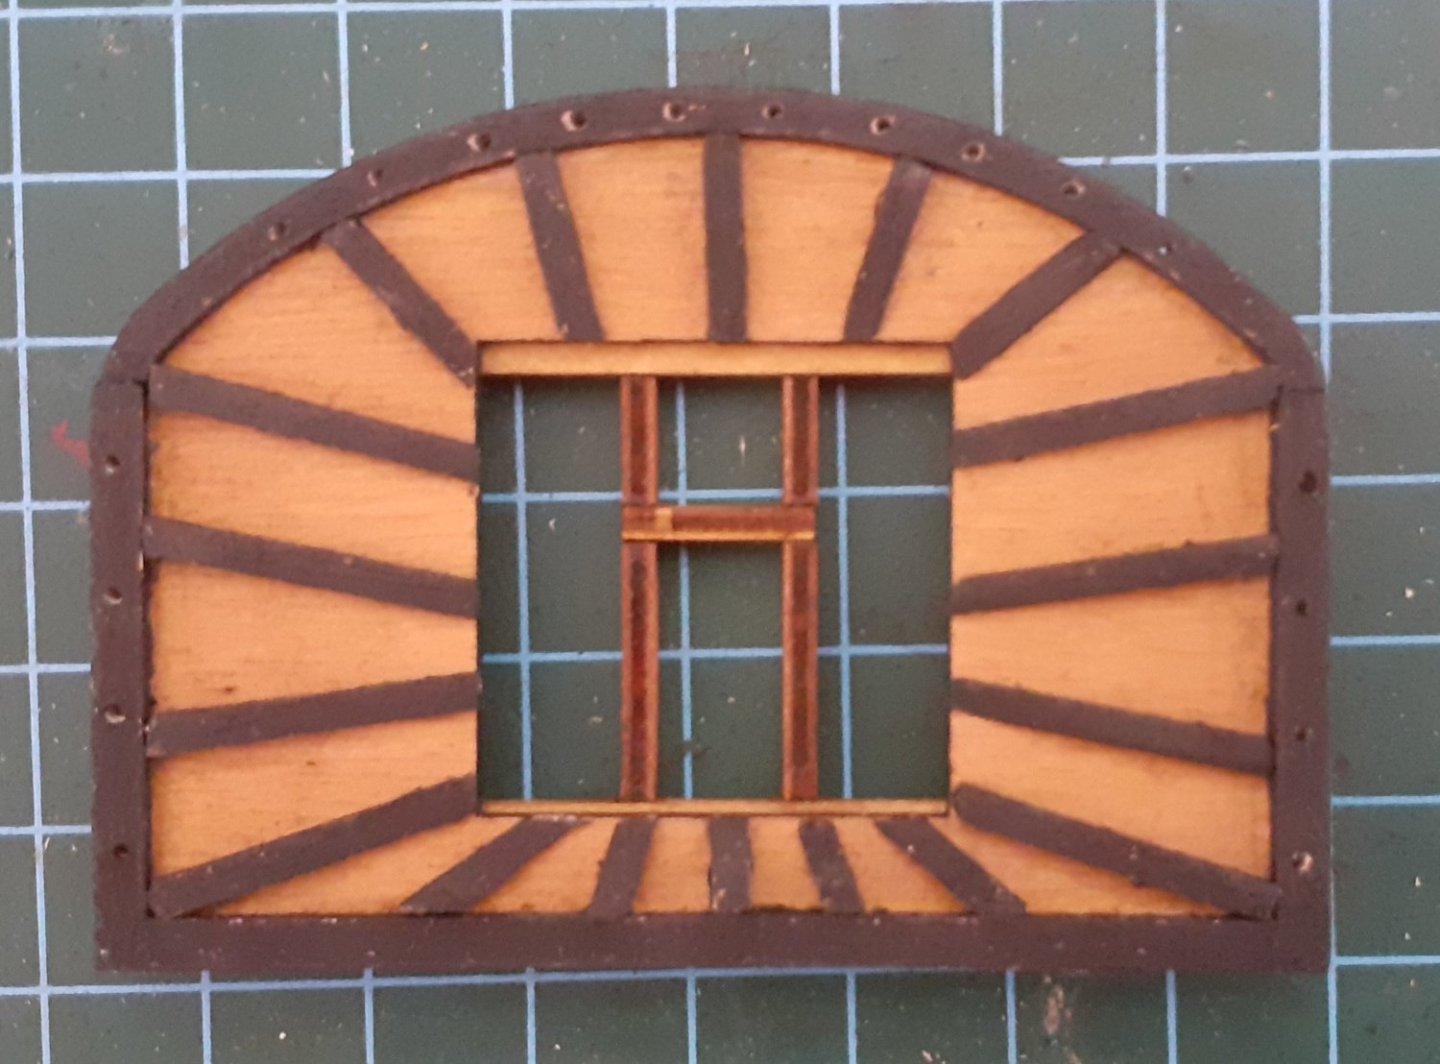
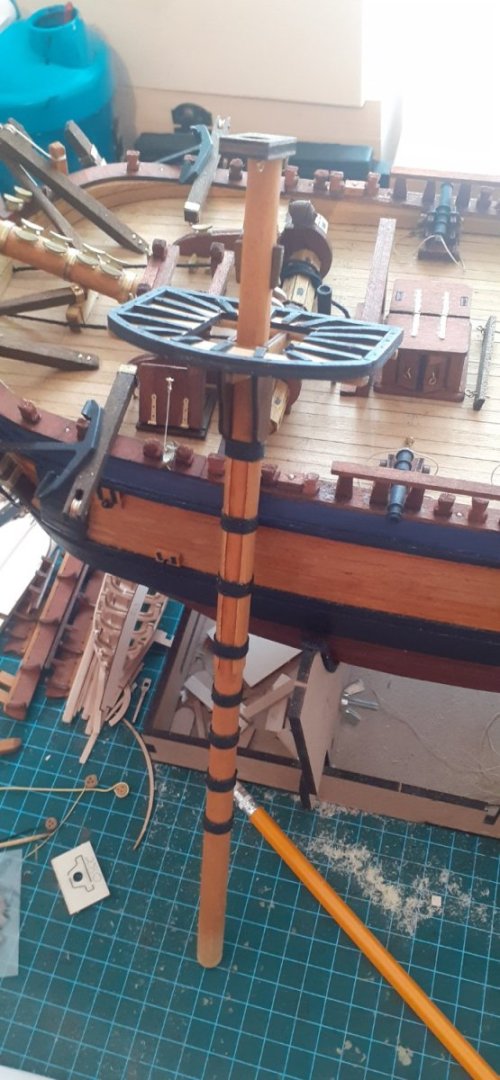
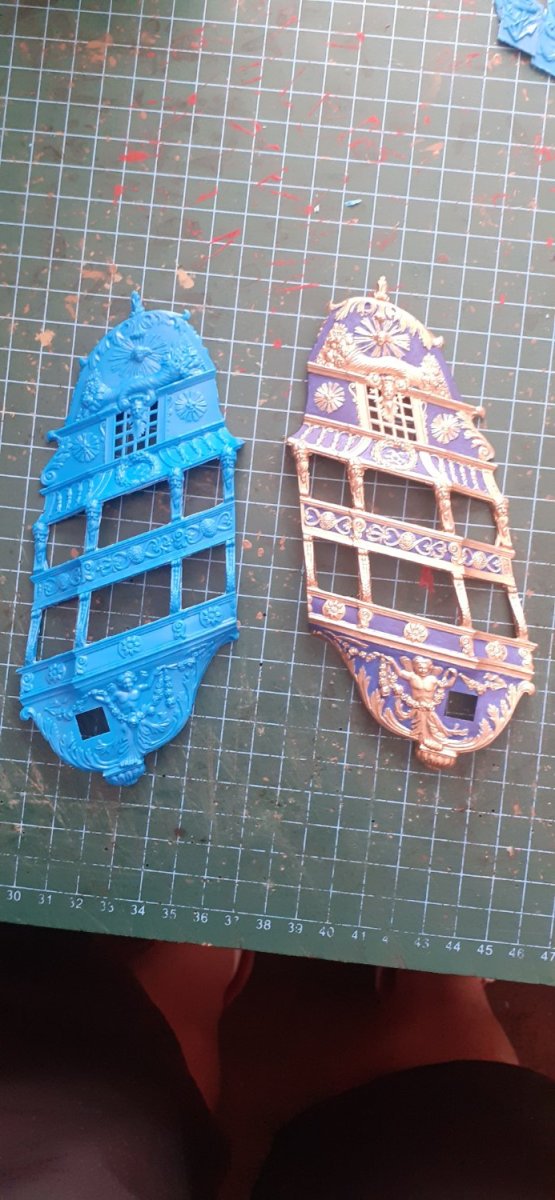
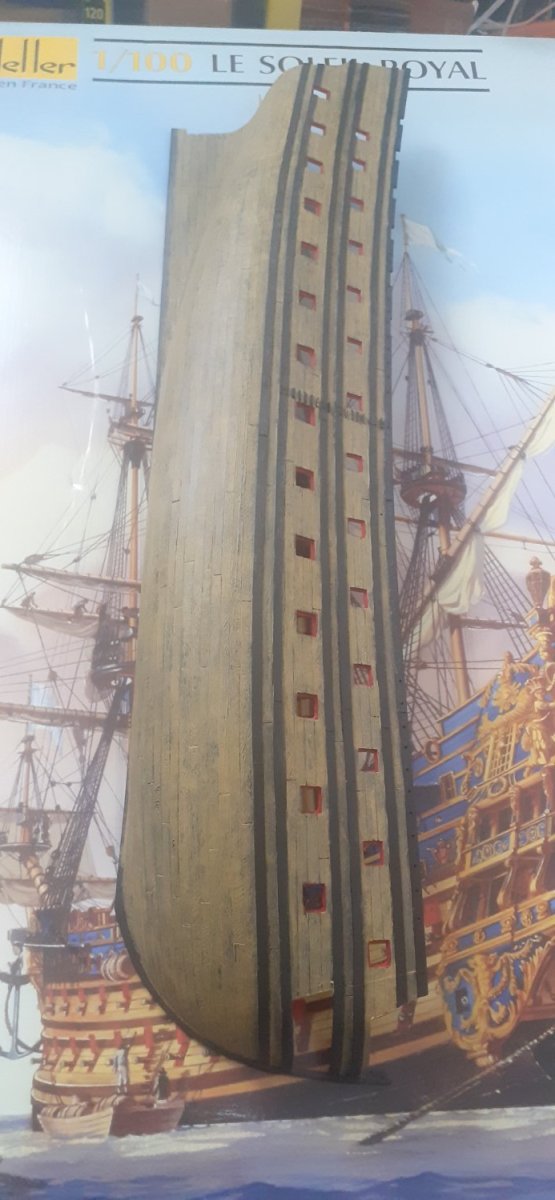
SOLEIL ROYAL : Heller 1/100 (side project cont'd) Small update Stern Gallery painted just to add a slight wash and of course any touch ups I've maybe missed. I have painted the 7 Hexagonal type panels blue instead of Gold as I intend to add decorative work to these and I will be adding some more decorative pieces to the SR at a later date. This has taken most of the week out with work, a highly detailed piece but very attractive. It's only when you are painting these parts you appreciate the work that has went into designing moulds through the process of Engineering, I take my hat off to Heller for producing a Superb Historical work of Art, it must have cost a fortune to produce this at the time. Yes these kits have been around a long time, I just wish more on this scale and magnitude would be produced. Next up will be the wash then the painting of the side Hull architecture/Gun ports/railings or the Architectural Bow fittings. Such a wonderful Hobby for all of us to enjoy 👍🍻🍻🏴🏴
- 44 replies
-
- 5
-
-
- soleil royal
- Heller
- (and 5 more)
-
Thank you very much for your kind words Henry. 👍🤺⚓
-
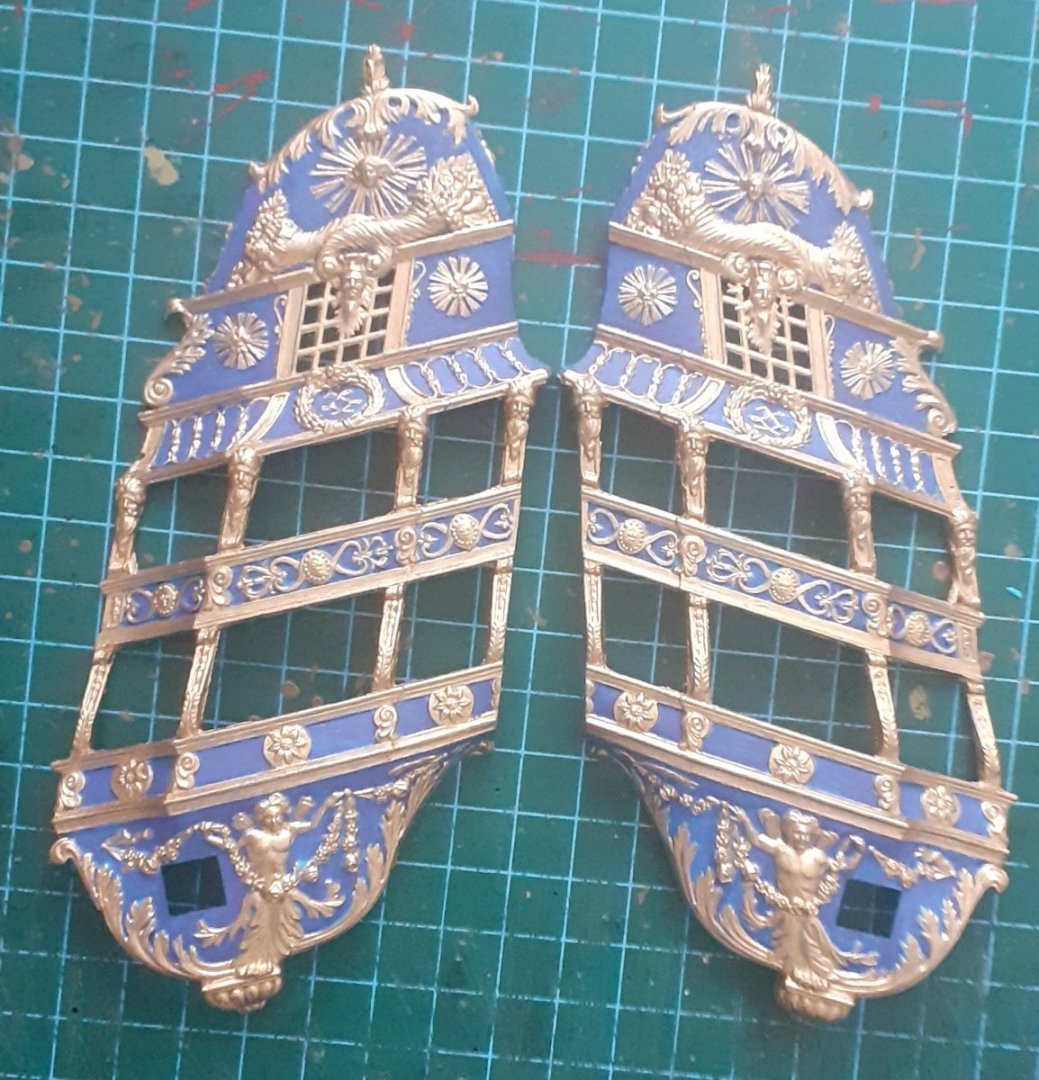
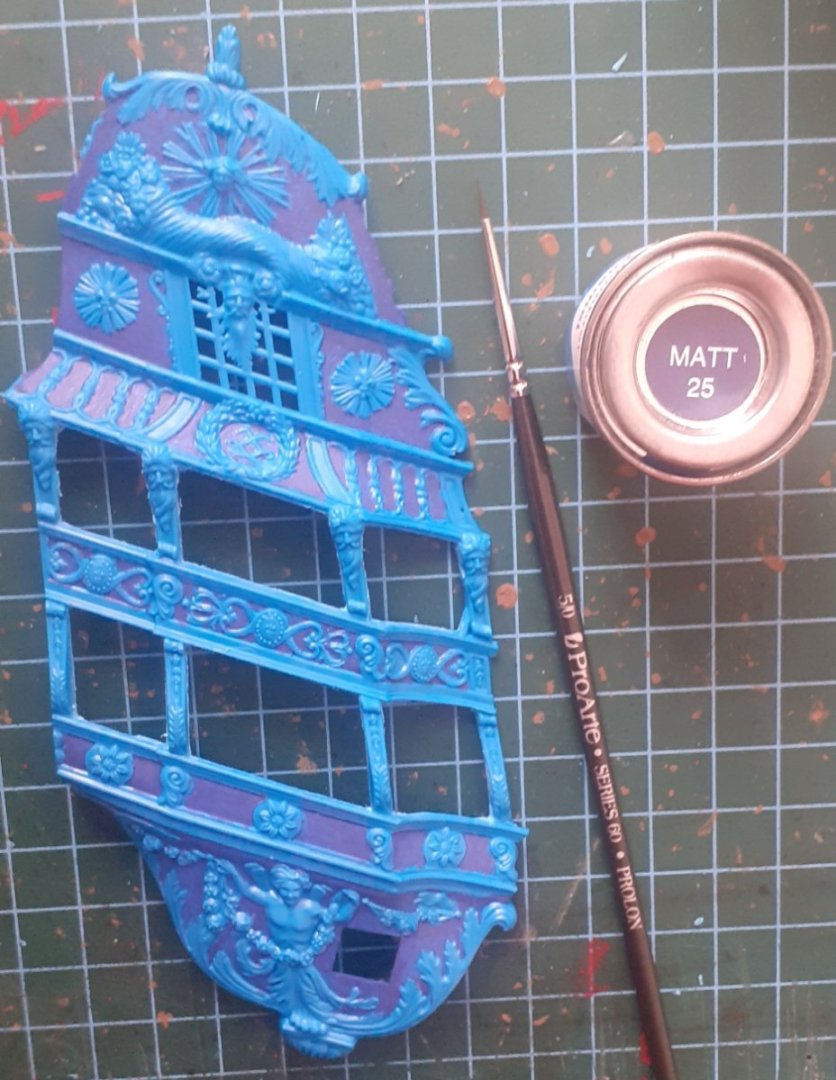
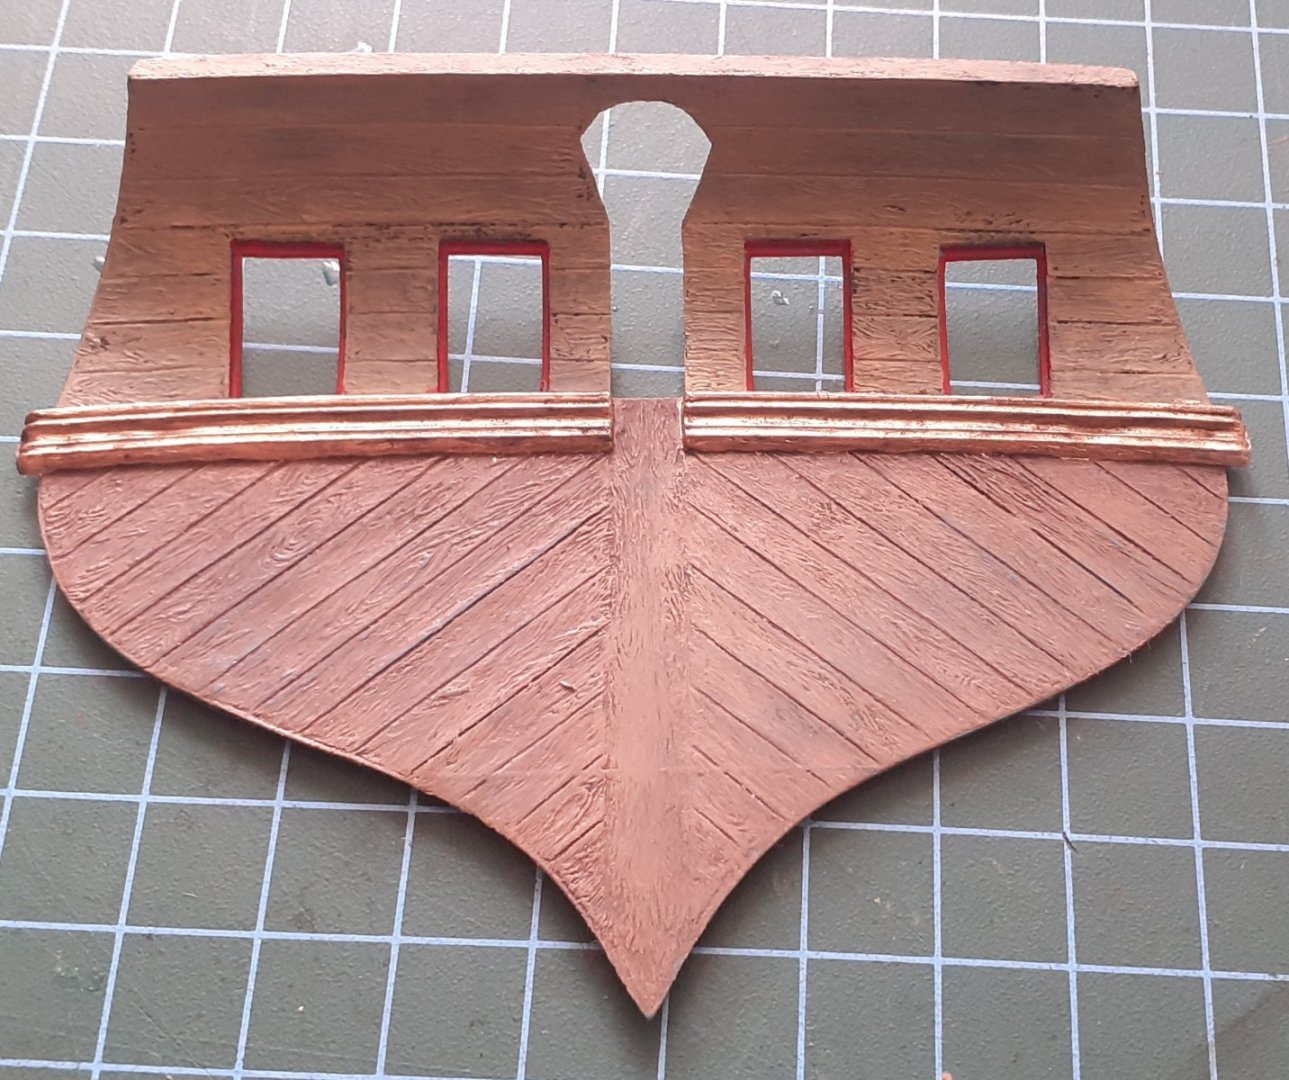
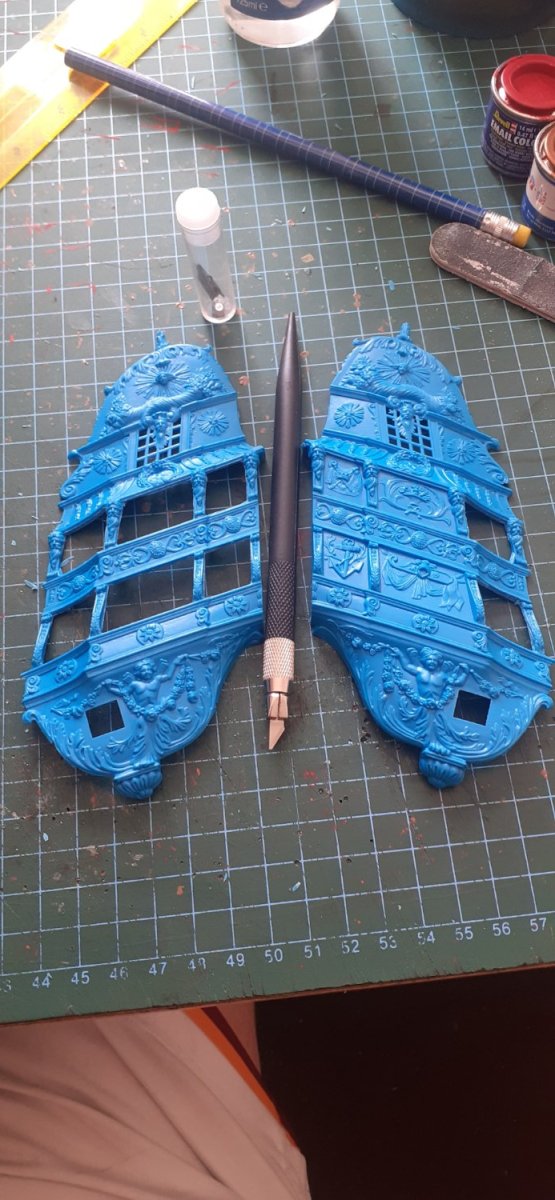
SOLEIL ROYAL : Heller 1/100 (side project cont'd) Small update Side Galleries painted just to add a weathered wash. It's took the best part of 3 days to finish this to the best of my abilities. There will probably be still the odd bit here and there that maybe touch up, as with detailed painting like this you always notice something later on. Apologies for the photo the blue in the photo looks lighter than it actually is, it's actually more of a mid blue (Humbrol matt 25) to be exact. Next up will be the wash then the painting of either the stern or the side Hull architecture/Gun ports/railings.


- 44 replies
-
- 4
-
-
- soleil royal
- Heller
- (and 5 more)
-
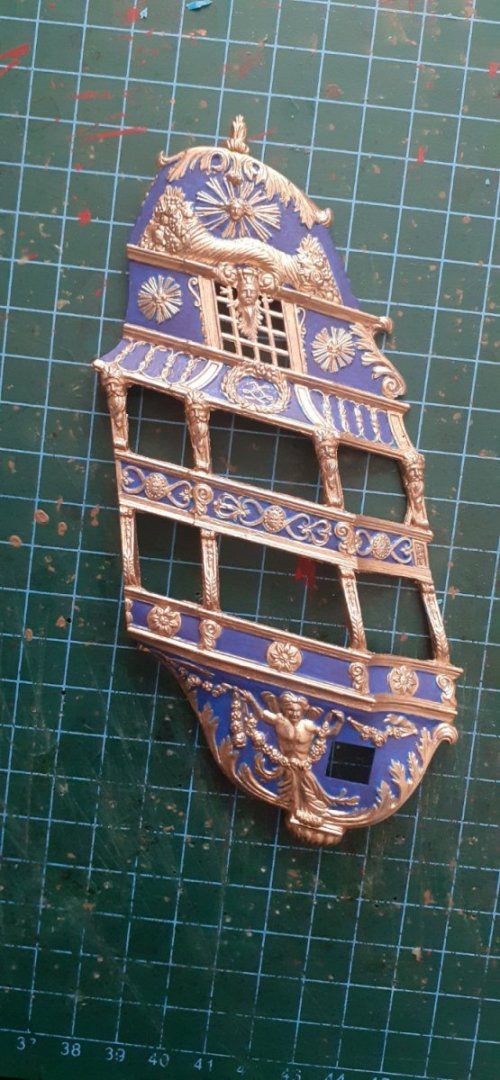
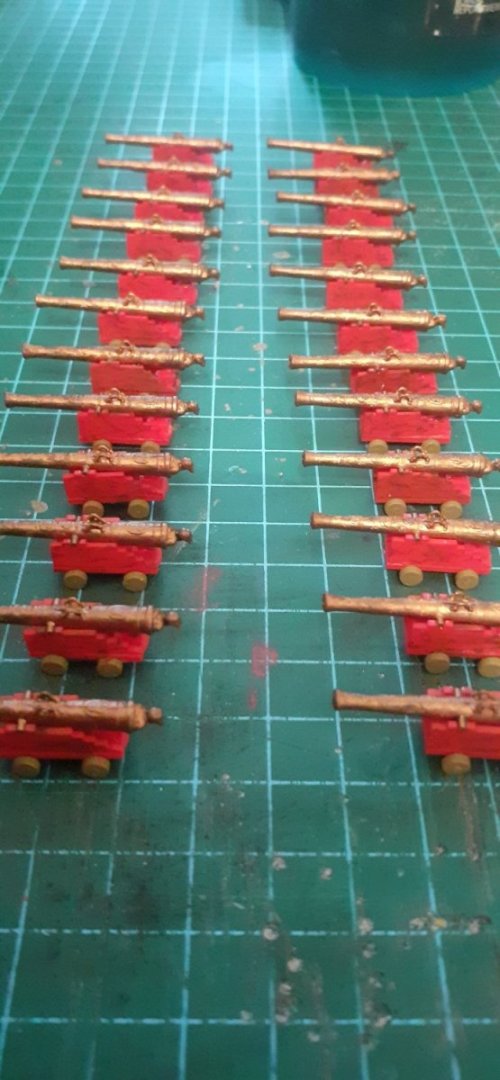
SOLEIL ROYAL : Heller 1/100 (side project cont'd) After completing the 112 guns started painting one of the side Galleries which I have opened up. This is by far the most intricate model painting I have done. Very rewarding and very happy so far 😀🌞. The gold will have to wait as the inconvenience of work beckons 🙄

- 44 replies
-
- 4
-
-
- soleil royal
- Heller
- (and 5 more)
-
Thank you very much Jeff, I've actually just ordered some more goodies this morning in the shape of Brass decorative pieces so I will see where I go with these also, if they don't fit well with the overall kit then they will be used elsewhere on one of my wood kits or something...
- 44 replies
-
- 1
-
-
- soleil royal
- Heller
- (and 5 more)
-
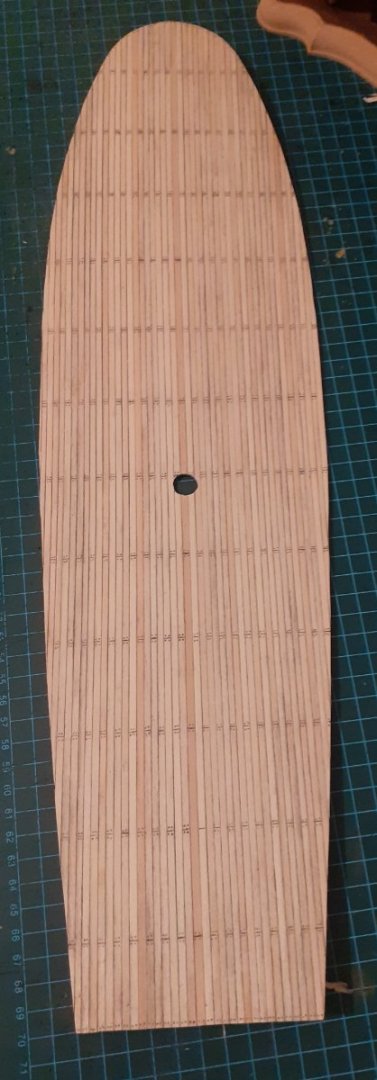
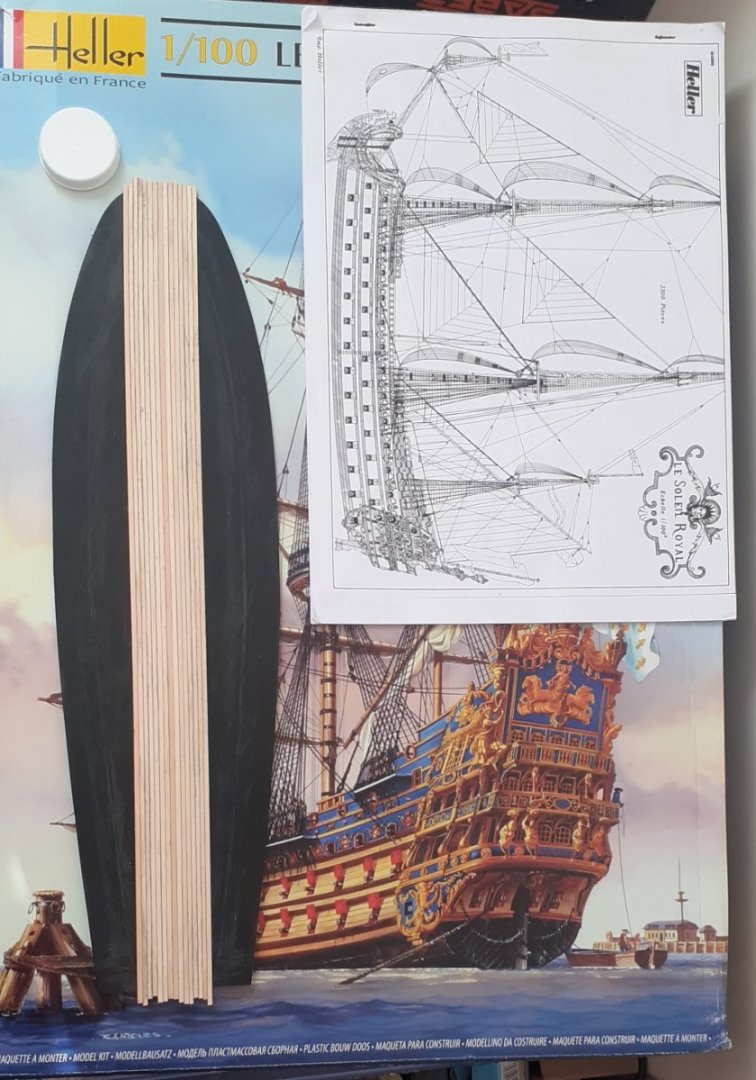
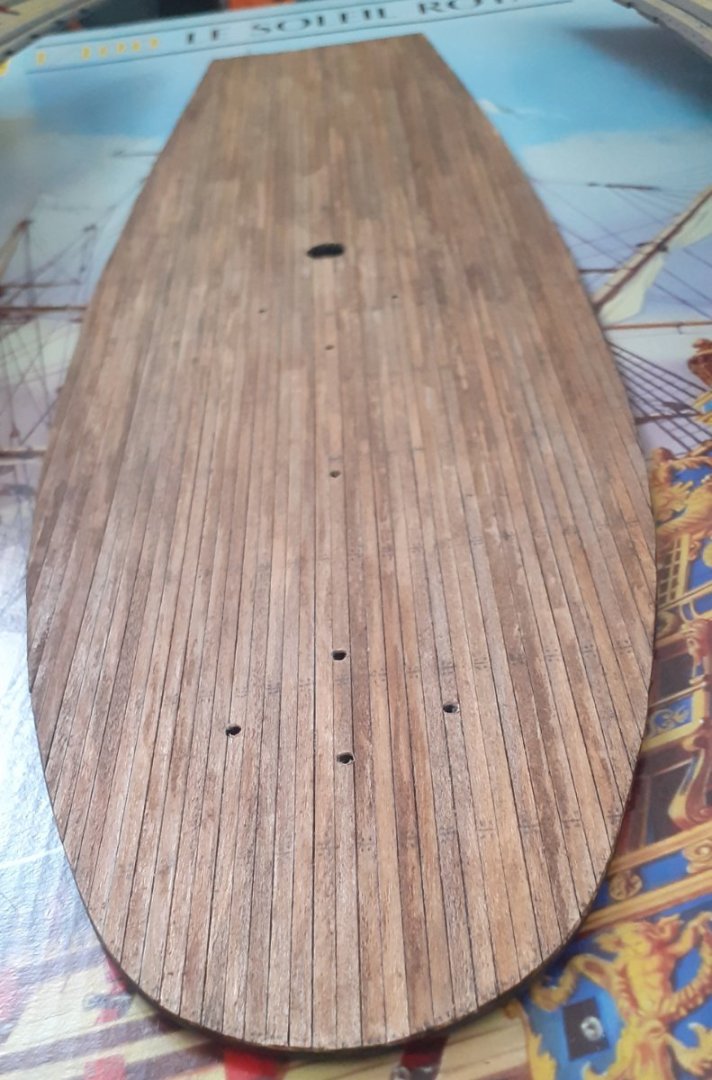
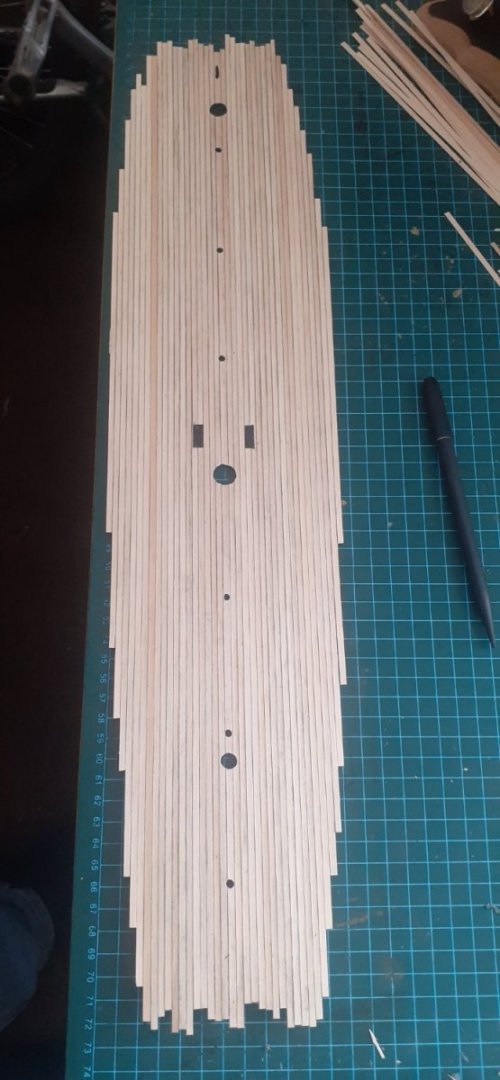
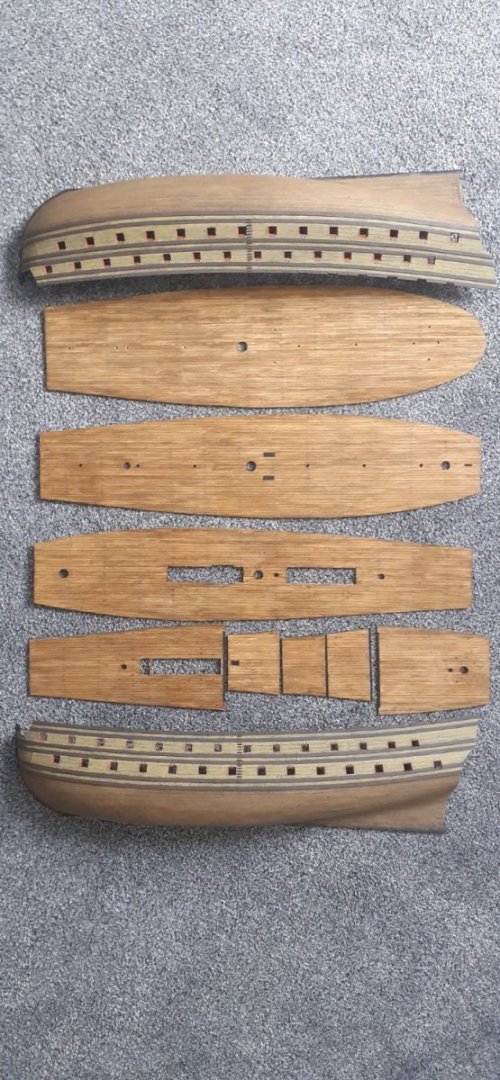
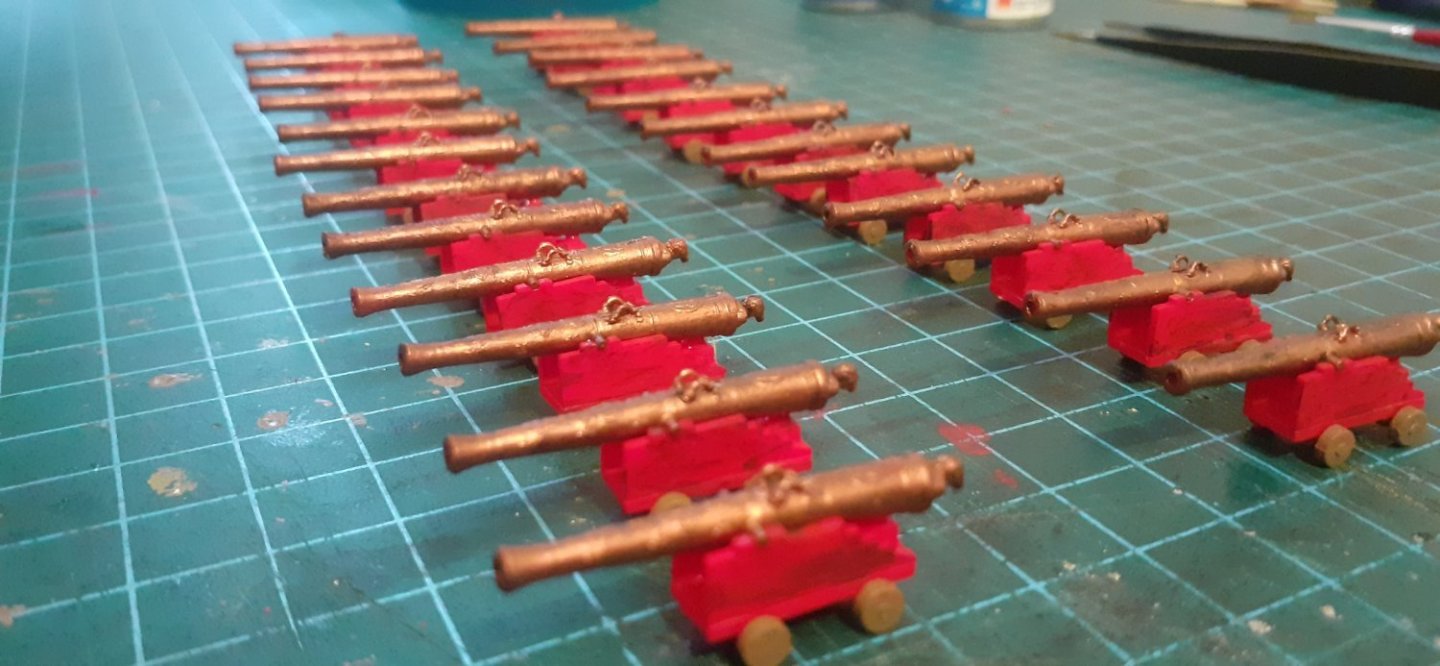
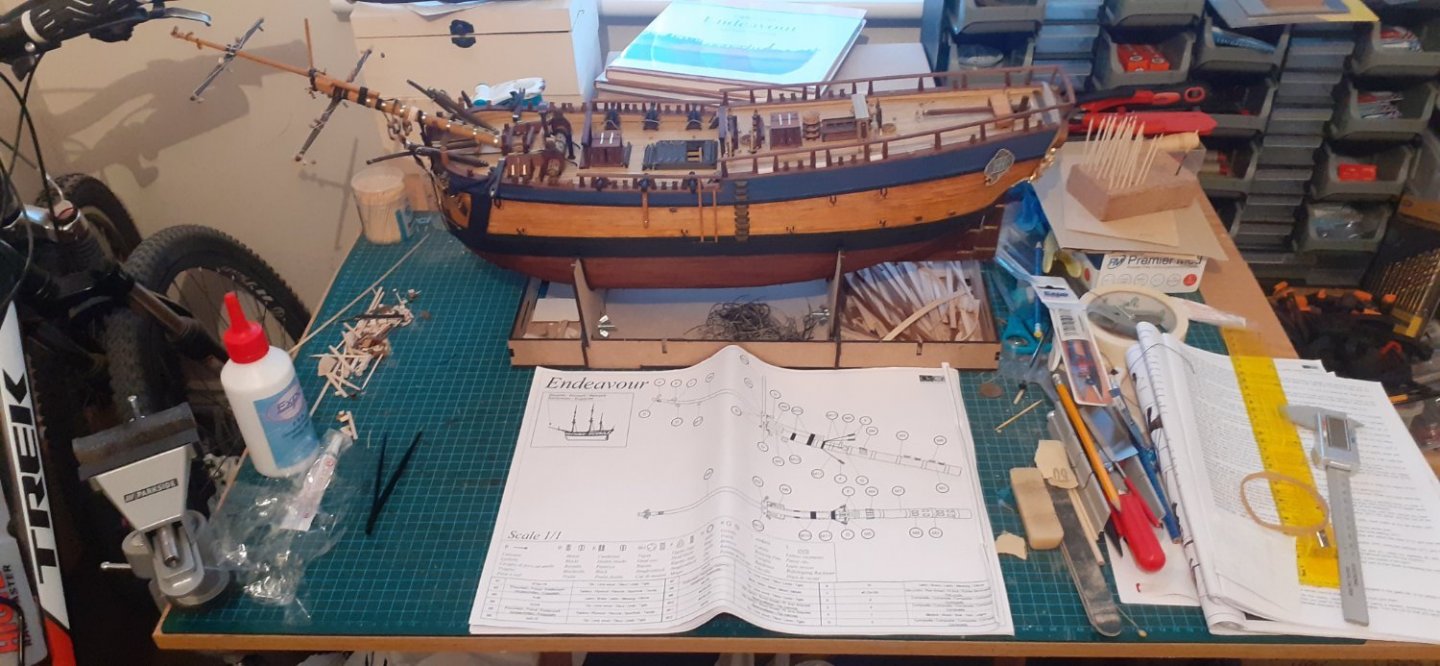
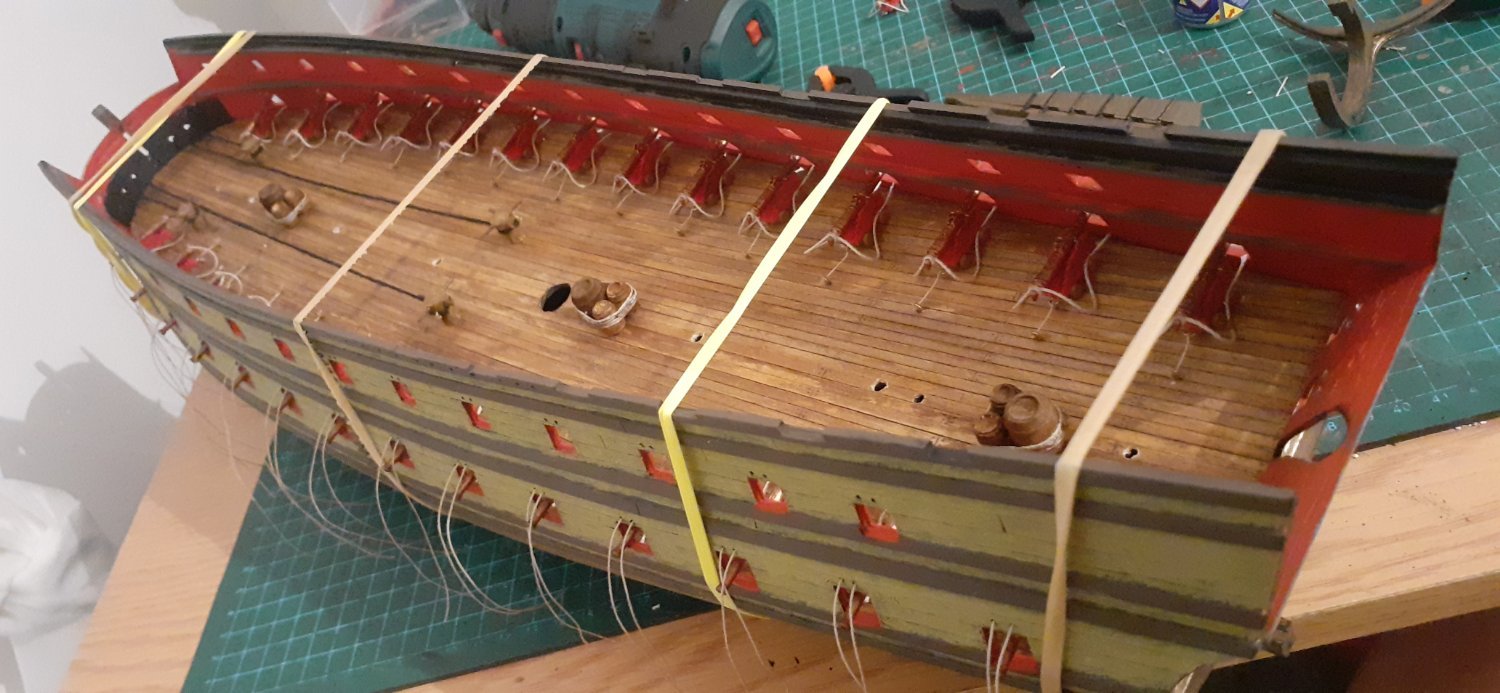
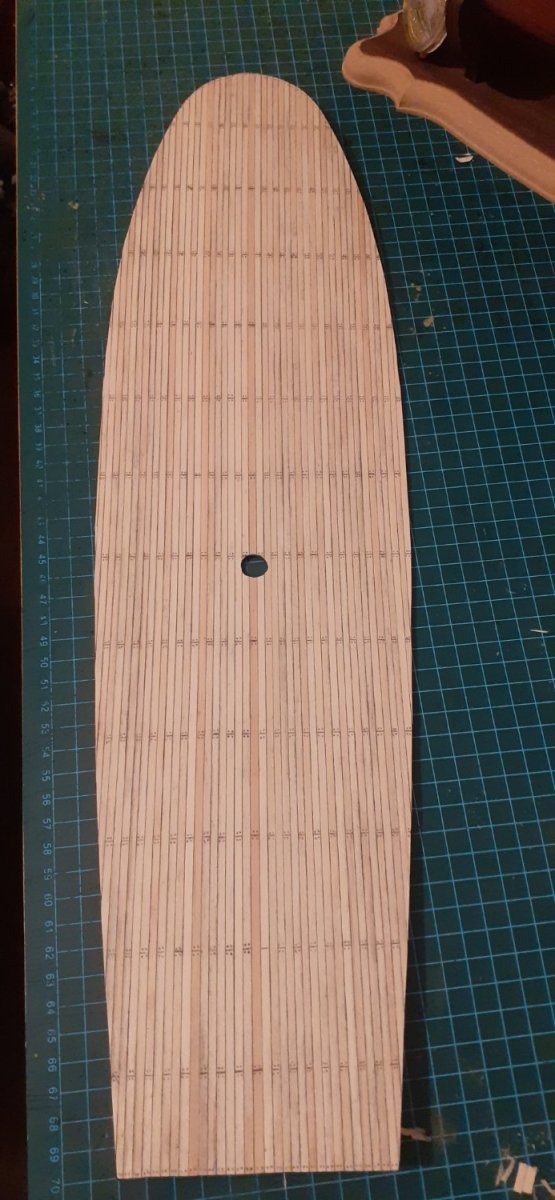
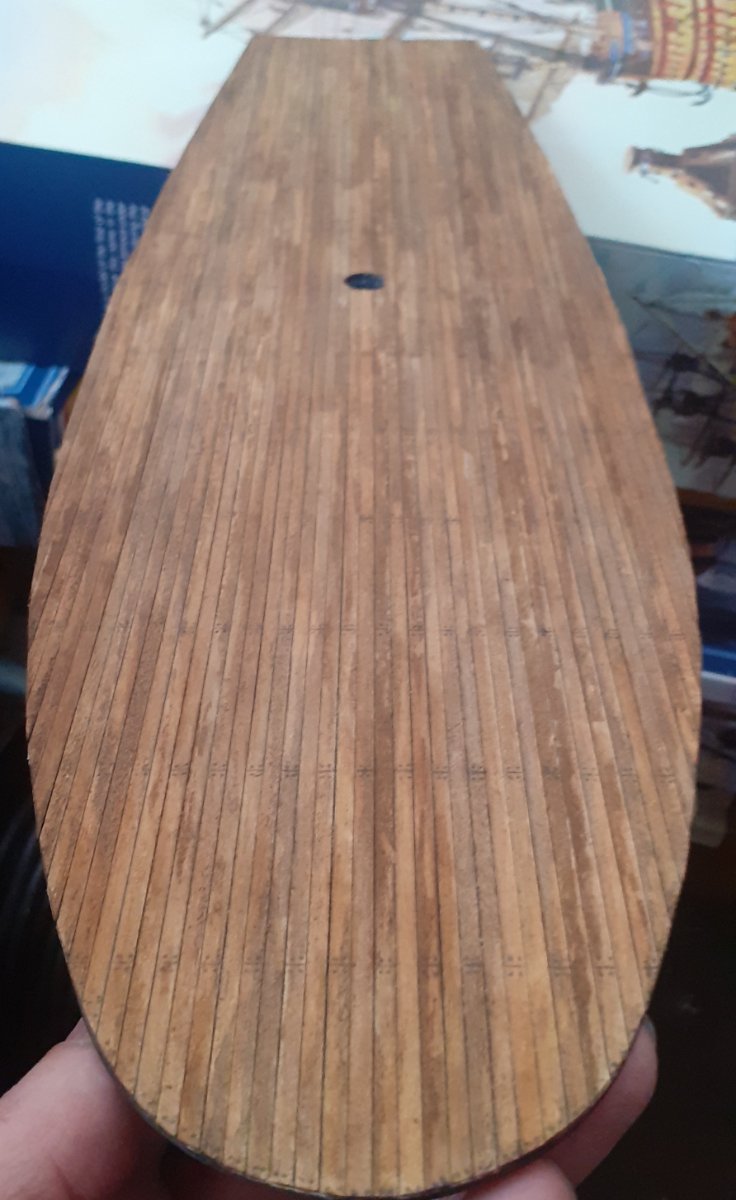
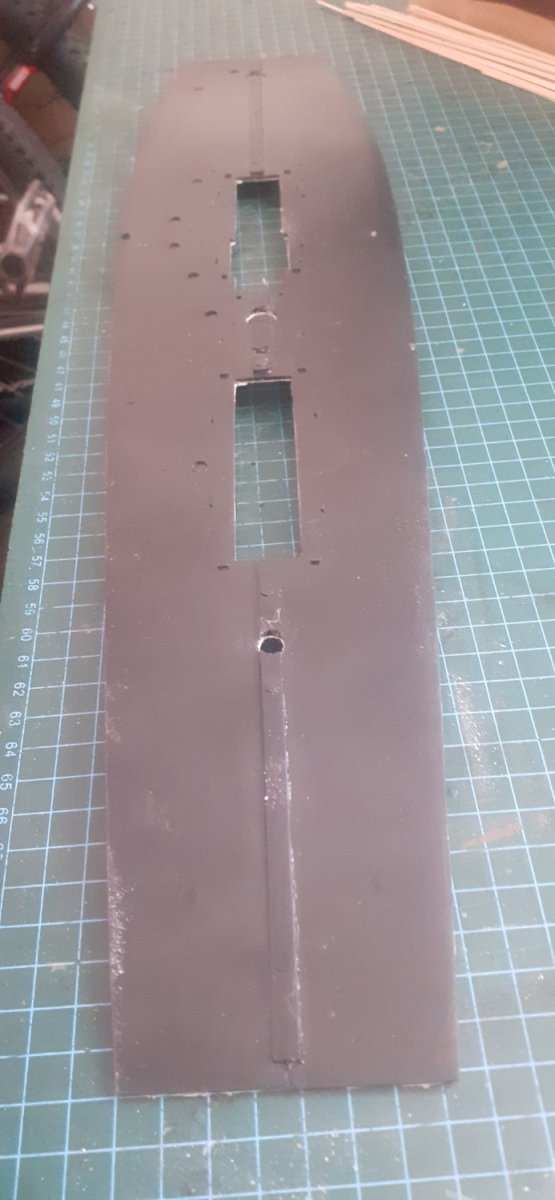
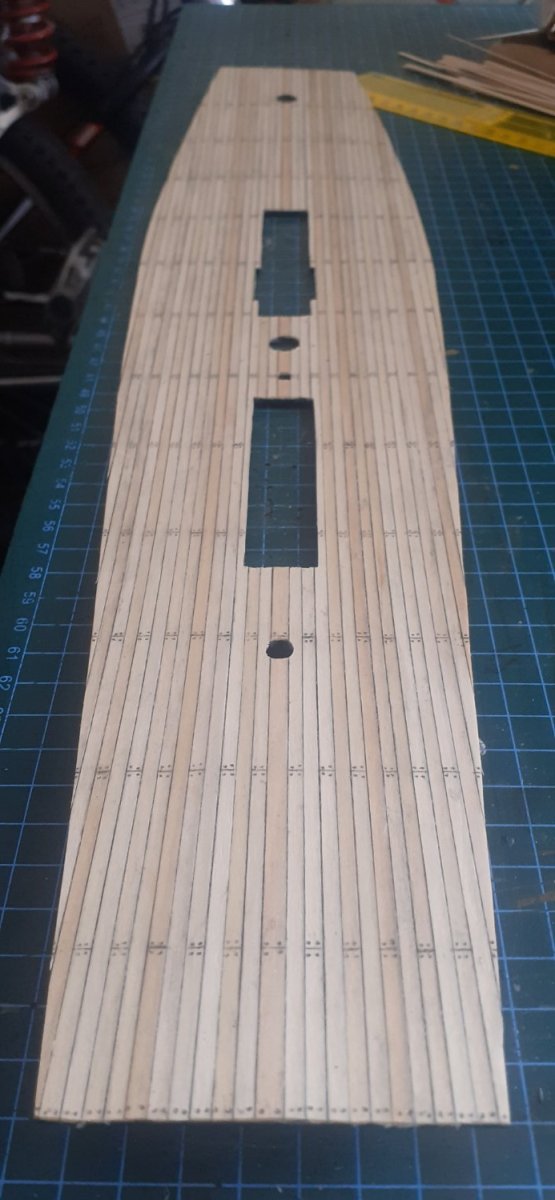
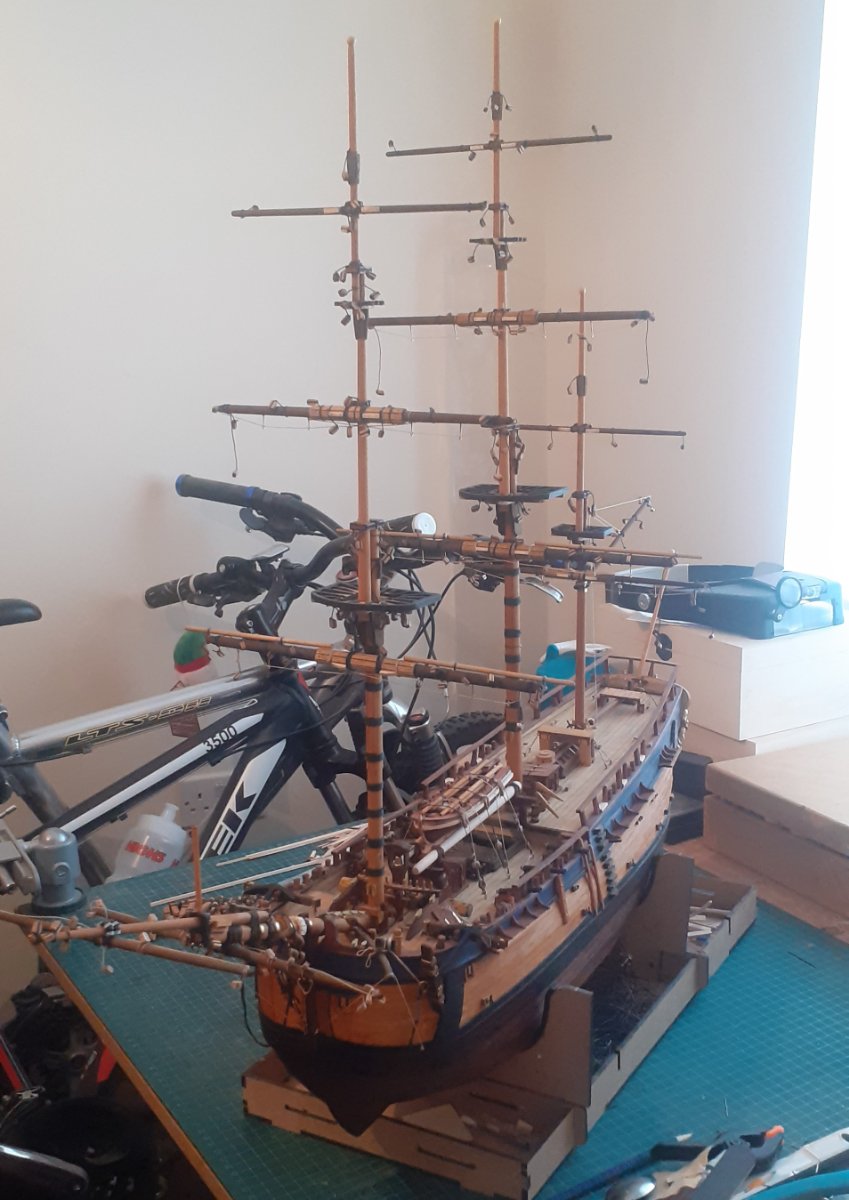
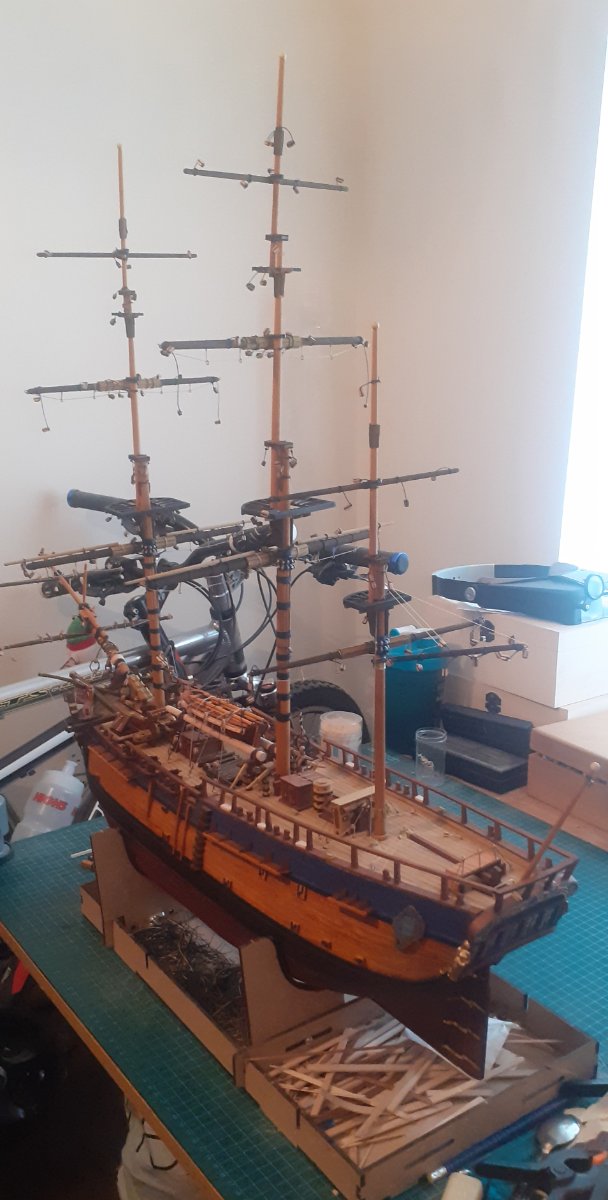
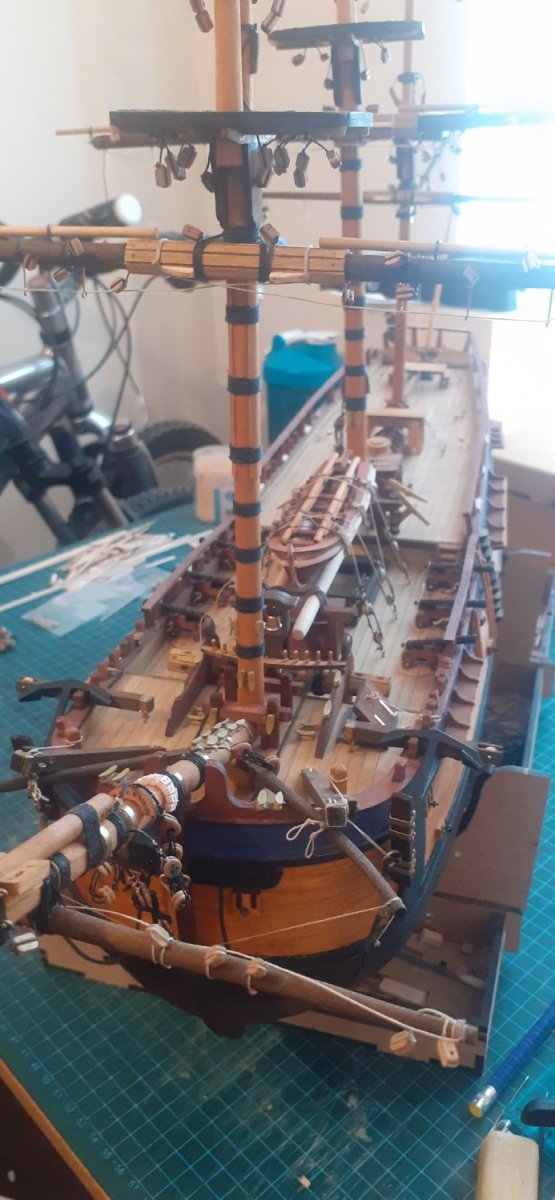
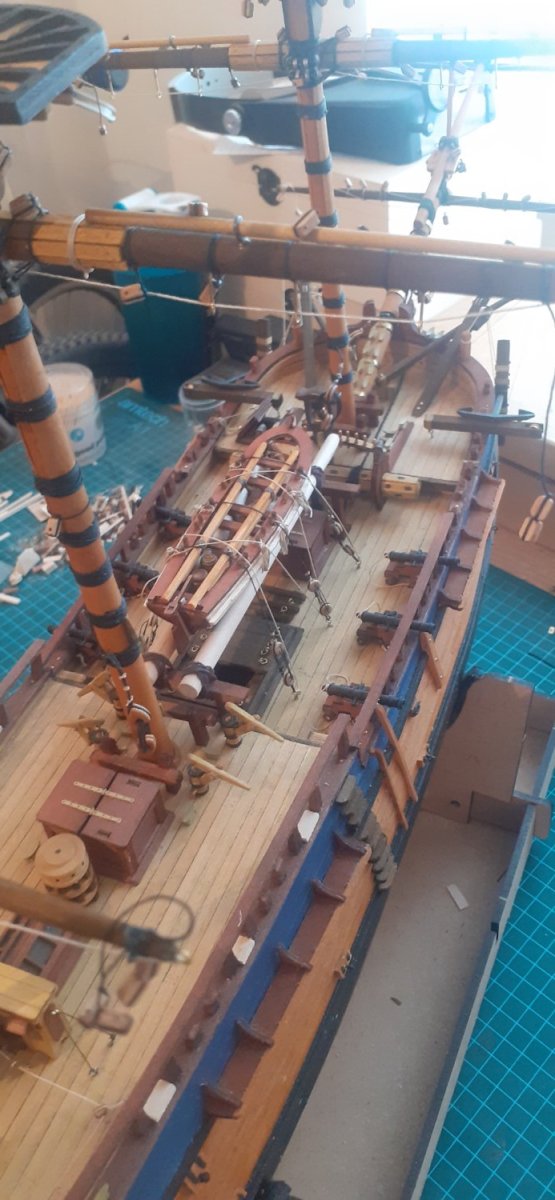
SOLEIL ROYAL - HELLER 1/100 (side project) At the moment I am refurbishing part of the house including my humble workroom. So atm I haven't technically been doing any major construction work regards to my kit. This is a big project but A SIDE ONE for me as when my workroom and other refurbish are bk to normal I will be starting a main project in wood. I actually started this a few weeks ago but didn't want to start a build log for obvious reasons, plus the fact even now I still don't have a true picture of where I will go with this, other than the fact I will be to a certain extent heavily improvising on her, which I have started. I wanted to have wooden decks throughout so I meaured the sizes of the planking on the decks, calculated how much I needed and bought in 80 x1metre lengths 3mm x 0.5mm lime wood. The planking has gone really well and I have now finished it all, I also stained this with a Dark oak stainer. The Hulls I was unsure about but went with the kit instructions using Humbrol brown yellow and a lot of drybrushing, this came out darker than expected but realising this was because the mouldings of my kit Hulls are solid black(I used the same brown yellow on my complete Royal Louis but since that mould was in white hence the colour originally close to what it should be). That said I was quite pleased with the darker finish and it gave it more of a weathered look. I thought the bottom of the Hull needed to be slightly darker though so I used a Humbrol Dark brown wash over the brown yellow and it really came up to what I wanted. I have also drilled holes in the hull sides for the addition of pulleys for the Gunport Hatches. Atm I am now just building and painting the guns. I've finished the 24lb(x24) and have just started the 18lbers. I was originally thinking to replace them all after sales but found it well nigh impossible to get the correct type of gun and in 4 different correct sizes, so I've had to stay with the kit supplied ones. I have also bought in relevant wooden Deadeyes(triangular), cloth flags and rigging thread. Looking a bit further forward I want to replace all the masts and yards with wood other than that I don't know exactly where I will go with her, other than keep painting and weathering parts, I may well add other things like metal anchors and Rudder chain etc... Apologies for the long intro and in hindsight I probably should have posted earlier, but this will be a long drawn out build a bit like this post lol... On to the photos.....


- 44 replies
-
- 5
-
-
- soleil royal
- Heller
- (and 5 more)
-
I have the Heller one Bill.
-
Hi Bill Here is the Link for the Occre warranty Spare parts form. If you have or you accidentally break any parts or they or you lose parts no matter how big or many fill in the form in your language and kit ref no which is on the instructions along with the part ref and how many you need and Occre will replace and send them to you free of any charge 👍🤺⚓. https://warranty.occre.com/form.php
-
Sorry for the late reply Bill, for some reasons I don't get notifications of all replies on MSW. Thank you very much for your kind words. Wow that's a lot of questions lol so I will try and break down my answers to each one in order. First of all like you I hadn't built any wooden models but also have years of working with wood experience just not on this scale. Like you I scoured a lot of models and also kept coming bk to the OCCRE'S Endeavour. I didn't want a ship build with very little detail, but also didn't want to bite off more than I could chew with a 3 decker and loads of gun ports, these were the 2 main reasons plus like you I really liked the ship and its history. Prett much most things are done straight from the kit, which I must say is top notch in the way of wood quality. Some of the parts I did change like the blocks (which were plastic in mine which I think was a slightly older kit but contacted Occre who replaced these with wood blocks and deadeyes free of any charge which is another reason as their customer service is absolutely brilliant) rigging thread, etc.. I also replaced the brass wire for the deadeyes with Mantua chain plates which were much more realistic and easy to use, the brass wire is not the best very hard to manipulate especially when making small articles. I also re measured and made my own sails as the ones with the kit, while good quality lacked the correct detail size and we're slightly too big imho. Along with other improvisations my thought process was even though the kit is highly detailed I thought I could add more and make it more custom made while keeping things as close to historical accuracy as possible. I did have too purchase aftermarket items such as better quality rigging thread, sail cloth and cloth flags, belaying pins and more blocks and deadeyes ( both walnut). I hope this helps your understanding Bill and that I haven't missed anything out. BTW I have just started my Soleil Royal as a side project as my work room needs refurbished so it's mainly all painting atm, however as I say SR will be a side project as I intend to start another wooden kit when everything is done. All the best Robert 👍 🤺 ⚓
-
No problem O.B.one glad my build can help you in some way or another. Your build looks to be very small will be very interesting to follow and see how it turns out. Happy modelling my friend.
-
Thank you very much for your kind words I am by no means an expert, just enjoying a hobby while learning and pushing my skill boundaries or at least trying to.
-
Thank you very much 👍 🤺⚓
-
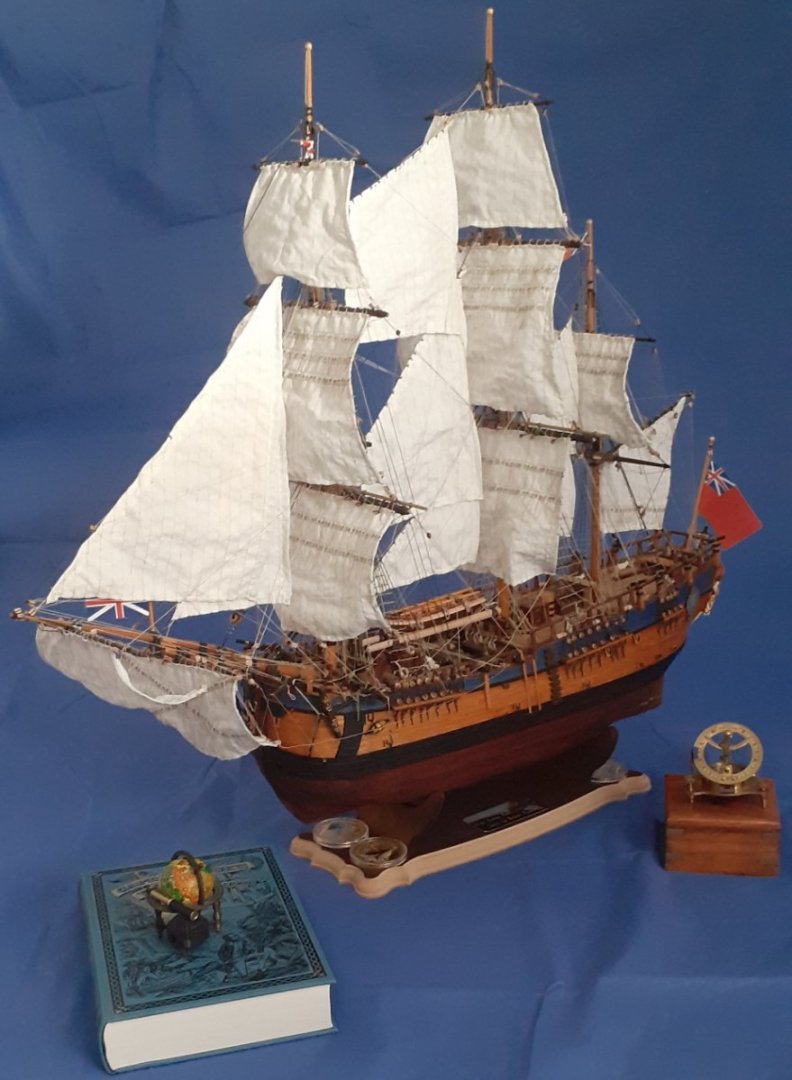
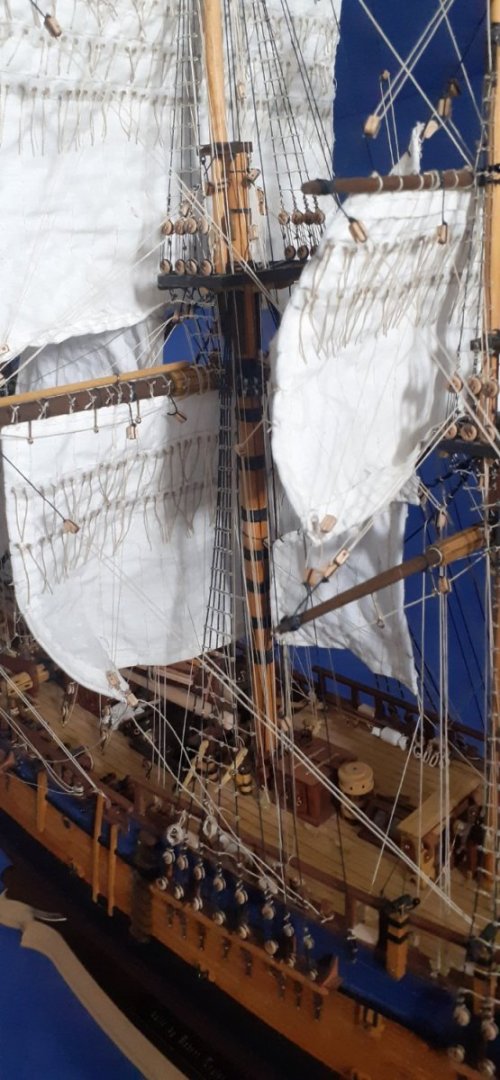
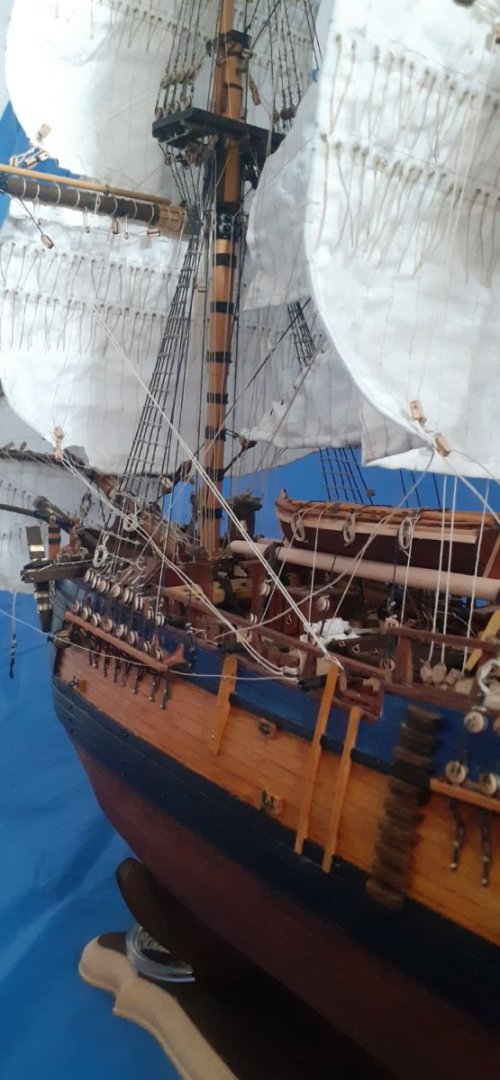
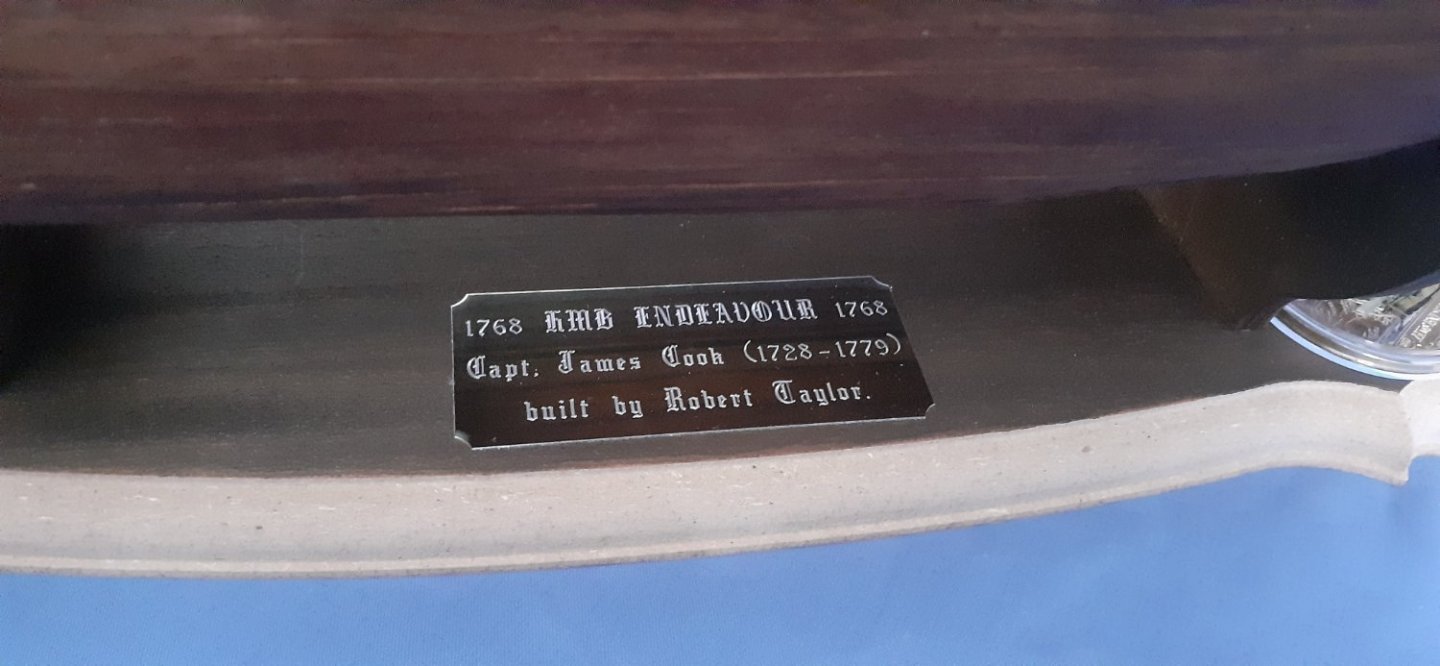
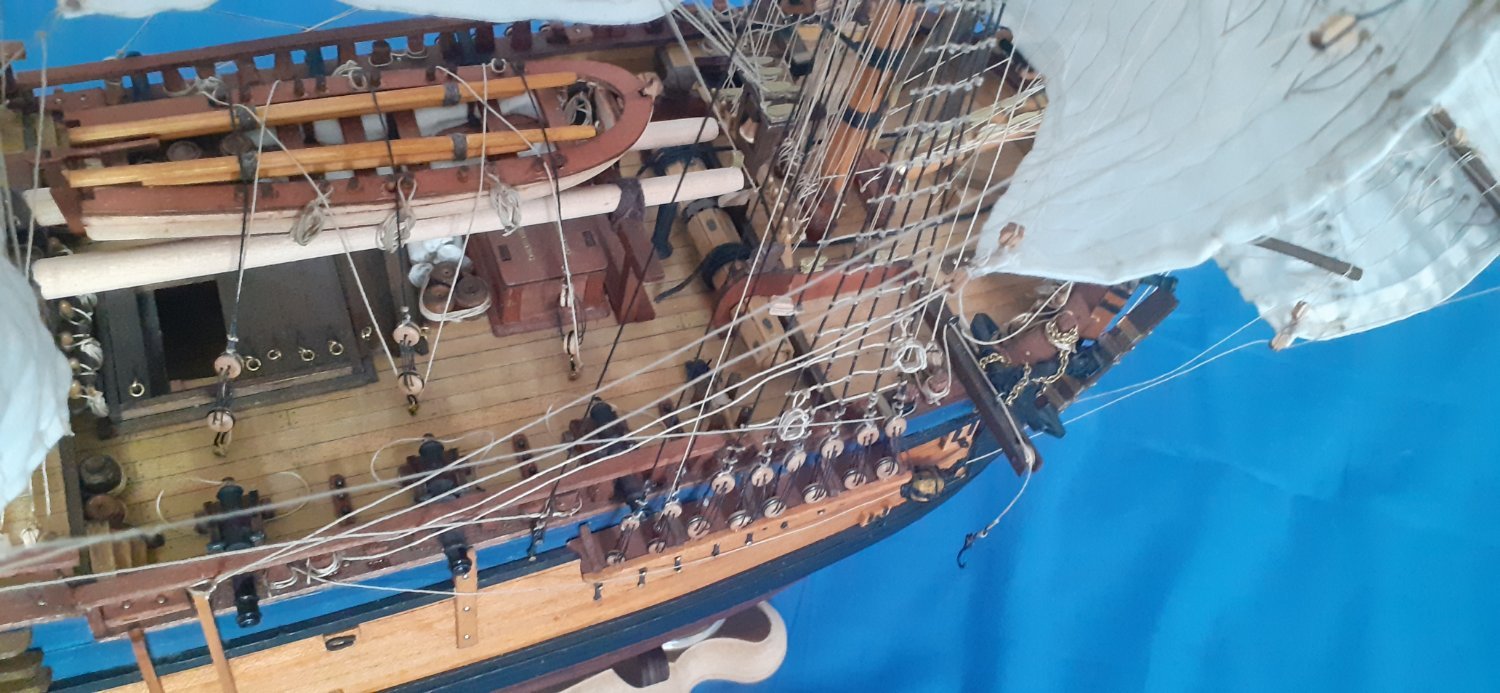
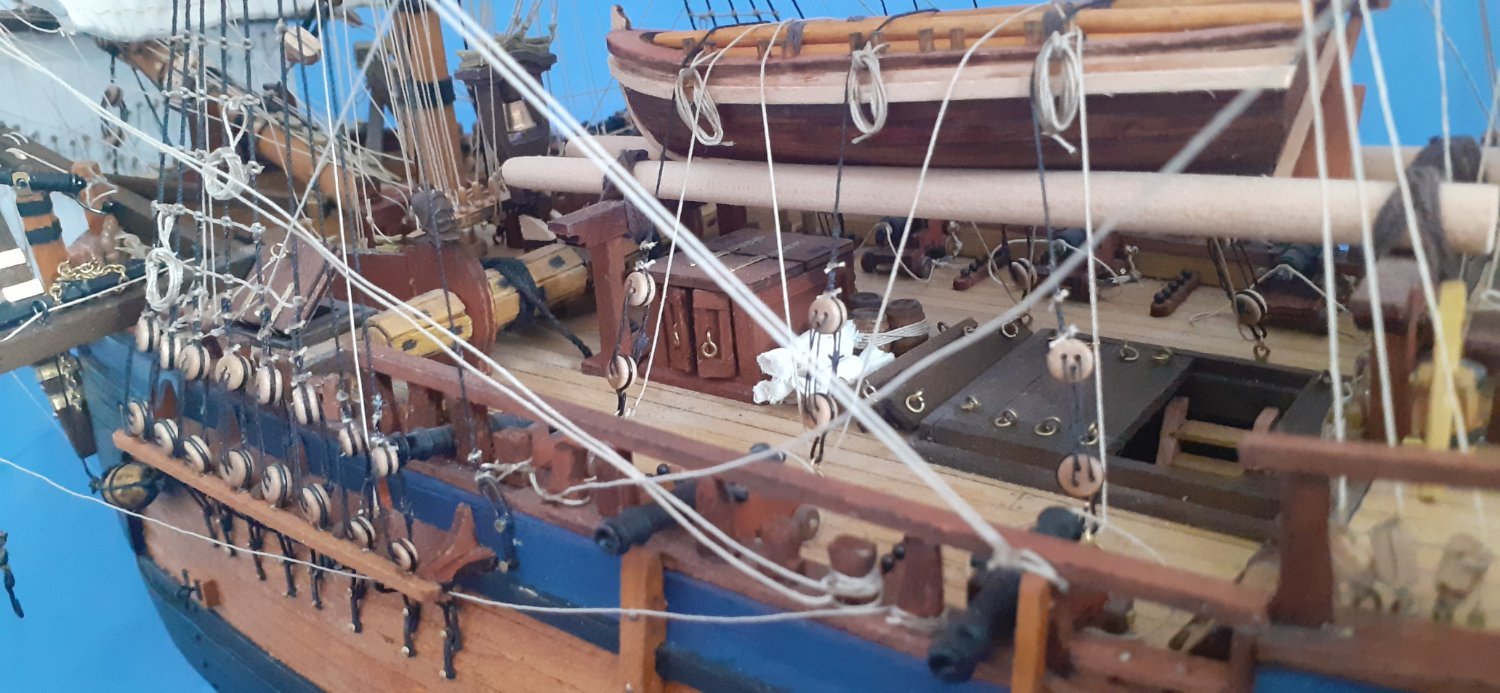
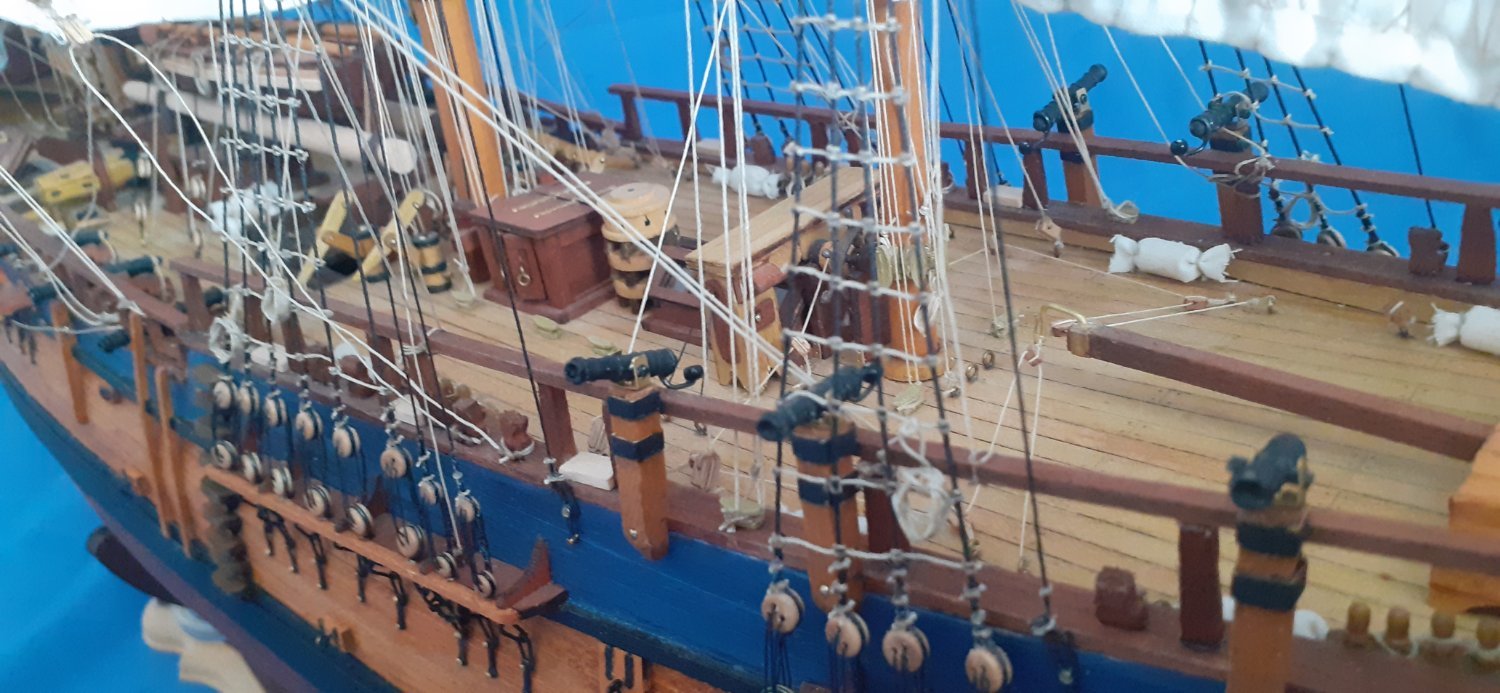
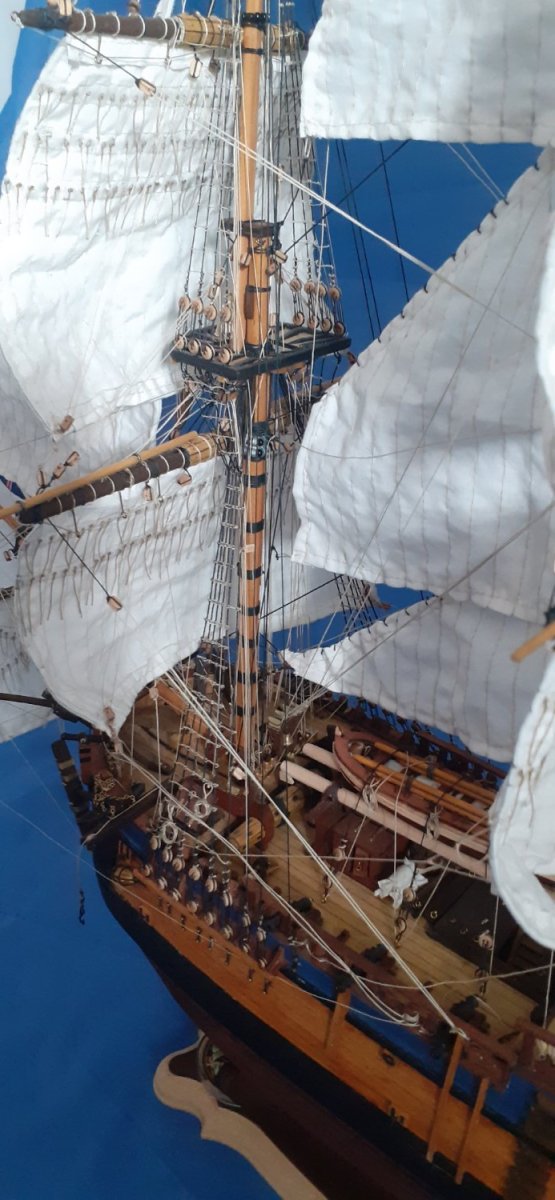
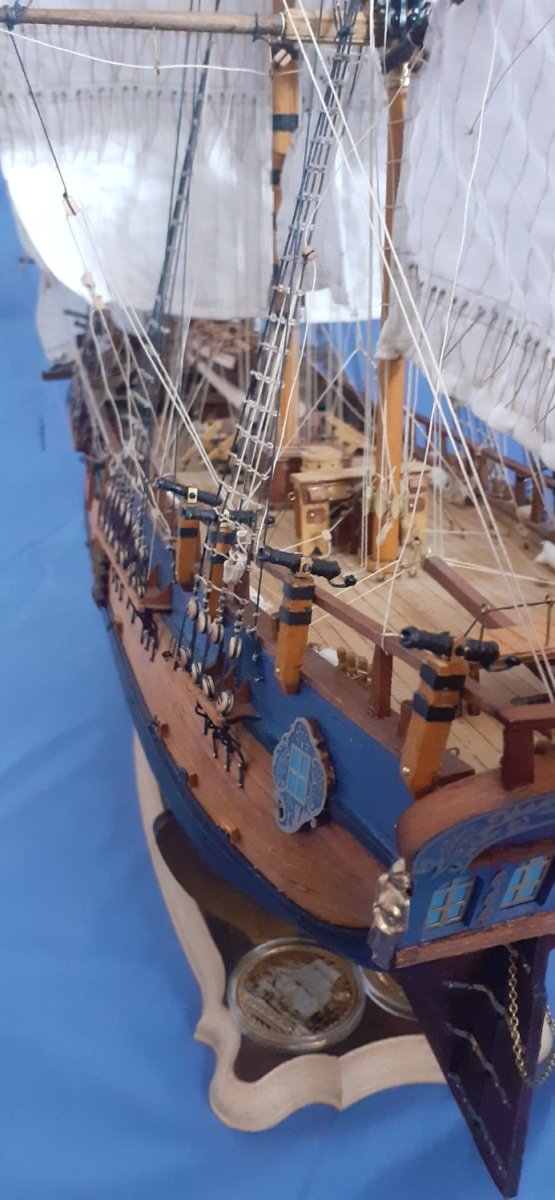
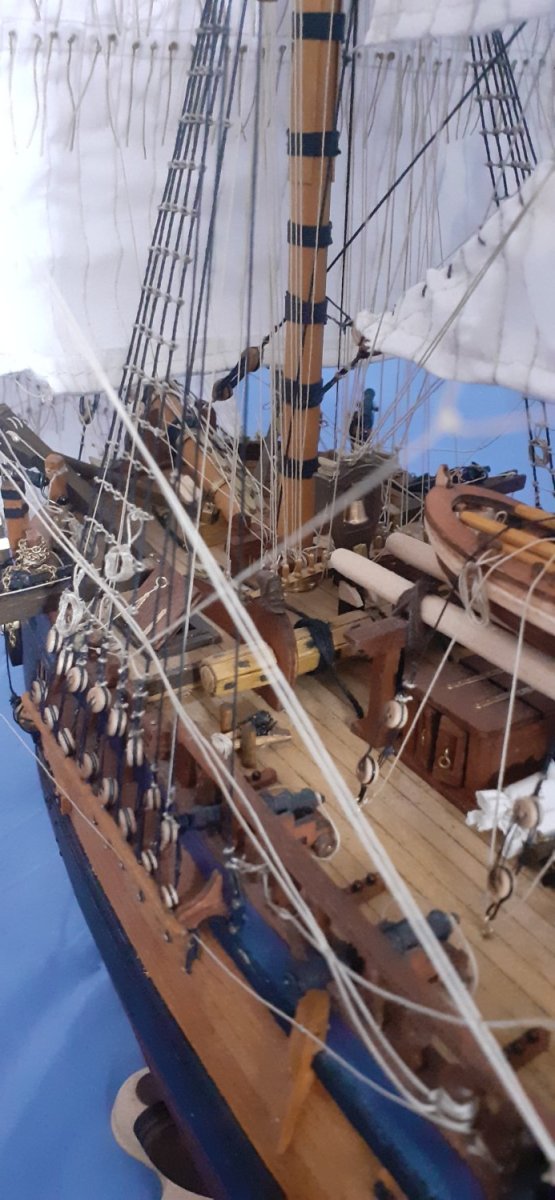
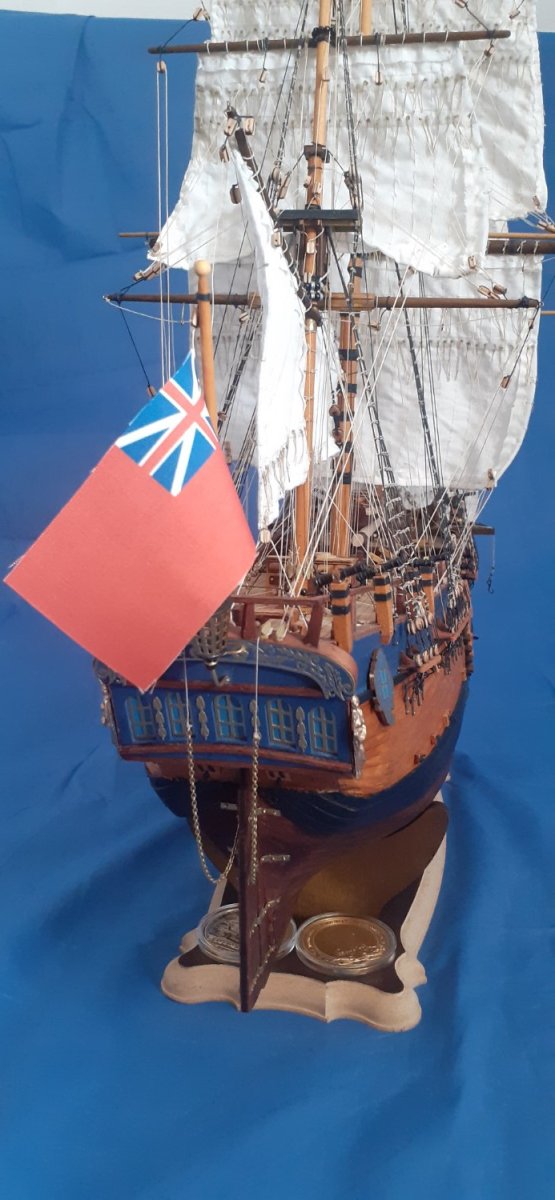
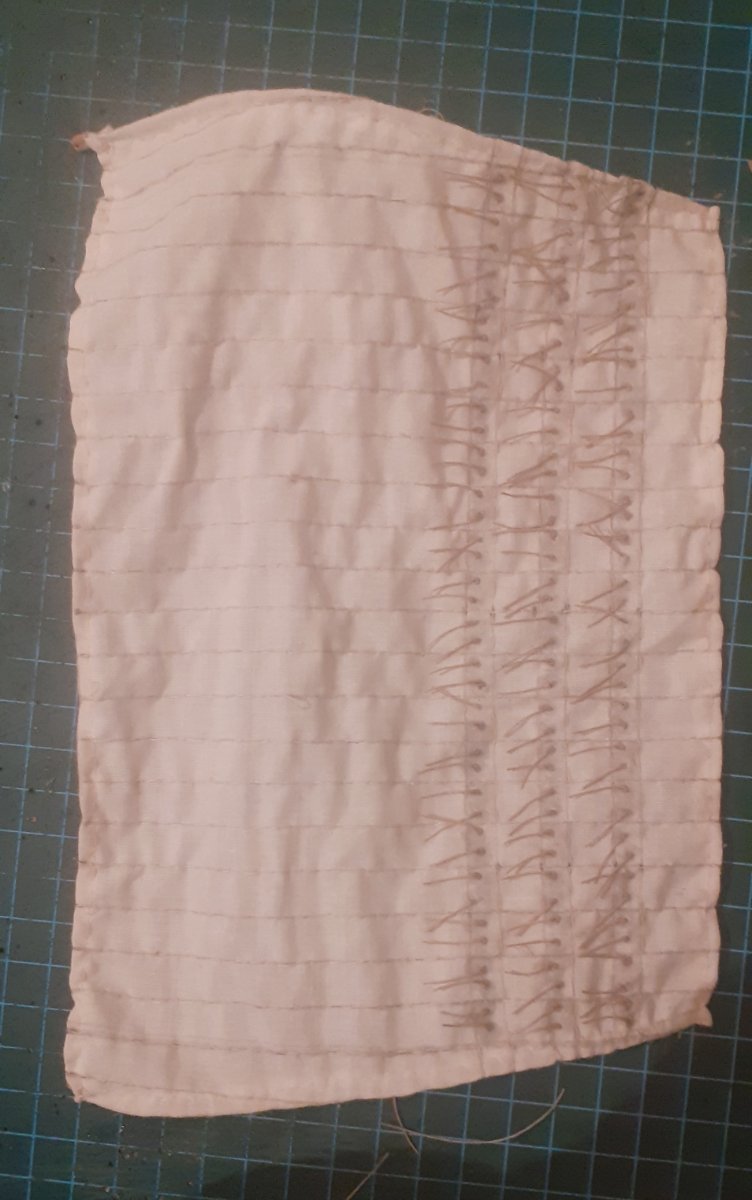
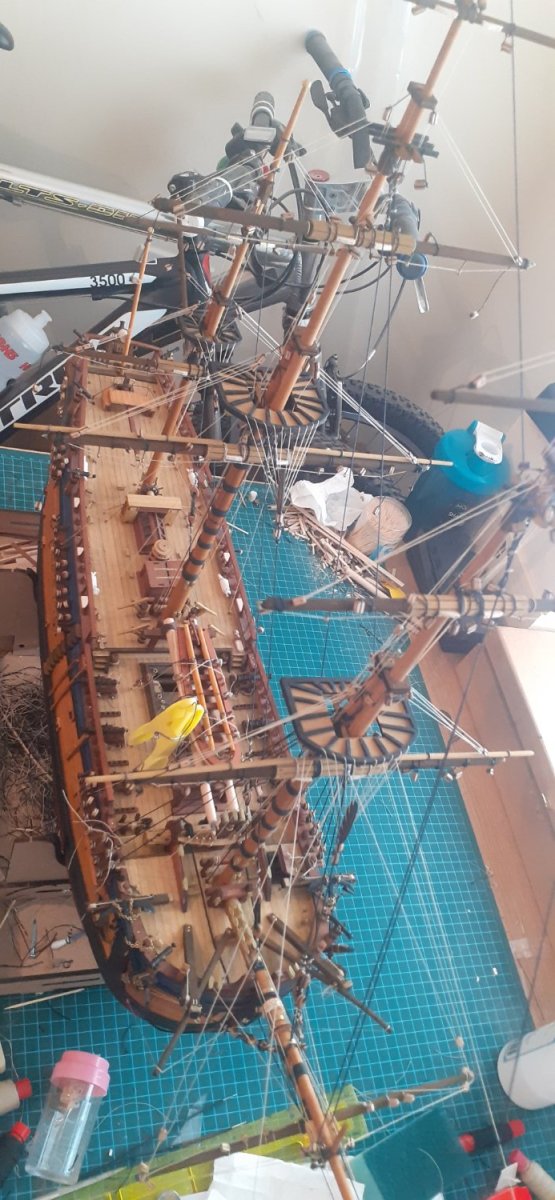
OcCre 1/54 Endeavour FINISHED! After 13 months work on my Endeavour(my first wooden kit), she is finally finished. It's been a great kit & build. I have improvised in a few things like my 17 Hand sewn sails, 550 Reefpoints/gaskets, 55 rope hanks, 50 belaying pins, 40 chainplates , Rigging instructions conforming with the AOS ENDEAVOUR book etc... now after 1100 clove hitches, 164 Deadeyes, 250+ Rigging Blocks, 12 Heart blocks & god knows how many miles of thread, she is now ready to set sail. Wishing Everyone all the best in this great hobby of ours, and keep building those works of art. I hope you enjoy the pictures as much as I enjoyed building her. Slainte Mhath Everyone 👍🍻🍻🤺🤺🤺⚓⚓⚓


- 38 replies
-
- 10
-
-
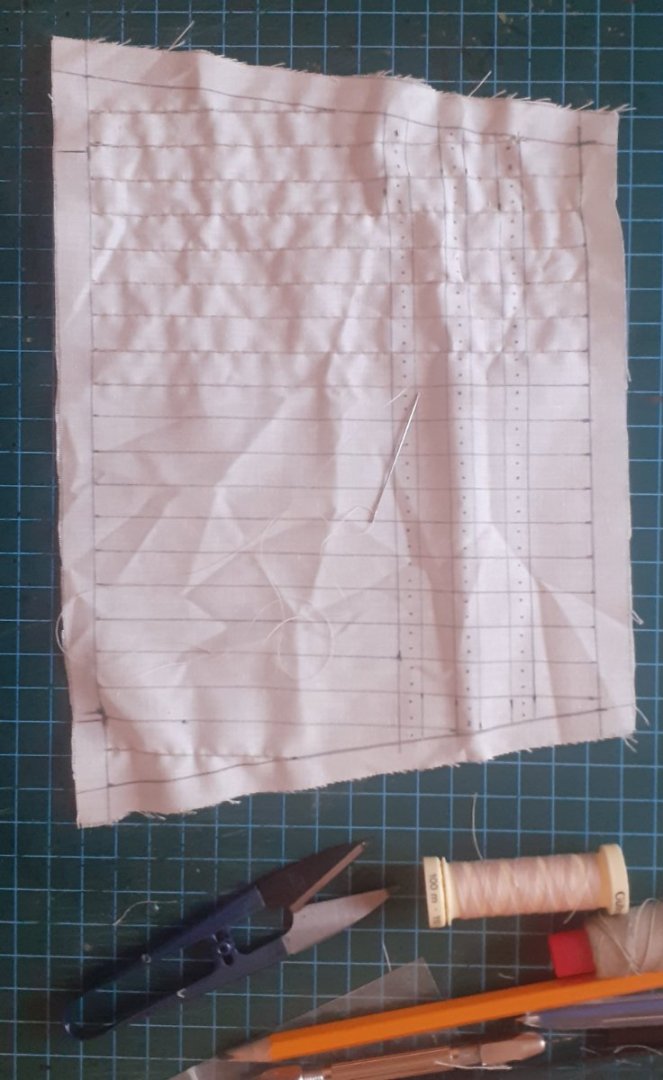
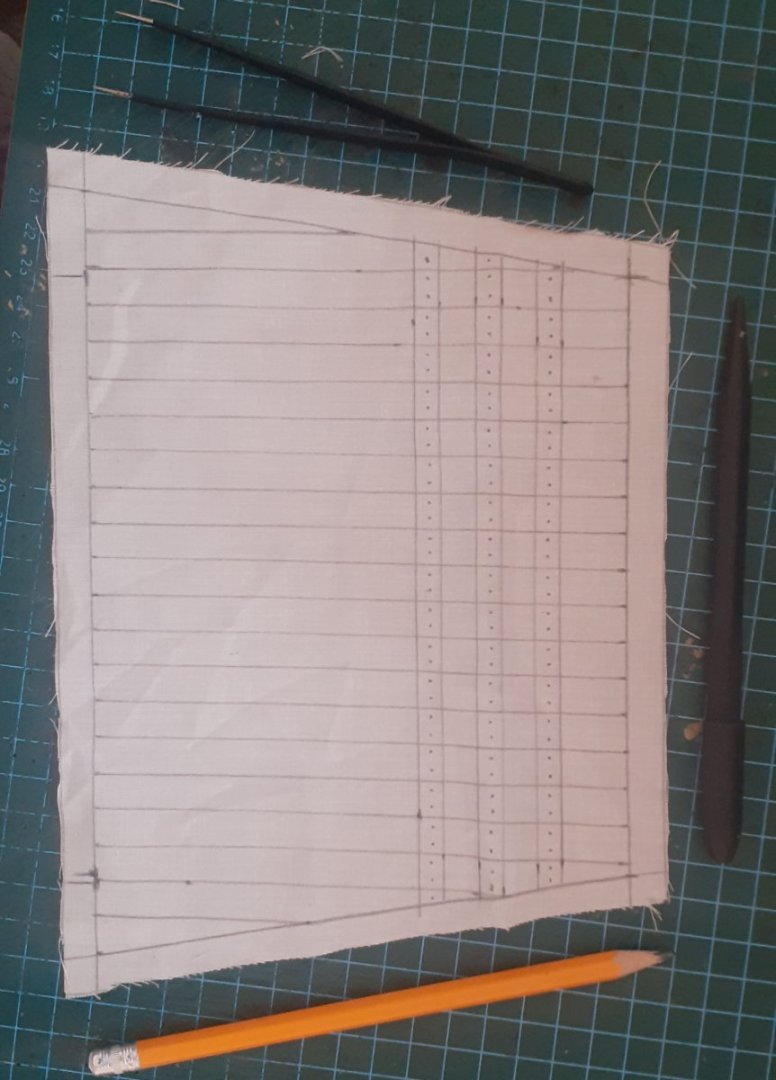
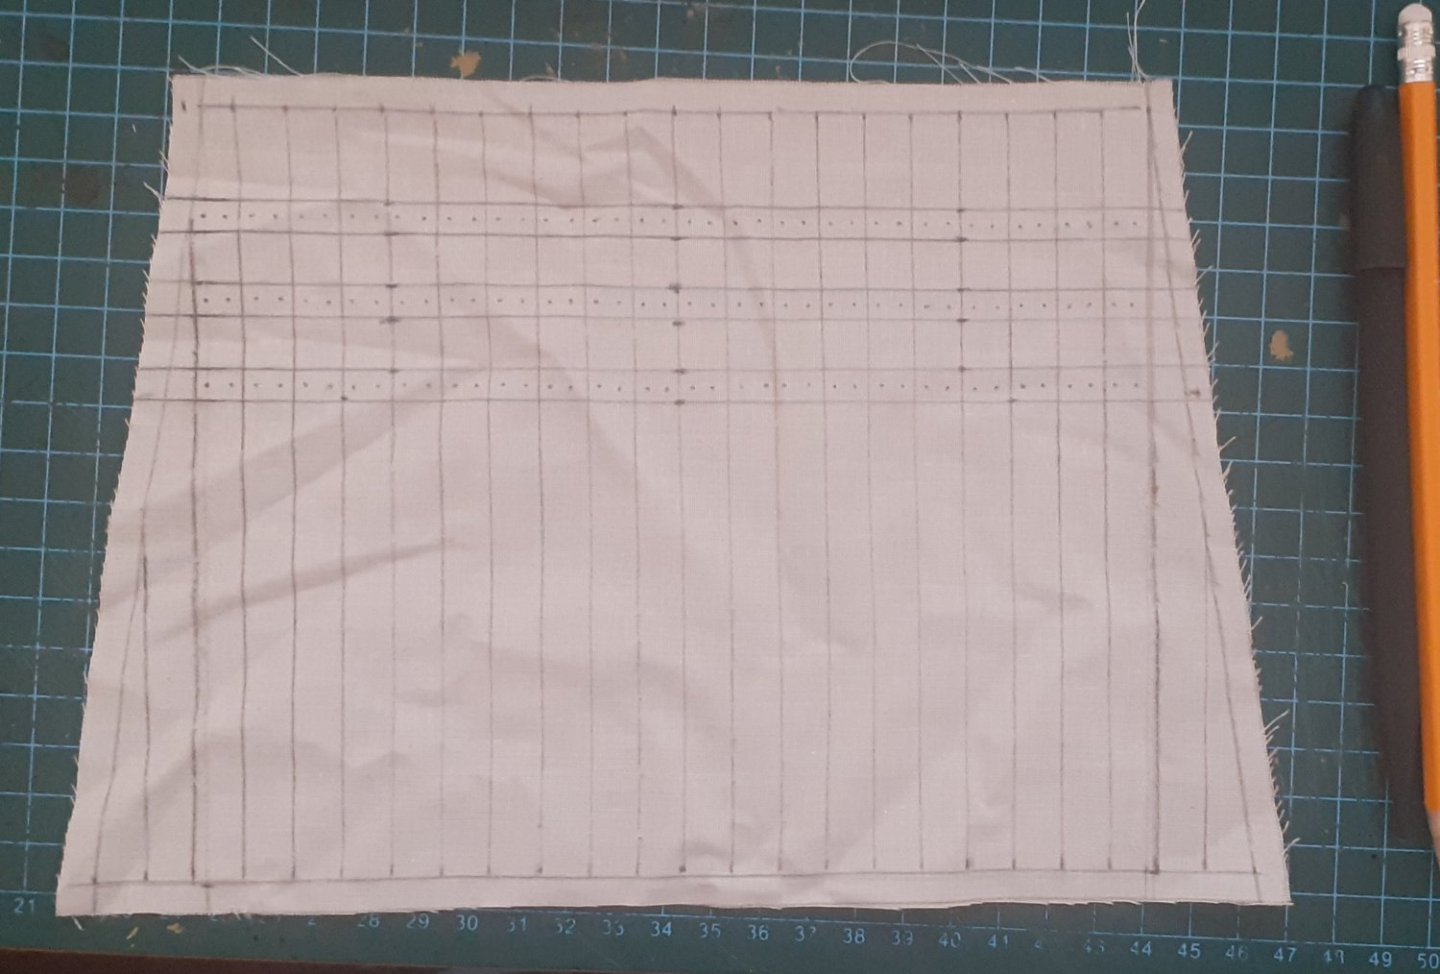
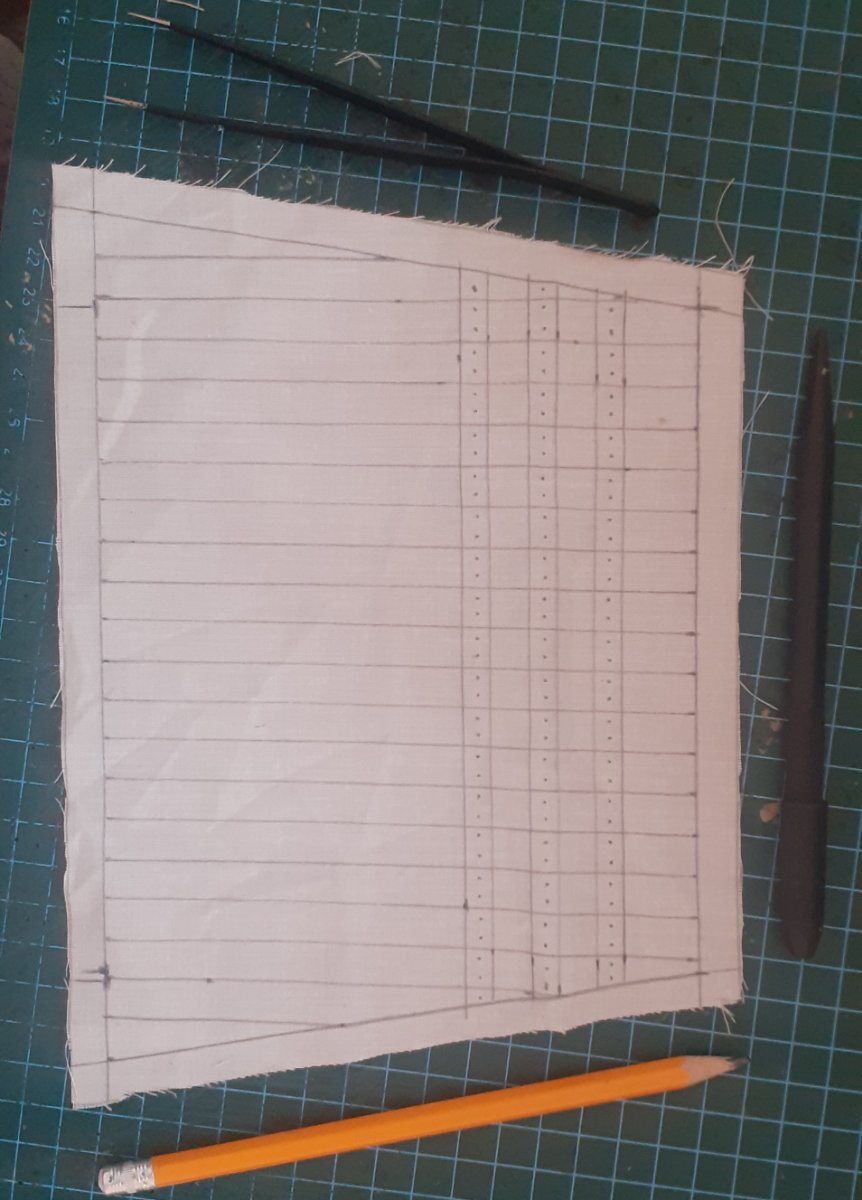
Well due to Health issues and work commitments, Christmas and life in general I haven't been near my Endeavour in 2 months. I have only just got bk to her last week, so this is a short update on what I've managed to do so far. I have chosen to disregard the kit sails and hand sew my own as I felt some of the kit ones were too large and lacked enough stitching detail. So here is my First Hand sewn sail finished for my Occre Endeavour This is the Main Topsail with its 120 reef points attached. I have also inserted 0.8mm modelling wire in the sides so as to Billow the sail when it is rigged thus no need for a water/glue paste mix to hold the shape. Next sail up for Hand sewing will be the Fore Topsail which will also have approximately 120 reef points attached. Happy modelling everyone and a very apologetic and belated Merry Xmas and New year.


-
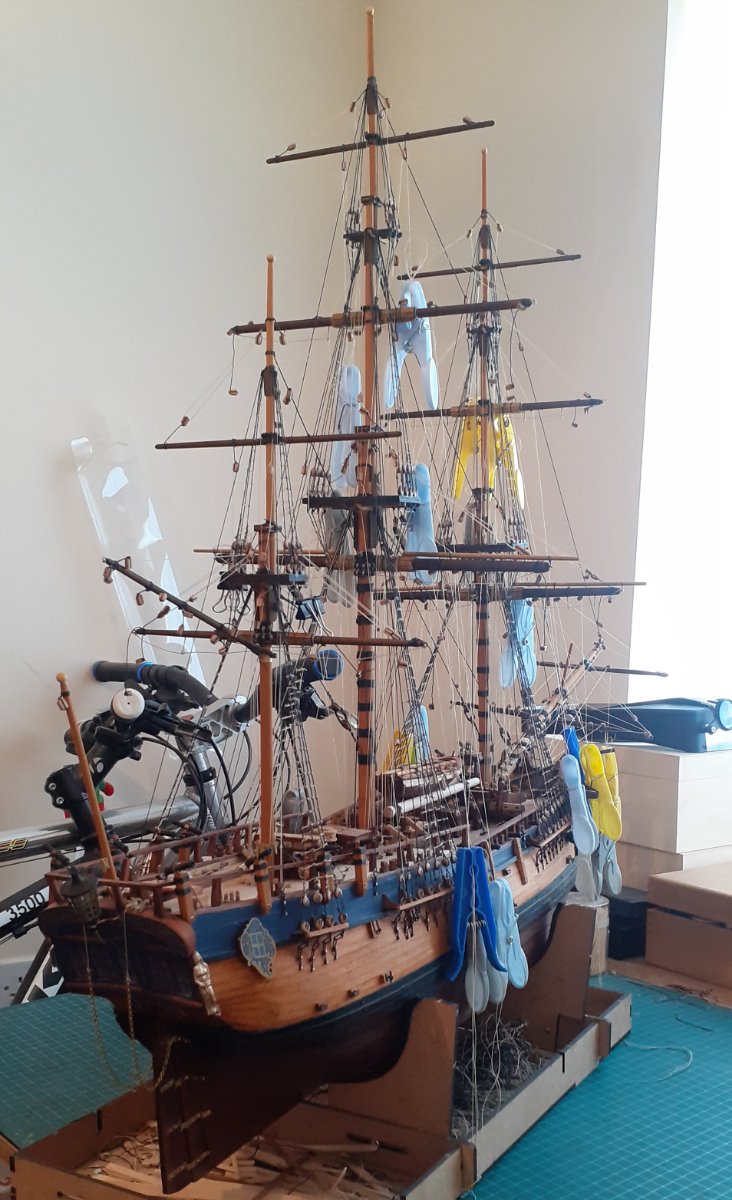
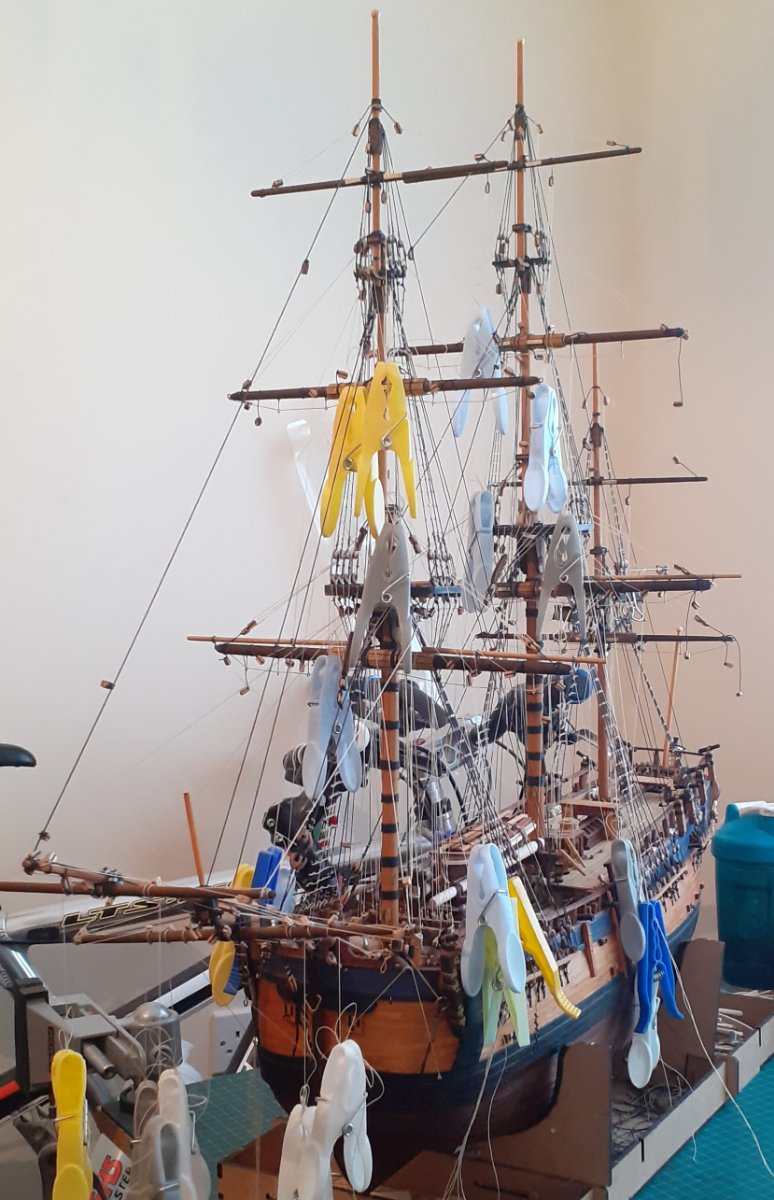
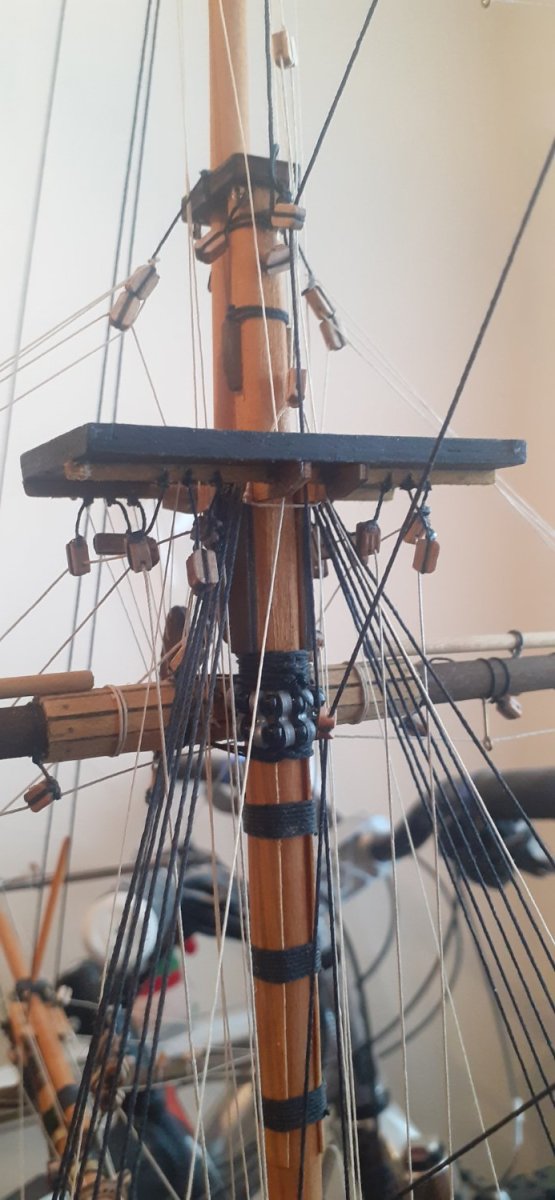
Occre Endeavour 1/54 WIP update Its been 6 weeks or so since my last post, on and off with health issues which seem never ending atm, but I can now say that 90% of the rigging is finished with the exception of rigging sails and bowlines, threat of the sail rigging is in place as you can see from clothes pegs tied to these to keep them separated. Shrouds, ratlines, backstays, rope ladders, lifts etc etc... have all been finished. I have also added the 3rd backstay for the Fore and Main masts that weren't in the kit plans but are in the AOS Endeavour book. The Next stage I have 3 options as follows..... 1, Make and hand sew my own sails as some of the ones in the kit I feel are out of scale(too large) and lack correct amount of stitching detail. 2, Use the Sails supplied with the kit. 3, Do not use any sails and tie up the rigging that is installed for the sails to finished her off. Happy modelling everyone staysafe and take care. Slainte Mhath! 👍🤺⚓🍻


-
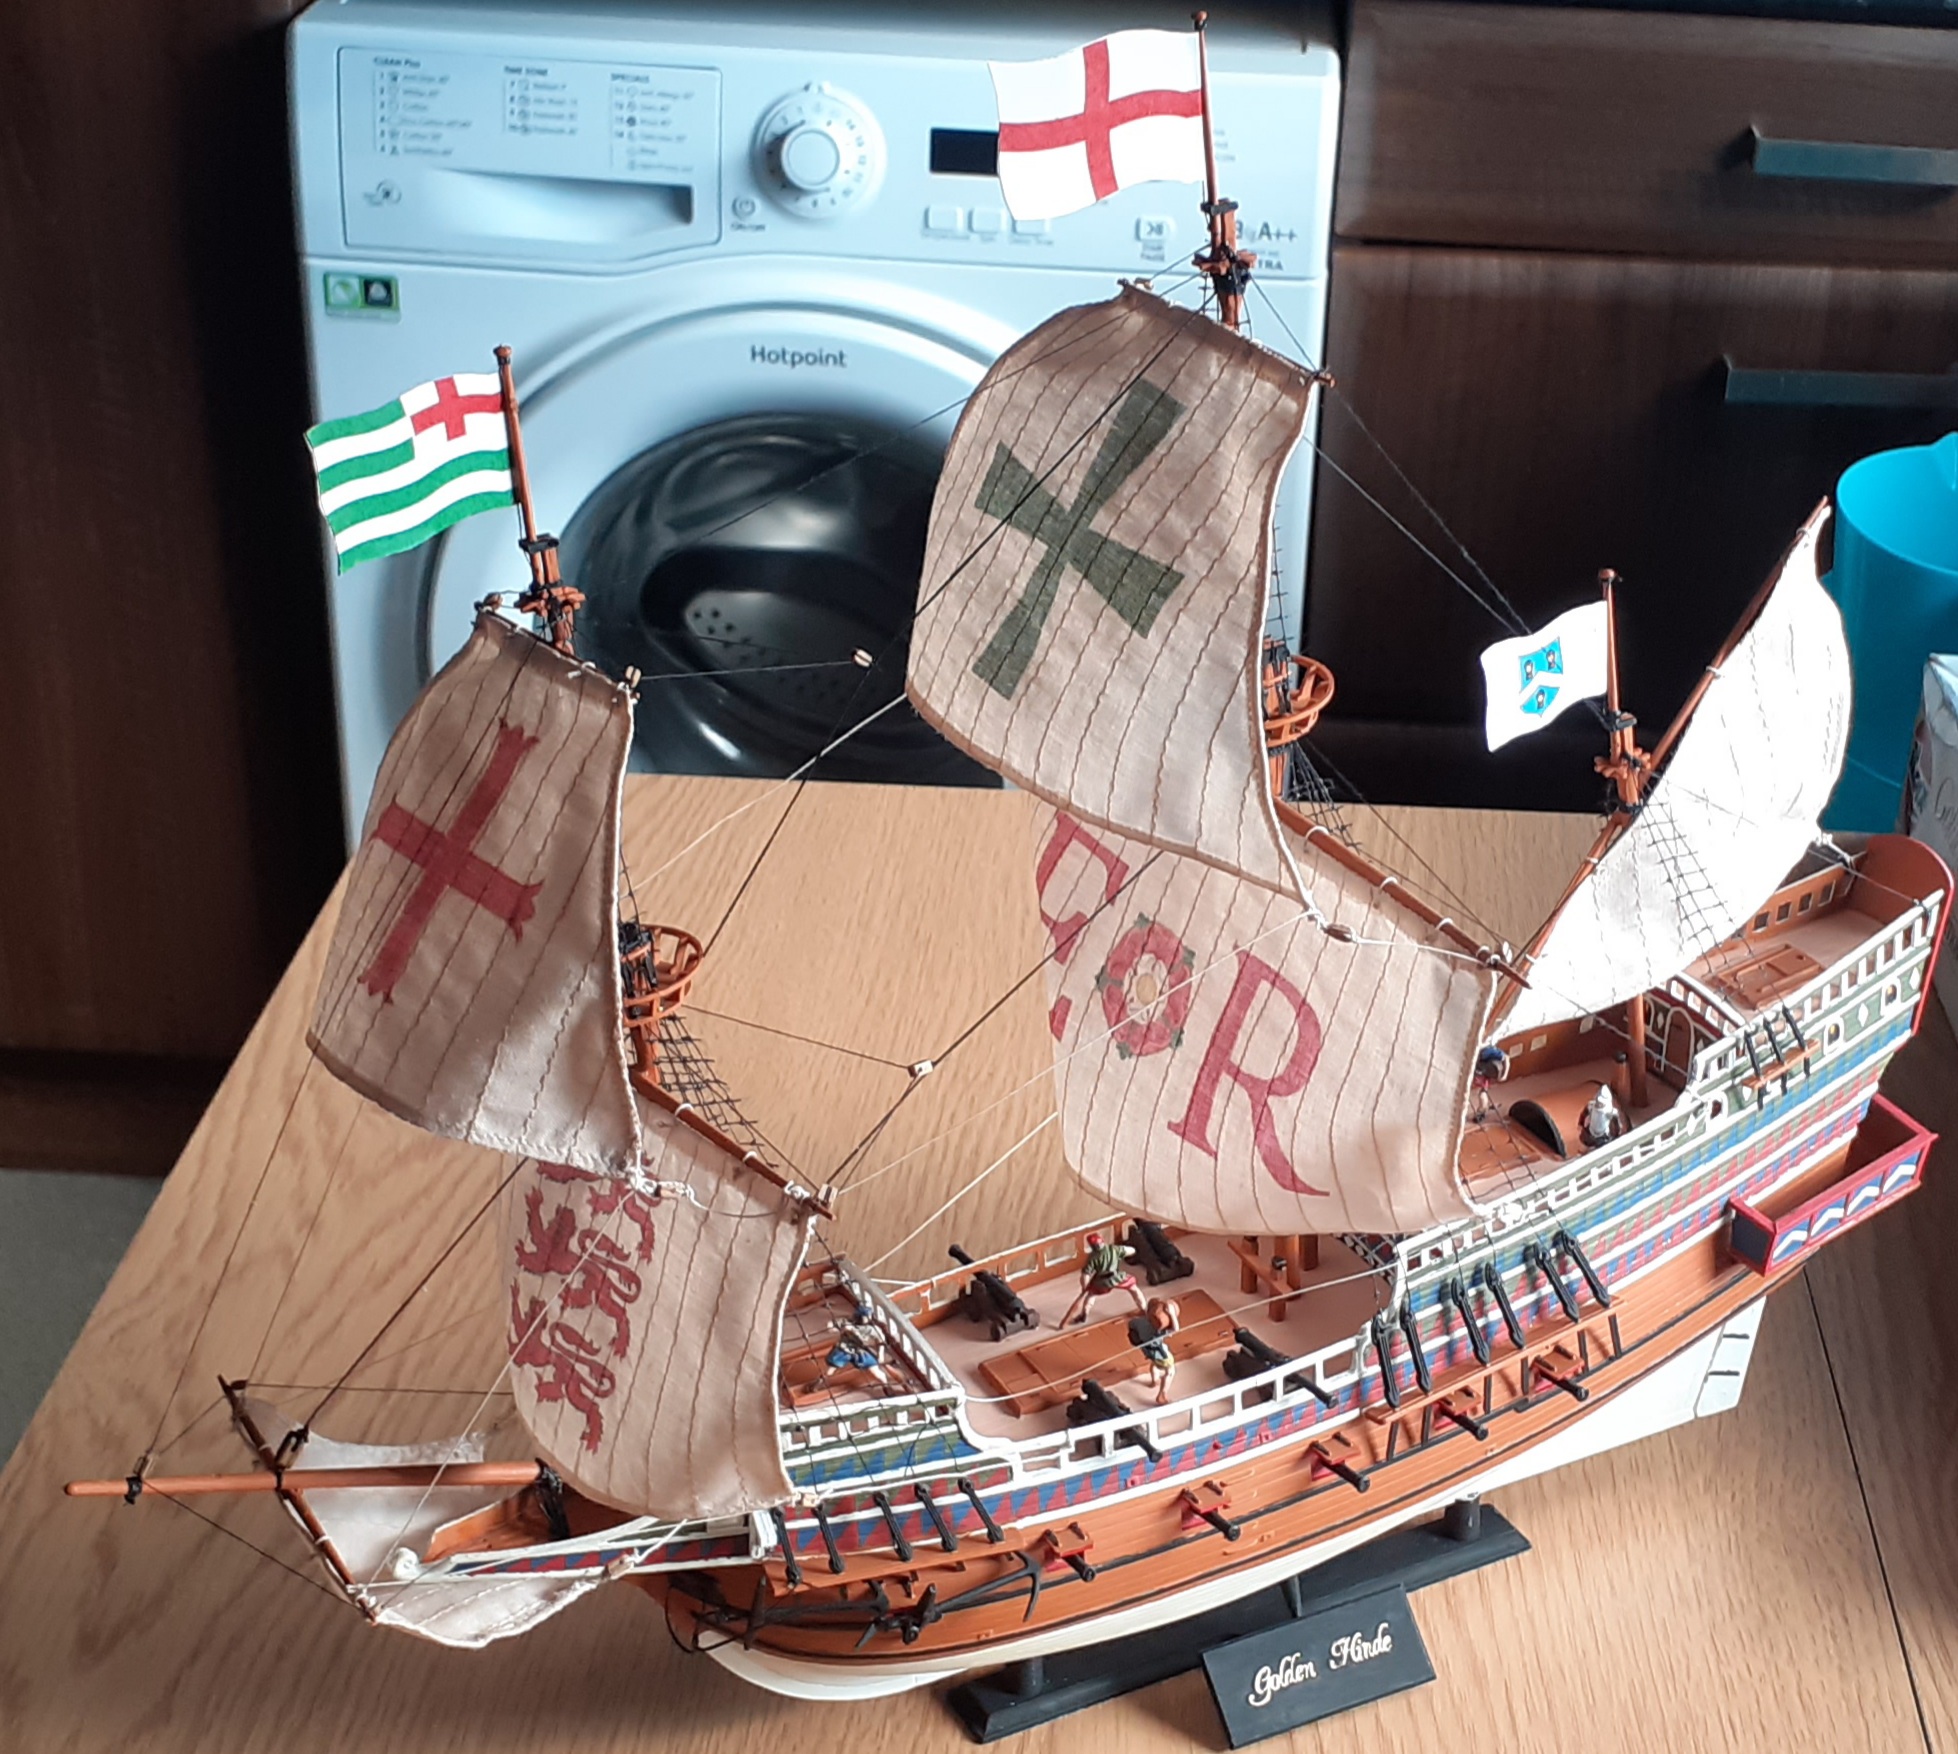
Hi James I painted the wood of the Hull on my Golden Hind I used Revell's Matt 85 Brown which actually comes out a lovely Golden brown colour. Hope this helps James All the best Robert.
- 24 replies
-
- 1
-
-
- golden hind
- airfix
- (and 1 more)
-
Hi Pete First of all Deepest apologies for the waiting so long for am answer. I am not sure how this MSW system works as I haven't had a notification as to your question as I have been on here several times since your question. If I remember right I used a mix between 3cm and 5mm blocks mostly 3mm, these I purchase from "Cornwall Model Boats" a company here in the UK which I thoroughly recommend as they have an extensive range of kits, fittings and accessories for kit building. Hope this helps Pete All the best Robert
-
Occre Endeavour 1/54 WIP update Standing tall and proud her rigging has begun....... with all lower deadeyes in place it's now spaghetti junction time...😉


-
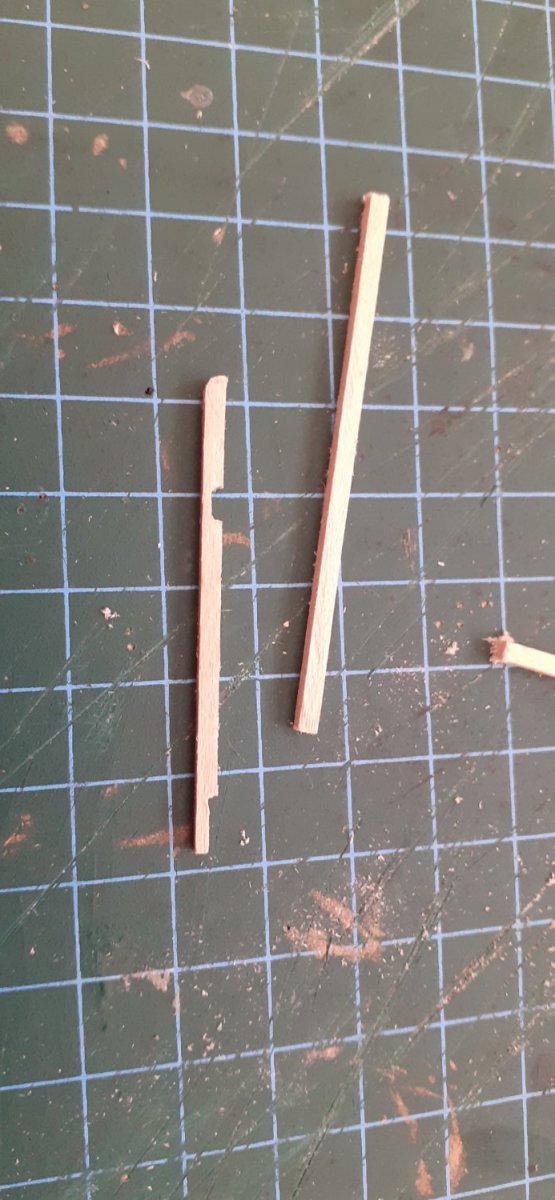
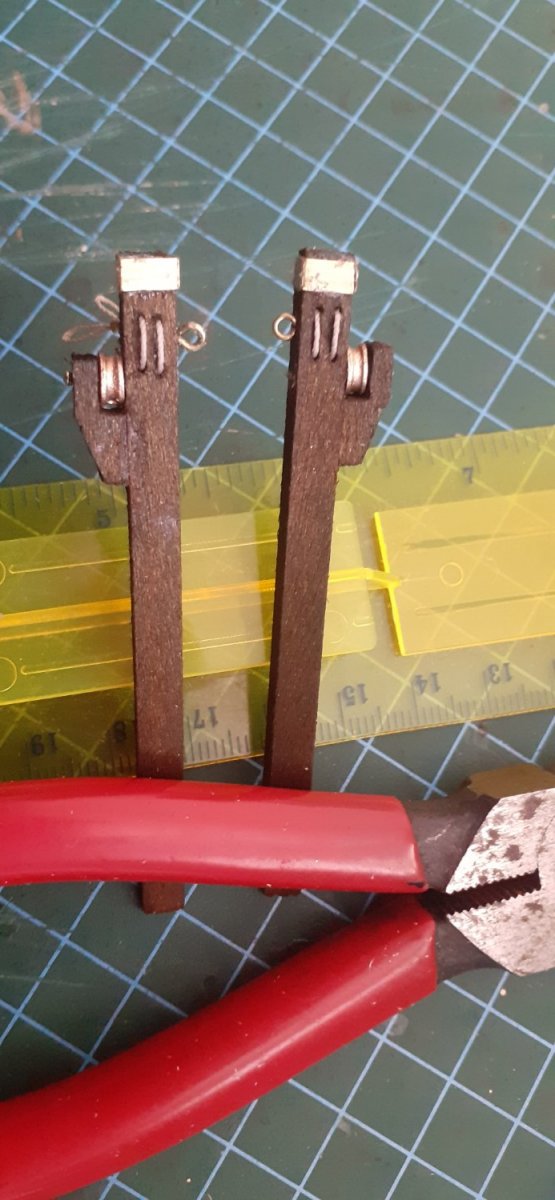
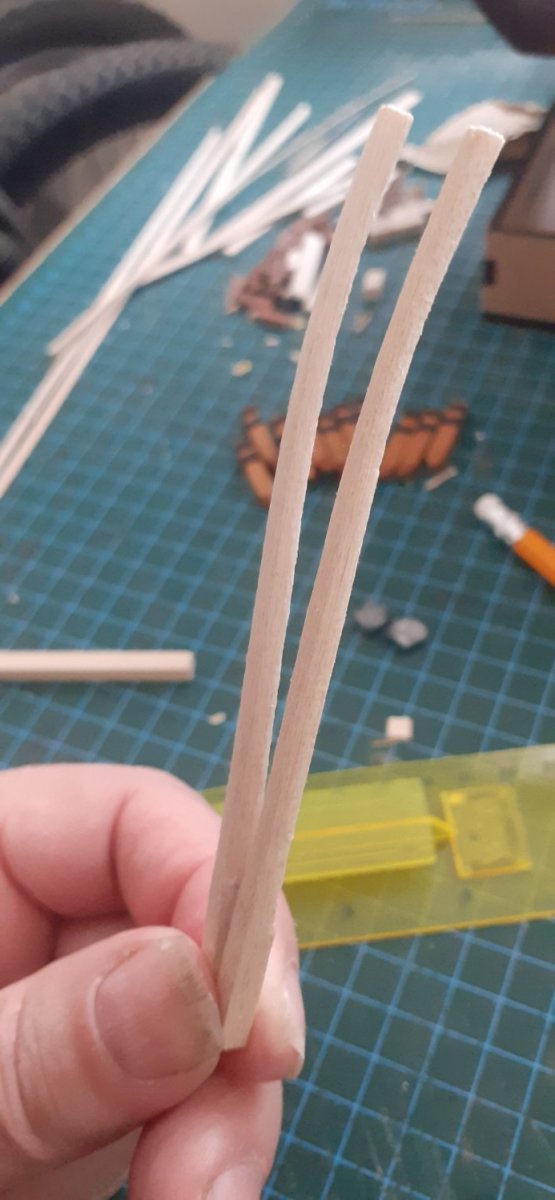
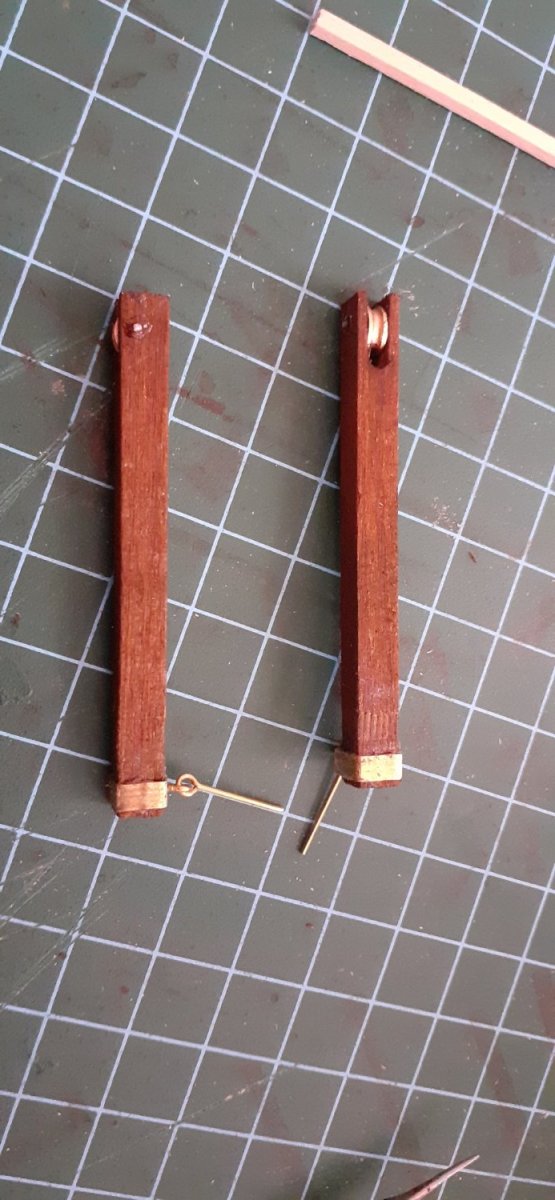
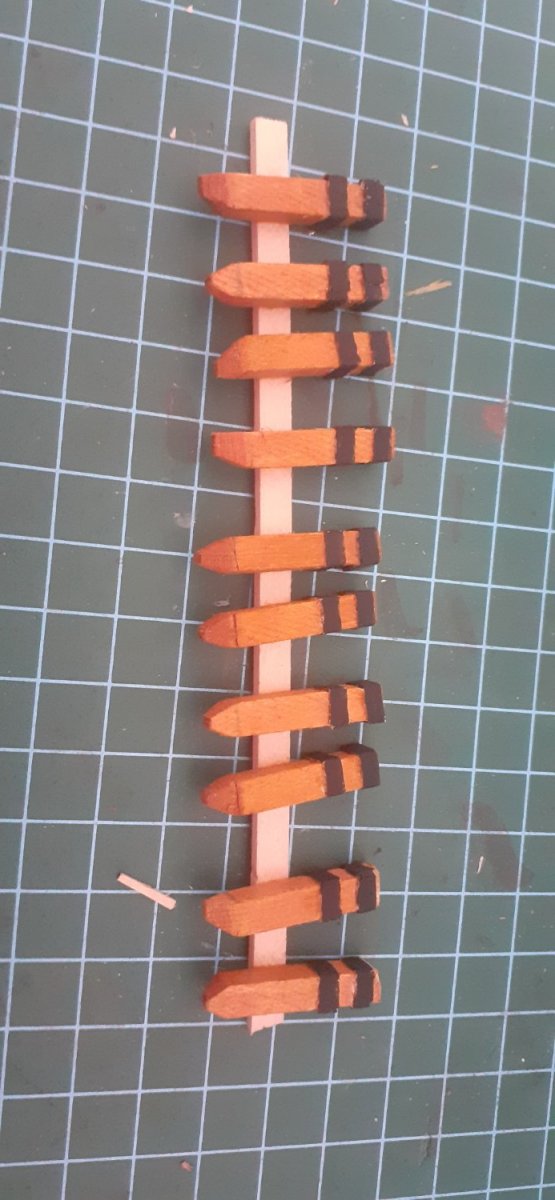
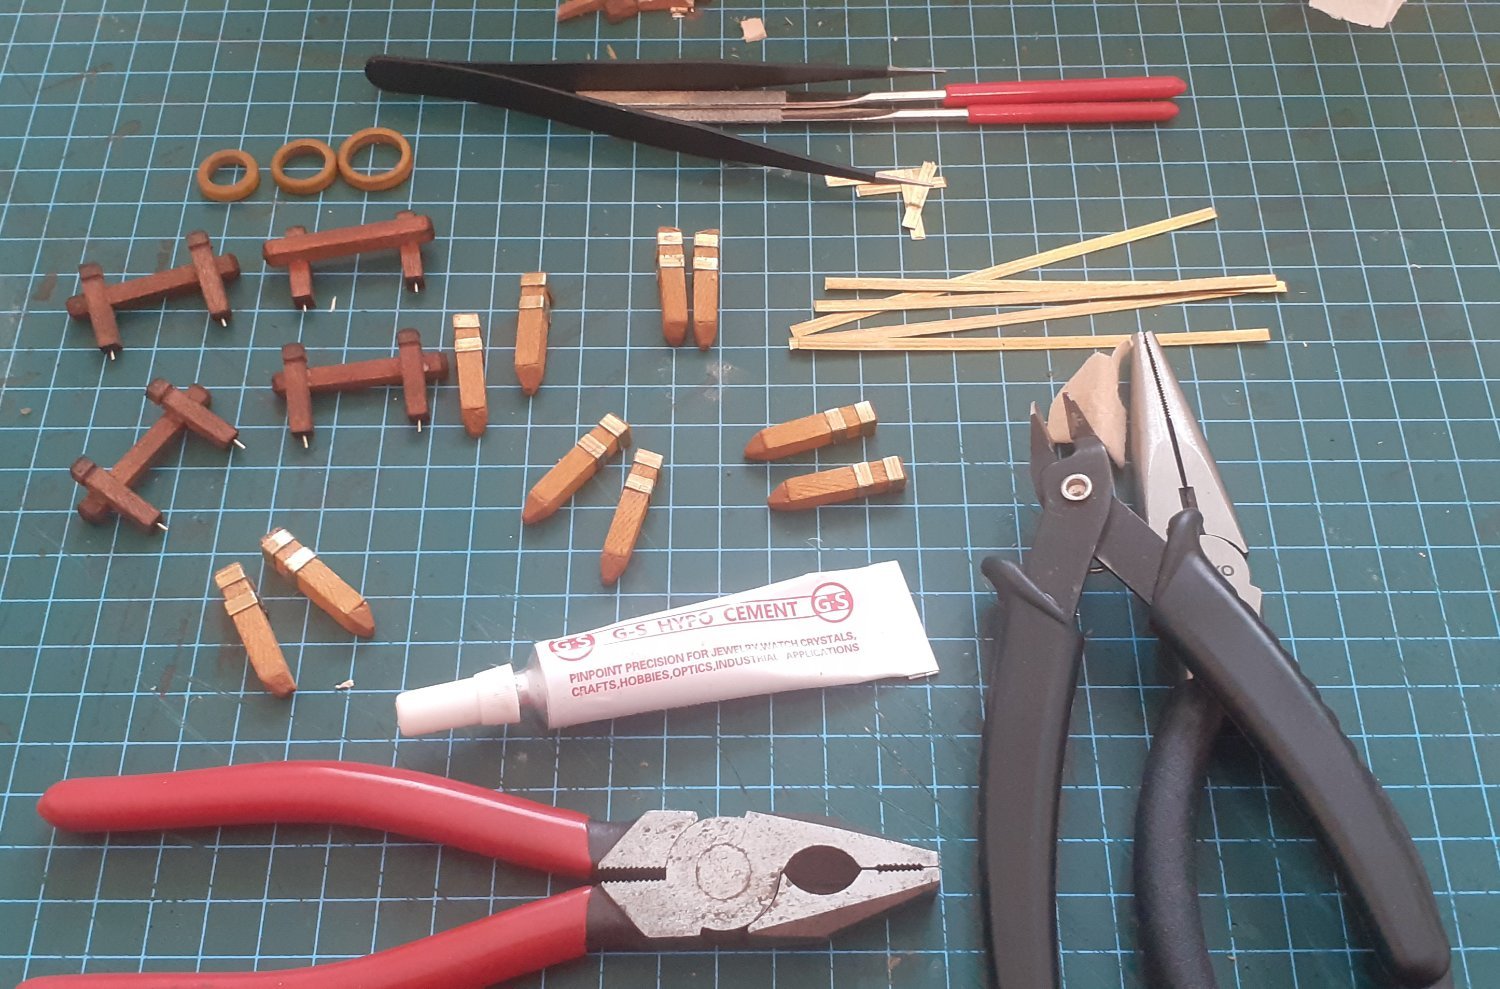
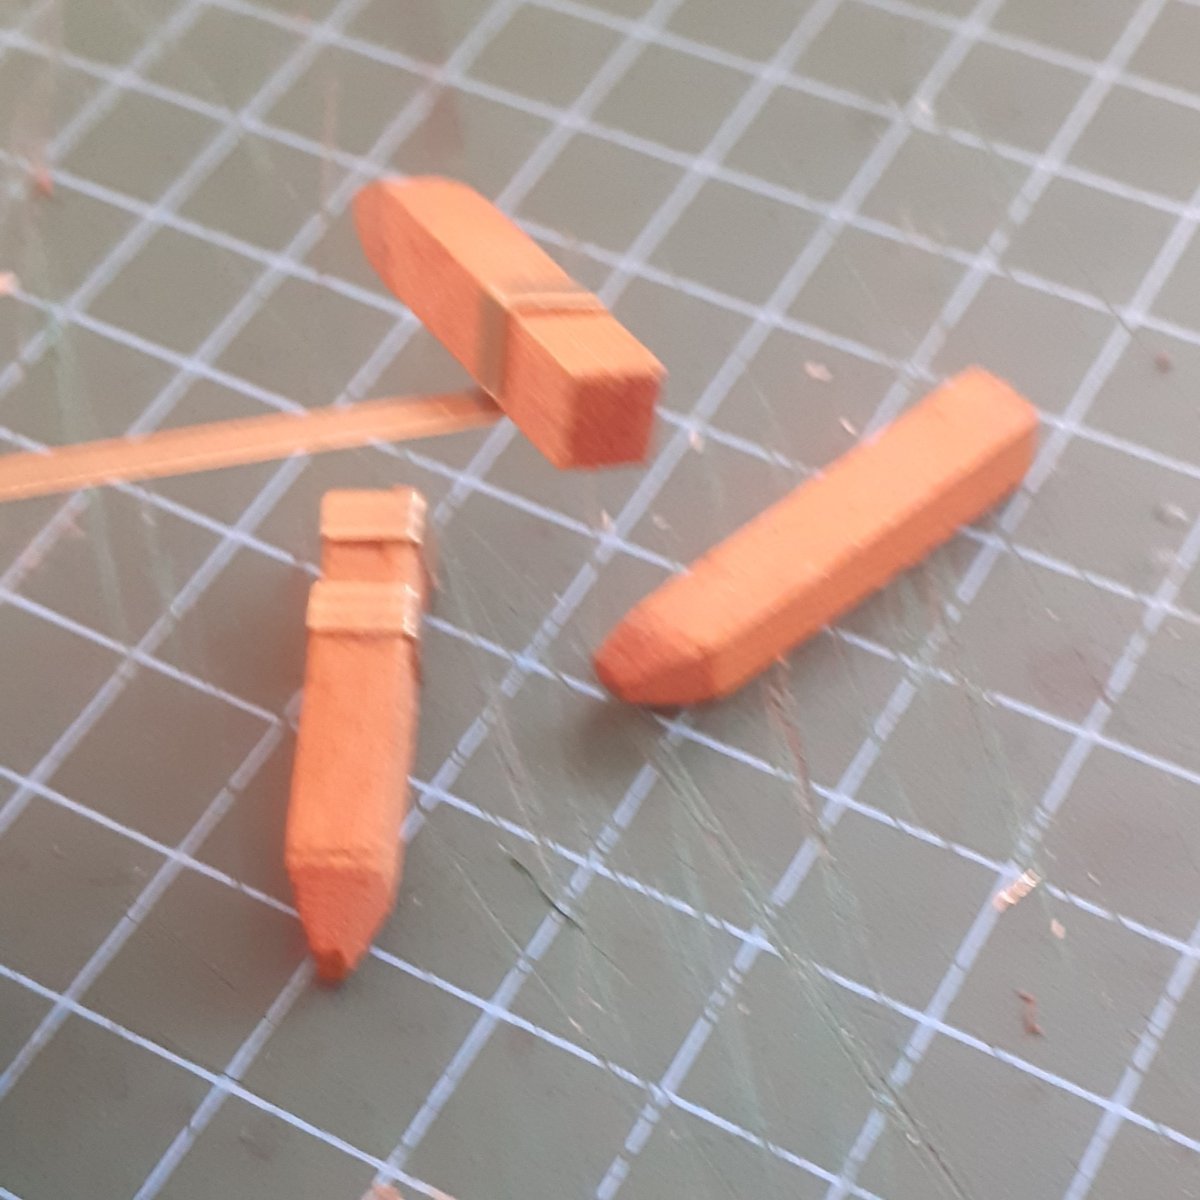
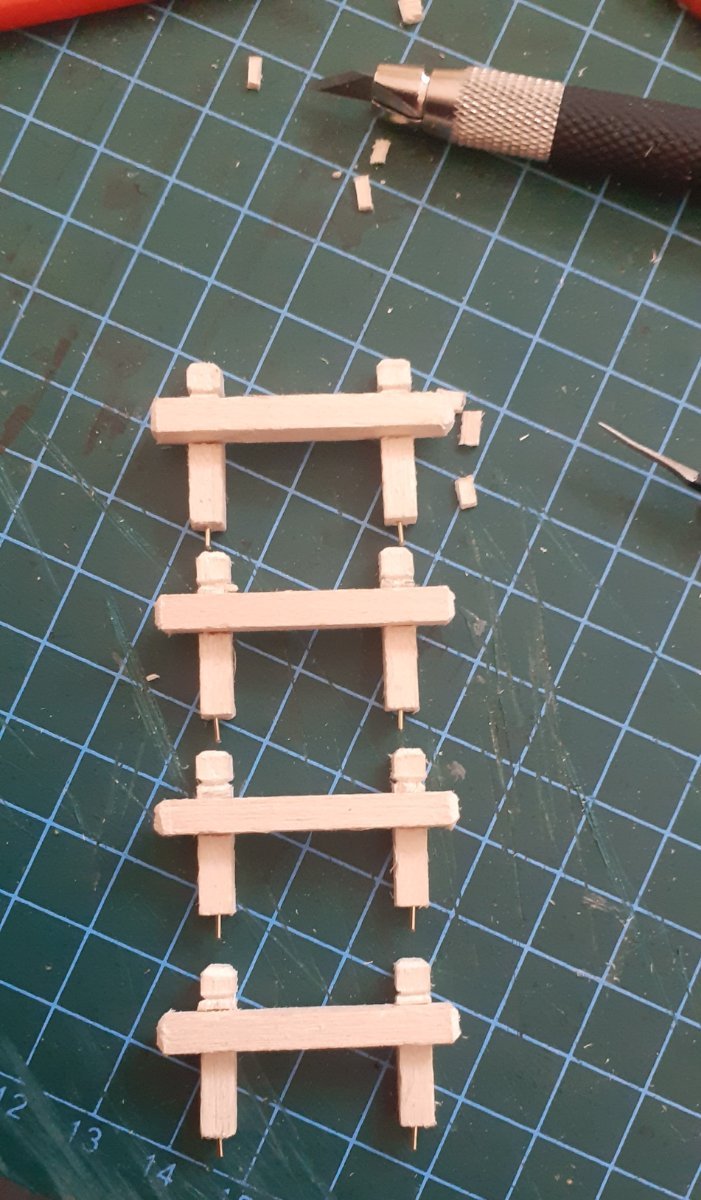
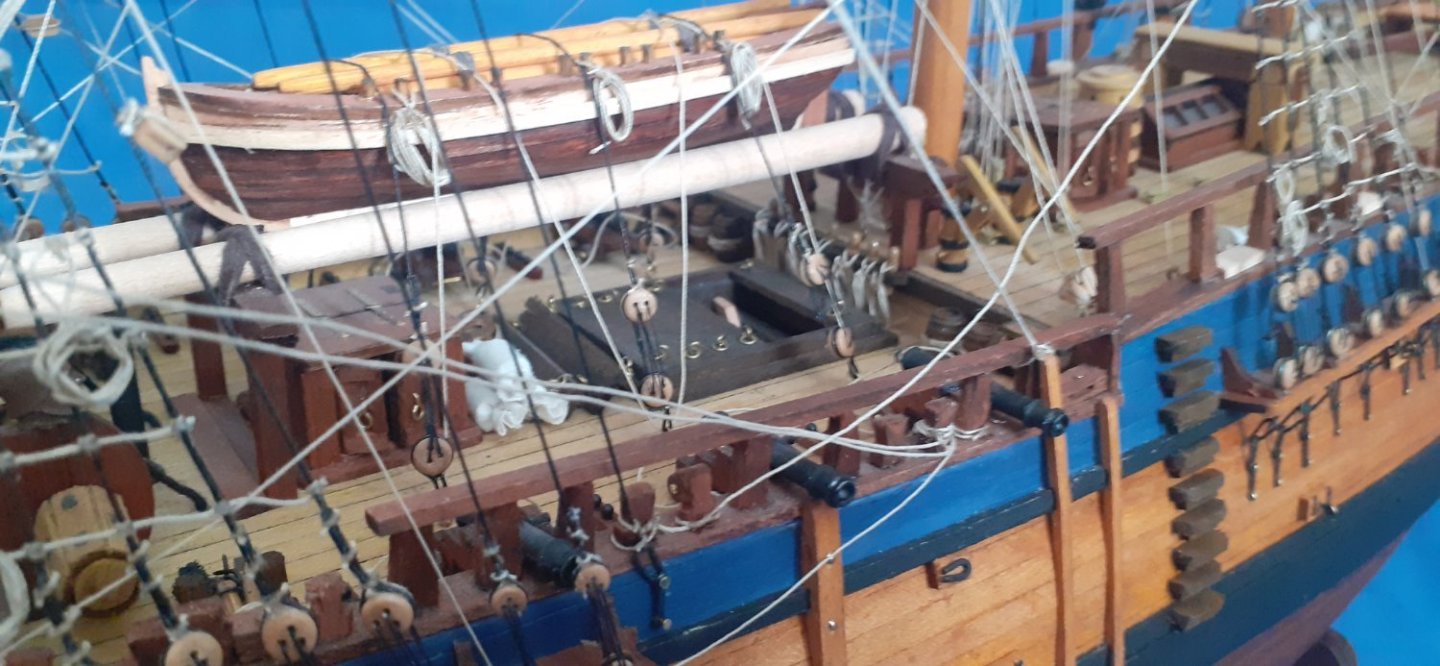
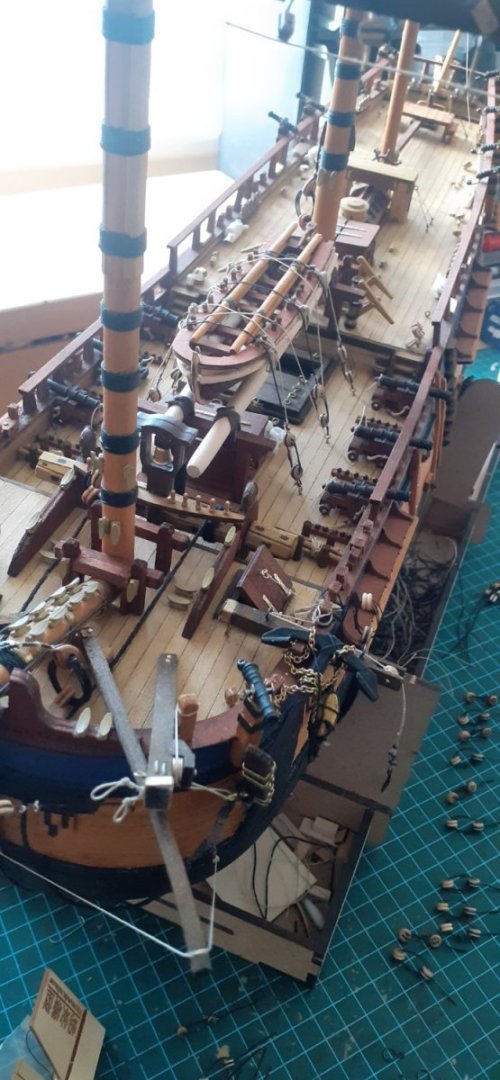
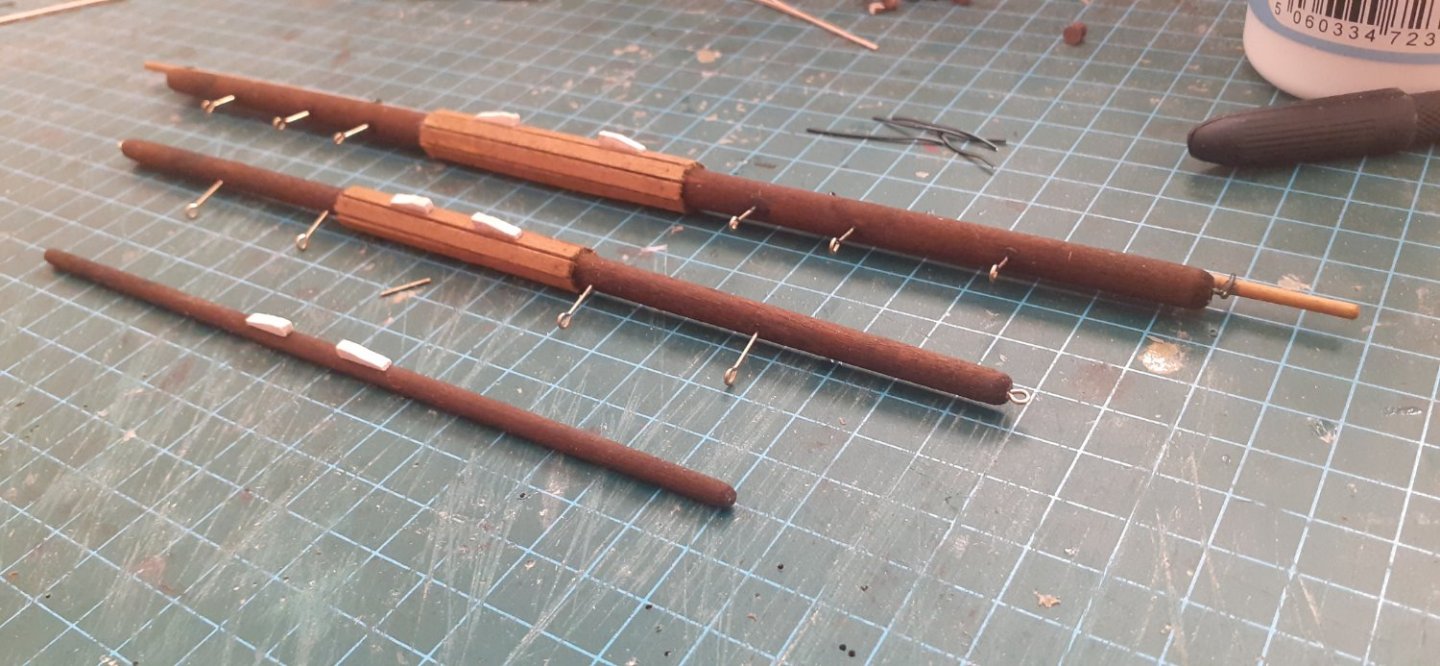
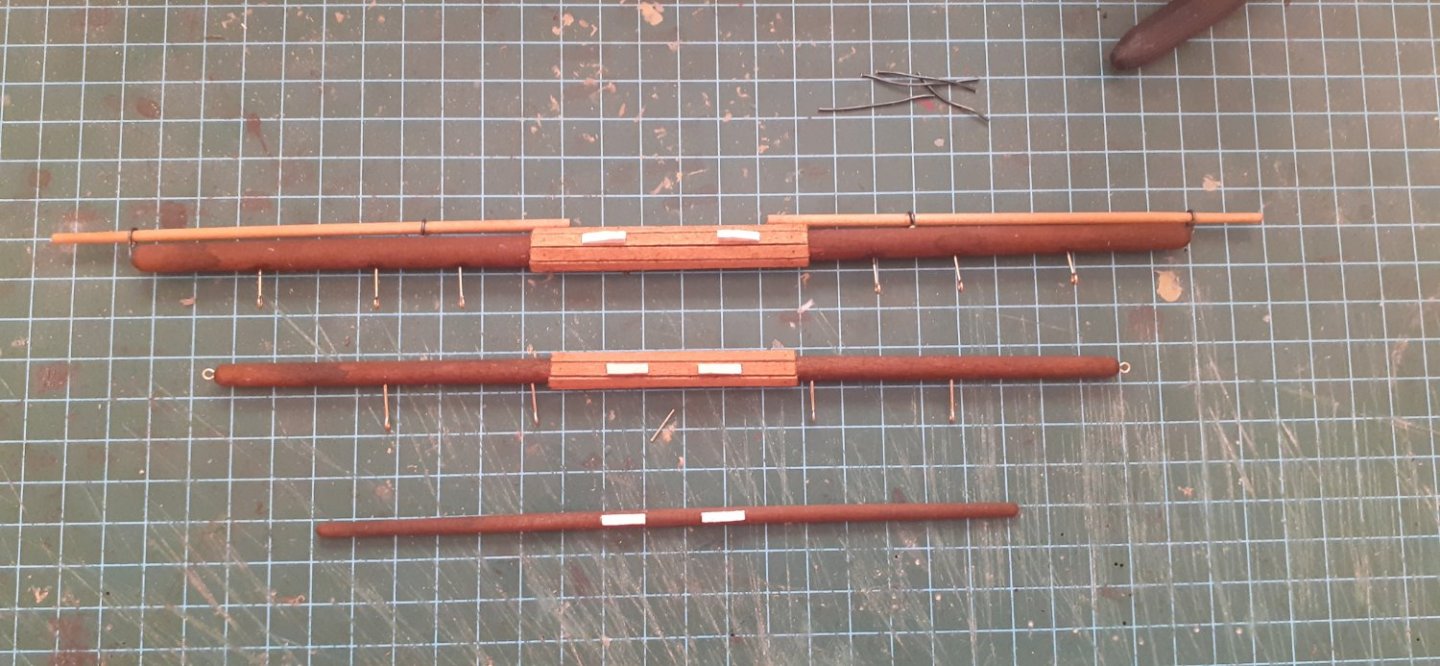
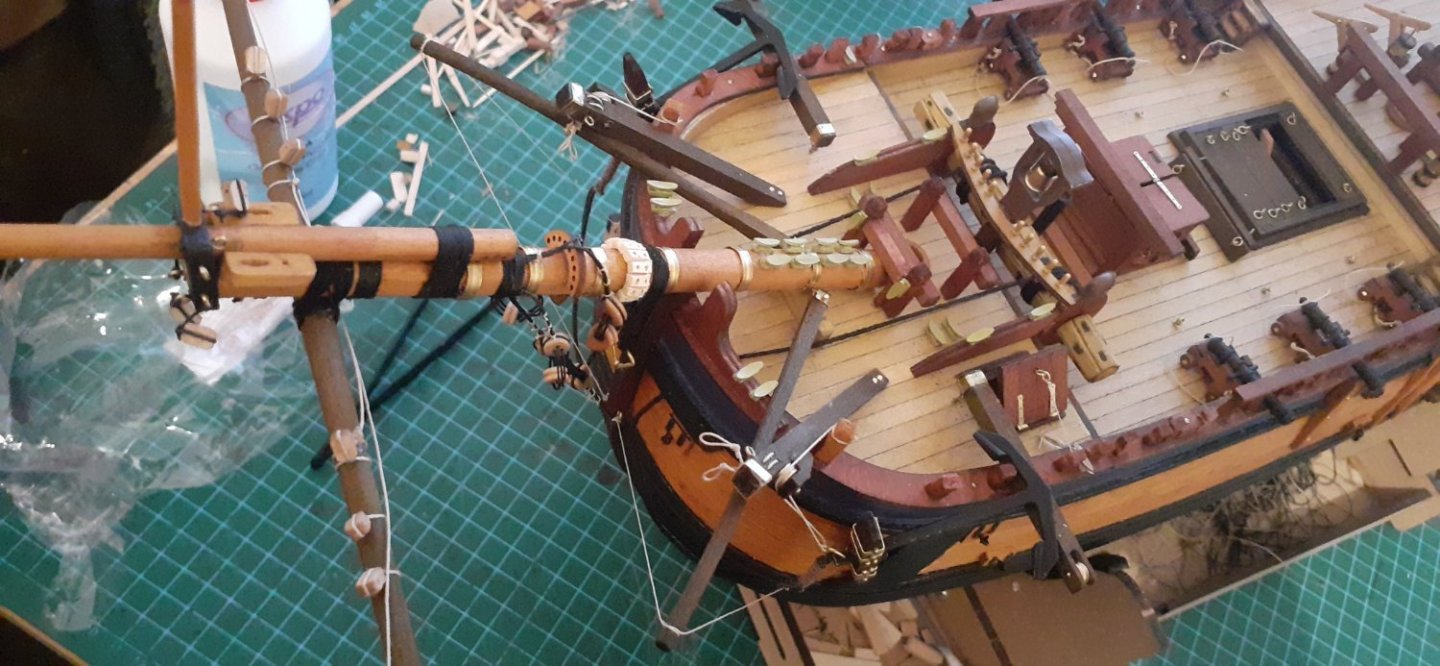
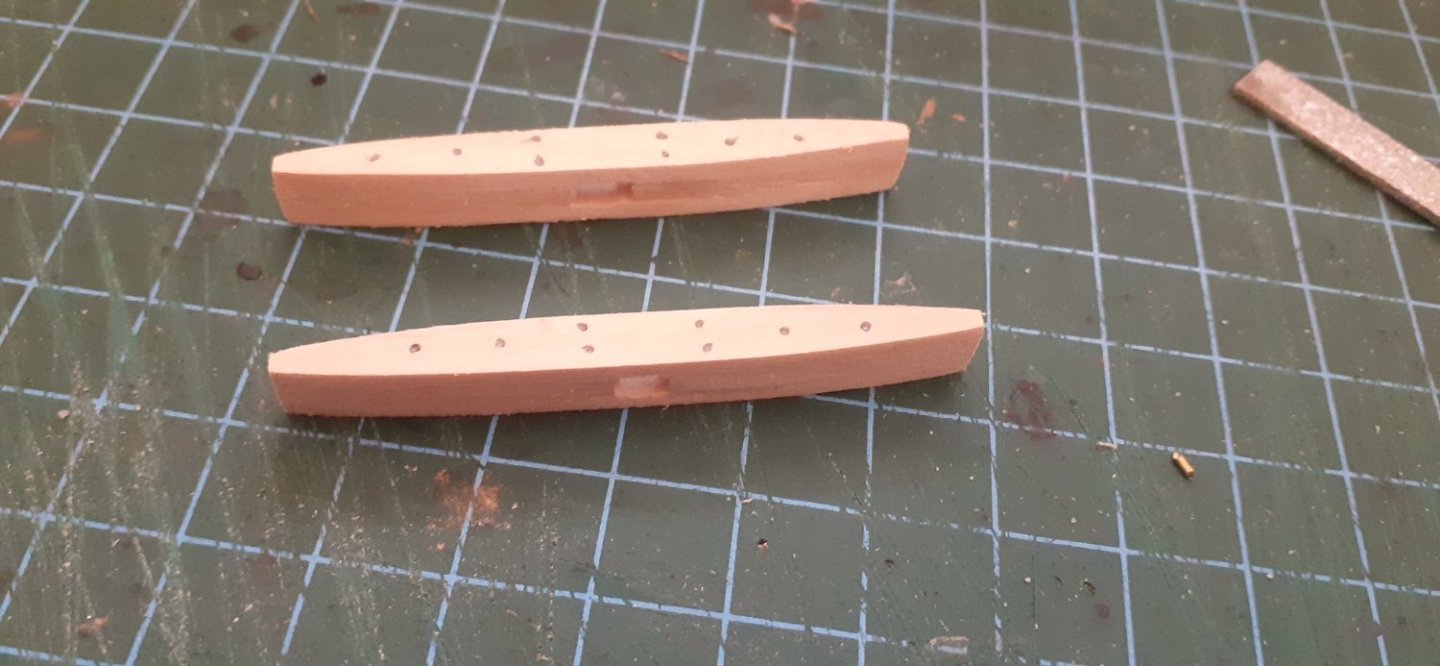
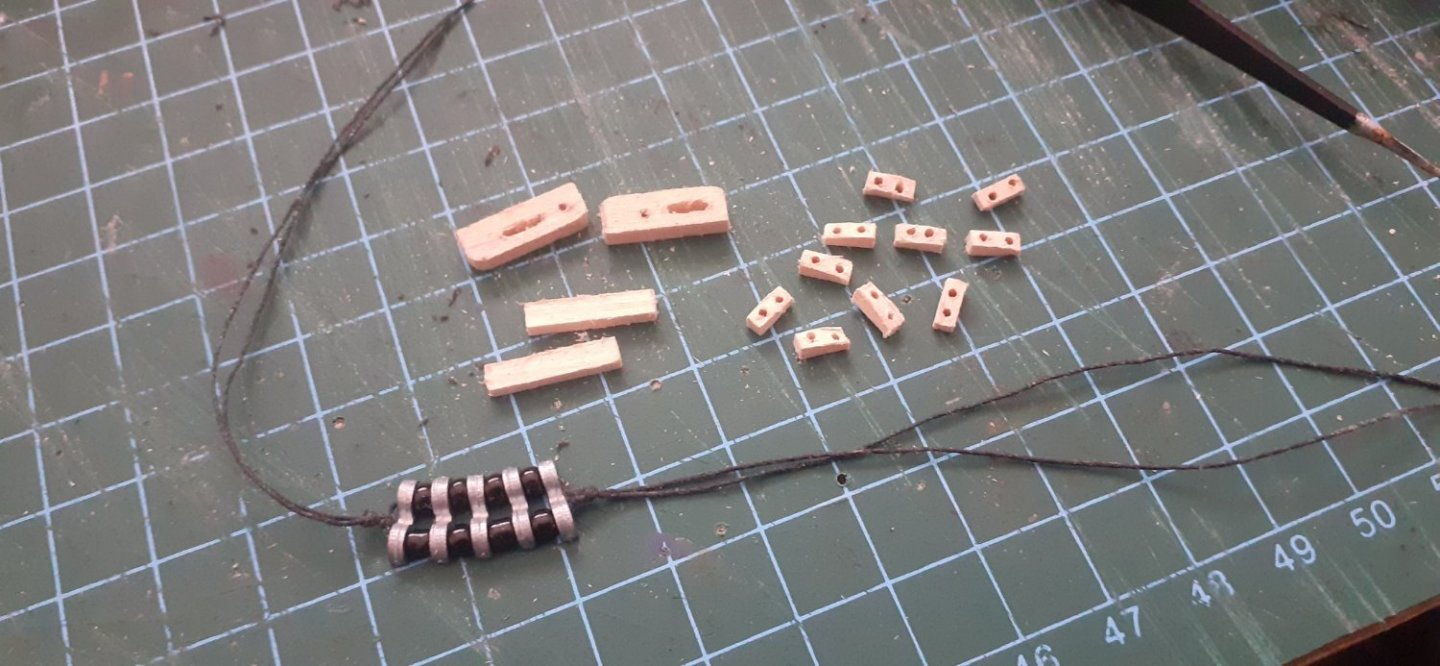
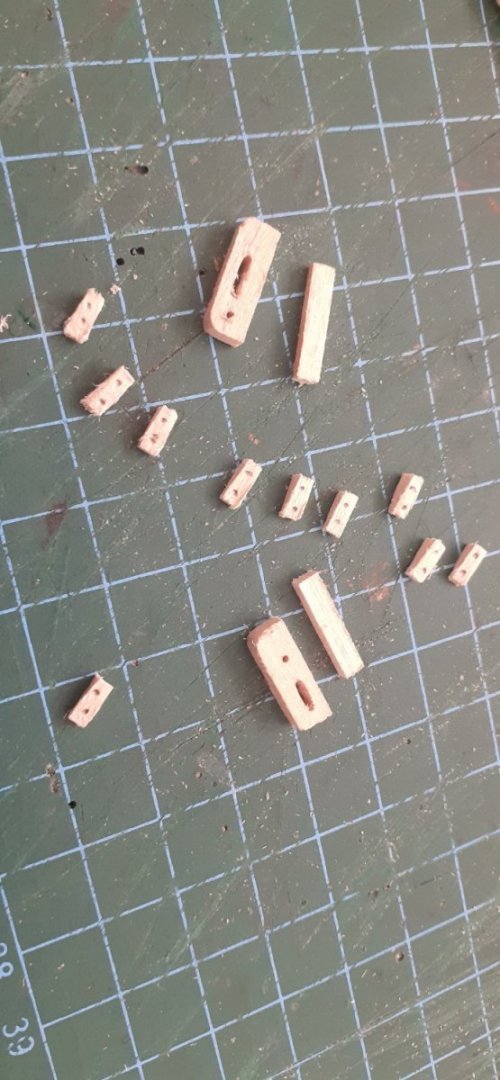
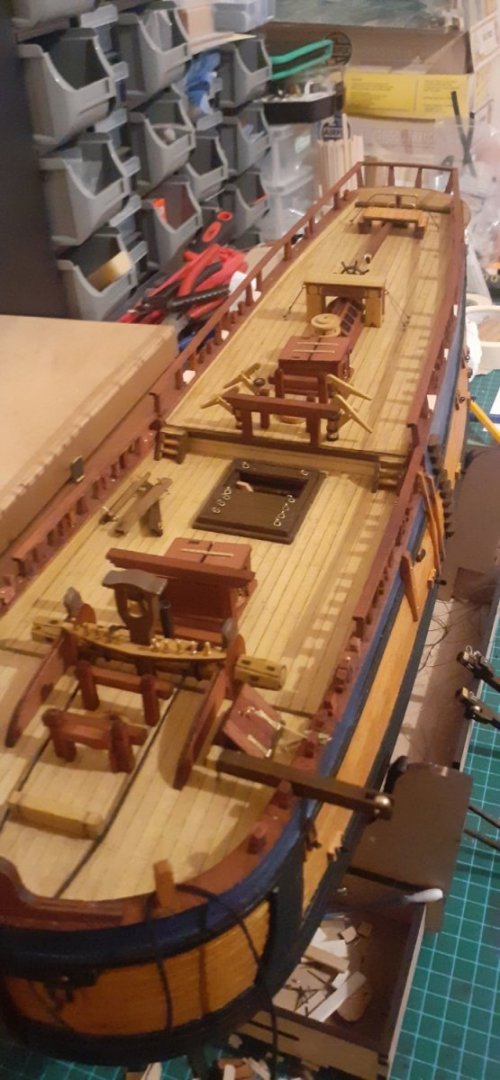
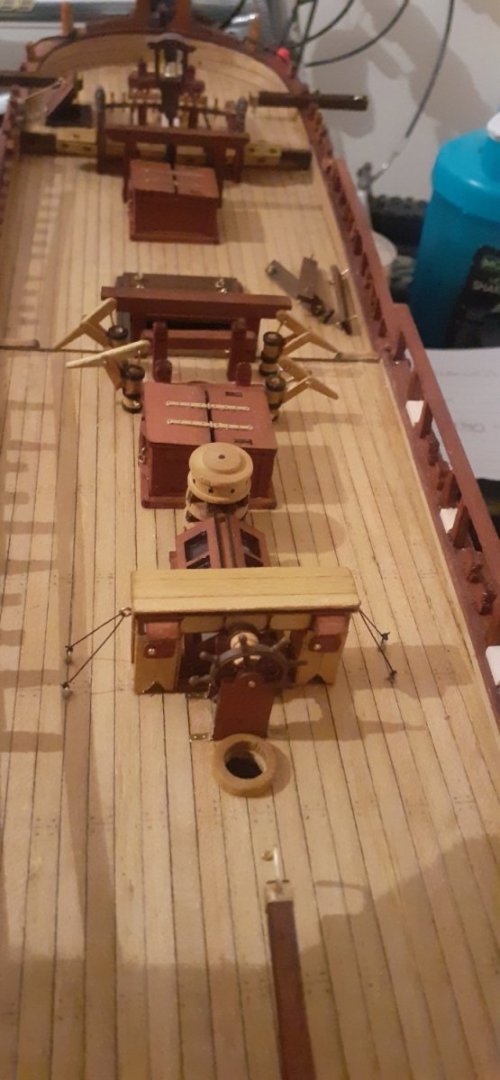
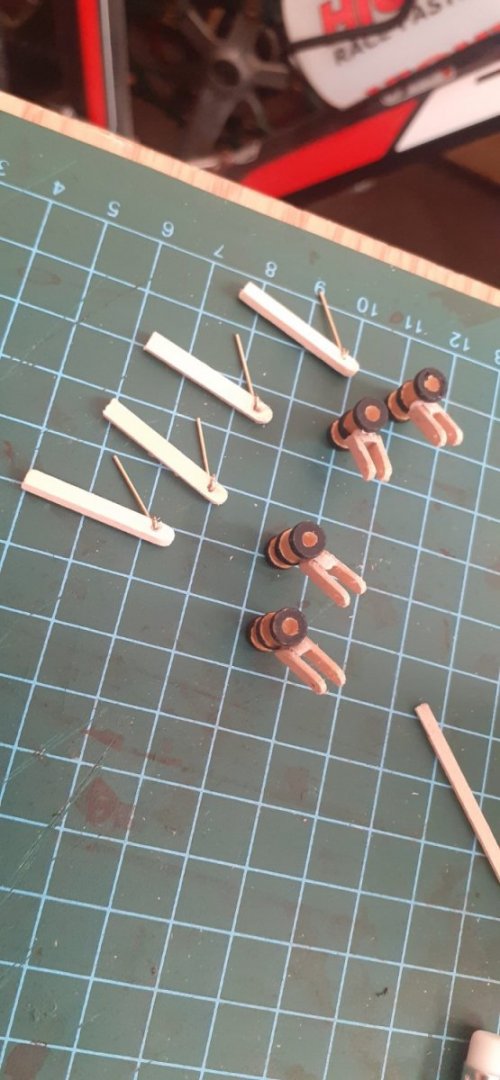
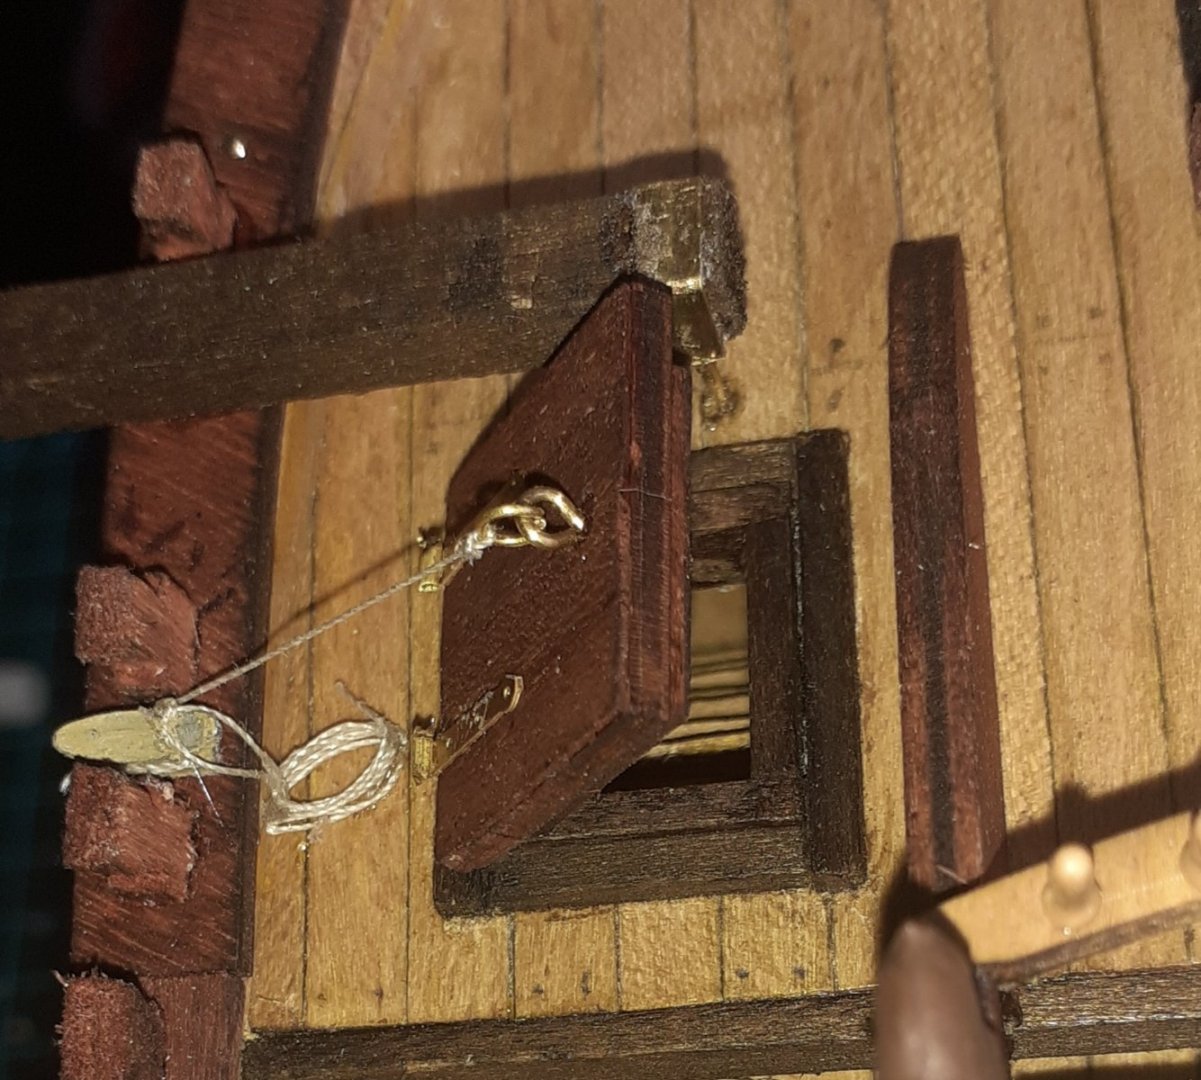
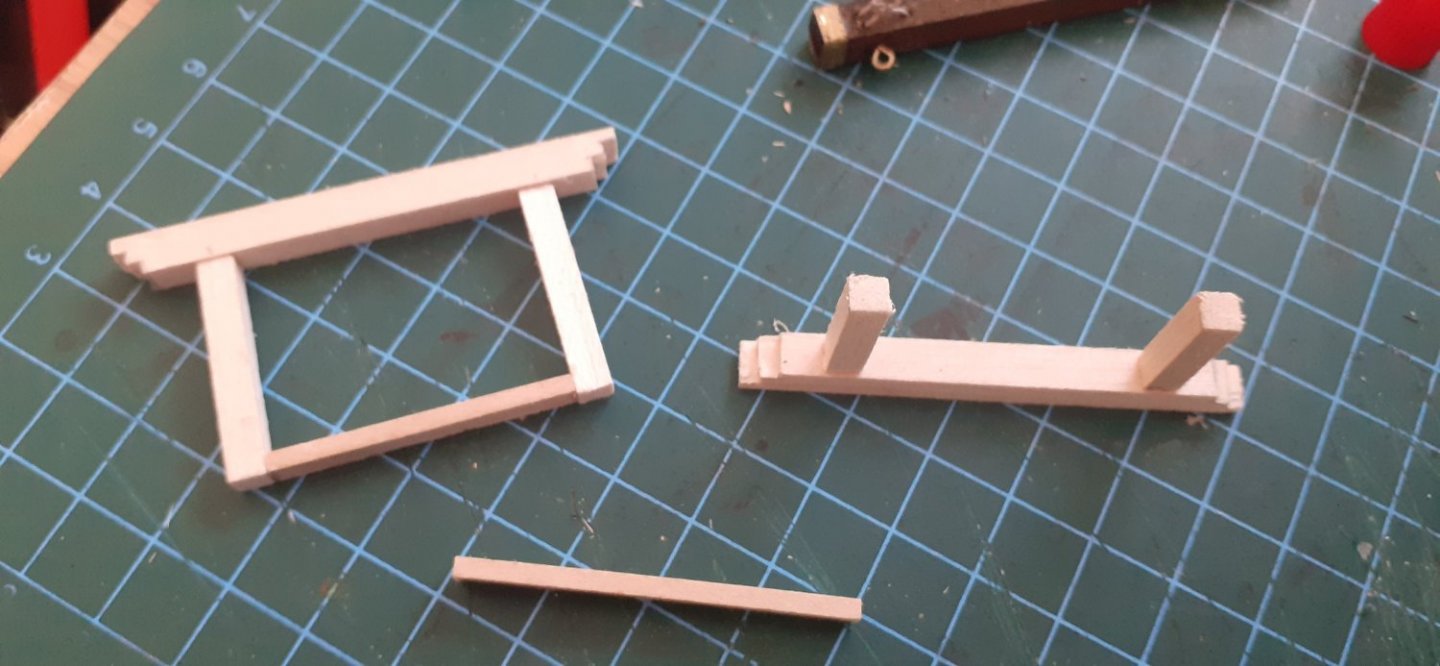
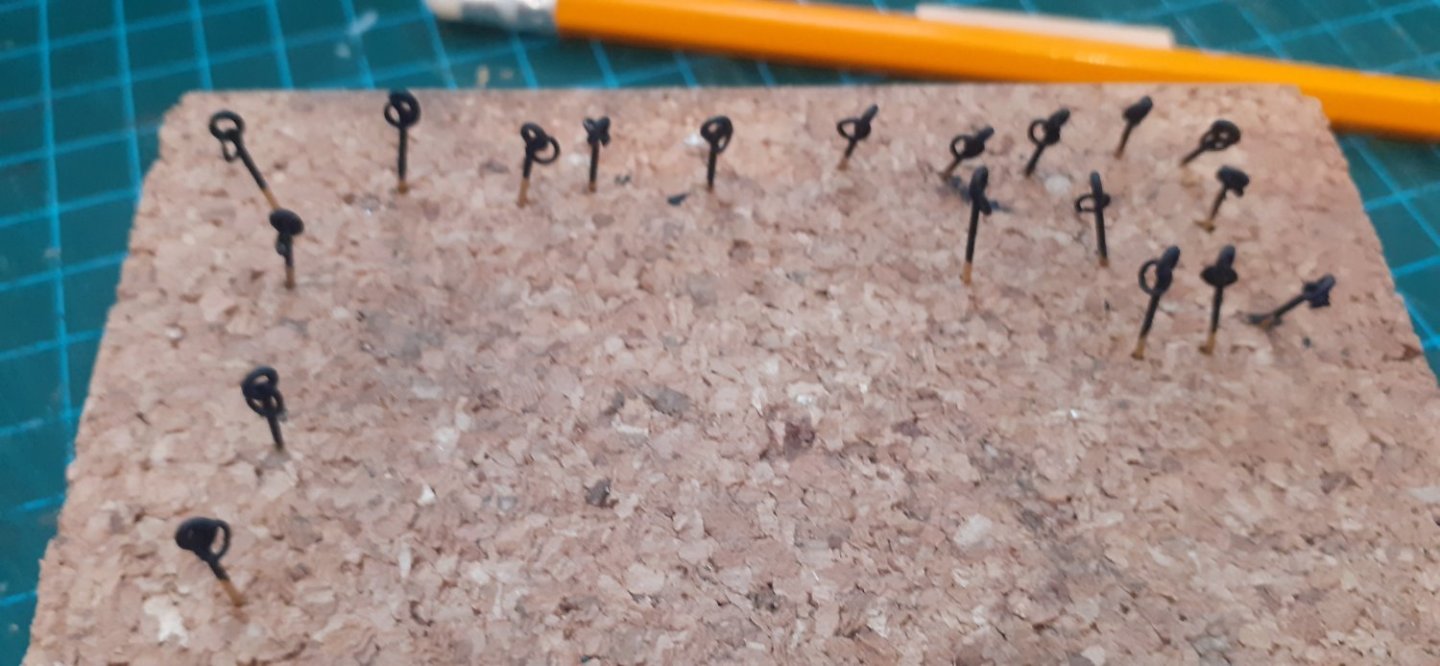
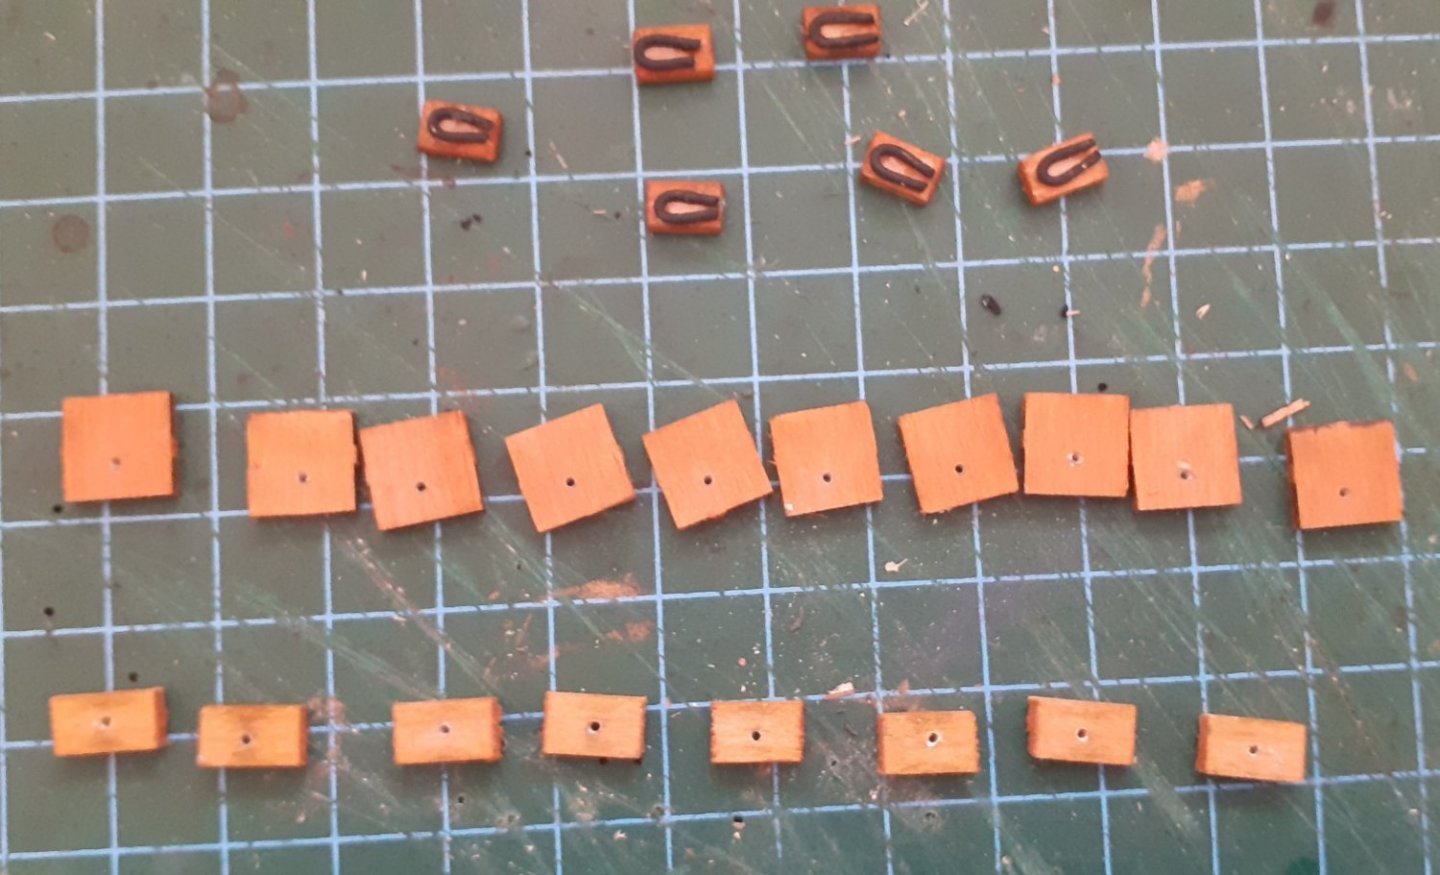
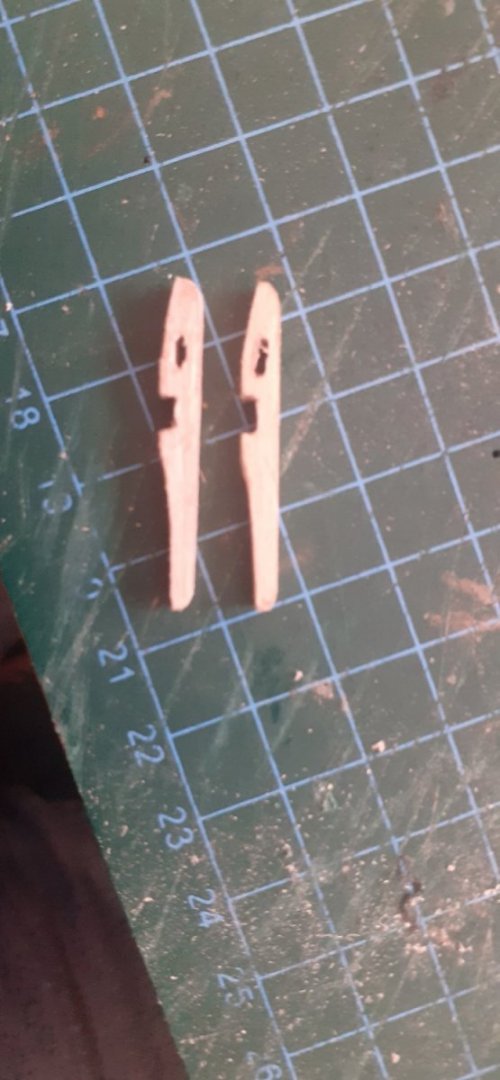
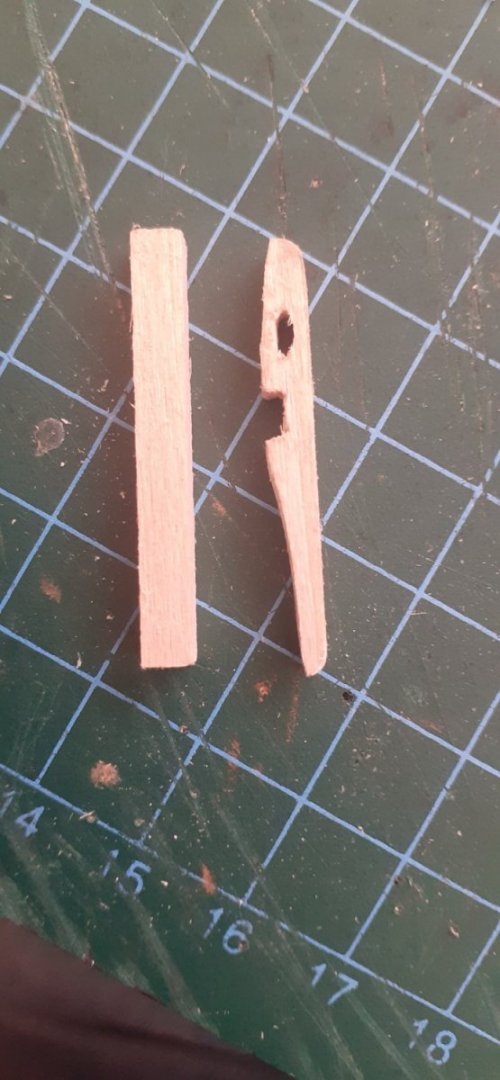
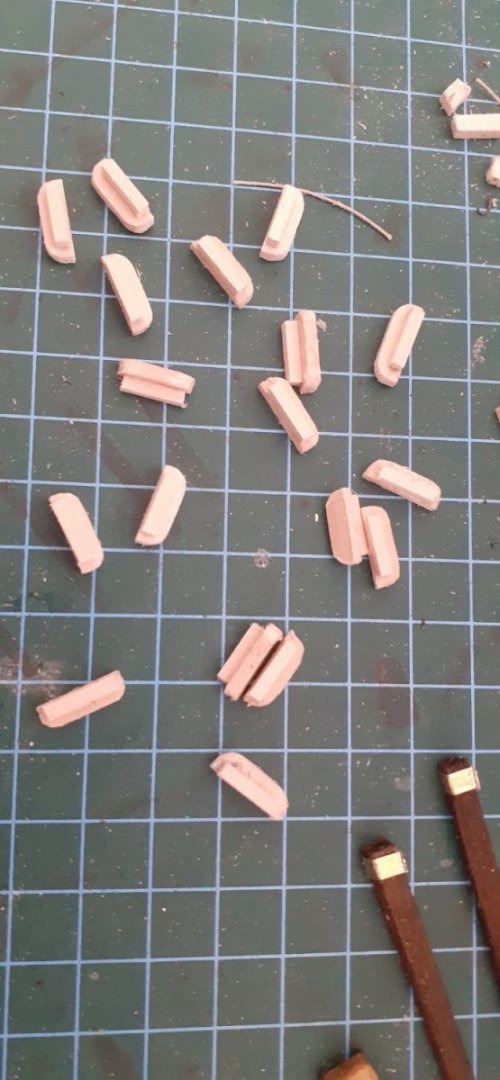
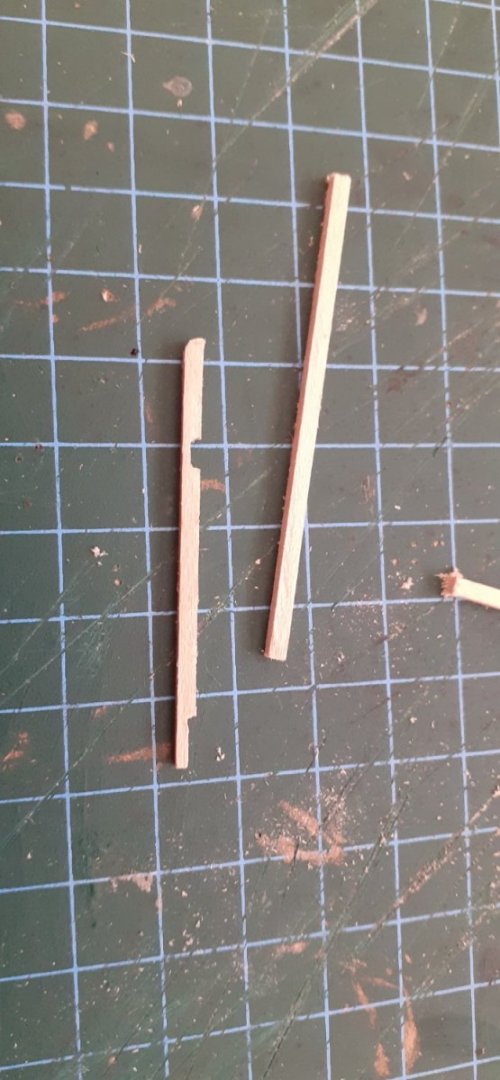
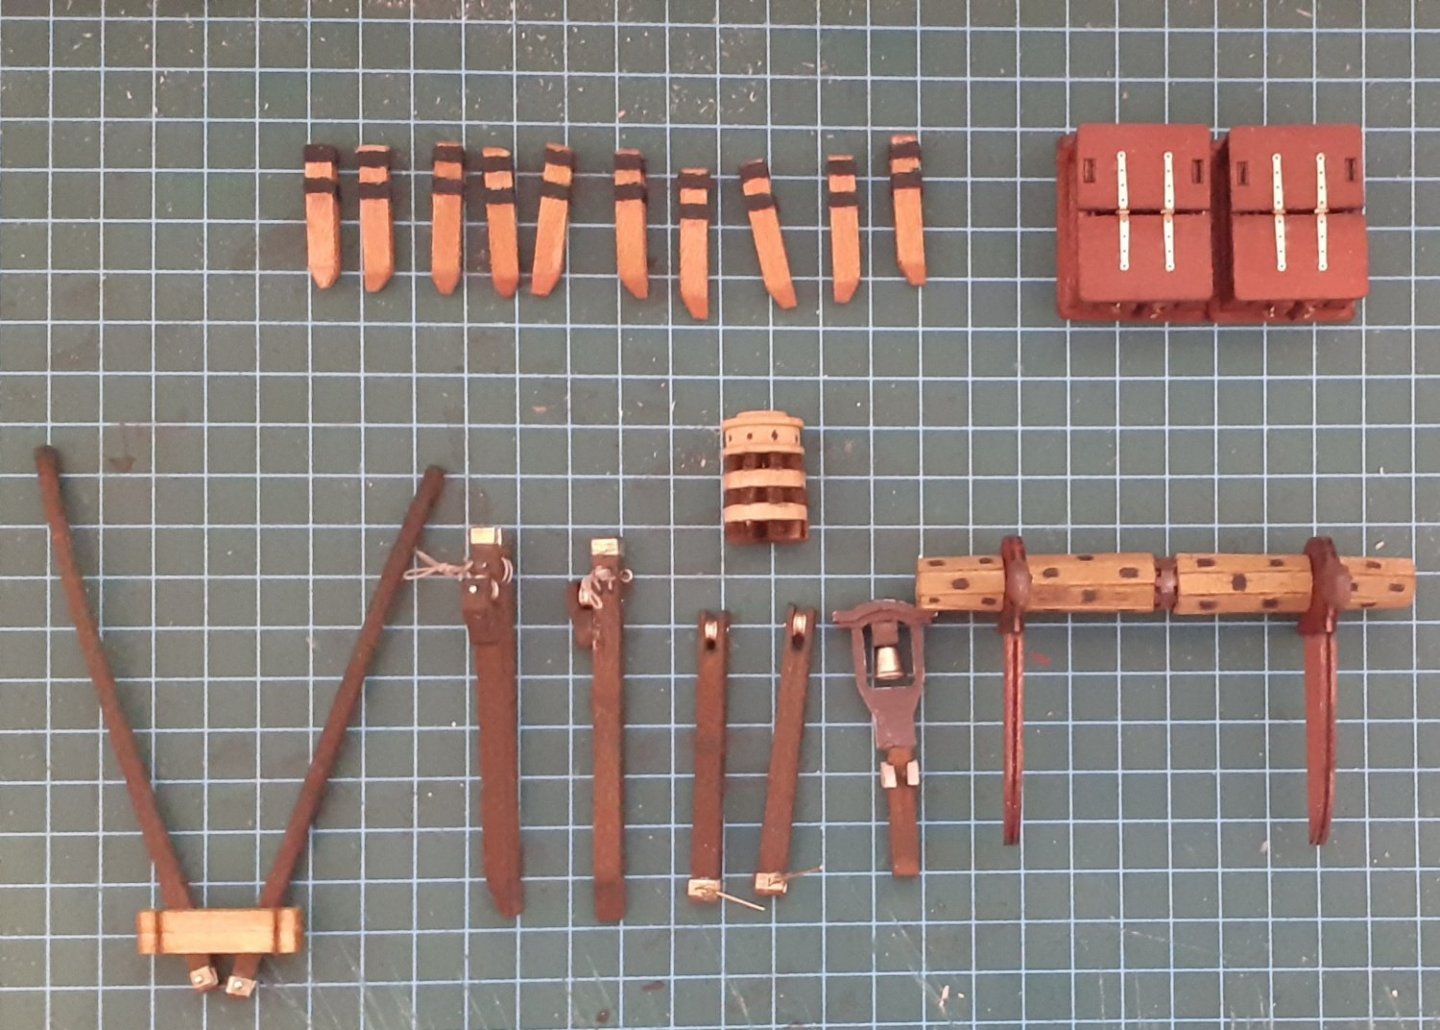
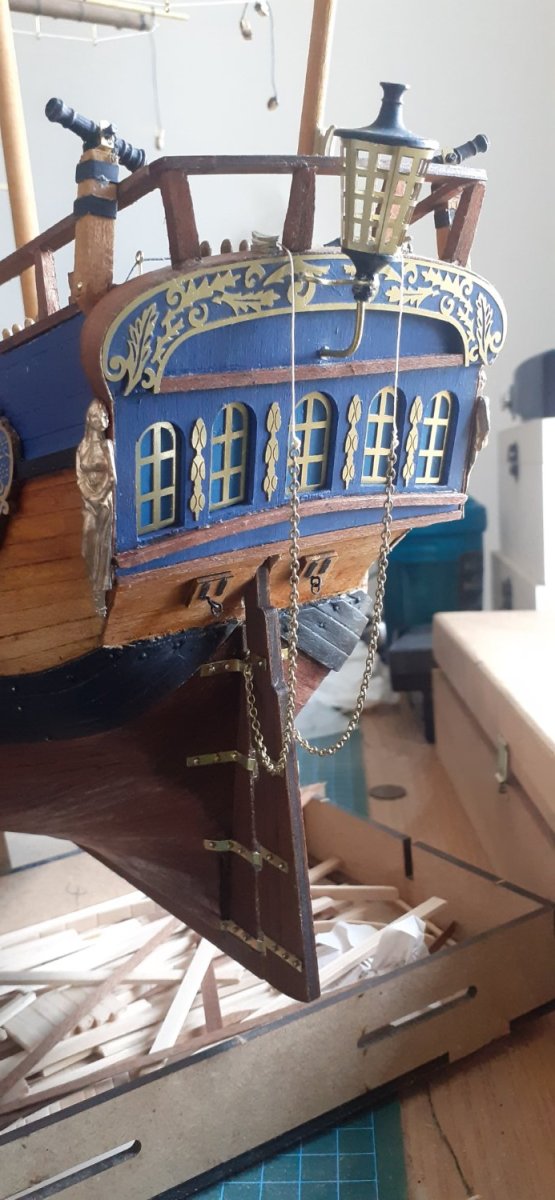
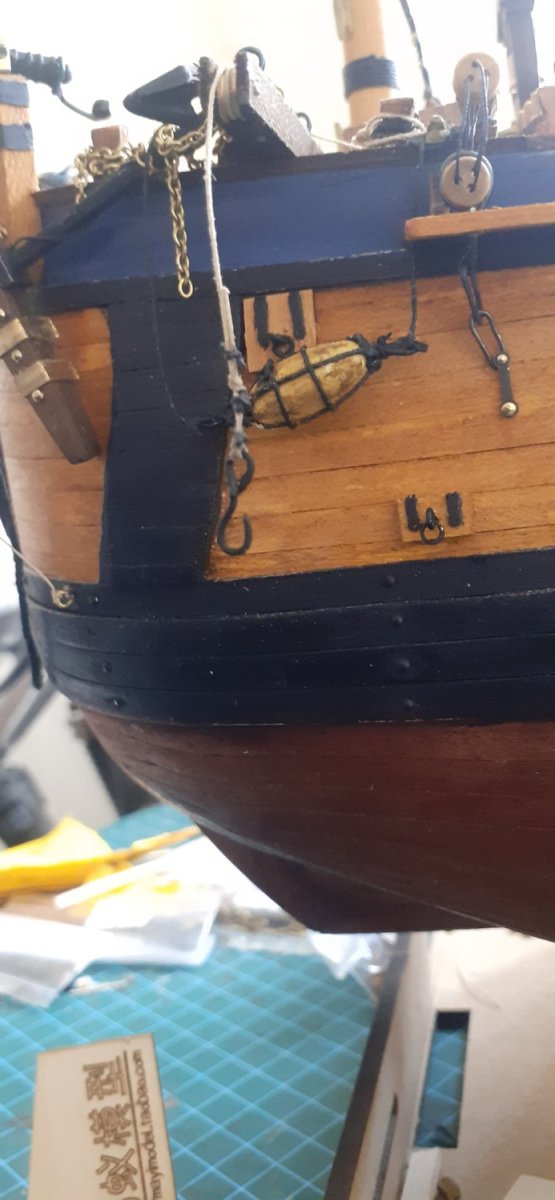
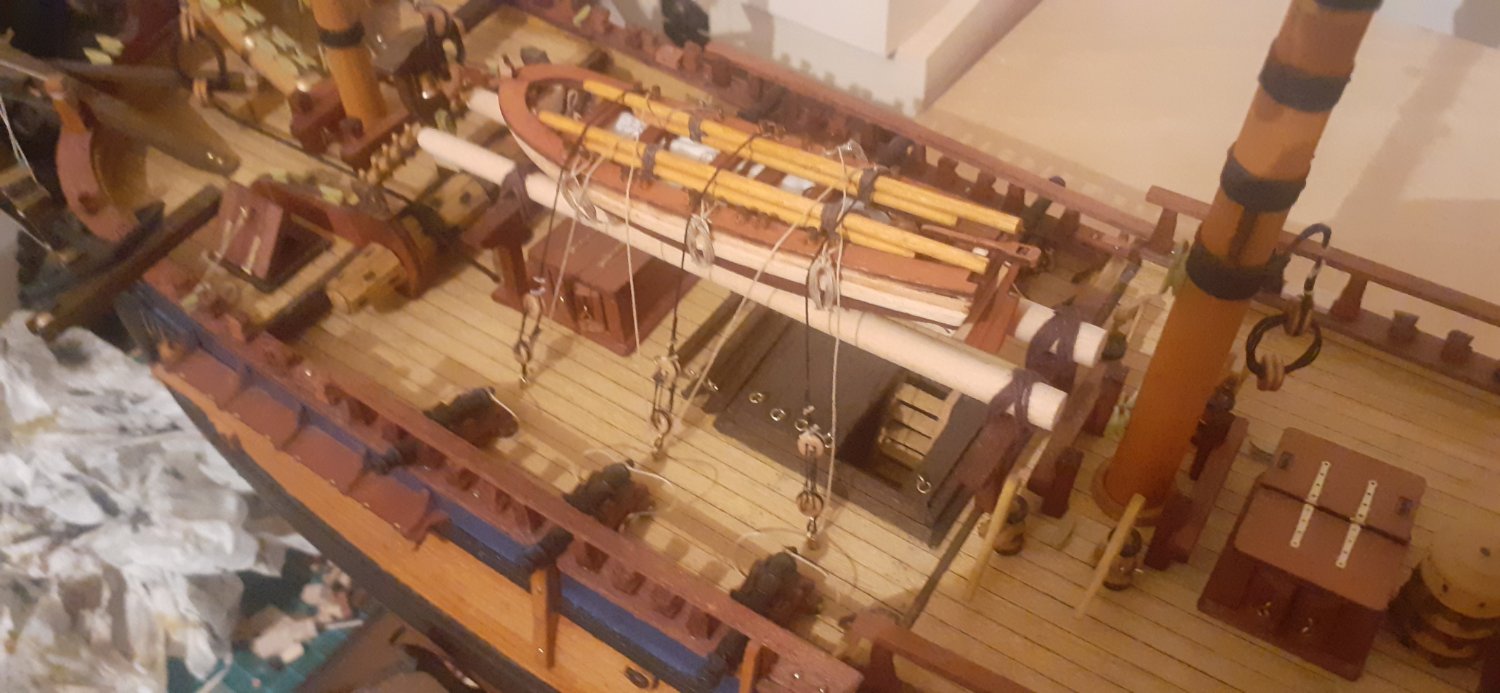
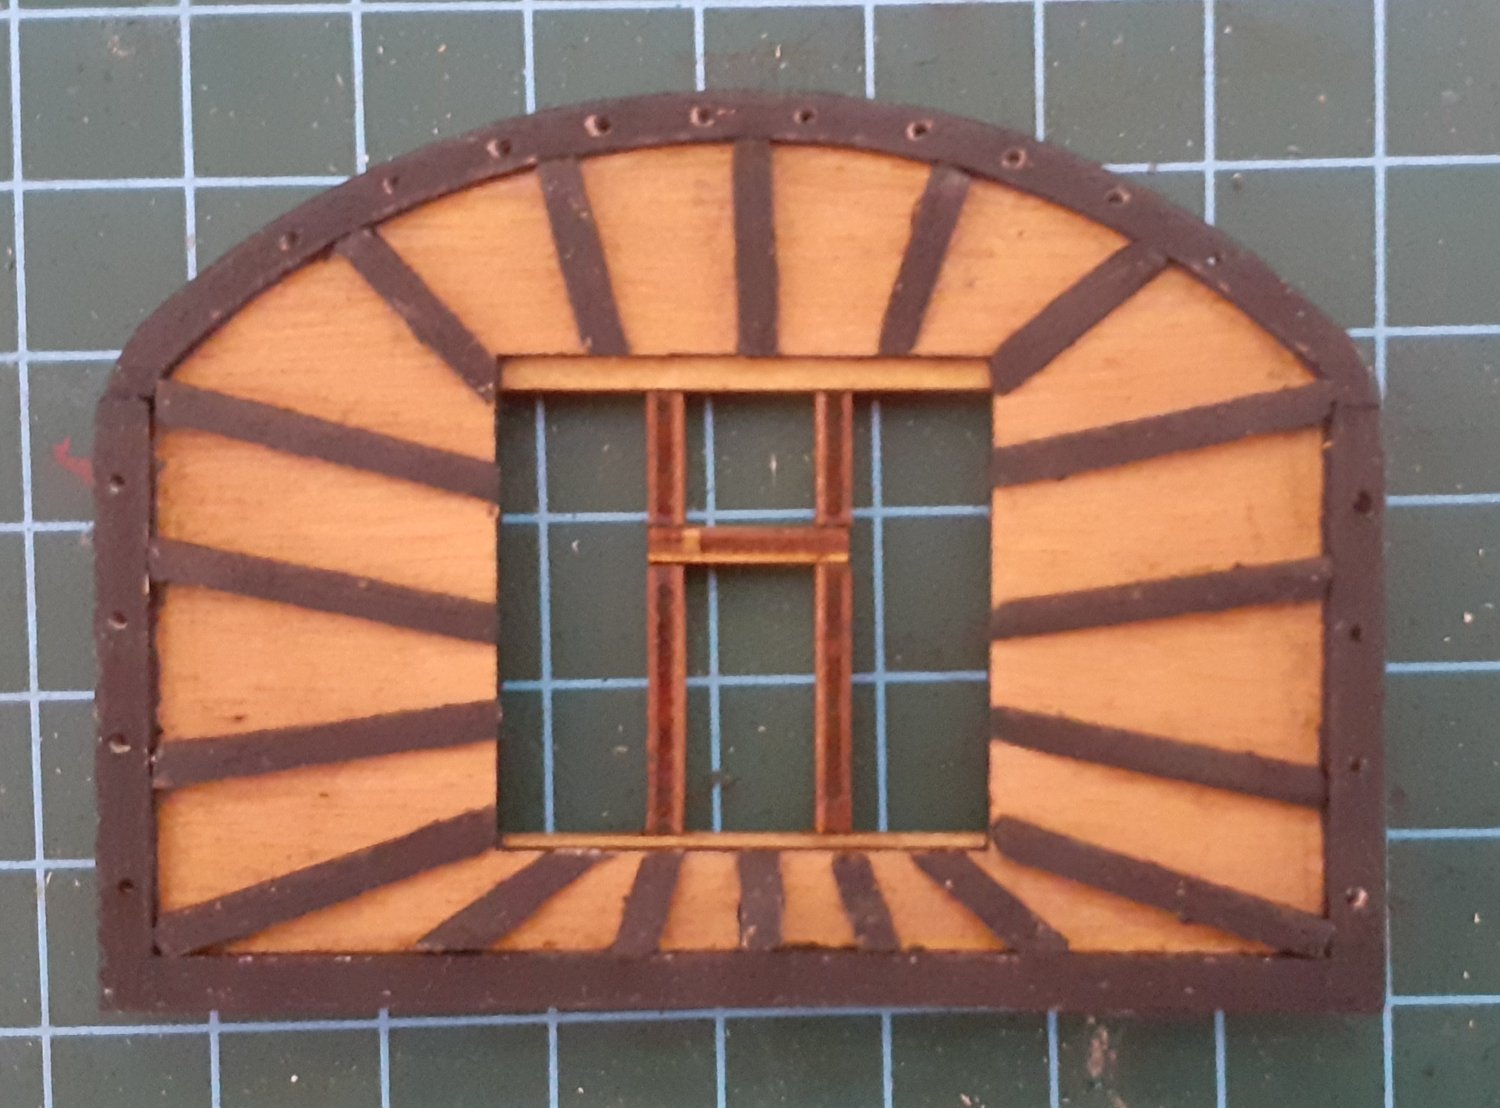
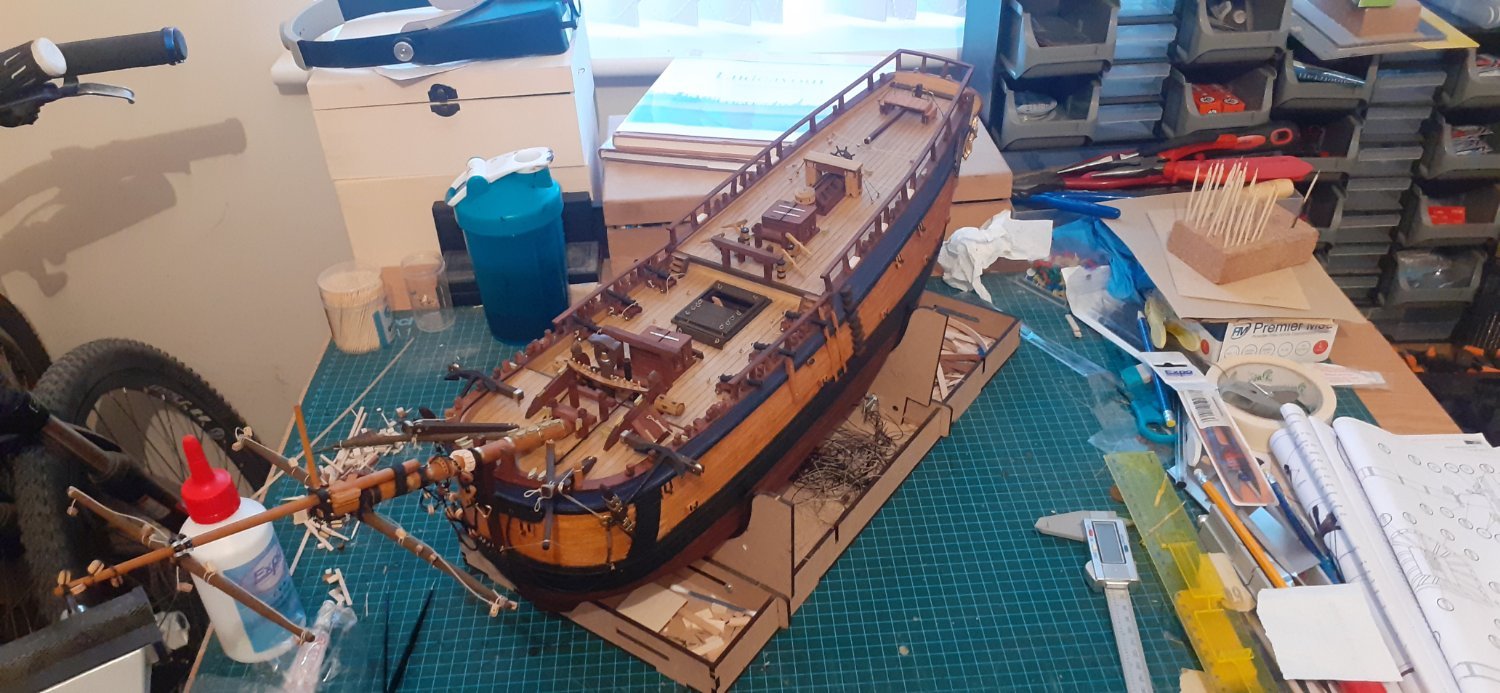
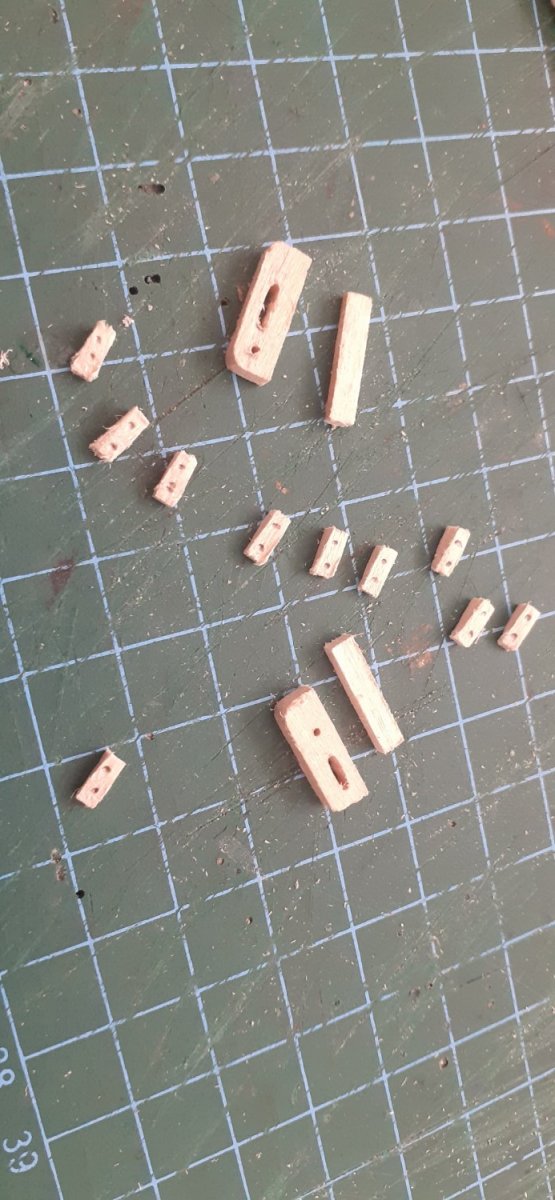
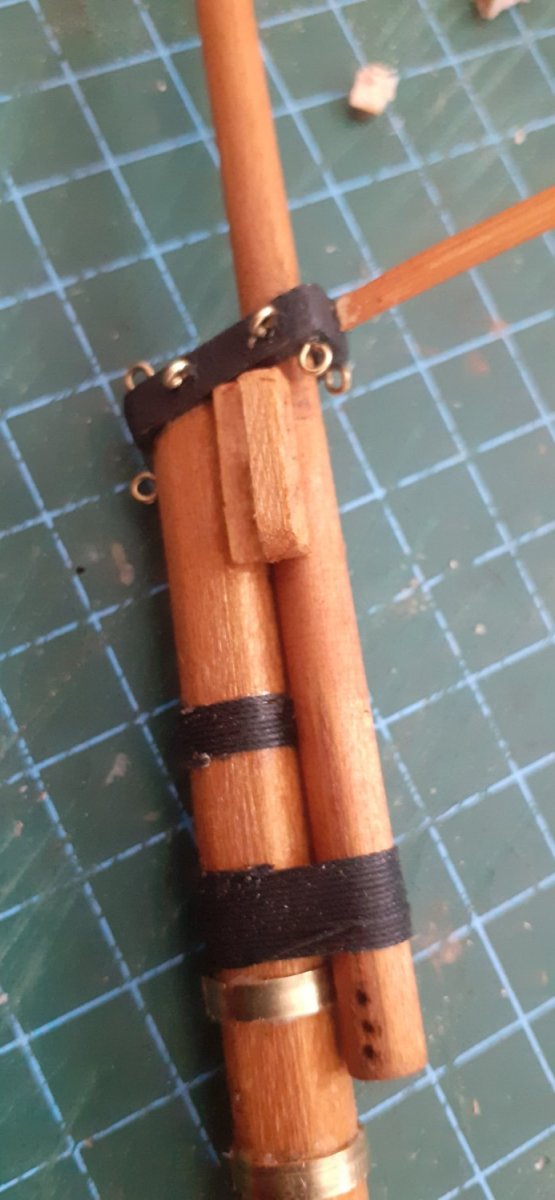
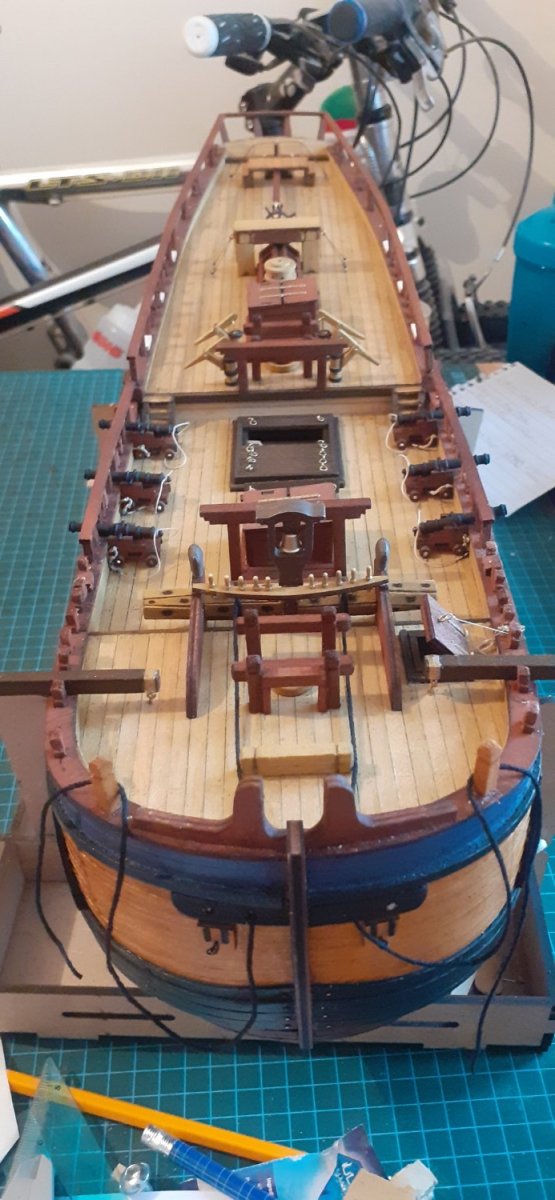
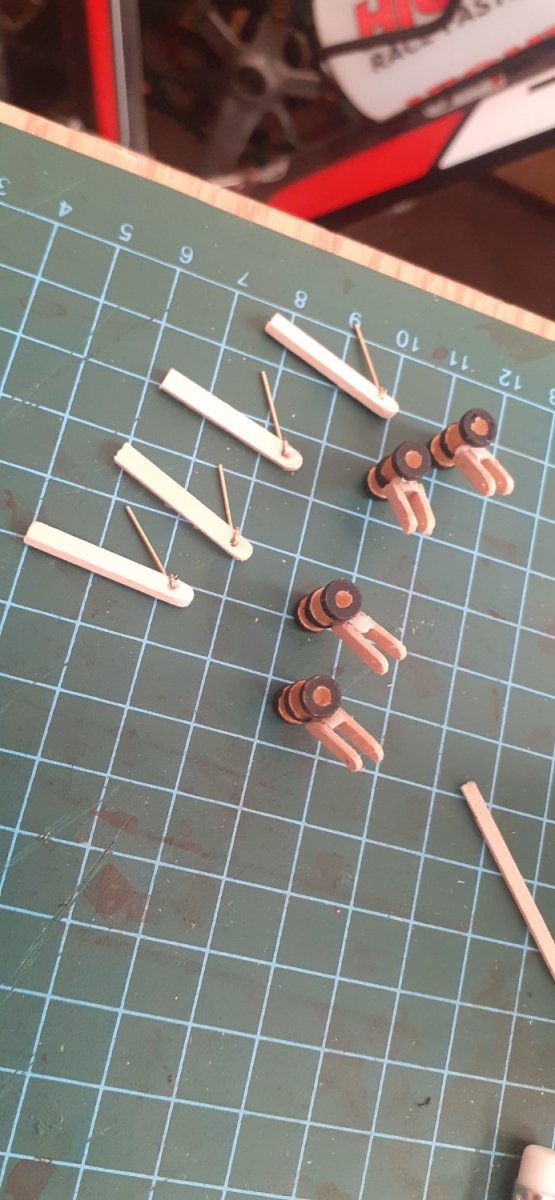
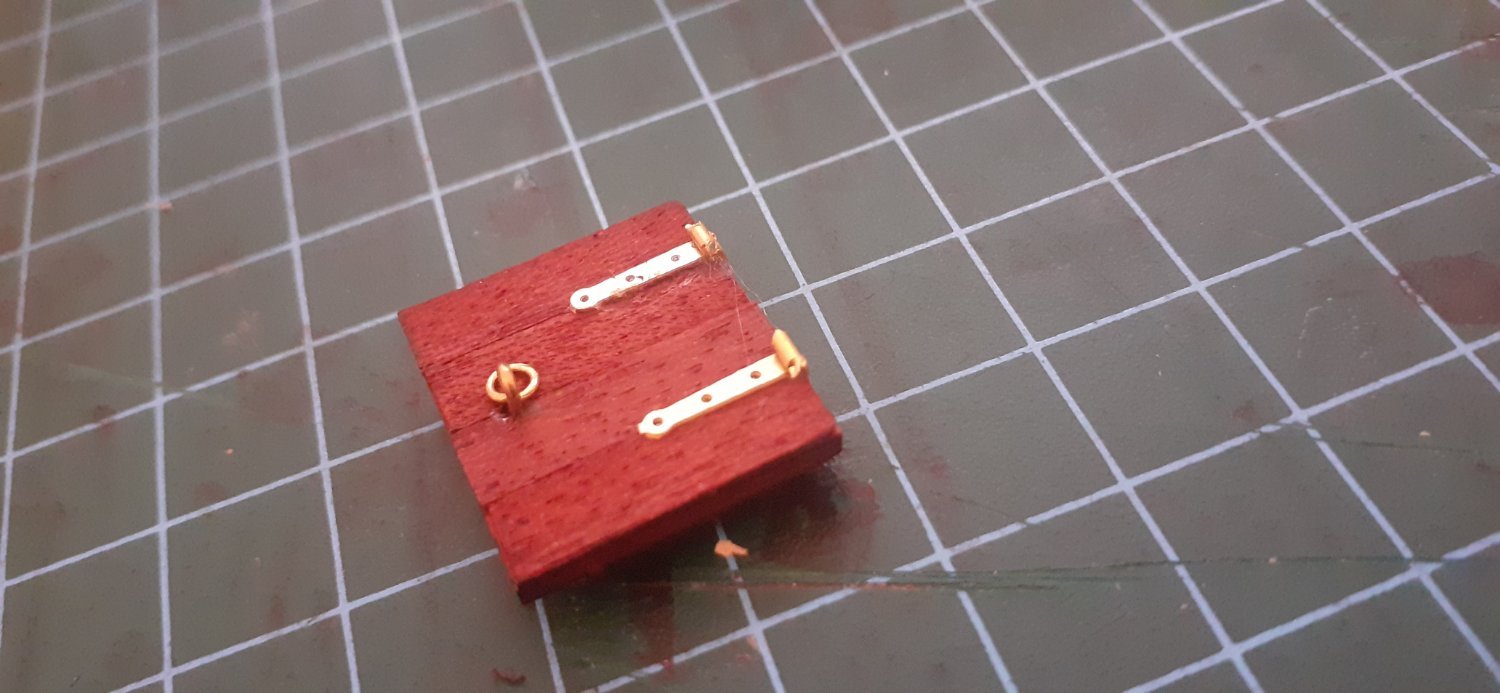
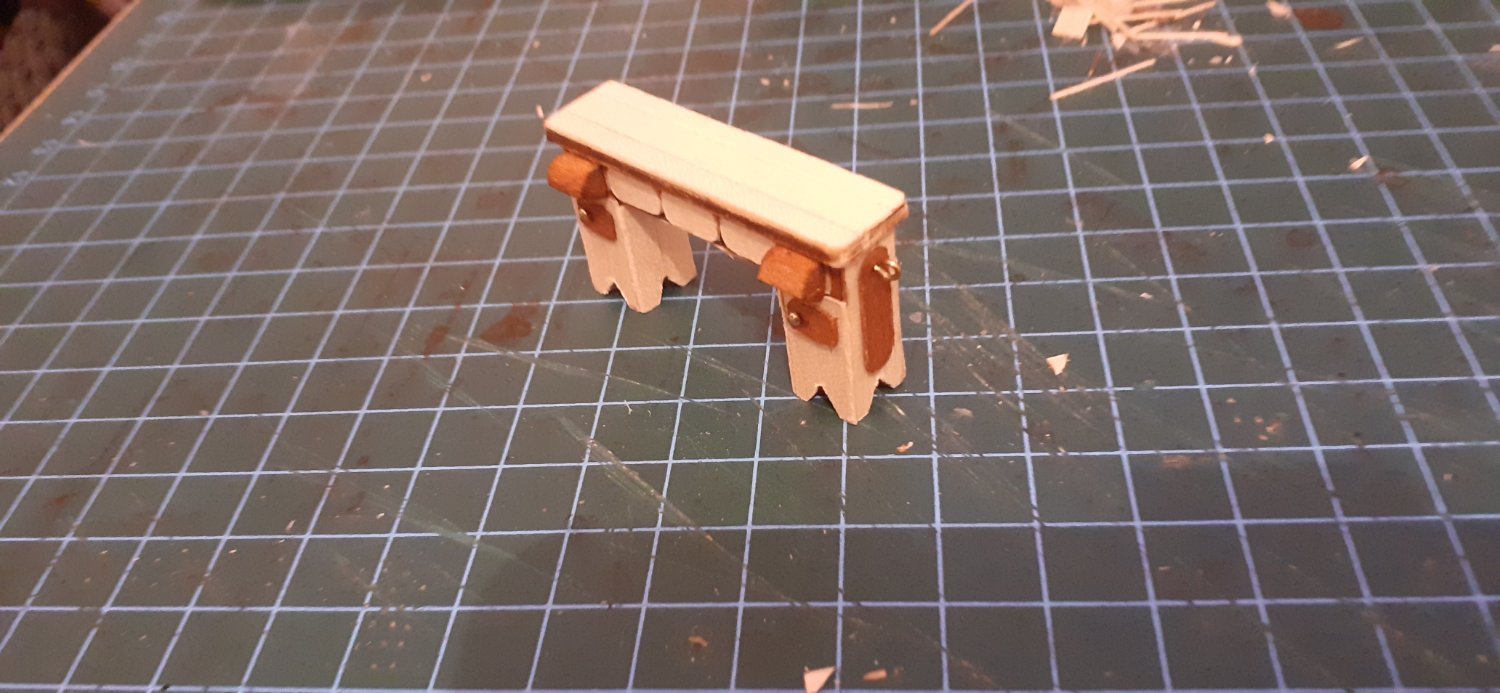
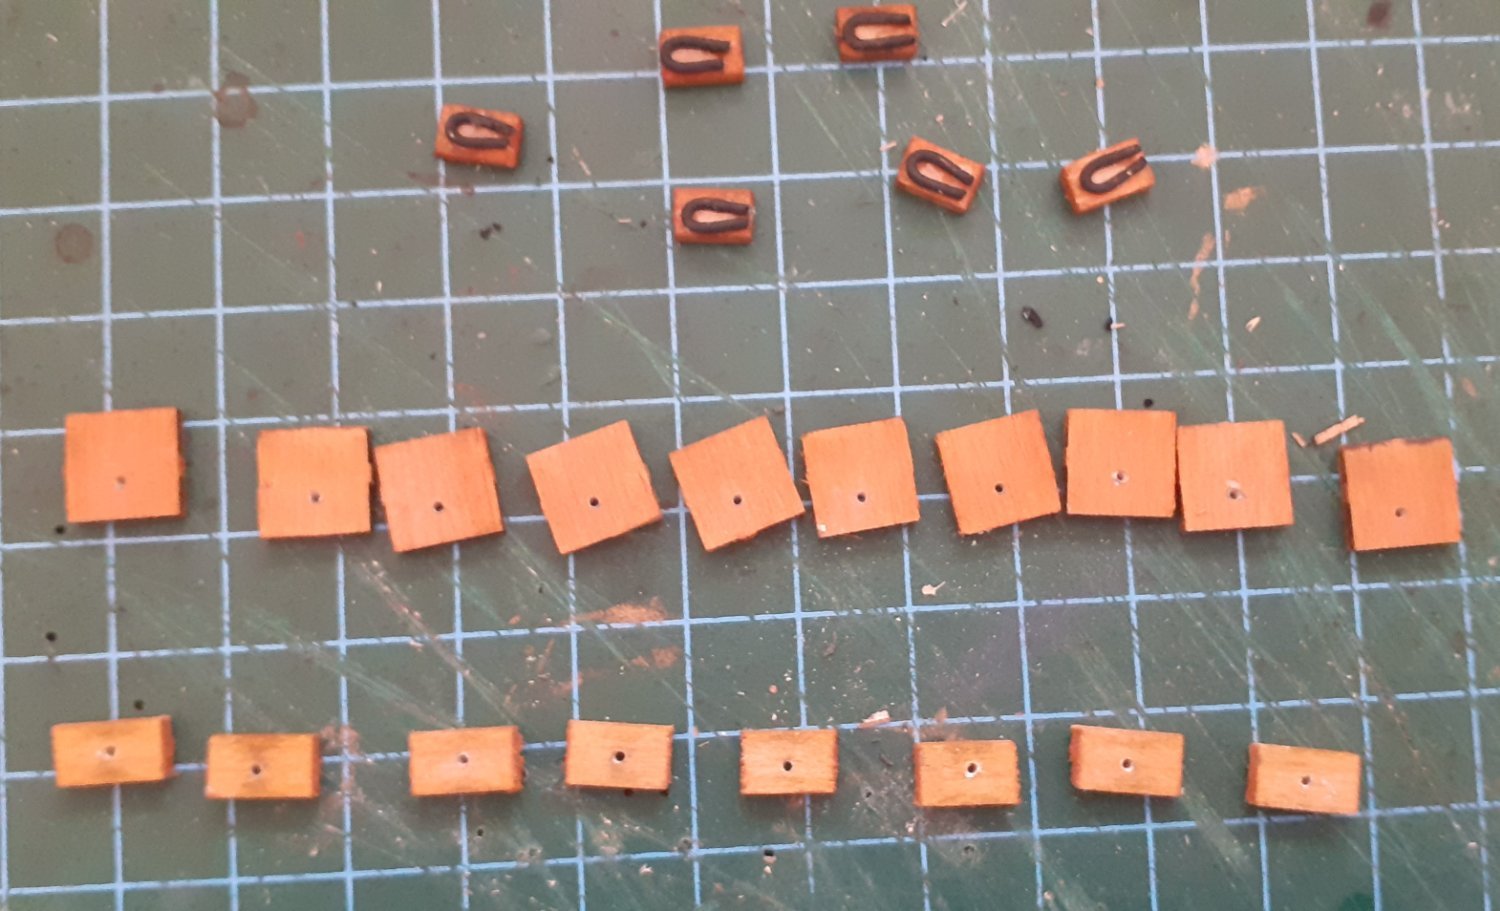
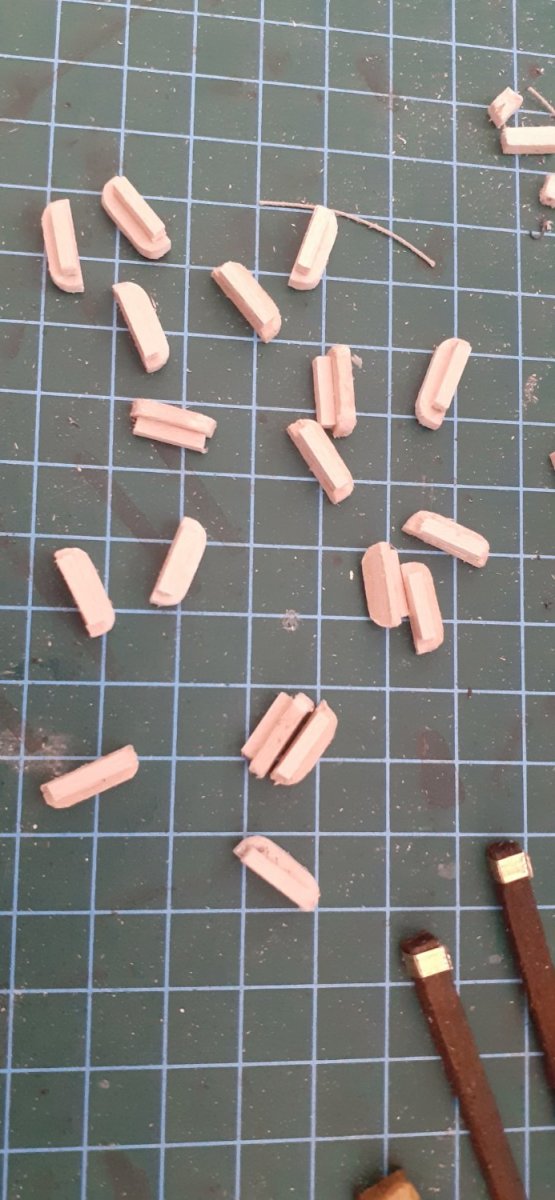
Occre Endeavour 1/54 WIP update. Been adding more Deck detail in the form of Anchor Bouys, Fish Davitt hooks, Cannon shot, Cartridge Bags, Barrels, Cannon Arnament tools in the shape of Sponge, Rammer, Ladle and Worm. Along with more belaying pins a Belaying block points for rigging. Swivel guns are all mounted as is the Lantern and Rudder chain. Starting the deadeyes which I am changing to chain plates to conform with the actual plans rather than the brass wire in the kit. I have also had to disregard the Deadeye strops as they didn't fit well with the caldercraft deadeyes I use, so I am using 8mm Black modelling wire to which I add a hook on the end to take the chainplates. Progress has been slowed somewhat due to my health atm, first being a chest infection the next being Carpal tunnel syndrome which is affecting myself now off work and struggling with modelling as any conserted pressure has swollen my wrist and forearm. However trying my best through the pain barrier. Happy modelling everyone all the best of health and staysafe. 👍🤺⚓


-
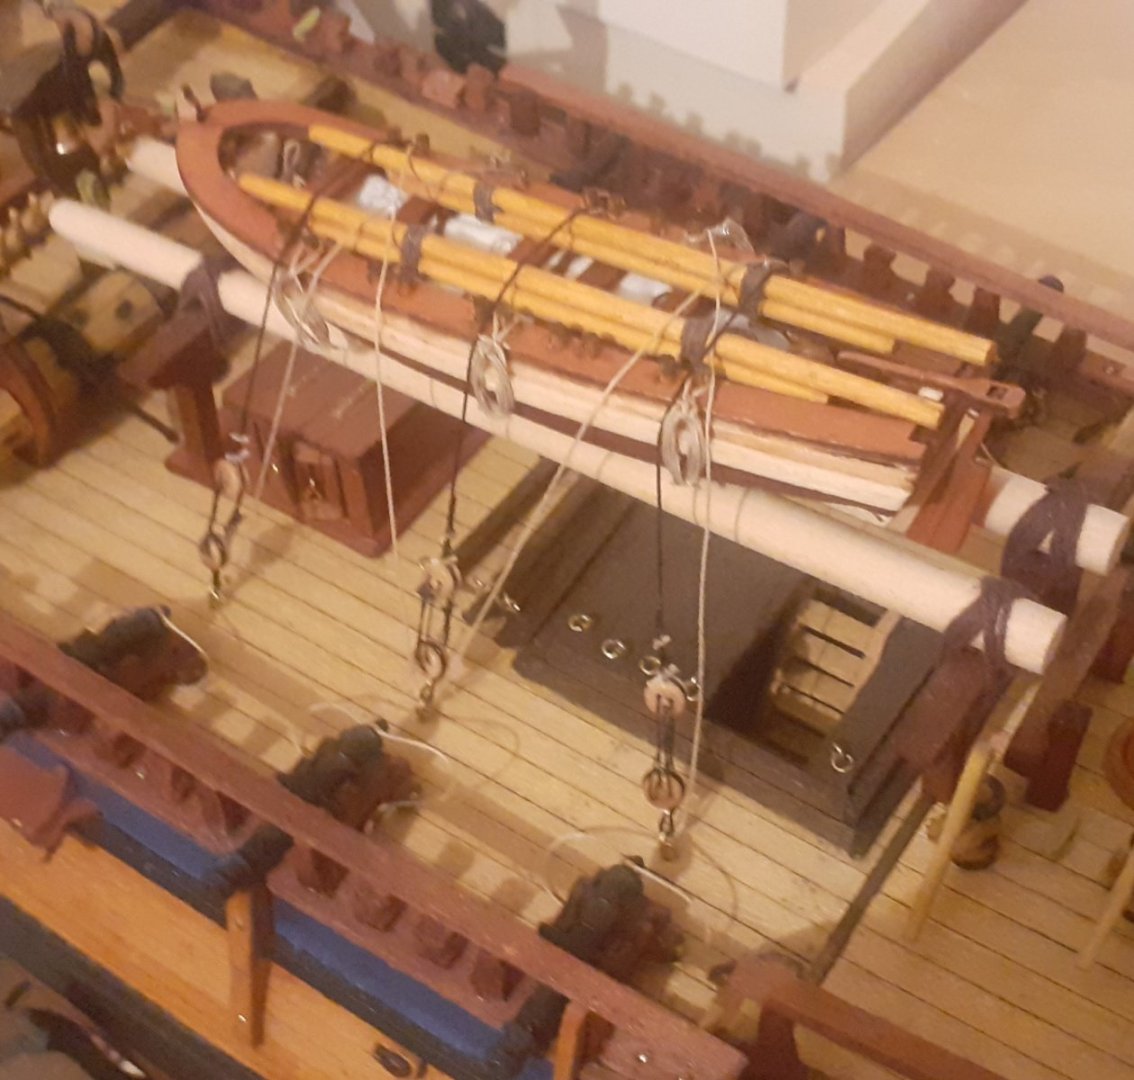
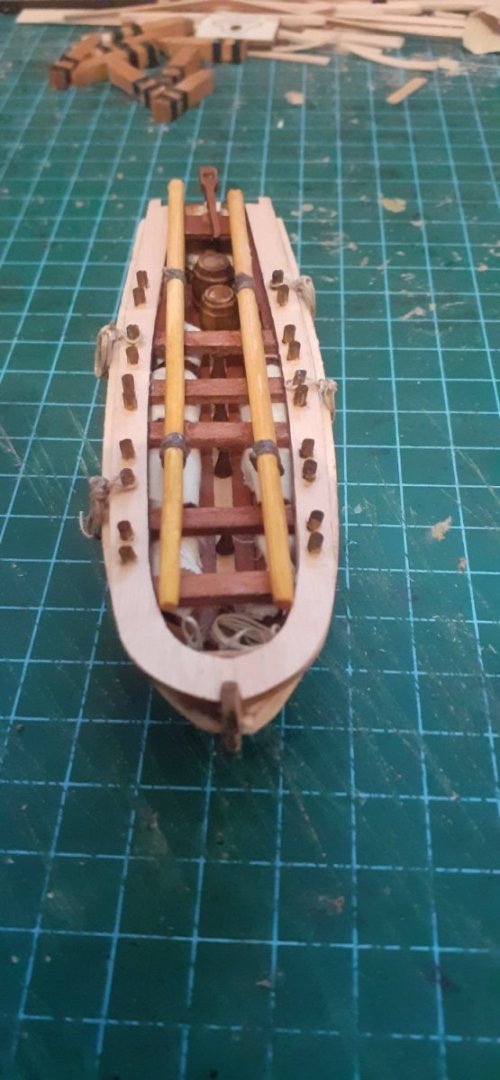
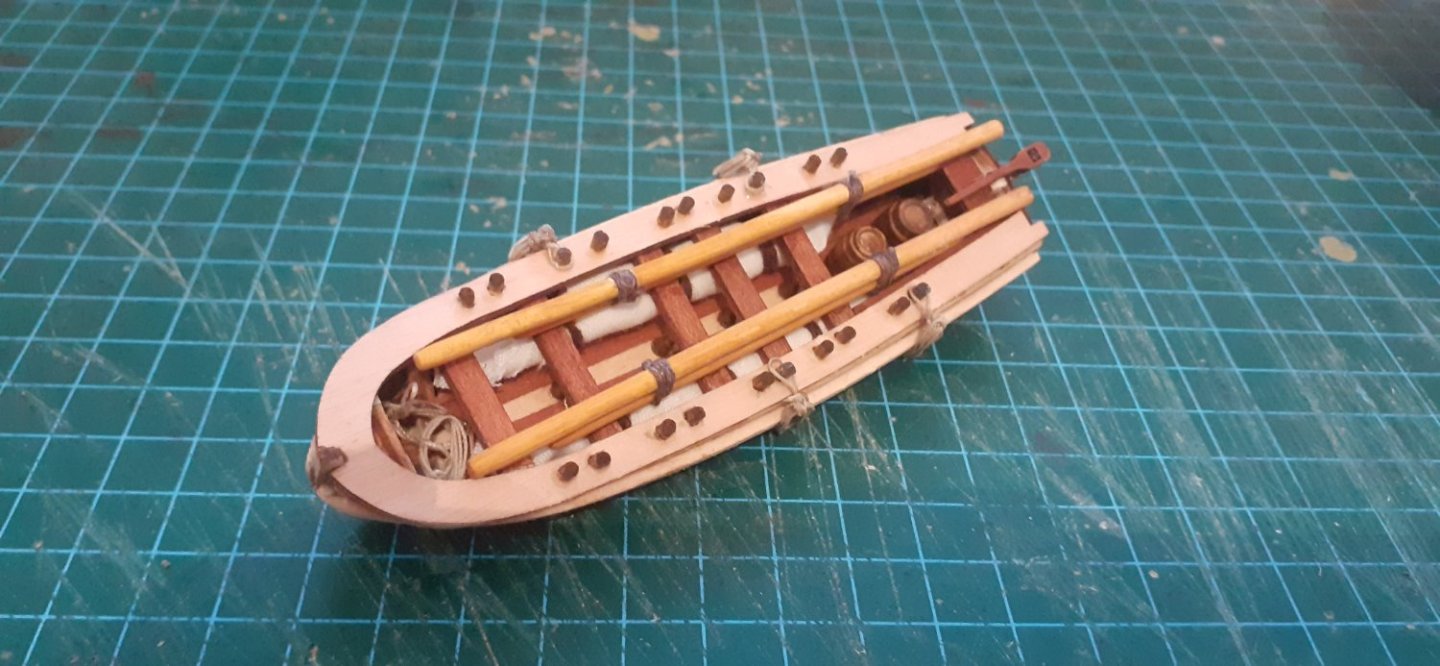
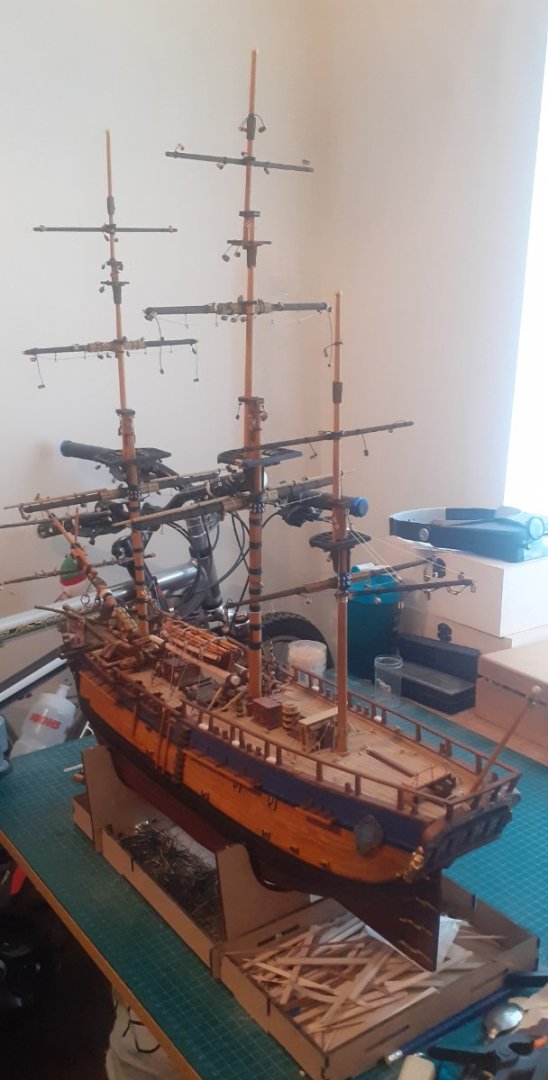
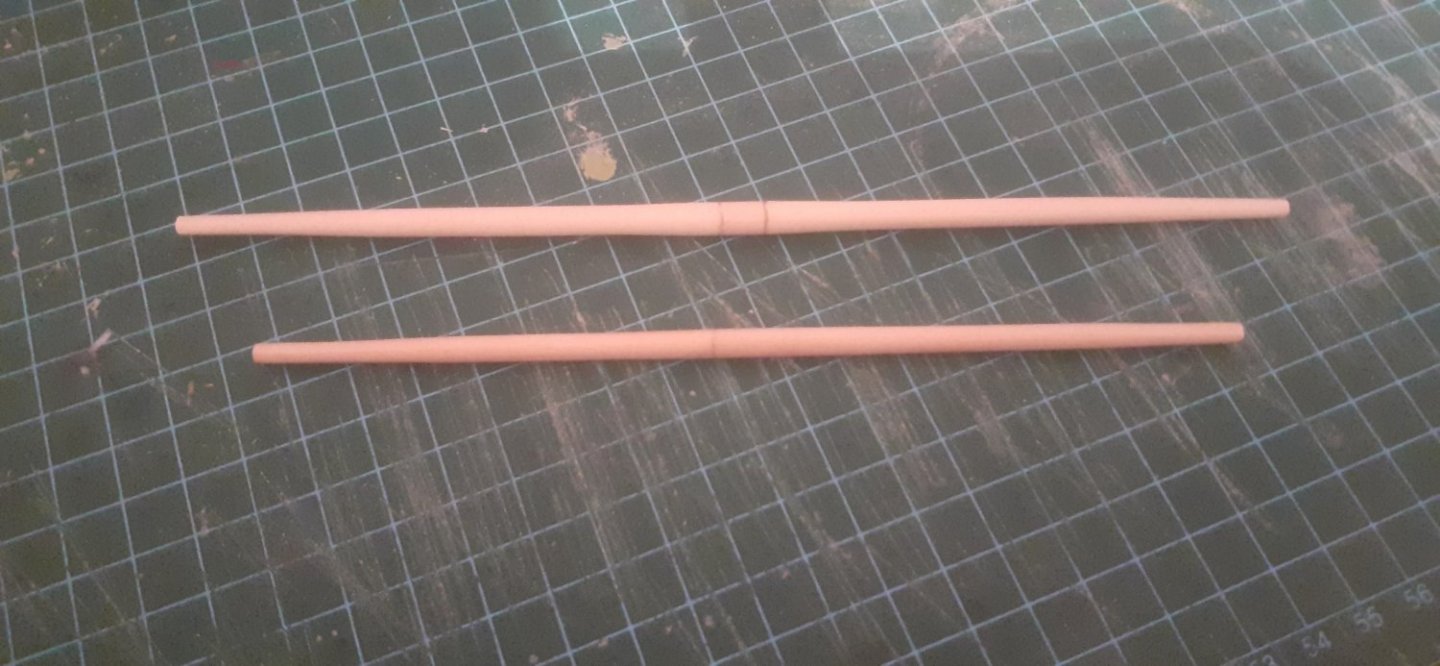
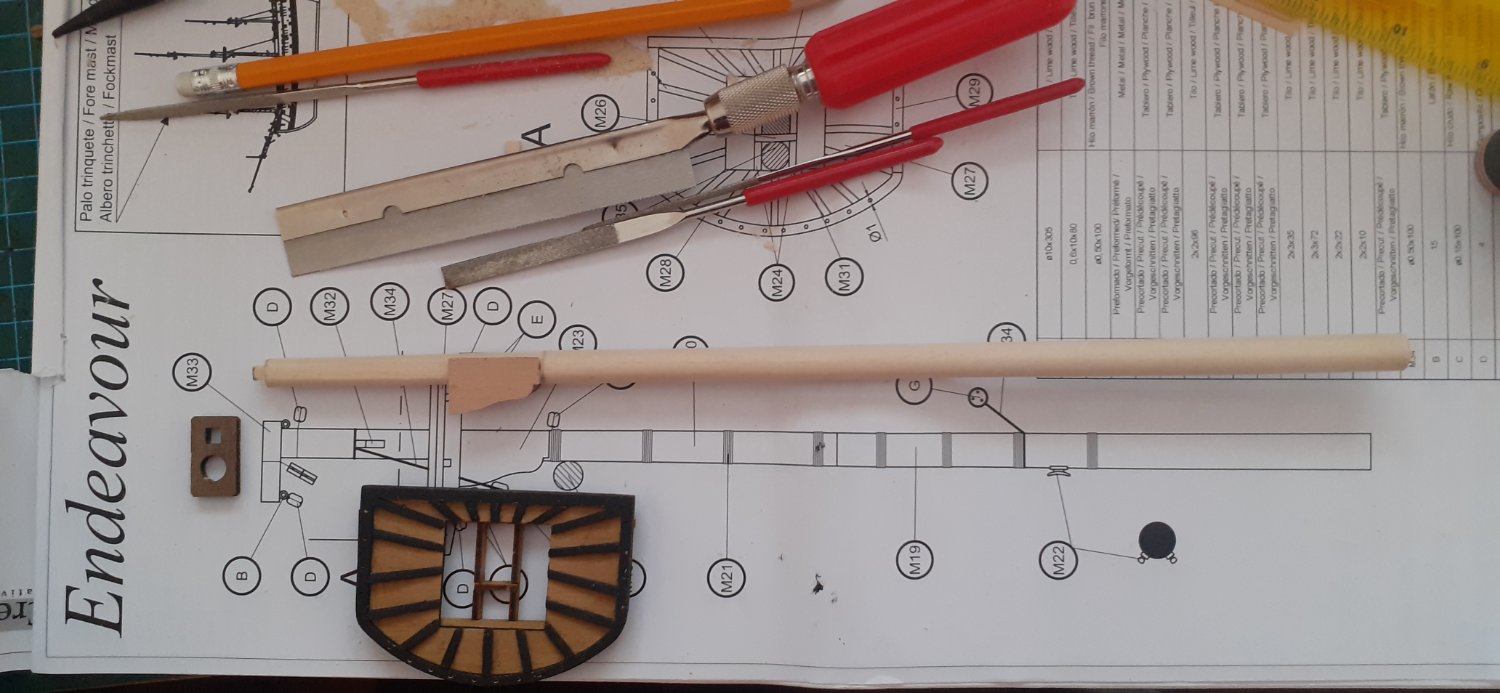
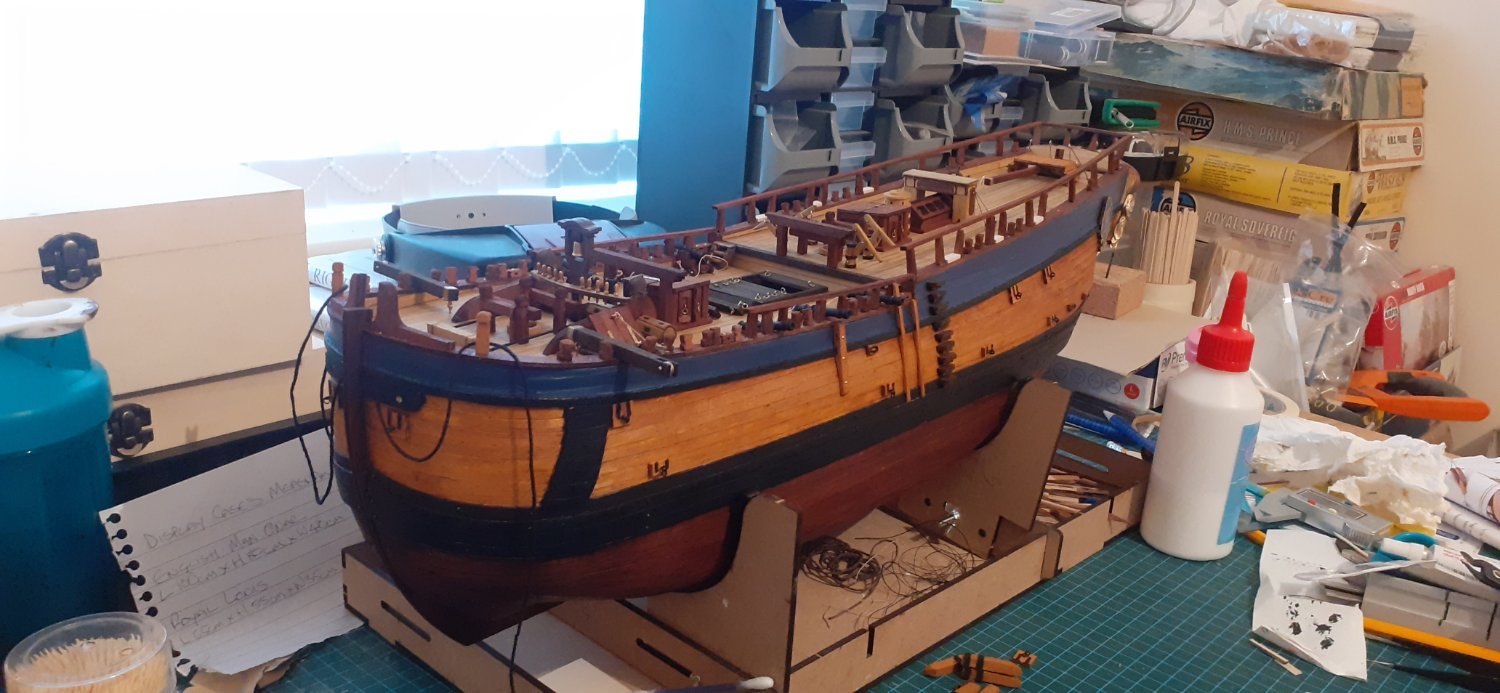
Occre Endeavour 1/54 WIP Update: Its been 6 weeks or so since my last post with 2 of them being on holiday. Obviously took a few time outs as well through tiredness due to work, life and ship building balance. Fore, Main & Mizzen masts are all complete now and have been stained and painted along the way, including the Gaff and Flagstaff, all of which are only dry fitted to the ship atm as there is work still to be done on deck and around the Hull. The Lifeboat is finished with a few extra details, and has been rigged to the spare masts. Next stage will be Fitting the Gun posts then painting and fitting the Swivel Guns. The Gun mounts will need the holes slightly drilled larger so the guns fit. After this I will be adding some more deck detail before I can permanently fit the masts one by one in preparation of the start of the Standing rigging. All in all I am pretty happy with my progress and that satisfaction you get when you see your ship coming together. Also a big thanks to OcCre - Ocio Creativo First Class Customer service which has supplied me with a few parts that I needed along the way. Happy modelling everyone staysafe and take care 👍🤺⚓ Slainte Mhath 🍻🍻


-
Hi Hamilton Pulling a chair up to watch your build on this with a lot of interests I have been eyeing this kit for over a year and have just recently managed to acquire this kit at a very low price, but one which wont be built for a while as I am working on one kit just now with a possible 2 others after that. All the best Robert 👍🤺⚓
-
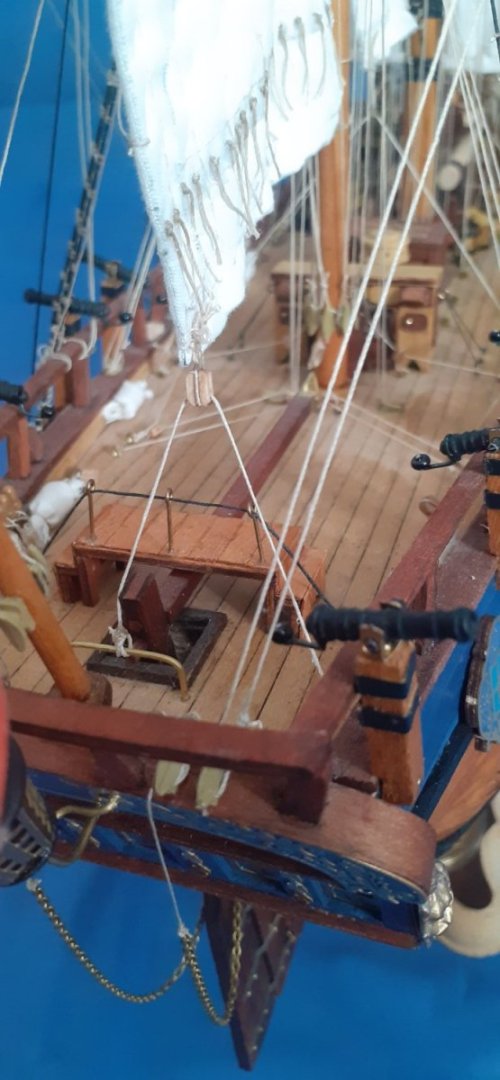
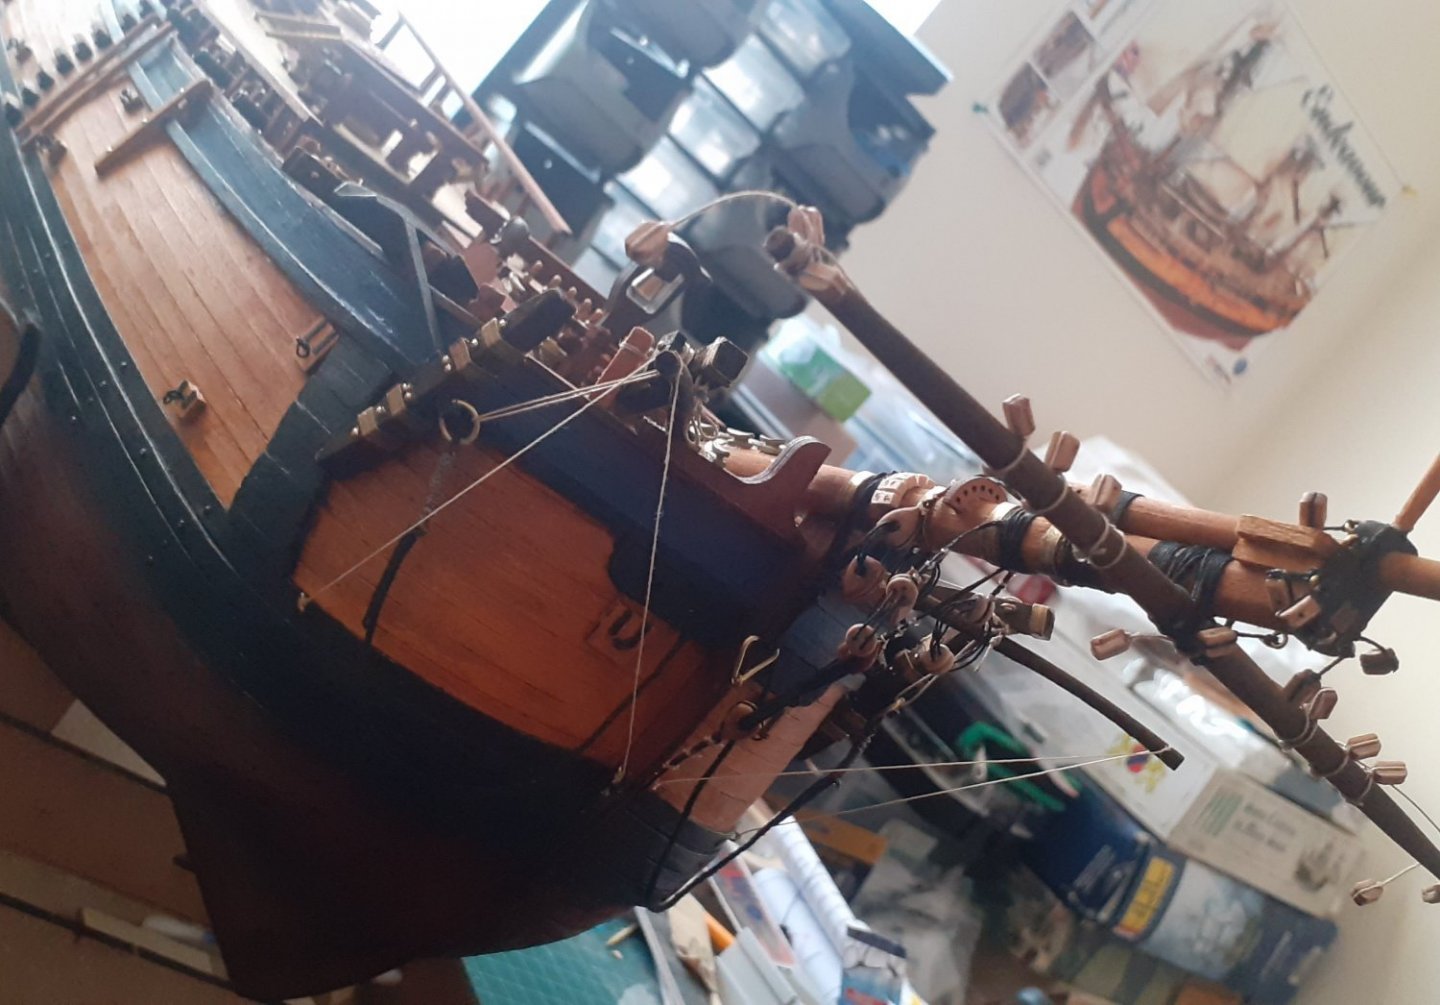
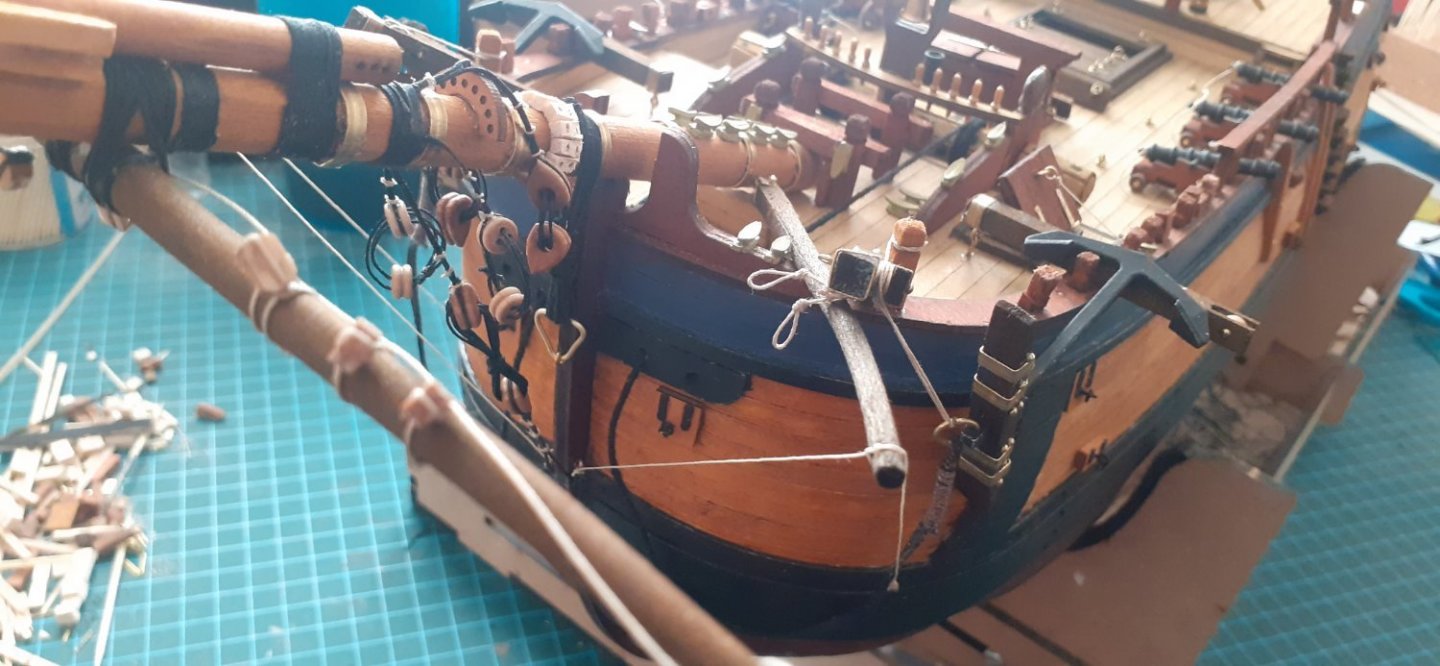
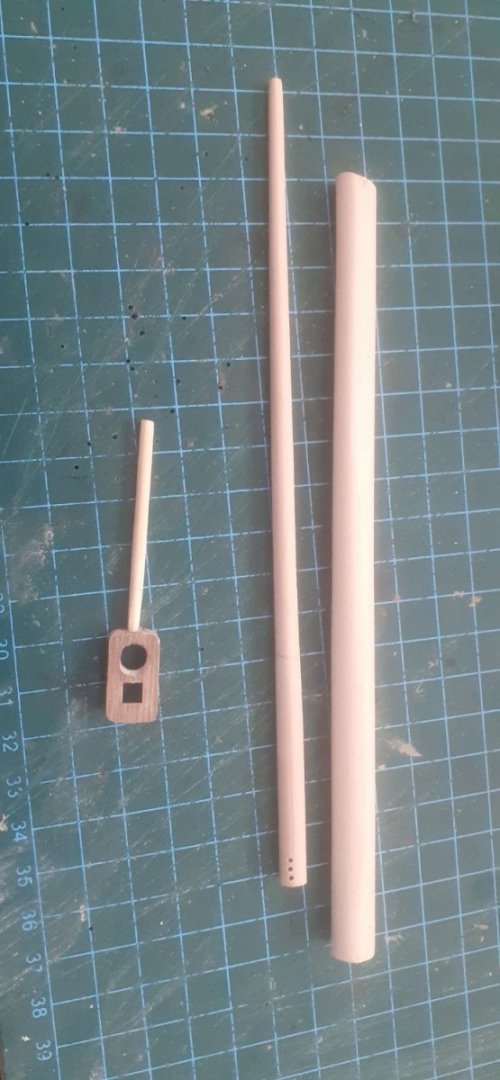
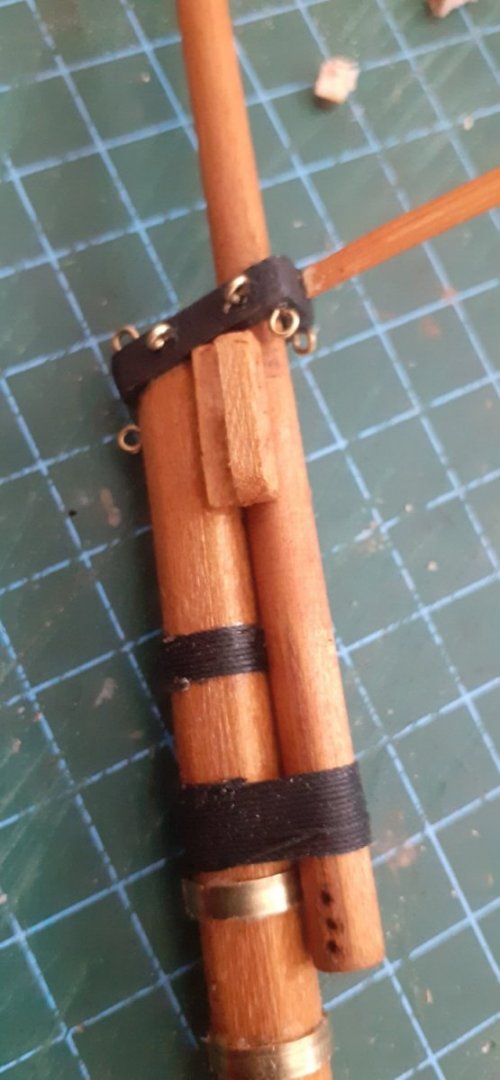
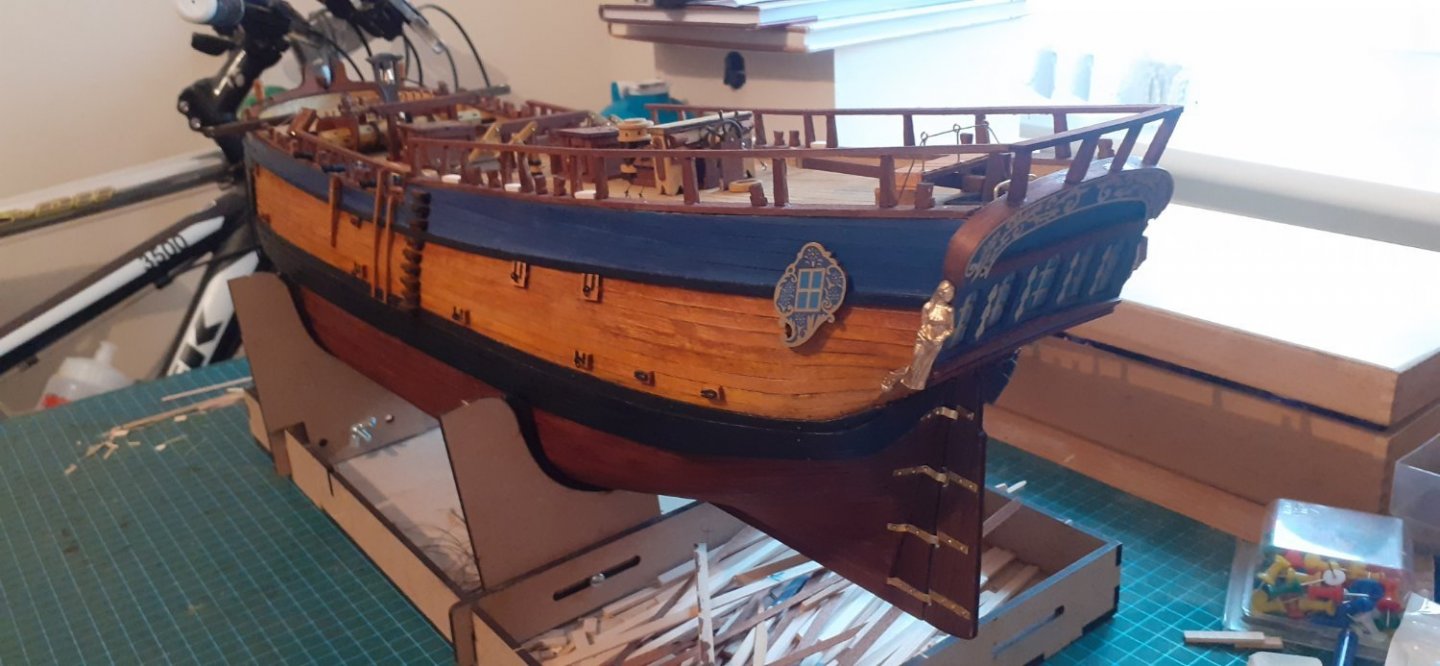
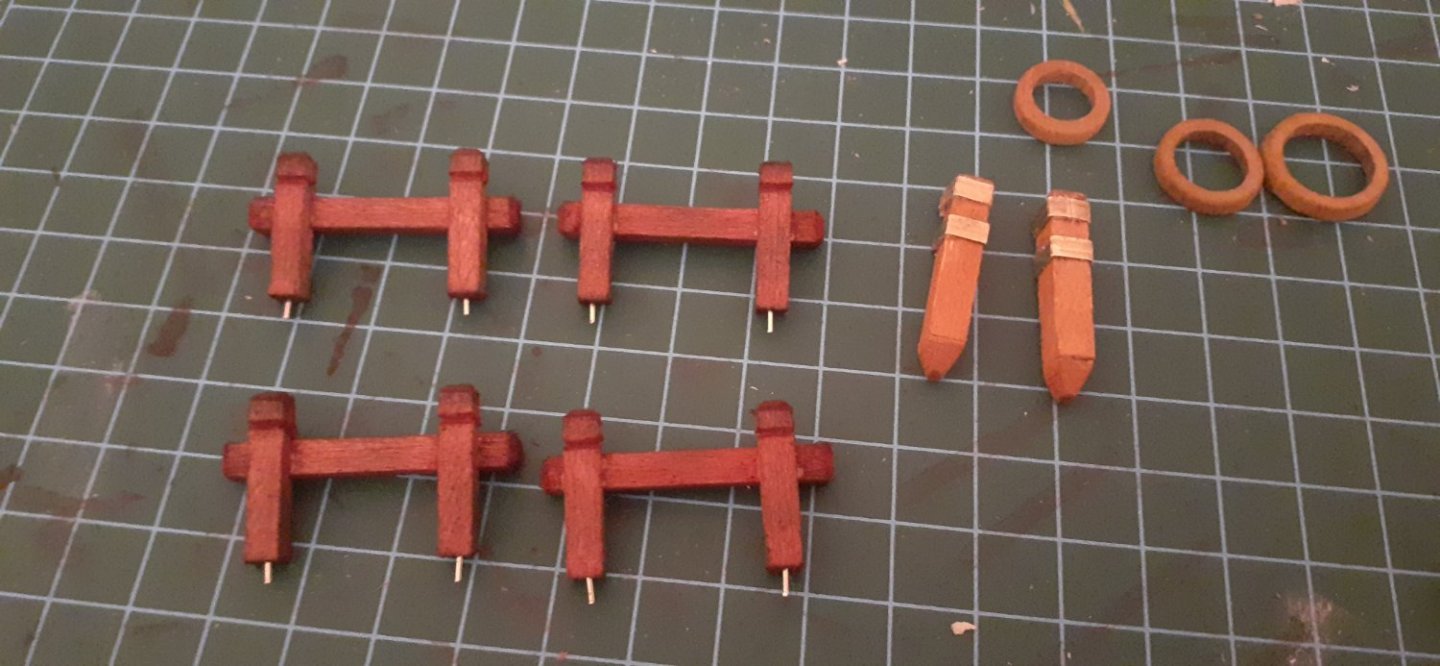
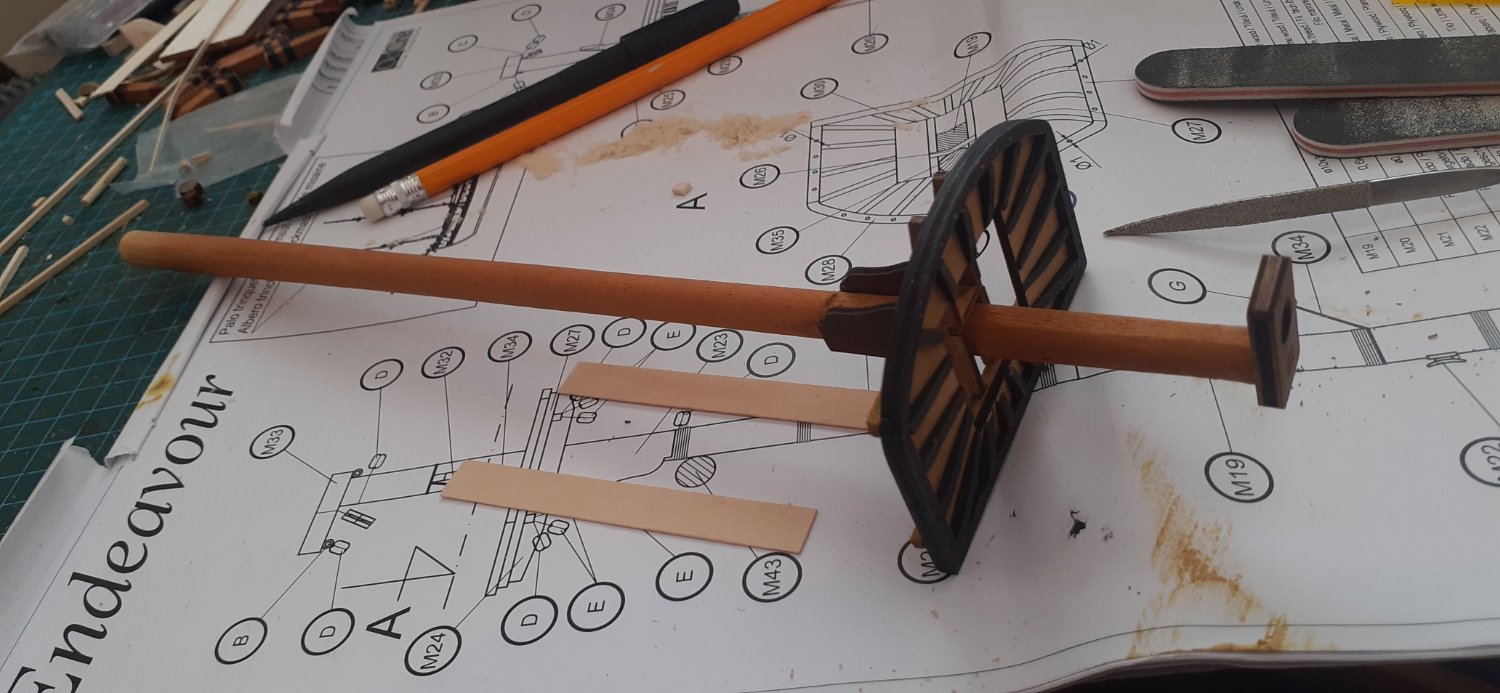
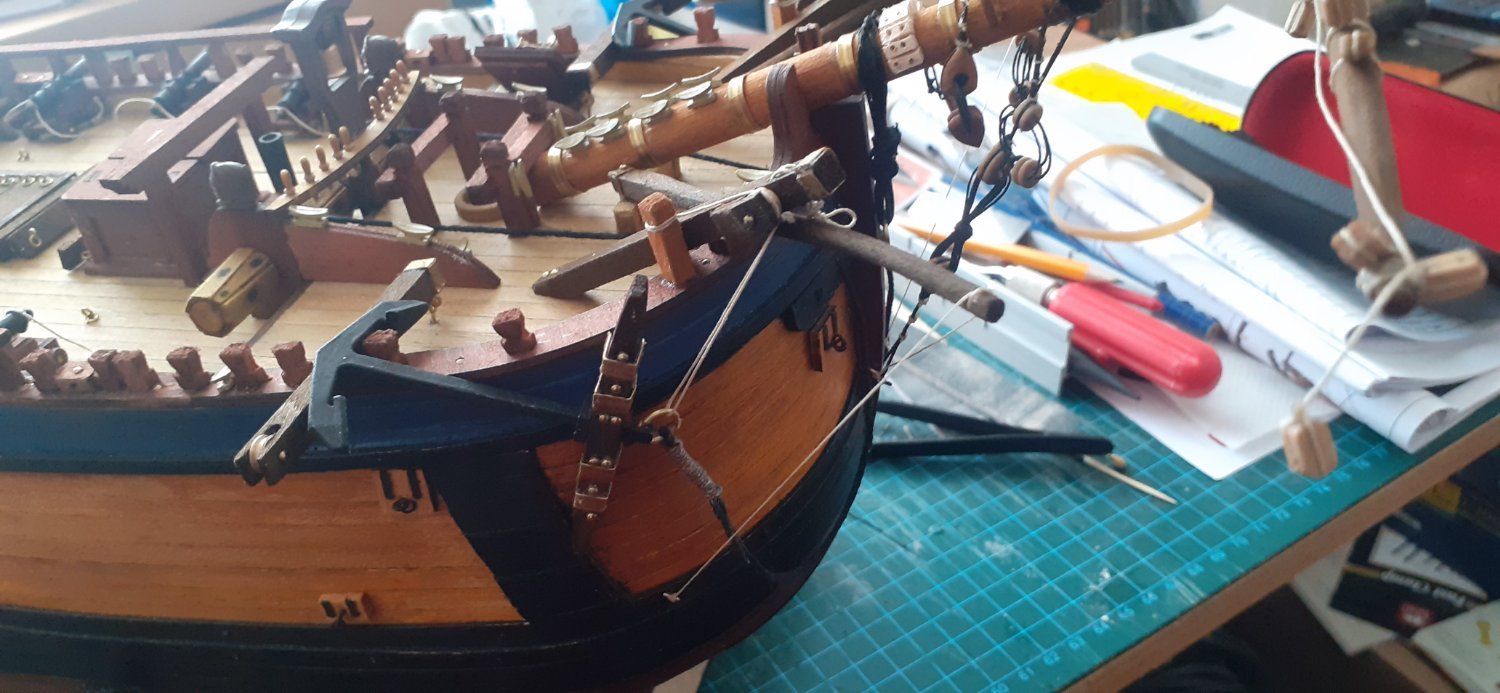
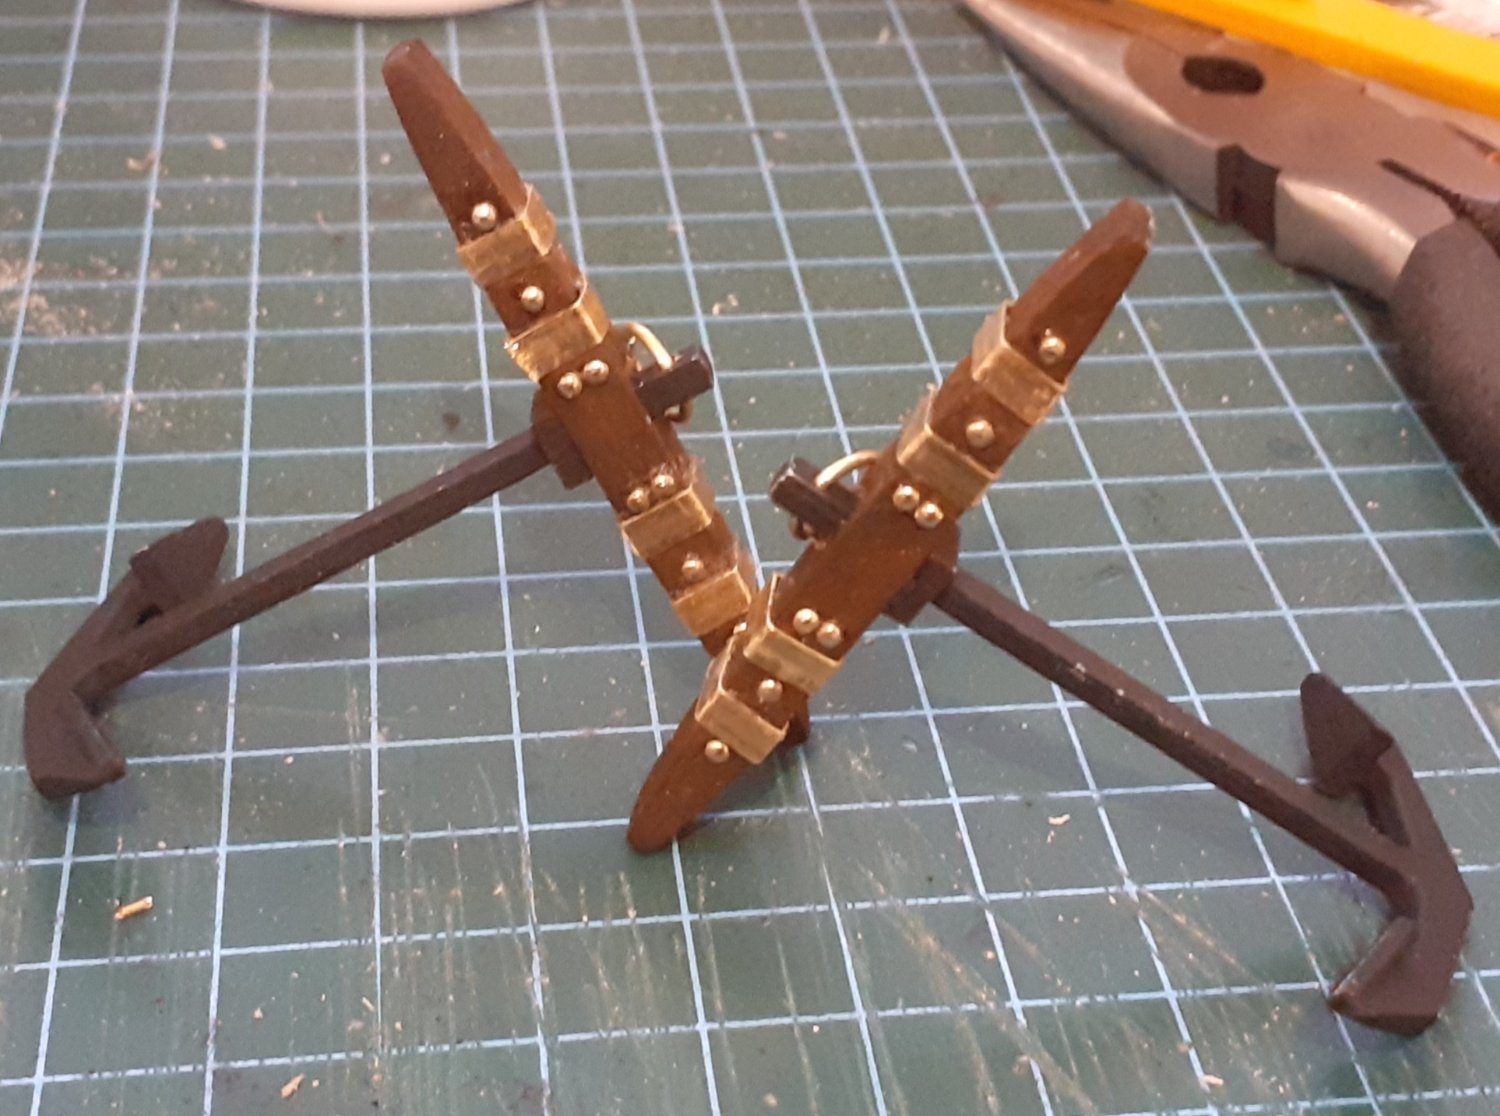
Occre Endeavour 1/54 WIP update. The Bowsprit is finished and permanently fitted with all relevant rigging blocks, heart blocks, cleats etc.. as well as the Yards. The Davitts, Booms and Anchors which I already made have now been fitted and rigged up. I have left the chains off the Anchors for now so as to give myself enough room to remove Anchors when I eventually add the swivel gun posts and guns which I will be adding at a later date thus ensuring no clumsy accidents breaking them while trying to work round about them. There will of course be touch ups and minor alterations near the end. It's not perfect but I am happy with it. Probably the hardest part in this was the bending of the brass rings around the Oval Bowsprit as there is a lot of tension in the brass which makes it hard to conform truly to the shape required. Next stage will be making the Foremast in between this I will continue to make the life boat as well. All the best everyone Happy health and modelling Rob 👍🤺🤺⚓⚓


-
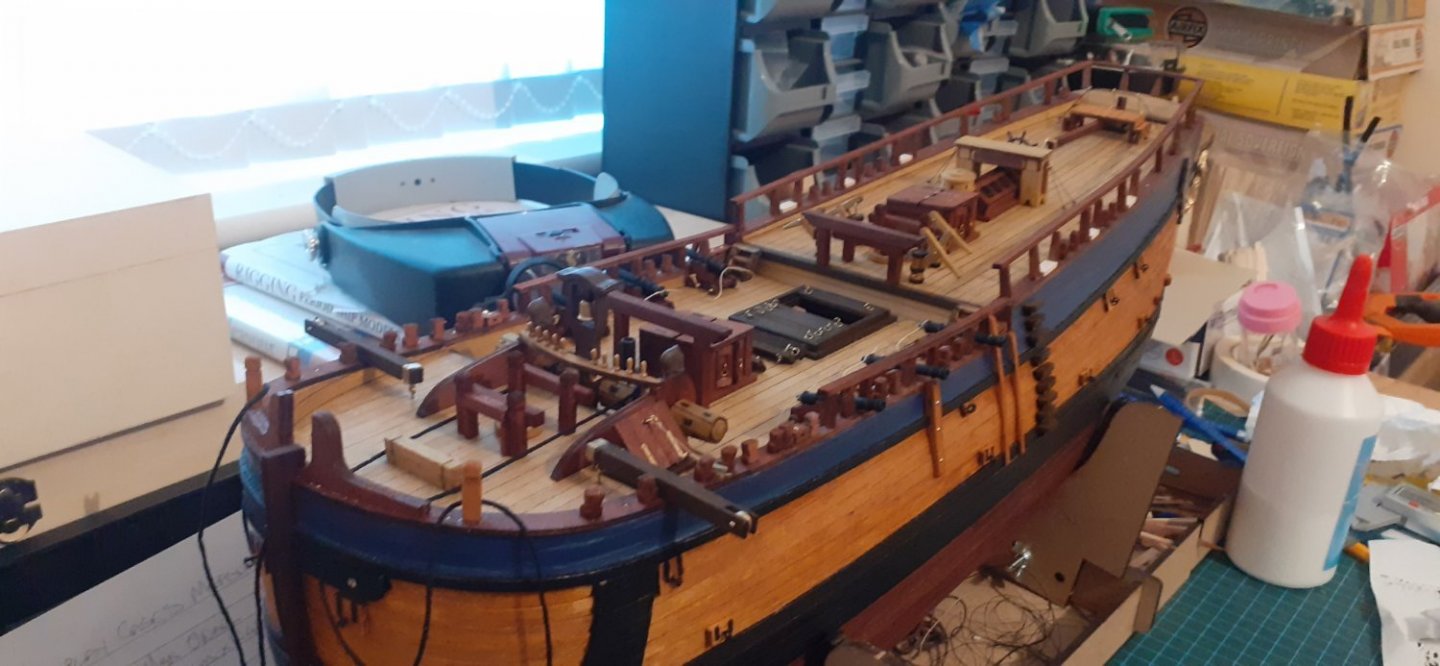
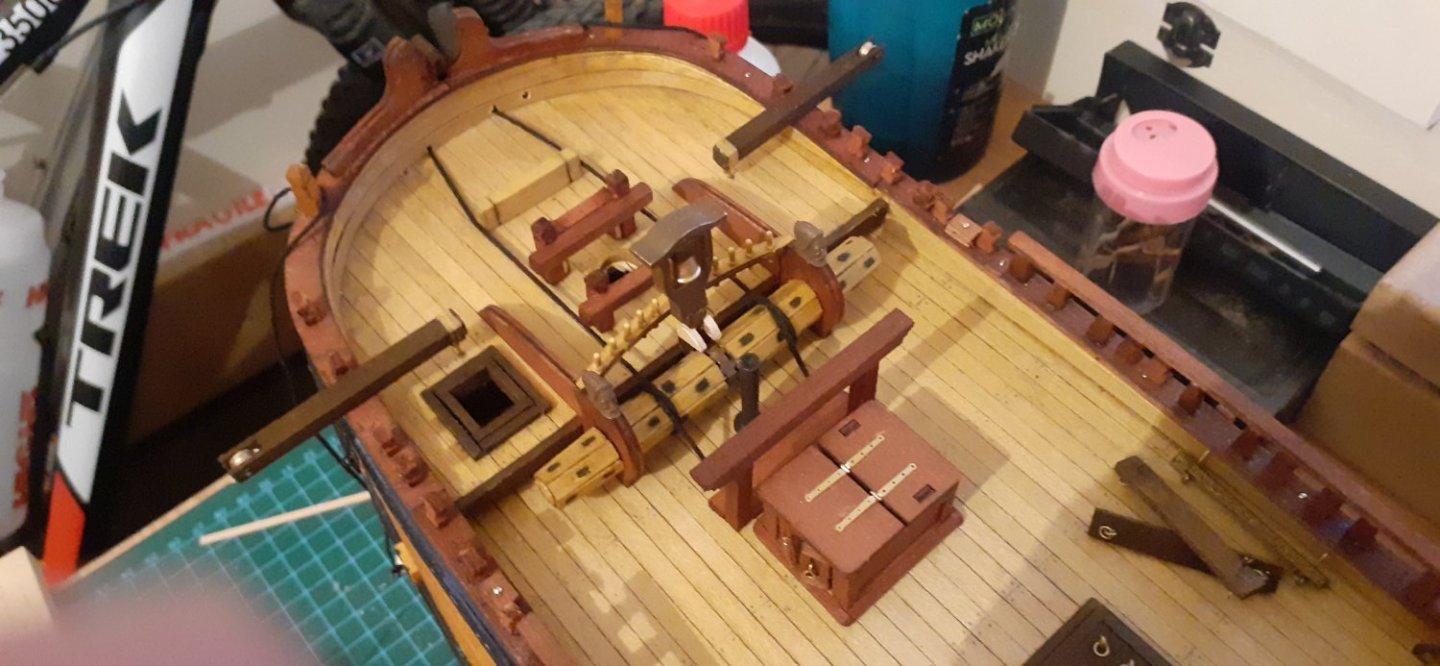
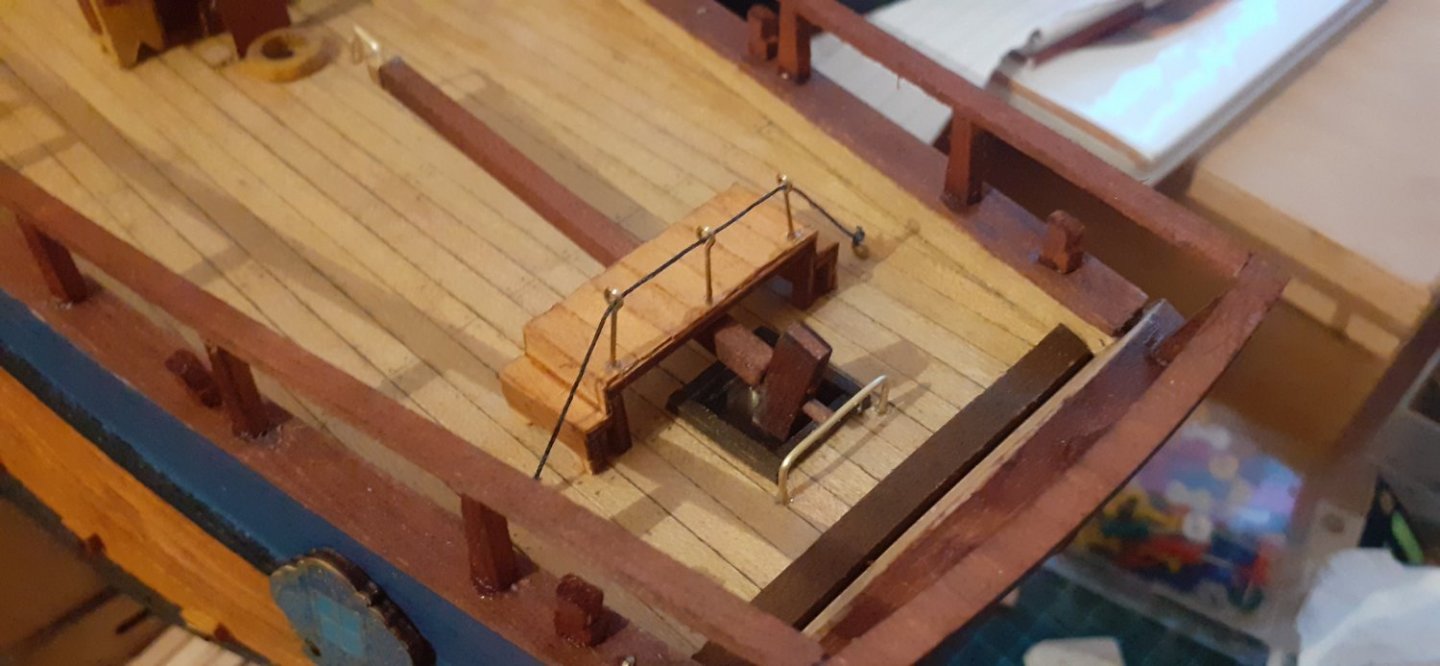
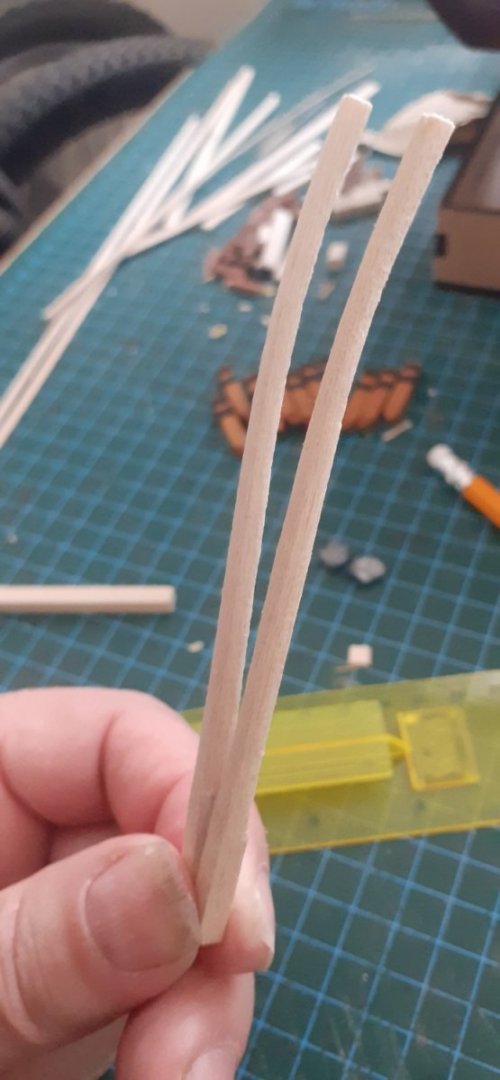
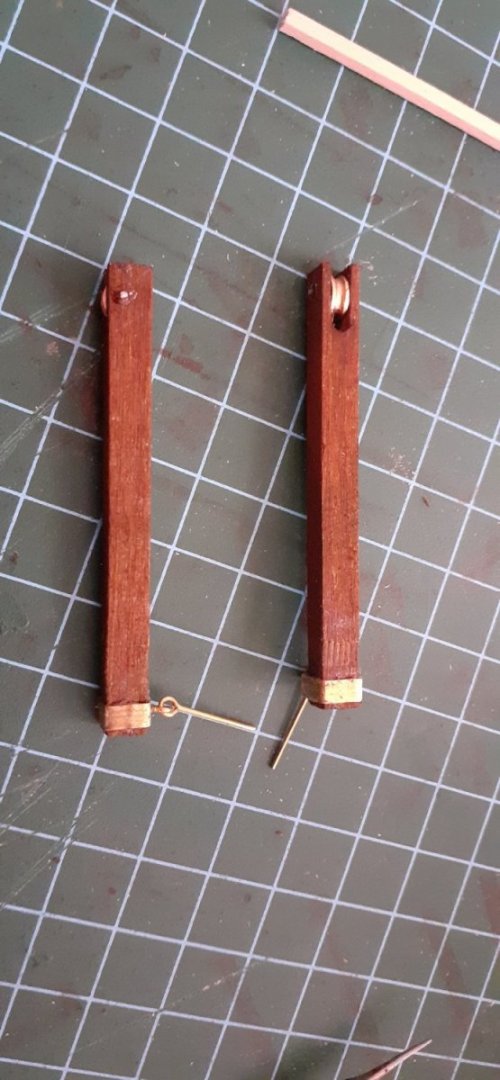
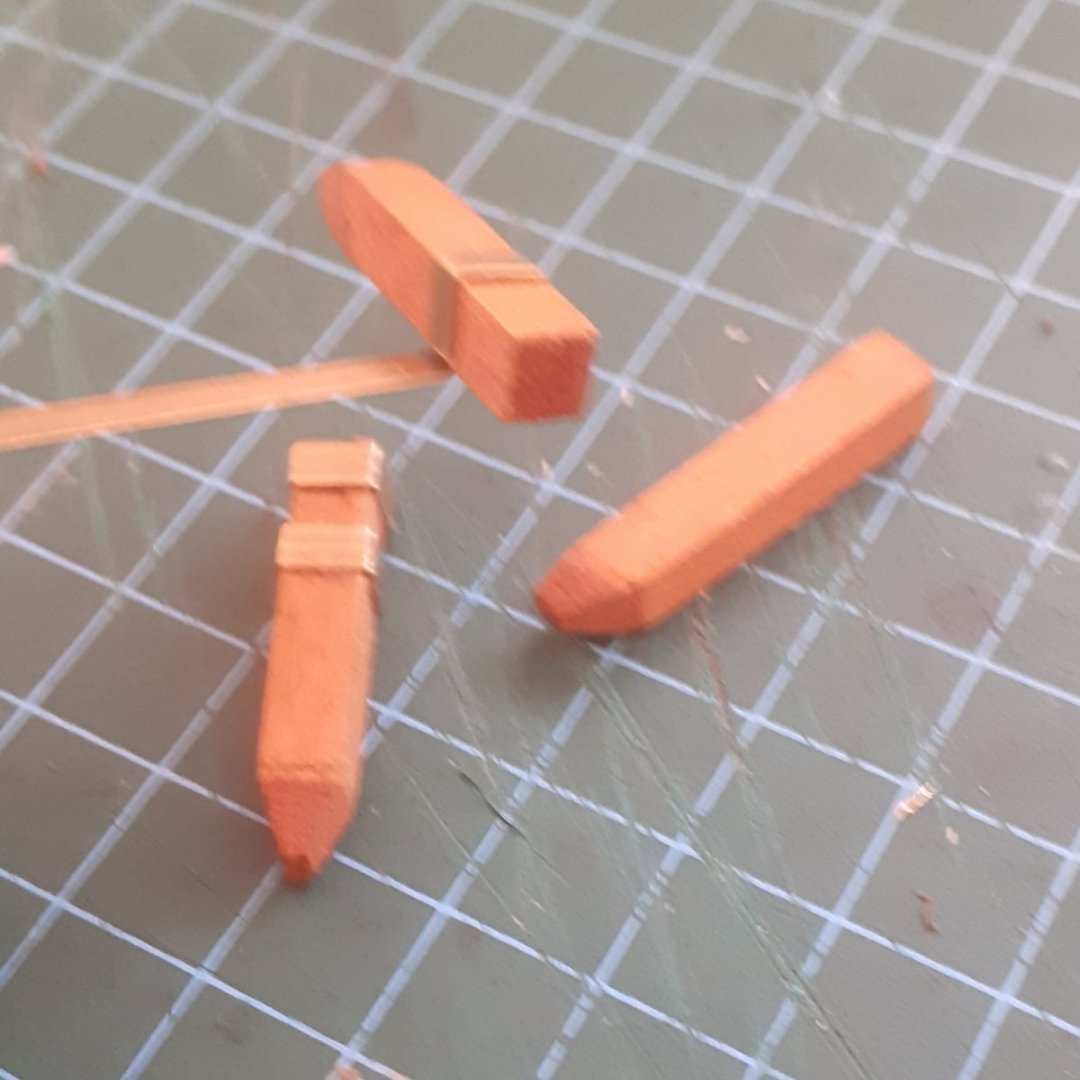
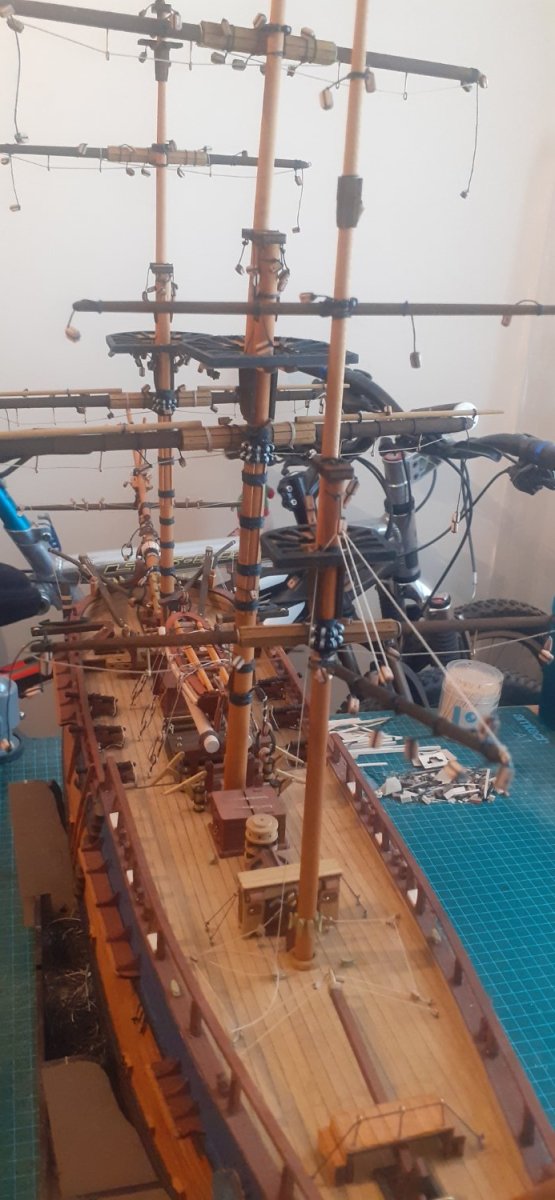
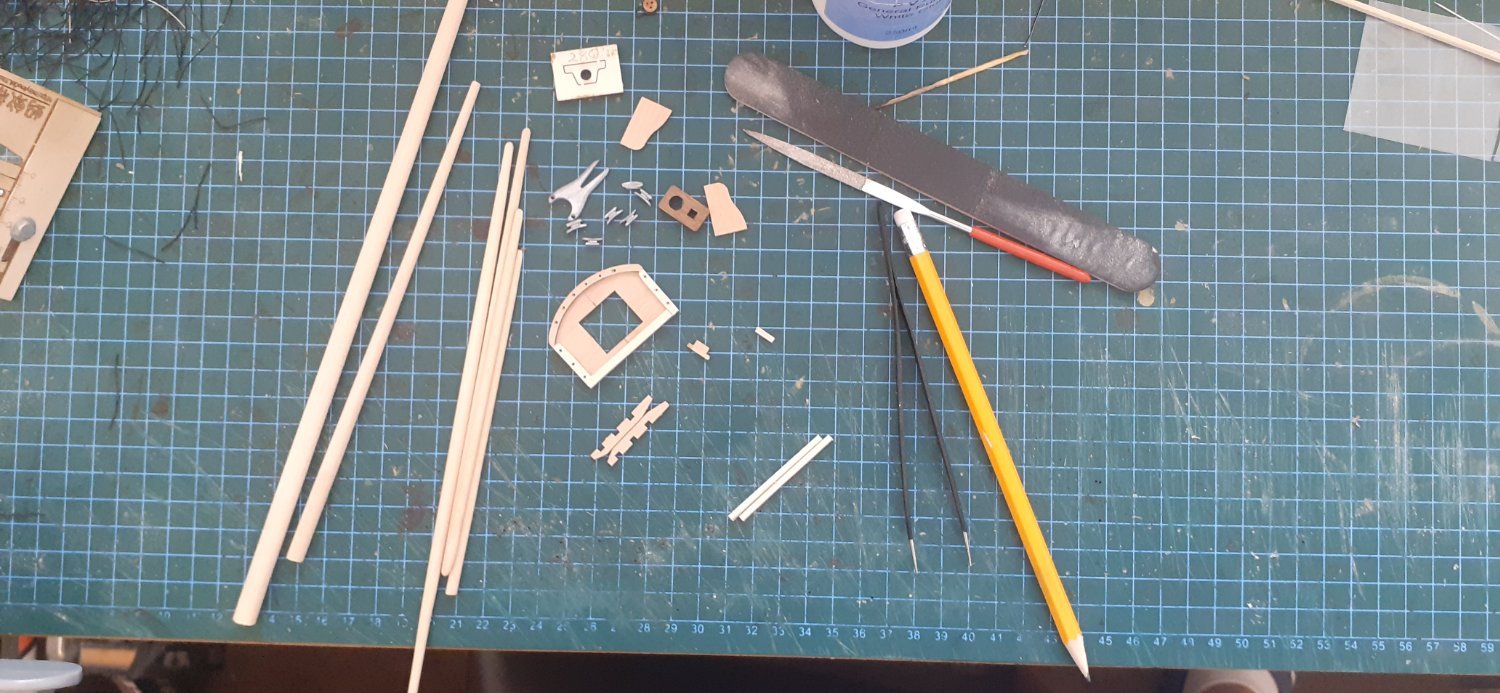
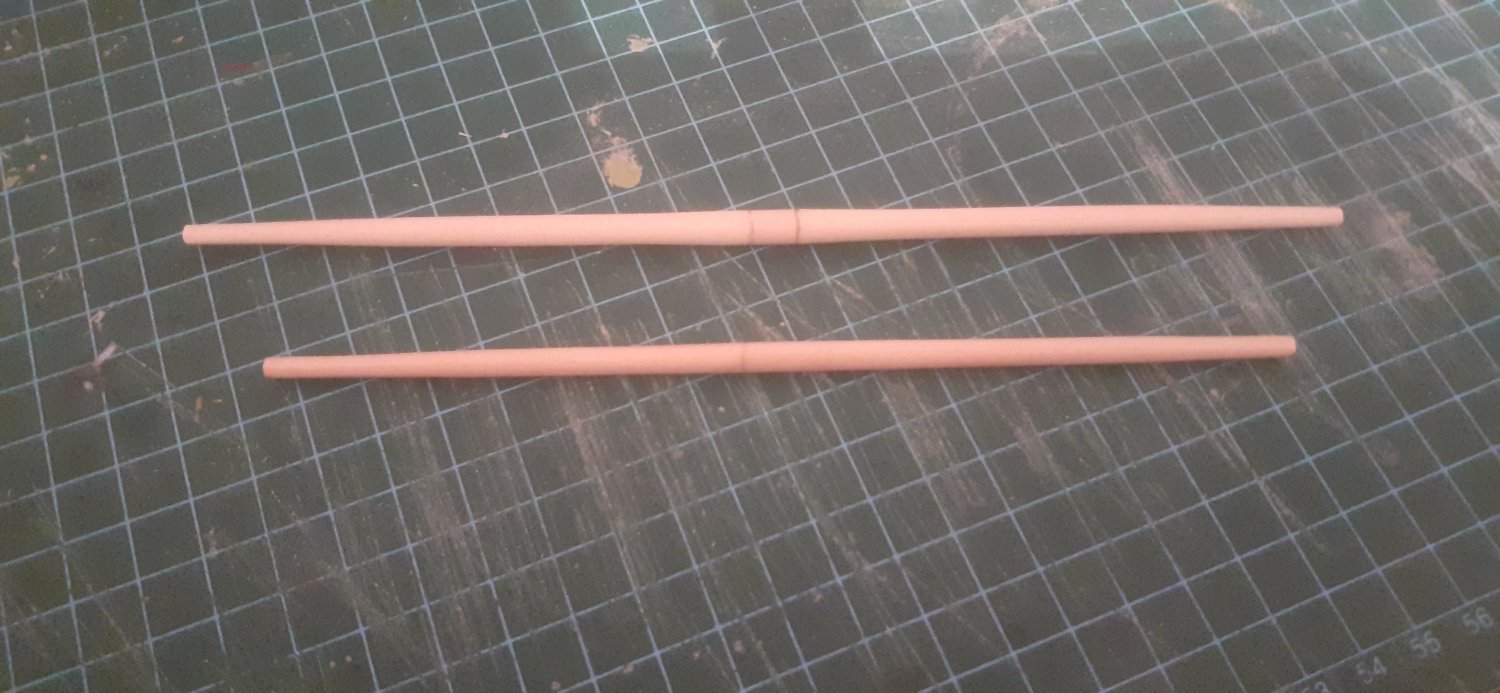
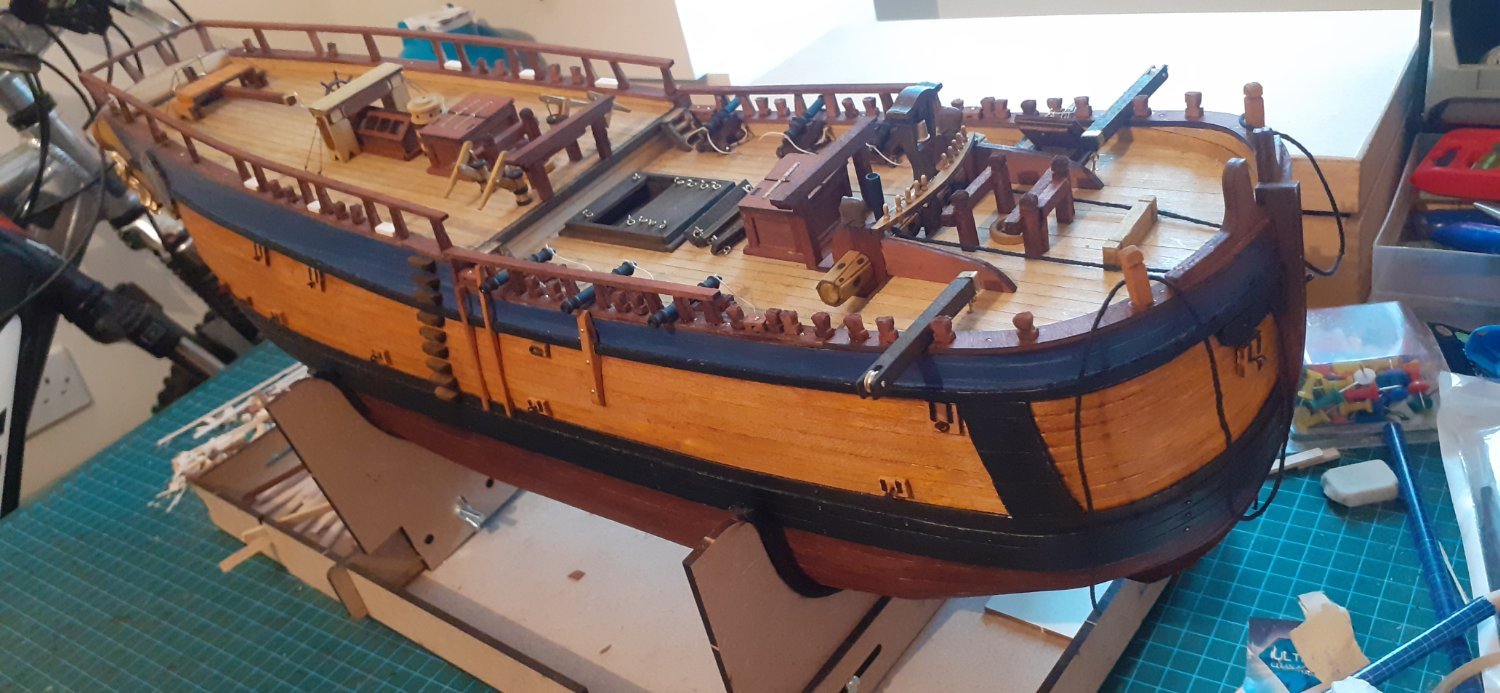
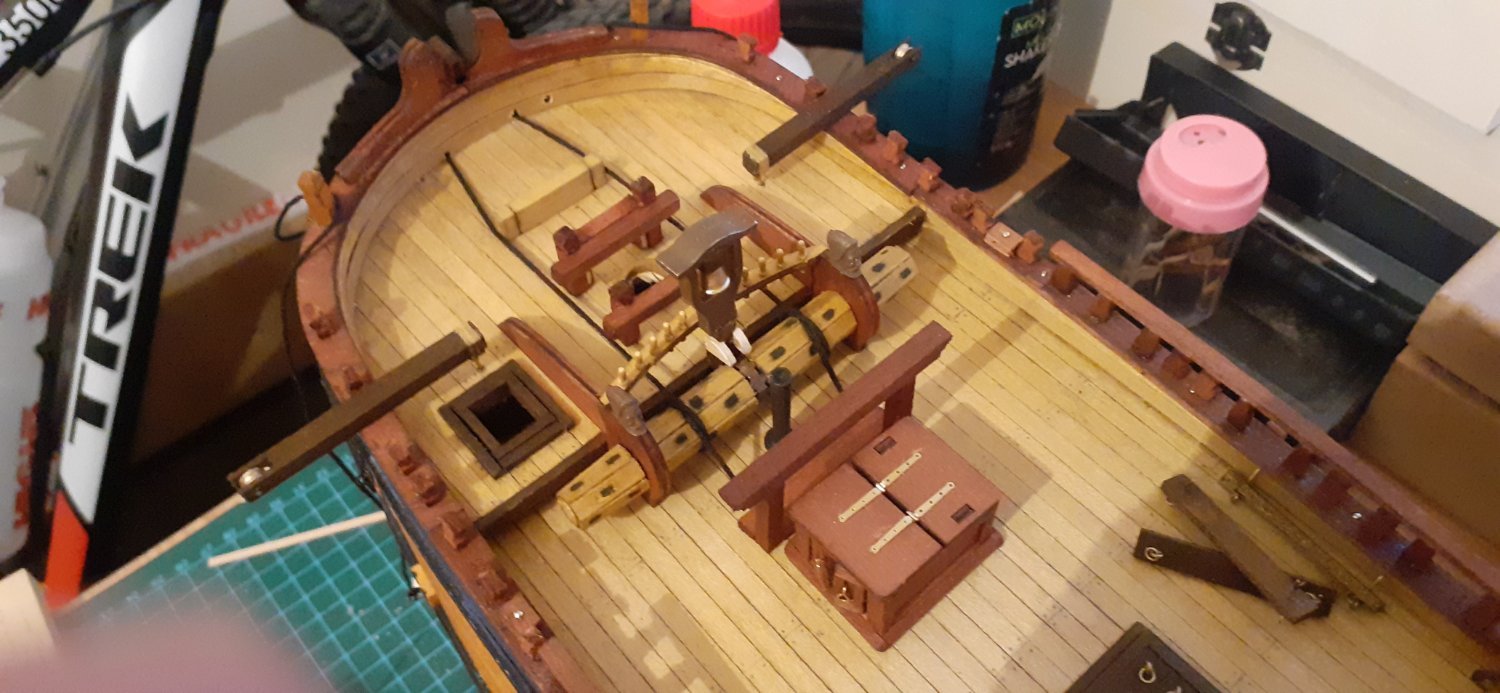
OCCRE ENDEAVOUR 1/54 Update! Hi Everyone Its been a while since my last build post but there has been a lot going on regards deck detail. Cannons, Pumps, Windlass, Bell, Fore Hatch Cover, Davitts, Steps, Ladders, Skids, Chess-trees, Capstan, Binnacle cupboard, Wheel, Tiller platform etc.. all permanently fixed. The other Davitts and Booms have been made but I will be building the Bowsprit next so I can fit these all correctly at the same time as well as all the cleats. All in all it's been a very very enjoyable learning curve, and I am pretty pleased with the outcome so far considering it's my first wooden build. Next stage as I say will probably be making the channels although like the post/swivel guns, I wont be fitting these for a while yet. After the channels I will be building the Bowsprit so I can fit the other davitts, booms and cleats for the Bow and the rest of the ship. Happy modelling everyone All the best and Staysafe and healthy Rob 👍🍻🤺🤺⚓⚓


.thumb.jpg.7a3c776d03fbc3ed201c8235a255c5ae.jpg)


.jpg.f90fae03c4cca5f8235c984ef36e936a.jpg)