


ortho85
-
Posts
144 -
Joined
-
Last visited
Content Type
Profiles
Forums
Gallery
Events
Posts posted by ortho85
-
-
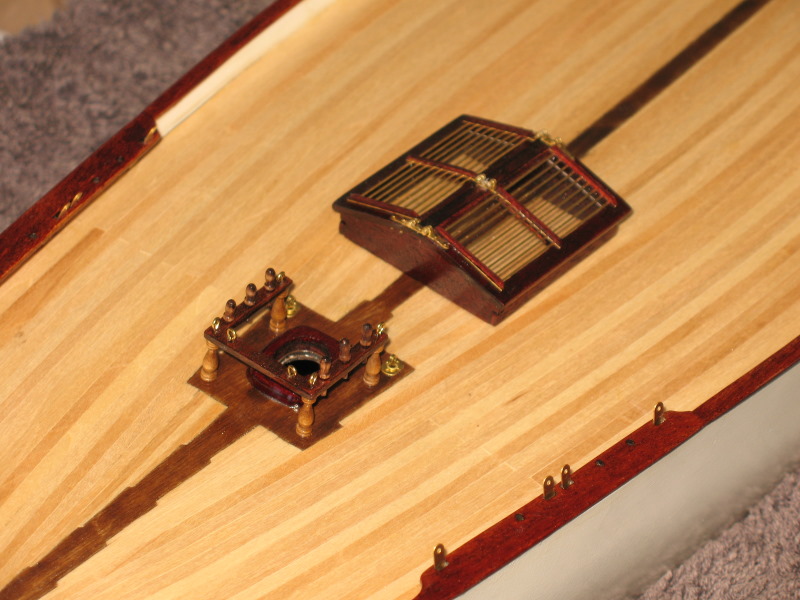
And an update on the construction of deck ornaments. I'm using smaller images for the finer items.
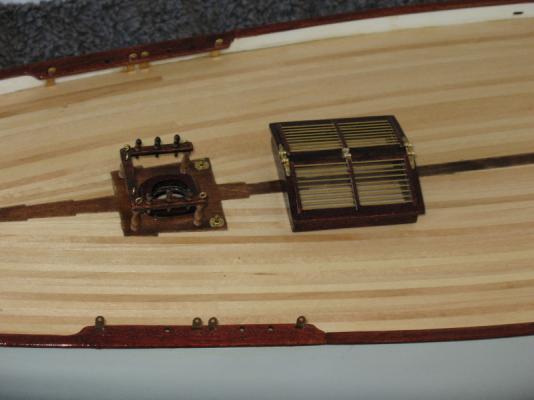
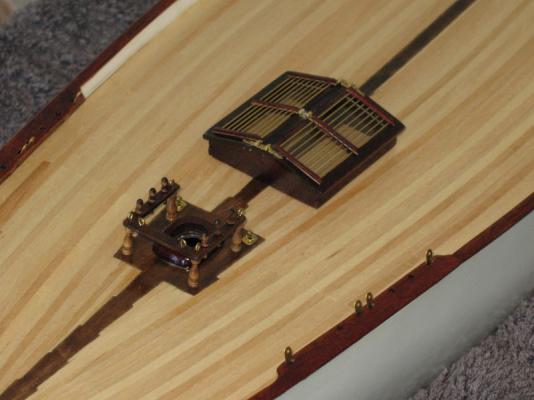
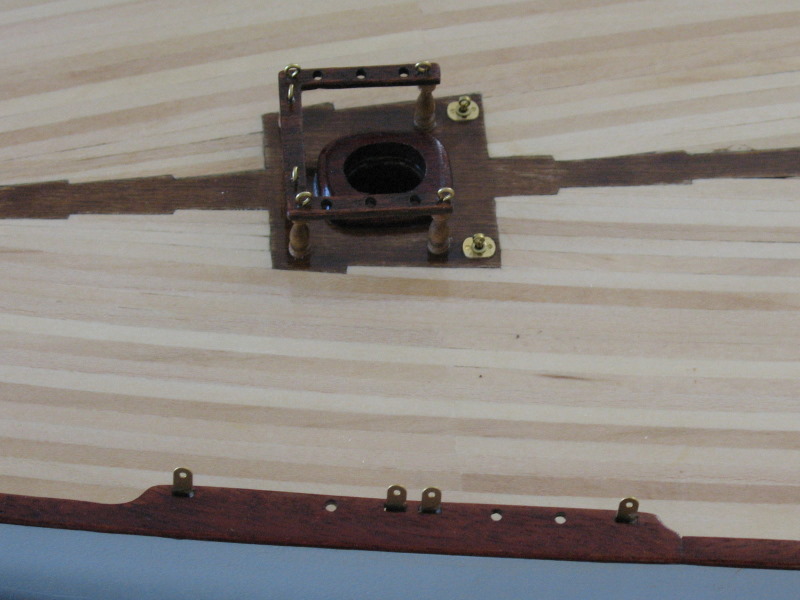
First came the main mast coaming, and the belaying pin rack. Nothing too complex there. Here they are glued to the deck:

You can also see the brass brackets at the gunwales. Not sure what they are for, yet.
Next was a skylight. This caused many headaches. The wooden frame was awkward, but came good.
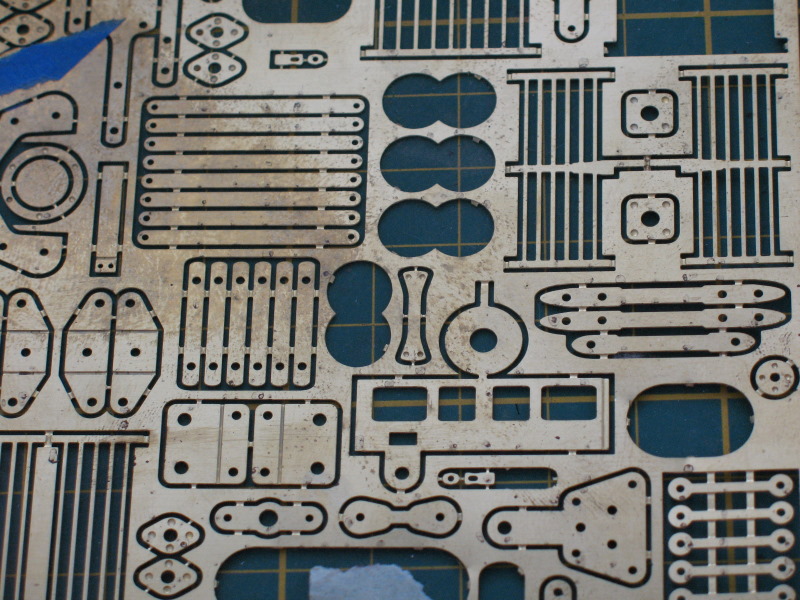
To the frame are attached various brass fittings. Here, again, Amati falls short!
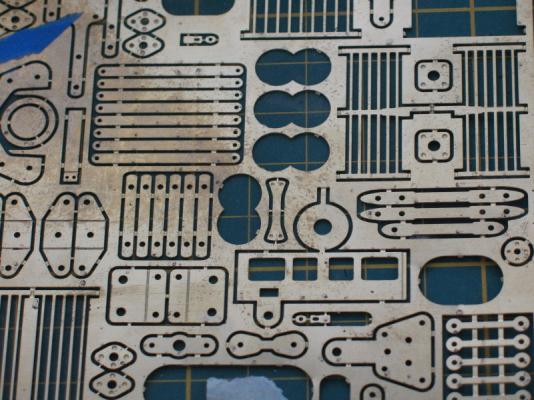
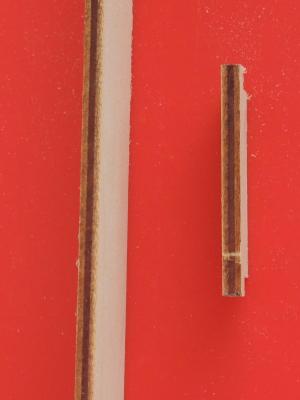
They come on a pre-formed sheet, with no key. This mirrors their parts list, which will say "Wood strips mm3", without any clue to numbers or lengths.
Here is a section of the sheet, the green mat has 1cm divisions:
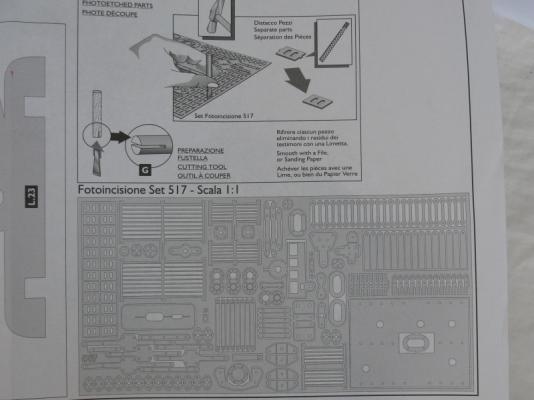
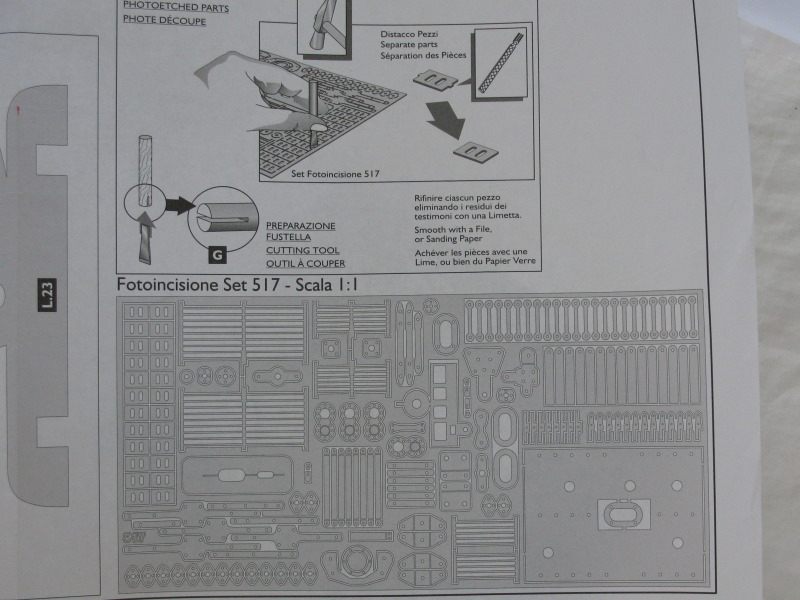
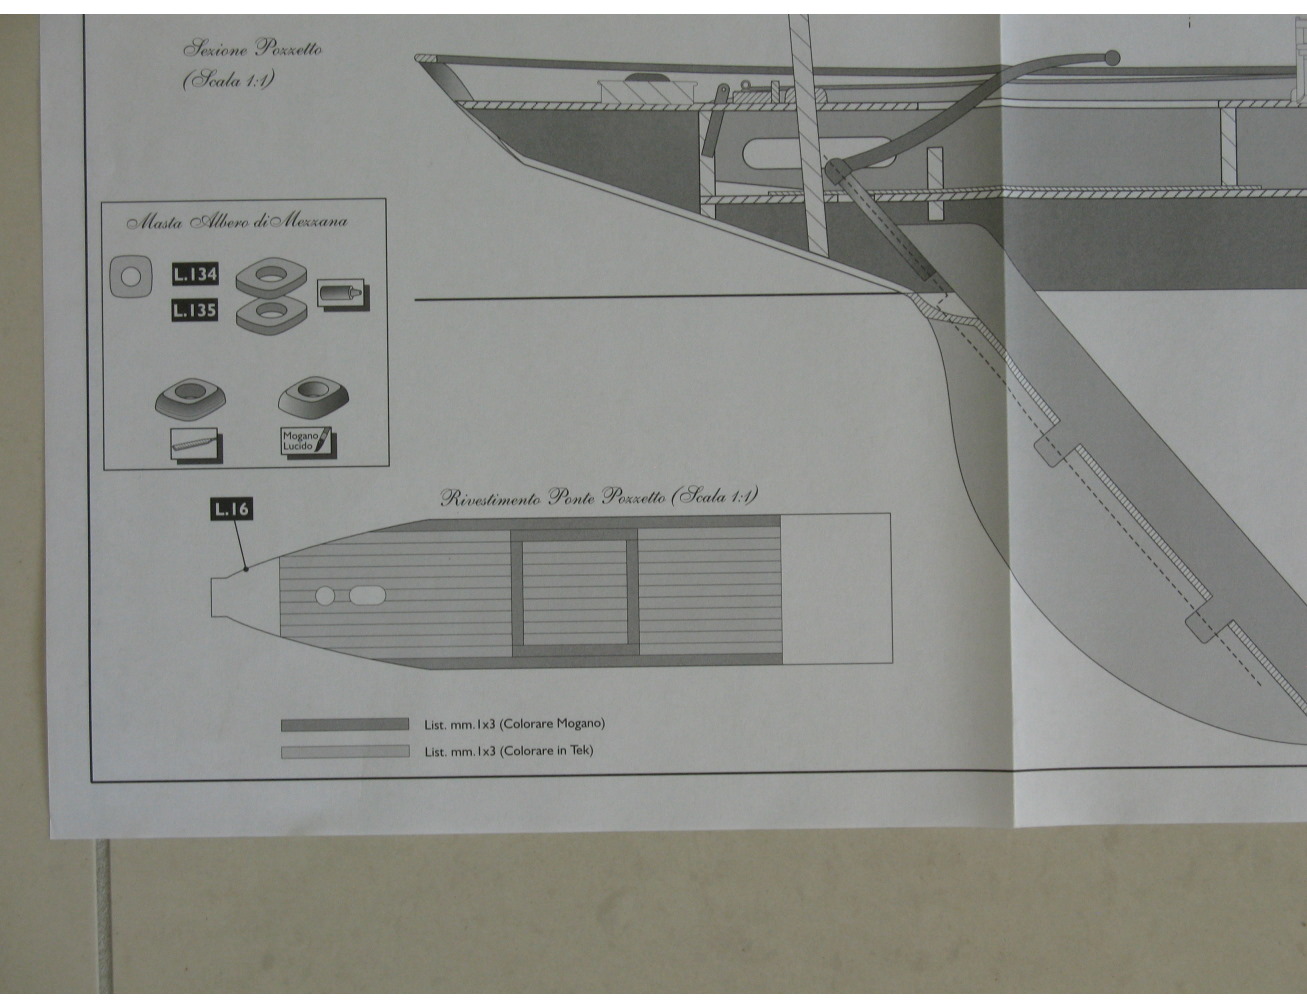
And the really useful (NOT) part of the plans, explaining this:
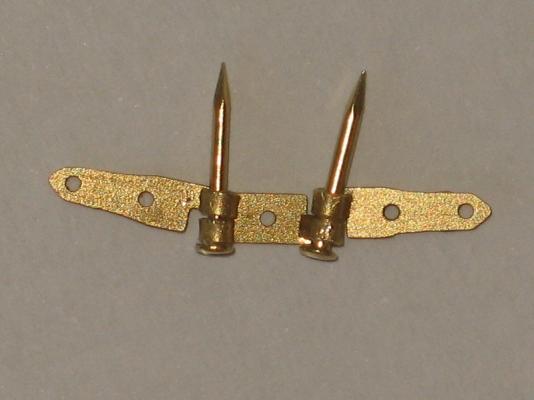
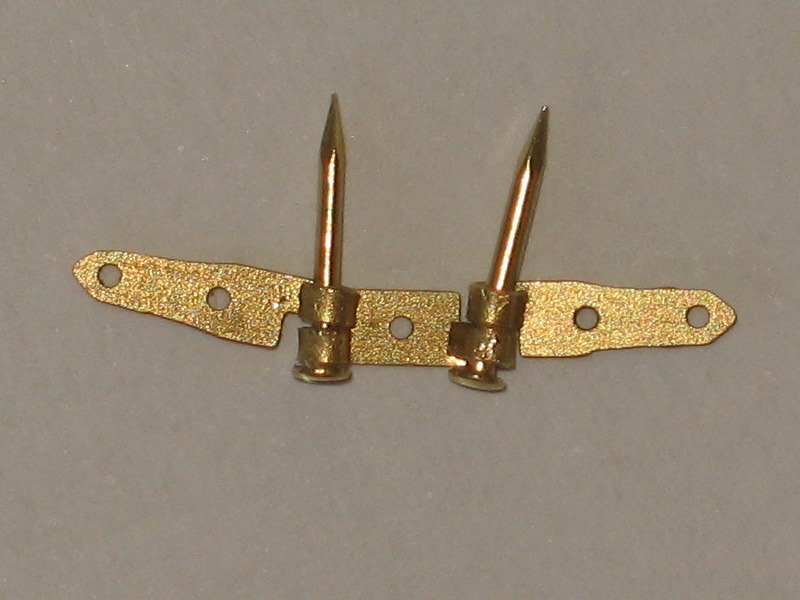
This is a hinge, before trimming the hinge-pin:
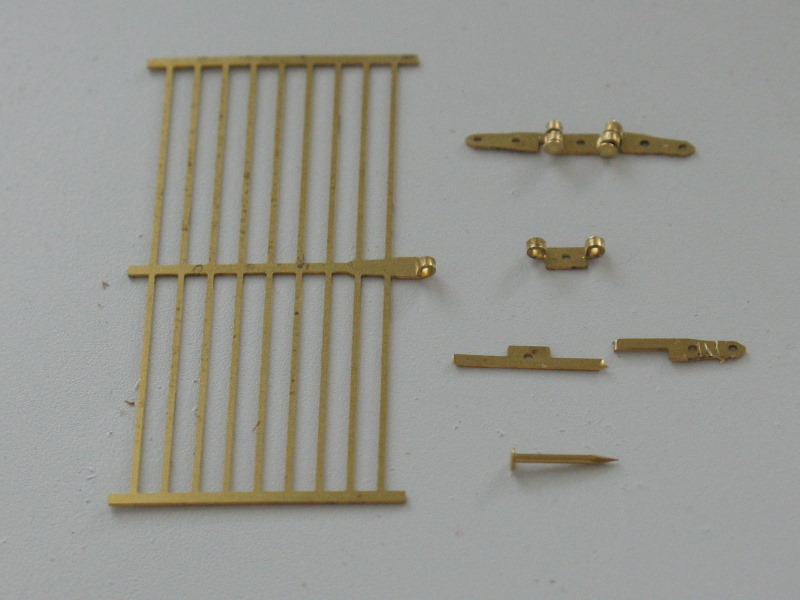
And some of the parts during construction of the hinges and gratings:

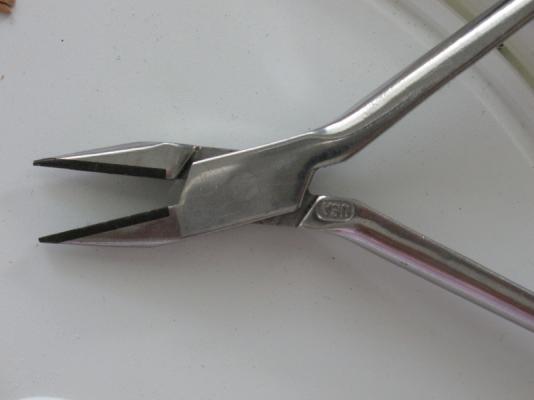
Fortunately I still have some things from my practising days, such as these Jarabak pliers:
After many hours, the skylight was ready. Here it is, just resting on the deck:
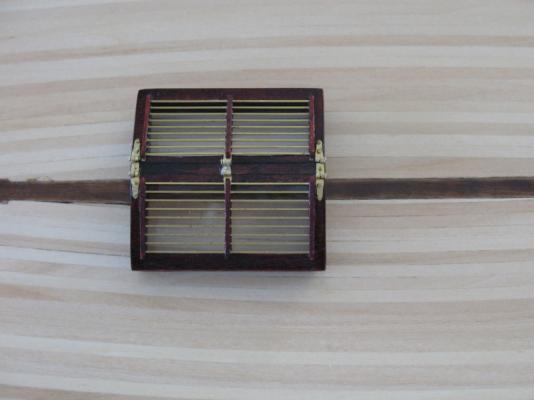
It's interesting how different the colours look in different lighting (with/without flash, respectively):

If anyone has any tips on getting the best colour, please tell me. Otherwise I might have to do my own research!
Cheers,
Brett
- dgbot, IgorSky, Salty Sea Dog and 6 others
-
 9
9
-
I enjoy tremendously reading your adventure with Amati (is it a Love-Hate relationship?)
Yves
Yves - the term is 'schadenfreude' !
No, it's purely a Hate-Hate relationship. I will never make another Amati model
The (pathetic) "instructions" are littered with 'but first' situations. There was an episode of Mash, where Hawkeye was defusing a bomb, using Amati-like instructions. He came to a part which said "cut the red wire", and the next bit said "but first ......................".
Currently I am starting on the deck 'furniture'. Referring to the photos you linked me to is helping enormously. The plans are then somewhat clarified.
Back to staining/sanding/swearing.
Cheers,
Brett
-
Hi Yves,
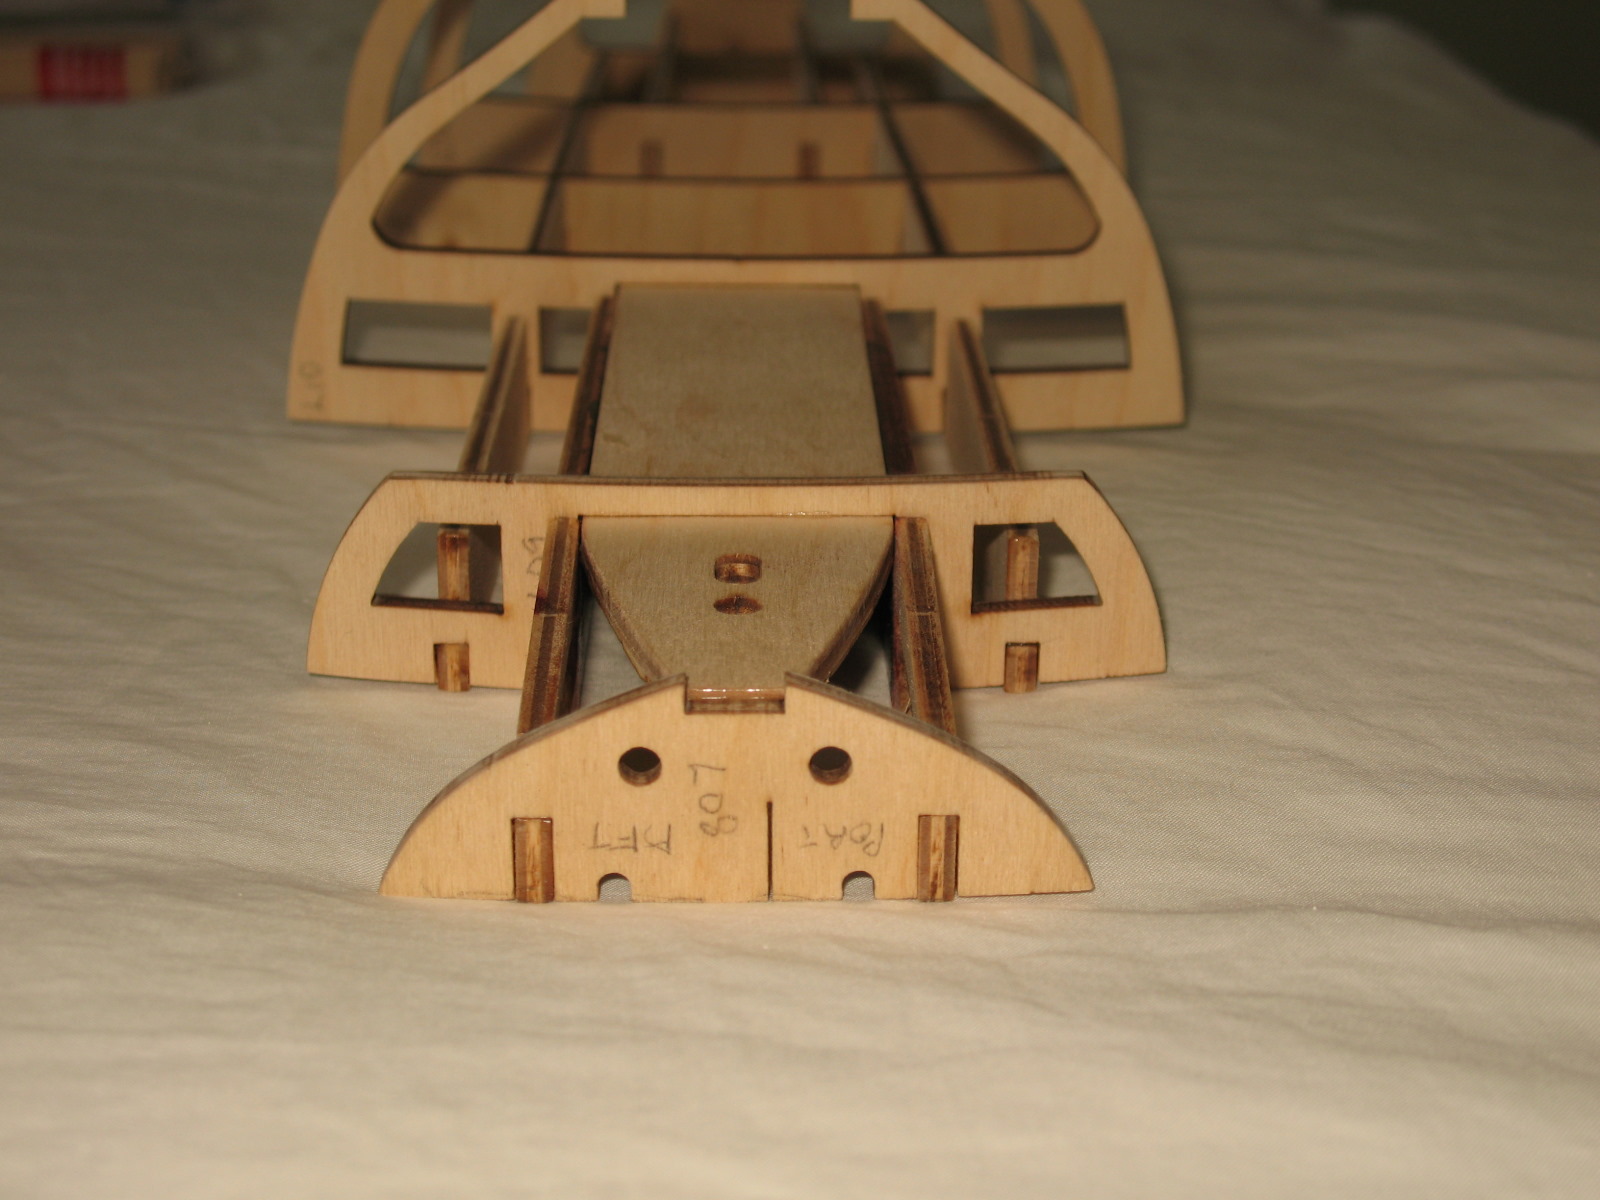
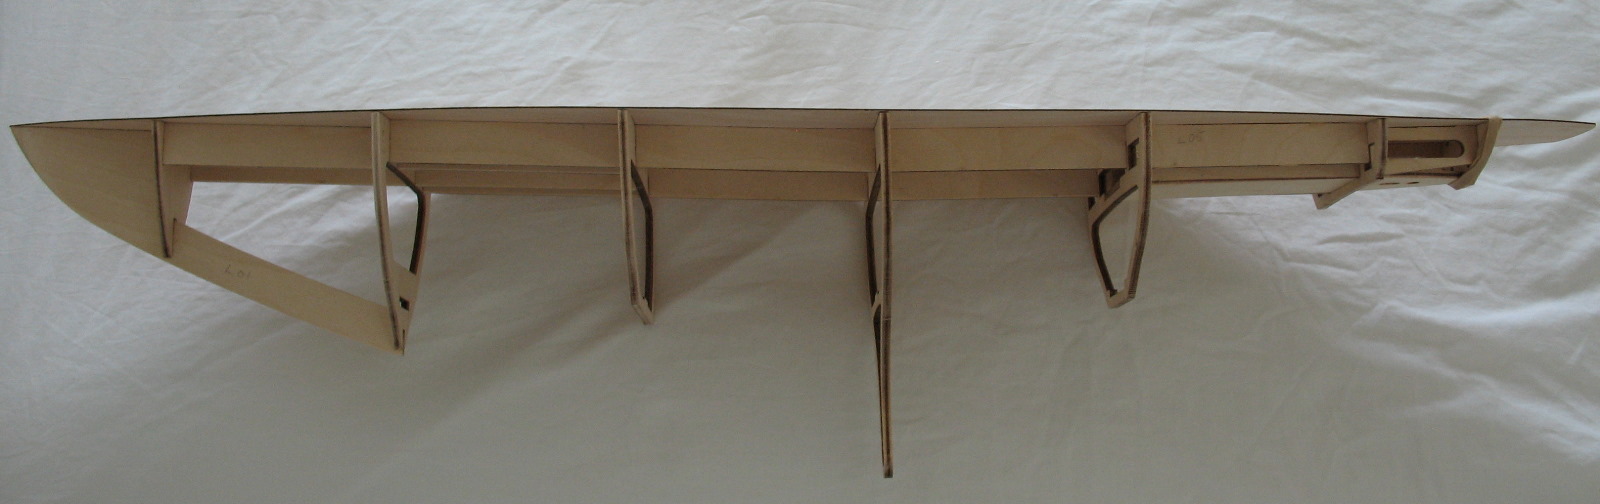
As requested, some images/plans of the bulkheads:
The next plan shows you should adjust the fit into the hull, but it seemed OK. In retrospect I should have used some sort of indicator paste (lipstick?) to refine the fit.
This was the trial assembly:
I don't have a good end-on view, just the stern:
And a side view:

Hope that gives you more info.
Cheers,
Brett
-
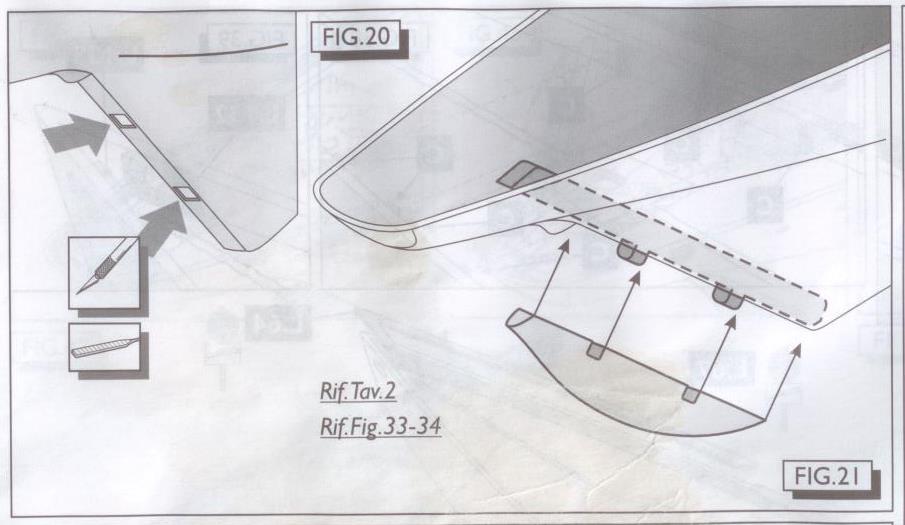
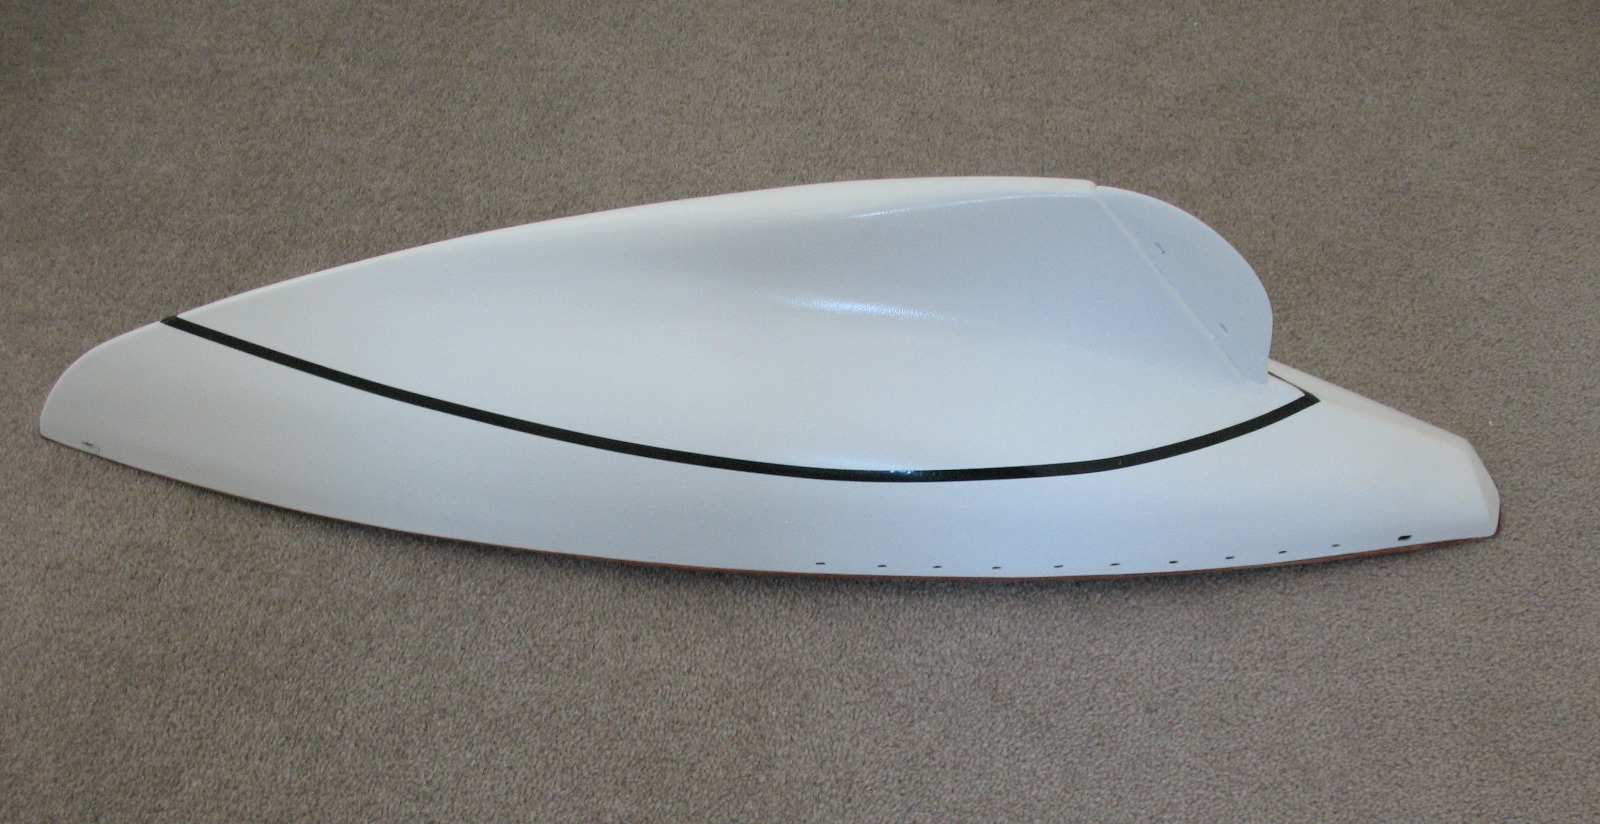
So, I made the rudder, but deviated from the plans there. They would have you installing a 'sternpost' inside the hull, and making holes through the hull to glue the rudder to this:
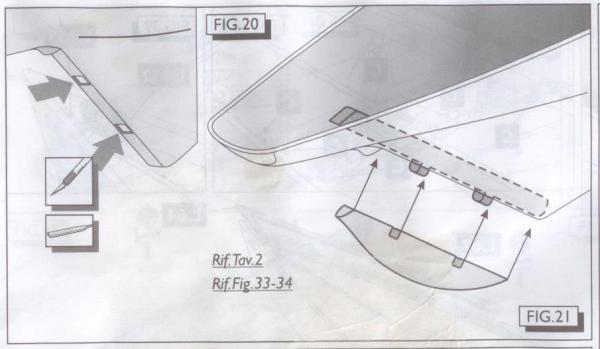
Almost impossible to get the holes right, so I skipped this, and (later) glued the rudder directly to the hull.
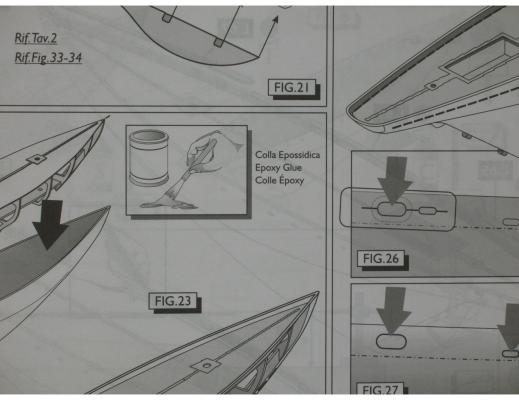
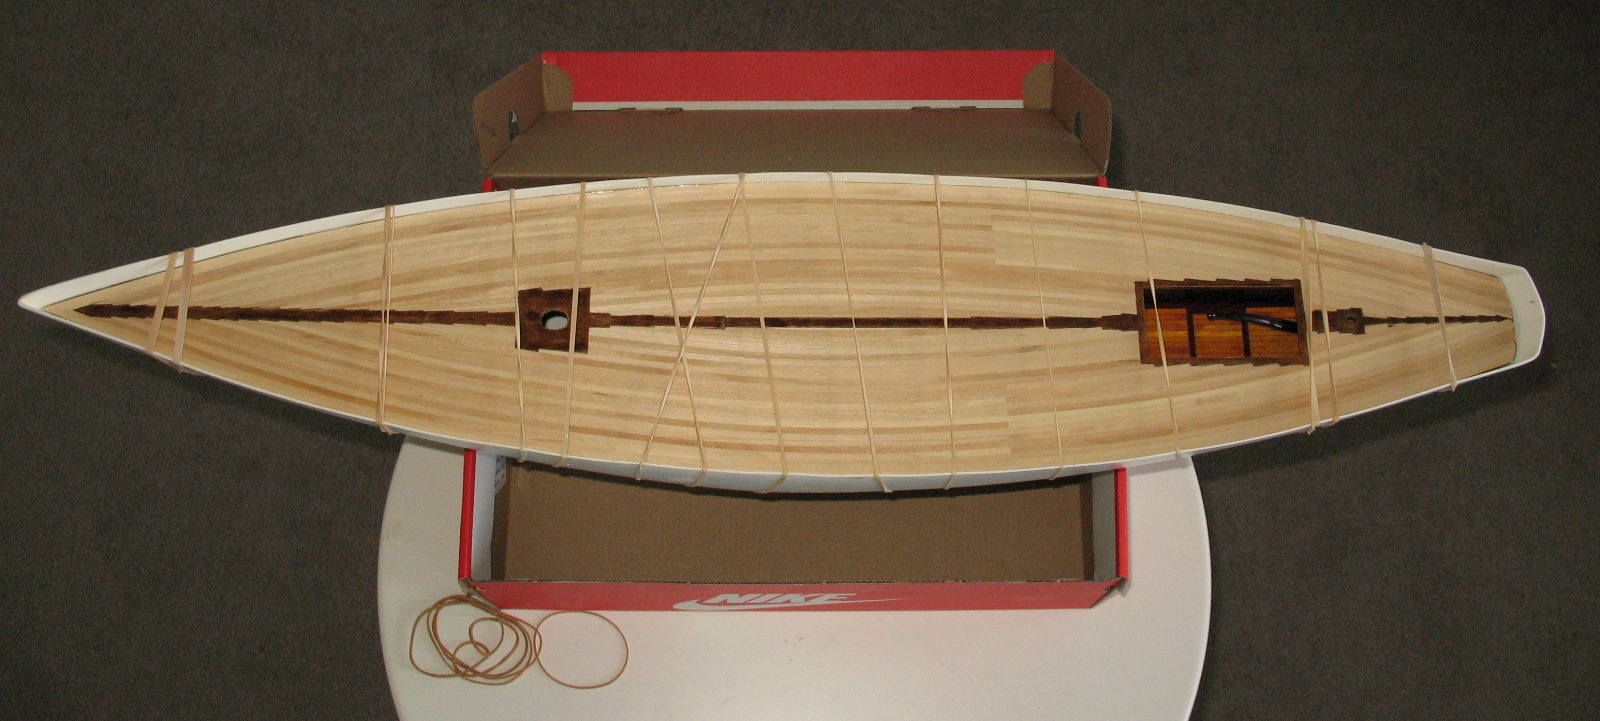
So now came the part I was dreading - gluing the deck/framework into the hull. After several trial fits, and marking the deck line with the construction in place, it was panic time!
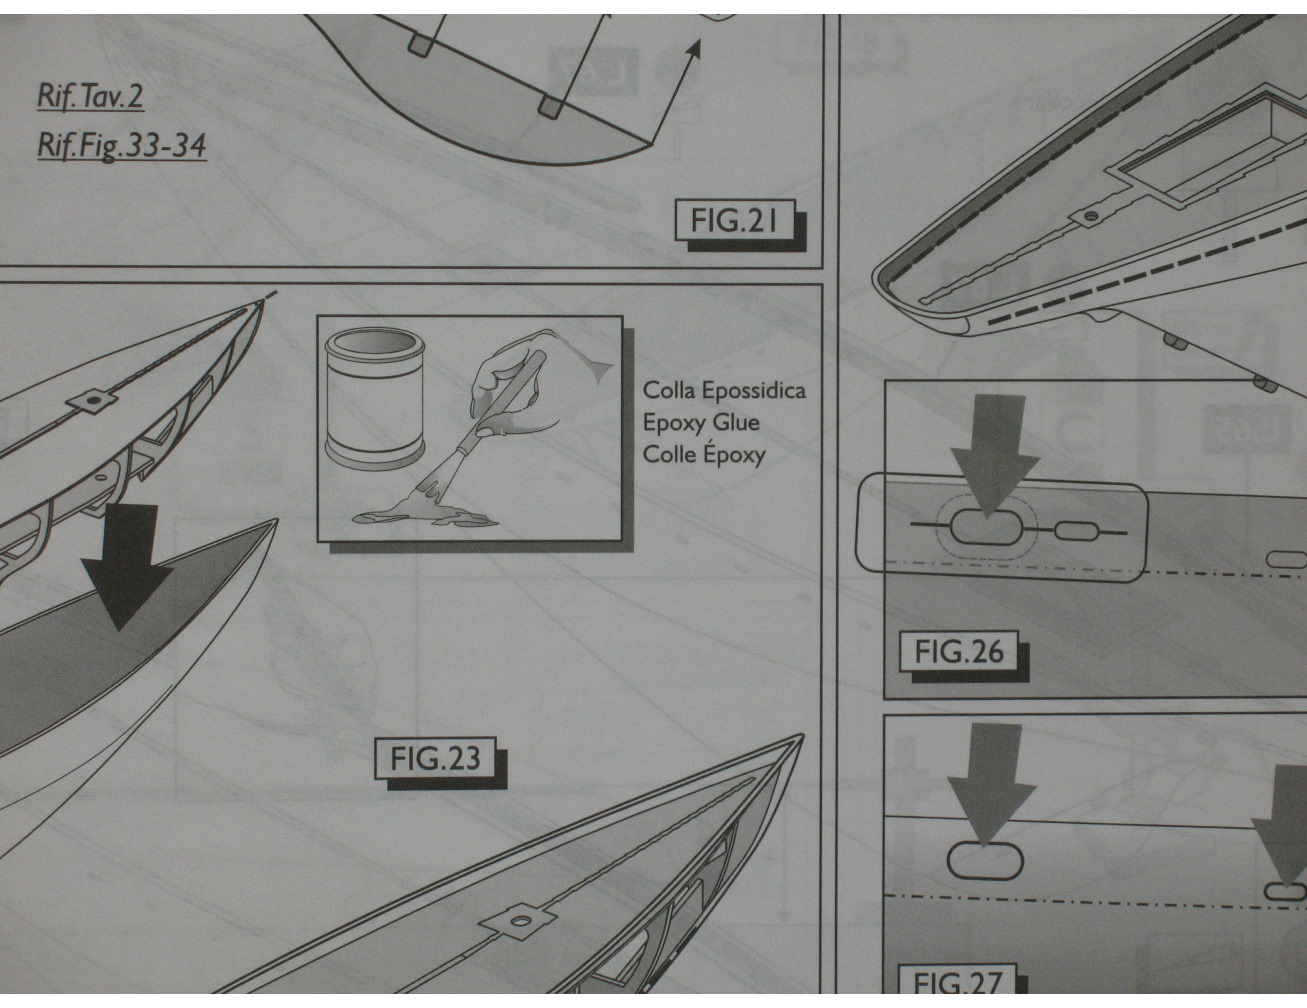
The instructions say to use "epossidic glue". I interpreted this as 'epoxy', and found that all I had was 5-minute set. Too fast for the many bits that needed glue. Off to the hardware store for slower setting - 12 hours!
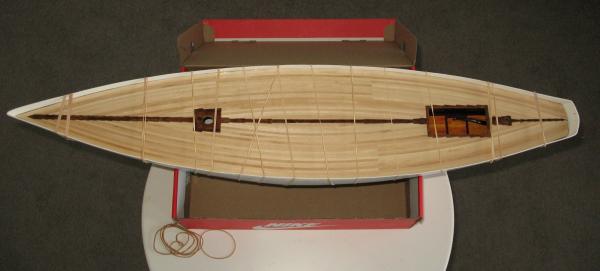
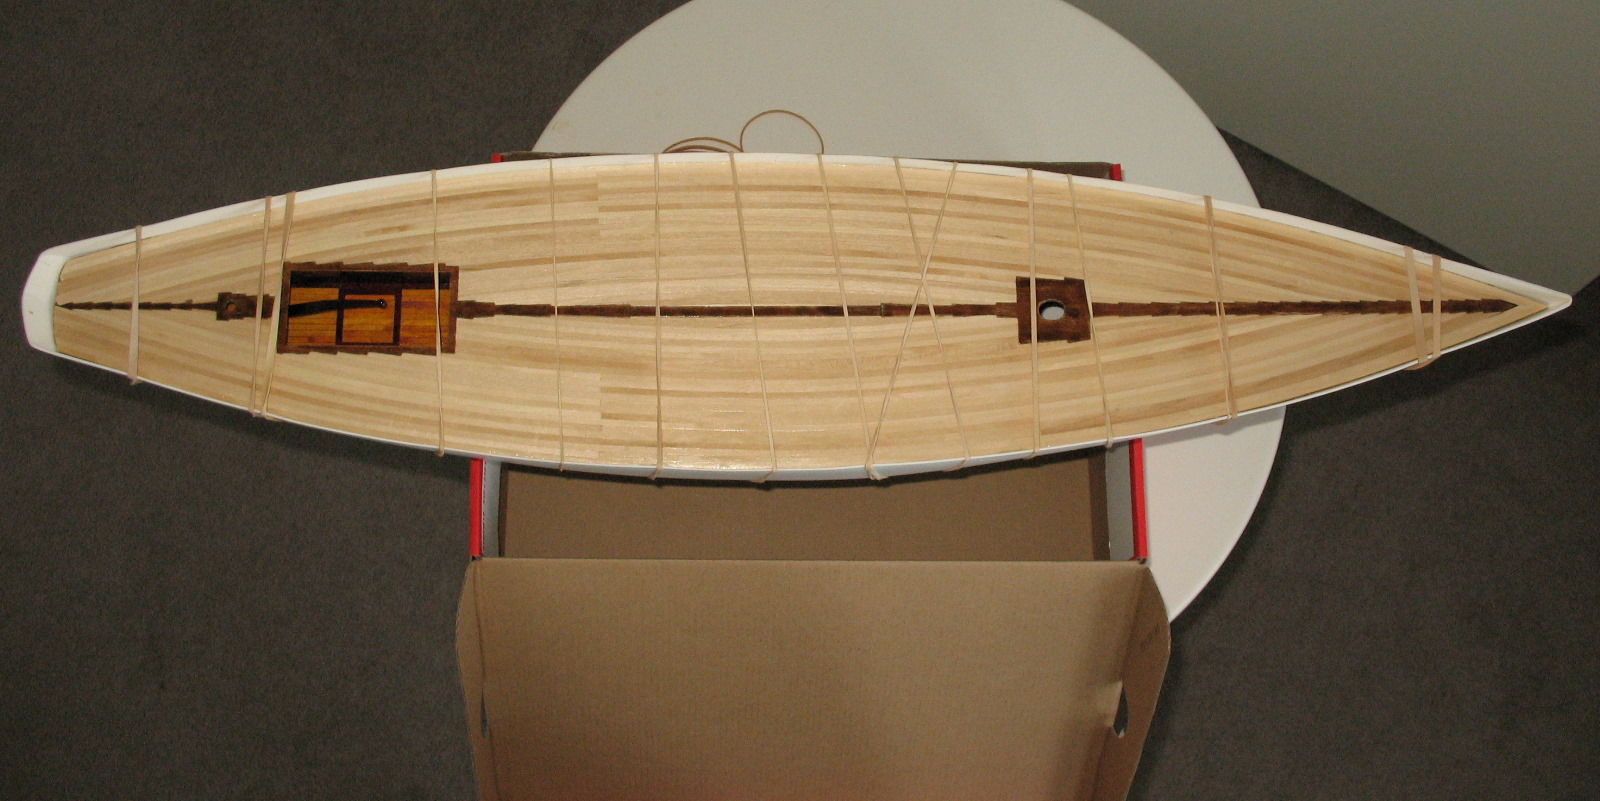
I should have enlisted help, but, like an idiot, I sailed on and spread glue everywhere, then mucked around trying to get it all together as planned. Lots of rubber bands to hold the hull against the frame:
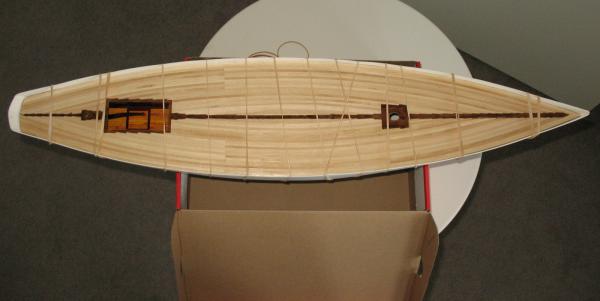
Do you like the classy stand I made from a shoe box?
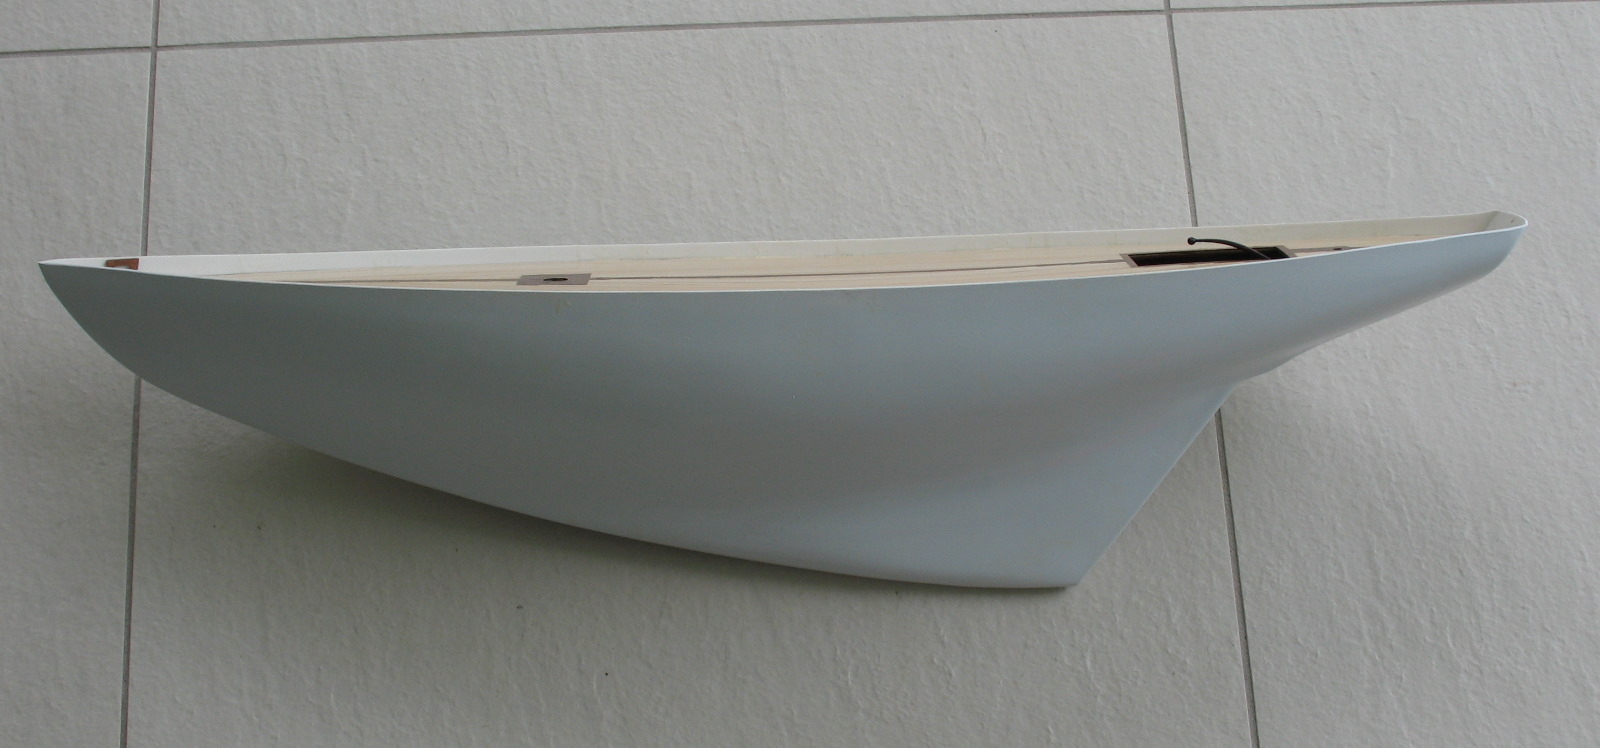
I then painted the hull, using spray on primer, and gloss white:
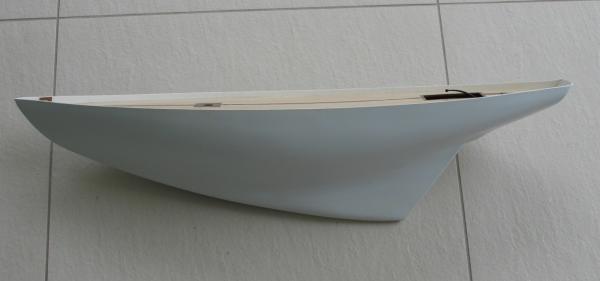
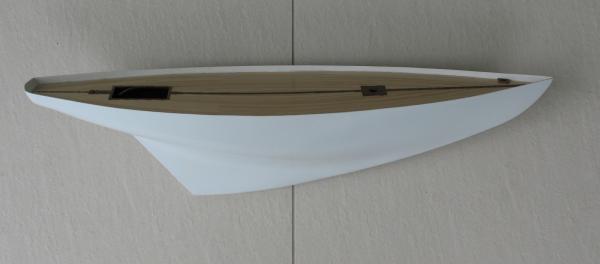
The tiller you can see sticking up above the deckline broke off shortly after this, and will be reglued much later!
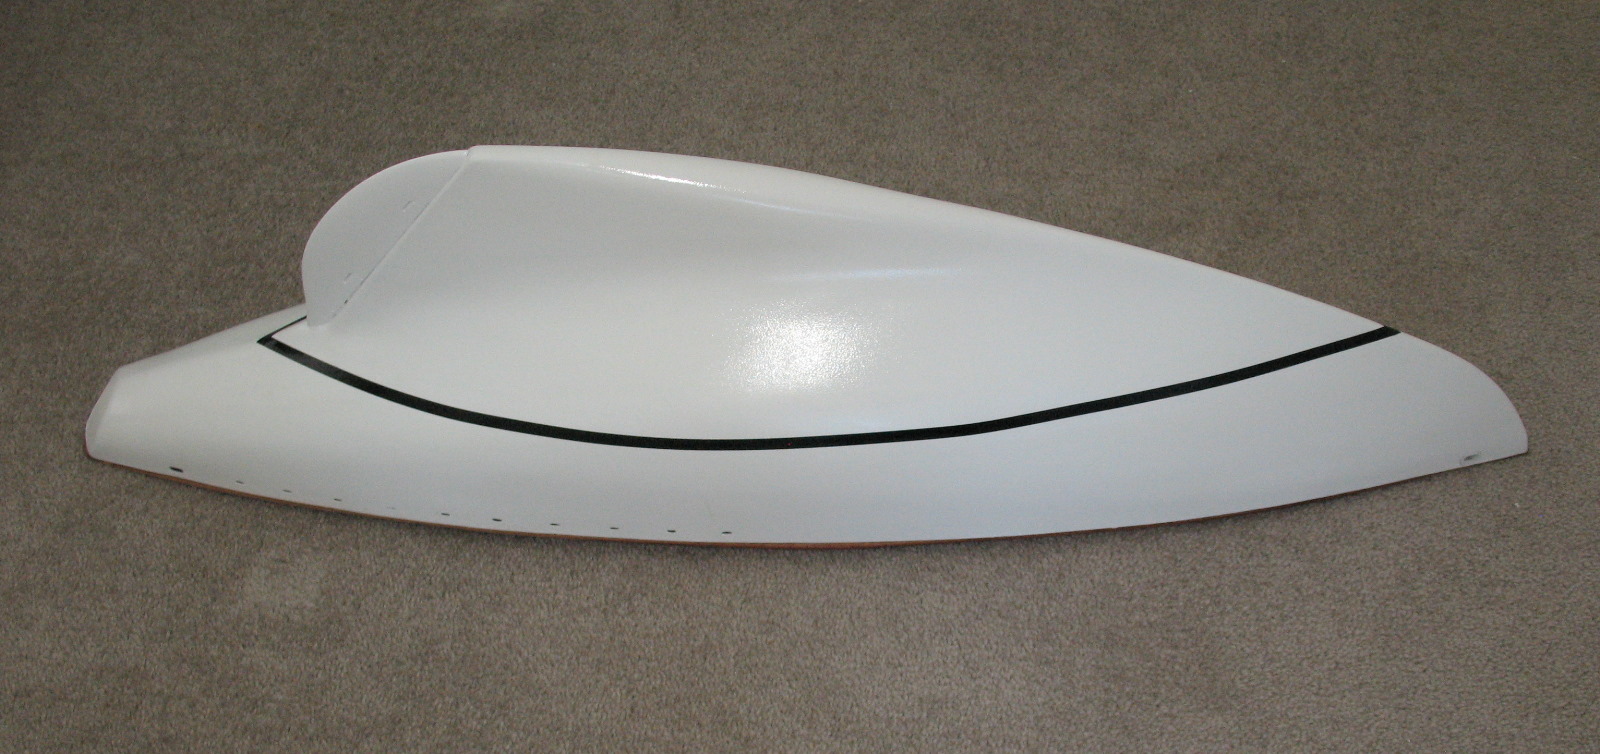
I then had to wait FIVE days for the paint to fully set! Next came the hawseholes and scuppers. These have a brass template for shape and size, but are made freehand, on a line that follows the deckline:
Problems were starting to surface:
- The glue had oozed over both sides of the hull
- Some sections had not bonded properly
- The paint was not as glossy as I expected, and was being messed up by my handling
- Areas that I assumed would be covered by some sort of trim, were not, and were standing out like the proverbial. Here at the stern was the worst:
Some areas I re-glued, and that improved the fit (a bit). The stern, as you will see, I decided to make my own trim - not perfect.
Trial fitting the bulwarks shows how Amati can really screw up.
They come in a bow section, stern section, and three longer sections. Here they are blue-tacked in place:
Close up of the fit:

A gap of about 6mm !!!! How hard would it be to make the sections a little bigger, so I could sand them down?
Now I have to sand them UP? Or, as my father used to say, use the 'cutting on saw'?
But that's a problem for a little later.
I sanded/scraped the paint back to a better surface, then re-primed, and re-painted. This time I used "Appliance White", as recommended on this forum. Again, I waited 5 days for the paint to fully set.
Then I glued on the bulwarks and added a couple of small pieces each side to make up for Amati's stupidity.
Next, another scary bit - marking the waterline, and applying automotive tape at this line. I used a variant of this idea http://modelshipworld.com/index.php/topic/1585-homemade-waterline-markers/#entry33810
The plans call for 8mm tape, but all I could get was 6mm. Here are shots of my SECOND go at the waterline tape:
The first attempt had a bubble, and was a bit short for some reason. It may have been my lack of following instructions. They said the tape has to be applied to a surface at 18C or less.
So I redid it today - and it's currently 37C outside !!! Cranked up the aircon, and stuck the model in the beer fridge for a bit. Hope this time works better!
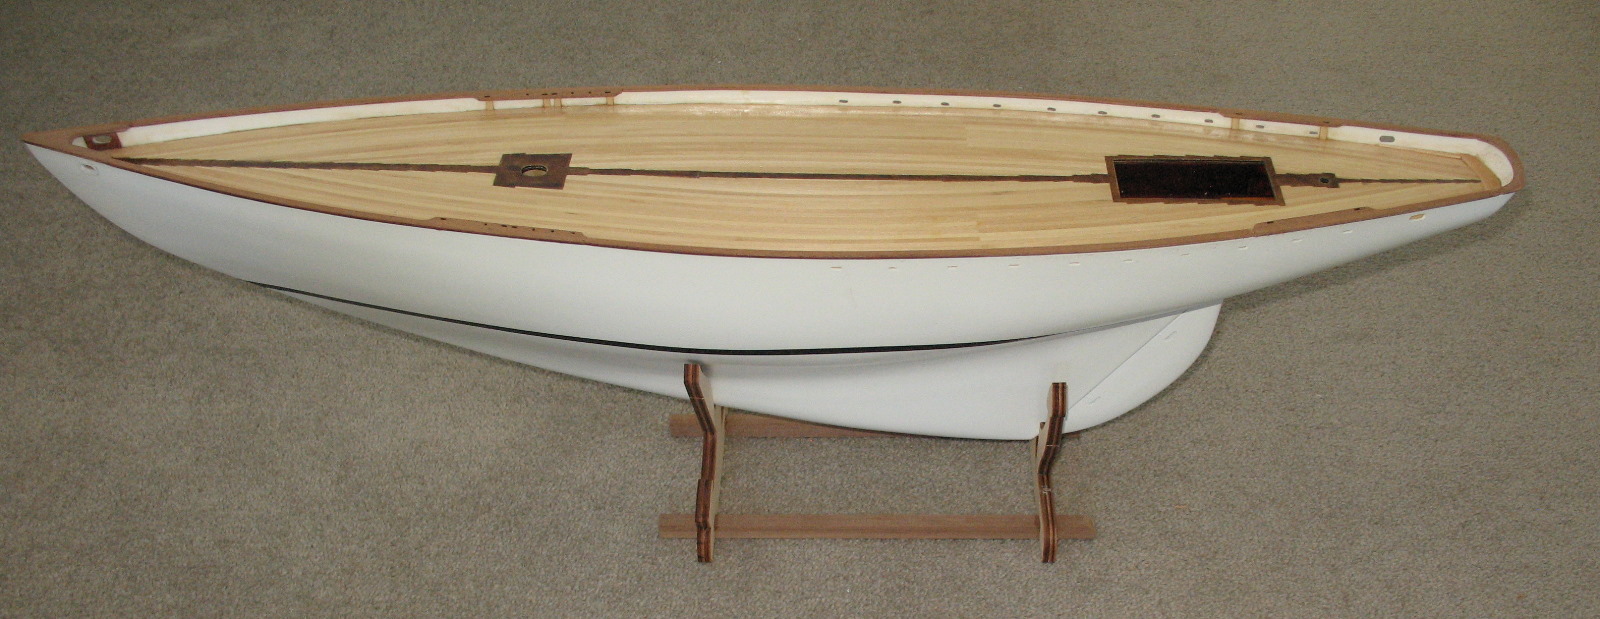
So here's a shot of the current state (on the weird stand they have you make up), and then I'm off to sand and seal the bulwarks. Then I may repaint, reglue, and drink beer - or go for a swim:

Cheers,
Brett
-
Minor update. I masked the kingplank, sanded the deck, then sealed it with Feast Watson Sanding Sealer. I gave it 2 coats of sealer, and sanded between coats, finding areas still needing TLC.
Here it is after the two sealer coats:

Removed the masking tape, sanded again, and this is after a coat of Wipe-on-Poly Gloss:

Rinse, and repeat! After two coats of Wipe-on-Poly Gloss:
And now the deck gets put aside while I make the rudder. Much sawdust is flying from the plywood!
Cheers,
Brett
- yvesvidal, Salty Sea Dog, hexnut and 4 others
-
7
-
-
Well, as Yves suggested, I looked at the real photos, and realised the 'kingplank' (I didn't know that term) was indeed darker timber.
So I stained it with walnut stain/varnish. Unfortunately my pencil marks kept showing through, so I may have to sand back and re-stain later.
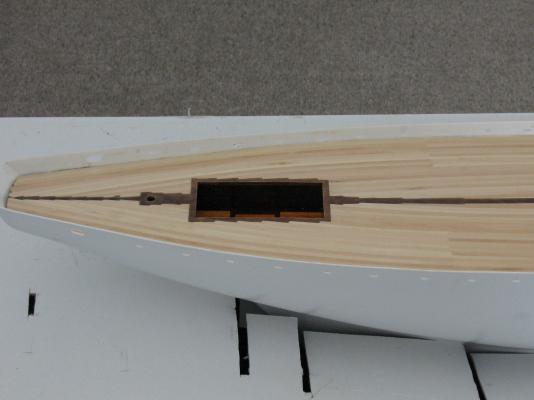
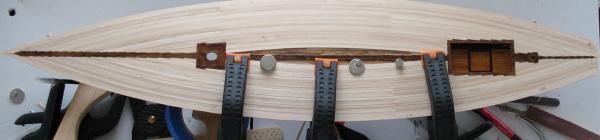
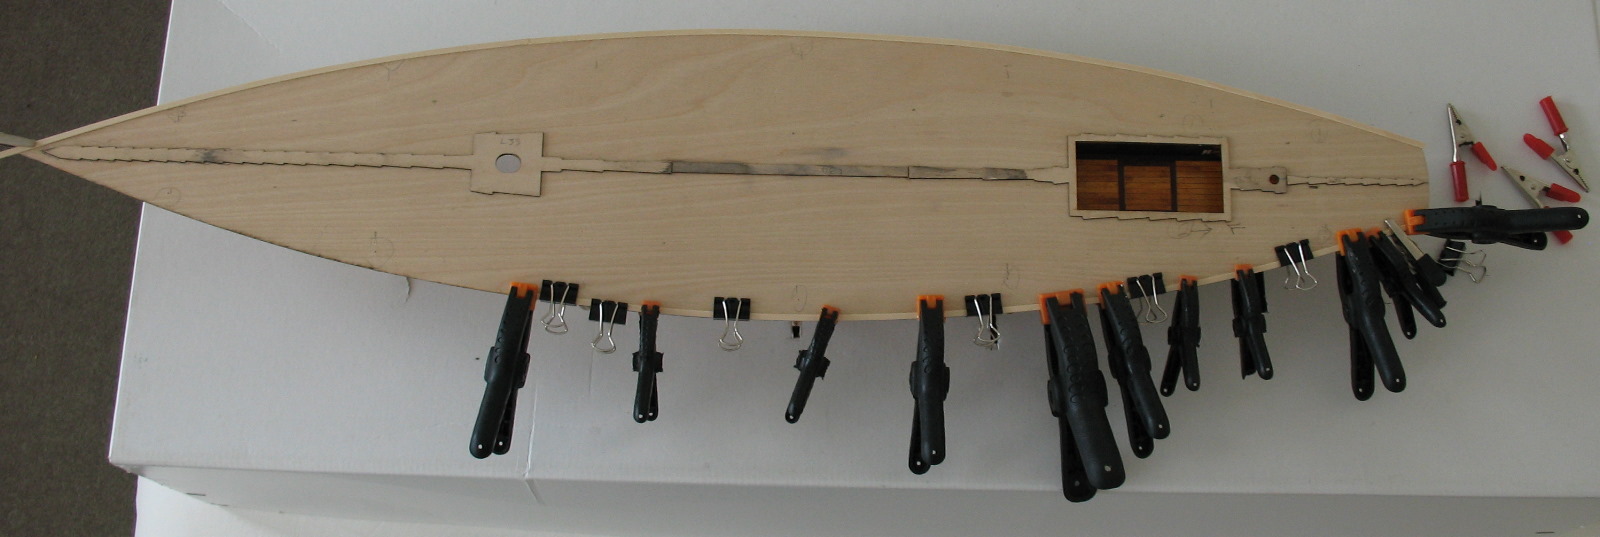
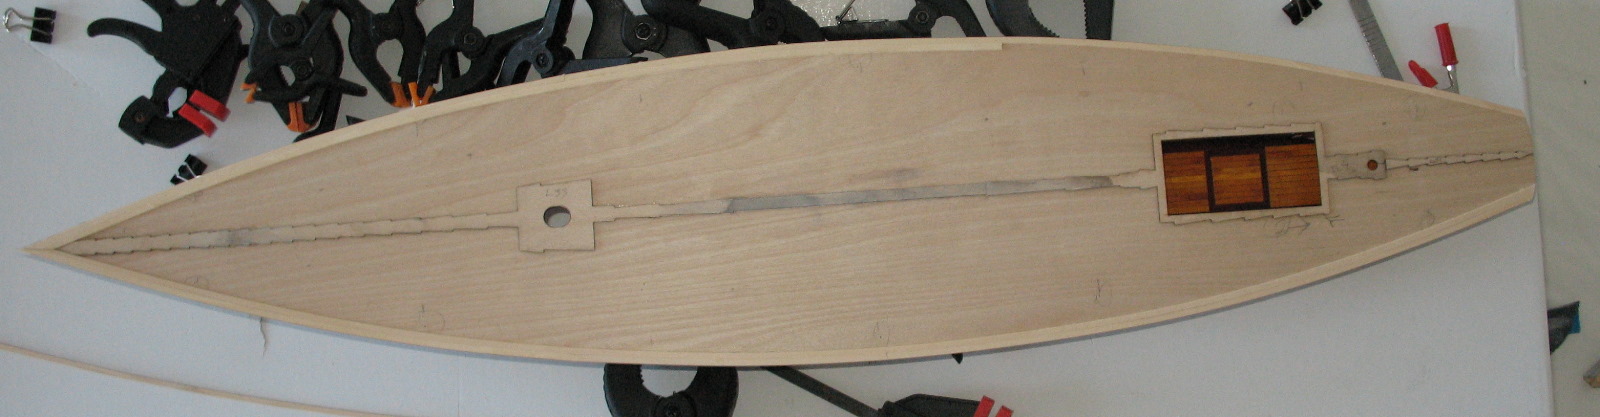
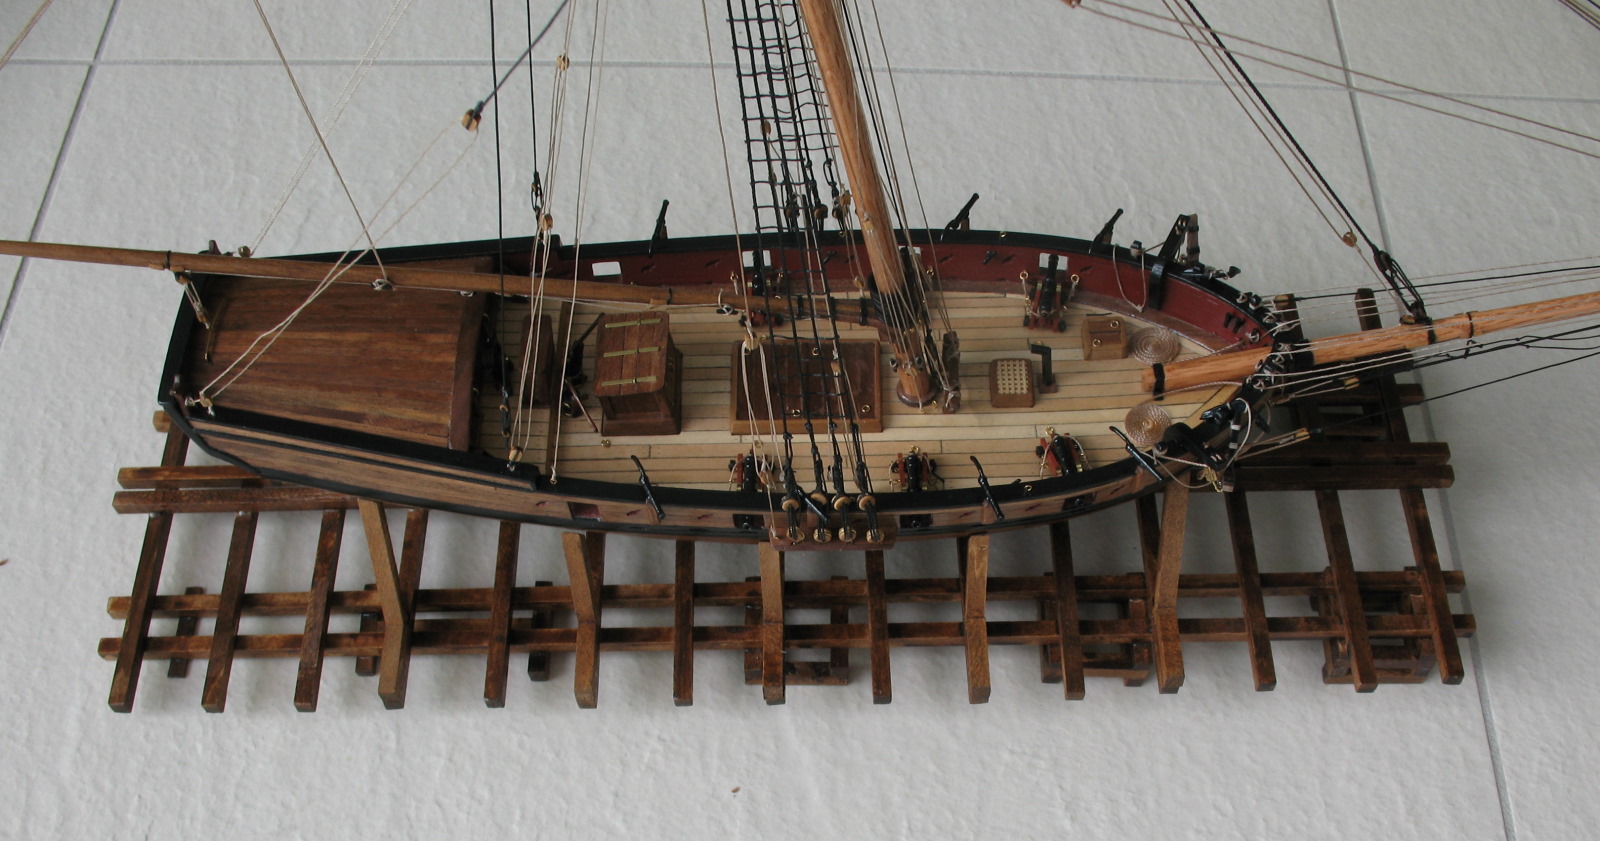
One interesting problem, the size of the boat makes it awkward to clamp. In the beginning I could use loads of different clamp sizes and types:
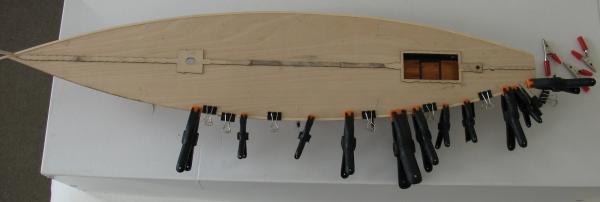
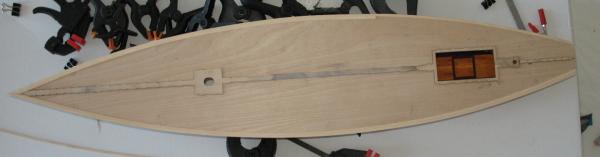
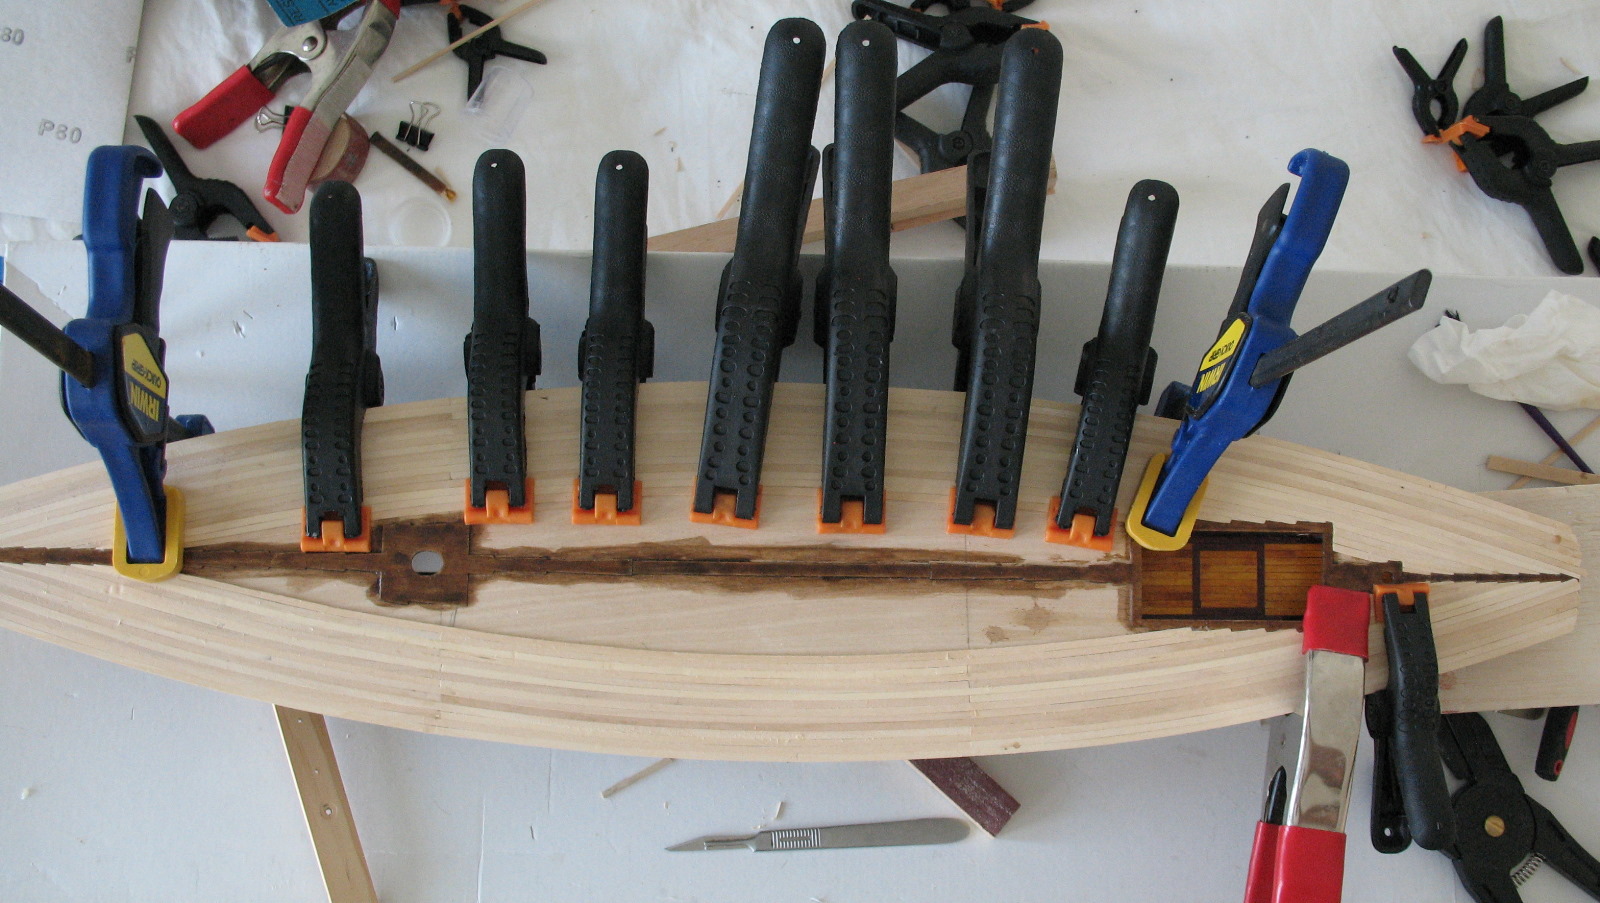
Later, I was limited to using my bigger clamps. Here you can also see
- The stained kingplank
- The planking pattern I used for the outer 12 lines of planks (1 long and 1 short)
- After 12 lines I was able to use a single plank, without joins
- And you get a bit of an idea of the mess I am comfortable working in
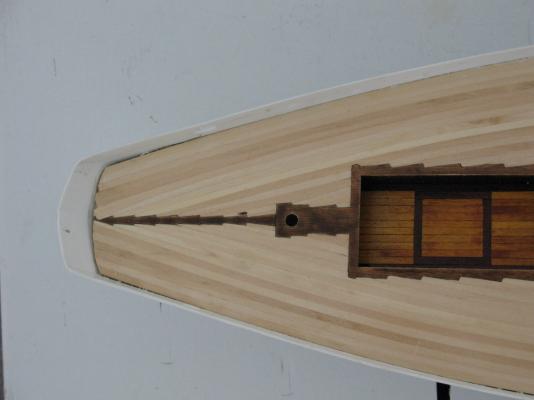
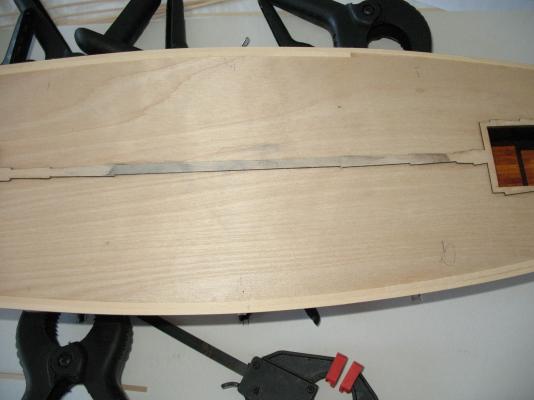
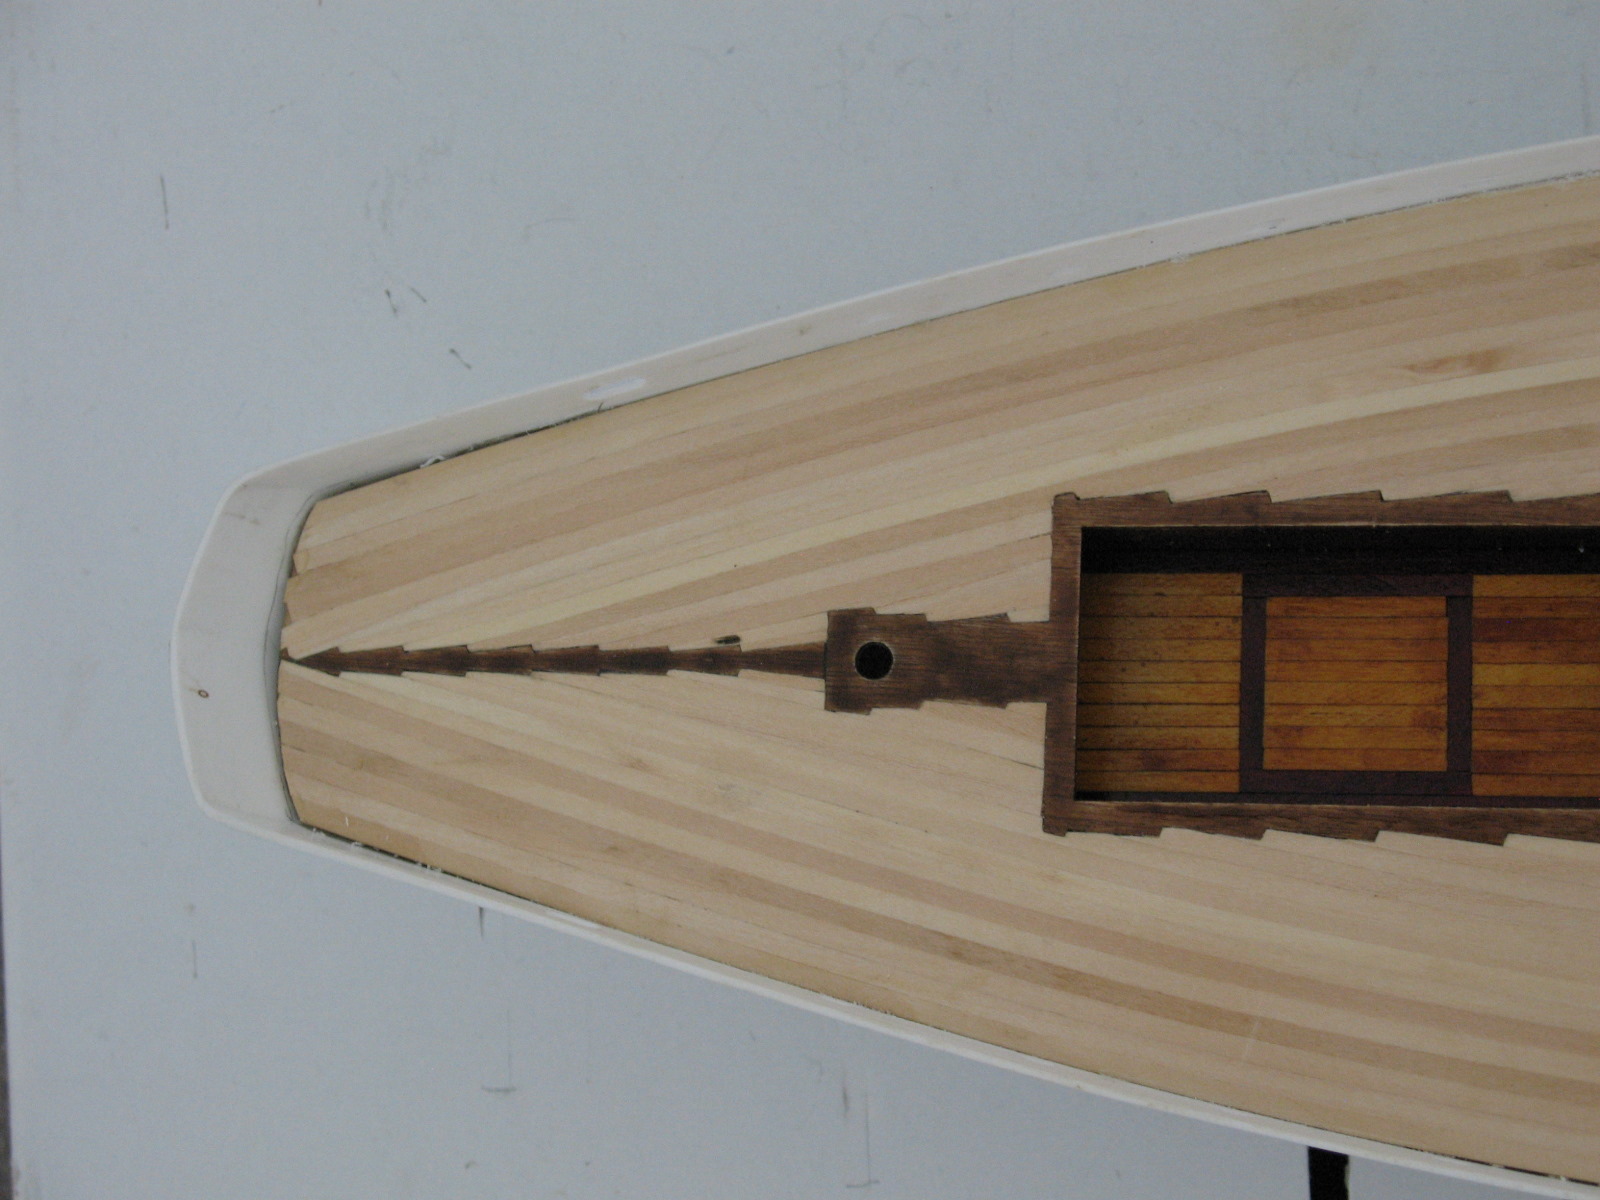
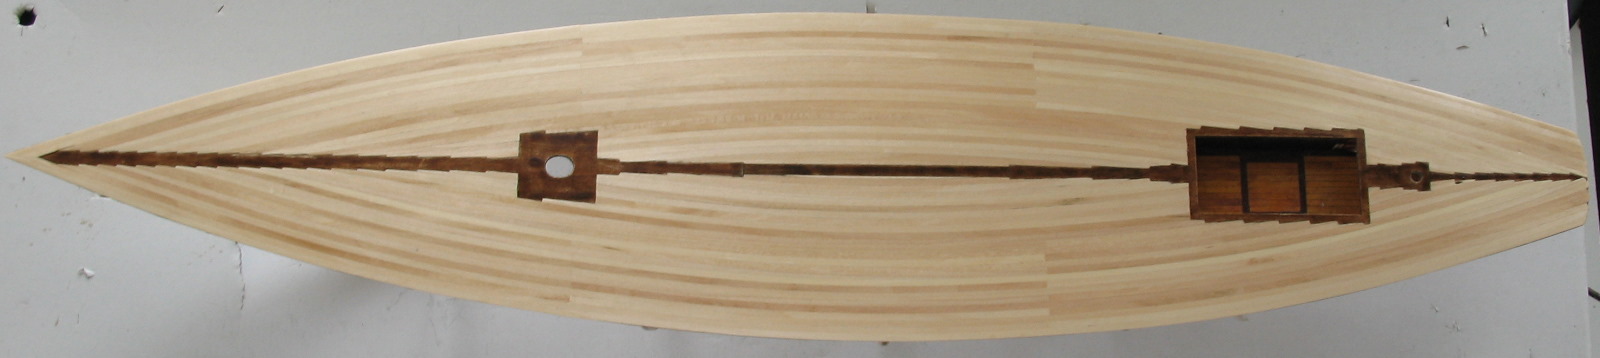
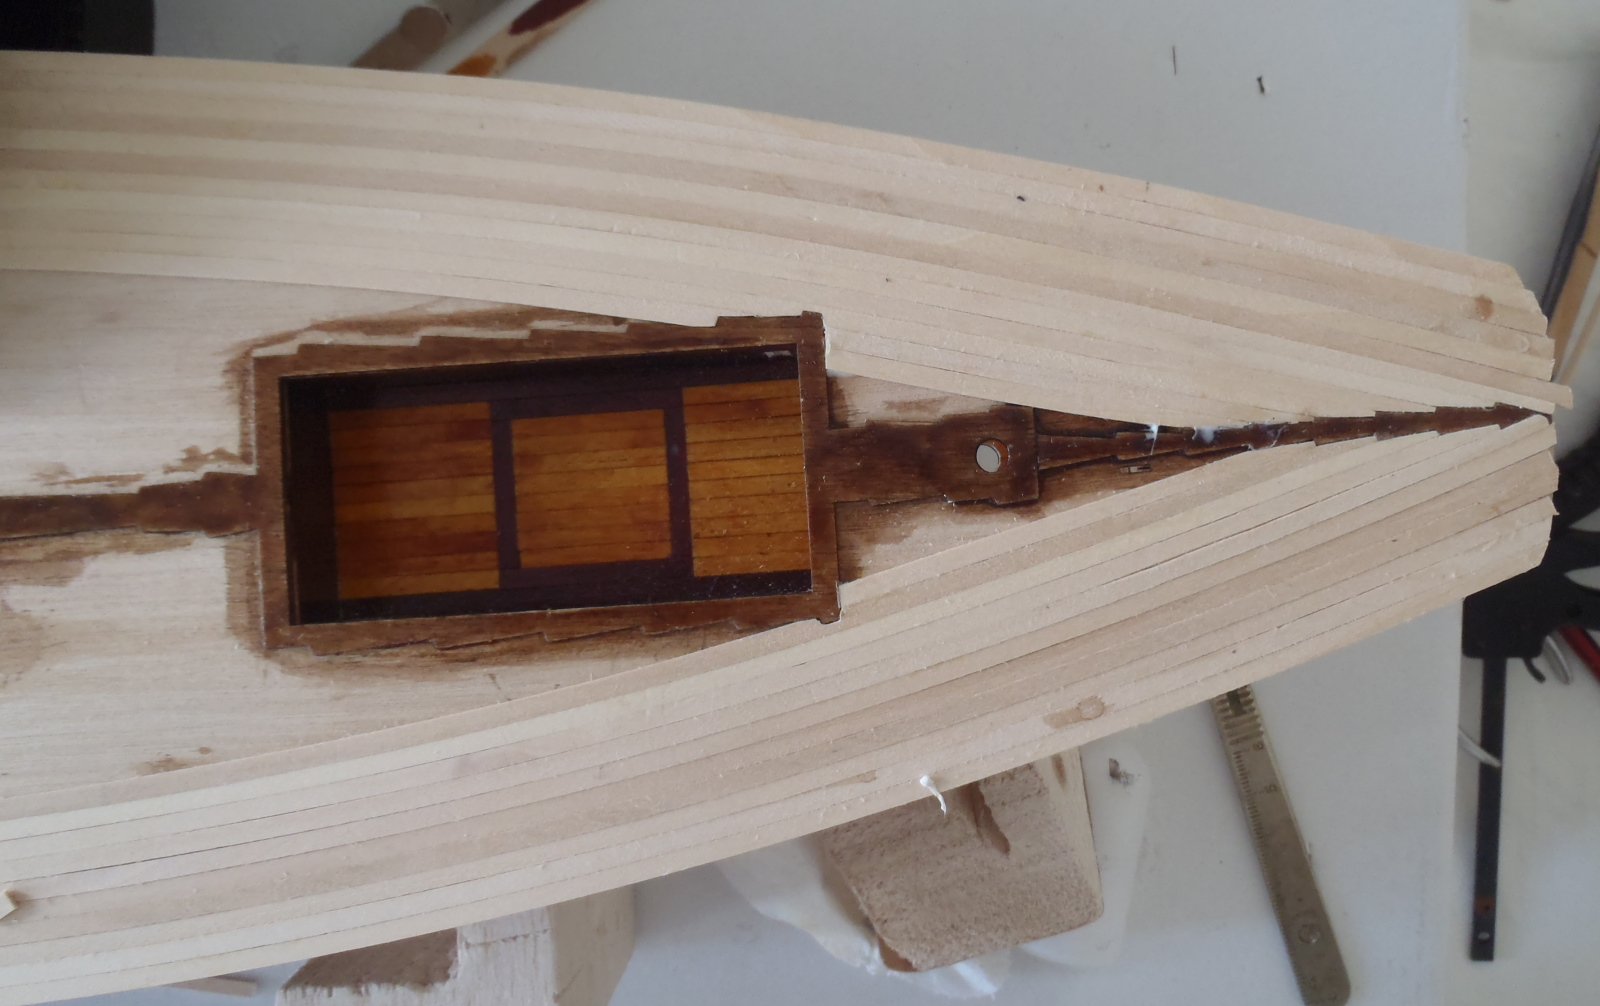
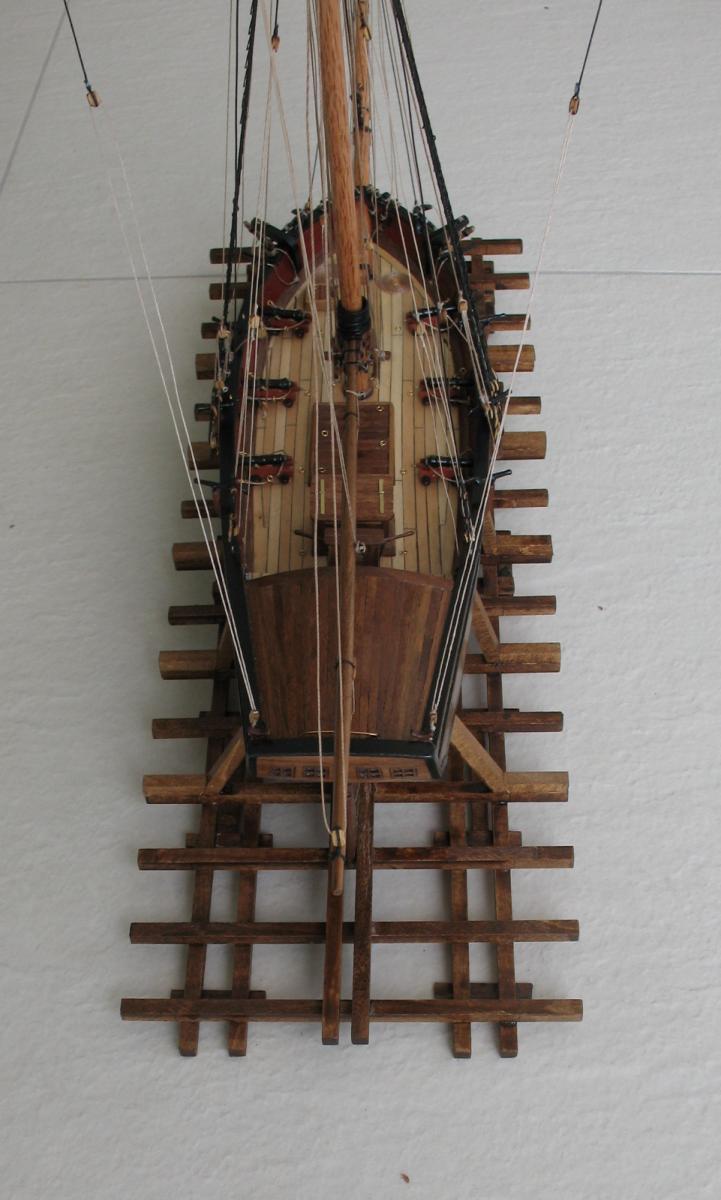
These closer views show how weird the planking gets nearer the midline aft. Also you can see how I've lathered on the walnut stain and layers of sealant!


Here you can see details of the final tiny planks needed in this area:
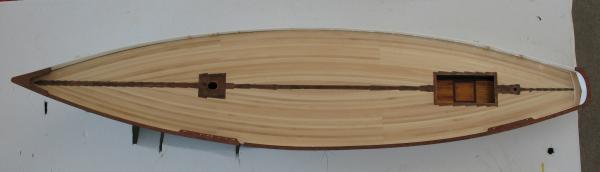
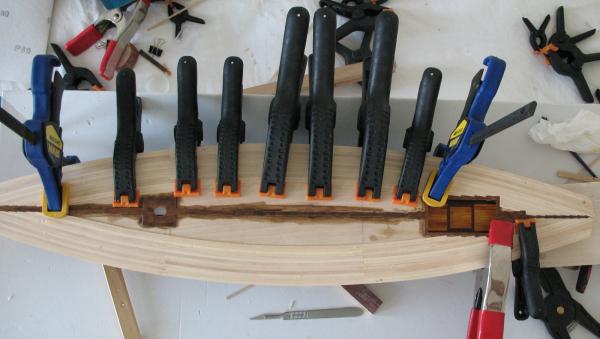
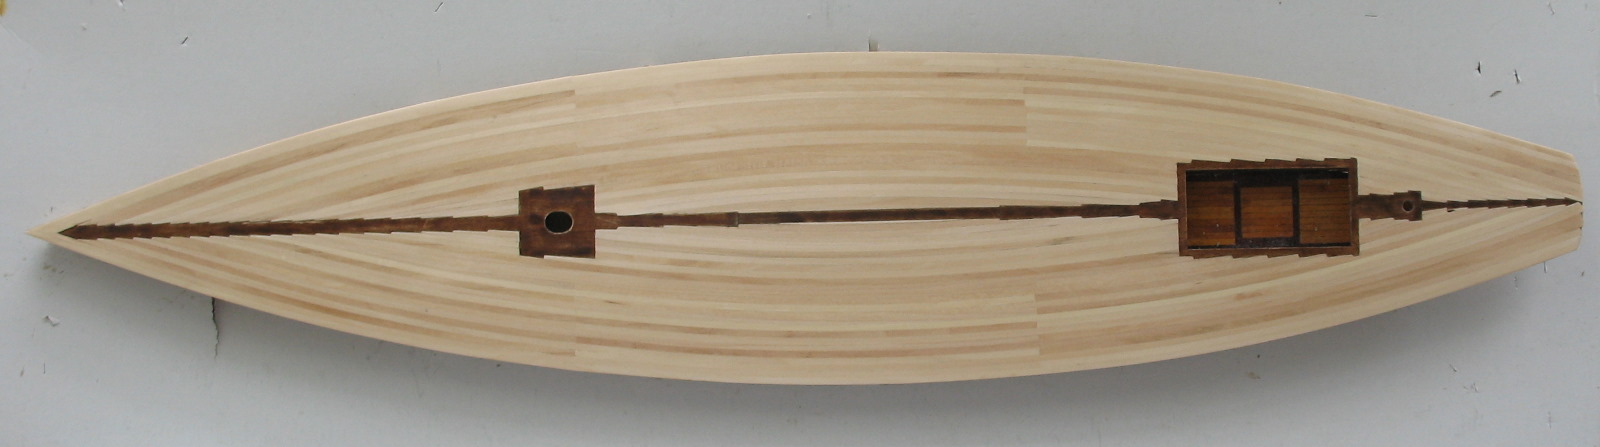
Now we're getting towards the finish:
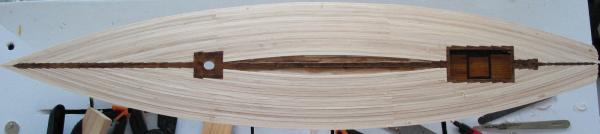
By now, I only had 3 clamps that were big enough, so I had to supplement these with magnets:
At last, I was there:
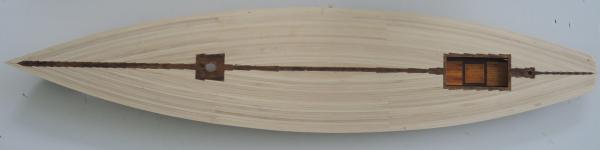
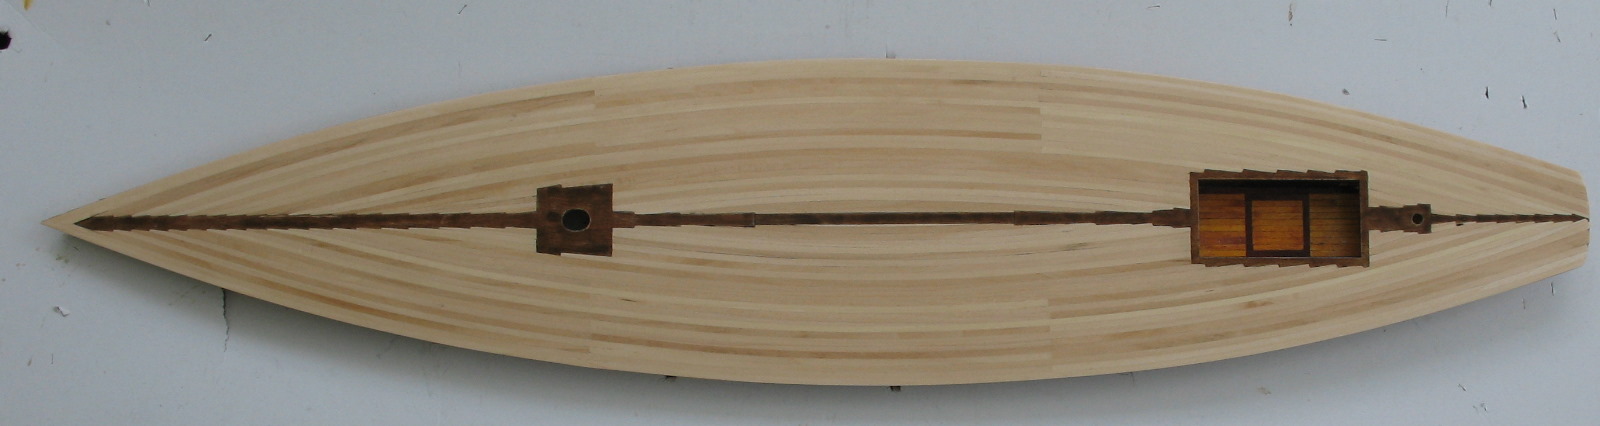
Now we move on to sanding. But first, a bit of a question. What colour are the deck planks on the real boat?
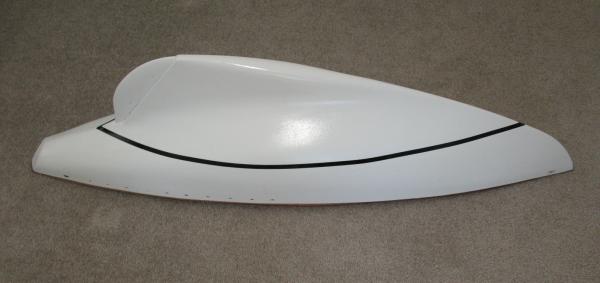
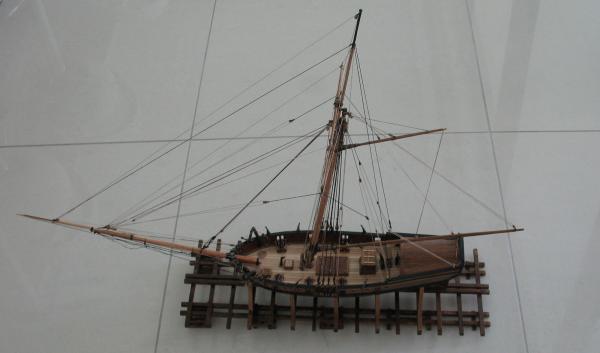
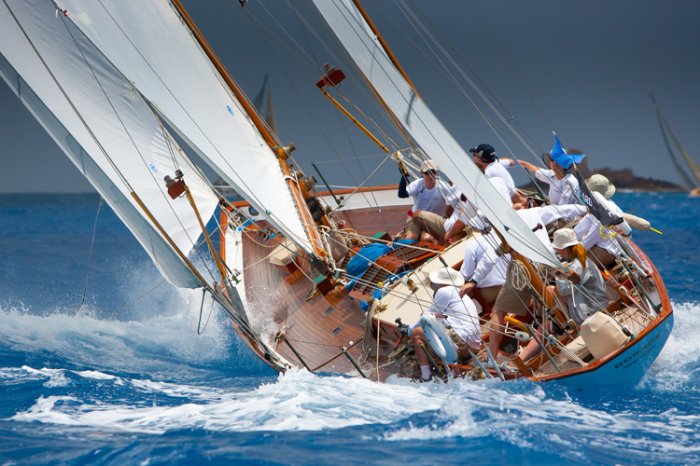
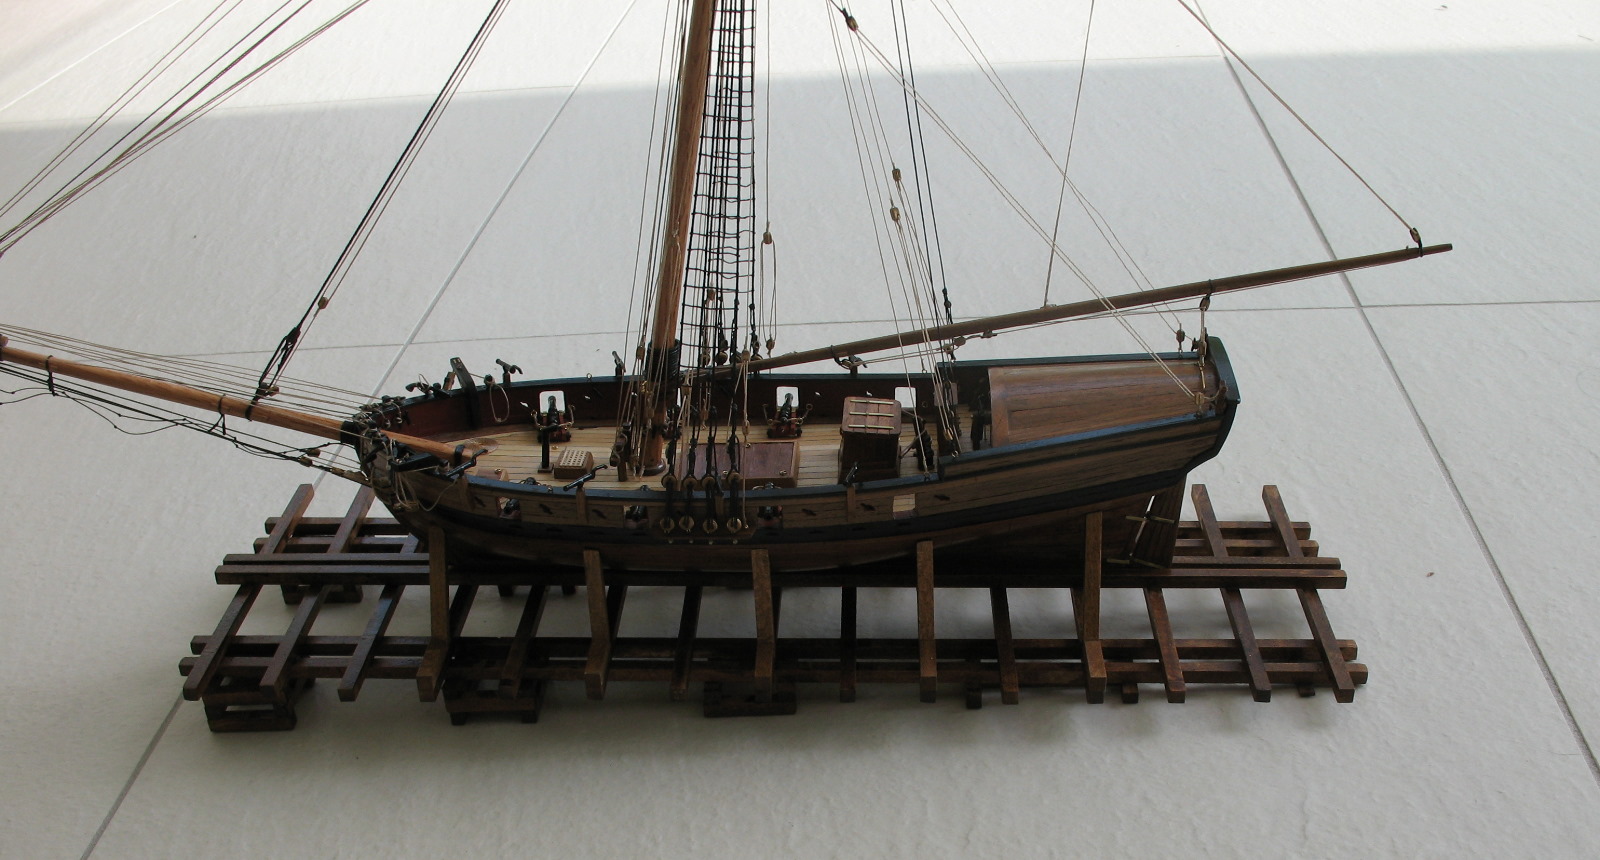
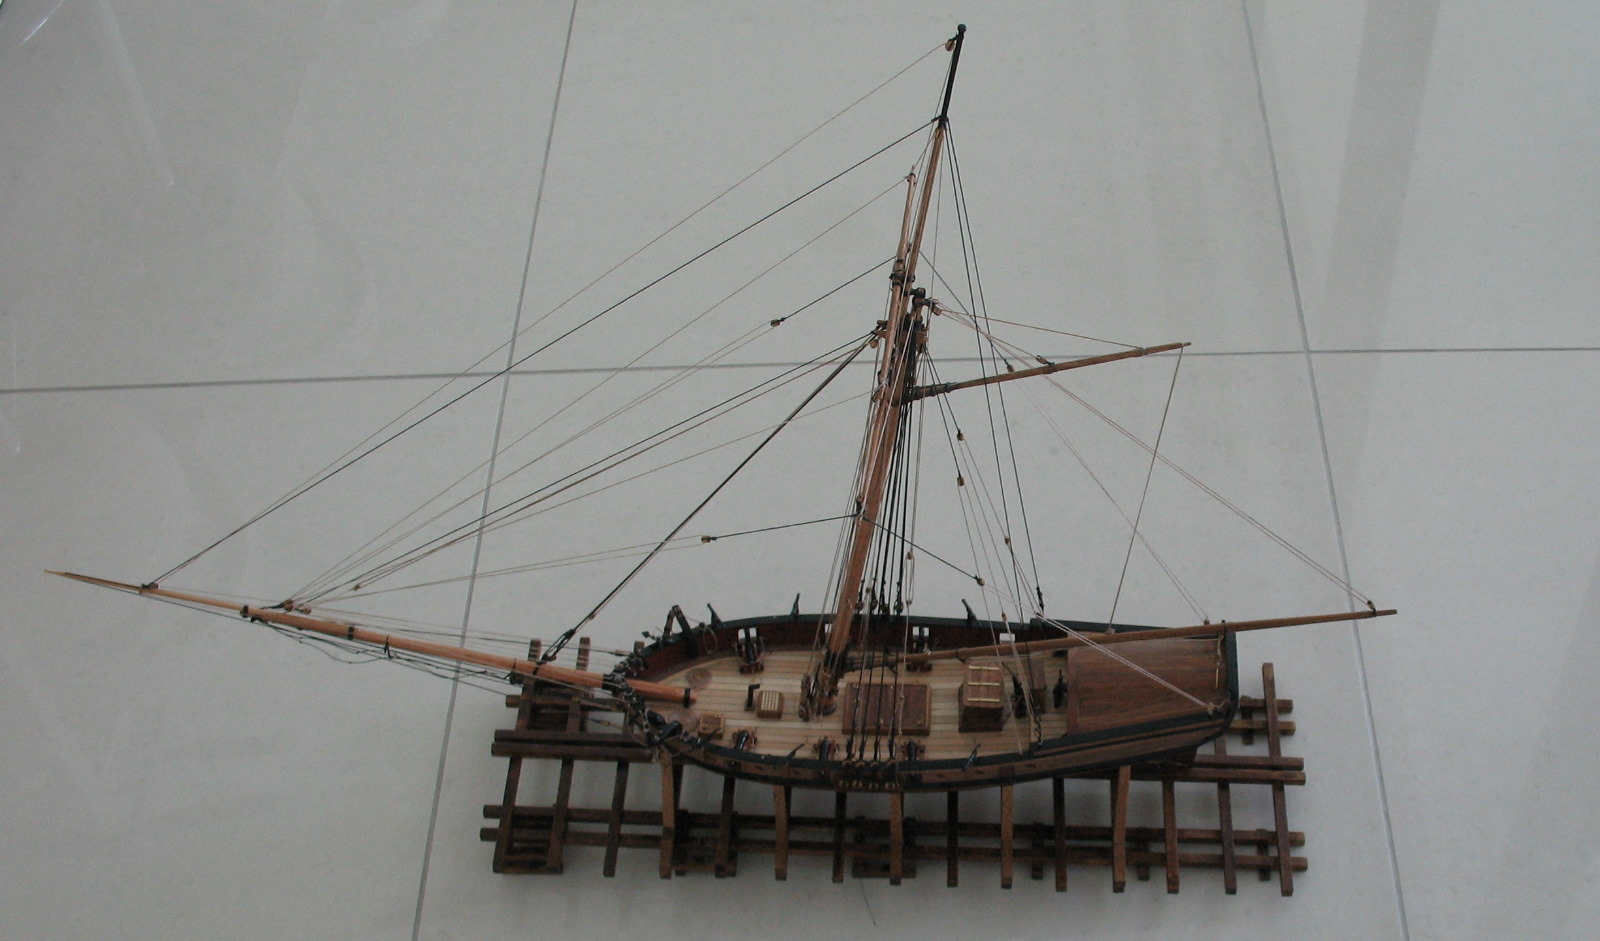
In some photos they look natural. See the semi-hull model above, and this:
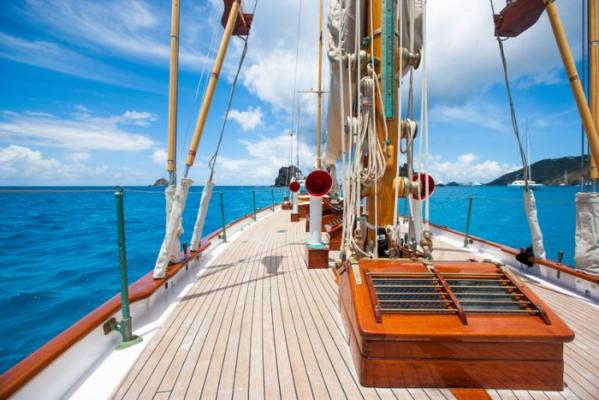
And in others they look quite dark, as in the action photo above, and this:

I like the lighter colour, so will probably go with that.
Cheers,
Brett
- Salty Sea Dog, IgorSky, GuntherMT and 4 others
-
7
-
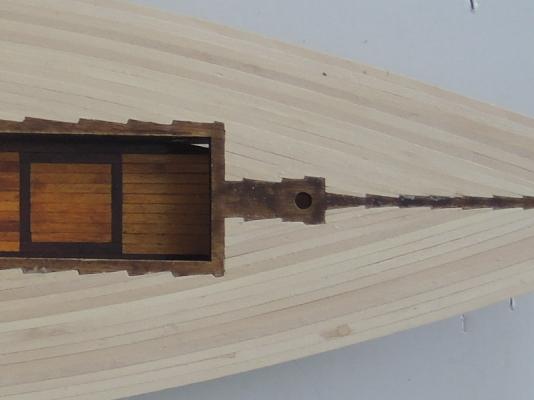
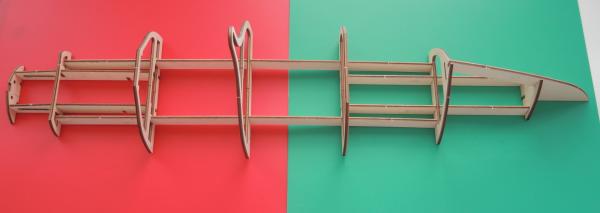
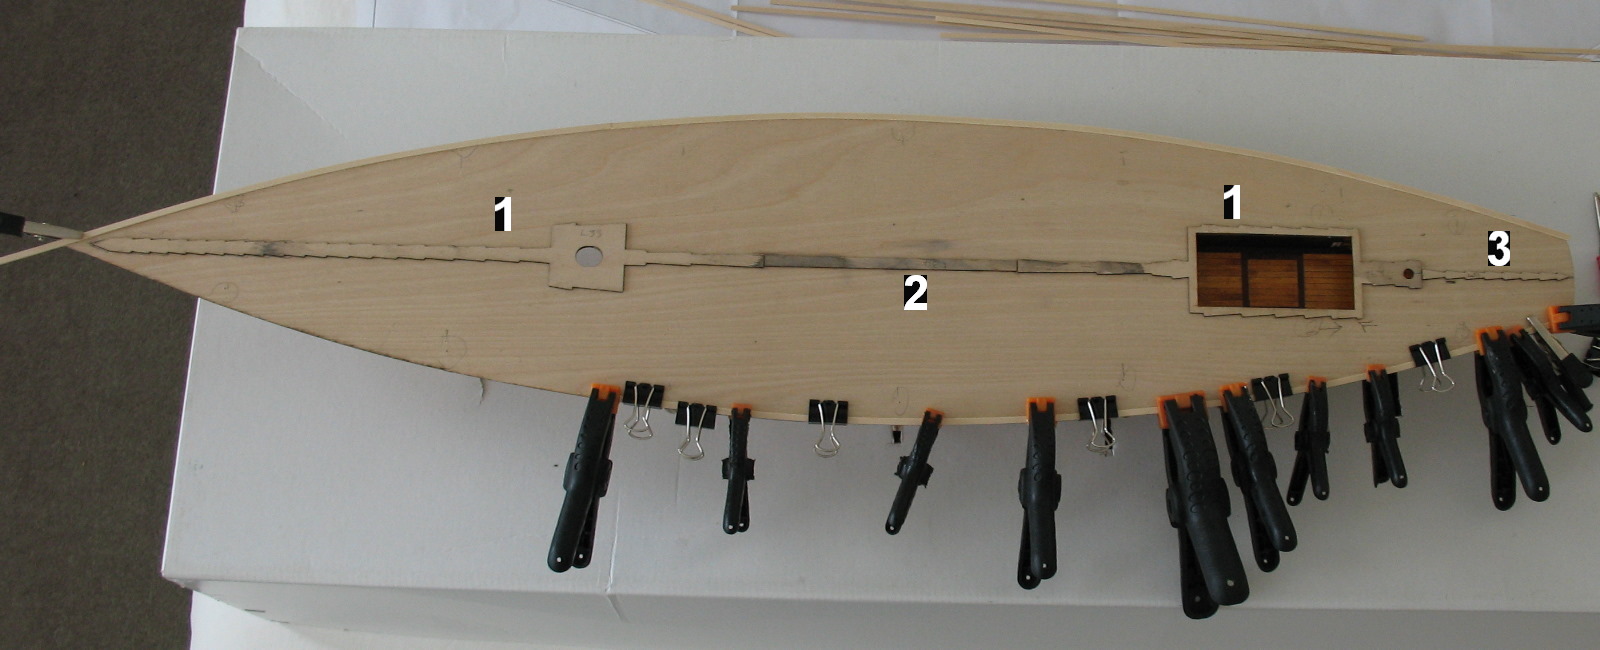
And so begins planking the deck. The first bits are pre-cut centre trims. The usual problem here - where is the true centre of any model?
So I did my best, and, as usual, it was not perfect. The trim goes on as seen here - parts #1 first, fit around cut-outs on the deck to position them. Then #2 and #3 complete the collection:

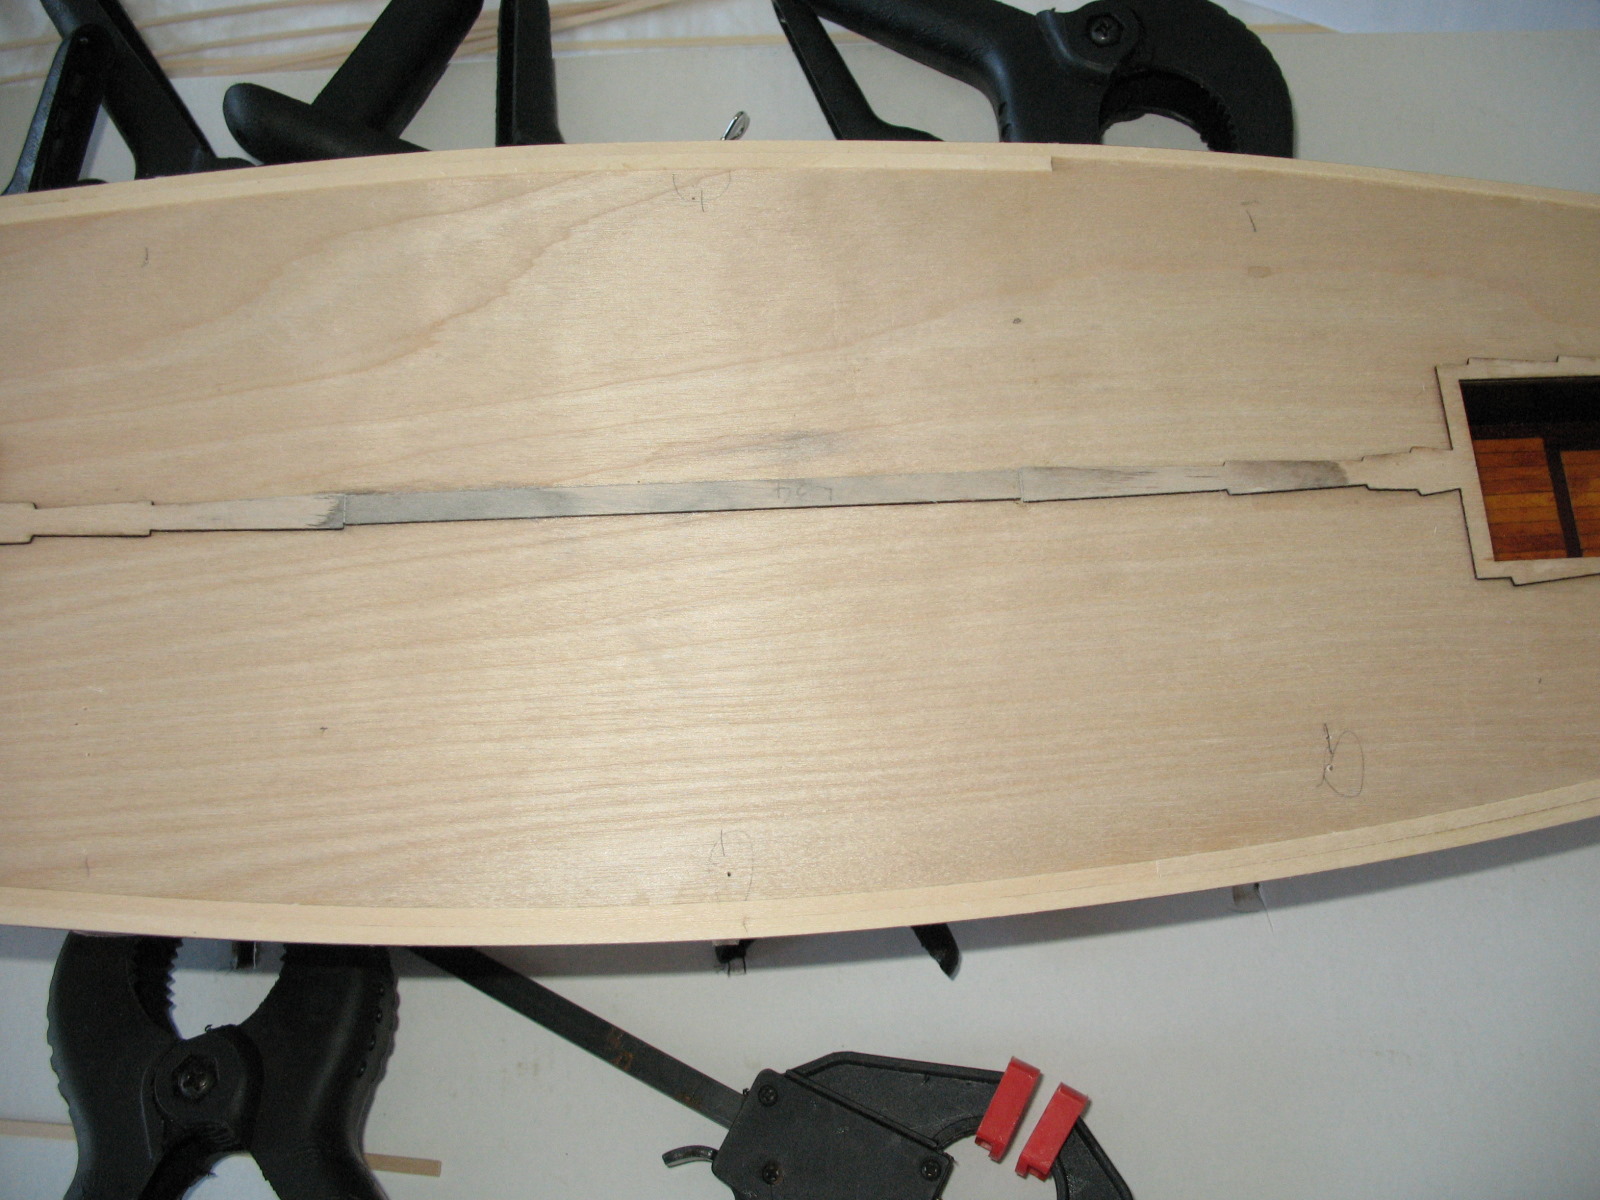
As I came to fit the planks, I realised that I was not dead centre:
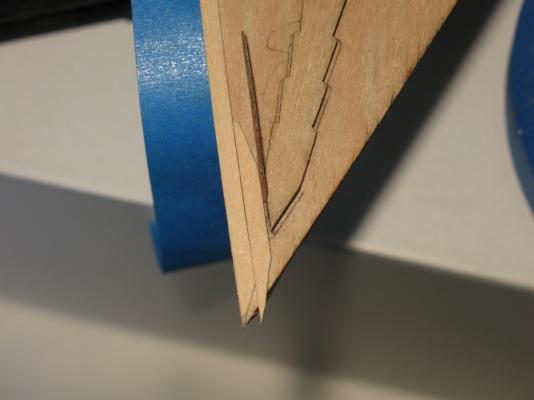
Not critical, because the edges will be covered later, but I unglued and reglued part of the first plank.
These planks all have to be bent, but this 3mm timber is easily moulded. Here we are with 2 planks on one side, and 1.5 on the other:
You can see a bit of the cockpit, with its "mahogany" and "teak" stained planks and sides.
Here I need advice. I did not sand the edges of the centre trim. When I wiped off excess PVA glue with a wet brush, the timber has stained:
Any suggestions how to remove the discolouration? I will be staining this with a "teak" oil based stain, but I think the dirty colour will come through.
Thanks,
Brett
-
The instructions in my Amati kit say to use "spray filler" to seal the softwood deck planks.
Any suggestions for something available in Australia?
Is it different to Wipe-on-Poly in terms of finish? Or maybe Estapol?
Thanks,
Brett
-
Thanks, Yves. All input greatly appreciated.
The link that Patrick gave to the real boat's website showed very few joins in the planks. It, and your photo, make me think I will stick to as few joins as possible. And their joins are near perfect, so I will try to mirror that.
I'm due to place the first planks today.
Cheers,
Brett
-
-
Hi Patrick,
I had seen your log - I think it's the only Dorade in MSW. Just a leeetle bit smaller than mine!
However, I am so glad you replied, as I would like to elect you my resident expert, and ask your opinion.
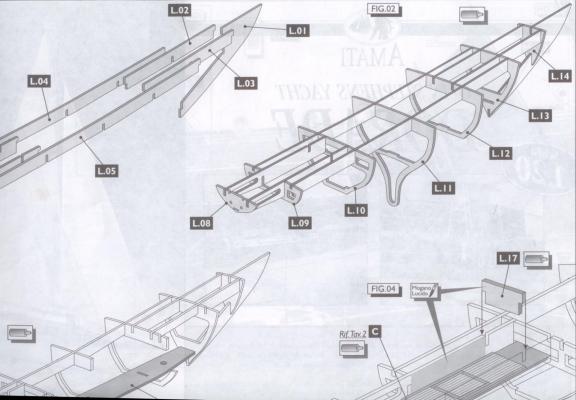
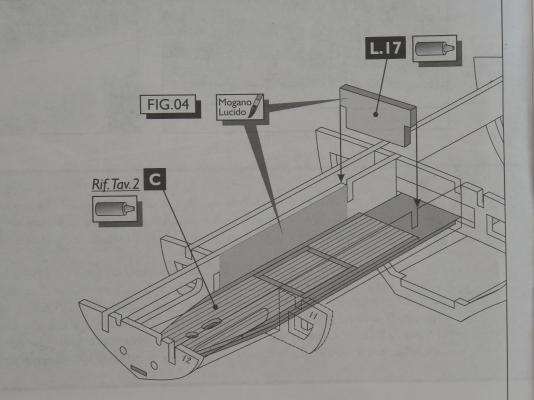
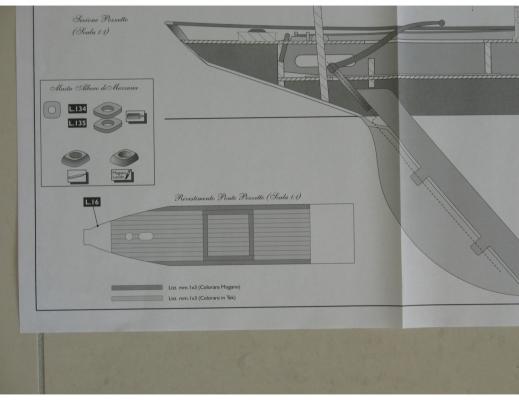
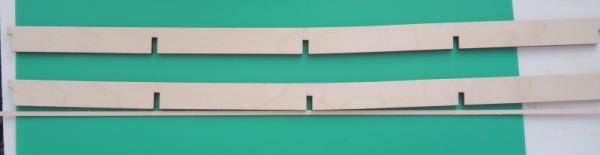
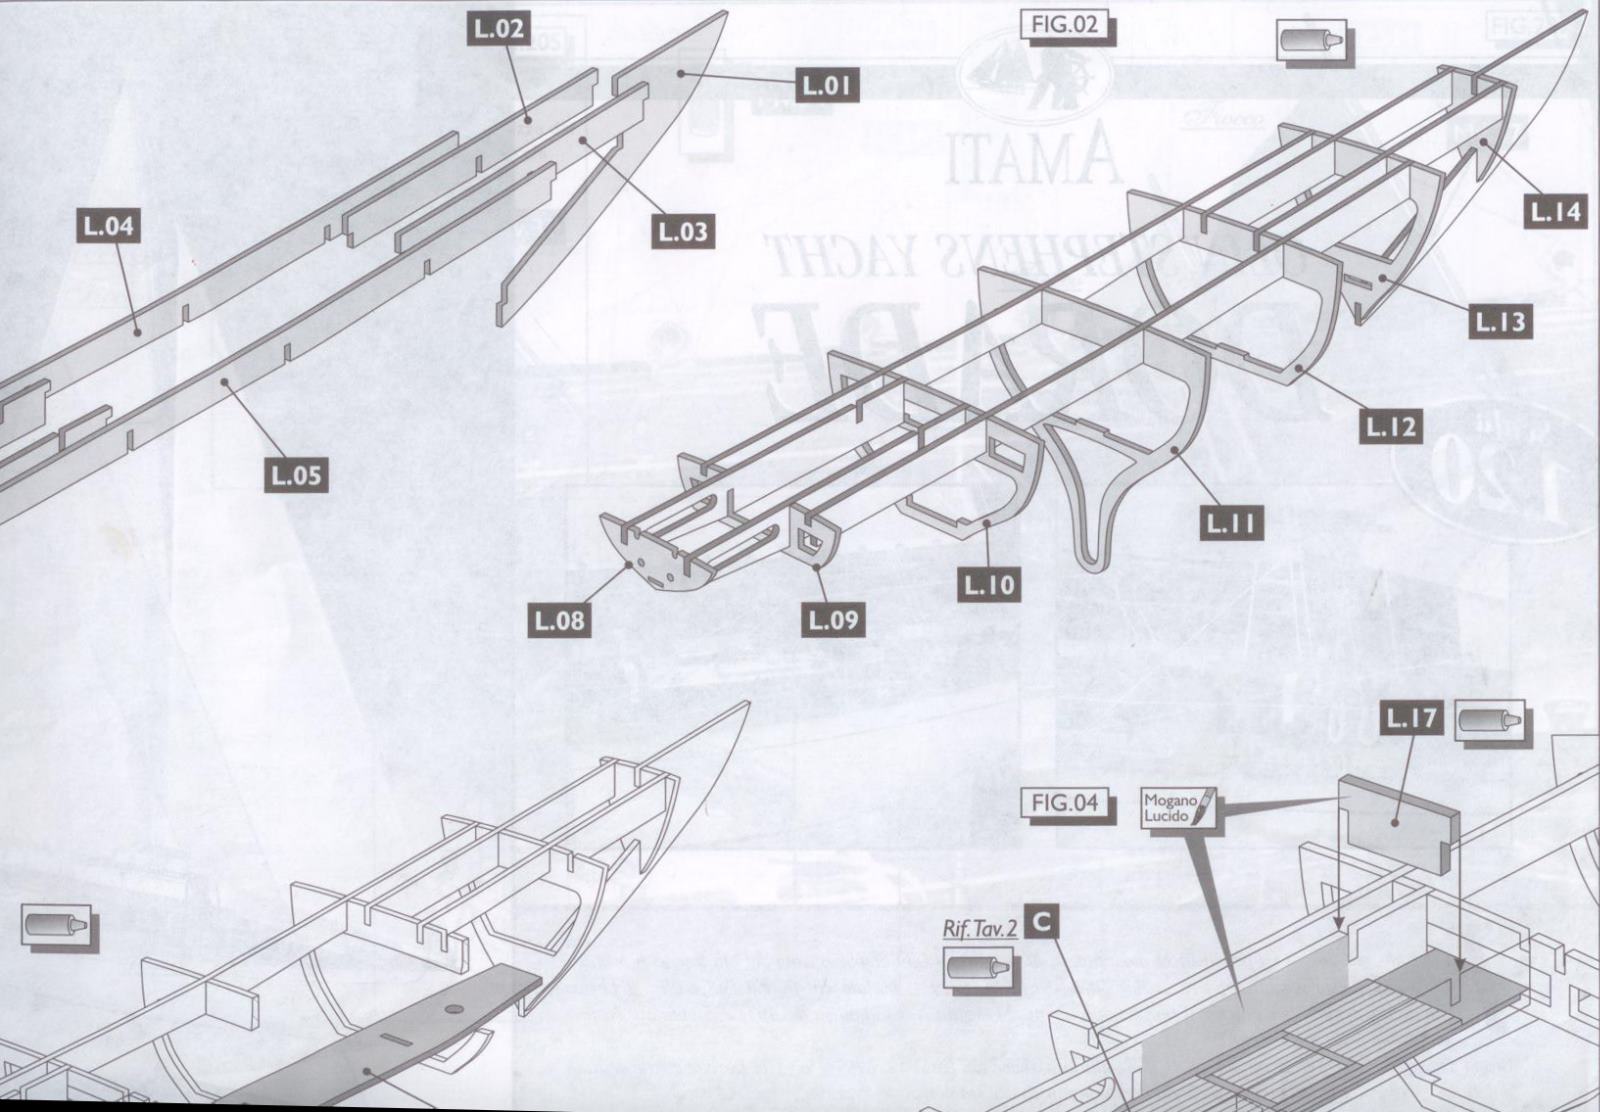
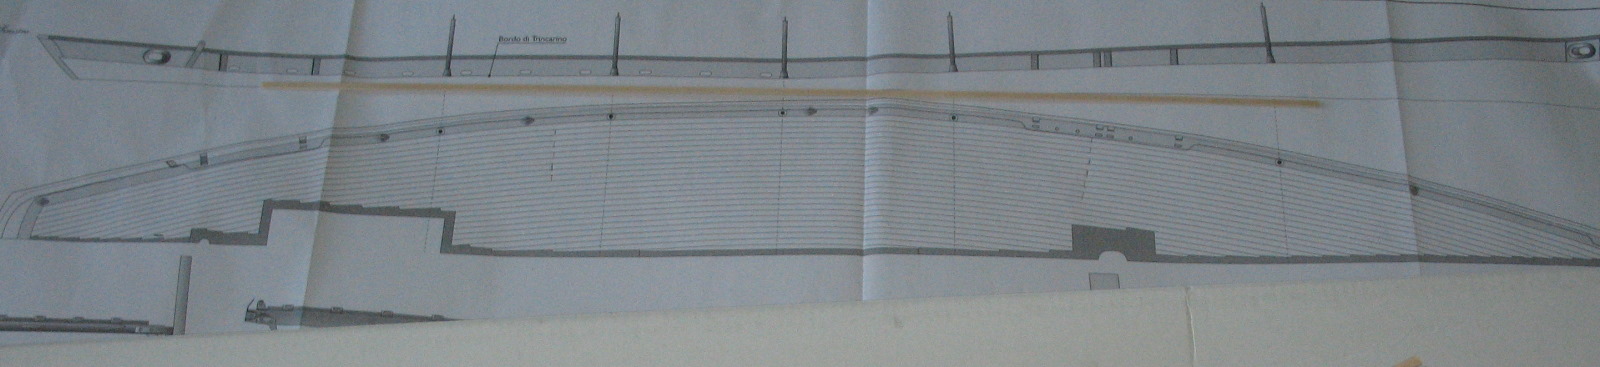
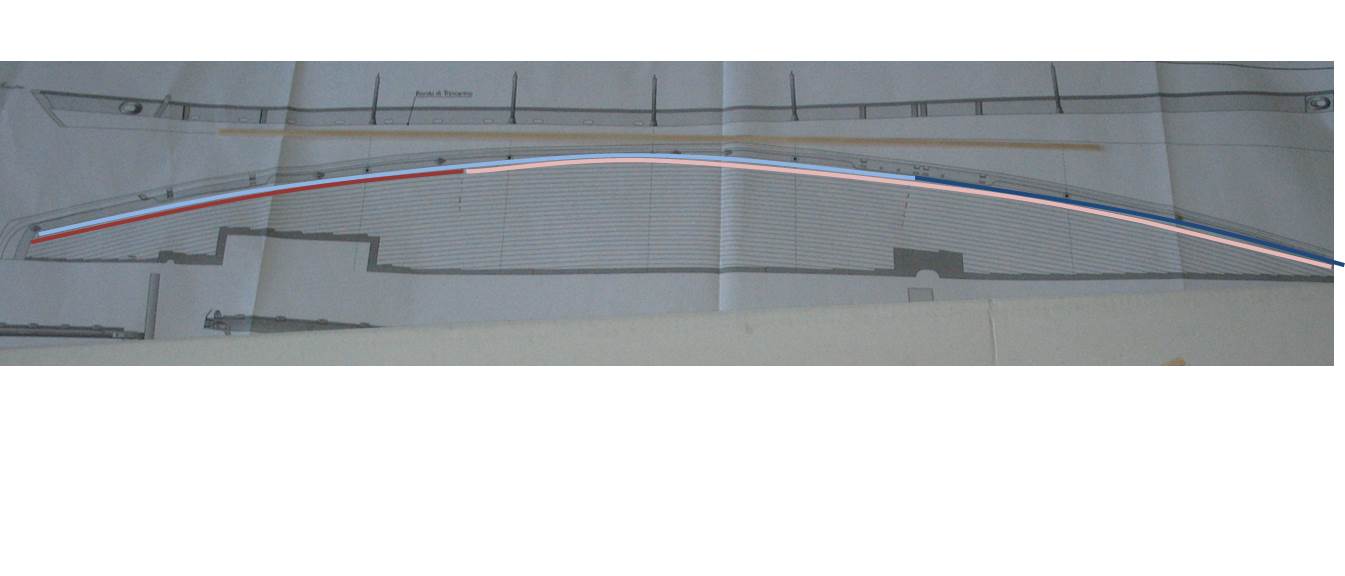
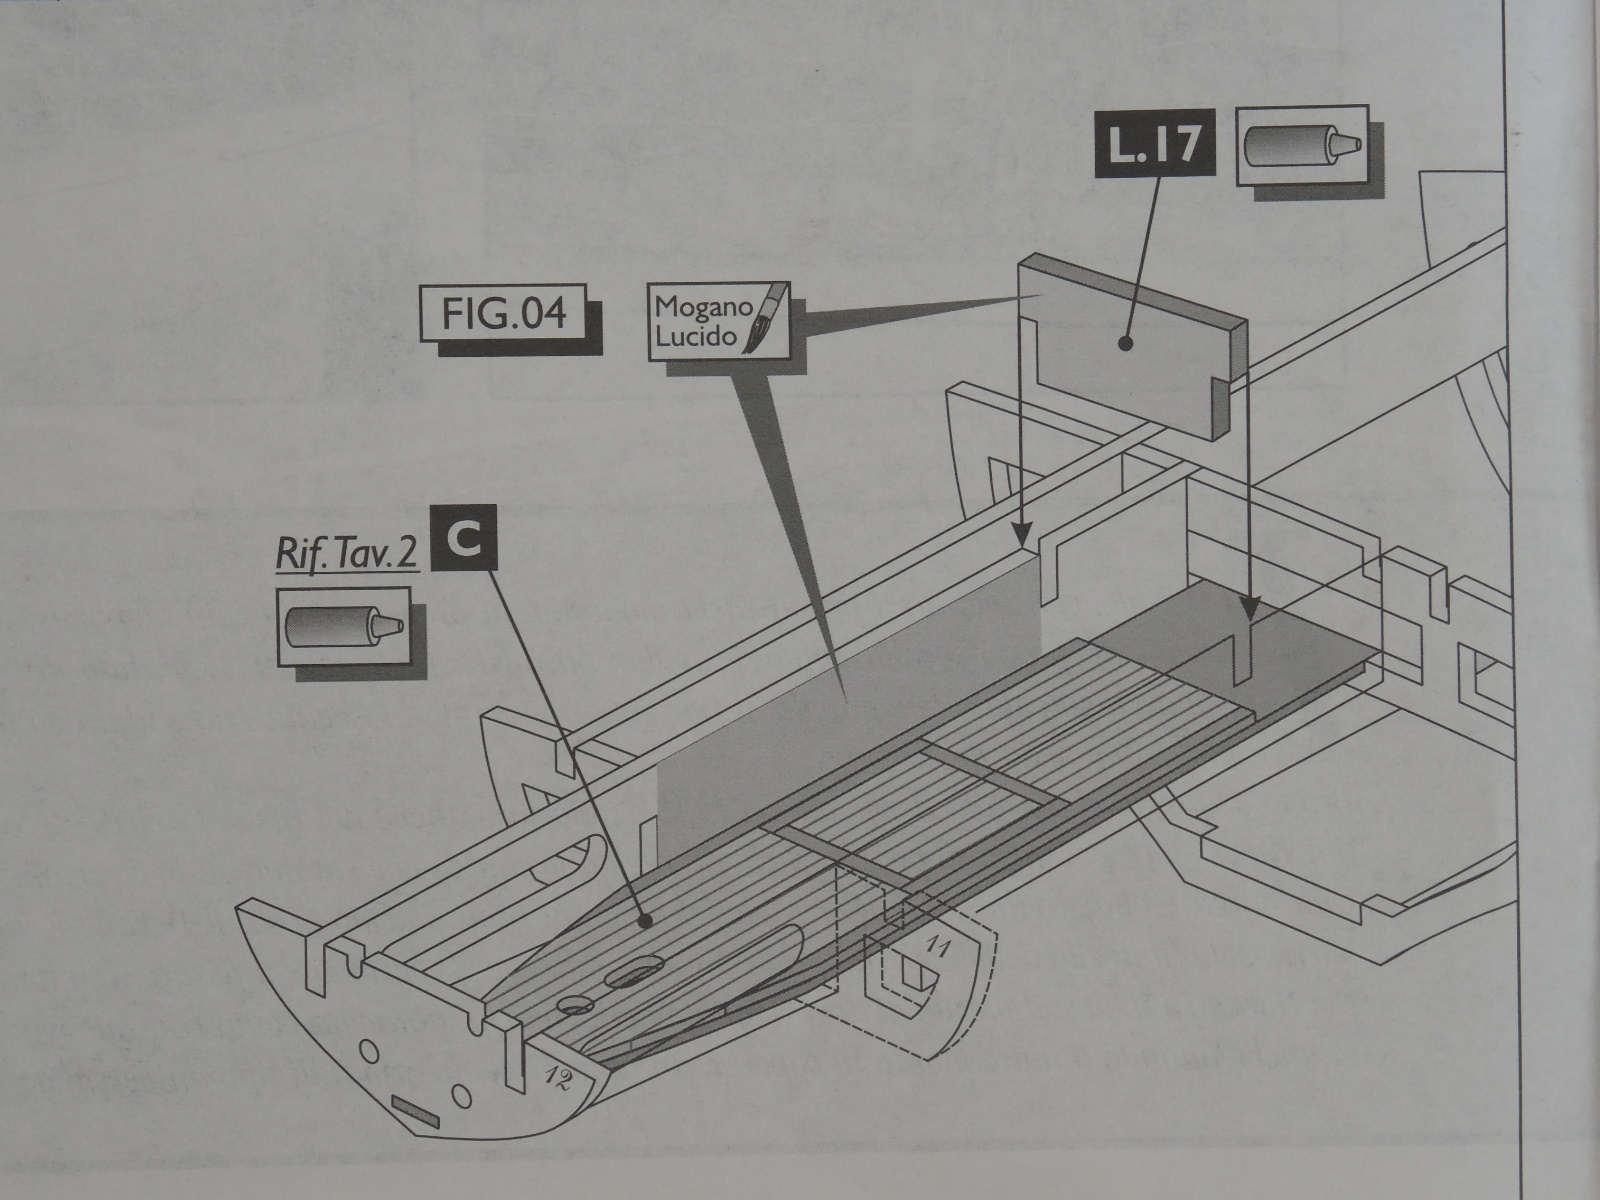
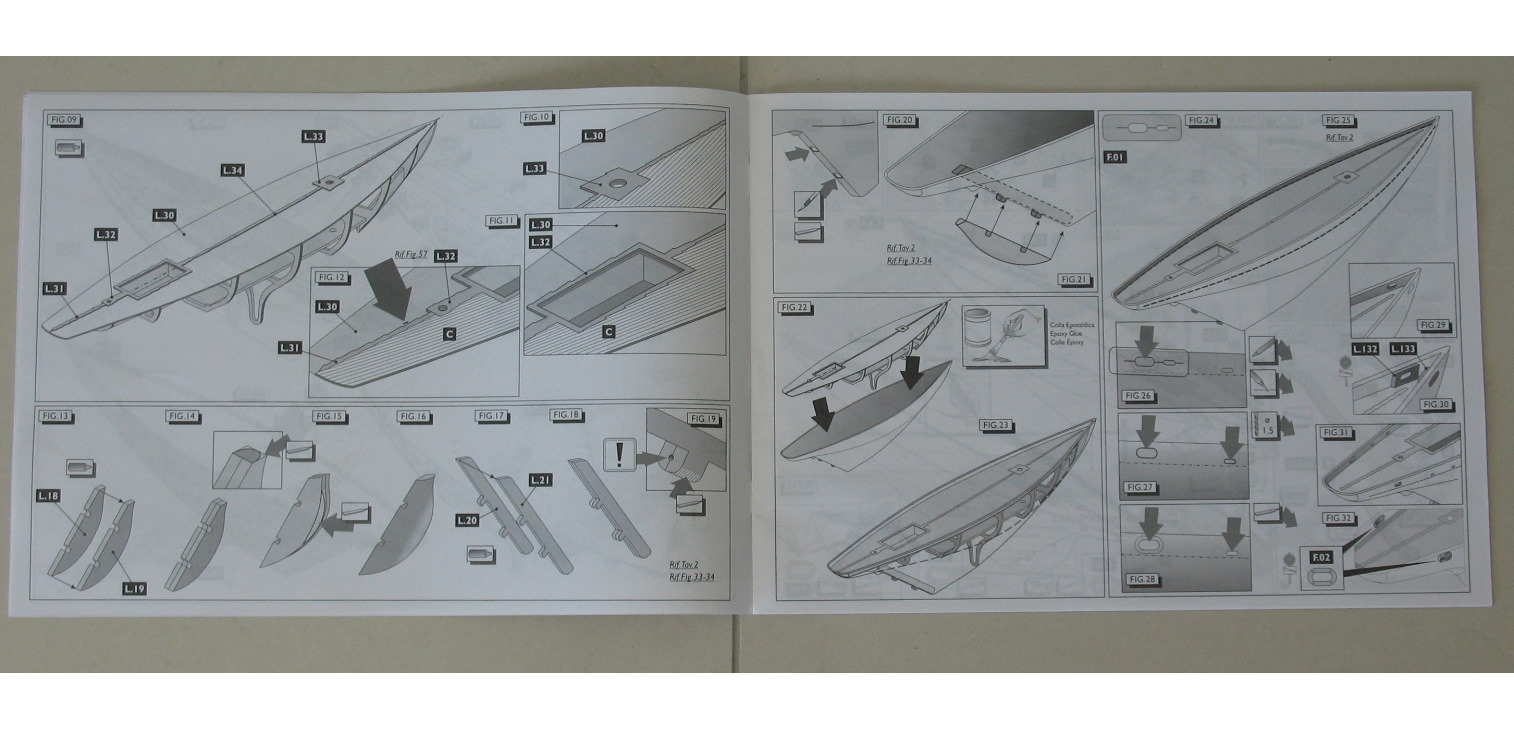
I will soon start the deck planking. There are no photos to help, but the plans show the planks as one long continuous piece of timber.
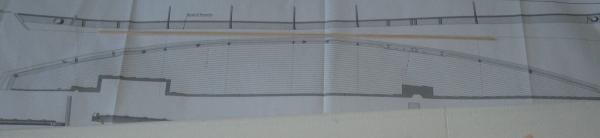
They provide 600mm soft wood planks. The longest part of the deck is over 800mm. Here is a view of part of the plan showing uninterrupted planks:
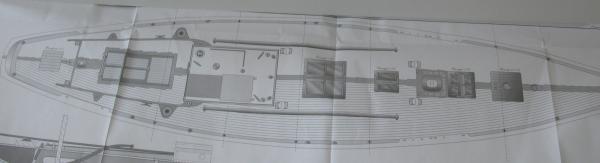
This shows the actual plank in relation to the 1:1 plan:
So, from your research, do you think there is a right way to plank the deck?
I can do the traditional, using sections to represent shorter planks. However, I'm thinking of following a simpler, cleaner line, using just 2 planks from fore to aft - one long, one short, alternating.
On the plan above, I drew lines to roughly show the joins if you look closely. Here is an attempt to sketch that:
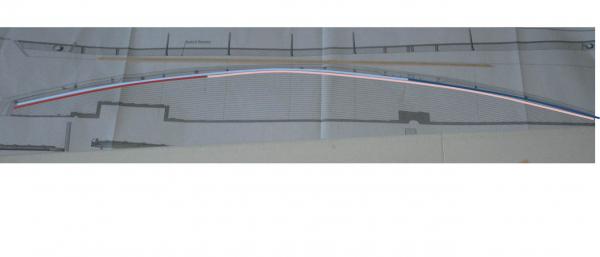
What do you think? BTW anyone can play!
Cheers.
Brett
-
Thank, Yves.
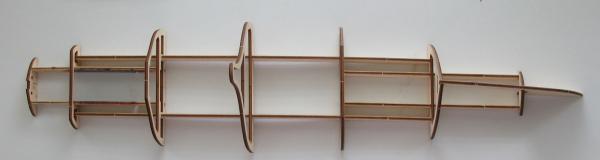
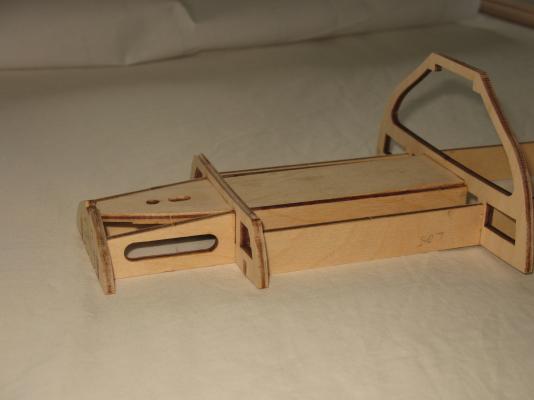
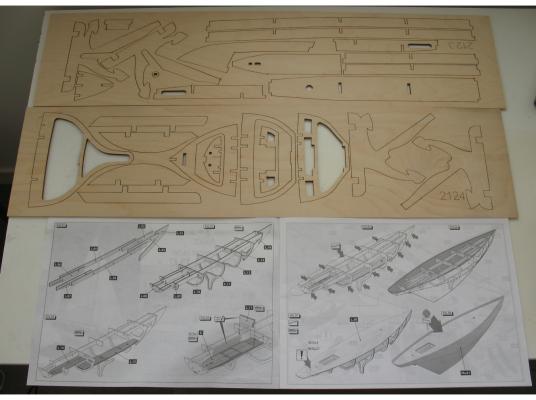
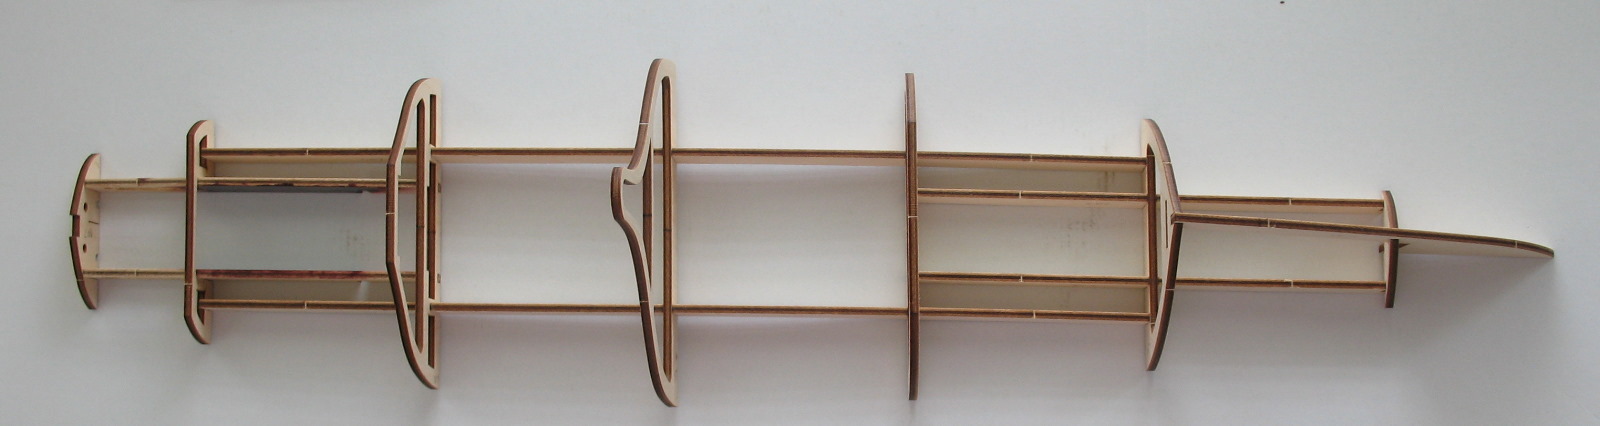
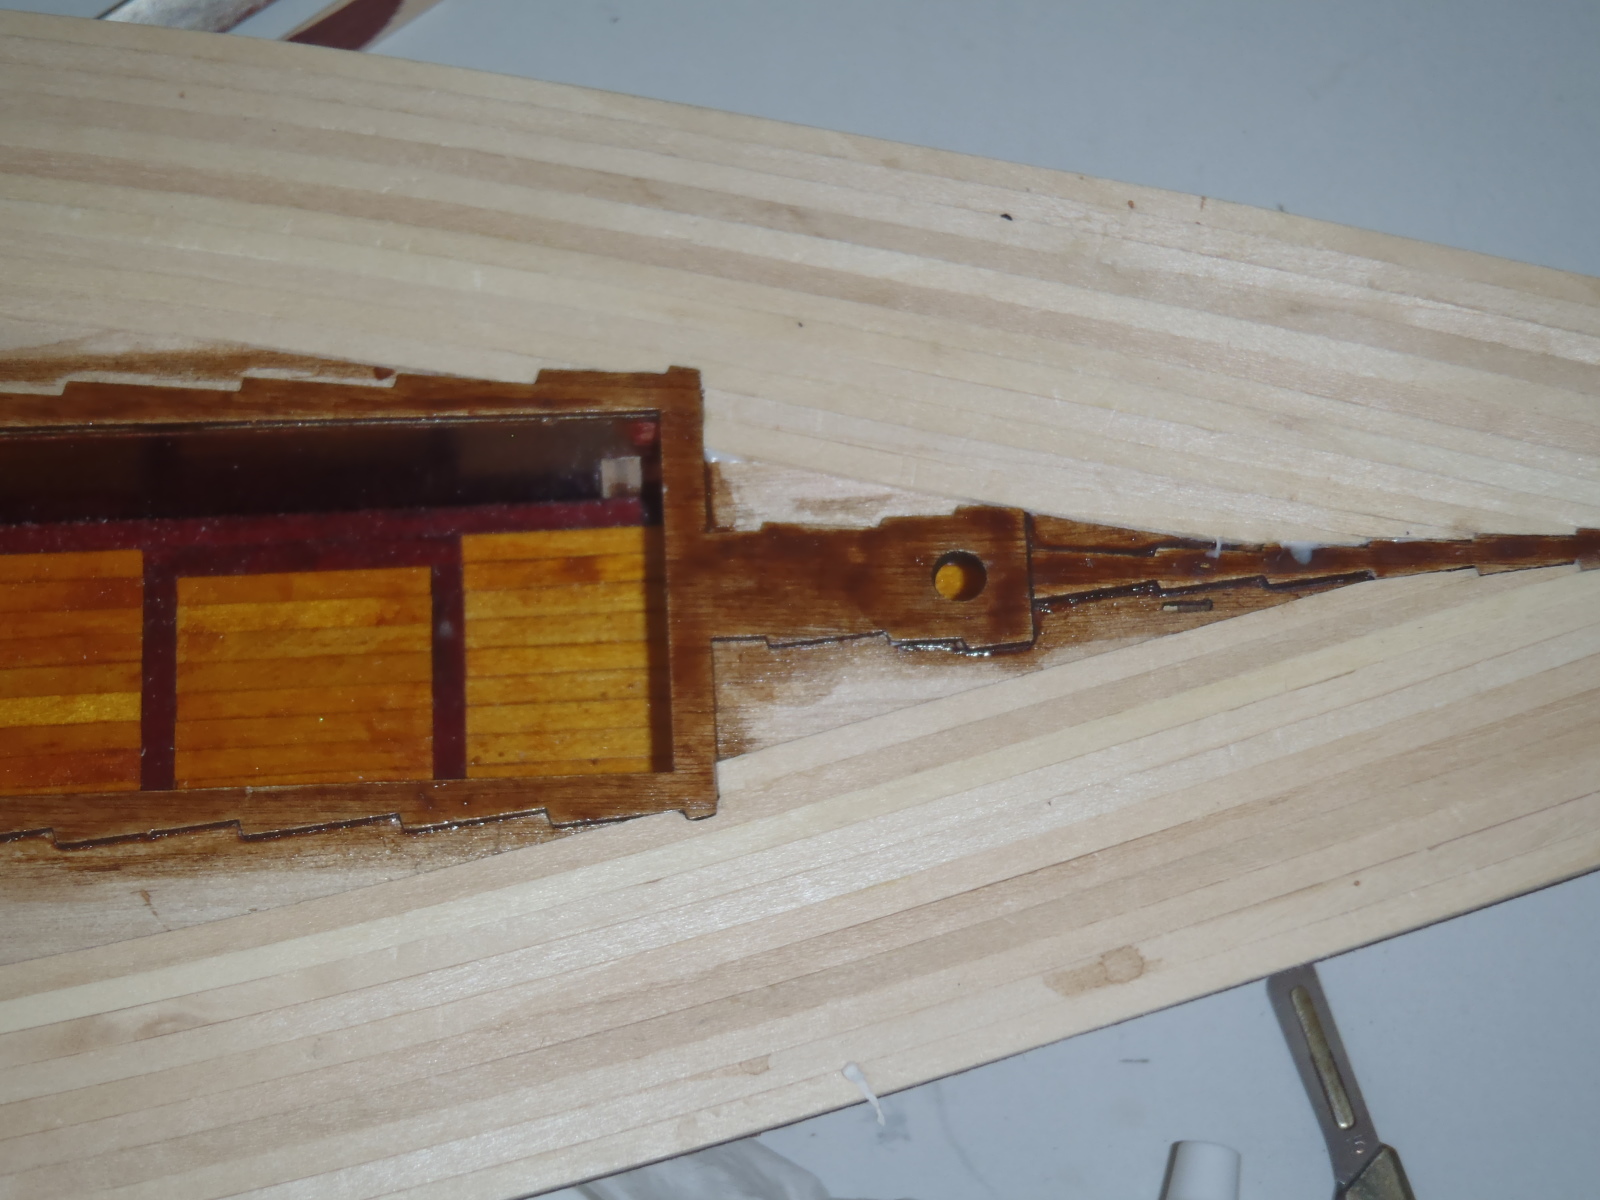
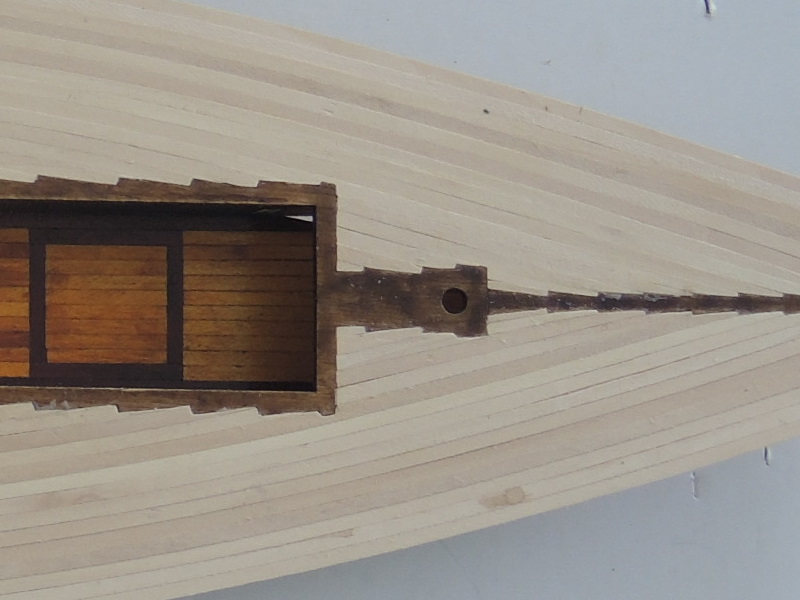
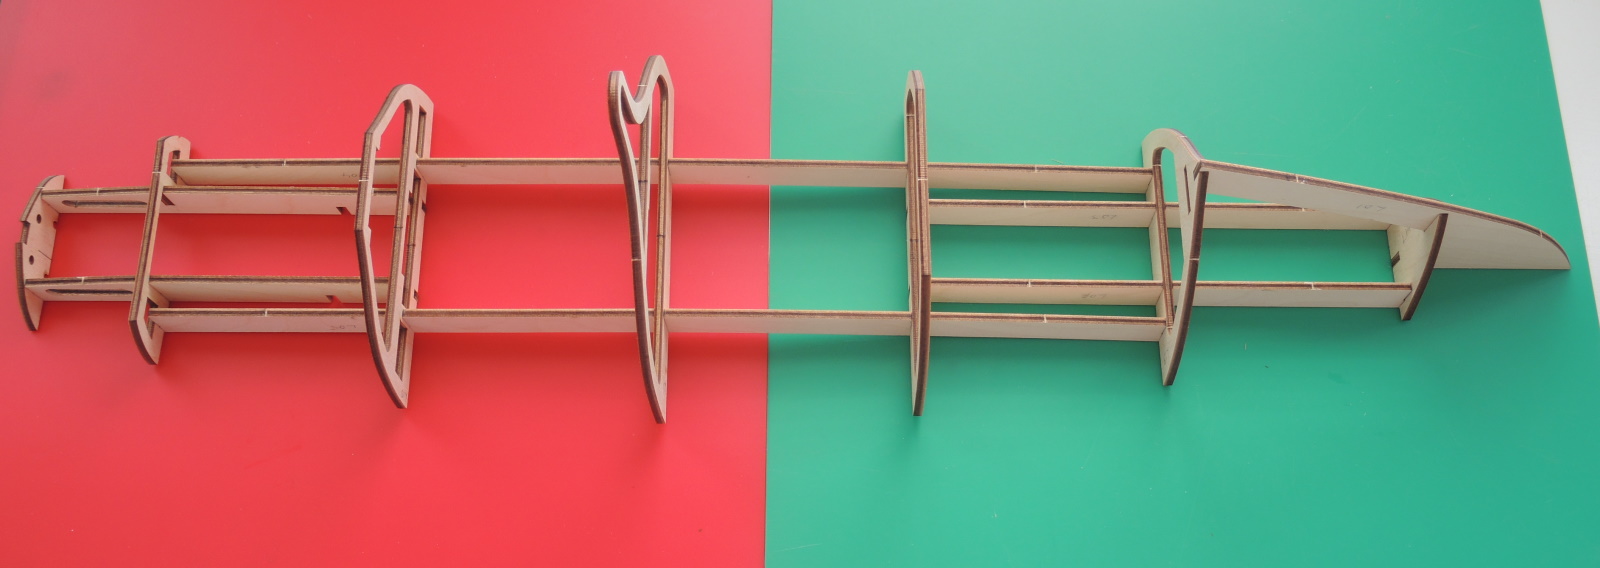
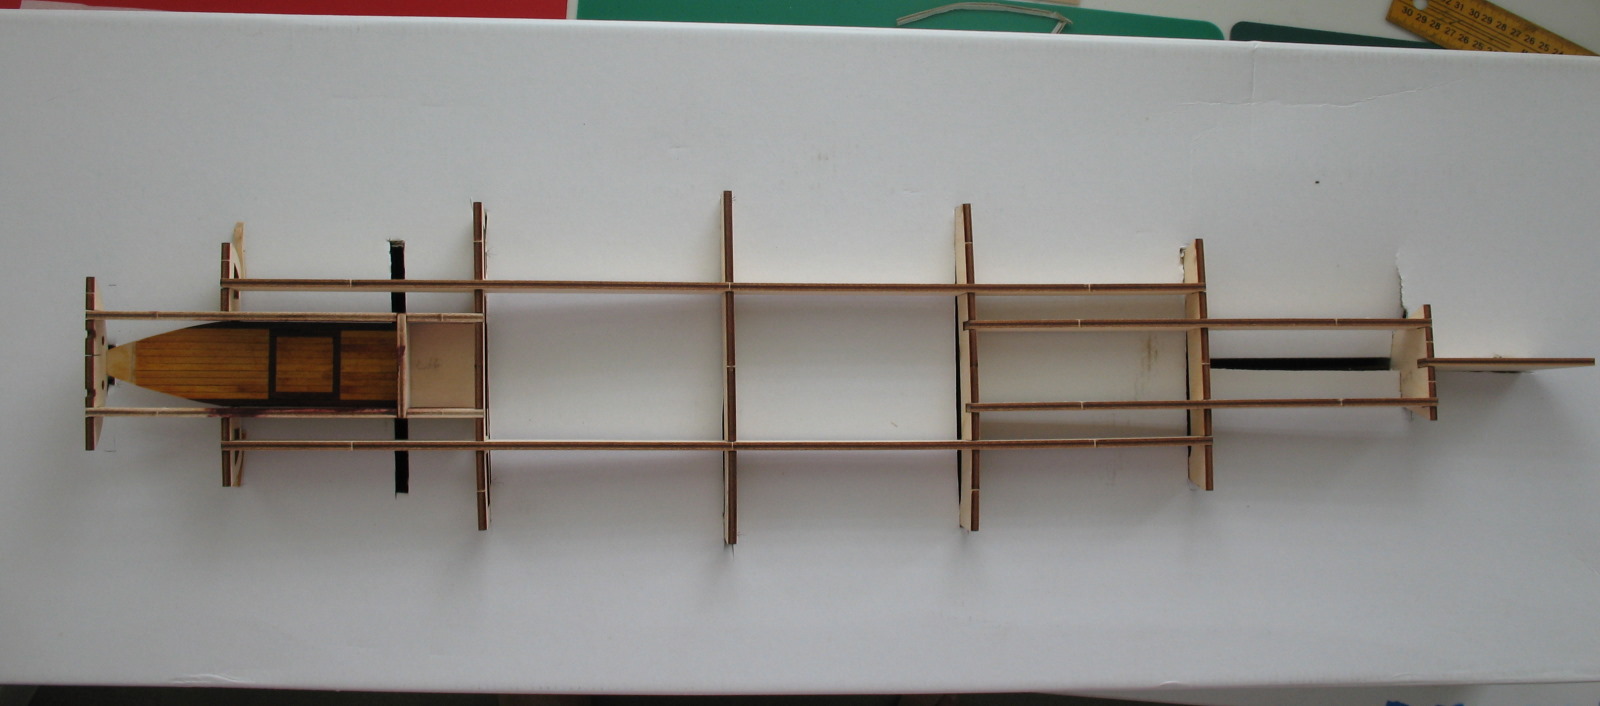
So begins the construction. Apologies for photo quality - this is a difficult model to photograph!
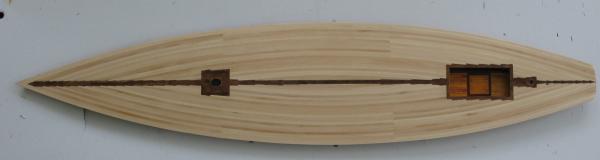
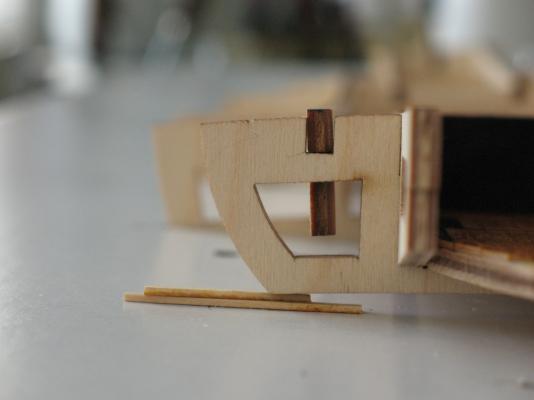
The first step is to test assemble the framework - without gluing them. The problem with this is the uneven frames - so I managed to check it upside down:
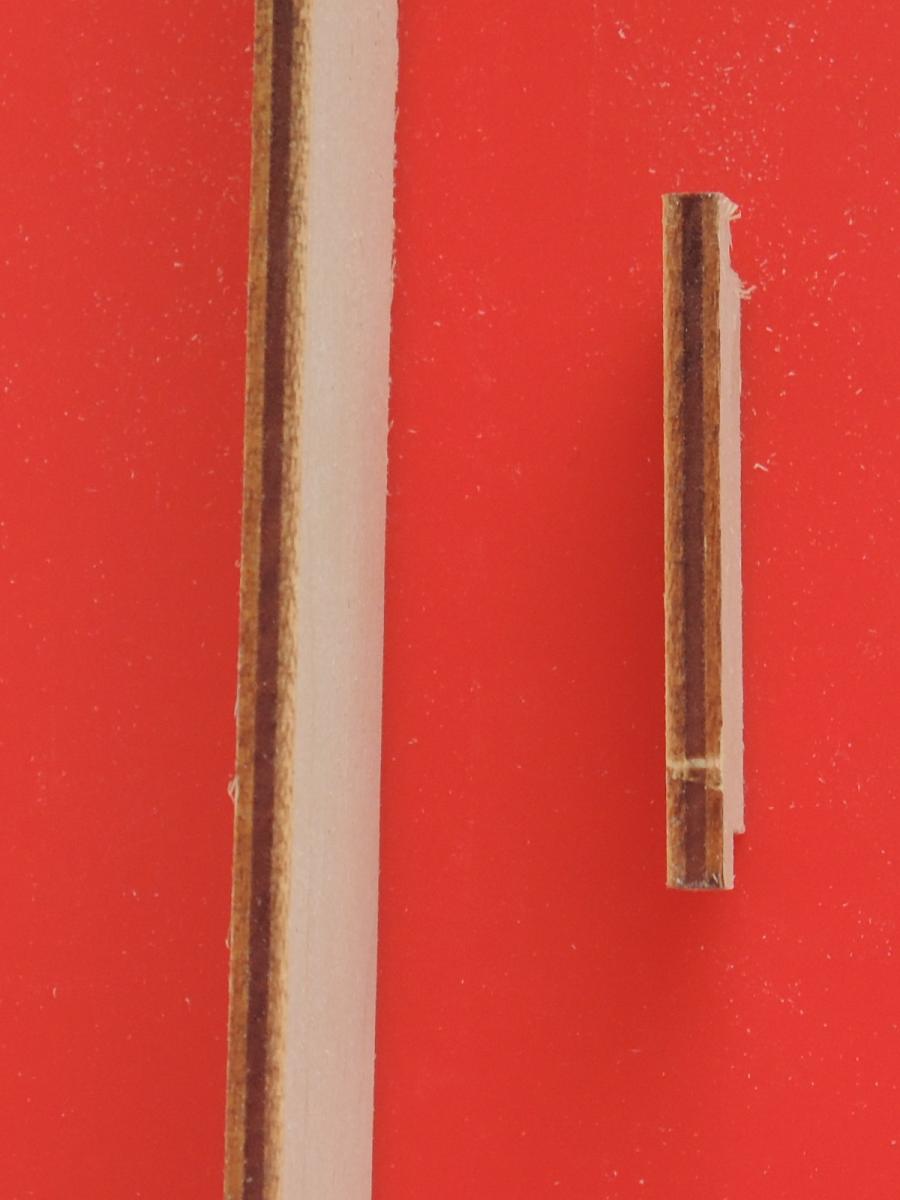
The material these are made from is 4mm plywood. A lot different to the usual bass or walnut! These are some edges after cleaning off the laser burns:
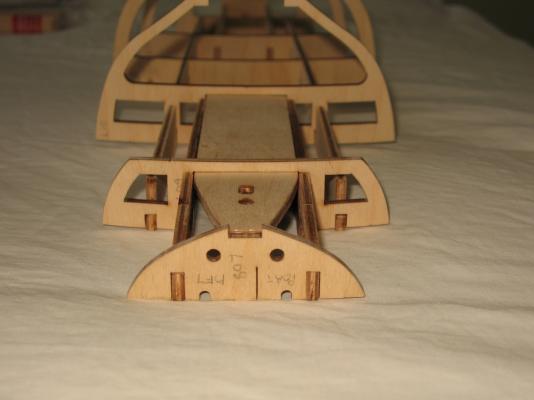
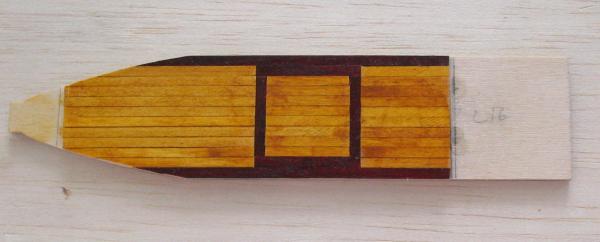
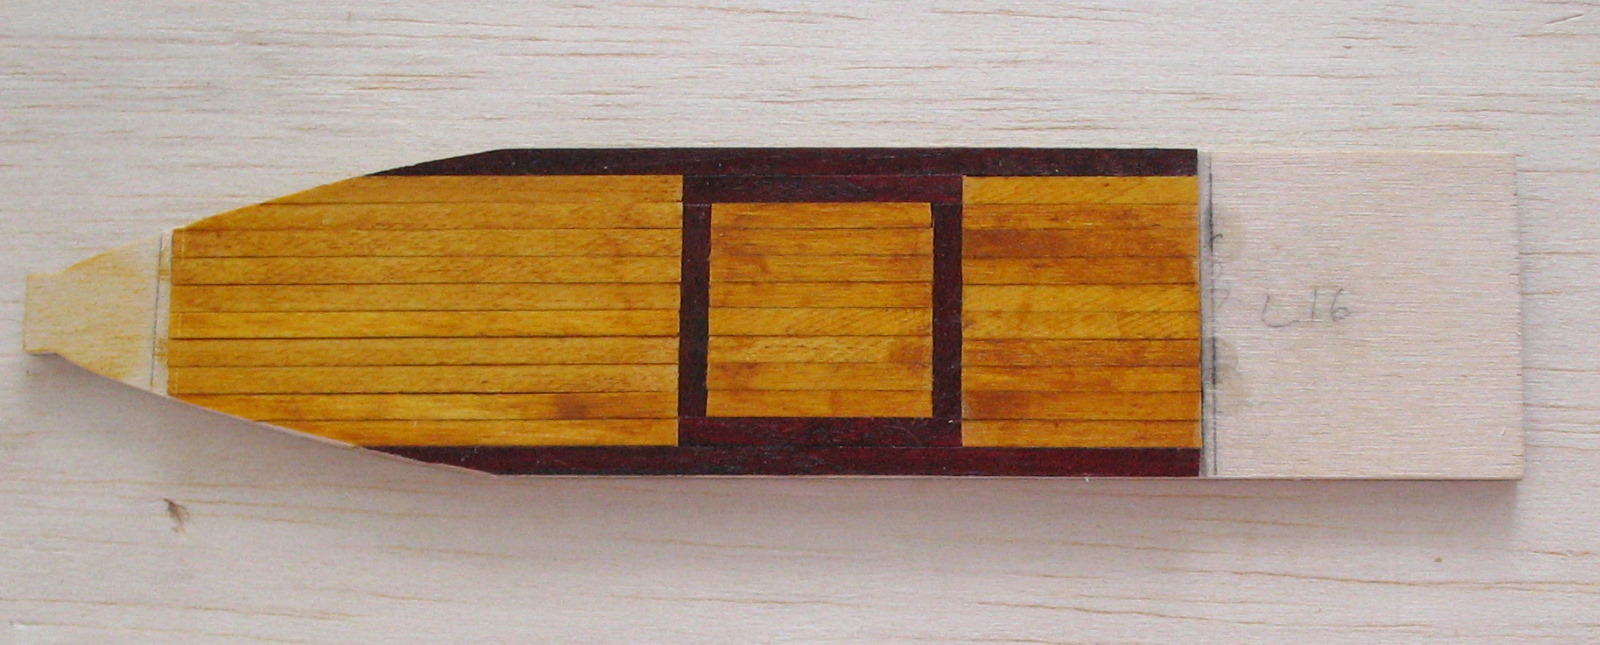
Next step is to mark the position of the cockpit in the frame:
Then plank the cockpit floor using 3mm planks, stained 'teak' and 'mahogany':
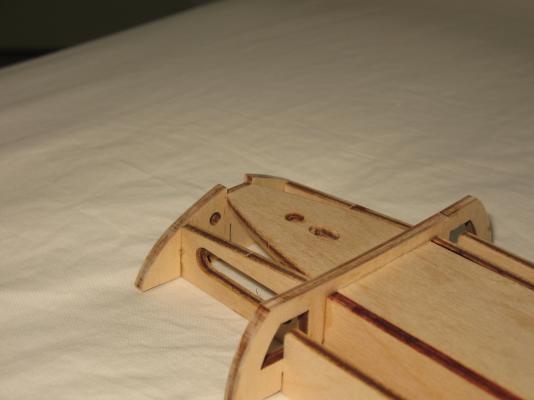
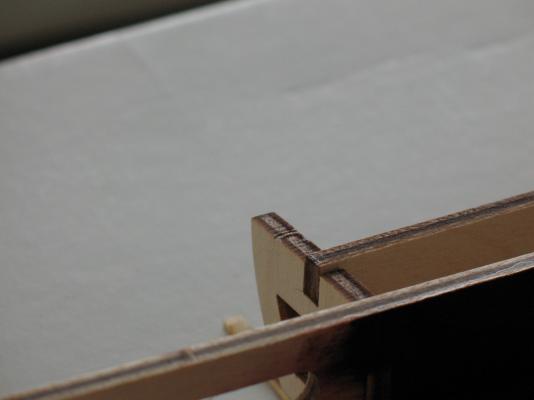
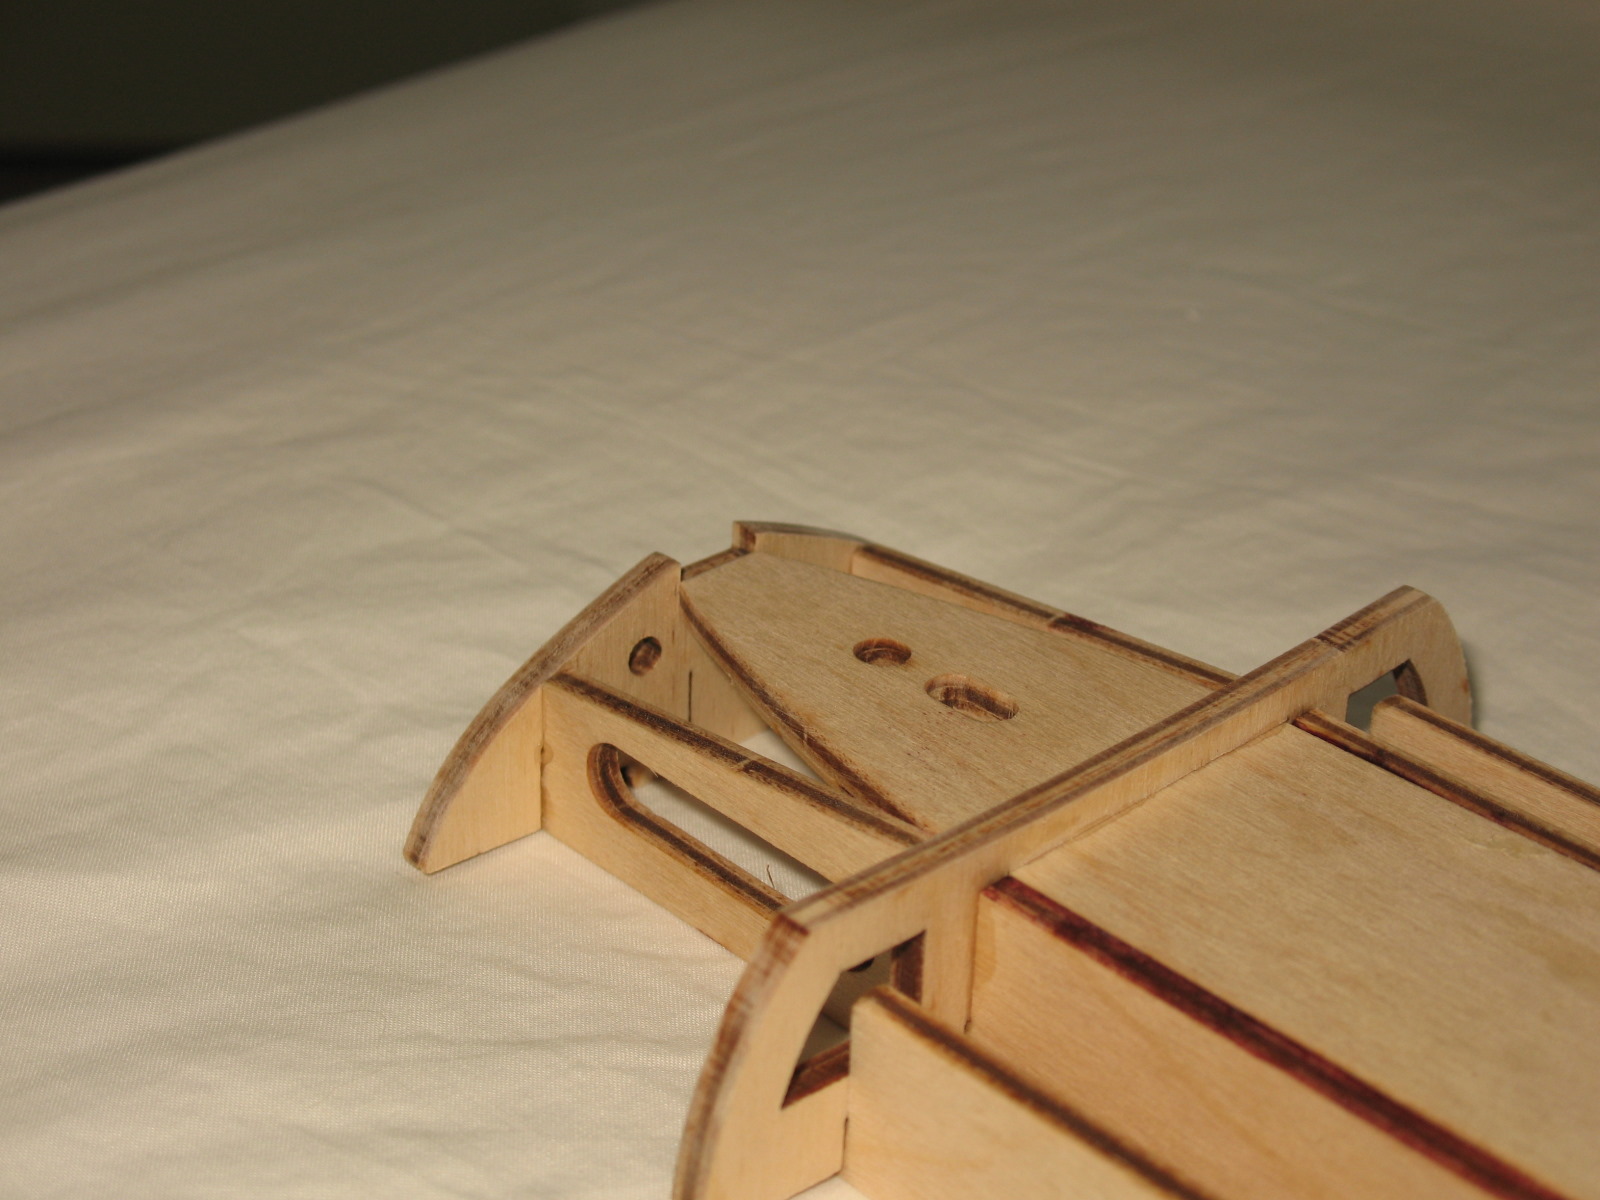
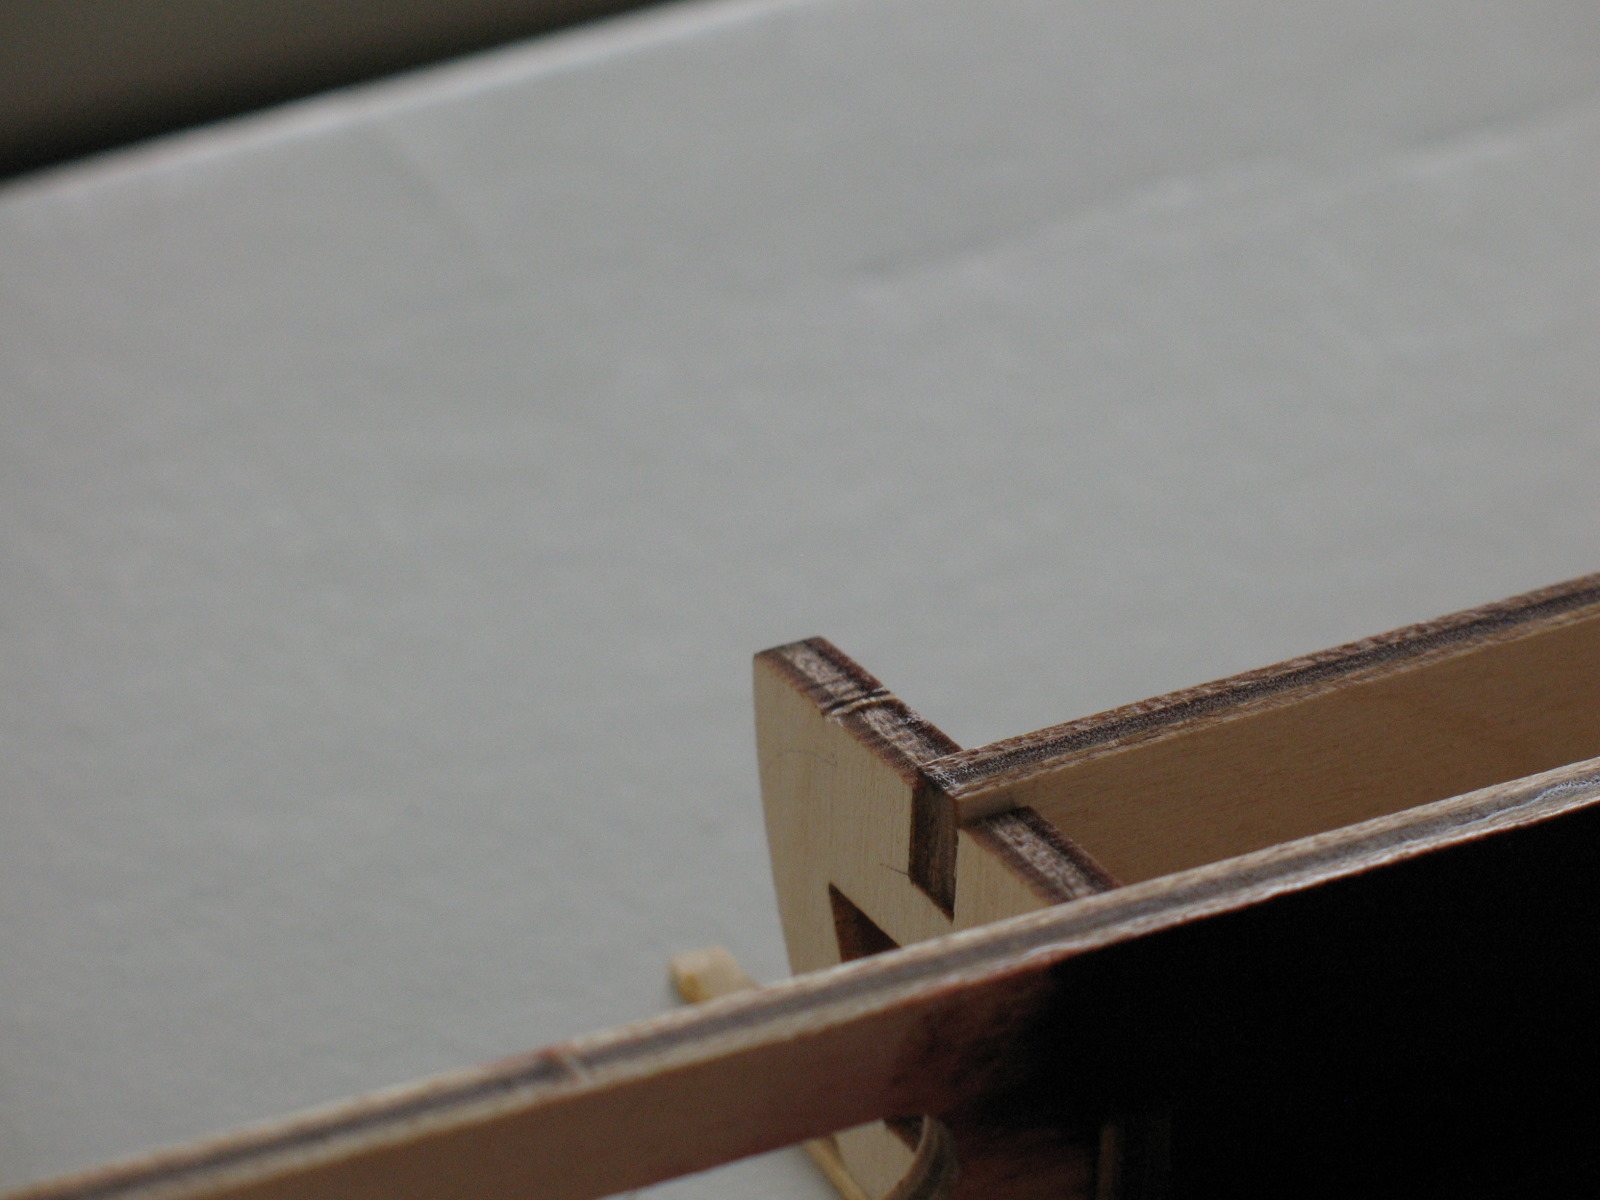
This is now glued in to that part of the framework. And here we hit our first problem - the laser cutting is inaccurate! The little tongue to the left of the photo above is supposed to fit into a slot in the final frame, according to the plan. Two things - it doesn't fit (without heavy bending!) and the frame doesn't have the point shown in the plan!
So, after much agonising, I cut that tongue back:
And glued it just below (above?) the slot:
BTW, another whinge, none of the pre-cut parts are numbered on a parts plan - you just have to figure it out.
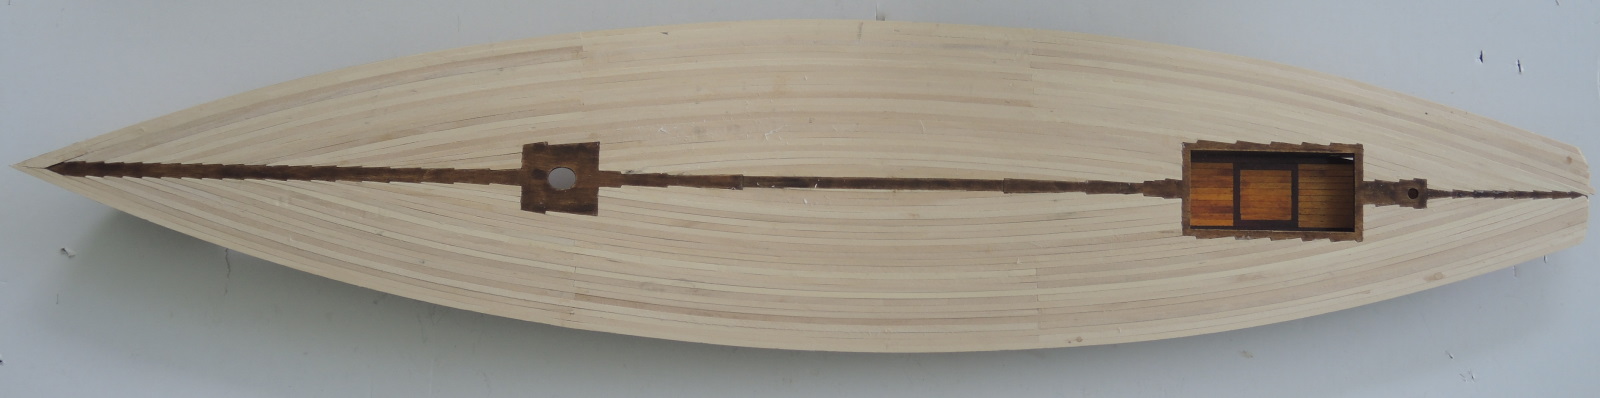
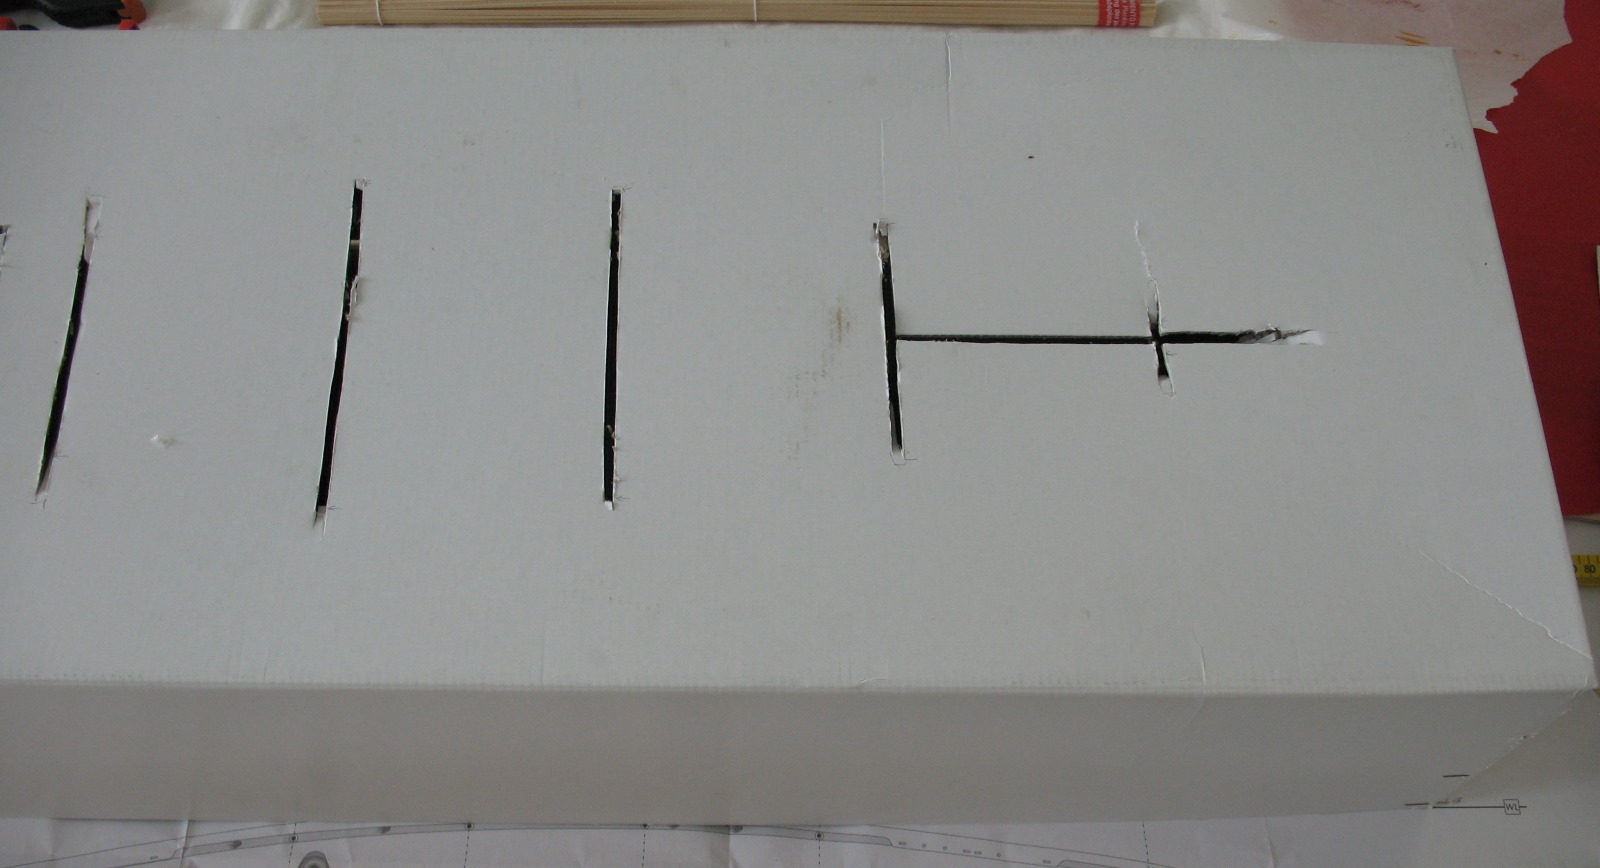
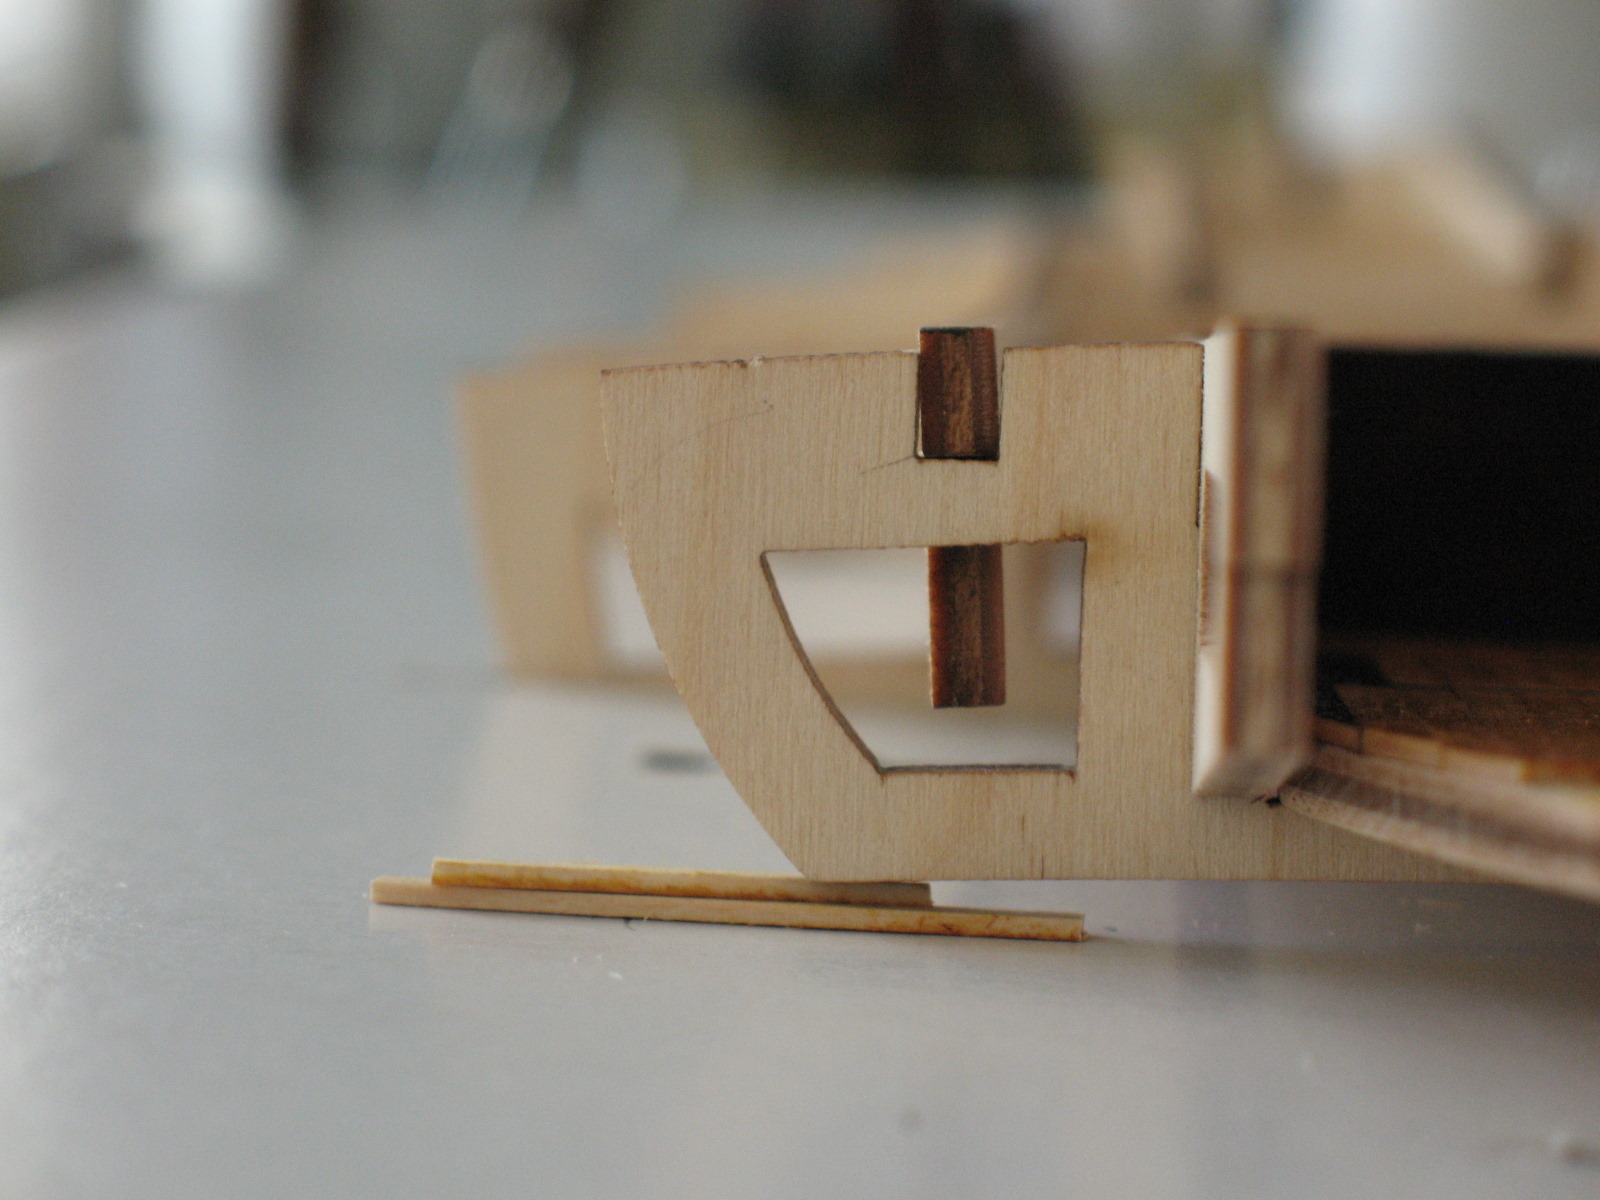
At this point I needed to see the whole thing the right way up, so I marked and cut the box it came in to receive the irregular frames:
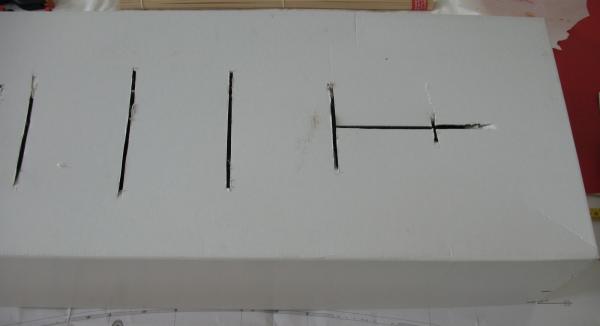
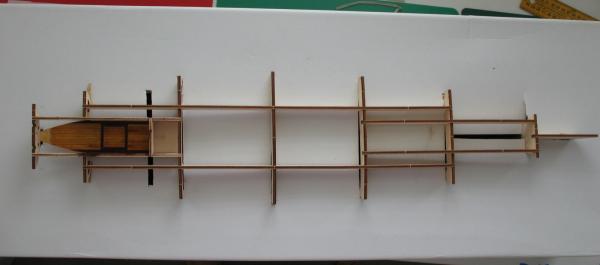
This disclosed the next inaccuracy - about 1mm excess height of a fore/aft support:
Sanding plywood takes forever!
Enough for today,
Brett
-
Background.
I was "asked" to build something pretty to put on display in our lounge room. The usual models (i.e. warships, Nelson's Navy, and that era) were deemed unsuitable.
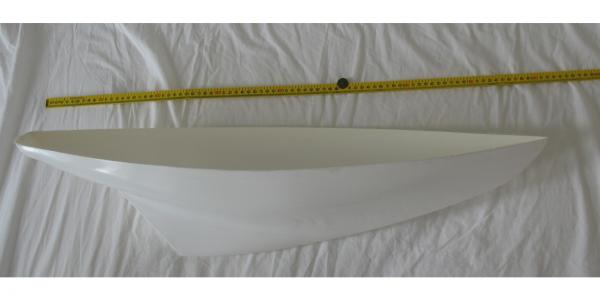
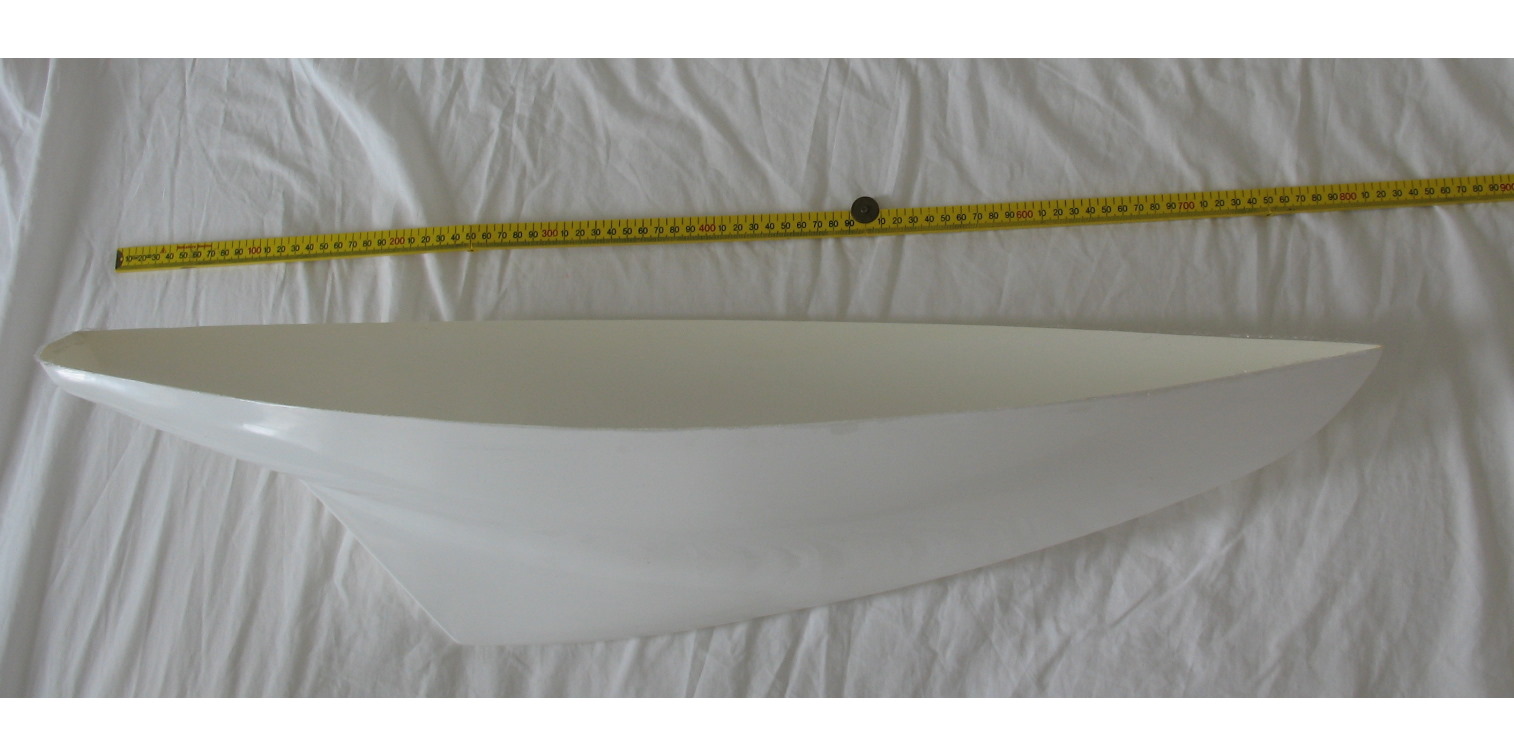
After eliminating most of the wooden kit types available, we settled on "modern" yachts. The next criterion was size - had to be around 800-1000mm length. And it had to be pretty!
Didn't leave many available to choose from.
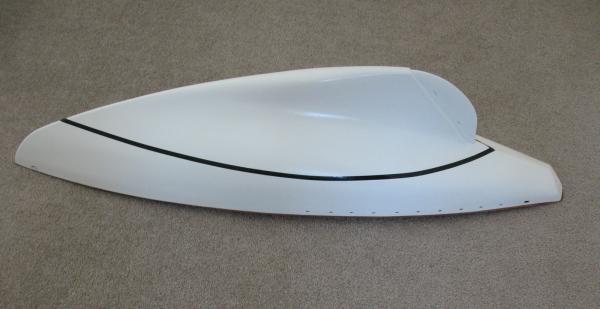
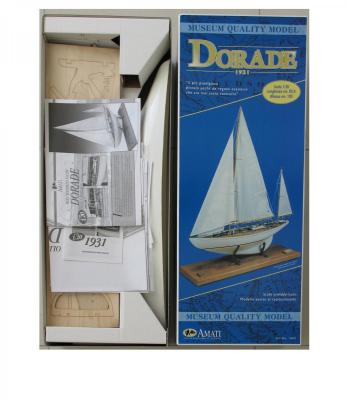
Final choice was 'Olin Stephen's yacht Dorade', measuring 856mm long, and 1028mm high. This is the link to Wiki - http://en.wikipedia.org/wiki/Dorade_%28yacht%29
Again, options were limited for buying the model, but I had good response from Cornwall Model Boats, so ordered from them. Delivery was very fast - ordered on 6th Jan, received on the 13th - and that's from the UK to Australia!
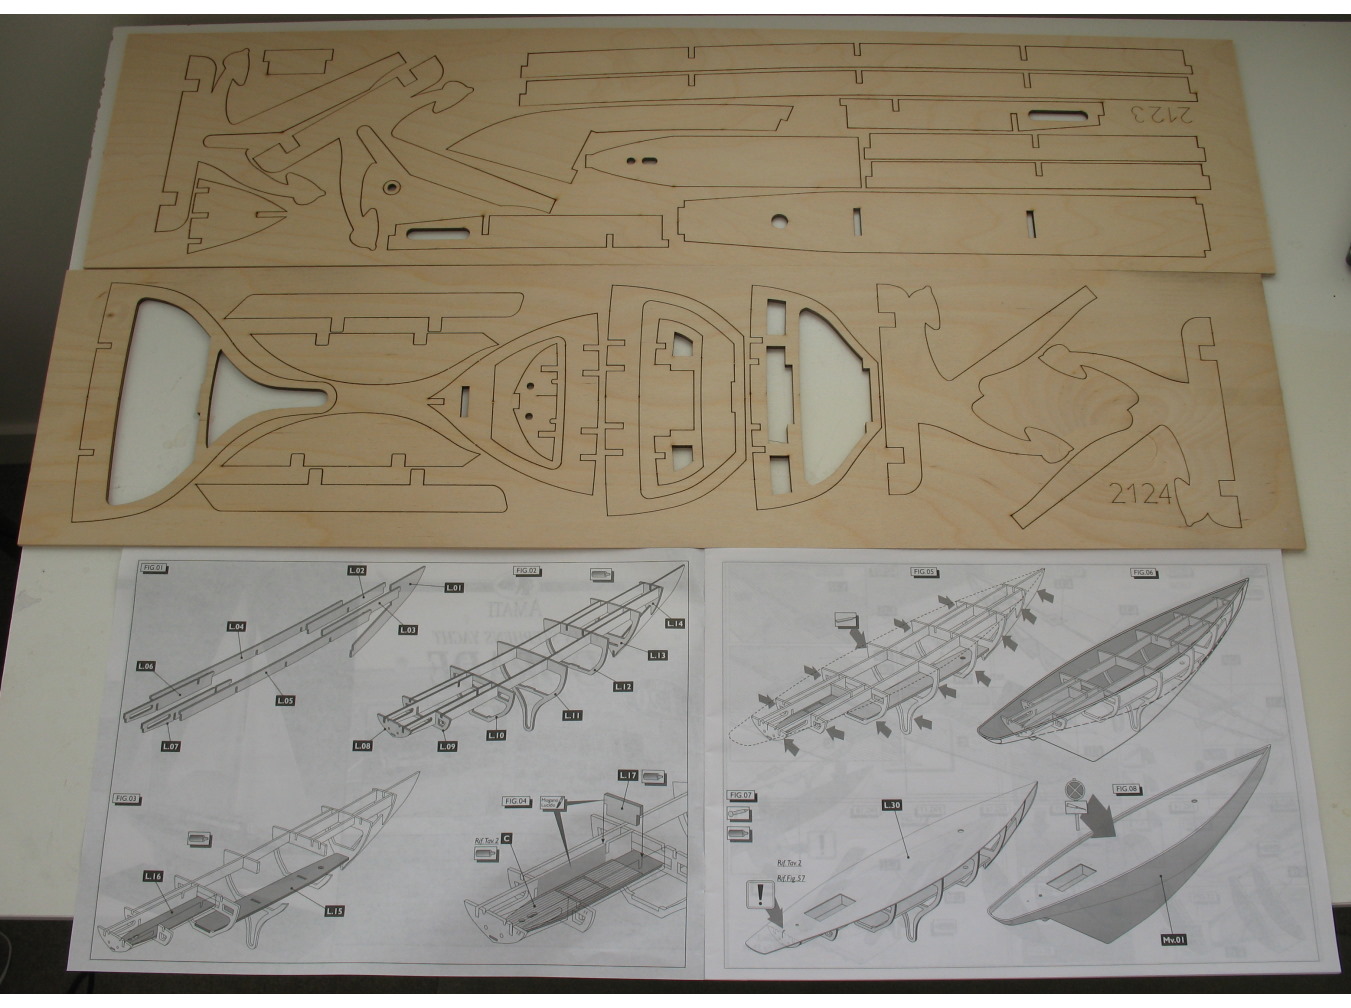
Box contents looked like this:
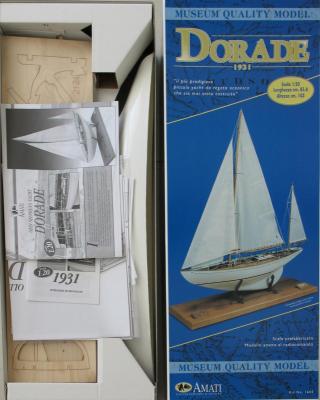
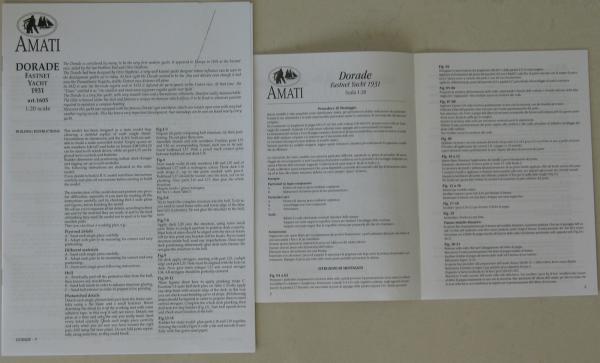
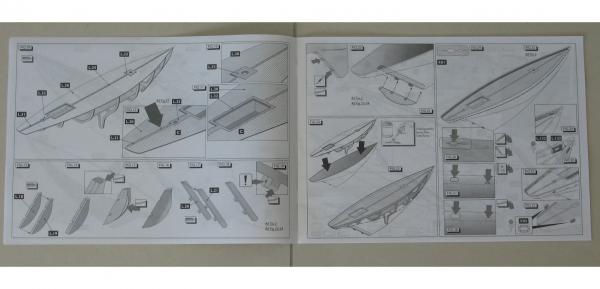
There are instructions, diagrams, and full size plans. The instructions are translated into English, but some notations on the plans are not:
It's a simplified model, with a pre-formed ABS hull, so the packing list is quite short. The parts all look smart:
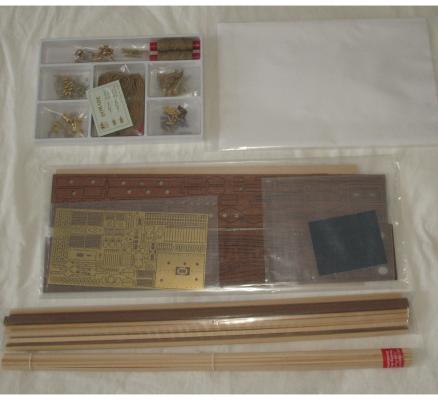
And on to assembly, and the usual complications. More soon.
Cheers,
Brett
- Ship Shape, egkb, justsayrow and 5 others
-
8
-
Thanks, John - I will try that.
And I will begin a log, RSN.
Cheers,
Brett
-
So, one year and one month after I started this model, what have I learned? Here are a few random thoughts:
- Never buy a model whose instructions and supplies are in Imperial measurements!
- Choosing a model with no sails assuming it would be simpler is dumb. Both require about the same rigging. D'oh!
- No matter how much you try to read the manual or follow a practicum, there are still plenty of opportunities for mistakes.
- The plans and instructions that come with the AVS could be shortened to "here's the bits, now make the model".
- Bob Hunt's practicum was very helpful, but certainly not perfect.
- I learned a lot about reading plans - by the time-tested method of screwing up and redoing things.
- Unlike my first model, this one came with plenty of excess timber and fittings. A big tick there!
- Model rope has a mind of its own. The best option I found was to soak it in hot water for 5-10 minutes to make it a bit more compliant. Sections that wanted to twist could be somewhat tamed with a coat of diluted PVA.
- If you plan to put tension on seized blocks etc., use CA not diluted PVA to strengthen the seizing.
- Don't buy cheap drills bits from Ebay. Enough said!
- Like any journey, the last 10% always seems to take the longest.
Finally, when all is finished, no-one else notices the faults, blemishes, deficiencies or asymmetries. Probably they are just sick of being bored to tears by the model builder!
Cheers,
Brett
-
Thanks, but I need to be able to have all the pieces in position when gluing. Plus, I prefer the slower set and easier ungluing of PVA (white glue).
Cheers,
Brett
-
Under orders from the First Sea Lady, my next "build" is the Amati Dorade - for display purposes:
It's more of an assembly, than a true build. Should take weeks, not months (or years).
Questions:
- Is it worth making a log for this? I couldn't find anything similar.
- Can I get help on supporting the parts during assembly, please?
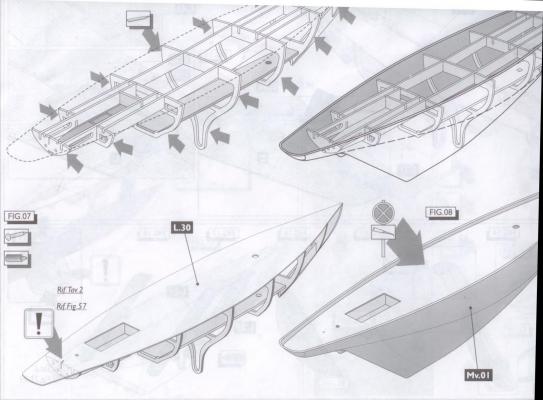
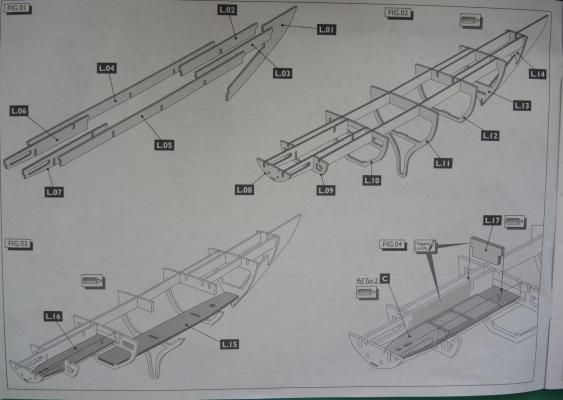
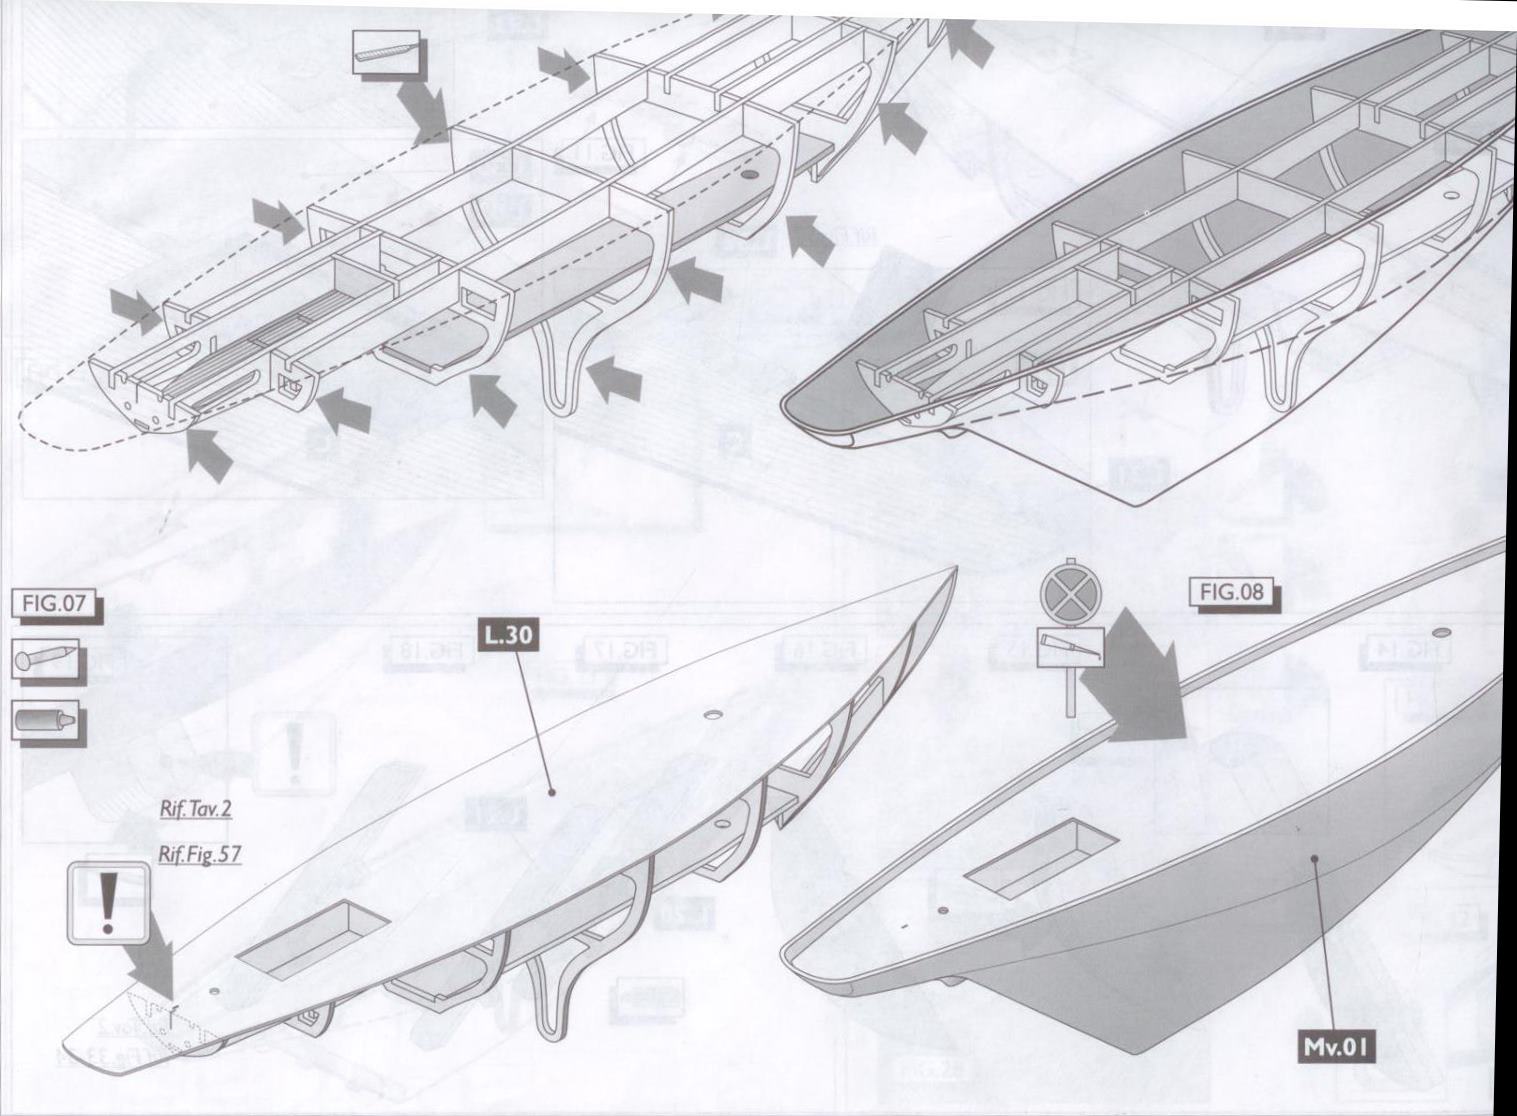
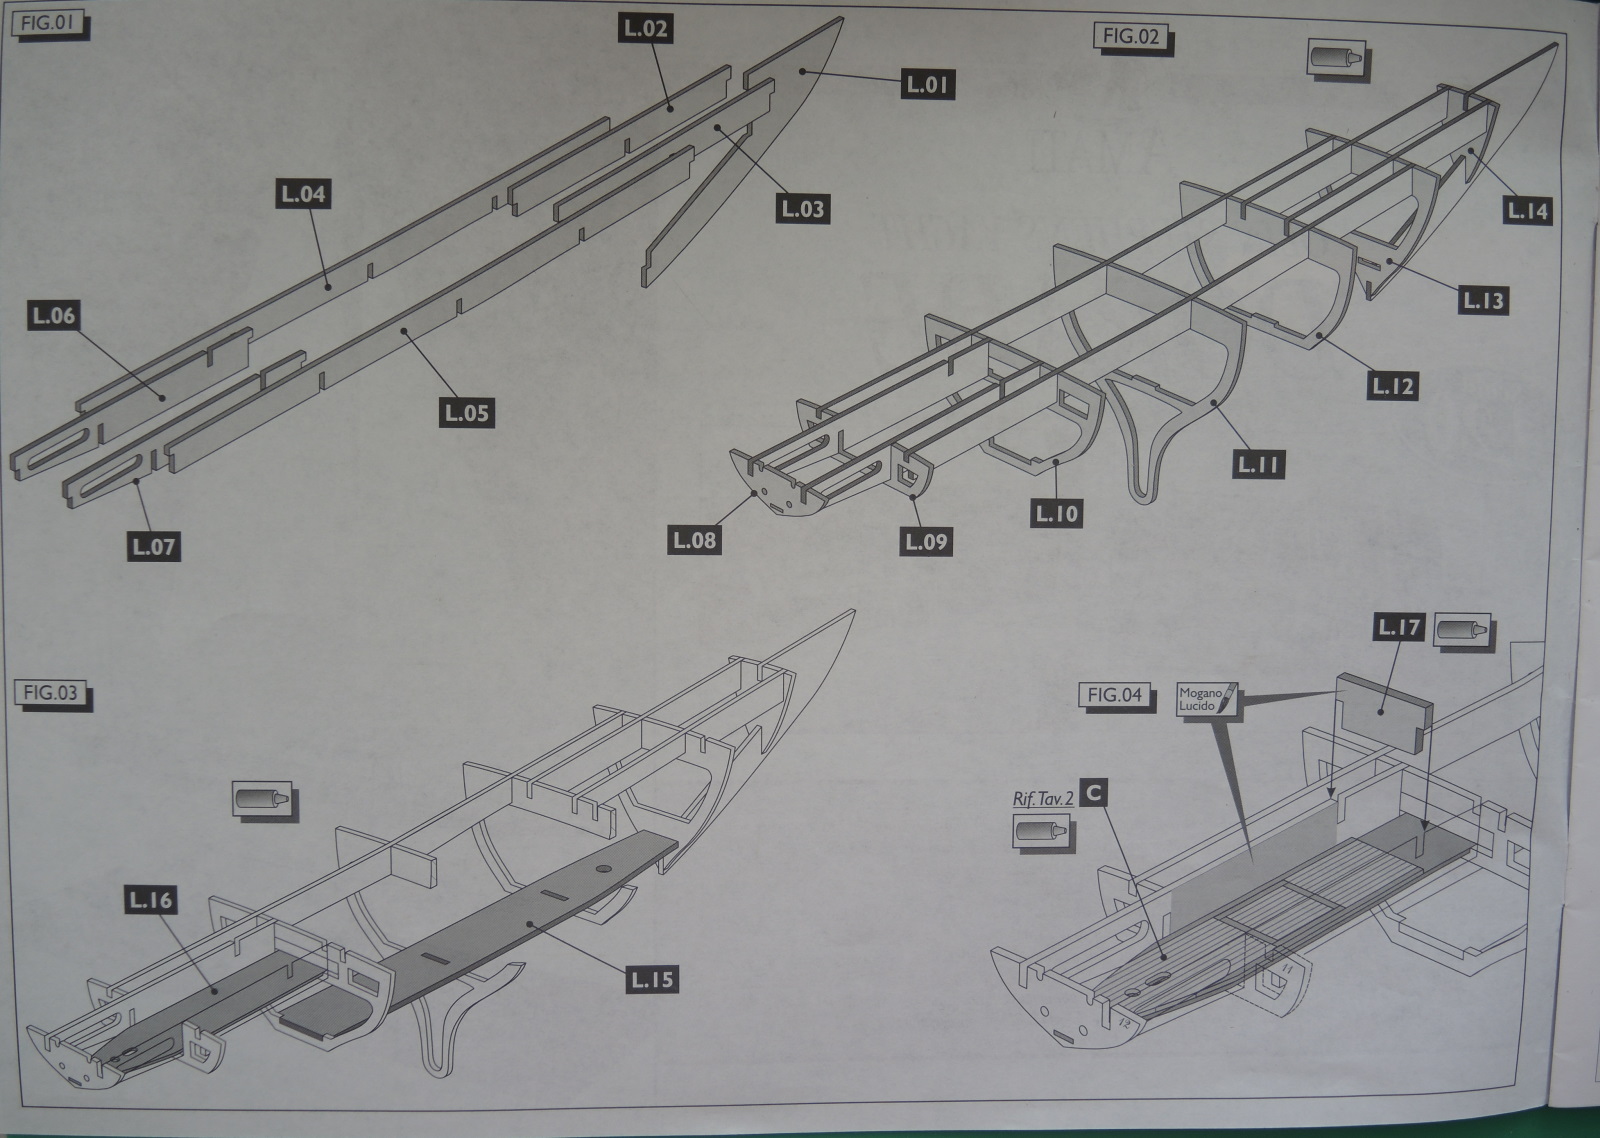
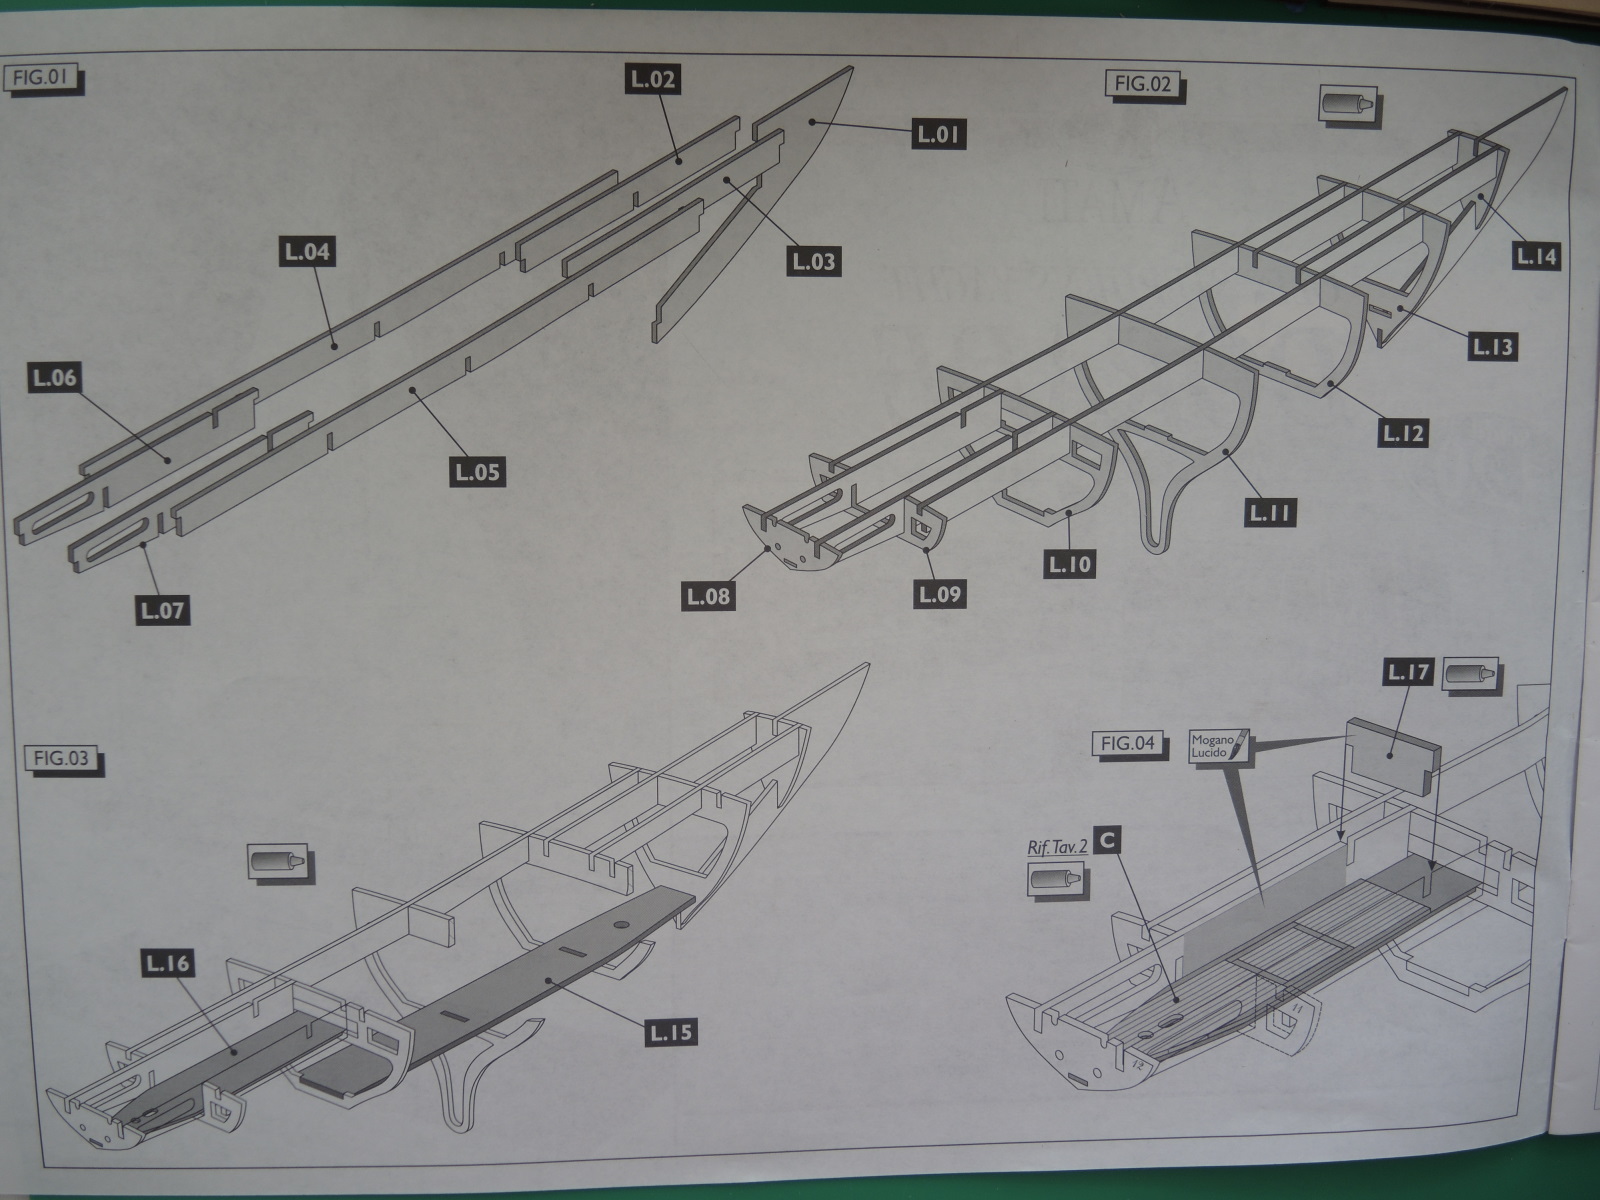
Here's the problem. This is the first page of instructions:
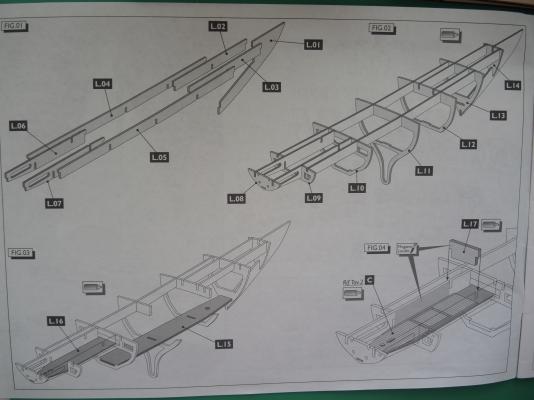
The parts to be positioned as in Fig 1 & Fig 2 are loose fits. The frames are irregular shapes. There is no obvious way to support the model at this stage of assembly for gluing.
Normally I could just invert the model, but the timbers running fore/aft are not flat either:
So, back to the 2 questions - do I make a log, and any clever ideas how to support it during gluing?
Thanks,
Brett
-
Thanks, grayarea. I'm about to post questions about my next project.
It's the Dorade, 1:20, by Amati. There's a huge difference between that and the AVS!
Cheers,
Brett
-
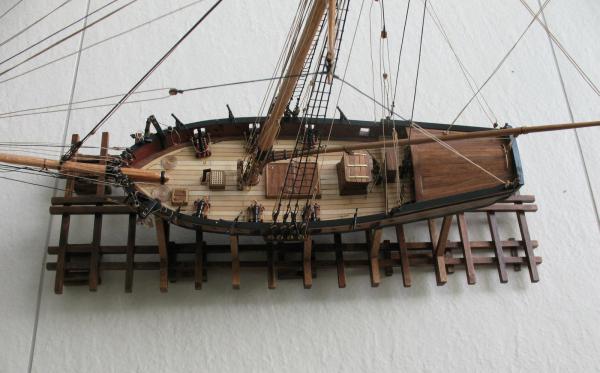
Well, as you can see, I got lazy with all the rigging. I admire and envy all those builds with beautiful coils of rope everywhere. However, my skill, eyes, hands, and patience meant that I cut corners! Lots of short ropes and glue.
The same was true with the ratlines. I experimented with the various options, then decided to use the needle method. Even that proved a trial, such that I cheated, and just glued the final few tiny lines.
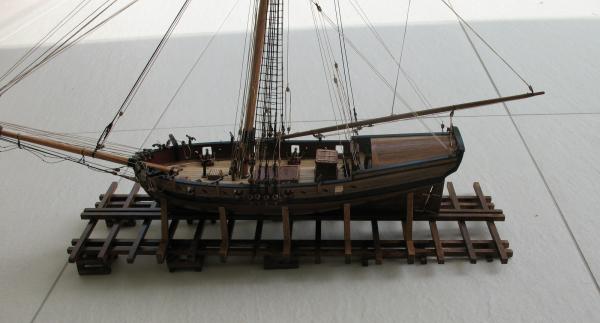
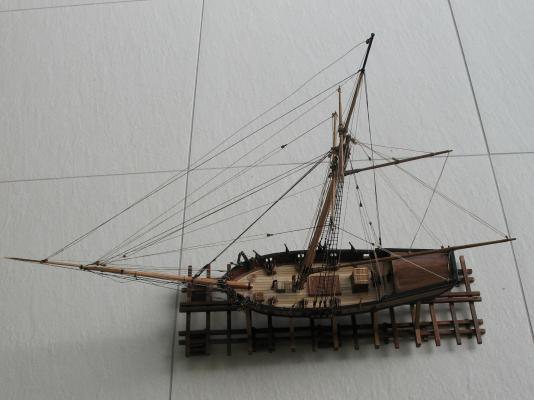
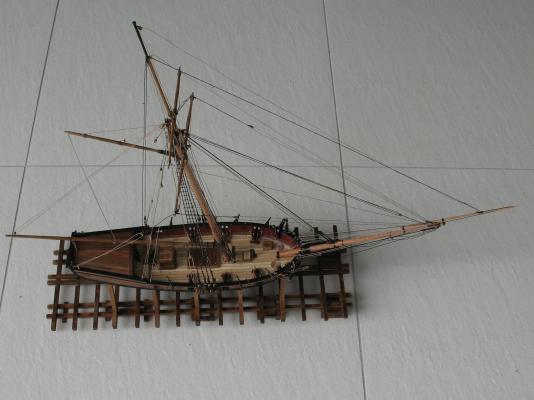
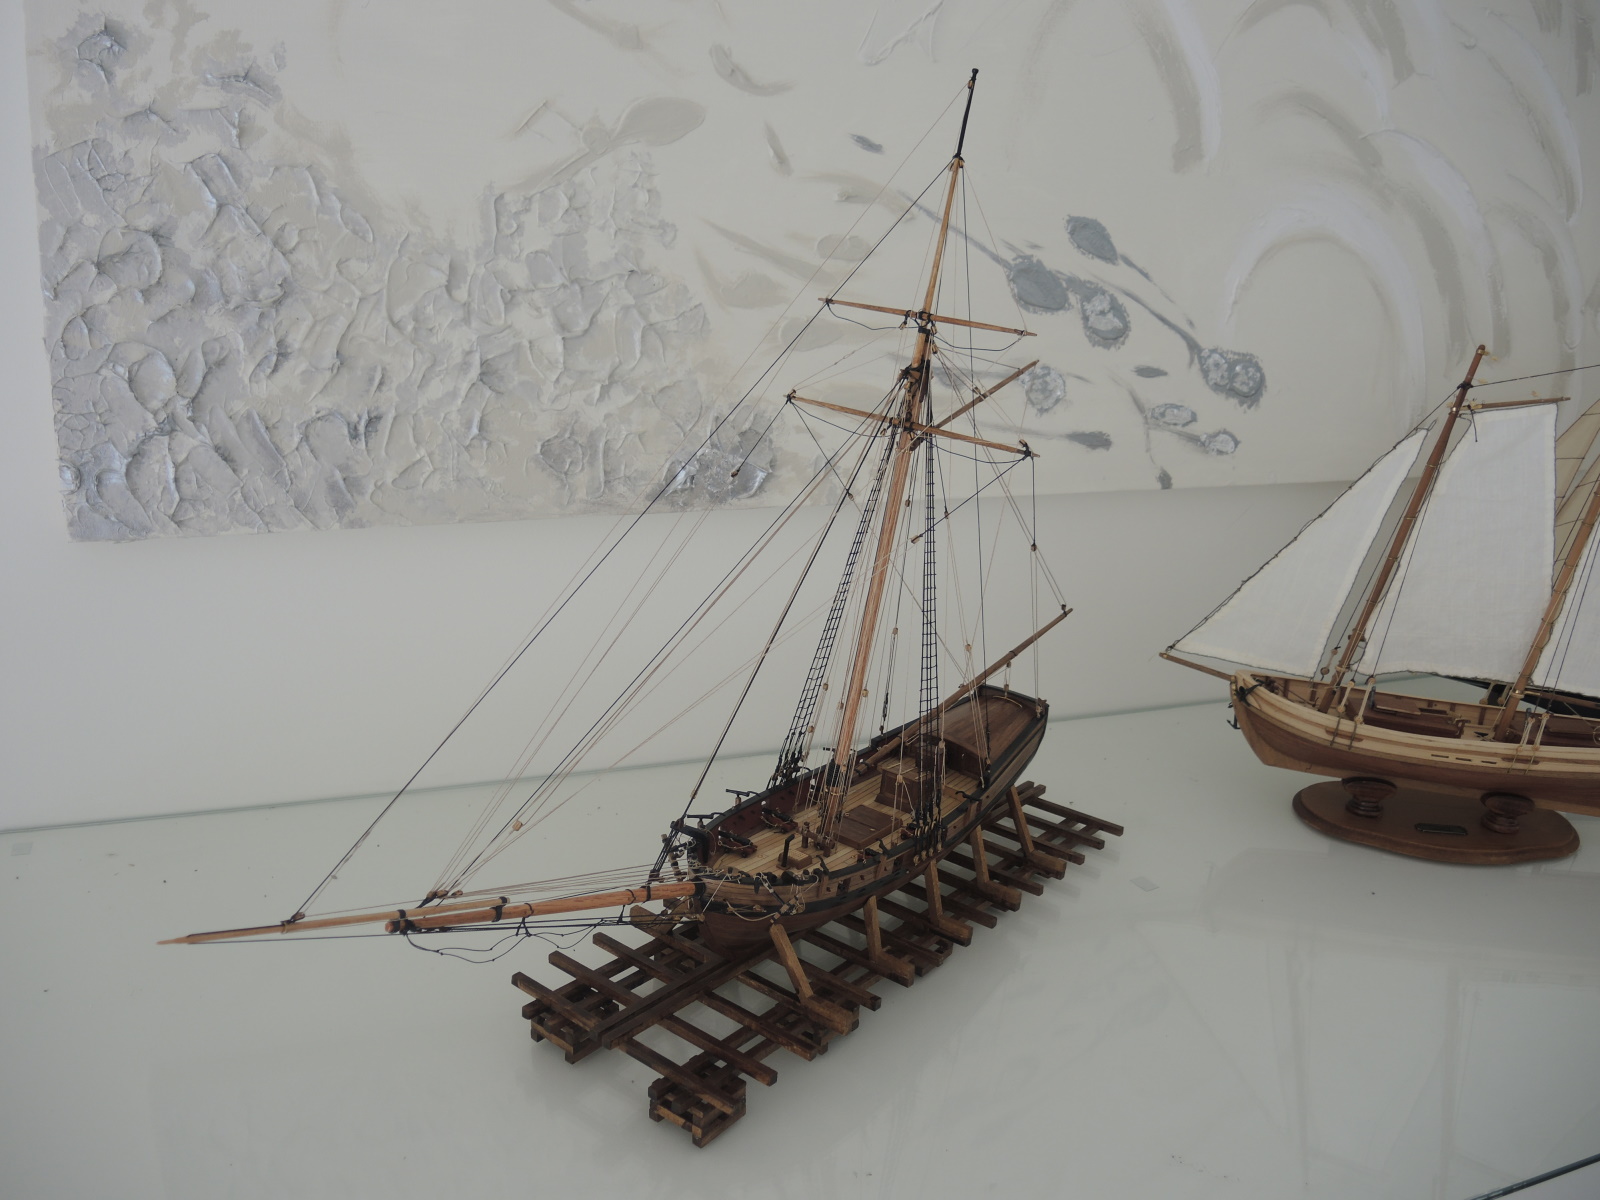
Here are the latest photos. There are a few things I might go back and touch up, but, to be honest, I'm scared I will risk damaging the model.
So these are probably the final photos in this log:
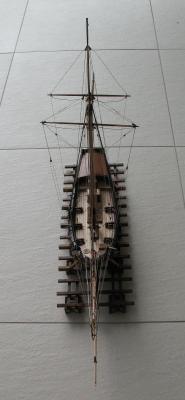
And, here she is sitting alongside my first build:

And so, as one of my favourite authors (William Goldman) said, on to the next!
I plan to post soon, with a summary. At present it's too hot in Brisbane to do anything more active than play with models or computers!
Cheers,
Brett
- GuntherMT, egkb, GrandpaPhil and 3 others
-
6
-
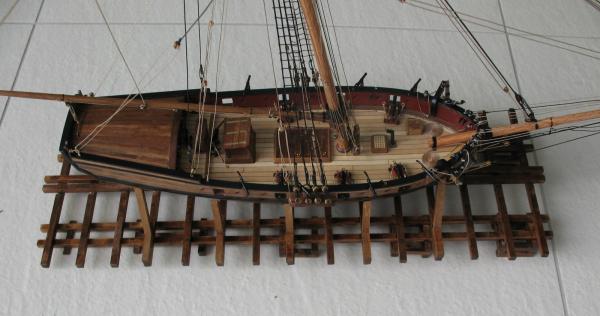
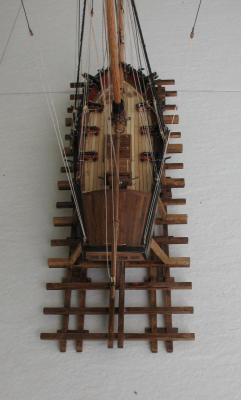
Nearly there!
Once again, a lot of fiddly stuff, rudely interrupted by life. Slooooow progress at this stage of the process.
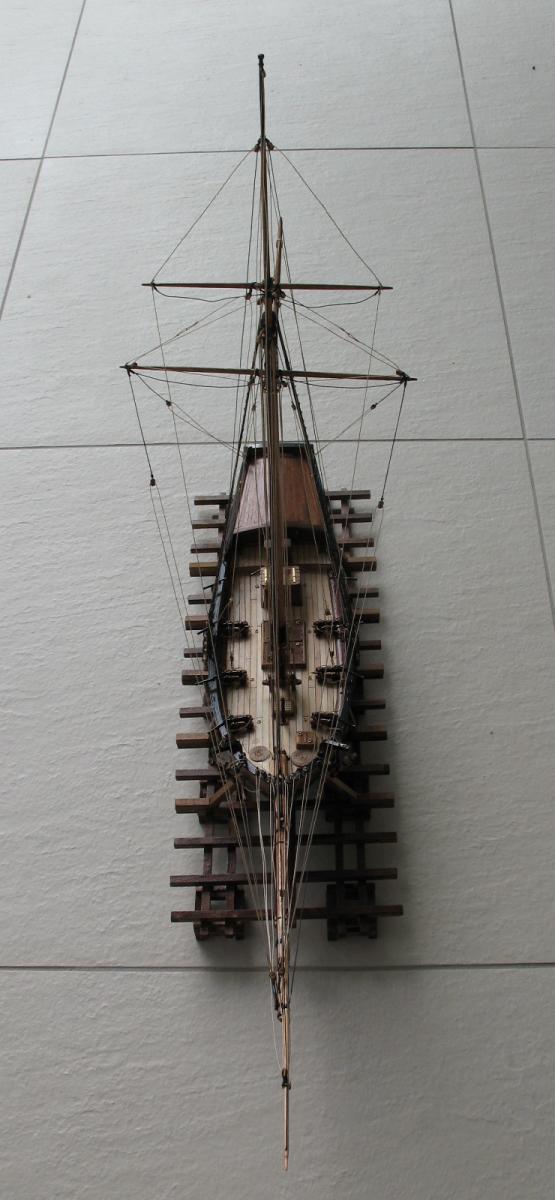
After lots of rigging, this was the status a couple of days ago:

And some different angles:
As you can see, I left the ratlines to the end - but that's for another time!
BTW, I never glued the hand cannons in, so removed them for the rigging stages. As usual, there was a lot of re-doing of seizing and other mistakes along the way.
And, of course, the model fell over a couple of times, and needed minor repairs.
Soon I will post the finished photos - and a summary.
Cheers,
Brett
-
Thanks, Charlie, Chris and MrBlueJacket.
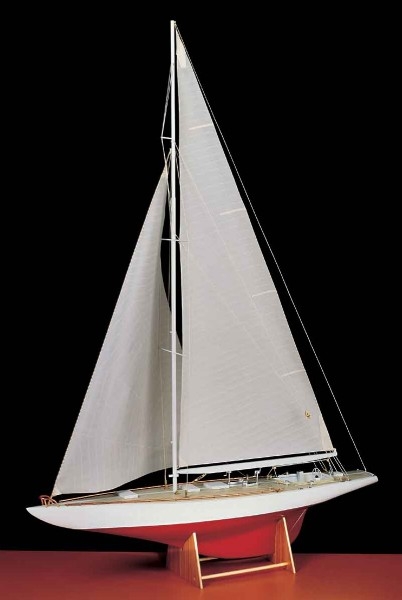
The historical ones are out of contention for this project. My orders are to find a modern yacht, like this design:
That's the Amati Columbia - not what I want to build next, but hey after 41 years of married bliss I ain't gunna break from tradition now!
Cheers,
Brett
- CharlieZardoz and mtaylor
-
2
-
So, the latest is to look for something in the modern yacht style, around 800mm long.
The Amati Endeavour (1934 America's Cup yacht) looked possible, but that is said to be 1150mm long - a bit big!
Although it's a resin hull, the only vaguely interesting looking model I have found is the Amati Dorade Racing Yacht. As seen here - http://www.historicships.com/TALLSHIPS/Amati/Dorade%20AM1605/Dorade%20am1605.htm
Any comments on this, or Amati, or any other suggestions?
Please!
-
Thanks, CharlieSandoz!
I have just run my own suggestions up the flagpole, and got told I'm wrong (again!).
However, your non-warship ideas sound like what she is after, so I'll check those out. Apparently a more modern sailing ship/boat would be ideal.
Cheers,
Brett


Dorade 1931 by ortho85 - FINISHED - Amati - scale 1:20 - Fastnet Yacht
in - Kit build logs for subjects built from 1901 - Present Day
Posted
Thank you, David.
I might play with the colour settings etc on the camera.
Cheers,
Brett