

SkiBee
-
Posts
182 -
Joined
-
Last visited
Content Type
Profiles
Forums
Gallery
Events
Posts posted by SkiBee
-
-
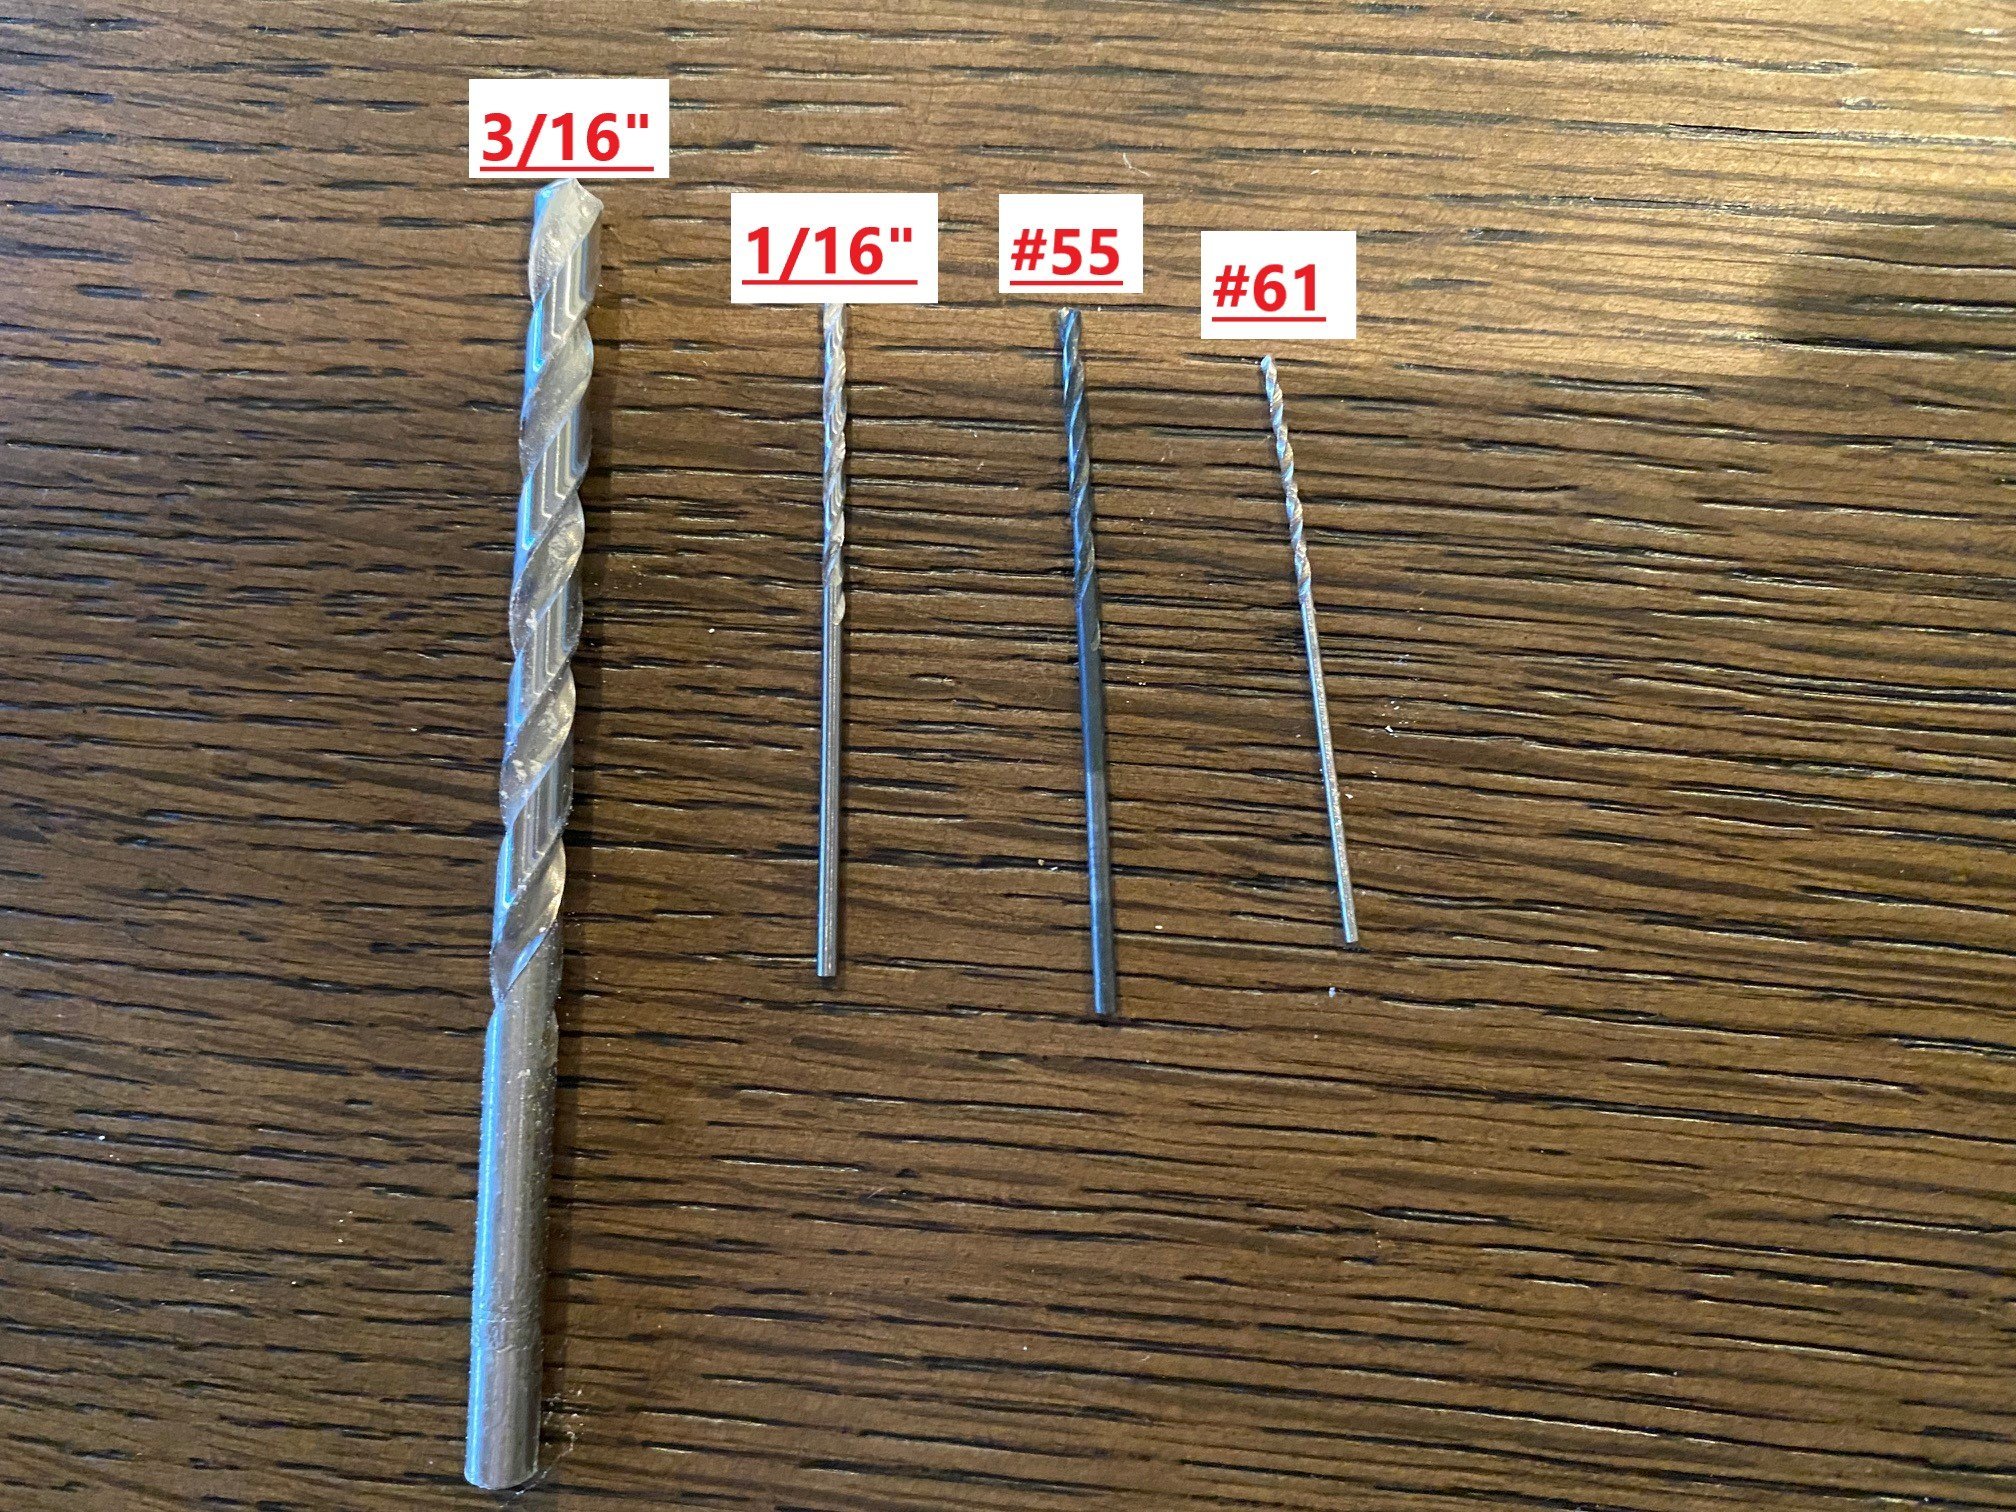
@lraymo Drill bit size can be very confusing. Below is a picture of a 4 different bits. You can see that a 3/16 inch drill bit is larger than what bits you have. I have not seen a model tool drill bit set that has a 3/16 inch drill bit. That is why I recommended just going to a hardware store like Ace or Home Depot and buying just the 3/16 inch bit. (Side Note: I did not drill the hole for the rudder to fit in since I cut the rudder to short for it to go up into the hull, so I sanded it to just fit in and will glue it in place.)
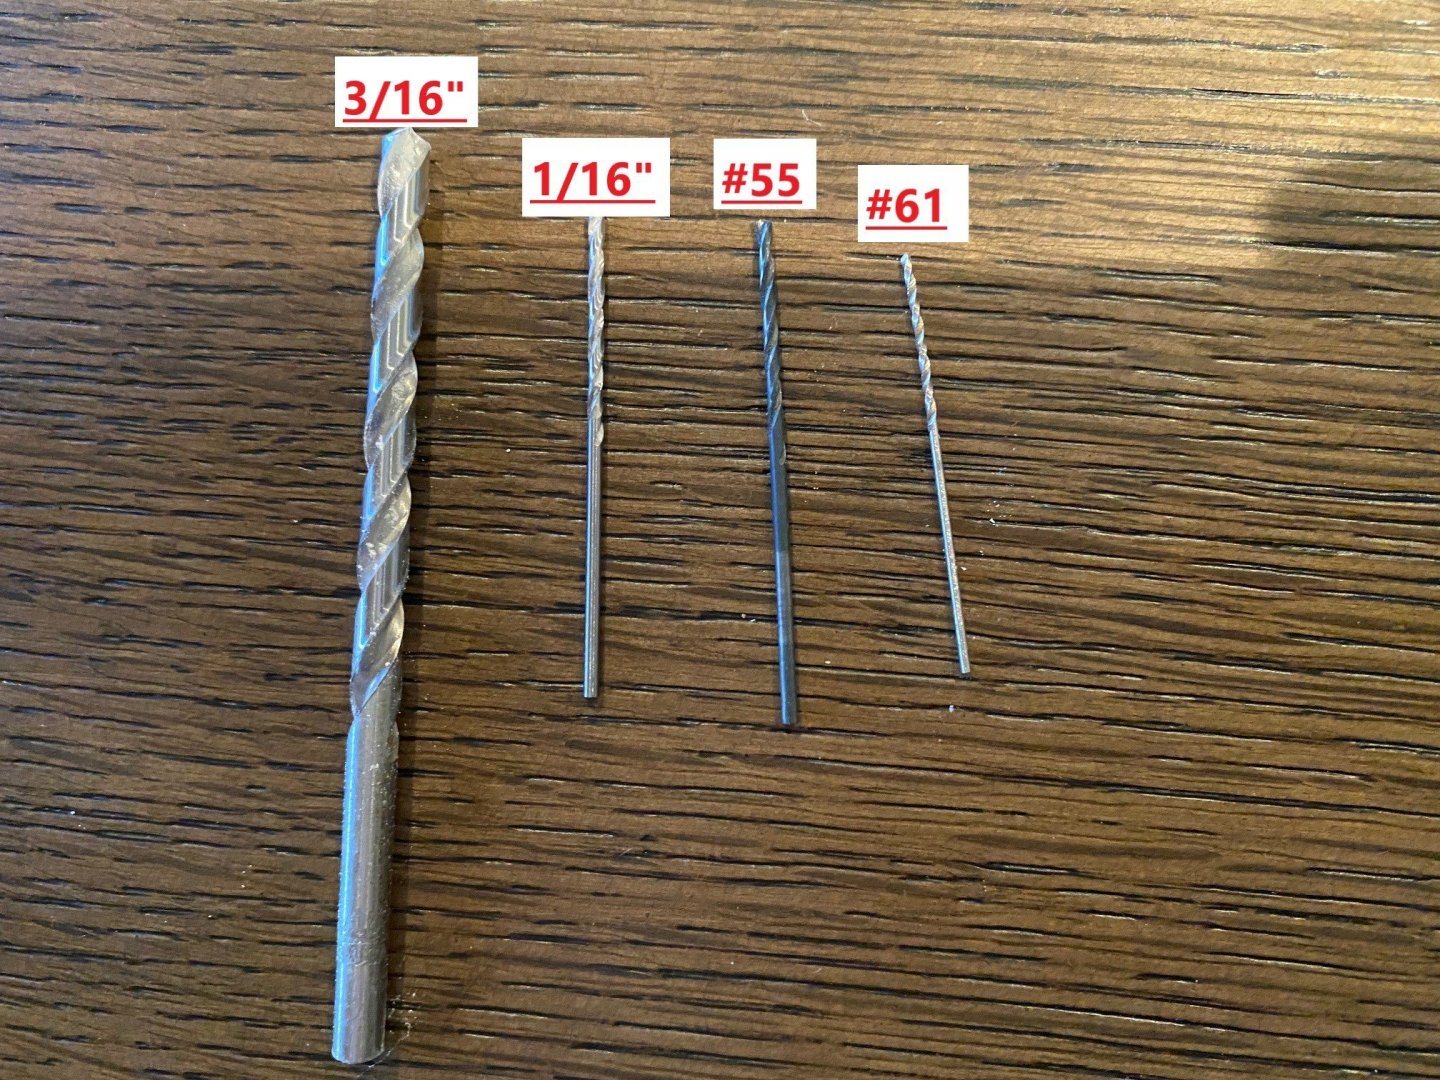
For the mounting pins that go in the launch way, I used a 1/16 inch bit that I had in a wood bit set, from a 1/16 inch to 1/4 inch. You can see from the picture that a #55 bit that you have, it is close to a 1/16th inch bit. I would recommend trying it first and see if the pin goes in without to much trouble. If the pin does not go in easily then try to widen the hole by using the #55 drill bit like a file to open up the hole until the pin fits. If not then you will have to buy a 1/16 inch bit or a #52 bit.
What is extra confusing is the Micro Mark drill bit kit you pictured is sized for drilling tap holes that are sized to match the screw that would go into the hole.
If this is still confusing, send me a message via the web site.
-
@lraymo I used a 1/16" bit that I had in my wood drill bit set, it would be about a 51 or 52 gauge bit. I did use a pin vise to hold the bit, mine has 4 different sized ends and the large hole end worked.
If you don't have a wood bit set with small bits, try your local hardware store, sometimes you can just buy one instead of a set of them.
-
@lraymo you asked:
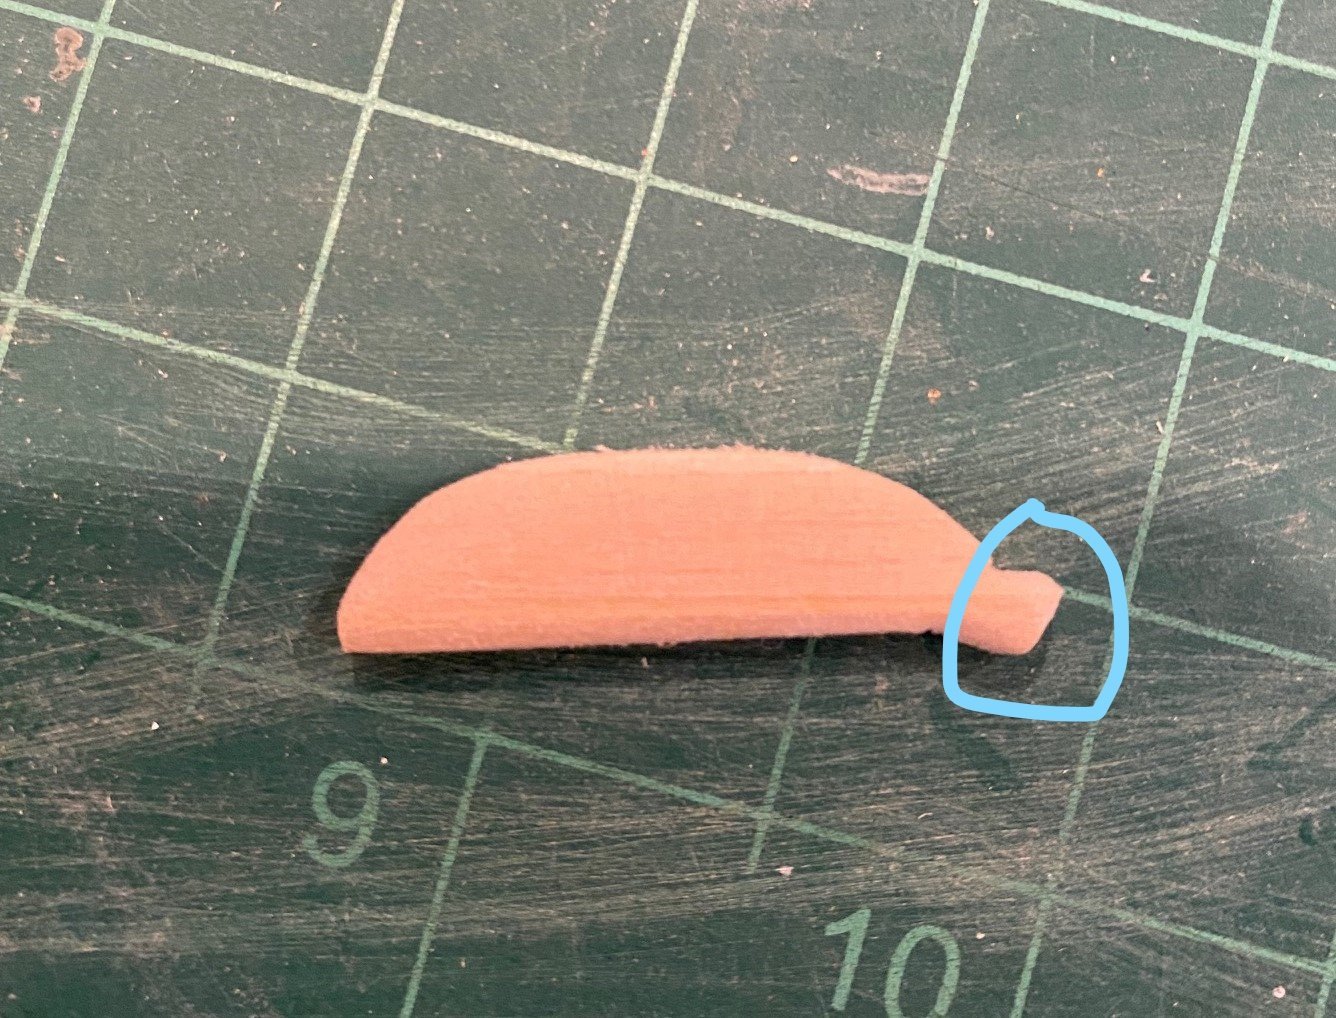
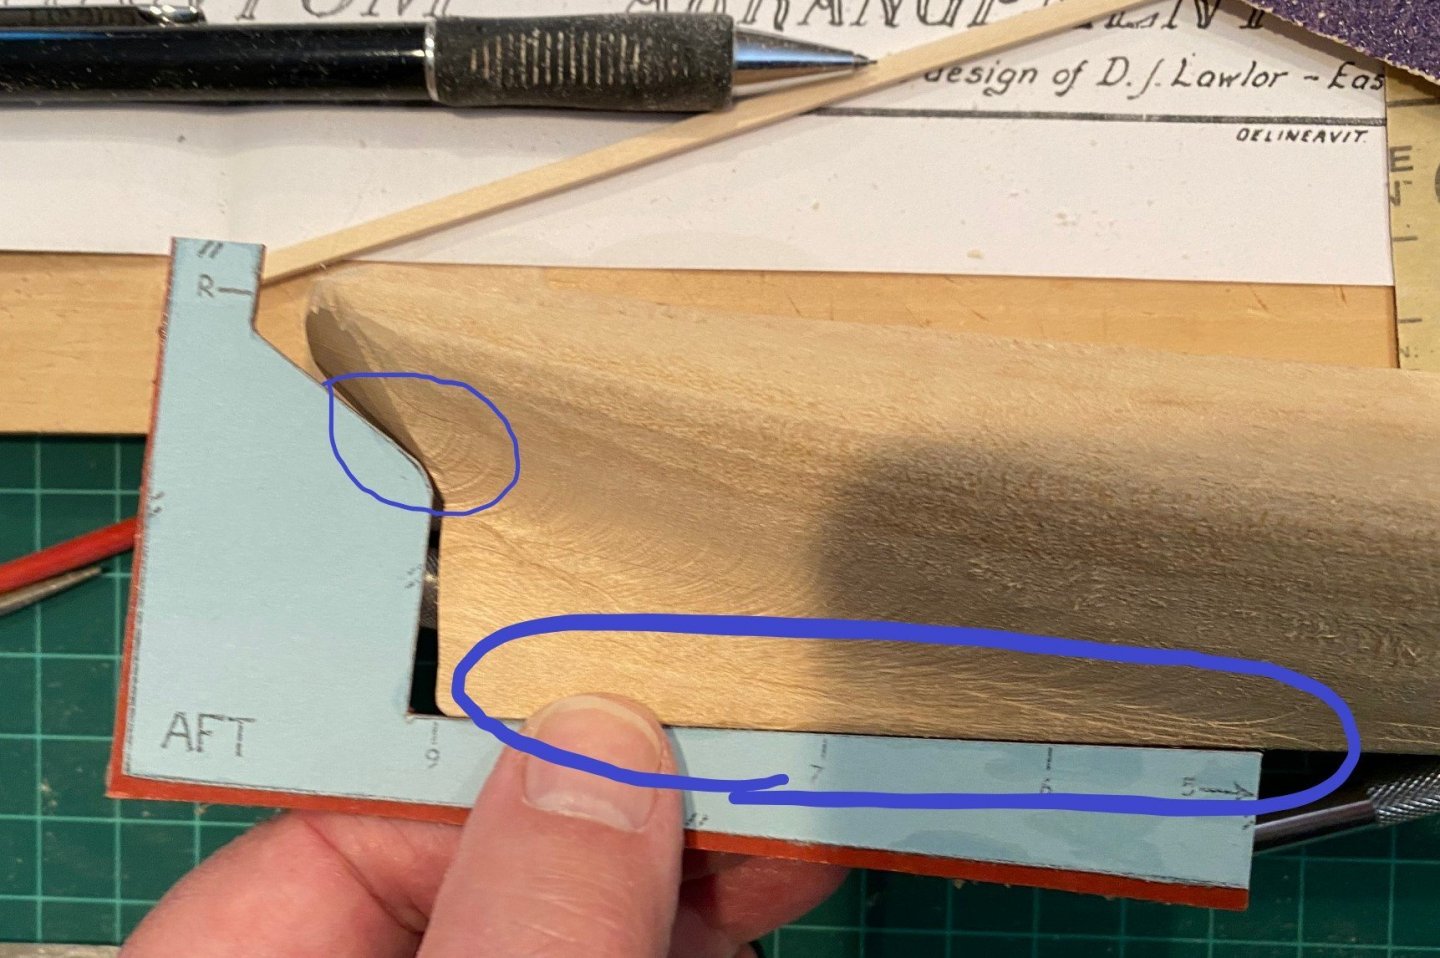
Rudder confusion! In reading ahead, it says its now good time to drill the hole for the rudder. What hole are they talking about?
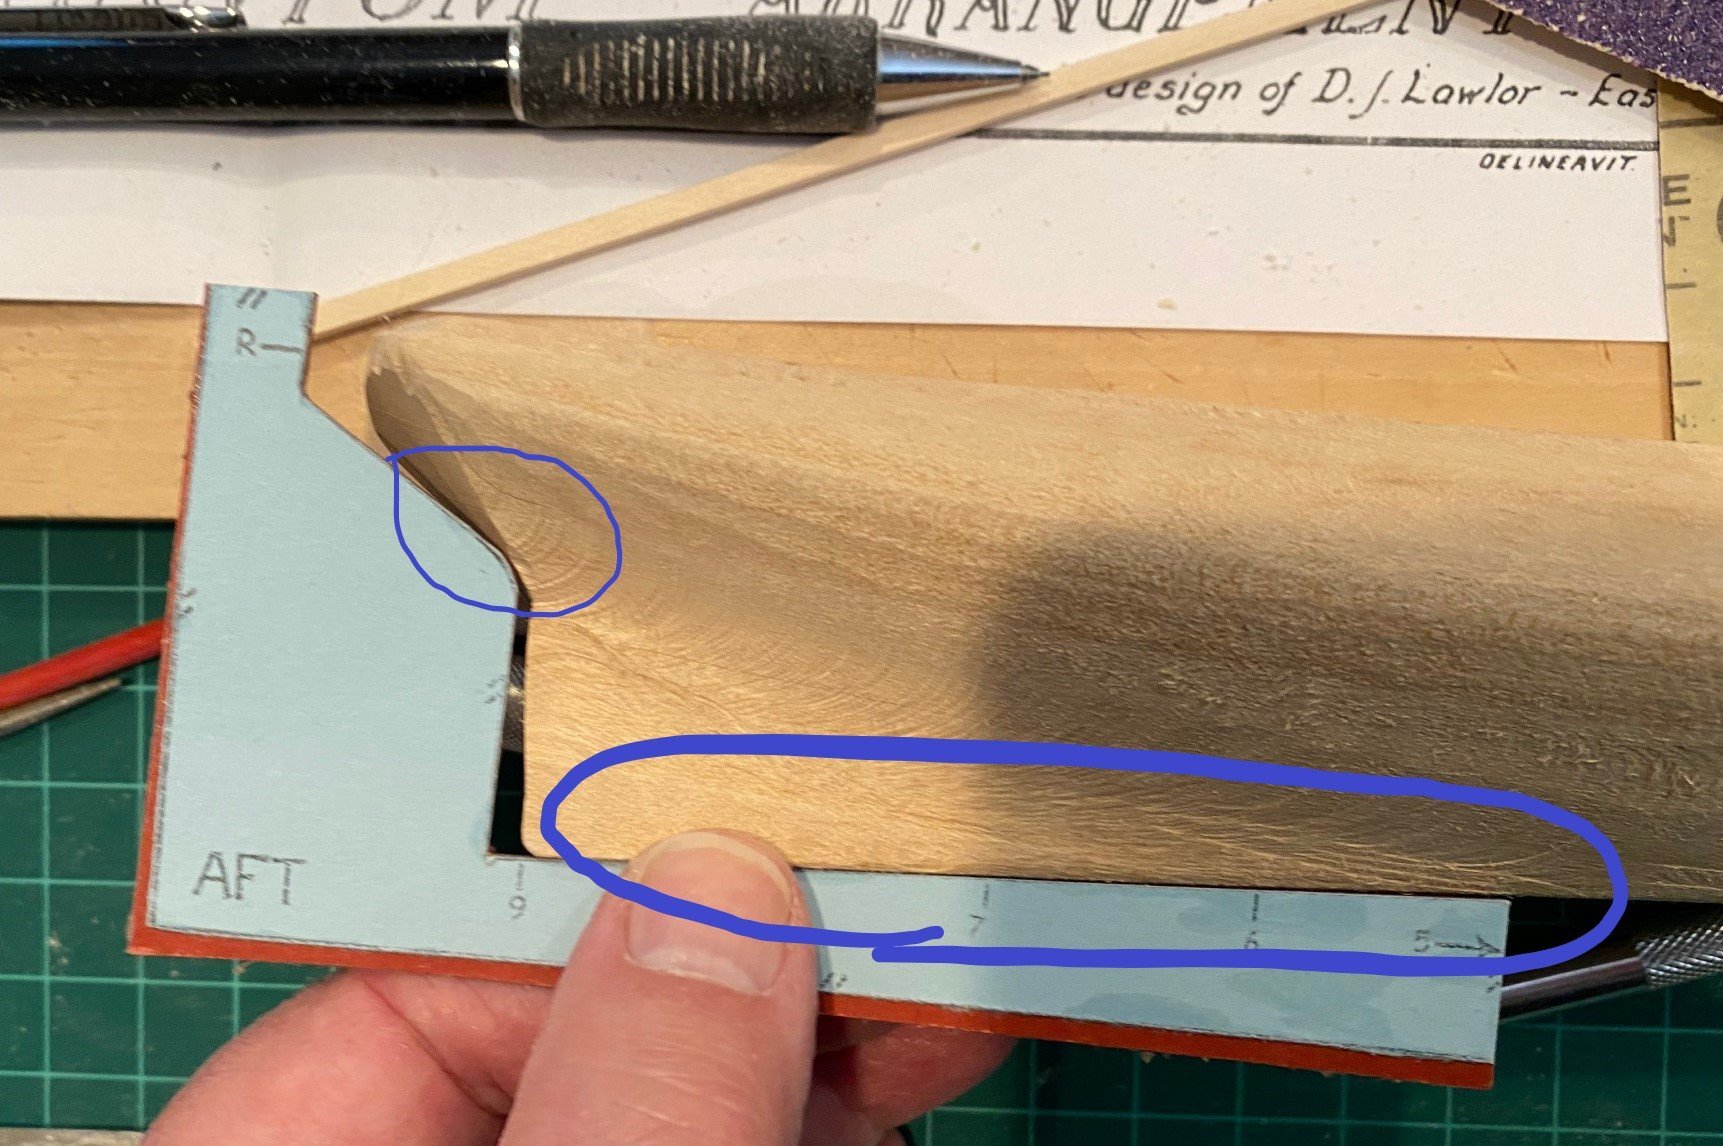
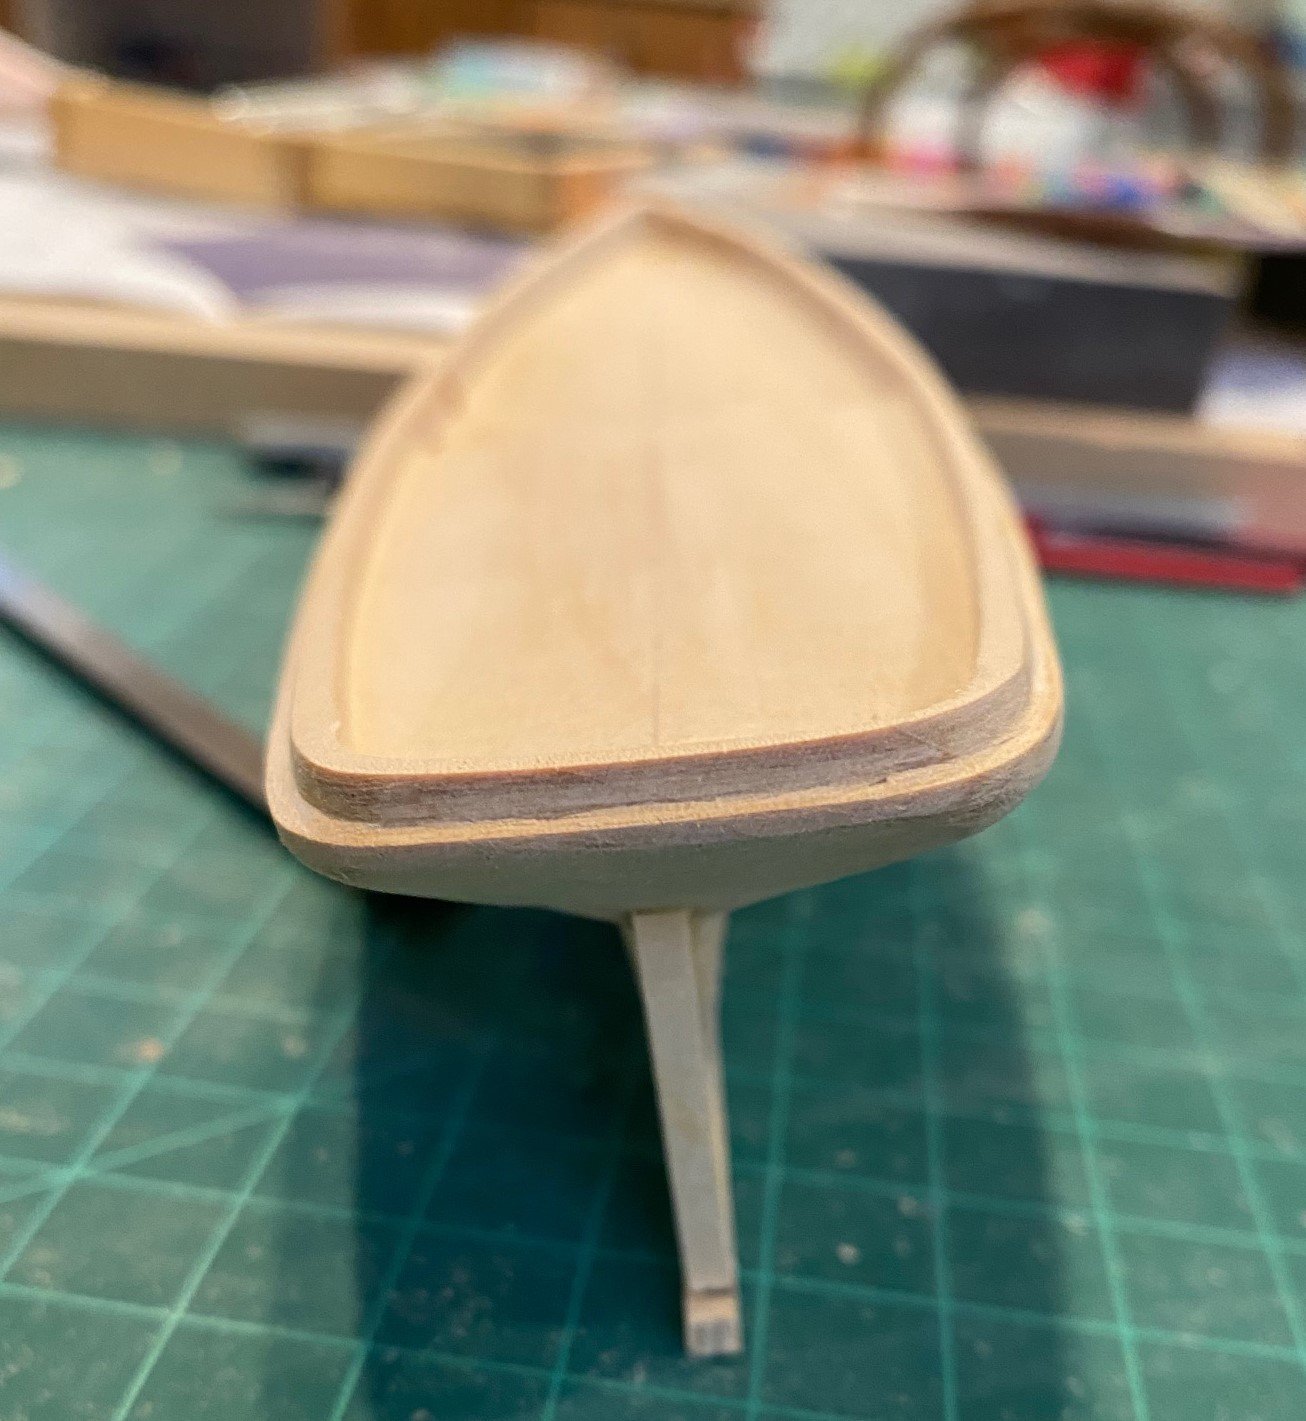
See instruction page 10, your drilling the hole for the very top of the rudder, see the part of the rudder in the blue circle.
-
@lraymo For a 3/16 hole, your going to use a regular wood drill bit, not one of the small ones you have. A 3/16 inch bit would be equivalent to a #13 gauge drill bit.
The following web page provides a conversion chart for gauge size to inch and mm.
https://en.wikipedia.org/wiki/Drill_bit_sizes
Before you drill a hole for the rudder to pivot on, measure the rounded end that will fit in the hole. You might need a bit smaller or bigger than a 3/16"
Good Luck
- Keith Black, lraymo and Ryland Craze
-
 3
3
-
@GGibson Good to have you back; but those Granddaughters do need our time, almost as much as we need time with them.
I stained my deck before gluing in the coaming and cabin sides, just use white glue.
-
I used a chisel blade for vertical cut after I scored the side of the hull with a curved #22 blade. It worked really nicely, I was afraid to use the chisel blade to cut the horizontal. Refer to my build log. Good work
- Keith Black, Ryland Craze and lraymo
-
3
-
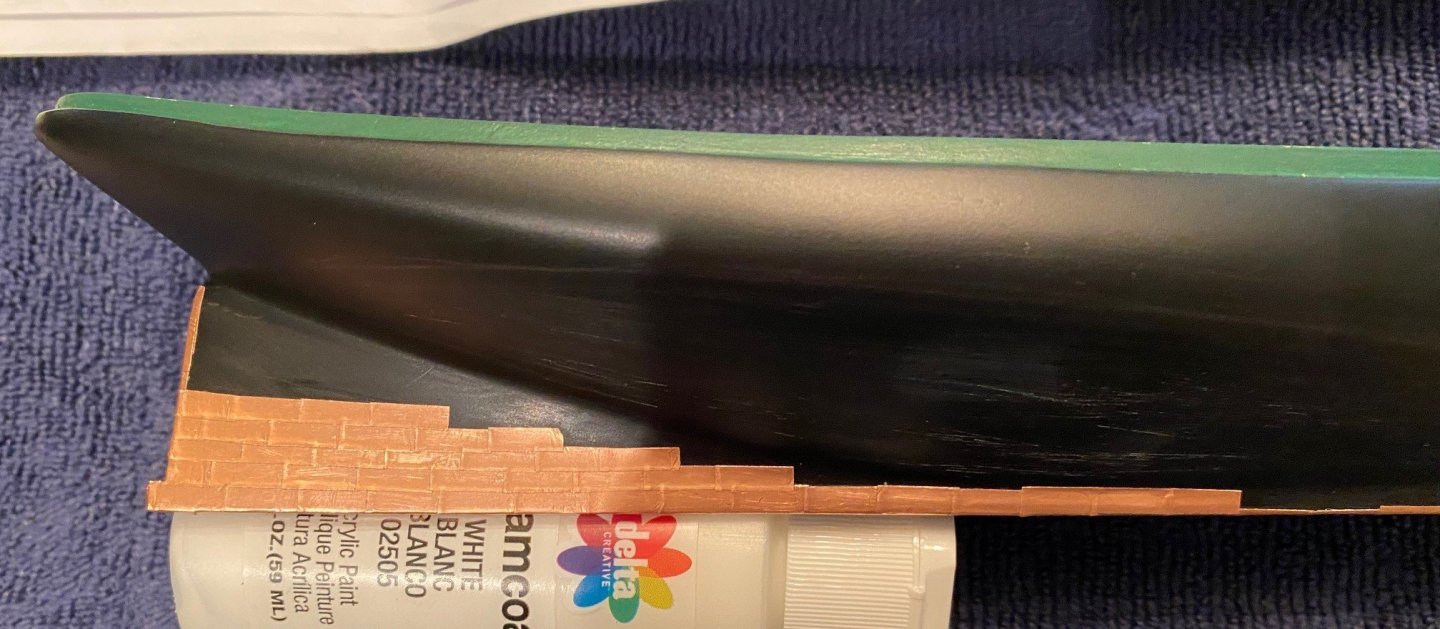
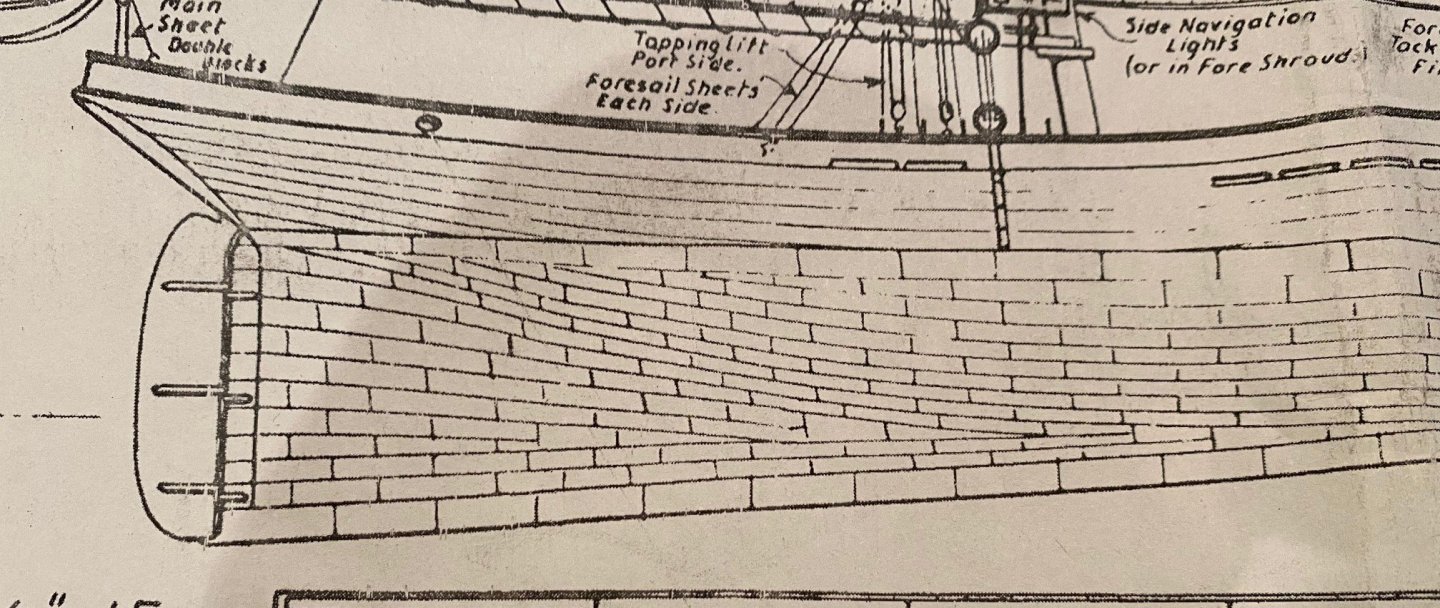
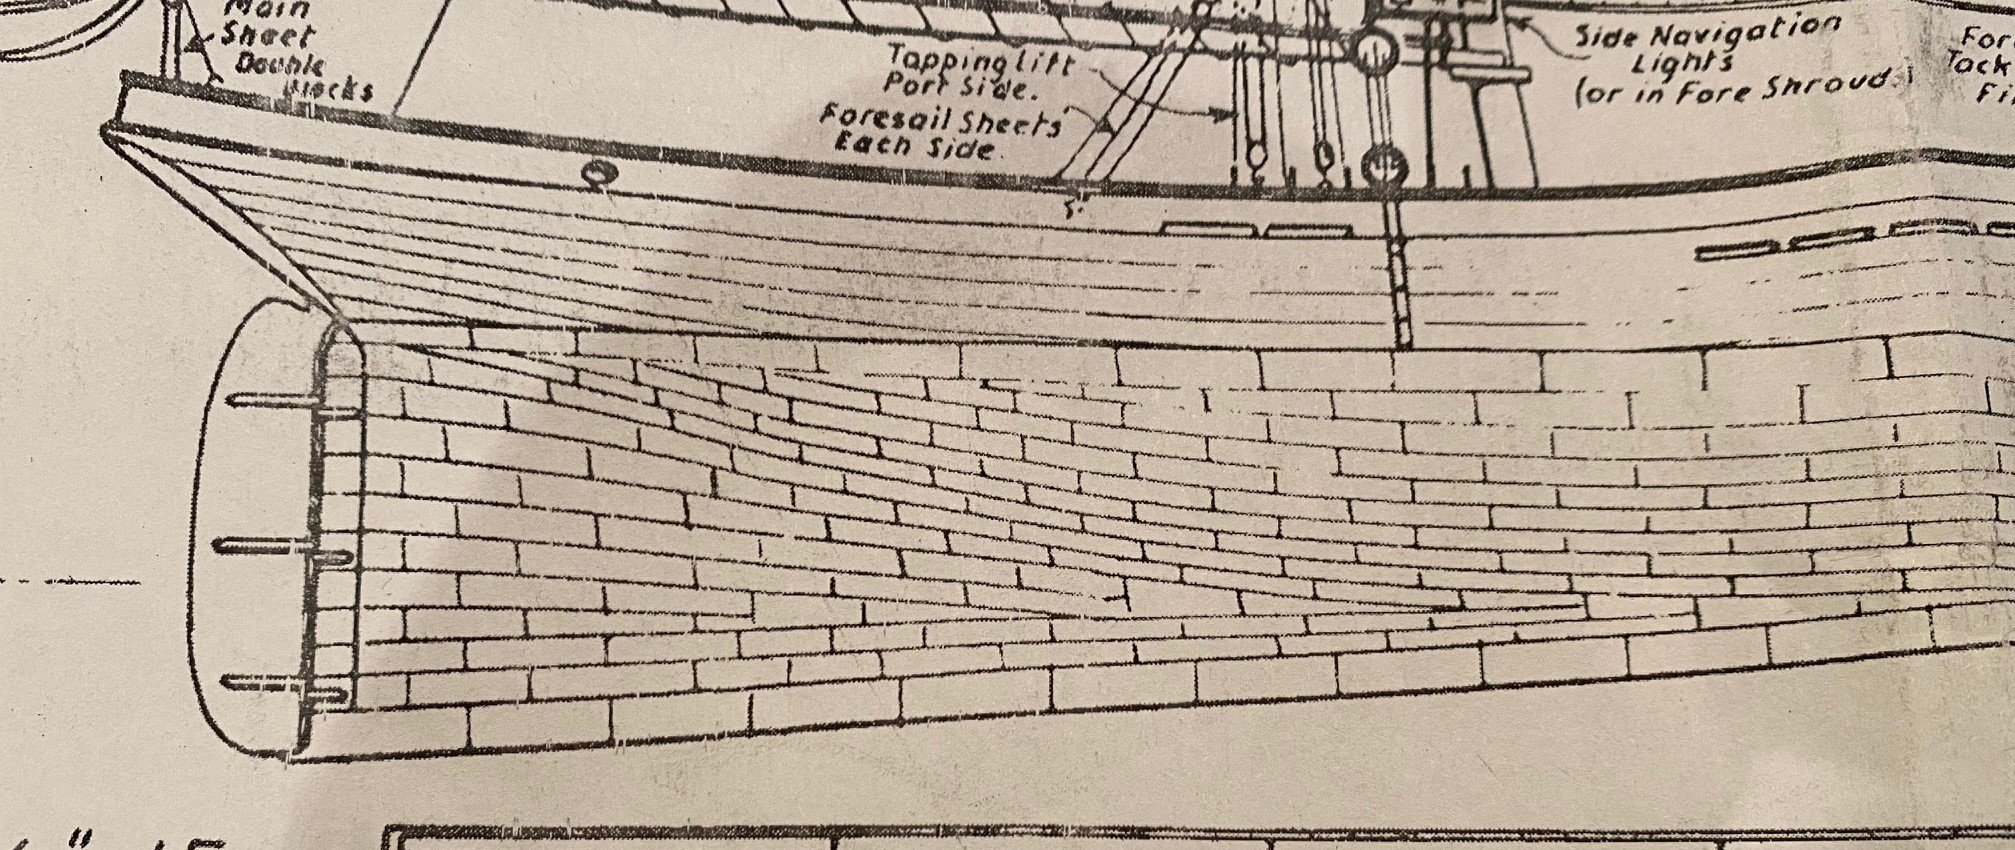
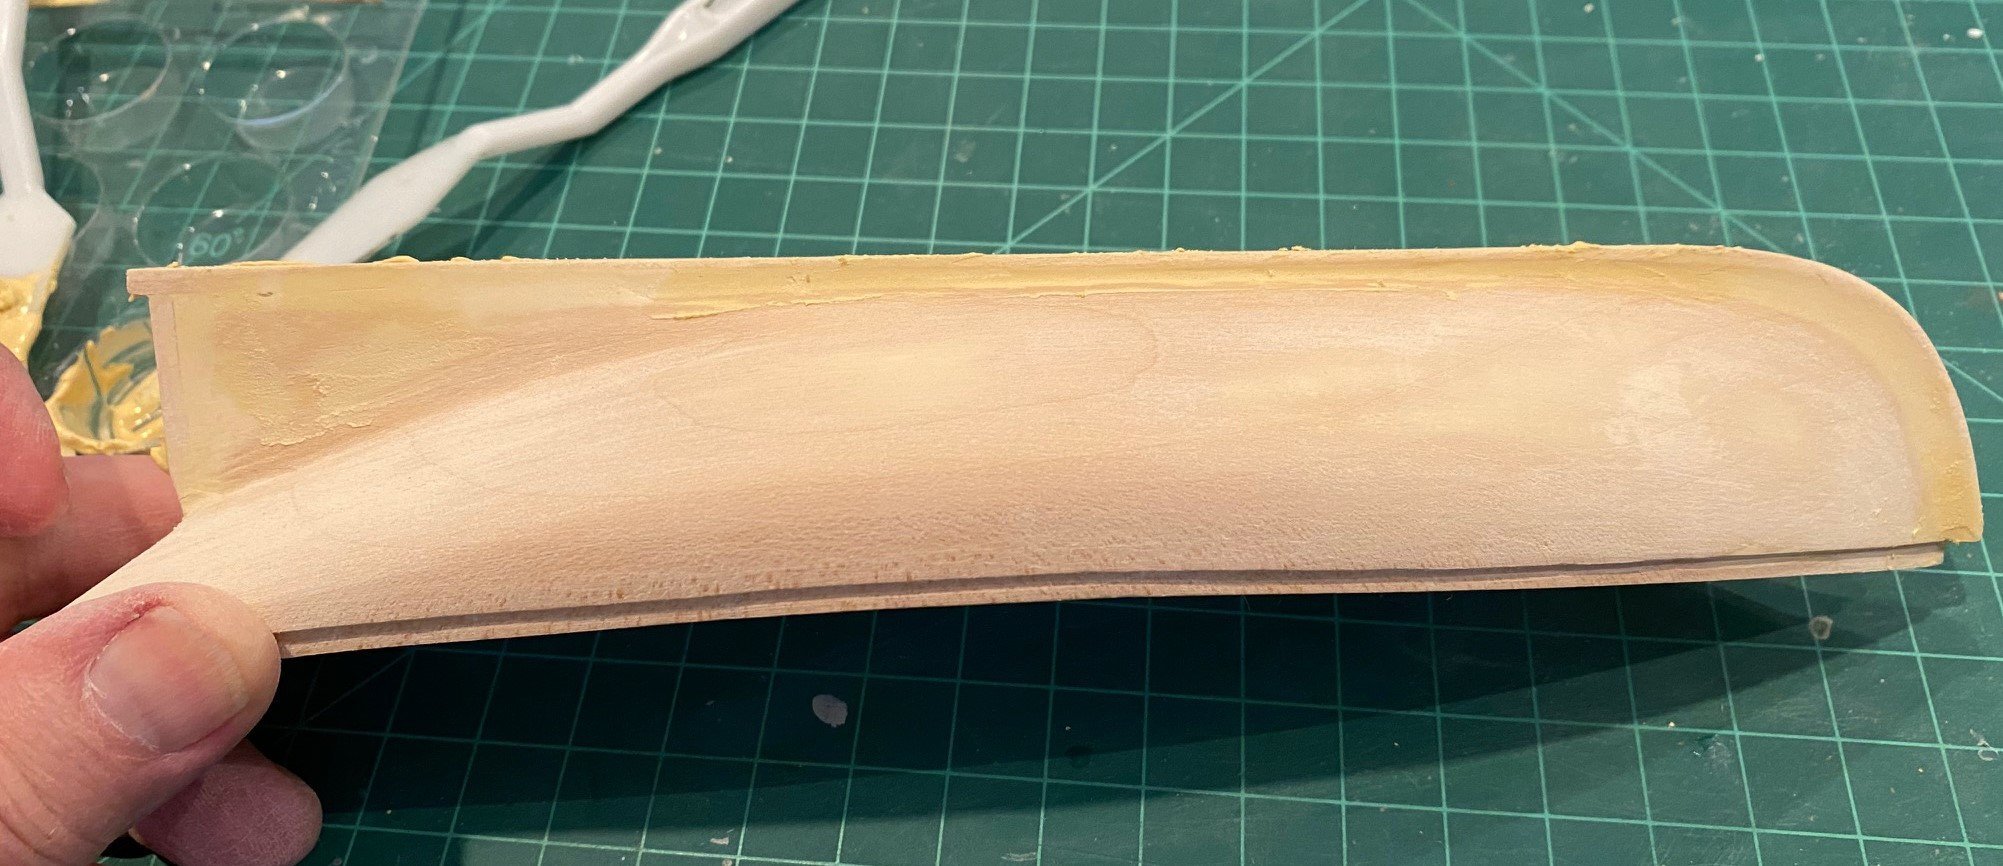
Started coppering the hull, another challenge to overcome and a learning experience. With my fat fingers it is a little hard to get the right amount of overlap both horizontally and vertically, as well as splitting the copper tape evenly down the middle. There is a difference on the copper tile laydown in the printed instructions illustration and the schematic. The schematic looks like they followed planking type layout. I started per the printed instructions, but I can see that I will probably end up some where between the two.
-
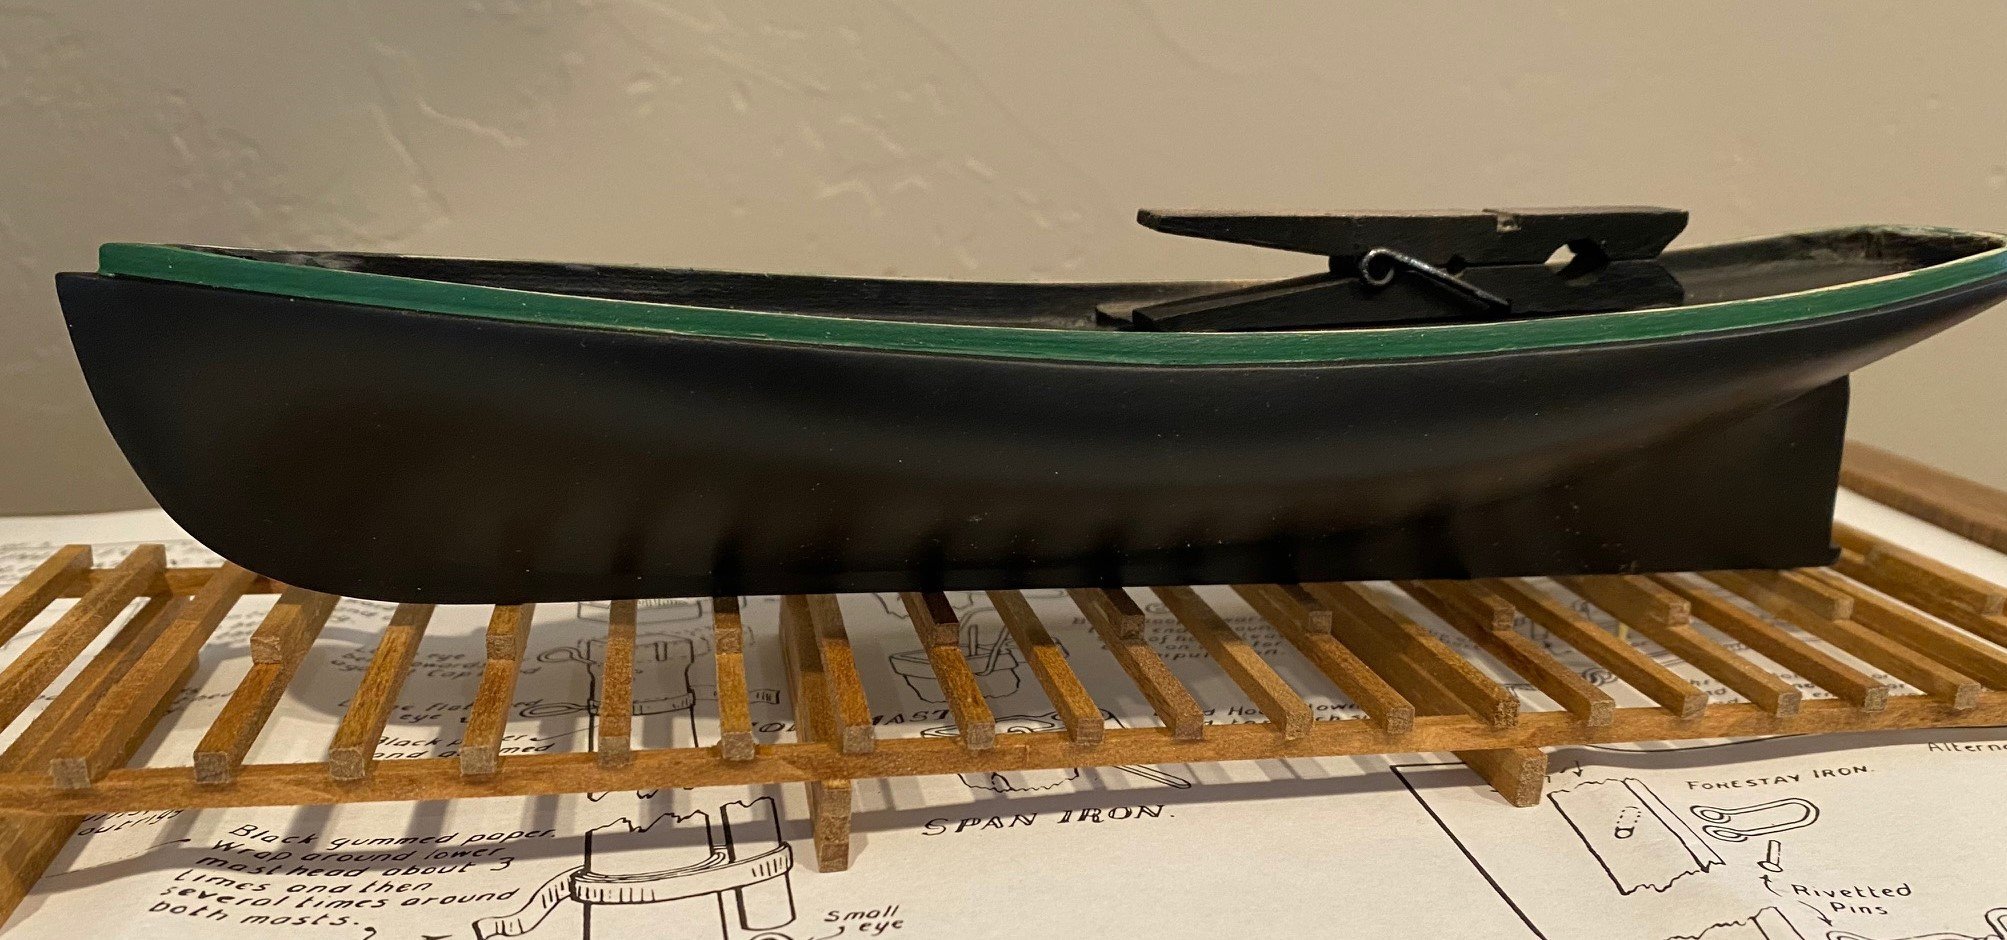
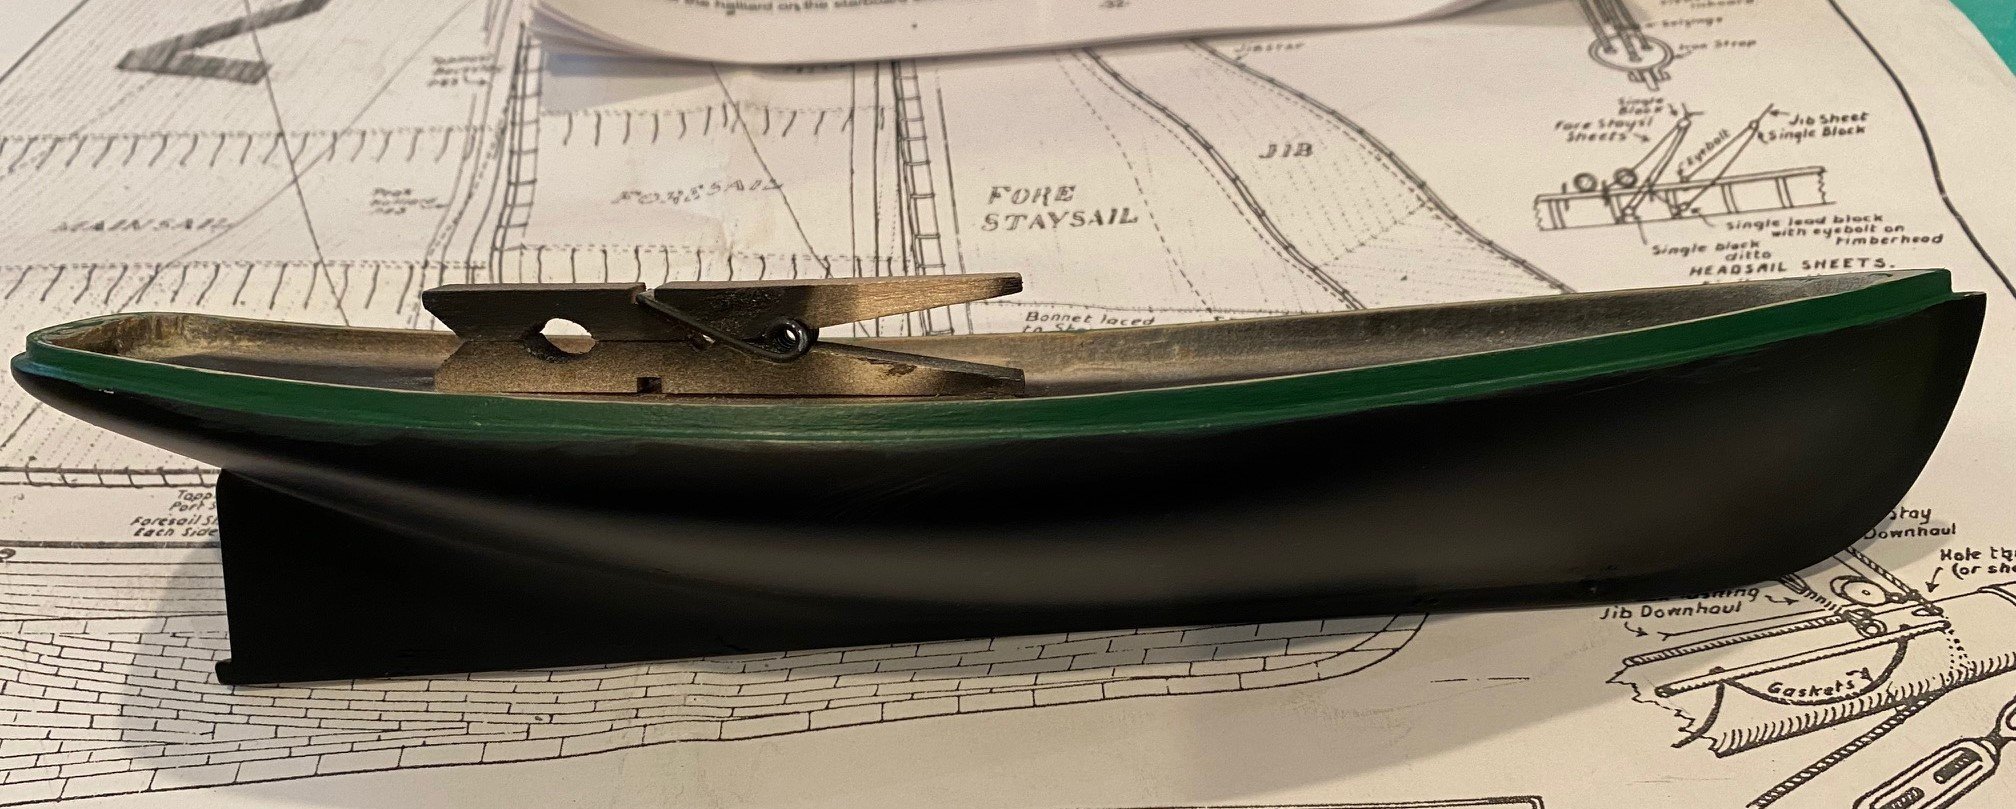
Drilled the holes to mount the boat to the launch way and dry-fitted the hull to it.

-
-
For clear coats, I've found that Tamiya Clear Flat is a good overcoat. Also, I routinely use Rust-oleum Clear Flat or Matt for a clear overcoat. The later being cheaper than Tamiya, I've not had a problem with the nozzle spurting as mentioned above. I've not been clear coating painted surface as much as stained or bare wood.
-
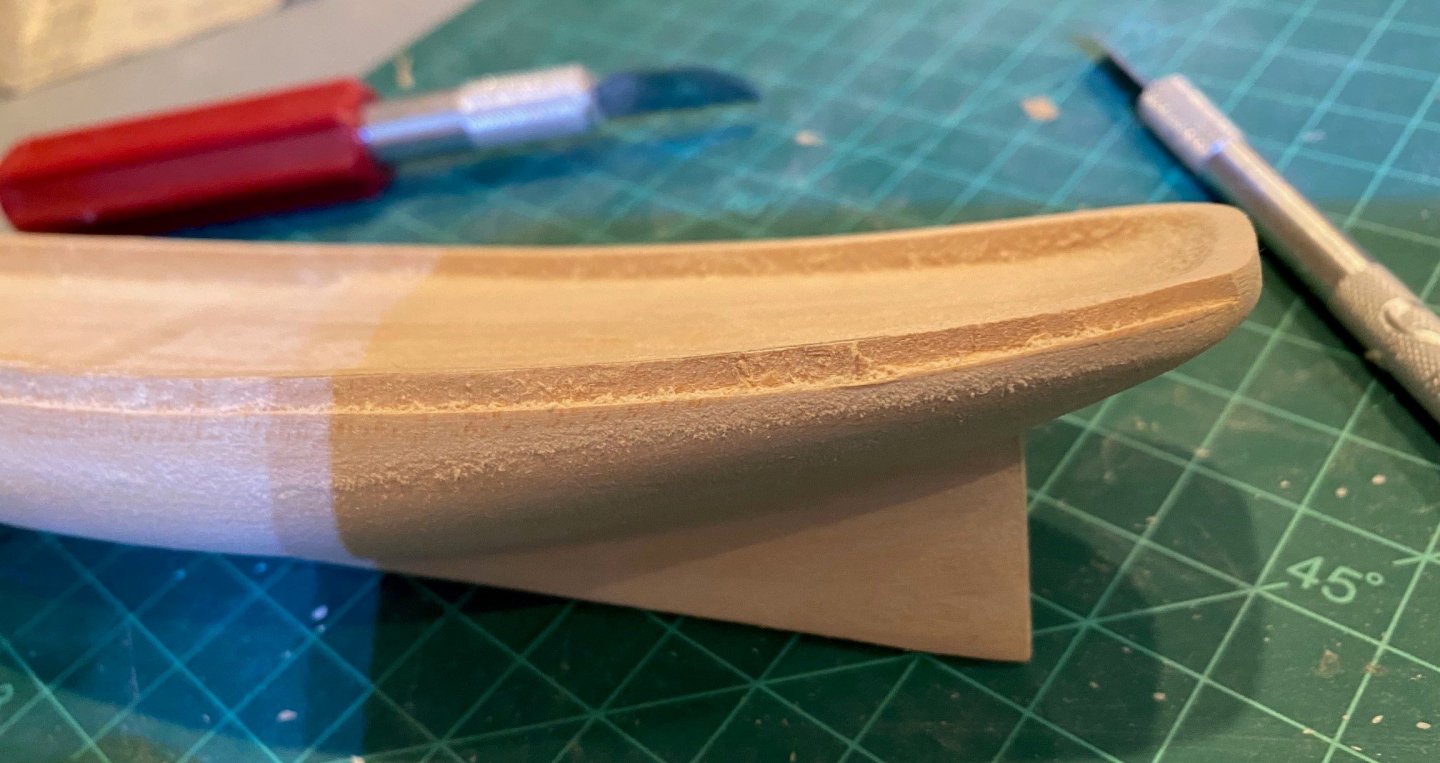
Final coat of primer on the hull, Tamiya Fine Gray Primer.
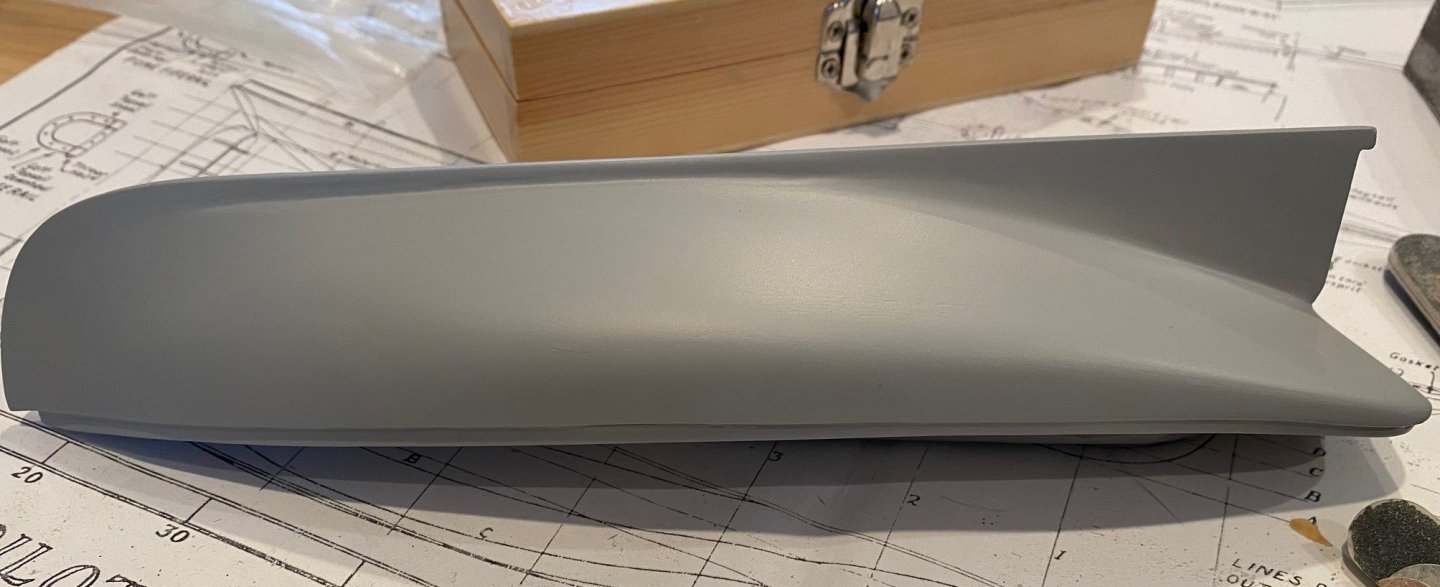
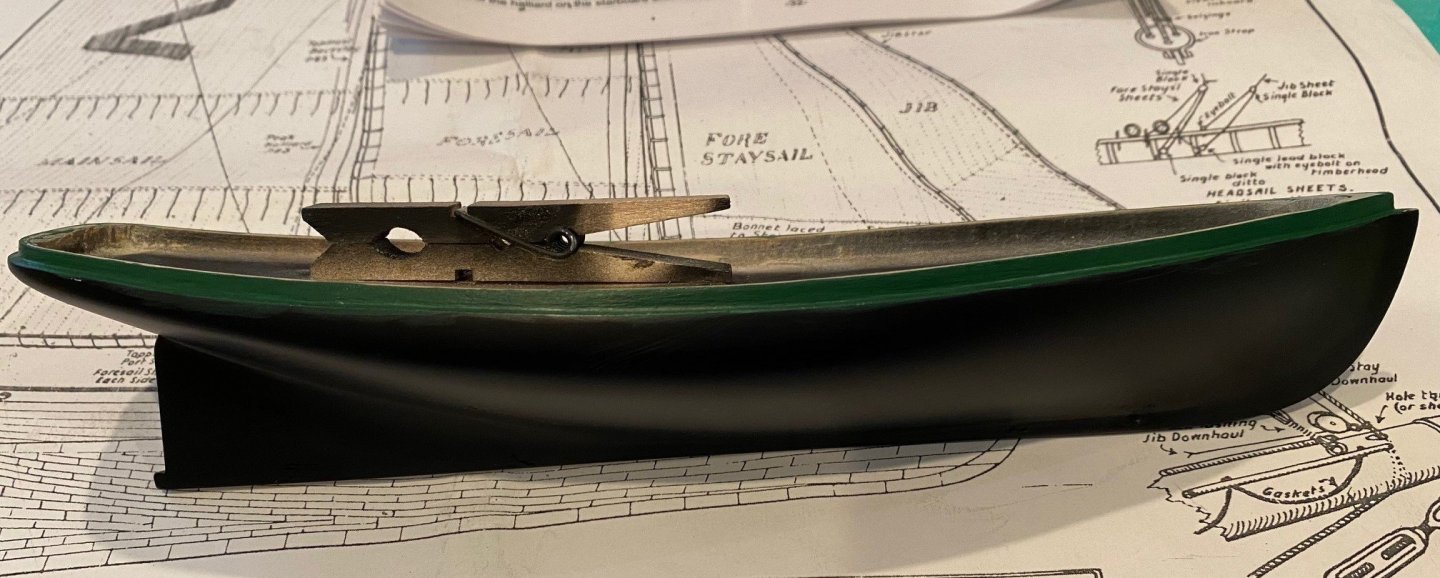
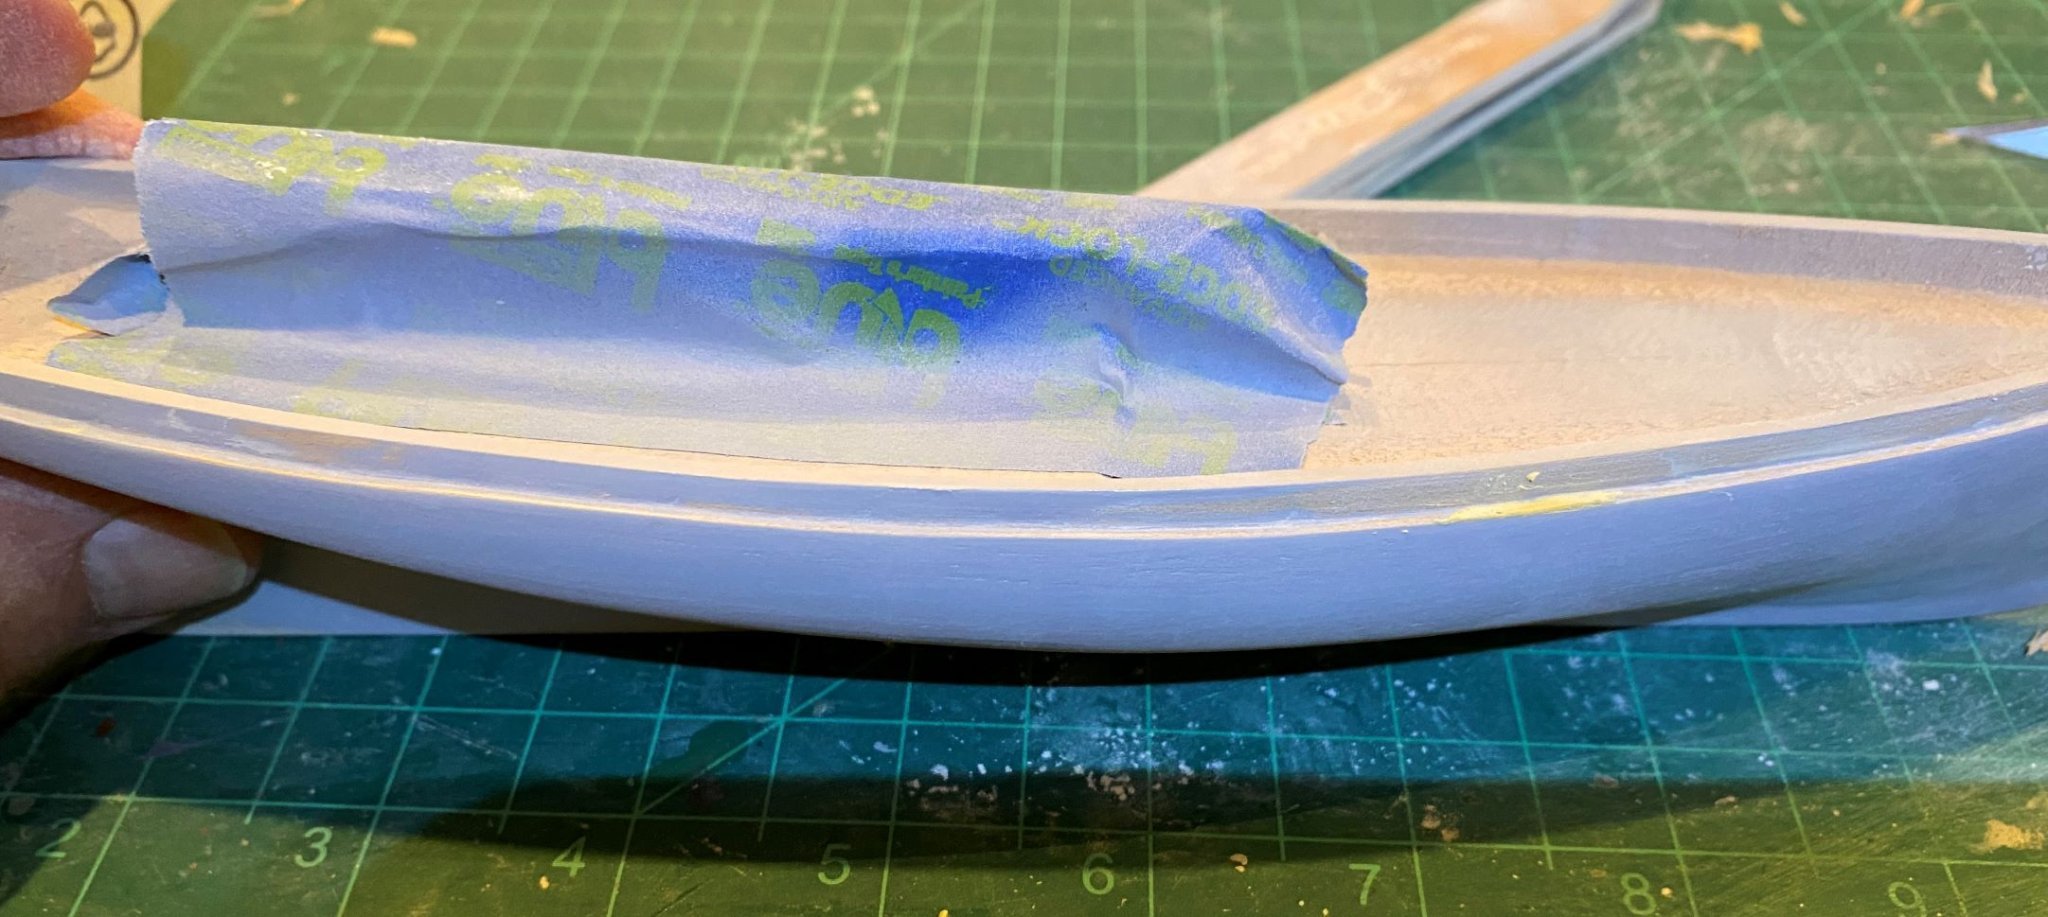
Decided to do a little something different, I painted the step below the cap rail Model Expo Bulwark Dark Green acrylic, left over from the Grand Banks Dory. A small problem arose, that in some areas the paint peeled off when I removed the tape, I used to mask the step off when I painted the rest of the hull Tamiya Matt Black spray paint. I think the problem is that I did not really rough up the surface of the primer prior to applying the acrylic, the primer I used does have a very smooth finish. So, I sanded the step down to mostly bare wood and tried again, need to touch up the black paint.
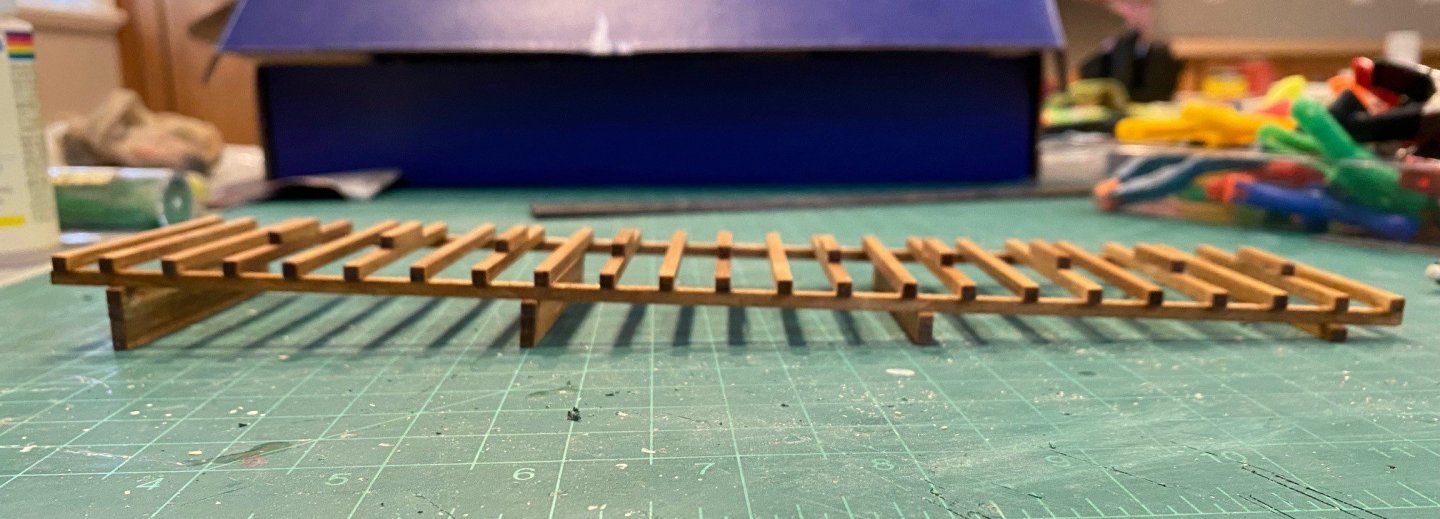
While the coats of paint were drying, I built the launching way. One recommendation, the instructions say to build the end riser with 5 pieces of wood, but if you lay it out you only need to use 4 to have a constant rise over the launching way.
- jlefever and bobandlucy
-
2
-
@lraymo I also called it good enough on the hull shape, it looked good to me even though the two sides are not symmetrical. You can't tell when just looking at it.
- lraymo and Keith Black
-
2
-
@lraymo I forgot to mention that I currently building the Phantom too and started a build log. I’m done shaping the hull and have it primed.
- Keith Black and lraymo
-
2
-
@lraymo Mine looked like yours, recommend that you butt the aft template to the keel to guide what has to be removed. I had to sand the area at the top of the stern where it meets the transom first to guide what I removed from the aft end of the stern.
Then I reduced the aft to match the schematic. Make sure you flatten the keel before you remove any other material from the hull.
-
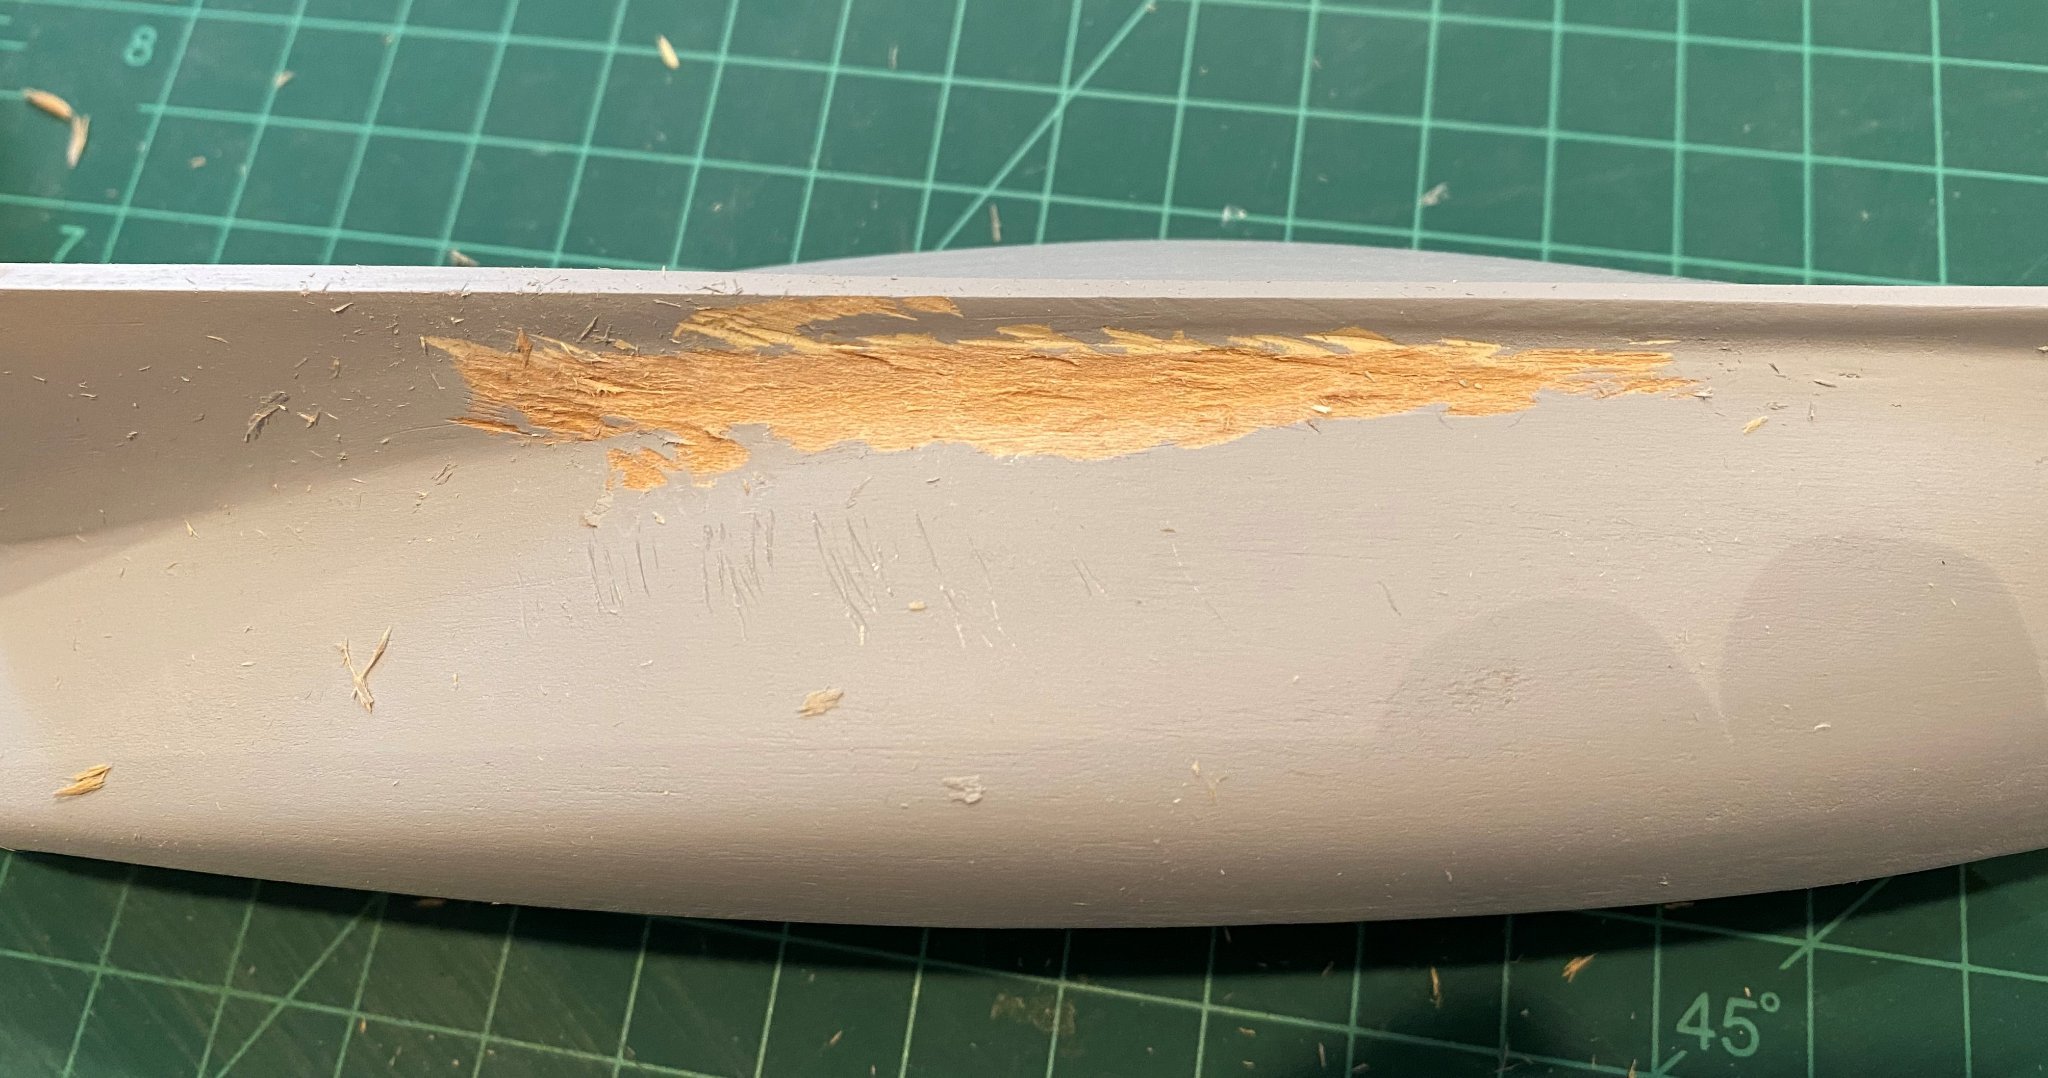
I whittled the hump in the hull rather than just sanding because I thought I would have more control to reduce just in the area that I wanted reduced.

Then I sanded the area smooth as I could and then used putty to fill in the remaining knife marks and make a smooth transition from hull to keel.
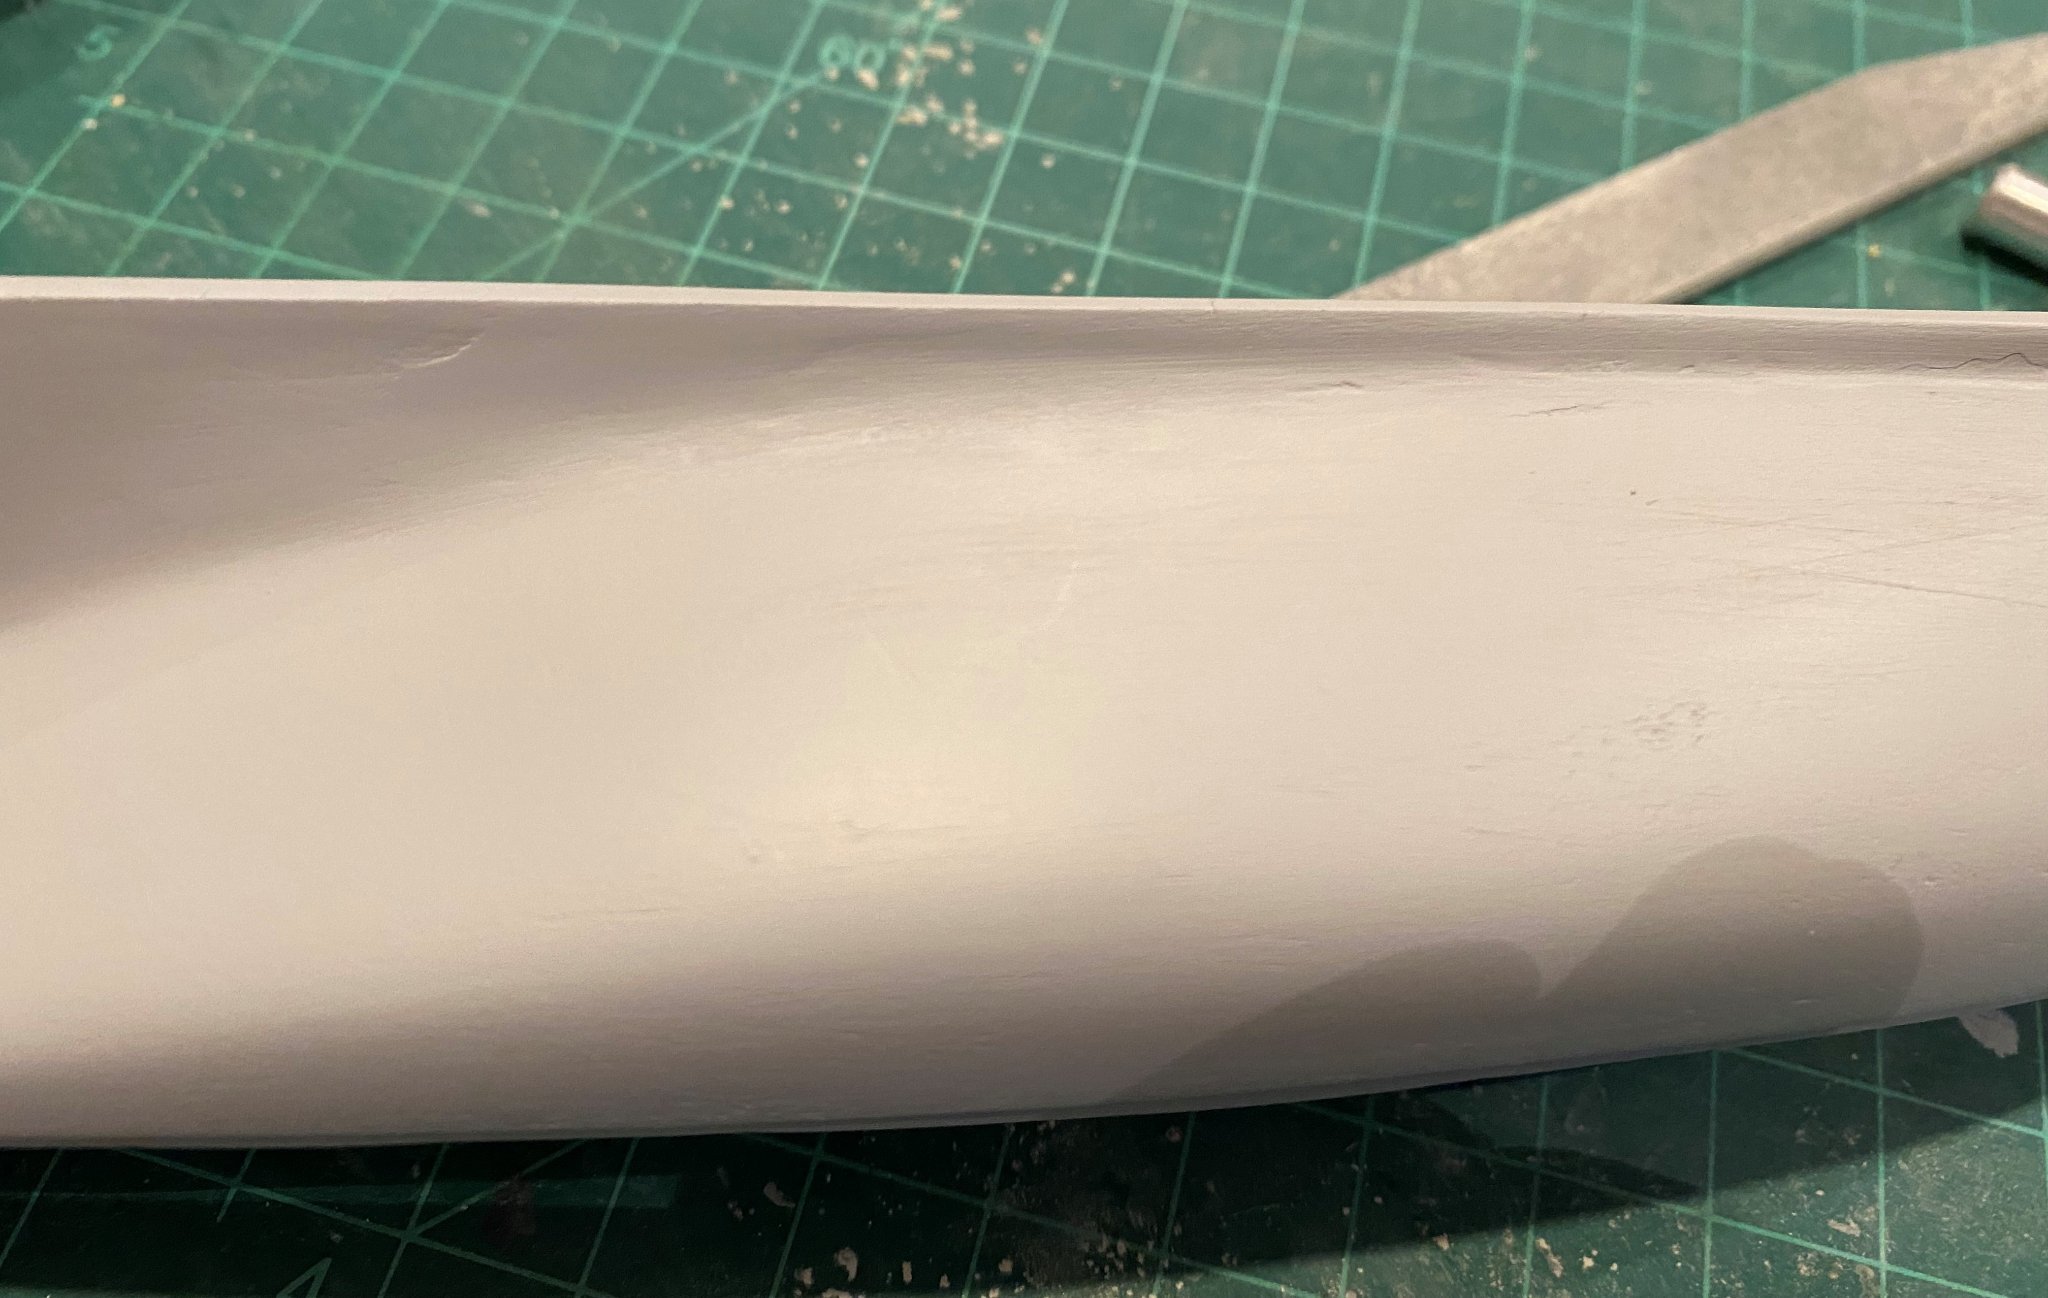
What it looks like after a second coat of Tamiya Fine Gray primer. I will be going through another round of sanding, putty and primer. I don’t like the unevenness of the step.

-
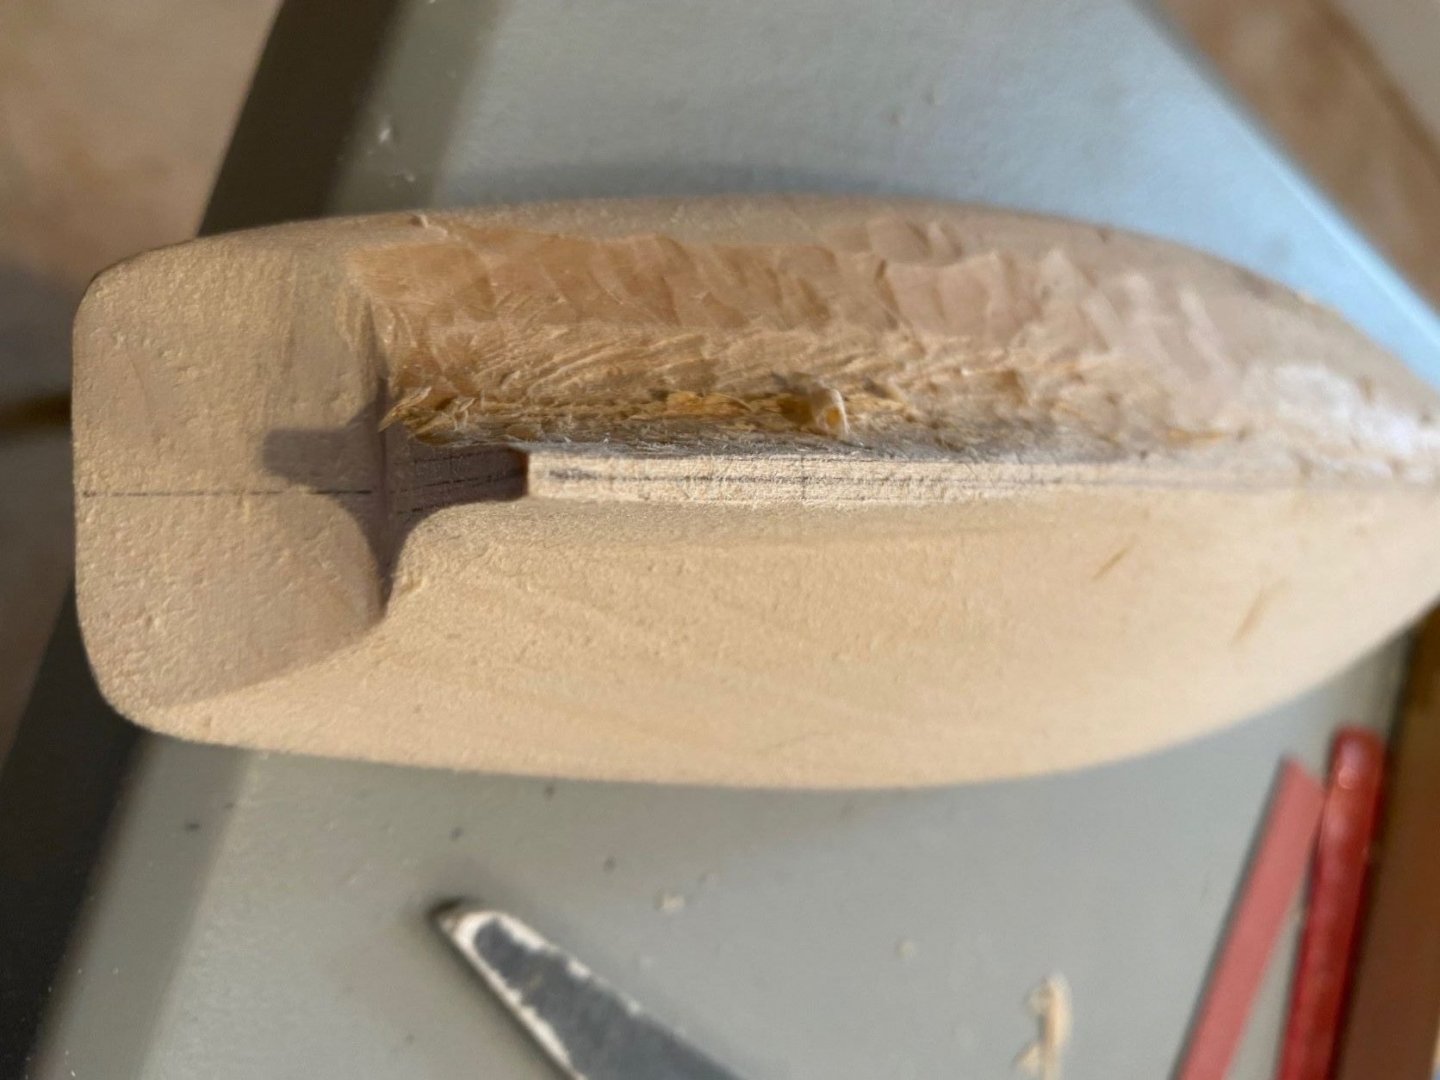
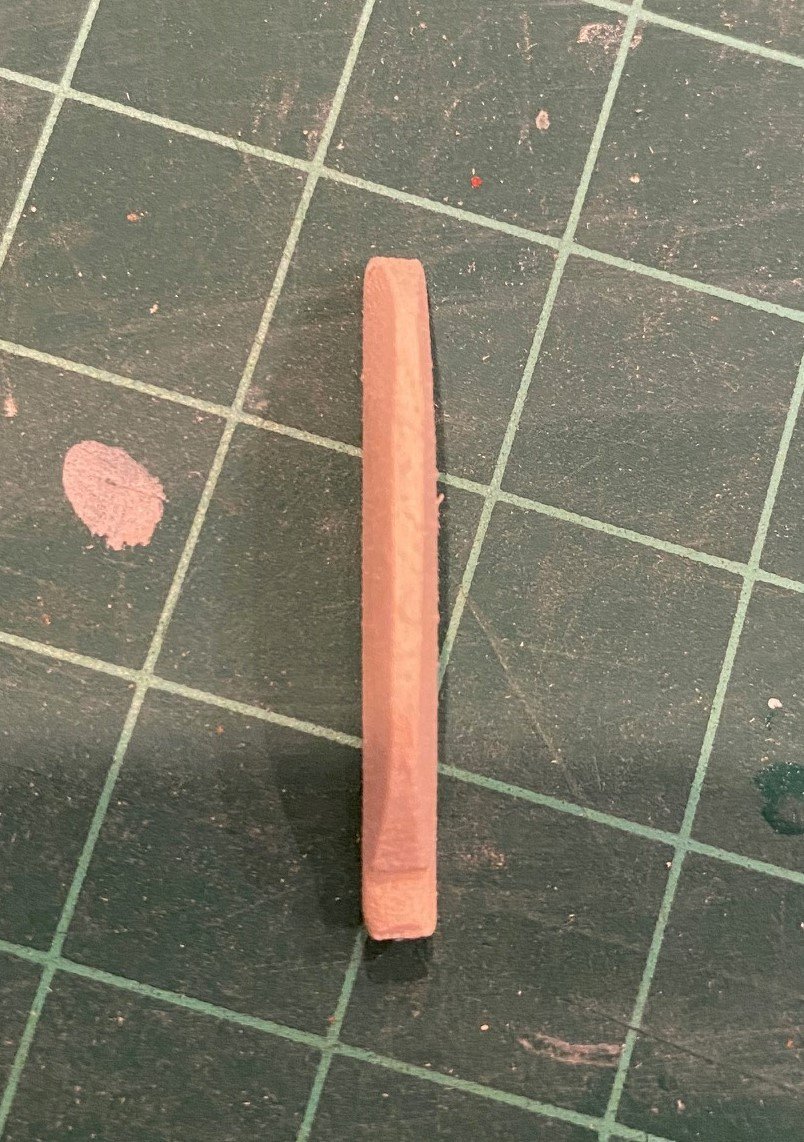
Took a minute to build the rudder, not sure how much tapper to have from front to aft. Also, I think I’m going to put a pin at the top and bottom instead of shaping the rudder stock.

A fourth coat of putty and then some move sanding, after that I think I will spray on some primer to determine how much more sanding and filling needs to be done.
The primer indicated very little putty work left to do on the majority of the hull.

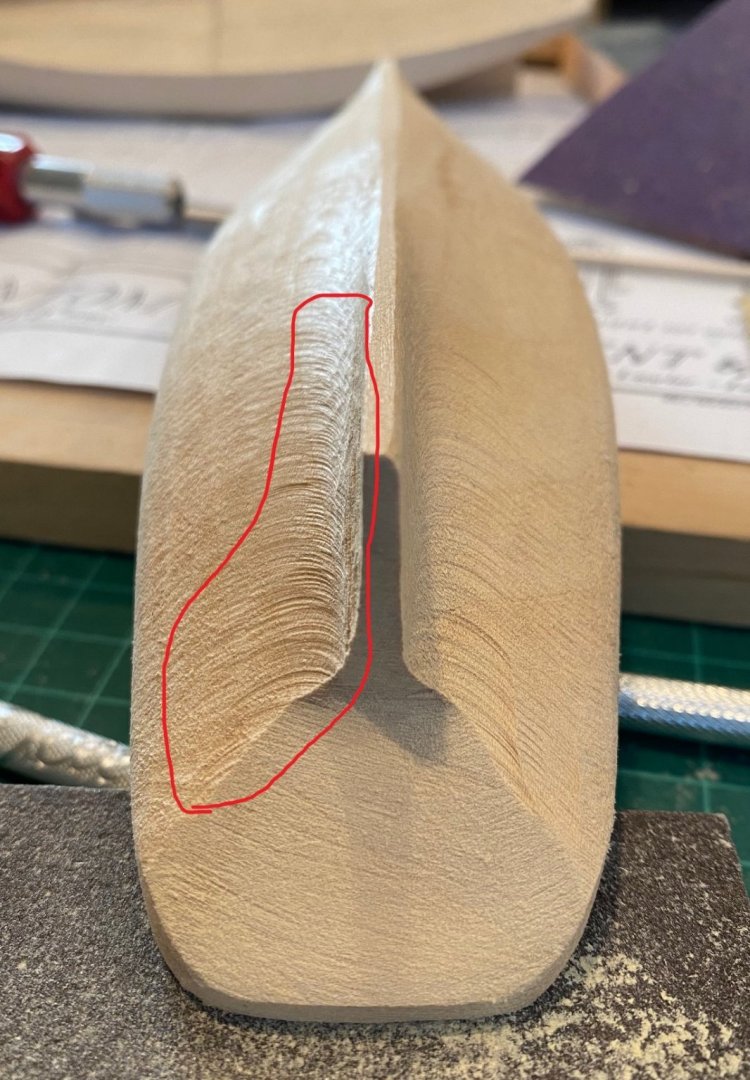
The biggest problem is what looks like a depression at the port keel is actually a hump of wood just above the keel. I think I’m going to have to whittle and sand to remove it. I thought about just filling it but I think that would eliminate the appearance of a keel at mid-ship.
-
Great job, I'm at the start of building mine and your log pictures will be a big help as I go.
-
2 hours ago, Retiredpm said:
Any trick to getting the creases out of it?
Before I did anything with the sail material, I wetted it and then ironed it with an iron on cotton. Now that you have put glue on, it might work and might not, but I'm sure it would leave some glue residue on your iron. Your might try it on a excess piece that you have glued before you try on the real sail.
Looking good.
- druxey and Ryland Craze
-
2
-
-
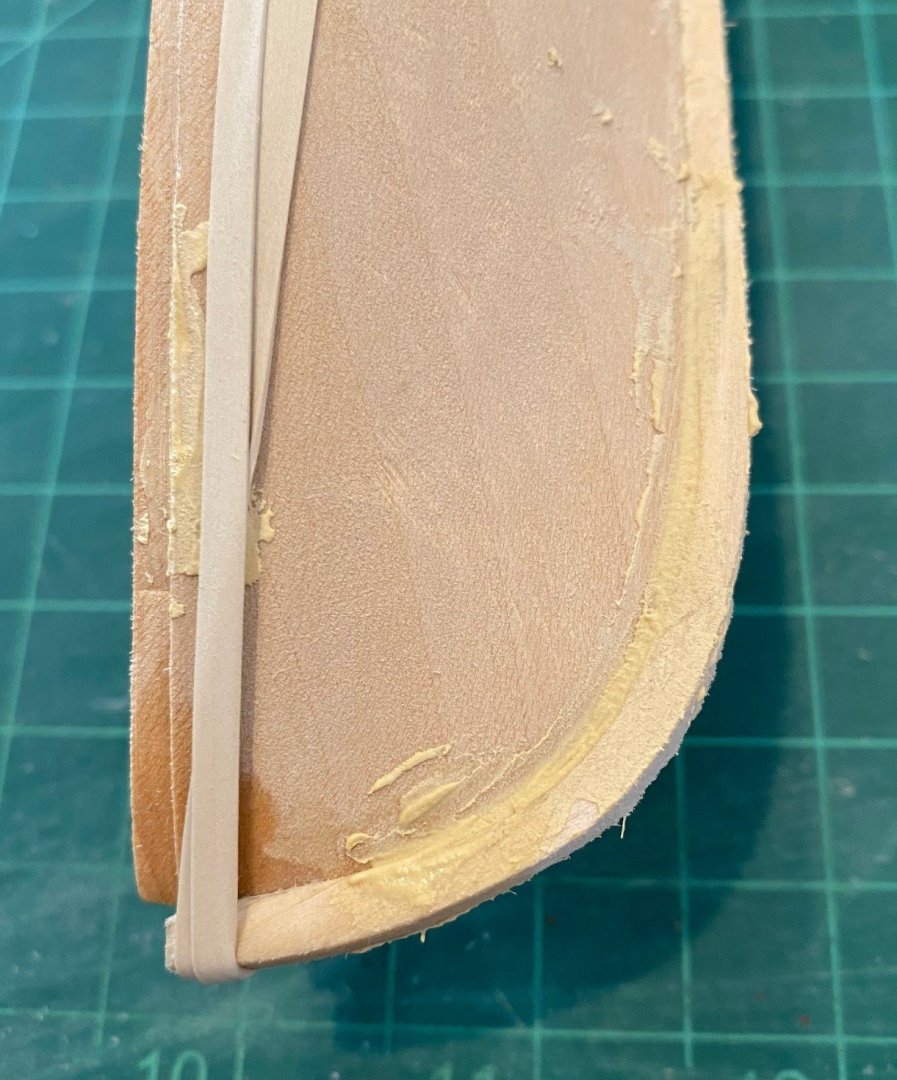
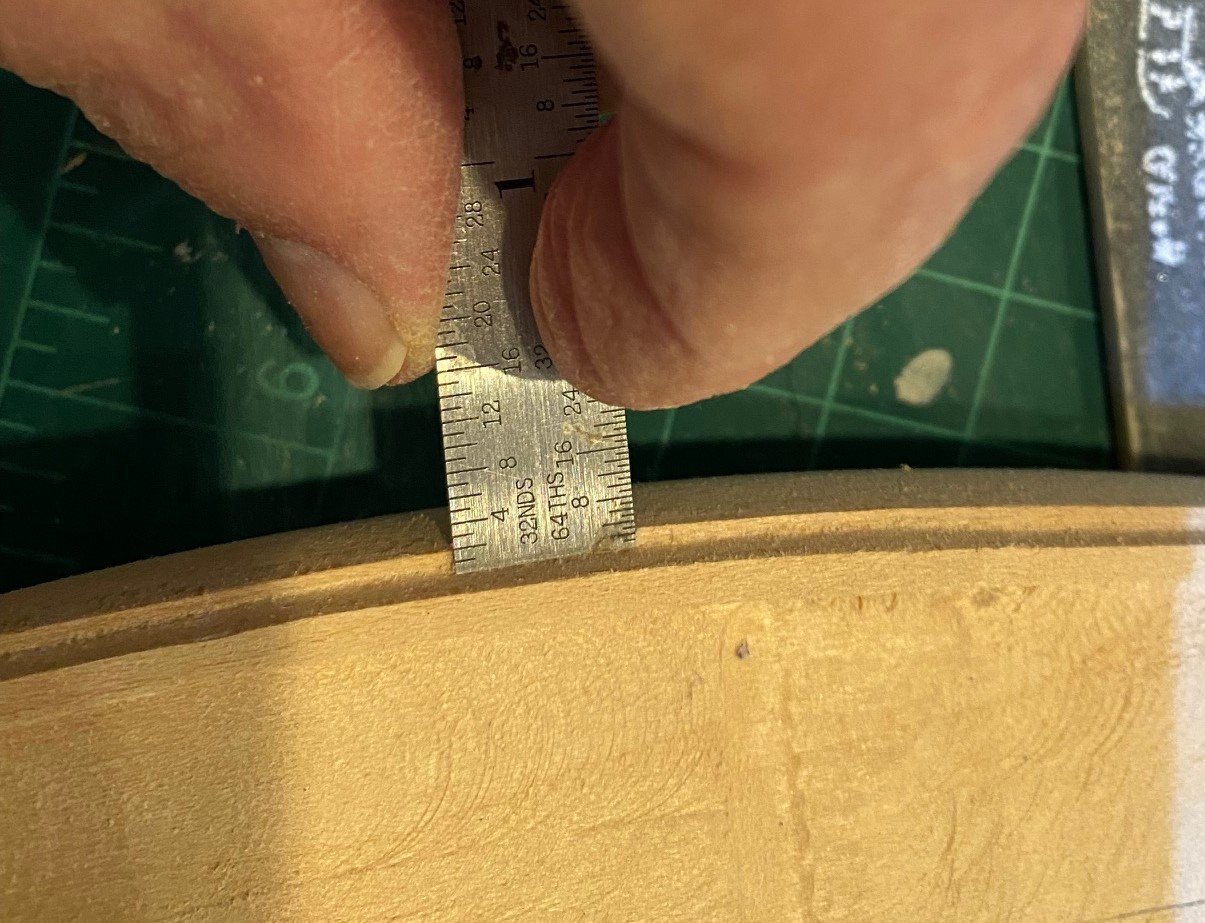
I’ve tried to pull in the top of the stem by wetting it and using rubber bands. It has reduced the gap between the stem and bow by half, still about a 32nd to 16th gap. I will fill the gap with glue and saw dust then putty for a smooth translon. You can see I’ve put on the first coat of putty in the gaps between the keel, stem, and stern post and the hull.
-
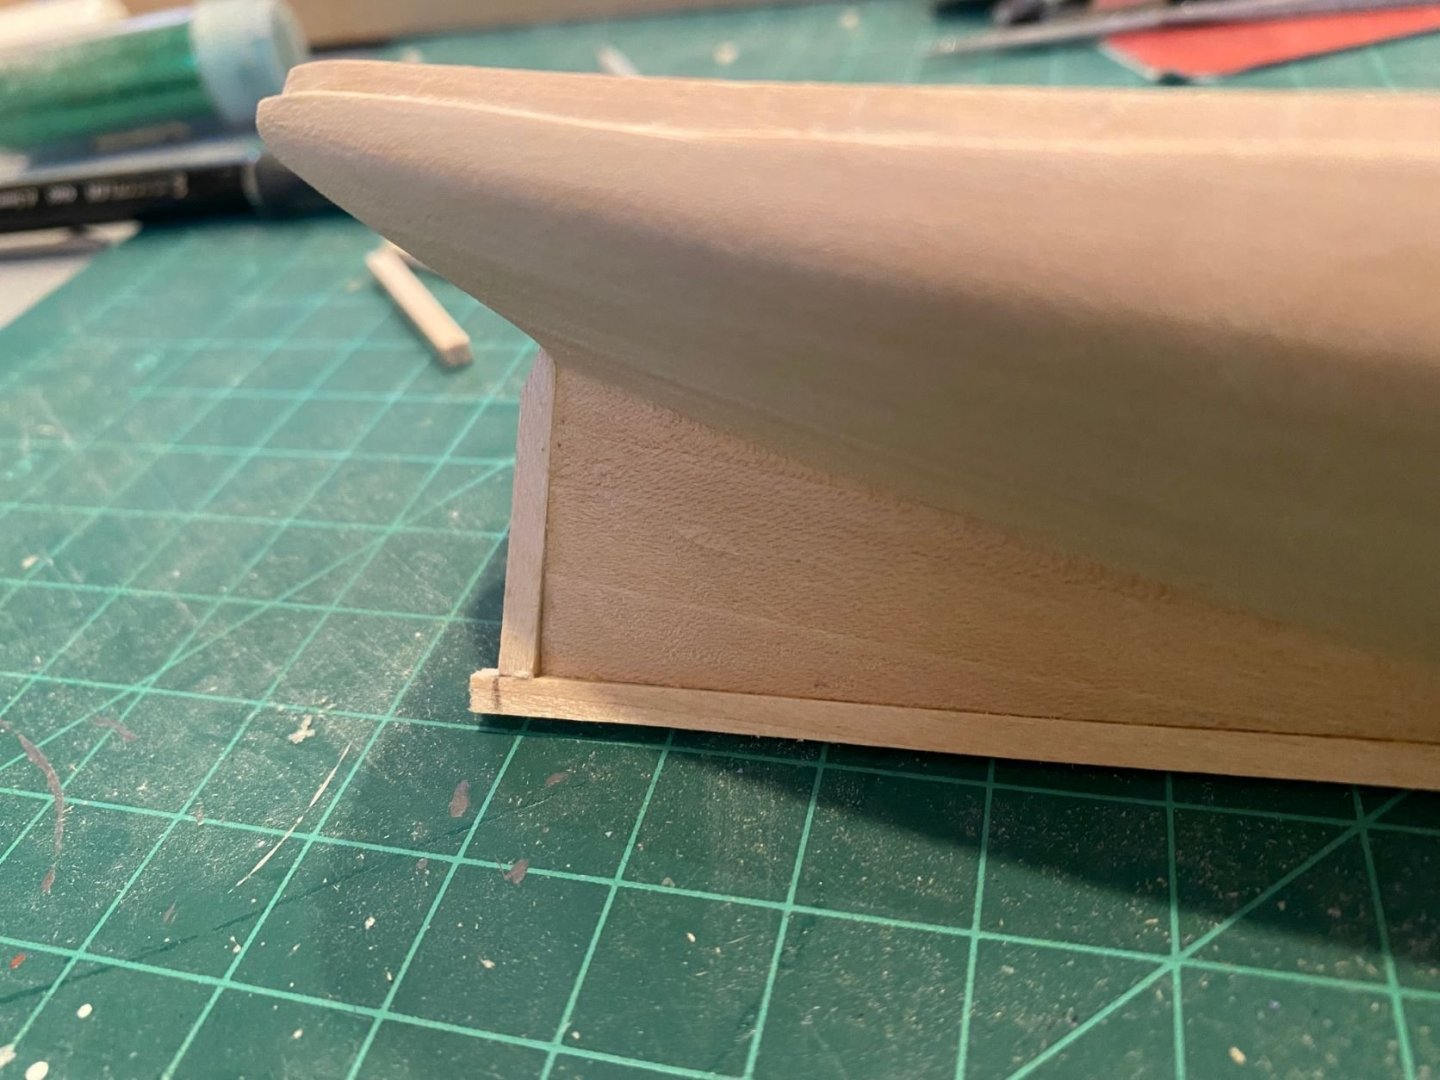
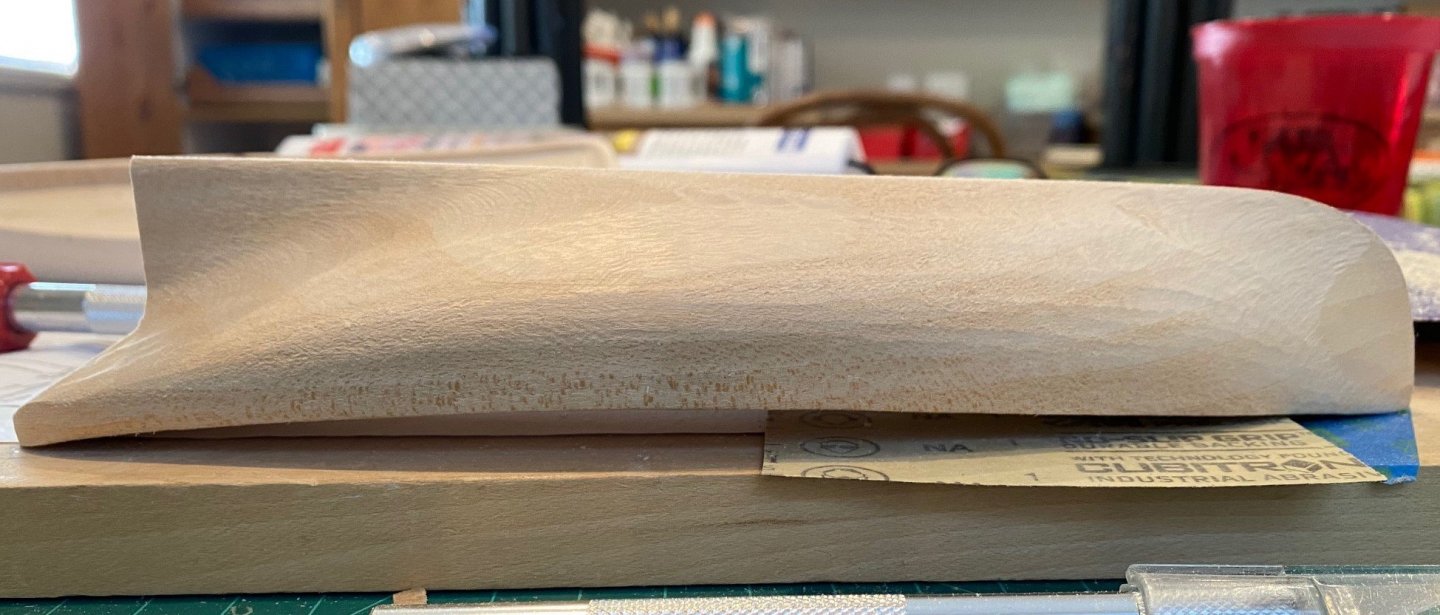
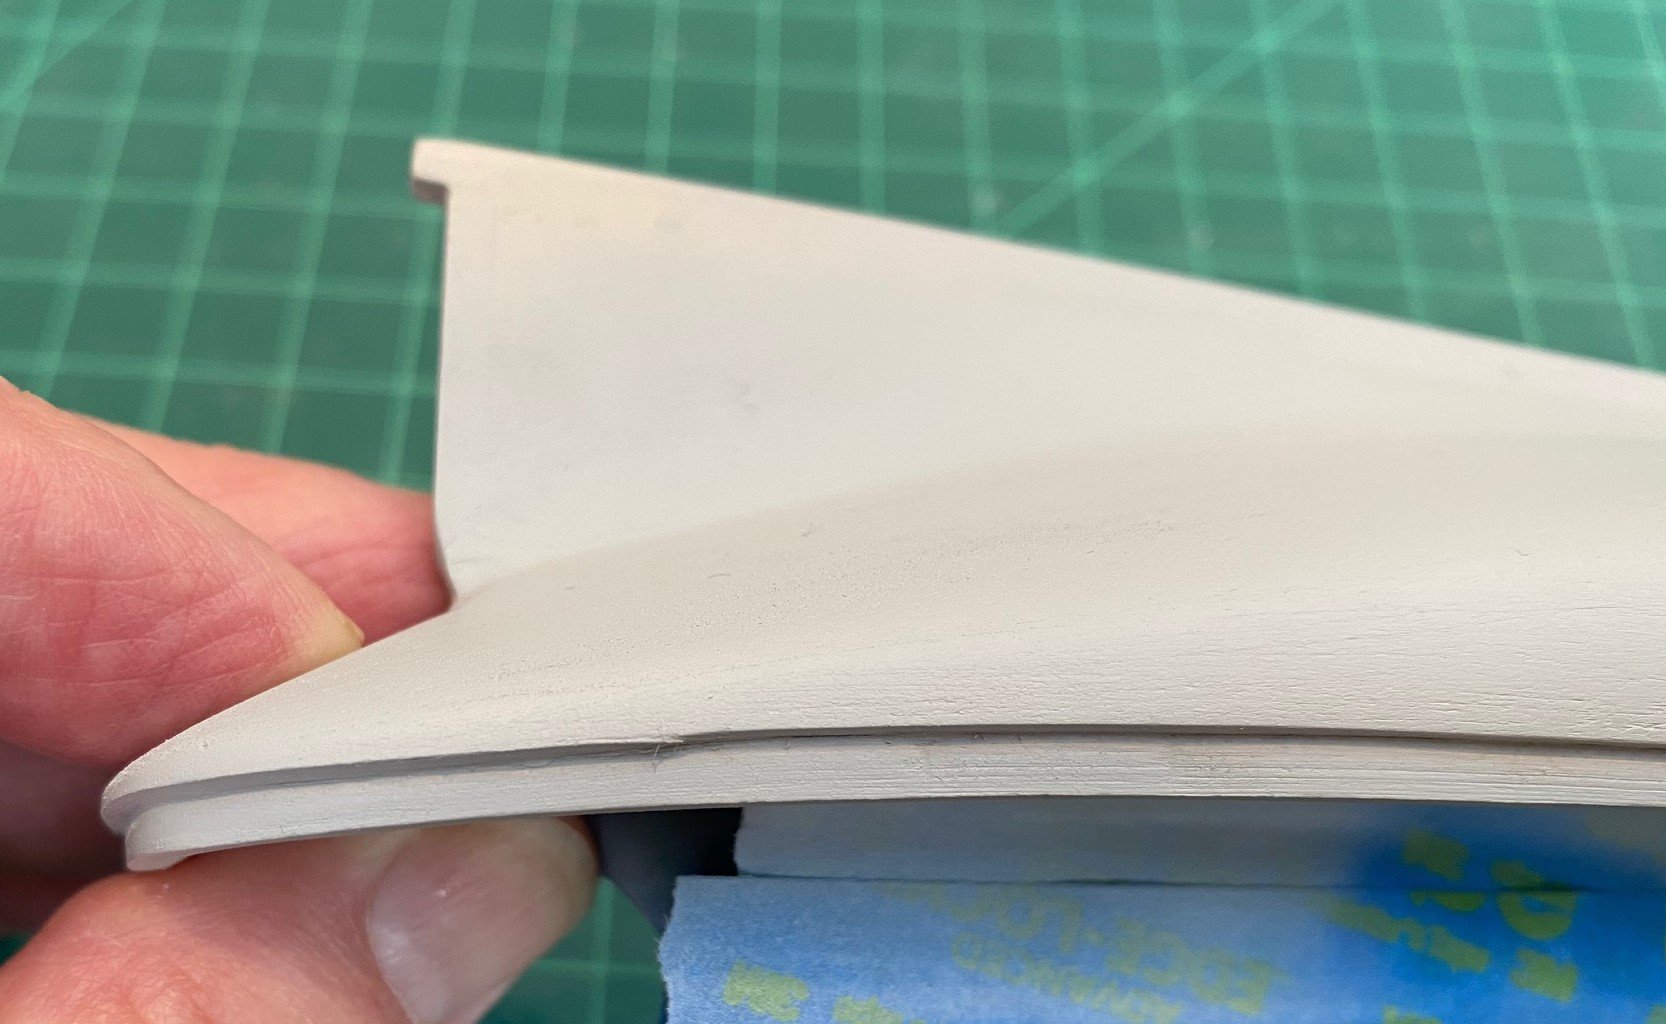
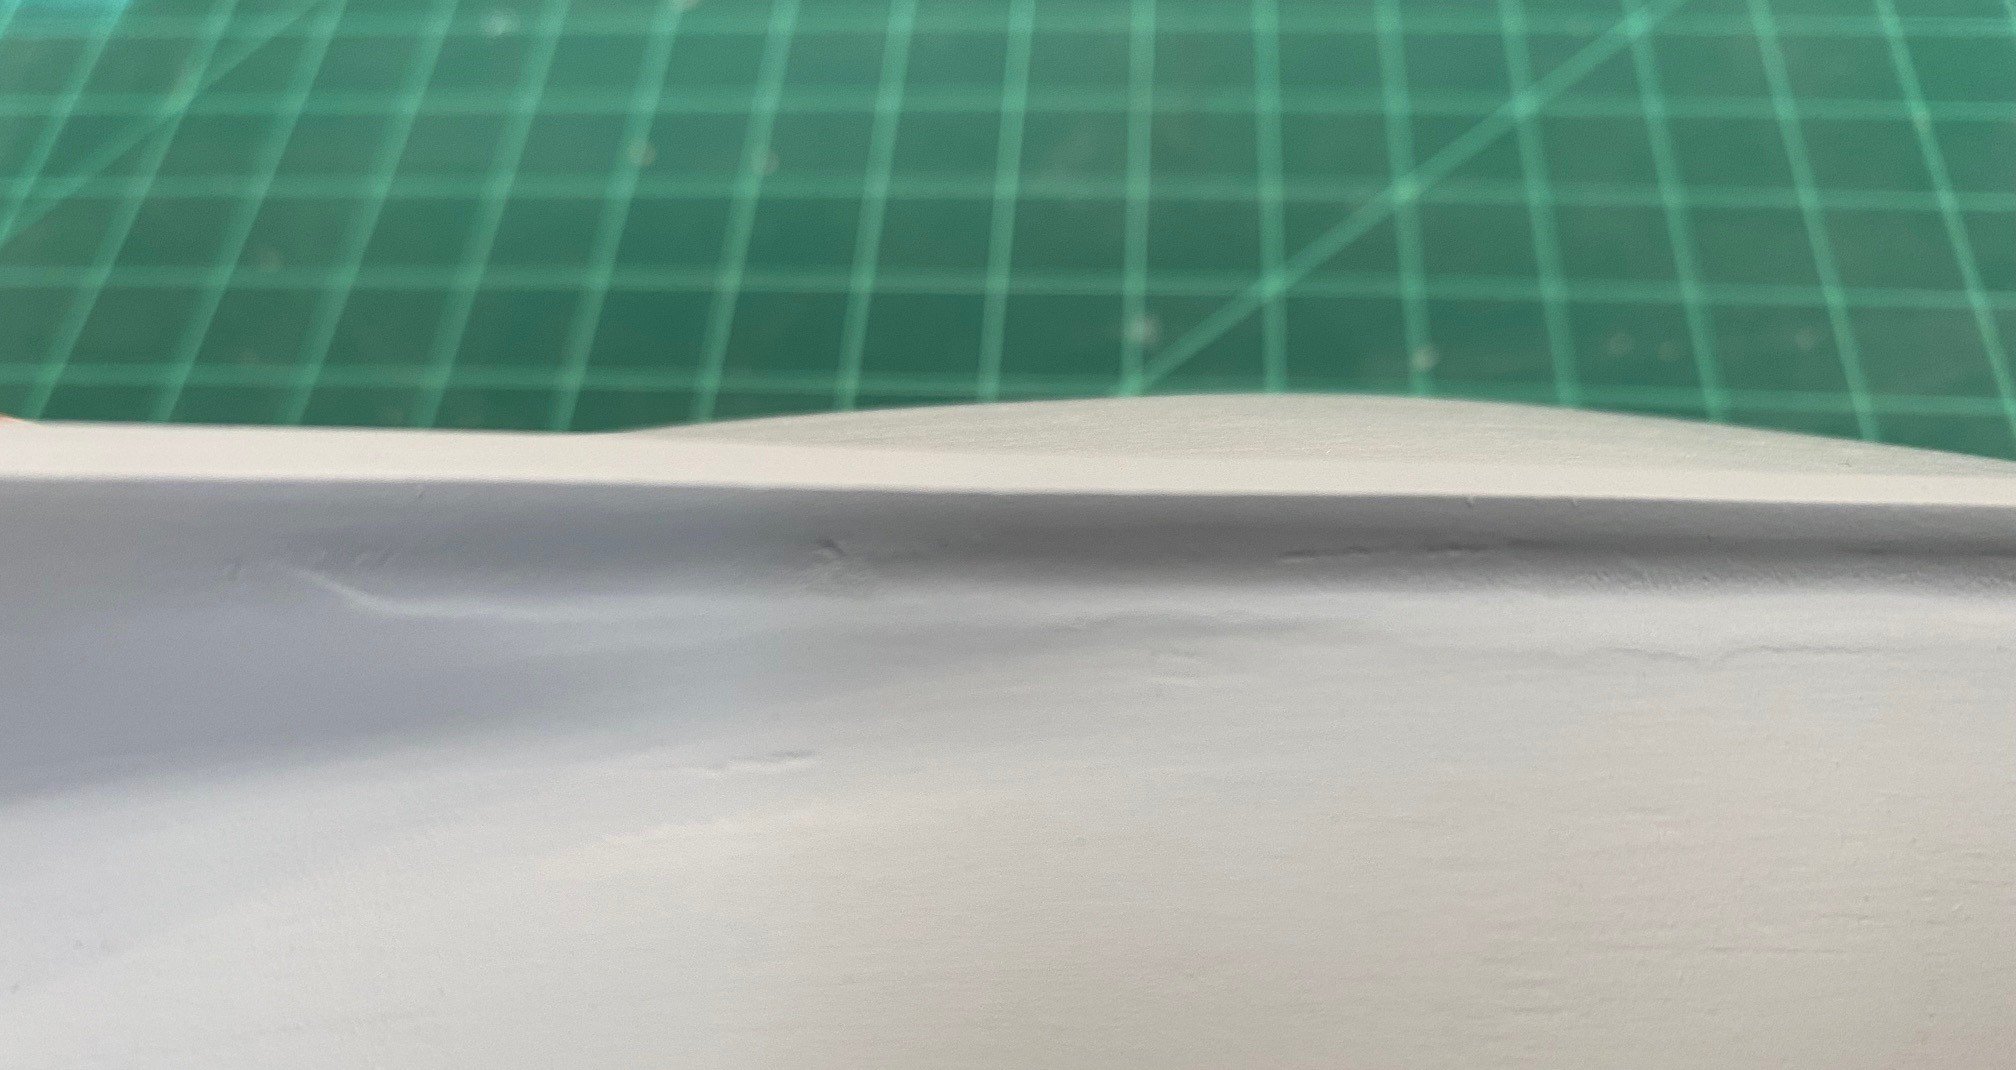
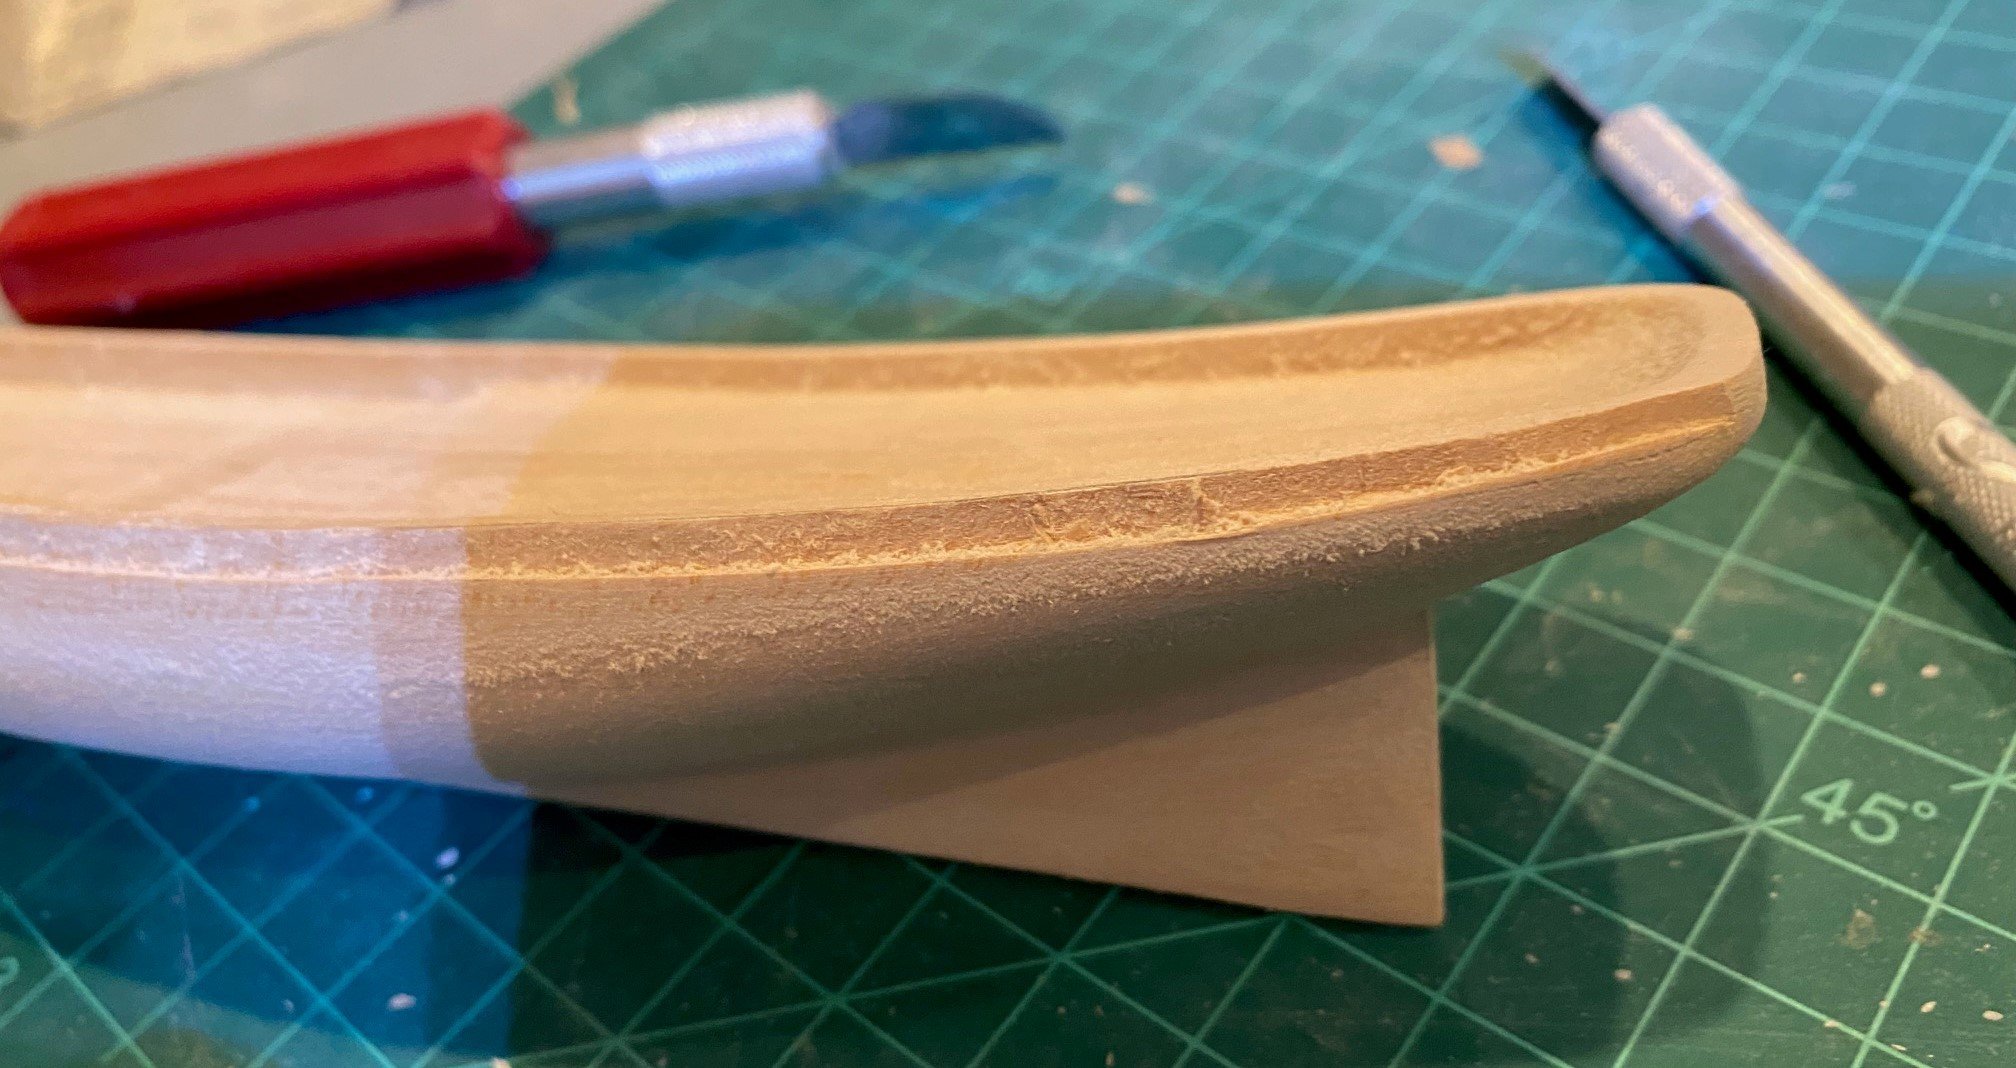
Finished the top step all around the boat, the depth looks even all the way around, about 1/16 in. There are a few dips in the step, maybe a little putty will smooth them out, I do believe in putty.

Built the bow stem per the instructions, reduced it down with a jeweler saw, knife, file and sand paper. I did break the stem/keel piece at the joint, and then glued it back together, you can see some discontinuity at the joint at the curve. Also, you can see a gap at the top of the stem, I got to the point that I could not reduce the stem’s curve to allow a perfect fit due to lack of material. Will moisten it and use rubber bands to bend it to fit, and if that does not work, more putty.
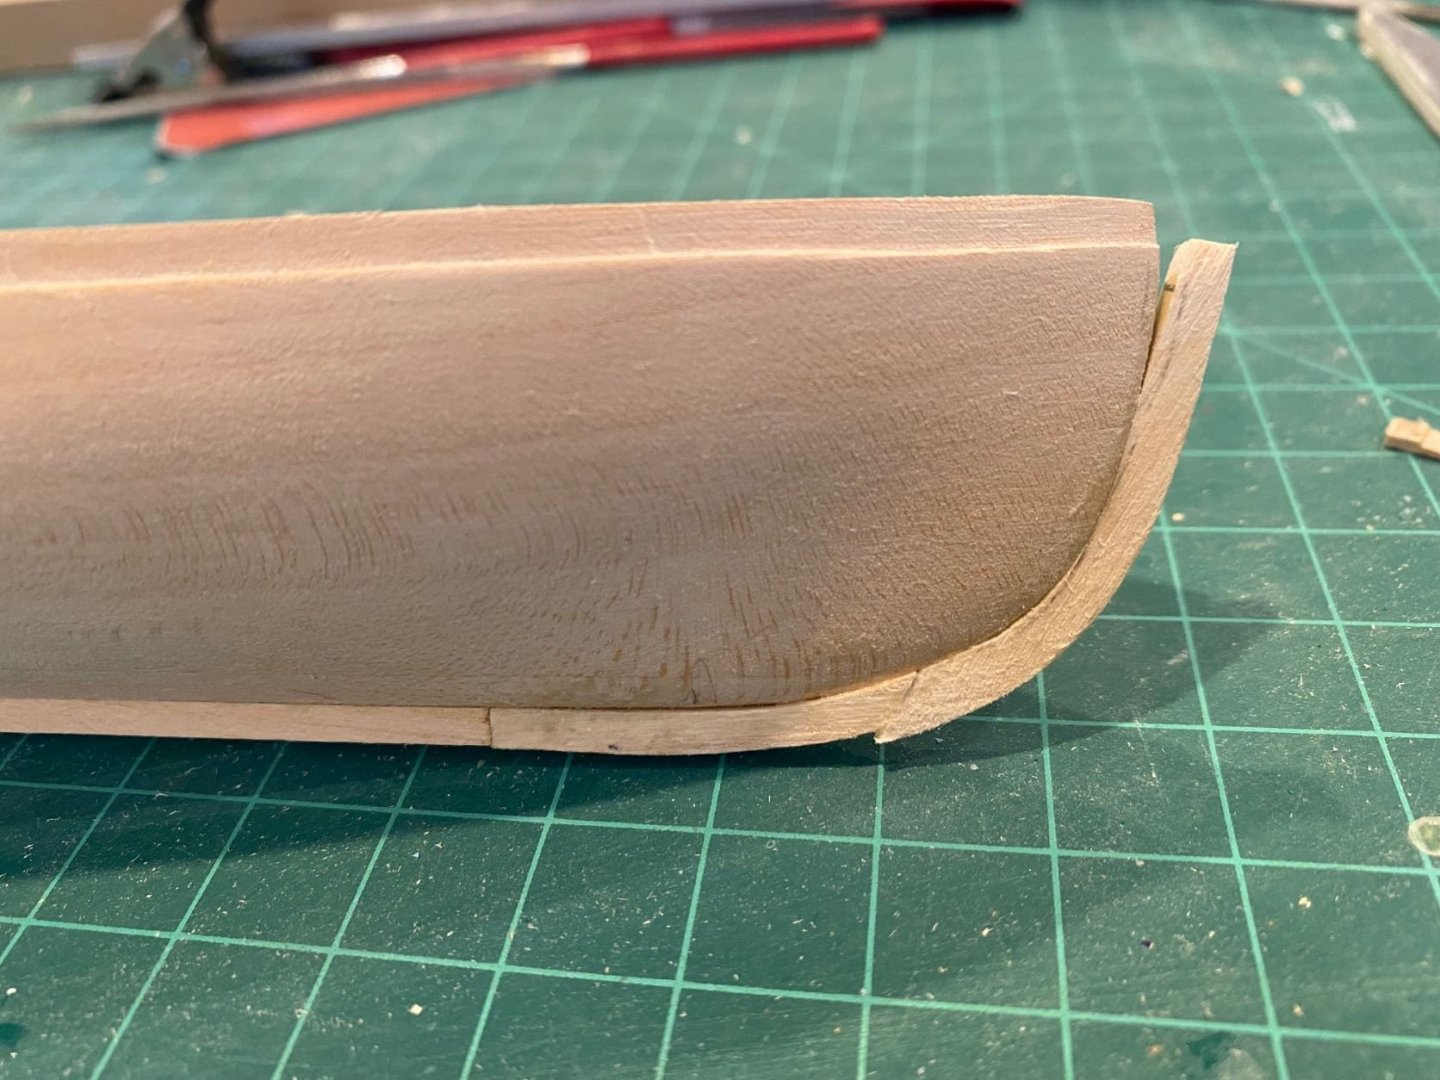
The main part of the keel when on ok, along with the stern post. You can see in the picture below that I have to fill in the aft part of the hull to match the keel and stern post, more putty.
- Duanelaker and GrandpaPhil
-
2
-
Very nice work, I just started my first solid hull and wished it looked as good as yours. Keep up the great work.
-
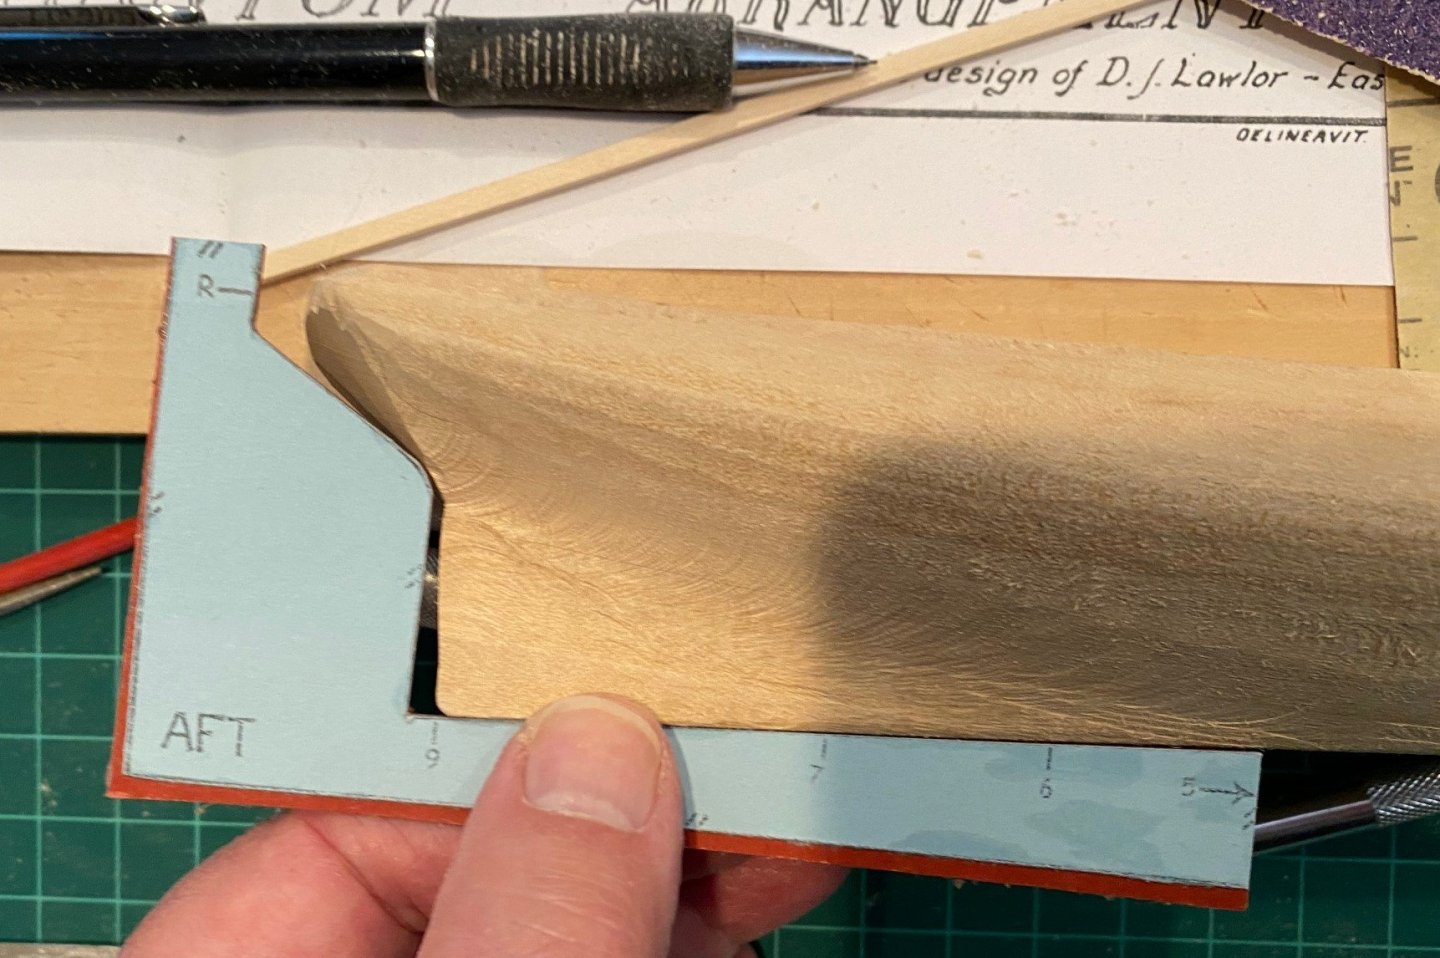
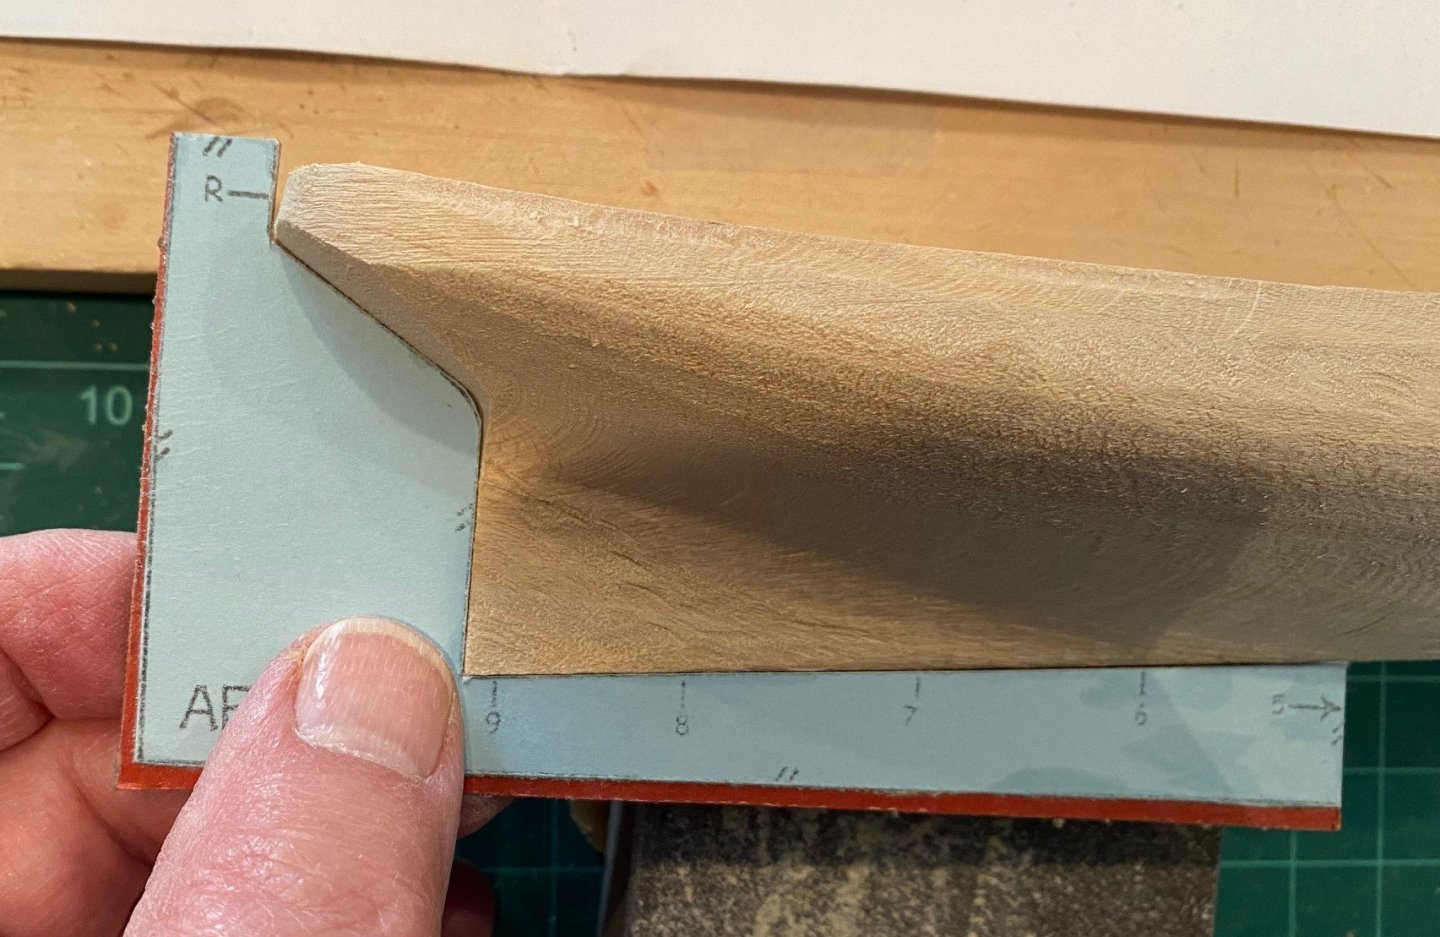
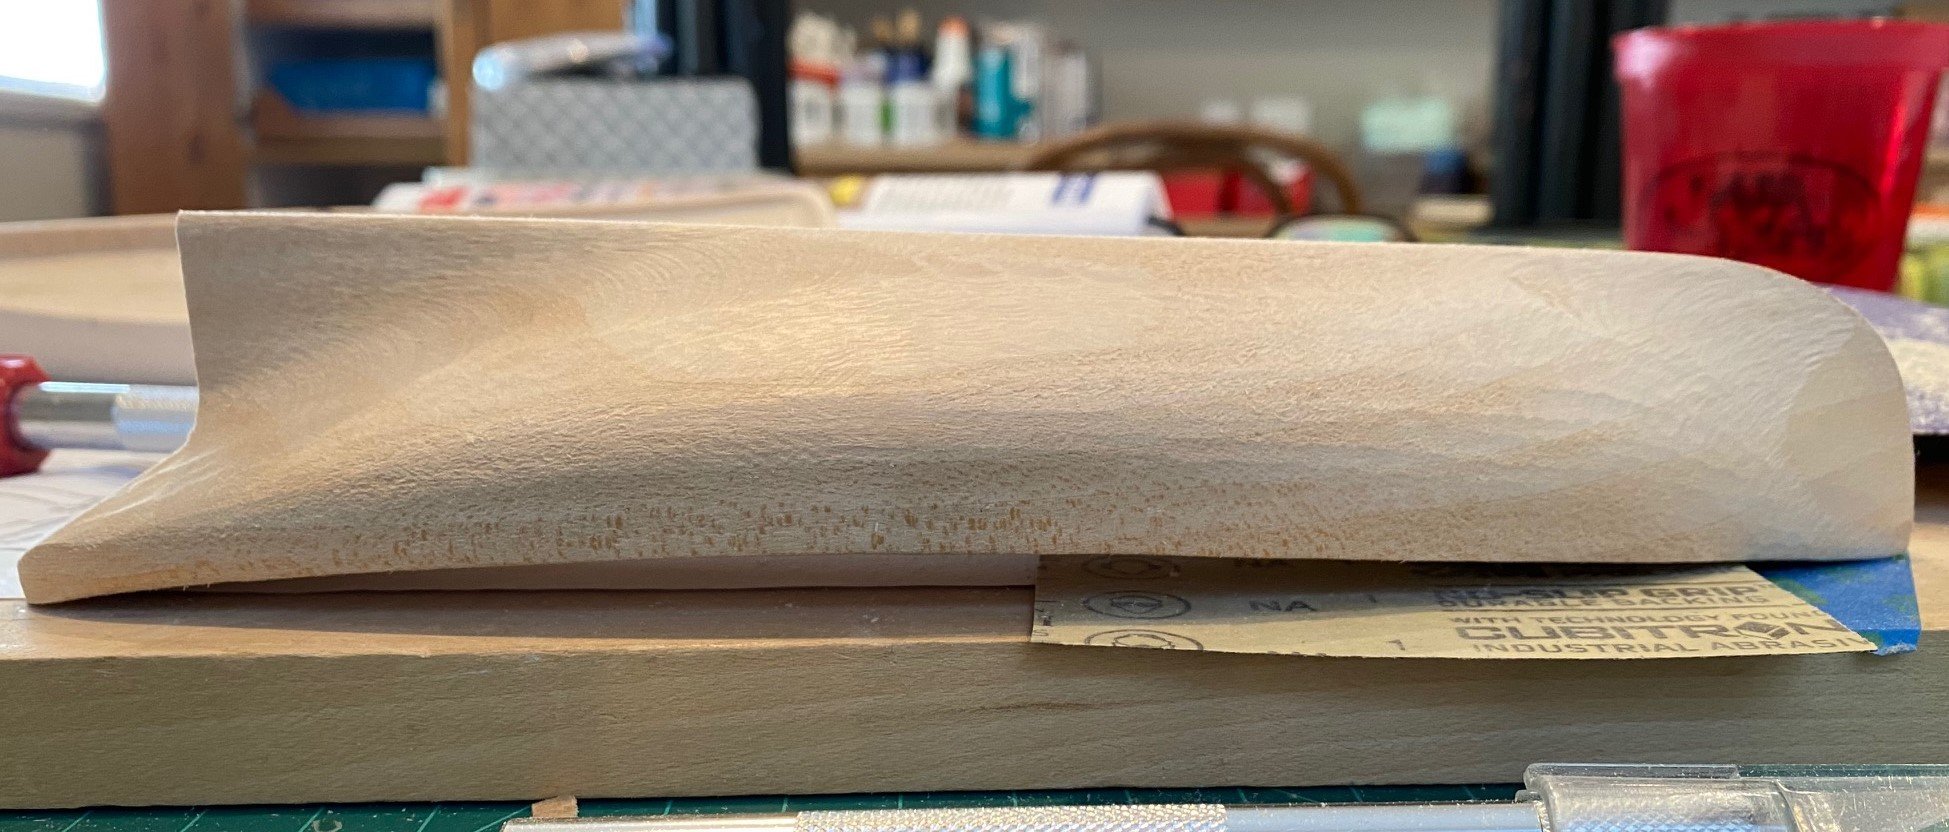
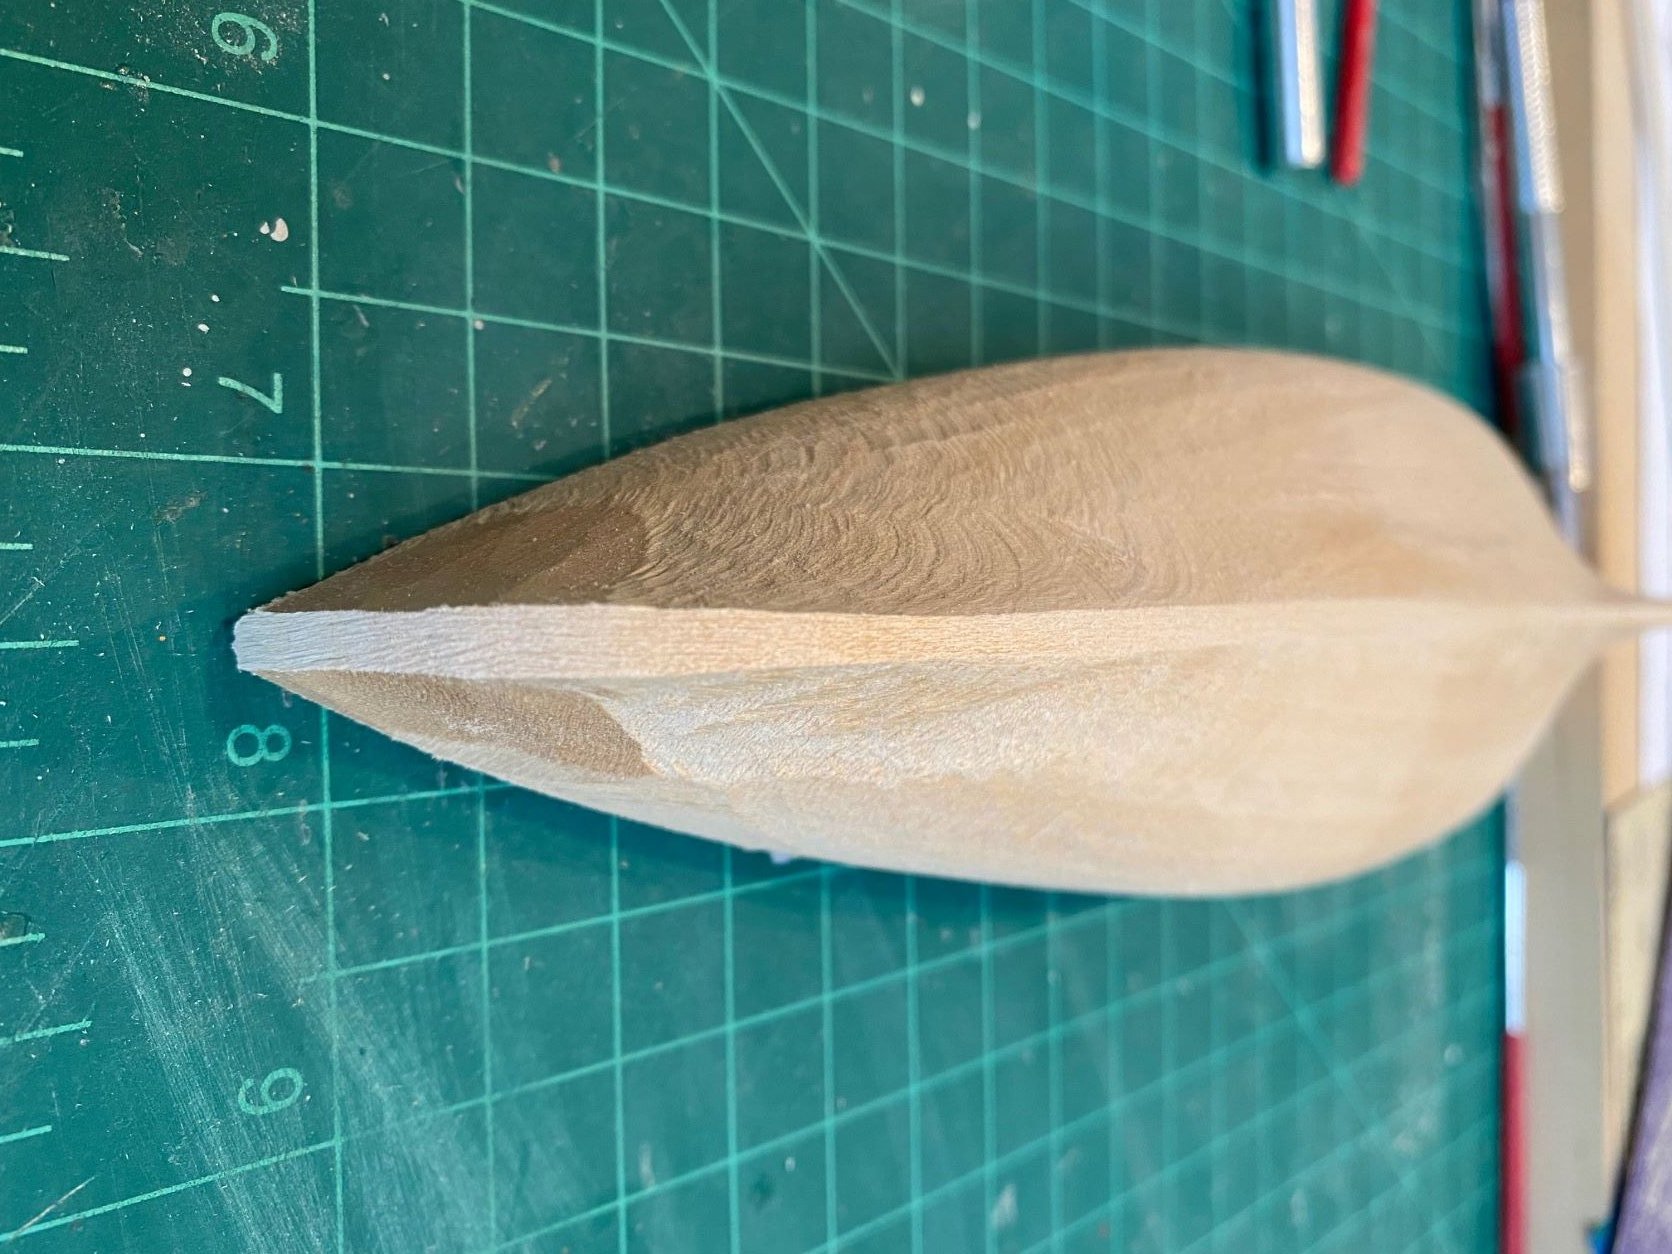
First, I checked the hull to the templates #5 thru #9 on both sides. It appears that I need to reduce the thickness of the aft part of the keel all the way down for the sternpost to fit and deepen the curve in the hull.
I used a chisel blade, #18, to reduce the thickness of the keel all the way down the aft end and just taking off a very small vertical notch along the keel from station #5 to #9. Then I used a curved x-acto #22 blade deepen the curve between the hull vertical and horizontal, as well as reduce the horizontal part of the hull from station #9 thru #7. Then I used some 80 grit sandpaper to smooth the areas and checked them against the templates. I had to do this about 4 times so I would not reduce to much at one time.
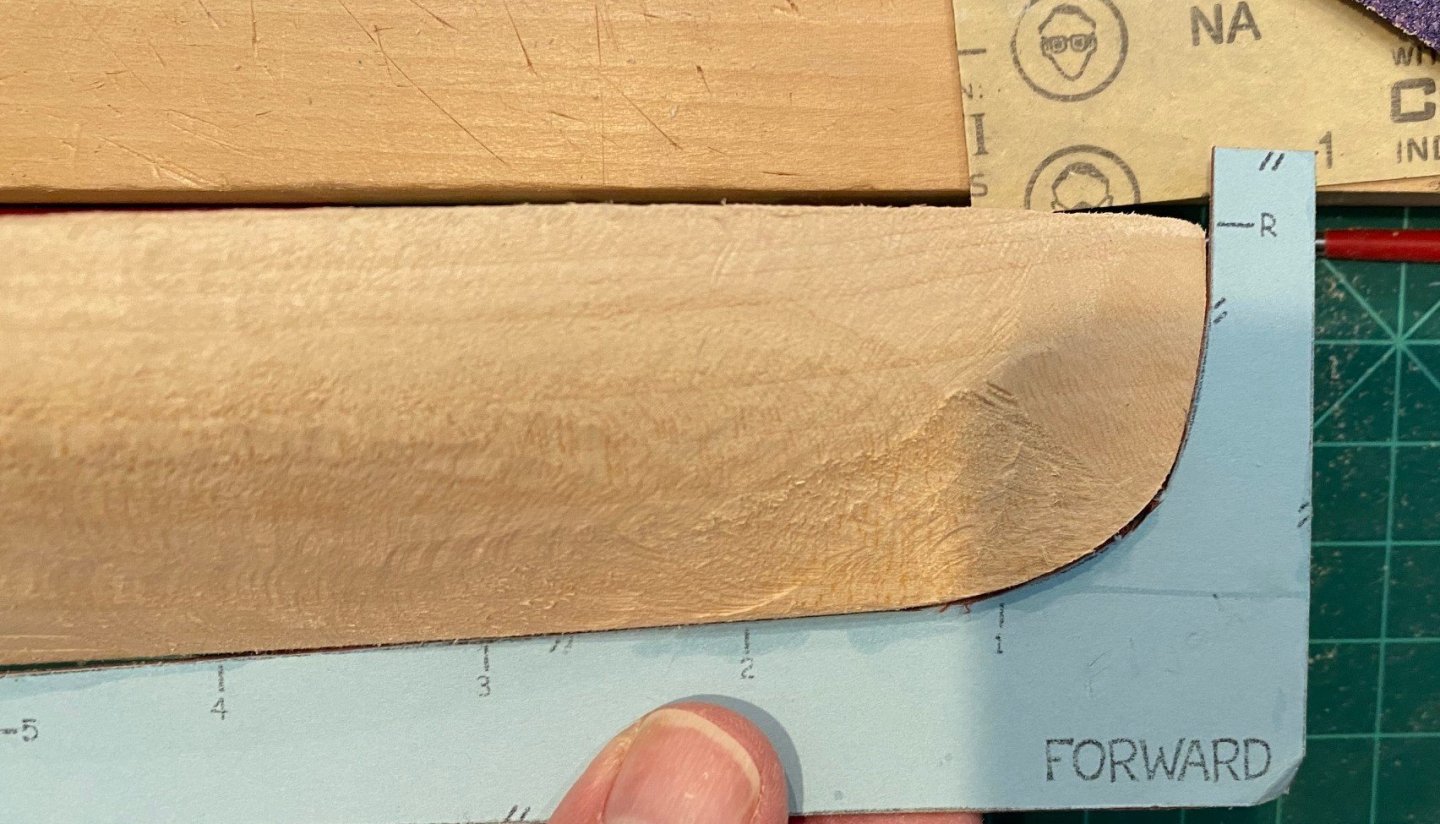
The fwd part of the hull just needed to be reduced a small amount to match the templates #1 thru #5, so I just used 80 grit sandpaper to reduce and smooth the hull transitions. My final hull did not match all of the templates exactly, but I think it was good enough. I was more concerned about getting a smooth hull with acceptable transitions. You can see that some of the gouge areas and the aft part where the keel and sternpost will be glued will require some wood filler, but that is why the sell it.

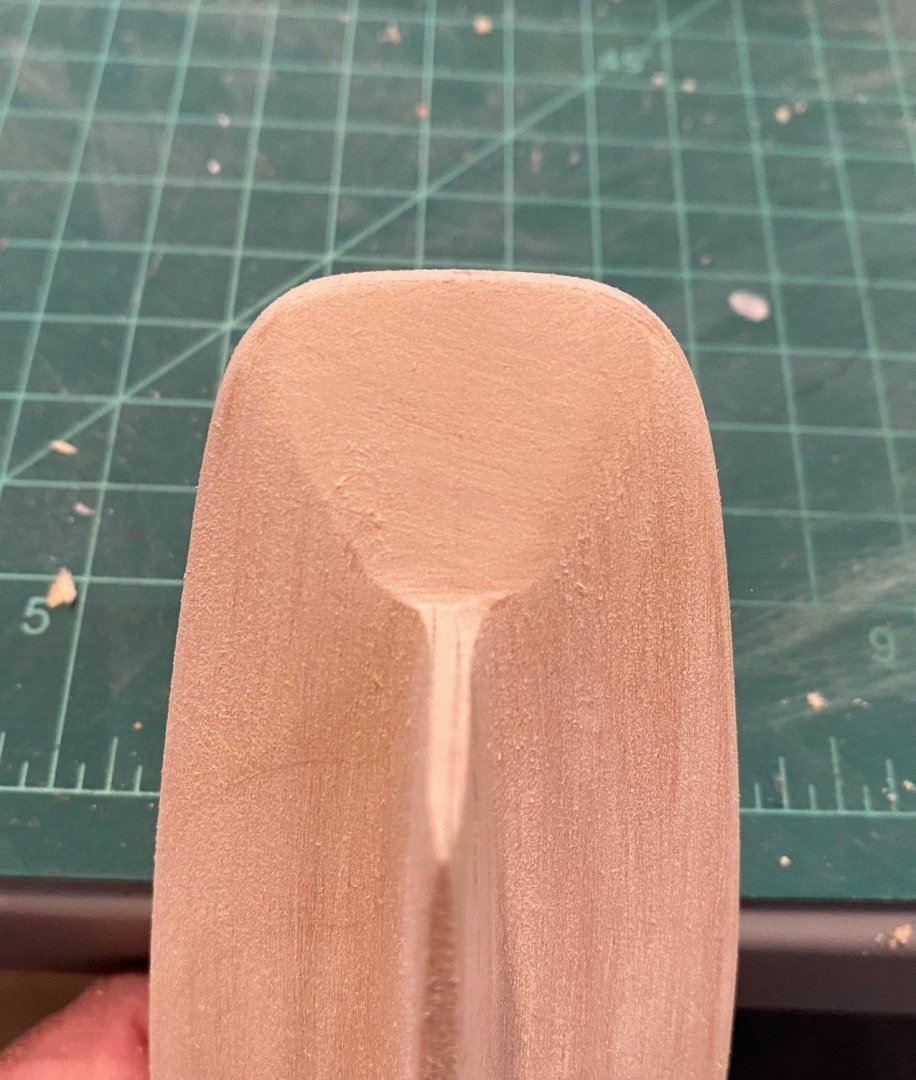
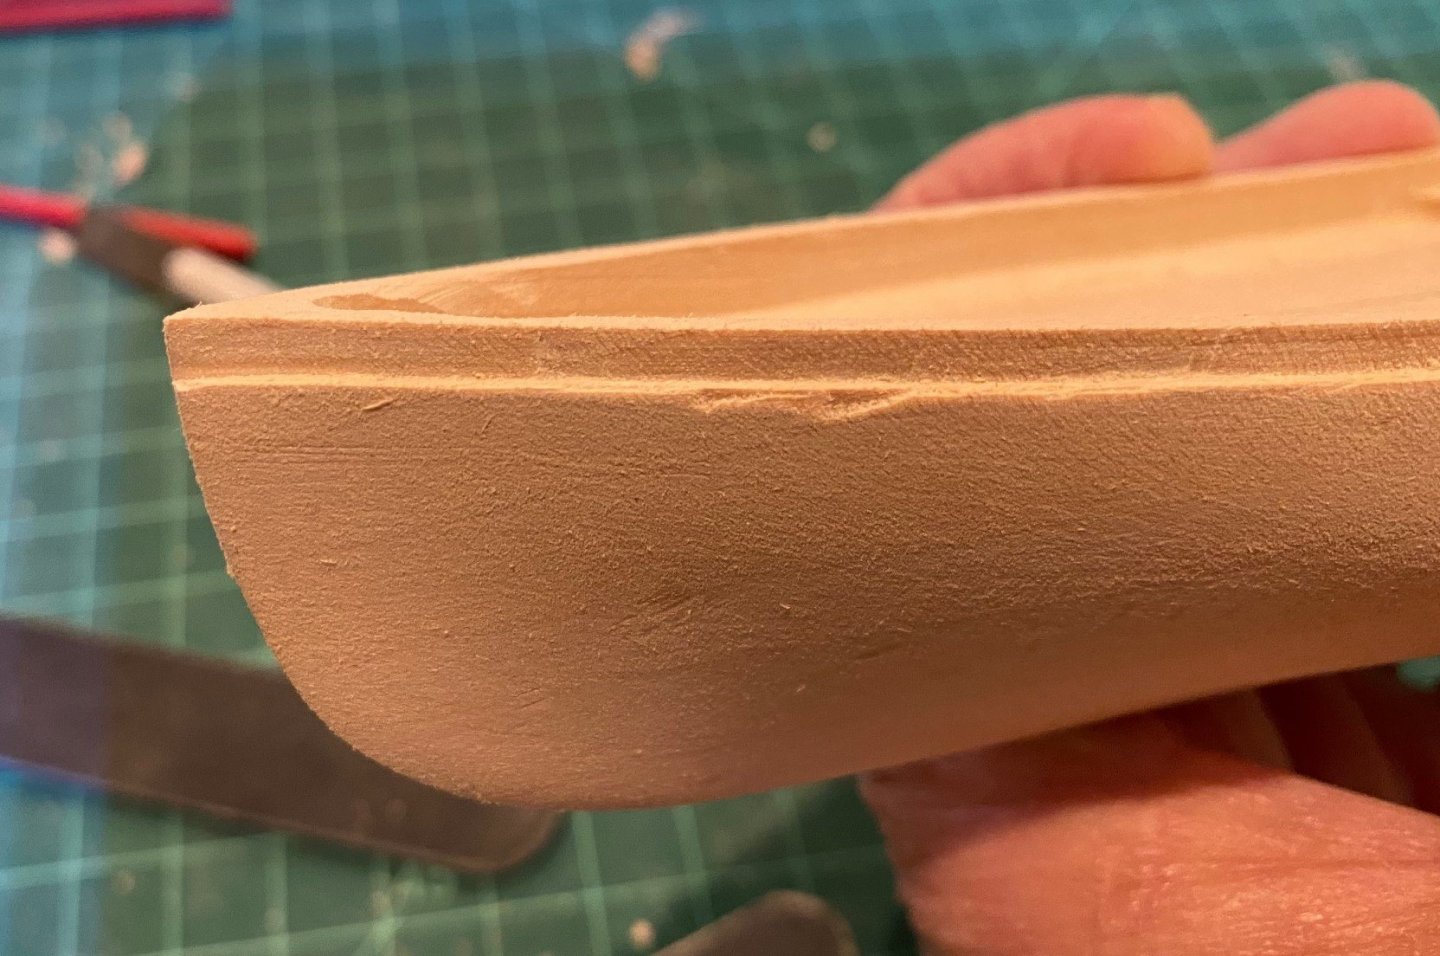
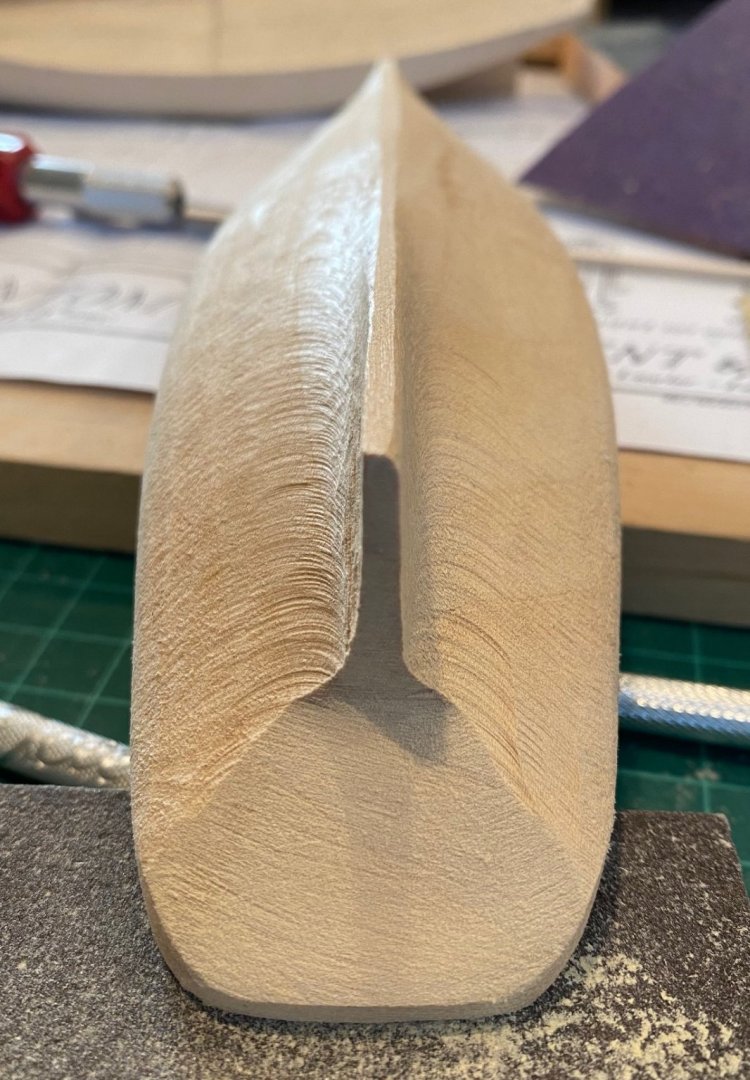
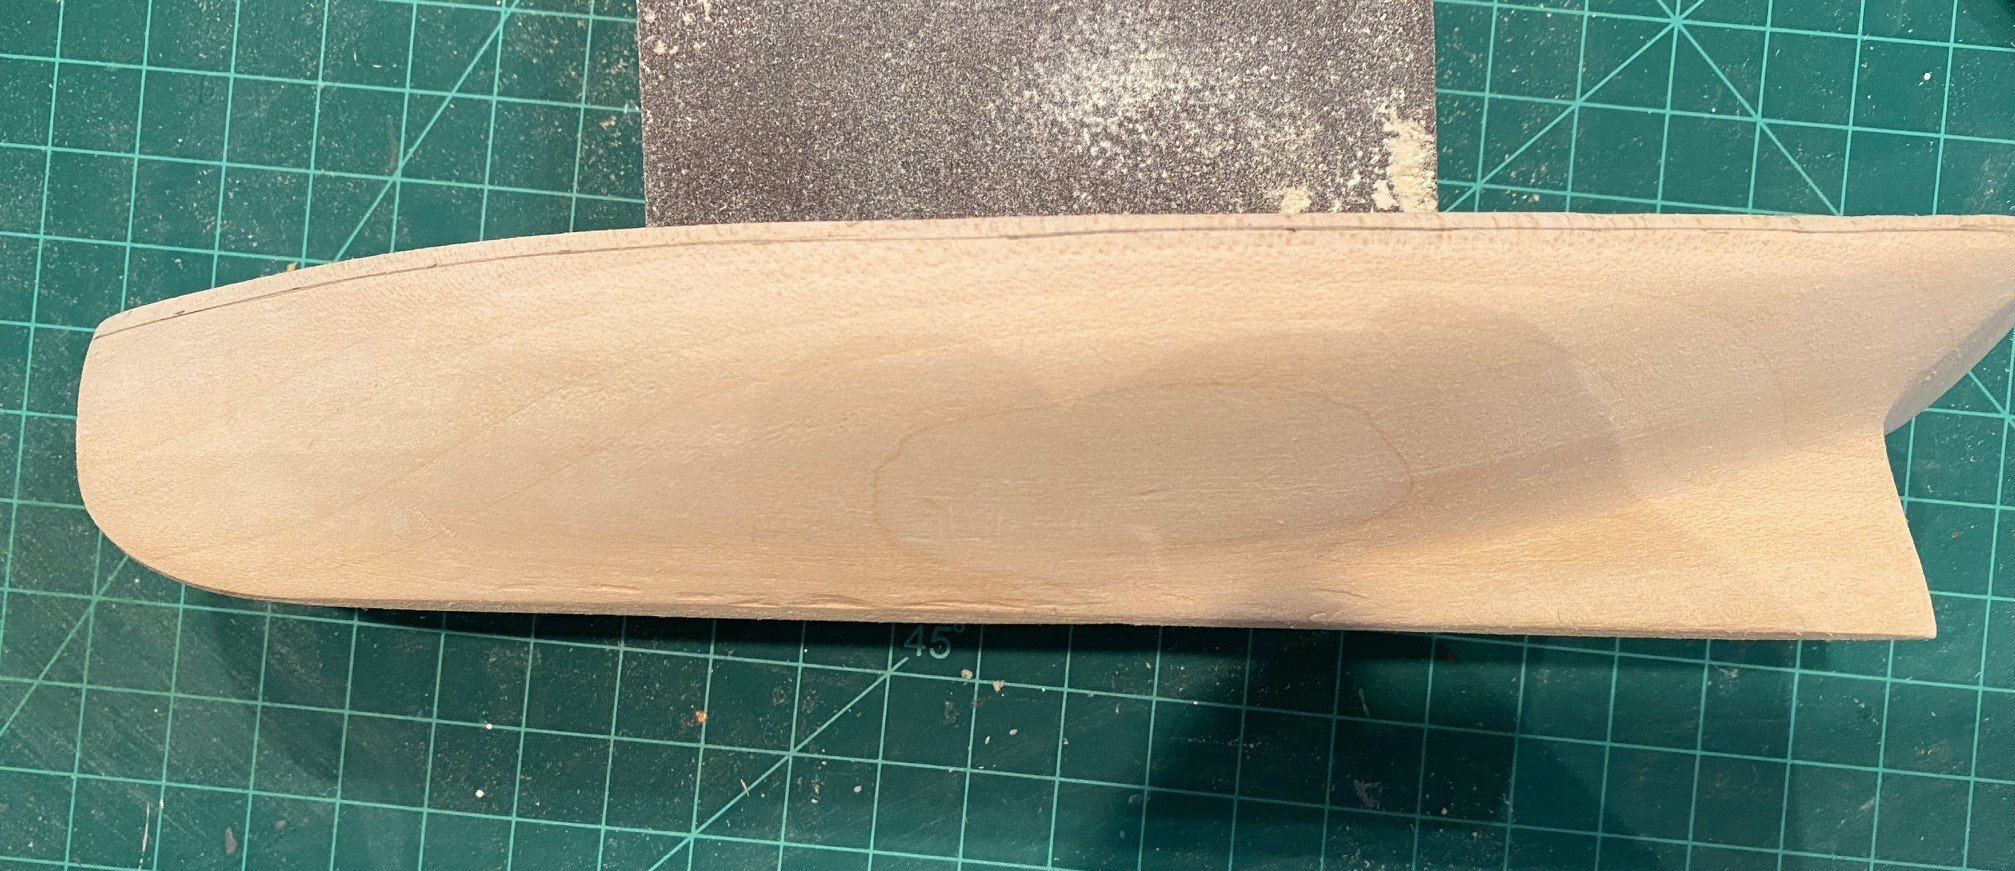
You can see a faint line where I will carve the step at the top of the hull, I also drew a line on the top of the bulwark 1/32 in from the outside to act as guides for cutting out the step. I also had to curve it up at the aft since the aft end of the fantail is only about 5/32 thick. I used a #22 curved blade to score along the line on the hull then I used the #18 chisel blade to take thin cuts down to the score line a couple of times.
When I was done carving the step on the port side, I noticed that I ended up with 1/16 th deep step. I don’t think this will cause to much of a problem downstream, maybe with the way the cap rail fits.

- Duanelaker, yvesvidal and GrandpaPhil
-
3
-
I'm back working on the Phantom after finishing the Muscongus Bay Lobster Smack by Model Shipways.
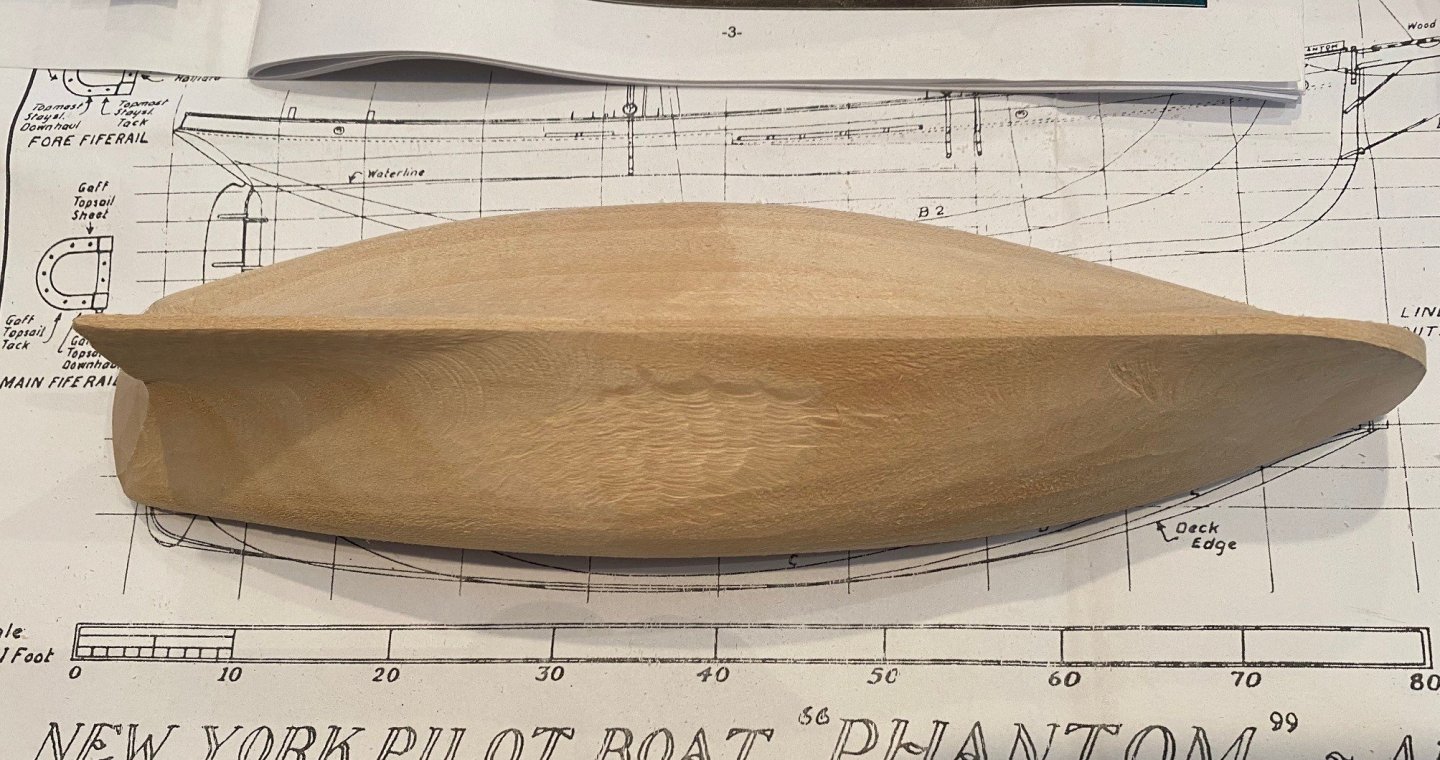
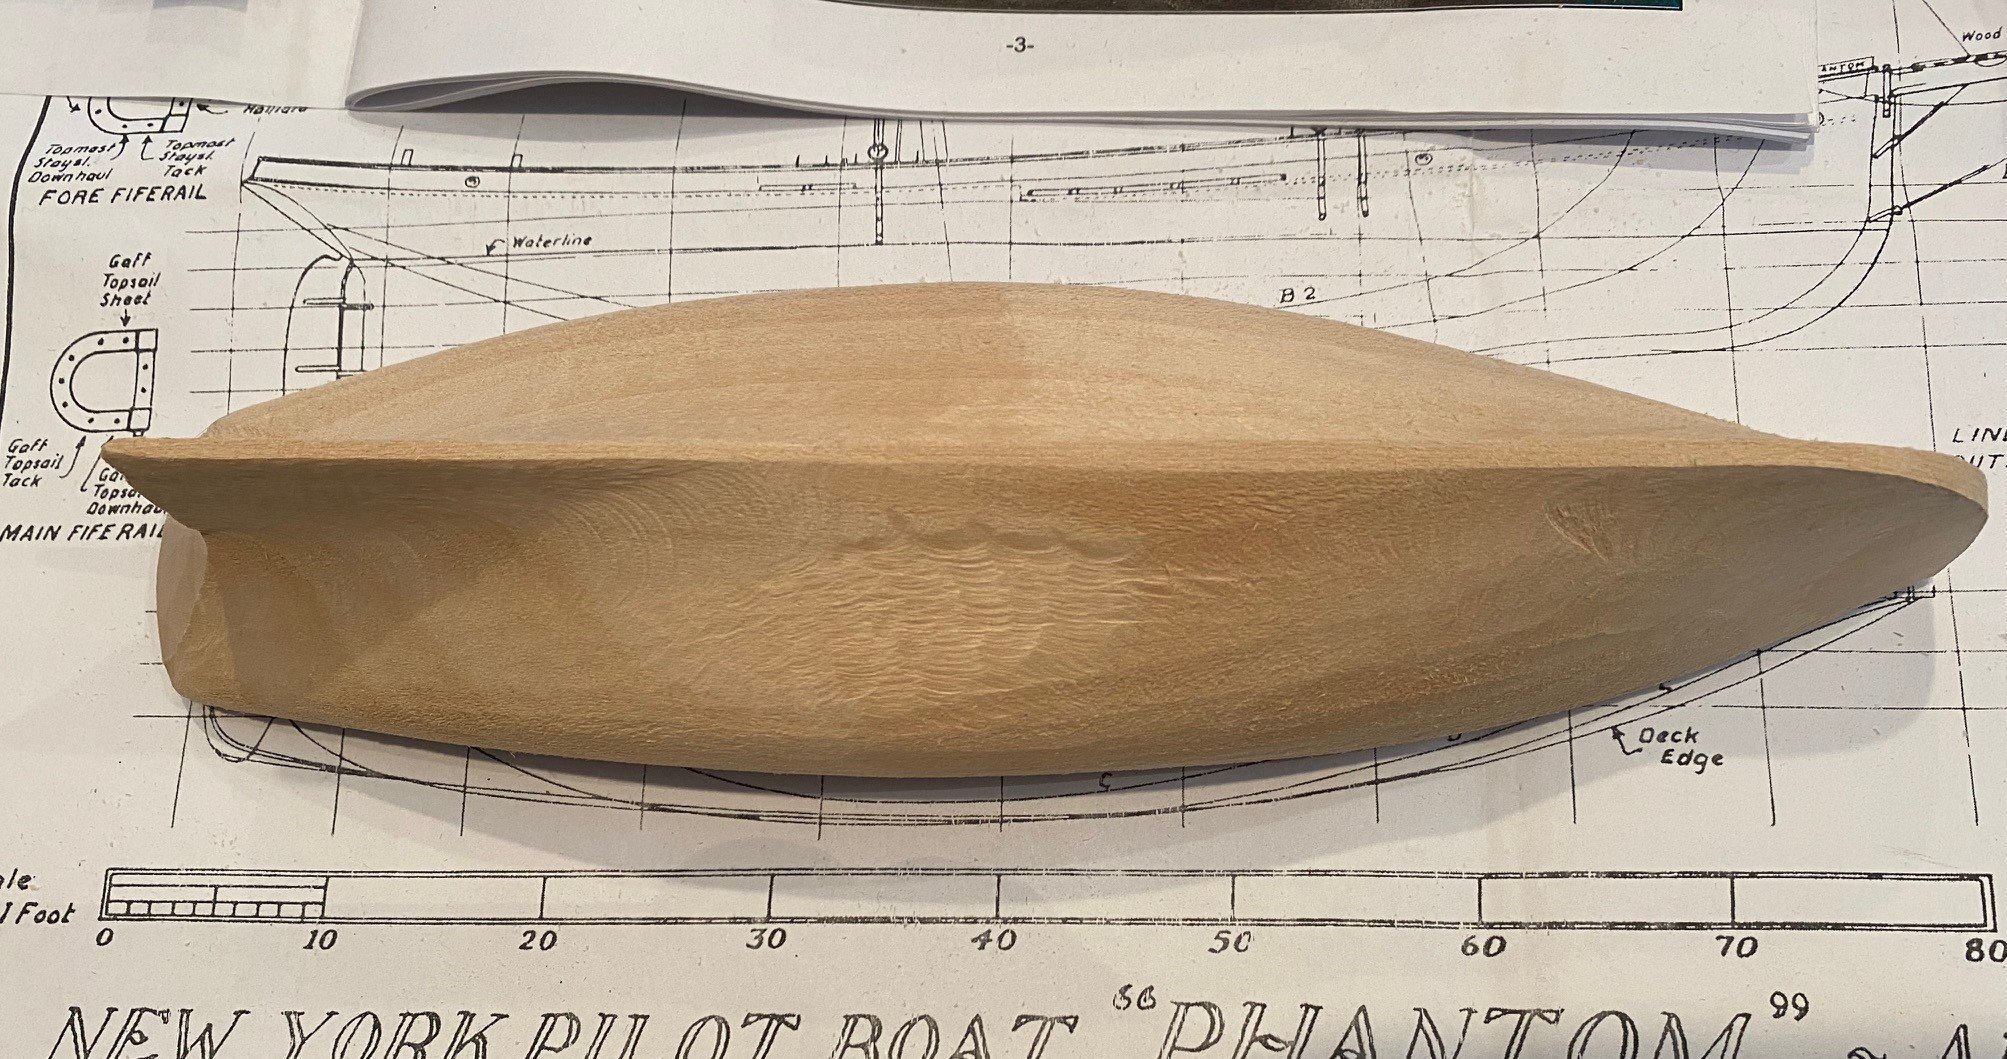
I practiced whittling and sanding the initial hull before starting to shape the replacement hull, good experience. This confirmed that the hull center line was off-center and that one side of the hull was shorter than the other and the plan. But it looks pretty good and I don’t think anyone would notice in the final product.
{From this point on I'm working on the new hull}
Per the instructions, the first thing I did was to get a flat keel surface and I also did the bow. I laid a full sheet of 80 grit on the work surface and then just moved the boat back and forth on the sand paper, trying to keep even fore -aft pressure as I tried to keep the boat perpendicular to the work surface. I kept checking the overall fore to aft flatness with a rule as I went.
I then did the same thing on the bow, dragging the boat on the paper to try and keep a flat perpendicular surface to the center line as I rounded the bow.
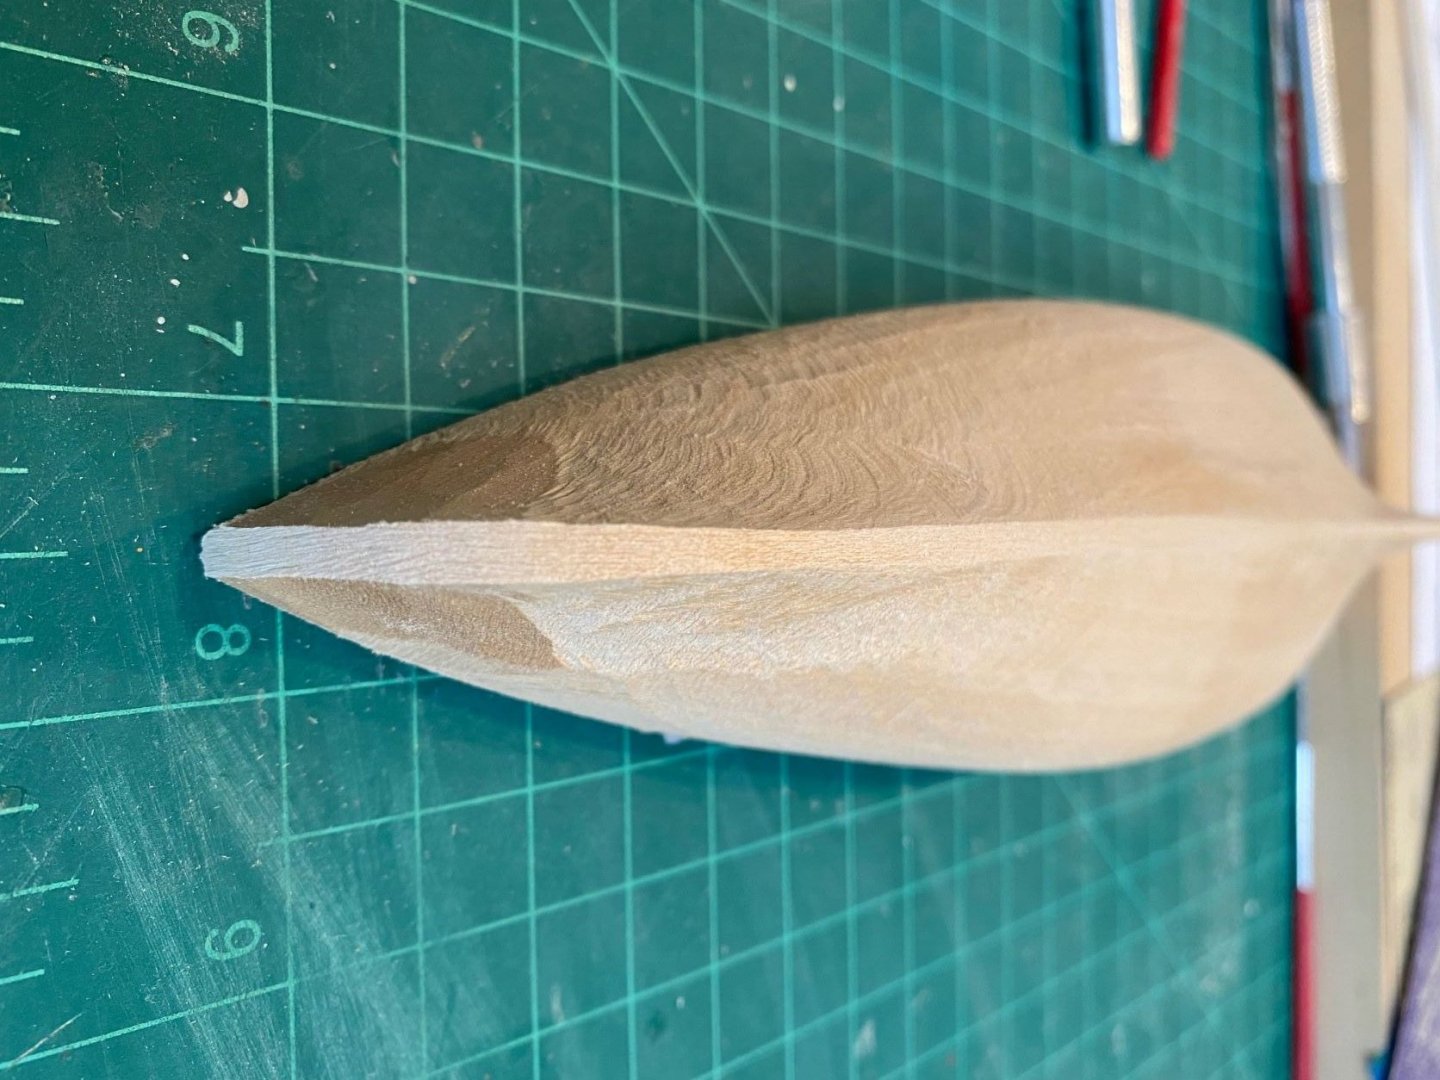
I’ve been working on the aft end of the boat; cutting, chiseling with a knife chisel blade and sanding with 80 grit paper. I was having a hard time whitling or chiseling with a blade, so I tried to file it with an old wood rasp I had (it was old, over 50 years old) but it was too large for the job. So, I went back to 80 grit sand paper and the knife chisel. The instructions said that you might have to remove about an 1/8 inch from the aft. I only removed about 3/32 inch to get it close to the template. I think I will wait until I have the sides of the hull close to template before I reduce it any more in the aft, as I’m doing for the bow
My initial check of the hull evenness with the templates indicates a good hull.

Now to move on to drawing centerlines and carving the hull to match the templates.
- Duanelaker and jlefever
-
2


Phantom by lraymo - Model Shipways - 1:96 scale - New York Pilot Boat
in - Kit build logs for subjects built from 1851 - 1900
Posted
Keith, yes you could use a pin for the rudder to rotate on, I just didn't see the need for the rudder to move on this model. Personal choice.